HOLIDAY DONATION DRIVE - SUPPORT MSW - DO YOUR PART TO KEEP THIS GREAT FORUM GOING! (Only 75 donations so far out of 49,000 members - C'mon guys!)
×


kustumize
-
Posts
29 -
Joined
-
Last visited
Content Type
Profiles
Forums
Gallery
Events
Everything posted by kustumize
-
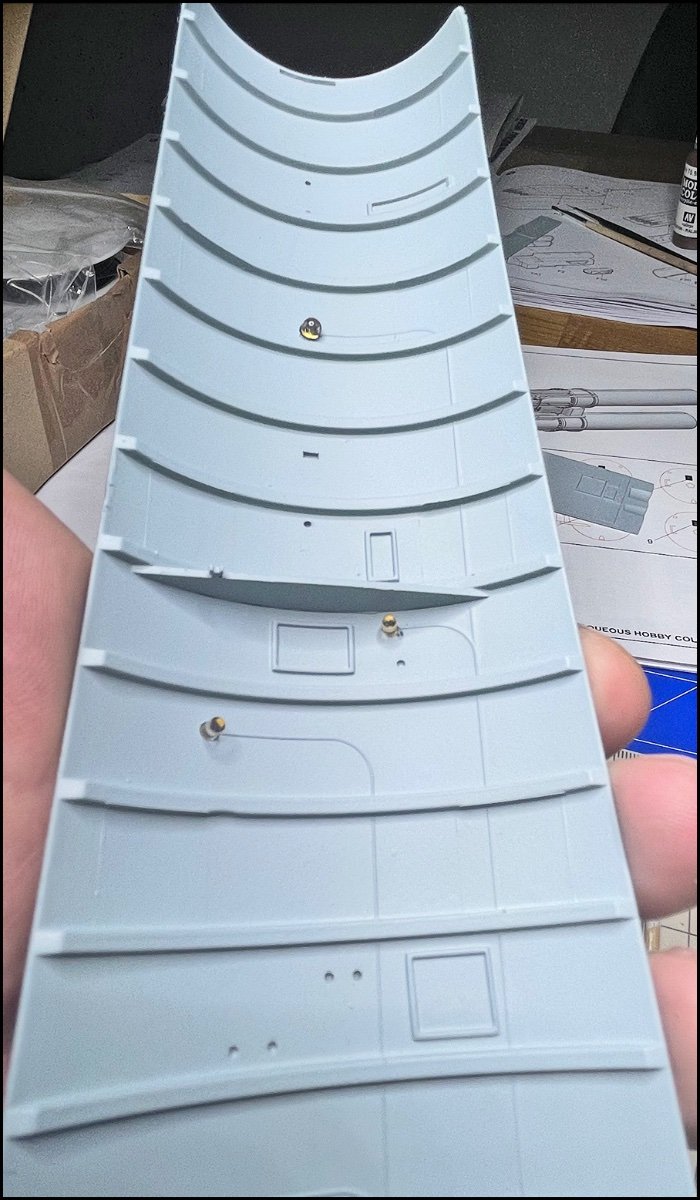
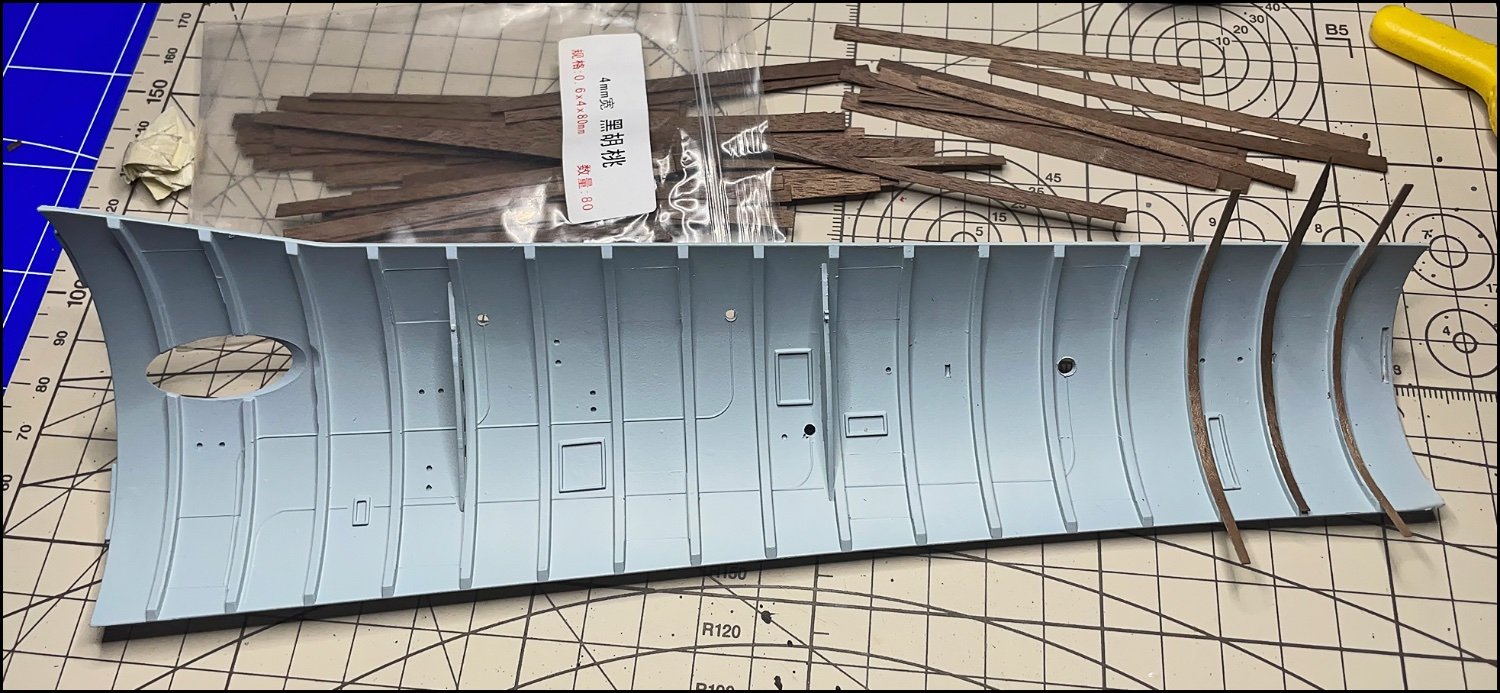
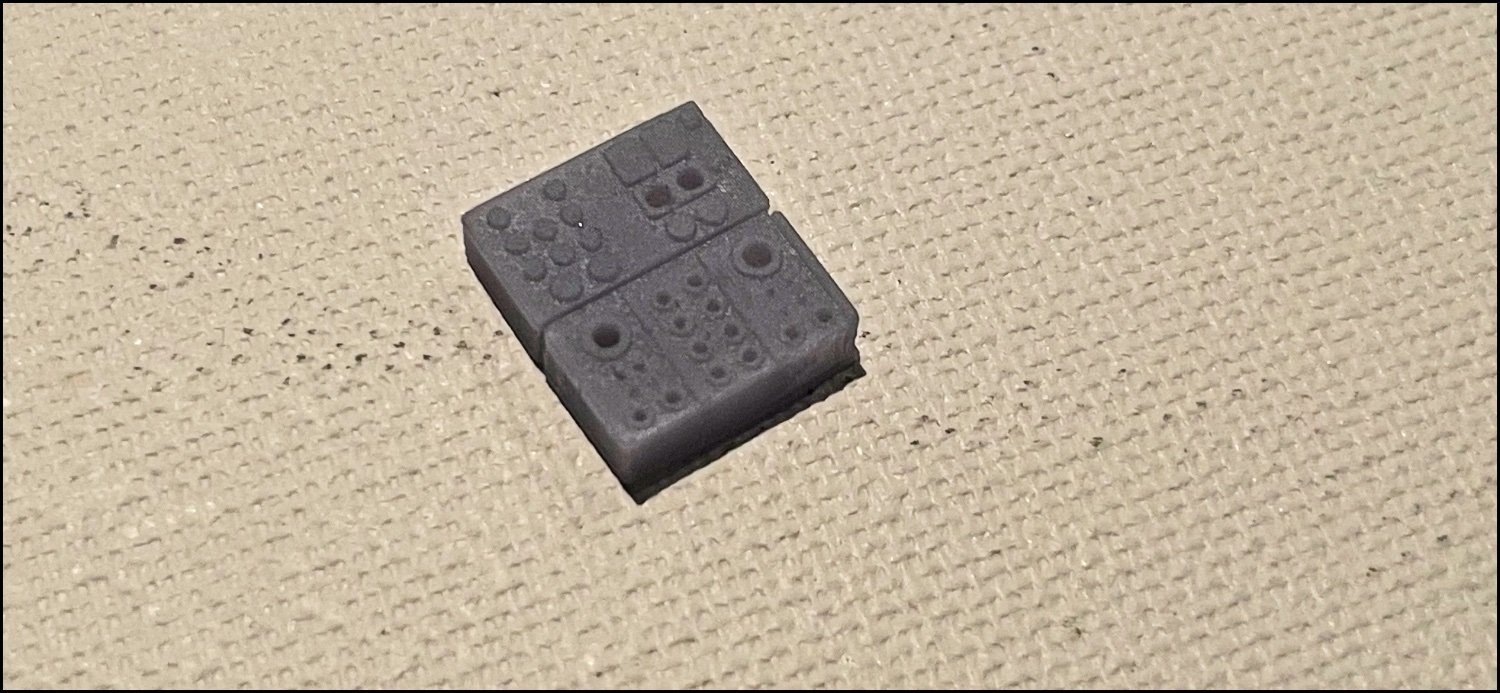
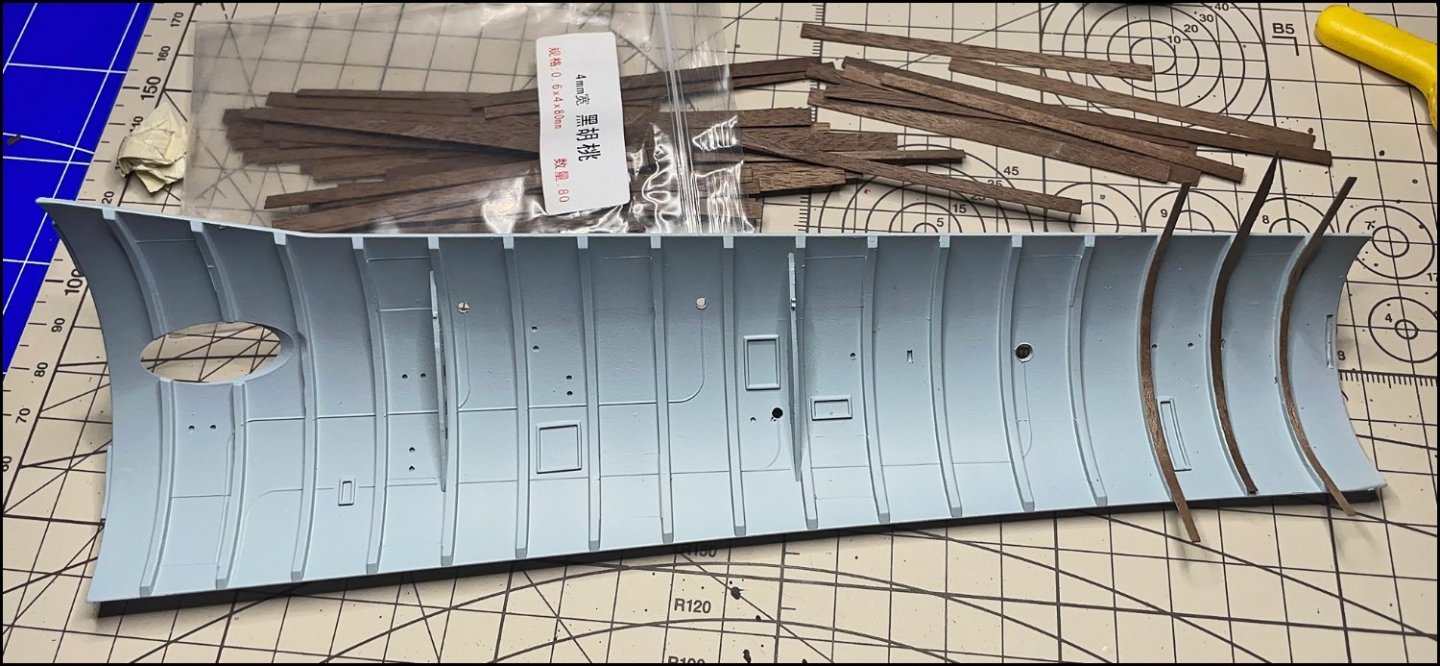
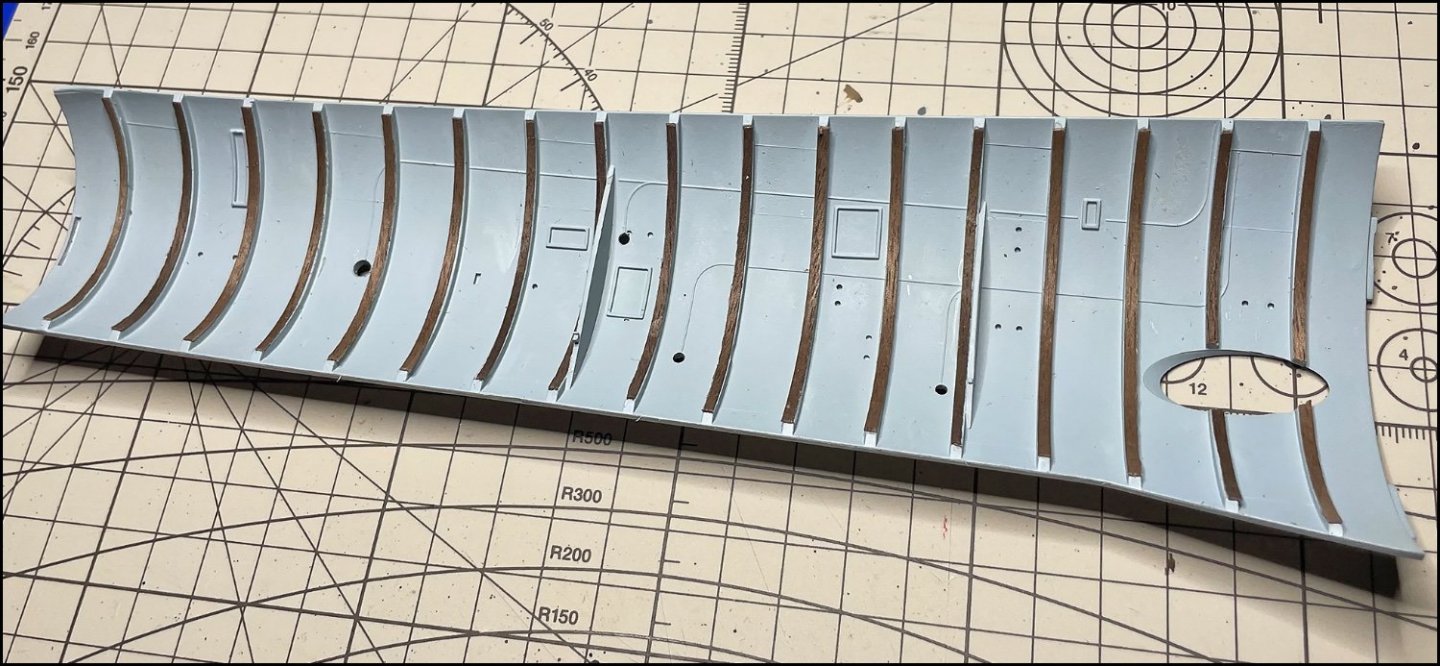
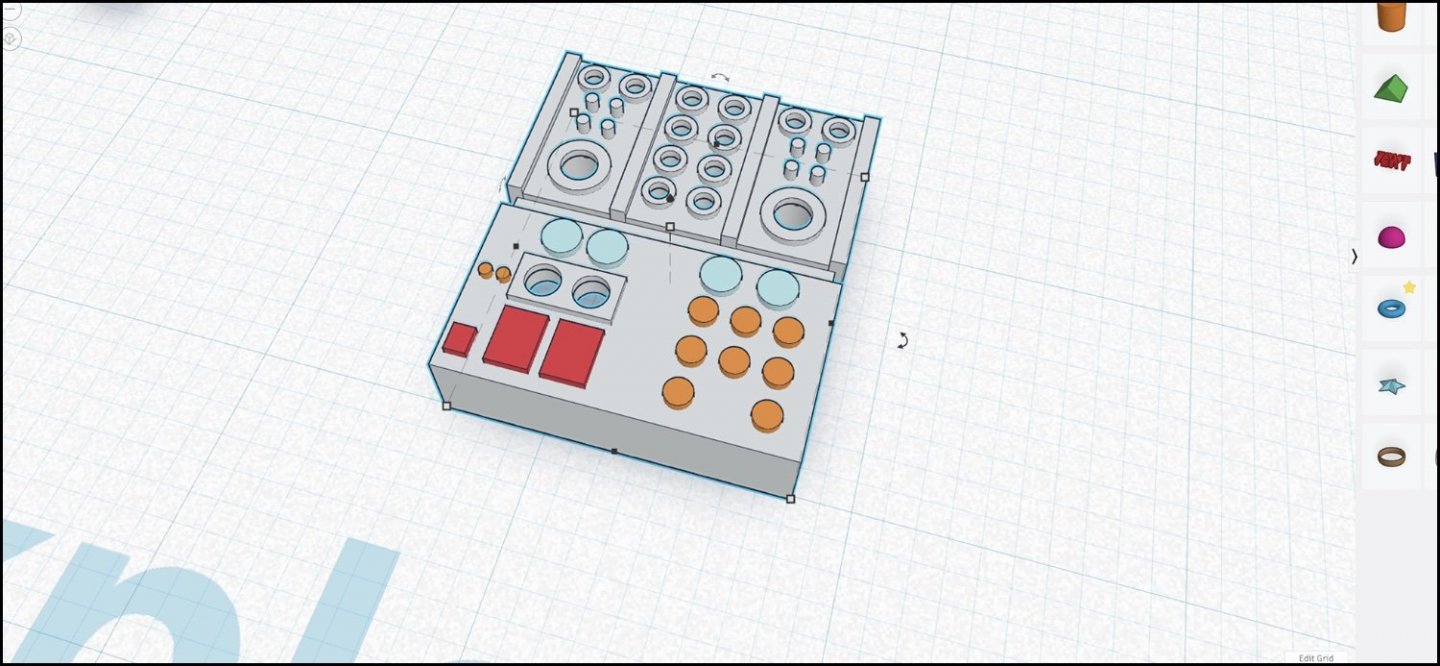
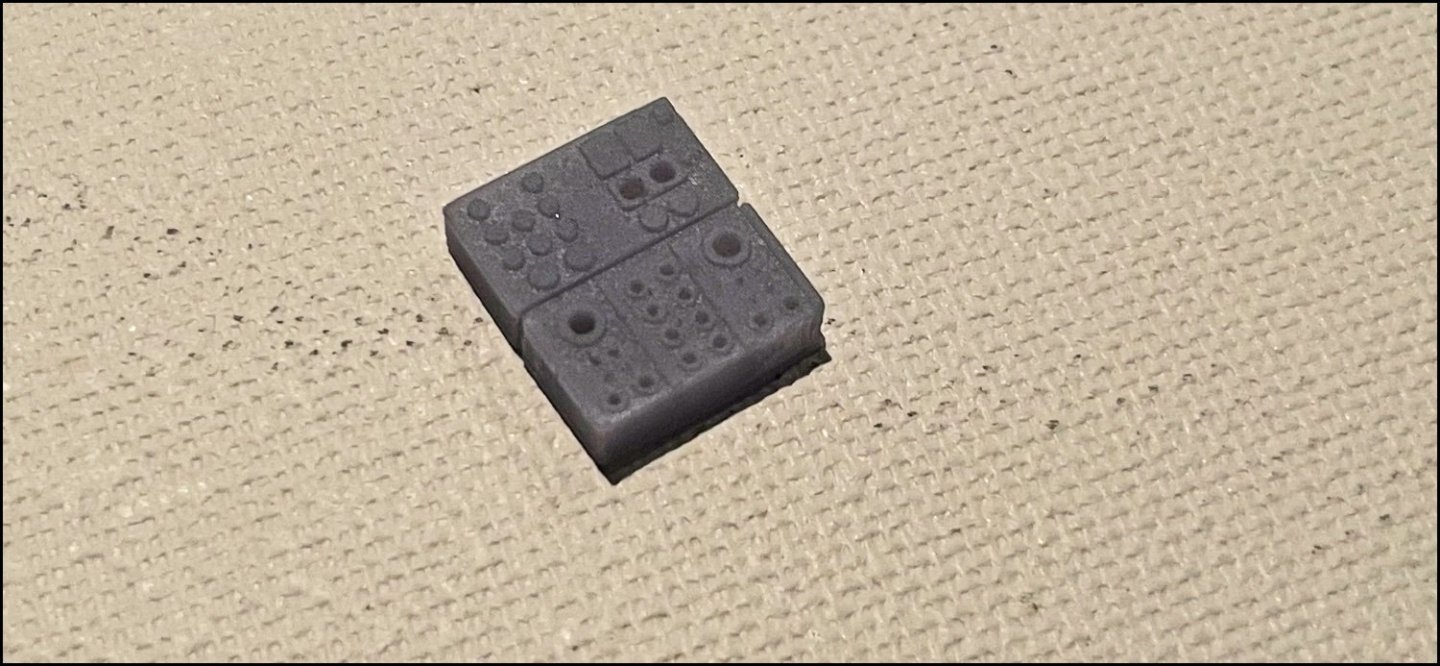
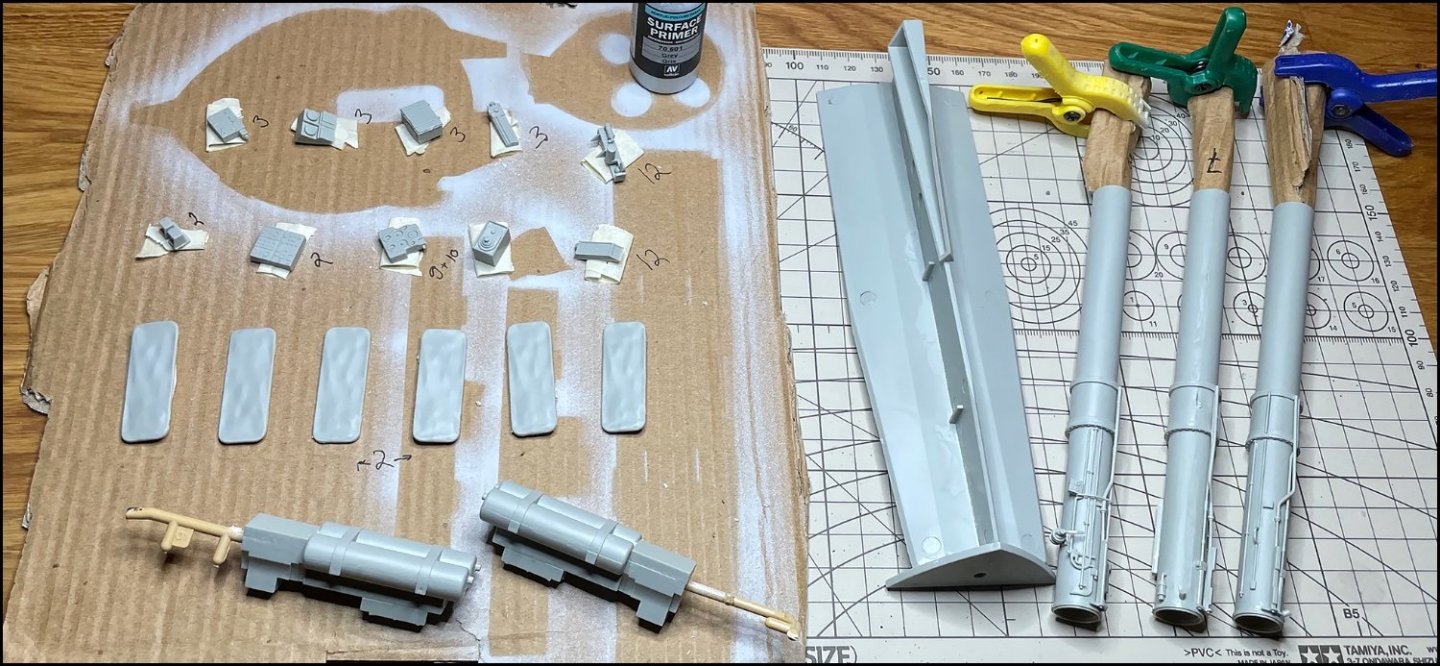
 FRONT TORPEDO TUBE COMPARTMENT Thanks Yves Roof is an interesting start. I drilled first four holes in the roof for the LEDs. The model has one 3mm lamp and three smaller 2mm lights. So the holes are same sizes. Roof is painted after primer Vallejo 907 Pale Grey Blue. 1x3 mm Led and 3x2mm bi-colored leds (red and warm white) I also have one wooden ship project and i had ordered more Wood plank for that. So why not use them on this U-Boat project. I painted and glued the small parts separately. It would have been easier and better for the end result to glue at least some of the parts even before the primer I also thought about lighting different devices by putting a led light inside them. I testing to draw one of these devices with a 3D program and leaving holes for the lights. But a problem here is probably that, that I have no idea what this device is and which ones are buttons or something else… So I guess at I use the original part and thinking that idea later. Re-drawn and printed device. Part G9 next to the beds
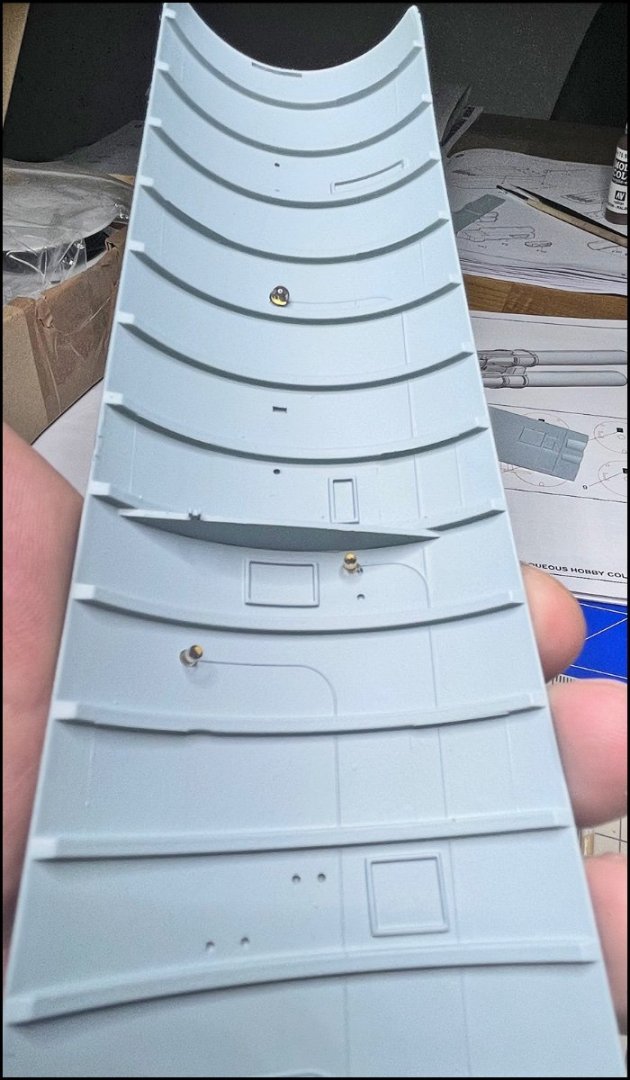

- 61 replies
-
- 11
-

-
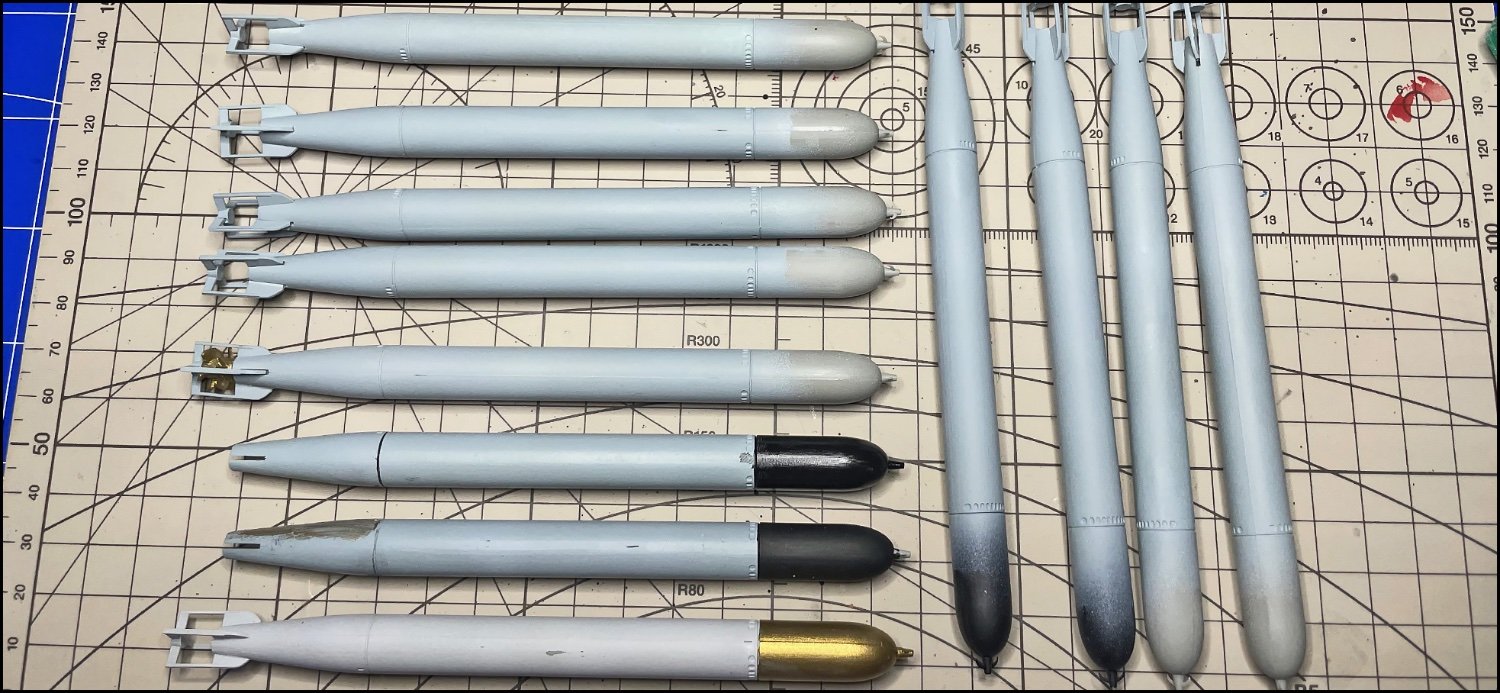
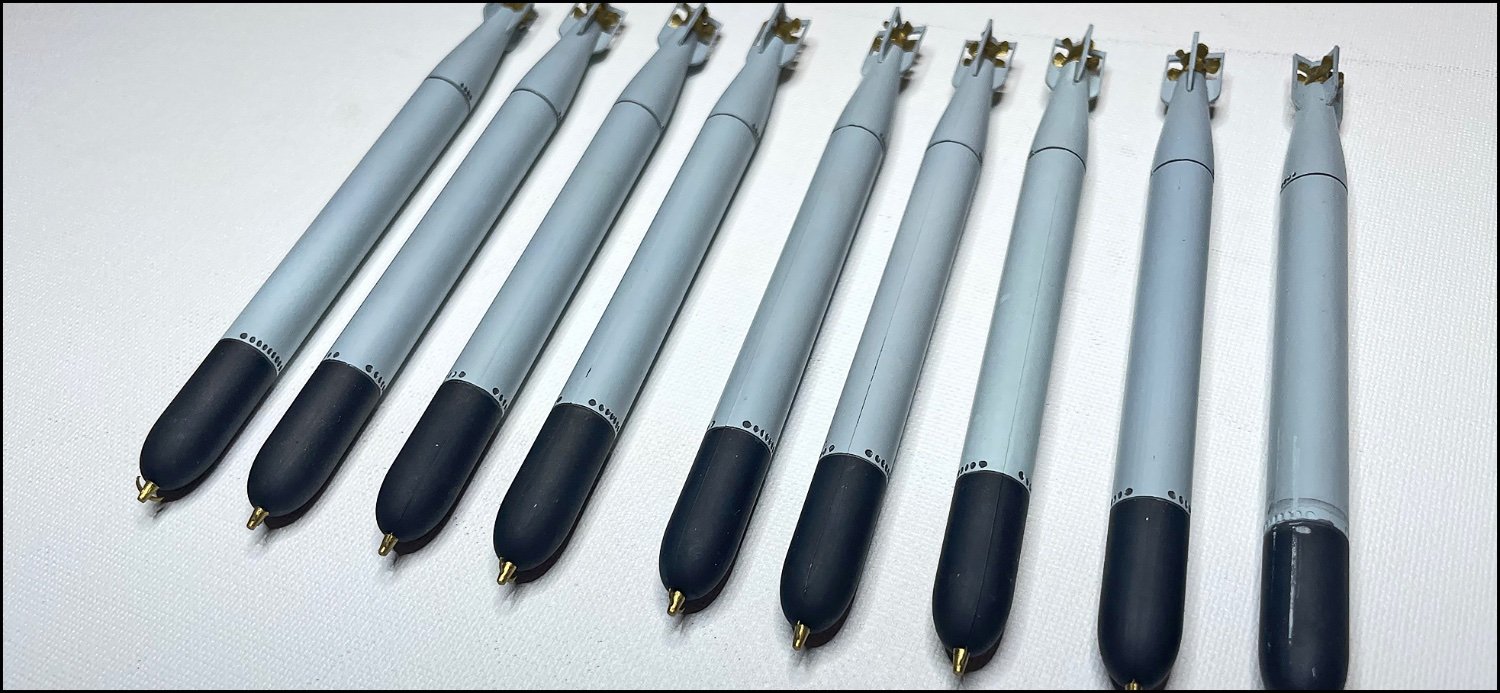
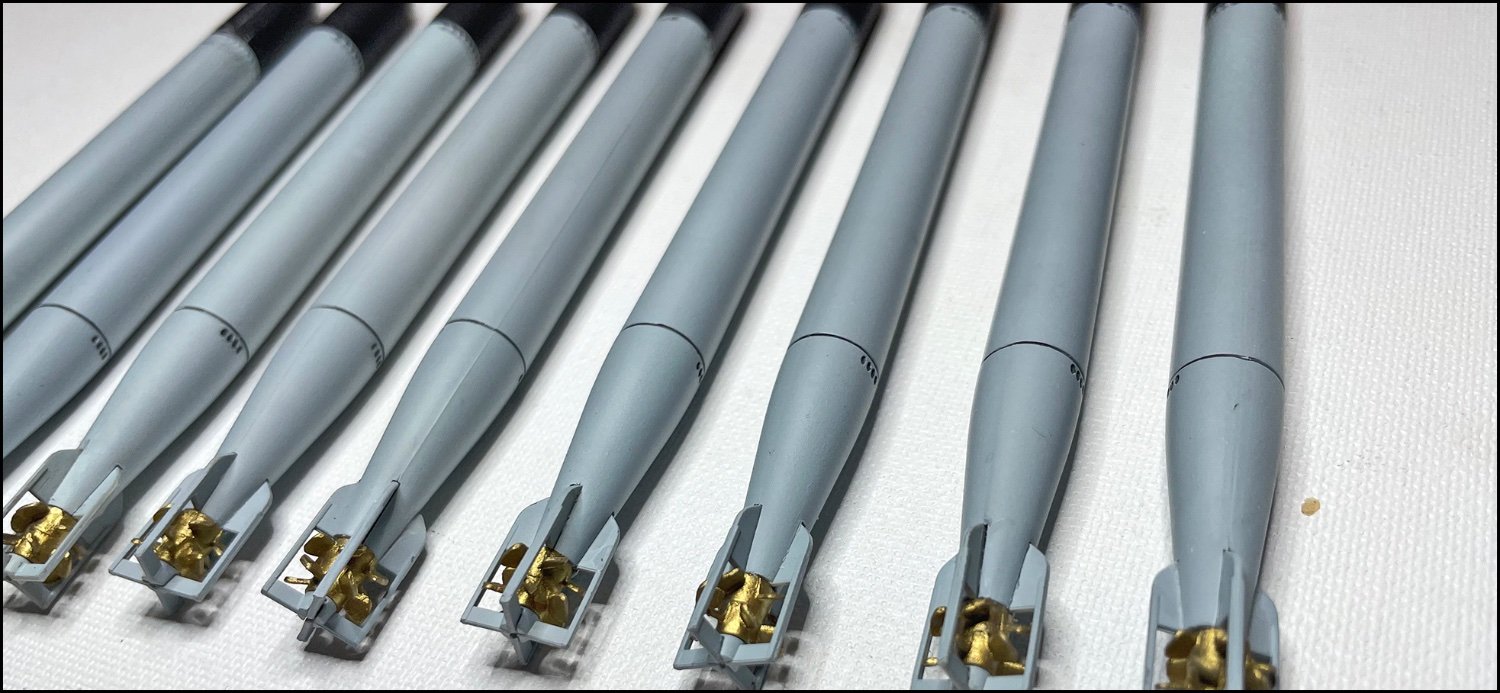
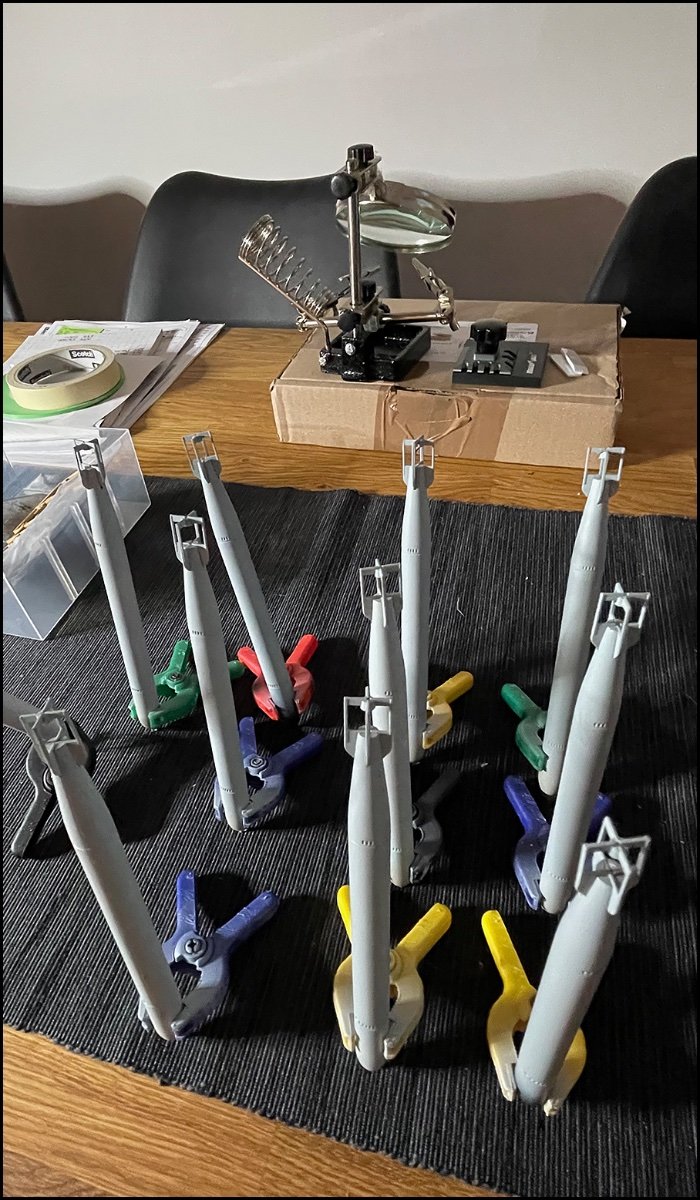
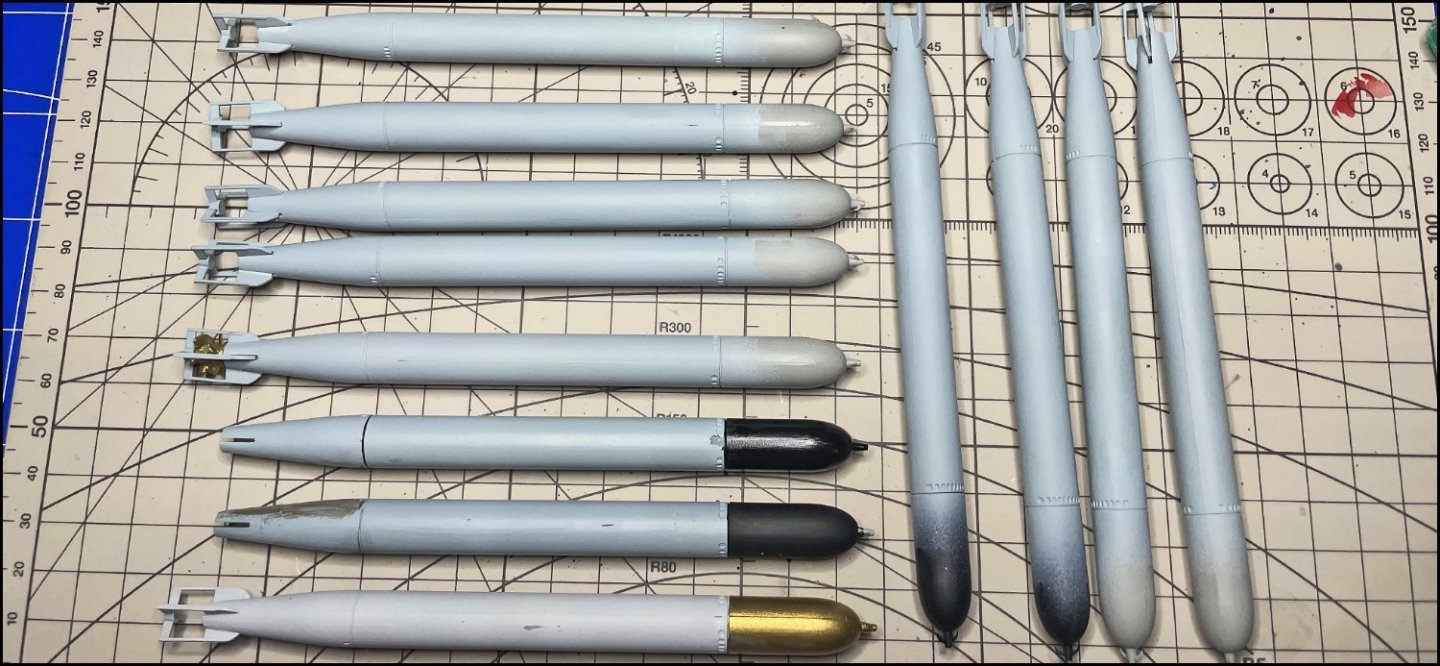
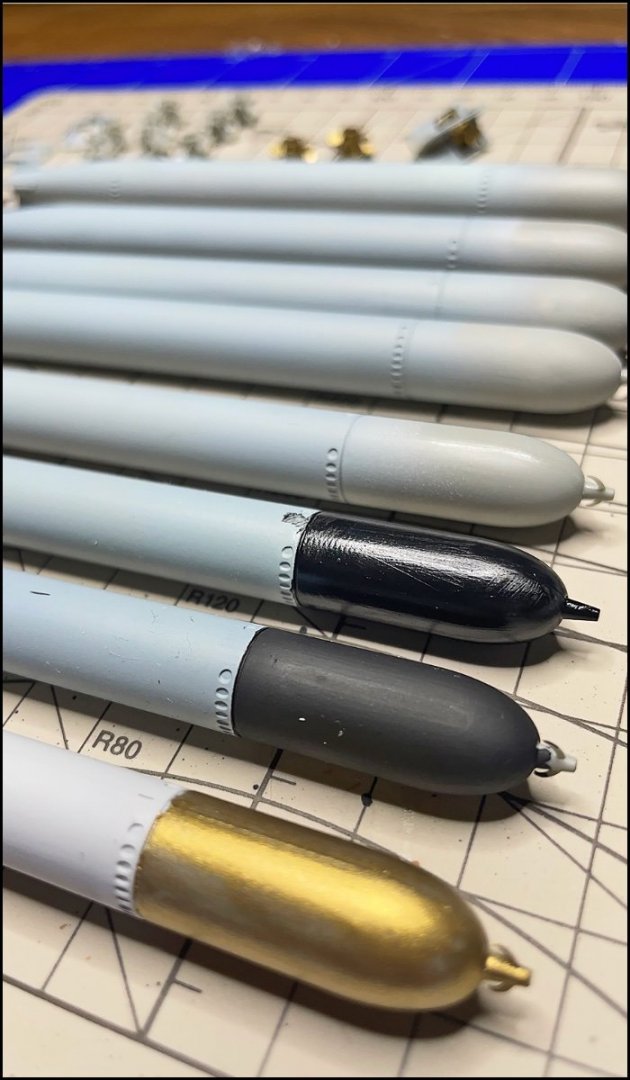
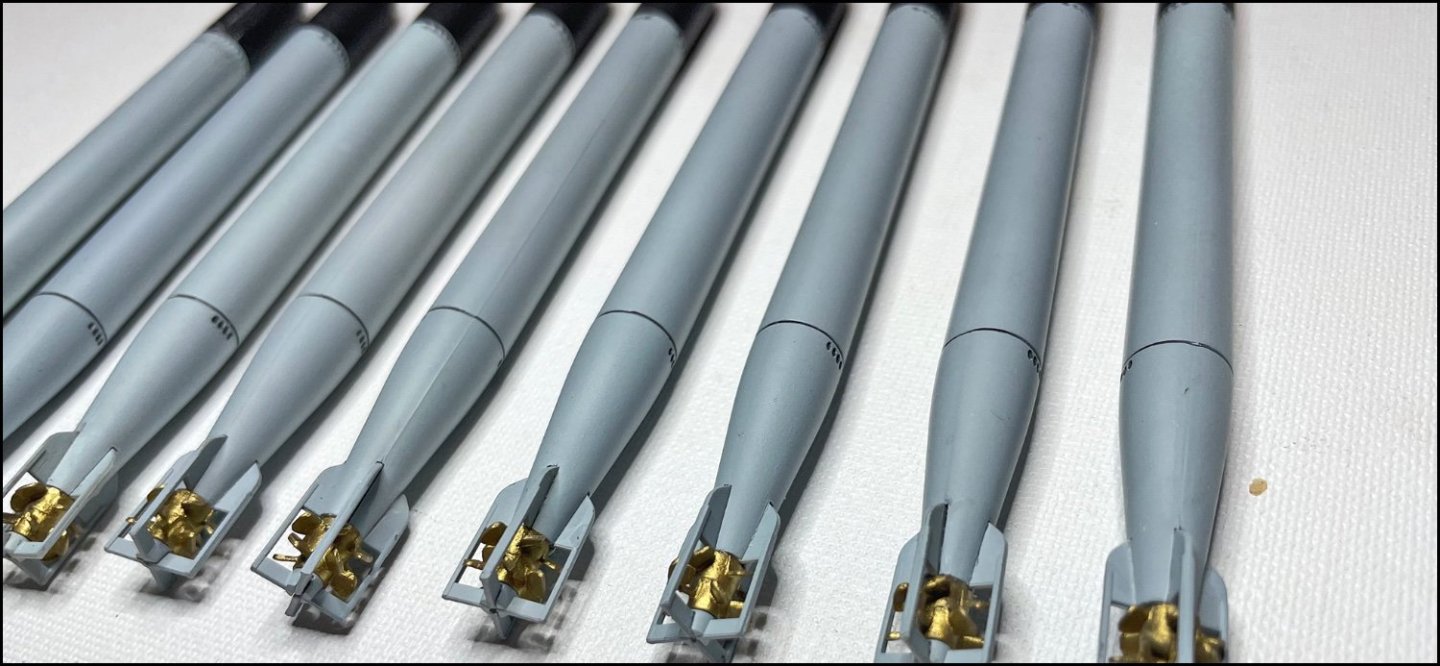
FRONT TORPEDO TUBE COMPARTMENT I saw several versions of painting torpedoes and tested a few. Glossy black, mat black or gold 🤔 But in the end I used the same color combination as in the instructions. Finished torpedoes. I think they still needs some scratches Using Vallejo Colors: 907 Pale Grey Blue - 950 Black - 878 Old Gold

- 61 replies
-
- 13
-
-
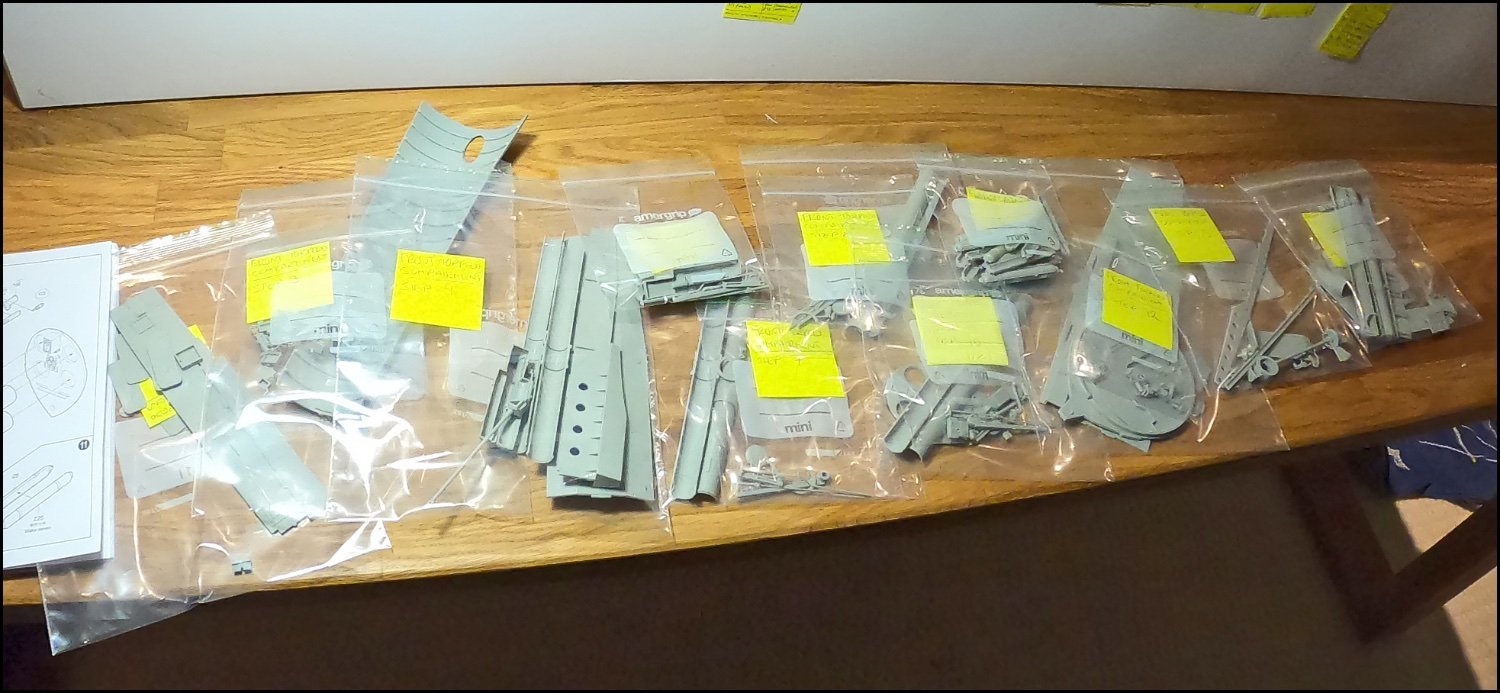
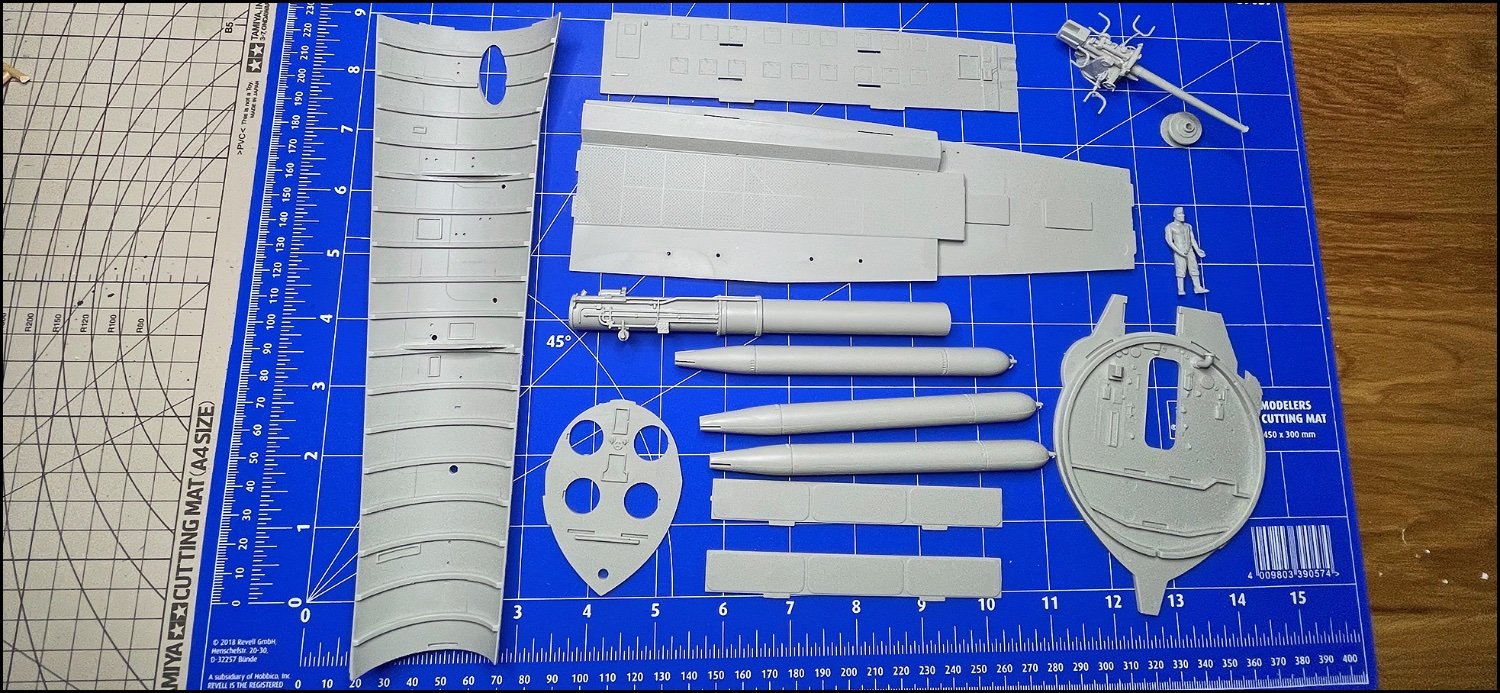
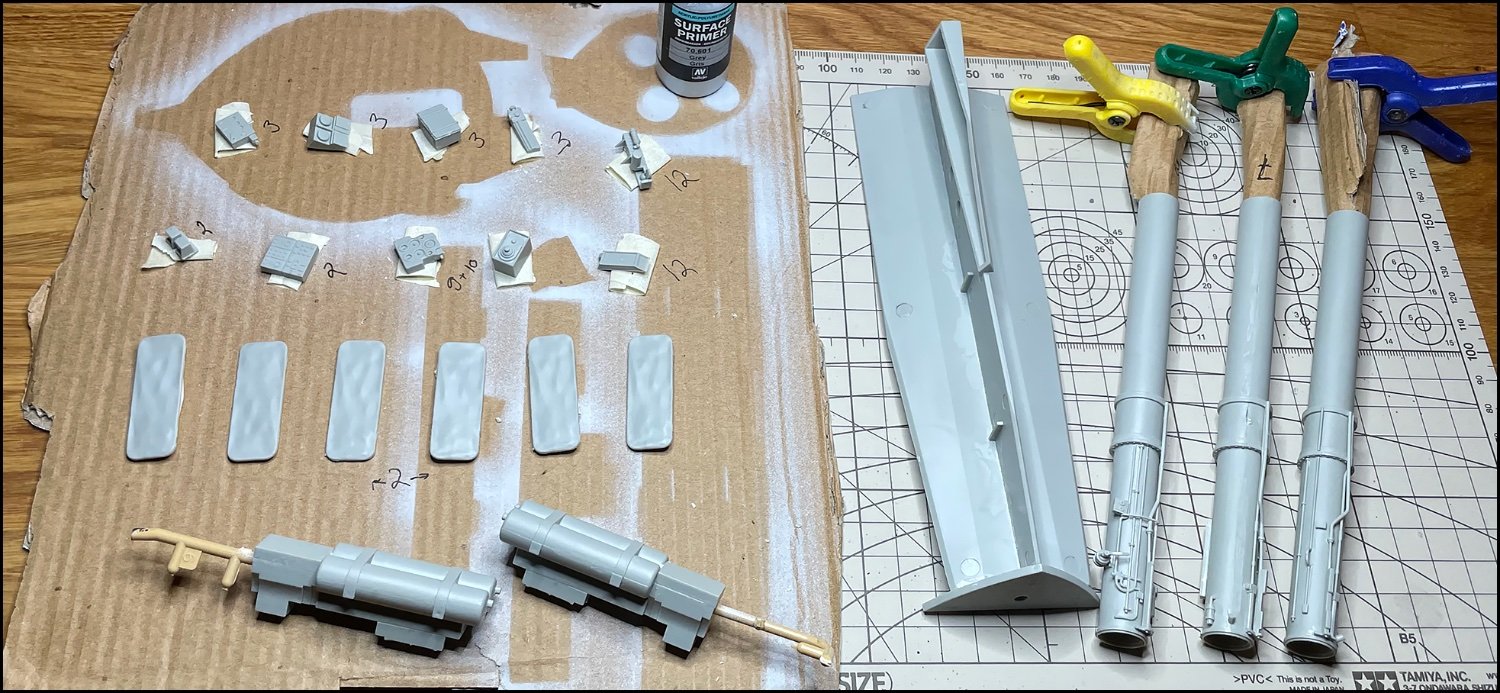
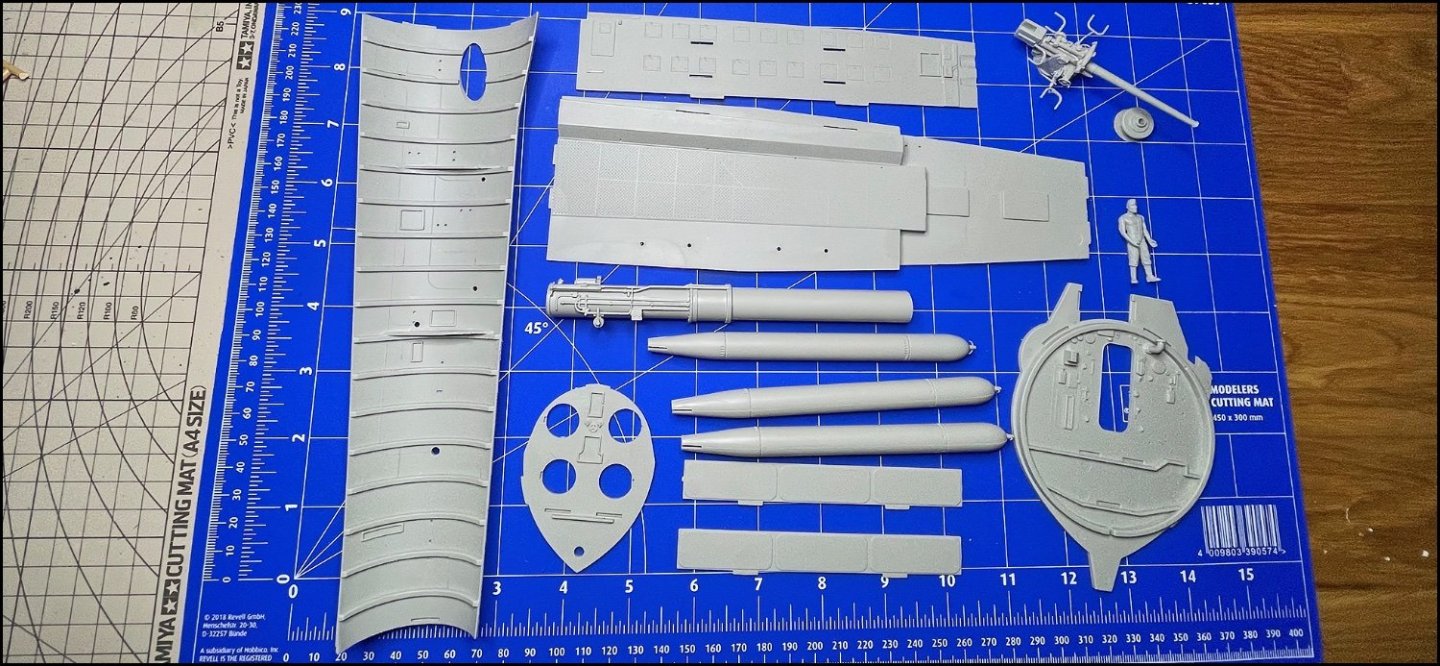
FRONT TORPEDO TUBE COMPARTMENT the engine room looked absolutely the most interesting to build, but perhaps better to start from the beginning of the instructions than jump ahead. In fact, I last built a plastic model about 30 years ago. I have never touched a airbrushes. I don’t have any experience with weathering, so I think I have a big challenge. But the paints, glues and tools seem to be completely different planet as they were 30 years ago. I first collected all the parts of the torpedo room in their own bags. I don't know is it reasonable or not, but parts was ready when I started making the model 😆 I glued a few parts together before priming. The deck gun is original, not Eduard. First time airbrushing. Here we go! Luckily there are extra torpedoes if you don’t want to put them in torpedo tubes. So "extra" torpedos you can use for example practice painting


-
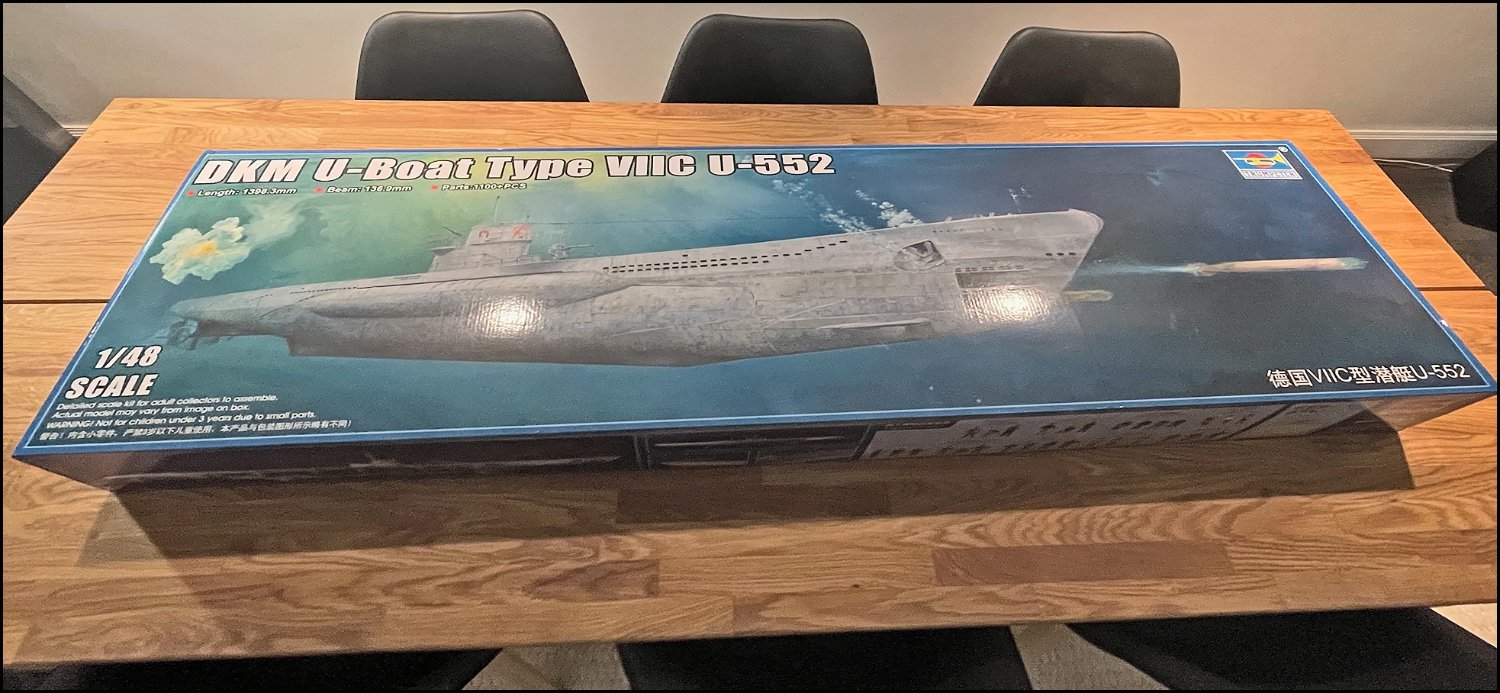
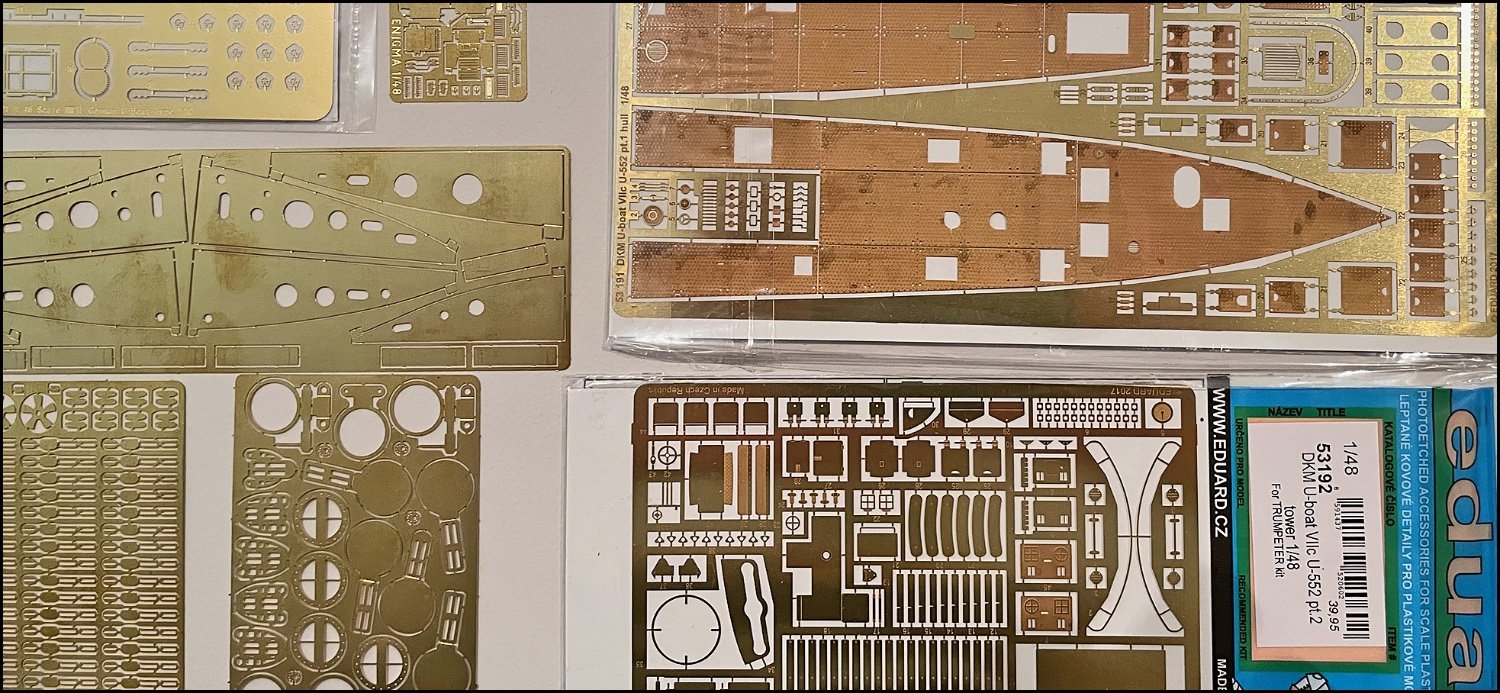
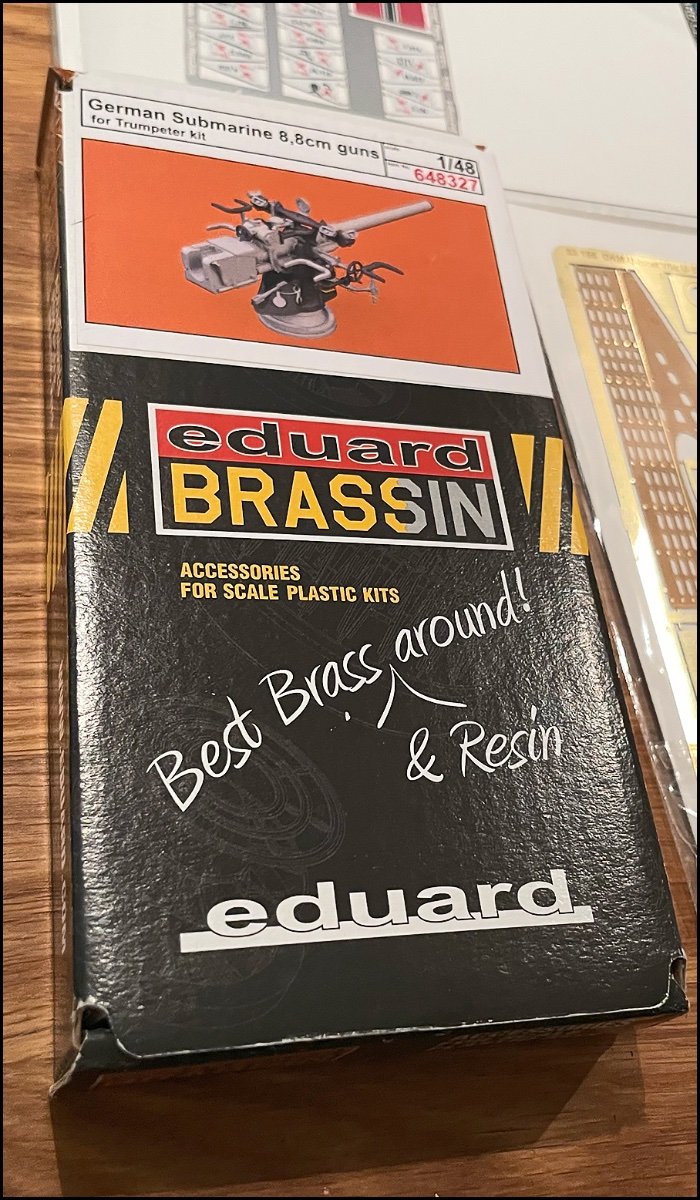
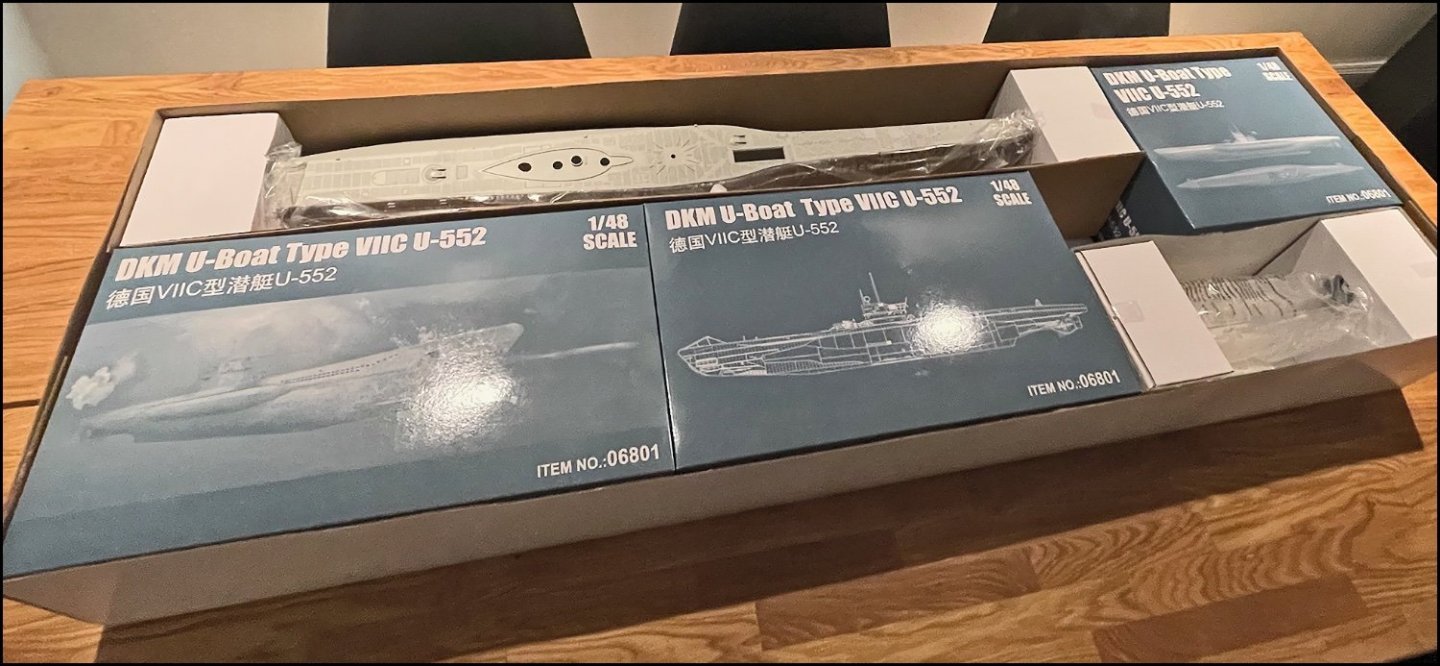
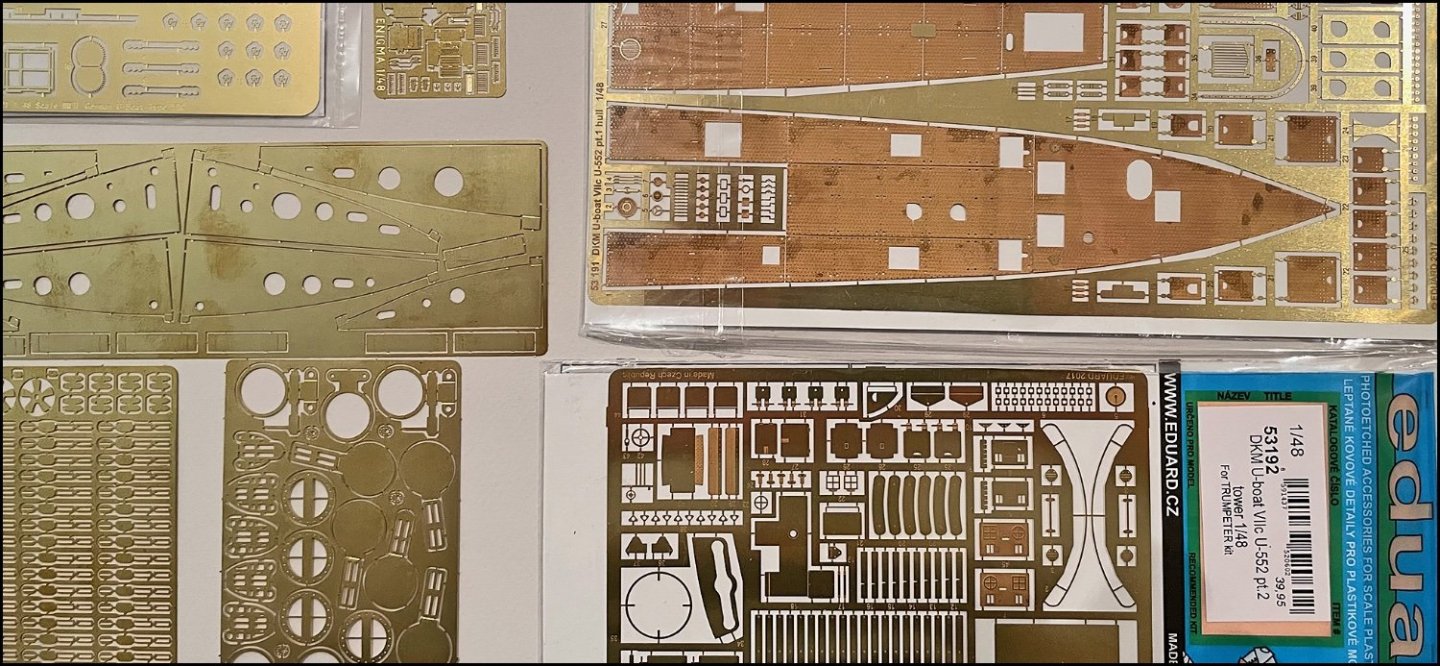
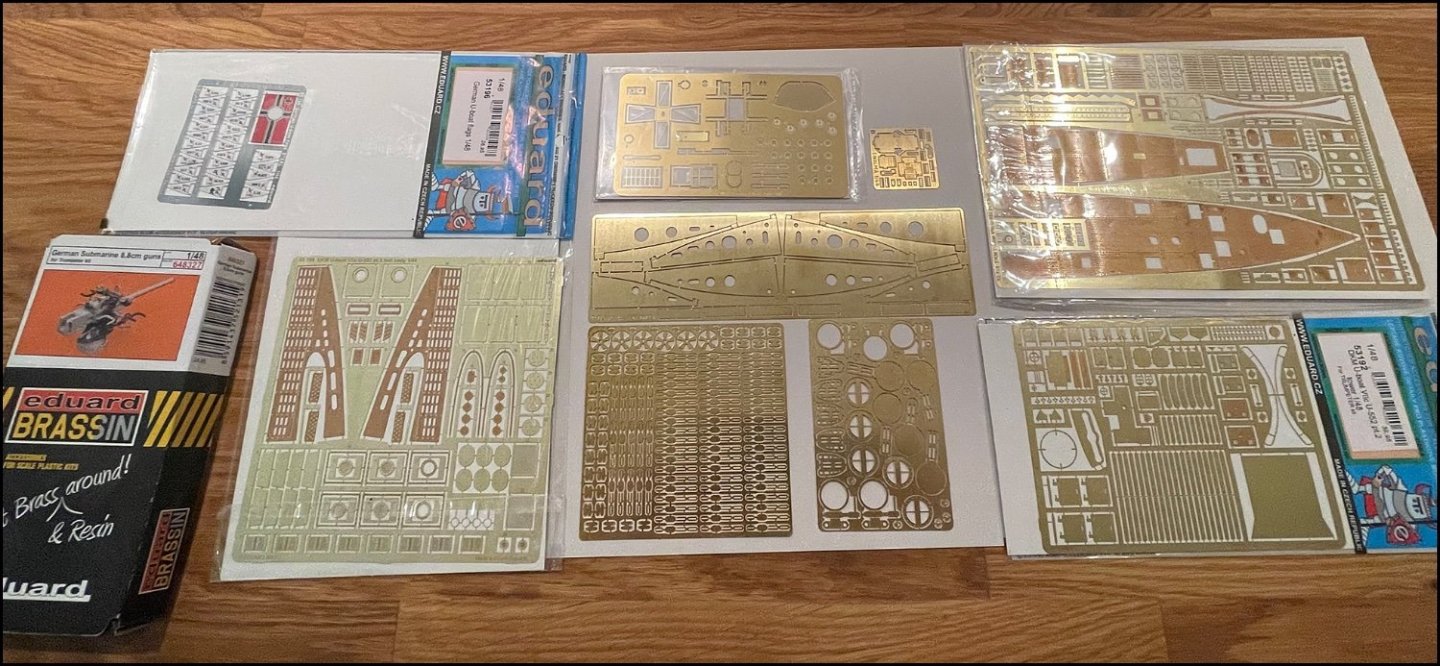
My U-552 build! I bought this U-Boat model already December. After that I have collected paints, supplies and extra parts for the model. …and of course looked at other building blogs and took tips on them for my own project. Thanks for them. The plan was to start build when I get my “new hobby corner" ready. It's still in the middle of it, but I'm starting to make a model little by little … A few "Open Box" pictures at first. Orginal Box My plan was to order all the photo etched parts from RC Sub, but their stock was sold out just then. So I order parts from Bid Ed (Eduard). I also ordered detailed 3d-printed dec-cannon made by Eduard. Of course after that, Rc Subs was parts I wanted order. So I also ordered more photo-etched parts from them, but not the biggest set …. Left to right: Big Ed's U-Boat flags - Trumpeter original photo etched parts - RcSub Enigma - Big Ed's hull - Eduard cannon - Big Ed's hull body - 3 parts from RcSubs and Big Ed's tower


- 61 replies
-
- 11
-