kustumize
-
Posts
29 -
Joined
-
Last visited
1 Follower

-
 schooner reacted to a post in a topic:
U-552 by kustumize - Trumpeter - 1/48 - PLASTIC - U-Boat
schooner reacted to a post in a topic:
U-552 by kustumize - Trumpeter - 1/48 - PLASTIC - U-Boat
-
Fuzznoggin reacted to a post in a topic:
U-552 by kustumize - Trumpeter - 1/48 - PLASTIC - U-Boat
-
Fuzznoggin reacted to a post in a topic:
U-552 by kustumize - Trumpeter - 1/48 - PLASTIC - U-Boat
-
Fuzznoggin reacted to a post in a topic:
U-552 by kustumize - Trumpeter - 1/48 - PLASTIC - U-Boat
-
 Javlin reacted to a post in a topic:
U-552 by kustumize - Trumpeter - 1/48 - PLASTIC - U-Boat
Javlin reacted to a post in a topic:
U-552 by kustumize - Trumpeter - 1/48 - PLASTIC - U-Boat
-
Javlin reacted to a post in a topic:
U-552 by kustumize - Trumpeter - 1/48 - PLASTIC - U-Boat
-
Javlin reacted to a post in a topic:
U-552 by kustumize - Trumpeter - 1/48 - PLASTIC - U-Boat
-
Rik Thistle reacted to a post in a topic:
U-552 by kustumize - Trumpeter - 1/48 - PLASTIC - U-Boat
-
Archi reacted to a post in a topic:
U-552 by kustumize - Trumpeter - 1/48 - PLASTIC - U-Boat
-
Archi reacted to a post in a topic:
U-552 by kustumize - Trumpeter - 1/48 - PLASTIC - U-Boat
-
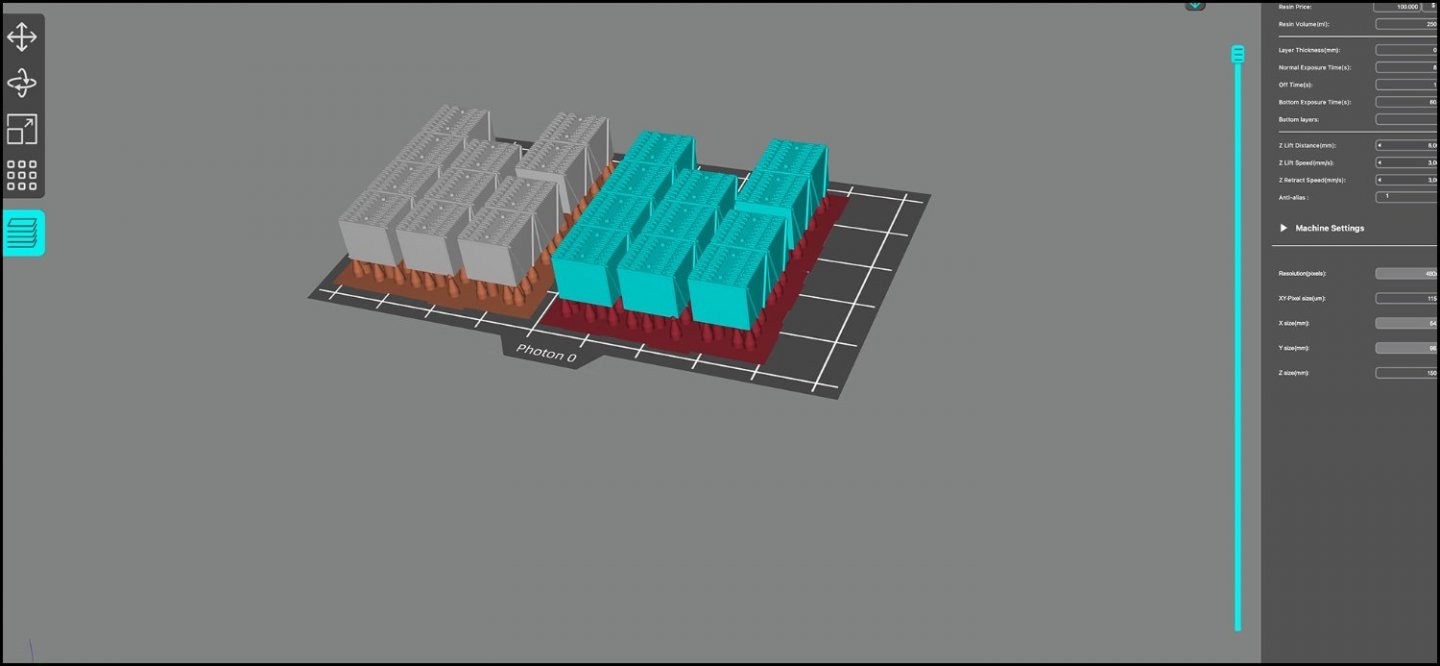
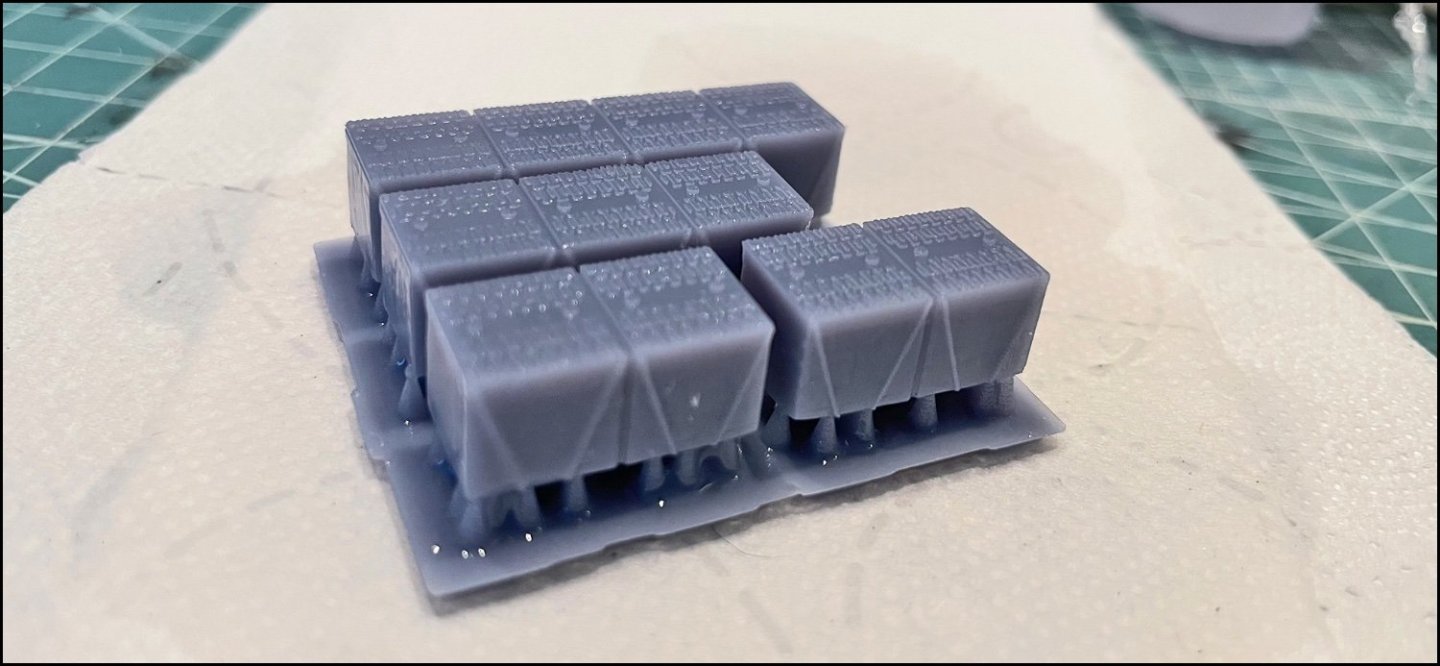
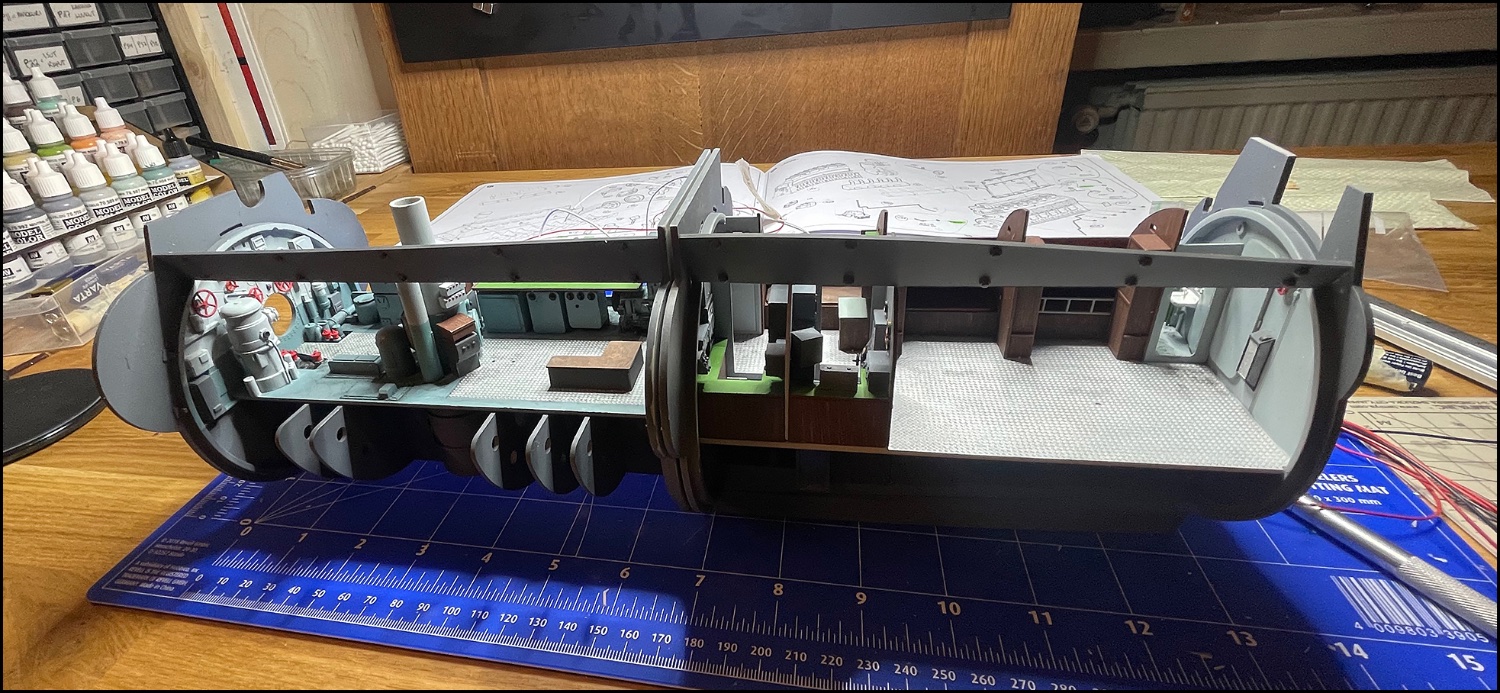
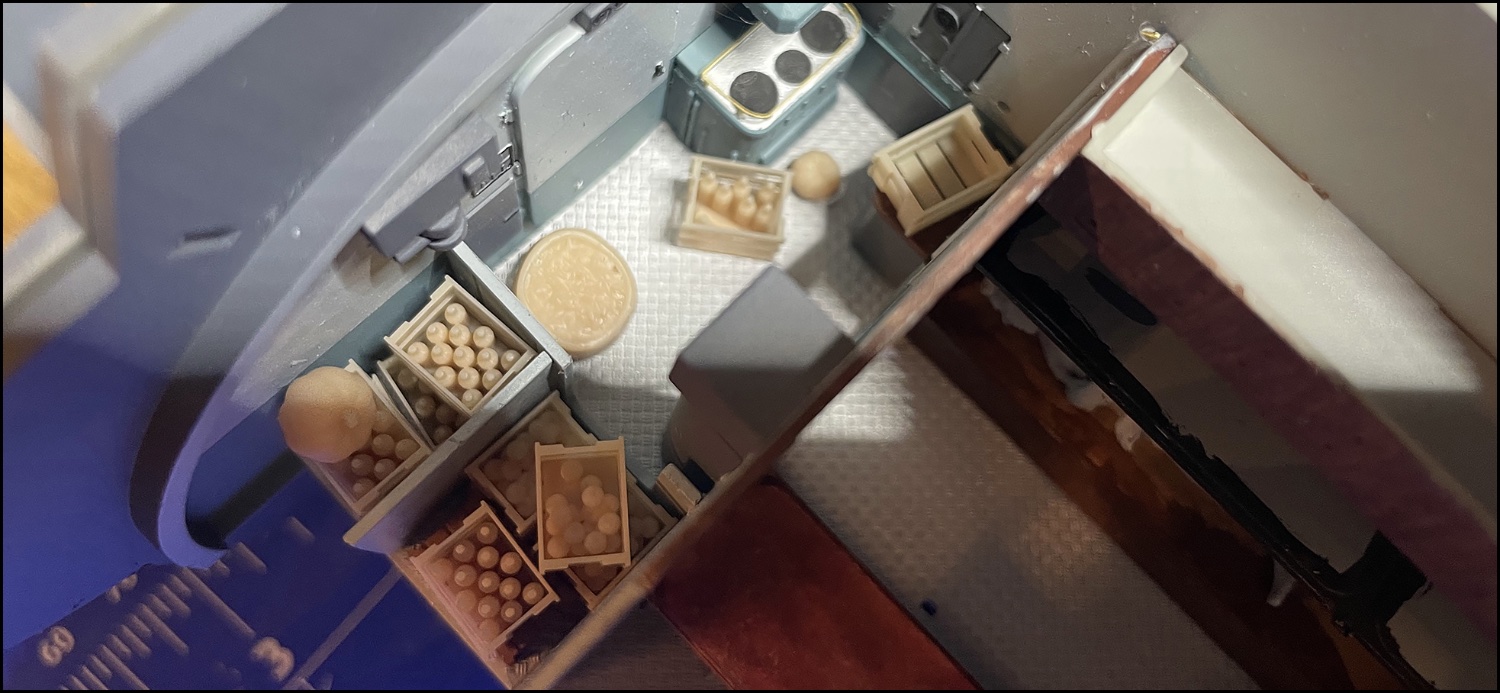
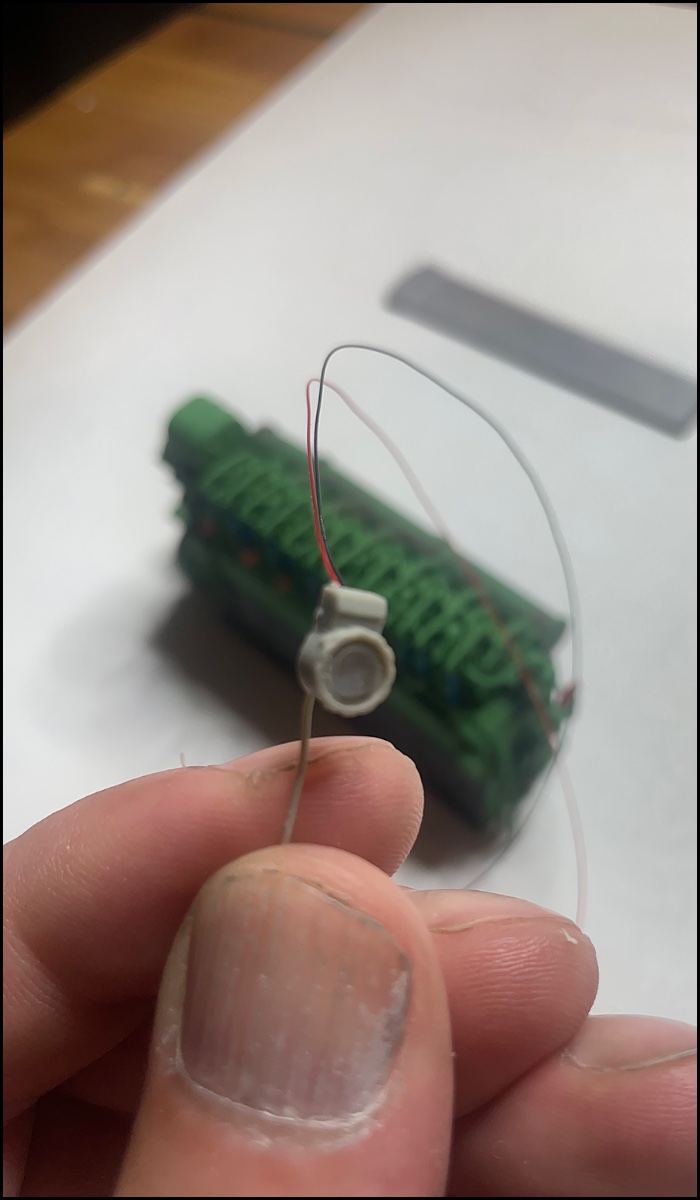
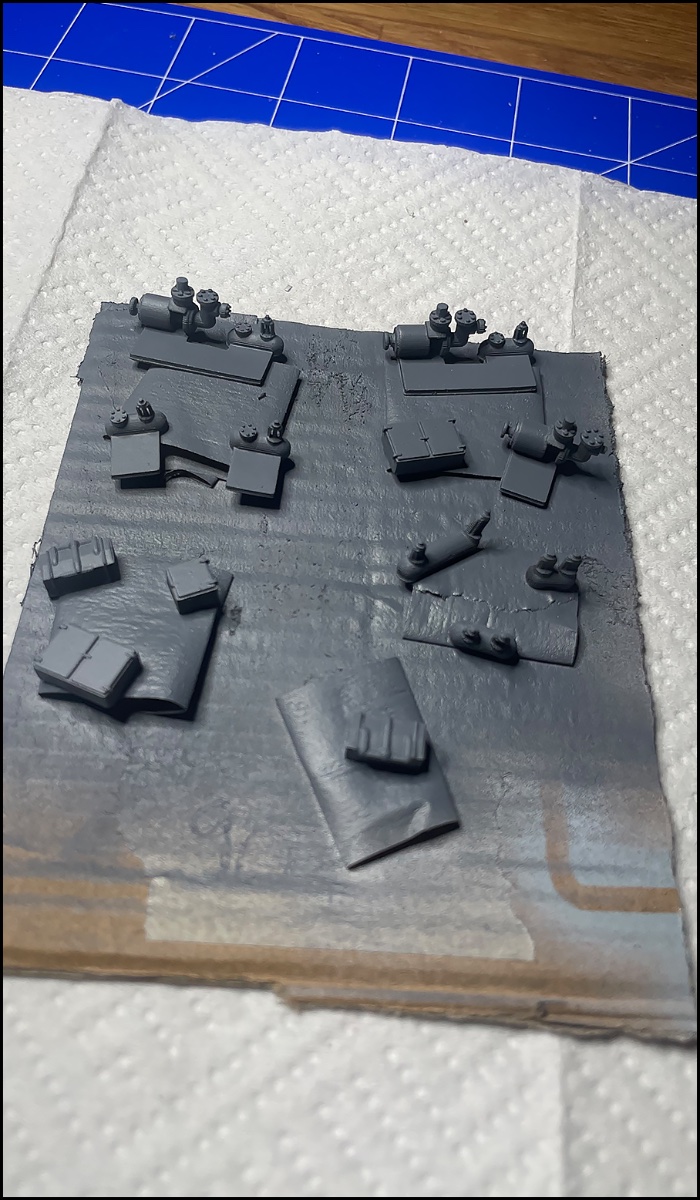
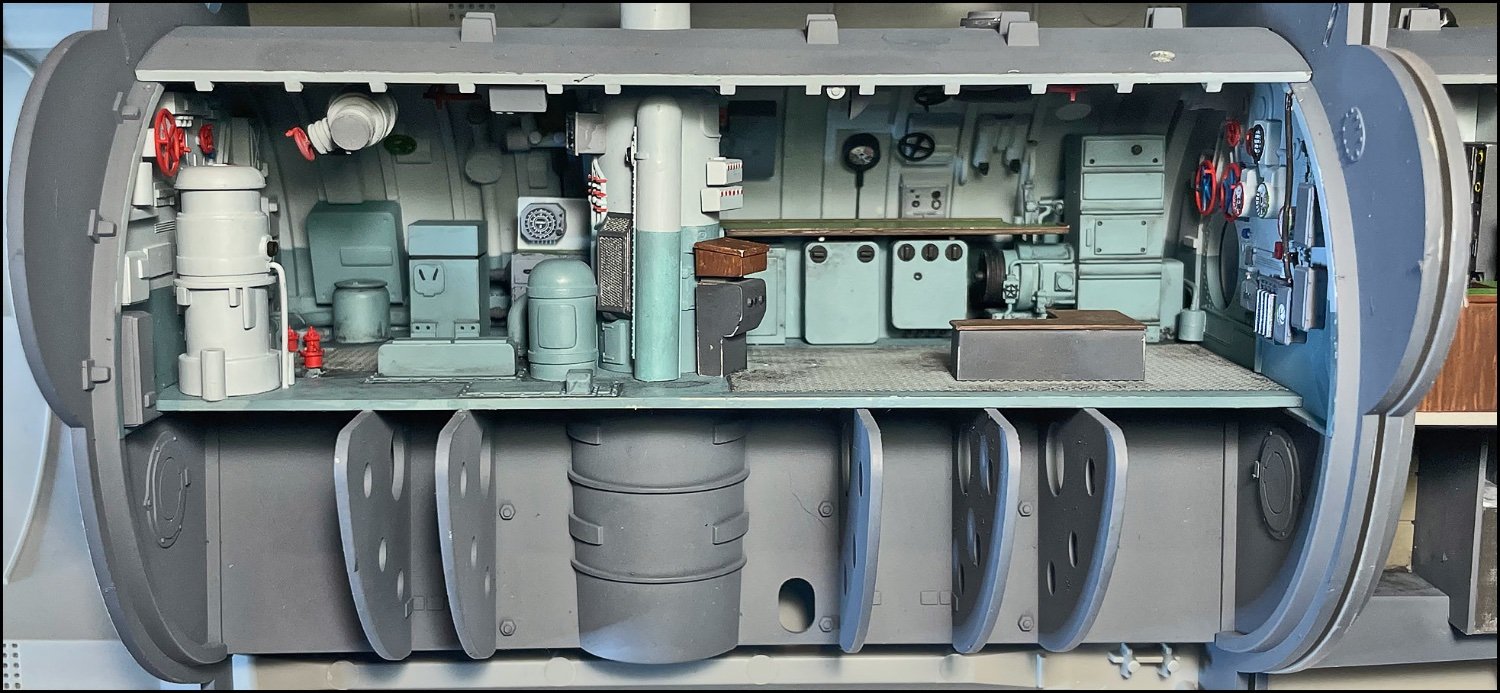
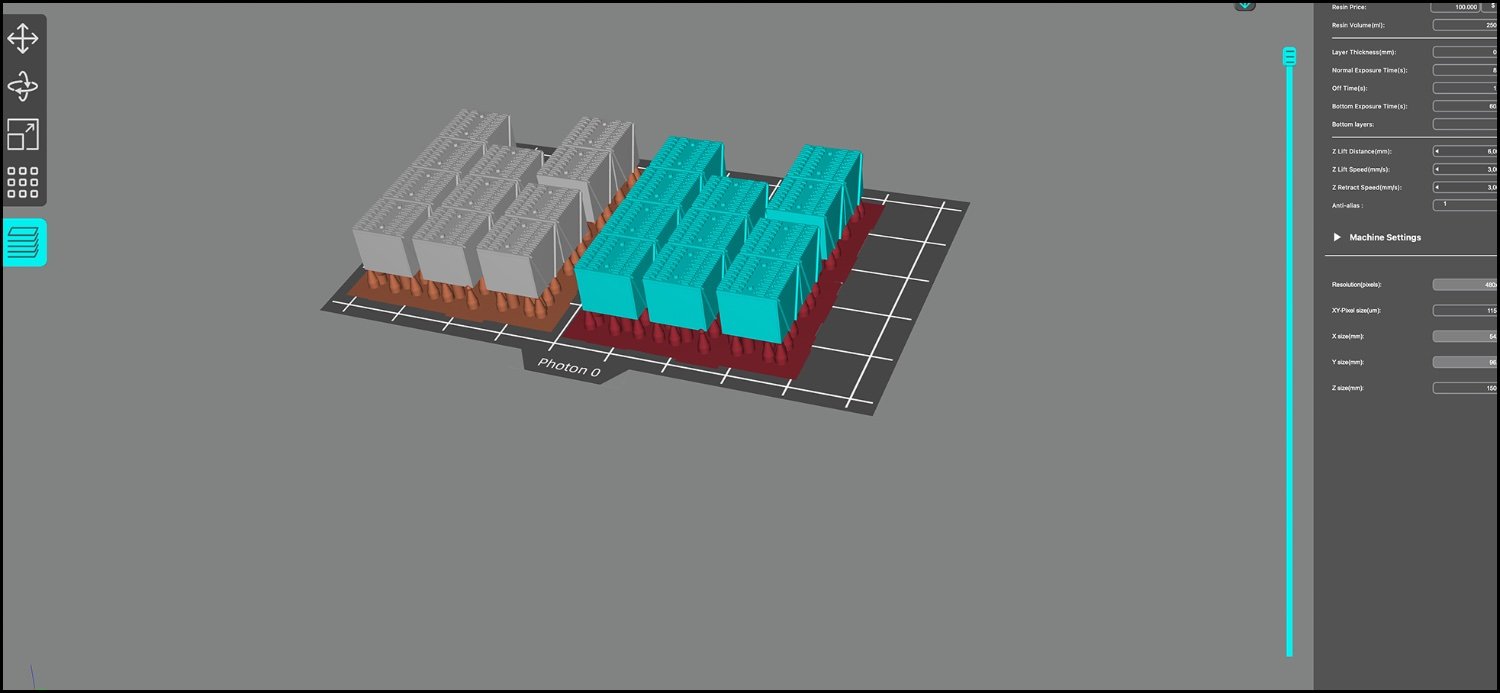
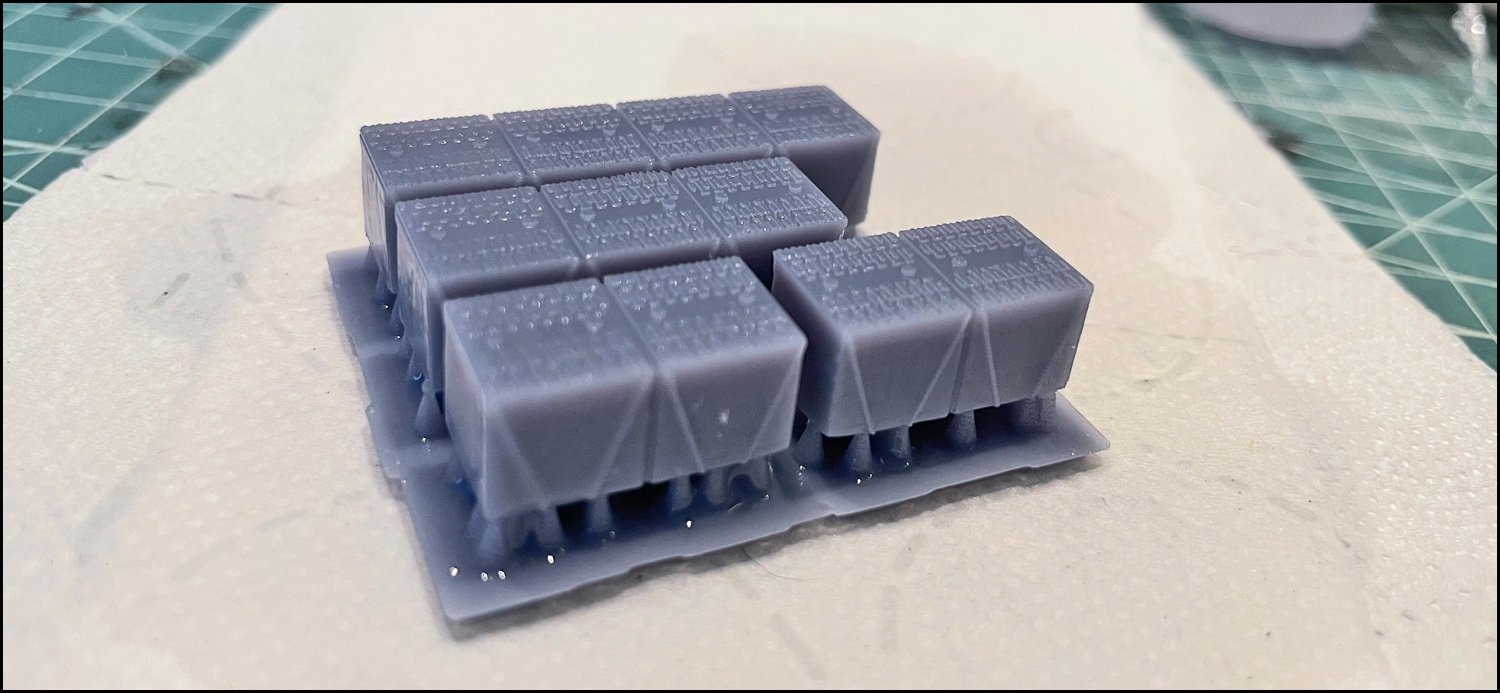
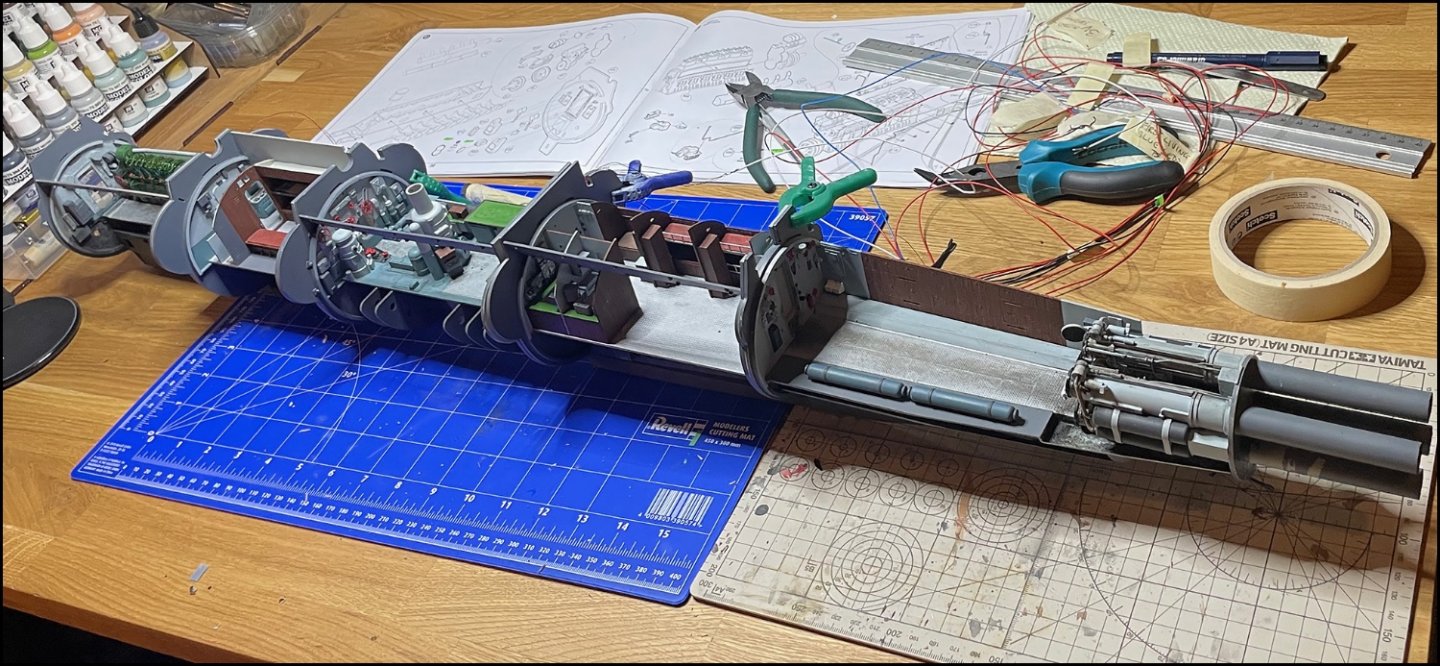
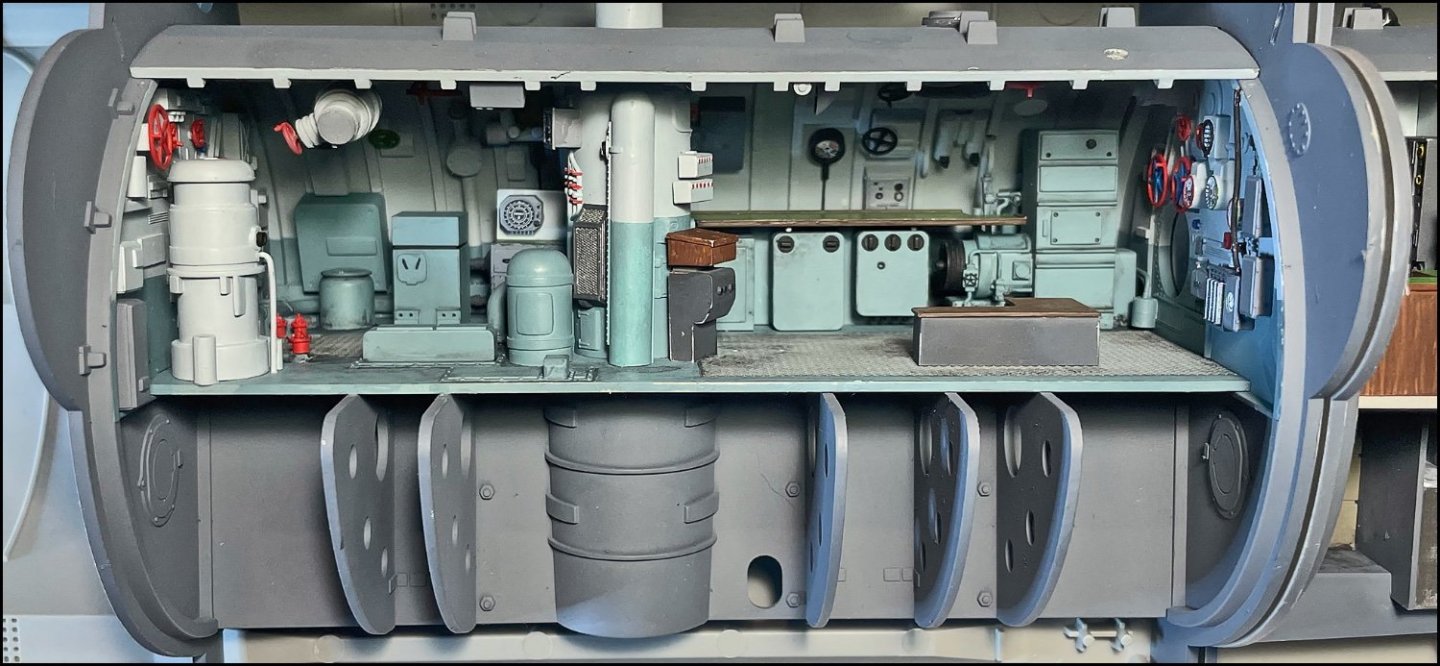
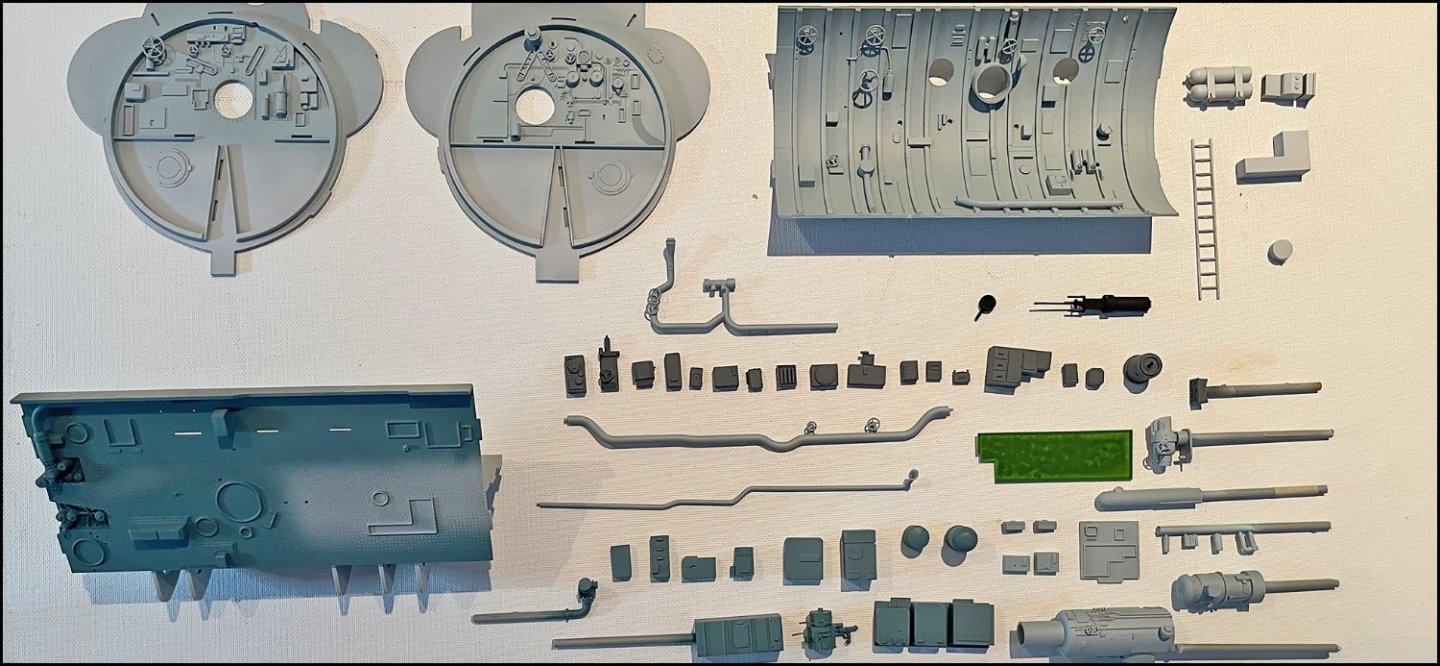
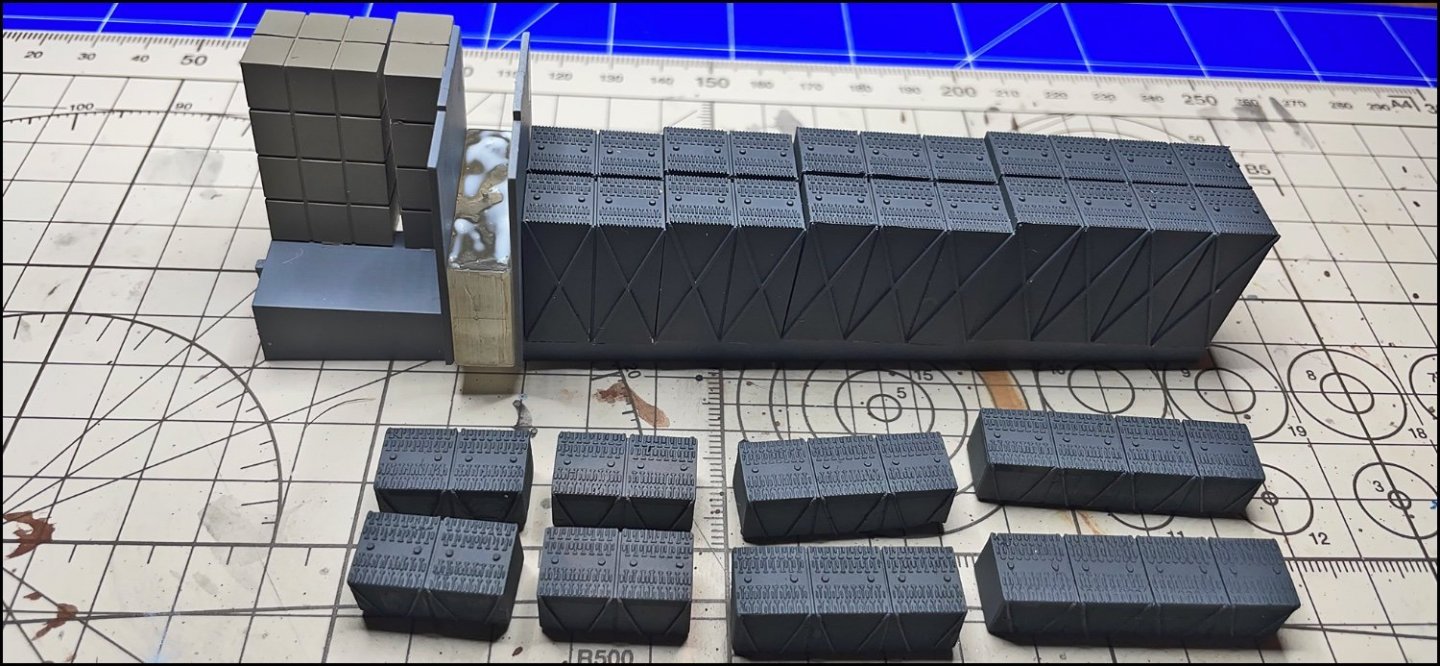
 DIESEL ROOM The pictures start in November and end in mid-January (2023). As I mentioned, I decided in the summer that I would make a new "manacave" for myself before continuing to model. I finished it at the beginning of November. it's made in a old a Belgian wardrobe that's over 100 years old. It had been so long since I last build that model I had to spend several hours wondering what to do next 😅 a repeat of the old one, but I put here is the finished parts again before assembling and weathering.... First things after photos sets was that I had to remove the light above the engine because there were some connection problems inside it. The red light on top of the Diesel engine is a 3D print and has a micro Led inside I only used Mig's "Engine Fuel & oil" paint and Vallejo "black" and water for weathering engine. And the result ------------------------------------------------------------------------------------- At this point, I decided to assemble all the compartments so that only the roofs are missing. the trumpeter's instructions often advise that the second bulkhead is the last part to be glued, so my compartments are still in quite a few parts... Here are some pictures So the compartments are not glued together, only bulkheads in their own compartments I also bought a new and much better quality 3D printer. My fingers are already itchy when I plan all the extras for the submarine. Here are some practice prints. I also found on the internet what all the food was loaded into the submarines and how much. We'll see how closely I decide to follow it... But now... The Electric room!
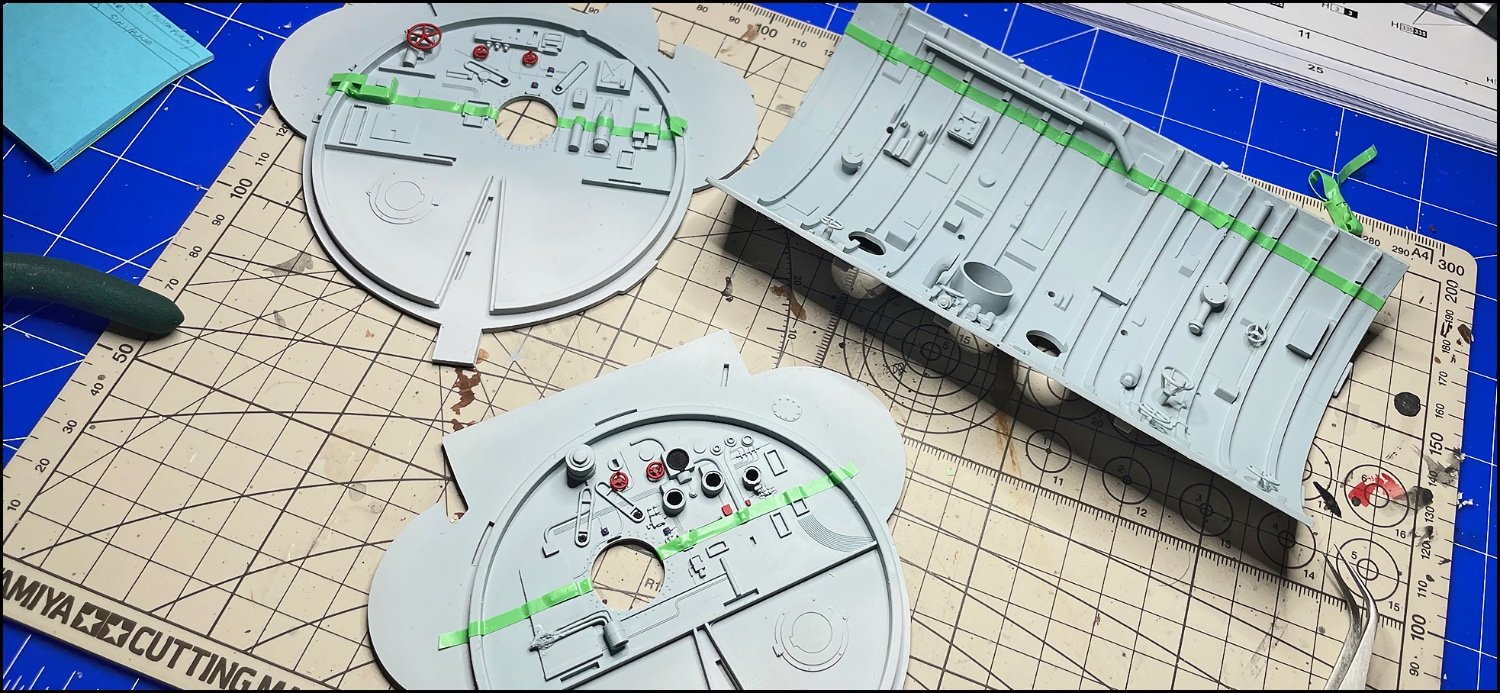
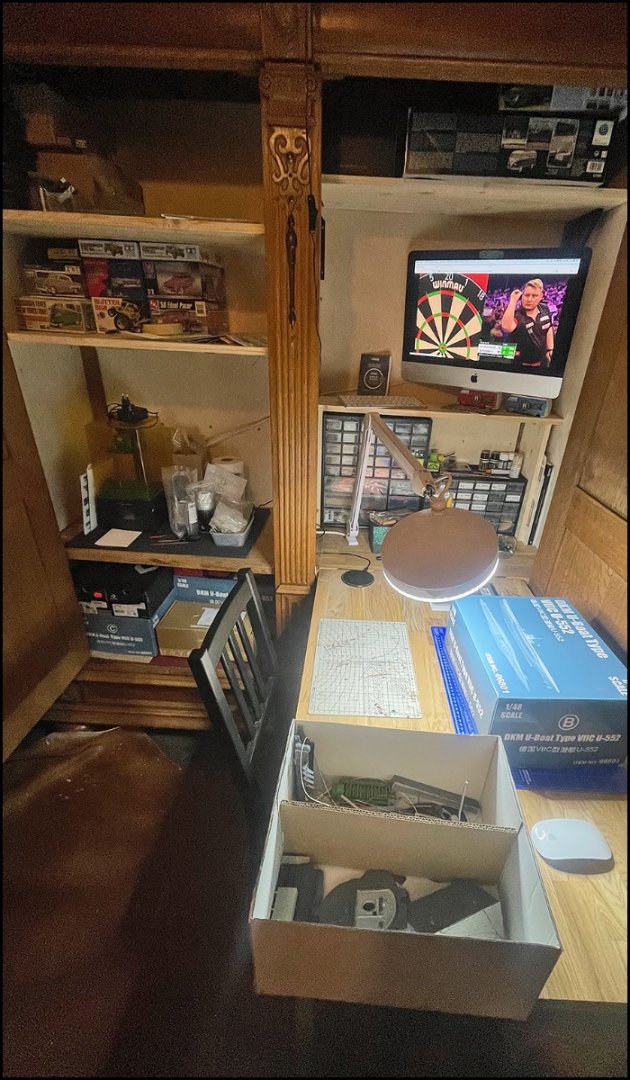


-
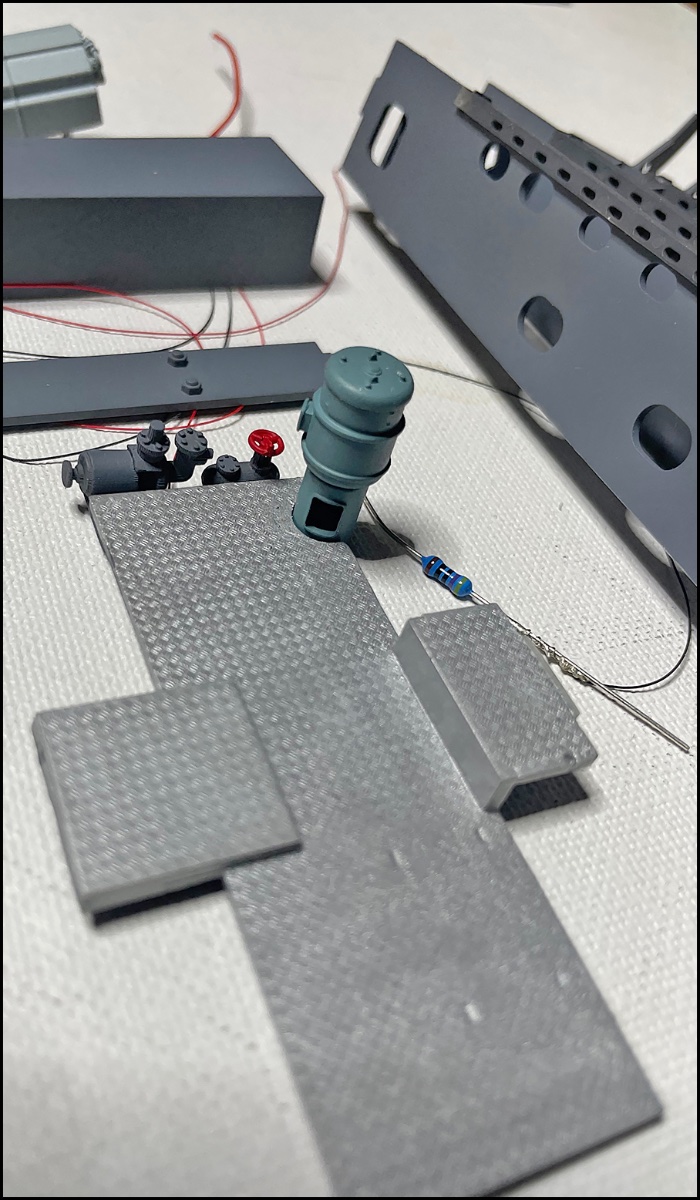
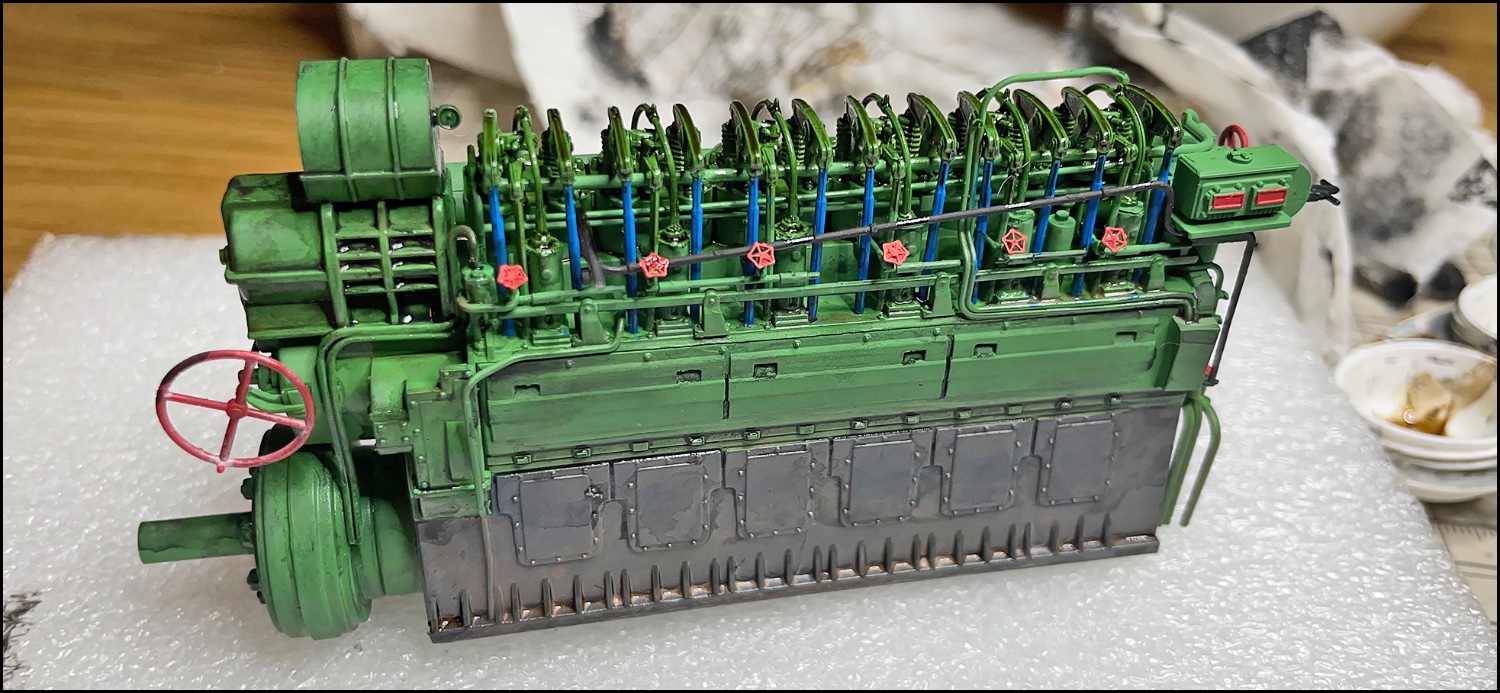
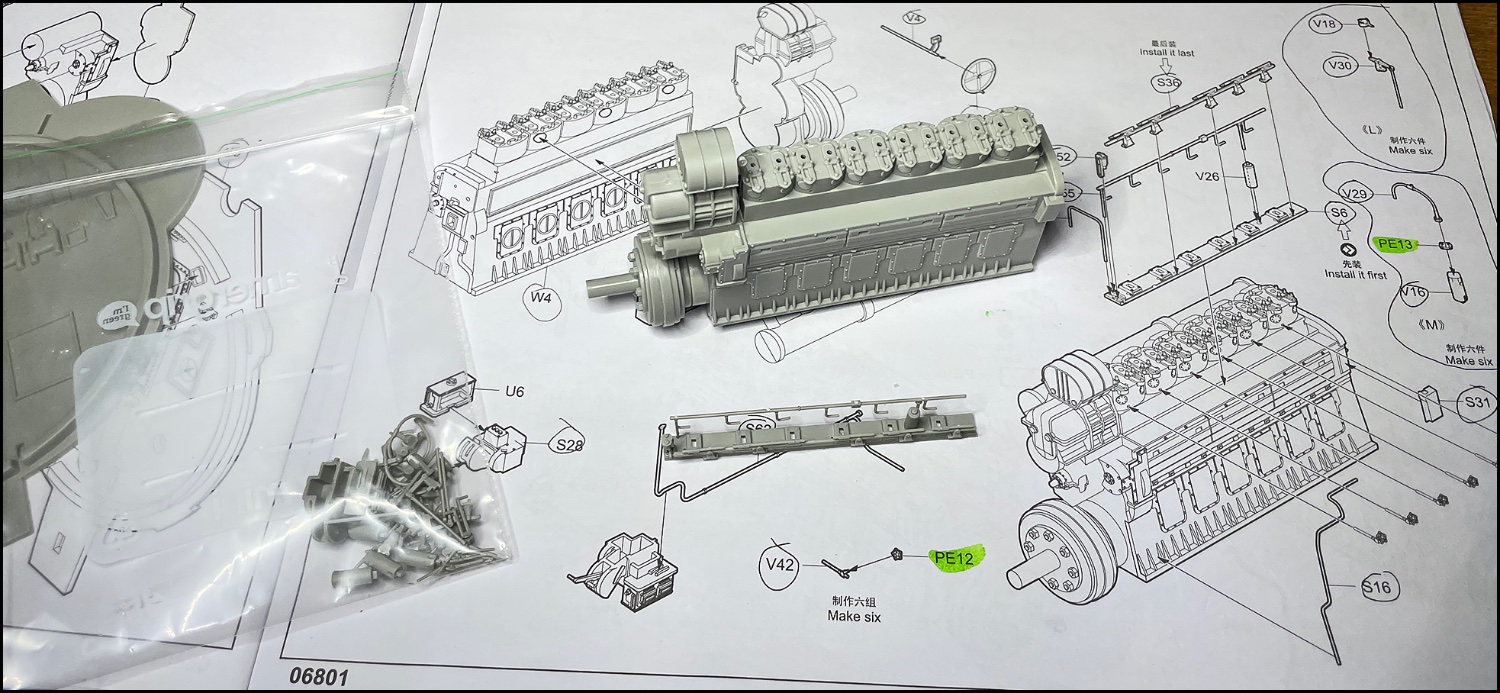
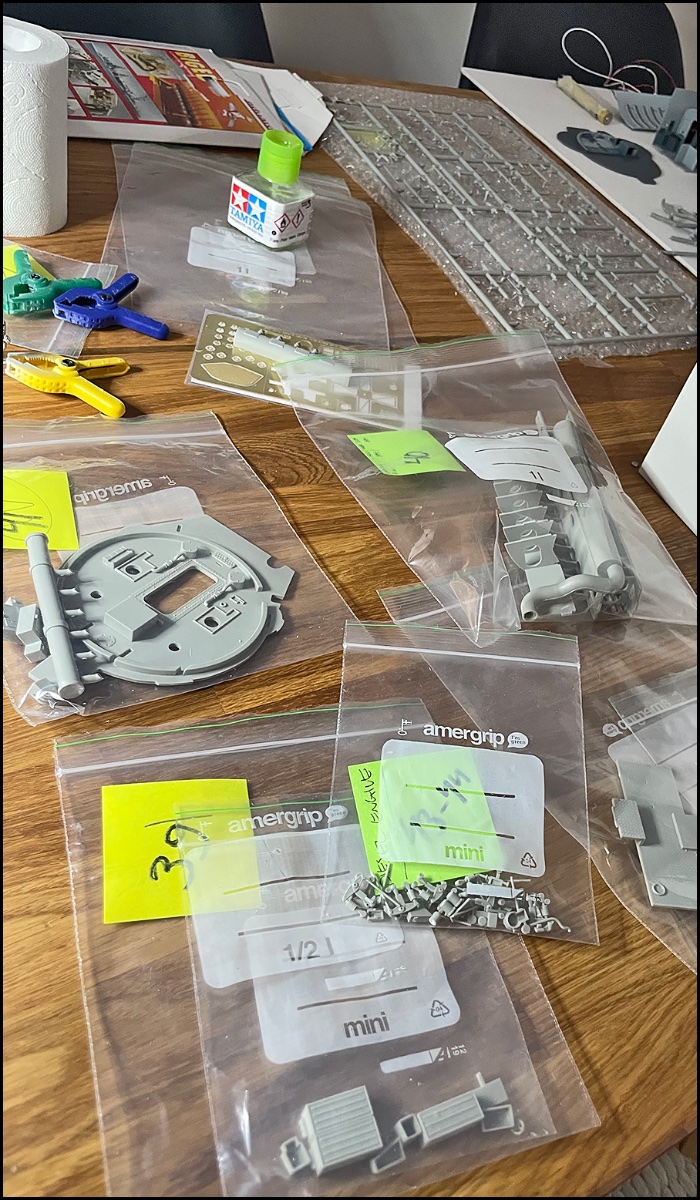
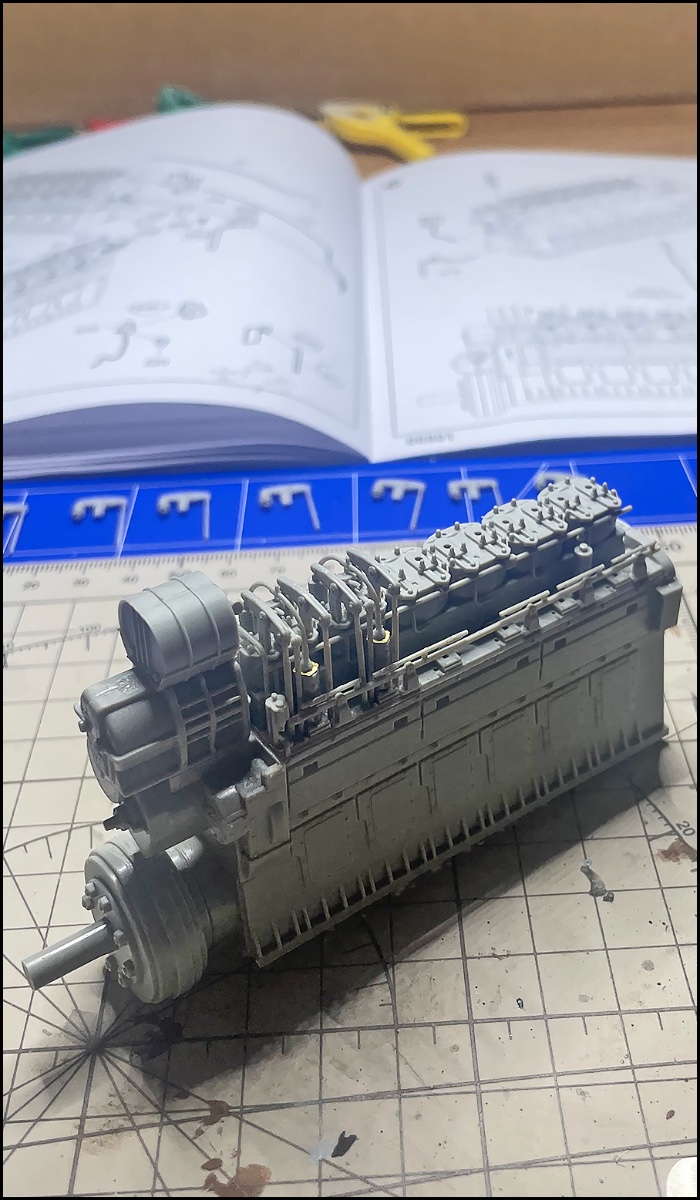
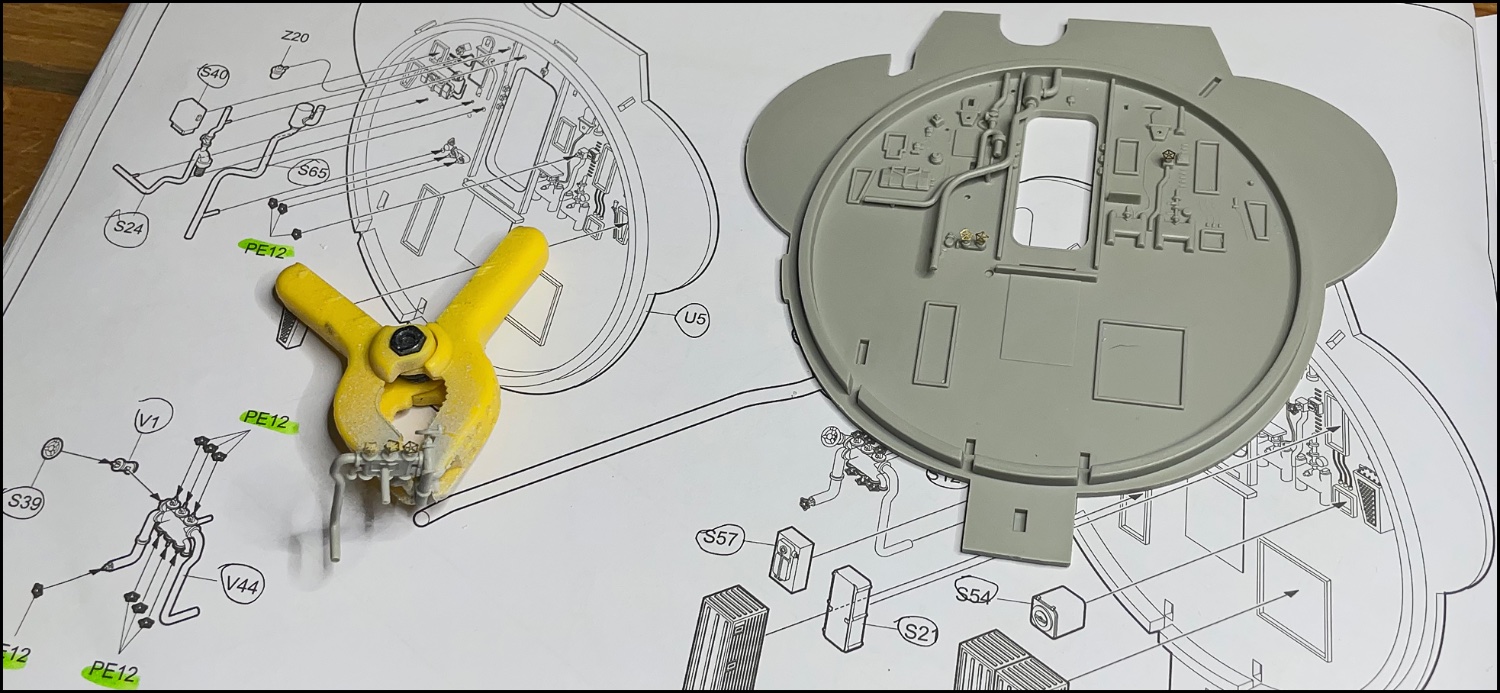
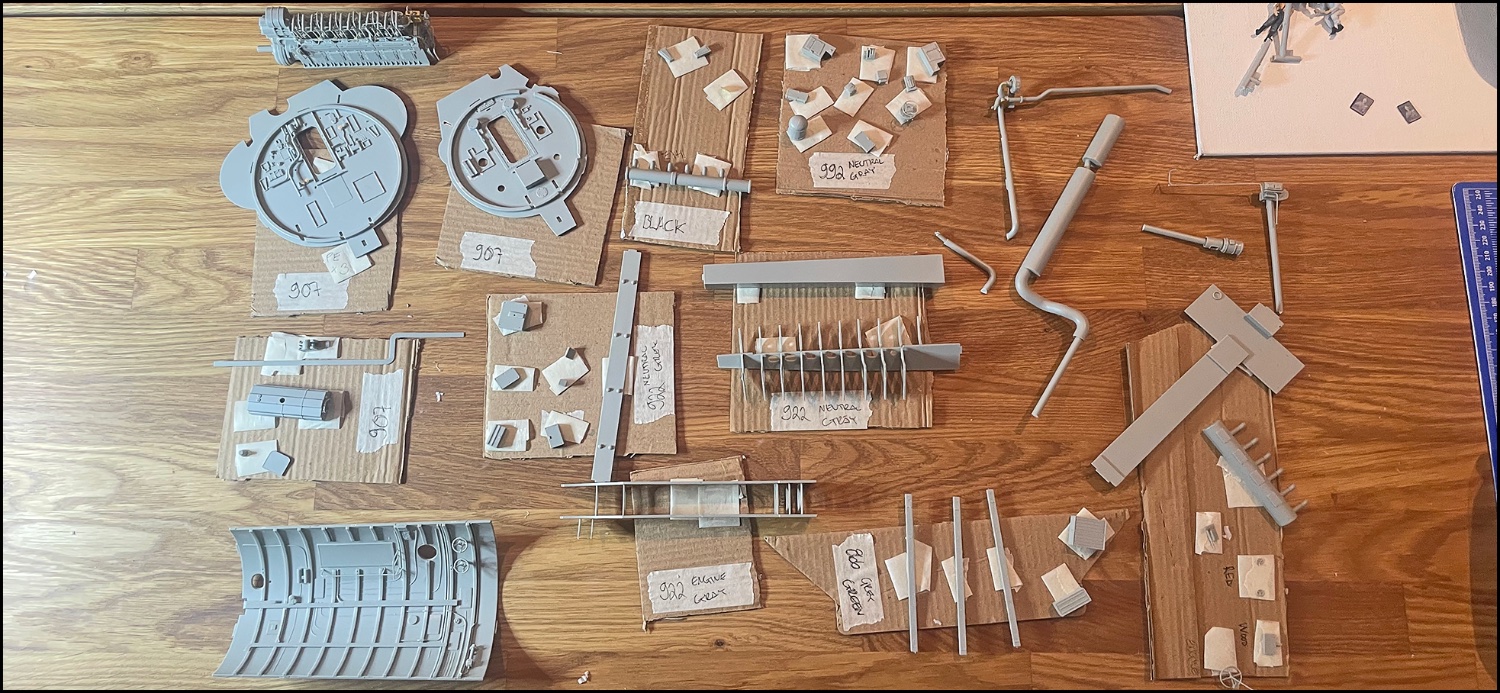
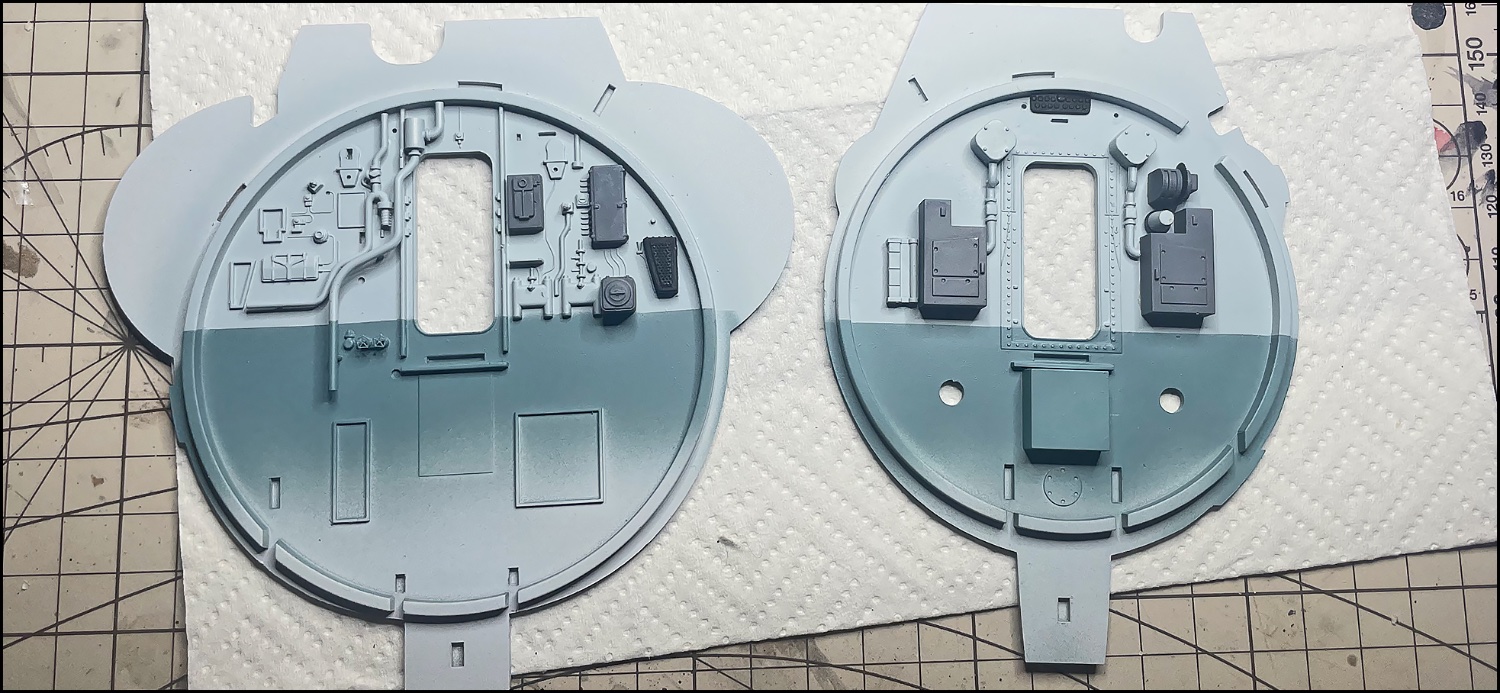
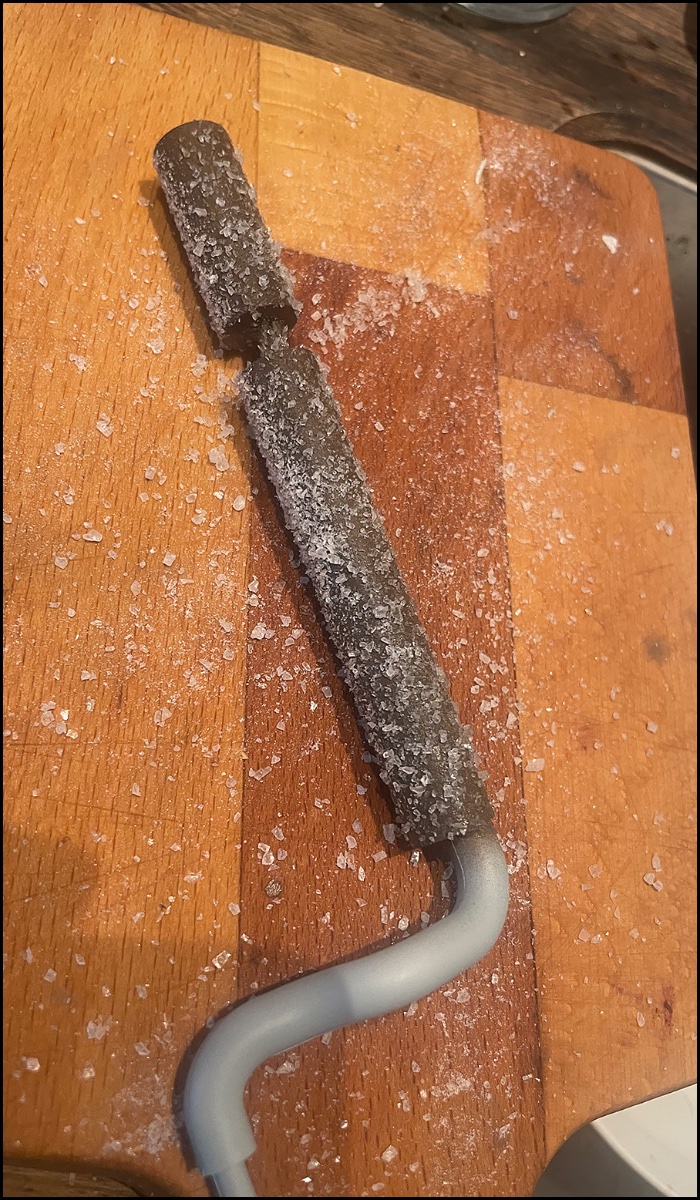
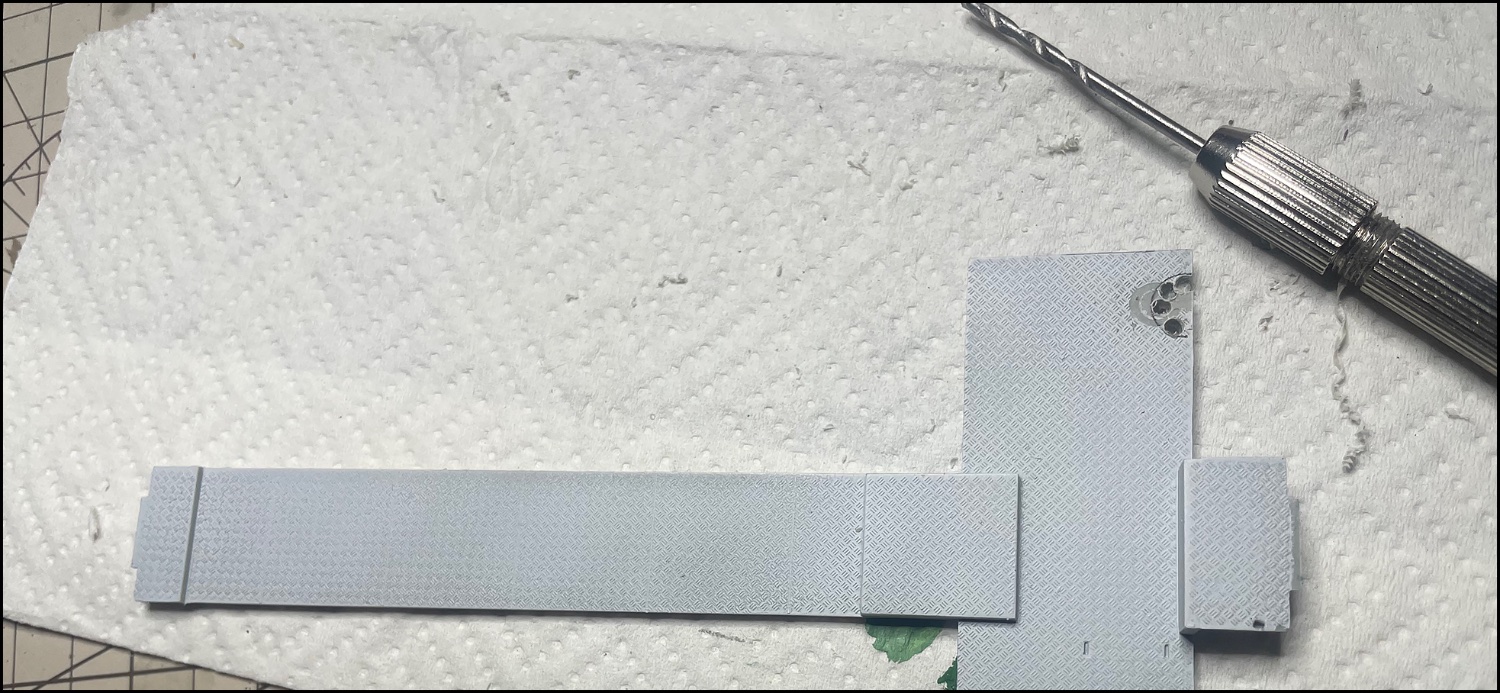
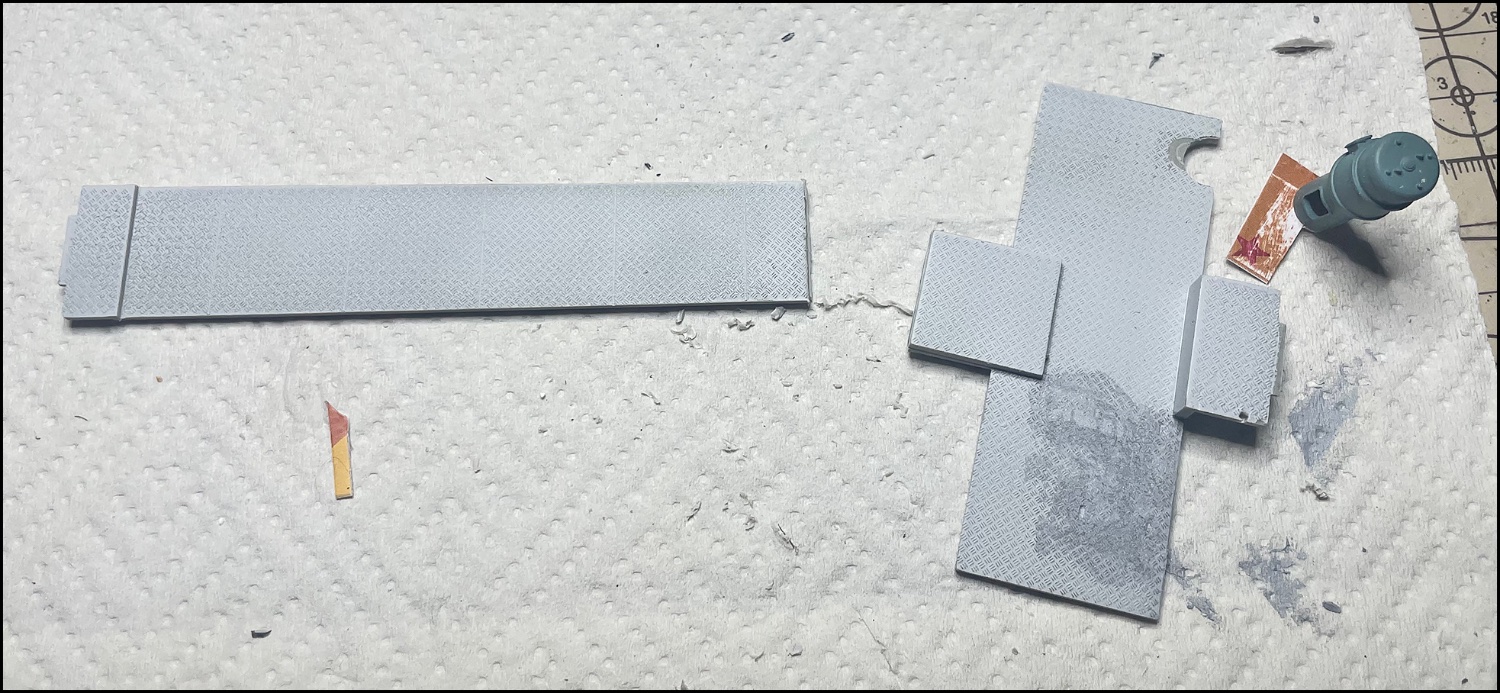
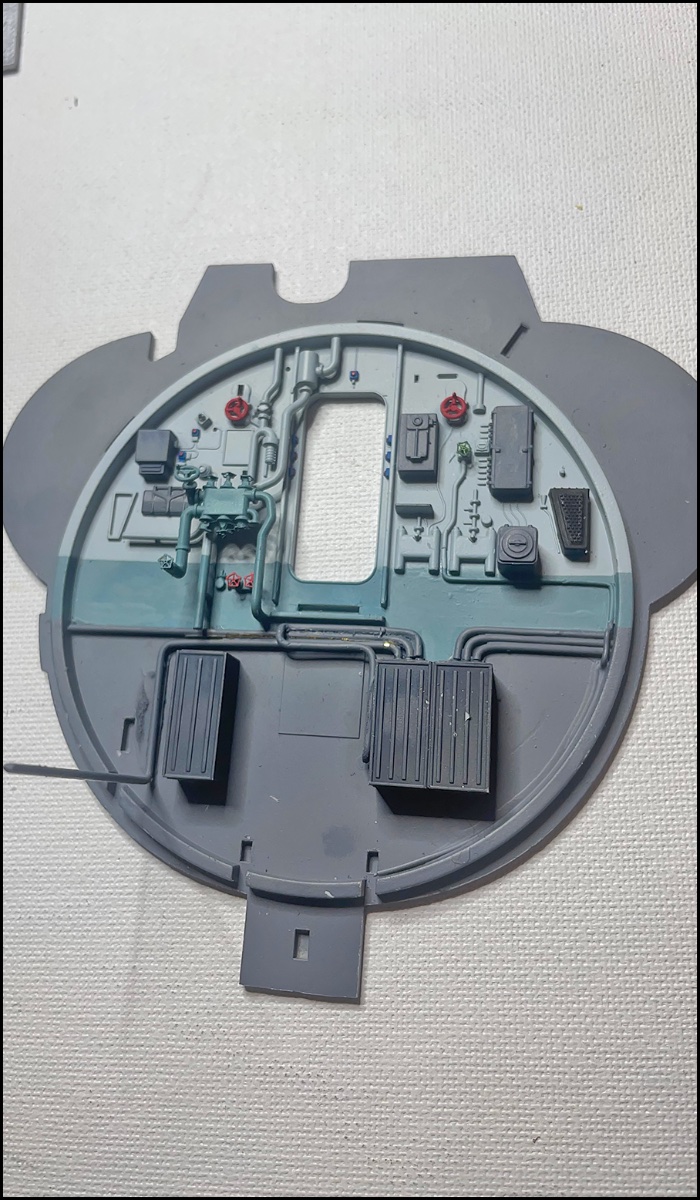
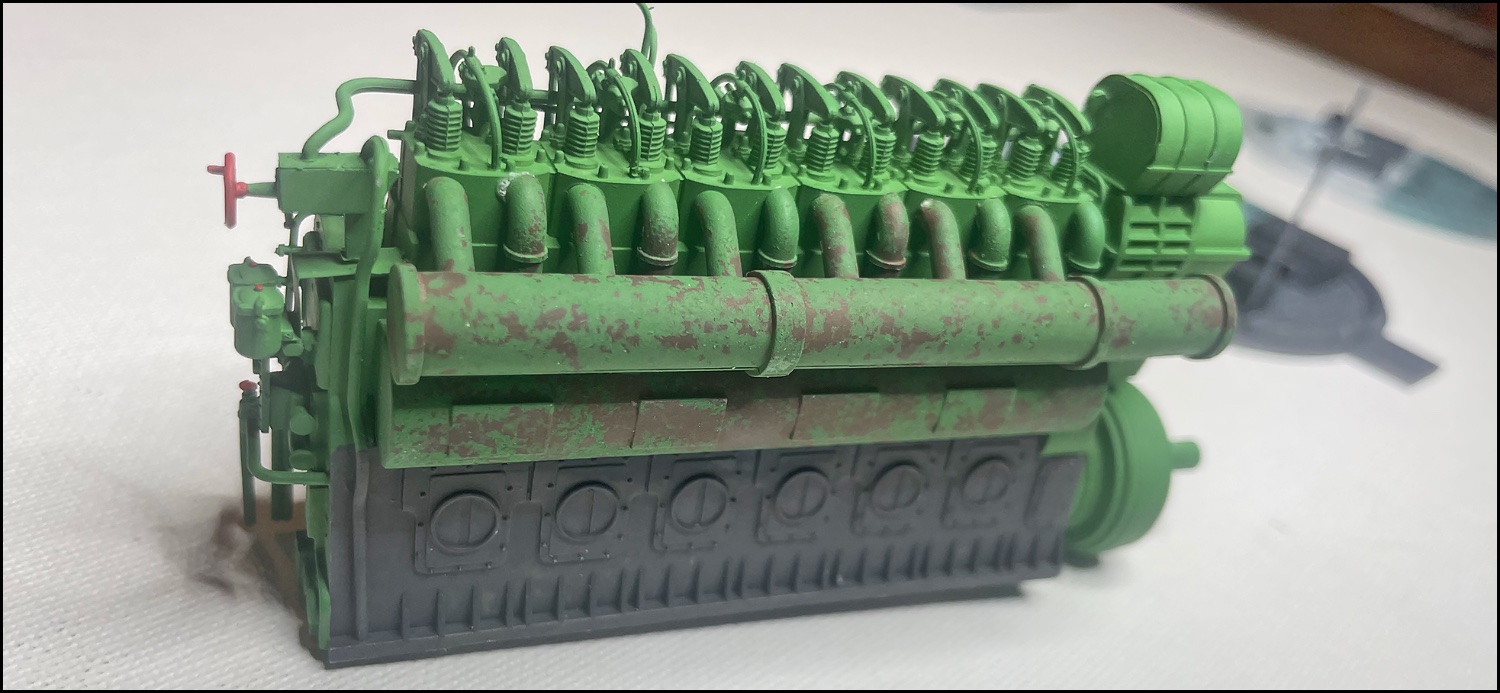
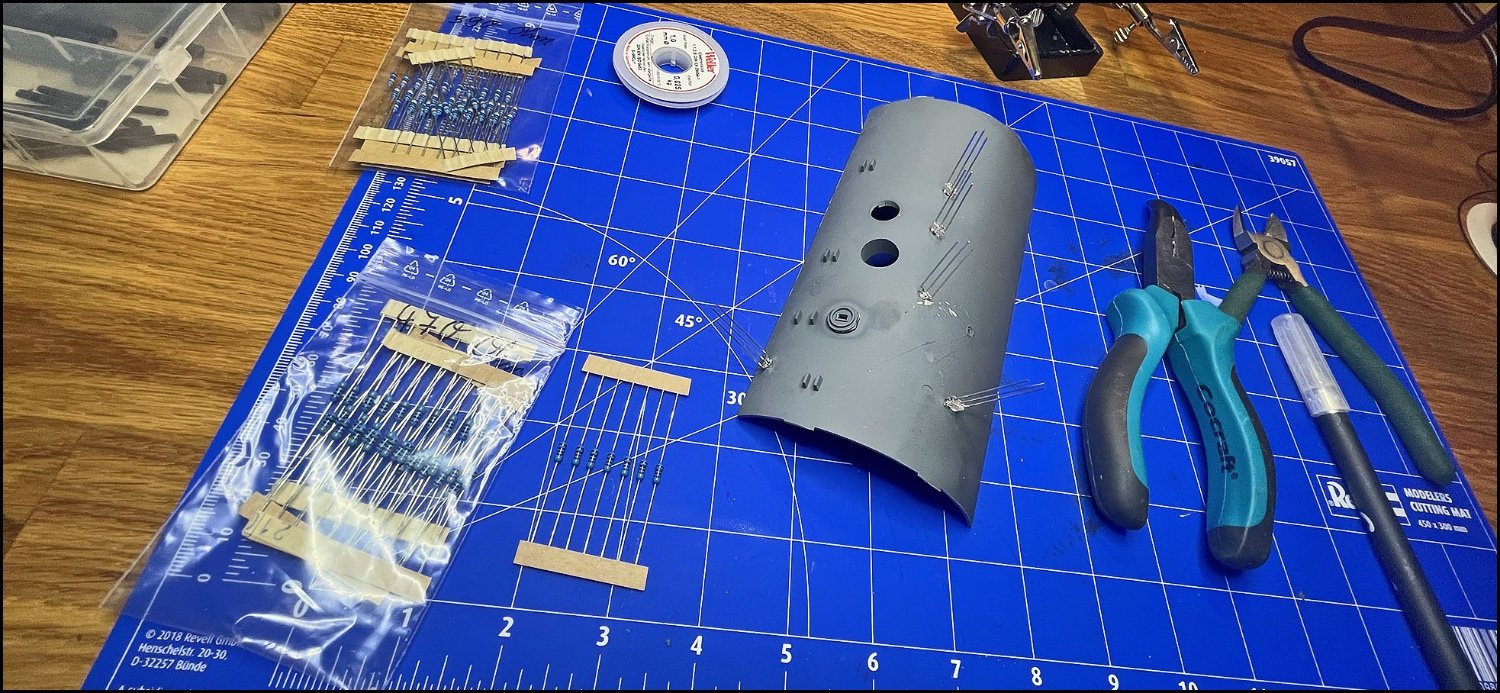
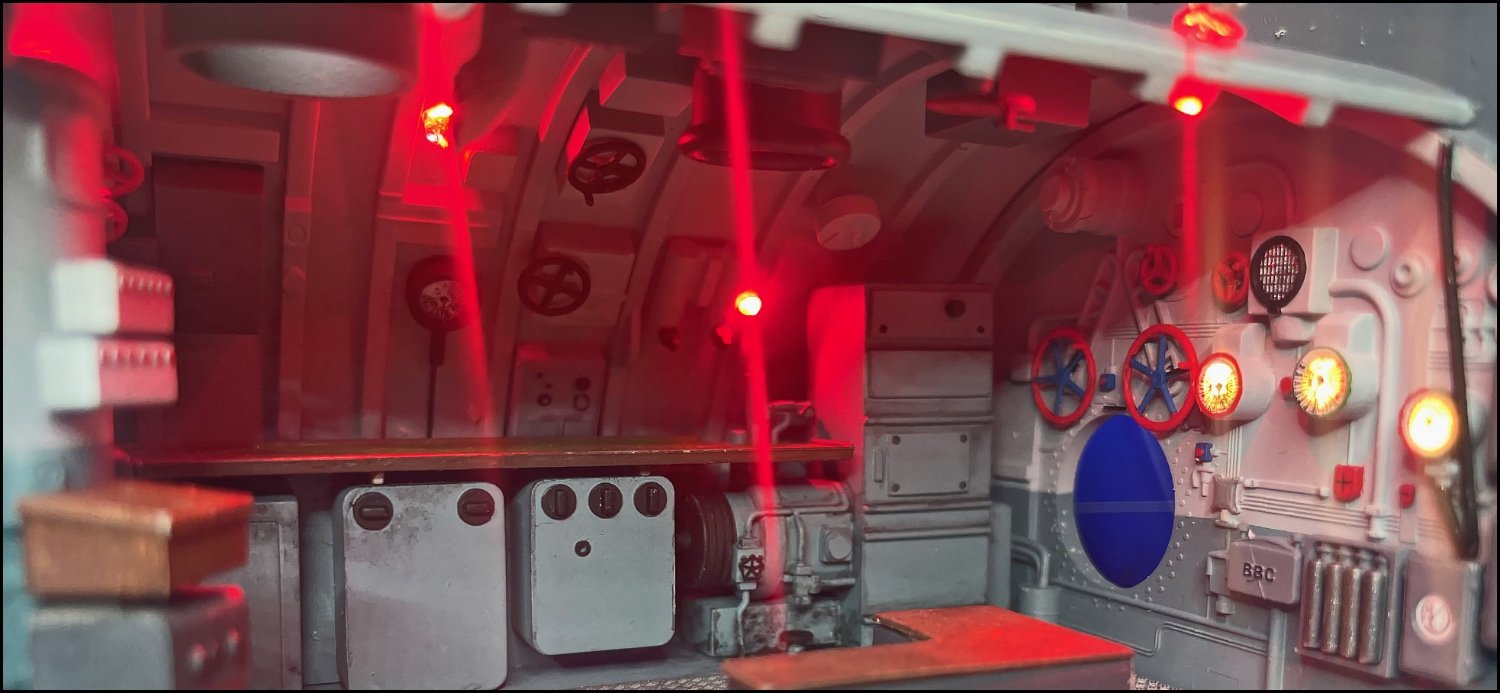
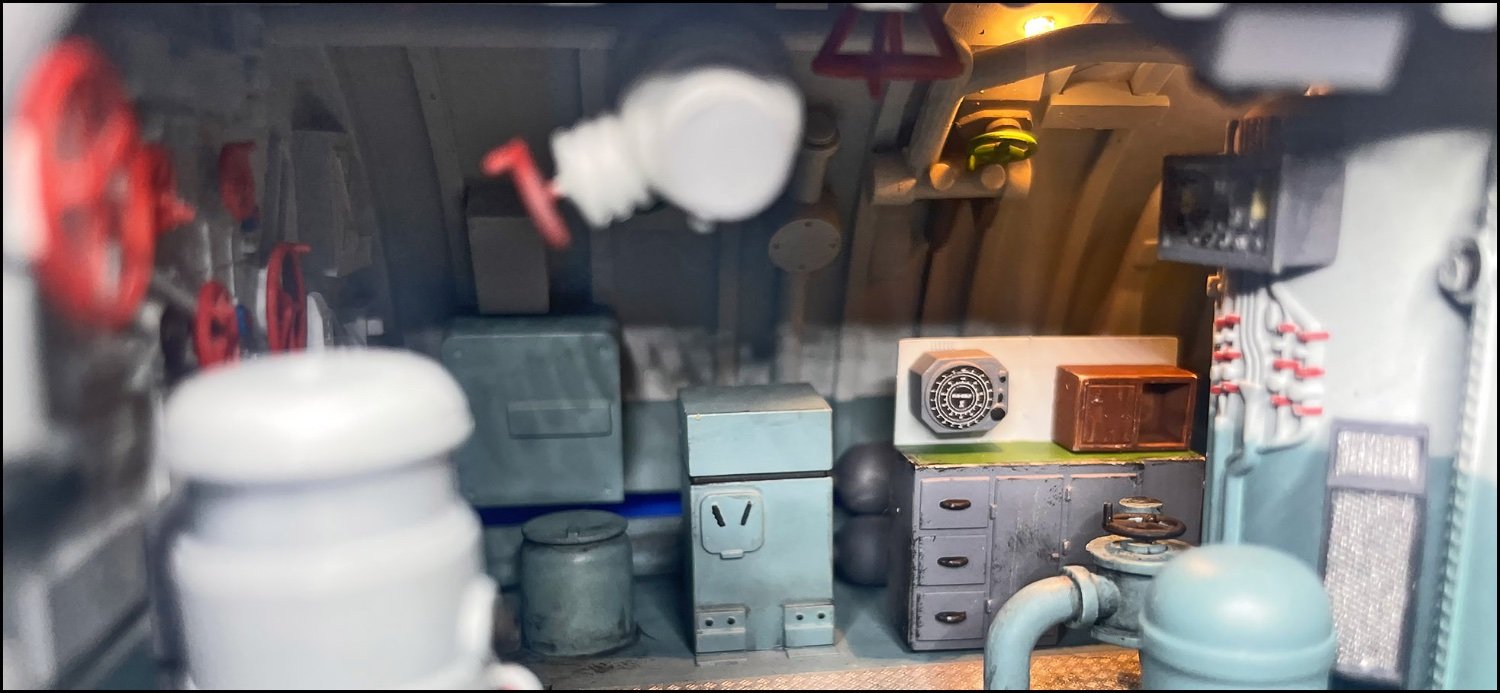
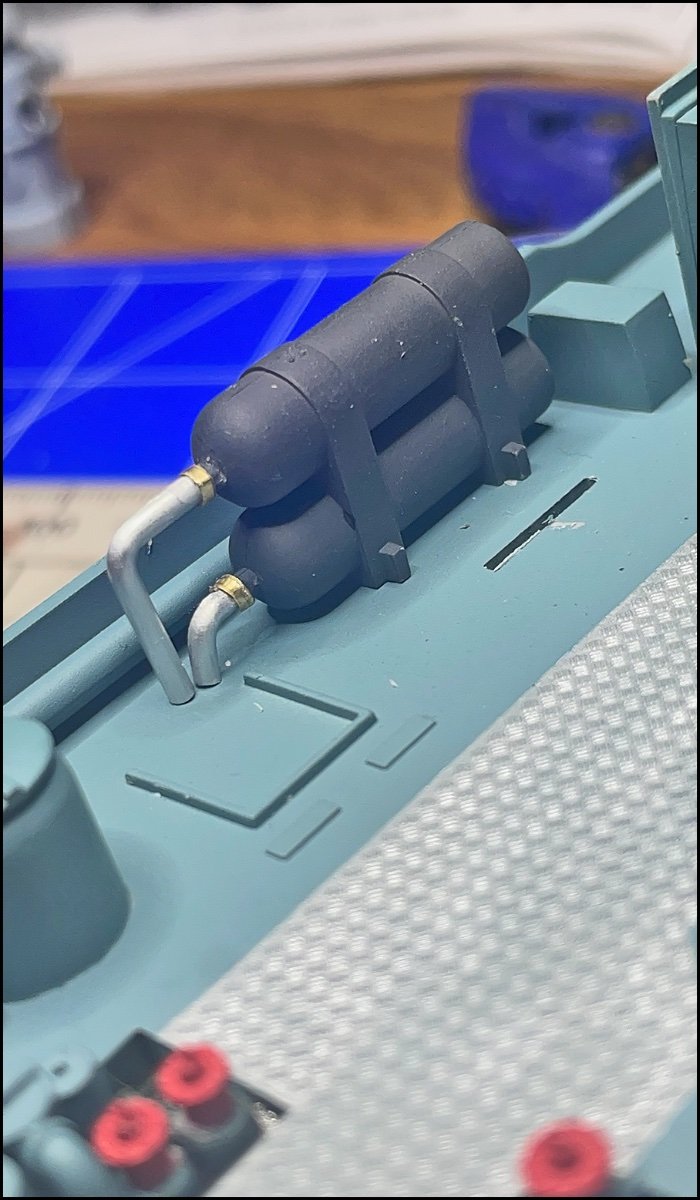
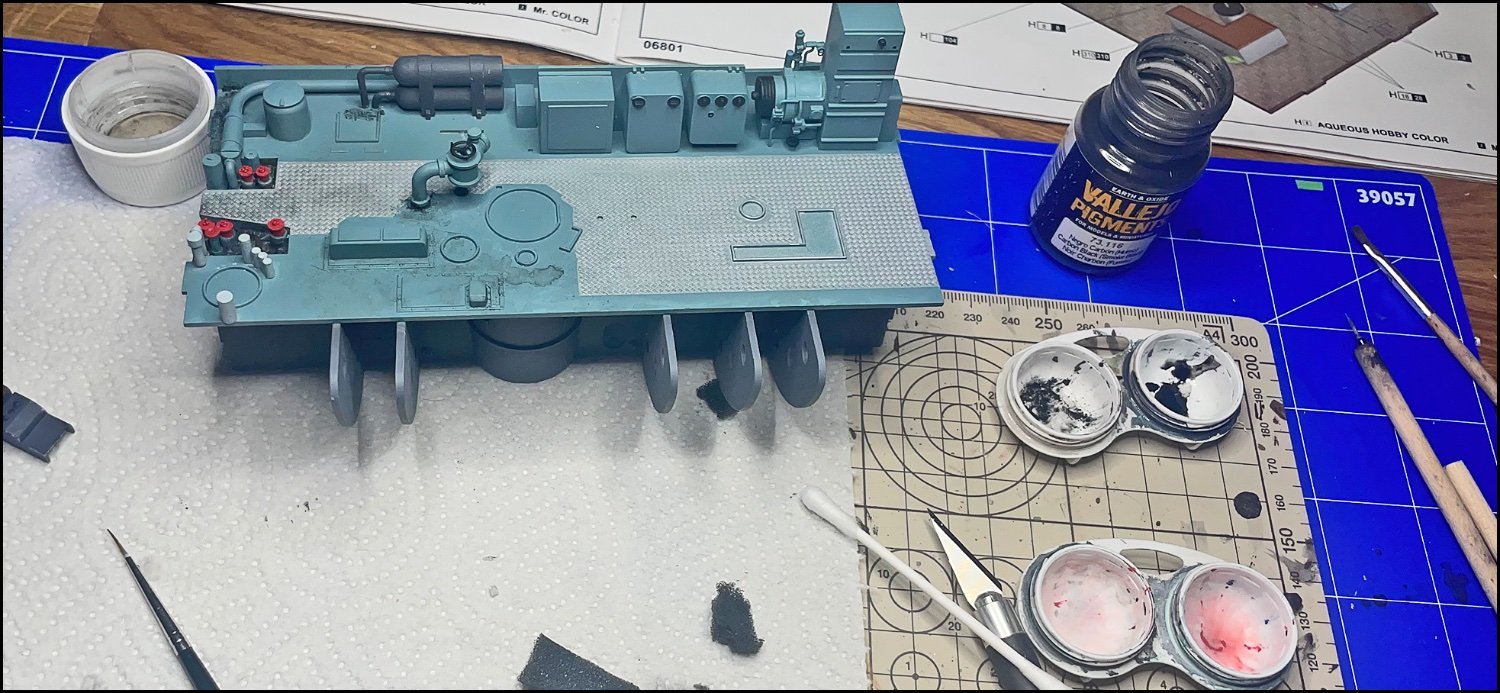
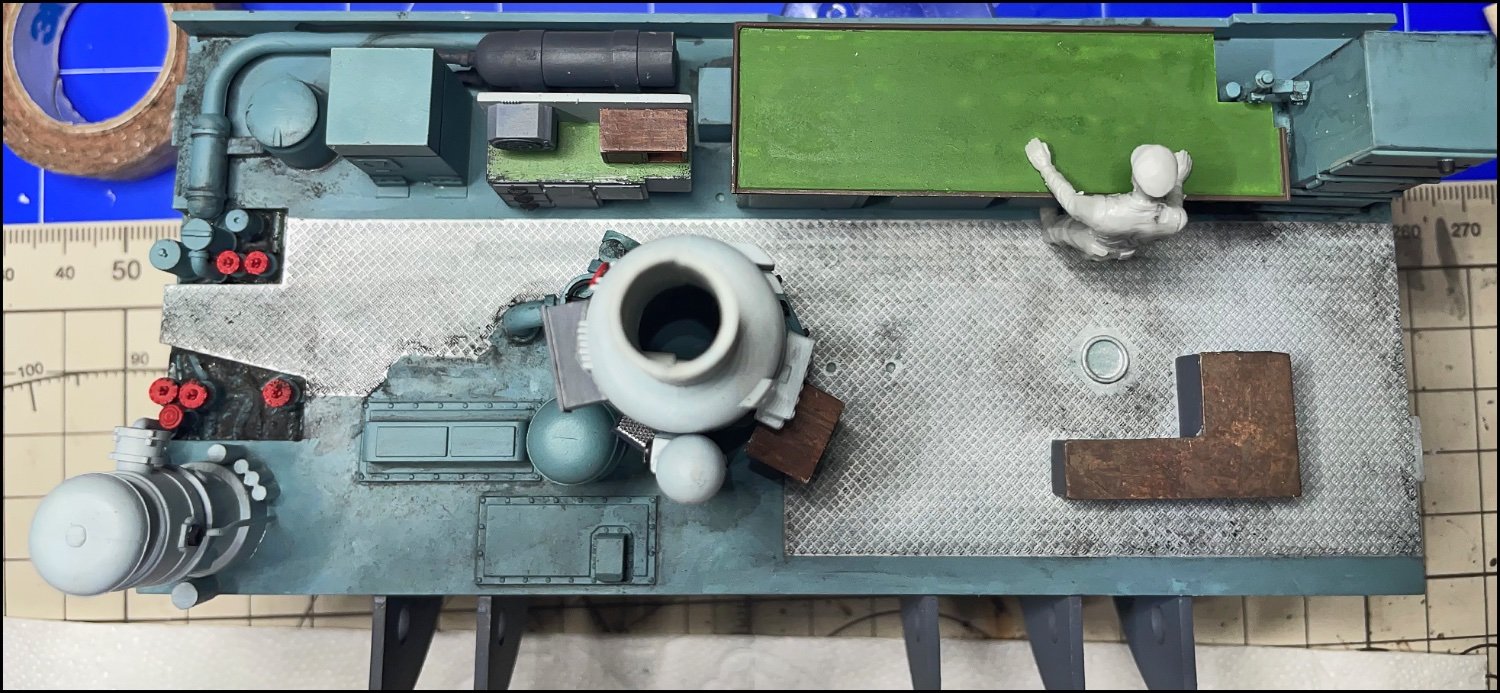
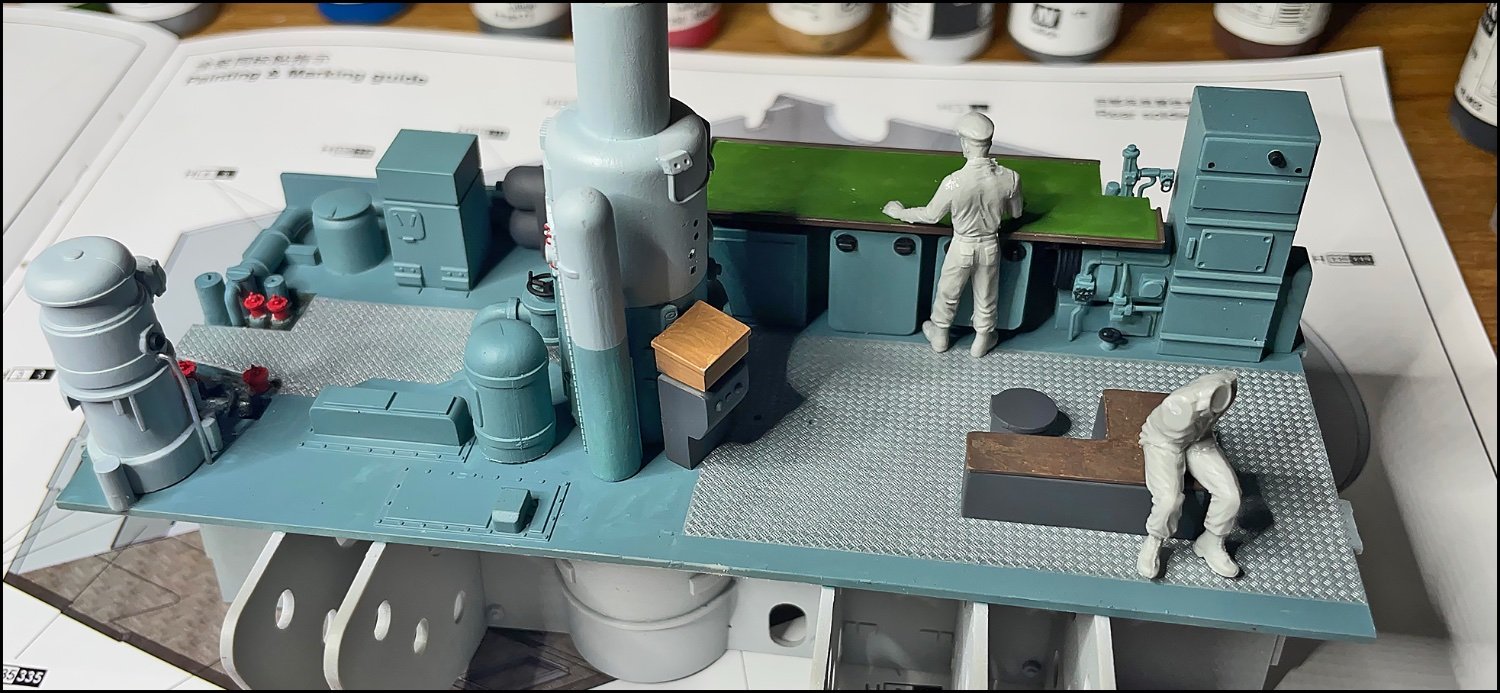
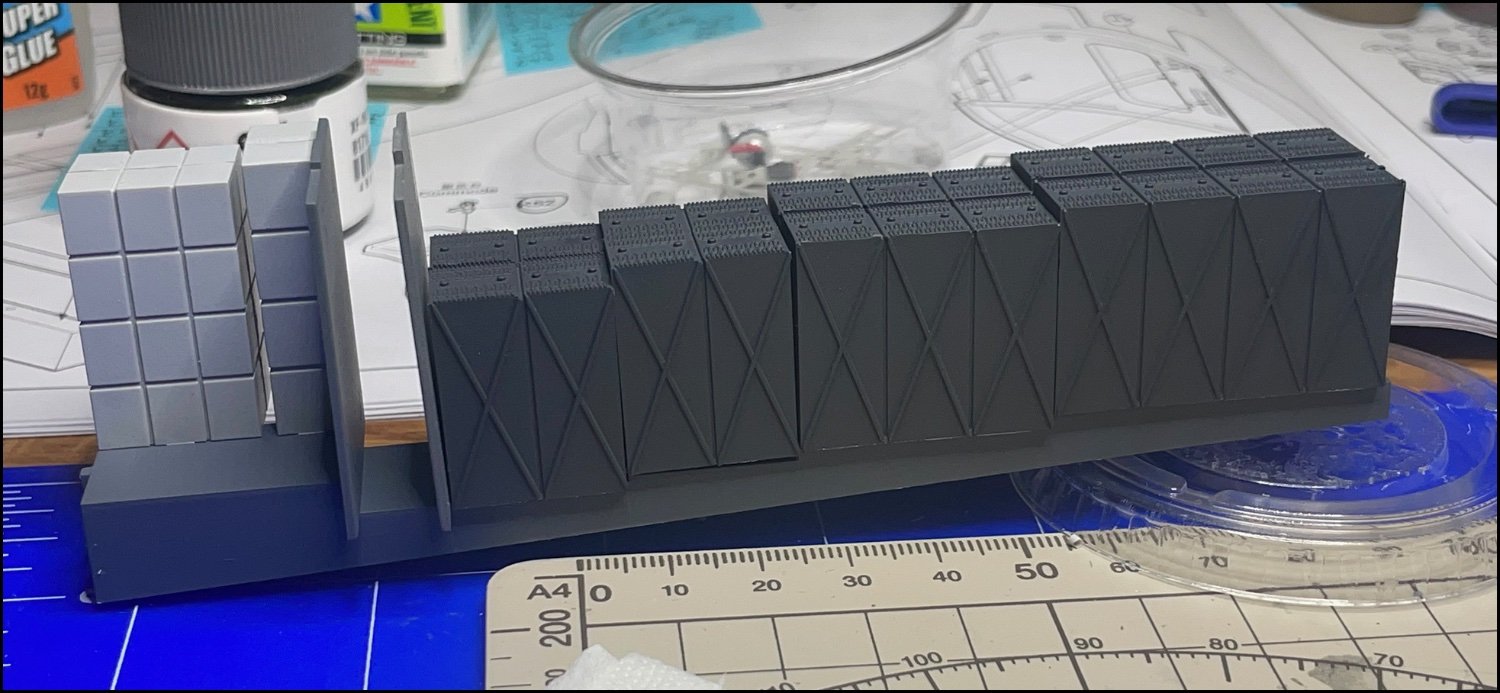
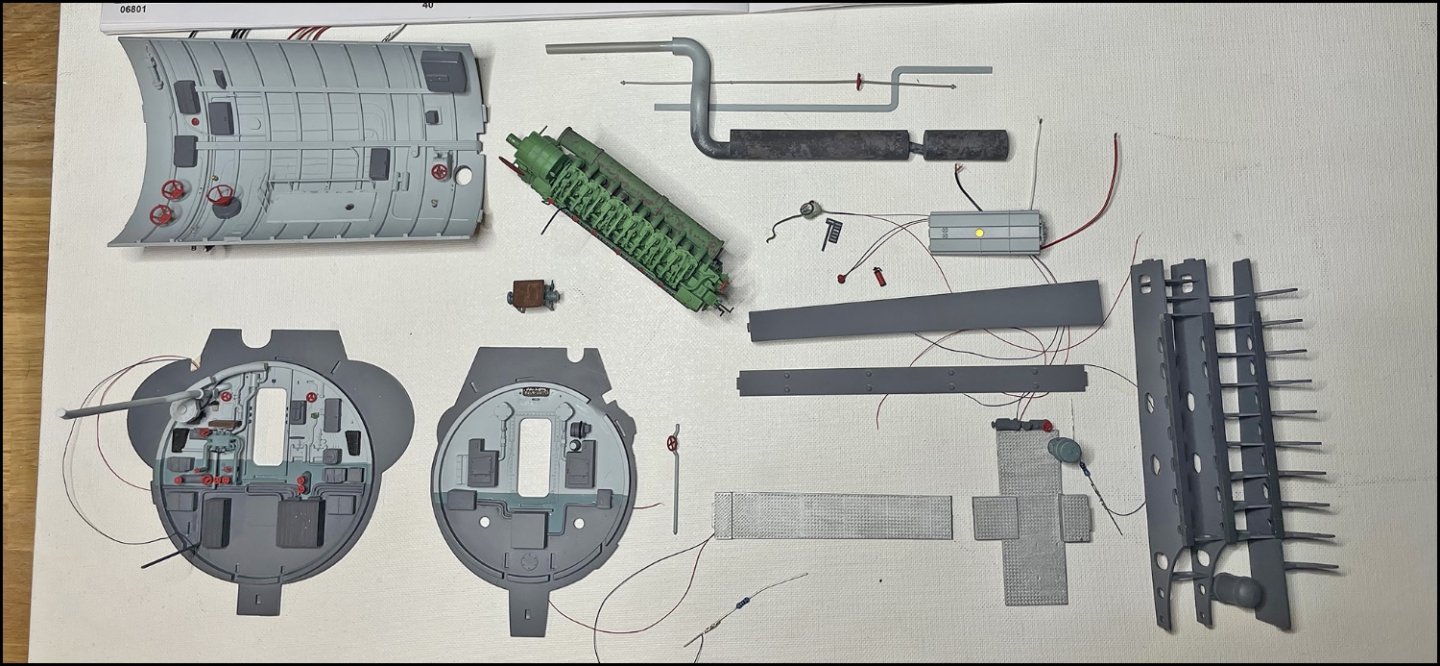
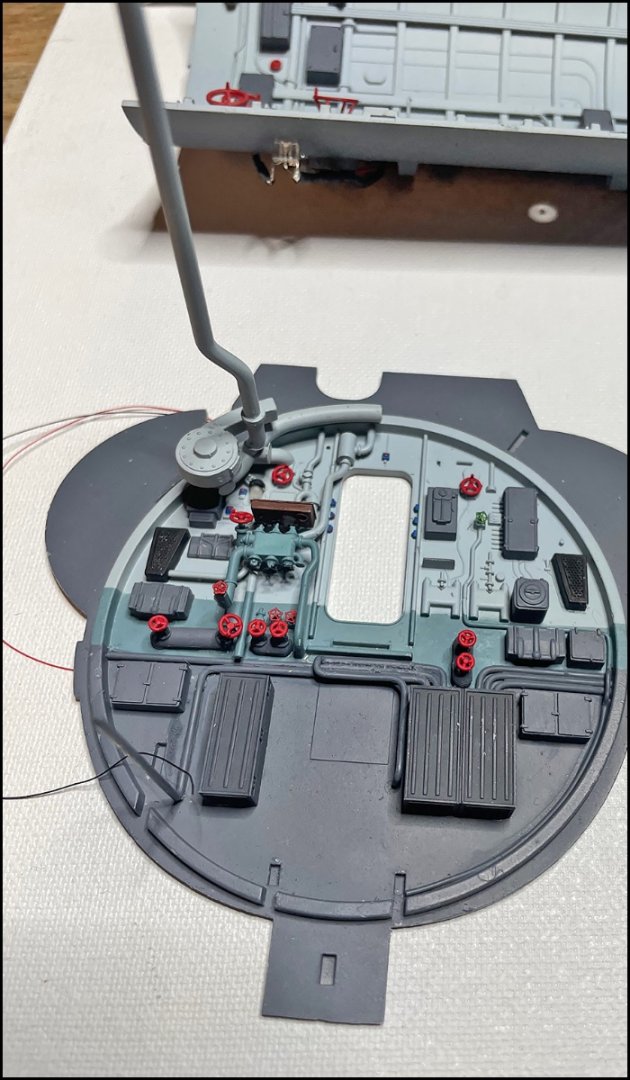
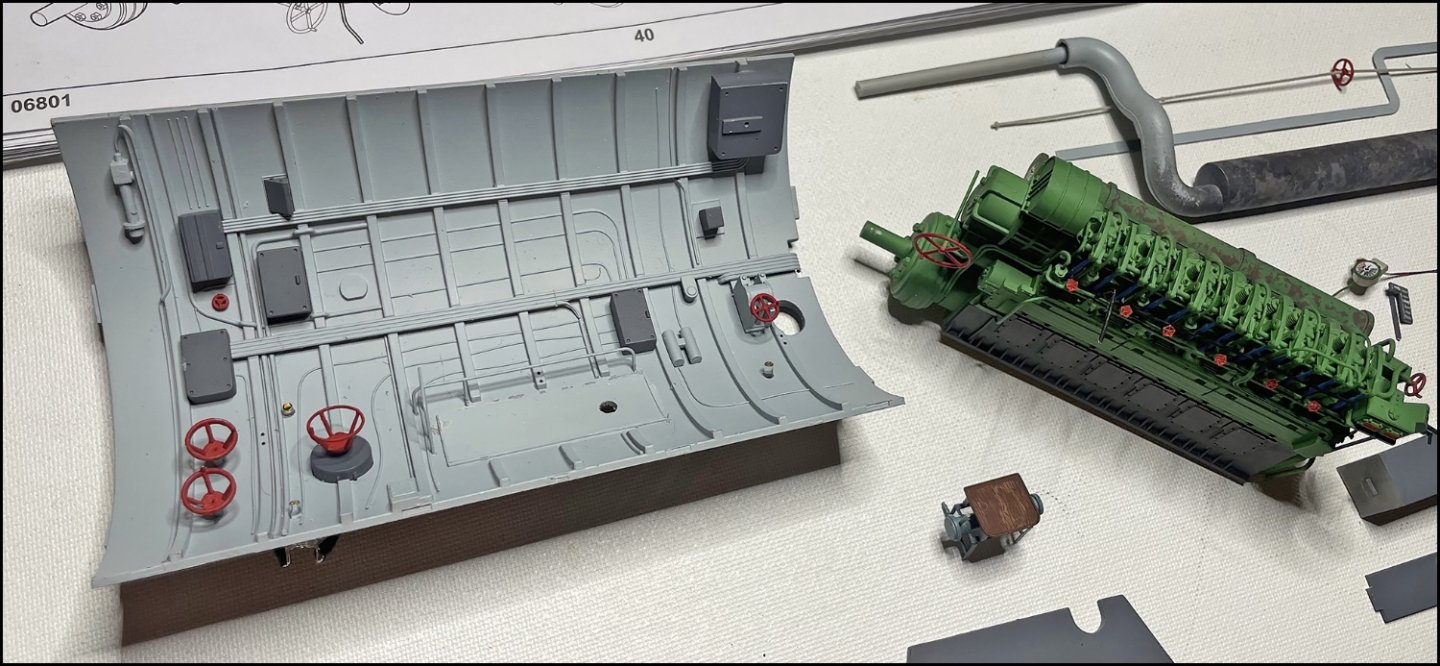
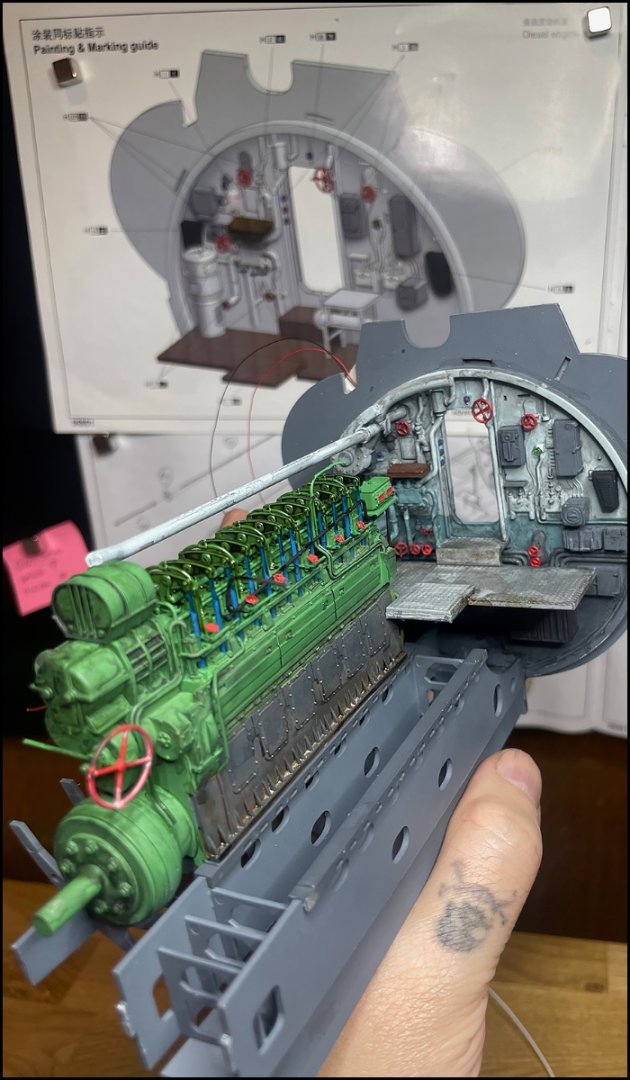
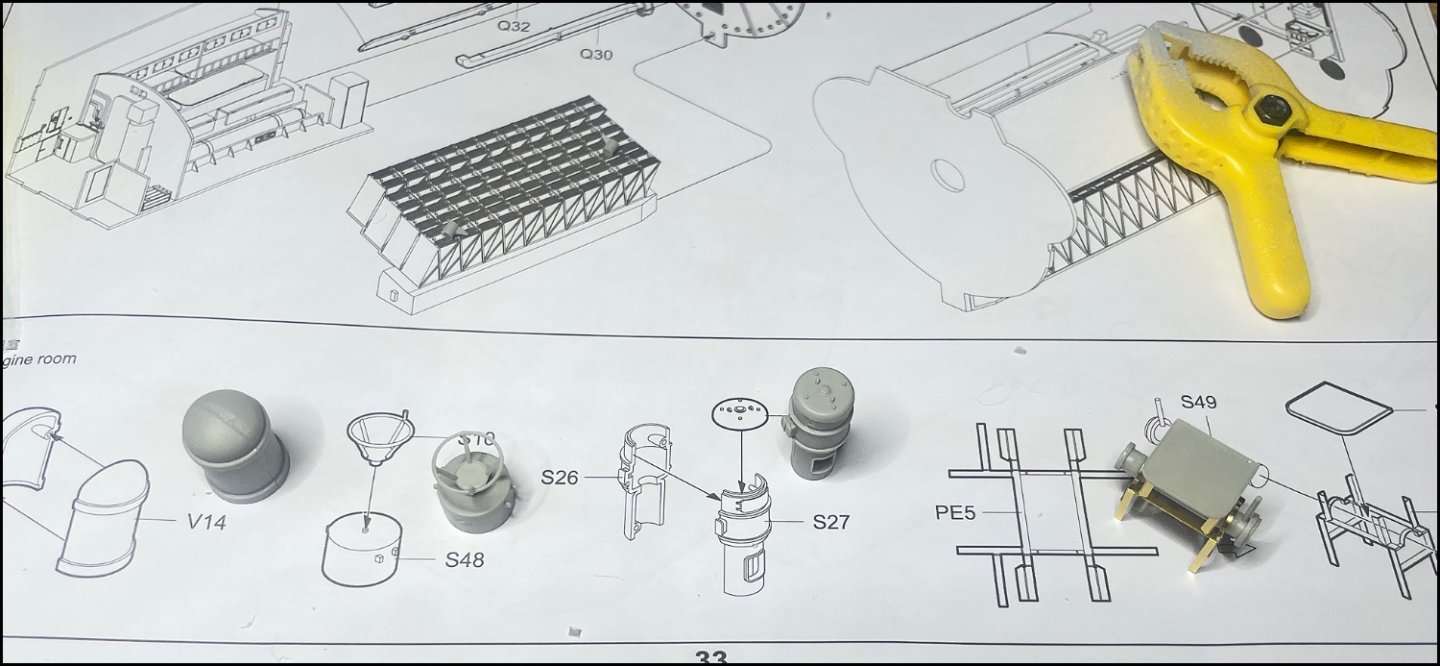
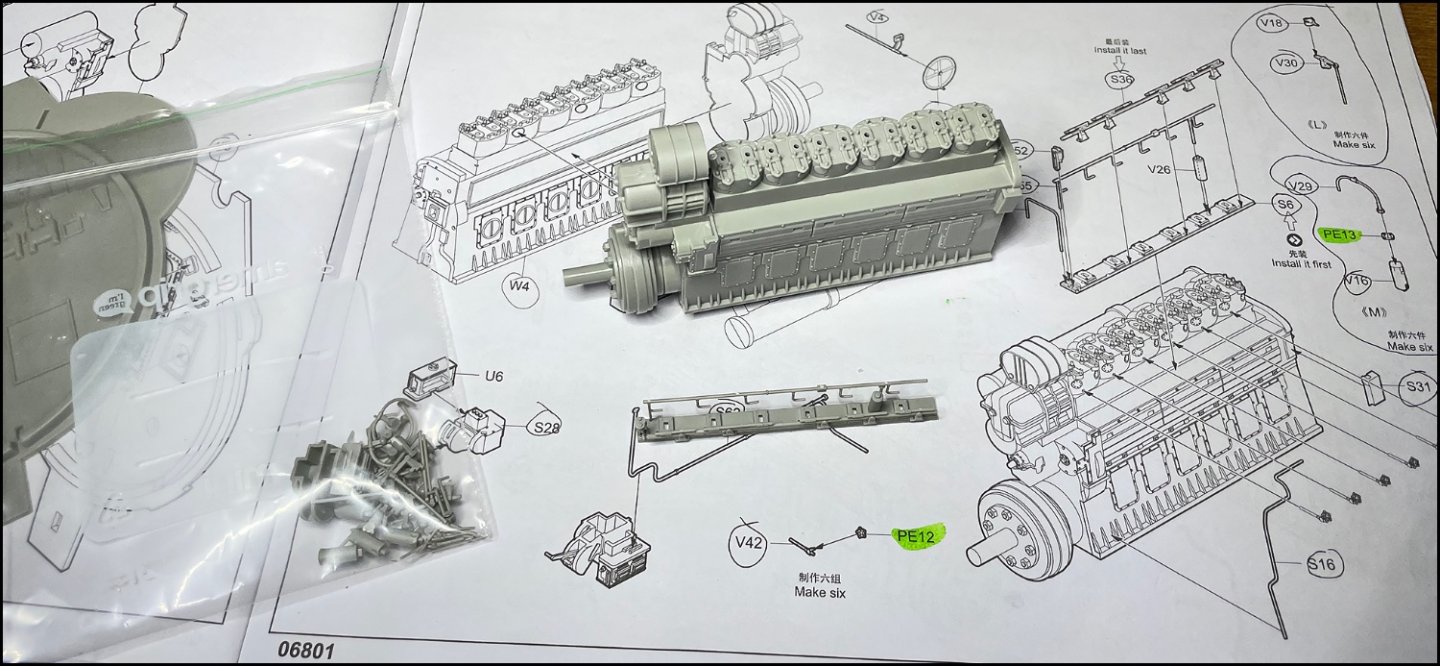
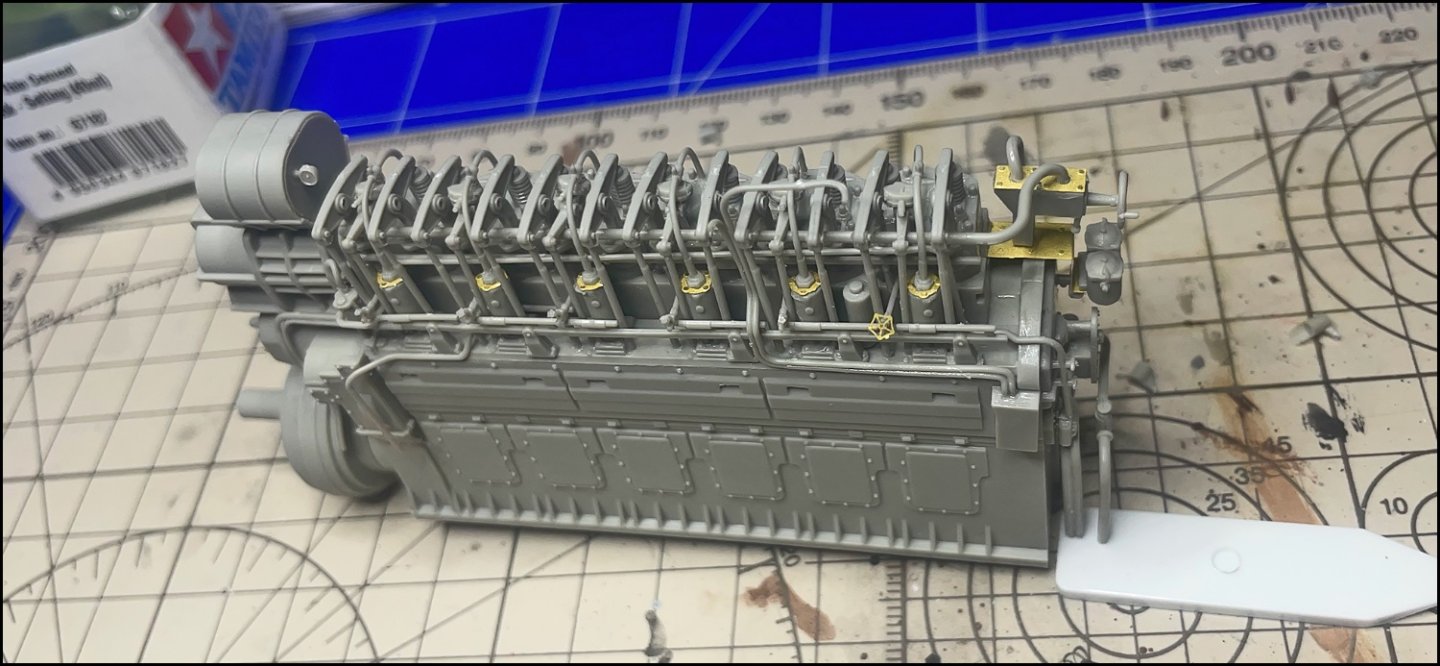
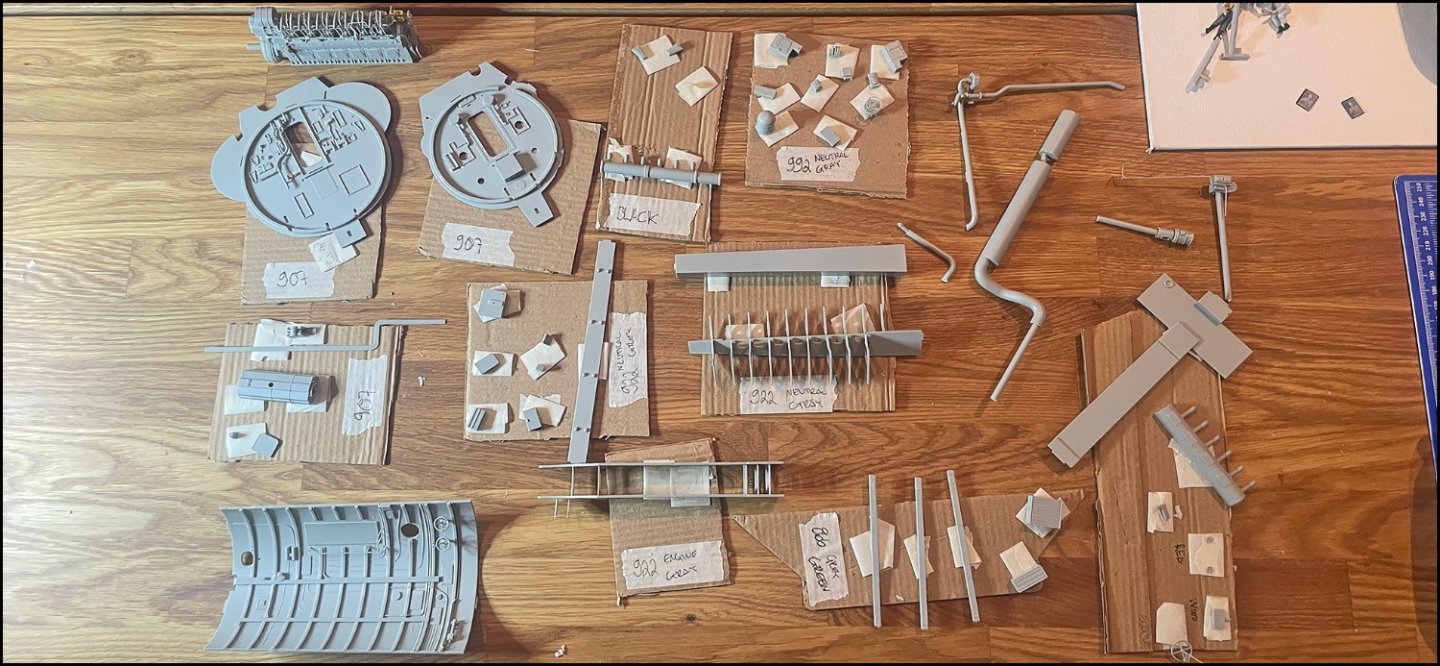
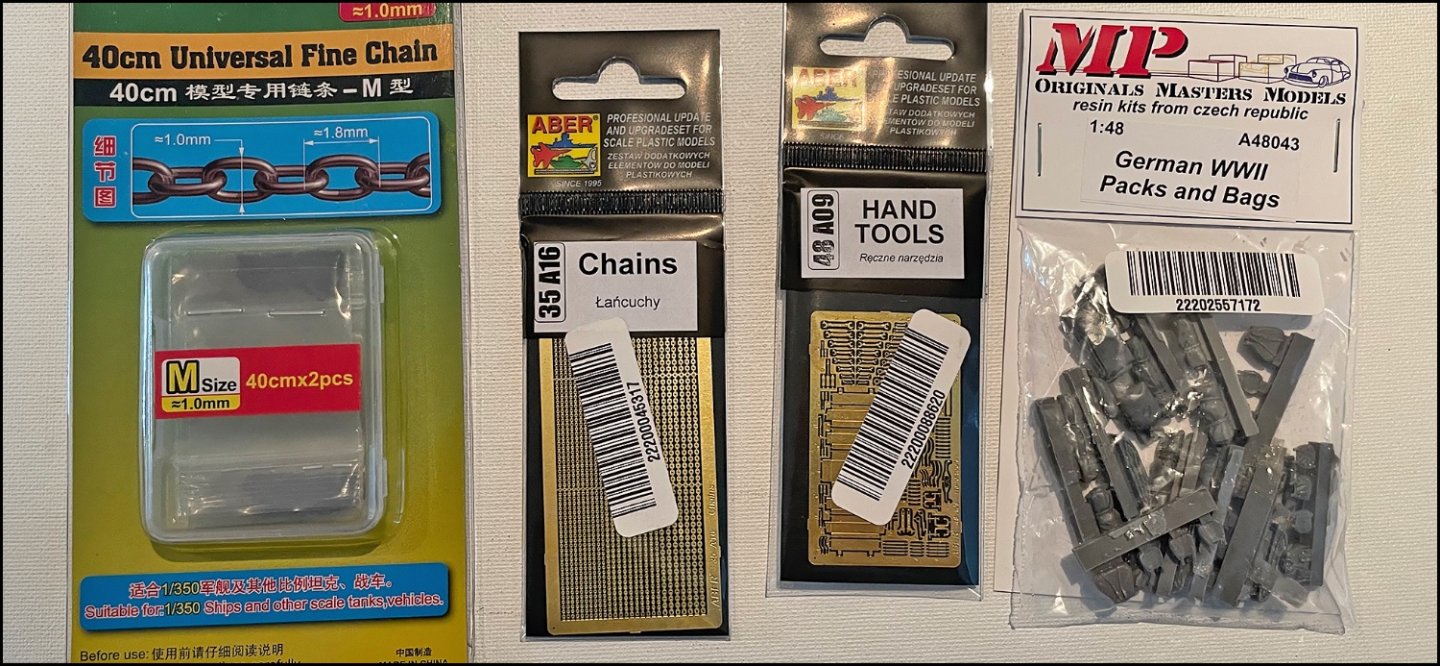
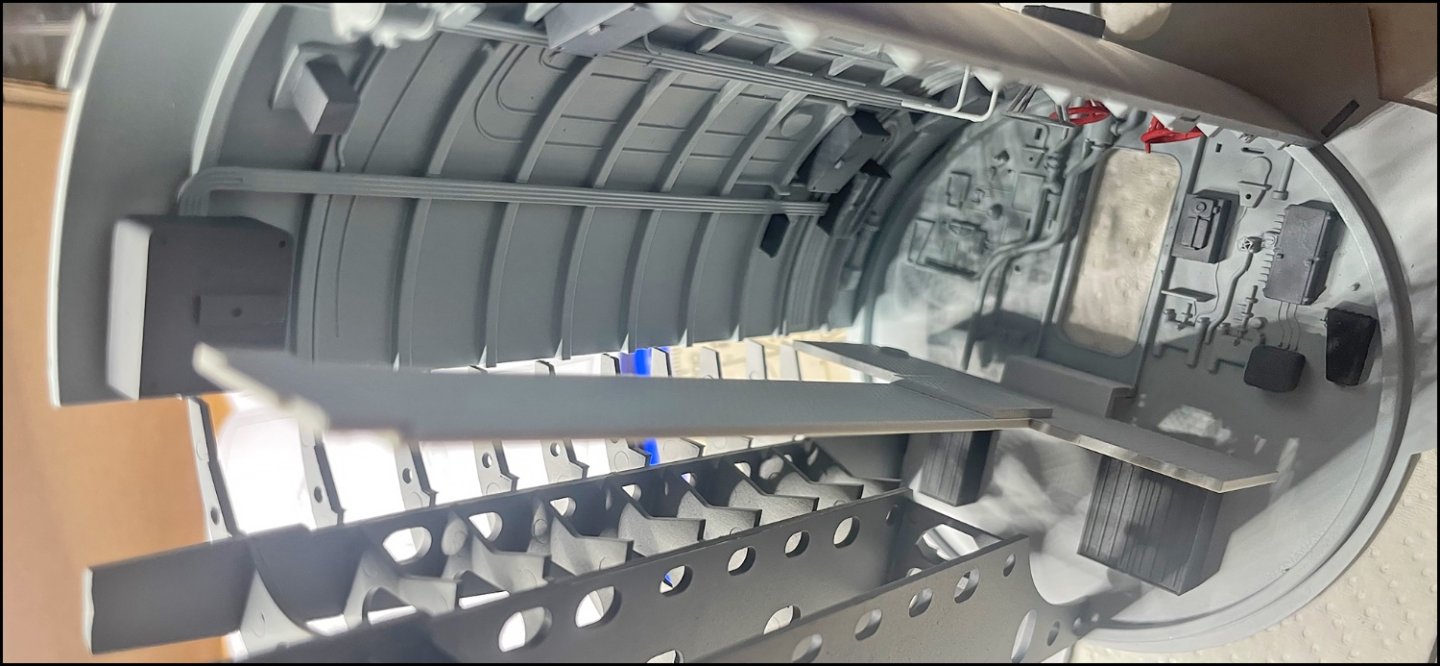
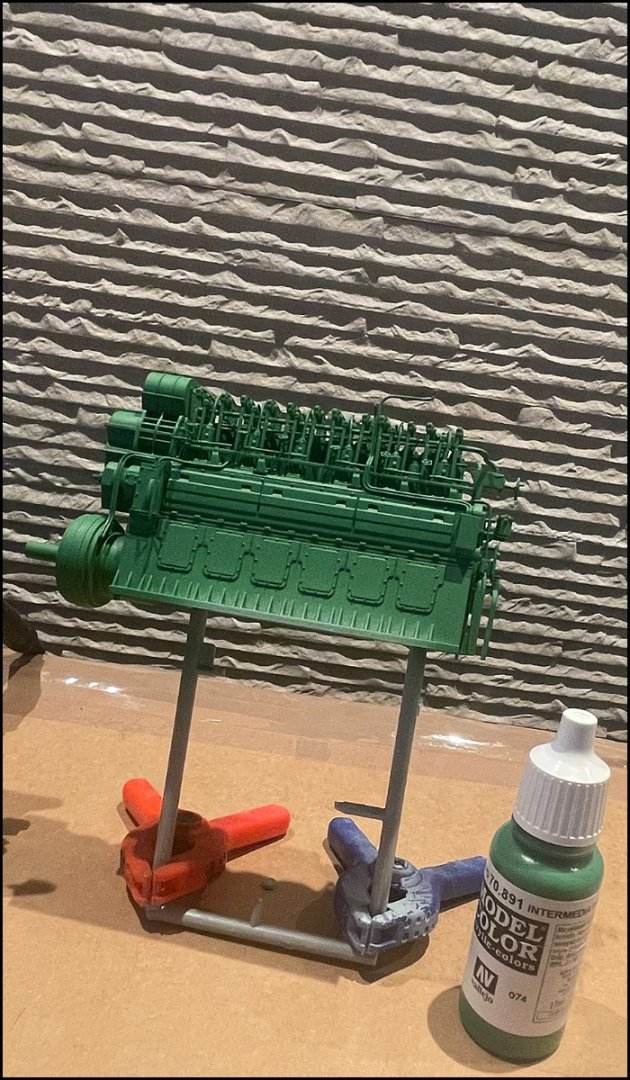
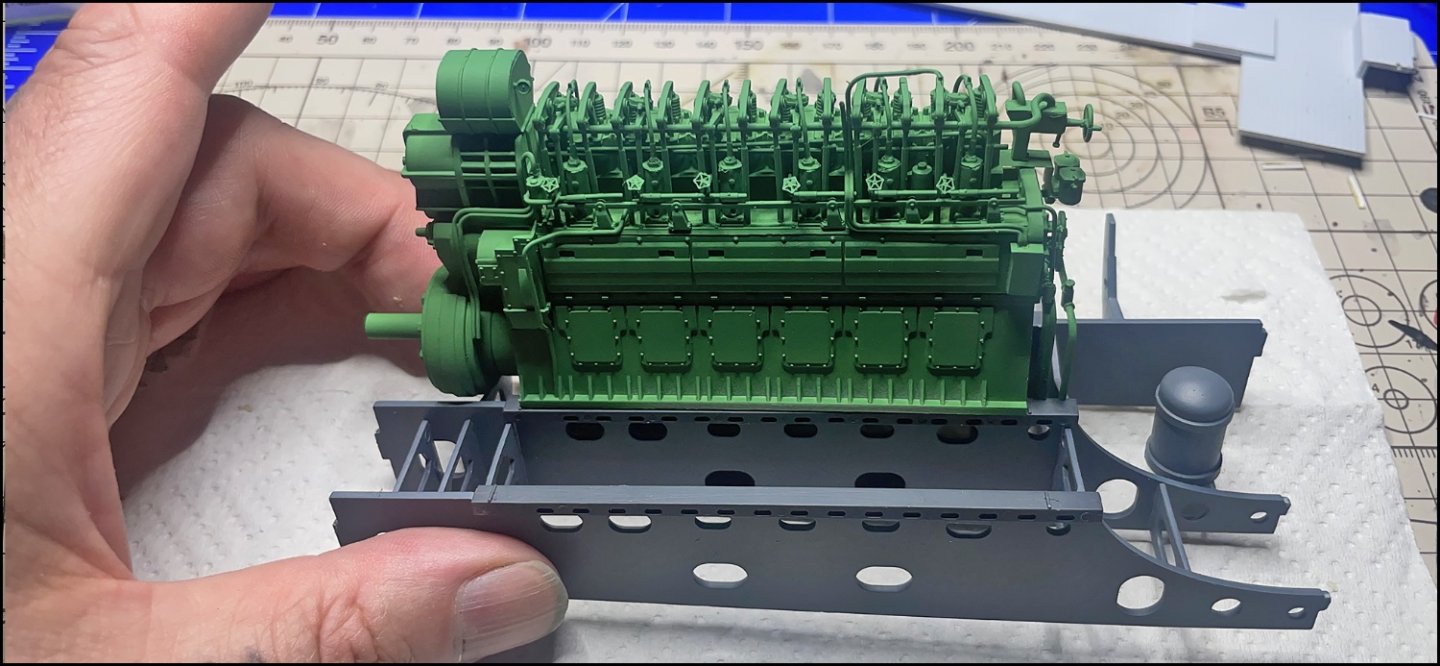
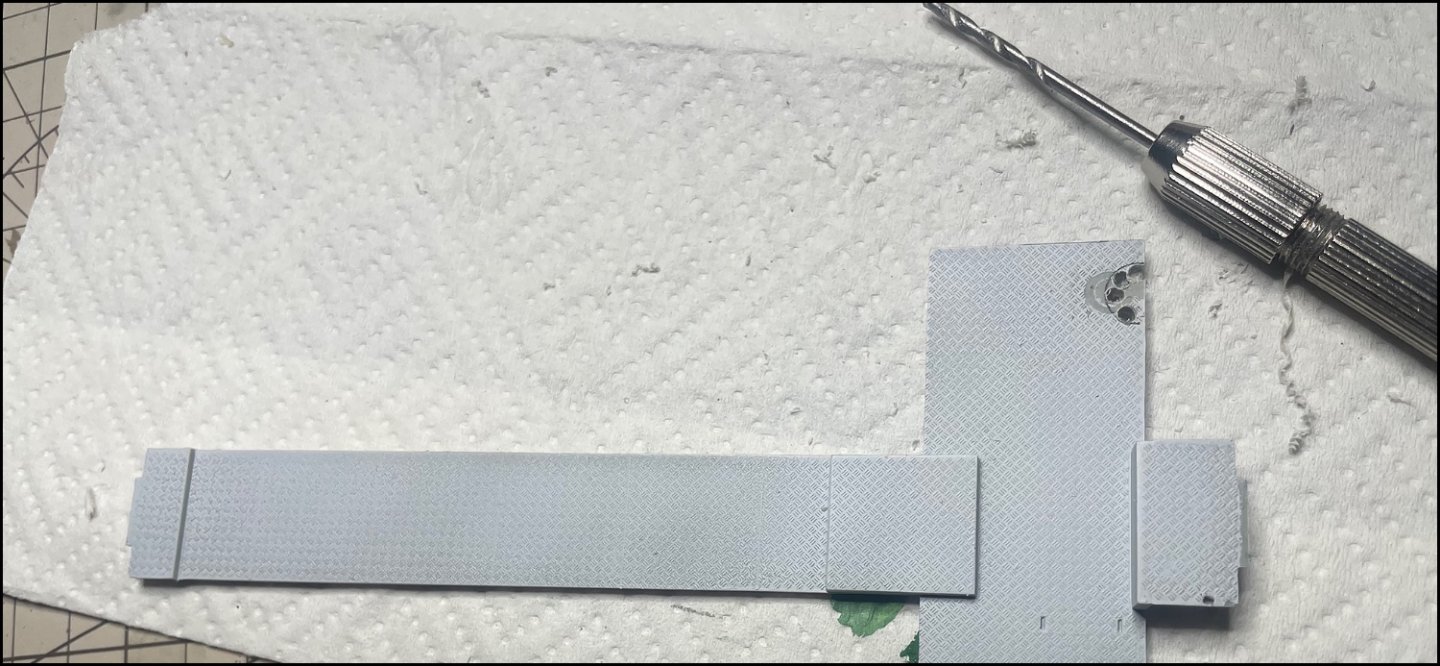
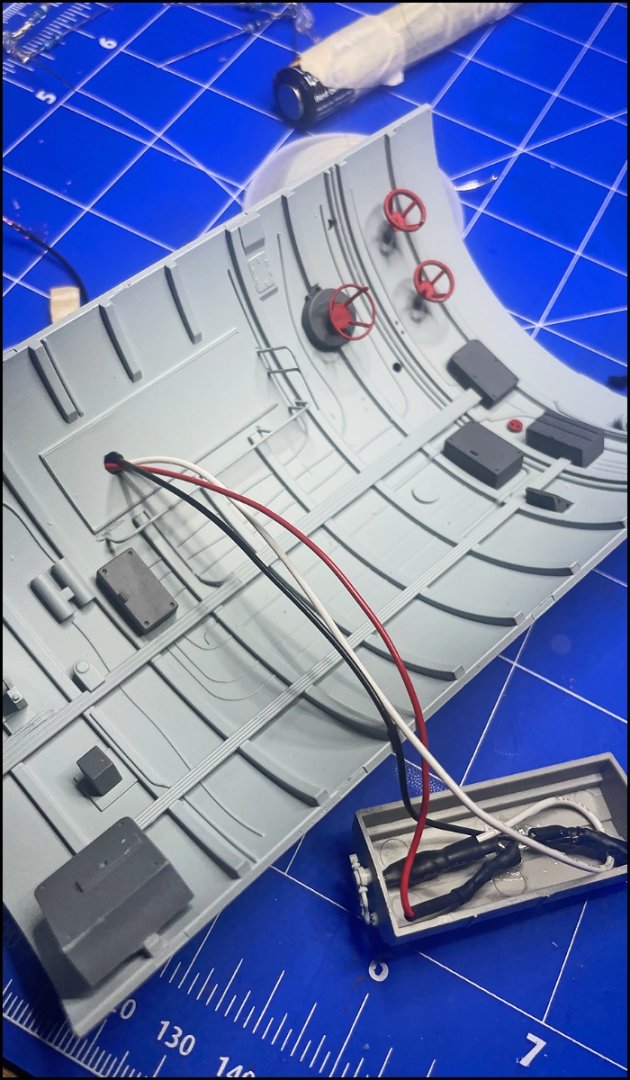
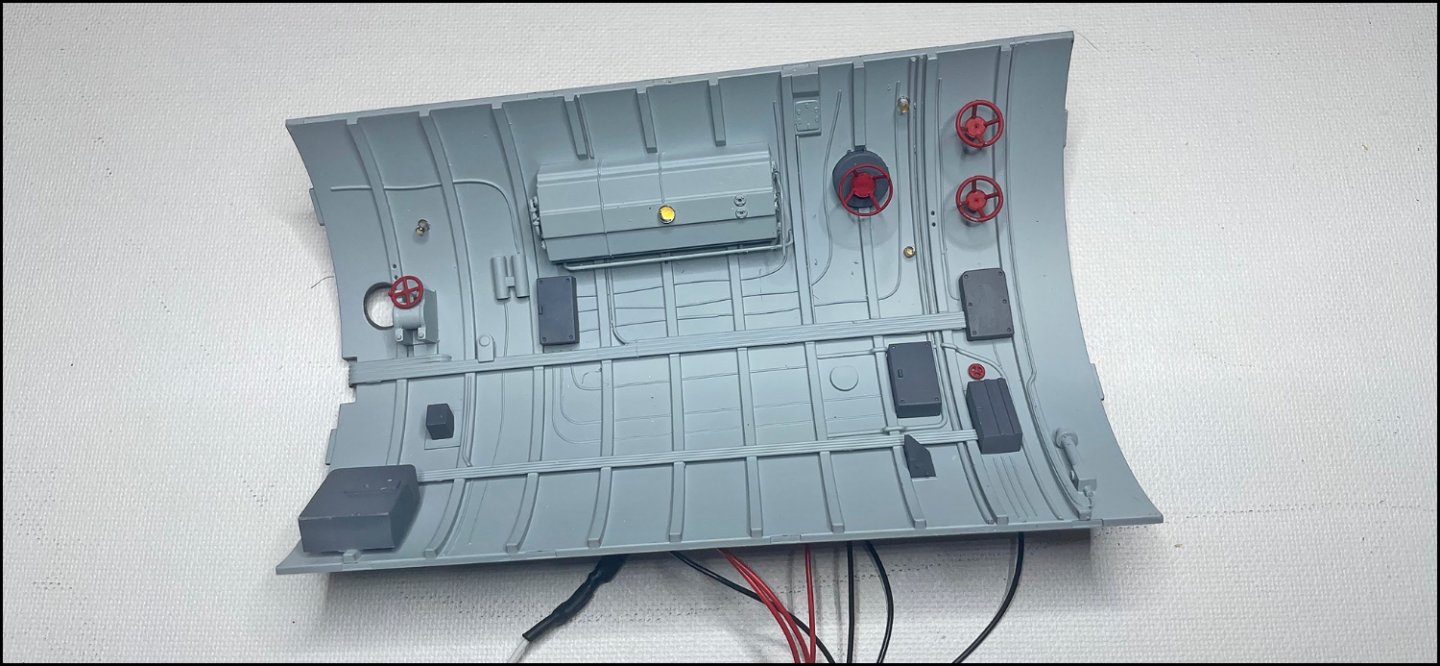
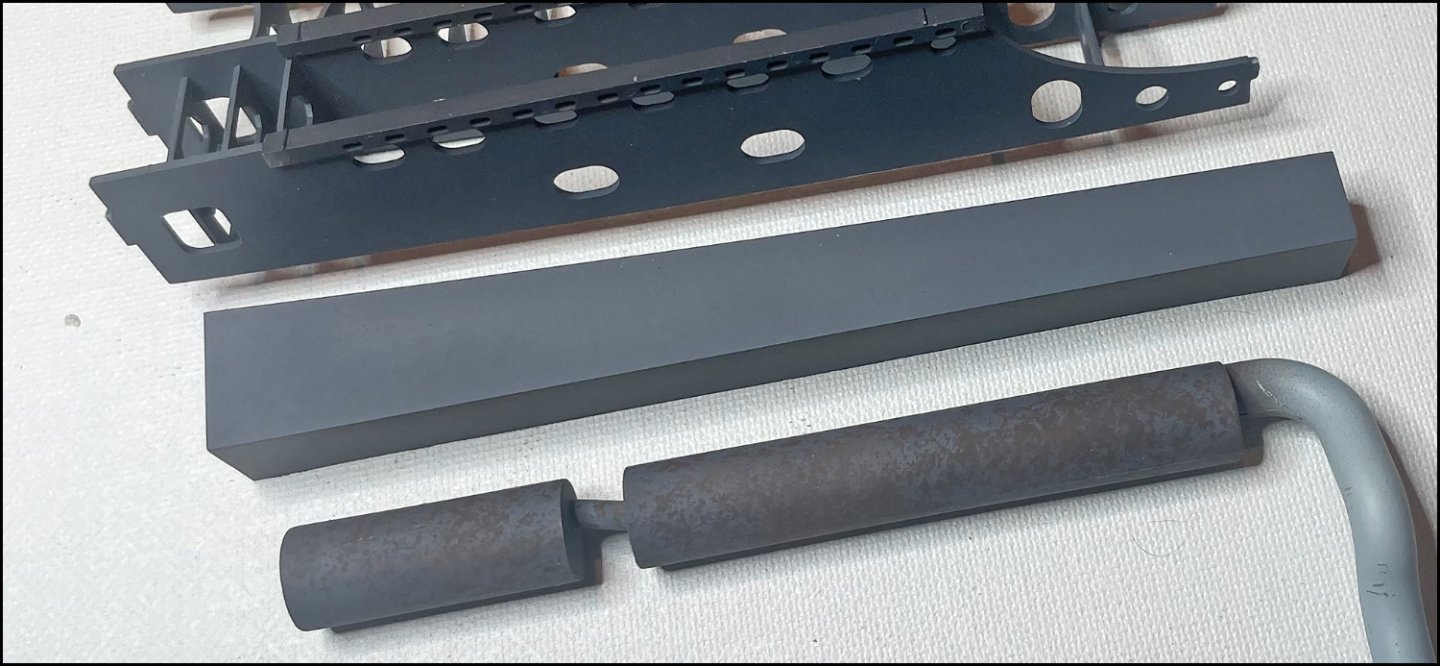
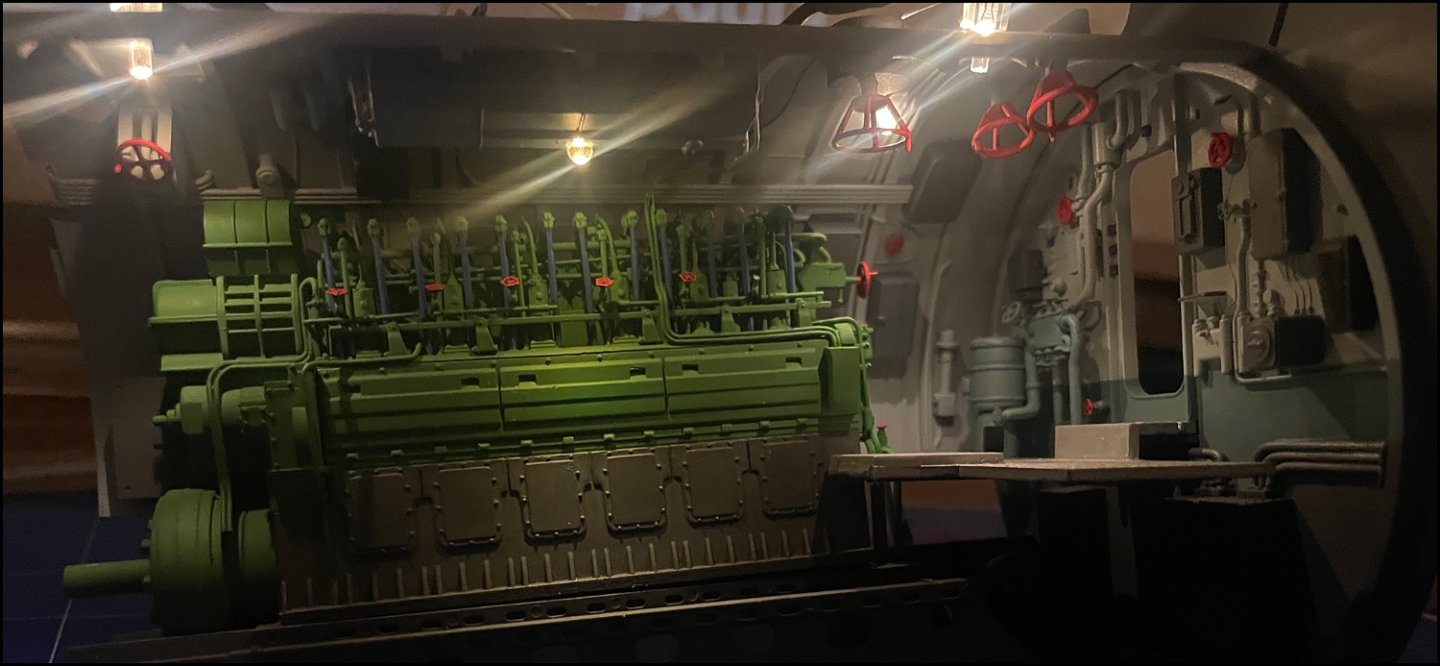
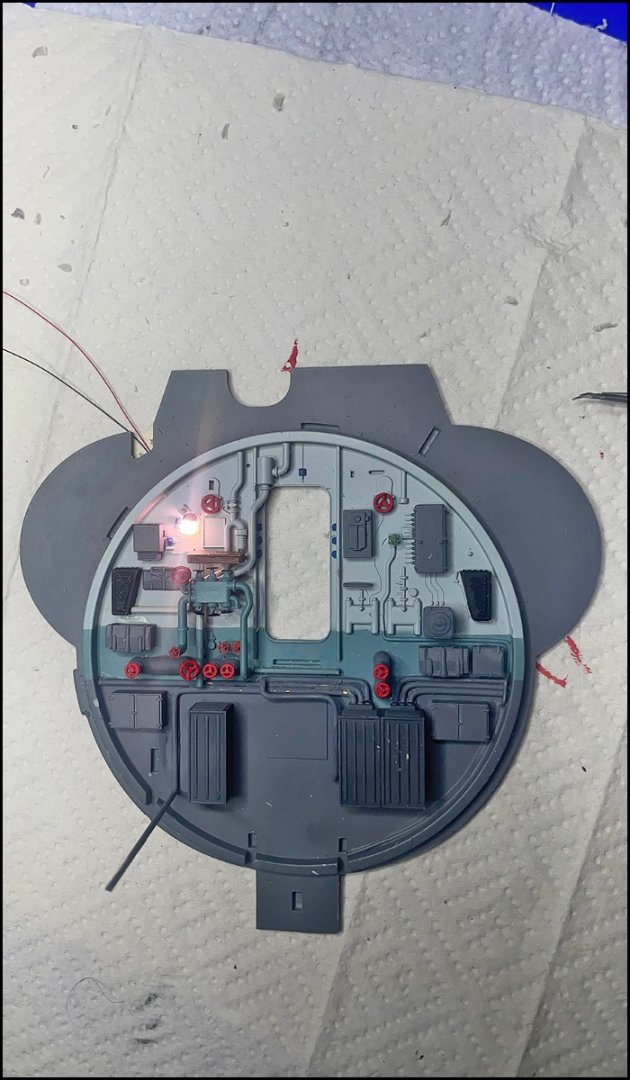
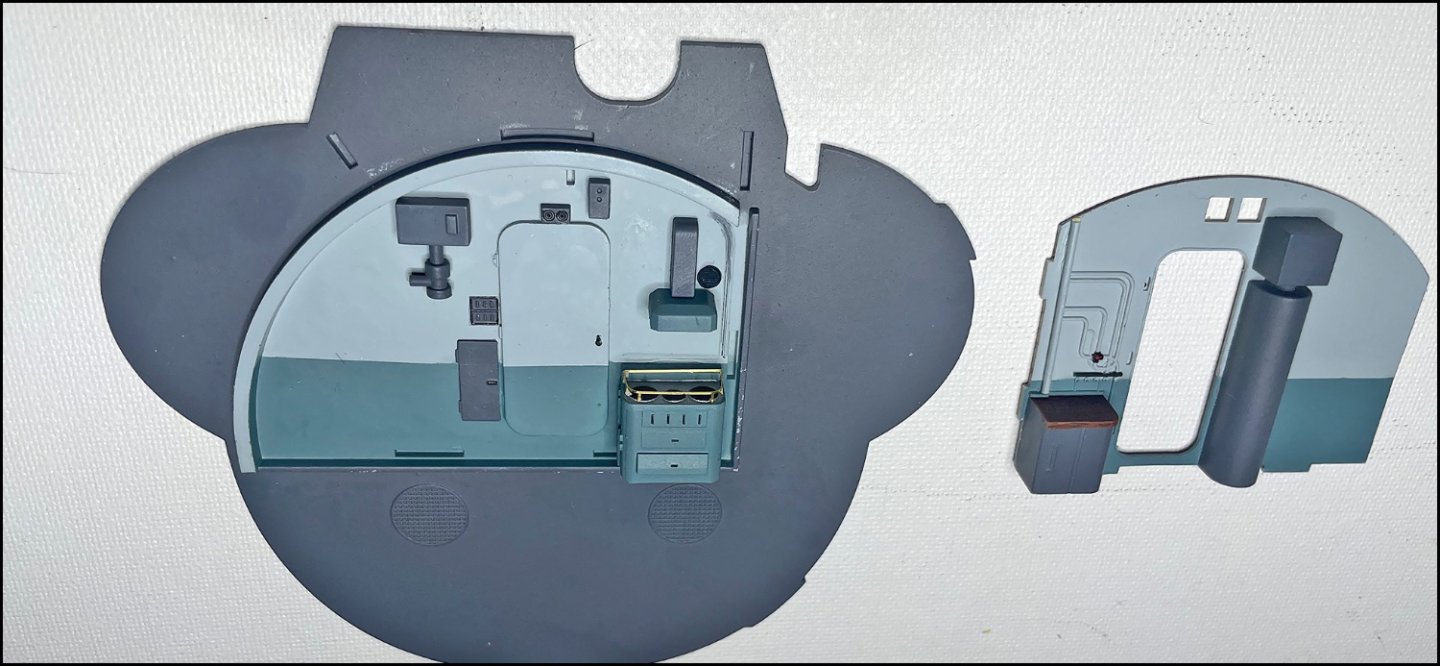
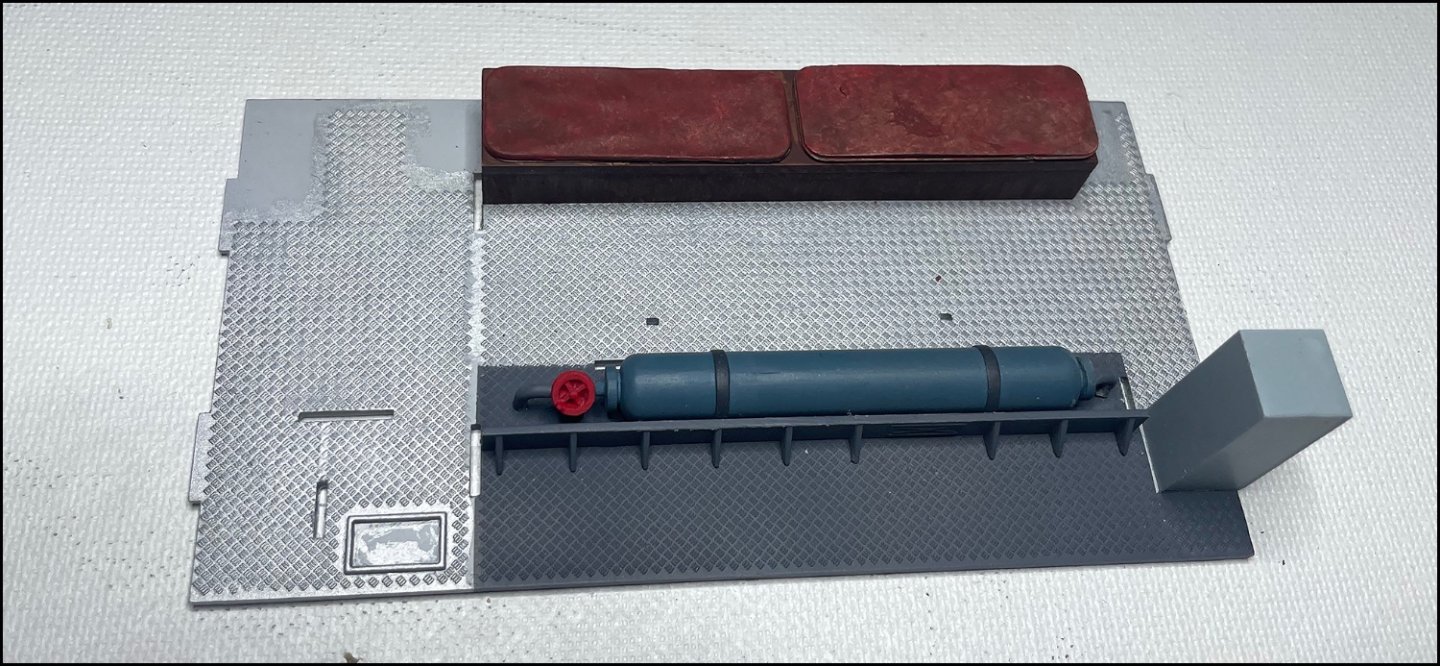
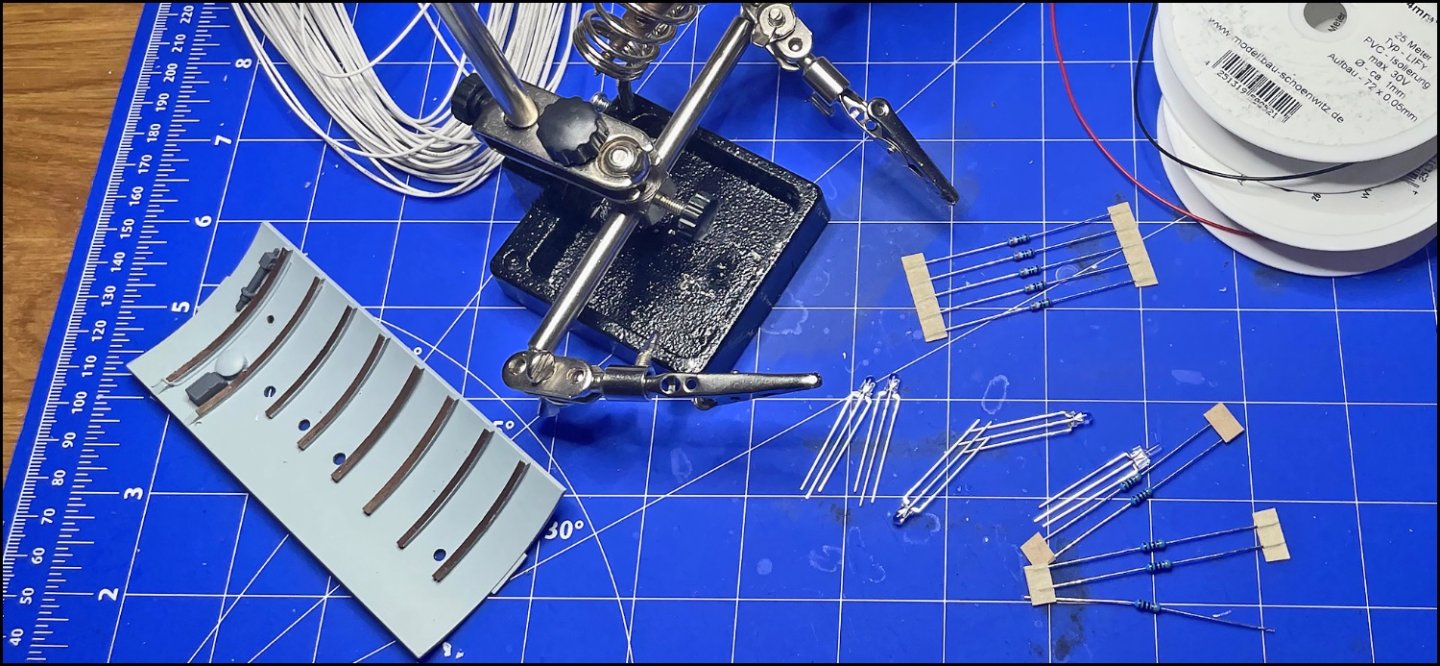
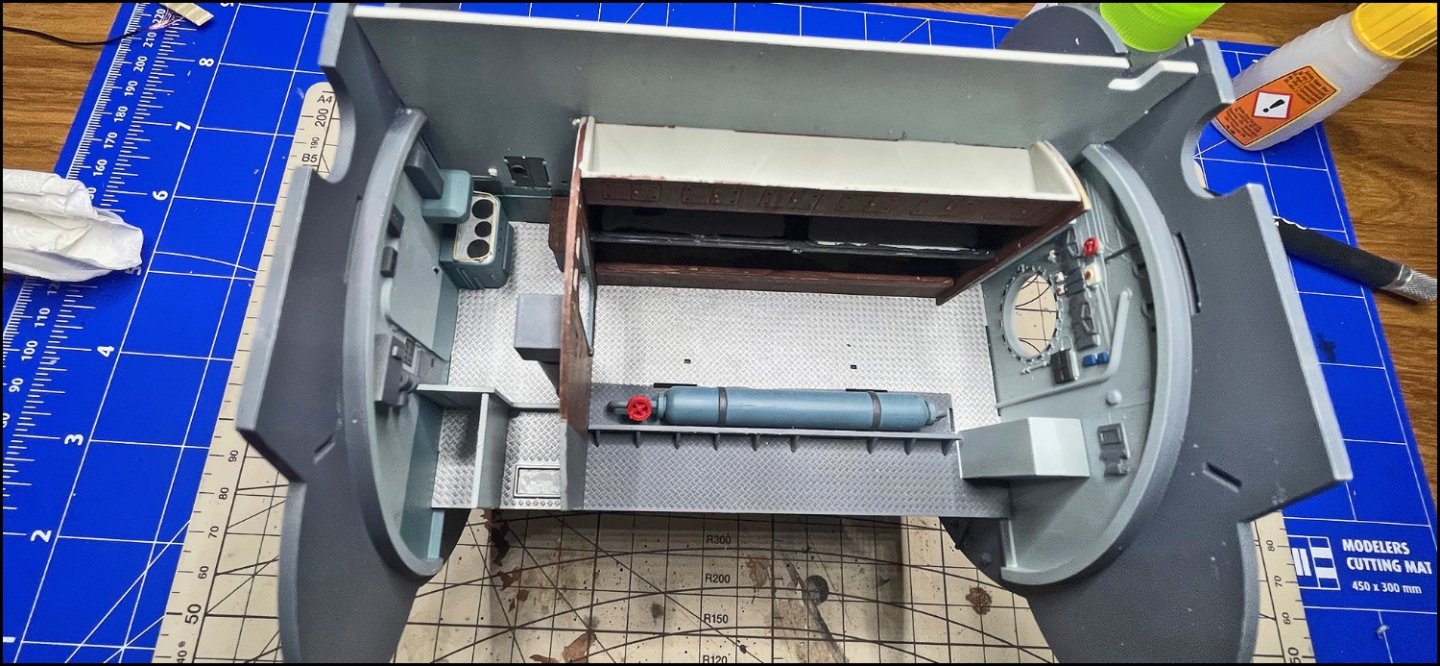
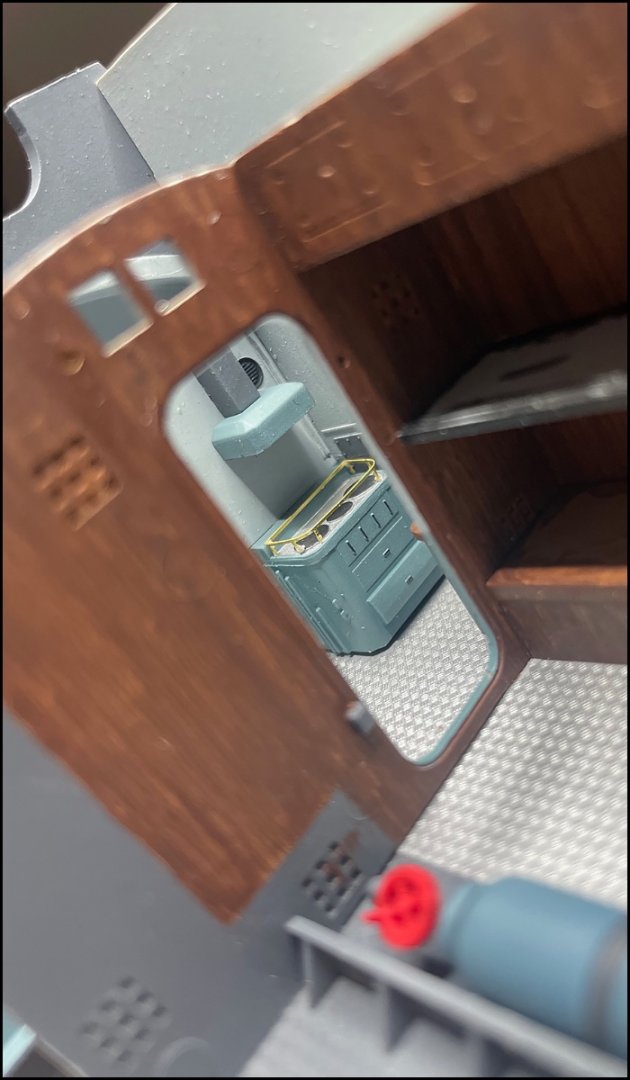
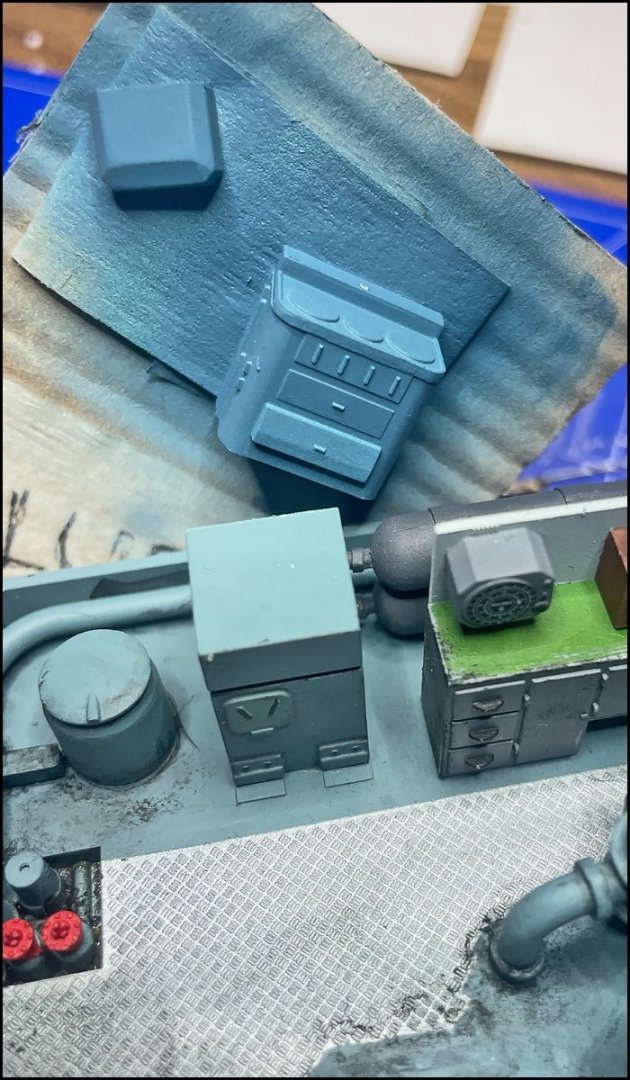
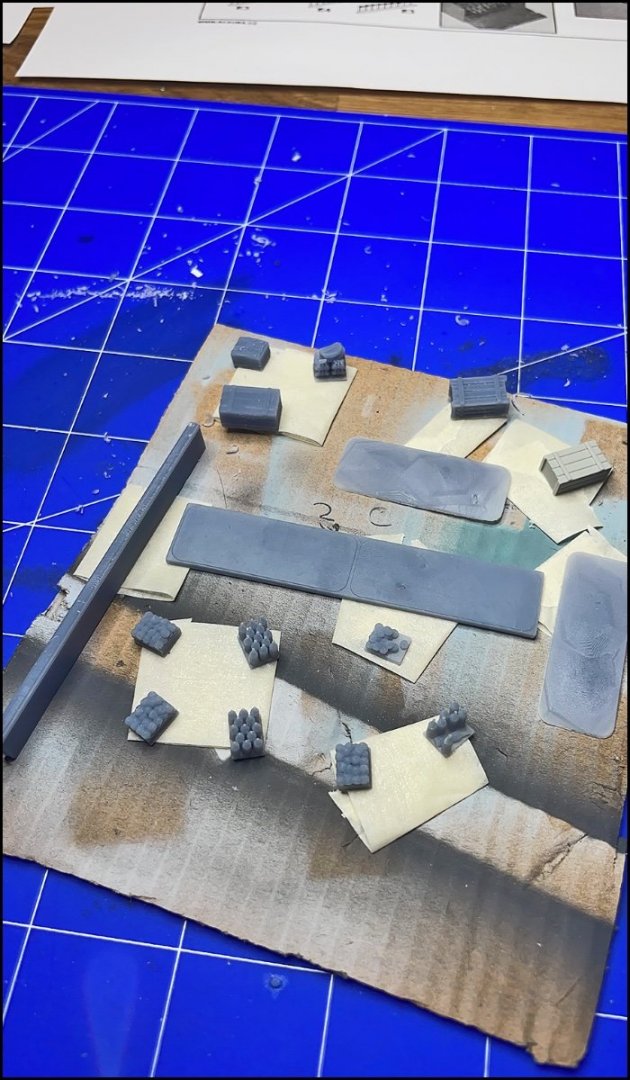
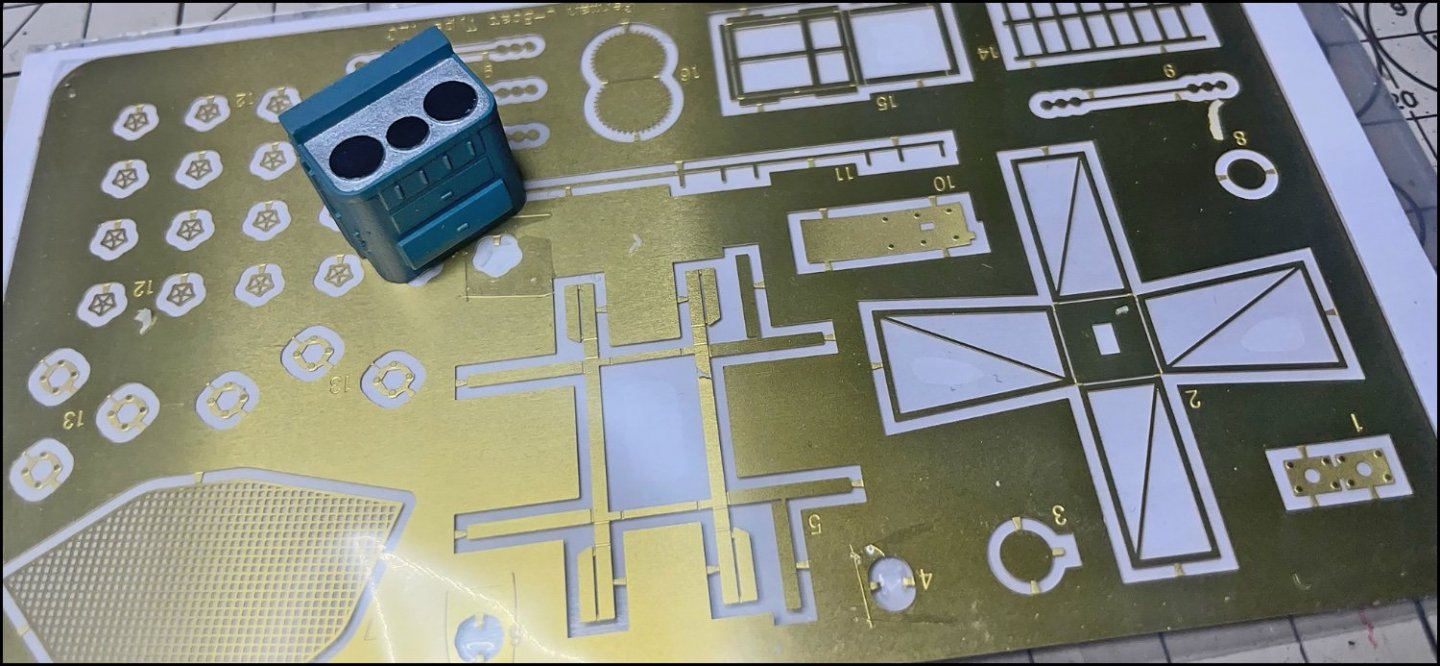
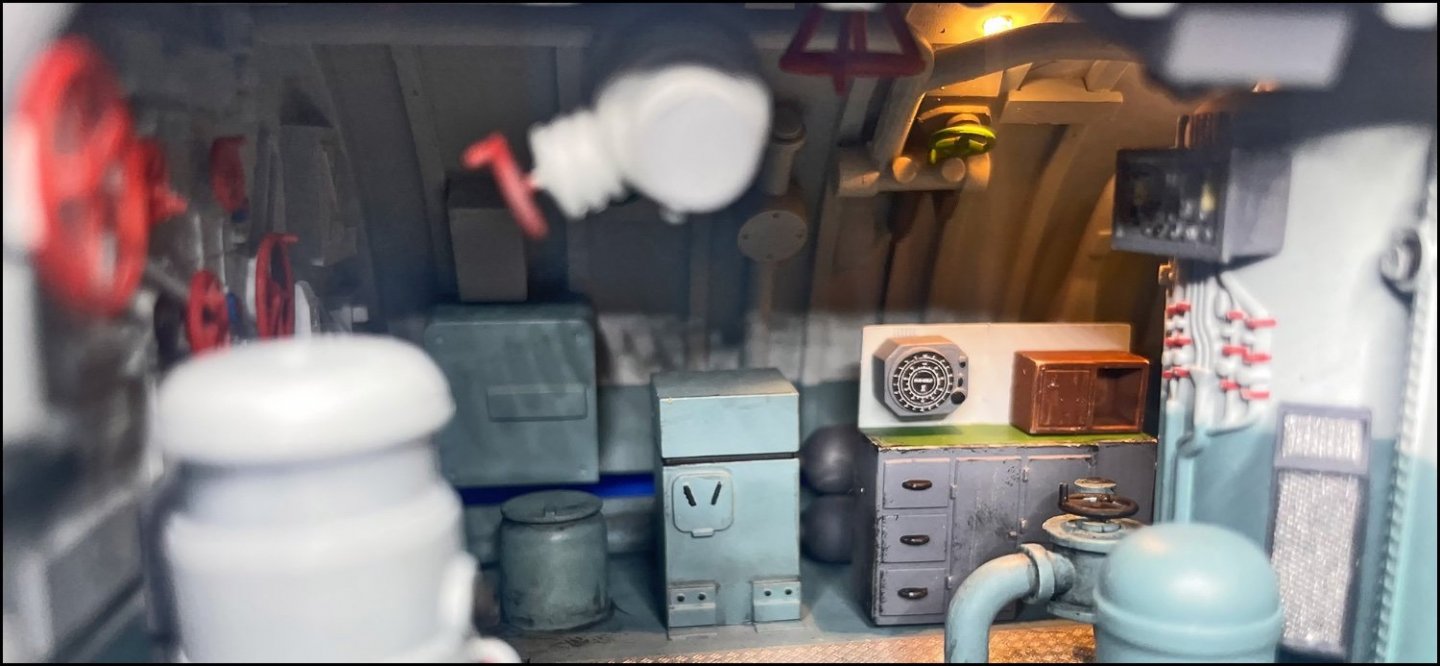
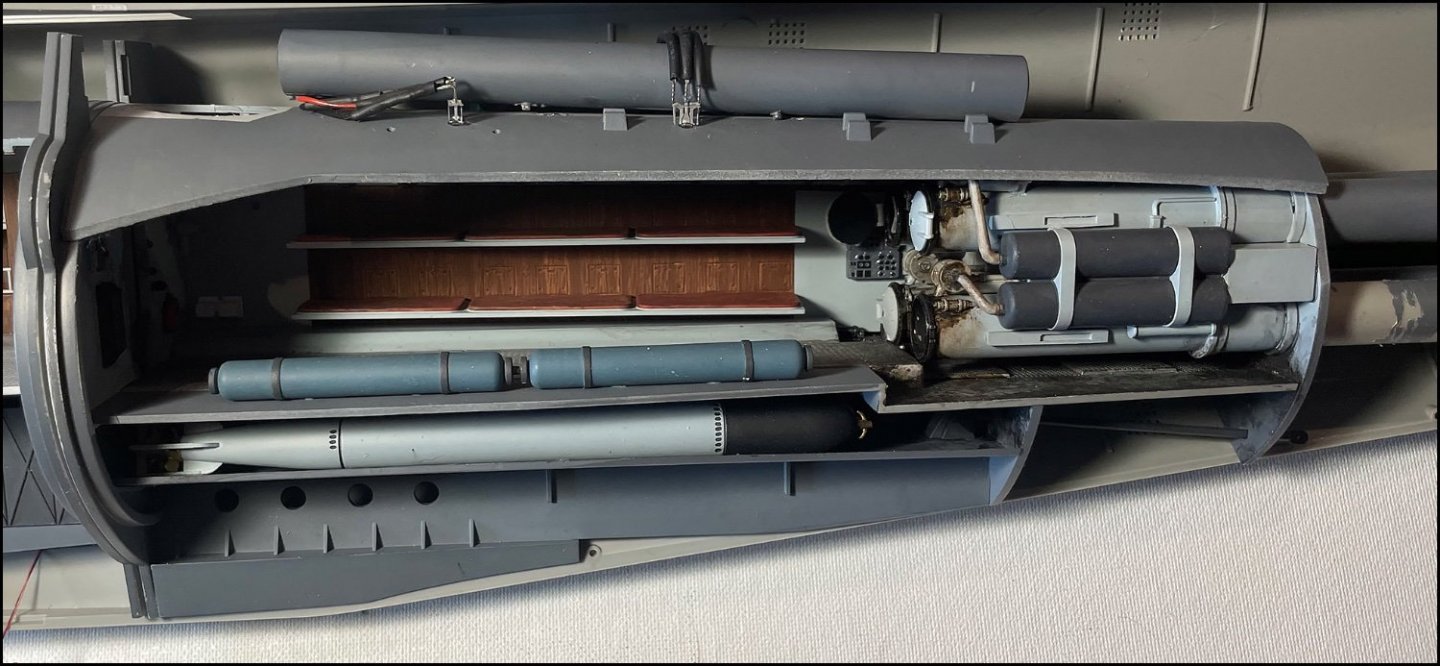
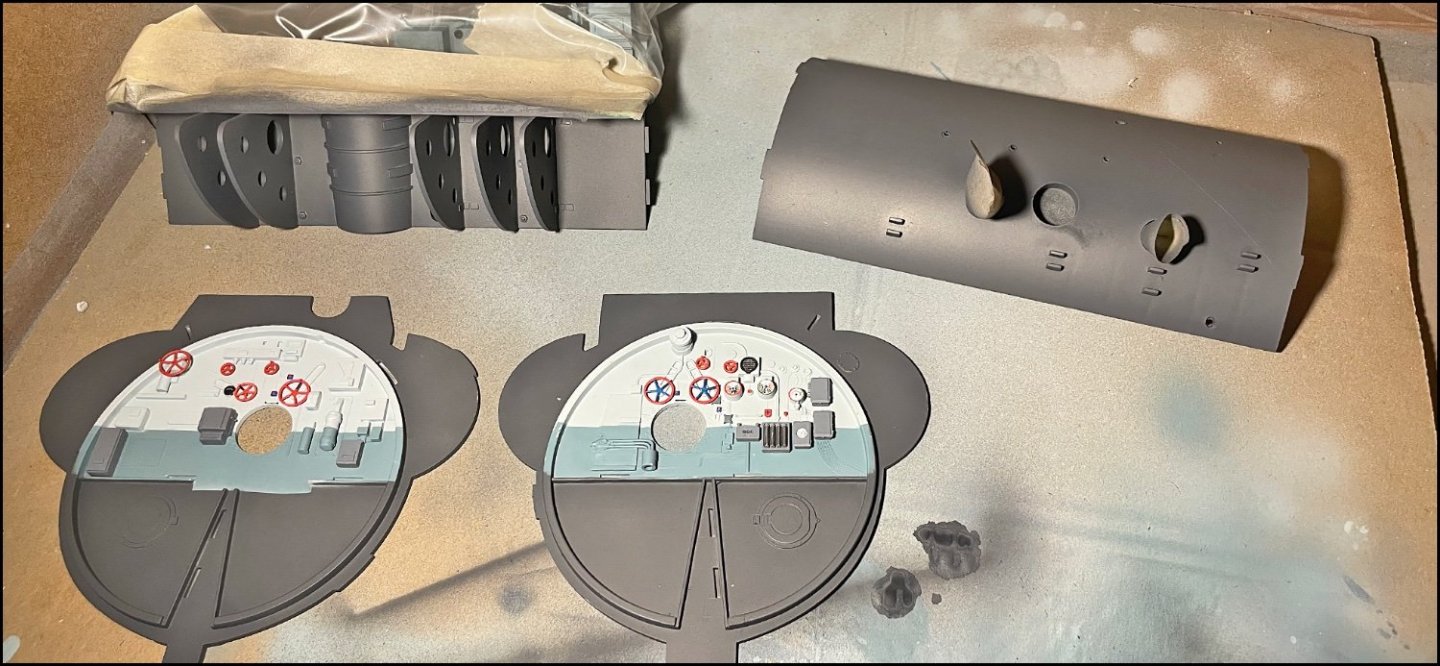
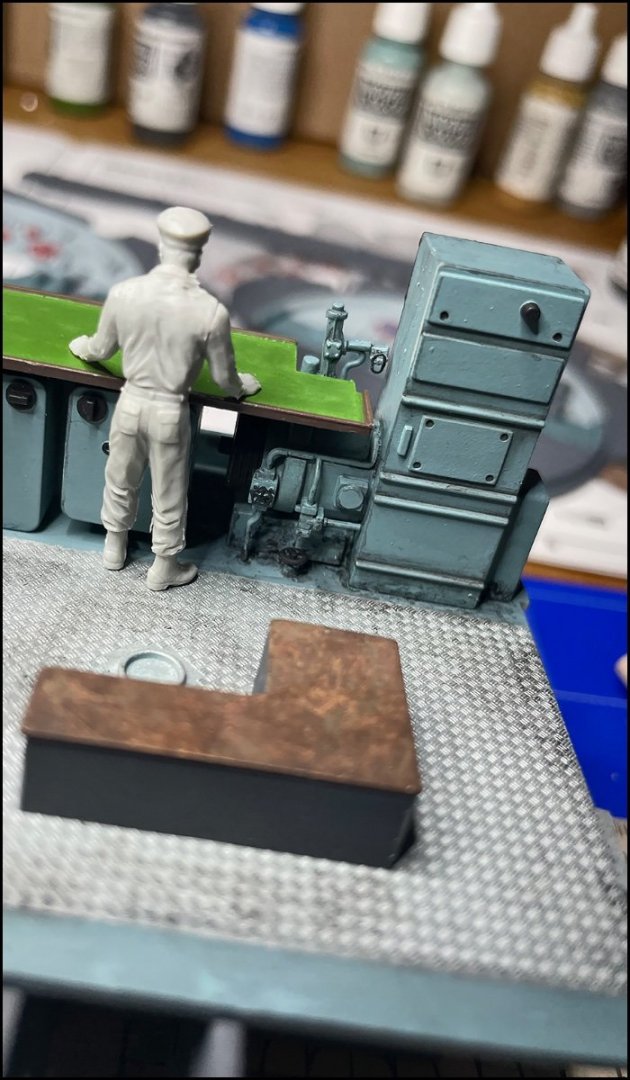
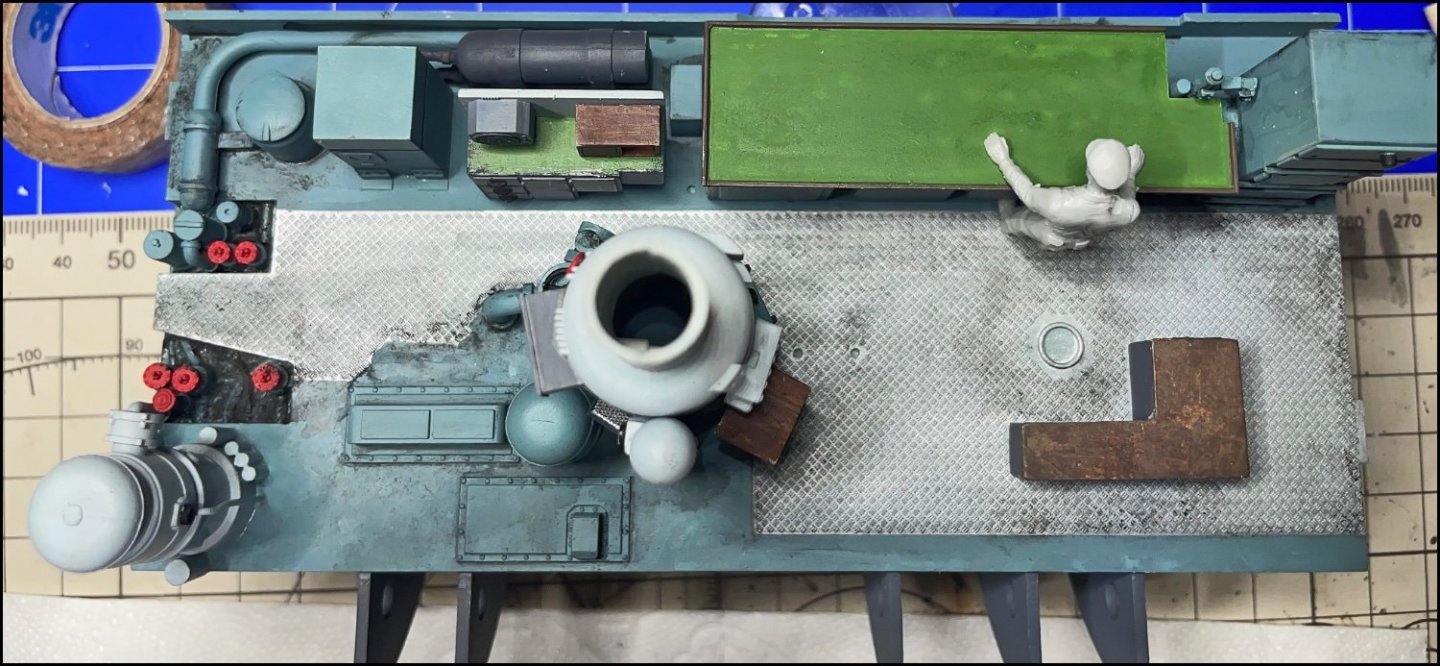
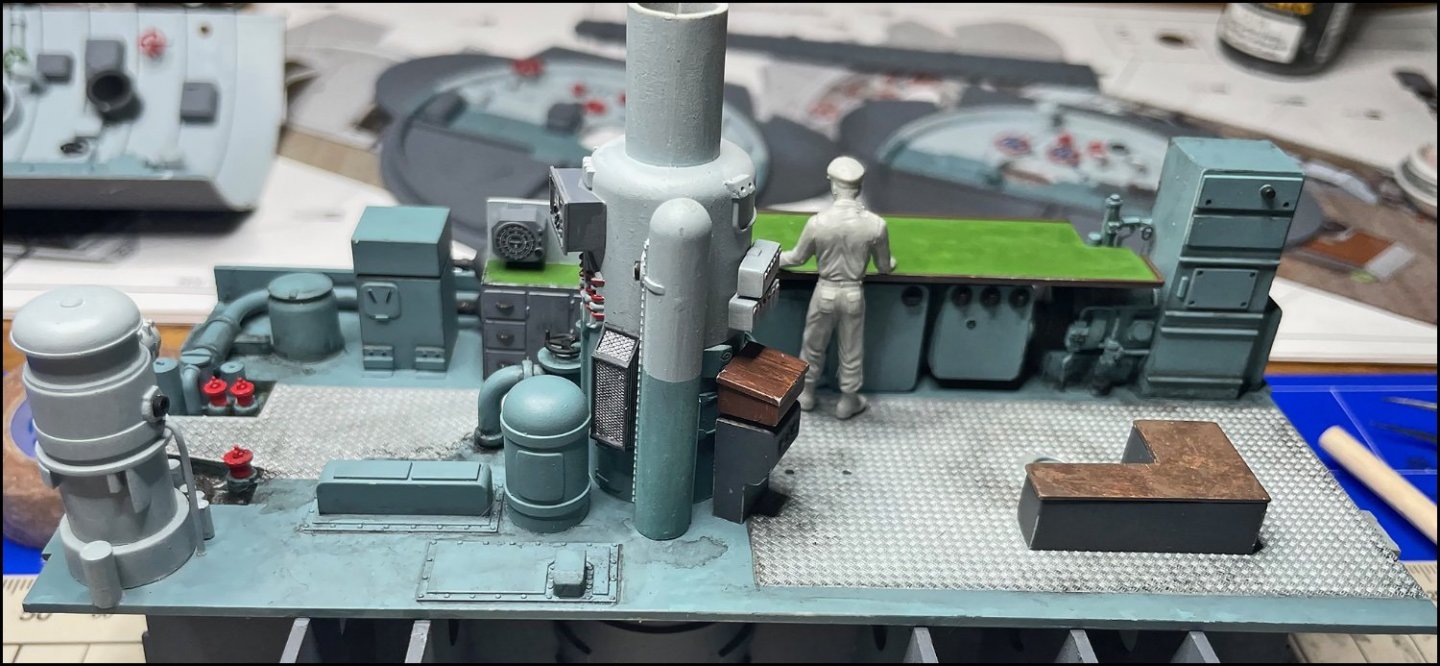
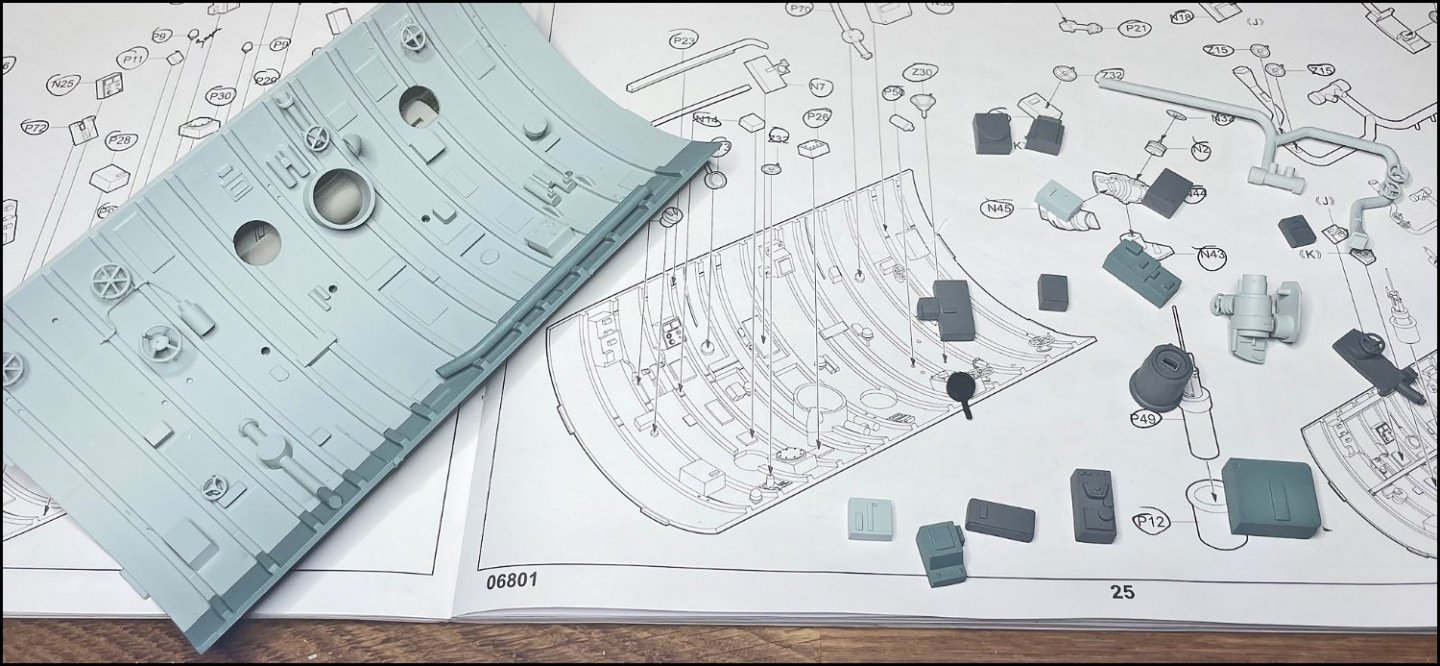
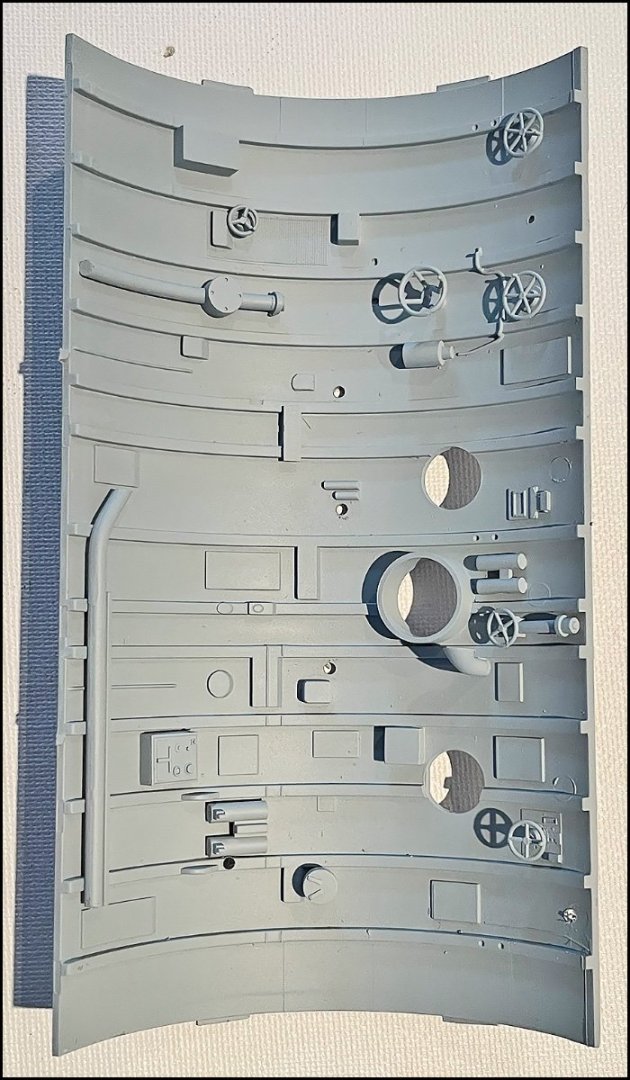
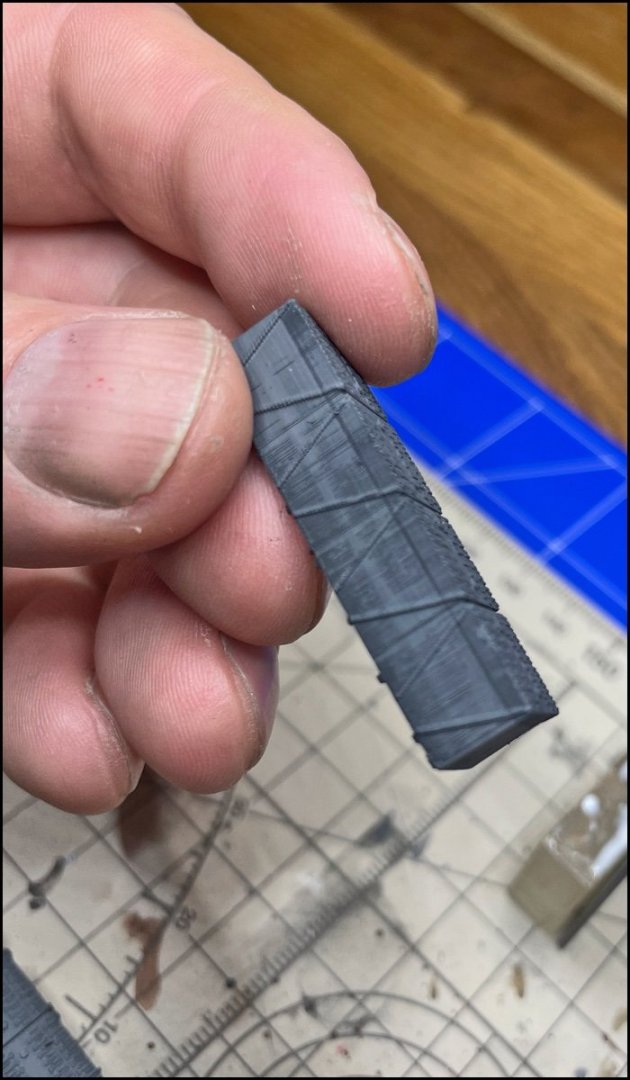
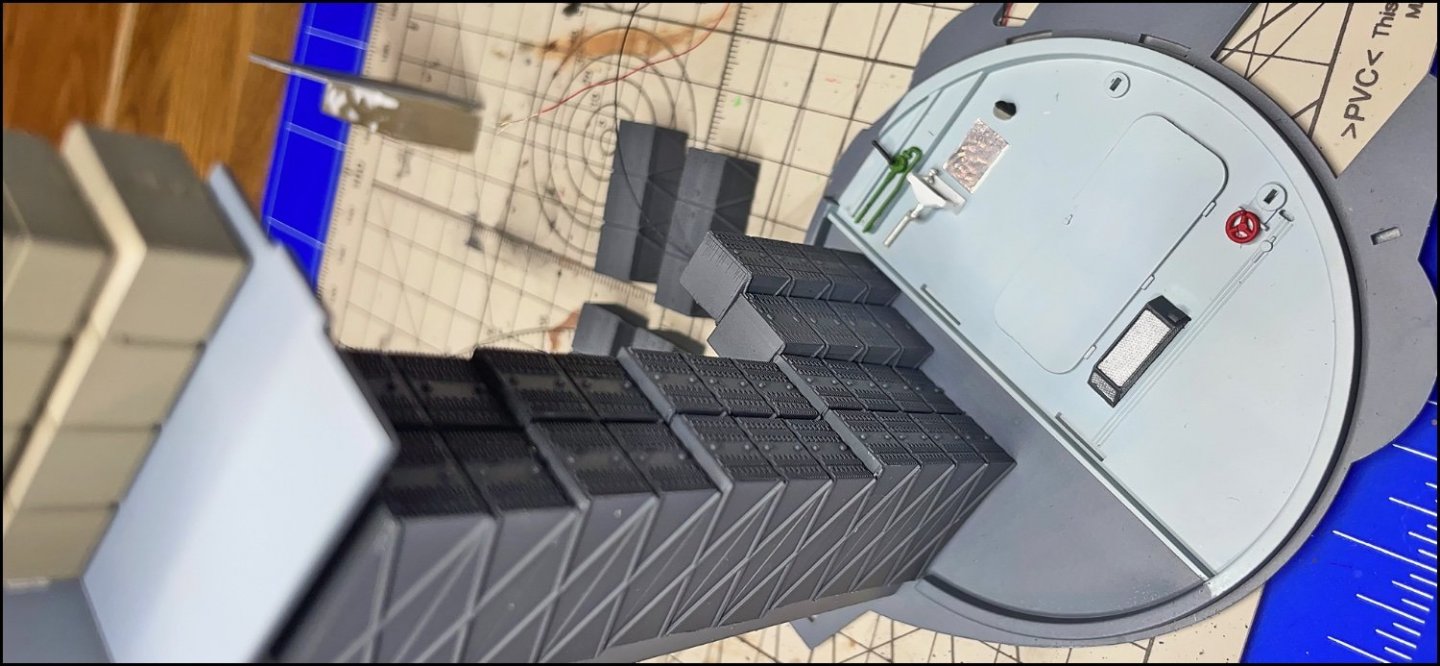
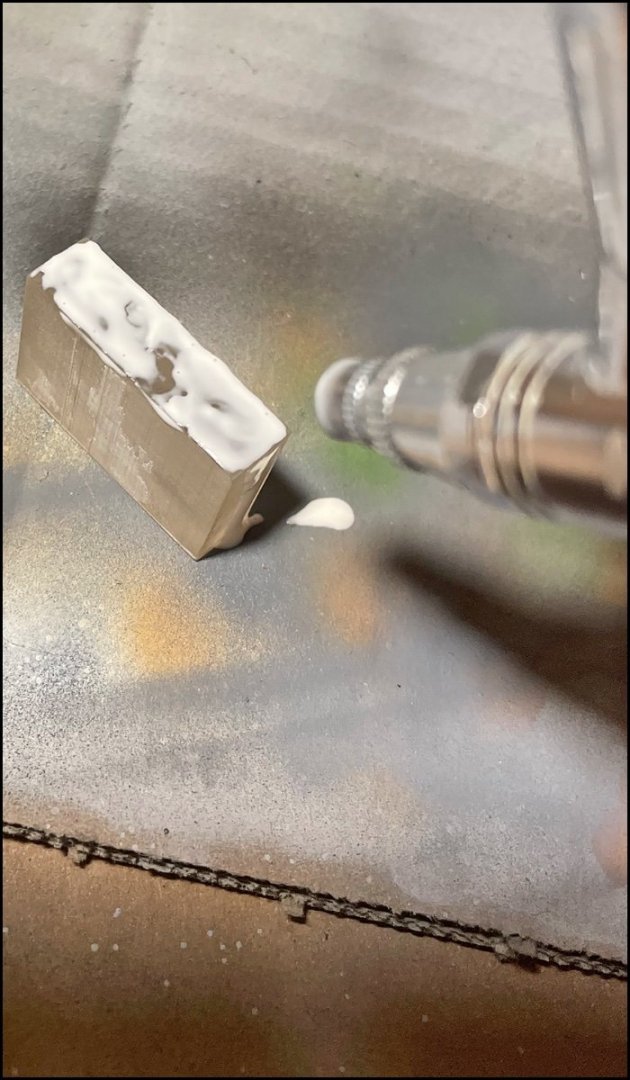
DIESEL ROOM Although all the rooms have been extremely interesting, I've been looking forward to the Diesel room for sure the most. I started making the Diesel room in June as soon as I finished the previous room. I finished it in January of this year. Well I had everything else to do in the summer and apparently also in the fall 😆. I also decided in summer that I would first build myself a modellbuilding table so that the kitchen table would remain free. Here just basic starting pictures again I calculated that there would have been about 90 parts in the engine Bulkhead and PE-parts. Ai like it! Lets get primer again. I placed an order at Super Hobby: Hand Tool kits to Dieselroom (PE). Chains to Torpedo rooms (I ordered both the right chain and the PE chain, because I couldn't figure which would be more suitable) And finally some German packs and Bags "Openbox" Just checking Use "Hemp"-color for the engine block they said.... well Vallejo's paint code wasn't in the trumpeter's paint instructions and I couldn't find it, so I bought several colors over there and here's the end result.... Vallejo 70.891 Intermediate Green In Trumpetter's painting instructions, only the room navigation has a dark blue lower part. But Kiel's real submarine has also a blue stripe at floor level, so I want too. You can get all sorts of fun effects with salt, so let's see what happens the more I looked at the pictures of Kiel's submarine diesel room, I feel that the model of the trumpeter is not as "tight" as real, and all the equipment is not exactly in the same places as in the model. So first I move this part a little. I also cut the floor in two pieces. (in fact, I don't remember why as I write this) 😅 Also the "side table" comes closer to the wall, so the "dirt" in the picture is a putty (I think Putty is right word 😅) 3D prints coming. I wanted more stuff for the diesel room. So here some extra parts for the Diesel room. (there are also other practice prints in picture) Installation of Leds. Three 2mm and one 3mm Because the lower part of the bulkhead is the familiar gray again. In my imagination, I made tubes that I can which the color. Some results Engine painted. Not weathered yet! Micro Led inside the diesel engine instrument panel Just testing lights extra 3D-prints ready for installation I counted all the necessary valves that the model still needs and I hoped that there would be extra ones. And there were, so I used them all in the Diesel room (here one of them) Bulkhead ready. I think its better!


-
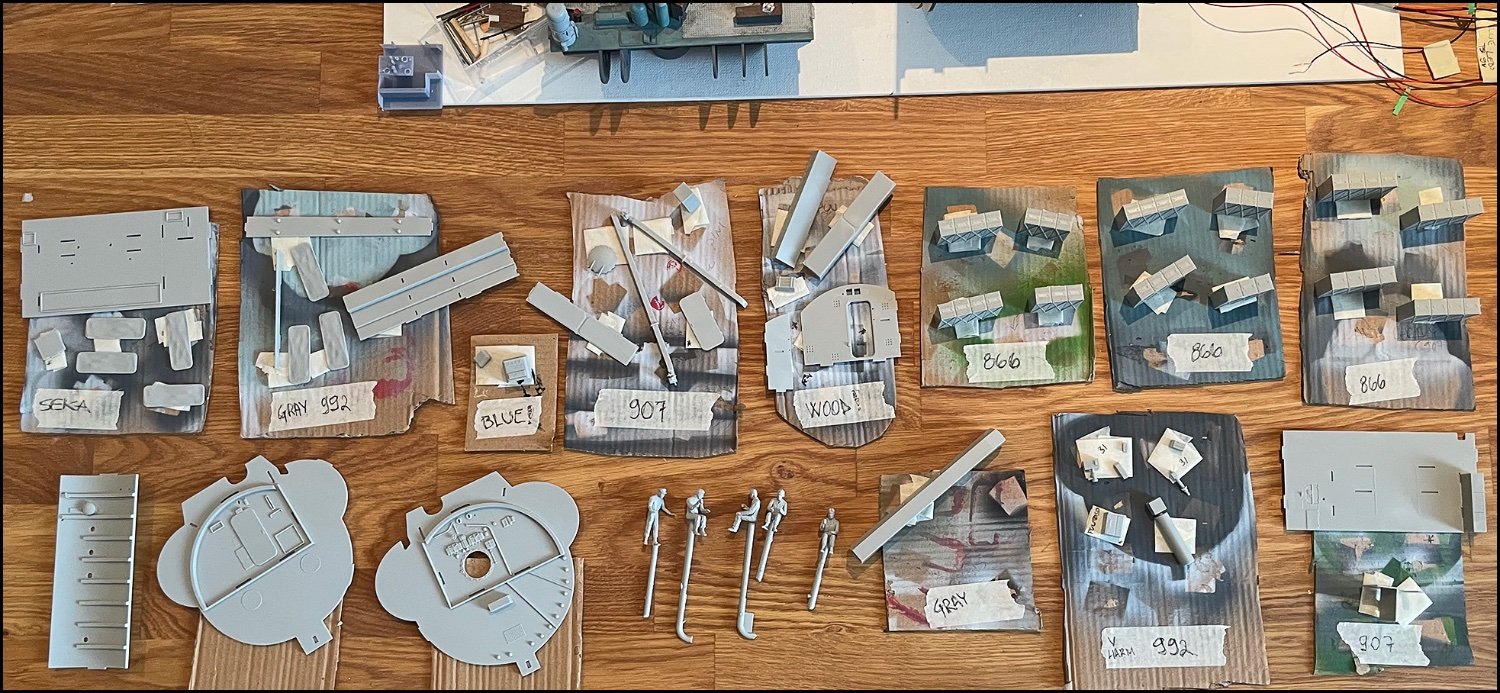
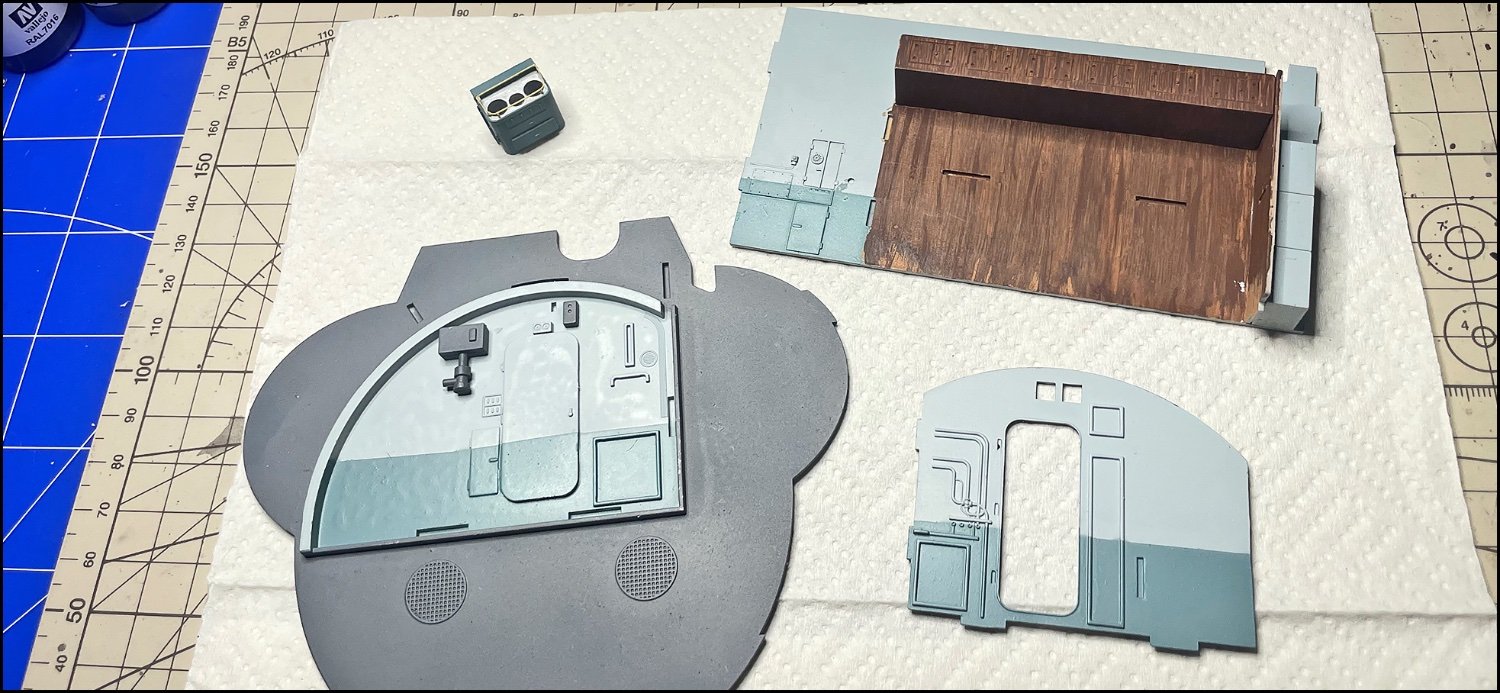
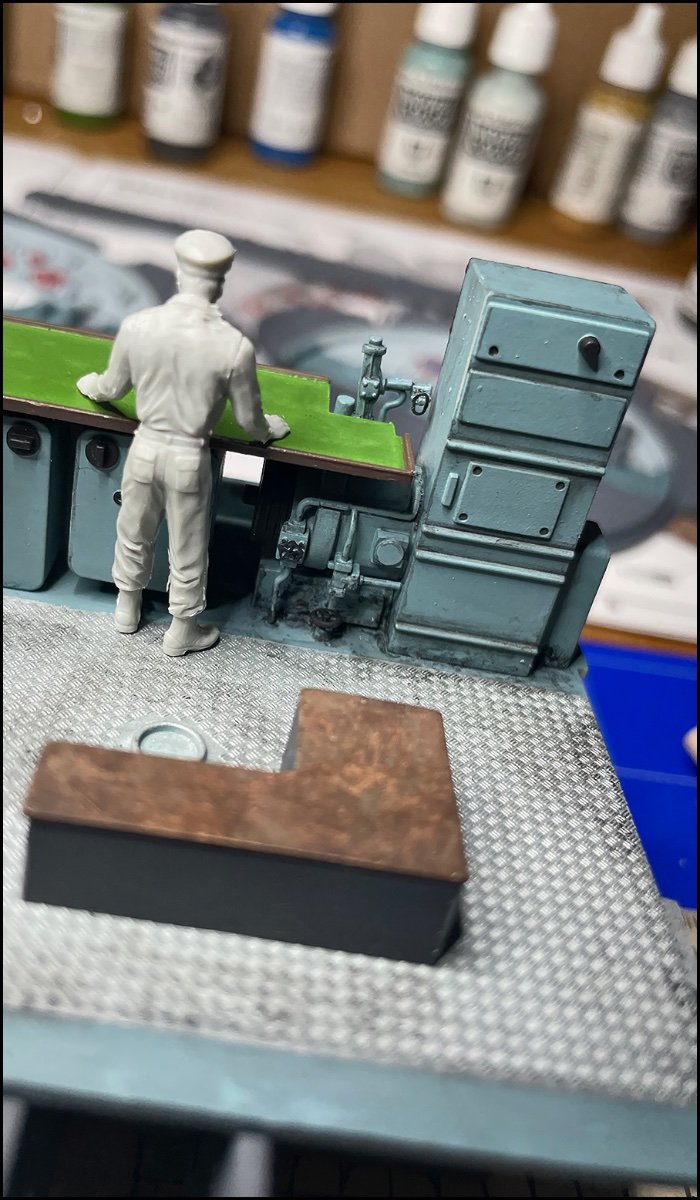
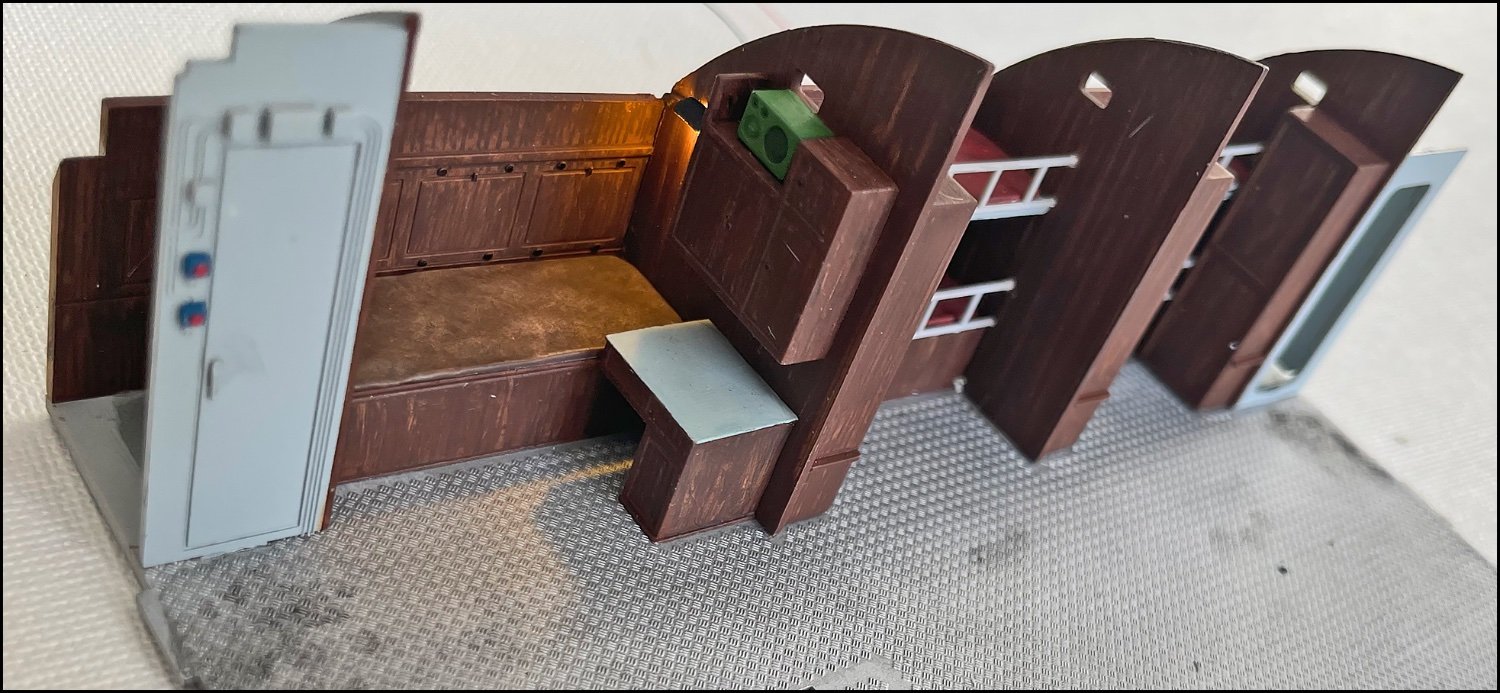
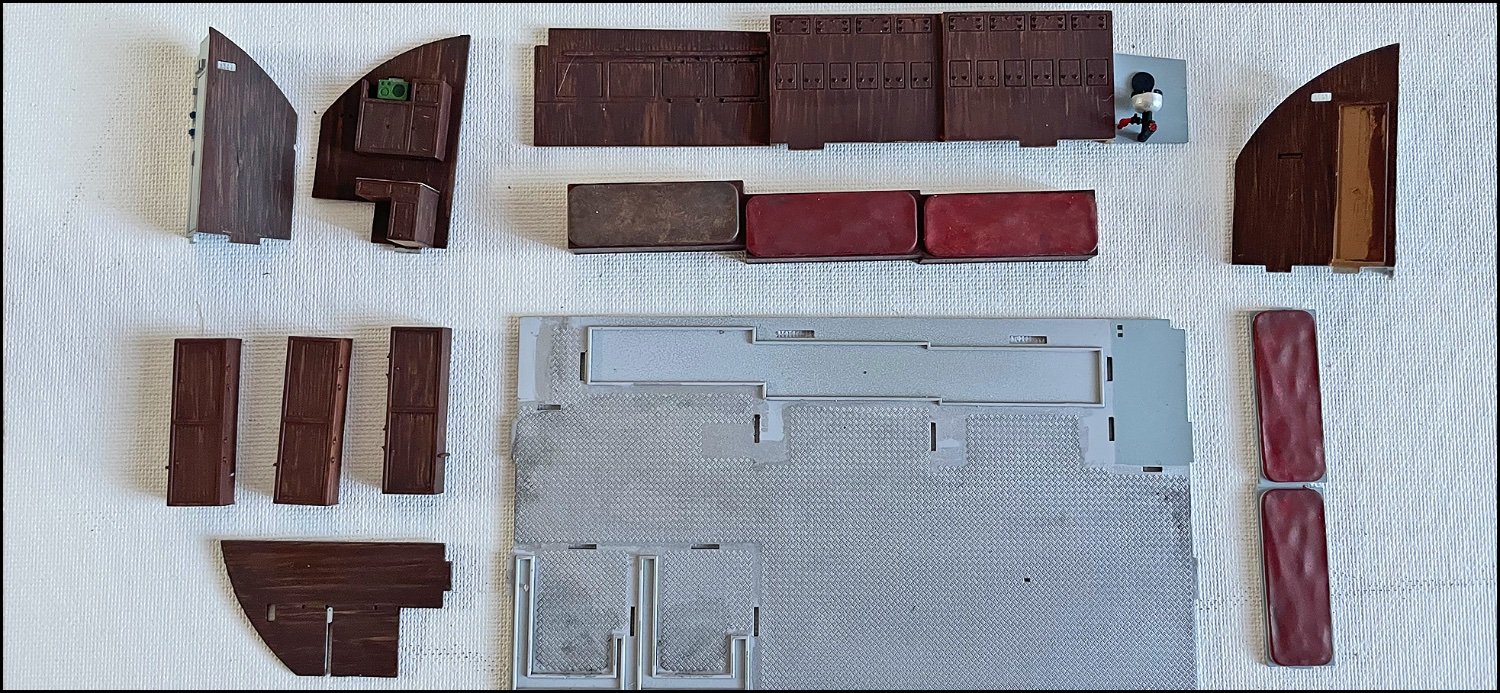
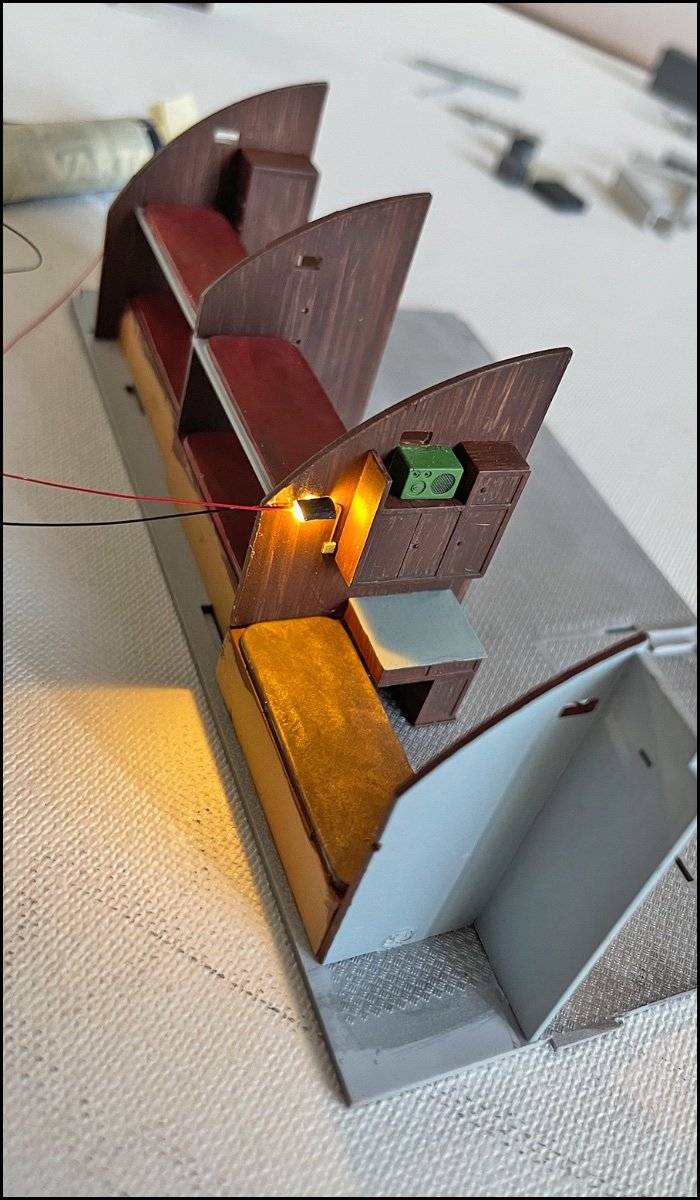
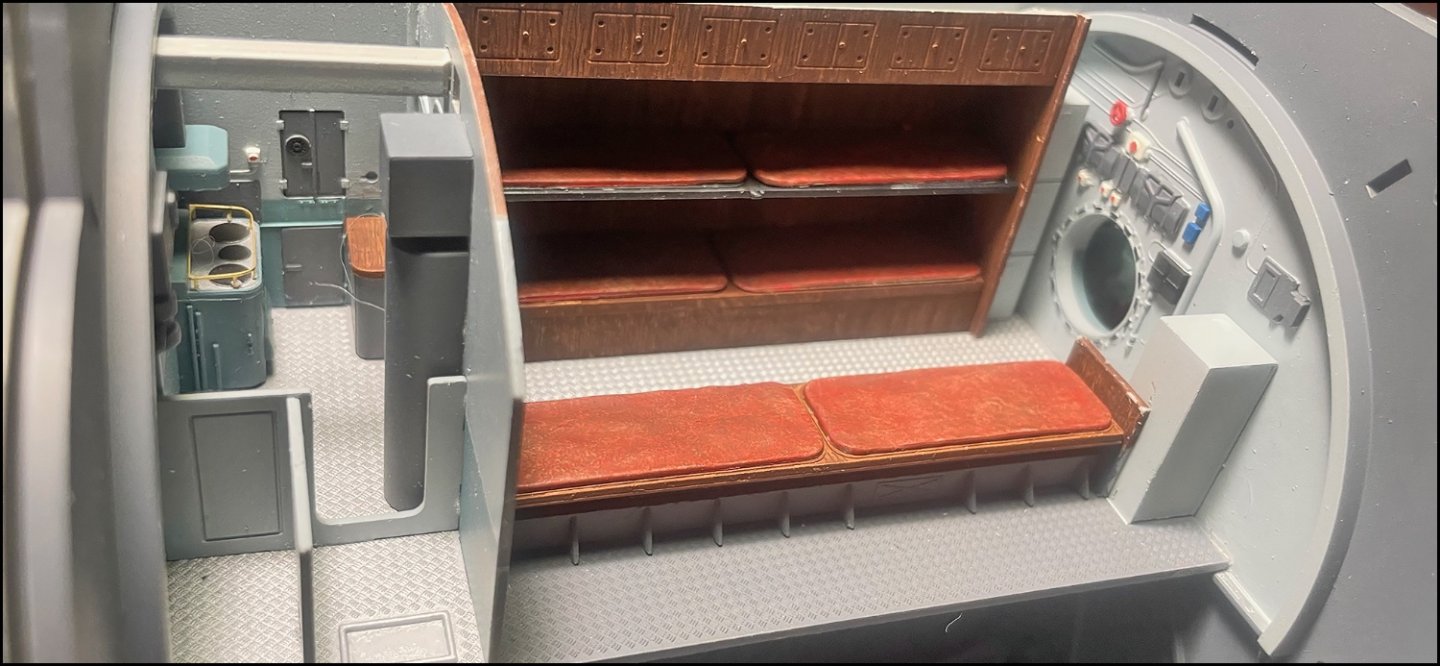
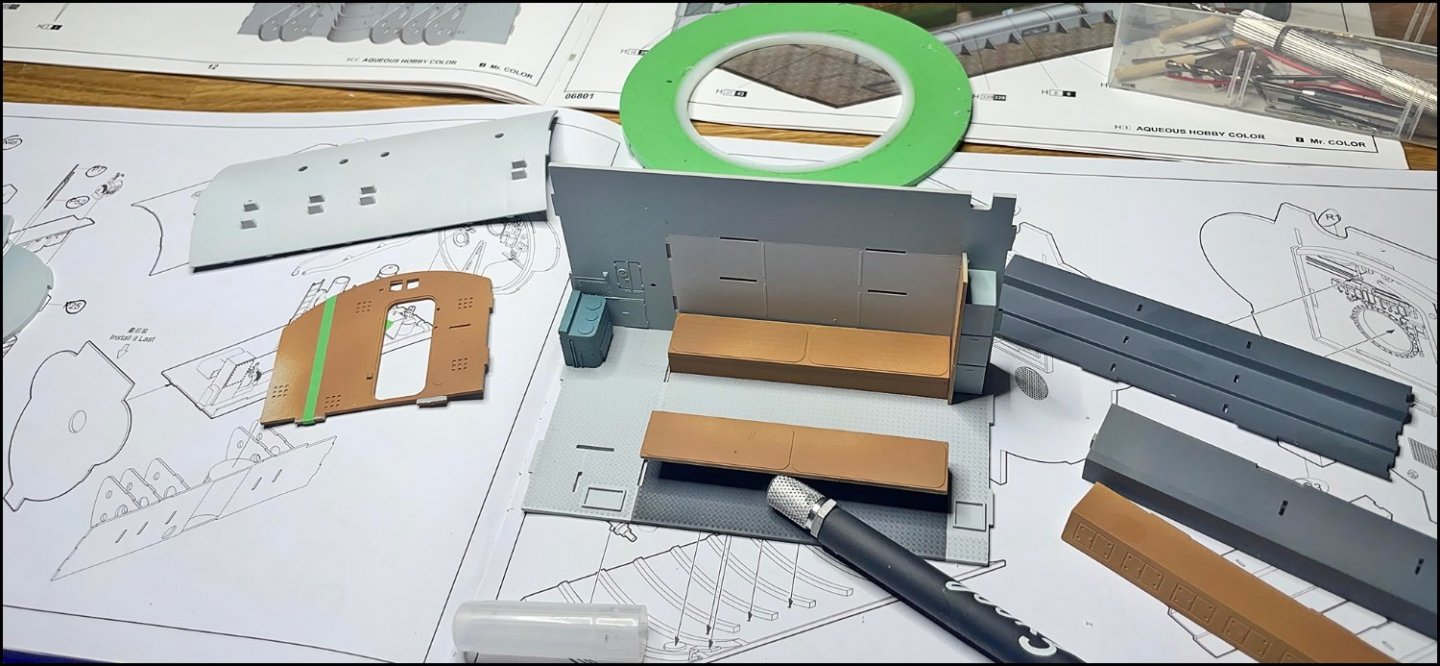
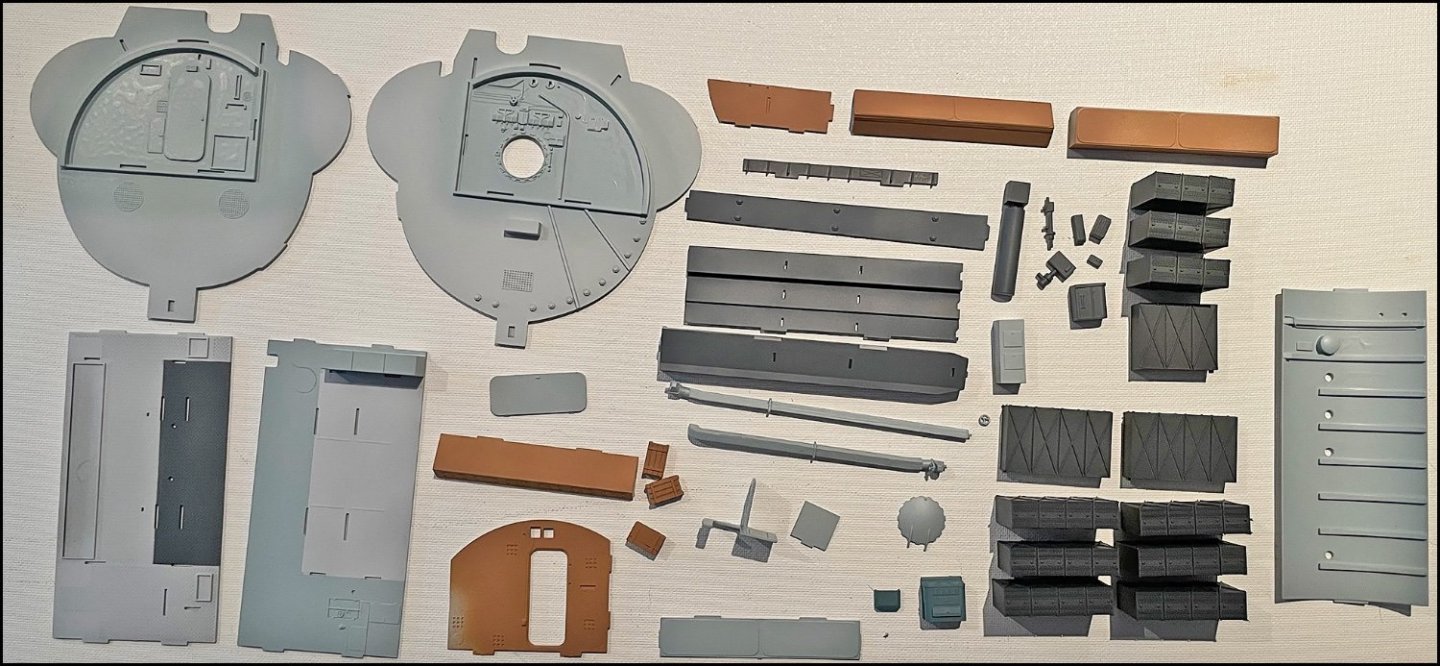
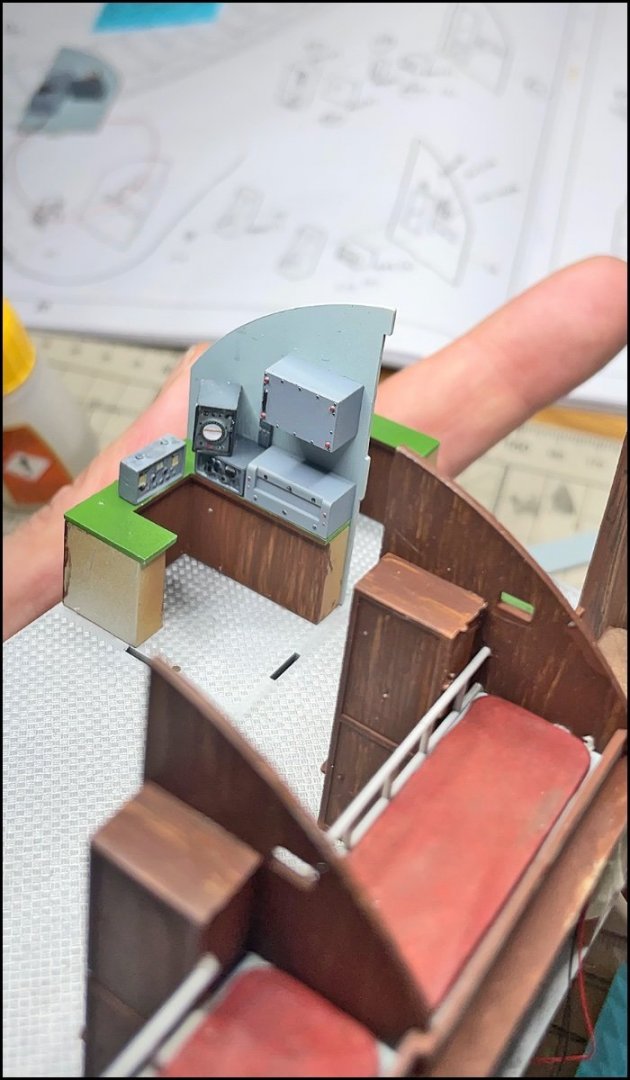
REAR SOLDIERS LIVING ROOM Time to update old construction photos. the Rear Soldiers Living room has already been completed to its glory at the beginning of June. Painted parts are ready for assembly. Kitchen walls ready to clue (opposite Diesel room). The cooker hood has a small led inside. Bulkhead opposite Navigation Room I decided to also make a row of beds on the opposite side of the corridor, as I also decided to do in the living room. because I'm running out of mattresses, I had to 3D print more of them. Here, the second mattress is the original, another quick 3D print. Red valve is also own 3d print. Batterys under the floor. I 3D printed also in here two rows of extra batteries Led assembly in process. I put an extra (2mm led) light above the kitchen Rear Soldiers Living room assembled almost ready. Bed rails and other details I will install after I have decided the positions of the soldiers.

-
kustumize reacted to a post in a topic:
U-552 by kustumize - Trumpeter - 1/48 - PLASTIC - U-Boat
-
kustumize reacted to a post in a topic:
RMS Titanic by Tom E - Trumpeter - 1:200 - PLASTIC
-
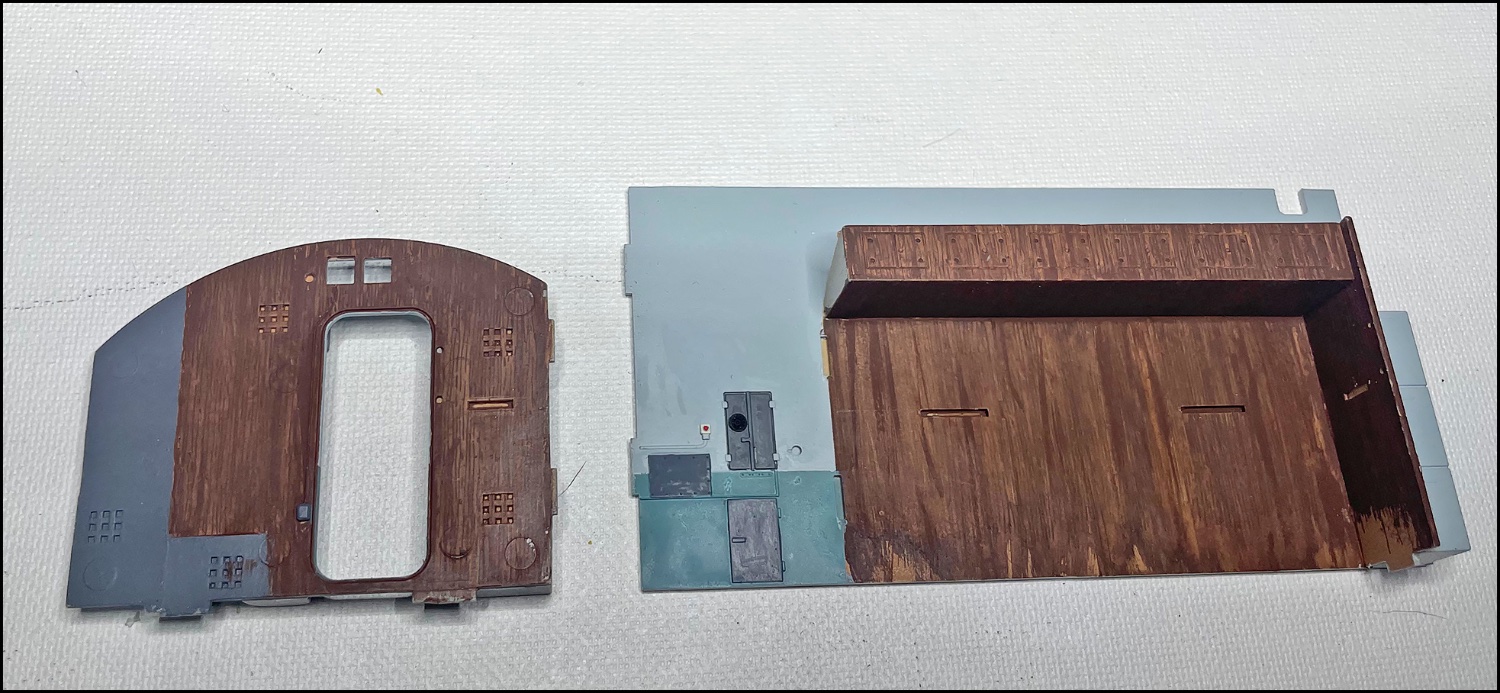
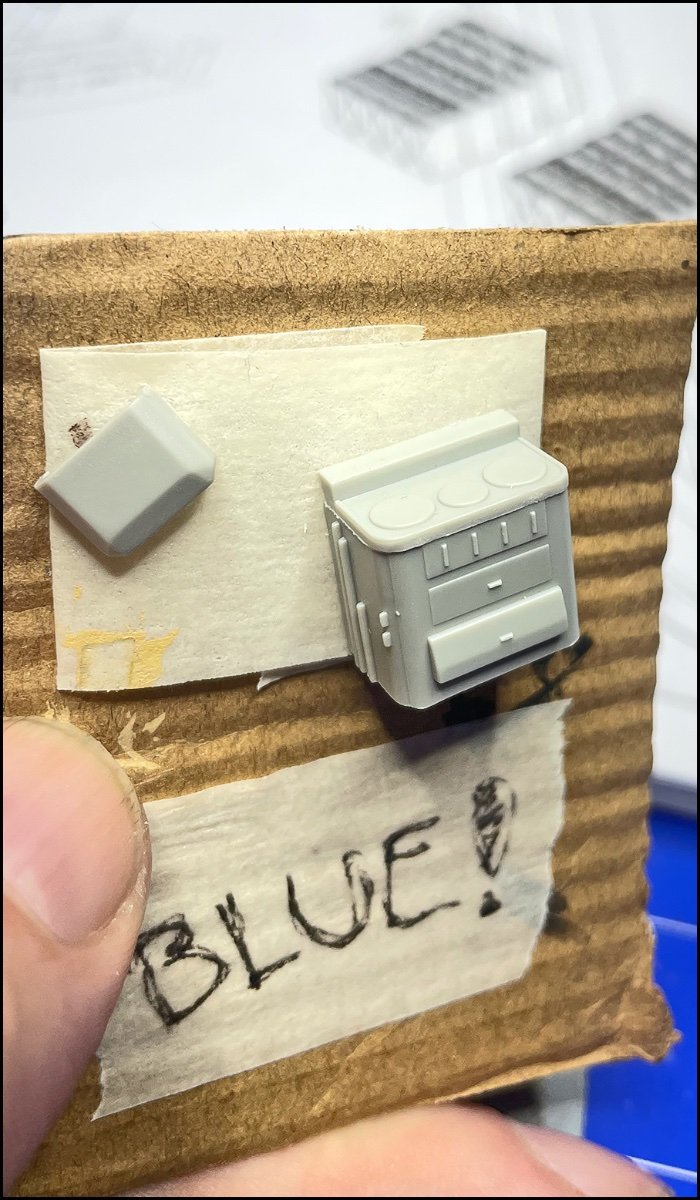
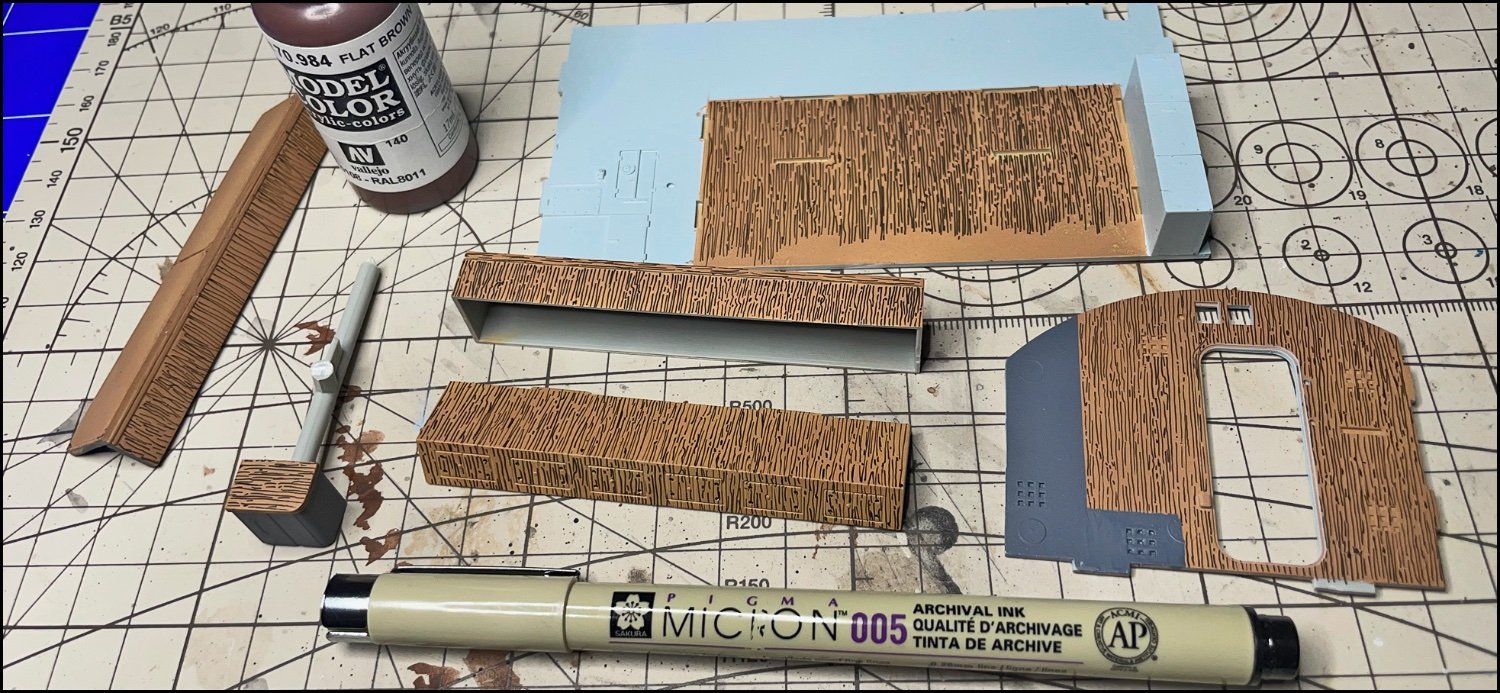
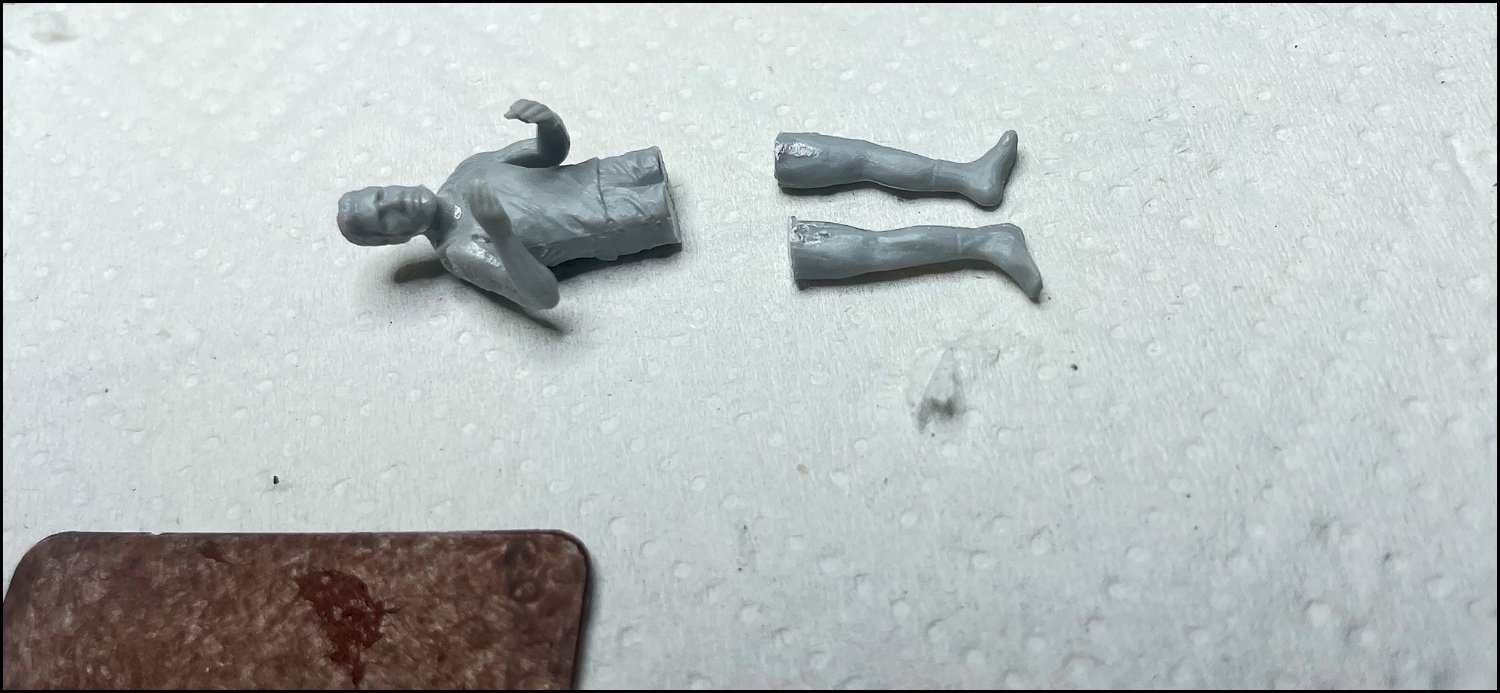
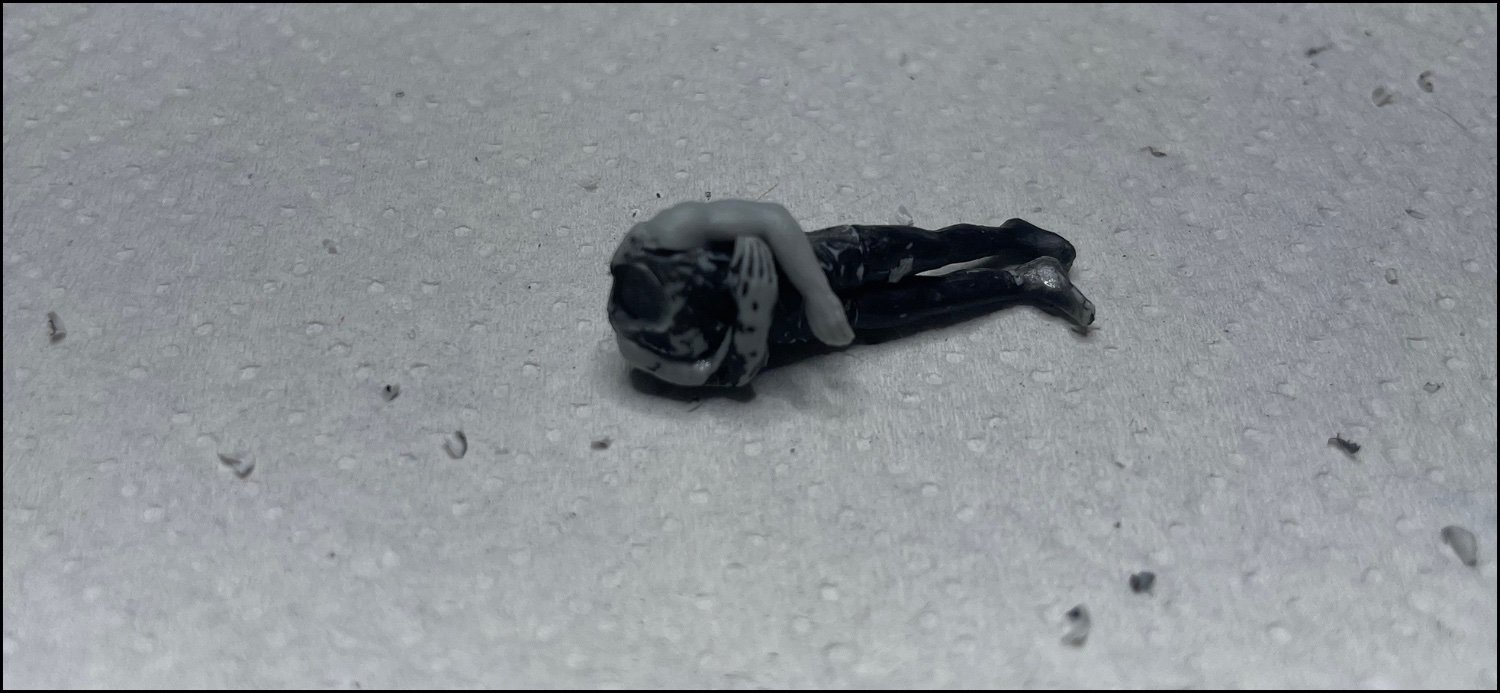
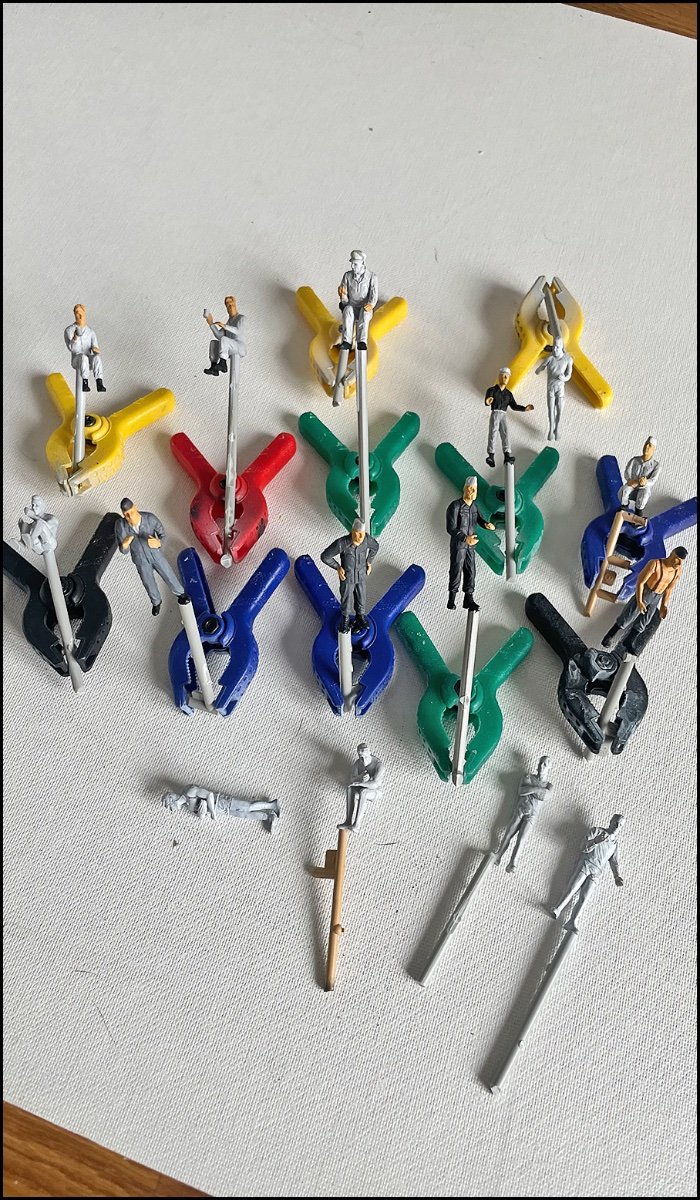
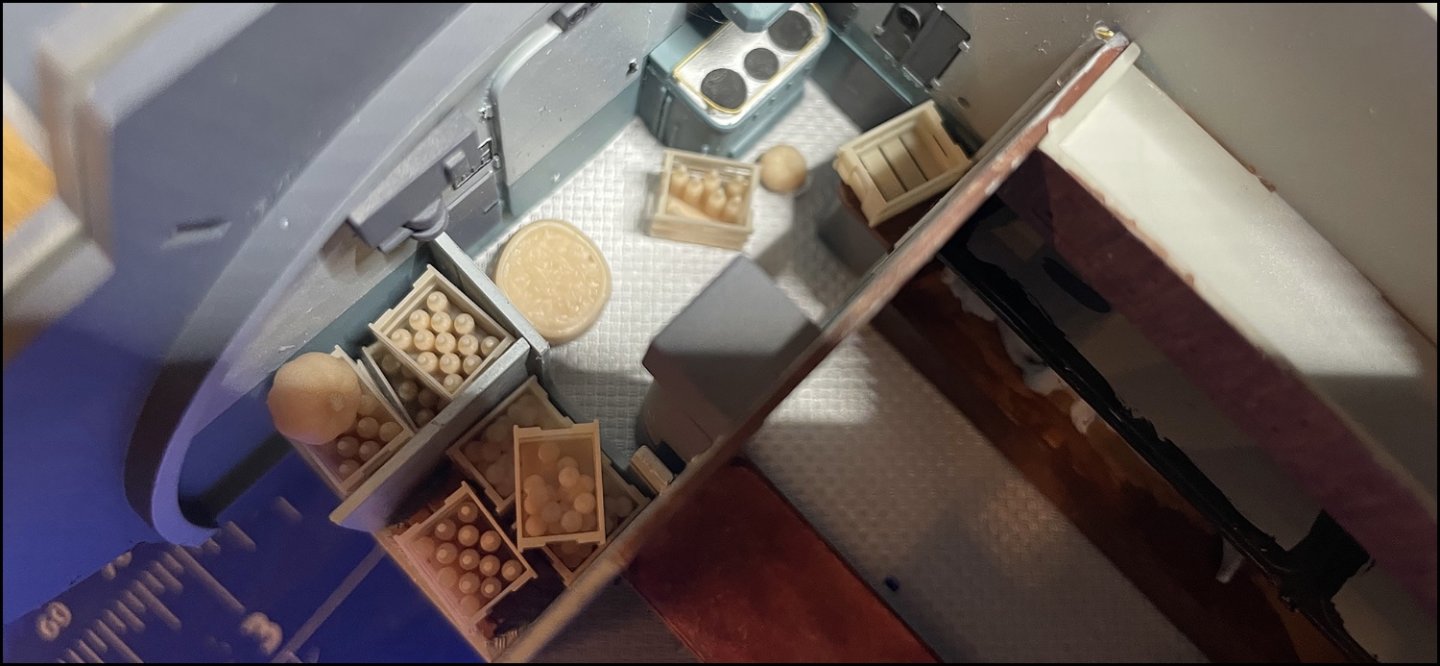
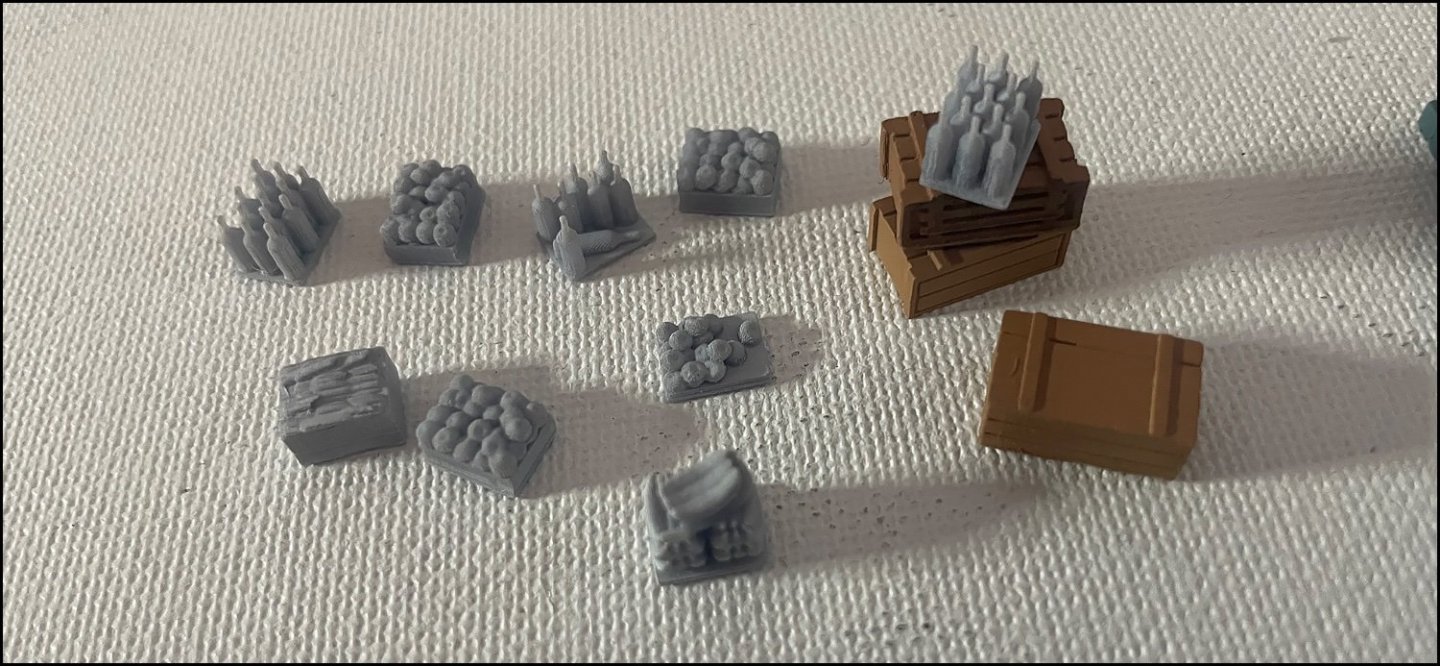
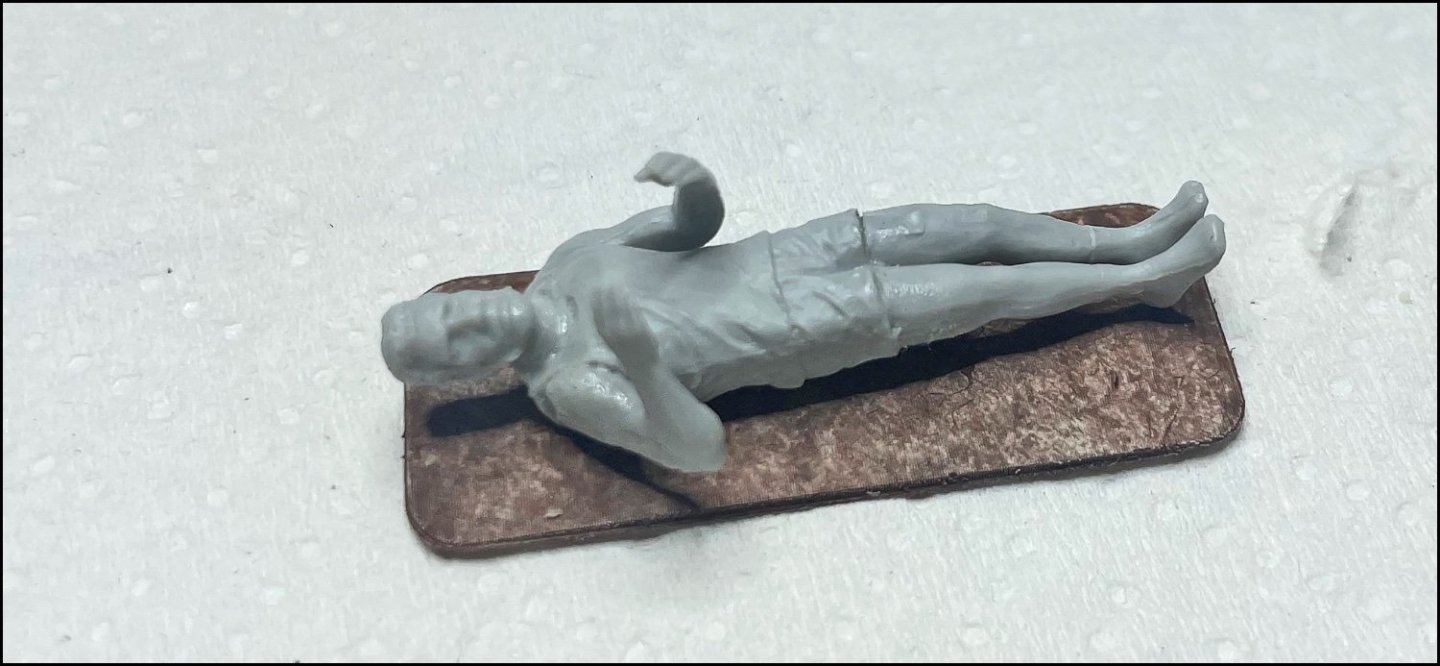
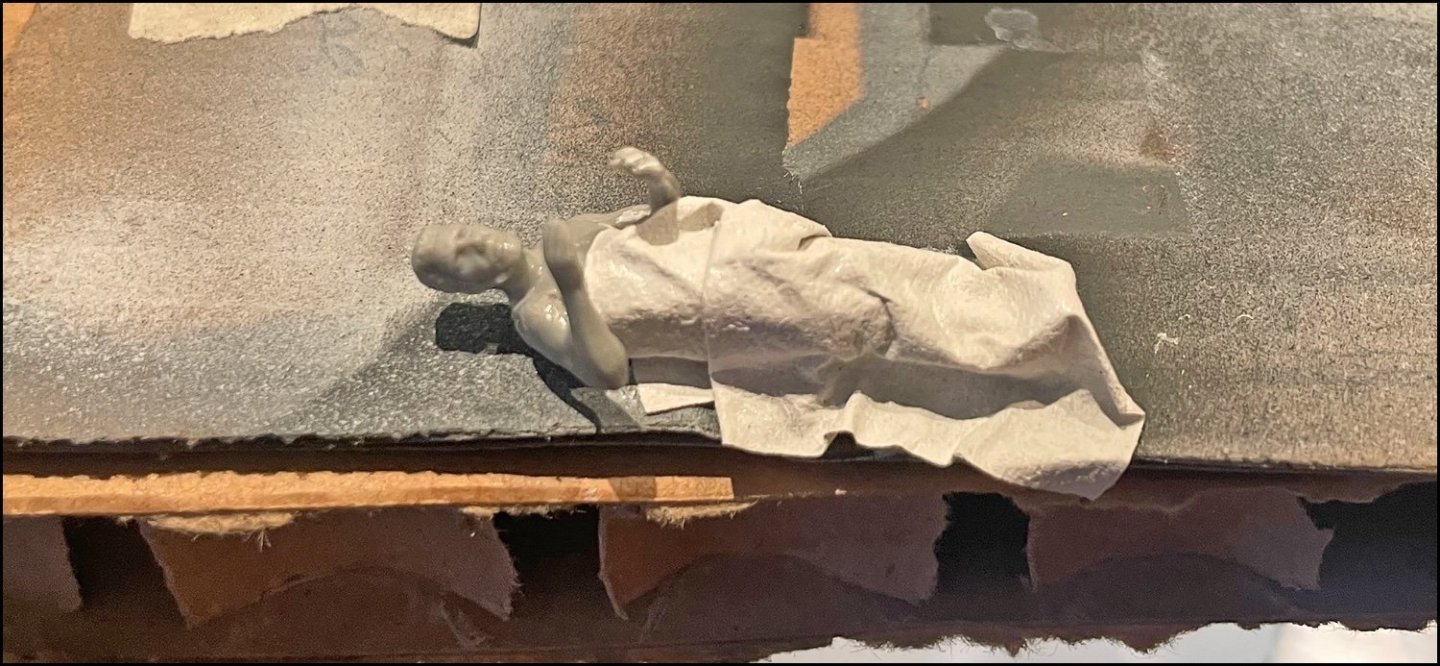
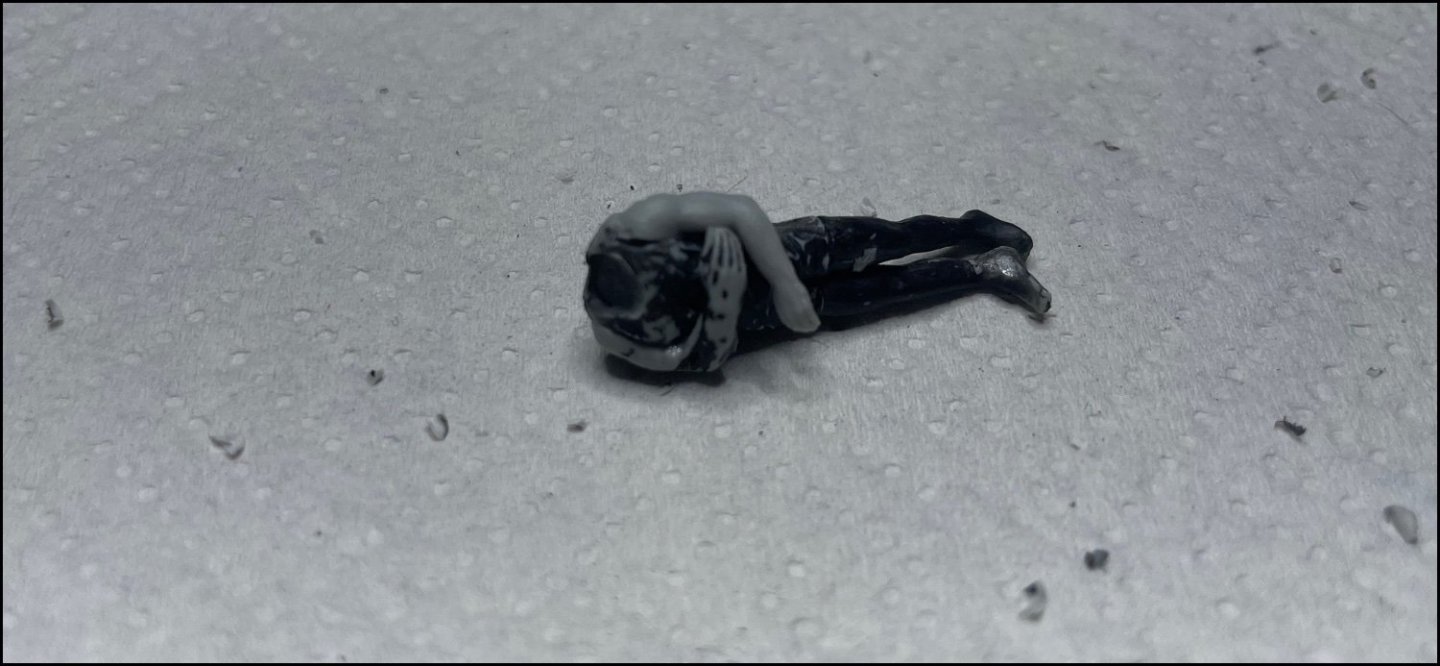
REAR SOLDIERS LIVING ROOM Here is the first three days work. At first I thought this would be a really boring room to build, but I was wrong. It became really interesting when I thought what all the soldiers in the room could do. Basic start again. I collect the parts by the main colors 3d prints also waiting for primer. Food supplies and wooden crates are just exercises. Two mattresses and two extra beds on the other side of the corridor. one crate is original. The oven is painted the same blue color that used in the previous room. Vallejo 904-Blue Gray. I checked the color on my own blog because I didn’t remember it 😅 But the end result was a complete disaster. Far too light and really spotty end result. I was wondering if I remember the color wrong. So I repainted the oven. And again the wrong result In the end: The first paint was right but I had mixed too much thinner into the paint. The result after a few paintings An extra bed assembled and painted at the front Wine, apples, carrots, bananas and wooden crates. I ordered Evergreen 0.28mm x 1.68mm polystyrene strips which I try to make crates to food suplies. How about PE-part #11 And a little painting of wooden parts. i found a thinner pen to draw the wood grain. The main color of the wall is also rough because I mixed the thinner and paint incorrectly. Next, I could start assembling, but a few crew plan first. Dr.Frankestein is here again... This soldier will be reading a magazine in her bed. I also tested making a blanket. It is made of kitchen paper, dipped in water with a brush and shaped into tweezers. At end, I painted it and it hardened. (Bad English again but its 2AM in here 😅) And another sleeping soldier under construction I have now found places for about 20 soldiers on board. At least ten of them will come to this room. As you see, the captain (that coming into the front living room) has got also the right head


- 63 replies
-
- 11
-
-
kustumize reacted to a post in a topic:
U-552 by kustumize - Trumpeter - 1/48 - PLASTIC - U-Boat
-
kustumize reacted to a post in a topic:
U-552 by kustumize - Trumpeter - 1/48 - PLASTIC - U-Boat
-
kustumize reacted to a post in a topic:
U-552 by kustumize - Trumpeter - 1/48 - PLASTIC - U-Boat
-
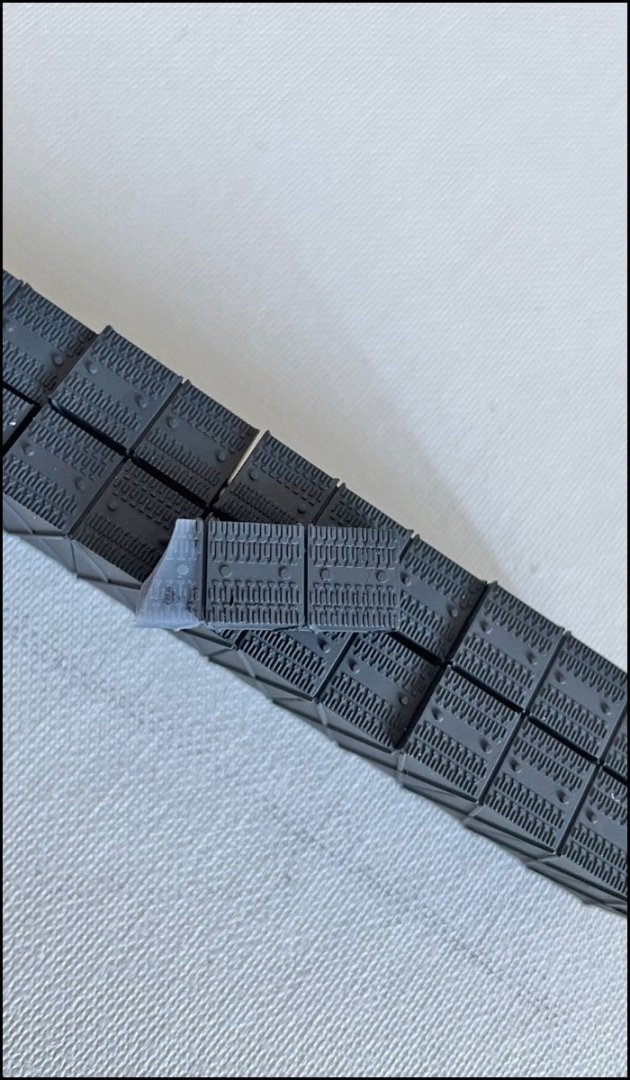
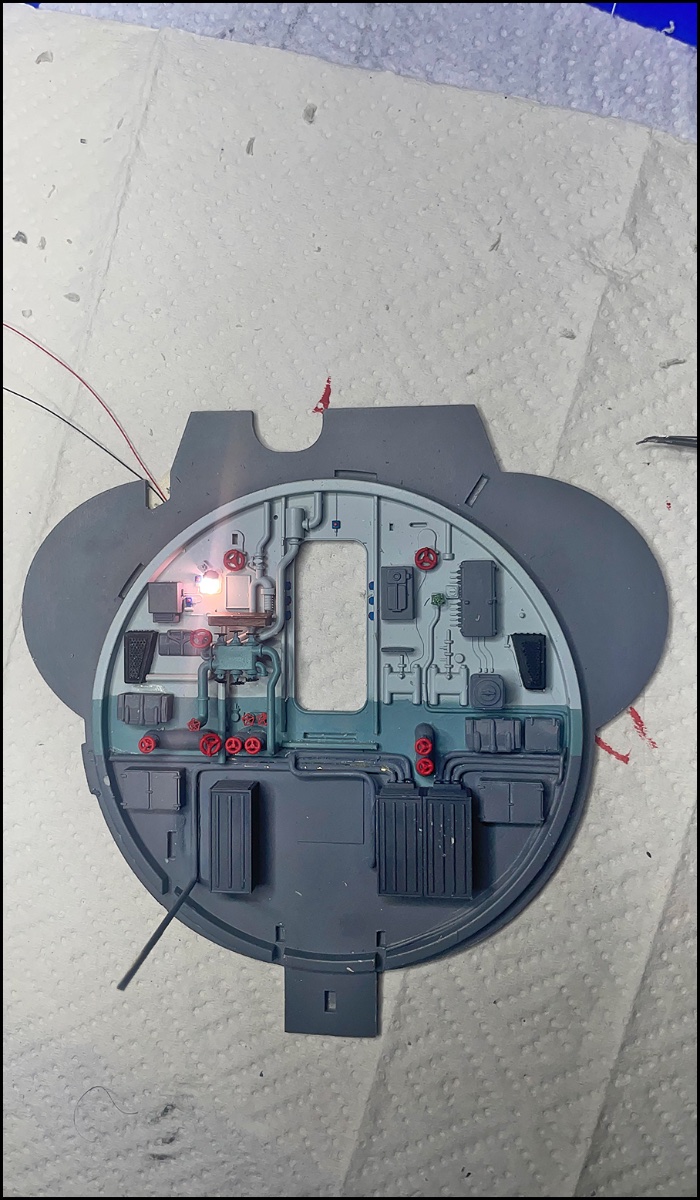
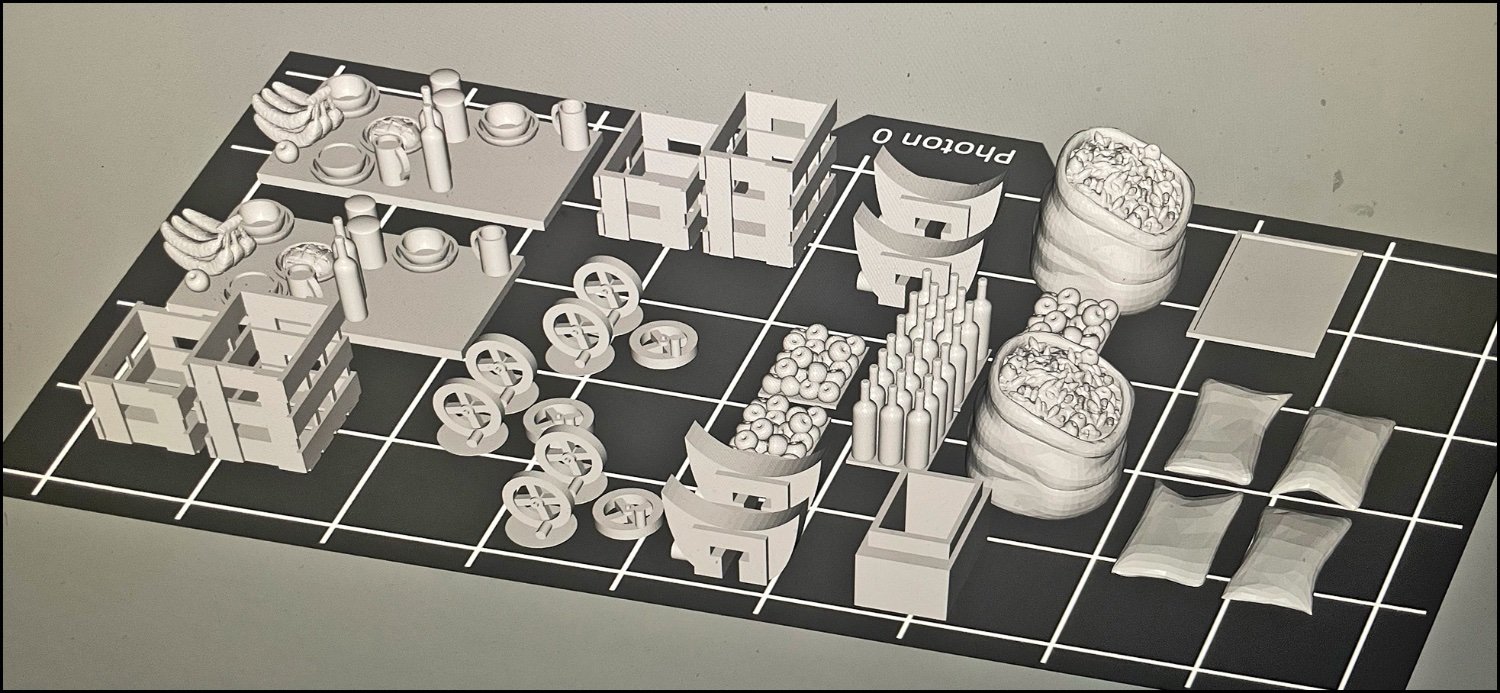
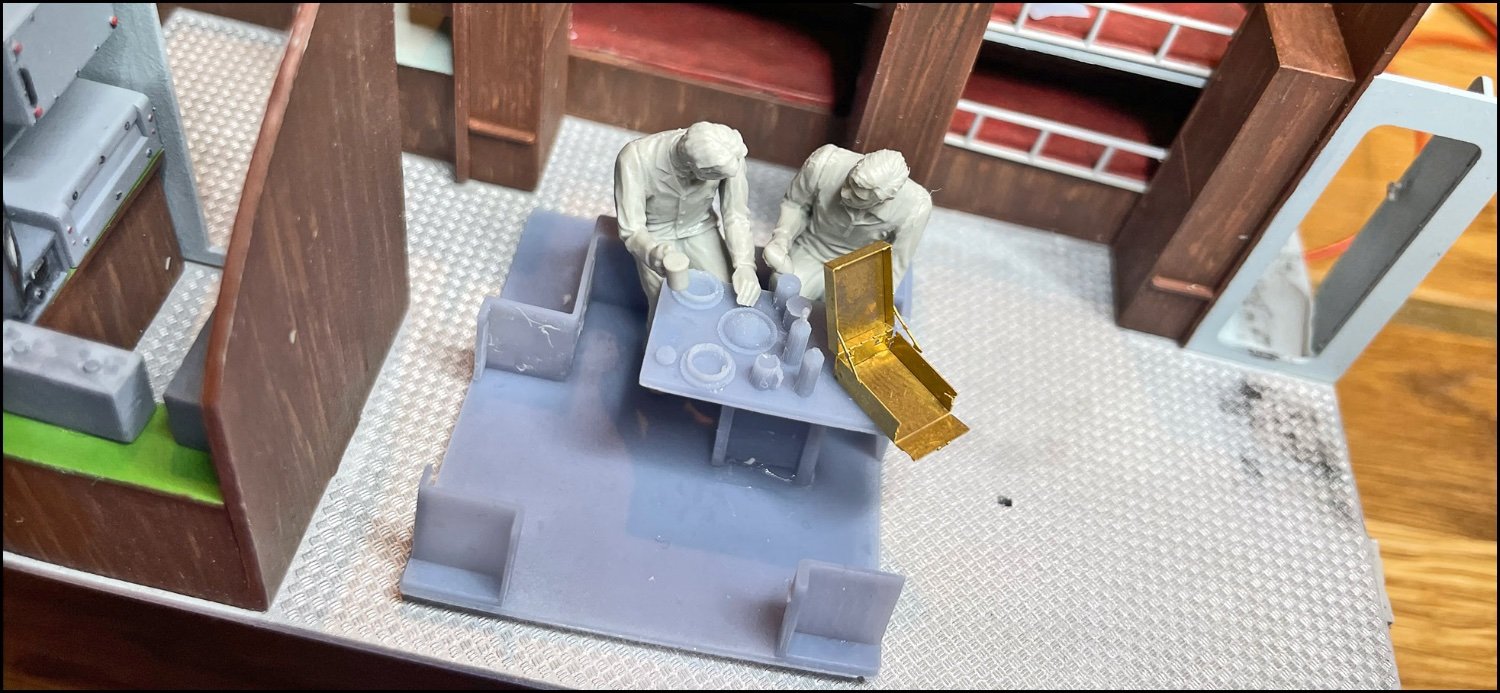
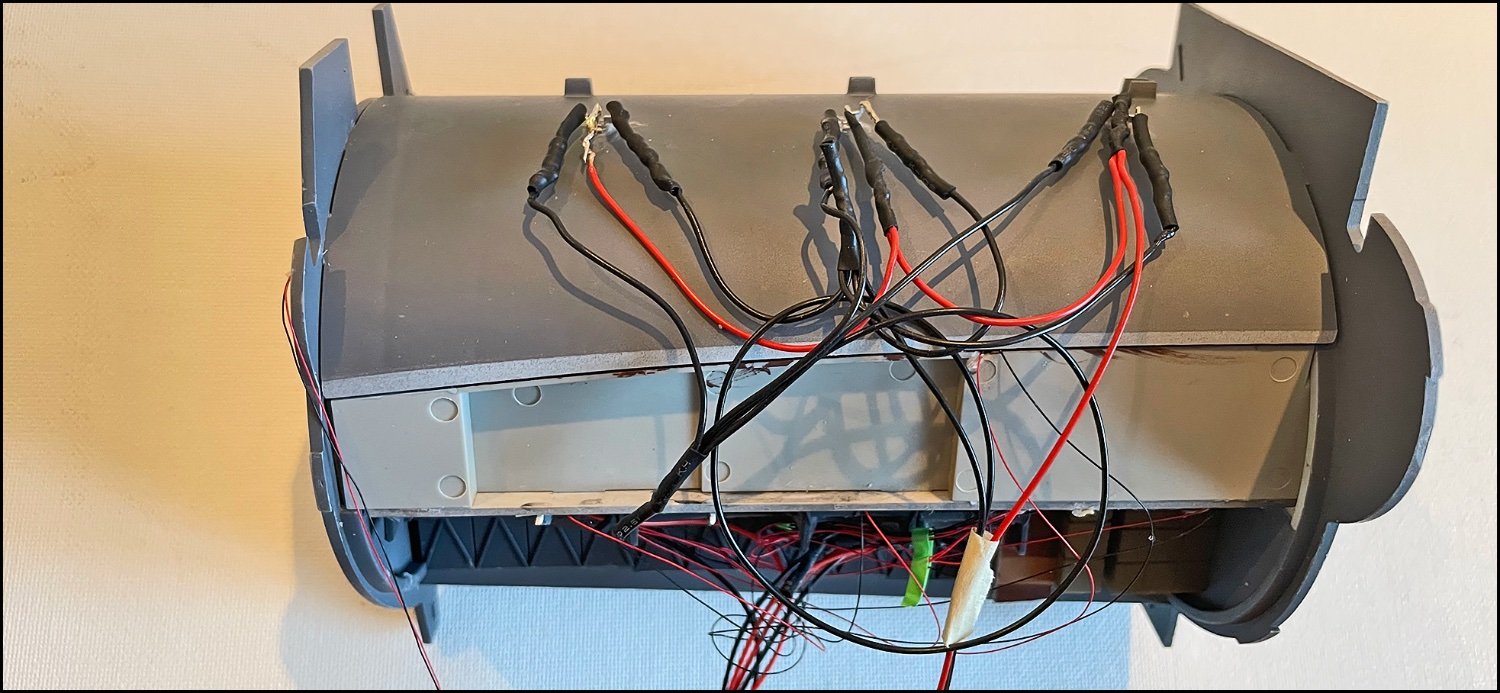
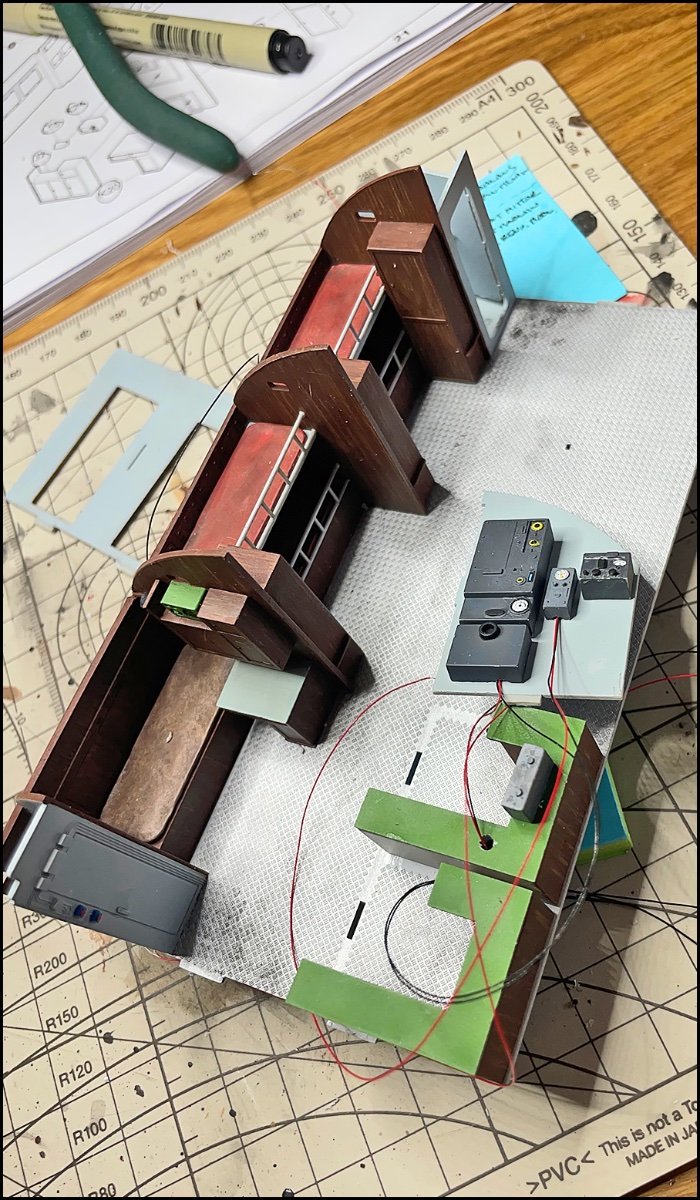
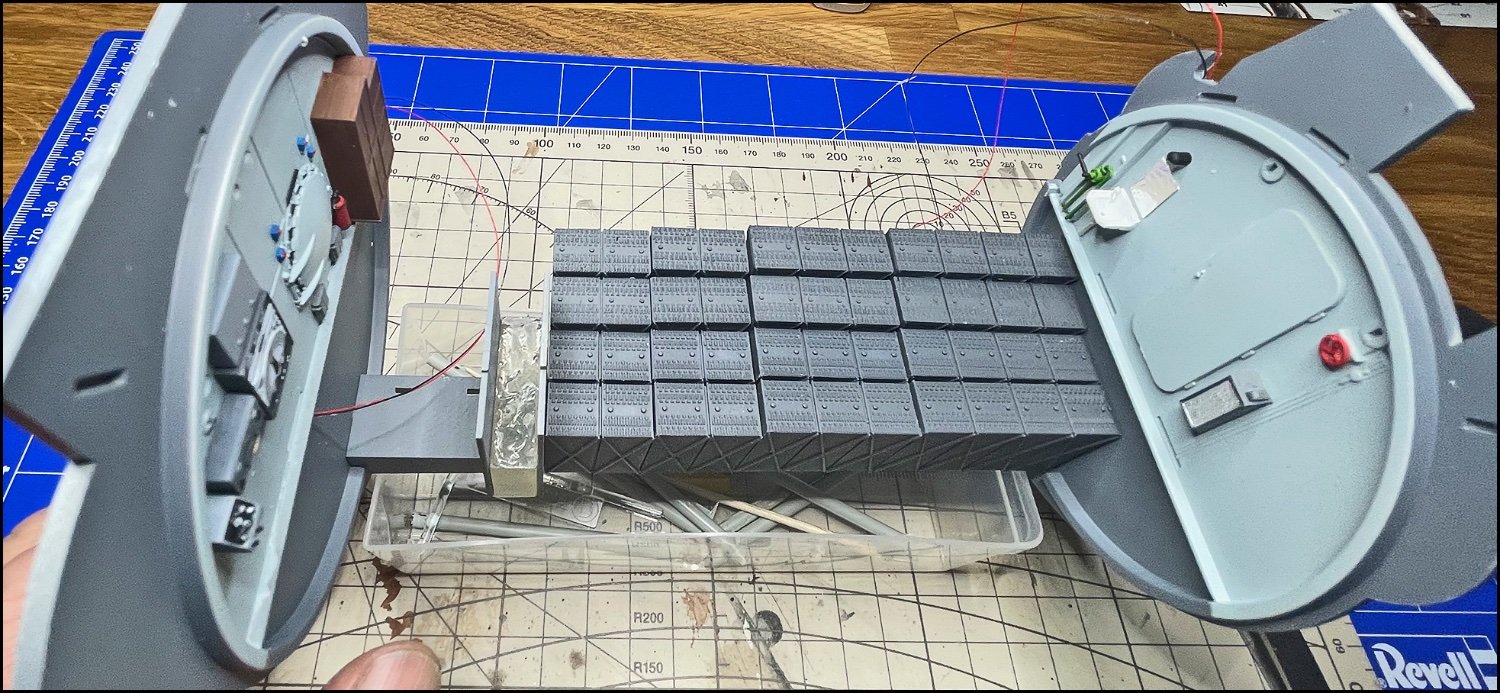
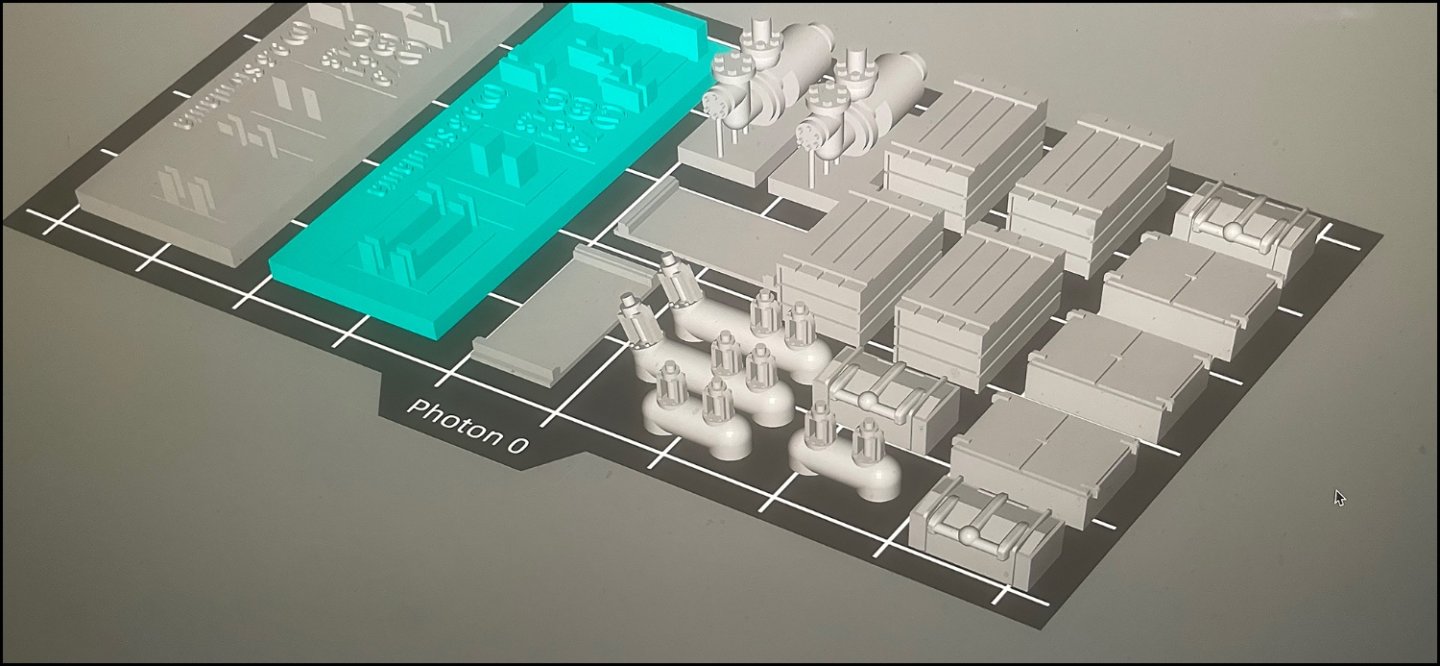
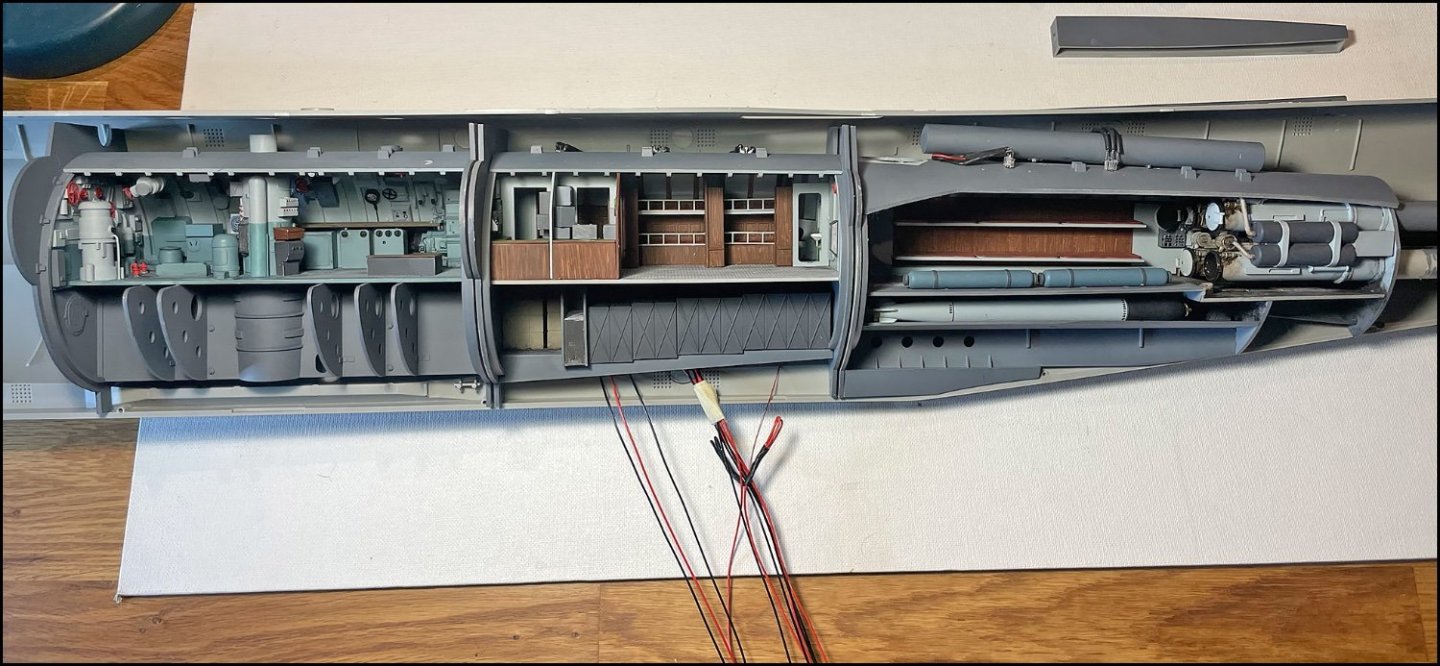
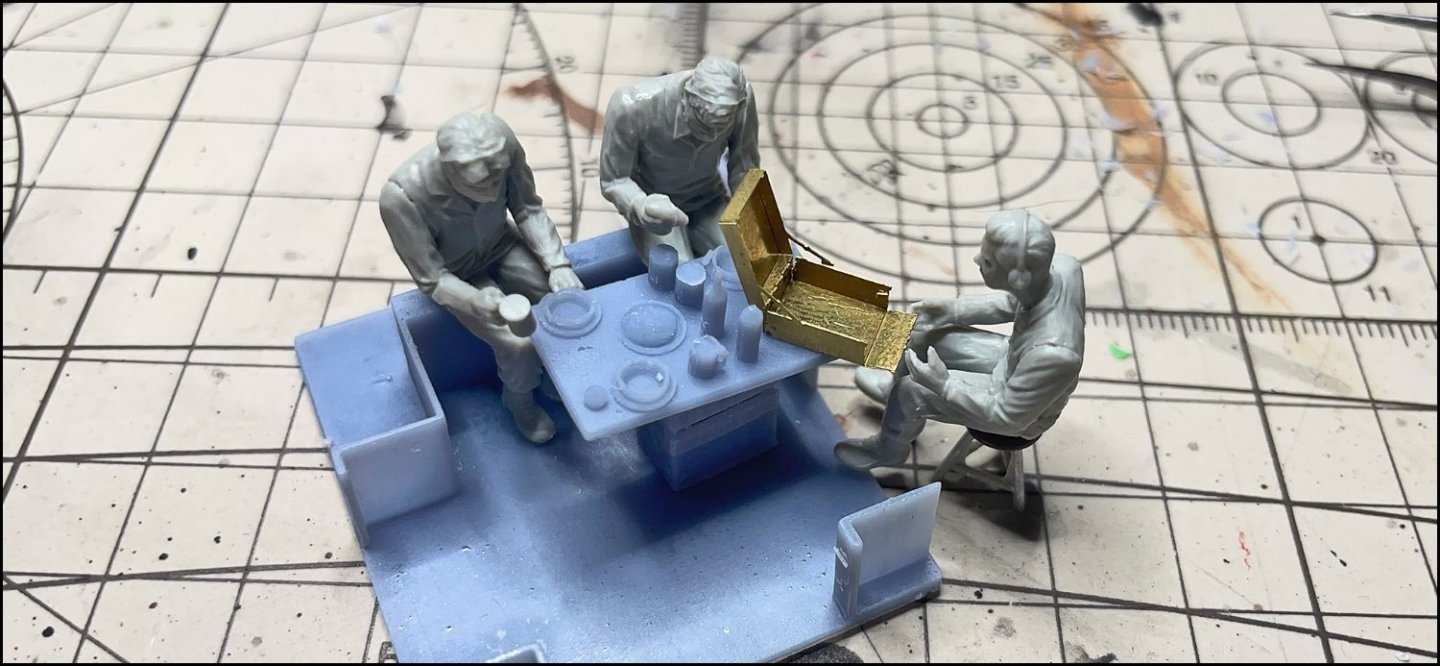
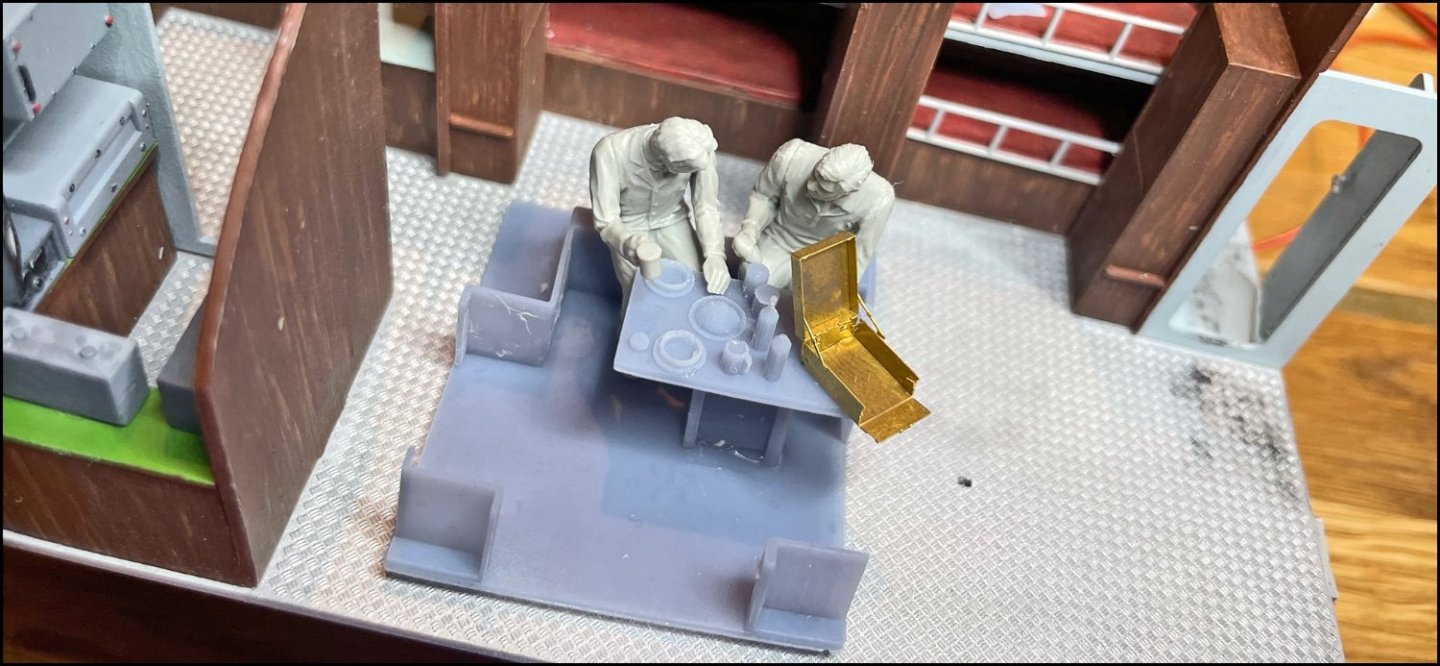
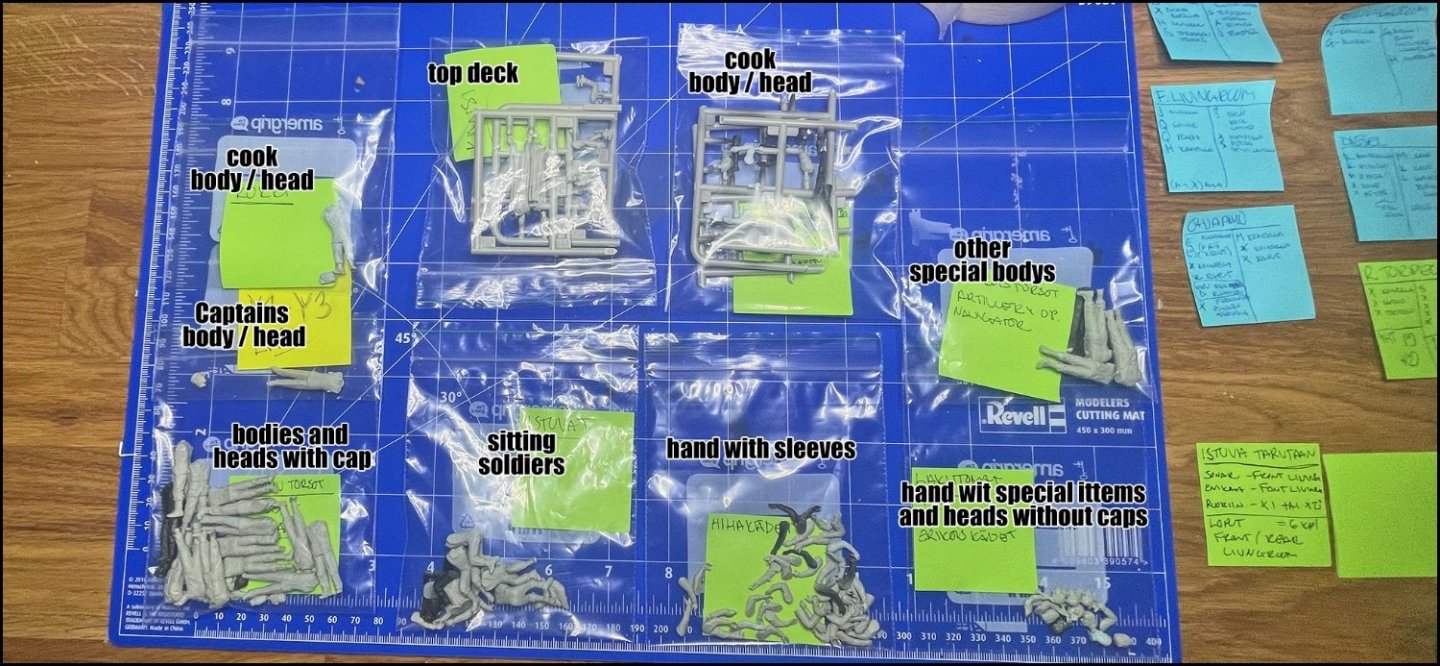
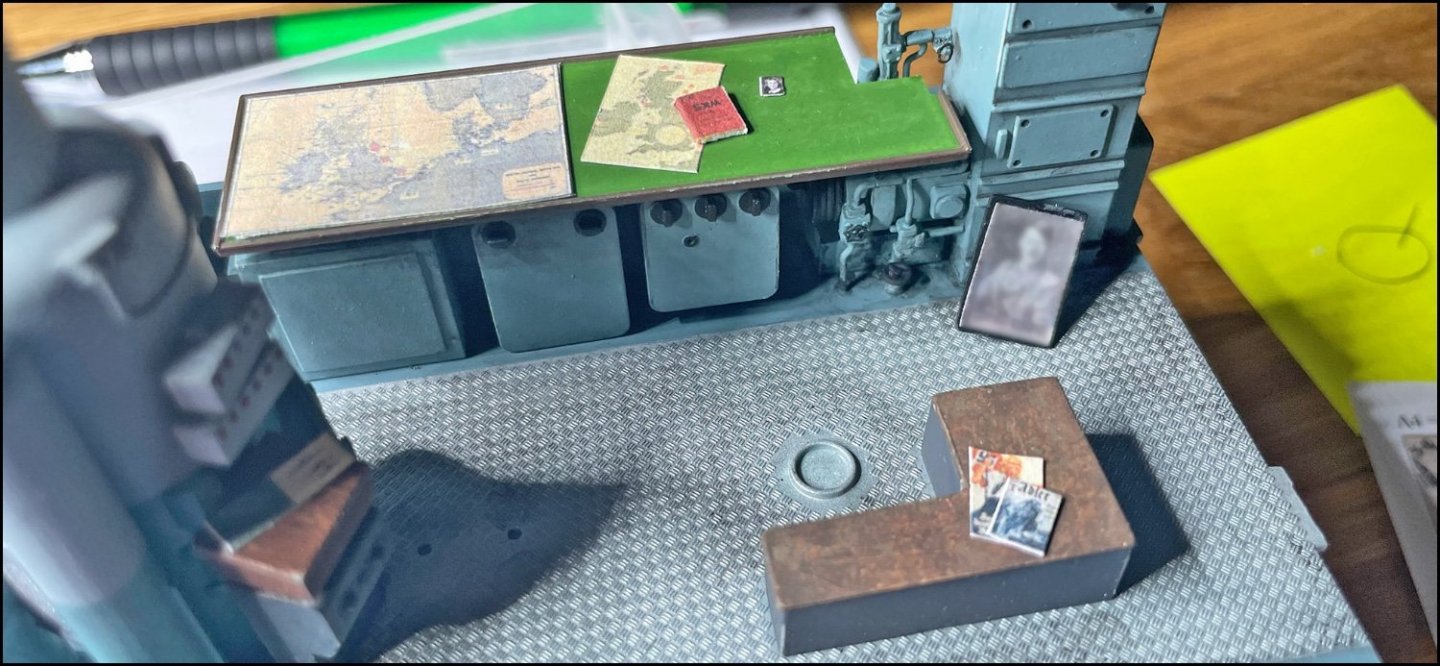
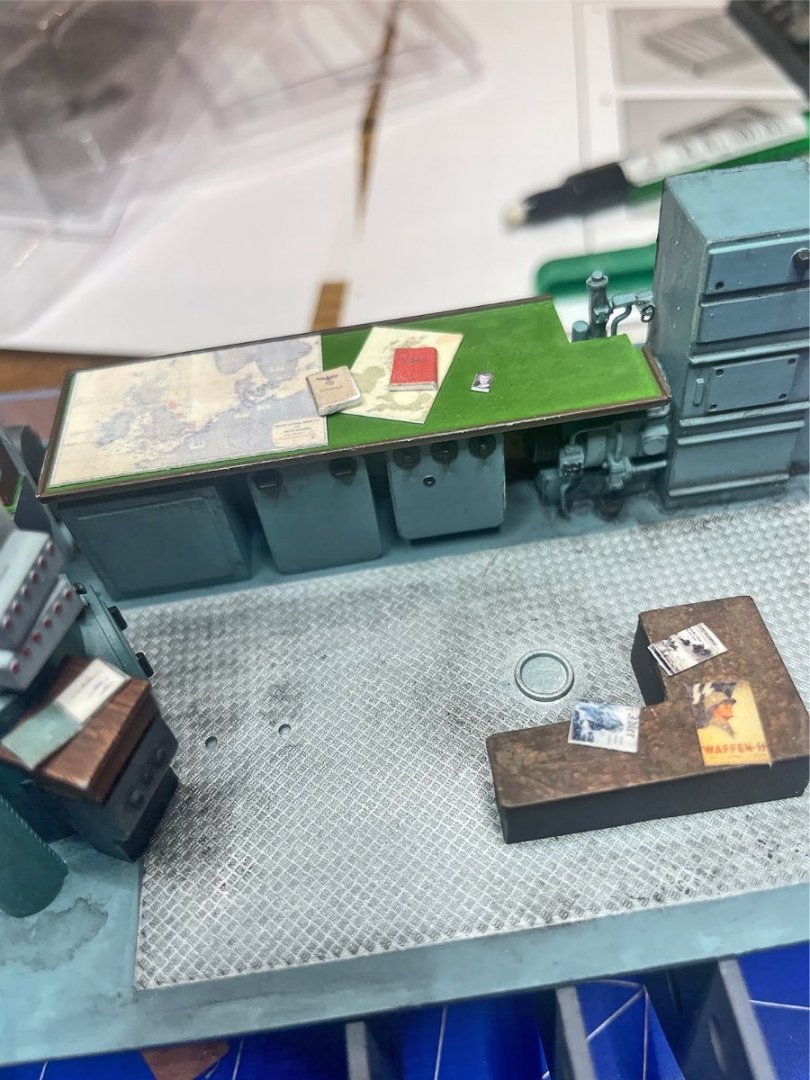
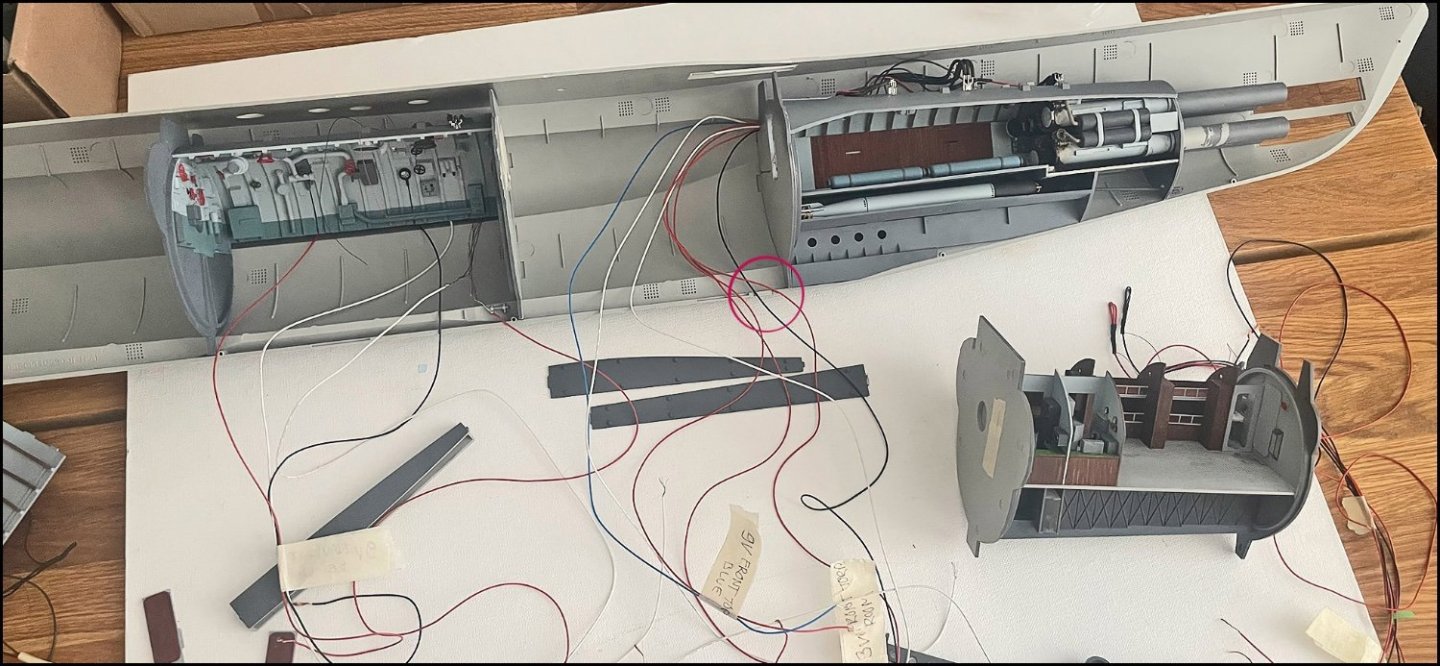
CENTRAL CONTROL ROOM Long time from the previous update. I still had no electrical connection to make from the Central Control Room. After that I left the room again waiting for the final assembly. A few more pictures of the end result. I put five lights as was in the model I ran out of SMD 0402 Leds so i only got three gauges lit. Now I'm waiting for new ones in the mail BRINGING THE THREE DEPARTMENT TOGETHER I planned that now is the time to put the three completed departments together and finish them. I will be able to put one missing LED in the Central Control Room later. I cleared the wires and wondered where I could get the wires out of the submarine. I thought of placing the submarine on the base on two tubes of about 10 mm, just like Yves did. It looks much better than the original. the wiring of the first three compartments should come along the front pipe. The best point seems to be the circled point DESIGN OF DETAILS But before I could complete the compartments I should put at least the most difficult crew members in place… and I didn't know which soldier I wanted in which room … I would also need some extra stuff like food suplies… I think about these things (Soldiers and extra parts) for really many days, if not more than a week, but something had to start. So I started 3d printing the extra parts. Some of the parts were too small and failed. I also planned if I buy a new 3D printer (anycubic 6K model). Maybe this newest model succeeds in even the smallest details. Here are some of my own drawings and some free on 3d websites. Some food suplies, Front Torpedo Room torpedo holders and valves, picture frames, pillows and food table. This moment of the captain and crew stuck strongly in my mind about the movie das boot. So I also want myself to have such a moment in my model. I printed a piece of the Front Soldiers Living Room to design the whole thing. One scene in aDas Boot, one soldier uses either an Enigma or an typewriter machine while the others eat, that's is the idea. I had already glued about ten soldiers, so their positions had to be corrected. For these two, I changed the position of the head as well as the position of the other hand. Now they seem to be talking to each other. the trumpeter’s instructions for making soldiers are really deep. really really deep ... I thought it best to put all the soldiers in pieces and bring them to life again like dr frankestain. (One "coo body / head" should bee "men in underwear) 😄 I also printed posters, books, etc. to the right scale. These are plain copy paper and these on photo paper. For some reason less sharpen than copy paper. Maybe the reason is in the printer or in me 😀 But after all this, I still don't know where to put all soldiers... so I thought it would be best to build all the departments ready and then start planning where to put them. However, I want to put as many crew on board as possible. When the model progresses, I can think about this as well.... So let's start making the next section ... Rear Soldiers Living Room... here we come


- 63 replies
-
- 13
-
-
-
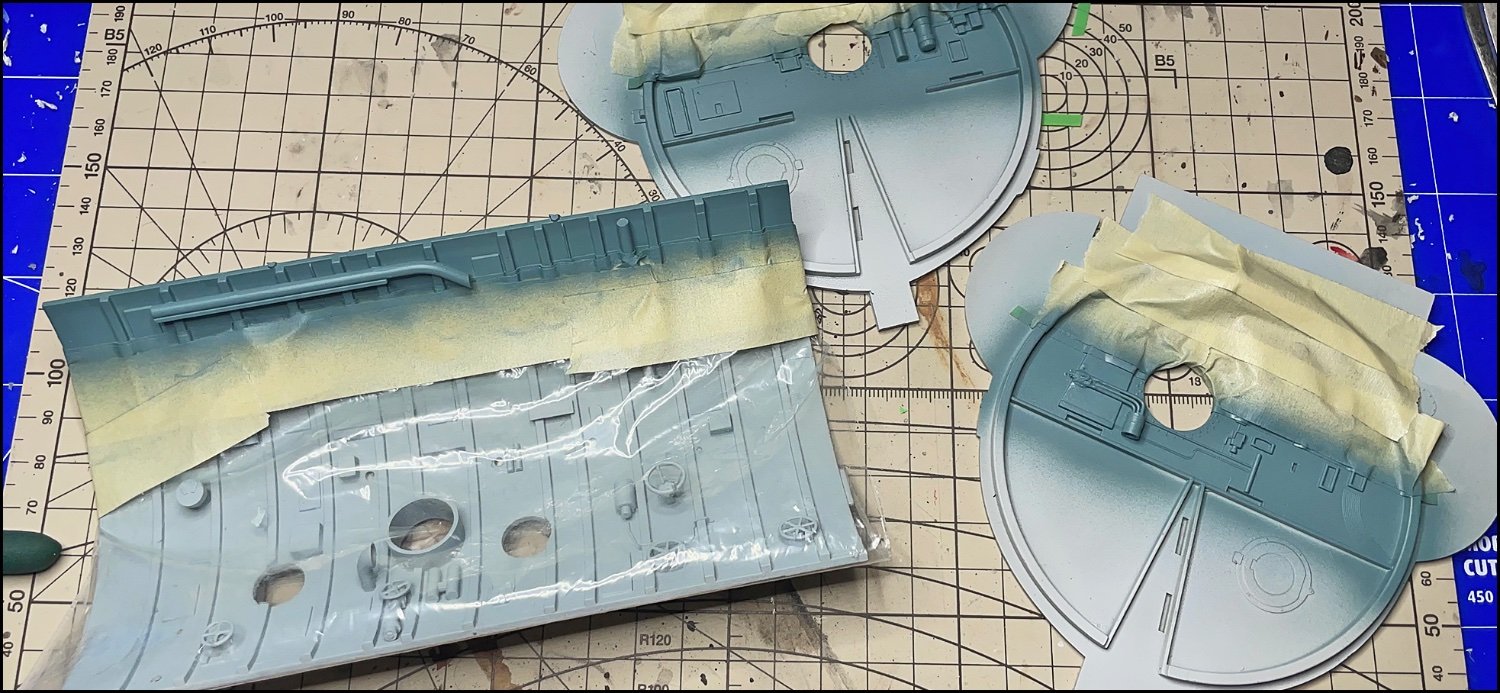
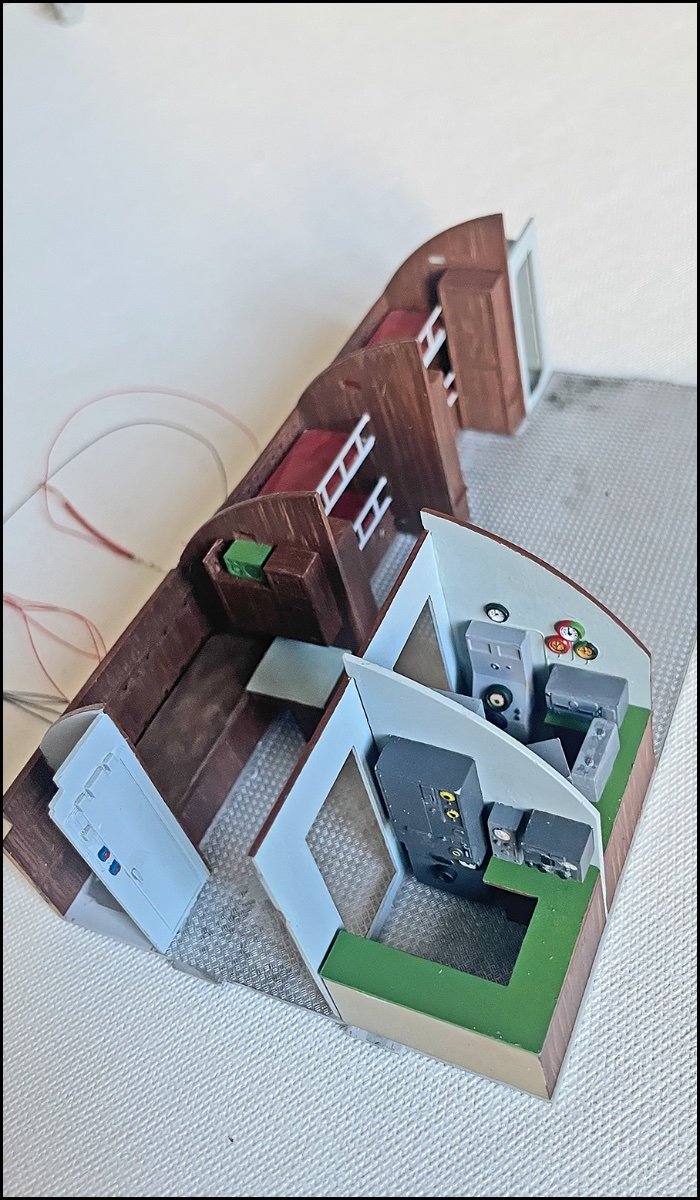
CENTRAL CONTROL ROOM Not much but something. Let's call this "weathering day#1" 😀 But before that I painted a few more parts ... with a slightly poor result ... When I took off the first masking tapes, I noticed that I had painted the parts with the wrong paint. Too dark gray. 😬 So lets tape it again... a little extra detail I'm not quite sure what I'm doing, but so far it looks good. I only use Vallejo "Negro Carbon" pigment, black paint and lots of water. And here are a few pictures of the result ... or mostly of the "first day weathering results" I also decided to glue all the parts in place. .


- 63 replies
-
- 12
-
-
-
kustumize reacted to a post in a topic:
U-552 by kustumize - Trumpeter - 1/48 - PLASTIC - U-Boat
-
kustumize reacted to a post in a topic:
U-552 by kustumize - Trumpeter - 1/48 - PLASTIC - U-Boat
-
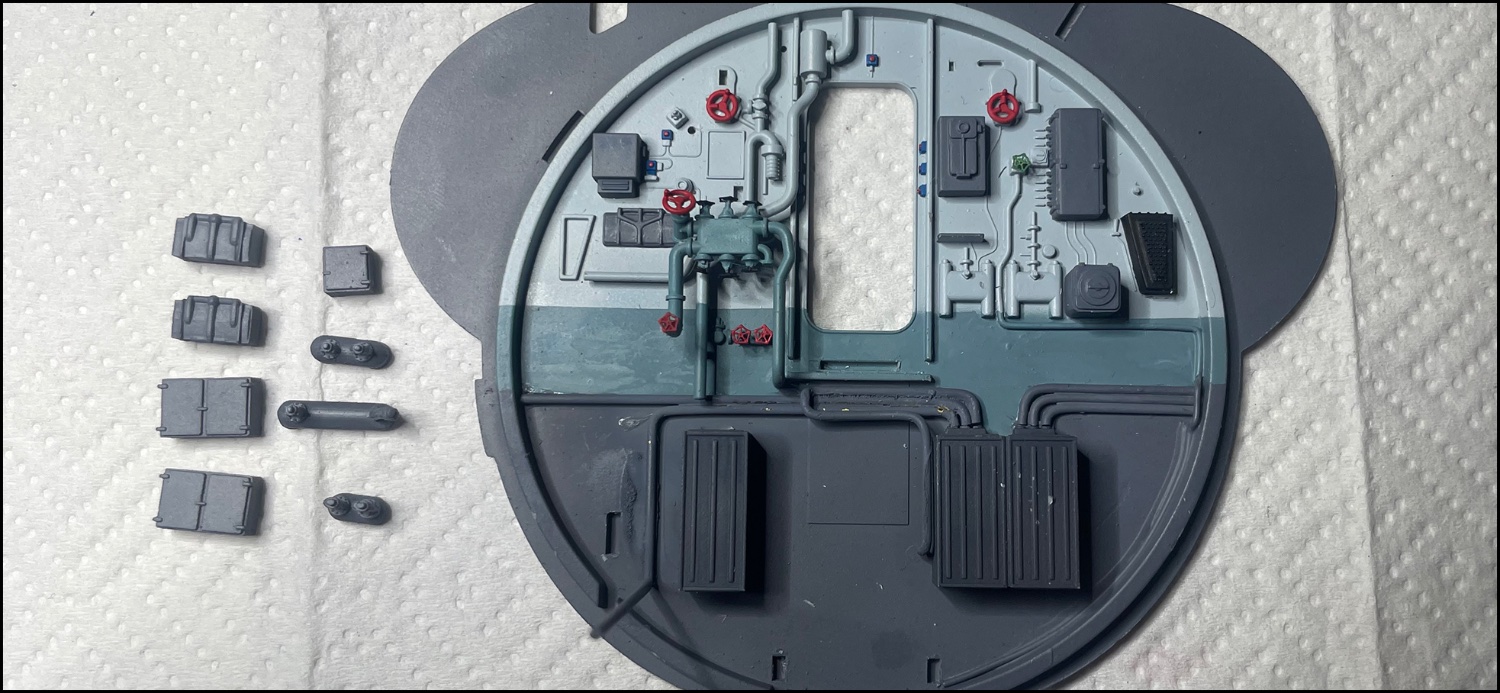
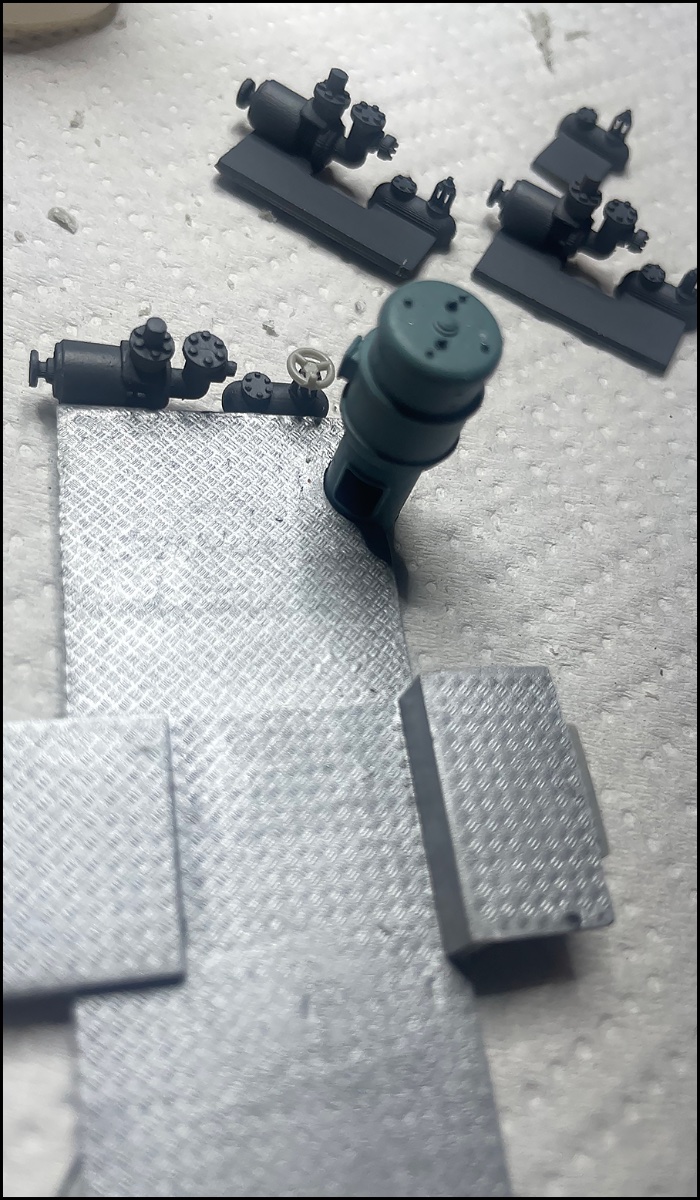
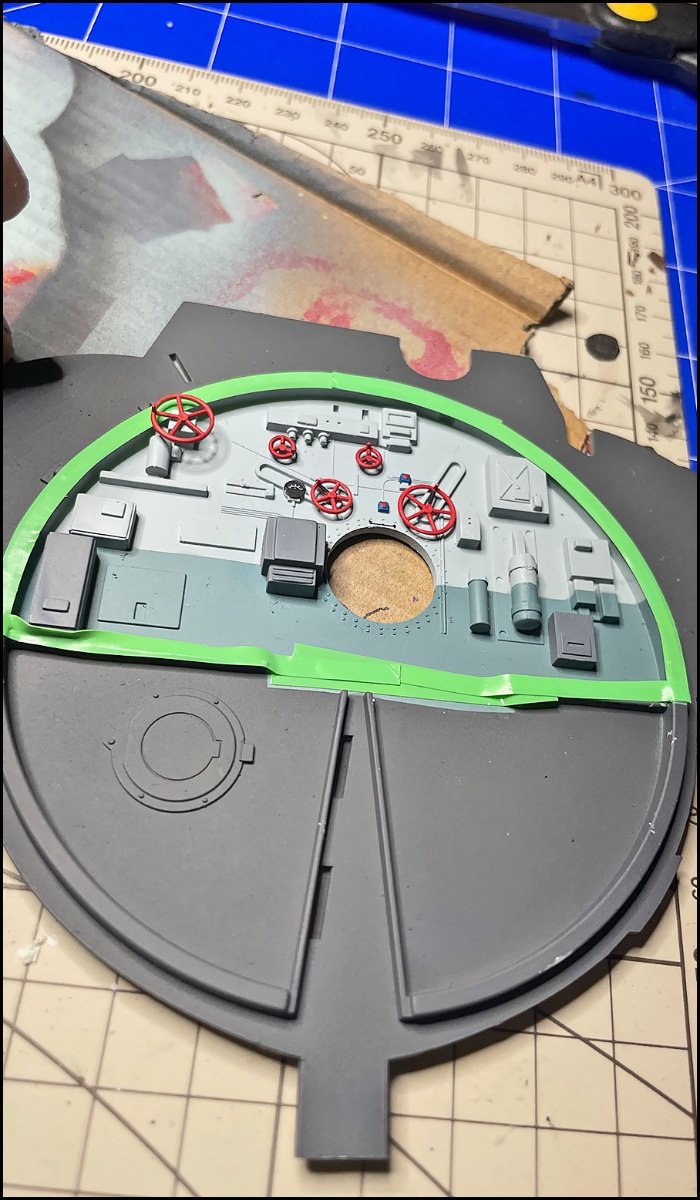
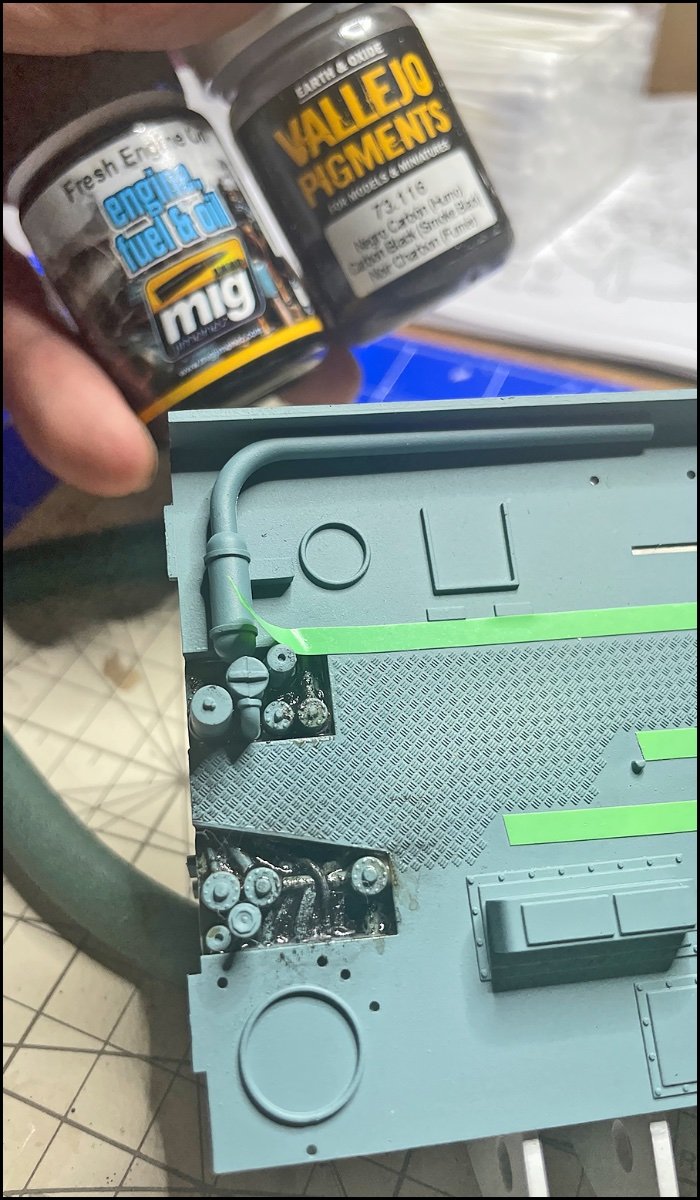
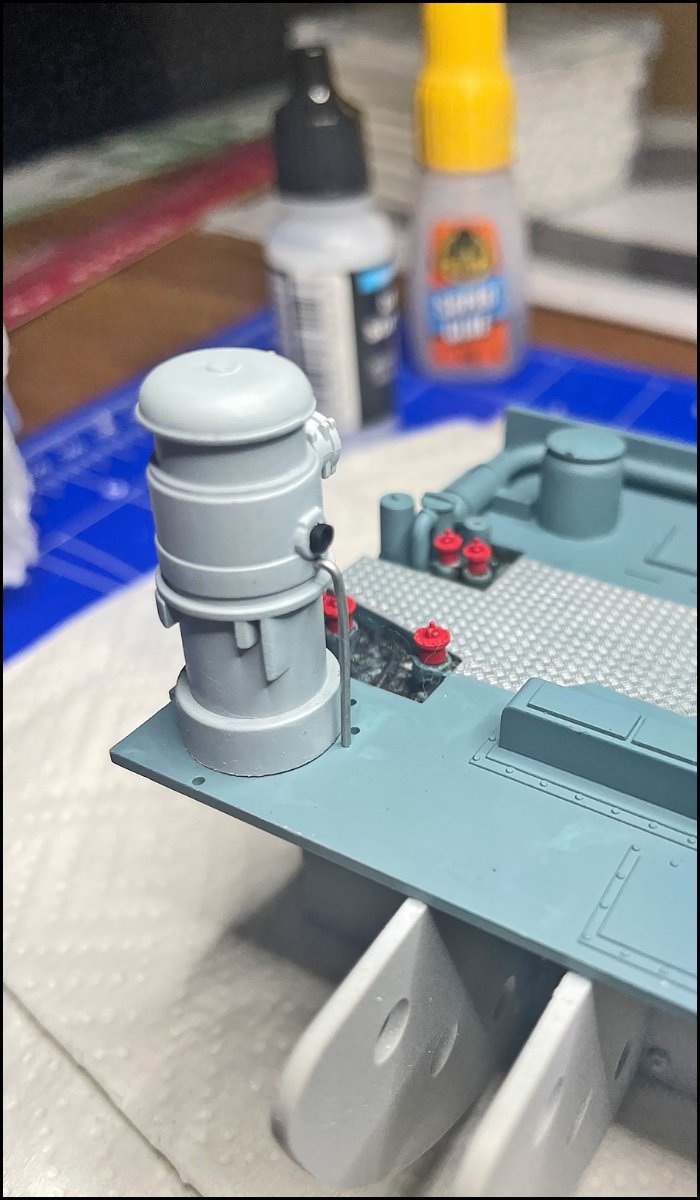
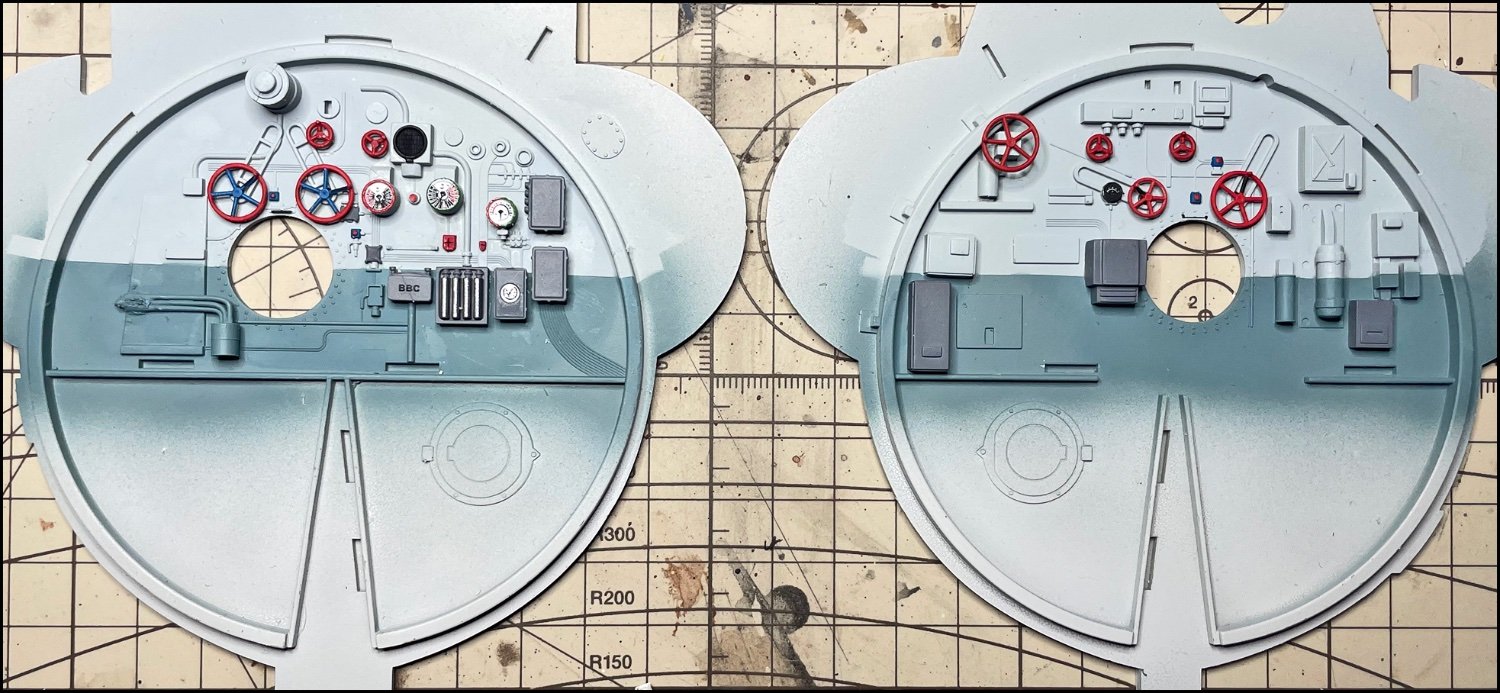
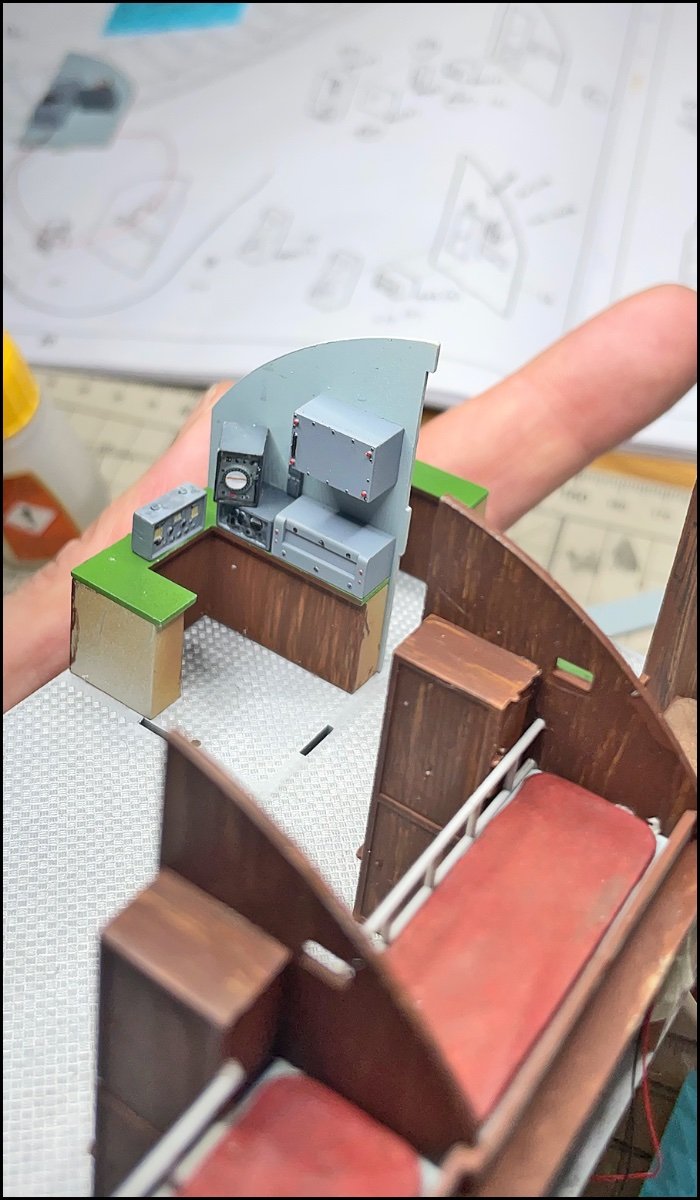
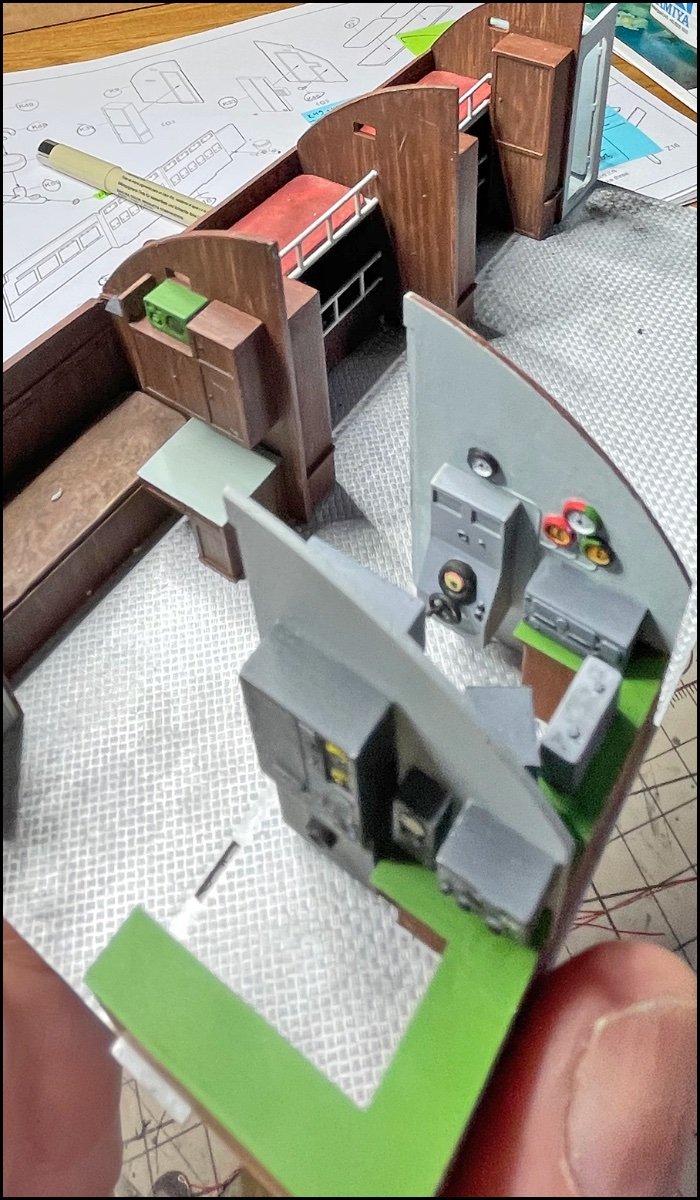
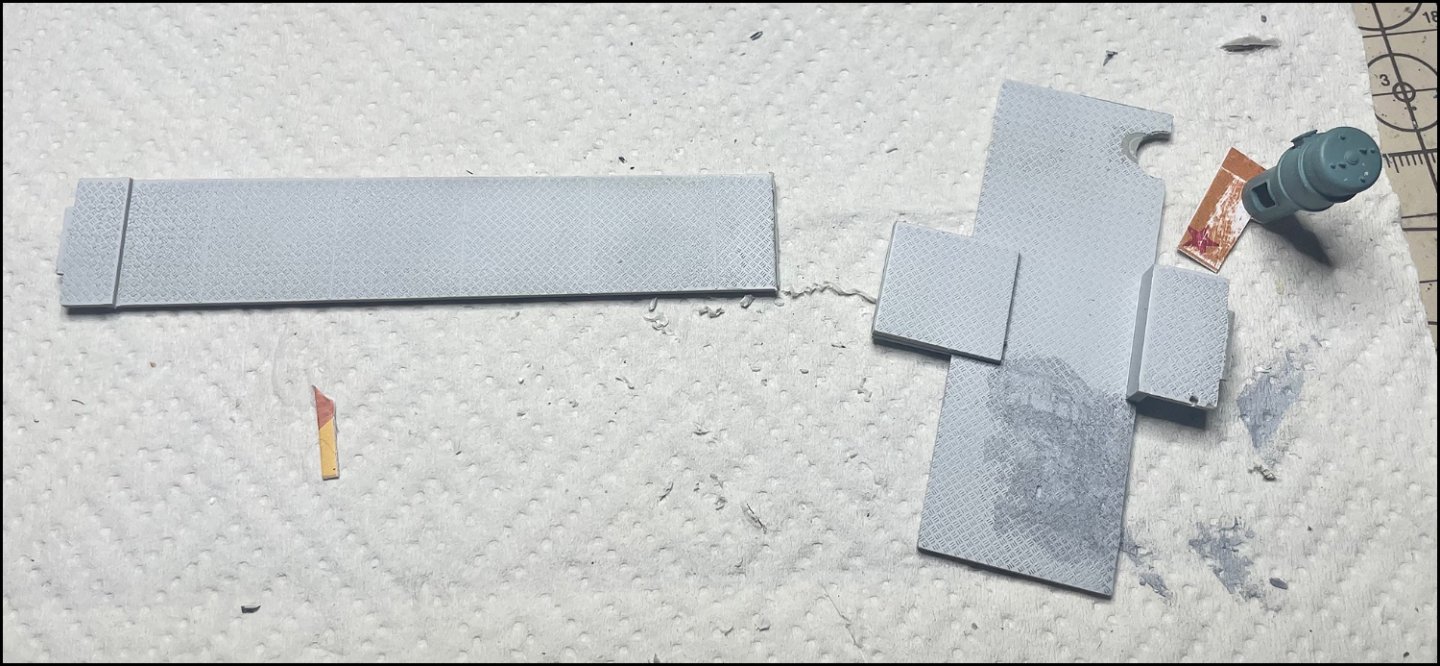
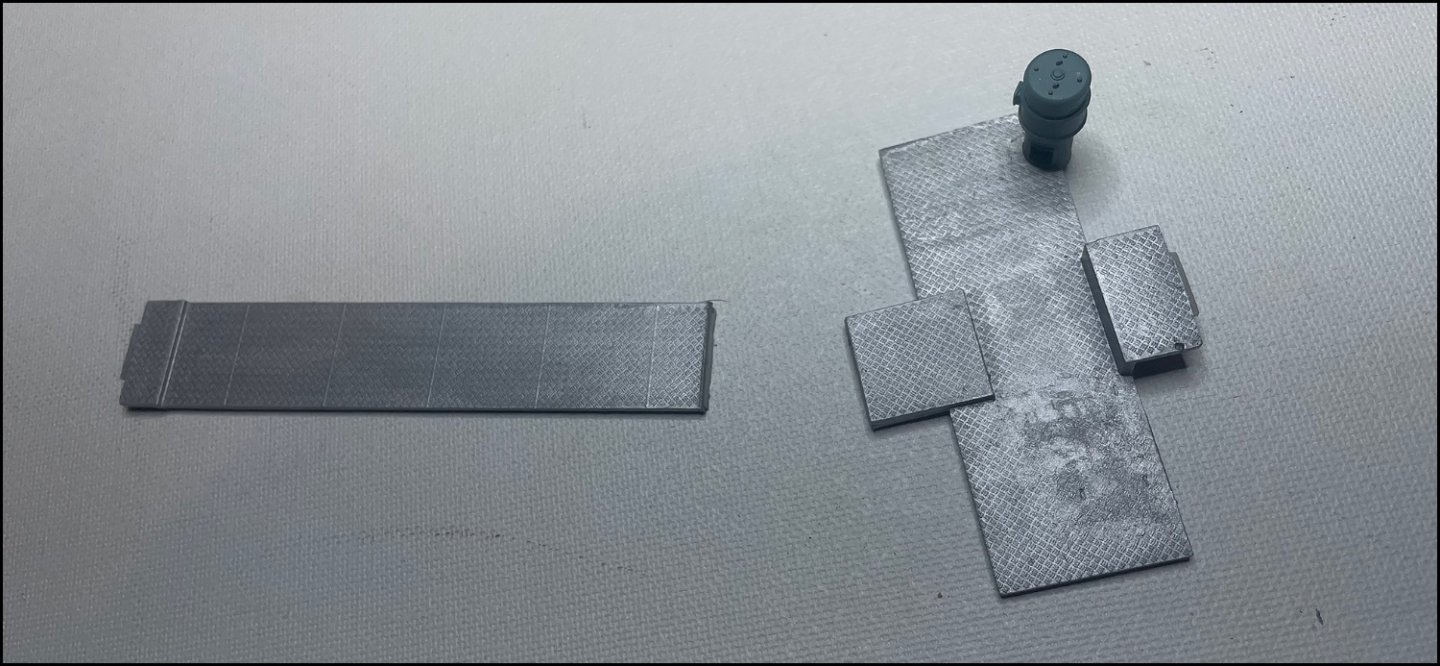
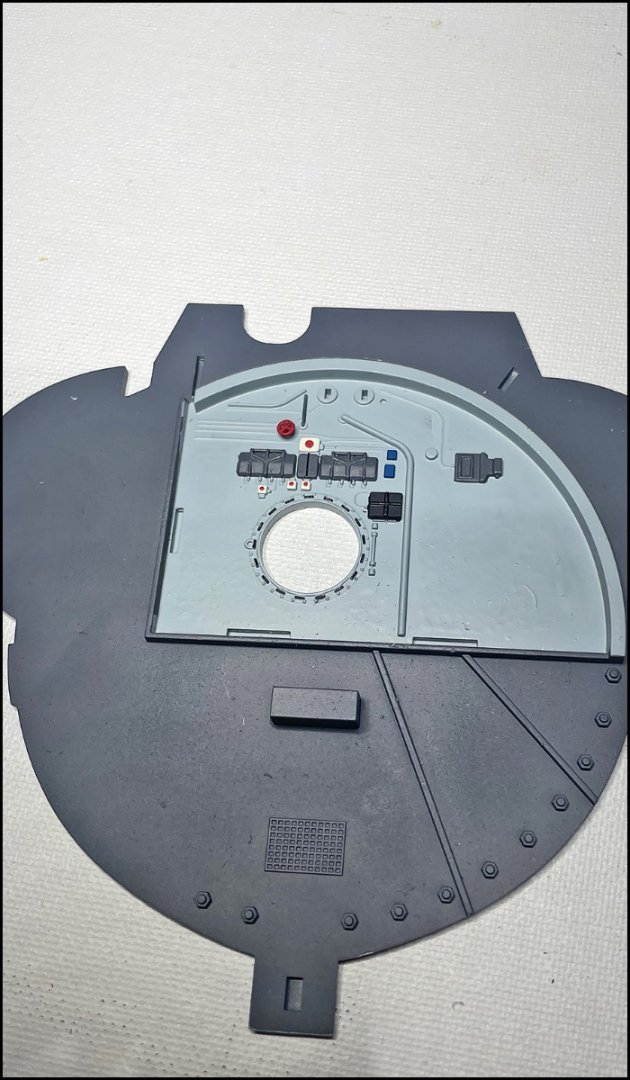
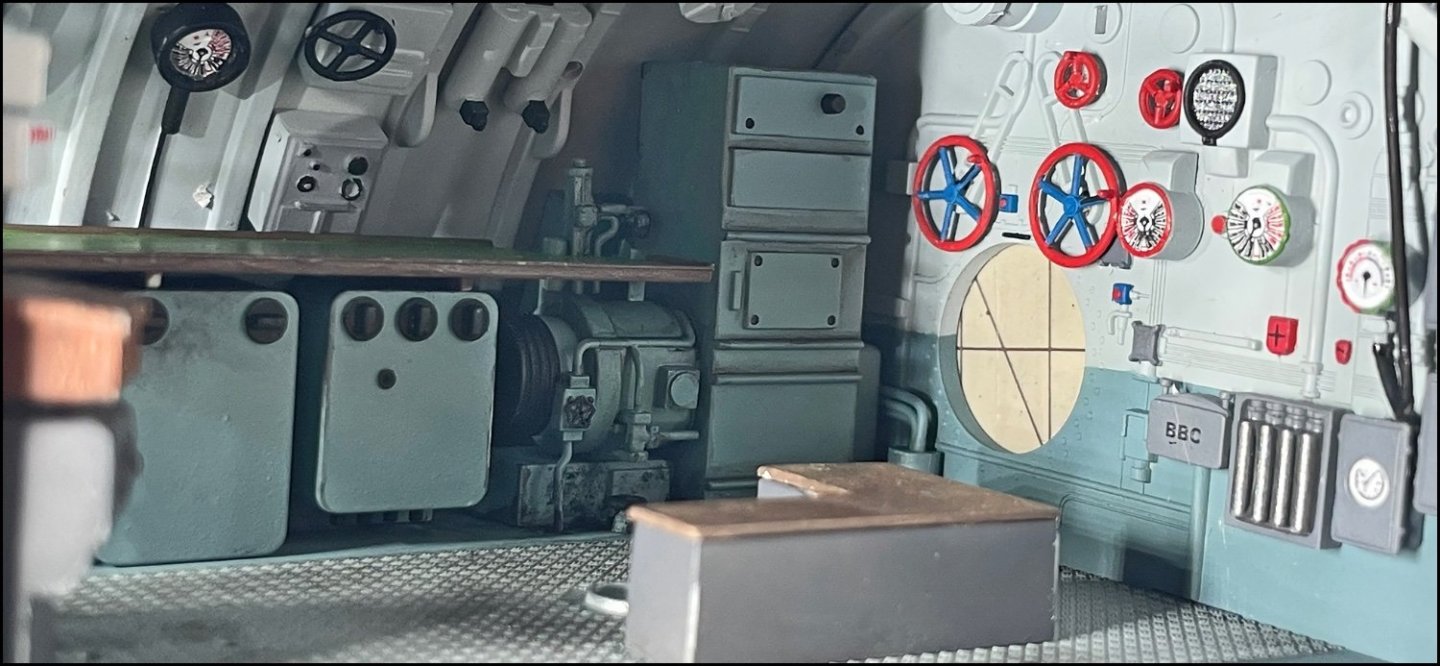
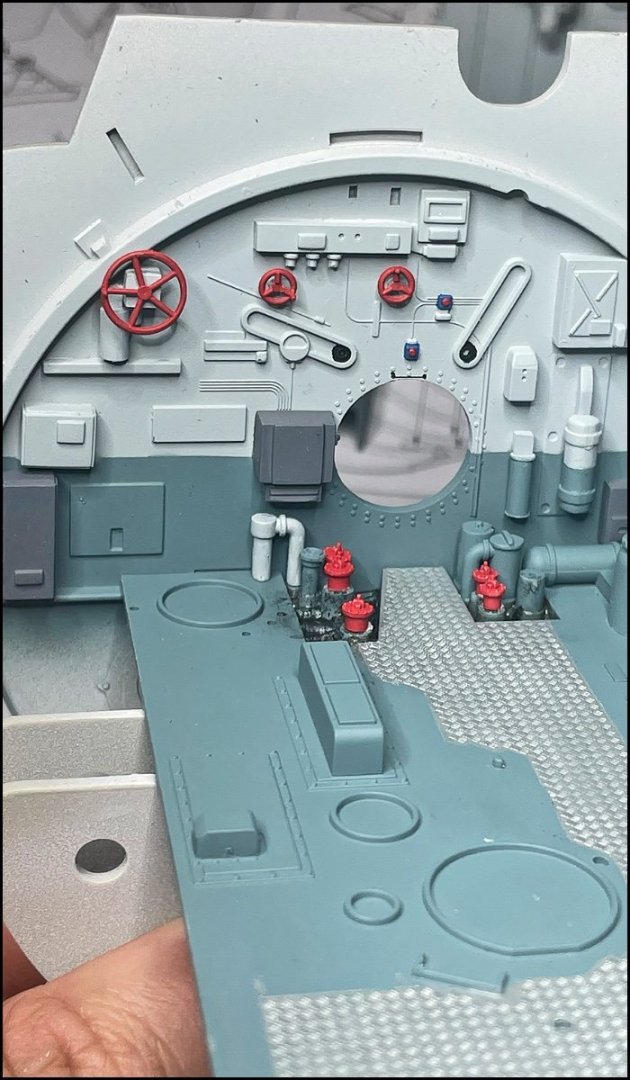
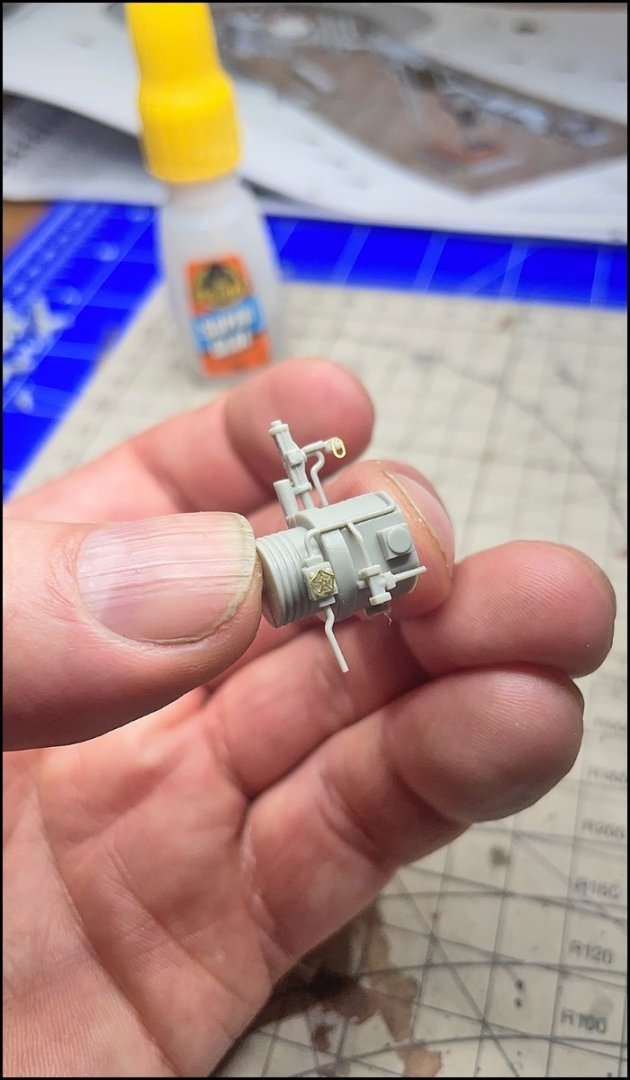
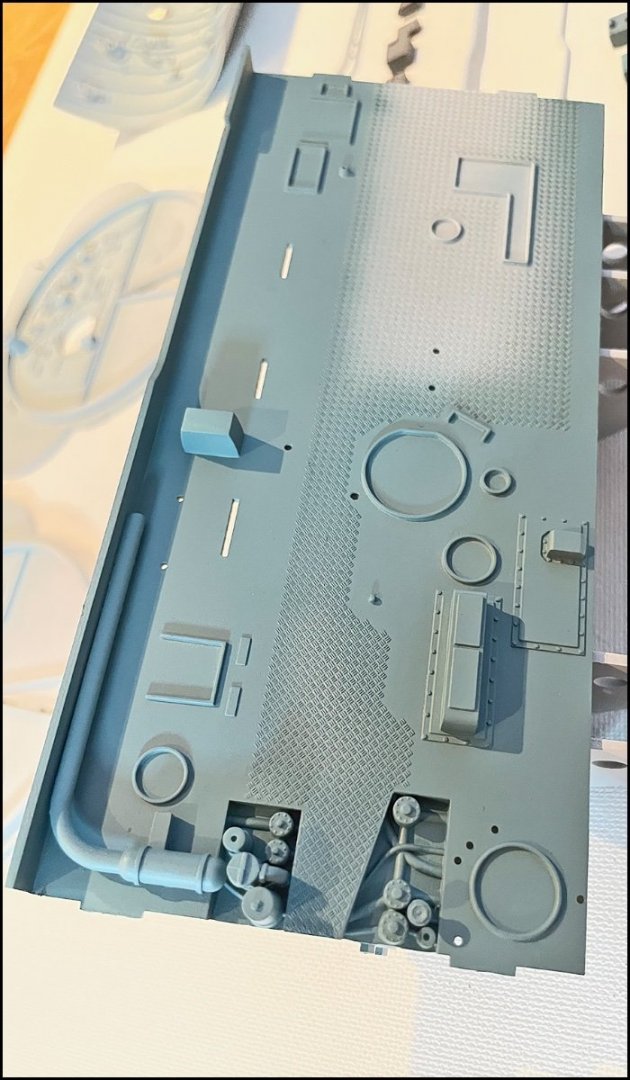
CENTRAL CONTROL ROOM Something from this week. Mostly painting and details. More details and paintings. I drilled and engraved holes for the leds. I also made a small modified for the right wall machine. Pipes. Using K&S Alum Rod 1/32 The bottom is painted blue. Wallejo 904-Blue Gray. A little dirt and oil Just testing. the diamond plate is painted Tamiyan Flat Aluminum (XF-16) Roof assembly I got excited to do more details. Let's see what else I came up with .... Same K&S Alum Rod 1/32 More paint, details and decals Just looked what it looks like without weathering, not glued. Now I have to think what extra details I want here. Maps, table light perhaps, more tanks and valves..... The "drivers" bench I made by cutting it from my credit card (Old one 😅)


- 63 replies
-
- 11
-
-
-
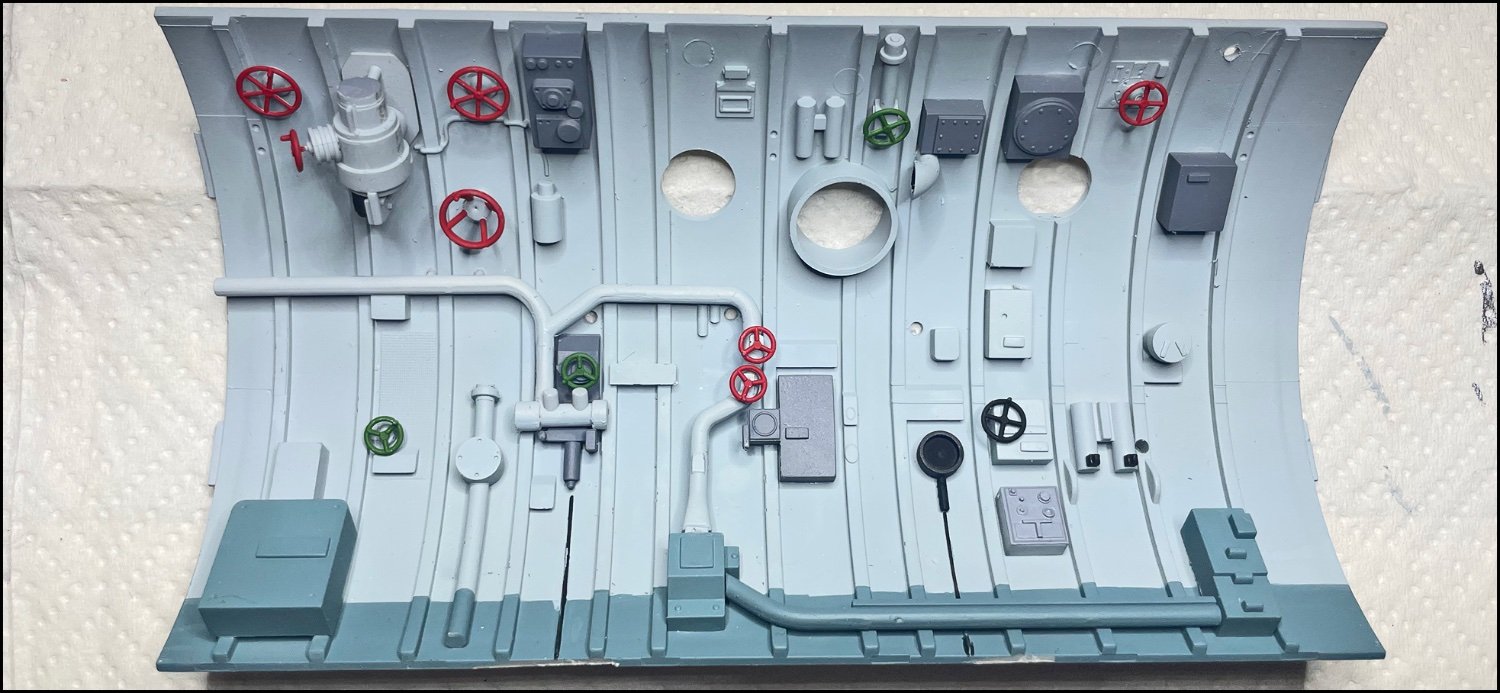
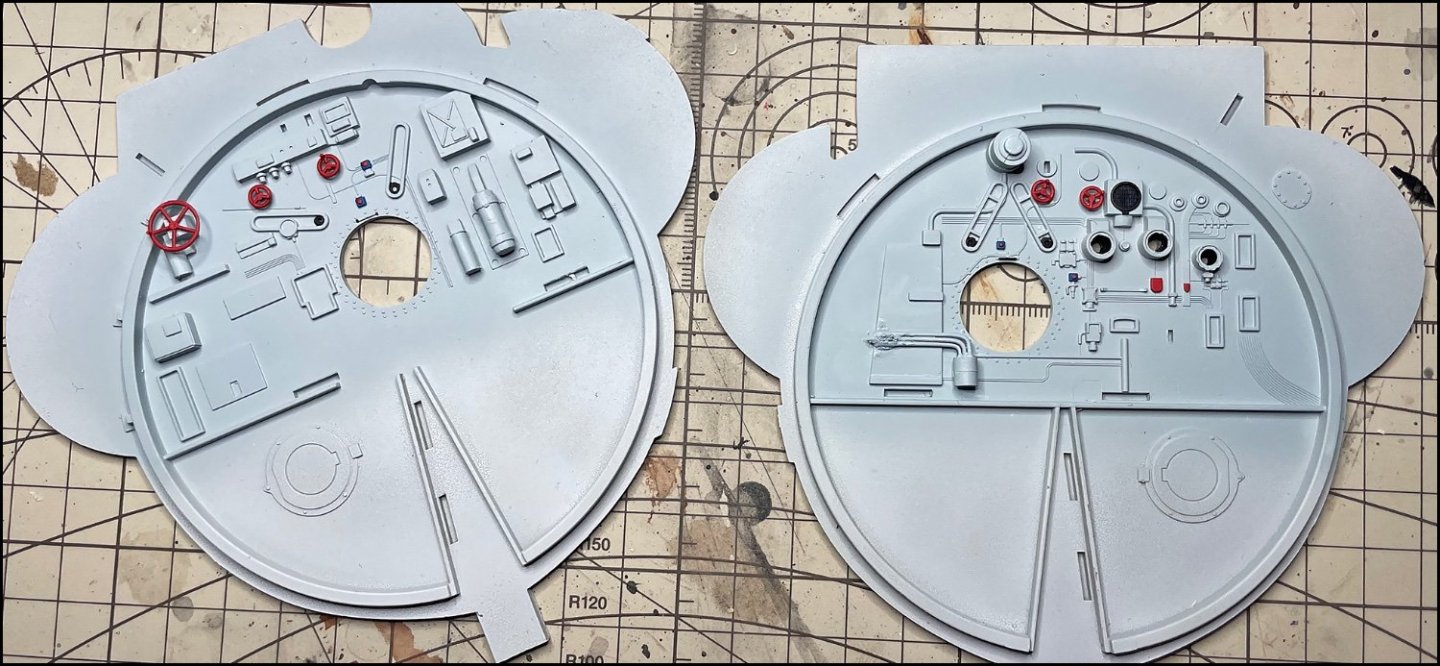
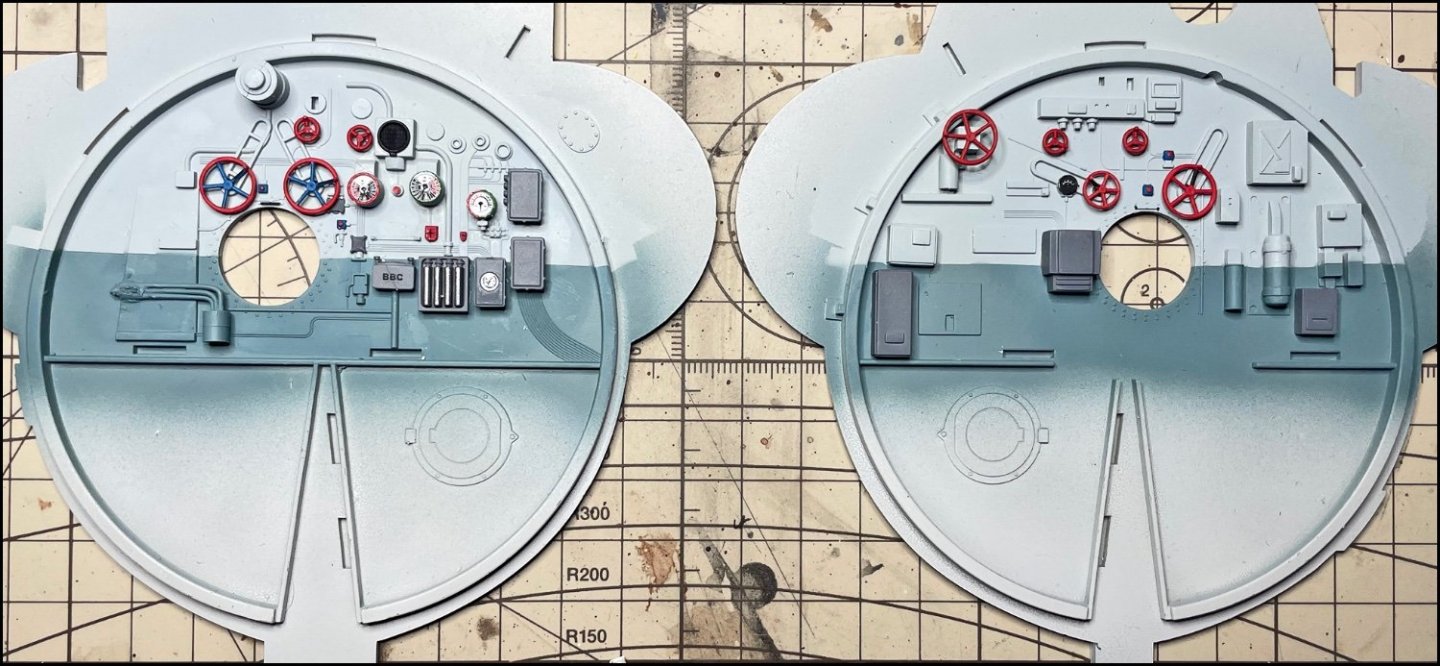
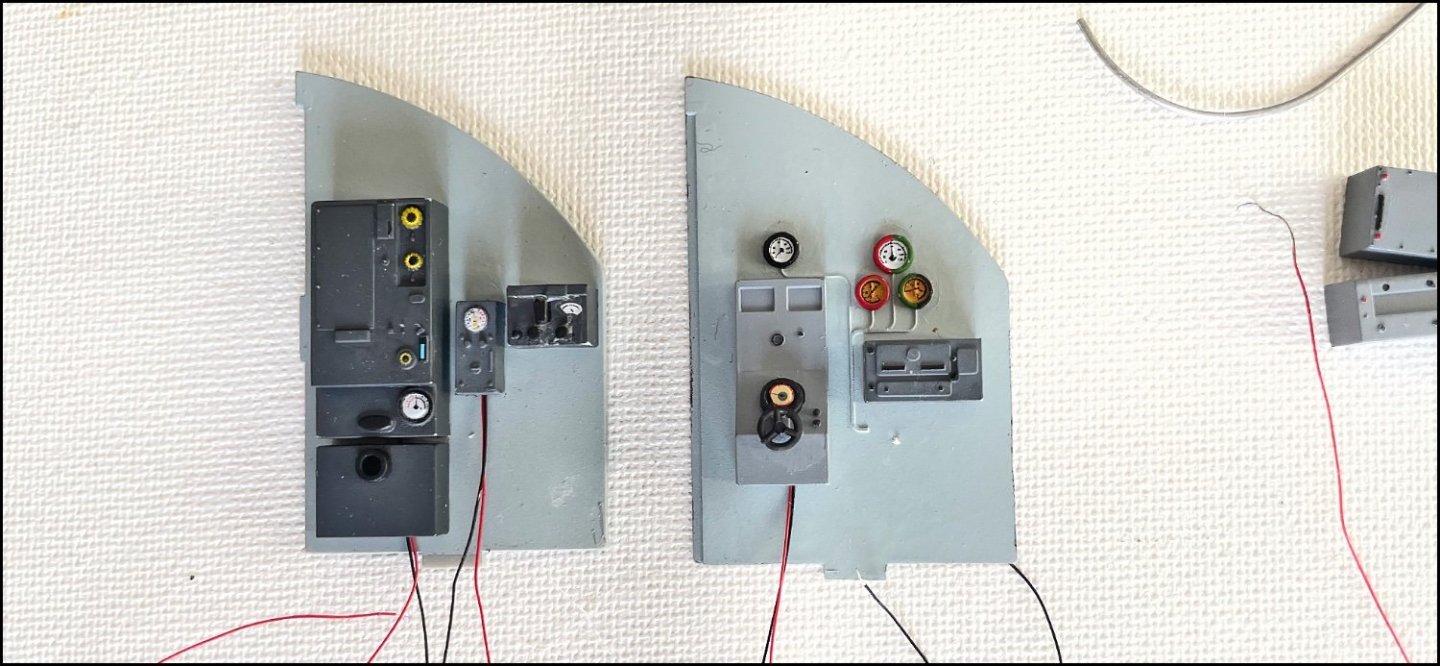
CENTRAL CONTROL ROOM I started finding parts and painting of the Central Control room a couple of days ago. Here are pictures at today from the first round of Airbrushing after primer. I calculated that the parts would be total about 170. I glued some of them in place before painting. It would be great if there were a lot of PE parts also inside First round after primer..... I had two choices for the color blue. I tried Wallejo Model Air 257 at first but it was too light. Eventually I painted in darker blue; Wallejo 904-Blue Gray.

- 63 replies
-
- 10
-
-
-
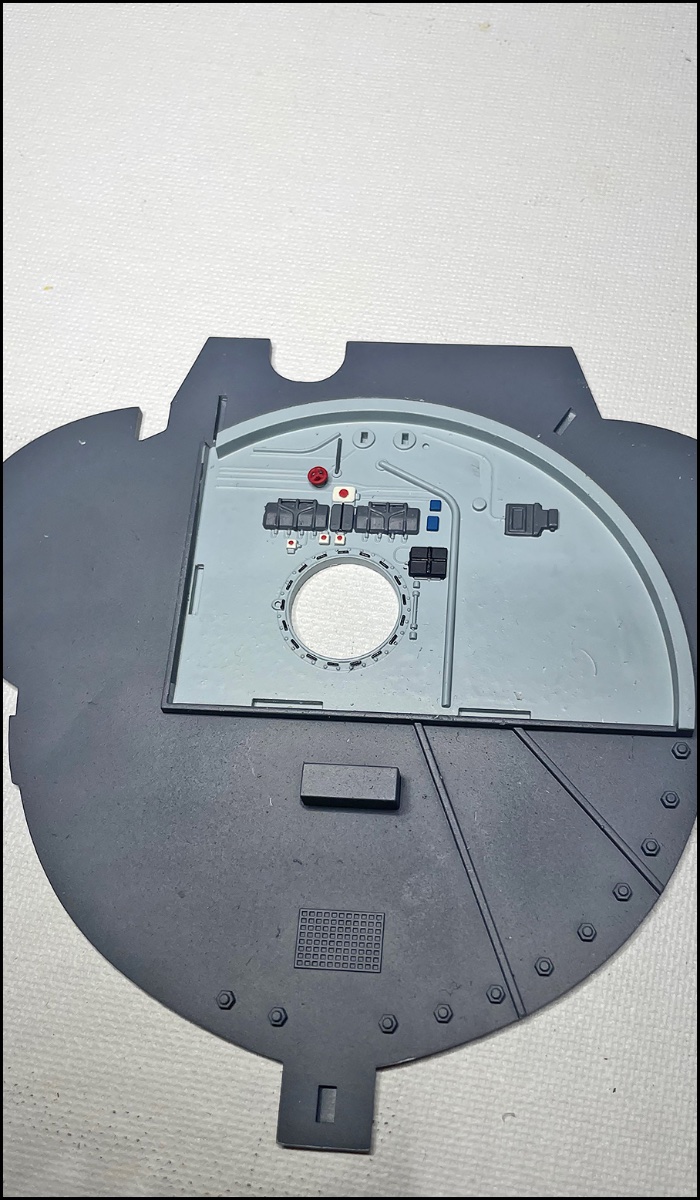
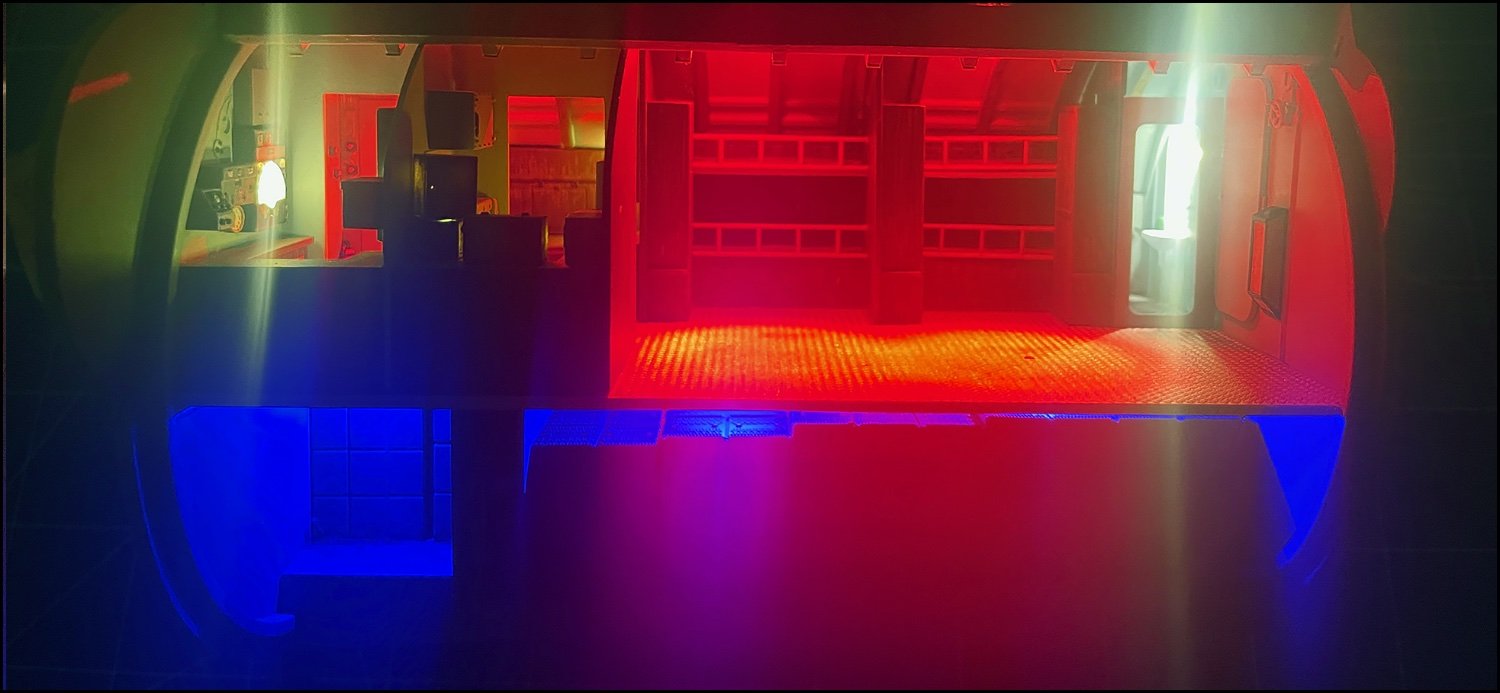
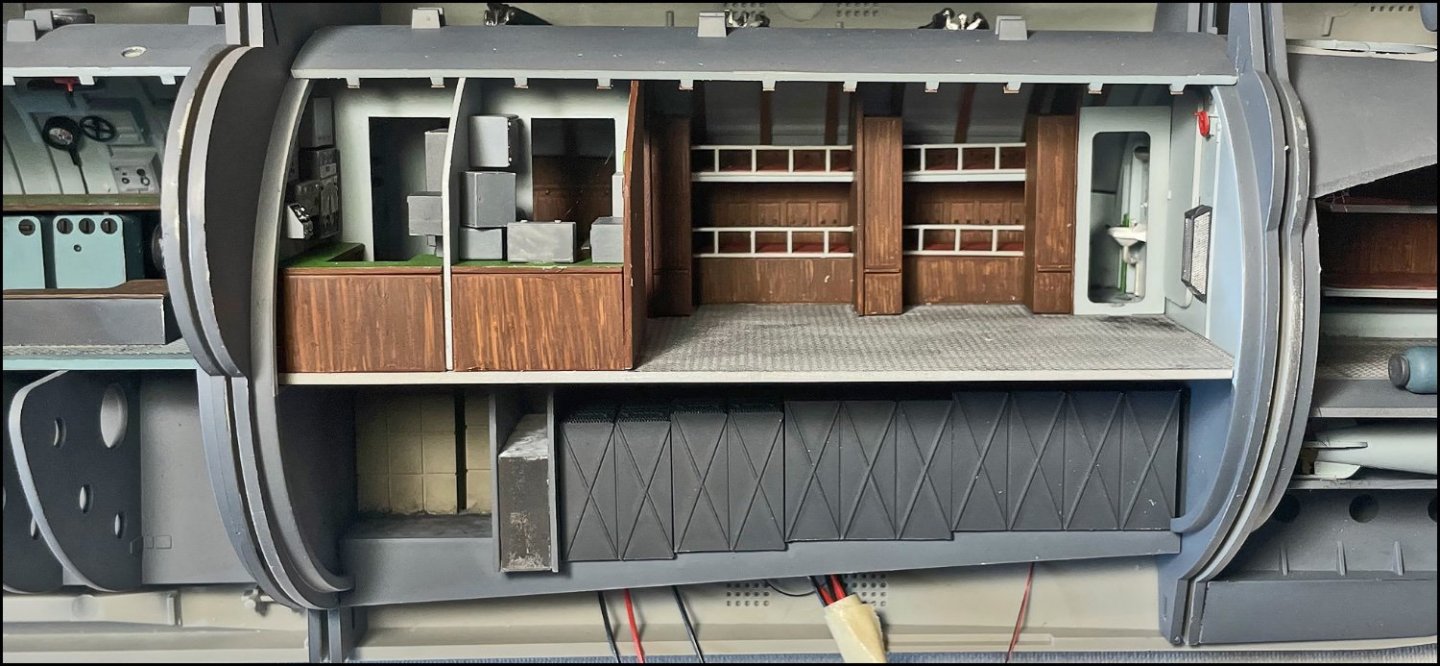
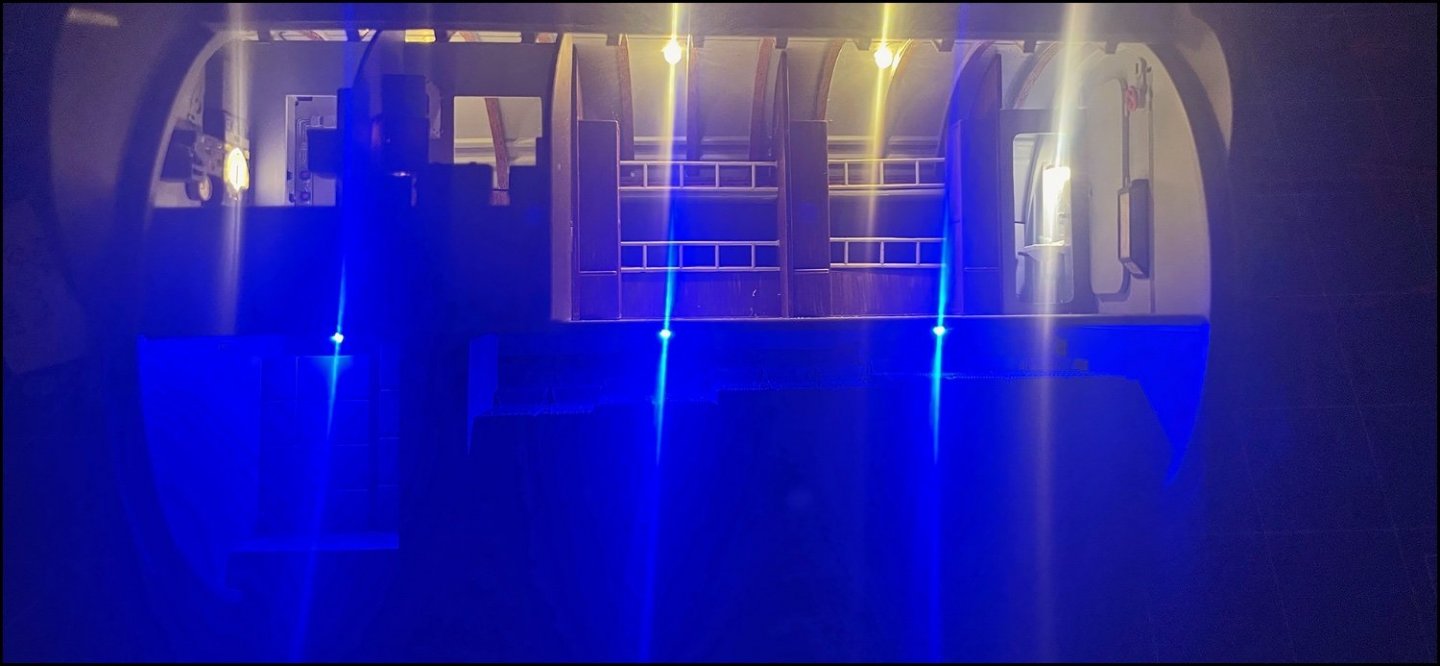
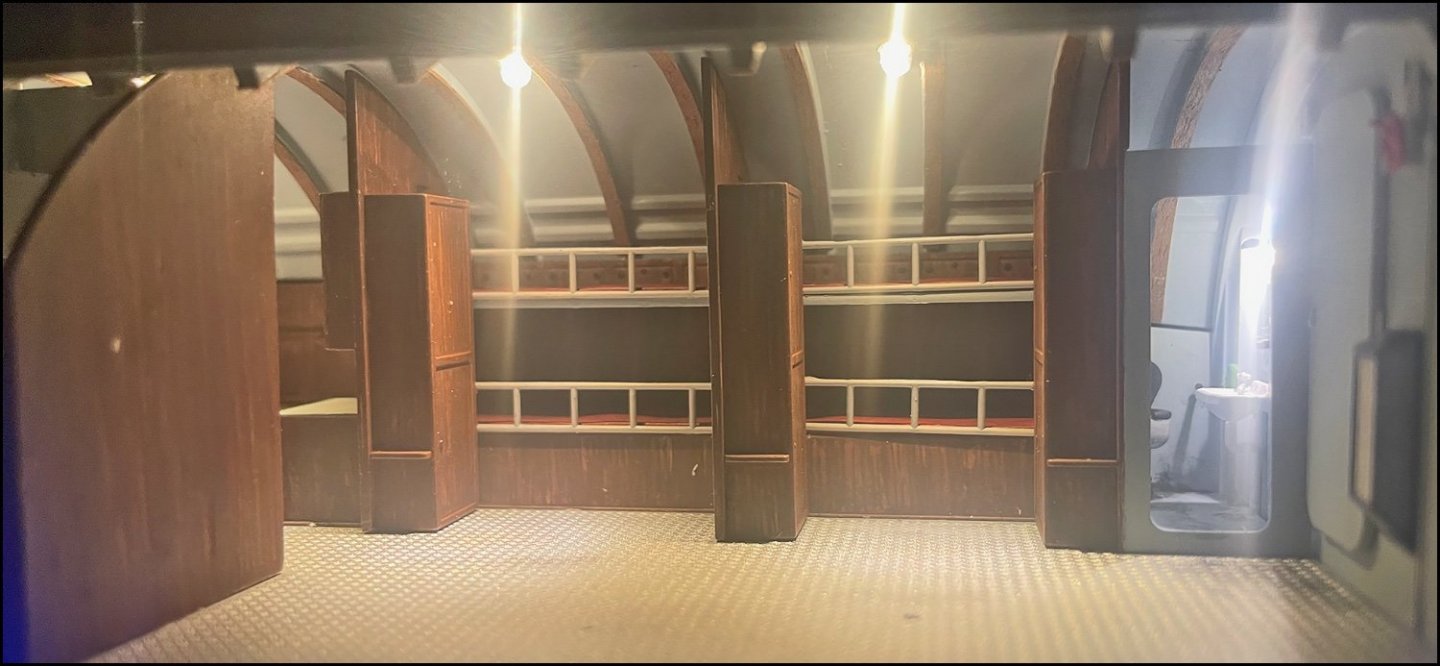
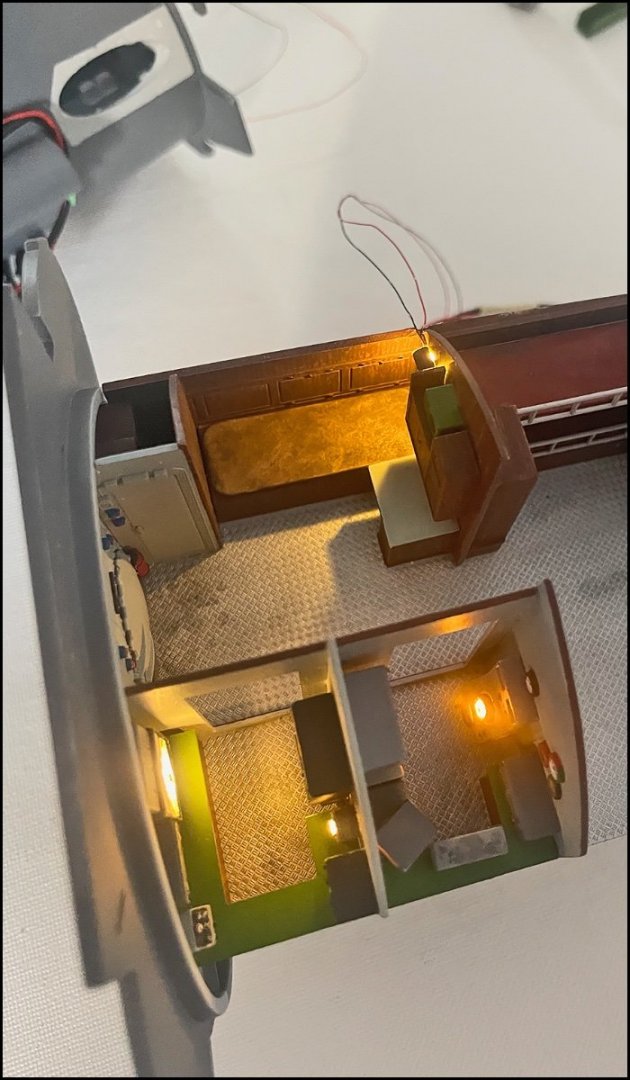
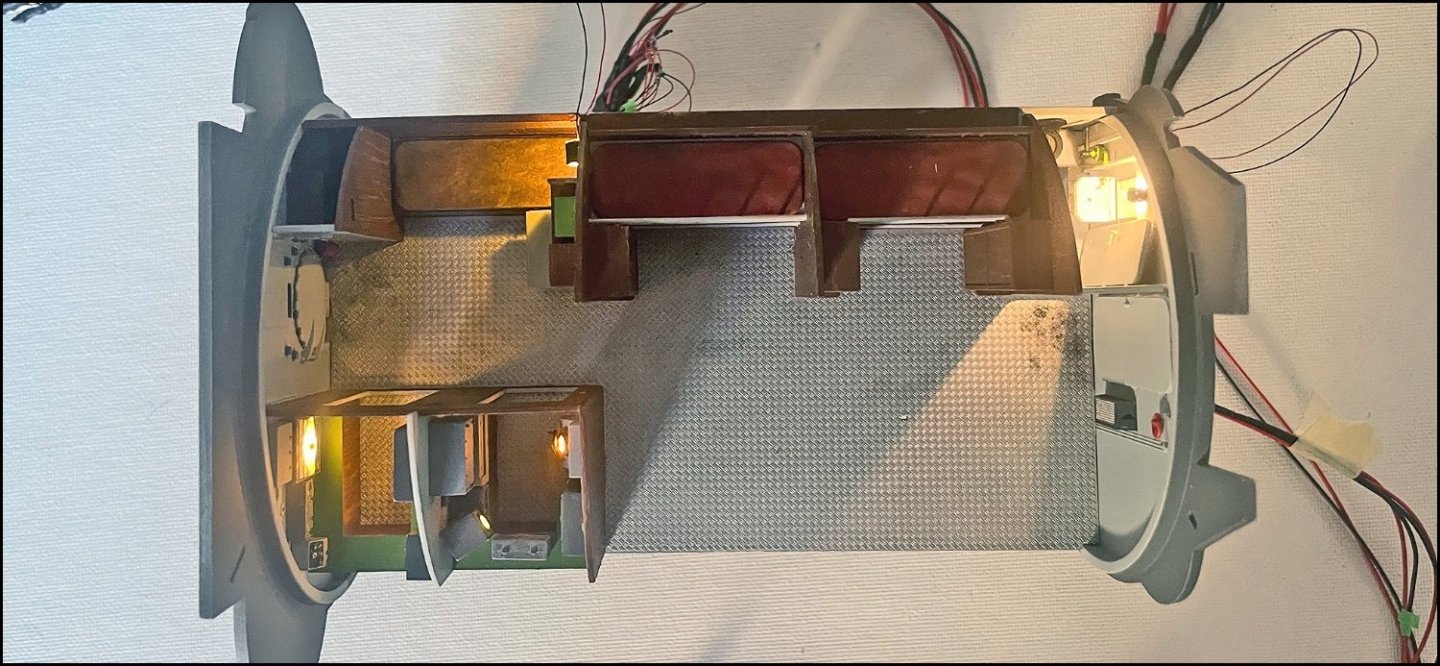
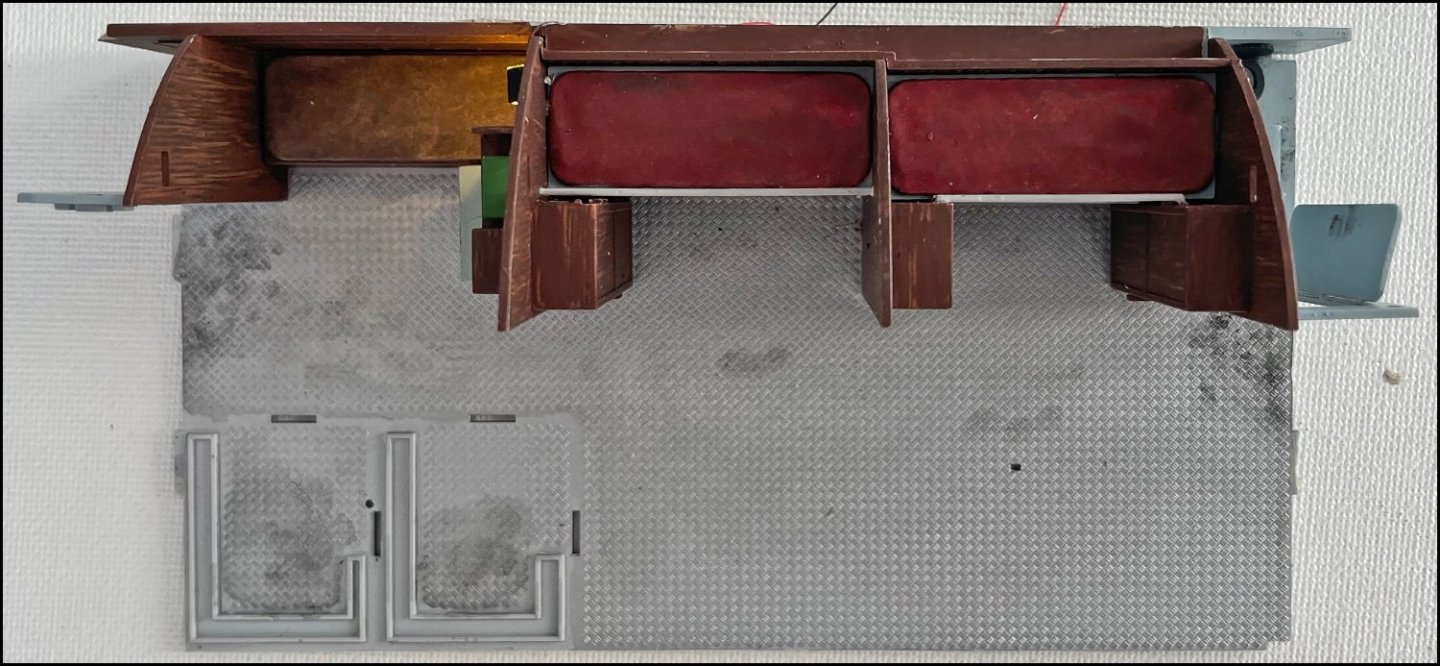
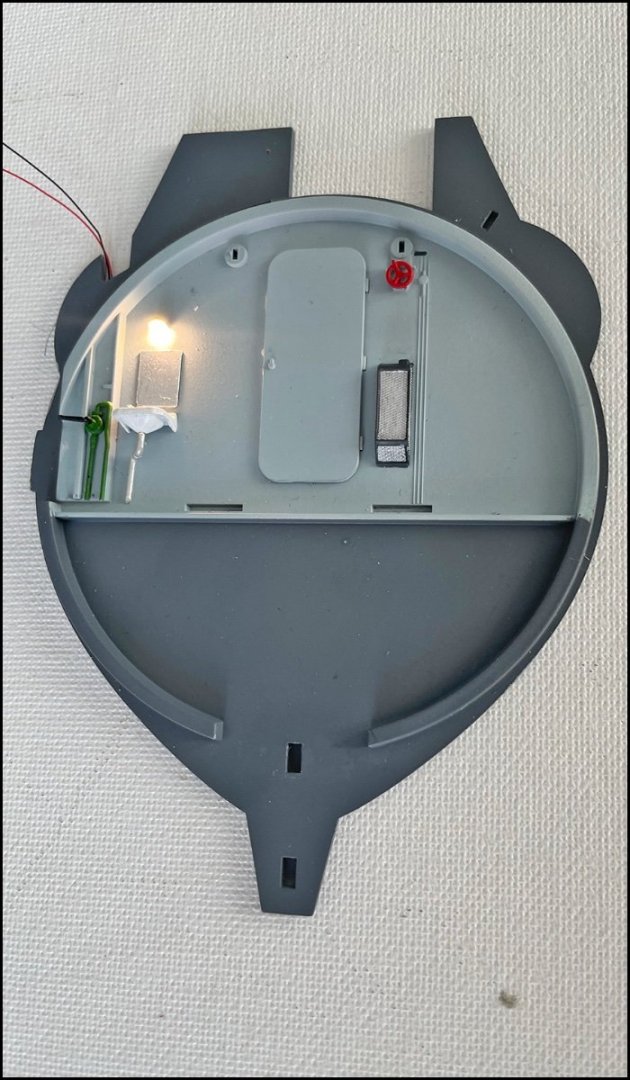
FRONT SOLDIERS LIVING ROOM A small photoshoot. There are still a lot of details that I was thinking of adding to every room,so for example yet I haven't glued the roof. Not the most beautiful, but its work. 3 red/white leds on roof, 3 blue leds under deck. WC- light and 5 micro led inside sonar and transmeter machines.....


-
FRONT SOLDIERS LIVING ROOM Making transmitter receiver- and sonar -rooms and some wiring. Under the deck I assembly 3 blue leds


- 63 replies
-
- 11
-
-

-
kustumize reacted to a post in a topic:
U-552 by kustumize - Trumpeter - 1/48 - PLASTIC - U-Boat
-
kustumize reacted to a post in a topic:
U-552 by kustumize - Trumpeter - 1/48 - PLASTIC - U-Boat
-
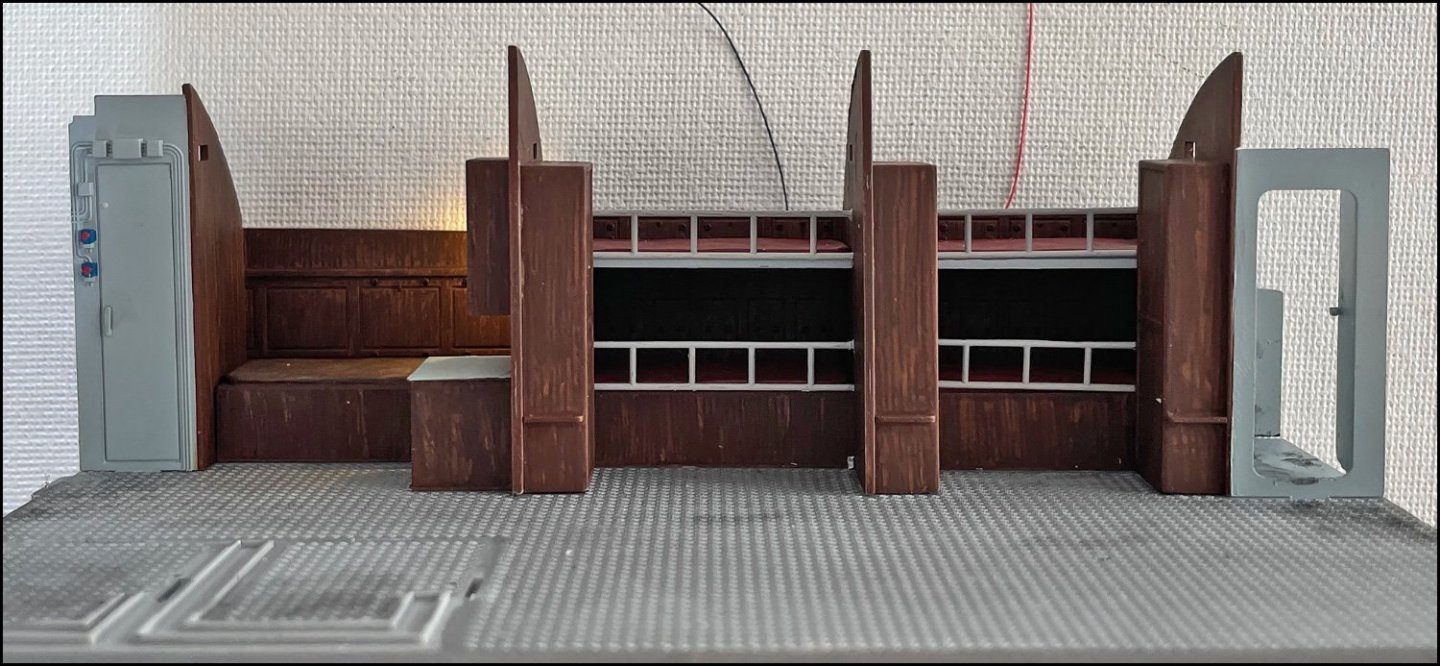
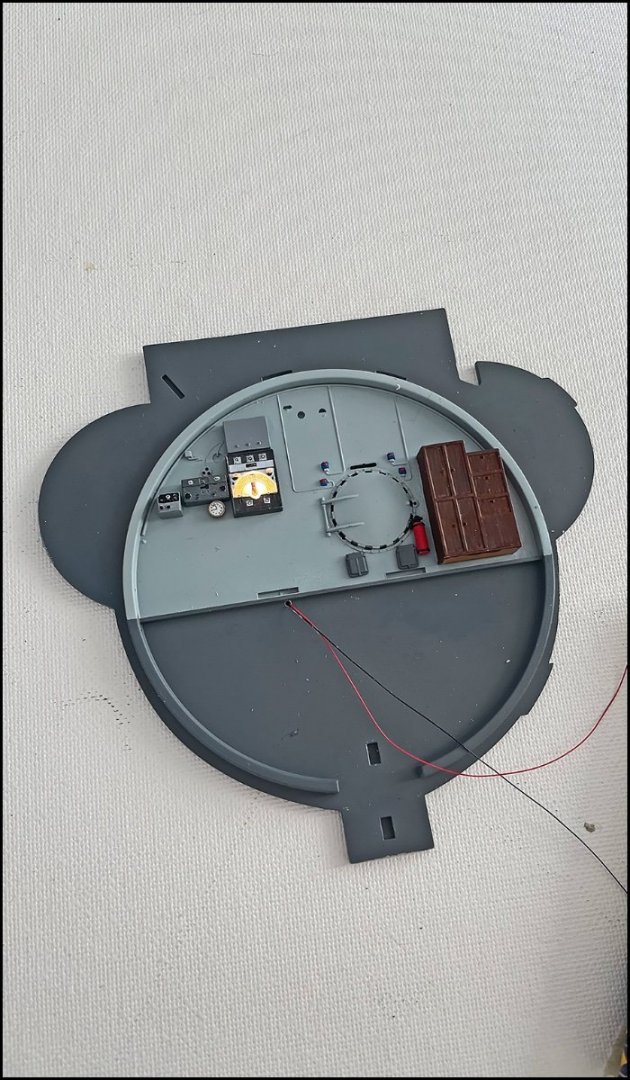
FRONT SOLDIERS LIVING ROOM A few more stuff from this week .... The sleeping quarters are now ready. I was still thinking about the curtain in front of the captain's room. Transmitter and sonar rooms are also under construction. I put an unfinished picture of them too I also wanted a light in the bathroom. This was my solution to it. I also made a mirror over the sink. Transmitter and sonar rooms in process... Gluing decals has been a real pain. Luckily, Vallejos label softener has helped in gluing. Still need a final finish

-
FRONT SOLDIERS LIVING ROOM Working with batteries.... 3D printed, washed and painted extra batteries ready for installation After painting i noticed there is again an error in 3d printing... Almost at the finish. Some details still in mind Making water tank. 3d printed rectangle and glue. I printed on a small whale inside the water tank, but it is too invisible 😀


-
kustumize reacted to a post in a topic:
U-552 by kustumize - Trumpeter - 1/48 - PLASTIC - U-Boat
-
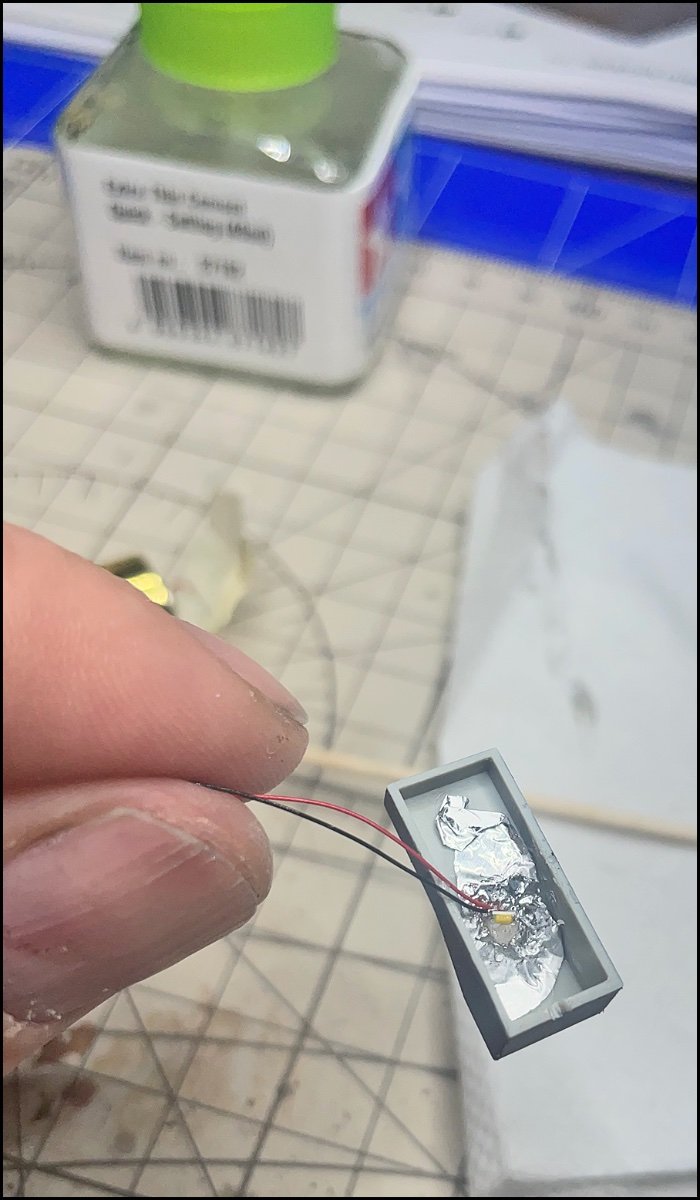
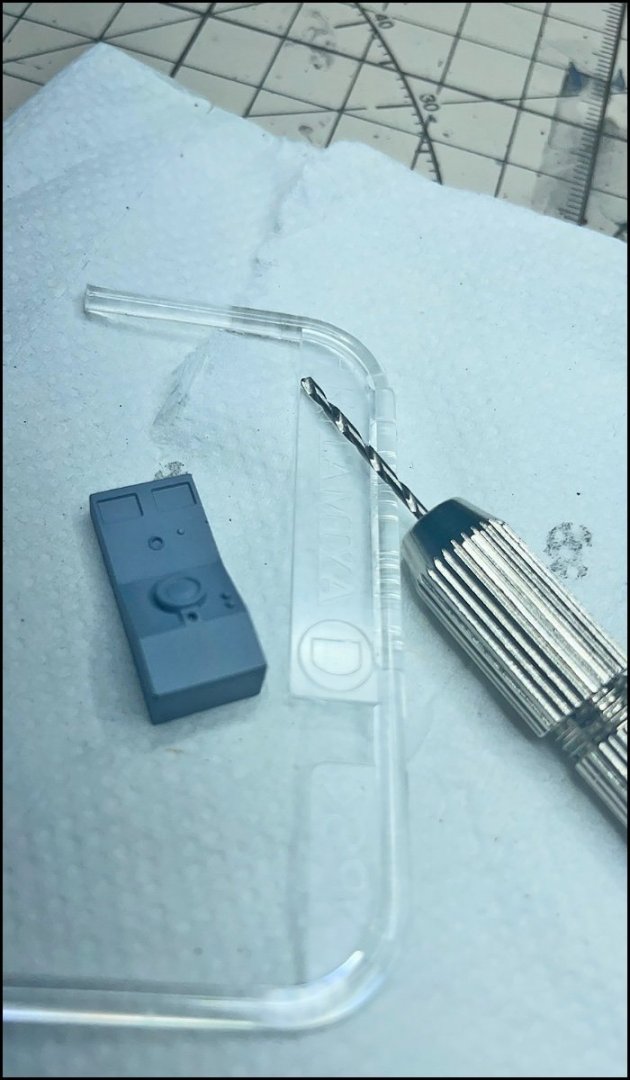
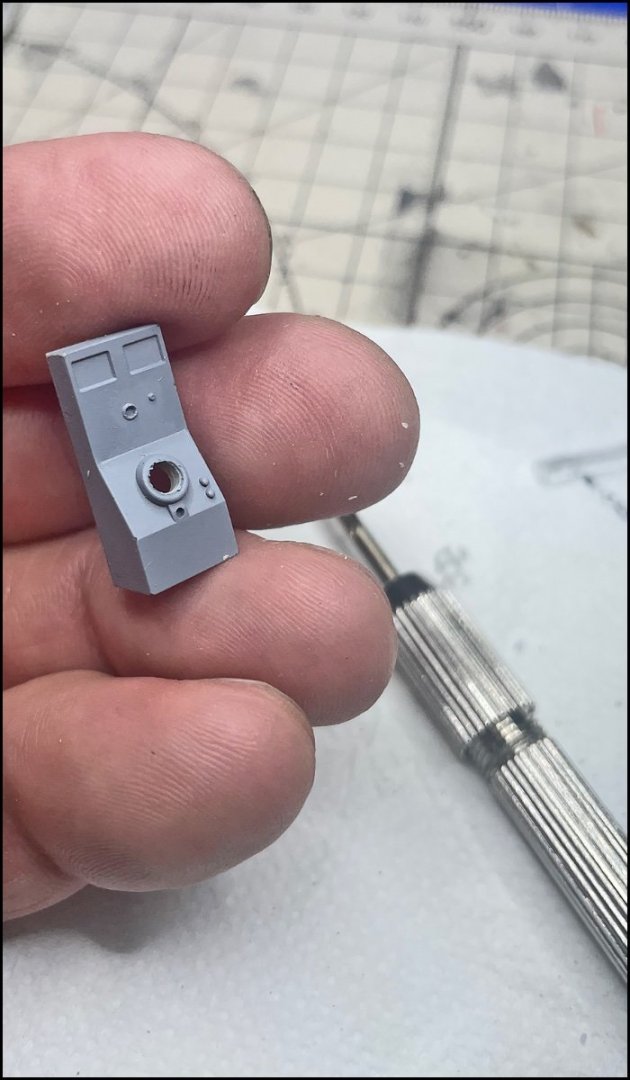
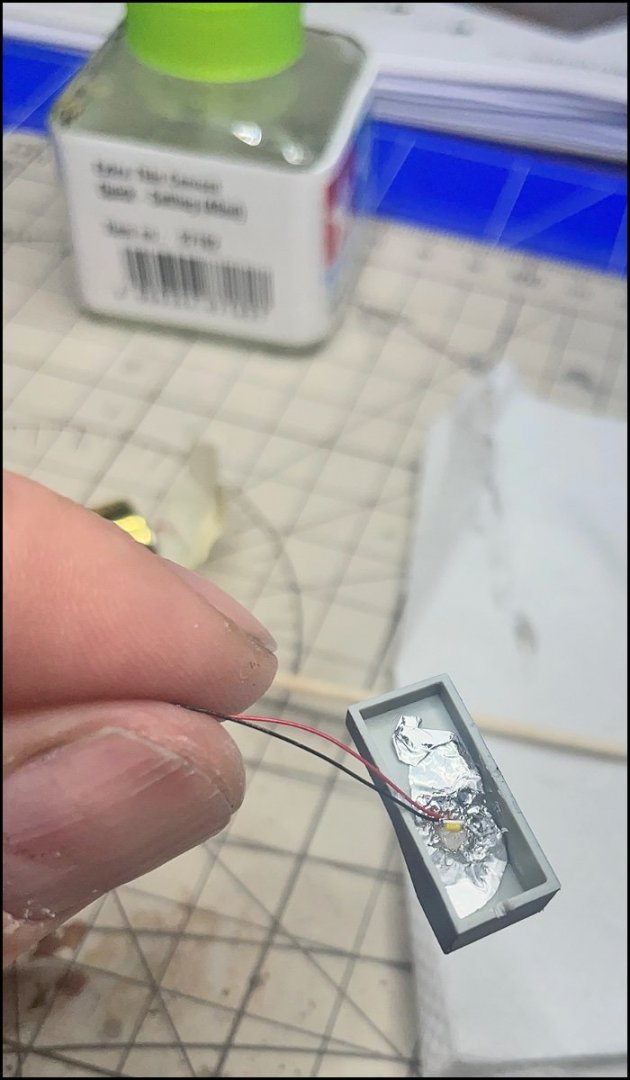
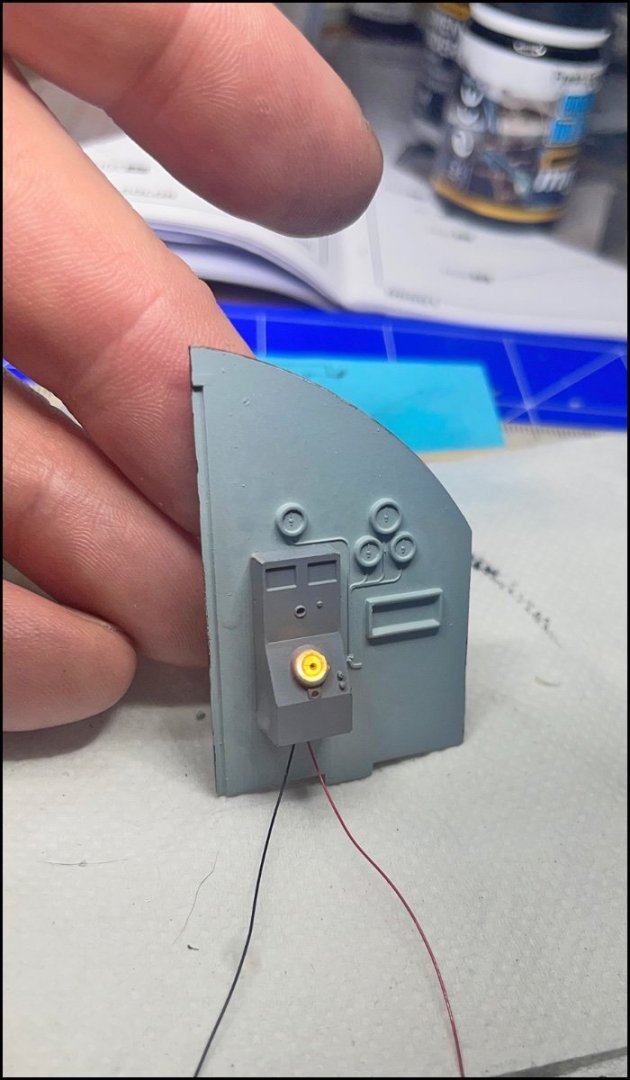
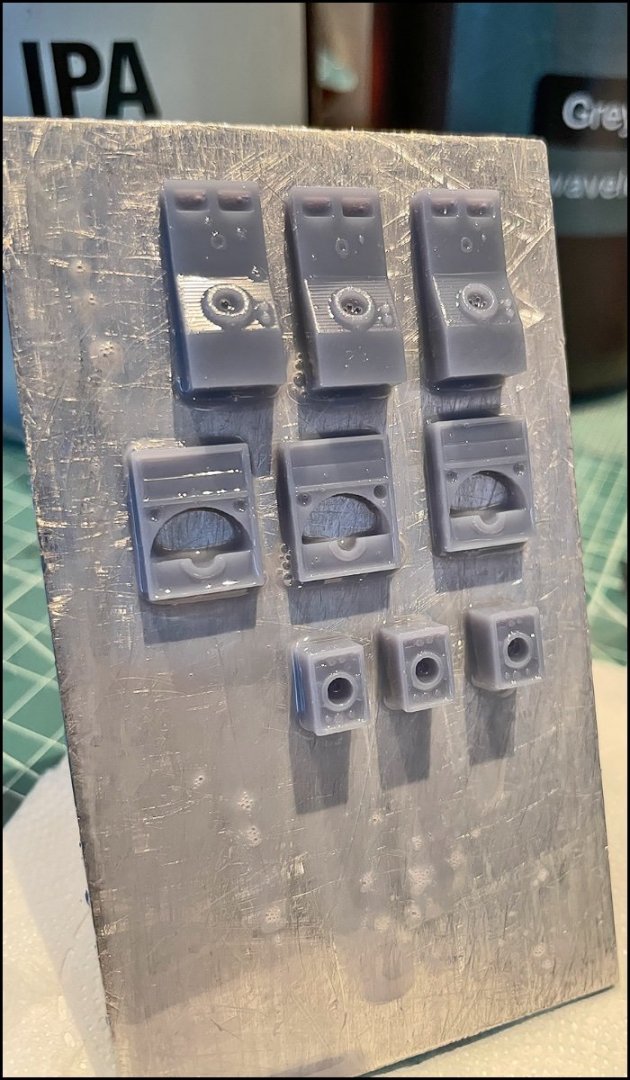
FRONT SOLDIERS LIVING ROOM I decided today to try to do lighting for one of the devices. Here's the result. This part is K2. Primed and painted. I took transparent plastic from another model. I carefully drilling the correct size hole and glue clear plastic tube inside Foil paper around 0402 SMD led It works 😀 I tested to print a few of these machines earlier today, but this is now at least useless
-
FRONT SOLDIERS LIVING ROOM And some pictures of today ... I painted the batteries a couple of days earlier and I designed extra batteries. I also started building the sleeping quarters (the all the parts are finally painted to look like wood). I also make a lamp in the Captains bedroom... I understand that there are six rows of batteries instead of two, so I print some more. First demo versions. Almost the same. Second version and result.... Here we go.... i messed up with radio decal, so it went to the trash. Light is 3D-Printed