-
Posts
182 -
Joined
-
Last visited
About Peter6172

- Birthday 04/22/1961
Profile Information
-
Gender
Male
-
Location
Canberra, Australia
-
Interests
Model Railway, Photography (Landscape and Wildlife)
Recent Profile Visitors
-
 Saburo reacted to a post in a topic:
EURYALUS 1803 by Peter6172 - 1:48
-
 Helge Hafstad reacted to a post in a topic:
HMB ENDEAVOUR by Peter6172 - FINISHED - Artesania Latina - 1/65
-
 Helge Hafstad reacted to a post in a topic:
HMB ENDEAVOUR by Peter6172 - FINISHED - Artesania Latina - 1/65
-
 Helge Hafstad reacted to a post in a topic:
HMB ENDEAVOUR by Peter6172 - FINISHED - Artesania Latina - 1/65
-
 Helge Hafstad reacted to a post in a topic:
HMB ENDEAVOUR by Peter6172 - FINISHED - Artesania Latina - 1/65
-
 Helge Hafstad reacted to a post in a topic:
HMB ENDEAVOUR by Peter6172 - FINISHED - Artesania Latina - 1/65
-
 Helge Hafstad reacted to a post in a topic:
HMB ENDEAVOUR by Peter6172 - FINISHED - Artesania Latina - 1/65
-
 Helge Hafstad reacted to a post in a topic:
HMB ENDEAVOUR by Peter6172 - FINISHED - Artesania Latina - 1/65
-
 Helge Hafstad reacted to a post in a topic:
HMB ENDEAVOUR by Peter6172 - FINISHED - Artesania Latina - 1/65
-
 Helge Hafstad reacted to a post in a topic:
1:65 HMS Endeavour - Artesania Latina
-

EURYALUS 1803 by Peter6172 - 1:48
Peter6172 replied to Peter6172's topic in - Build logs for subjects built 1801 - 1850
Have made some progress with the reorganisation/refitting/remaking of Bollard and Hawse pieces and forward cant frames. Have made and fitted port cant frames Zf, Za, Yf, Ya, Xf, Xa with Wf ready to fit. Starboard side has only Za fitted. Need to remake Hawse piece #4 port and starboard and Zf for the starboard side. These splintered during disassembly. -

EURYALUS 1803 by Peter6172 - 1:48
Peter6172 replied to Peter6172's topic in - Build logs for subjects built 1801 - 1850
Well after hours of procrastination, I finally decided I was not happy with how the bollard/Hawse pieces were fitted to the stem so they were all removed. I had considered just sanding them back to get a neat fit but then decided that if I chose not to plank then I really did need them to fit properly relative to the already cut rabbet. I need to examine how the Bollard piece fits the stem and will need to mark the pieces with the Reference Line mark so that I can fit them up knowing where they should fit in relation to the stem and the rest of the frames. I will refit frames Zf and Za before I embark on the Bollard/Hawse pieces but this time make sure that the frames are perpendicular and not slanted aft (caused by the previous poor fit of the pieces). -

EURYALUS 1803 by Peter6172 - 1:48
Peter6172 replied to Peter6172's topic in - Build logs for subjects built 1801 - 1850
Getting on with fitting the Bollard/HawsePieces as well as Frames Zf and Za. Had all sorts of difficulties envisioning the way the Bollard/Hawse timbers fitted the stem and Frame Zf so I decided to make and fit Frames Zf and Za first so I could see the gap in which the Bollard/Hawse timber pieces went. This was simplified further by assembling Bollard and Hawse timbers 1, 2 and 3 leaving Hawse Piece 4 to fit later with the filling piece. While things were drying, I got on with finishing the assembly of Frames 23a, 23f, 22a and 22f and started assembly of Frames 21a and 21f. I also need to finish scrolling out Frames 0 thru 10, the start cutting templates for the front end of the ship. I also finished the preliminary fairing internally and externally off the aft end of the ship. I employed Dremel's 60grit 30mm diameter sanding disk for this mounted in my Ryobi R18RT rotary tool. It has more power and lasts longer than my Dremel 8220 and a slightly smaller handpiece. -

EURYALUS 1803 by Peter6172 - 1:48
Peter6172 replied to Peter6172's topic in - Build logs for subjects built 1801 - 1850
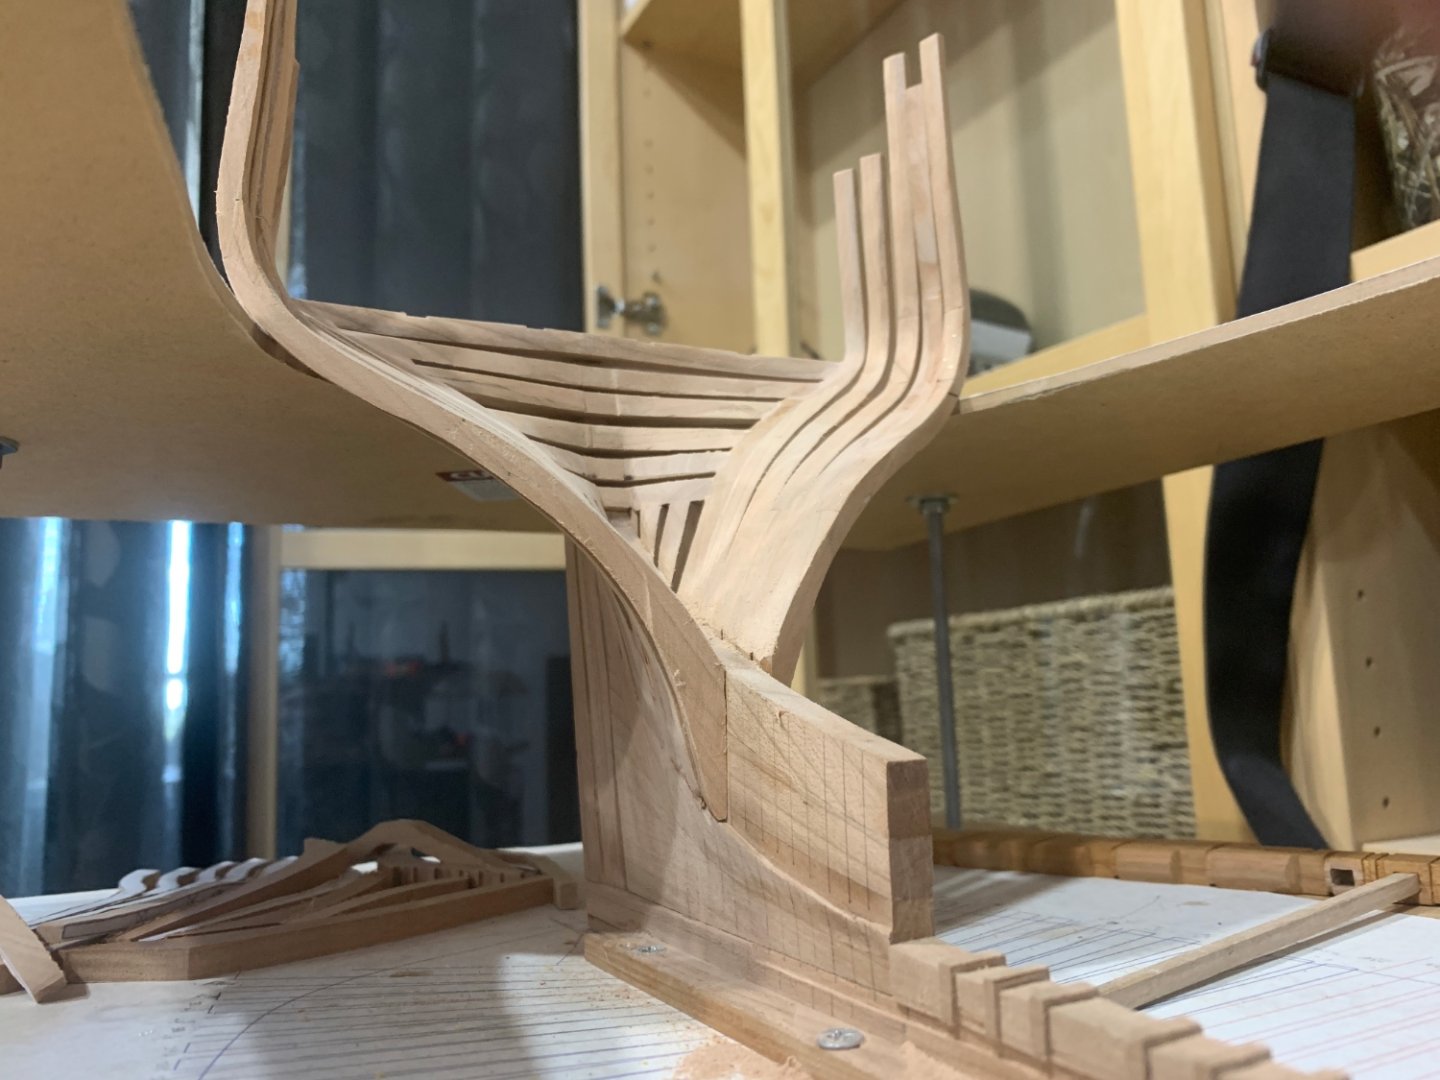
I made up a wood base to secure the pieces to using washer head screws. I then slid the base piece under the mill by hand (just like a router really) to mill out the slots. Obviously I had to leave some on the toe so that there was a flat surface to do the other side on Hawse 1, 2 and 3. I then simply shaved these raised ends with a chisel. The real test for me is glueing the pieces together as there was no real way to clamp it up. -
 Peter6172 reacted to a post in a topic:
EURYALUS 1803 by Peter6172 - 1:48
-
 Peter6172 reacted to a post in a topic:
EURYALUS 1803 by Peter6172 - 1:48
-

EURYALUS 1803 by Peter6172 - 1:48
Peter6172 replied to Peter6172's topic in - Build logs for subjects built 1801 - 1850
Mark. It's come to my attention from other modellers here that perhaps you have relocated me to the wrong sub heading. Perhaps my build log should be in the scracthbuilds of 1801 - 1850 section? -

EURYALUS 1803 by Peter6172 - 1:48
Peter6172 replied to Peter6172's topic in - Build logs for subjects built 1801 - 1850
Issues with my Bollard and Hawse pieces resolved. I misinterpreted the plans by making assumptions about how they were shaped based on how the frames were made: i.e. fwd/aft faces flat, athwartship faces tapered. The Bollard/Hawse pieces are fwd/aft tapered with athwartship flat. STBD side done and ready for milling out the air slots and drilling hawse holes. Frame Zf sits next to it waiting final fitting once the Bollard/Hawse pieces are assembled. -

EURYALUS 1803 by Peter6172 - 1:48
Peter6172 replied to Peter6172's topic in - Build logs for subjects built 1801 - 1850
Having some difficulties with the Bollard and Hawse pieces. I templated and cut them out but after shaping one side, I think I have misinterpreted the drawings as they don't go together correctly. I think I know where I went wrong but have sort guidance from Allan and Wayne to set me right. -

EURYALUS 1803 by Peter6172 - 1:48
Peter6172 replied to Peter6172's topic in - Build logs for subjects built 1801 - 1850
So all the aft cant frames are in as well as the first full frames 24a and 24f. I have also dry fitted 23a as well as Keelson 6 and the sternum knee to see how things are progressing. Some minor fitting to be done between 23a, 24f and the keelson to neatly fit the taper. I have also done a preliminary fairing of the frames from transom to 24f and all looks well so far. I am now turning my attention to the bow with the bollard and hawse pieces to be scrolled out today as well as frames Va and Vf. -
 Peter6172 reacted to a post in a topic:
EURYALUS 1803 by Peter6172 - 1:48
-

EURYALUS 1803 by Peter6172 - 1:48
Peter6172 replied to Peter6172's topic in - Build logs for subjects built 1801 - 1850
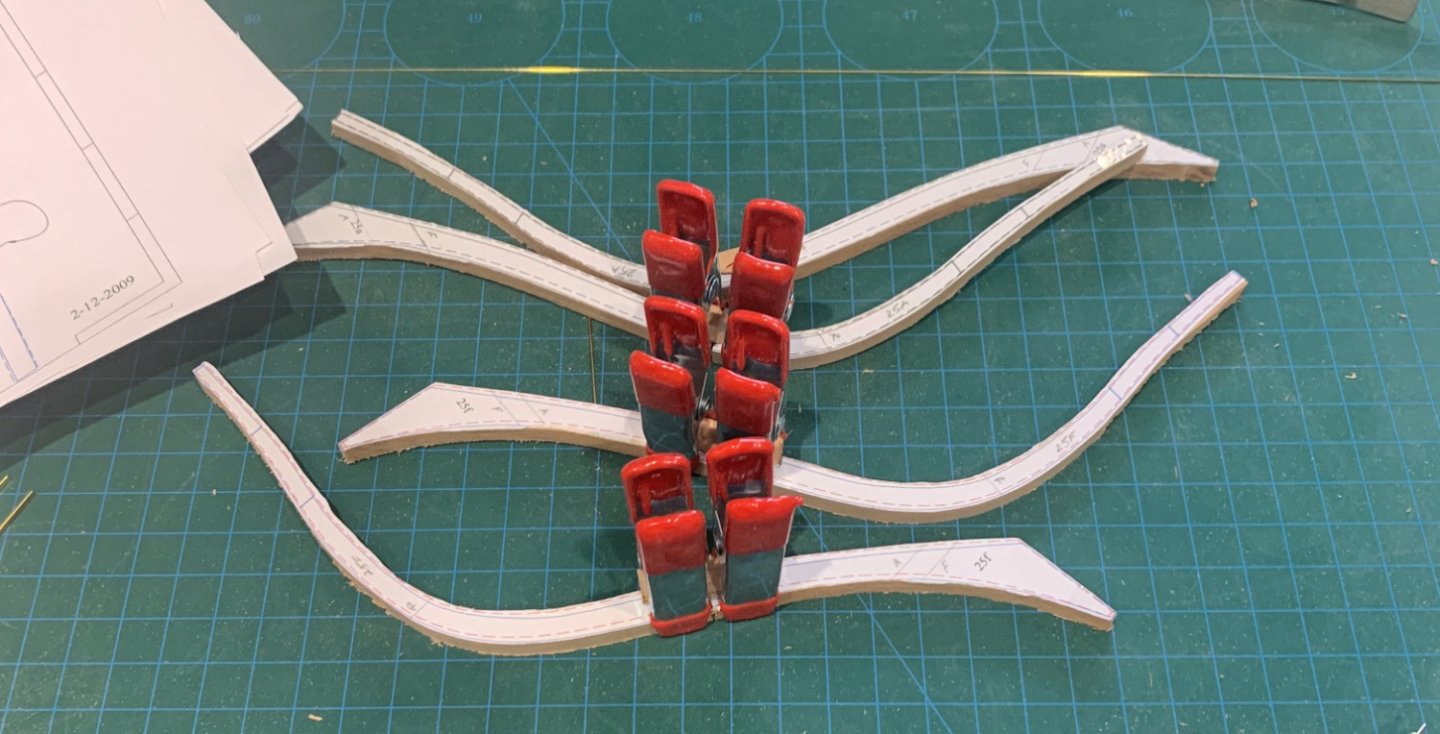
Ahhhh. Next disaster. In a rush to install cant frames 27A/F and 26A/F the clamp holding the heels to the deadwood was applied too harshly and the frames slid up the deadwood overnight. Things looked a little off this morning when I checked the reference marks and the tops of the frames relative to their Port counterparts. 2mm appeared at the beading line so off came the frames. thee were damaged in removal so three new frames have to be made. Lesson: Take your time and make sure the timbers you clamp are clamped in a way that they cannot move out of alignment as glue can be a good lubricant at the timber/timber interface. -
 Peter6172 reacted to a post in a topic:
EURYALUS 1803 by Peter6172 - 1:48
-
OK team, I have put this build on hold as I have taken possession of the EURYALUS from a modeller who has now passed away. THUNDERER will be the next cab off the rank.
-
Work has finally recommenced on BOUNTY with the arrival of more pear timber. I purchased 2mm sheets of pear so I could properly spile the bow planks rather than steam bend and force edge set the planks. I have managed 7 planks below the whales fitted in the bent and edge set manner so 8 and below will be undertaken with proper spiling.
-

EURYALUS 1803 by Peter6172 - 1:48
Peter6172 replied to Peter6172's topic in - Build logs for subjects built 1801 - 1850
Have completed installing Port side aft cant frames. Just need to install the starboard 27A & F, 26A & F and 25 today then 24A & F full frames (shown dry fitted) and I will stop to do some internal and external fairing to make sure I am still on the right path. The first of the Bollard Pieces and been made and dry fitted to the stem. -

EURYALUS 1803 by Peter6172 - 1:48
Peter6172 replied to Peter6172's topic in - Build logs for subjects built 1801 - 1850
Still have bunch of cant frames to install (now they are all made) but I wanted to test fit my first full frames (24A and 24F) to see their fit on the rising wood. Nicely surprised to see them slot in with a little push. They are all clamped in against the deadwood to make sure that their alignment is true at the keel and reference board. -

EURYALUS 1803 by Peter6172 - 1:48
Peter6172 replied to Peter6172's topic in - Build logs for subjects built 1801 - 1850
So, all the aft cant frames are fabricated; some still need pre-fairing and tree-nailing. 29F is being glued in so I should get to the straight frames by the weekend (touch wood) -

EURYALUS 1803 by Peter6172 - 1:48
Peter6172 replied to Peter6172's topic in - Build logs for subjects built 1801 - 1850
Well I am back to where I left off before discovering the issue with the starboard can't frames. I have done some further fairing by hand held sandpaper to see that the alignment is true on the inside. If it's right on the inside, the small extra on the outside should fair in nicely. I picked up the issue when I noticed that Frames 30A and 30F albeit correctly aligned on the reference board, were not vertical as they rose above the reference board. The way I have the building board position, I get a perfect view of the port frames but only a side on view of the starboard frames so I will need to move the trolley out into more open space when fitting the frames to get a better view from all angles.
About us
Modelshipworld - Advancing Ship Modeling through Research
SSL Secured
Your security is important for us so this Website is SSL-Secured
NRG Mailing Address
Nautical Research Guild
237 South Lincoln Street
Westmont IL, 60559-1917
Model Ship World ® and the MSW logo are Registered Trademarks, and belong to the Nautical Research Guild (United States Patent and Trademark Office: No. 6,929,264 & No. 6,929,274, registered Dec. 20, 2022)
Helpful Links
About the NRG
If you enjoy building ship models that are historically accurate as well as beautiful, then The Nautical Research Guild (NRG) is just right for you.
The Guild is a non-profit educational organization whose mission is to “Advance Ship Modeling Through Research”. We provide support to our members in their efforts to raise the quality of their model ships.
The Nautical Research Guild has published our world-renowned quarterly magazine, The Nautical Research Journal, since 1955. The pages of the Journal are full of articles by accomplished ship modelers who show you how they create those exquisite details on their models, and by maritime historians who show you the correct details to build. The Journal is available in both print and digital editions. Go to the NRG web site (www.thenrg.org) to download a complimentary digital copy of the Journal. The NRG also publishes plan sets, books and compilations of back issues of the Journal and the former Ships in Scale and Model Ship Builder magazines.


