


tj456
-
Posts
65 -
Joined
-
Last visited
Content Type
Profiles
Forums
Gallery
Events
Everything posted by tj456
-
Mayflower by tj456 - 1/19 scale
tj456 replied to tj456's topic in - Build logs for subjects built 1501 - 1750
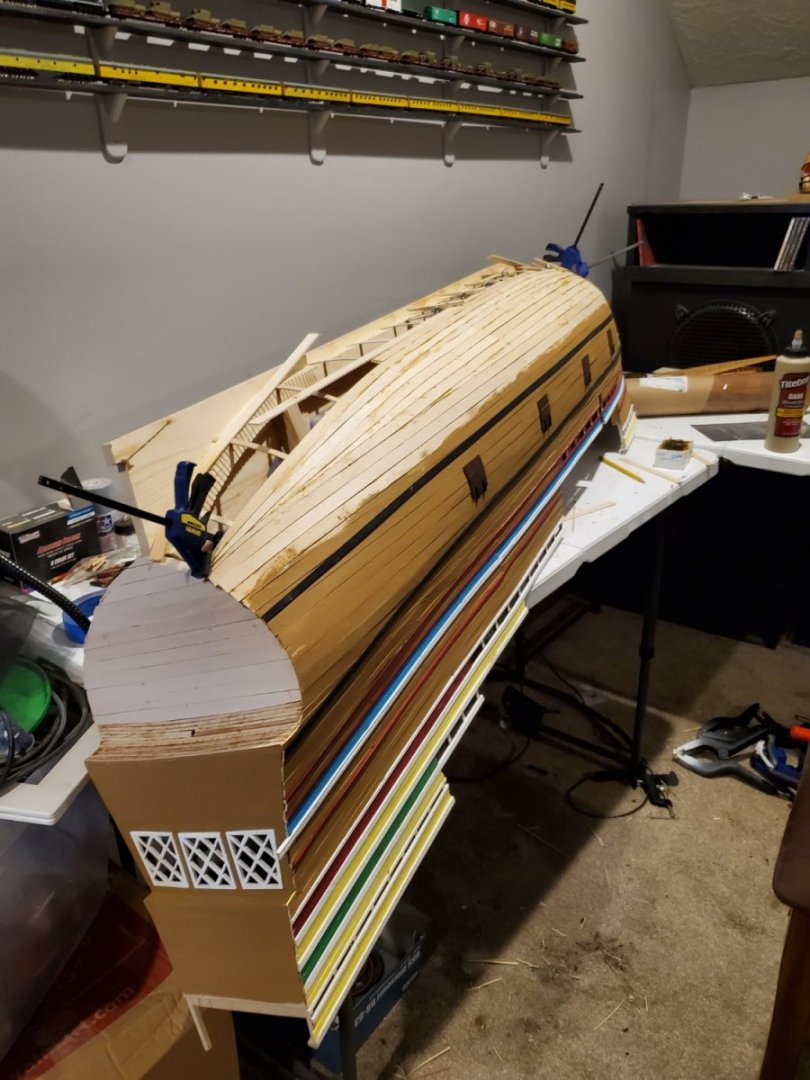
Starboard prow almost done. There were lots of curves converging here so it took about a week.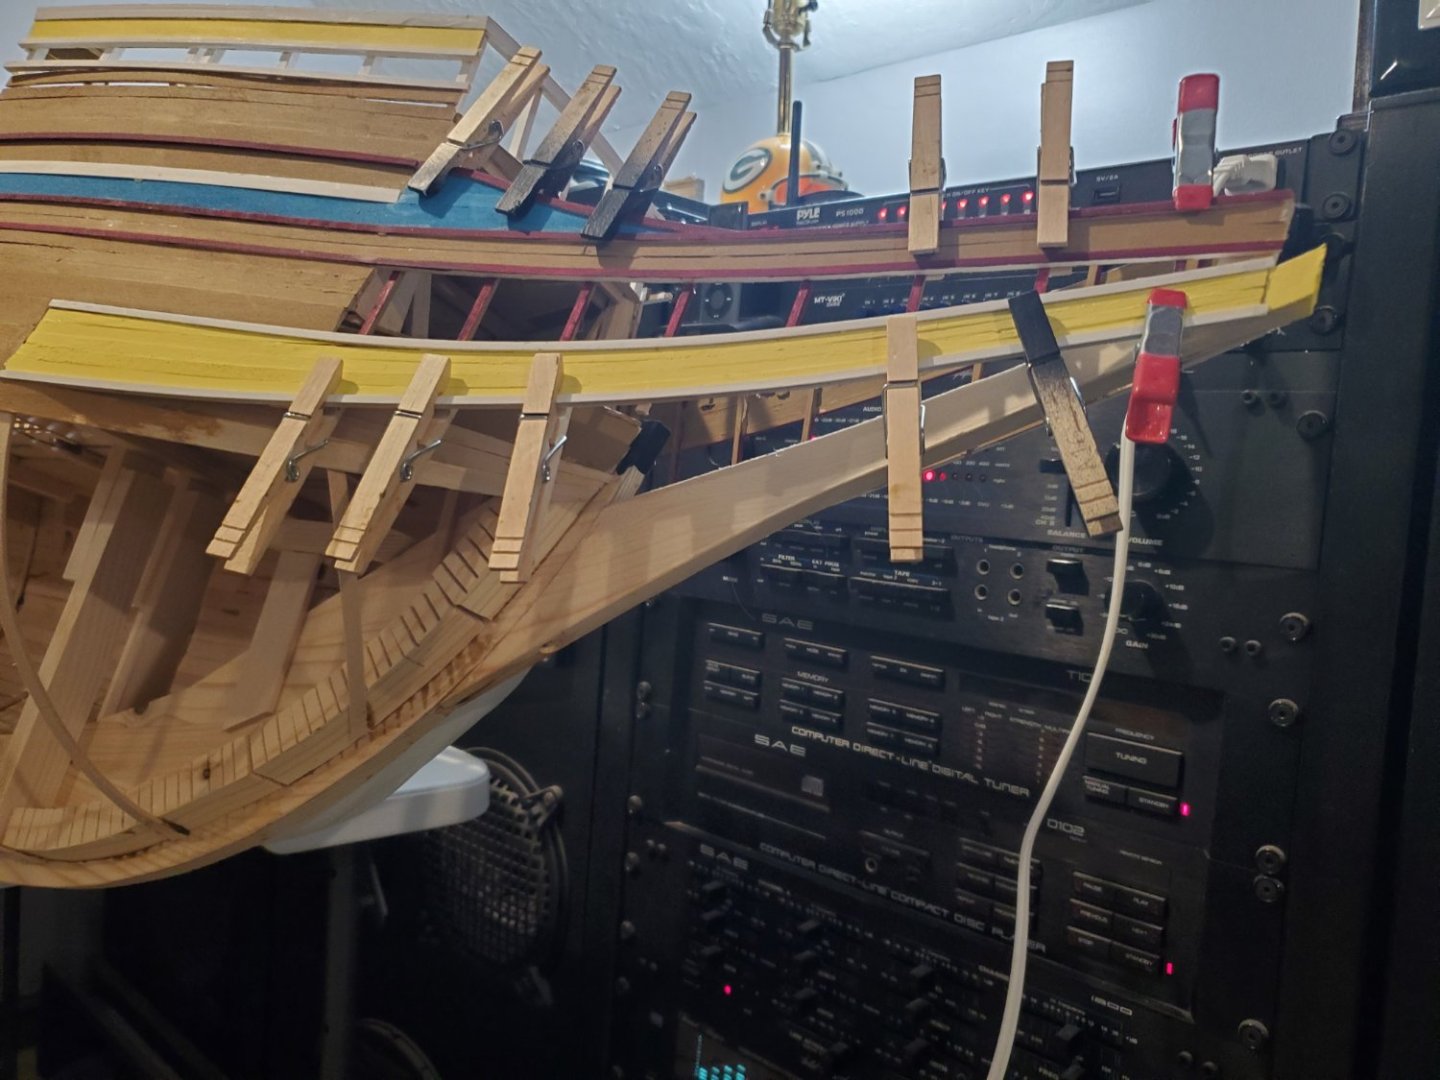

-
Mayflower by tj456 - 1/19 scale
tj456 replied to tj456's topic in - Build logs for subjects built 1501 - 1750
My wife also descended from someone on that ship. I'm using MS plans and multiplying everything by 4, and a picture I took in Plymouth of the replica for colors. -
Mayflower by tj456 - 1/19 scale
tj456 replied to tj456's topic in - Build logs for subjects built 1501 - 1750
So far planking one side 1st hasn't bit me yet. There's a pretty strong frame to prevent warpage. However topside work should have been done on both sides simultaneously. Live and learn. I've never done such a large model before and I wanted to get an early idea of how it would look -
Mayflower by tj456 - 1/19 scale
tj456 replied to tj456's topic in - Build logs for subjects built 1501 - 1750
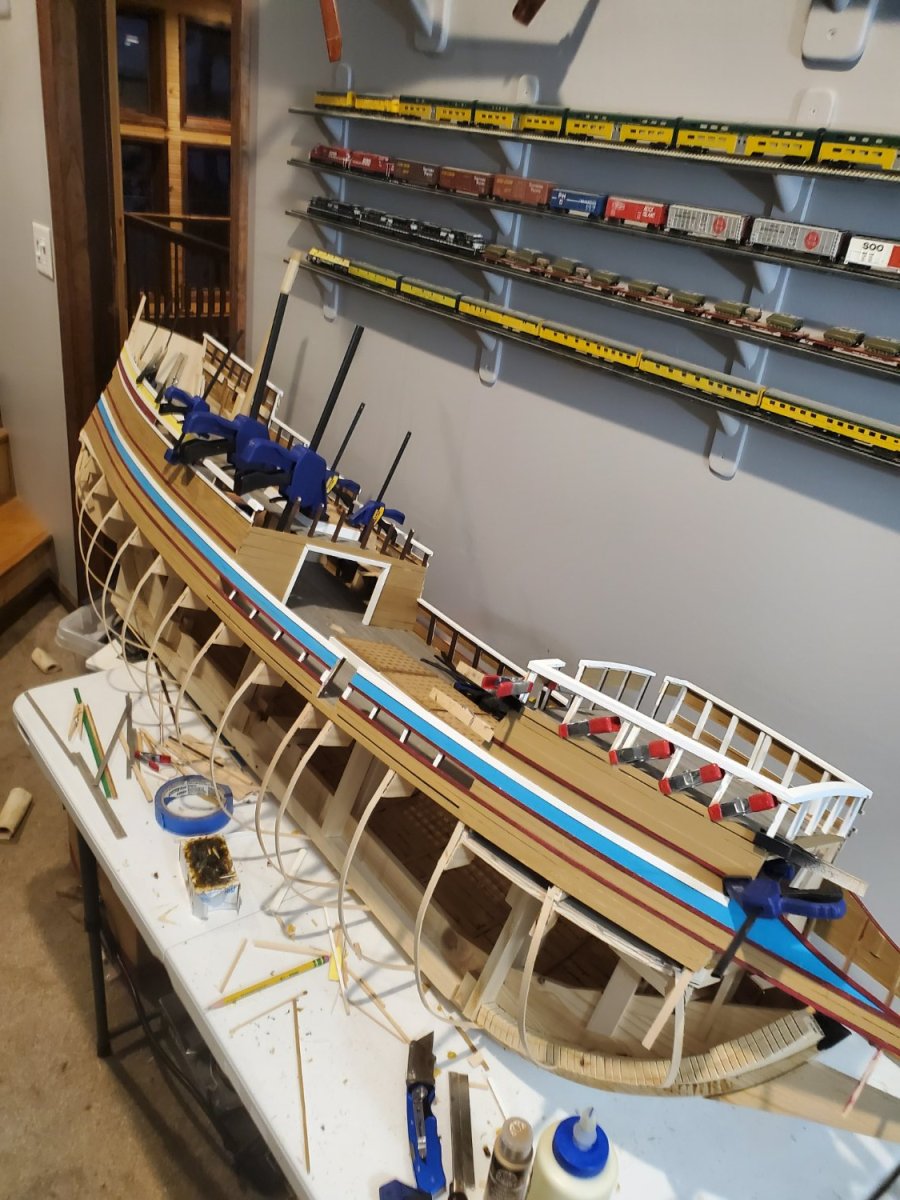
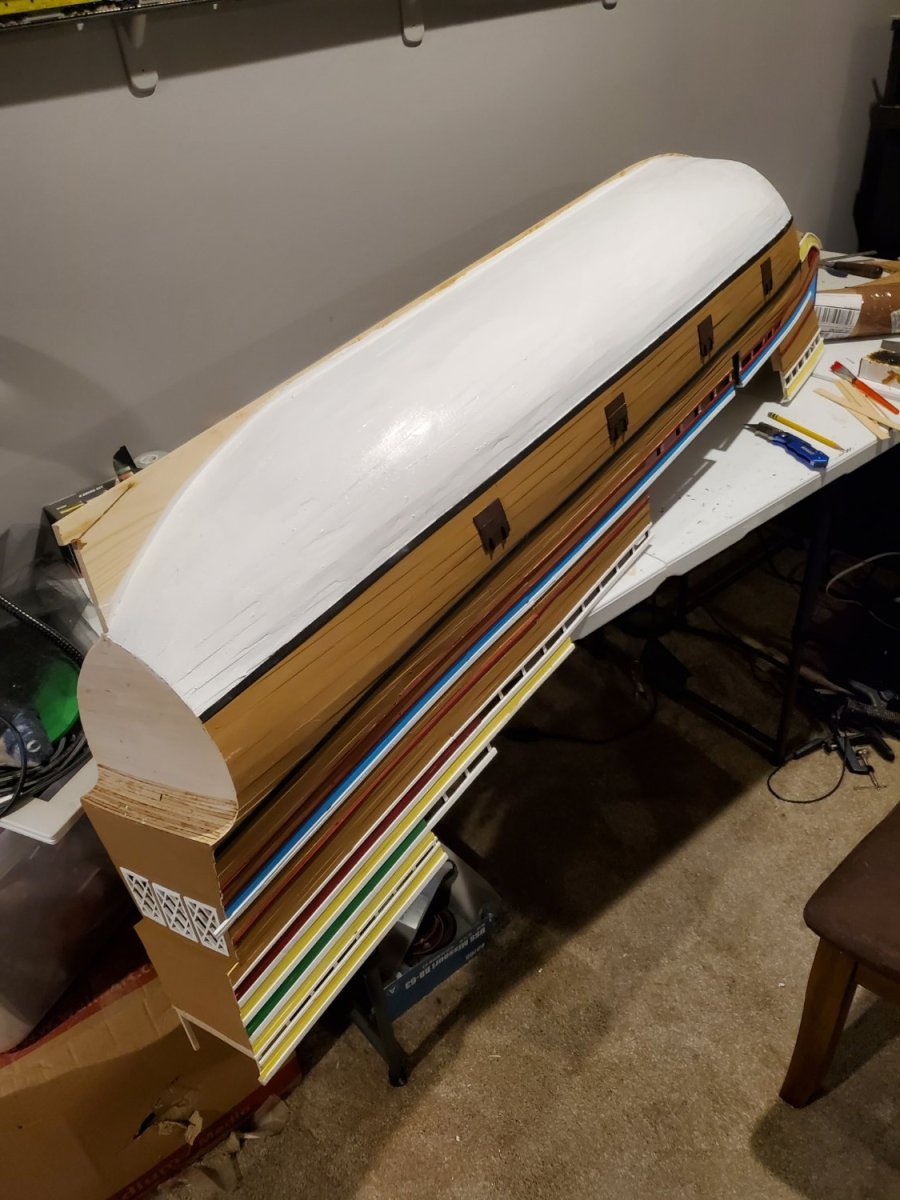
A bit out of order but the stern is all but done.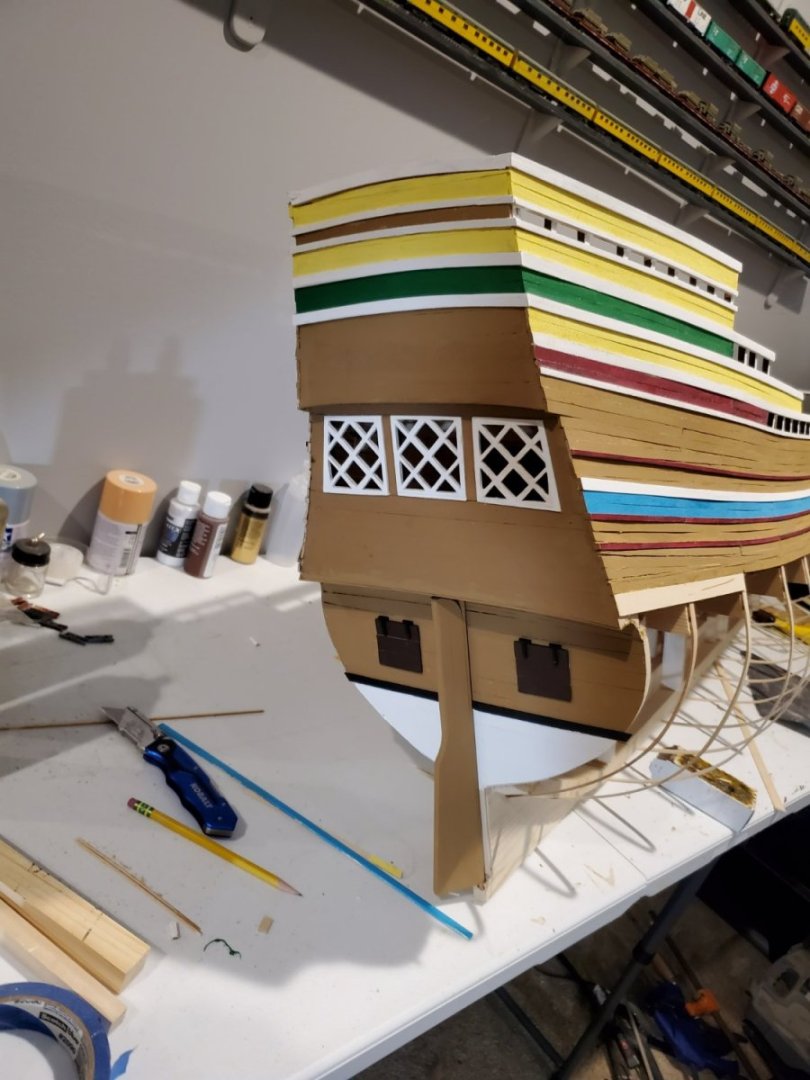
-
Mayflower by tj456 - 1/19 scale
tj456 replied to tj456's topic in - Build logs for subjects built 1501 - 1750
Time for some ladders. I need 6 so I made a jig to make 6 ladders the same. 4 for the main deck and 2 shorter ones to get to the poop deck.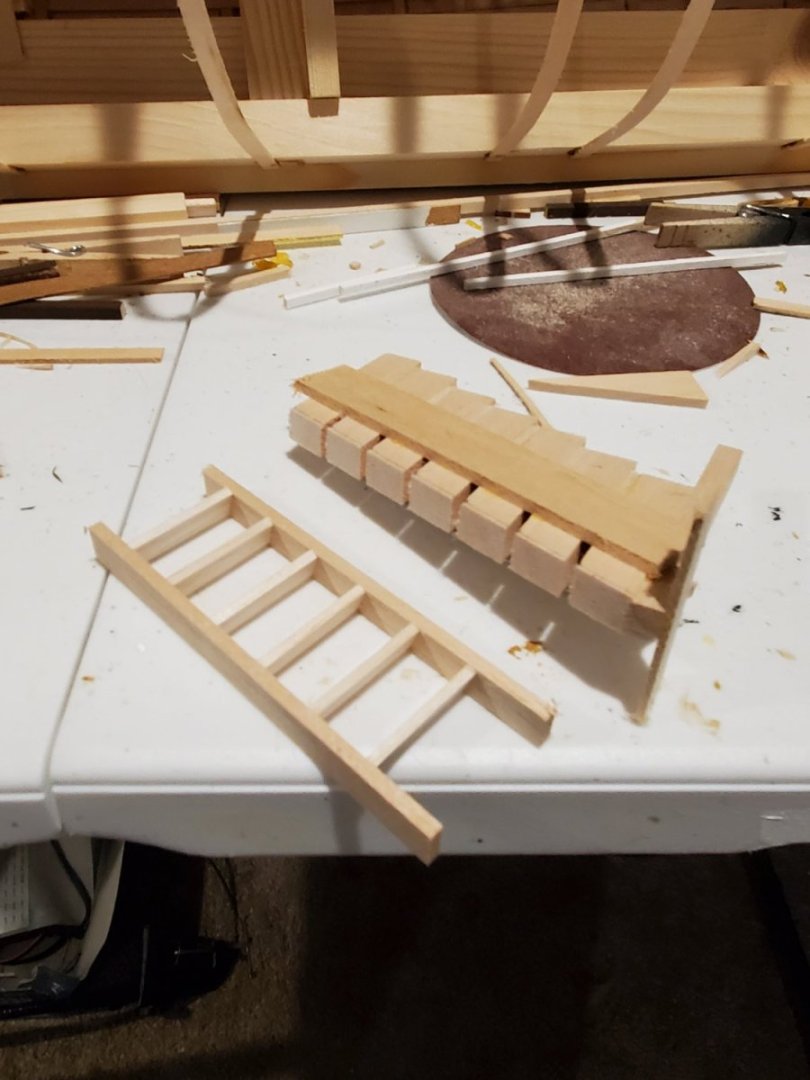
-
Mayflower by tj456 - 1/19 scale
tj456 replied to tj456's topic in - Build logs for subjects built 1501 - 1750
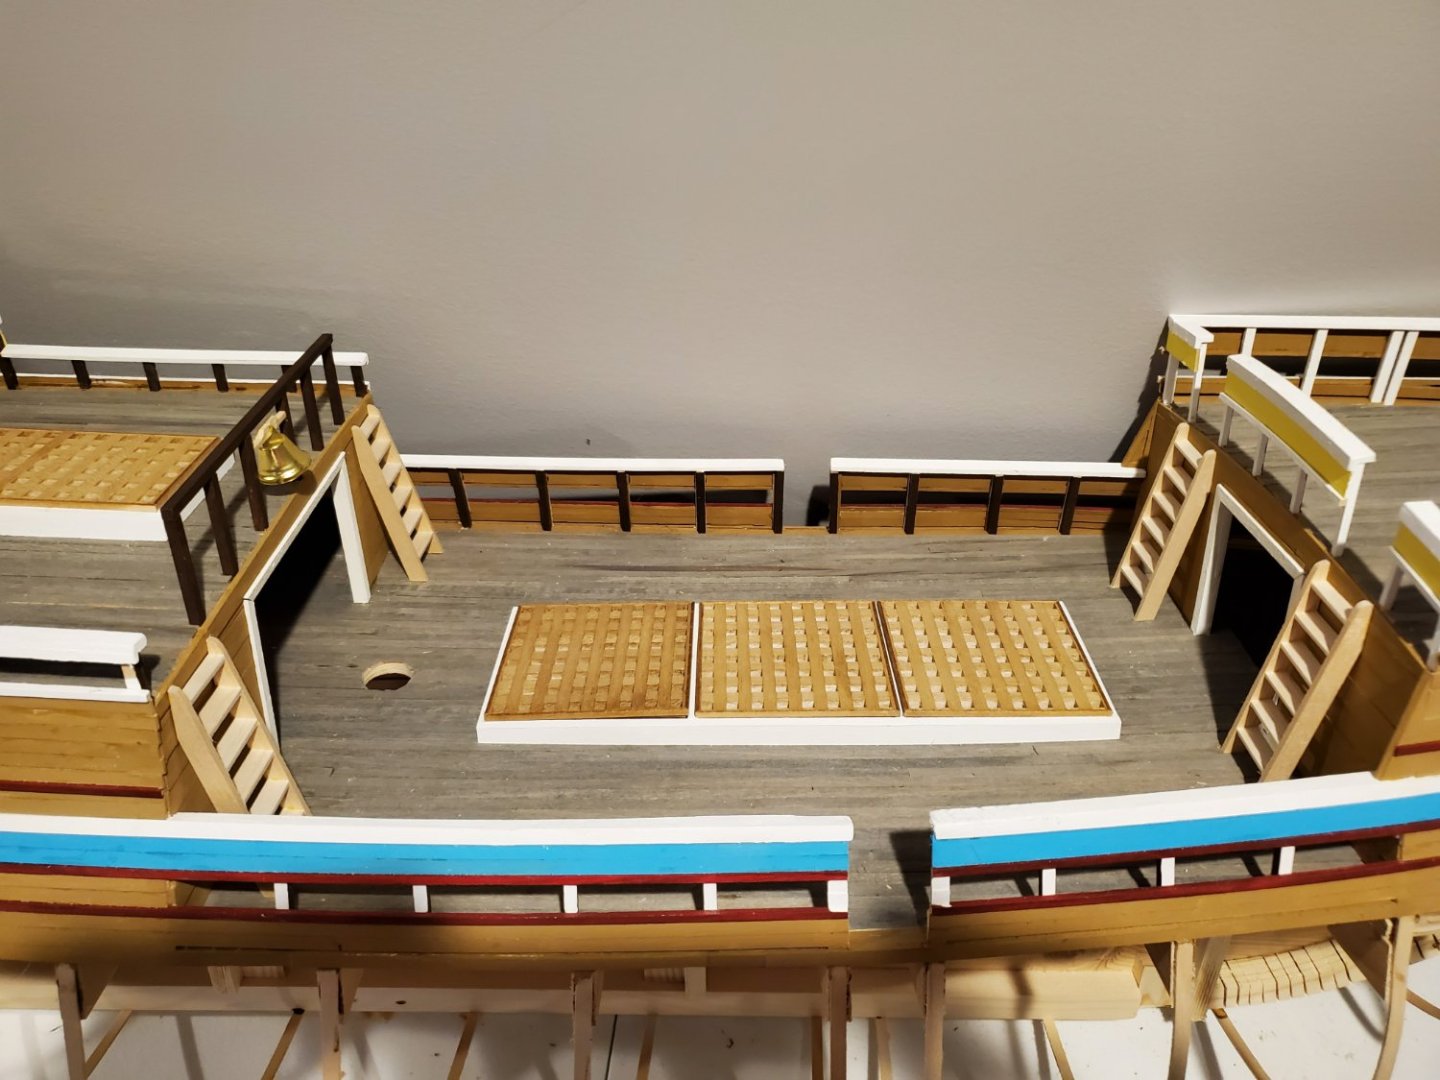
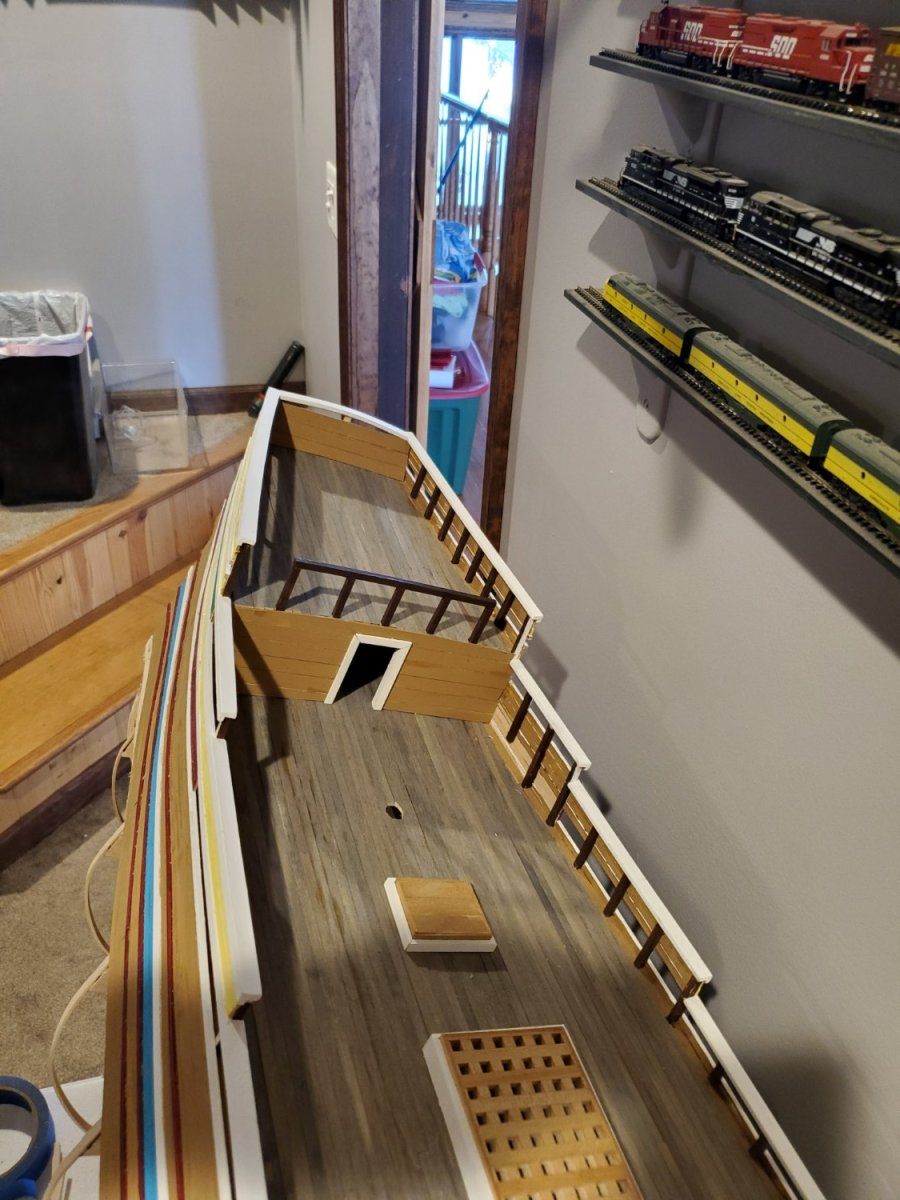
The upper stern and poop deck
-
Mayflower by tj456 - 1/19 scale
tj456 replied to tj456's topic in - Build logs for subjects built 1501 - 1750
No ship is complete without the ship's bell!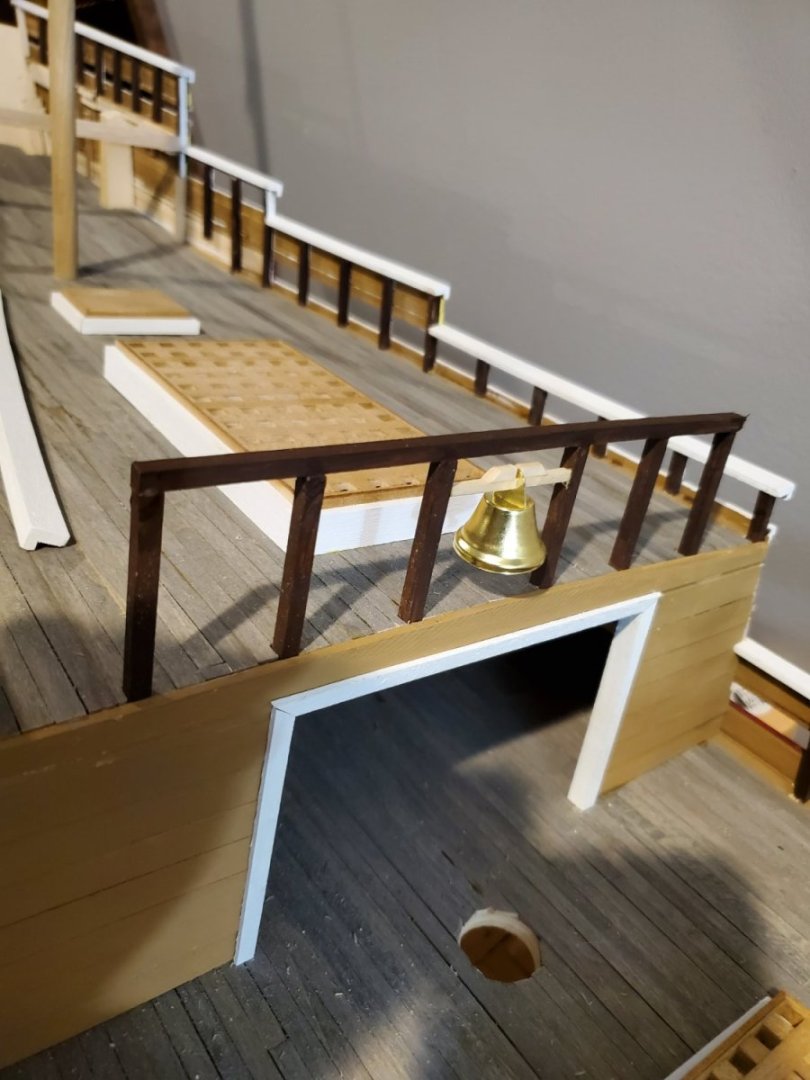
-
Mayflower by tj456 - 1/19 scale
tj456 replied to tj456's topic in - Build logs for subjects built 1501 - 1750
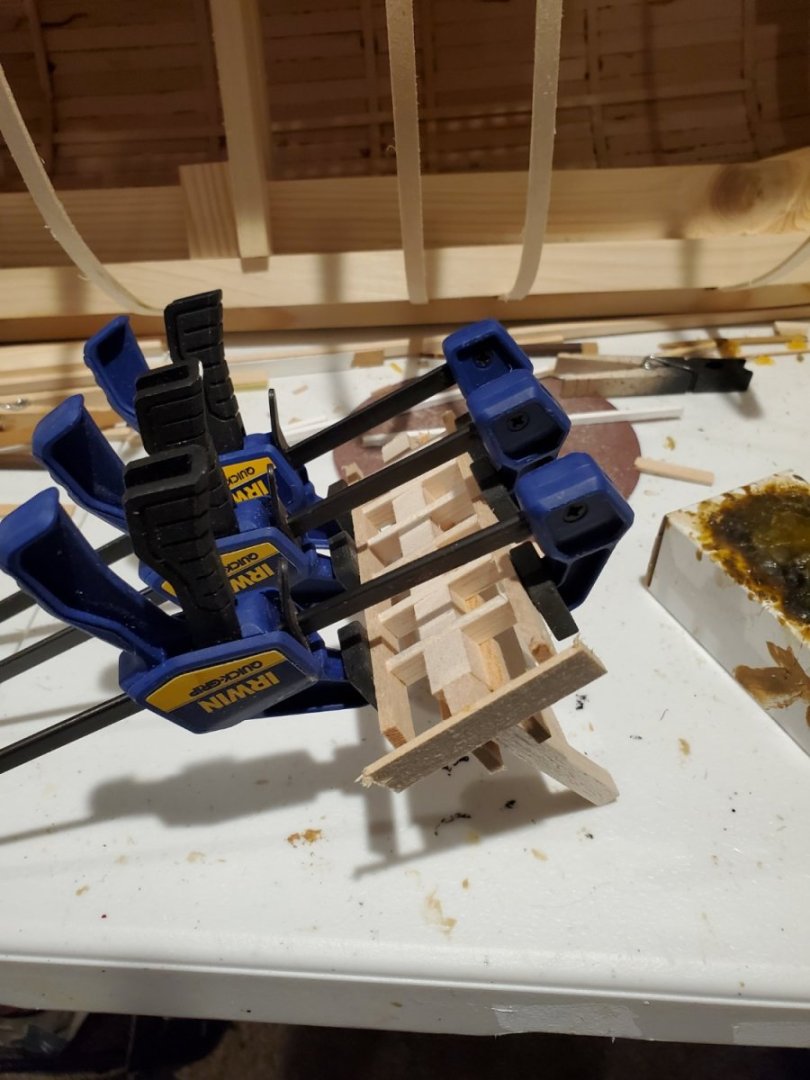
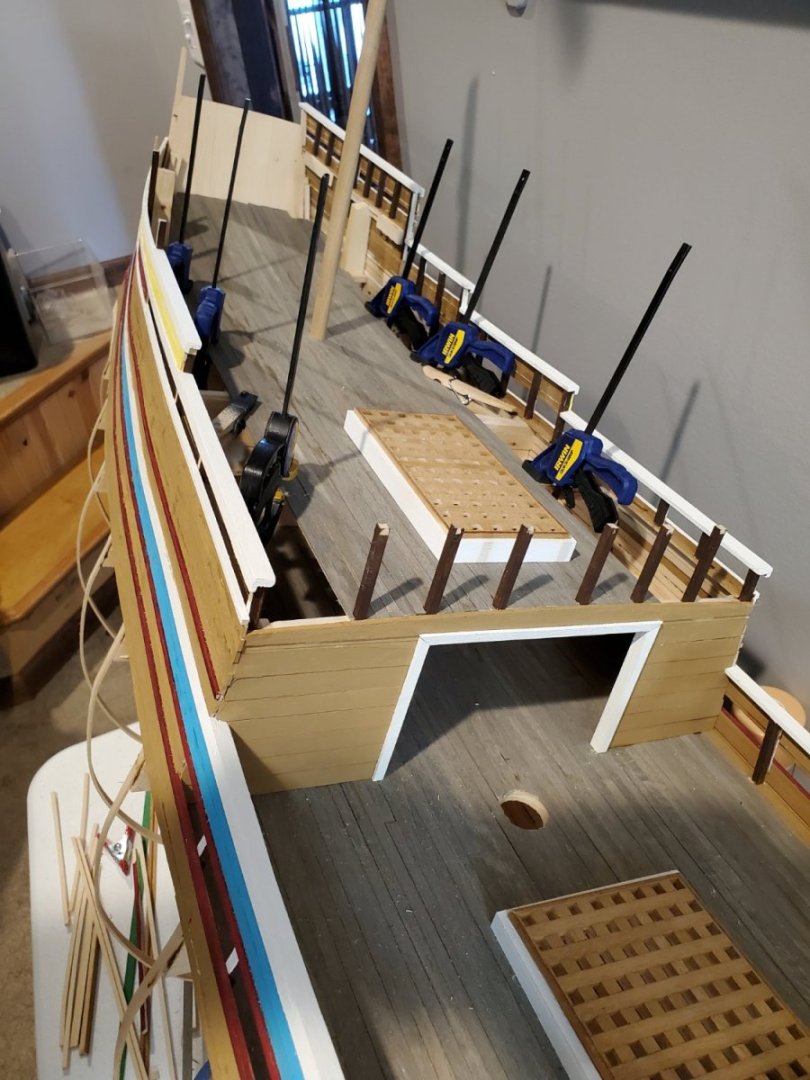
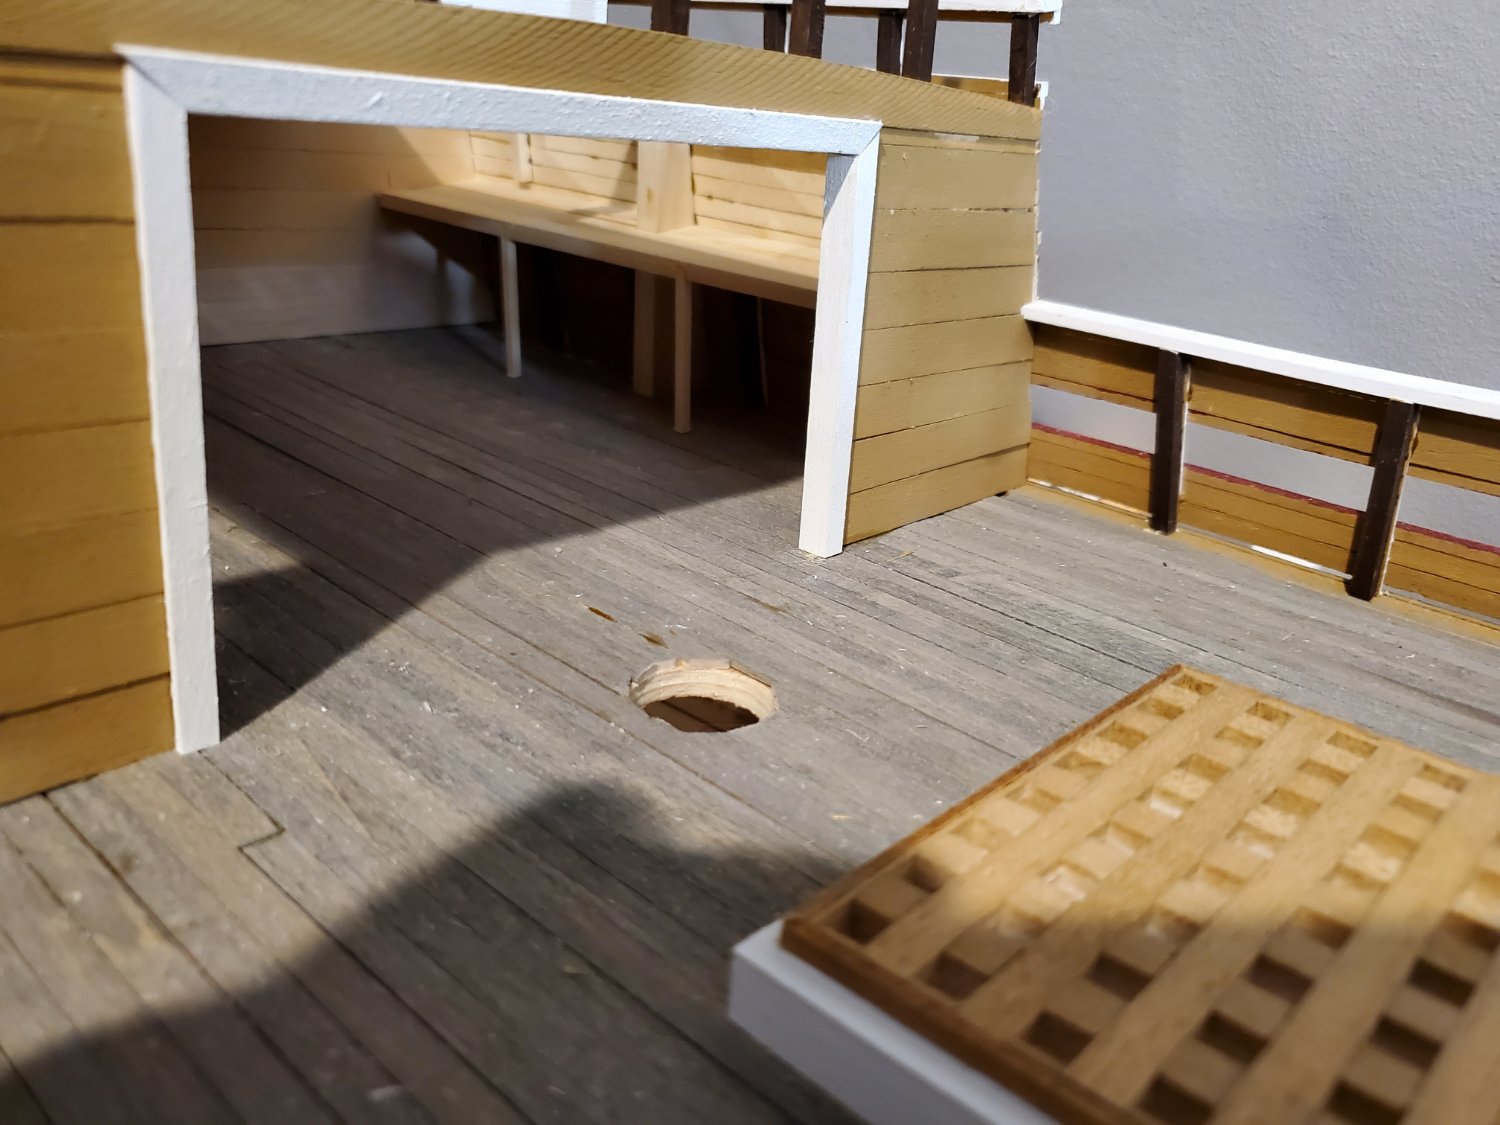
To cover a mistake I added a workbench.
-
Mayflower by tj456 - 1/19 scale
tj456 replied to tj456's topic in - Build logs for subjects built 1501 - 1750
more construction

-
Mayflower by tj456 - 1/19 scale
tj456 replied to tj456's topic in - Build logs for subjects built 1501 - 1750
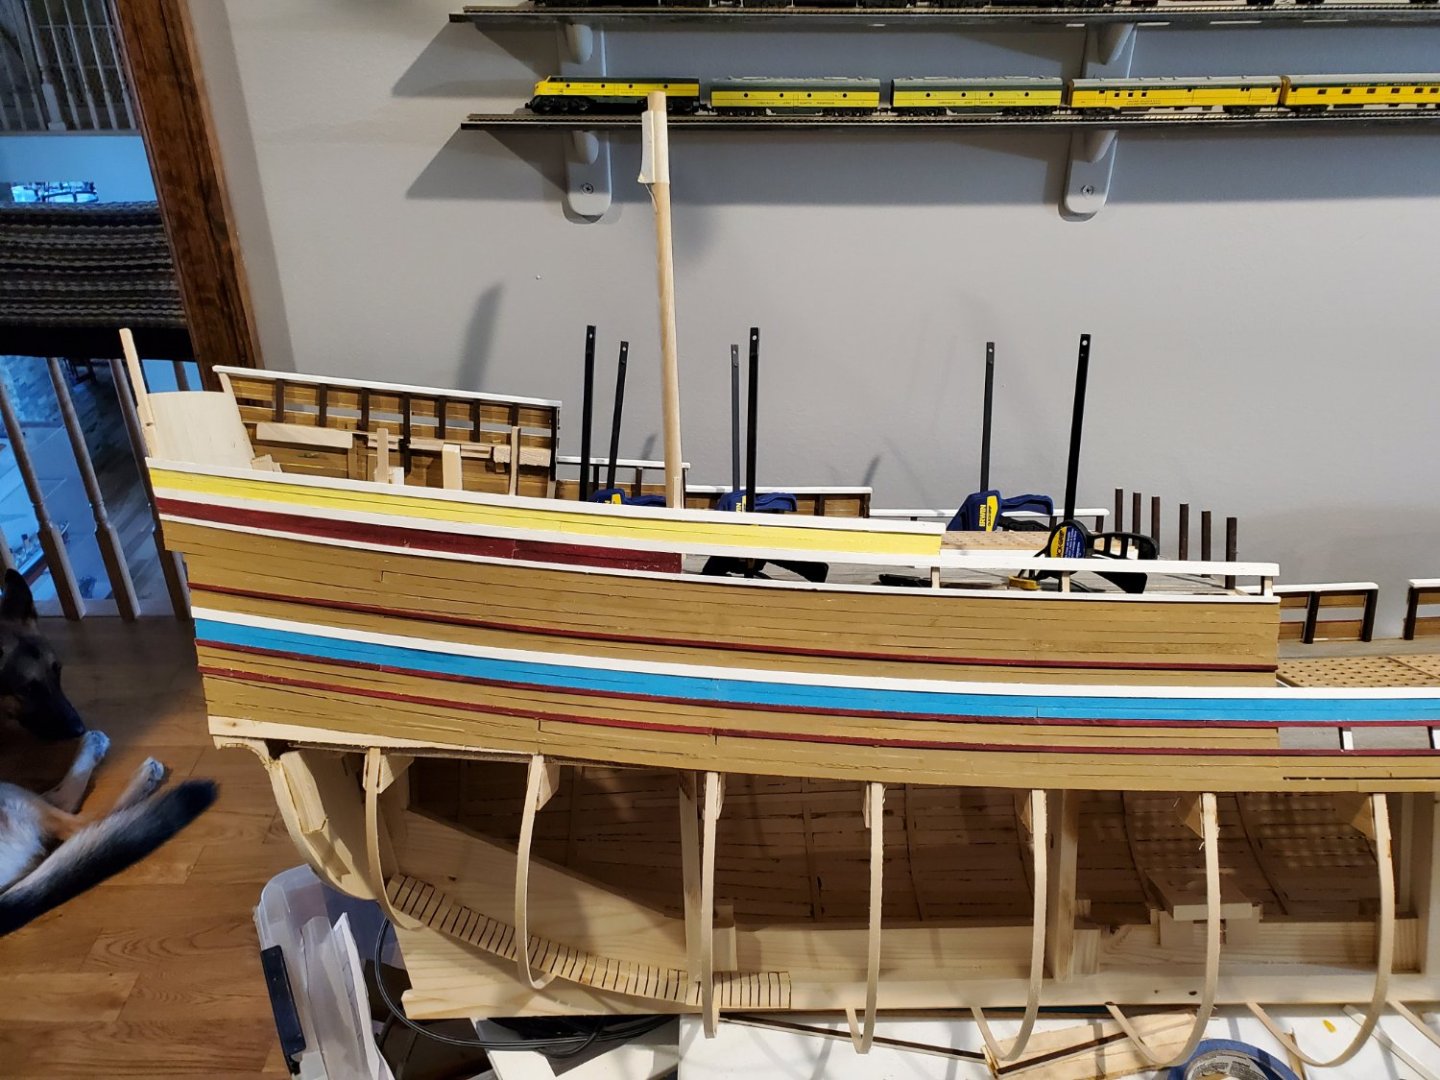
some more starboard work...

-
Mayflower by tj456 - 1/19 scale
tj456 replied to tj456's topic in - Build logs for subjects built 1501 - 1750
Thanks. Those are CNW train cars and even a Soo Line box car. I grew up in Rhinelander WI and I remember my grandparents coming up on the train from Crystal Lake Illinois. The train station is still there but its a stock brokerage now. -
Mayflower by tj456 - 1/19 scale
tj456 replied to tj456's topic in - Build logs for subjects built 1501 - 1750
Good question. I have thought about this and the ribs in combination with the planking, all glued on every edge, make for a strong enough and light structure. The completed port side easily takes the weight of the entire ship layinf on its side with no problem. -
Mayflower by tj456 - 1/19 scale
tj456 replied to tj456's topic in - Build logs for subjects built 1501 - 1750
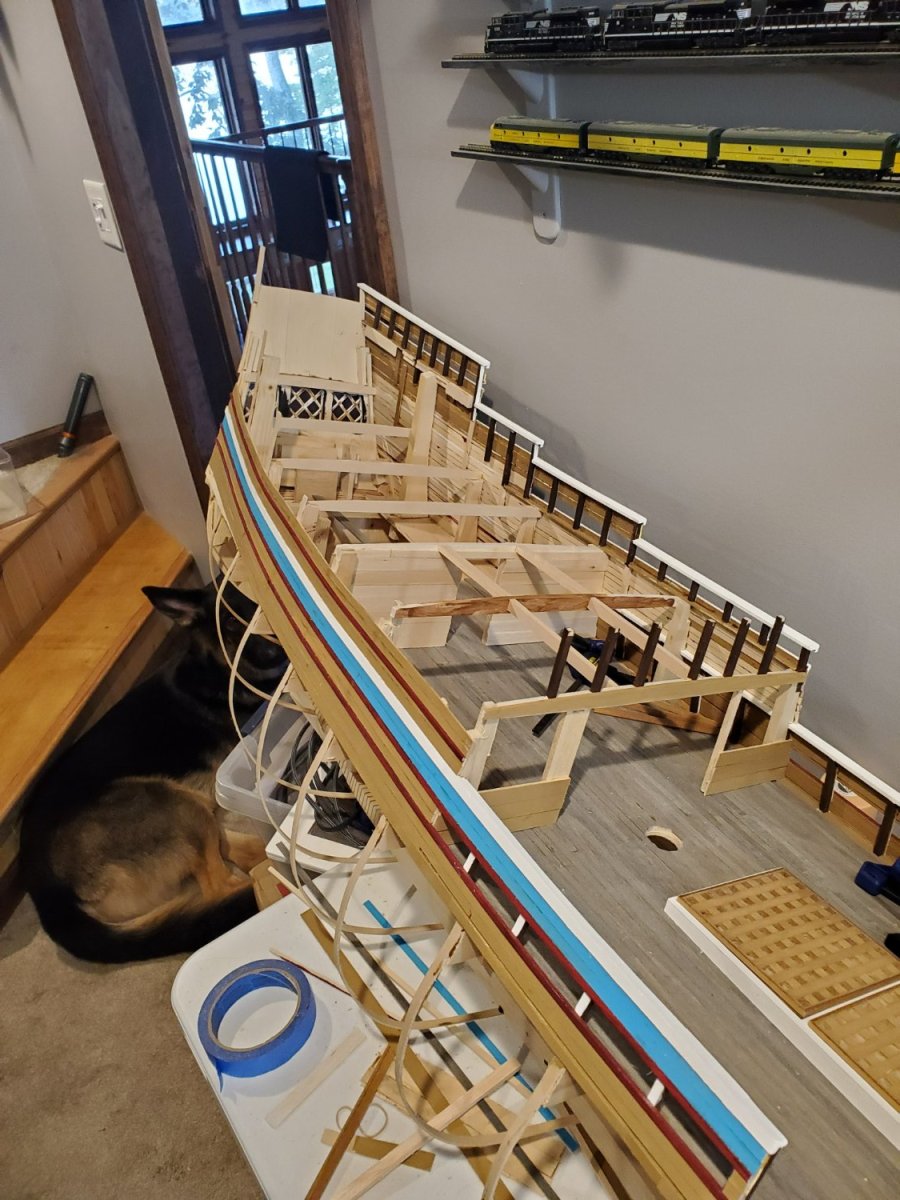
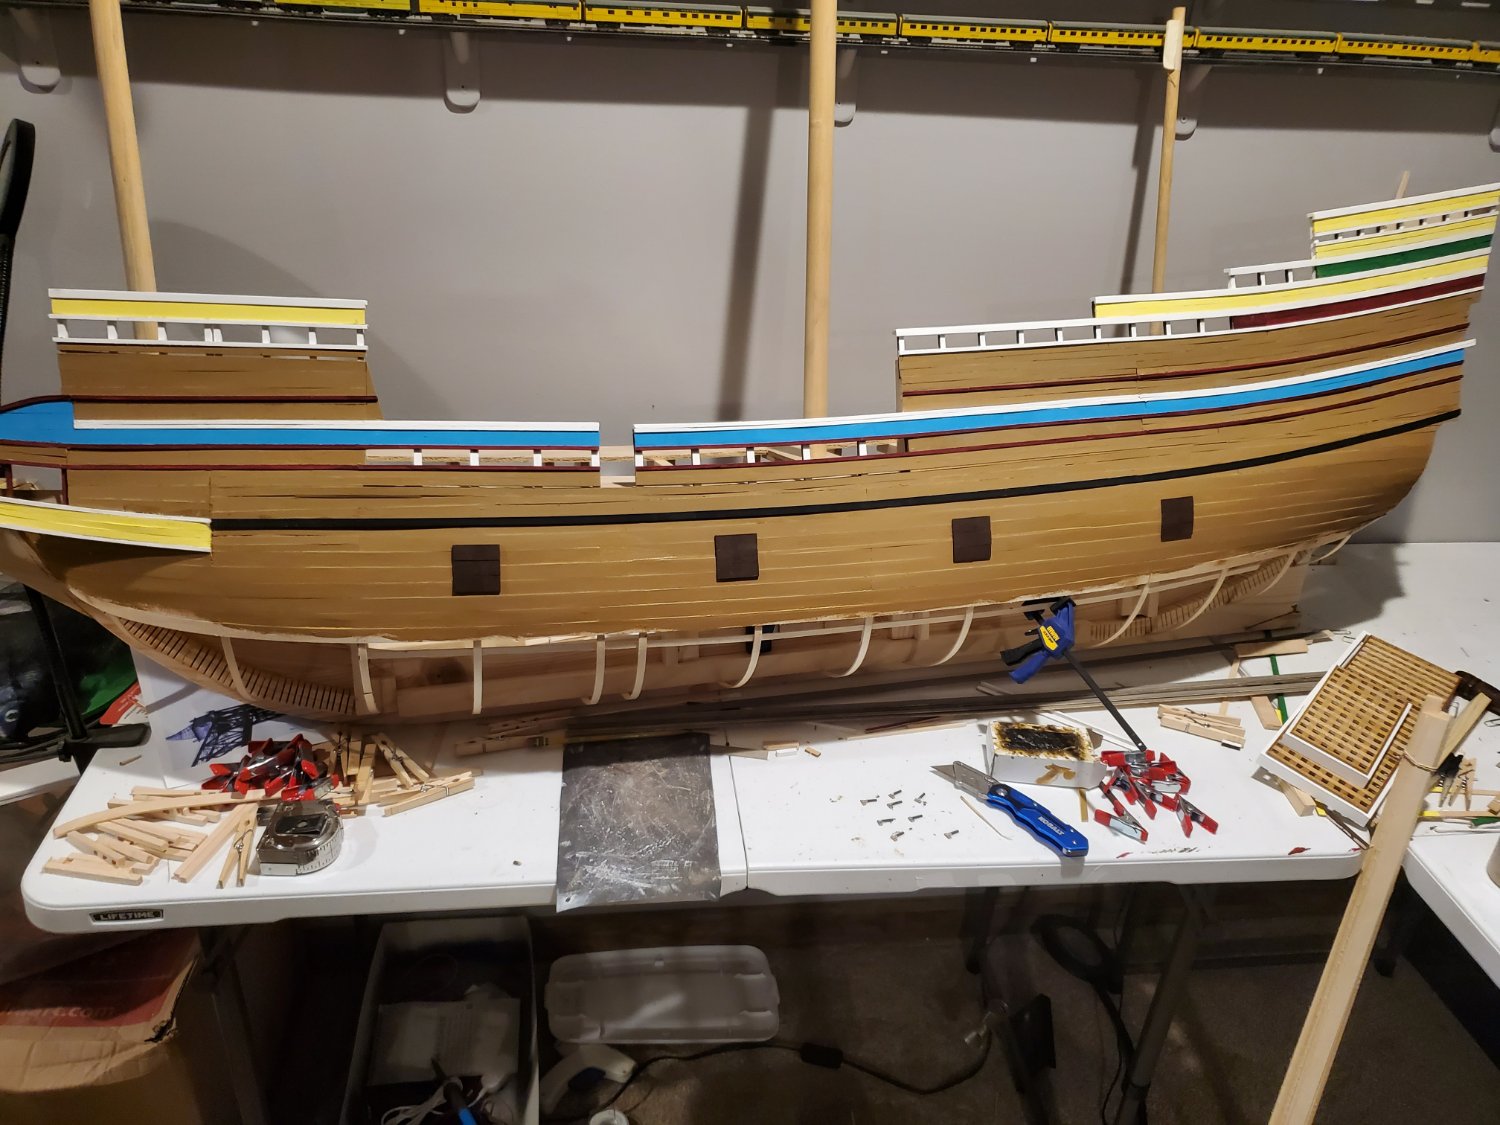
Now it's just a matter of repeating the port side planking. The hard part is doing it the same (more or less) so the lines even out on the stern. I am going to take advantage of the learning curve here and make improvements where I see fit. One can only see one side at a time and one side will probably be against a wall when displayed.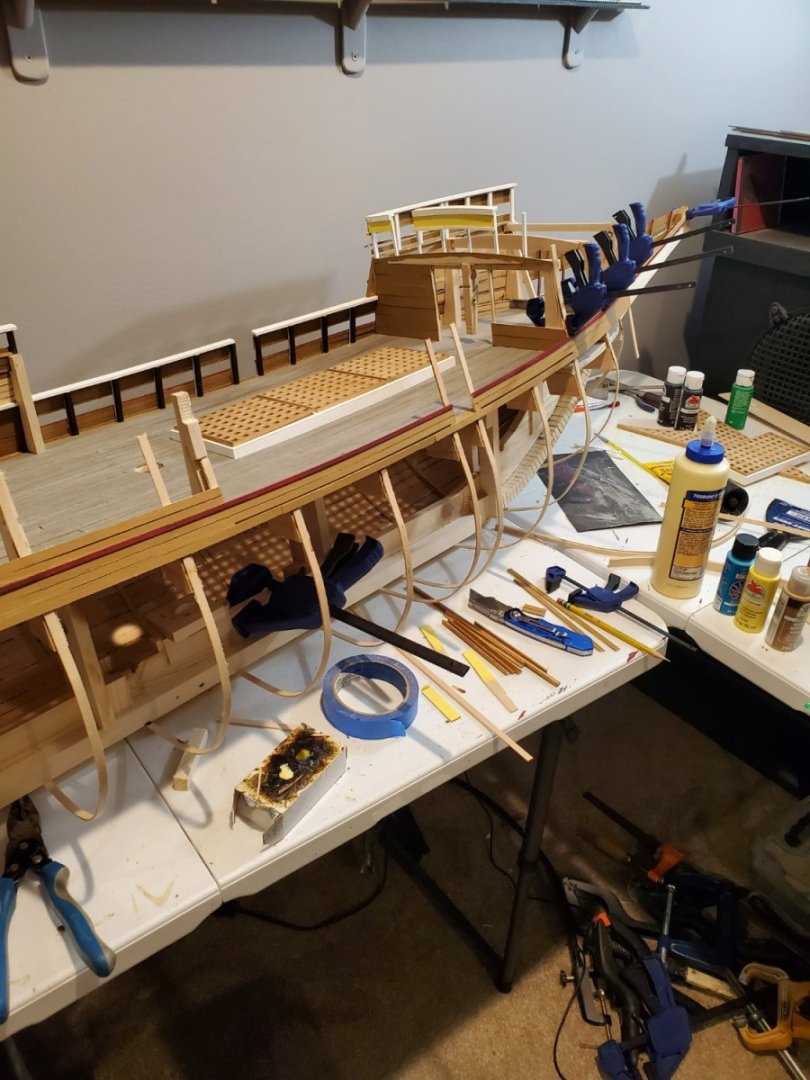

-
Mayflower by tj456 - 1/19 scale
tj456 replied to tj456's topic in - Build logs for subjects built 1501 - 1750
Here are the starboard ribs installed. I put the middle one in 1st and then stretched a temporary strip from it to both the bow and stern for reference to get the curves right.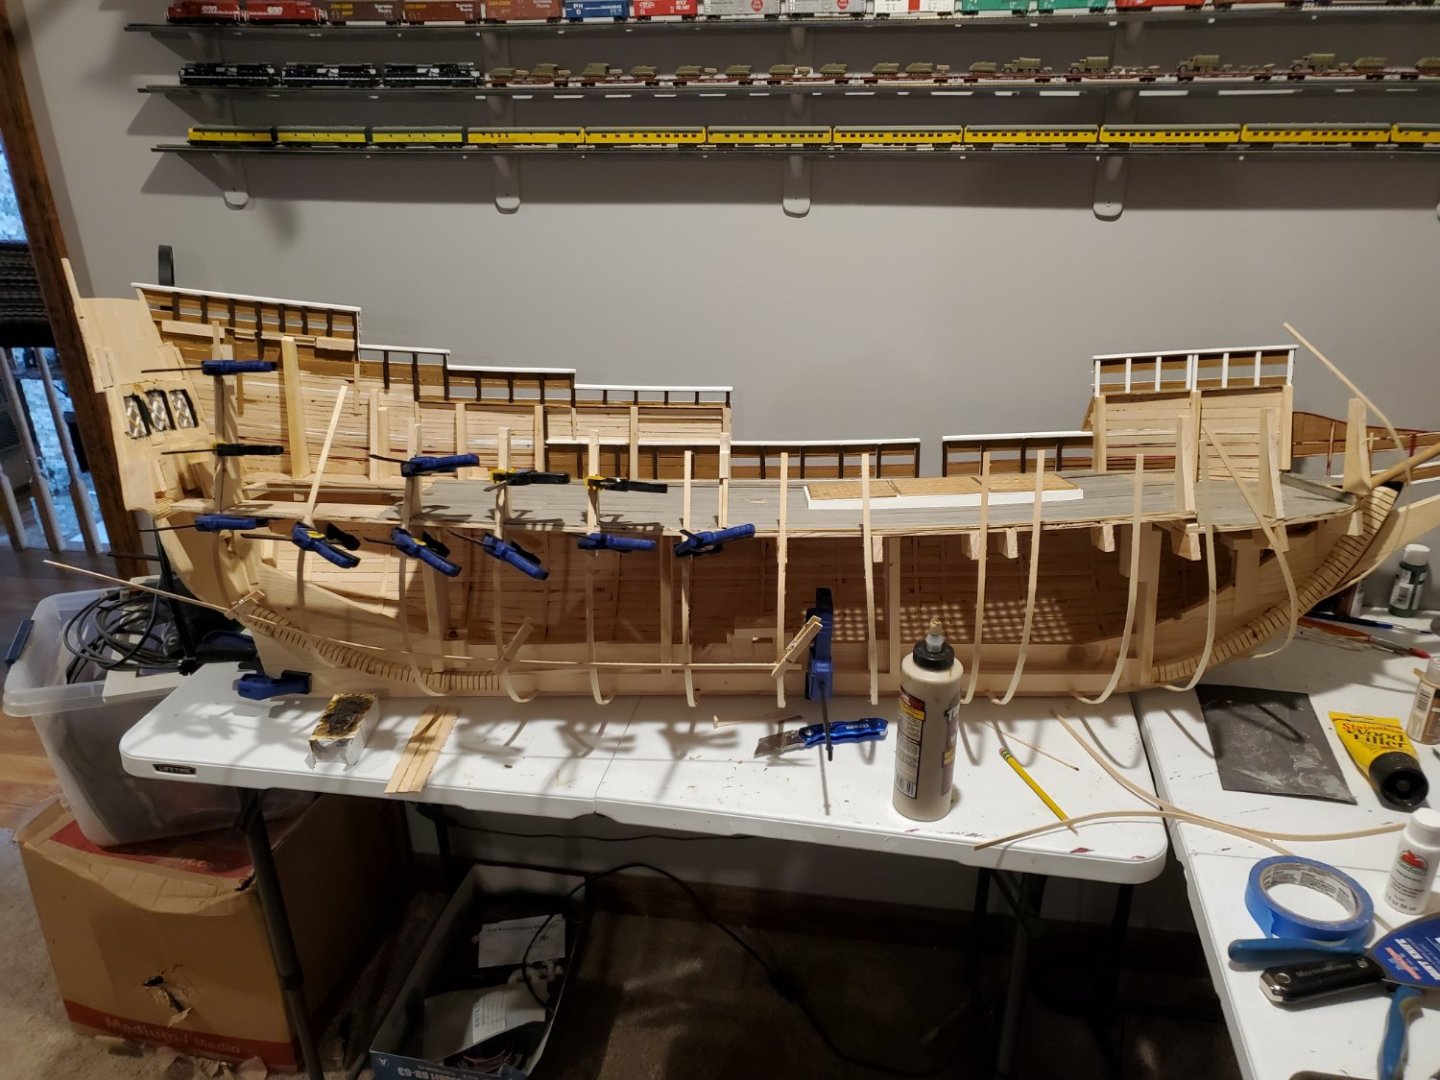
-
Mayflower by tj456 - 1/19 scale
tj456 replied to tj456's topic in - Build logs for subjects built 1501 - 1750
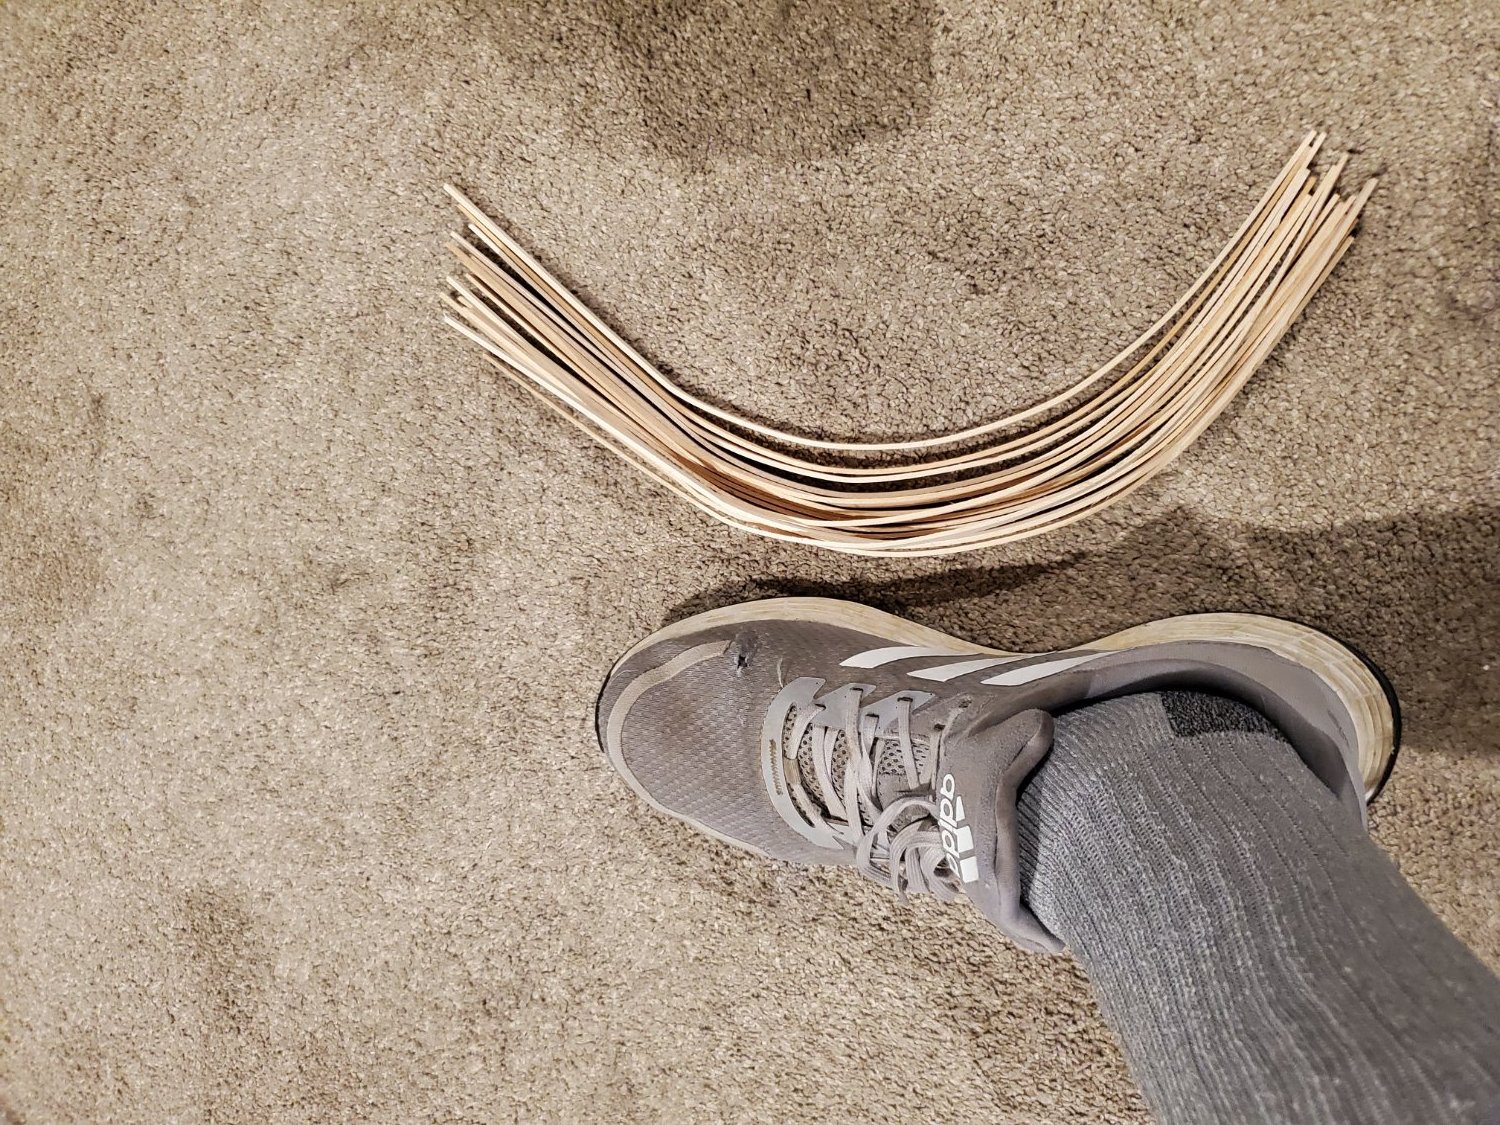
The 1st pic is the jig with ribs on it. The 2nd pic is the ribs out of the jig after 36 hours. I soaked the ribs in water for 6 hours, put them on the jig, and took my wife's iron and ironed them for a couple of minutes. My size 11 shoe is in the picture for scale but they are all 18 inches long.

-
Mayflower by tj456 - 1/19 scale
tj456 replied to tj456's topic in - Build logs for subjects built 1501 - 1750
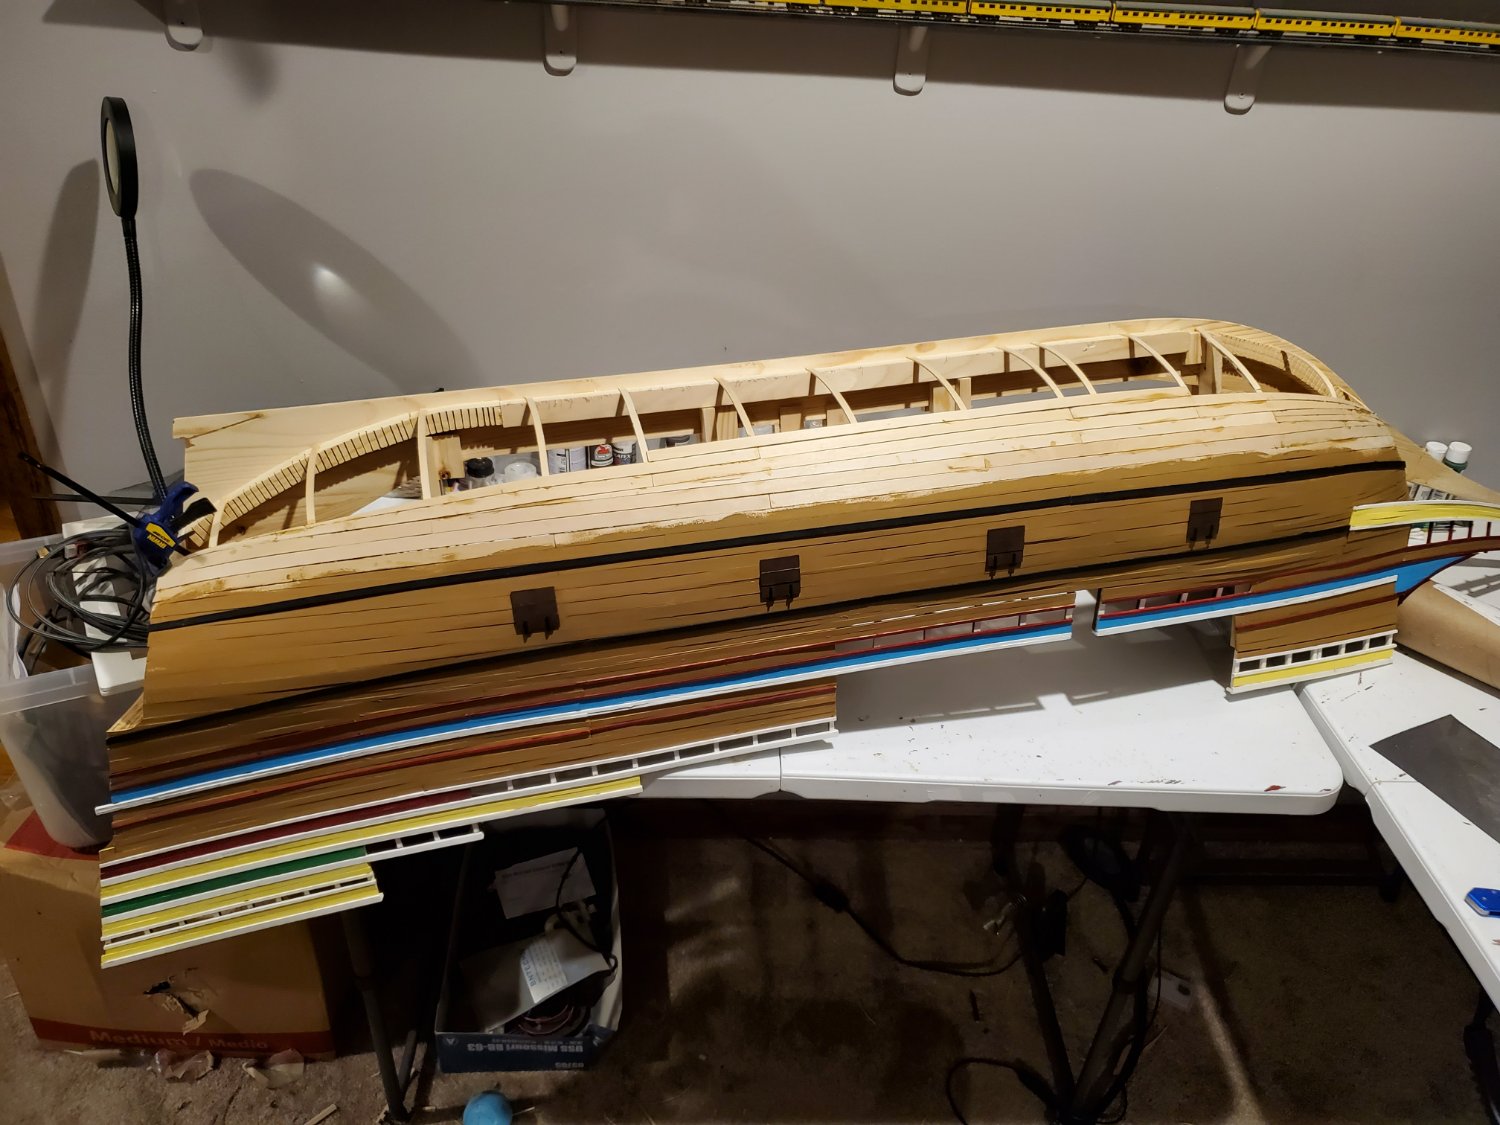
Now that the port side is mostly complete I have turned my attention to the starboard side. This picture gives a good view of the inside of the port side and is a good start point for the jig I made for the ribs. The port side ribs were just tensioned and bent but I had to clean up minor errors to make the lines flow nicely.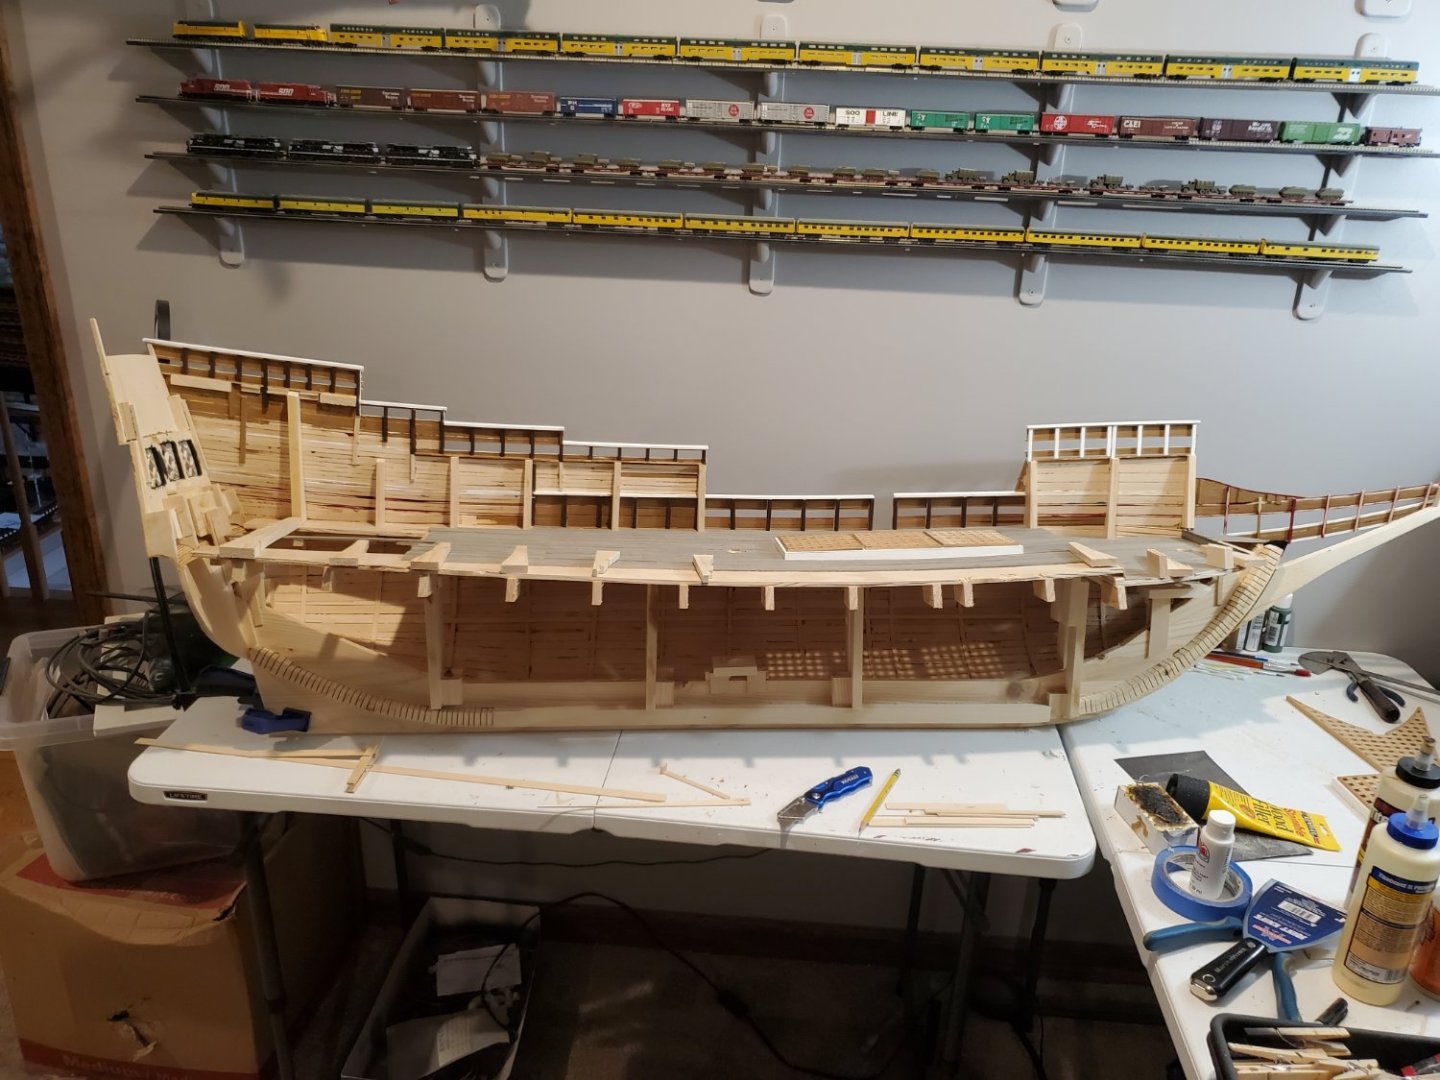
-
Mayflower by tj456 - 1/19 scale
tj456 replied to tj456's topic in - Build logs for subjects built 1501 - 1750
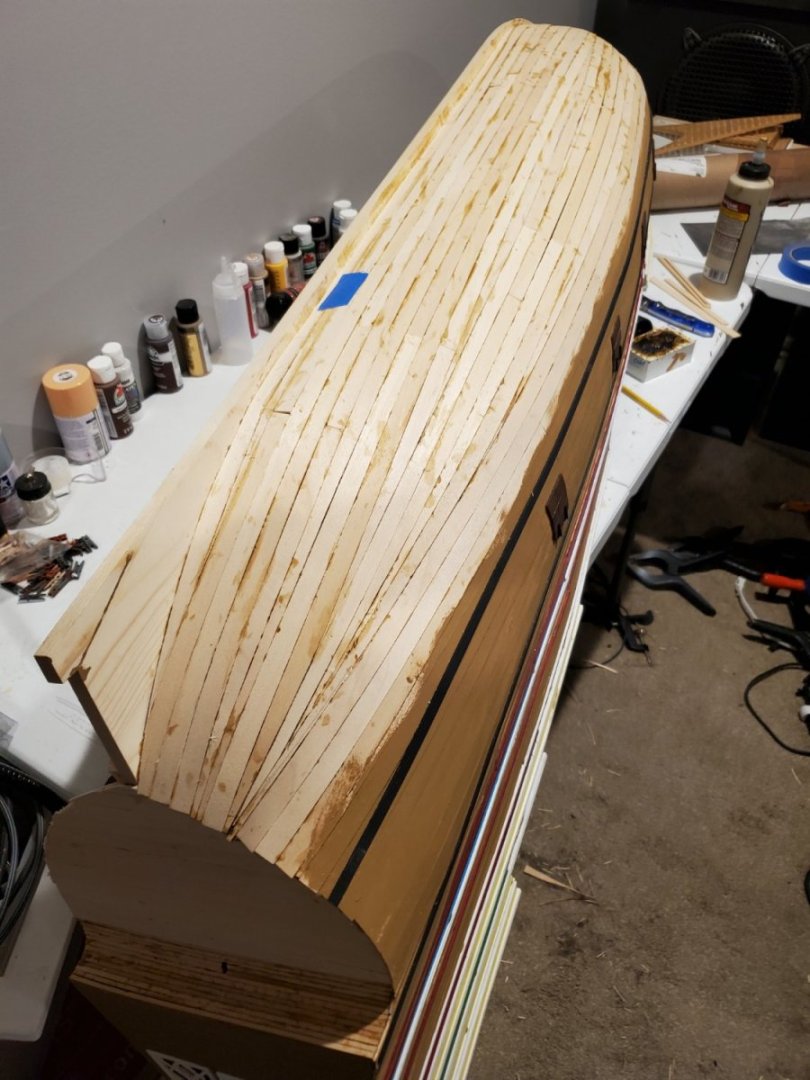
The bow did not come out as well as the stern but some serious sanding and spackle fixed my mistakes. Hopefully the learning curve will increase for the starboard side.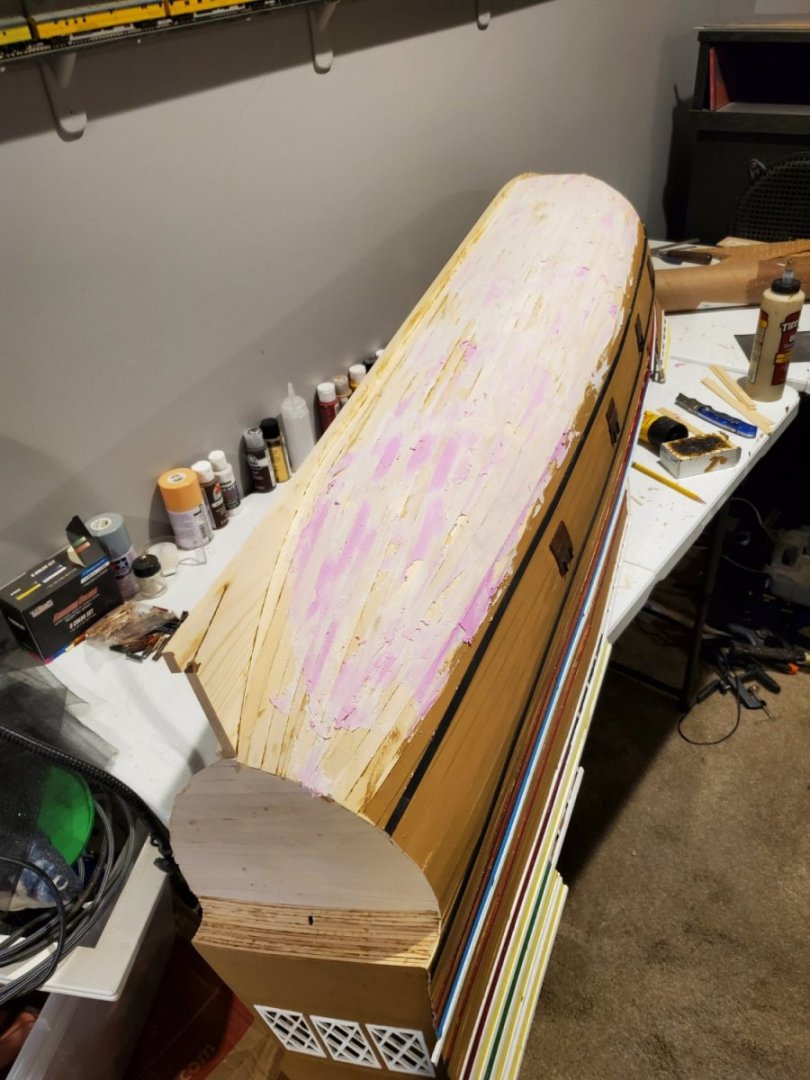

-
Mayflower by tj456 - 1/19 scale
tj456 replied to tj456's topic in - Build logs for subjects built 1501 - 1750
An interesting article and thanks. I did the tapers to a point because it was easy on the big belt sander. Here's what the end results came out looking like:
-
Mayflower by tj456 - 1/19 scale
tj456 replied to tj456's topic in - Build logs for subjects built 1501 - 1750
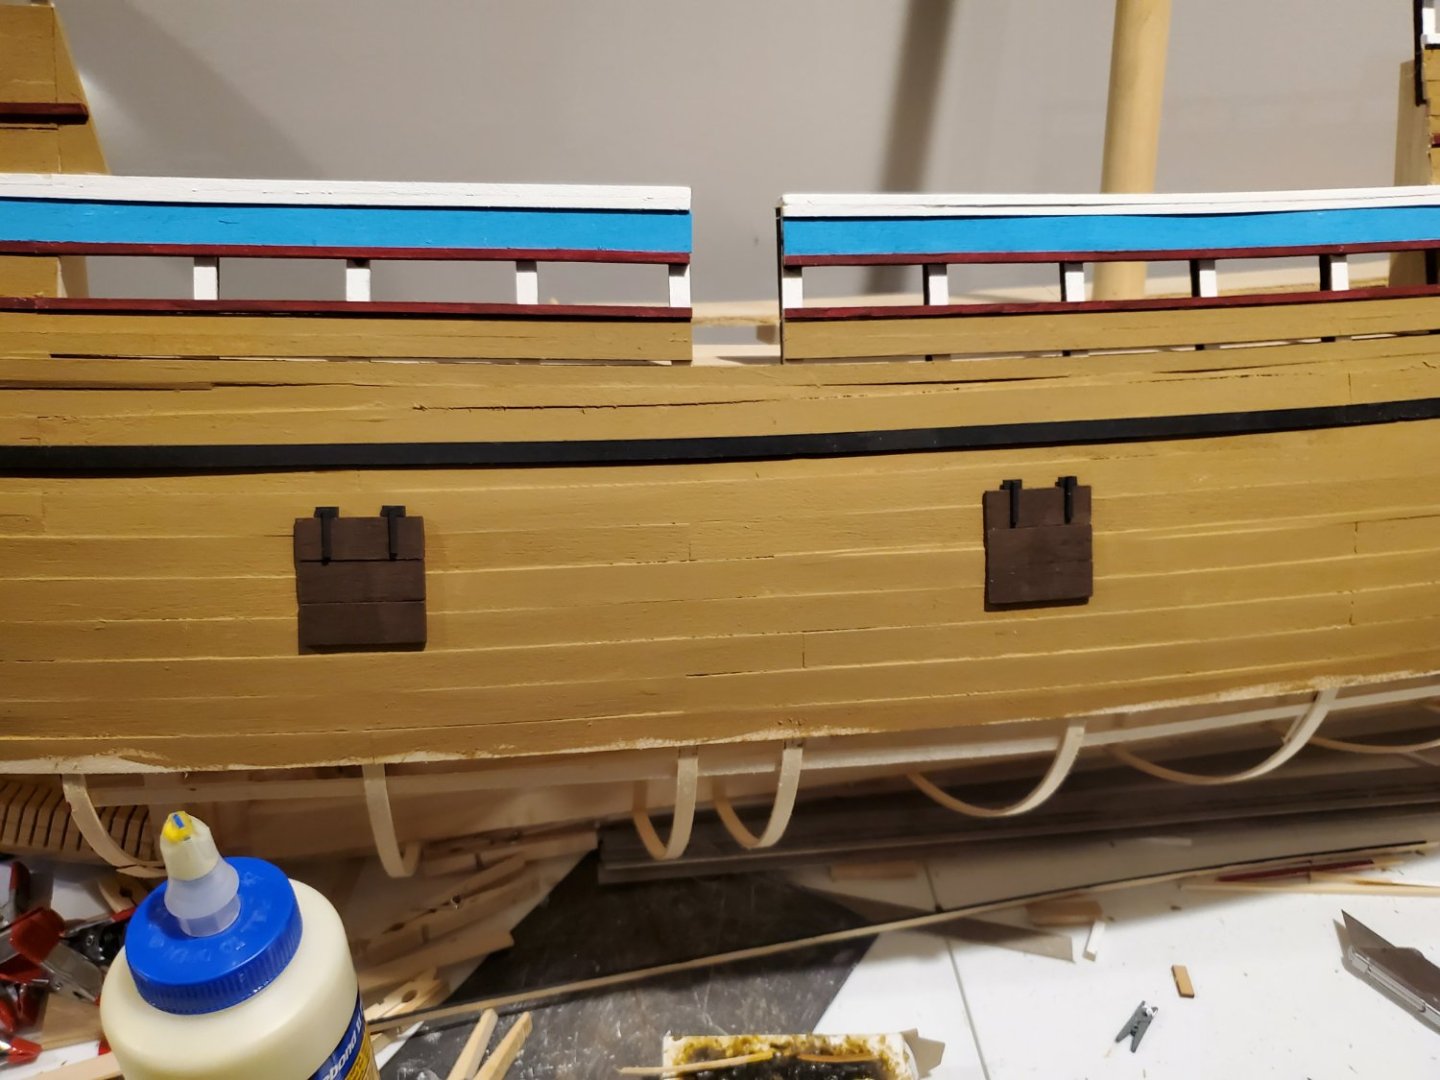
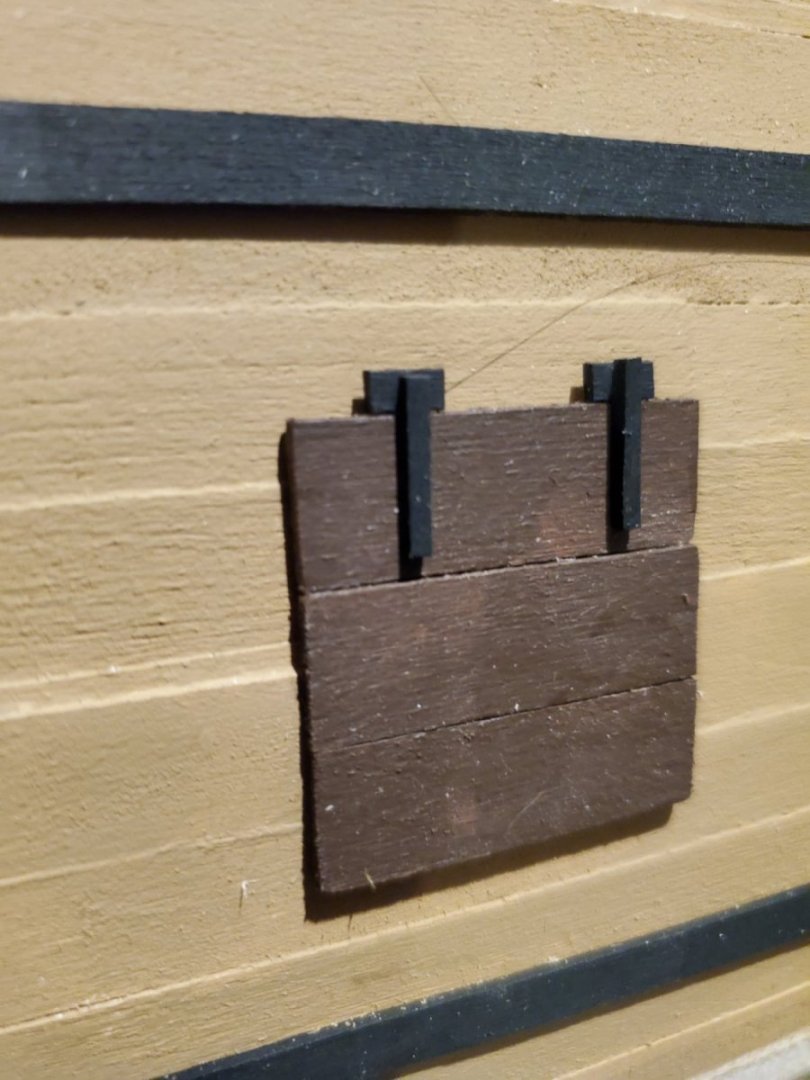
I'm now working down the portside hull. The Mayflower didn't carry much weaponry so the easy way was to just glue gun port covers on to the hull. The hinges are simply 1/16 x 1/16 strips glued to a 1/16 x 1/8 piece of scrap. It looks good and was cheap and easy. The hull planking is proving to be more difficult than the smaller models I have built in the past. You really have to taper most planks but still maintain the lines for ease of the next row. Luckily I have a large stationary belt sander which makes this easier. Any tips on planking or any other issues would be greatly appreciated as this is a 1st for me.
-
Mayflower by tj456 - 1/19 scale
tj456 replied to tj456's topic in - Build logs for subjects built 1501 - 1750
I forgot to post this one...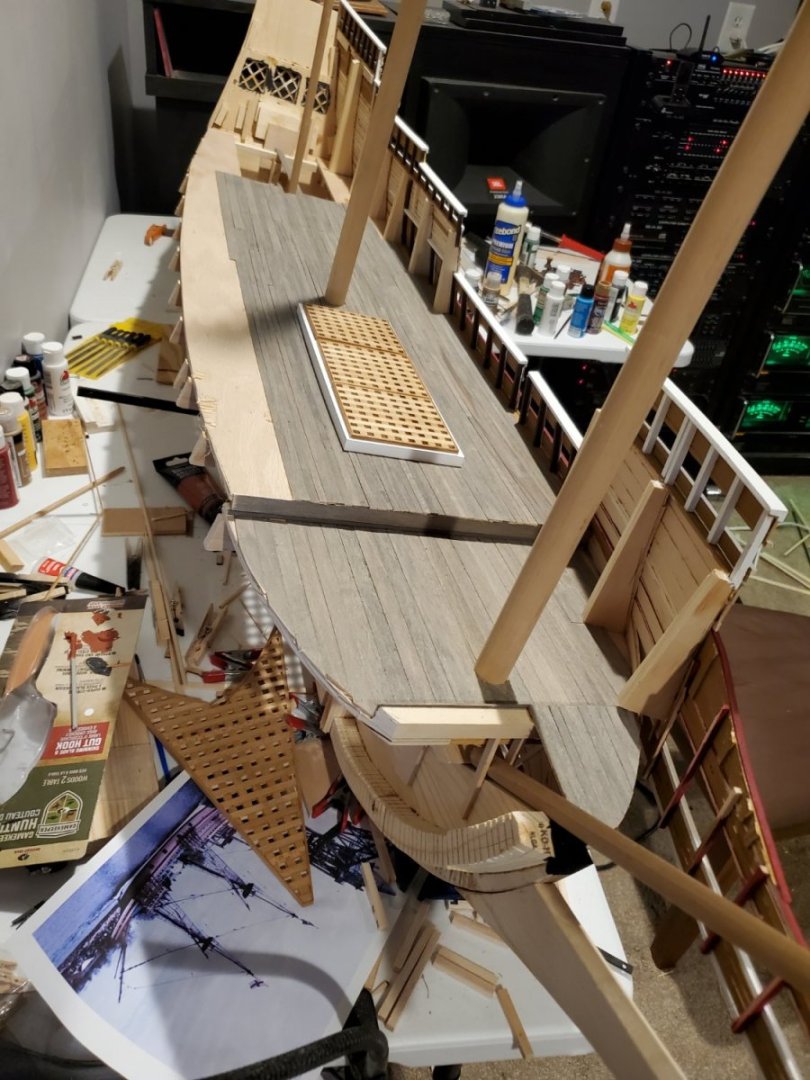
-
Mayflower by tj456 - 1/19 scale
tj456 replied to tj456's topic in - Build logs for subjects built 1501 - 1750
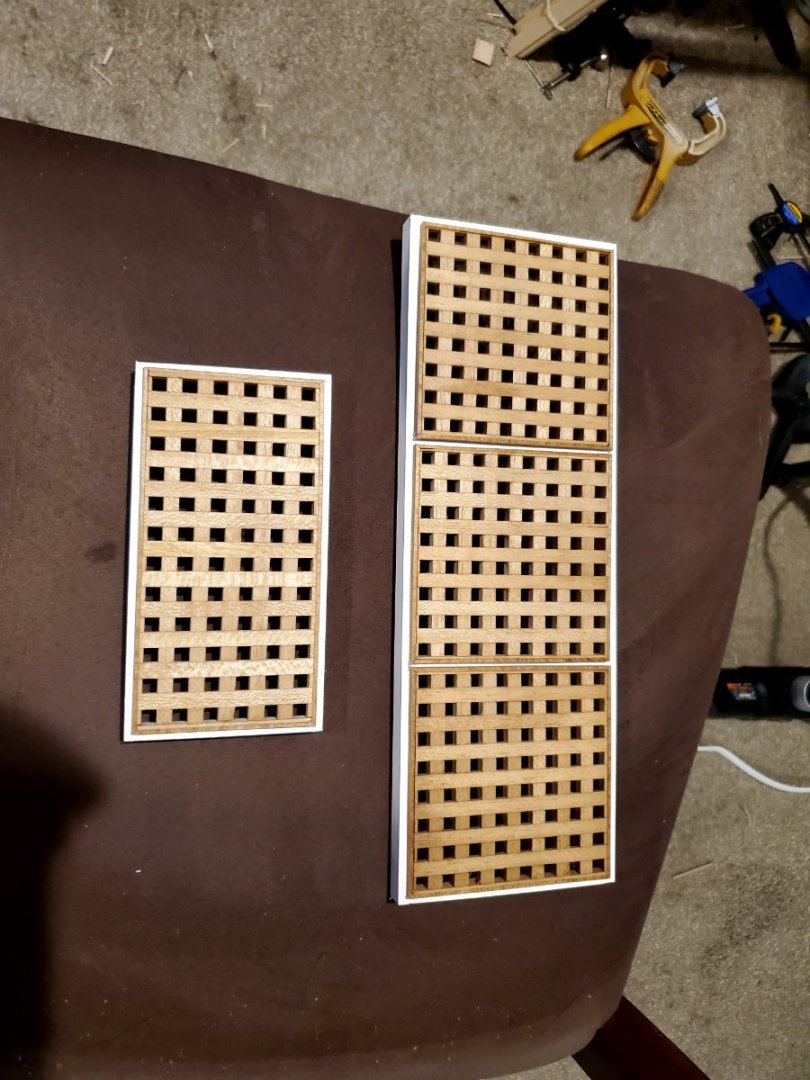
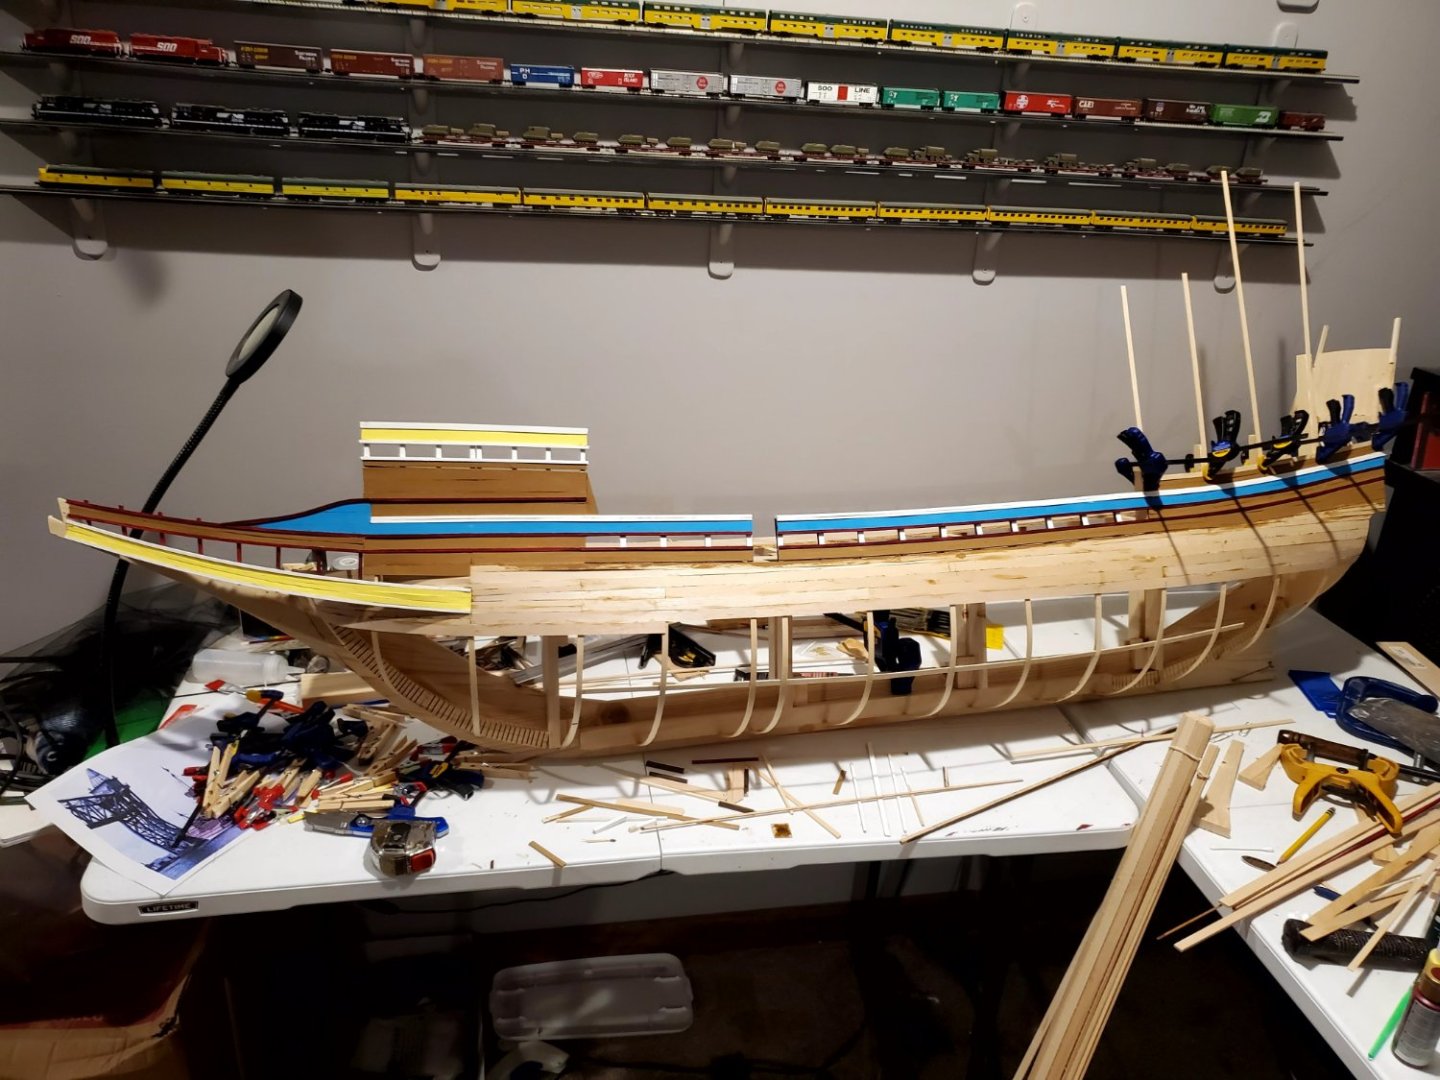
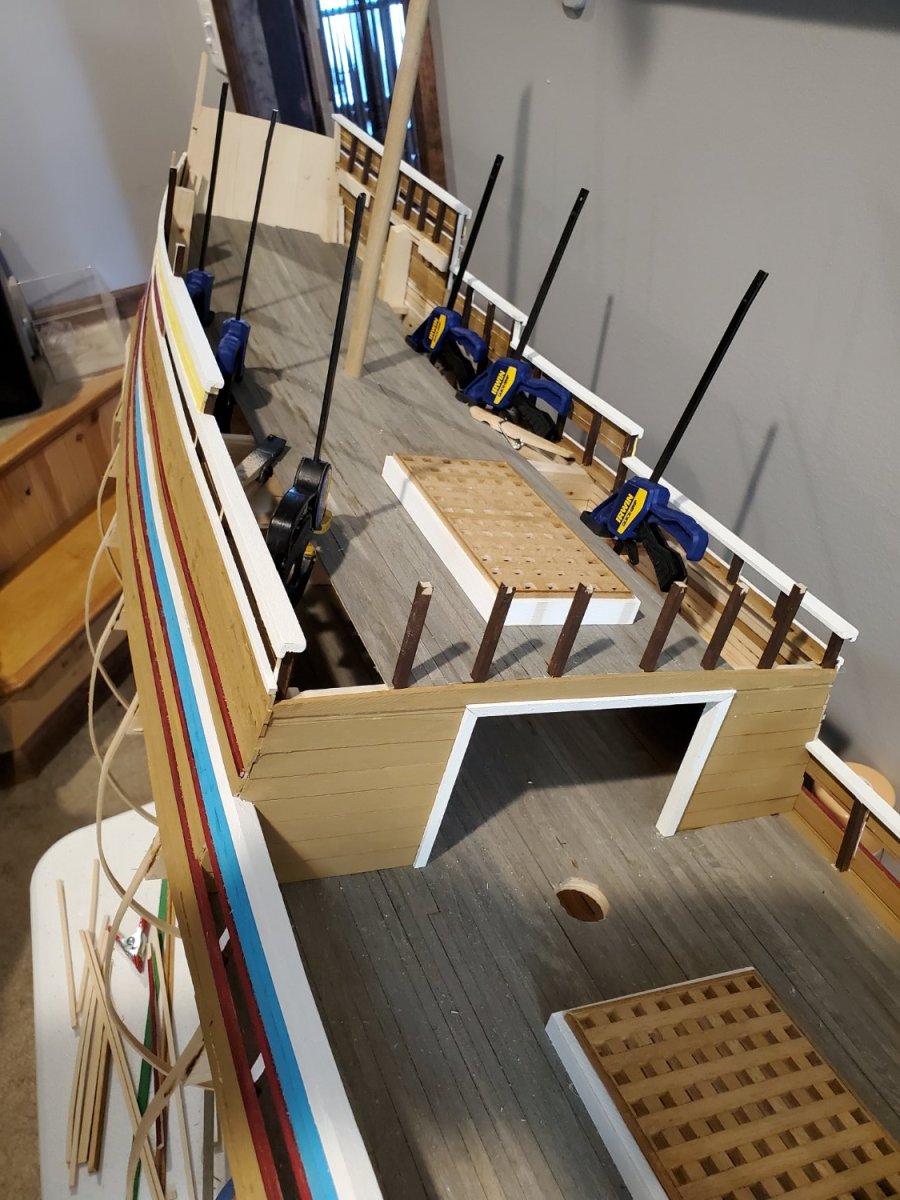
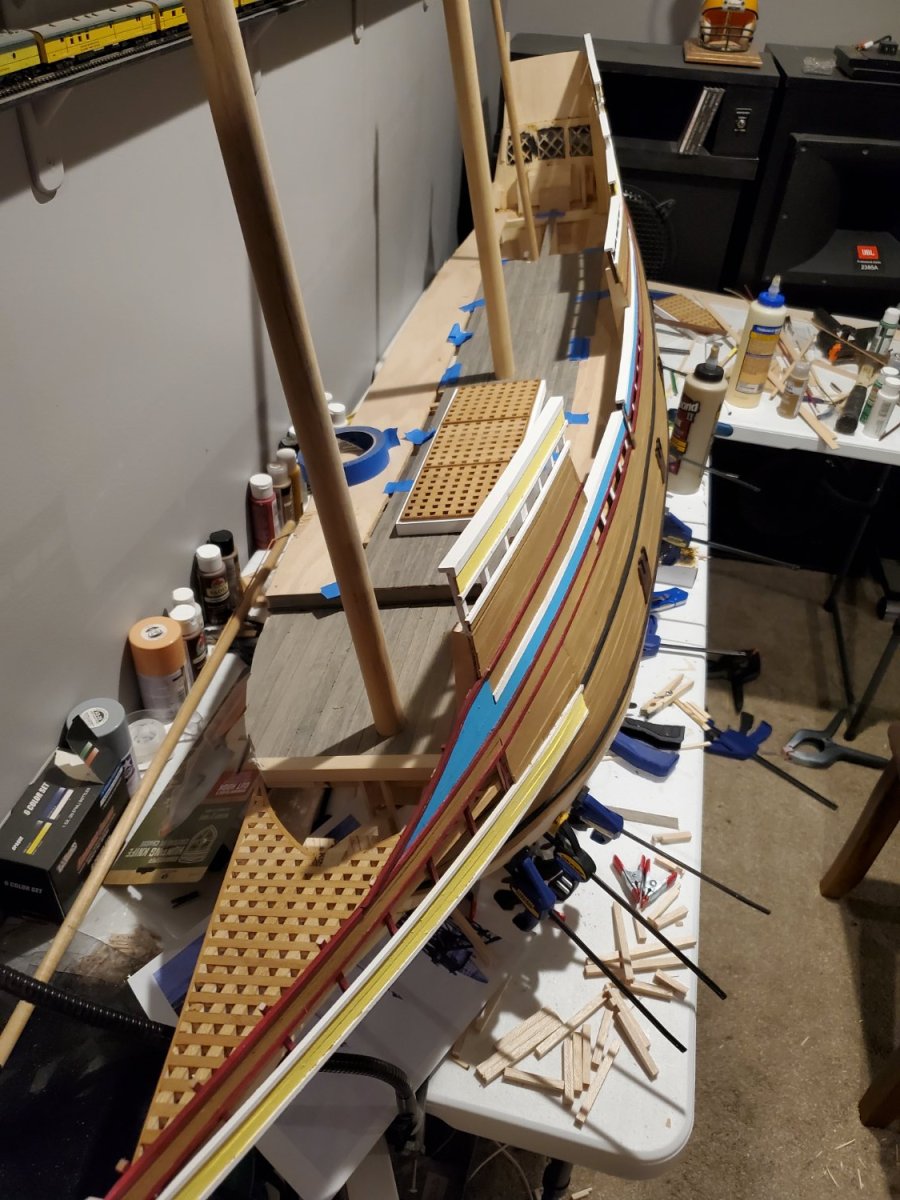
Since I finished the hatches I went ahead and laid the deck

-
Mayflower by tj456 - 1/19 scale
tj456 replied to tj456's topic in - Build logs for subjects built 1501 - 1750
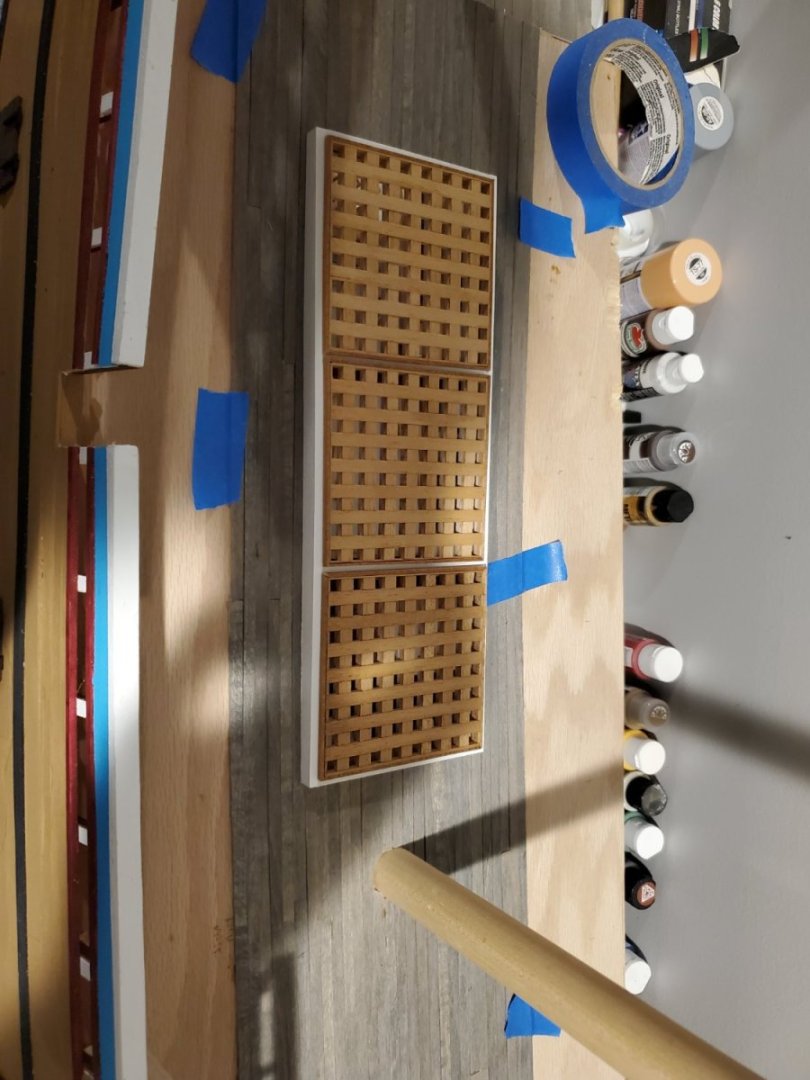
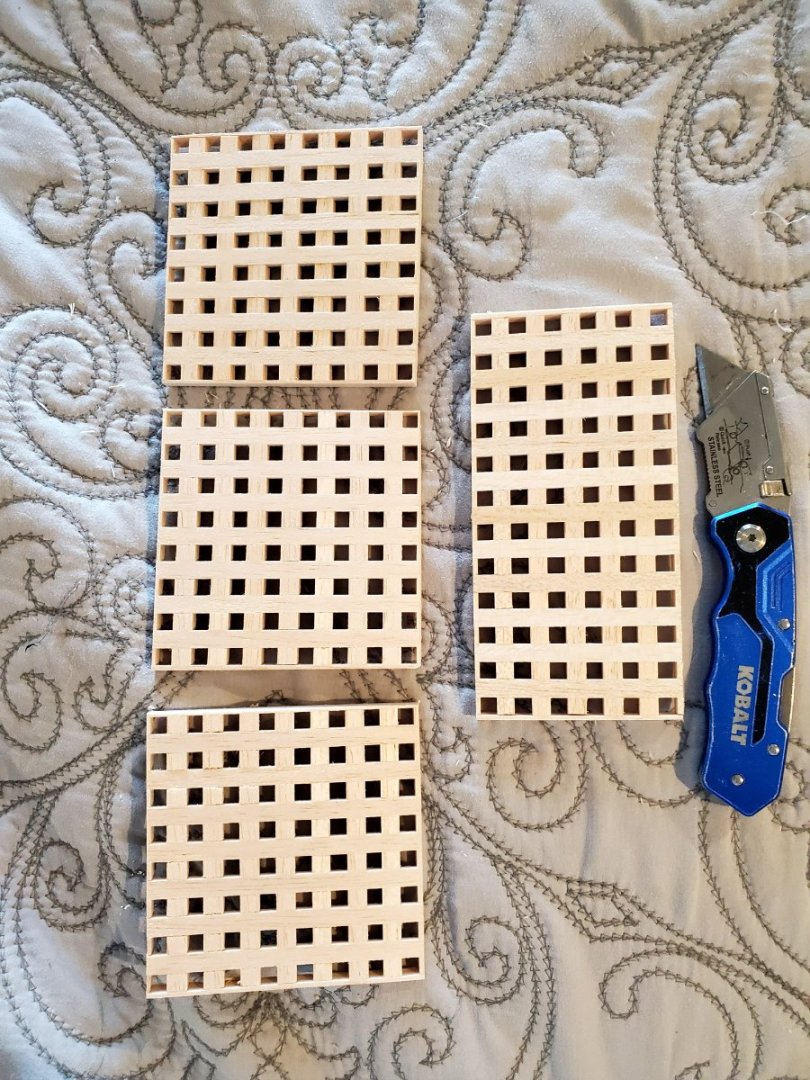
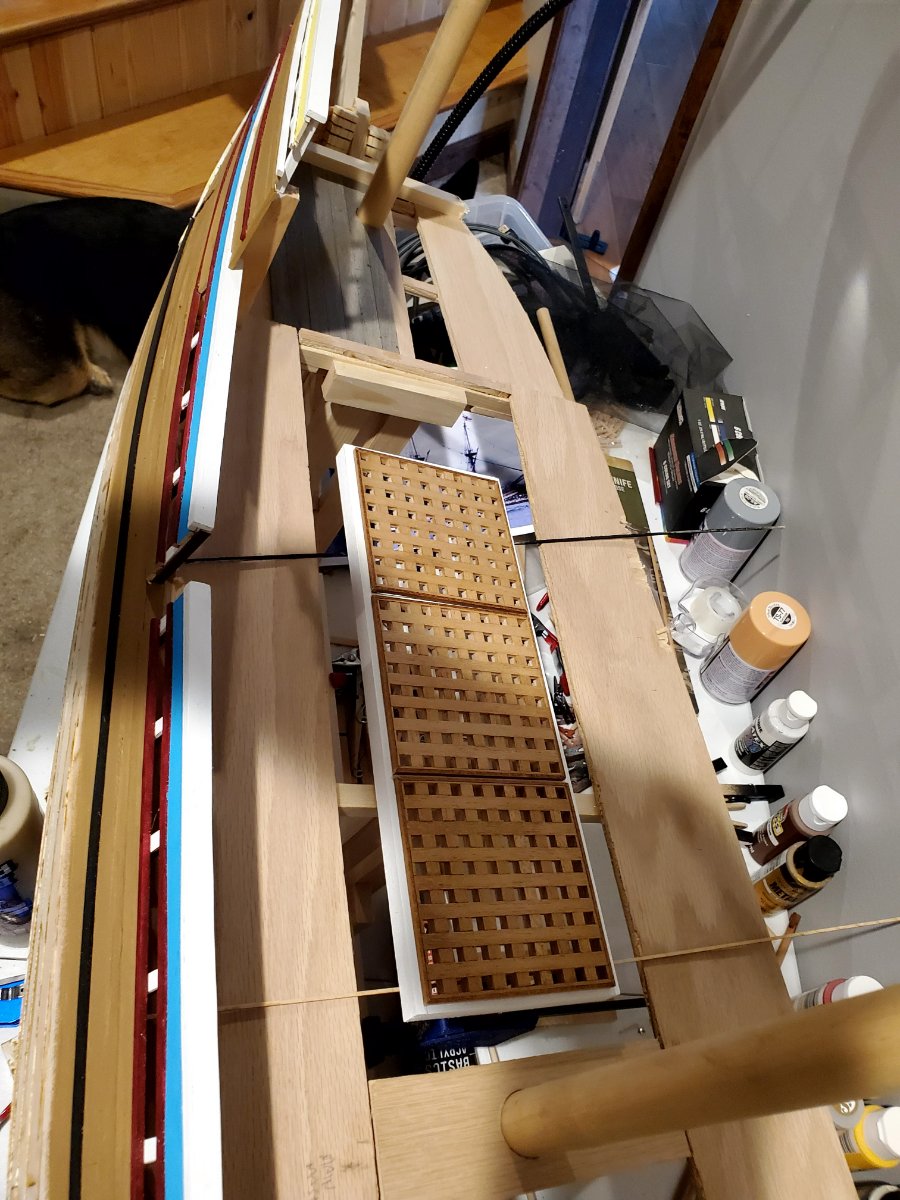
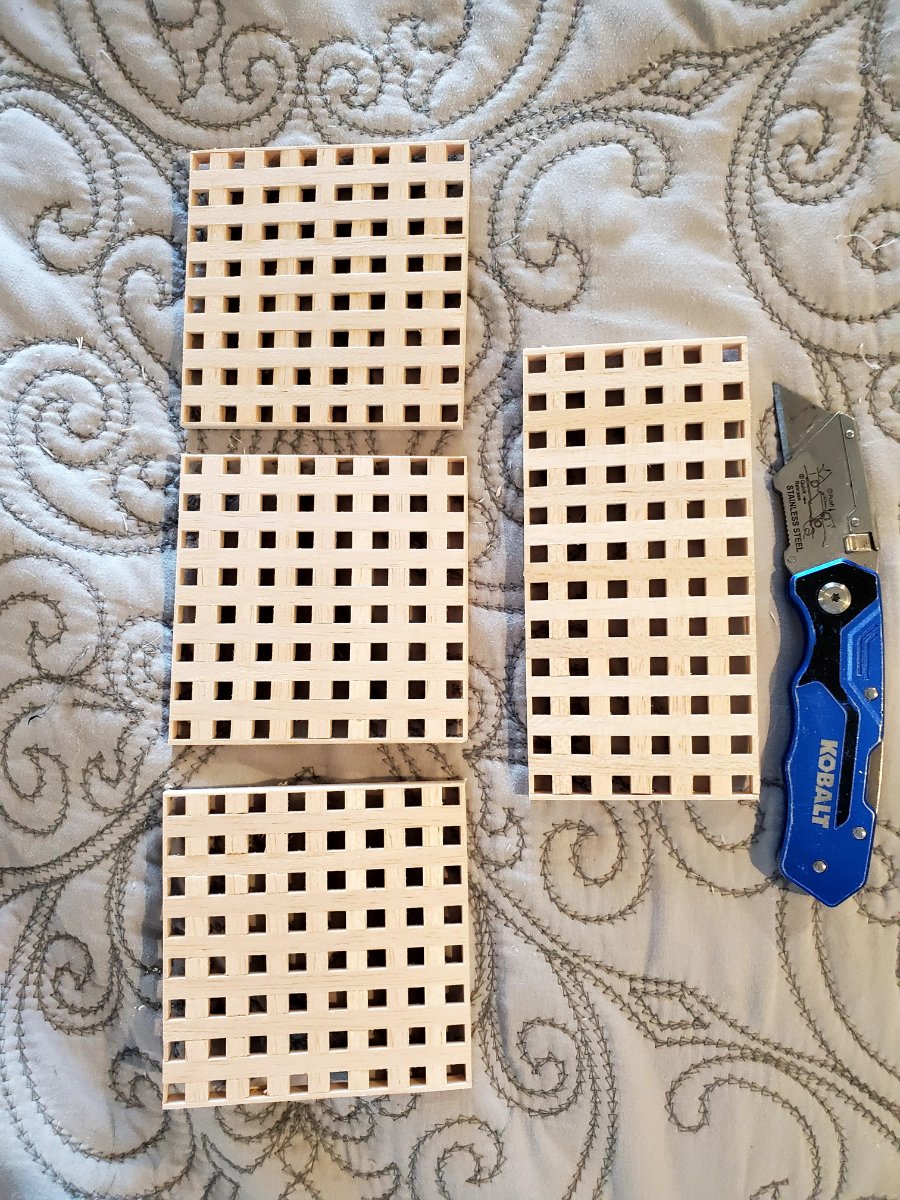
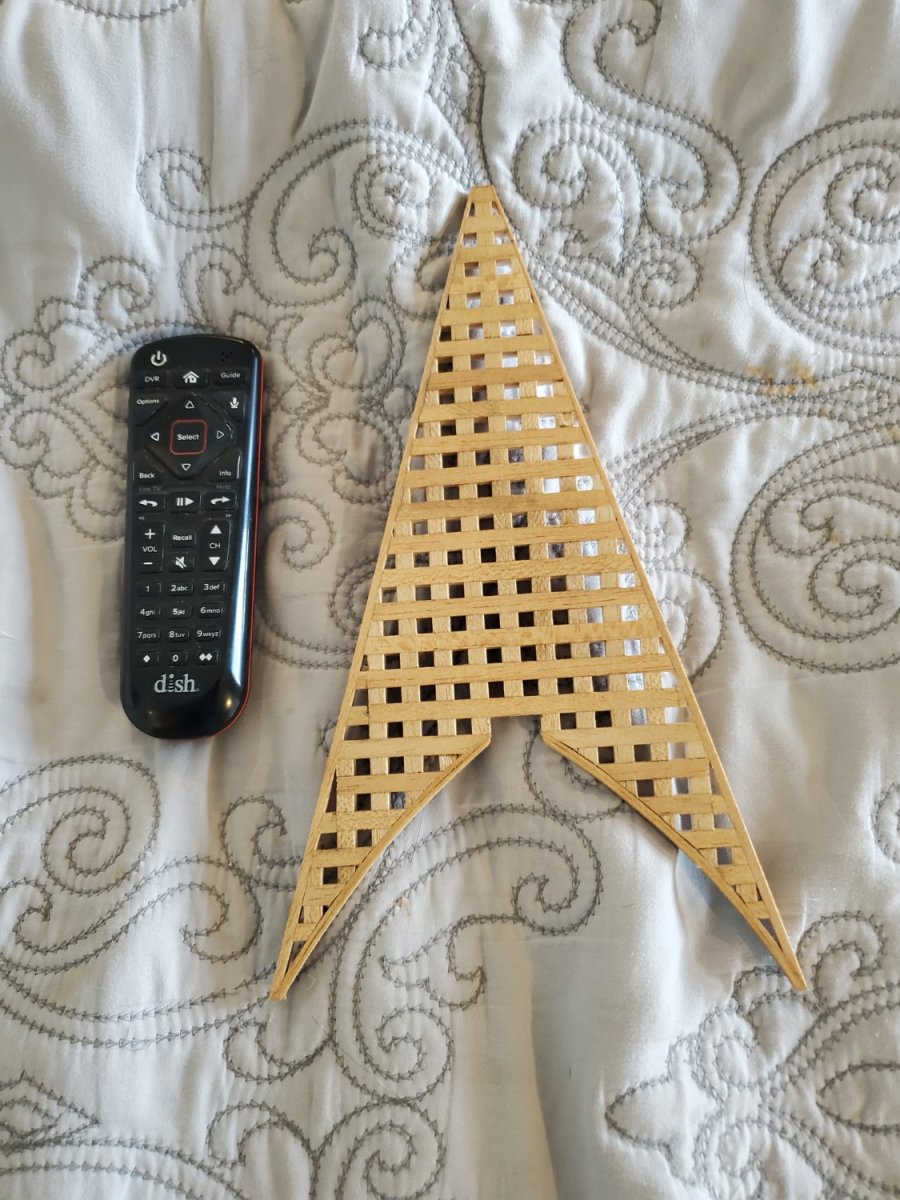
While waiting for glue to dry I made the hatch grates.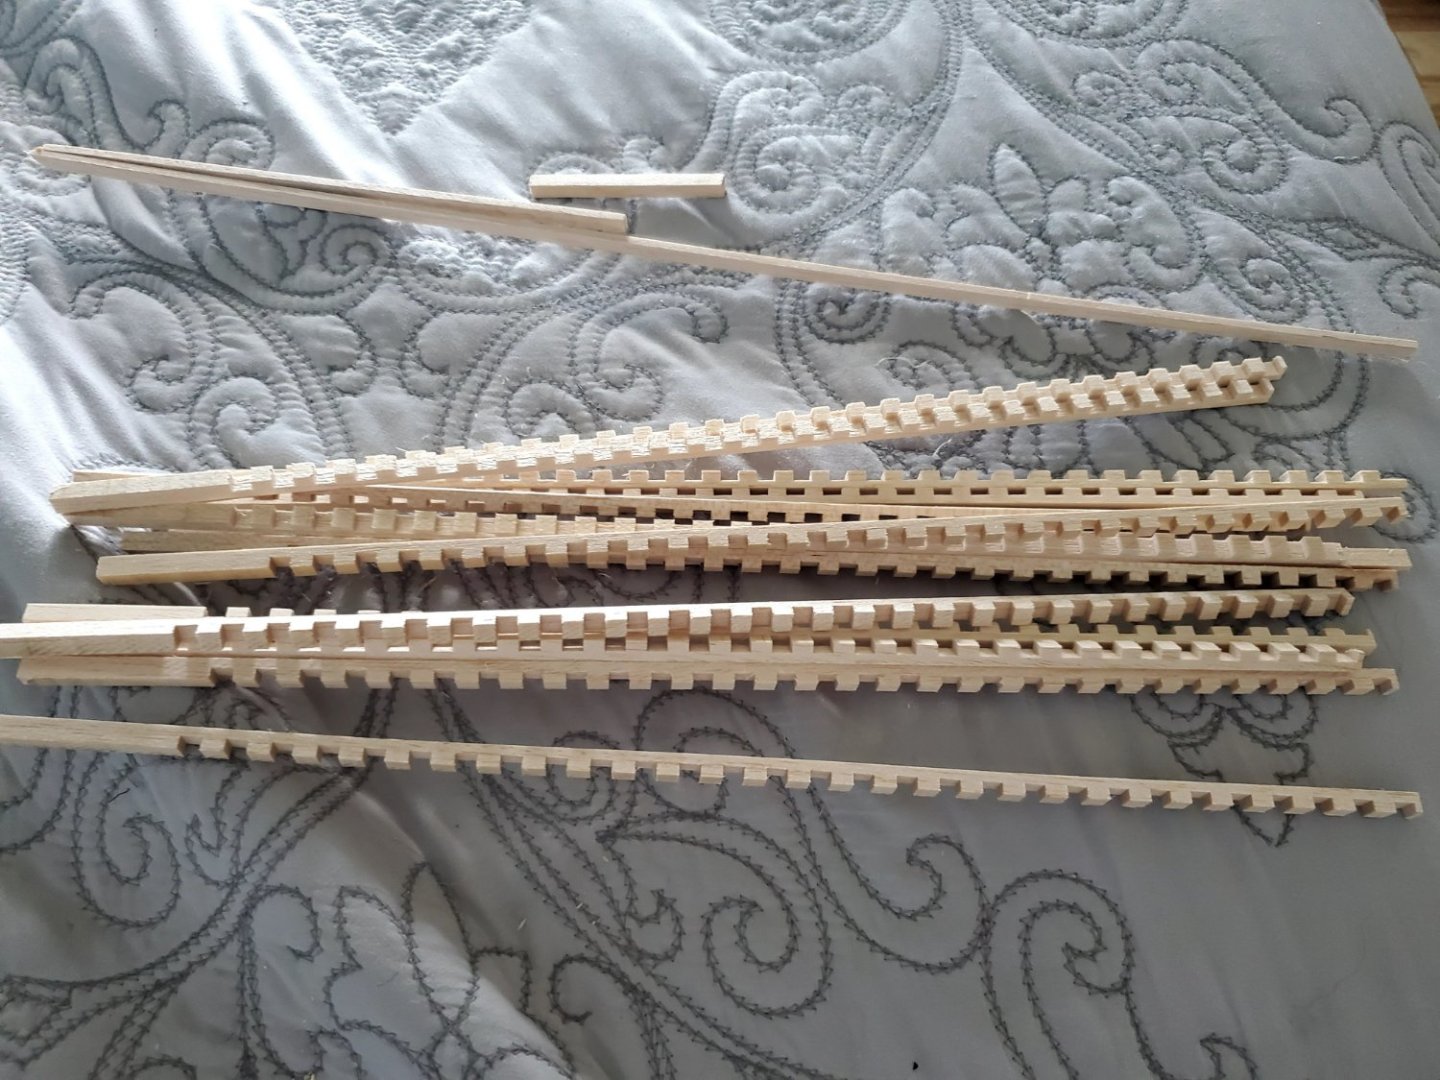

-
Mayflower by tj456 - 1/19 scale
tj456 replied to tj456's topic in - Build logs for subjects built 1501 - 1750
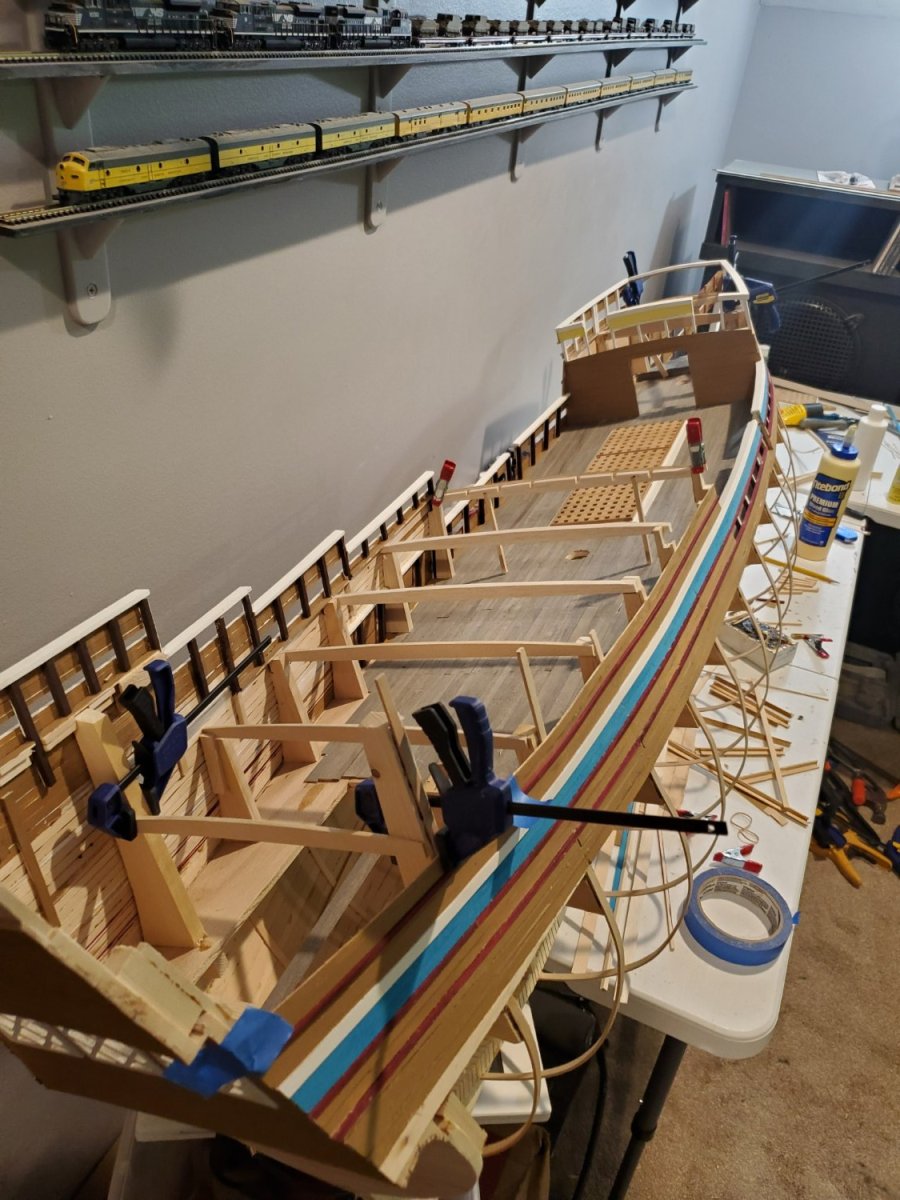
I also added some temporary masts and spinnaker just to get an idea of how big this thing is going to be. The final length will be 81 inches. -
Mayflower by tj456 - 1/19 scale
tj456 replied to tj456's topic in - Build logs for subjects built 1501 - 1750
Now the entire port side is more or less complete..thumb.jpeg.e0d4bf181eb341182995b2c91bf2072b.jpeg)
.thumb.jpeg.893e2e93bf9e6dfa4c1ea07ab180047f.jpeg)
.thumb.jpeg.f81b7753a275f0da0c05304b6bf6af31.jpeg)
.thumb.jpeg.5f46f4971b80873ad41c1484b799e95f.jpeg)
-
Mayflower by tj456 - 1/19 scale
tj456 replied to tj456's topic in - Build logs for subjects built 1501 - 1750
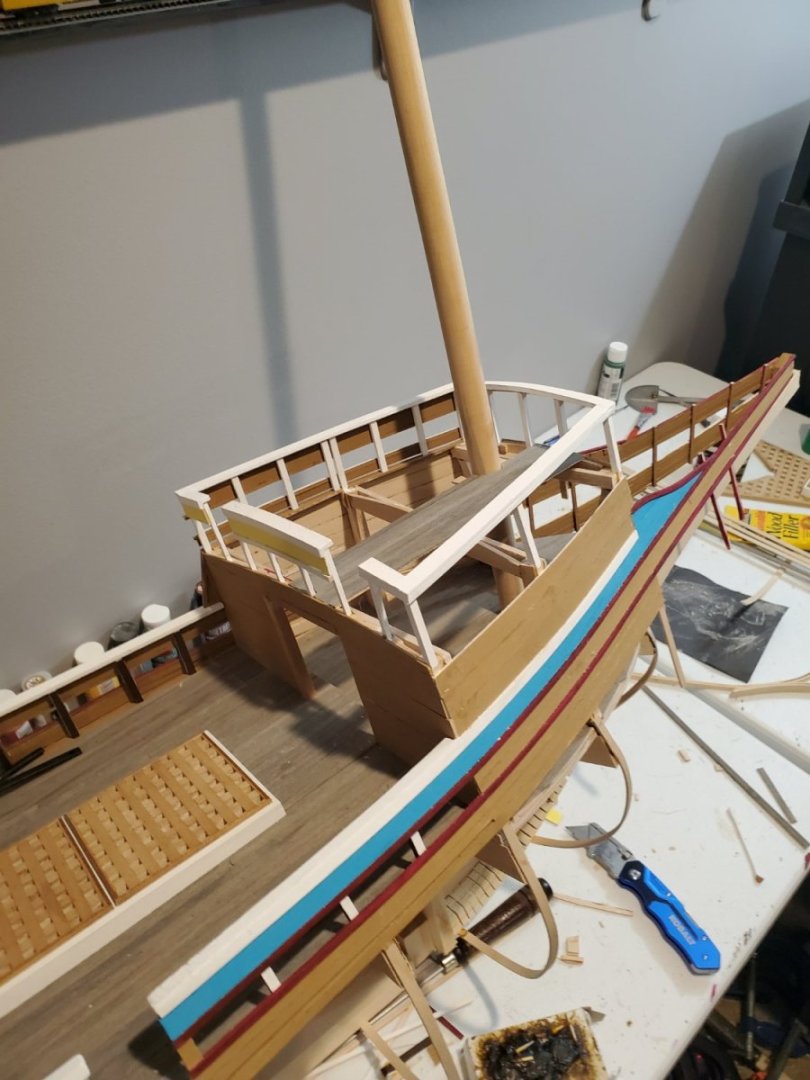
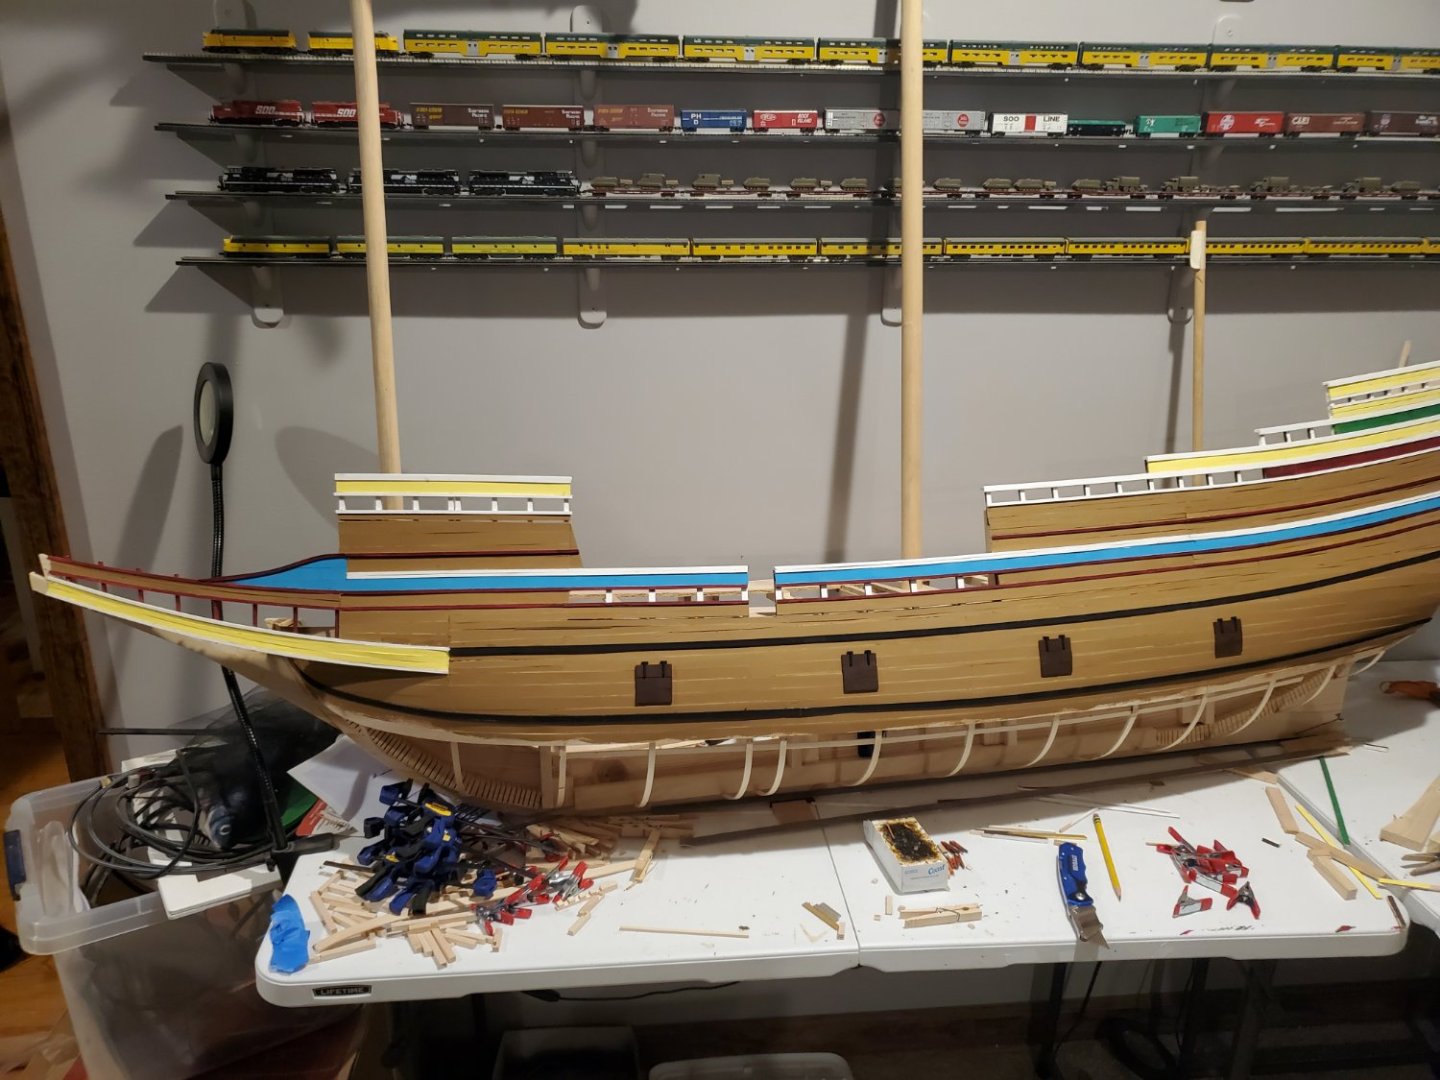
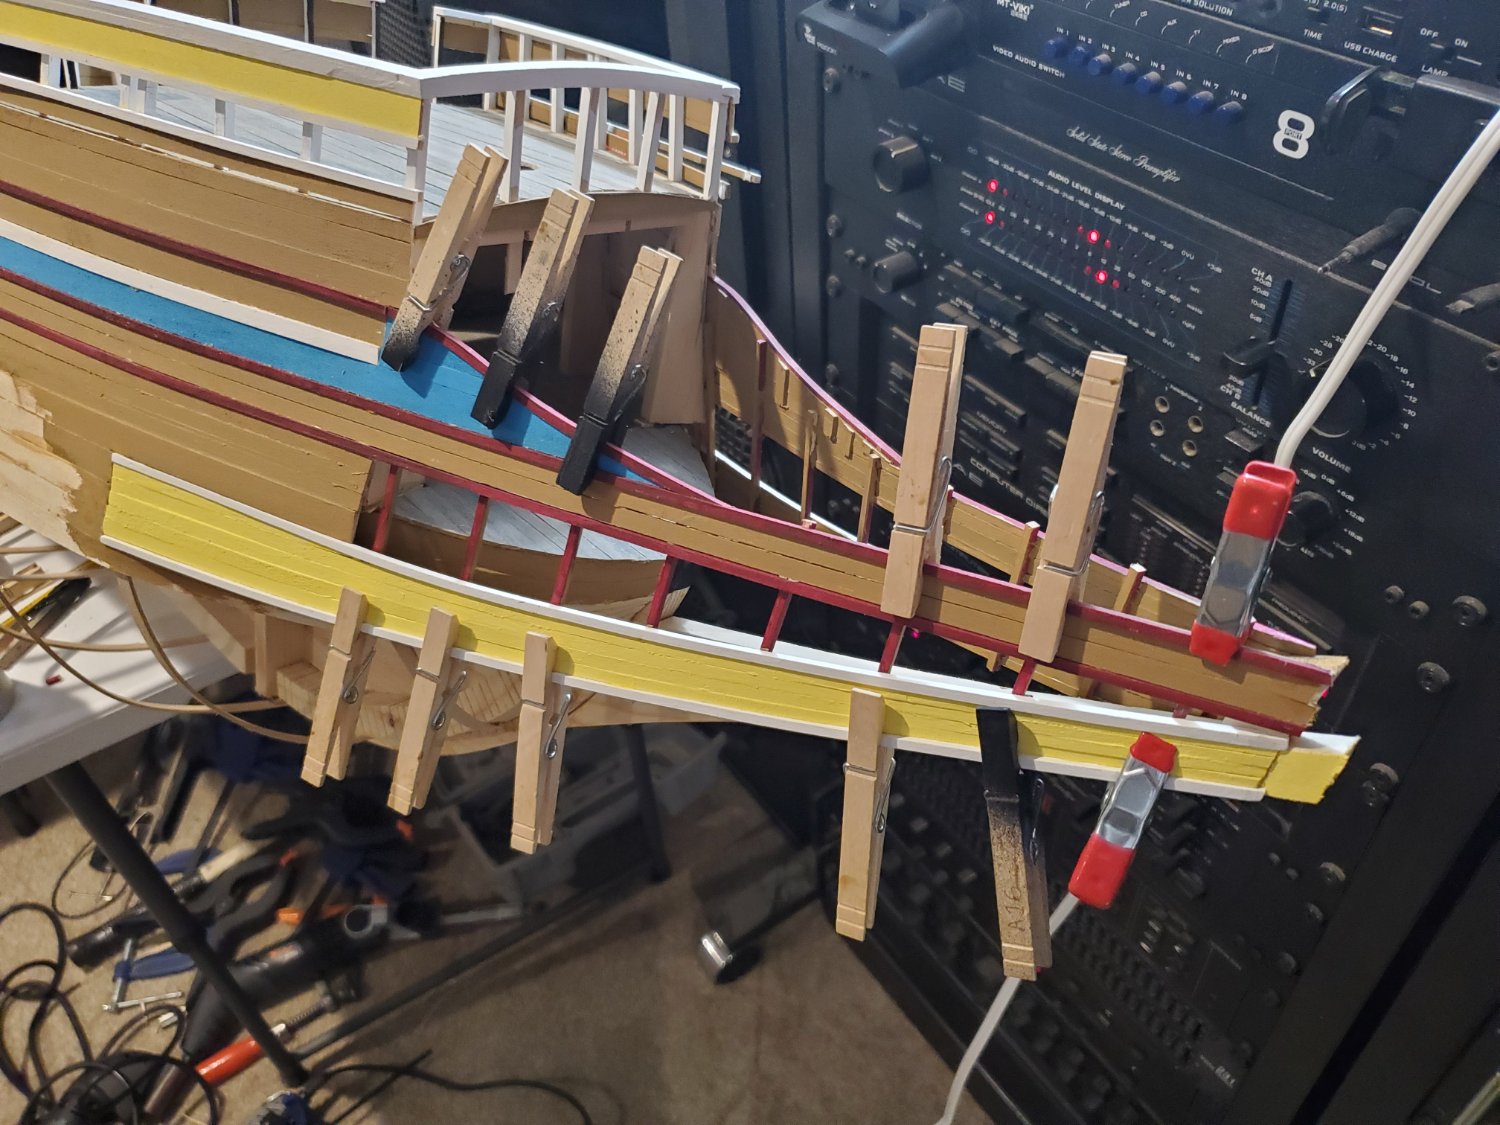
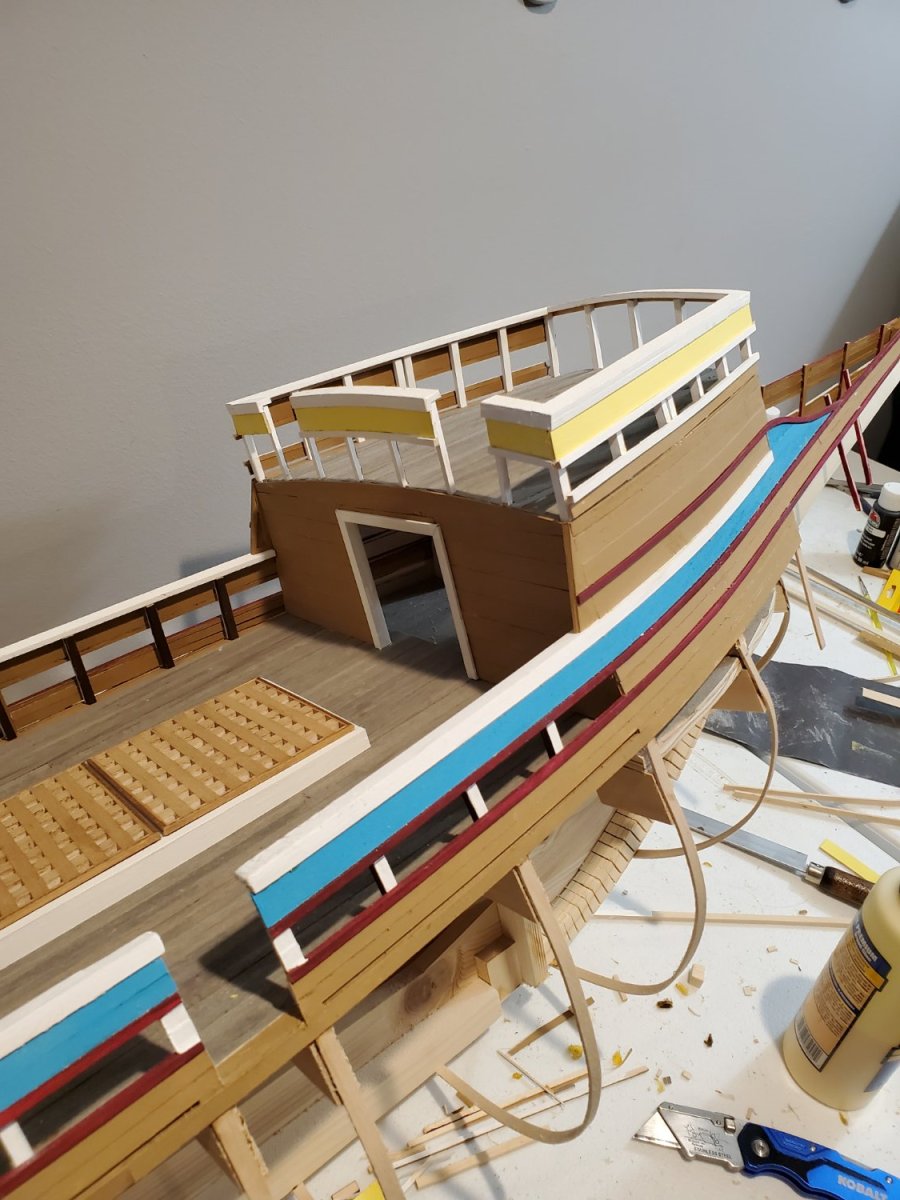
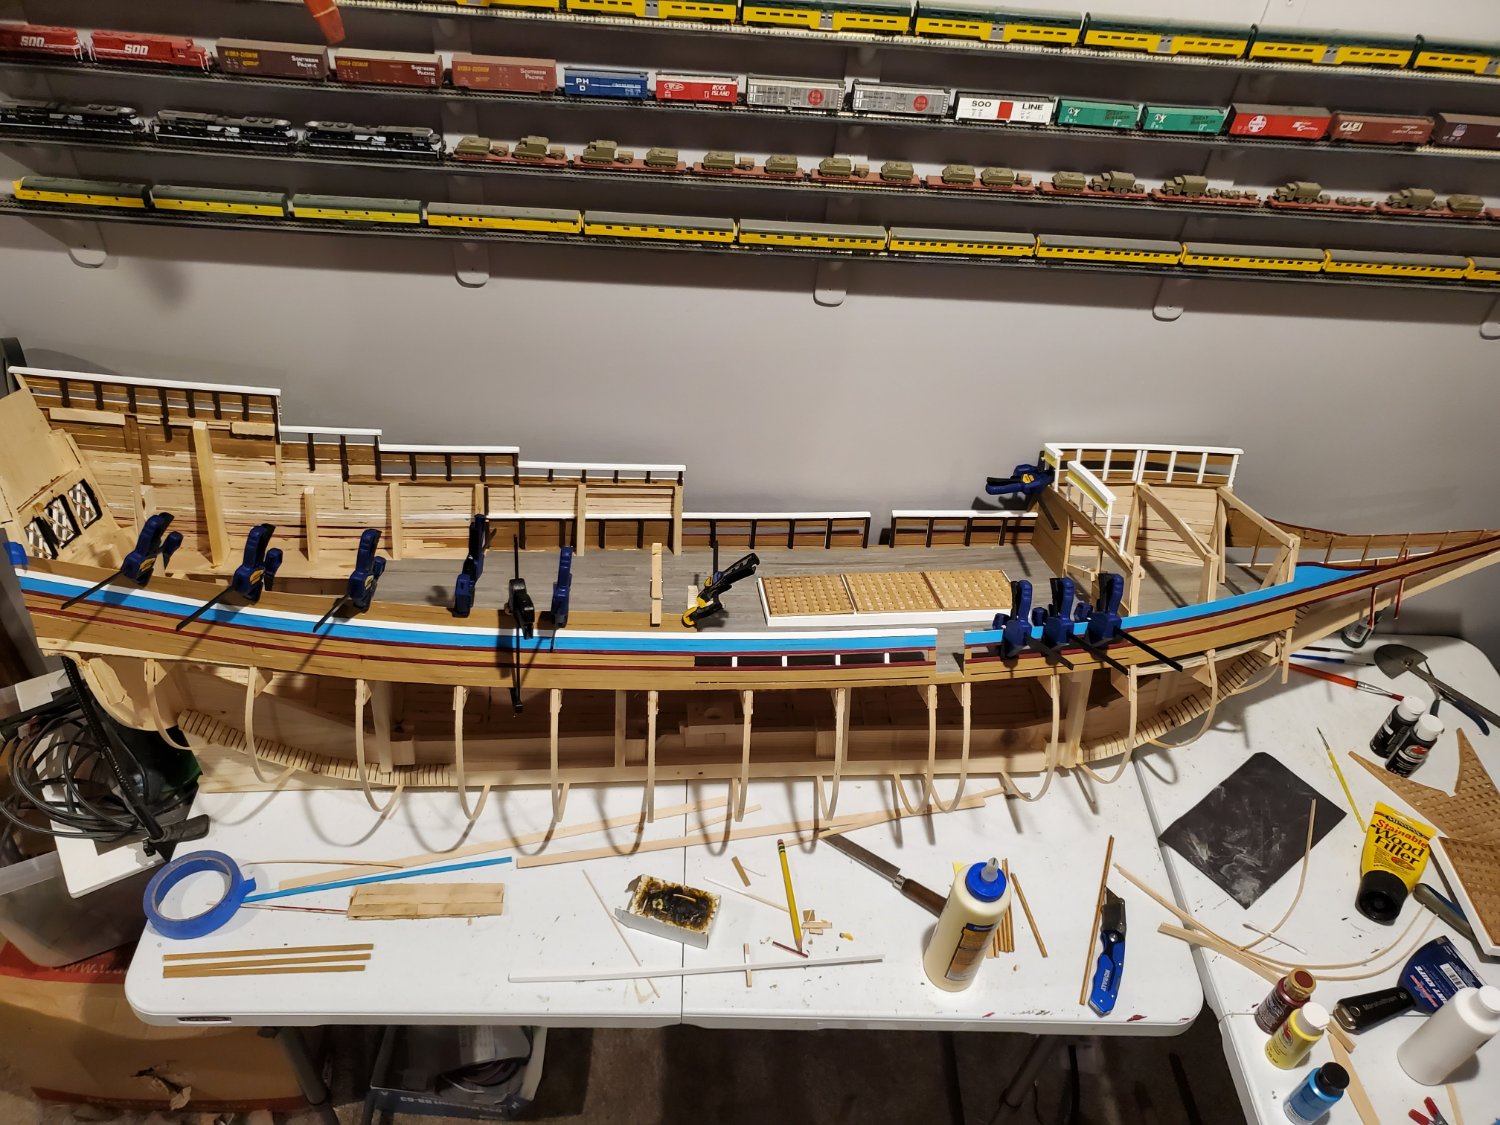
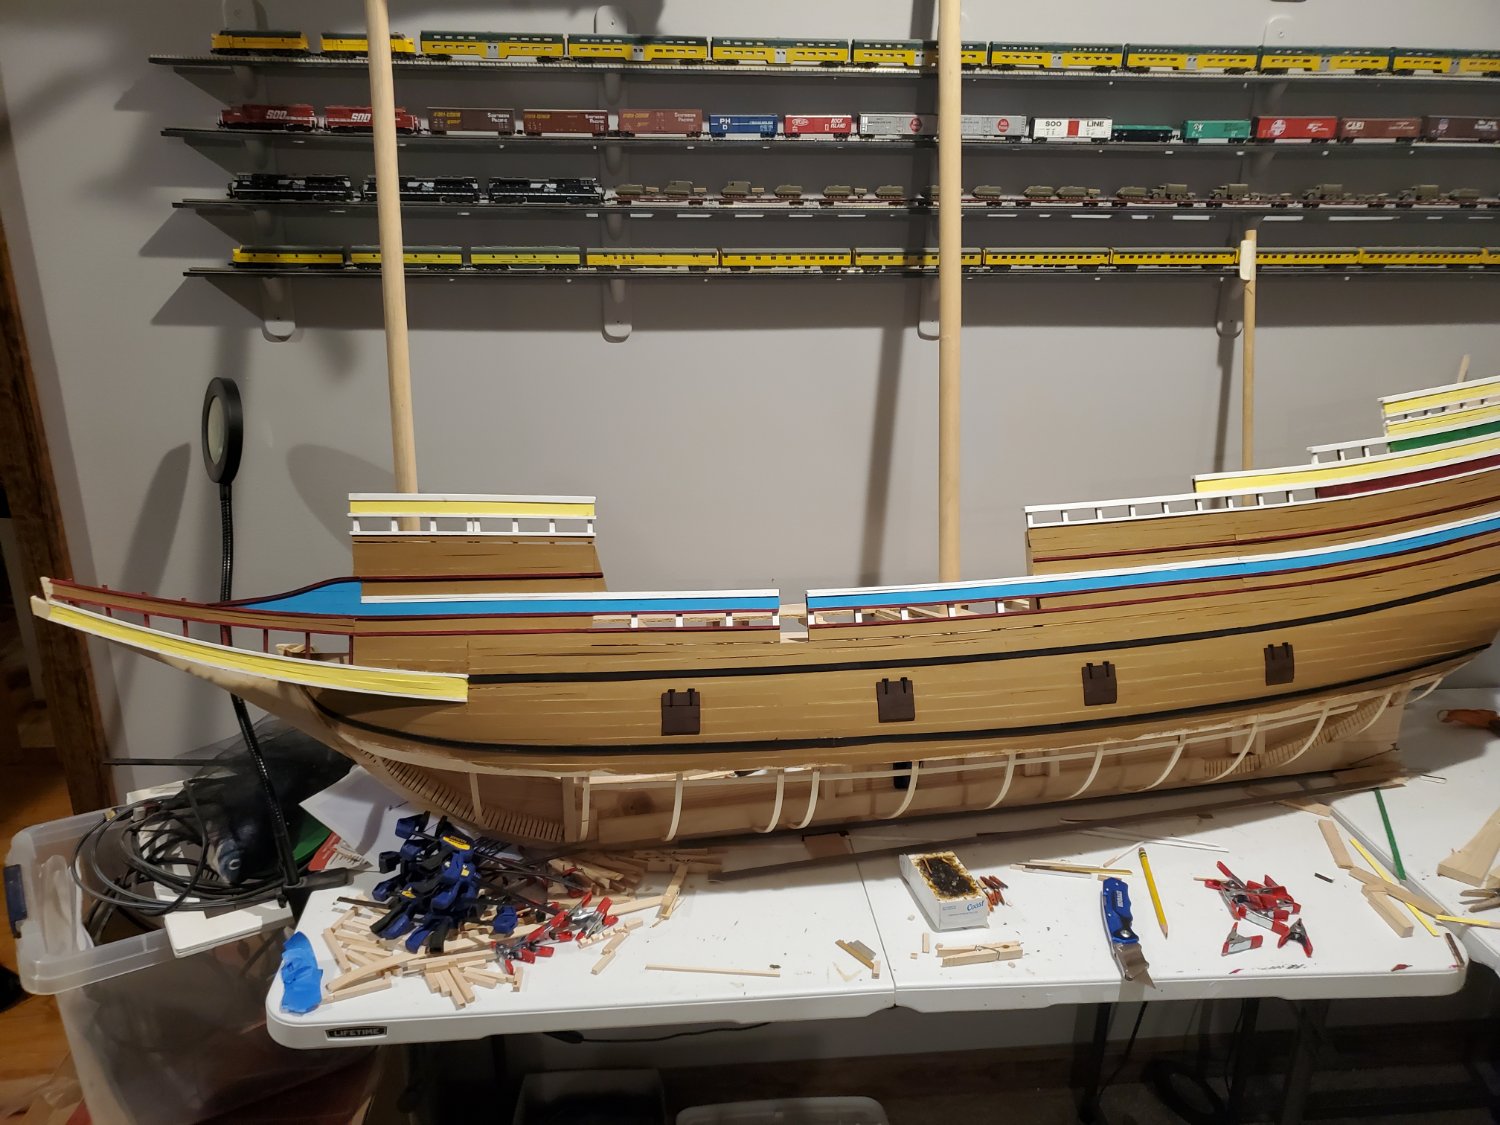
Finished the port side forecastle and some work towards the stern..thumb.jpeg.b0ff7c2f9bc05ef4f8973d9fa46e6c61.jpeg)


.jpeg.19117e2871971622374e4982c5f745cc.jpeg)
.jpeg.07893ae52b634642c4f5b4c5edce2a96.jpeg)
.jpeg.349f1889f1725d9d495613b5b10ee23d.jpeg)
.jpeg.4676a109eedda5978cd6fc6eac61dccc.jpeg)
.jpeg.3e87a422e487e509492863b68202531c.jpeg)
