Dan DSilva
-
Posts
81 -
Joined
-
Last visited
Content Type
Profiles
Forums
Gallery
Events
Everything posted by Dan DSilva
-
 Thanks!
 -
I think this is what I was looking for. Thanks!
-
Hello again, Does anyone know where to get really thin round rods and sheets of wood or rigid plastic that would be suitable for making small-scale oars (like in the range of well under a millimeter)? I know there are types of plastic commonly used for scratchbuilding models, but I seem to be having trouble finding the right place to buy it.
-
Hello Roger, I found where you wrote here that you did a tutorial on vacuum-forming, but I'm having trouble finding the tutorial itself. Do you recall what the title of the post was?
-
Thank you. I've had to be away for a while but I'm looking up both of those today.
-
Interesting. The admiralty plan for HMS Lion appears to have them, but I guess they may have been added later (it was in service until 1752) or maybe it was just unusual in that regard. Well, in any case, I've already drilled them. So it's gonna have them, period-correct or not. --- Fabricating them from scratch and getting nice rounded edges seems extremely delicate. Right now, I'm thinking of using either fiber washers or wooden bullseyes split along the grooves. Either would require boring out slightly with a needle file.
-
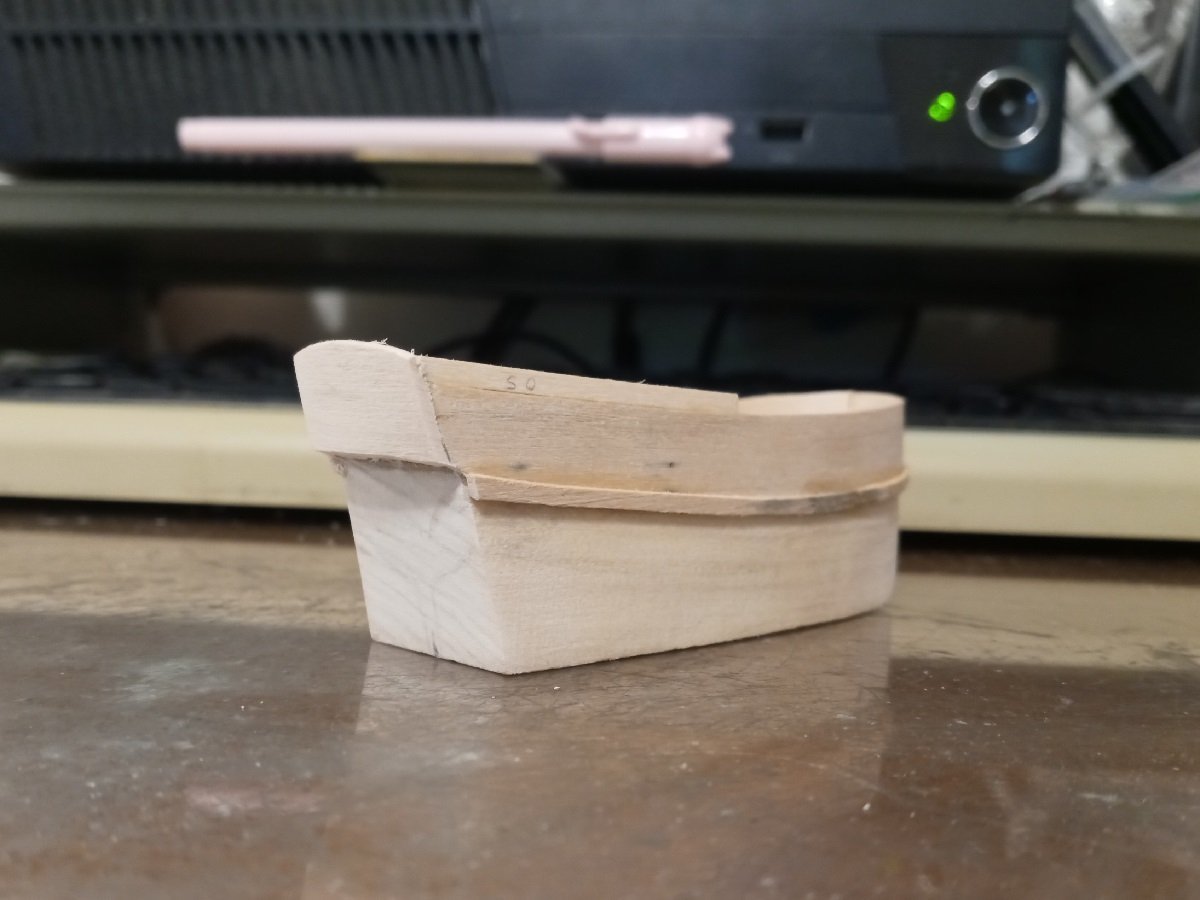
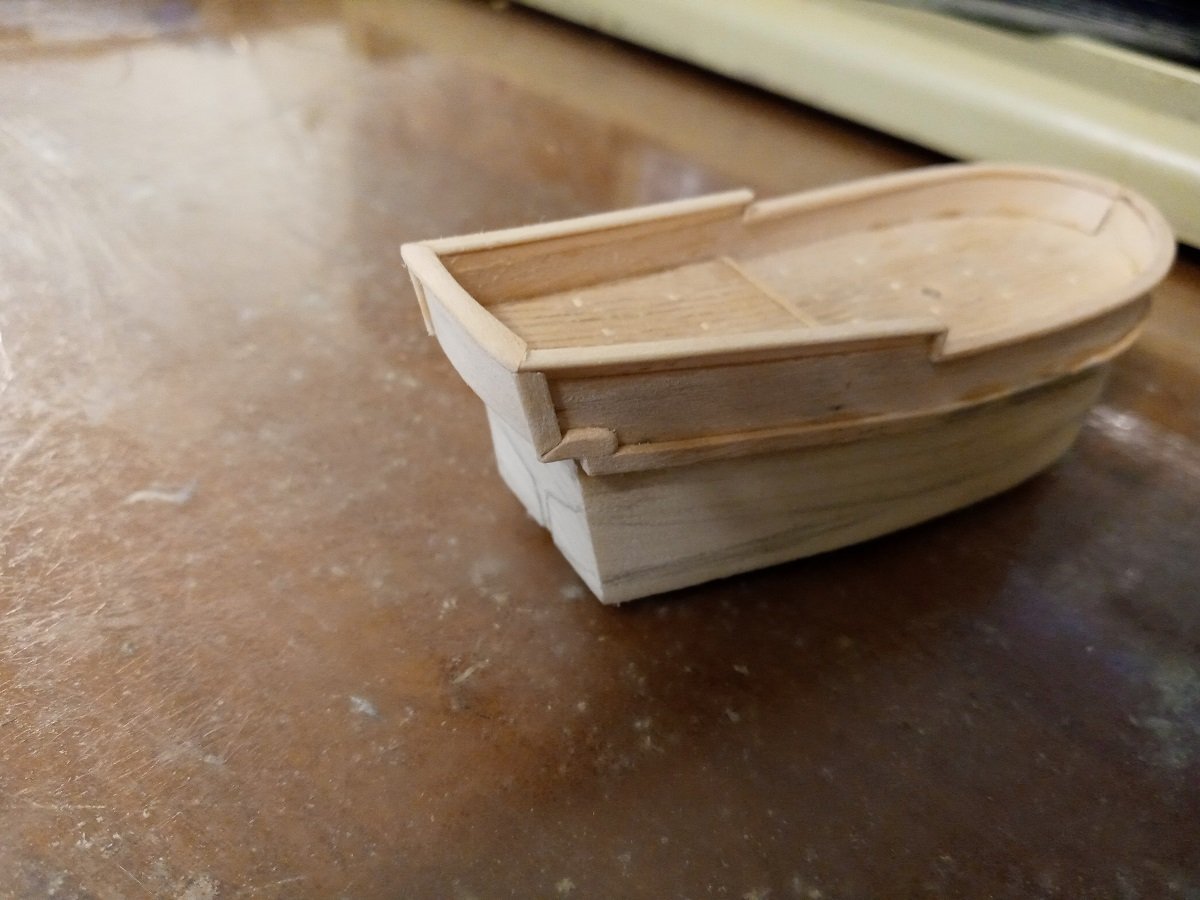
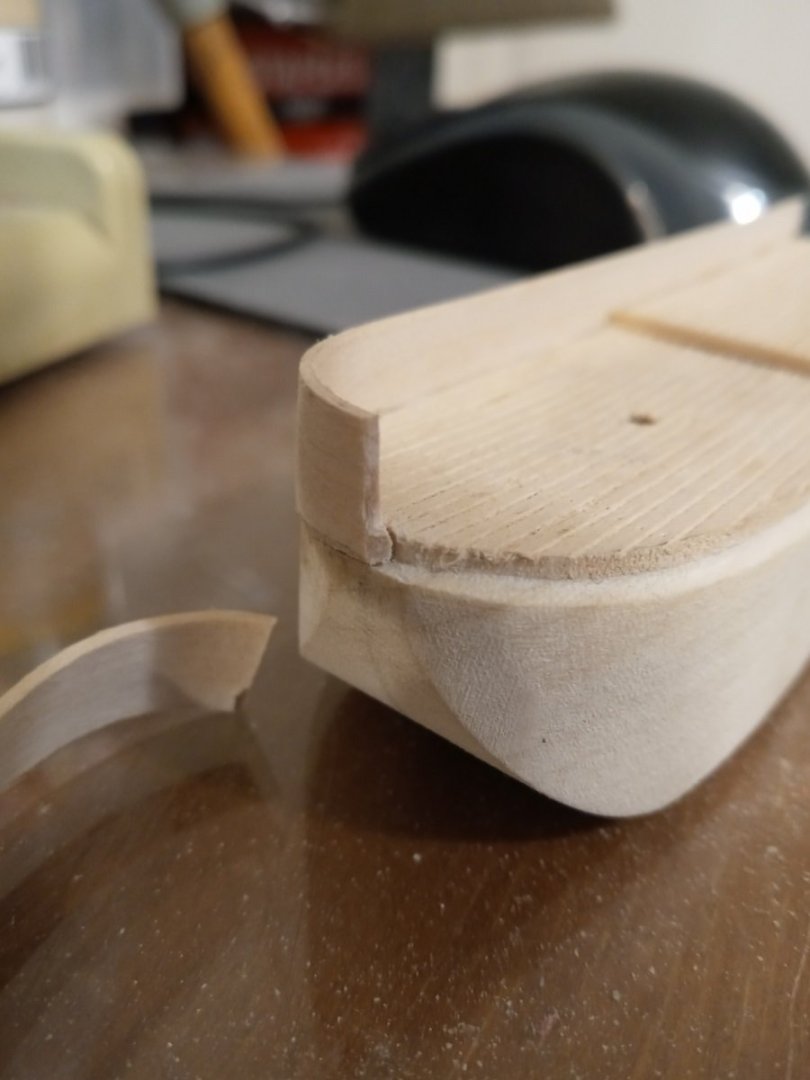
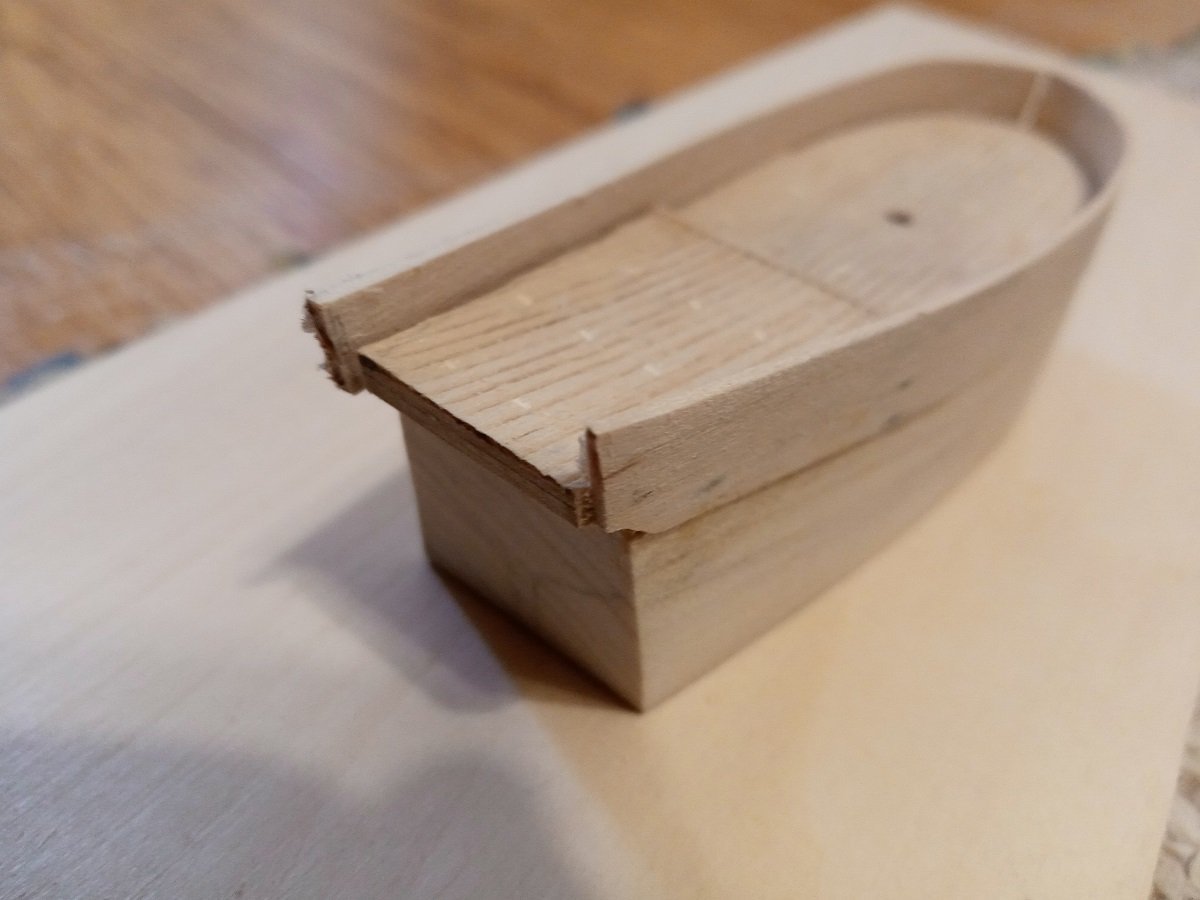
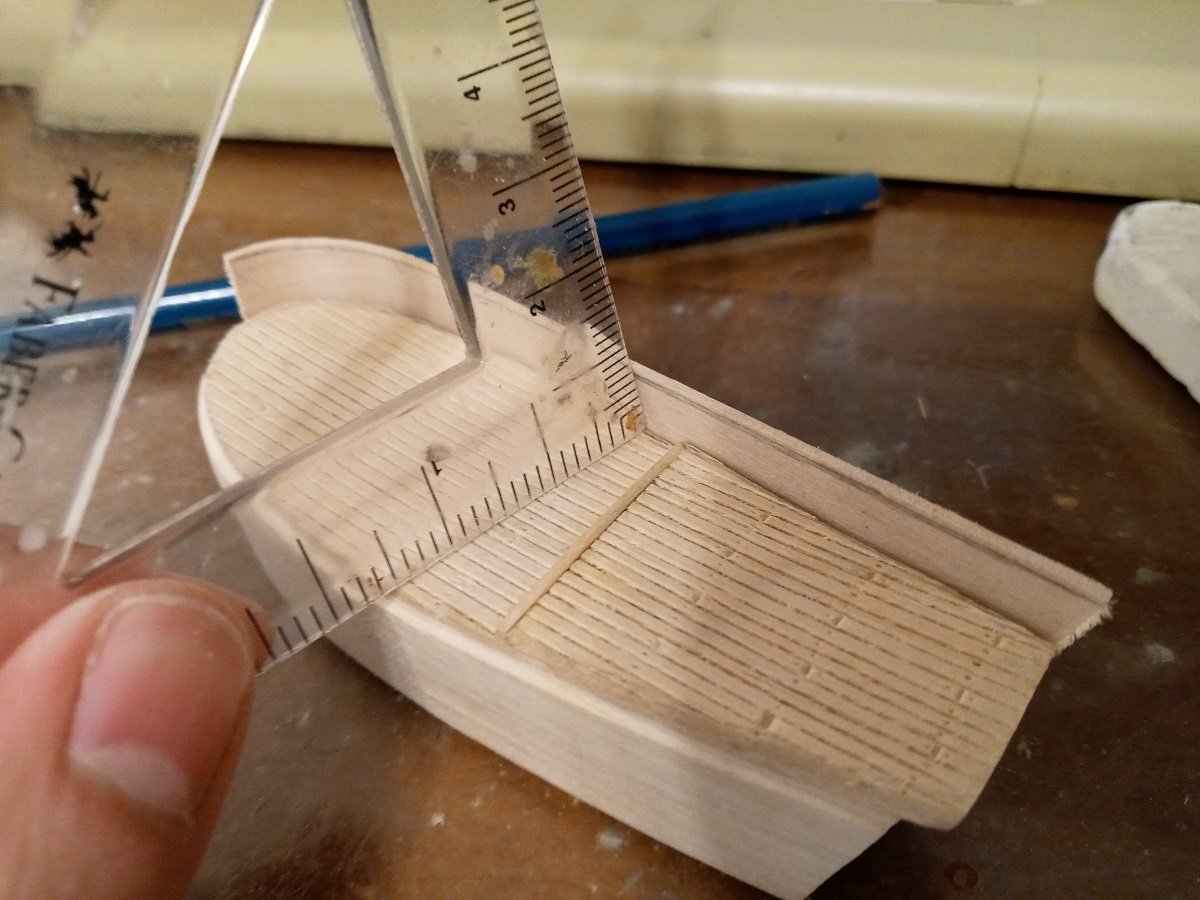
Thank you! The obvious solution: I sand the stern to a convex shape so the rudder stock hole is saved and the deck meets the back ends of the bulwarks symmetrically. The blank for the transom is cut to considerably longer than its final length and wet-molded to match the stern's curve. As with the deck thingy, the transom is then sanded to shape. The side thingies are applied in basically the same way as the bulwarks. I ran into a snag when I glued the starboard one noticeably farther down than the port one. Luckily I was able to break it off in one piece with an X-Acto, but that just makes me worry that this wood glue may not be as strong as I thought (maybe it weakens if it's not used up quickly enough?). The further I advance, the more detail I decide is necessary for it to look real. At this point I decided it was really necessary to add a rail around the tops of the bulwarks. I started by grinding and sanding about a millimeter off the top all around. Then I traced the edge onto a basswood sheet and added some extra width to provide a little overhang. After cutting the overall section out, I opened it by splitting with a knife instead of with a saw or cutoff wheel so there wouldn't be a gap, and traced the initial interior sections to be cut out. The insides of the rails shaped and sanded, I then wet-formed the rails with a bunch of pens as the contact points, a bag of marbles to distribute pressure, and a steel block for extra weight. Actually, at some point the block fell over and took the marbles and pens with it, but by then the rails had dried, so it was okay. When the glue was dry, a quick trip to the mini belt sander and a little finishing with fine sandpaper gives a shallow, nicely rounded overhang. I should've angled the back ends of the rails before glueing them, but my flat triangle needle file came to the rescue. I inserted some vertical rail sections as seen here and later trimmed them down and angled them. The transom rail is another wet-formed piece -- hopefully the last I'll have to do. It likewise has angled ends, and is sanded first on the inside, glued, and then sanded on the outside just like the main rails. Weighting down the transom rail. The curve of the transom was a little higher than the rail, which worked out well since the transom is the interior piece and could be sanded down to match the rail. If it had been the other way around, there would've been trouble. As you can see, I've started thinking about the cross-sectional shaping of the hull. I began by re-pencilling the grind lines that had previously been rubbed away. You can't see it in this picture, but I also added the groove for the keel and stem; it seemed like now was the time to do it, before rounding the bottom of the hull and risking the cutoff wheel sliding off-center. While the groove wound up a little too wide in spots, I hope to correct that with wood filler. Since the remaining pieces are straight, they were much faster to shape and glue. Here's the fully framed transom. For some reason I'm feeling excessively pleased with the angled joints. I briefly considered adding stern windows, but it doesn't seem feasible. I've come to realize that I didn't take the width of the stern rails and frames into account in my draft; thus the upper half of the stern is going to be too wide overall. Next step should be to drill the holes for the gunports and figure out how I'm going to make their doughnut-shaped frames. Then it'll be off to the belt sander to finally do the cross sectional shaping.
-
Yeah, I've decided that's probably going to have to be my motto. Actually the fact that there are things I wish existed that don't (or that do but are too expensive) has been my main motivation for every craft project.
-
Should I take it as read that there are no readymade actual whaling-type whaleboats of about this scale on the market?
-
Indeed. So, logically, the style of boats should be whatever was current in the year that I think the voyage begins.
-
That's an interesting point, which I hadn't thought of. I've been attempting to construct a timeline of the novel, and several clues lead me to the working assumption that the story begins in 1840. The Pequod is a very old ship when the story takes place, but I figure the equipment that's most easily replaced (e.g. boats, harpoons, lances) should be pretty modern.
-
Thank you, I'll check it out. I understand the Montagu is a naval boat and not a boat for whaling as such, and there are obvious differences in shape (actually it looks more like a giant clinker-built canoe than anything else I've seen). But it's close enough that I wouldn't rule it out yet.
-
Thank you. Yep, boats built for whaling seem to have had a lot more sheer and sharp raking. My experience with scratchbuilding rowing boats has not been positive so far.
-
Hello again, I've decided to aim for 1:128 scale for my Pequod and other sailing ships.. Before resorting to scratchbuilding the boats, I thought I'd look around at what was already on the market. The best that I've found so far are 25- and 27-foot Montagu whalers made by Quaycraft. Of course, these are not 19th-century whaleboats; their bows are less raked than what I've seen and they would require added oarlocks. https://quaycraft.uk/product/25ft-whaler/ https://quaycraft.uk/product/27ft-whaler/ The other option I know of are Amati's 65mm boats. I don't know what real-world model they represent, but I believe it's a more modern naval design. Their bows have a better shape than the Montagu, but their interiors would require more modification. https://www.cornwallmodelboats.co.uk/acatalog/4975-Whaleboat-65mm-A4975.html I would greatly appreciate if anyone knows other models out there.
-
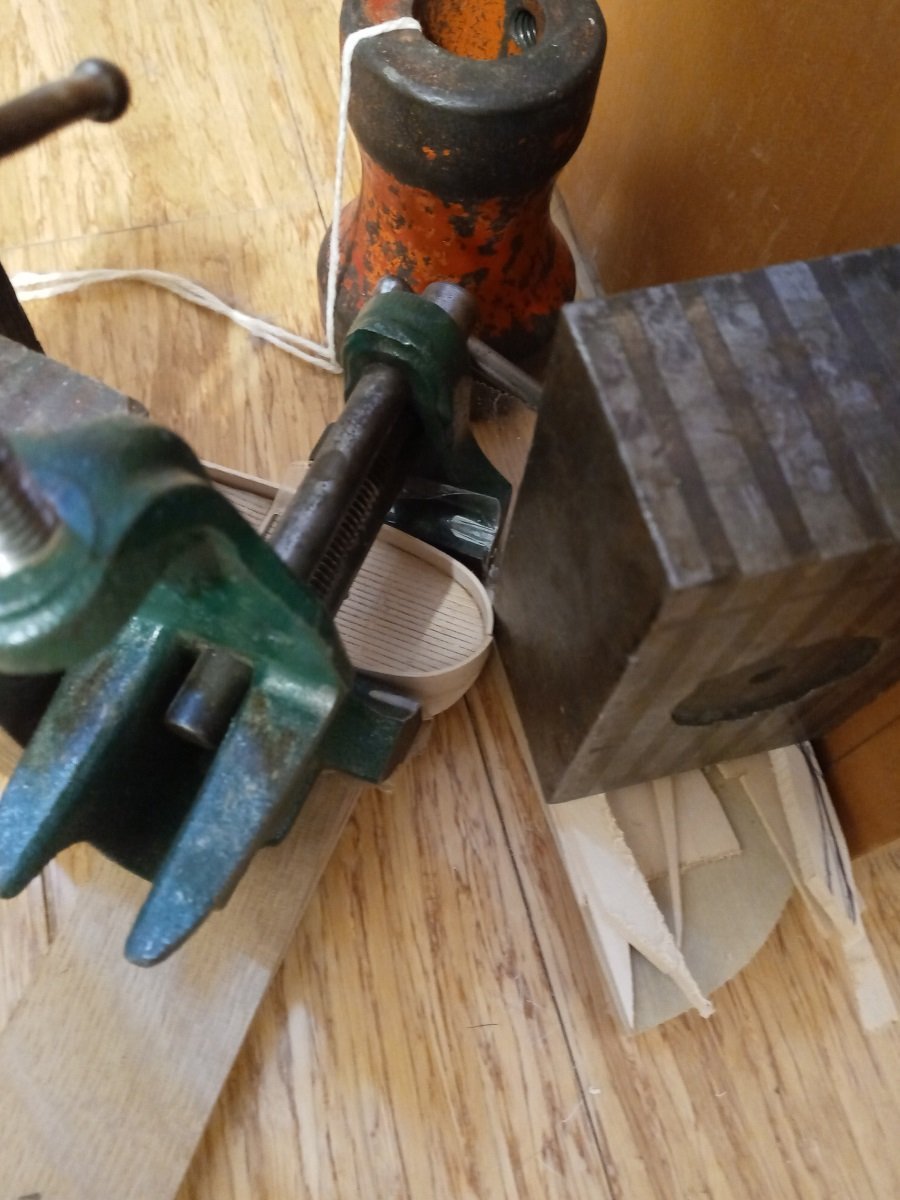
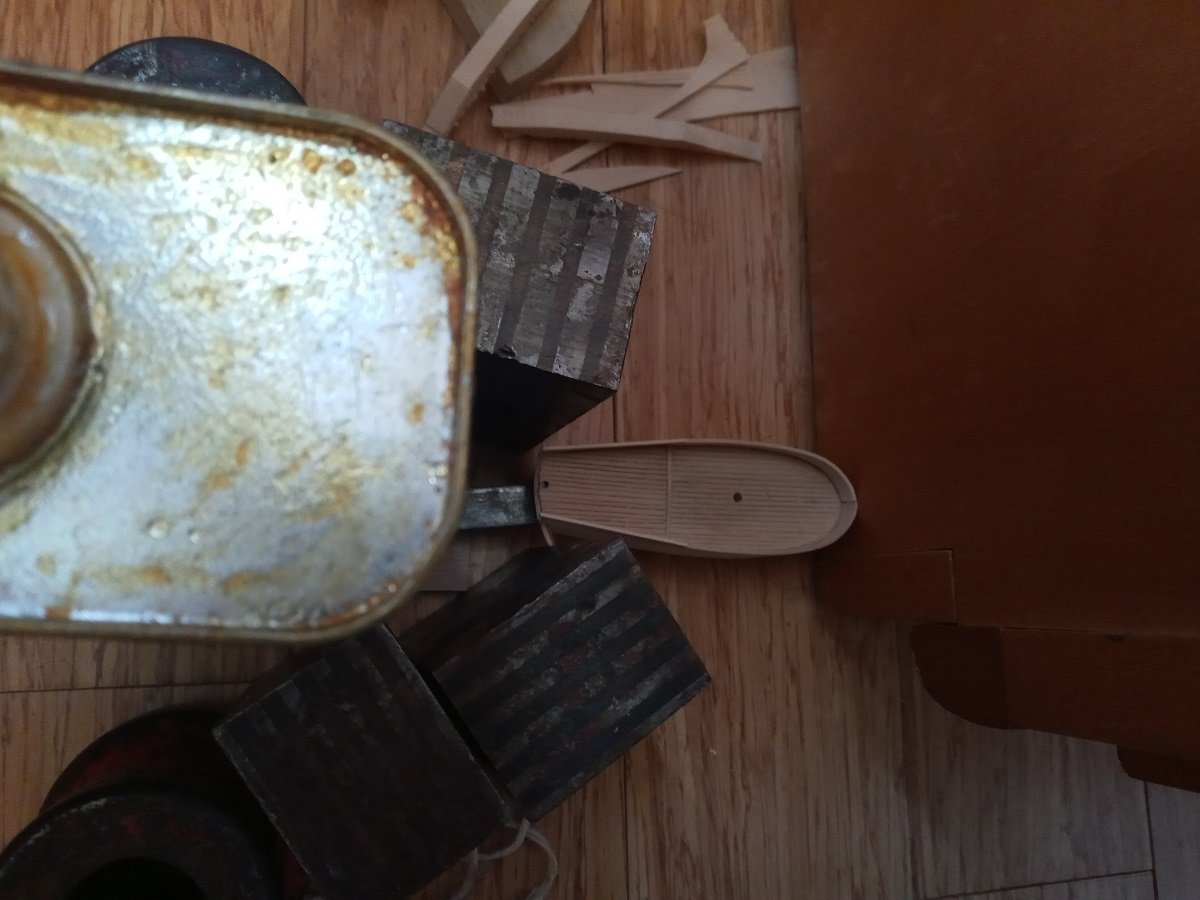
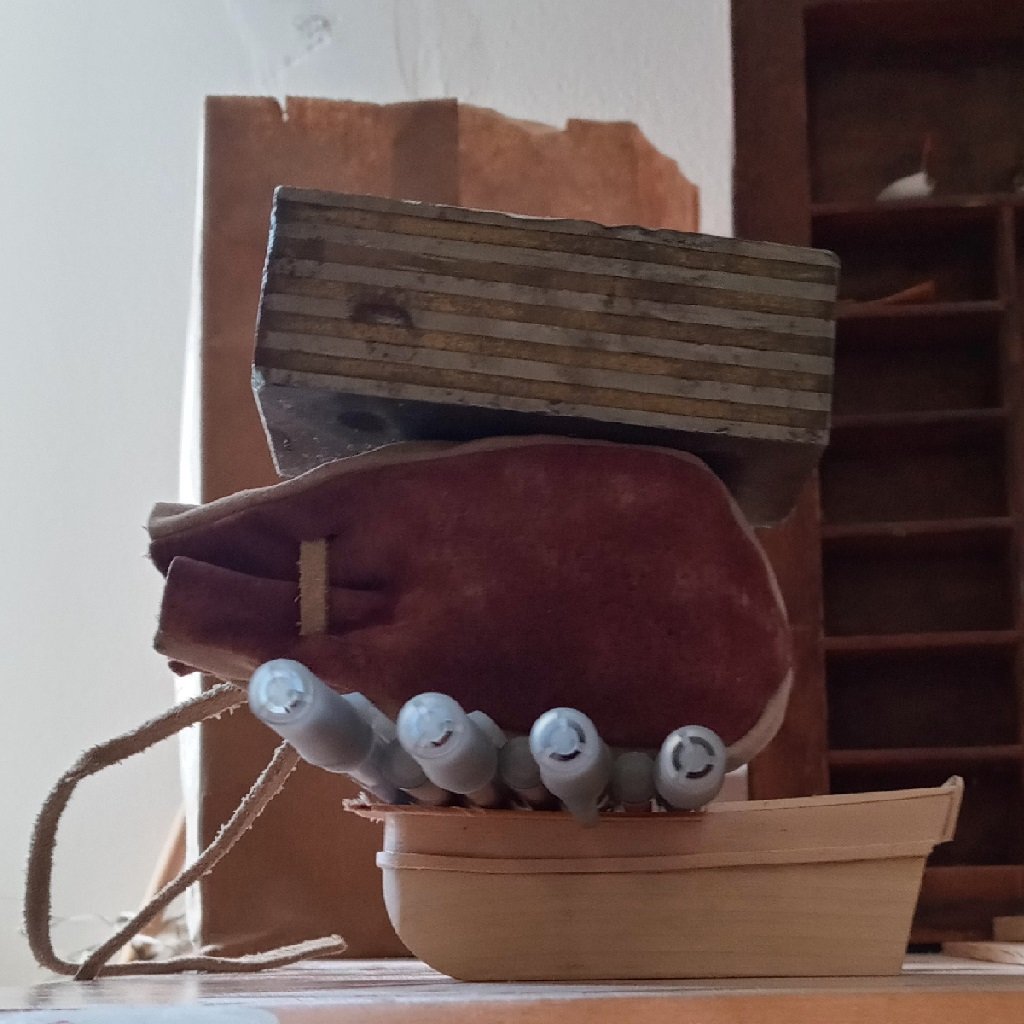
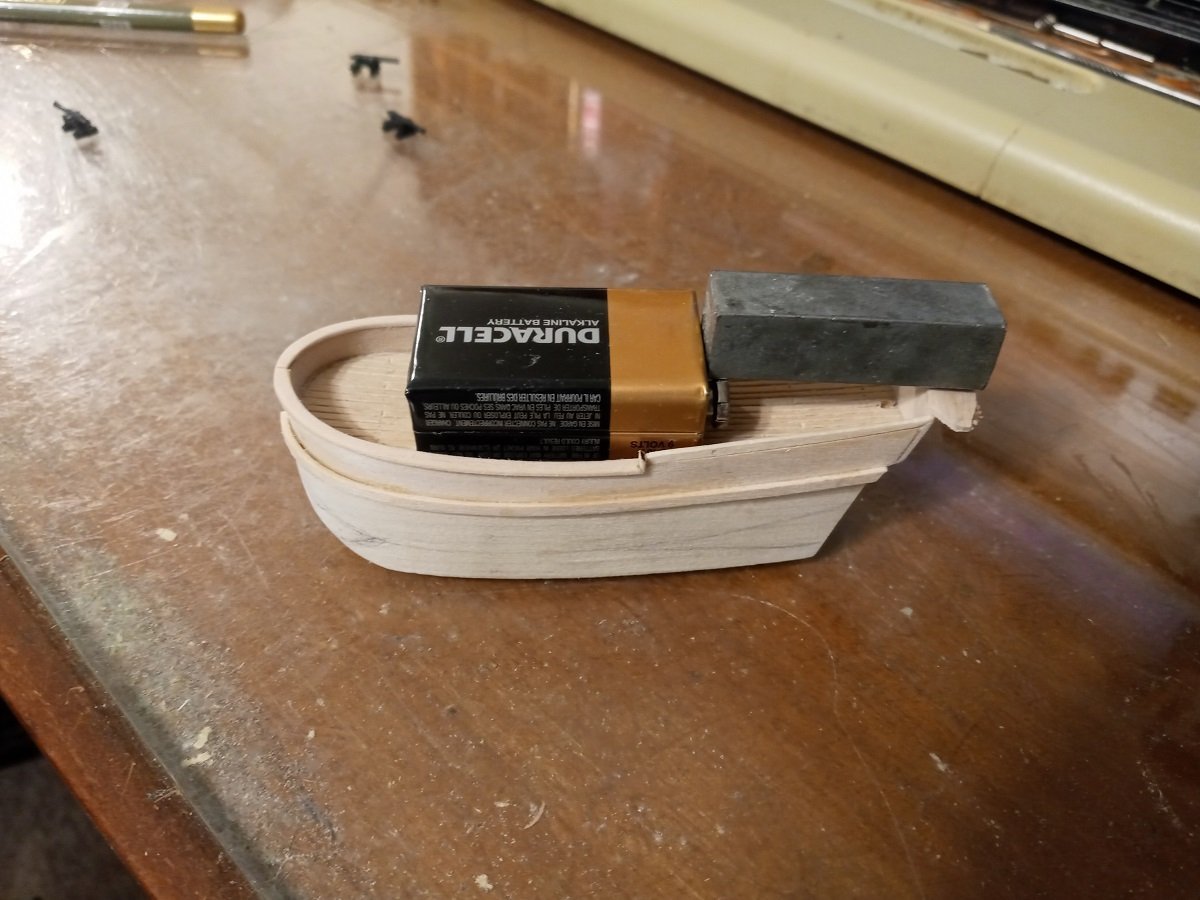
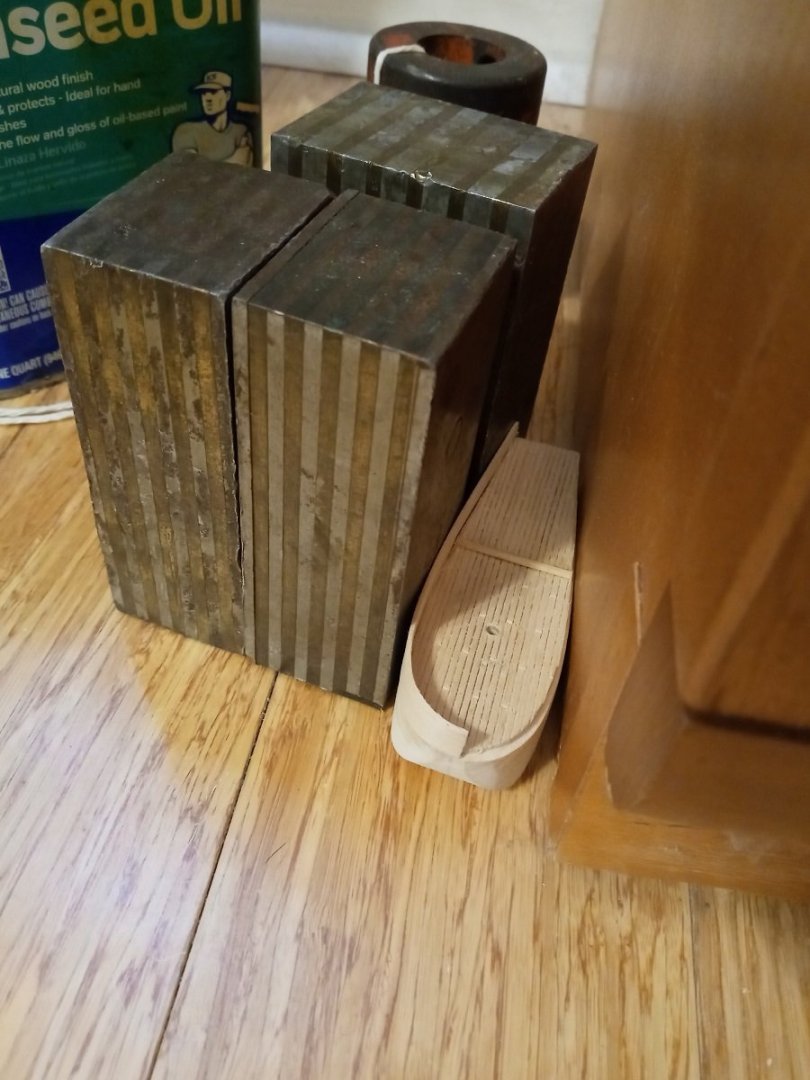
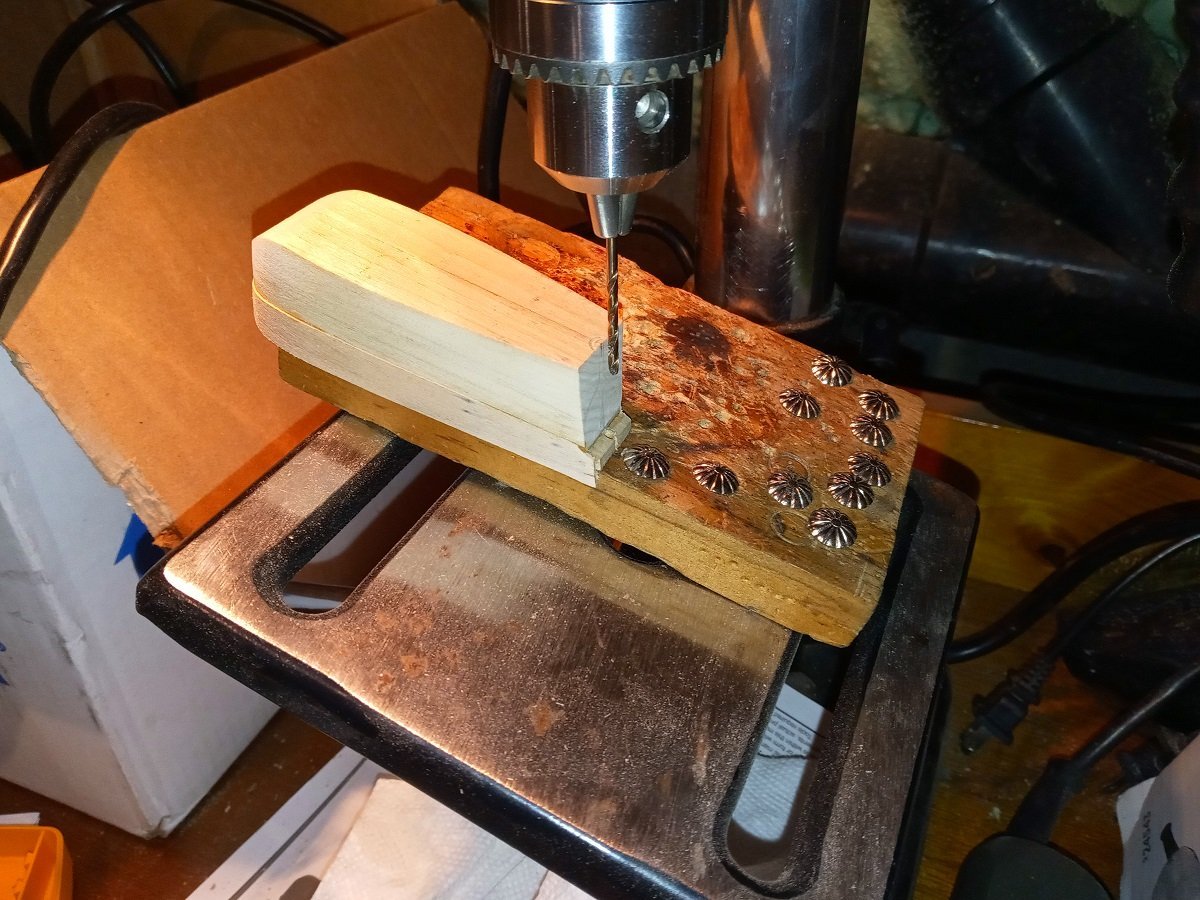
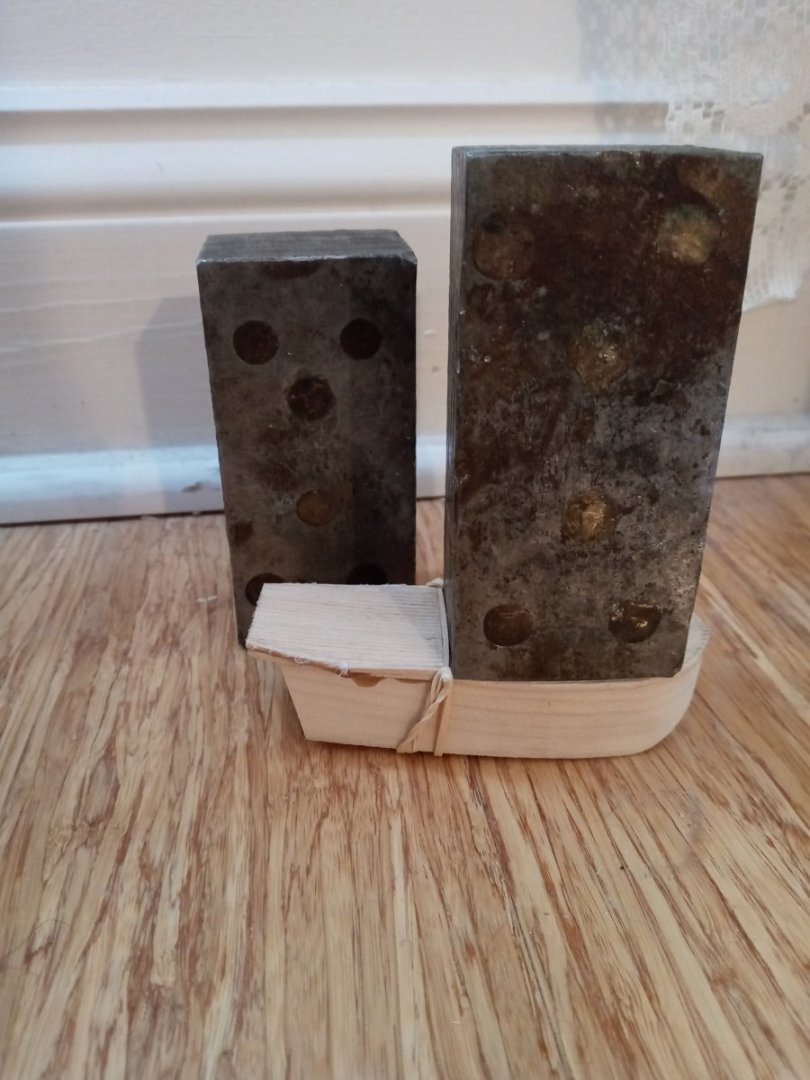
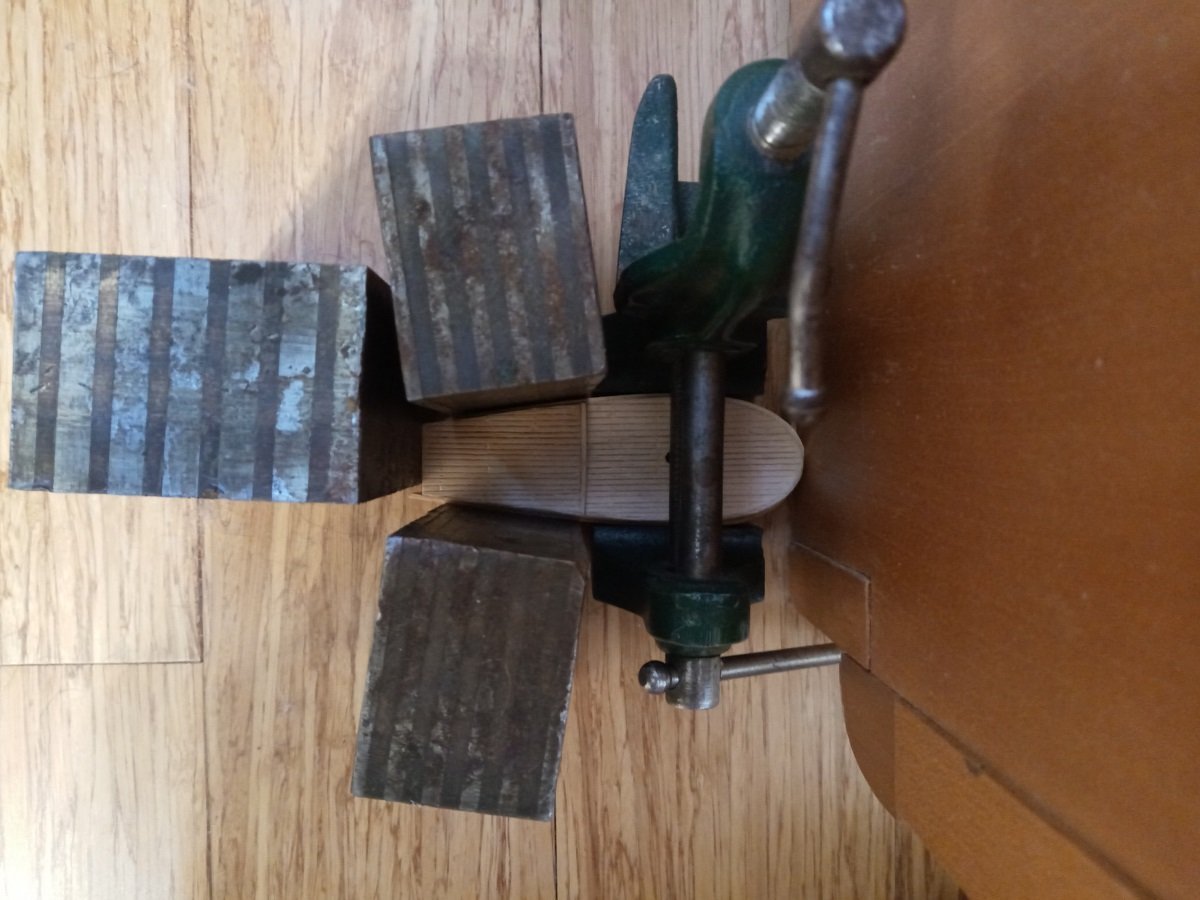
Seems like about time for an update. Part 1 of glueing down the bulwark. Part 2, glueing down the back half. These blocks of layered brass and steel were given to me years and years ago by an uncle to use as anvils. I don't know what their original purpose was. I somehow fitted the starboard bulwark a little forward and pushed to the left. As a result it stuck slightly past the midline at the bow and had to be trimmed back. Once it was glued in place, the only practical way to trim it was with the Dremel, and because none of the Dremel bits can fit into the tiny angle between the deck and the hull, there was a little lump left there that I had to compensate for by grinding a pit into the corresponding spot on the port bulwark. The thingy that goes along the port side is just a leftover from making the bulwark, while the starboard one is cut down from my first attempt at a bulwark that turned out too low. I had no idea basswood contains tannin, so I didn't put tape on the vise while shaping the first one and now it's a little bit ebonized. Another unfortunate result of the imperfect fitting is that the back edge of the starboard bulwark falls slightly short of the stern while the port one sticks out a bit. Obviously I shouldn't have trimmed it to length before glueing it in place, but there's an obvious solution which you've probably already guessed. Realized that I should've drilled the hole for the rudder stock before attaching the bulwarks, but since I'd only attached one, it wasn't too late, as it could just go over the edge of the support block. Unfortunately I lowered the drill press a little too much and left a rotary mark on the bottom of the hull. Maybe I can fix that with wood filler. Another problem with the starboard bulwark was I apparently failed to get the glue up to the bow midline. So now it's become a three-step process. I put a blob of glue where it should've been, pushed some into the crack with a pin, fitted, wiped off the excess and then set it up to press dry again. All this press fitting and drying is taking a long time because I don't want to take things apart until I'm completely sure they're dry. The port bulwark would be fitted just like the first, but I made the inlet slightly too deep. That meant that it wouldn't be properly seated and there would be a gap between the bulwark and deck, so I had to raise the opposing wall formed by one of the metal blocks to above the edge of the inlet. A pair of extended rails are added to match the raised quarterdeck. After looking at a few period examples again, I realized the slanted front edges I put in the original draft are incorrect and they should stick straight up. And here you can see step 1 of the obvious solution. Step 2 is in the works right now.


-
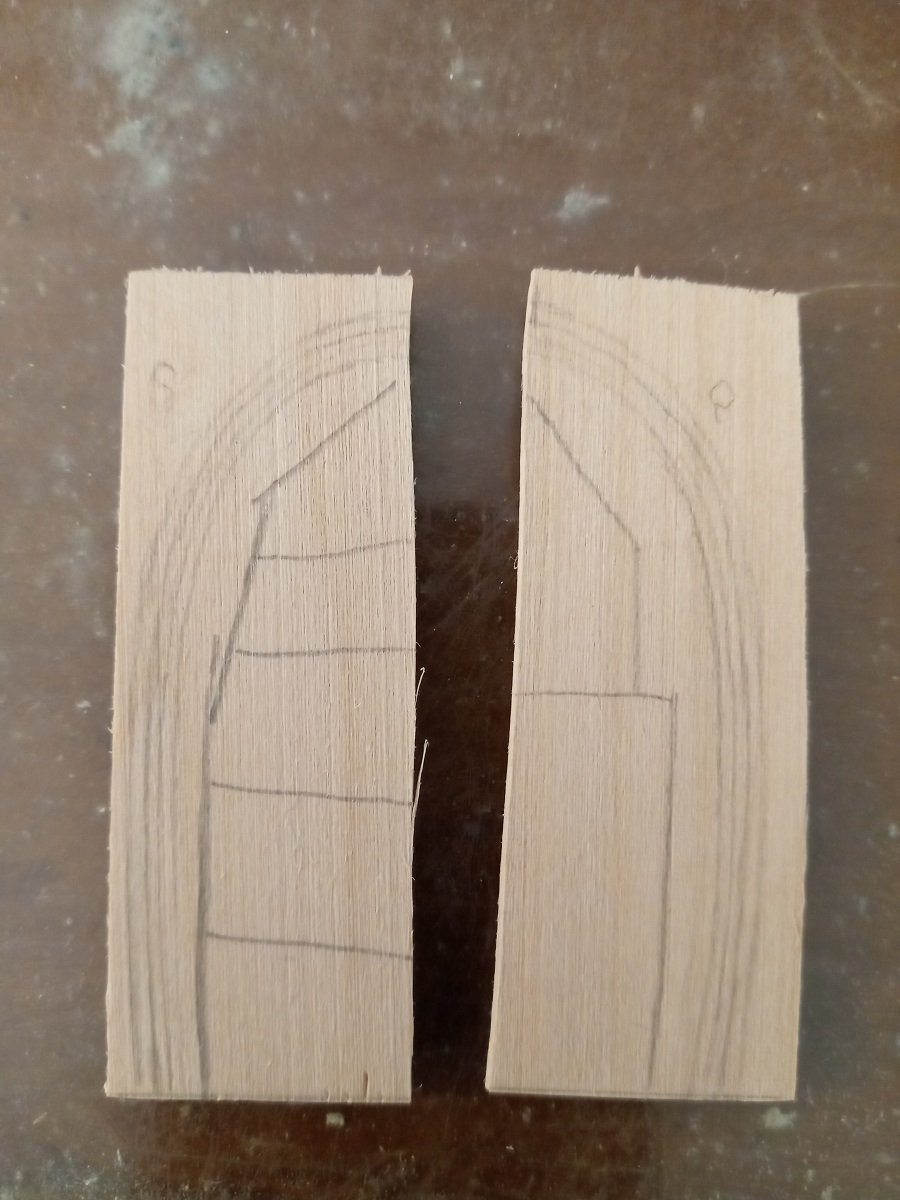
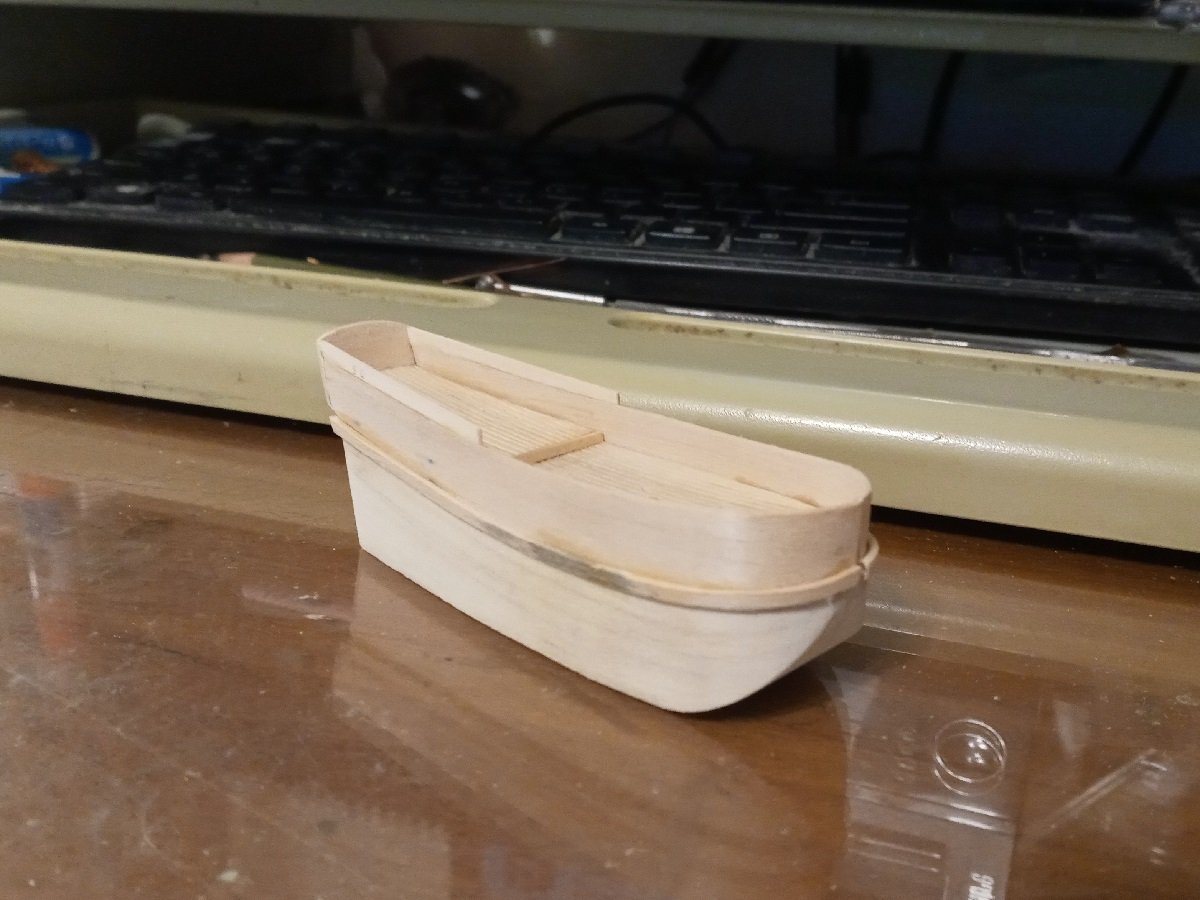
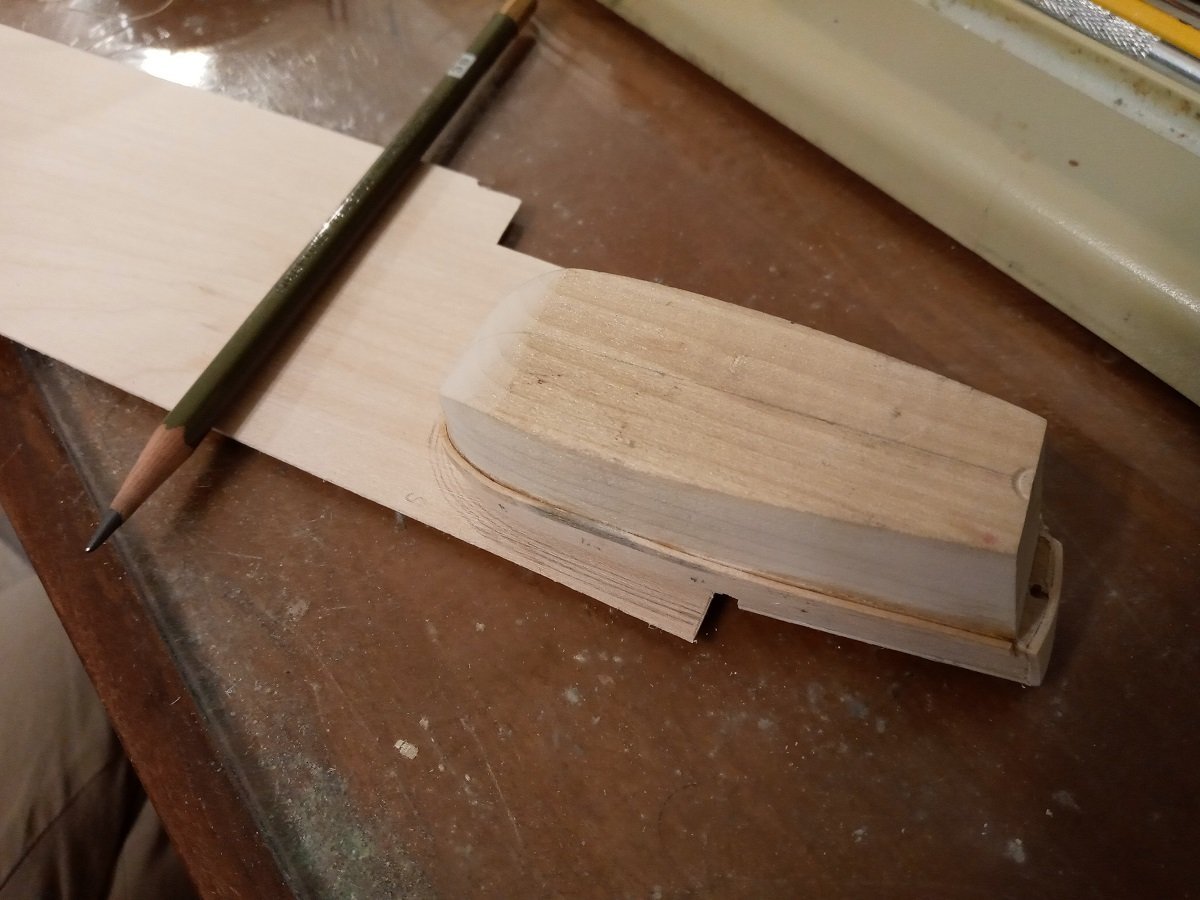
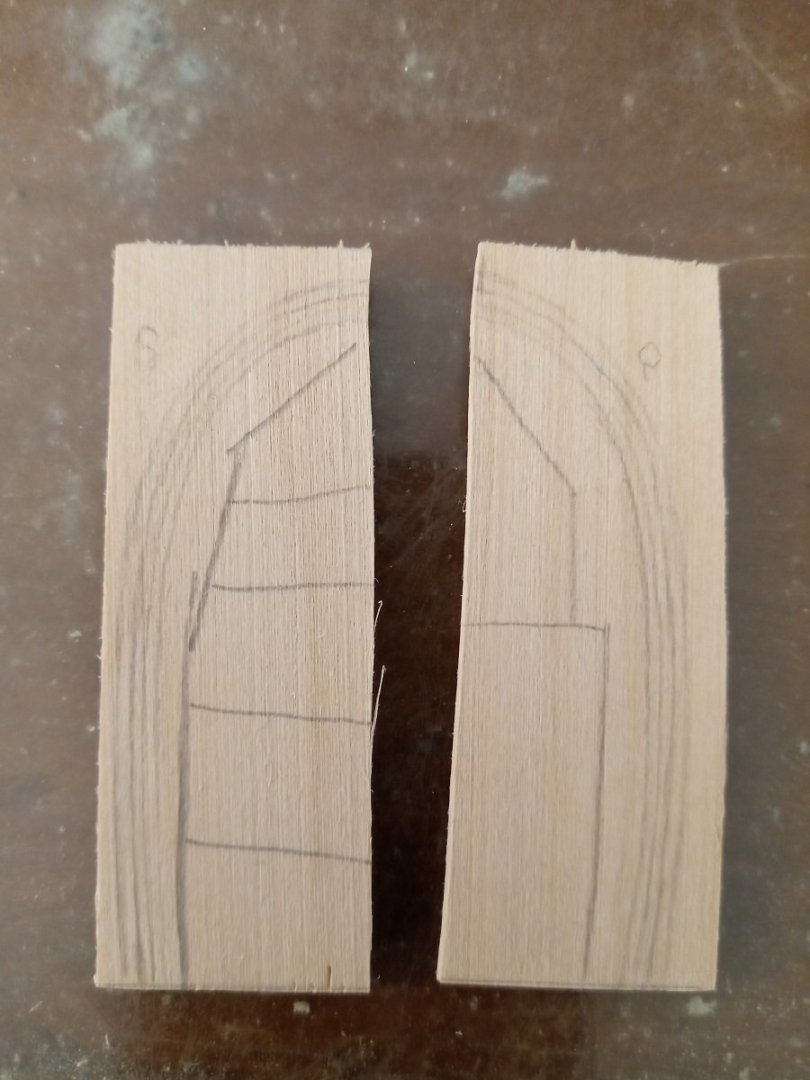
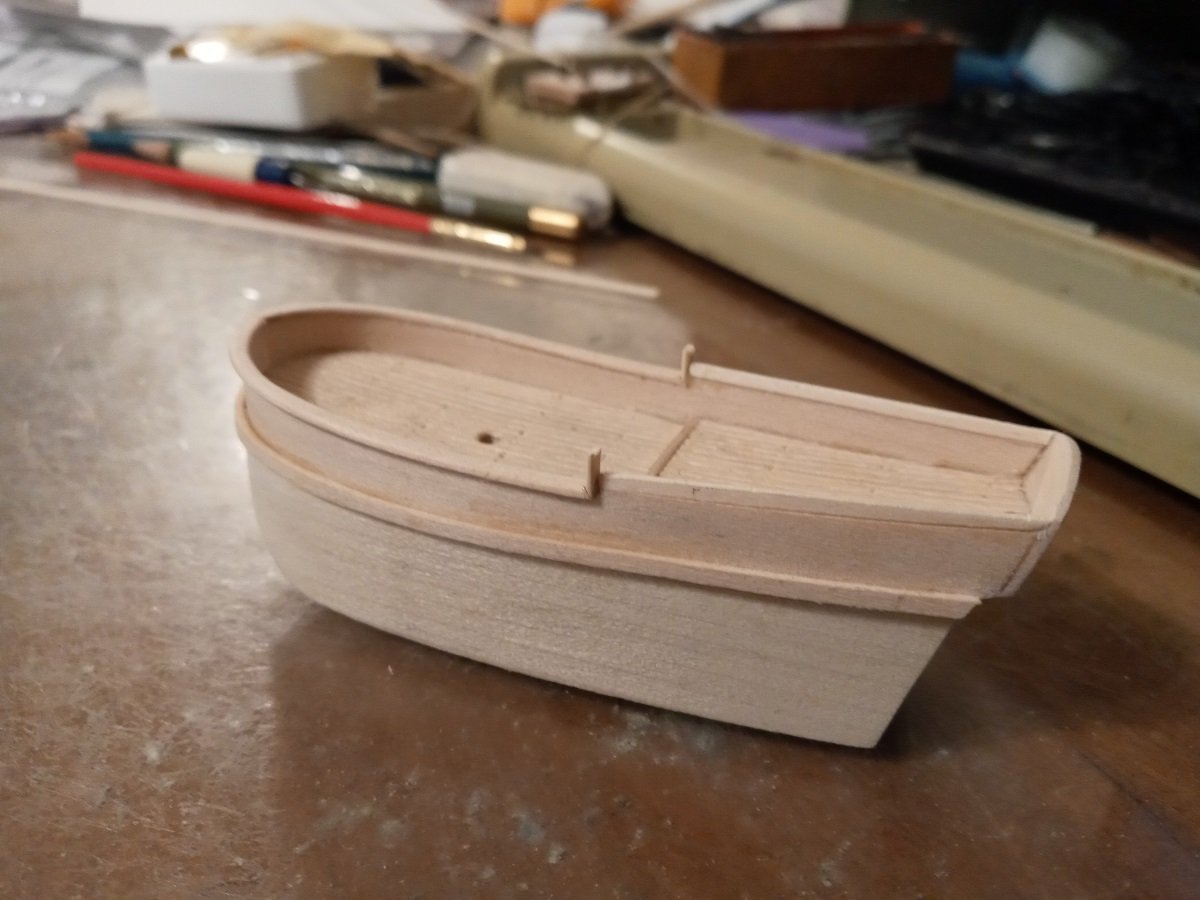
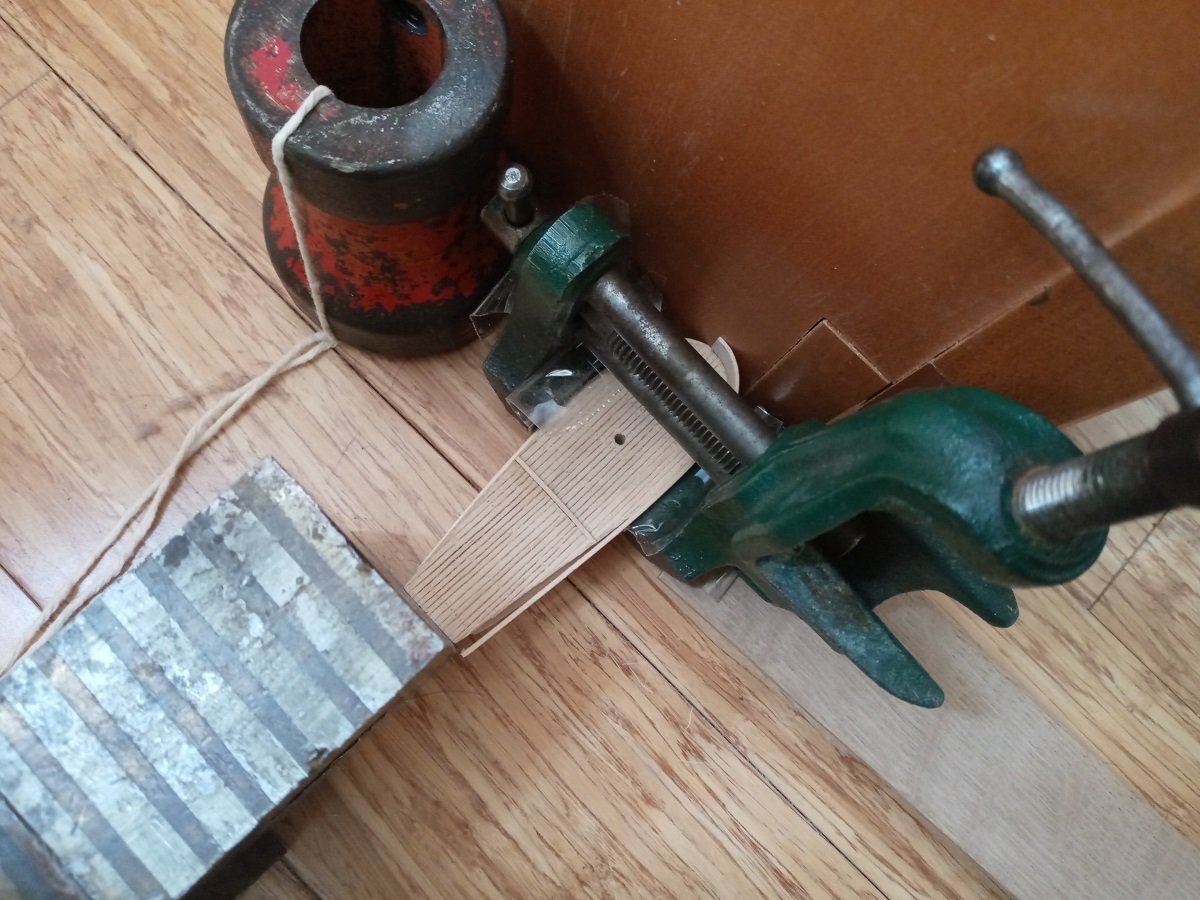
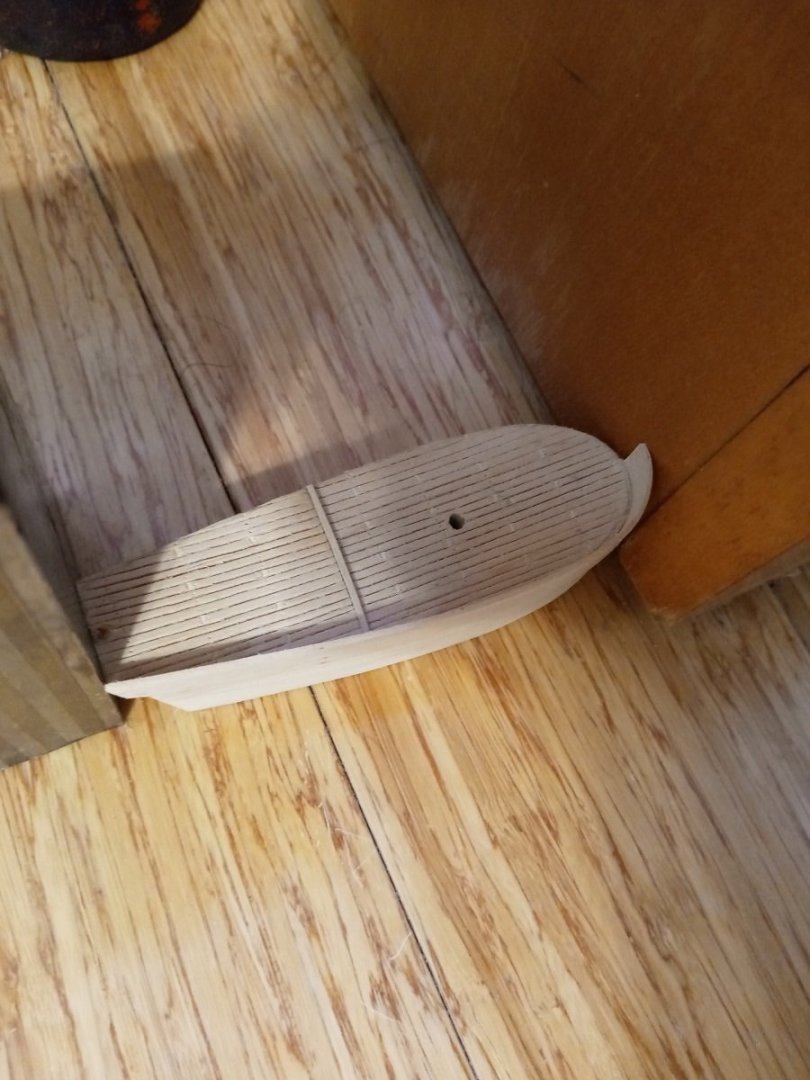
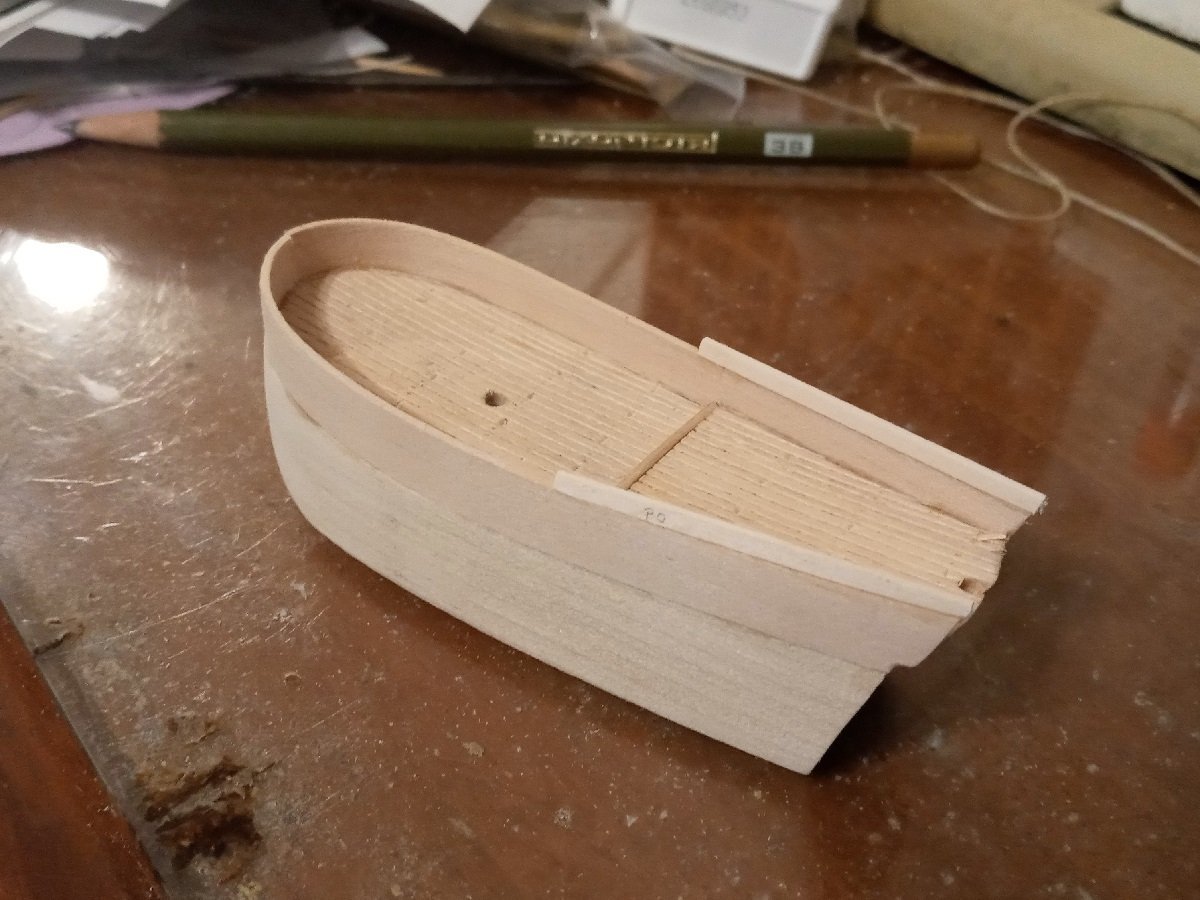
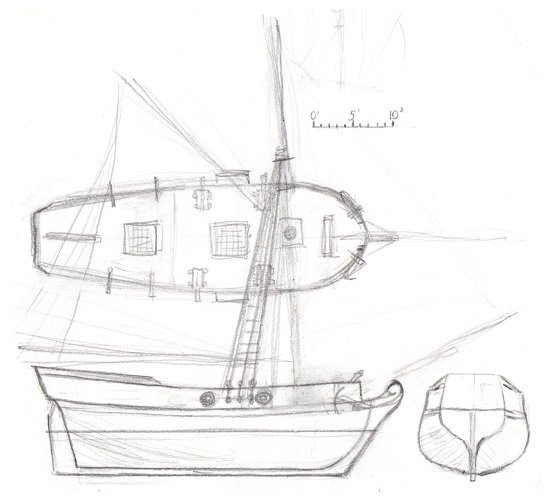
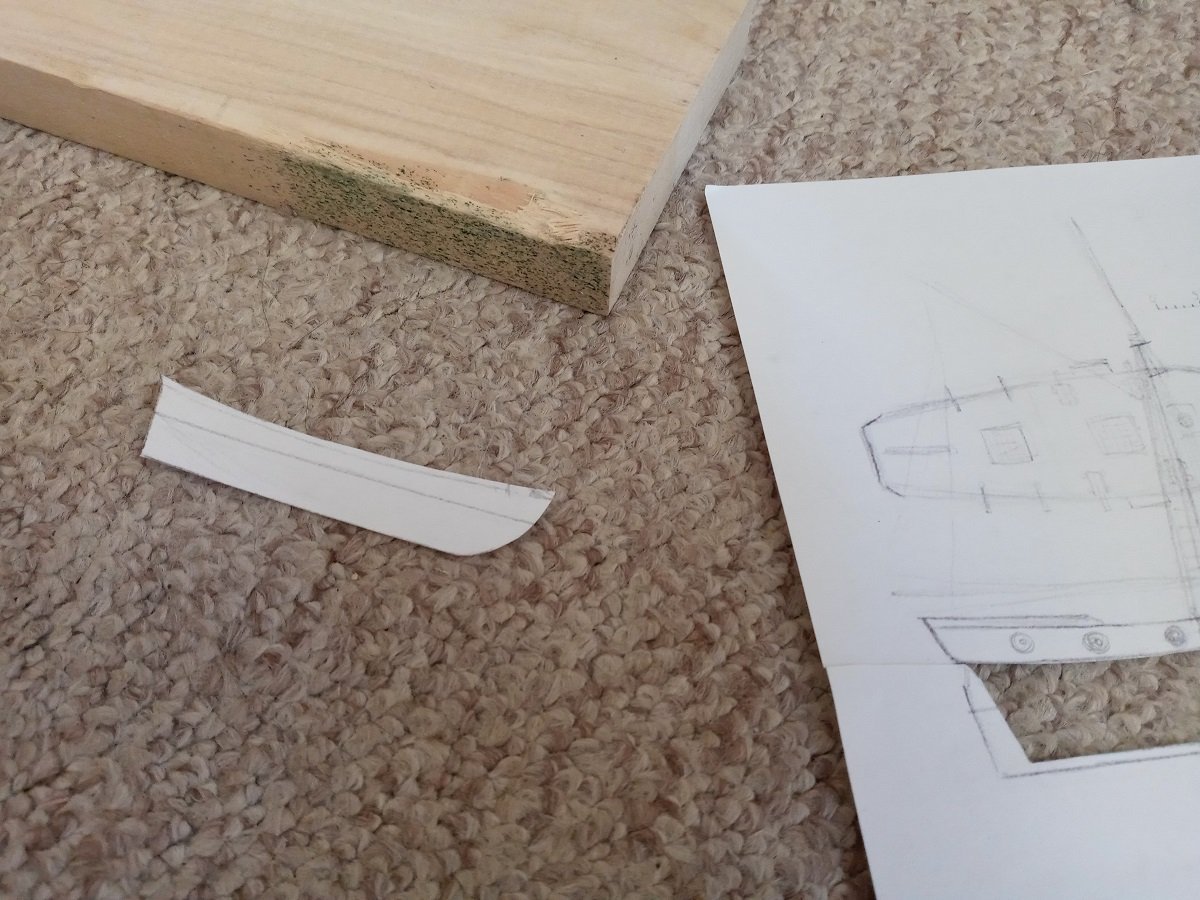
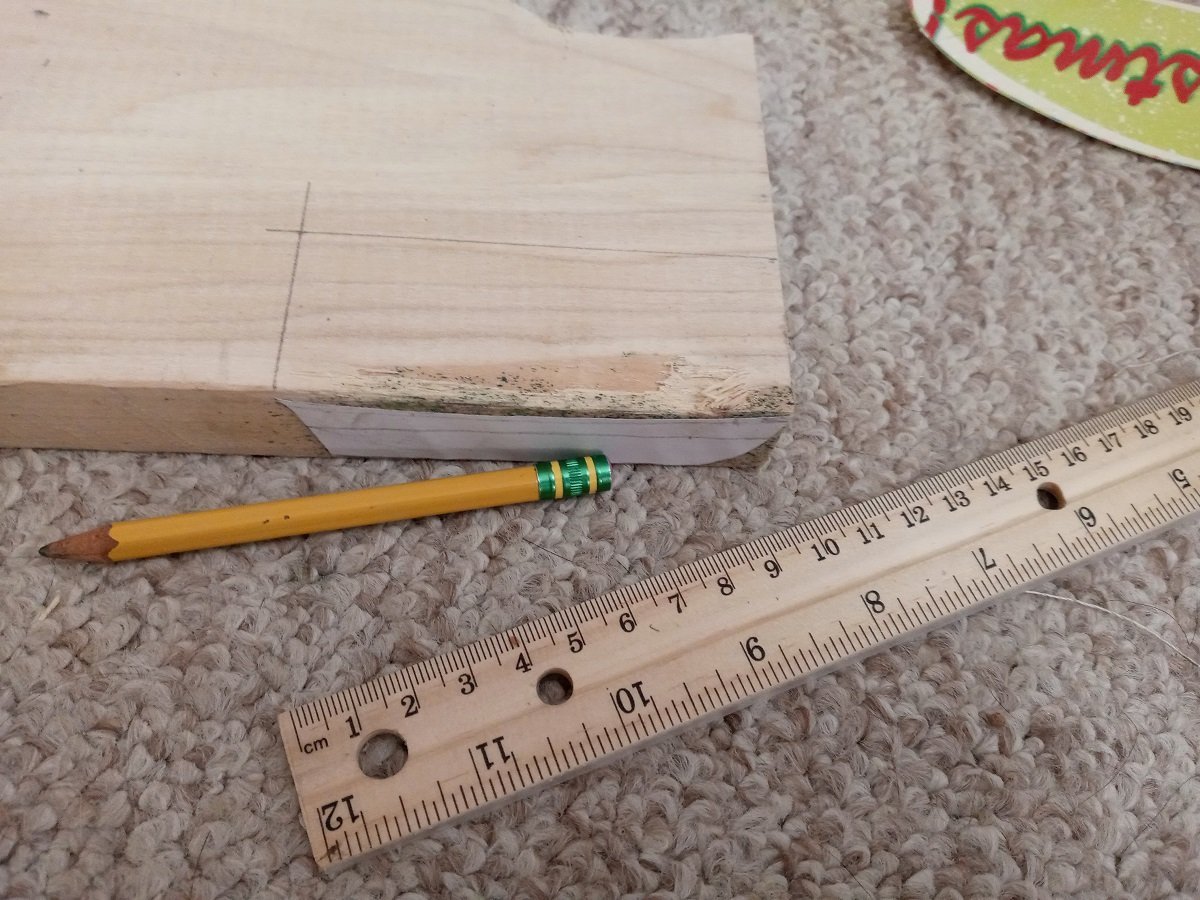
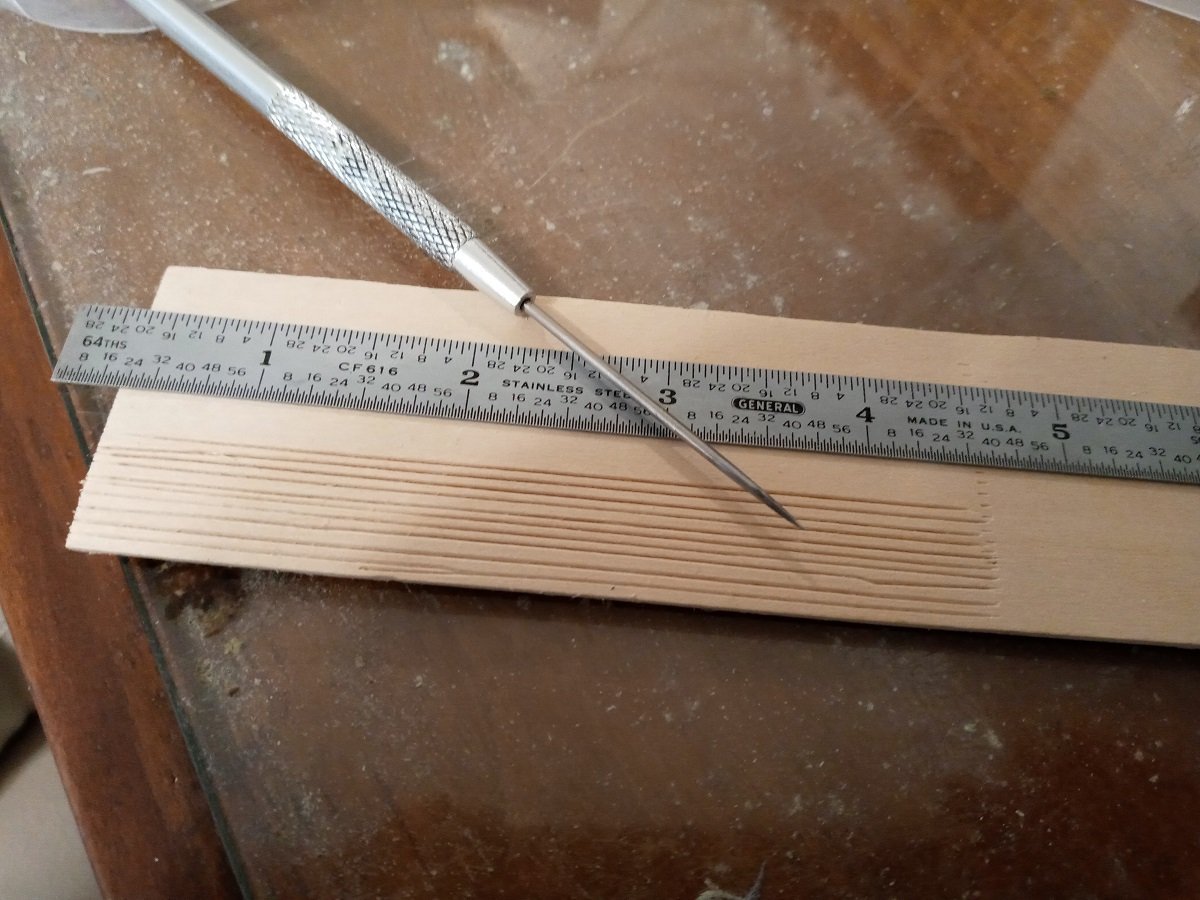
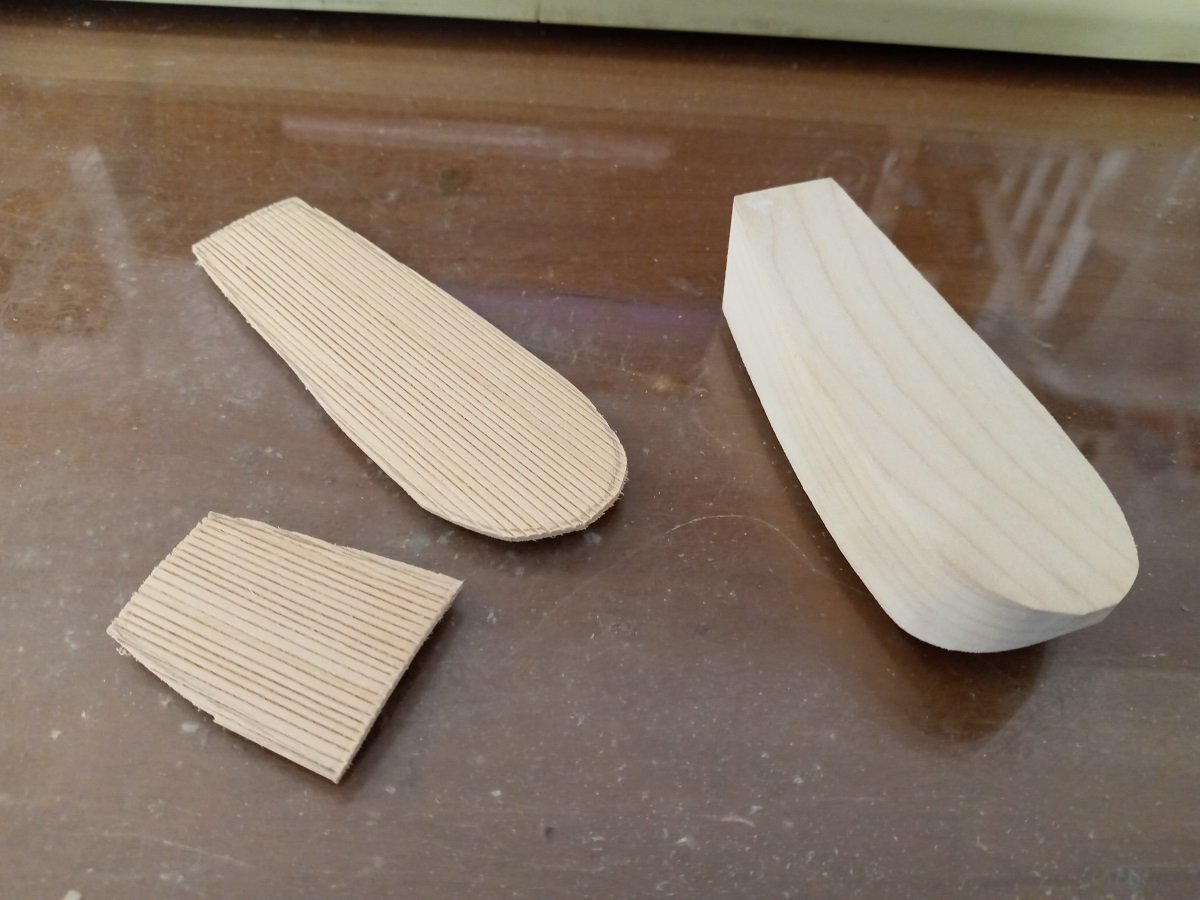
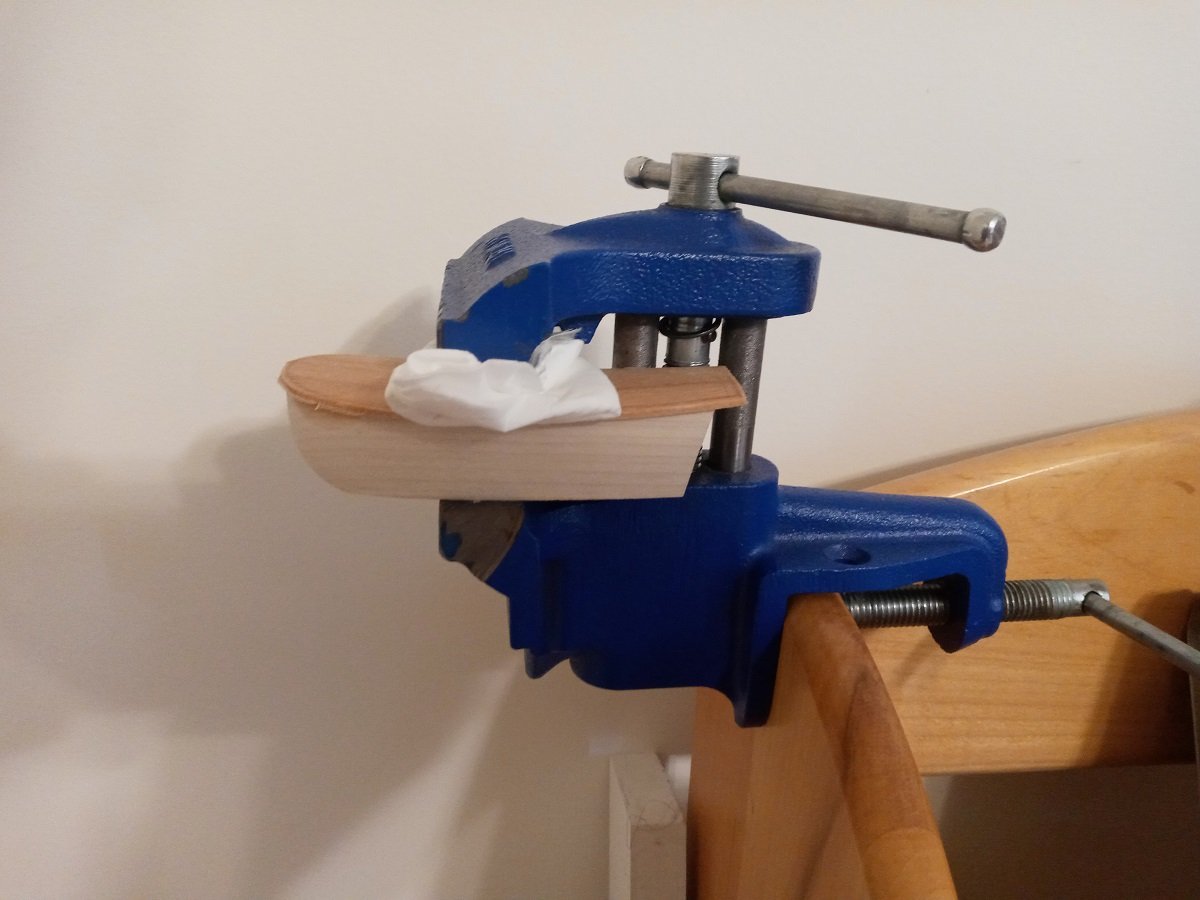
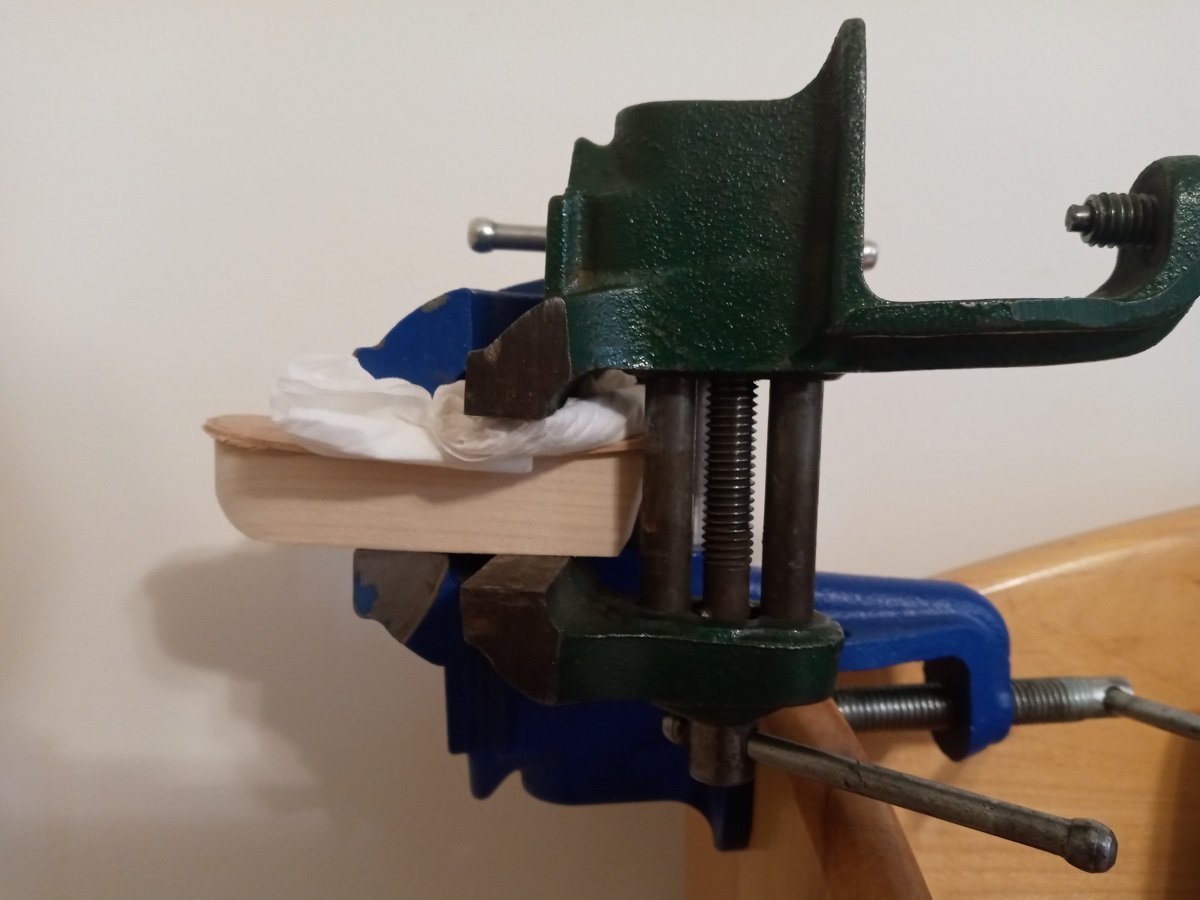
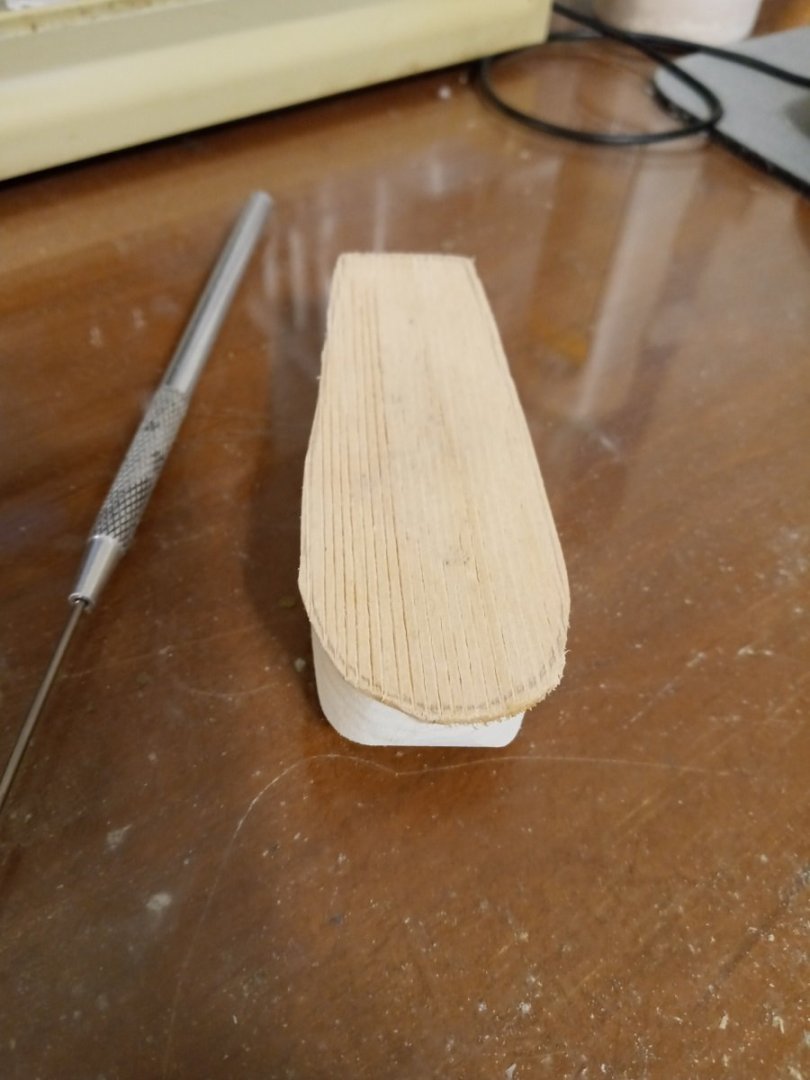
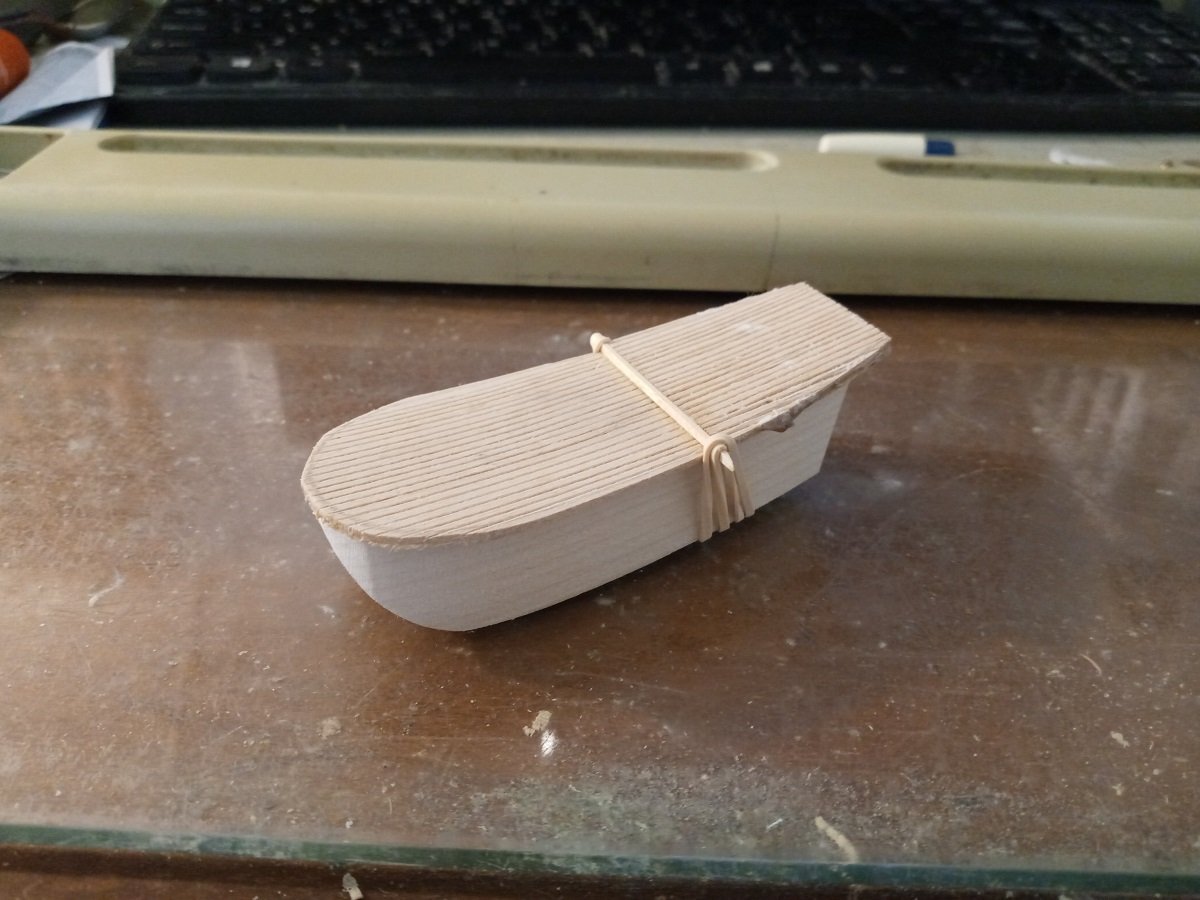
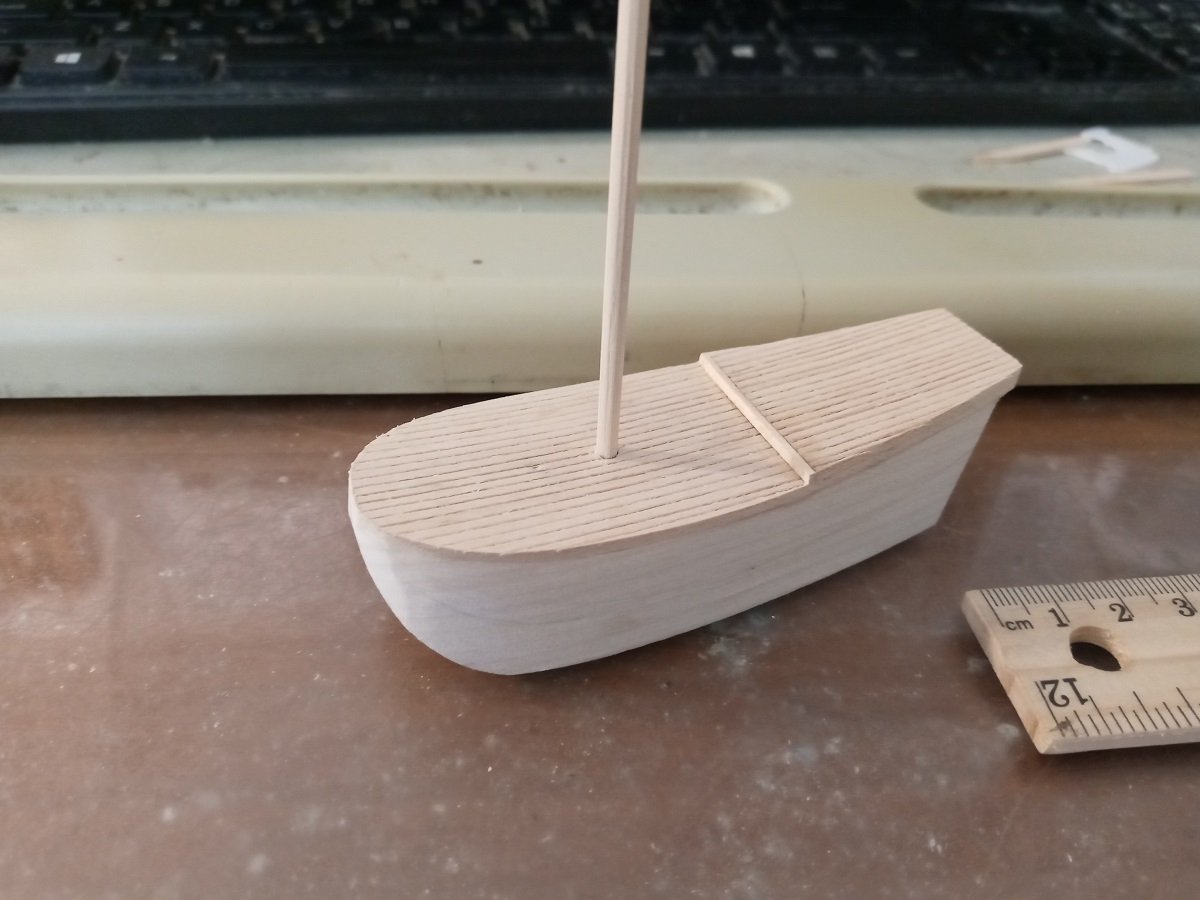
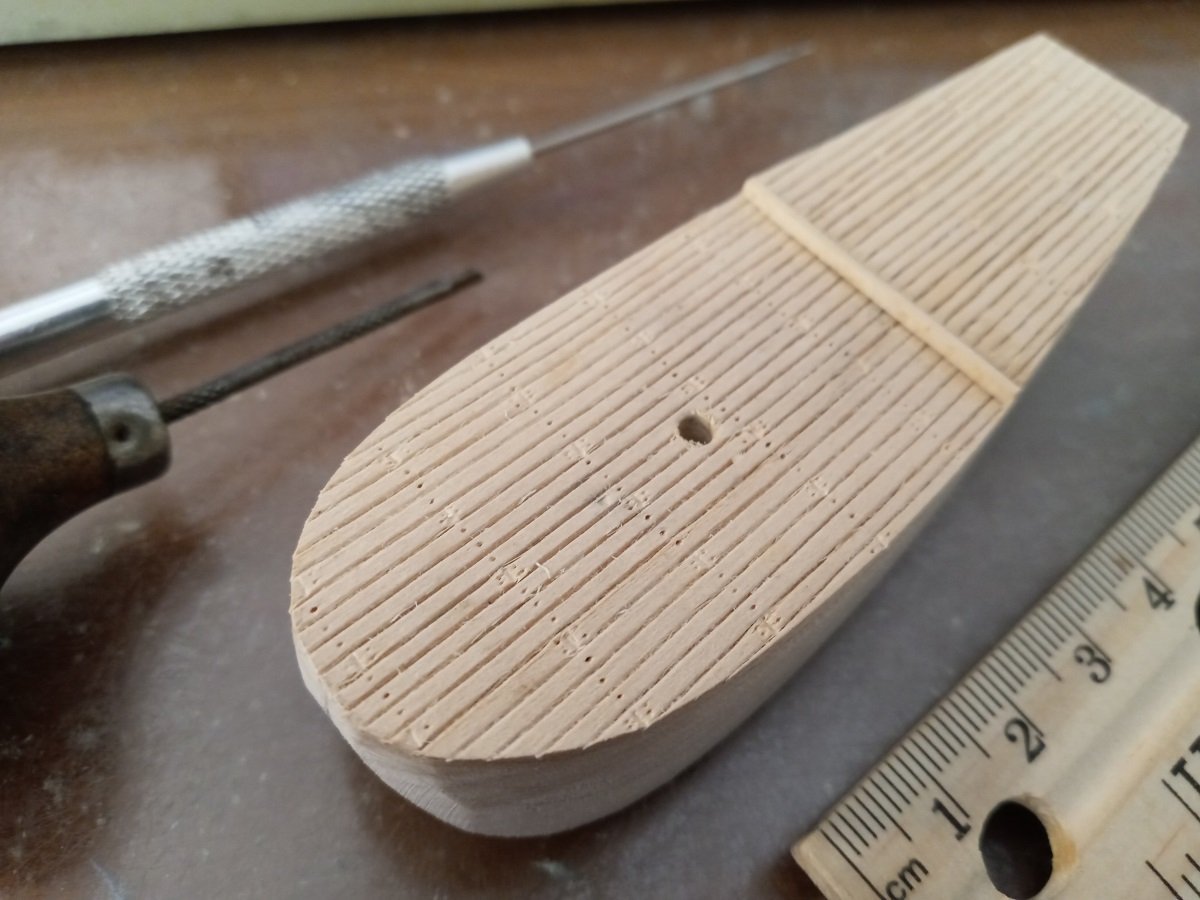
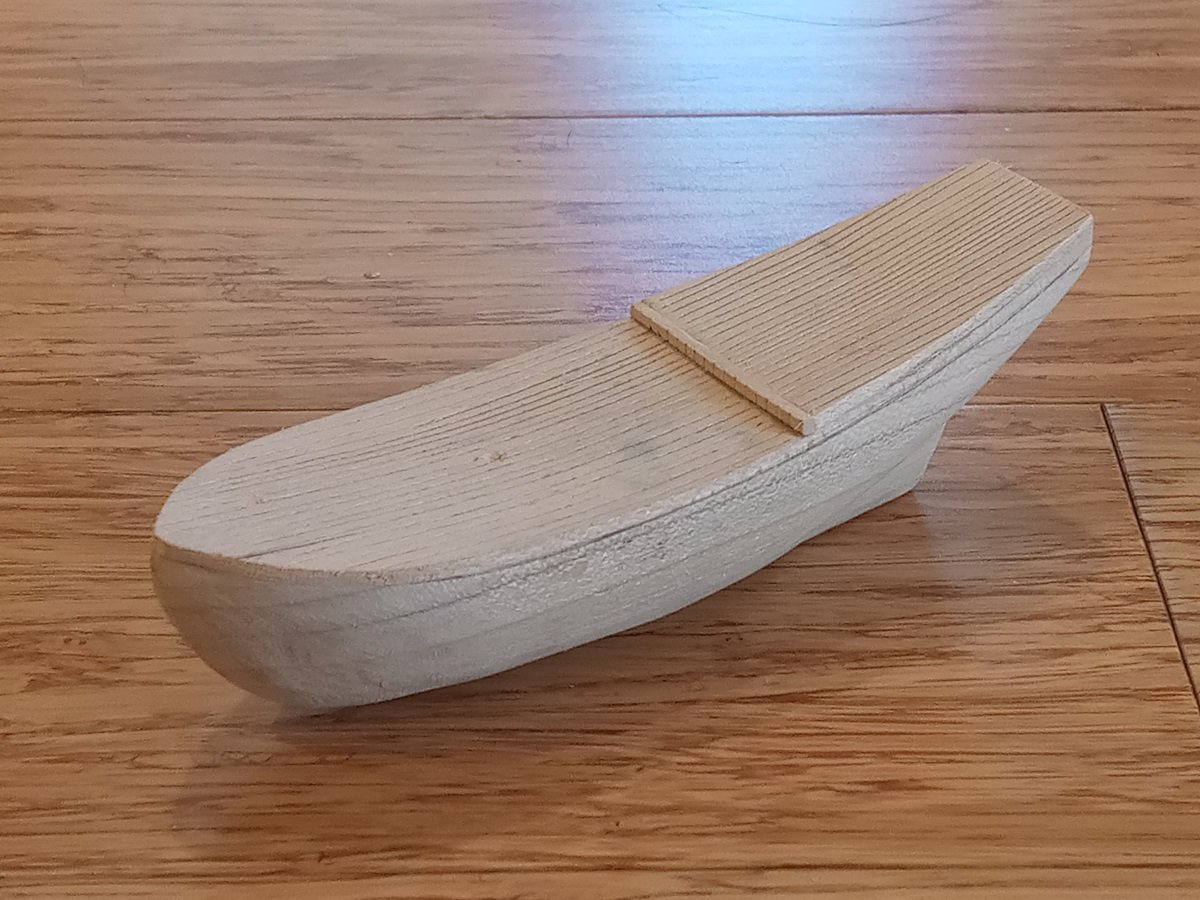
This design is my attempt at the smallest, simplest vessel of the early 18th century that would still plausibly have some of the features of a "ship" (deck, beak, square topsail, ratlines, etc.). At 1:128 scale it will represent a length of 45 feet from stem to stern, slightly longer than HMY Royal Escape. While I've scratchbuilt wood models in the past, they were almost all tiny and heavily simplified to the point of being abstract, and also had waterline hulls. This will be my first proper attempt with full hull, realistic rigging and other details. I've already had to alter some things from the initial draft. I used what I first thought was a plank of poplar. Don't ask why I thought that. It's obviously maple. (As you can see, I felt the need to add more gunports, even if it won't have that many guns.) This is the way we plank the deck, plank the deck, plank the deck... Upon finding that the rear of the deck was bowing upward in the middle, I added another vise. The soaked grain swells so that the planking requires some redefinition the next day. Because I'm not skilled enough to create perfectly straight lines, some setup is needed to keep the thingy flush against the front edge of the quarterdeck. Unfortunately, due to the deck's angle, I can't put an additional weight on top to keep it from bowing upward in the middle. At this point I started adding secondary lines for shaping the hull -- prematurely, because I only then realized it would be much, much easier to add certain other features while the bottom and sides were still flat. After further comparison with period images, I moved the mast hole back by just over 3/8 inch from where it's indicated on the plan and decided not to rake it. You can still see the tiny dent where I marked the drill spot as per the original plan. I used a graver to mark the ends of the deck planks. The nail holes didn't go so well, as the awl tended to make the basswood split. Inletting for the bulwarks. I will skip the guess-and-check process by which I figured out how to make the bulwarks and skip right to the outcome. I found the basswood splits when bent where there's runout, so what works is extra-wide strips with straight edges cut along the grain, shaped to match the inlet after drying. Here's where we stand right now. Fitting the lower edge to the inlet was surprisingly easy with a Dremel cutoff wheel and sandpaper. Problem now is I've never been on an 18th-century ship and don't know how high the bulwark should be, whether I should build it up or sand it down. Anyways, more to follow.


-
English fleets and small vessels in the early 1700s
Dan DSilva replied to Dan DSilva's topic in Nautical/Naval History
Hi again, Sorry I had to wander off for a while 'cause the spring university term is starting and I'm spending most of my time on required reading. Jerry, I downloaded a Kindle reader but the price appears to have shot up to $48 in the meanwhile, so it's looking like there may be print editions that'll be cheaper. druxey, thanks for the clarification. In that case I'll count the yacht and the hoy as different types of small vessel that both fit into my area of interest. Roger, thank you for the information and the offer. I've been doing a few plans inspired by the ones at RMG; probably going to aim for a single-master about the size of the Royal Escape but with a later period aesthetic more like the rebuilt Fubbs -- what I like about that sort of design is its features make it look like a minimized version of a full-sized ship.
-
English fleets and small vessels in the early 1700s
Dan DSilva replied to Dan DSilva's topic in Nautical/Naval History
Are the single-masted yachts technically hoys? -
English fleets and small vessels in the early 1700s
Dan DSilva replied to Dan DSilva's topic in Nautical/Naval History
Thanks, I'll take a look! -
English fleets and small vessels in the early 1700s
Dan DSilva replied to Dan DSilva's topic in Nautical/Naval History
I'm not sure... the boats look very similar, but the first painting is supposed to be at Calais and the second "in the Thames Estuary near Sheerness." Did I miss something in the file descriptions? -
English fleets and small vessels in the early 1700s
Dan DSilva replied to Dan DSilva's topic in Nautical/Naval History
I'm finding that a lot of ships of the kind in the paintings are referred to as royal yachts, but I don't know whether at that time that could describe a physical type or just its role. Royal Museums Greenwich says that they were normally ketch-rigged, so one with a single mast may have been privately owned and not a royal yacht. As for use, HMY Fubbs served in the Mediterranean several times during the War of the Spanish Succession; Mary was deployed to the Baltic in 1700, and William and Mary fought in the Battle of Malaga in 1704. So yeah, this kind of vessel was being sent a fair distance abroad and serving in battle fleets. -
Hello! I recently started on this sloop without having given proper thought to the place I wanted it to occupy in my collection and whether it was right for the period. So that's possibly some time lost. After consideration, I have the notion of eventually doing a few ships from a fleet or squadron from around 1700-1705, but I'd like to start relatively small and simple. A lot of paintings from the late 1600s-early 1700s show decked, armed, single-masted boats that look to be about as big as Bermuda sloops, like here and here, but I'm having trouble finding information about them. Would you see these little guys, or any vessels in that size range, accompanying men-of-war out at sea? If so, do you know where I can learn more about them? Also, are there any good general resources about the typical composition of English fleets when they were away from home at that time, with numbers of different warships and auxiliary vessels?
-
So, here's what I've wound up with: Scientific Bounty in approximately 1:120 scale. Got it cheap on eBay because it was partly assembled and there's a few missing or damaged pieces, though I don't think anything that can't be easily replaced. Also could use upgrades on top of modifications -- it doesn't even come with sails, for one. But I think it's an okay start.

-
Good catch; the reason I ask about common scales is because of course the Pequod isn't the only ship in the book, so if it winds up being 1:110 then maybe I'll get a Revell Morgan to sit alongside it on the shelf as the Rachel or something.
-
Thank you. A solid hull sounds like it'd be more suitable for a beginner. The Constructo 1:110 Bounty looks nice, if there are any available by the time I have enough money saved up, but I will look into a simpler learner's model in the meanwhile.