MTC
-
Posts
44 -
Joined
-
Last visited
Content Type
Profiles
Forums
Gallery
Events
Everything posted by MTC
-
Some final thoughts on the model and the build. First, Allan you ask a great question about the reefing lines in the sail. If I had to do it over, I would have tied the reefing lines into the sail before I dyed the sail. That way, they would have been darkened/aged and then I could have set them in a hanging position while the sail dried and I could have further ironed them into place when I ironed the sails. I would also like to hear from more experienced builders about how the deal with this problem. The other big problem I had with the rigging lines was how I colored them. I did a lot of searching through the msw tips and one of the things I saw a few times was that other builders had used wood stain to color the lines. I tried it and I really liked the color and it seemed to be a good way to get consistent color so I went with it. The problem with this is that it makes the lines very stiff and they don’t hang or stretch right as you can see if you go back to the finished pictures and look at the gaff halyard or the jib sheets on the deck. They don’t stretch right or lay flat. The final color problem I had was with the metal chains and fittings. In a lot of the tips, other builders had used metal blackening solutions and to me that seemed more permanent than trying to paint these things. However, the metal blackening solution eats up some of the cheap pot metal and leaves it very pitted and corroded. In earlier posts, I complained about the small metal fittings and how I had to drill all of them out to get the line through them. When I went to paint them, in many cases I had to redrill them because the paint film filled in the holes enough so that I couldn’t get the line through them. This in turn weakened the fittings and in some cases they broke when I was tightening the standing rigging and I had to jury-rig a new fitting. It is something I will email Nic at Bluejacket about. All in all, I thought the kit was very good and I would certainly recommend a Bluejacket kit to anyone. i have not decided on my next project yet but I grew up on the southern end of the Chesapeake Bay and I am looking at models of the Skipjacks or some of the other crabbing and oyster boats that I used to sail around and see out in front of our house.
- 54 replies
-
- 1
-

-
- Spray
- BlueJacket Shipcrafters
- (and 1 more)
-
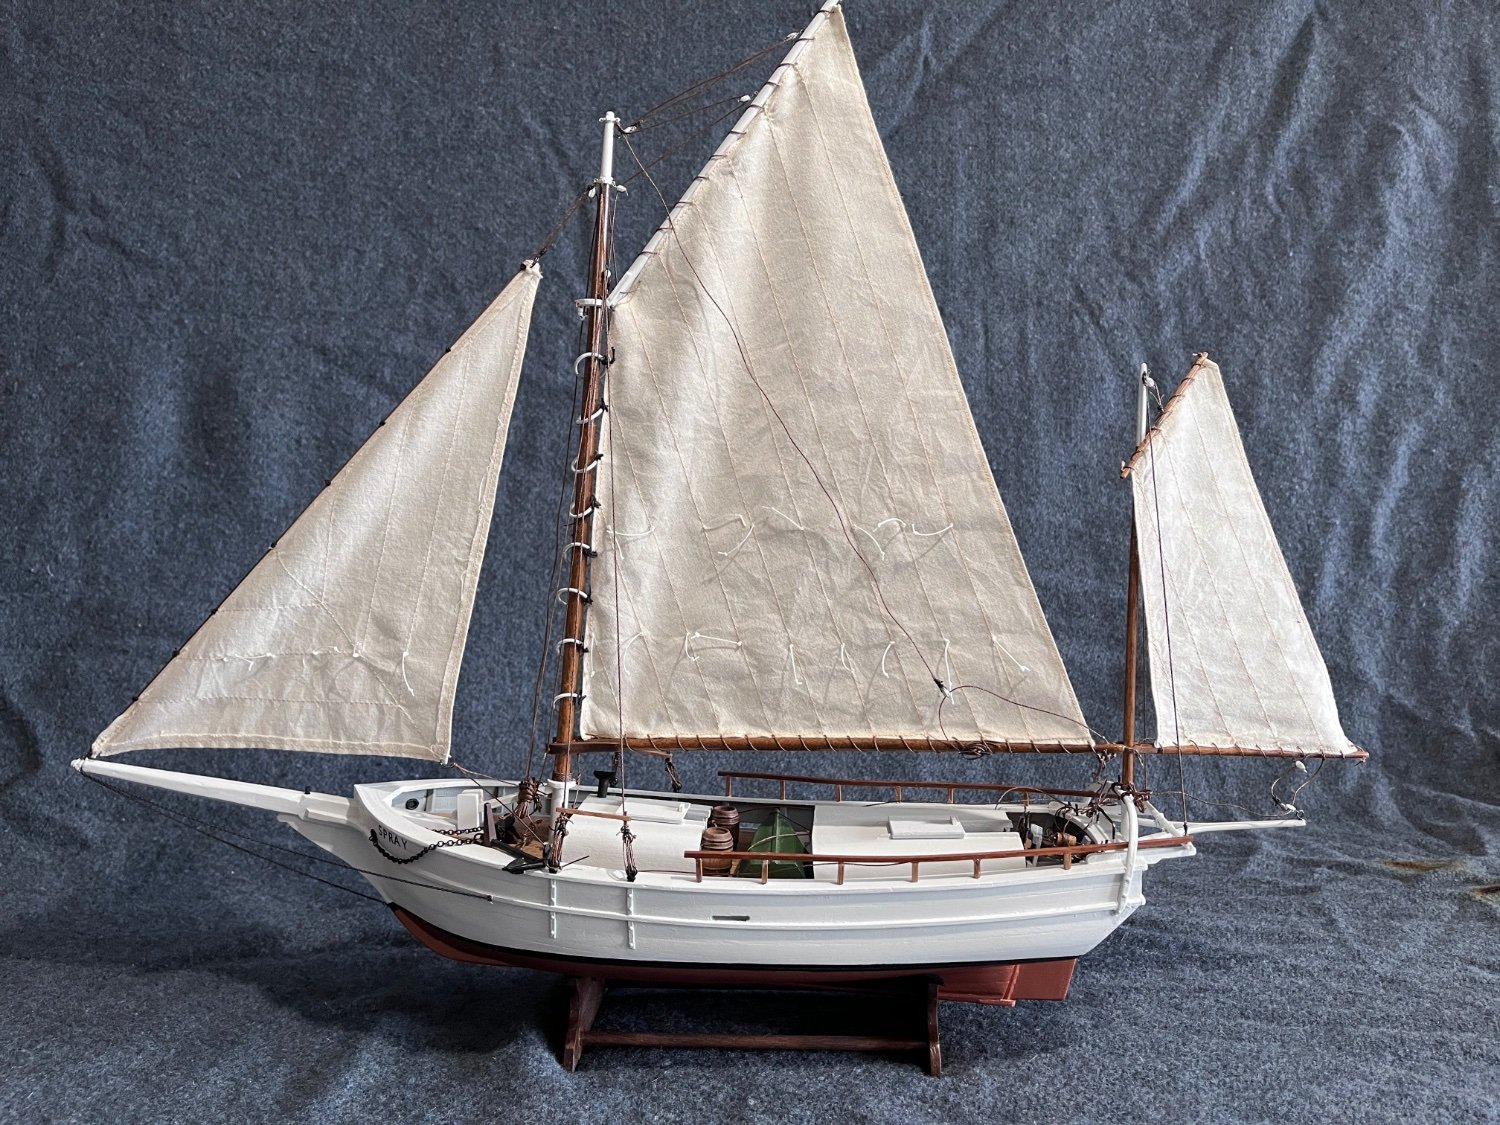
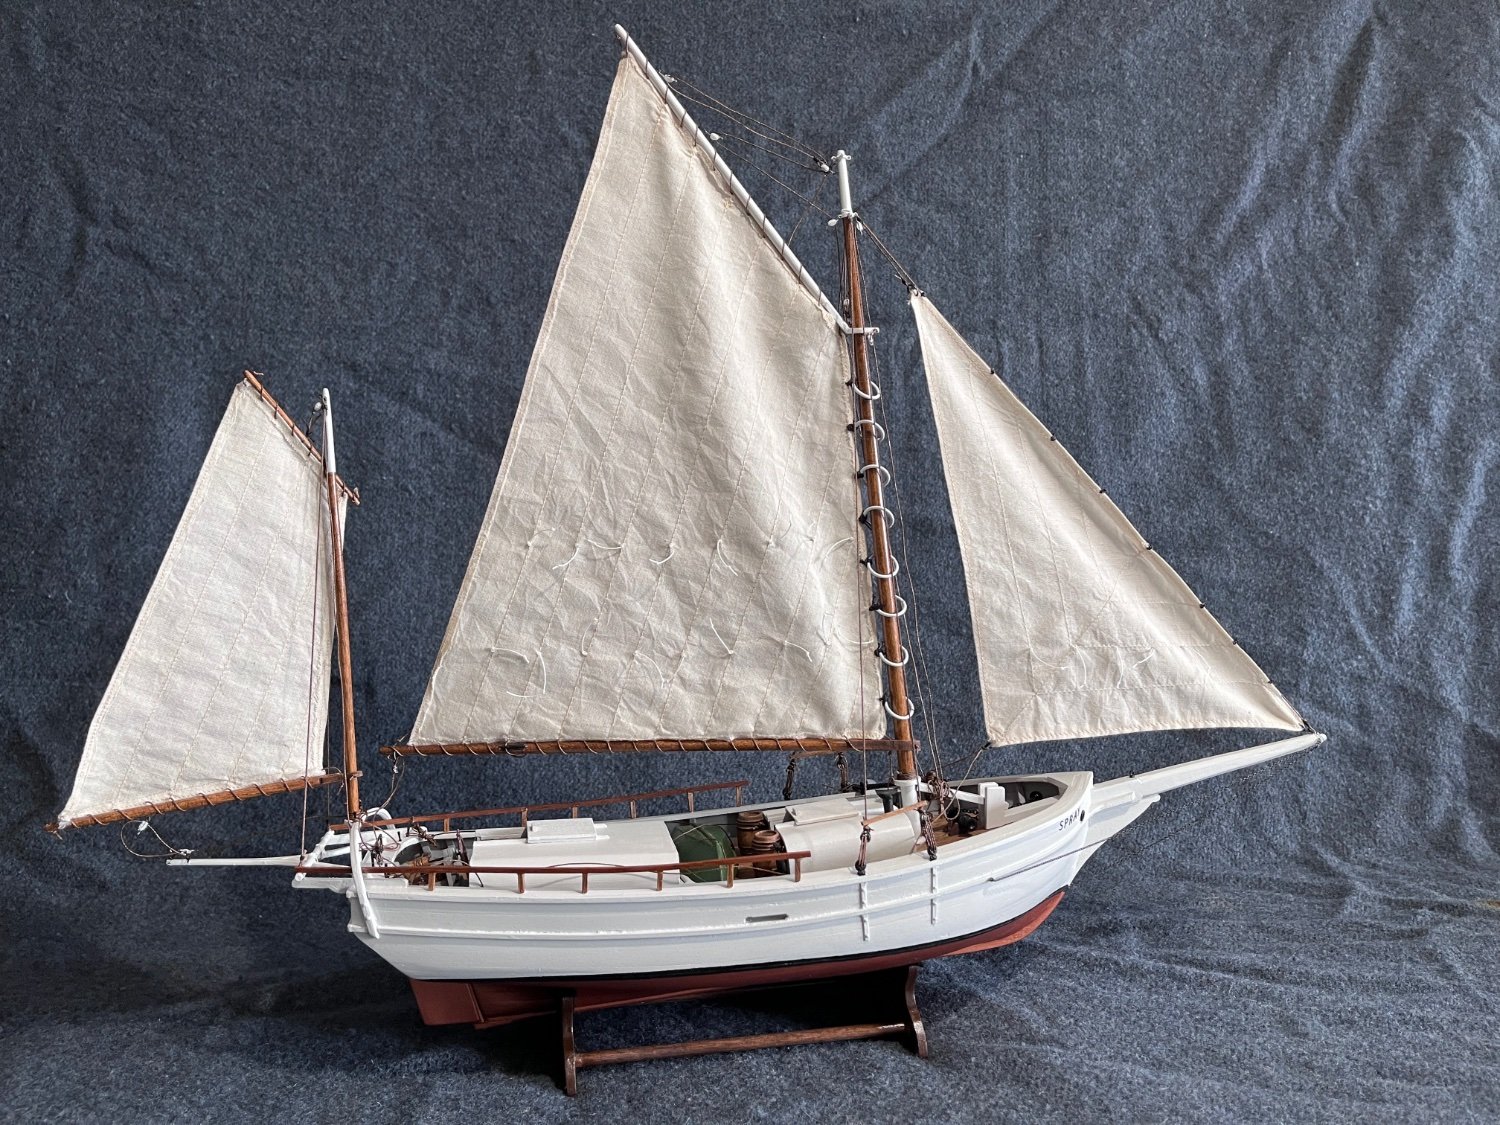
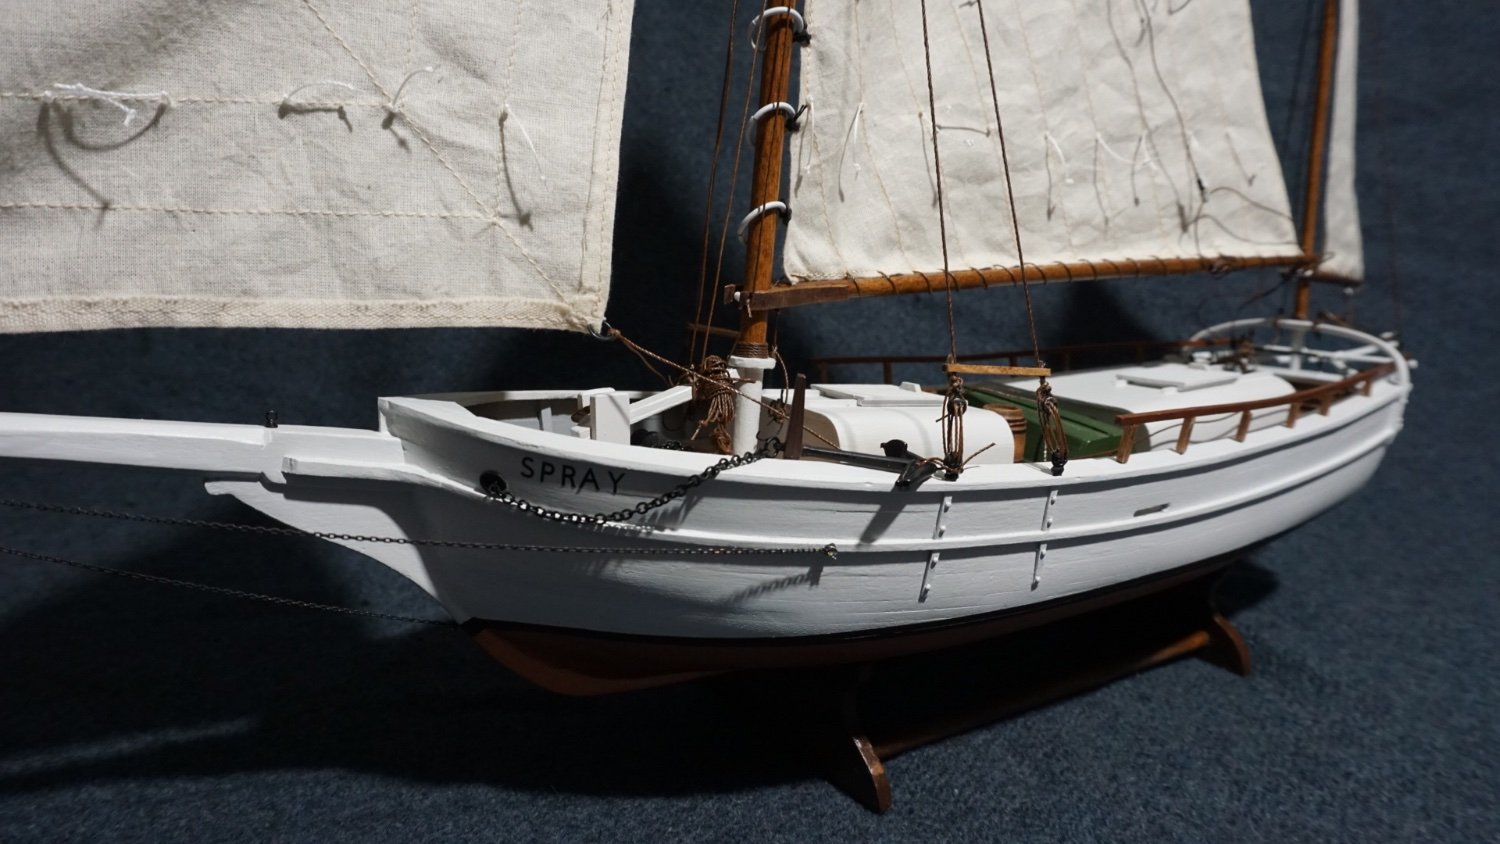
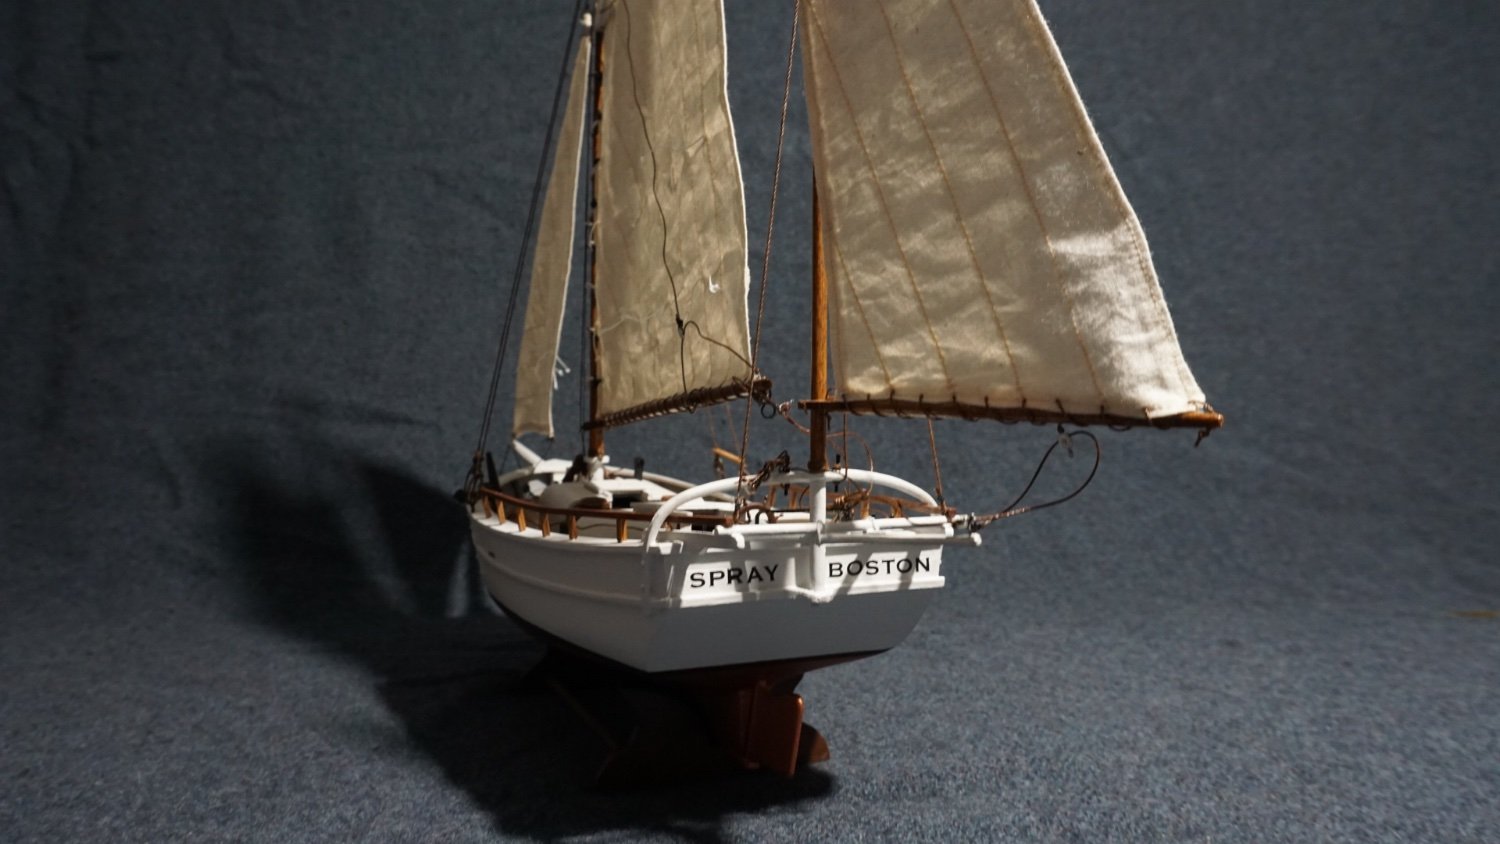
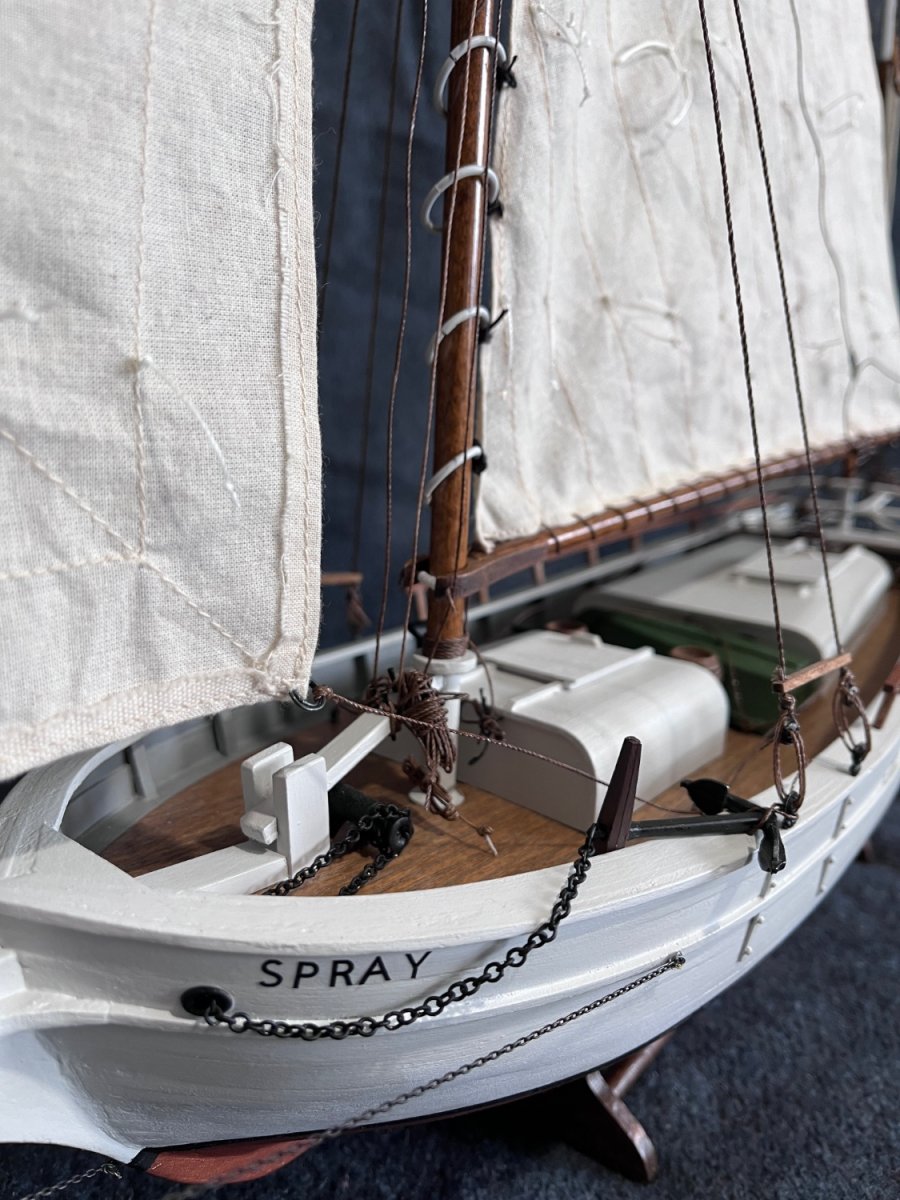
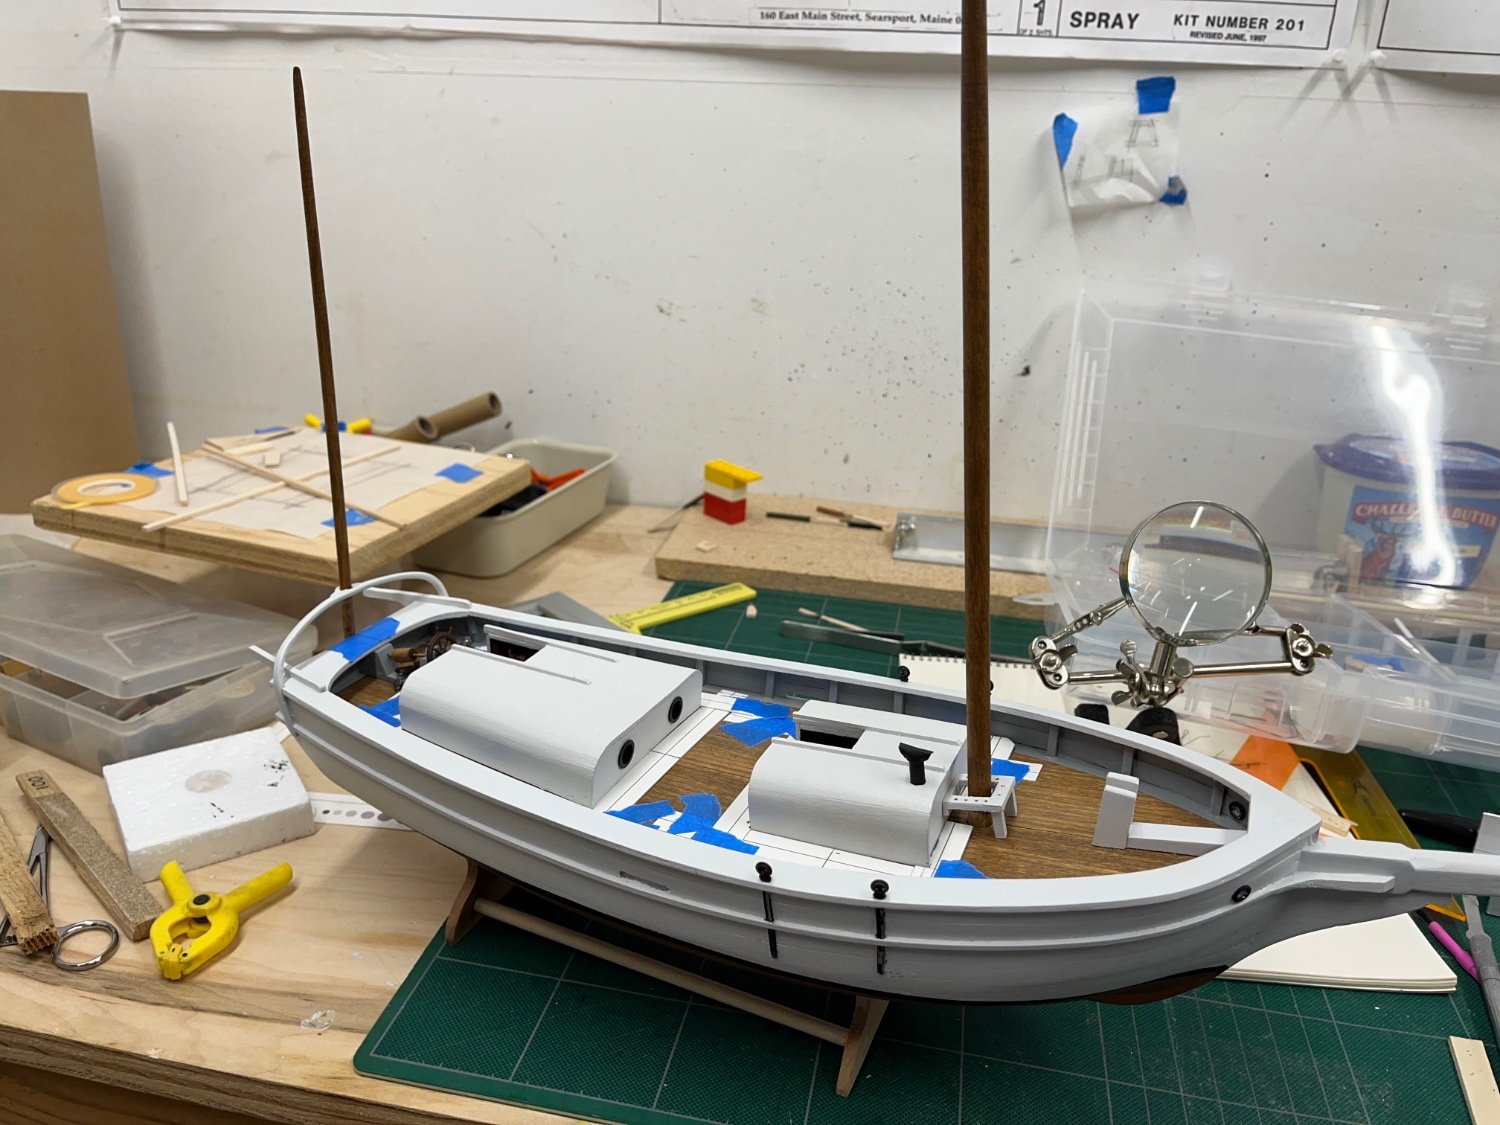
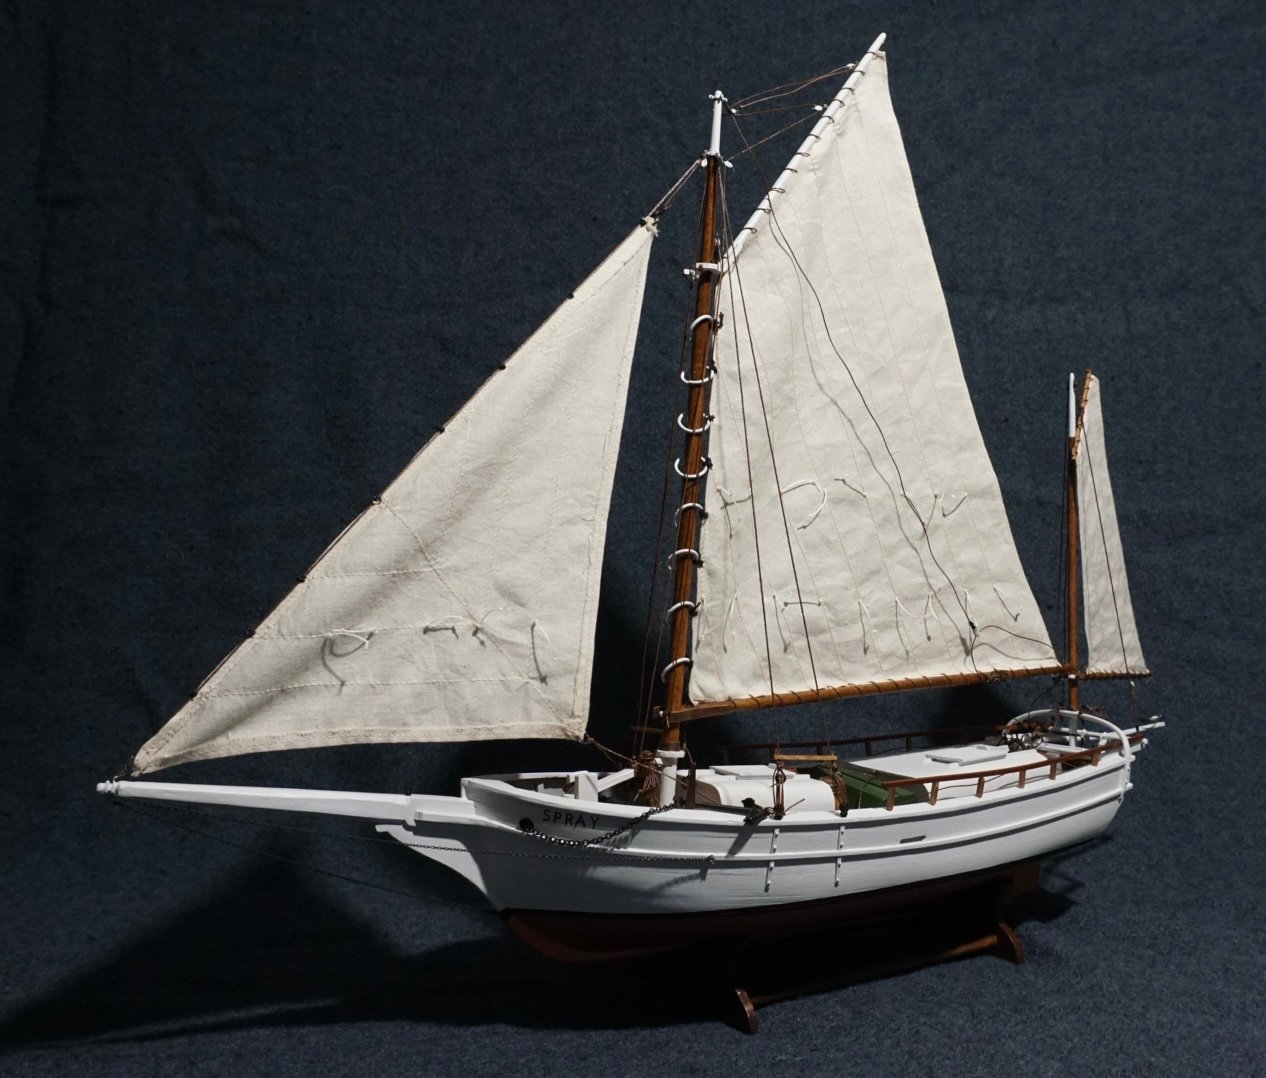
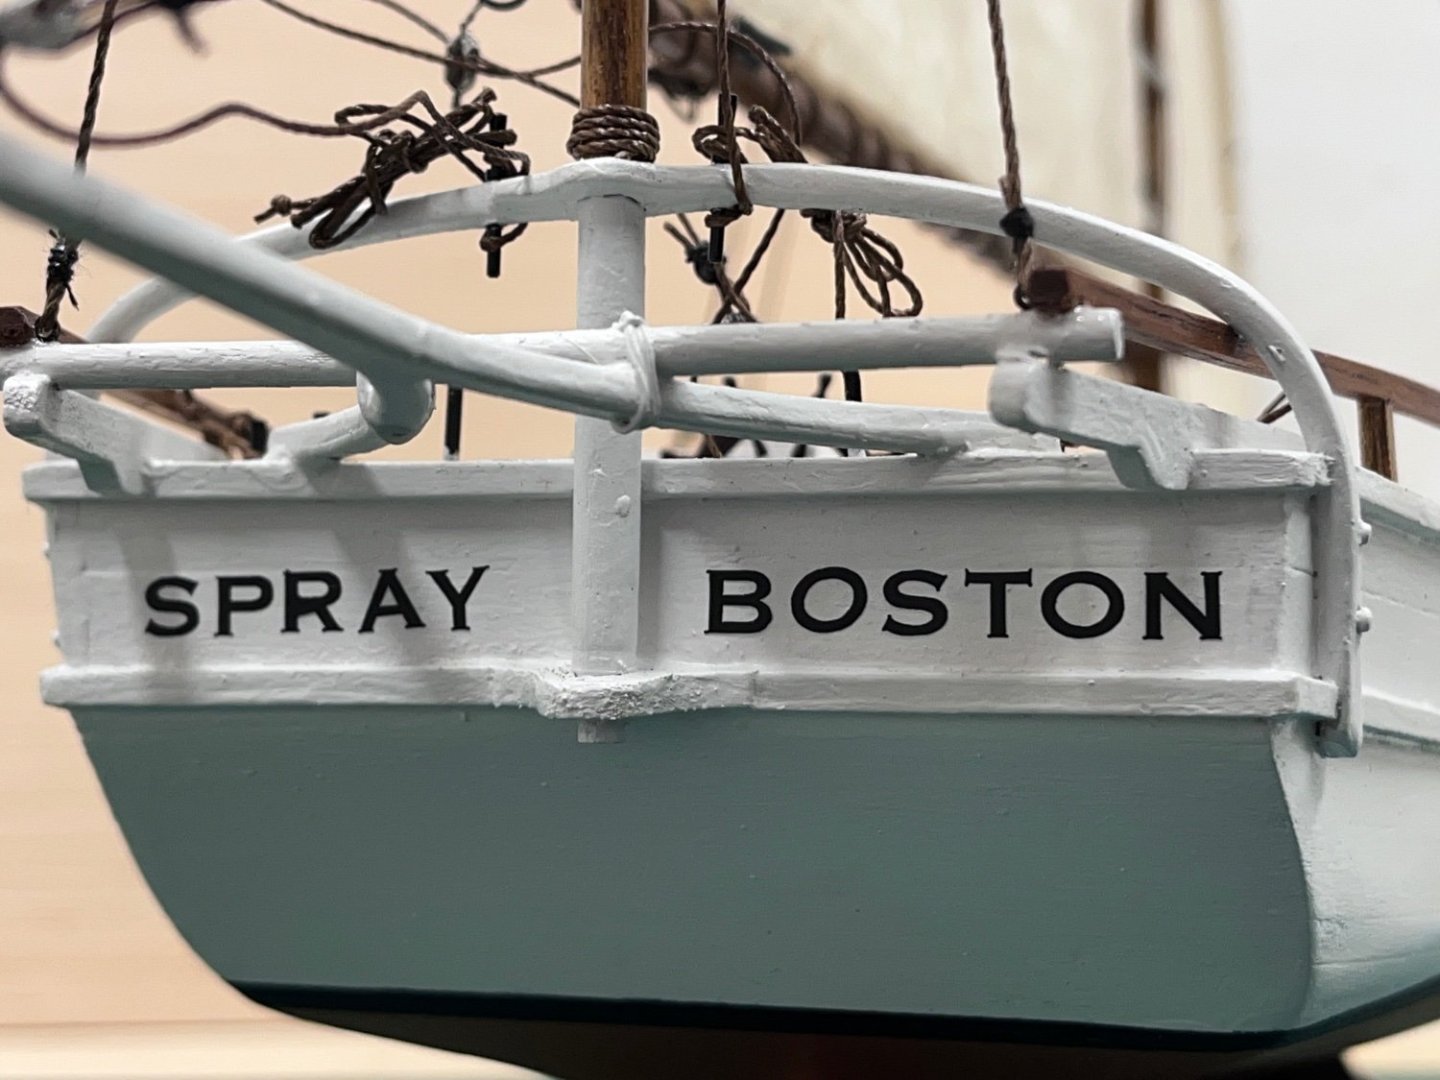
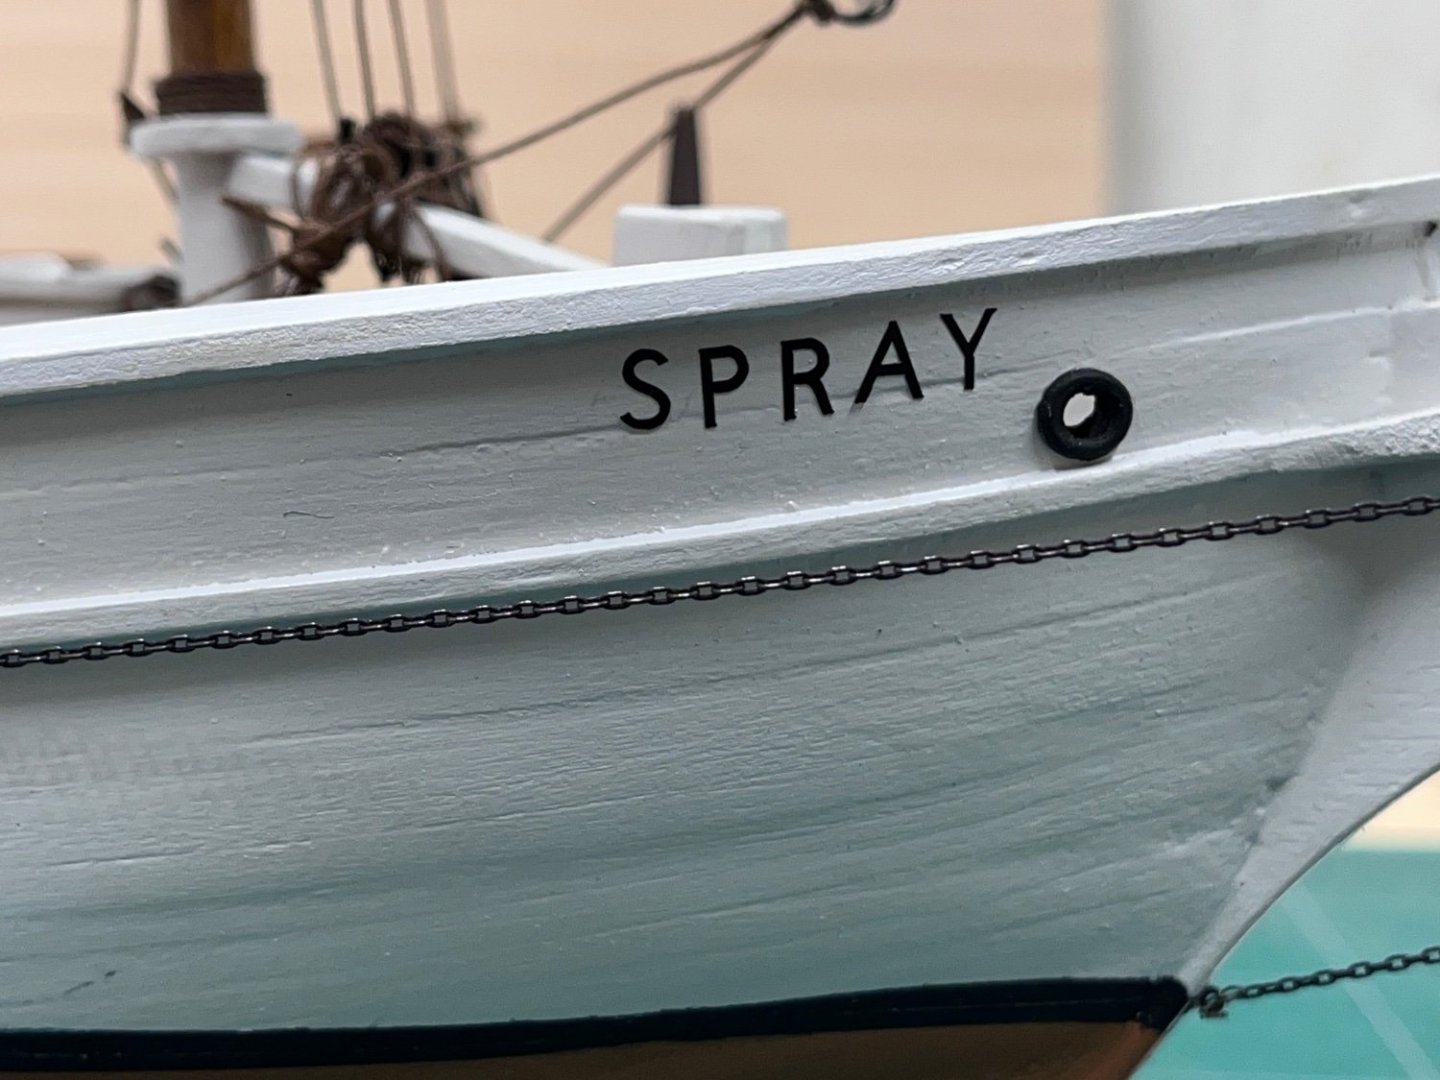
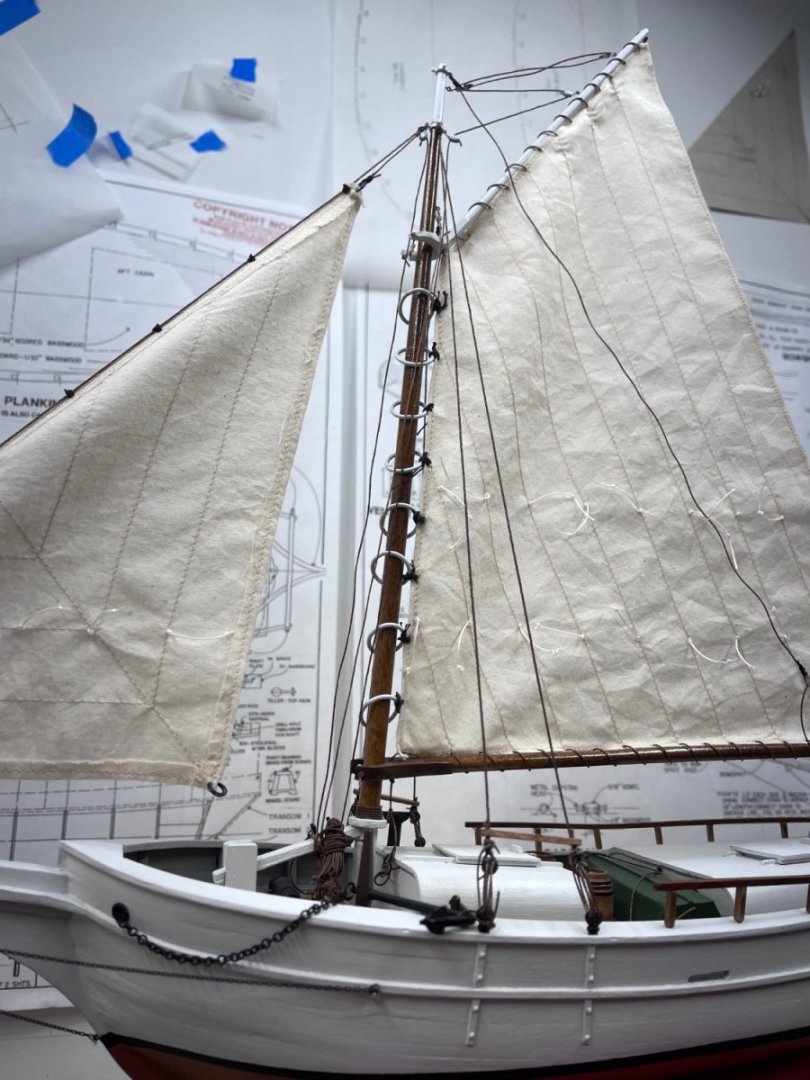
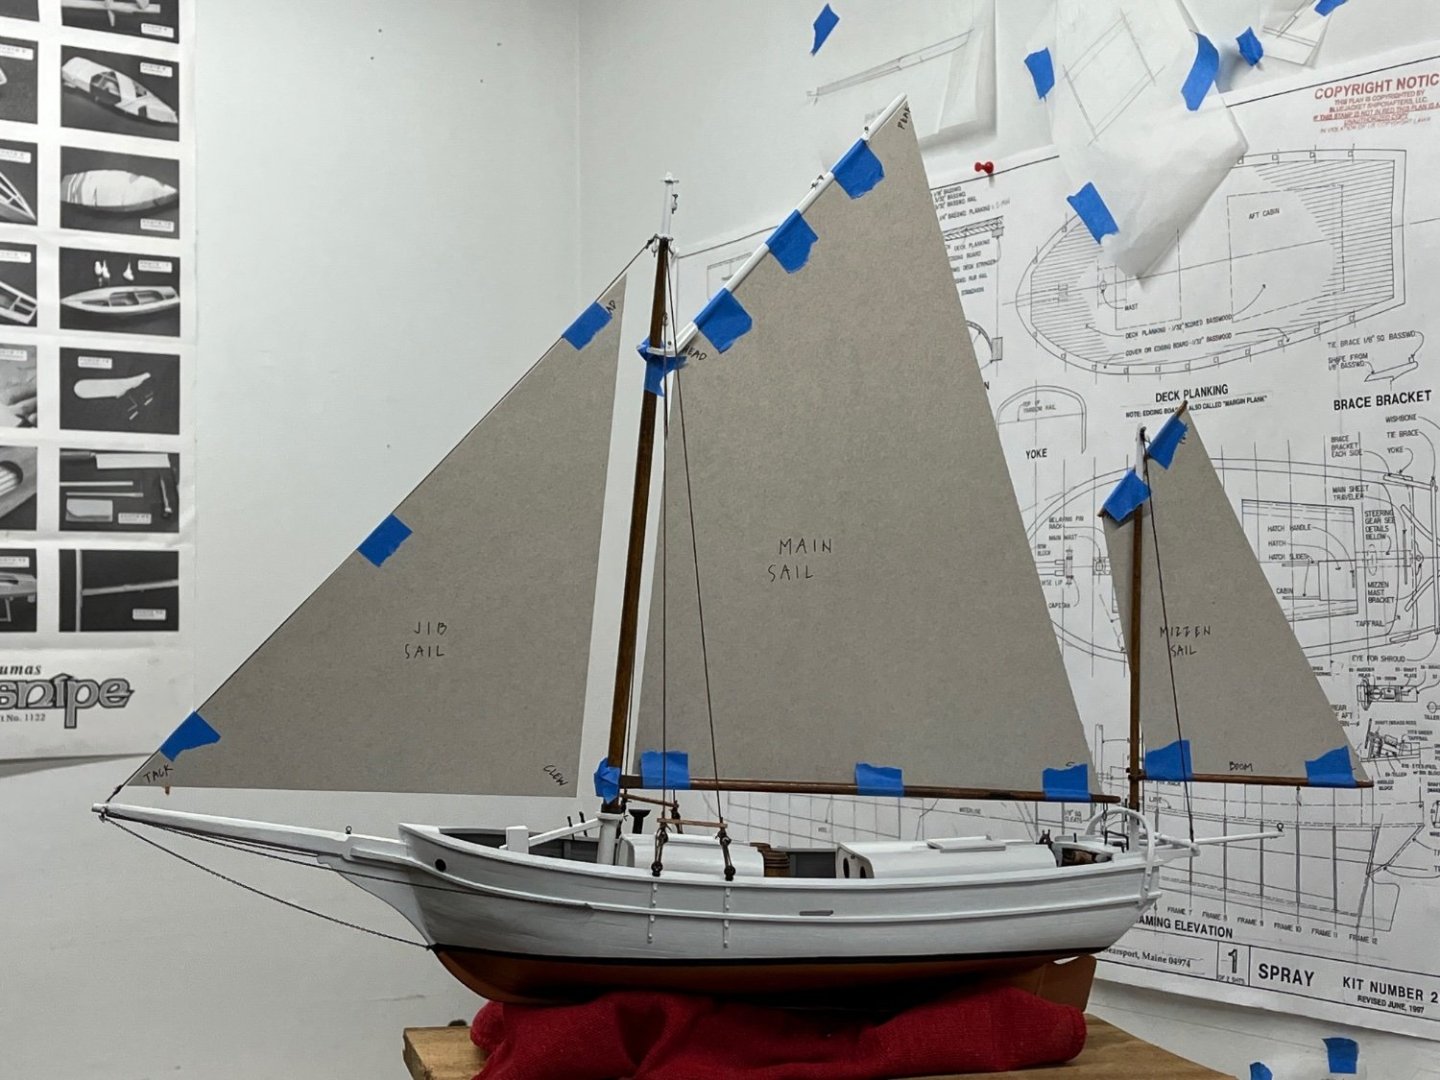
Finally done after starting in early February of last year. Here are some images of the finished model.


- 54 replies
-
- 7
-

-
-
- Spray
- BlueJacket Shipcrafters
- (and 1 more)
-
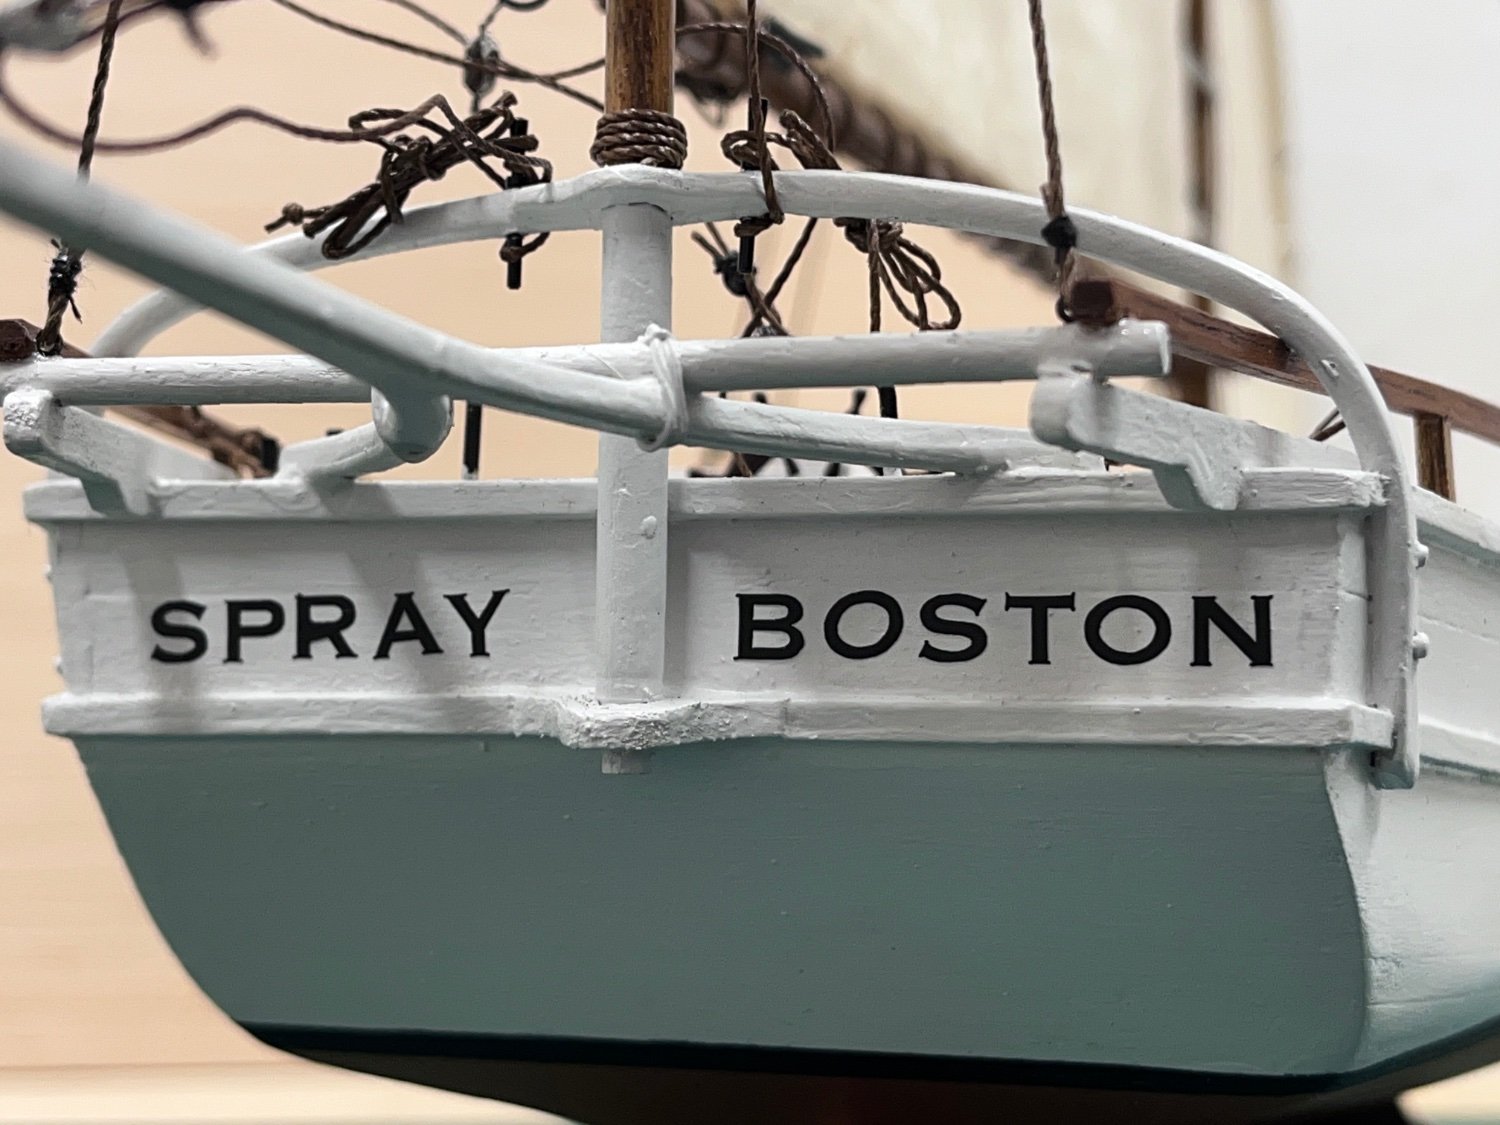
Last bits to go. I have access to a Cricut machine and got the bow and stern names sized and cut out. I played around and found a font that approximates the ones in the pictures. Definitely were hand painted. It was tough to get them on straight but that adds to the hand painted look.
- 54 replies
-
- 3
-
-
- Spray
- BlueJacket Shipcrafters
- (and 1 more)
-
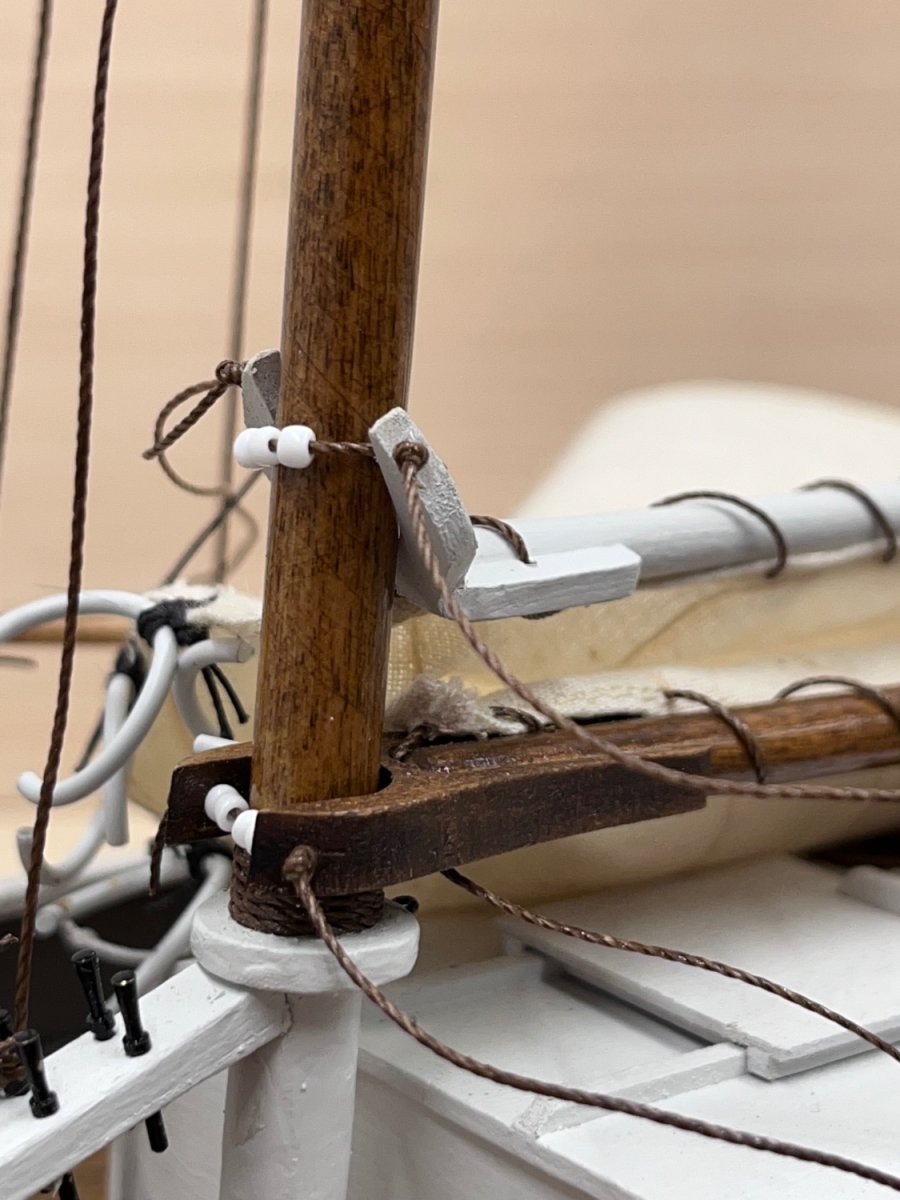
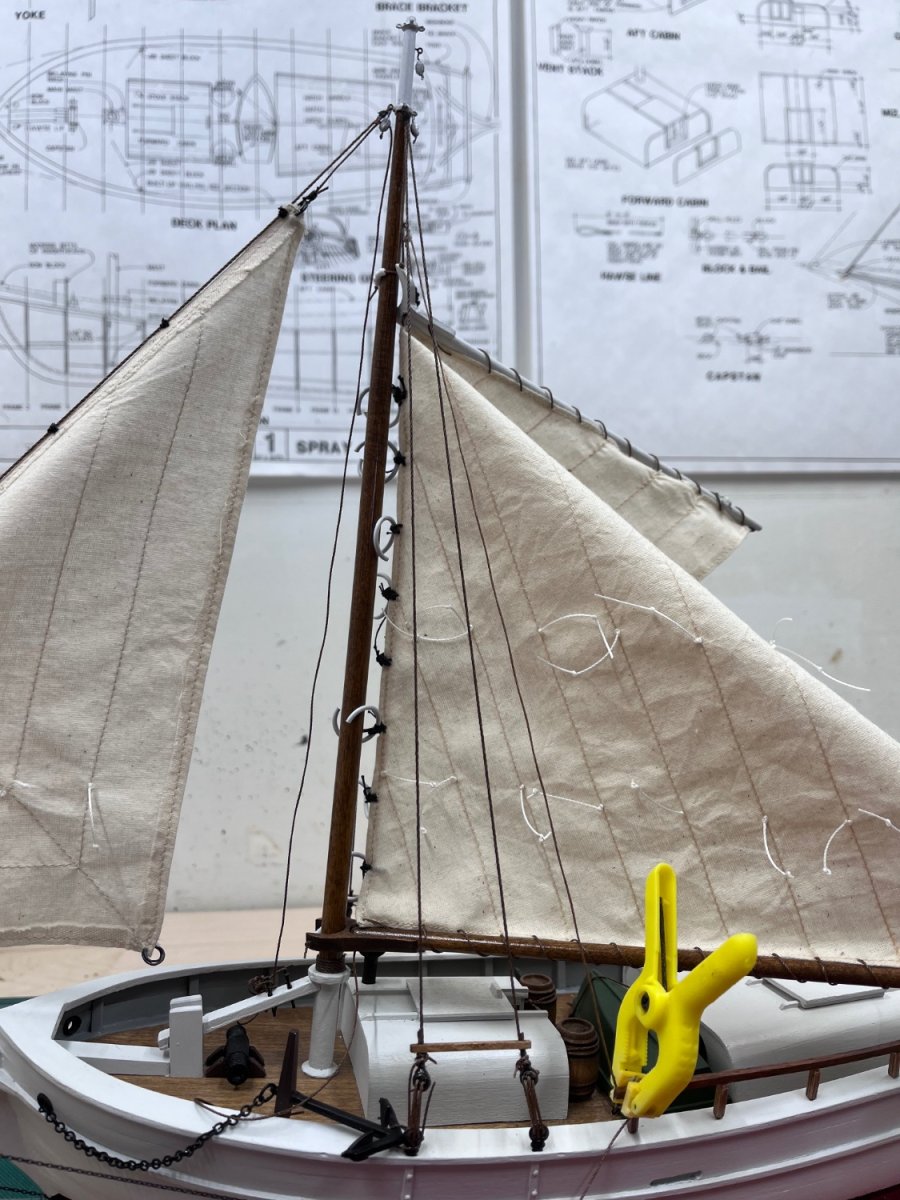
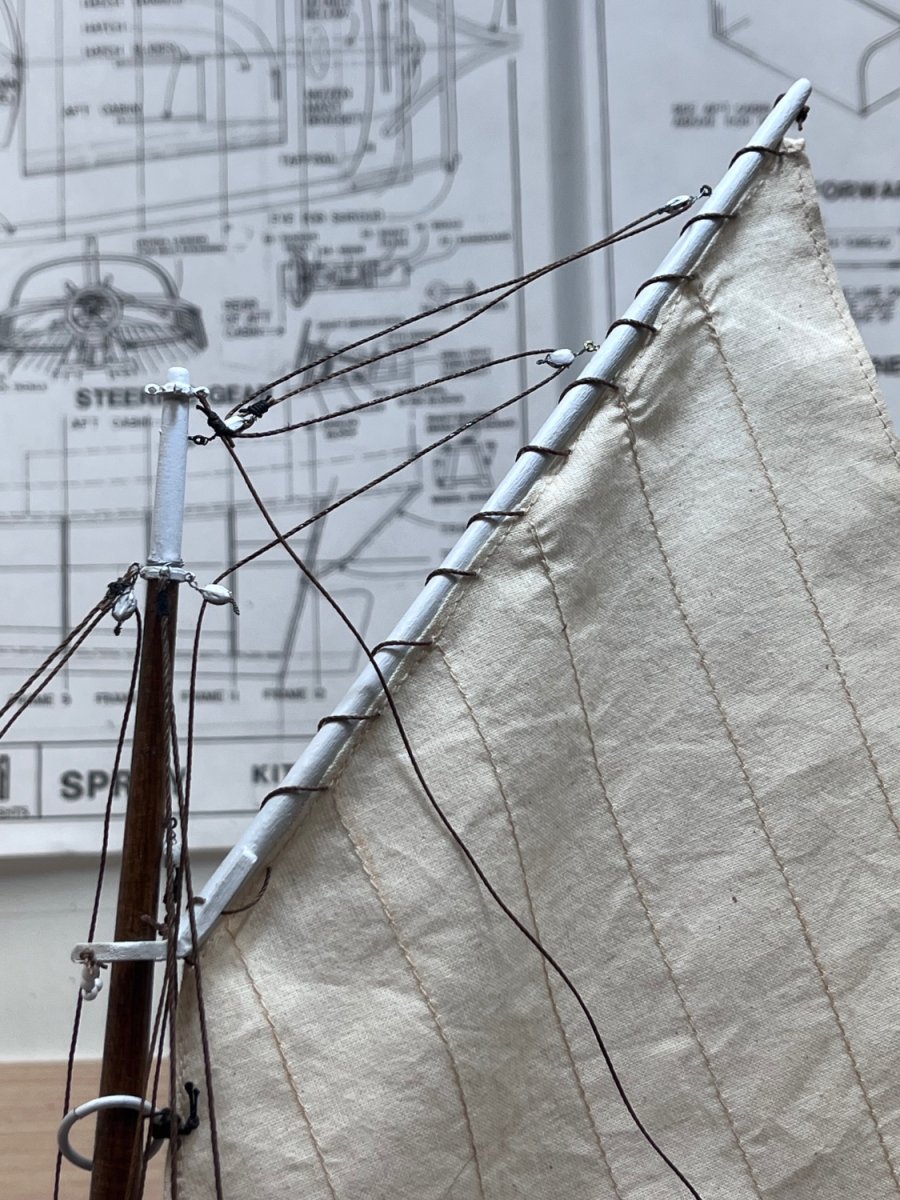
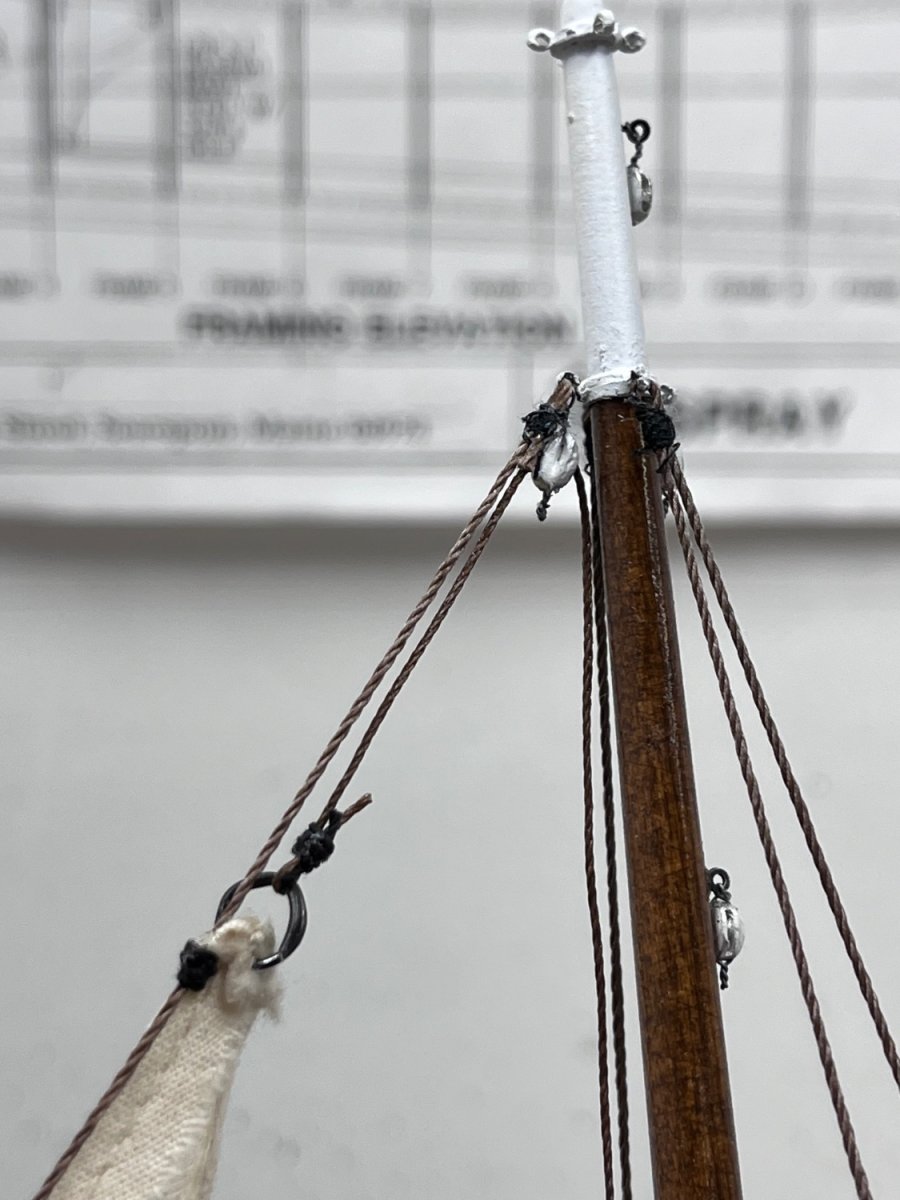
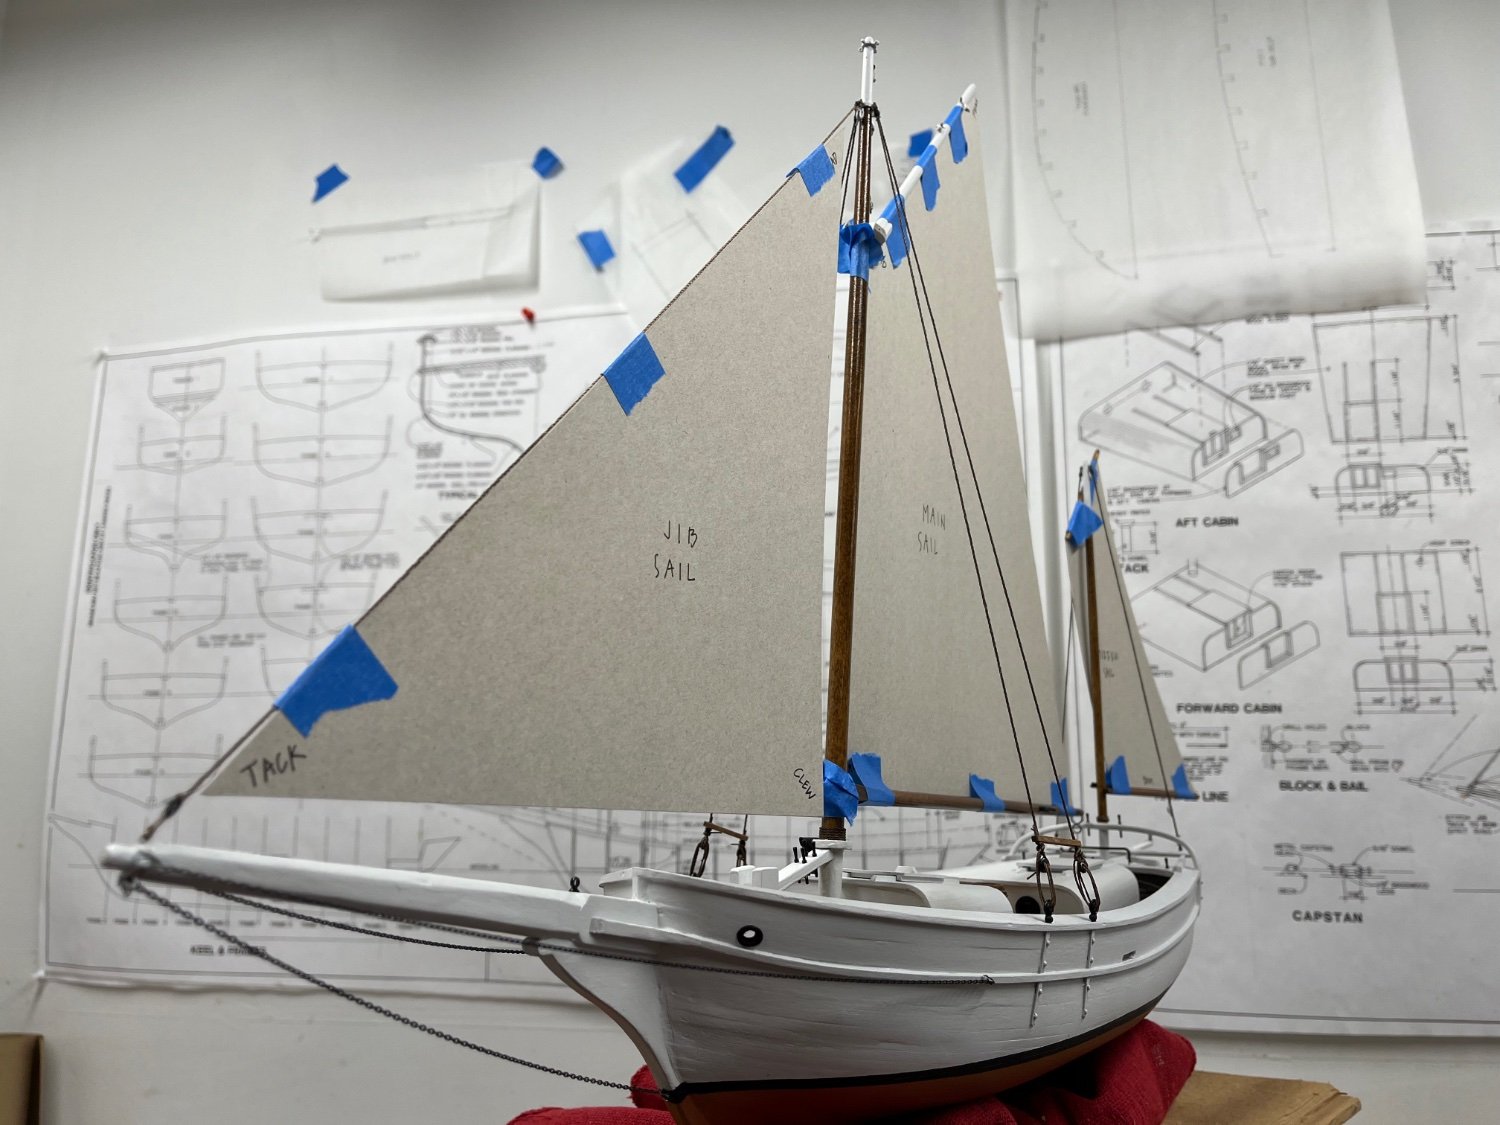
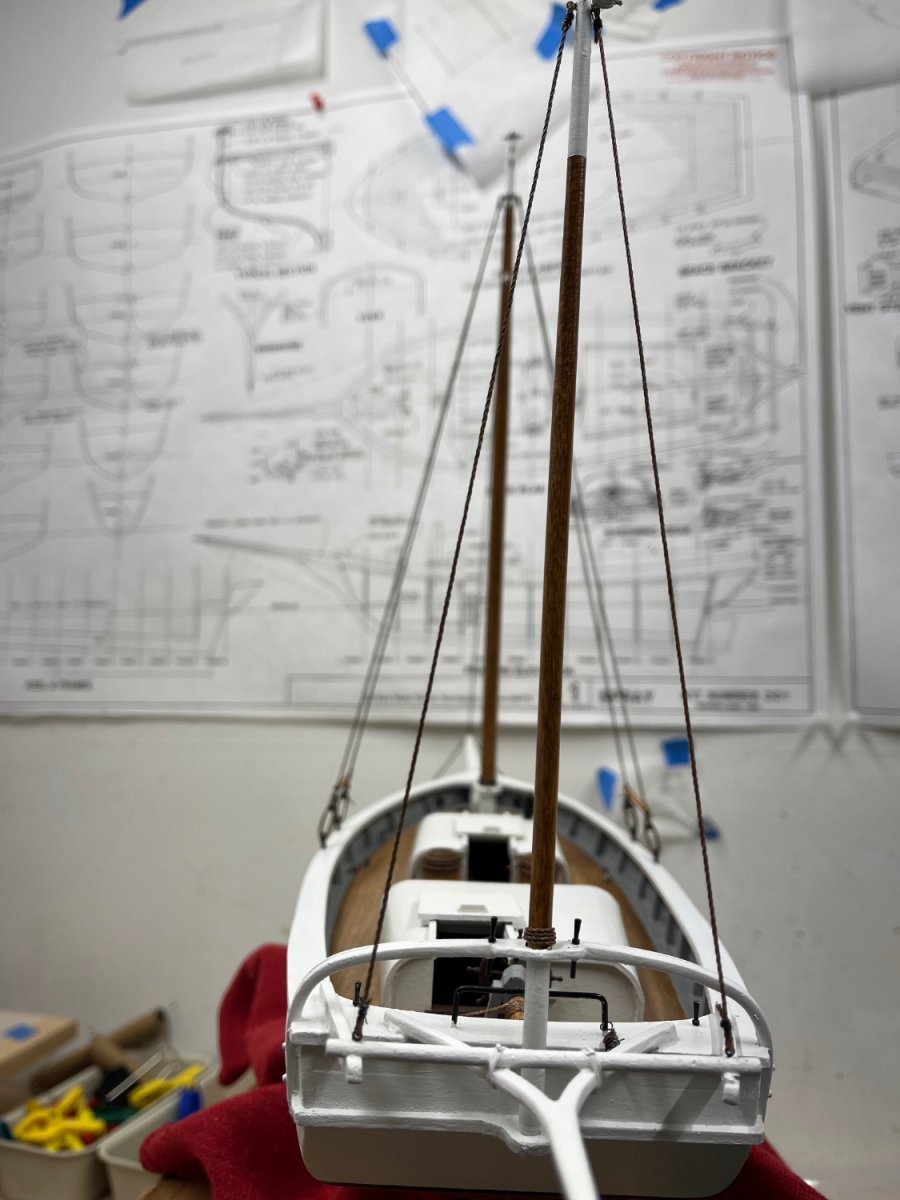
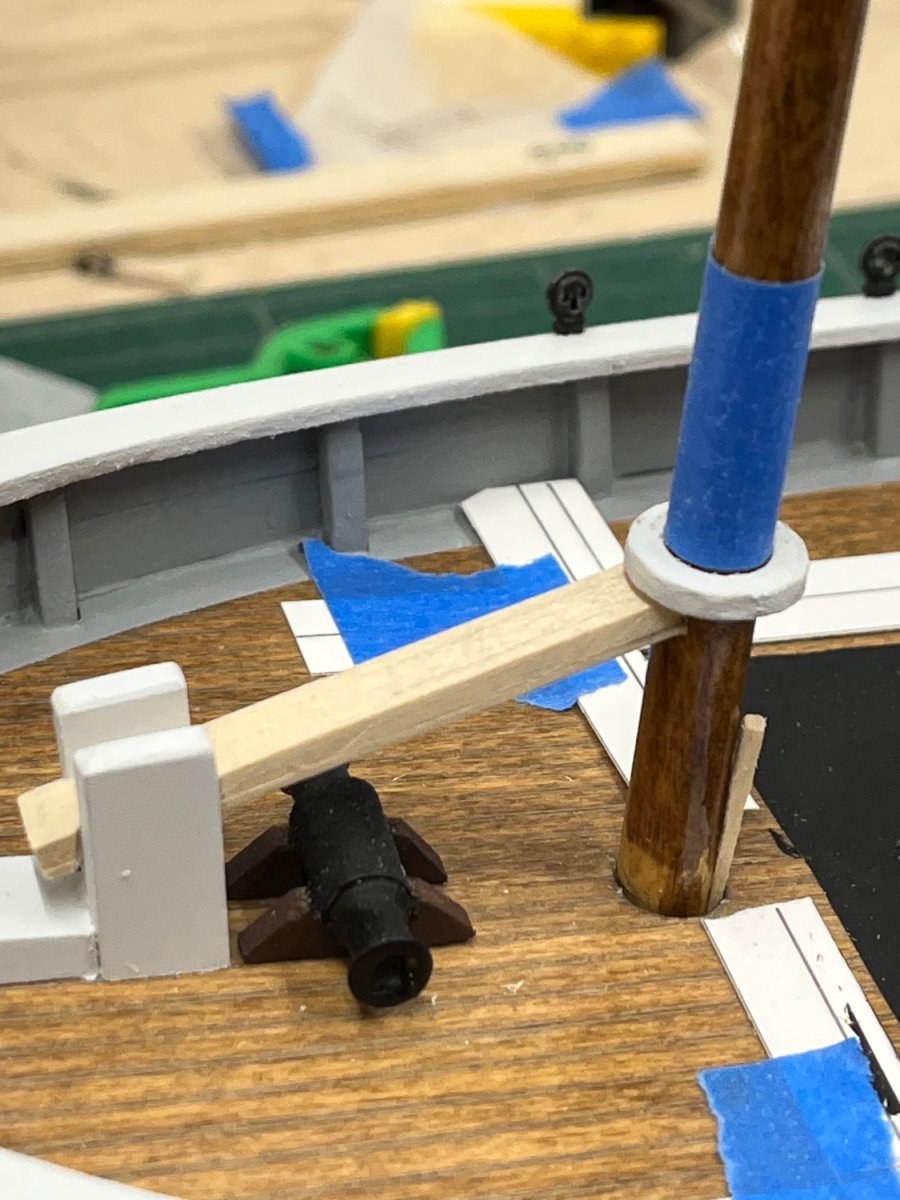
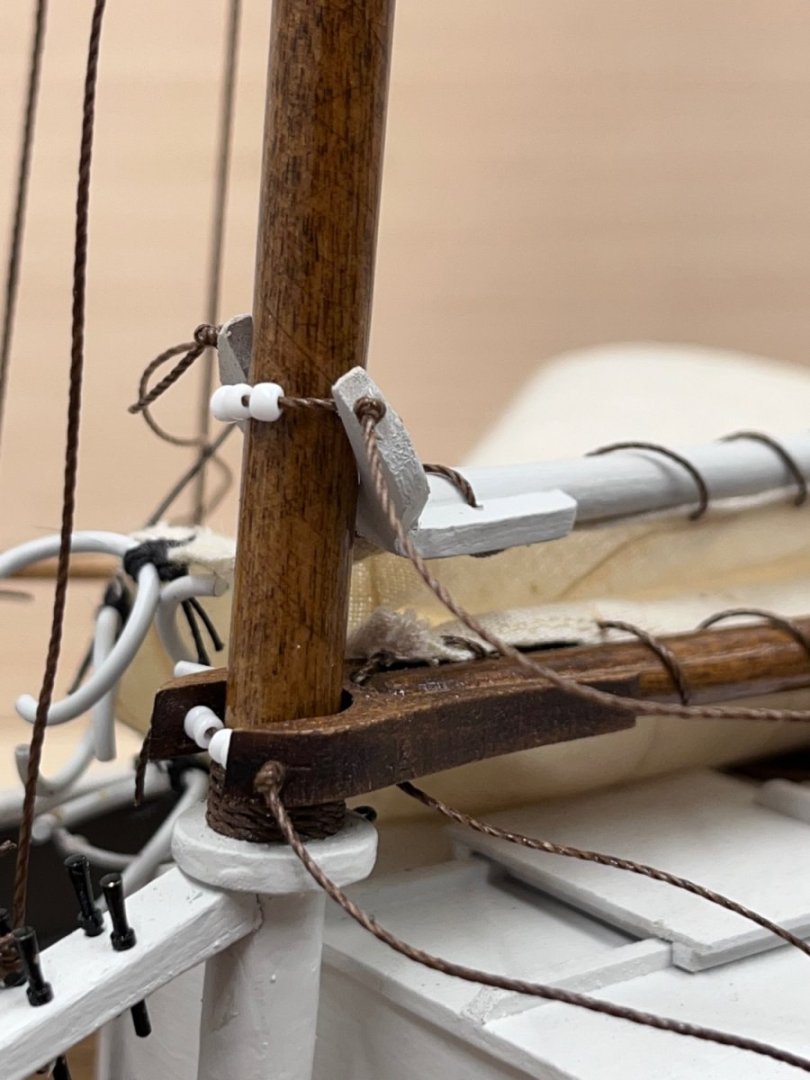
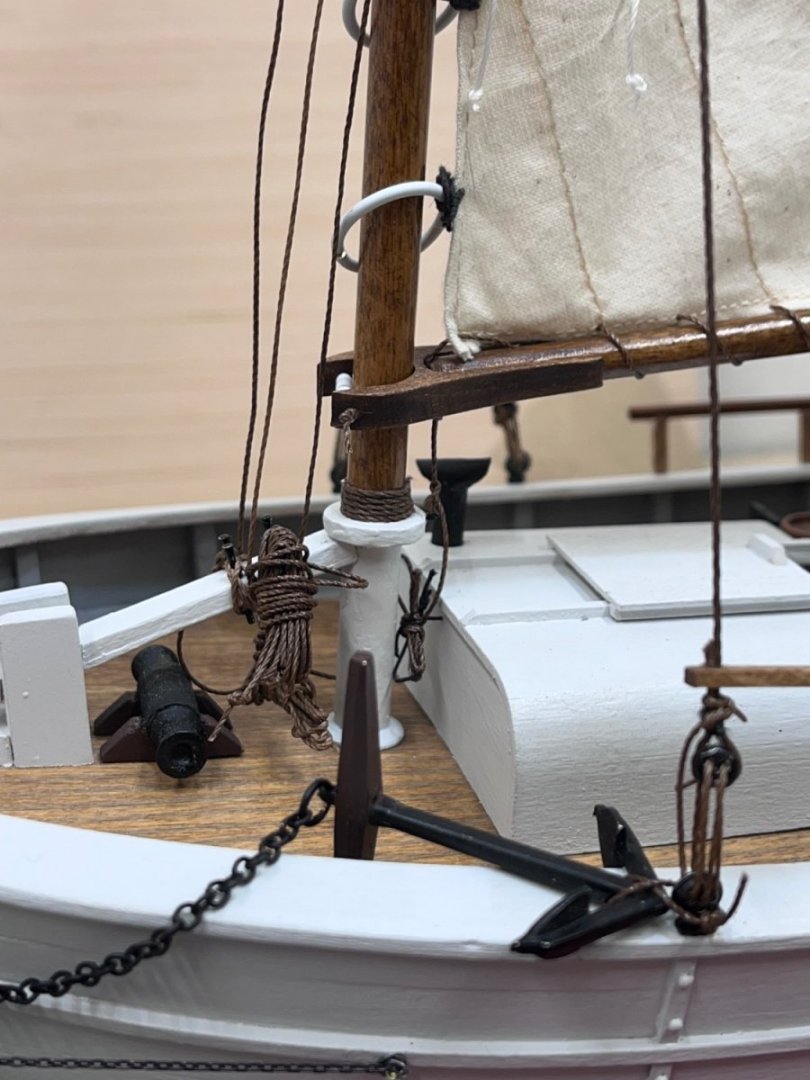
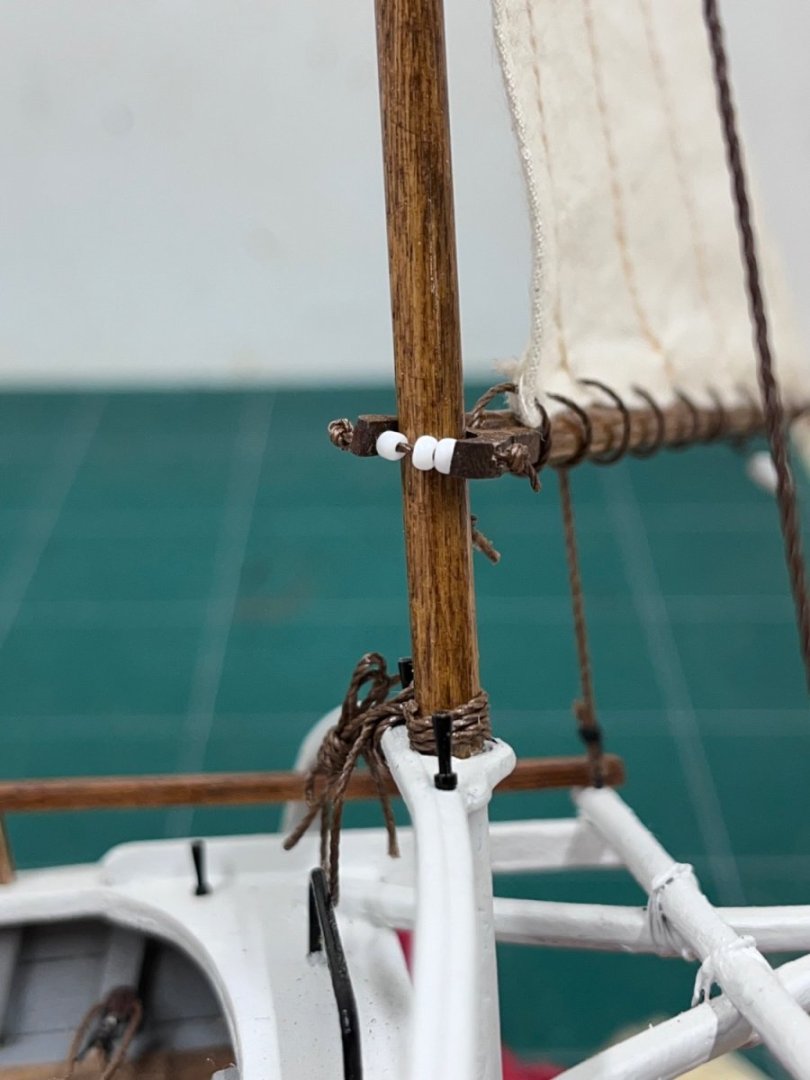
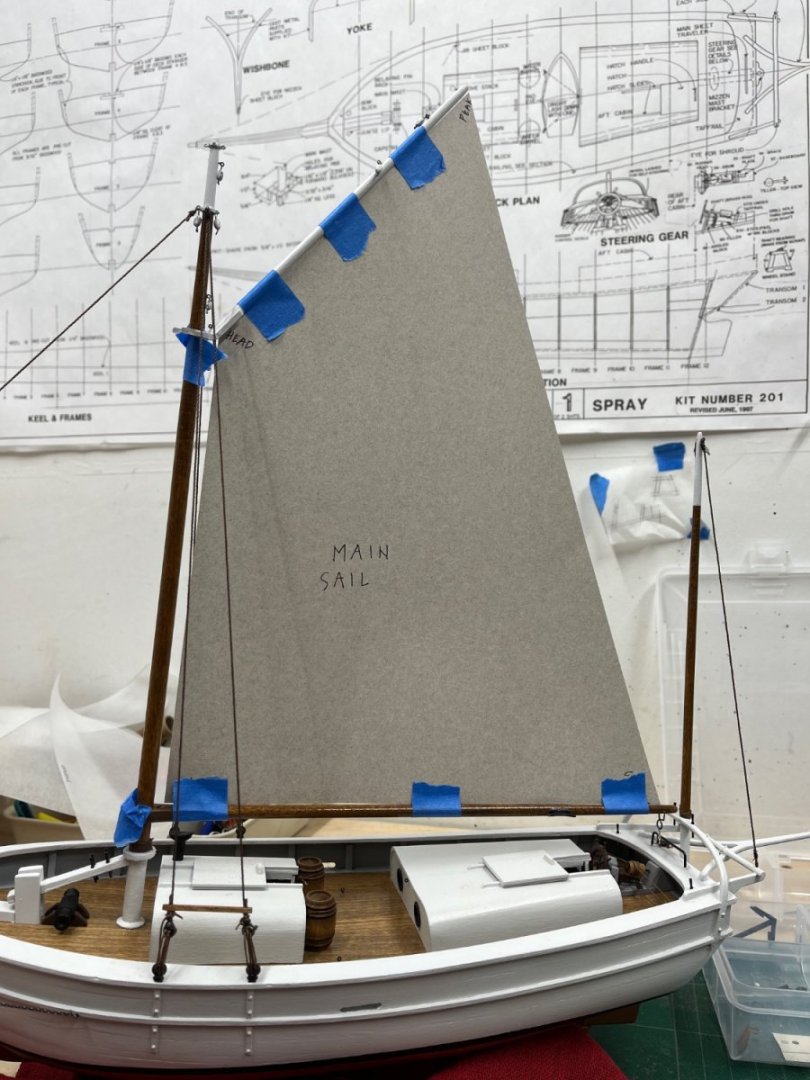
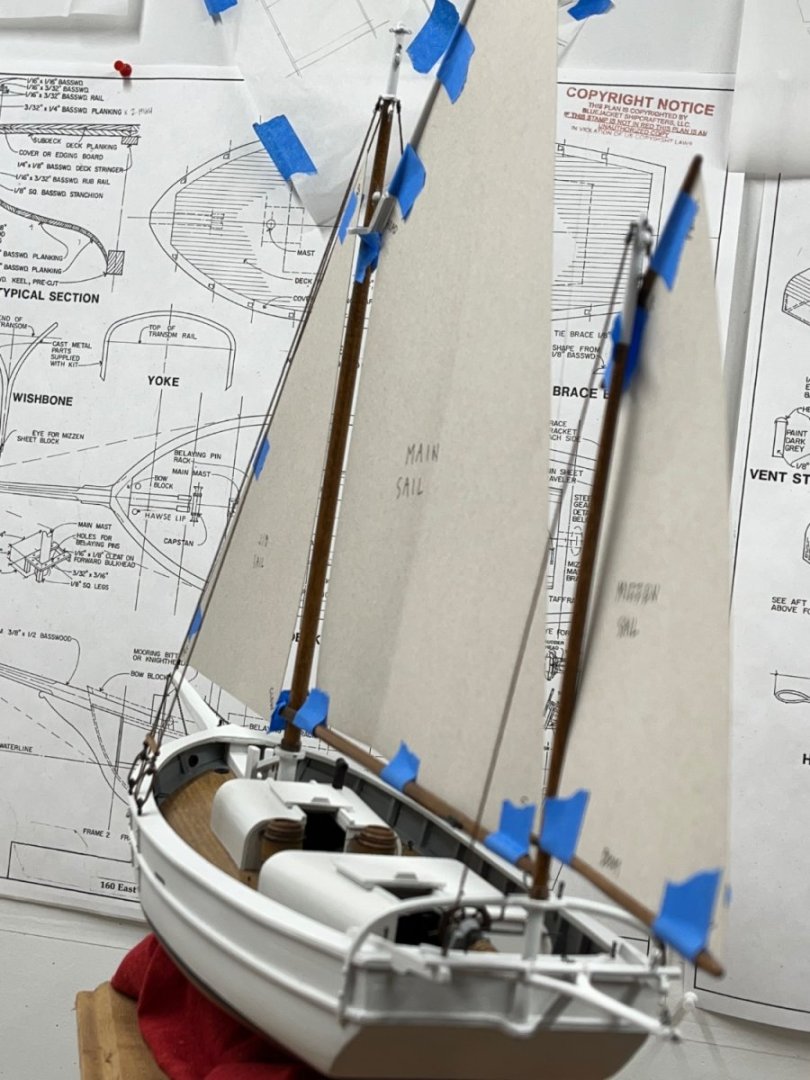
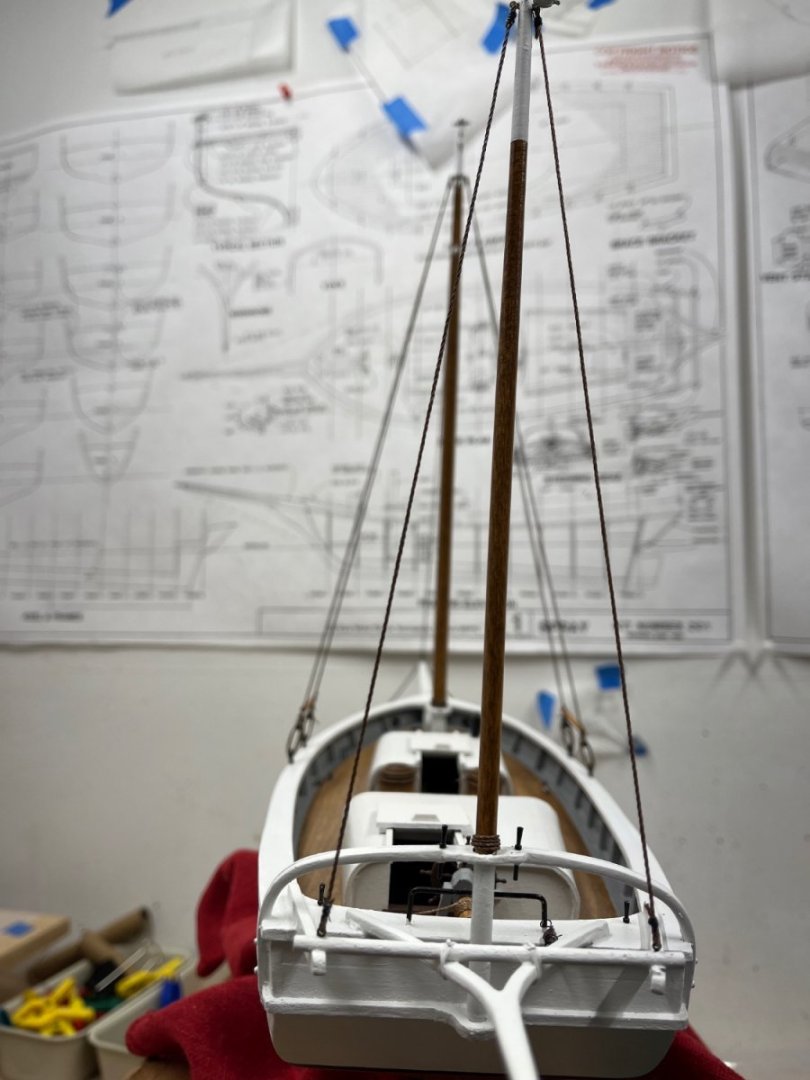
I’m playing catch-up on the build log here catching up on what I have done over the past month or so. On to rigging and setting the main sail. I realized that I would not have enough of the small line that is used in the halyards and sheets so I ordered another spool from Bluejacket. With that in hand, I started by securing the boom yoke and gaff yokes to the mast with the beads and clipping the sail loops back around the mast. Then I cut the lengths for the two mainsail halyards and tied them off to the gaff and to the upper block and threaded them through the blocks along the gaff and the mast and hoisted the mainsail a little over a year after I started the model. It’s a bit of a trick to coil the lines but with some practice I got them all coiled and hung over the belaying pins.


- 54 replies
-
- 3
-
-
- Spray
- BlueJacket Shipcrafters
- (and 1 more)
-
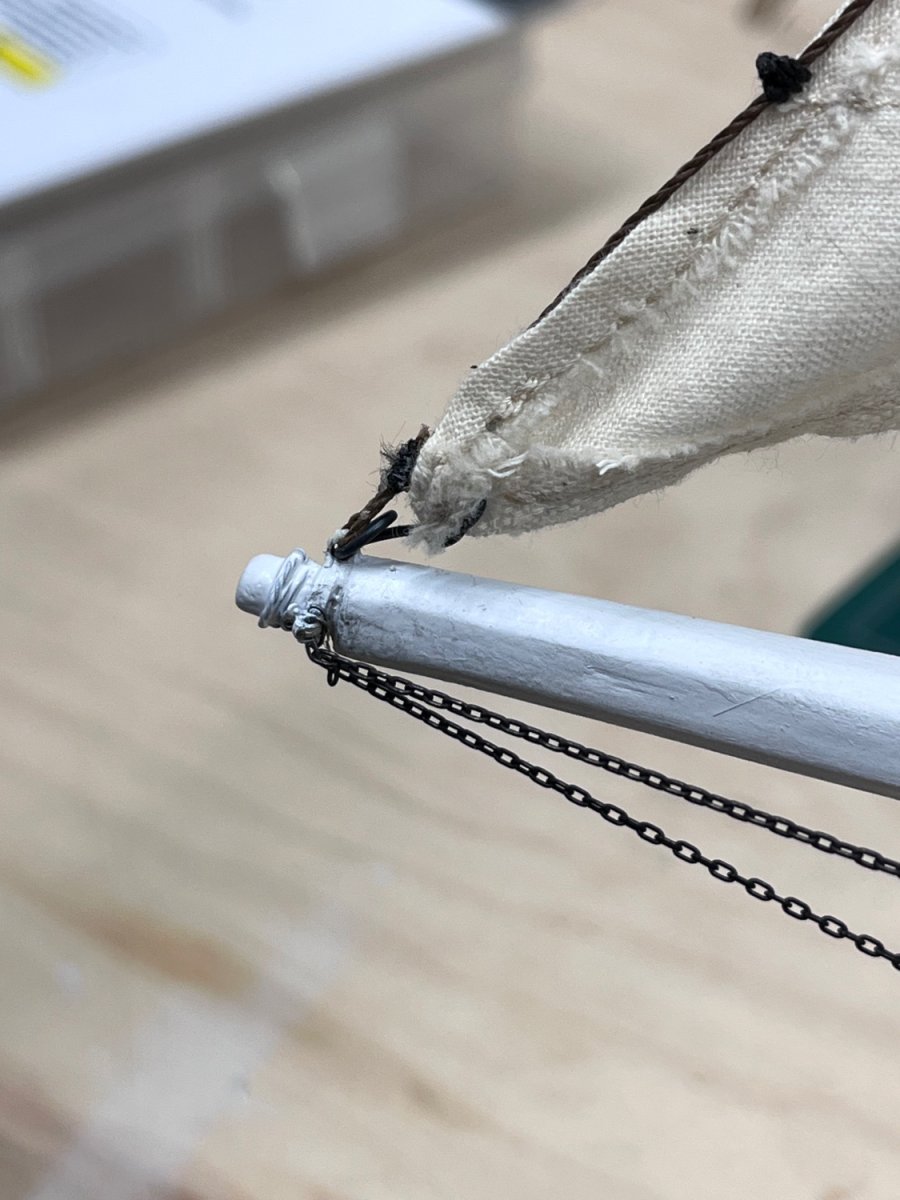
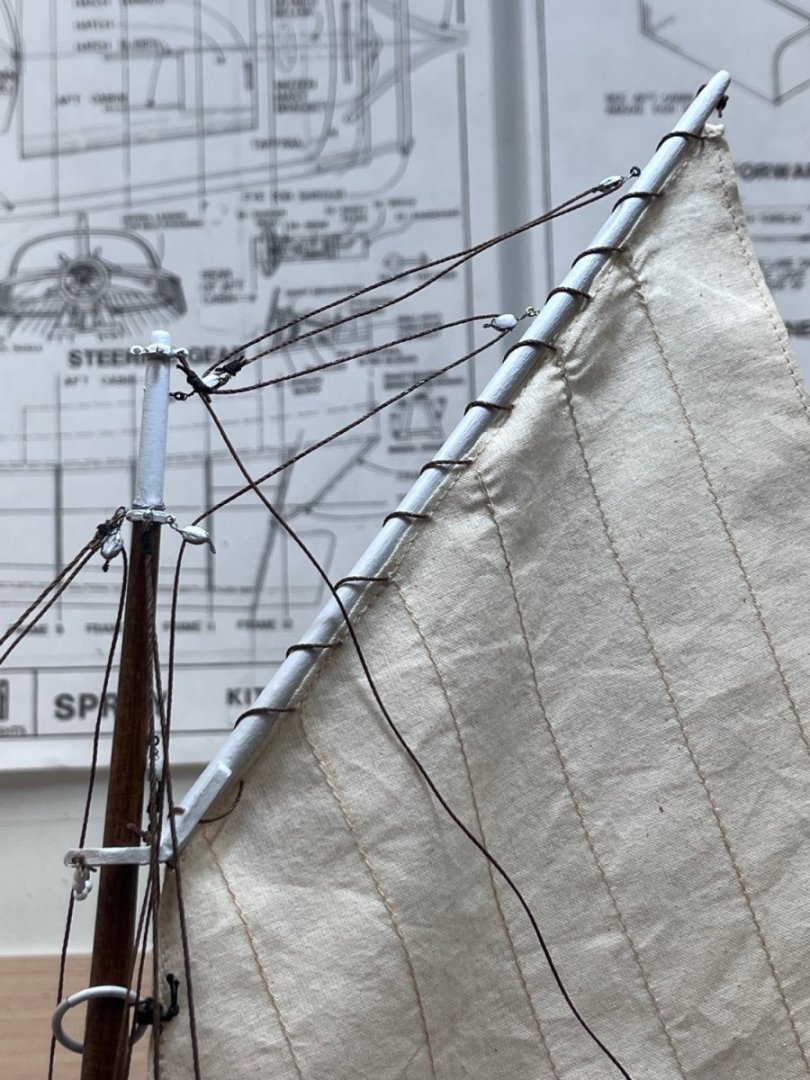
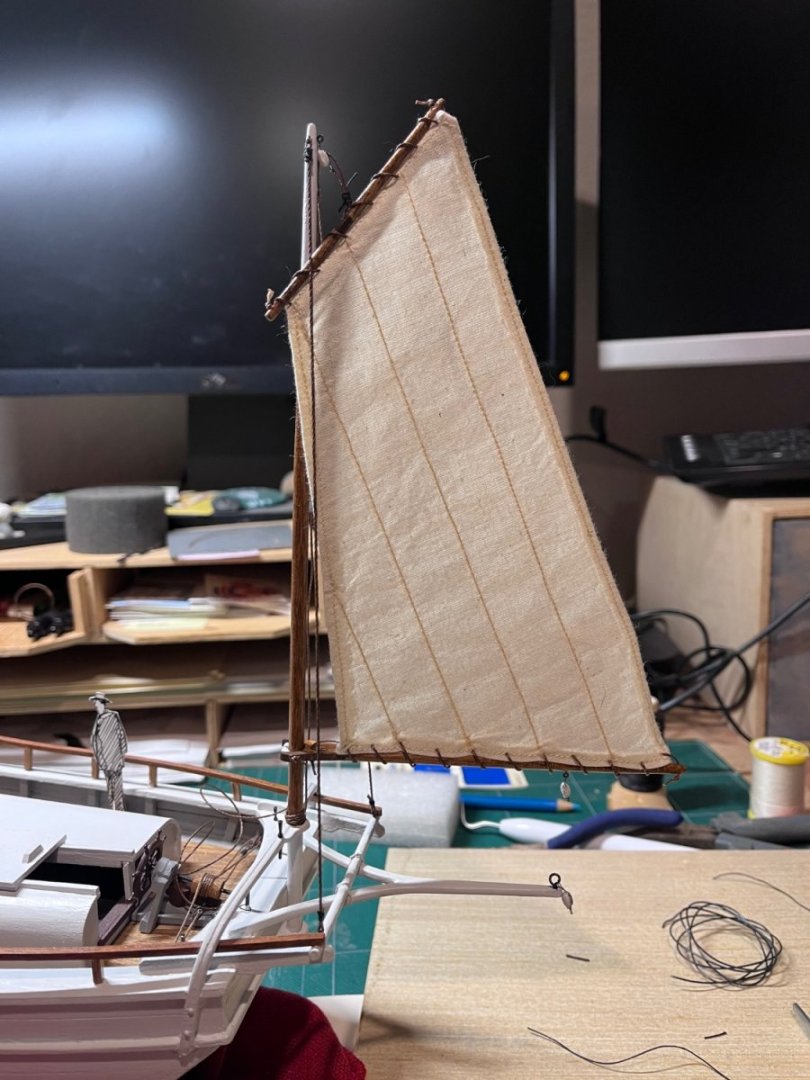
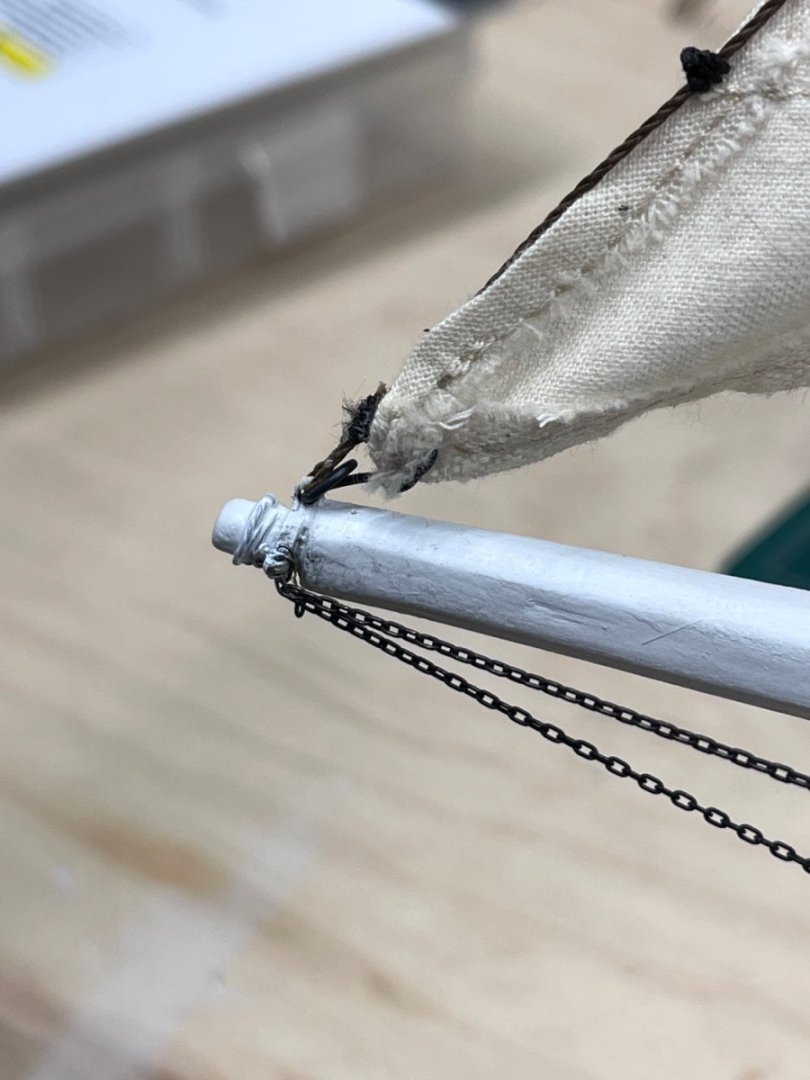
Working on getting the sails rigged and on the boat. I started with the mizzen sail - the easiest one - lashing the boom and gaff spars to the sail and then tying the halyard to the gaff. It was fairly easy to run the halyard through the upper block on the mizzen mast, hoist the sail and tie the halyard to the belaying pin. Then I used the small line and beads to make the yoke around the mast to secure the boom to the mast. You use a lot of line just in making sure that you have enough to make the final knot - usually an extra inch or so. On most of these knots, I used a drop of glue to make sure it holds. On the jib, there would have been grommets in the corners and shackles to attach the halyard at the head, sheets at the clew and to an eyebolt on the bow sprit at the tack. I made split-ring hoops from the wire in the kit as small as I could and threaded them through the thickened hem of the sail. The I used a heavy black thread to tie off the luff on the sail to the forestay.

- 54 replies
-
- 2
-
-
- Spray
- BlueJacket Shipcrafters
- (and 1 more)
-
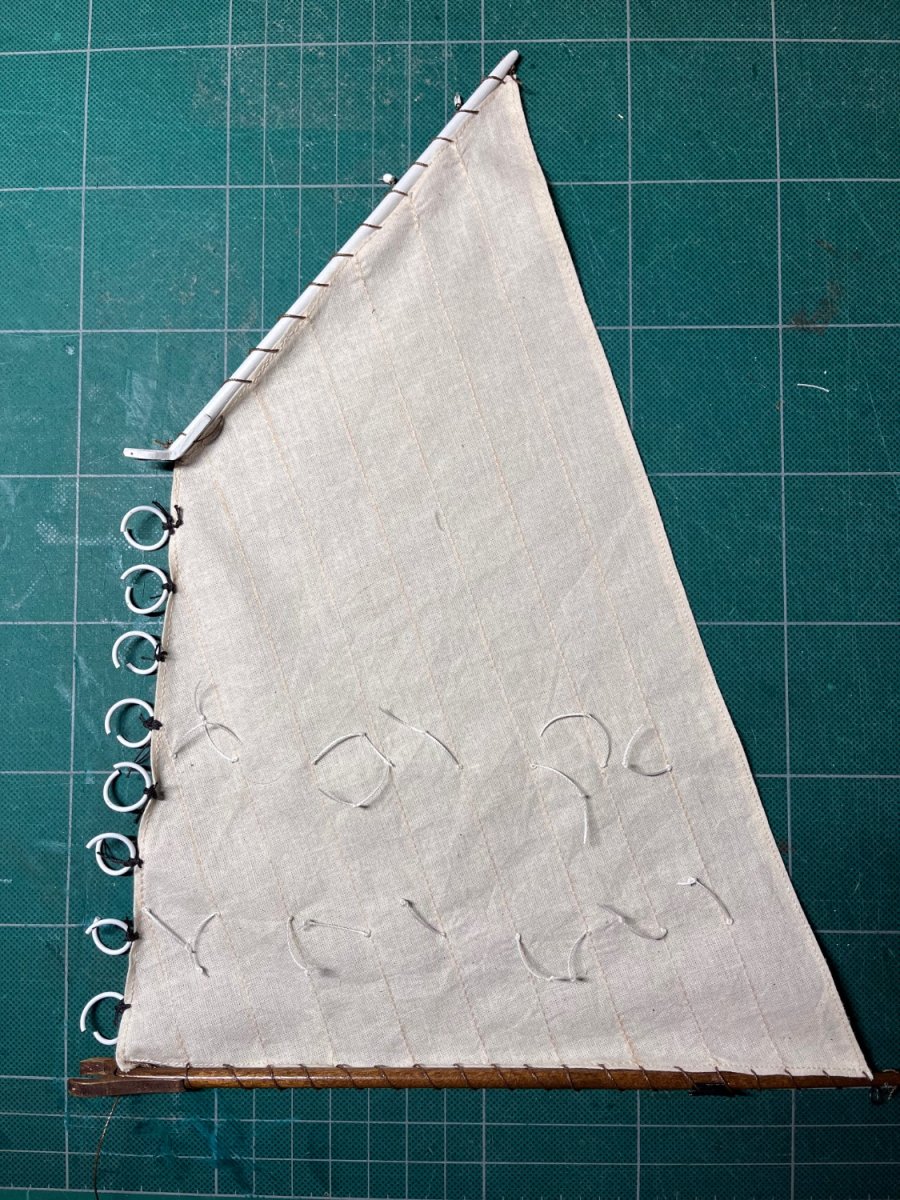
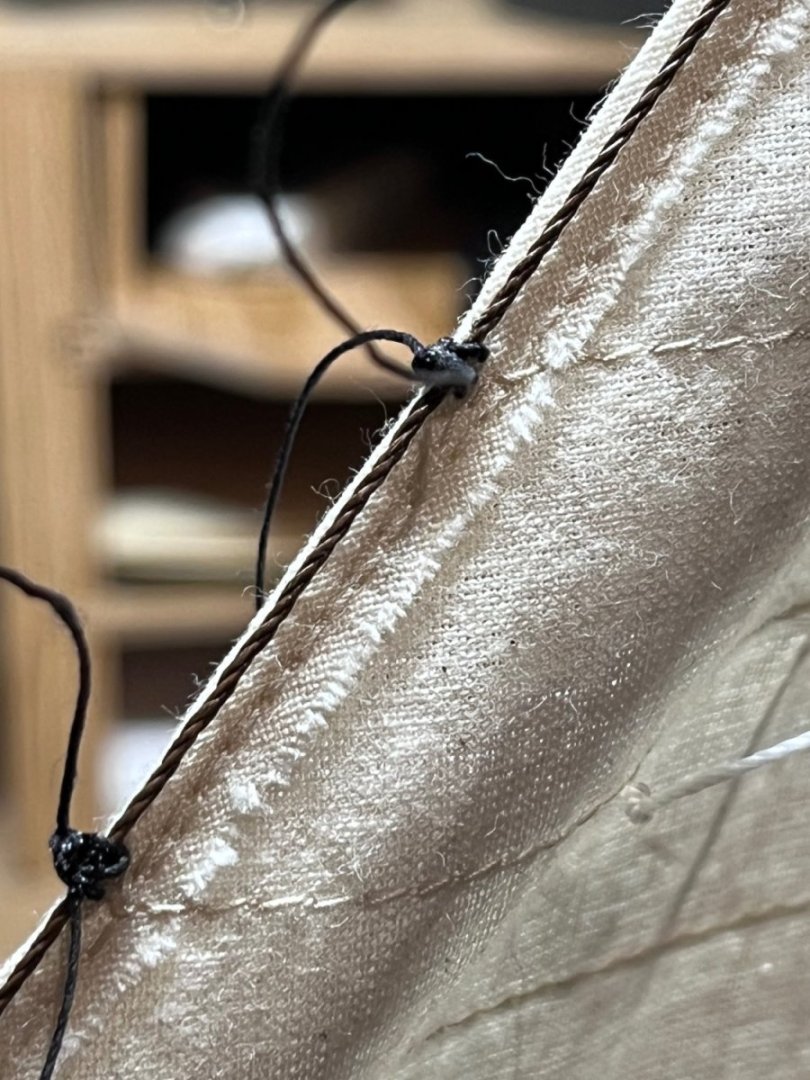
With the finished sails, I then started the trim work on them with the reefing ties and then lashing the spars to the top and bottom of the mizzen sail and the boom and gaff to the main. Then I added the mast hoops. The goal is to do as much as possible to finish the sails while they are flat on a work surface before hanging them off the masts.

- 54 replies
-
- 3
-
-
- Spray
- BlueJacket Shipcrafters
- (and 1 more)
-
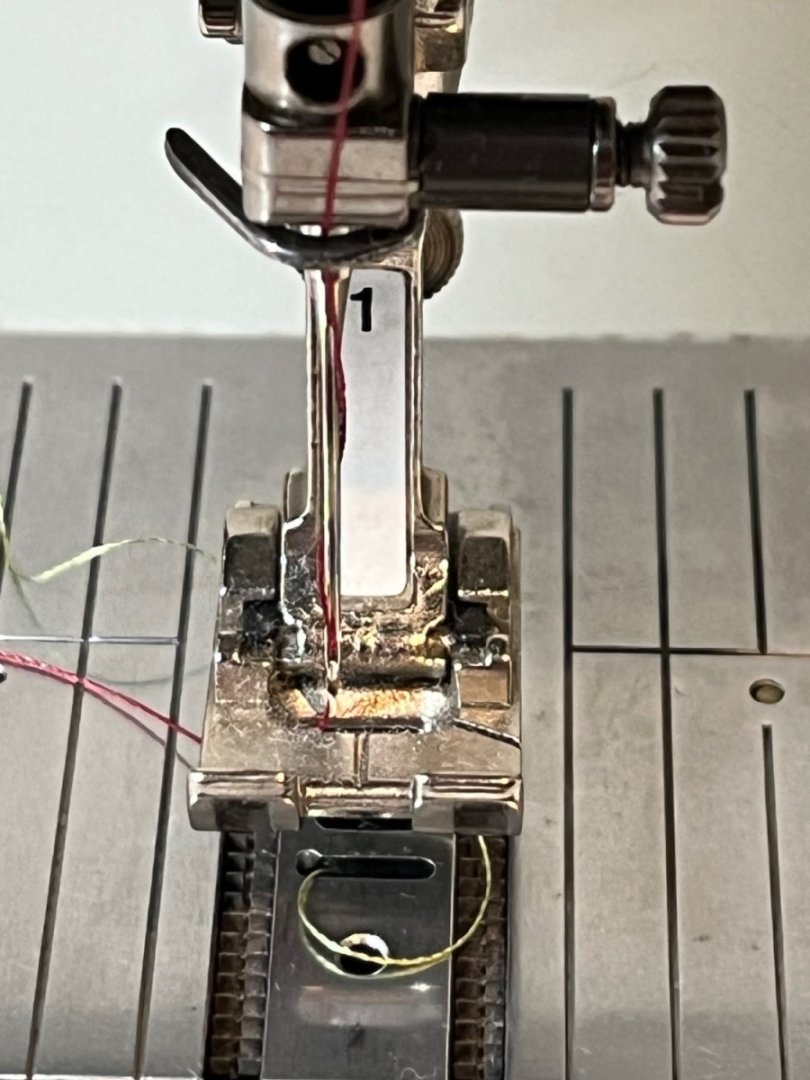
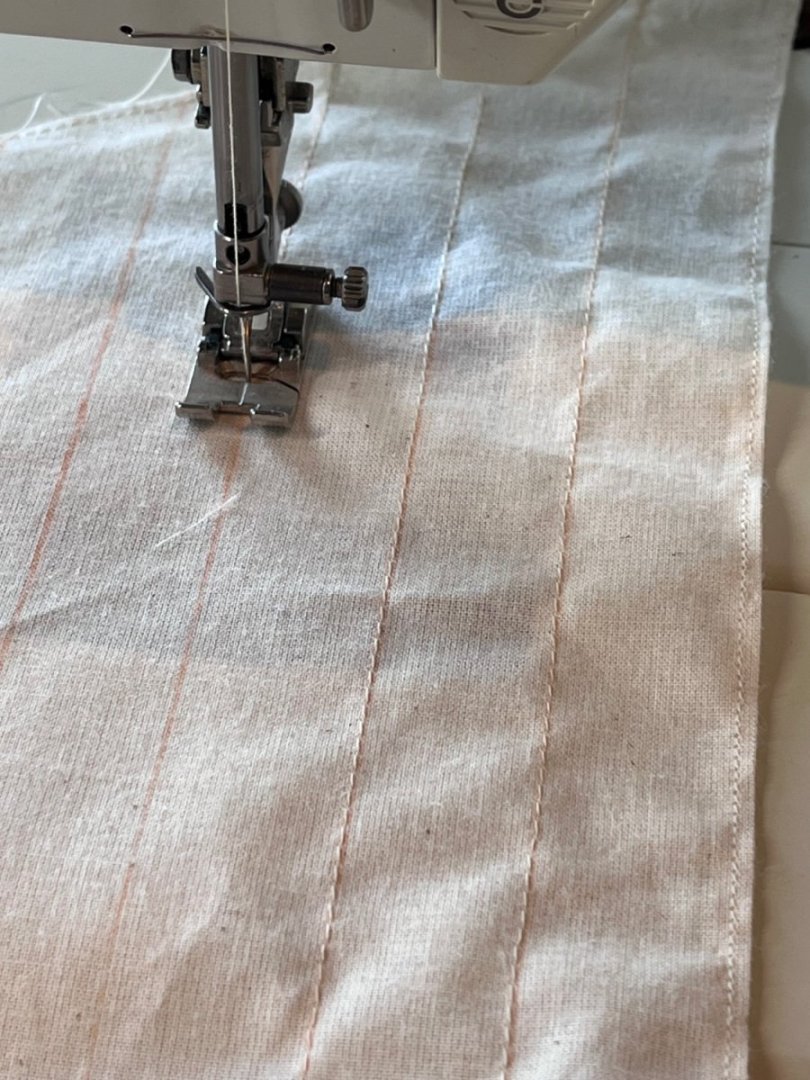
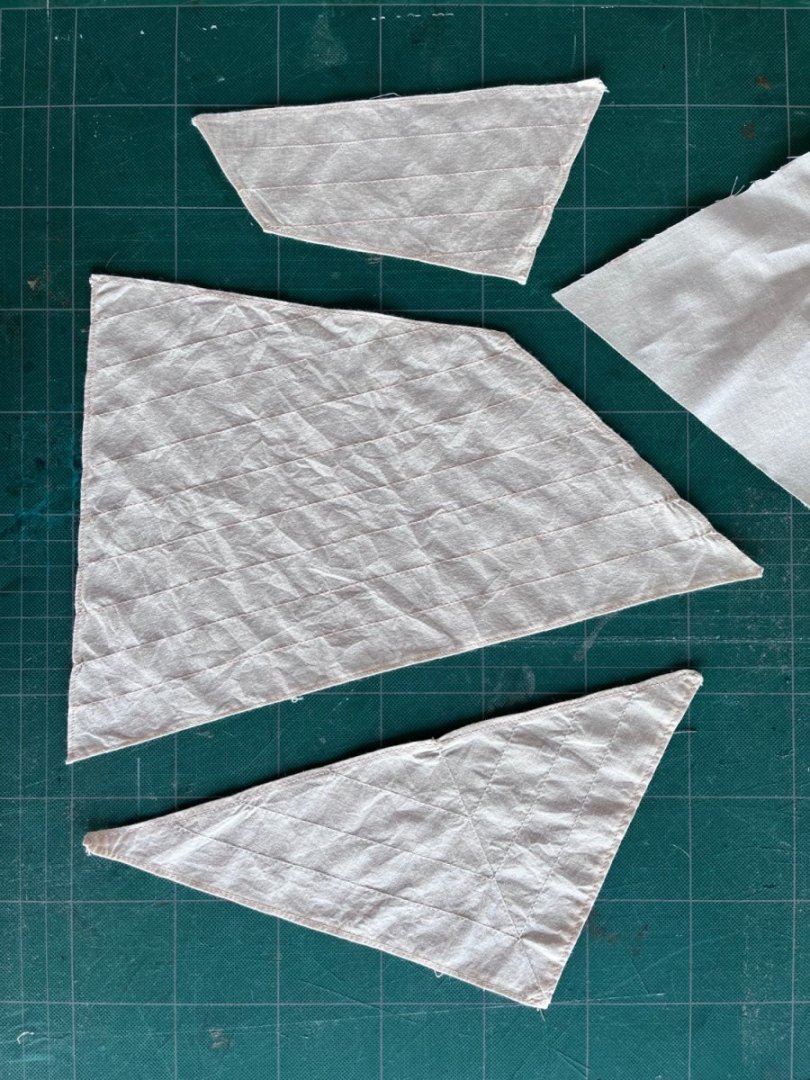
Finally cut the sails using the chipboard sail layouts (from a couple of posts back) as templates and over-cut the fabric by about 3/16” for the hem. I then folded these hems over the chipboard and ironed then to get a decent seam and then used really cool sewing clips to hold the hem in place. And then I decided I wanted to do it all on the model so I got sewing lessons from my wife. Sewing machines are really amazing pieces of machinery and with lots of practice, I could pretty well sew a straight line stitch and was ready to sew the sails. The little plastic spring clips work great and are clipped every inch or two along the edge hold the hem in place and then you take them off as they get close to the foot of the machine and you have a hems edge when it comes out from under the foot. After hemming the edges, I laid out the sail seams with fabric chalk and sewed a straight stitch to give the look of the seams. I cleaned up the corners with hand stitching and then washed the sails and then stained them to get the aged look with coffee. I soaked them for 2-hours and then gave them a good rinse and laid them flat to dry. Note that because I had cut the sails before washing and staining the fabric, I did everything in cold water so the fabric would not shrink. When they were dry, I ironed them.
- 54 replies
-
- 2
-
-
- Spray
- BlueJacket Shipcrafters
- (and 1 more)
-
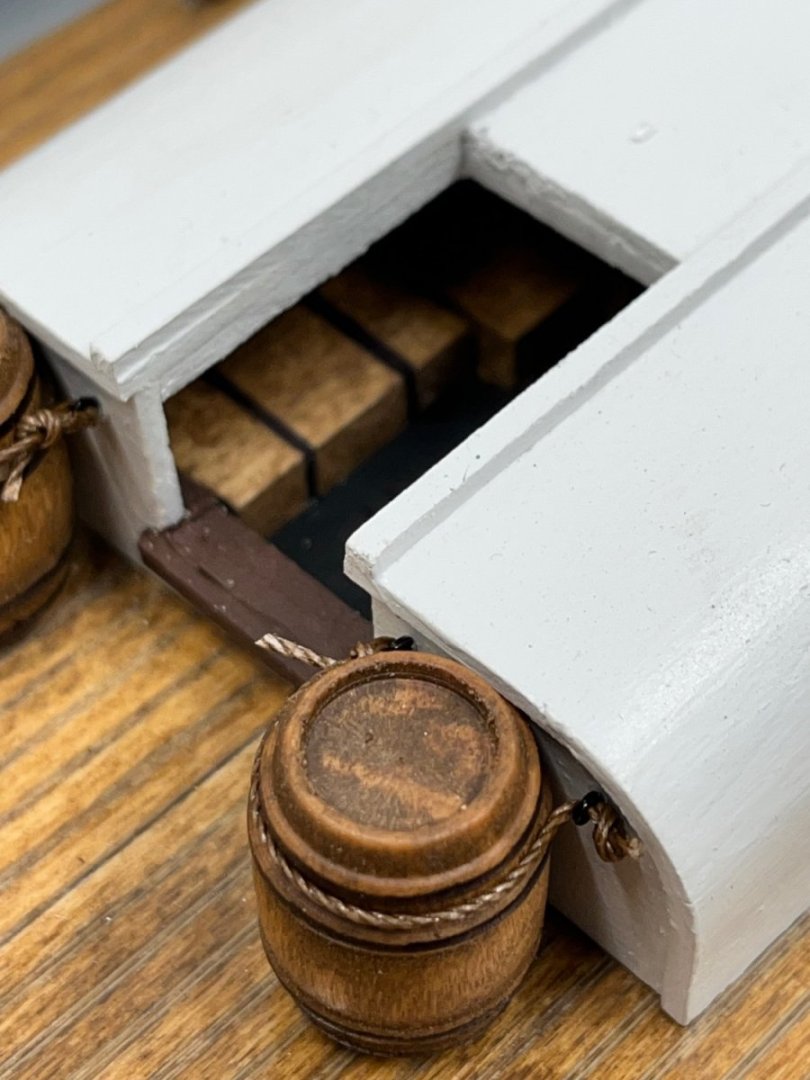
I’ve taken some time off from the model with the holidays and working up the nerve to start on the sails. I finished the deck trim work doing the mahogany railing and got about all of the woodwork done before starting on the sails. I mounted the water barrels and “lashed” them into place. Really trying to get everything done that will be hard to reach and work on when the sails get set.


- 54 replies
-
- 2
-
-
- Spray
- BlueJacket Shipcrafters
- (and 1 more)
-
Starting to plan for the sails. Started by making chipboard templates of the sails. I started by tracing the sails off the plans and transferring them to some thin chipboard I had. The I worked on fitting the main and mizzzen sails to the spars. Surprisingly easy step which is helped by the booms and gaffs - 3 out of 4 of the sides are set lengths. I ended up setting the sails a little higher off the deck as is shown on the drawings mainly because I think it looks better and the deck details are not as crowded by the sails and spars. Now comes the hard part of actually making the sails. I don’t sew but fortunately my wife is very good at sewing.


- 54 replies
-
- 2
-
-
- Spray
- BlueJacket Shipcrafters
- (and 1 more)
-
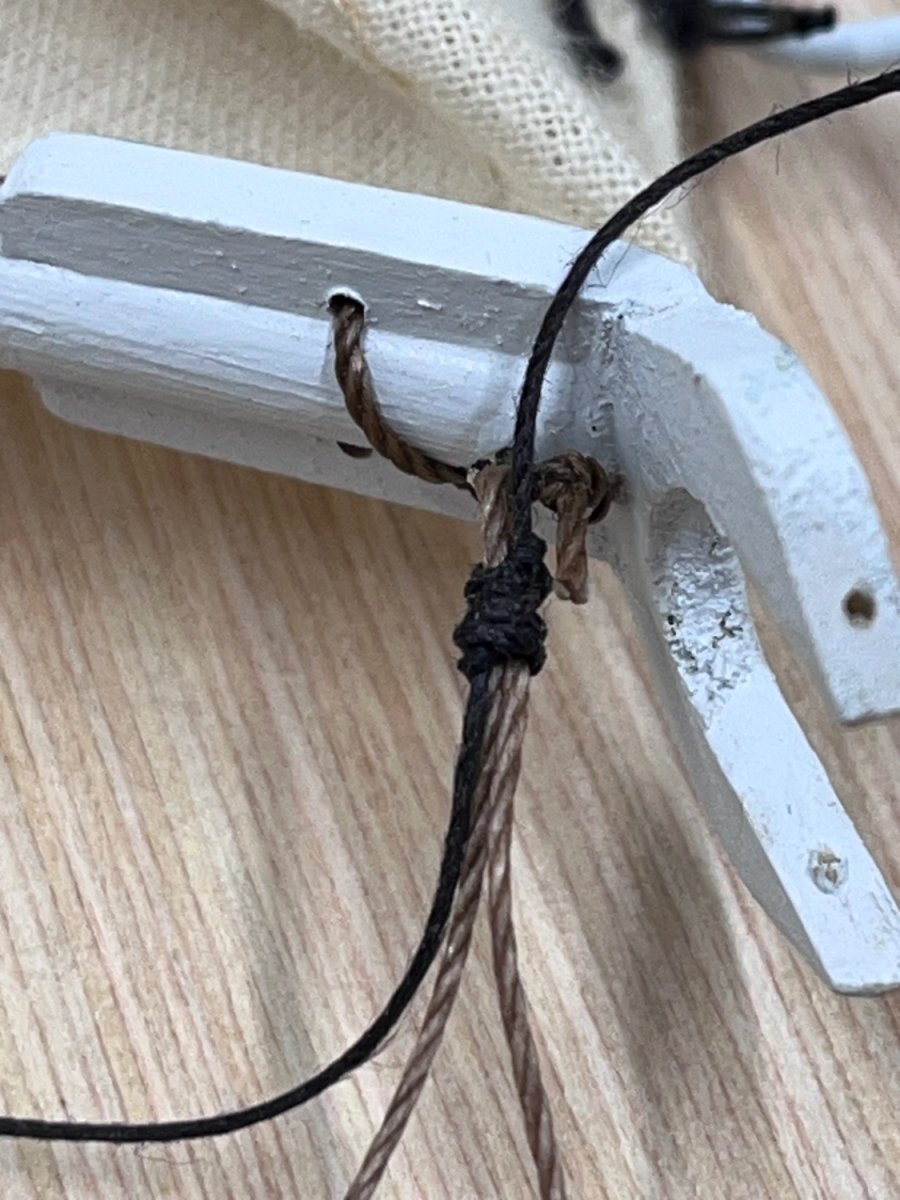
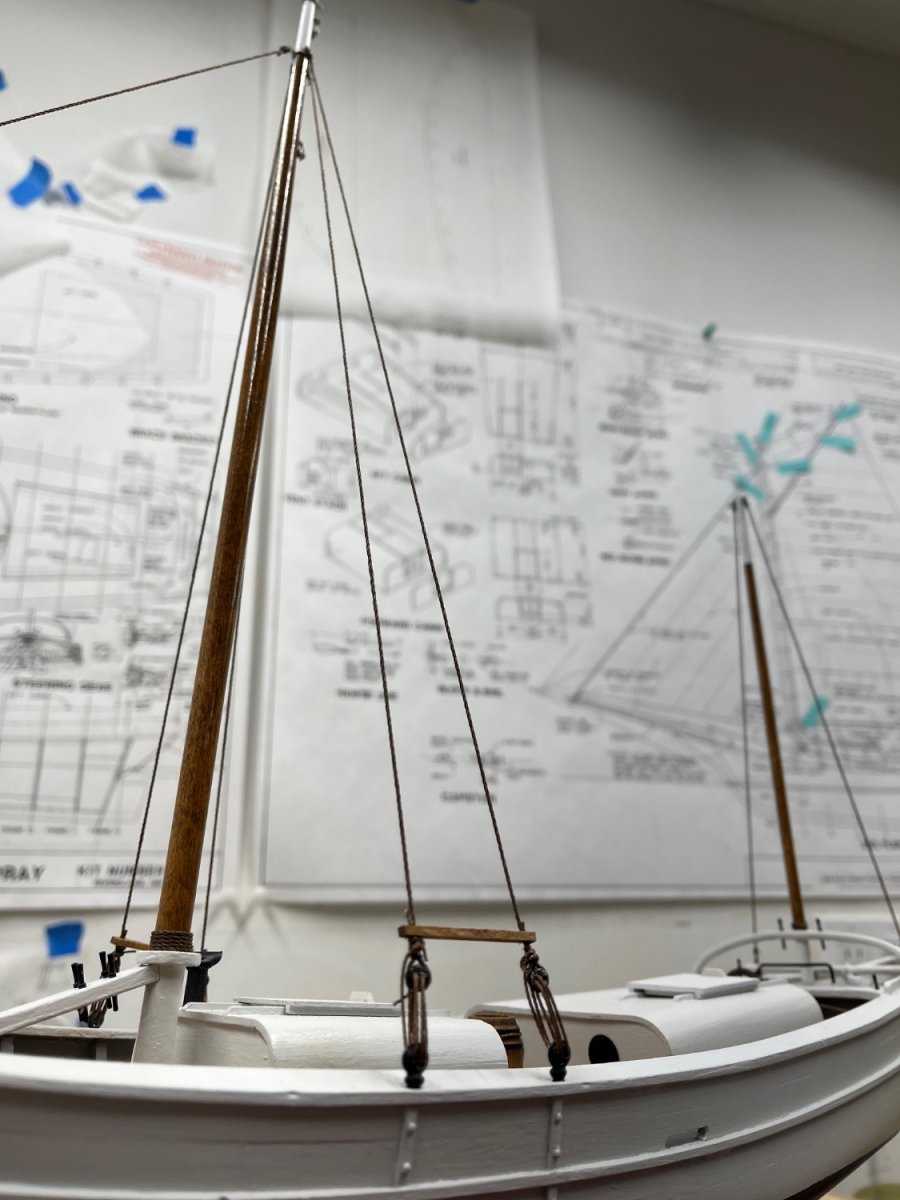
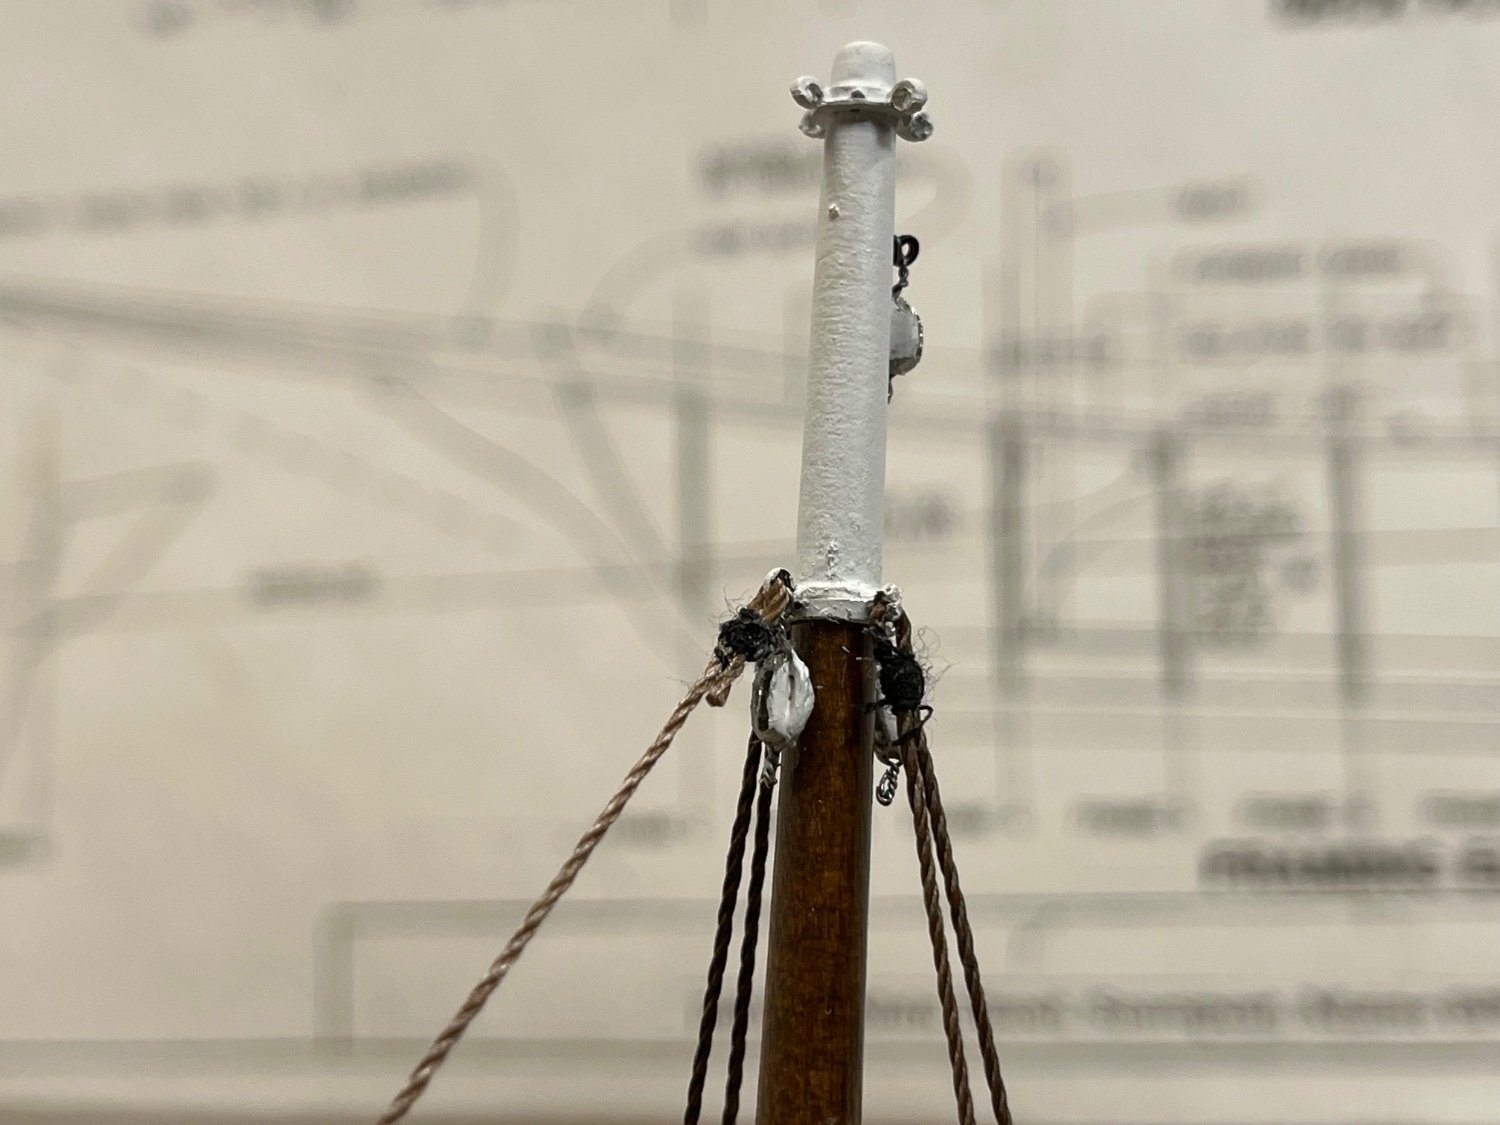
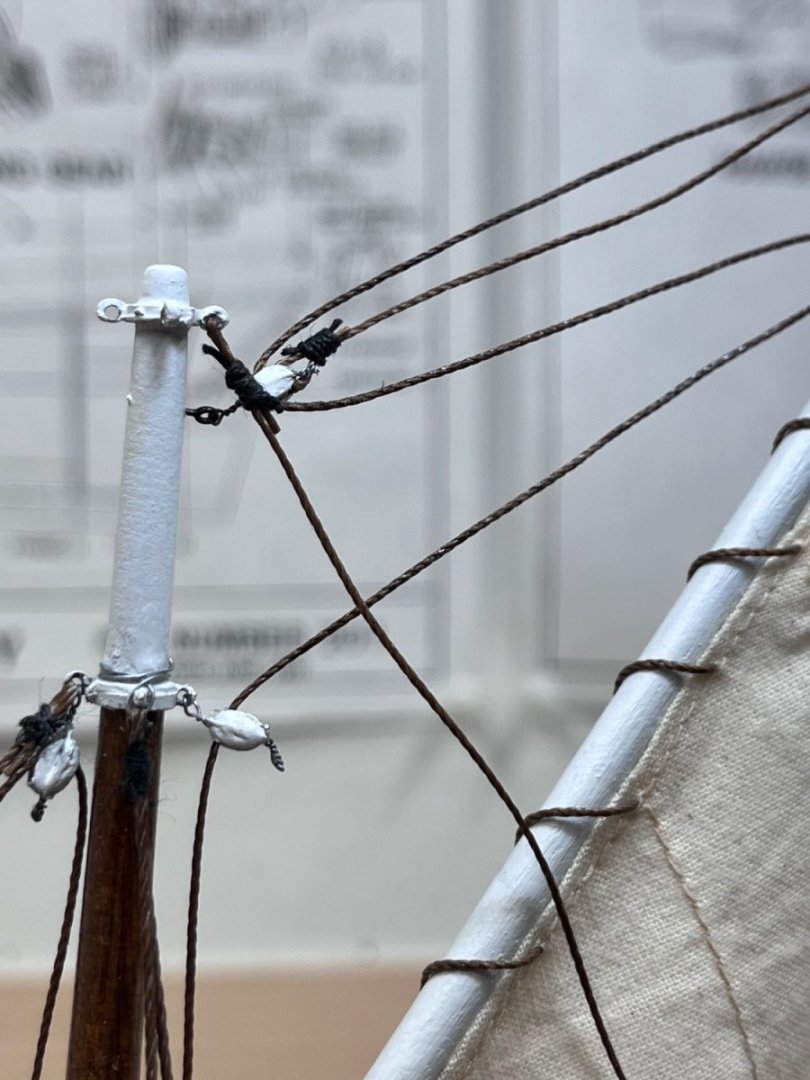
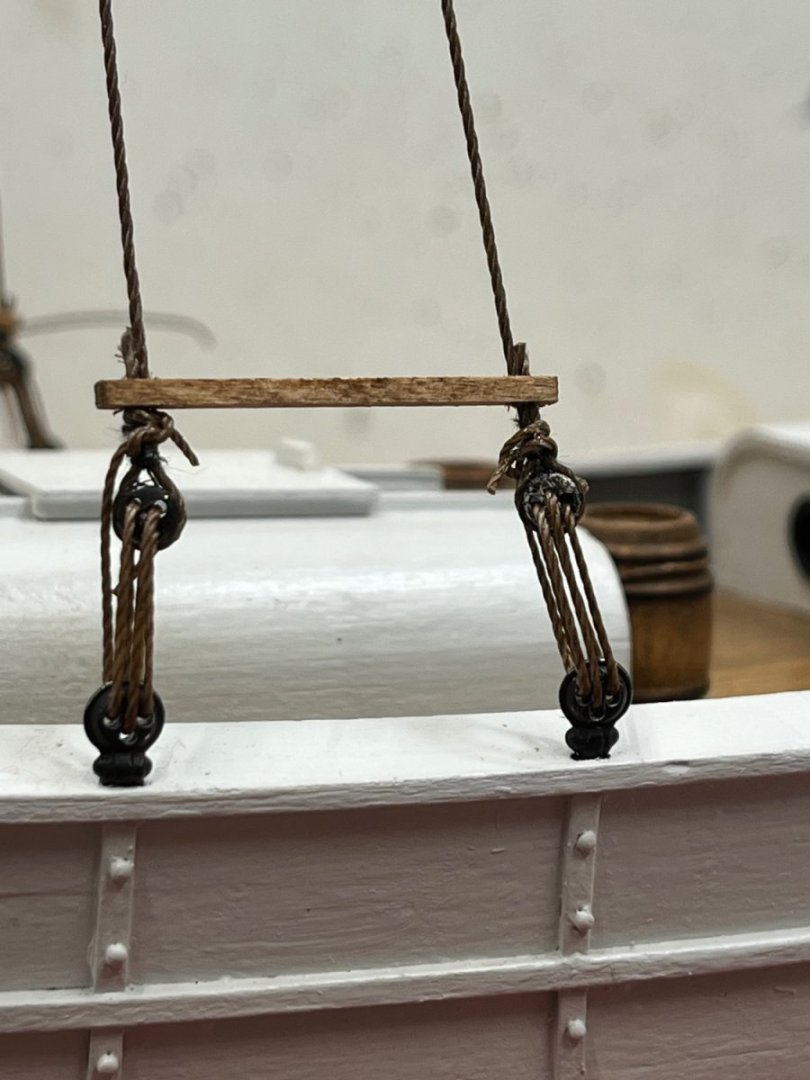
Standing rigging is complete. I had originally planned on tying the lines to the eyes with bowlines - the knot I have used all over my real sailboat - but realized that the knots would be too big and out of scale, so I made loops in the lines through the eyes and then used thread to whip the lines into a tight loop. These lines would have probably been eye-spliced back in Slocom’s day so I feel pretty good about them. Similar end around the deadeyes but used a little glue to hold the line to the fitting and then used the whipping to finish the loop tightly. The standing rigging on the Spray is a pretty simple layout and didn’t take much time to complete.


- 54 replies
-
- 2
-
-
- Spray
- BlueJacket Shipcrafters
- (and 1 more)
-
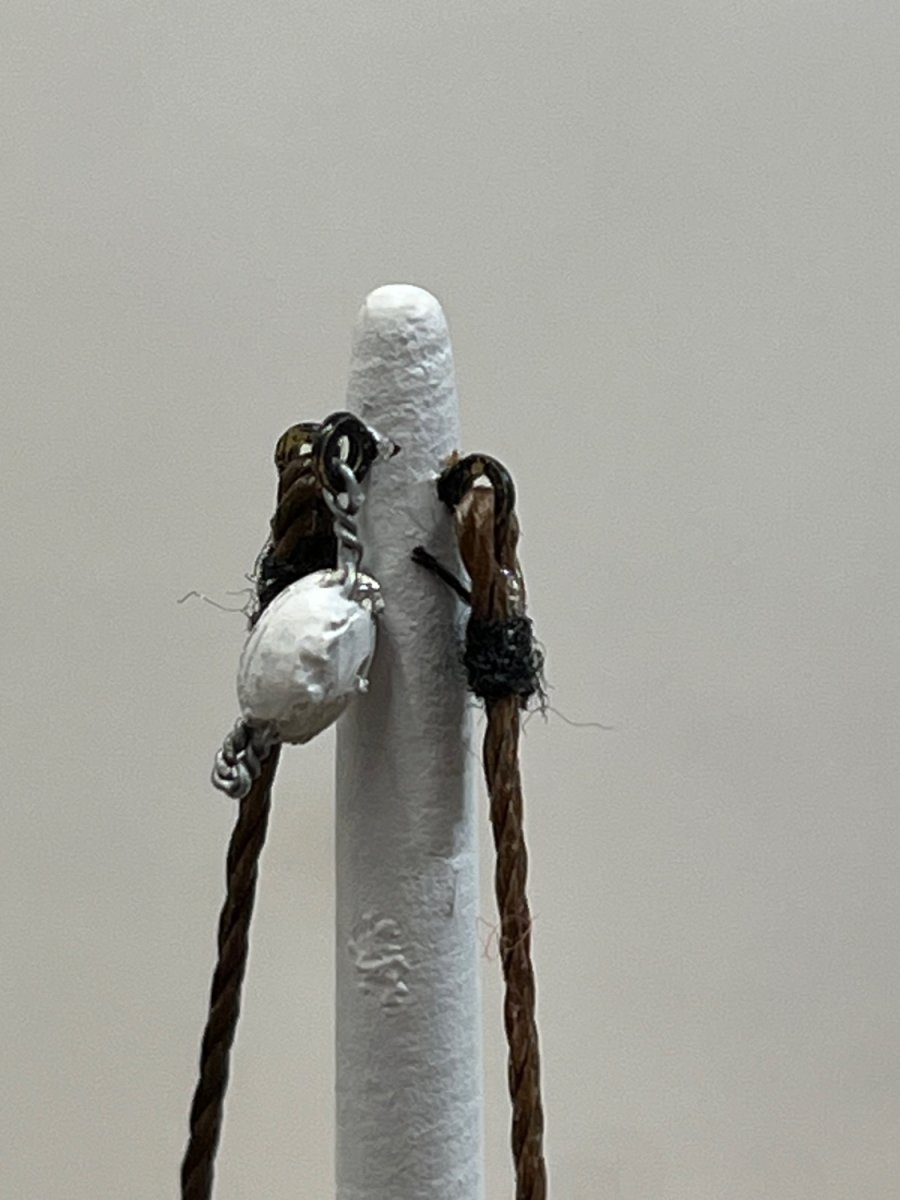
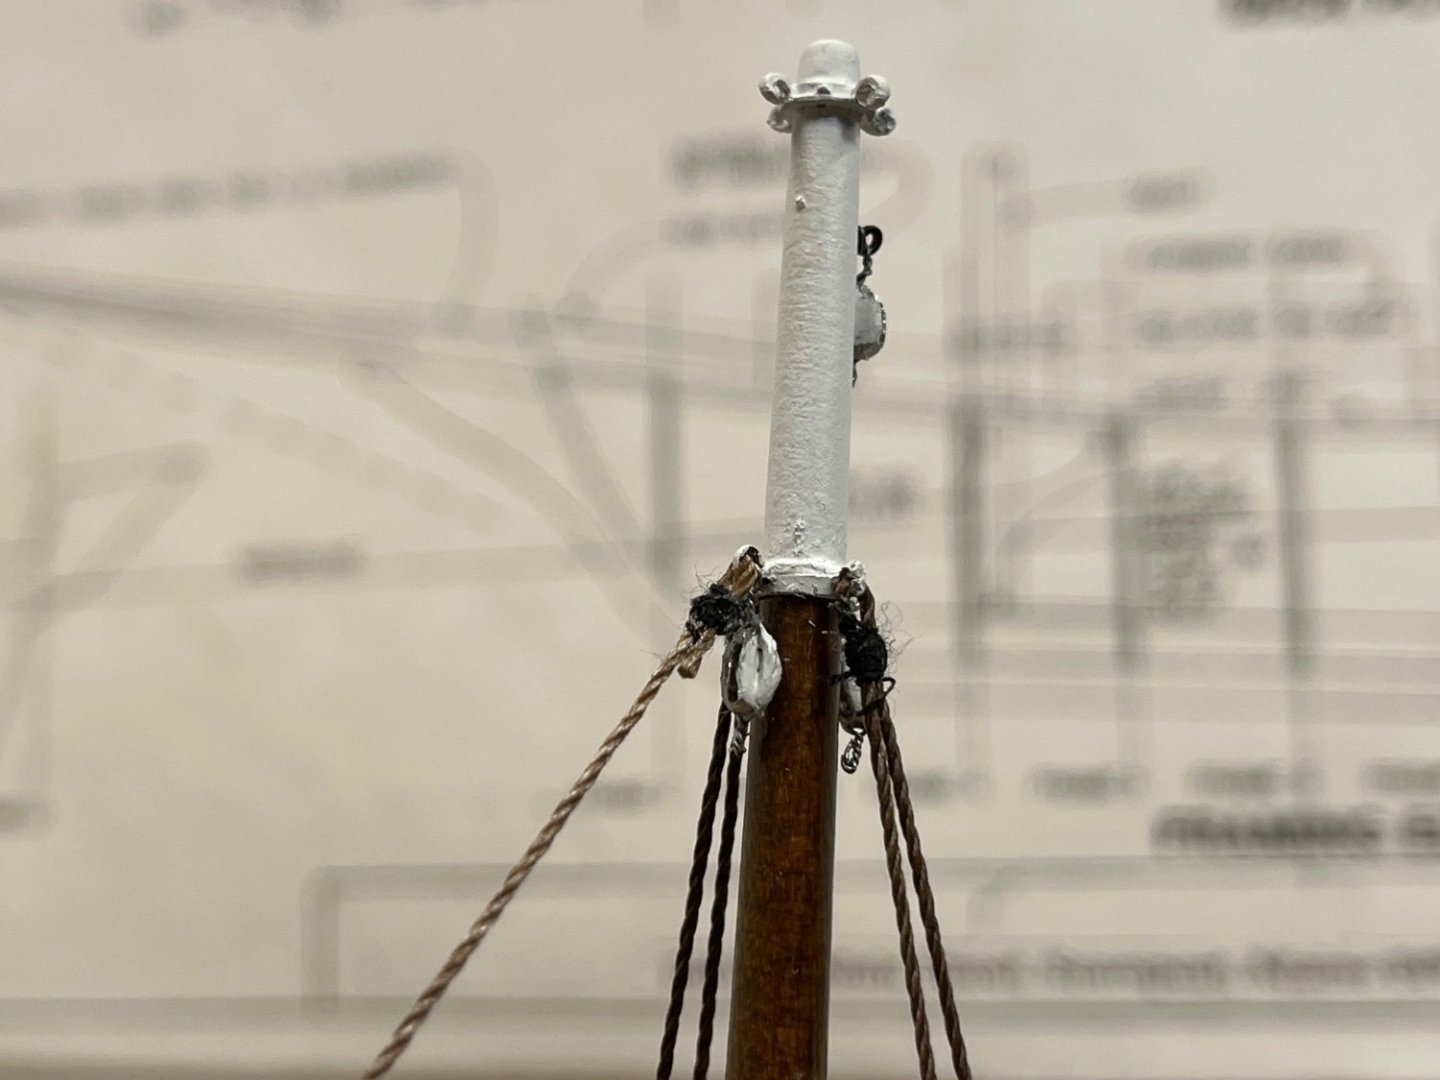
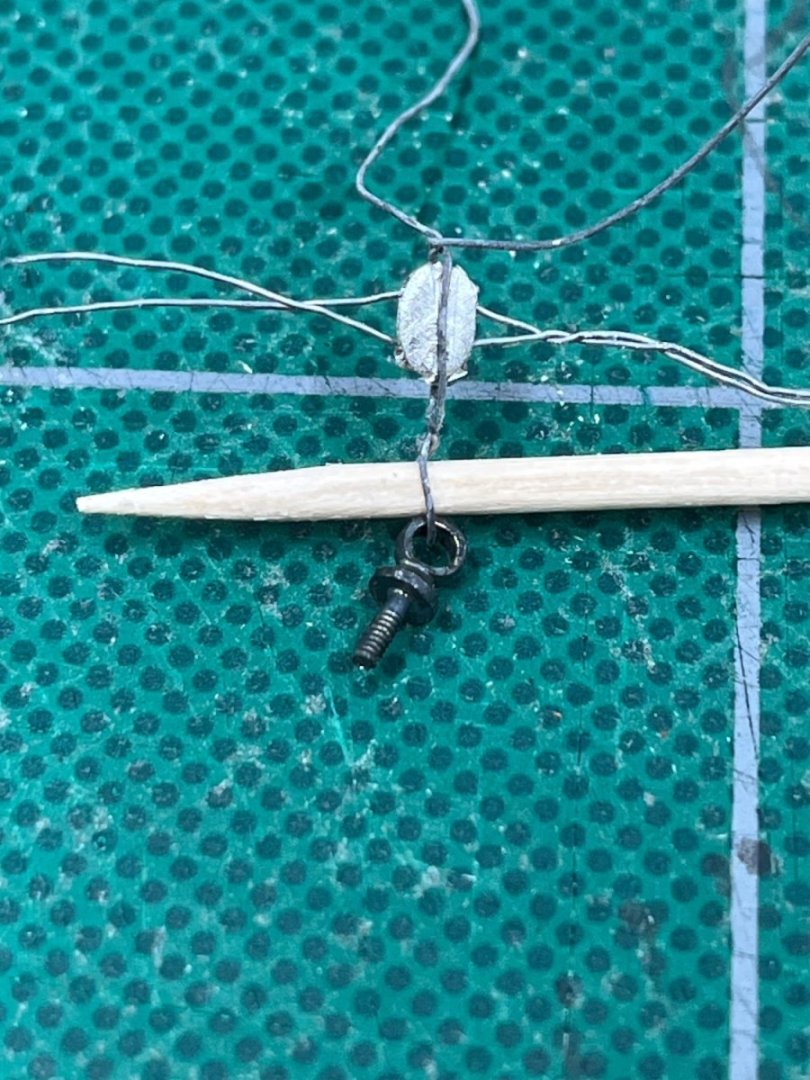
All the deck work is done and the masts have been stepped. I should have added all of the blocks and fittings to the masts before setting them in place. It is much easier to set the eye pins and wire the blocks to the pins on the flat of the cutting board than up in the air. Lesson learned. Starting now with the standing rigging. It’s frustrating to have to drill out all of the fittings in order to get the larger line through the eyes but once I had done a couple of them, I got the hang of it.

- 54 replies
-
- 3
-
-
- Spray
- BlueJacket Shipcrafters
- (and 1 more)
-
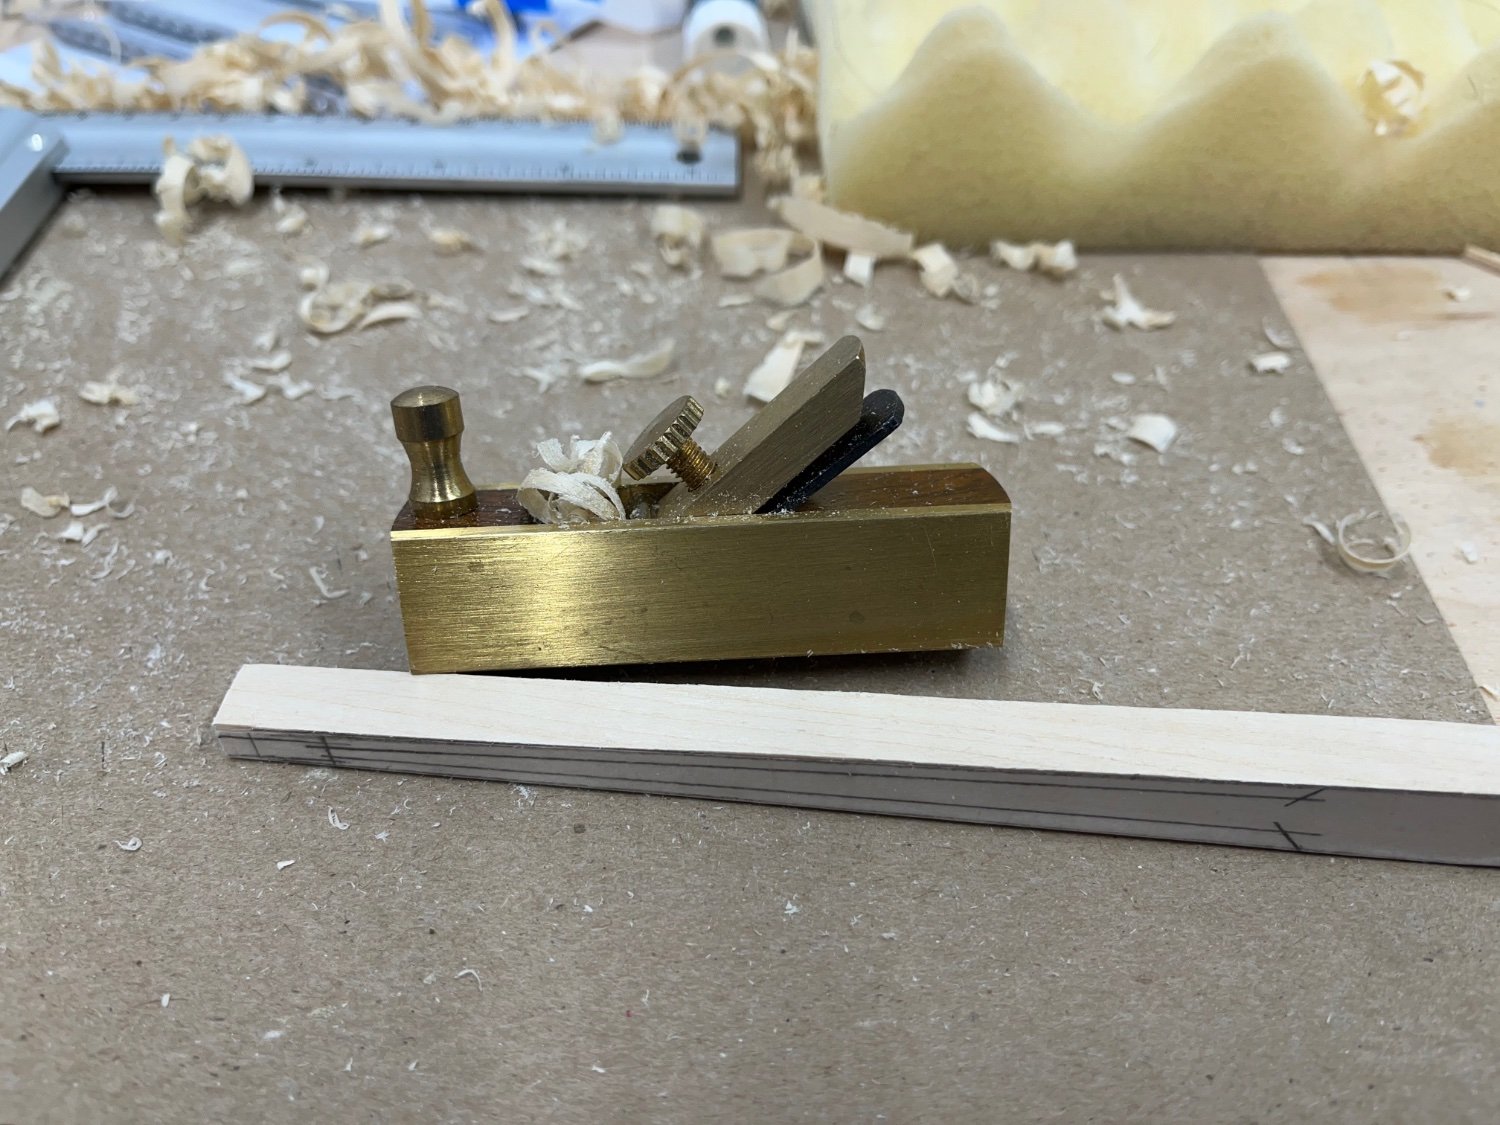
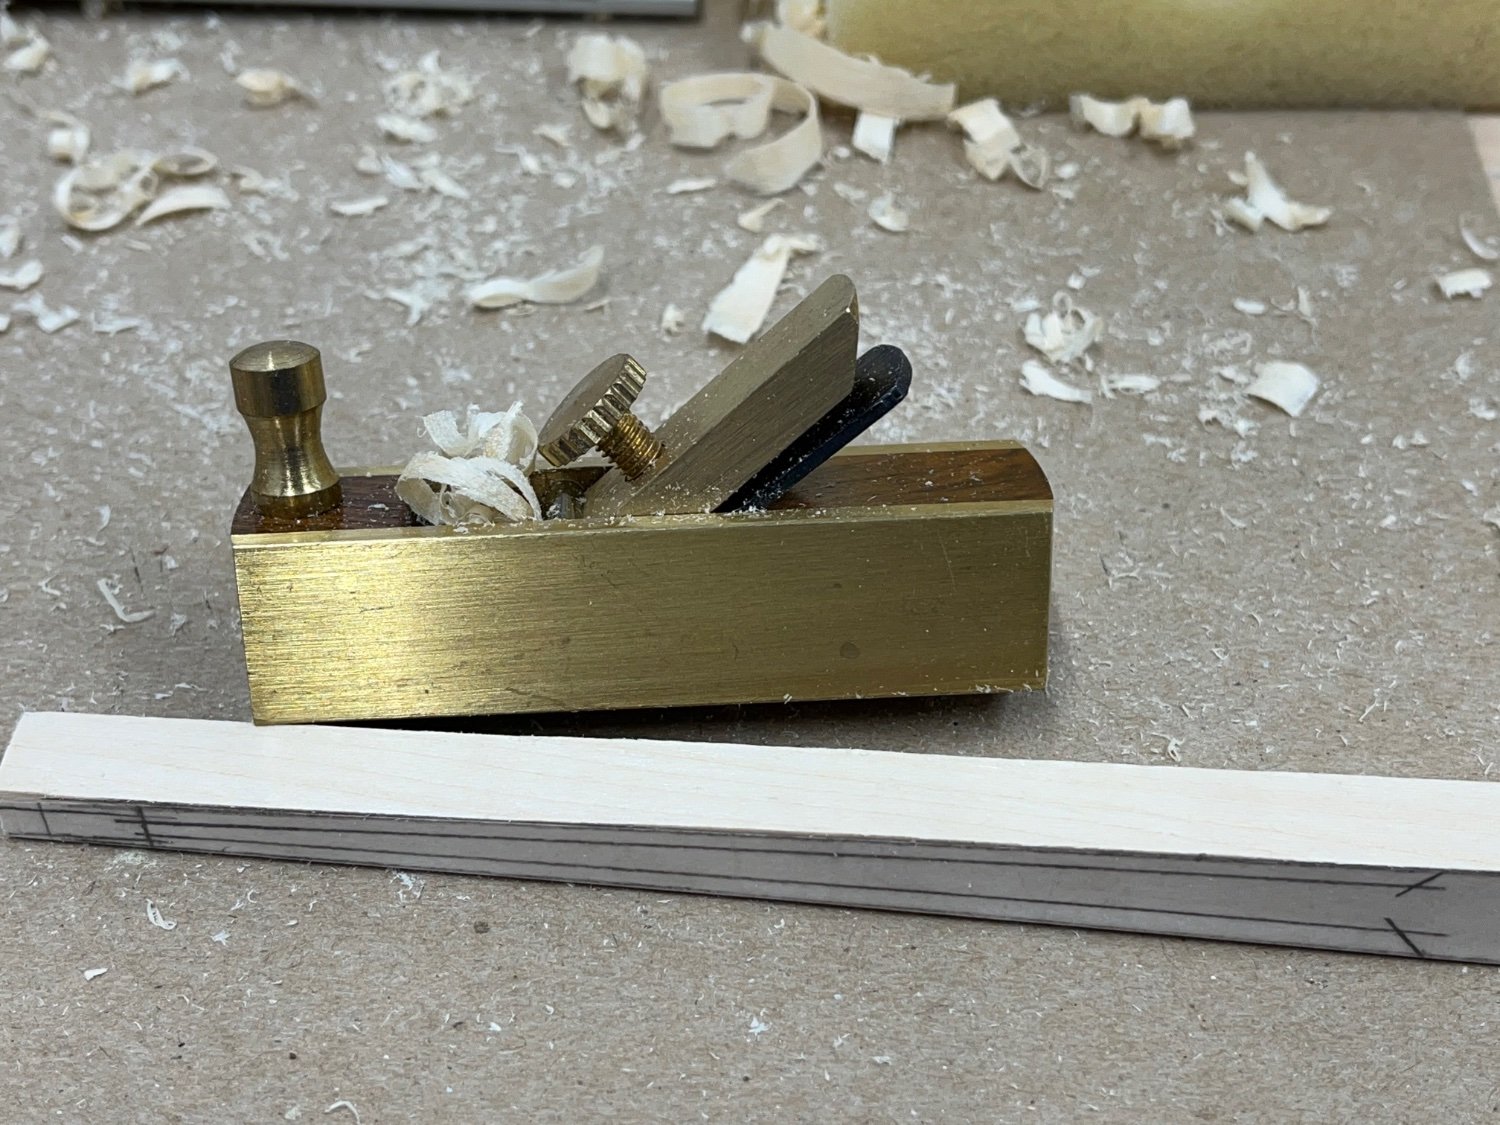
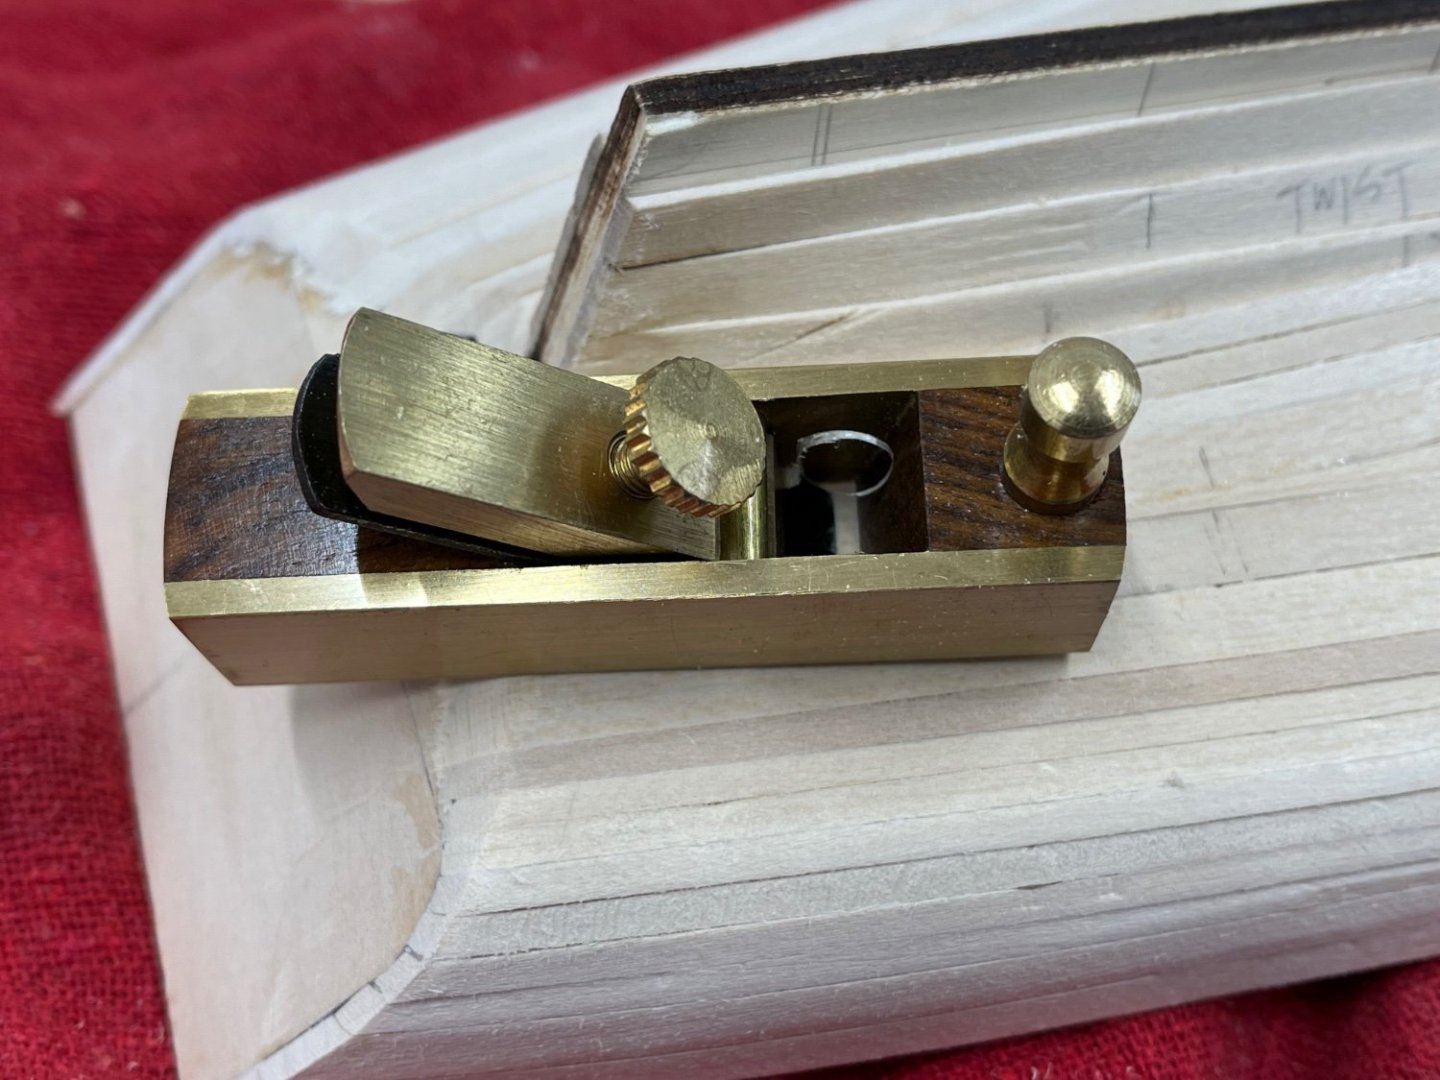
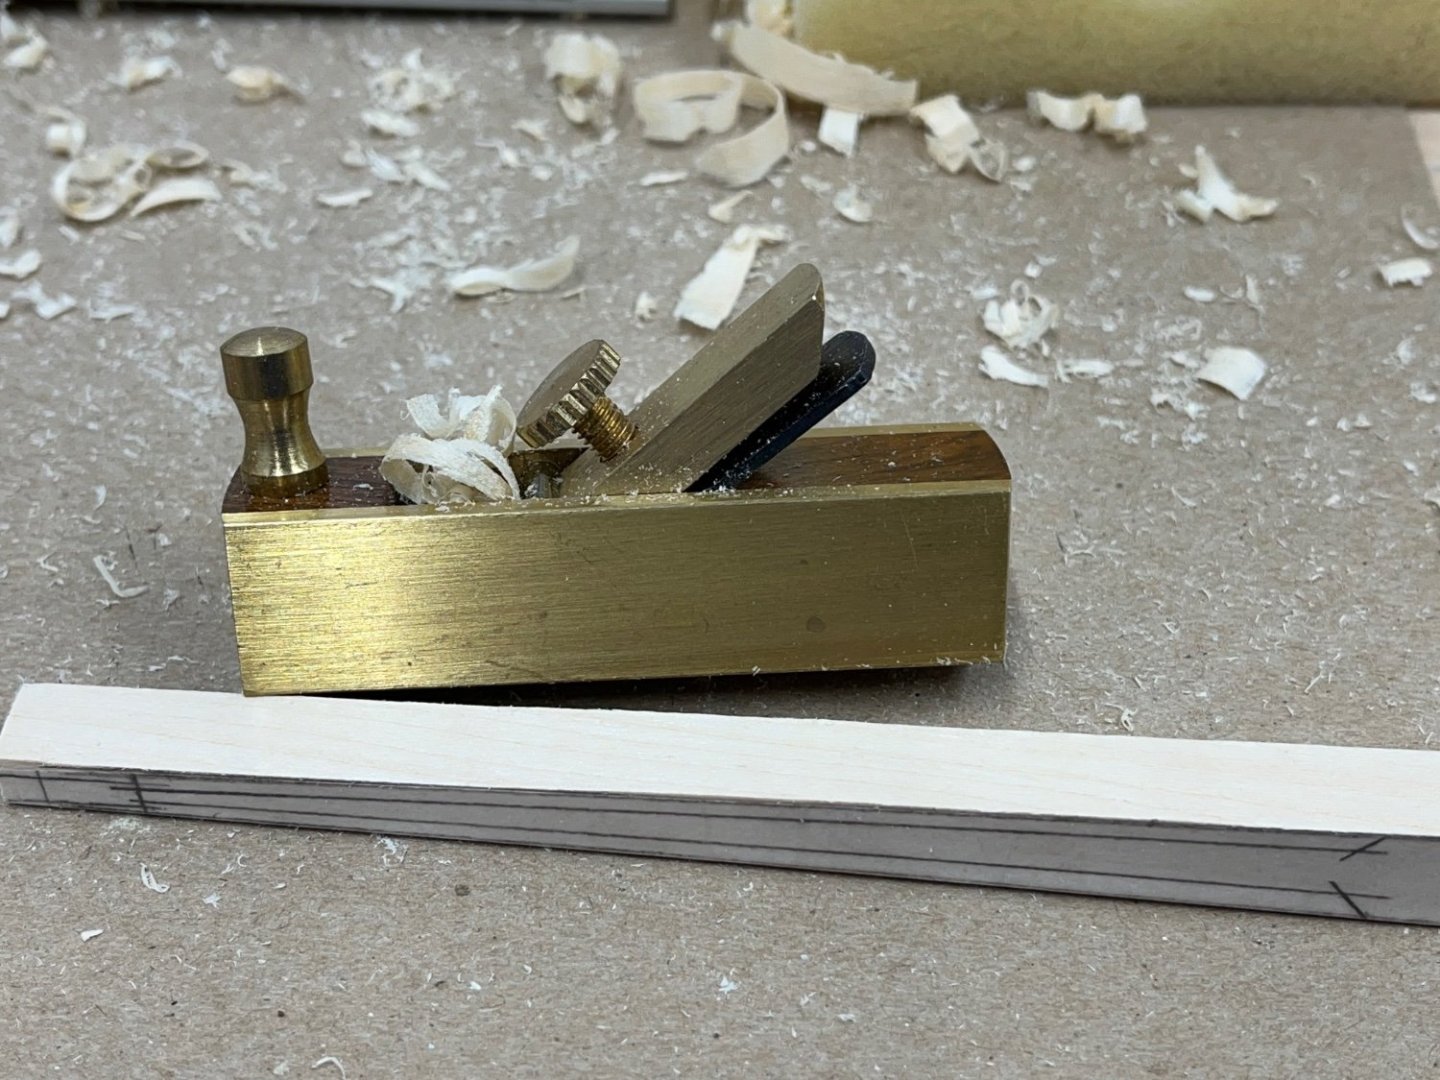
JC, This may be a bit like the blind leading the blind as is seems we are both pretty new to serious model building but here goes- I found that the plane worked very well on taking off the high edges of the planks where the hull is most curved. The advantage of the plane over an exacto knife is that you can set the depth of the plane knife and you will not accidentally gouge the blade into the wood. Since the basswood is so soft, I find it easy to push too hard on the knife blade and cut too deeply into the soft wood but with the plane blade set at say, 1/16” you will not cut any deeper than that into the wood. Since the block of the plane follows the surface of the wood, I find it a little easier to control than a knife. I also used it to shape the bow sprit and other planks that I needed to shape or make a little bit smaller. Of course if I didn’t have the plane, I am sure I would have made do with an exacto but I really think the plane is a pretty cool tool and the set was less than ten bucks. Let’s face it, having the tools is part of the fun.
- 54 replies
-
- 1
-

-
- Spray
- BlueJacket Shipcrafters
- (and 1 more)
-
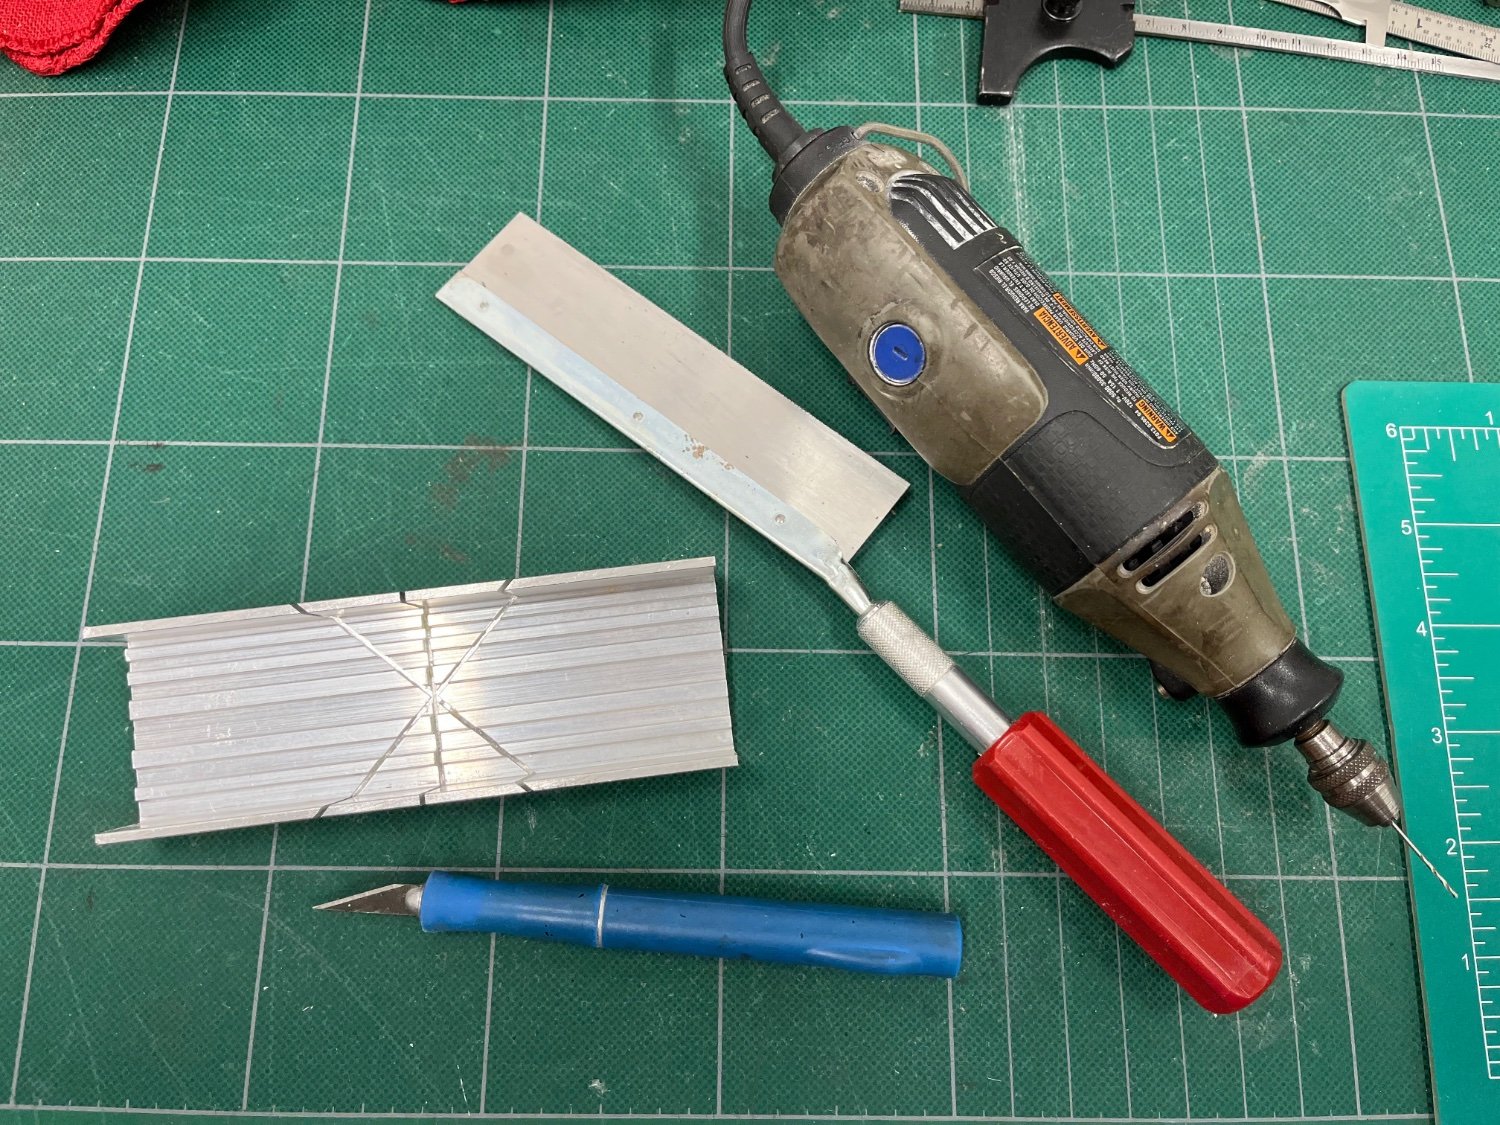
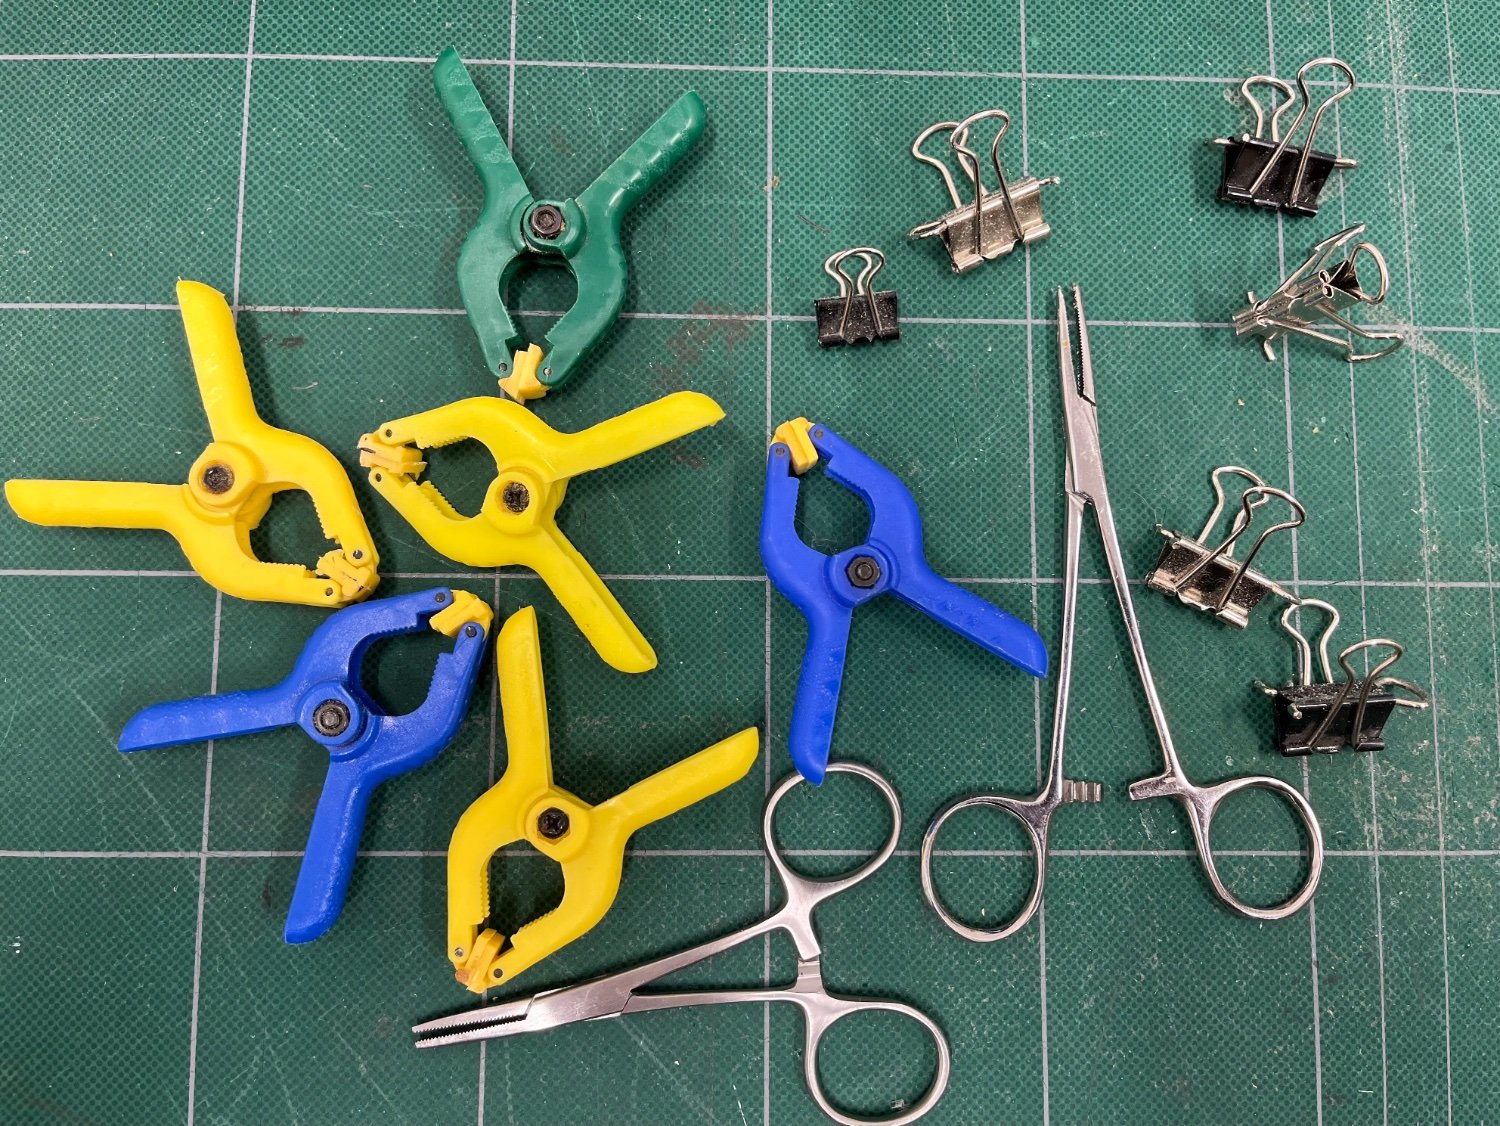
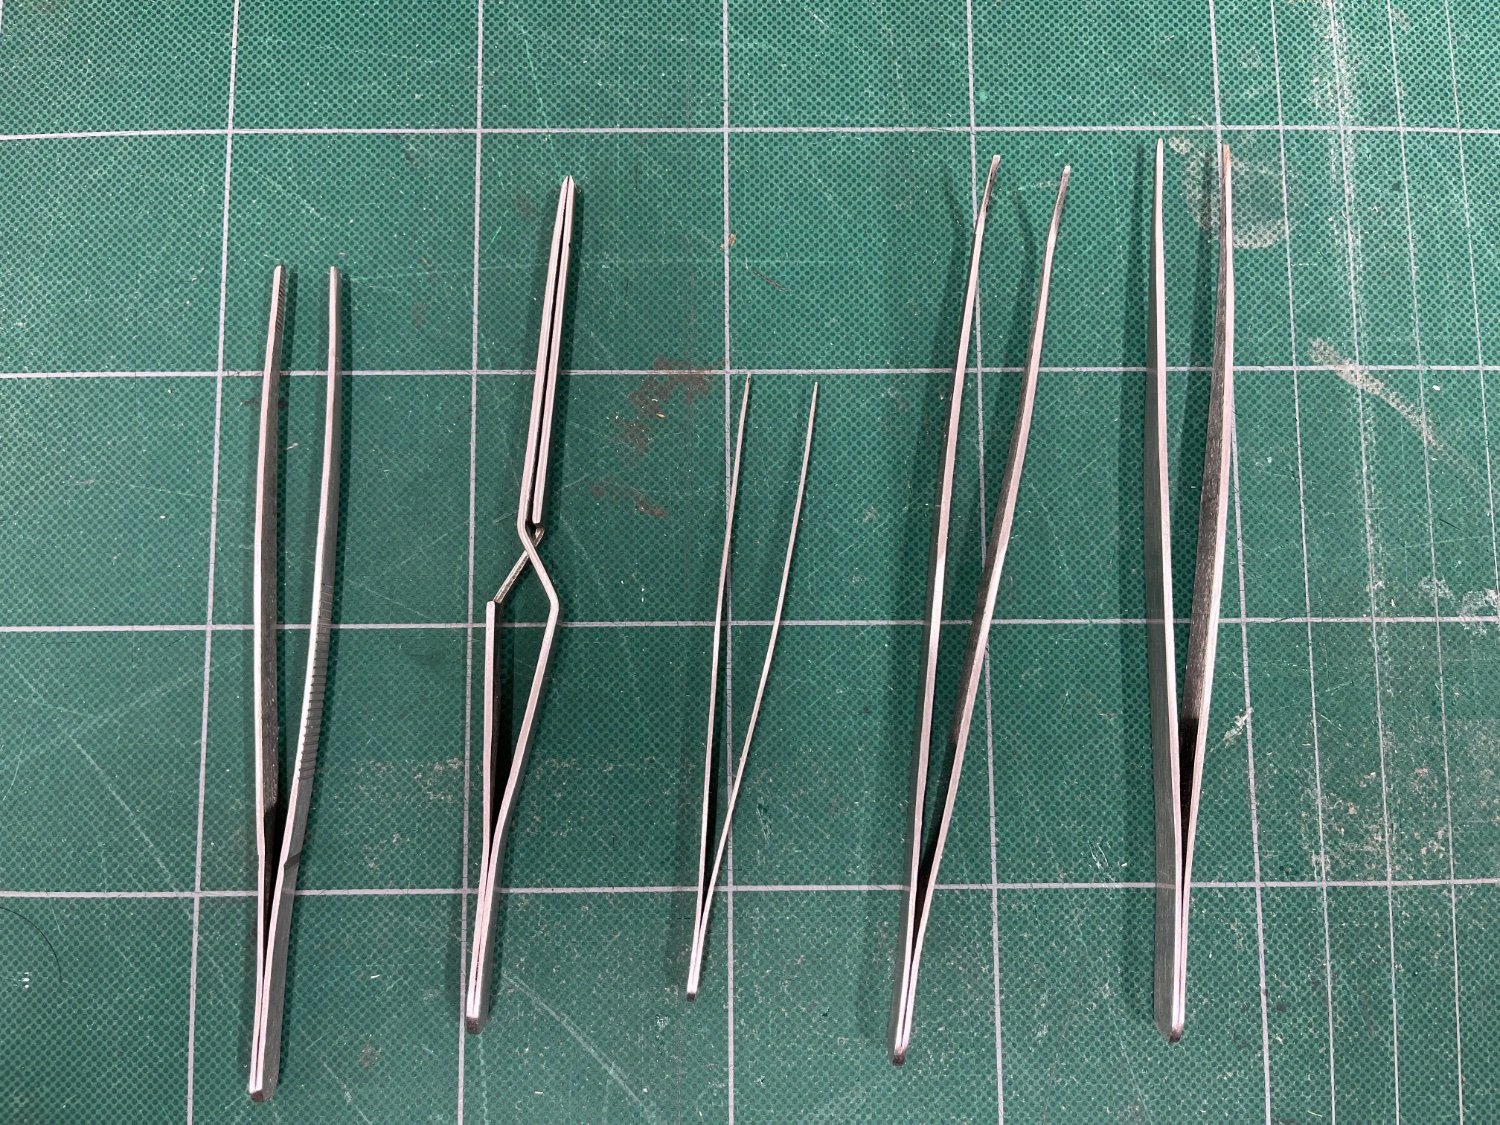
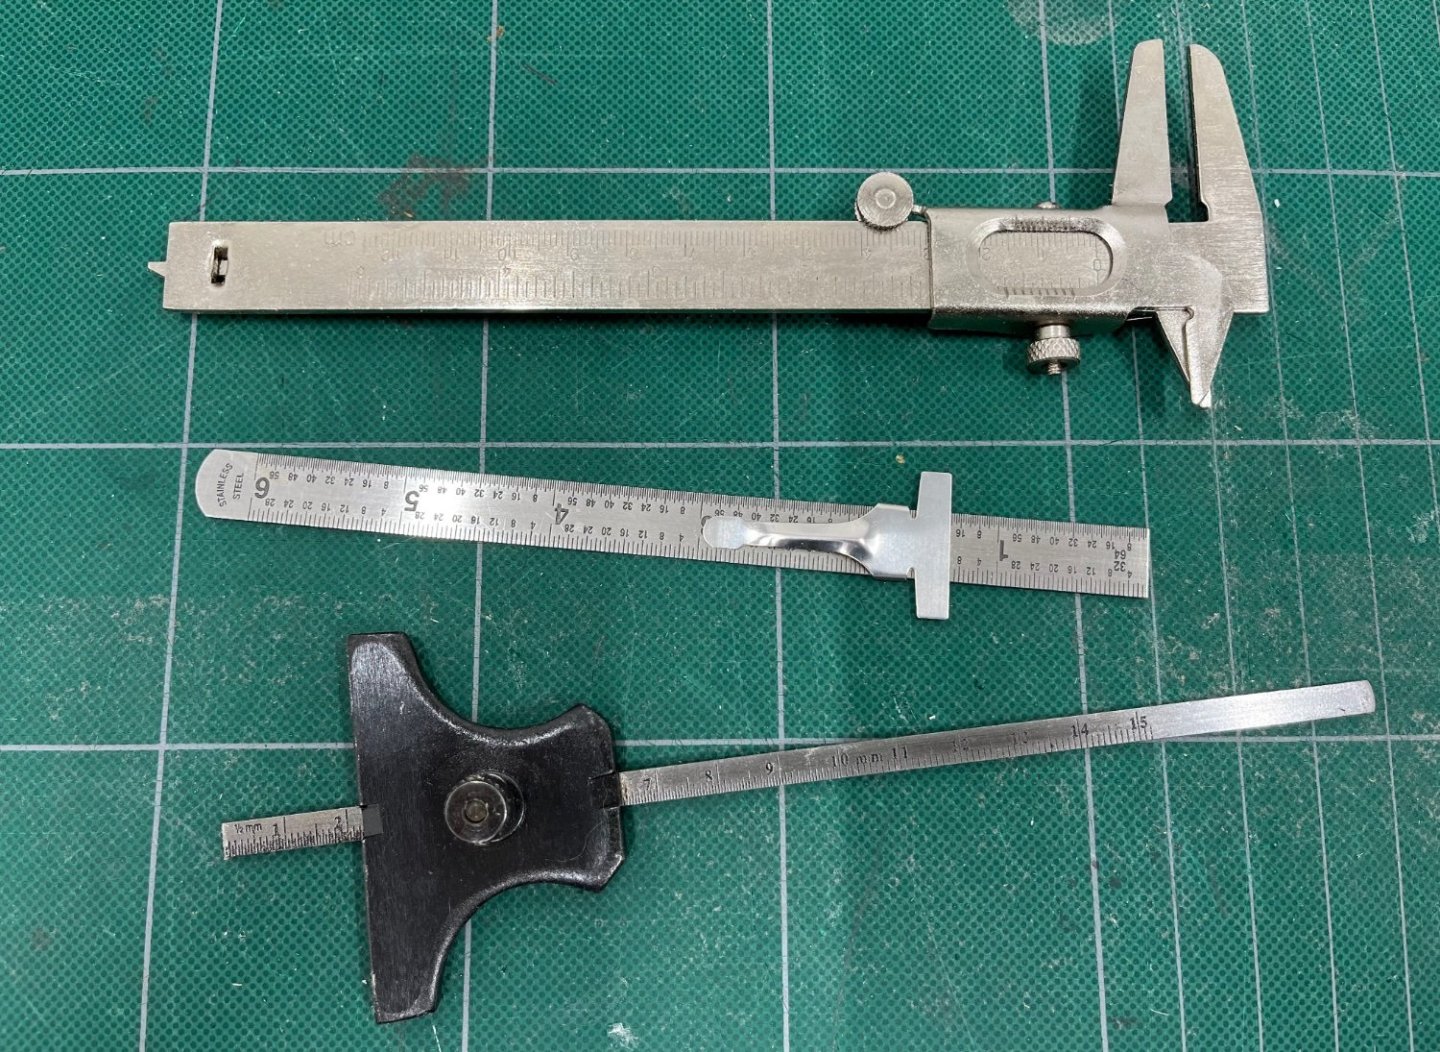
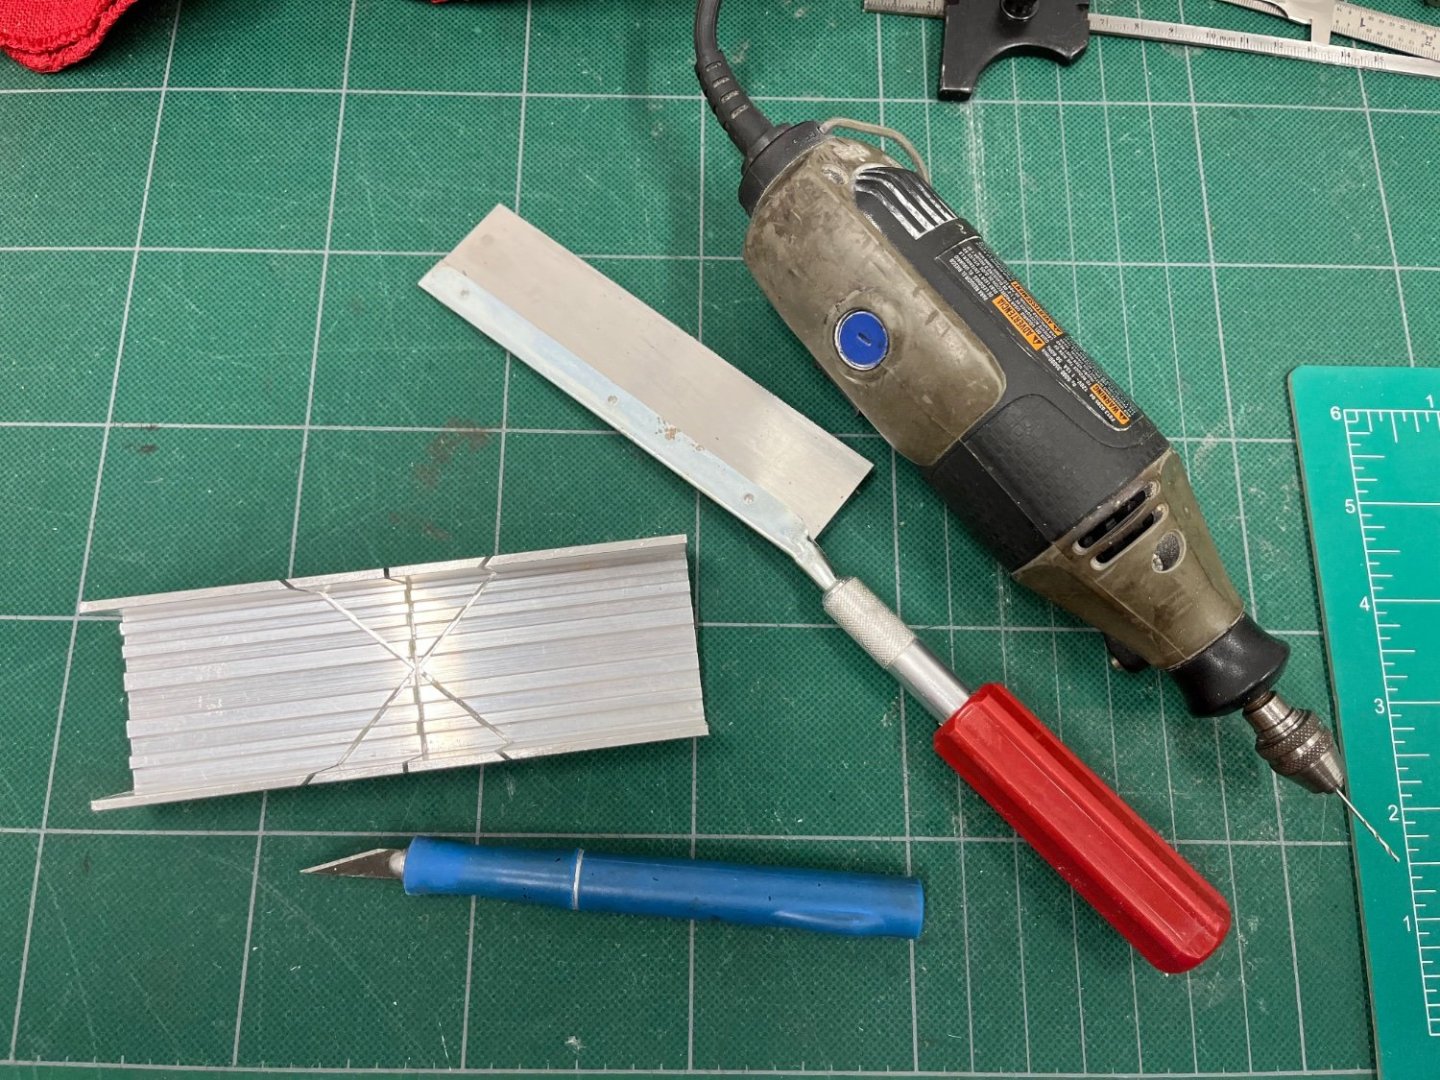
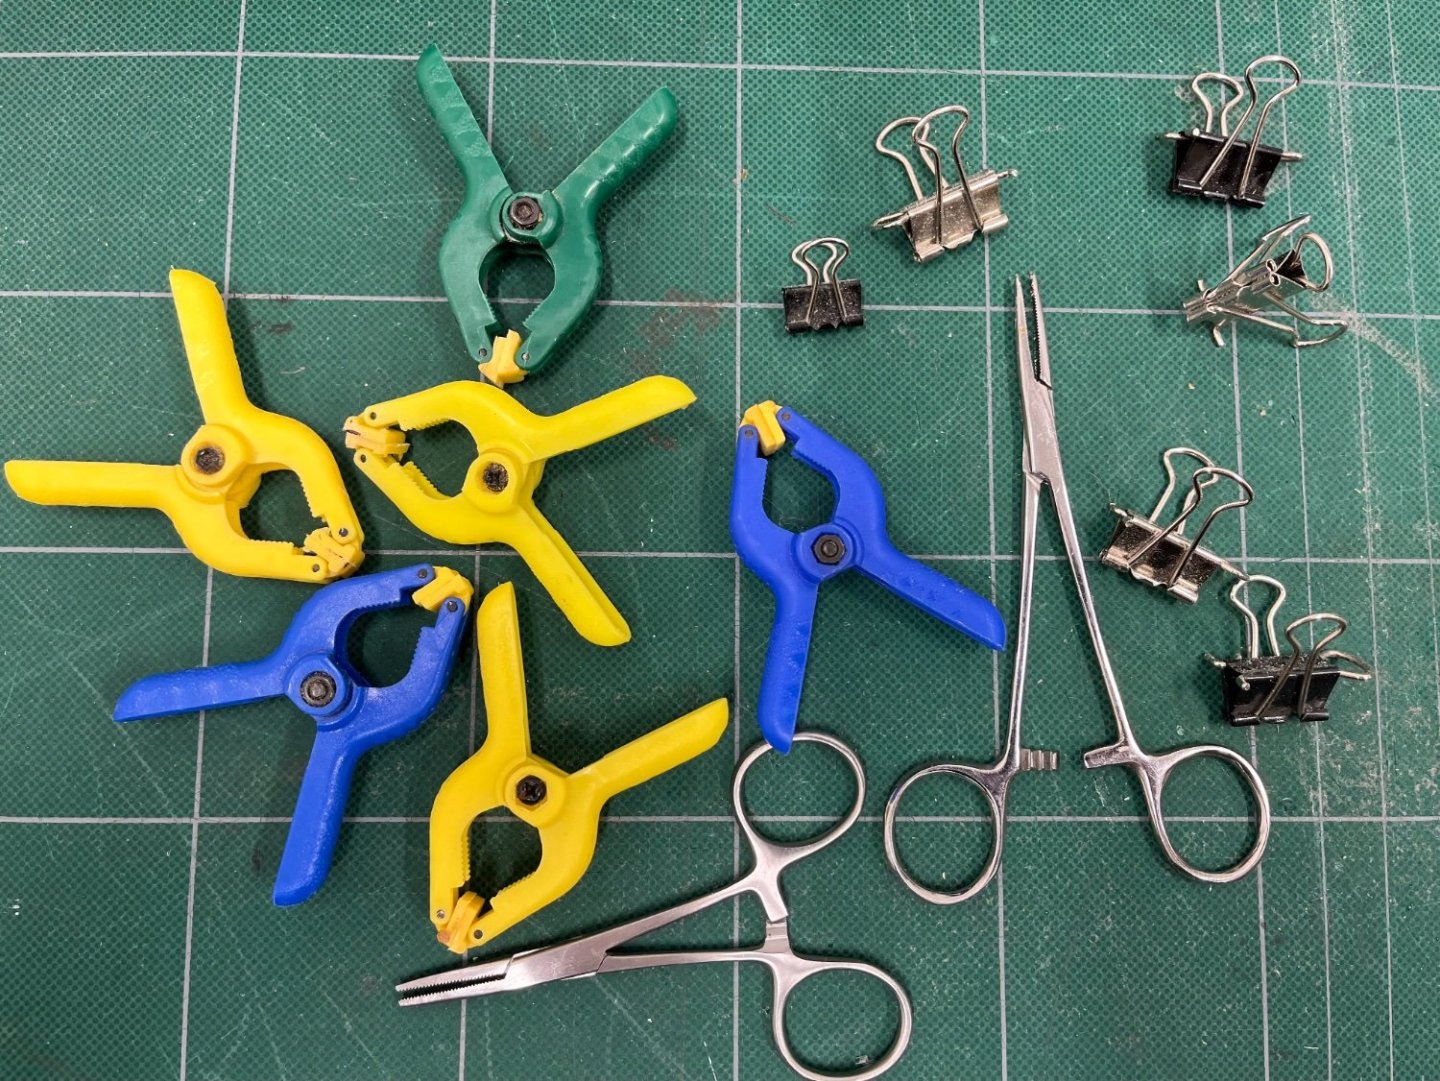
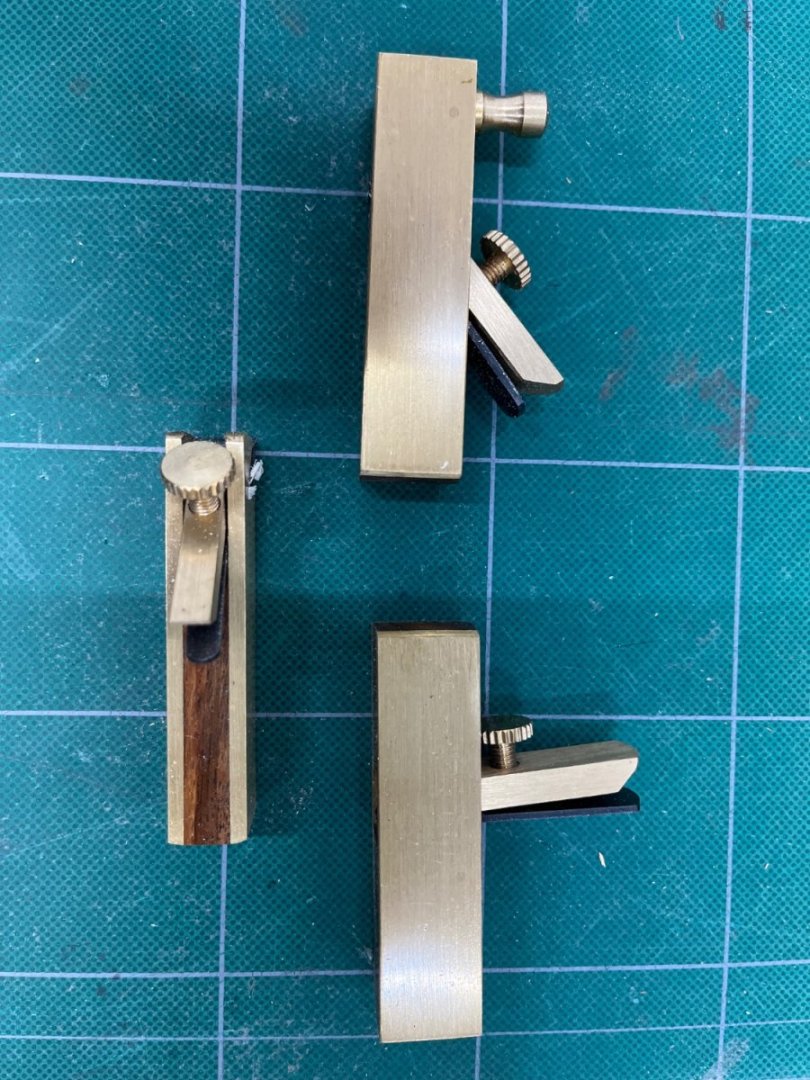
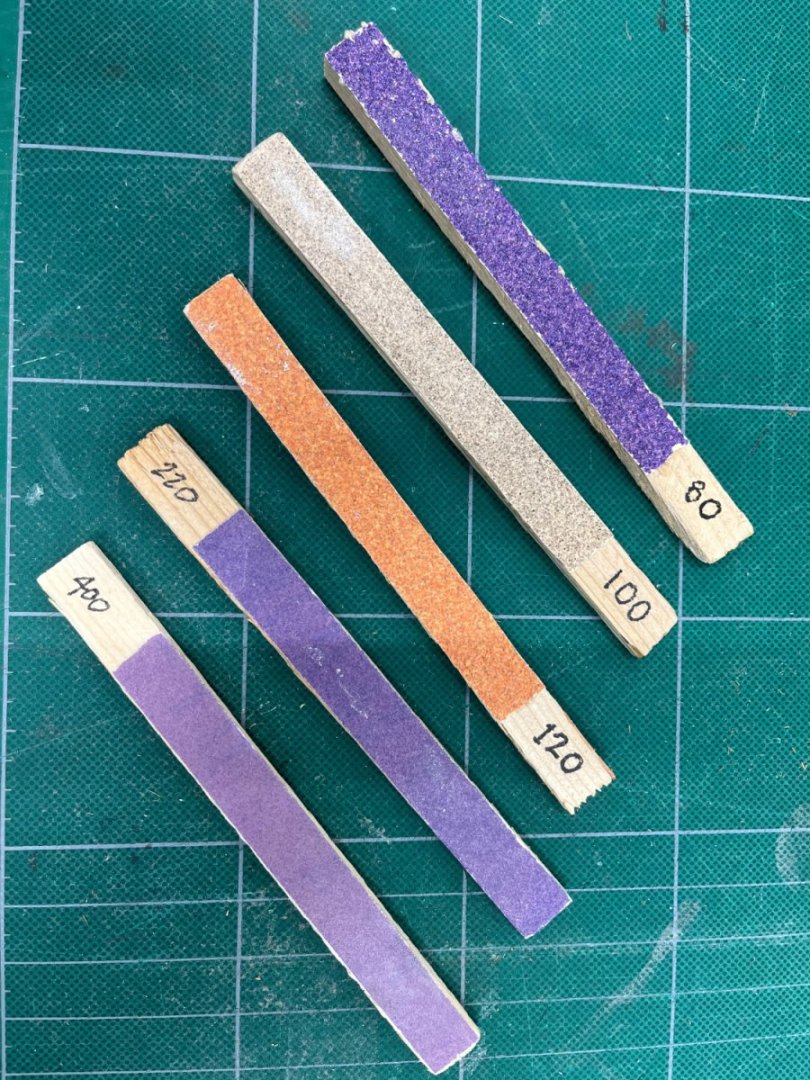
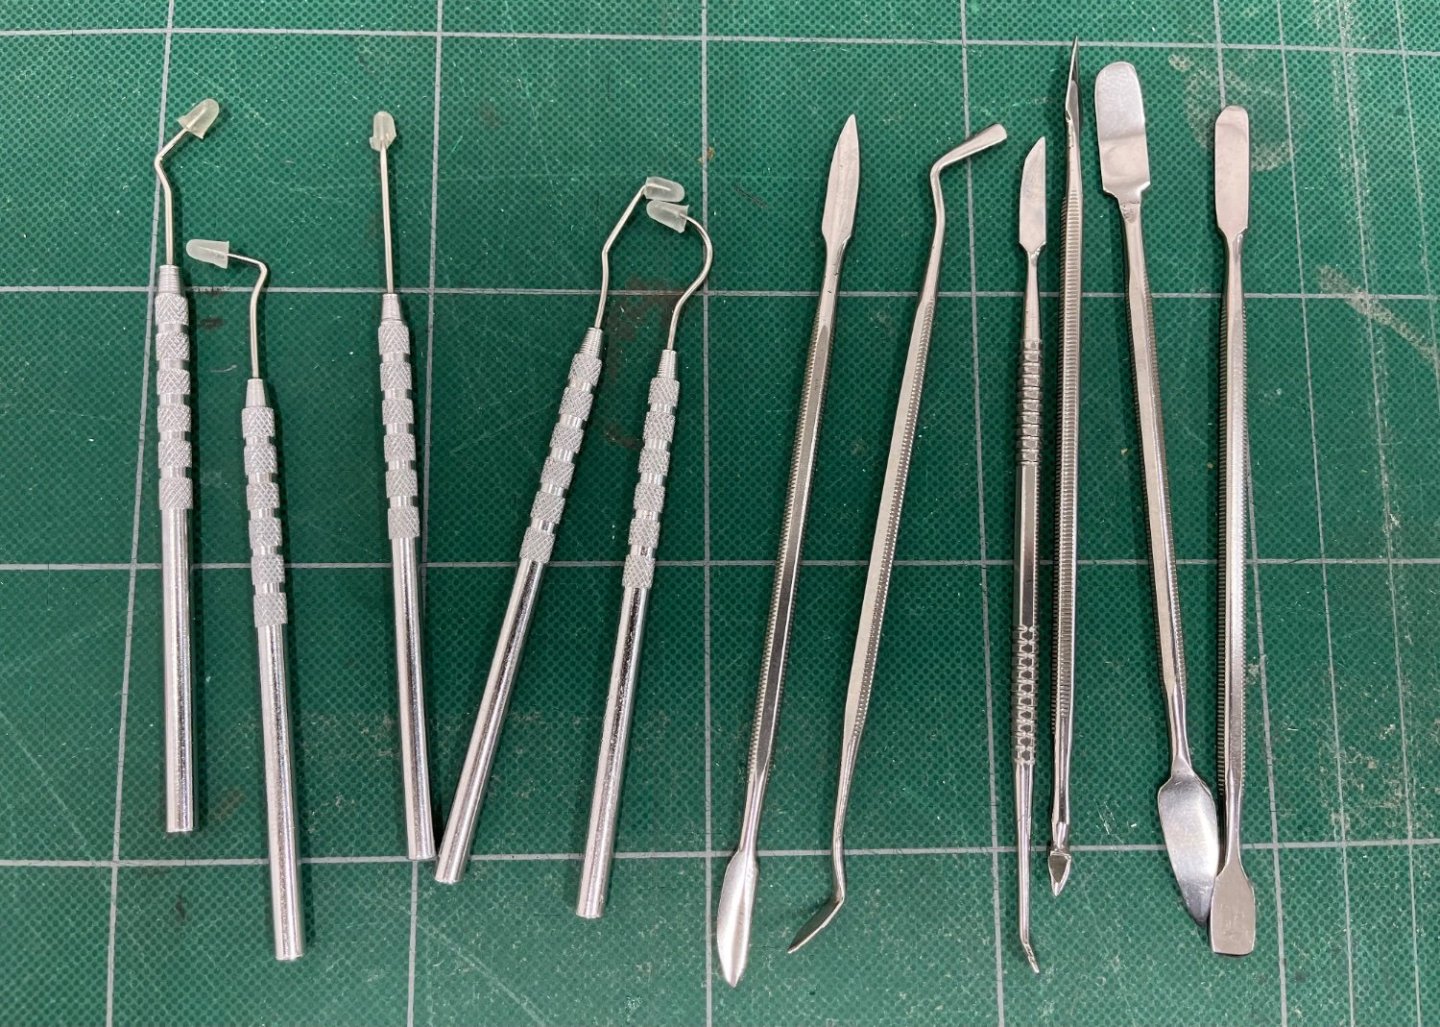
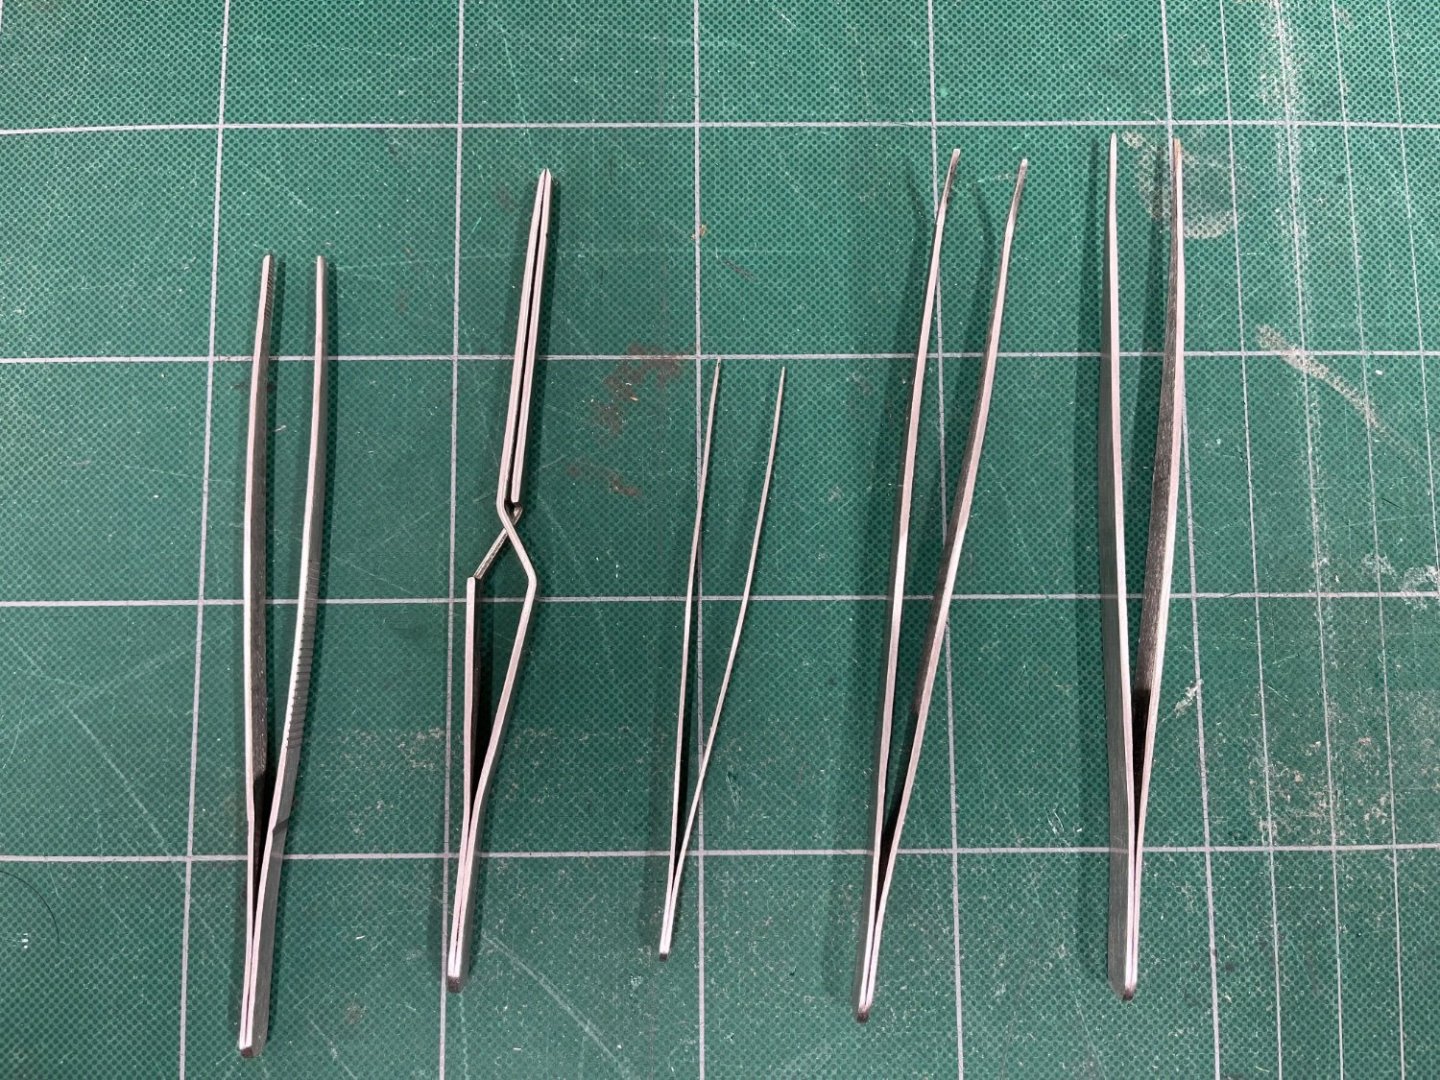
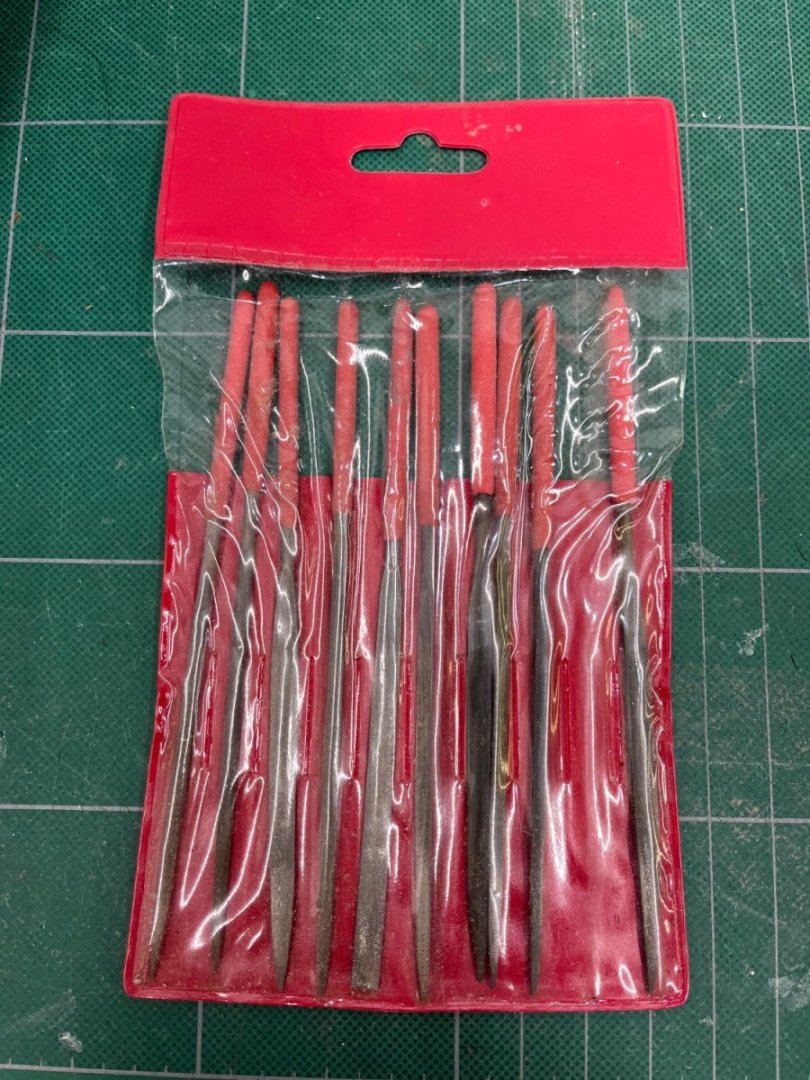
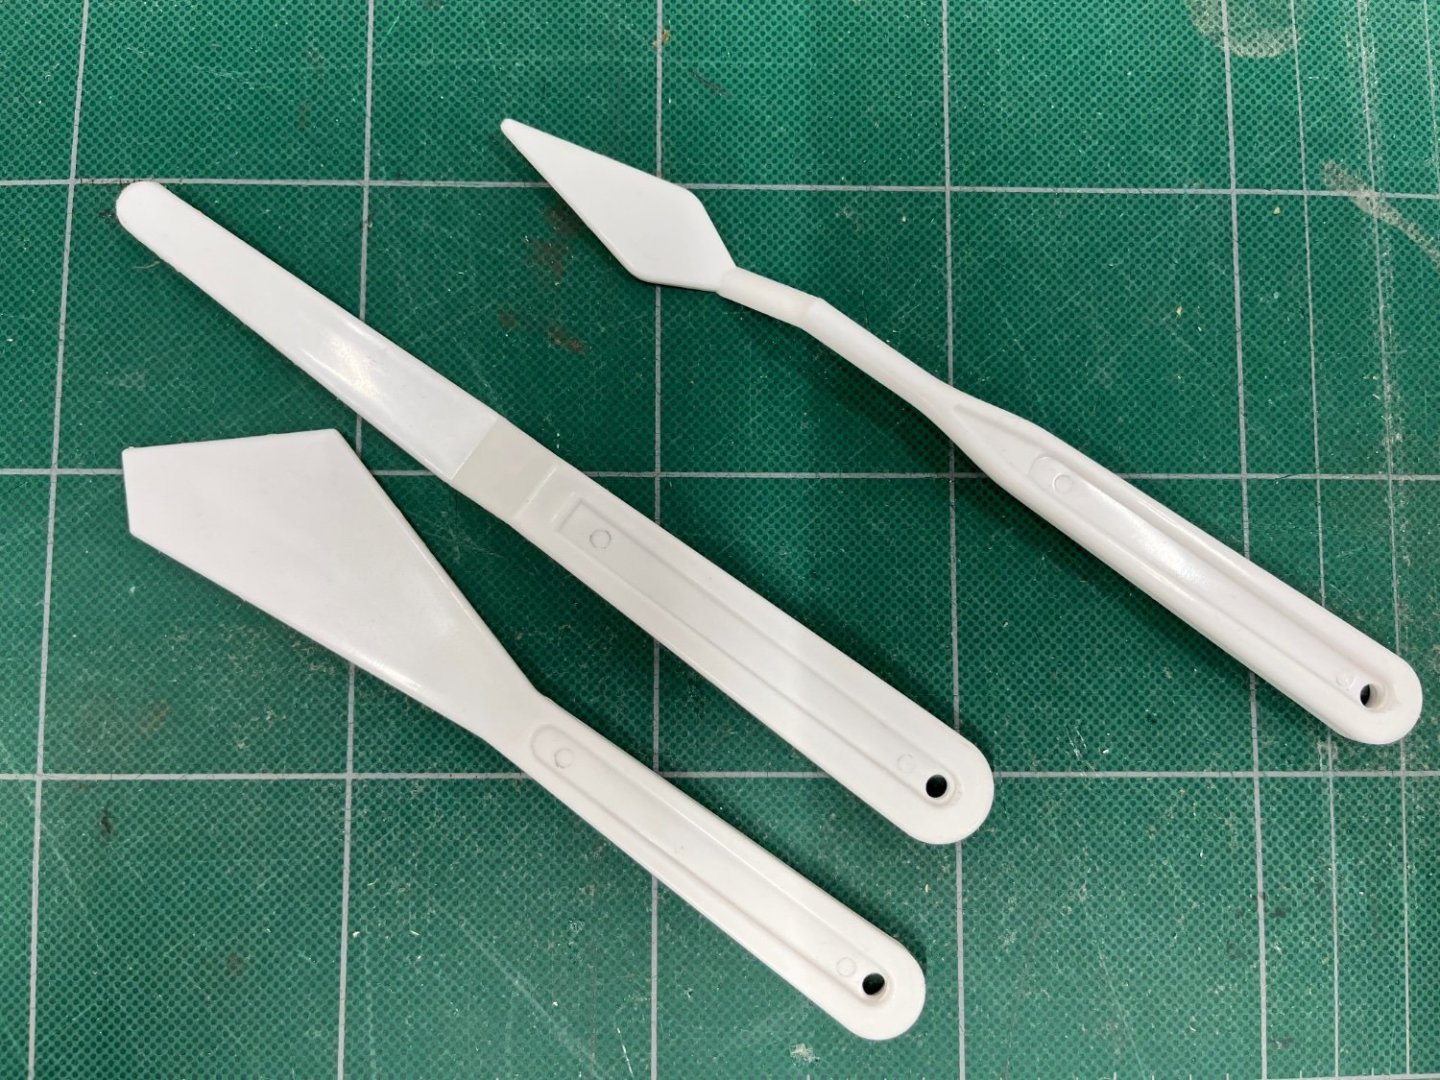
As a builder new to the more complex plank-on-frame models, one of the big questions I had going into this project is what kind of tools would I need. so this post is about the tools. Image 1: tools to measure. Part of a set from Harbor Freight. Image 2: tools to cut and drill. I use the dremel mainly just to drill and I got a set of very fine bits from HF. Image 3: clamps. Whoever came up with the binder clip clamp idea should be in the model builders hall of fame. Image 4: small block planes were very useful in the initial shaping of the hull planks. This set from HF. Image 5: I made a bunch of sanding boards by gluing strips of sandpaper to the small blocks of wood about 1/4”x3/8”x6”. The basswood of the model is so soft that you really don’t need much of the course paper. Image 6: a set of dental picks and shaped scraping knives are useful for doing all sorts of different things and getting into different spaces. Sets from HF. Image 7: a set of tweezers is mandatory for the fine work and rigging. Again from HF. Image 8: a set of small files including flat, triangular, round, and curved. HF. Image 9: plastic artist palette knives are useful for applying wood putty to the hull. Any art supply store. As a beginning modeler, I did not want to go out and spend hundreds of dollars on the tools, when I was not sure if I would build another ship so Harbor Freight was a very inexpensive way to get some good tools to start building. Not trying to advertise them but for the fifty dollars or so I spent, I got a lot of very useful tools that helped me get to this point in the build.
- 54 replies
-
- 2
-
-
- Spray
- BlueJacket Shipcrafters
- (and 1 more)
-
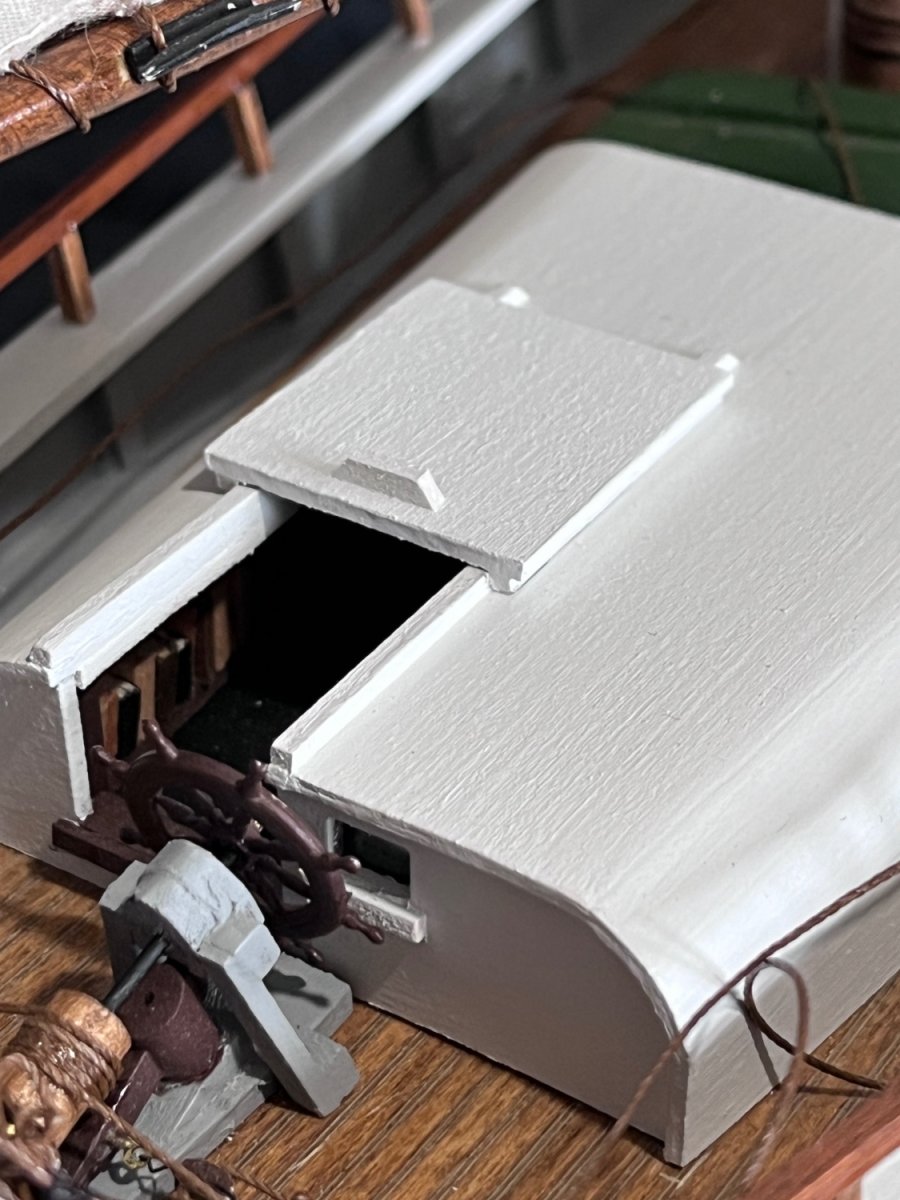
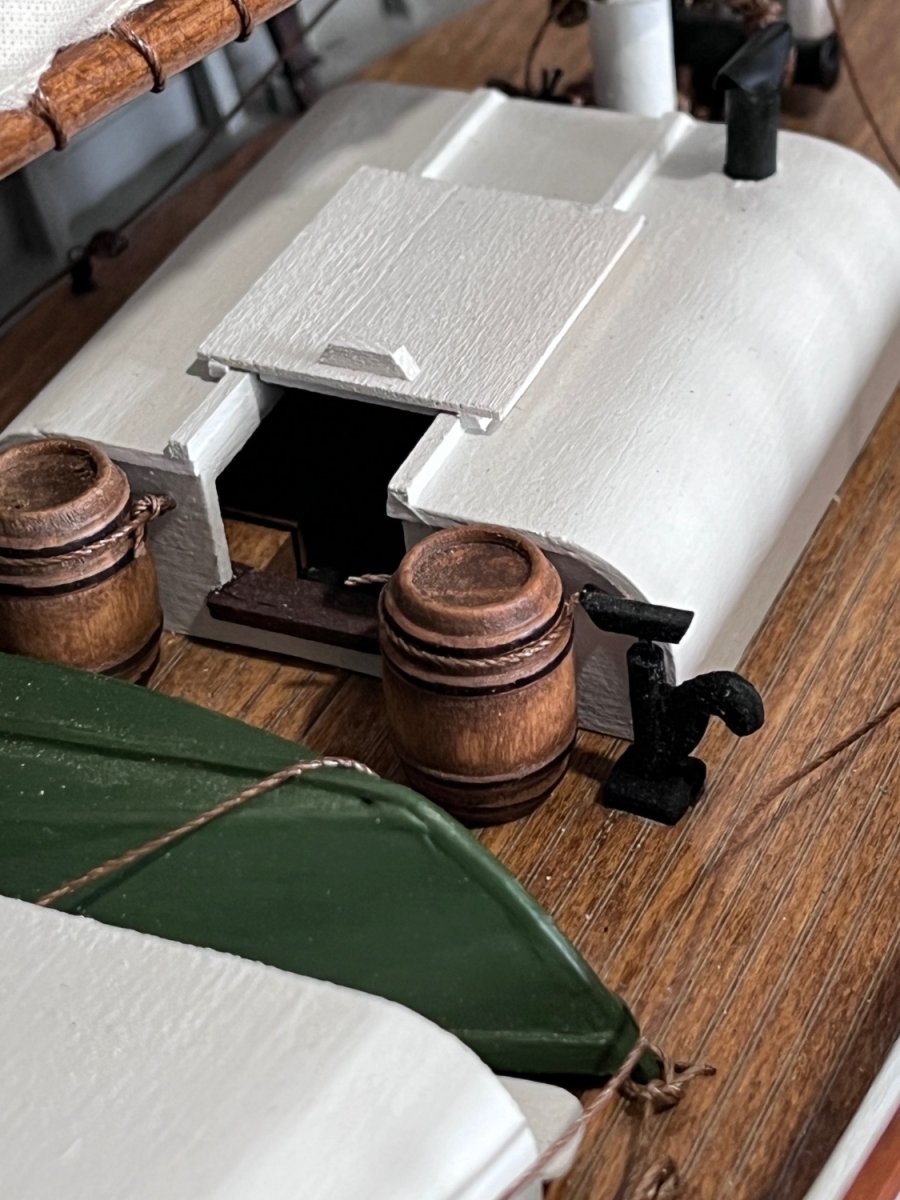
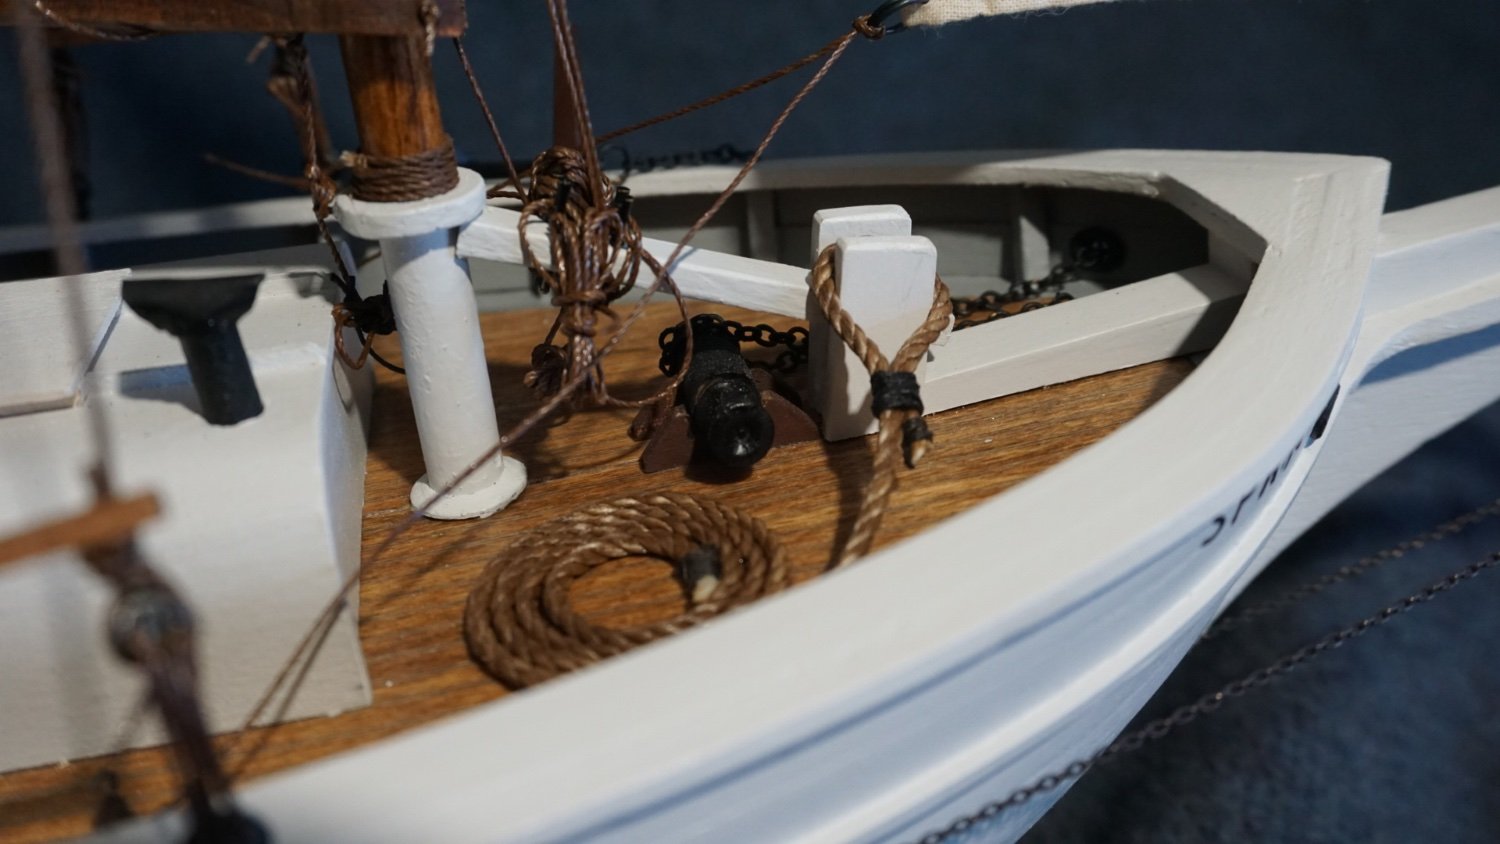
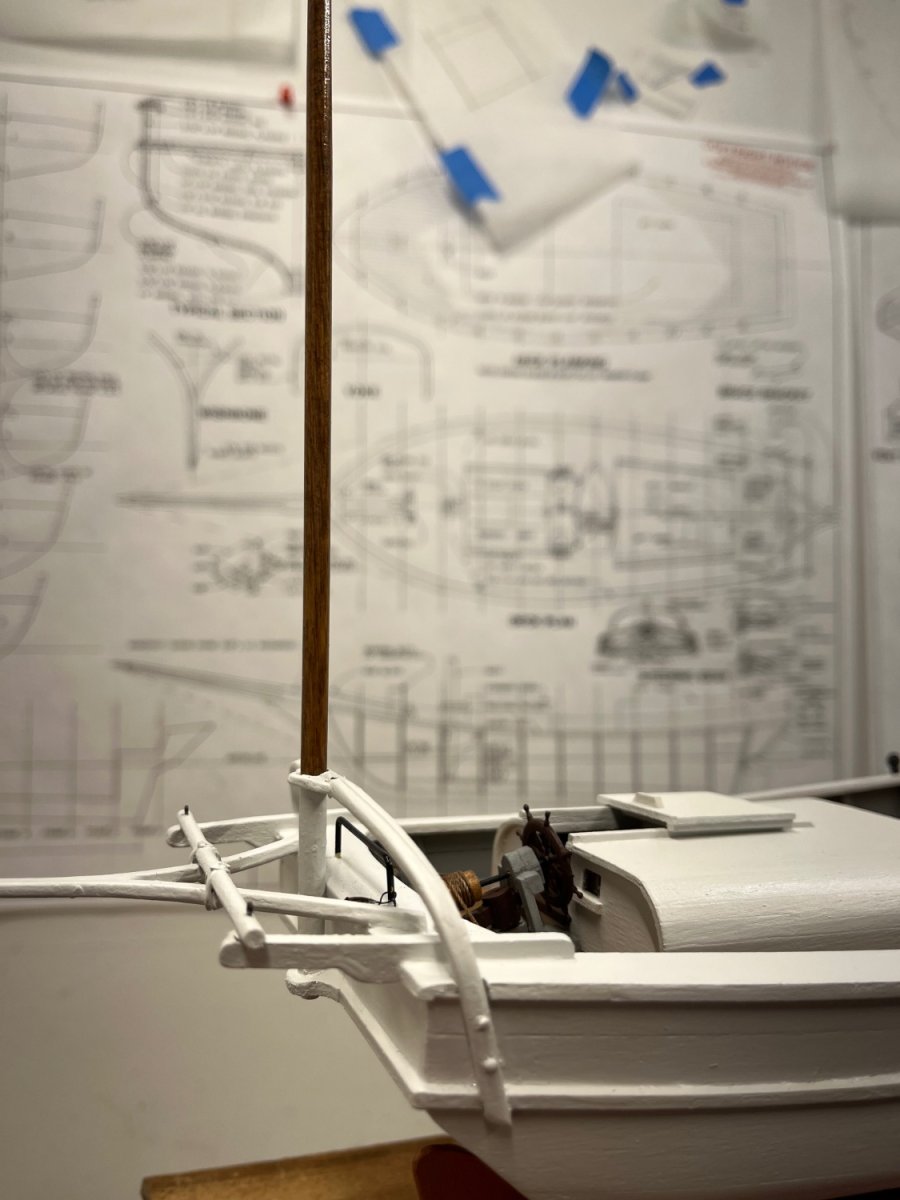
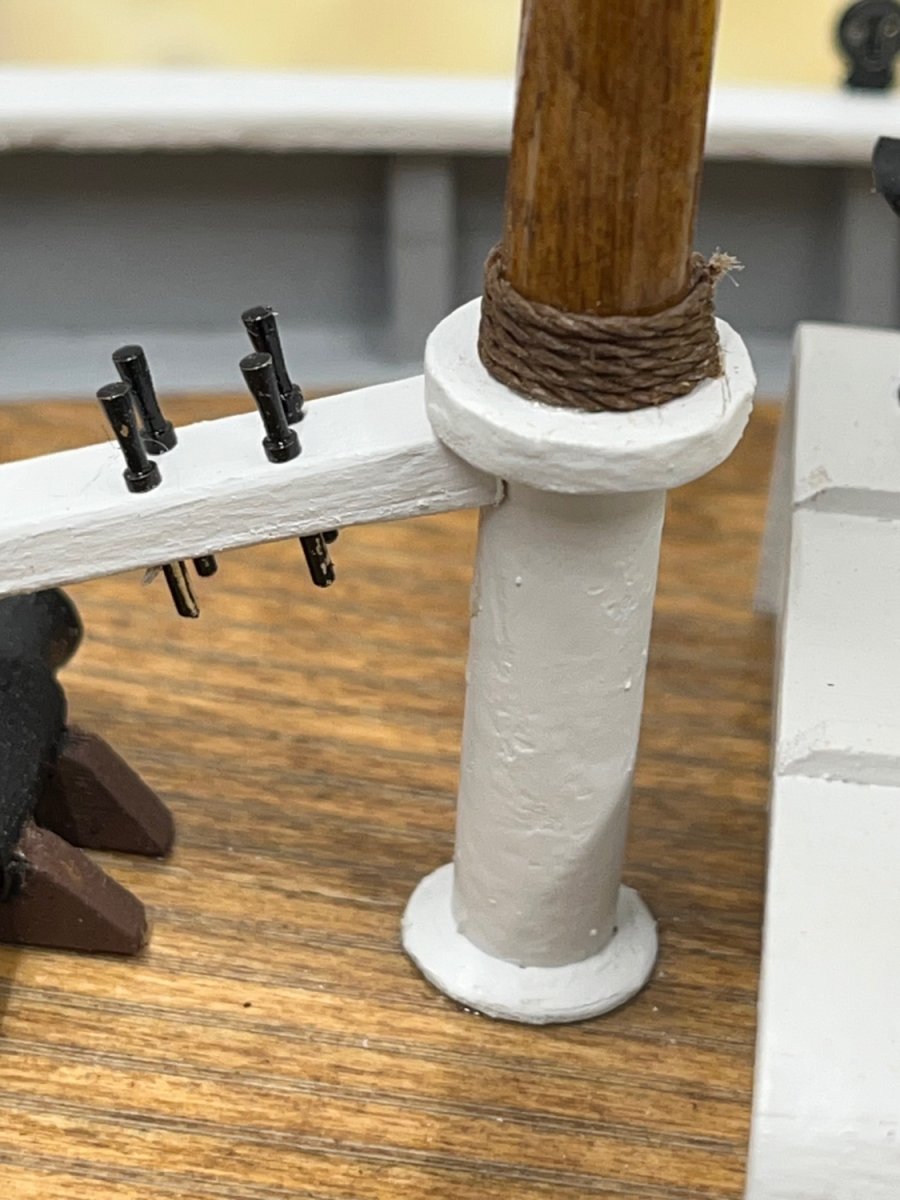
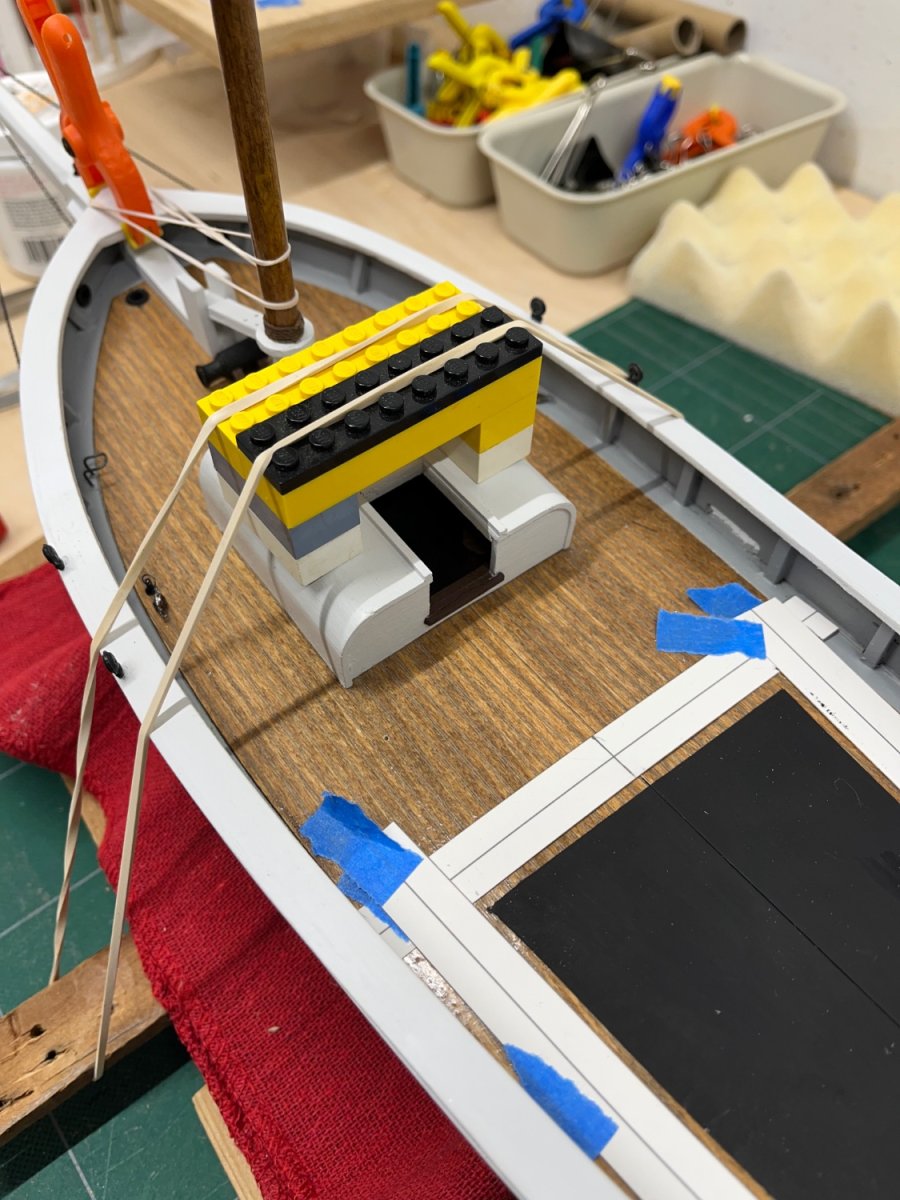
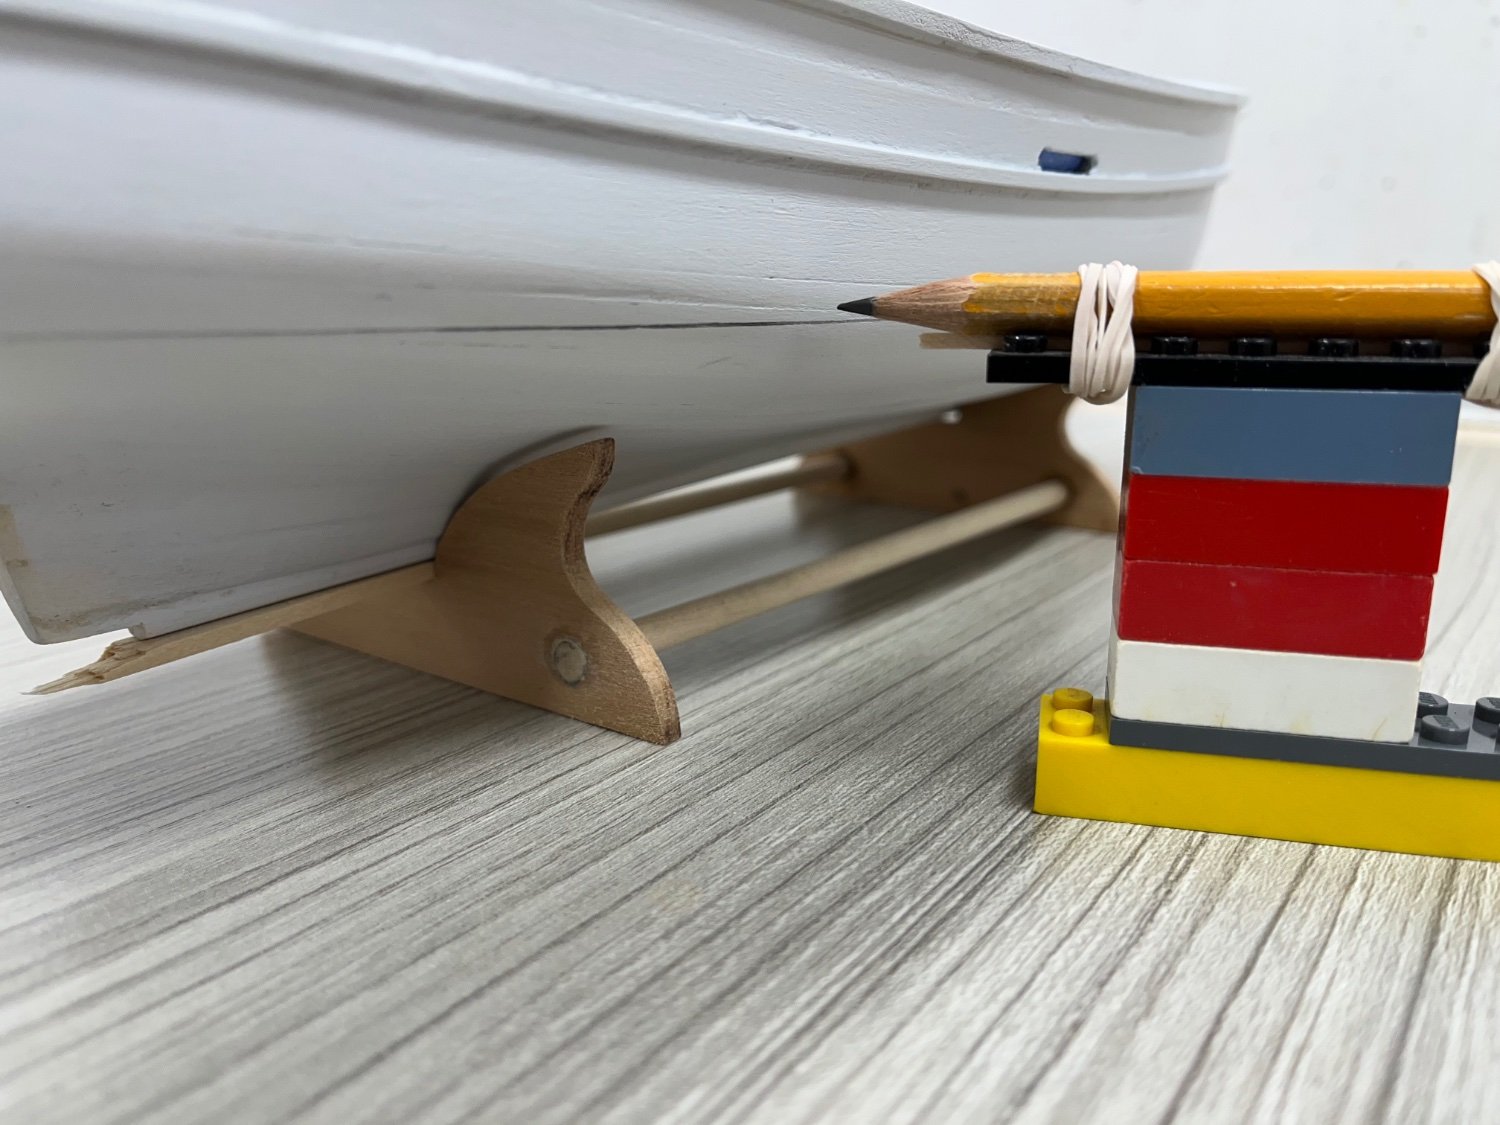
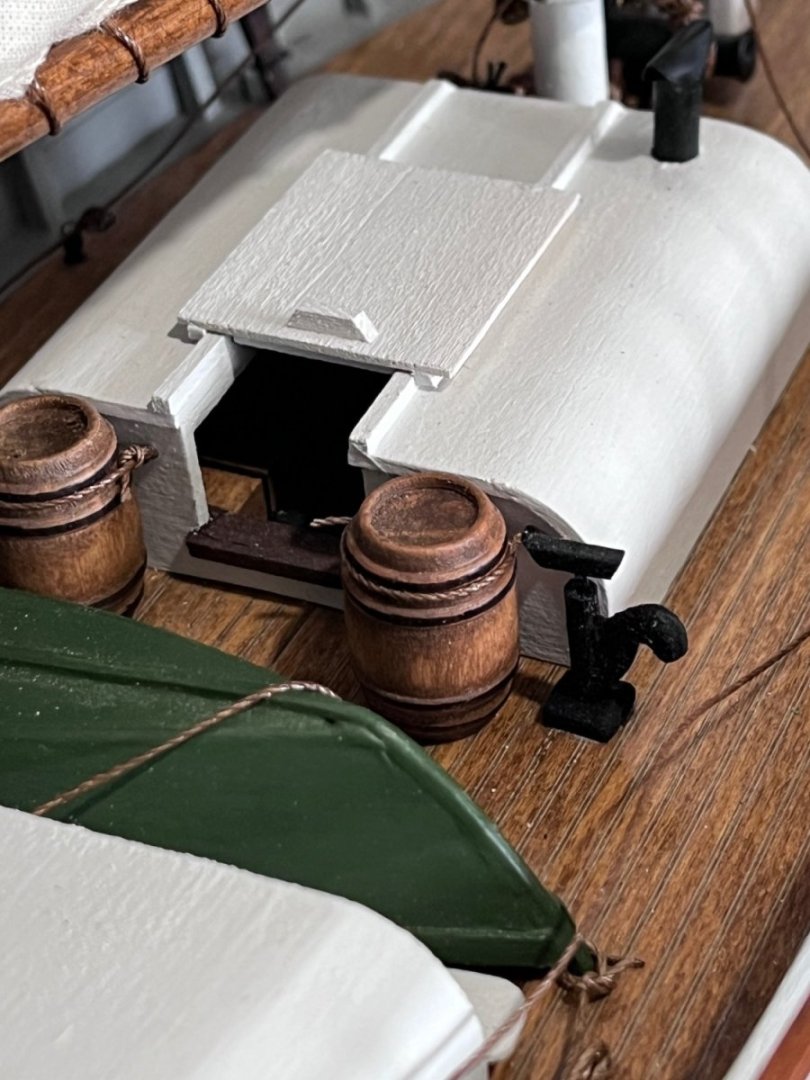
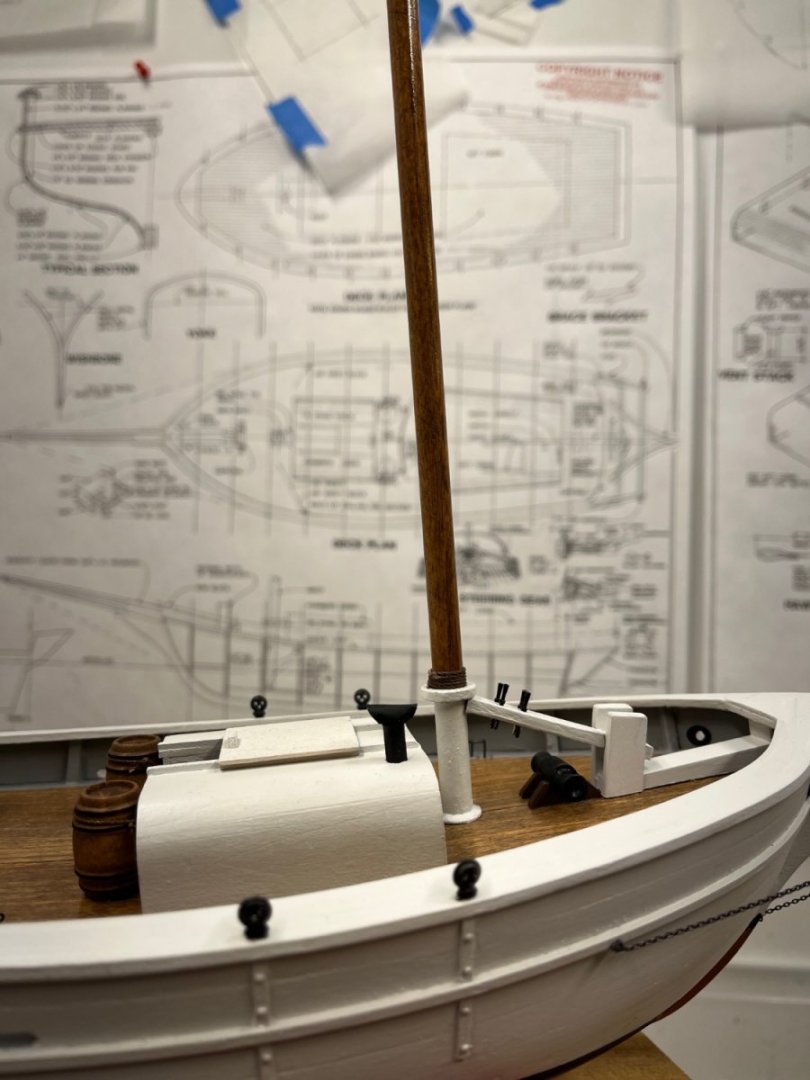
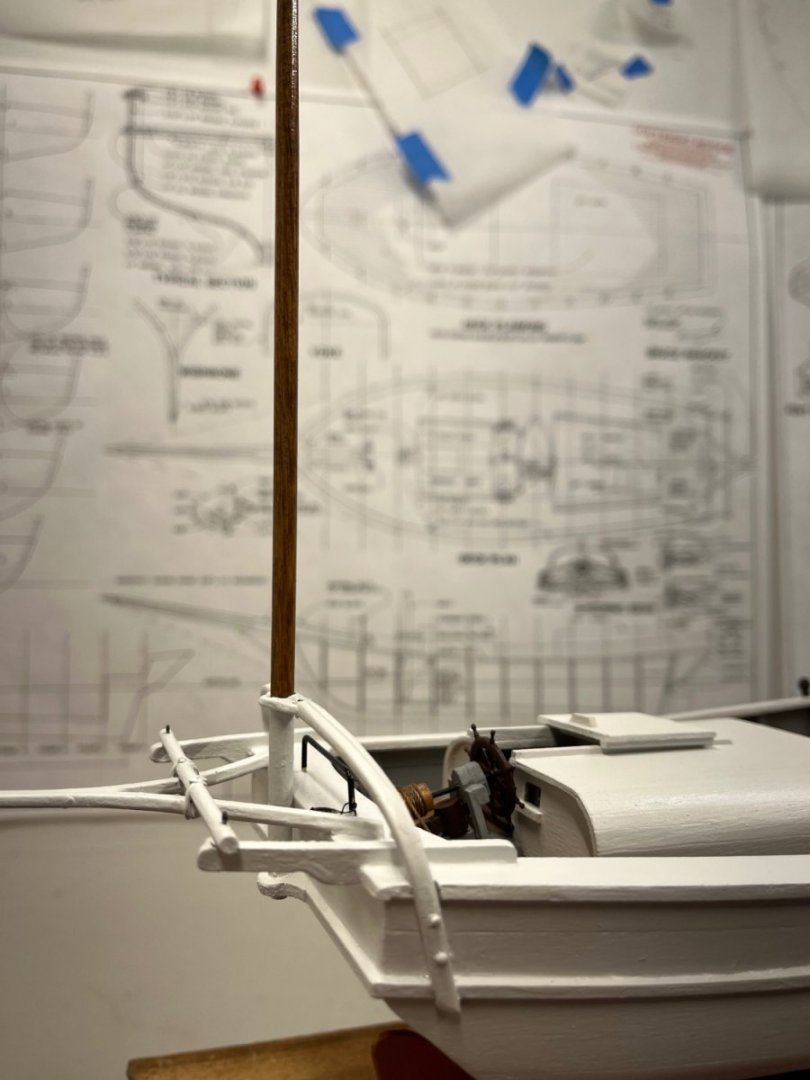
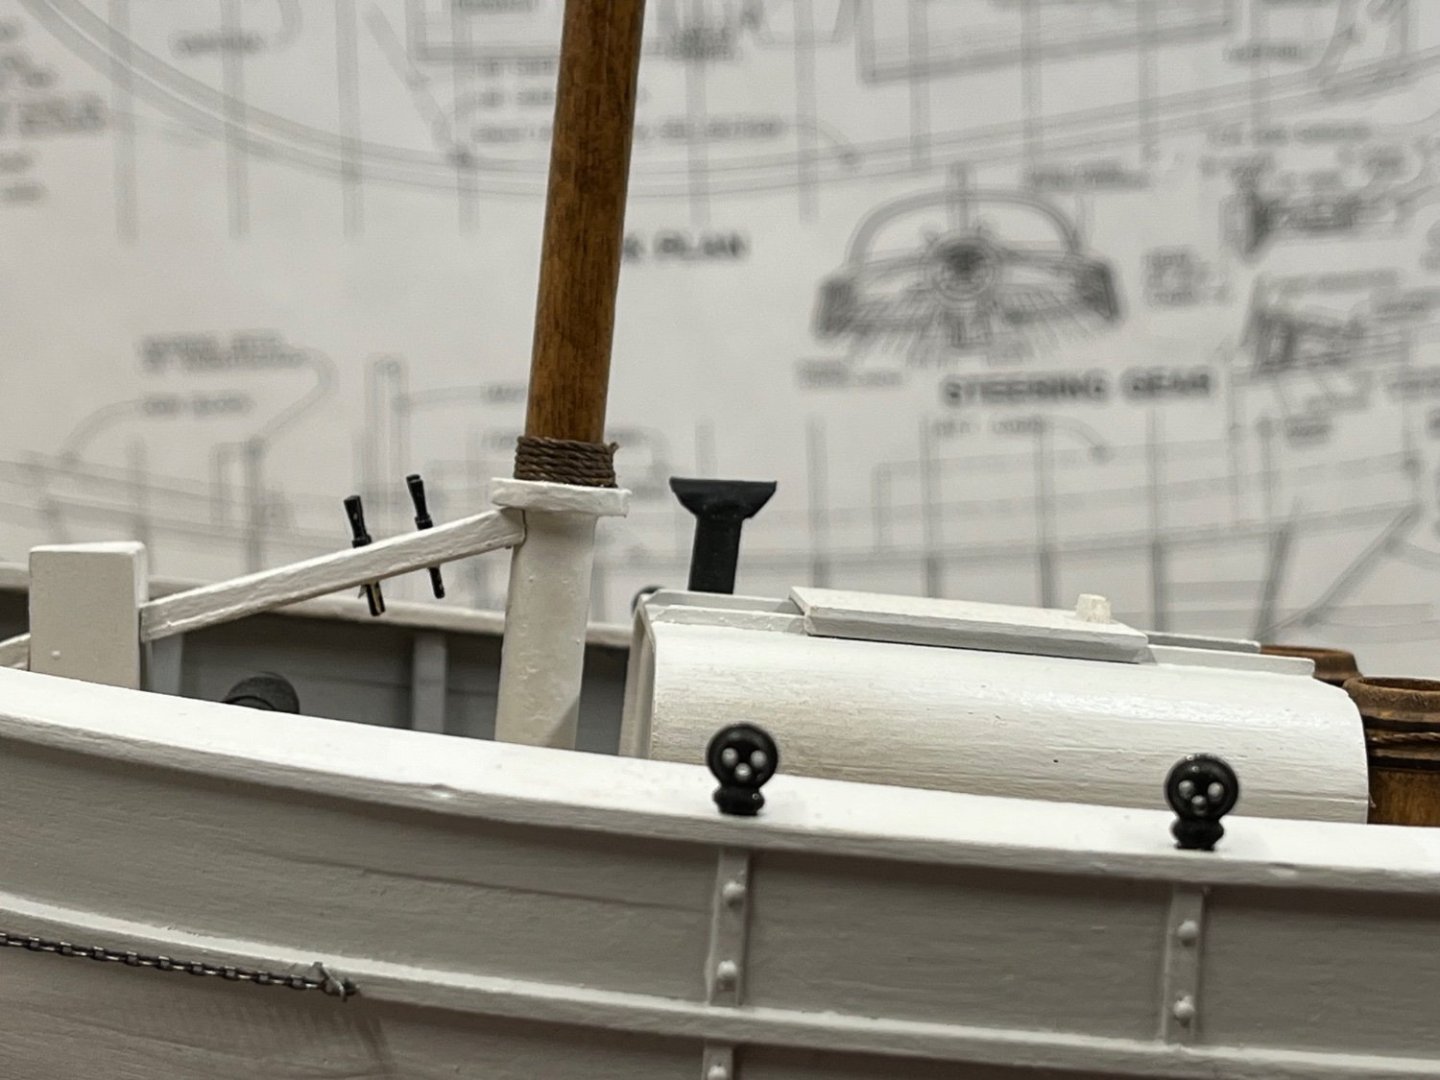
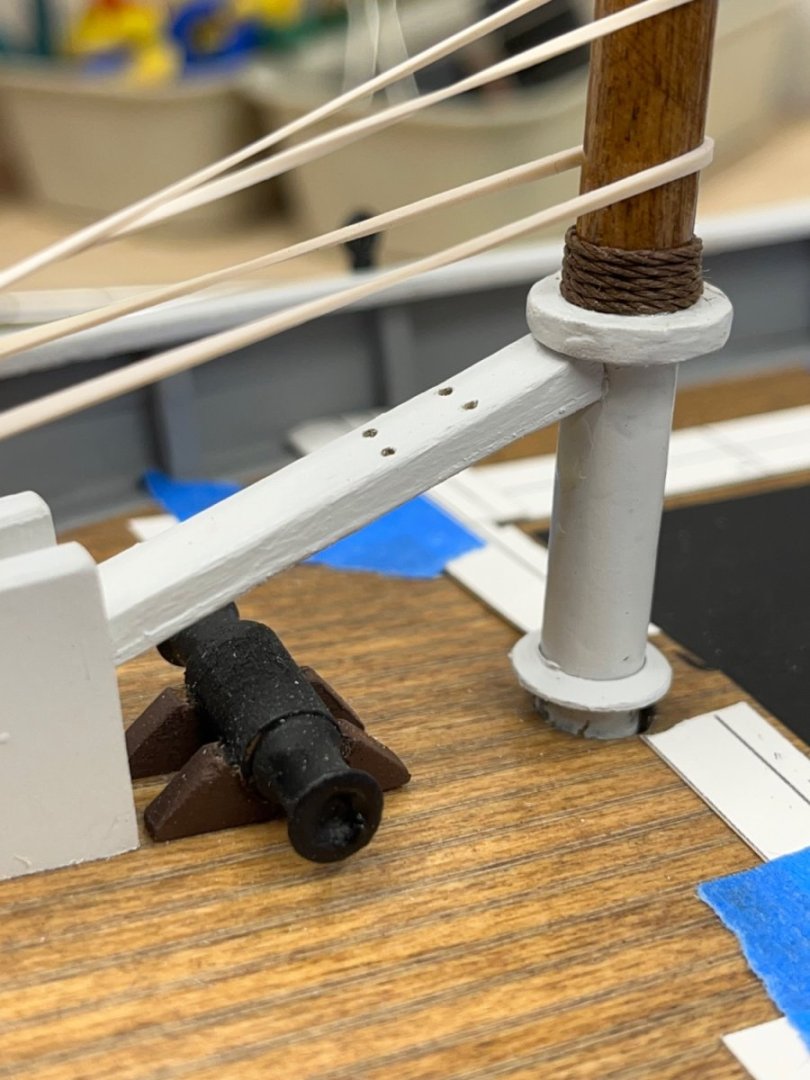
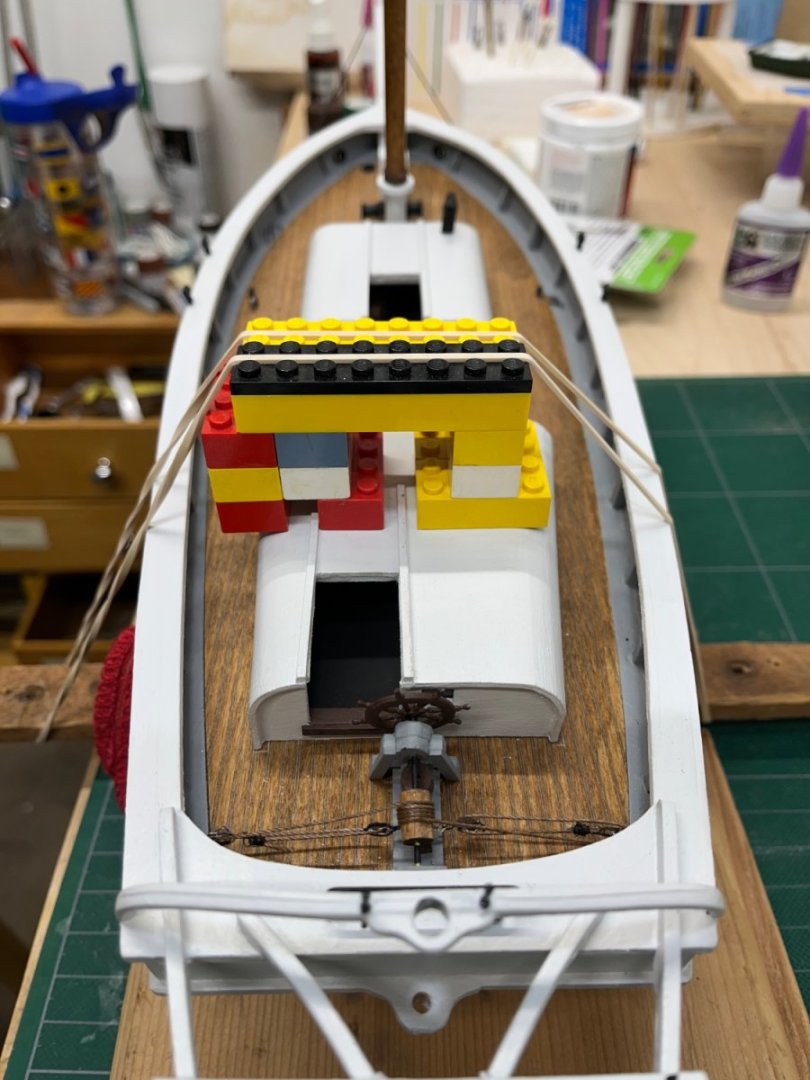
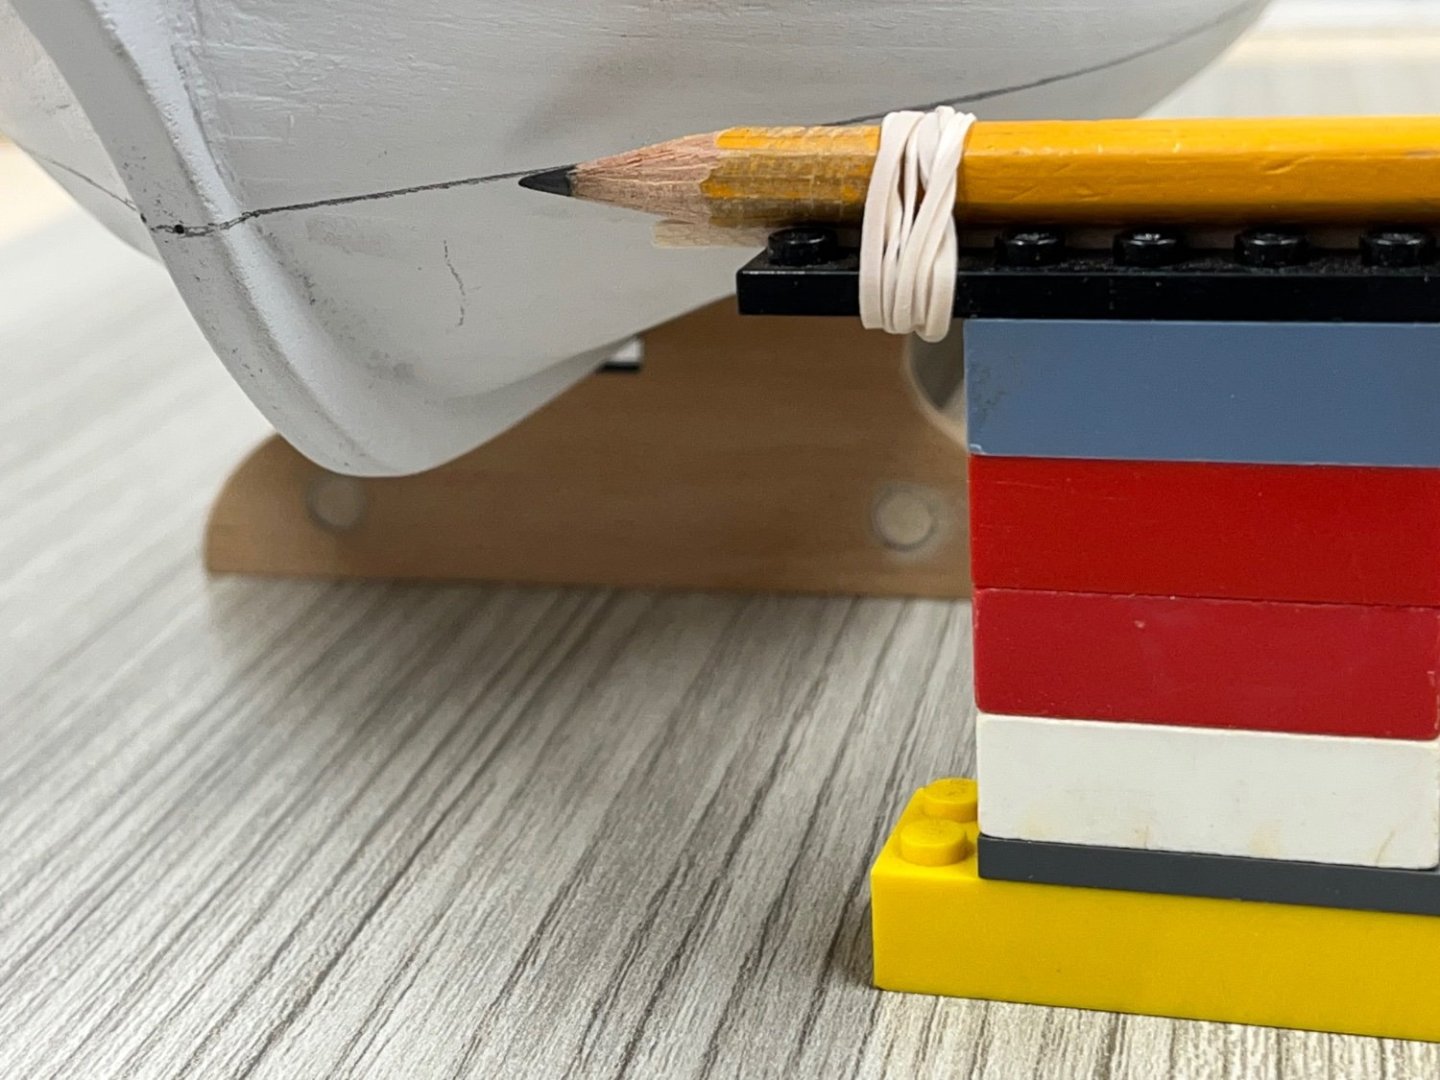
All the details I could think of and pick up on in the instructions are complete so it’s now time to start setting the larger pieces - masts and cabins in place. I decided to start from the bow and work my way back to the stern. First I set the mast against the belaying pin rack so I could get the lower portion of the mast painted before setting the forward cabin. I used rubber bands and a clamp to hold the mast against the rack. Then I set and glued the mast ring down on the deck and painted the bottom portion of the mast. Next I set the forward cabin and used large rubber bands and Lego blocks as spacers to hold the cabin down tight while the glue dried. I thought that the the water barrels needed something more than just gluing them to the deck so I decided that they would have been secured to the forward cabin at least, so I added eye-pins to the cabin wall and tied them off. I have always been fascinated by the interior layout of the Spray and I wanted to build the cabin hatches open so I pained the deck within the cabins black and then added crates and barrels inside the forward cabin where Slocom would have stored a lot of his food. Finally, i set the aft cabin, again using Lego blocks to make a base to put even pressure across the cabin while the glue dried. The aft cabin was where the berths were. Slocom mentions his books and the shelves in the cabin so I put a shelf inside the hatch. It’s not where the shelves really were but it give some idea of what the cabins were like. Finally, the last big piece to get set was the mizzenmast. The lower portion of this mast is also painted white up to the hoop brace.


- 54 replies
-
- 2
-
-
- Spray
- BlueJacket Shipcrafters
- (and 1 more)
-
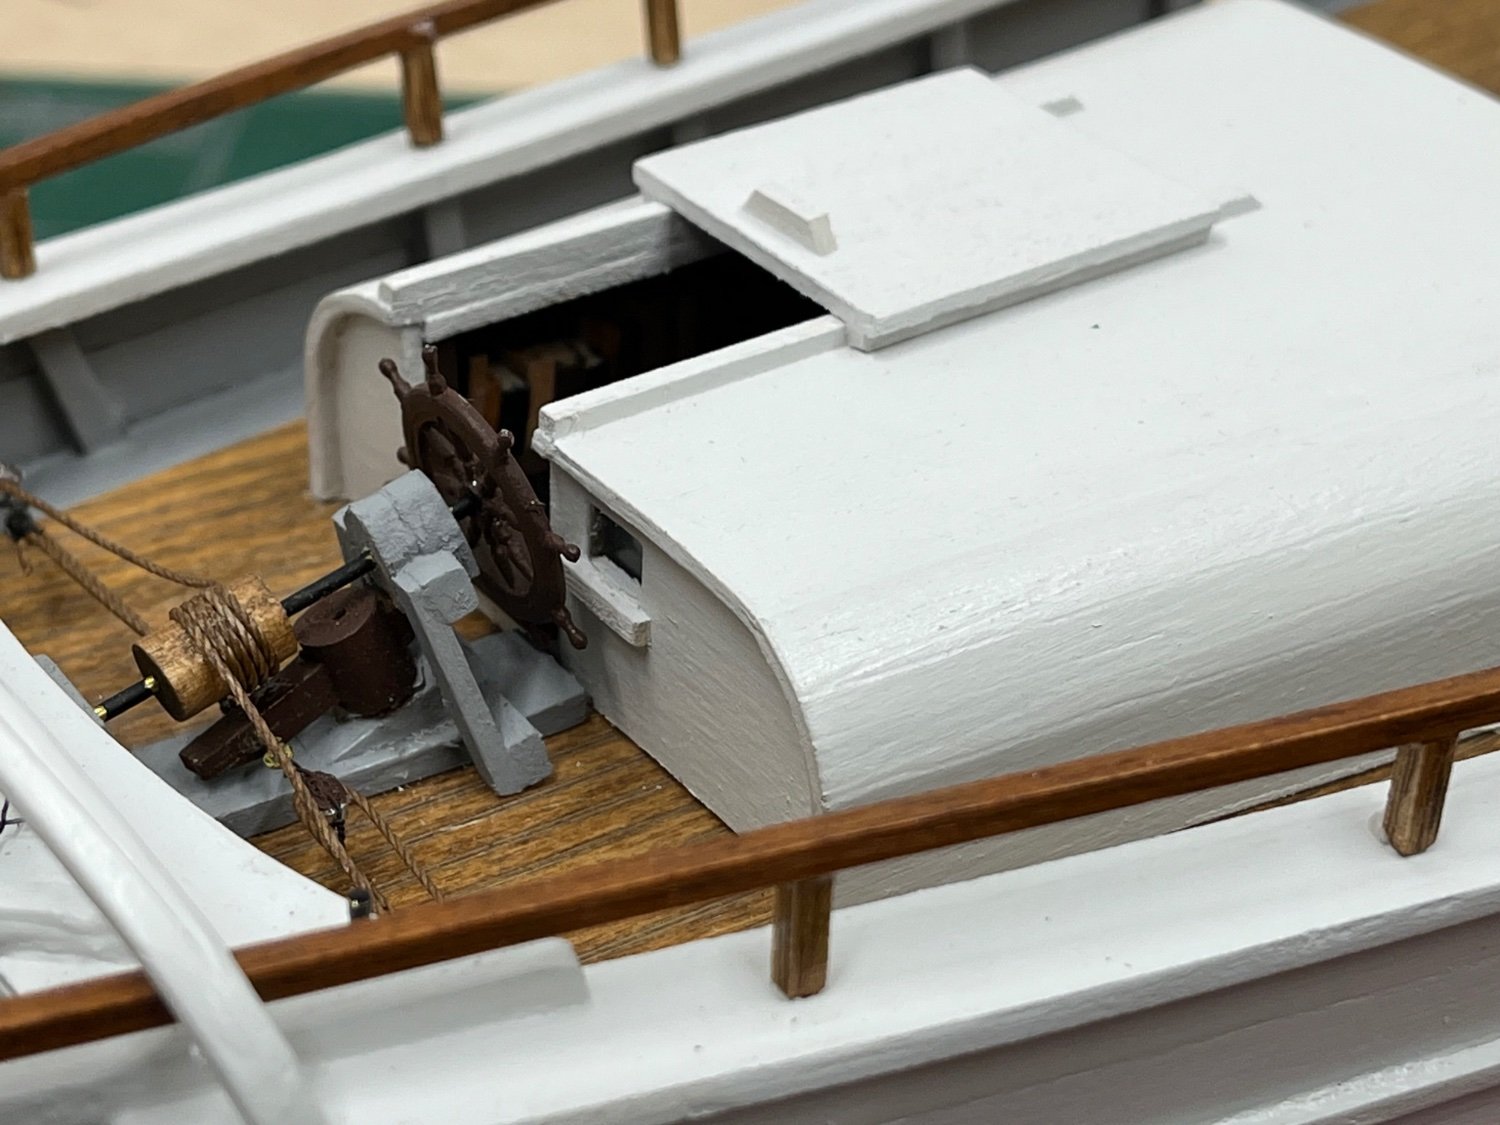
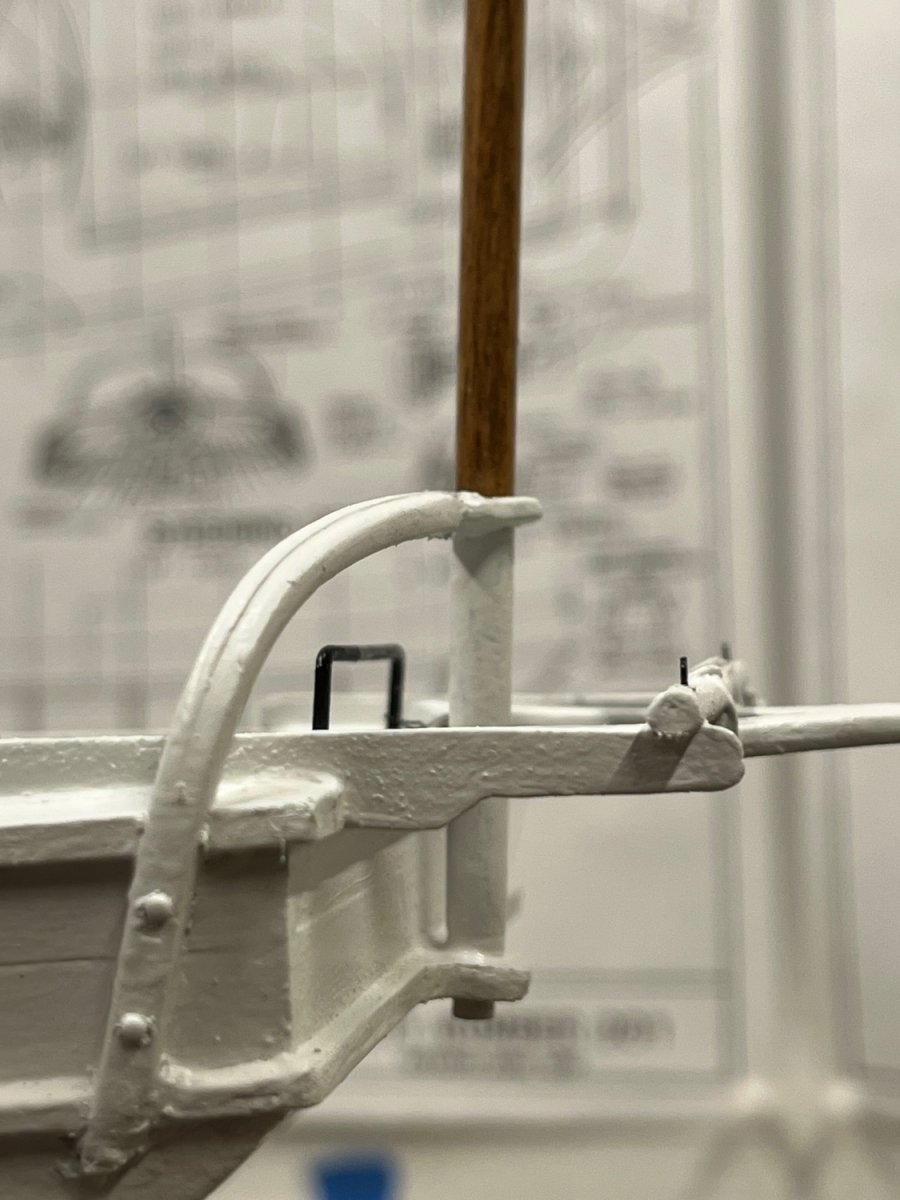
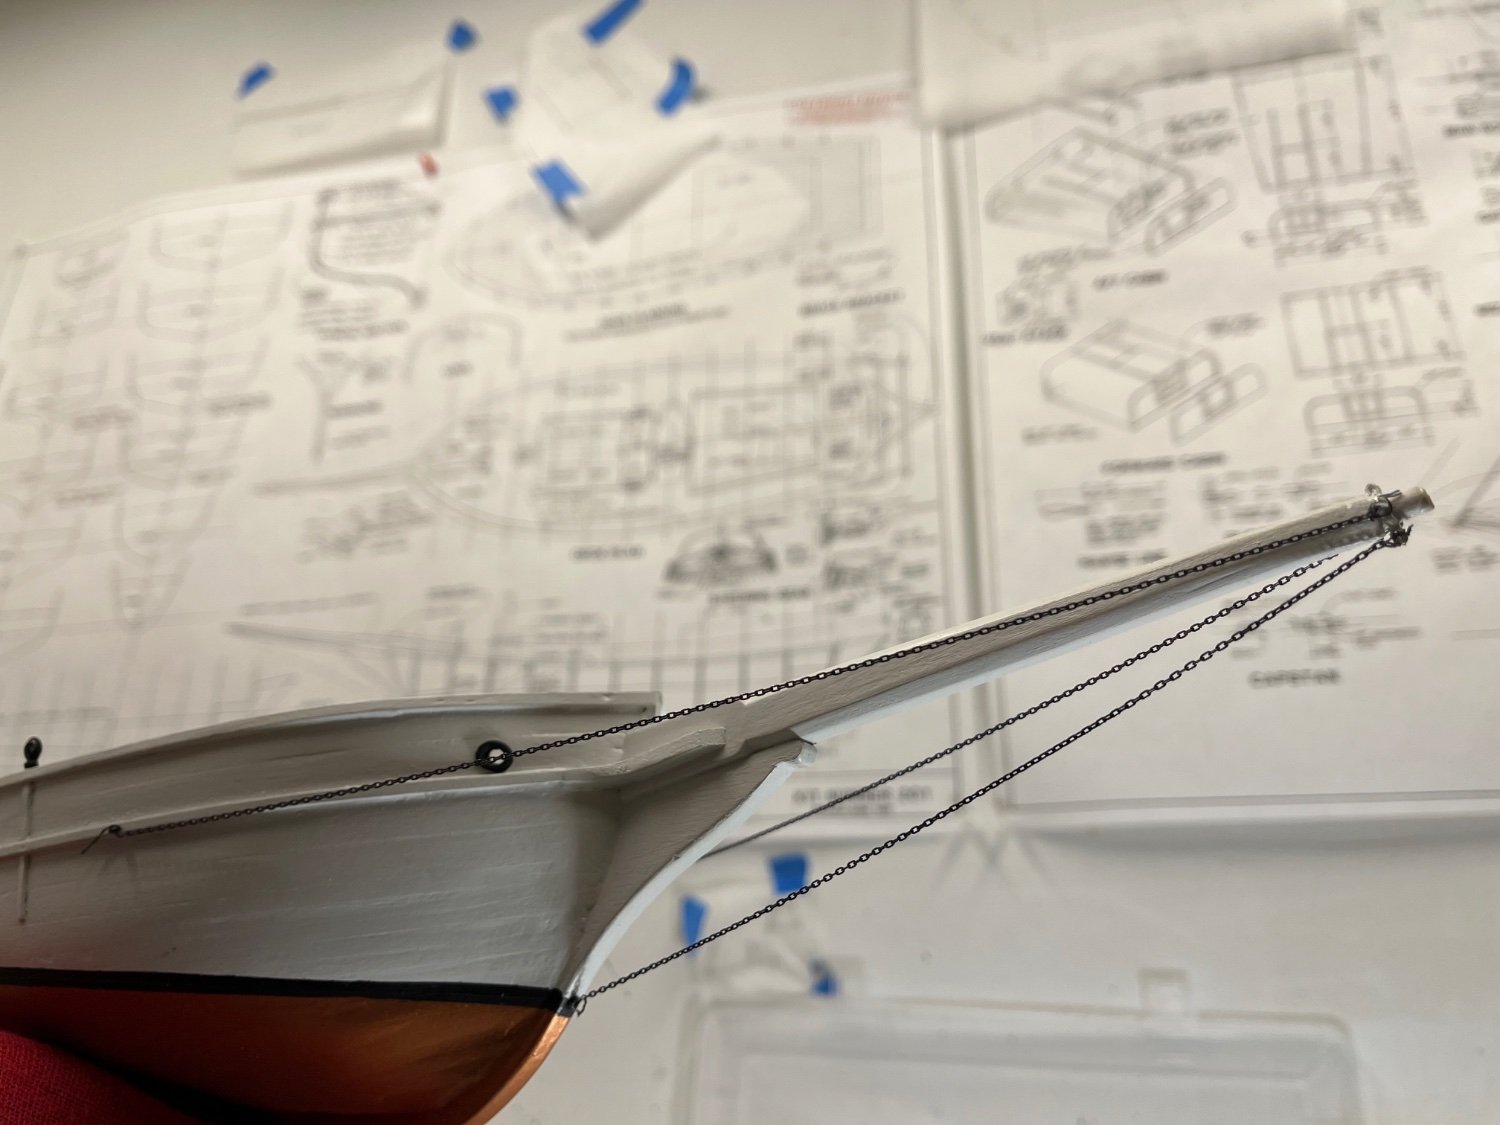
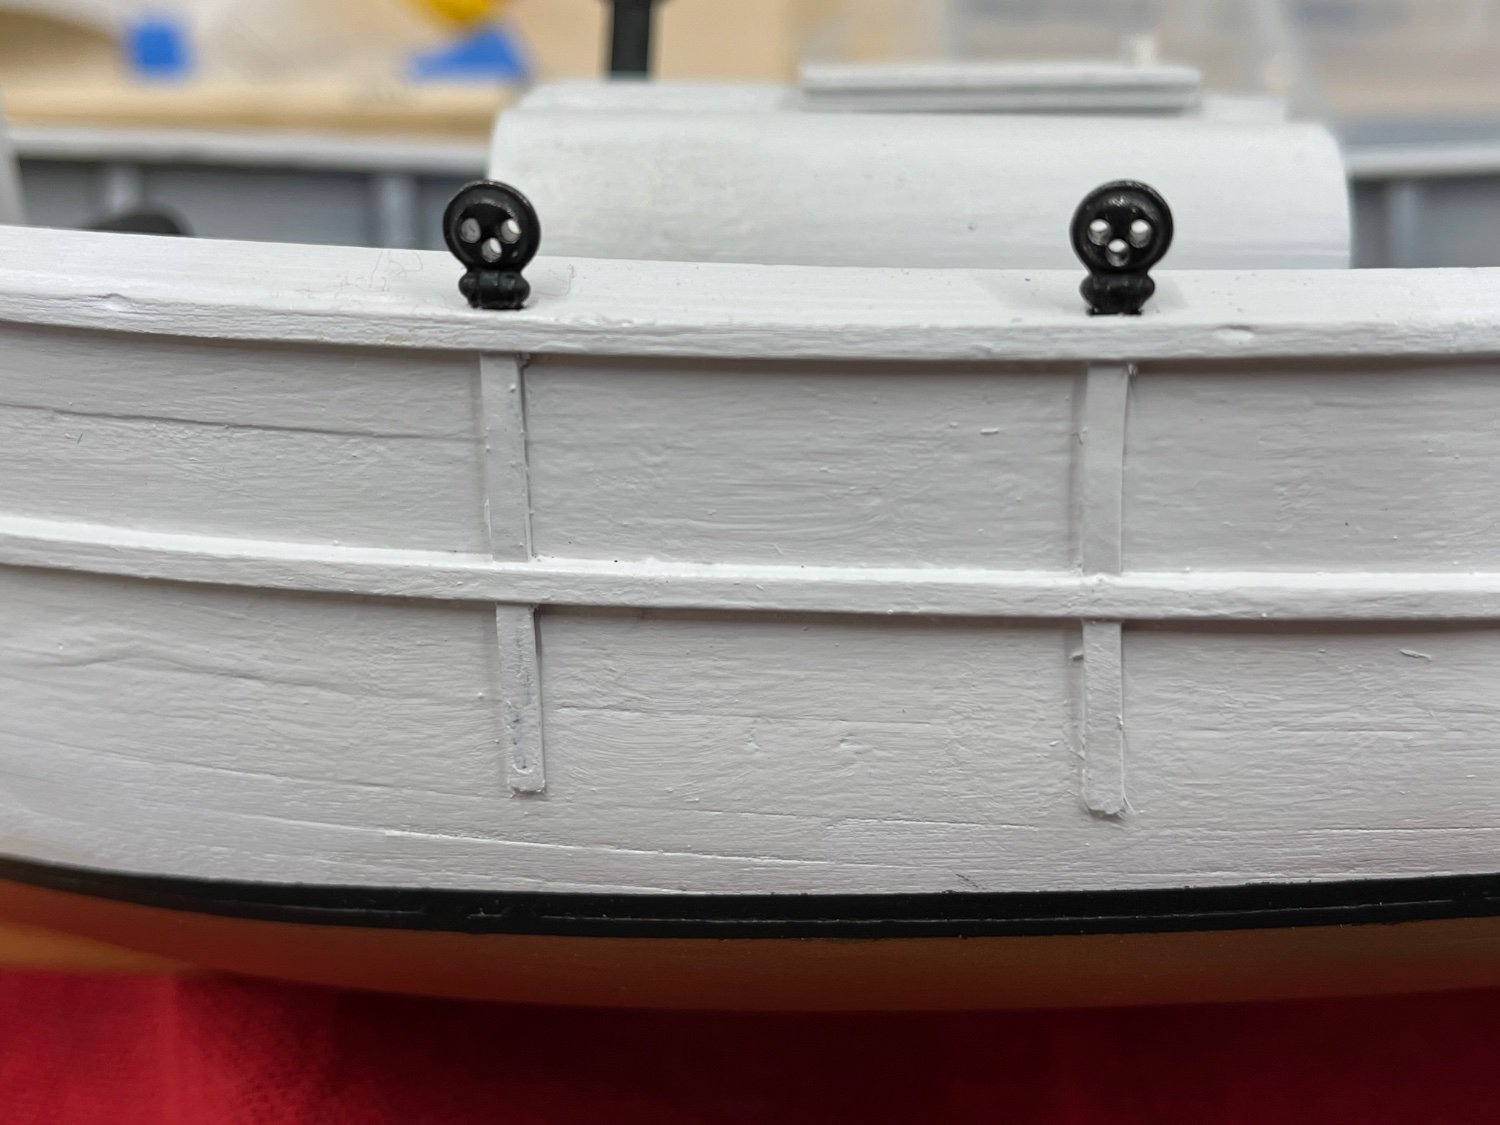
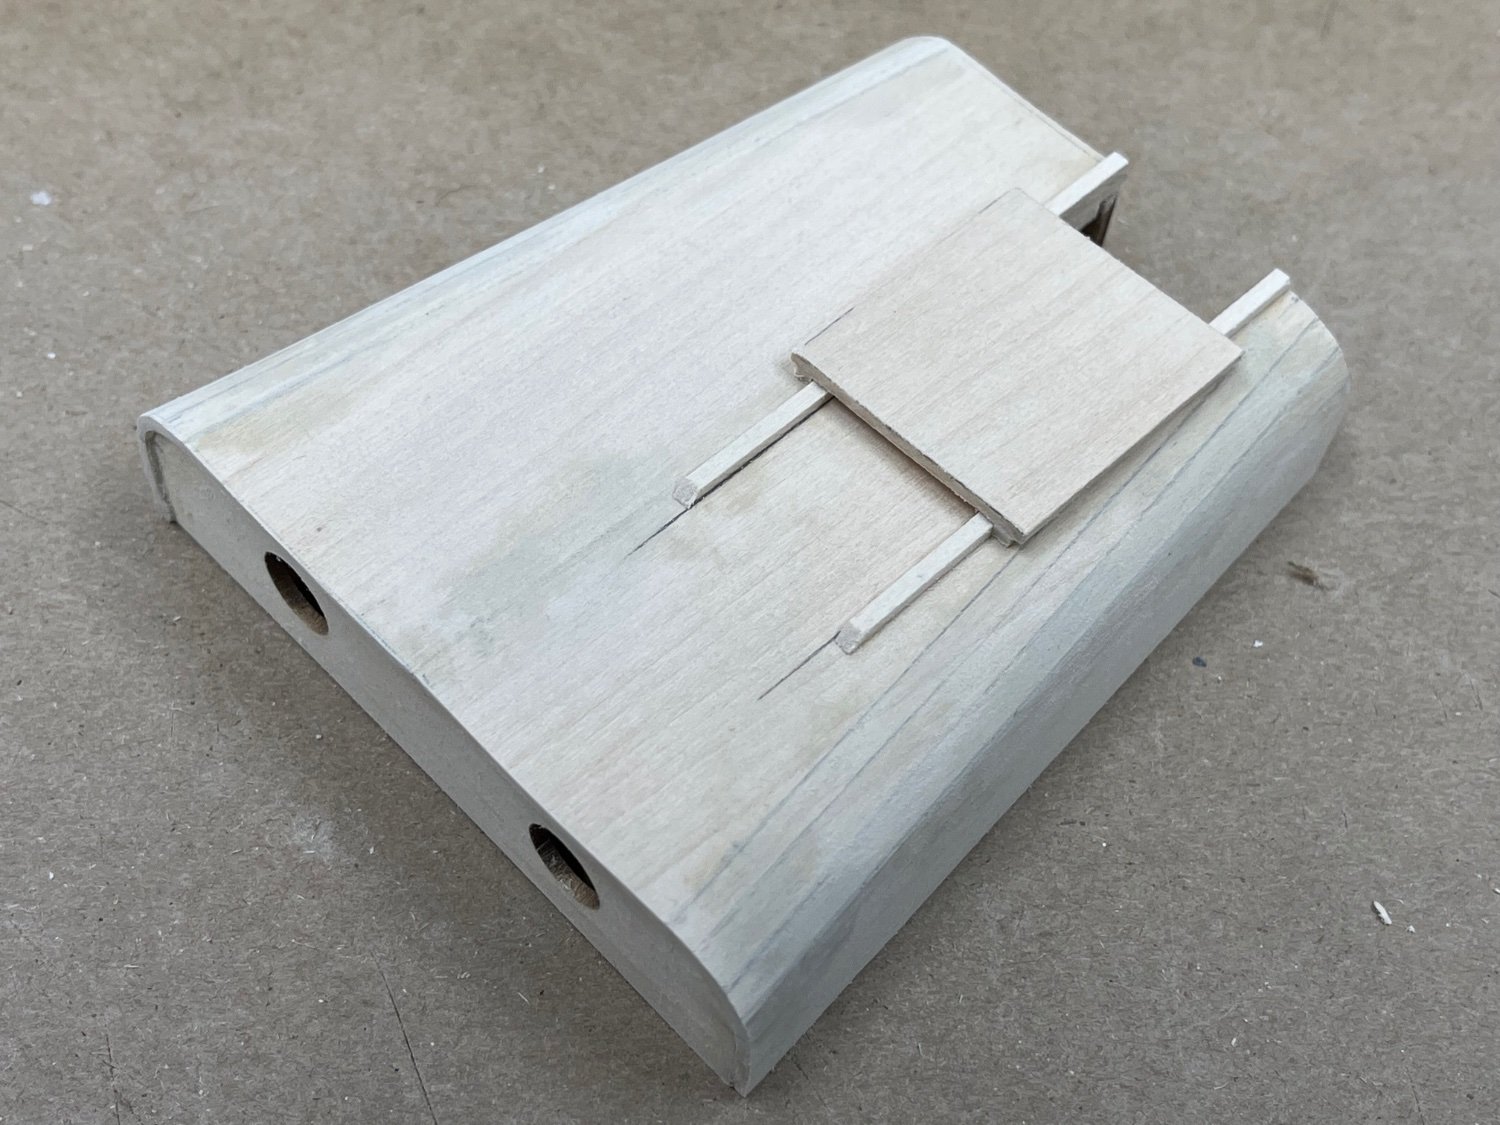
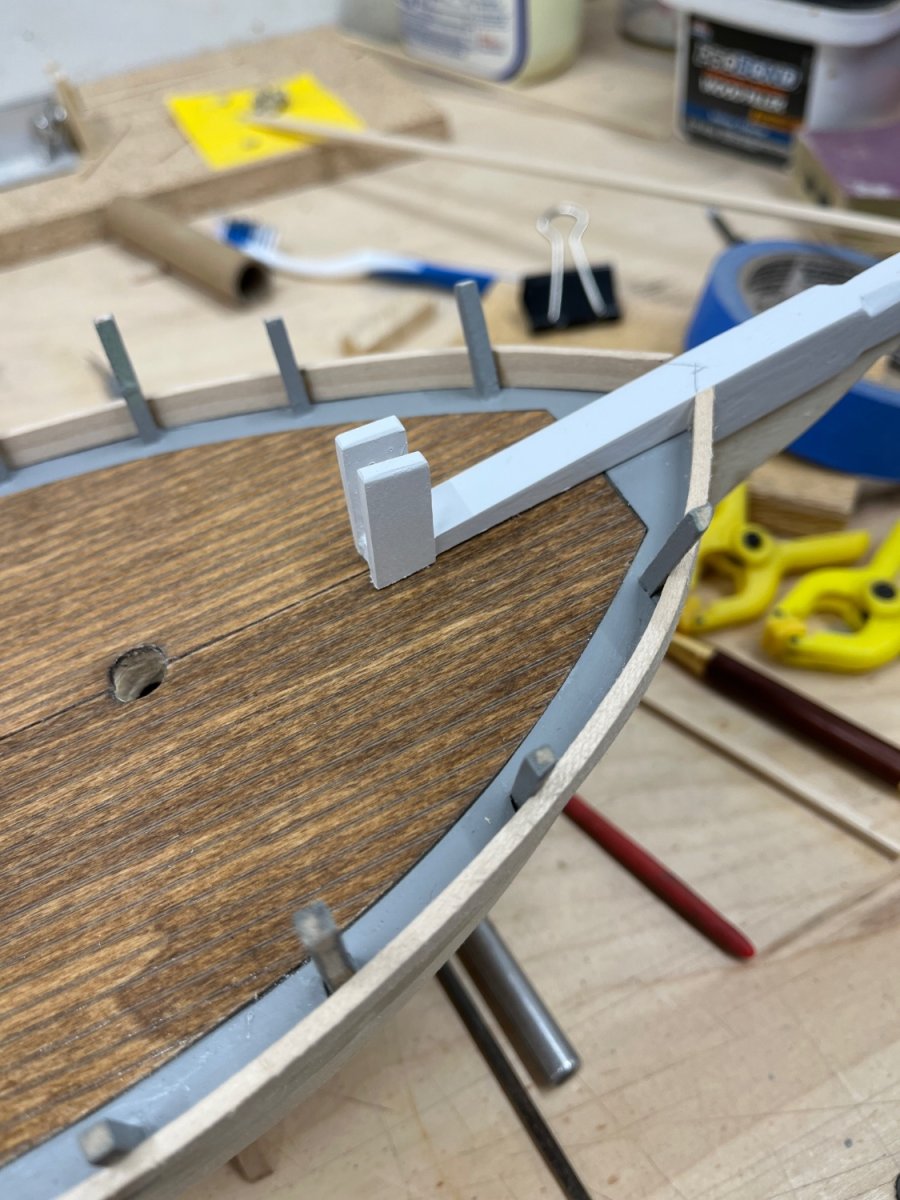
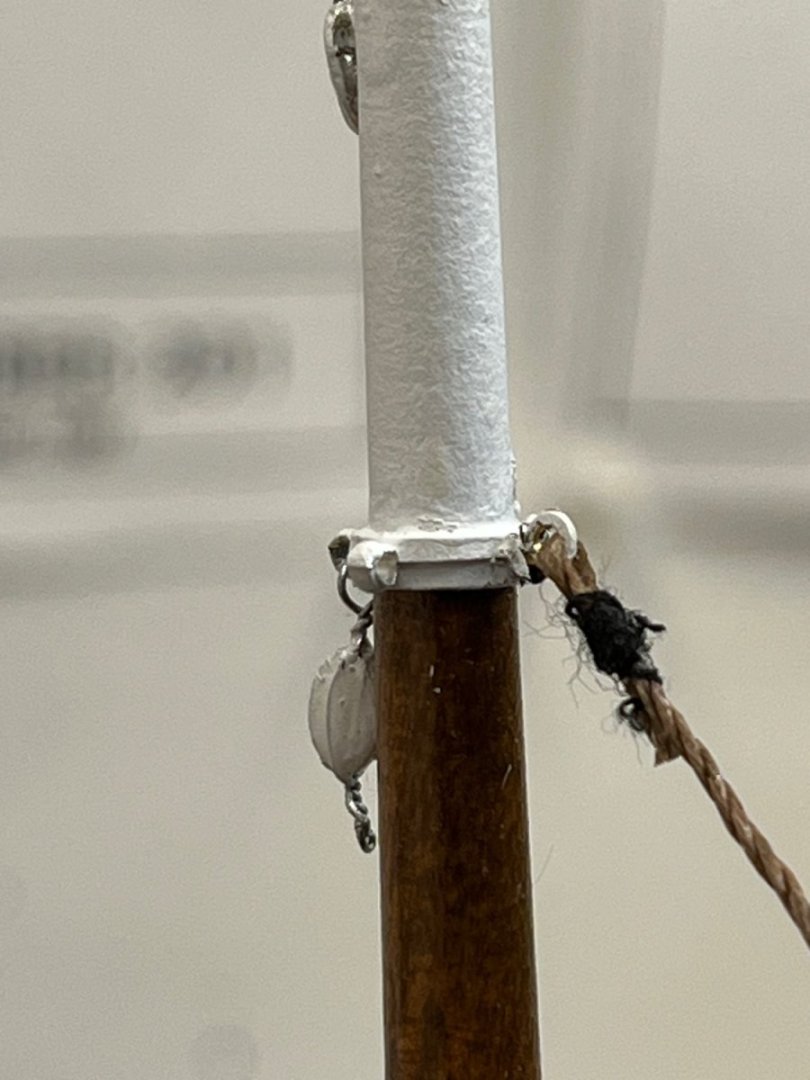
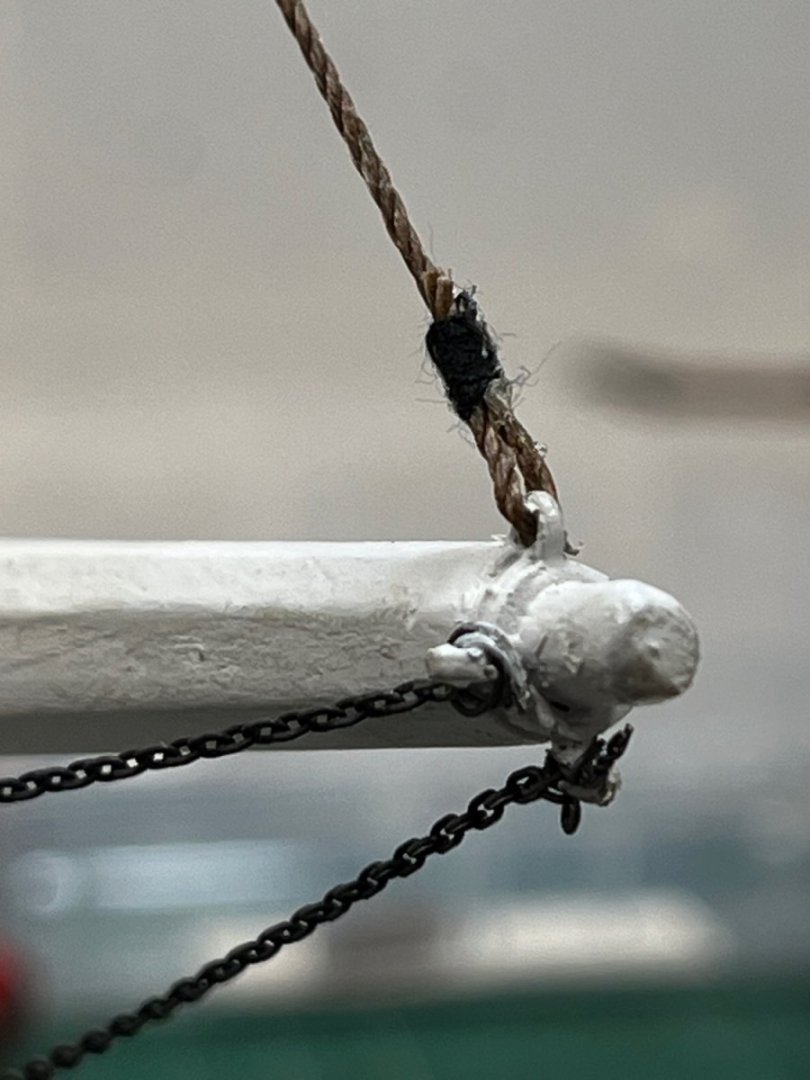
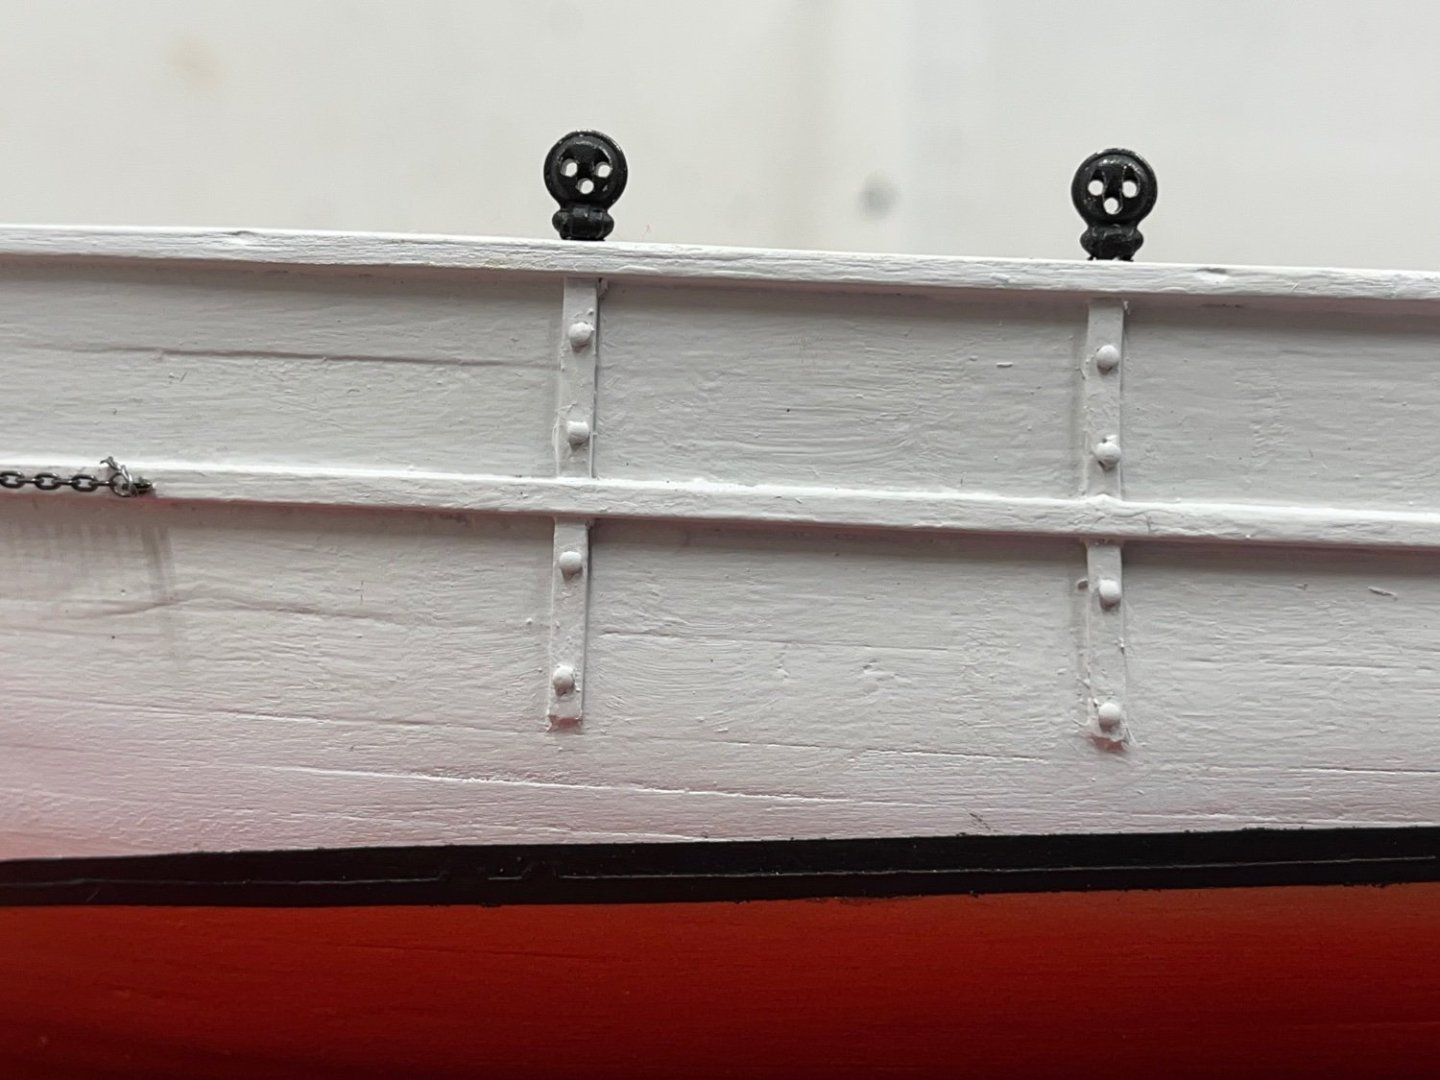
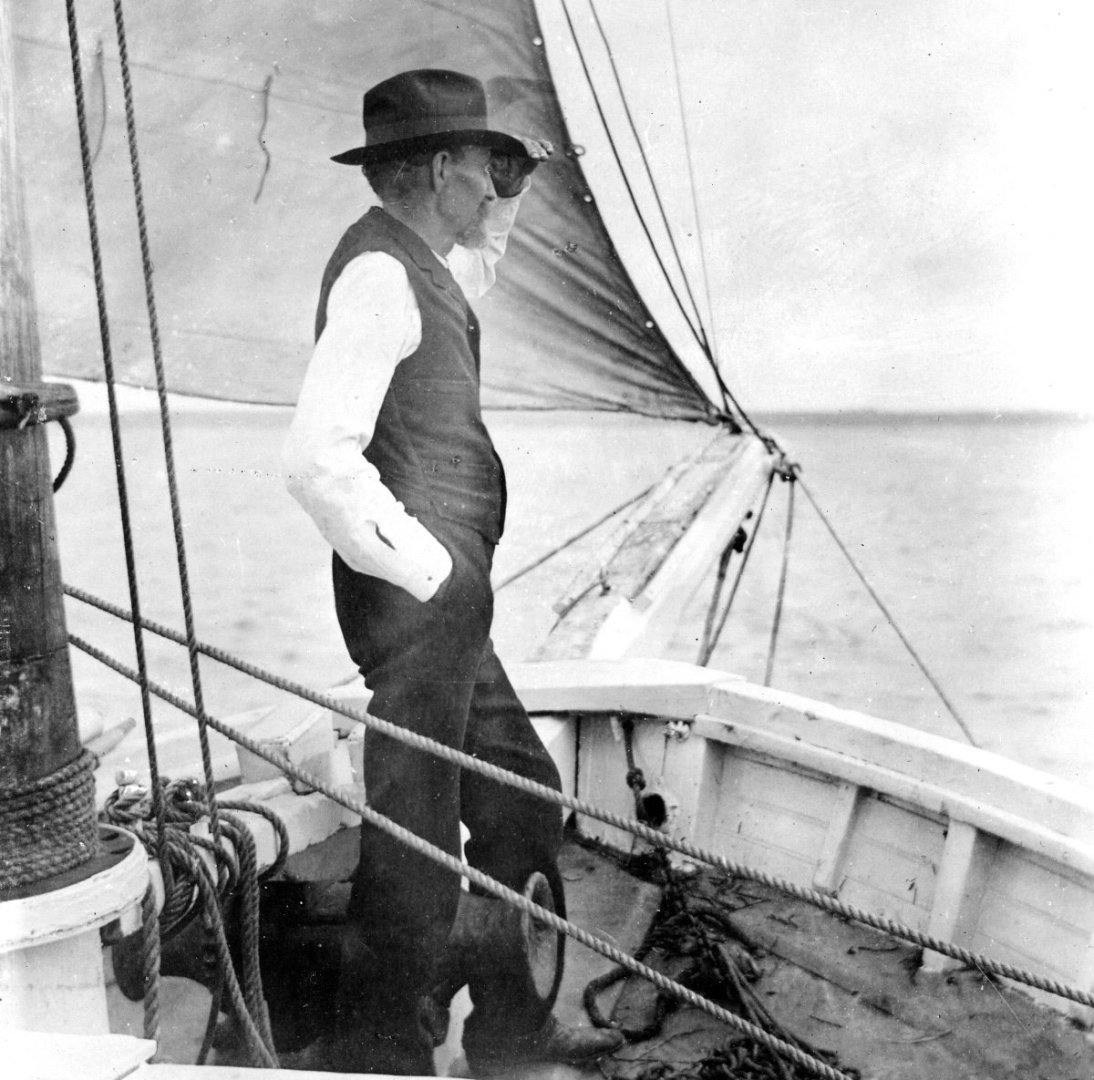
I am continuing the detailing of the deck fittings and getting everything in place before setting the cabins and masts. Also getting everything done with the hull while I can still handle it. Once the big pieces are in place and the masts are standing, it will get harder to get my hands into the mid-ships. The deck plan in the book shows a bilge pump between cabins so I put one together from scraps. I will need to see how the dinghy and barrels fit before setting it in place. One of the existing pictures of Slocom on the Spray just forward of the mast shows the rack for the belaying pins. It runs from the mast ring down to the knightshead at the bow sprit. This is different from the rack in the model kit plans but I think it is a better detail - one of the quirks of the Spray. The pins set into the chainplates are a good detail and I used them at the yoke as well. The chains for the bow sprit were difficult to get tight, but ultimately I did not think they needed to be too tight to look okay. Getting close to setting the cabins and finishing the deck.


- 54 replies
-
- 3
-
-
- Spray
- BlueJacket Shipcrafters
- (and 1 more)
-
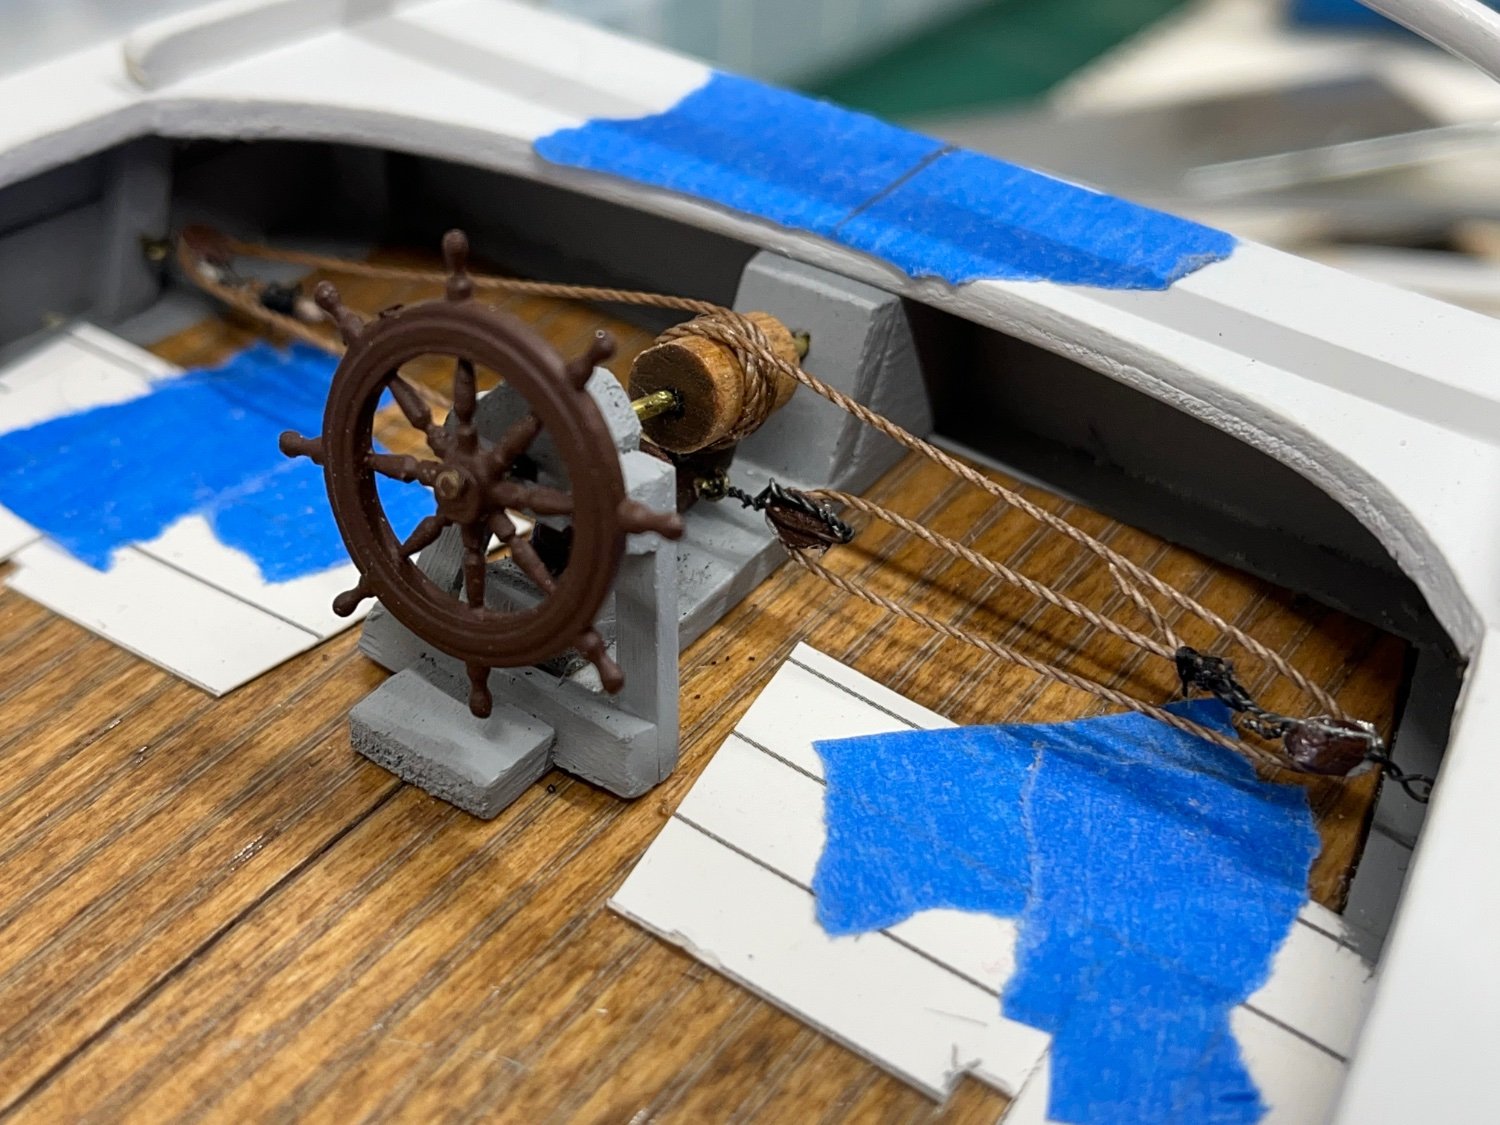
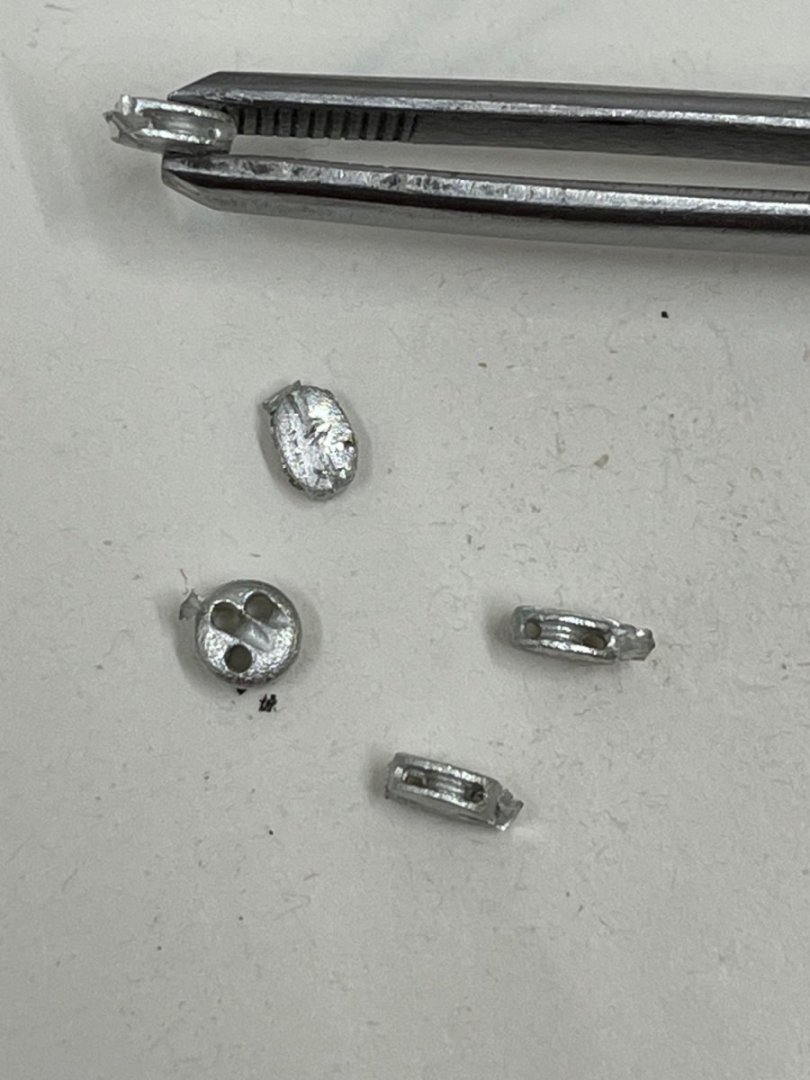
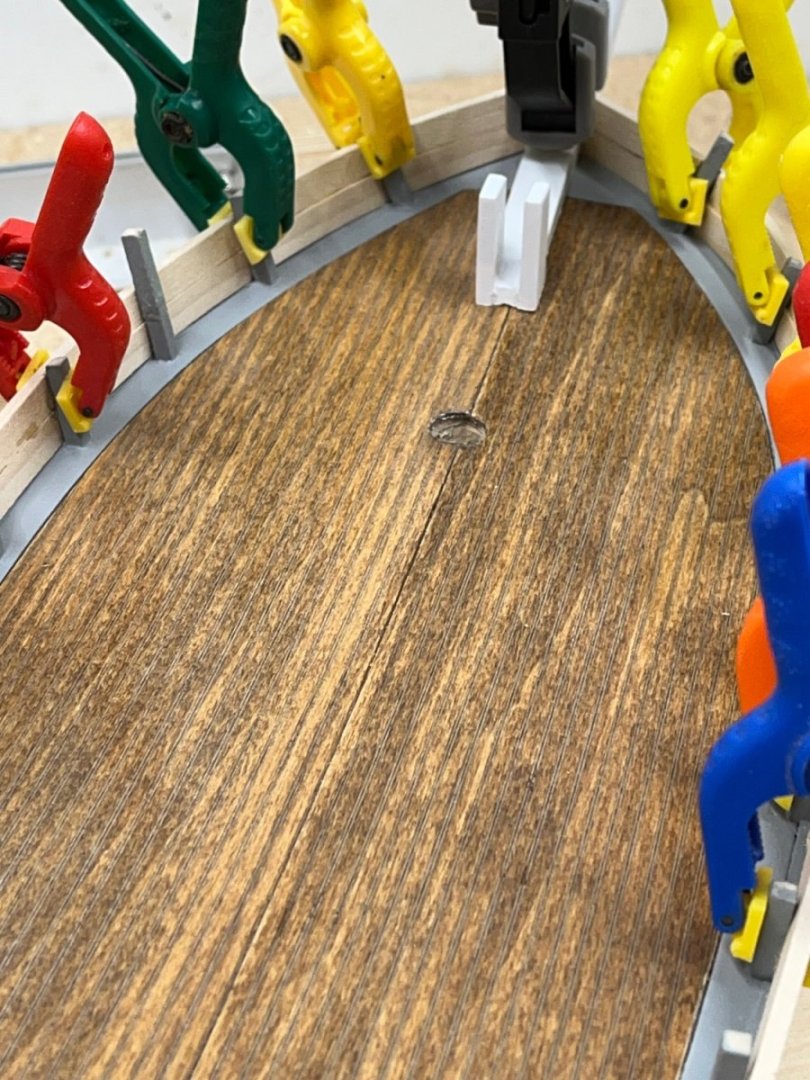
Finally some rain and cooler weather in the PNW and time to start back up on the build. Hull was largely finished earlier in the summer and now is time for the fit-out of the deck. I had earlier finished the cabins, mostly while waiting for planks to soak or dry clamped in place. Finally got to open the bag of fittings and start planning how to rig everything. The larger fittings like the hoop mizzenmast mast support are good and can be easily worked and fit to the hull. The smaller blocks and deadeyes are disappointing. I have had to drill out all of the blocks. They are soft cast metal and difficult to work with. To use fine wire to make the eyes for the blocks, you need to use CA to hold them together. Some of the other build logs have talked about buying these fittings separately and I think on the next model I build, I will consider other sources for these types of parts. The deck work starts with the steering assembly which is a good place to start since the blocks and fittings and lines are largely below the rails and transom. I am using card stock to lay out the cabins and other deck gear which allows me to measure and center the pieces. Slow progress with lots of test-fitting of parts and pieces and making sure I can get to all of the different areas to install fittings before I glue anything large in place.


- 54 replies
-
- 3
-
-
- Spray
- BlueJacket Shipcrafters
- (and 1 more)
-
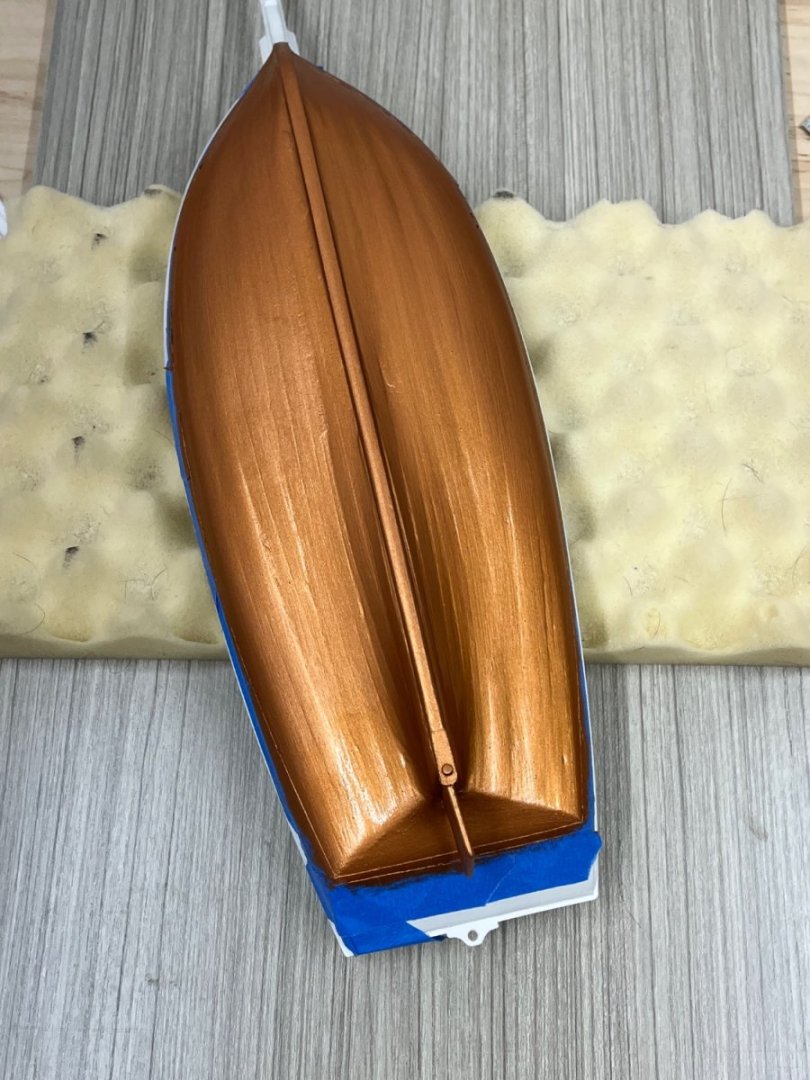
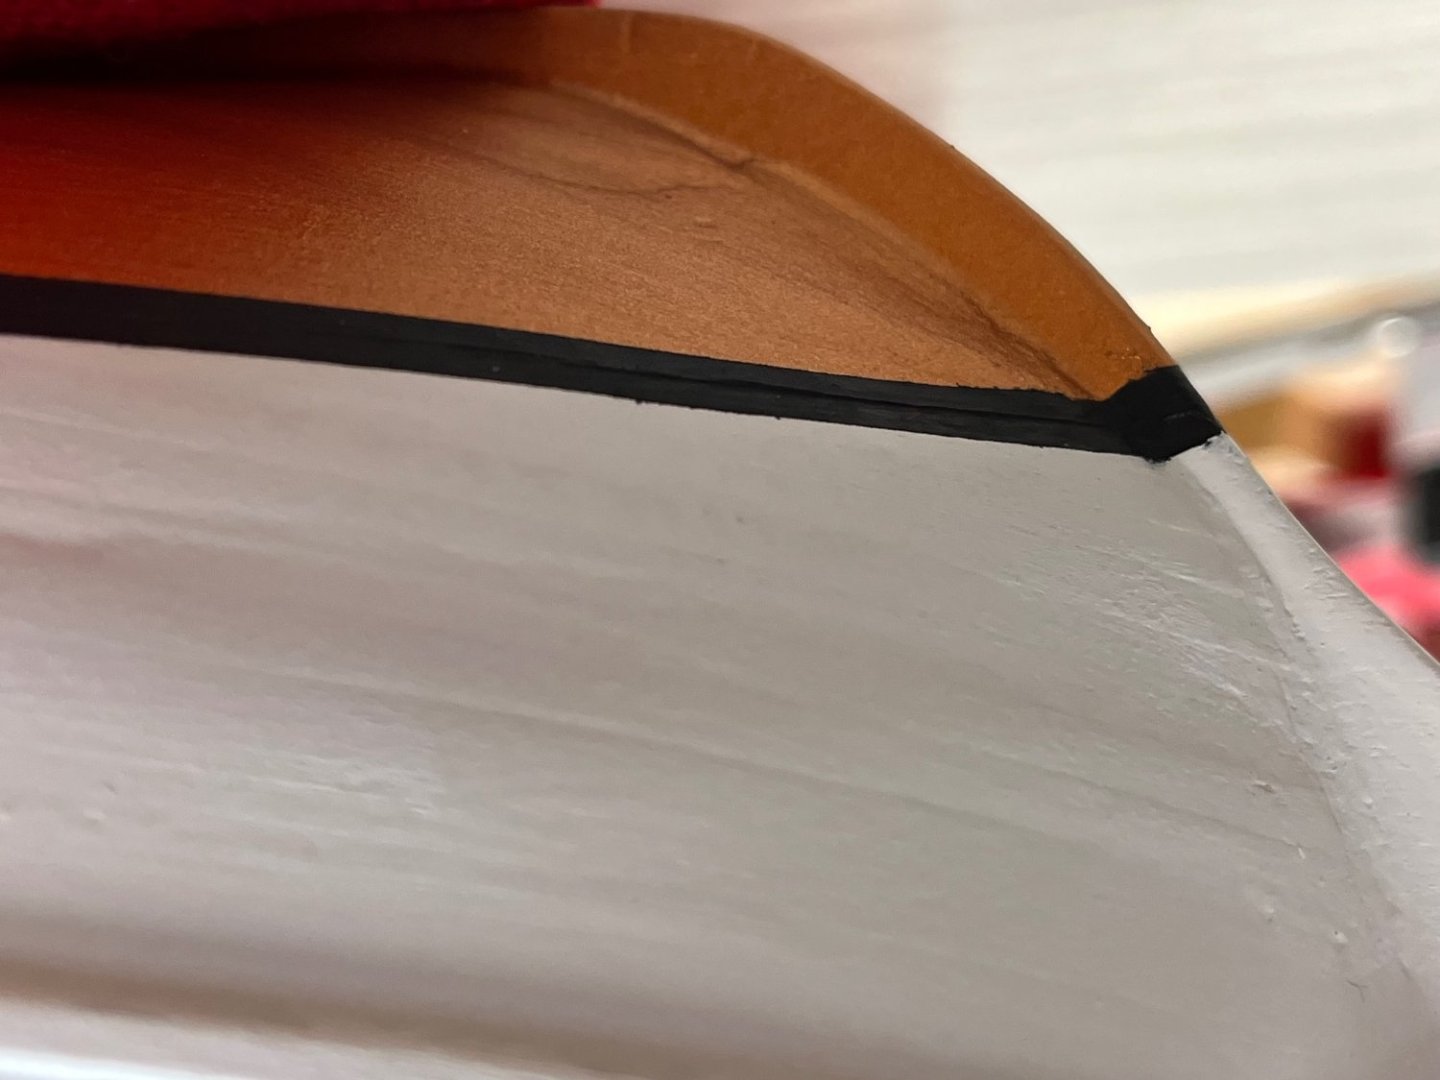
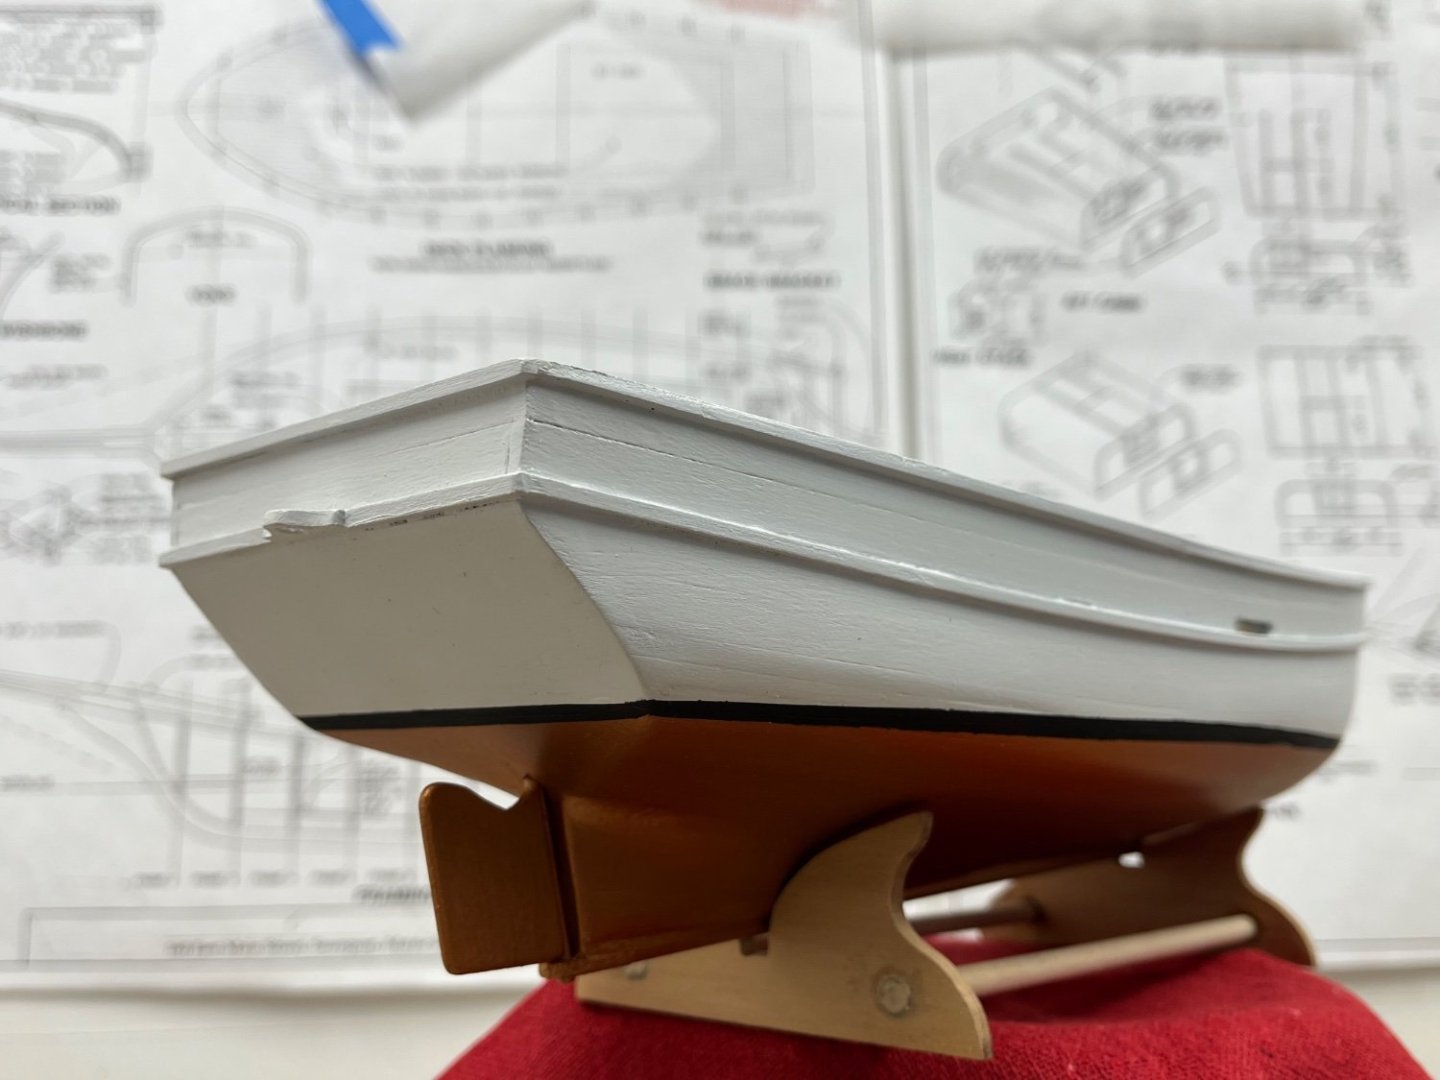
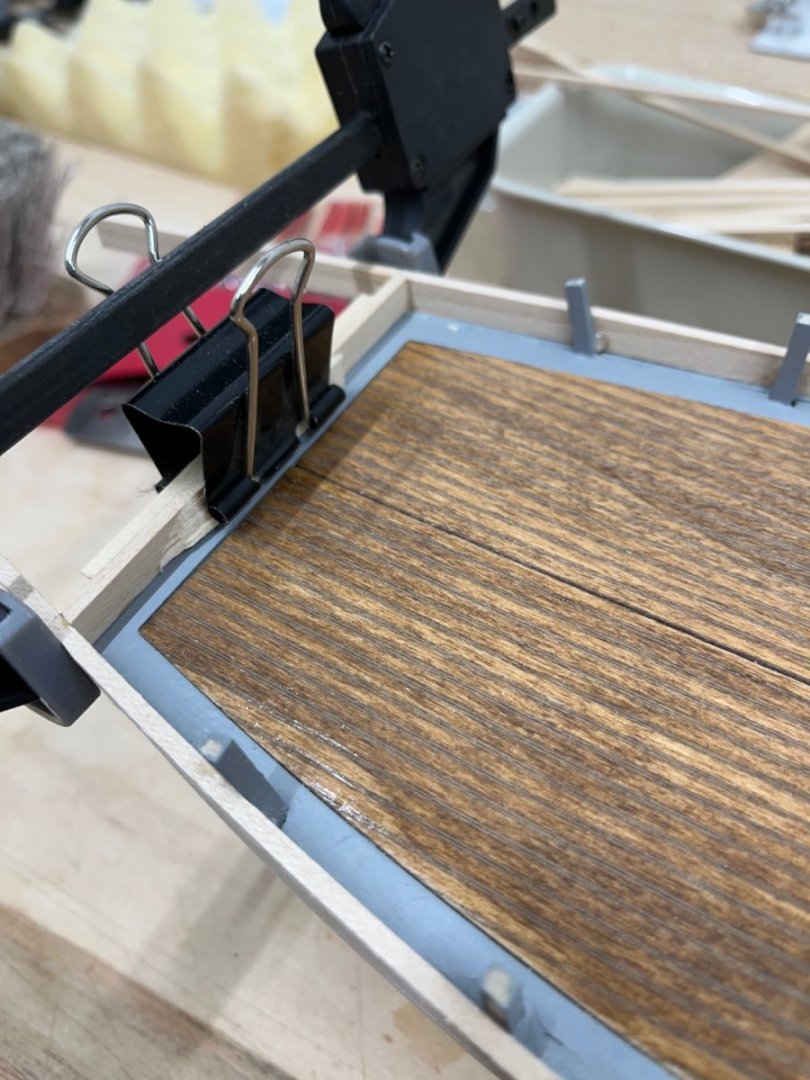
Long time since the last post but mainly because it is summer here in the PNW and it’s too nice to be indoors in the shop. I got the hull finished and that will do until I start back up this fall with fitting out the model and doing all of the little parts and pieces before rigging it. I put at least three coats of paint on everything and then finished off the hull with the black boot stripe. I set the model on a flat level surface and leveled it side to side and then positioned it in the cradle so that the waterline started and ended where it shows on the plans and then drew the waterline. I had a really hard time finding model paint from the local hobby shops. I ended up using a Glidden spray trim finish from Home Depot and had them mix a sample size of the same off white matte to do the smaller pieces and touch-up with a brush. It has a grey tint to it so it’s not a bright white and I am pretty pleased with the color. I used Tamiya flat copper for the bottom coat and also like the sheen it has. I will pick it back up in the fall and hopefully finish the model by the end of the year.


- 54 replies
-
- 3
-
-
- Spray
- BlueJacket Shipcrafters
- (and 1 more)
-
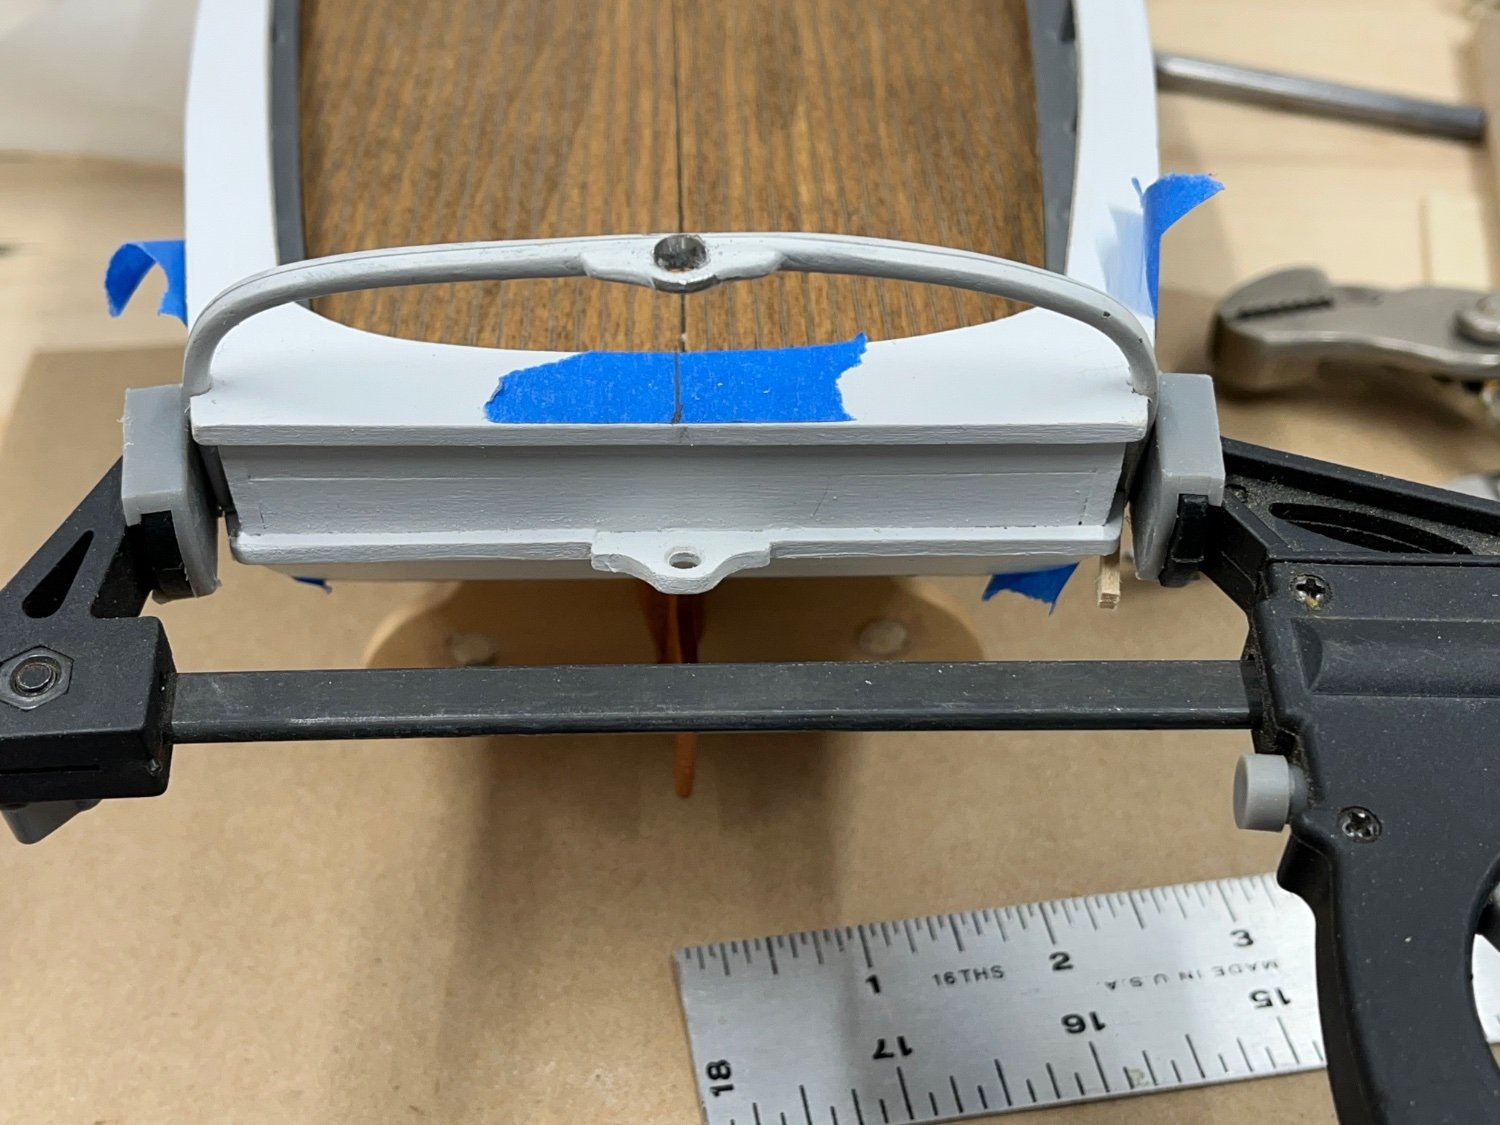
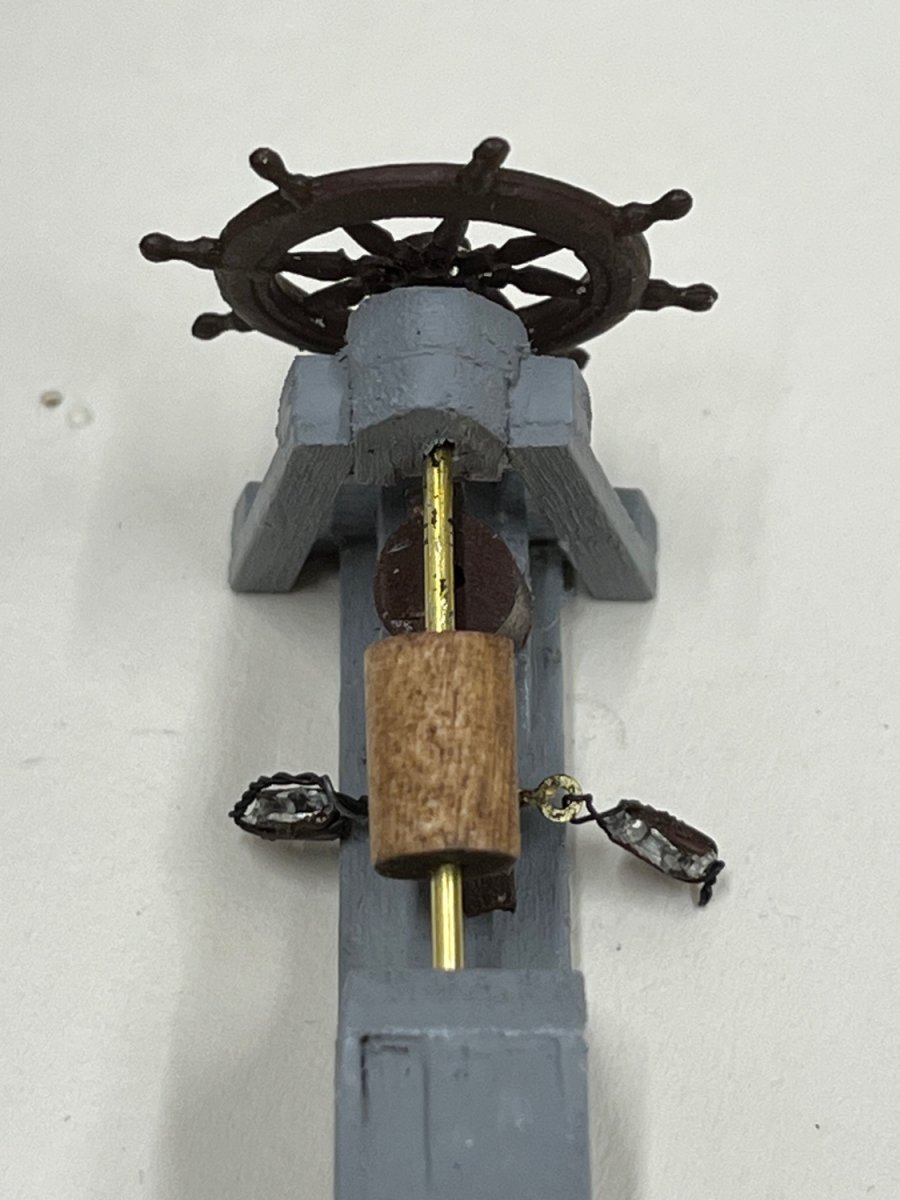
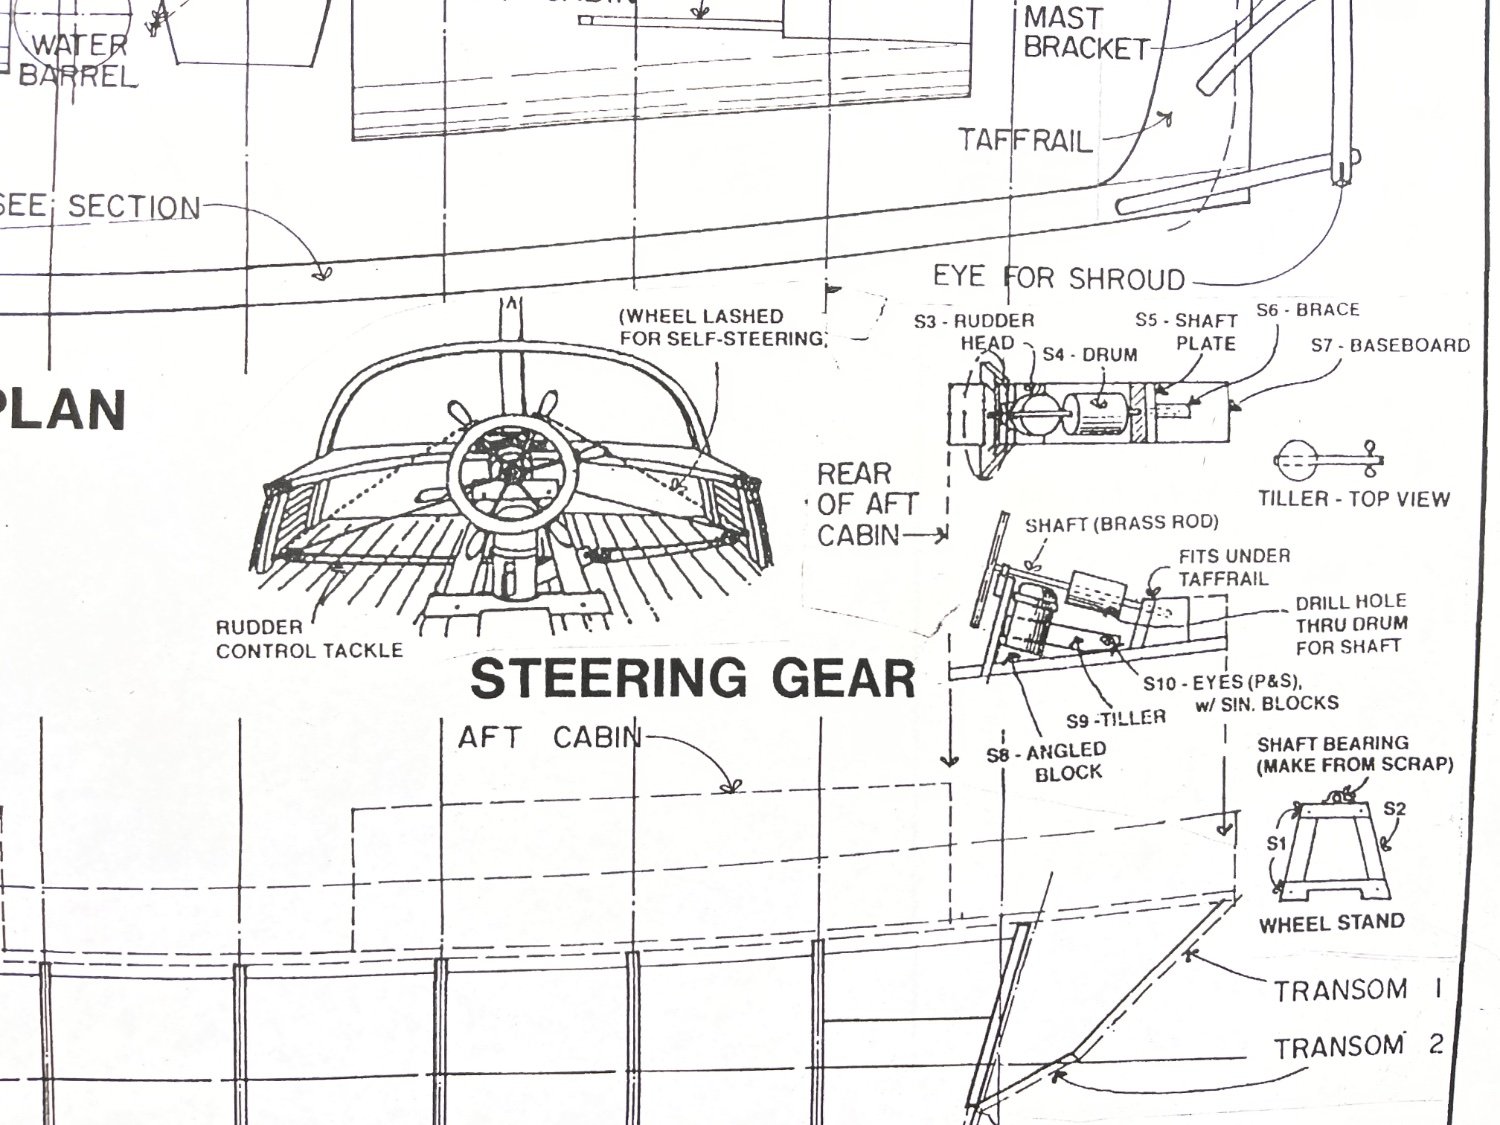
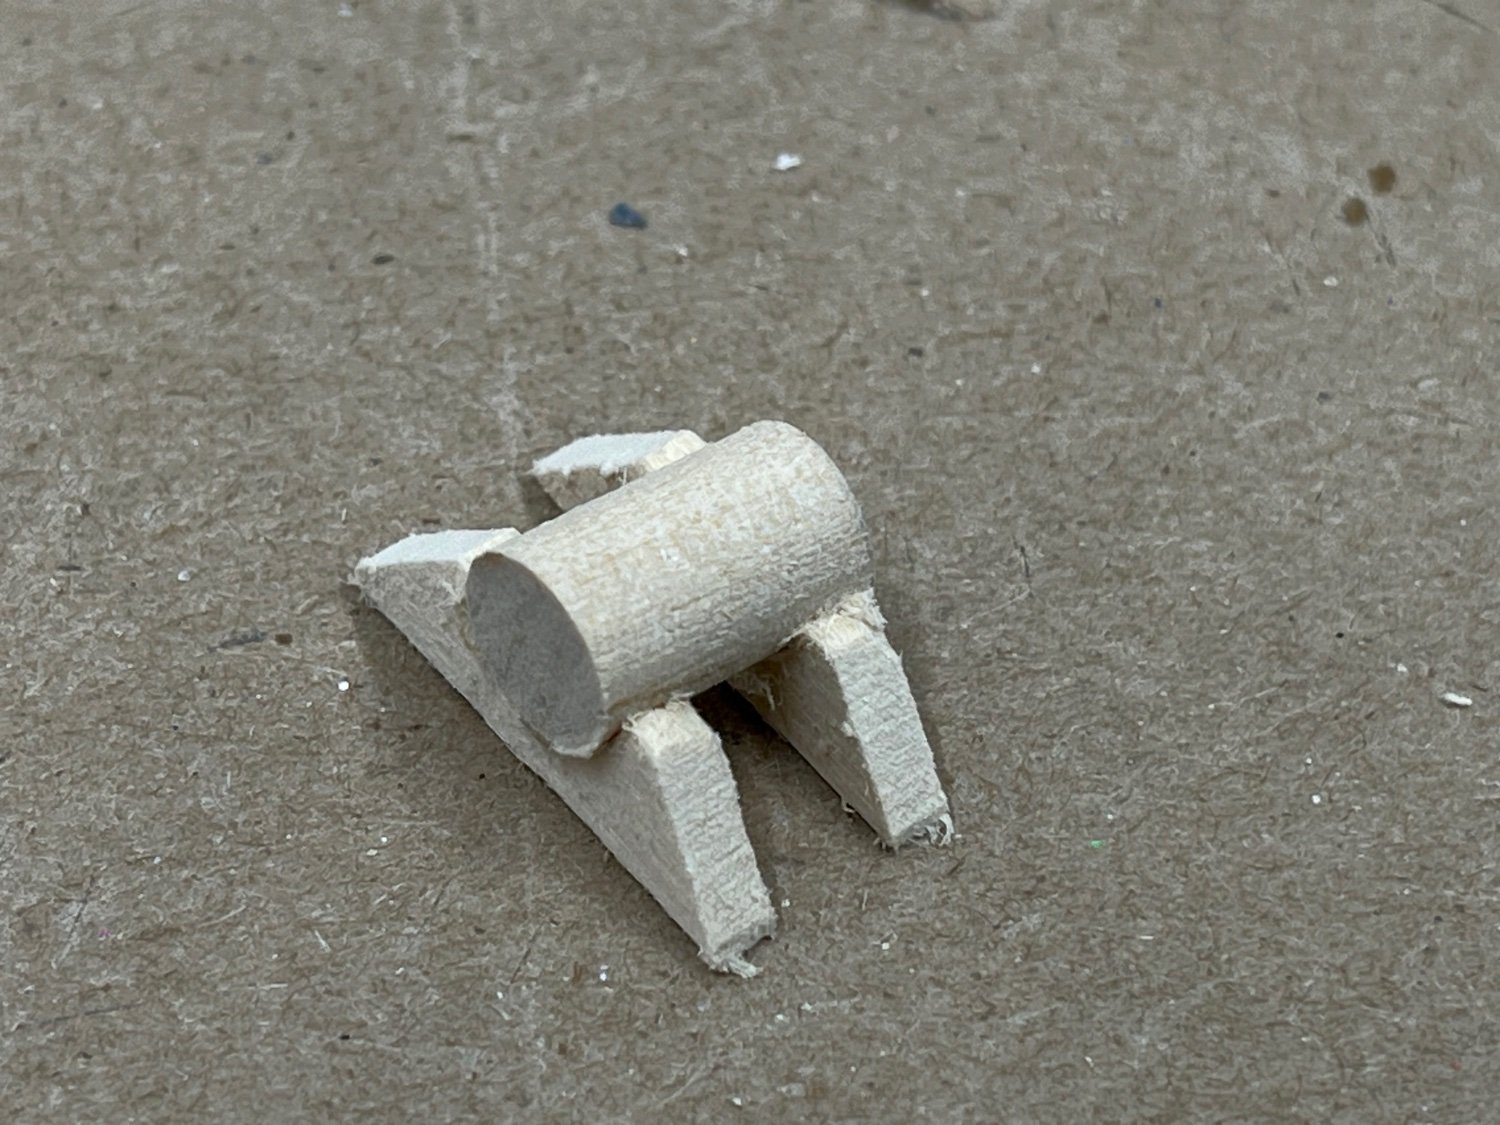
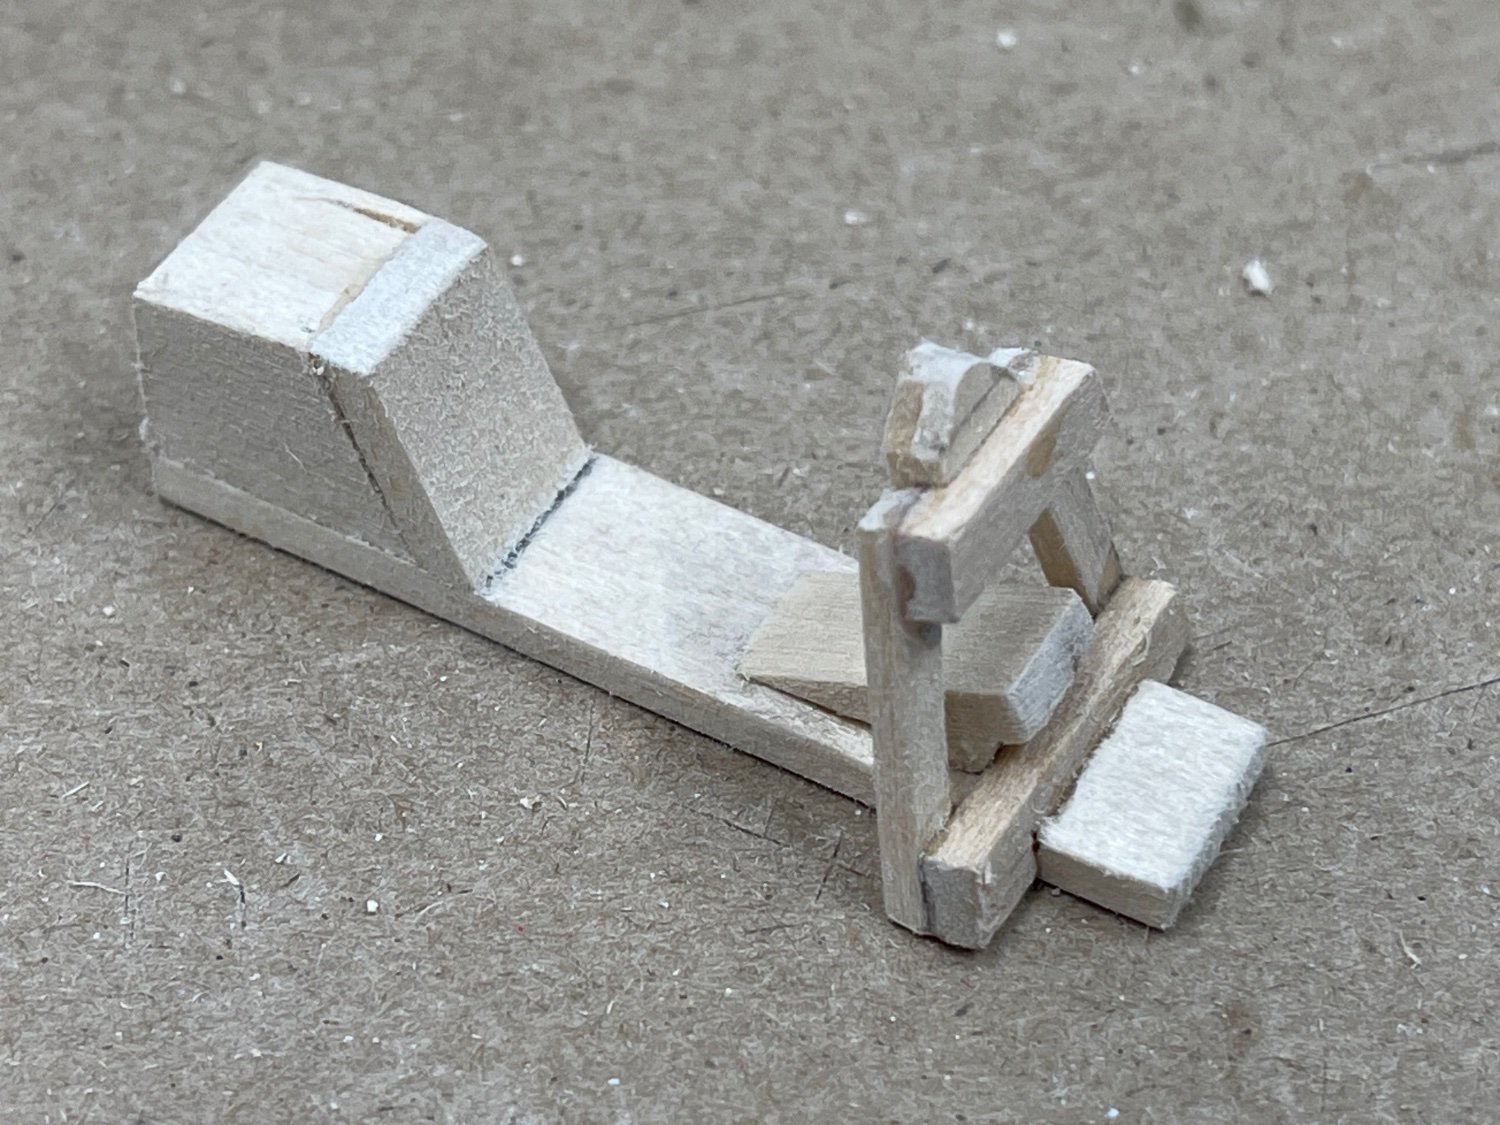
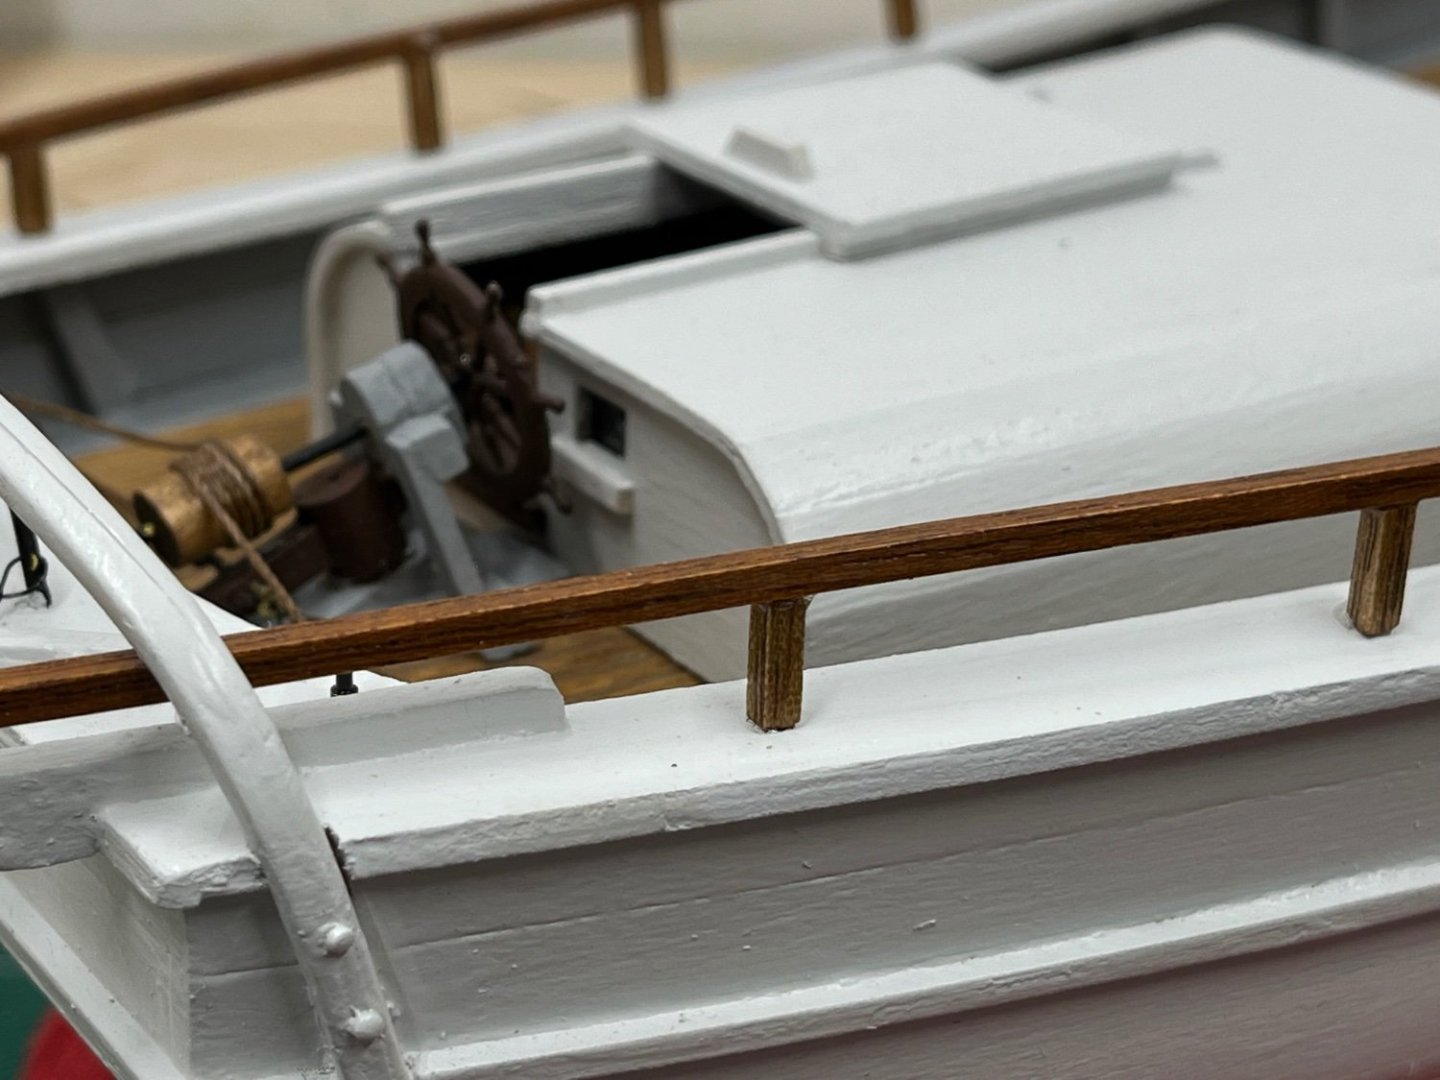
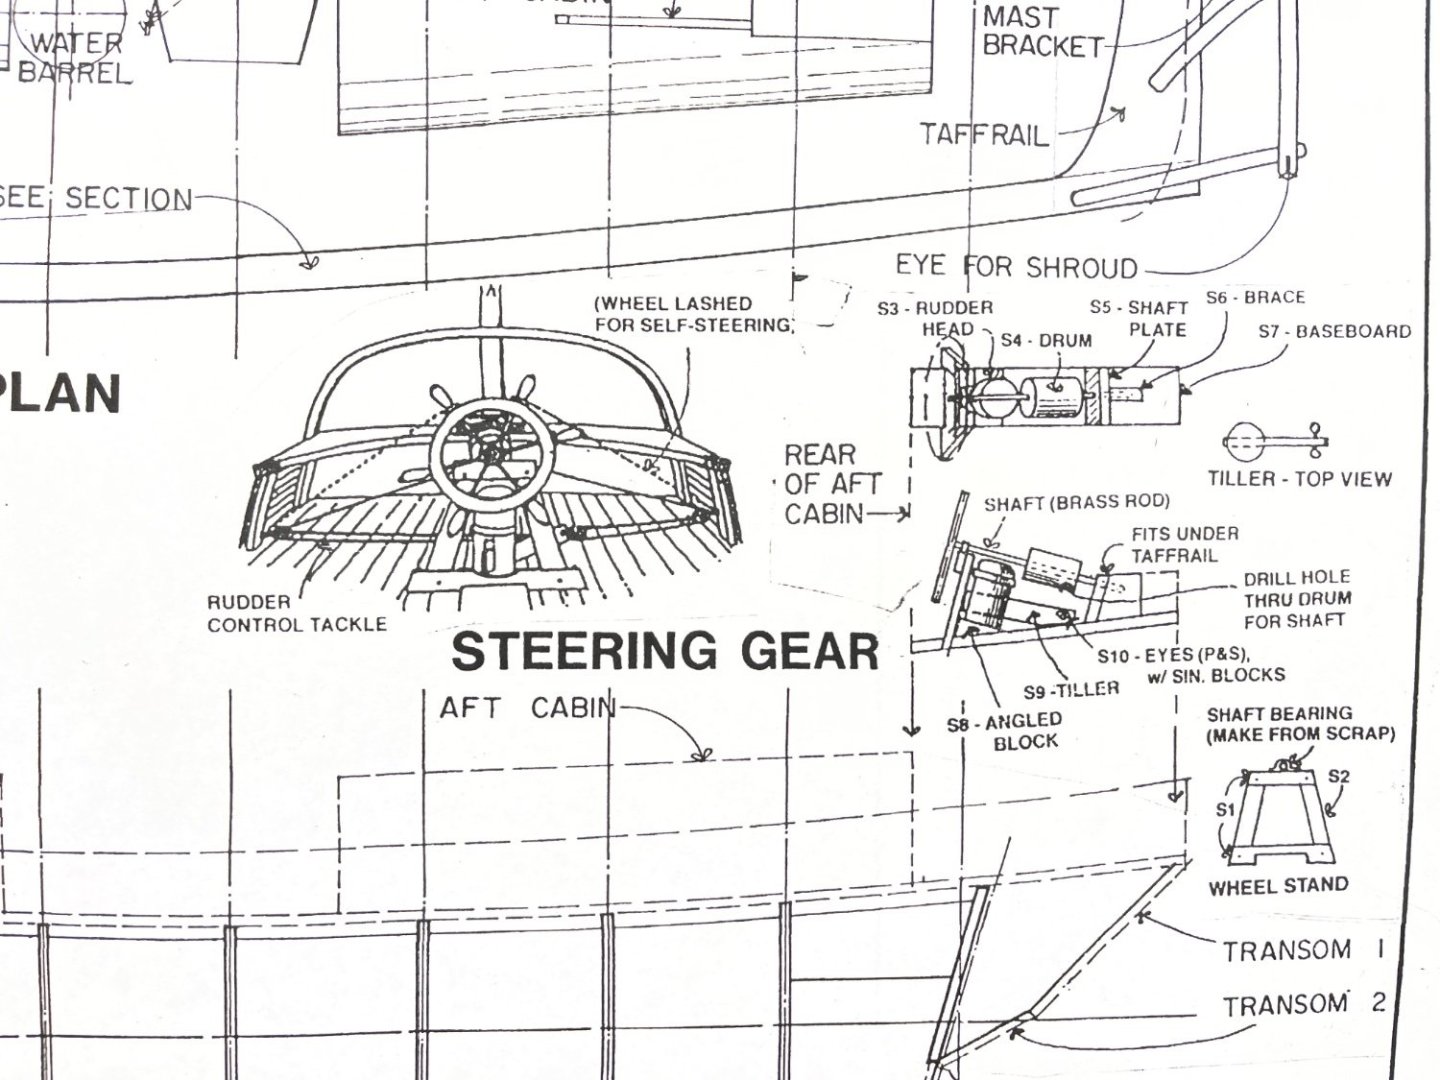
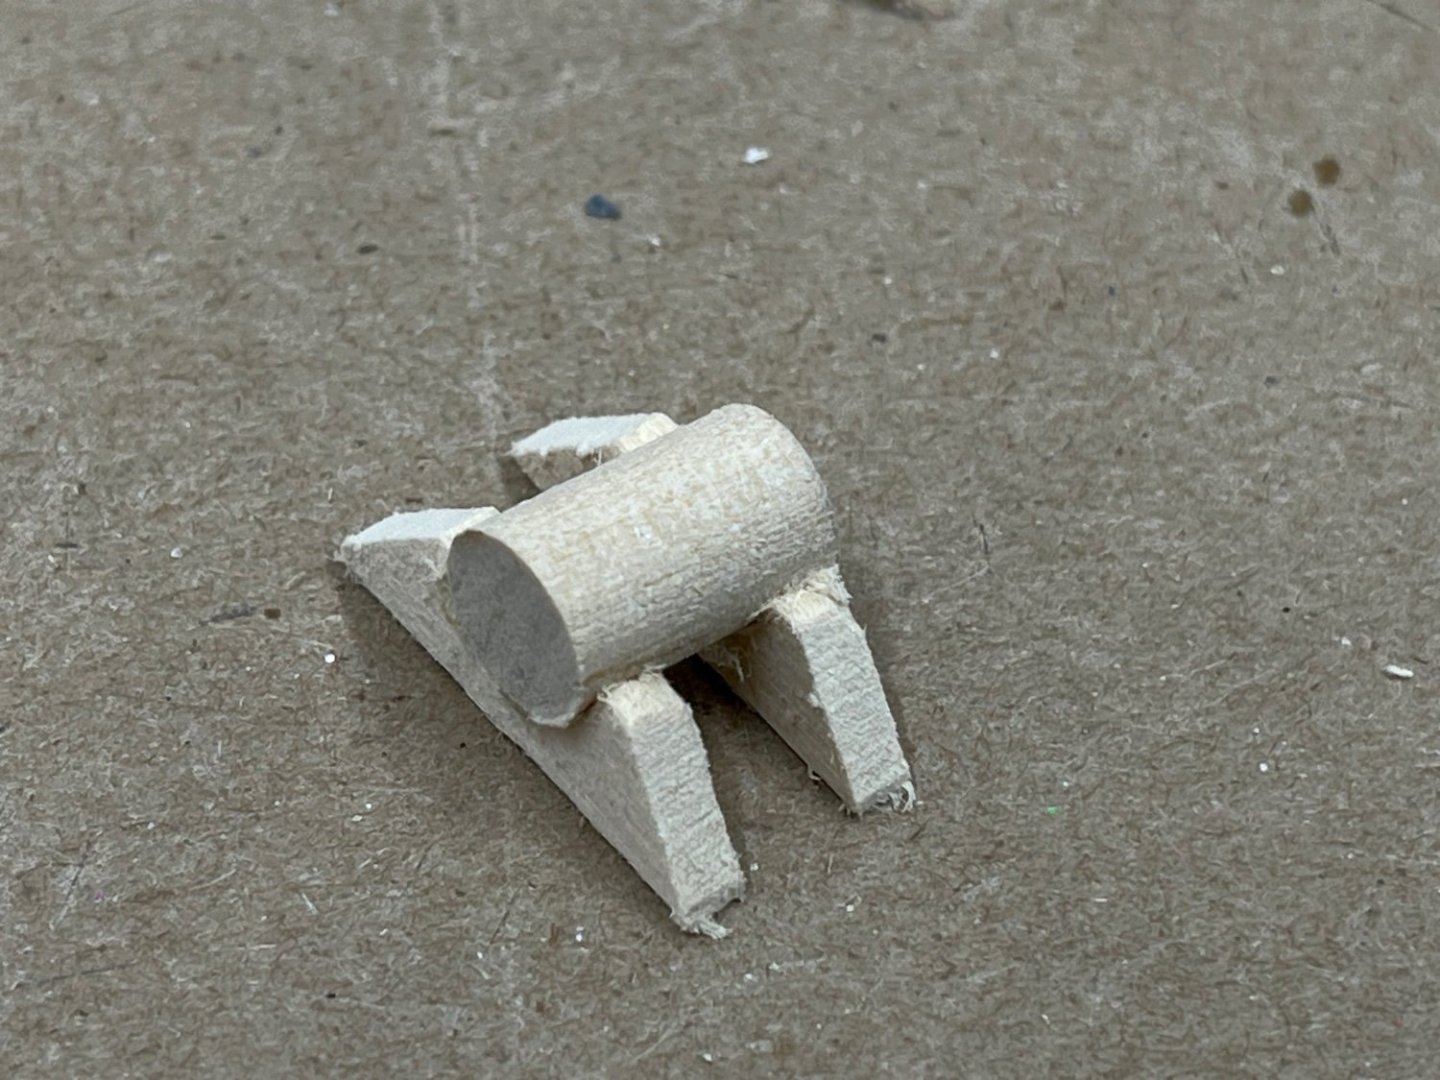
This is the wheel stand that sits behind the aft cabin. The wheel sets on the right hand side and the block on the left side fits underneath the taftrail. I like the detail of the wood deck and cabin in your model! Nice work.
-
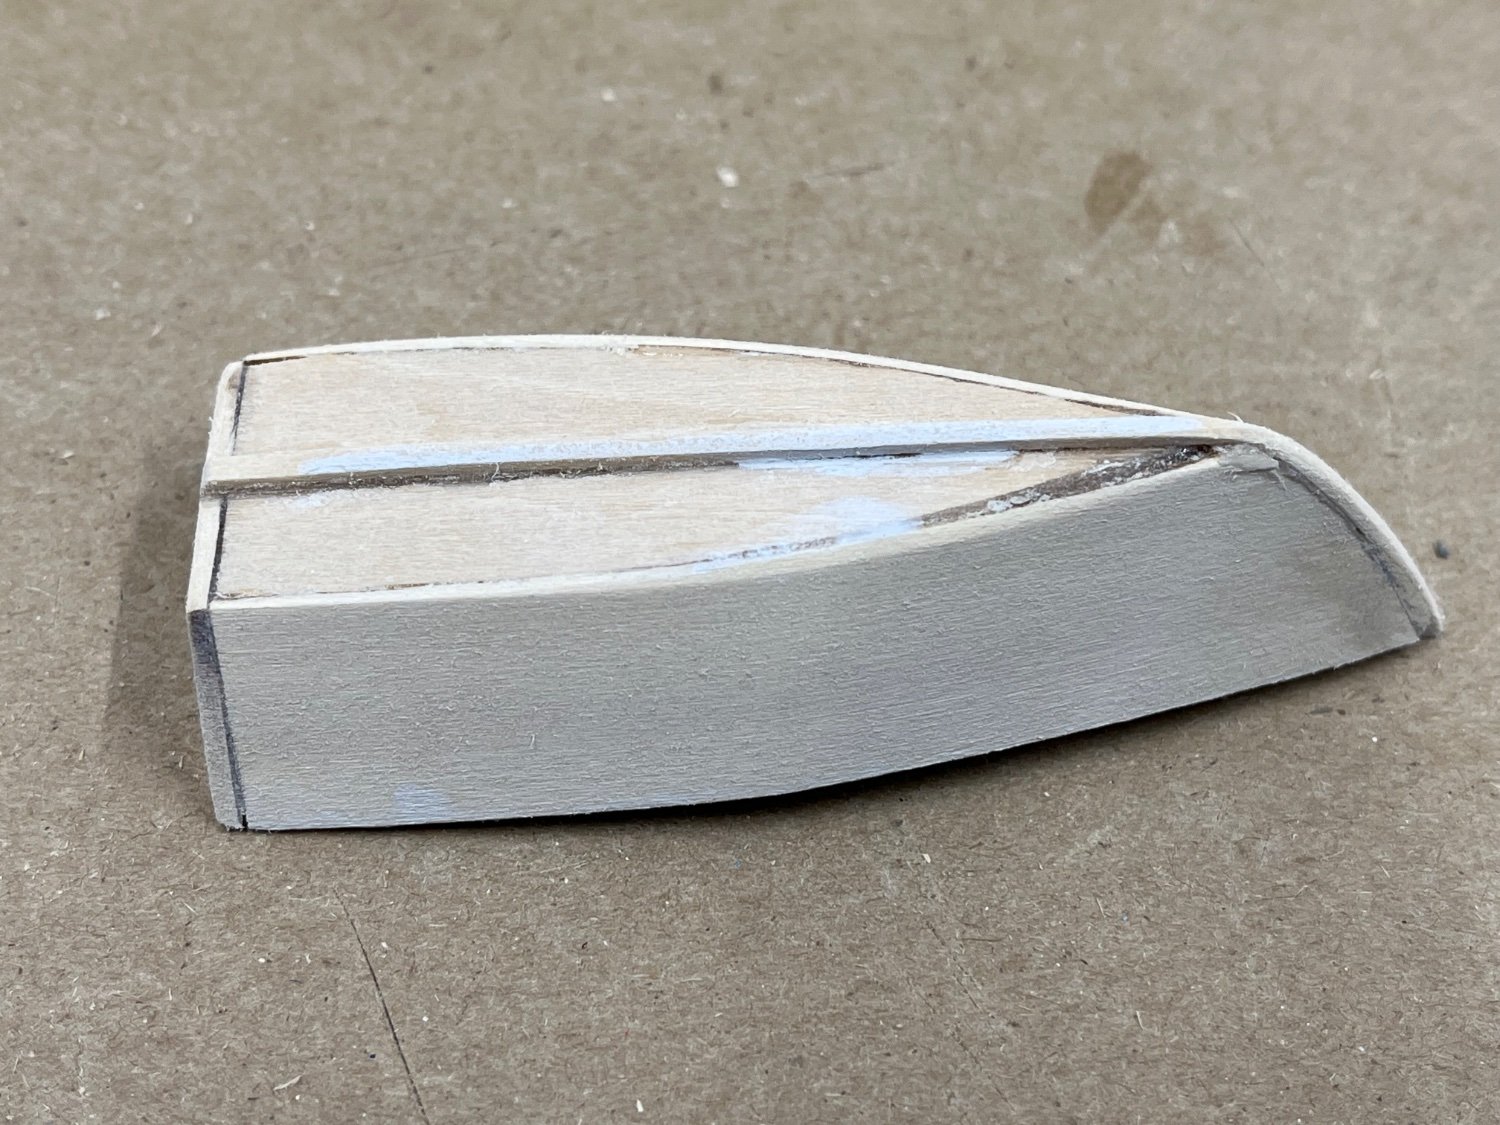
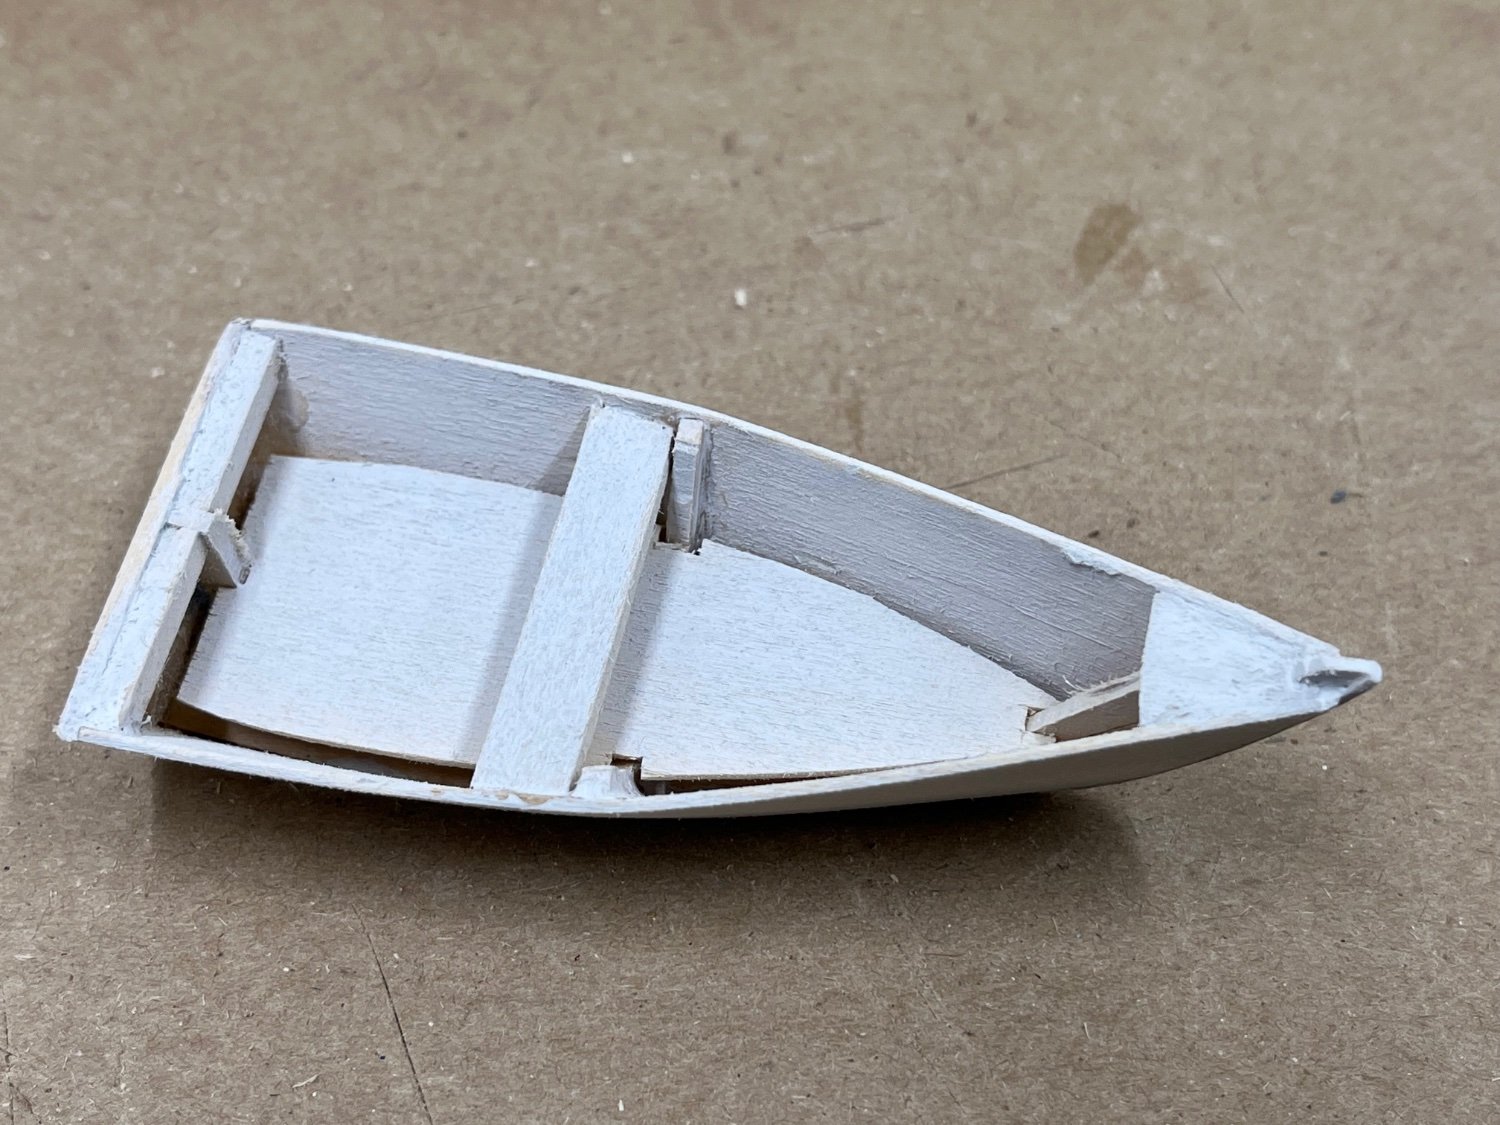
Just trying to catch up on the build log - these last few posts cover weeks of model building. In between soaking, forming and gluing planks into place, I have been working on the cabins, dinghy and other parts of the boat. Lots of little pieces of basswood and lots of trial and error to get the assemblies right. I bought an extra piec of sheet basswood when scoring and forming the curves of the cabin didn’t work out so well. I decided I wanted to make the companion ways operable just because. I will probably paint the deck inside of the cabins black. I really liked the idea of building the interiors of the cabins because I have always been intrigued by the drawings of the layout of the Spray’s interior, but I was afraid I would screw things up.


-
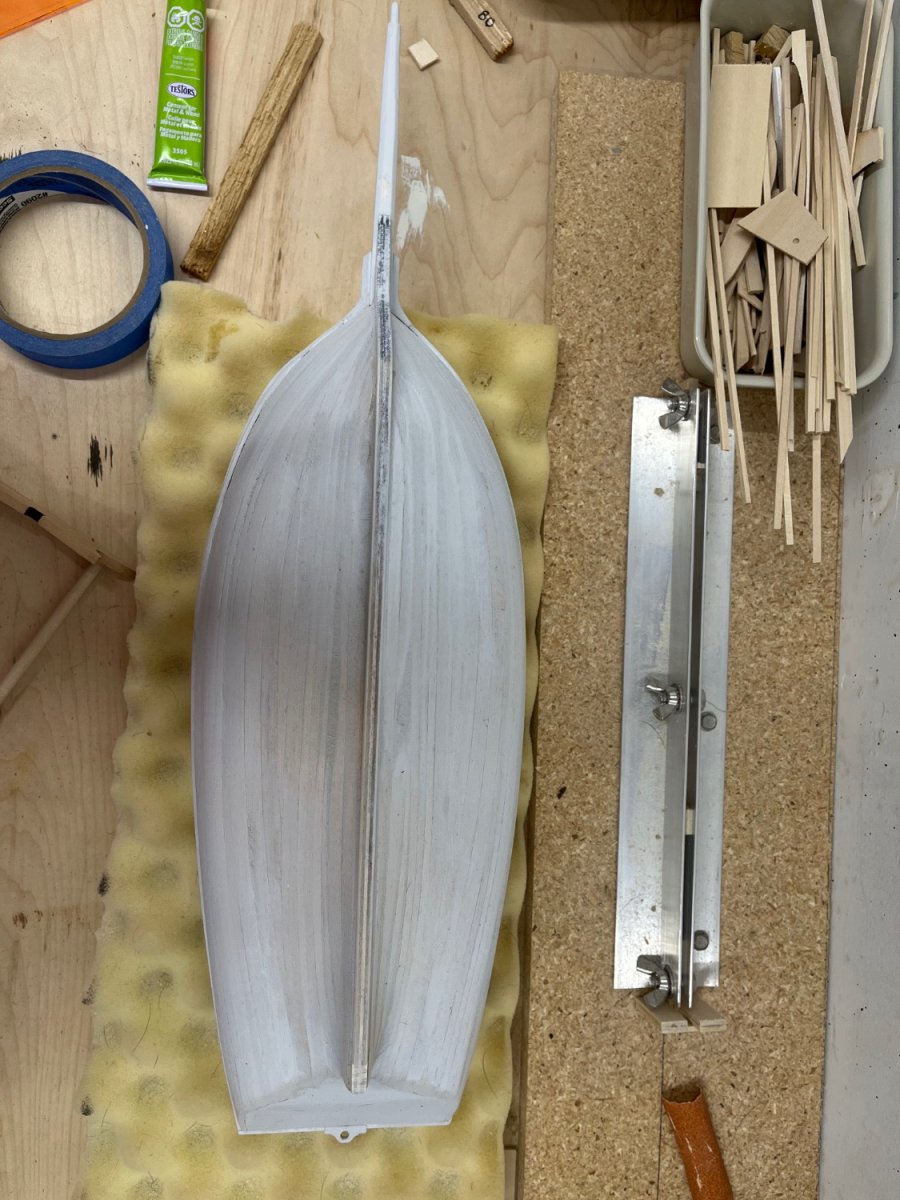
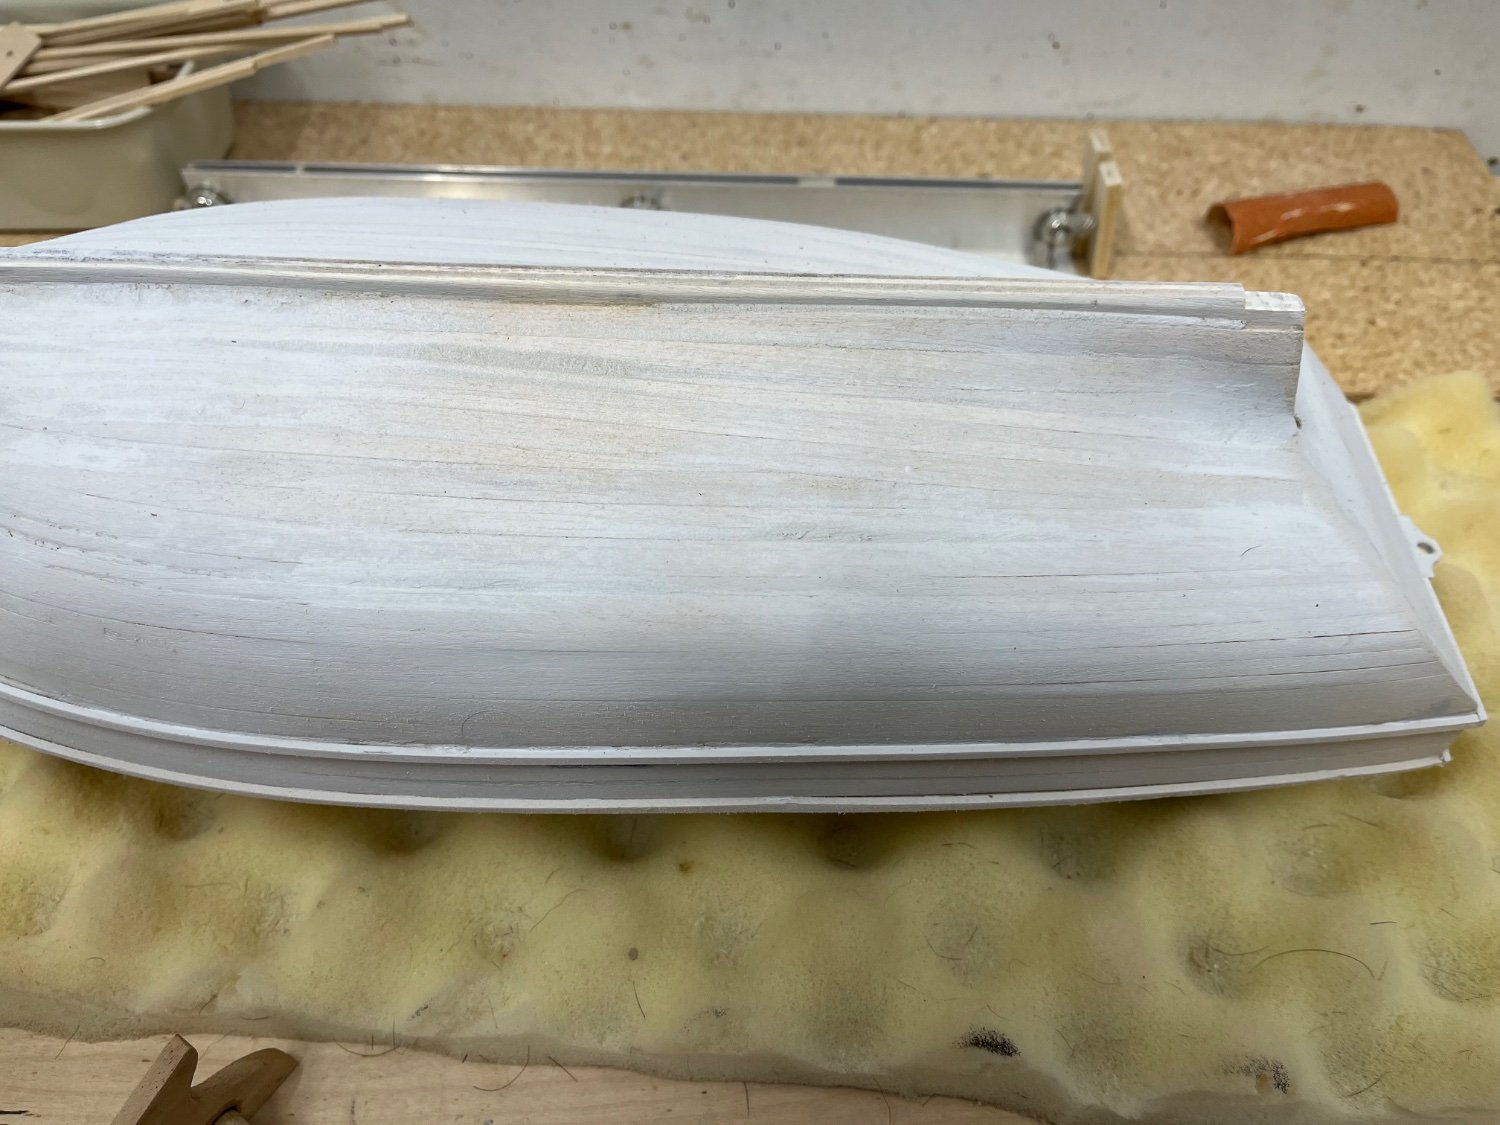
With the rail finished, it was time to rough sand, fill and shape the bulwark and railing. Next step was to prime the hull and then do the final filling with the thinned mixture of wood putty and then do the final sanding of the hull. I tried to limit the filling so that I didn’t lose the boards of the hull. It was not a fiberglass thing and it was an old boat when Slocum started to work on it. Most of the sanding from here on is with 220 and 400 grit.


-
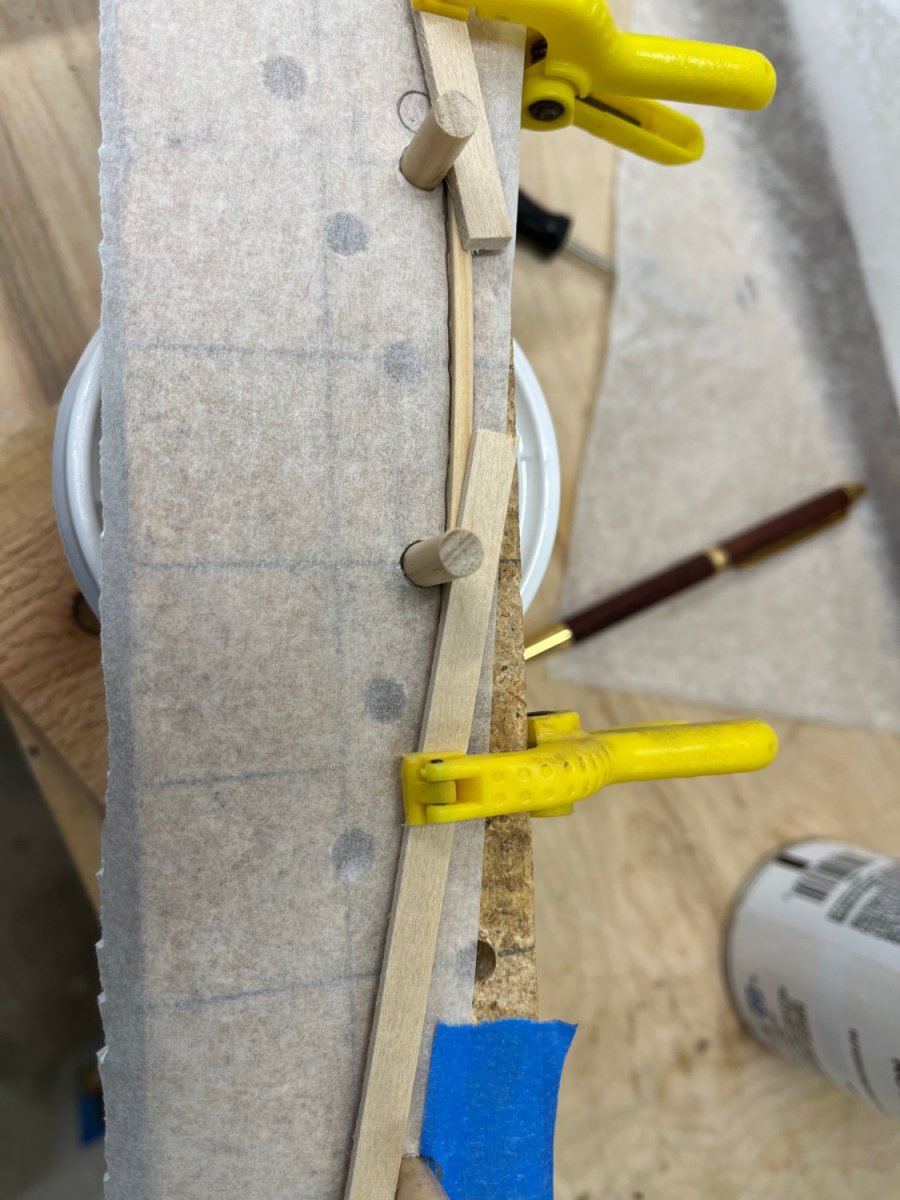
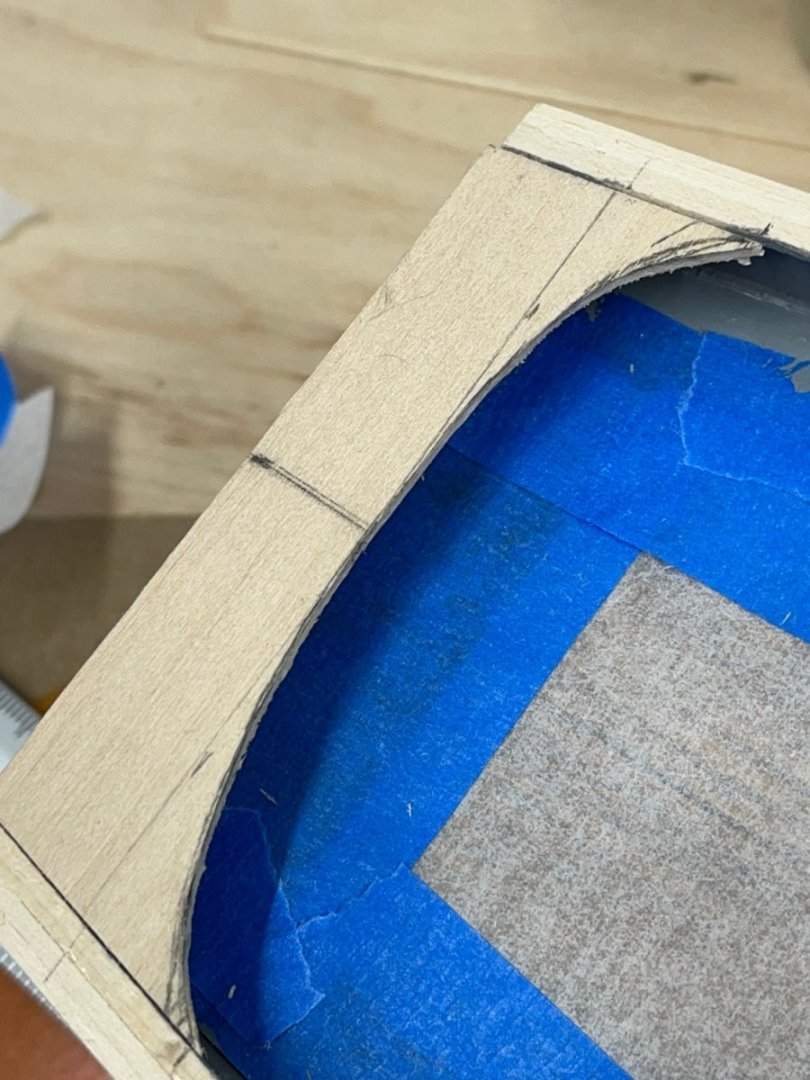
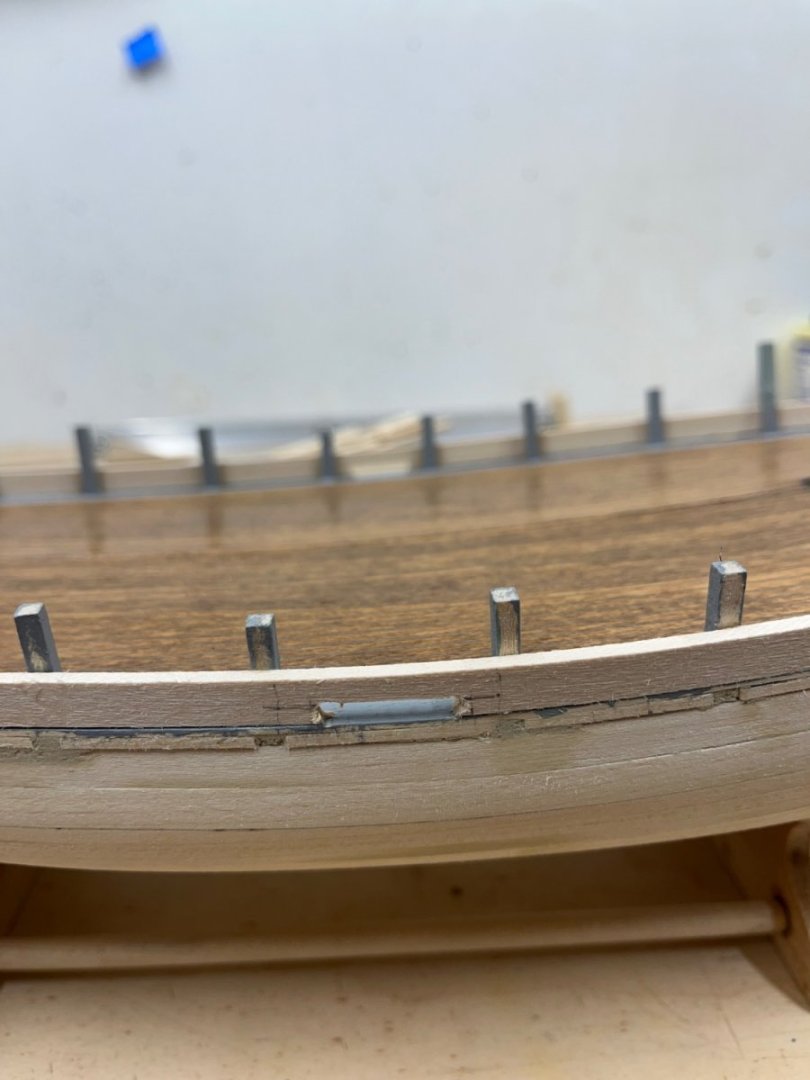
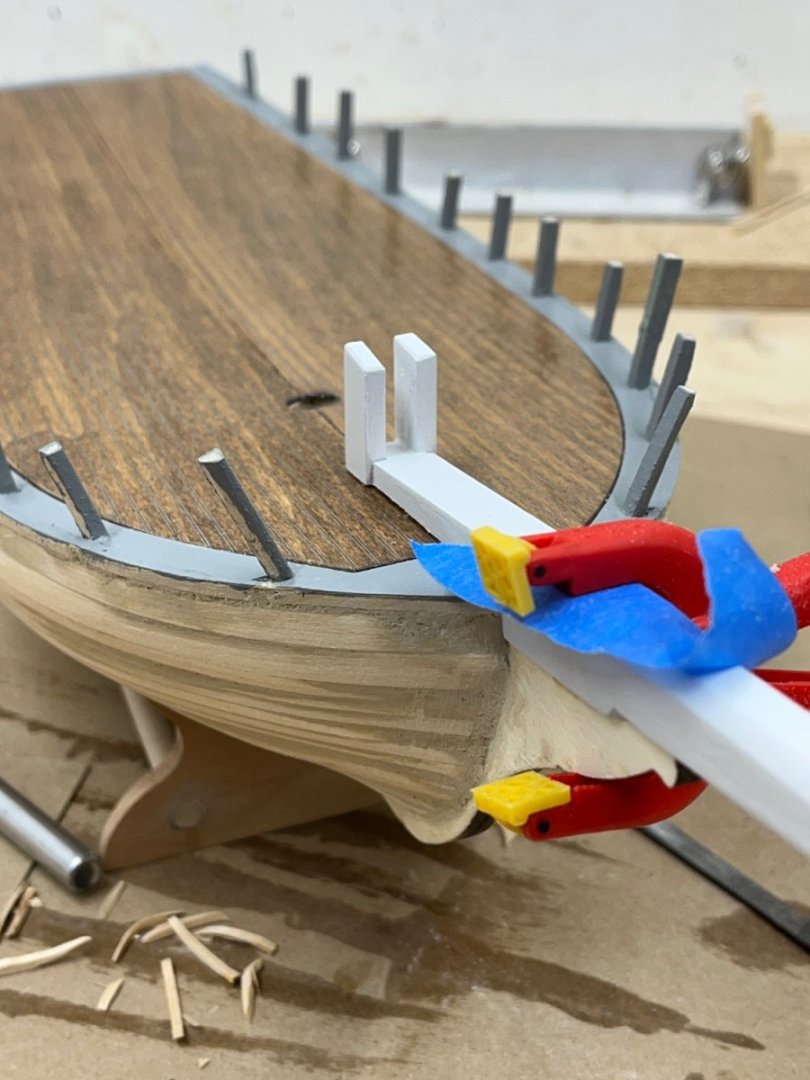
Finishing the bulwark with the 5 piece railing. Most of the pieces are 1/16” square which bend easily with a little soaking-really only at the bow do you need much of a bend to them. A jig helped in bending the wider plank 3/32” plank. It was harder than expected to get them aligned but sandpaper will take care that. After the top planks were set, I fitted the taftrail and the bow block in place and then finished with the sides of the rail.

-
In the previous post, the scuppers show cut into the bottom plank. Just adding some detail photos of the bulwark planking here that should help the next modeler working through these details.


- 54 replies
-
- 2
-
-
- Spray
- BlueJacket Shipcrafters
- (and 1 more)
-
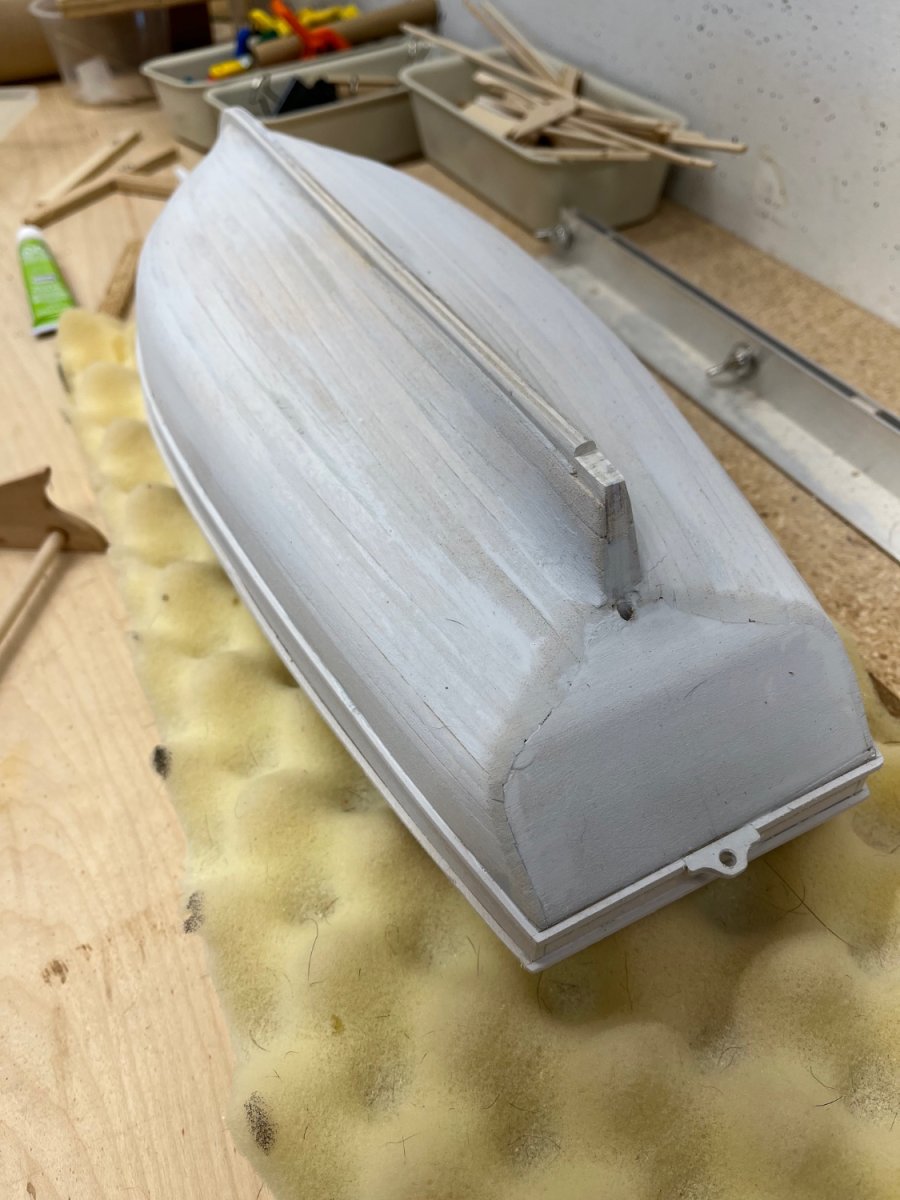
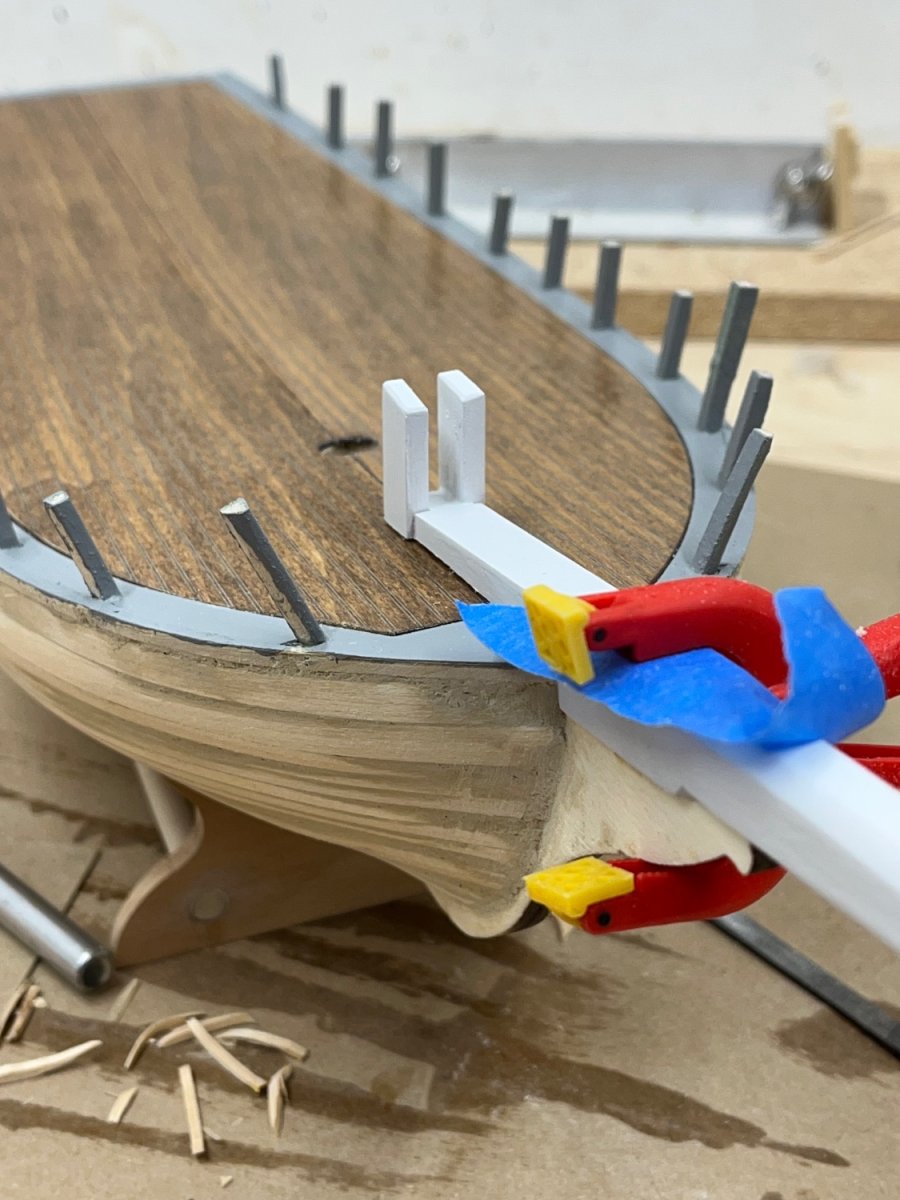
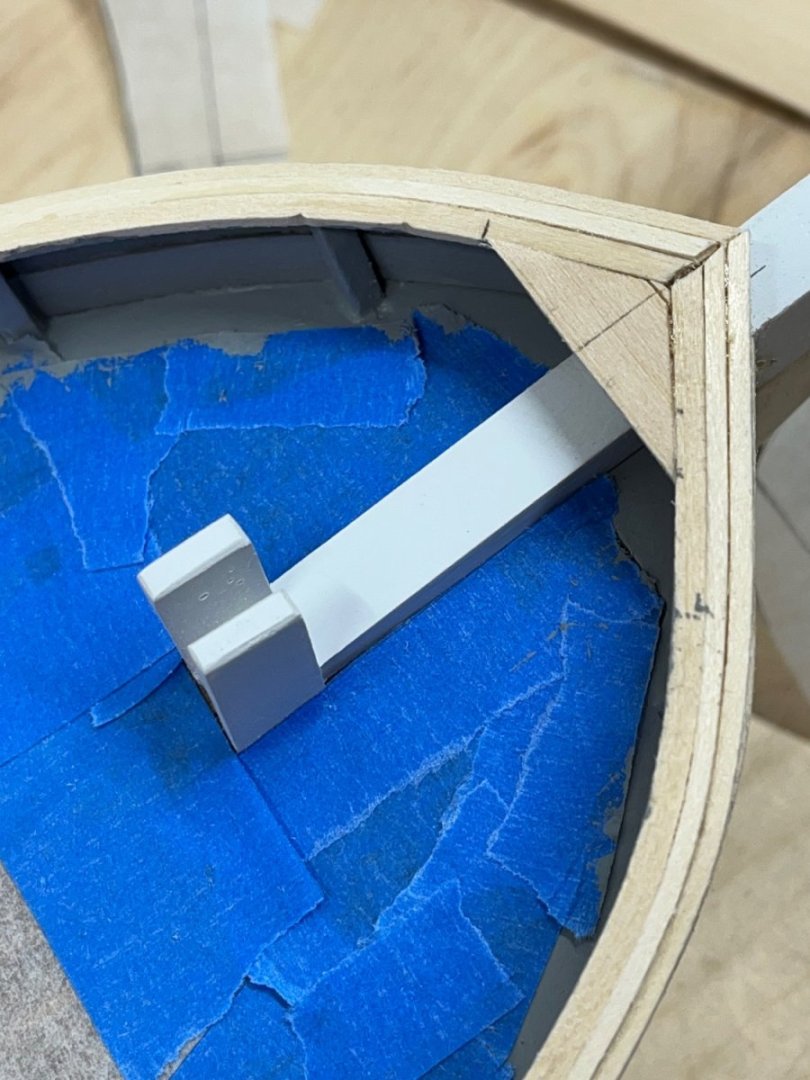
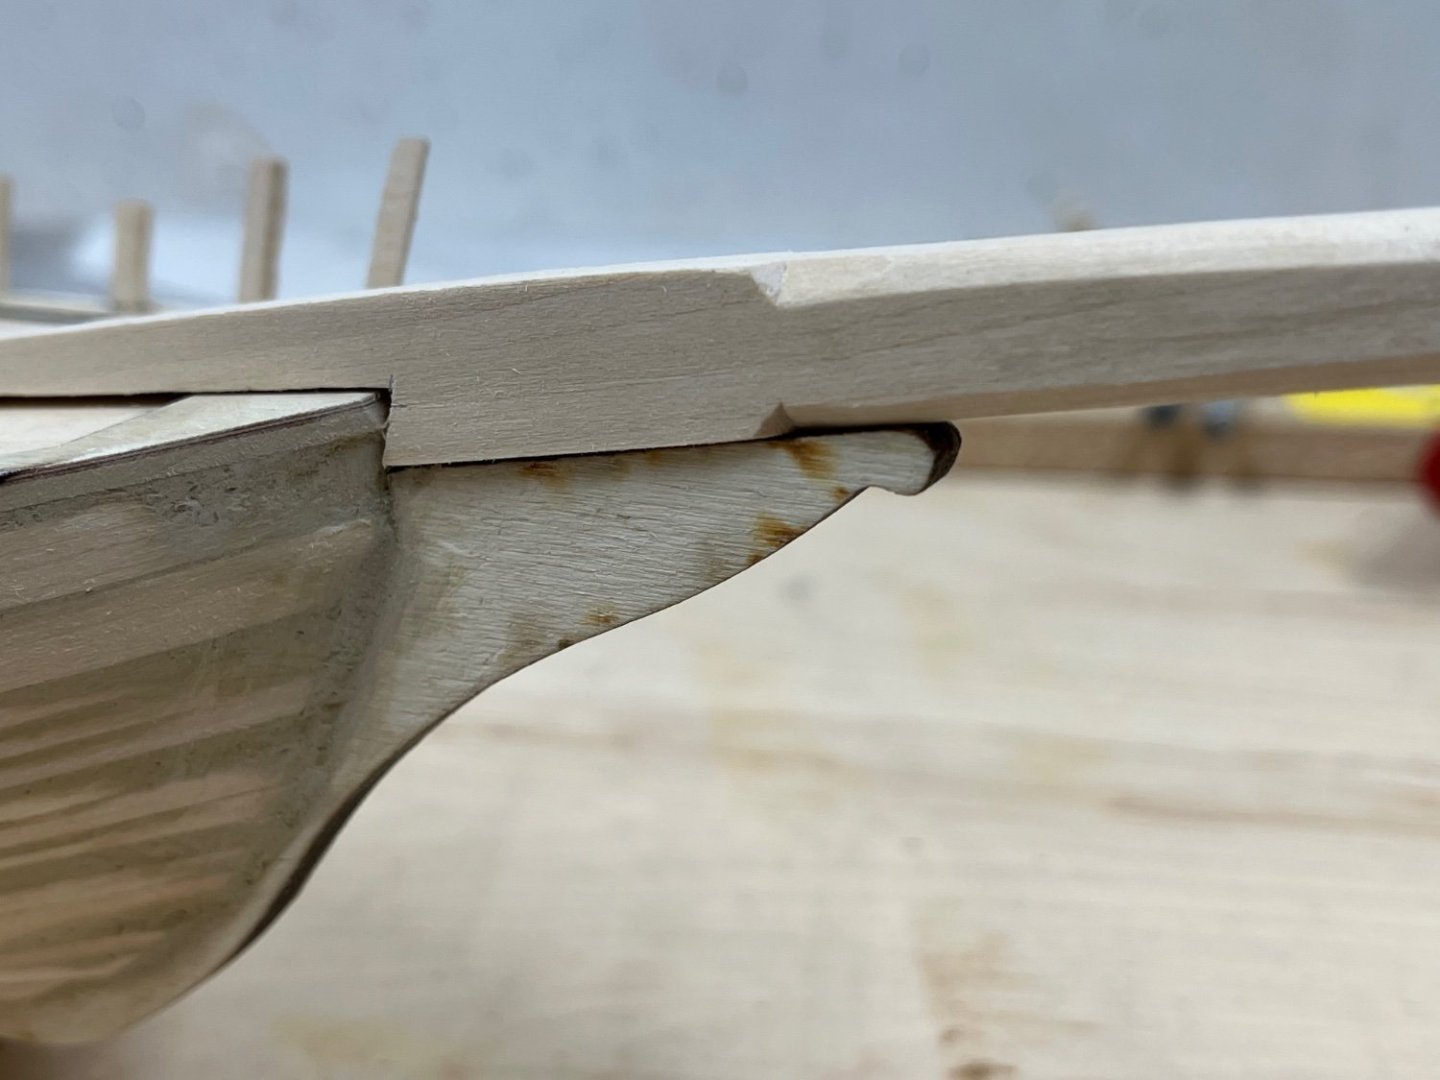
With the deck in place and the bowsprit set, I could now start planking the bulwarks. The plans called for starting with a 1/8” plank, then a 1/4” plank and finally a 3/16” plank. It looked to me to be easier to use two 1/4” planks so that was the way I built up the bulwarks. With the planks soaked, formed and trimmed I set them in place. I cut a block to set above the bowsprit to help form the prow and give a good surface to glue the last planks to. This would get covered with the bow block and would also give me something to hold the block in place. I also glows in a 1/8”x1/8” post on the stern corners. It seemed like in building up the bulwark, there would have been some kind of structure in the corners.

- 54 replies
-
- 1
-
-
- Spray
- BlueJacket Shipcrafters
- (and 1 more)
-
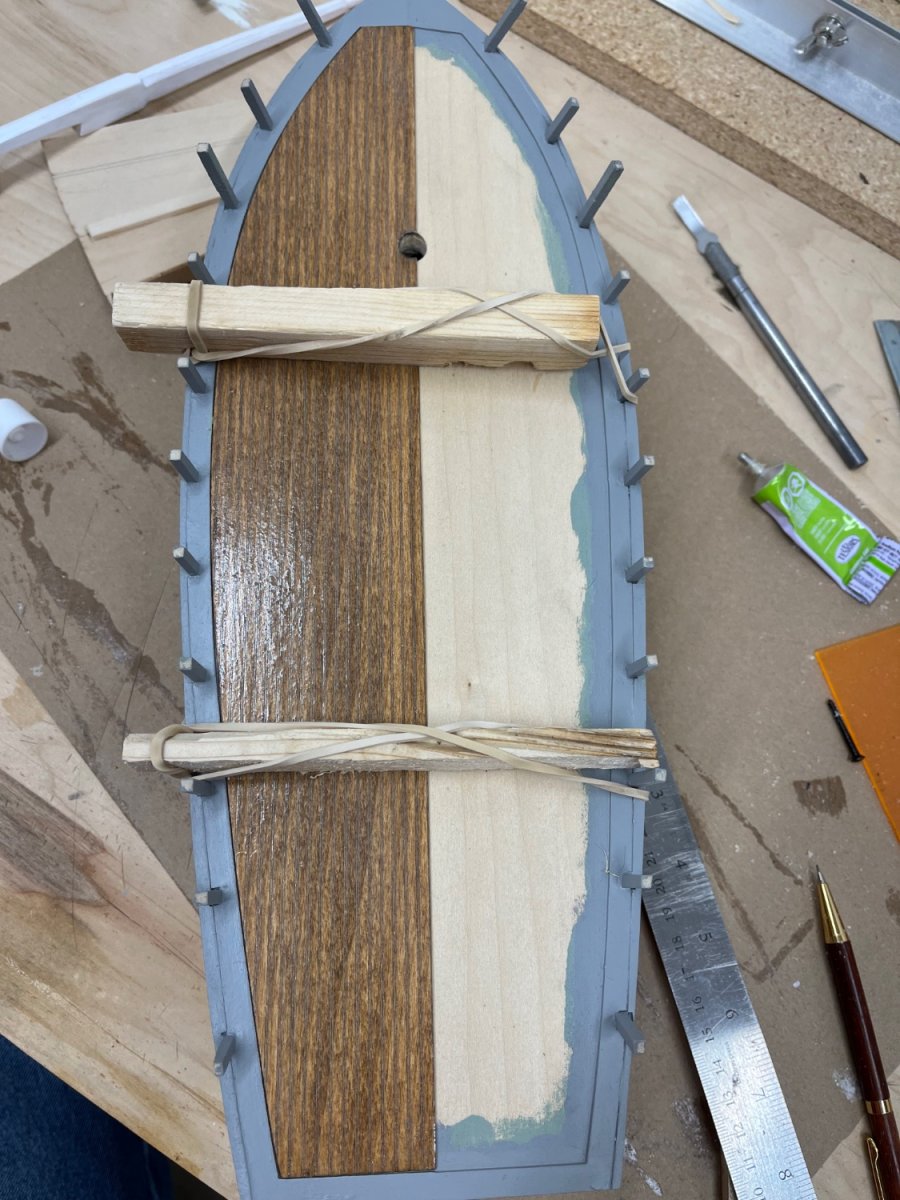
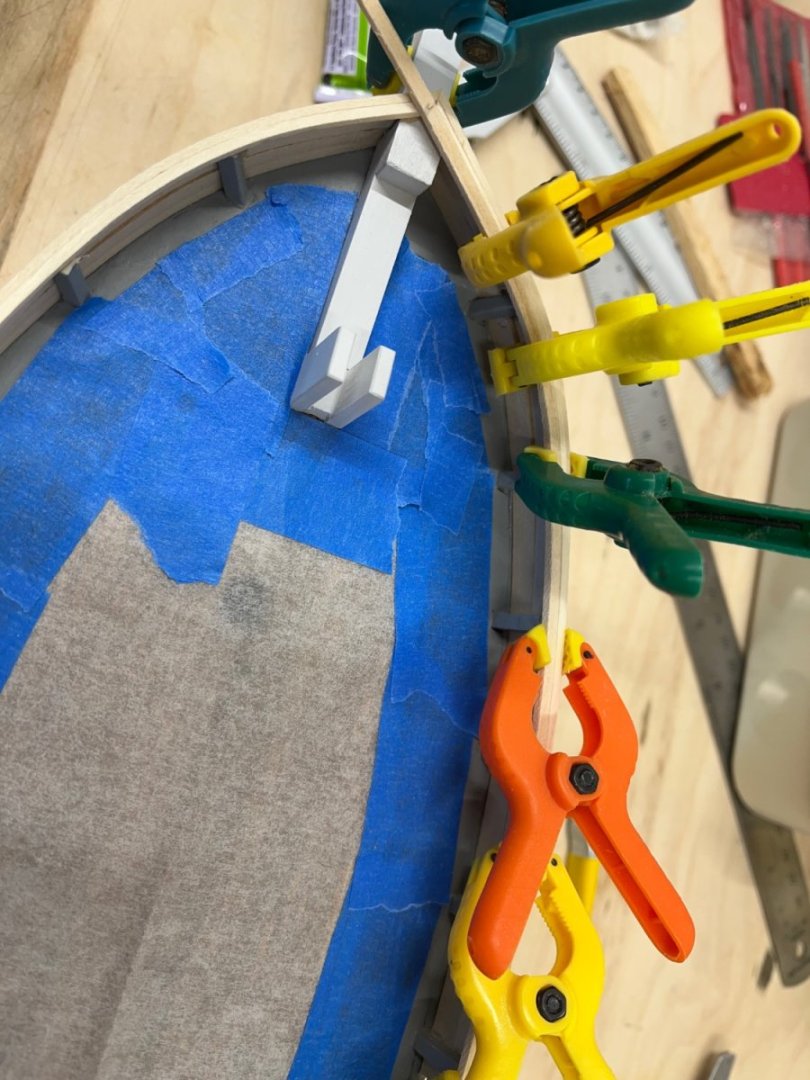
Been a while since posting on the build. Model paint is hard to come by locally so it took a while to find a color I was pleased with for the margin boards. I used a light sky grey which I think goes better with the stained decks and white hull. Since Slocum painted almost everything on the boat white according to the book, I would guess that the margin boards would have been white as well. ”Two coats of copper paint were slapped on the bottom, two coats of white lead on the topsides and bulwarks.” (Chapter 1, page 37) Anyway, l like the bit of contrast color and used the grey to paint the inboard sides of the bulwark as well. After gluing down the finished deck pieces and doing some creative clamping with blocks and rubber bands and then gluing the bow sprit in place, it was time to build up the bulwarks and the 5-piece railing.

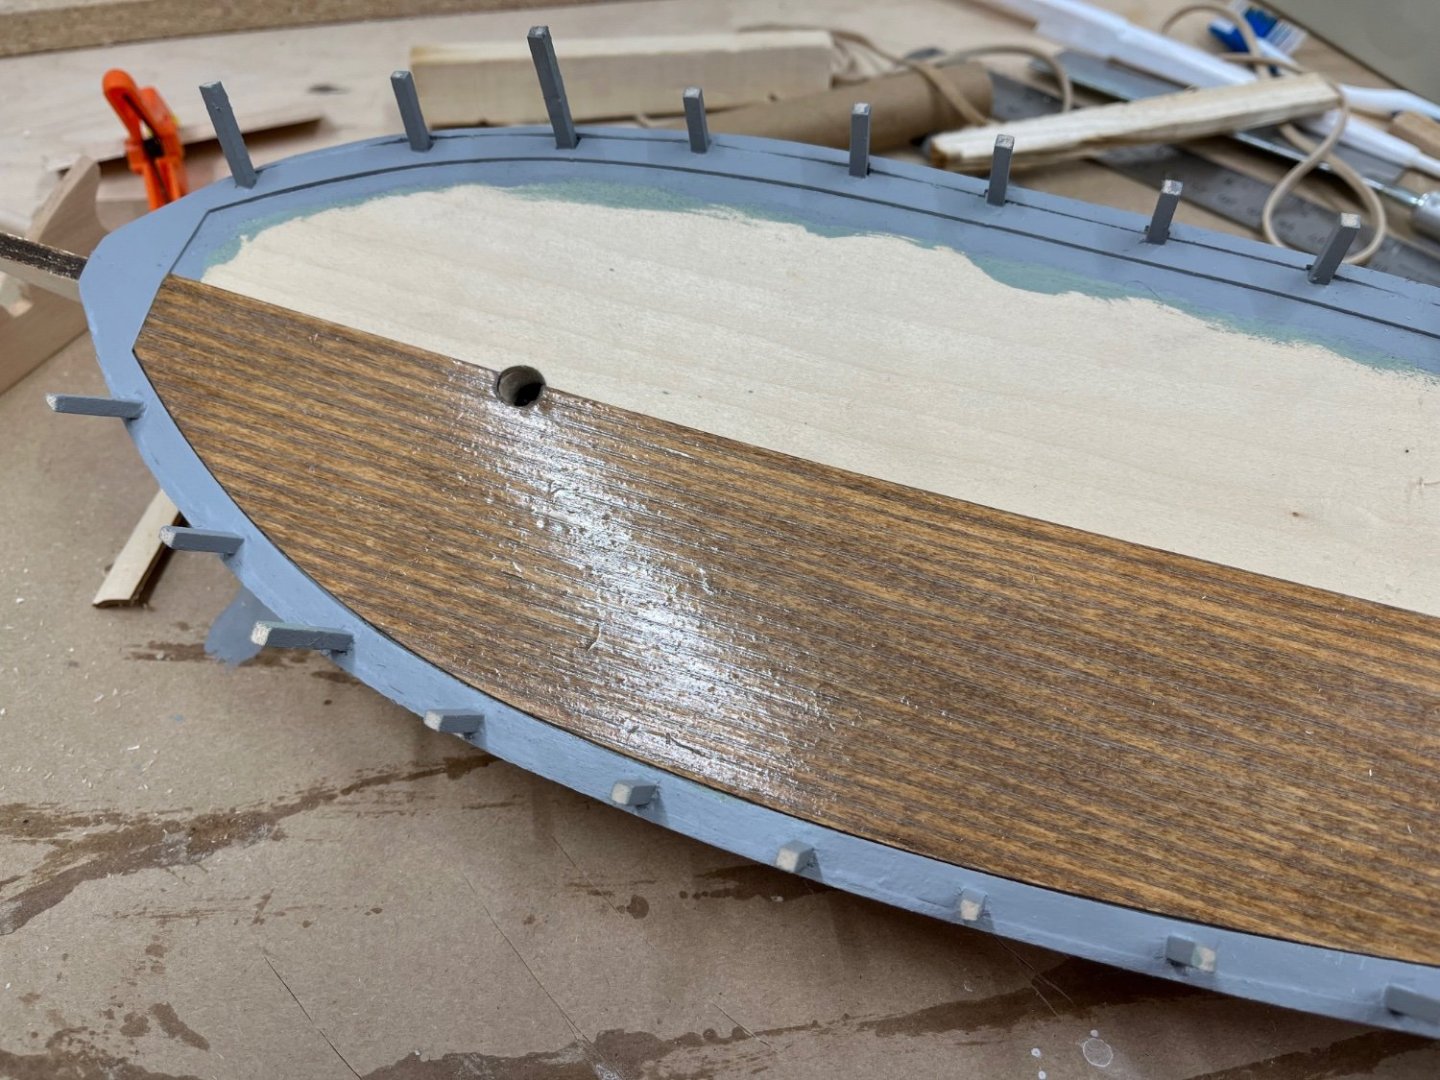
- 54 replies
-
- 1
-
-
- Spray
- BlueJacket Shipcrafters
- (and 1 more)
-
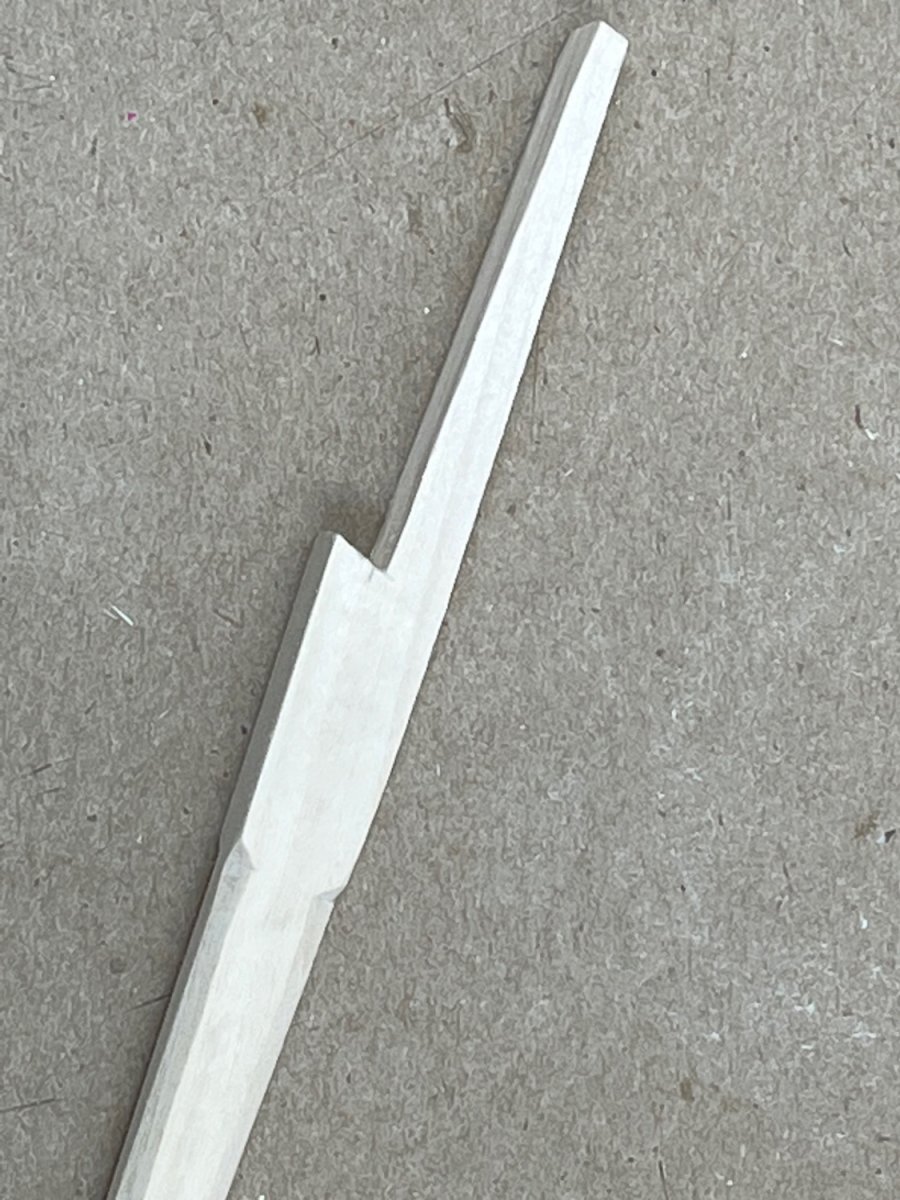
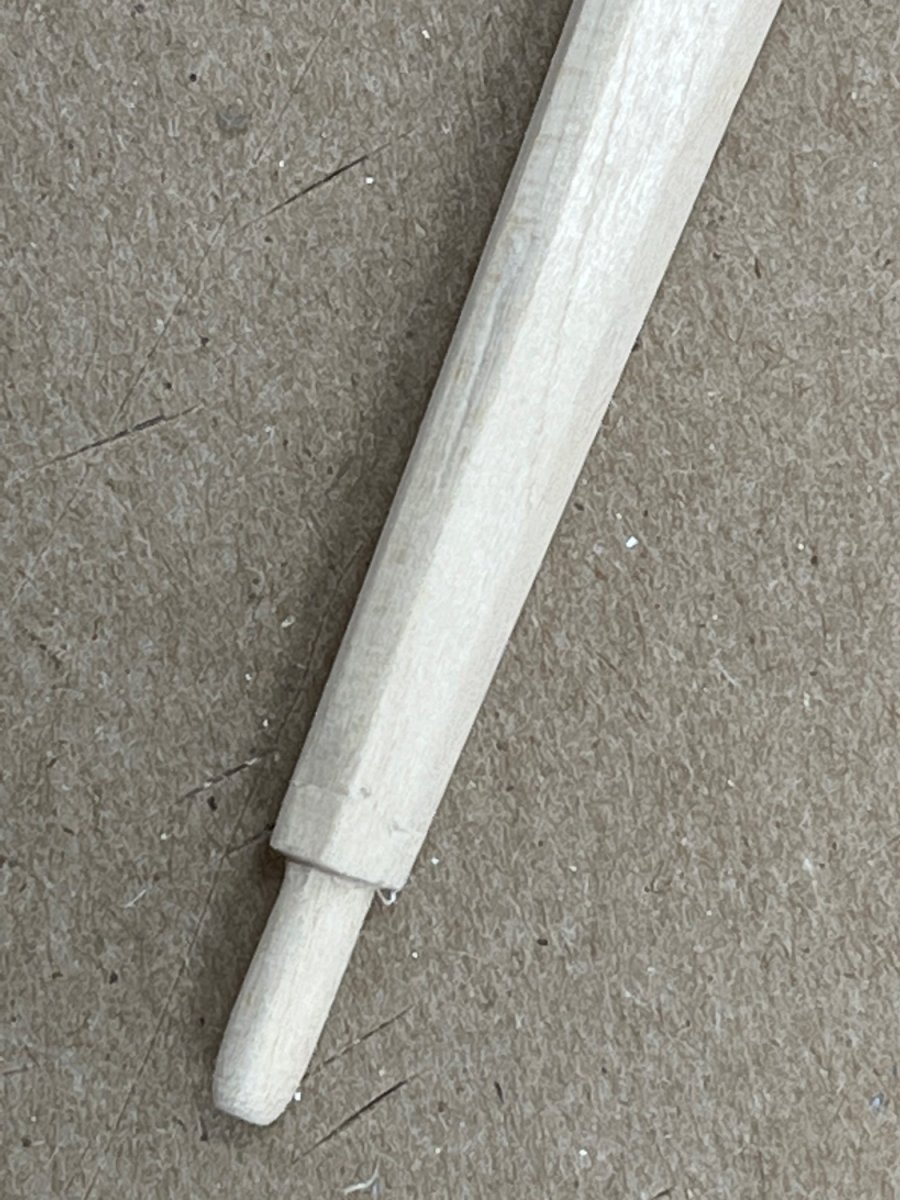
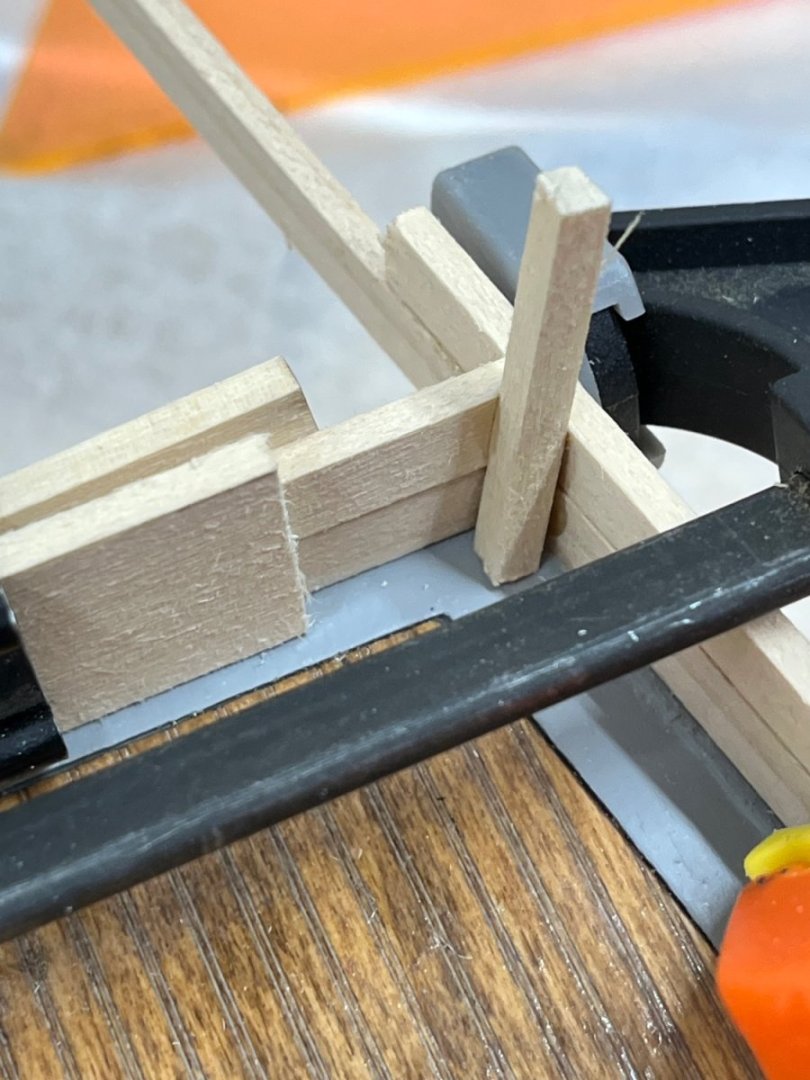
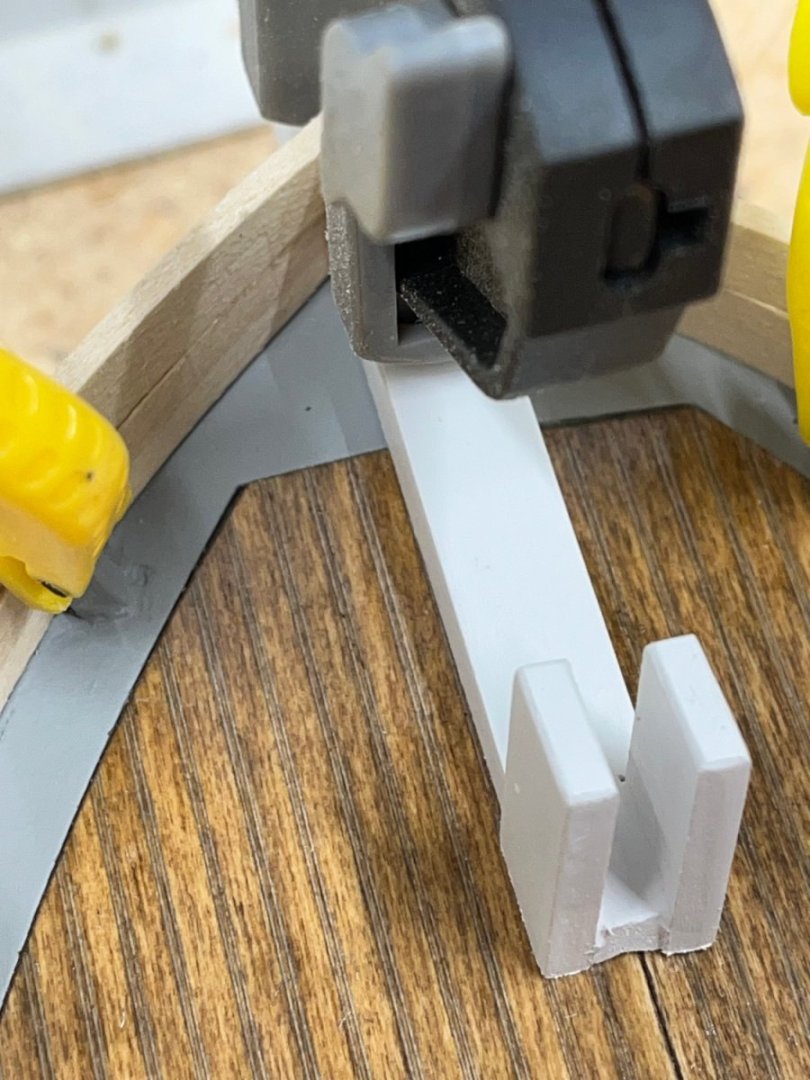
In between cutting and gluing and painting, I started on the bow sprit, using tracing paper to transfer the pattern onto the 3/8”x1/2” bow sprit material. The small block plane did a good job of making the main tapers to the top and sides and then used an x-acto saw to cut the notch in the bottom to fit to the keel and deck. Then I sawed the angle of the bevel and used the plane and x-acto knife to take down these edges to taper the bow sprit from square to octagonal at the outer edge. Then it was carving with the x-acto knife to form the rounded from point of the bow sprit. Sand it smooth and it’s ready to paint - which I think will be much easier than painting it in place sitting on the finished deck.


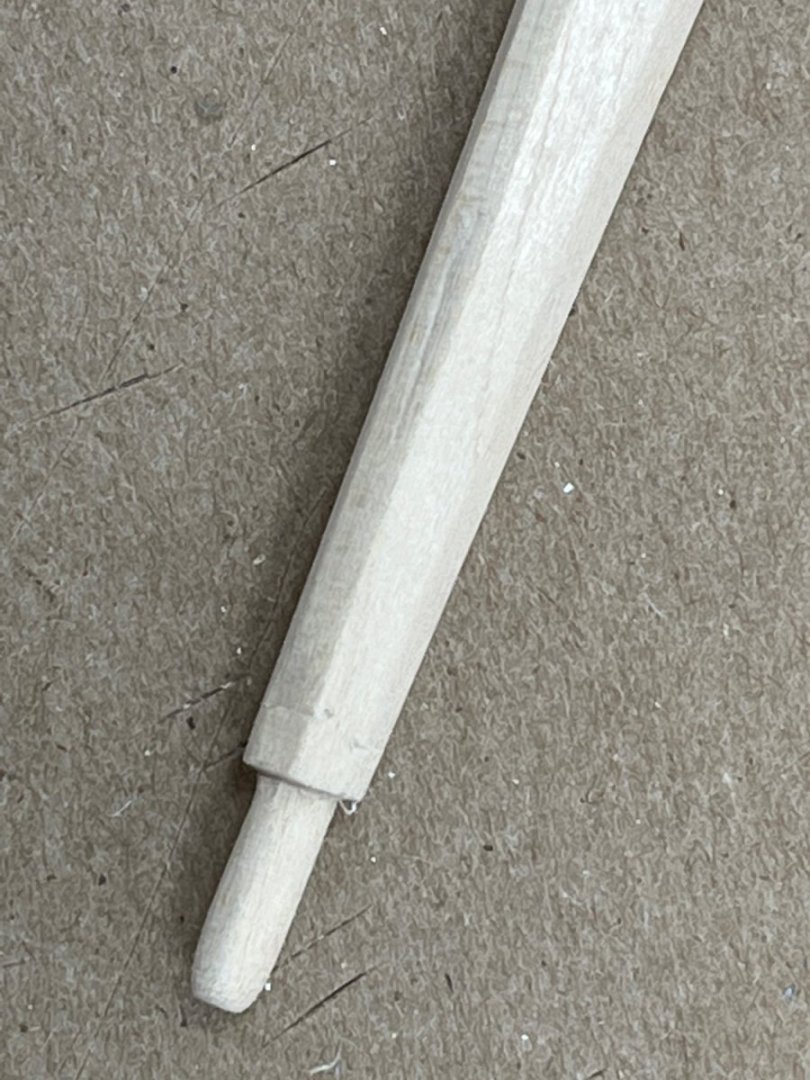
- 54 replies
-
- 2
-
-
- Spray
- BlueJacket Shipcrafters
- (and 1 more)