MORE HANDBOOKS ARE ON THEIR WAY! We will let you know when they get here.
×


MTC
-
Posts
44 -
Joined
-
Last visited
Content Type
Profiles
Forums
Gallery
Events
Everything posted by MTC
-
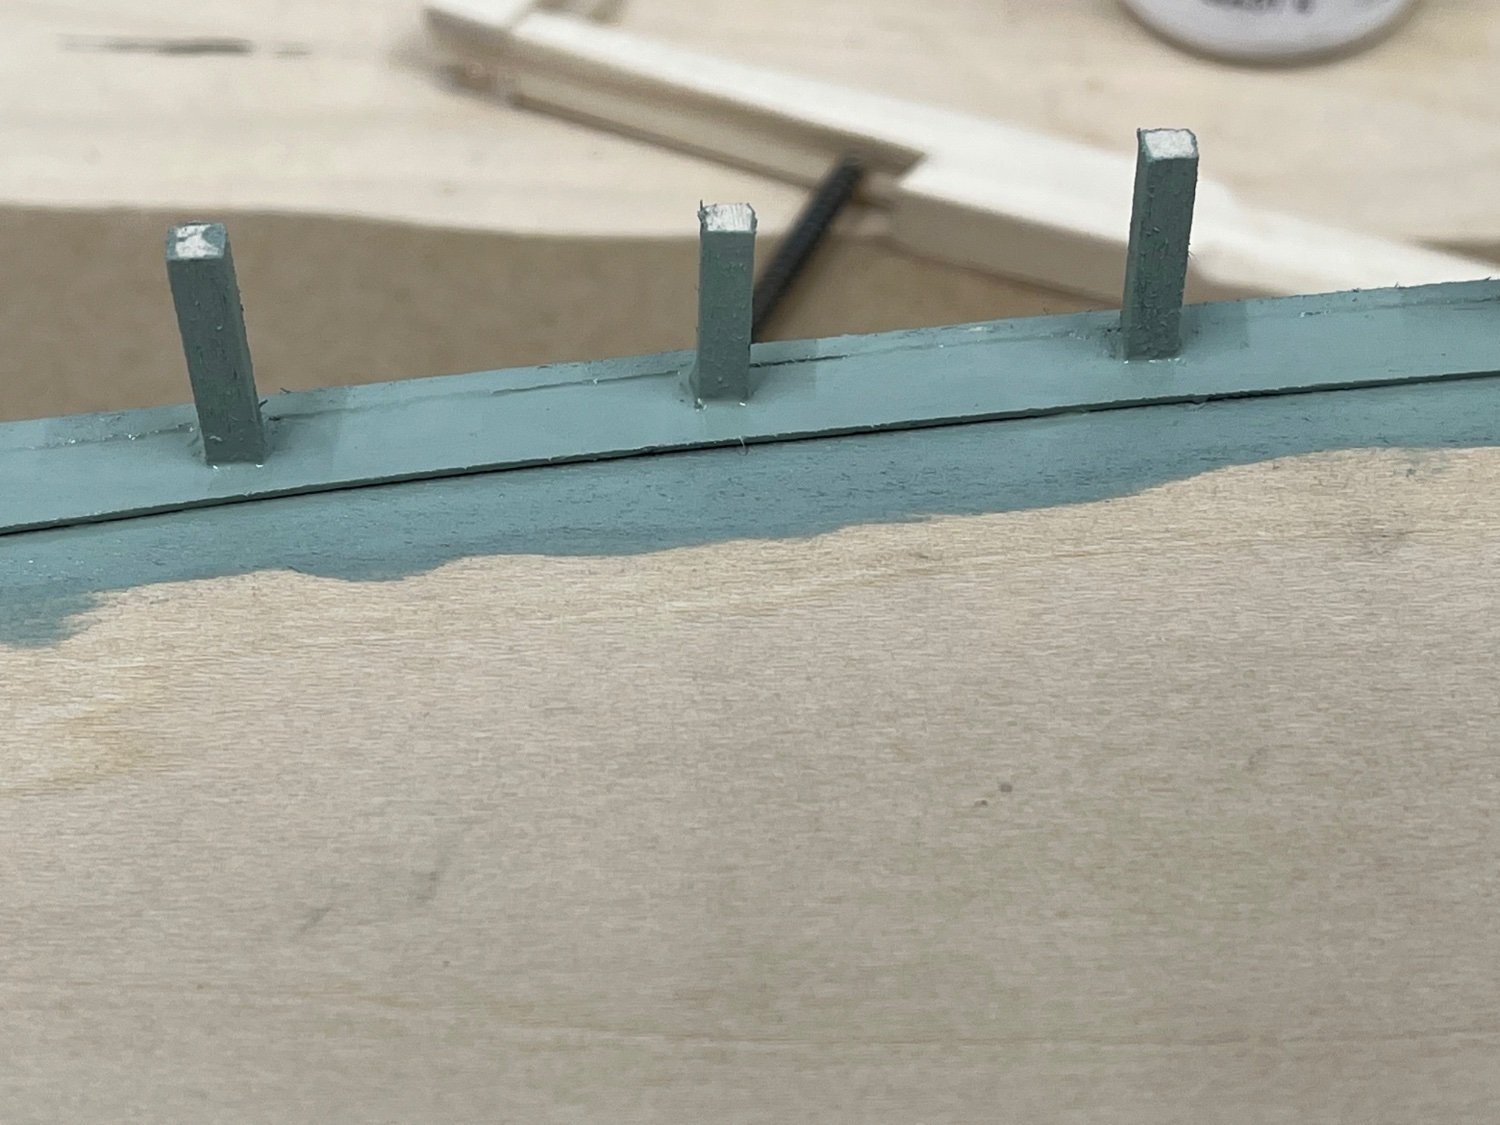
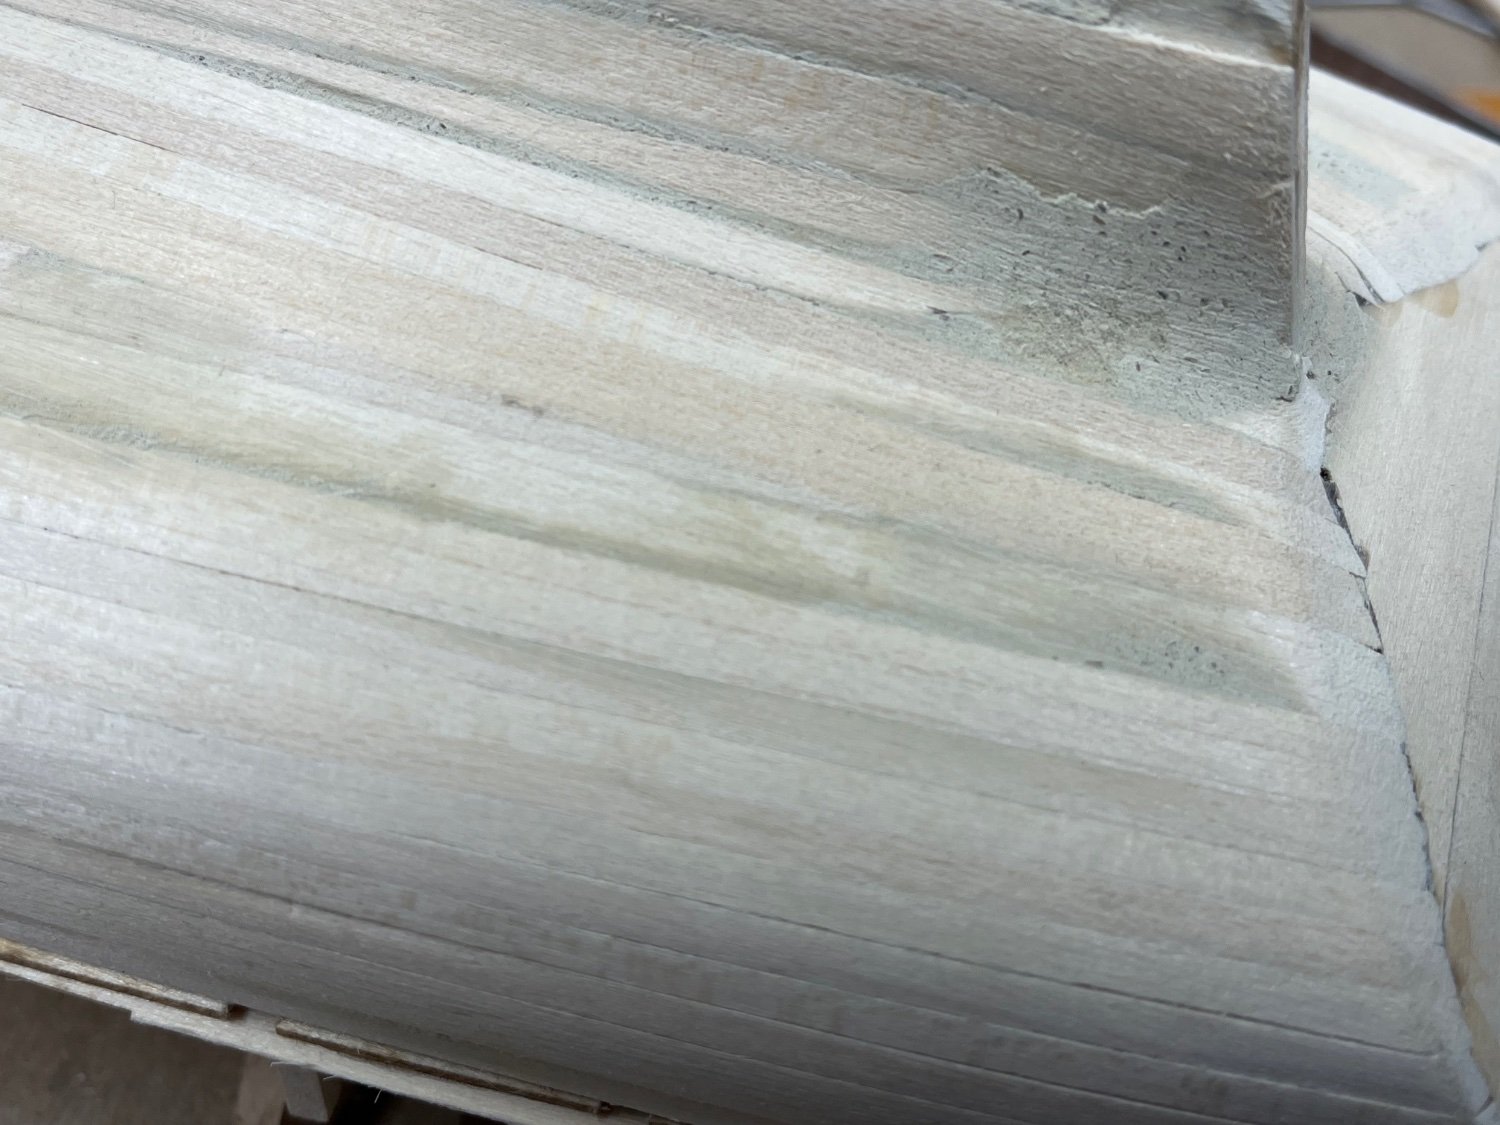
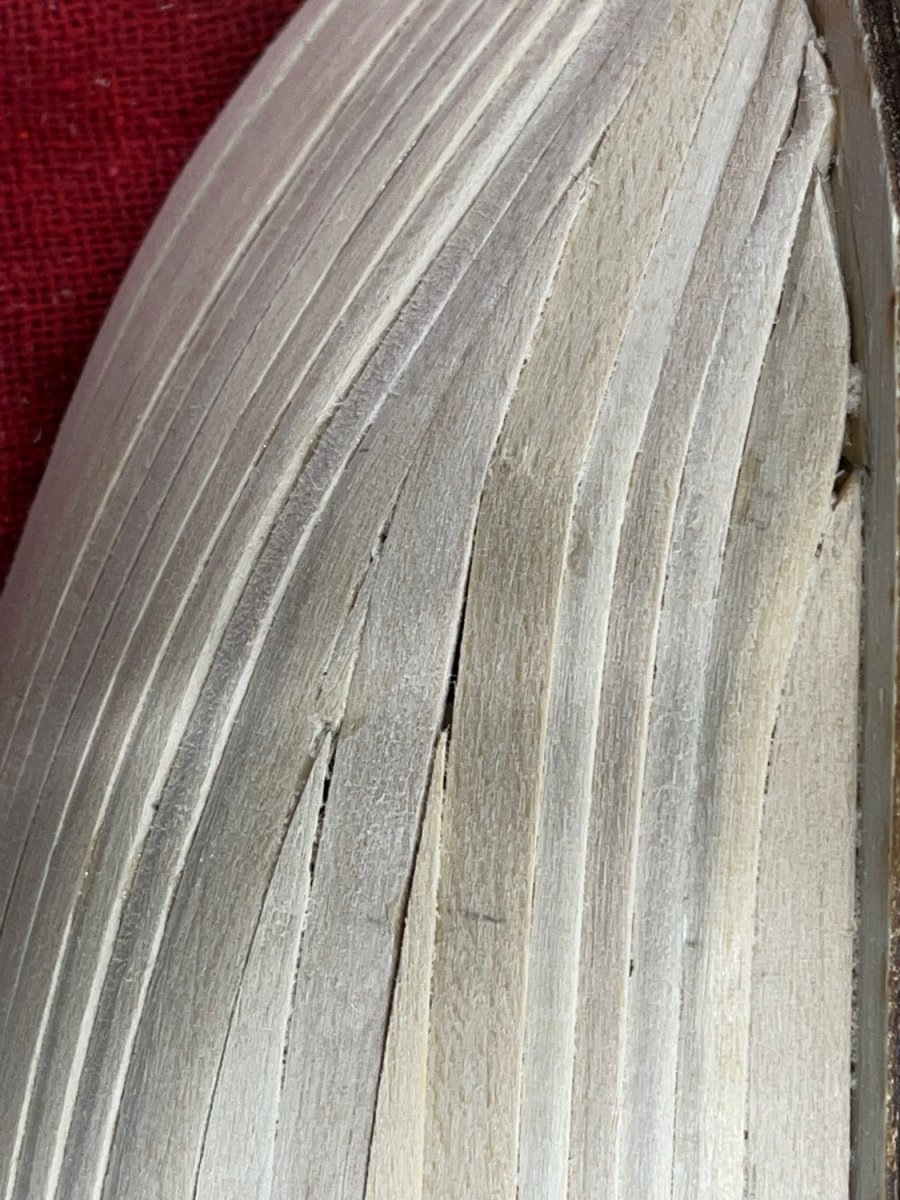
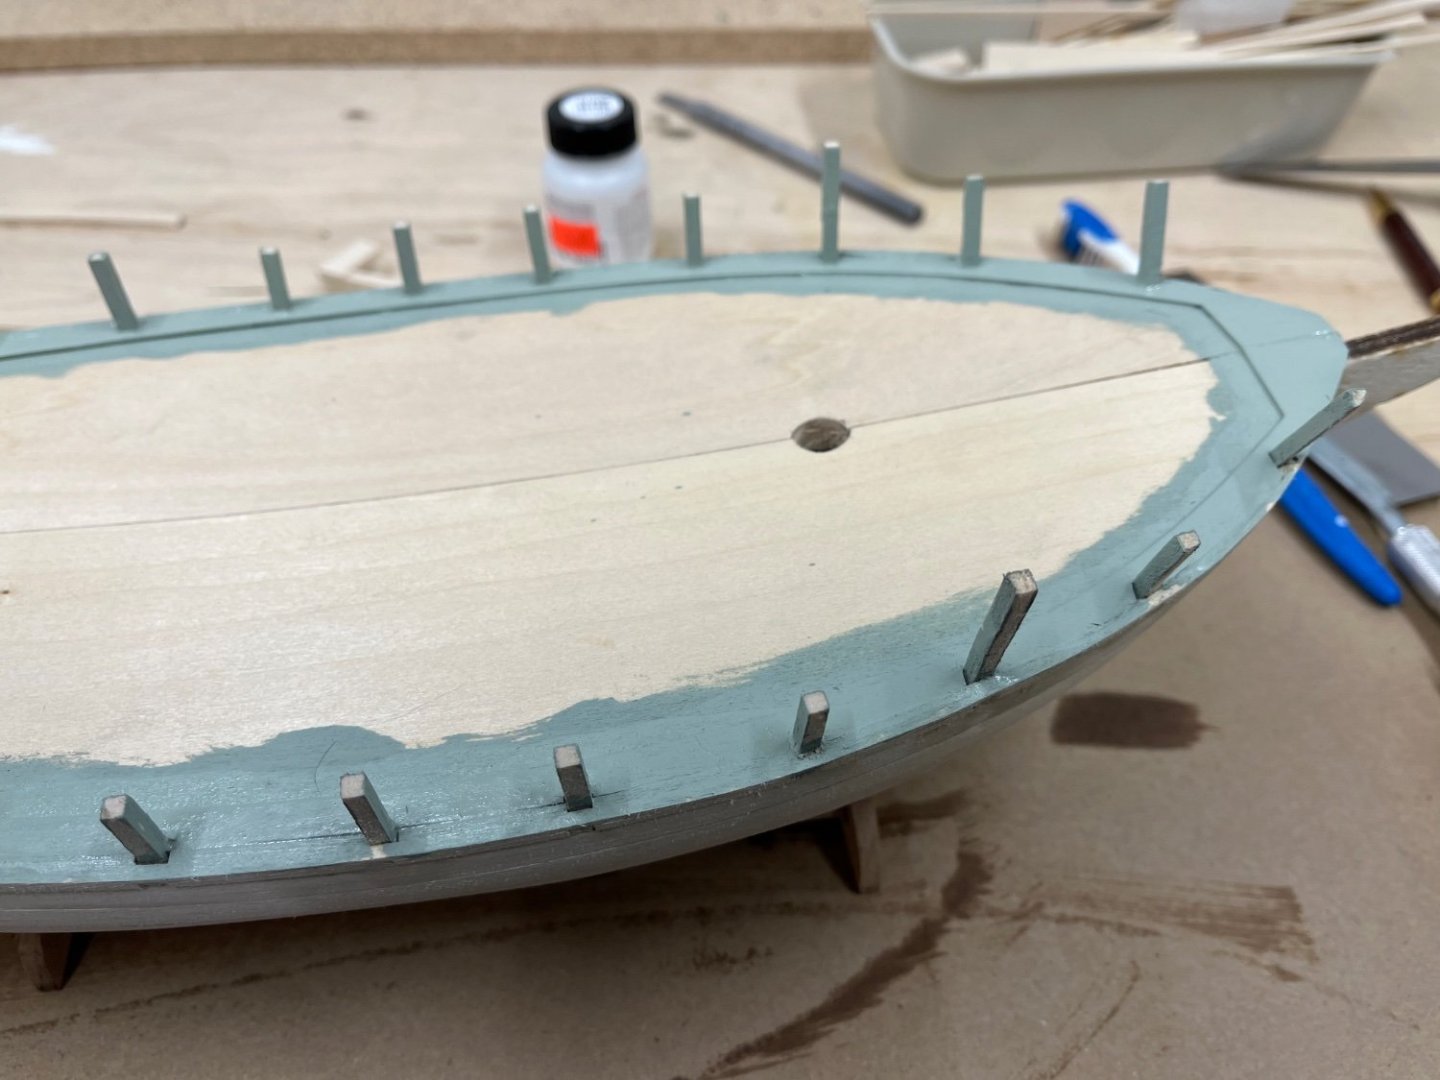
I used my thinned wood putty to fill in some of the little gaps between the margin boards and stanchions and then worked with knives, sanding sticks and dental picks to smooth the stanchions and margin boards. Afterwards, I painted the margin boards and stanchions. I am not particularly pleased with the color but the local model shop’s paint selection was low and they are waiting to restock the supplies. I also started finishing the deck with stain and then tried the window putty to fill in the grooves in the deck. It is a lot more subtle than the pictures look like and I think the clear varnish coats will help. It would be great if they could extend the grooved pattern across the entire sheet where the deck half is cut from so that you had some extra material to try out stain colors and the putty before you do it to the real deck pieces.


-
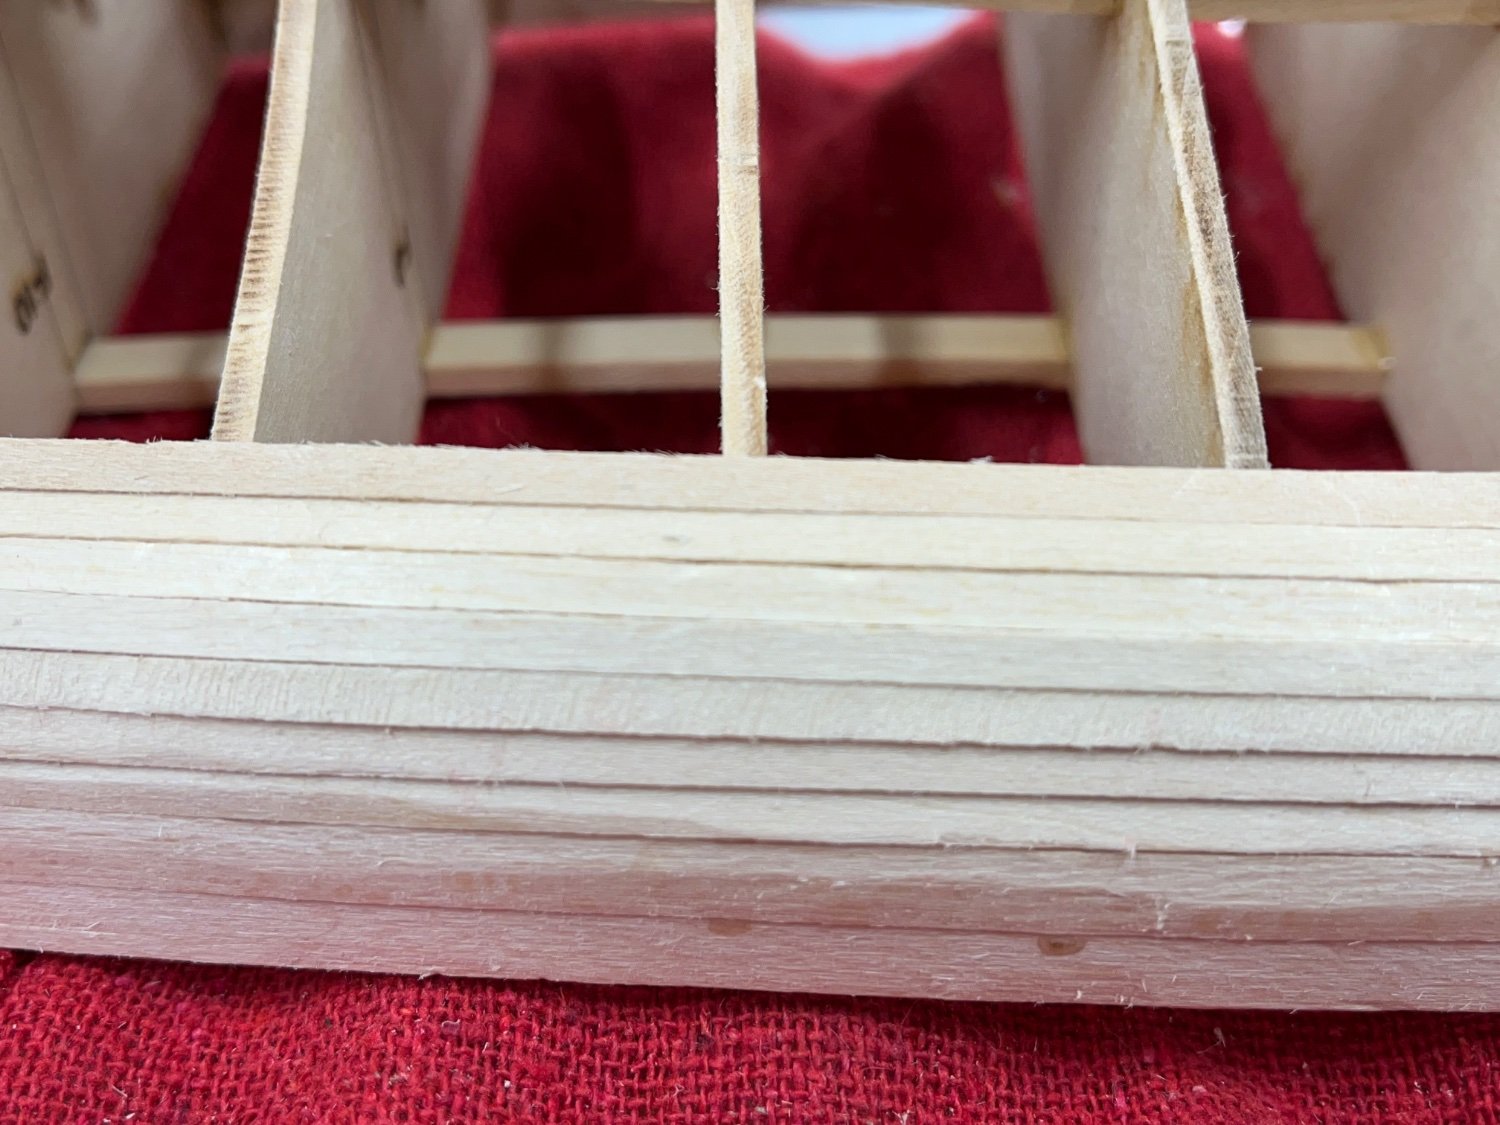
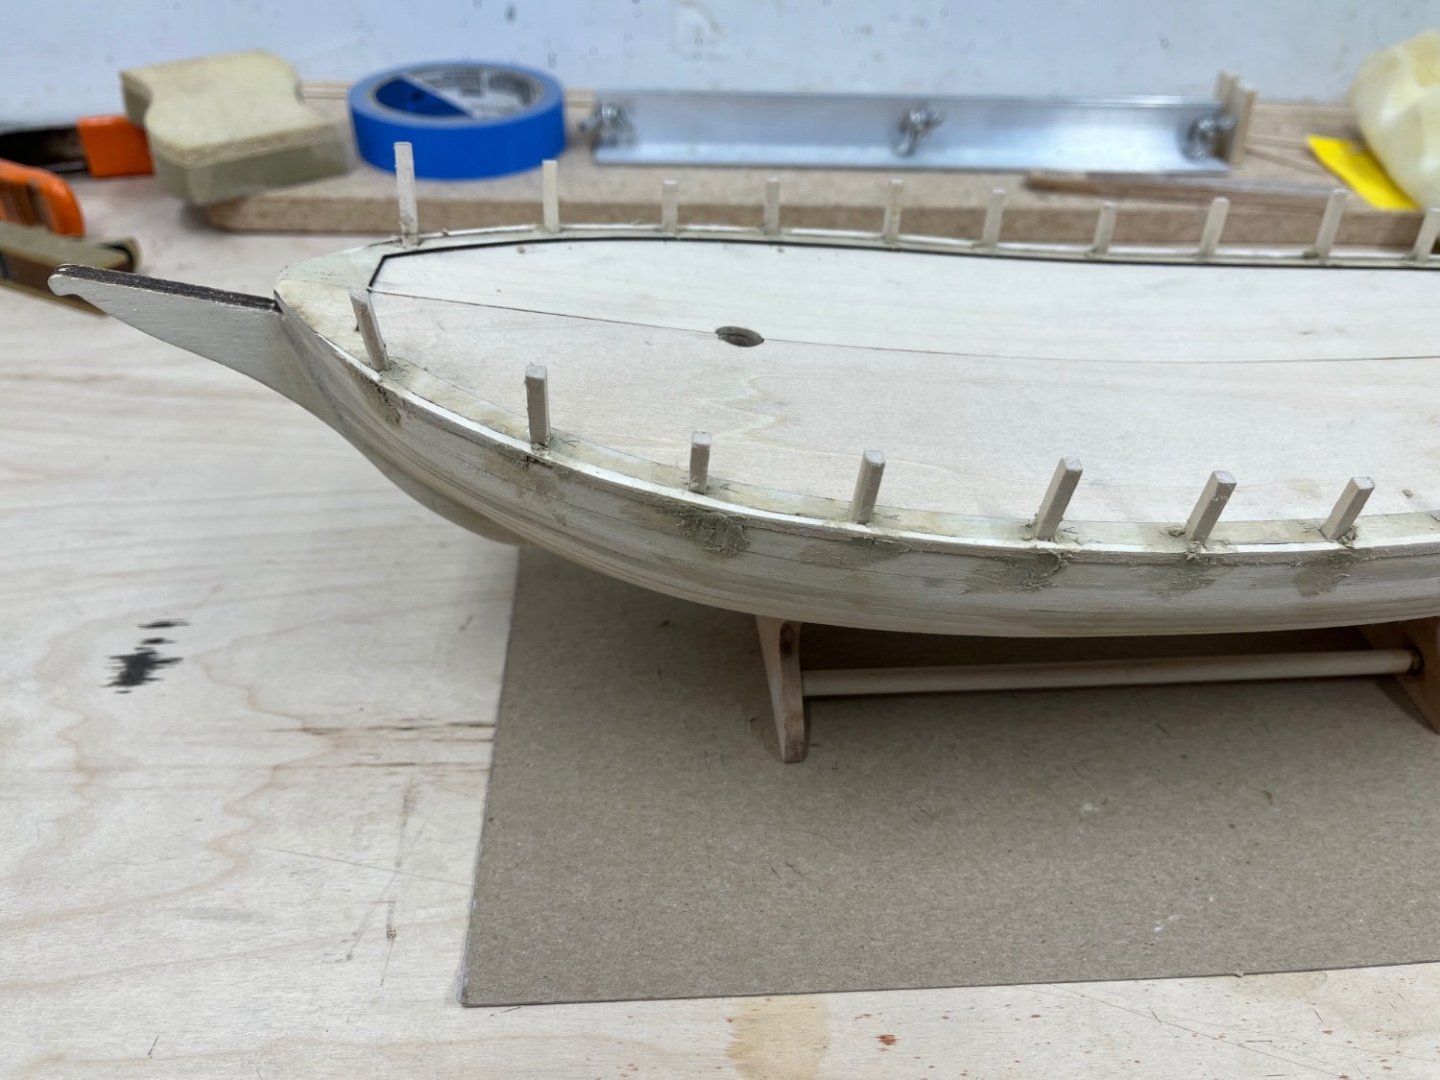
After cutting and fitting the margin boards, I glued them into place and then soaked and placed the outboard margin board. This piece is only about 1/8” wide but I cut it a little wider to match up with the sub-deck - both of which will get trimmed and sanded to match the hull planks below. The most visible part of the margin boards is the inboard side so in setting them like this, the rougher side is along the face of the planking and mostly out of sight.

-
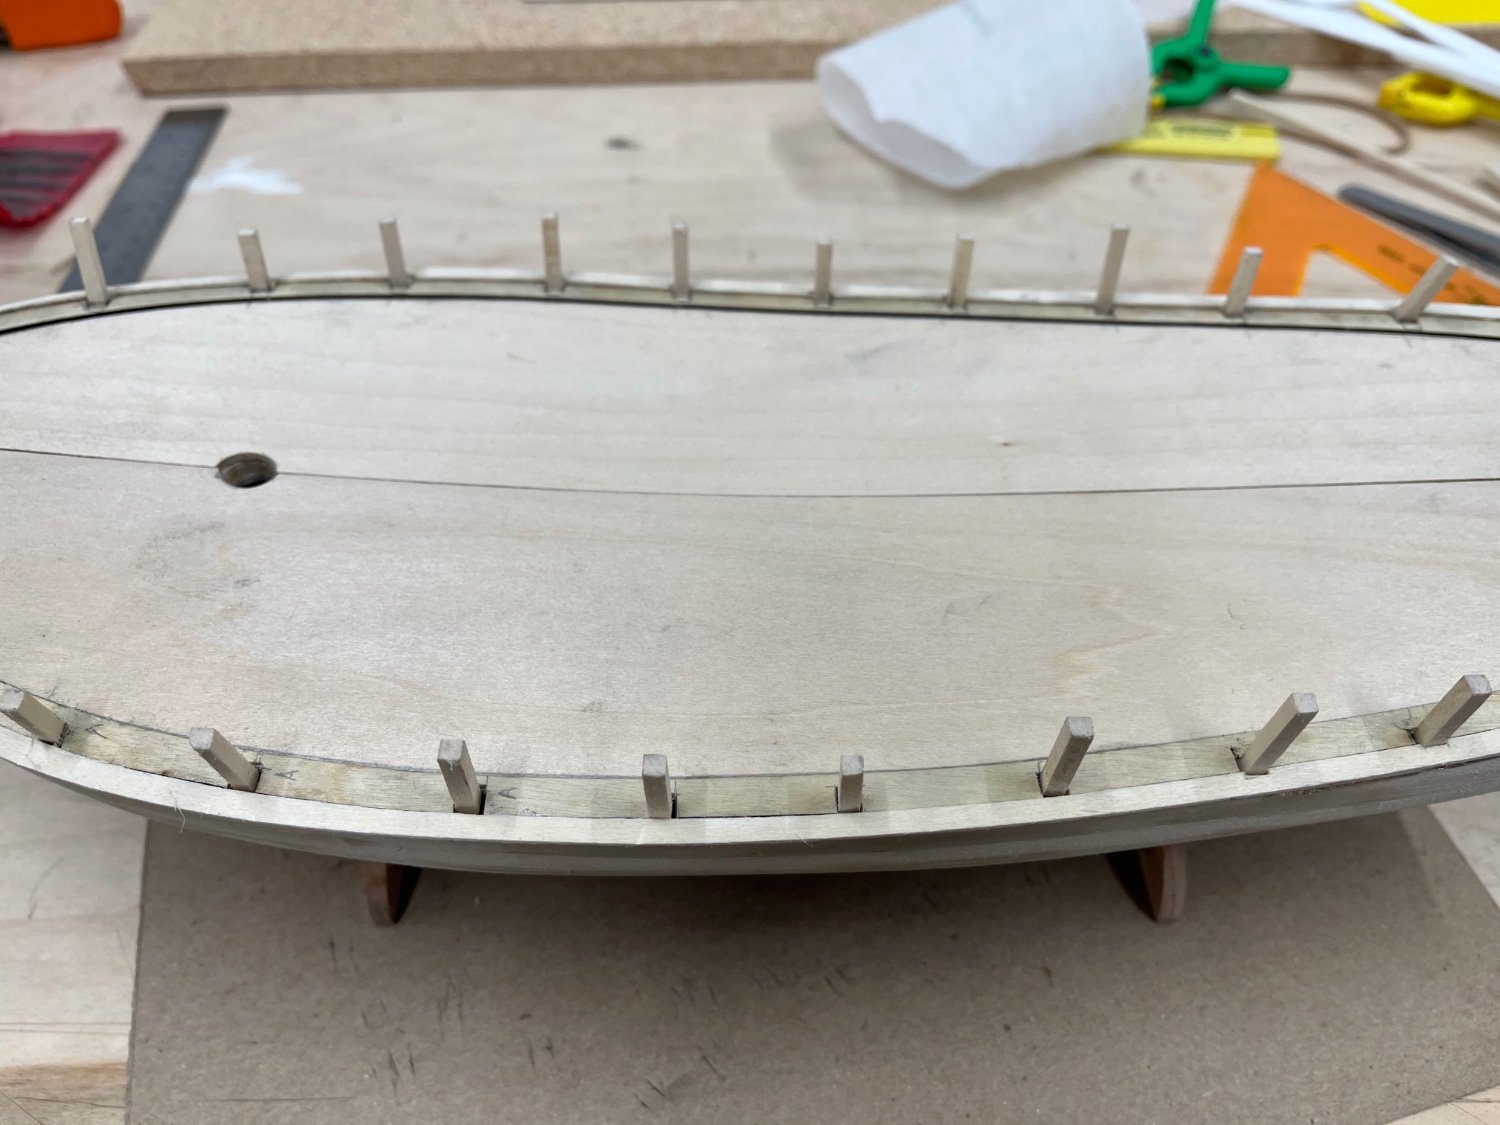
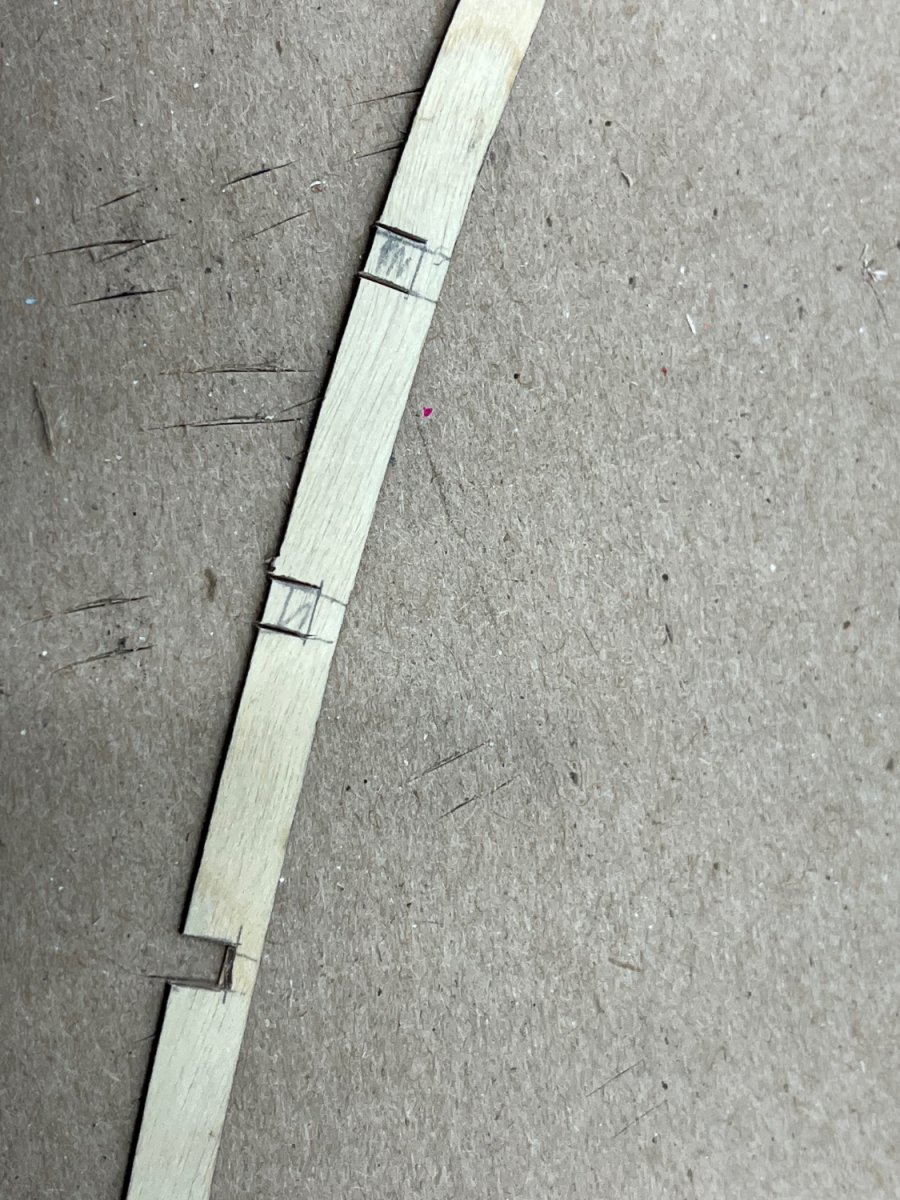
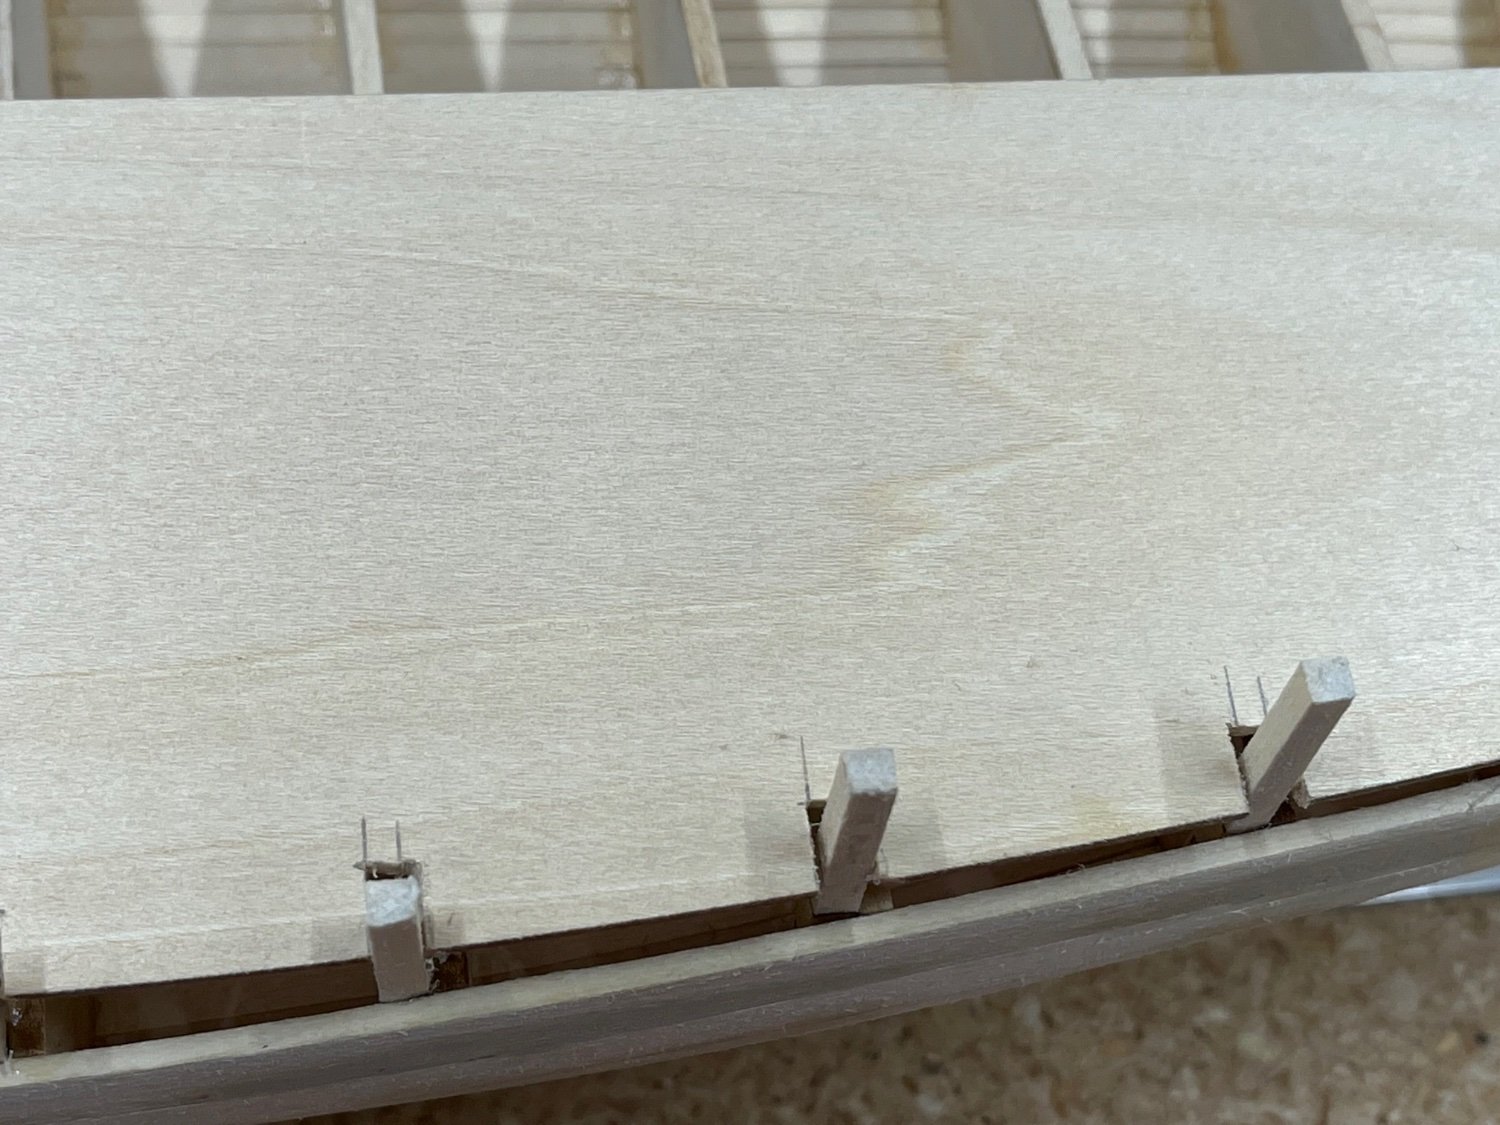
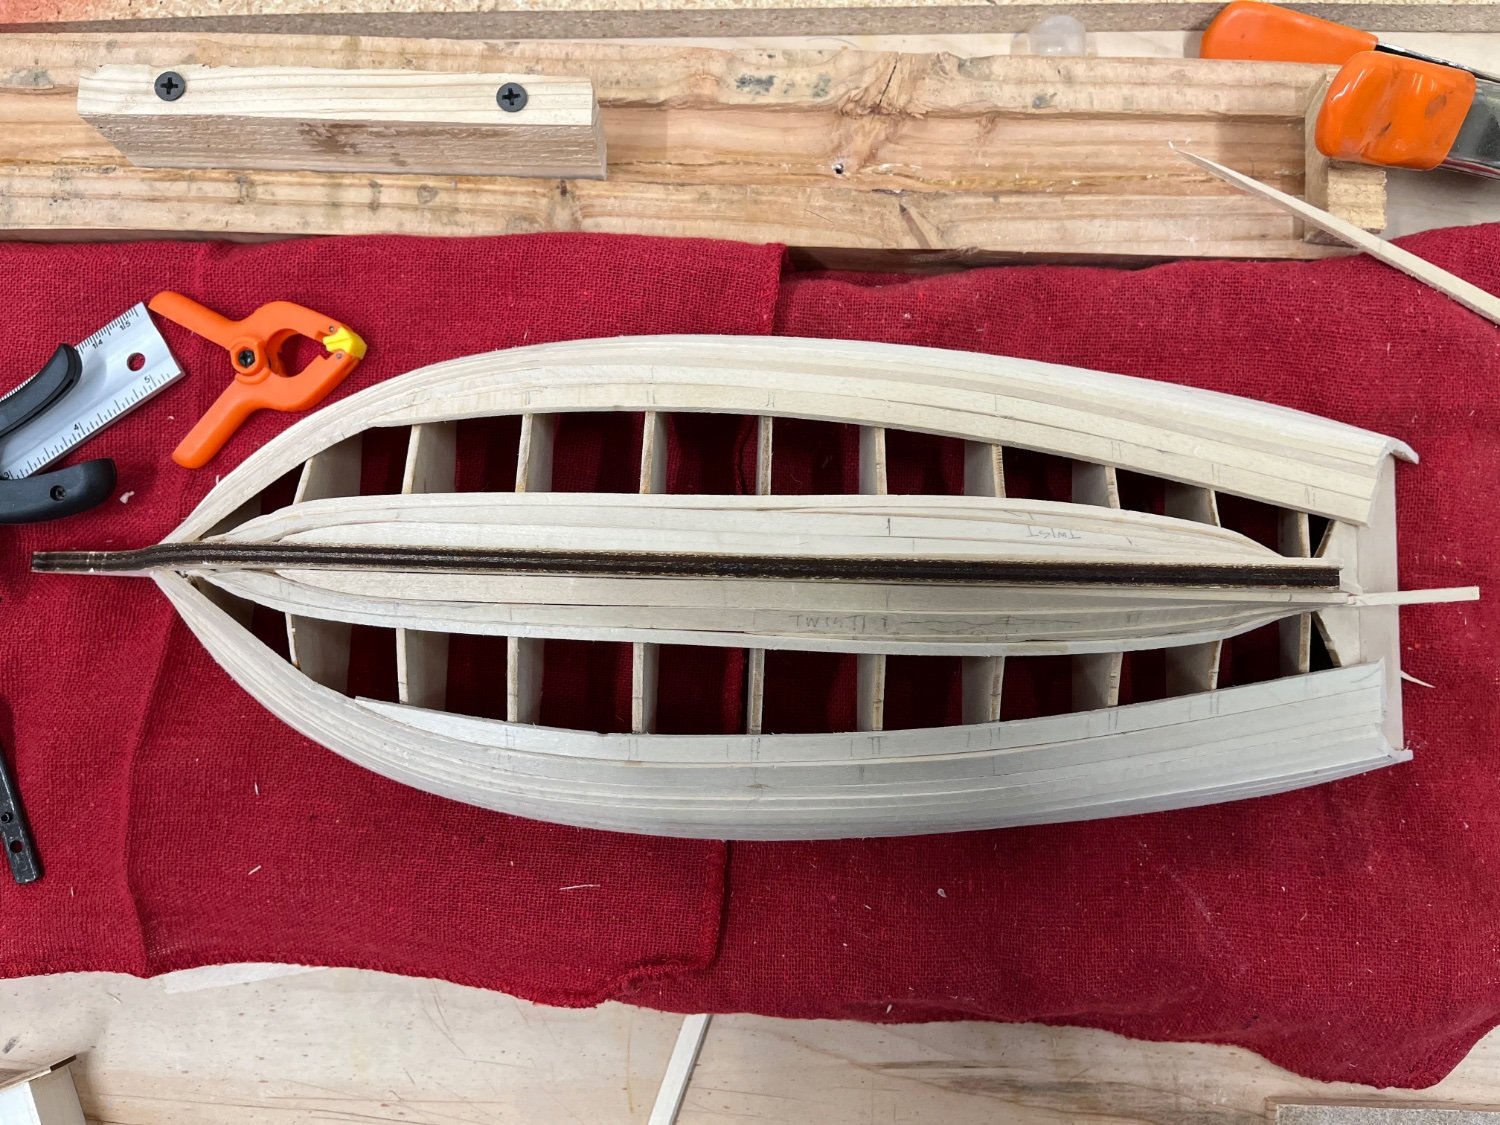
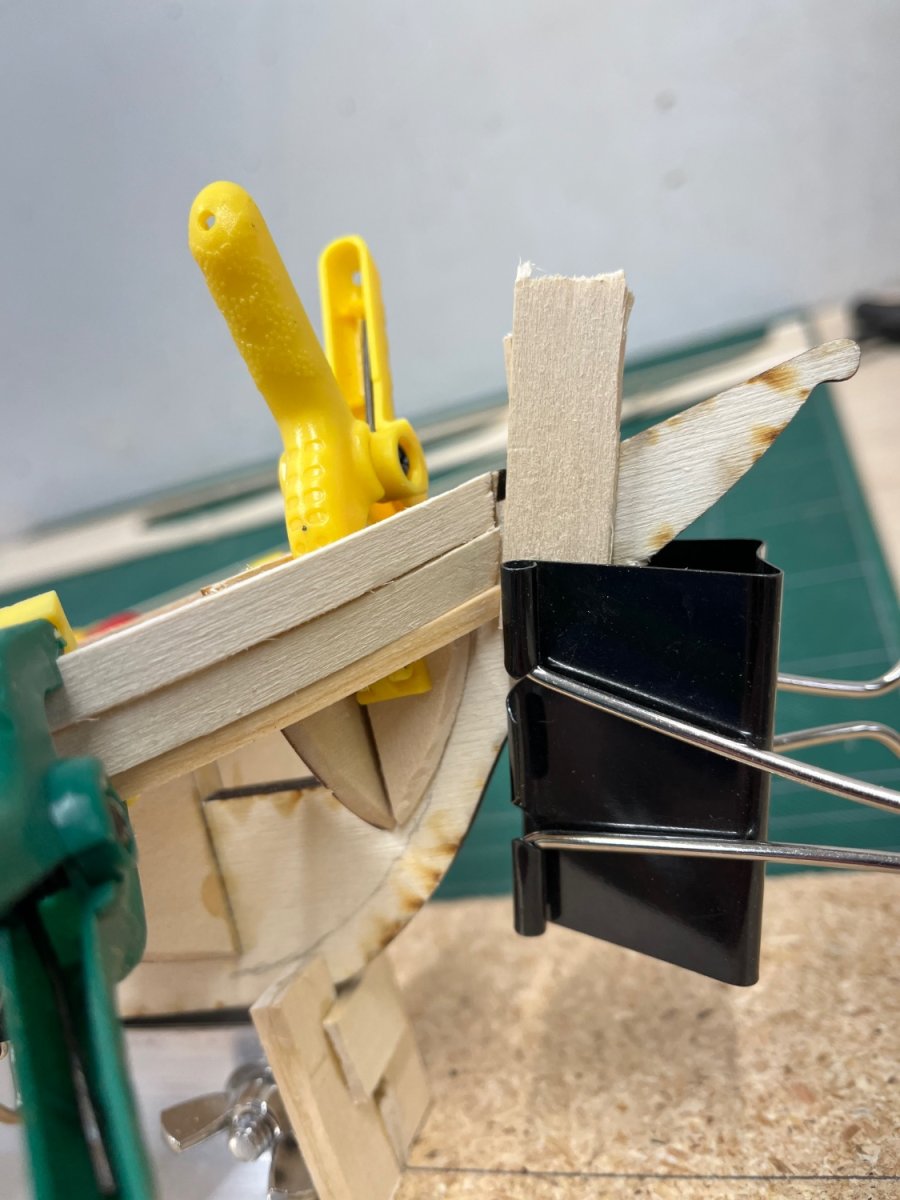
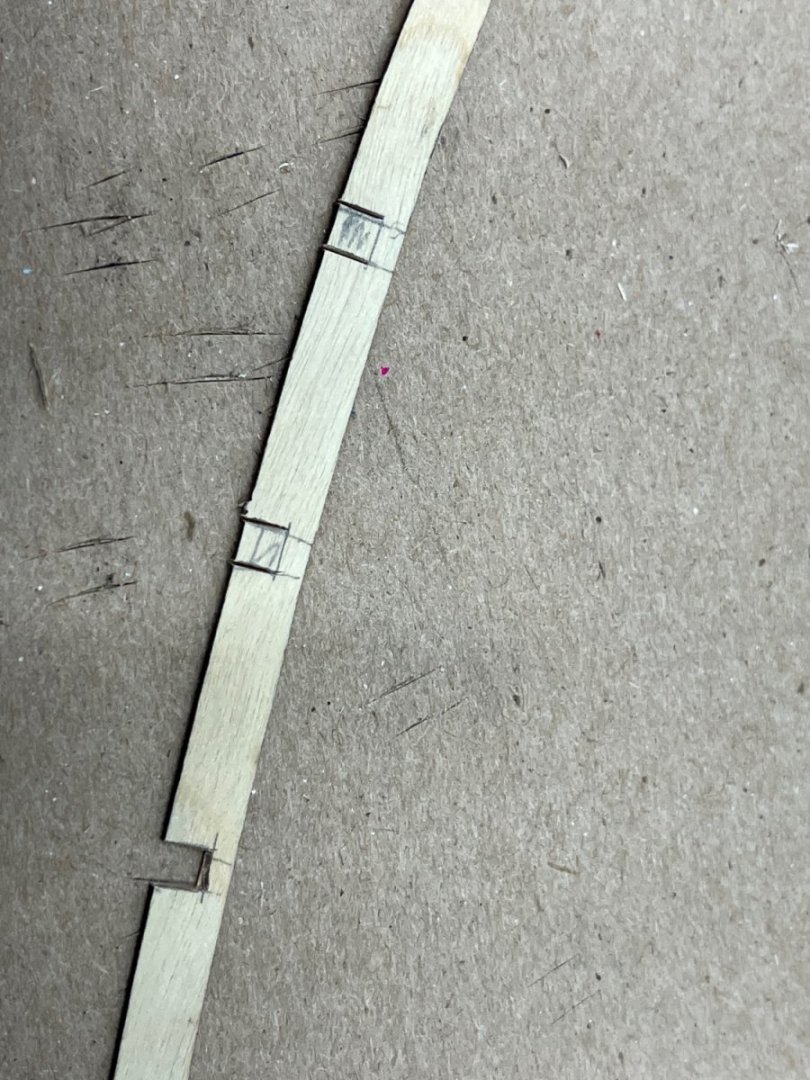
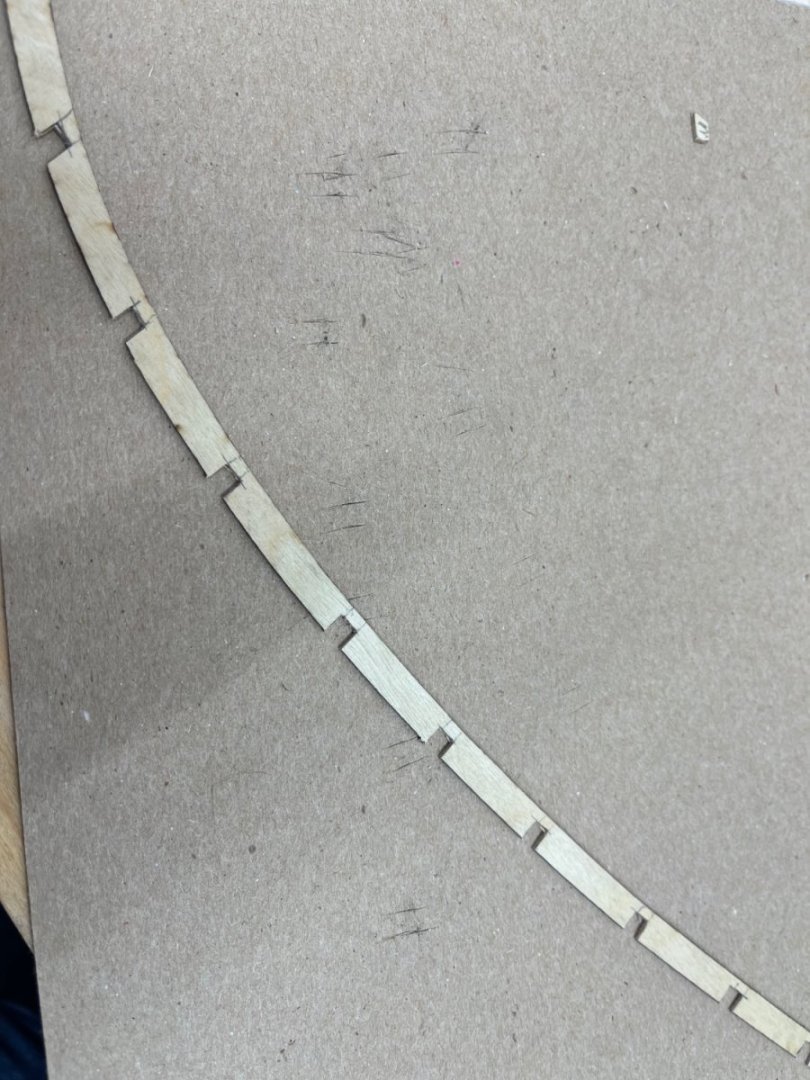
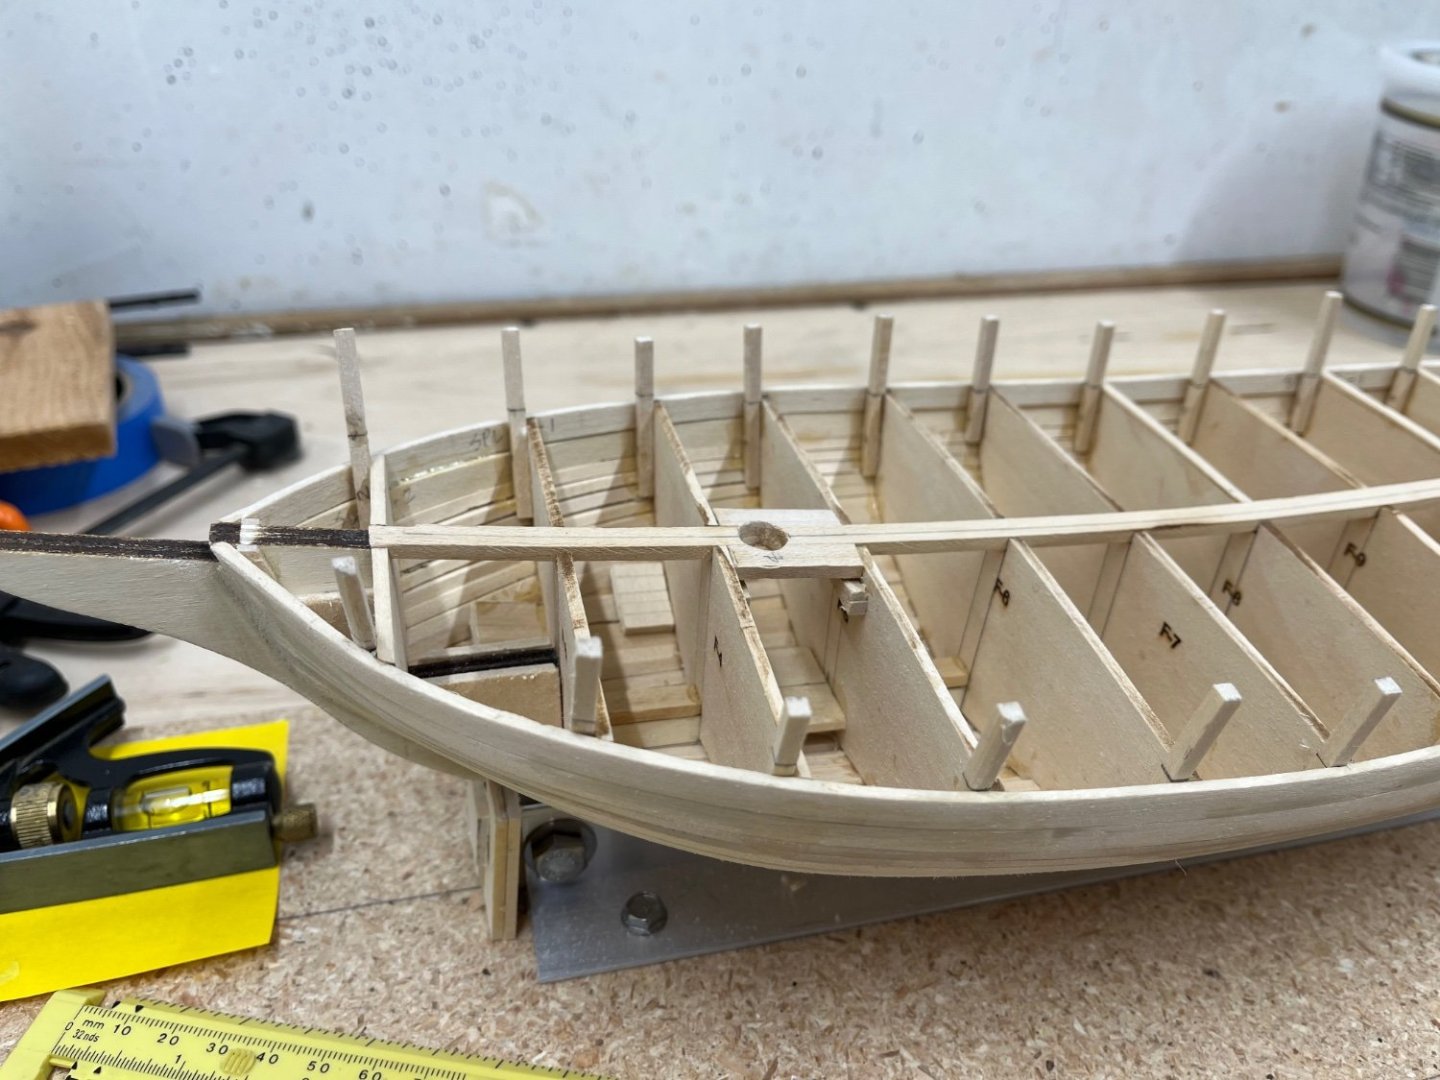
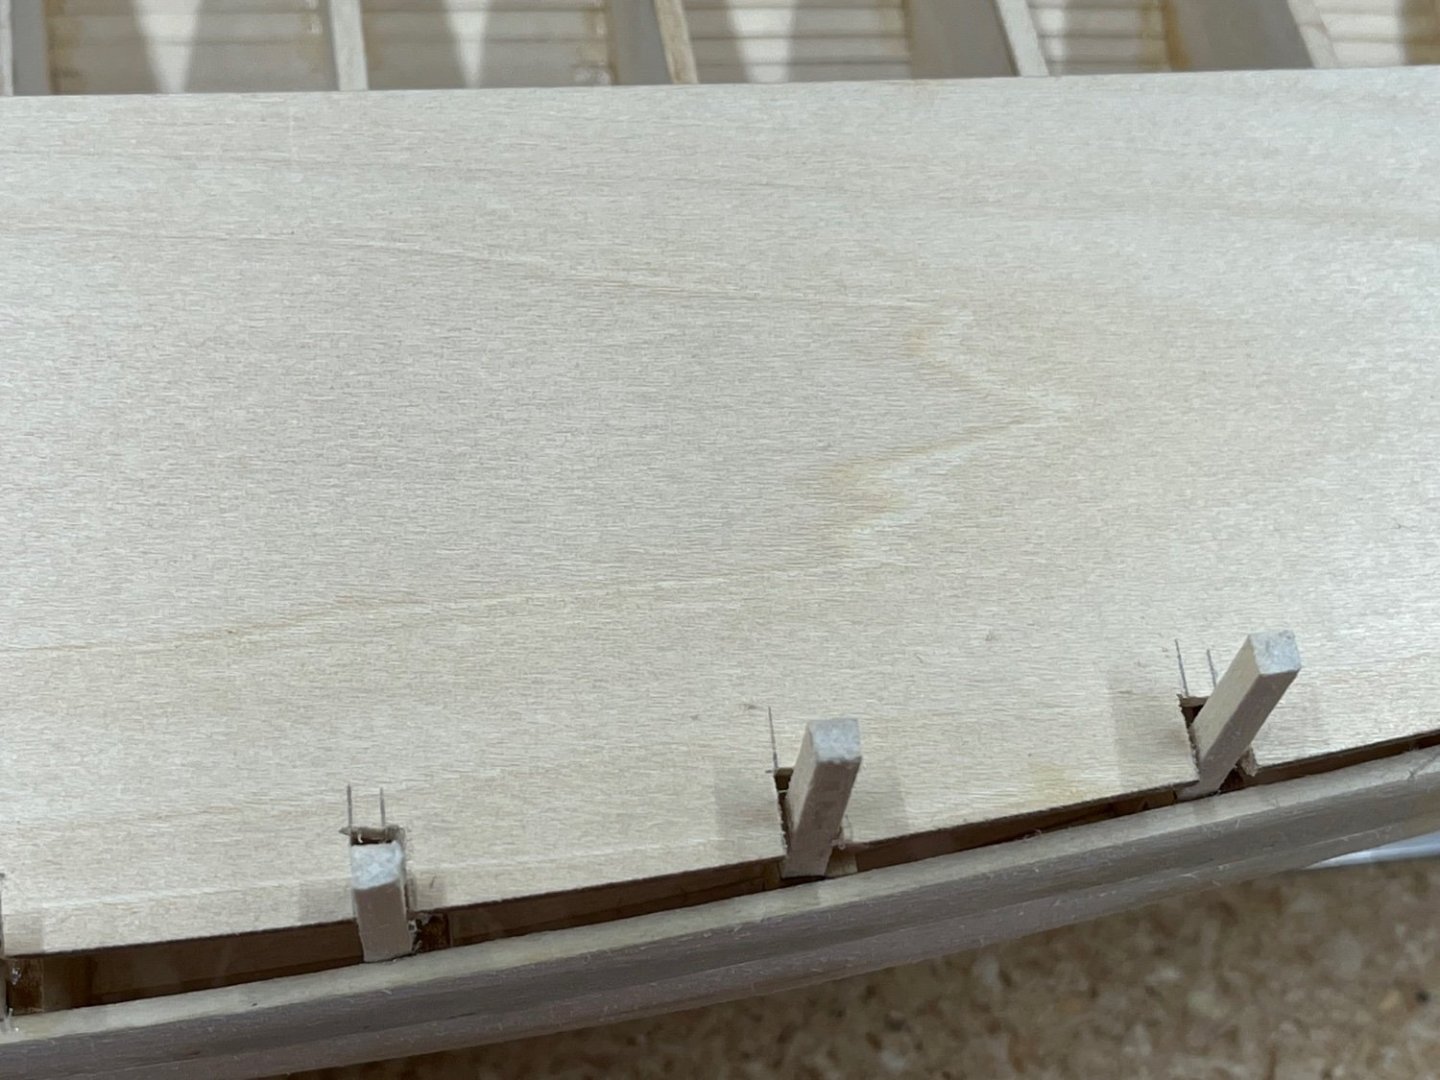
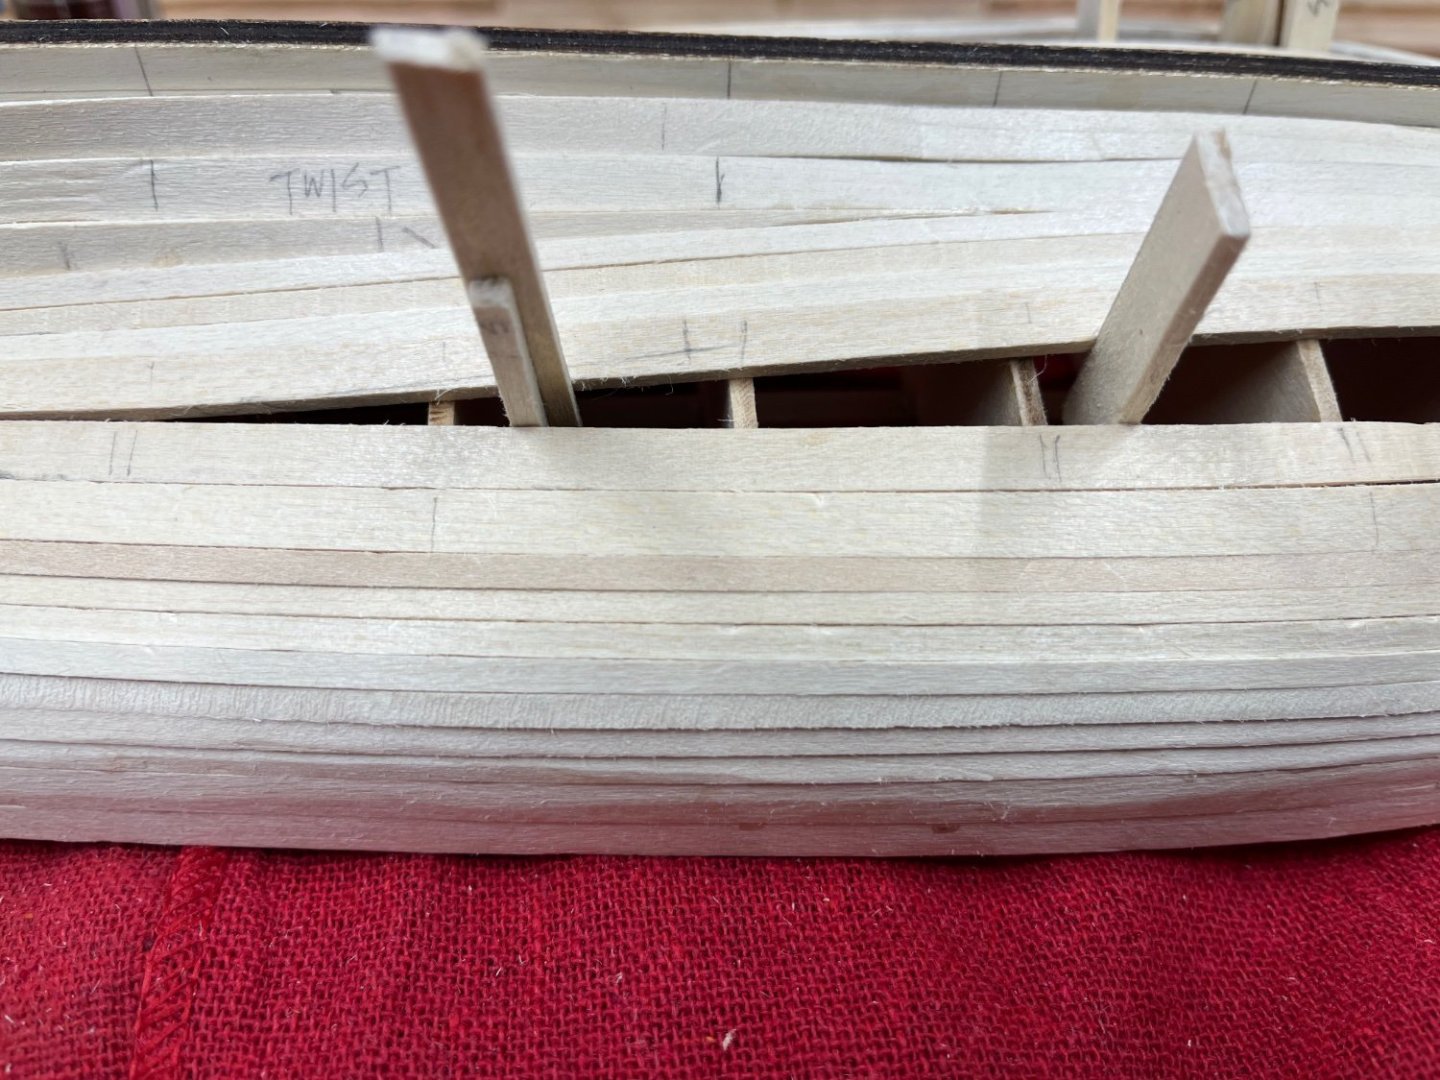
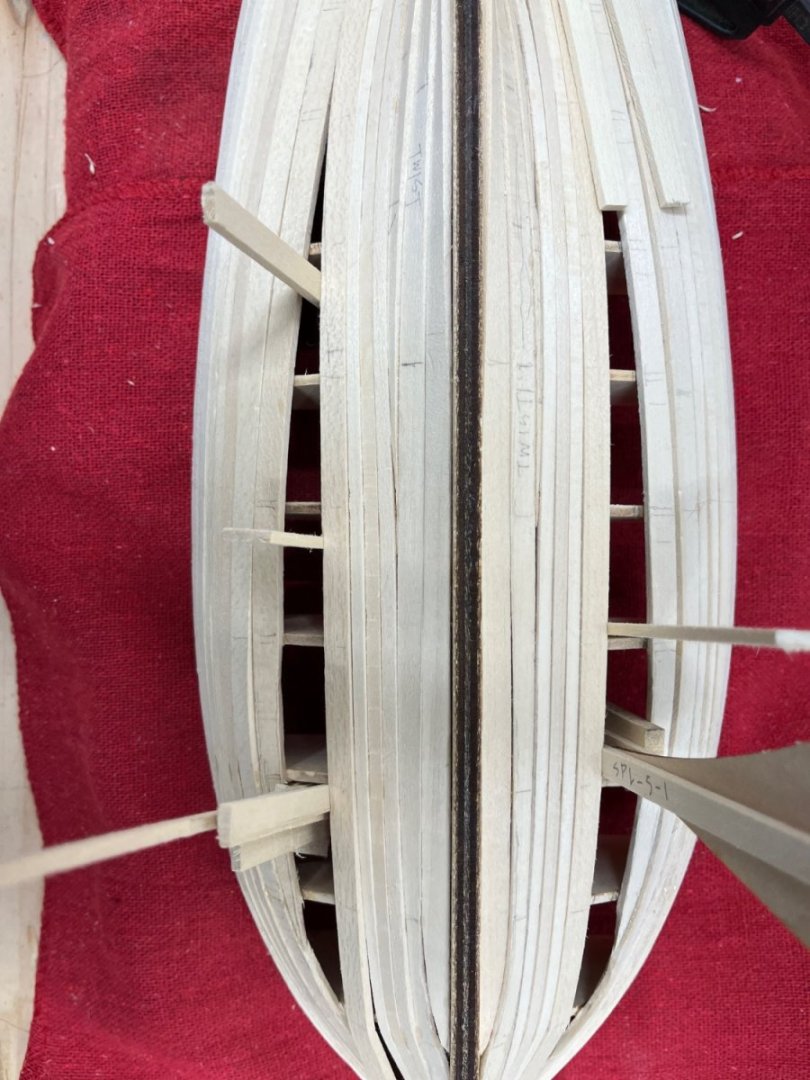
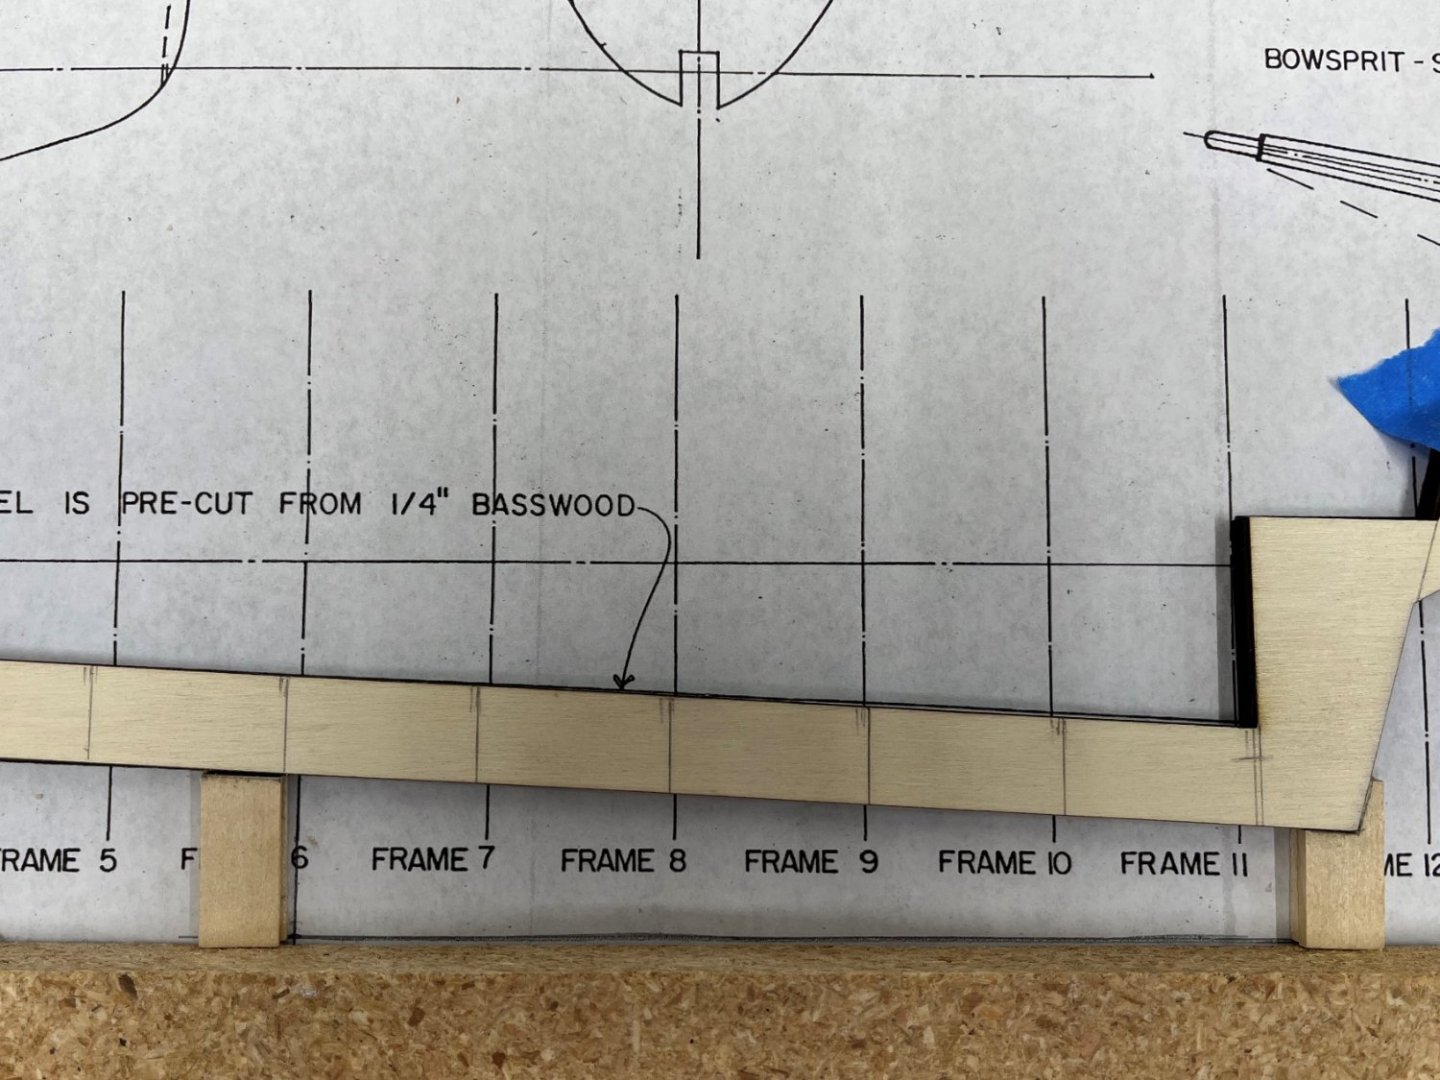
After fitting the two sub-deck halves to the stanchions and the centerline of the framing, I traced them to make patterns and then glued them into place. There is extra material that overhangs the sides but that should be easy to trim and sand smooth to the planks. Next I started on the margin boards which run along the outboard edge of the deck and the instructions call for square holes to be cut for each stanchion to fit through. The margin boards and the finished deck are 1/32” sheets of laser-cut basswood - very thin, easy to cut and easy to damage. Using the patterns which locate the stanchions, I laid them over the margin boards. I’m not sure why but the pattern of the stanchions did not line up very well with the margin boards. It appears that the planked frames were narrower than the deck and margin boards. The pre-cut margin boards are also not very wide and there is very little room for error in the alignment of the stanchions or to the edge of the hull planks. It would be helpful if the margin boards were a little wider to the outboard side as the would allow a little more tolerance in fitting it in. I ended up notching the margin boards to fit around the stanchions so that the inboard side aligned with the stanchions and then I fitted a long strip of the 1/32” plank cut from the excess of the deck sheets. This area is all below the bulwark and cap rail so I do not think it will be too visible when sanded and painted.

-
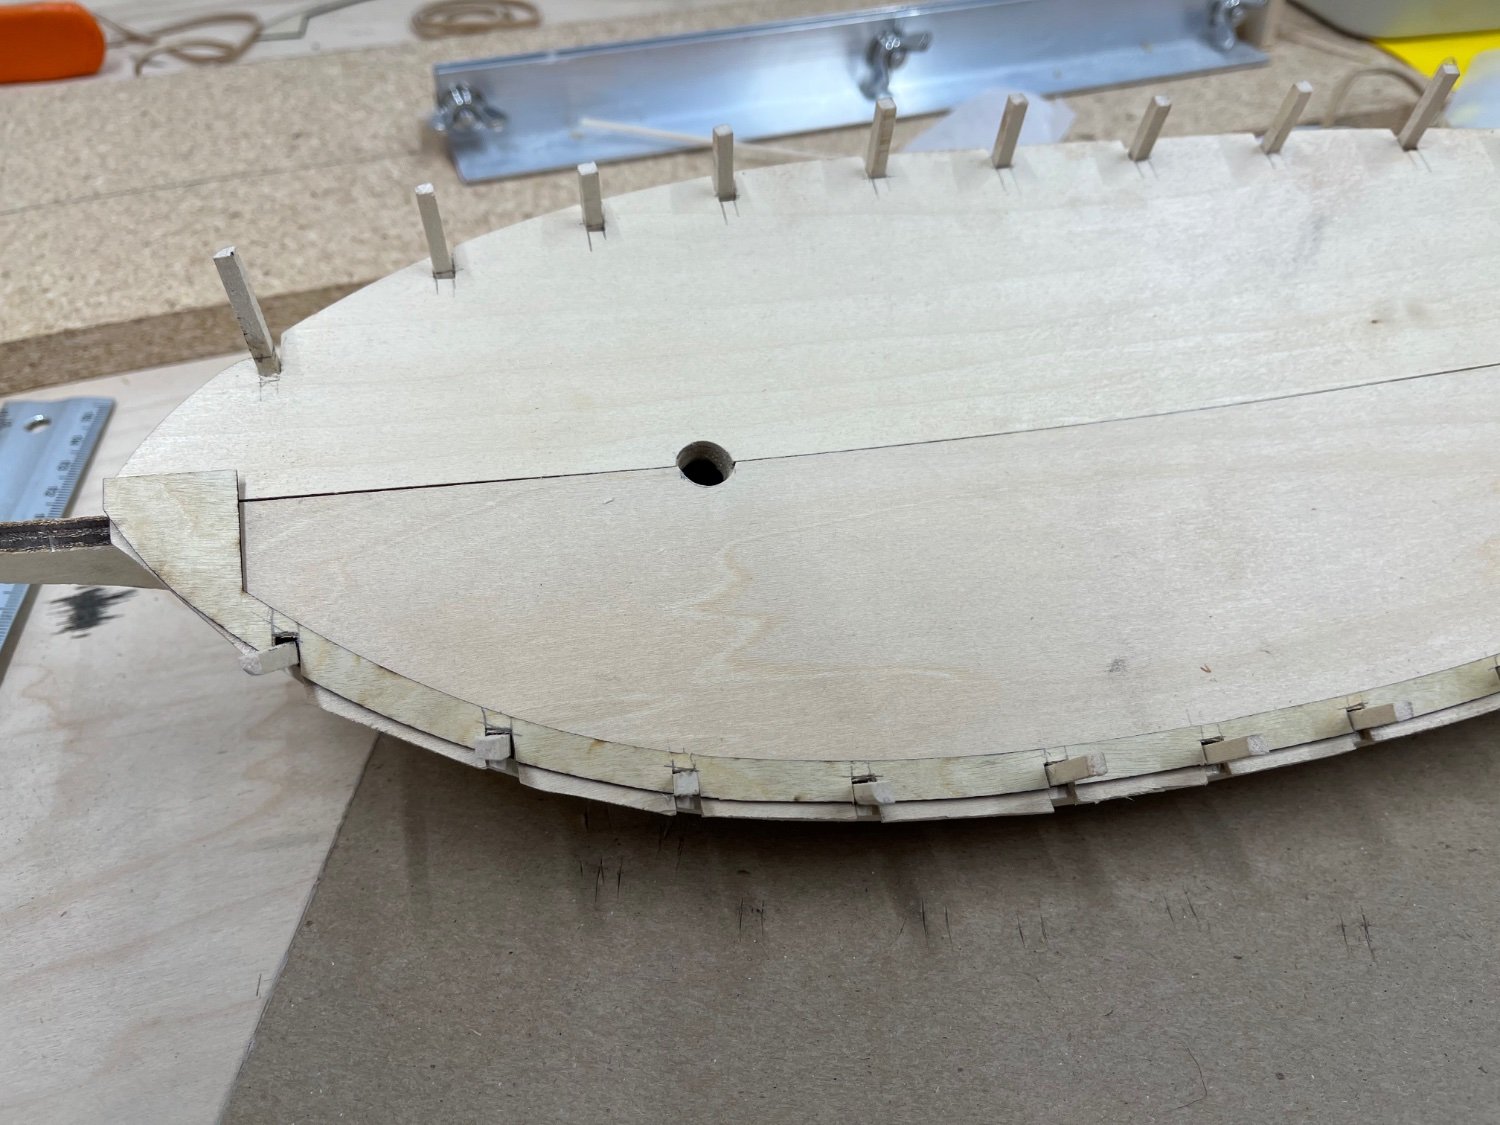
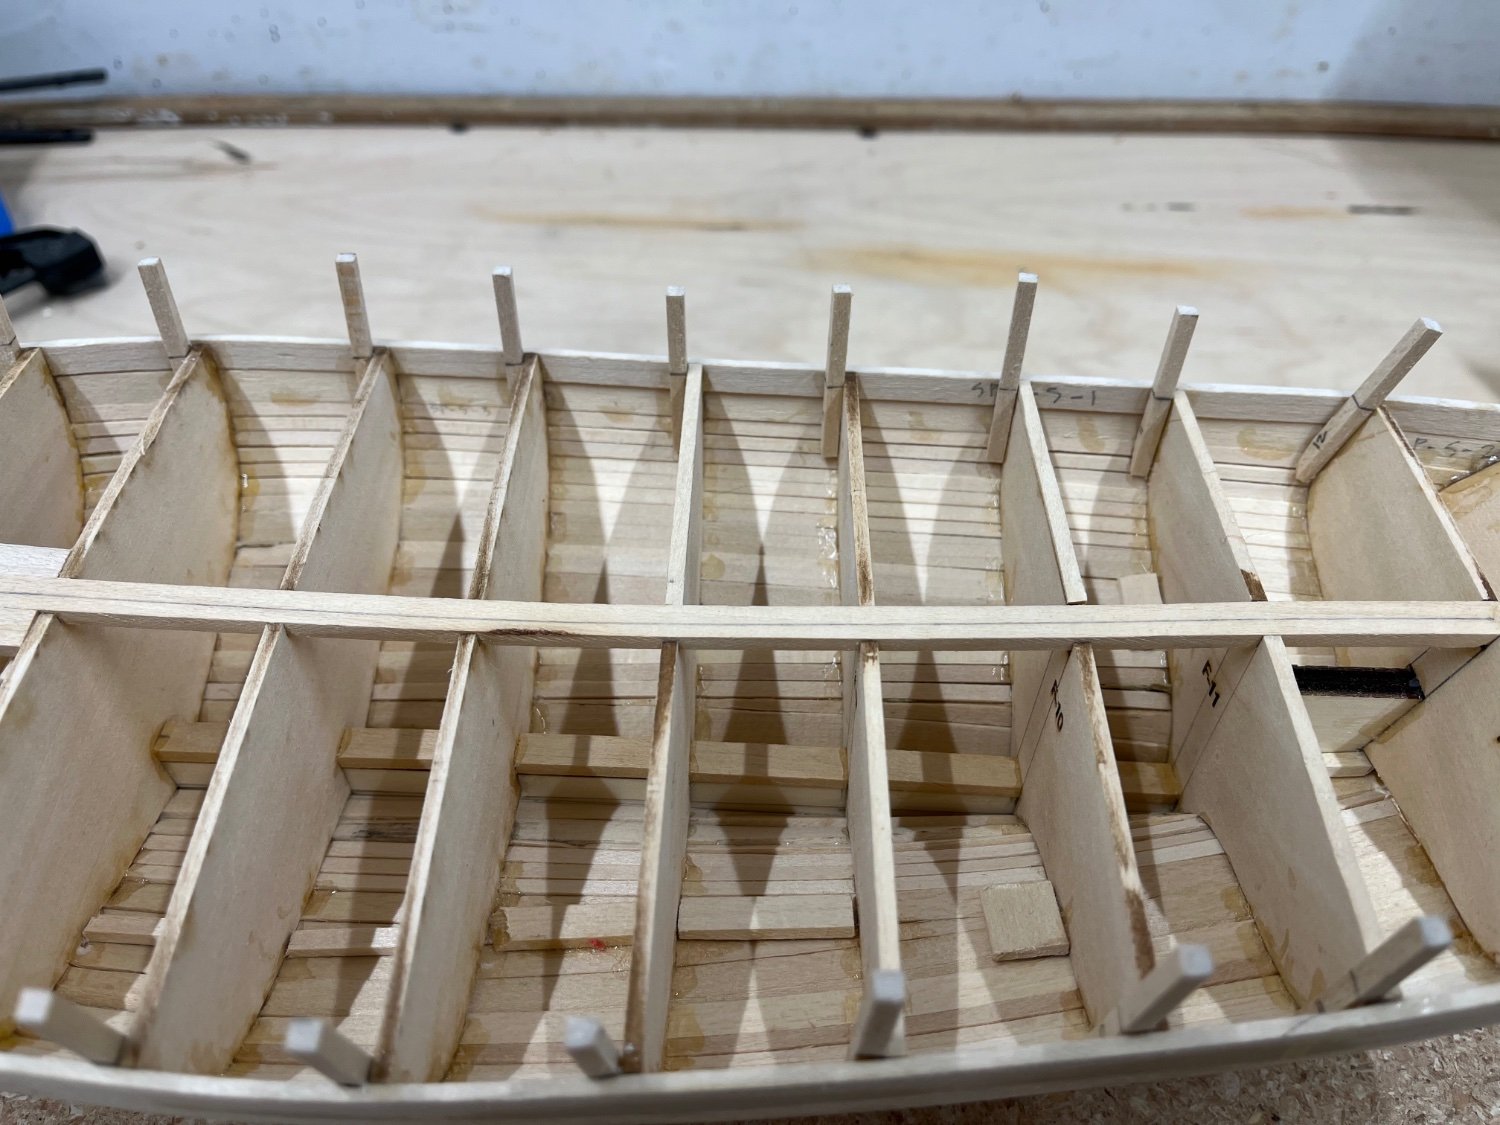
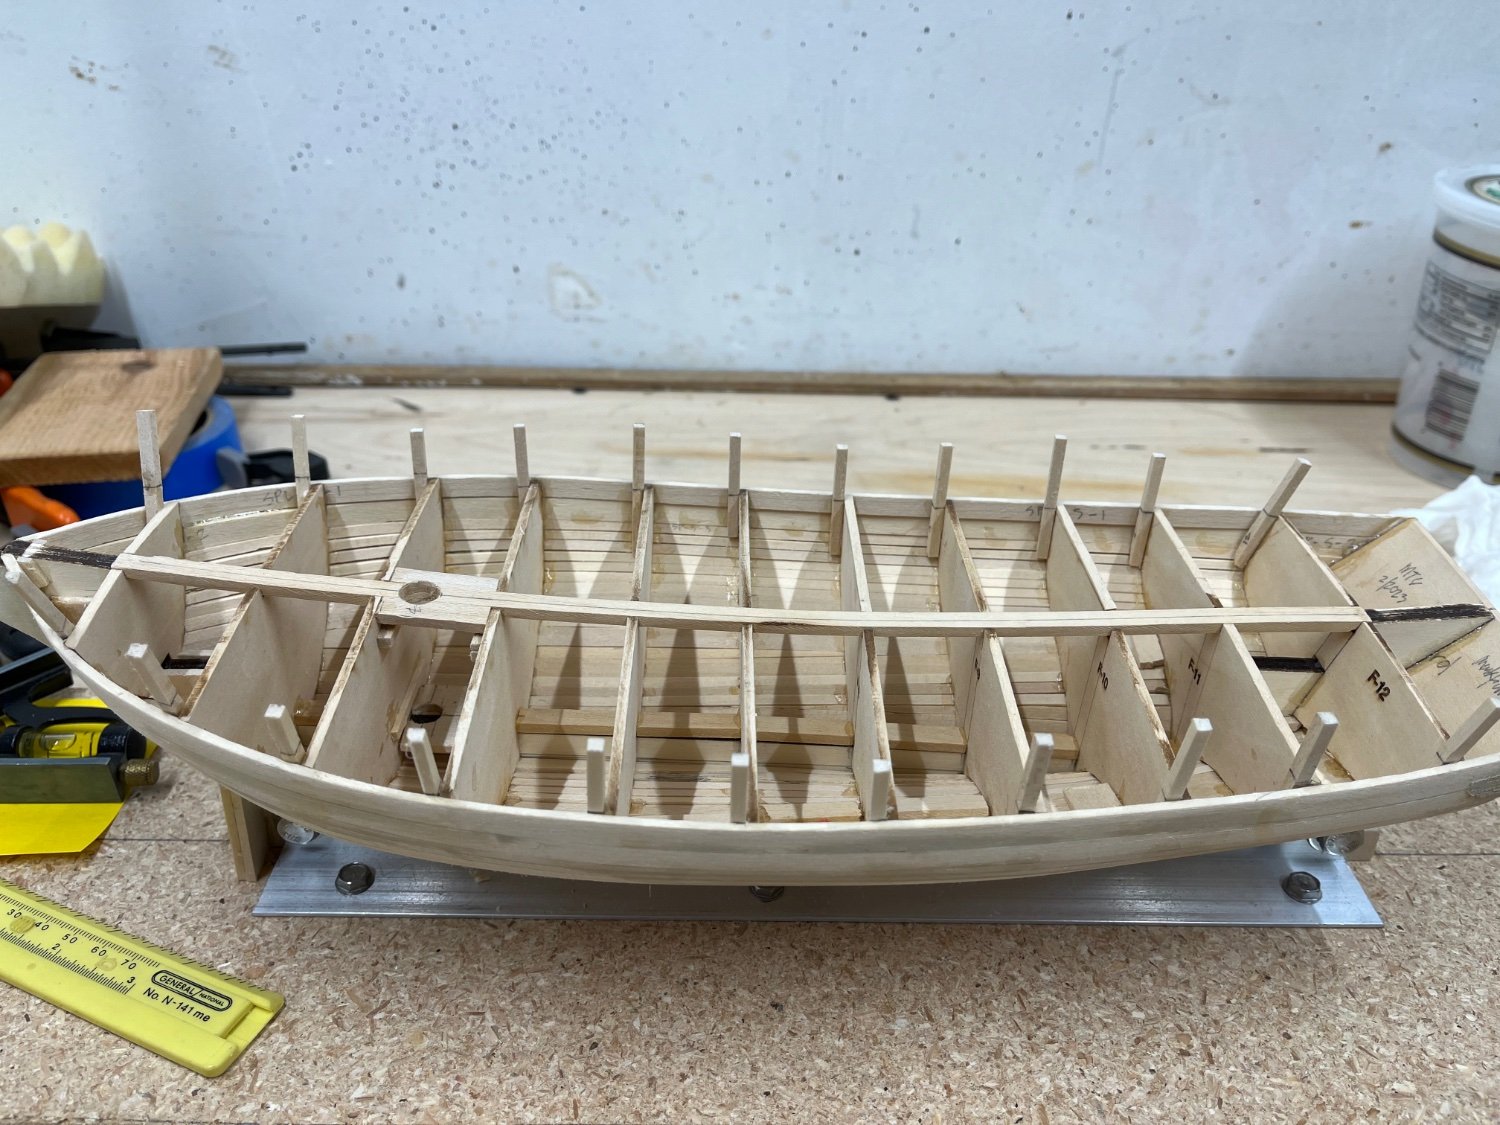
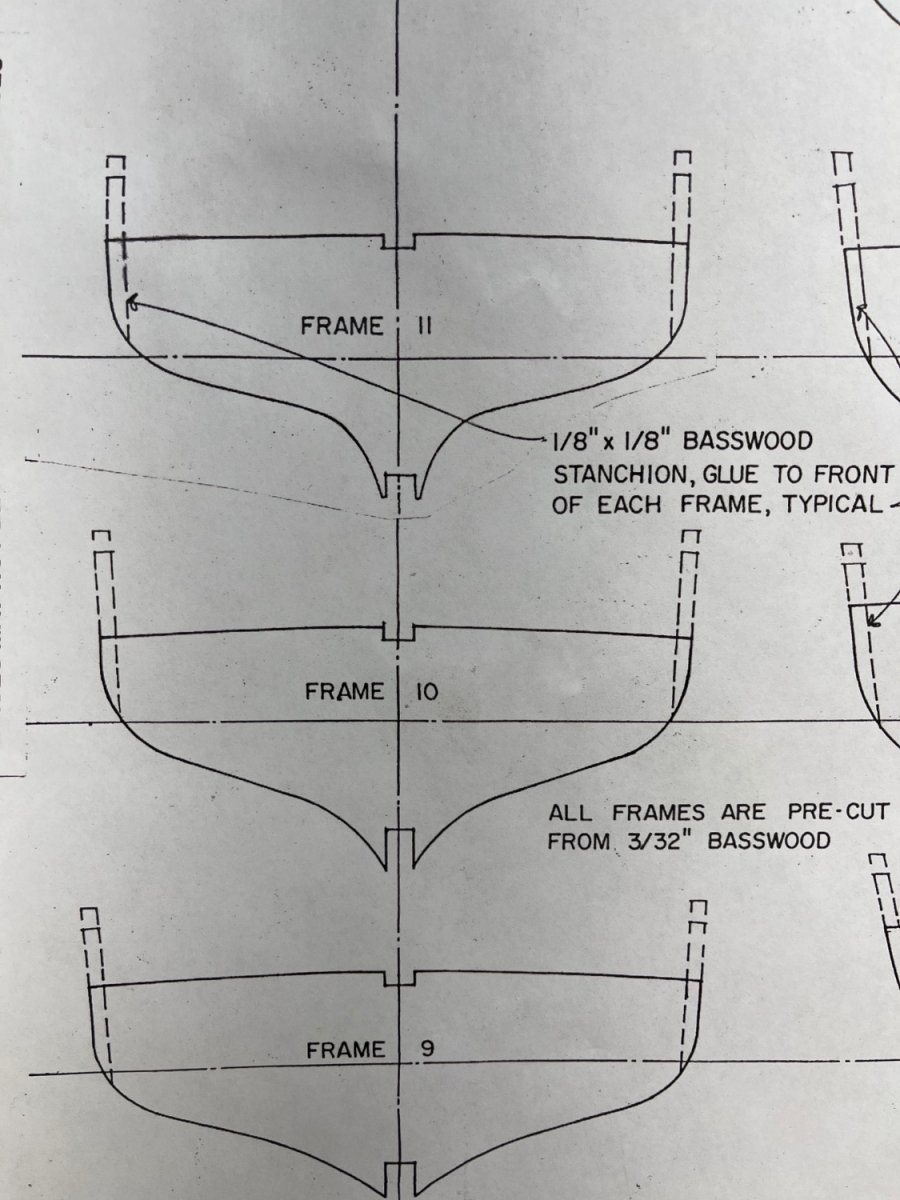
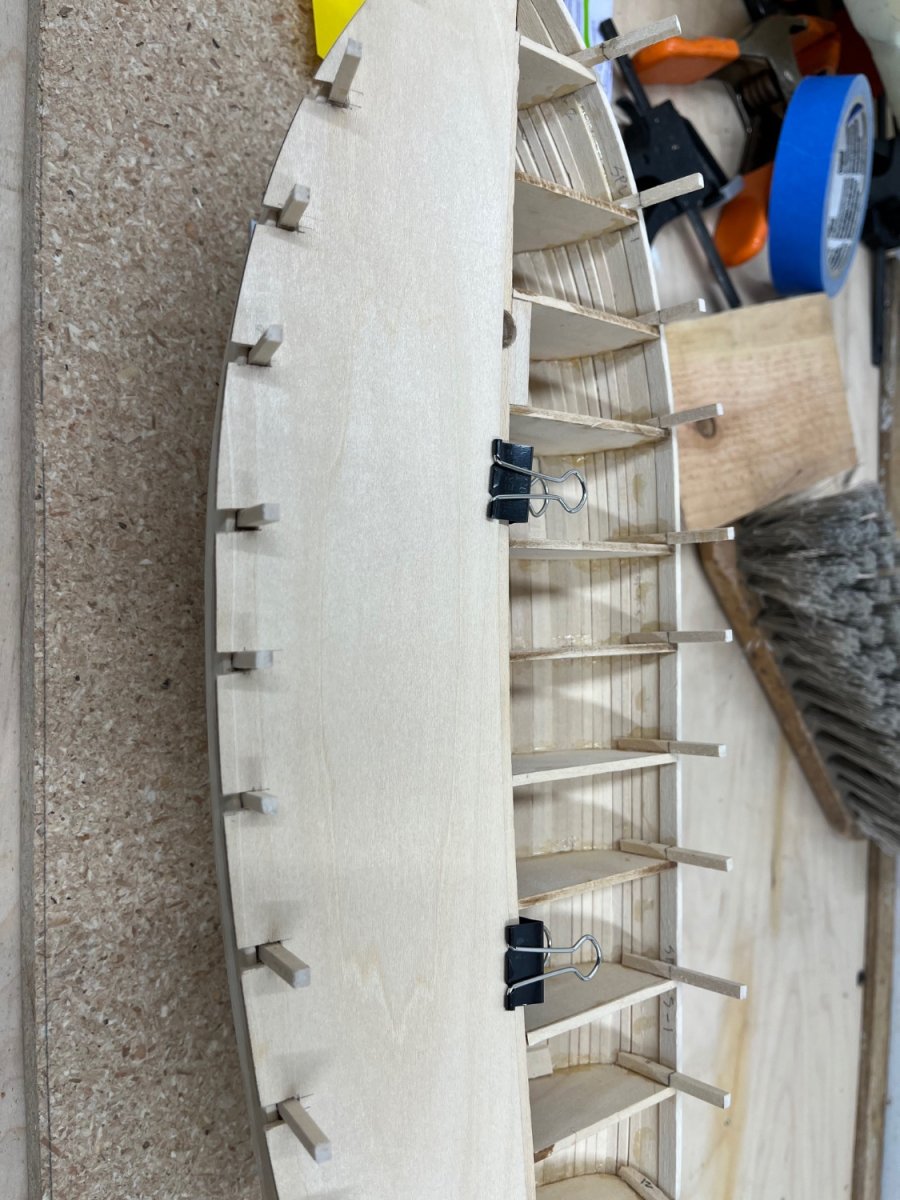
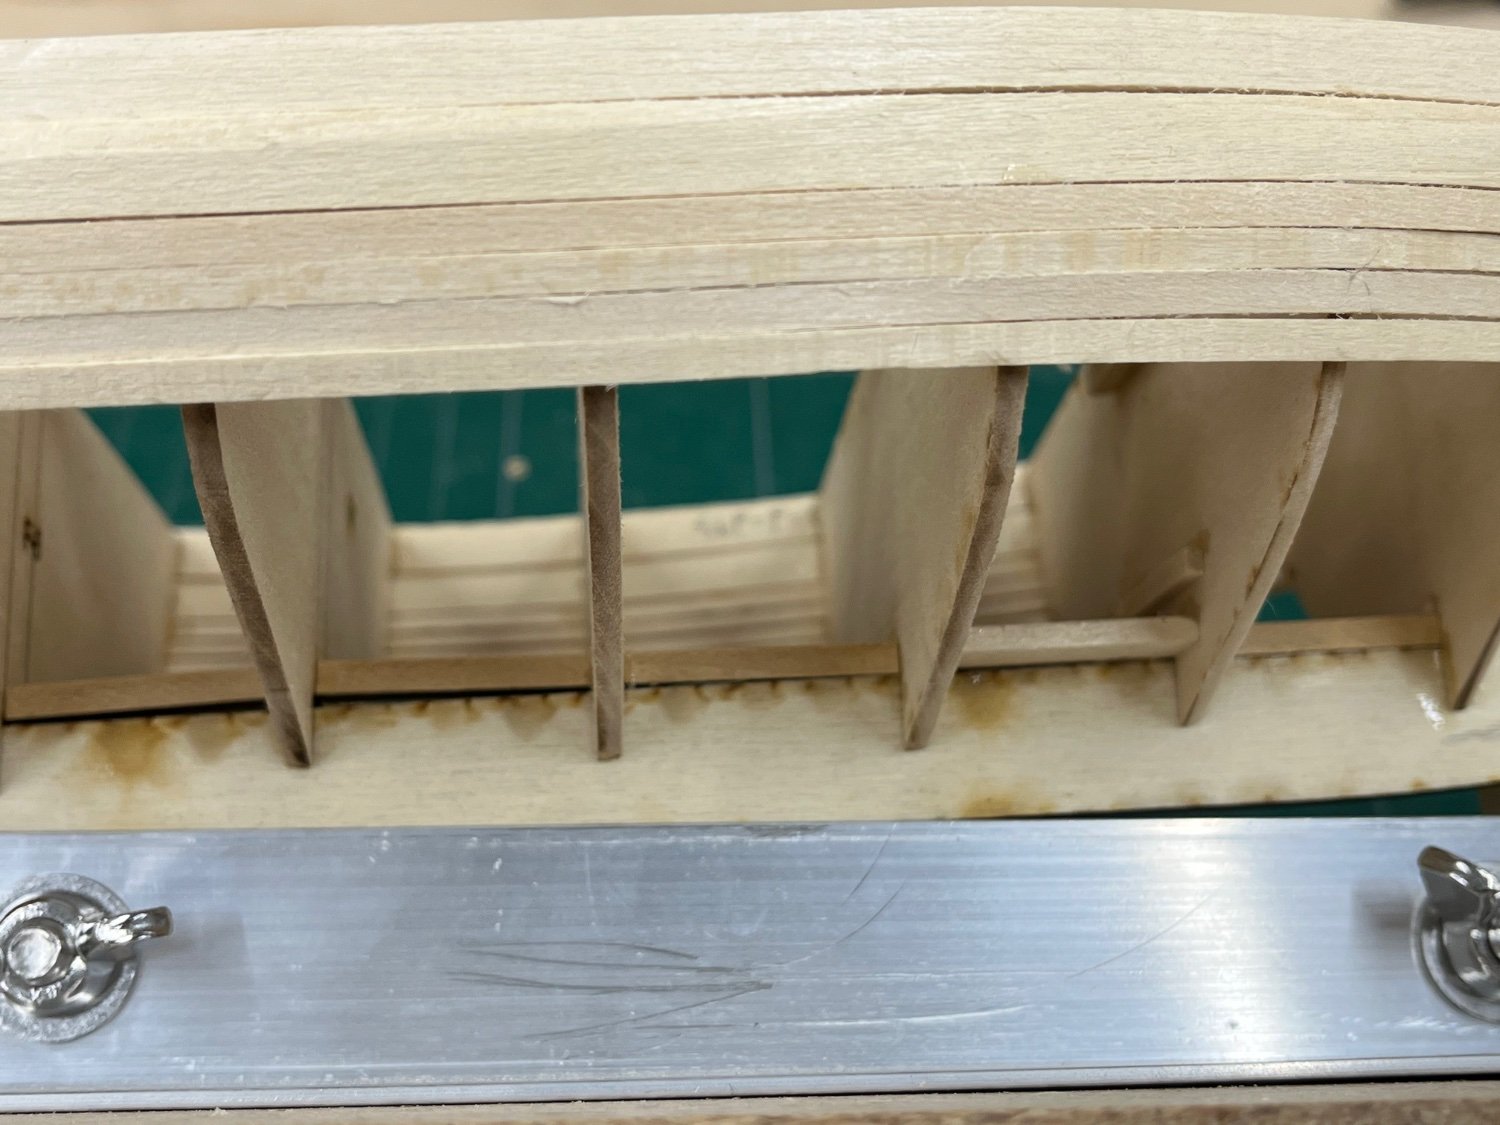
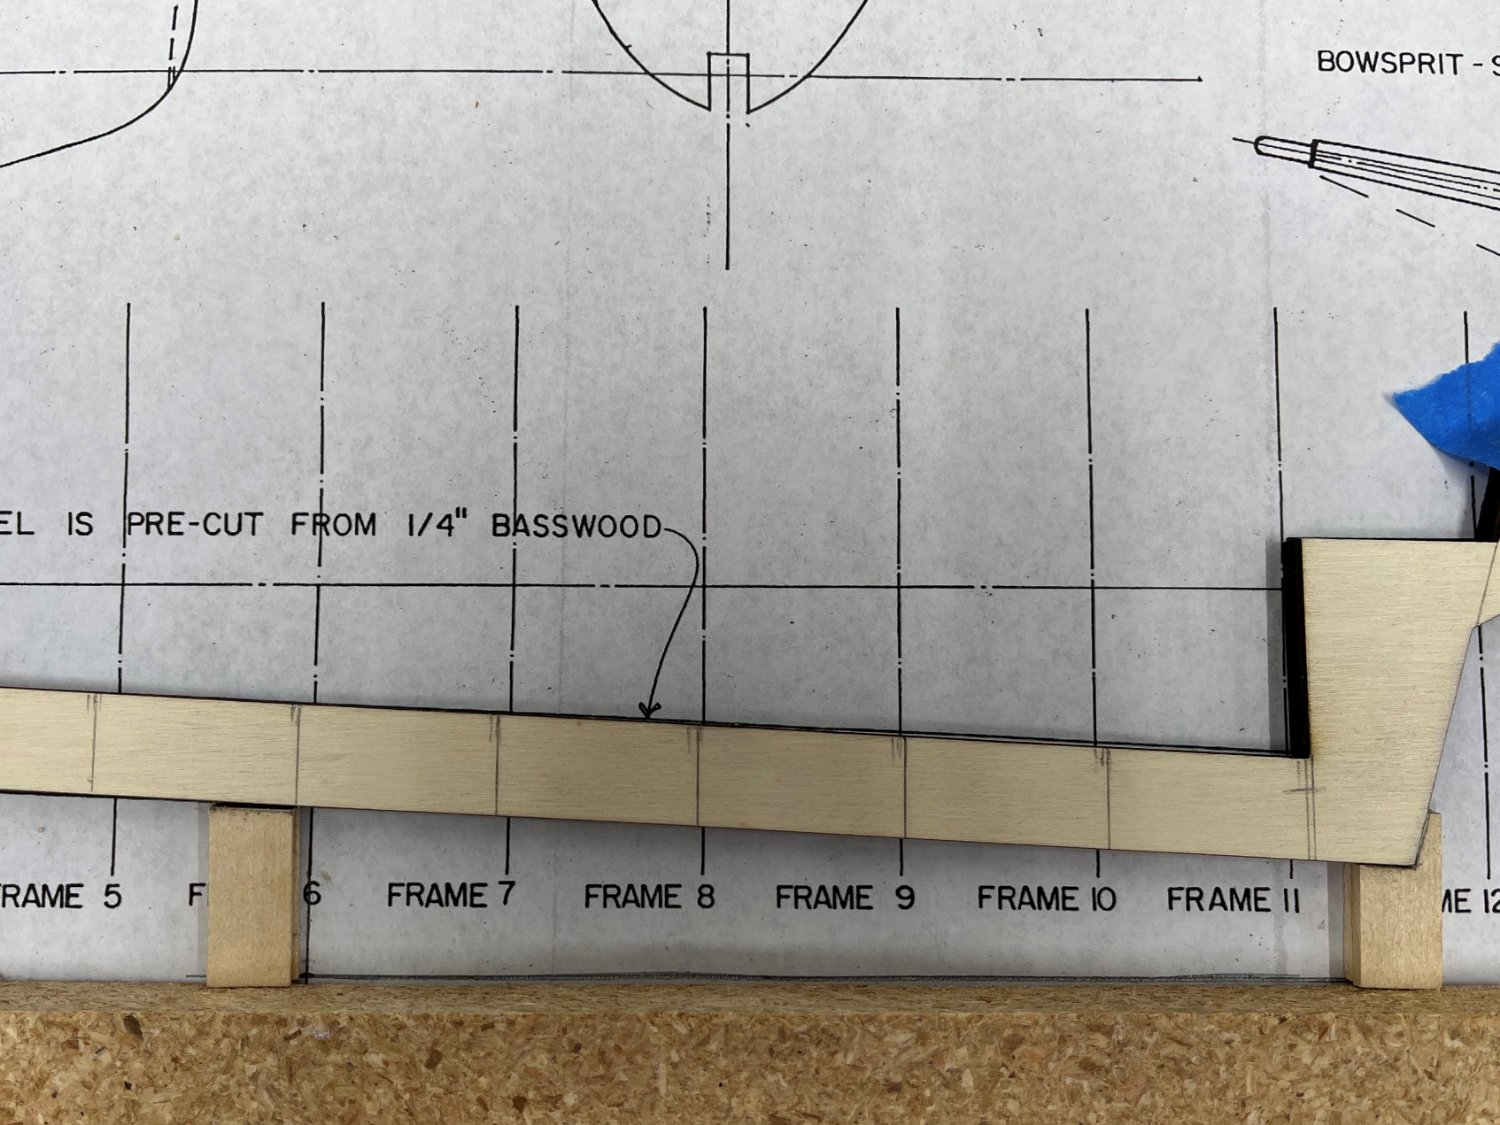
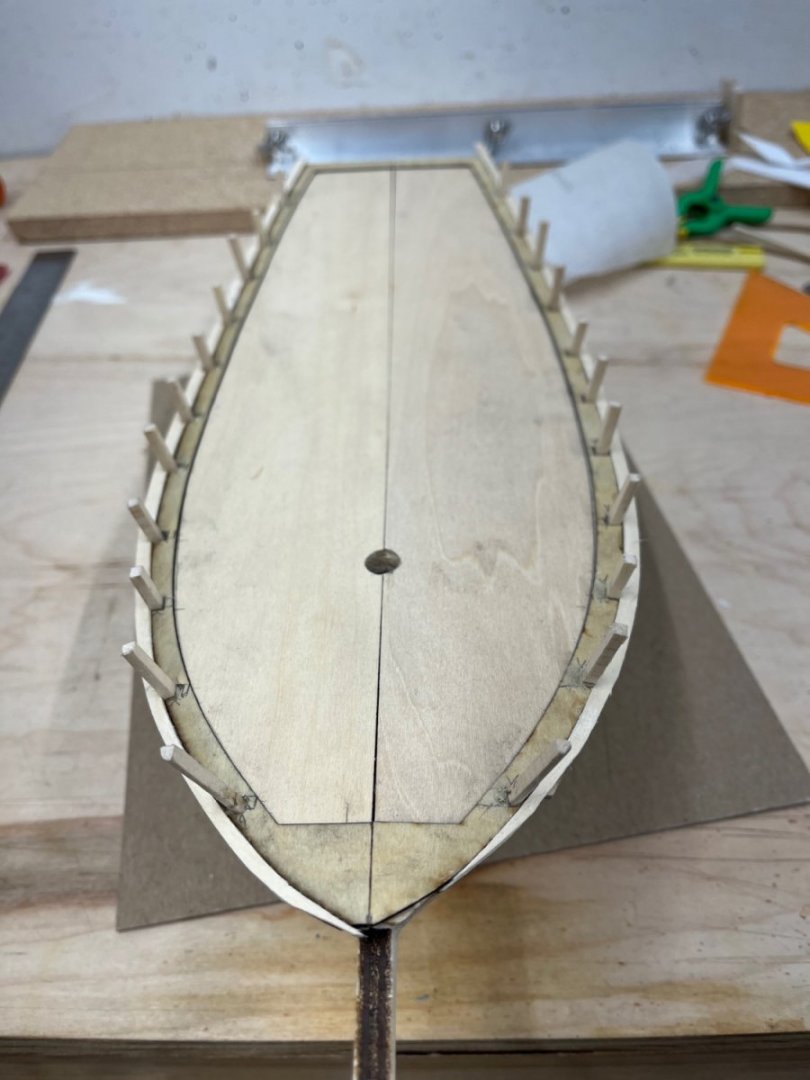
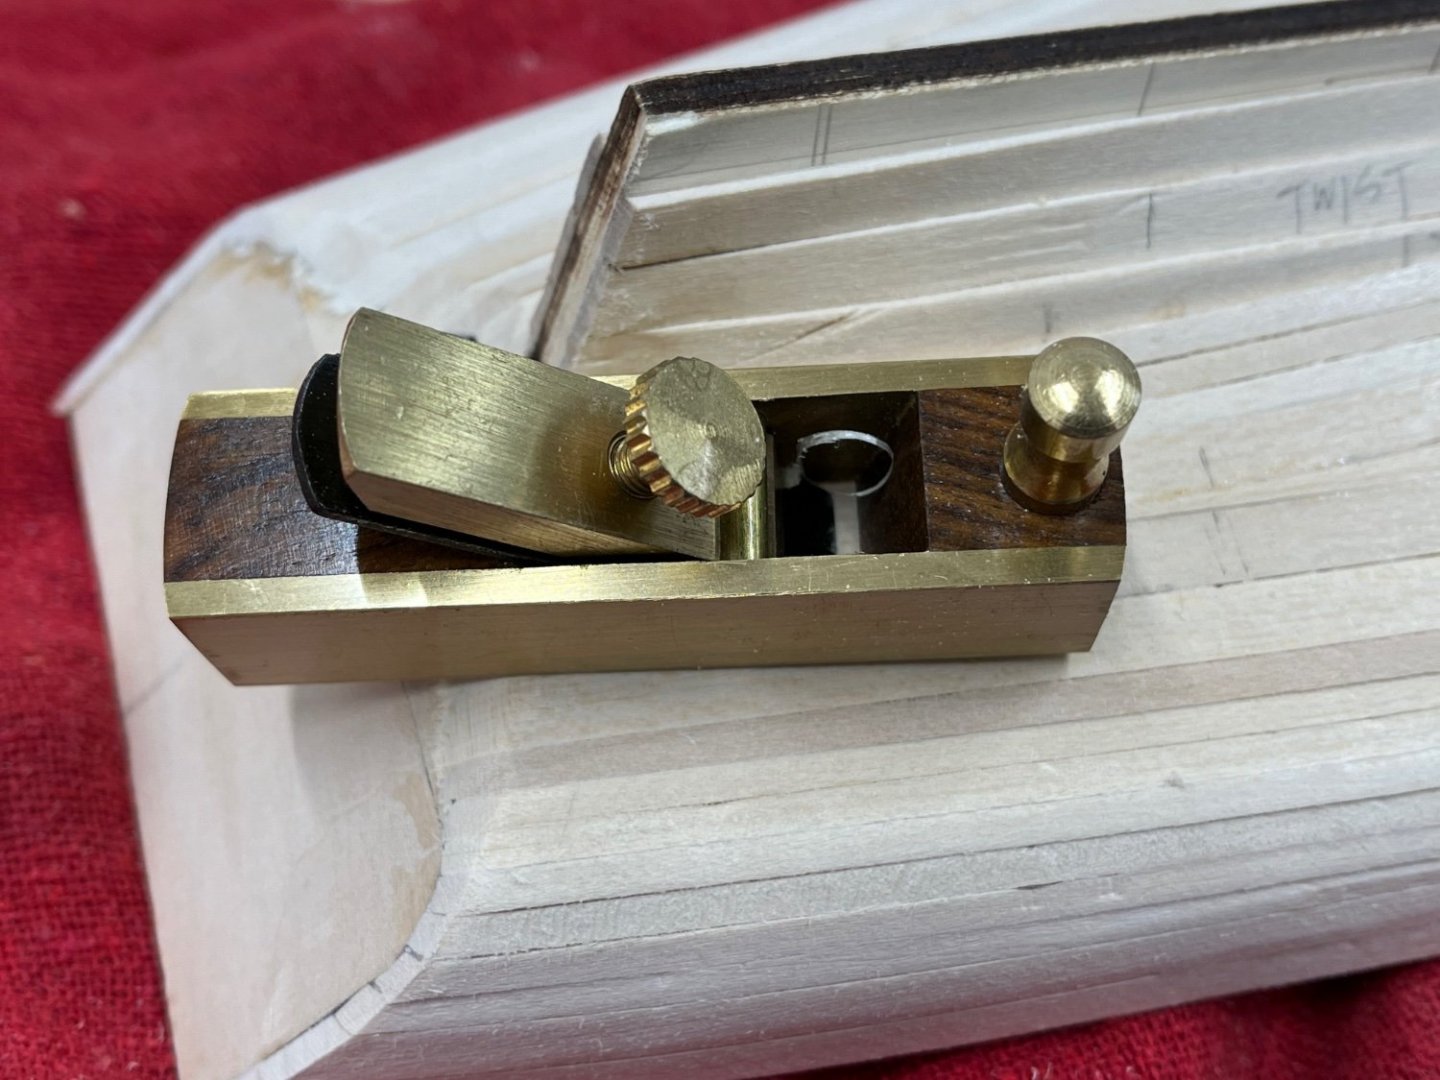
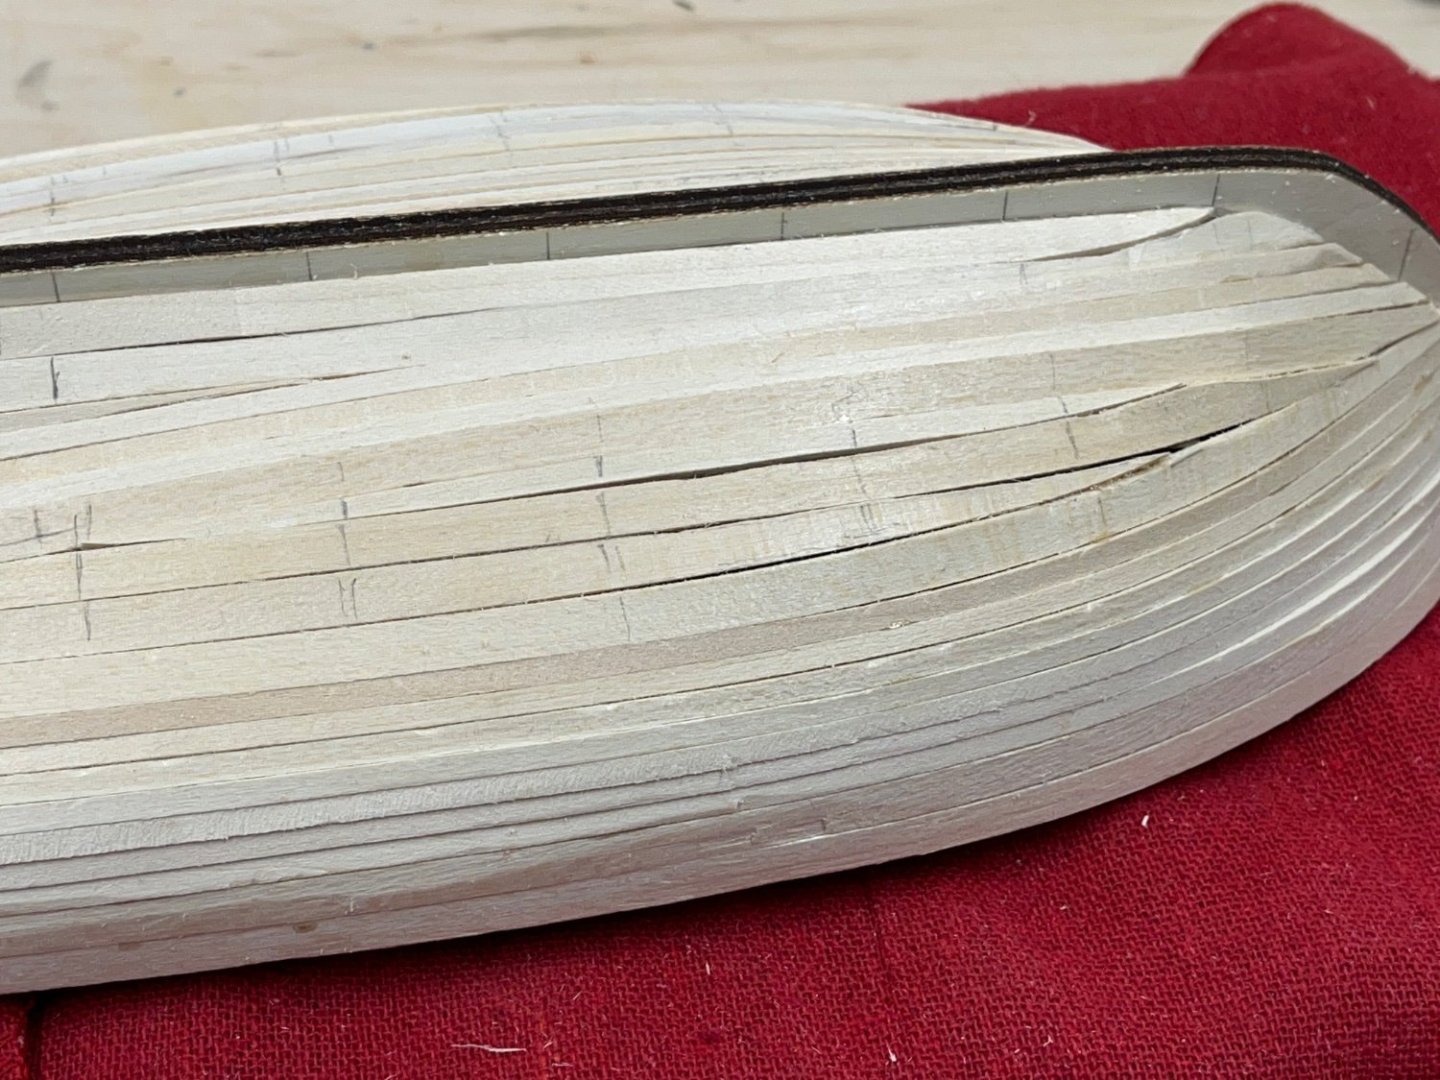
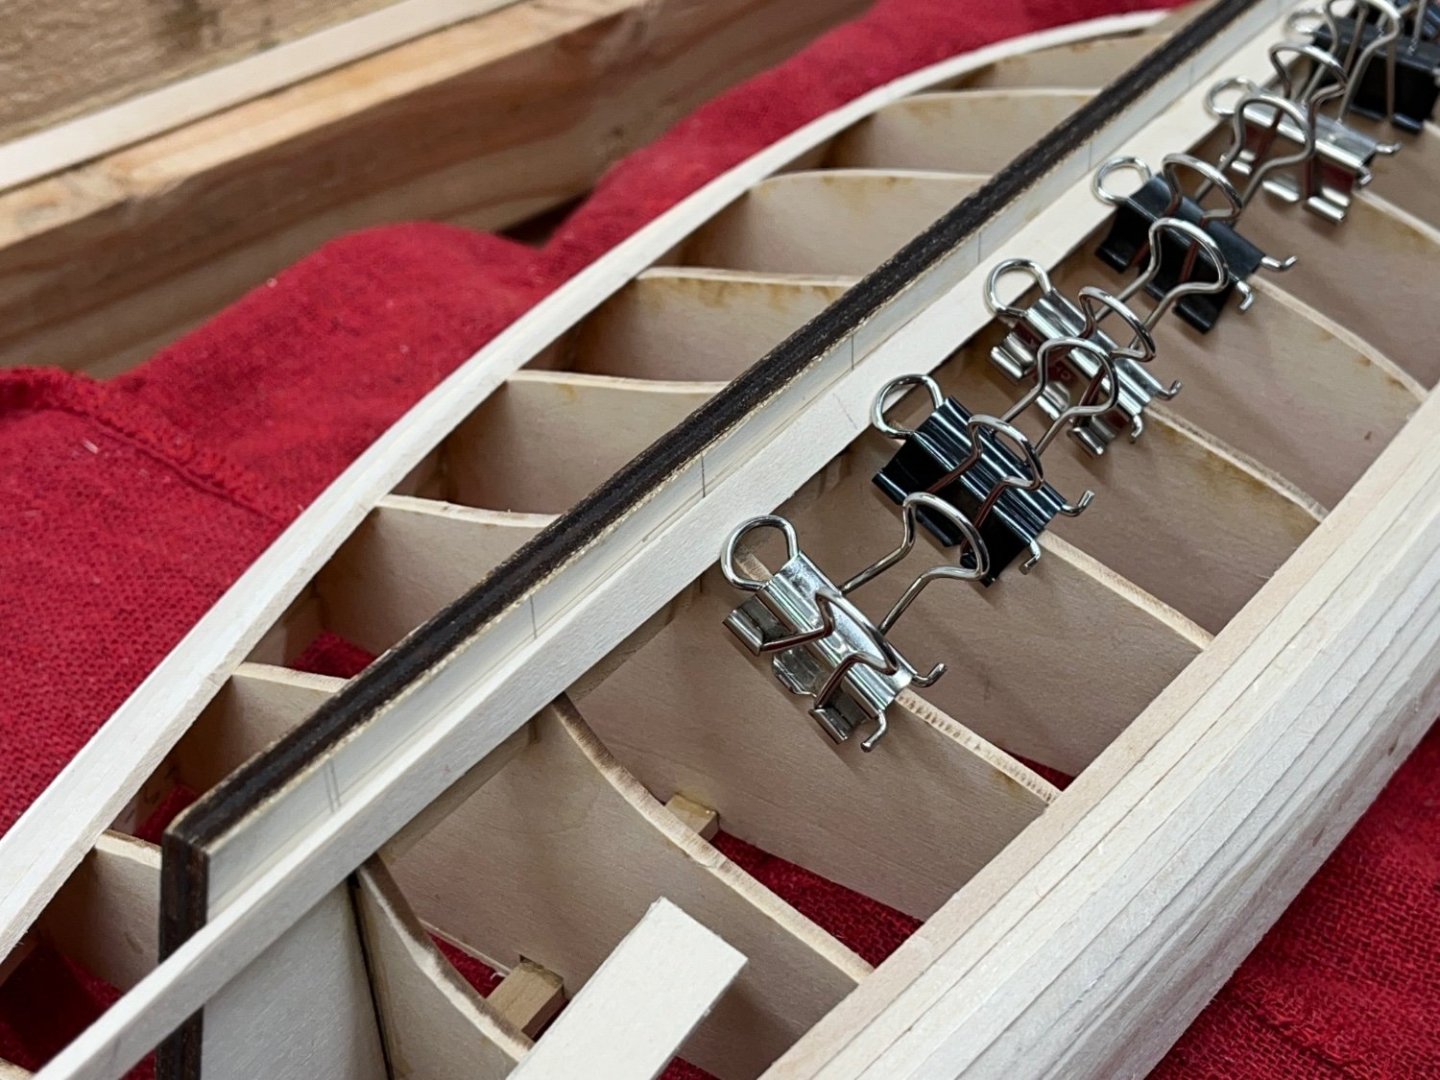
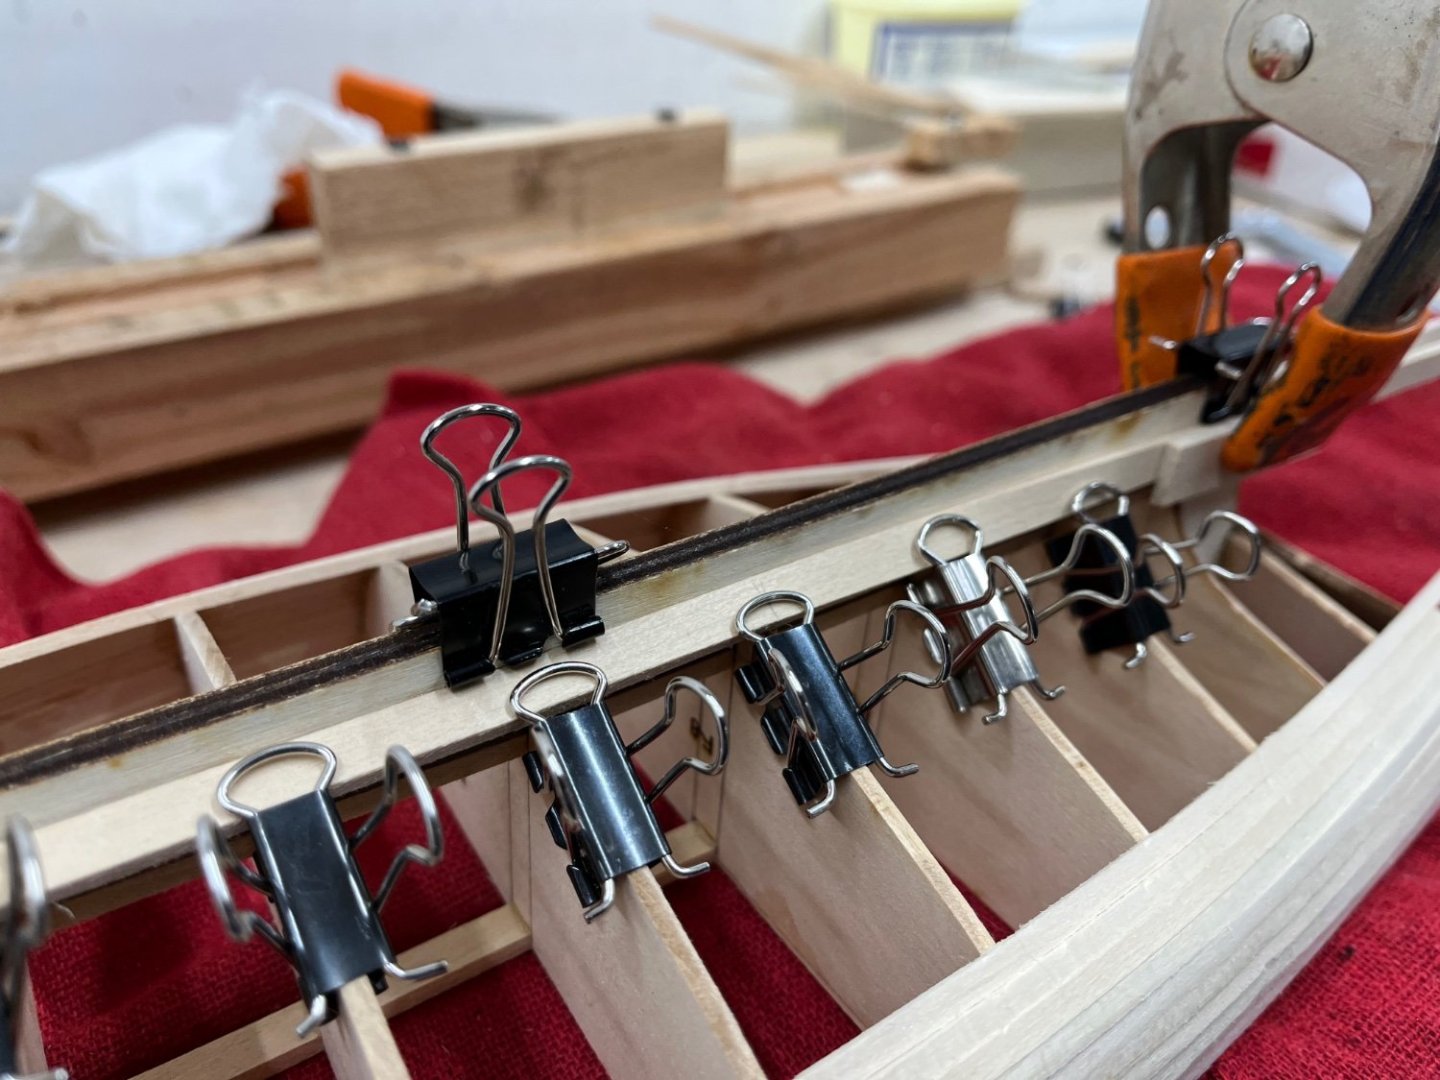
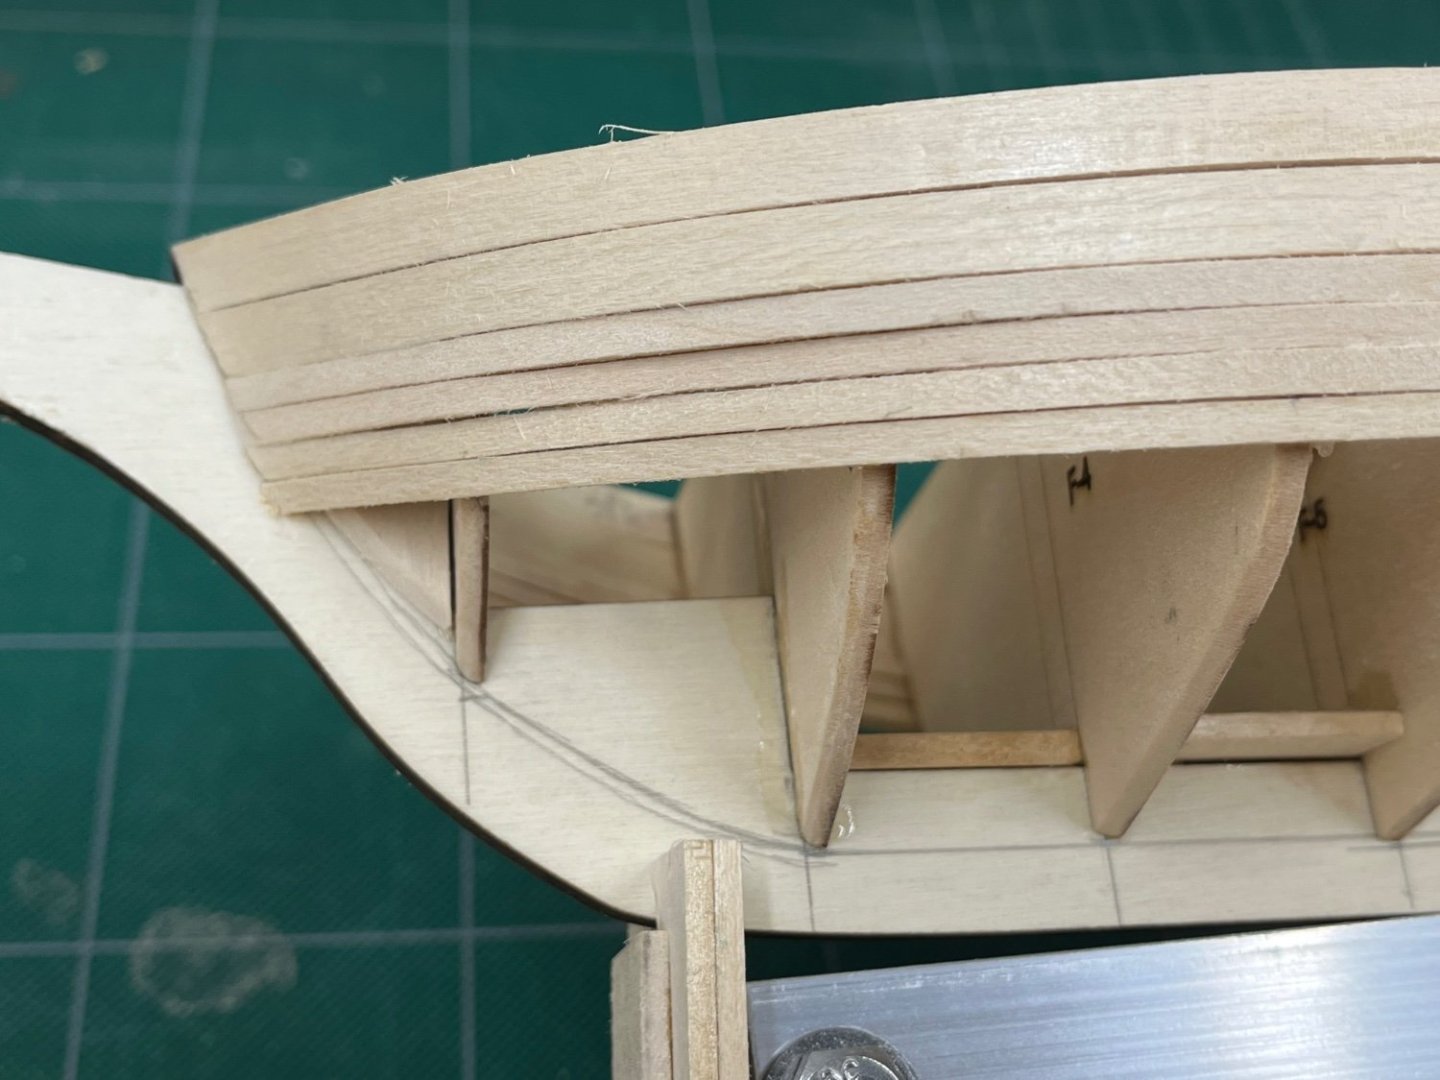
With the hull roughly finished, I started on the deck. On this model, the mail detail of the deck build is where stanchions are added to each frame to form the bulwark above the deck. This detail mimics the way that Slocom rebuilt the Spray in adding a 14” high bulwark to help protect the deck in open seas. There has been a lot of discussion on previous postings of builds of this kit on the best way to frame the bulwark. The easiest way to mount the stanchions (1/8” square basswood posts) would be to glue them to the frames before they are installed on the keel to get the right angle. The kit instructions say to set the sub-deck and then cut square holes at each frame edge and then glue the stanchions into place. Because the stanchions are set down about 3/4” below the deck, they need to be tapered to follow the curve of each frame. This seemed to me to be a very difficult way to do the installation of the stanchions. I chose to set the stanchions before setting the sub-deck in place to ensure that they followed the line of the frames and continue the line of the hull up into the bulwark. The stanchions do not all stick up at the same angle but follow the curve of the hull. Towards the bow, they stick out at an angle and are progressively more vertical as you go towards the stern. Once these 22 stanchions were set, I started working on the sub-deck. Because the sub-deck is in two pieces, I could butt each half up against the stanchions and mark the locations on the deck piece and notch along the outer edge to fit around the stanchions.


- 54 replies
-
- 1
-

-
- Spray
- BlueJacket Shipcrafters
- (and 1 more)
-
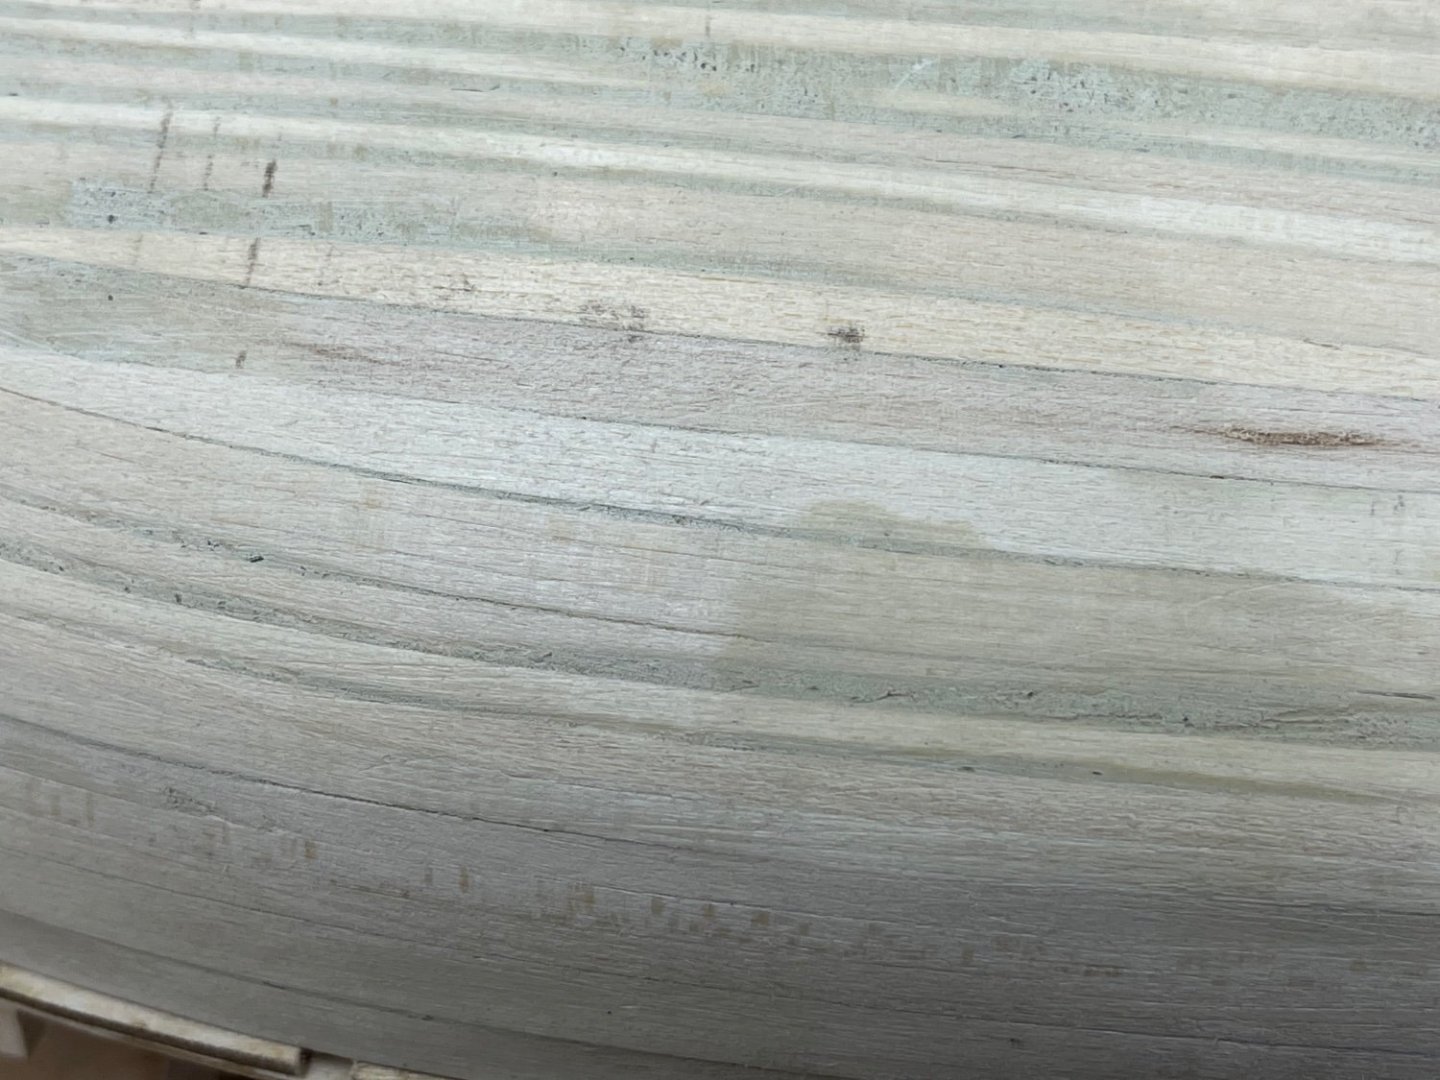
After lightly filling the joints and gaps between planks with the thinned wood putty, I sanded and reapplied thin layers of putty to the point where the hull seemed pretty smooth and even. I do not want to get the hull too smooth and even - it’s a model of an old wooden boat and I want to keep it looking that way. At this point, I will leave the rest of the sanding until I am ready to start painting the hull. After applying a coat of primer - when it will be easier to see the shapes and curves of the hull - I will do any final filling and sanding of the hull.

- 54 replies
-
- 2
-
-
- Spray
- BlueJacket Shipcrafters
- (and 1 more)
-
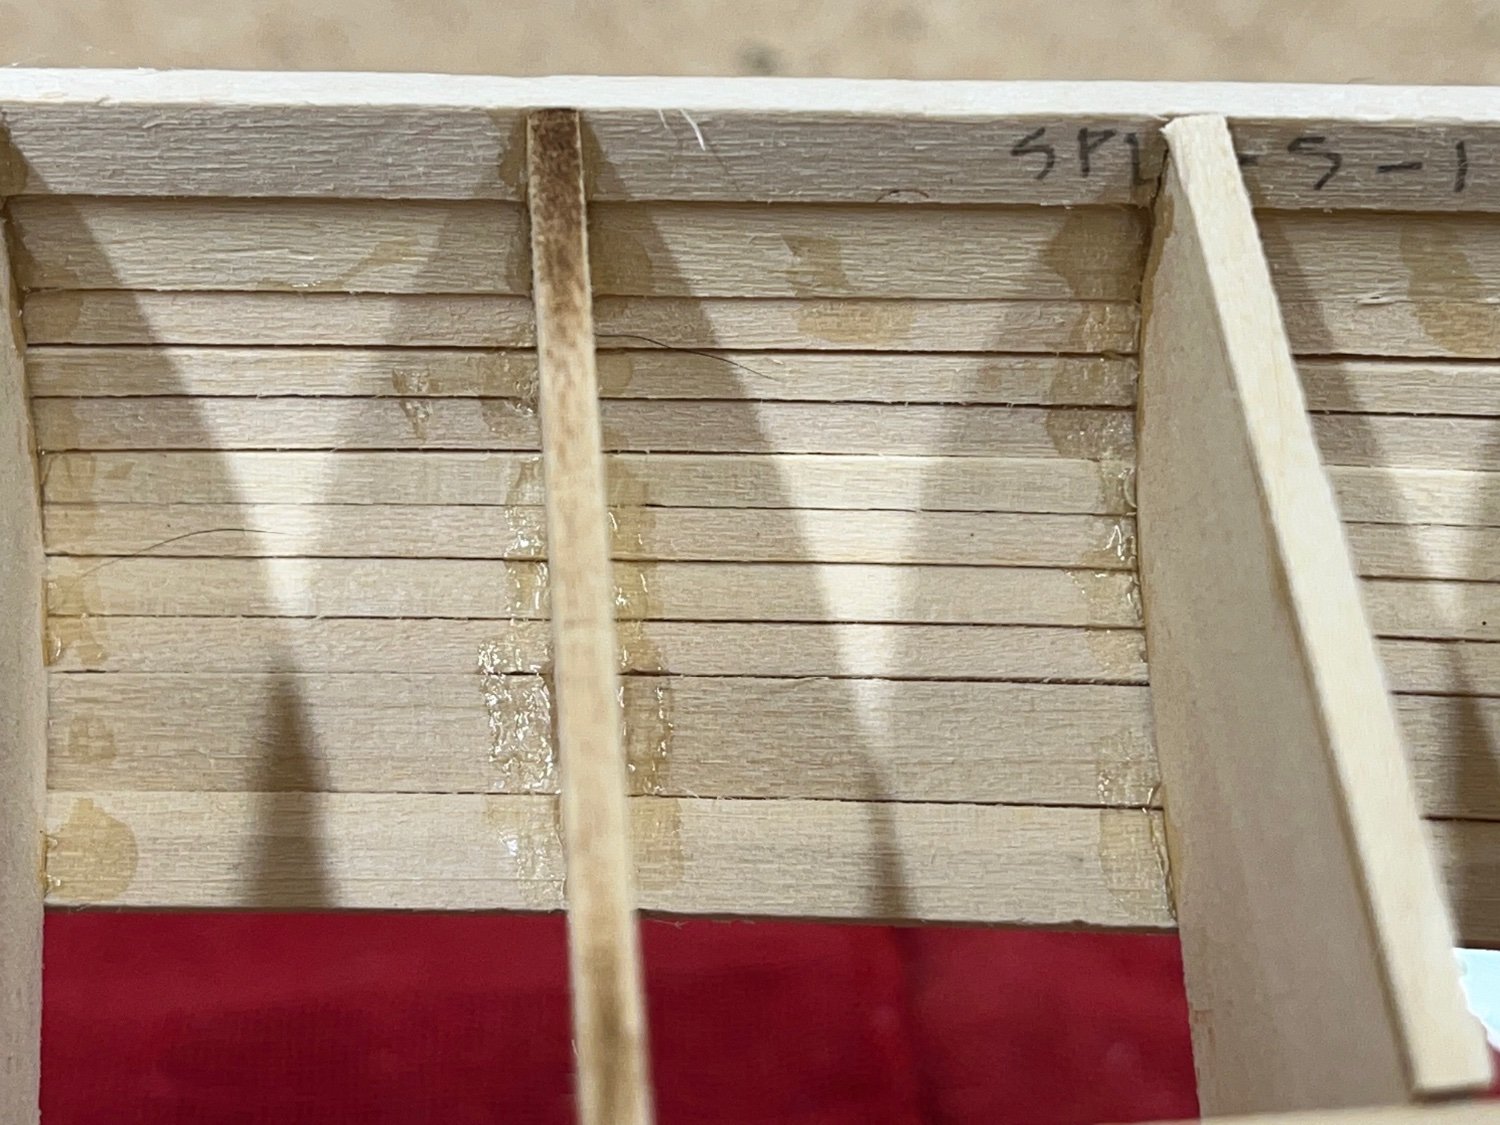
I started working the hull by working over the high edges of the planks with a small wood plane. This worked well to take down the edges of planks that rode higher than the adjacent plank. One I got these edges smooth, I started sanding the overall hull with 100 grit sandpaper until the planks were fairly smooth to each other across the hull. When I got to this point, then I started filling the gaps and seams with wood putty. I thinned some putty with water to make it easier to press into the gaps and joints using an artist palette knife. The thinned putty takes longer to dry but since you really don’t need very much, it doesn’t matter. When it dries. It seems to sand just fine and work the same as un-thinned putty so I don’t think there will be any problems with it.
-
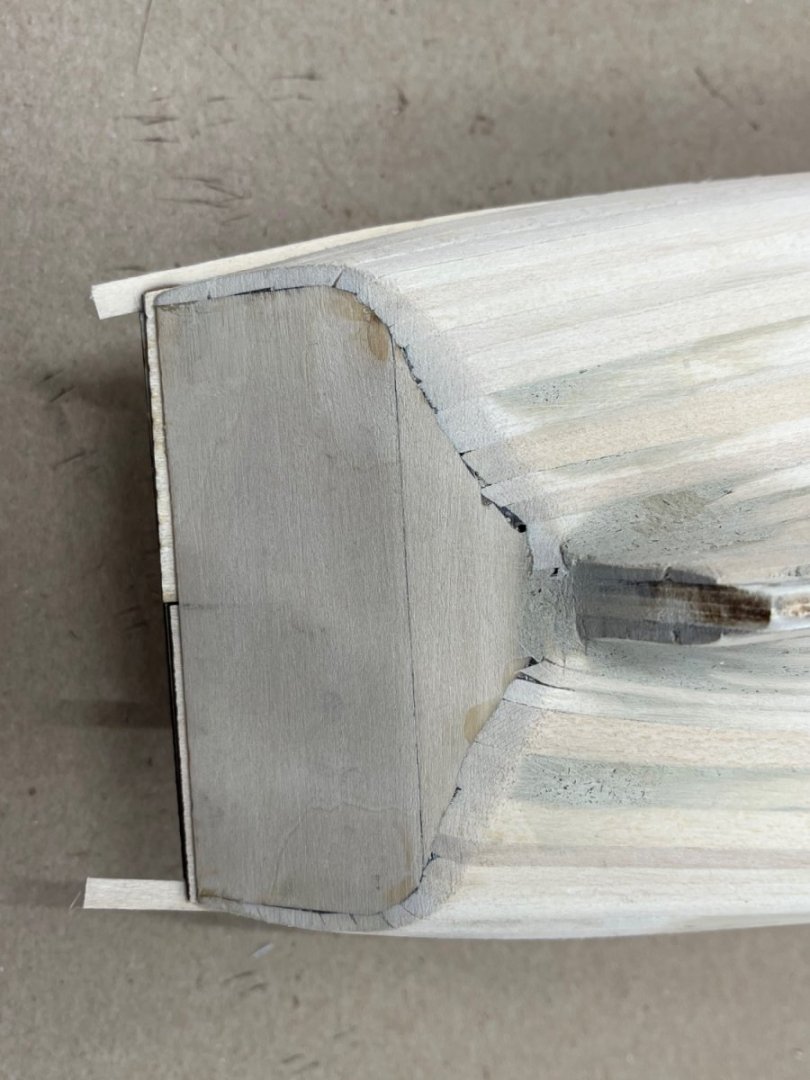
Finally got the hull completely planked. One side is noticeably better than the other and I see a lot of places where I could have done better but not so much that I will go back and try to cut pieces out and redo them. Wood filler and sandpaper from here on and glad again that Slocom painted Spray’s hull.


- 54 replies
-
- 3
-
-
- Spray
- BlueJacket Shipcrafters
- (and 1 more)
-
When I got to where the space between the planks was less than a full plank, I used tracing paper to trace the gap that needed to be filled and cut tapered planks from the 1/4” plank strips to fit the gap. I tried to lay them out so that these cheater planks would end on a frame or run over a frame by a little to give a surface to glue the plank to. On a few of these, I soaked and bent the planks before or after cutting to bend them into place. As the gap between the planks gets smaller, you can’t use the binder clamps so you need to wedge in pieces of wood to get the planks set in place. It’s a good thing that this model has a painted hull. It’s a good way to practice and learn to plank without going crazy trying to make everything fit the way you see on the really good models - hats off to those who have mastered this art.
- 54 replies
-
- 1
-
-
- Spray
- BlueJacket Shipcrafters
- (and 1 more)
-
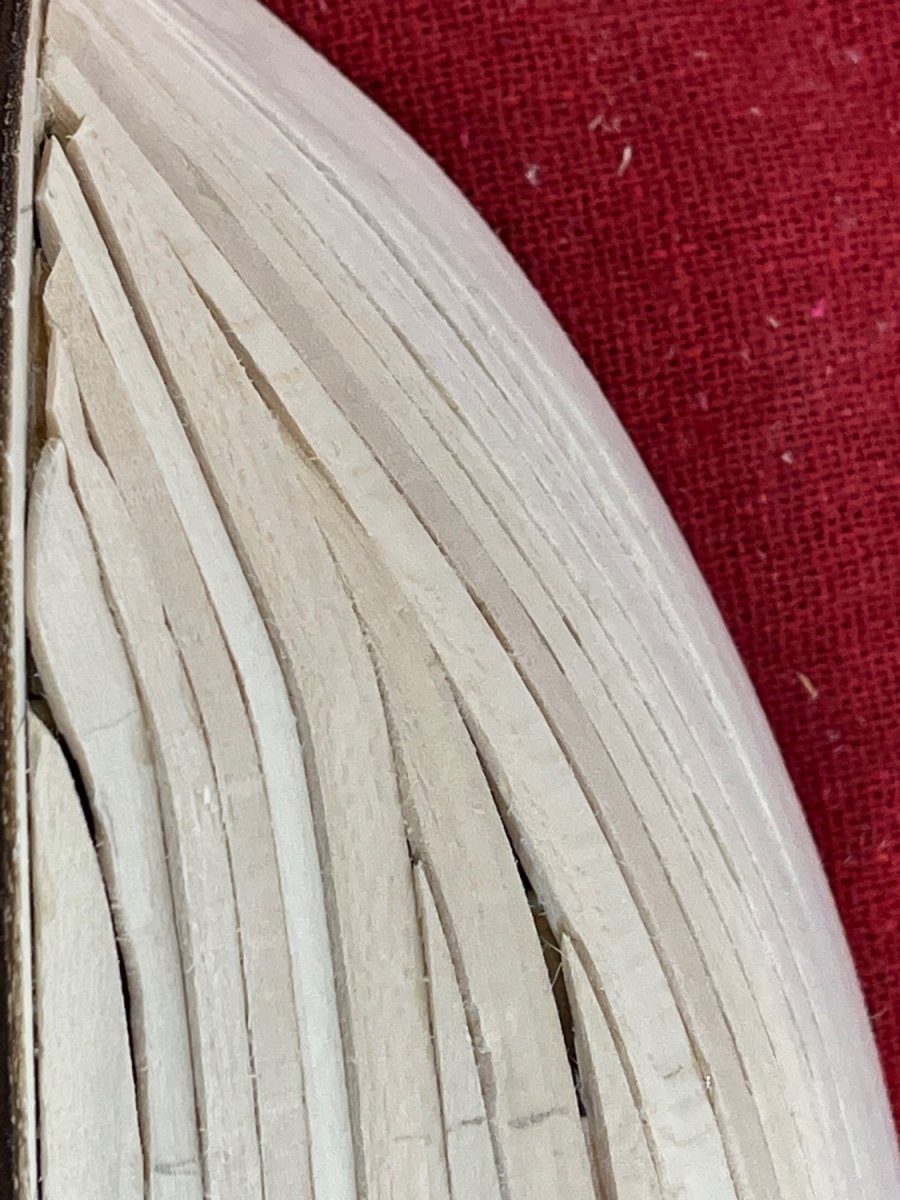
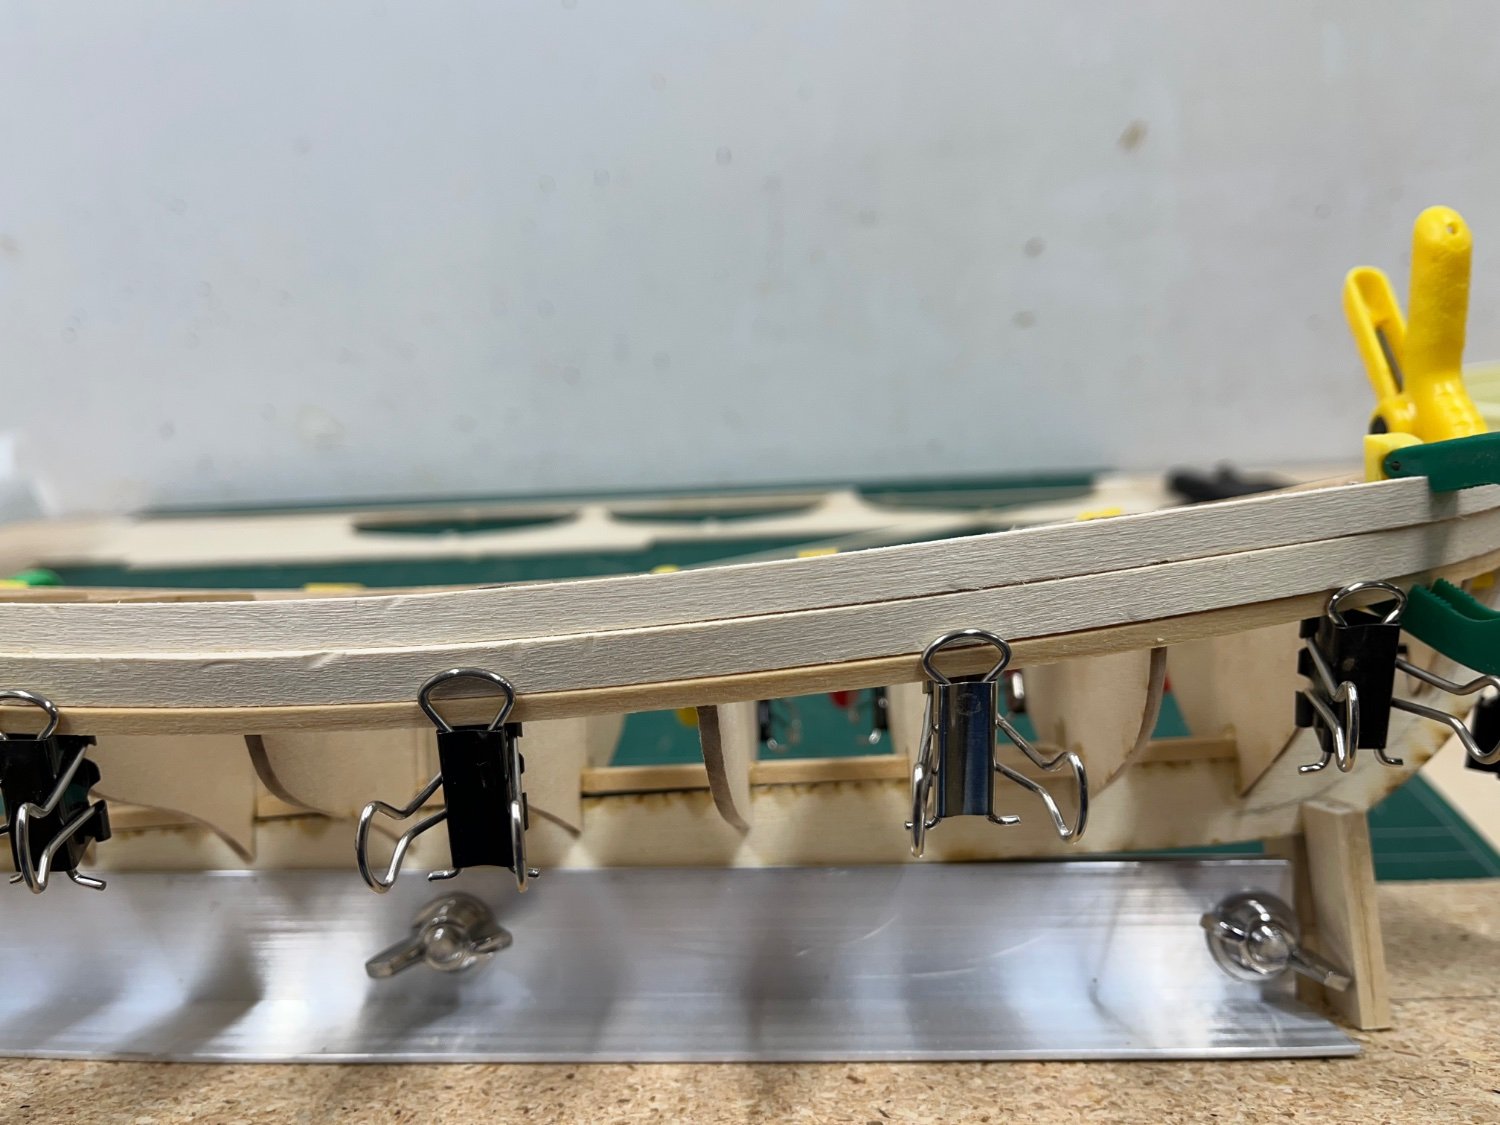
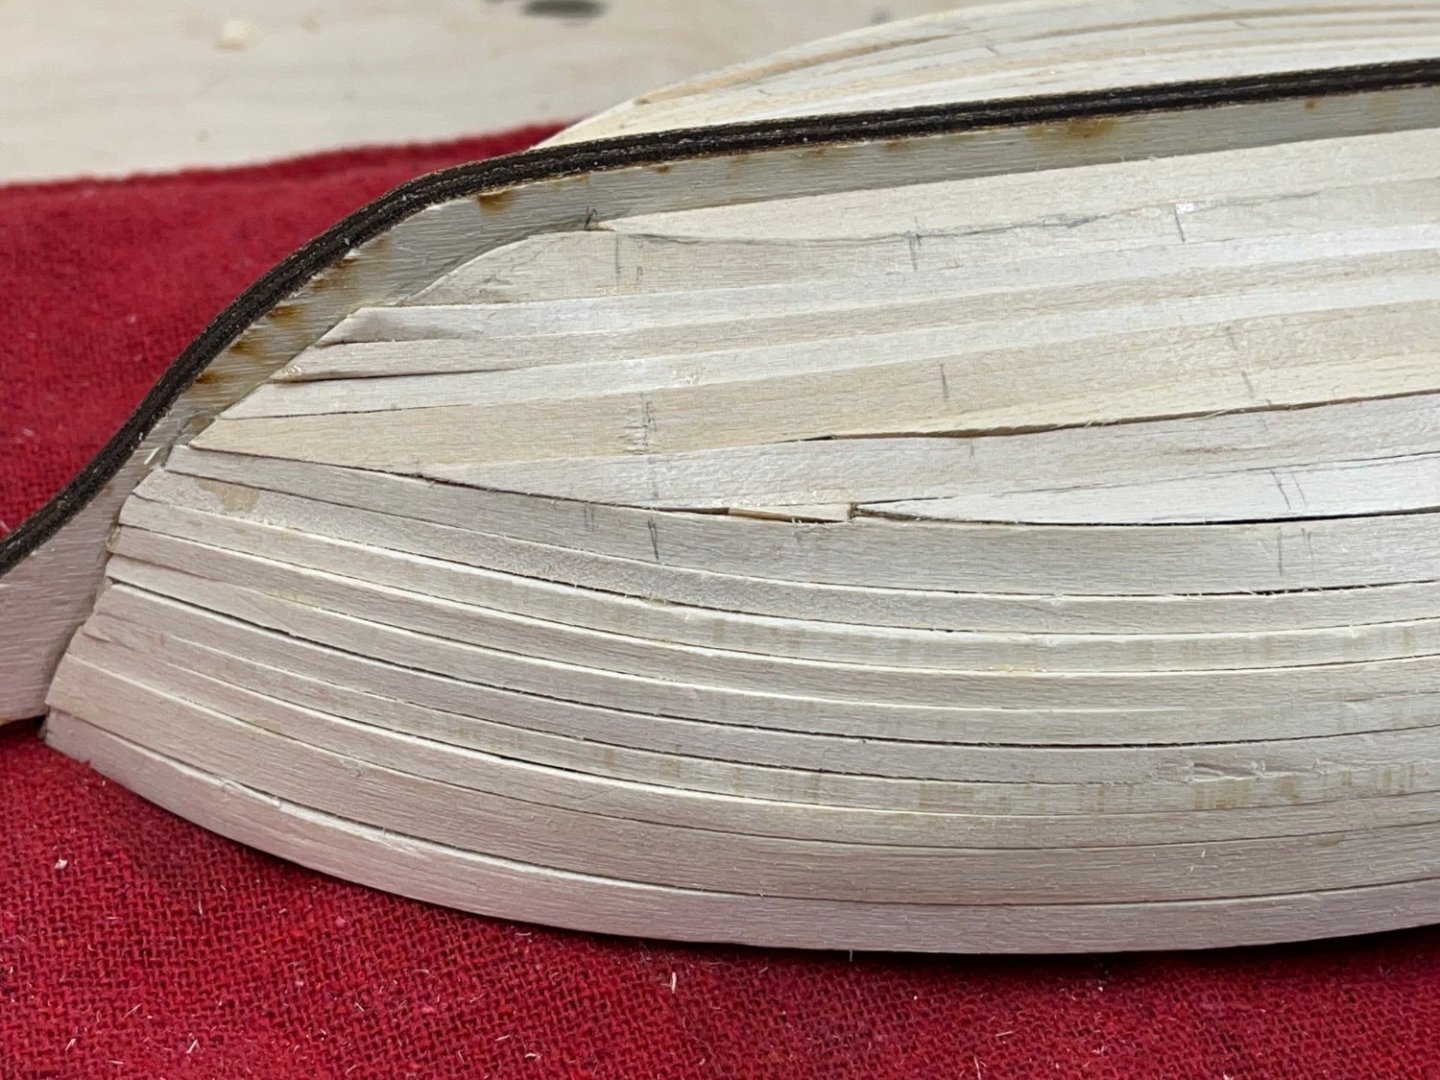
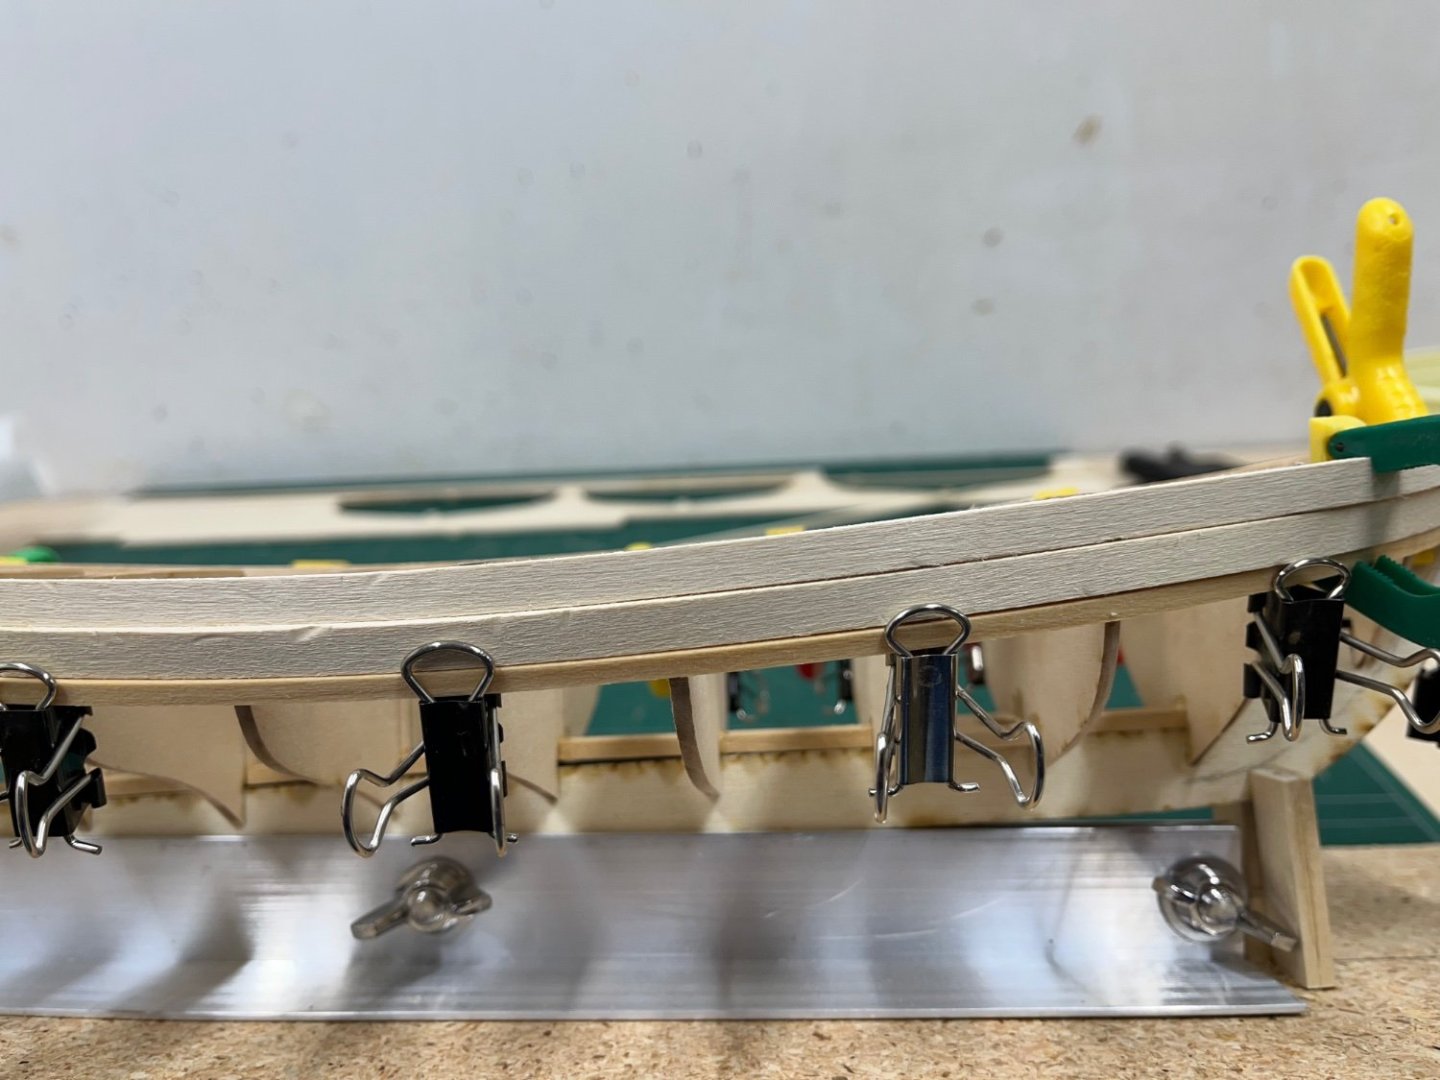
Slowly planking the hull and even more slowly posting about the progress. The planking with the 1/8” wide planks goes pretty smoothly and generally all it takes is trimming it to the bow, soaking the piece for about 20 minutes and clamping it into place. I let the piece dry in place and then do any final fitting and sanding the top surface to get a better fit against the previous planks and then glue it in place. The 1/8” planks let you form the hard curved portion of the frame and as I get to the flatter bottom section, it is clear that I will need to work with cheater planks to make the planks fit from bow to stern.


-
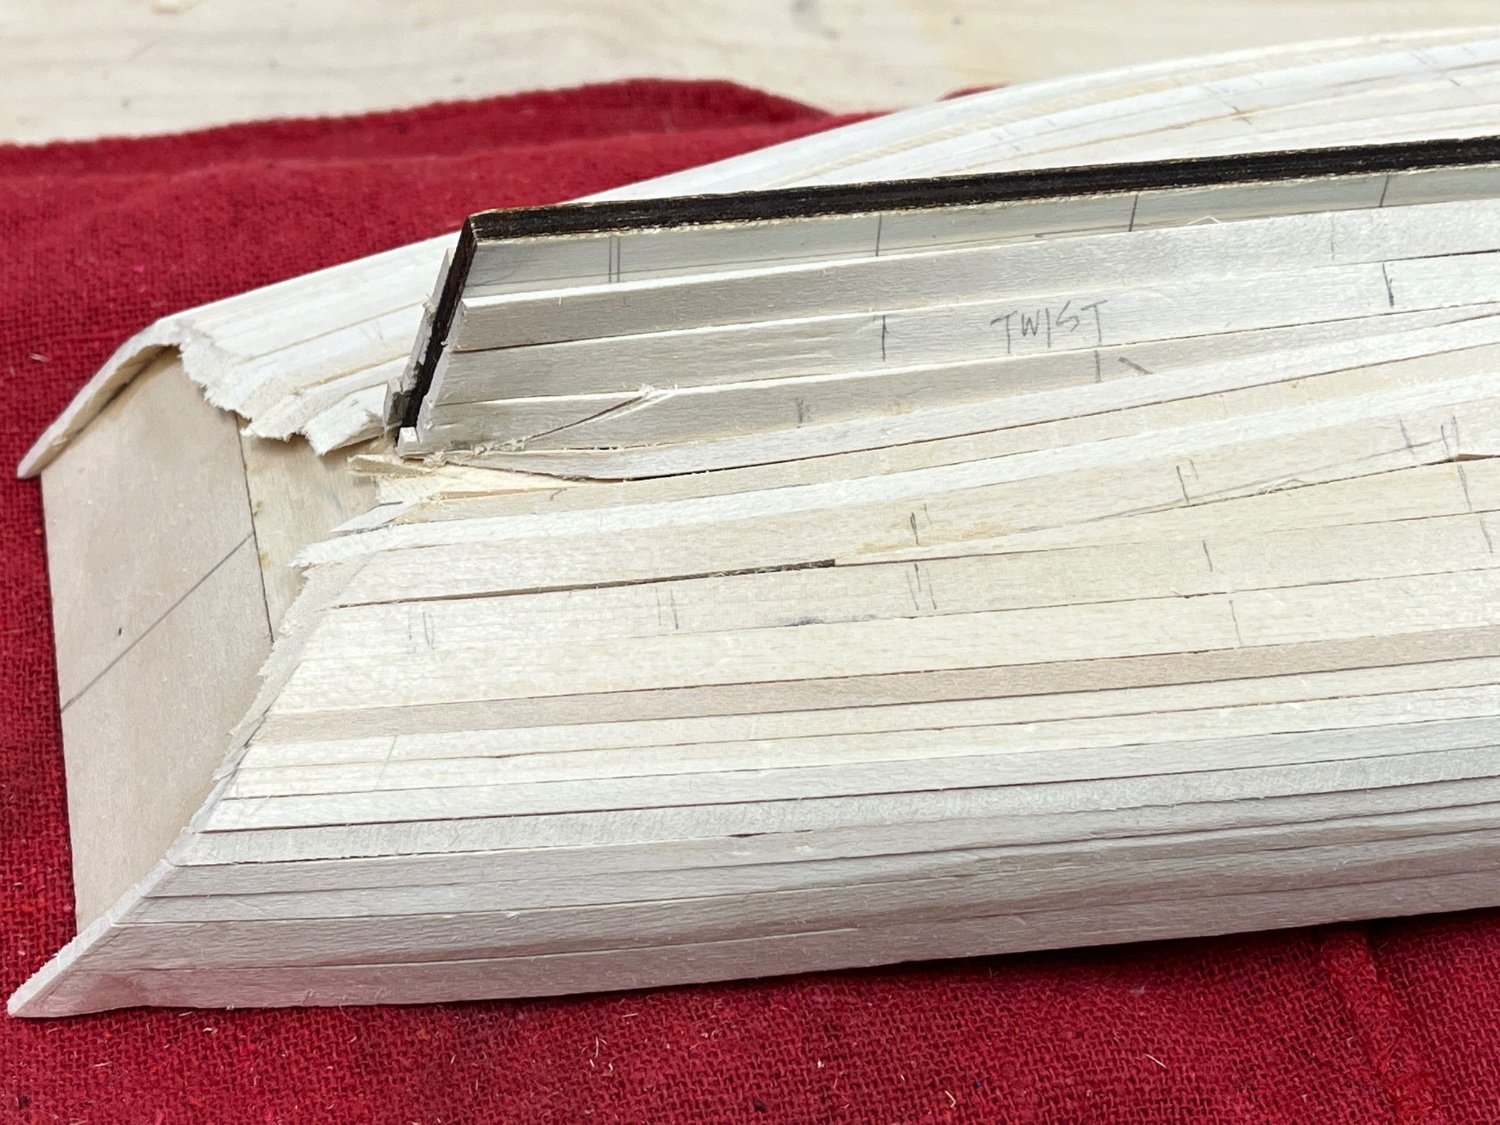
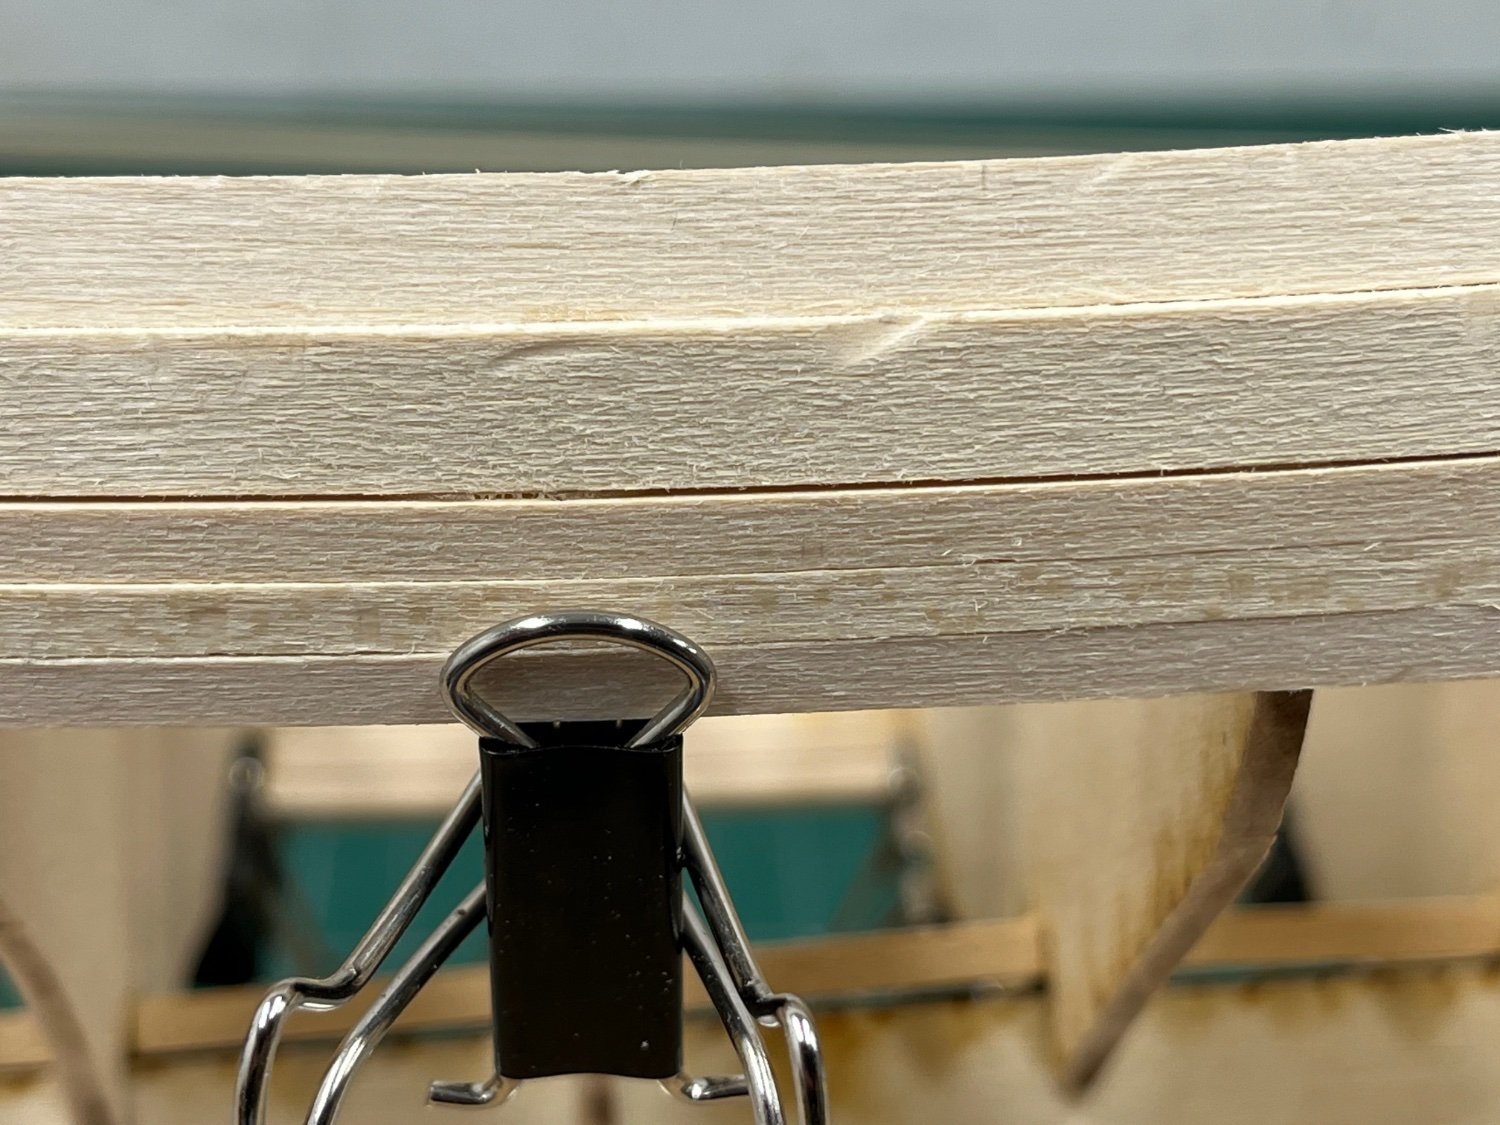
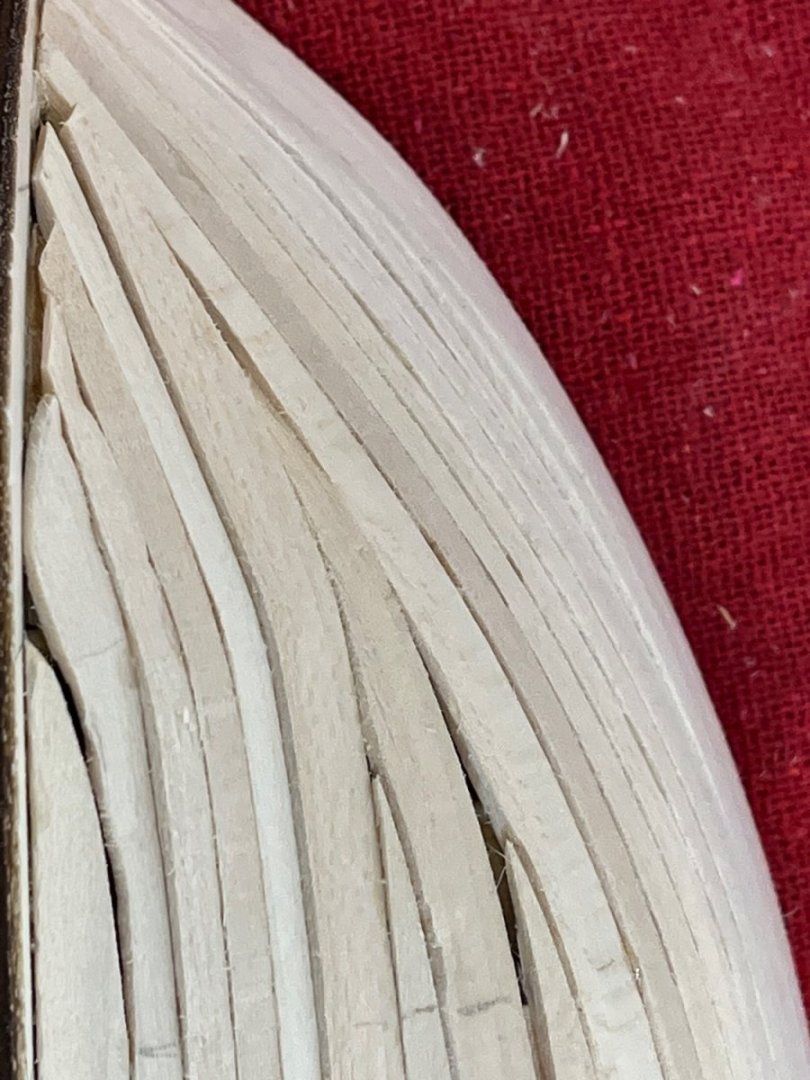
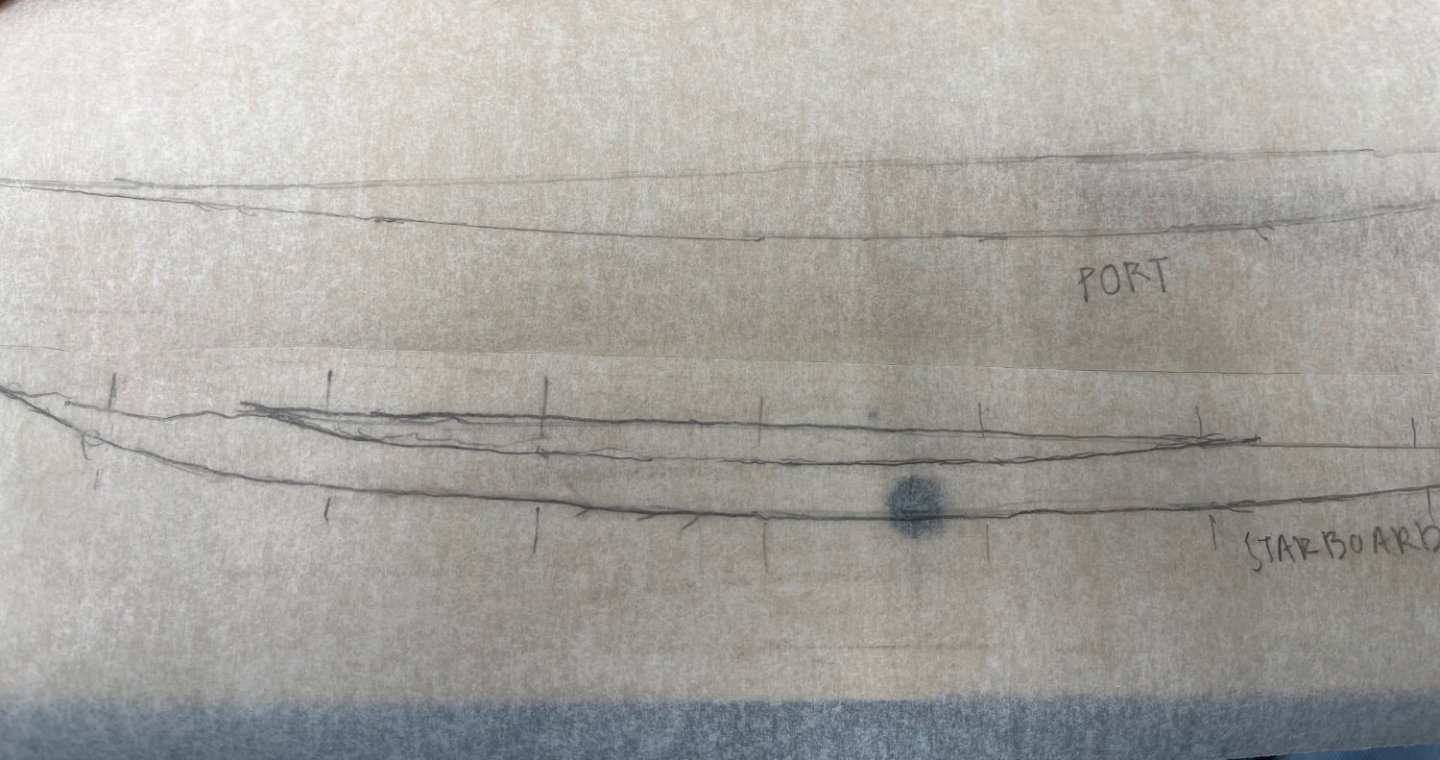
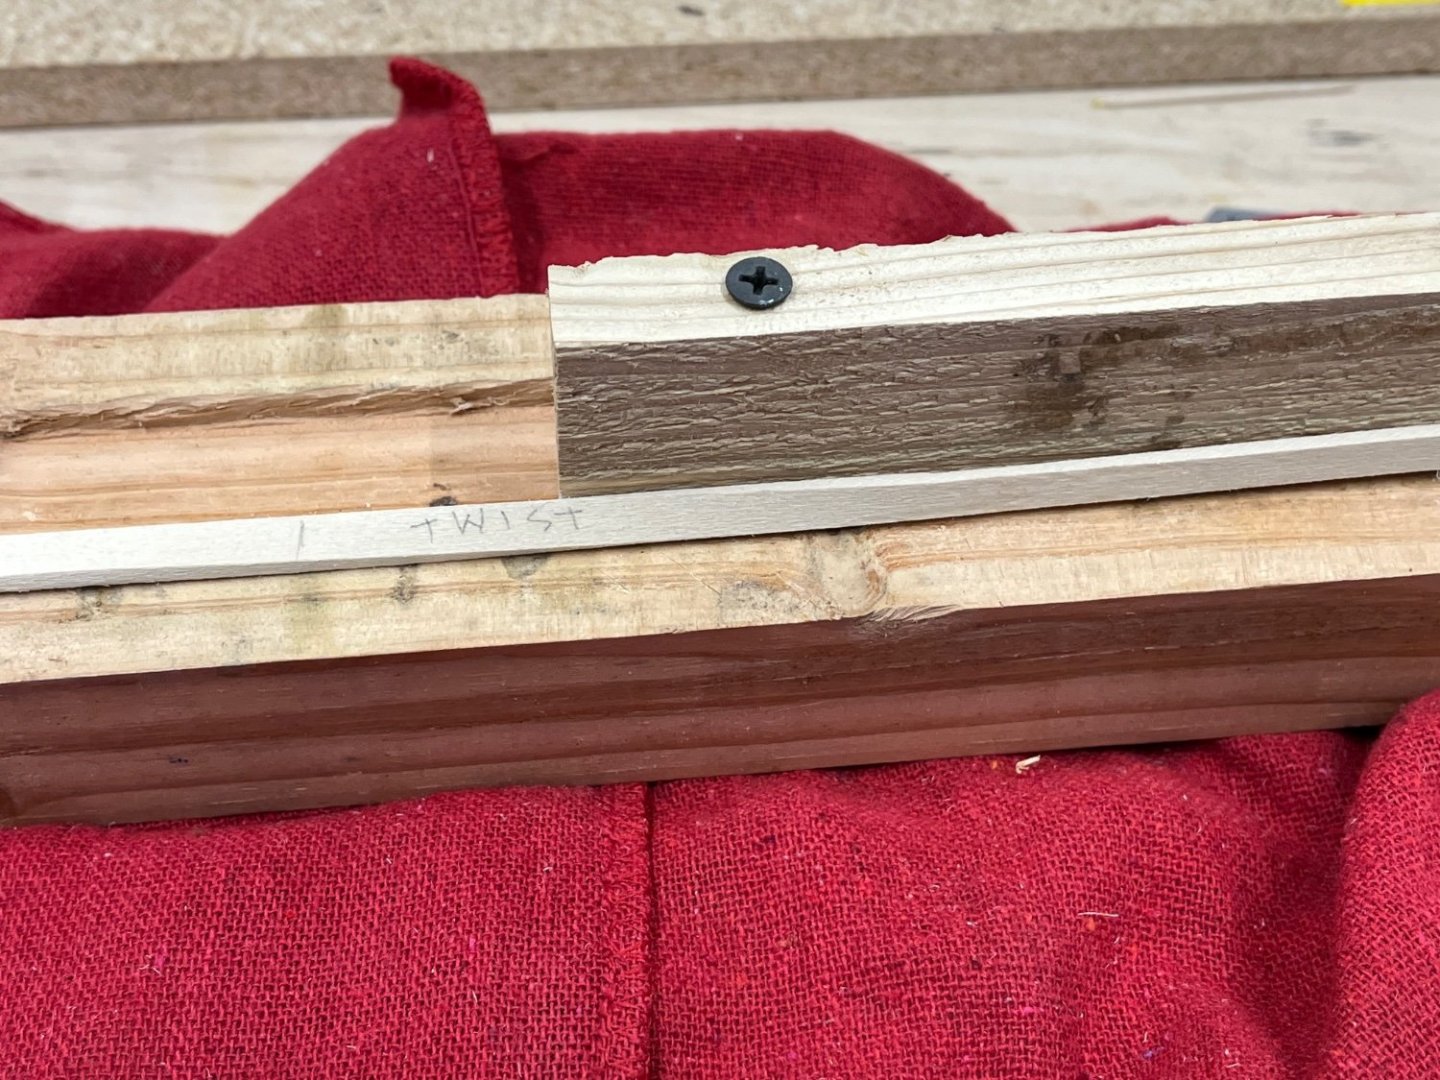
After the garboard plank dried, the next step was to fit it in place. The twist held pretty well in the plank so it was only a matter of the final twisting and bending of +/-10 degrees or so to fit the plank tight to the frames. I resoaked the plank for a few minutes to make it a little easier to fit and then clamped it into place. It seems to fit pretty well and it should take fairly minimal sanding to fair the plank edge to the keel.
- 54 replies
-
- 1
-
-
- Spray
- BlueJacket Shipcrafters
- (and 1 more)
-
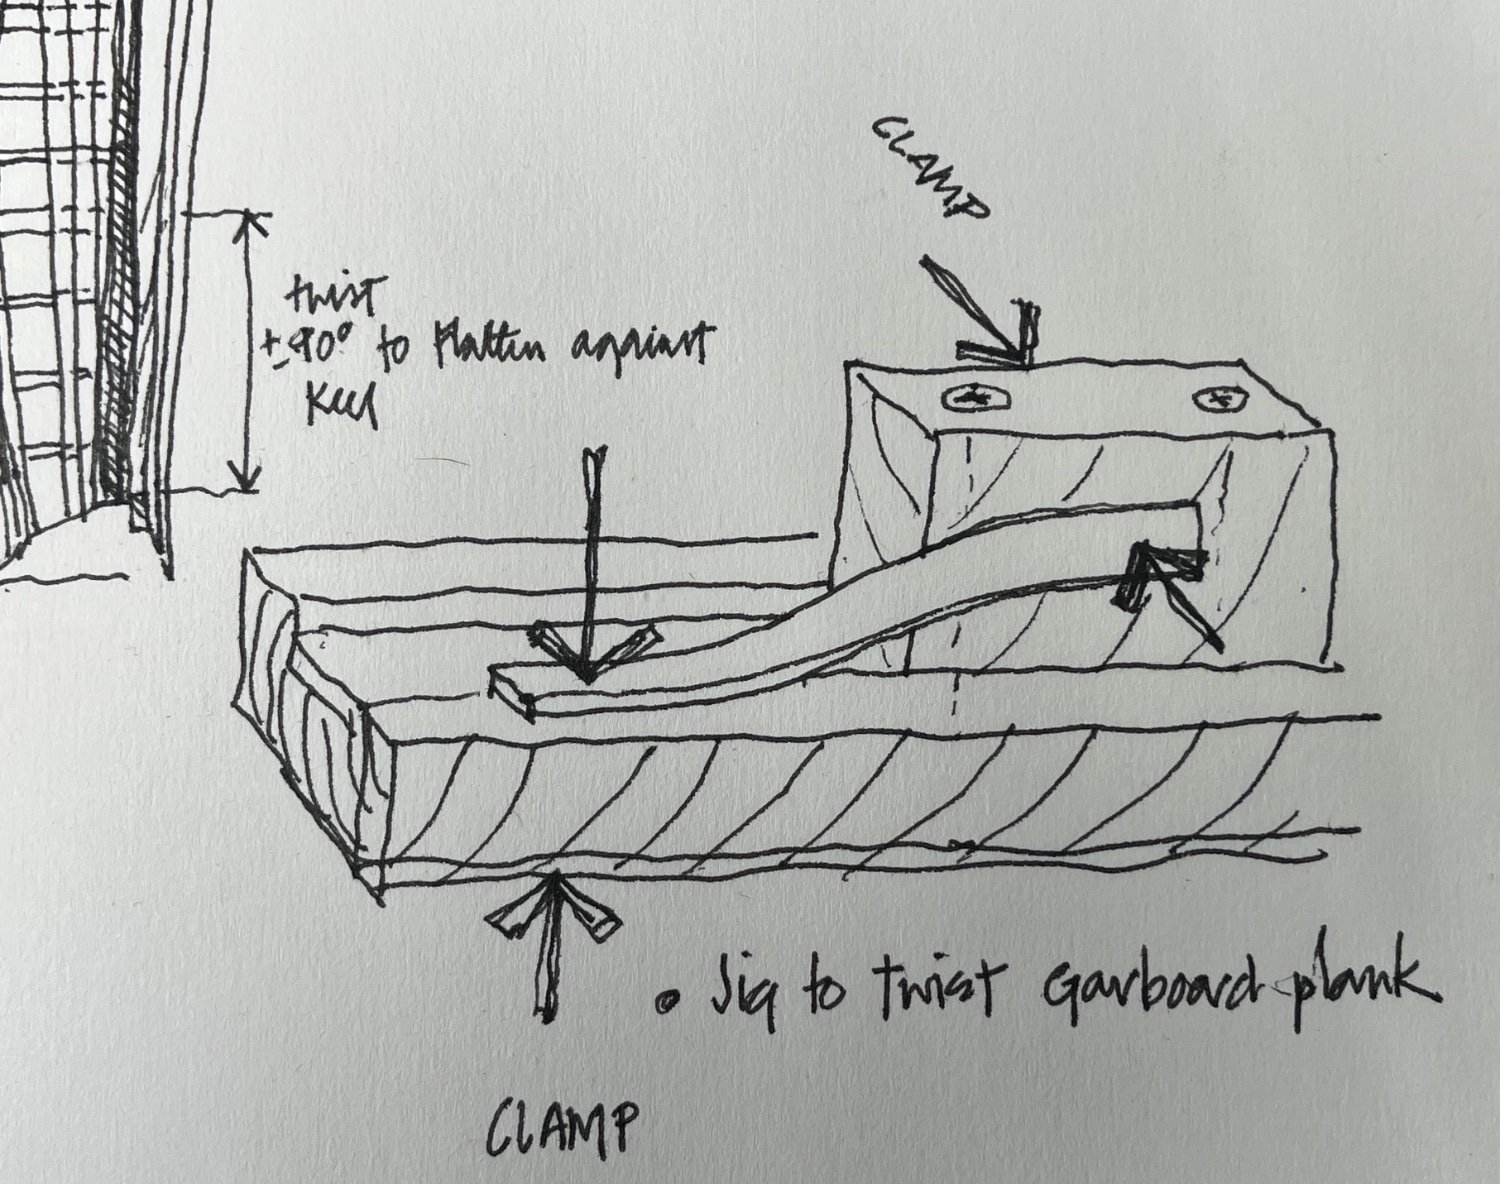
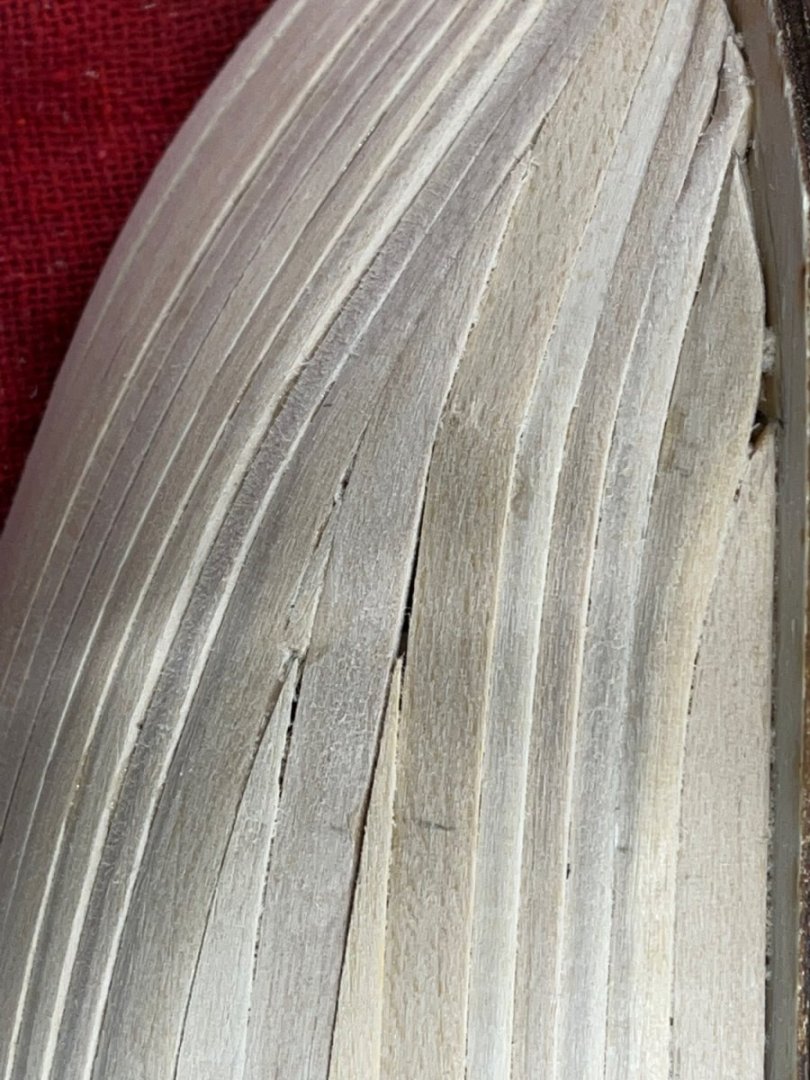
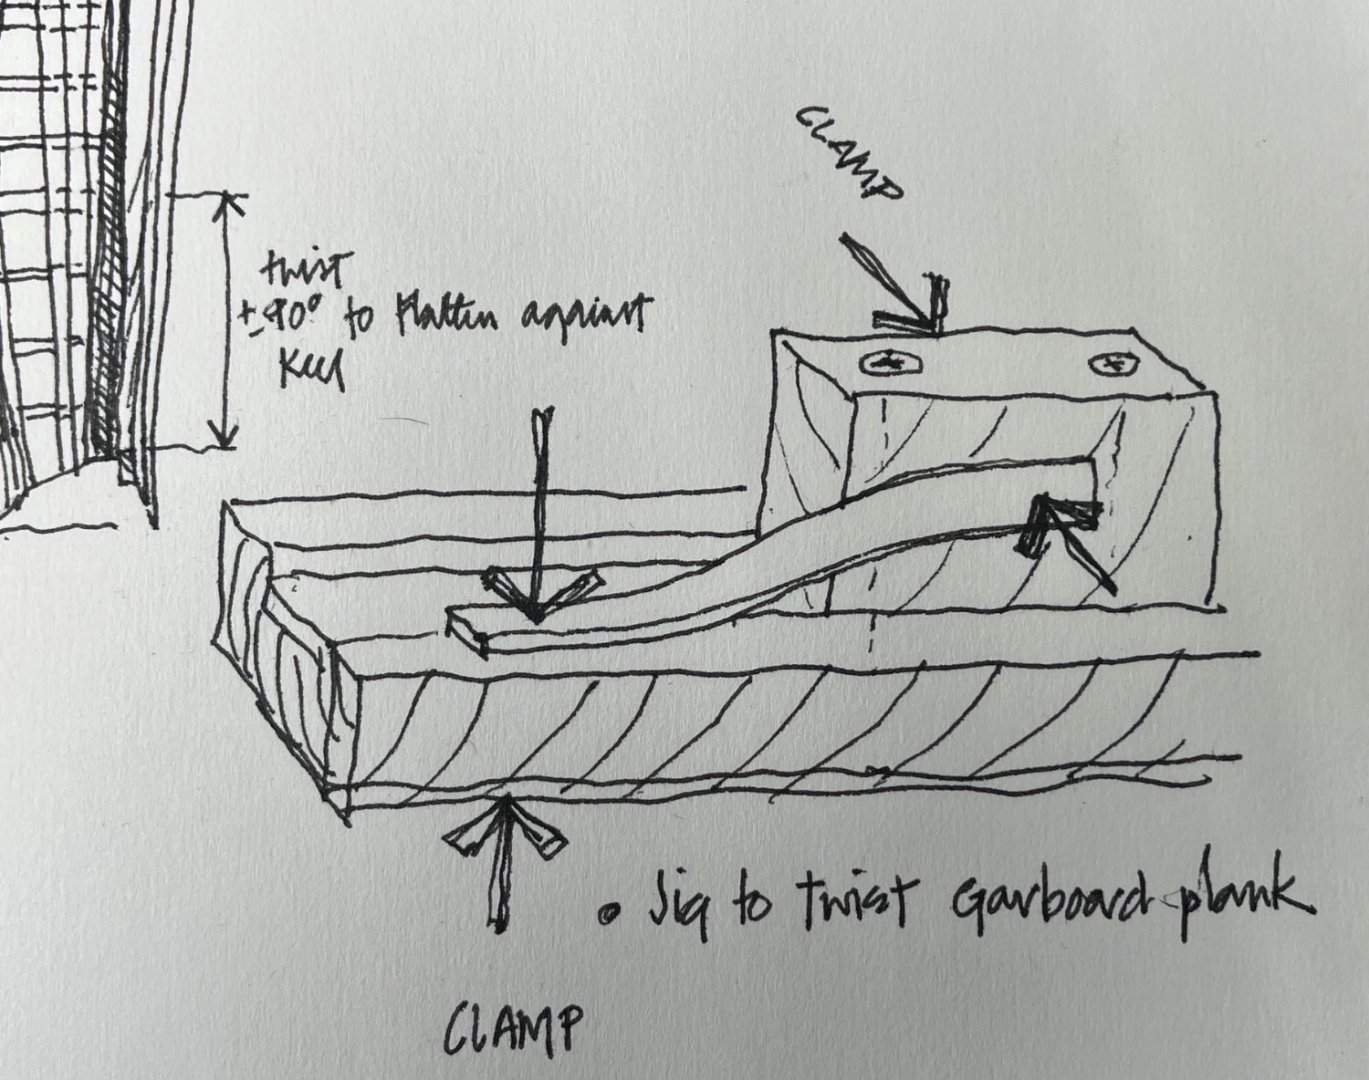
Next step is to start at the keel with the garboard plank. At the stern, this plank has about a 90 degree twist in it to follow the curve from the frames at mid-ship to the keel at the rudder post. I made a jig and used it to clamp the planks in with the twist. The twist happens over about the length of three frames so I used that distance to space between the clamps in the jig and left plenty of length on either end to fit the plank after the first bending. After soaking the planks, I clamped them into the jig using some larger spring clamps that would hold the planks tightly - use blocks between the planks and the clamps so that the clamps do not deform the wet planks too much.
- 54 replies
-
- 1
-
-
- Spray
- BlueJacket Shipcrafters
- (and 1 more)
-
Trying to catch up with the build-log -I really don’t build this quickly. The 3/32”x1/8” planks that follow the curve of the bilge go pretty quickly, and I get into the pattern of soaking and then wet fitting and clamping into place one evening, letting them dry and then gluing them into place the next evening. This process is working the way down from the shear line. As the curve increases, I have been beveling the top edge so that the plank fils tightly next to the square bottom edge of the plank above. Doing this in the dry fitting stage gives a pretty good fit along the lengths of the planks. Works pretty well for making progress during the week after work.


- 54 replies
-
- 1
-
-
- Spray
- BlueJacket Shipcrafters
- (and 1 more)
-
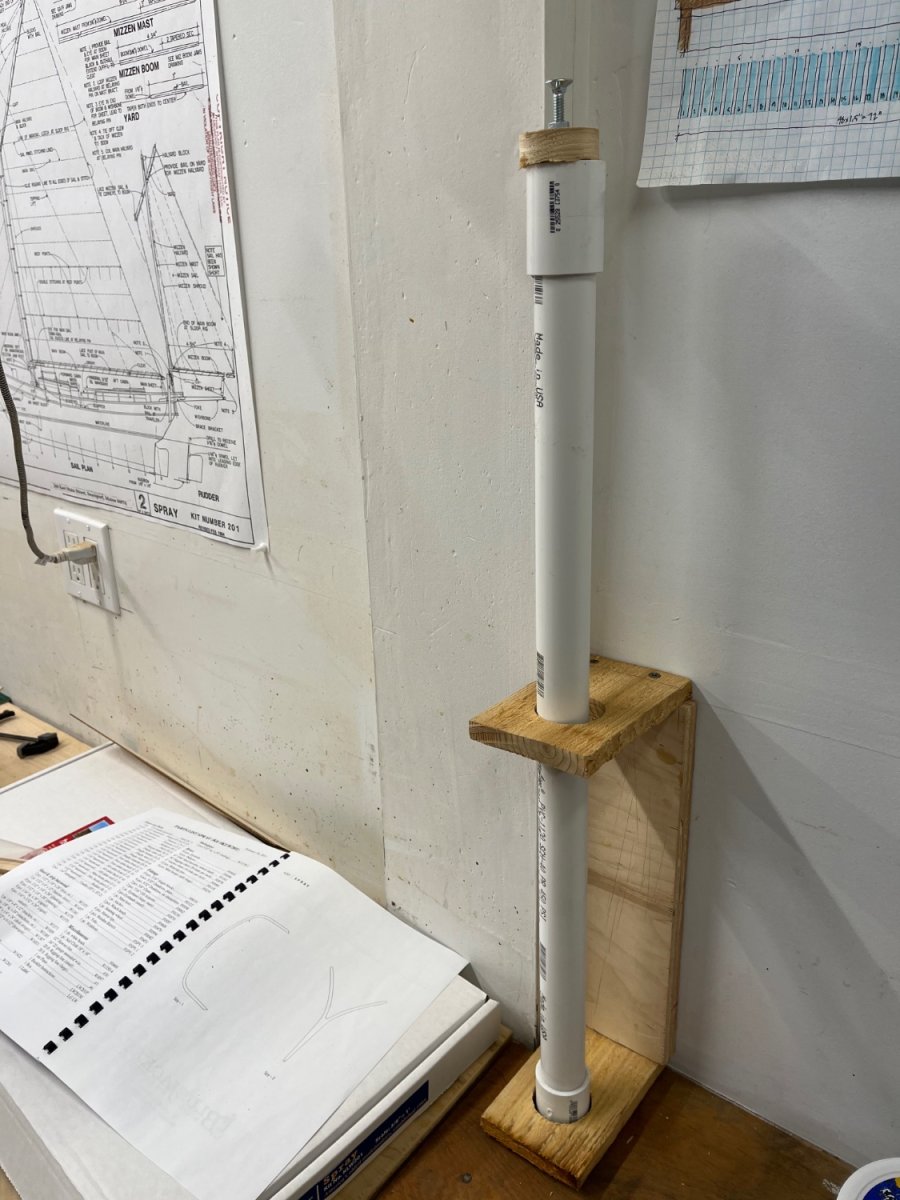
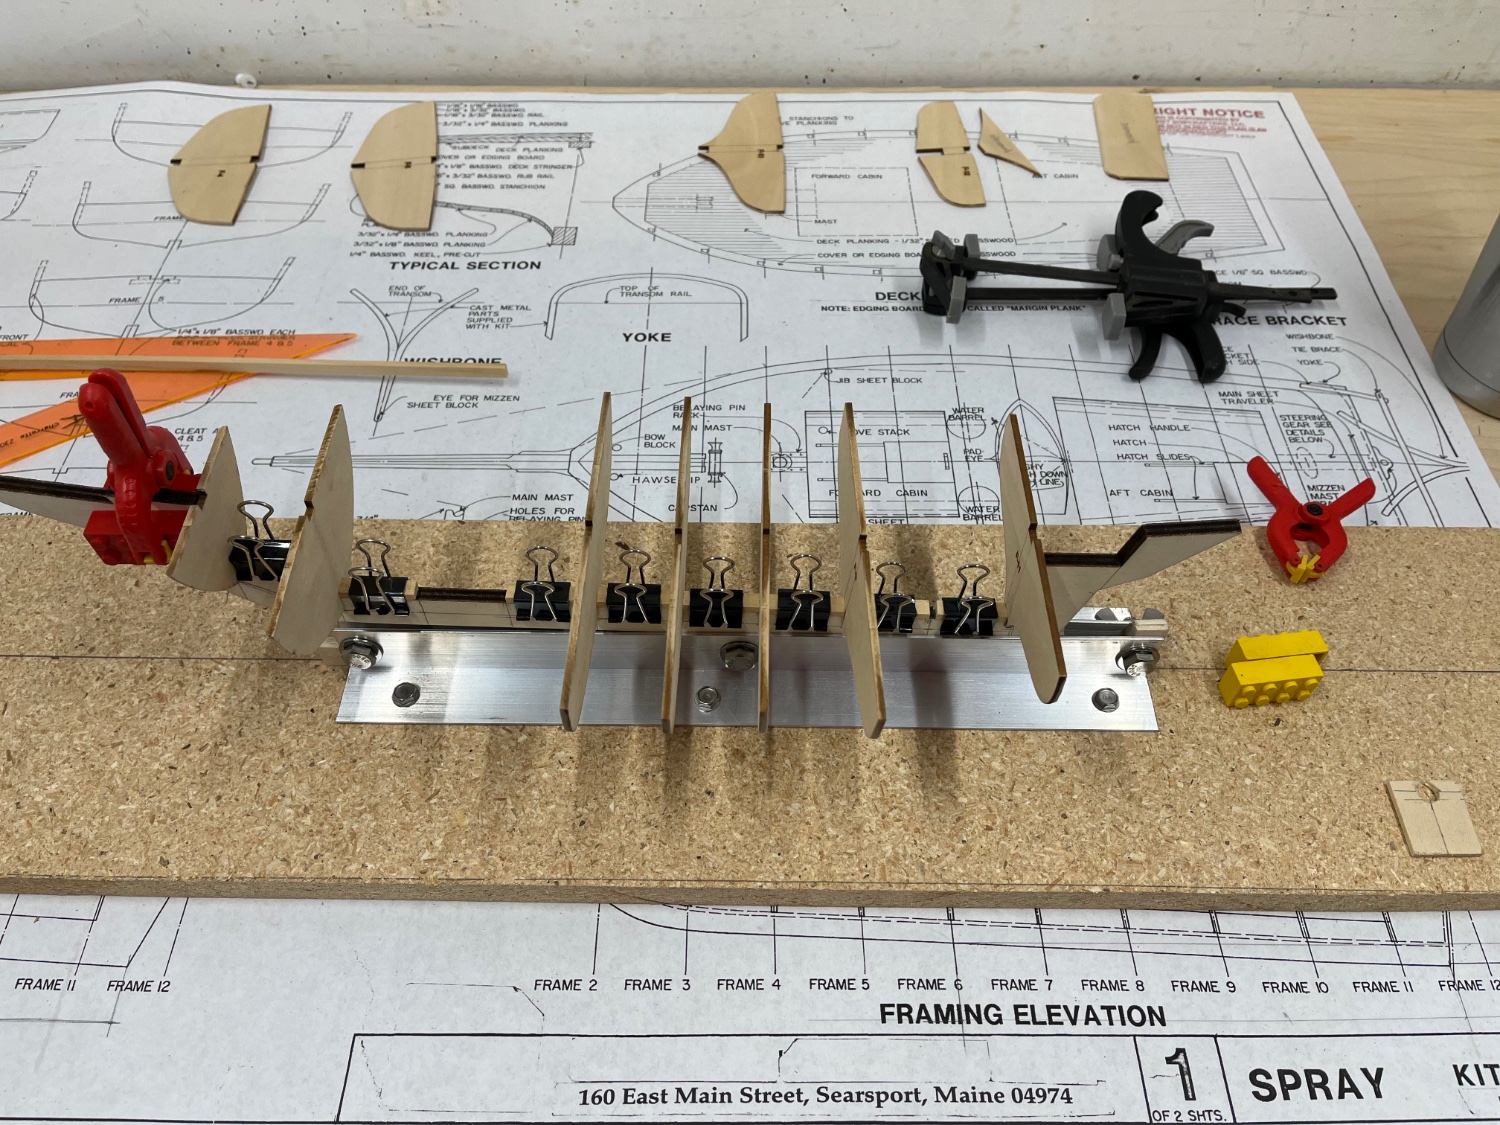
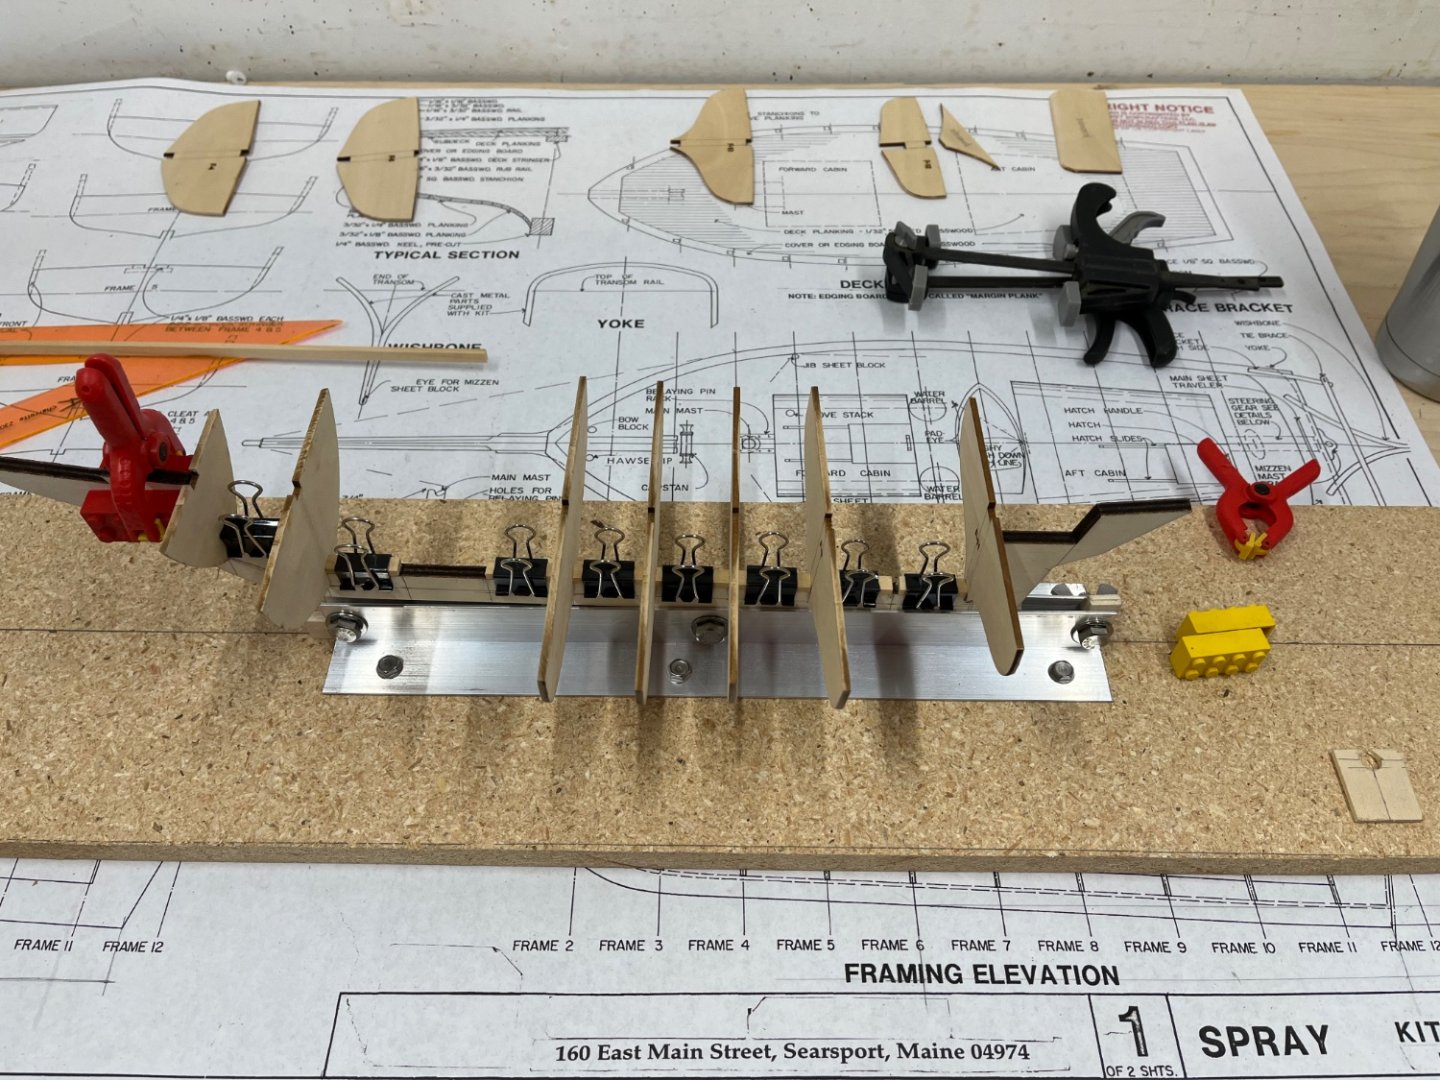
With the frames all glued into place, I set the center deck stringer and then used one of the small strips of basswood to check the bevel on the outboard edges of the frames and sanded them to get them to better follow the curve of the hull planking. then started the planking at the shear line with two 3/23”x1/4” planks. Soaking them in a 1” dia.x24” PVC pipe capped at one end - thanks to plank on frame hints from the build forums! It is great to have that kind of guidance from other model builders. I built a bracket to stand the pipe up and a way to cap it so that it would hold the planks down under water - basswood floats well. On all of the planks, I dried the wet planks after soaking for about 20 minutes and wet fit them into place and clamped the planks in and let them dry before gluing them in. Kind of tricky to get them clamped tight to the keel at the bow but I guess that is what wood putty is for. You get better as you go setting them tight to the keel and each other.


-
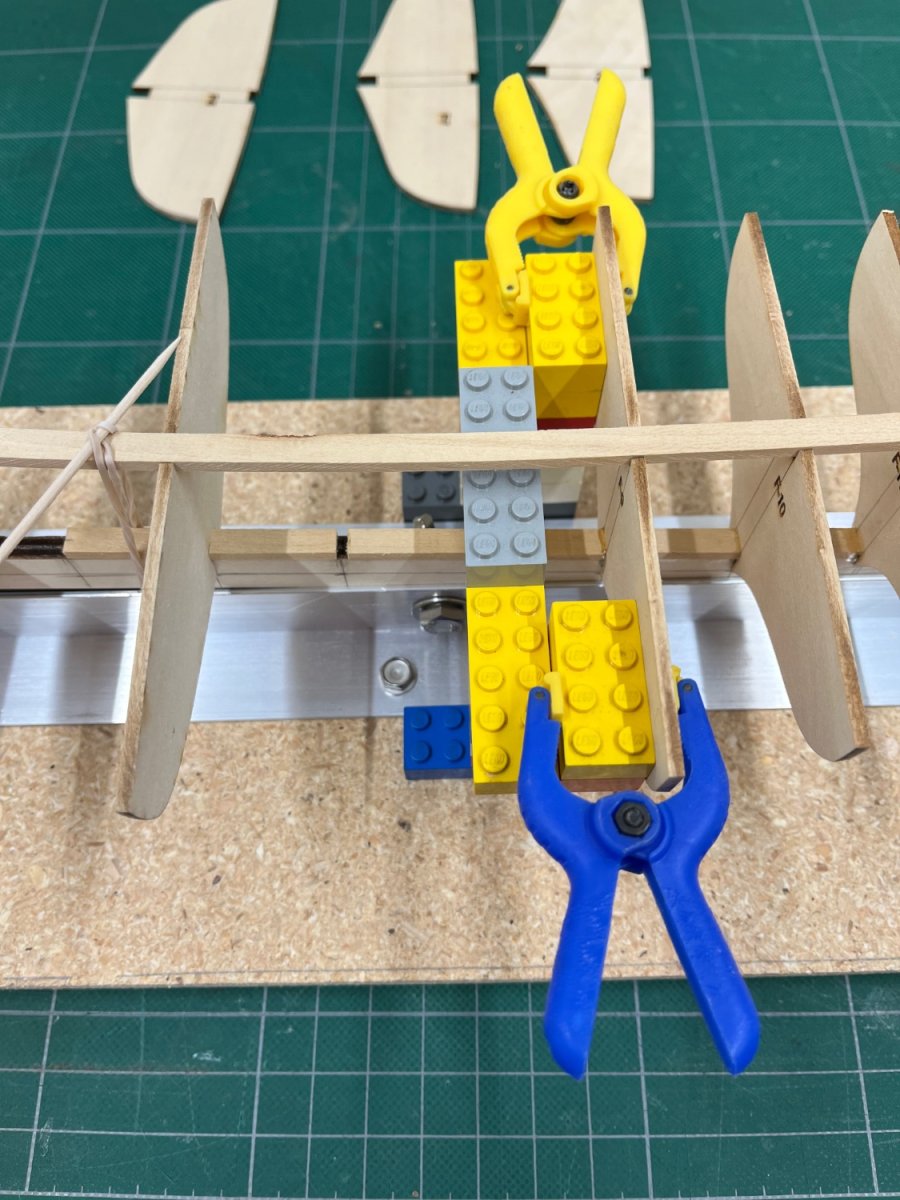
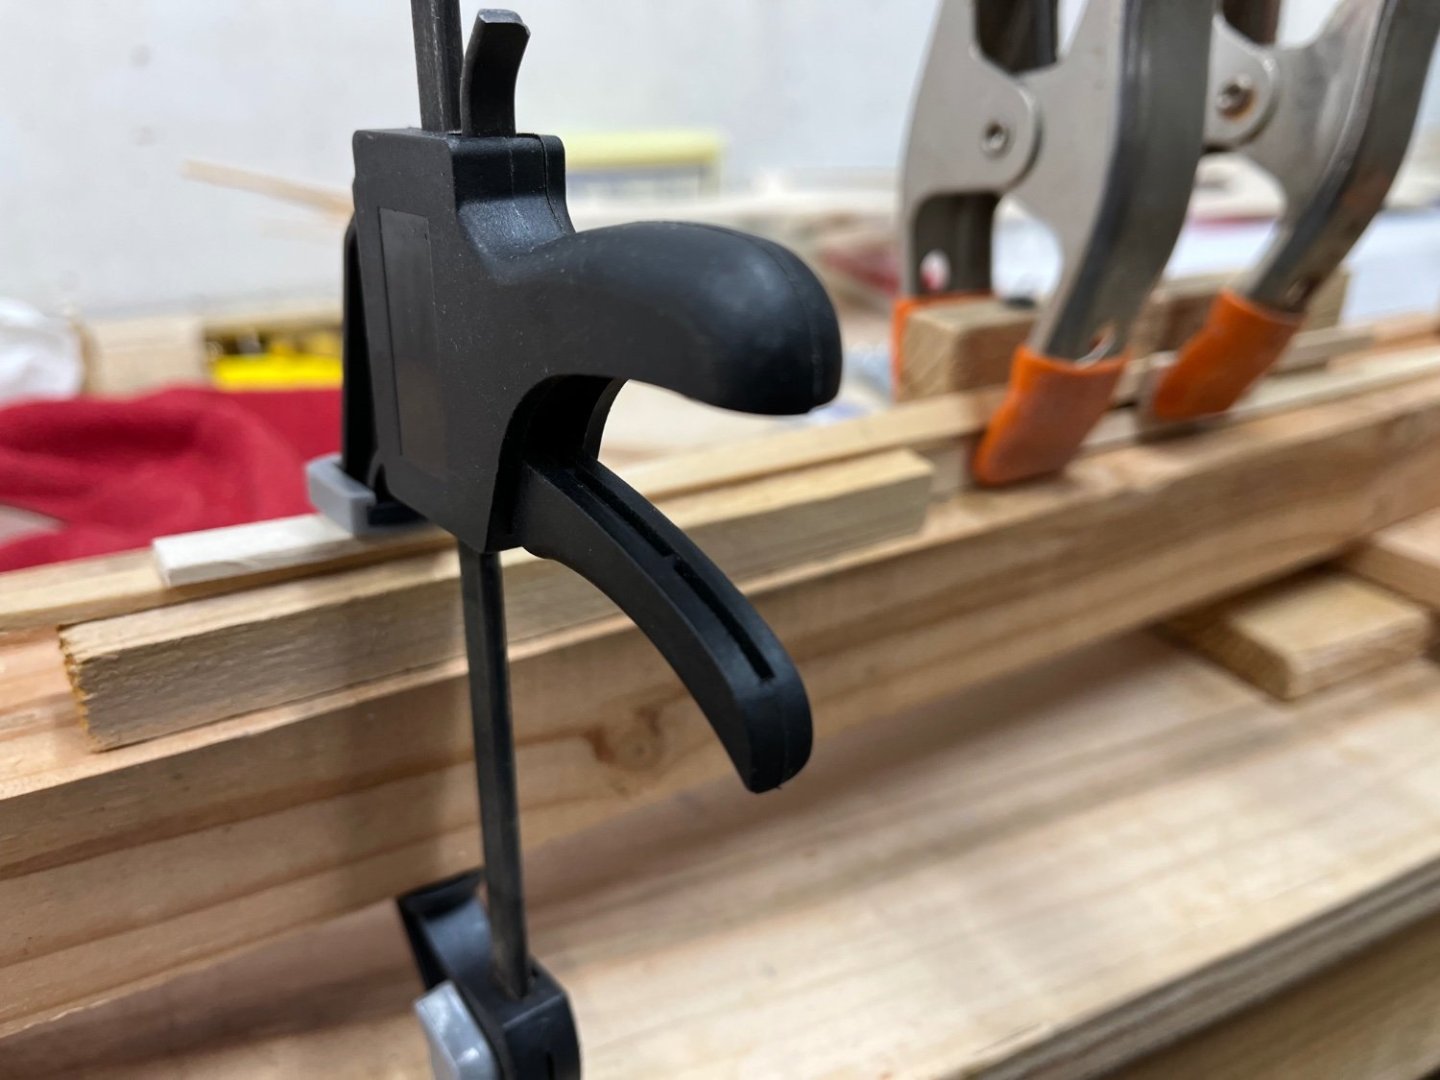
To set the middle frames, I relied on using the 1/8”x1/4” plank that runs along the top of the frames from the bow frame to the stern frame to help align and square the frames along the length of the keel. To square each frame as i set them, I used Legos - thanks to the tip from many other build logs - to square the frame to the cross-axis and vertically. By building a saddle frame from the legos, I was able to work my way down the length of the keel setting the rest of the frames. The deeper pockets from the blocks helped to set these frames more solidly to the keel - which is the only attachment of these frames until the top rib and the the planks can be installed to more solidly hold the frames. Lots of little clamps and binder clips are a must have.


- 54 replies
-
- 3
-
-
- Spray
- BlueJacket Shipcrafters
- (and 1 more)
-
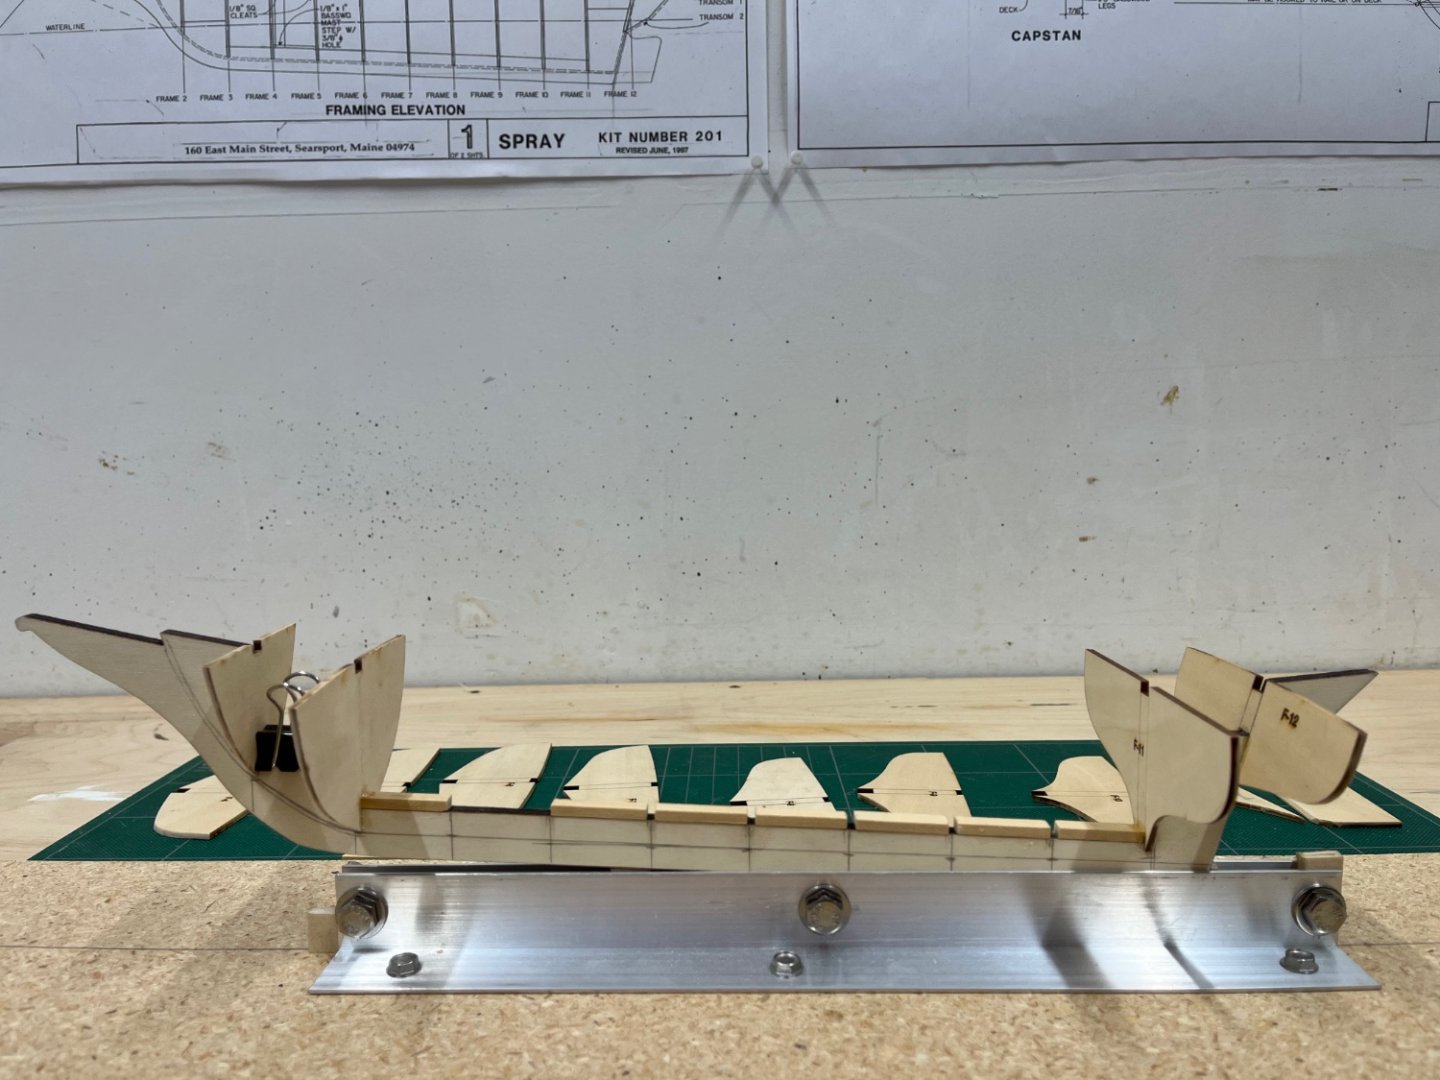
After I was satisfied with the dry fit of the frames, I started gluing them to the keel. I started with the two frames at the bow and the last frame before the transom and finally the transom. These set against vertical surfaces of the keel so there is a fairly long surface to glue to and these are easy to get set square. most of the frames only have a small +/-1/8” channel in the base to fit over the keel and many of the narrow tips can easily break so I decided to cut blocks to go in between the frames to give me a larger seat for them to fit in.
- 54 replies
-
- 1
-
-
- Spray
- BlueJacket Shipcrafters
- (and 1 more)
-
Trying to catch up with the build-log… Next step is fitting the frames to the keel. This is fairly straightforward. I started on sanding the outboard edge to fit the curve of the planks. Mostly eyeballing them at this point but it is easier to sand the frames when they are not glued to the keel. Binder clips are a great clamp for setting frames in place.
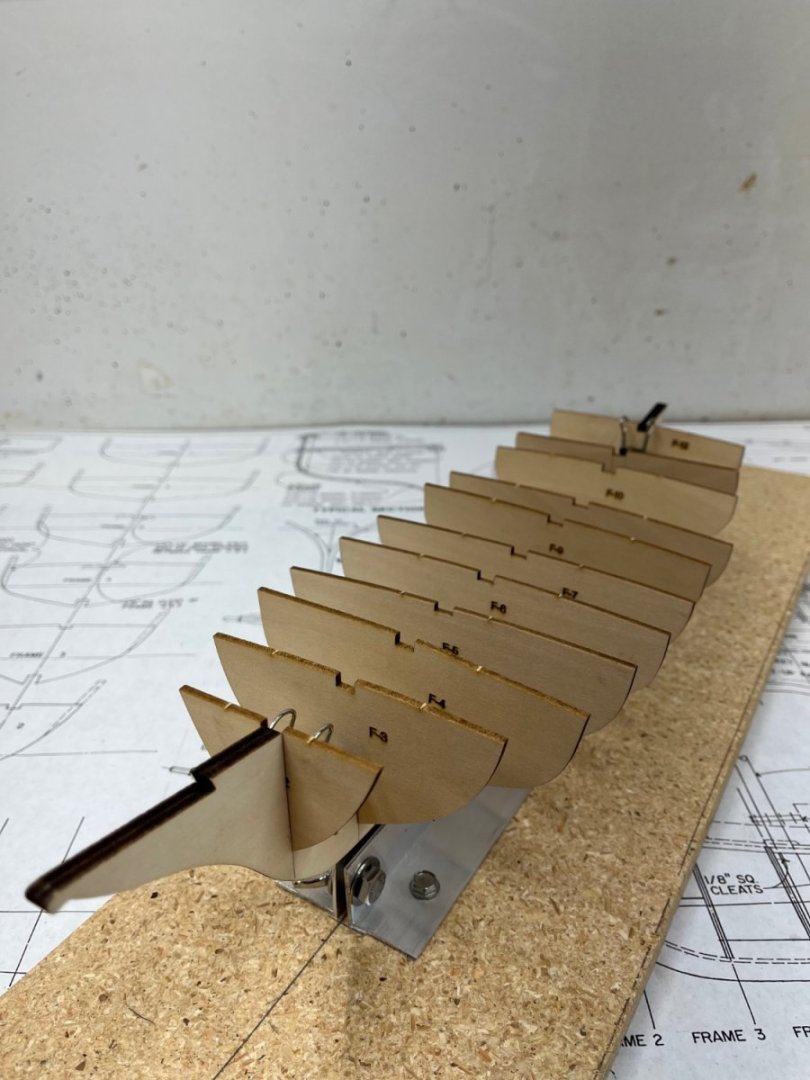
- 54 replies
-
- 4
-
-
- Spray
- BlueJacket Shipcrafters
- (and 1 more)
-
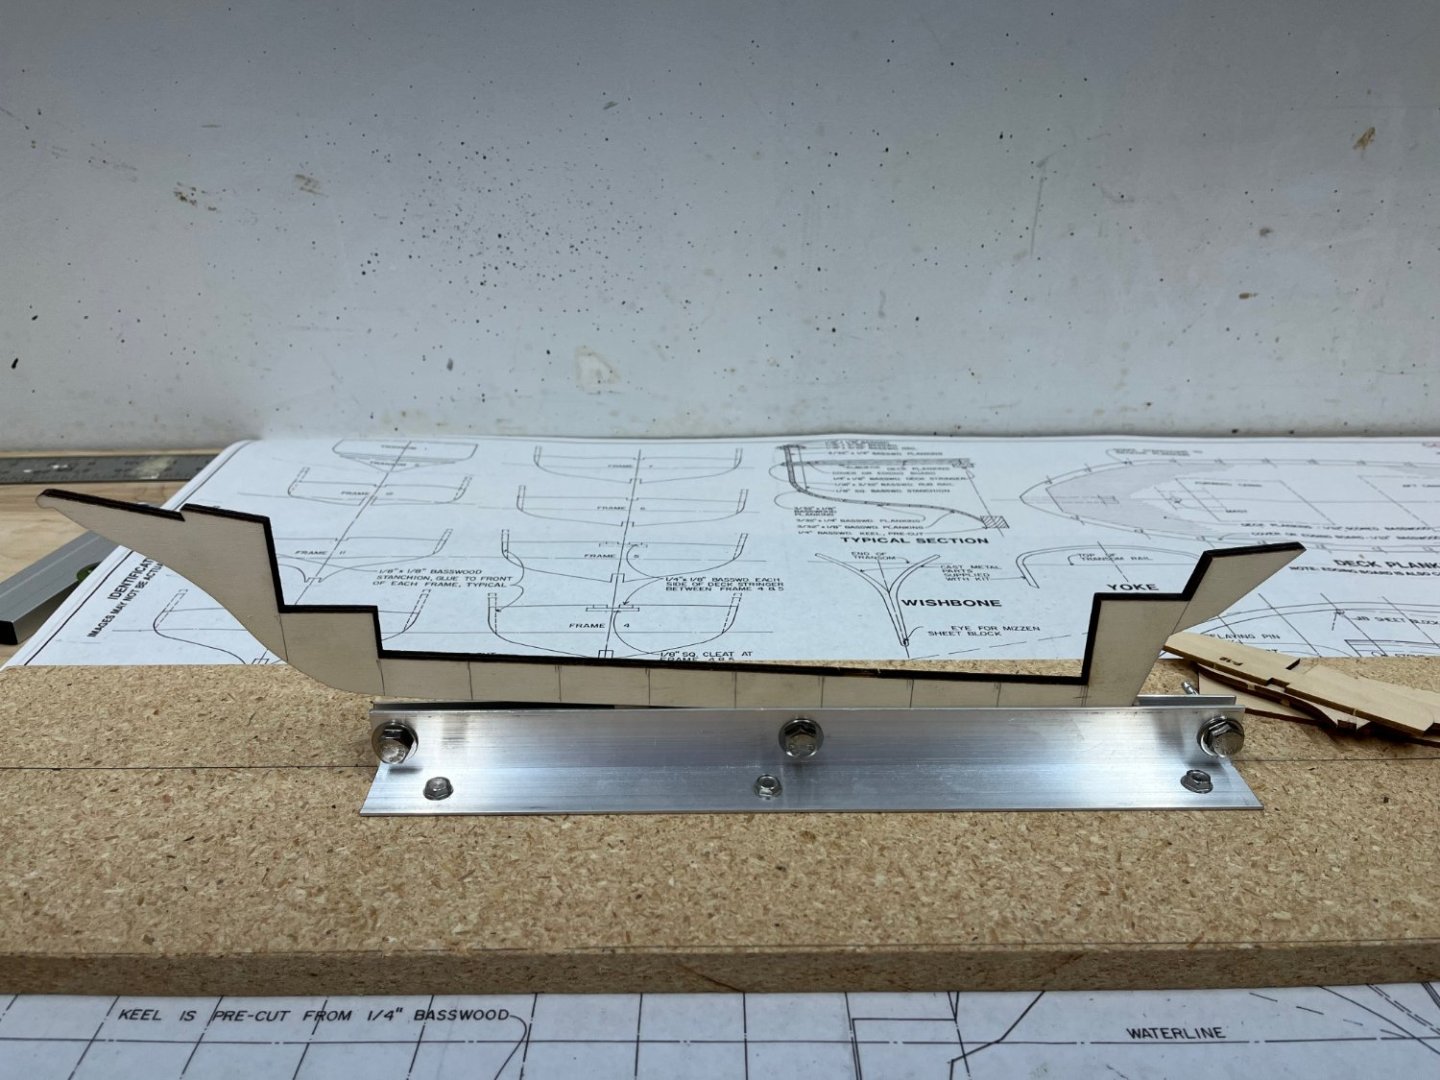
First steps were to read everything on the building of this model - Build-Logs from this site, the instruction manual from Bluejacket and, of course, "Sailing Alone around the World" by Joshua Slocum. Then building the model ship-rails to hold the keel. These were built from 1"x1"x12" aluminum angles. One side is screwed to a base board and the other is bolted with wing-nuts to the fixed angle to act as a clamp. I cut blocks to set under the keel to hold it at the correct angle so that the frames would all be perpendicular to the base.
- 54 replies
-
- 4
-
-
- Spray
- BlueJacket Shipcrafters
- (and 1 more)
-
I am starting work on Joshua Slocom’s Spray. This is my first model being tracked in Model Ship World. My previous models have been Dumas sailboat models and this Bluejacket model is my first real plank-on-frame. Previous build-logs that have been posted of this model have been invaluable in helping me approach this build..
- 54 replies
-
- 3
-
-
- Spray
- BlueJacket Shipcrafters
- (and 1 more)