TannumIan
-
Posts
33 -
Joined
-
Last visited
Content Type
Profiles
Forums
Gallery
Events
Everything posted by TannumIan
-
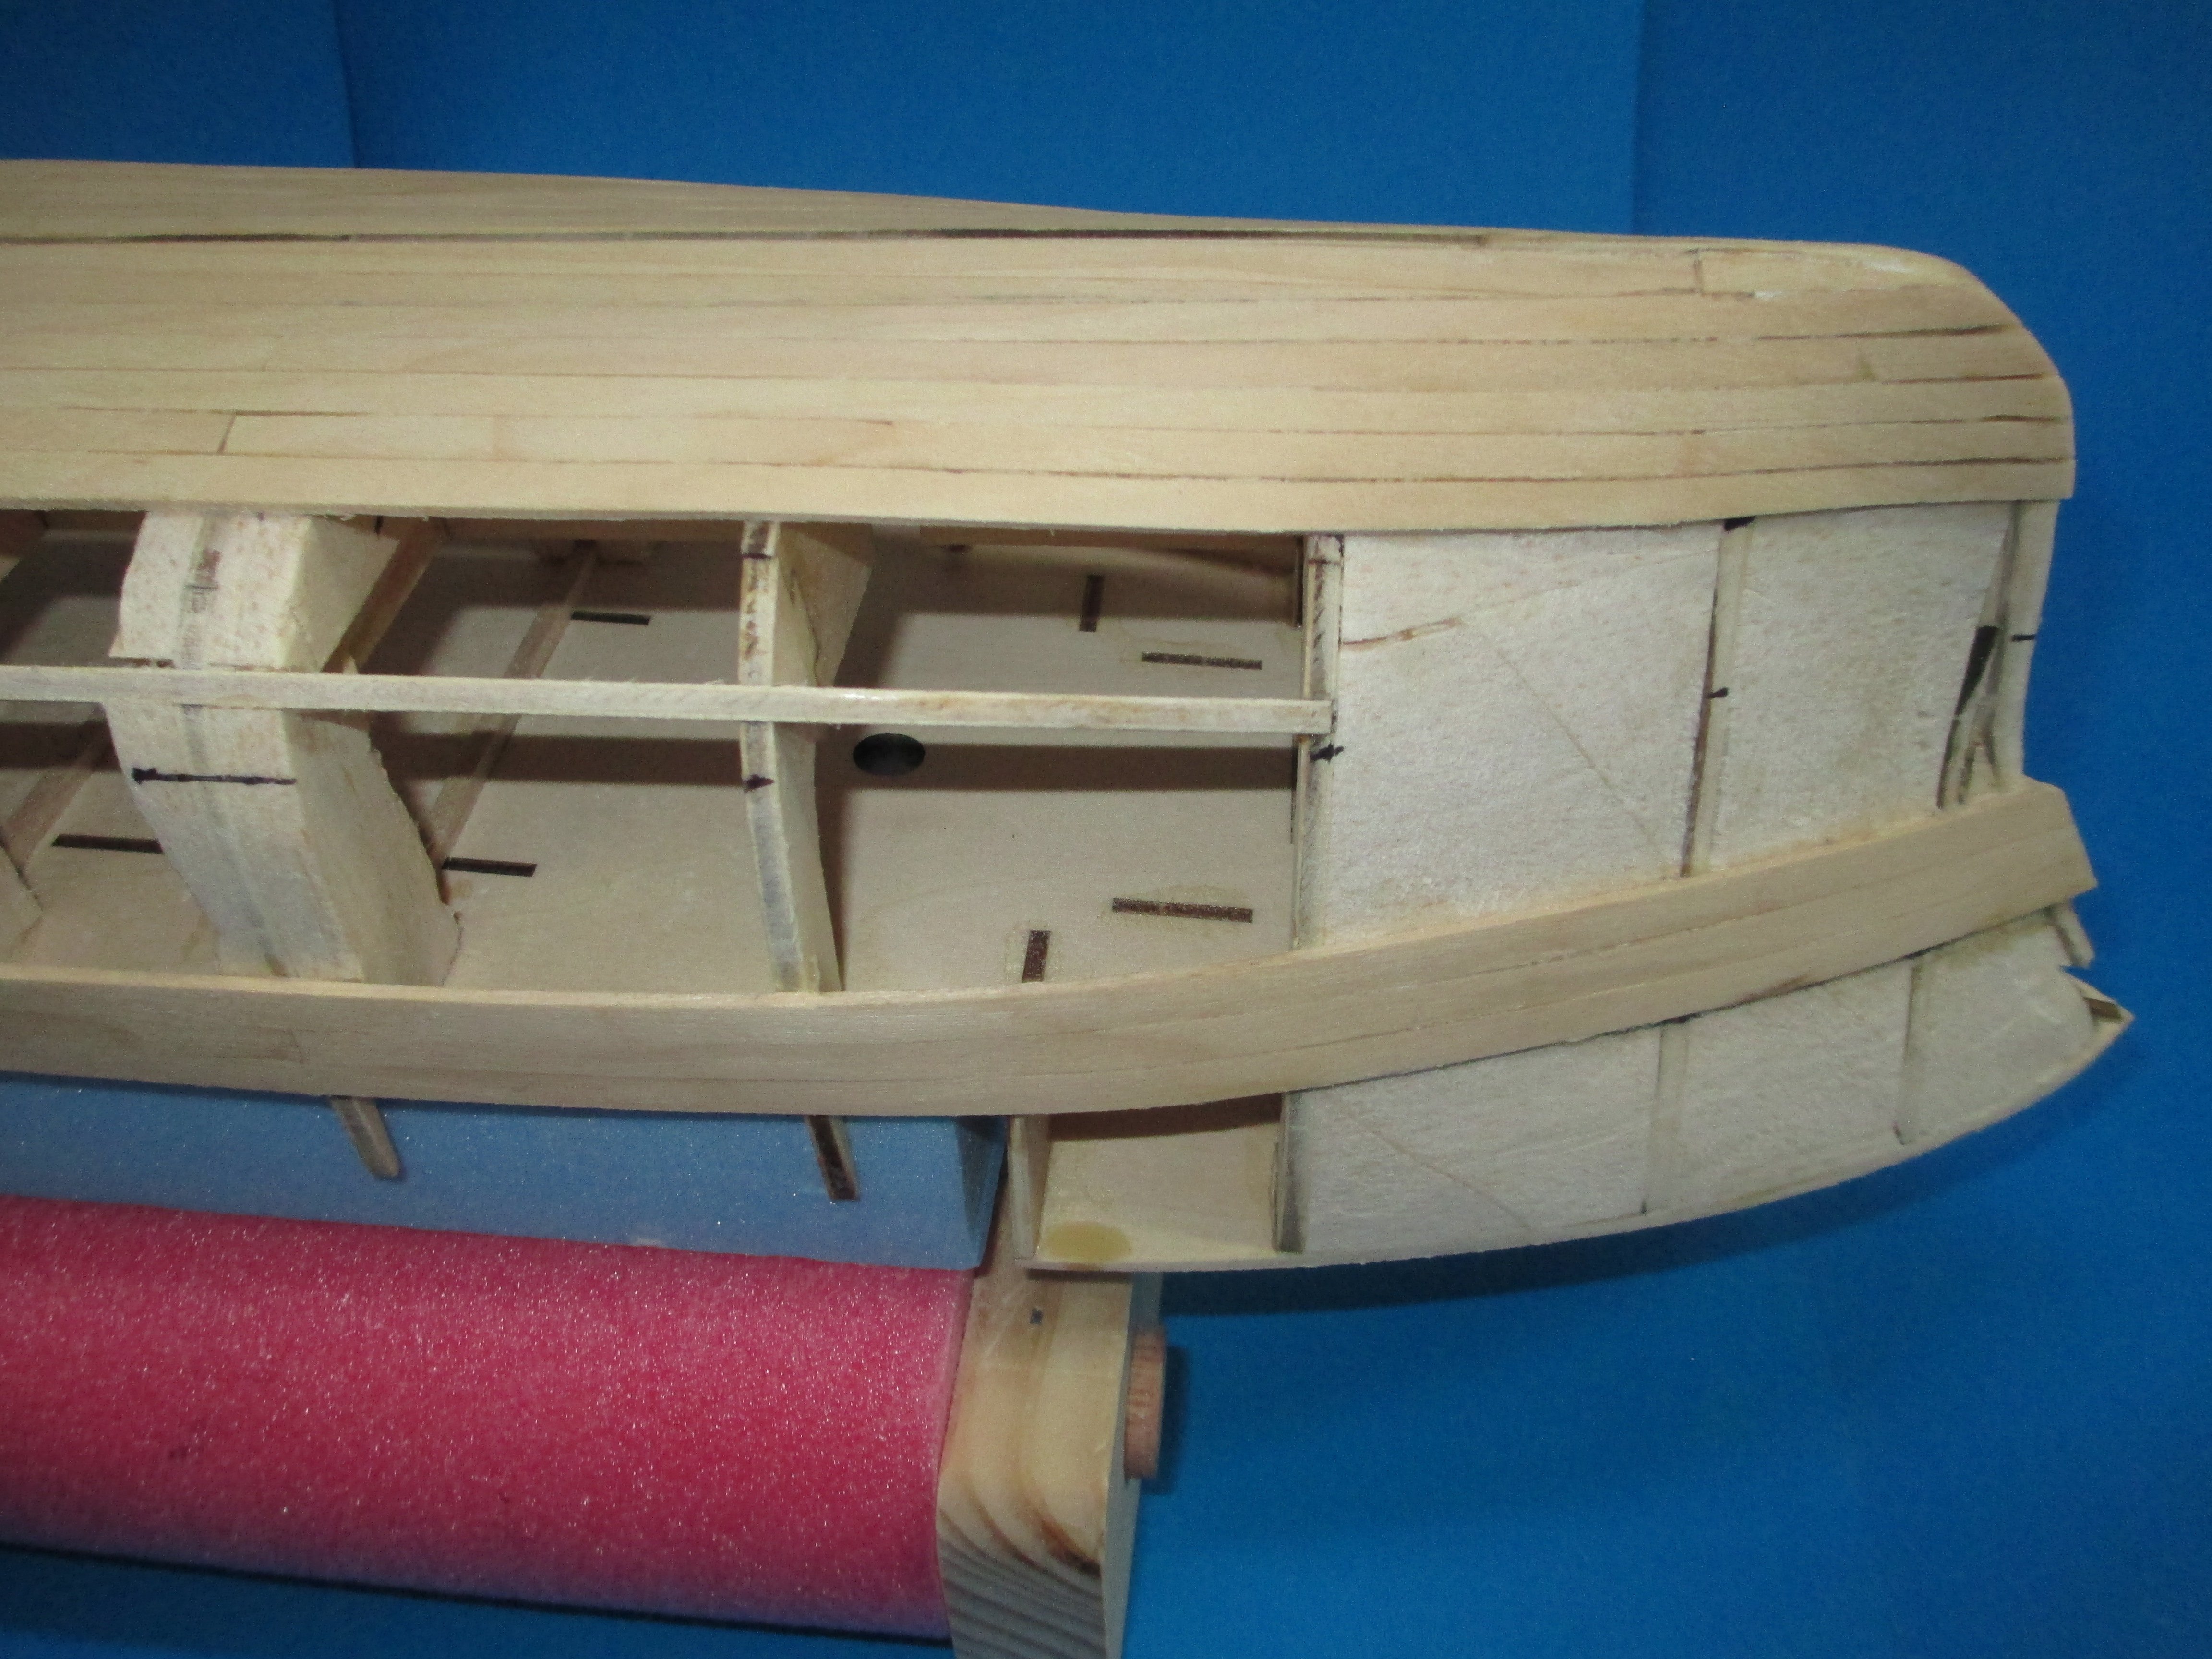
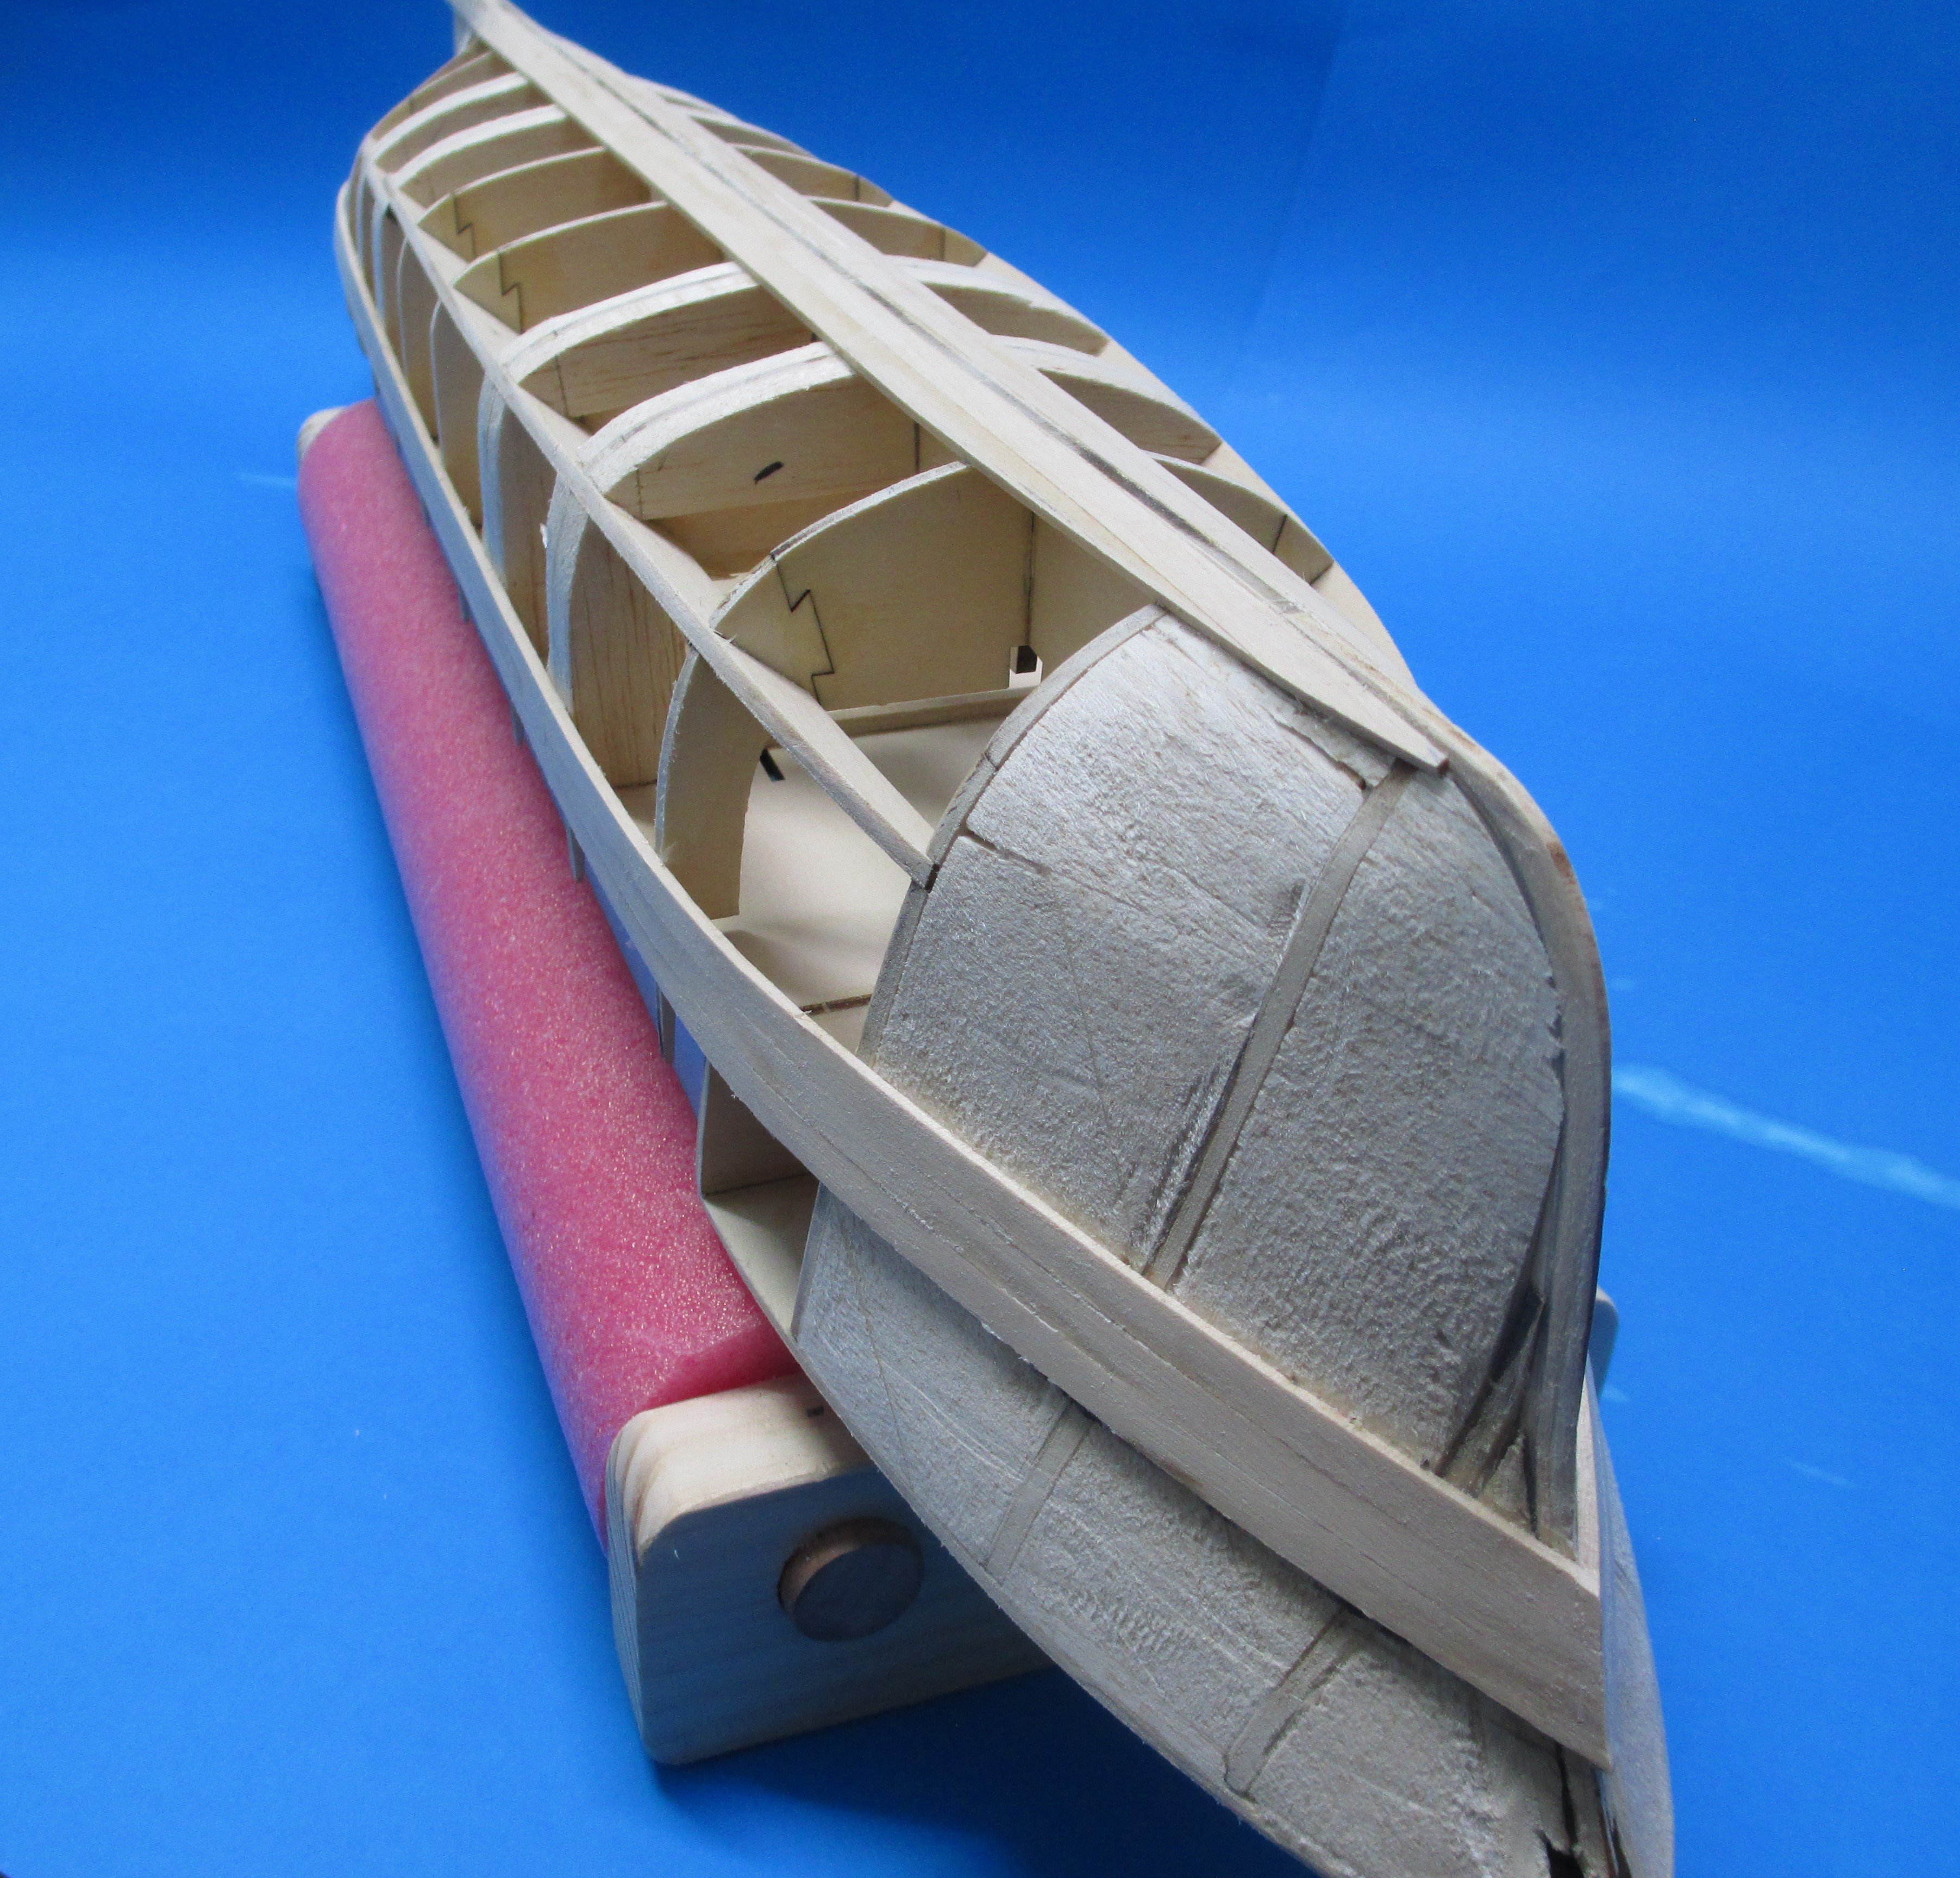
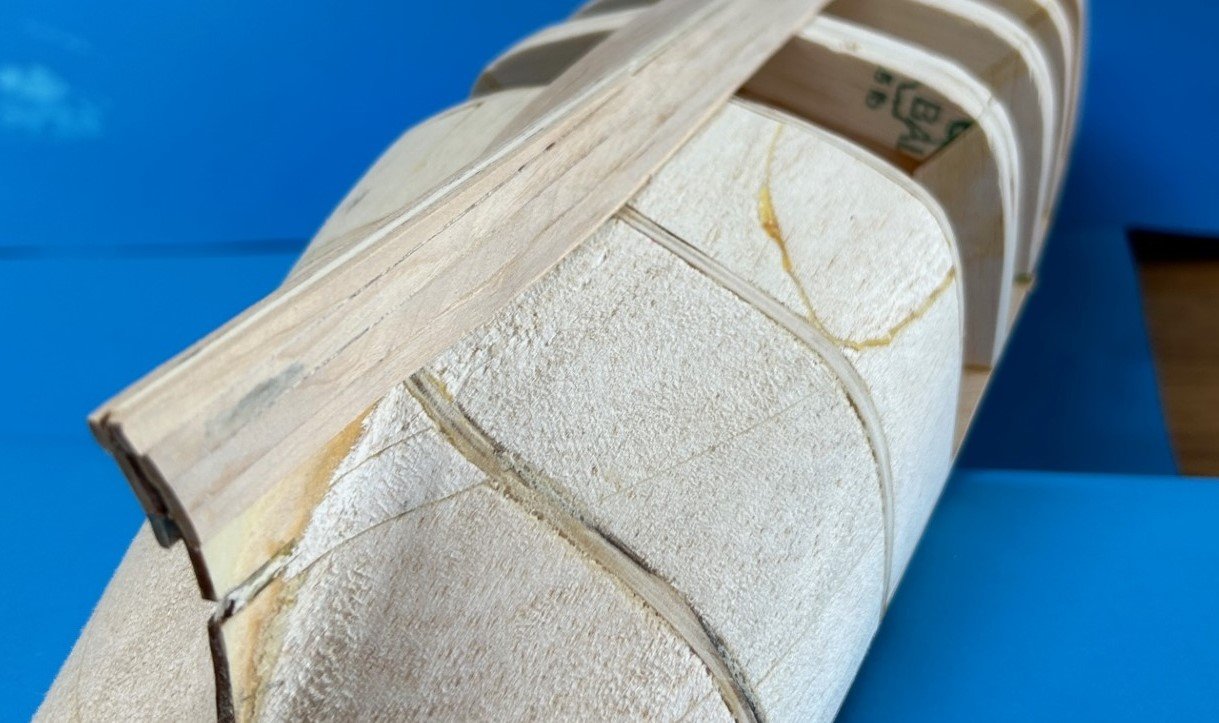
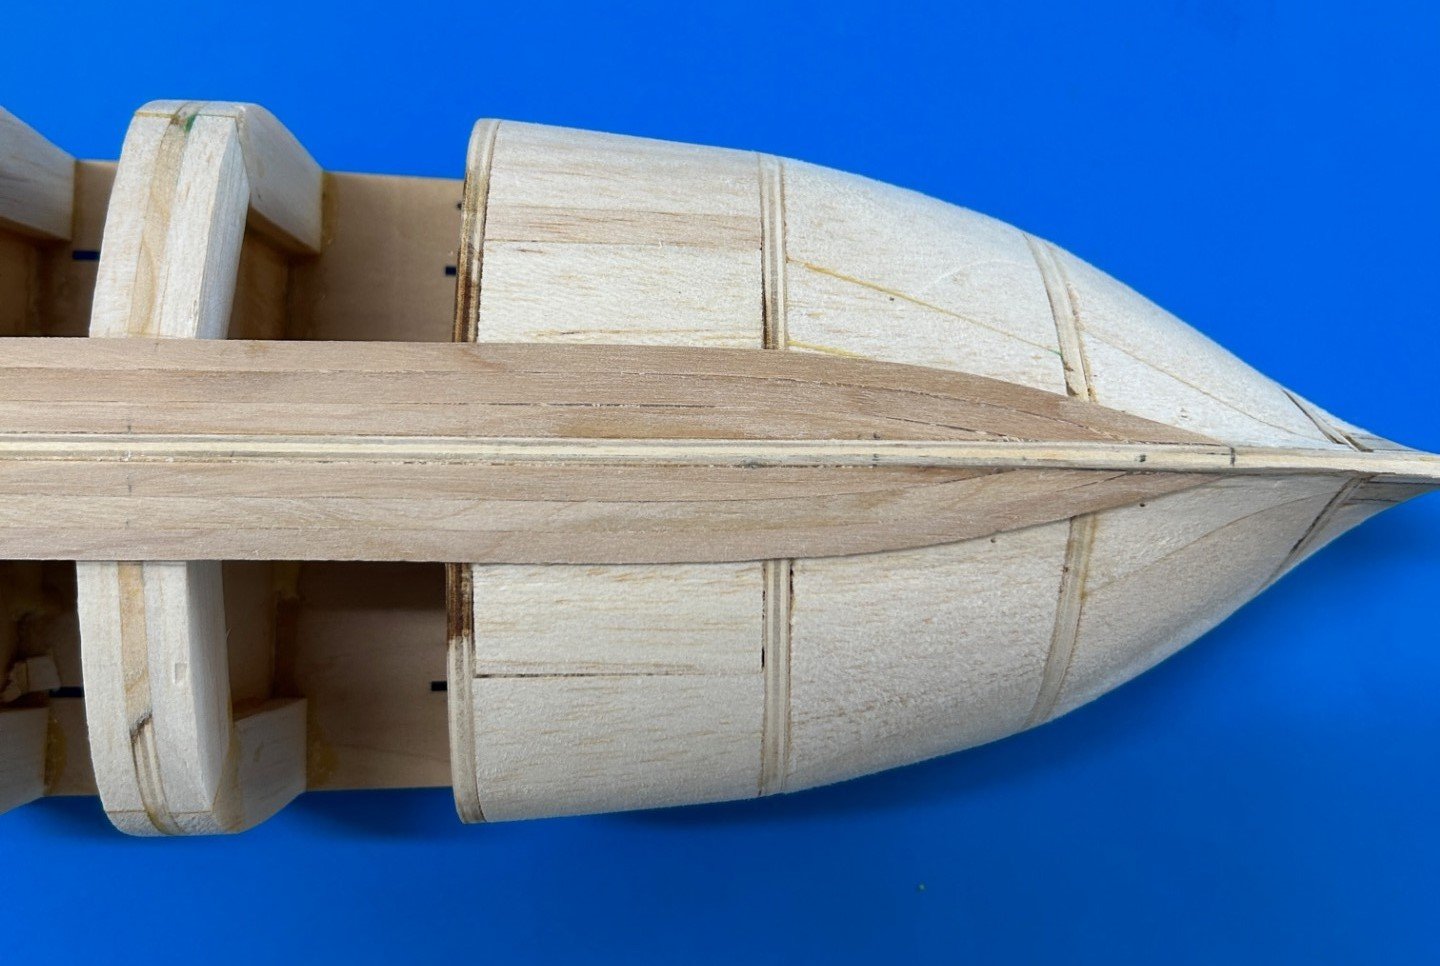
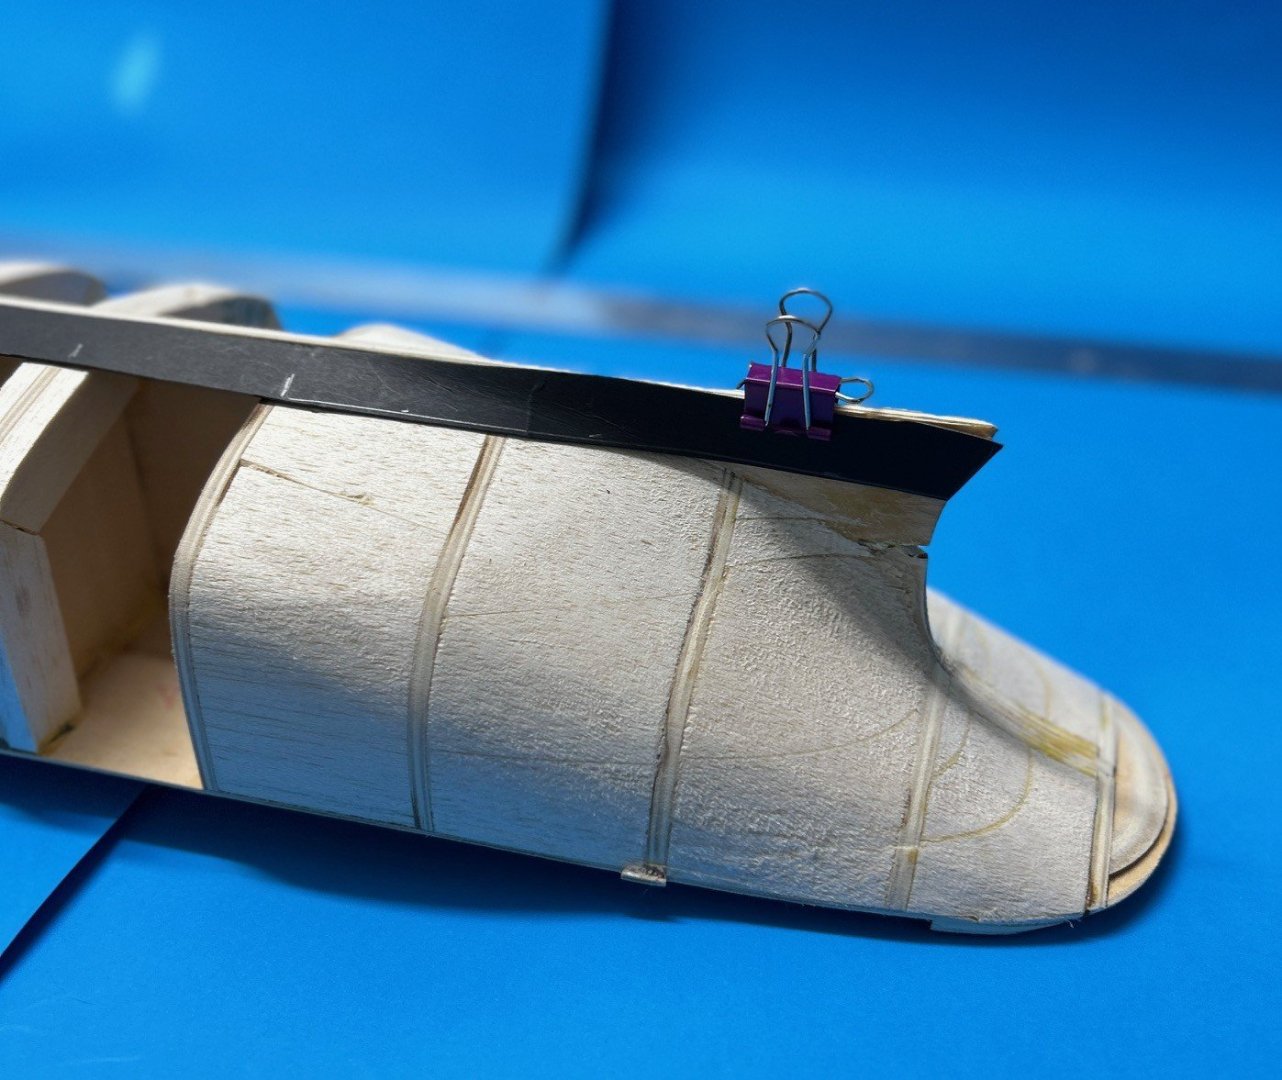
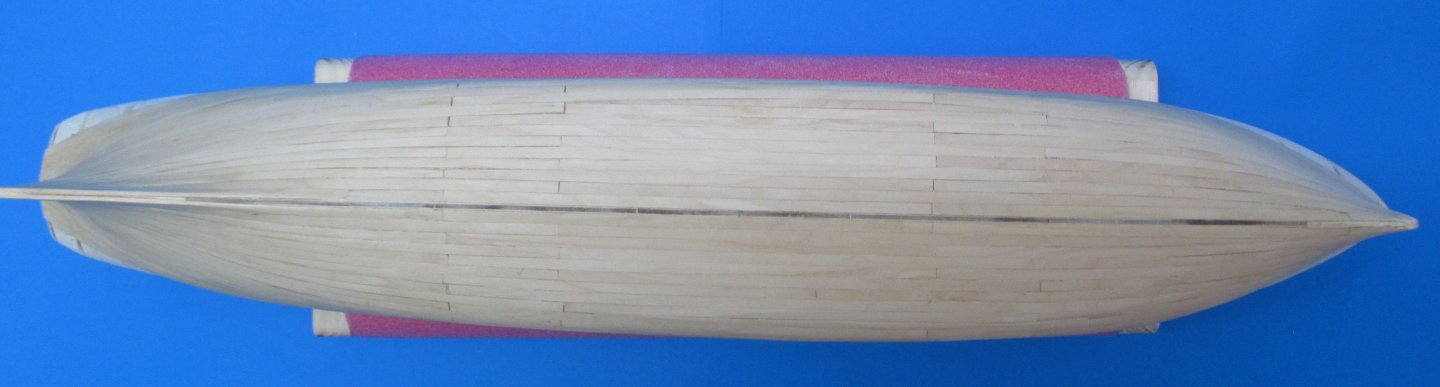
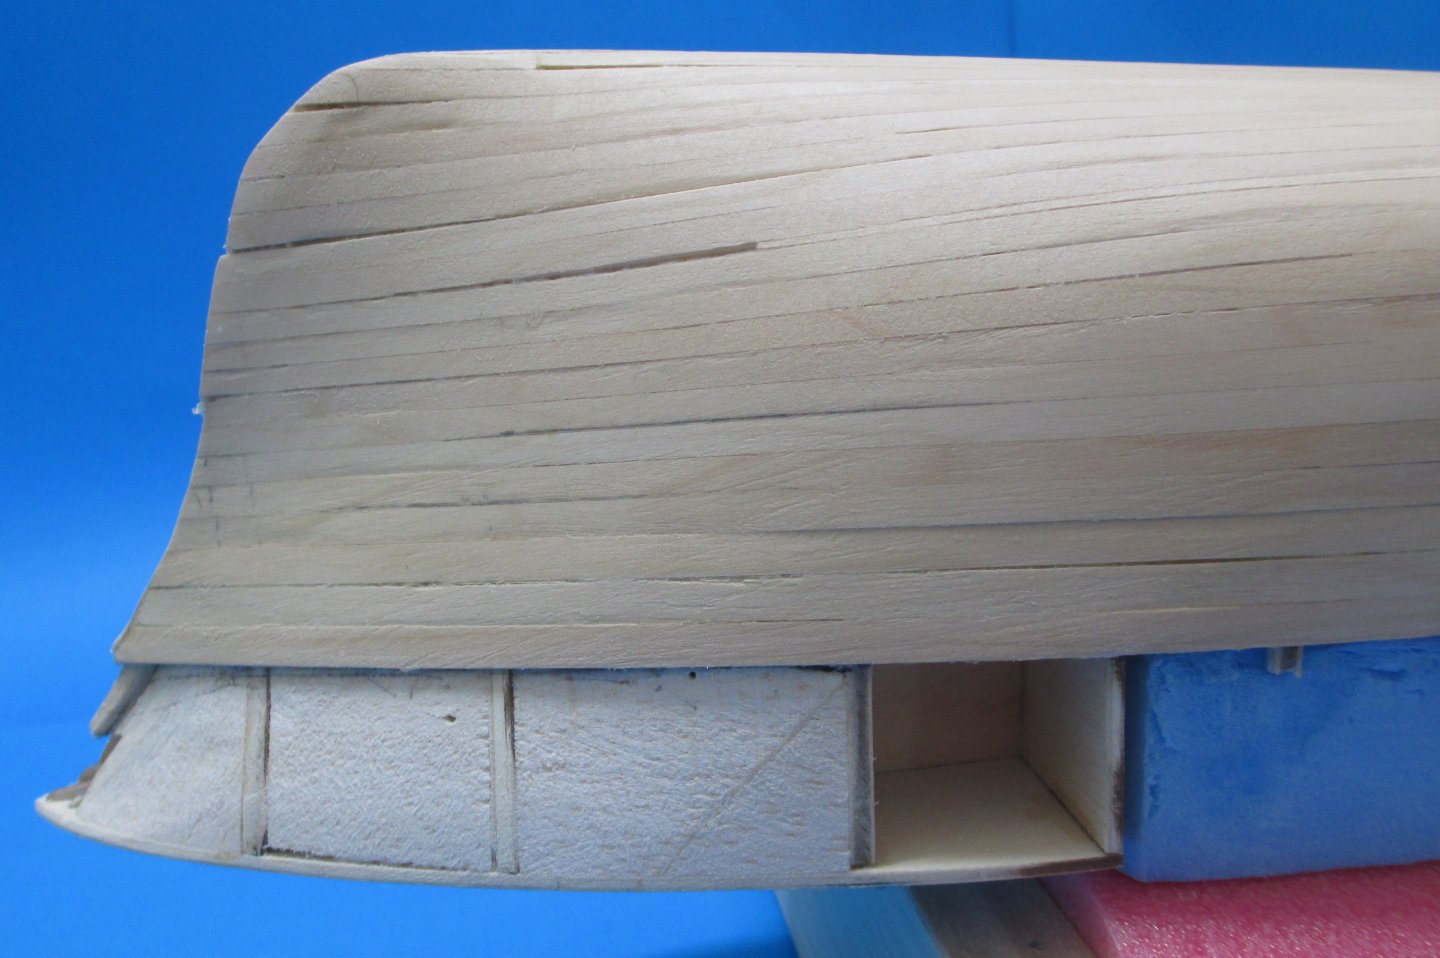
The garboard planks are now fitted as planned. The are some gaps but I was generally happy with the result. This will be a painted hull so some filler and sandpaper wont be noticed. I will add 2 more planks to the garboard before moving into the stem vertical section where the planks will require a small taper at the first few bulkheads. New bulwarks will have to be made from laminated plywood and dry fitted to the first rows of planks (gunwales?). The deck will be fitted after the hull is complete.
-
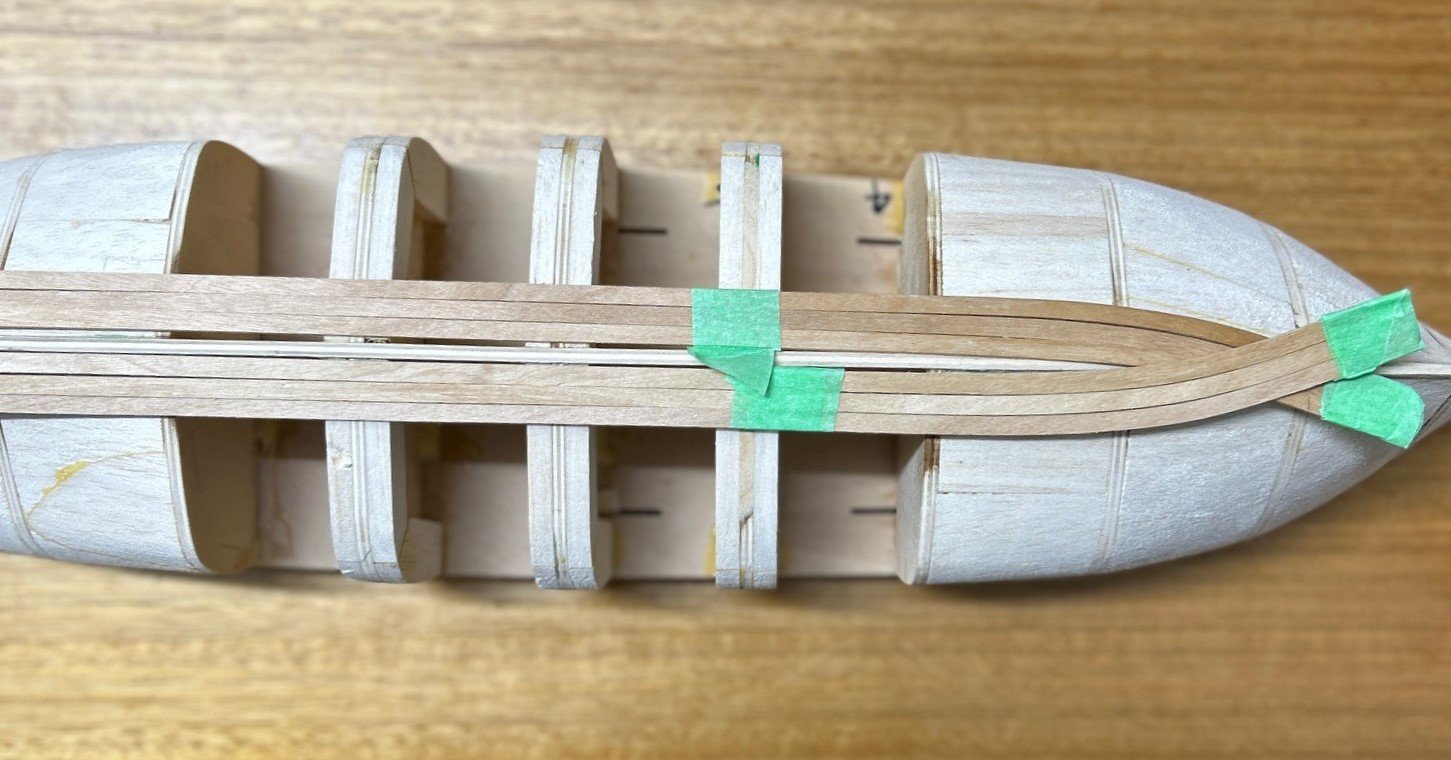
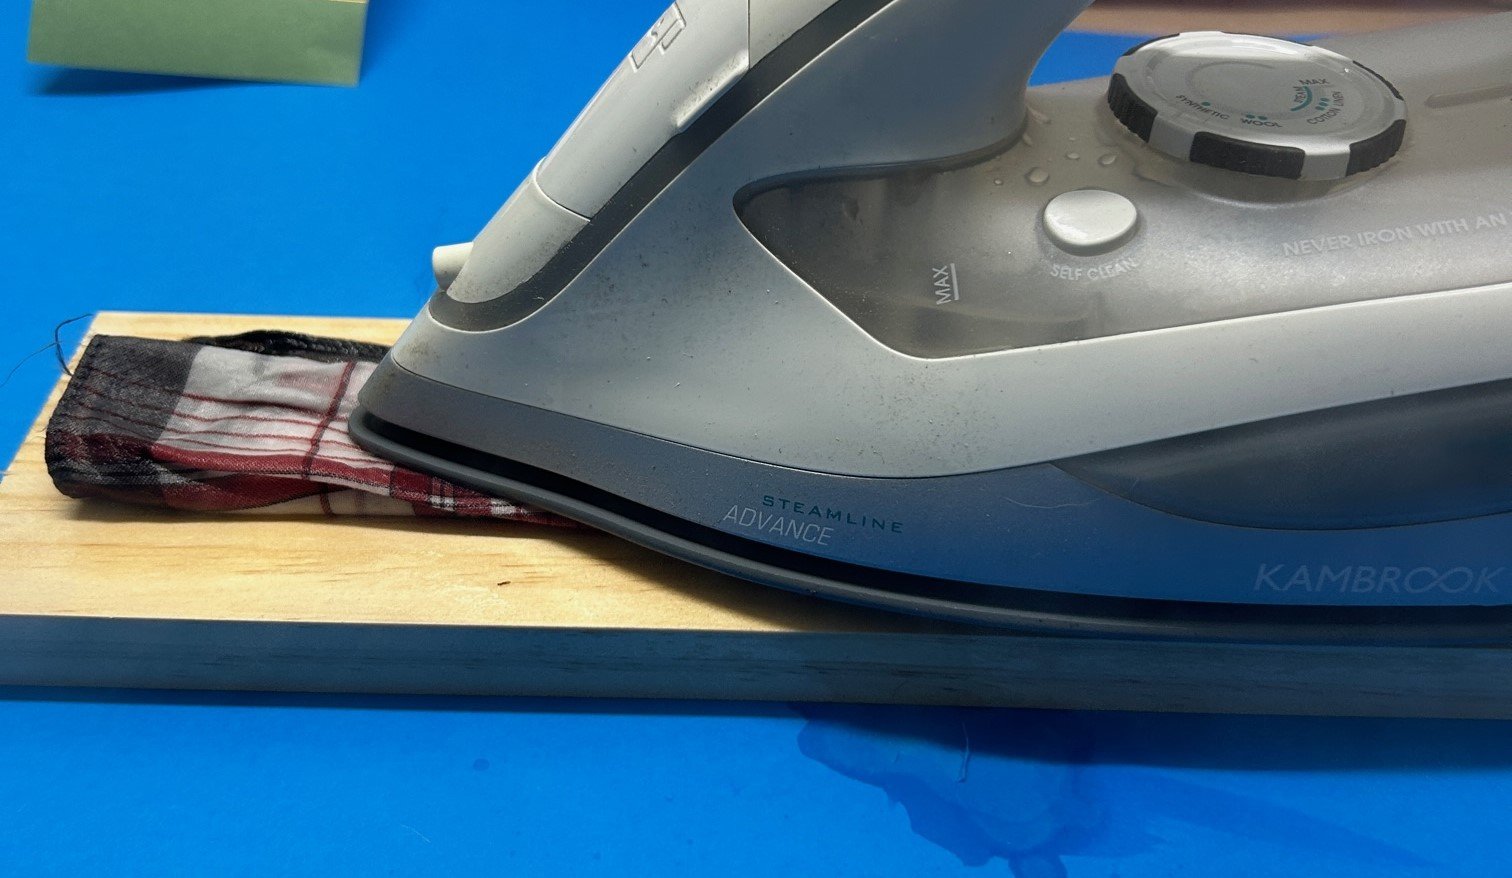
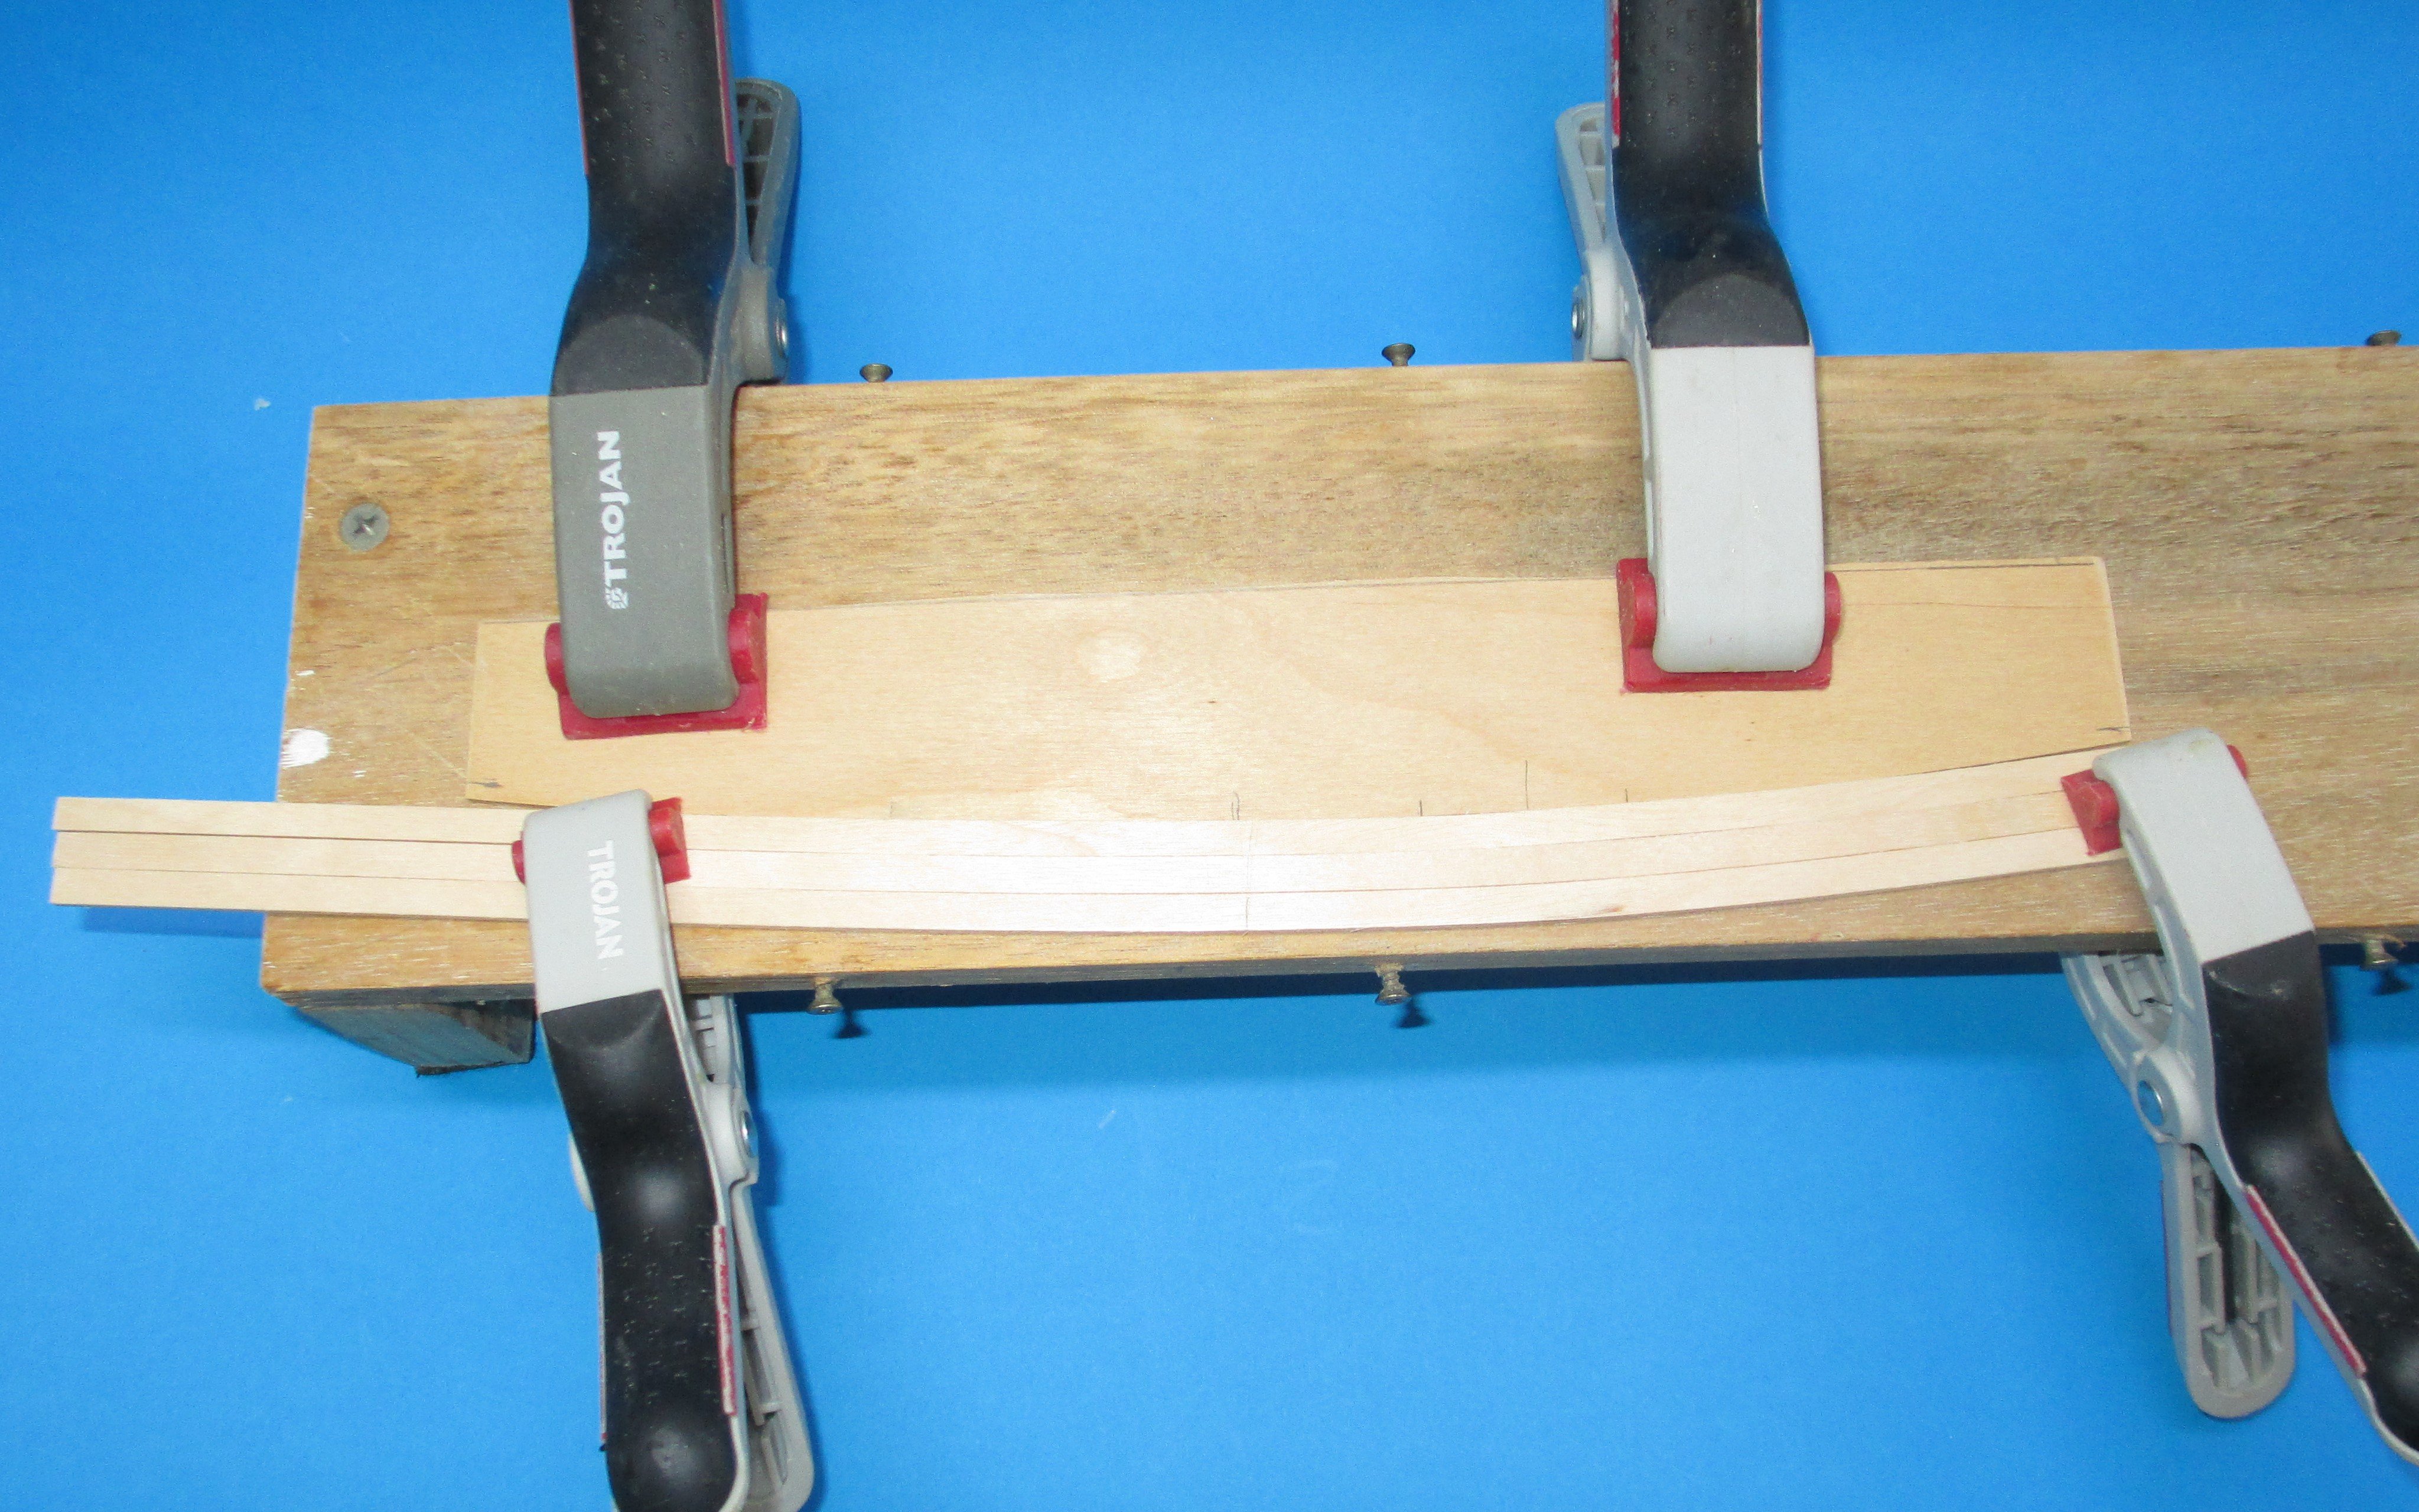
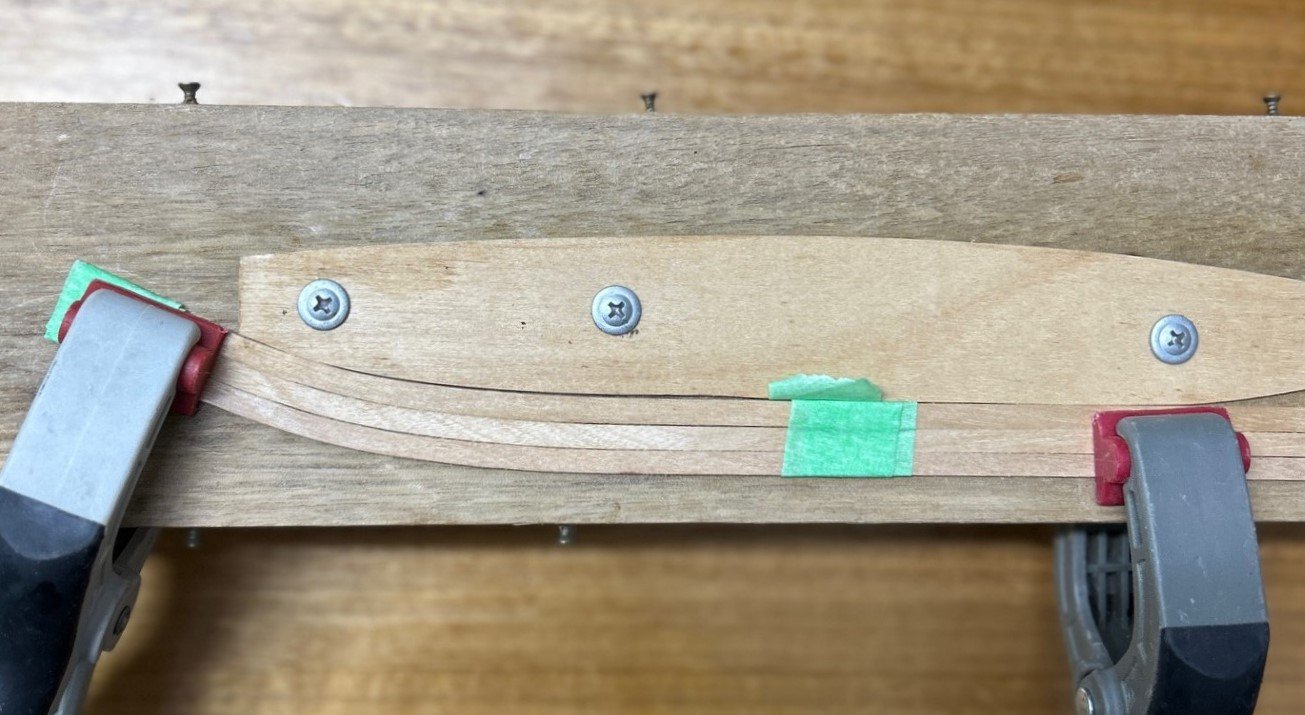
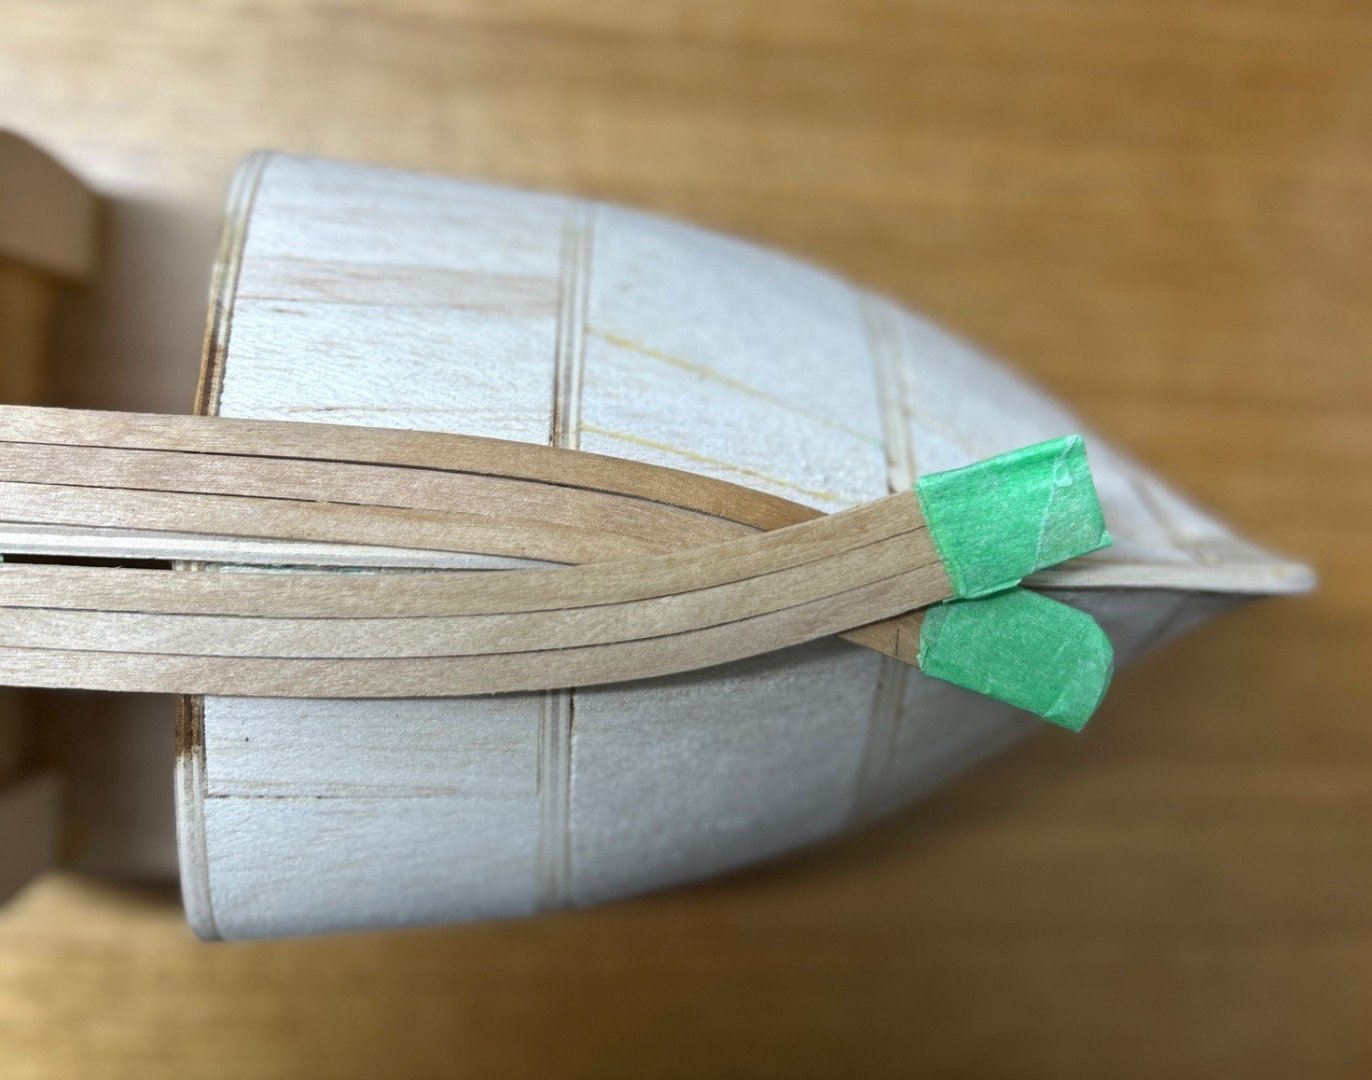
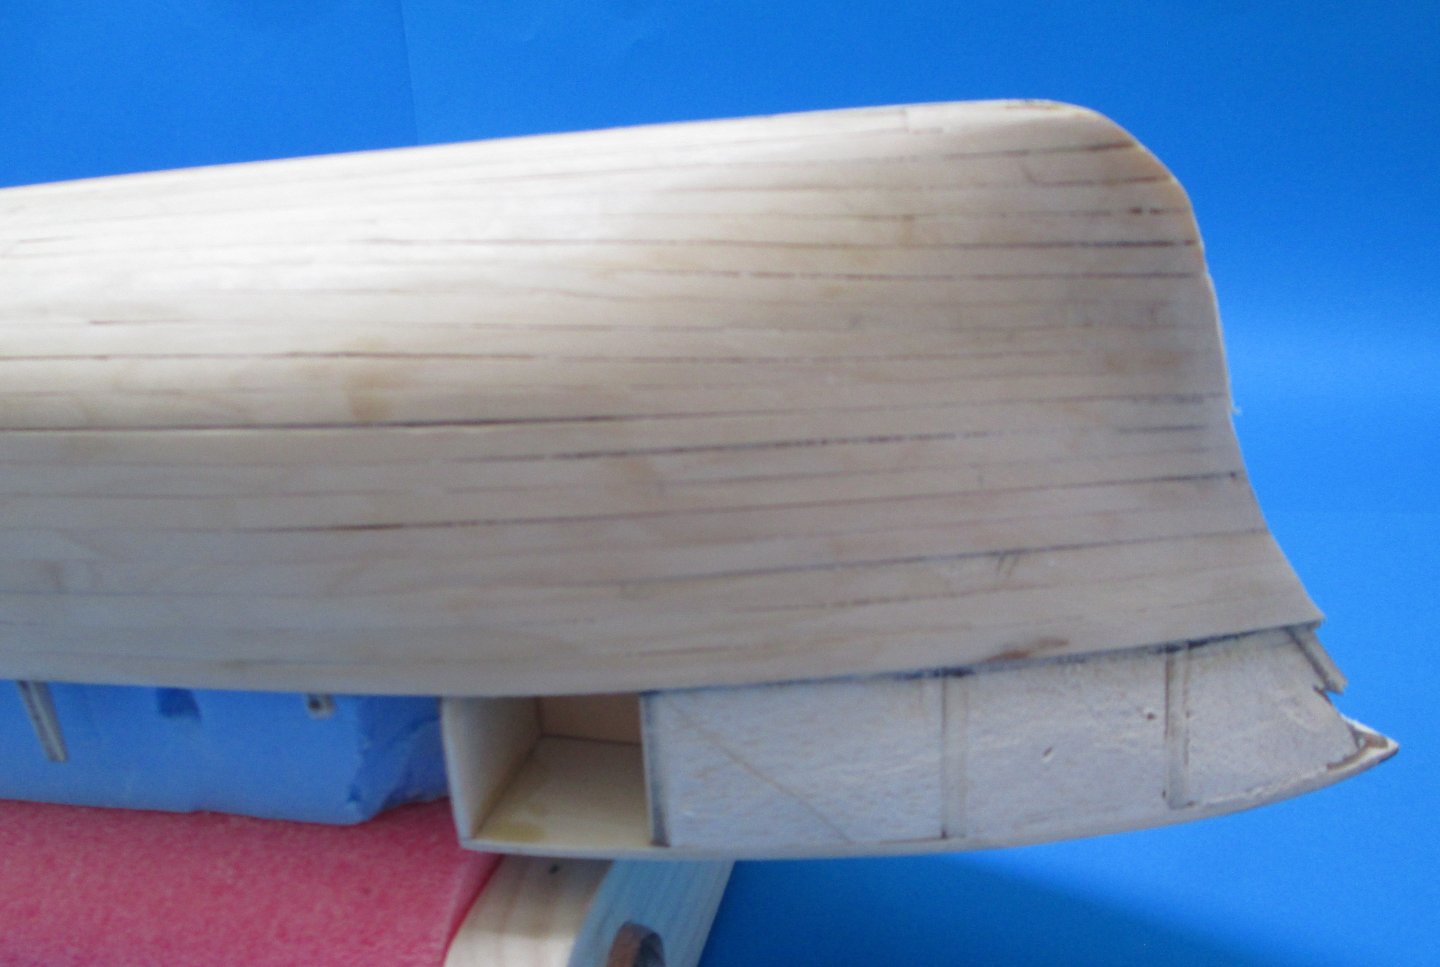
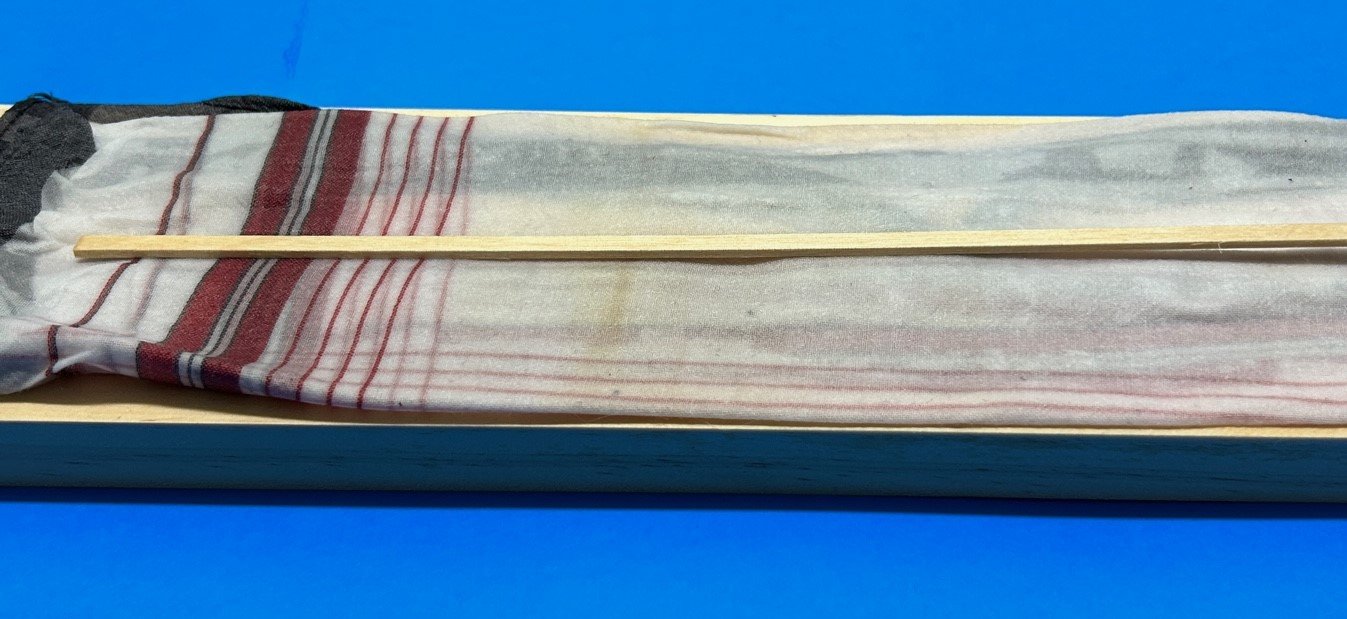
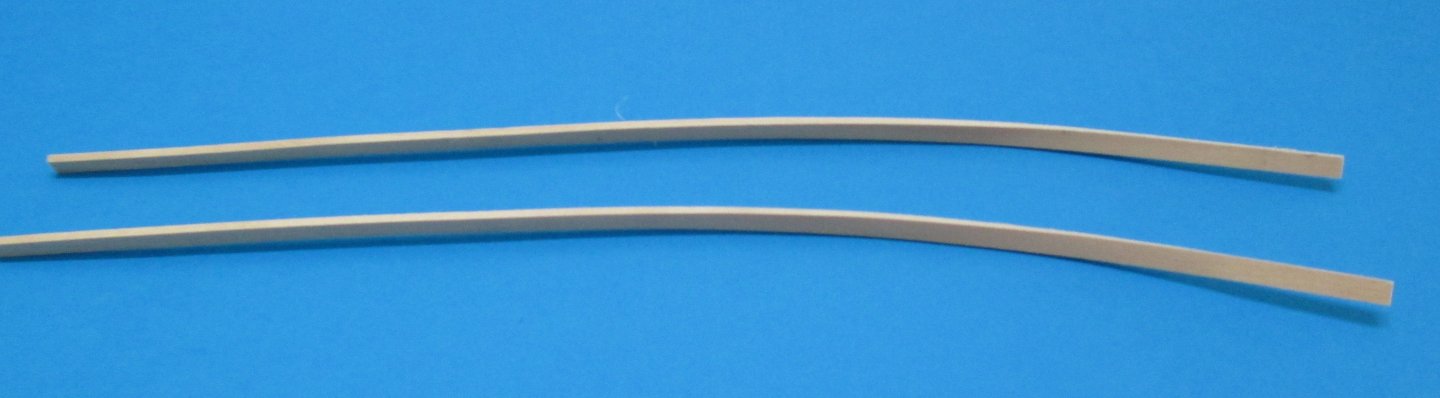
I have prepared the garboard plank(s) ready for fitting to the keel. Along with the next 2 planks the garboard plank will fit to the horizontal keel section allow the remaining planks to be tapered to about 75% width at the vertical stem section. These planks were soaked in a cloudy ammonia solution and dried for 24 hours. I then used a domestic iron to heat the planks for bending. The use of ammonia is contentious but I have had good results with aircraft balsa shaping and these 5 x 1.6mm planks. The planks felt more consistent to bend and had little kick back. Bending the three planks together posed no problem and created a tight fit between the planks Lucy Pucy, thanks for the ROSEGARTH photo - an excellent result. While the planks are in the position below I dampen the planks an heat with the iron until dry

-
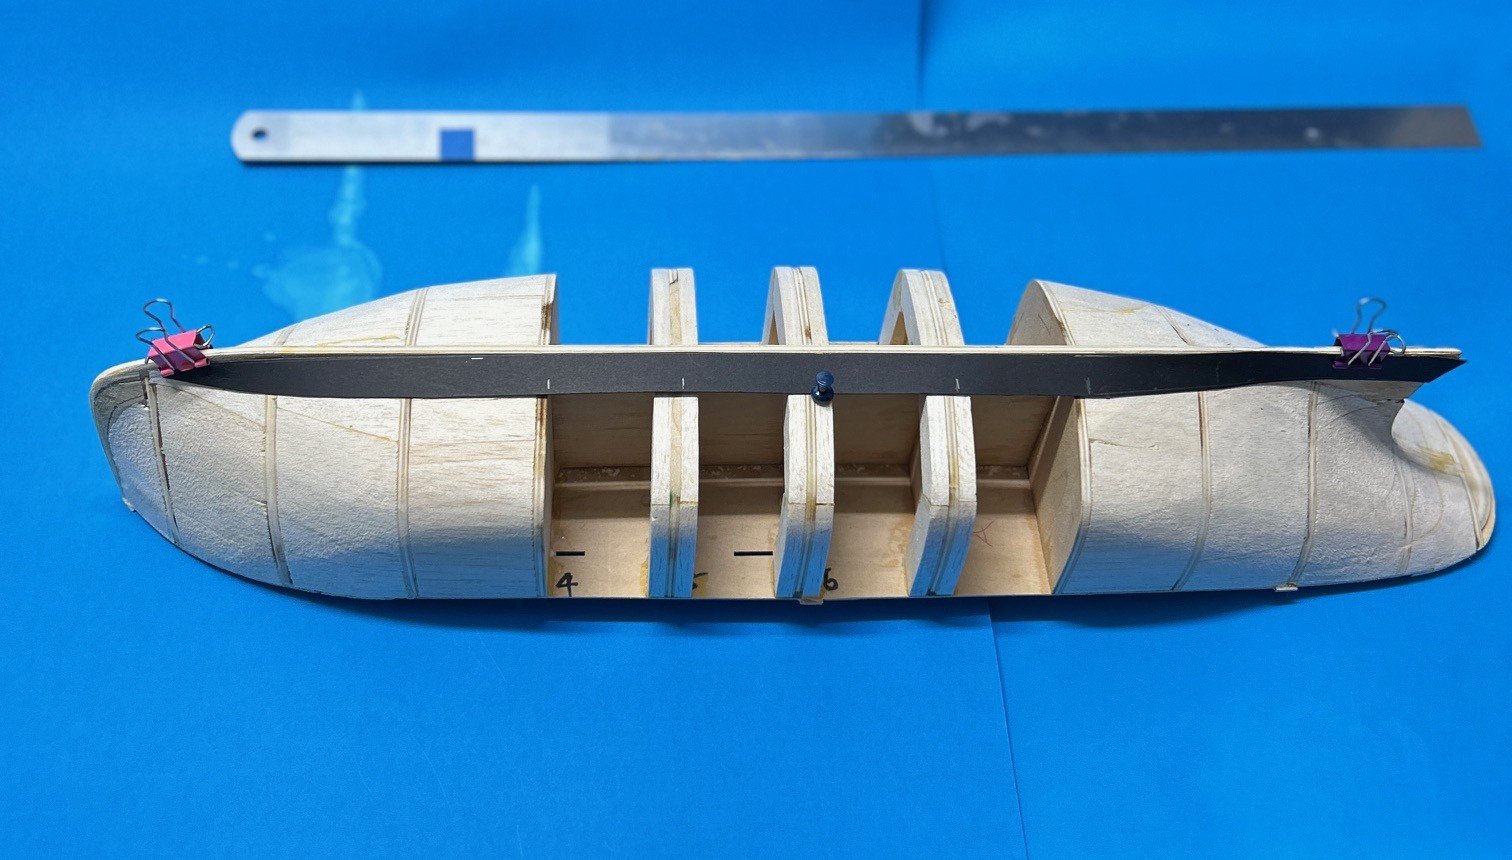
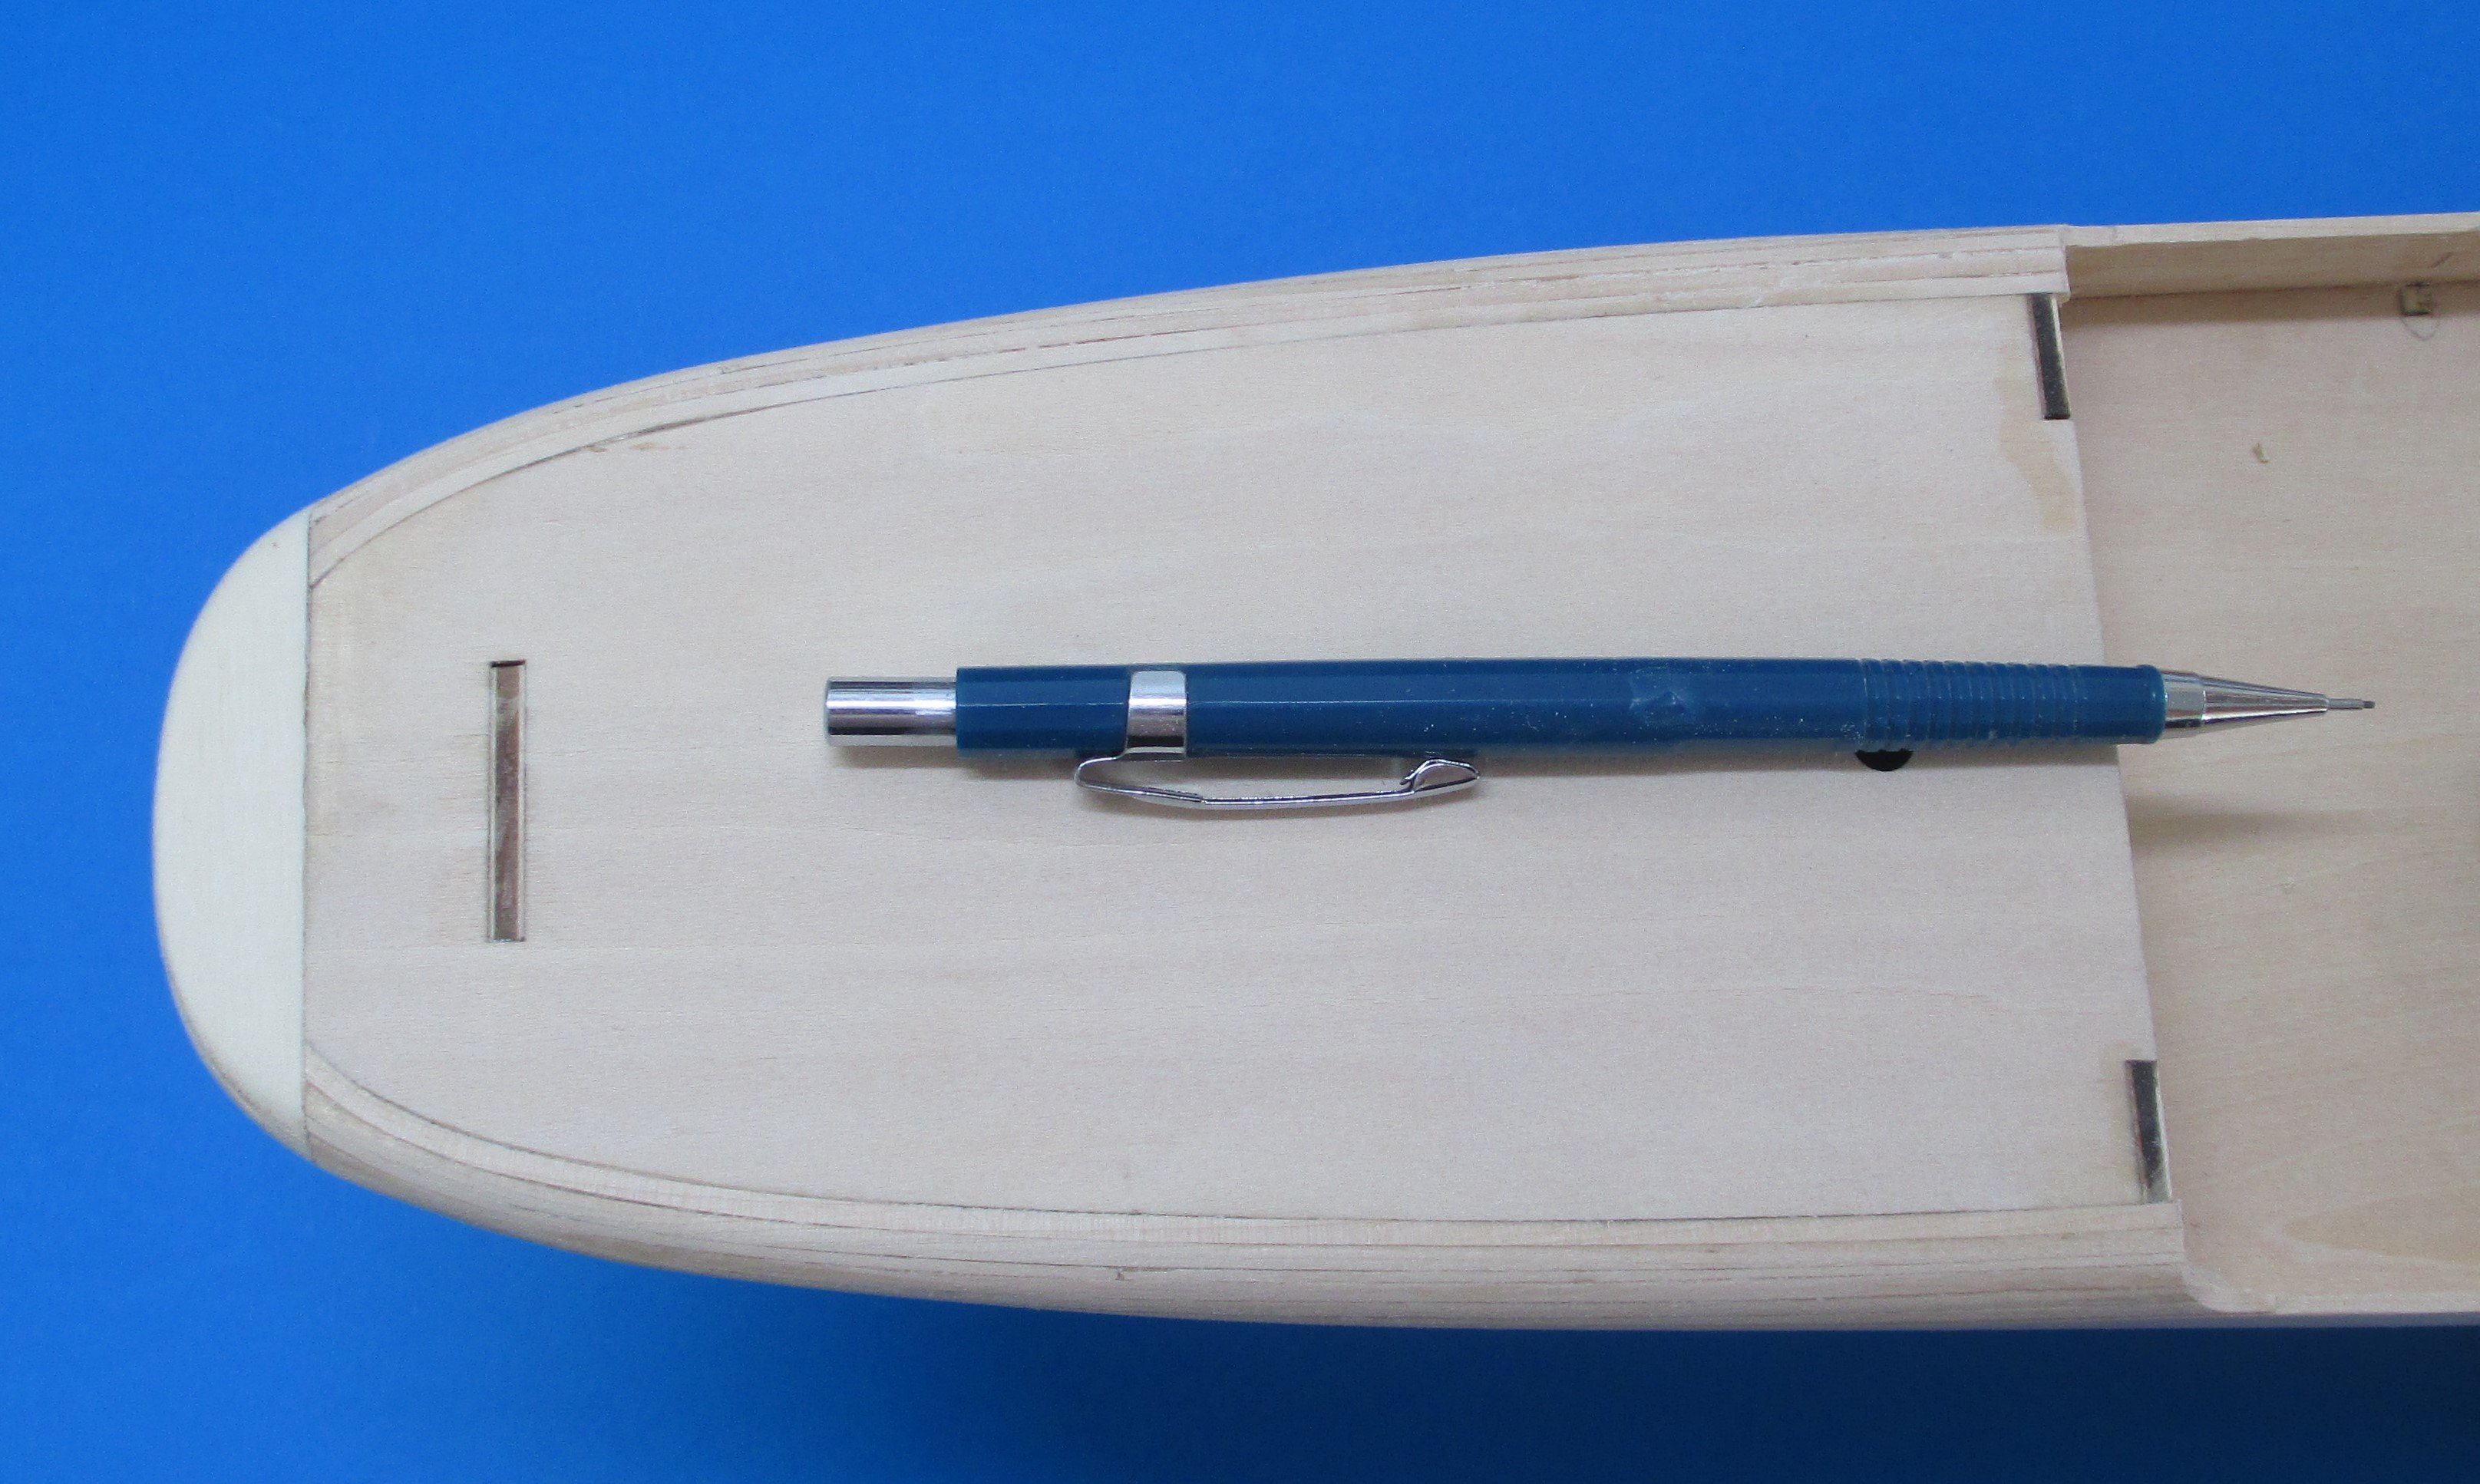
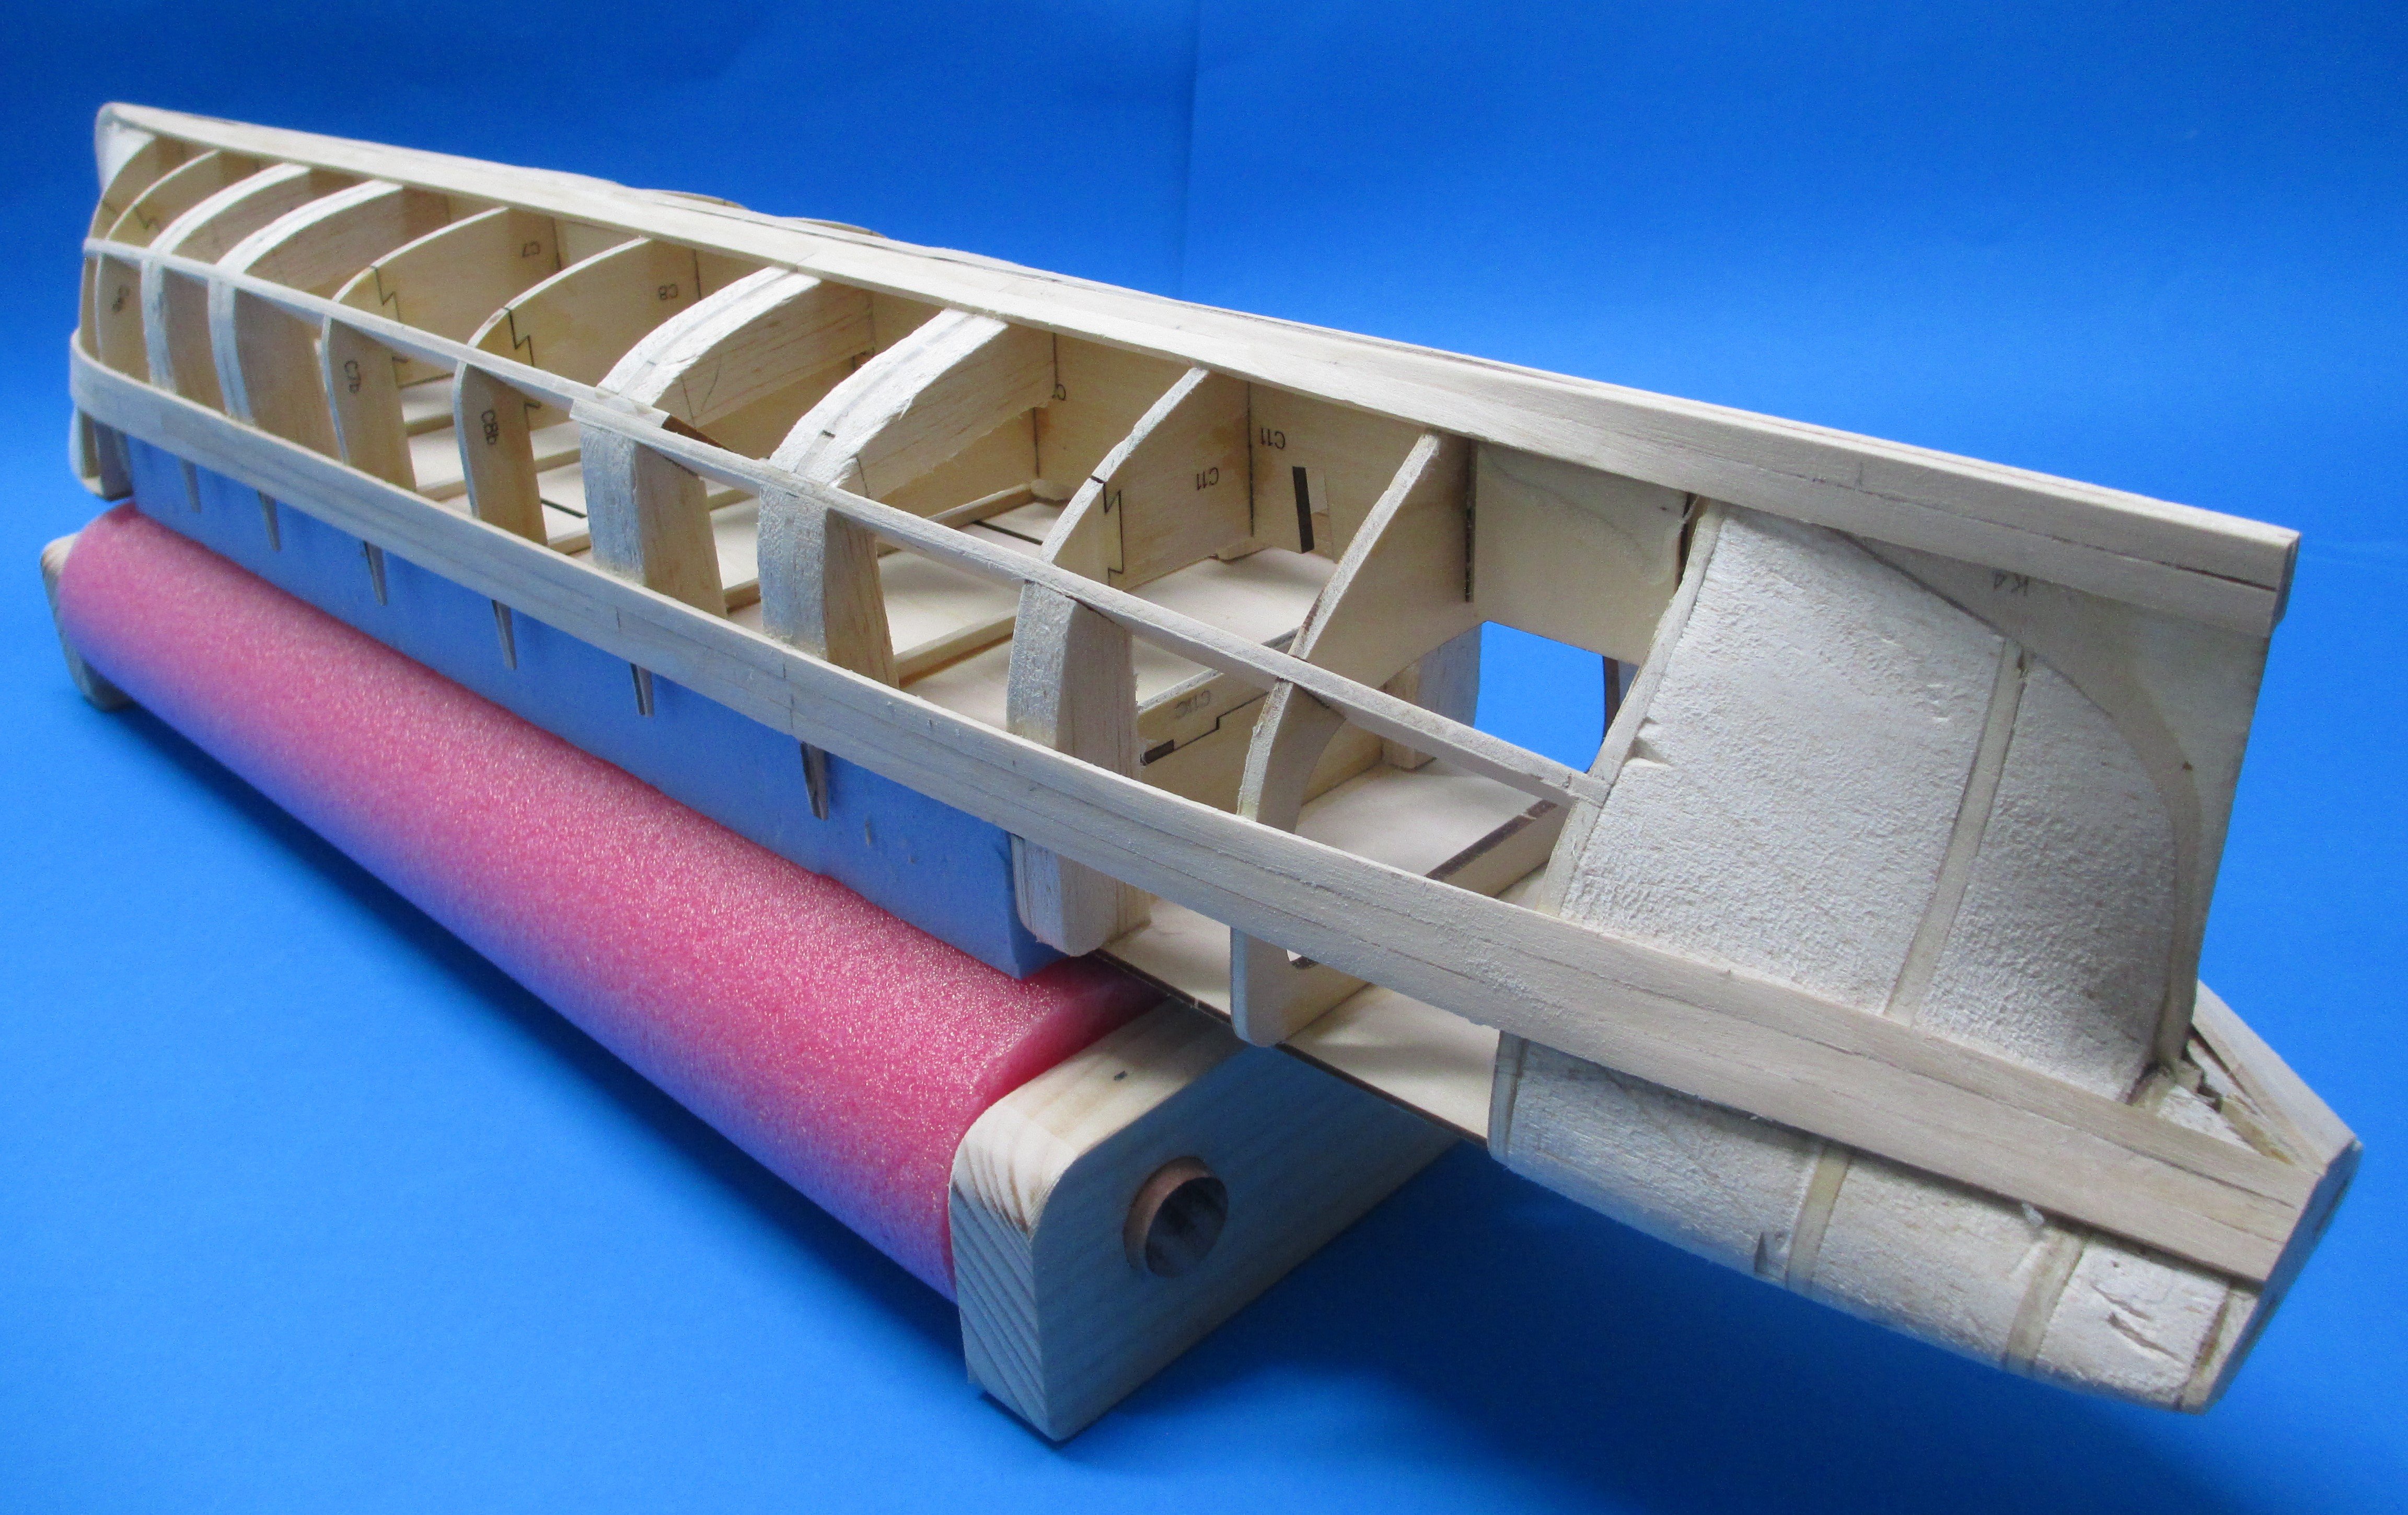
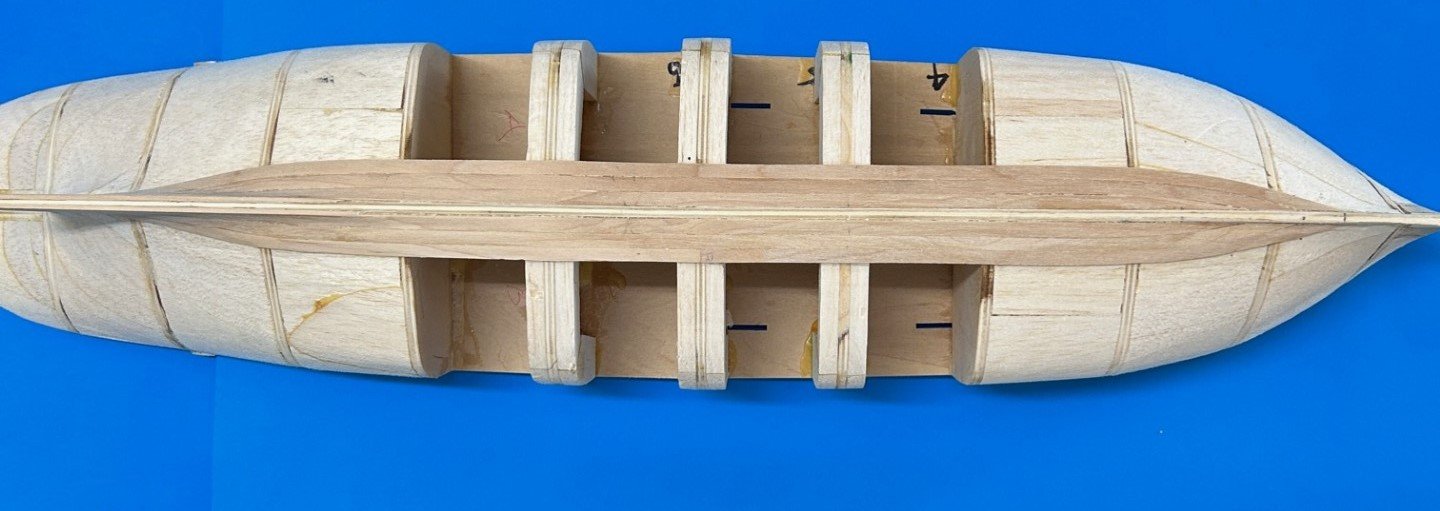
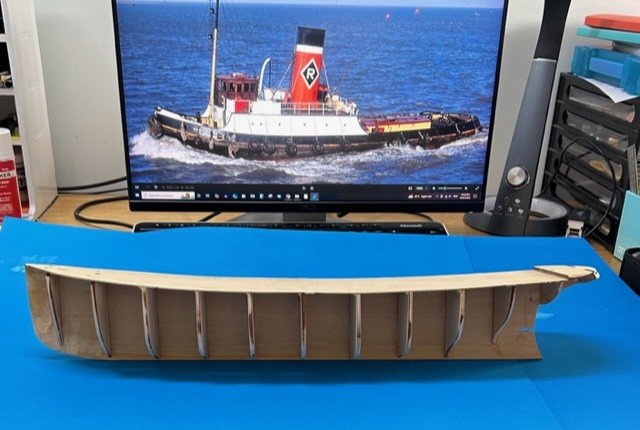
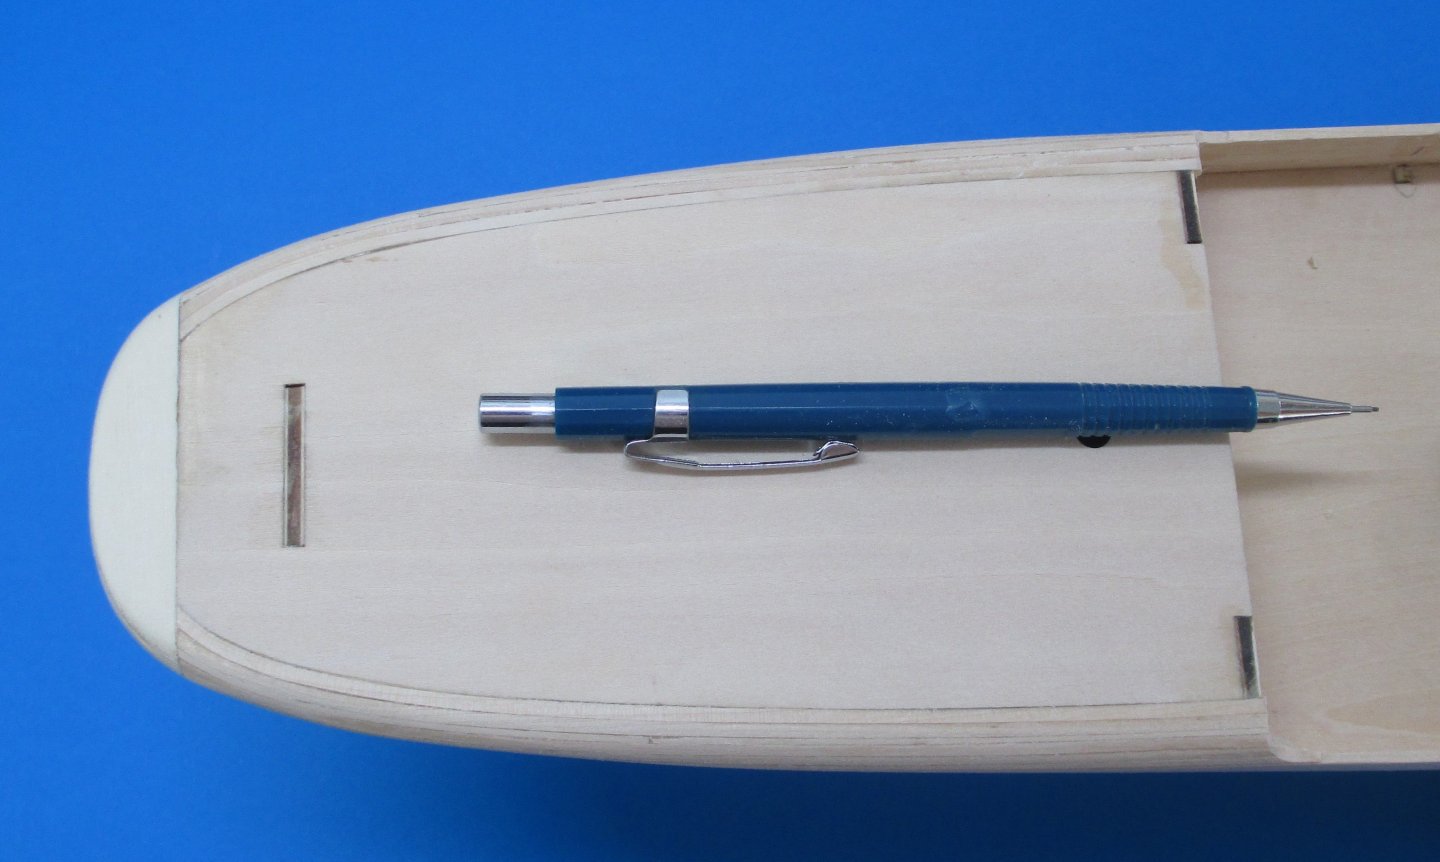
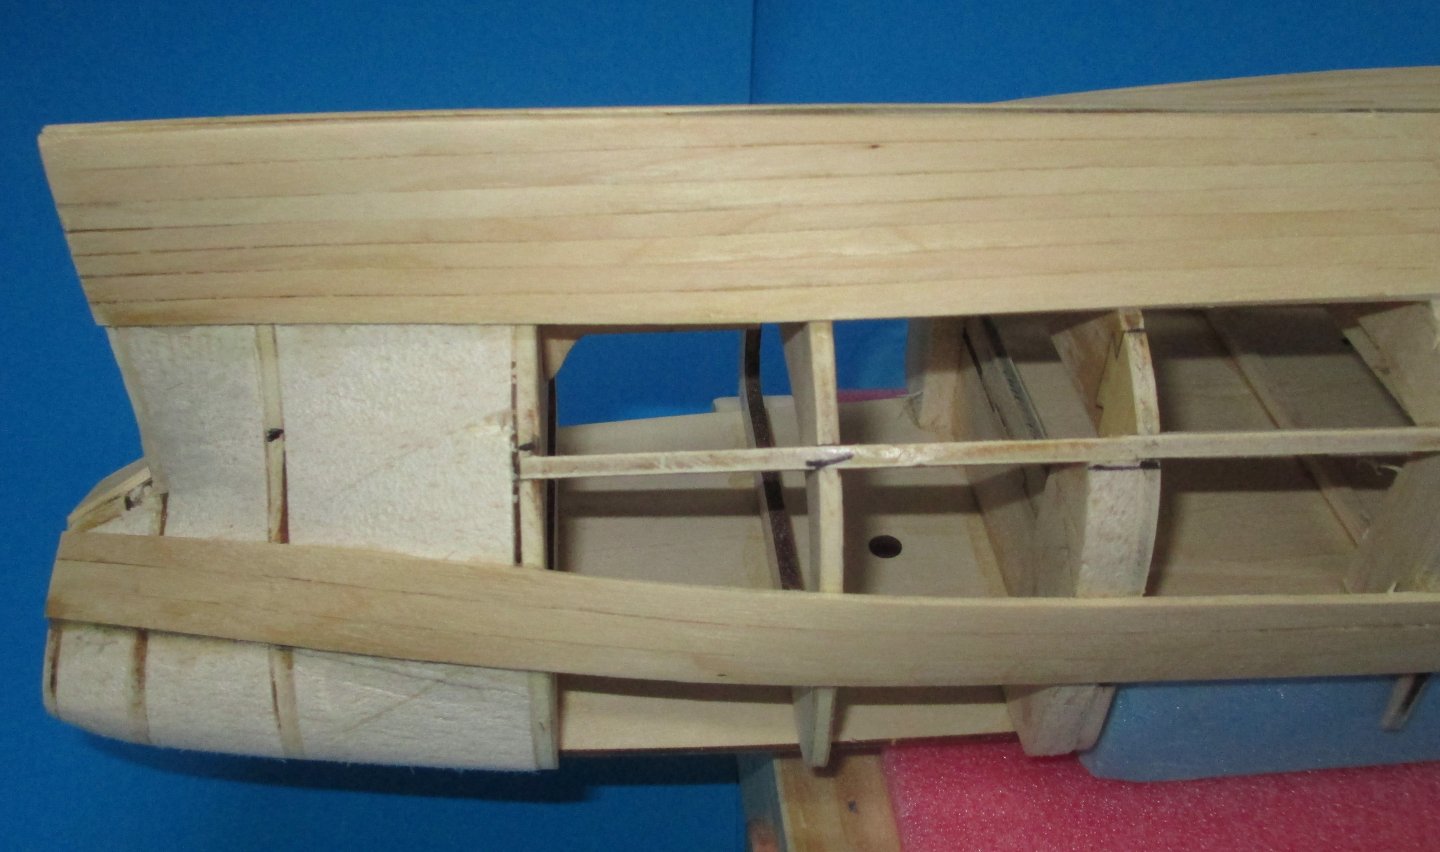
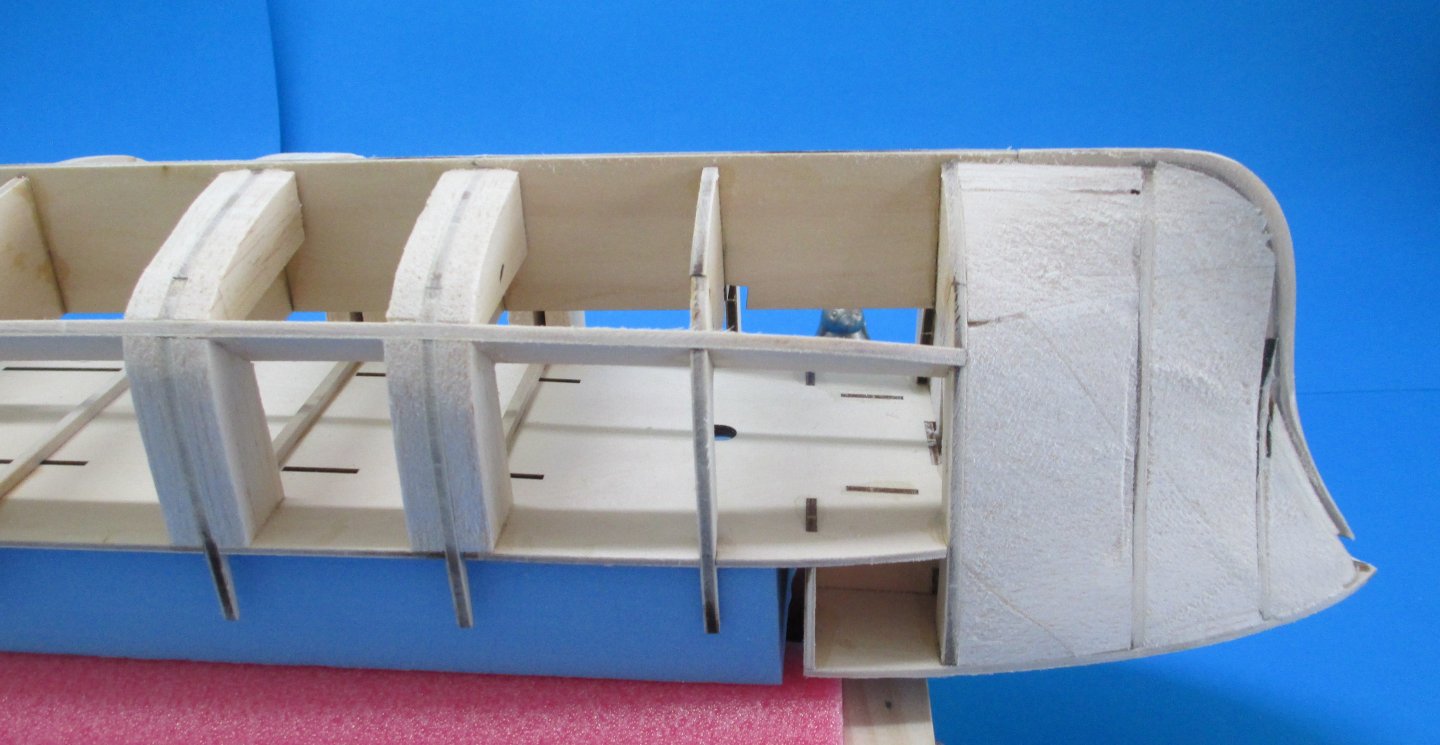
The hull is now blocked and faired to a stage where I can map out the planking. Using thick carboard I have made a garboard plank template that does not use any of the vertical part of the stem but uses 3 planks (15mm) at midships. The 5mm planks will only taper to 4mm at the stem and stern which I think is a reasonable result. I will go through the exercise of lining off the hull area before doing the final fairing and checking the planks will align with the bulwarks that will be fitted after the hull is planked. The deadwood area will be tapered to about 1 mm at the keel. This area will be frail until some planks are fitted. (Does anyone know why Artesania build the decks before the hull planking or what the logic is)

-
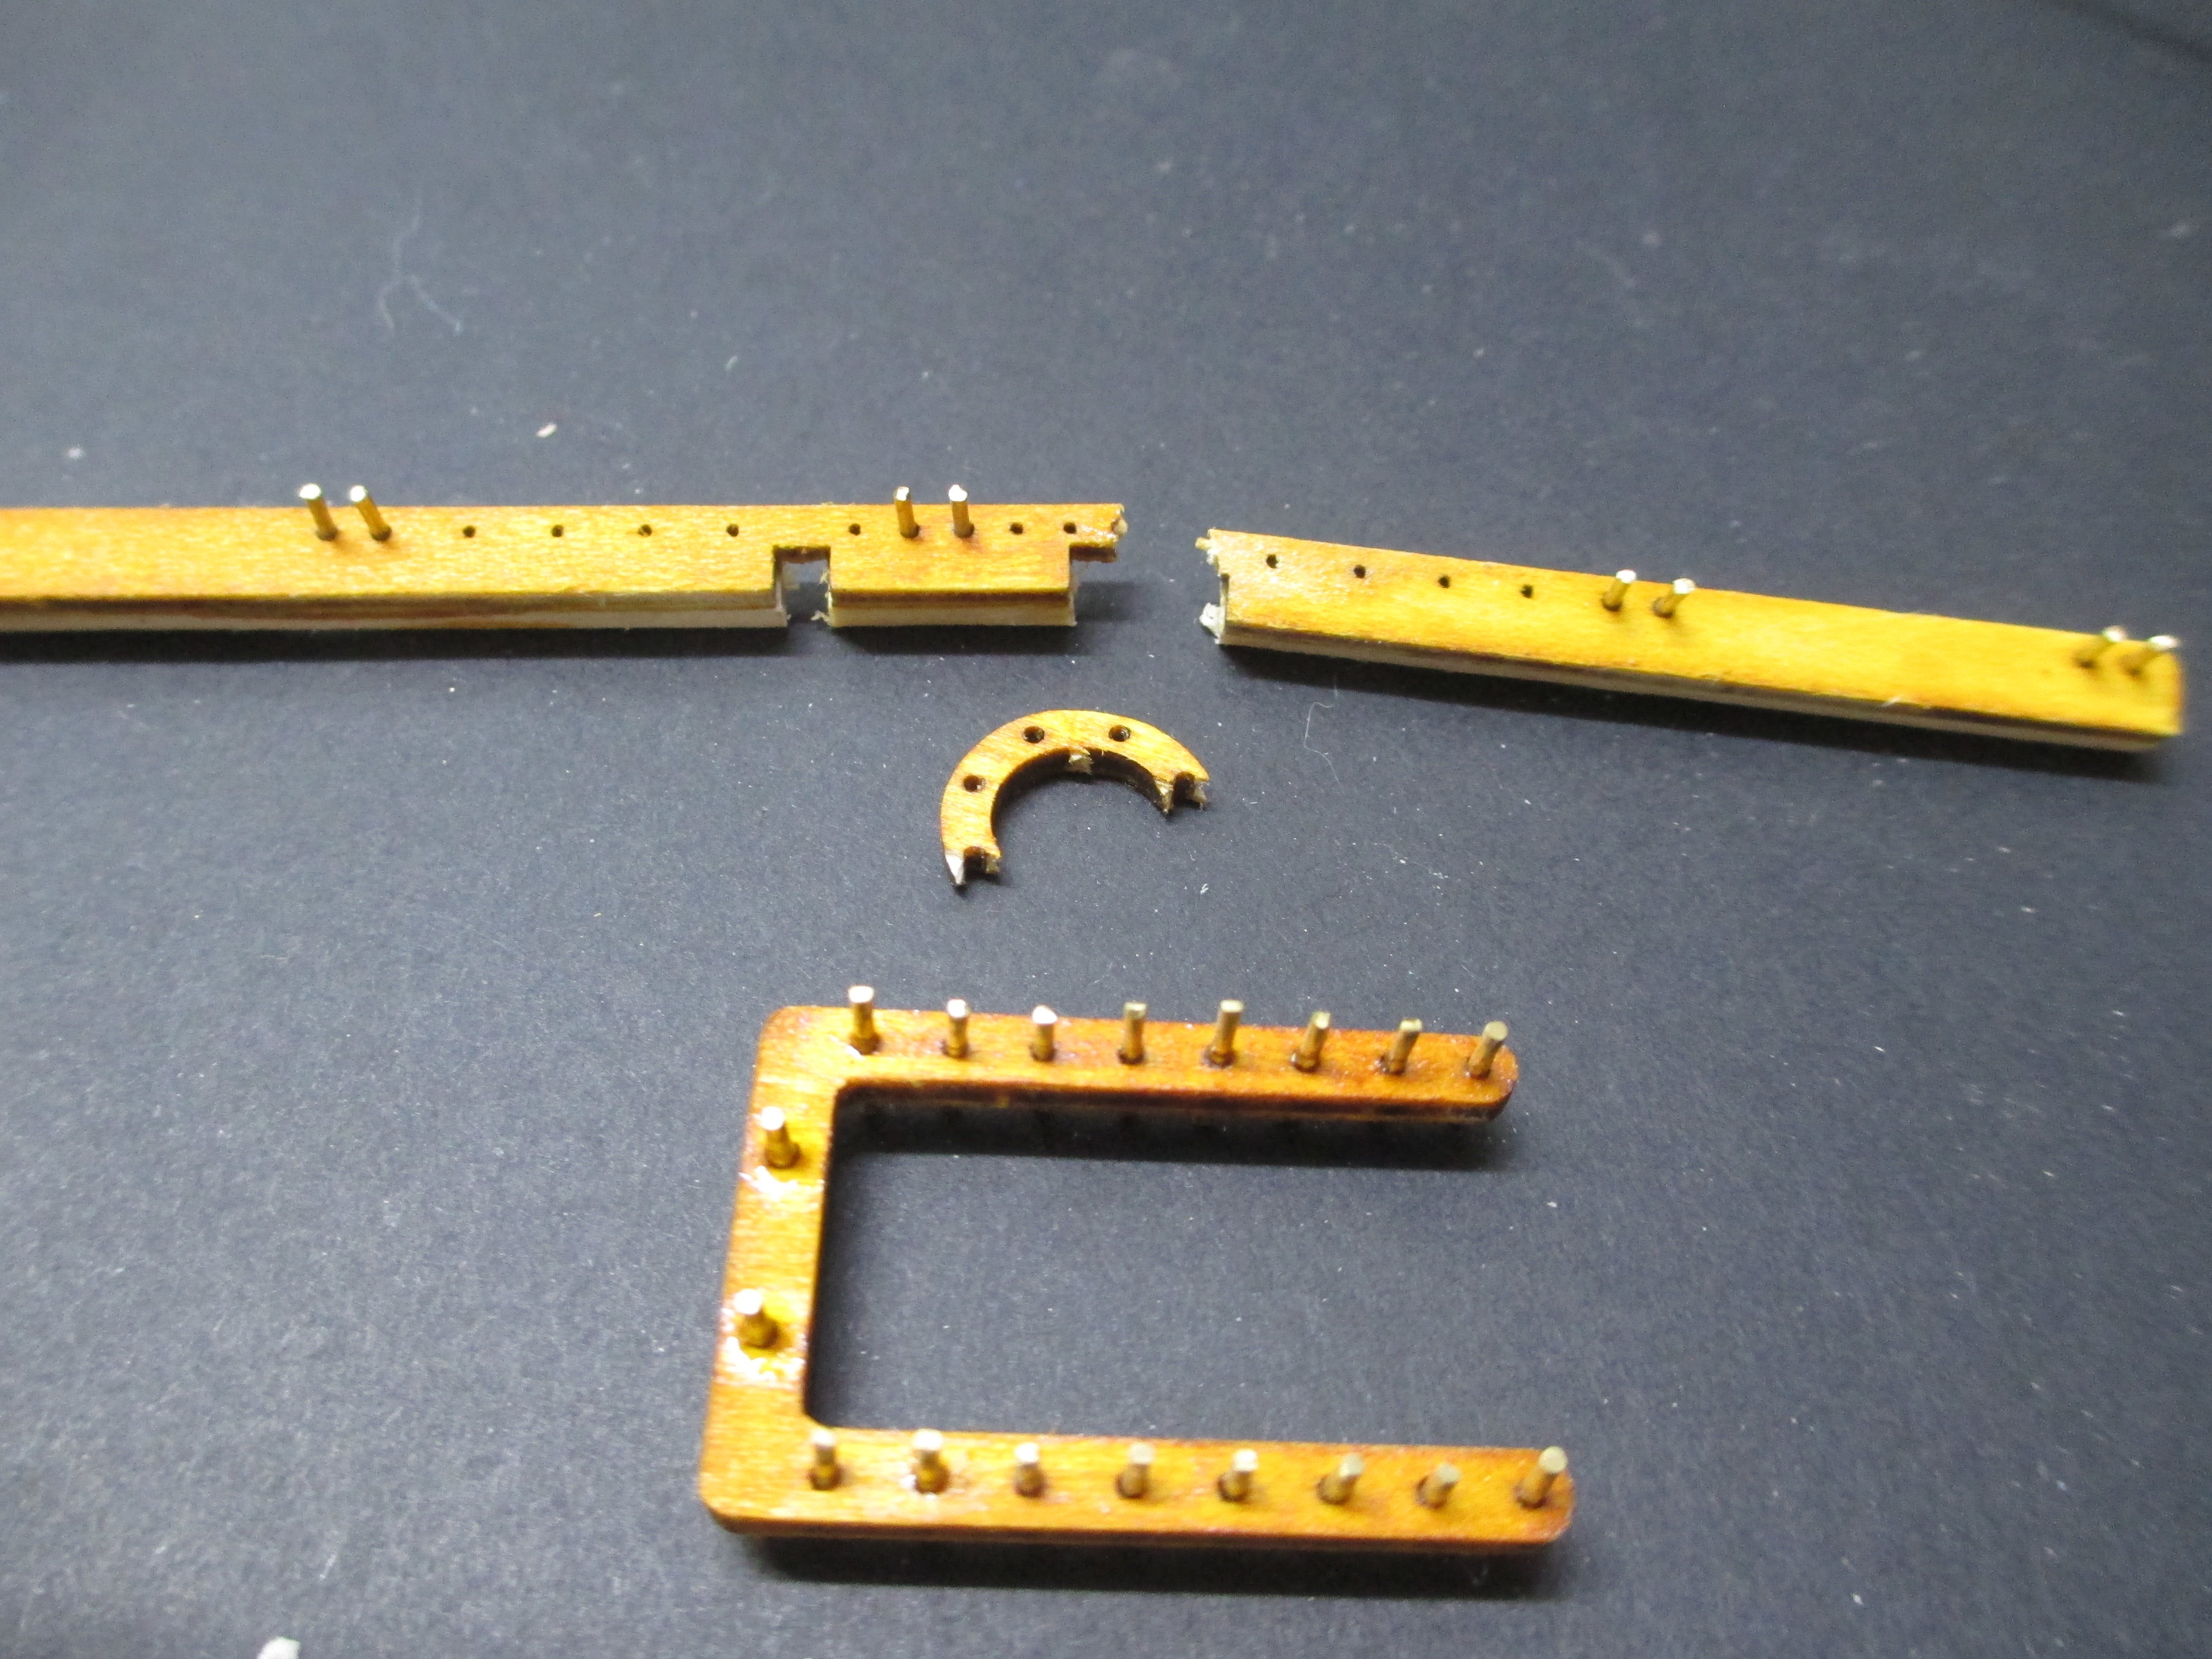
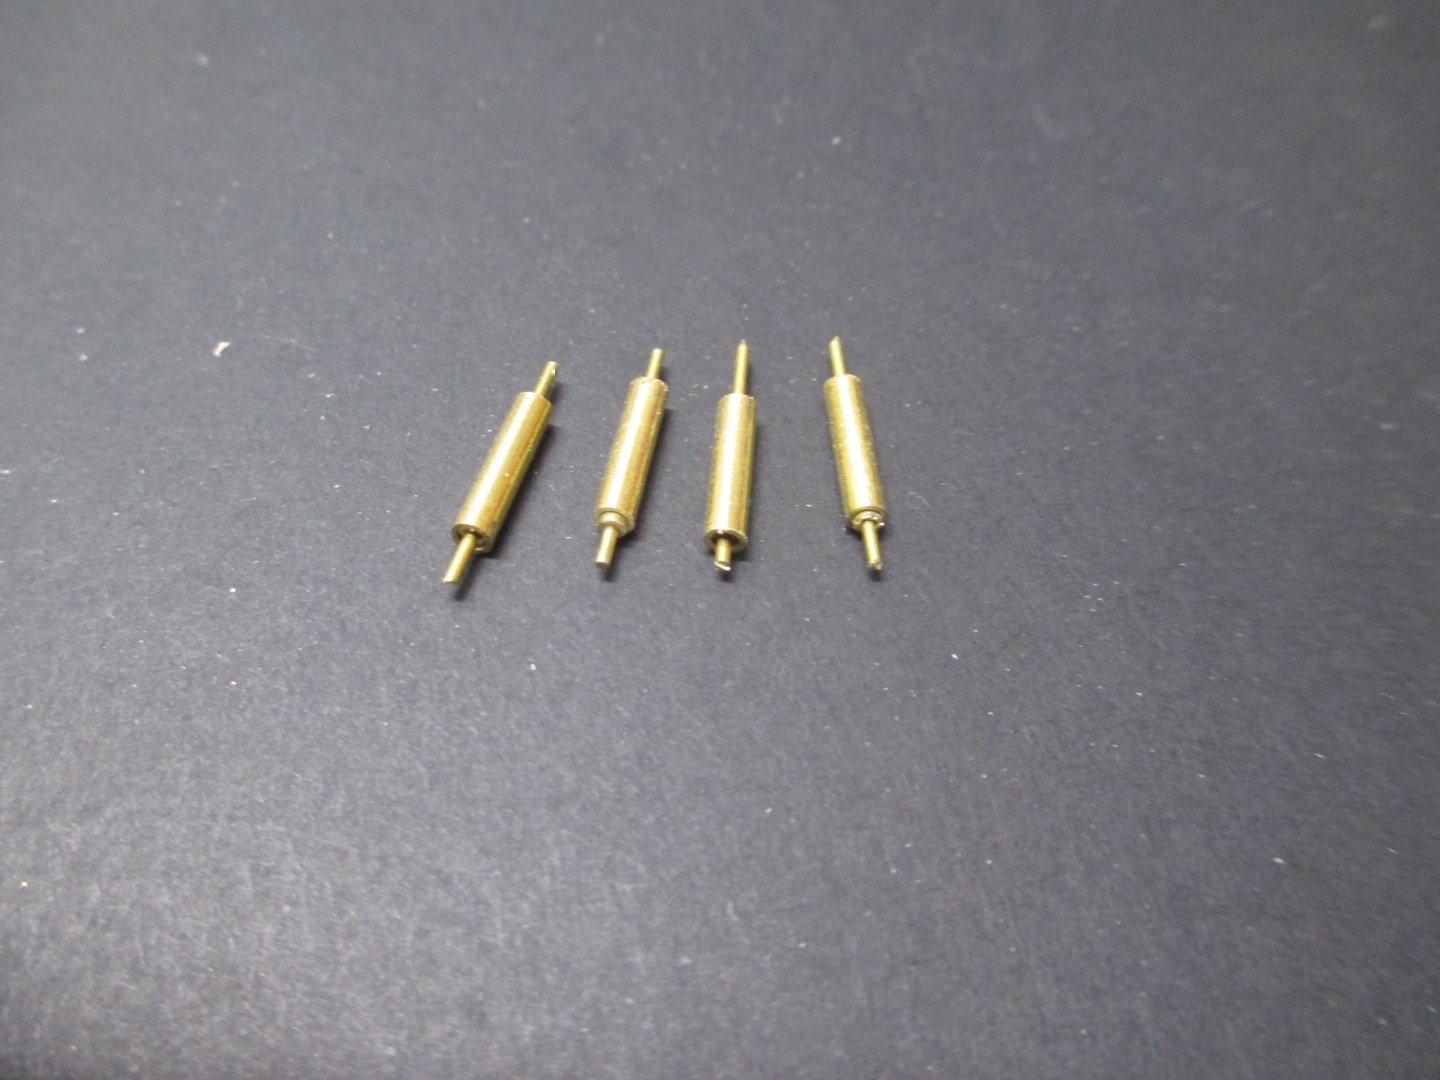
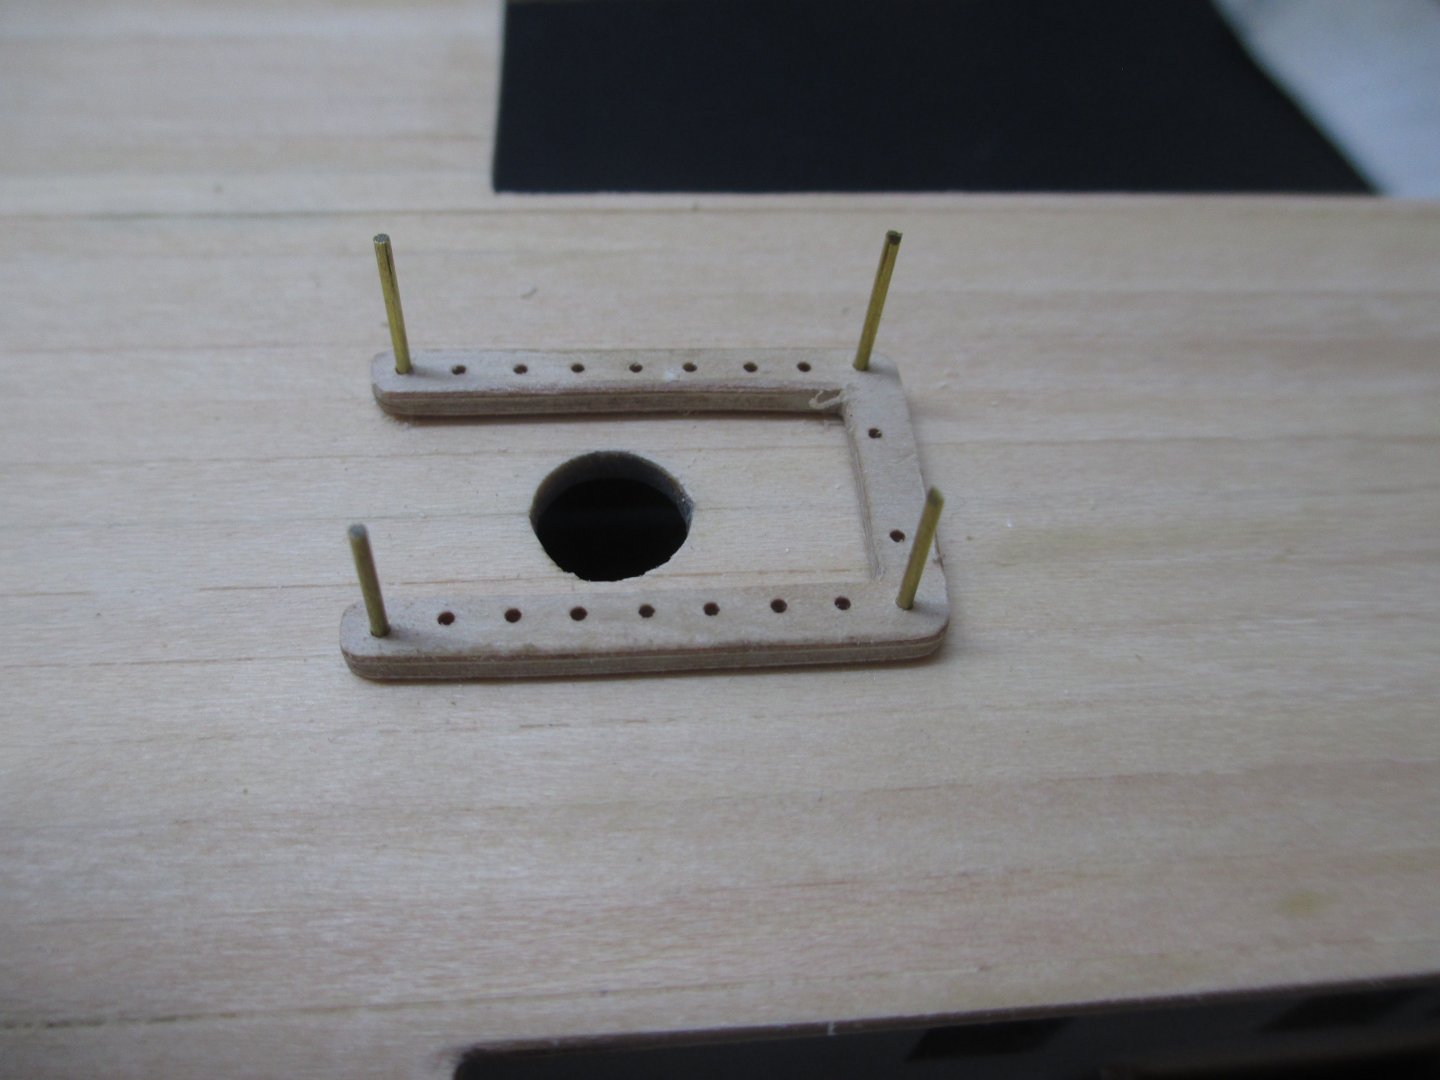
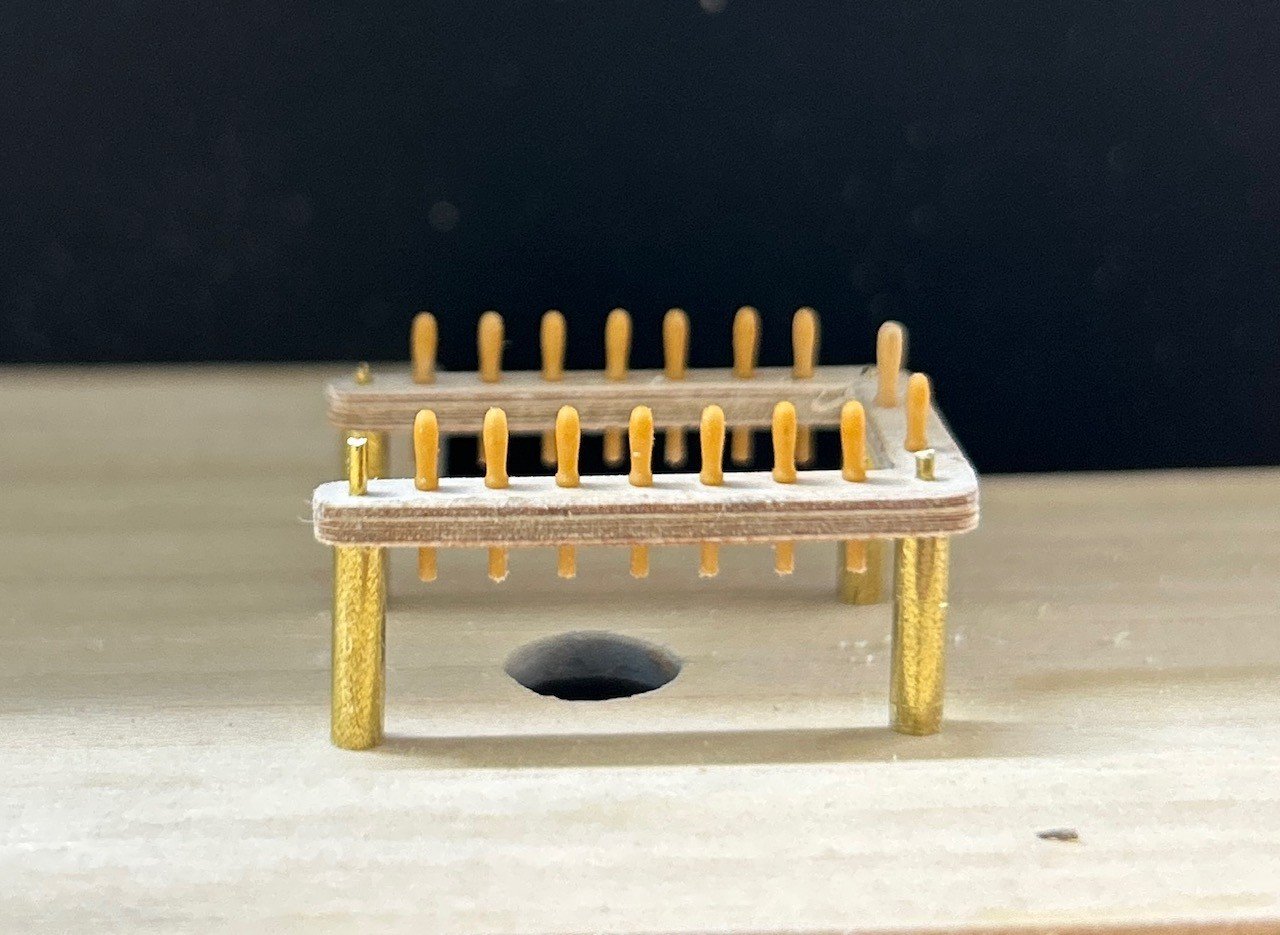
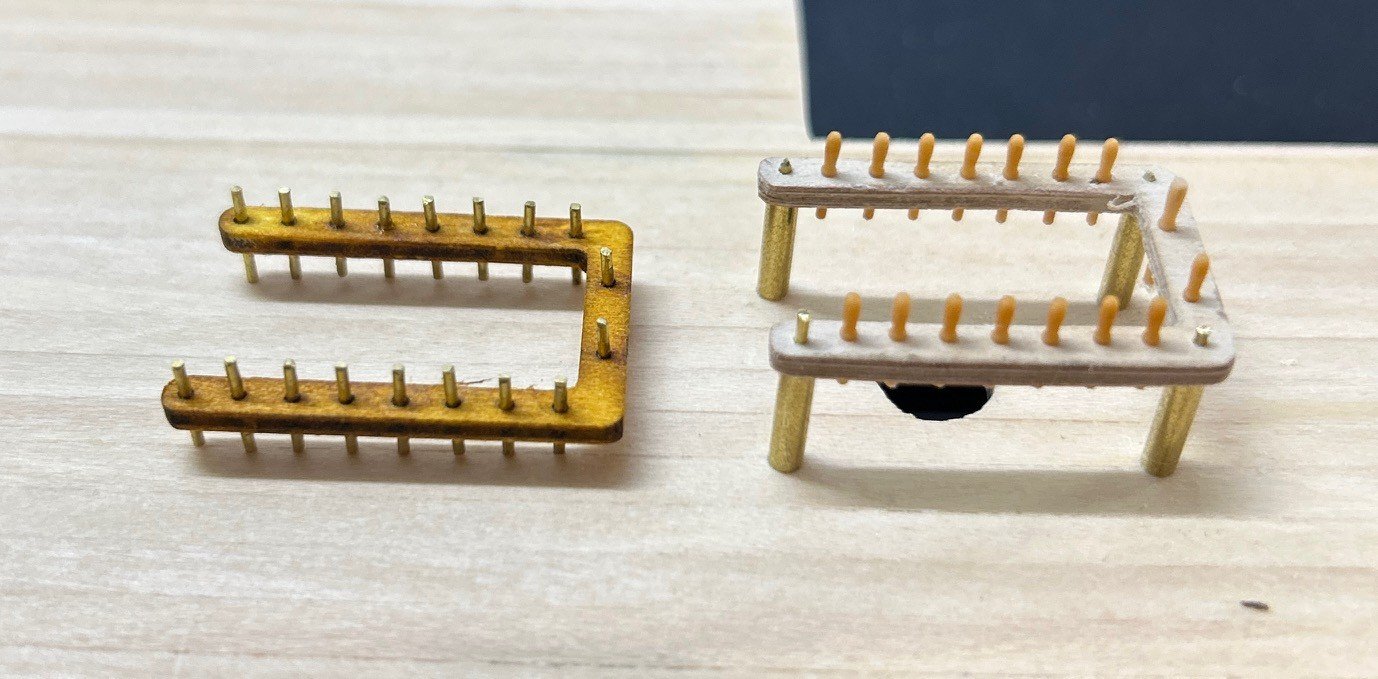
Replace Pin Rails and fit Syren Belaying Pins The existing ply pin rails have been replaced with laminated 0.4mm ply. I used 3 layers of 0.4mm ply that were each rotated 120° and glued with Titebond. The resulting board was very stiff with no weakness in any direction and could be worked without any tear out. Mounting posts were made from 1/32" brass rod and concentric sleeves to make an overall 3/32" diameter post. The pin rails were finished with Syren 1:64 Belaying Pins. This is the AL version of pin rails and the new laminated plywood pin rails. I made the posts from brass as I had the material and it easy to work and fit. Fitting the posts to the deck was easy to align by drilling through the rail and deck together and inserting a brass pin to hold the rail position while the other holes are drilled. Then just insert the brass sleeves to complete the posts. The end result is now presentable but I will give the timber pin rails a slight reduction in size before final painting and fitting.


-
This build stated as a learning exercise with the end result being a throw away. This is no longer the case and I will aim to build a ship that presentable to most people. After completing the hull and starting the deck it became apparent that I had to educate myself to have a deeper understanding of the deck and rigging construction. Then there is the replacement of the smaller parts laser cut from plywood that are weak, unusable and look terrible. Pin rails and belaying pins The kit provided 2mm plywood for the rails and 0.8mm brass for the belaying pins. I will replaced these with walnut rails and the Syren belaying pins. Rope I purchased the Syren Rope Maker and some Gutermann Mara121 and Mara151 thread from Ropes of Scale. These treads can produce 3 strand ropes from 0.010" to 0.060". I have yet to experiment with the 4 strand rope. With a little practice and experimenting making rope is easy. It is also a good talking point. The Chuck Pasaro YouTube videos are the most concise resource while the forums have a bit more theory and alternatives (but be prepared to go down a rabbit hole). Rigging and fittings There plenty of excellent resources available with the forums and books. I have 2 books that show the rigging systems in detailed sketches. They are The Rigging of Period Ship Models A Step-by-Step Guide to the Intricacies of Square-Rig by Lennarth Petersson Rigging Period Fore and Aft For fittings I purchased the Syren blocks.
-
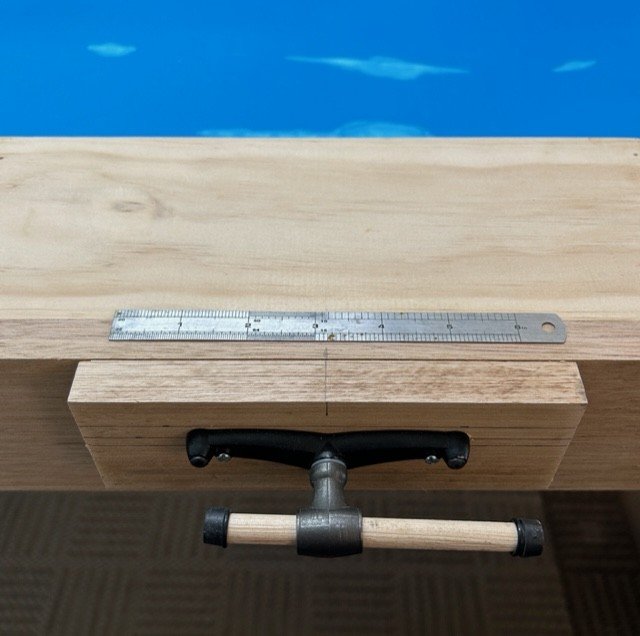
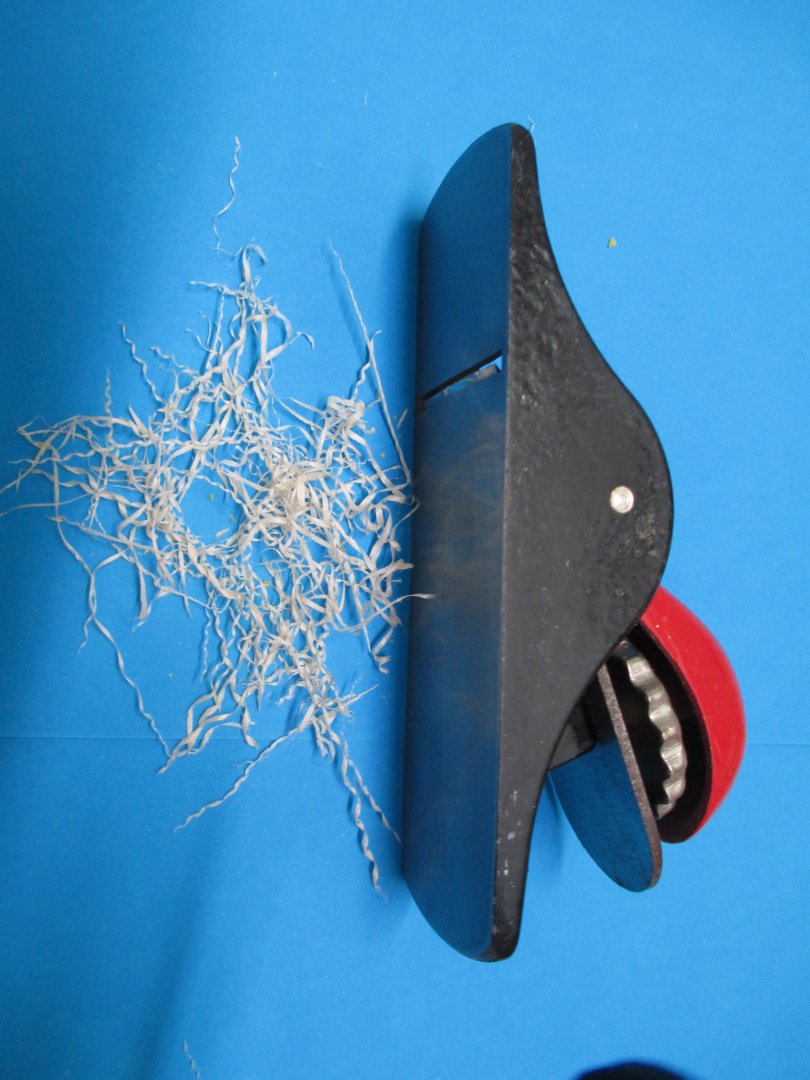
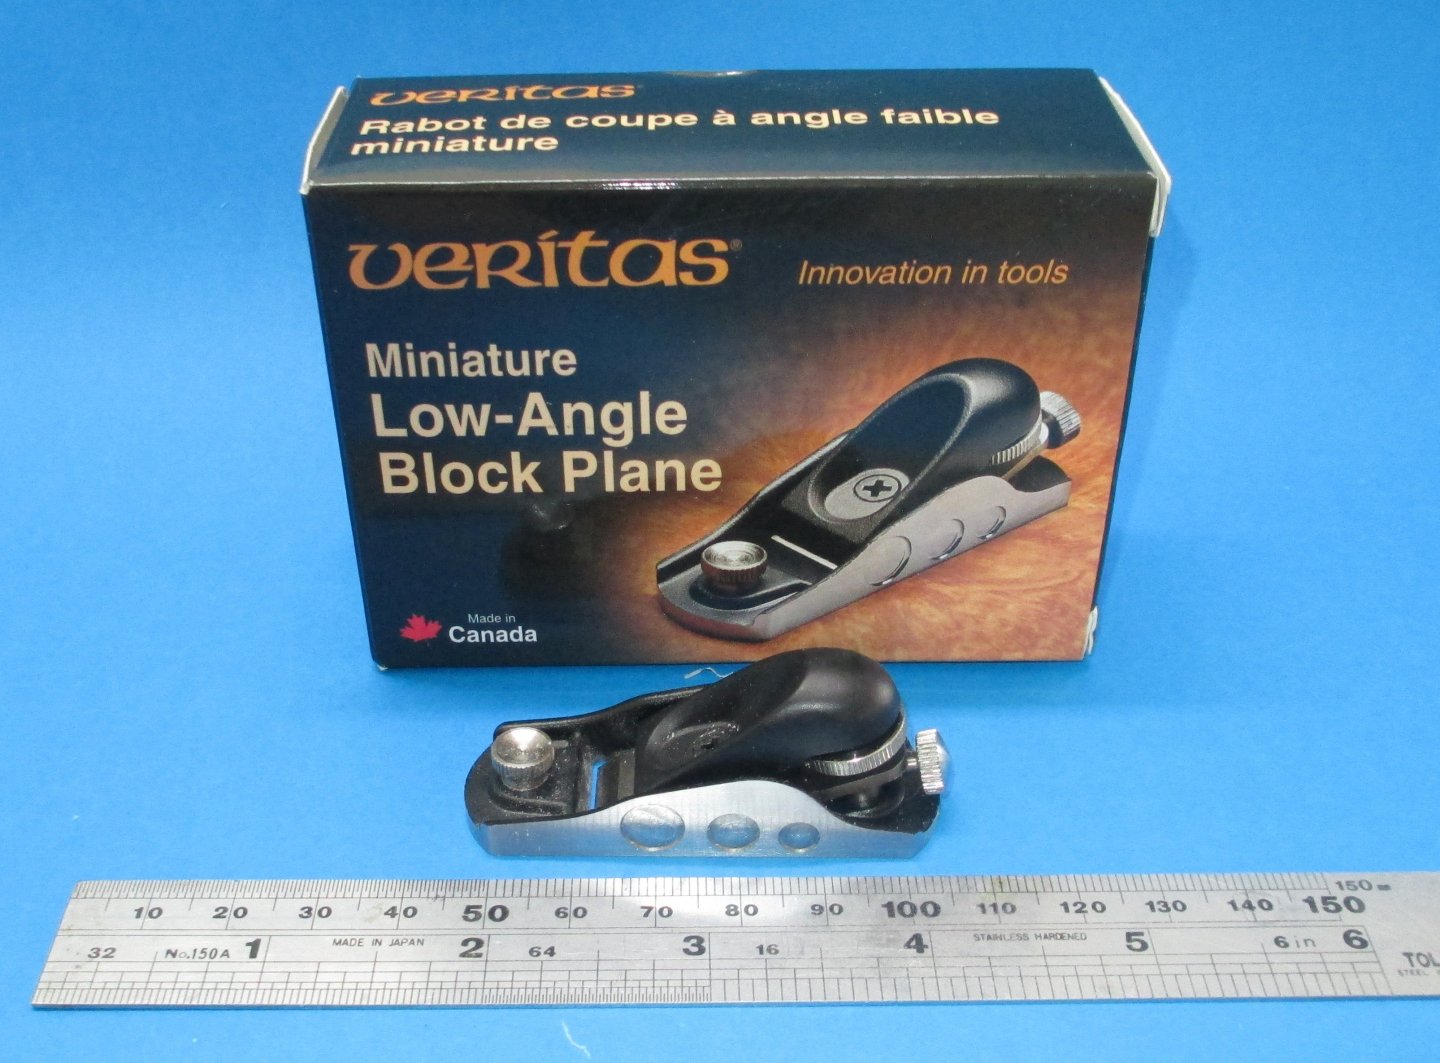
I use a homemade jig that clamps the bottom 2.5mm of the plank. This is was a pain to use until I added the springs to open the clamp. To shape a plank I use the miniature Veritas Block Plane. This plane has become one of my used tools. And I am currently making a vice that uses the miniature Veritas Bench Vice.


-
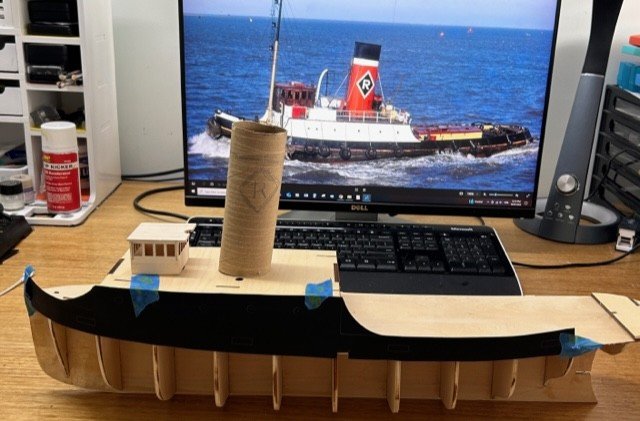
The Sanson stack made from 1" dowel is being replaced with an oval stack 50mm x 40mm. To get the shape I made an oval mandrel and laminated 4 layers of 0.8mm balsa. The soft balsa laminate is now firm to handle but I will apply a few coats of sanding sealer to keep the surface clean. This is the target look and shape. A mandrel was made from balsa and kitchen bamboo sticks. White PVA was used to laminate 600mm of 0.8mm balsa wrapped around the mandrel. The end result compared to the AL kit supply.


-
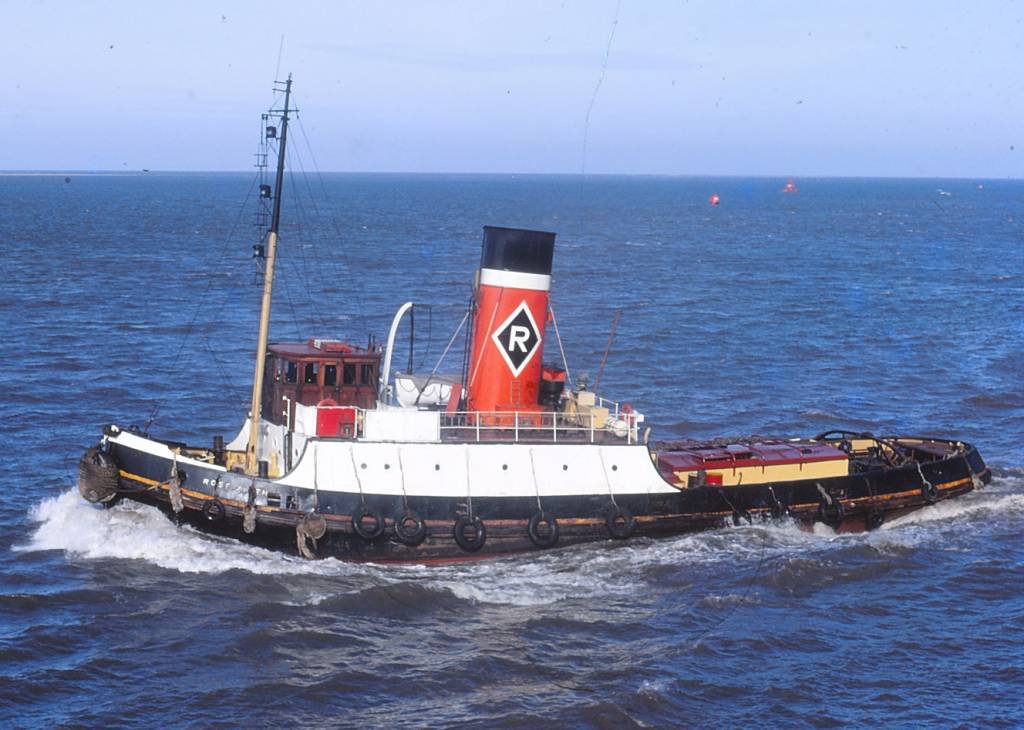
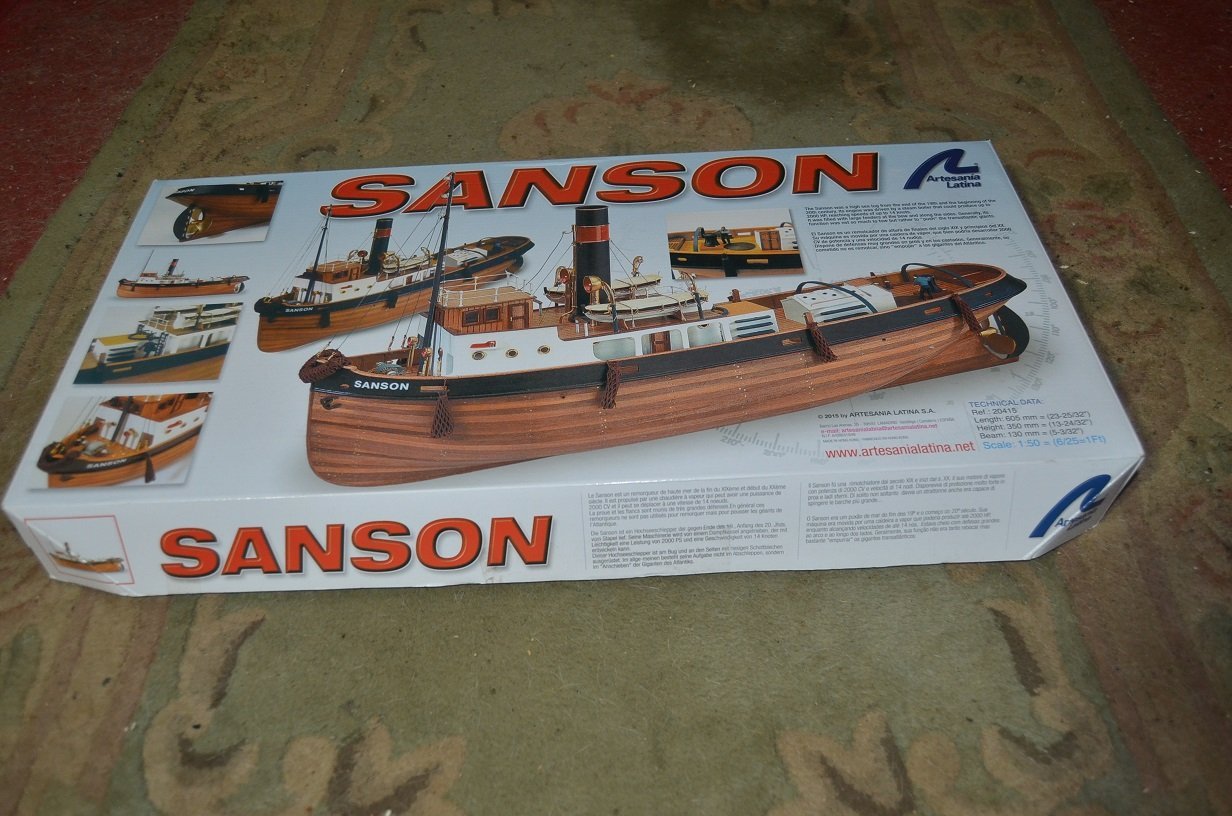
About 10 years ago I purchased the AL Sanson as my introduction to wood ship building. However the excitement soon turned to disappointment when the 1.5mm plywood was found to be delaminating. What ply was not delaminating was just the lowest excuse for ply that could be manufactured. The kit was then packed away and put down as a bad experiment. Last year I started an AL BELEM ship that is now progressing well. This build has required a lot of self education especially in the rigging department. While spending endless hours reading about ship/rigging construction I found a build log by user RECI who posted photos of Liverpool steam tugs. As I liked the look of these tugs I will be modifying the Sanson into the Rosegarth tug. While not an accurate scale representation, the defining features of the Rosegarth will be added to give a semi-scale appearance. I am currently fairing the bulkheads and getting ready to add the fore and aft blocking with the unblocked bulkheads to be widened about 12mm. The Sanson kit is the original version This is the Rosegarth that I will be using as a guide. A rough mockup with the BELEMs wheelhouse.
-
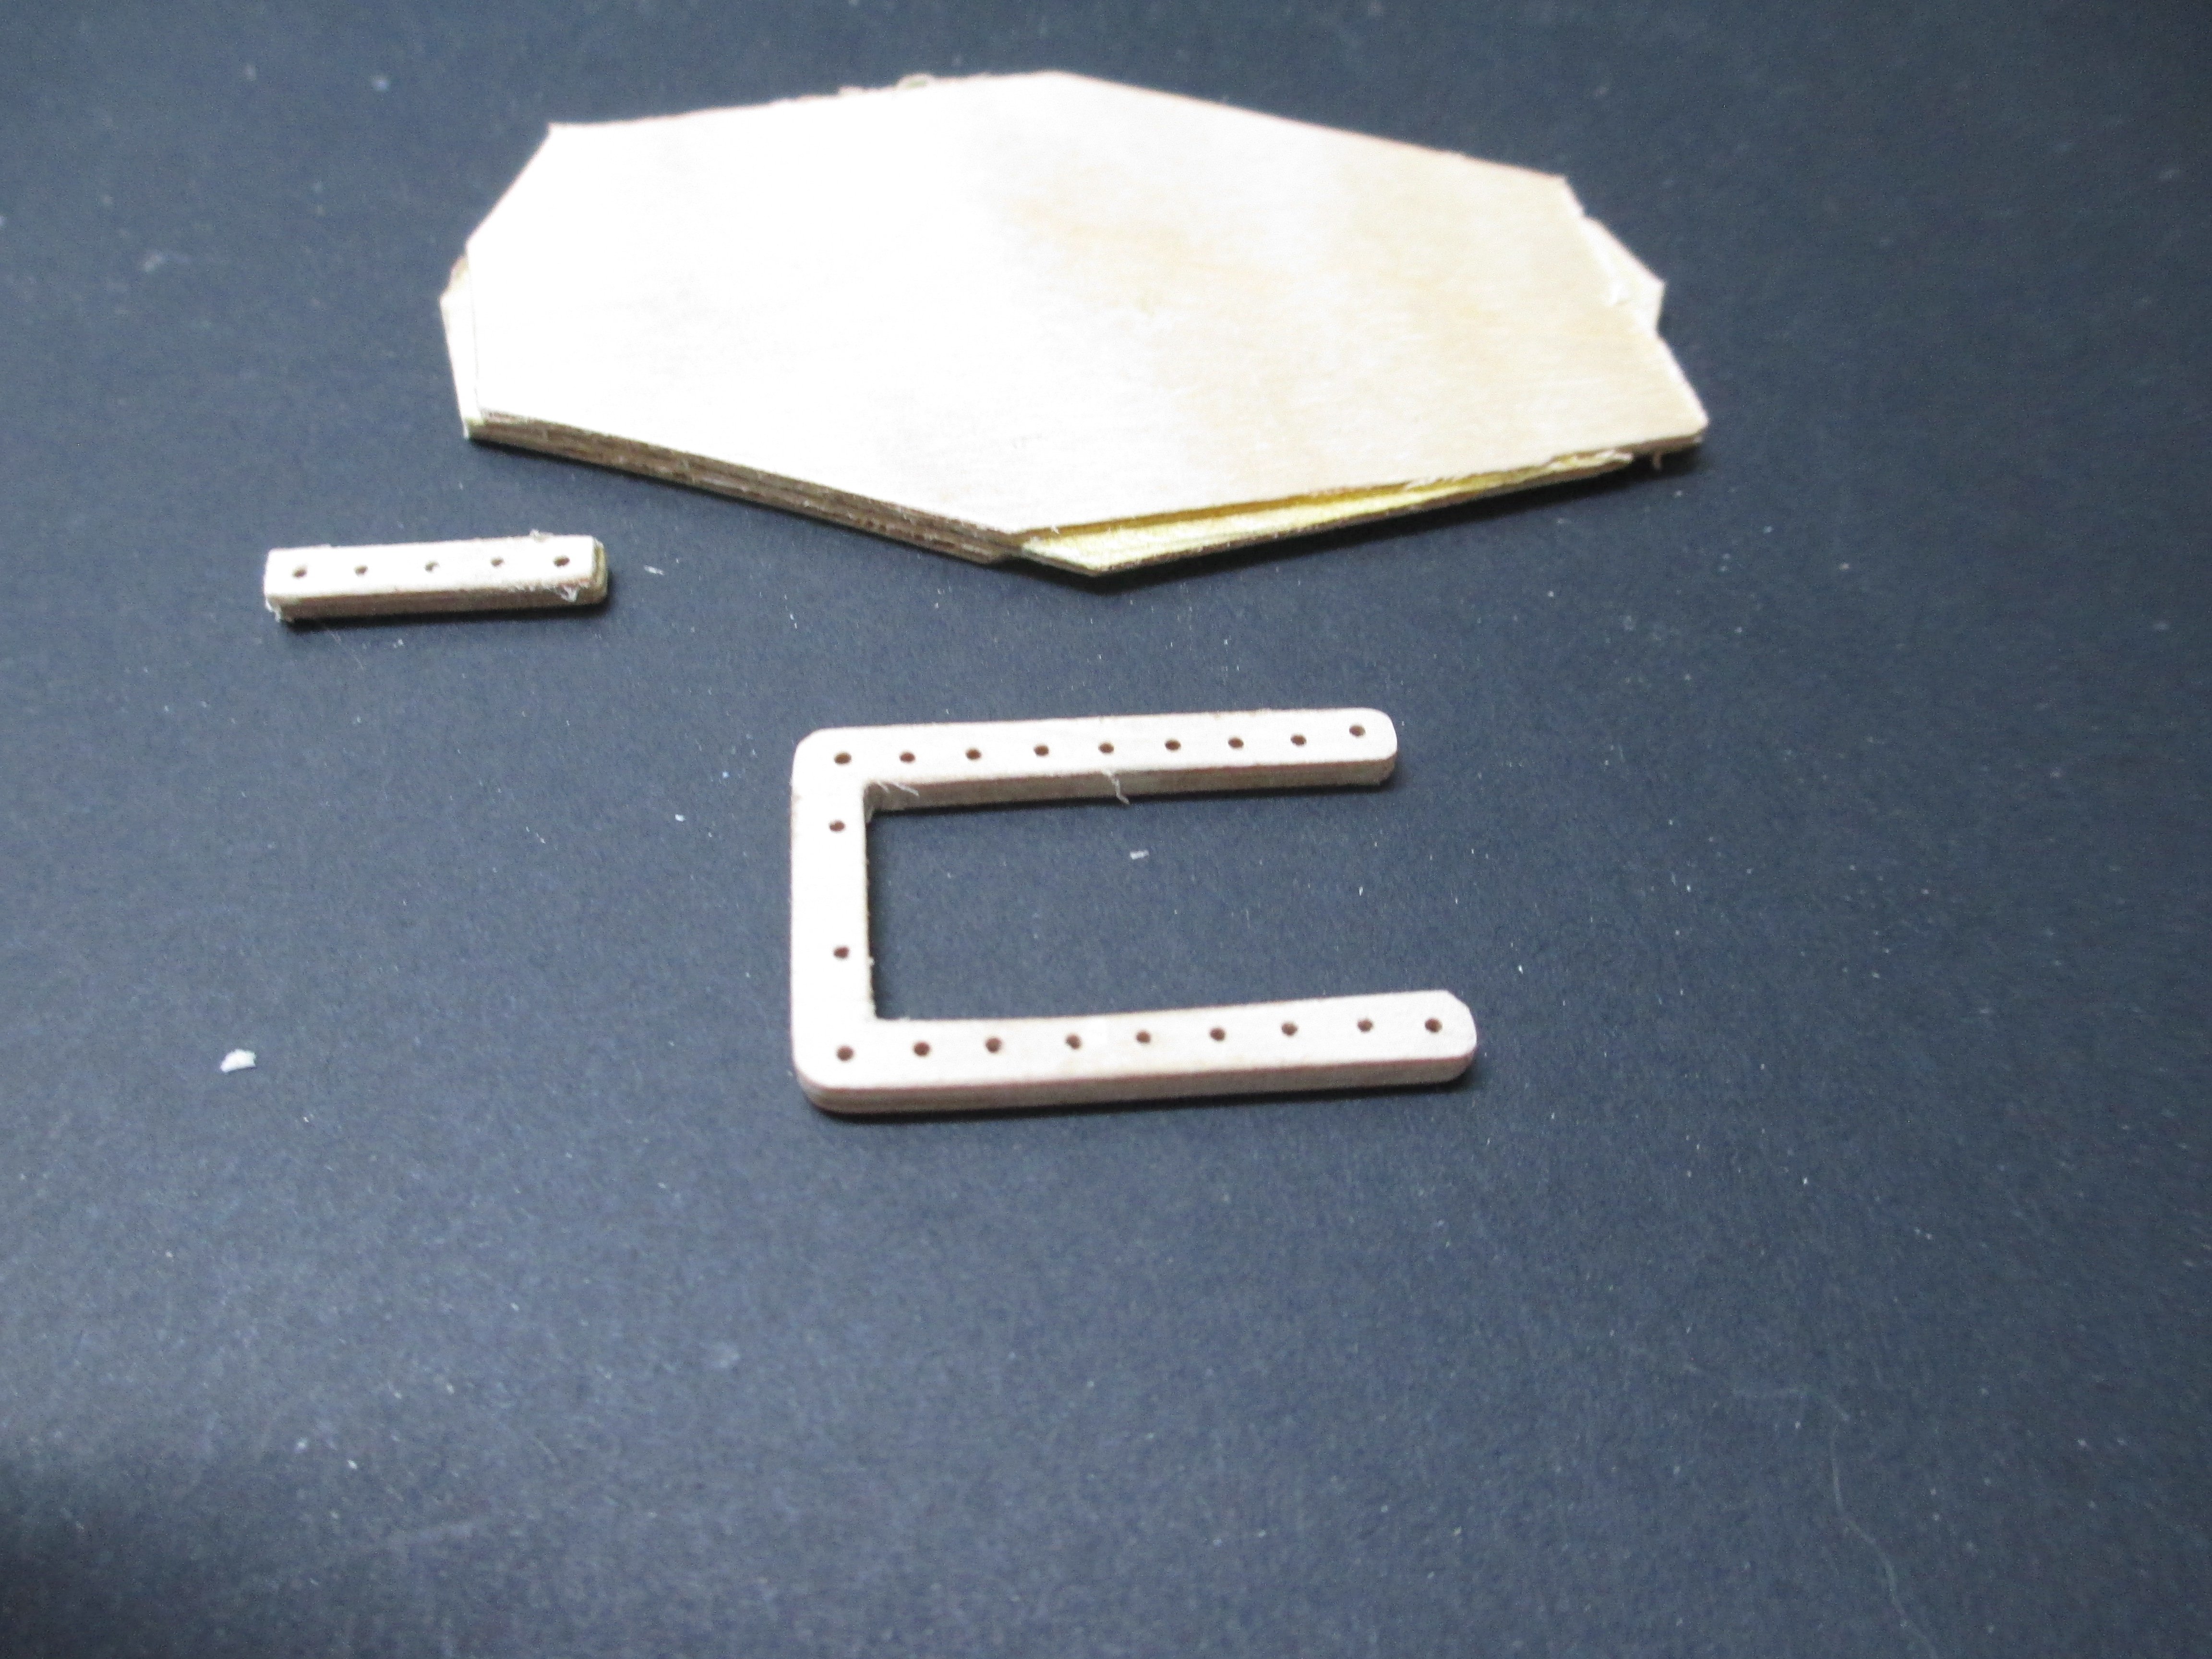
An option is to make new parts out of laminated 0.5mm (0.020") birch plywood. Only glue together once the laminated parts are bent in position or close to it. Here is my replacement plywood of some pin rails that broke. Ian
- 17 replies
-
- 1
-

-
- Swift
- Artesania Latina
- (and 1 more)
-
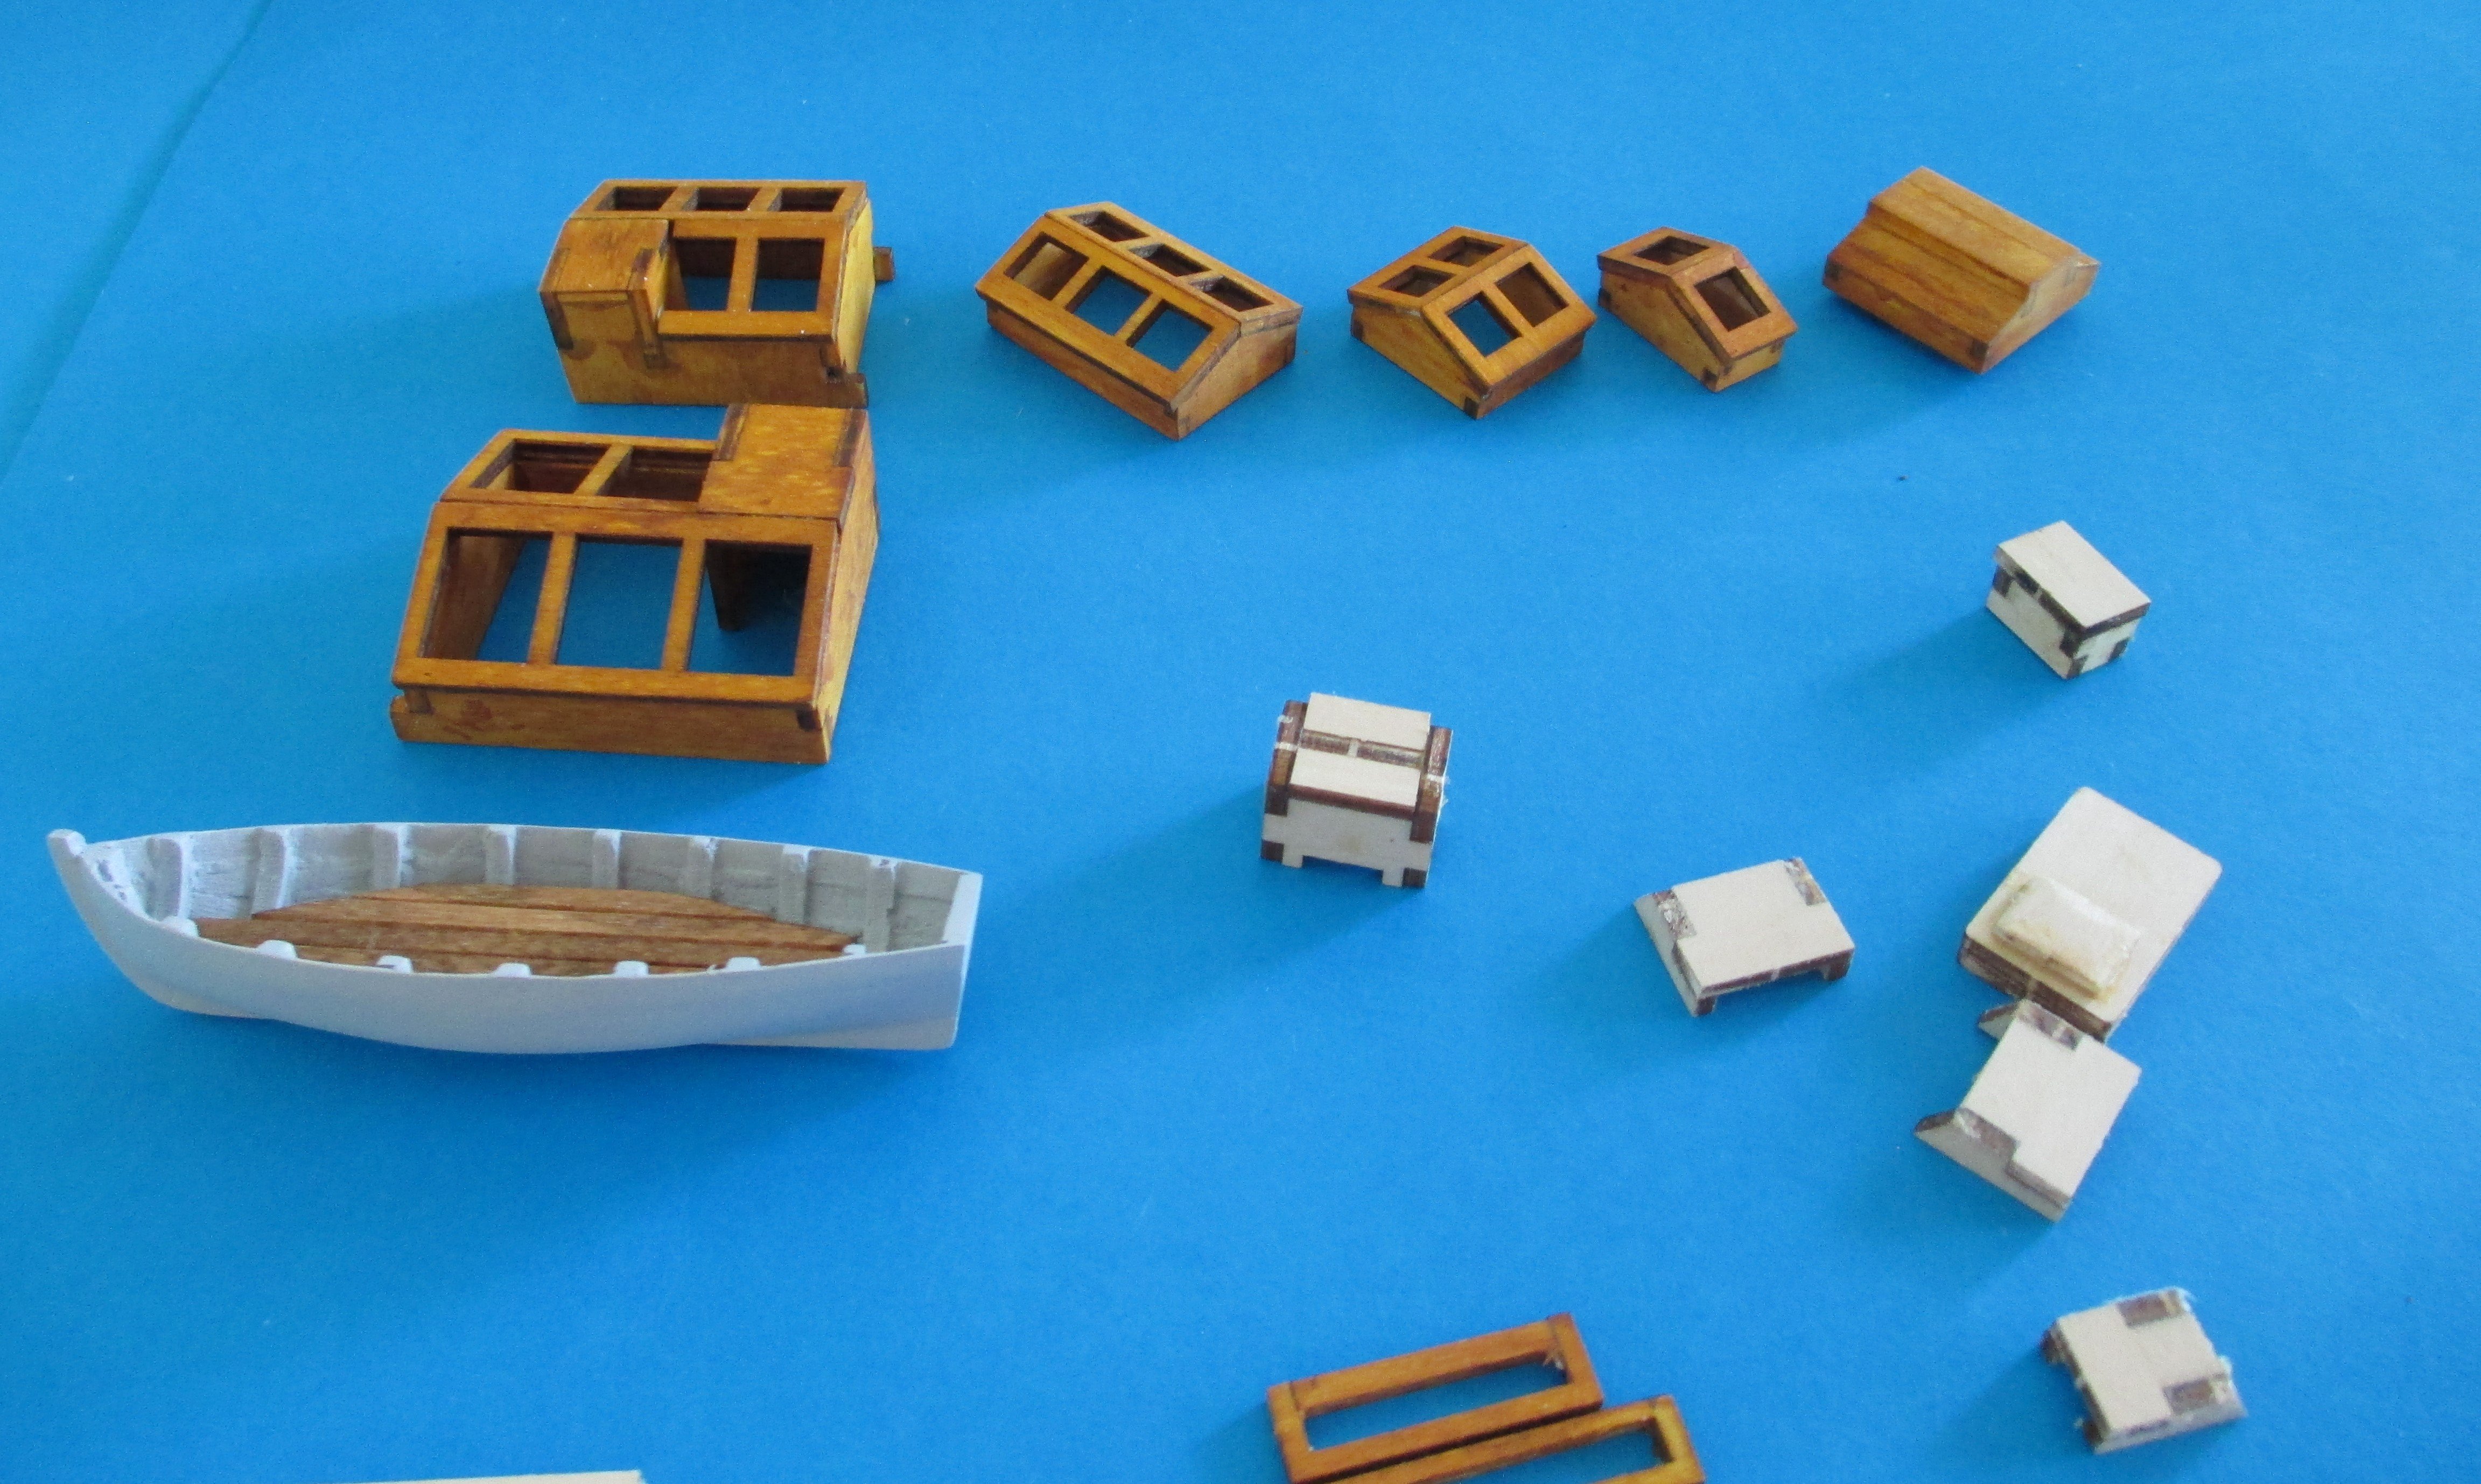
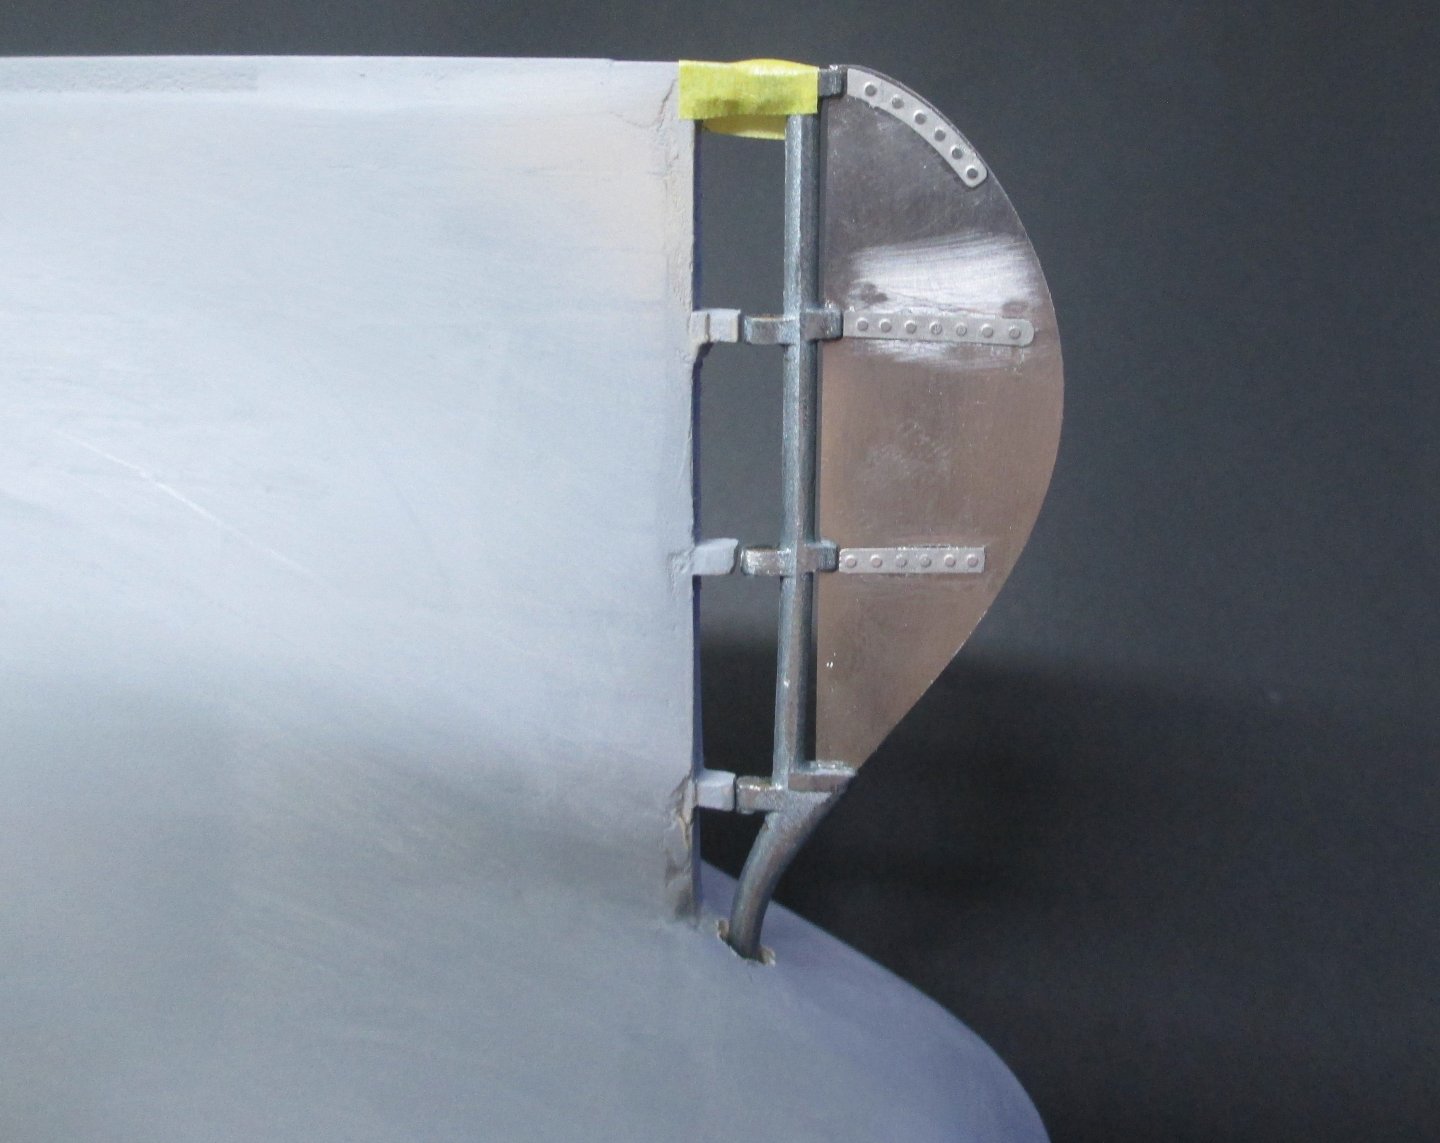
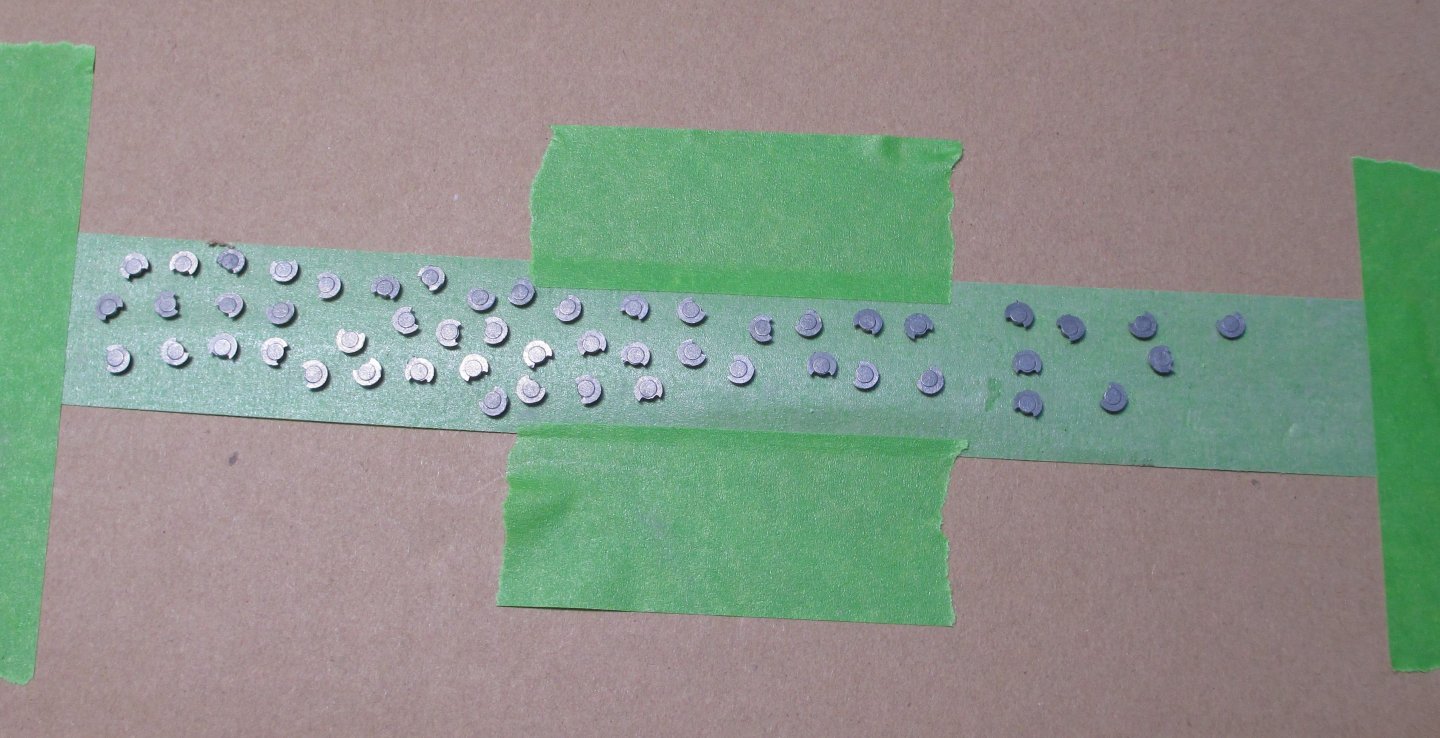
I have decided to assemble and paint all the PE and cast parts in 1 or 2 batches. There are many hours filing to clean the s...alloy cast parts but the end result will be worth the effort. Below are some photos of the portholes and rudder ready for etch primer.
-
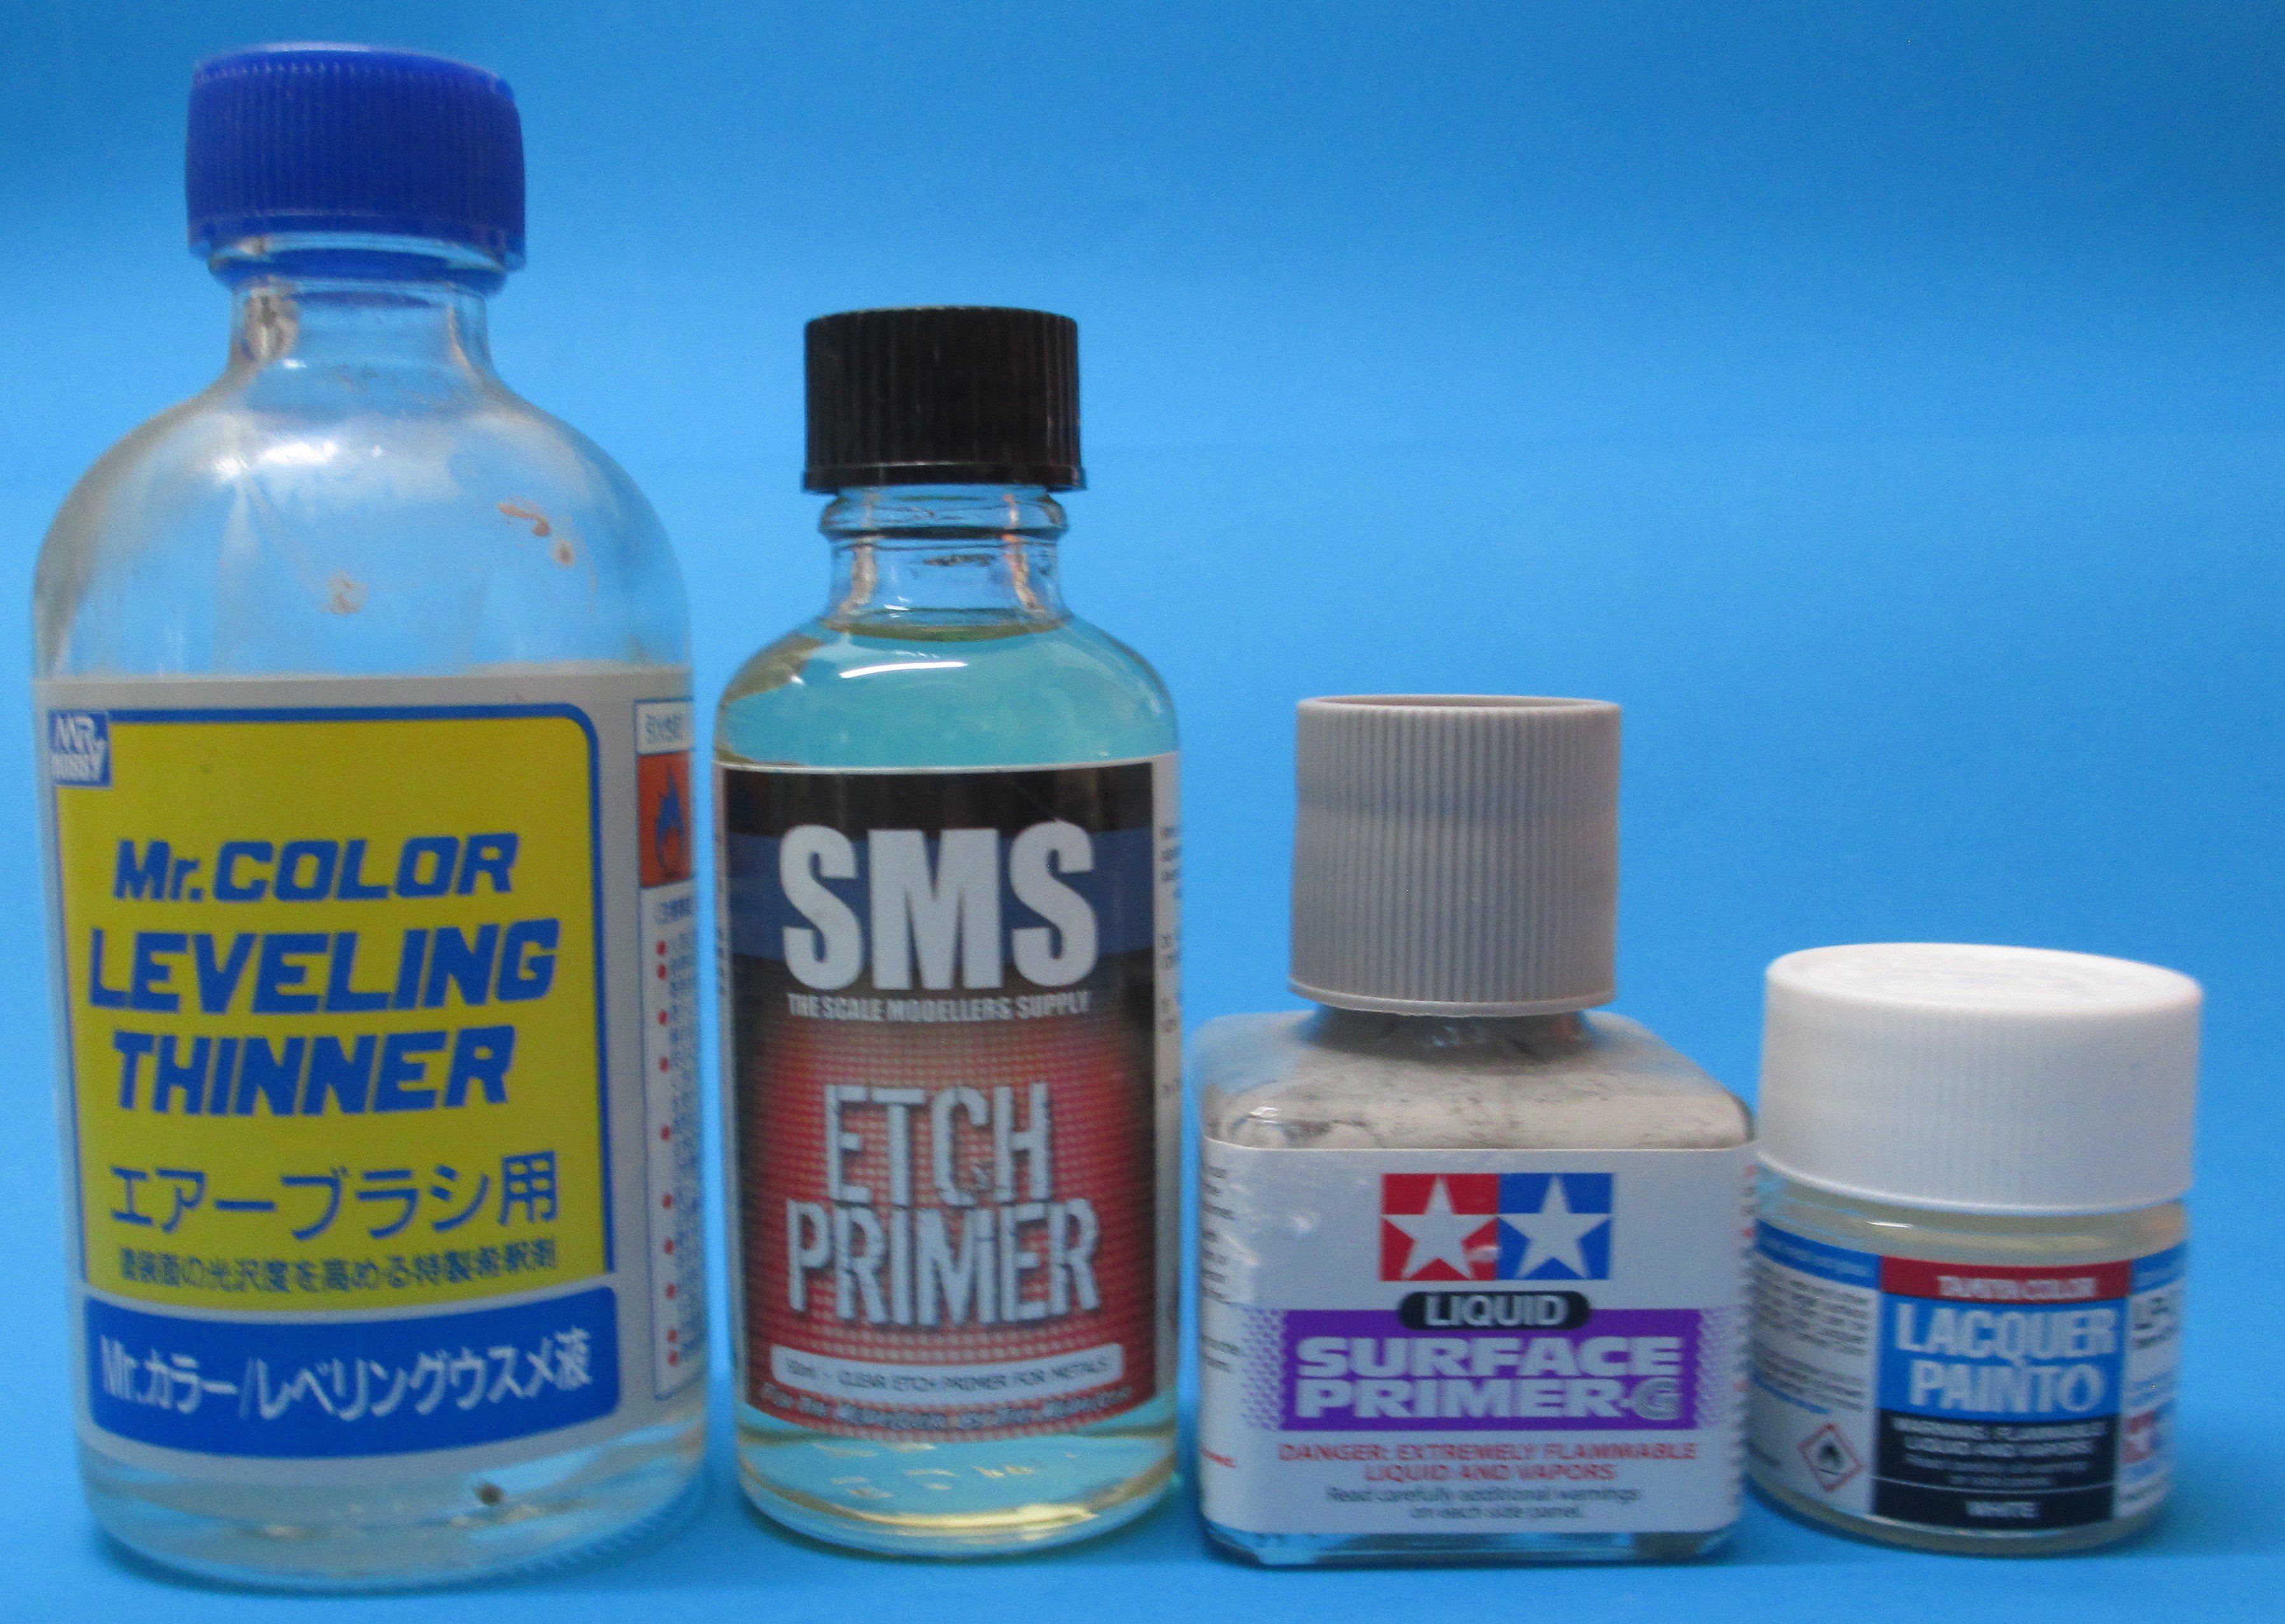
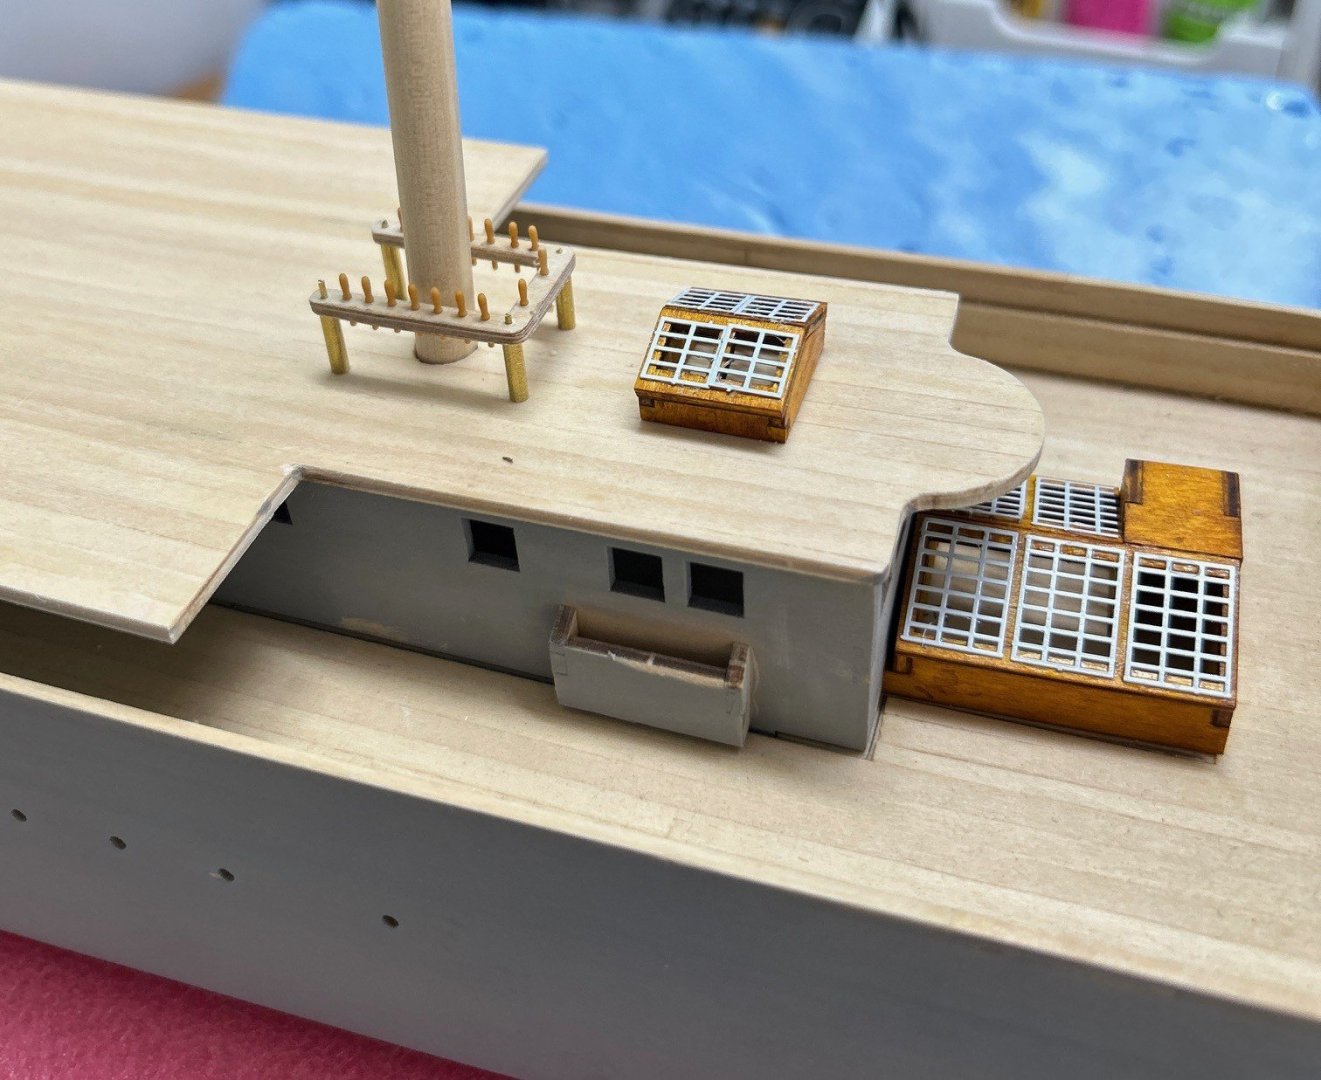
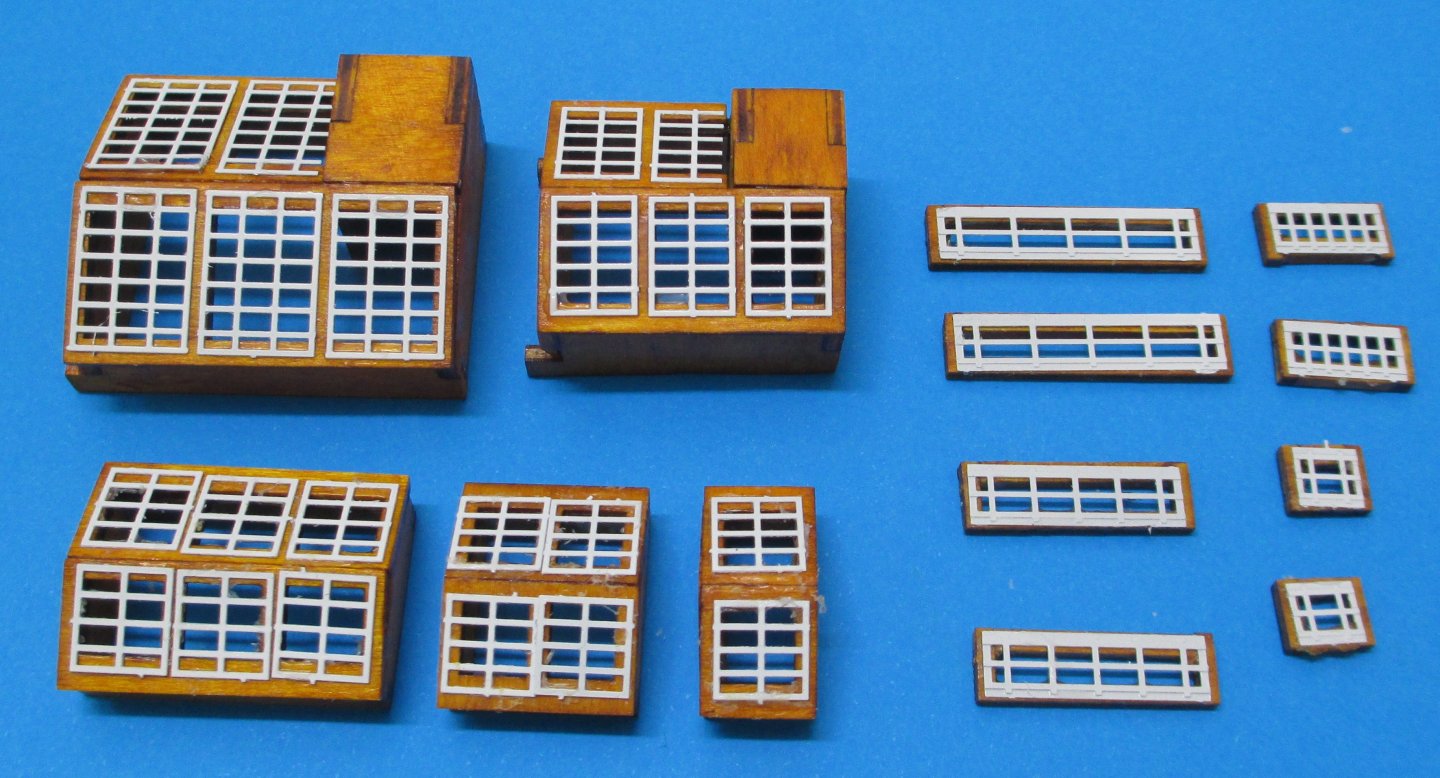
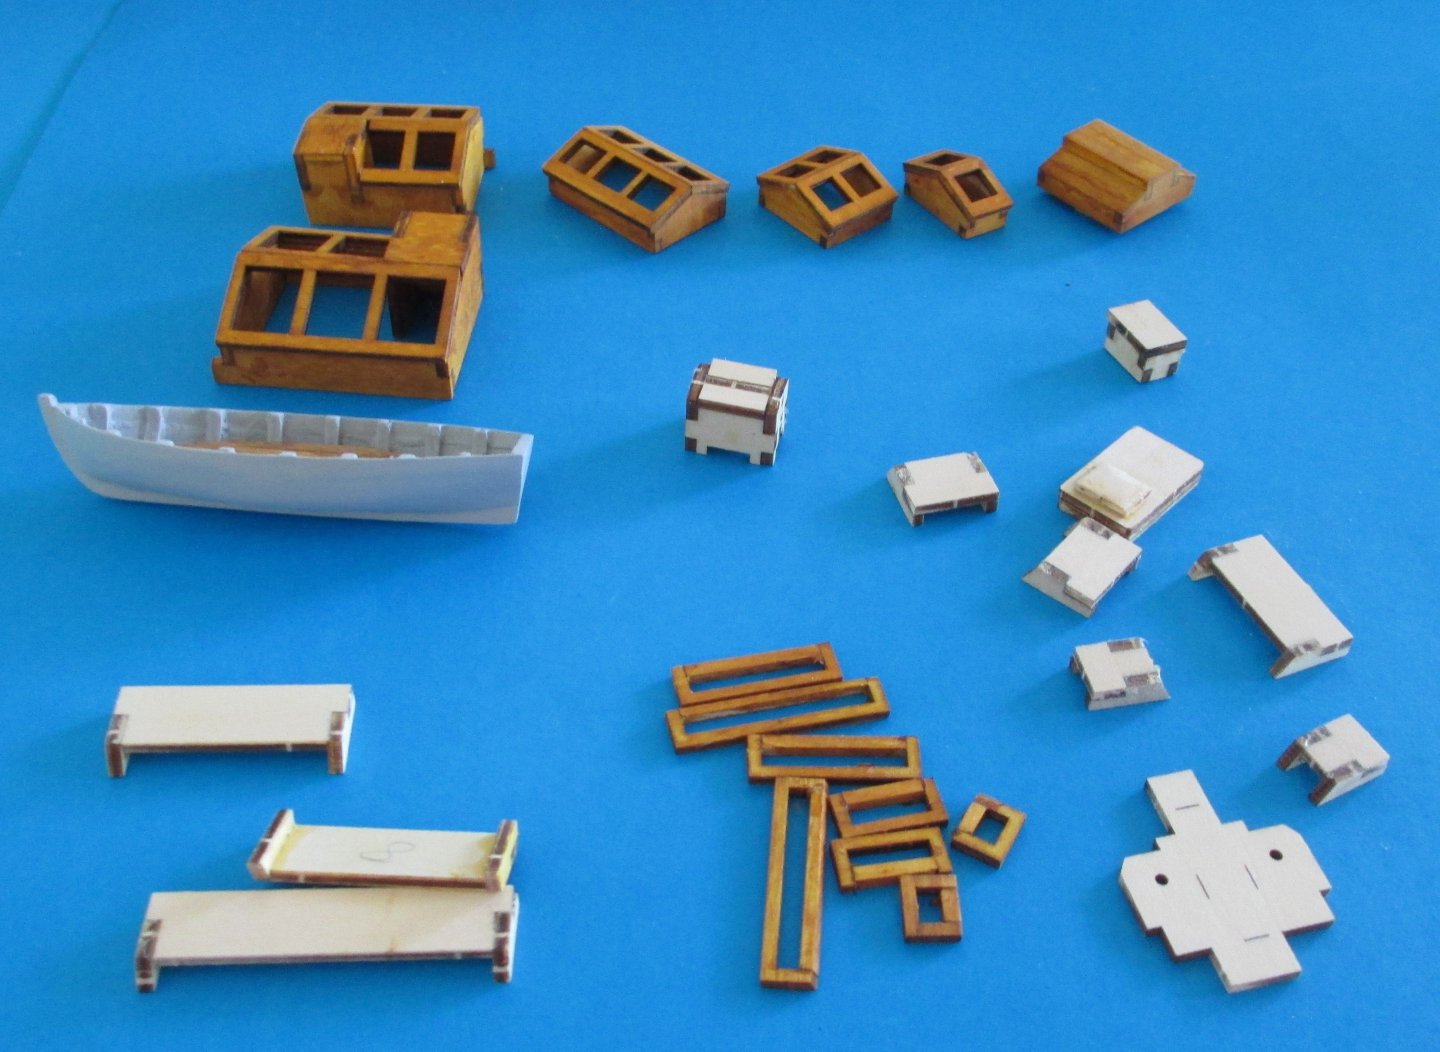
For something different, I am building the smaller parts into final assemblies. Below are the hatches and light/vent boxes. The PE parts are stainless steel and much easier to work than brass that must be annealed to avoid work hardening and cracks. Paint finishes are a regular topic so I have included what I used on the PE parts - generally what I have for the plastics car models. The SMS Etch Primer was the first coat on the metal followed by grey surface primer and then white lacquer. I have always used Mr COLOR Leveling Thinners for lacquer and acrylic paints. The leveling thinners was a game changer for my car finishes where a little sanding with 1500 - 5000 grit sandpaper before the cutting polishes produces an excellent result.

-
Yves, Phil Thank you for your kind words. The stylish lines of the hull will only get better when painted with gloss black. I am also considering only having the standard rigging or maybe one or two sails. Does anyone have an opinion on not installing the running rigging and sails. Thanks
-
The decking is now complete and ready for the perimeter trimming .


-
CHANGE of PLAN I started this build as a learning exercise as it had plenty of planking and rigging. The end result was not expected to be that good and would have probably ended up in the bin. However, the hull when painted will be satisfactory so I have decided to keep the model when finished. To that end I have acquired an old AL Virginia kit that I will use for some rigging practice and hopefully do a reasonable job of the BELEM rigging. Progress so far has been fairing the hull and making some of the smaller components. I have decided against trying to paint a timber finish onto the plywood parts and just used some Golden Teak stain for the finish. Next steps are the decking and preparing the hull for paint. I have to find a way to airbrush the port holes without sending them into some endless orbit. The plan is to use an etch primer before the main color.


-
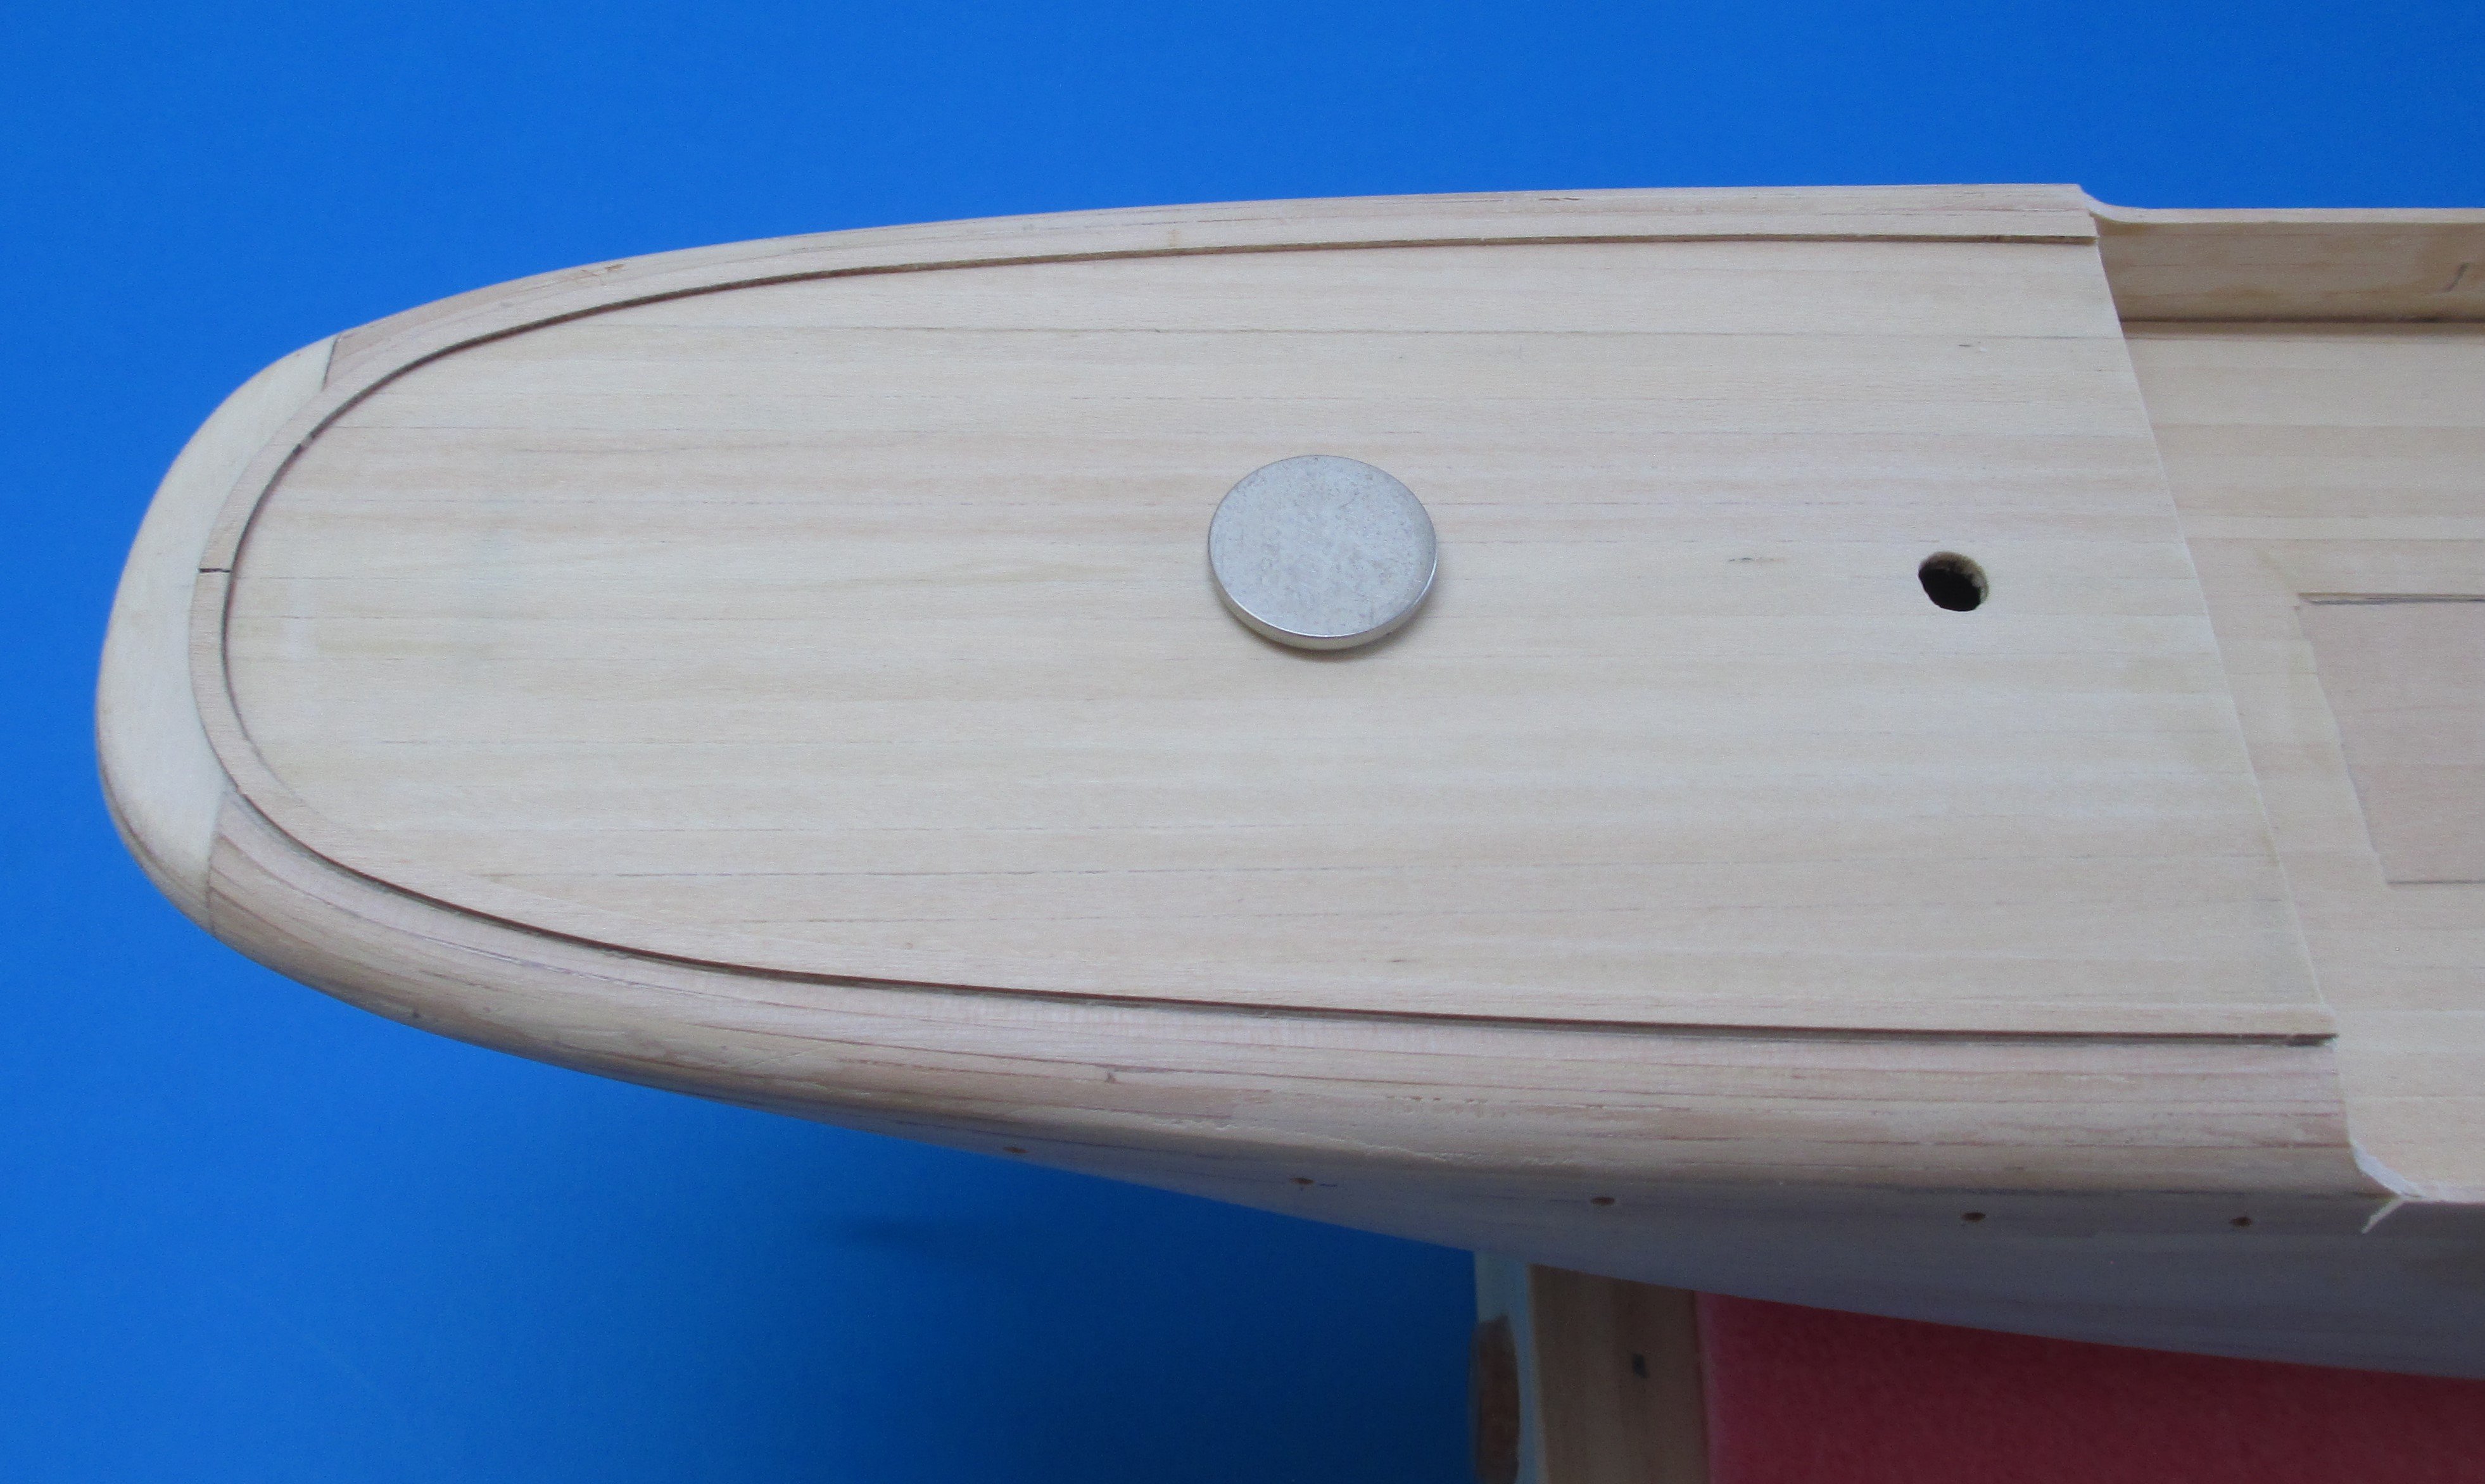
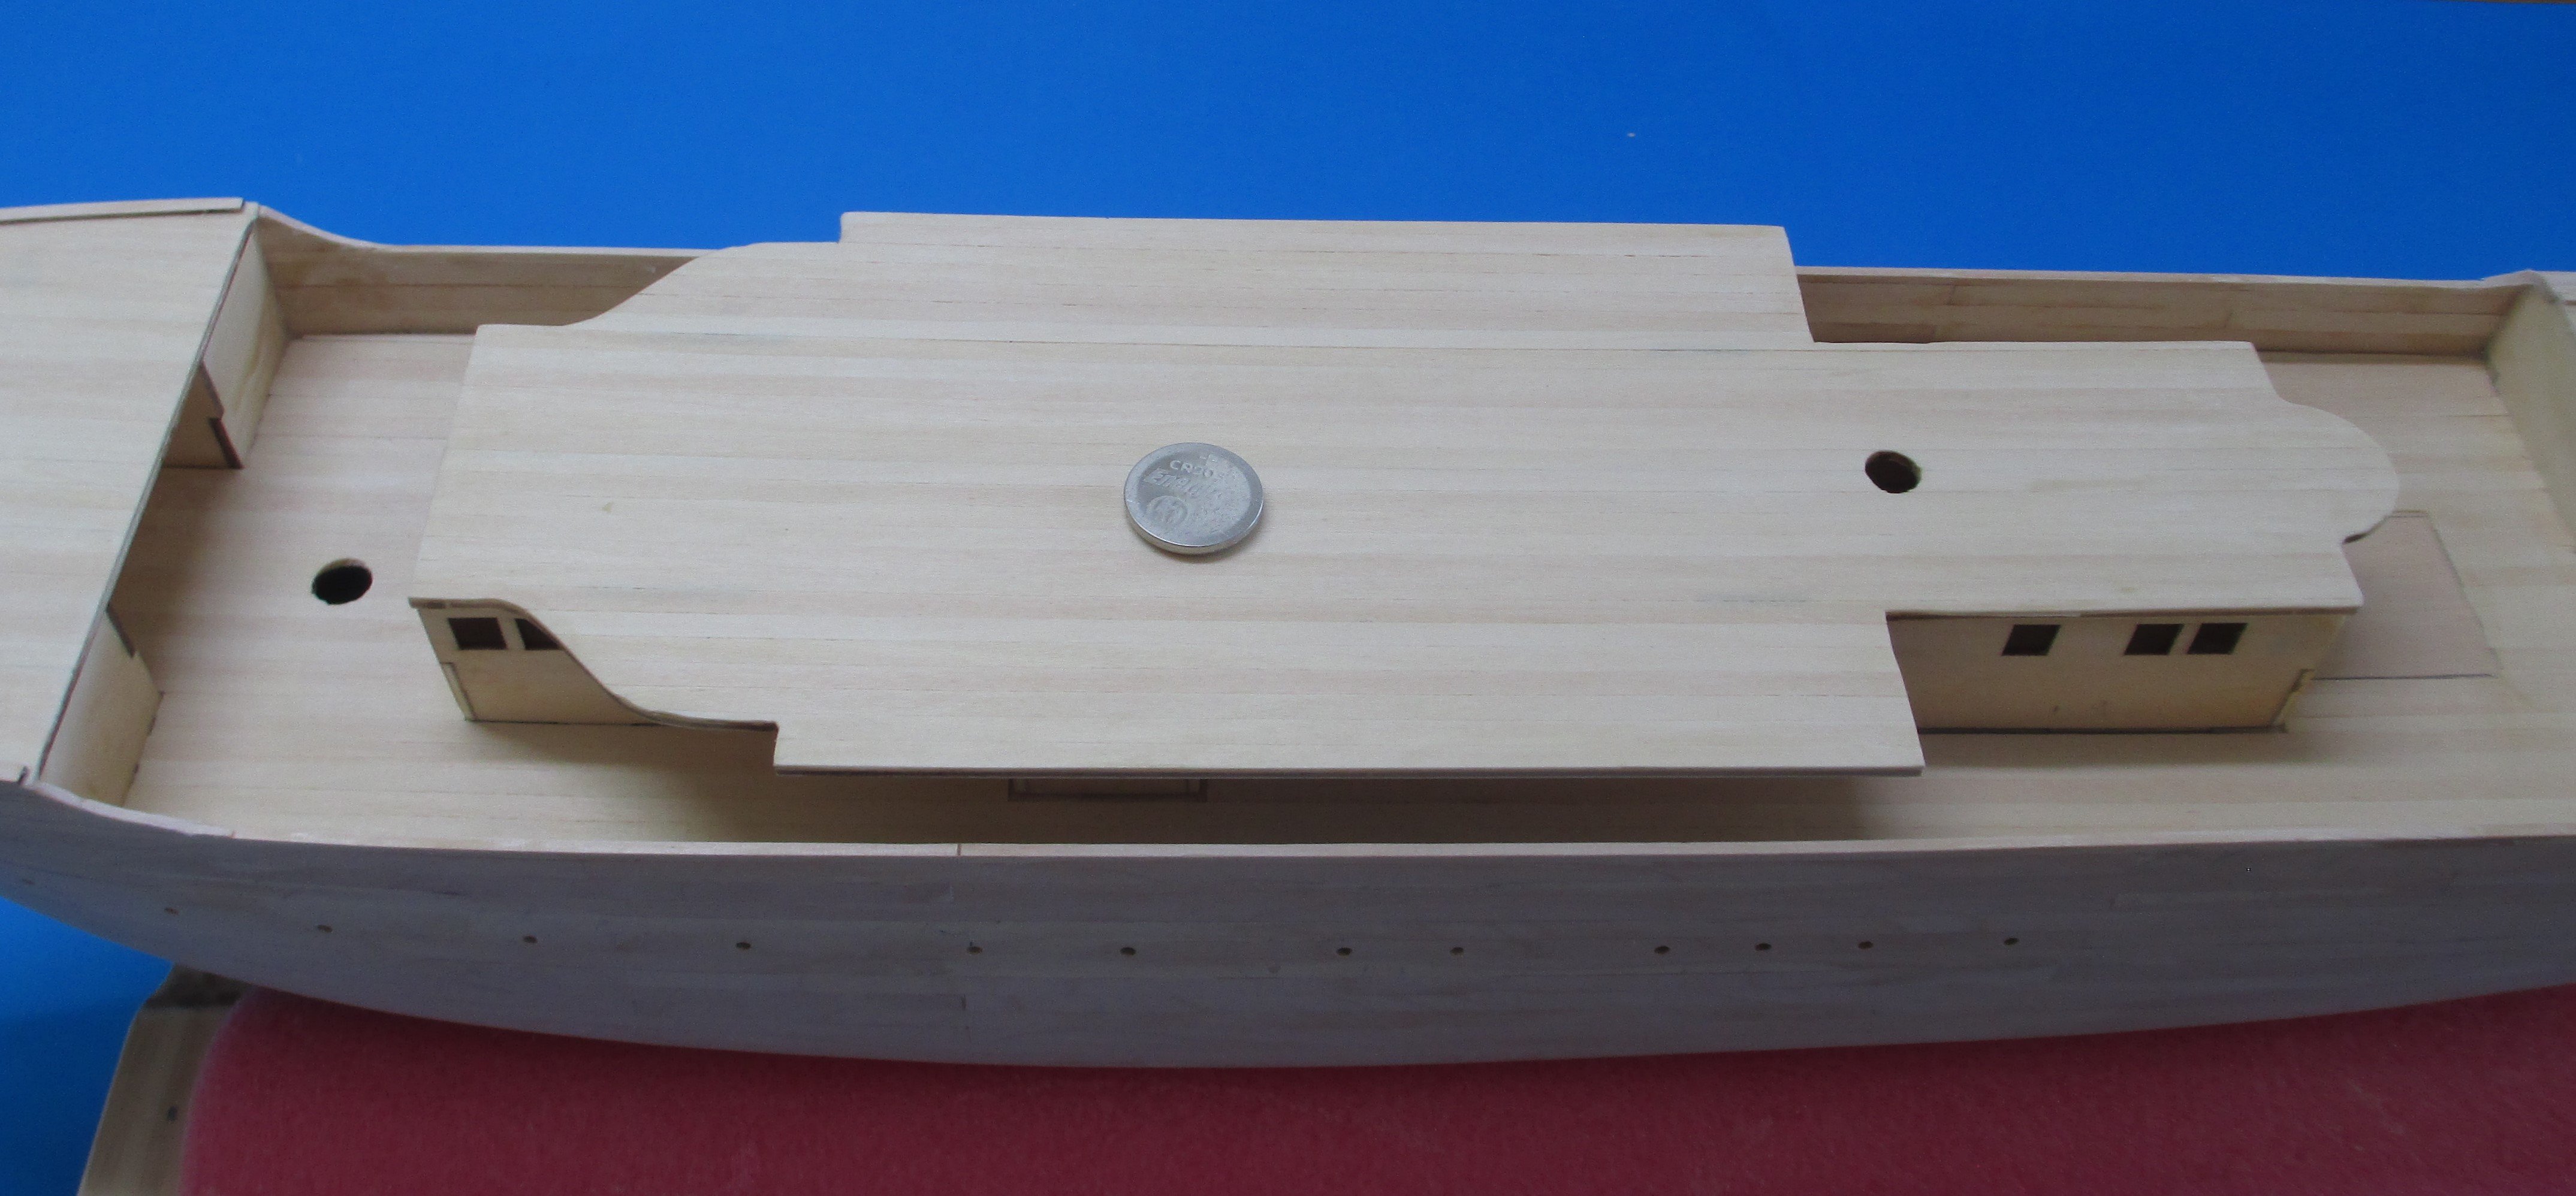
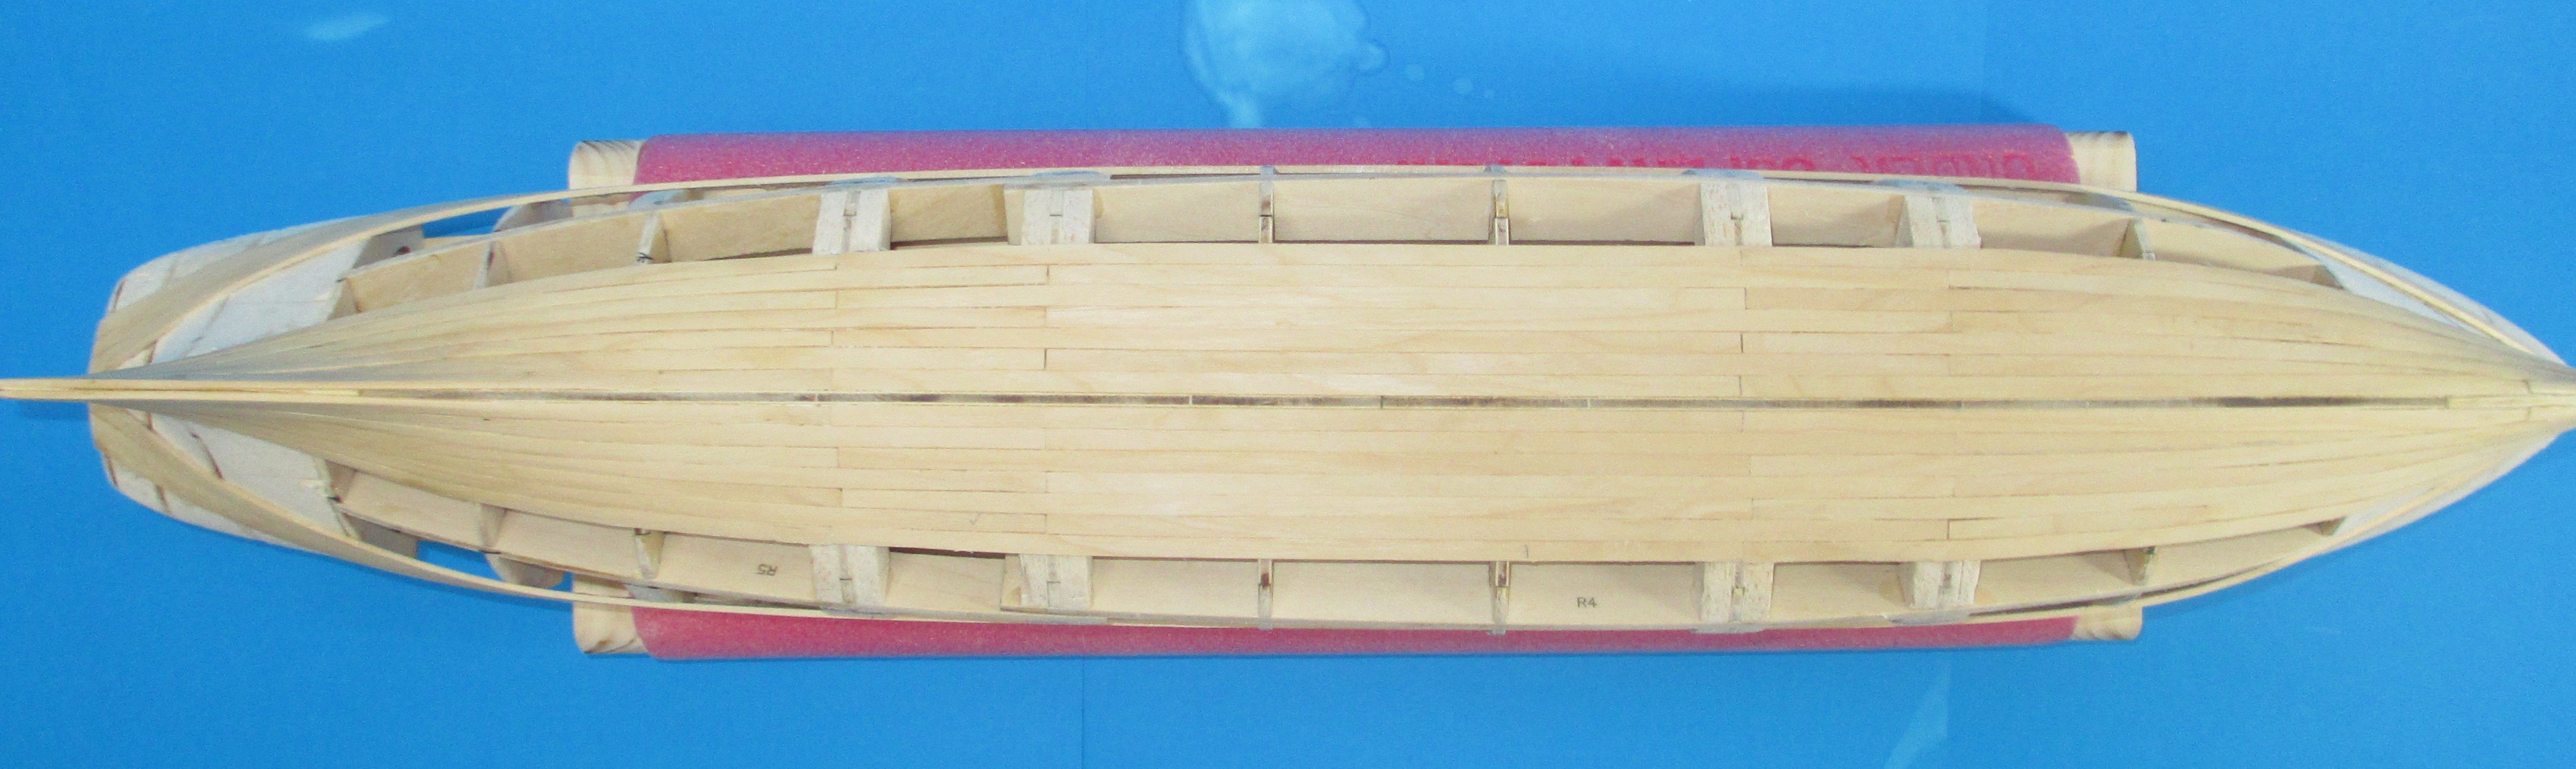
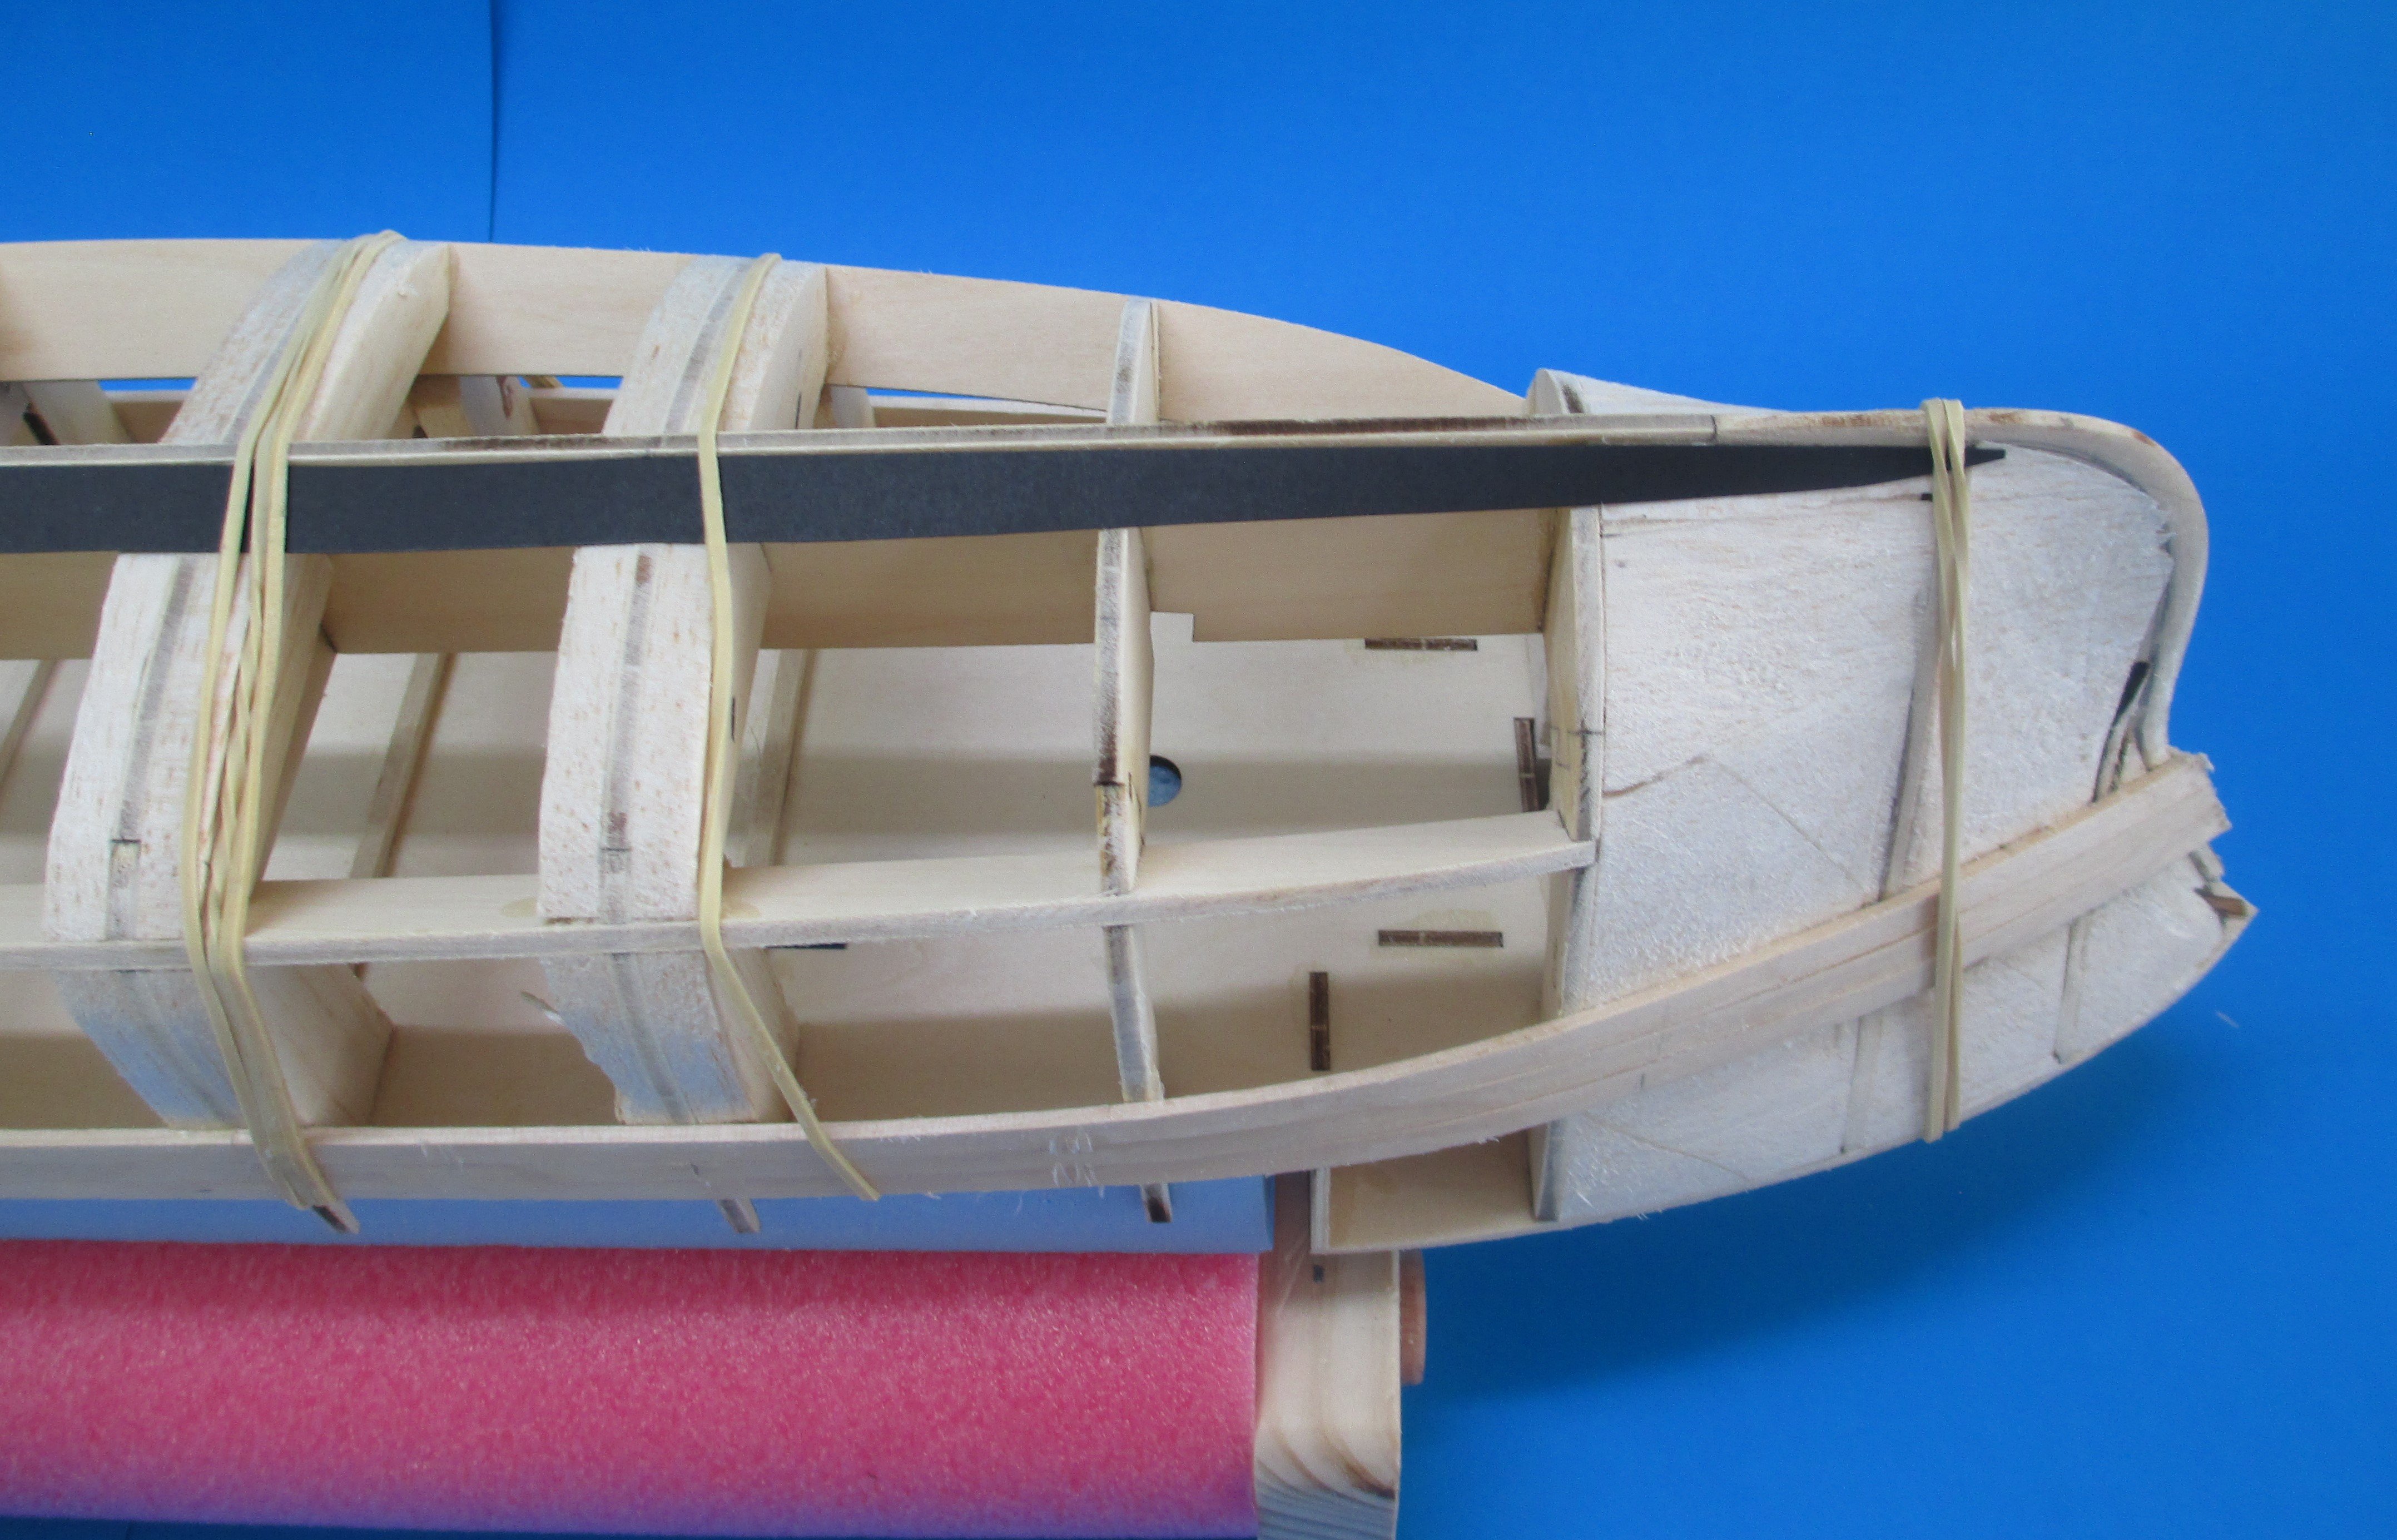
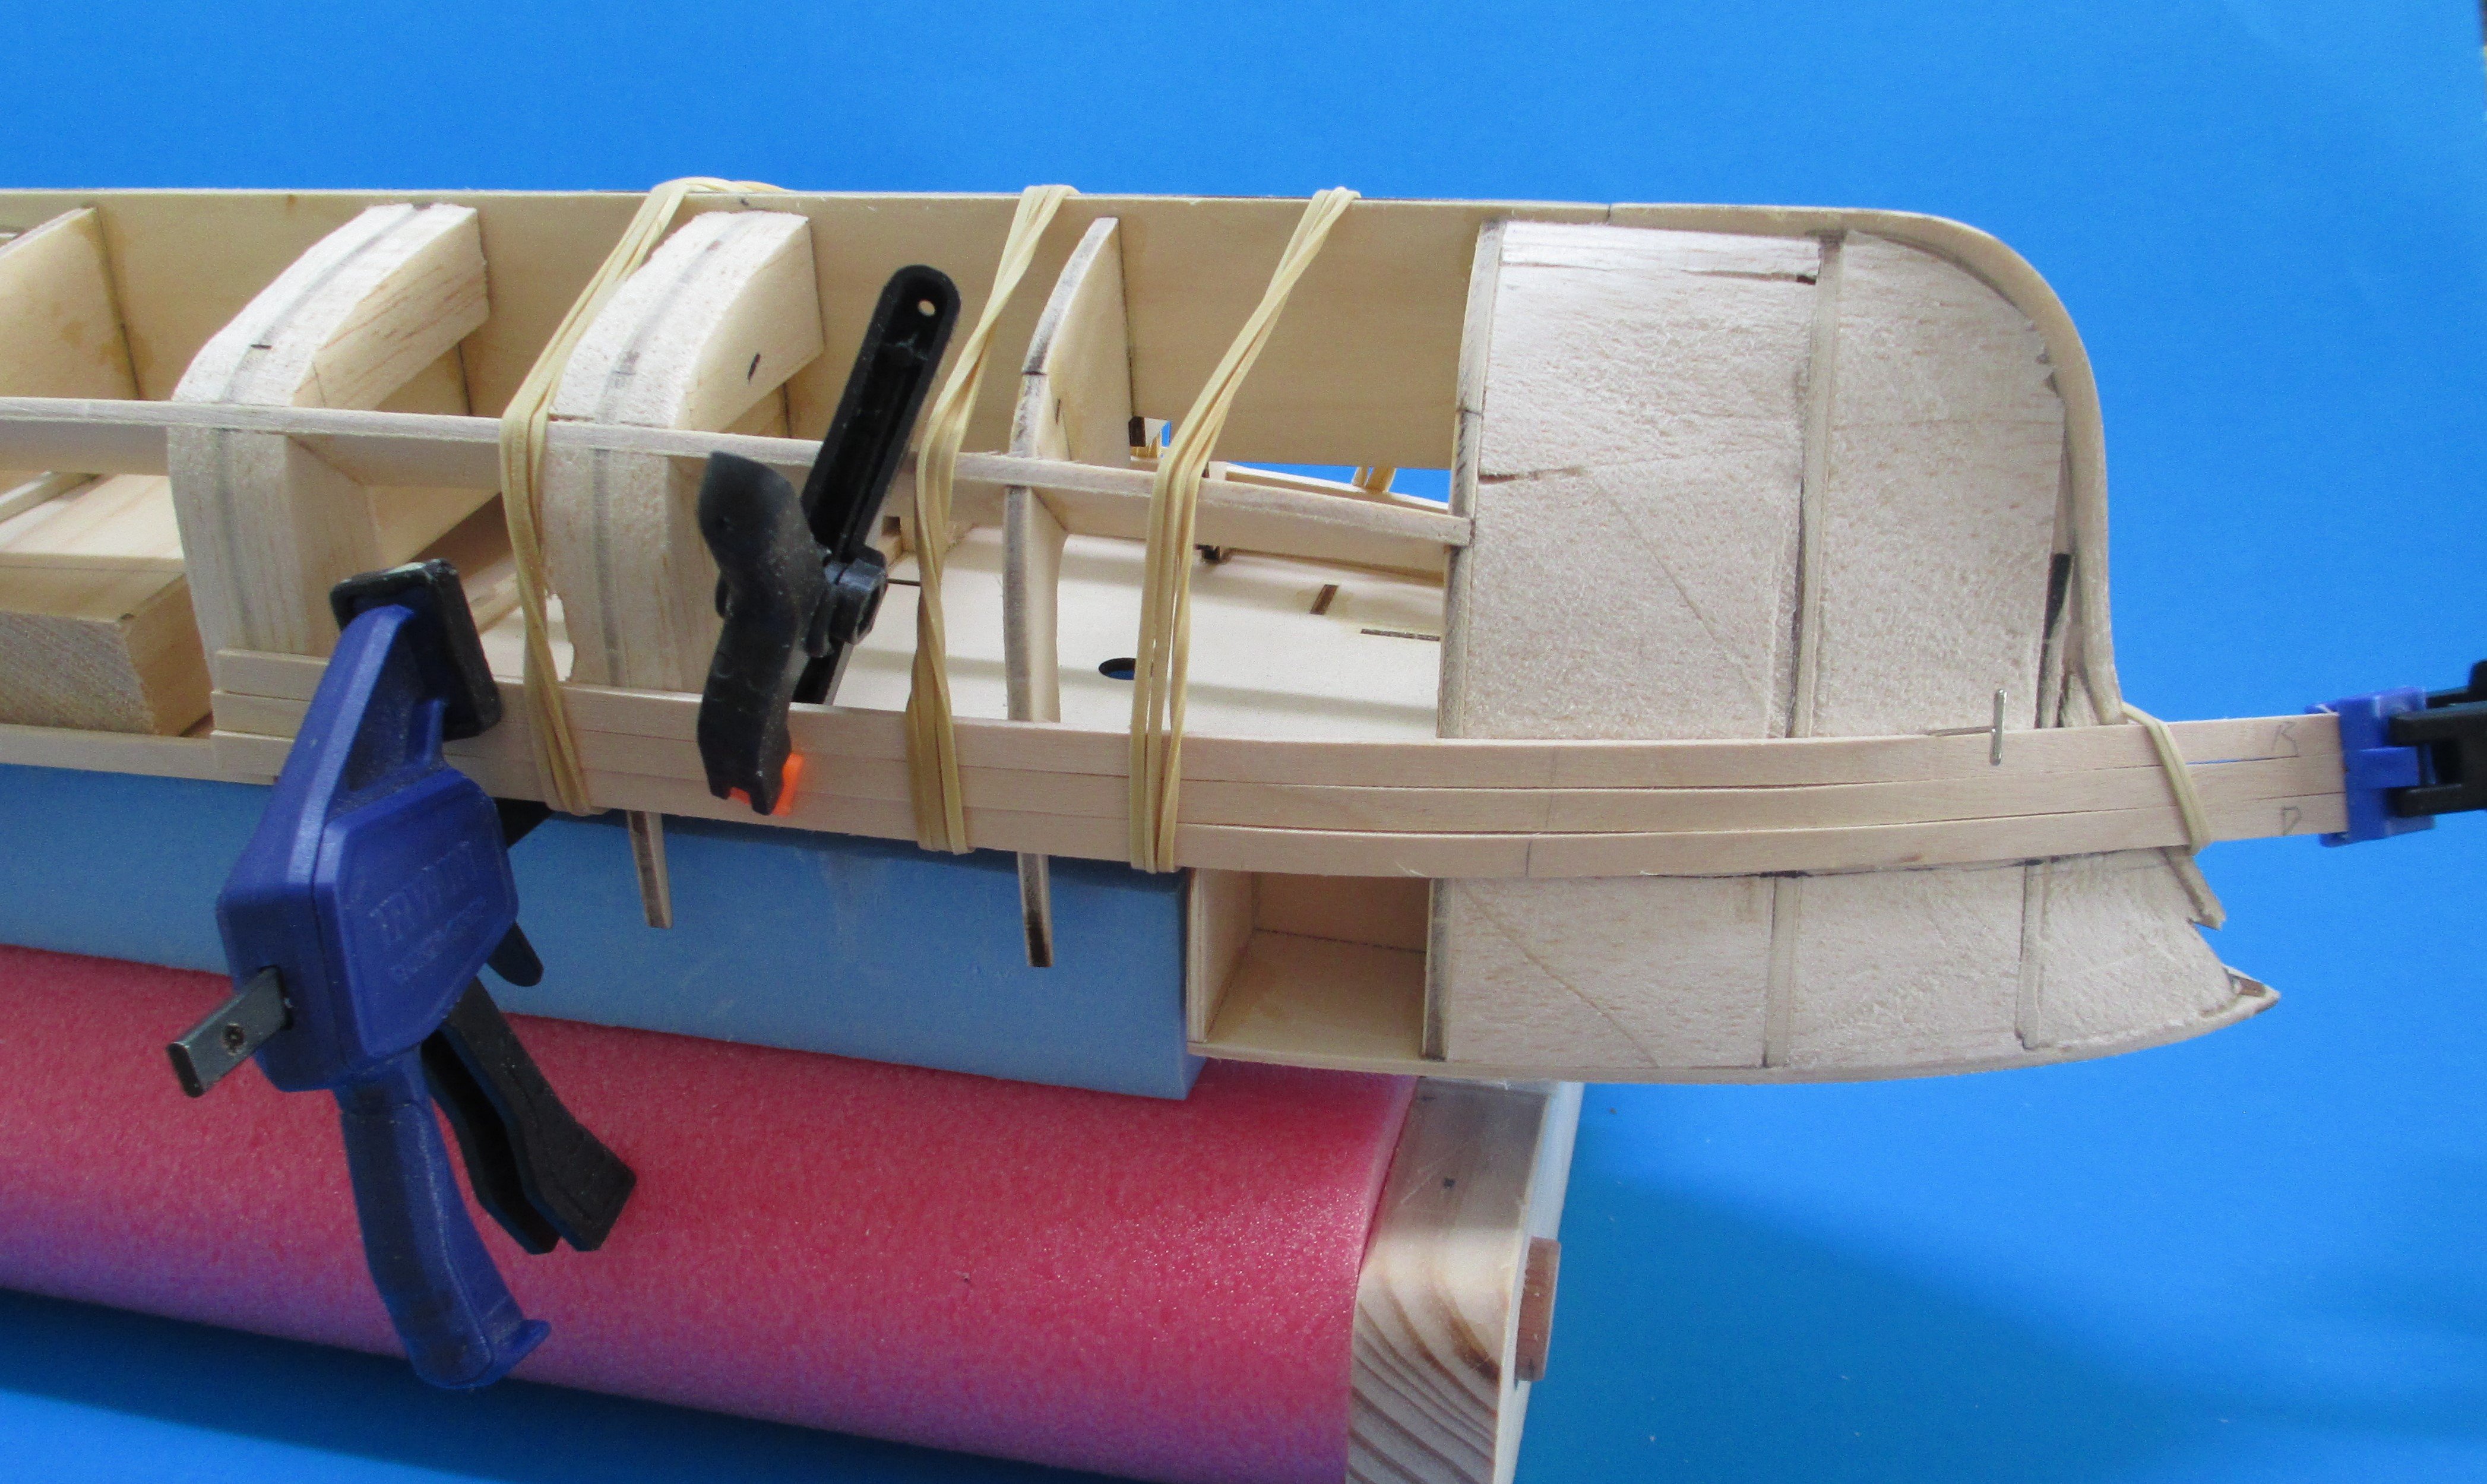
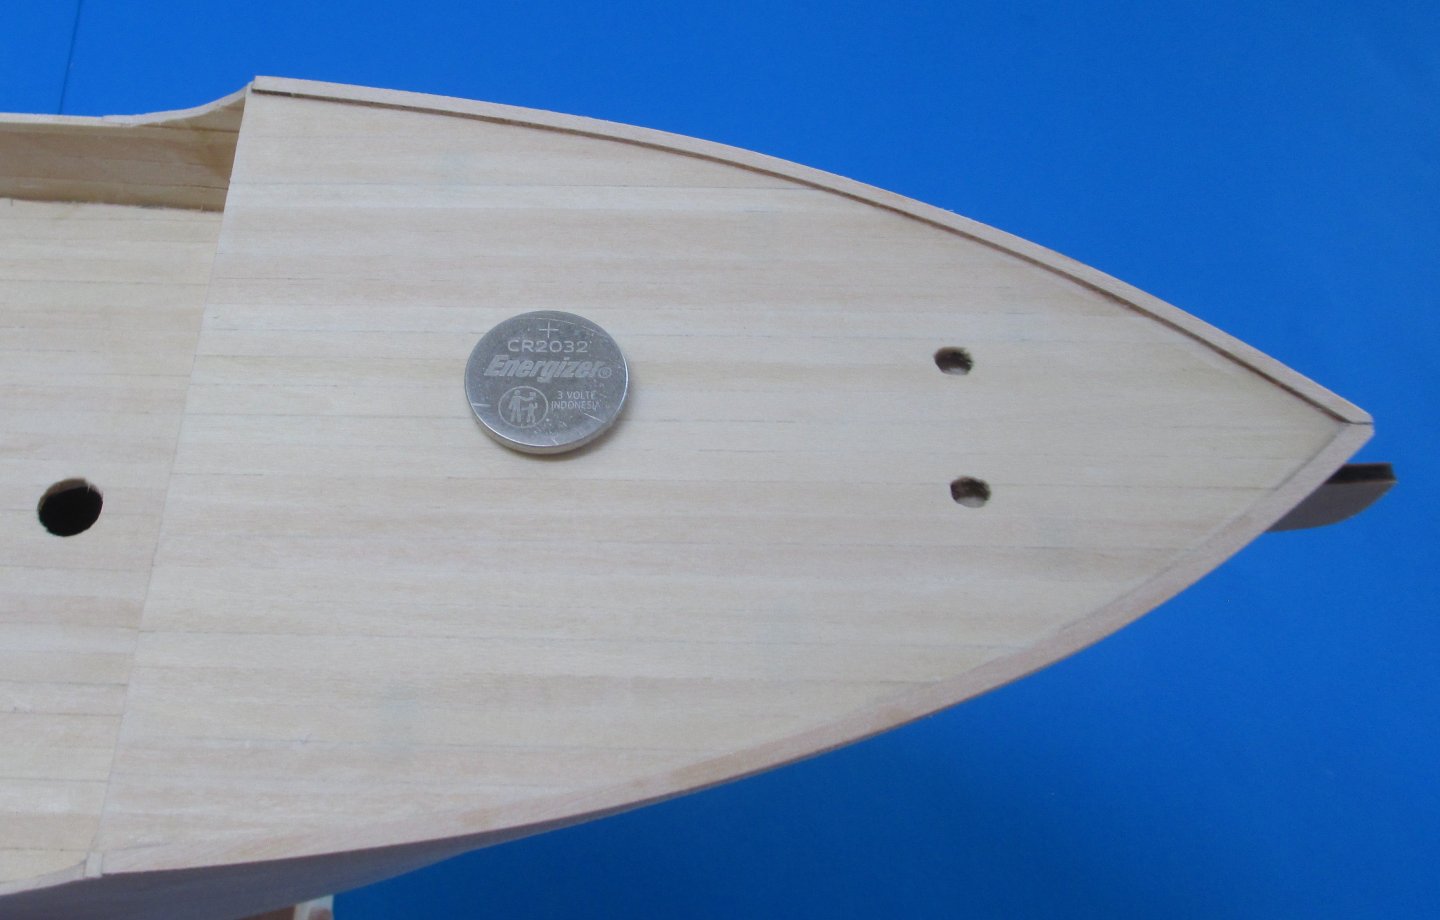
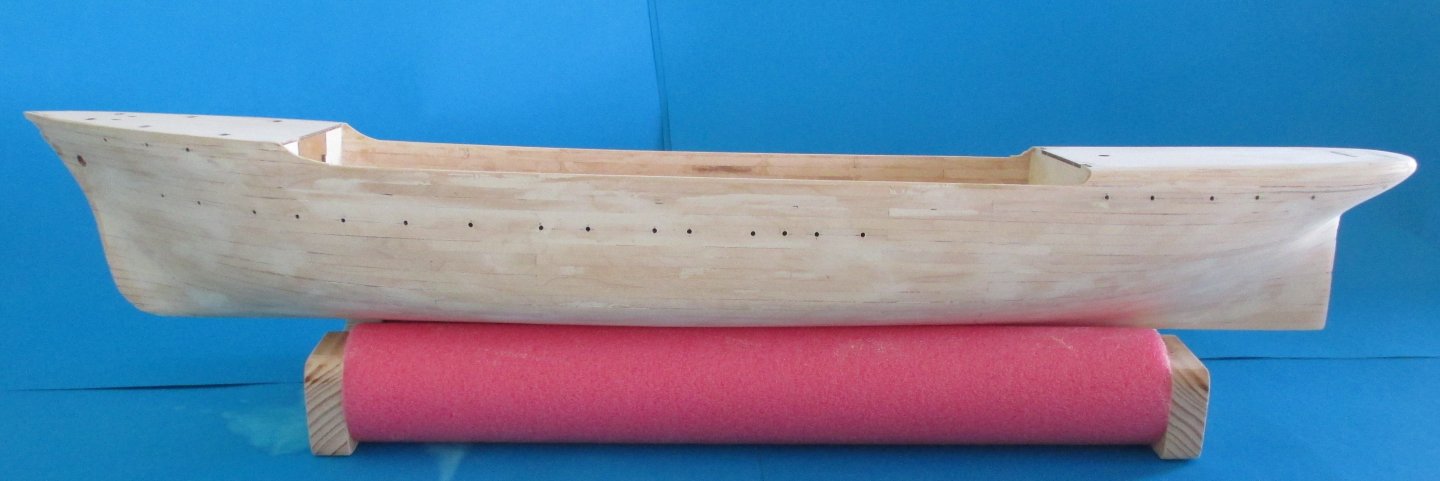
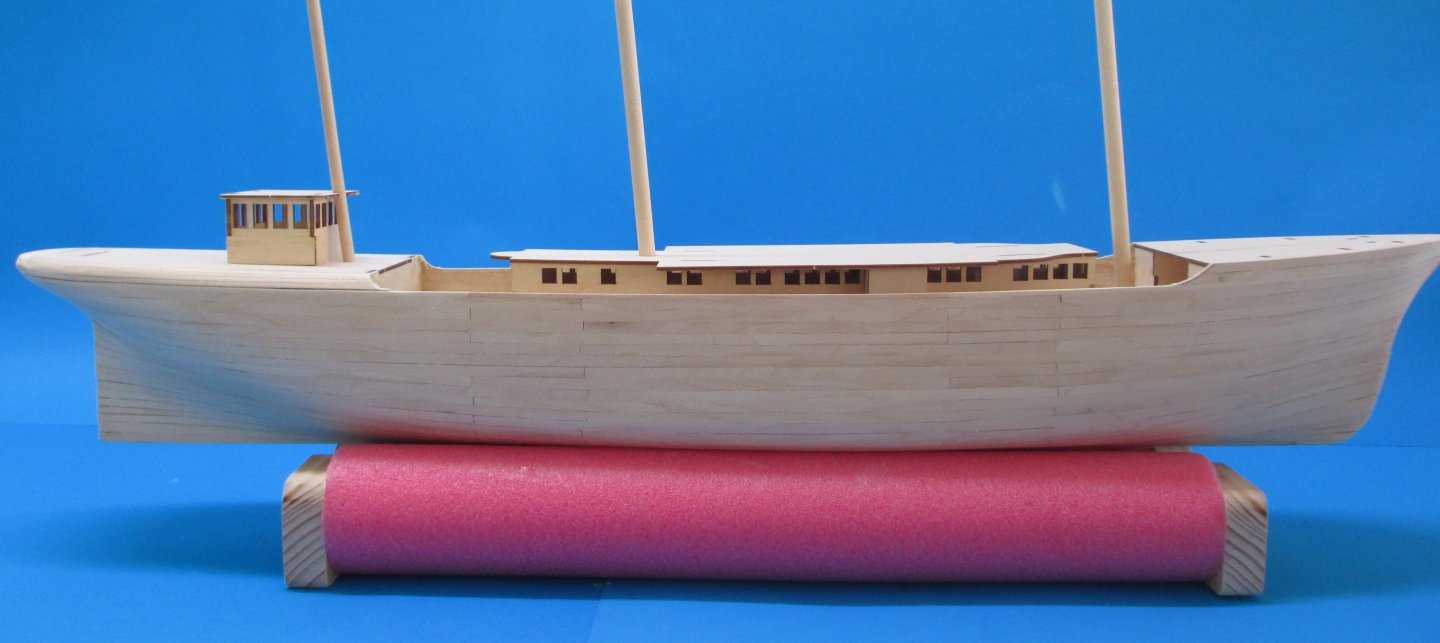
A major milestone is reached - Planking is now complete so the filling and final fairing can start. I have placed the cabin and masts in position to get an idea of the hull shape. This is a feel good look rather than any build planning. In 50 years of modeling this is the most challenging item I have made. Like balsa, sharp tools are a pre-requisite to aid in the best outcome to any wood machining. I have read in build logs to treat every plank as an individual project. This is so true. Tonight will be spent studying the manual to determine all the holes that require drilling in the hull. I think it will be be best to do now rather than later. The stern has nice curves. The 2mm² planks were very flexible after some steam treatment and only required rubber bands to hold them in position while the glue dried. My wood filler has suffered from old age so tomorrow I am off to Bunnings (aussie Home Depot) for some Poly filler.
-
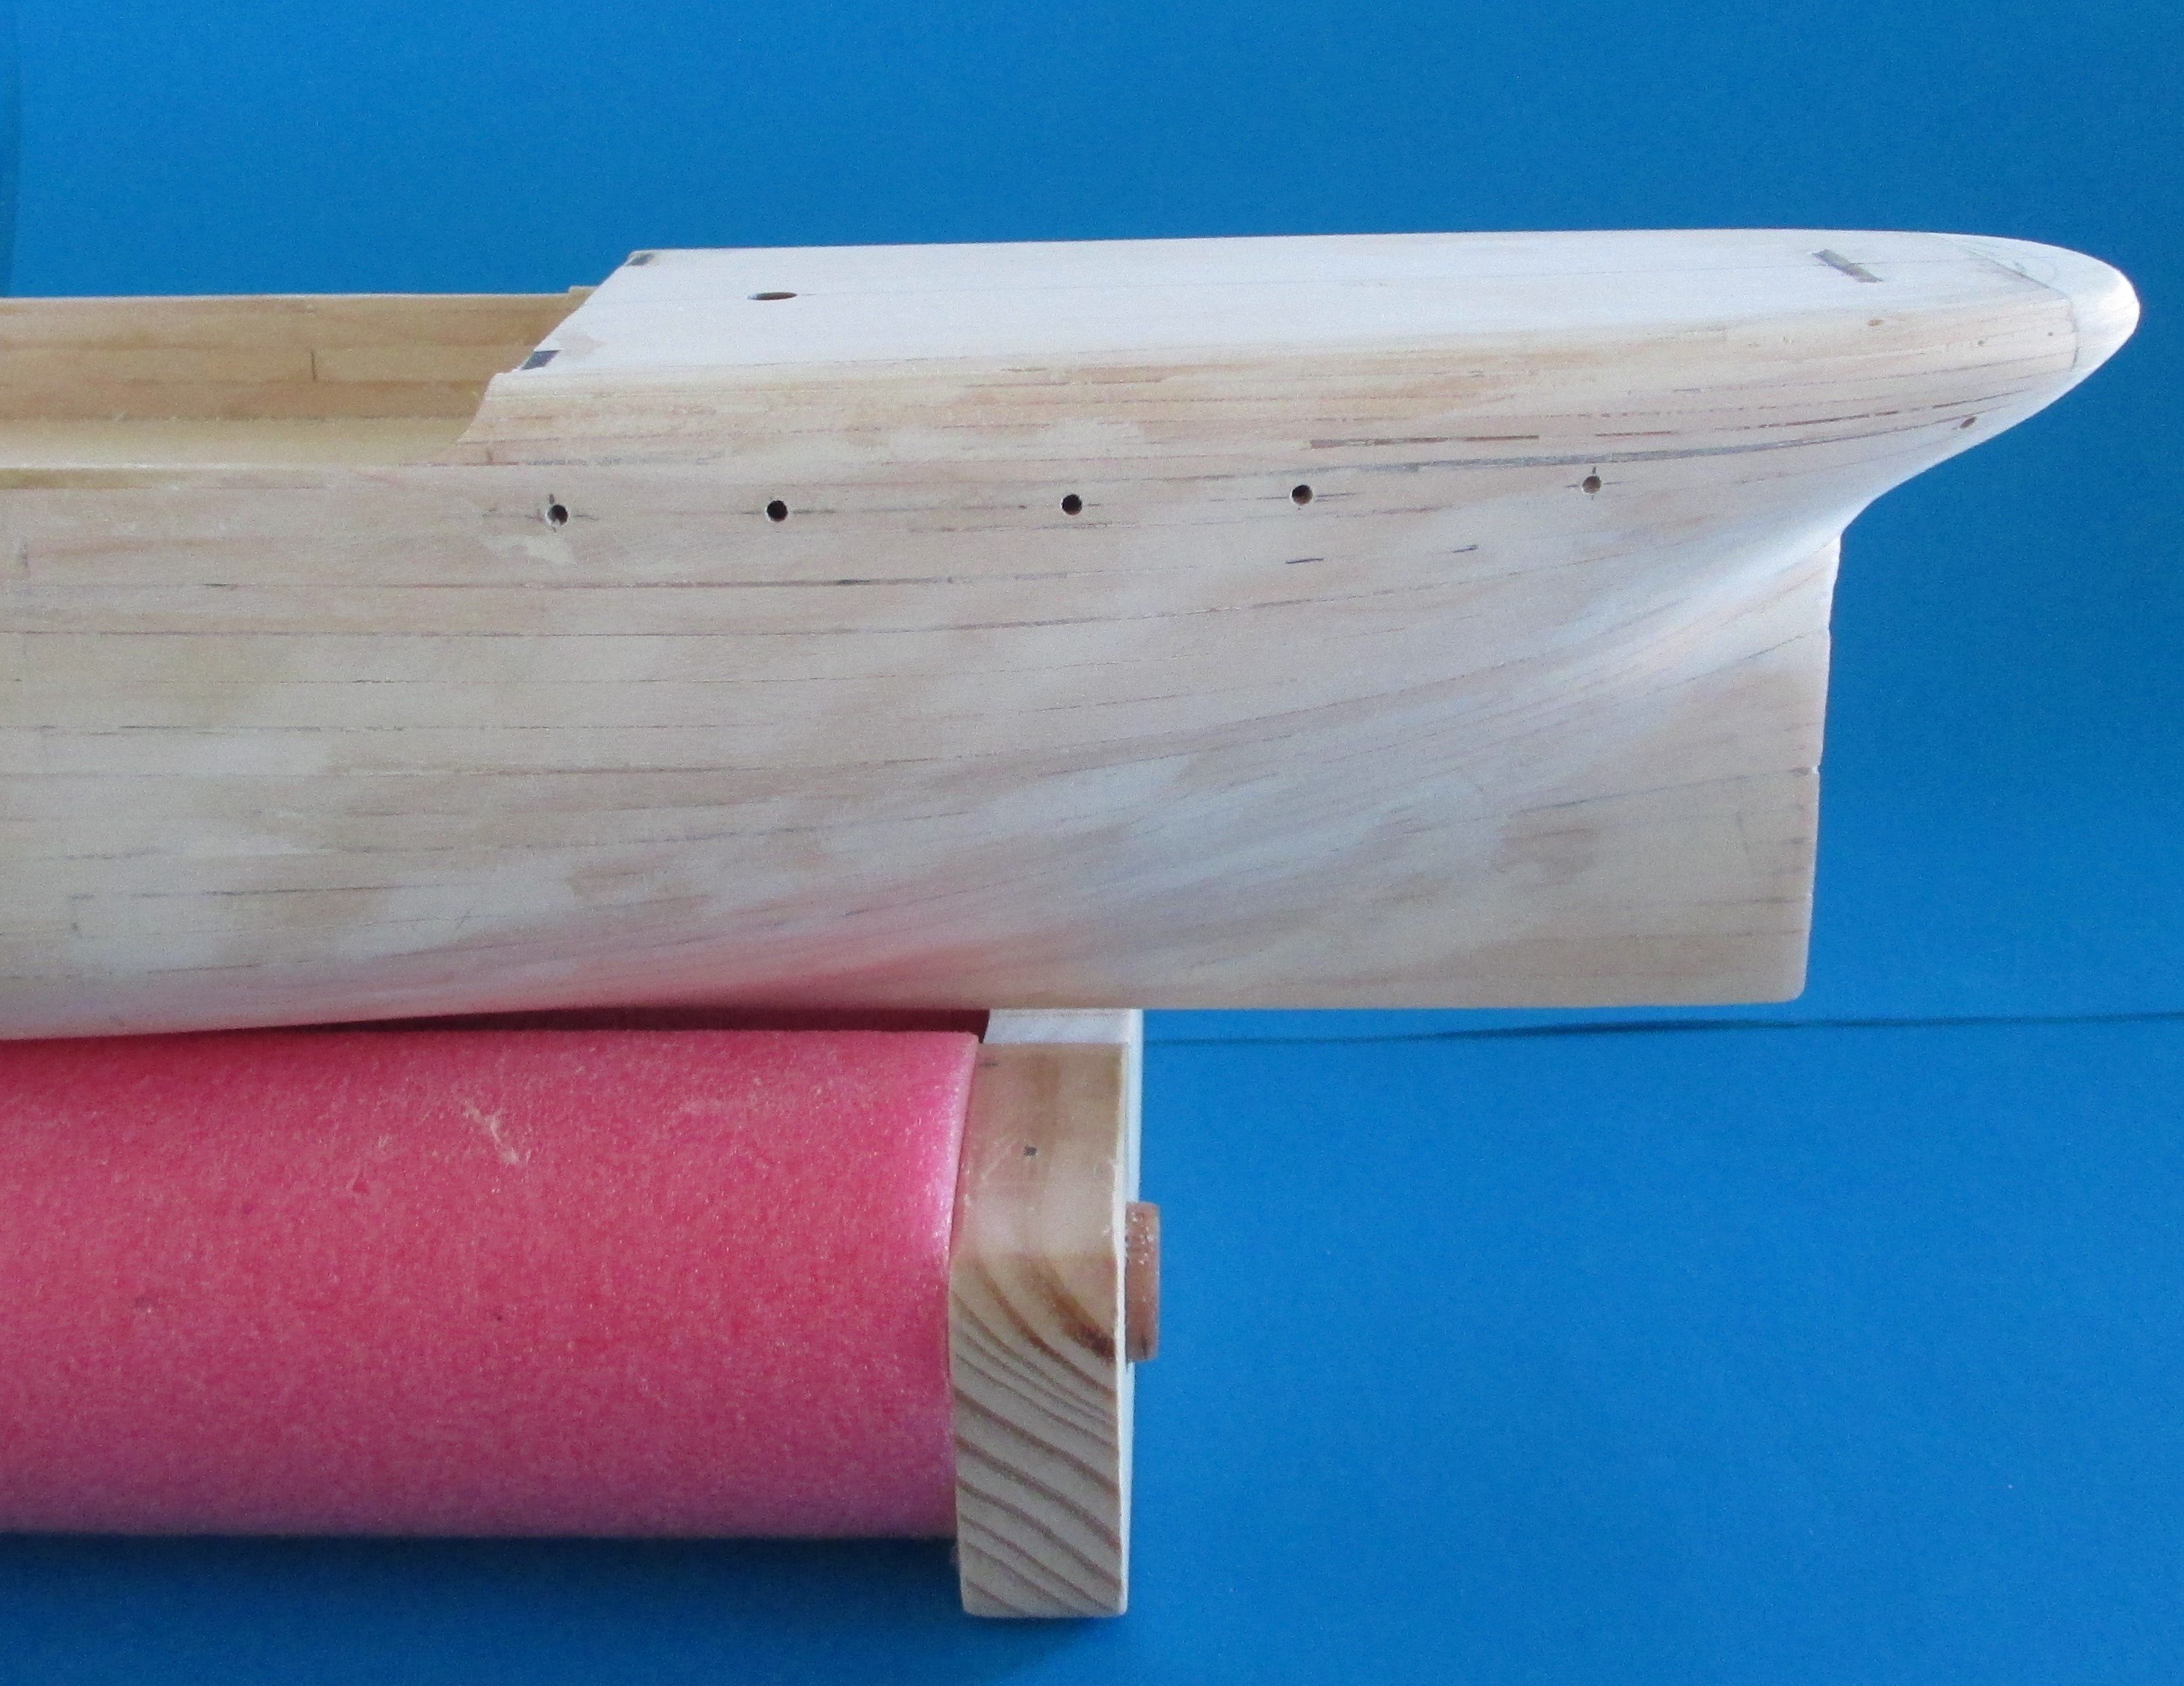
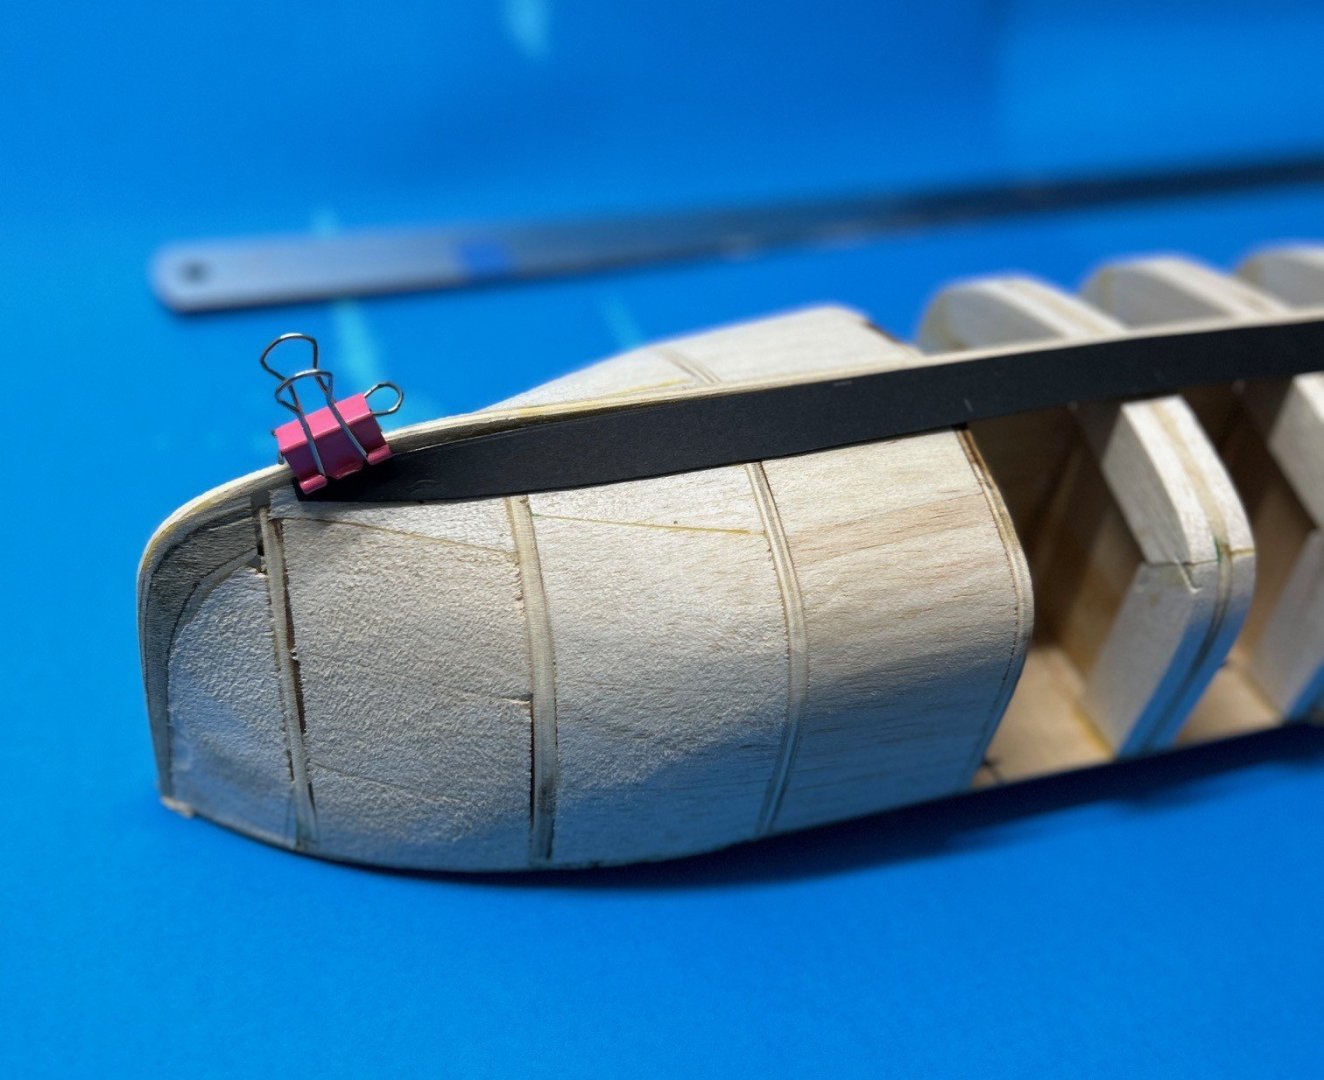
The lower hull planking is now complete. It was a steep learning curve that just had to be done to get some practical exposure to planking. While the result is a bit rough it is suitable for filling and painting black. Next step is to complete the upper hull planking.

-
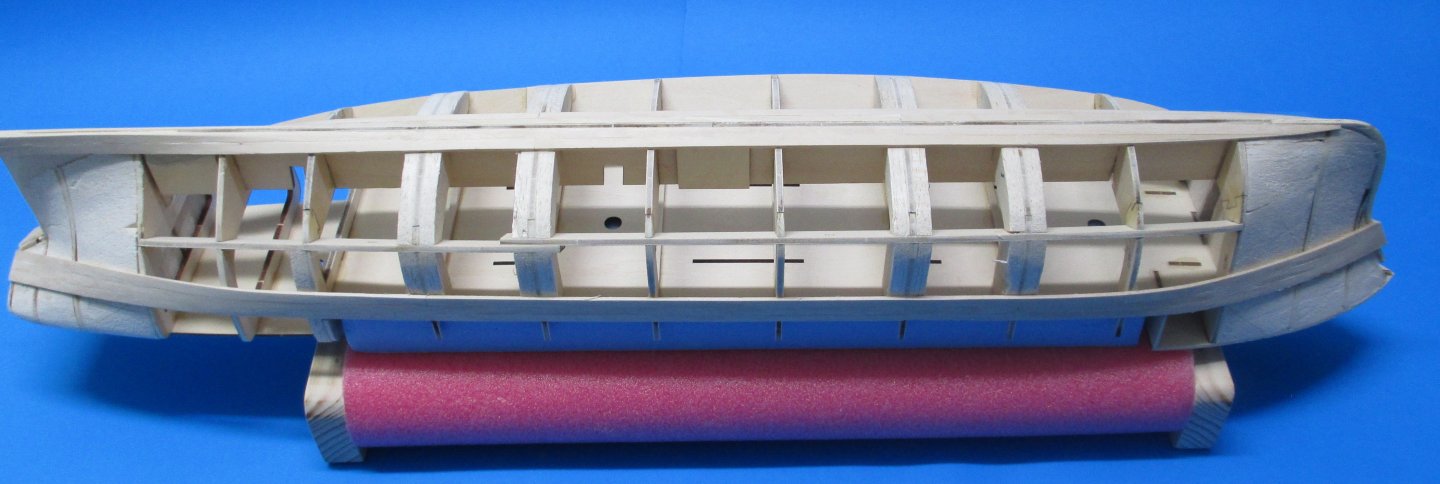
The hull planking is divided into 3 bands of 5 planks. Full width planks of 5mm will taper to 3.6-4.0mm at the stern and stem. As this is my first planking effort, the bands around the keel will be fitted first where they are least visible. I have finished the planks with thinned Wattyl sanding sealer to stop any dirt and grime buildup on the timber before fairing the hull. This sanding sealer powders well when sanded without clogging the sandpaper. The next big job is to build a quick release plank vice. The vice shown below is slow and tedious to use. The Veritas Miniature Block Plane shapes the planks with ease until you meet some of that curly grain. I keep the curly grain planks for straight lengths as it refuses to bend and be seated with accuracy. While this jig is functional, it is slow to get the plank out for measurement and back to the jig. I have some of these toggle clamps to use in the new plank jig. Hopefully I will get this done before XMAS when the noise and time constraints start.


-
Hello from Queensland Australia. My past has been with model Radio and Control Line aircraft. The Control Line models were scratch built F2B and Class B Teams racers. Recent years have also produced over 20 plastic cars and armour models Its now time for a change as I have been retired for a few years now and have time to devote to model ship building. I am currently have an AL Belem build in progress. It was chosen to get knowledge and experience with model ship building (and it will fit in my glass display cabinet). The AL BELEM build log has been created at BELEM by TannumIan - Artesania Latina - 1:75 Ian
-
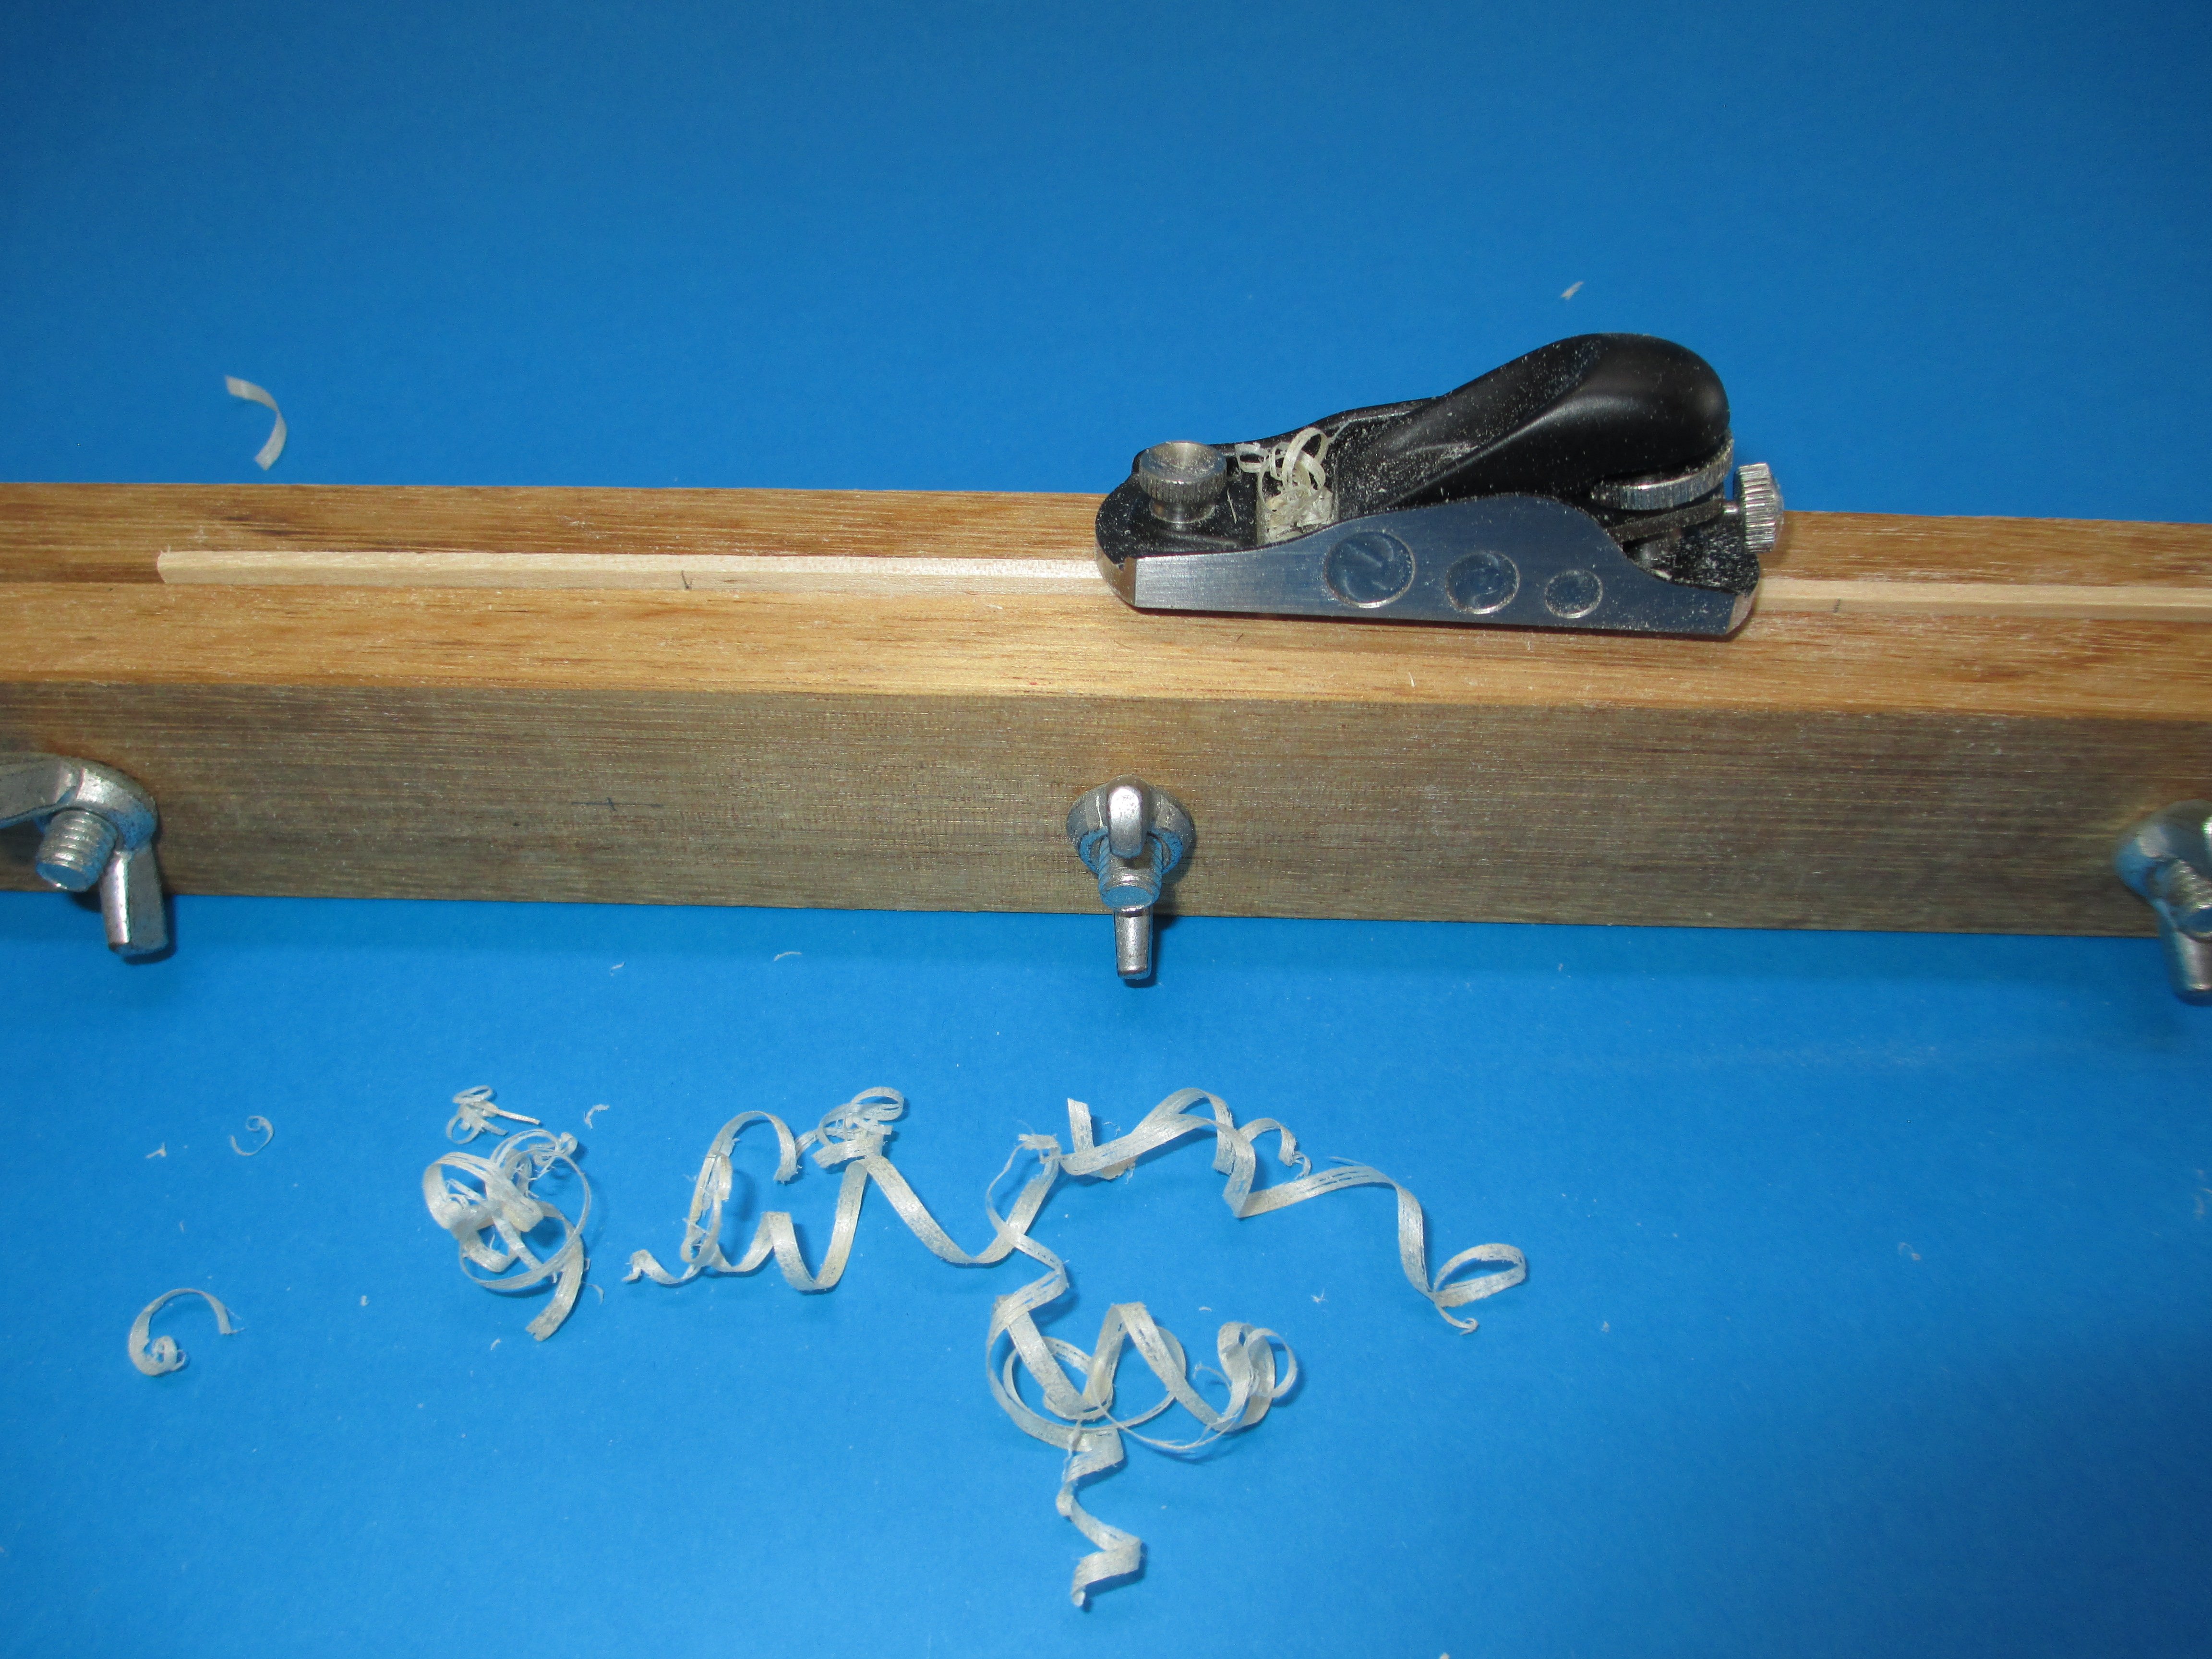
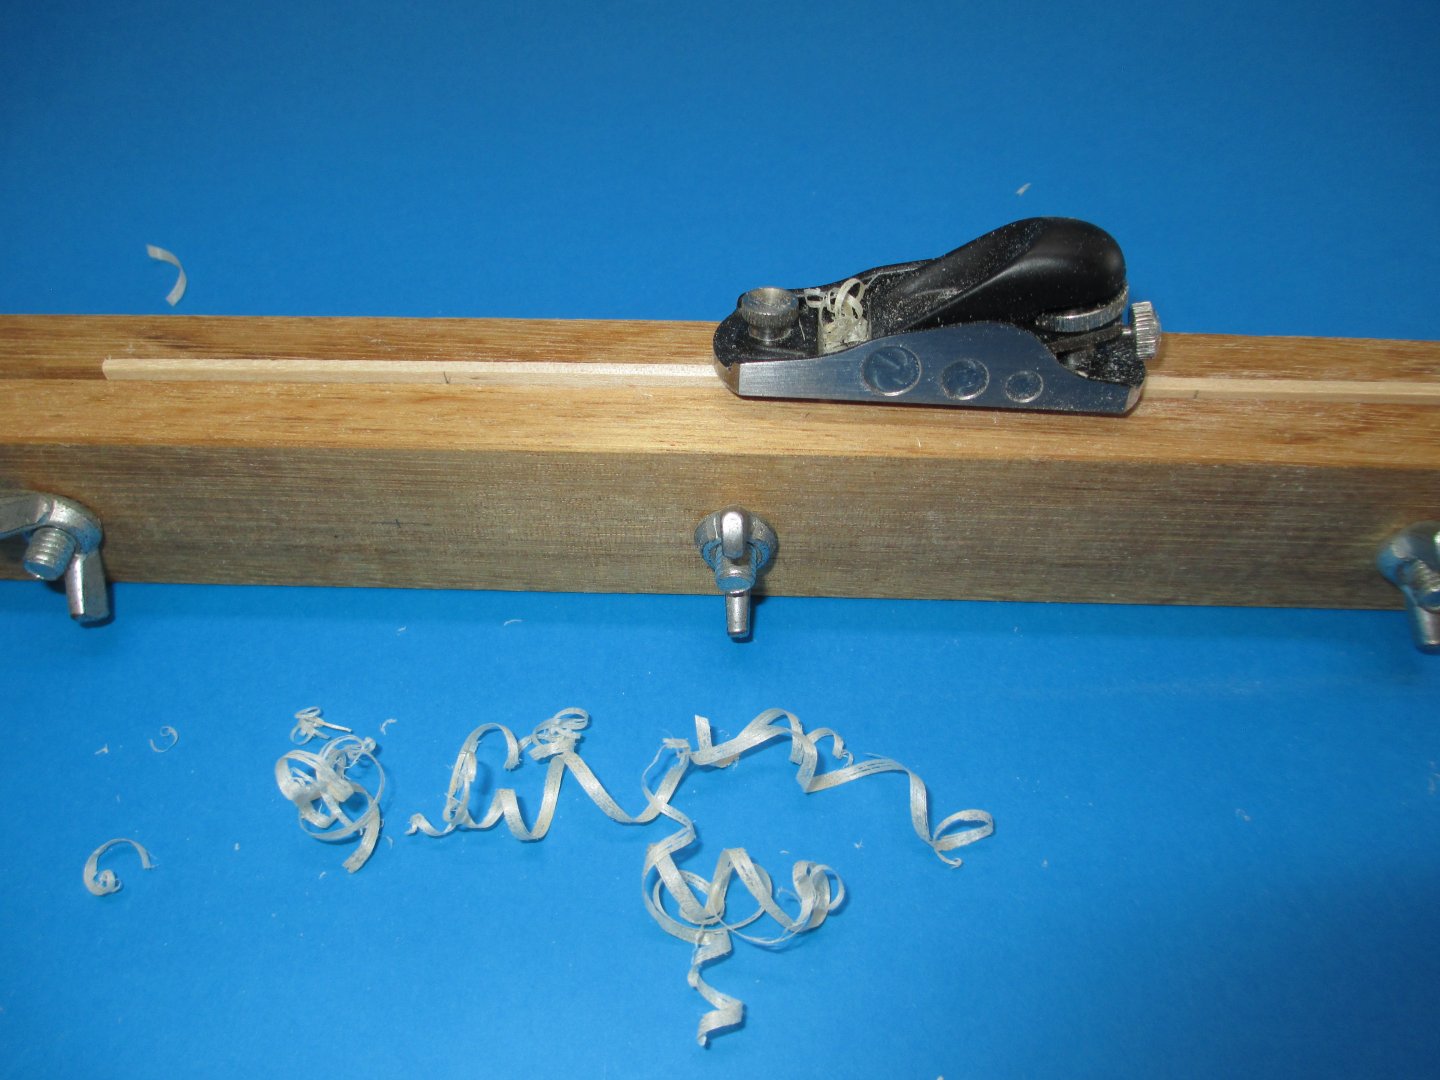
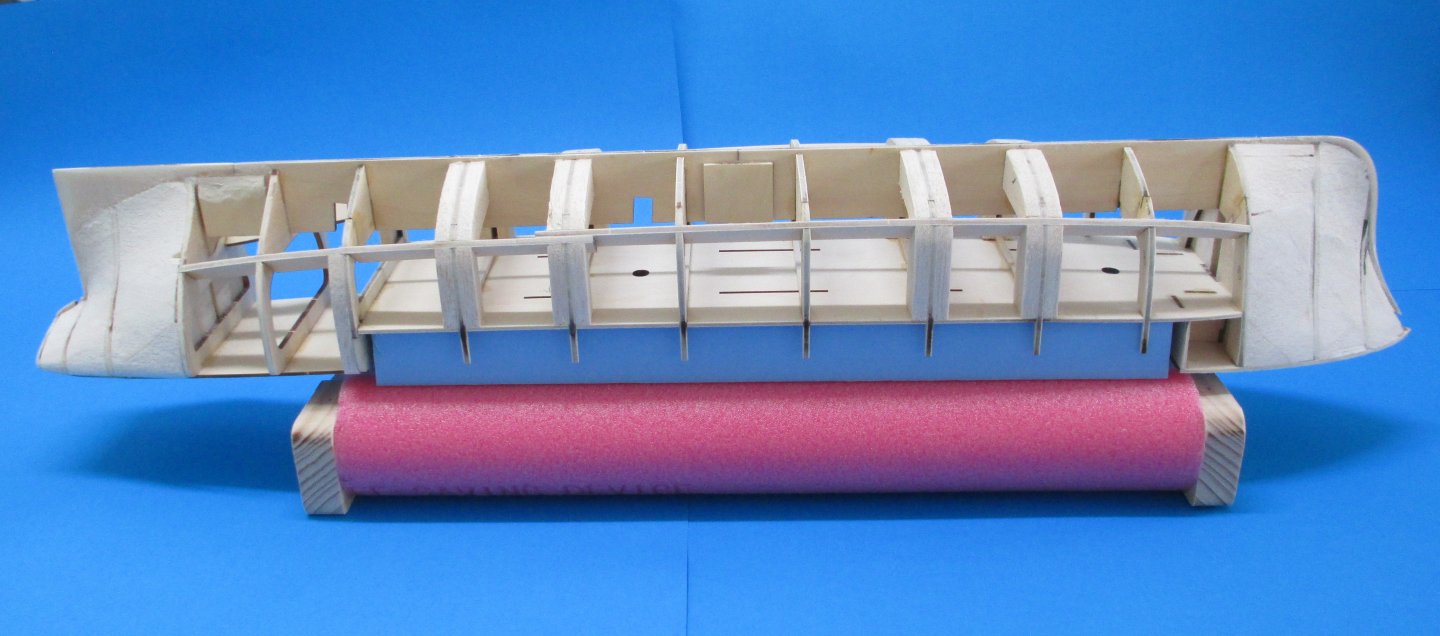
An invaluable tool. This old low angle plane was sharpened to 2000 grit using a Veritas sharpening jig. The plane was also flattened on a sheet of glass and many sheets of 400-800 sandpaper. Notice the fine shavings from the planks that were trimmed. The plane will be used to tapper the planks as the finish if far better than a knife or sandpaper. For curved planks the Veritas Miniature Low Angle plane is an excellent plane. Ready for lining out and planking.
-
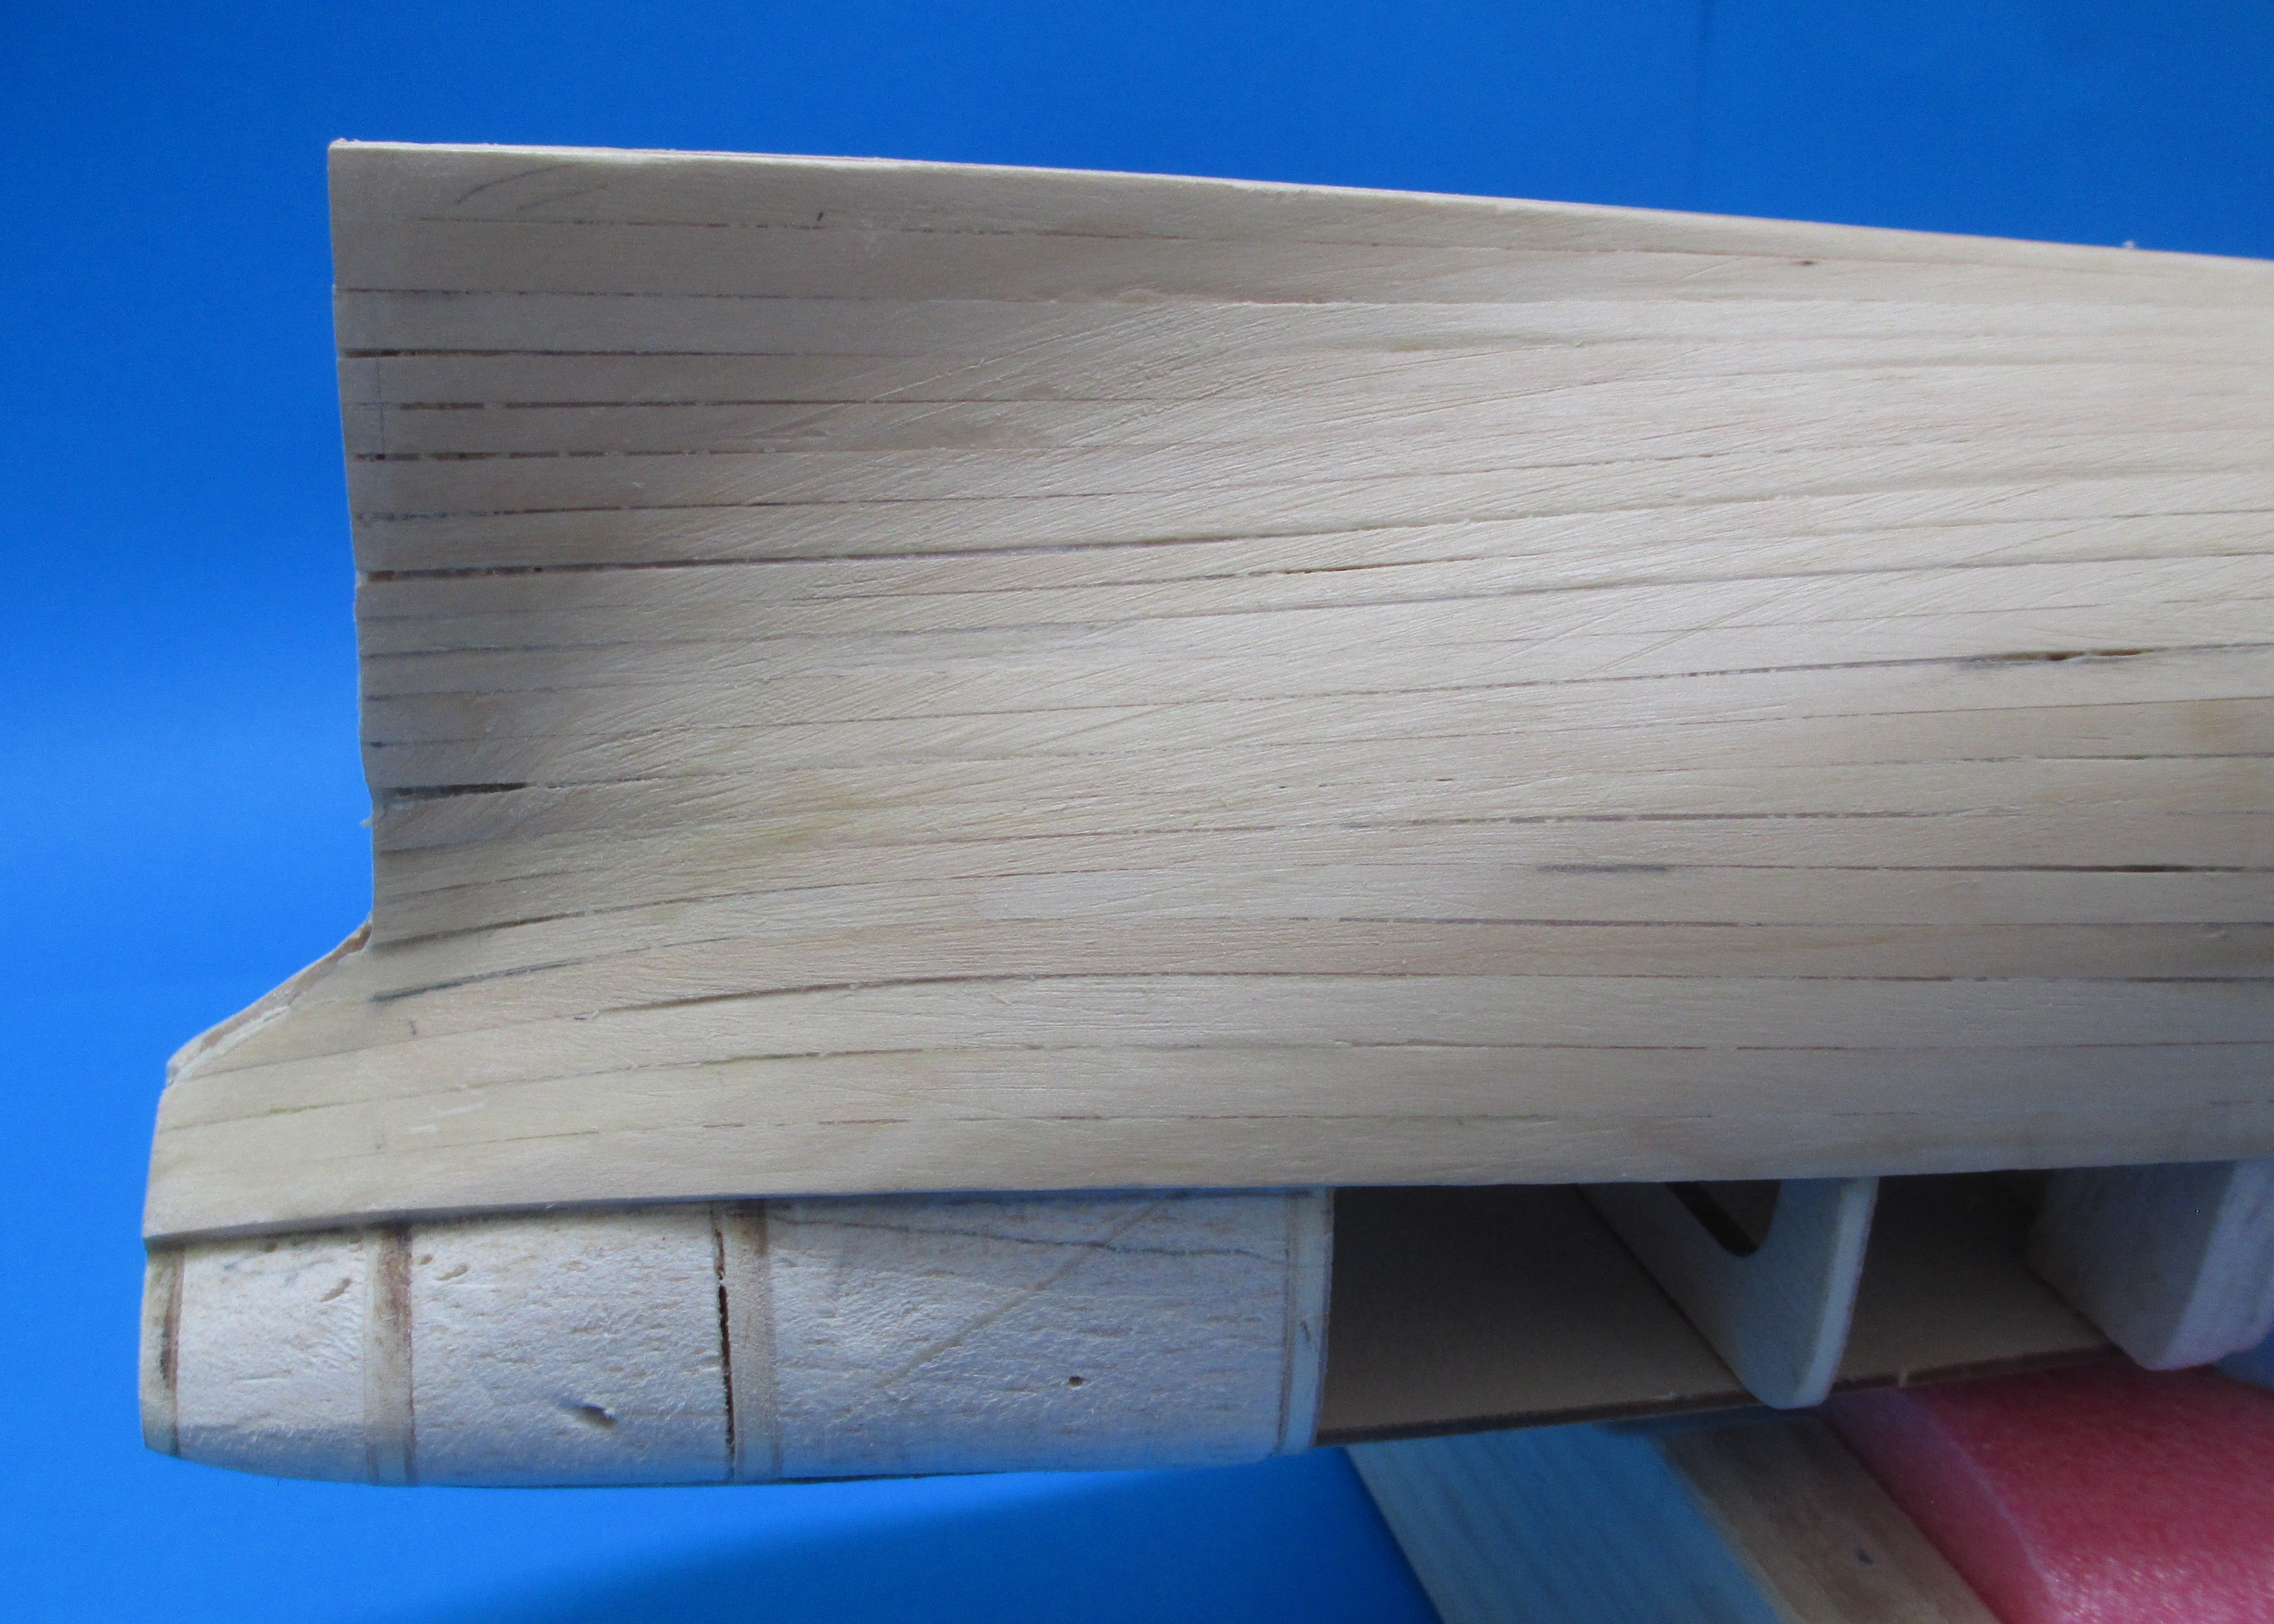
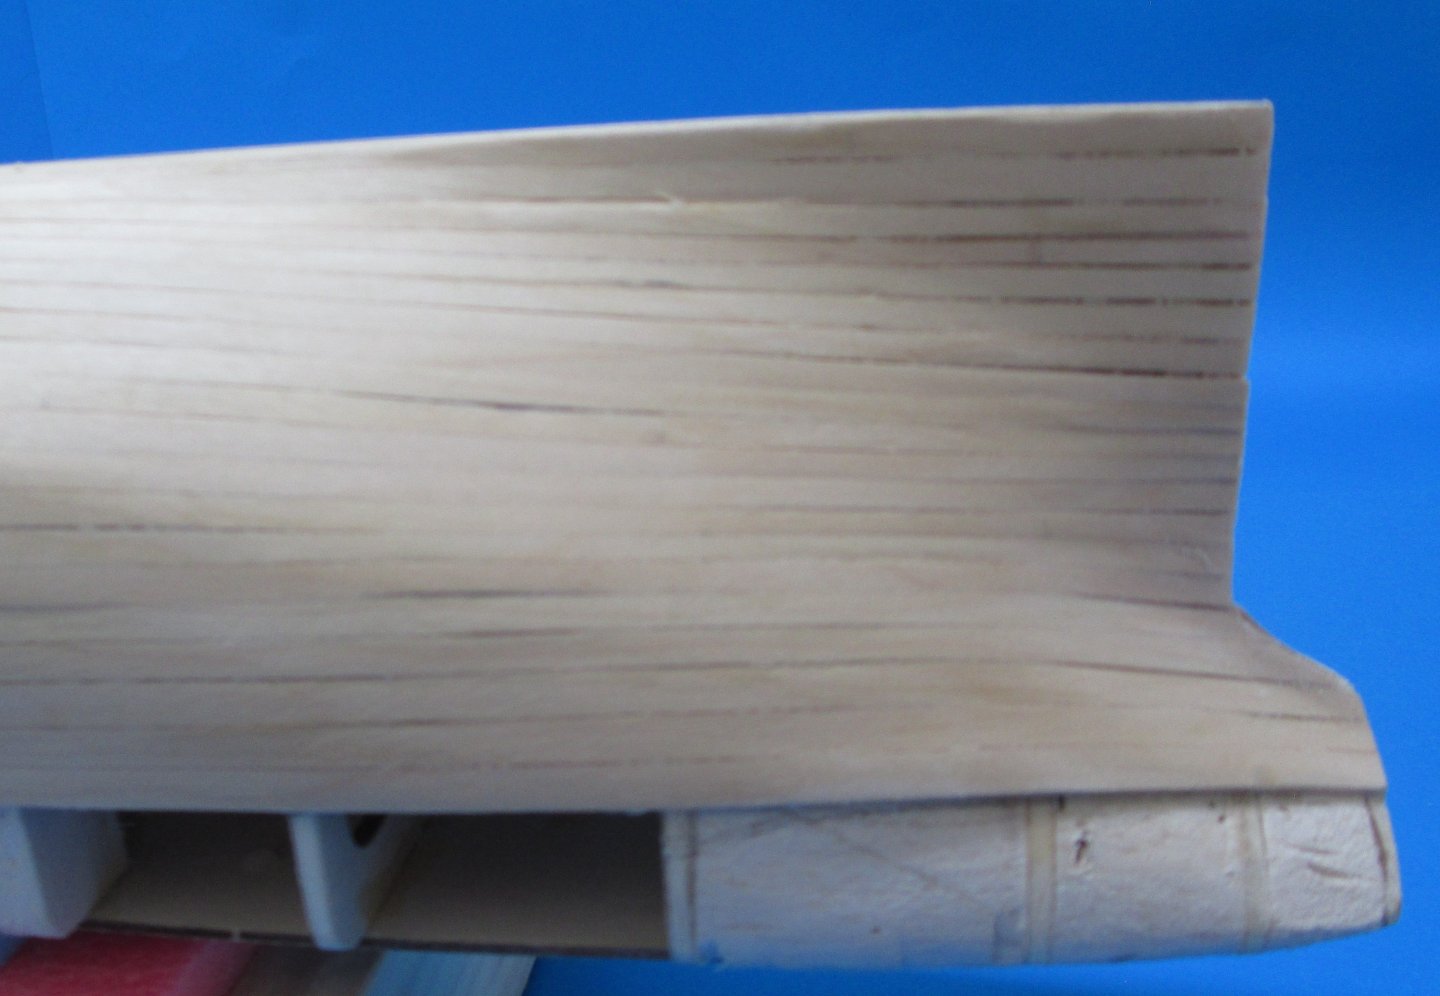
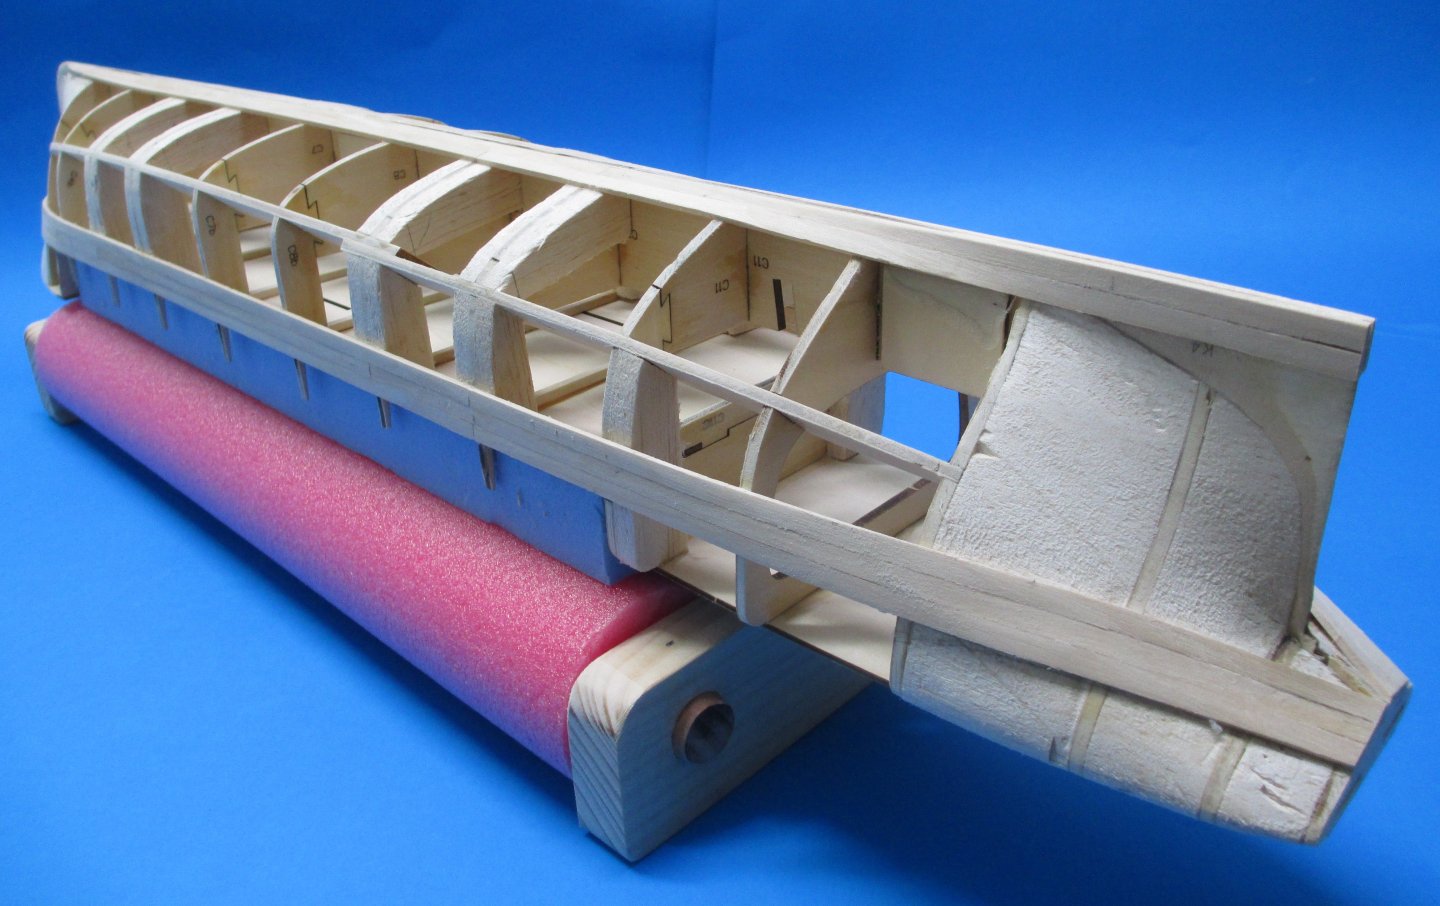
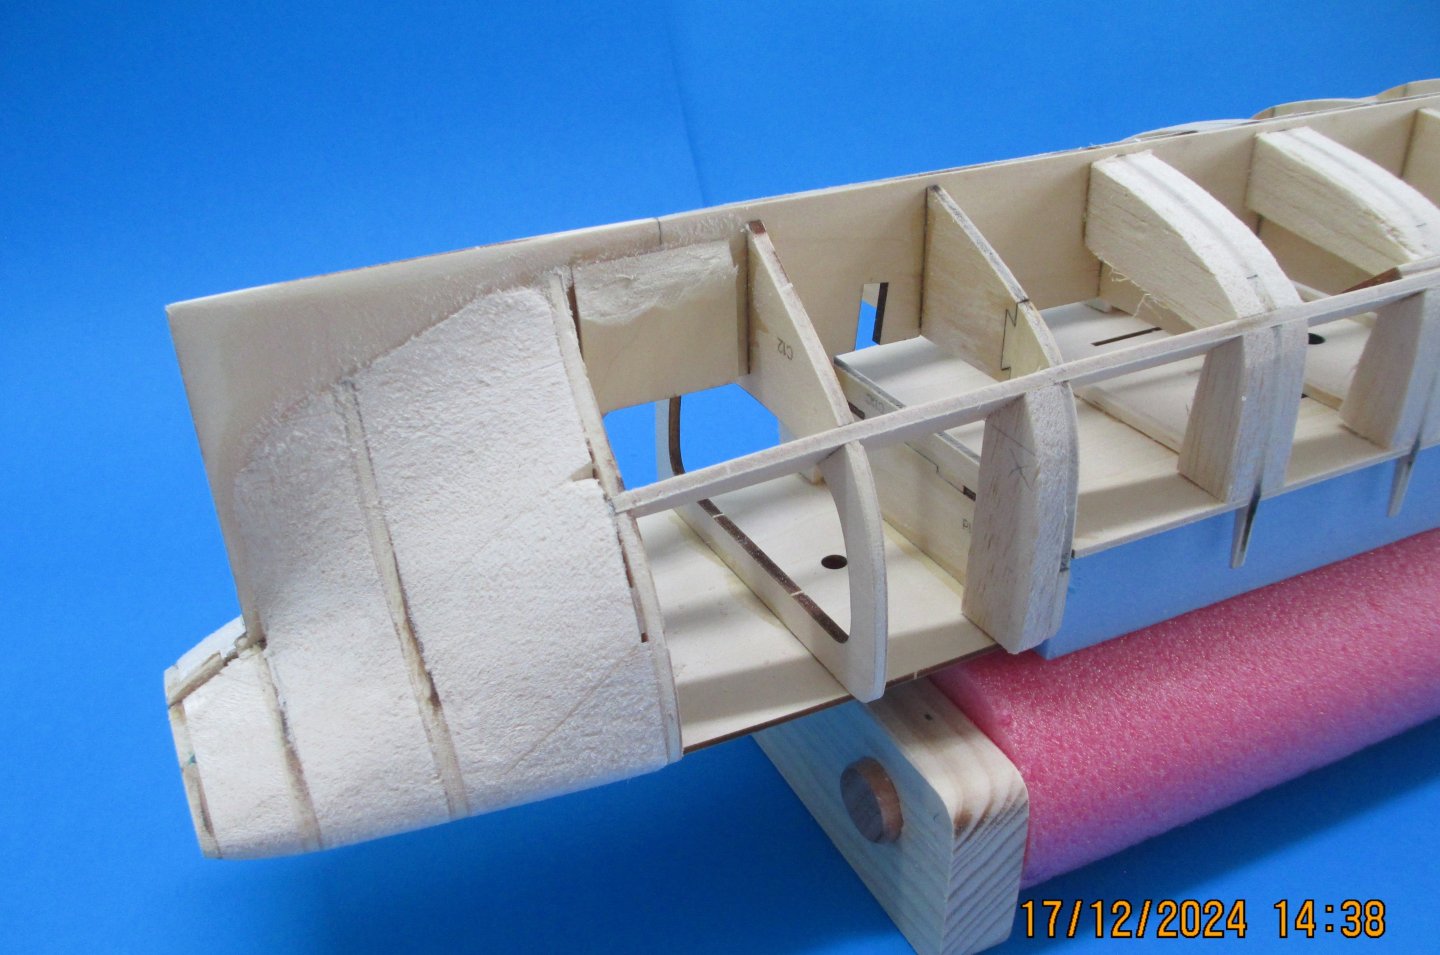
The deadwood edges were thinned to under 1mm in order that the planks are below the 3mm keel and rudder. The 2mm planks will be sanded to about 1mm on the edges.
-
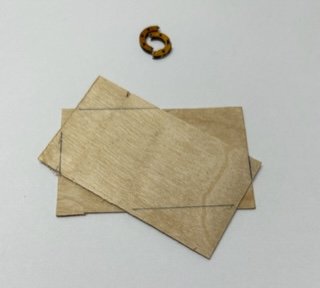
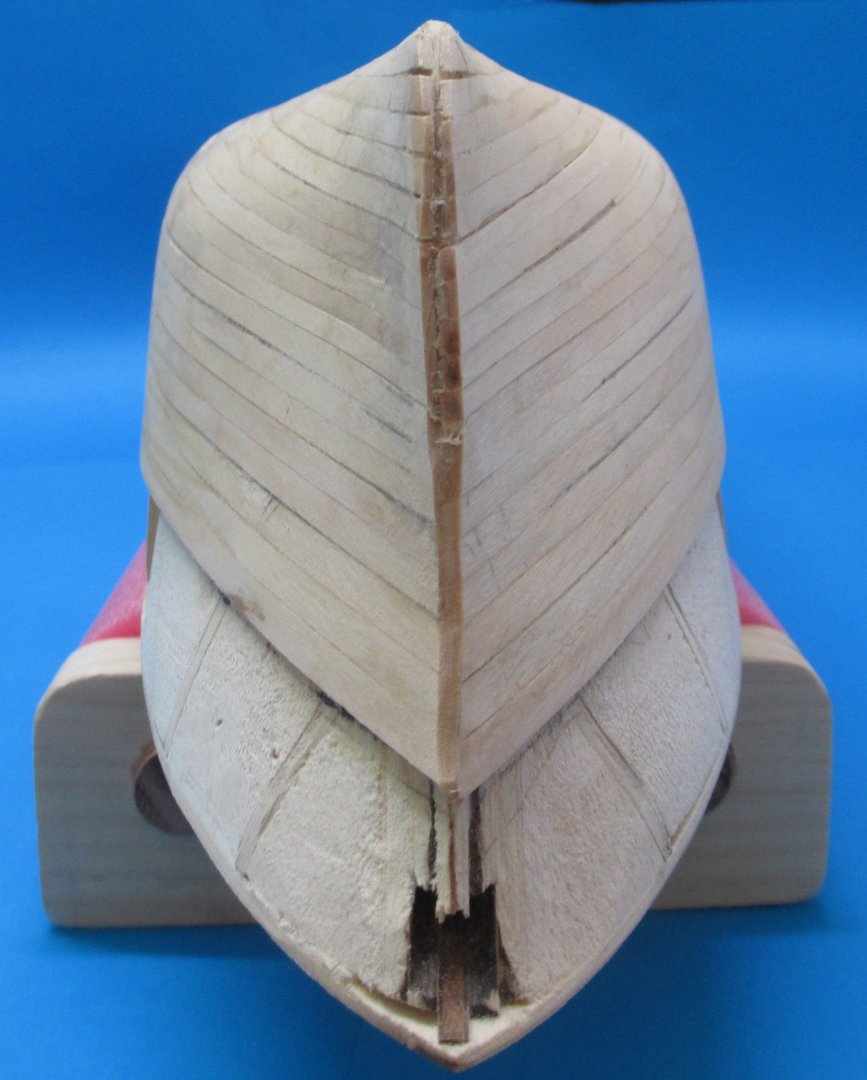
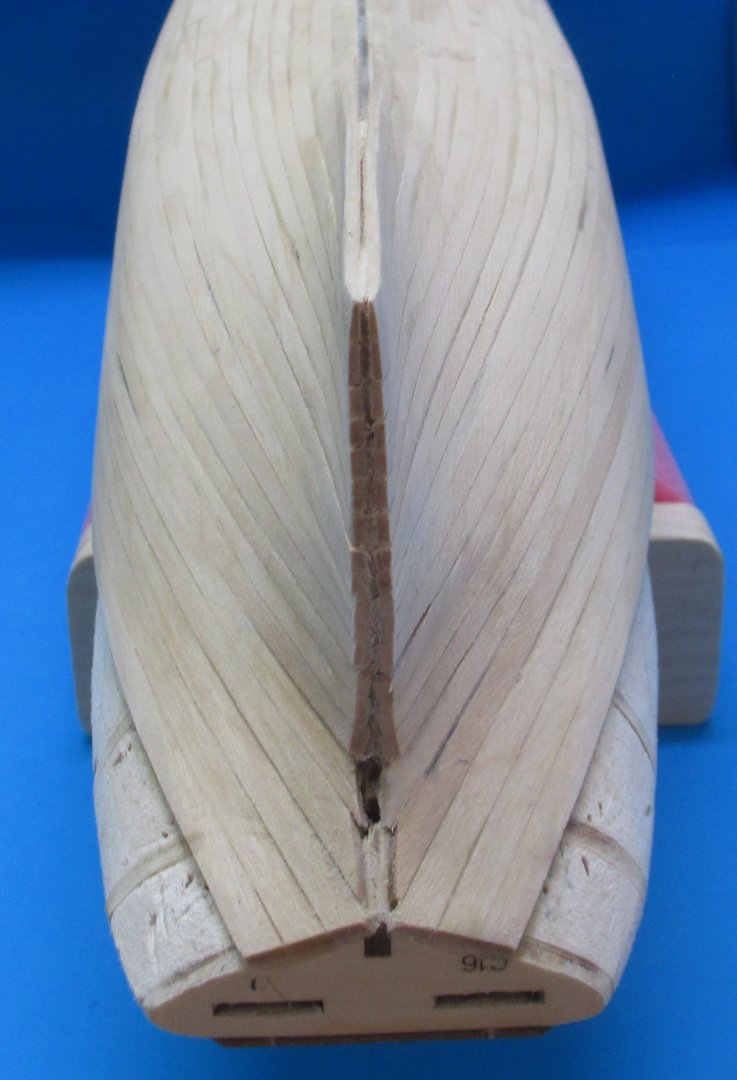
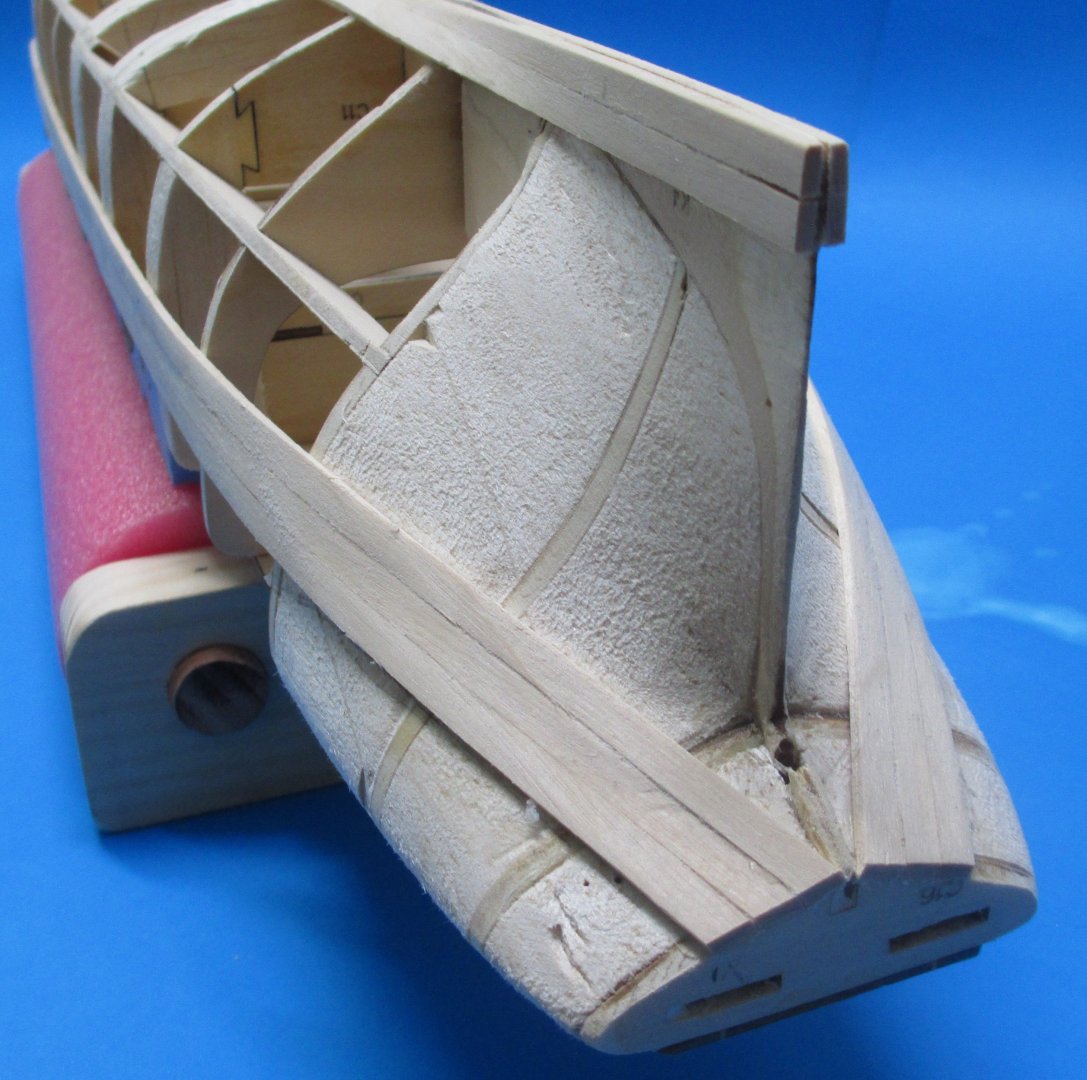
The garboard plank caused me grief as I could not see how to make it. The forums seem indicate that this is a common concern. I eventually made a cardboard template and then set about replacing the carboard with planking. The bow section was two planks glued together and cut to shape with the bandsaw. The garboard was kept away from the vertical section of the stem and low on the deadwood.


-
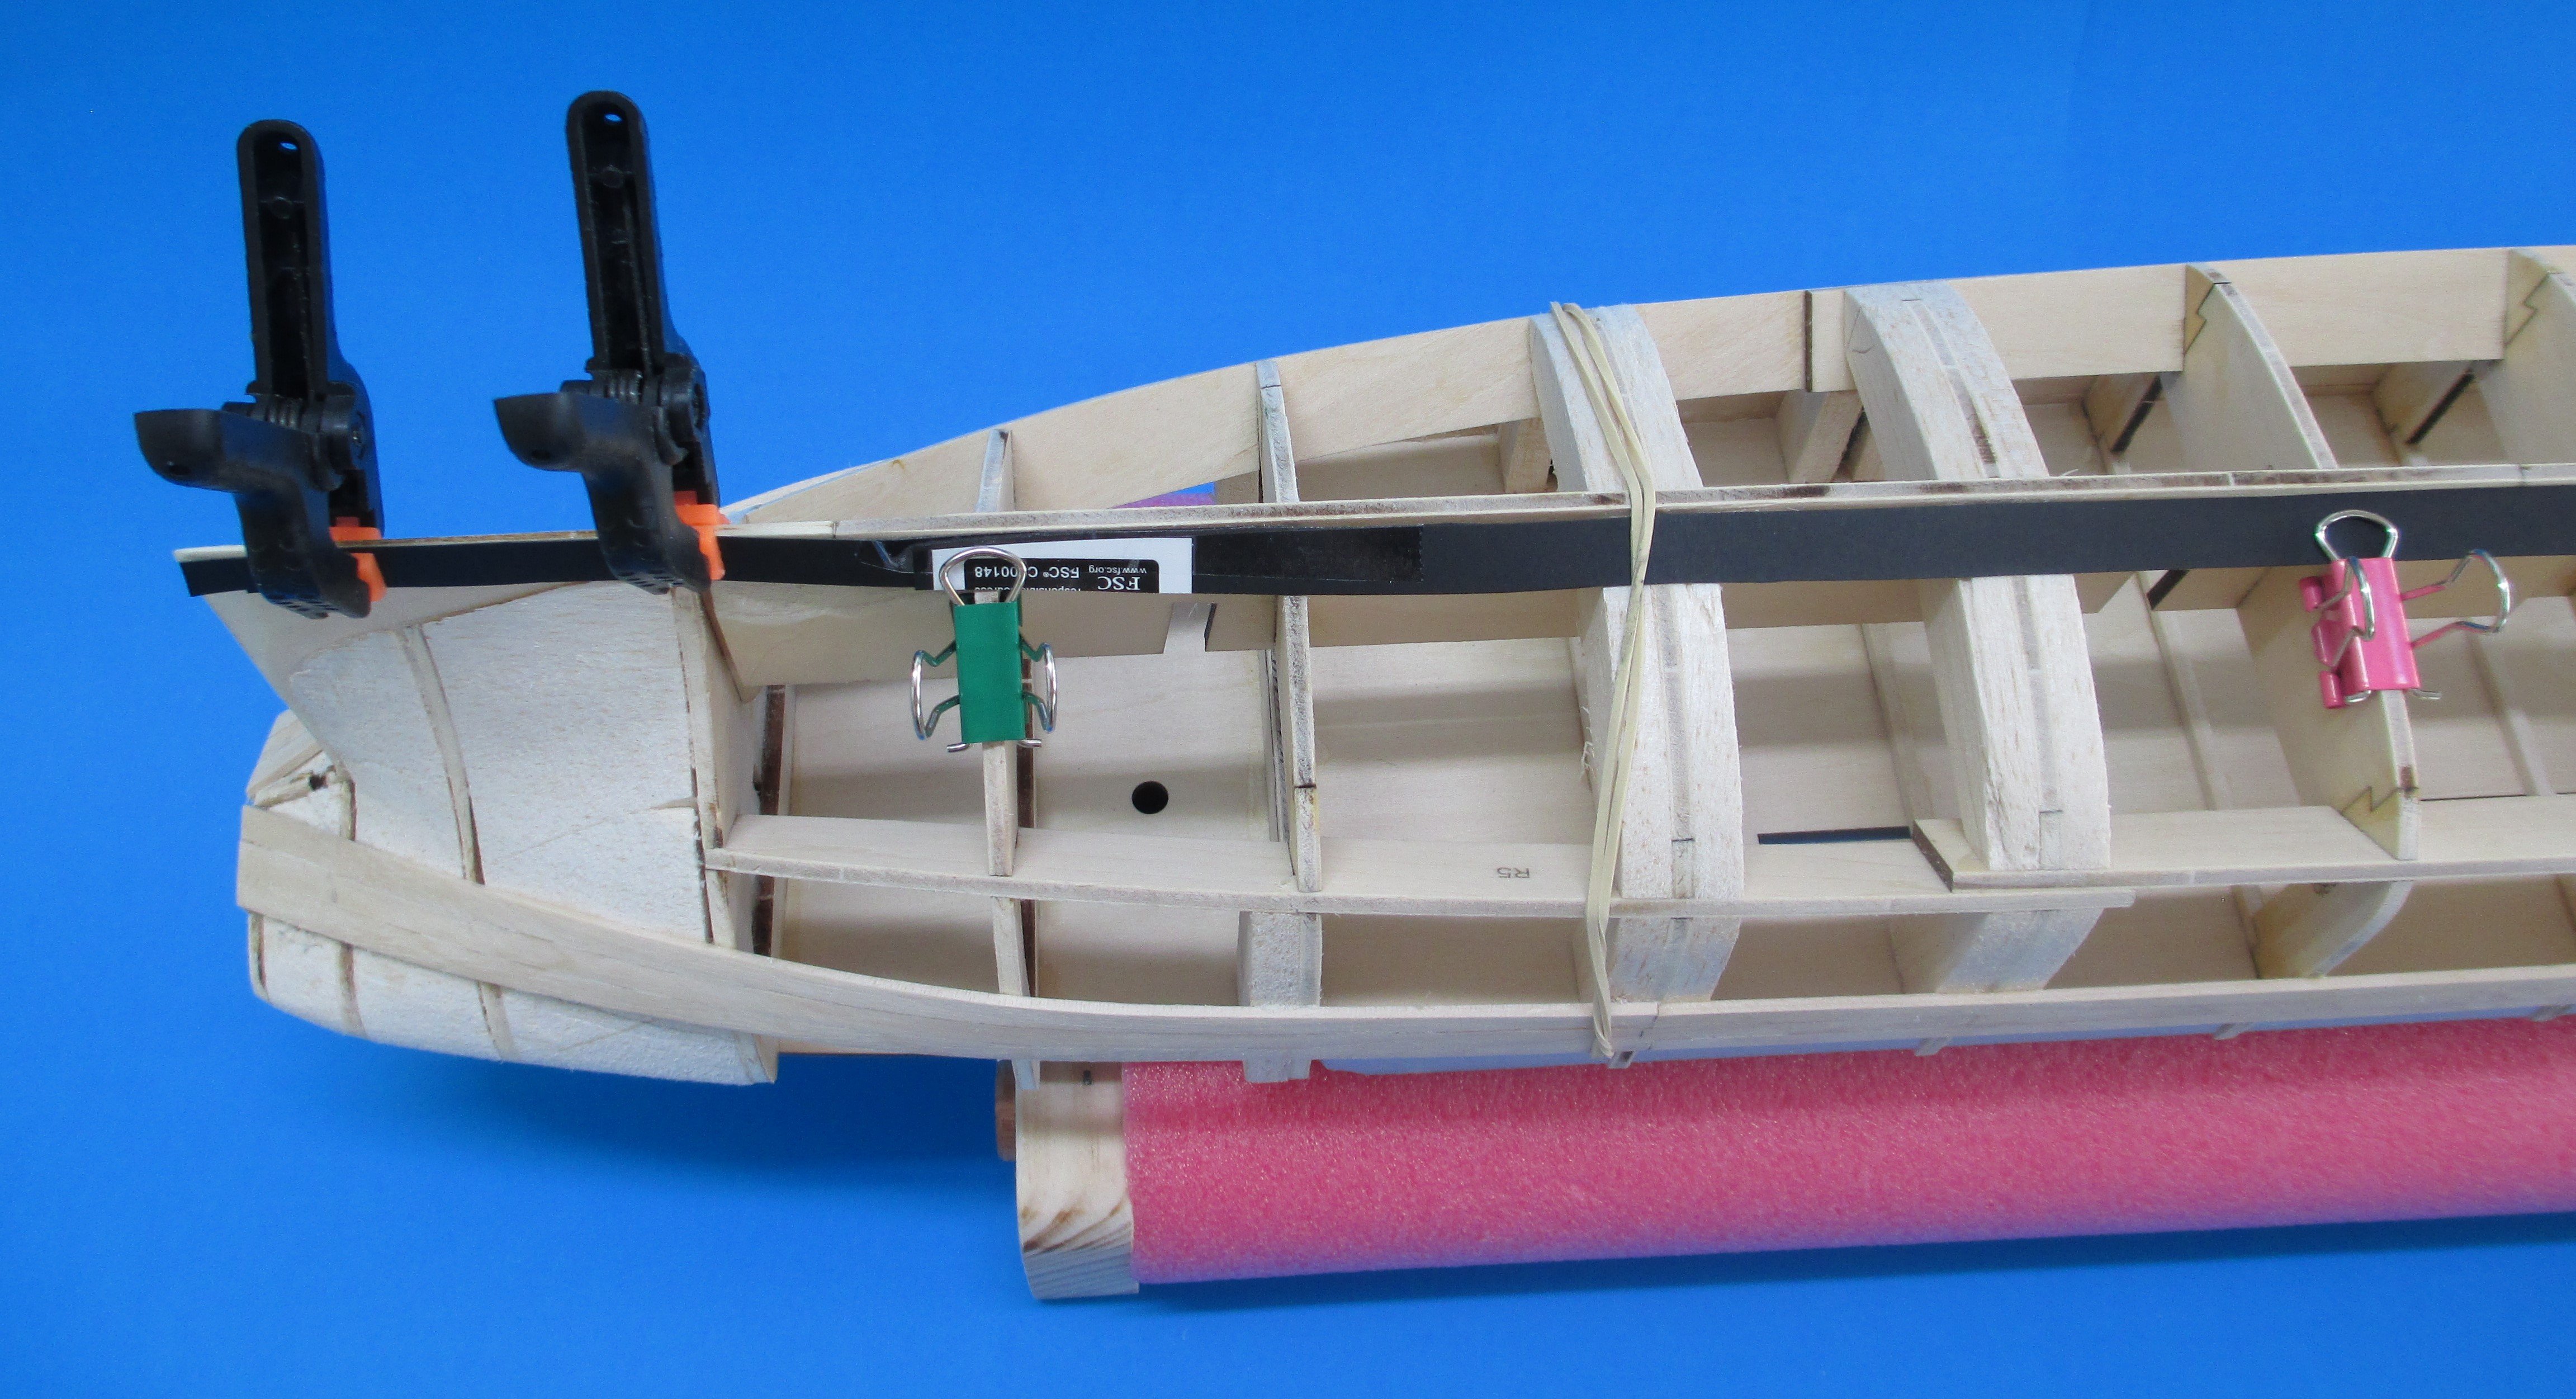
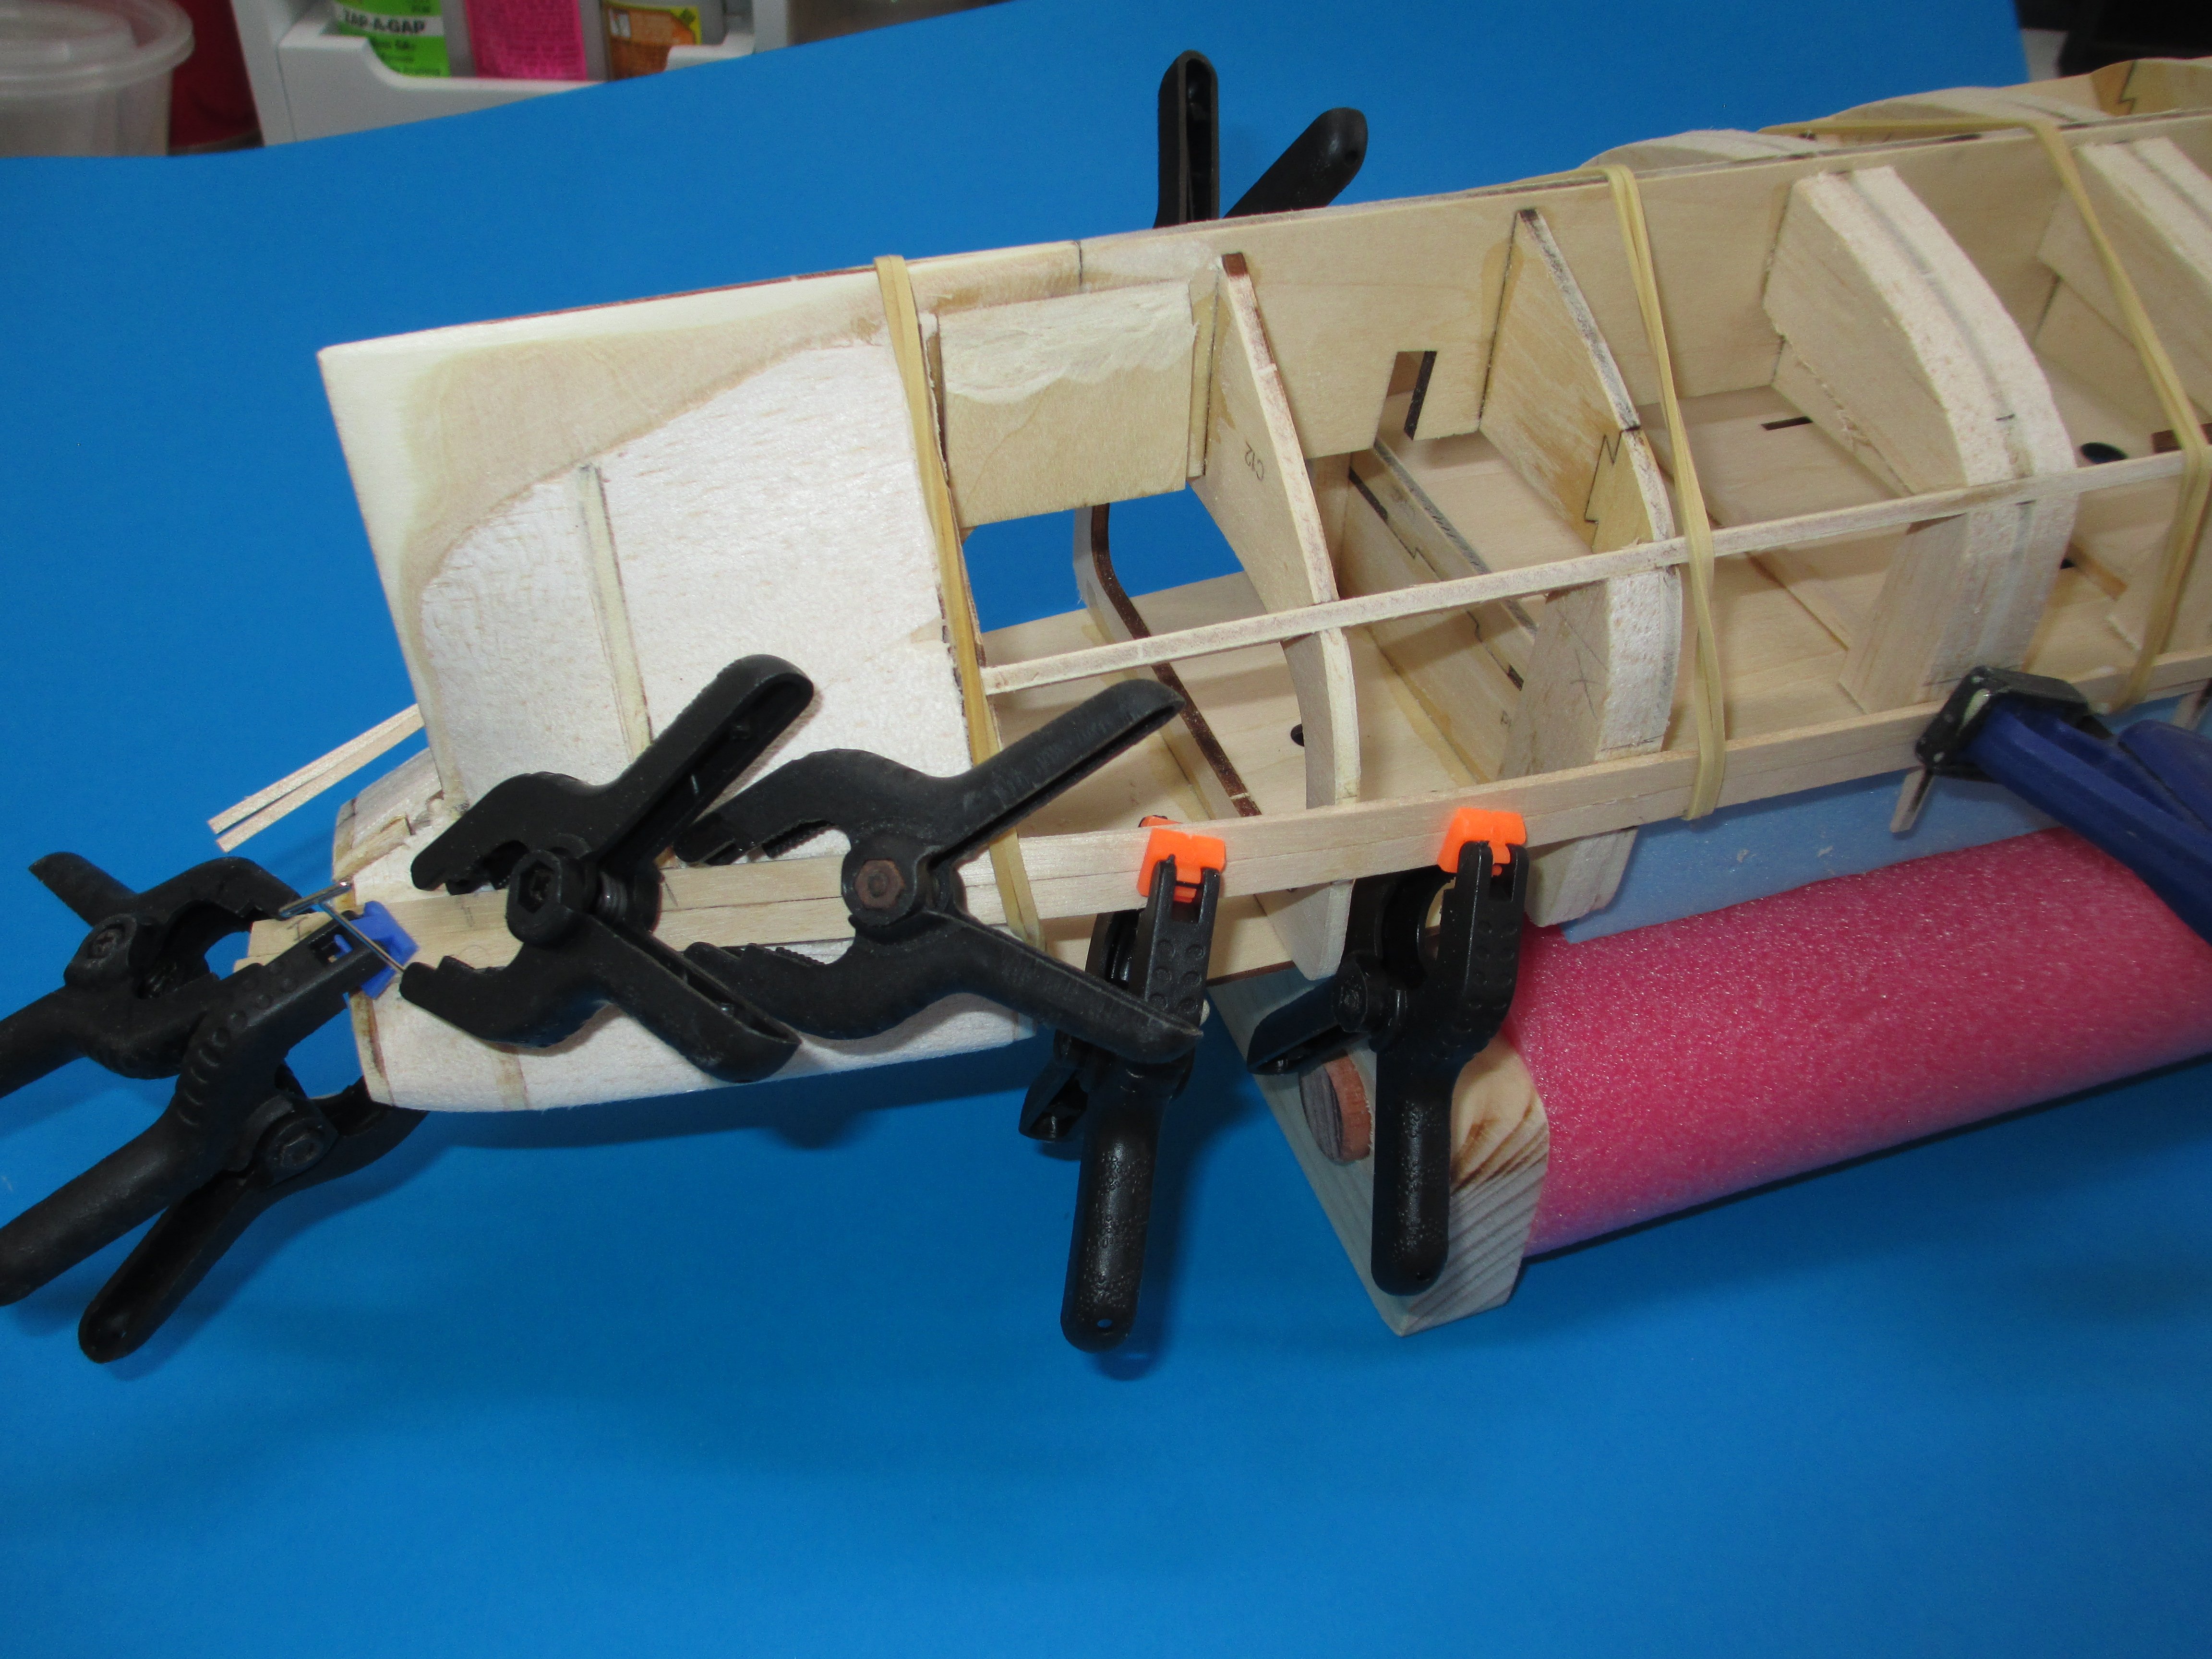
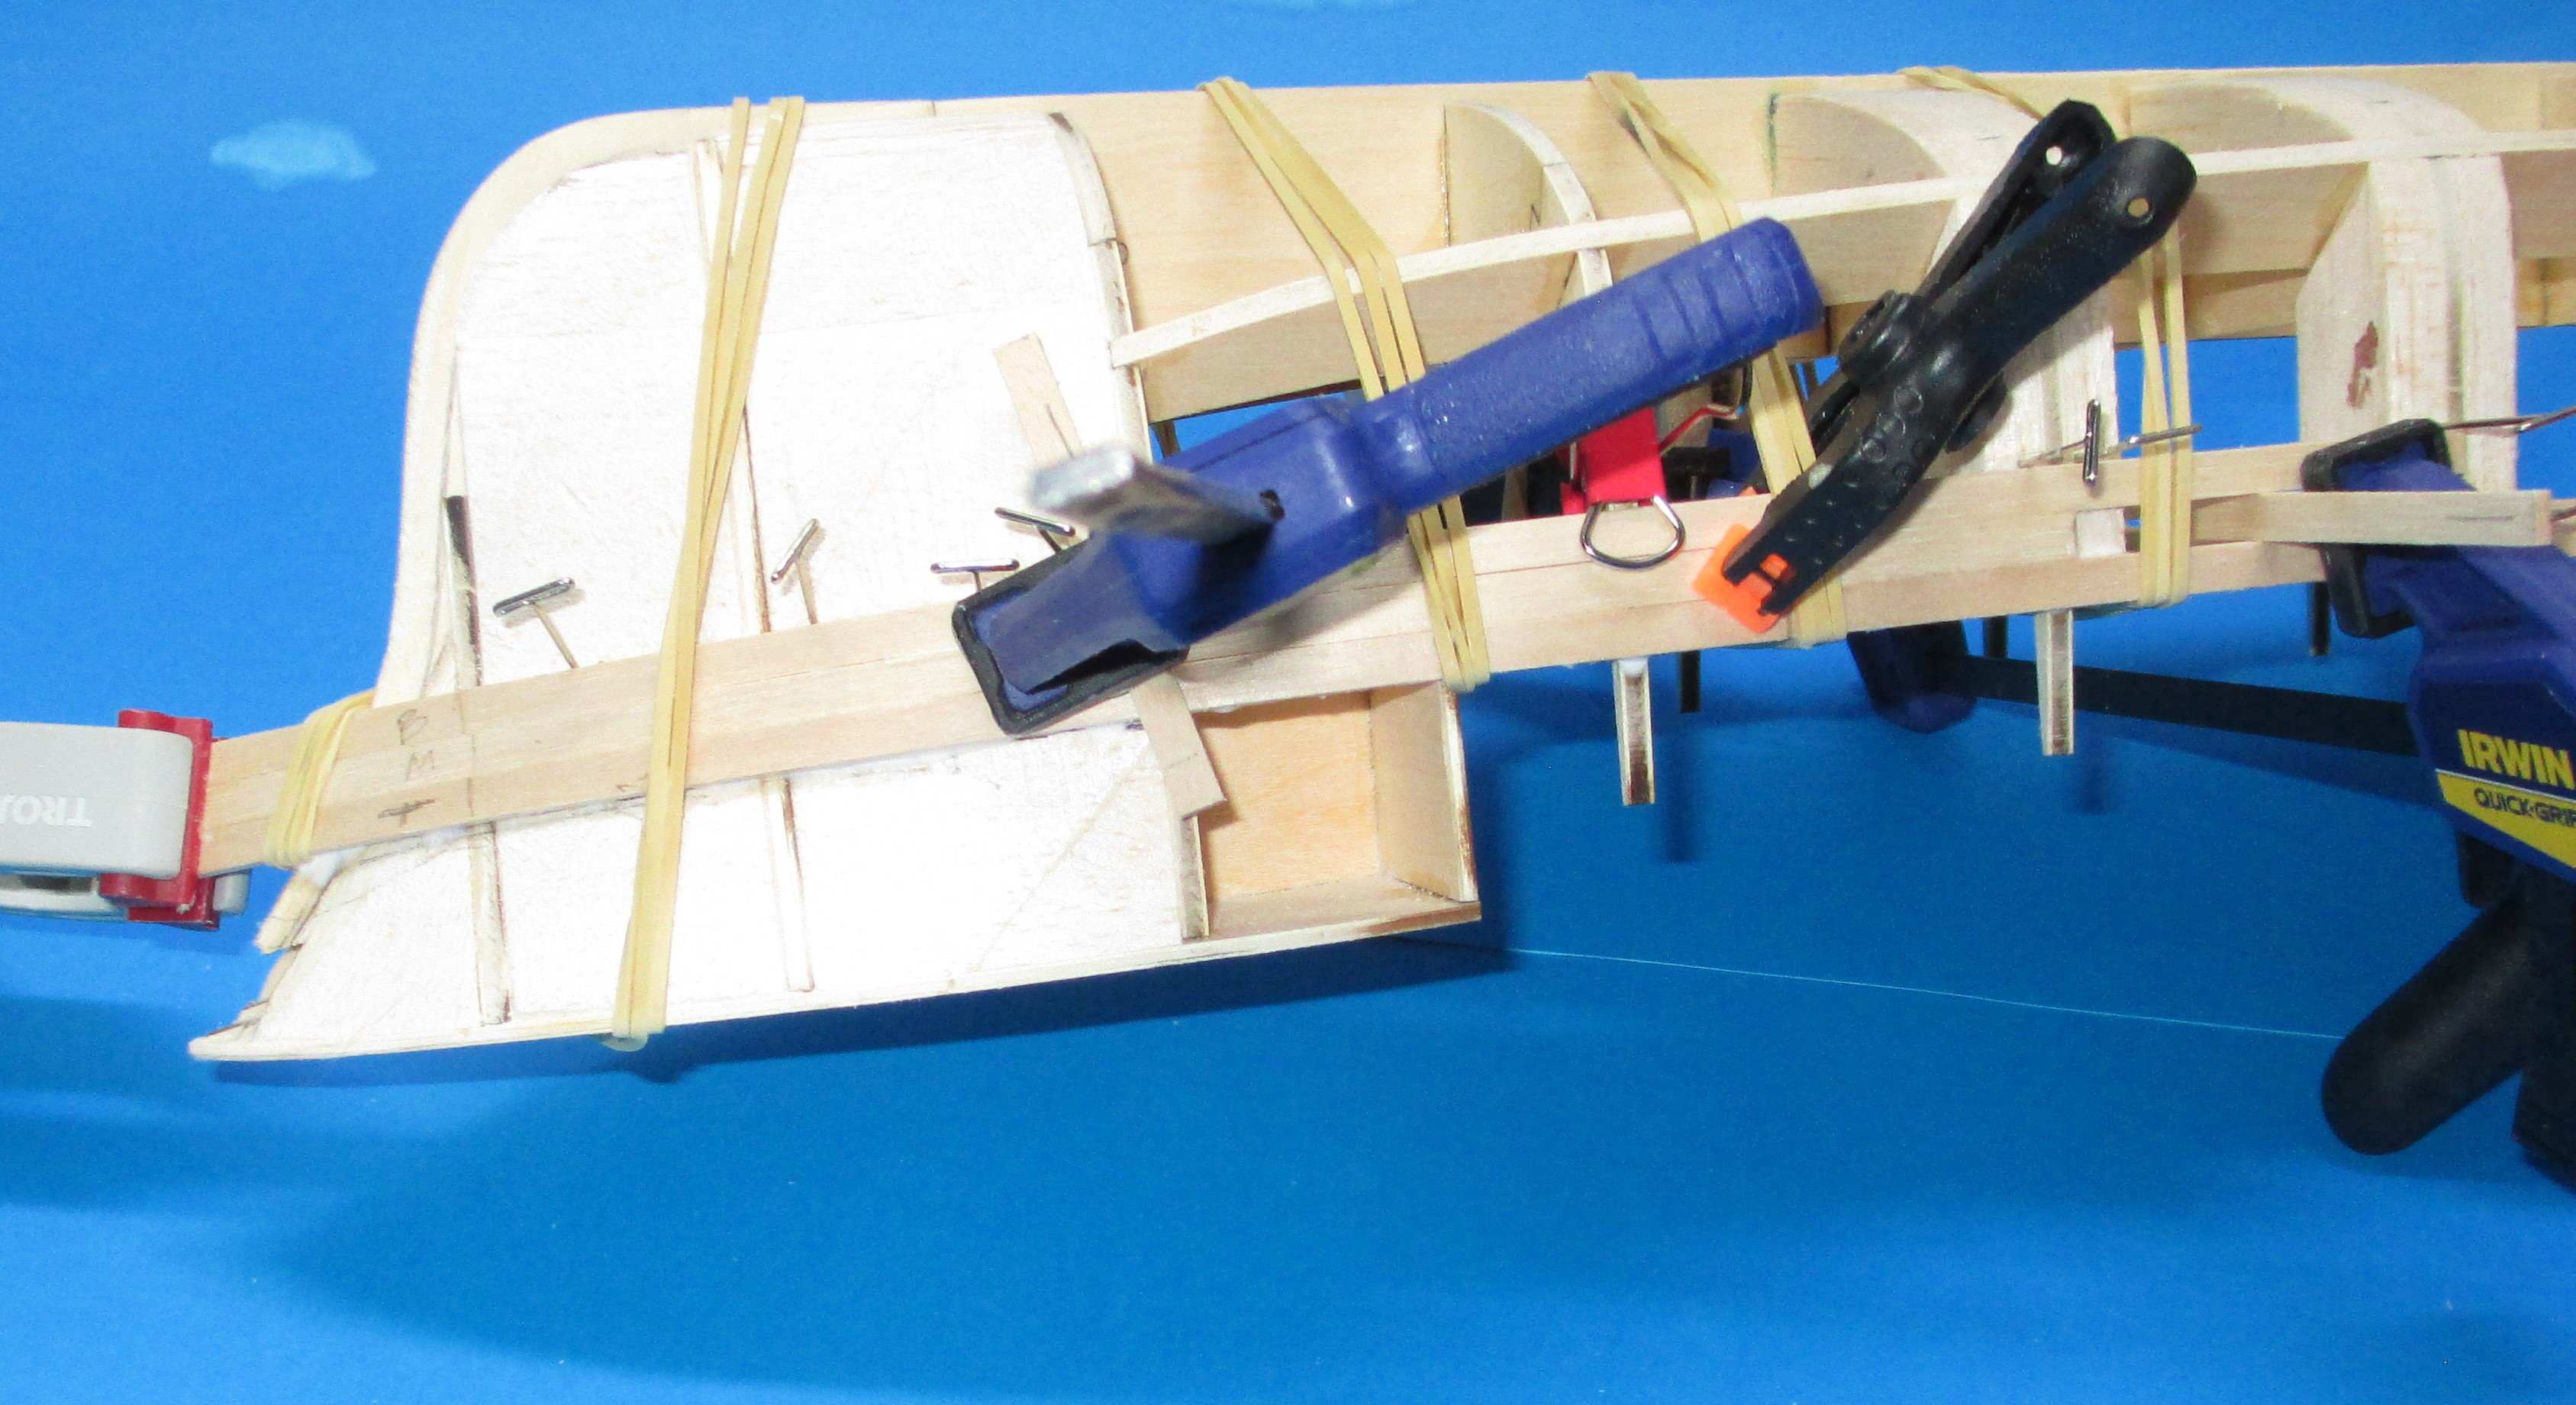
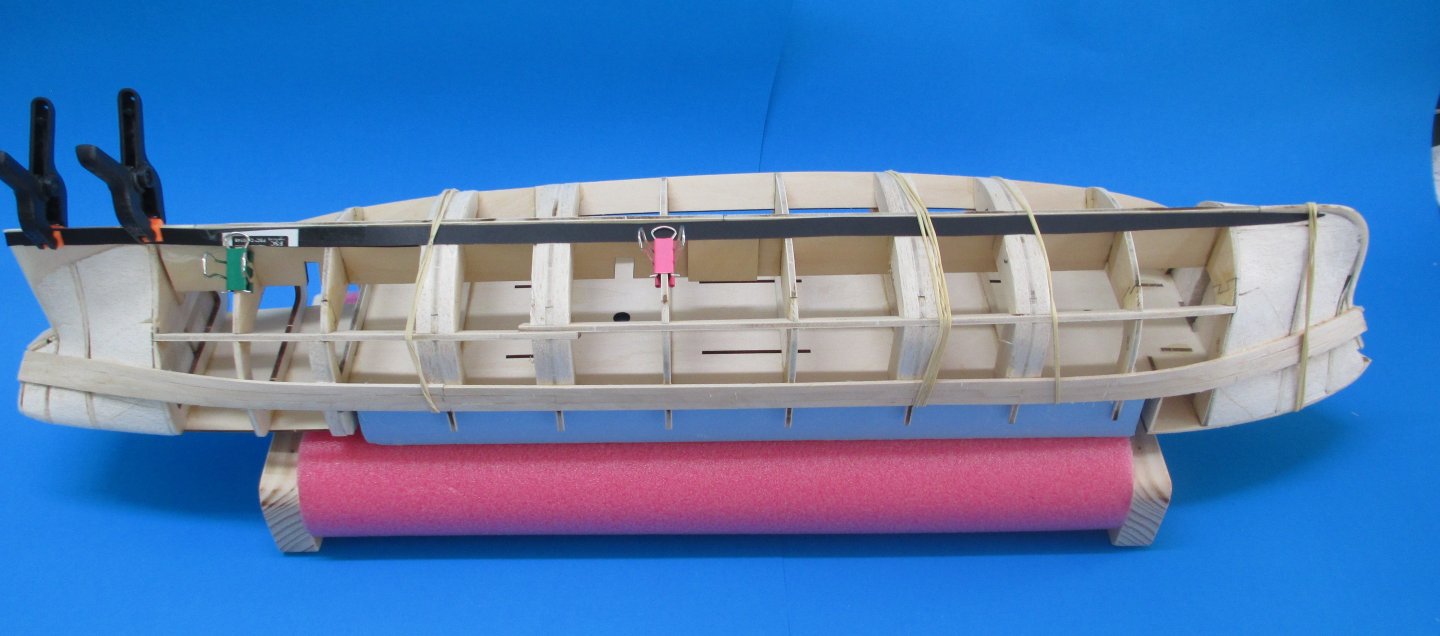
The first bow planks are steamed and fitted to the frame. I use #19 rubber bands help hold the planks in position and to apply force where clamps cannot be used like the stem below. Some bow planks are glued using white PVA glue. Same for the stern.


-
To steam a plank for bending the plank is wrapped in a wet cloth and heated for about 30 seconds using a domestic iron on the highest heat setting. This is fairly severe compared other methods but the plank has little spring back after being bent and clamped in desired position. The domestic iron also heats up quickly. These planks were edge set prior to fitting to the bow. These are the stern planks holding their shape after removing from the frame after cooling.


-
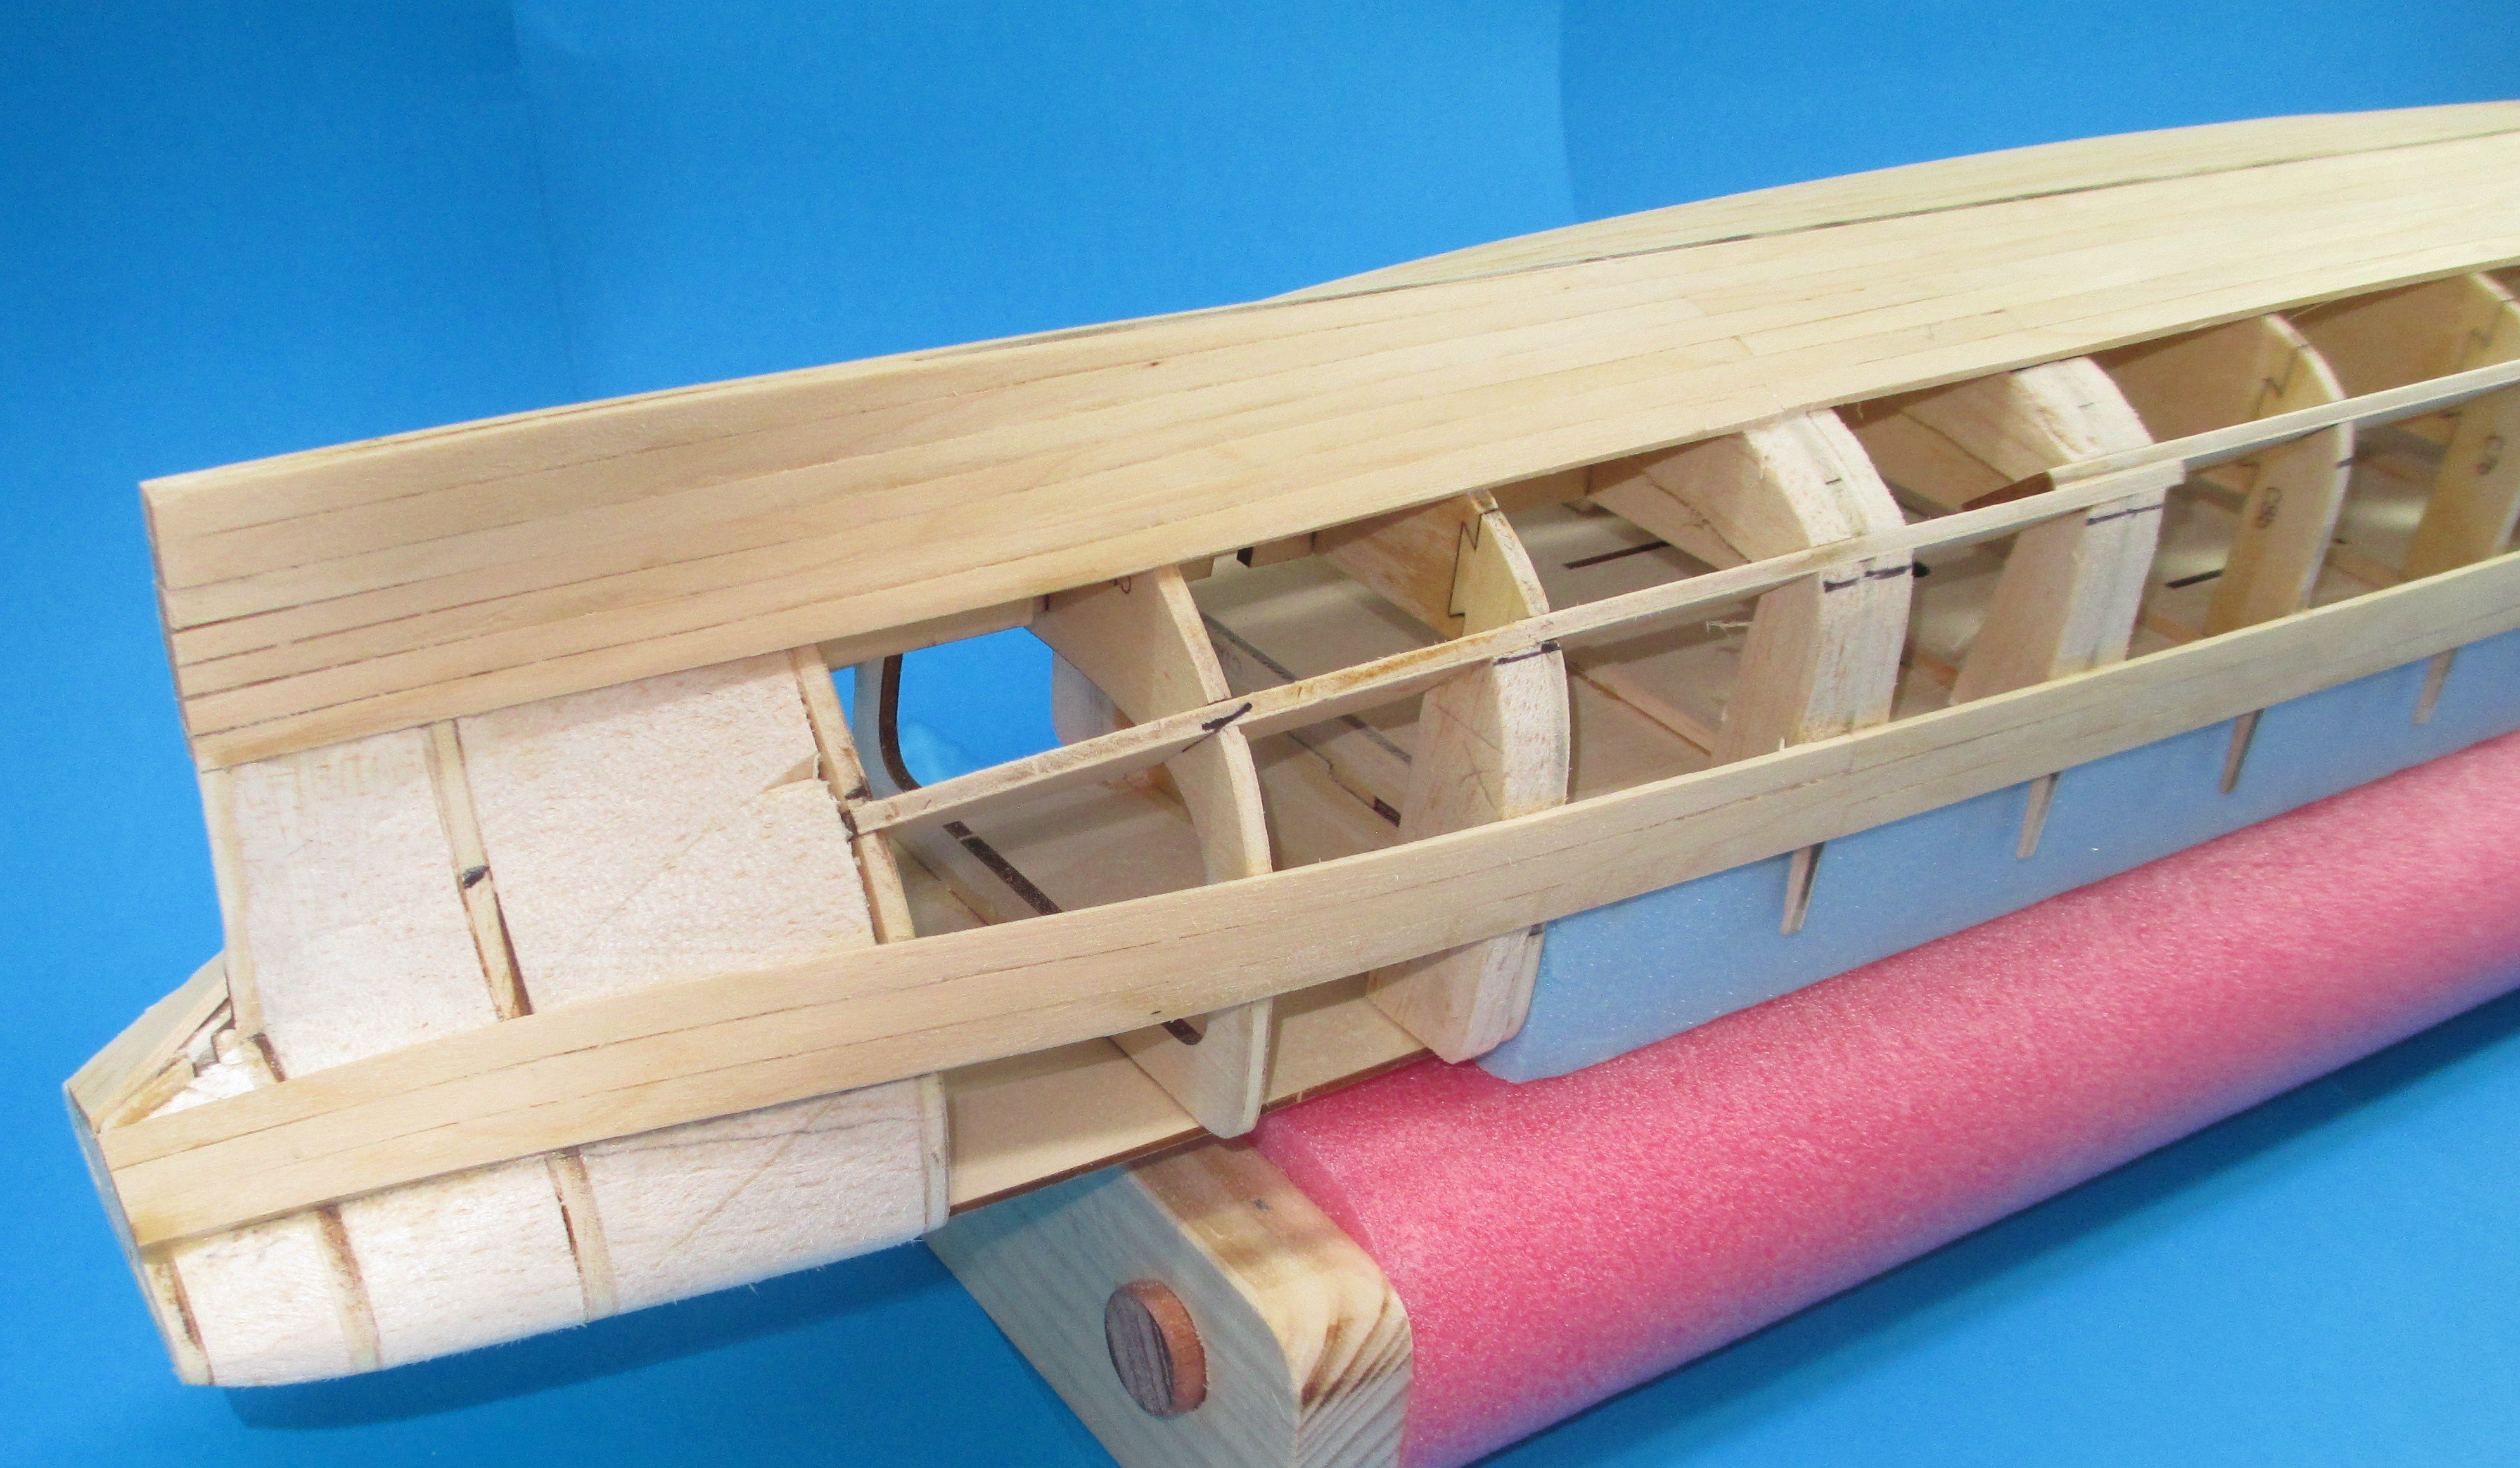
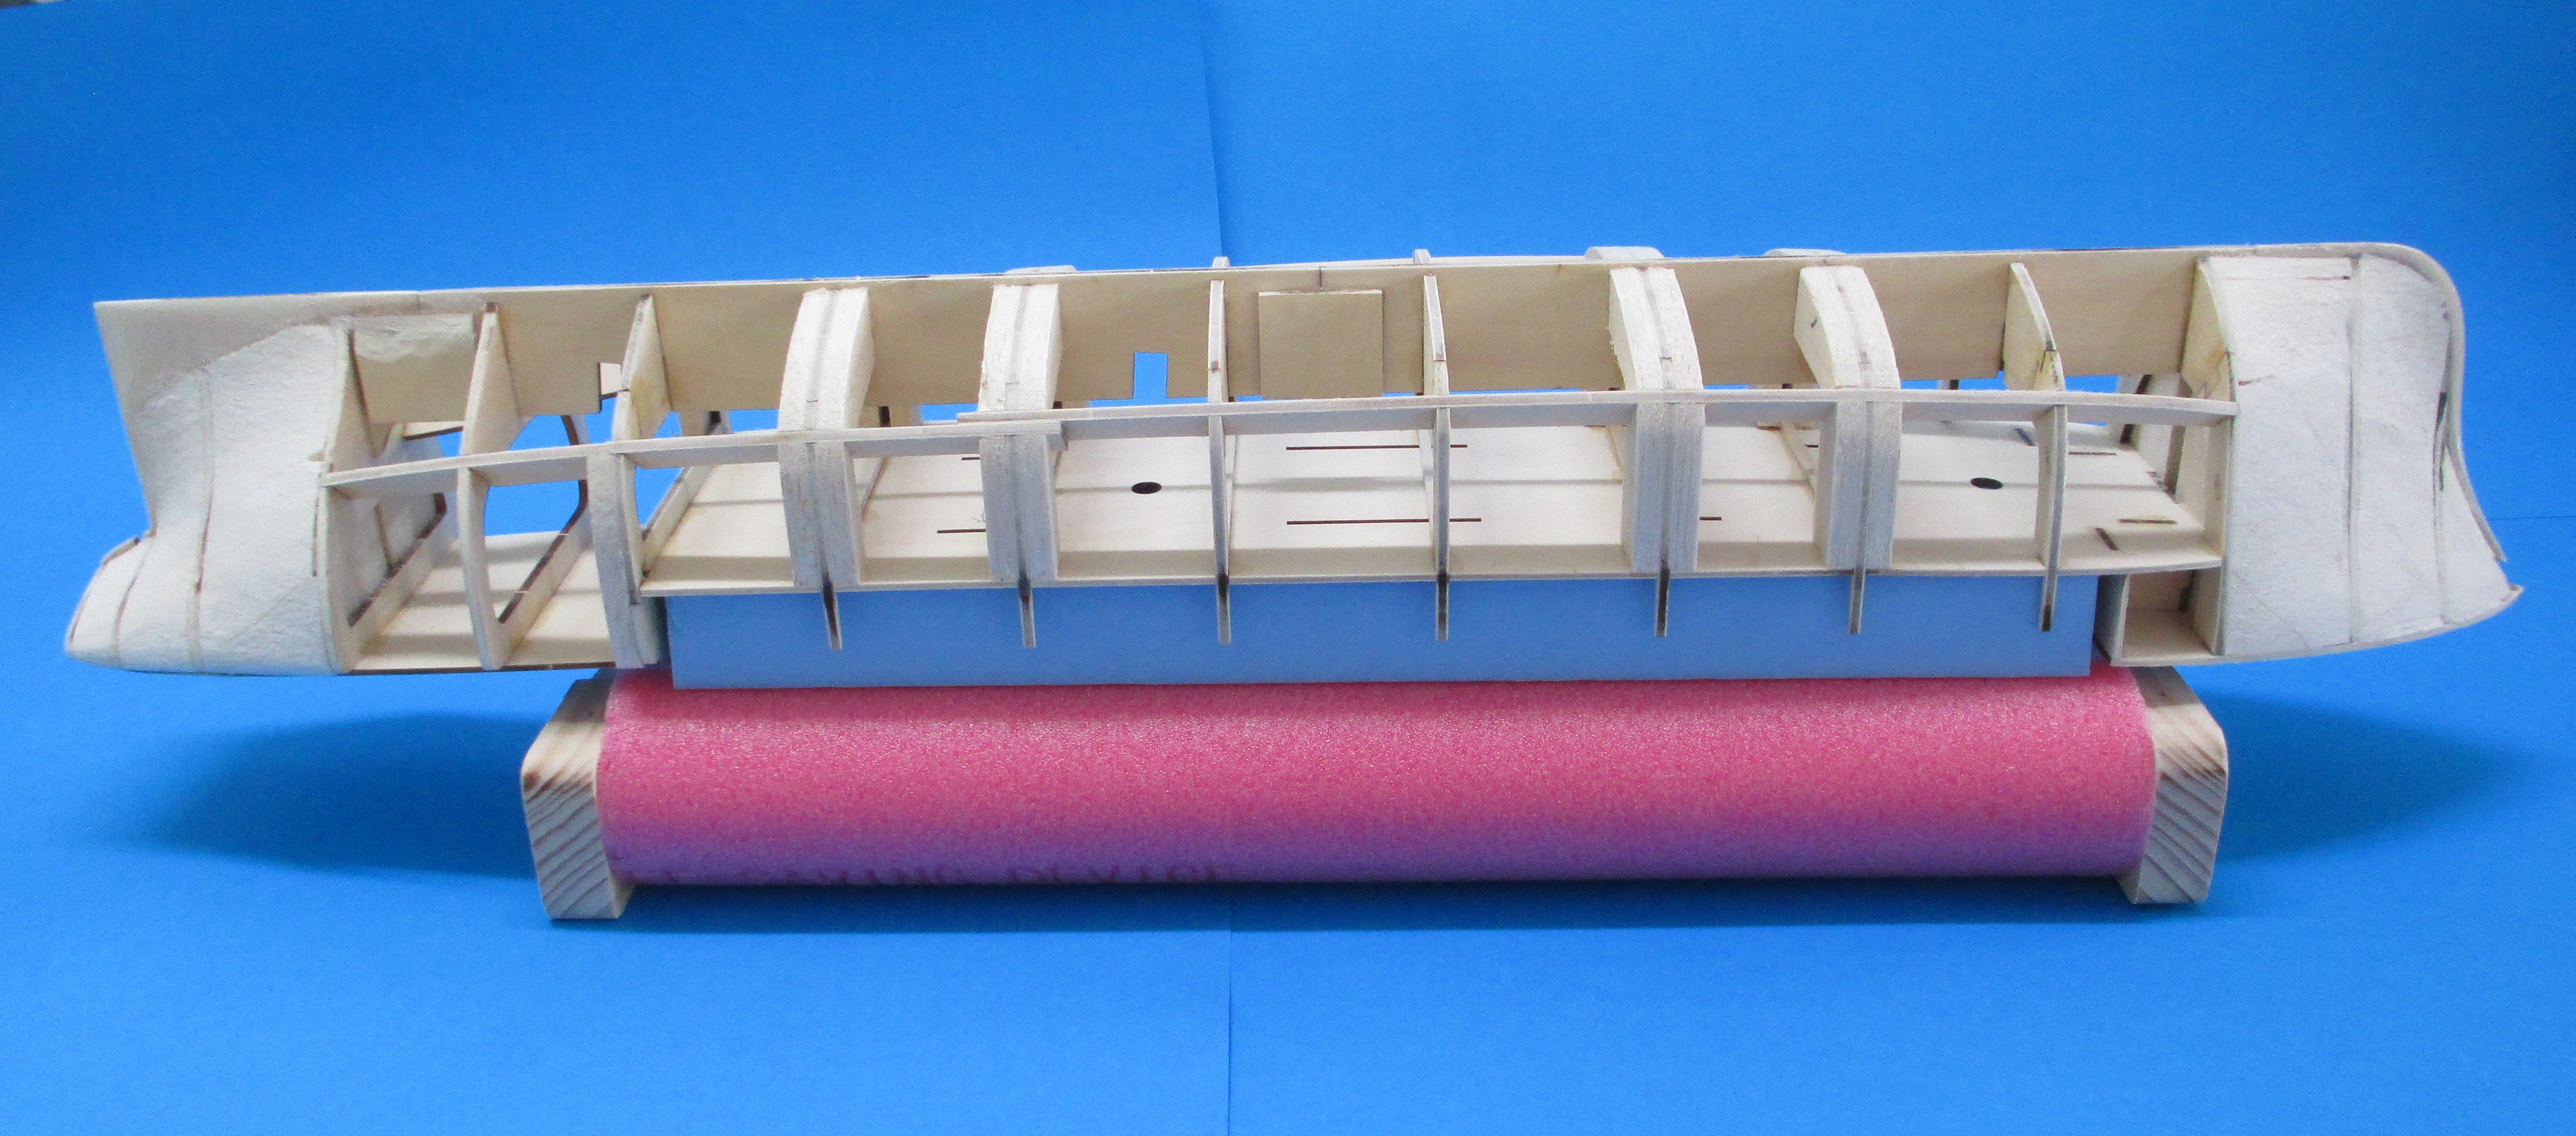
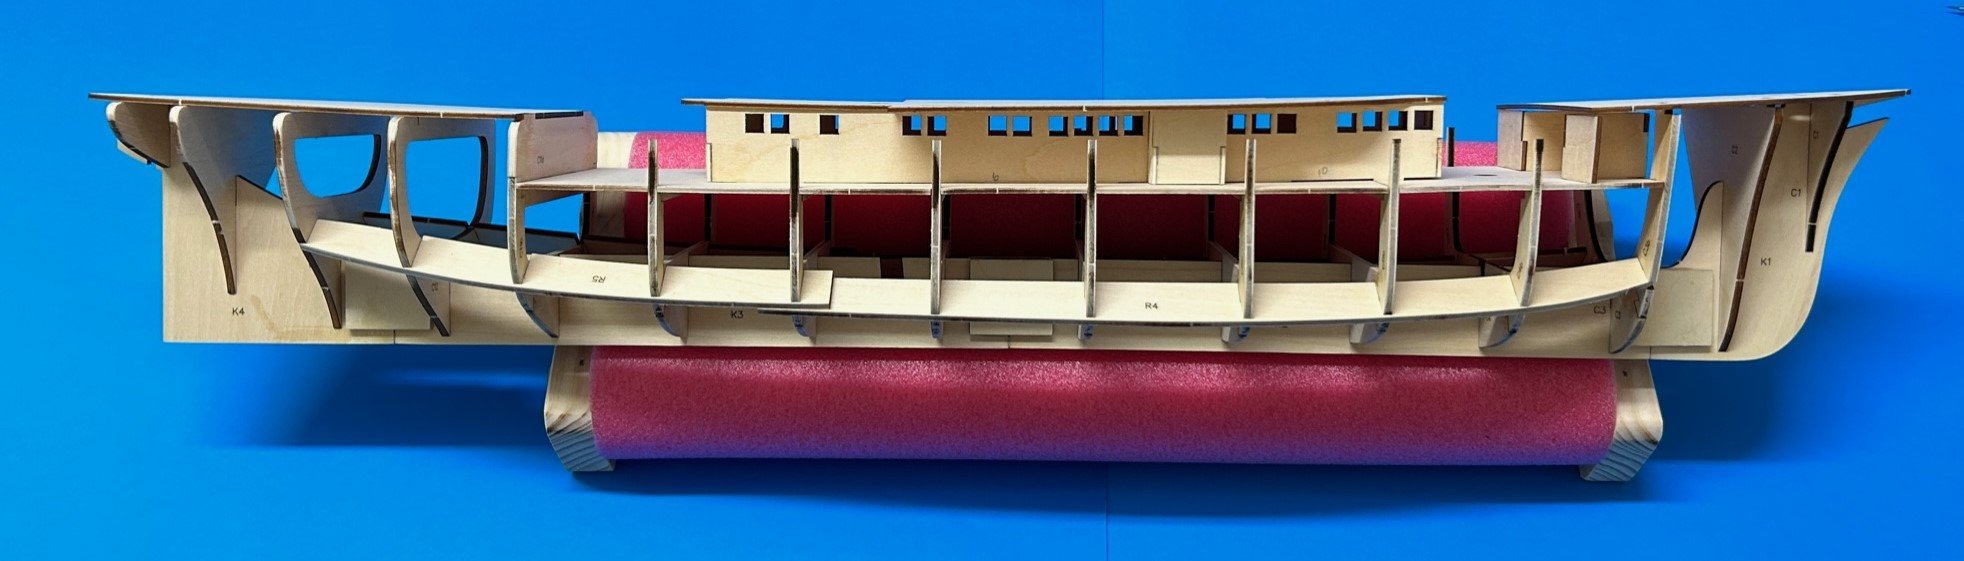
The filler blocks are hard balsa that I had laying about. Frames that supported plank joins had 6mm fillers added to both sides of the frame. The model is now ready for planking.
-
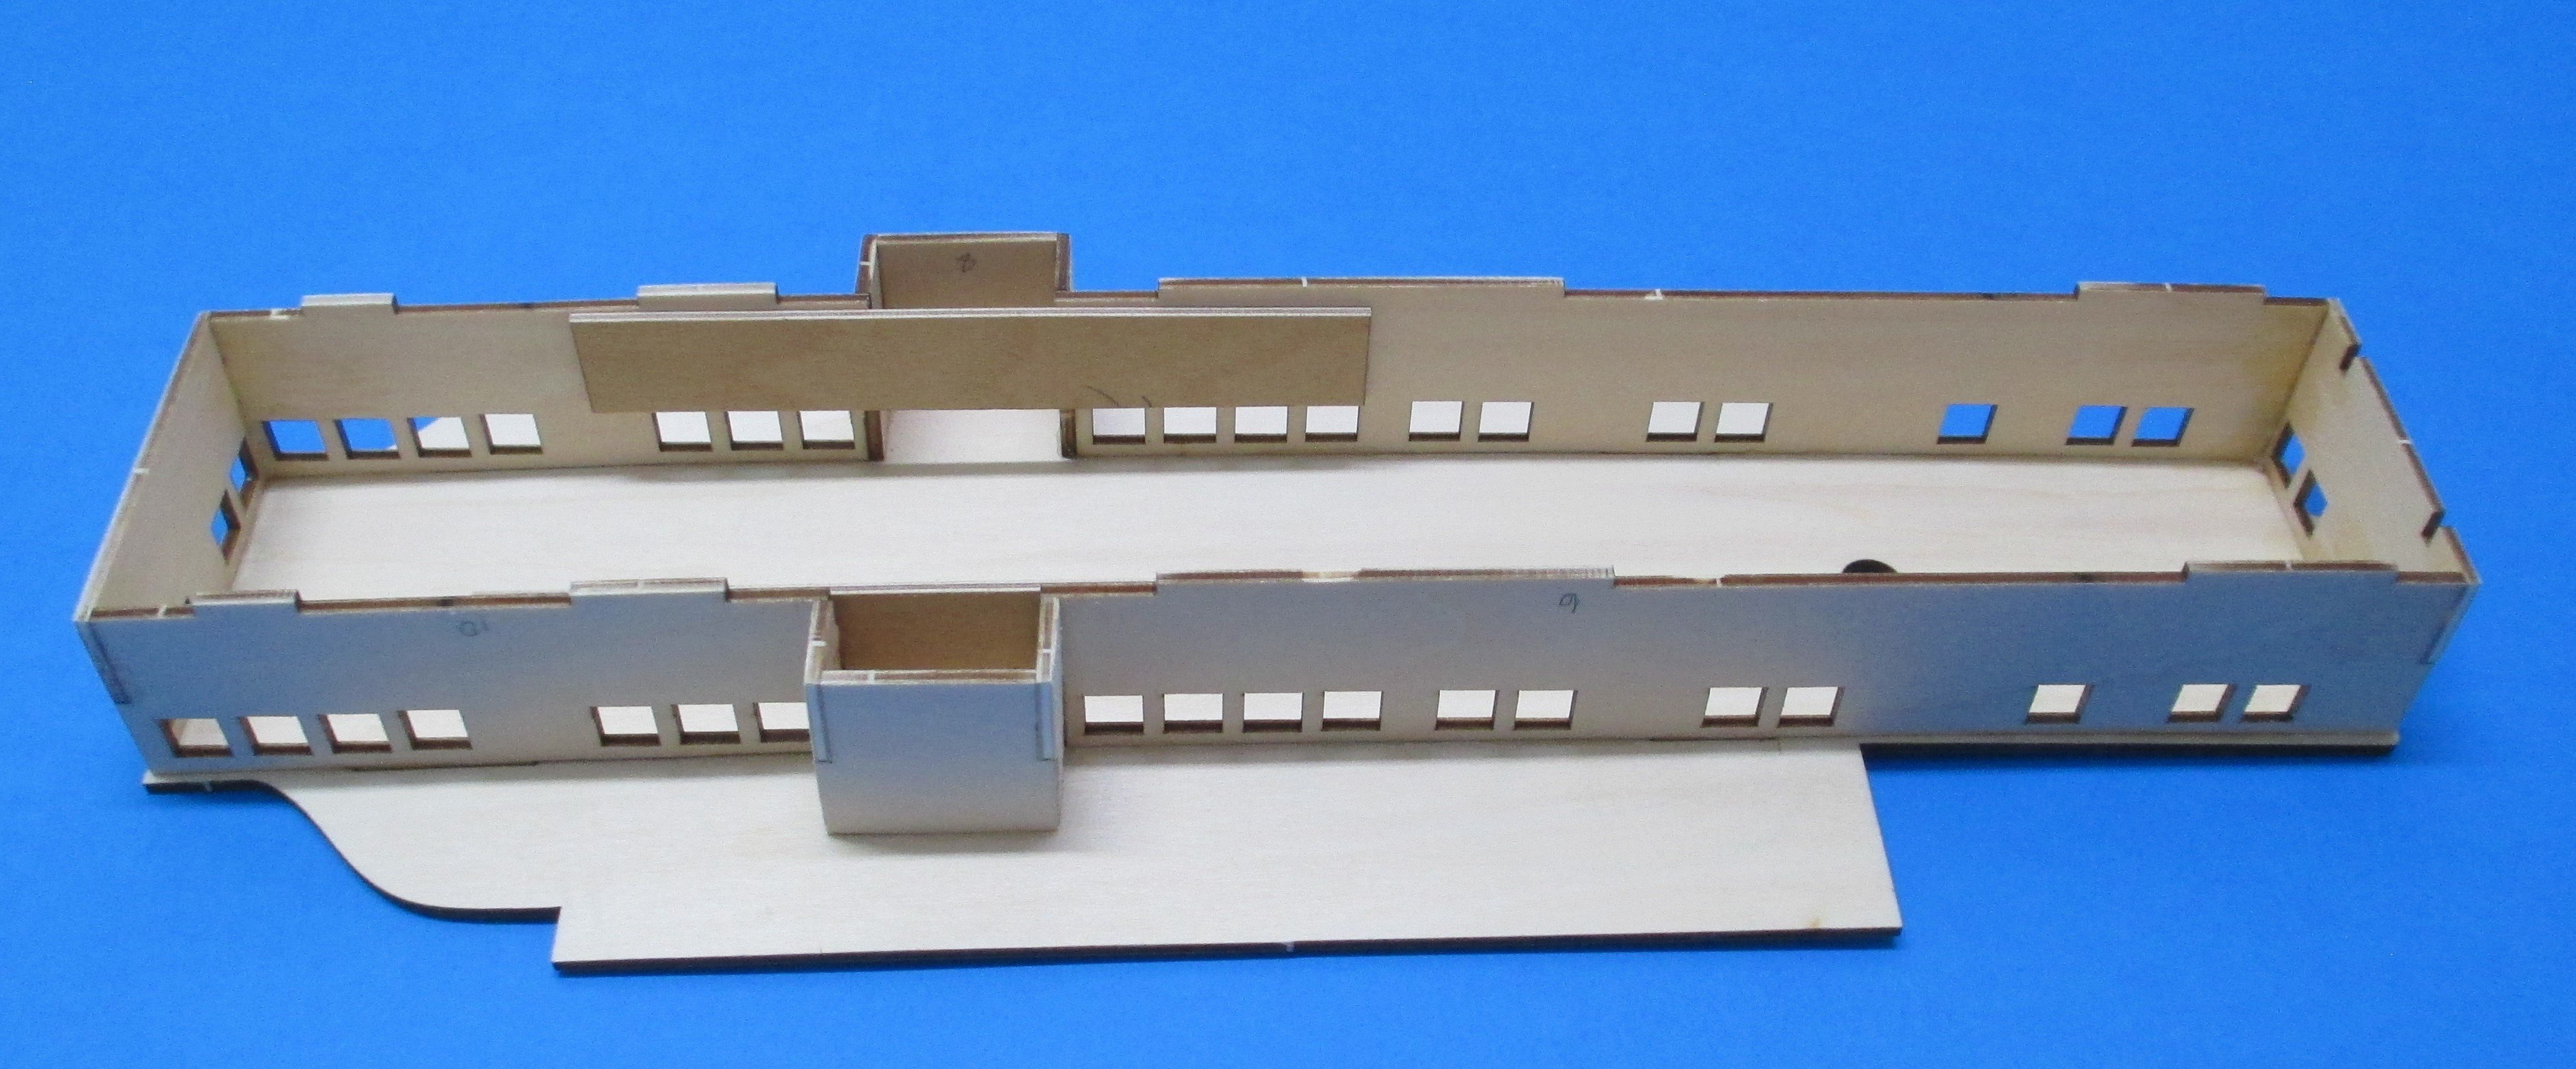
Extra plywood bracing was added to the cabin sides to maintain the deck curvature when the roof was fitted. All parts were assembled without glue. When all components were true and aligned the frames were spot glued with CA. This created a rigid frame that was fully glued with CA.