Daiga
-
Posts
11 -
Joined
-
Last visited
-
 elguzanoq reacted to a post in a topic:
Buccaneer by Daiga - OcCre - 1:100 - first build
elguzanoq reacted to a post in a topic:
Buccaneer by Daiga - OcCre - 1:100 - first build
-
I do not try to say that is correct and I am not trying to sell my model to museum. I wrote it in my first post. I said it is not correct it and leave the first build as it is as the aim of first build is do it till the end. Its not the only problem I find out during building and I will not brake the ship each time I find out something was not completely correct in process before. Its not Lego you can assemble how many times you want from very beginning and you know it very well. Think I skipped that part in rules where only 100% correct builds was allowed here. Well, I was wrong in this as well. I will continue but doubt I will post here.
-
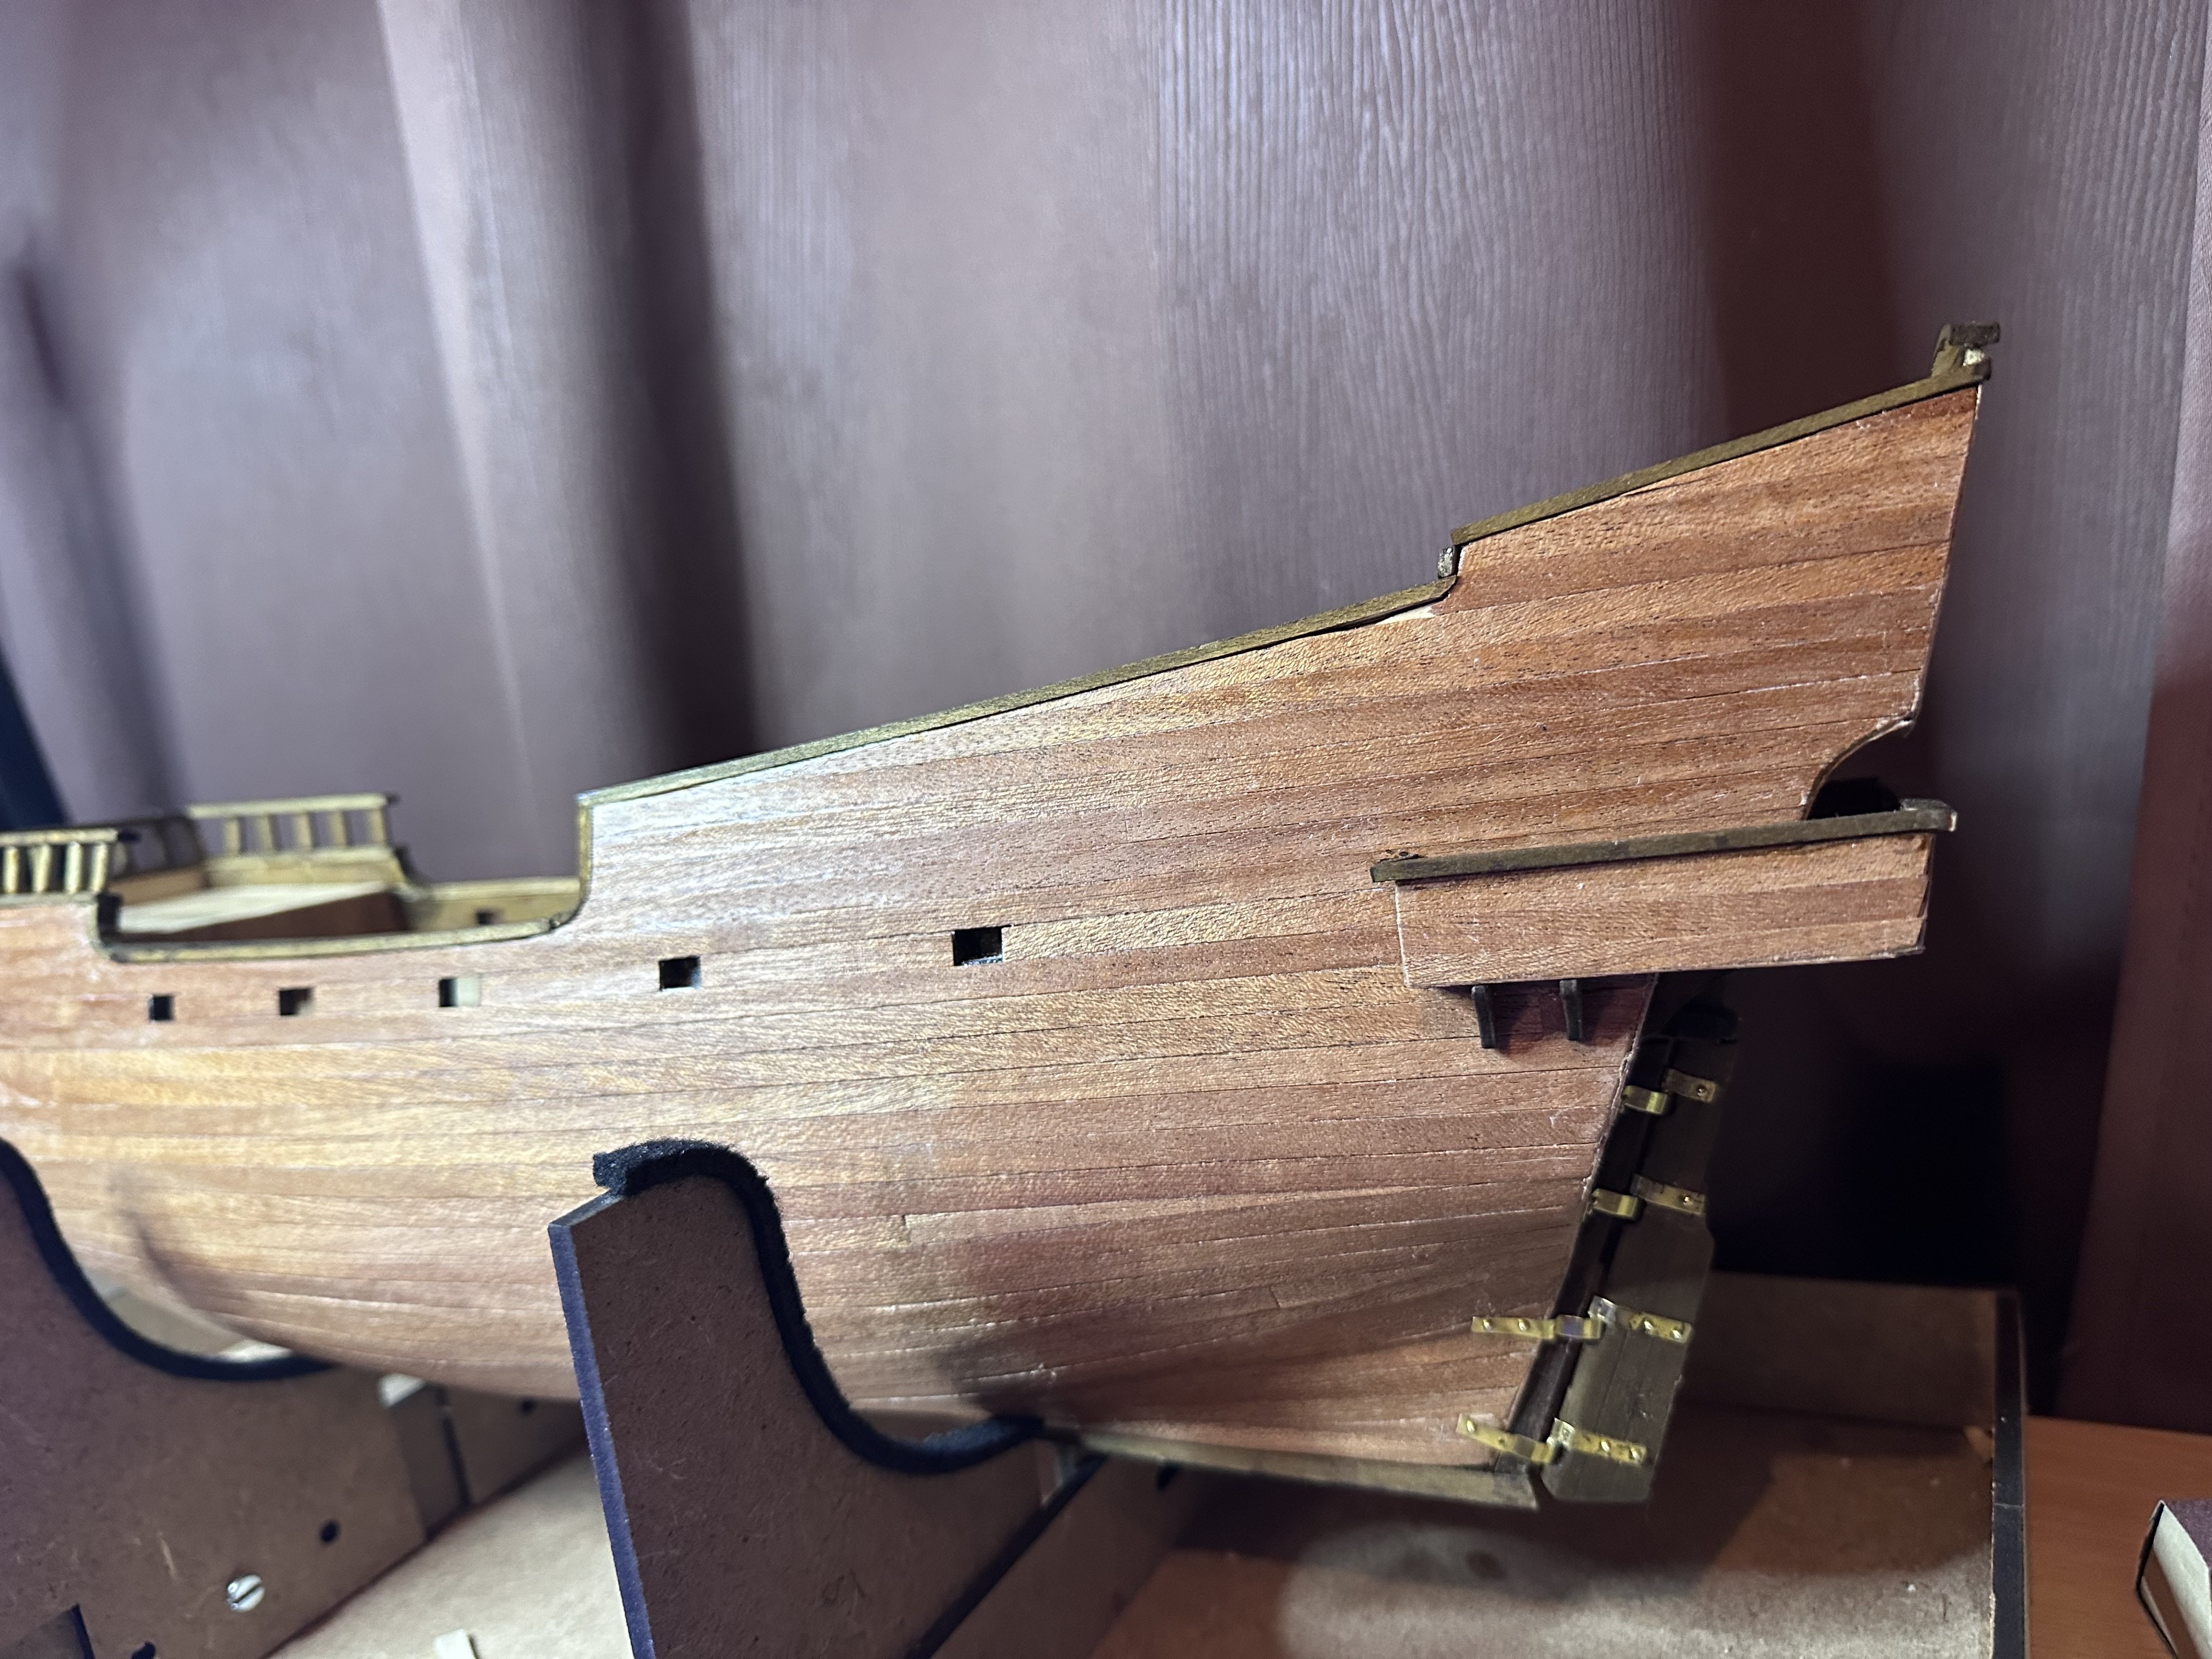
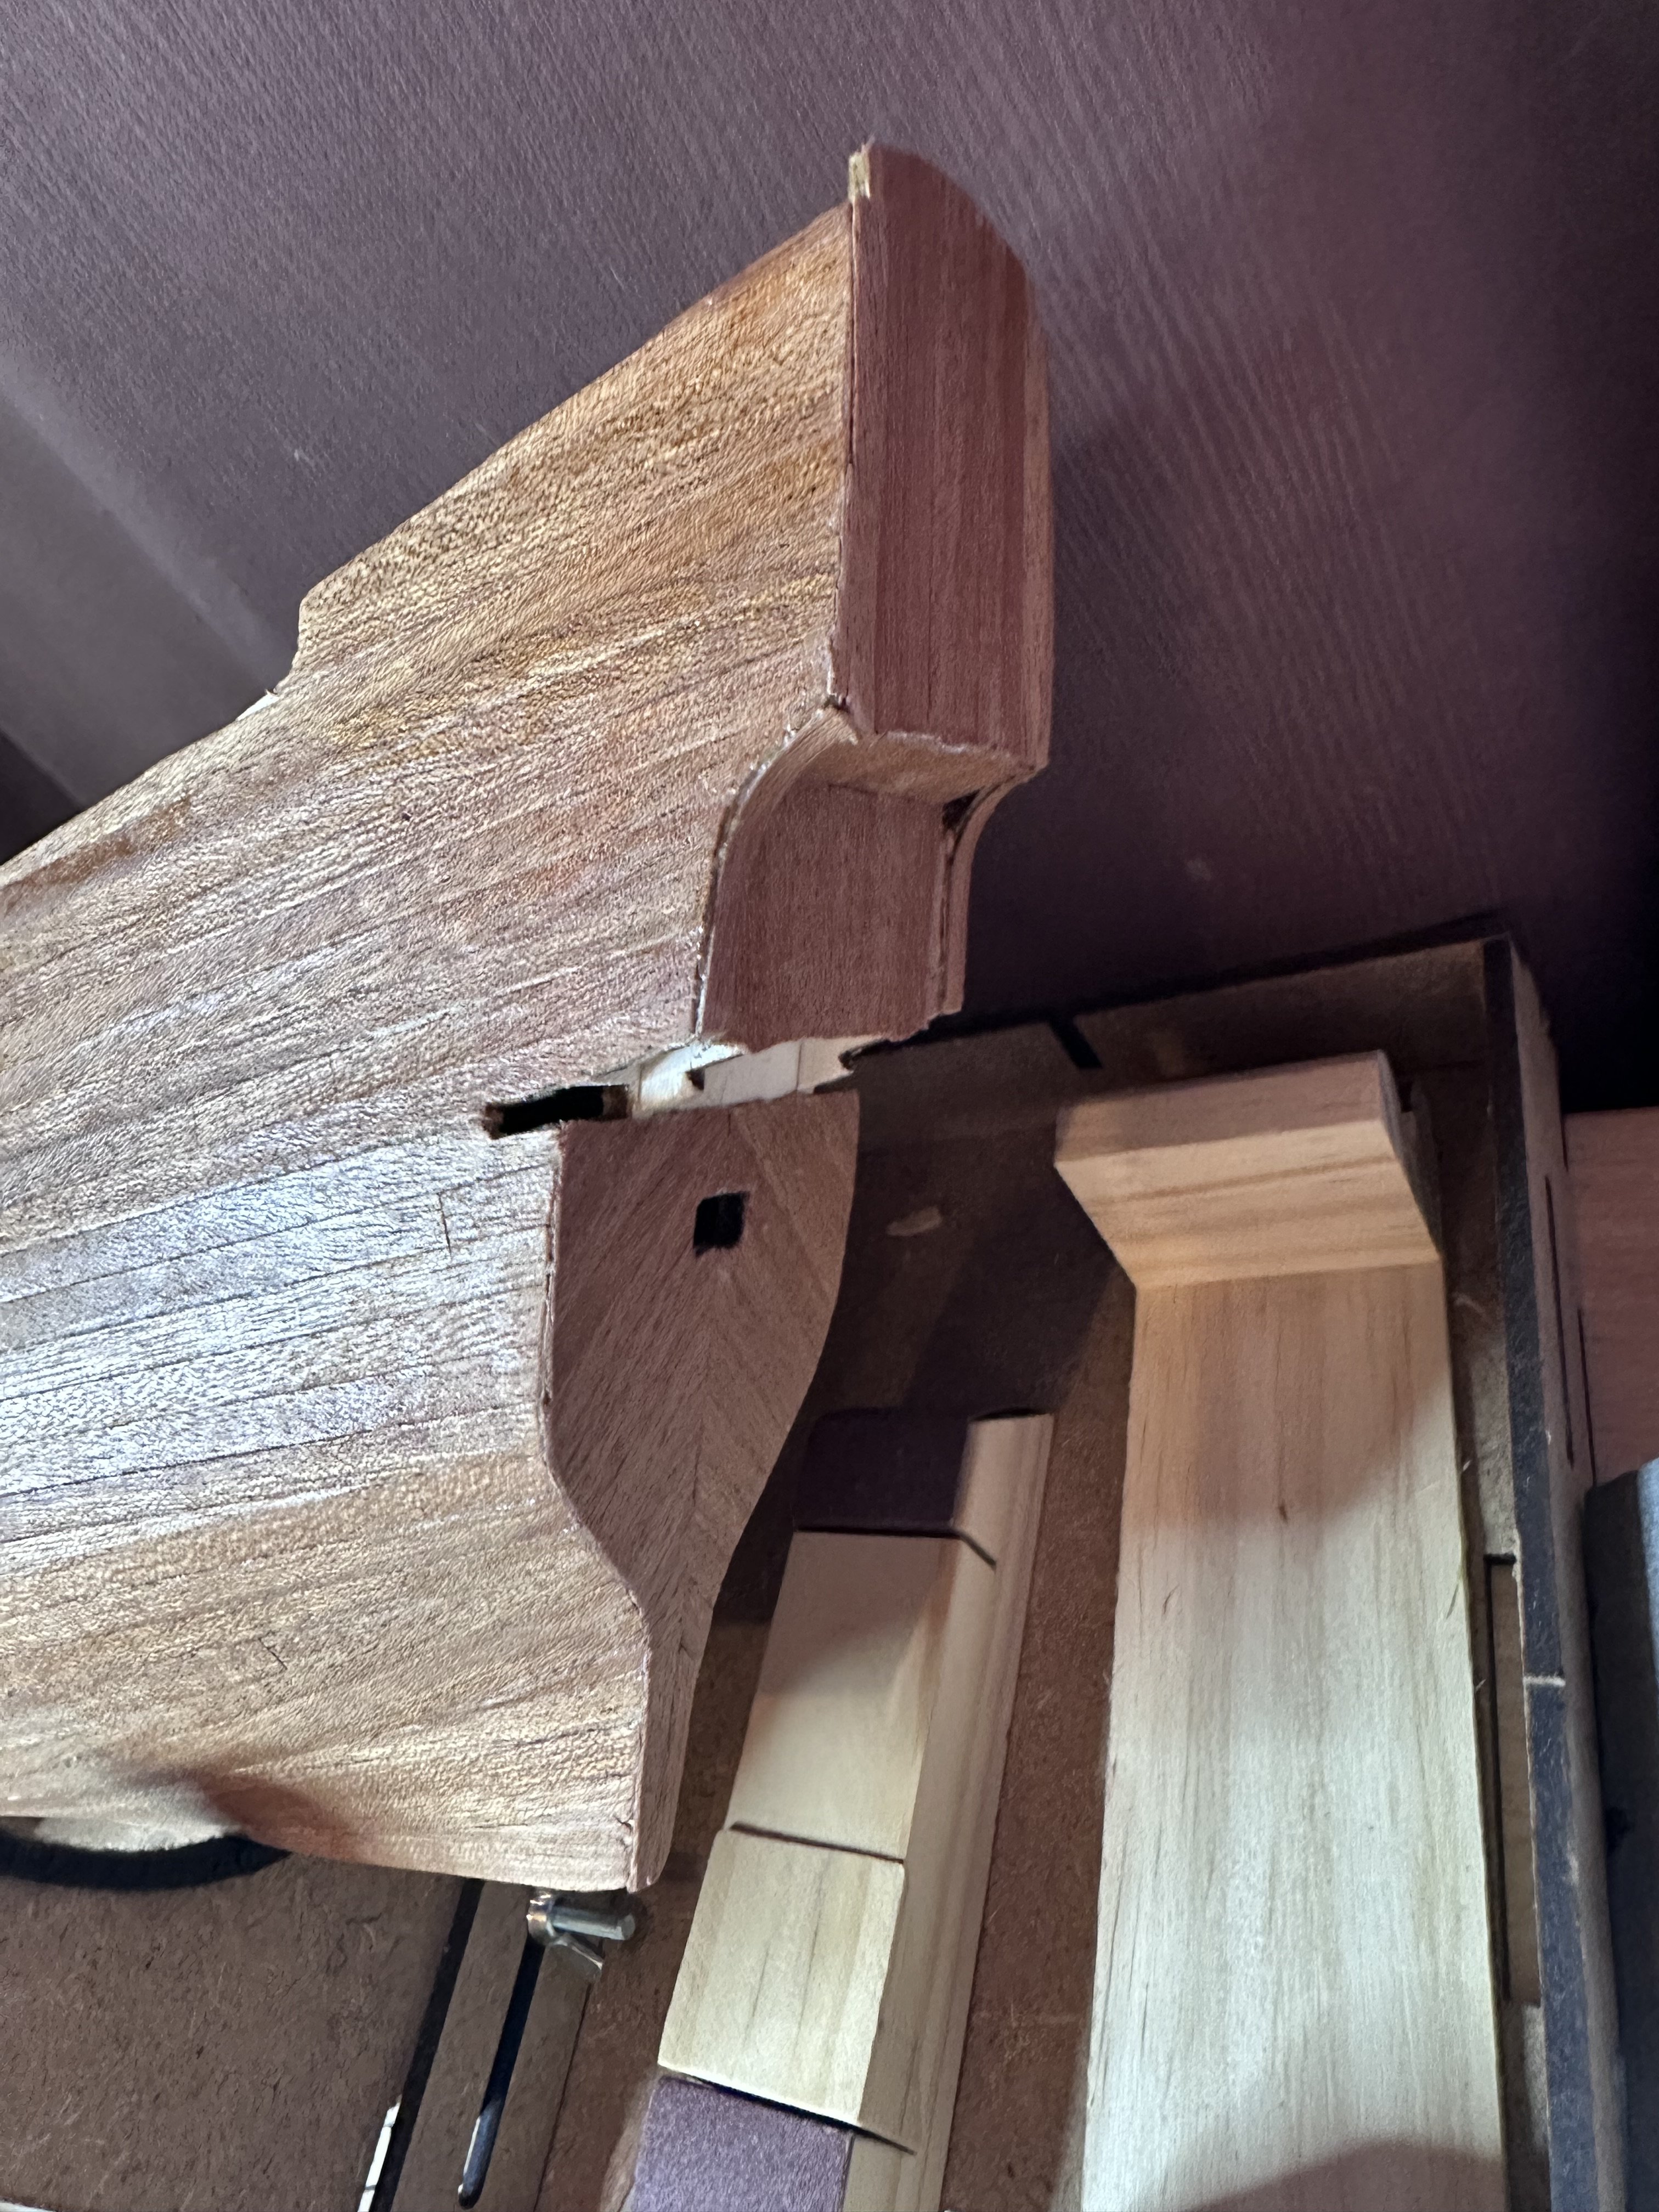
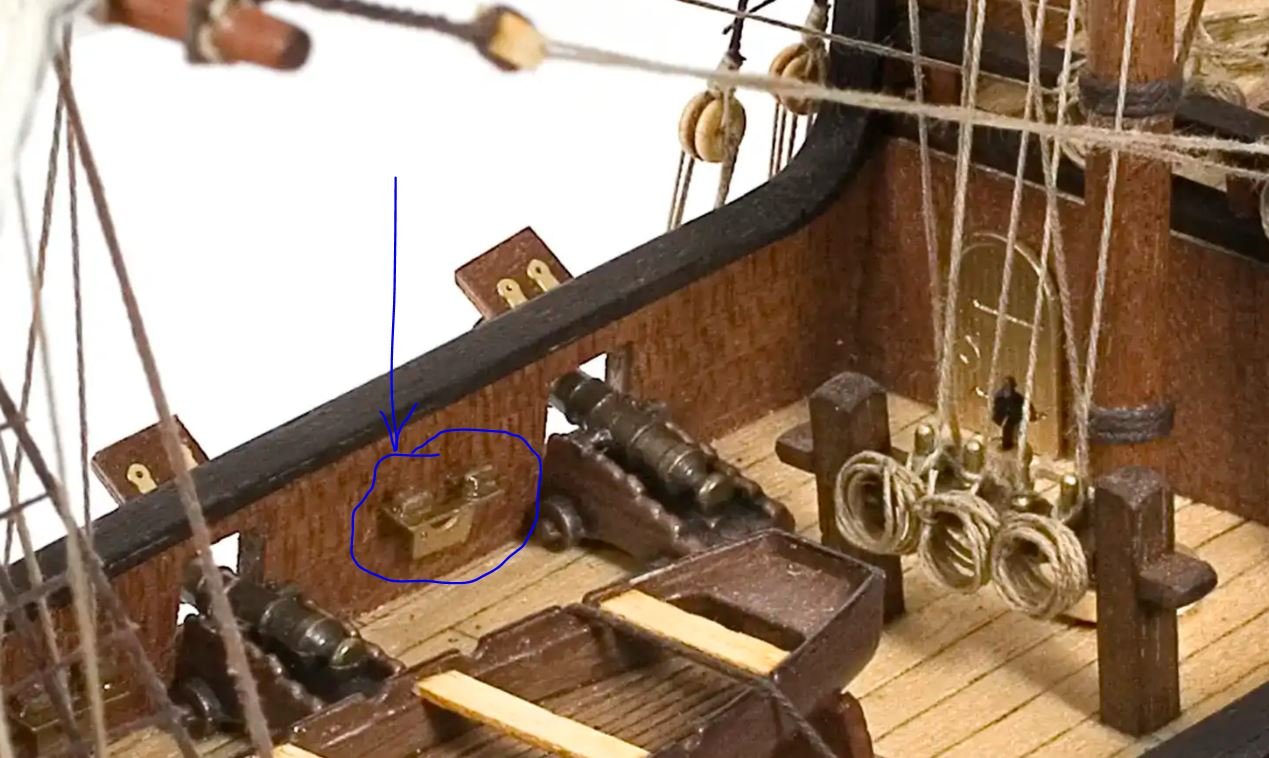
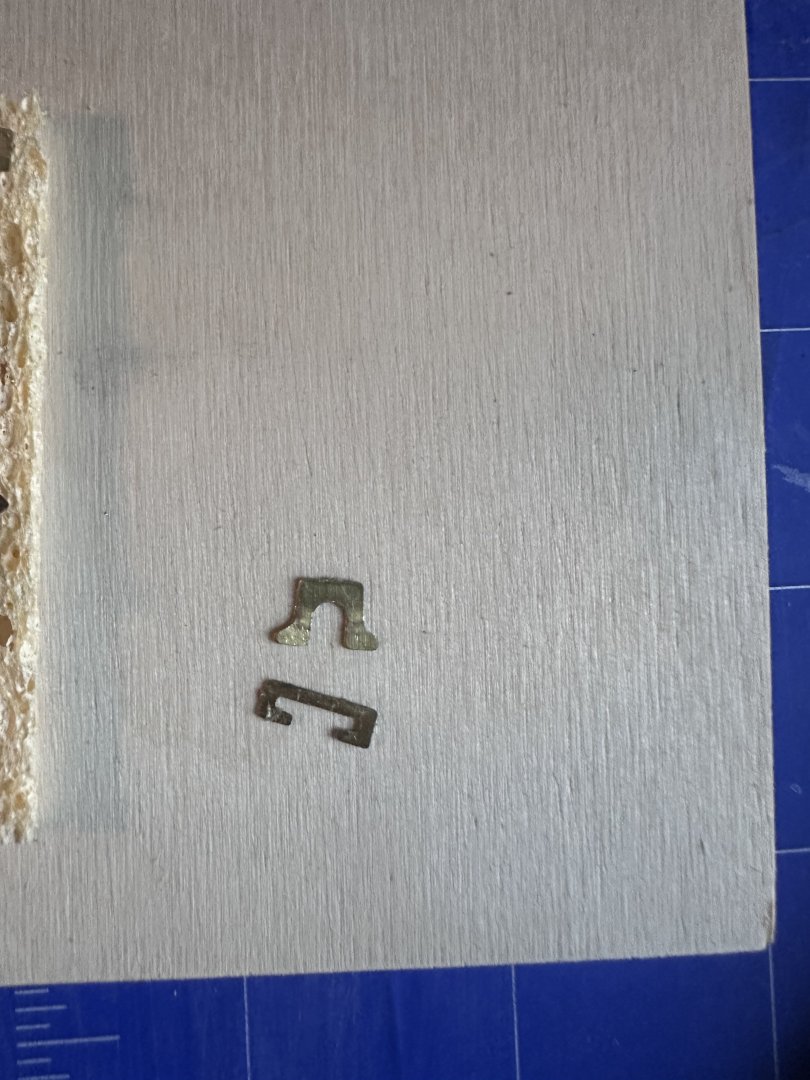
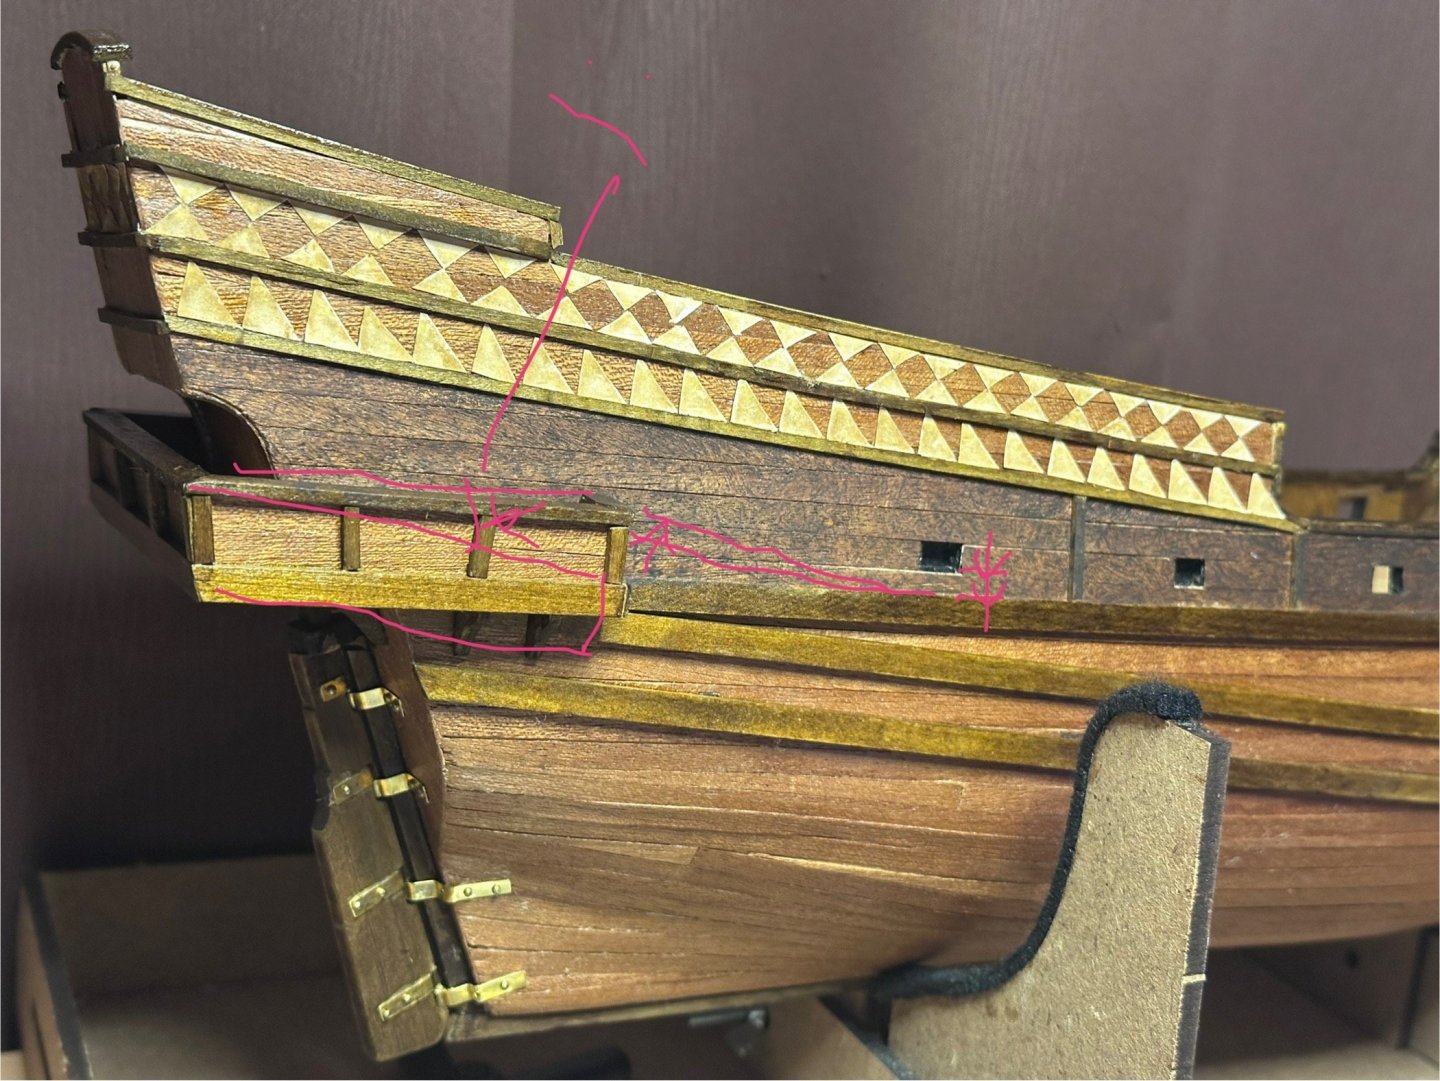
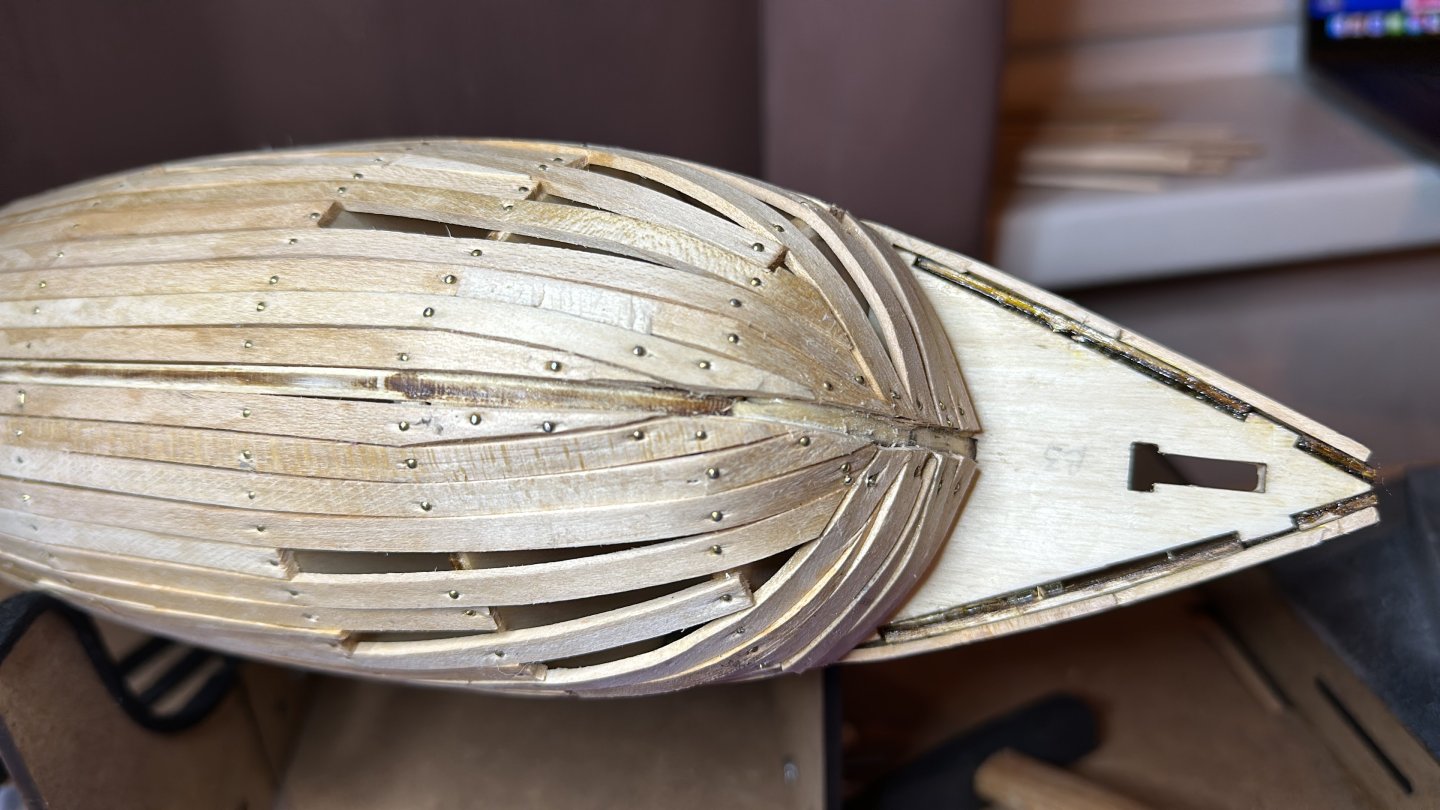
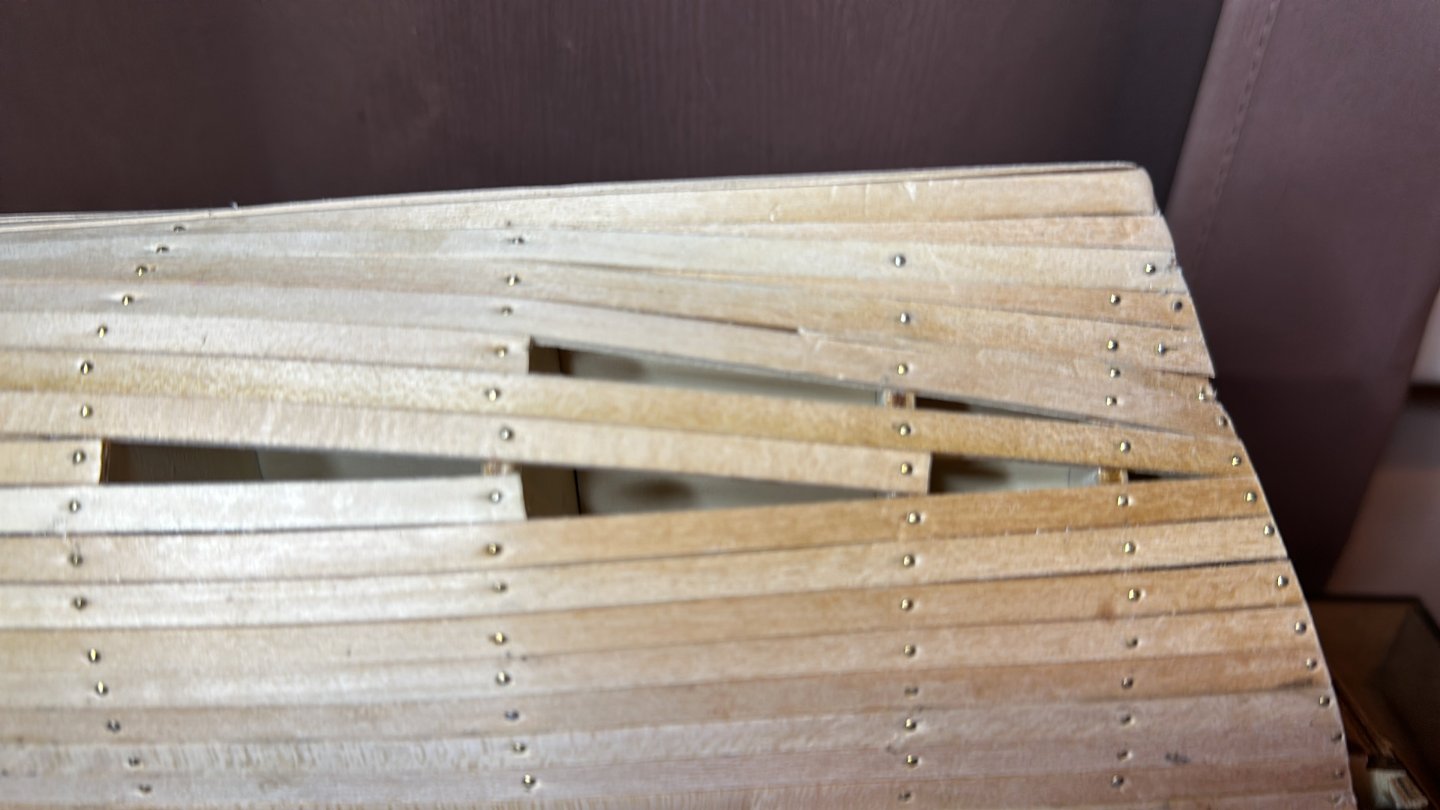
If somebody has any idea about this part I will be grateful. Have no idea how to make this from the parts I have. From video I cannot understand. They are glue them together, few words or better pictures - no idea
-
SiriusVoyager reacted to a post in a topic:
Buccaneer by Daiga - OcCre - 1:100 - first build
-
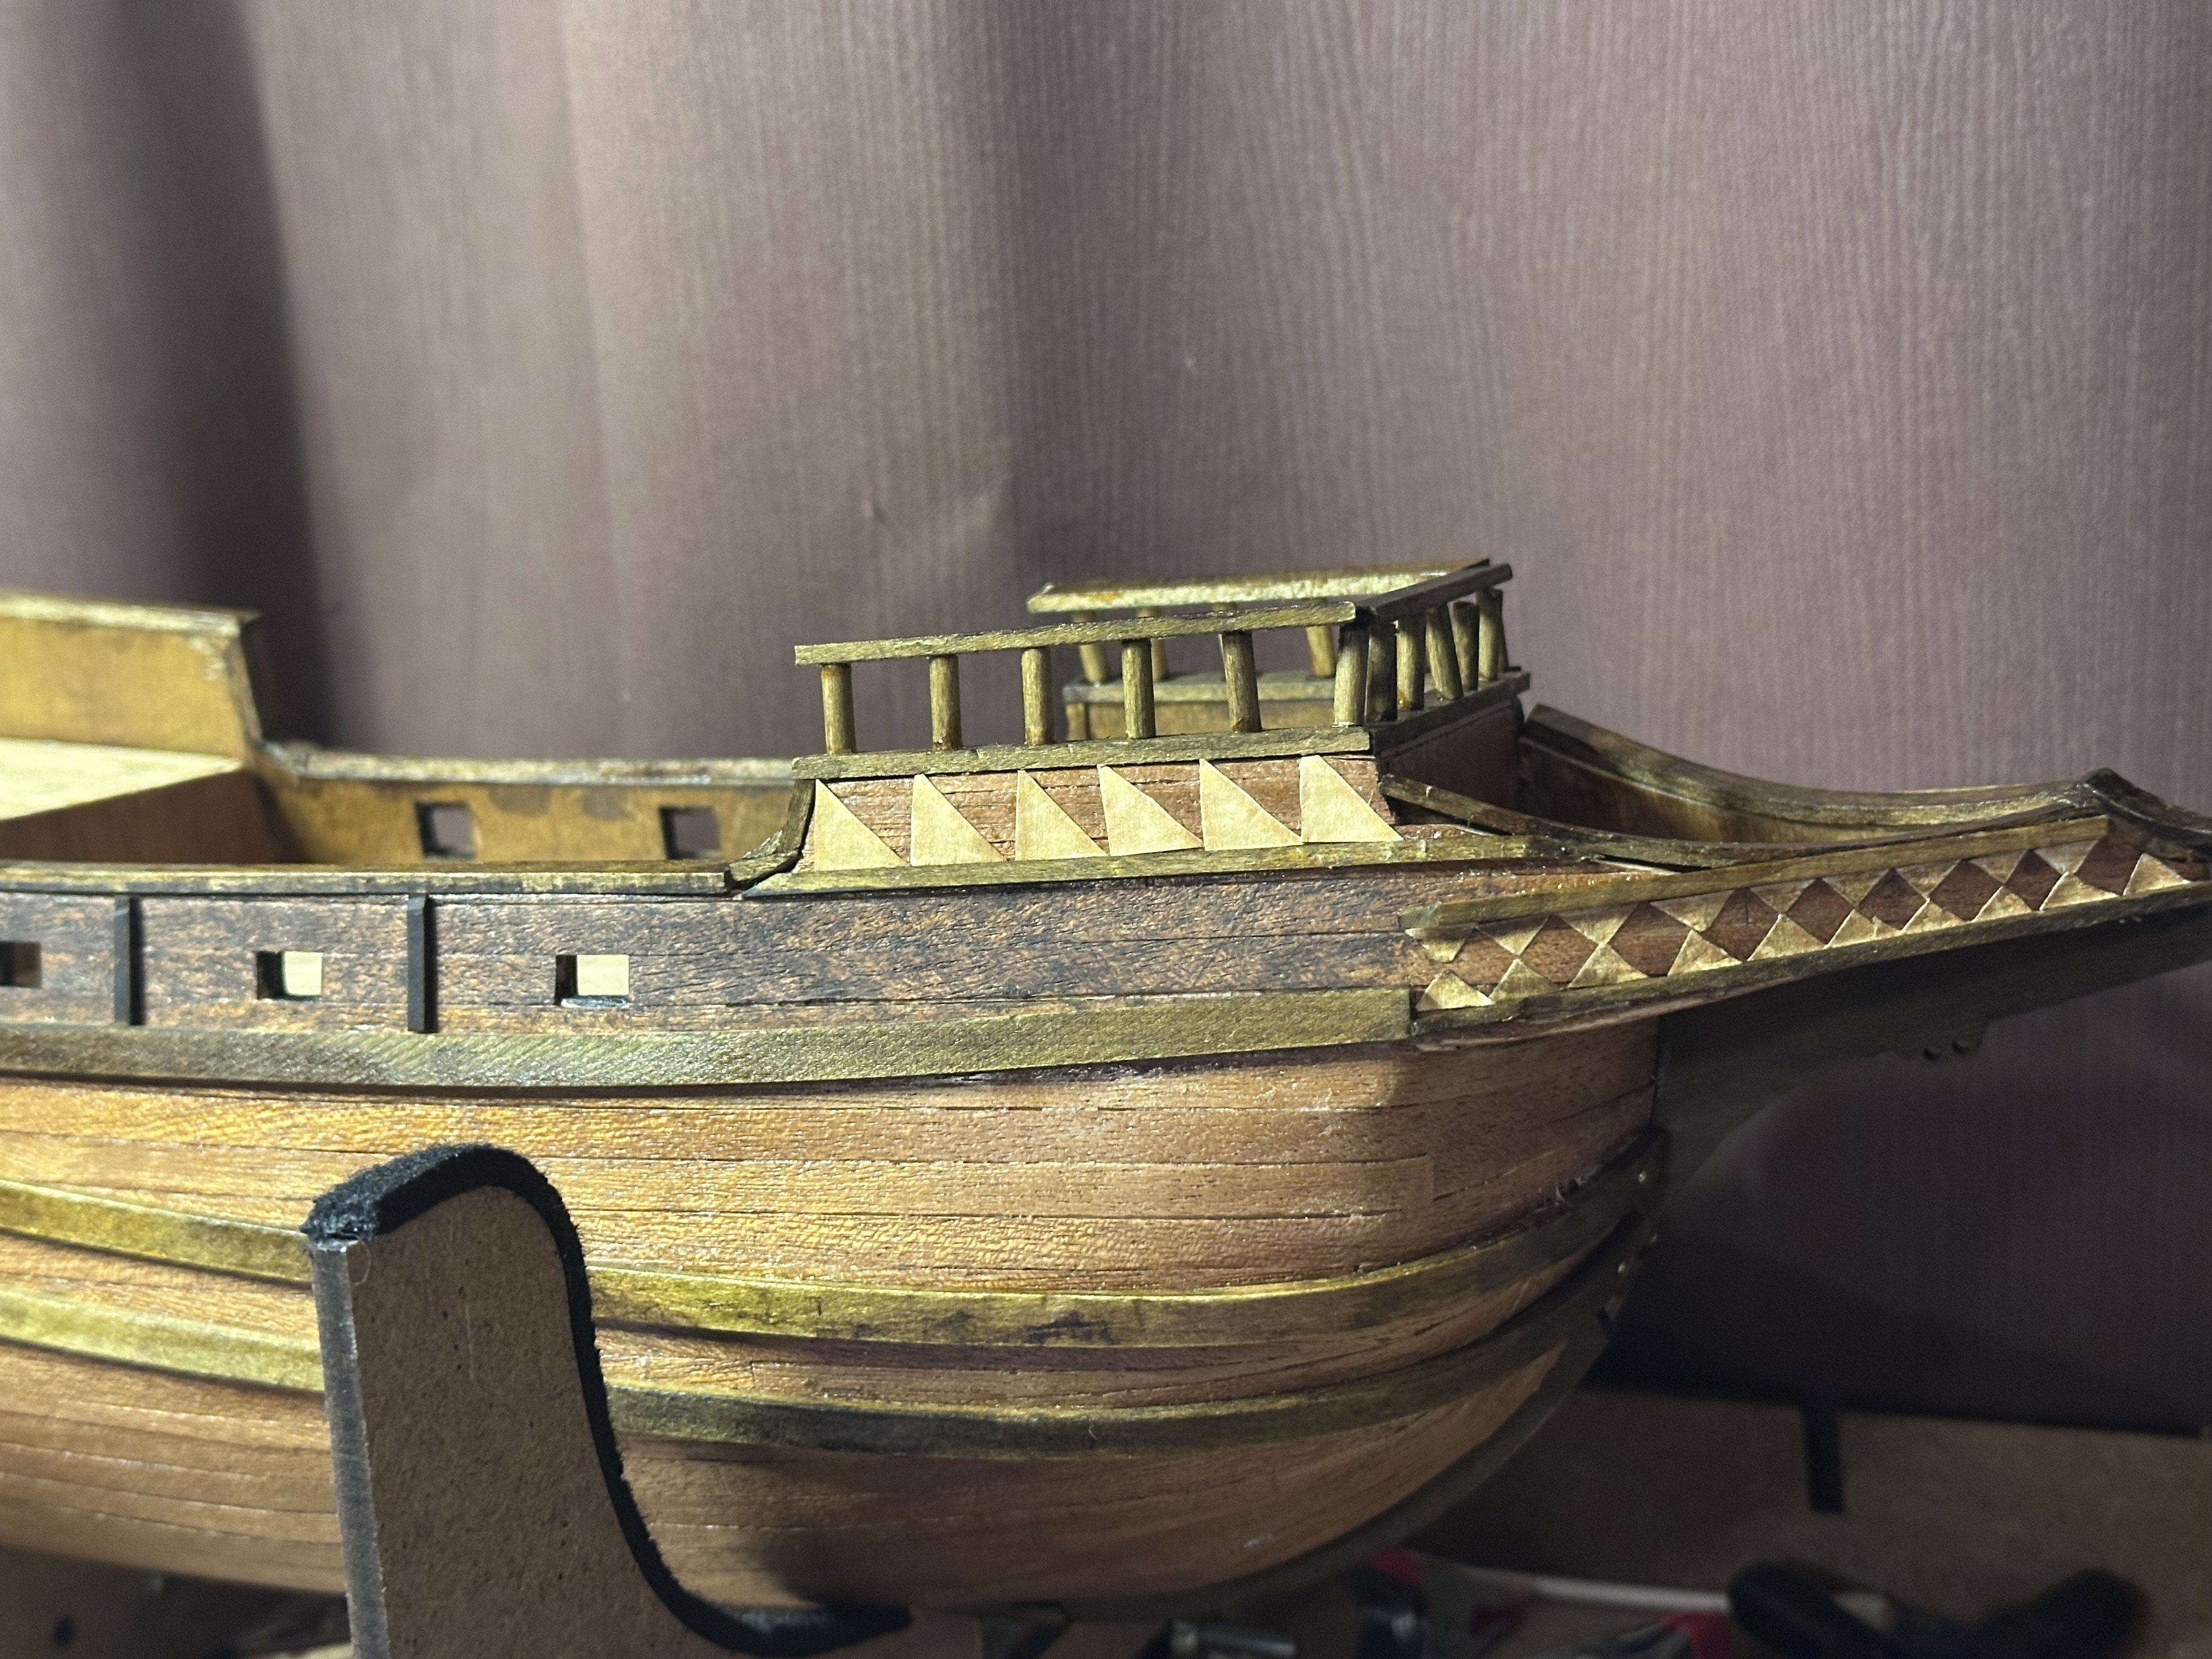
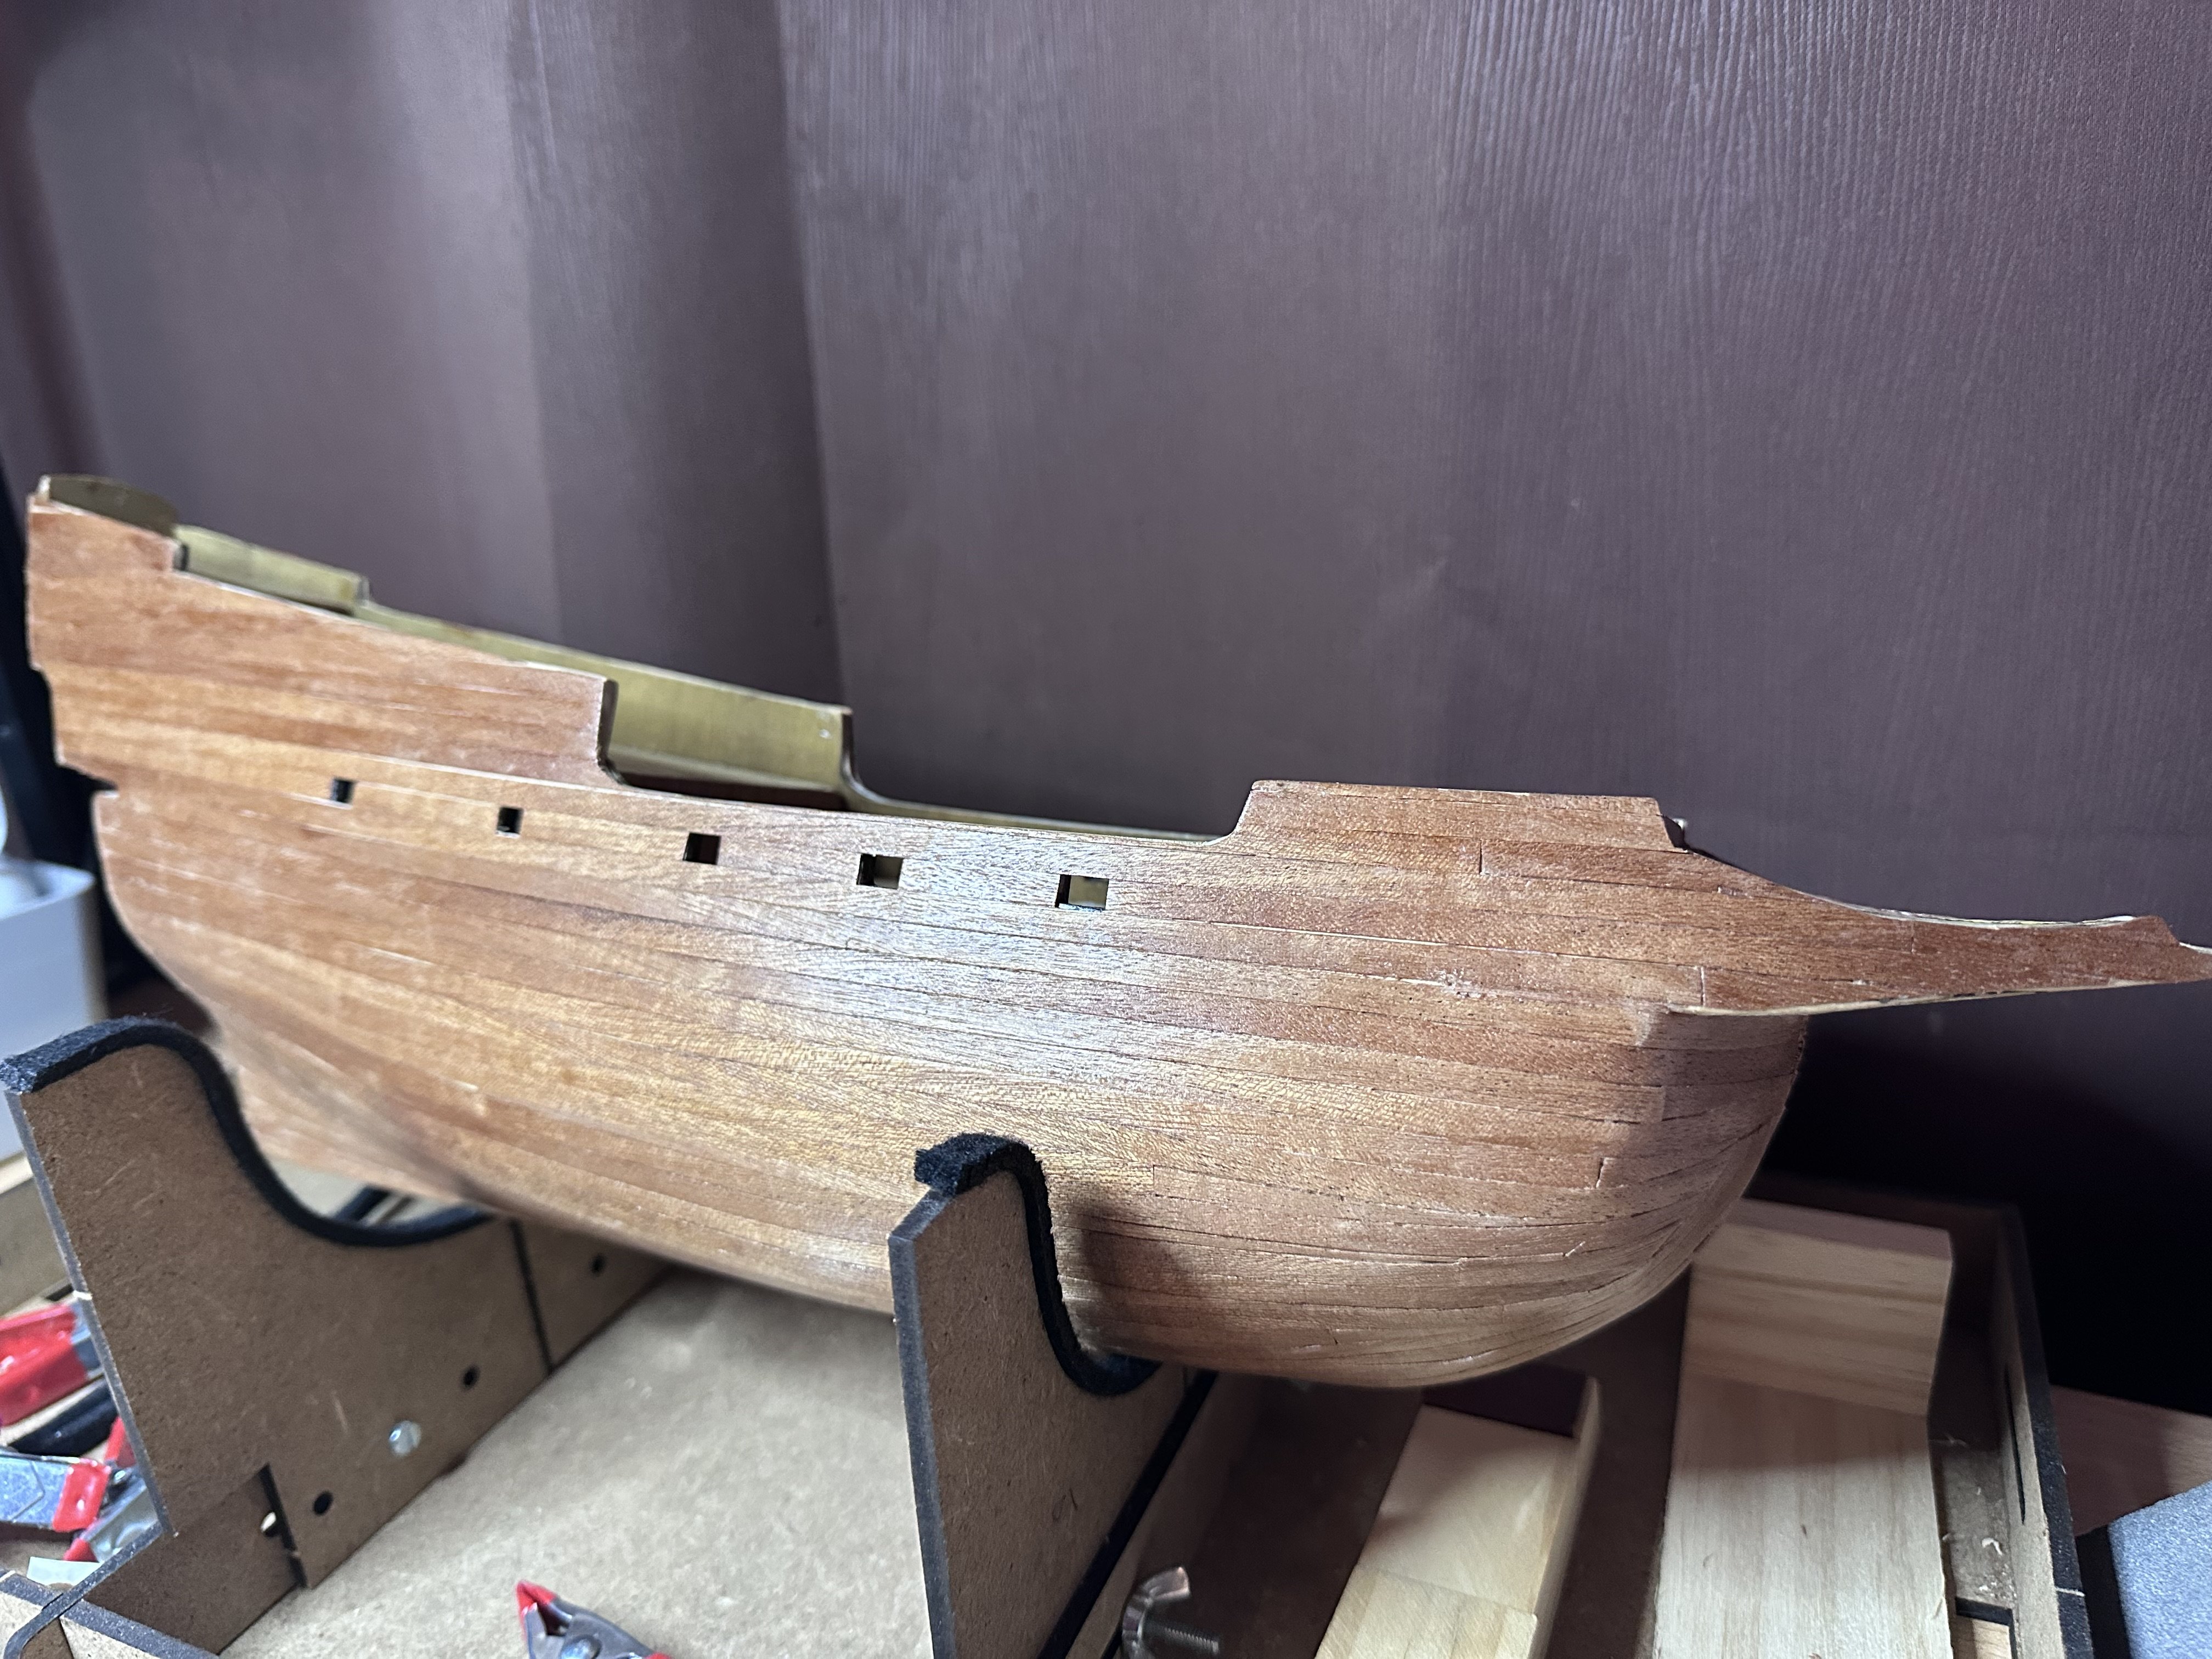
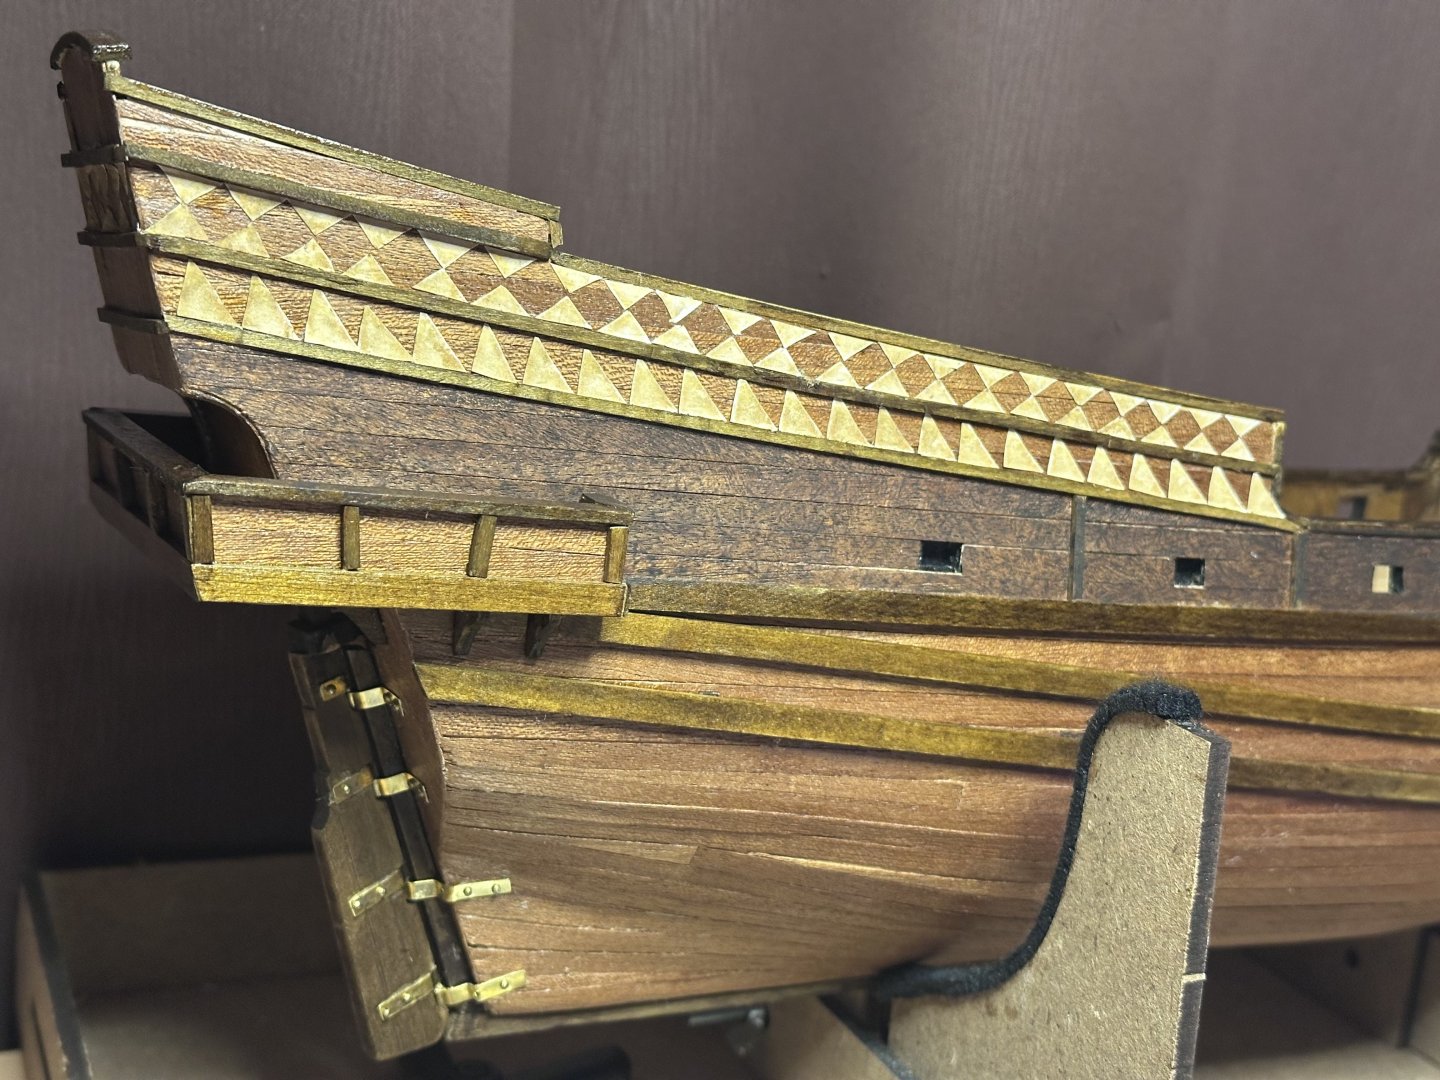
Yes, they are not parallel but they have to be. It was because of angle of balcony. I didnt want to break off the balcony in this stage. You are correct, they have to be parallel to be historically precise, parallel to each other on parallel to the line of hatches. I tried to draw the problem part, the reason why I left it like it was even its not completely correct and I know it. Will know what to check next time
-
GrandpaPhil reacted to a post in a topic:
Buccaneer by Daiga - OcCre - 1:100 - first build
-
 Daiga reacted to a post in a topic:
Buccaneer by Daiga - OcCre - 1:100 - first build
Daiga reacted to a post in a topic:
Buccaneer by Daiga - OcCre - 1:100 - first build
-
Baker reacted to a post in a topic:
Buccaneer by Daiga - OcCre - 1:100 - first build
-
Baker reacted to a post in a topic:
Buccaneer by Daiga - OcCre - 1:100 - first build
-
Baker reacted to a post in a topic:
Buccaneer by Daiga - OcCre - 1:100 - first build
-
Baker reacted to a post in a topic:
Buccaneer by Daiga - OcCre - 1:100 - first build
-
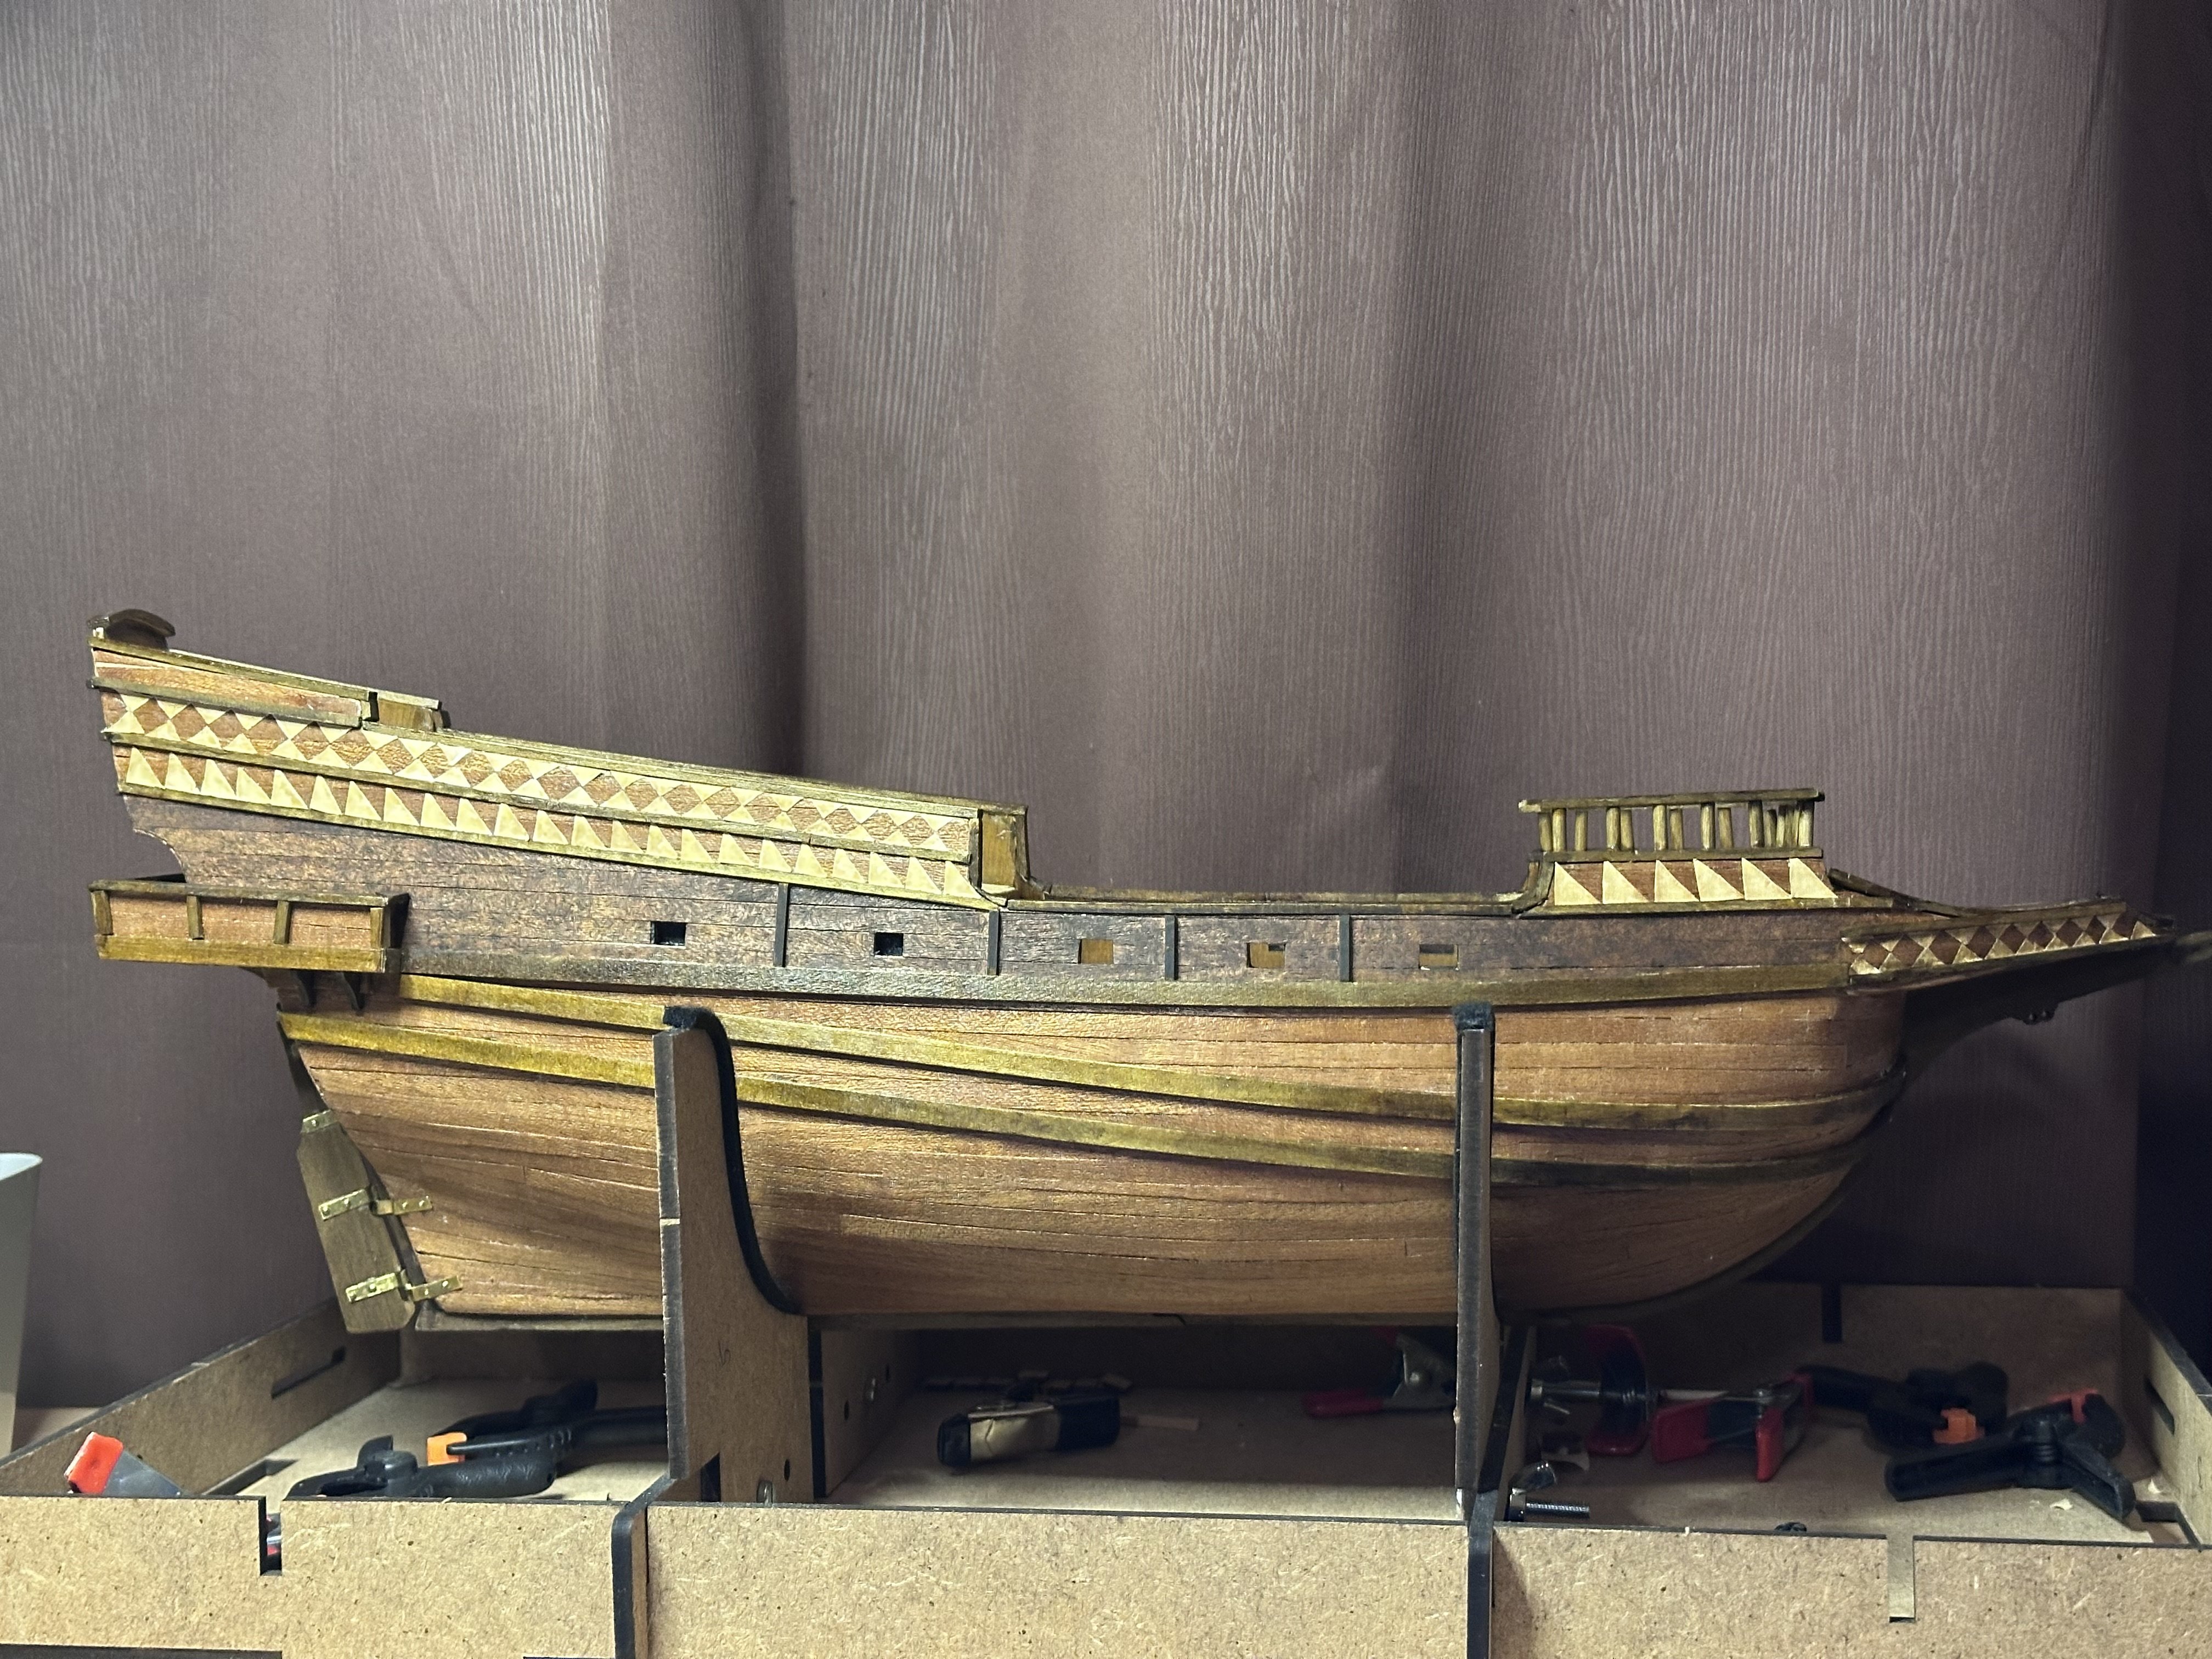
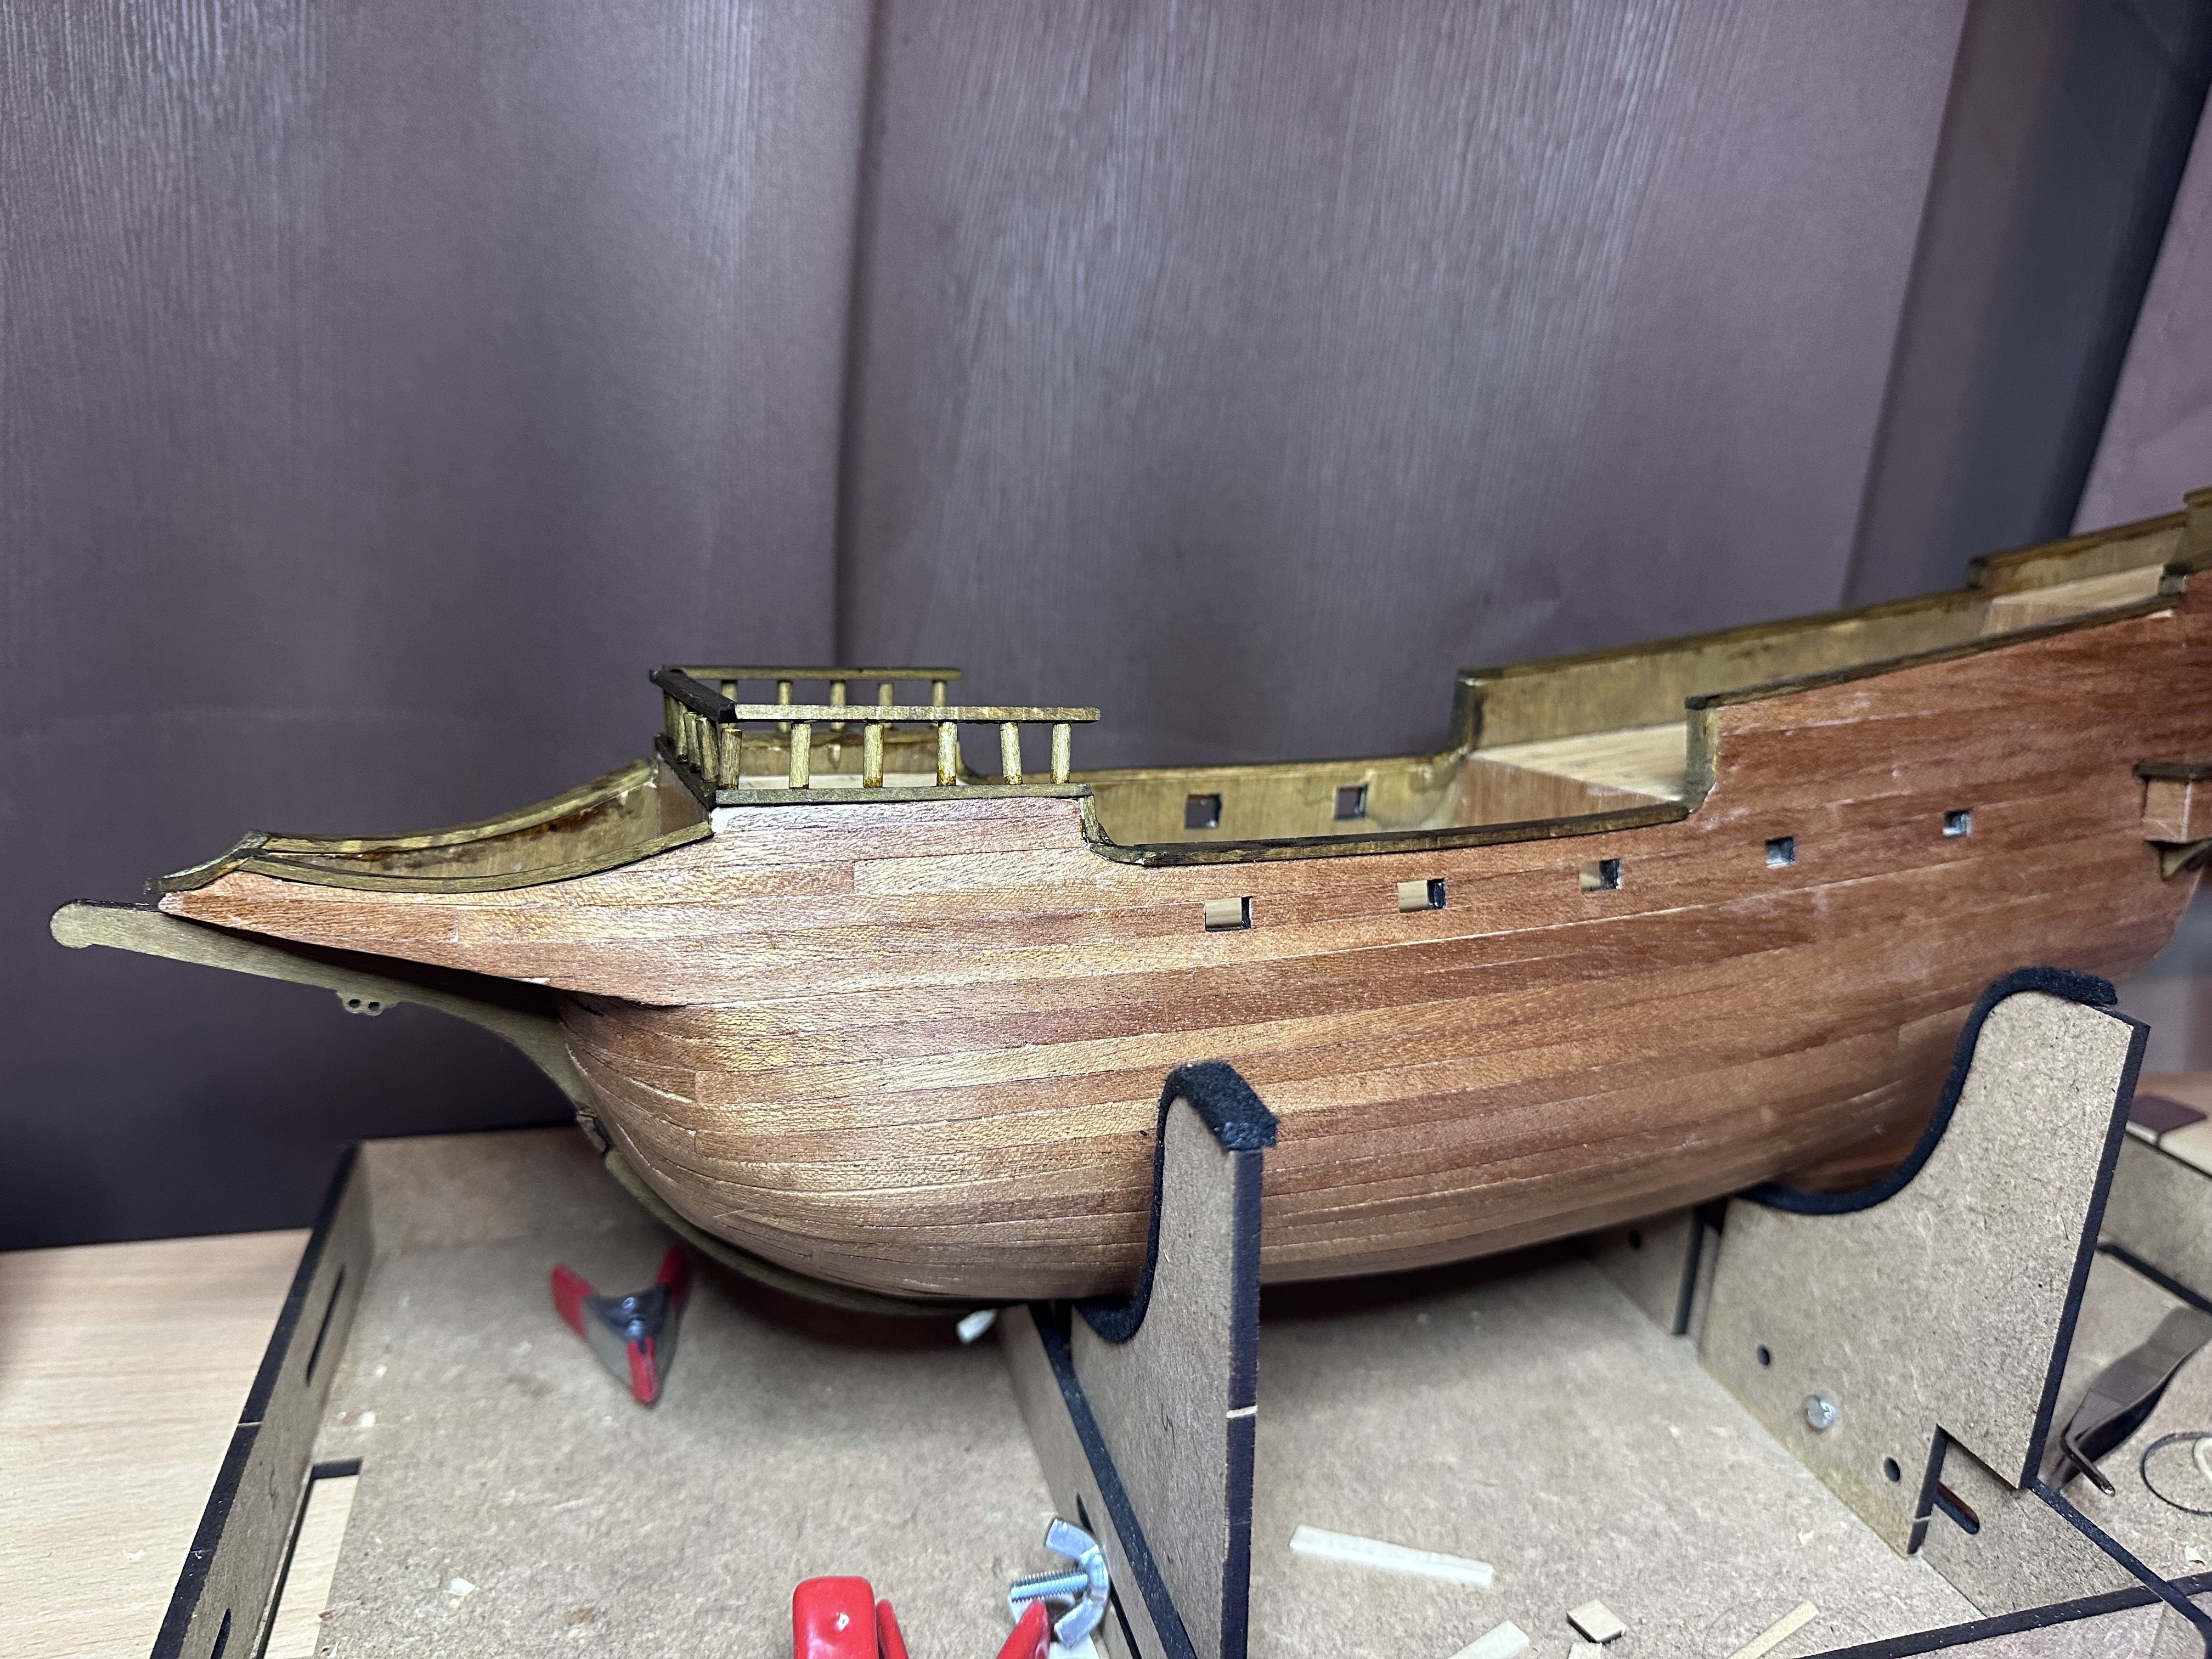
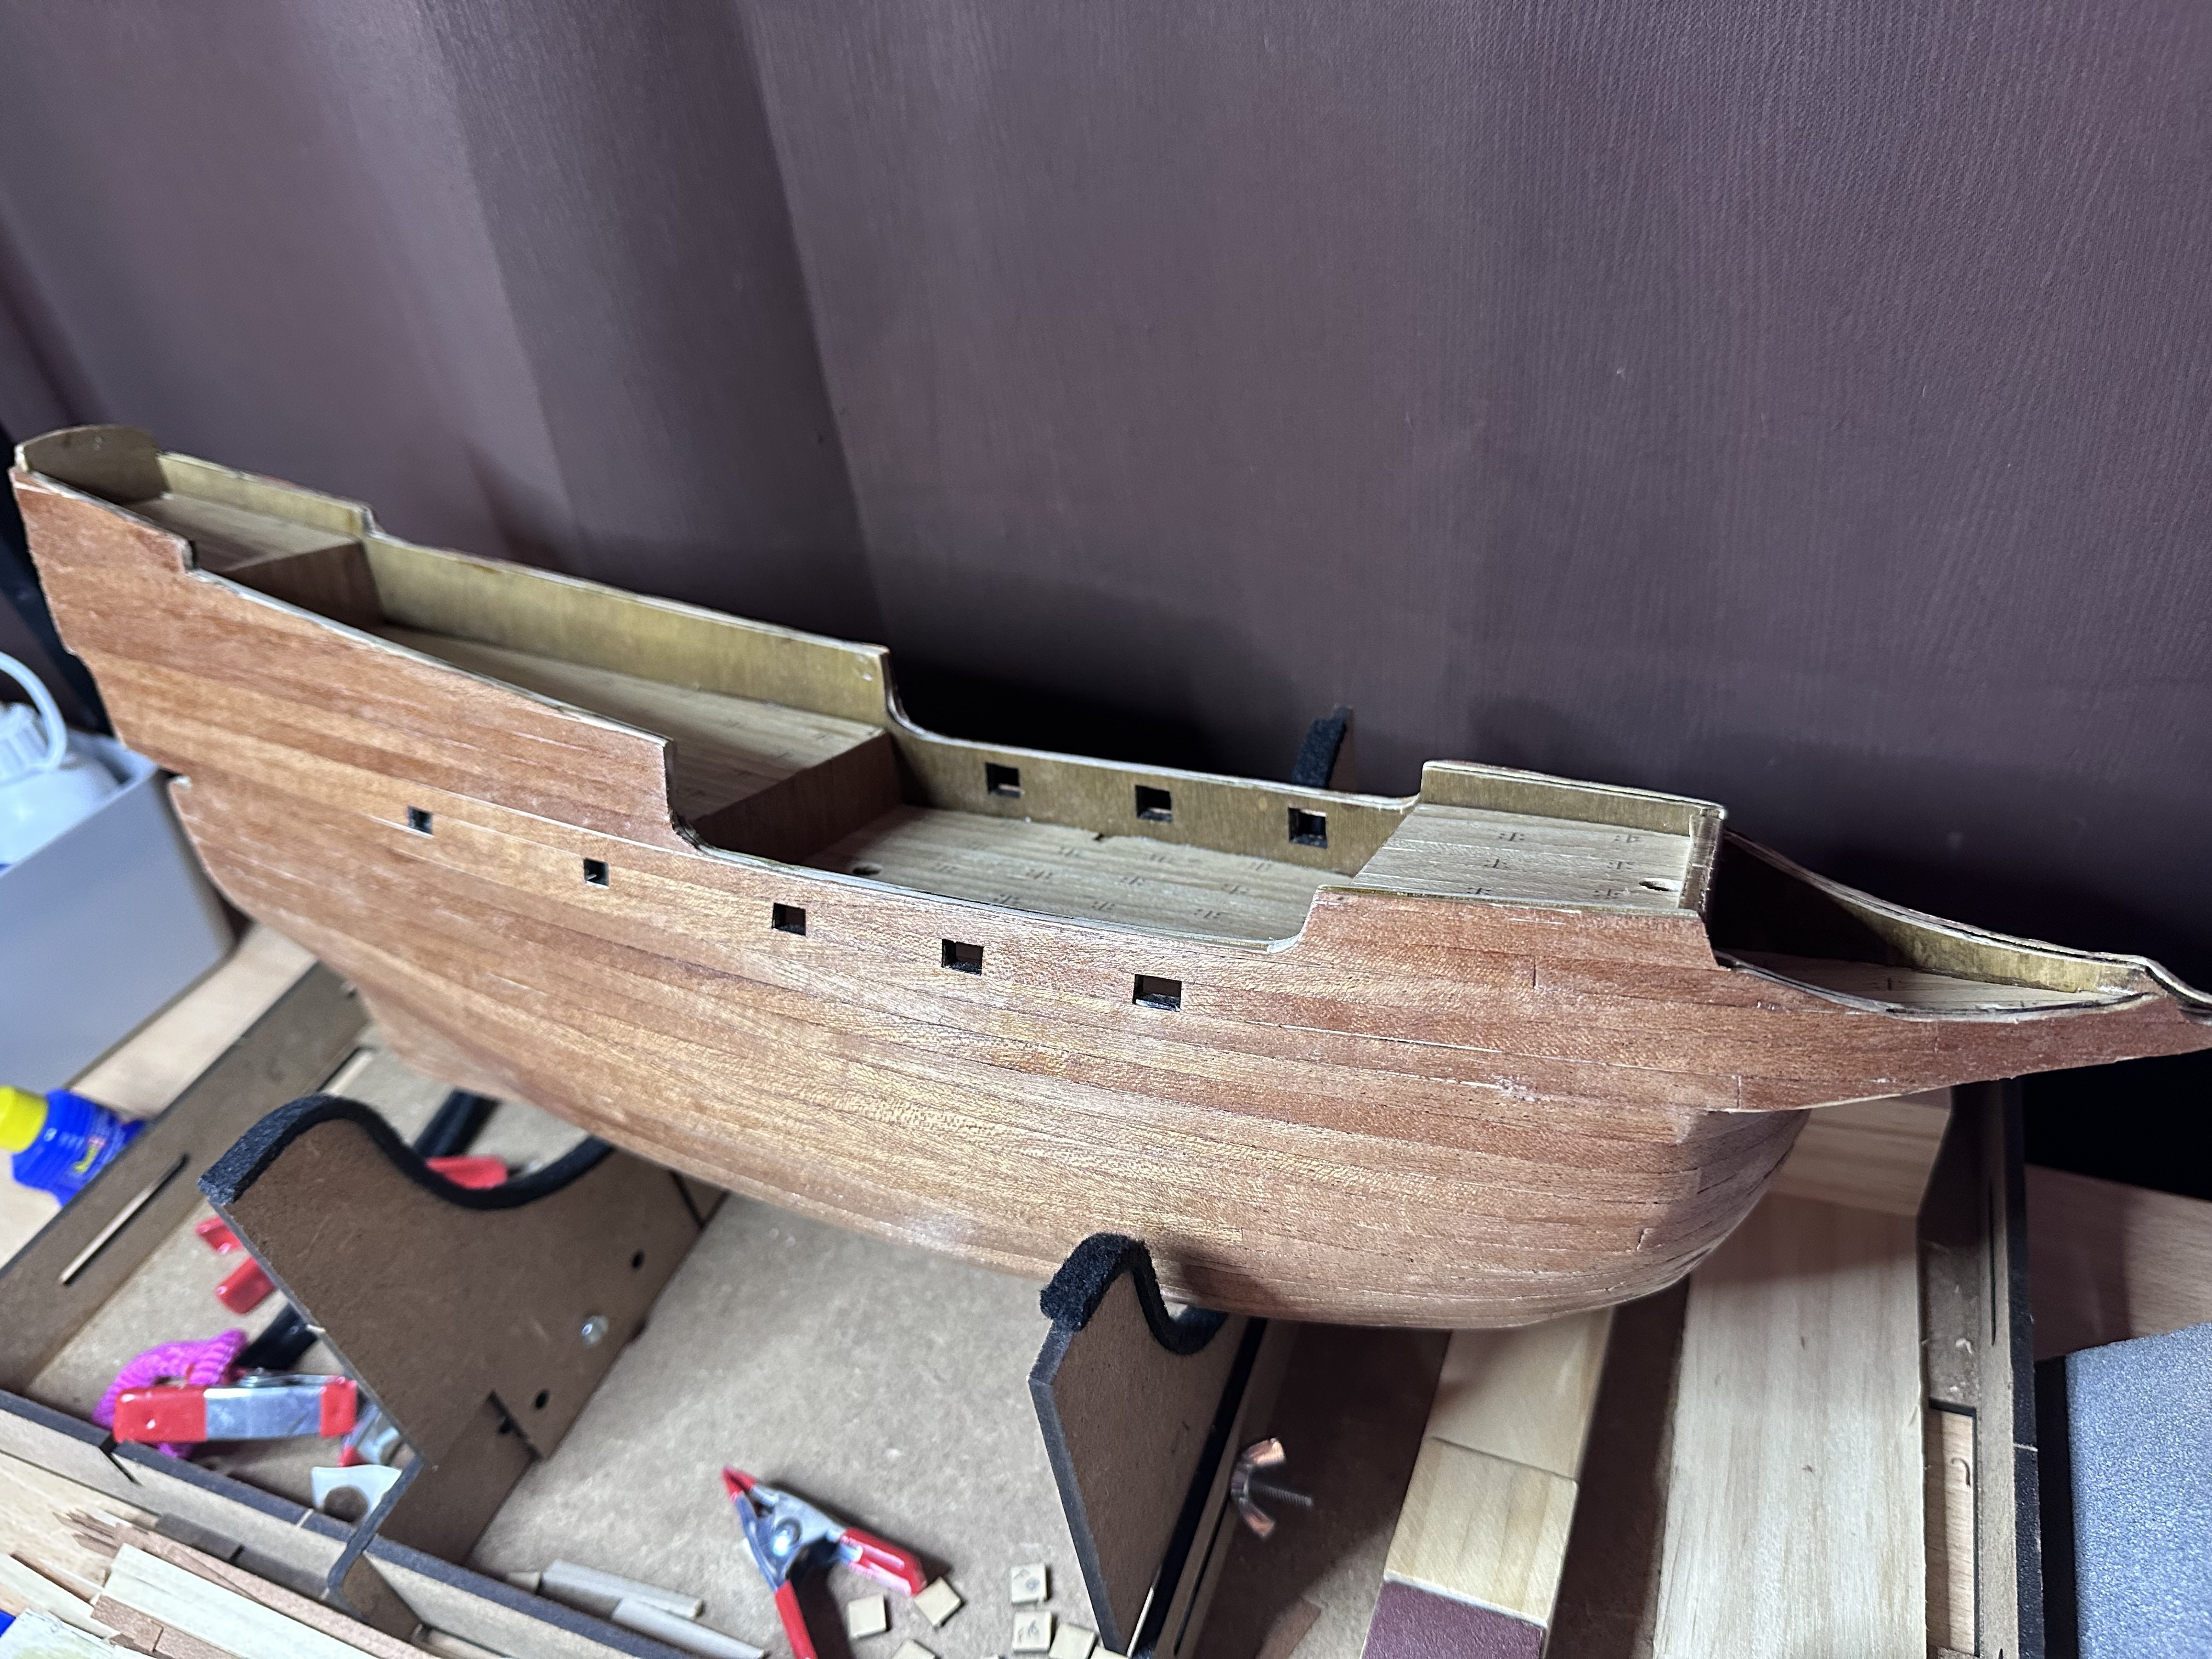
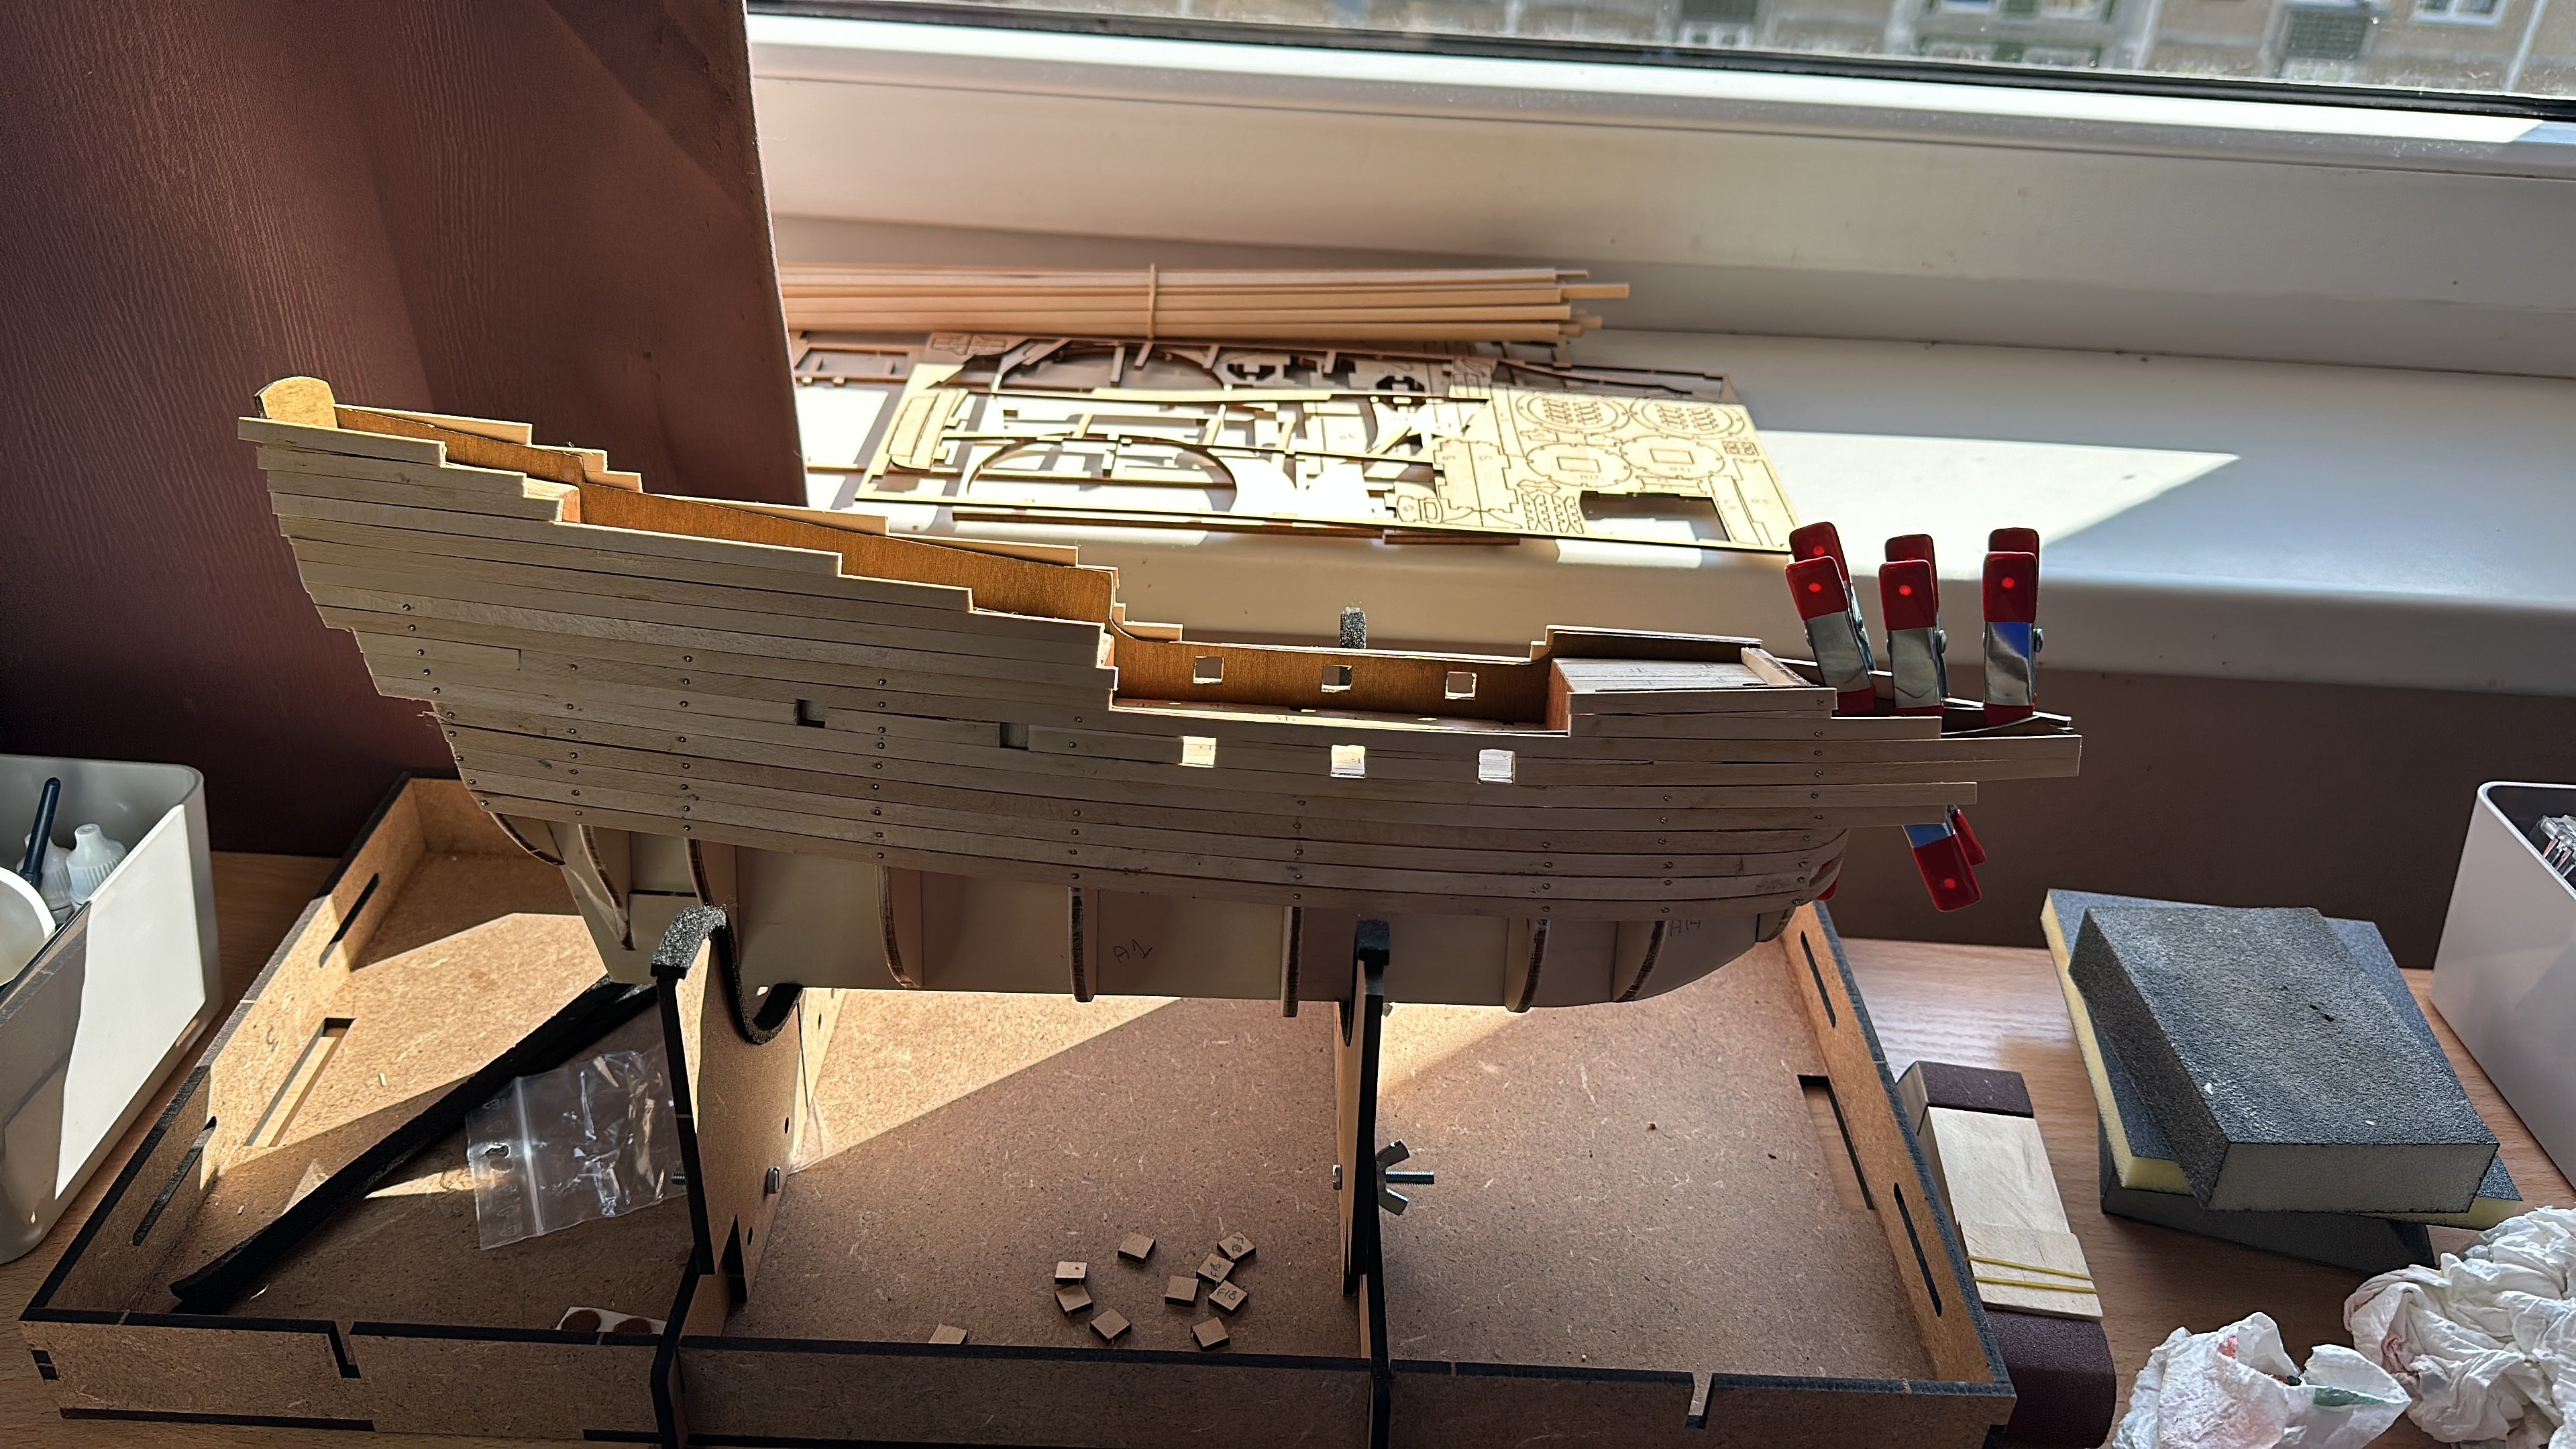
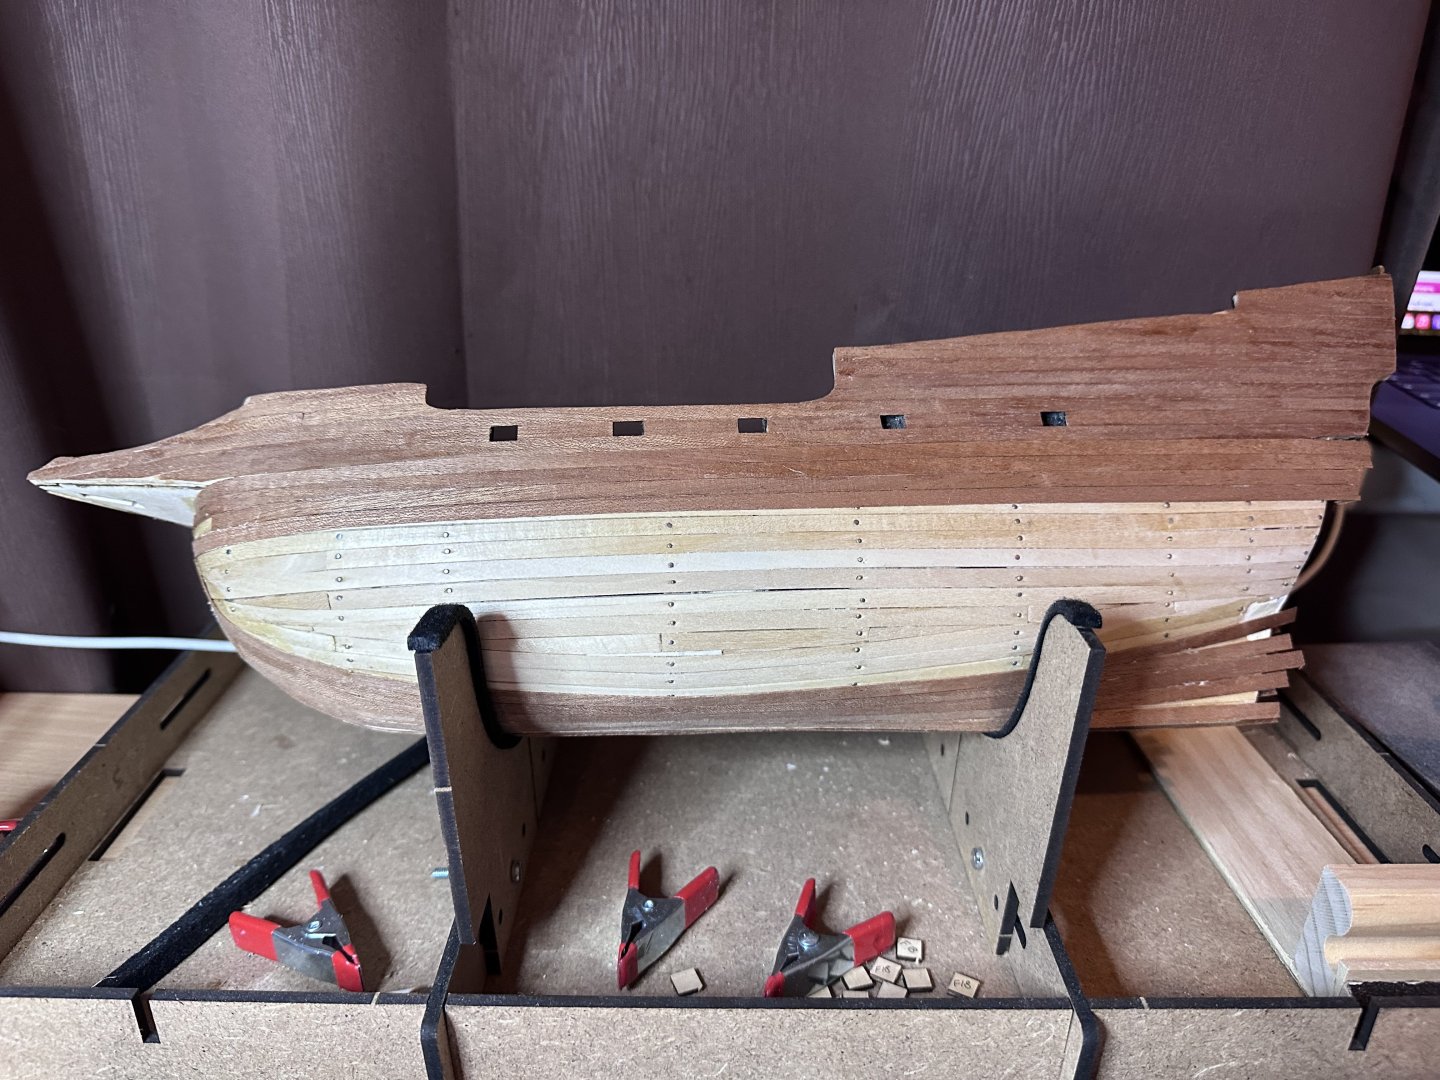
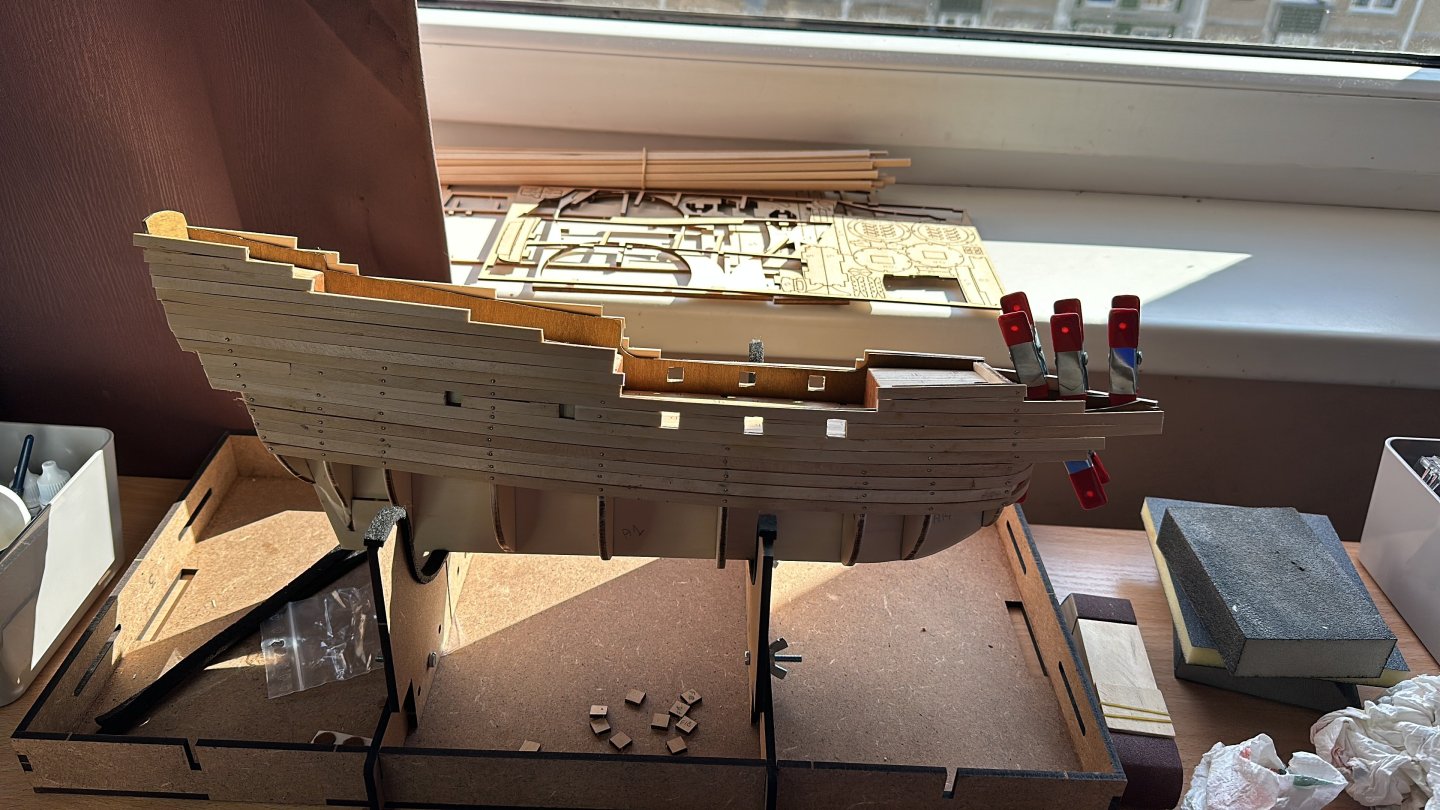
Next step is finished. I have seen in one forum man who build two Buccaneers: one as a first, second as it have to be. Starting to deeply understand him. Think my ship will be like Vasa warship, which will look quite nice but was not able to hold on water because was build wrong but good my Buccaneer will not have to swim, I hope. To glue planks on sides was very tricky, I have done it little by little. also they are not correct lined because of the angle of balcony. I didnt know I had to check it (therefore I am beginner) but I hope will be possible to bring that all together in the end. Left as it is Bitumen also was tricky, I was not able to properly done with the tehnique was shown in video, but I didn't re-done it. My ship its not perfect, its authentic Think better result is to add some water and just paint it, at least I like it. So the job continues. I am starting to doubt about deadline in March bet dont care, It takes so long as it takes, thats it. Have a lot of fan.


-
 Daiga reacted to a post in a topic:
San Martin by Pfälzer - FINISHED - OcCre - 1:90
Daiga reacted to a post in a topic:
San Martin by Pfälzer - FINISHED - OcCre - 1:90
-
Daiga reacted to a post in a topic:
Buccaneer by Daiga - OcCre - 1:100 - first build
-
GrandpaPhil reacted to a post in a topic:
Buccaneer by Daiga - OcCre - 1:100 - first build
-
SiriusVoyager reacted to a post in a topic:
Buccaneer by Daiga - OcCre - 1:100 - first build
-
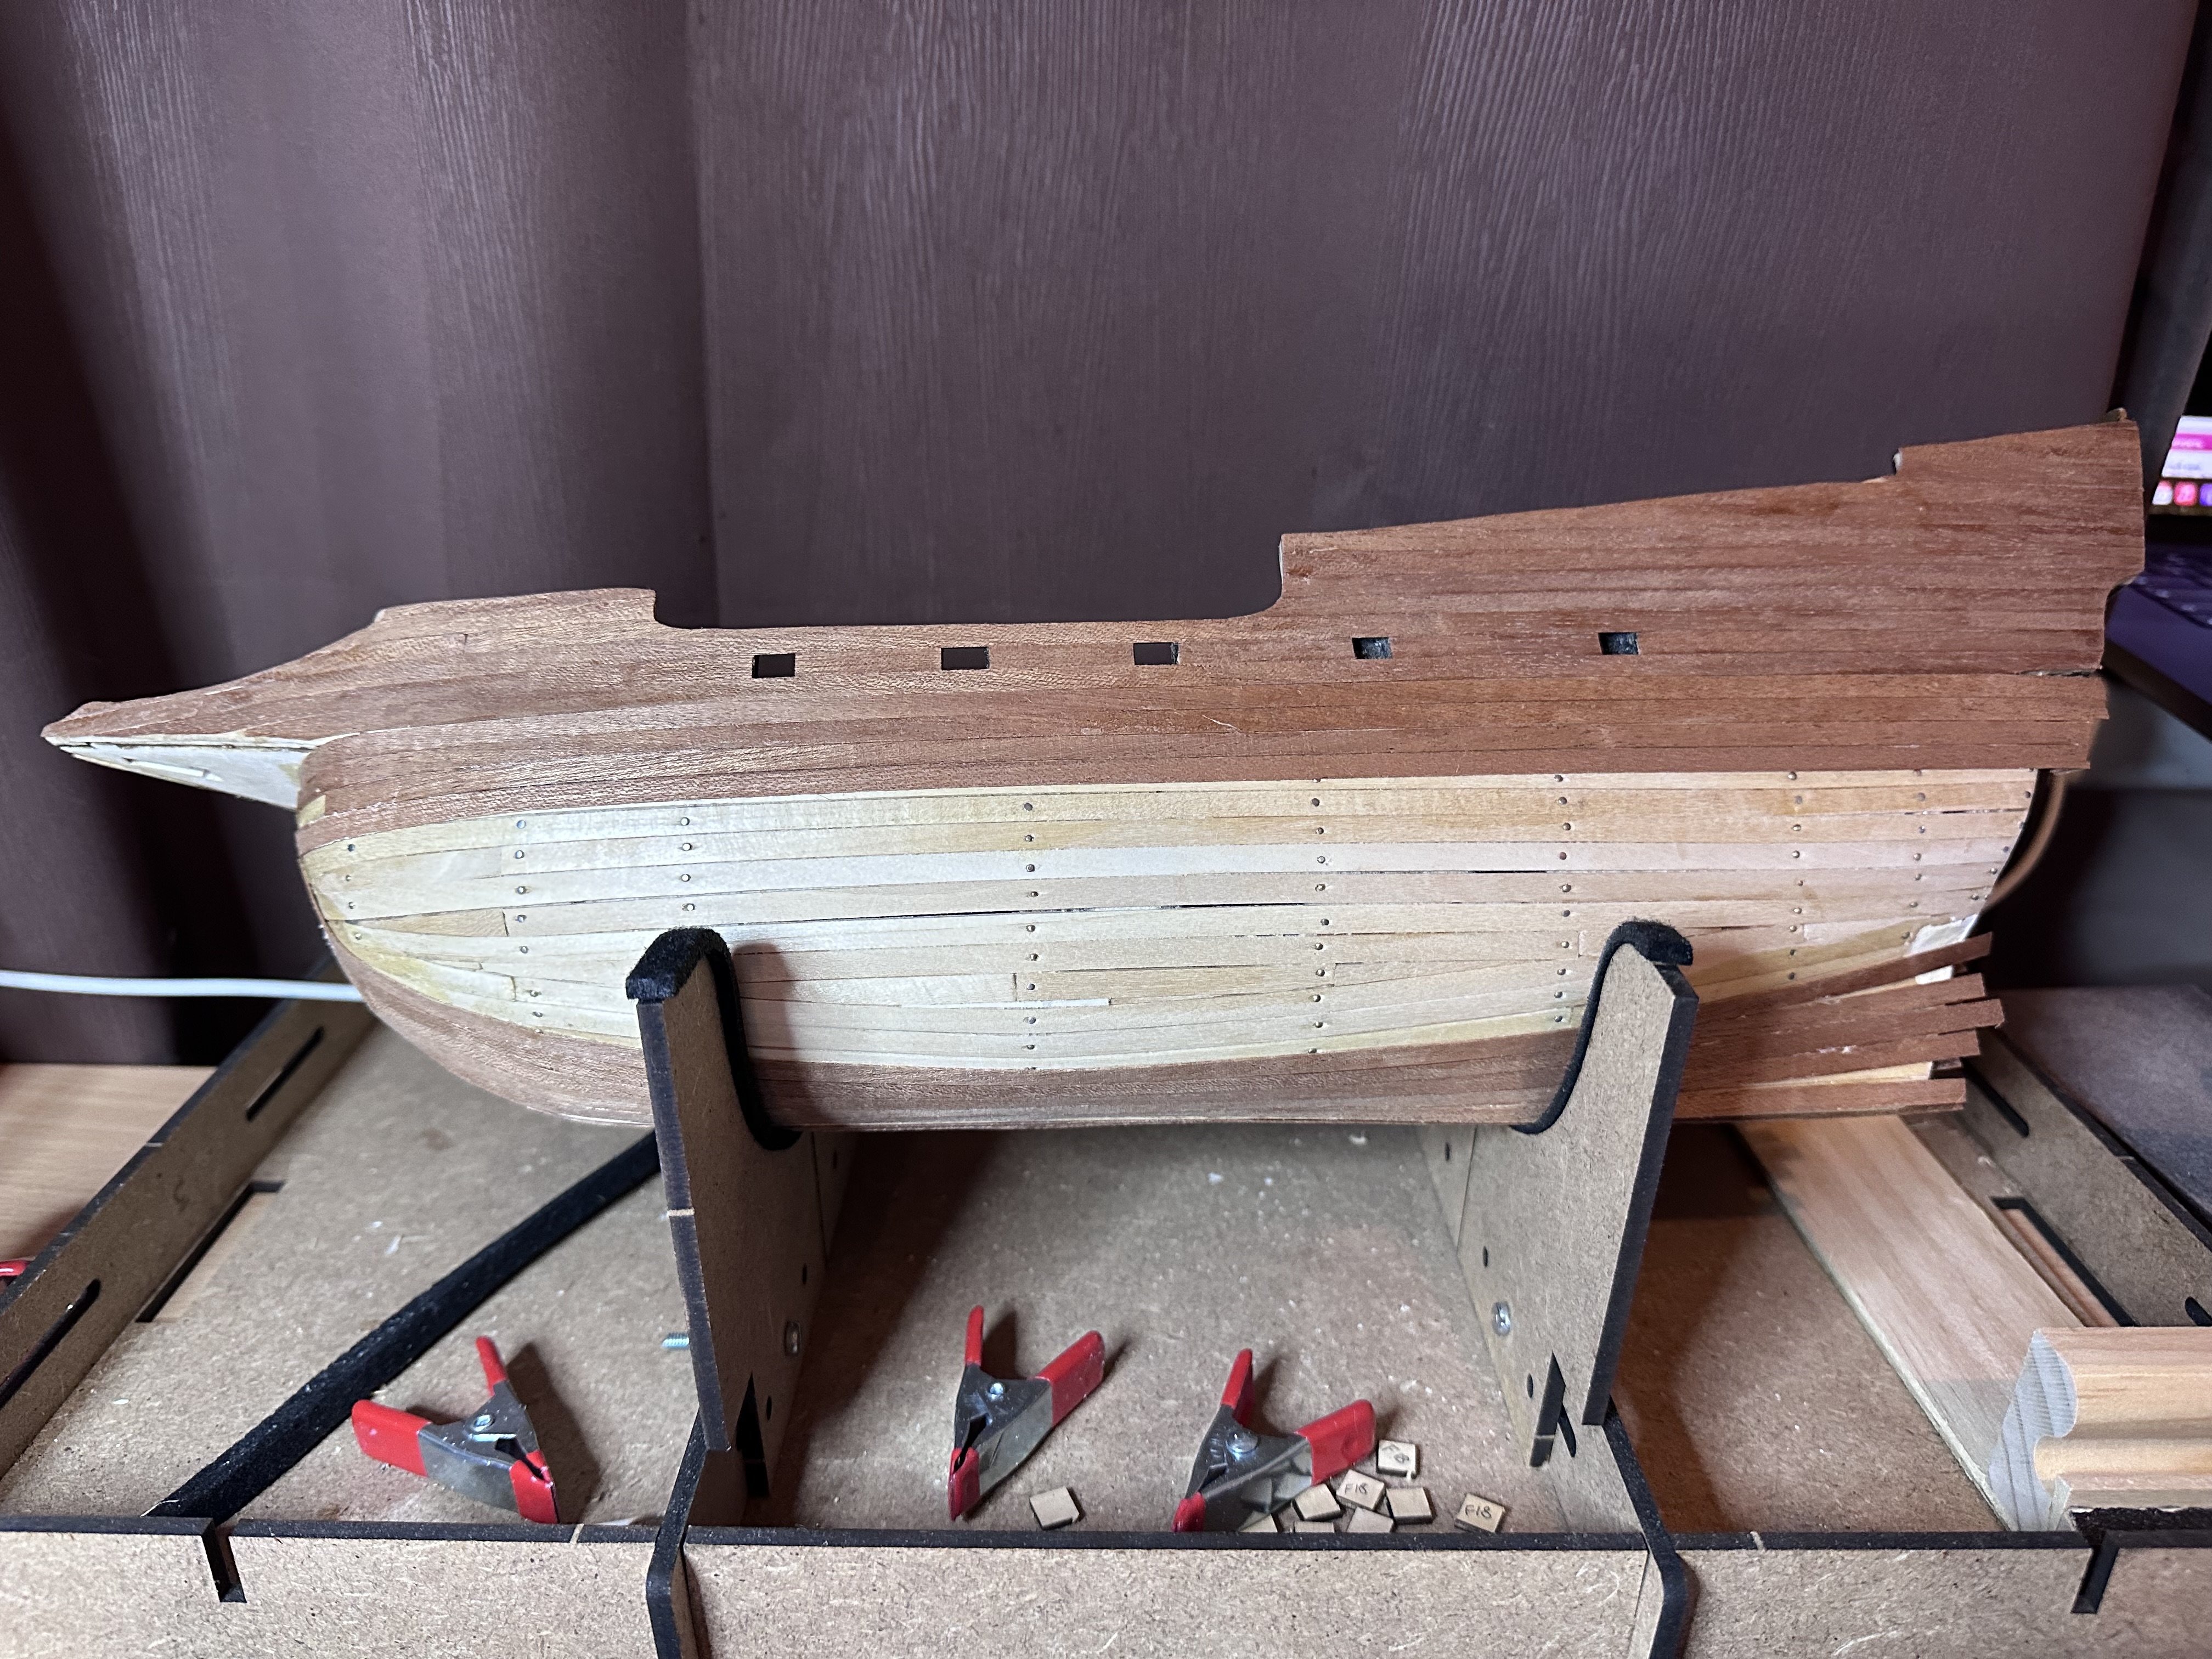
Next stage ready. Sure not everything is perfect. Also it seems I had to use pine dye instead of walnut dye but I think my will be " authentic" the ribs also is far from perfect, lesson learned - you cannot trust measurements. Had to just line up them to each other. OK, next ship. Also the corners I was not able bend a planks in 90 degrees. tried different - no idea, so I just ... sticked them together from small parts. Ready for next milestone. I have learned also that most of the thing is - just dont give up.

-
SiriusVoyager reacted to a post in a topic:
Buccaneer by Daiga - OcCre - 1:100 - first build
-
Daiga reacted to a post in a topic:
San Martin by Pfälzer - FINISHED - OcCre - 1:90
-
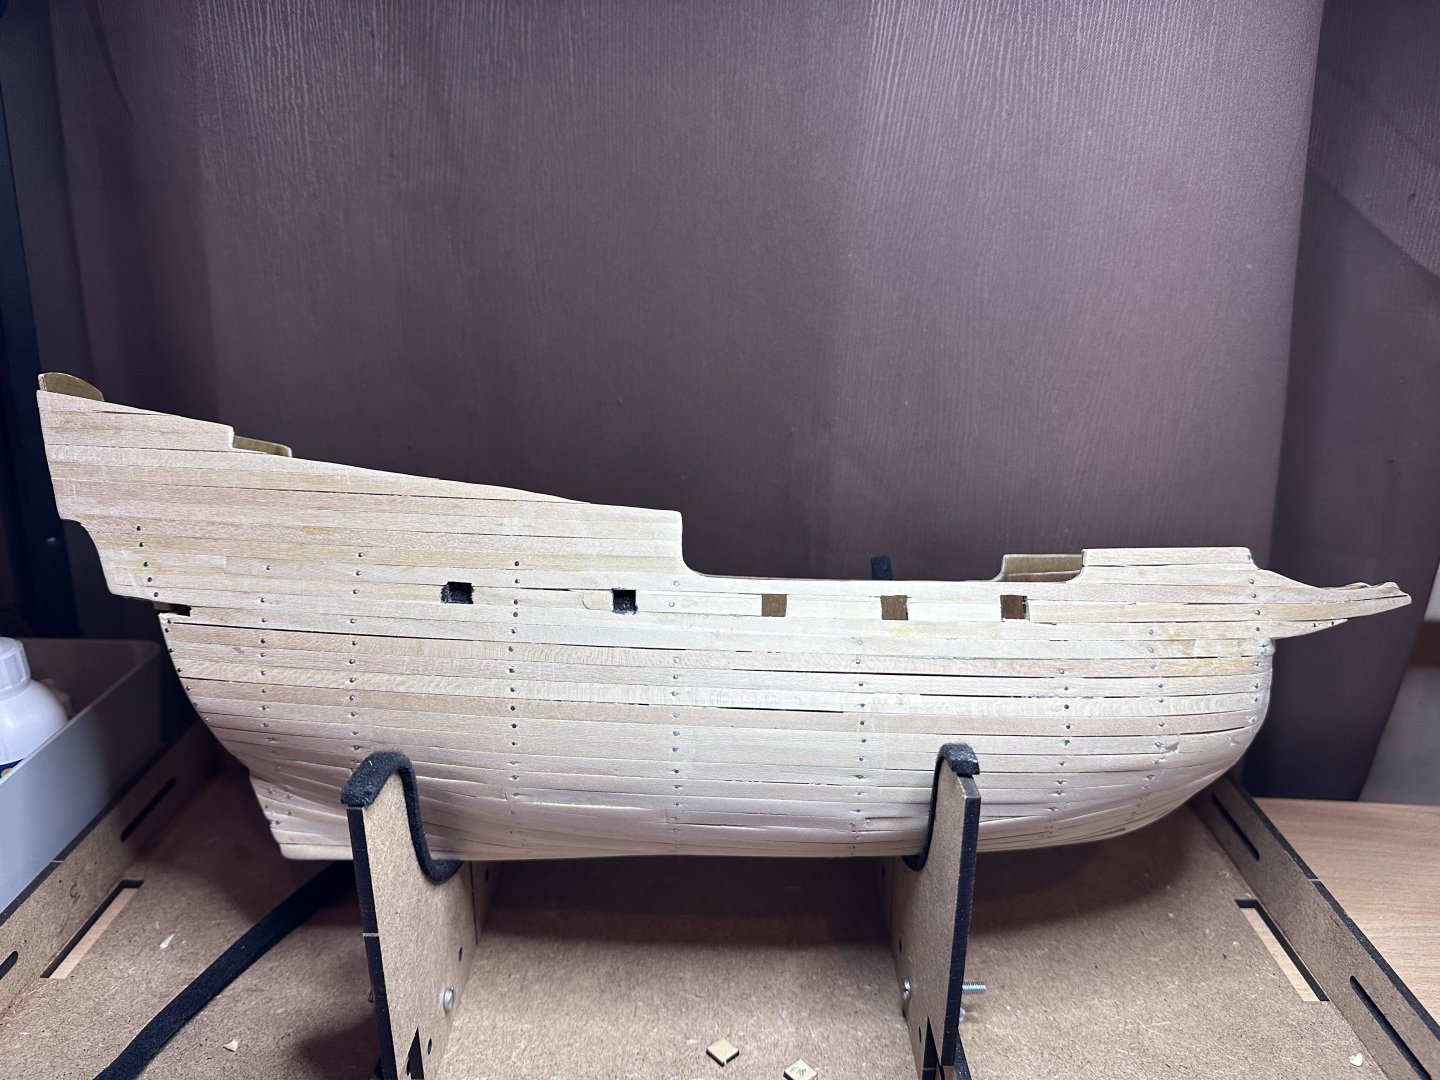
next layer done. It seems it will be easy because those planks were flexible. but it was not easy, it was tricky. Lesson learned, I switched from PVA glue to contact glue because better fix was mote important and cutting the edges was not easy, the planks were fragile. Just didnt give up and in the end I covered itr with satin vanish, dont know if I had to but I felt its necessary


-
Daiga reacted to a post in a topic:
Buccaneer by Daiga - OcCre - 1:100 - first build
-
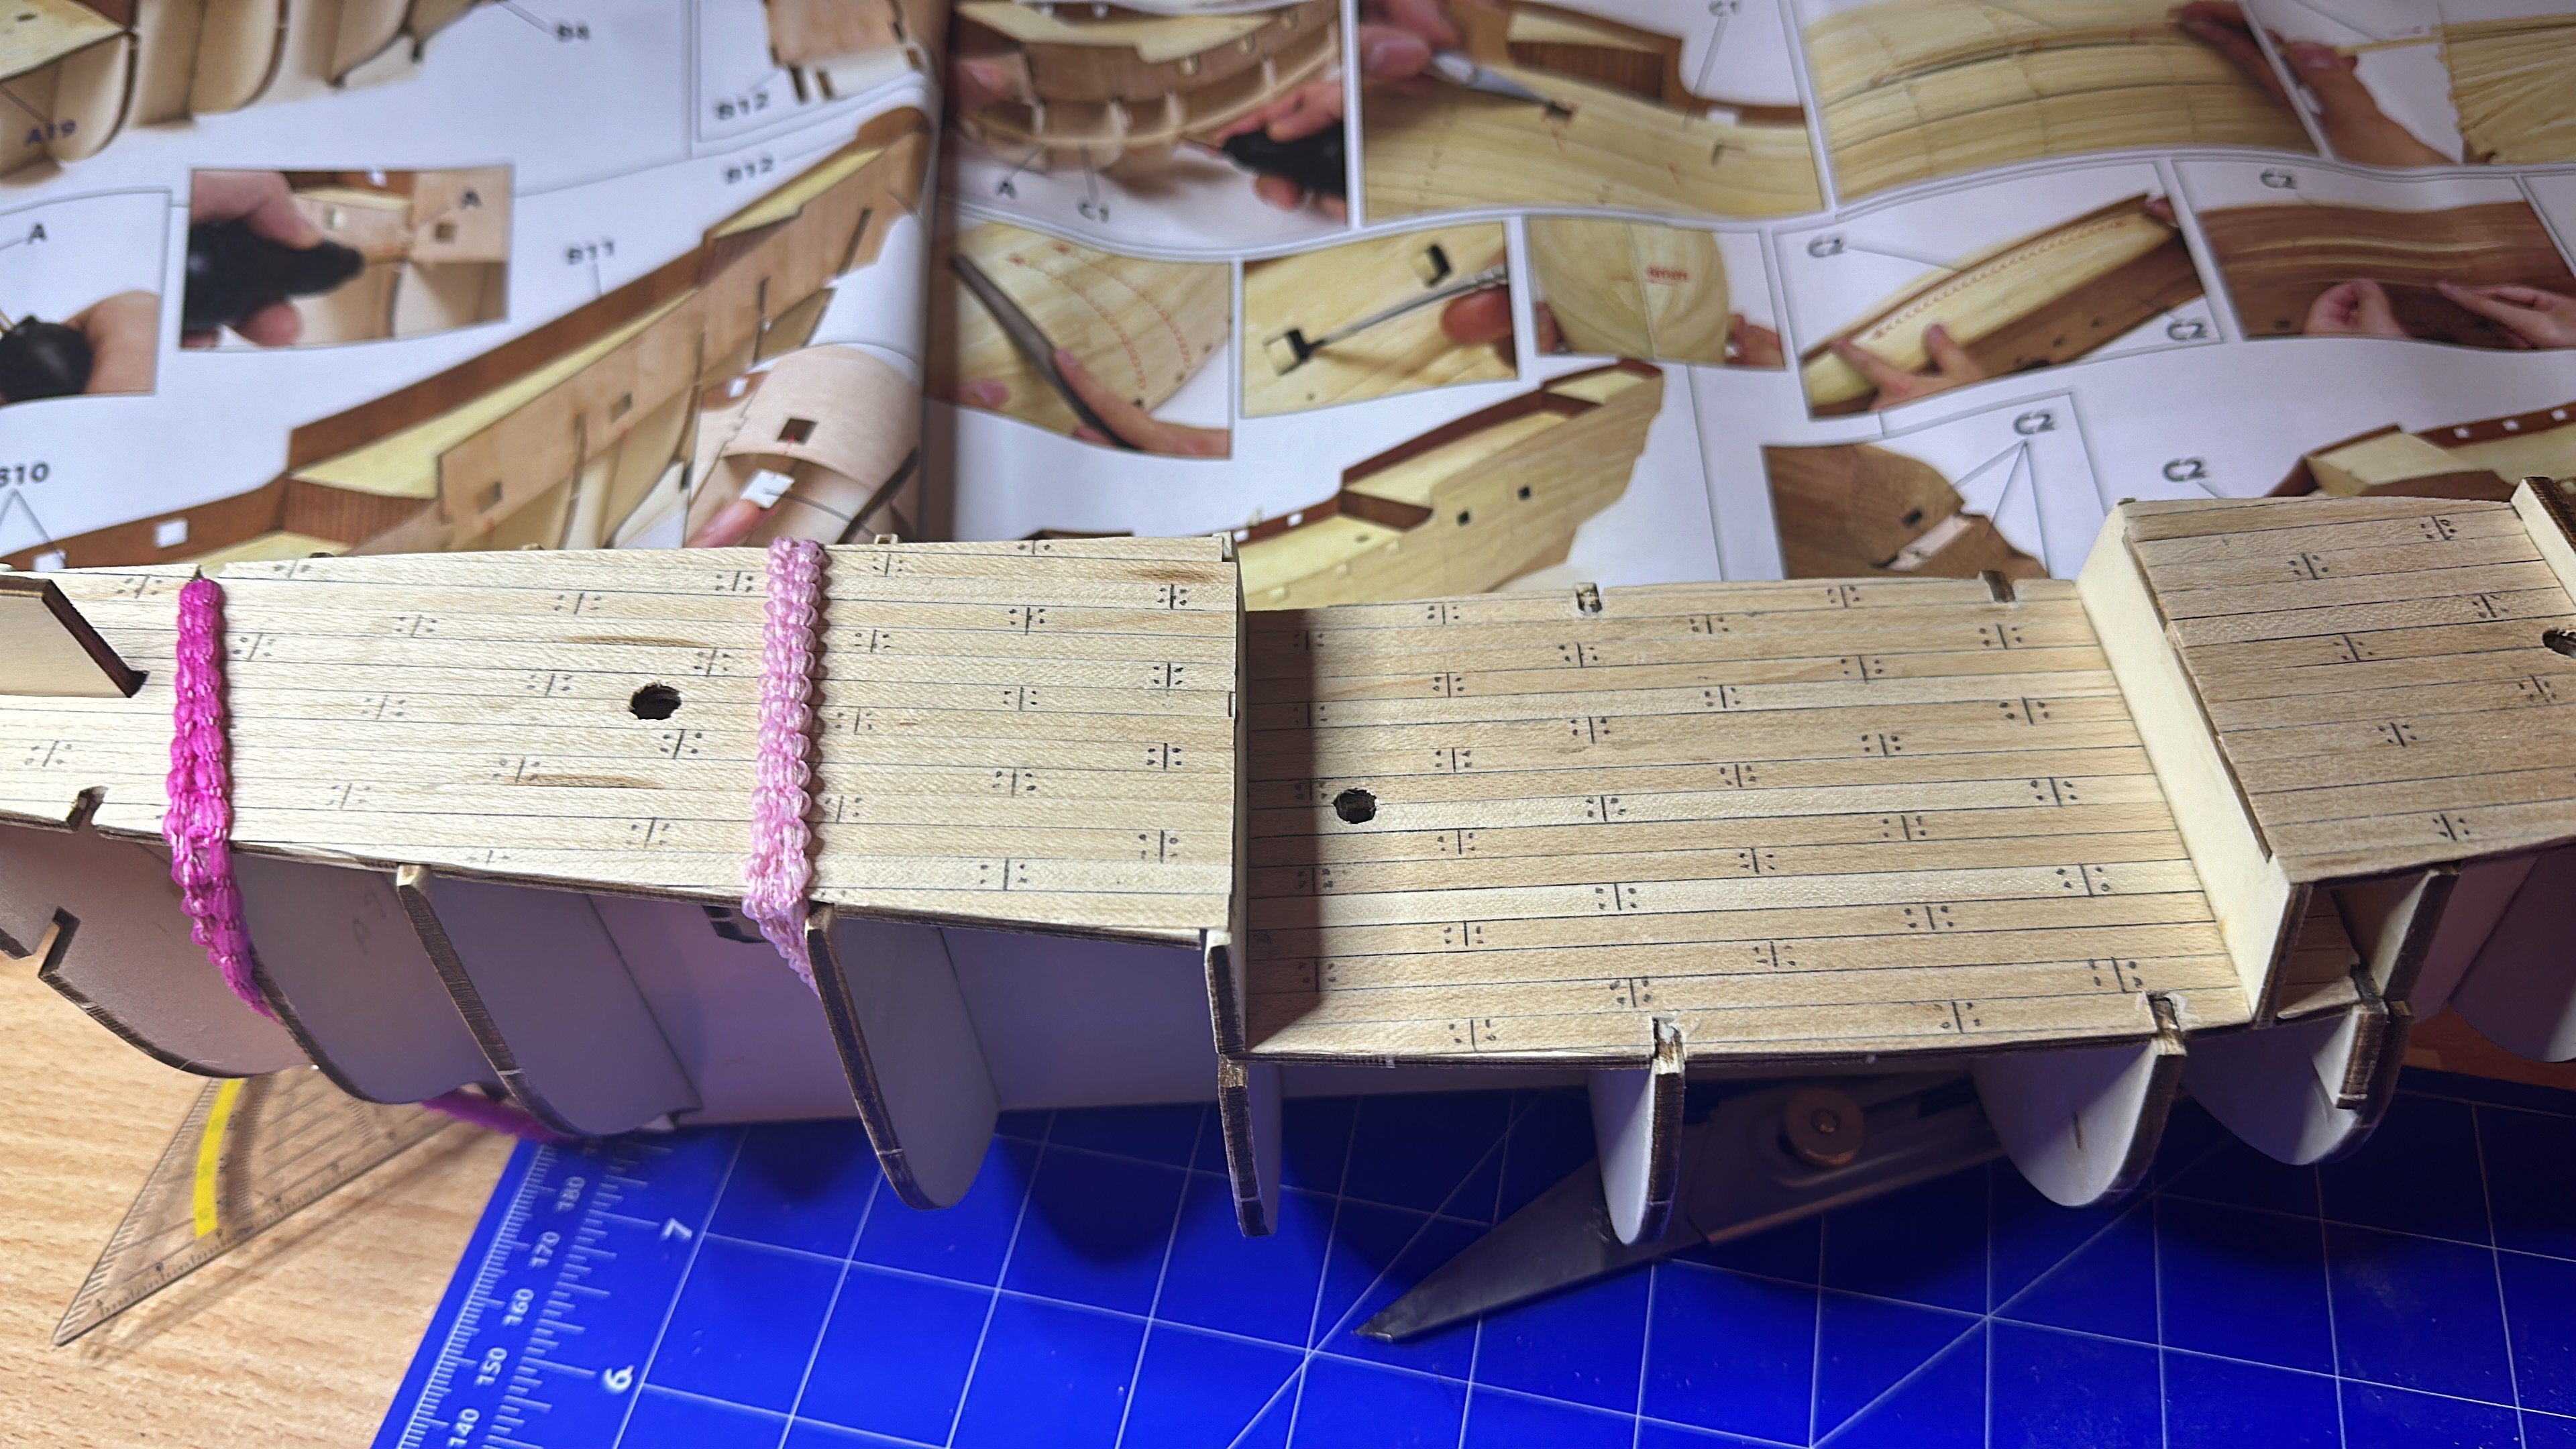
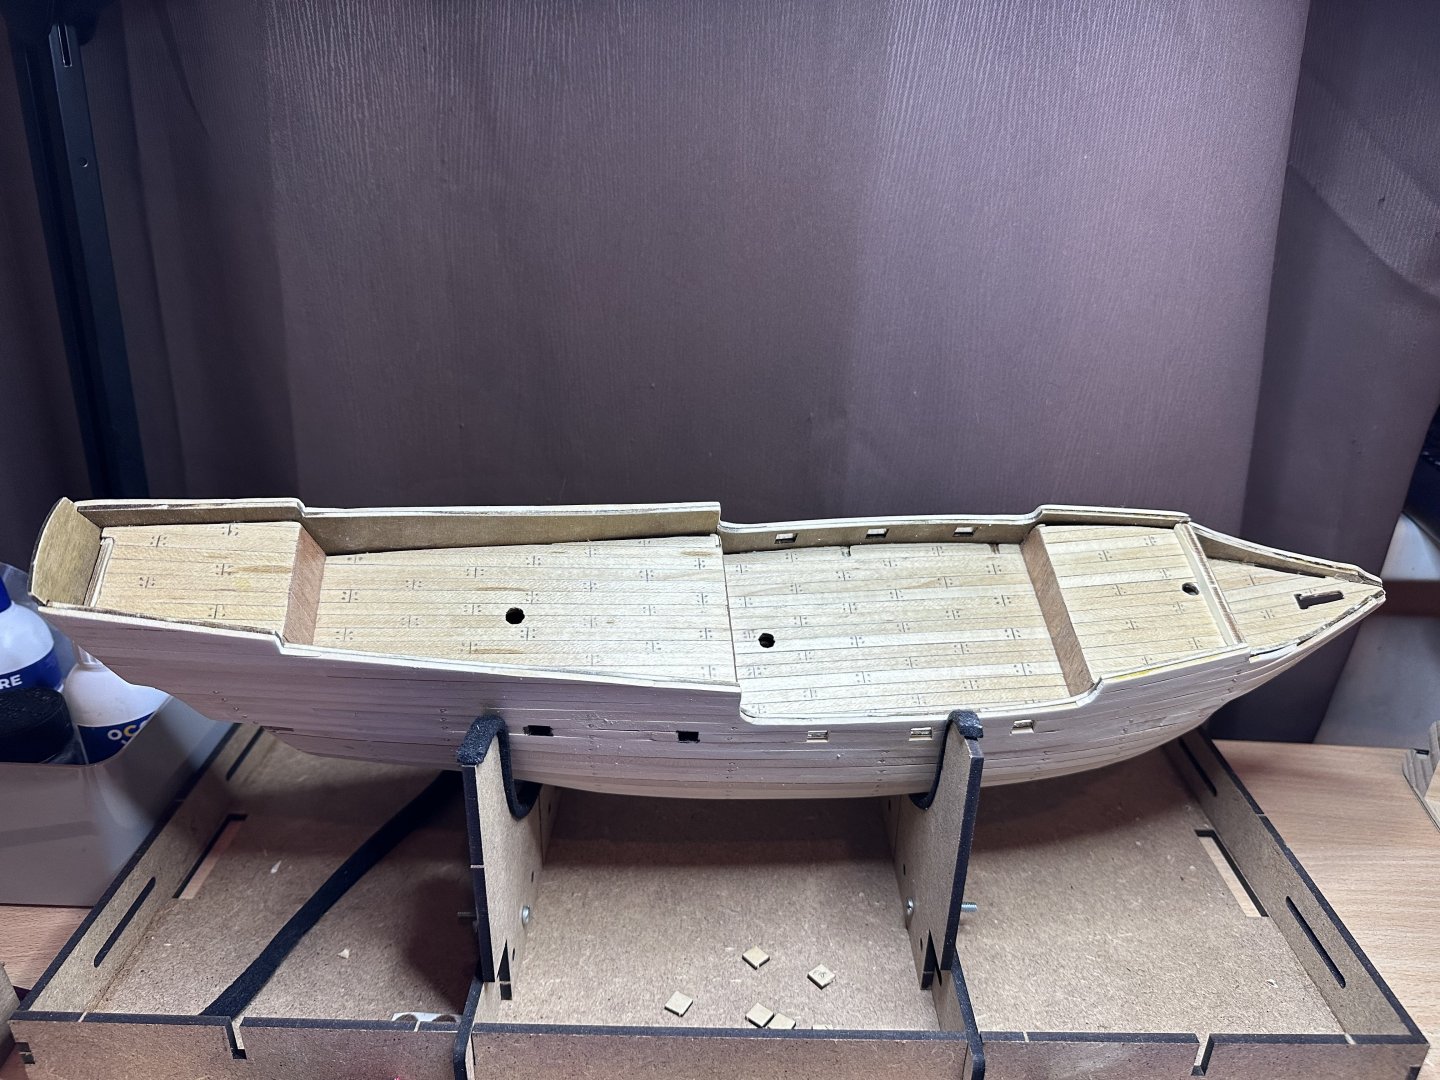
In this part we are getting ready for the next layer And dock looks not very bad I think
-
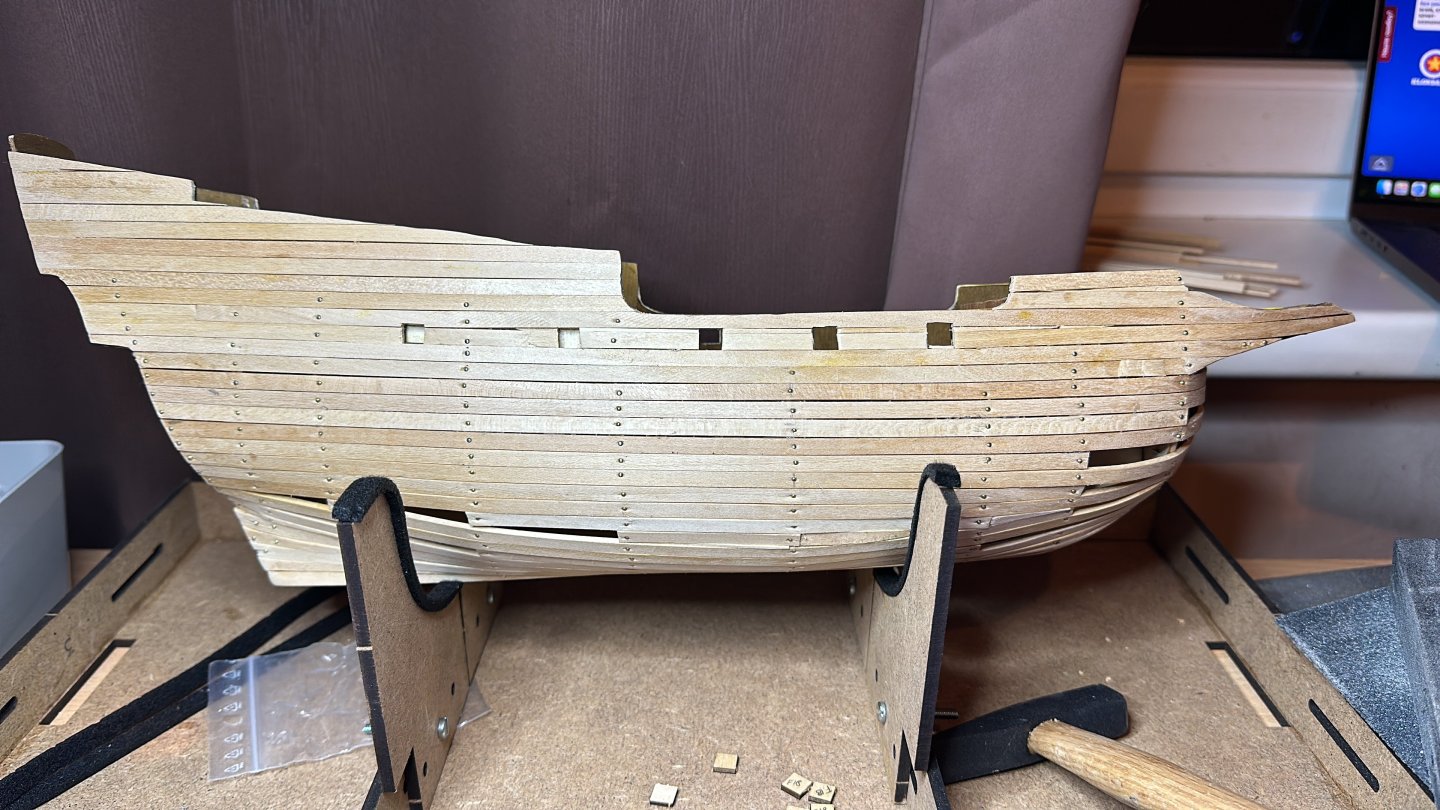
I found Electric Plank bender useful for this job. Not the iron as in instruction Think is OK Not bad, but we will see in the end In this part I found this is relaxing, just do some planks and ... relax
-
I found a youtube instruction and it was more clear from this part forward Actually the construction was not similar on both sides, it was 3-4 mm difference, I was able to see it from hatches. Lesson learned - do it more carefully Also I used PVA glue instead of contact glue at it was in instruction, I have read it somewhere in Internet its better. Cannot complain
-
In this part I realised, that I made mistake on gluing the frame, it was not correct. I had to reassemble it and do it again. Lesson learned - try it twice

-
Hi builders, Last winter I started to enjoy Lego building. This winter I have to set something more exciting. This is my first build, hope to get ready till spring (March). Started from this part, made too many holes, but, lets say it will be "authentic". Lesson learned - read the instruction carefully