GrandpaPhil
-
Posts
4,885 -
Joined
-
Last visited

.thumb.jpeg.ee4d205046163acd786c8b7e92026d43.jpeg)


.thumb.jpeg.fc5d633a7b34428fcf19419a73d56d55.jpeg)


About GrandpaPhil

-
 Knocklouder reacted to a post in a topic:
Cat Esther by GrandpaPhil - 1/64 - CARD
Knocklouder reacted to a post in a topic:
Cat Esther by GrandpaPhil - 1/64 - CARD
-
Baker reacted to a post in a topic:
Cat Esther by GrandpaPhil - 1/64 - CARD
-
JacquesCousteau reacted to a post in a topic:
Cat Esther by GrandpaPhil - 1/64 - CARD
-
Scottish Guy reacted to a post in a topic:
Cat Esther by GrandpaPhil - 1/64 - CARD
-
chadwijm6 reacted to a post in a topic:
Sopwith Camel by gsdpic - FINISHED - Artesania Latina - 1/16th scale
-
GrandpaPhil reacted to a post in a topic:
King of the Mississippi by Warnerade - Artesania Latina - 1:80
-
GrandpaPhil reacted to a post in a topic:
King of the Mississippi by Warnerade - Artesania Latina - 1:80
-
GrandpaPhil reacted to a post in a topic:
King of the Mississippi by Warnerade - Artesania Latina - 1:80
-
GrandpaPhil reacted to a post in a topic:
King of the Mississippi by Warnerade - Artesania Latina - 1:80
-
GrandpaPhil reacted to a post in a topic:
Canoa de Rancho by JacquesCousteau - Scale 1:32 - Lake Chapala Fishing and Cabotage Vessel
-
GrandpaPhil reacted to a post in a topic:
ZULU 1916 by Ras Ambrioso - 1/48 scale - stern paddlewheeler
-
GrandpaPhil reacted to a post in a topic:
Herzogin Cecilie 1902 by Jim Lad - Four Masted Barque
-
GrandpaPhil reacted to a post in a topic:
LA CREOLE/ LA GUADELOUPE by matiz - 1:48 - by Tiziano Mainardi from Boudriot plans
-
GrandpaPhil reacted to a post in a topic:
French 64 Gun Ship 1729 by Jeronimo
-
GrandpaPhil reacted to a post in a topic:
Curtiss P-40K Kittyhawk Mk III by realworkingsailor - Special Hobby - 1/72
-
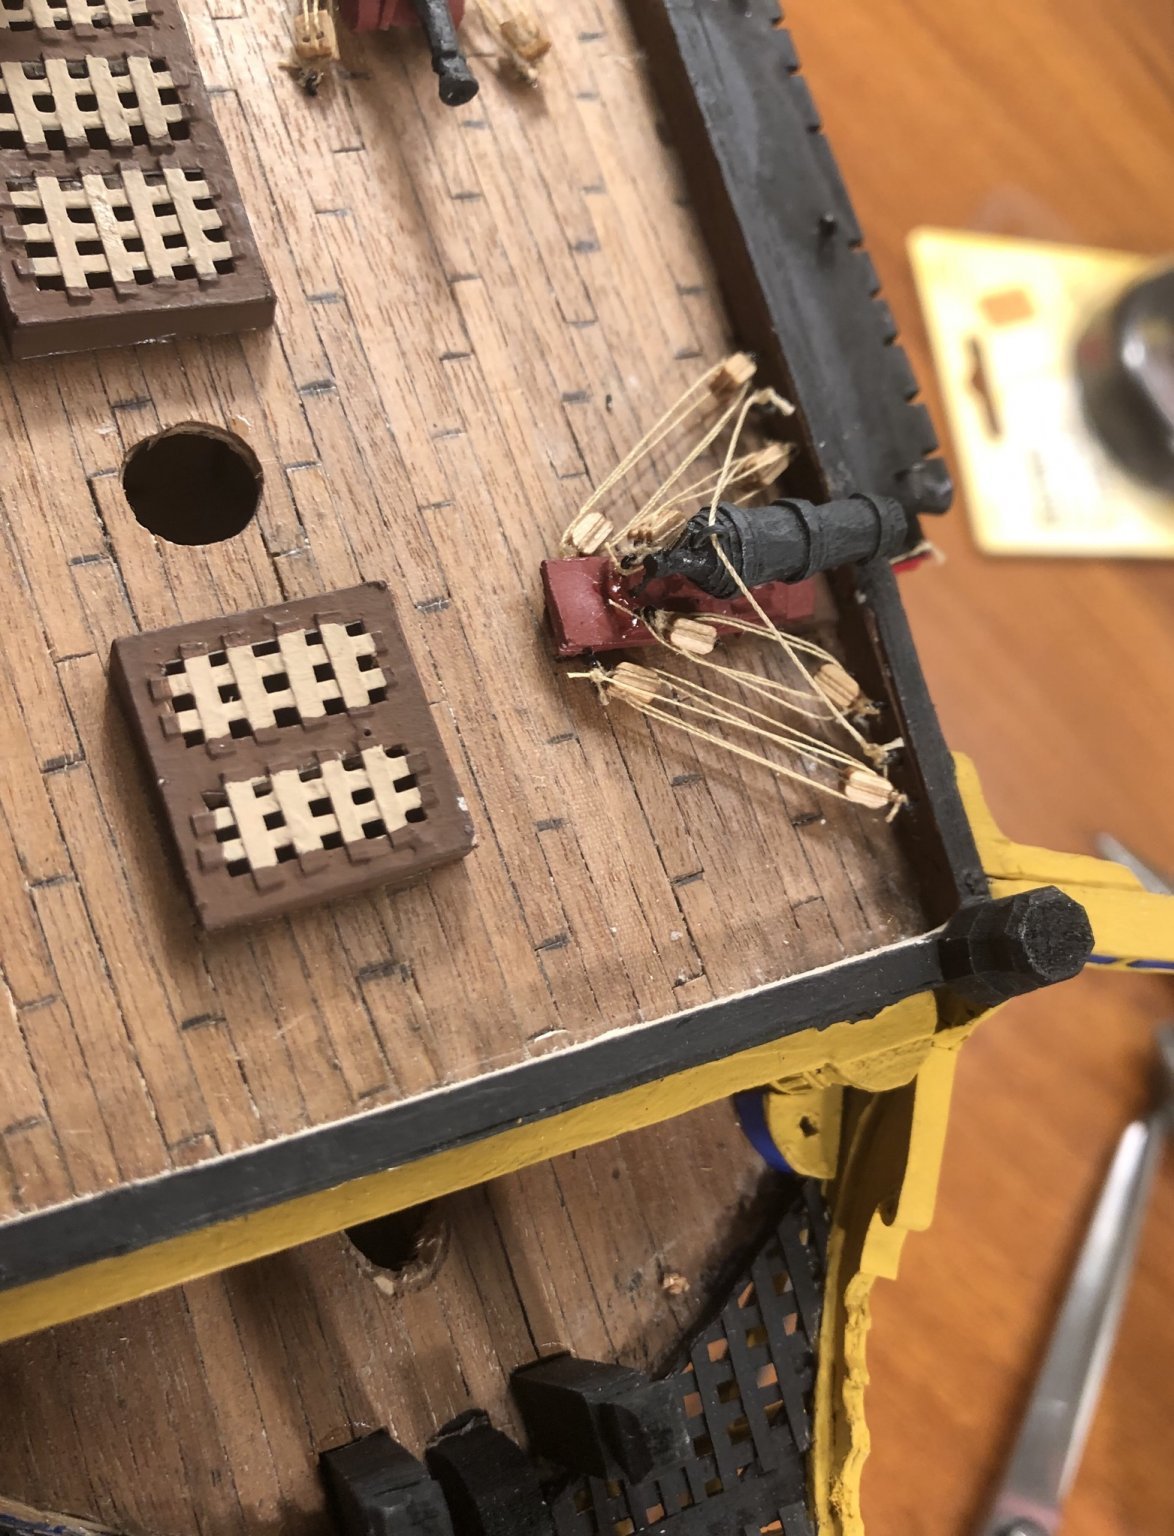
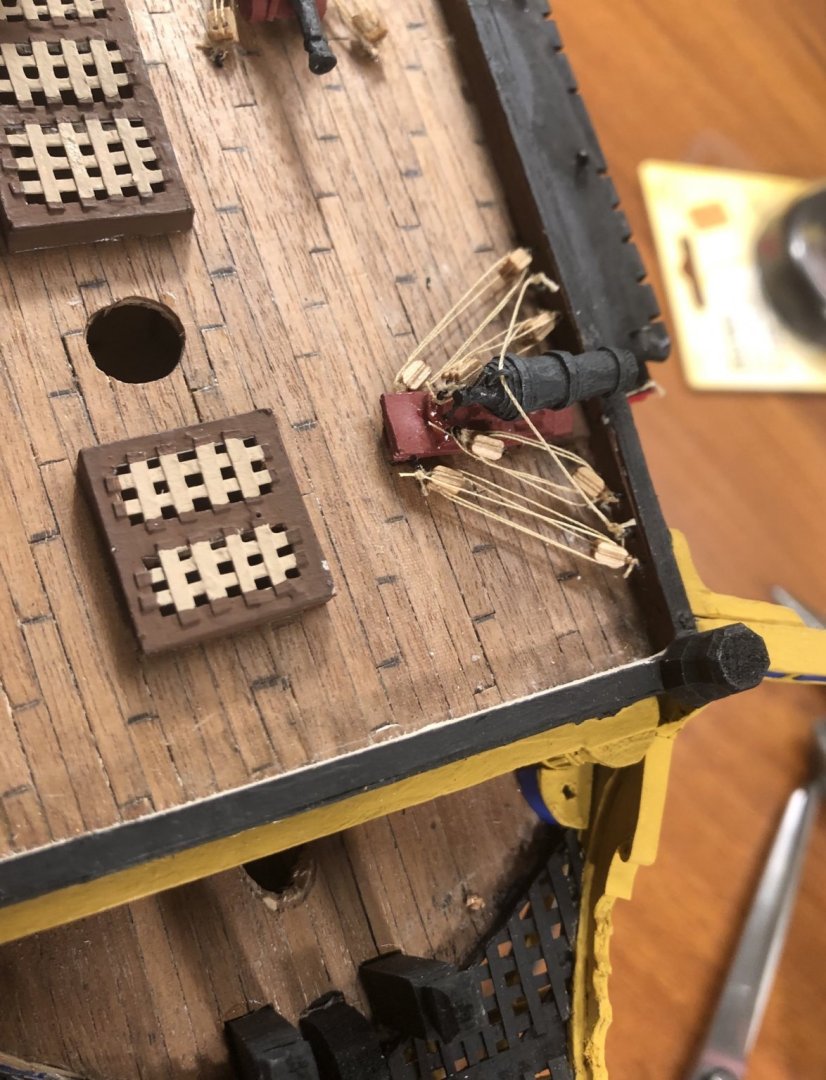
For a swivel mounted carronade it will be similar to this: That’s on the Victory, so the carronade is a little bigger and a little heavier than what Niagara packed, but yours will be of a similar configuration, just most likely with only one set of blocks on each side to aim, not two sets on each side like is on mine.
-
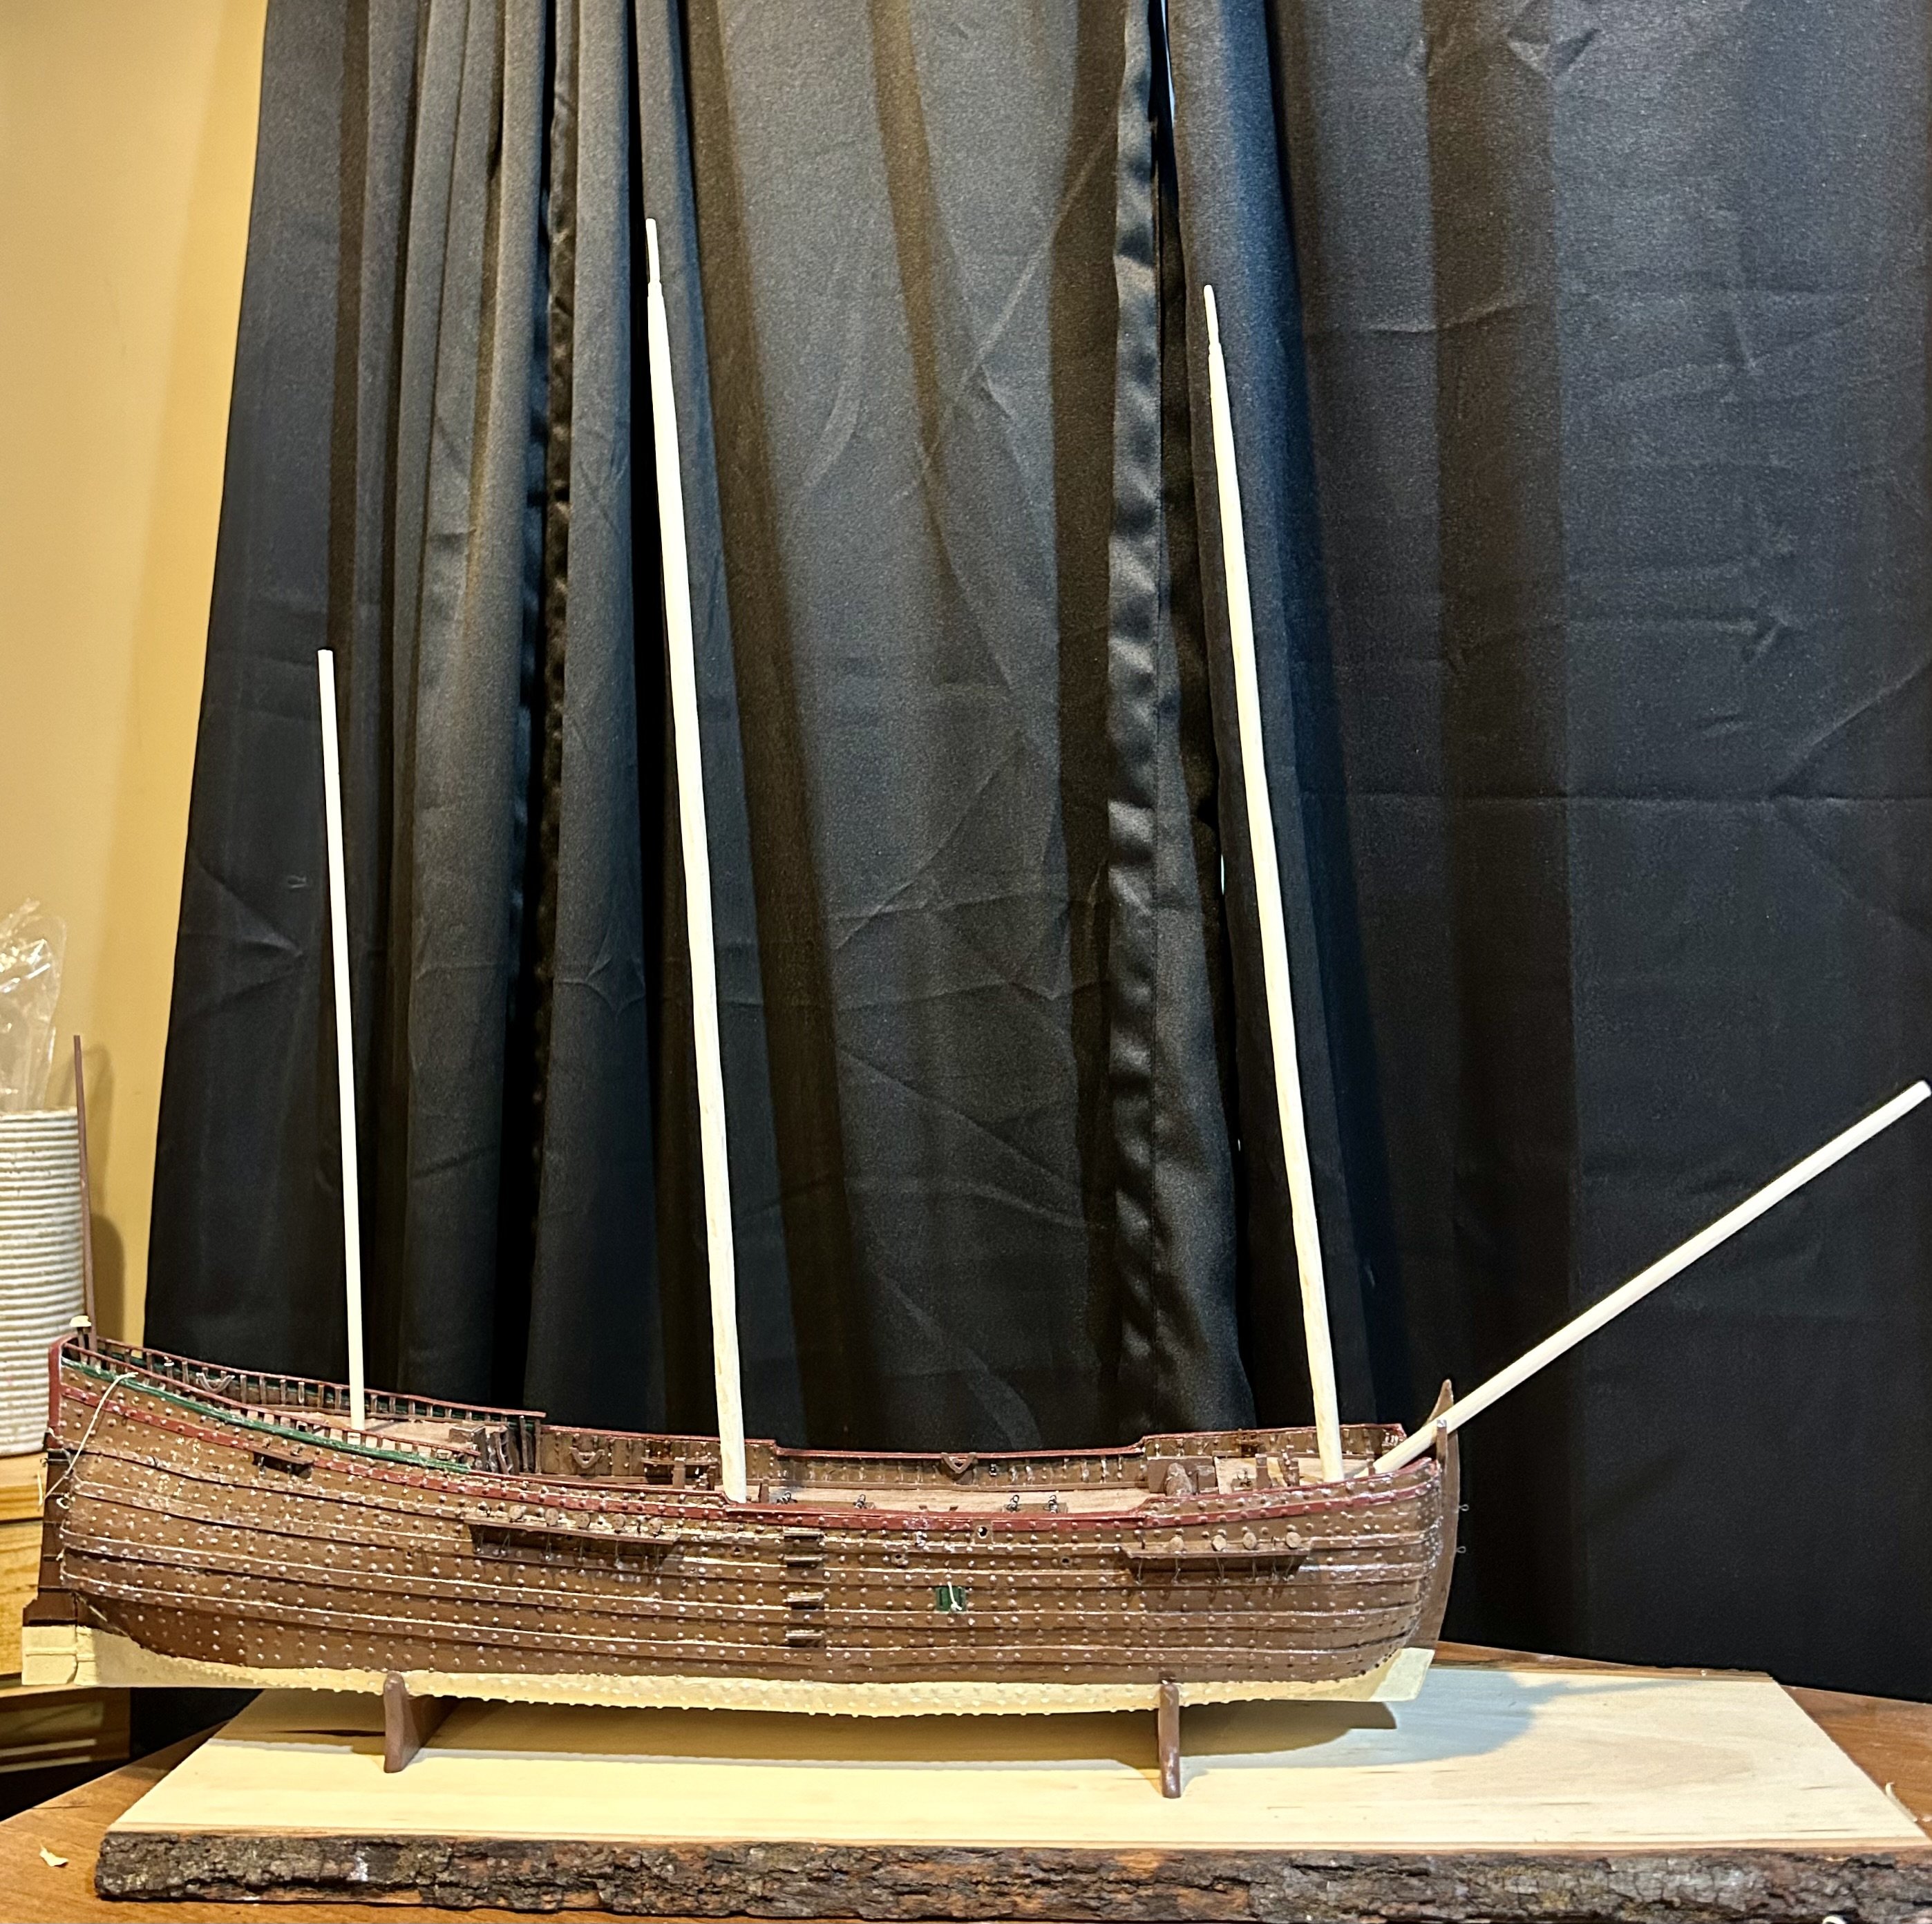
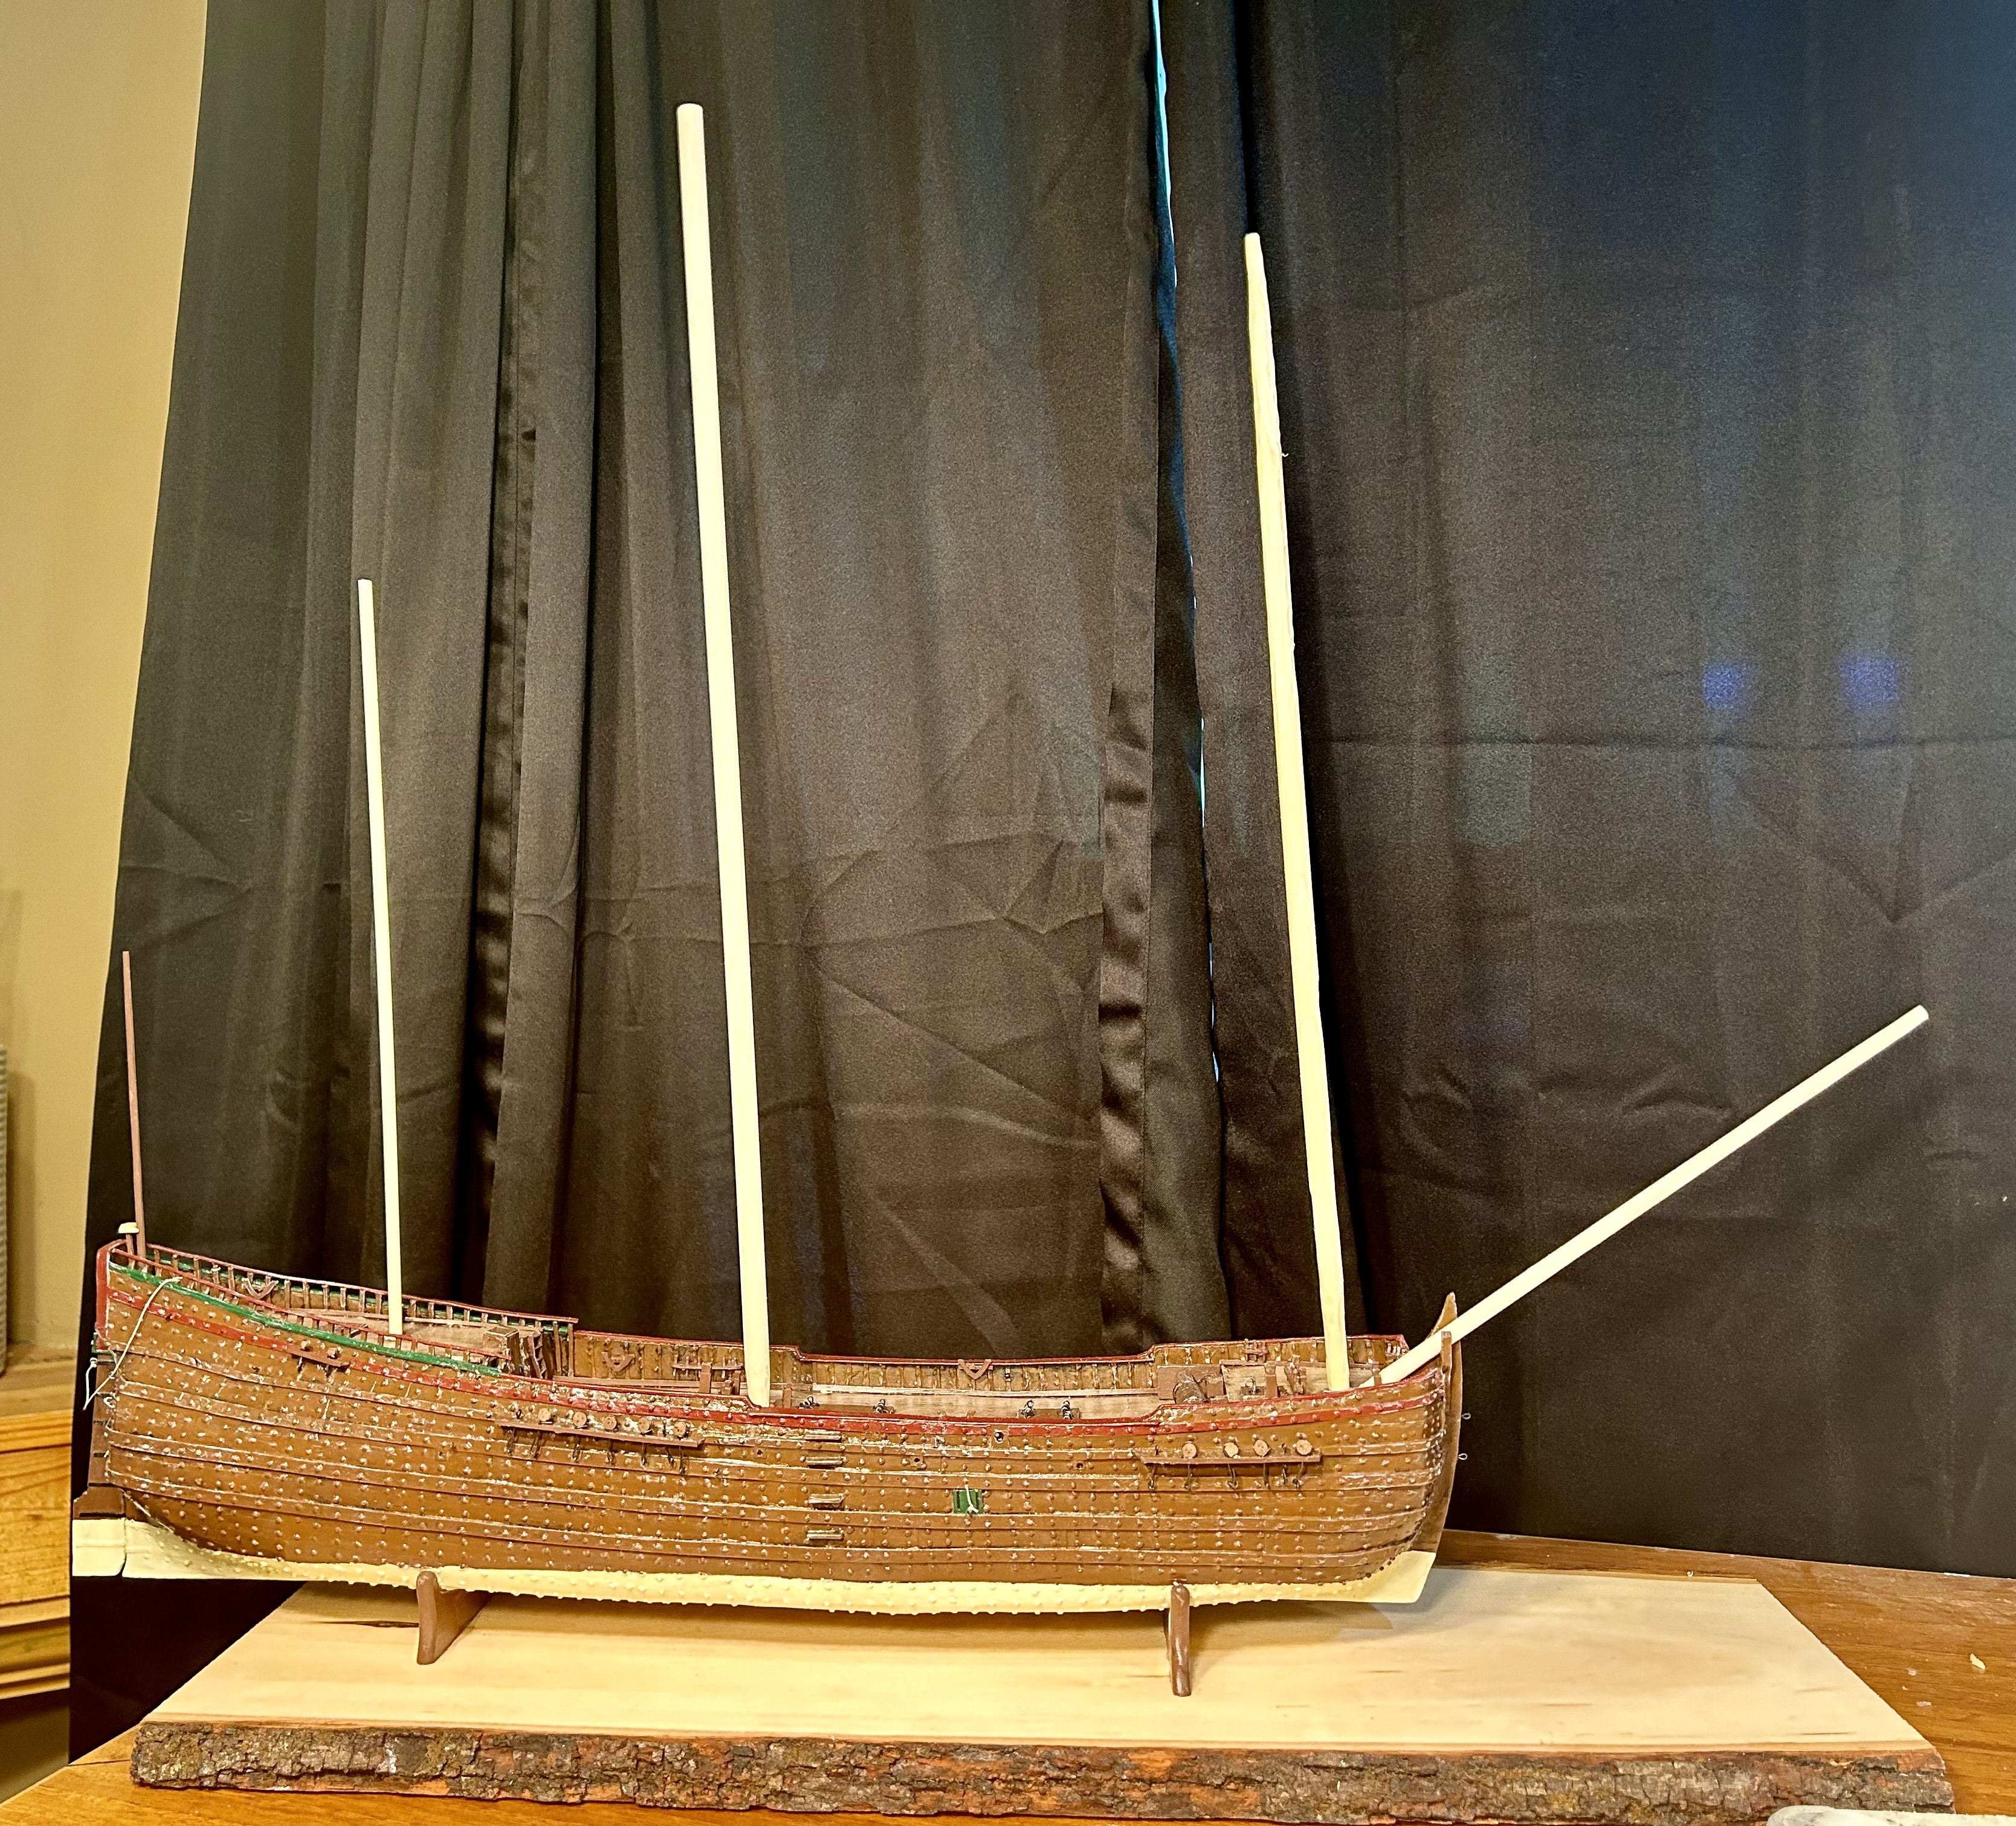
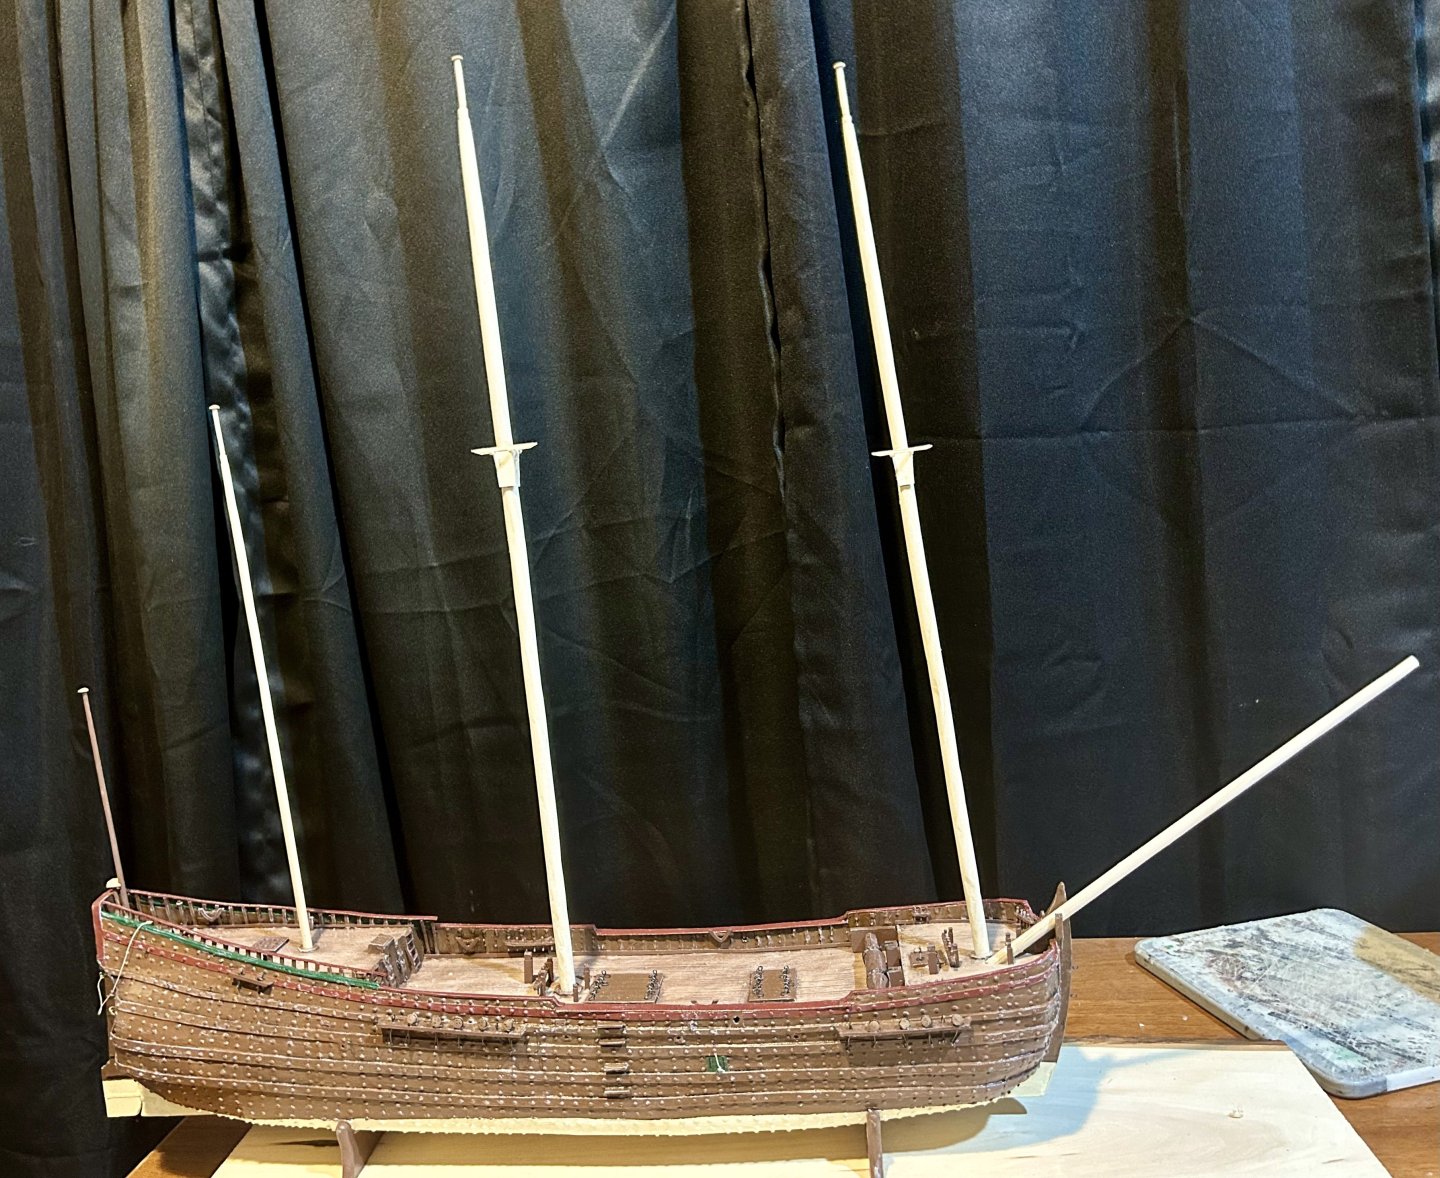
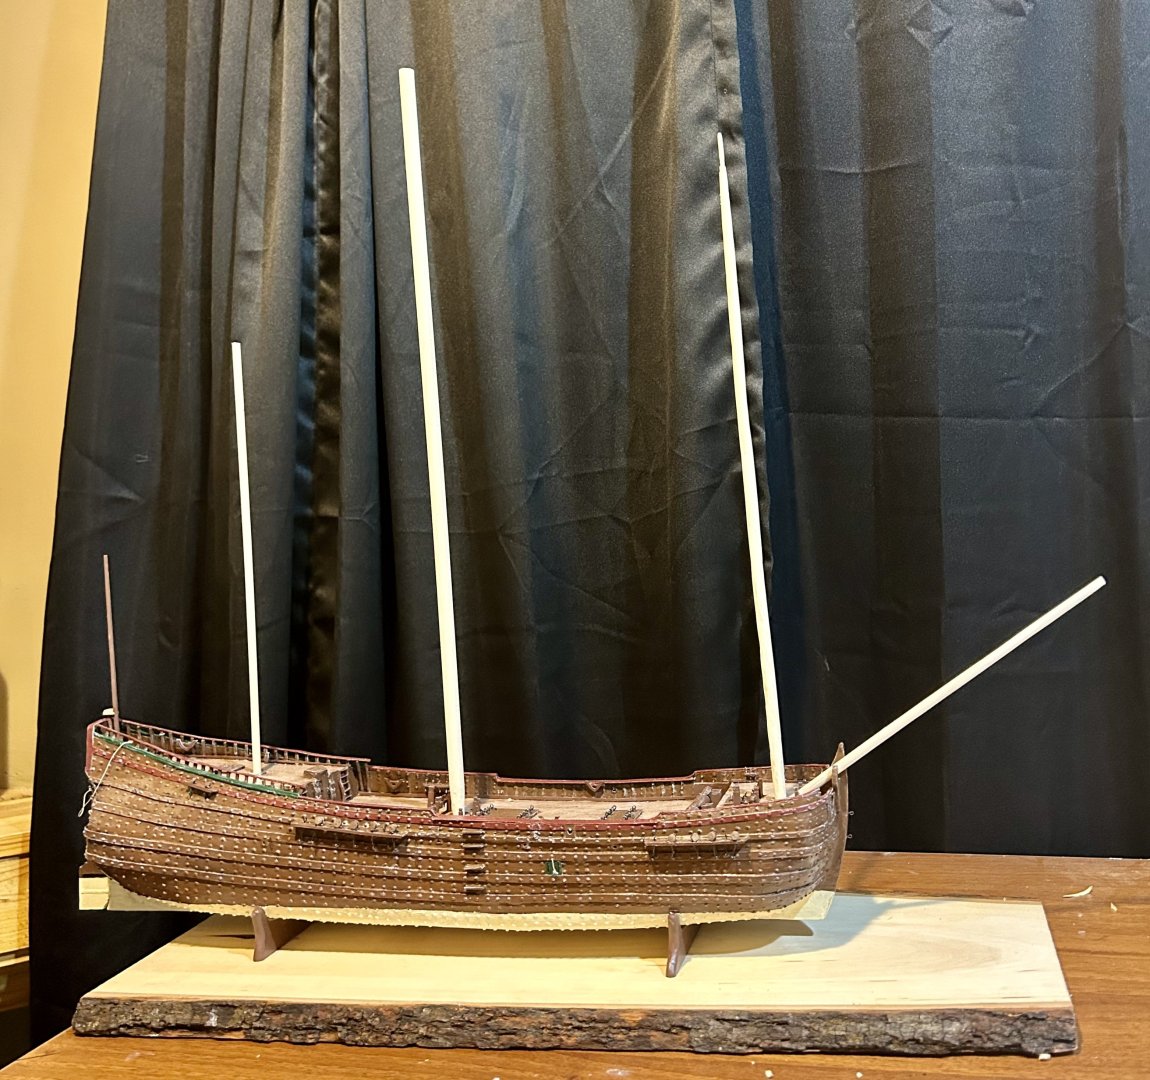
Masts are assembled! Next: paint and permanent installation once everything dries!
-
Very nicely done!
-
Main mast is shaped:

-
One of the things I really enjoy about Steven’s builds is the sheer amount of historical research from primary sources that is done, and the debates that interpreting those sources creates. I have learned a lot from them and it is incredible to see the models take shape that embodies that research.
-
Very nicely done!
-
Ferrus, Howard Chapelle has several excellent examples of pilot cutters in his books “The History of American Sailing Ships” and “The Search For Speed Under Sail”. His books are some of my go-to references for 19th Century sailing vessels. He has many sets of hull lines/plans and isometric drawings of different ships, including pilot boats. That may help you with the hull/deck design. Chapelle’s books are very common and can be found on EBay cheaply.
-
The foremast is shaped:
-
All masts are cut to length: I now know how big this model is going to be. Now to finish shaping them and get them permanently installed. I am using my classic scalpel carving method.

-
Bob, Very nicely done! Tell Captain Marvin to enjoy his new ride!
-
Is there any news on when the monograph for the Royal Yacht Fubbs will be available for purchase?
-
Hello from Cleveland (or thereabouts)
GrandpaPhil replied to EGL's topic in New member Introductions
Welcome!