Galkar
-
Posts
12 -
Joined
-
Last visited
Content Type
Profiles
Forums
Gallery
Events
Everything posted by Galkar
-
Thank you for the context - this makes me glad I did bevel mine And good luck on your own dory!
- 28 replies
-
- 1
-

-
- Lowell Grand Banks Dory
- Model Shipways
- (and 1 more)
-
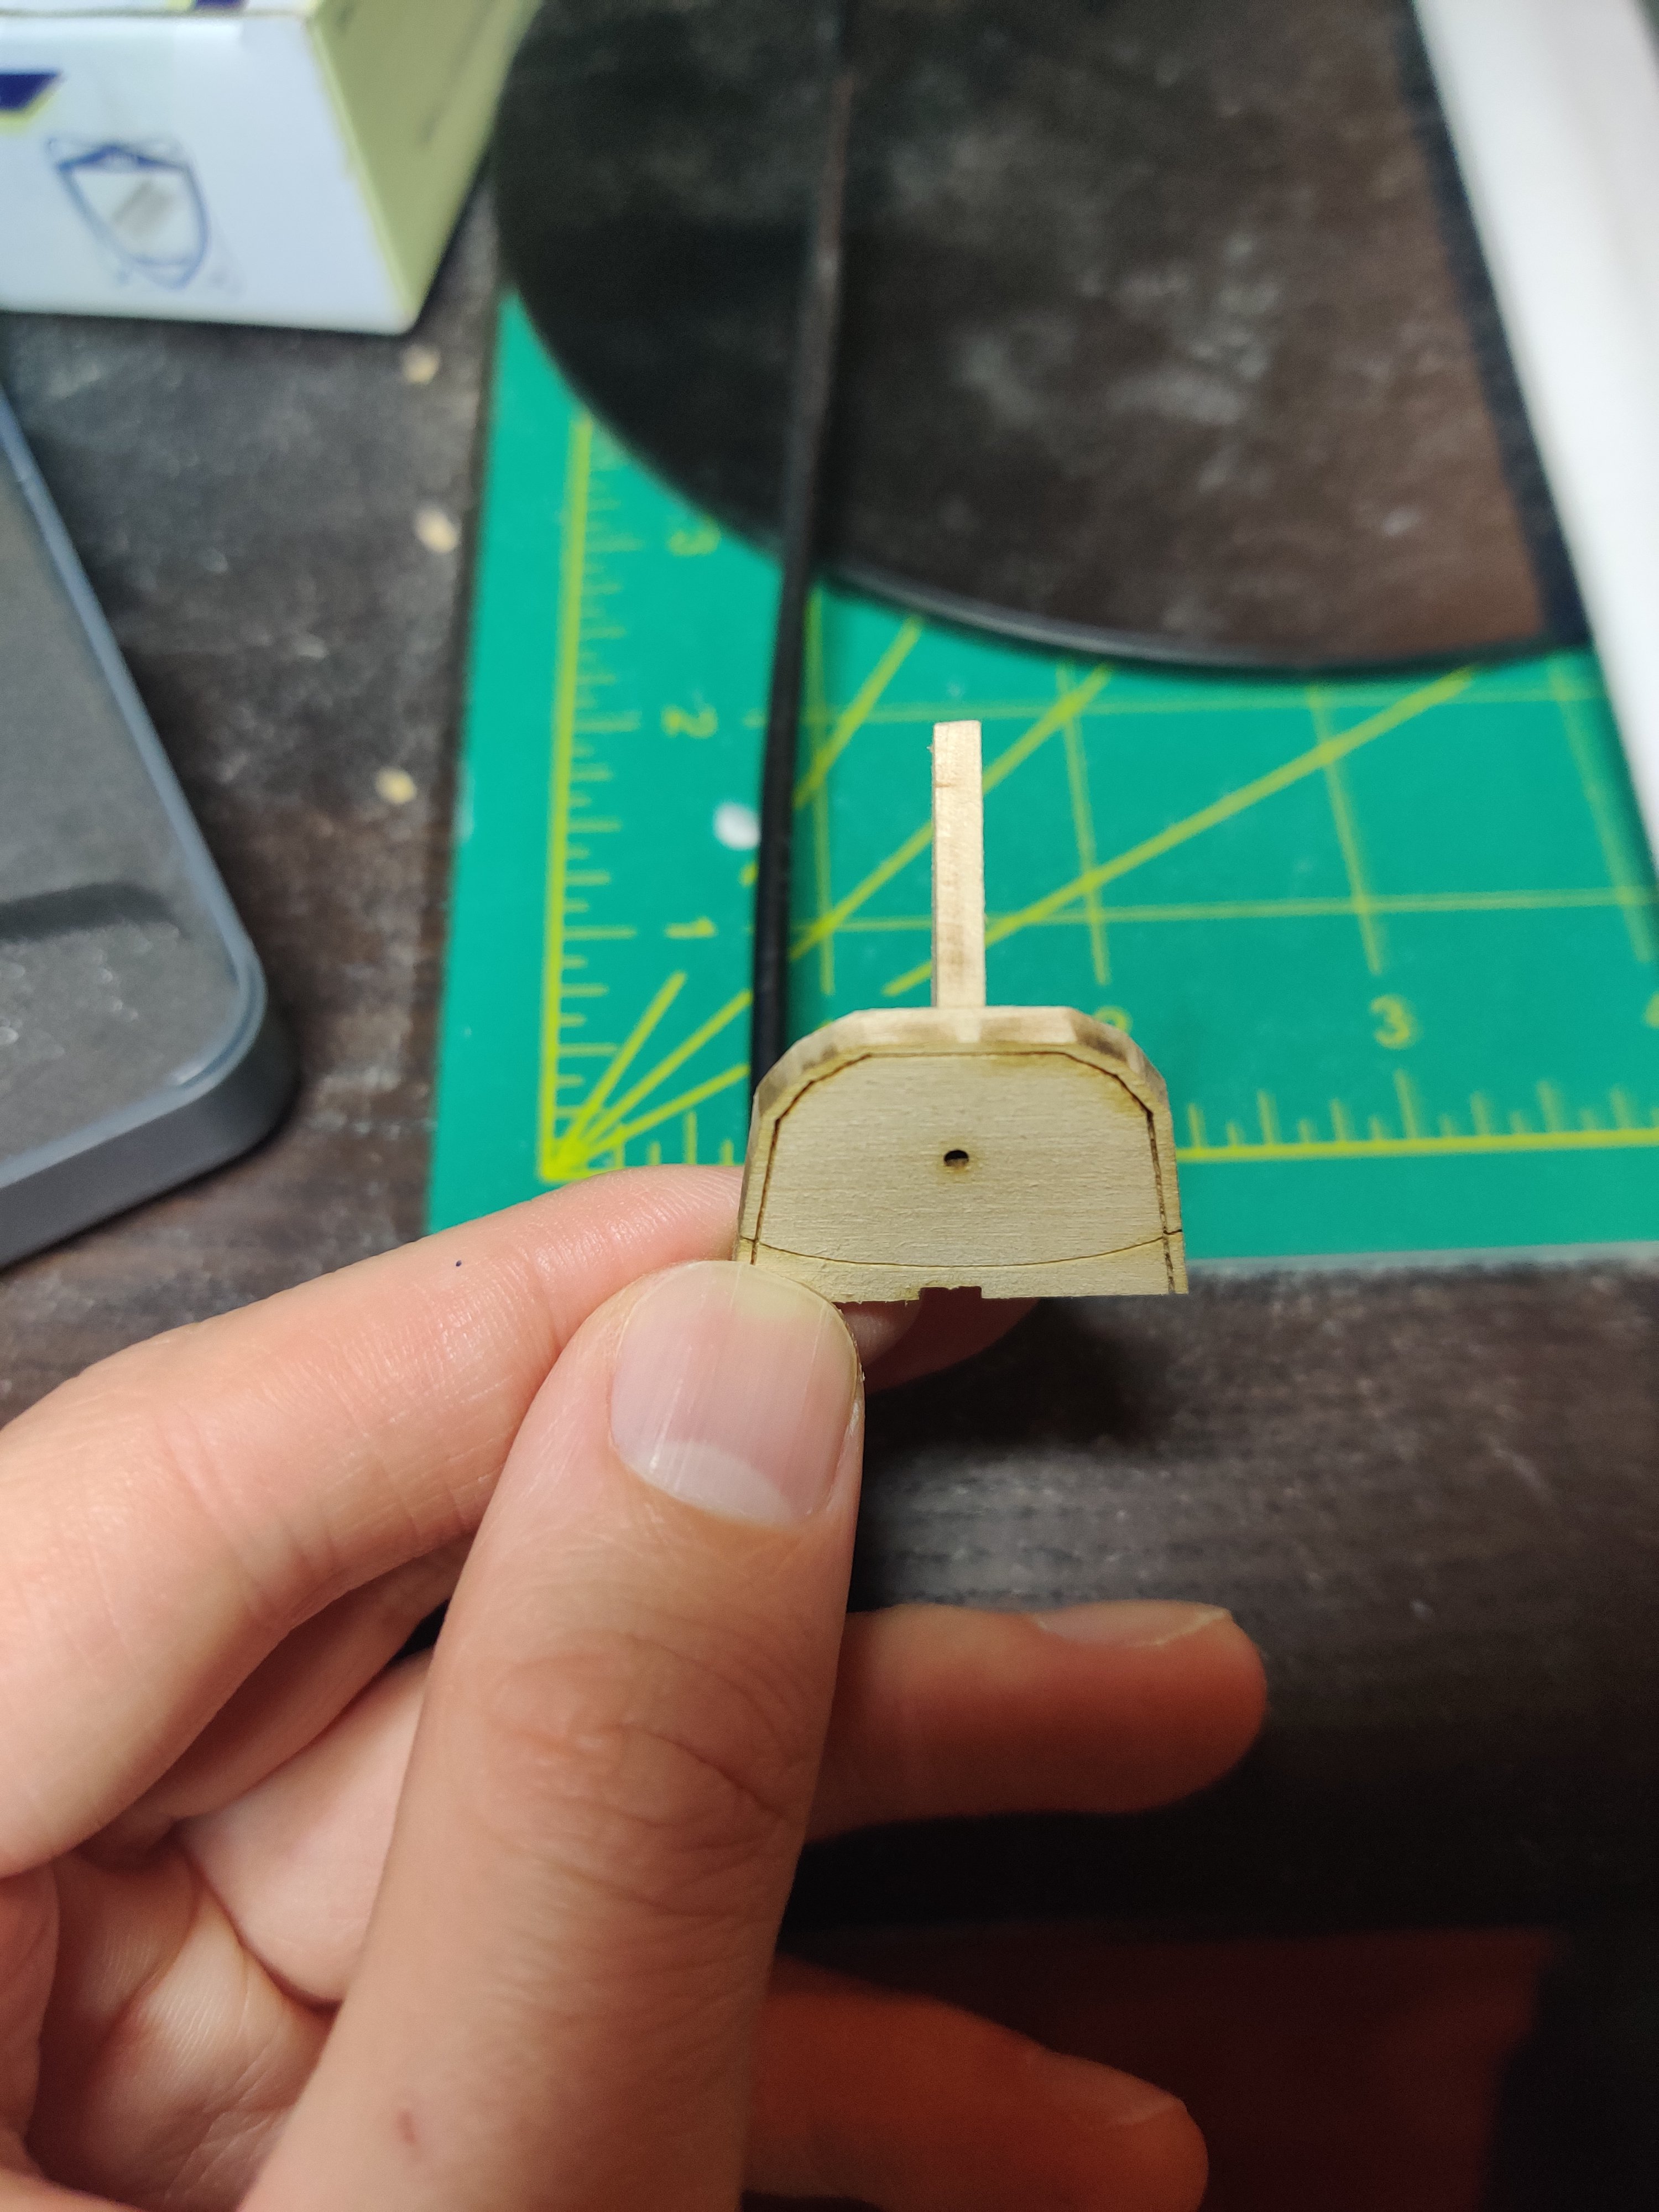
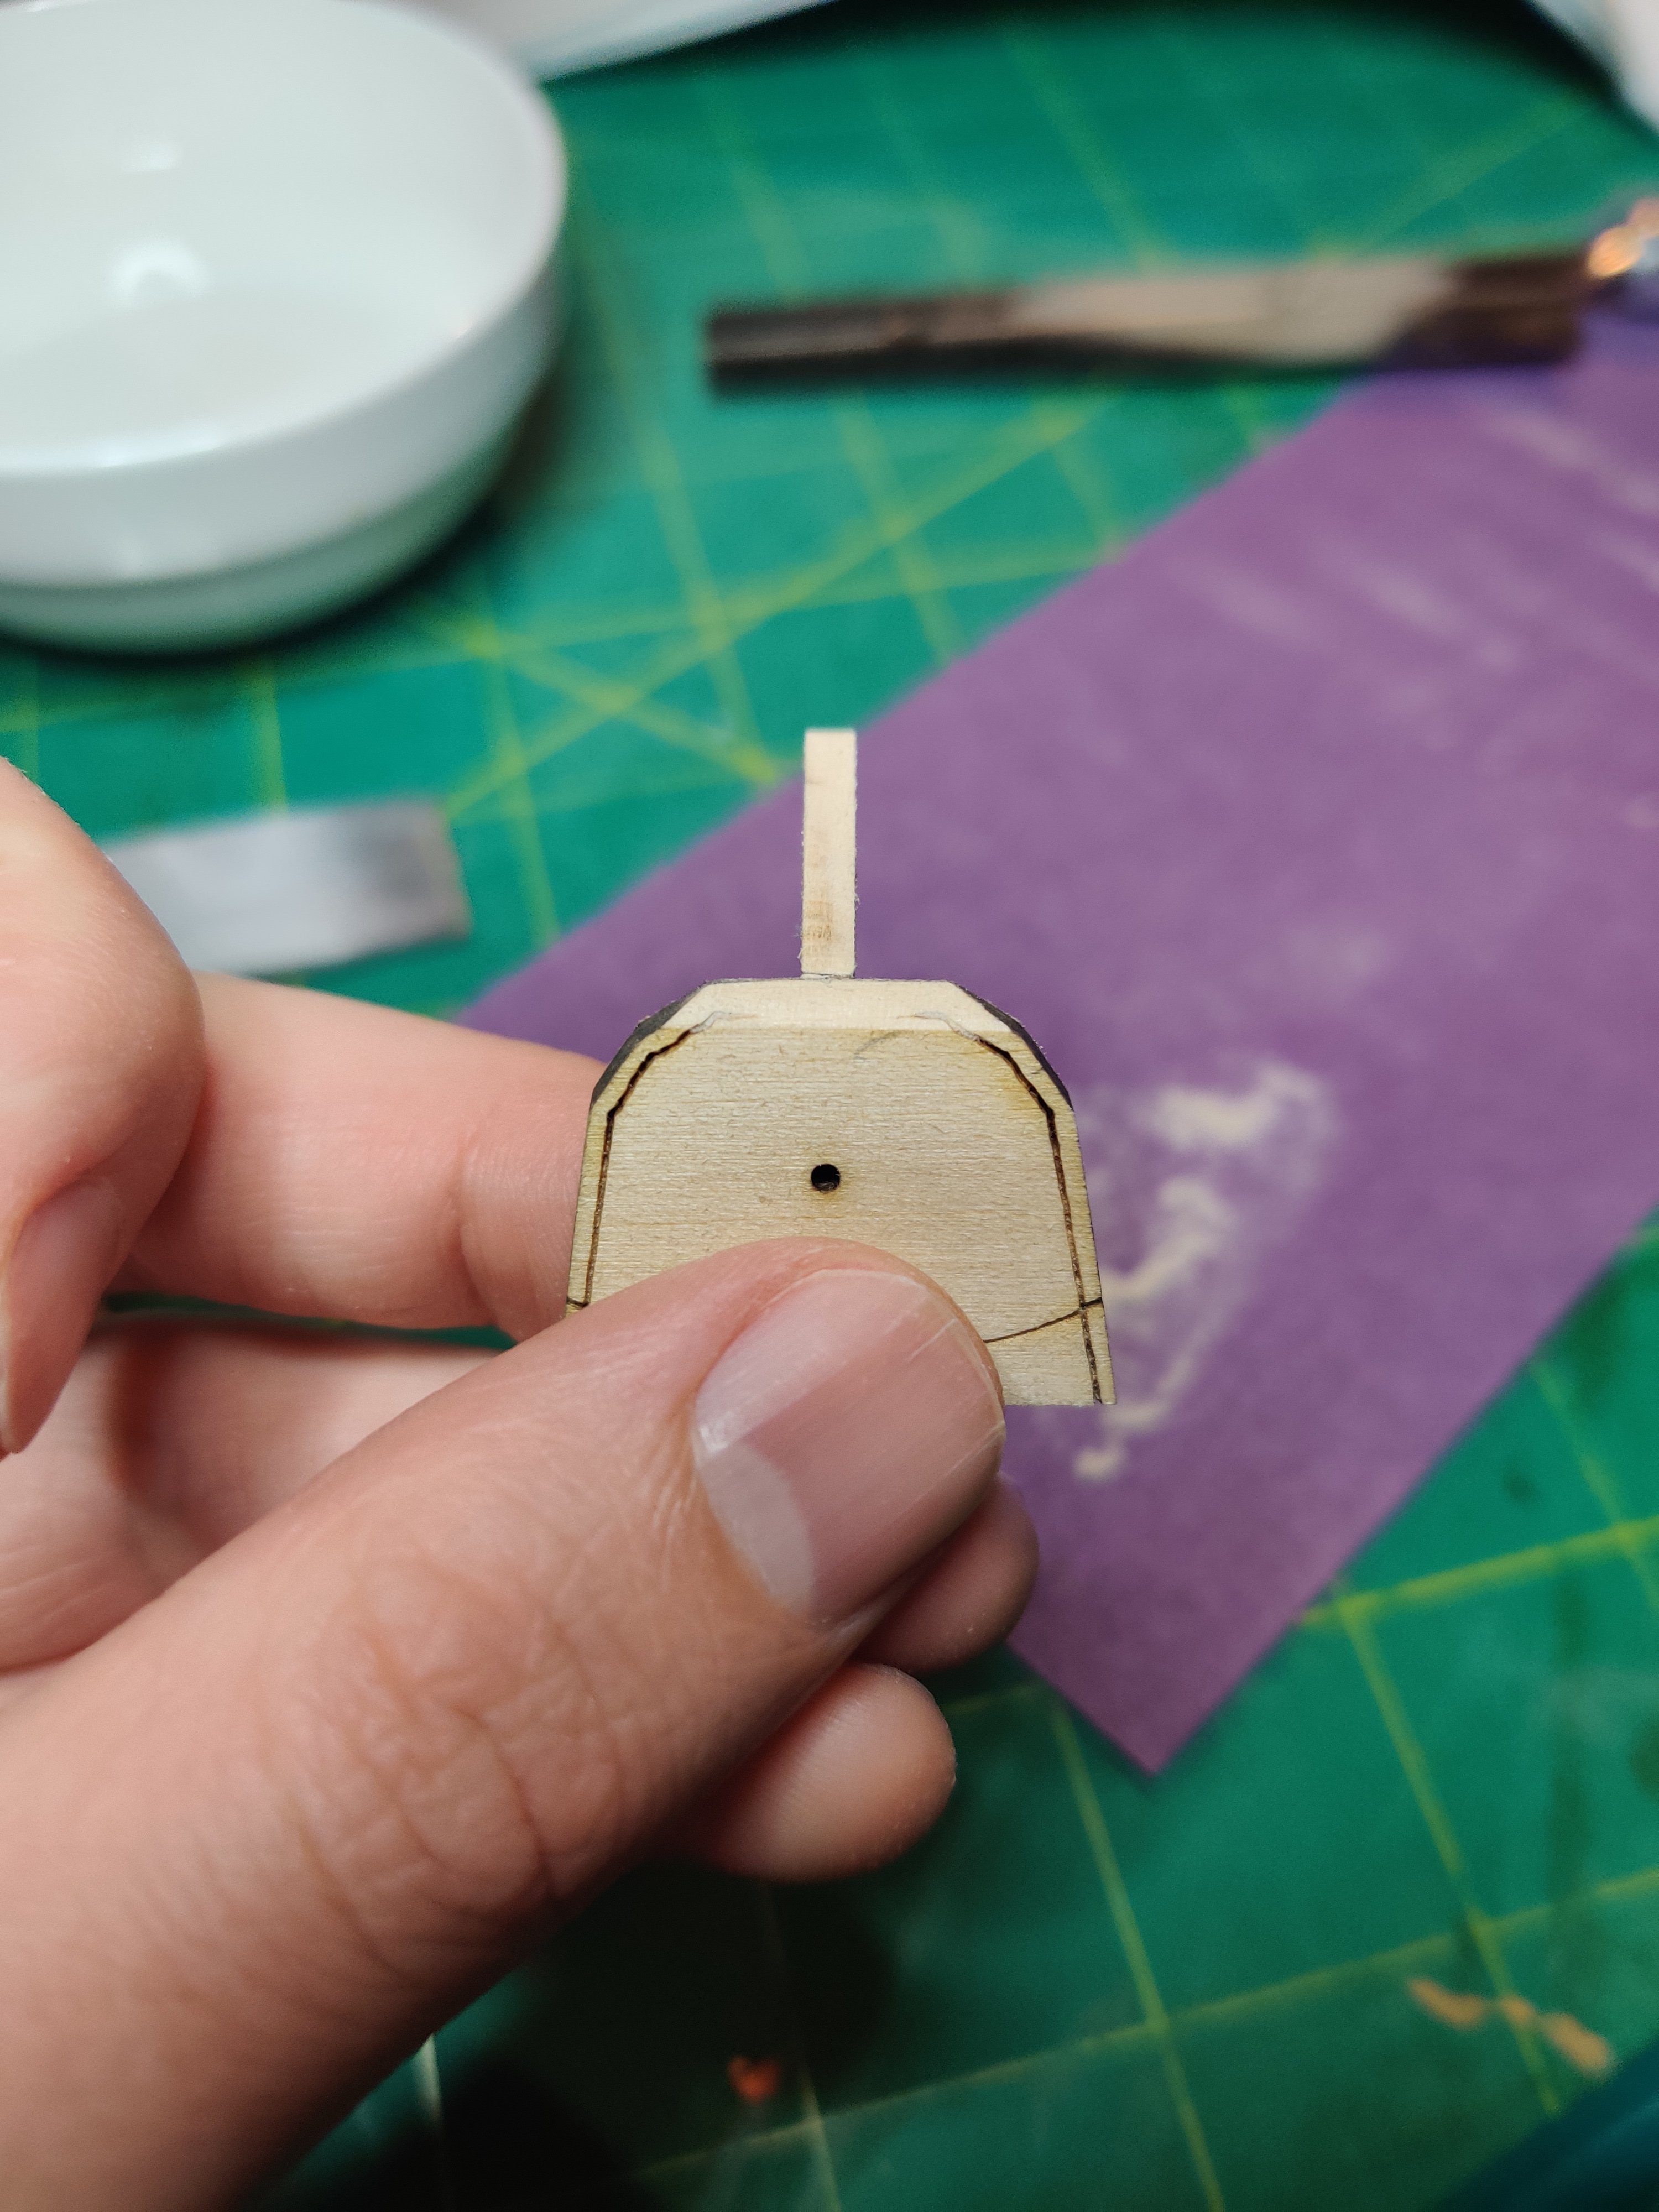
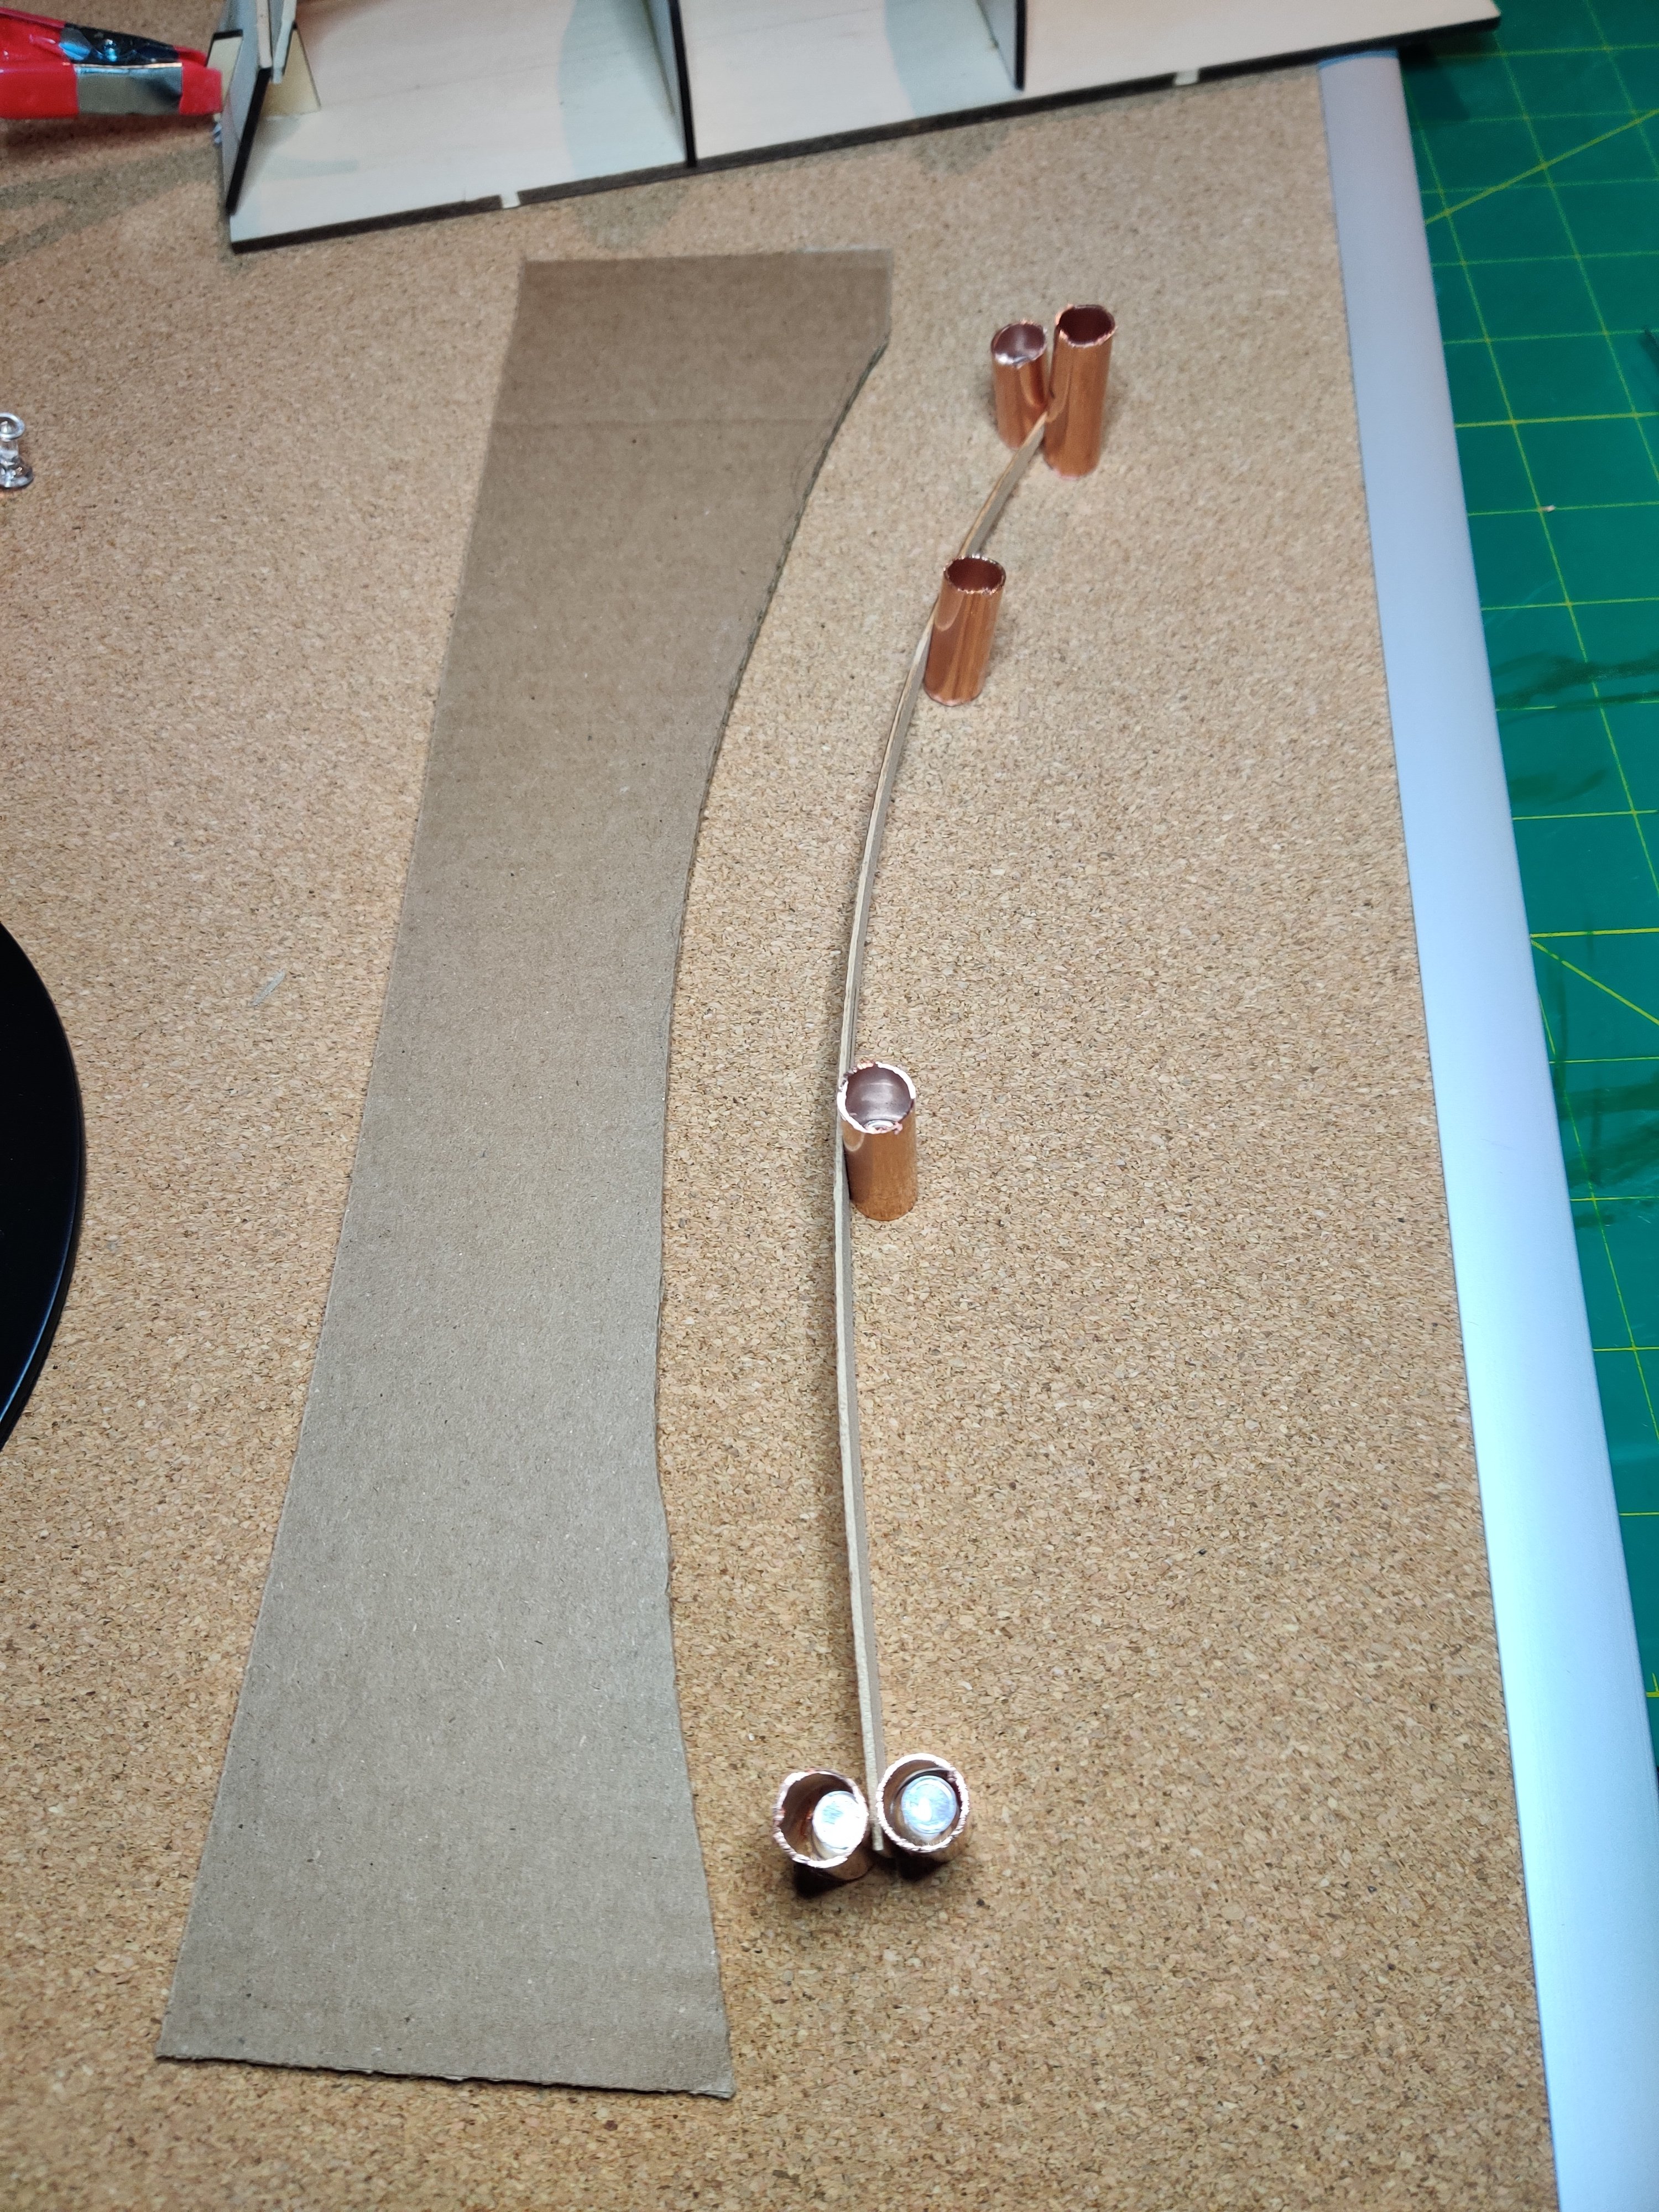
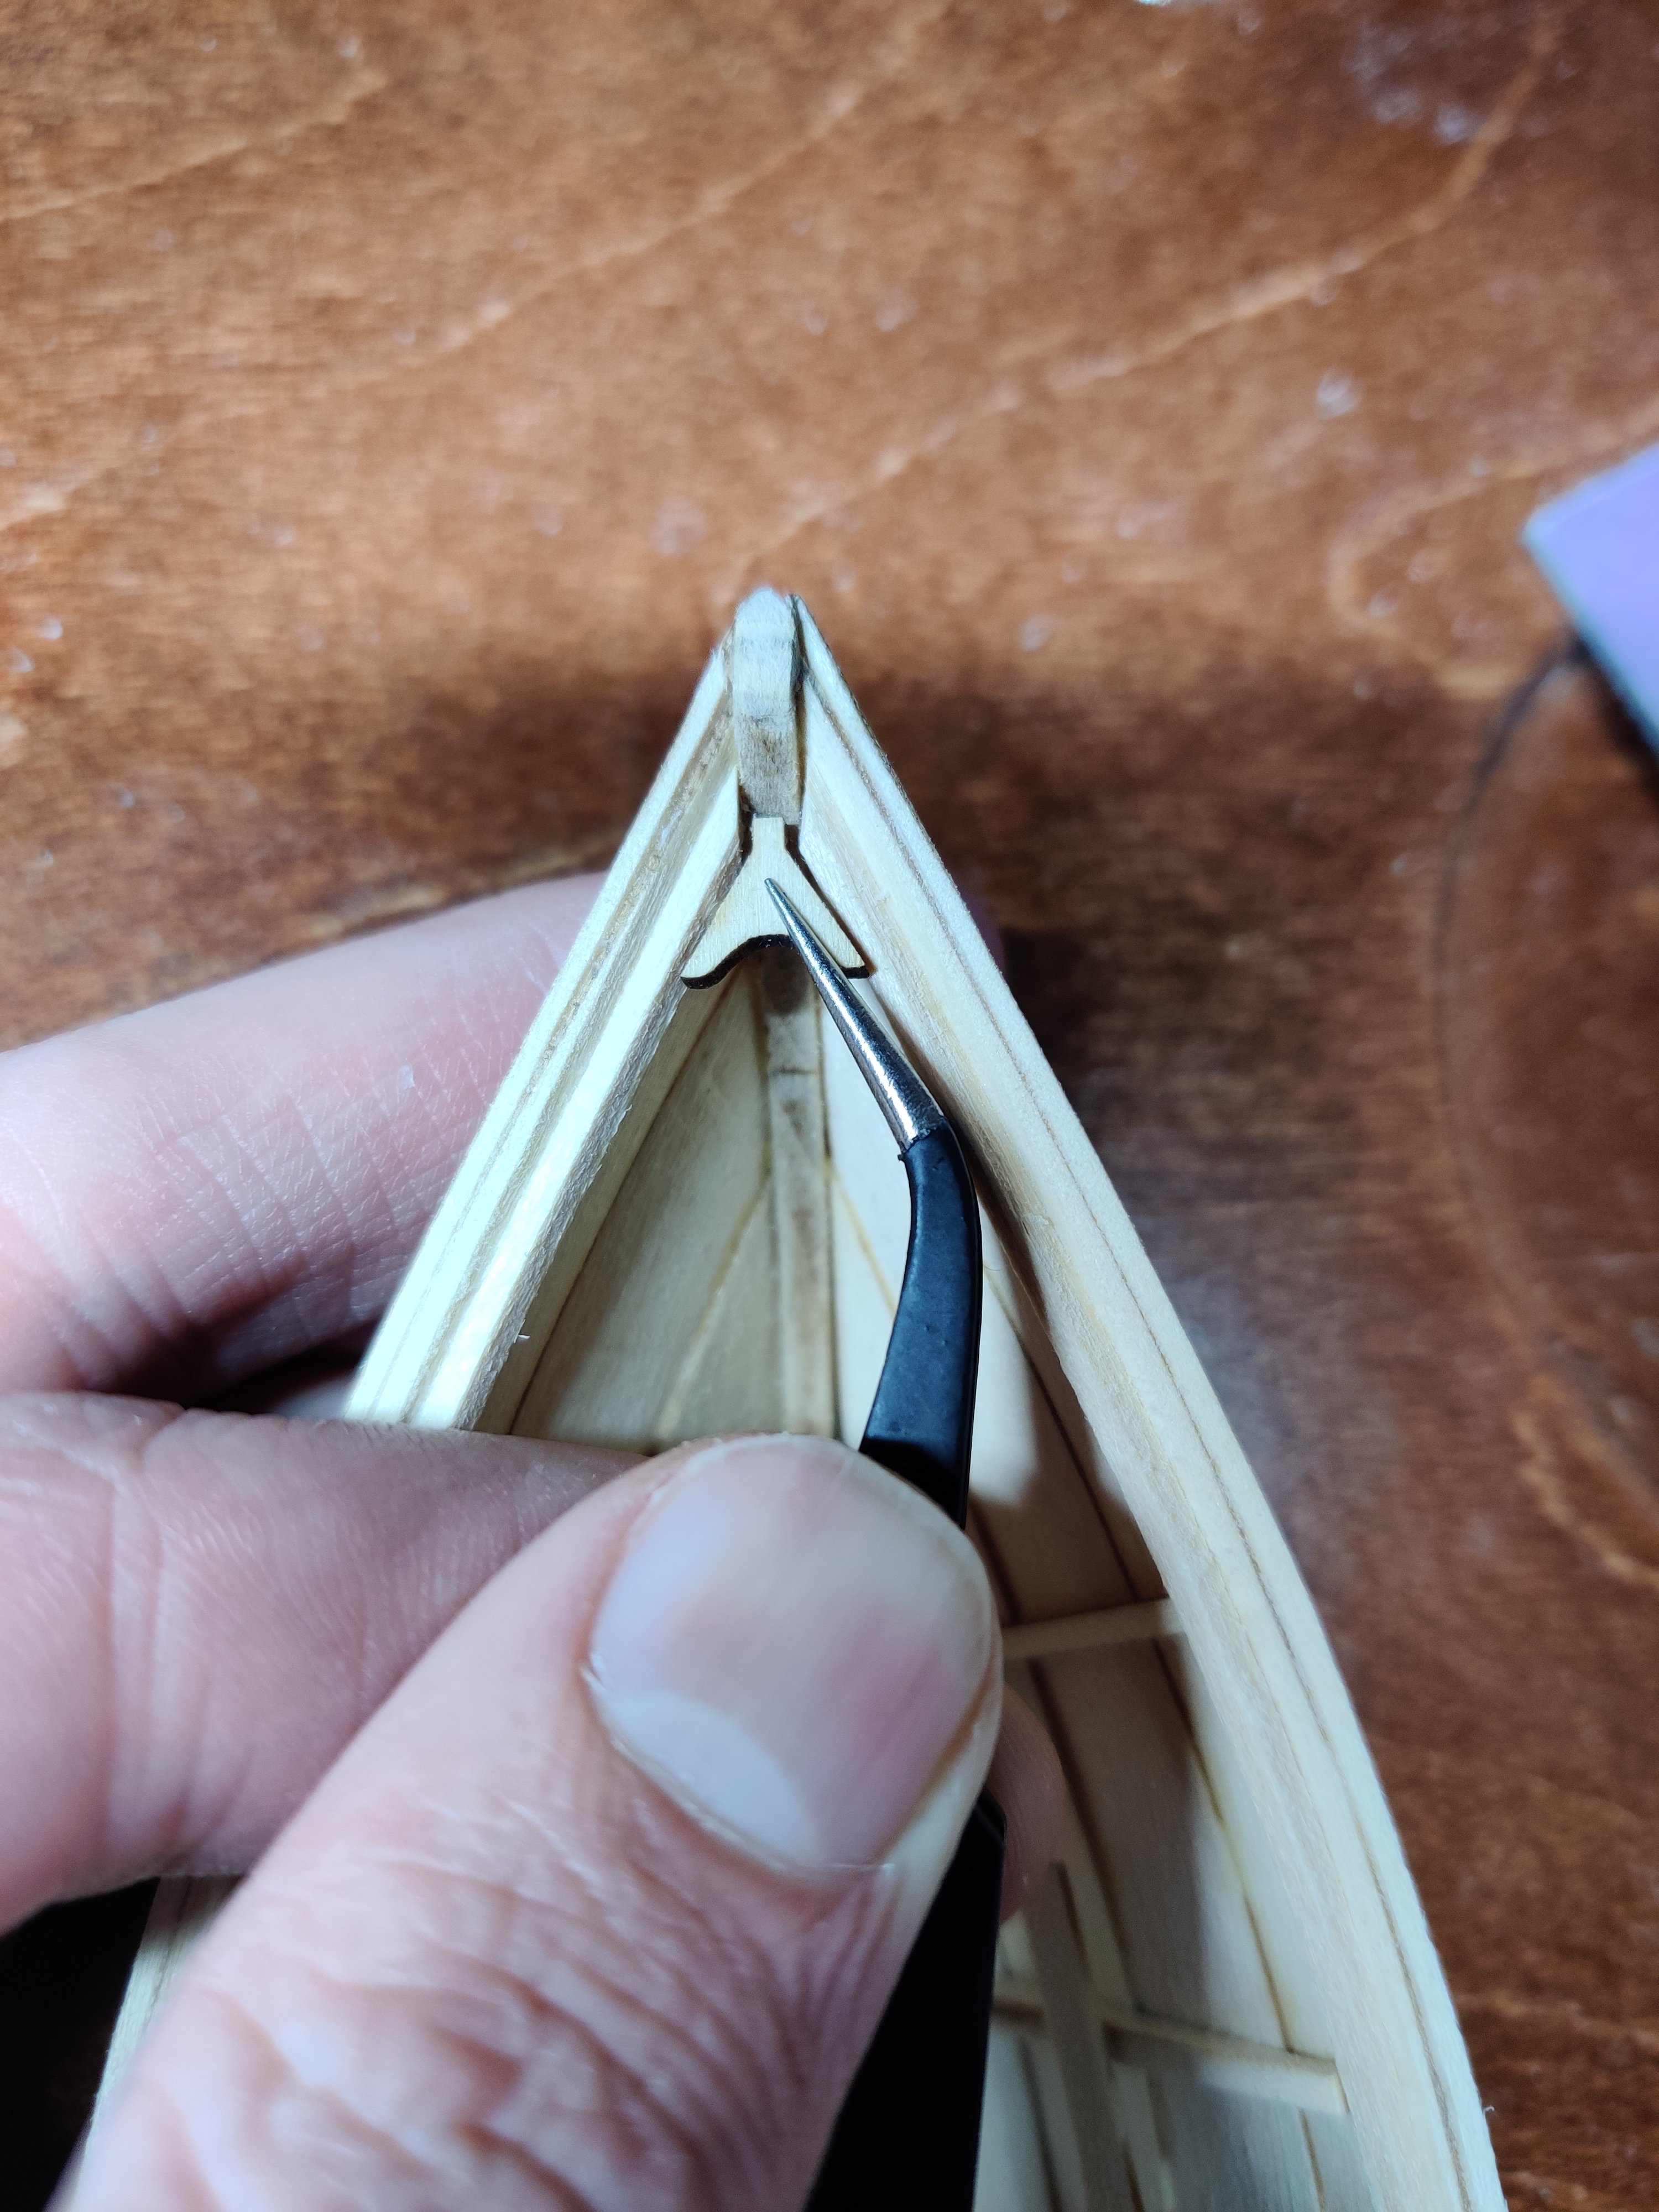
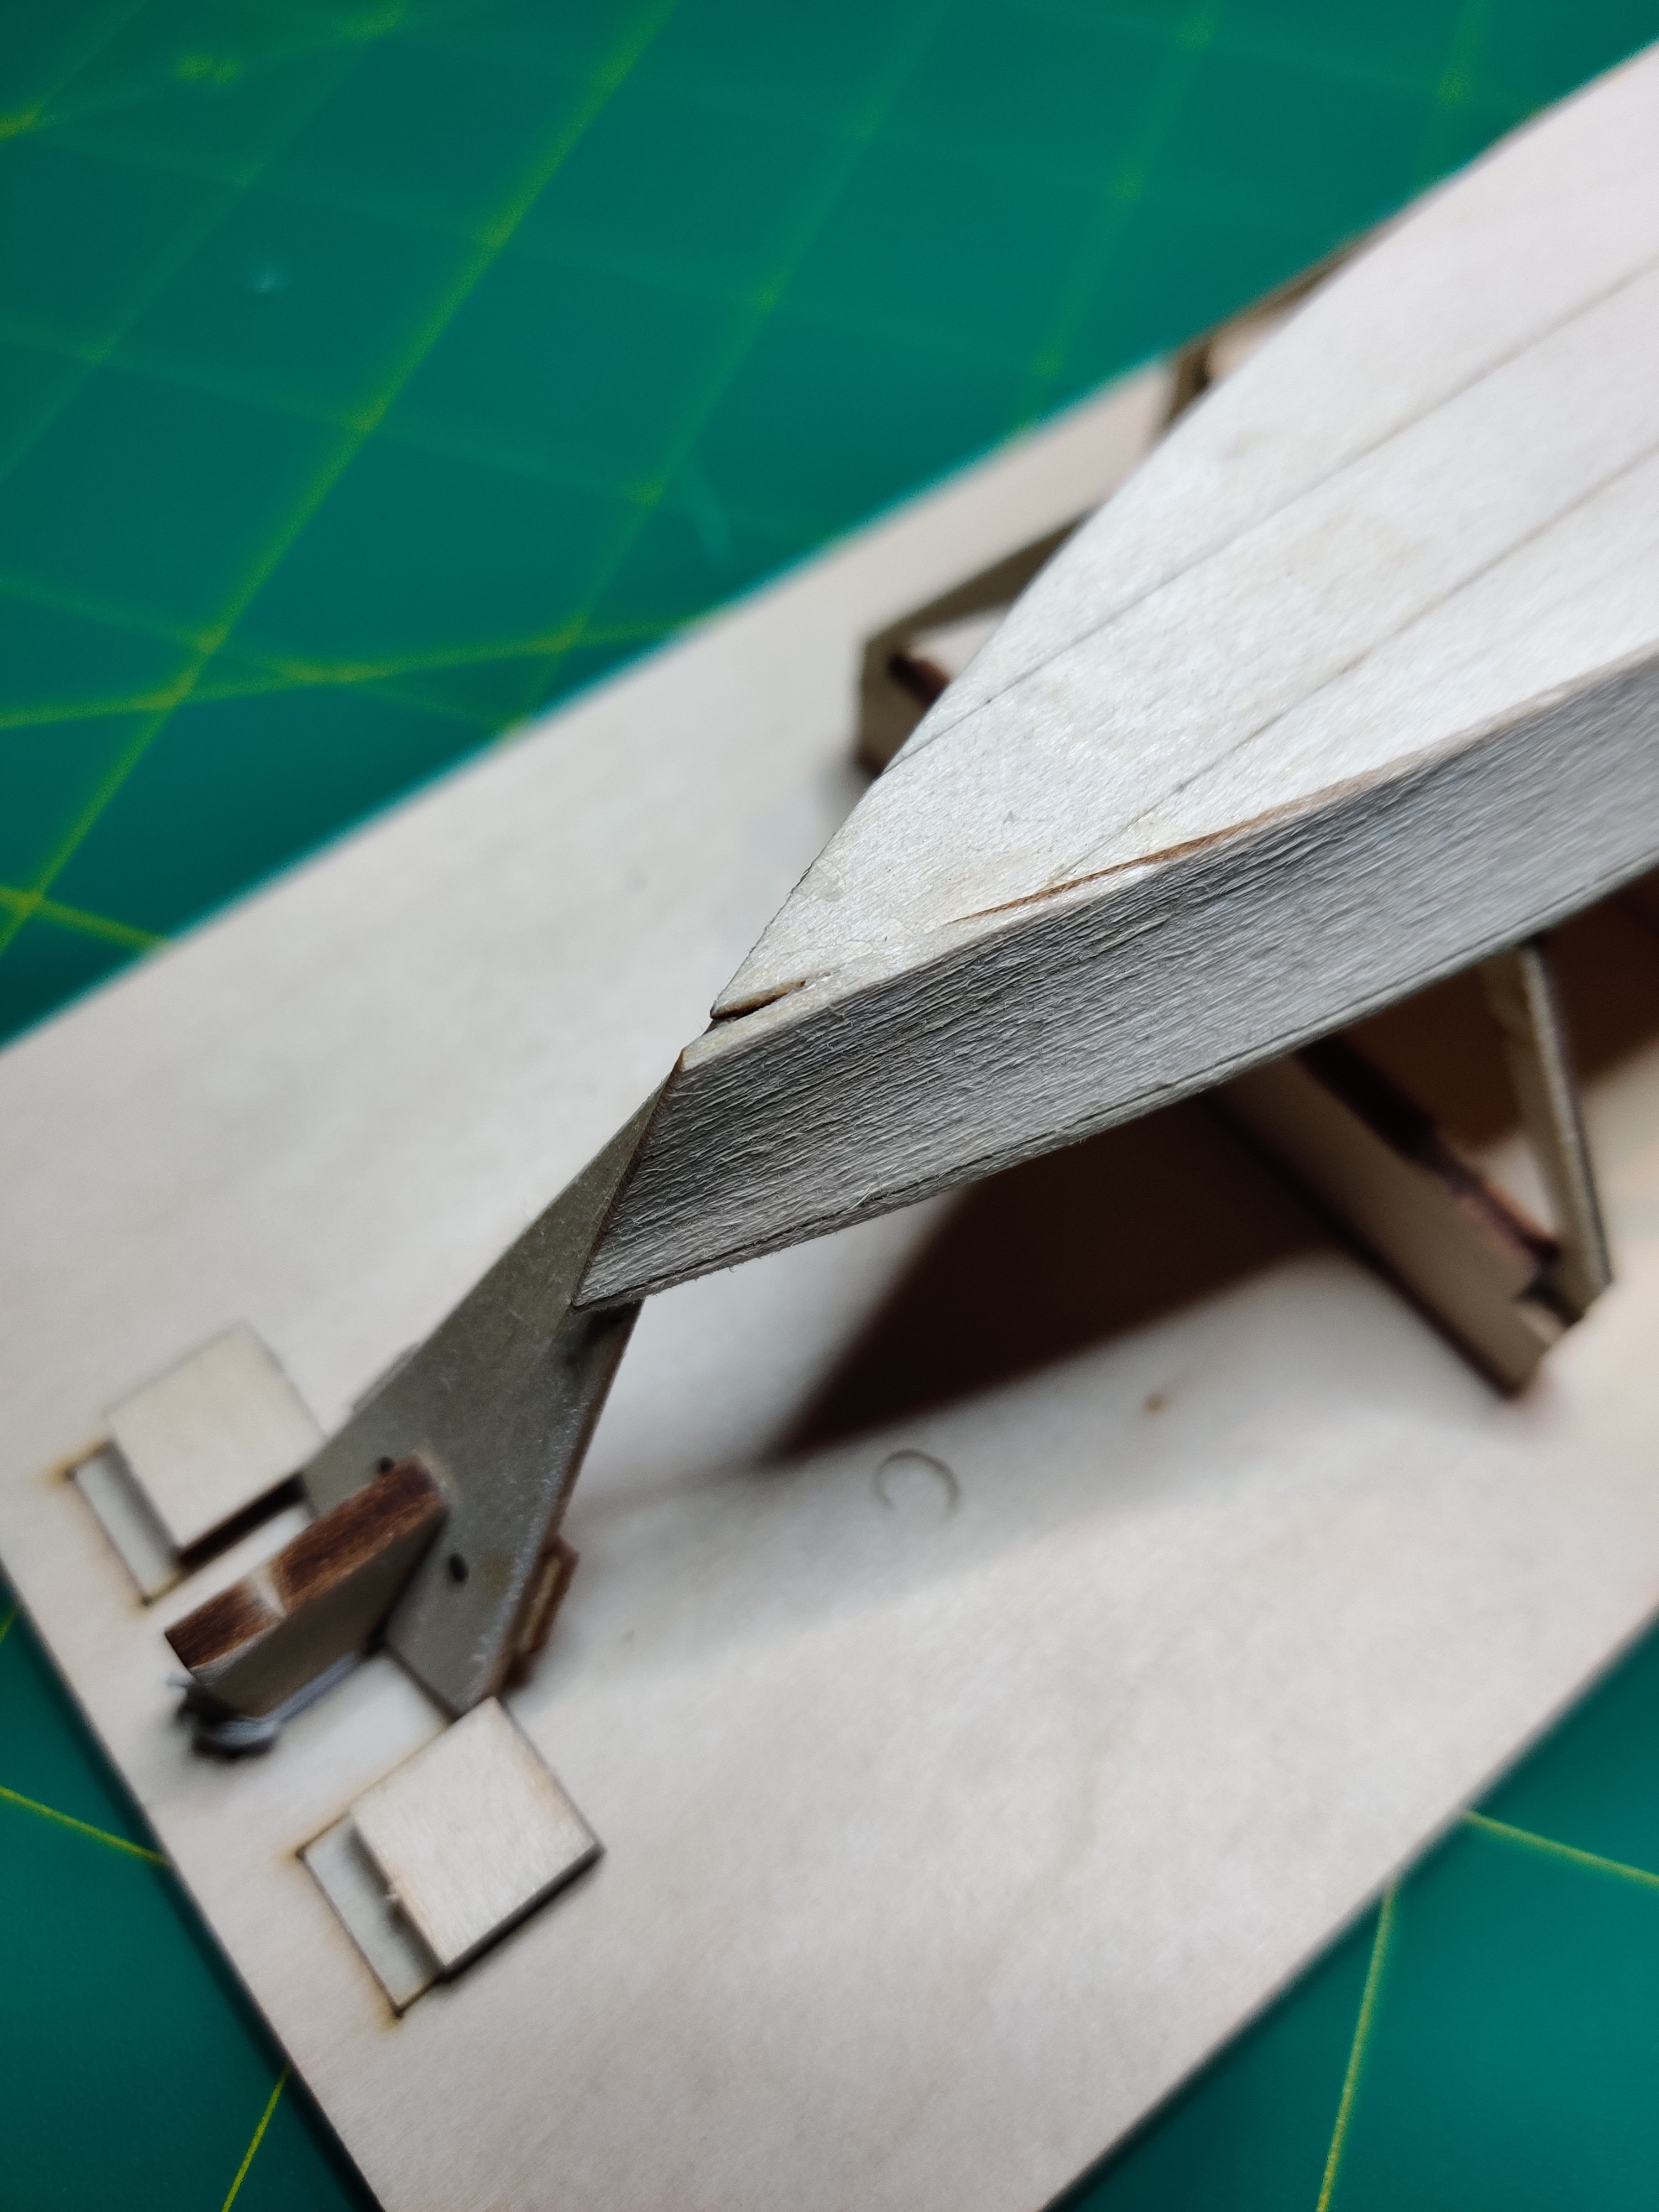
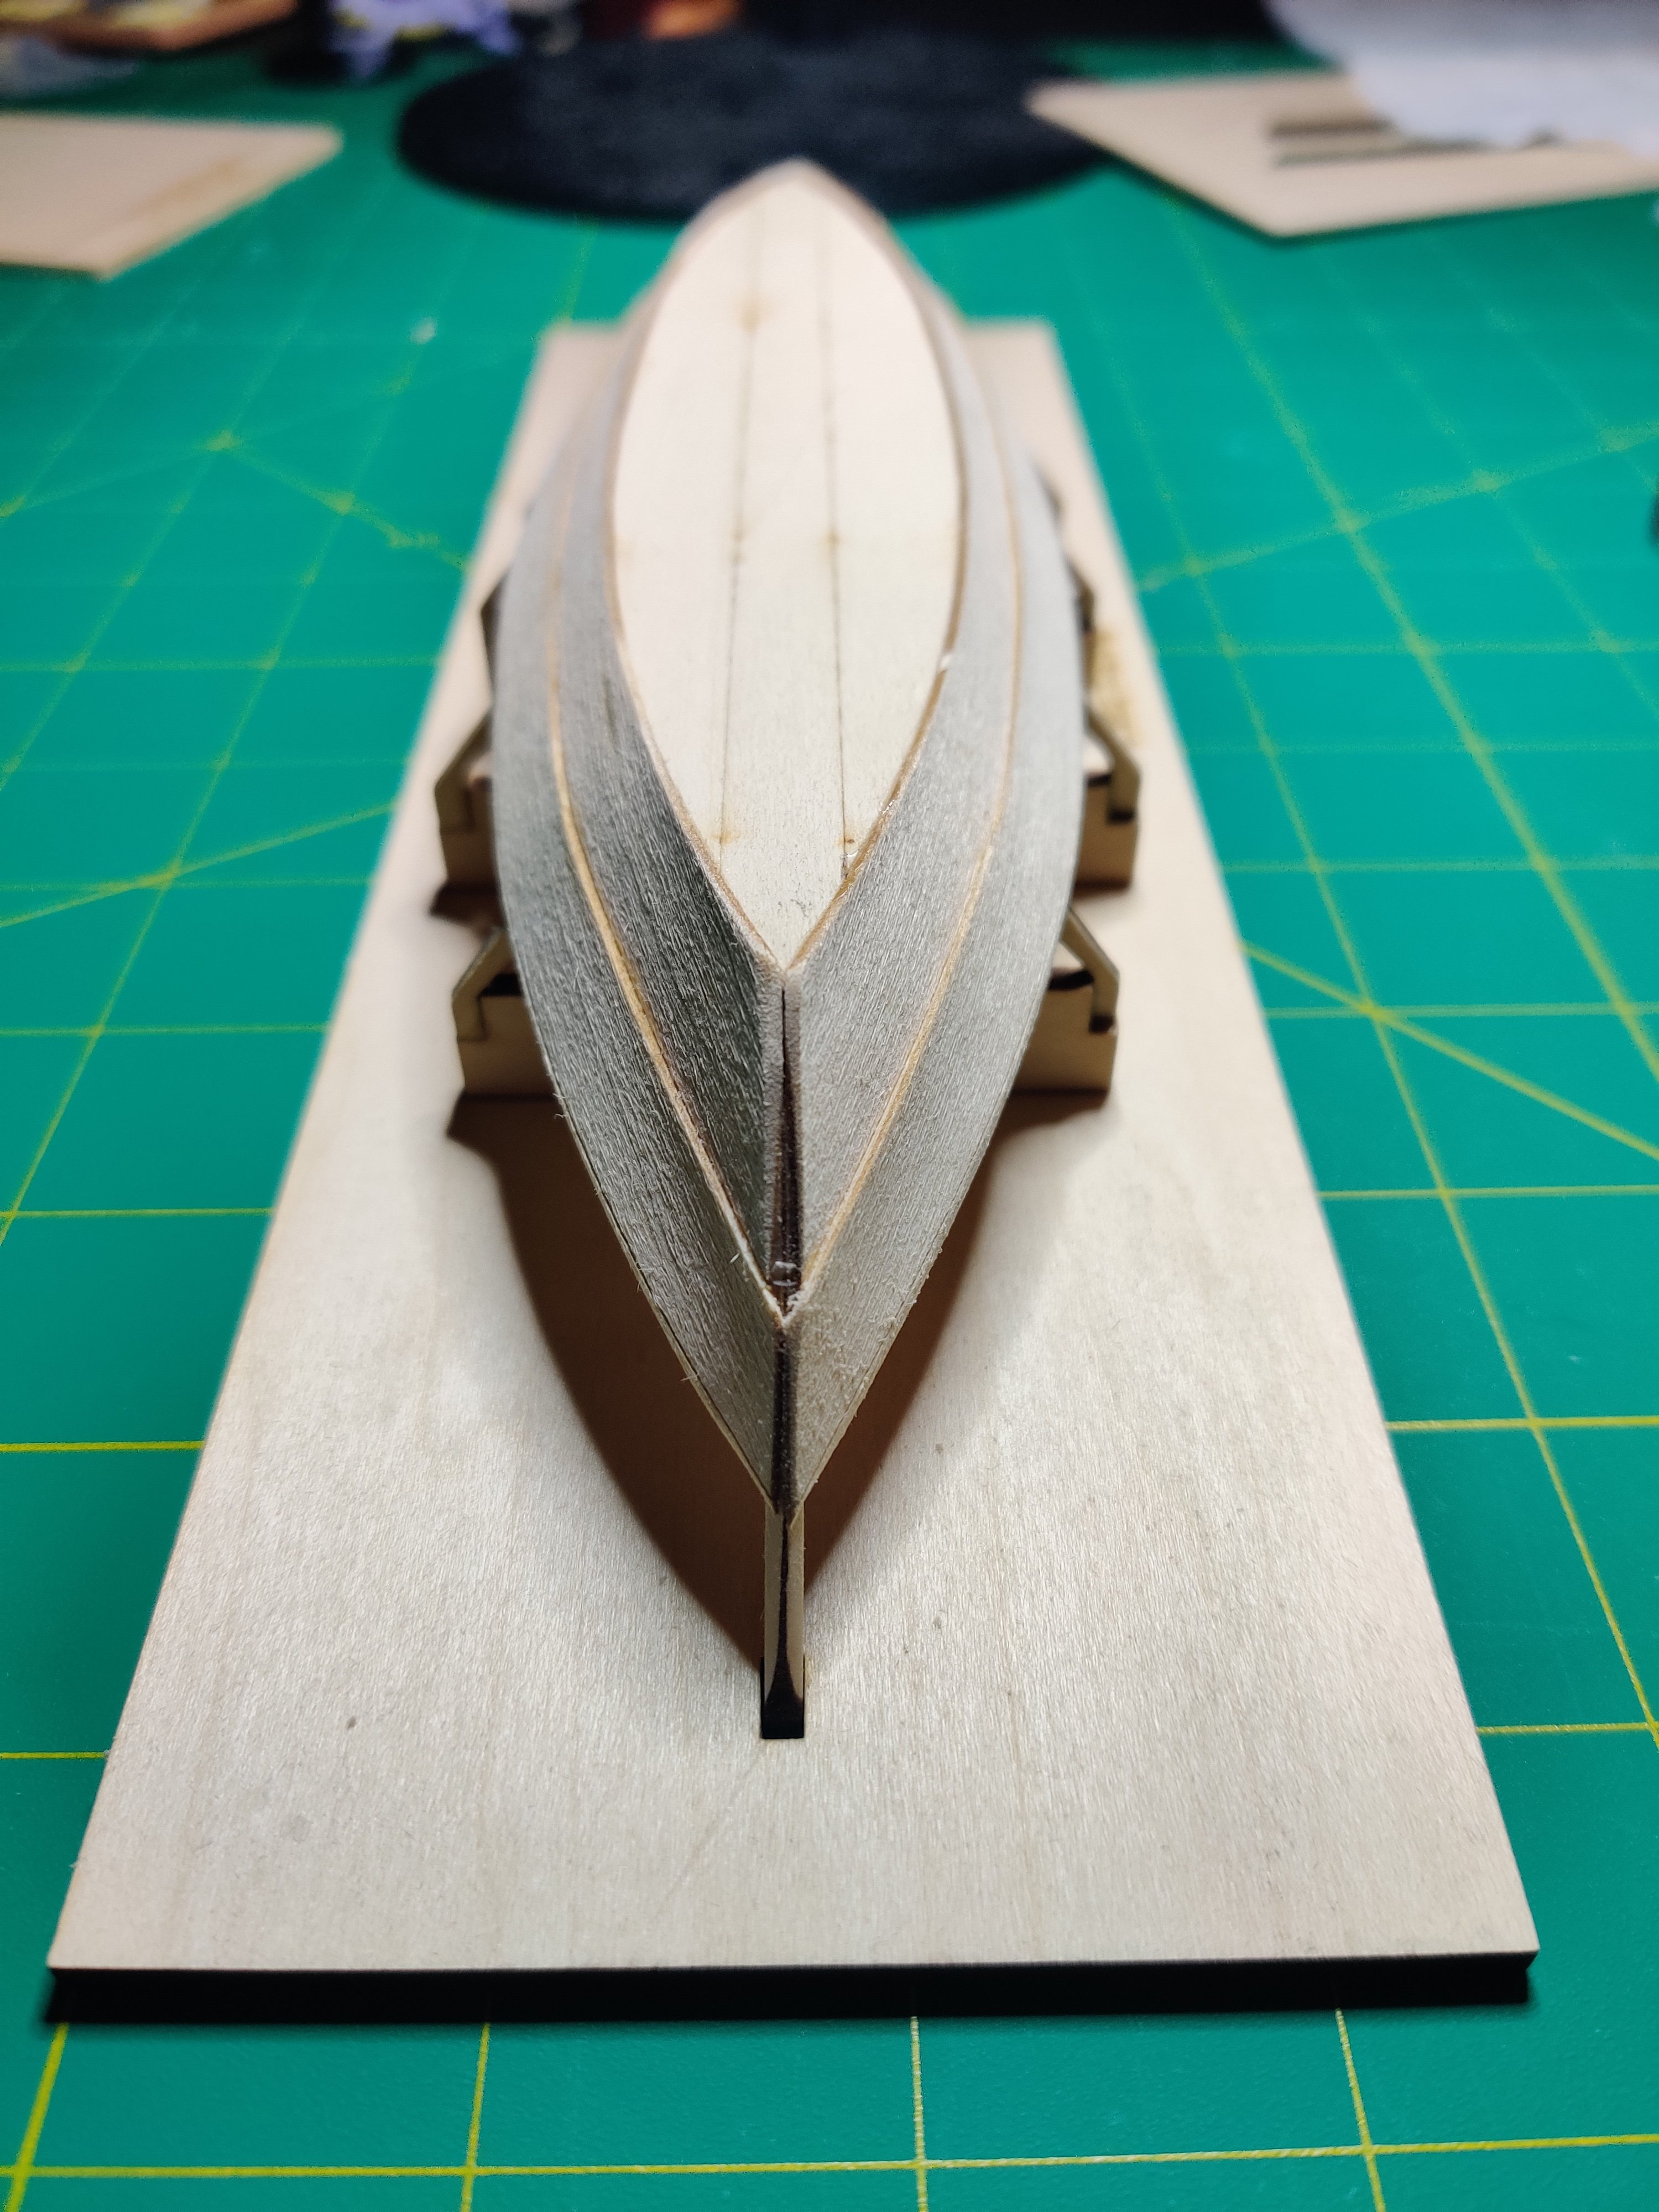
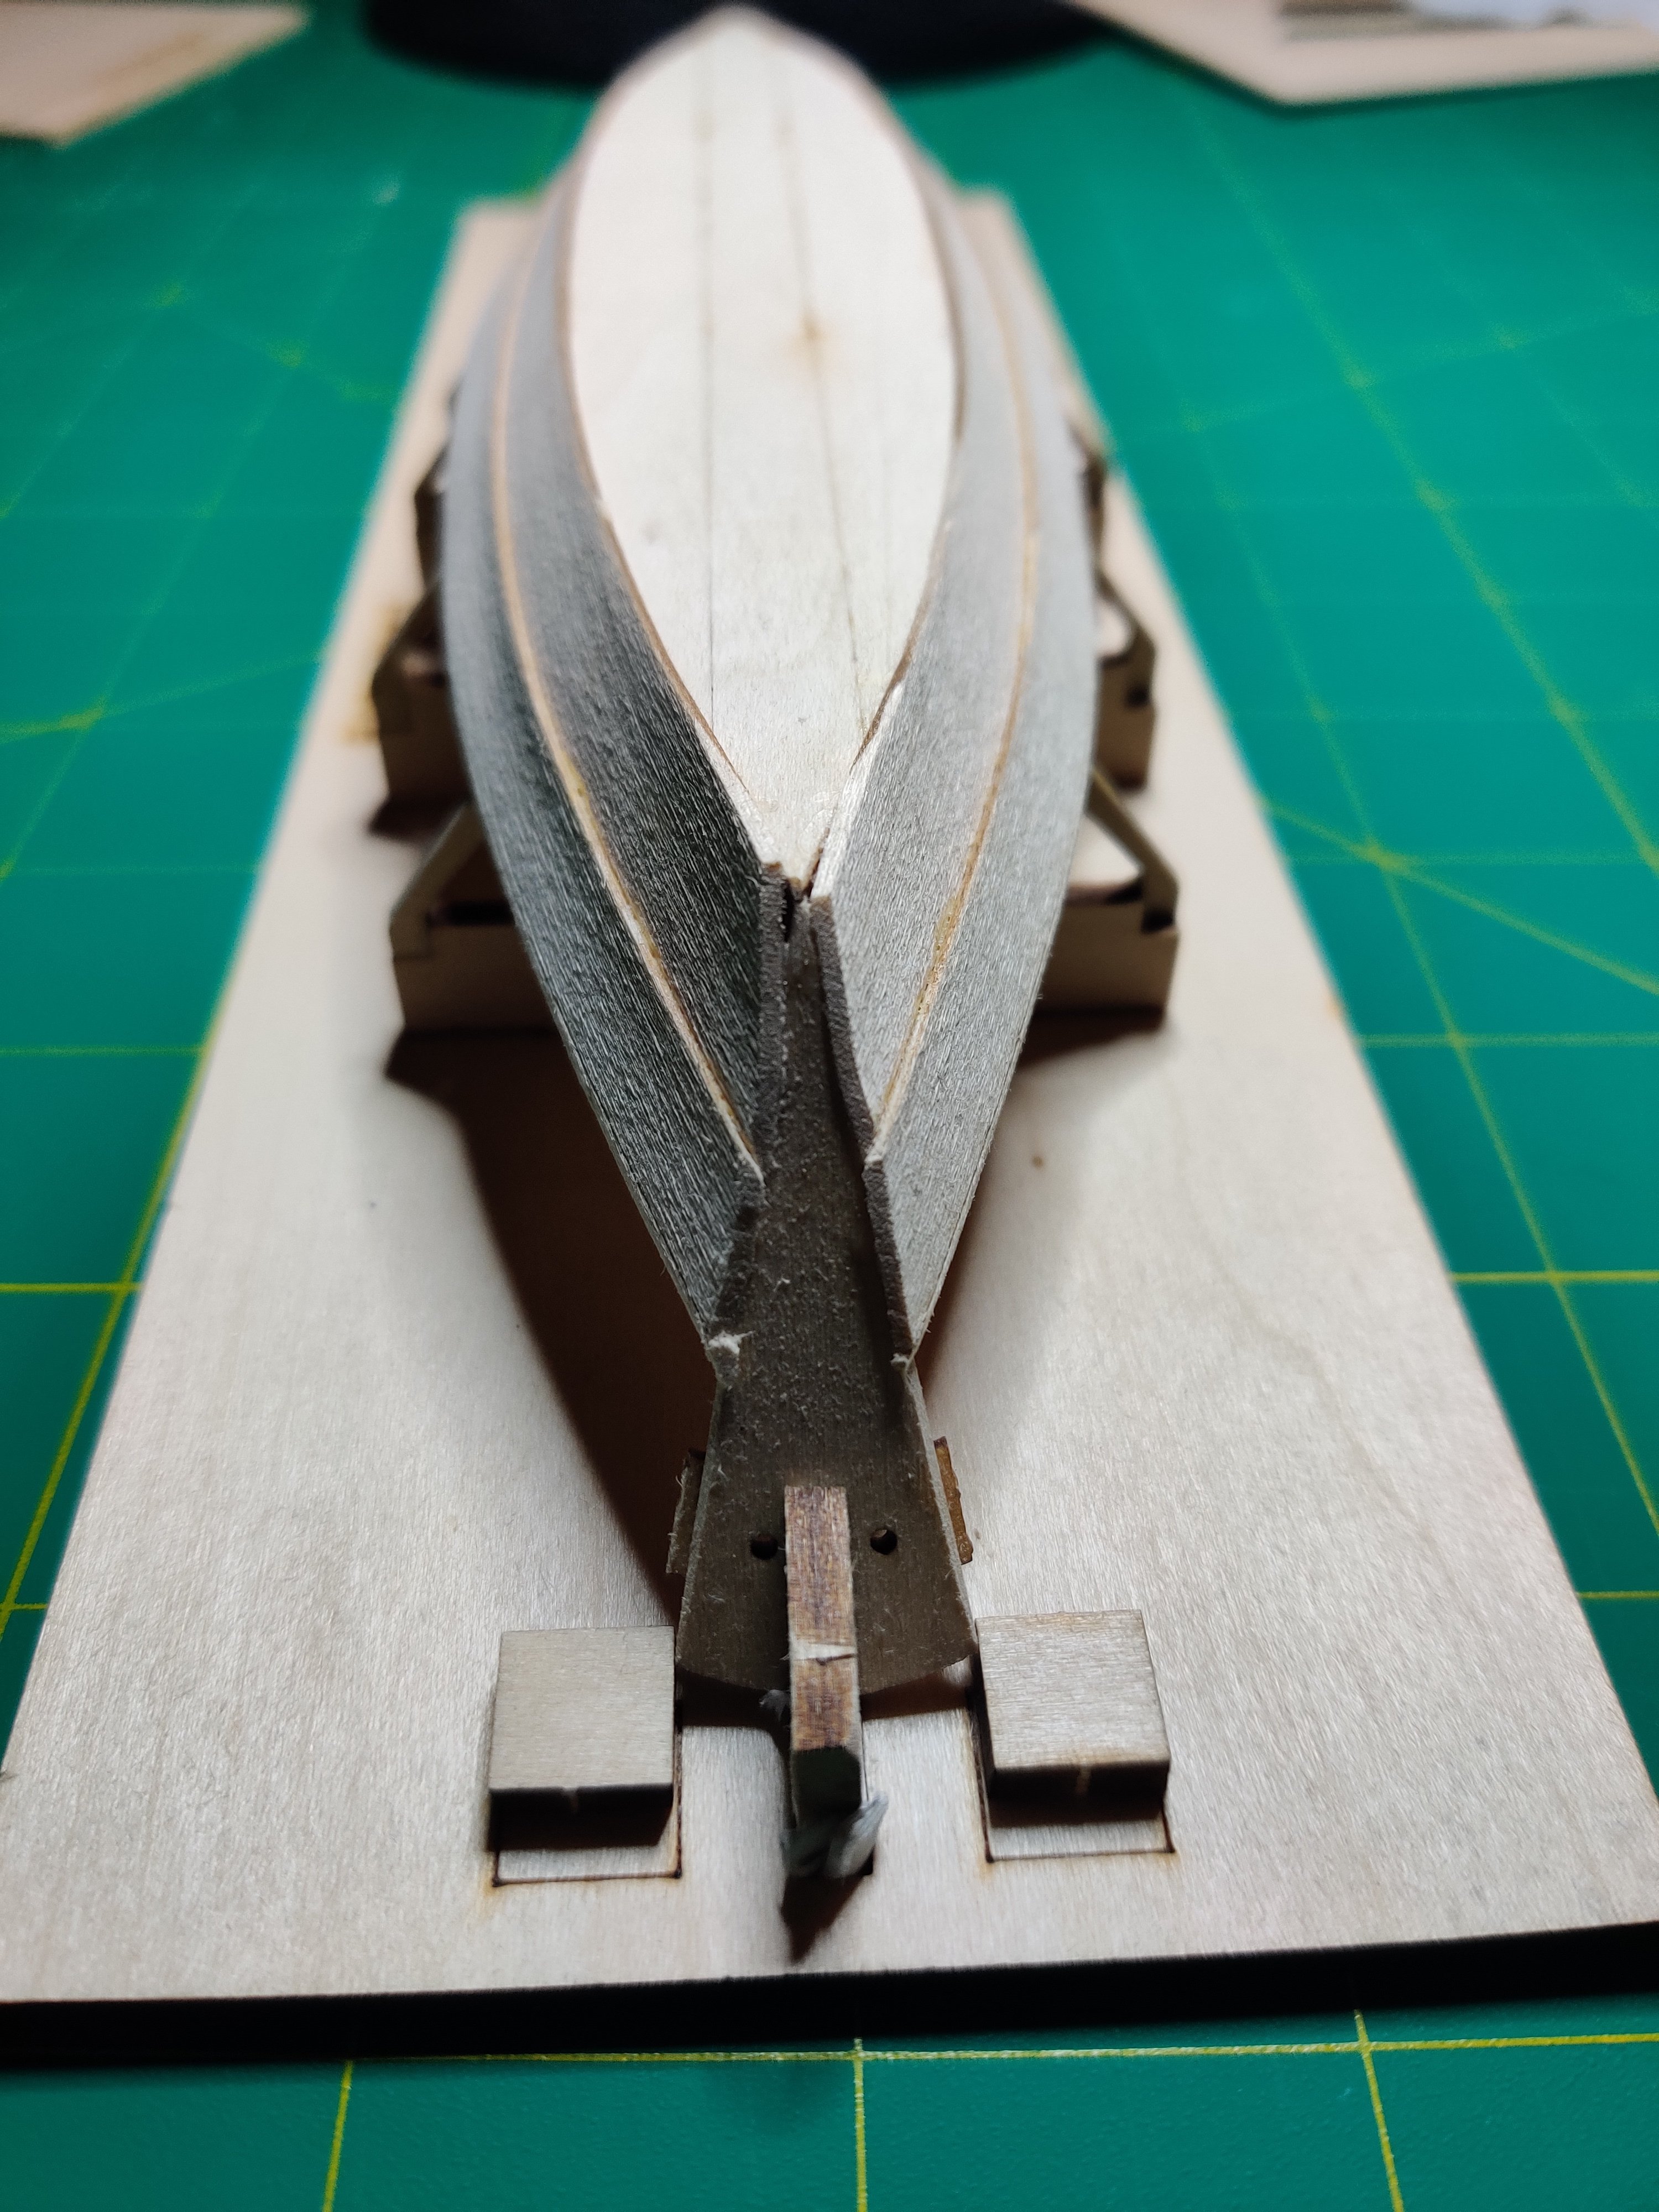
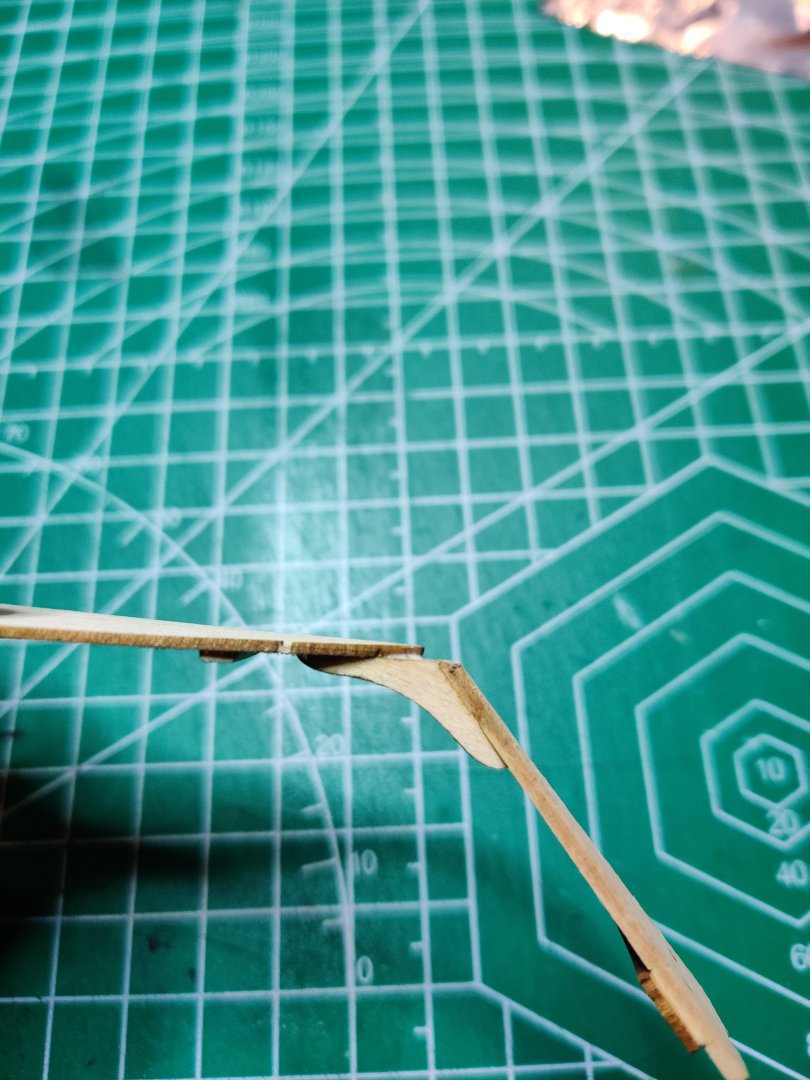
After finishing the Dory, it's time to move on to the Norwegian Sailing Pram. Starting with the transoms, the stern transom was easy enough. The bevel guide certainly made things easier, although it wasn't perfectly straightforward. I noticed partway through that I was sanding it pretty unevenly, so had to be pretty conscious on how I was applying pressure for the rest of it to try to get it to all come out evenly. For the bow transom, I got a bit overeager with removing char and sanded the char off of the sides, forgetting that the instructions specifically say to not do that yet. Fortunately this was easily re-darkened with a pencil which worked just fine. Unfortunately, beveling that transom to be flush with the knee did end up bringing the bevel past the pre-marked bevel line. I hope this won't cause any problems when attaching the planks. Otherwise assembly of the transoms was easy enough. Constructing the build board was a bit of a pain, unlike with the Dory. The two frames both very much did not want to fit into their holes, and so required a lot of careful sanding to ensure that they fit while still standing upright. I also drew a center line on the board and found that the bow transom holder slot wasn't quite aligned, so had to widen that and then add a shim to one side. I also accidentally snapped the arm of the stern transom holder while pushing it into the slot, but that was easily repaired with some scraps from the extra side cleats that came with the Dory kit. At this point I am on the step for bending the first plank and have not had good success yet. For the Dory I followed the instruction's suggestion to soak the planks in hot water and then clamp them to the frame to bend. This worked well, but I didn't like the degree to which it raised the grain. Given that the instructions for the Pram provide other suggested methods besides soaking, I wanted to try something else this time around that wouldn't raise the grain so much. I saw in another build log someone had used some copper tubing held by pins attached to cork board to build a jig to hold the plank in shape for bending. This looked like a great idea, so I cut some cardboard to approximate the curve of the hull, built a jig with some copper tubing on cork board, and used my heat gun to try to bend the plank. This did not work at all how I wanted it to. It turns out that push pins are wider at the bottom than at the top, which meant that the bits of copper tube would tilt when pushed on by the plank, meaning that, while the plank did bend decently well for the curve of the frames, it also developed a significant twist which I could not seem to get rid of. Thankfully the kit comes with a spare. For the spare I tried just clamping it to the frame and using the heat gun. This did not produce anywhere near enough bend in the plank. This shouldn't be a surprise since the instructions do specifically say that you need to over-bend, but I was still hoping it would work a bit better. This is where I am for the moment. It seems that bending is a significantly harder step here than it was on the Dory. For the Dory, the bending seemed to mostly just be a quality of life improvement to make it easier to glue the planks onto the frames, since the pre-cut shape of the planks meant the bend wasn't necessary for shaping. While the Pram does also have pre-shaped planks, in this case because we don't glue them to the frames of the building board, it seems that getting a good bend will surely be much more important for producing a properly shaped hull, as the rigid, locked-in frames will act as a helpful guide, rather than actually providing any support. I guess it's time to read a bunch of other build logs to look for ideas before trying again.


- 1 reply
-
- 4
-
-

-
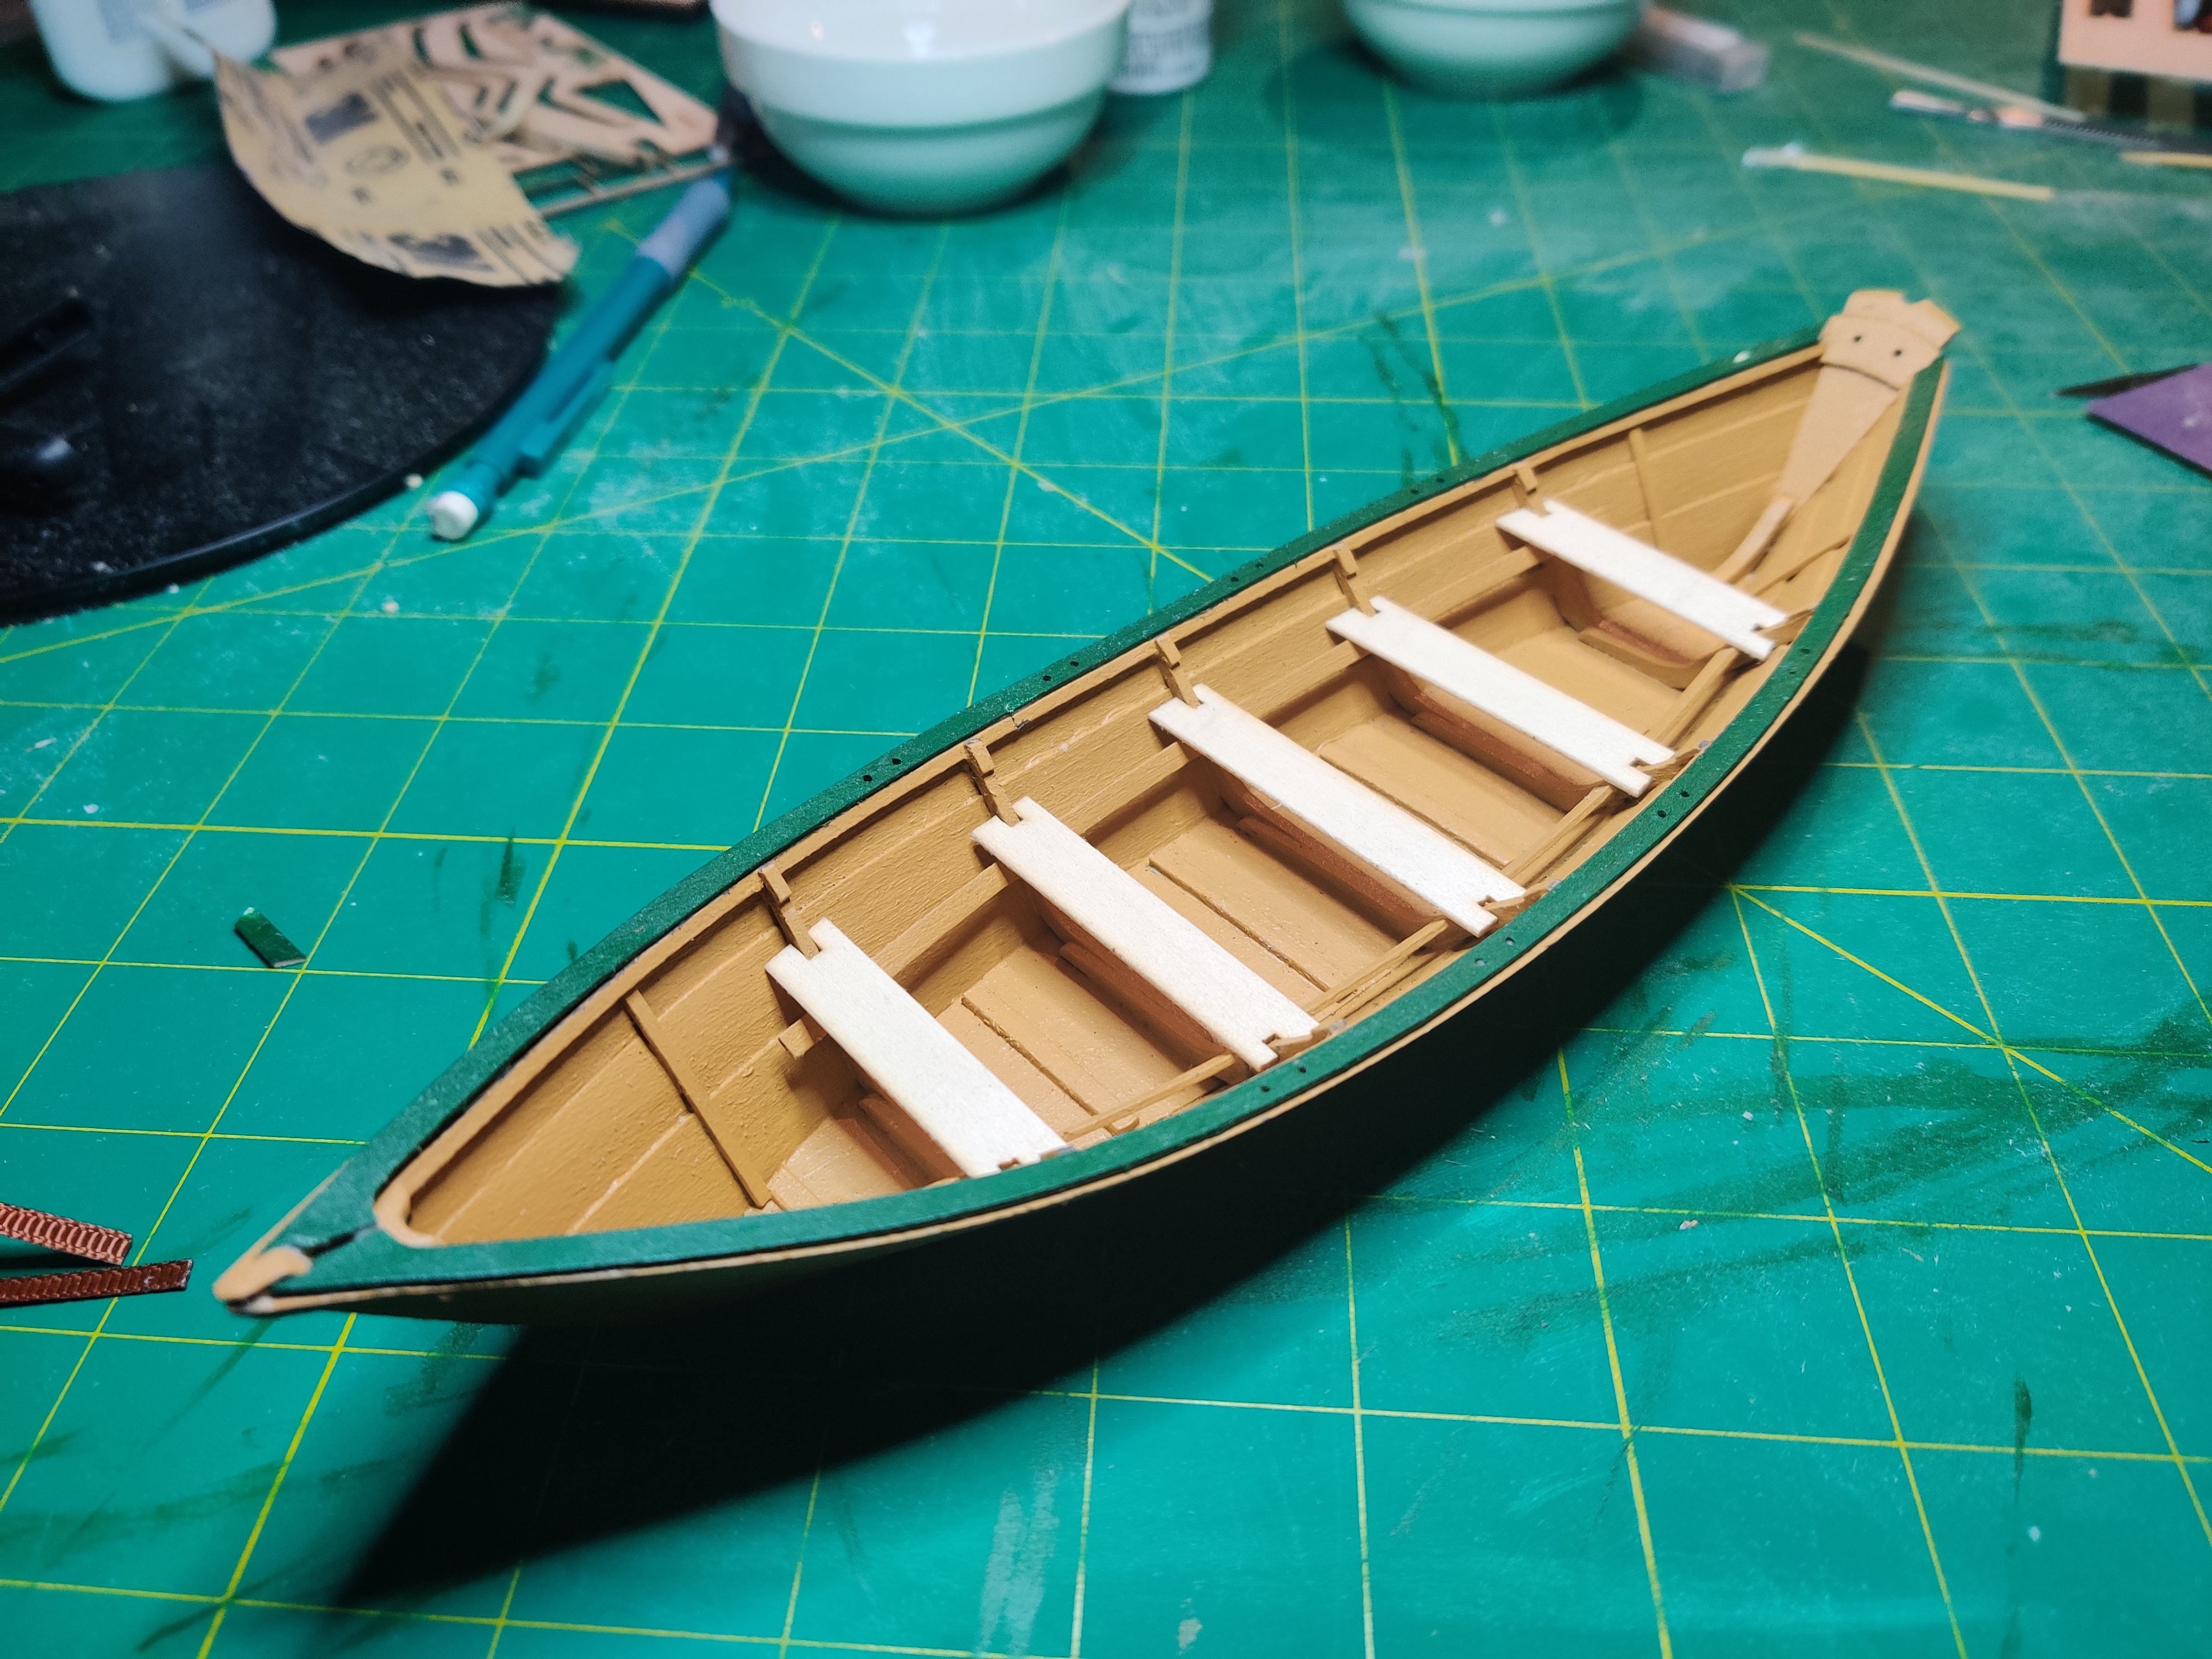
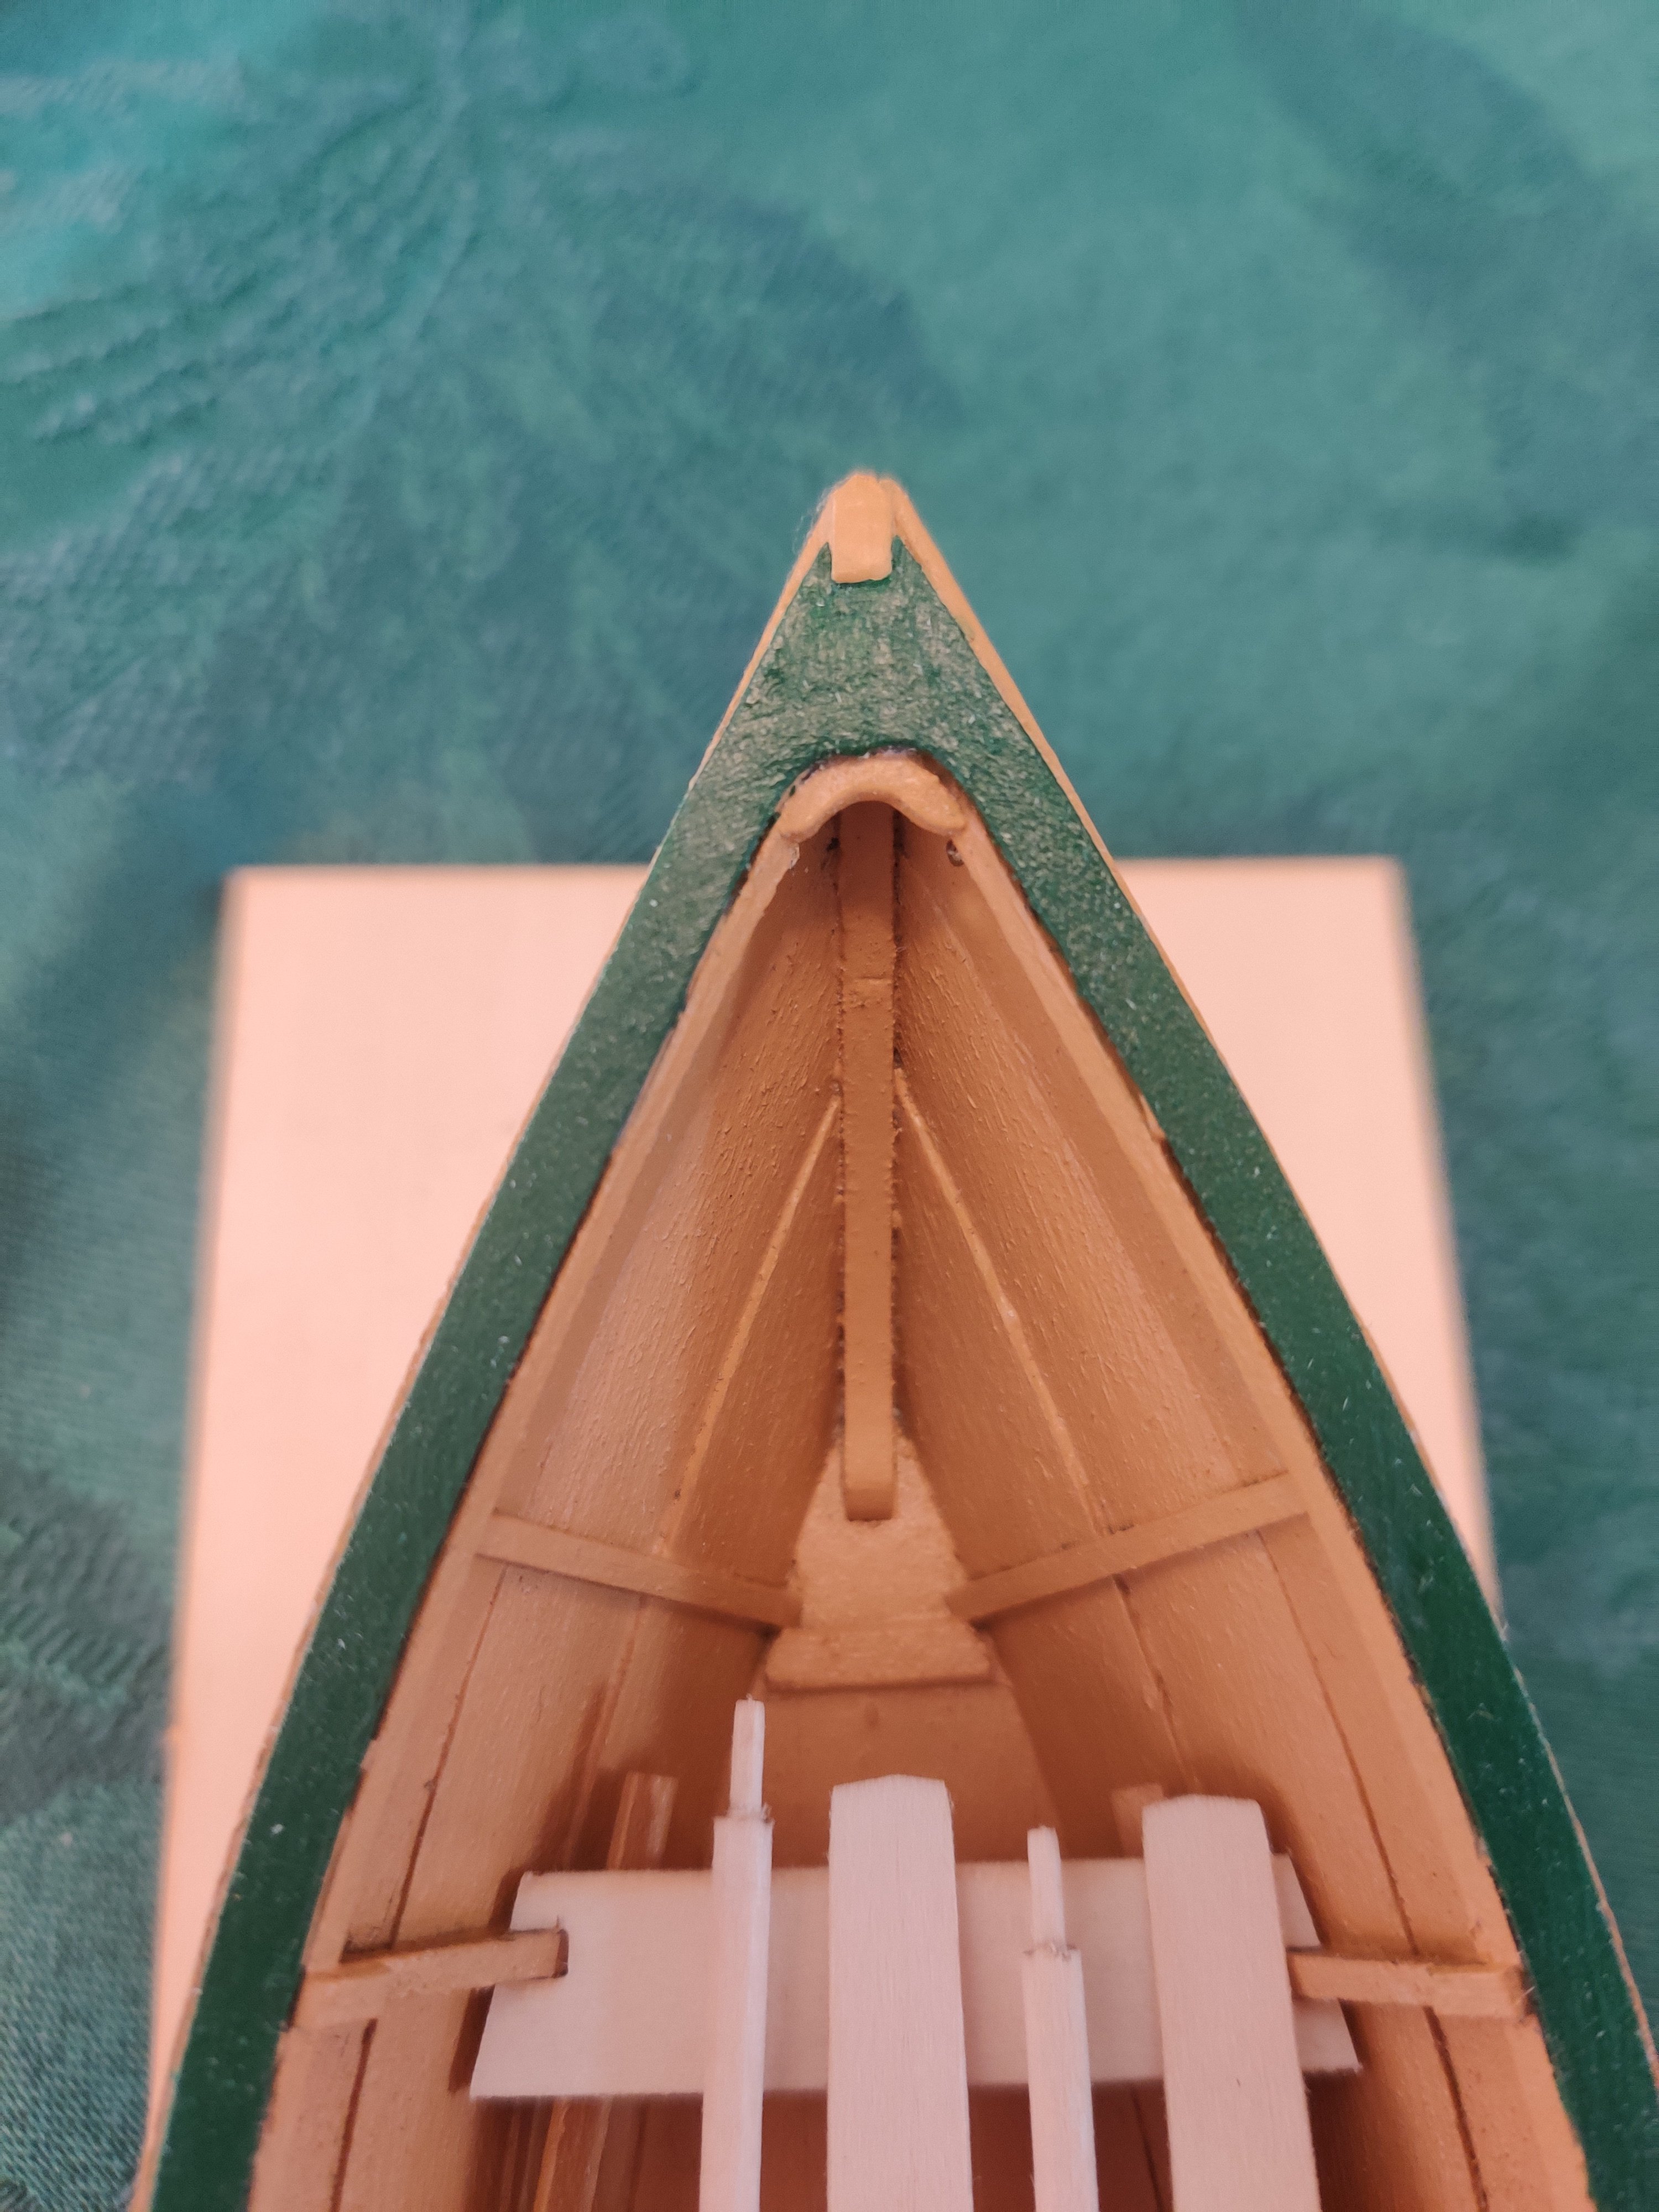
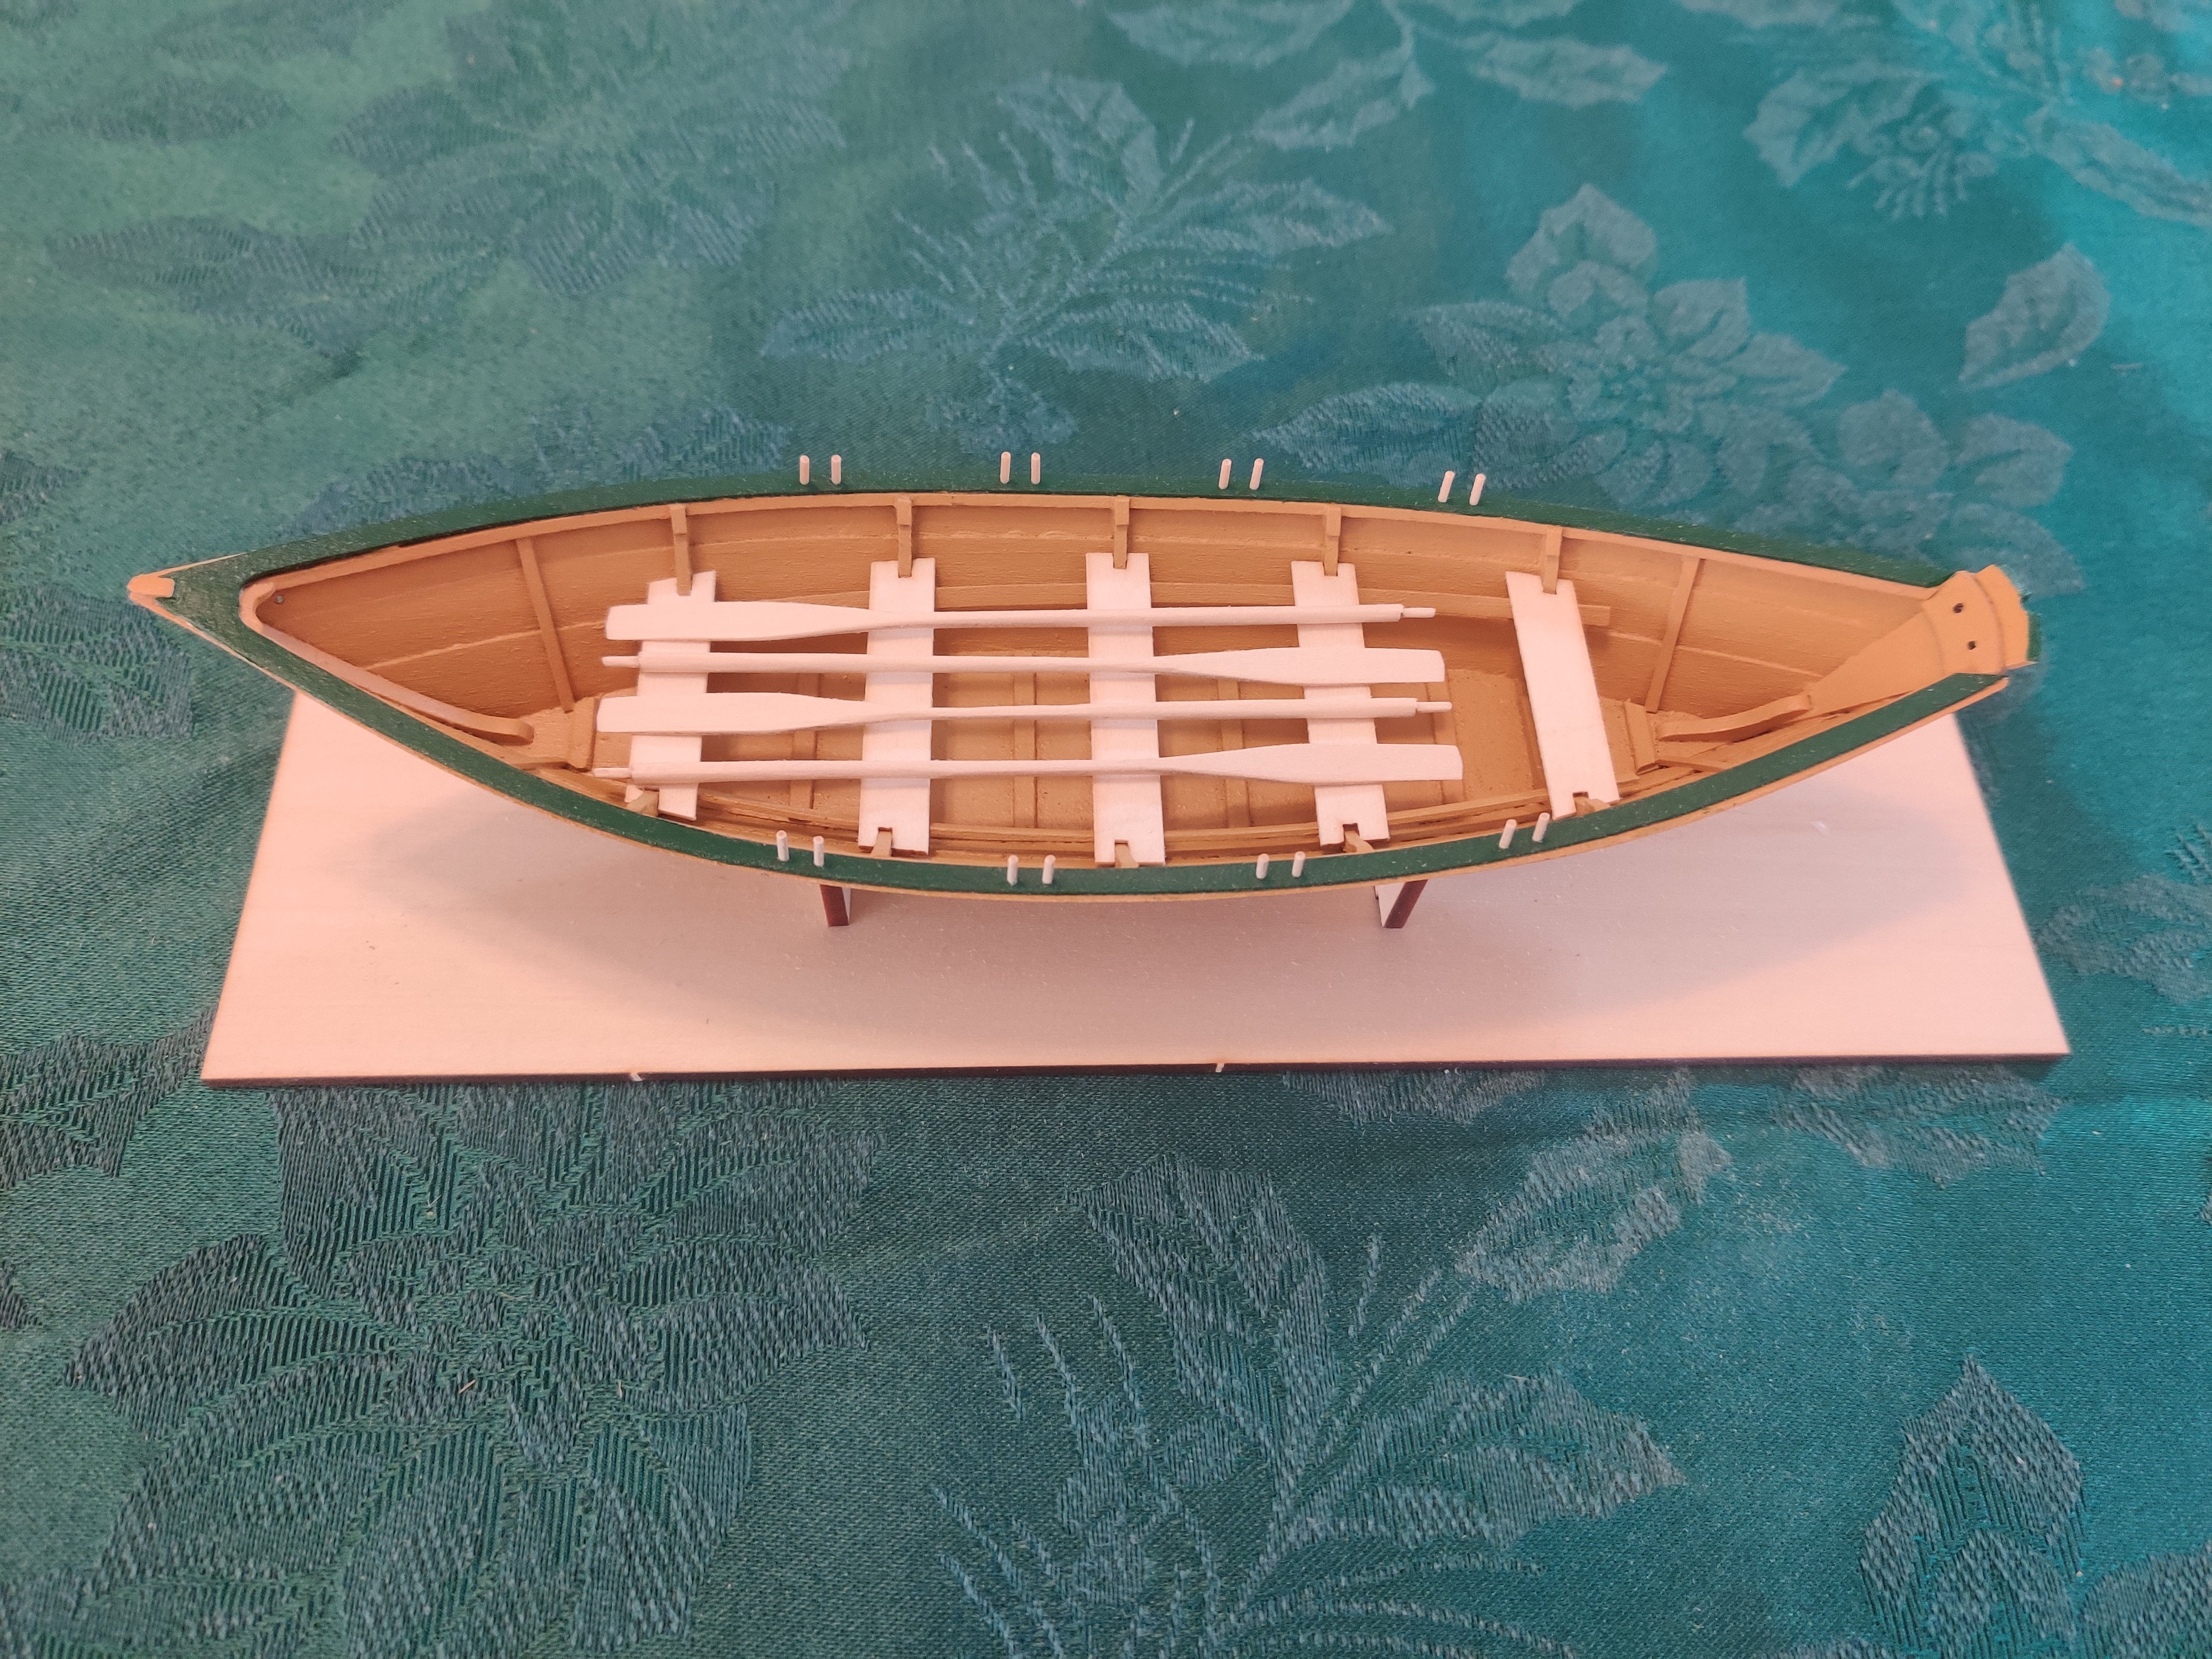
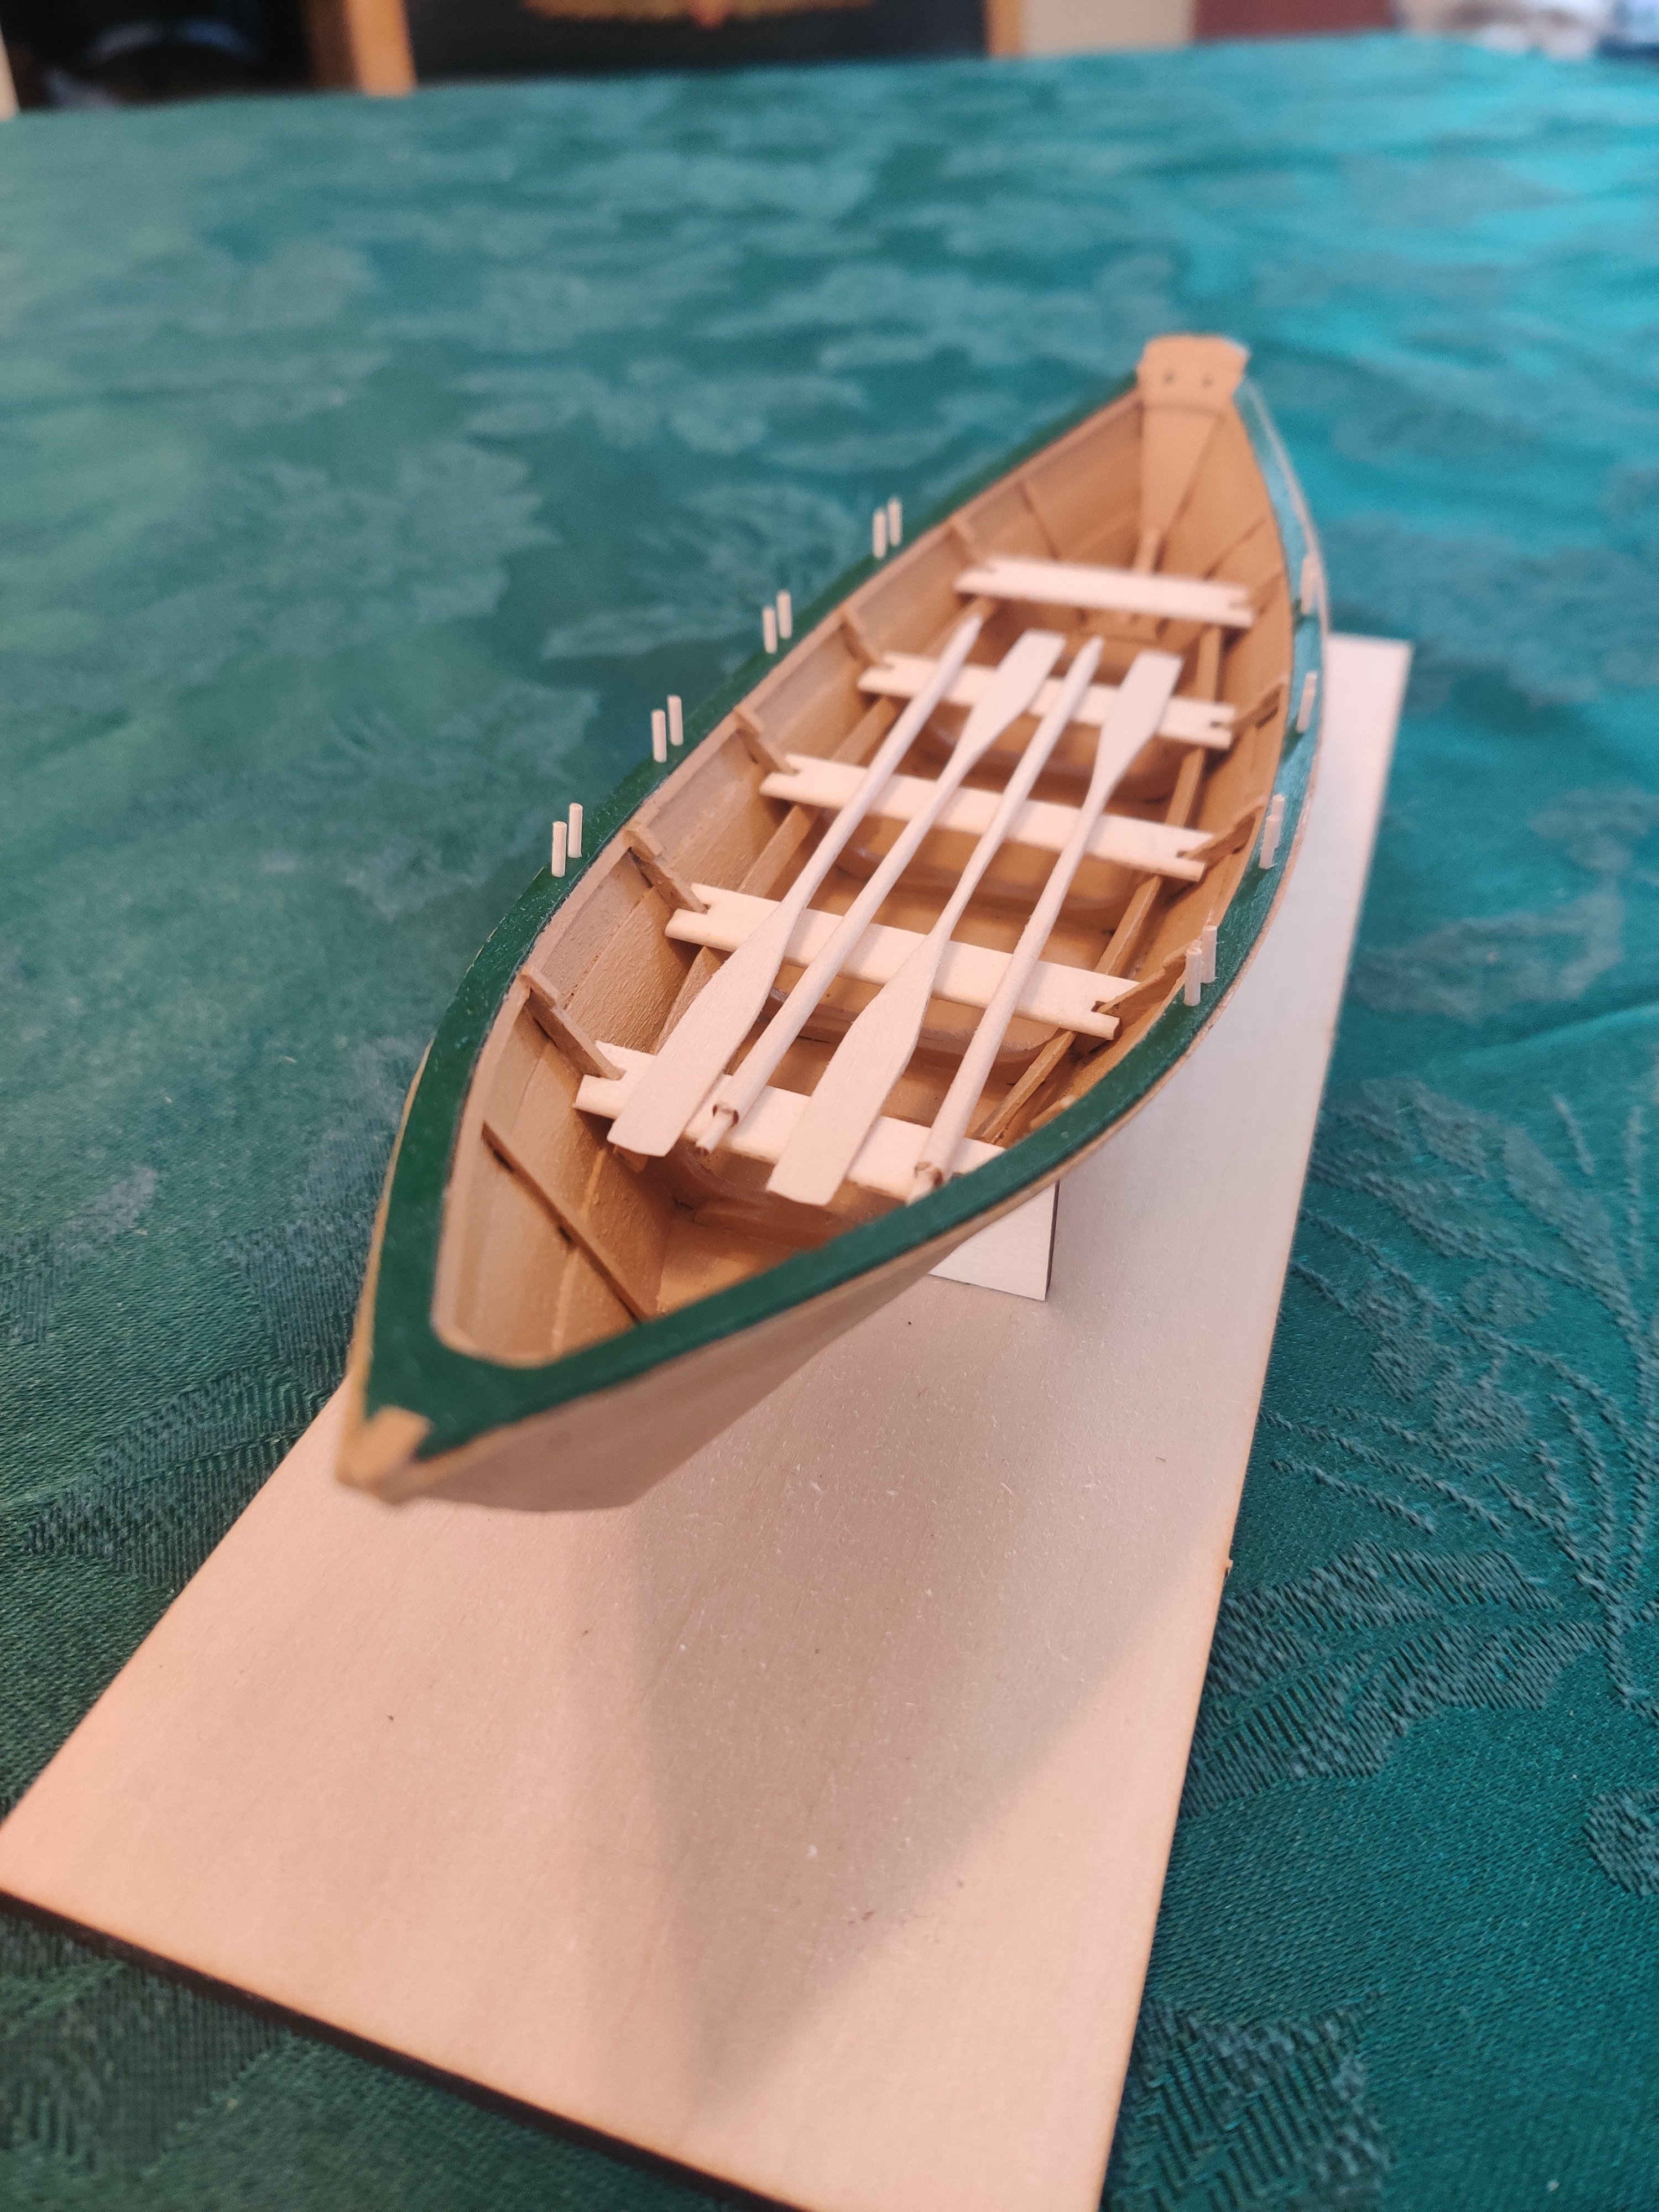
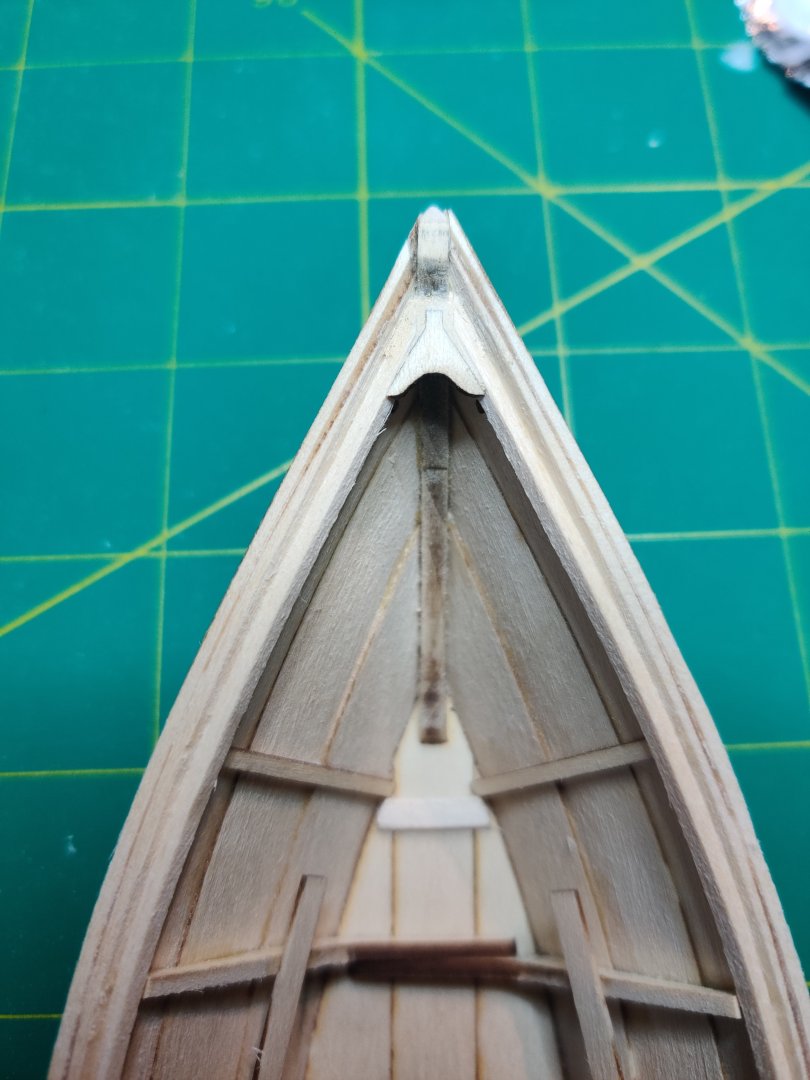
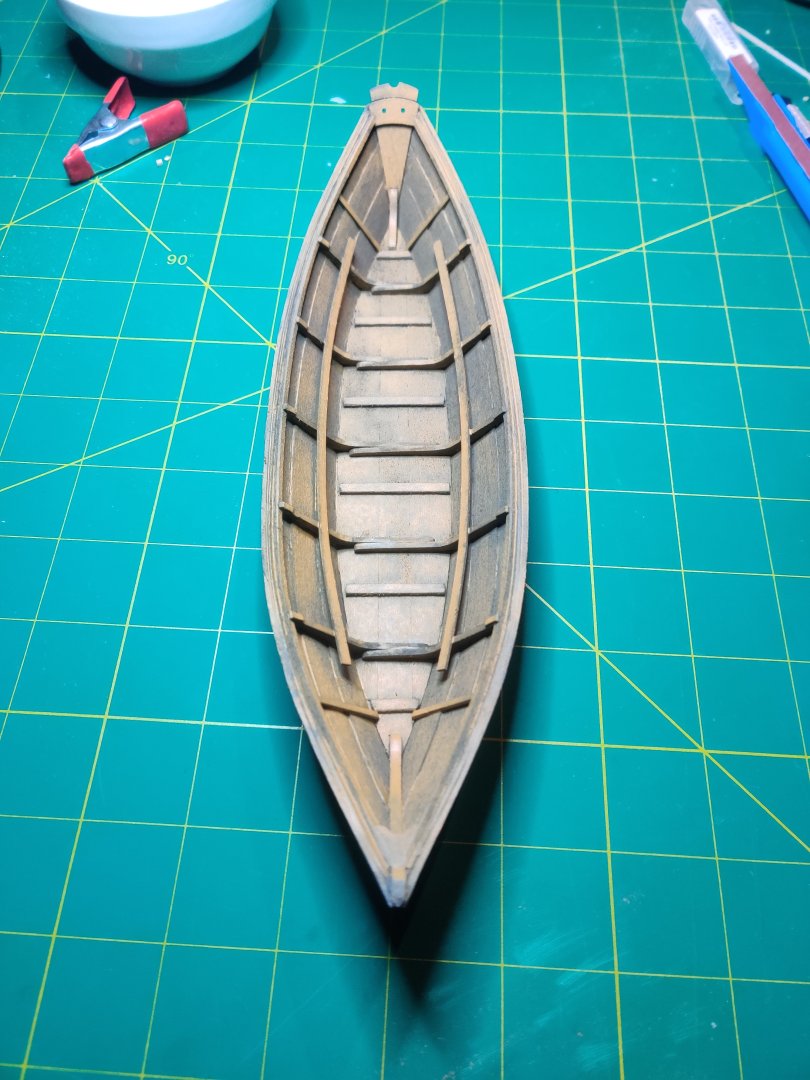
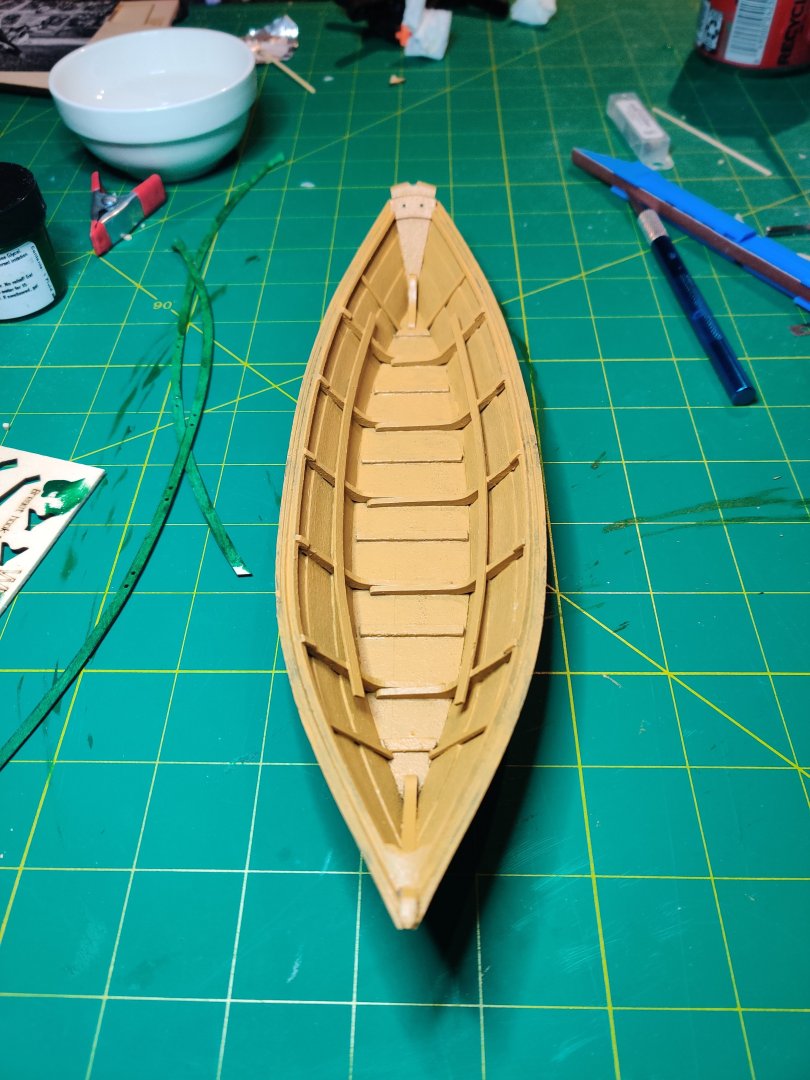
It's finished! (Mostly.) I actually tried to write an update before it was completed but couldn't seem to upload any images to the forum at that time, so this will be all the rest of the log together. I also had a couple of marathon work sessions at the end and got in the zone enough that I forgot to take many incremental pictures, so I won't have the best illustrative photos here. After my last post, I was able to install the side cleats, seat risers, side bands, and gunwales without too much trouble. The first significant issue I ran into was that the breast hook supplied with the kit was noticeably significantly smaller than the one in the photos included in the instructions, to the point where it didn't even come close to filling the gap between the gunwales: Fortunately some wood filler and some sanding seemed to do the trick: I also noticed around this time that my stem does not rise as high out of the front of the boat as on other boats I've seen in the instructions and in other build logs. I have no idea why this is. I didn't sand it down significantly, and I thought I did a pretty good job of seating the planks where they should at the stem. Maybe this is an artifact of my having attached the side bands too high at the bow, as that seems to have eaten up most of what little protrusion there was. Oh well, it won't cause any problems for the structure of this model. For the gunwales and side bands, I think I may not have properly understood how they were meant to sit all in relation to the sheer plank. I thought I did a good job sanding them all level across the width of the boat as checked by a set square, but I ended up having a bit of trouble later on when attaching the cap rails. Before moving on to glue those, though, it was time to paint the boat which turned out to be the worst part of the process yet. I started by priming with a rattle can grey primer. I thought I might be able to save some time by painting the boat using my airbrush, but this turned out to be a bit of a nightmare. The paint supplied with the kit instantly clogged my airbrush worse than I've ever experienced, and did so again after a thorough clean and thinning it down even more. I was able to get it to spray on my third try, but only by thinning it down so much that it seemed to be just getting the boat wet just as much as it was applying any meaningful color (and it still eventually clogged the brush). I suppose I shouldn't be terribly surprised that the included paints aren't particularly high quality. Maybe next time I would be better off trying to color match using my existing paint collection. Coming out of the attempt at airbrushing I had a grey boat with some patchy yellow ochre applied: After this I switched to using a brush which, while not frustrating like the airbrush, was very tedious. I had to apply 3 or 4 coats to get something like an even application, and even still I can see a bit of patchiness if I look. I did also try to do a bit of sanding as the grain was very noticeably raised, but I gave that up pretty quickly when I realized I just didn't have a good way of sanding the rough, highly visible but hard to reach nooks inside the boat such as between the frames and the bottom cleats. This is something I would love to hear some advice on if anyone has any. This is also just generally an area where I clearly need to develop some more patience, but I really wanted to get back to the actual building. Eventually though it was all painted: Next step was to attach the cap rails. This didn't go super great as the way I had aligned the gunwale/sheer plank/side bands meant that the cap rails had a bit of a twist in the first 1.5 inches or so, as well as a gap above the gunwale for roughly that length. It didn't seem hugely noticeable though and addressing it would have required some pretty aggressive sanding down at the front of the boat, so I left it as is. Also this step made me very glad that I switched from the yellow wood glue that came with the kit to plain Elmer's white glue. I had mentioned very early in this log that I had had quite a lot of trouble using alcohol to remove a glued piece and this happened again while trying to use alcohol to soften and clean up some excess glue that ended up on the inside of the planks in preparation for painting. I kept those spots flooded with alcohol for ages and it made almost no difference in softening it and eventually I had to use a chisel knife to just shave it away while still almost rock hard. After this I decided to not use that again and switch to white glue, and I'm glad I did. While gluing the front of the second cap rail, I clamped it manually with my fingers but let it go too soon and it popped up, leaving some columns of dried glue attaching it to the hull: It would have been awful to try to release this to try again if I had wood glue and I'm sure I would have broken the cap rail in the process. With the white glue though it was no problem and I was easily able to get it cleaned up and glued down again. At this point I was very excited as, even though it wasn't finished yet, it pretty much looked like a completed boat if you squint. I added the thwarts even though they still needed to be properly fitted: There's a bit of unevenness in the alignment of the cap rails as I had some trouble clamping them along the length in a way that didn't pull them either inwards or outwards, but I'm still pretty happy with it. At this point, I still needed to fill the gap above the breast hook, touch of the cap rail paint, fit the thwarts, shape the oars, round cut and attach the thole pins, and attach the beckets. This is where I completely forgot to take any more pictures, so unfortunately it will just be descriptions from here. Filling the gap where the two cap rails met was easy enough to do with some filler and sanding, after which it all painted up very nicely. Fitting the thwarts was also straightforward, just needed to sand a couple of them down a bit. Shaping the oars though was not fun at all and made me pine for the better days of painting. Maybe I should have followed one of the suggestions from the instructions and tried starting with whittling the oar blades, but I have no confidence in my whittling abilities so elected to do it all with sanding. This was extremely tedious and made my arm a bit sore with all the back and forth. And unlike painting, it wasn't something I could do while also watching some TV or something since I had to be constantly paying attention to make sure I kept things symmetrical and didn't over-sand them. I'm very pleased with how they turned out but it was, in the end, the worst part of the experience of building this boat. Rounding the length of the oars was much more enjoyable. I did have some trouble getting them to have a properly circular cross-section and each one is a bit more ellipsoidal, but I doubt anyone would notice unless they picked one up to examine it. The thole pins were a mixed bag of success. For the first 2/3 of the length of the wood strip I did a fantastic job if I do say so myself of getting a nice cylindrical round finish. After that though I completely fell apart for some reason and just could not for the life of me sand it evenly. I'm very glad that it came with more length than was needed though as in the end I was able to mostly piece together a decent set of pins. The last item to truly finish this kit is the beckets. I tried to install these, but the provided scale rope is just too large for the holes in the transom/sheer plank, and none of the drill bits for my pin vise drill are large enough to properly widen the hole. Maybe I'll try using the smallest bit from my power drill. On the other hand, some of the thread for rigging included with the Norwegian Sailing Pram kit seems like it may be a good size so I'm thinking I may see if there's any leftover after I'm finished with that kit that I could use. In either case, while I decide how to handle that, I'm considering this kit "finished". I had a great time working on this kit. Clearly I need to develop some more patience when it comes to painting and shaping oars, but otherwise it was a very satisfying experience building this boat. There are certainly some aspects of I that I see could have been done better, but I don't think there are any major mistakes so overall I'm quite happy with how it turned out. Next up is the Norwegian Sailing Pram, and I'm very excited to build my first kit with a sail and rigging!


- 28 replies
-
- 17
-
-
-
- Lowell Grand Banks Dory
- Model Shipways
- (and 1 more)
-
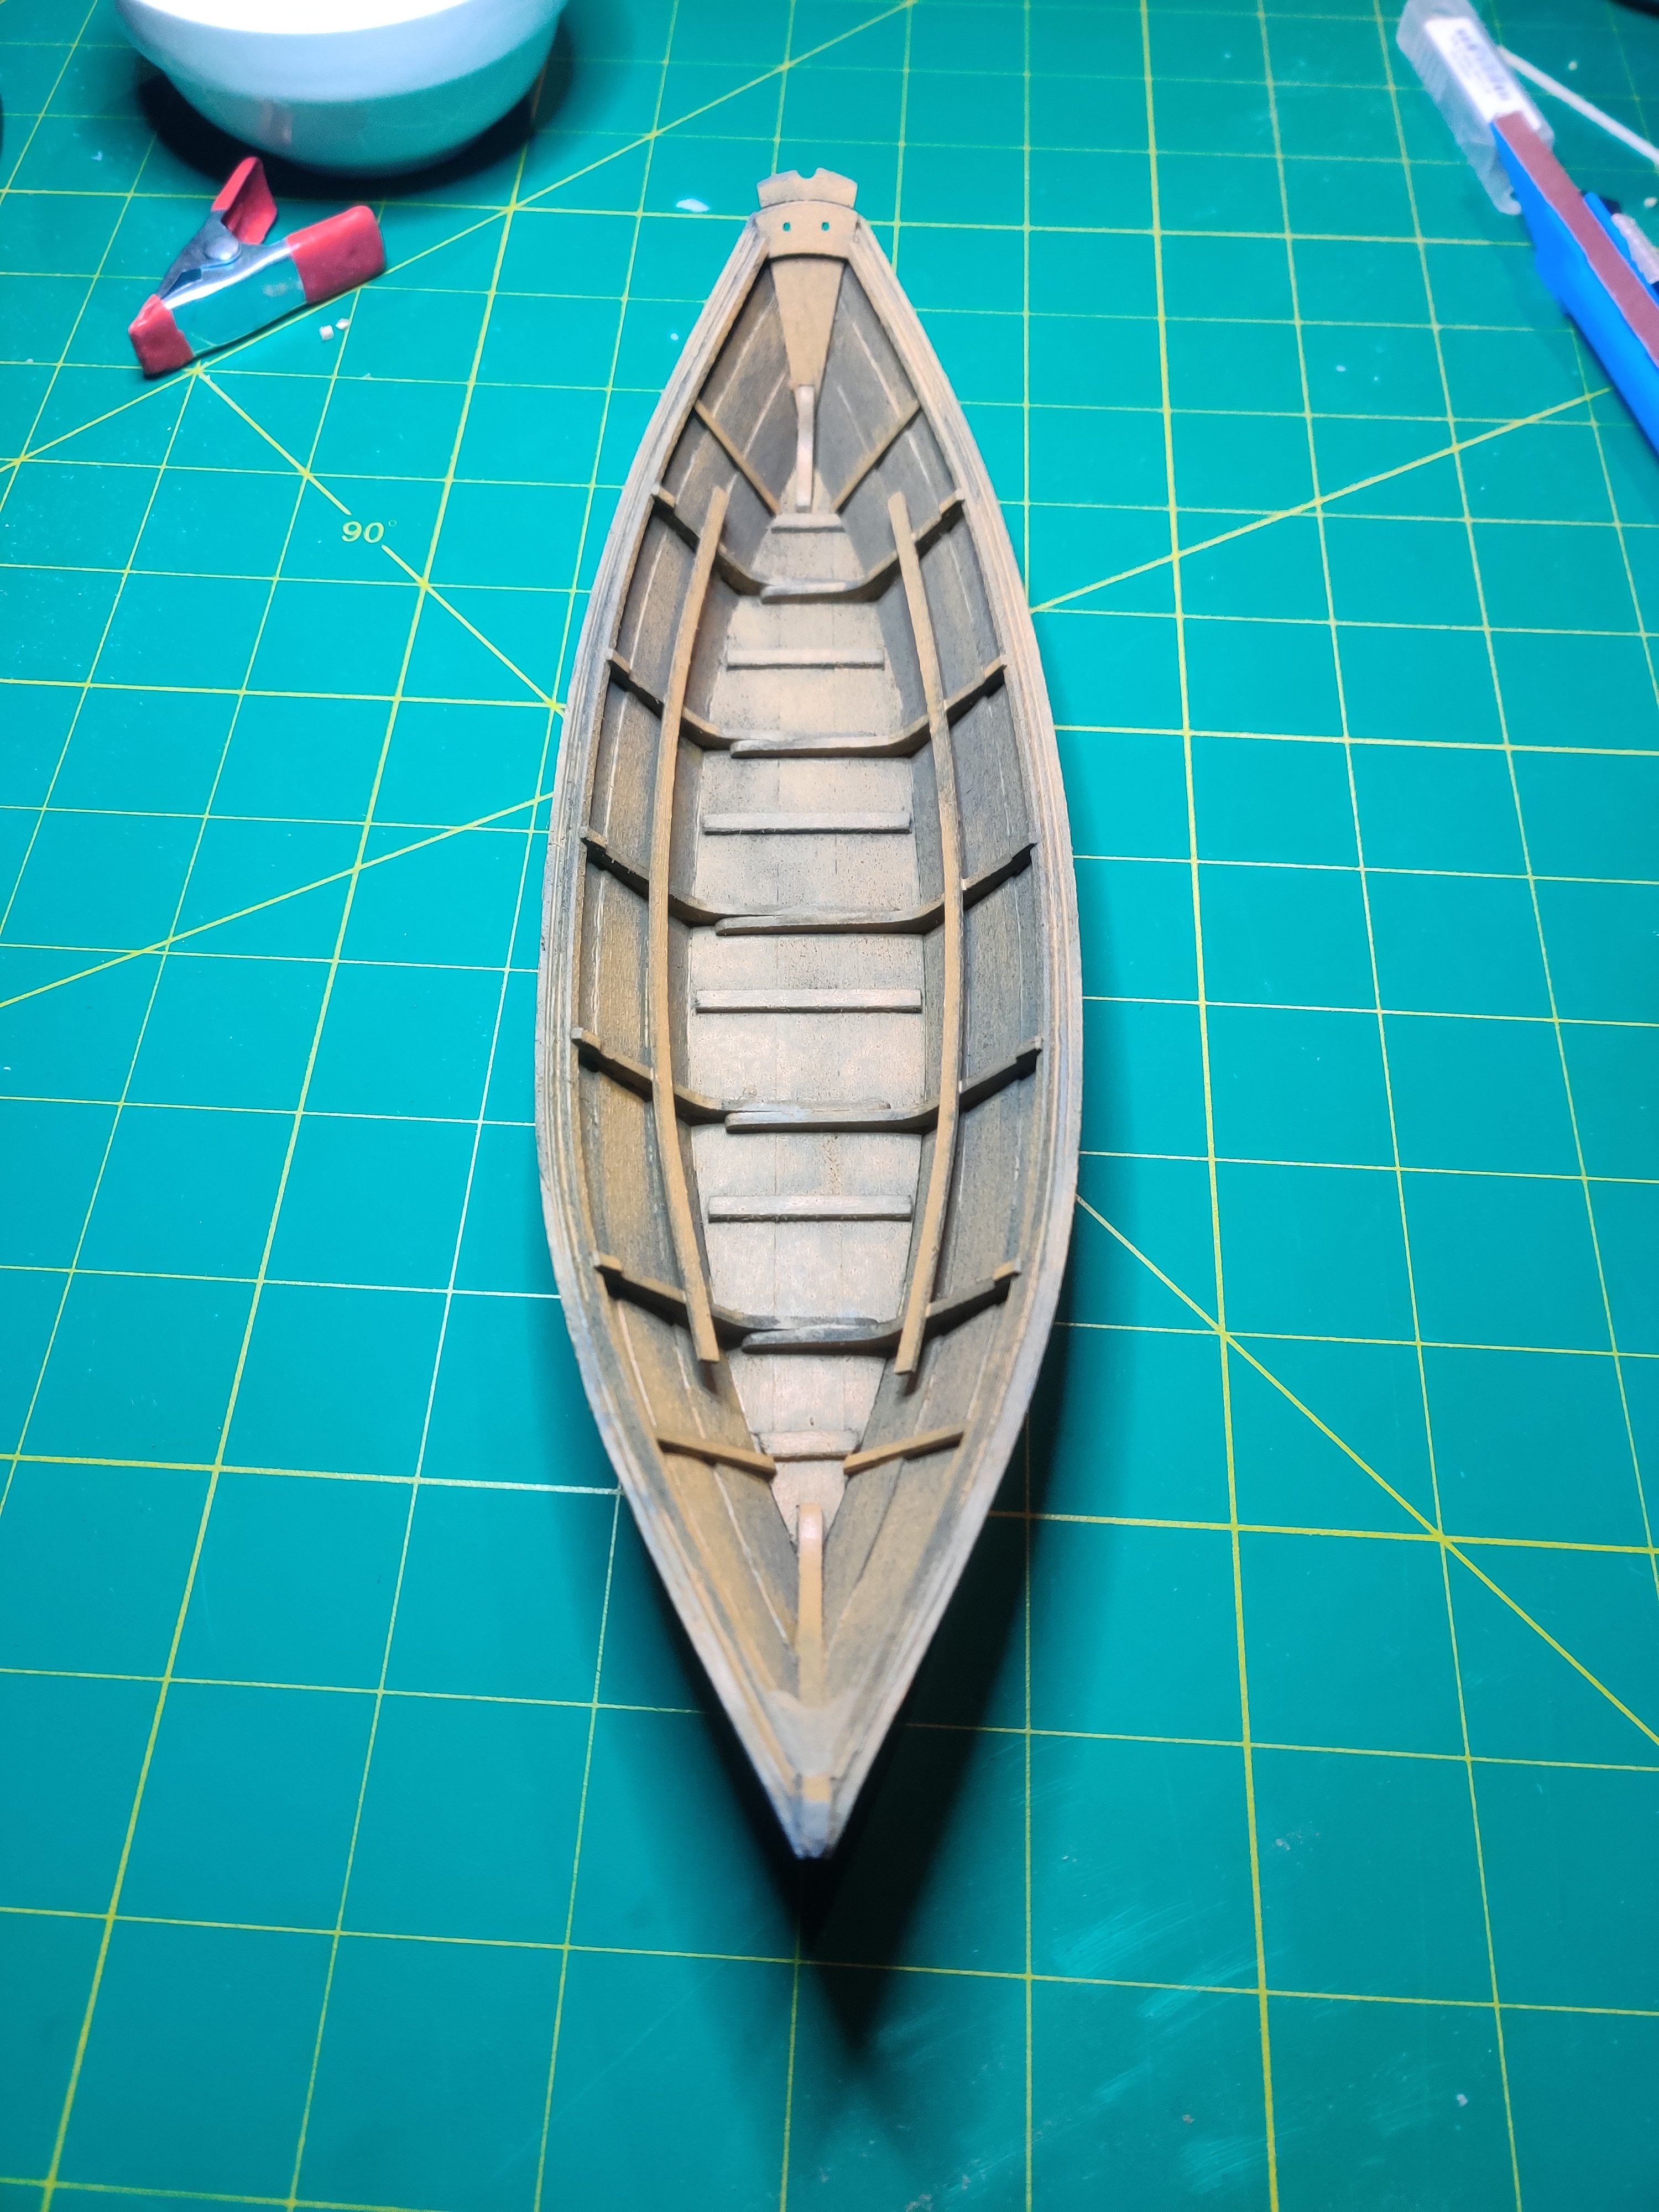
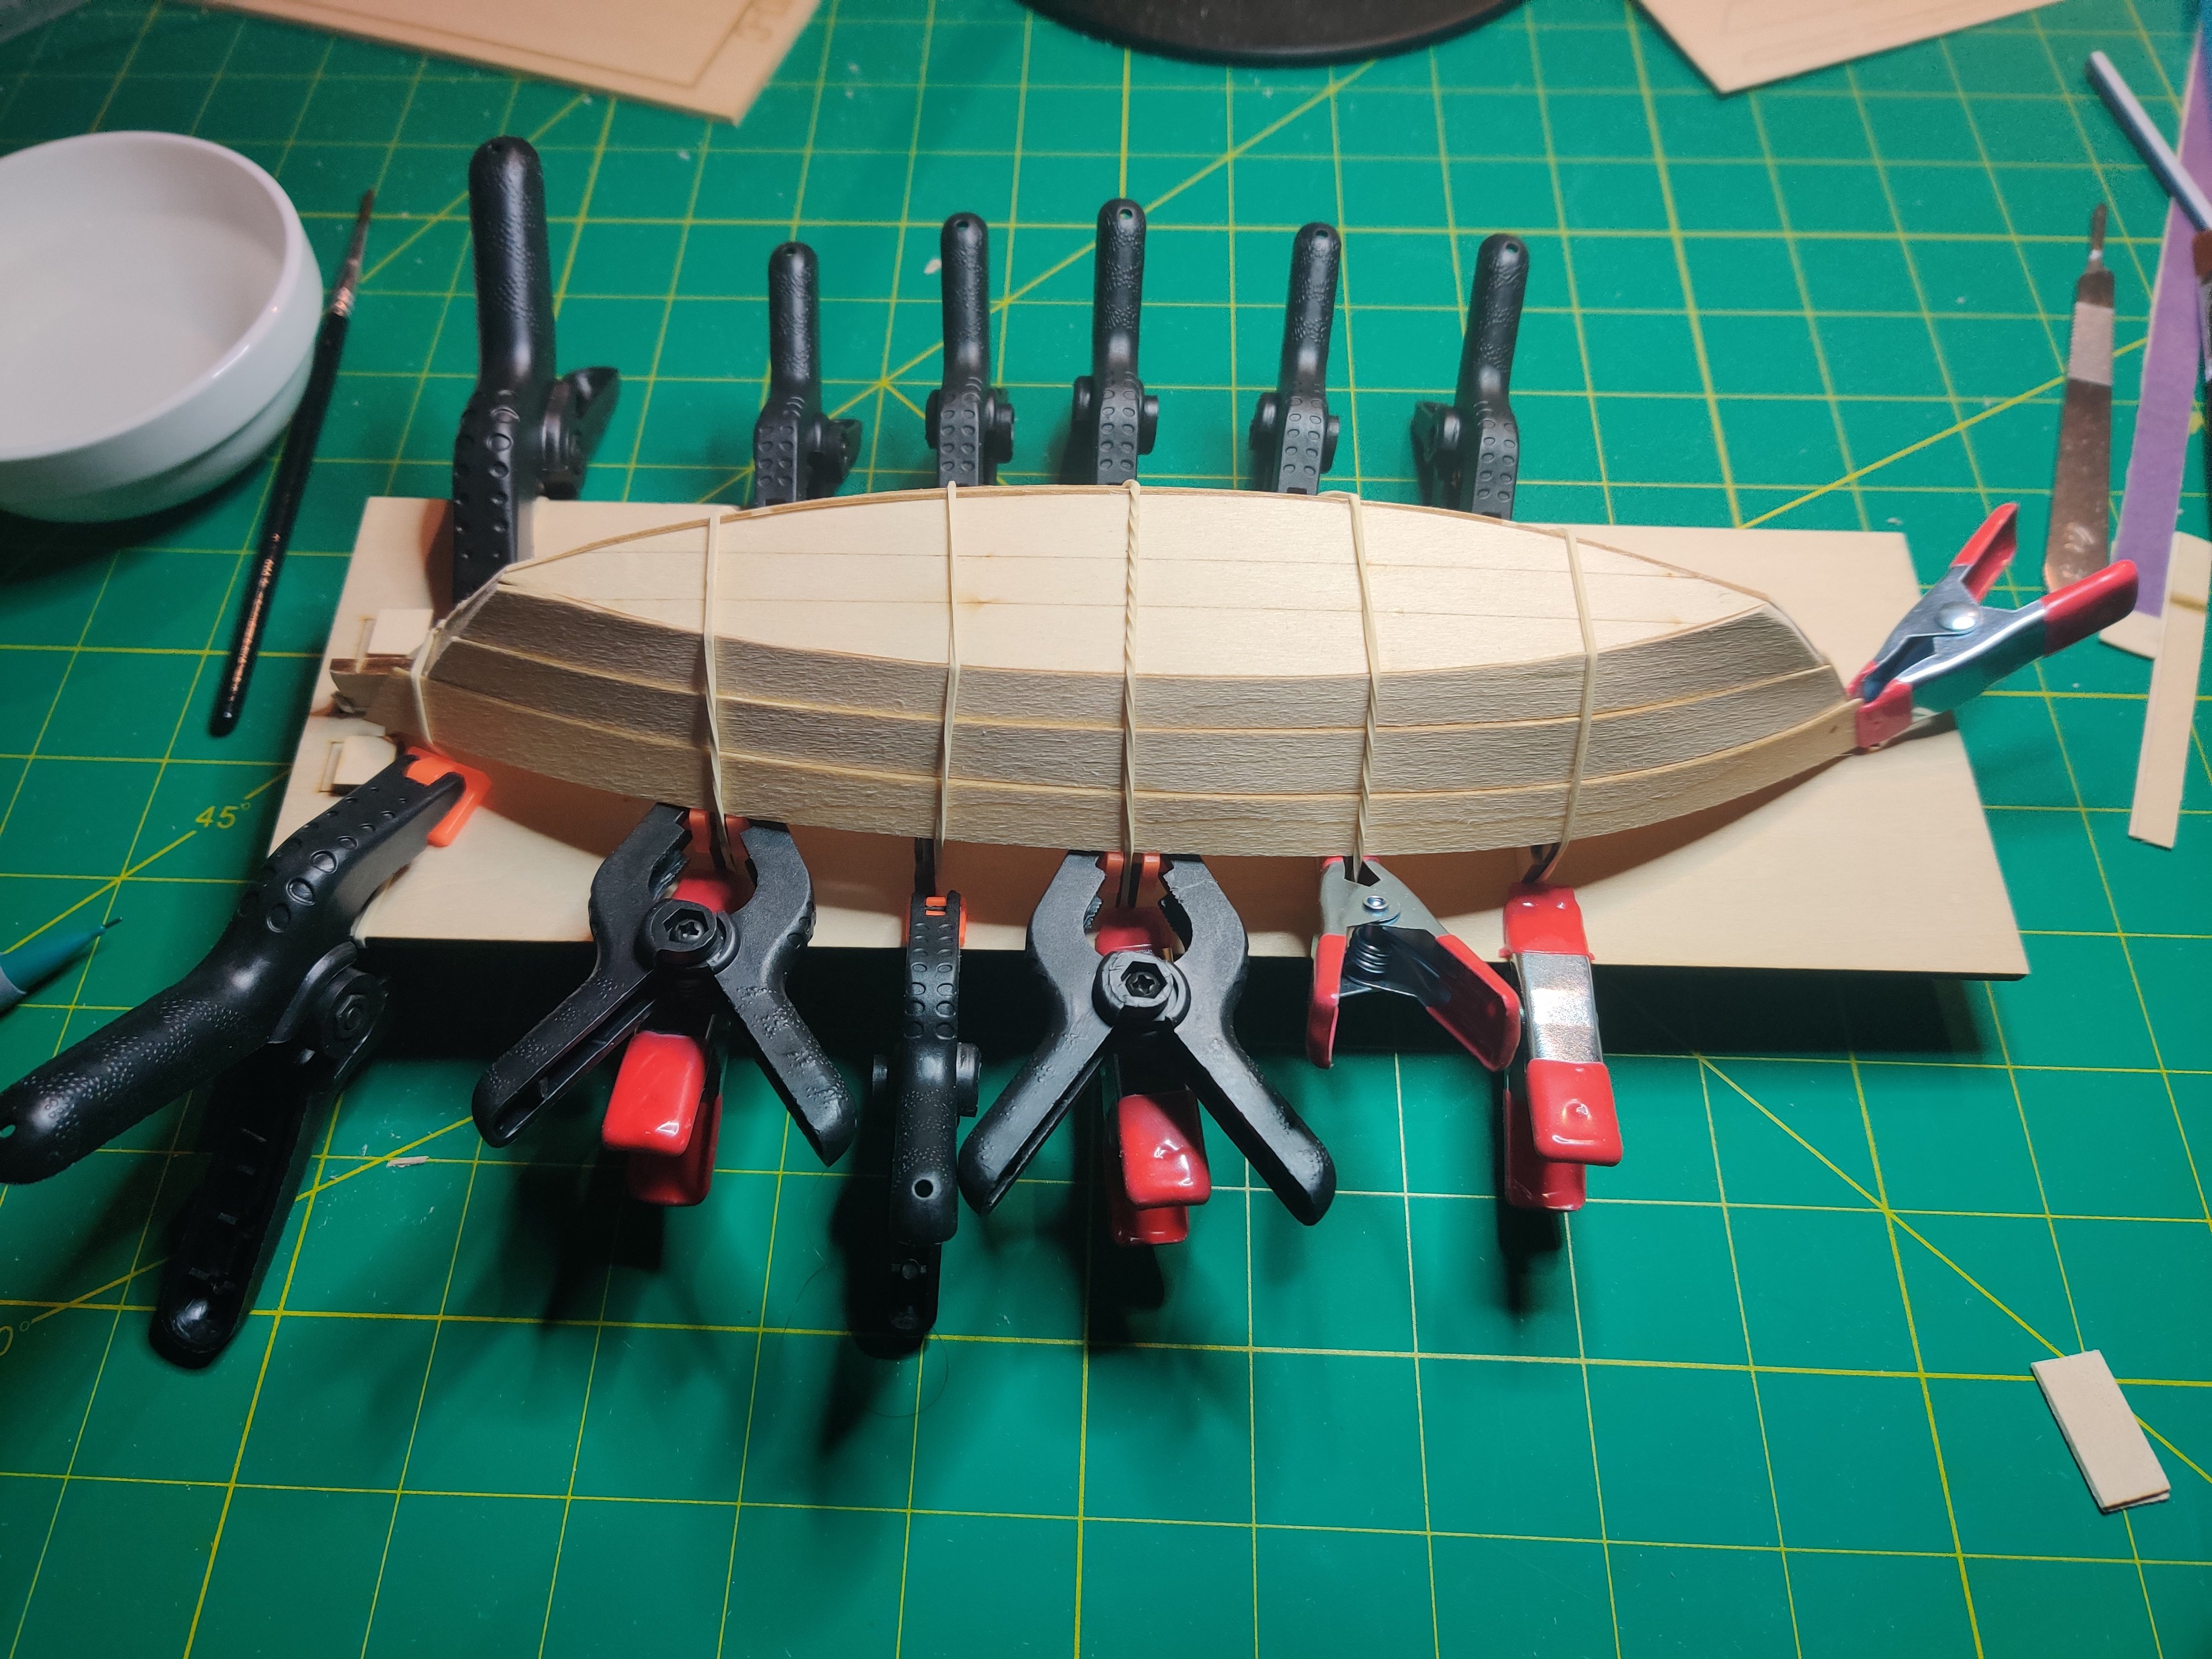
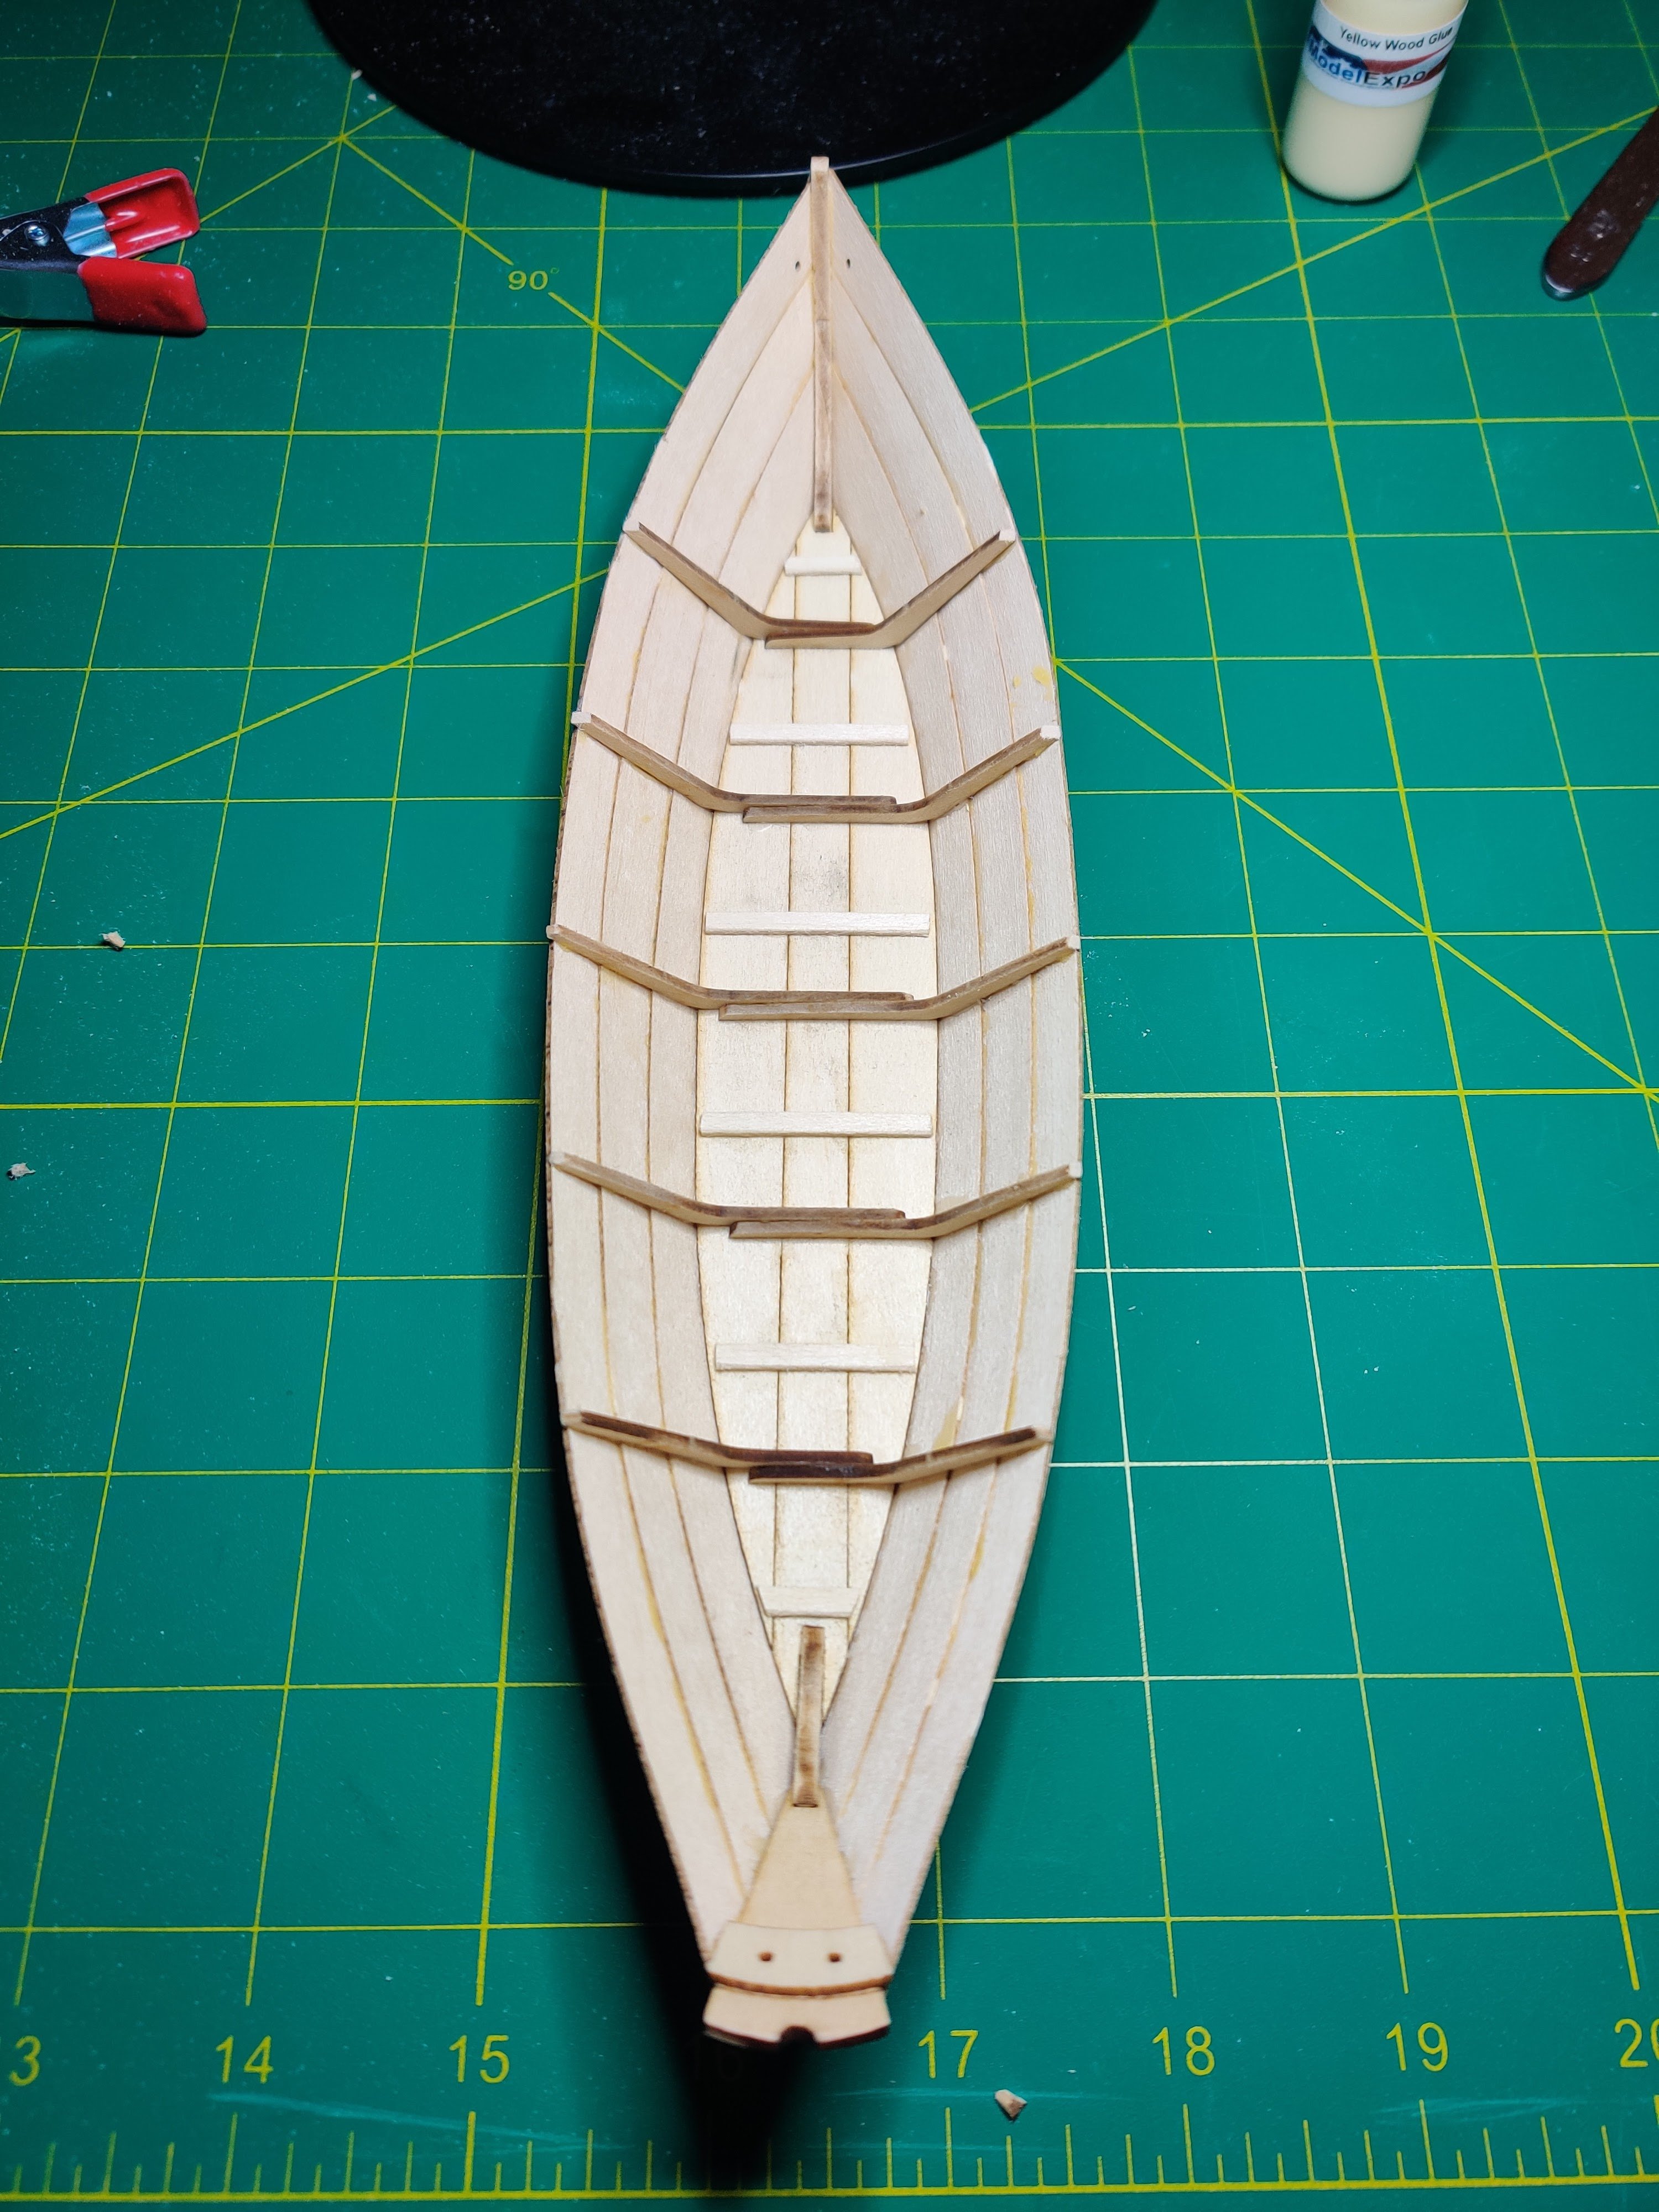
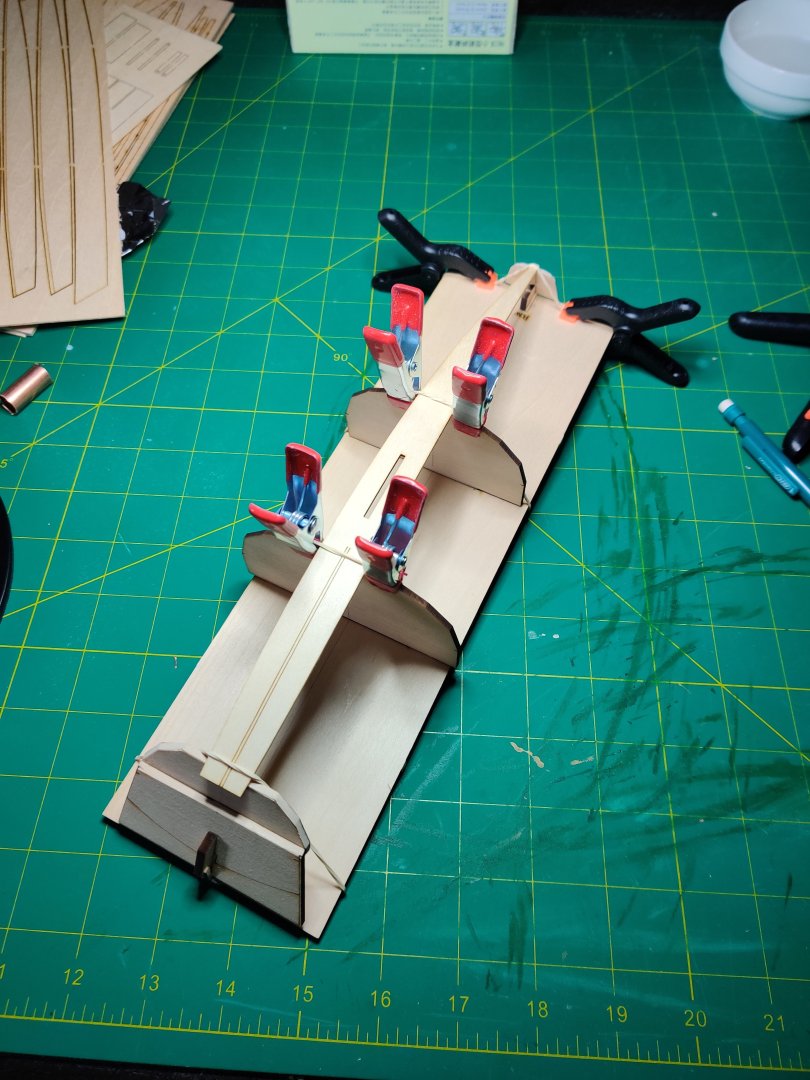
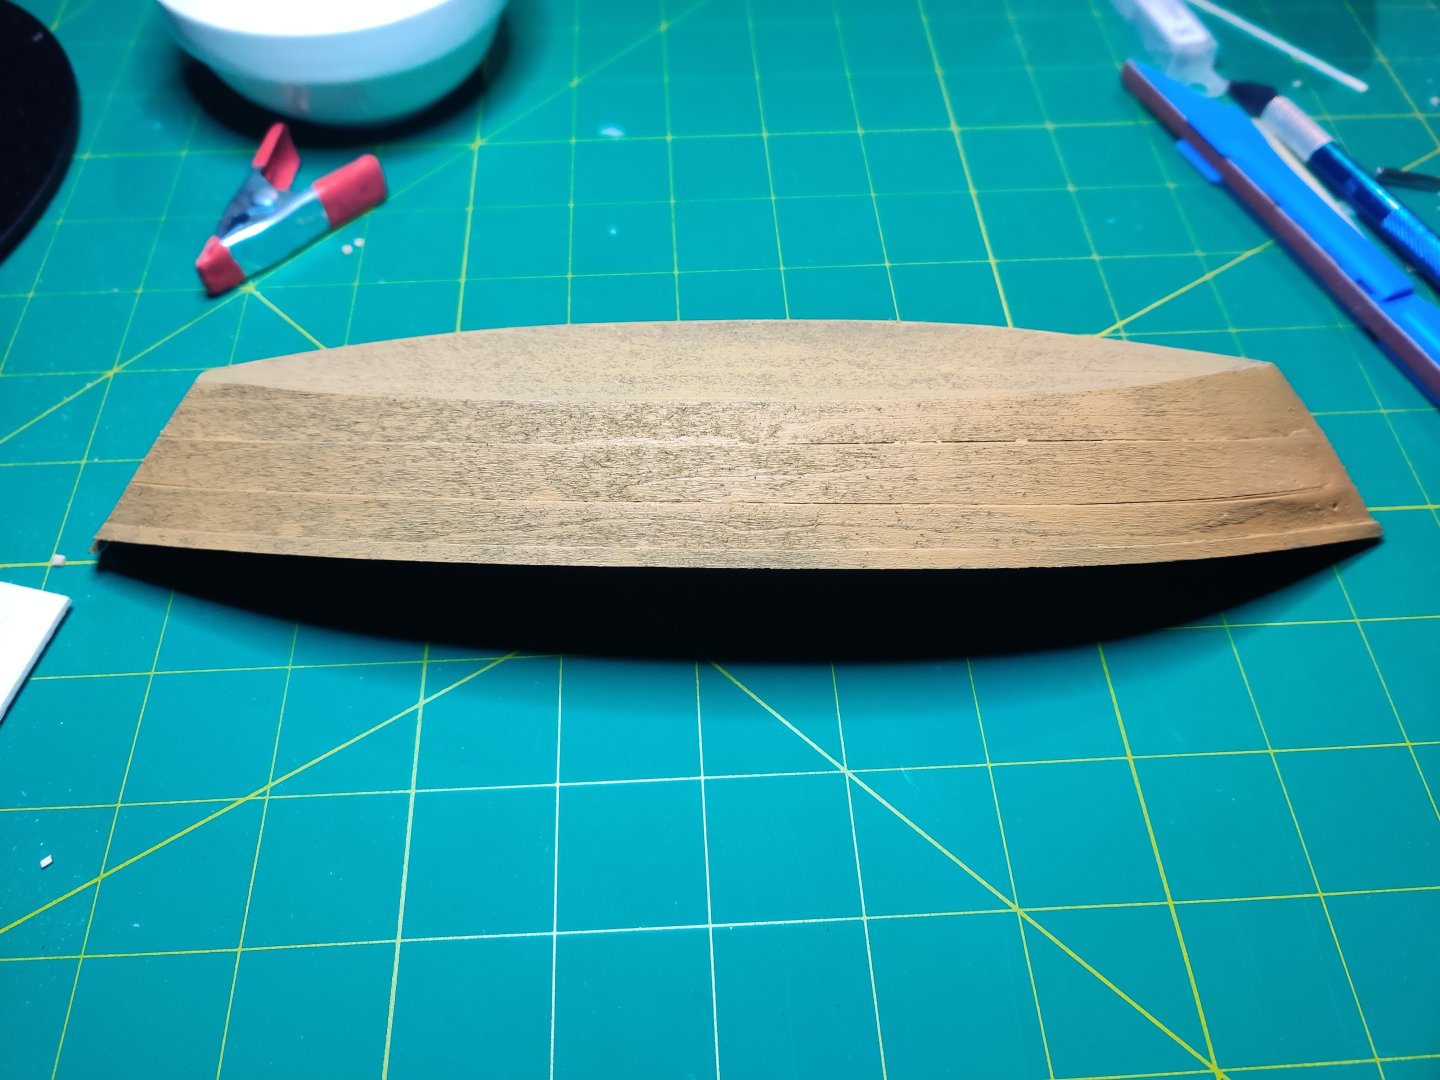
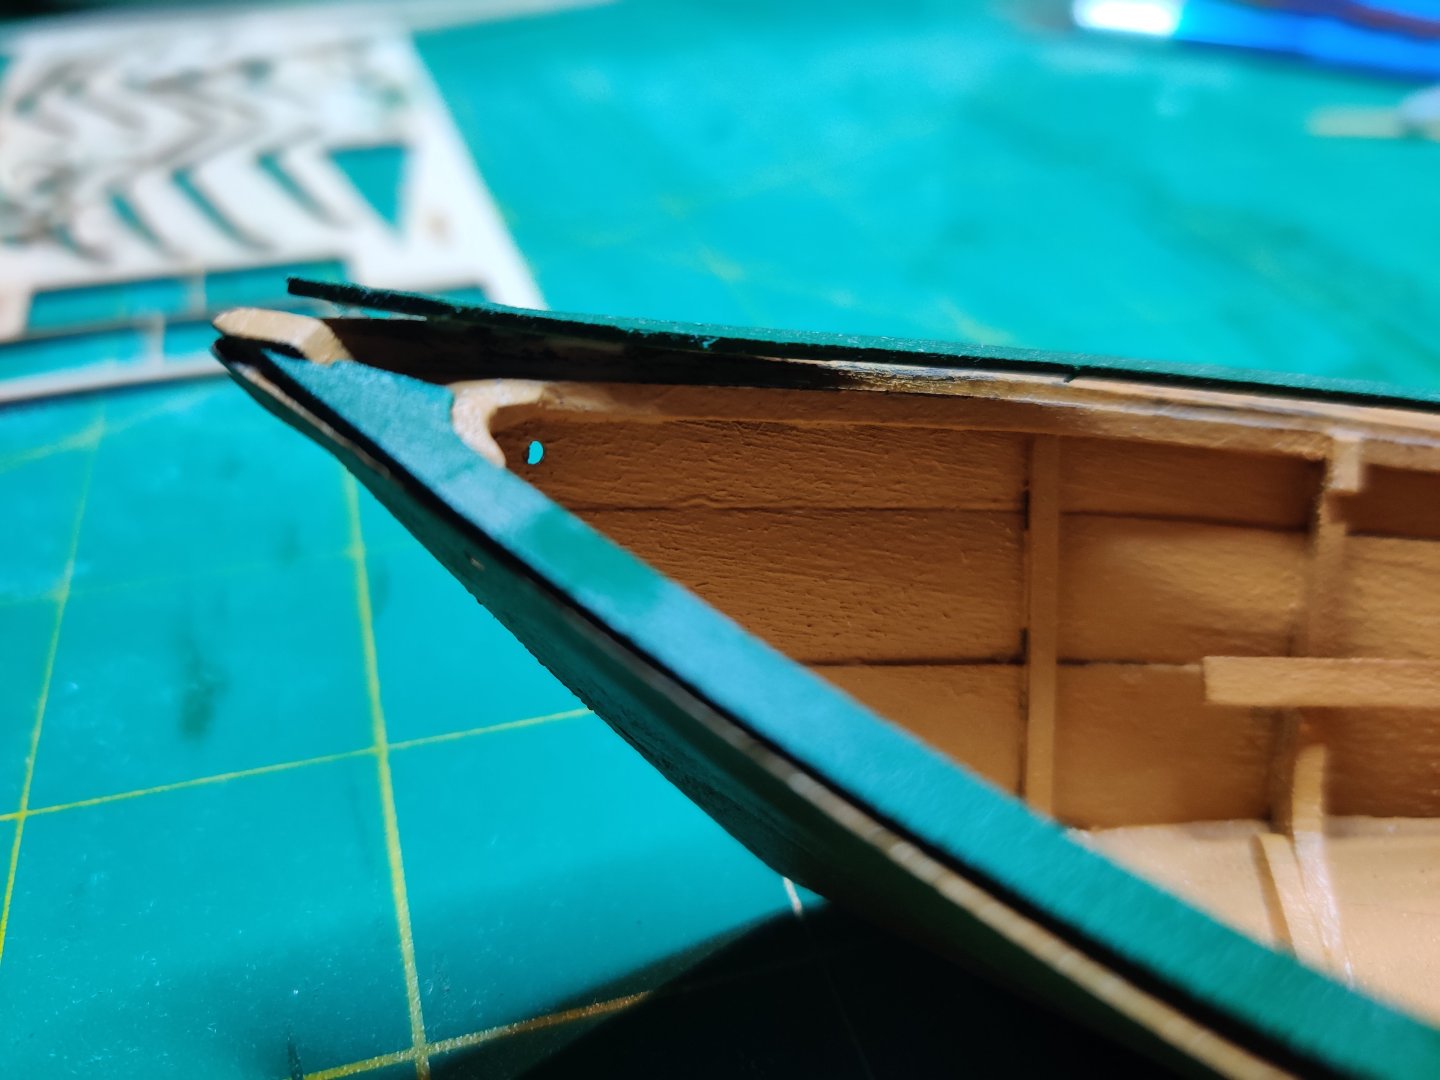
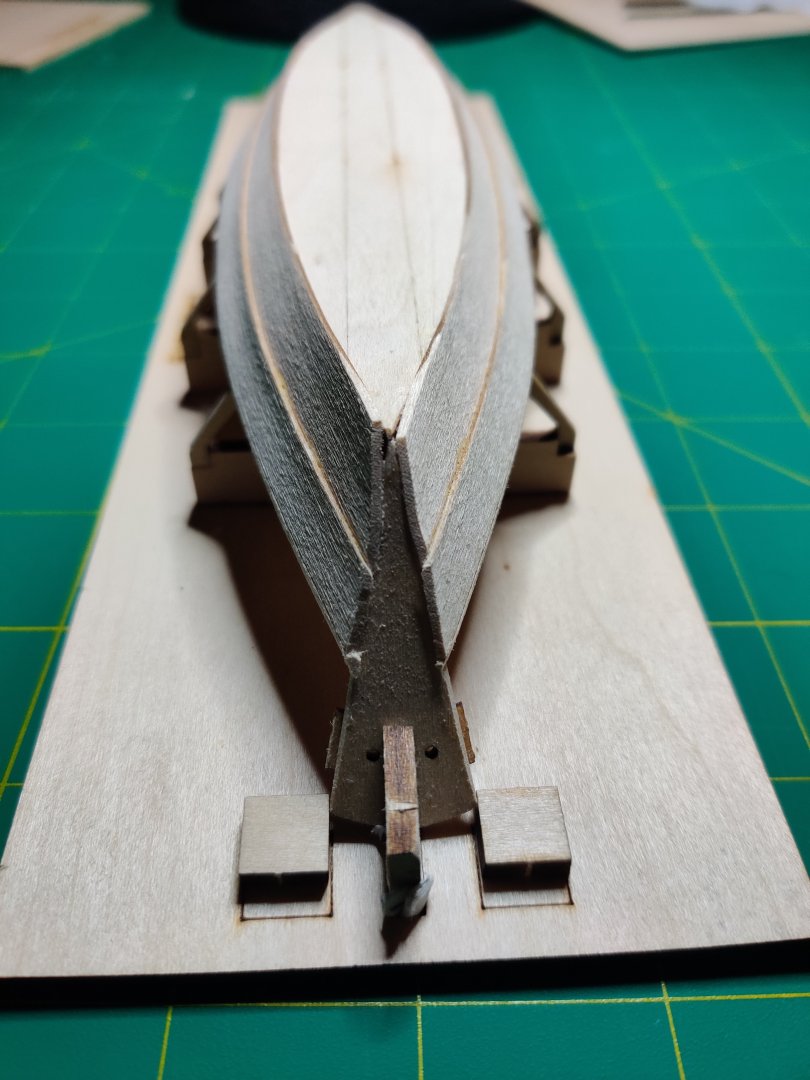
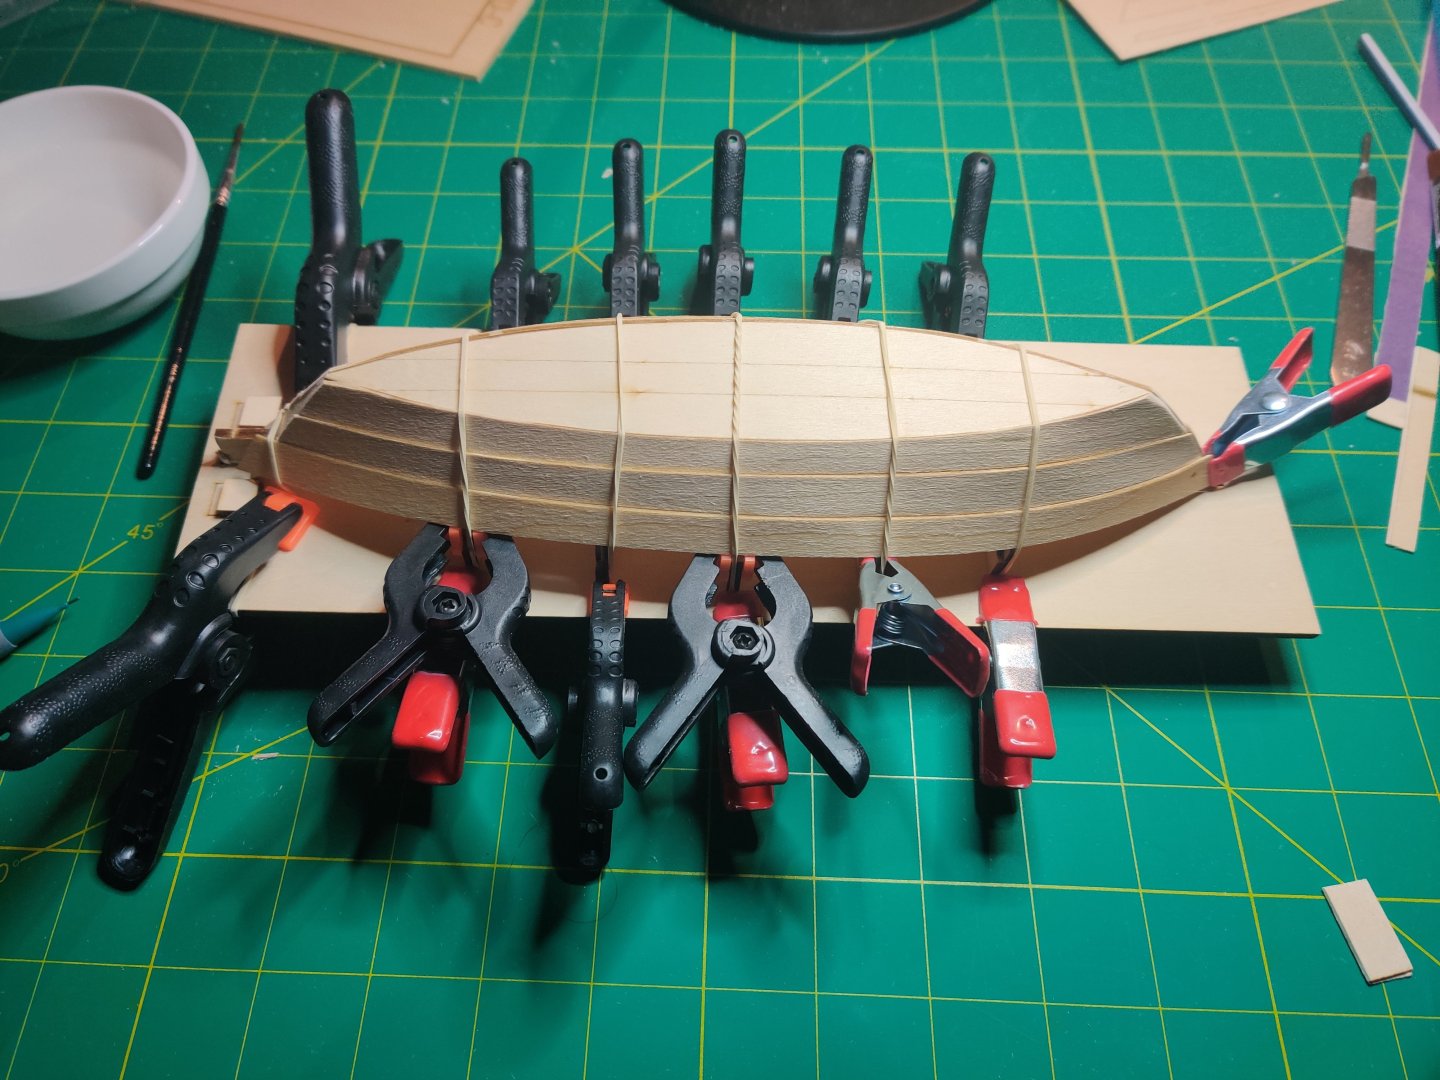
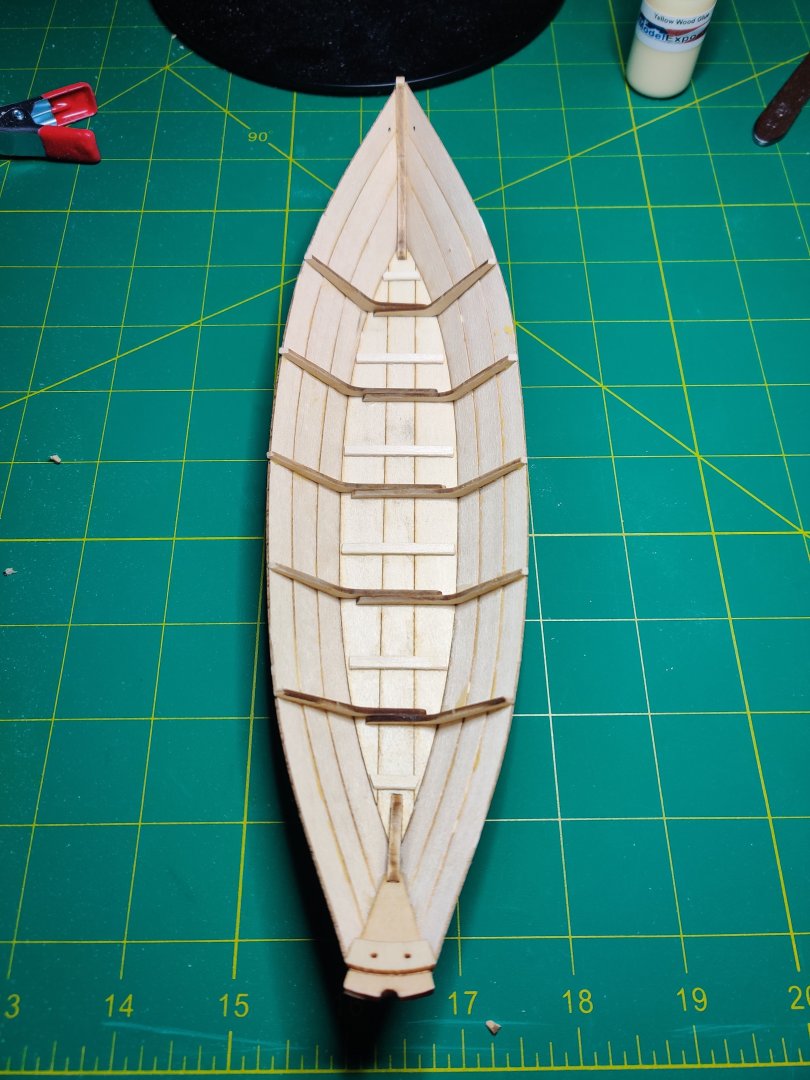
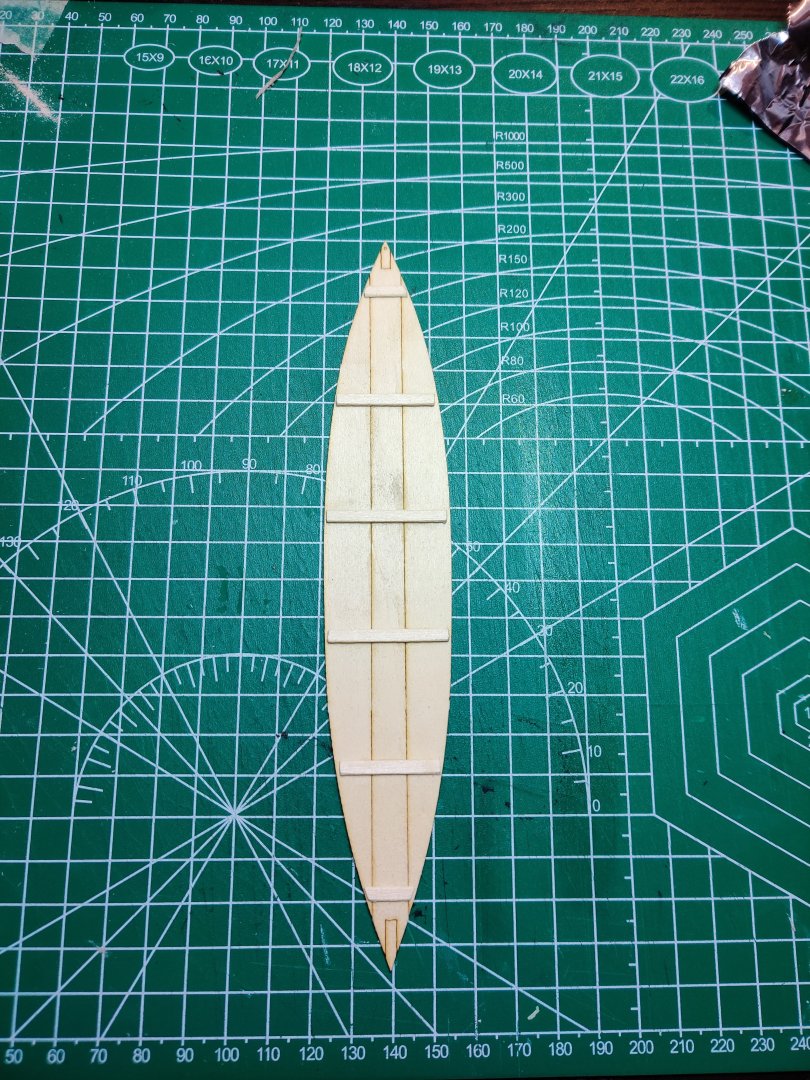
This project hasn't been abandoned, I've just been away from it for a bit due to some travel and holiday stuff. But I'm back now with an update! I've finished planking the boat and have removed it from the frame. I'm mostly happy with how that went. There were some struggles and a couple of mistakes, but nothing catastrophic. I appreciate the suggestions in the previous two posts, although by that time I had already added the first broad plank and decided to bevel the full length of the inner side. I knew that was probably not the technically correct thing to do but I figured worst case scenario it wouldn't really cause any issue and would give me some more beveling practice, and in the end I do think it may have helped a bit. The first mistake I made was that I accidentally snapped the corner off of one of the garboards while doing a little bit of sanding. Once I get some wood filler this should be easy to fix, but I was still pretty annoyed at myself. Good lesson about carelessness! The two garboards went on pretty easily, but when it came to the broad and sheer planks those were much trickier. I don't know if I somehow attached the frame to the build board poorly or something, but when it came time to bend and then glue the broad and sheer planks, it was very hard to get them properly aligned. I could get 90% of it lined up with the previous plank just fine, but always the last segment towards the front would deviate significantly almost as if there wasn't enough of a pre-cut curve in the piece. Some aggressive handling and rubber banding/clamping during the bending stage did help with this a bit, but still there's a noticeable gap of 1-2mm between the etched beveling mark and the edge of the next plank in some places. Another issue I had was that getting the broad and sheer planks to make good contact with the actual frame for gluing was a bit difficult in some places as the planks tended to only want to touch at the edge farthest from where they overlapped the previous plank. This wasn't too hard to solve by pressing hard on the planks after gluing, but it did mean that I had to spend a decent amount of time holding the planks with my fingers since in a couple of places I couldn't get the rubber bands to hold tightly enough. This is exactly what I was worried about and wanted to pre-address with the full-length inner bevel, and I imagine this problem would have only been worse if I hadn't done that. Fortunately this doesn't seem to have interfered with the overlapping "clinker" appearance of the planks. On the topic of beveling, though, I had mixed success with the rolling bevel producing a flush meeting at the stem and transom, so the boat looks a bit rough there. Nevertheless, the planks are all glued and the boat is removed from the build board. There's still some sanding/filling and general cleanup that needs to be done before moving on to the details, but it's very satisfying to see the basic structure of the boat completed. One other piece of trouble I had which can be easily seen in the below photos is that I found it very hard to clean up errant glue when gluing the planks. Partly this was just because it always felt like a race against time getting the rubber bands on and everything clamped after the glue was applied but before it began to set and often by the time I was satisfied that everything was secure, the glue was already to a point where it didn't respond well to a wet brush. But even if that hadn't been an issue, the other problem was that once you put the second of a pair of planks on it becomes very difficult to even look between the build board and the attached planks to spot any errant glue inside the boat, let alone get at it with a brush. I'm not really sure how I could have done that better, but I'm guessing it shouldn't be too hard to clean up after the fact. Pleased with the alignment after the garboard and broad planks: Although you can see there's also a bit of a gap where the starboard garboard meets the transom, so that will also require some wood filler. Clamping the final sheer plank: The boat after being removed from the build board but before really cleaning it up: I'm excited to be back to work on this project!


- 28 replies
-
- 7
-
-
-
- Lowell Grand Banks Dory
- Model Shipways
- (and 1 more)
-
I've got the first garboard plank glued and the second one clamped for bending at the moment, but looking ahead I'm a bit confused about how the beveling should for the broad and sheer planks. The instructions mention these needing a bevel on their inner side, but only mention giving them the rolling bevel at the ends, and not the same full bevel along the whole length of the inner side. Is this correct? If the only bevel on the inner side is done at the fore and aft ends, then for most of the length of the boat the outer bevel of the plank beneath would be overlapped by a flat, unbeveled plank. It seems like adding the half-width bevel along the full length of the inner side would make for a smoother join there (while still leaving a visible overlap). Anyone who has built this boat, do you remember how this part went for you? I haven't yet found any mention of this in the 5 or 6 build logs I've looked through today.
- 28 replies
-
- 2
-
-
- Lowell Grand Banks Dory
- Model Shipways
- (and 1 more)
-
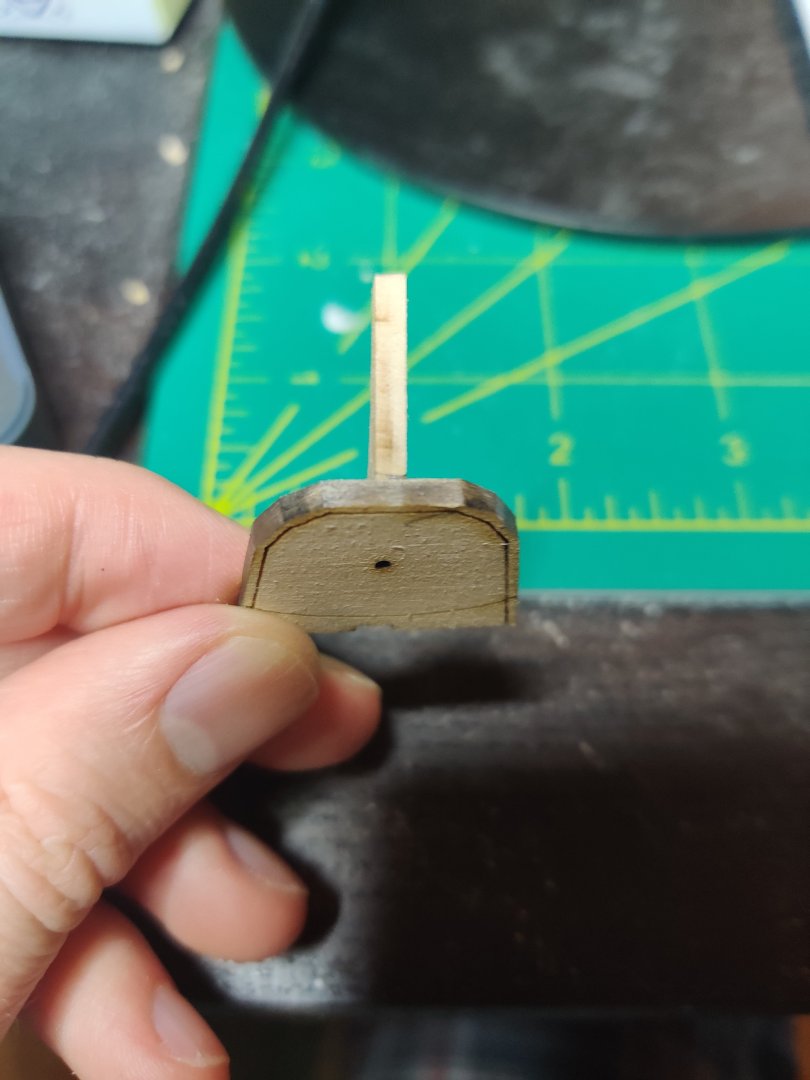
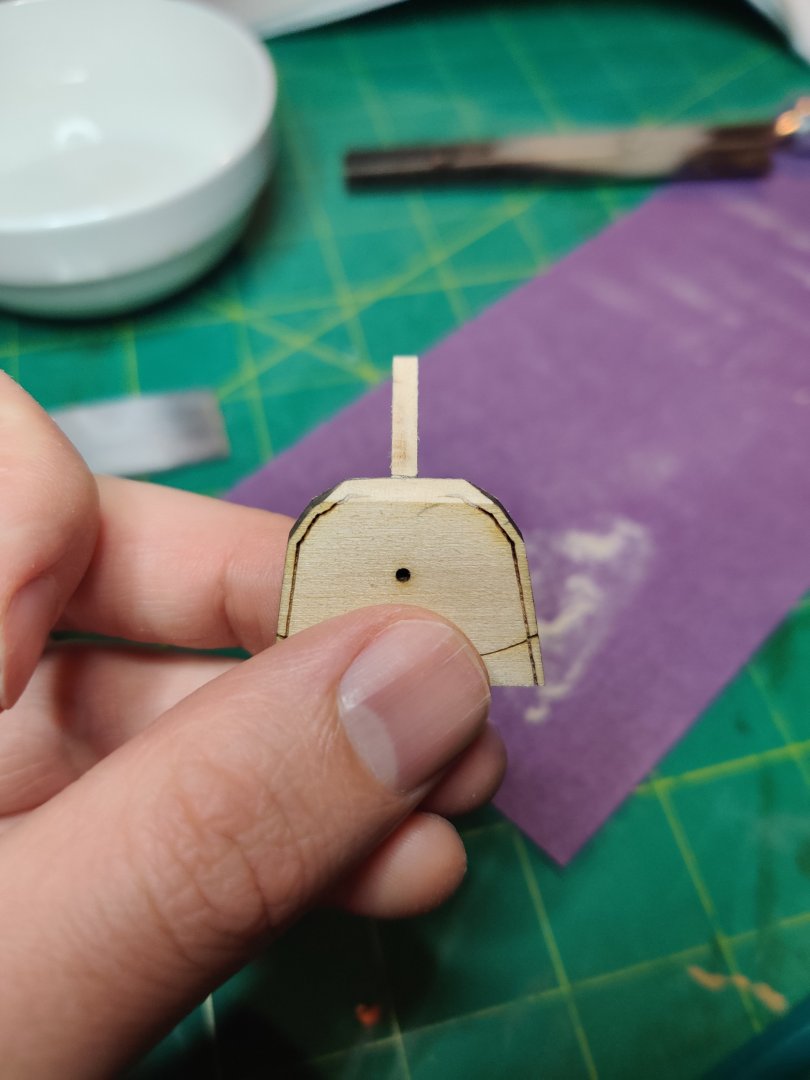
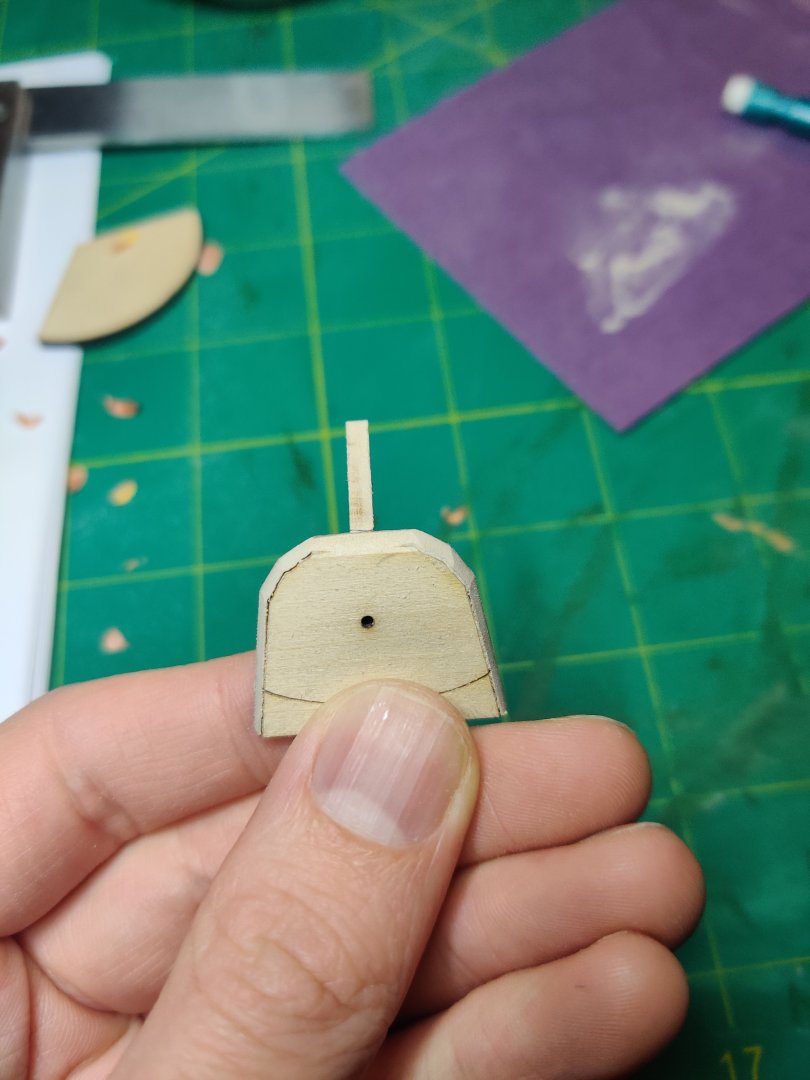
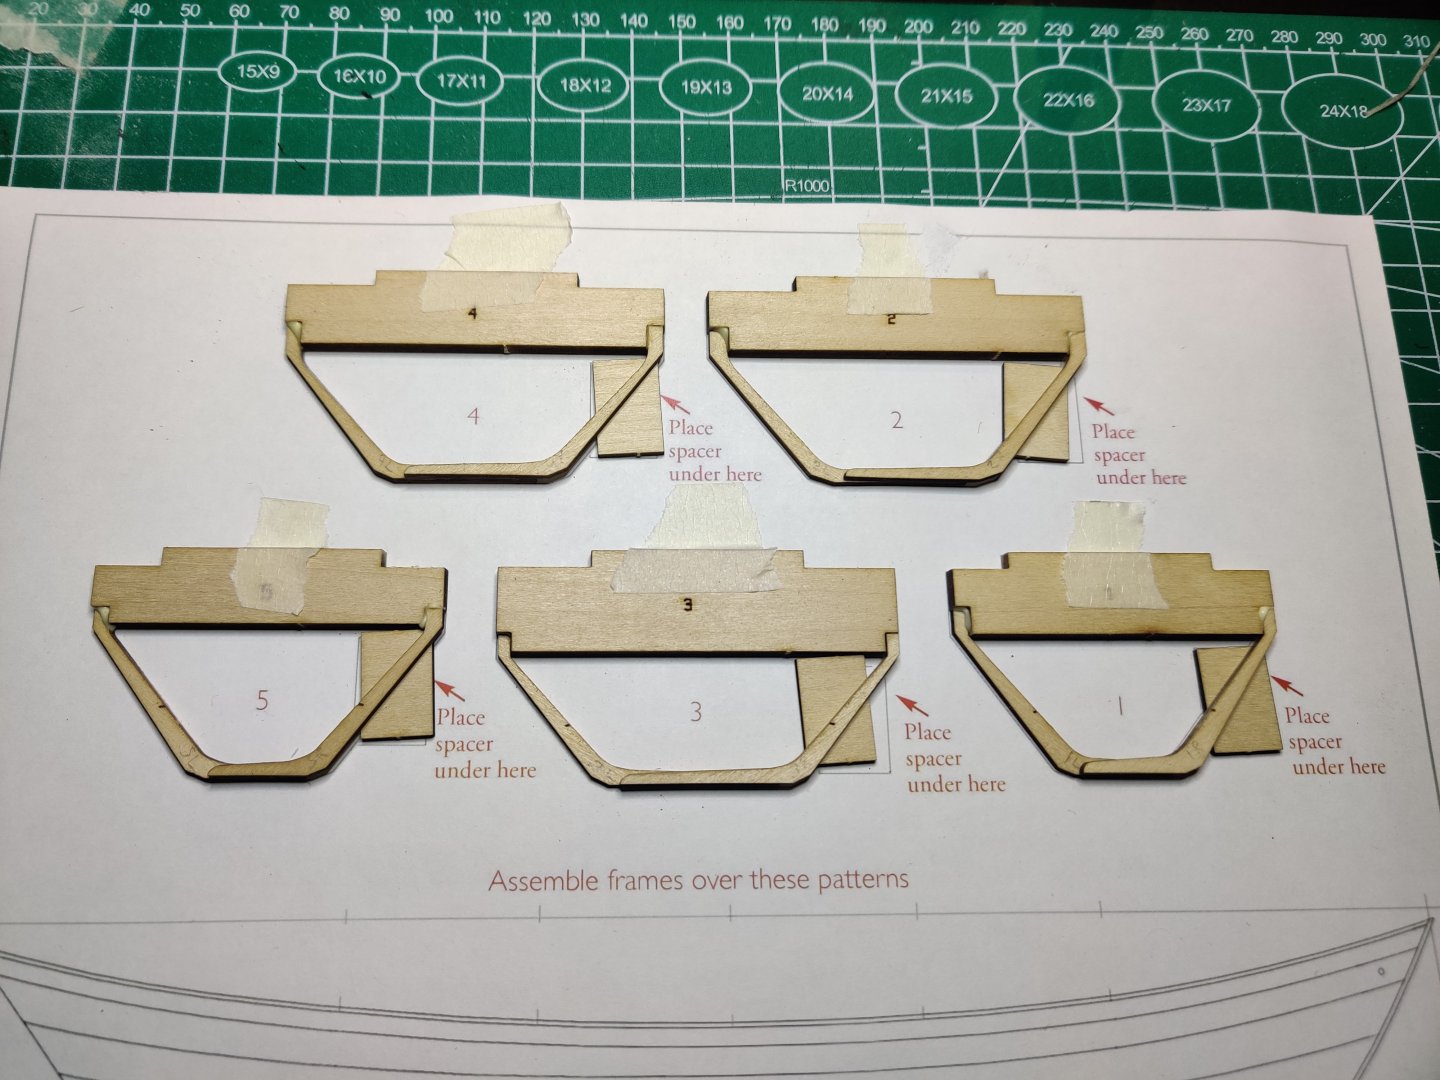
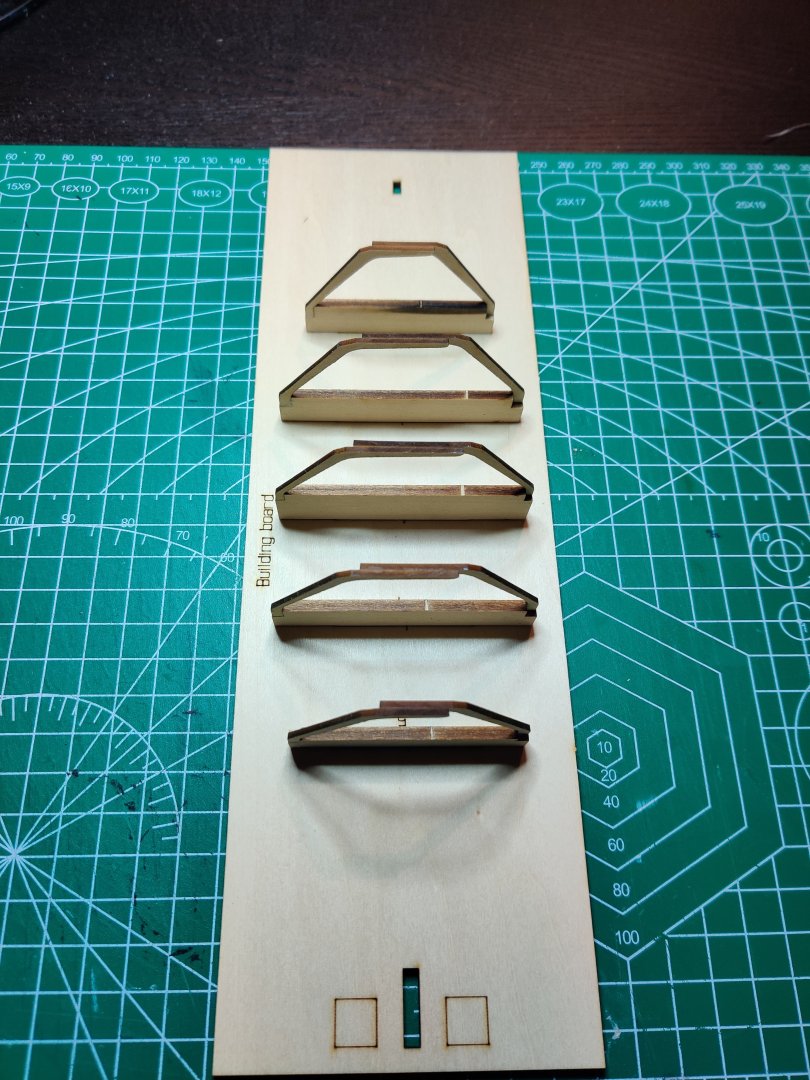
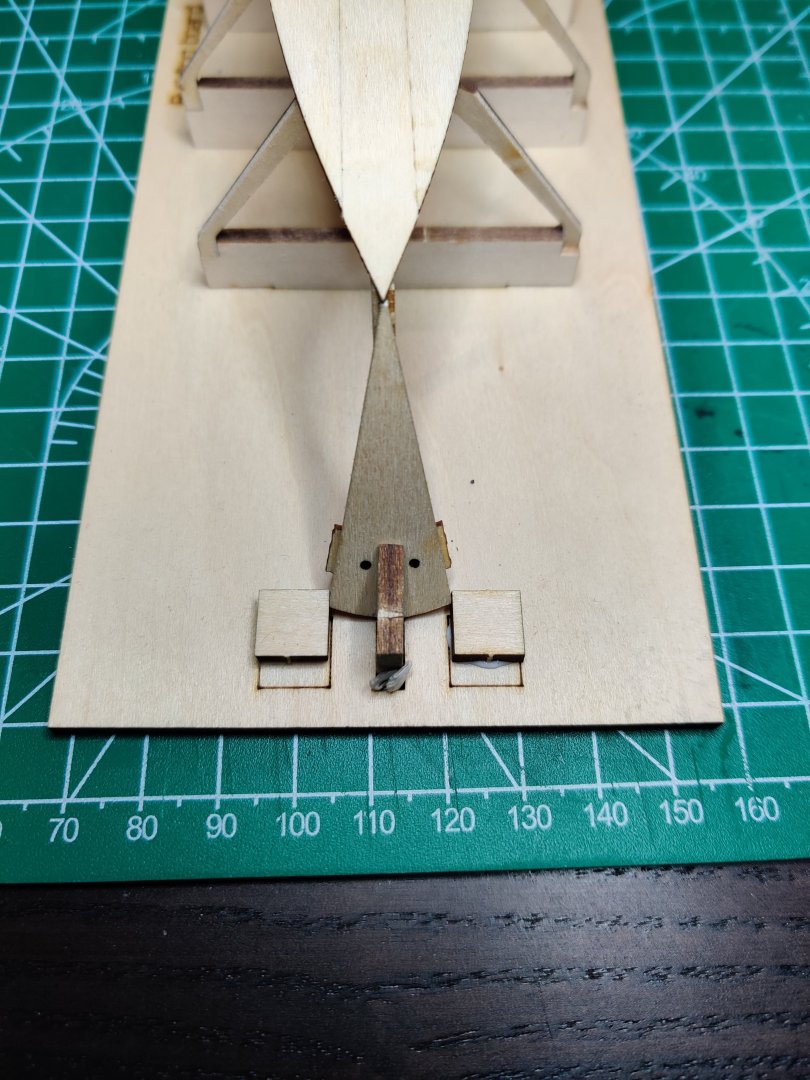
I did end up detaching and re-gluing the stern knee from the bottom. This ended up being a much more difficult process than I expected. I thought the 99% IPA would make fairly quick work of the glue, but after about 10 minutes of constantly flooding the join with IPA it was still completely solid. The only way I was eventually able to get it off was to gradually worry an xacto knife blade in between the two pieces and very slowly cut through the glue. This worked well enough here because there was easy lateral access to the seam between the two pieces, but I have no idea how I would do this in the future on a join where I don't have that kind of access. Next big step was to assemble all of the frames. I wanted to use the included plans as a template as suggested to make sure I had the two halves of each frame properly lined up, but unfortunately the plans were not quite printed to scale. Luckily the instructions are available online so I was able to print them out scaled up slightly. In another build log I saw a suggestion to tape down the cross-piece, and this helped a lot. Attaching the frames to the build board was no problem, they all fit snugly with no need for sanding or shims. When it came time to attach the transom holder, though, it was way too far back to be able to properly hold it. (Ironically if I had left the transom assembly the way I had originally glued it I think it would have worked.) If I installed the holder as suggested the transom would have been halfway up the diagonal slot and way above and not even close to the two side blocks. To fix this I sanded down the bottom front of the holder piece, put a shim behind it to force it forward, and glued the two side blocks much further up. I didn't take a photo before my modifications to show how it was off, but here is how it looks afterwards: Next step is to glue the bottom to the frames. I'm not really sure how to ensure that I have it properly centered side-to-side on the frames. It's a bit tricky to eyeball because of the asymmetry on the frames. I'll check through some of the other logs to see if I can find anything, or just eyeball it if I can't.
- 28 replies
-
- 5
-
-
- Lowell Grand Banks Dory
- Model Shipways
- (and 1 more)
-
Yeah I think I will. Even if it ends up not being necessary here it's probably good practice to try this regluing process now when it should be fairly easy. Thank you for the encouragement! And of course, feel free to follow. I welcome any feedback at all!
- 28 replies
-
- 4
-
-
- Lowell Grand Banks Dory
- Model Shipways
- (and 1 more)
-
Greetings from a clueless Patrick O'Brian fan
Galkar replied to Galkar's topic in New member Introductions
Last night I was able to reclaim the craft room from all the boxes that have somehow accumulated in there over the months, and I've started a build log for my Dory! I absolutely welcome any feedback as I'm sure I'll be making plenty of mistakes, plenty without realizing. I did indeed read your build log when I was first looking around for Sophie kits - it's extremely impressive! I did briefly consider trying to follow in your footsteps, but I dismissed that idea thinking that adding even a small amount of scratch-building into my first truly complex kit would be a recipe for disaster. Since you're here, though, I'd be curious to hear your thoughts. How hard was it to do the modifications you made, and did they make other parts of the build appreciably harder? Part of what scared me off was looking at your drawings since I know I would need to do something similar but I have no knowledge of or experience with any kind of technical drawing. Really, I'm curious to hear if you think that what you did would be achievable by someone with no drafting or woodworking experience who has only build the kits from the Model Shipways Shipwright 3 set. (Even just typing it out it sounds ridiculous, but hey, maybe I'm overestimating the difficulty!) -
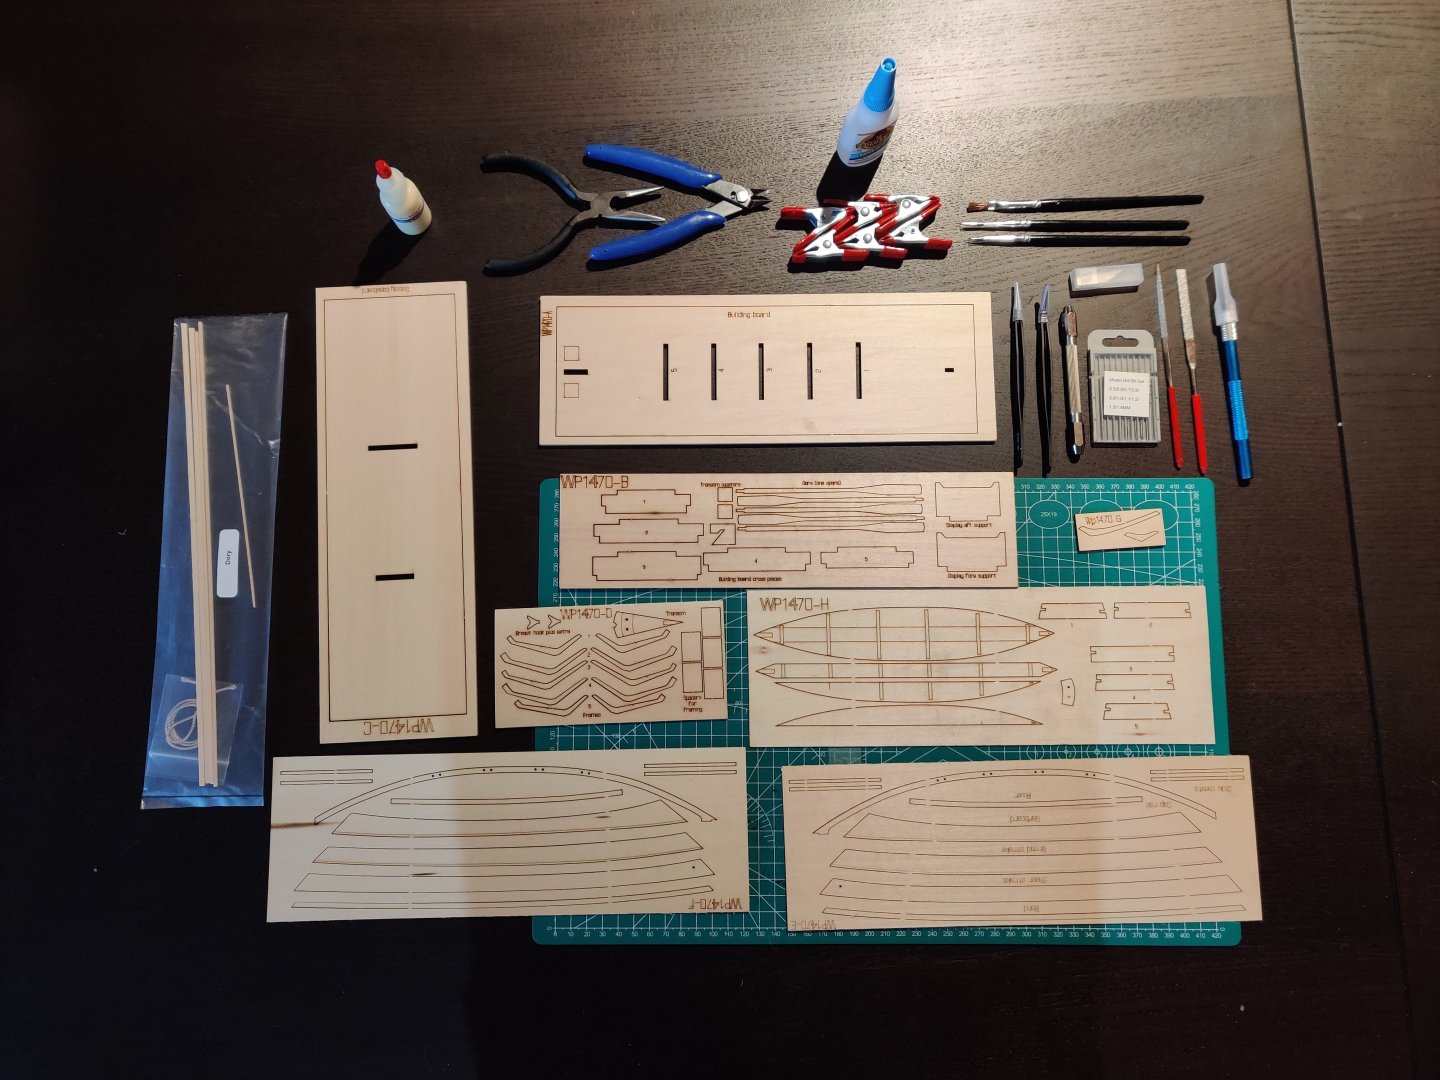
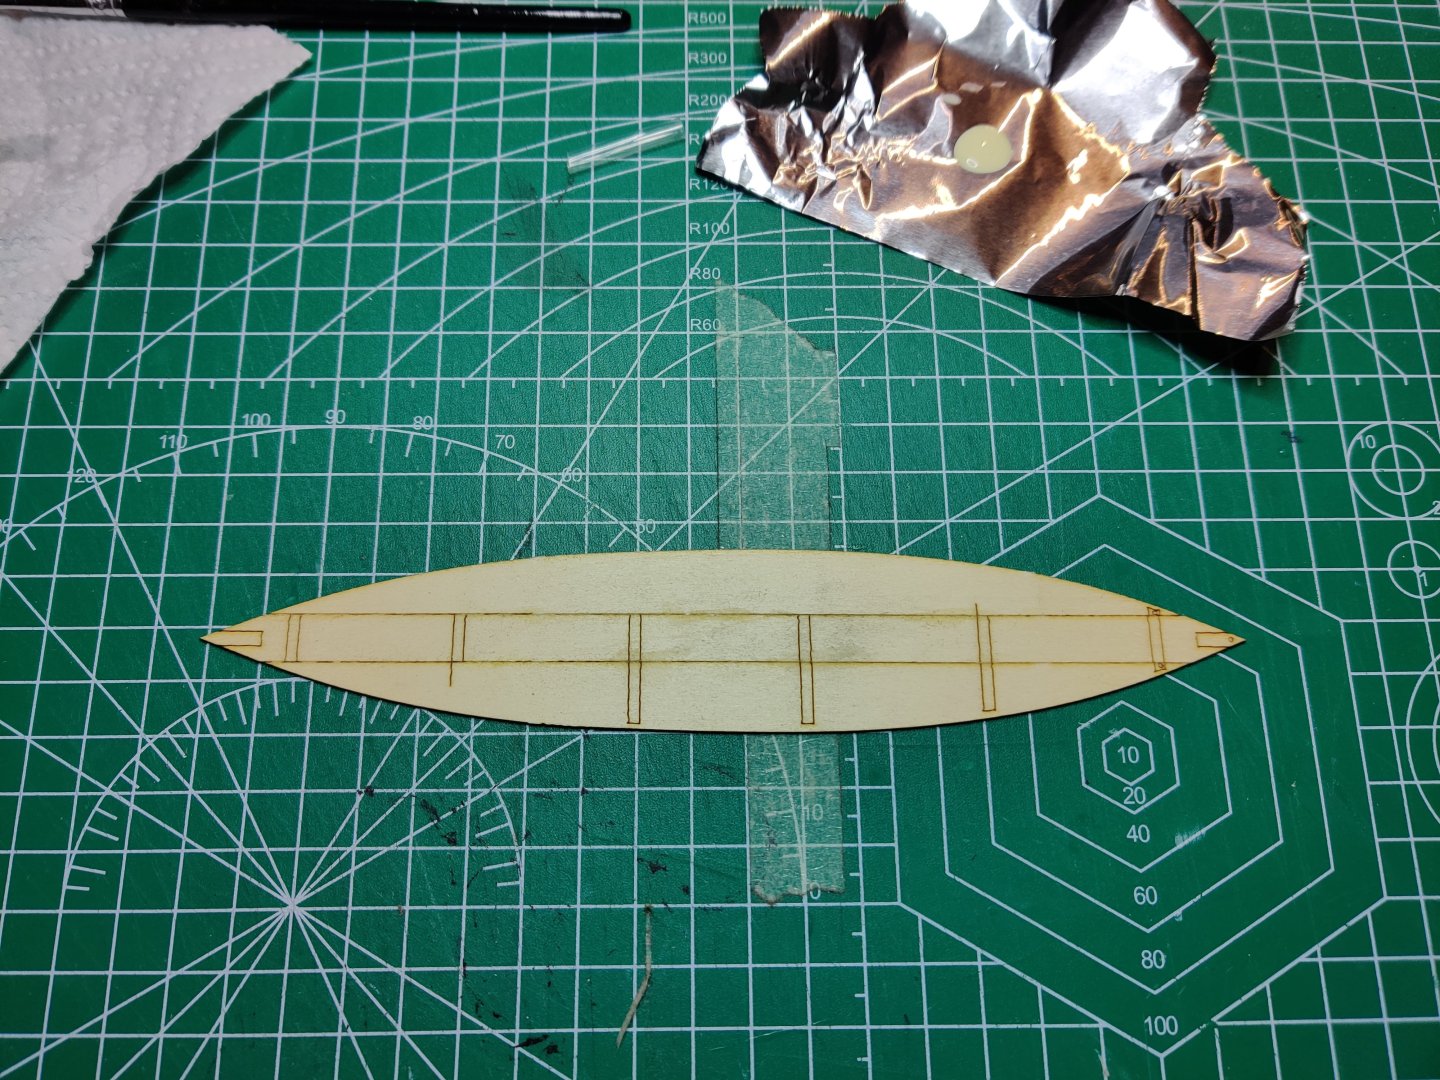
Hello everyone, it's time for yet another build log of the Model Shipways Grand Banks Dory! This is my first ever model boat/ship, and I'm coming at this with precisely zero woodworking experience, so hopefully I am the target audience for this kit. My long-term goal is to work my way up to Vanguard Models' Speedy, so to that end I got the Model Shipways 3 kit learning set to get me on the road to a more complex ship. To any experience builders who may read this build log - I welcome any feedback at all! If you spot that I'm doing something stupid that I seem oblivious of don't feel bad about letting me know - I'm here to learn a skill that's totally new to me and any feedback (including critical feedback) would be very helpful . To start with, I took an inventory of all of the listed parts. Since this was the 3 kit set, this also came with tools and paints. All of the listed wood parts were there including an extra strip of 1/8" basswood. The tool set was missing the sandpaper and the chisel blades, but it did come with some pliers, clippers, a pair of (not very good) files, and a pin vice drill and bits, none of which were listed which was nice. It was a bit shocking feeling just how thin the plank sheets are. It's one thing to read a number like 1/32" and another entirely to feel it in your hands. I'm afraid it'll snap if I look at it wrong! Gluing the bottom together was pretty straightforward. Oddly the two side pieces didn't have a full set of laser markings and the ones that are there look like they were done by hand, but this didn't interfere with the assembly. The bottom cleats were also straightforward. Since the kit didn't come with sandpaper I had to make due with what I had lying around. The instructions suggest to use 150 and 220 grit sandpaper. I only had 120 (which seemed too course) and 220, so I stuck with 220 for everything. At first I was worried this would only be good for finishing and not for removing material, but after using it to shorten the cleats to the proper length and bevel them I wonder what you would even want the 150 for. This wood is so soft that the 220 made quick work of shortening the cleats and I found it was easy to accidentally over-bevel with even just a couple of back-and-forths. For the two cleats on the ends where the angle of the bottom's side is most extreme I figured I would try to match that angle as a way to practice beveling to an intentional angle. Attaching the stem and transom assembly was a bit trickier. It was hard to figure out a good way to make sure they were truly even with the center line of the boat. I did my best using the straight lines on my cutting mat as a guide and to my eye they look correct, but I do slightly worry that since I didn't use any kind of jig to ensure straightness, any imperceptible deviations may be magnified later in the build. With the transom assembly, though, I worry I may have already made a mistake. I lined up the stern knee with the marks on the boat's bottom just as I did with the transom, but doing so resulted in a bit of an overhang where the knee/transom stick out a bit past the point of the bottom. Looking ahead in the instructions I see that a photo shows their stern knee glued very close to the rearmost bottom cleat leaving no overhang, so I am considering breaking out the isopropyl and redoing this step. But on the other hand, a quick survey of build logs shows at least a couple that appear to have done the same thing I did with no apparent problem. Any thoughts on if it's worth trying to remove this glue and redo this? At the moment the bottom is sitting in the bender. Later today I'll start working on the frames while I decide whether or not I want to redo the transom.

- 28 replies
-
- 7
-
-
-
- Lowell Grand Banks Dory
- Model Shipways
- (and 1 more)
-
Greetings from a clueless Patrick O'Brian fan
Galkar replied to Galkar's topic in New member Introductions
Thank you everyone for the warm welcome! That's nice to hear - and every discussion of the model I've seen seems to be very positive over its design, so I'm excited to get to it! I have a long way to go with these 3 models first though... -
Hello everyone! 6 months ago I didn't know anything about sailing ships (and still largely know very little). I have been reading Patrick O'Brian's Aubrey/Maturin series though and thoroughly enjoying it. I started looking around to see if there was a model of the Sophie from the first book and quickly learned that while there is not, that ship was essentially the Speedy with a quarter deck added. So after looking a bit more for Speedy models I found Vane's build log and decided I wanted to try it, but reading through that log made it clear that I would be out of my depth if I tried to start with that straight away. I have a decent amount of modeling experience, but it is all in the realm of miniature wargaming, and even then is mostly limited to painting. Certainly nothing that would prepare me for something like planking a hull. So after some more research I purchased the Model Shipways Shipwright 3 kit as a way to hopefully build up to Speedy. I'm hoping to be able to start on the Dory later today, and I will be adding my build to the large existing pile of build logs for that kit 😁. The Speedy kit looks like it'll still be a pretty big jump up in complexity from the Lobster Smack, but hopefully it will still be doable for someone with otherwise no shipbuilding or woodworking experience. Lastly I just want to say this seems like a great forum! Before I even really had a good sense of what this place was, just in my blind scattershot googling of various model ship related terms I kept seeing results from here pop up near the top of the results, almost always with some helpful info. I remember when I was in high school and this style of forum dominated special interest interaction over the internet, and I think the shift away from forums towards things like Discord has been a big loss for the internet generally, so it's great to come across one of these that's still thriving!
- 19 replies
-
- 13
-
-
This is already full of what looks like great advice! I'm about to start building a Dory as my first model ship, and getting such a detailed view into the pitfalls you encountered and solutions you found is very helpful. I look forward to following this log!
- 3 replies
-
- 2
-
-
- Lowell Grand Banks Dory
- Model Shipways
- (and 1 more)