HOLIDAY DONATION DRIVE - SUPPORT MSW - DO YOUR PART TO KEEP THIS GREAT FORUM GOING! (Only 75 donations so far out of 49,000 members - C'mon guys!)
×


Claudius_Rex
-
Posts
9 -
Joined
-
Last visited
Content Type
Profiles
Forums
Gallery
Events
Everything posted by Claudius_Rex
-
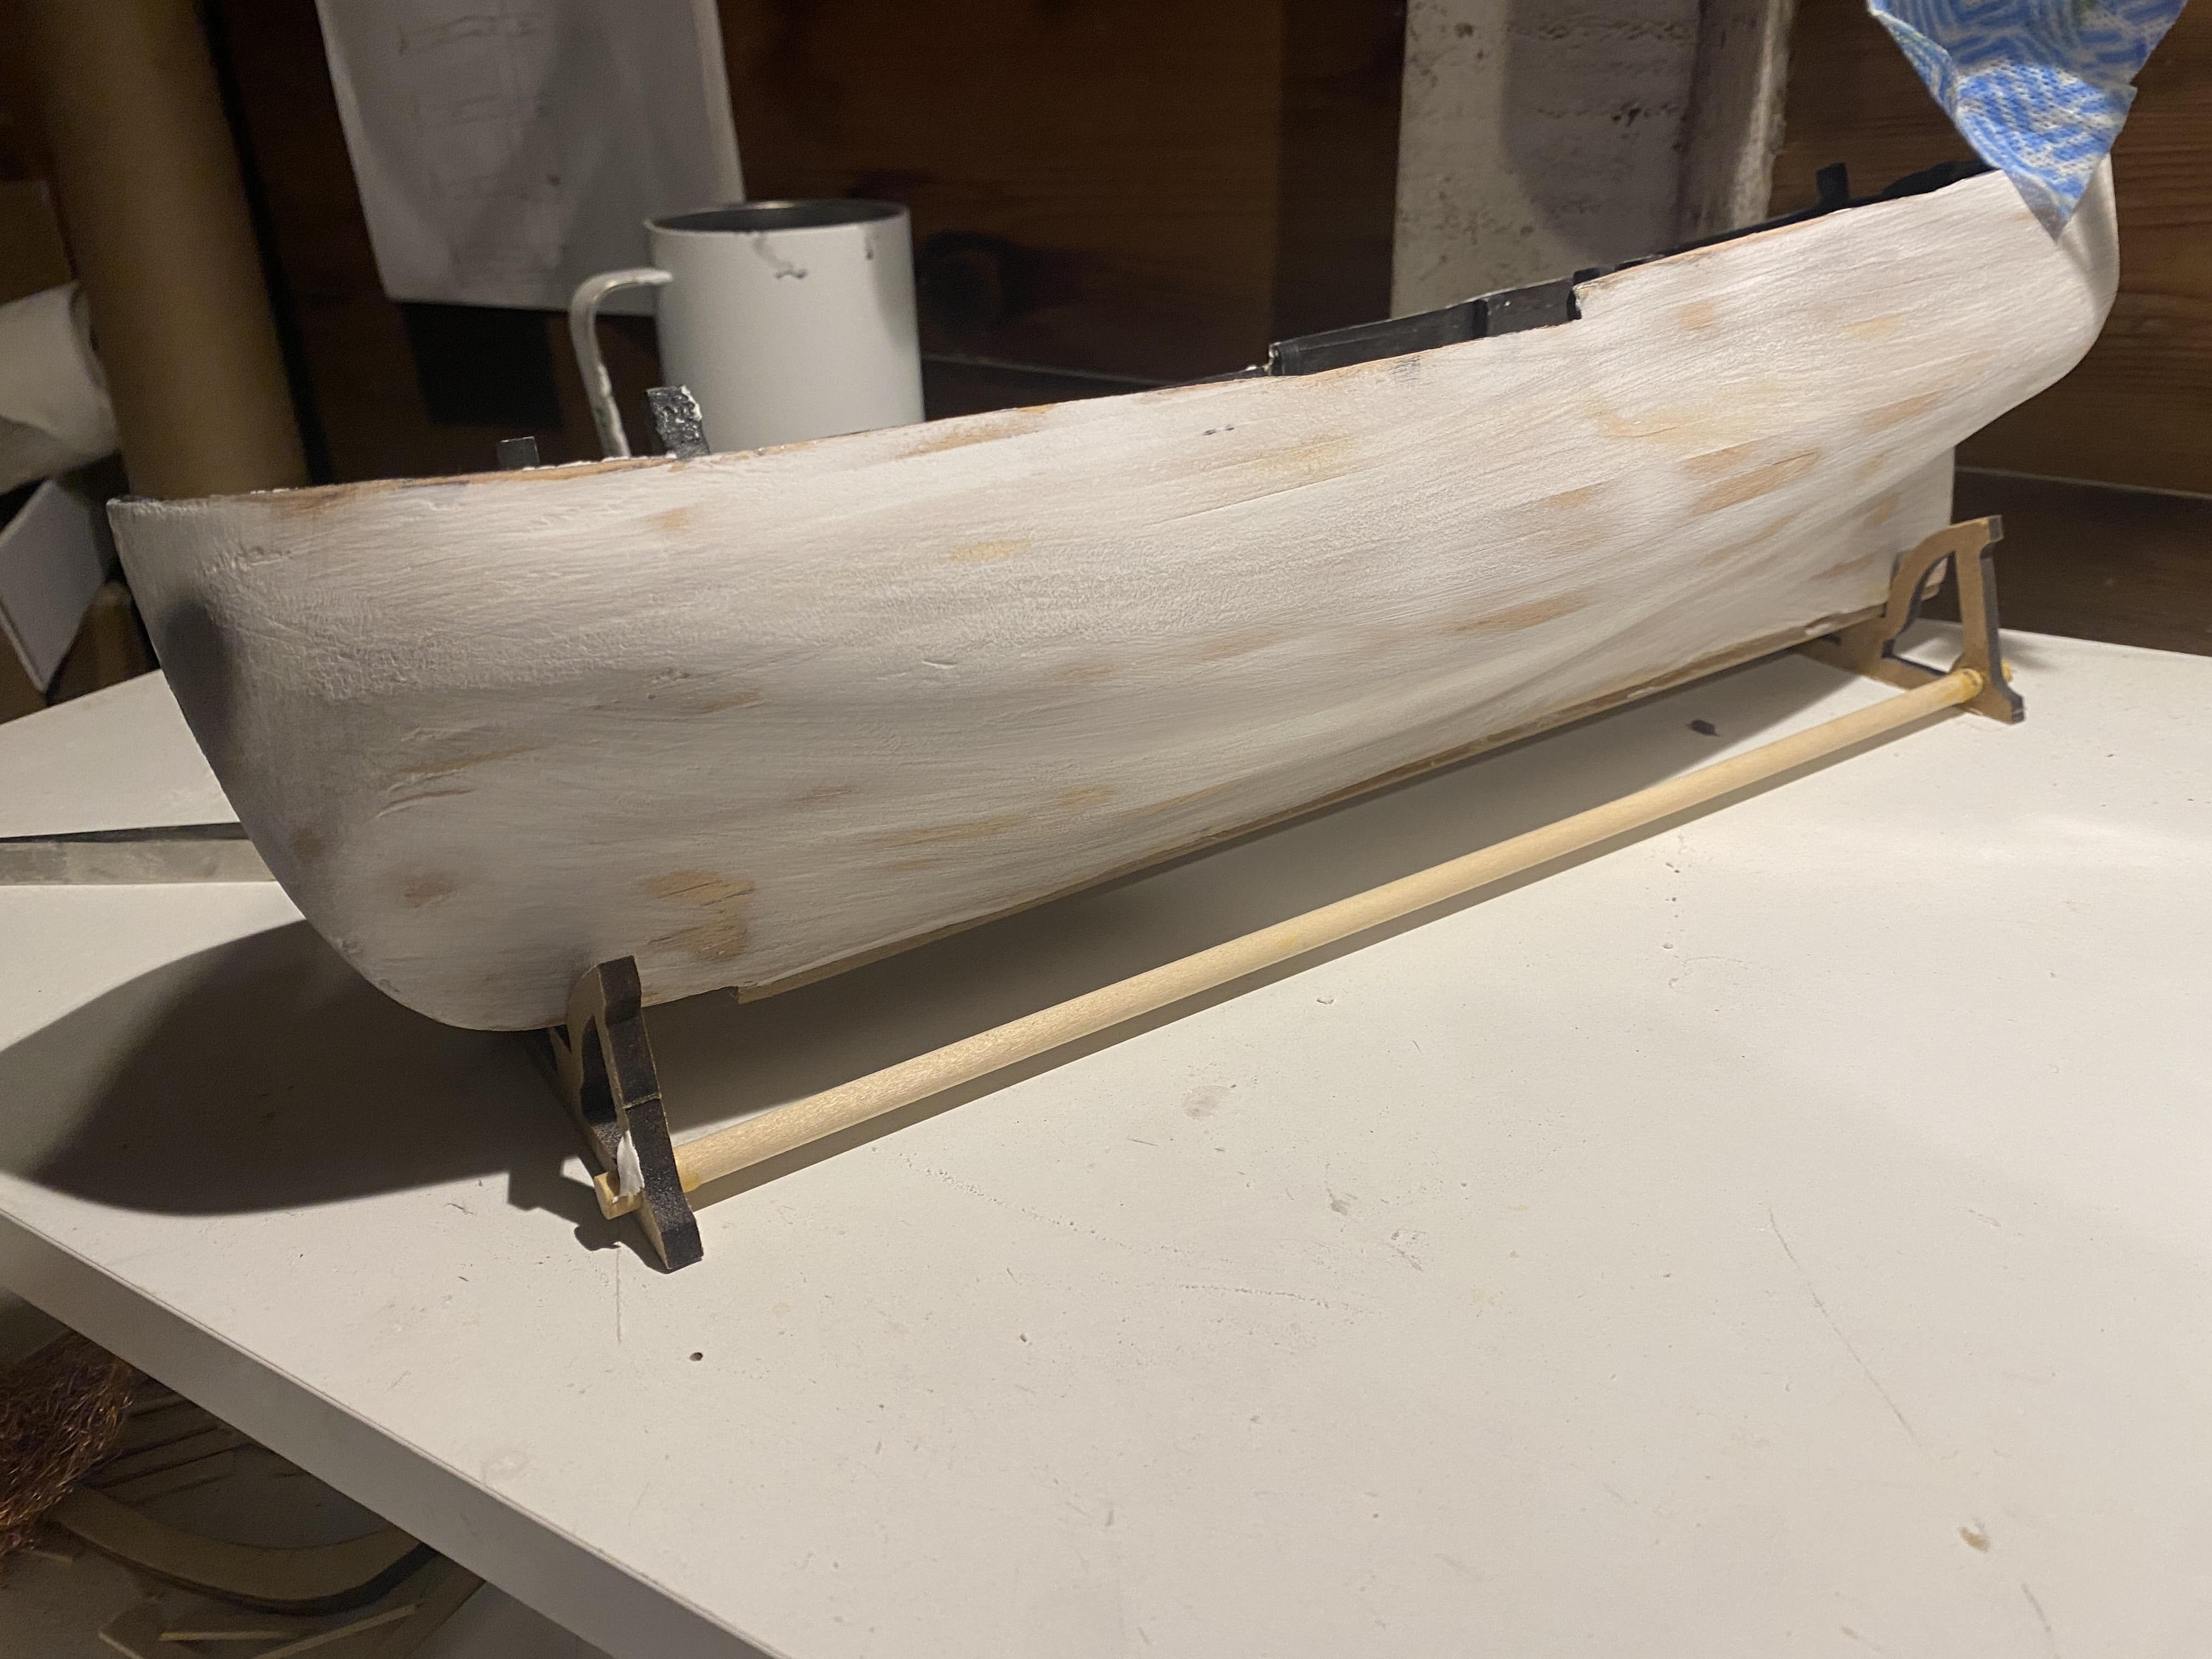
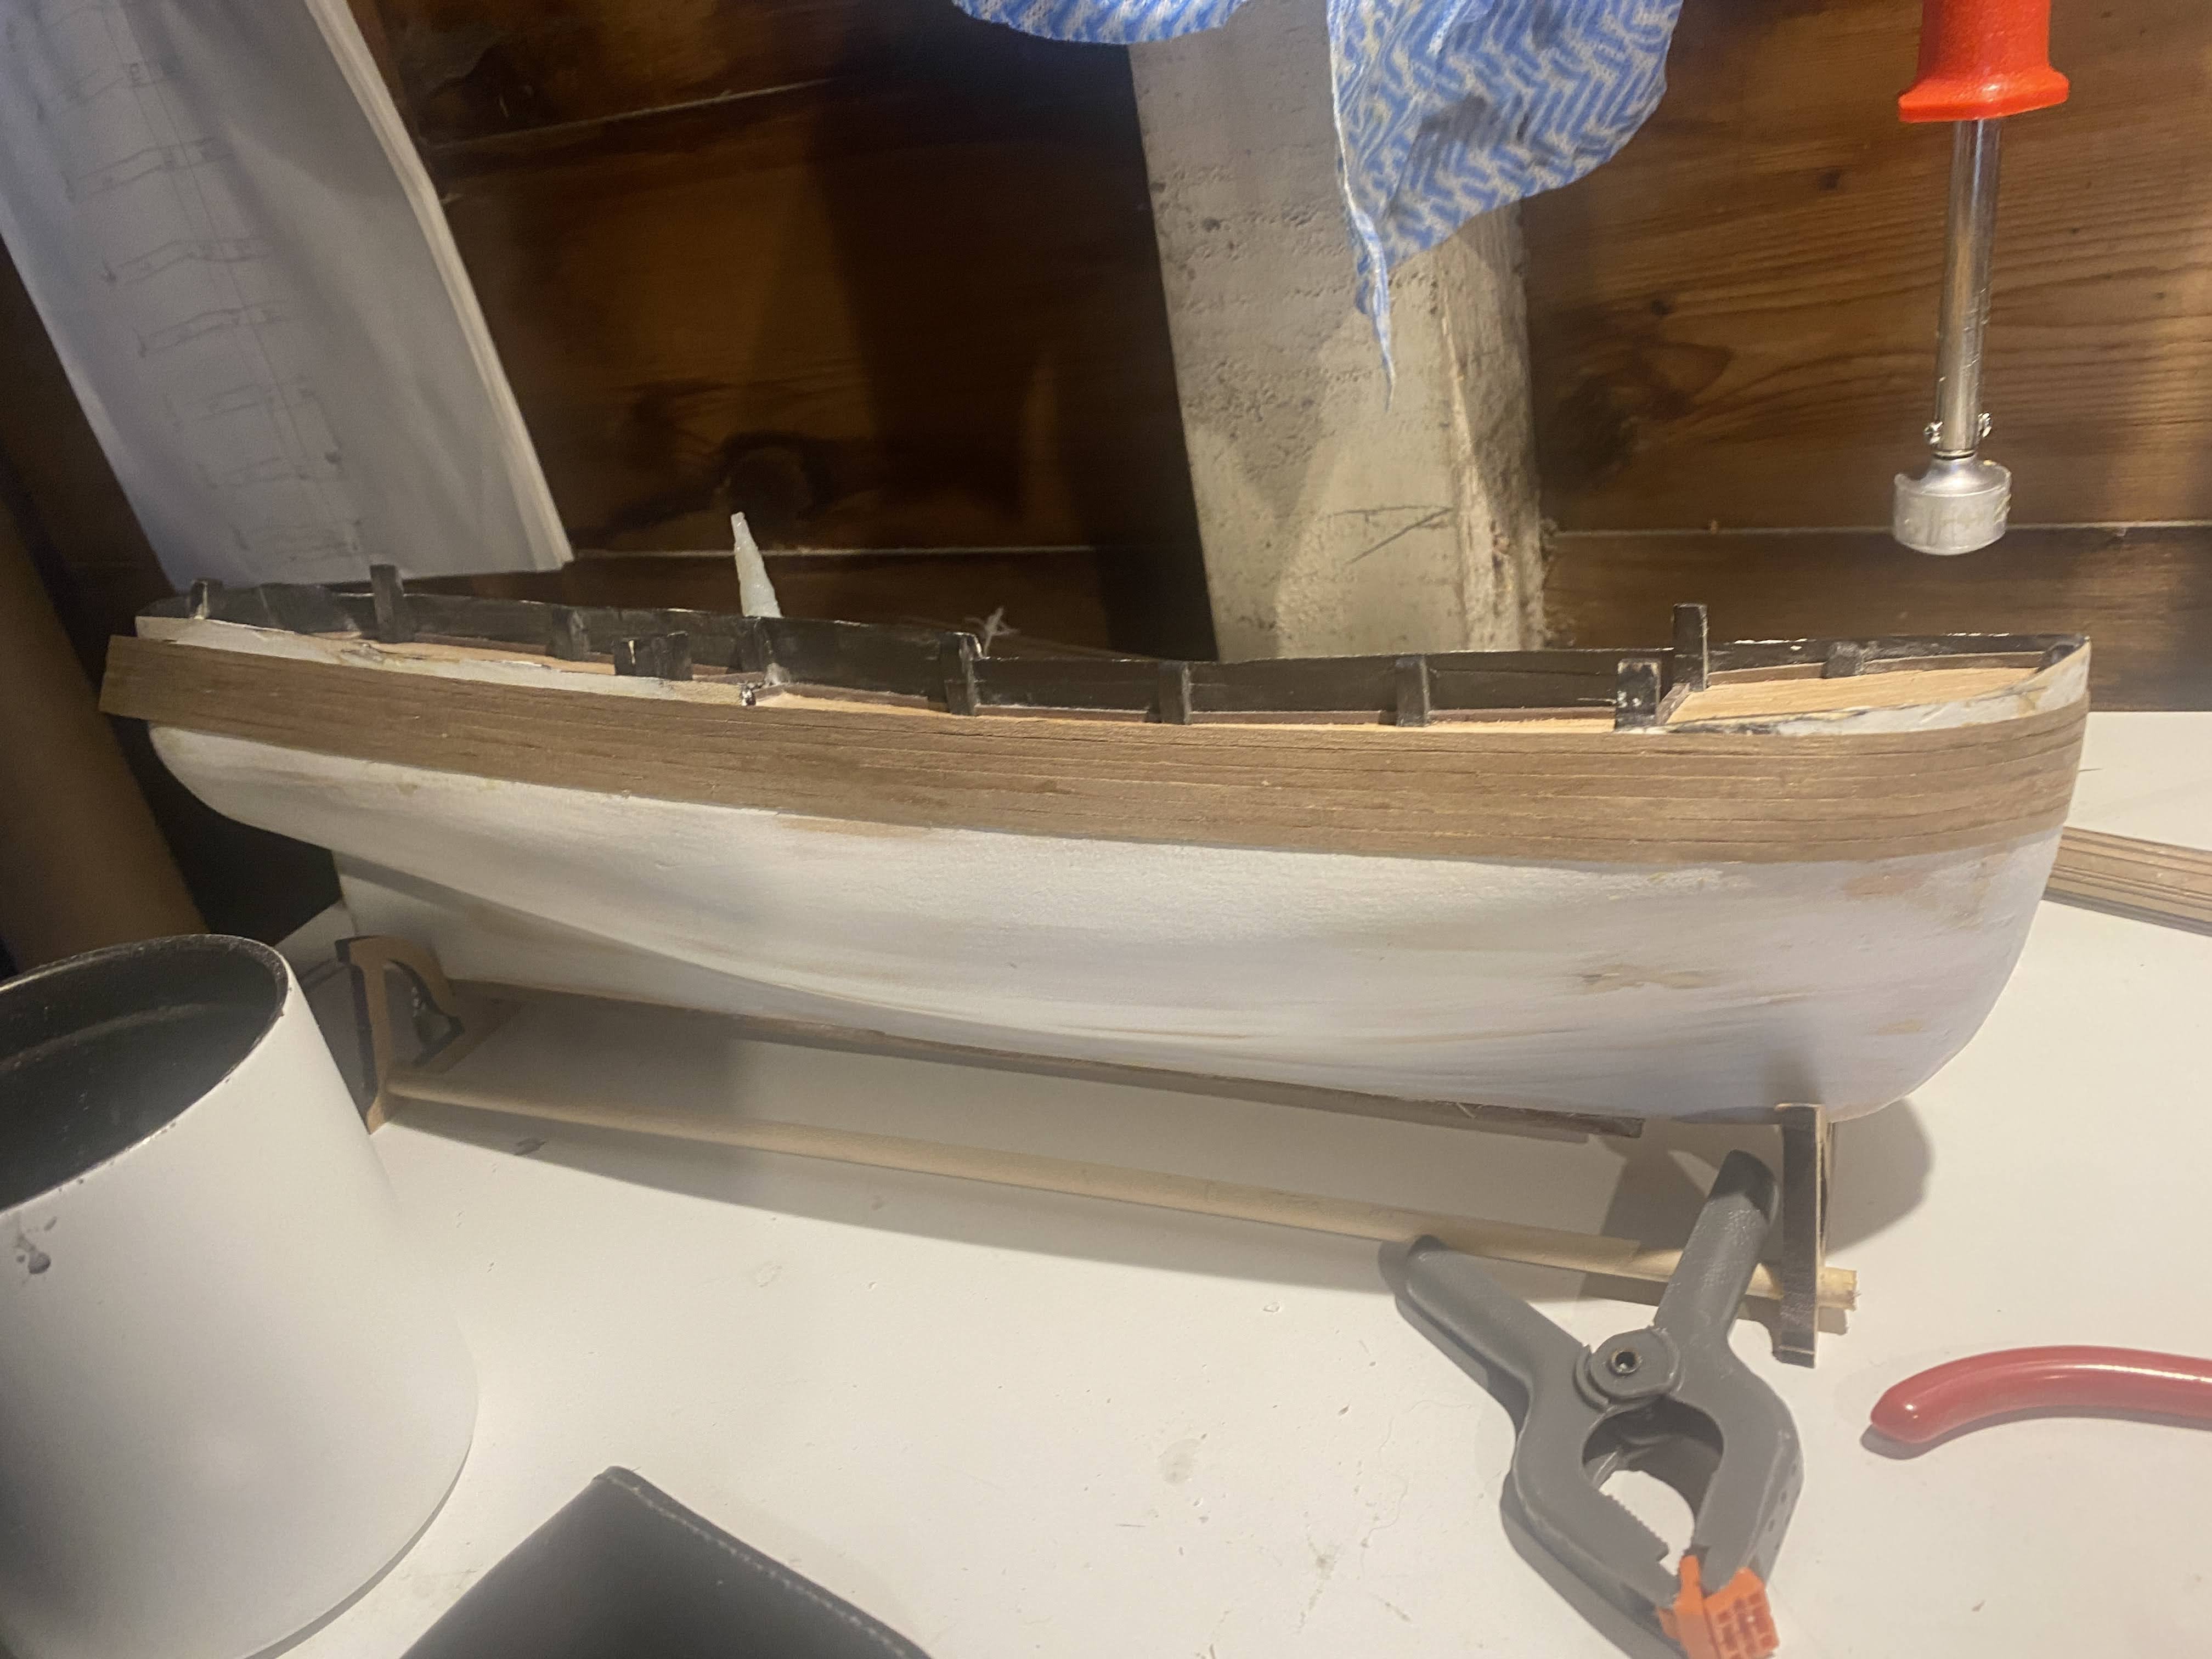
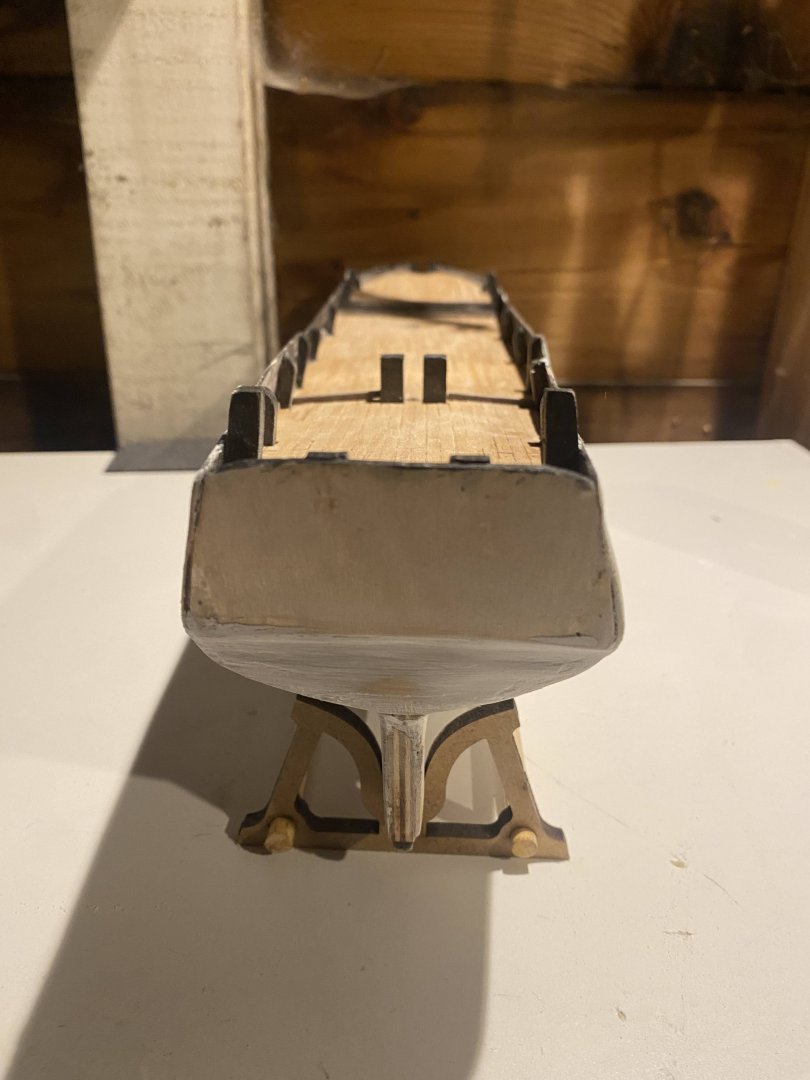
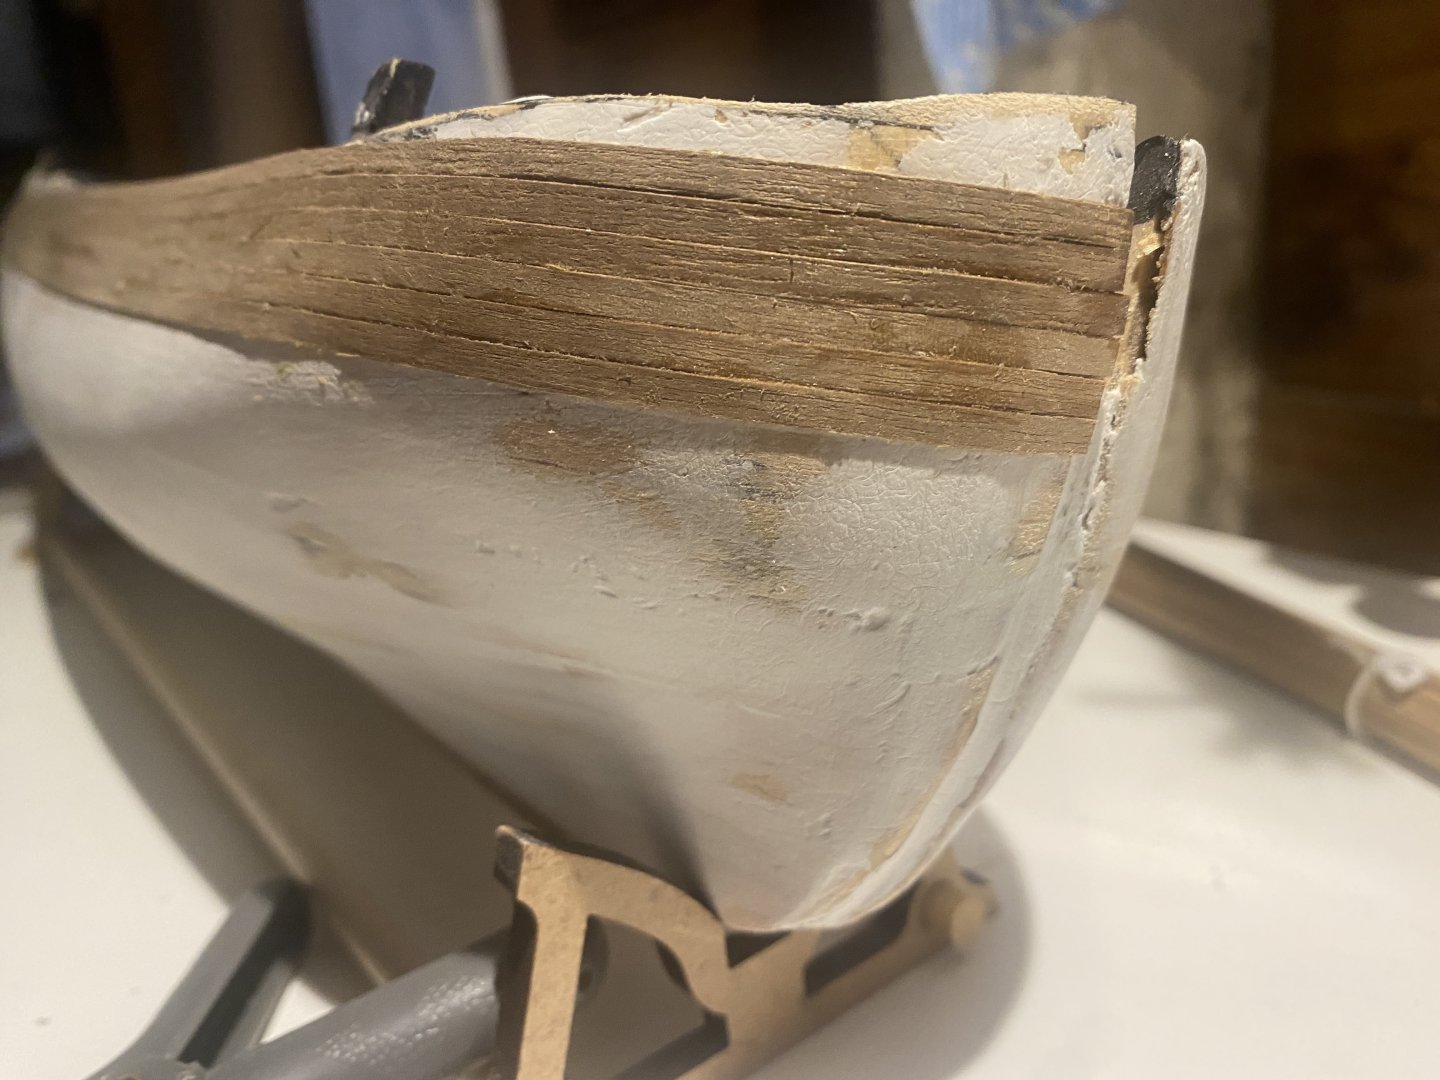
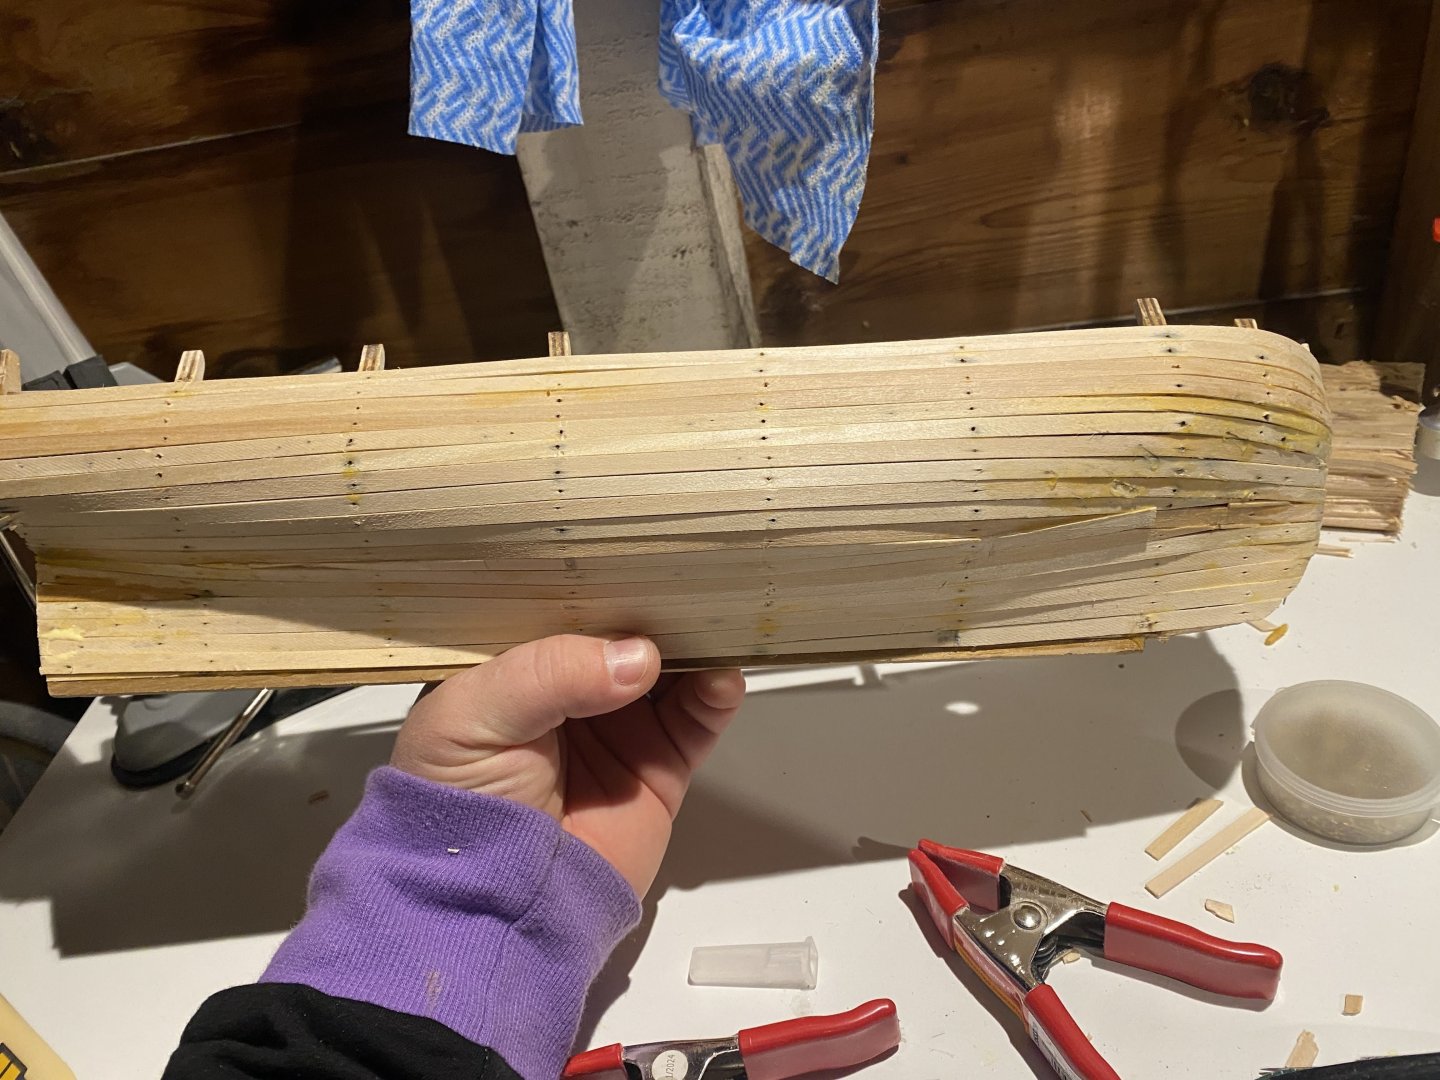
 Following Frank Mastini's advice, I coated the hull using modeling paste and sanded it down. I ended up using a little bit too much paste so the layer was thick and required a lot of sanding. But it created a very nice and smooth layer for my second planking. I used a copper wire sponge to score the surface so that the glue would adhere nicely to it and started my second planking. I'm really happy with the progress here. I also bought some Titebond Quick Set glue which is more viscous and dries quicker and I love it. Following Mastini again, I'm supergluing a plank at the stern to hold it in place, then brushing on wood glue a few inches at a time and using the plank bender to heat it up so the glue dries faster. I've gotten about 1/2 of on side done so far and very pleased with the results. I'll follow up when the second planking is done.


-
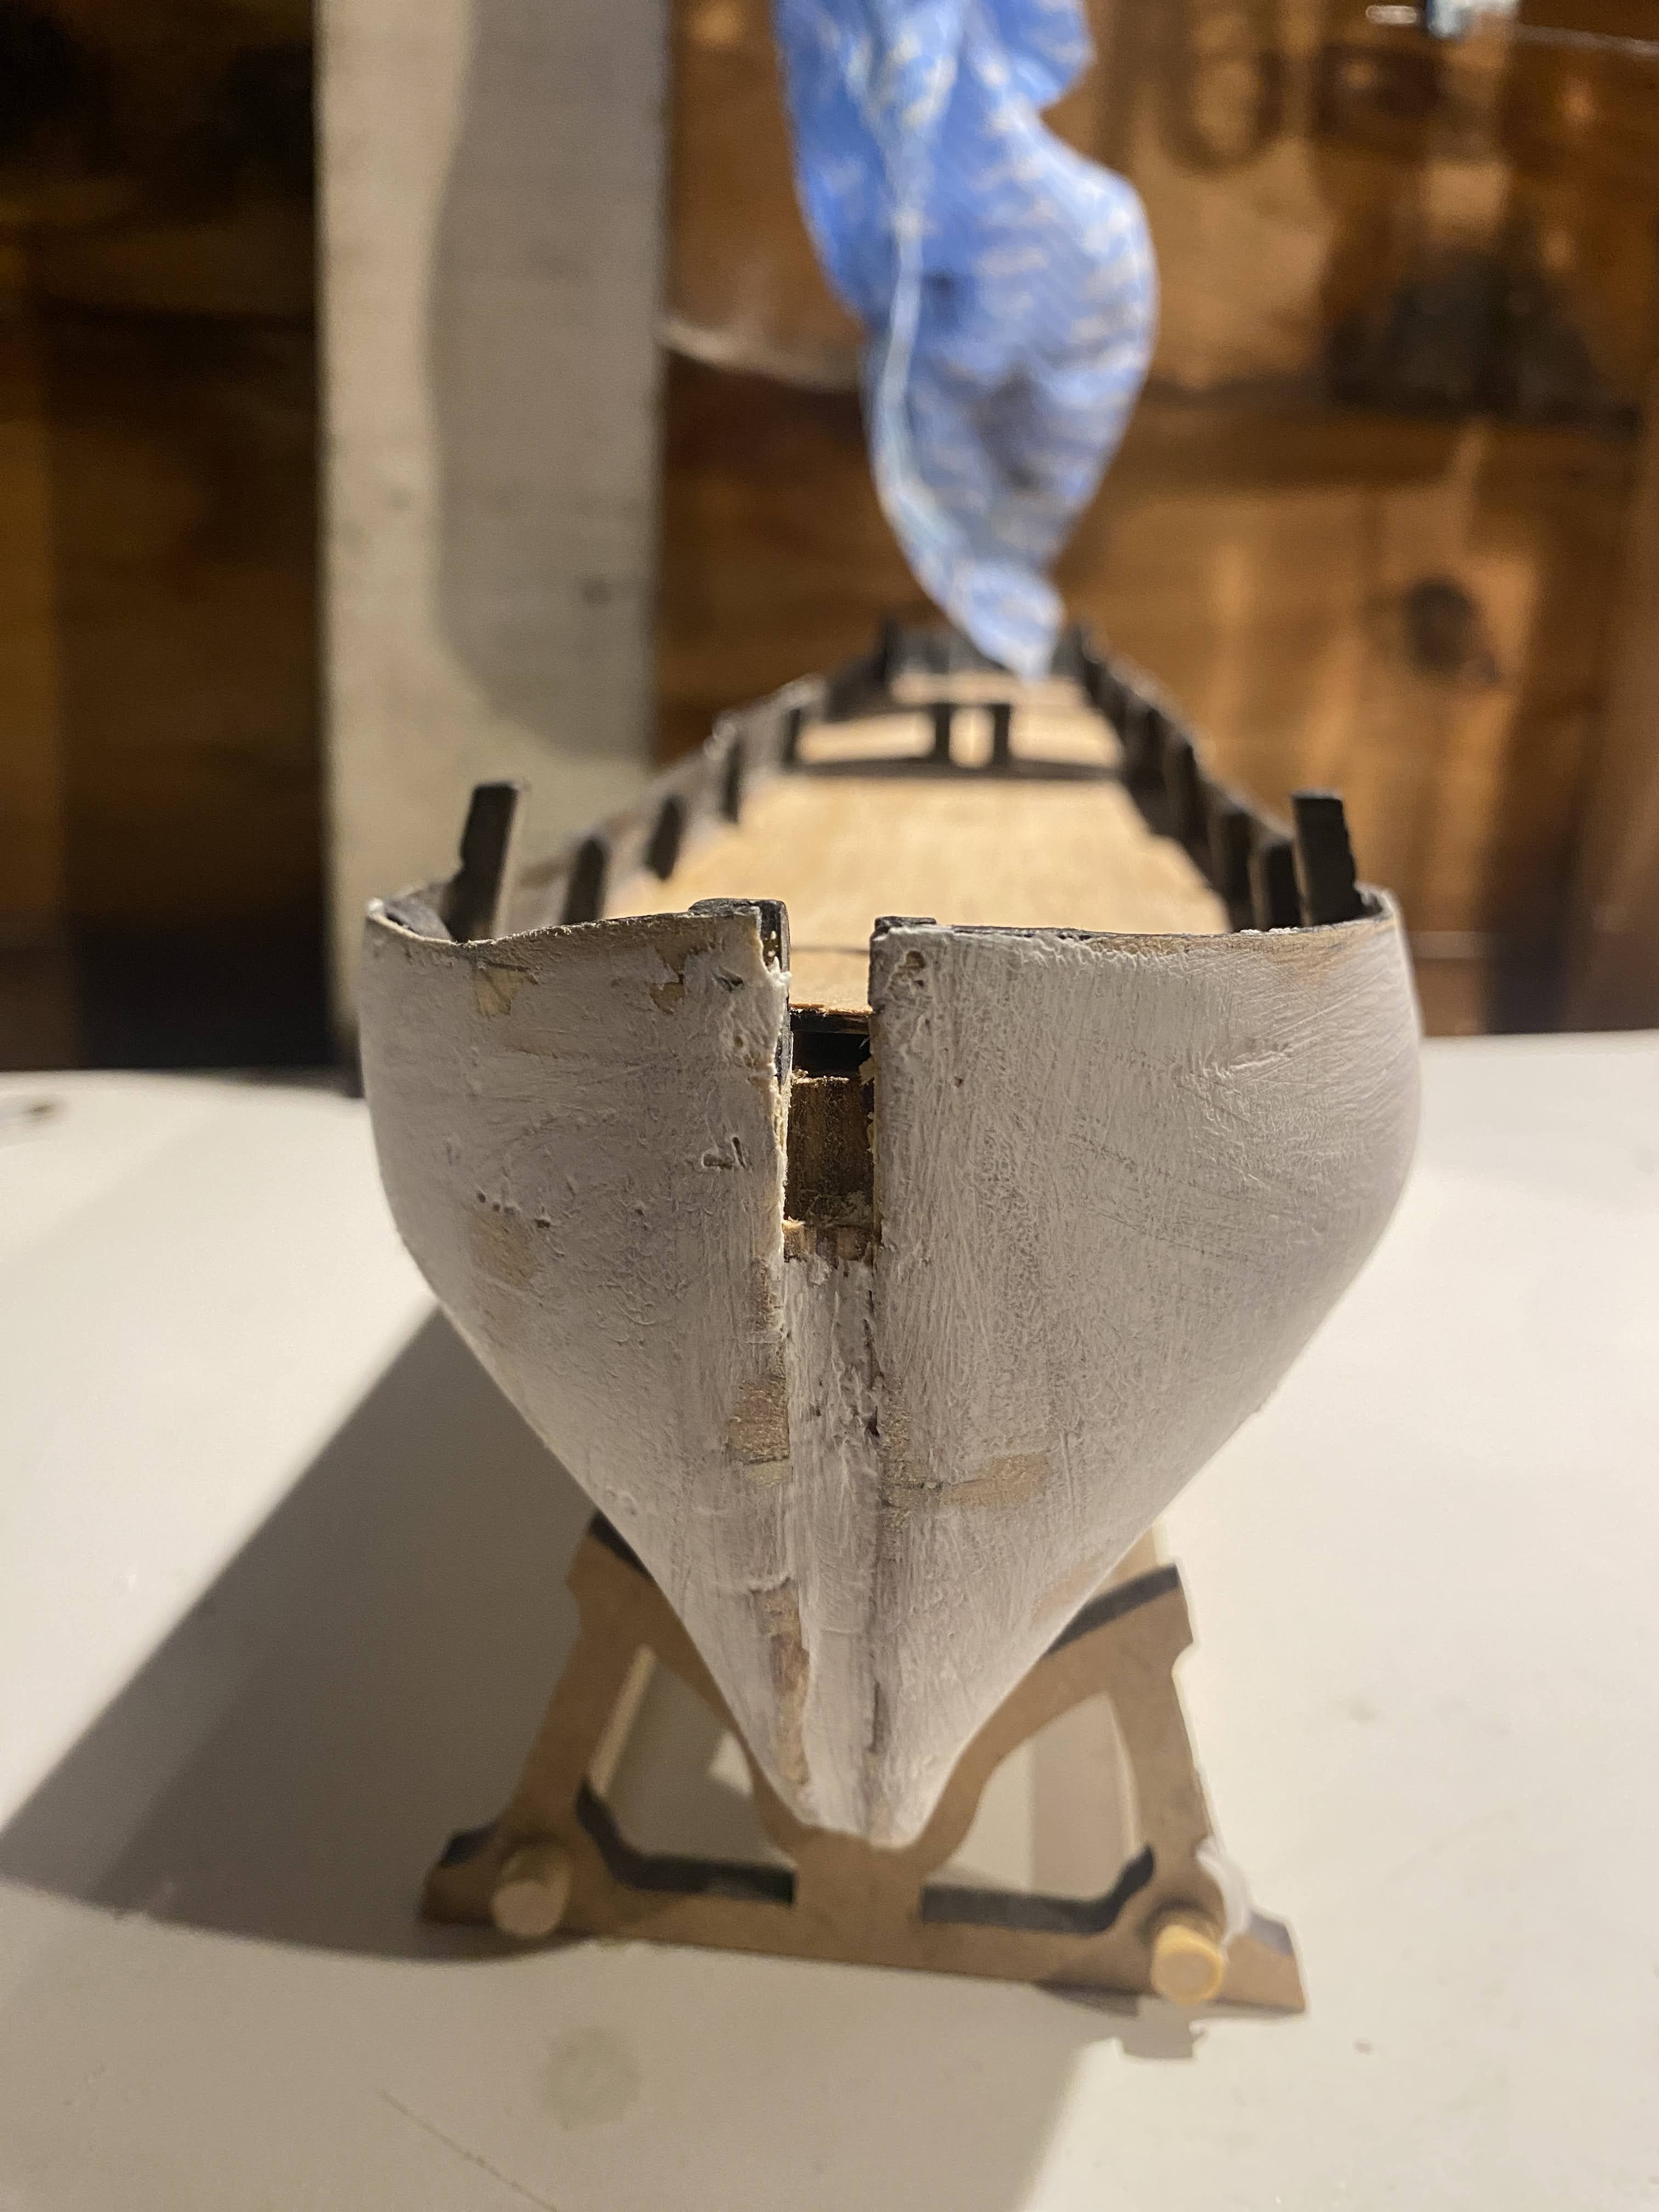
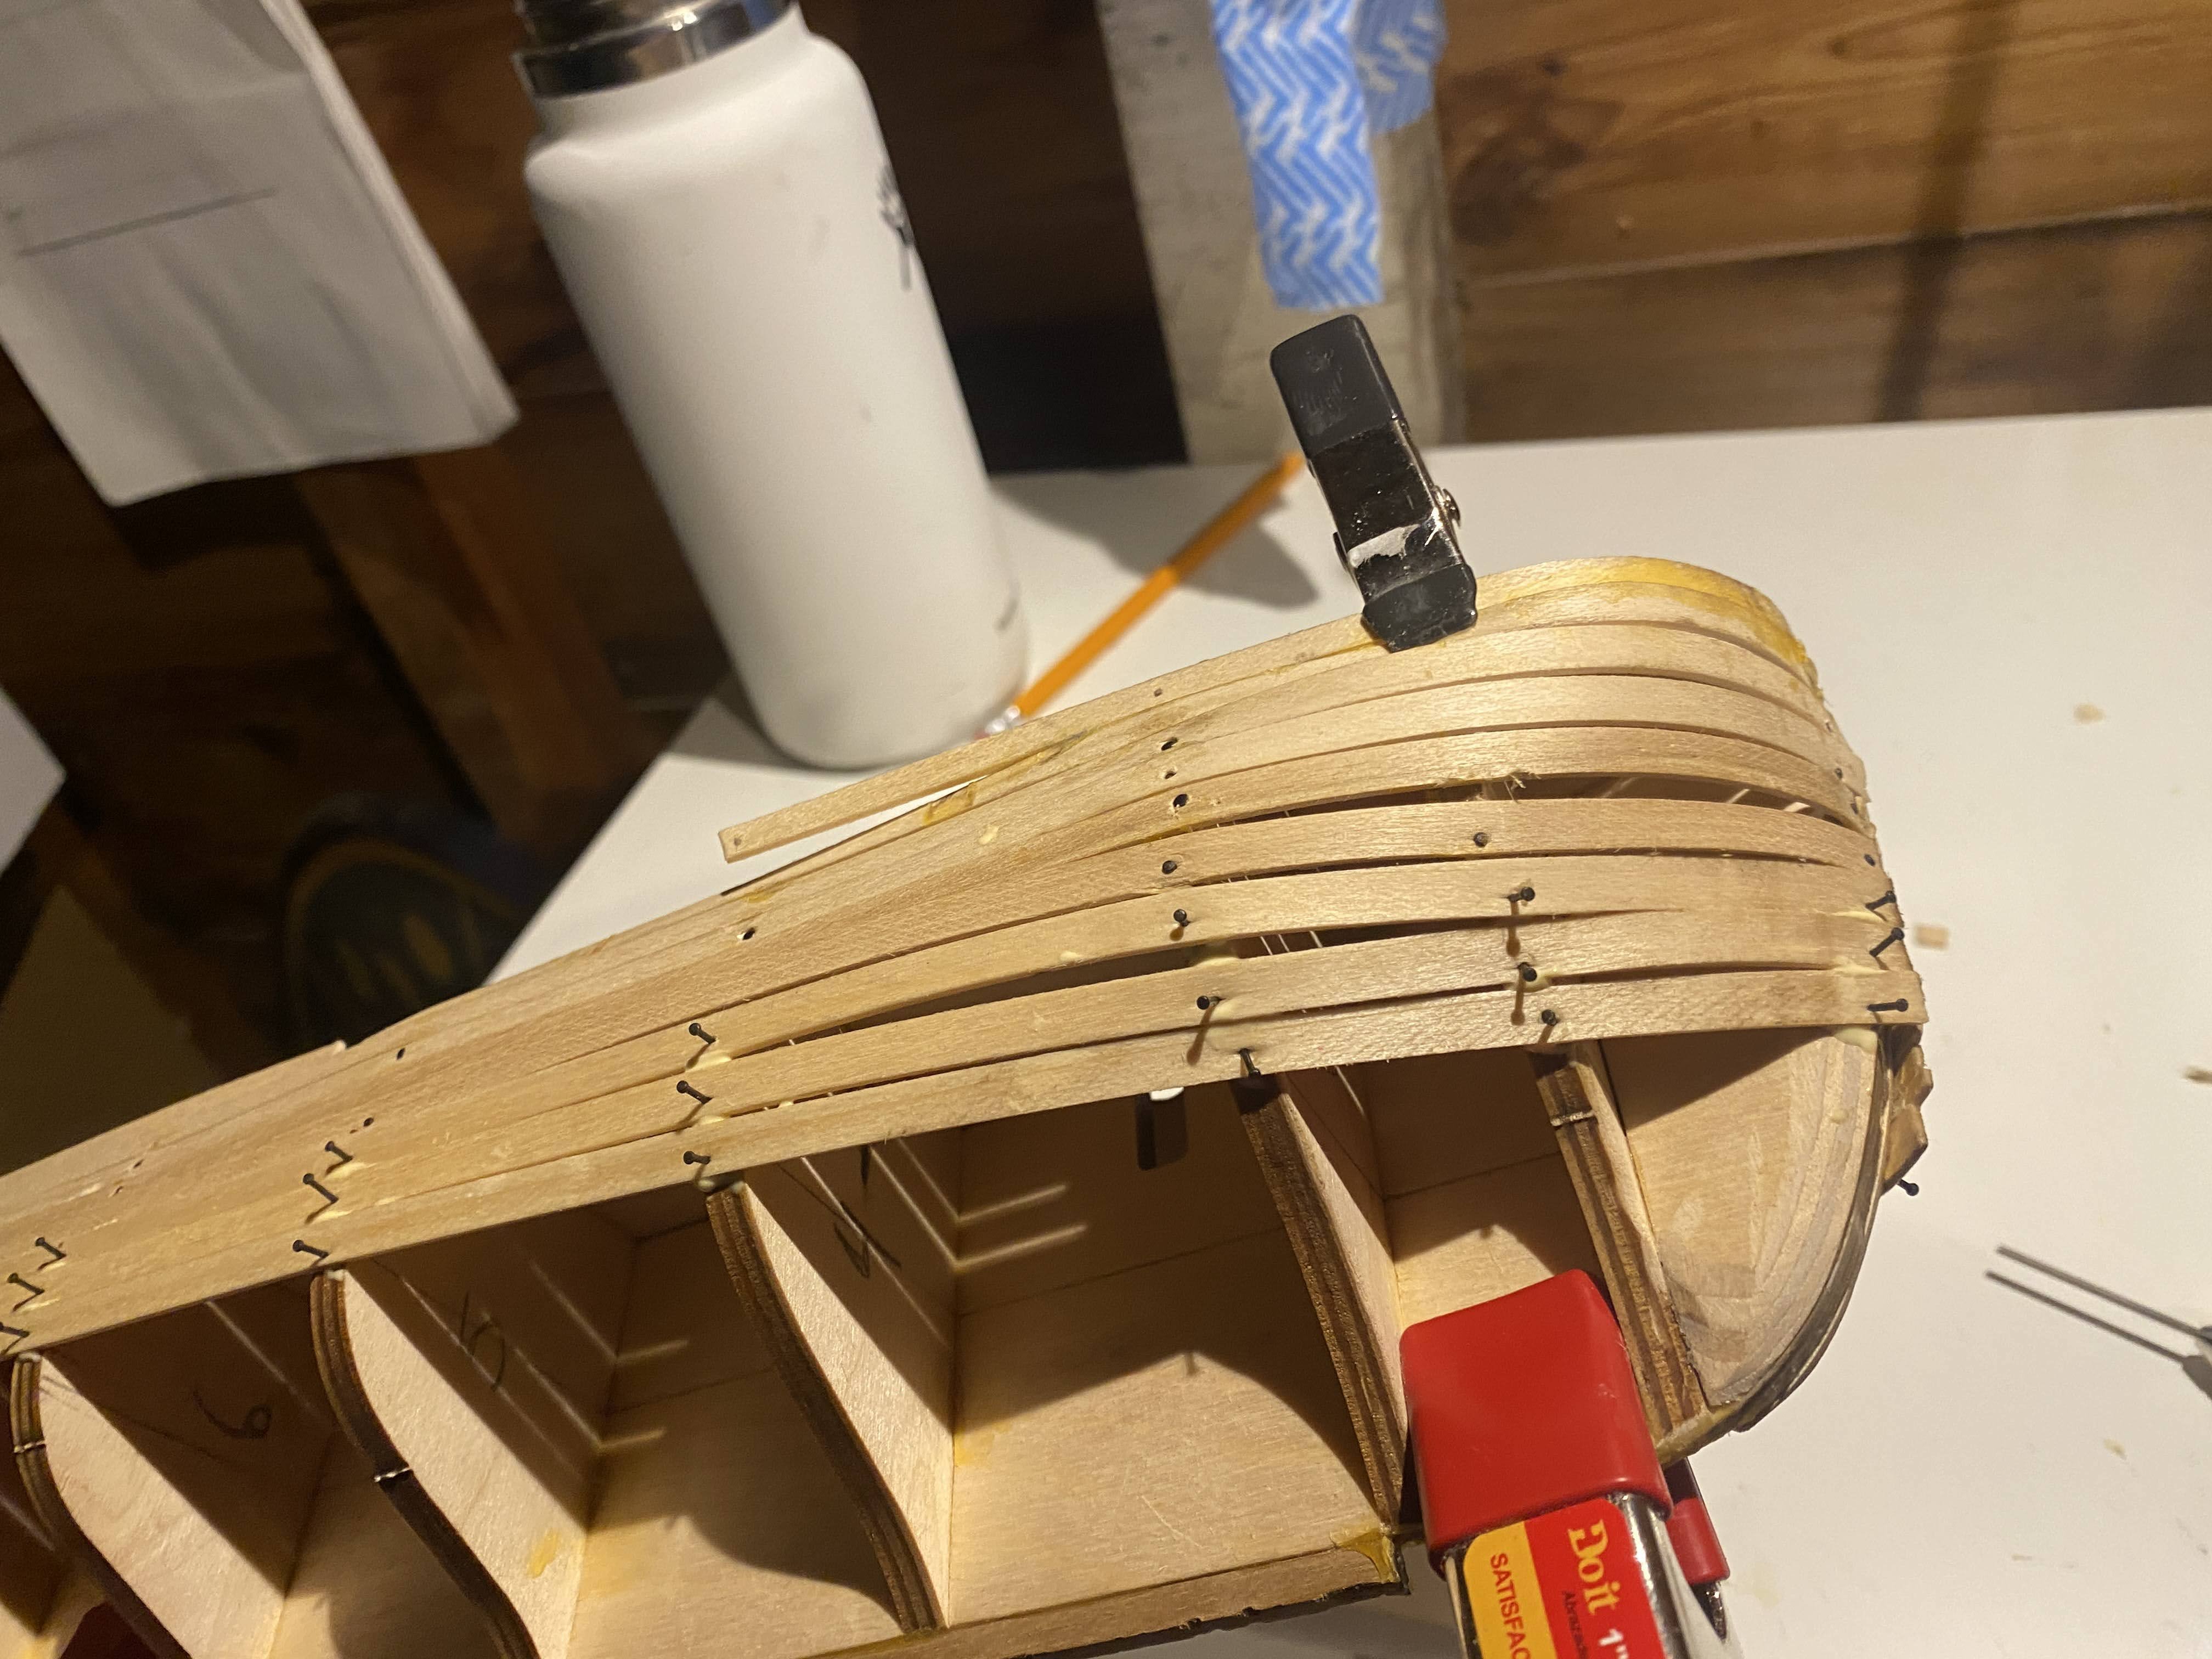
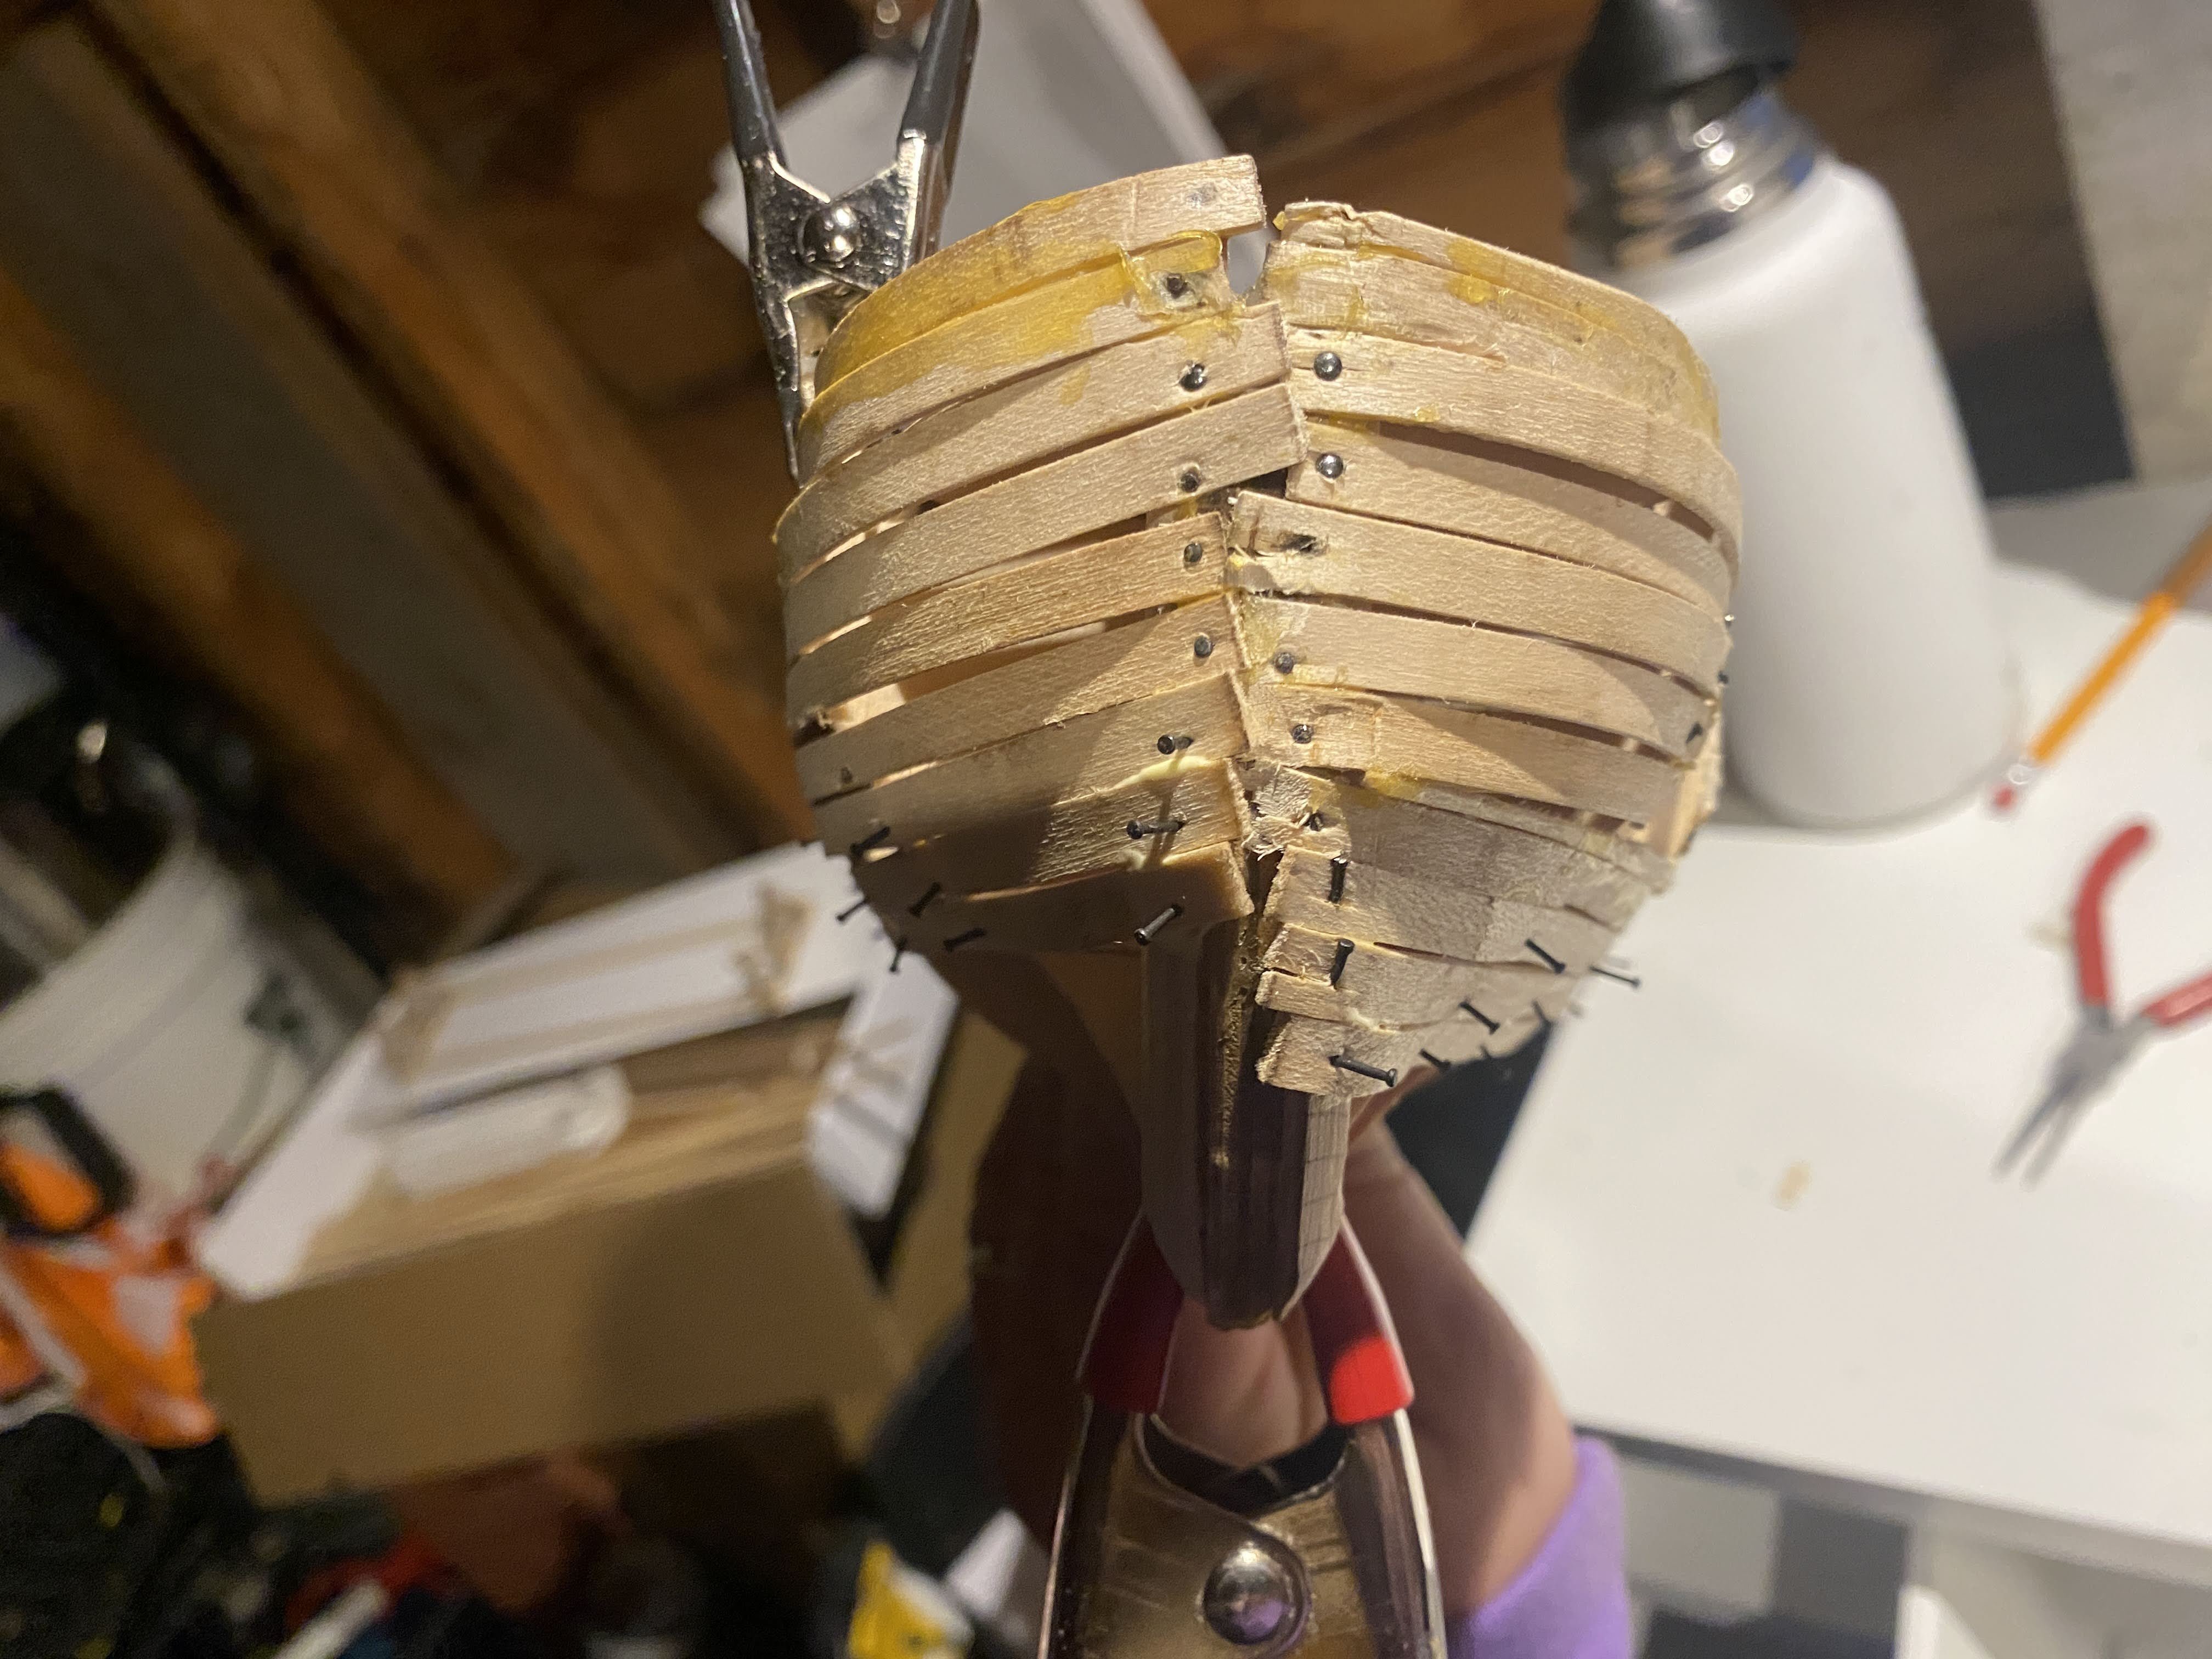
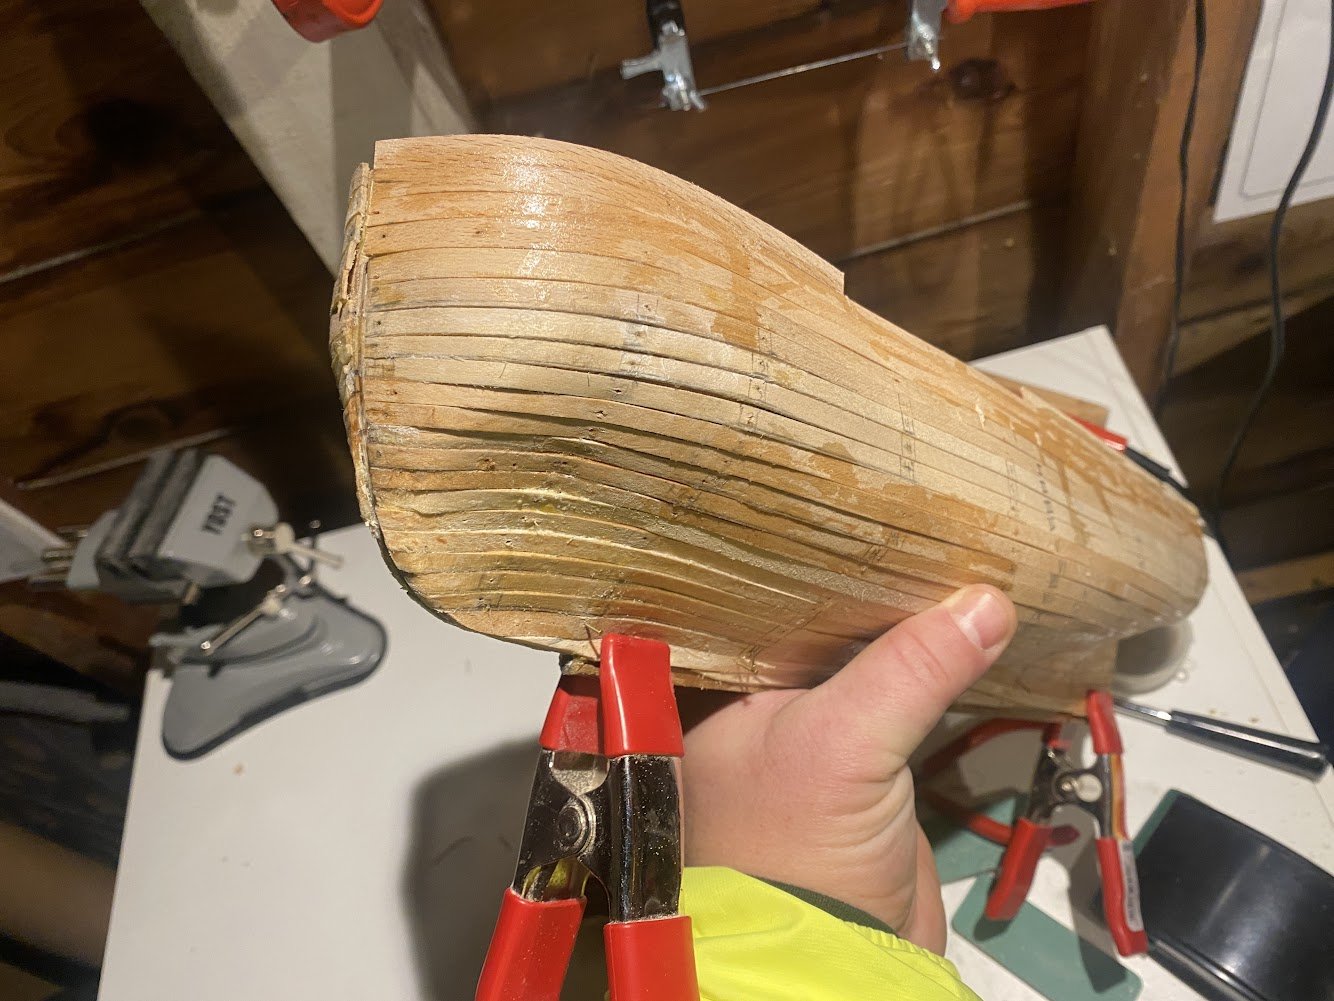
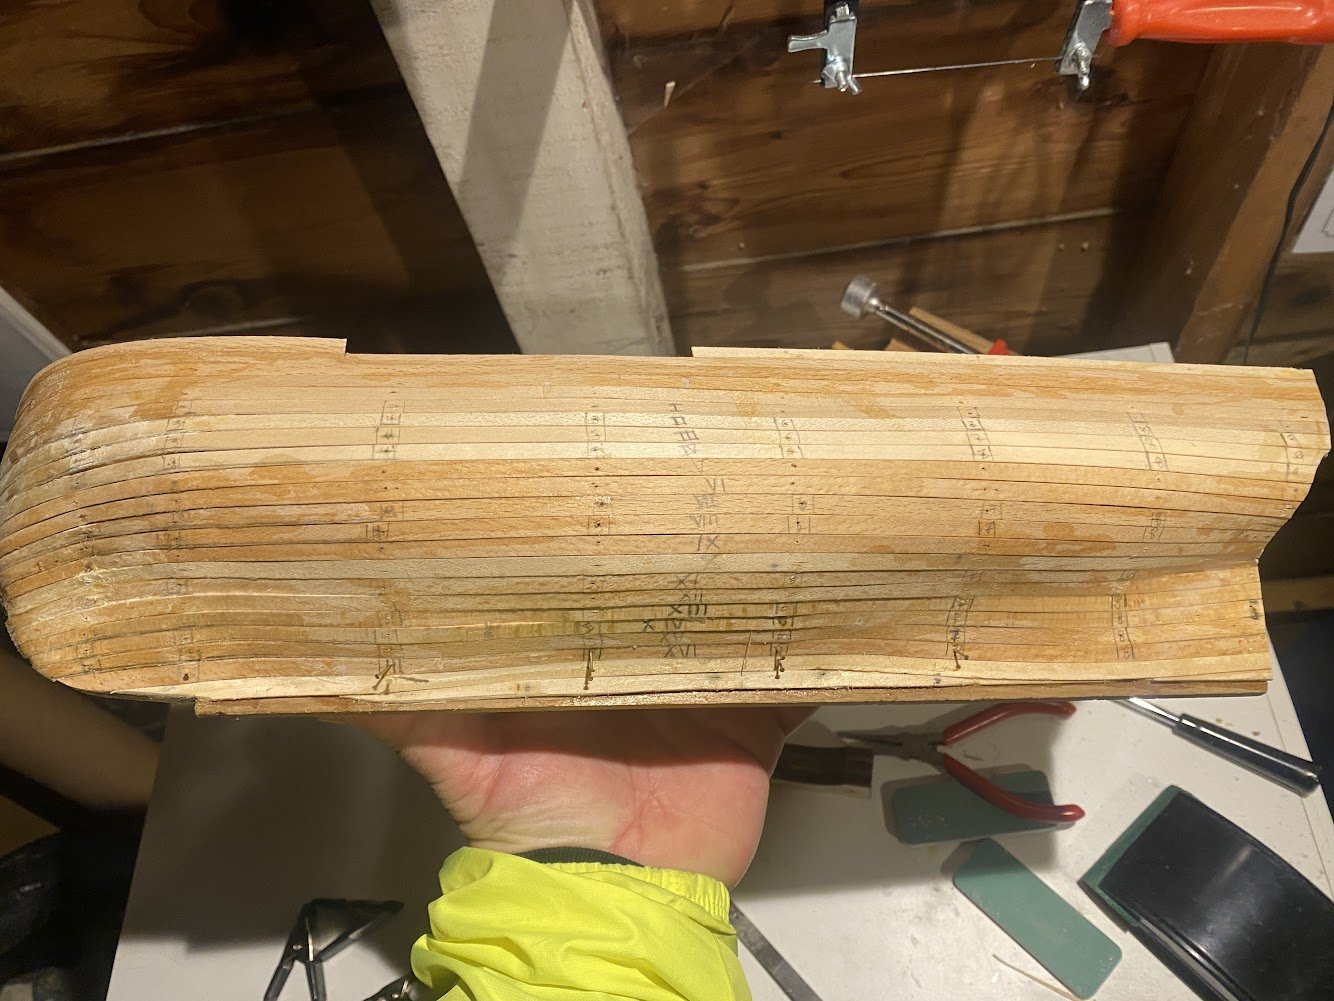
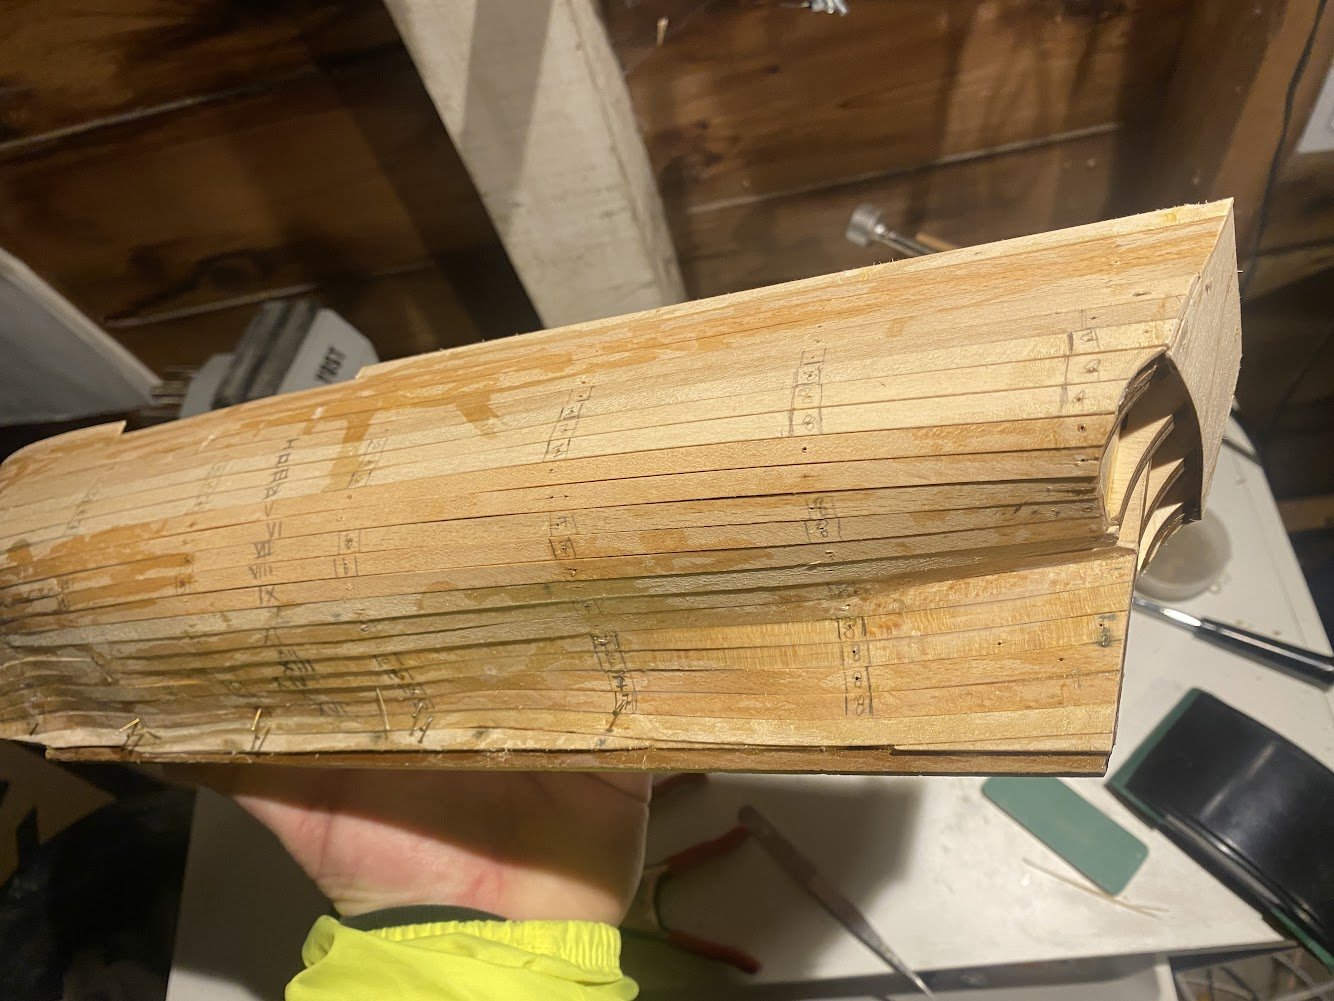
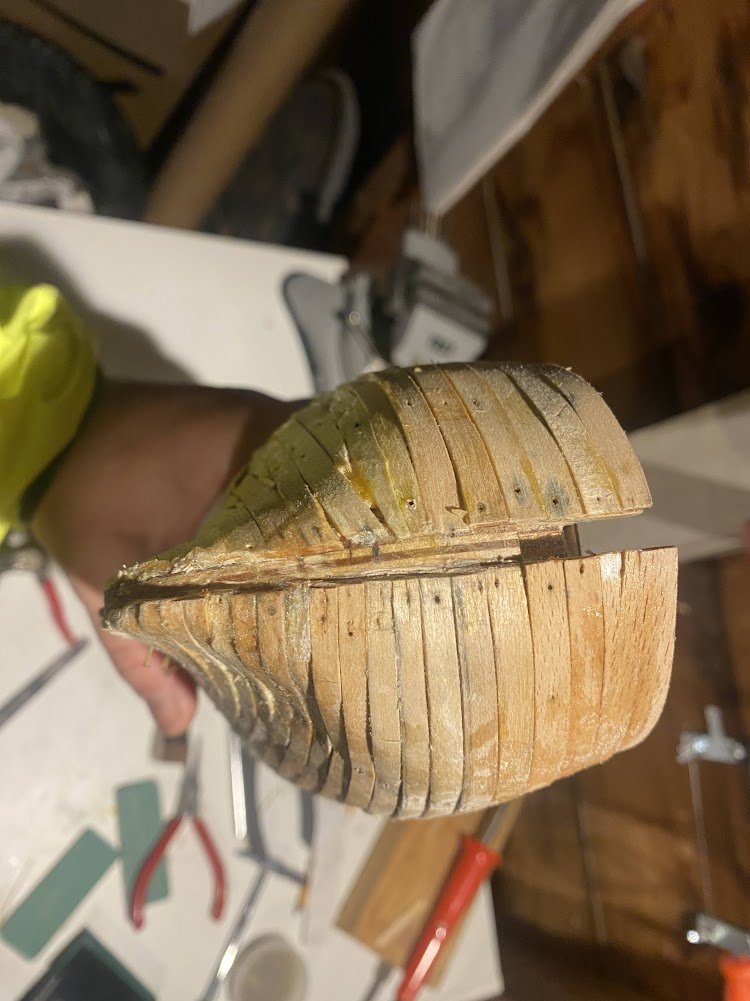
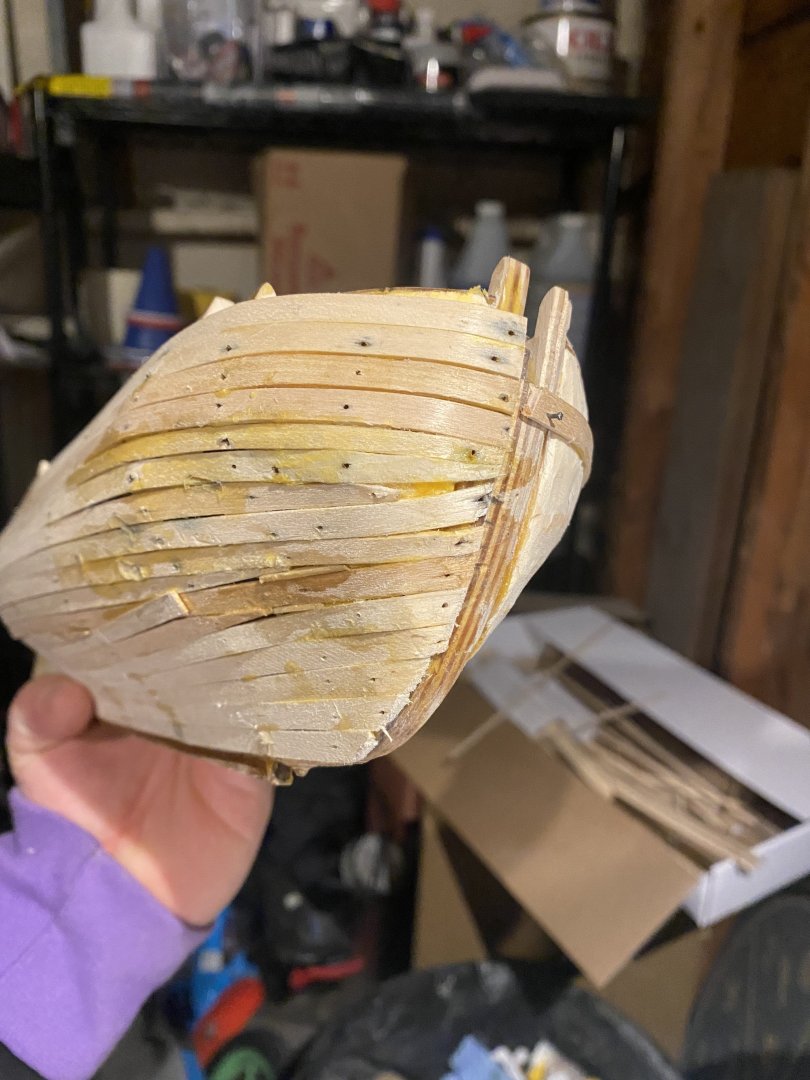
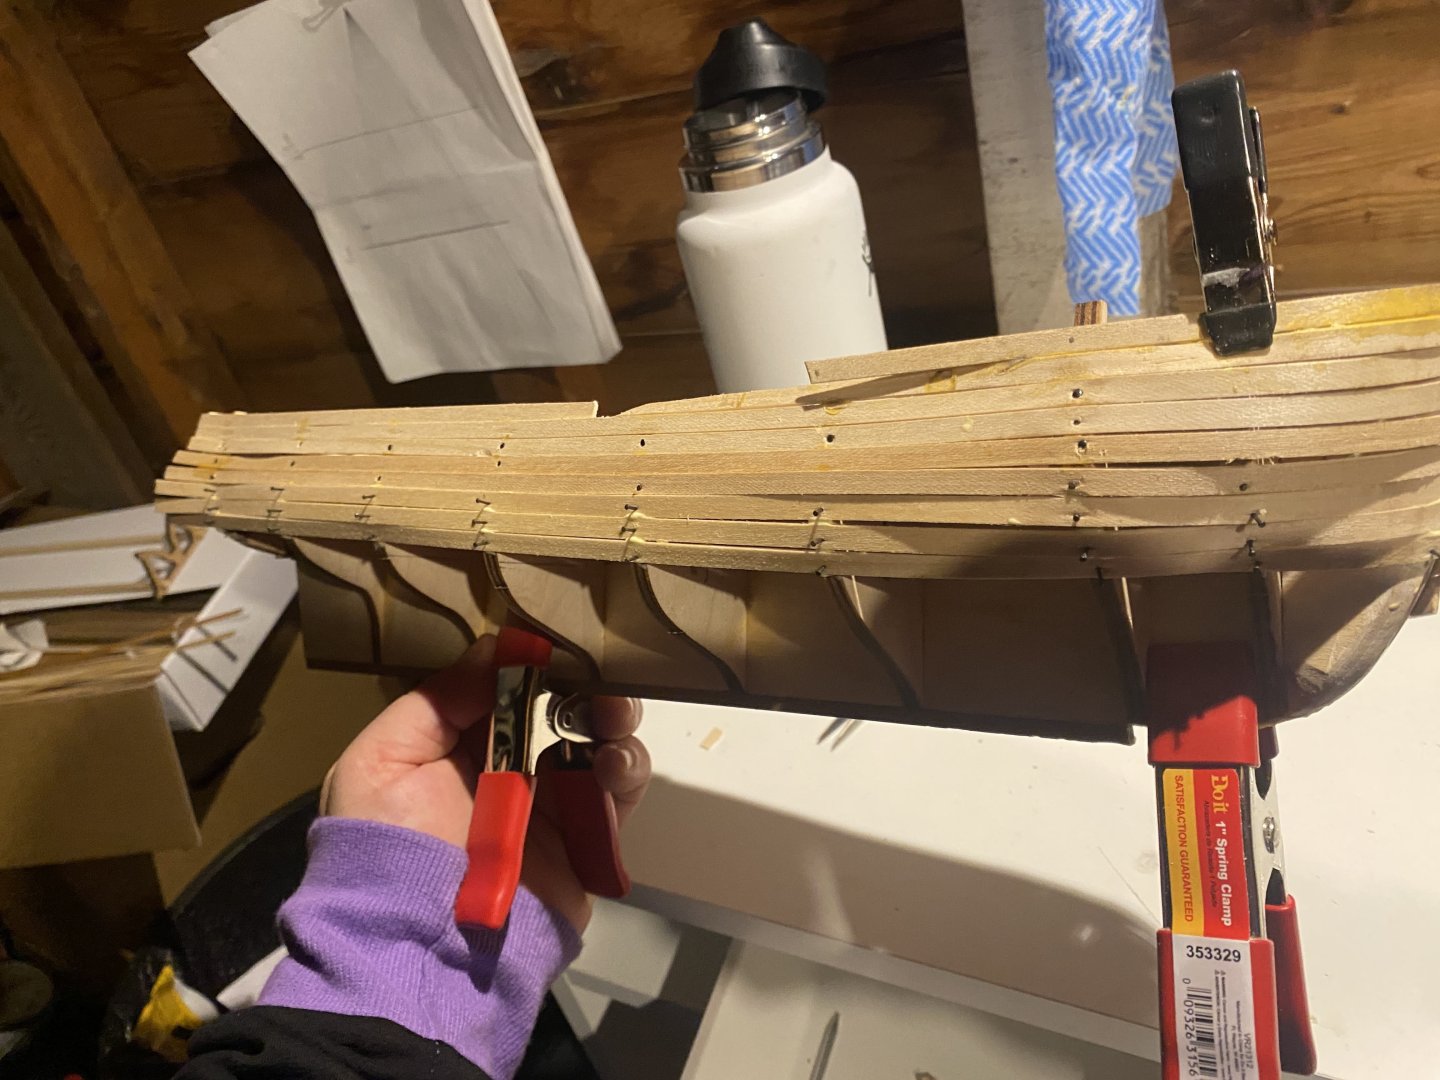
I finally go through the rest of the planking. For the second half I used my planking fan to sand down the planks at the bow section. I'm much happier with this section but realized after-the-fact that I hadn't properly sanded down my bow filler so the planks 12-15 were warping at the end bow portions. Some difficulties I ran into that I could use advice on: How do I get the curved planks to be flush with each other? As I'm going down the bulkhead? My solution was to be generous with super glue and hold them in place. It seemed to be a workable solution but I ended up using a lot of glue. You can see it in the photos with how shiny it all looks. I'm not sure how that will impact the sanding that comes next. Using the planking fan correctly. I created strips of paper for each bulkhead and marked on that paper where each plank would be, and used those markings to transfer on to each bulkhead. But what I found was that mid-way through the markings it was beginning to look a bit off my 1mm or so and I think it was because of the thickness of the lines from my pencil. Any advice on how to get super precise here? Mechanical pencil? Use my exacto knife instead? Advice on sanding. I'll be starting the sanding tonight and worried about sanding through these planks as they're quite thin.
-
Thank you Loracs for the suggestions! I actually had a plank bending iron on hand for this but found that I wasn't soaking the wood nearly long enough. For some reason I thought 5-10 minutes would be good enough but after letting them sit for 1-2 hours I found it made all the difference. I was finally able to finish the first half of gluing the first planking. It's still quite rough but I feel like I've learned a lot from my first pass. There are still some gaps and bumps but I'm going to accept that and try to improve the second half. The main thing was adding bow fillers. It was a lot of work sanding them down into shape but it made a huge difference. I'm wondering if it's worth adding fillers for every bulkhead... There's also a glaring mistake on the plank at the bottom that is very clearly overlapping. I don't have a good excuse for that...

-
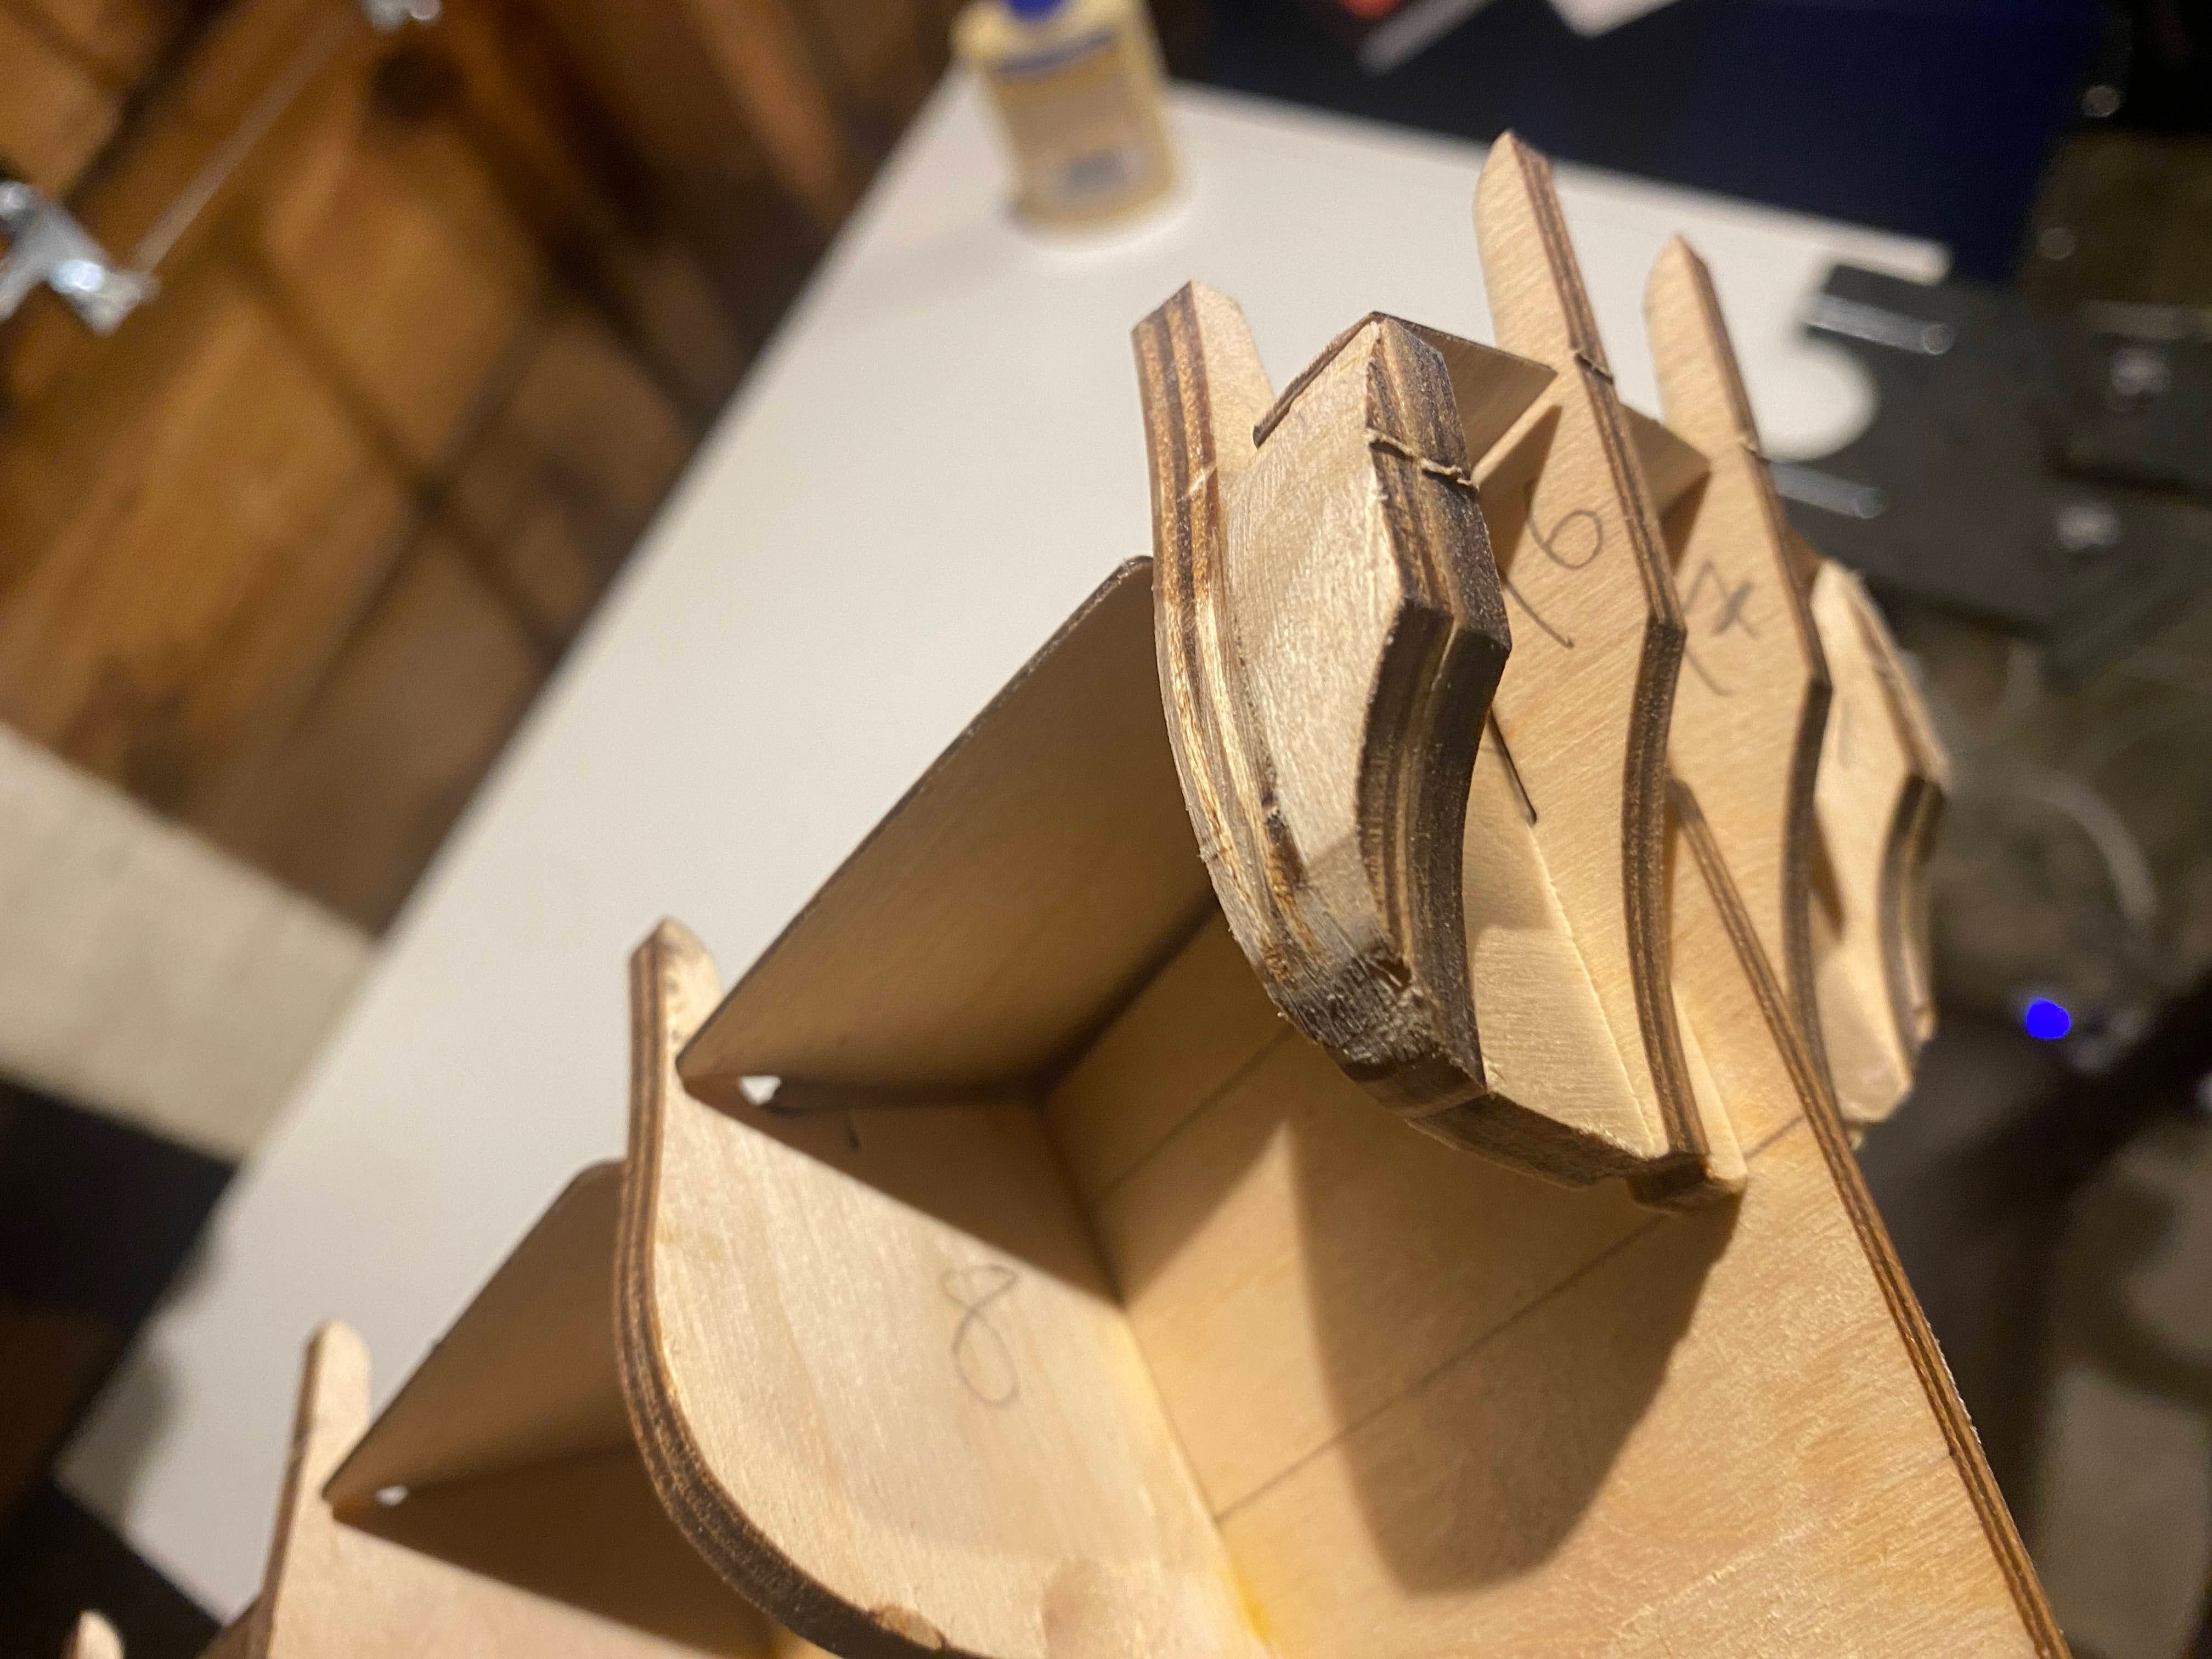
Thanks again @JacquesCousteau for the comment on fairing. I can't believe I skipped that step entirely. I spent the weekend creating a bow filler and it's make a huge difference. I have 6 planks, 3 on each side, pinned on right now to help me along with fairing and I'm still smoothing out a few bumps but I'm feeling so much more confident about the first planking. I will post a proper update with photos of my progress once the fairing is done but just wanted to jump in and say thanks again for the help & advice.
-
@JacquesCousteau, noted! I think you're right. It's frustrating to have to start from scratch but I want to make sure I get every part of the planking process down with this first model. Thank you for your advice.
-
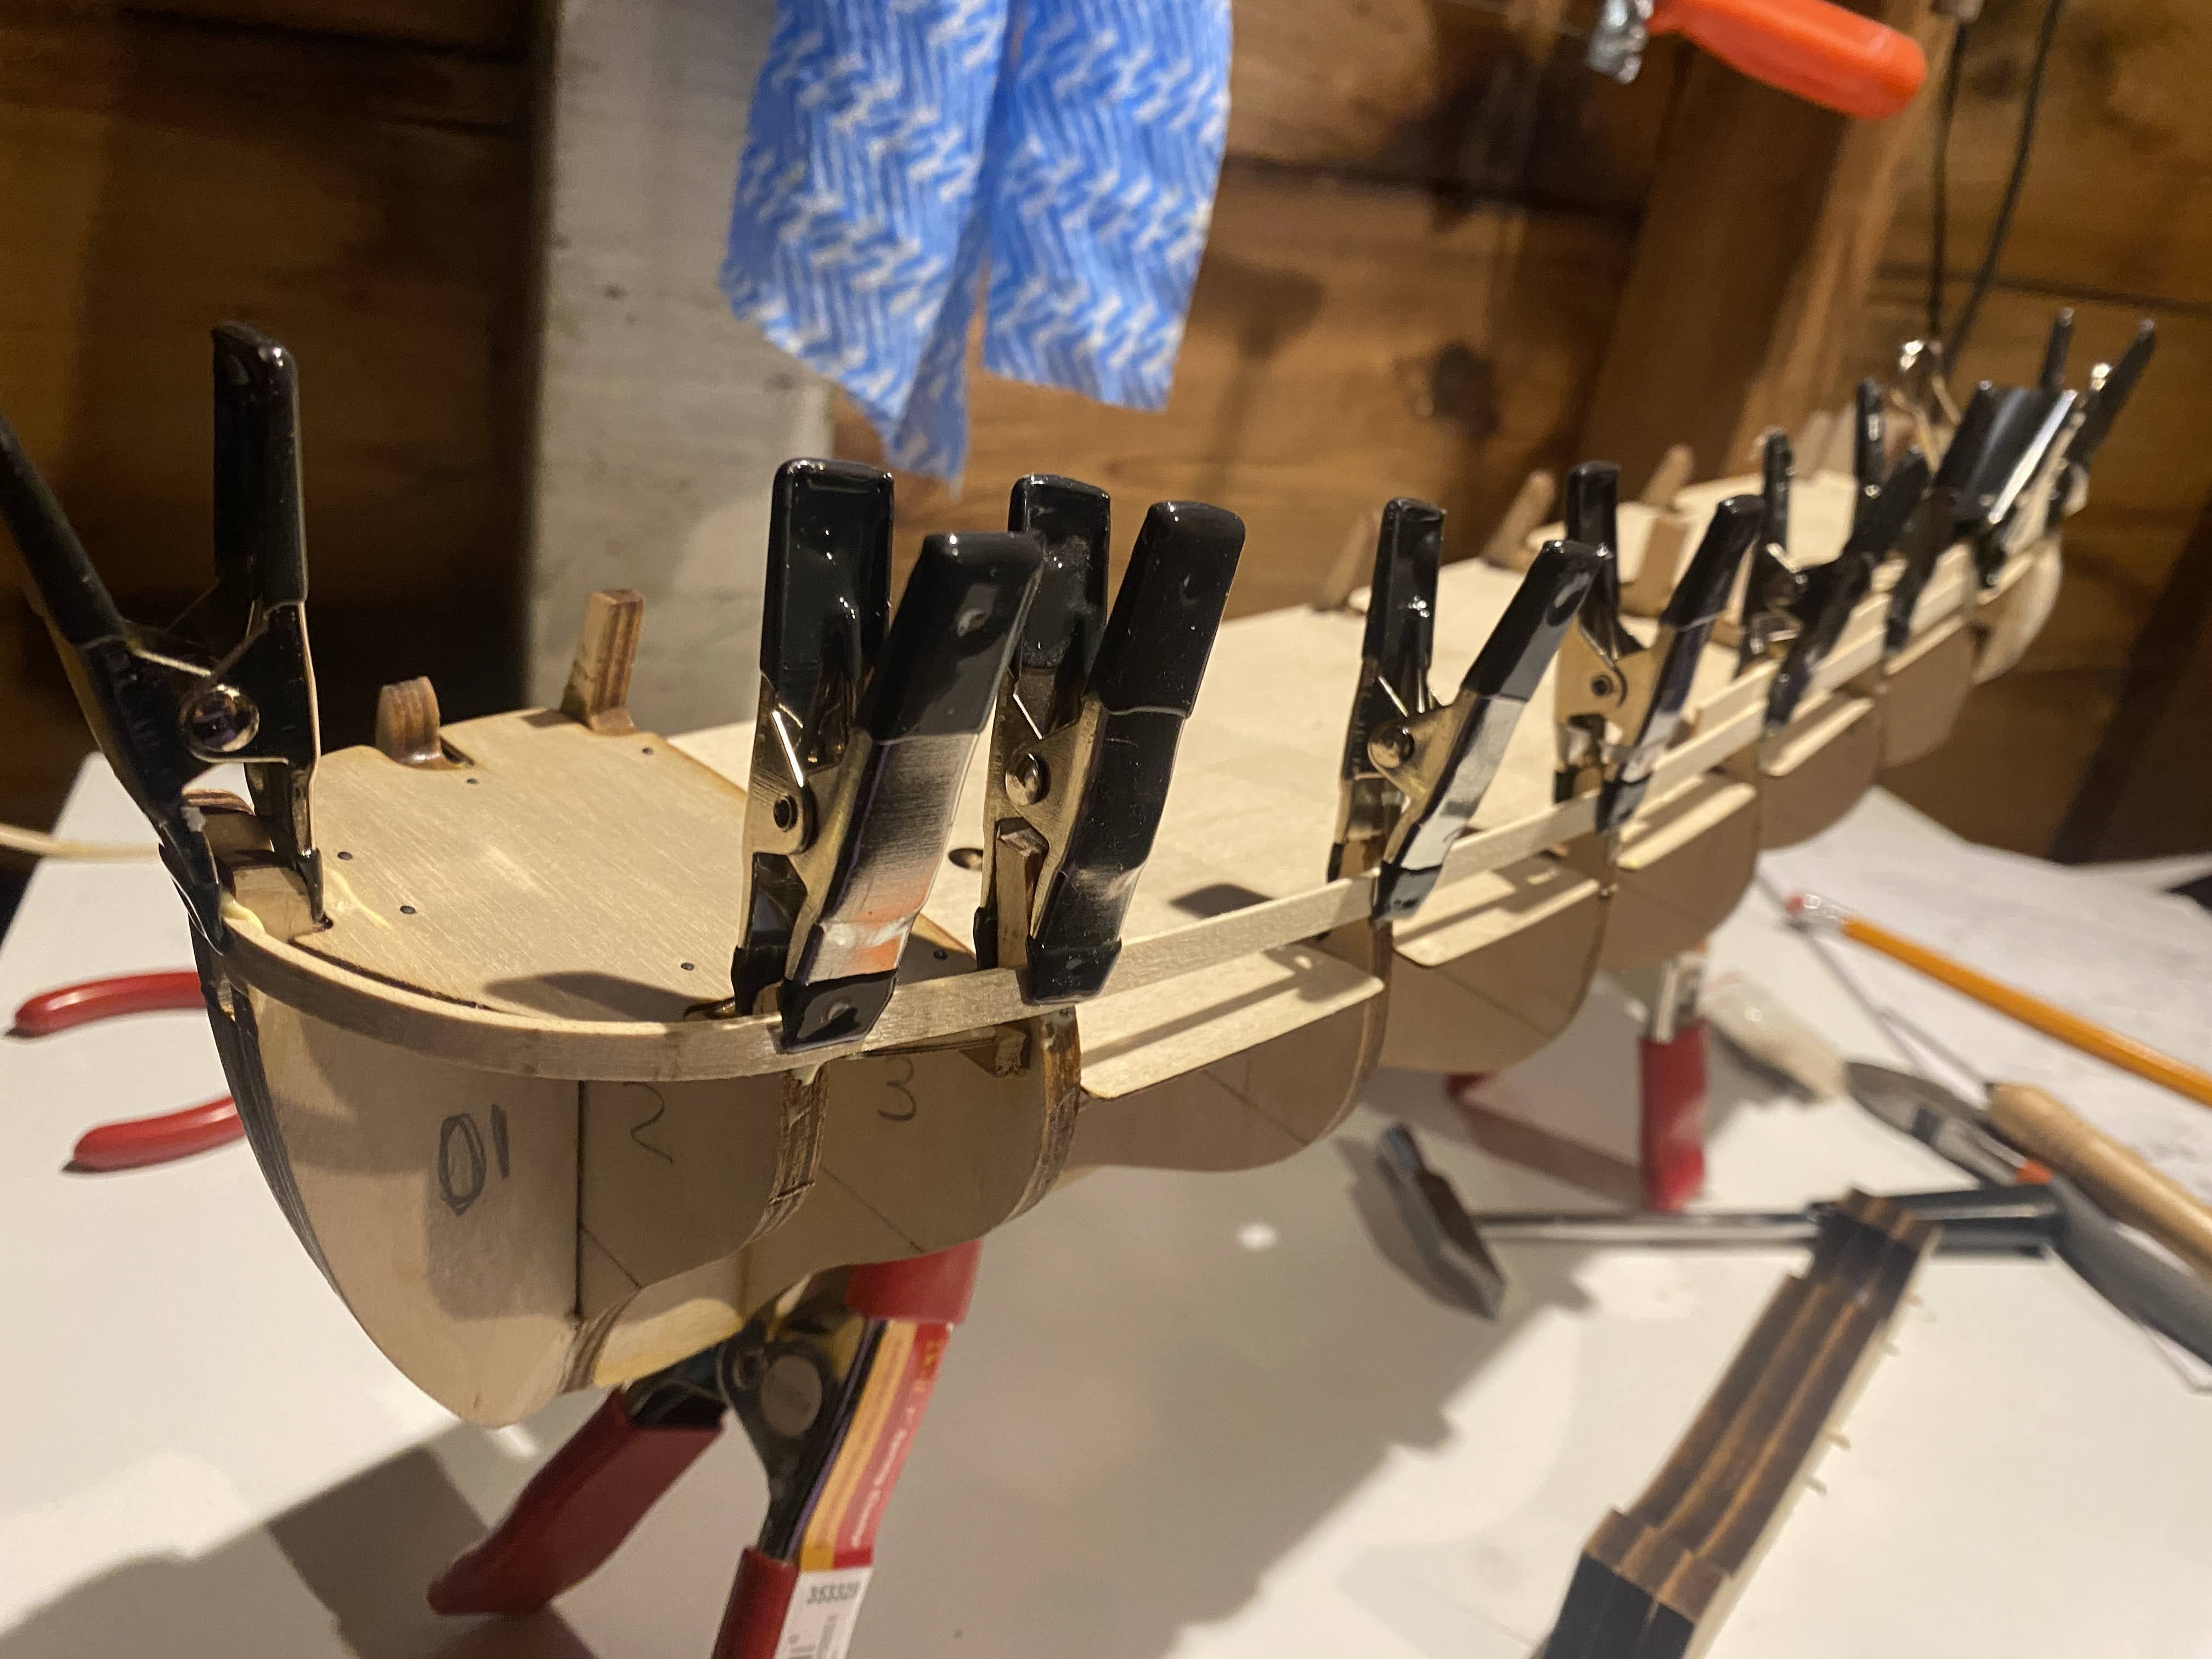
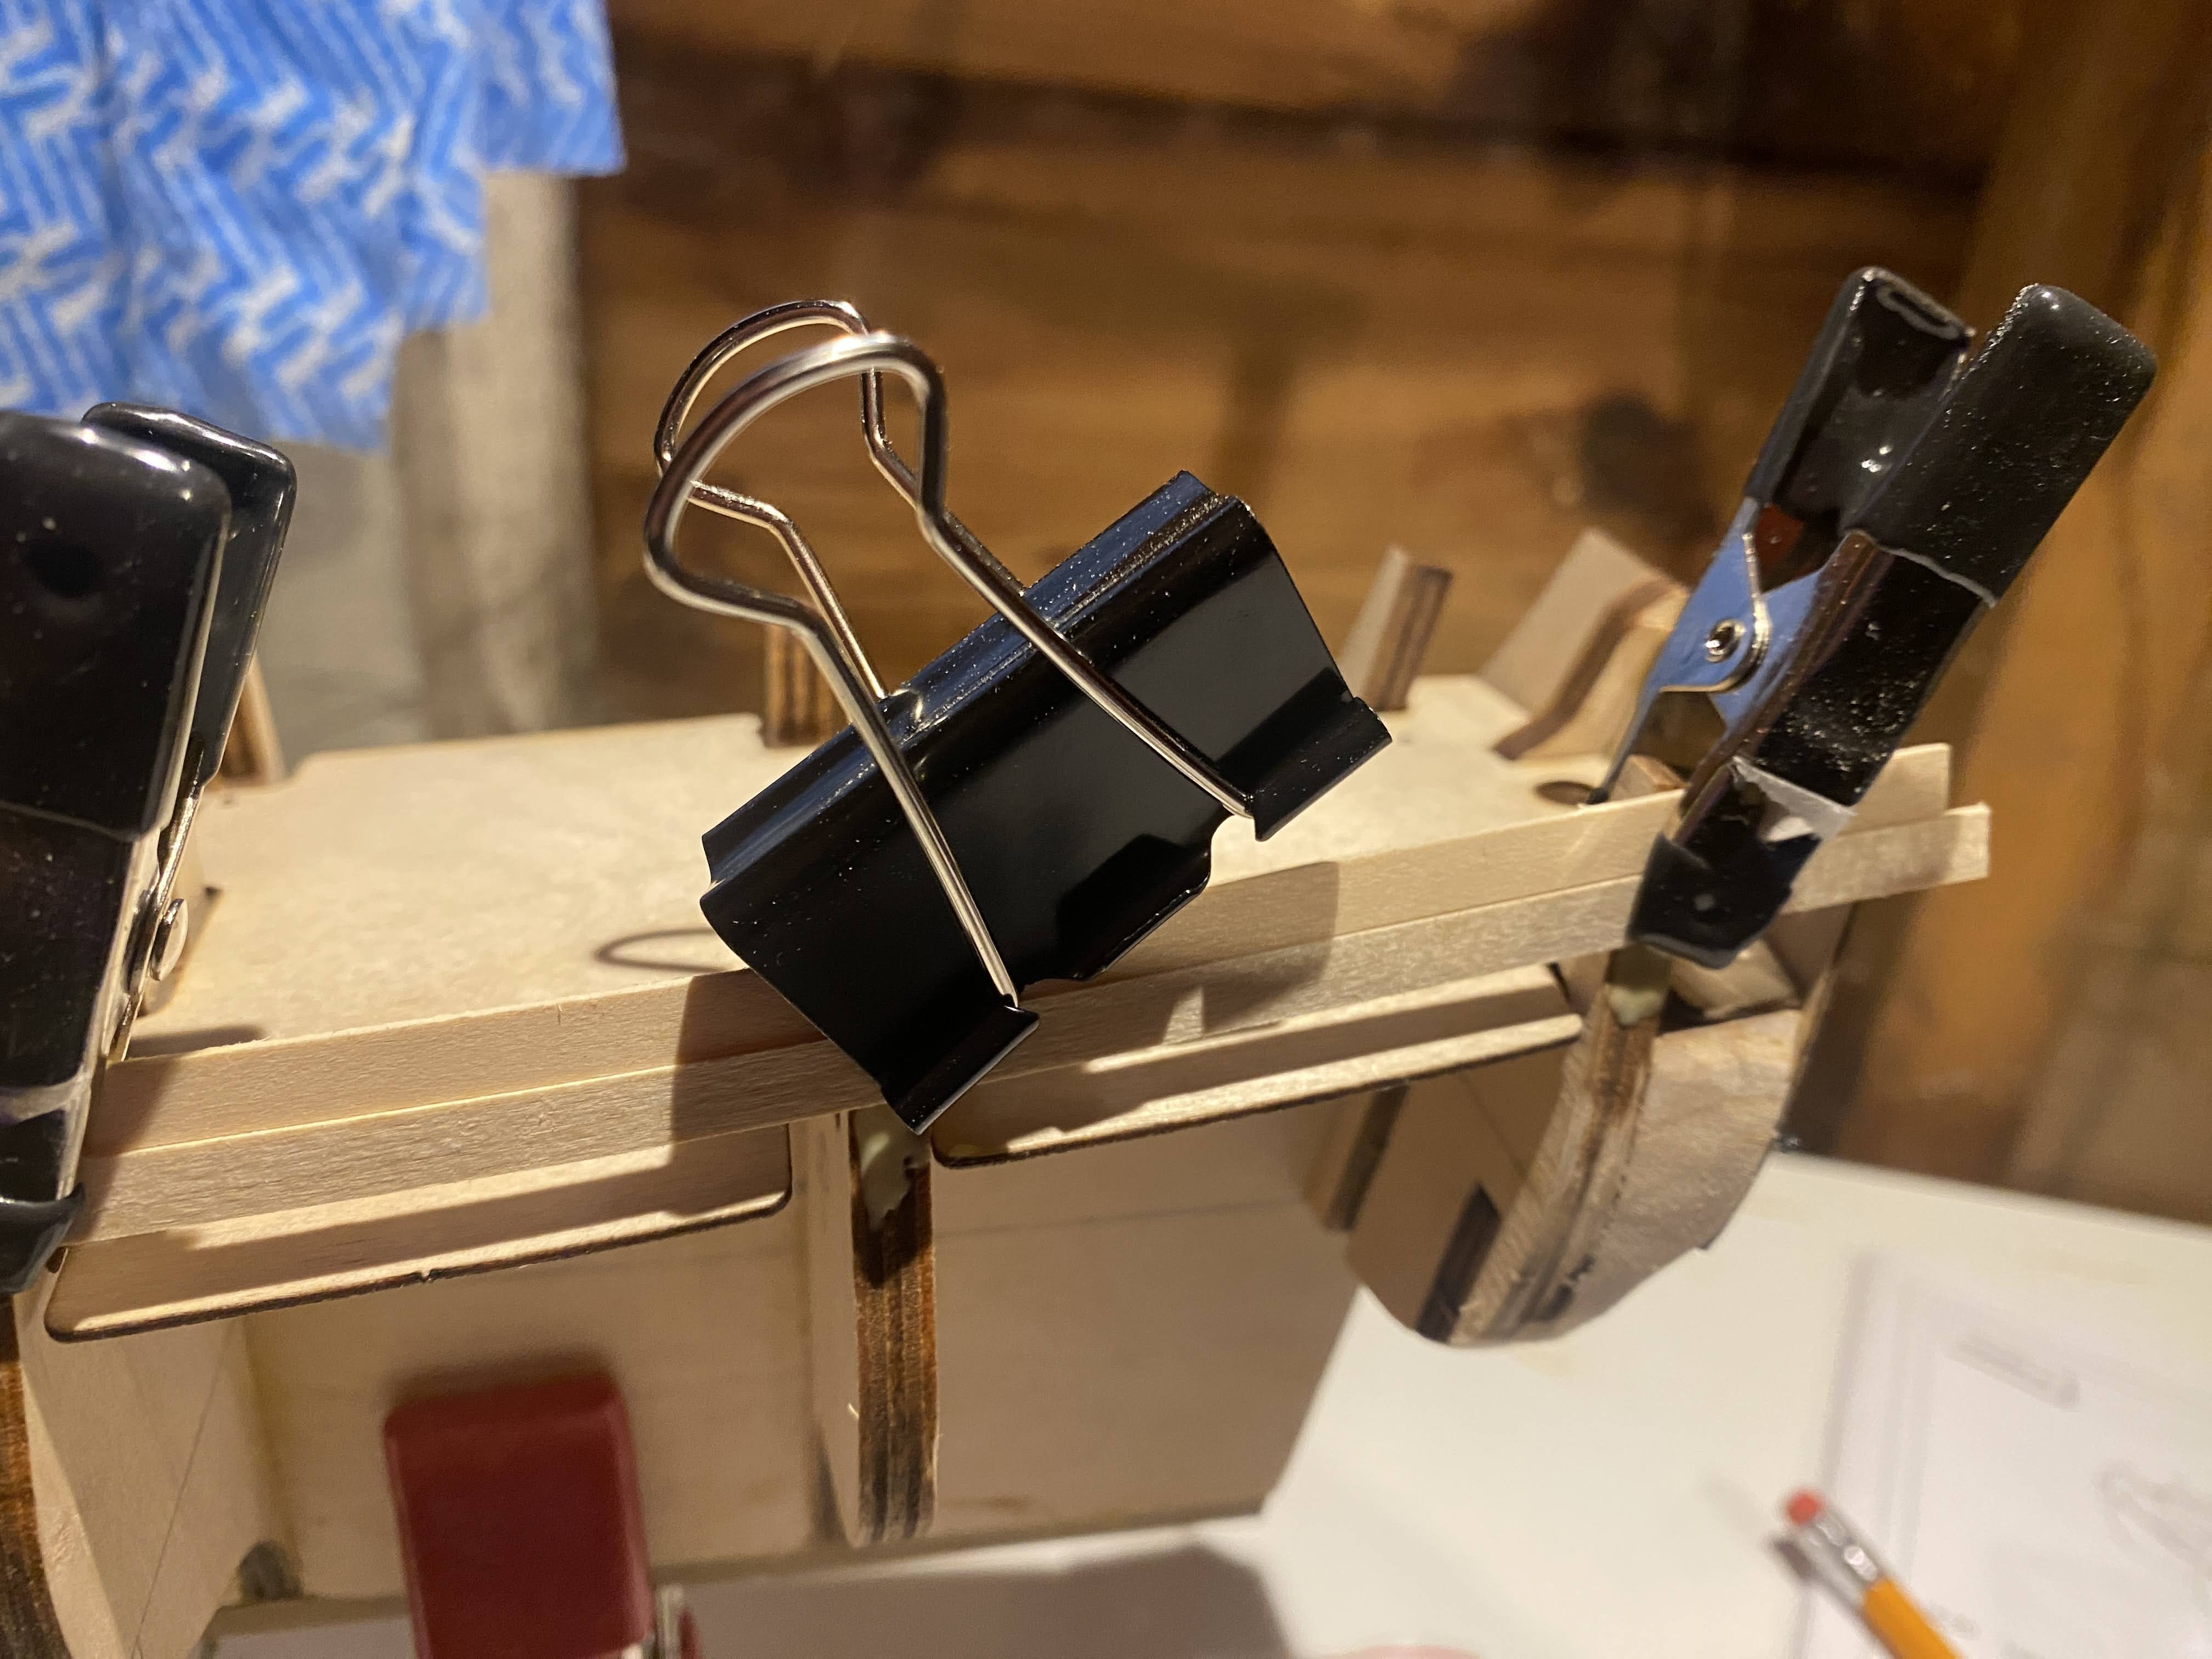
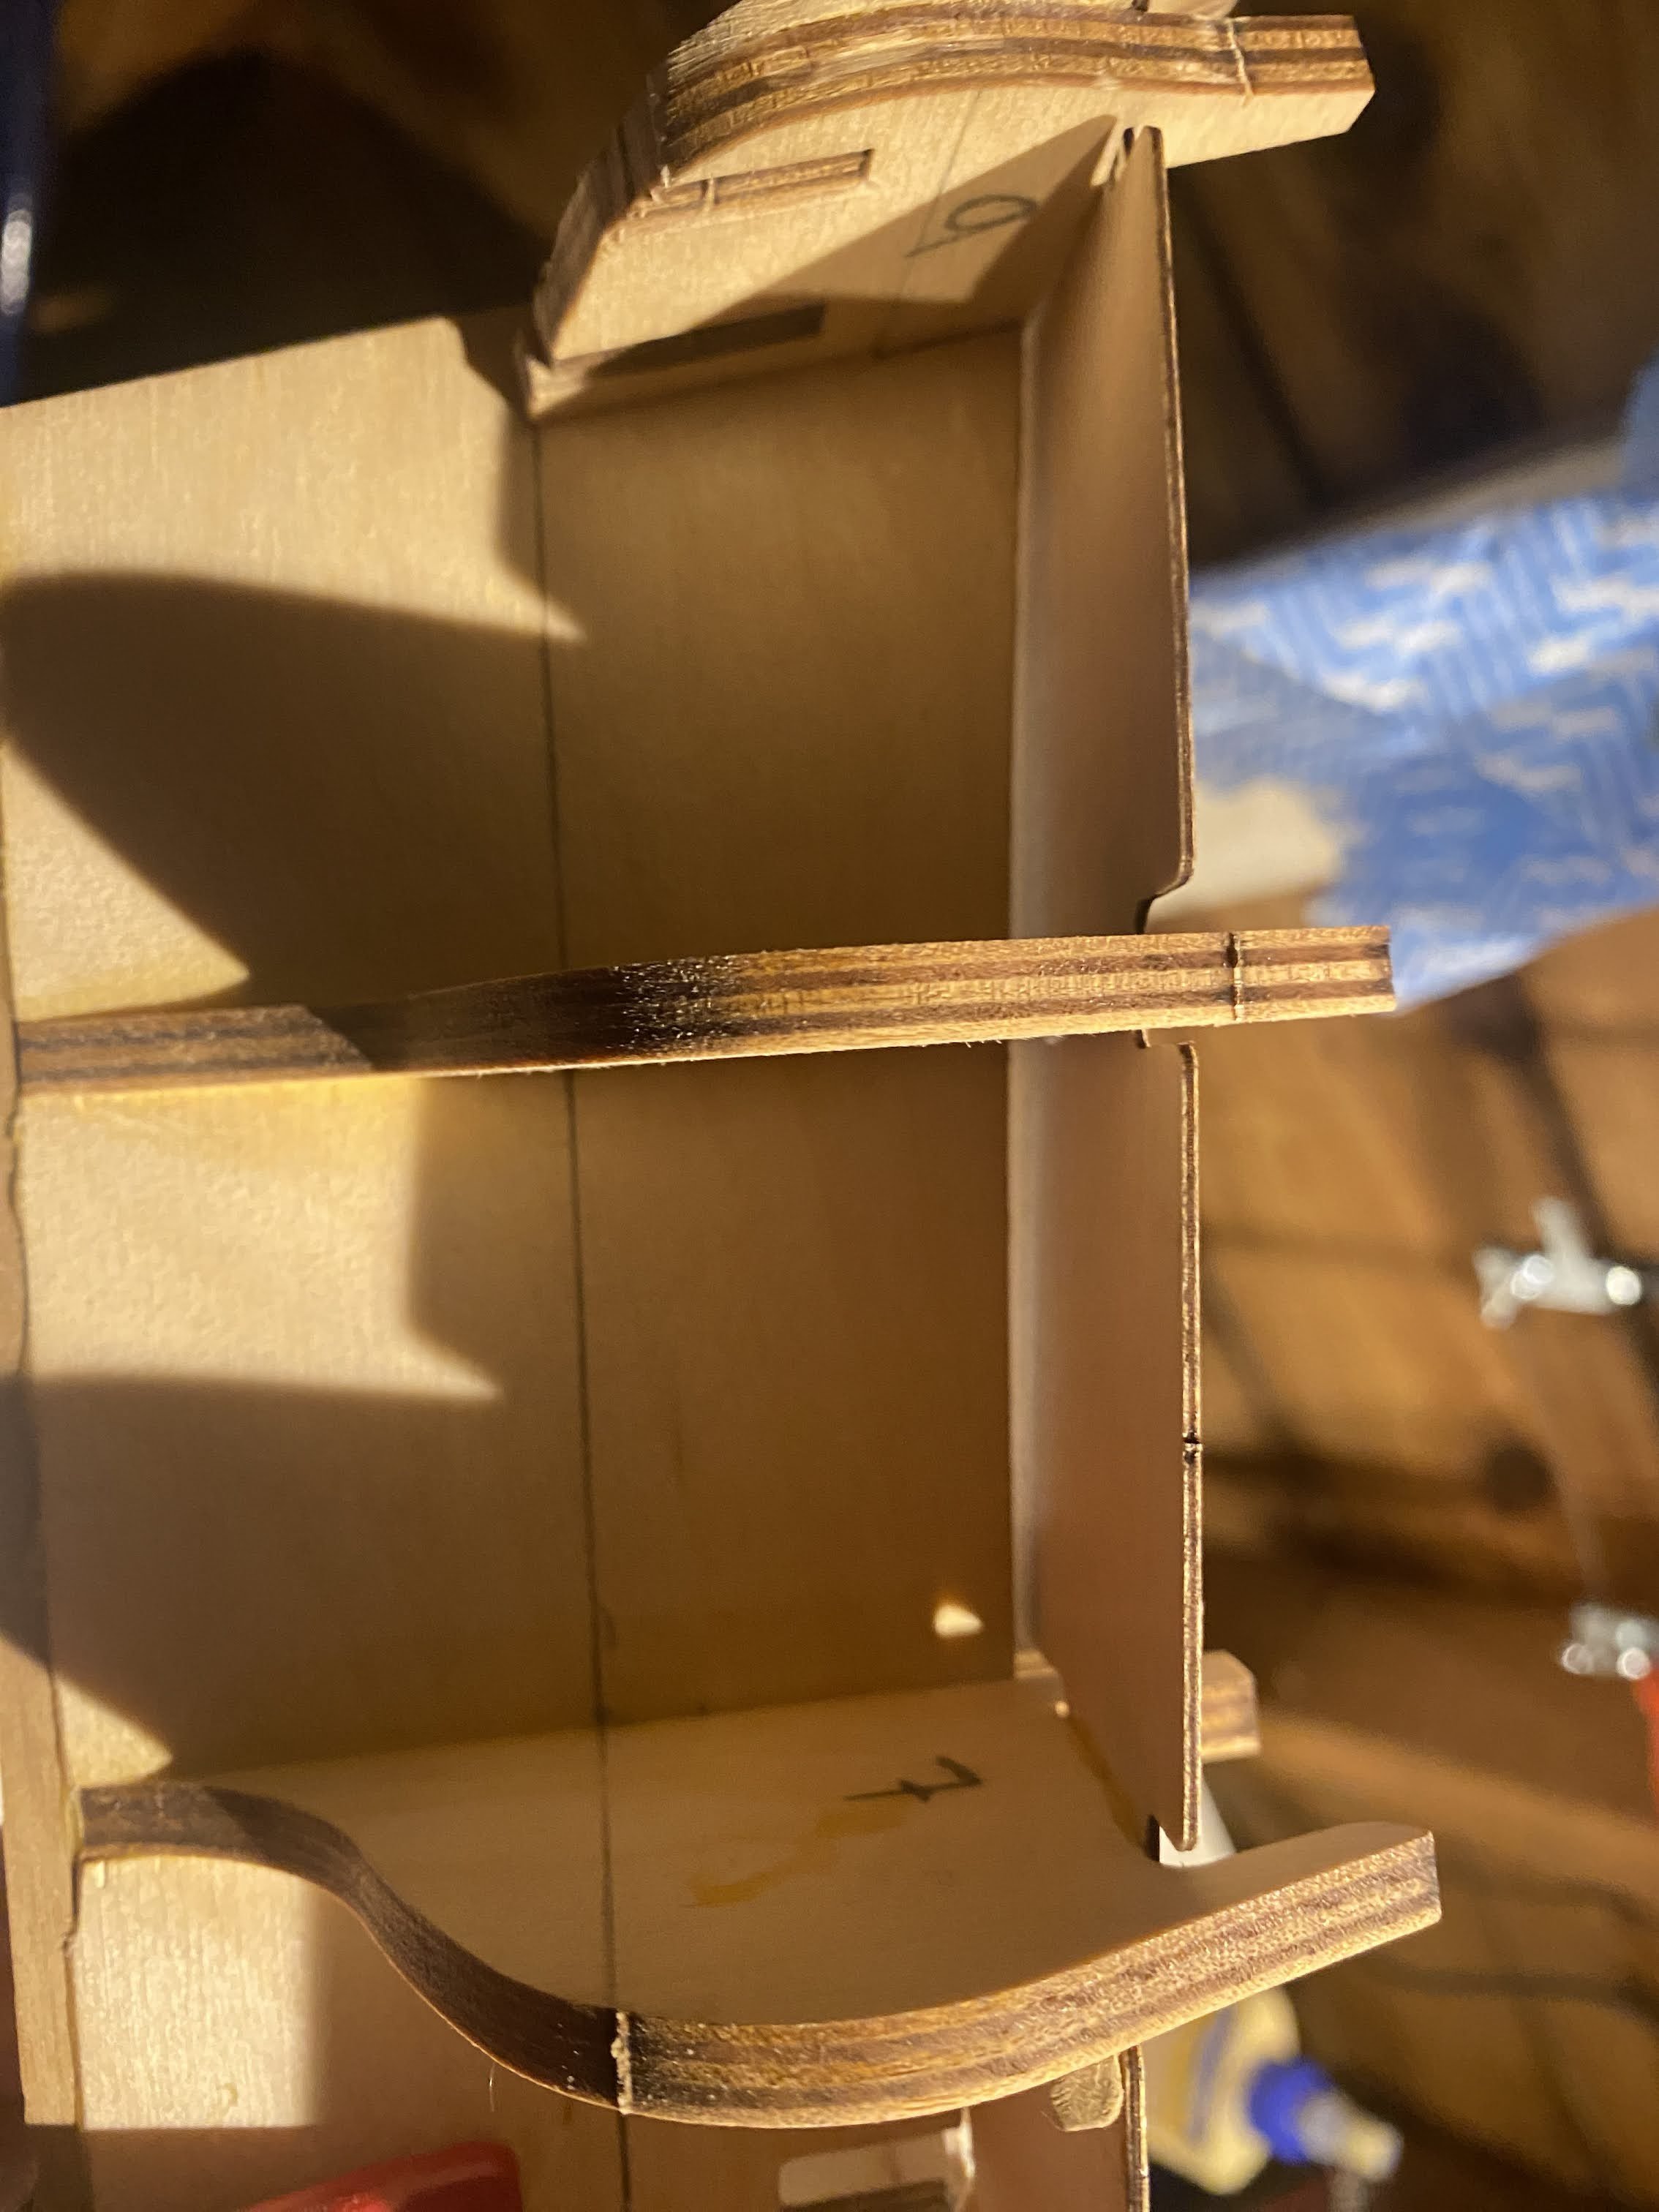
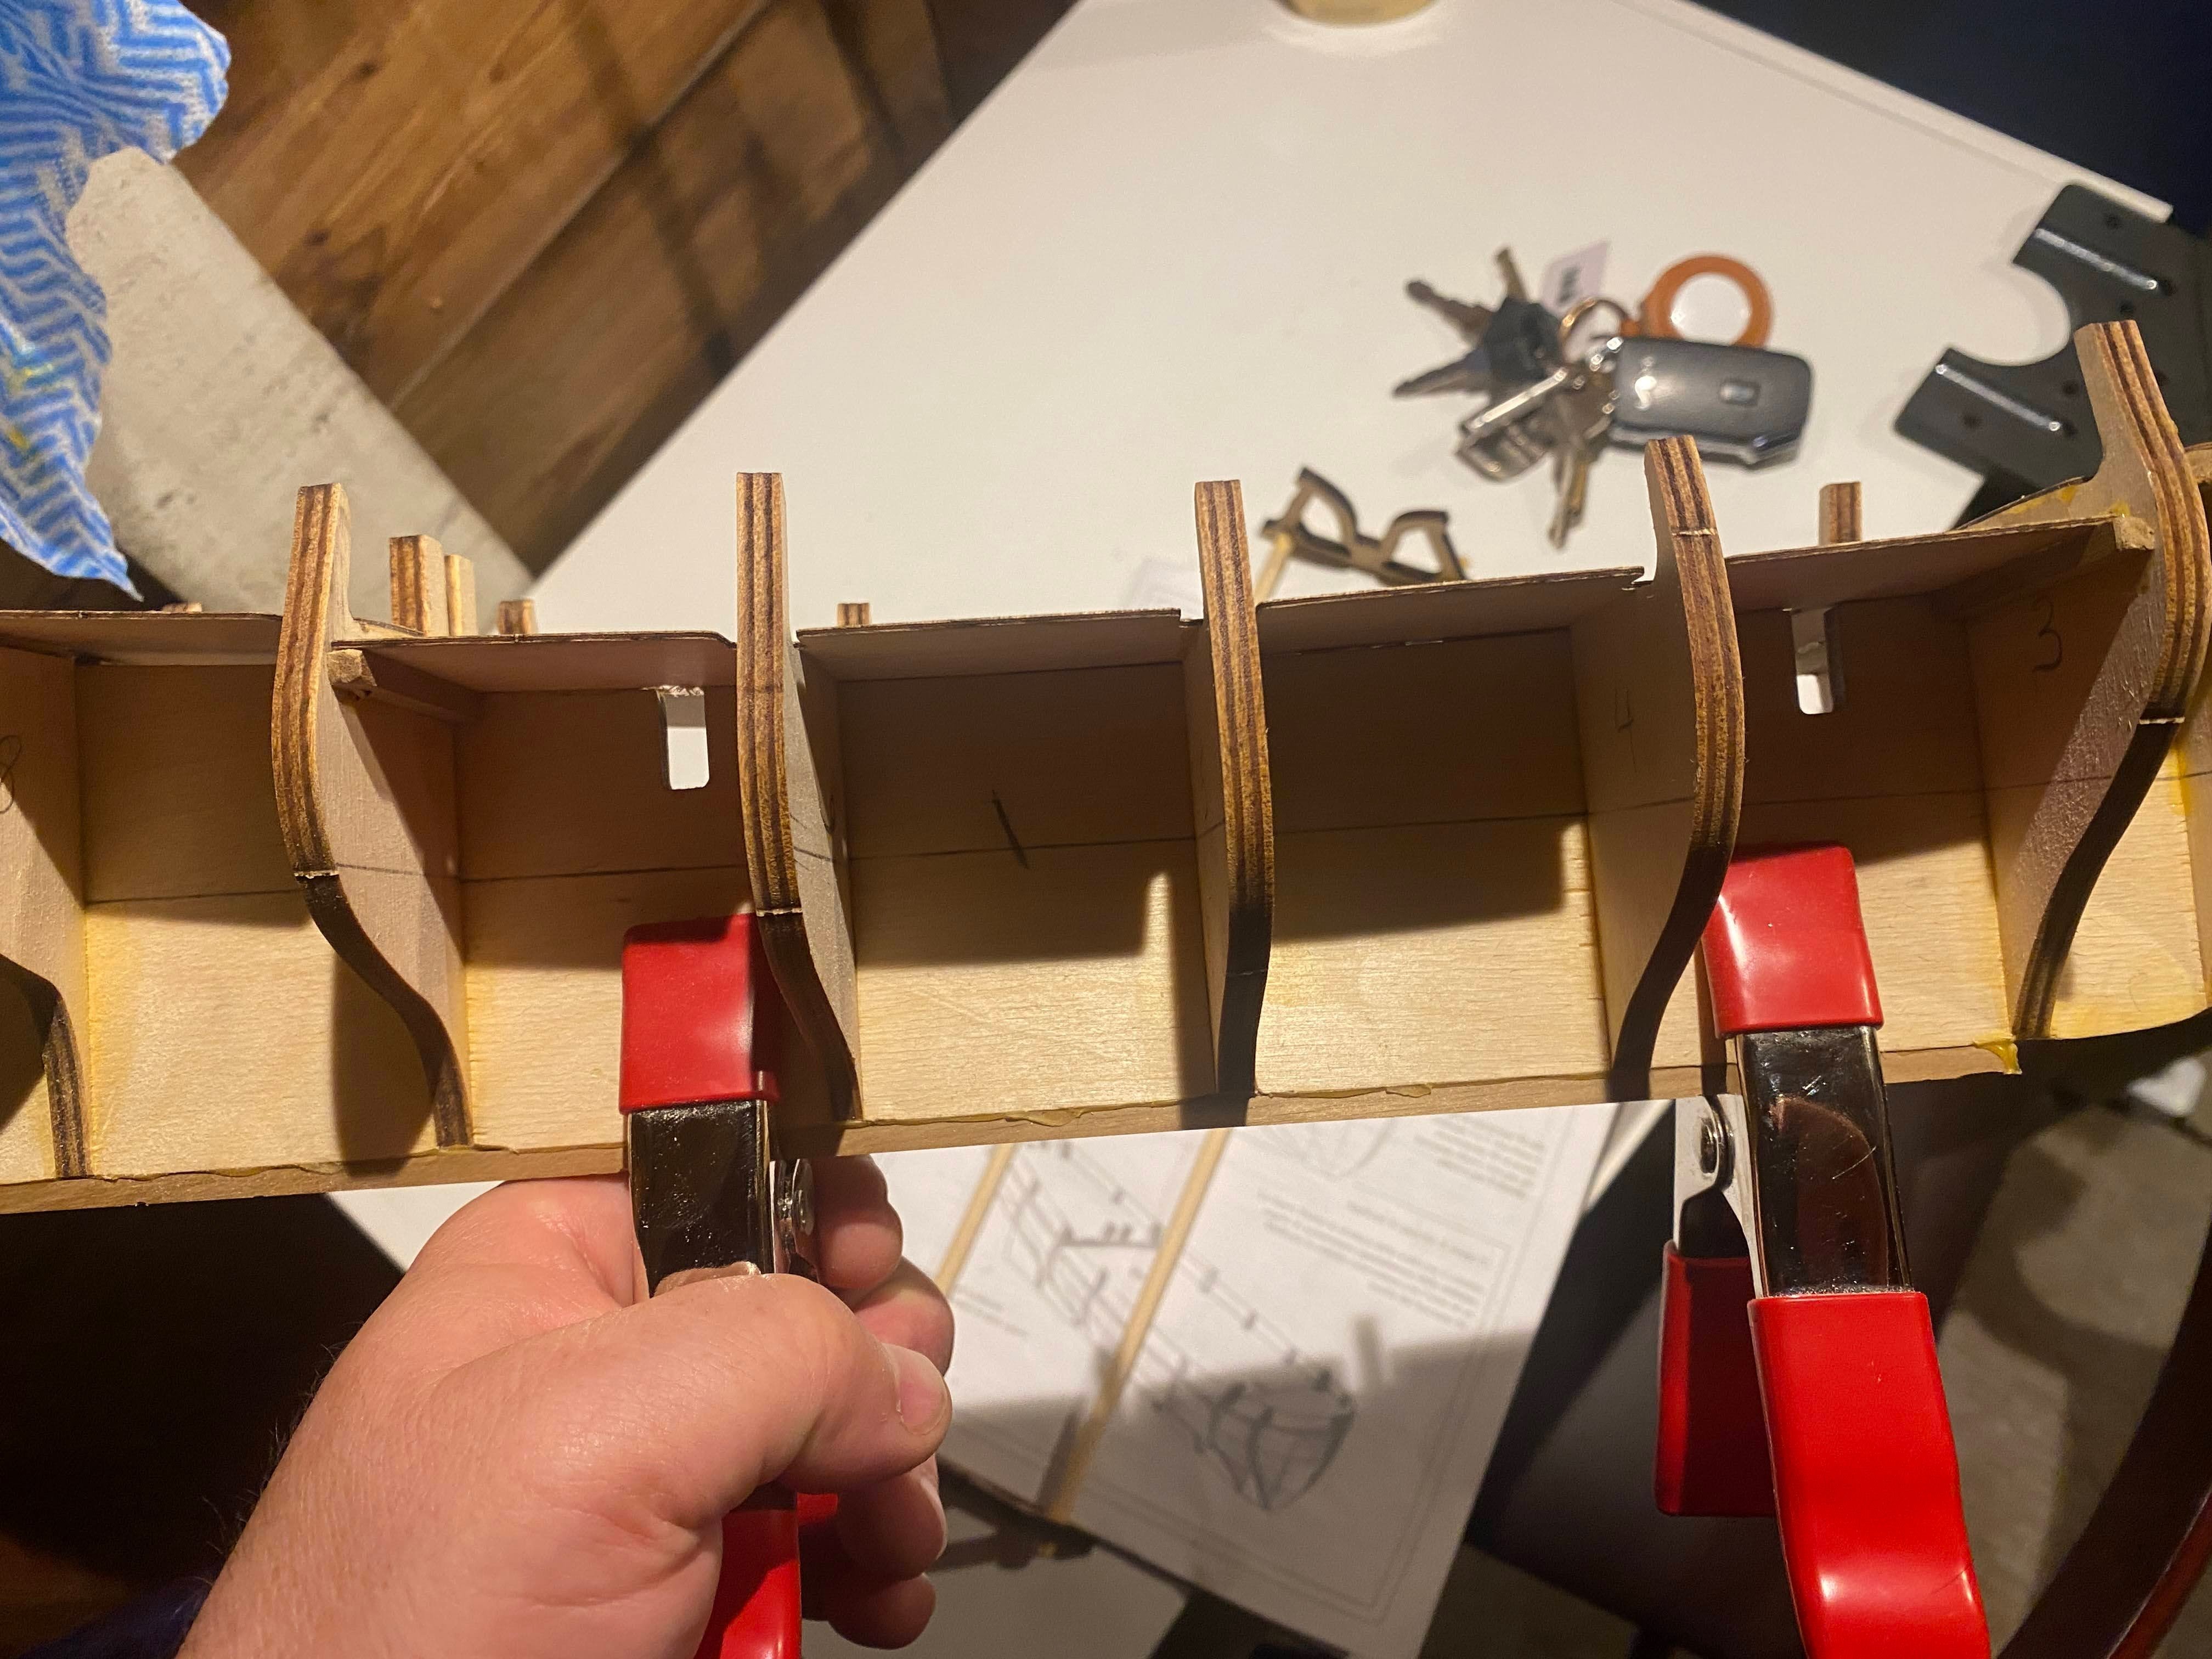
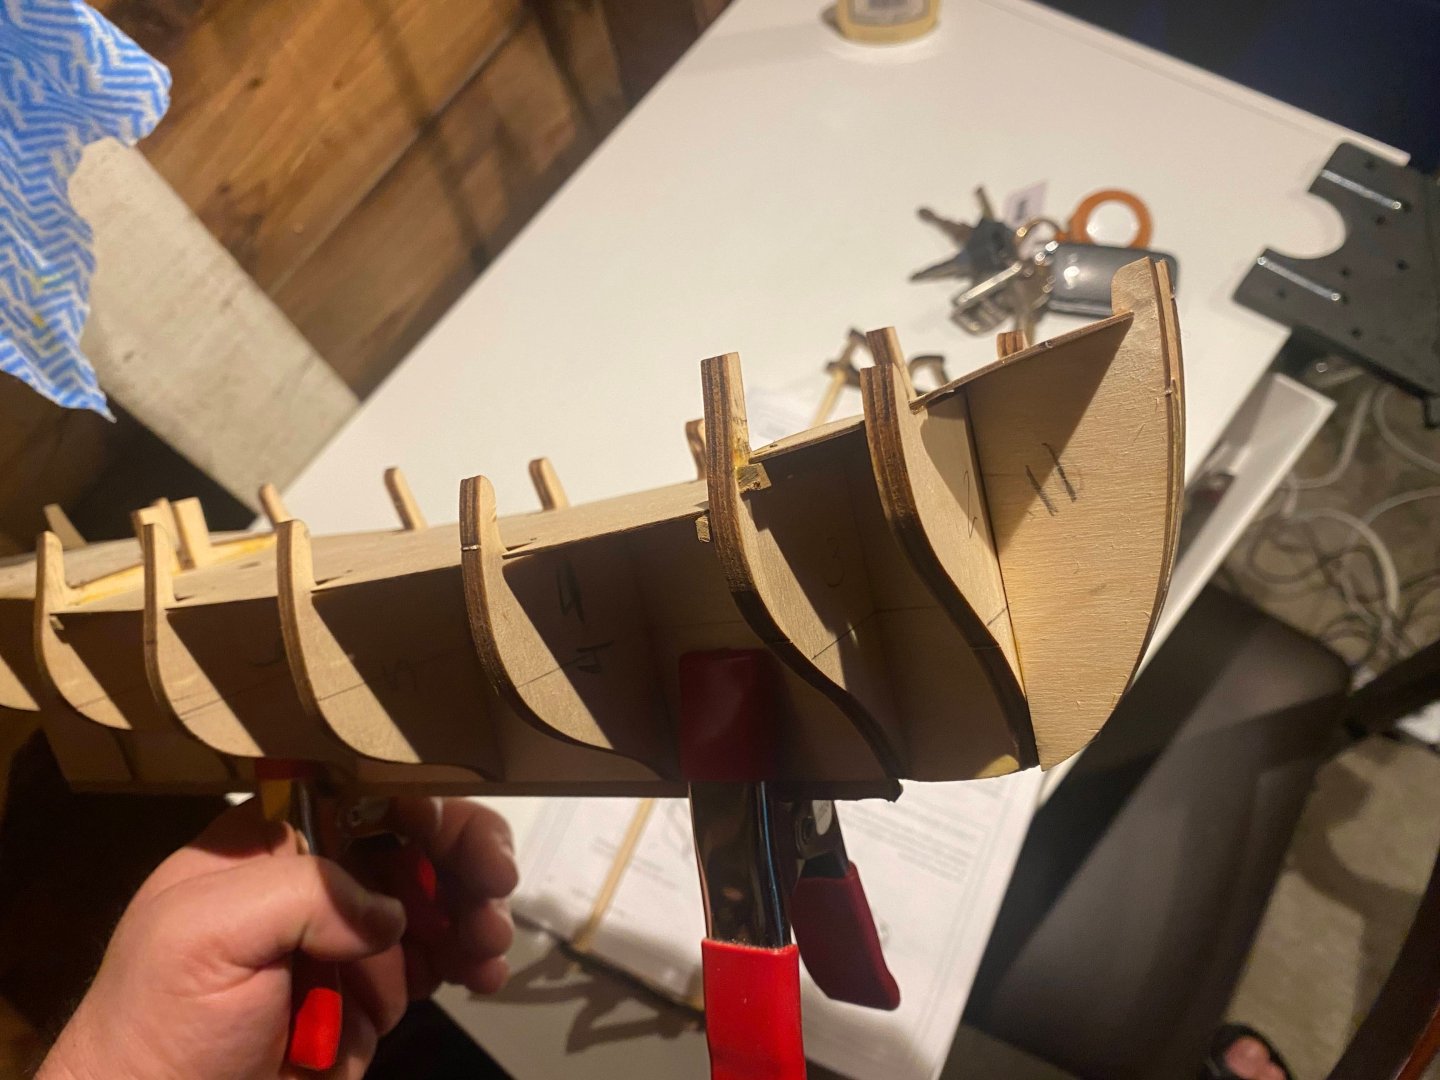
Planking is getting easier as I go but I've learned some key lessons: Make a bow filler, it will help shape the curved planks. I'm struggling to find the right curve at the top of the bulkheads without it. Soak your planks for an hour or so, they are so much more pliable and easier to insert pins into. A pin pusher is an invaluable tool. My current pins are 7.5mm and I find them to be a bit too small. I ordered some 10mm pins but I don't know if they will fit my current pusher. Some notable mistakes in my current build: There's a big gap between the planks and the false deck at the bow. I don't think I'll be able to fix it so I'm planning to fill it when I plank the deck. The planks were curving way to much on the port side by bulkhead #3, so I had to cut 4 of them to stretch them into position. I'll try and fill that gap later and cover it with the second planking. I wasn't soaking my planks long enough at the beginning so I had to drive my pins all the way to secure them. I think this will cause issues when I'm sanding, but we'll see. Questions for the group: How are things looking? Any major flaws that I'm not seeing that will cause problems later? Can I use wood filler + sanding to overcome a lot of the small gaps, especially at the bow, or should I taper some planks and wedge them in between? Mastini really pushes for some precise tapering to fill all the little gaps but he is being a perfectionist and I think the few pages he wrote on hull planking assume are written for a single planking. Thanks again for reading my log and any advice you might have.


-
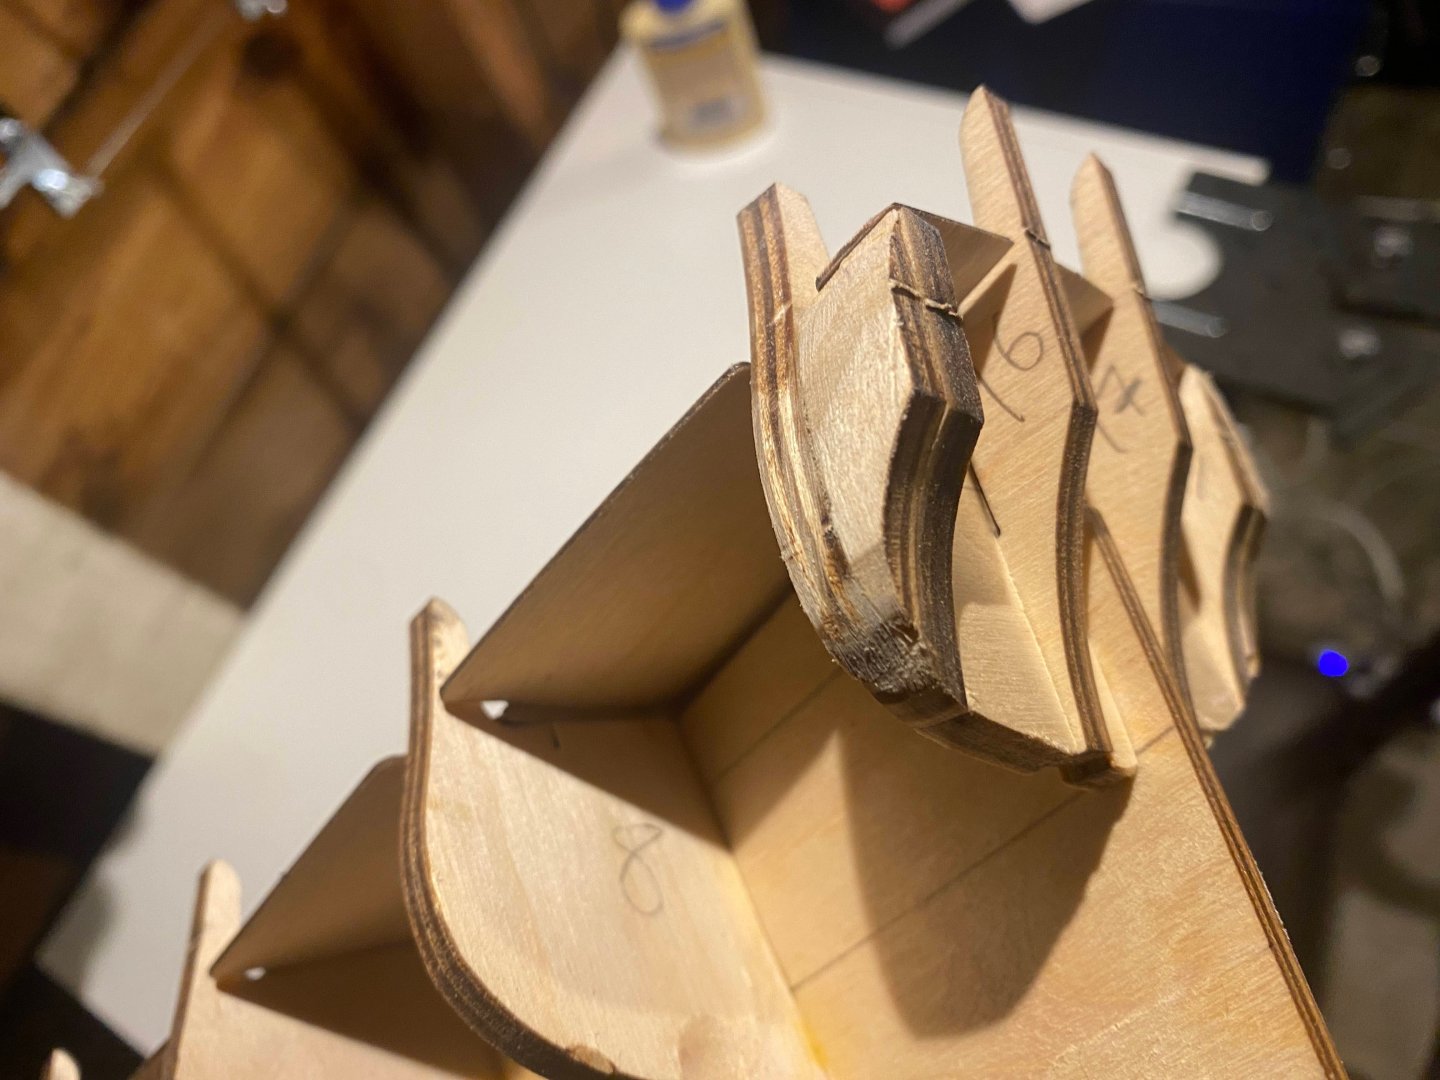
I've only been able to find small bits of time to work on this but I've been watching a lot of videos on how to use planking fans. I was able to add the first two planks to the port side and use my electric plank bender for the first time, which was a fun learning experience. Something about bending the wood to a nice curve is very satisfying. It's becoming more apparent that my bulkheads are not perfectly aligned and I'm regretting not waiting for my book to arrive before diving into that. I'm a bit surprised that my longest bulkhead is #8, closest to the stern, I was expecting it to be one of the middle bulkheads.


-
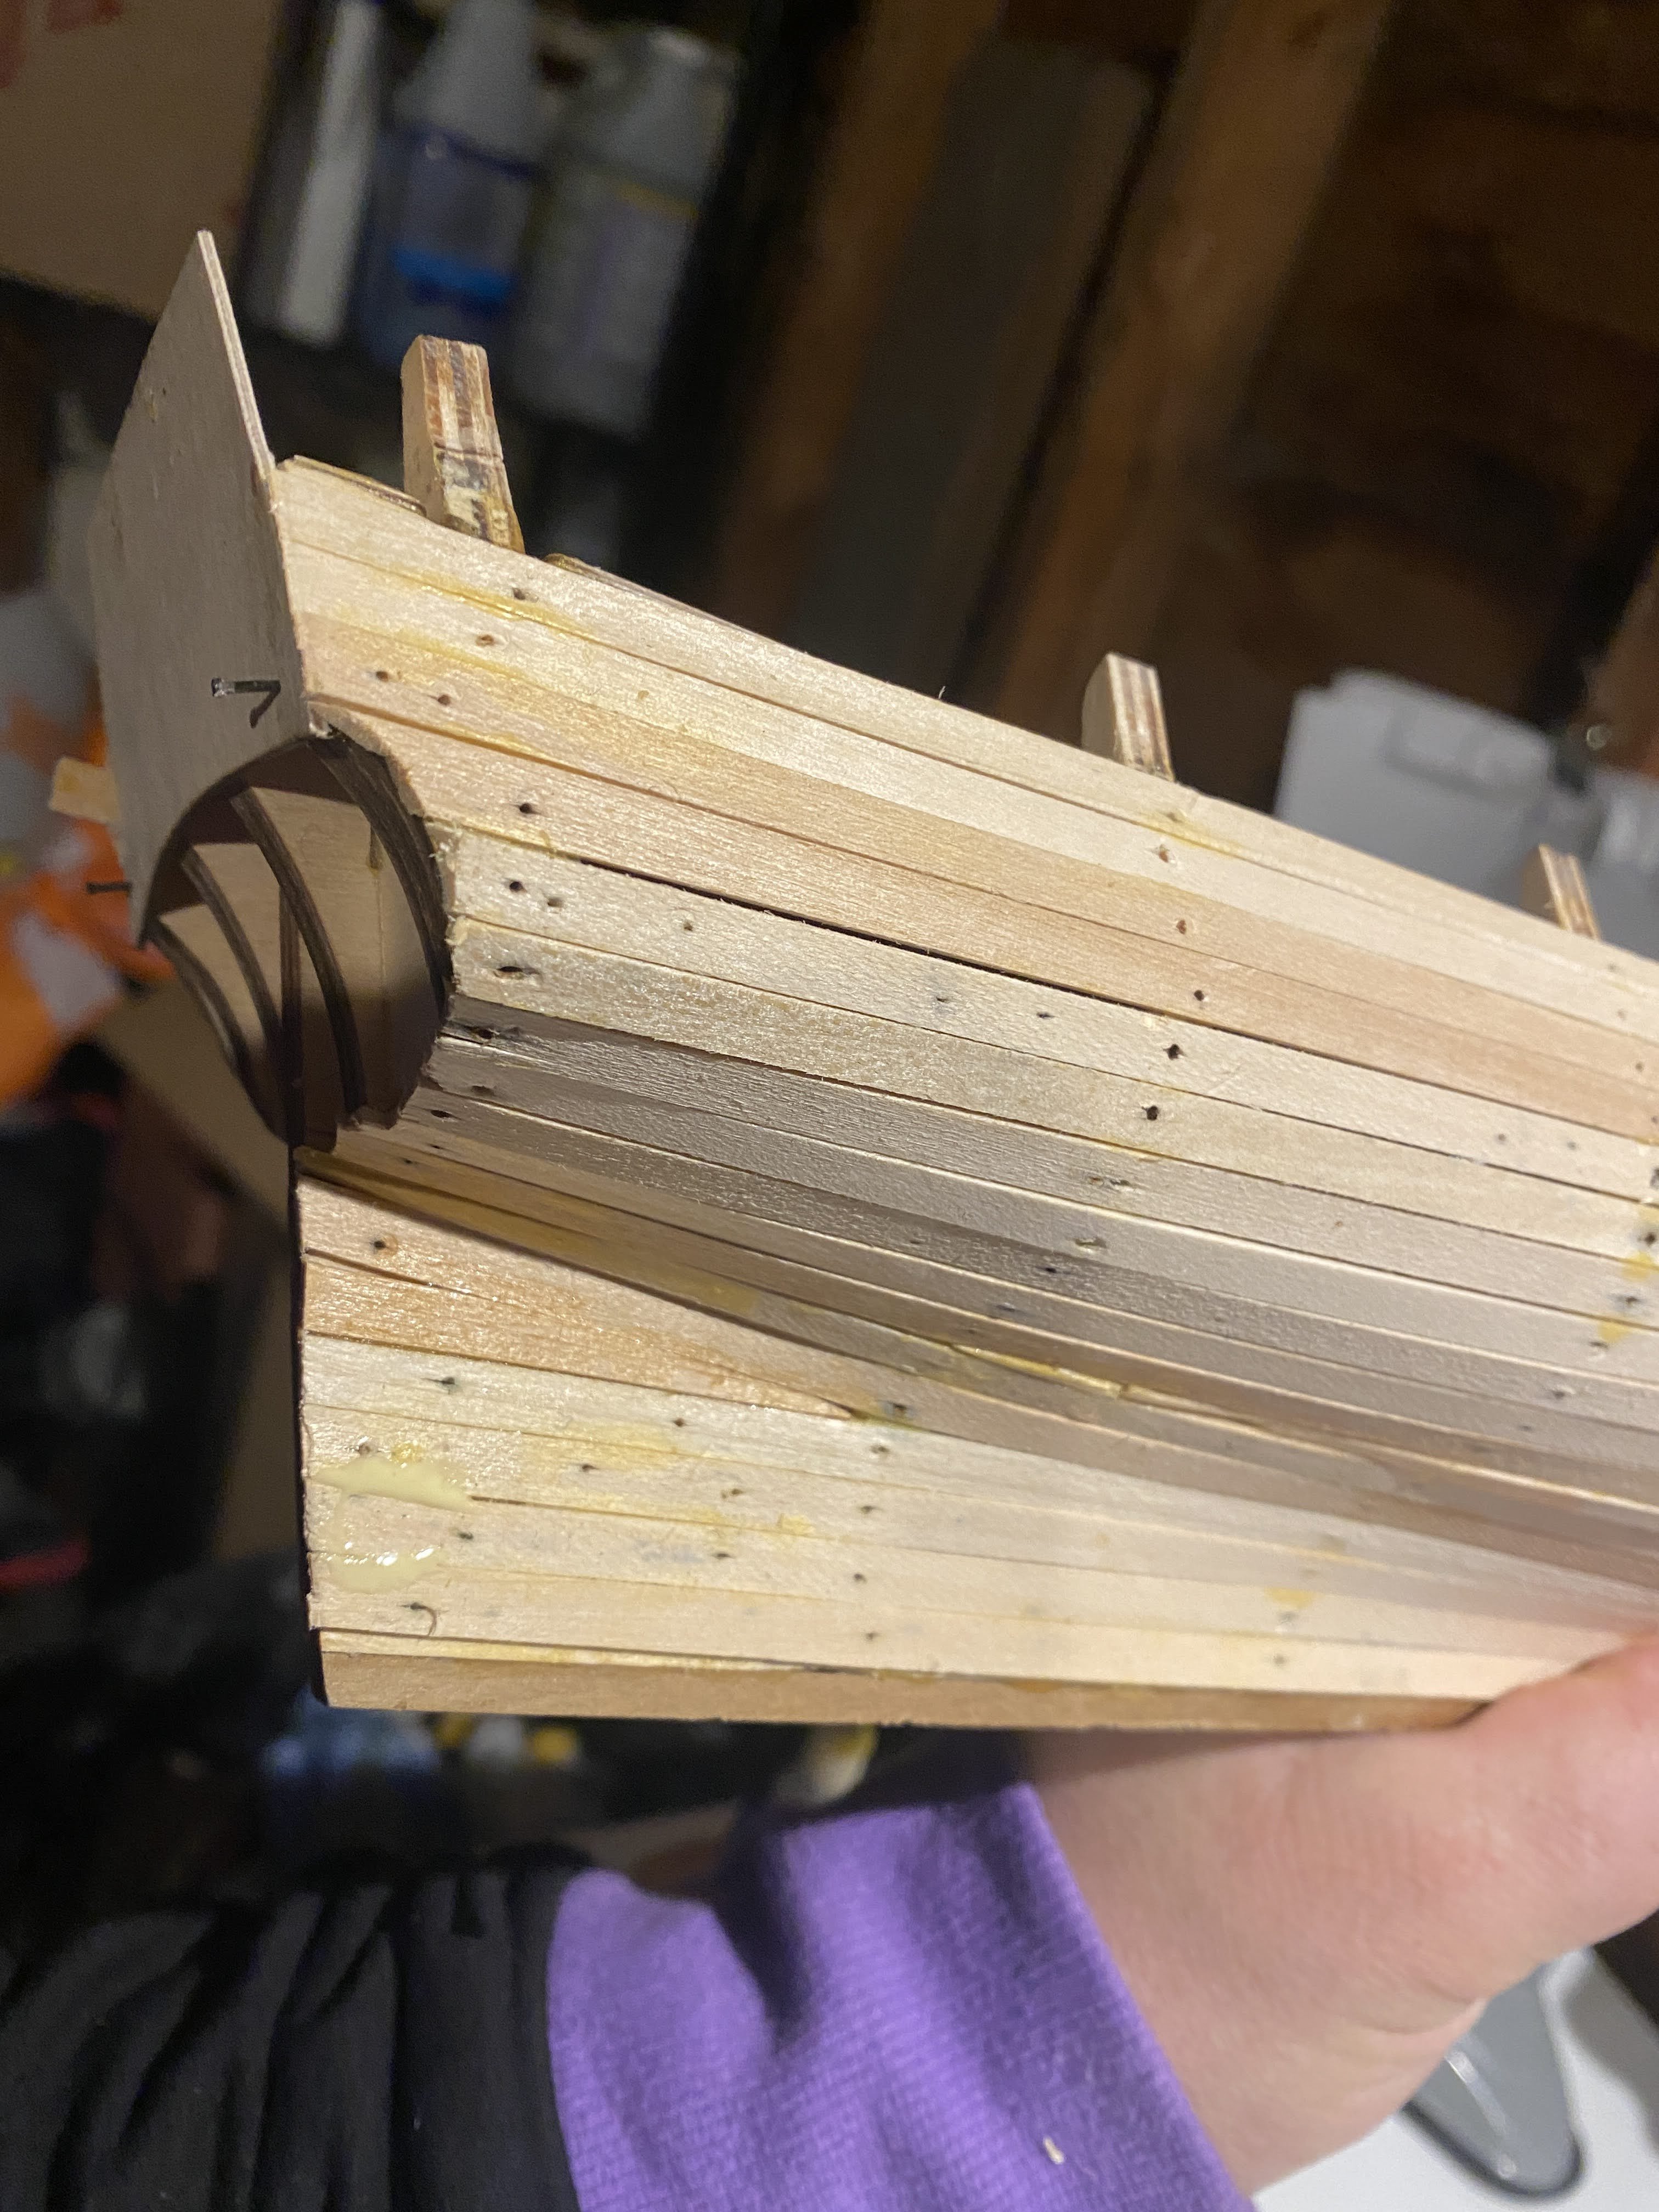
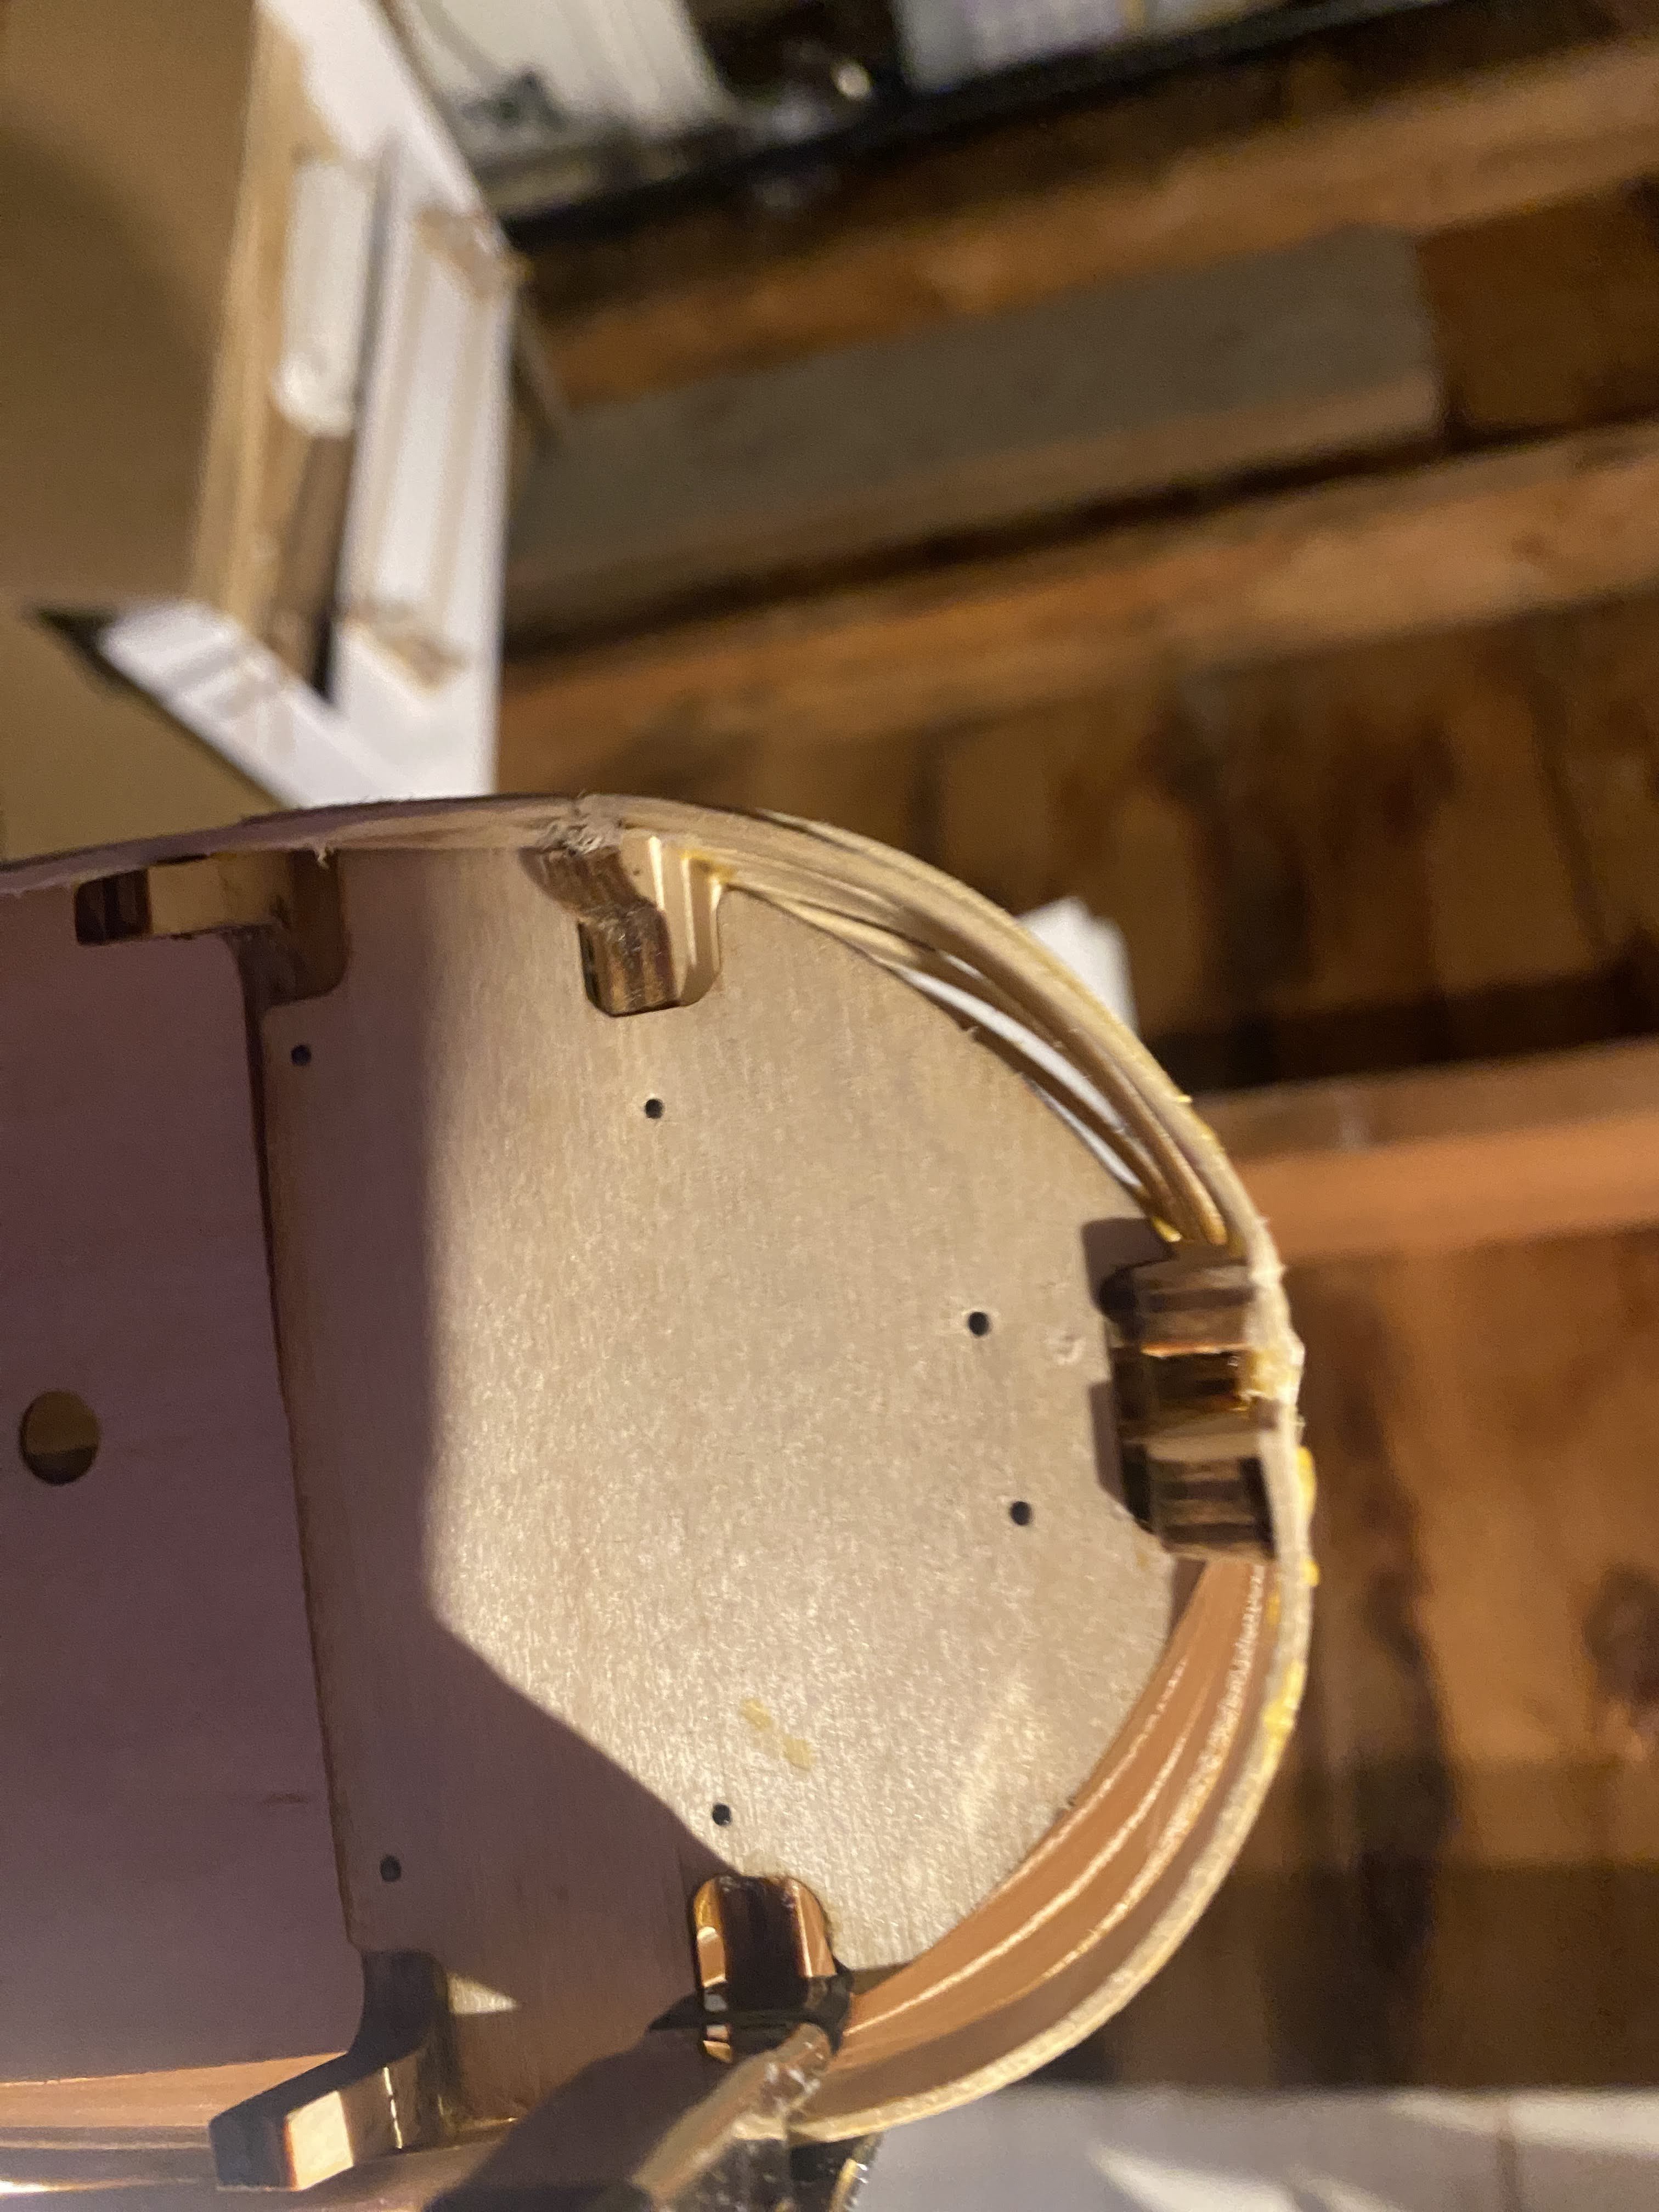
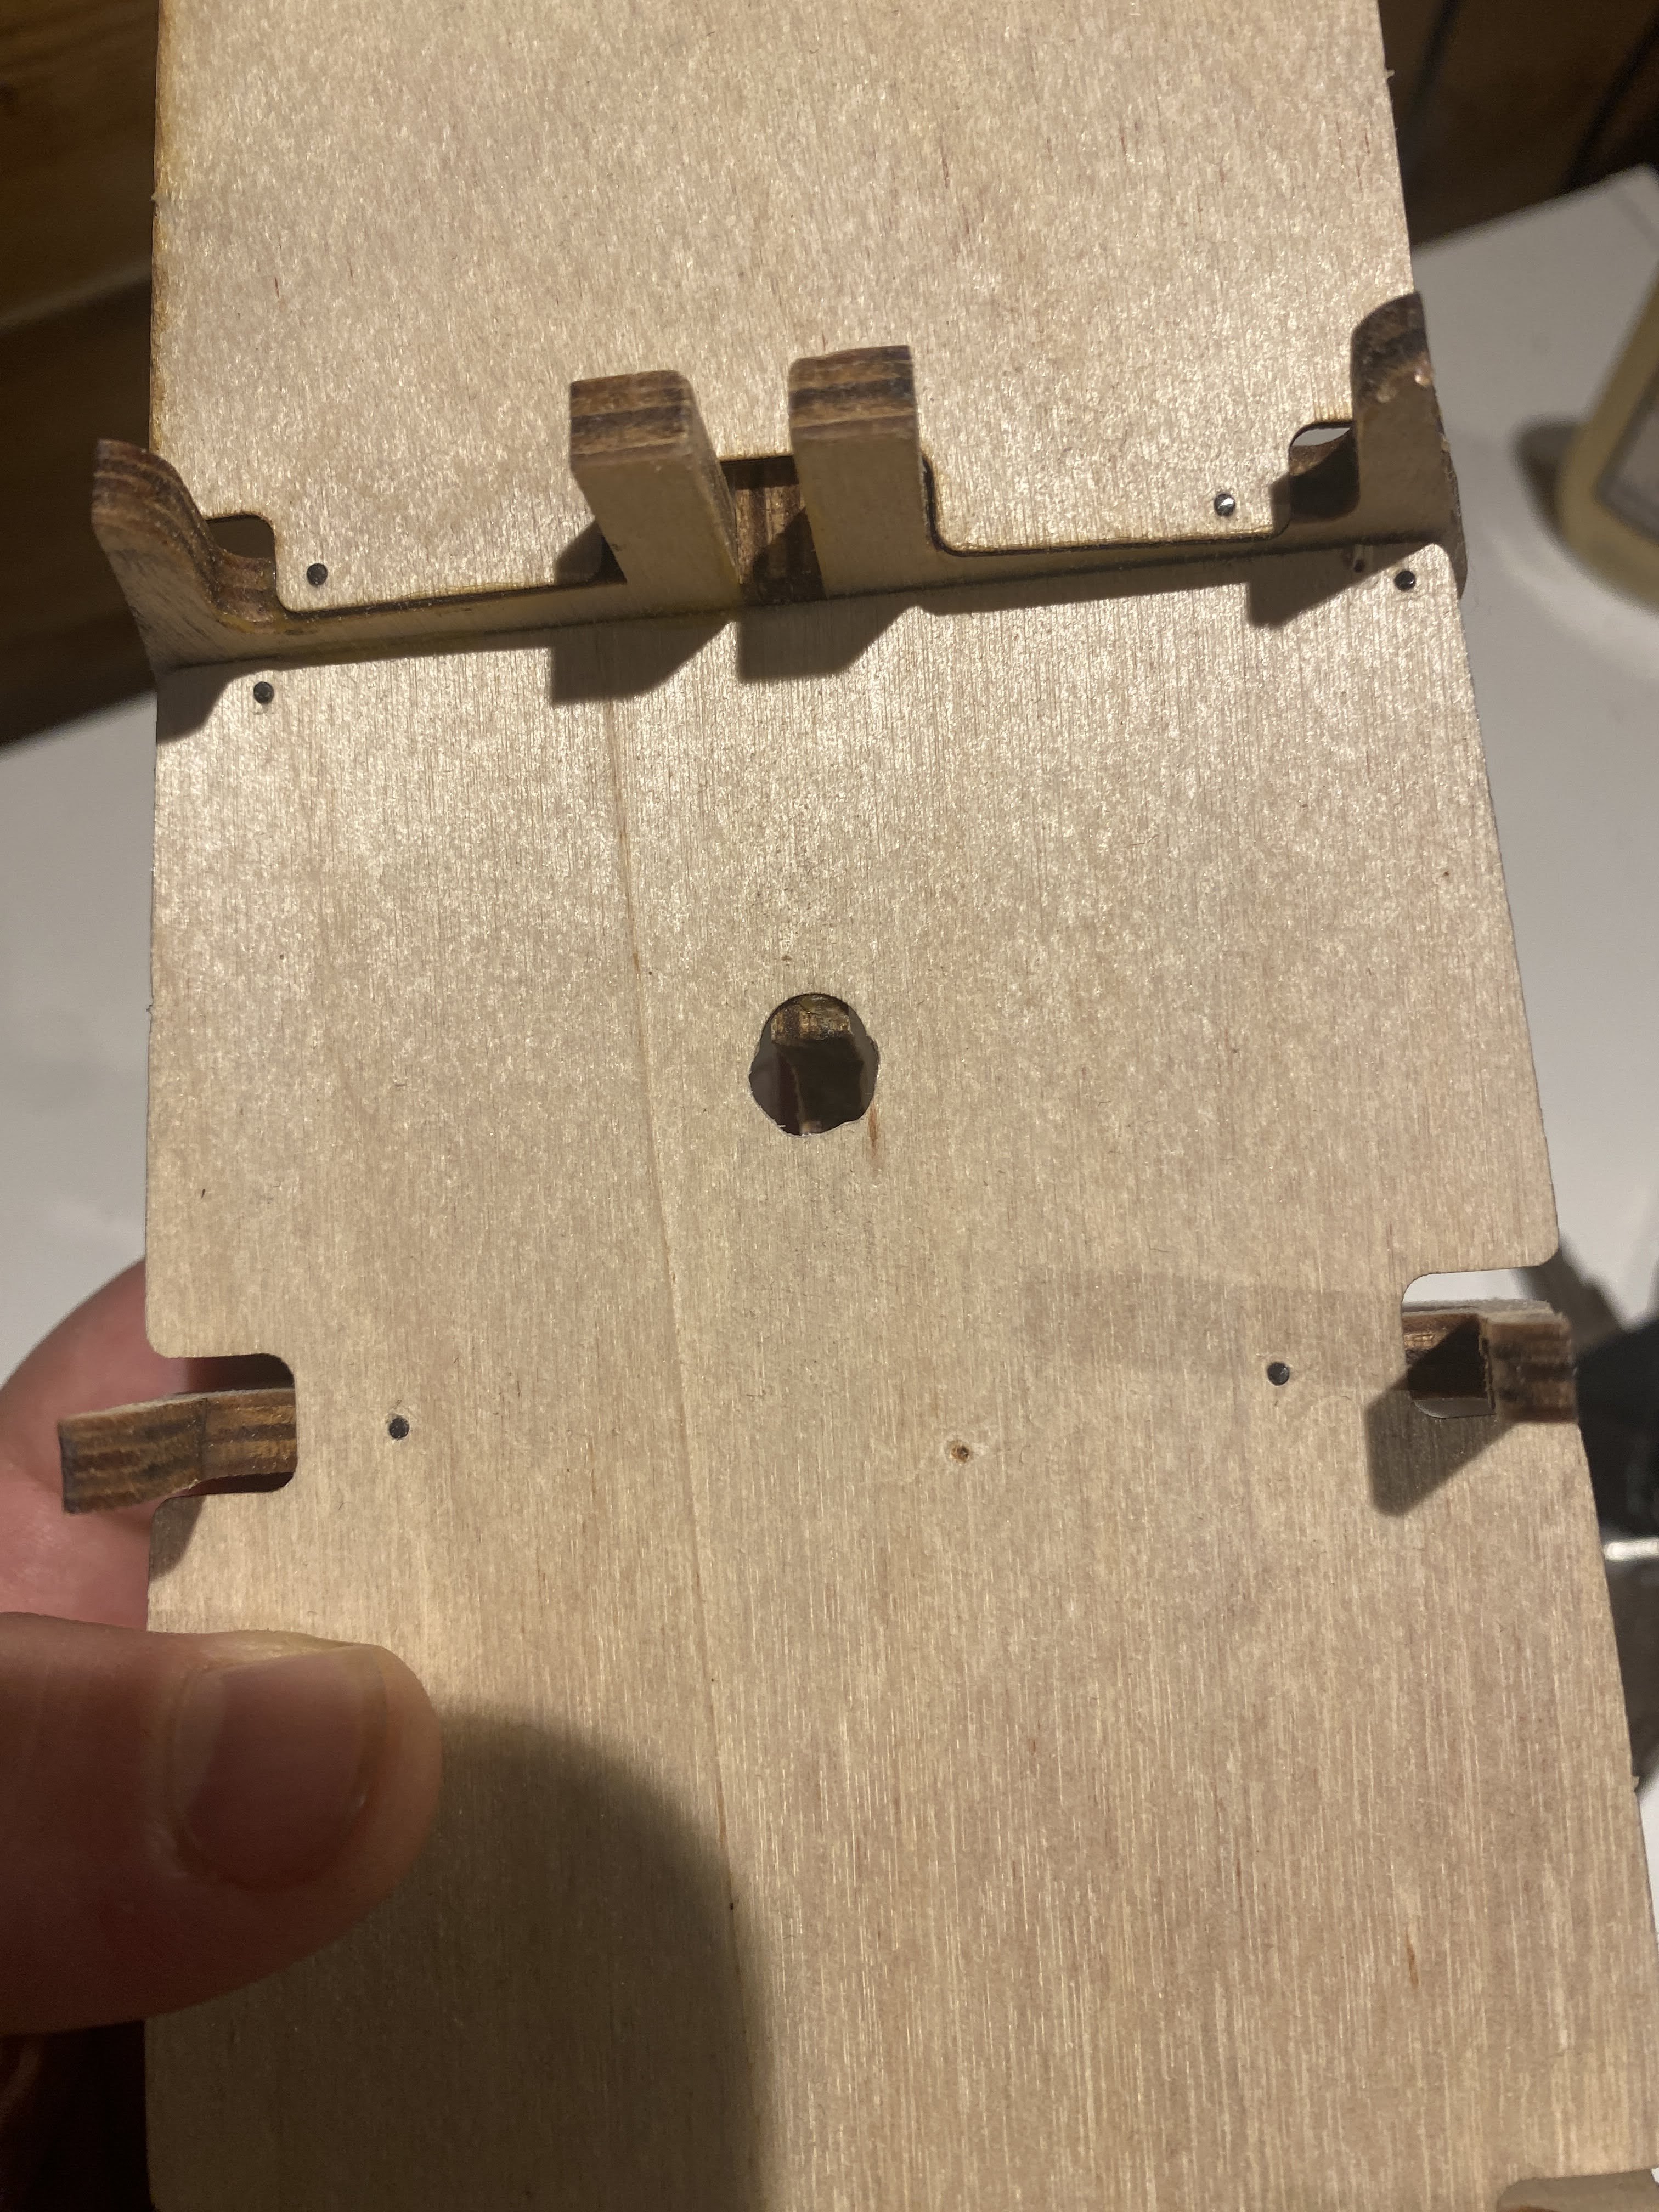
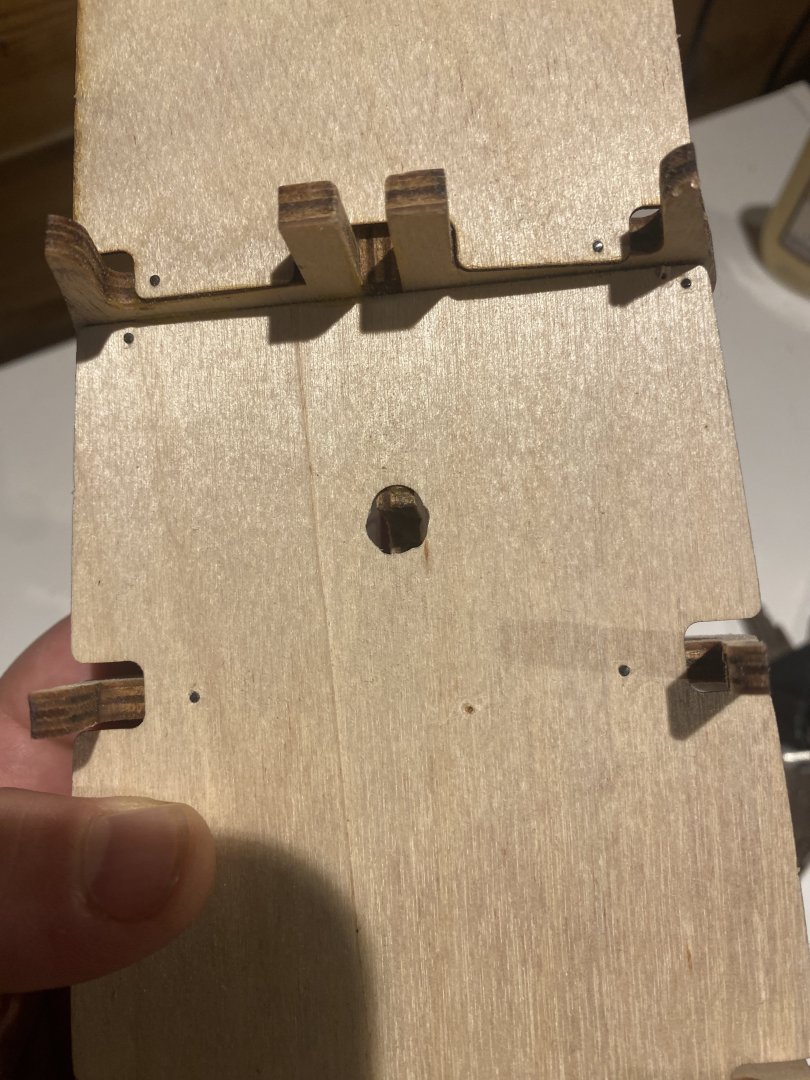
This is my first build so I rushed into gluing on the bulkheads before consulting my primary reference material, Ship Modeling Simplified by Frank Mastini. The main and forecastle decks are flush with the keel but I can already see a gap between the keel and the quarter deck, but I was able to nail and glue it to the bulkheads. The mast hole were misaligned, this was something that was noted in the YouTube video I'm following so I was expecting it. I filed the holes to properly align. I was unclear what to do with the wooden pieces that support the aft (unclear if I'm using the right terminology here) seen in IMG_4591 from the instructions, which are sparse and in Italian. But I was eventually able to figure out that I needed to cut and taper them to align with the curve of the aft bulkhead. I used a round sanding bit on my dremel and eyeballed it. I'm pretty happy with the result. The instructions tell me to plan the deck before the hull but based on what I've read in here I am going to proceed with the hull planking first.


-
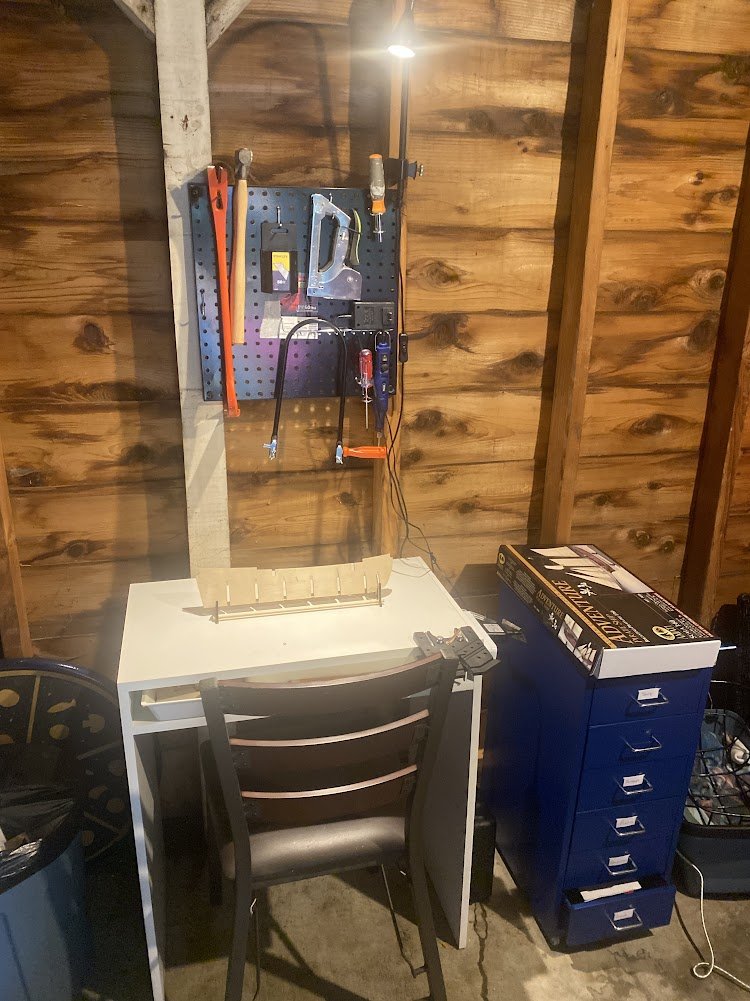
Hello, Very excited to get started on this journey! I made plastic ships when I was in high school but now that I'm in my 40s I wanted to sink my teeth into something more involved. For my first ship I'm working the Pirate Ship "Adventure" by Amati. I'm using Ship Modeling Simplified by Frank Mastini as my primary reference guide and a series of YouTube videos by Davaoshipmodeller working on that exact model. I plan on making mistakes and using this a learning opportunity before I work on something bigger next year. I've set myself up with a small work station in my garage on a cheap little IKEA desk, nothing fancy for now but I can expand on it as I need. Thanks again for providing this space for new modelers.
- 14 replies
-
- 13
-