
bnw
-
Posts
36 -
Joined
-
Last visited
-
 That really looks nice! It is surely one to consider. I would like to see some images of other methods to compare, and as you said, good advice is to try on some scrapmaterial too.
 -
Which type of deck finish can you advise? I would like to keep the light colour of the basswood planks and no high gloss but semi-gloss/silk or maybe some kind of waxlook. @TerryPat already advised a wioe-on poly, which was new to me, but it sounds interesting! Are there other ideas and maybe an overview of pro's and cons? Or a clear website or video about this subject? I didn't find one yet.... Or maybe some images with the different looks of the different methods. Later on the second planking of the hull will be mase with darker sapelly wood and I would like those also give a transparent finish. Can I use the same product/method as the deck or do I have to use something else?
-
I was wondering: in several built logs I see that people coated/varnished the deck before going on. I do understand that it will be easier to coat the deck while there is nothing on it. But I can also imagine that it might be better to glue the cabins and other details directly on the uncoated deck, instead of glueing them on a layer of coating. Maybe more in general: at which moments can you best coat the several parts of a ship? (Deck, details, hull,....)
-
 Loracs reacted to a post in a topic:
Bluenose II by bnw - Artesania Latina - 1:75
Loracs reacted to a post in a topic:
Bluenose II by bnw - Artesania Latina - 1:75
-
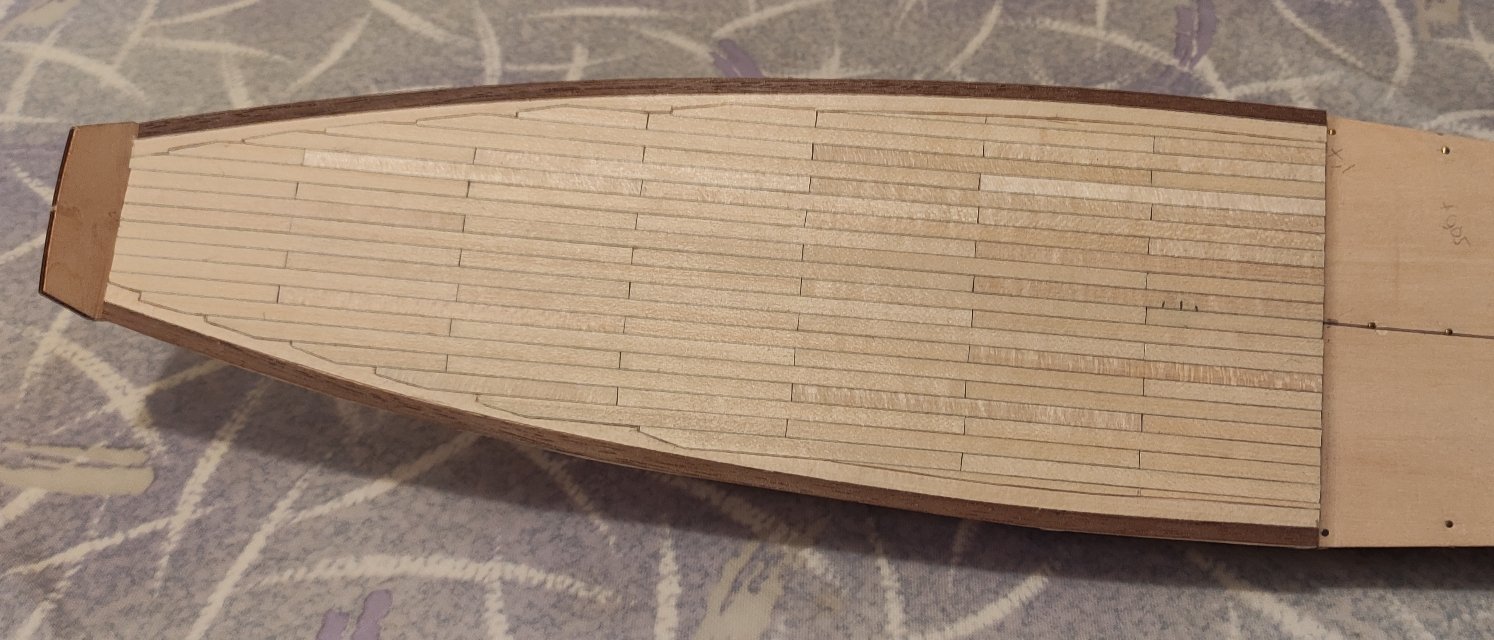
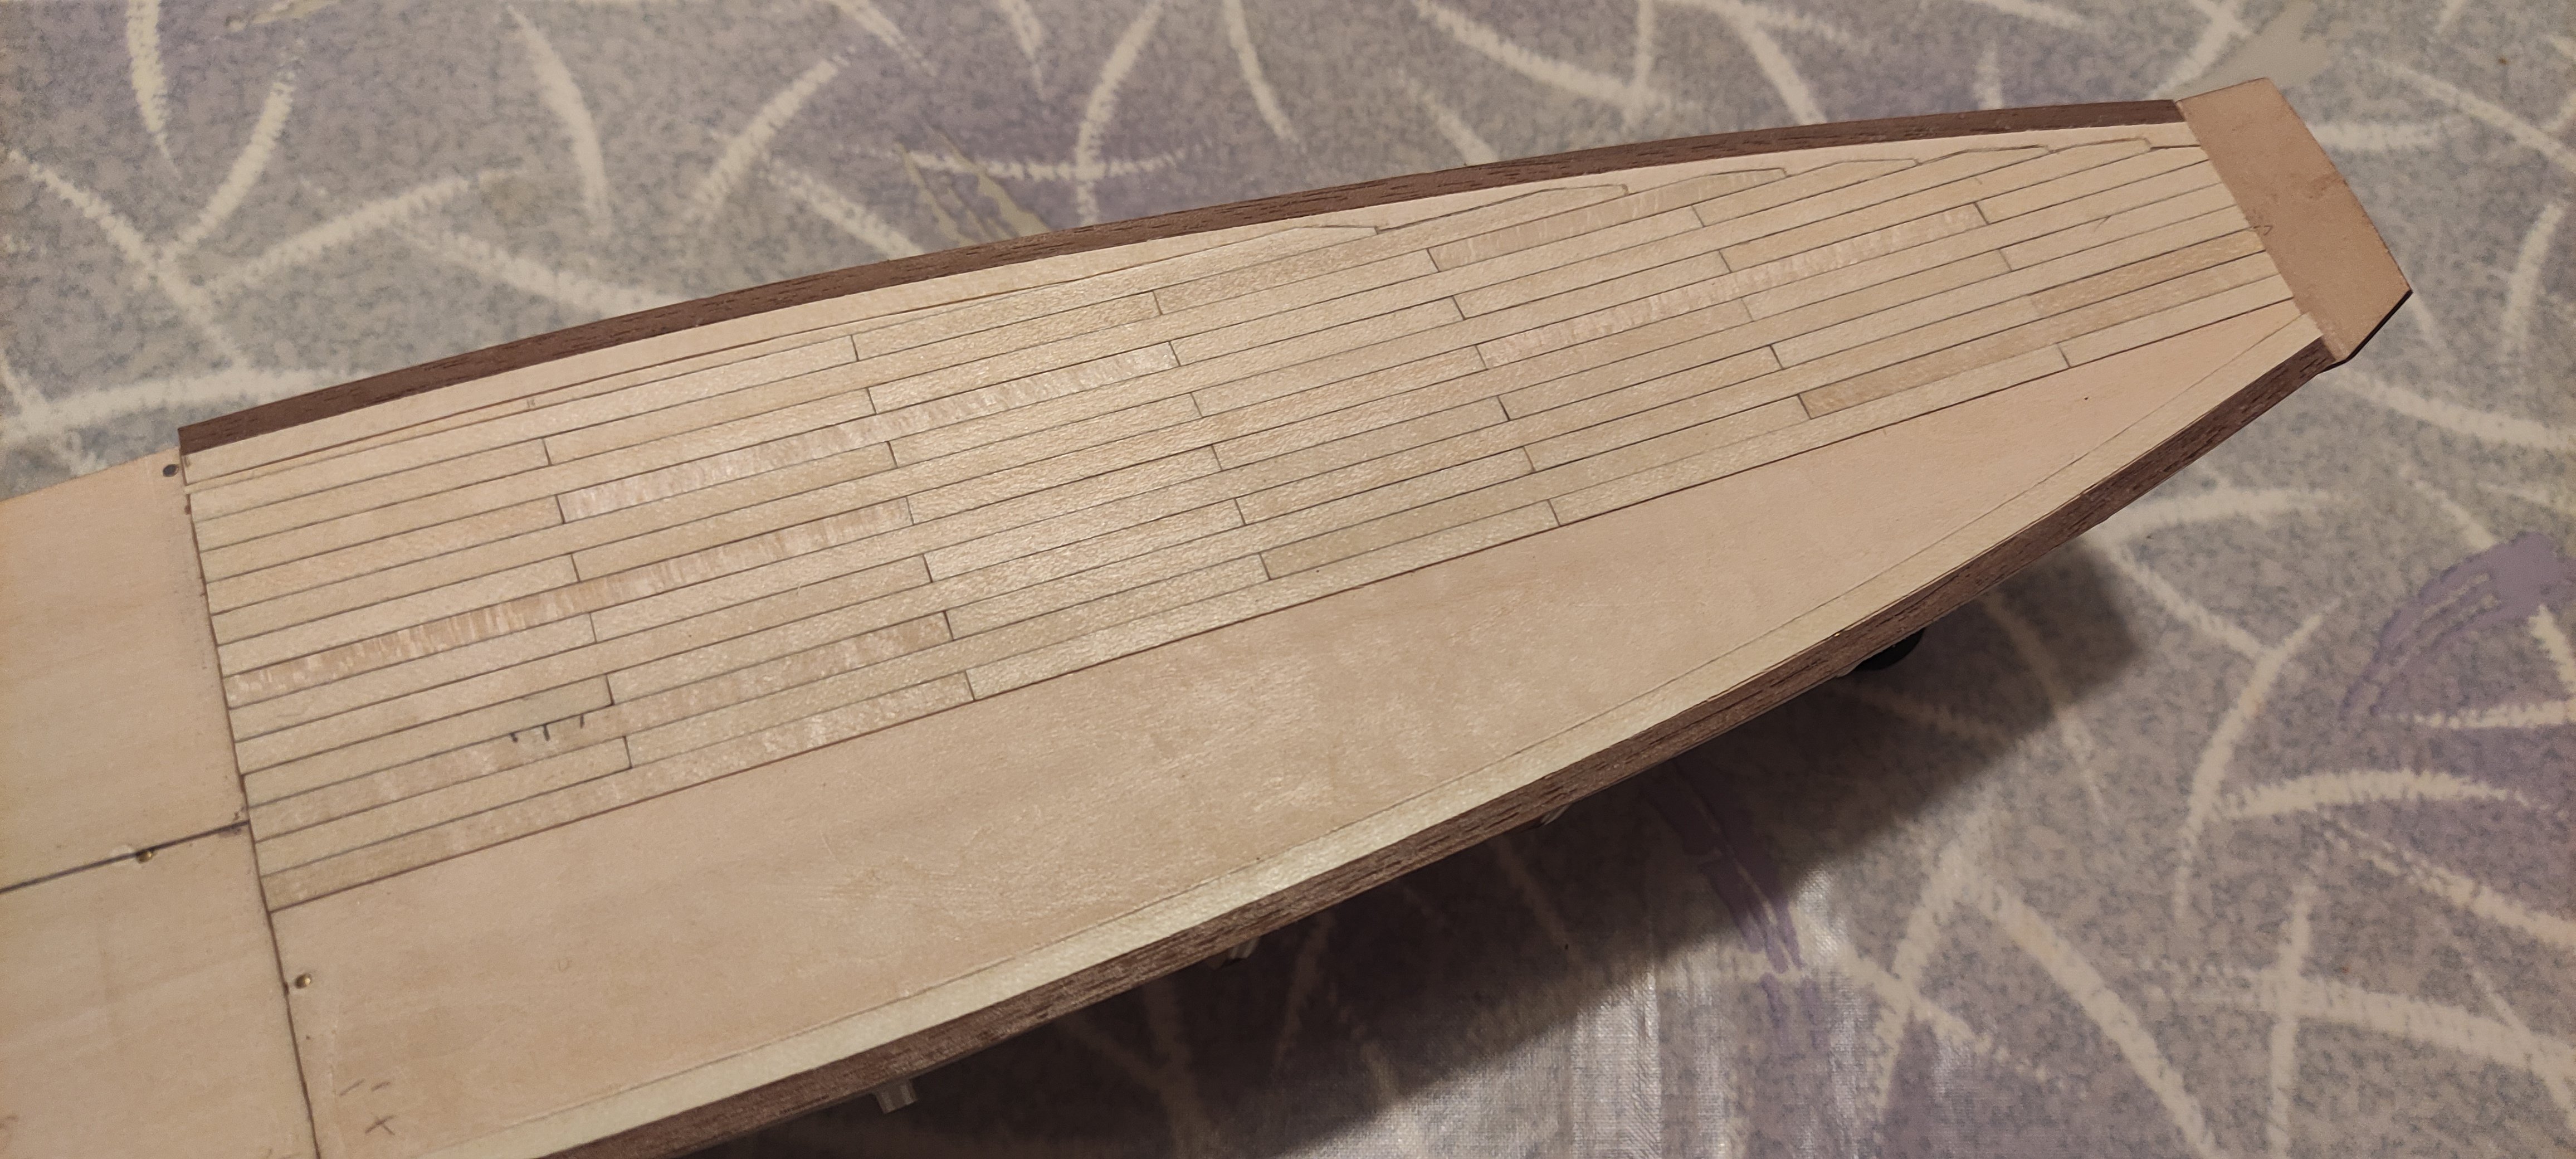
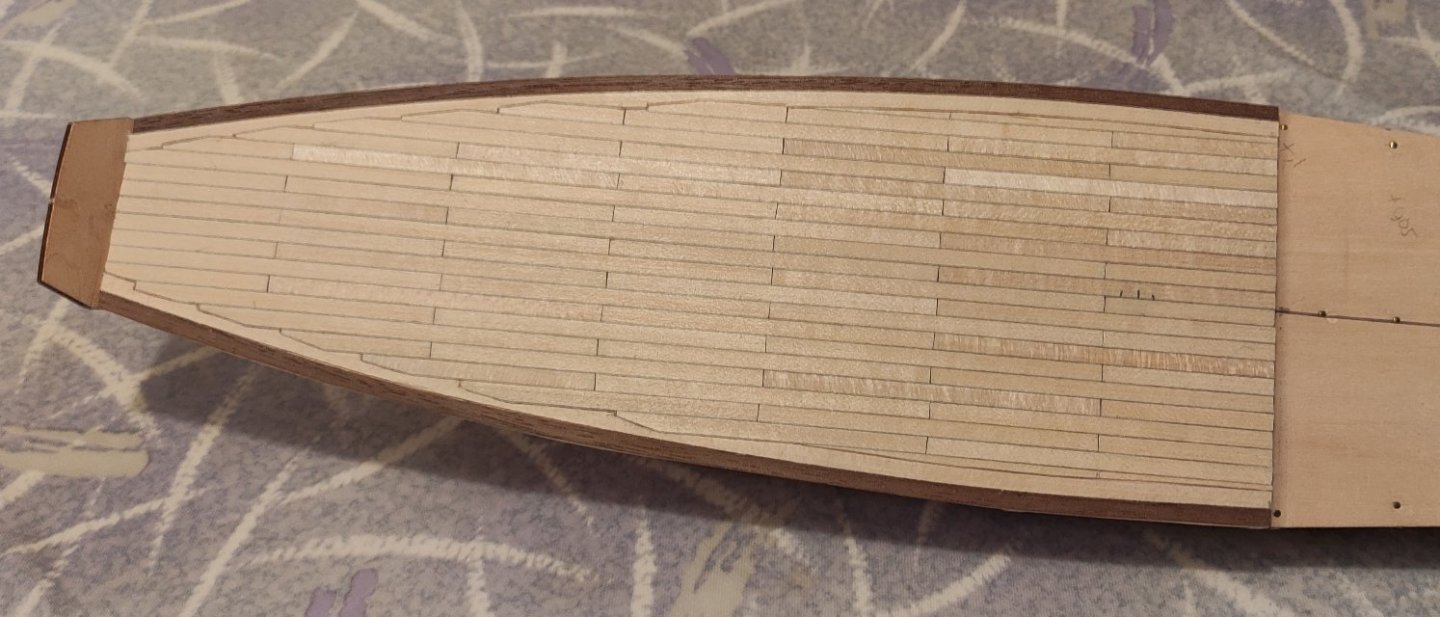
Thanks! To be honest, if you take a closer look, it can be done even more precise as what I did, but as said, this is all new to me, so I am quite happy with it. When I will do the front part of the deck, I may take some pictures how I did this. But actually I did it as per instructions. First I cut the plank as in this image: After that I placed it in position (no glue yet) and with a sharp pencil I drew the outline on the glued plank, which has to be cut. After that I cut the part away, using a steel ruler and a sharp knife. This part I found difficult to do as precise as needed, so when looking closer you will find some narrow slits, but overall not too bad. Maybe someone has an idea how to nicely fill these slits? I was thinking about a wood filings/glue mixture, but because I have blackened the sides of the planks to simulate the caulking, I am afraid that it will be worse than when I leave it as it is now.


-
TerryPat reacted to a post in a topic:
Bluenose II by bnw - Artesania Latina - 1:75
-
bnw reacted to a post in a topic:
Bluenose II by bnw - Artesania Latina - 1:75
-
Yes thank you! It would be a pitty if you put a lot of effort in it and the planks would curl up in dry times!
-
Ronald-V reacted to a post in a topic:
Bluenose II by bnw - Artesania Latina - 1:75
-
 bnw reacted to a post in a topic:
Bluenose II by bnw - Artesania Latina - 1:75
bnw reacted to a post in a topic:
Bluenose II by bnw - Artesania Latina - 1:75
-
Kenchington reacted to a post in a topic:
Bluenose II by bnw - Artesania Latina - 1:75
-
okay, still room for improvement, but with every new plank, my skills are growing a tiny bit! And maybe more important: I like doing this! I can’t put it aside, it’s addictive!
-
 Loracs reacted to a post in a topic:
Bluenose II by bnw - Artesania Latina - 1:75
Loracs reacted to a post in a topic:
Bluenose II by bnw - Artesania Latina - 1:75
-
Kenchington reacted to a post in a topic:
Bluenose II by bnw - Artesania Latina - 1:75
-
Today, I encountered the first part that I really struggled with! I am still pretty happy with the result, given that almost every task in building a wooden modelship is new to me, but this is something I still need to get better at! I was adding more planks on the deck, but as per manual, I have to make some cutouts in the curved outer plank. And that part, I did not find easy.....

-
Tnx, that's a great thing to hear! You are right, I have looked at some images and the smaller frame is closer to the real one!
-
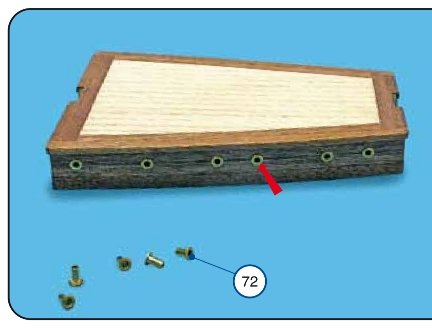
Okay, I have made my first (small) mistake, that is to say, I accidentally deviated from the instructions. The outer side of the cabin's roof should have two sapelly planks, but I accidentally placed only one. Instructions: My cabin: I'm thinking of leaving it like this. It looks pretty decent now and it probably will be quite difficult to cut away one plank-wide part of the basswood planks, because they have been glued to the false deck already.... Any ideas, or maybe best to leave it this way? There will be added some extra details but none of them will be a big problem, I think. So the 8 mm in the image below is 4 mm on my model now.

-
Okay, tnx! I will look into the that!
-
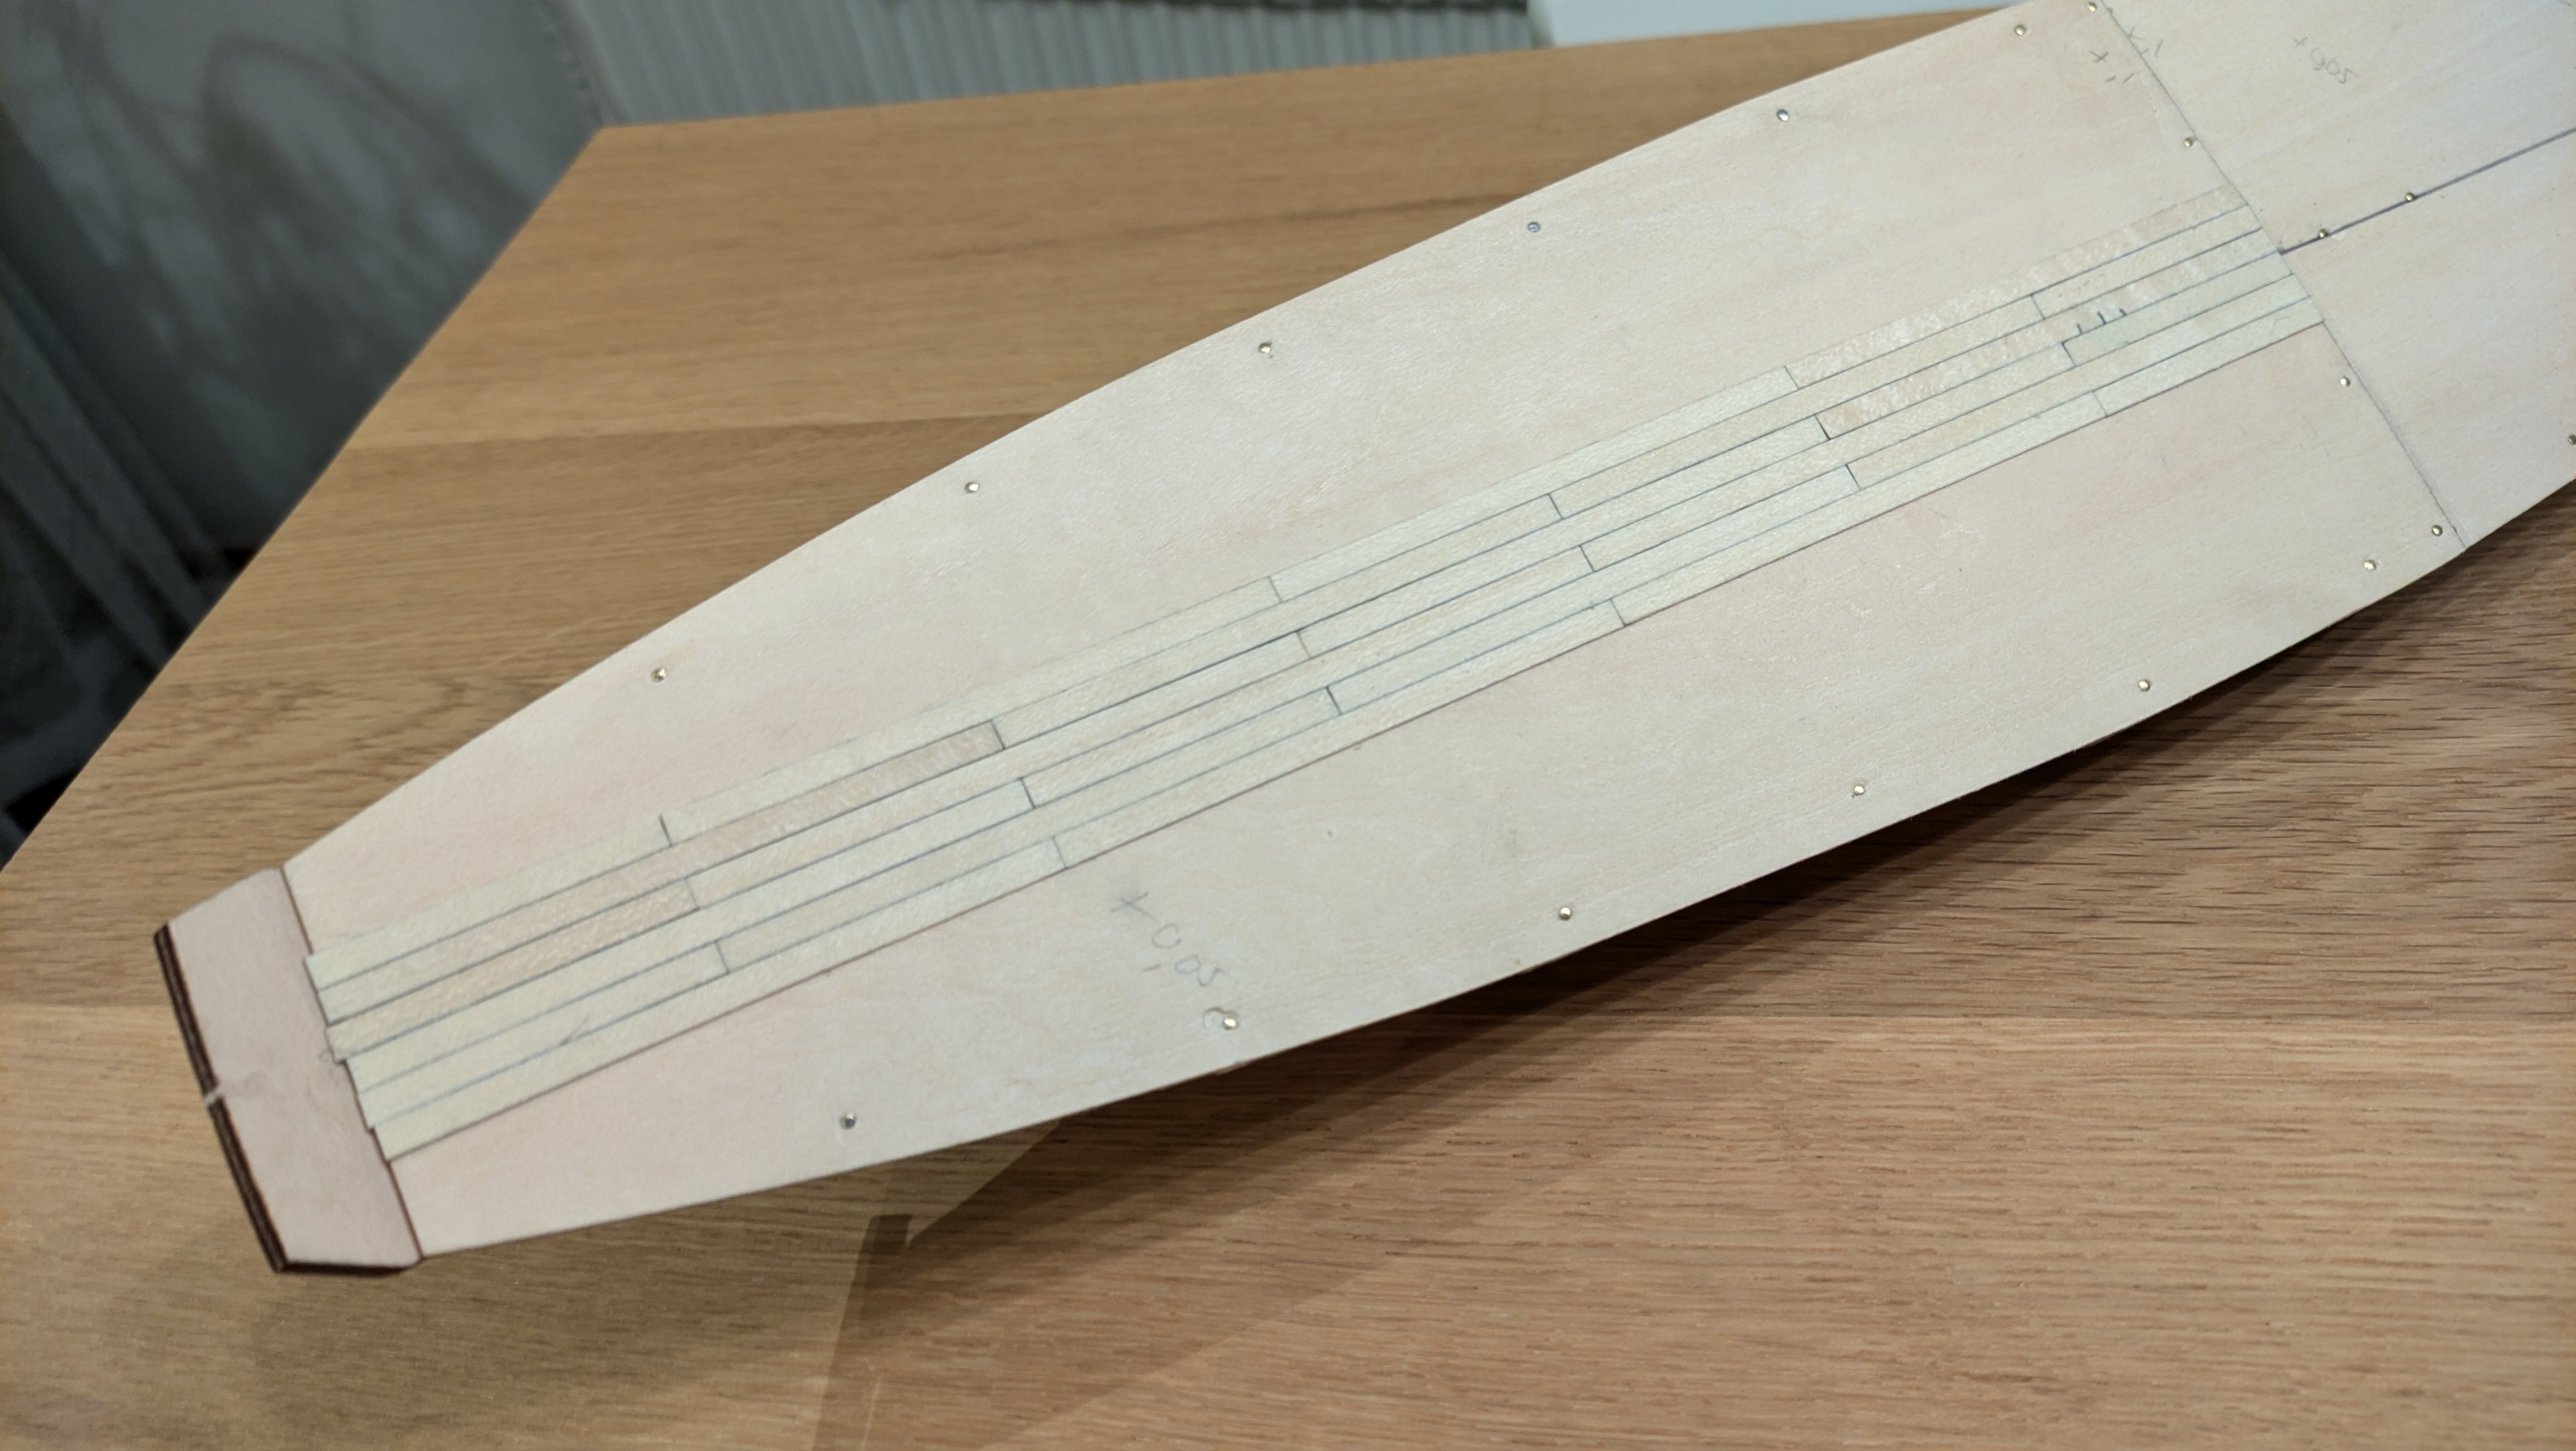
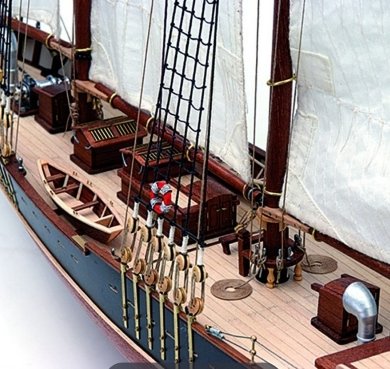
The curved planks have been glued to the deck (two on each side), so I can start filling in with the straight planks. In the meantime, while waiting for drying, I have started to build the stern cabin. There has to be added brass portholes. I assume it is best to put on the varnish on the cabin first and than place the portholes? I think I would like to keep the deck in this light colour (I know the original Bluenose has a darker coloured deck, but I like this light colour as AL also showed on the box): Is there any advice for the varnish? So as said, I would like it colourless and normally with paints, I like semi-gloss. Any thoughts and tips?

-
My first bent planks! One thing I was wondering: How does a wooden model ship hold up to changes in humidity? When I look at our oak parquet, I see that it responds prety much to changes in humidity. Will a model ship remain in good condition, or will the wood and glue joints eventually react?
-
Ronald-V reacted to a post in a topic:
Bluenose II by bnw - Artesania Latina - 1:75
-
tmj reacted to a post in a topic:
Bluenose II by bnw - Artesania Latina - 1:75
-
tmj reacted to a post in a topic:
Bluenose II by bnw - Artesania Latina - 1:75
-
tmj reacted to a post in a topic:
Bluenose II by bnw - Artesania Latina - 1:75
-
It has been quiet at the shipyard for a while.... Because there was work to do in the maintenance of the house. But today I have laid my first deck planks. I was wondering whether to do the calking or not, but I have chosen to use a pencil to add some little black on the sides of the planks before gluing them on the deck. The next step will be my first bending of planks for the outer planks. For my first modelship I am quite pleased with the result. Maybe I have to do one or two wipes with sandpaper. I am wondering one thing. My "biggest fear" is getting stains of the graphite when sanding the deck planks. How big will the risk be for that? Any tips to avoid that? One thing I can think of is sanding in the length direction of the planks.

-
Tnx! That sounds logical! Good comment about the many details around the masts
-
bnw reacted to a post in a topic:
Bluenose II by bnw - Artesania Latina - 1:75
-
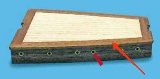
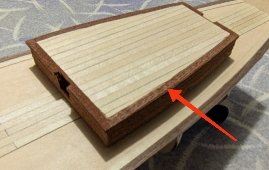
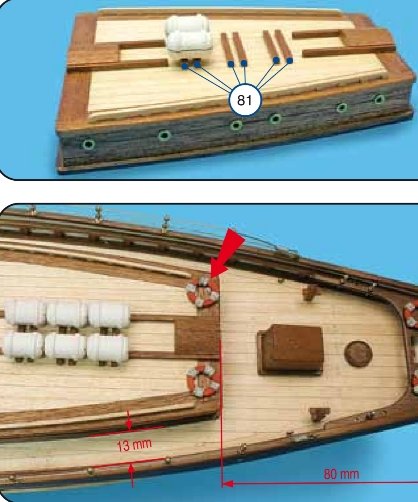
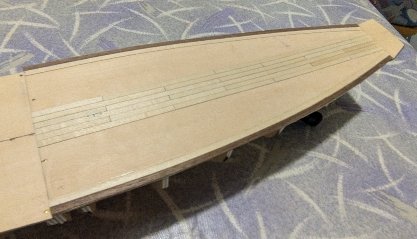
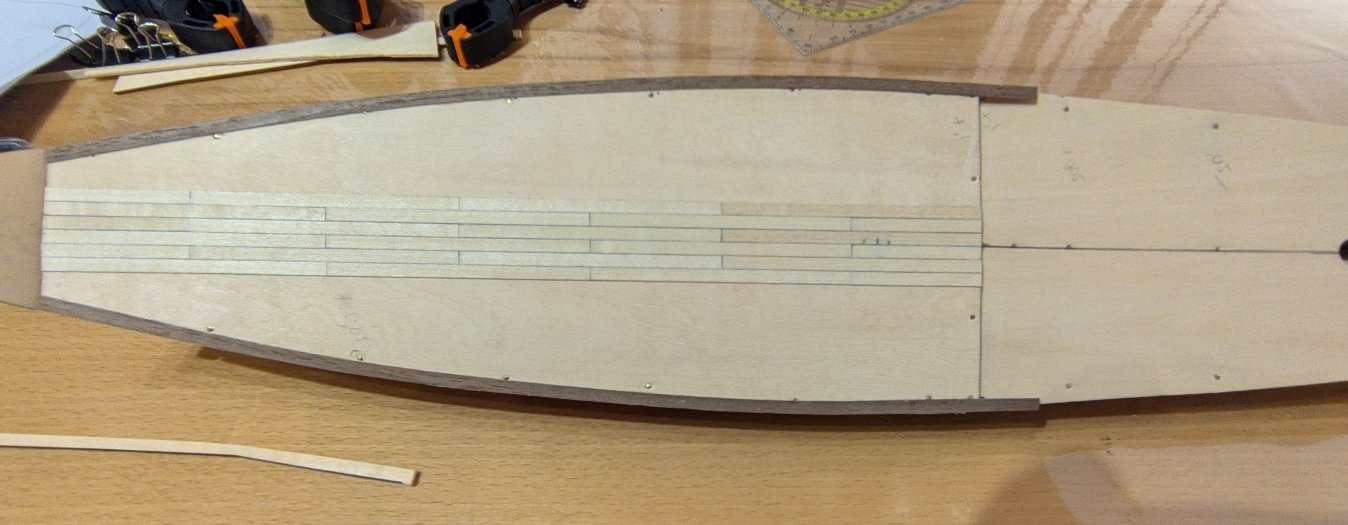
Planking the deck.... wondering how to start.... I am at the start of planking the decks, but I am wondering a few things, because of a small inacurrance in my work and a thing about the lasercut decks. Maybe I am thinking to much before actually start, but I would like to try to get the planking as symmetrical as possible. Next image is from the build log from @Penfold Bluenose II by Penfold - FINISHED - Artesania Latina - 1:75 When finmishing the planking, he noticed there was a small asymmetry in the pattern of the planks, because he sanded the contour of the deck after drawing the centerline, but before planking, as I did understand it well.: I hope to avoid that, but as a newbe, I have a small asymmetry in the position of the higher deck at the red arrow, because I was a bit inacurrate when assembling the frame. The hogher deck protrudes a maximum of 1 mm from the lower deck on one side. As per manual, next steps has to be made: Add 6 planks in around the centerline Add a walnut plank: And a basswood plank along the contour: Then fill in with the other basswood planks: And after a few other steps, sand the right shape in the bulkheads: But there are a few questions. At the red arrows, the higher lasercut deck has two obvious sharp points. Along the two green lines, the countour is a straight line and only the blue edge is curved. The walnut plank and later on the bulwarks will have to follow a nice curve. As told in the instructions, the curve will be sanded after placing the planks on the decks. That means, when attaching the outher plank, you need to stay inside the contour and will see the sharp points of the deck and other parts of the deck protruding, which will be sanded away at a later time: Another consequence of this is that the with of the walnut plank may vary because of the sanding. The other way might be to sand only the contour of the deck (not the bulkheads at his moment) to get the nice curve and place the outer walnut plank against this sanded curve. I can than sand and measure both sides as close as mirrored to get a nice symmetrical layout of the planks and draw the centerline after this. To be honest, the deviation between left and right is only in this incircled area; the rest is symmetrical: But I can imagine, because of the cutouts, a small asymmetrical area will be visible in asymmetrical cutouts/planking: The other thing is, because I will need to correct the little inaccuracy at the step from the lower to the highter deck, the hole of the mast will also be a little offset to the centerline (about 0,5 mm or <1 mm). So the lines between the planks will also be not completely symmetrical to the hole of the mast, but maybe that will be less visible? Can you guys tell me which way I can do this best? Or am I being too picky now and do I simply have to start planking? I hope I made my questions clear, but someone told me: ask before gluing!