HOLIDAY DONATION DRIVE - SUPPORT MSW - DO YOUR PART TO KEEP THIS GREAT FORUM GOING! (Only 44 donations so far out of 49,000 members - C'mon guys!)
×


gkharrin
-
Posts
93 -
Joined
-
Last visited
Content Type
Profiles
Forums
Gallery
Events
Everything posted by gkharrin
-
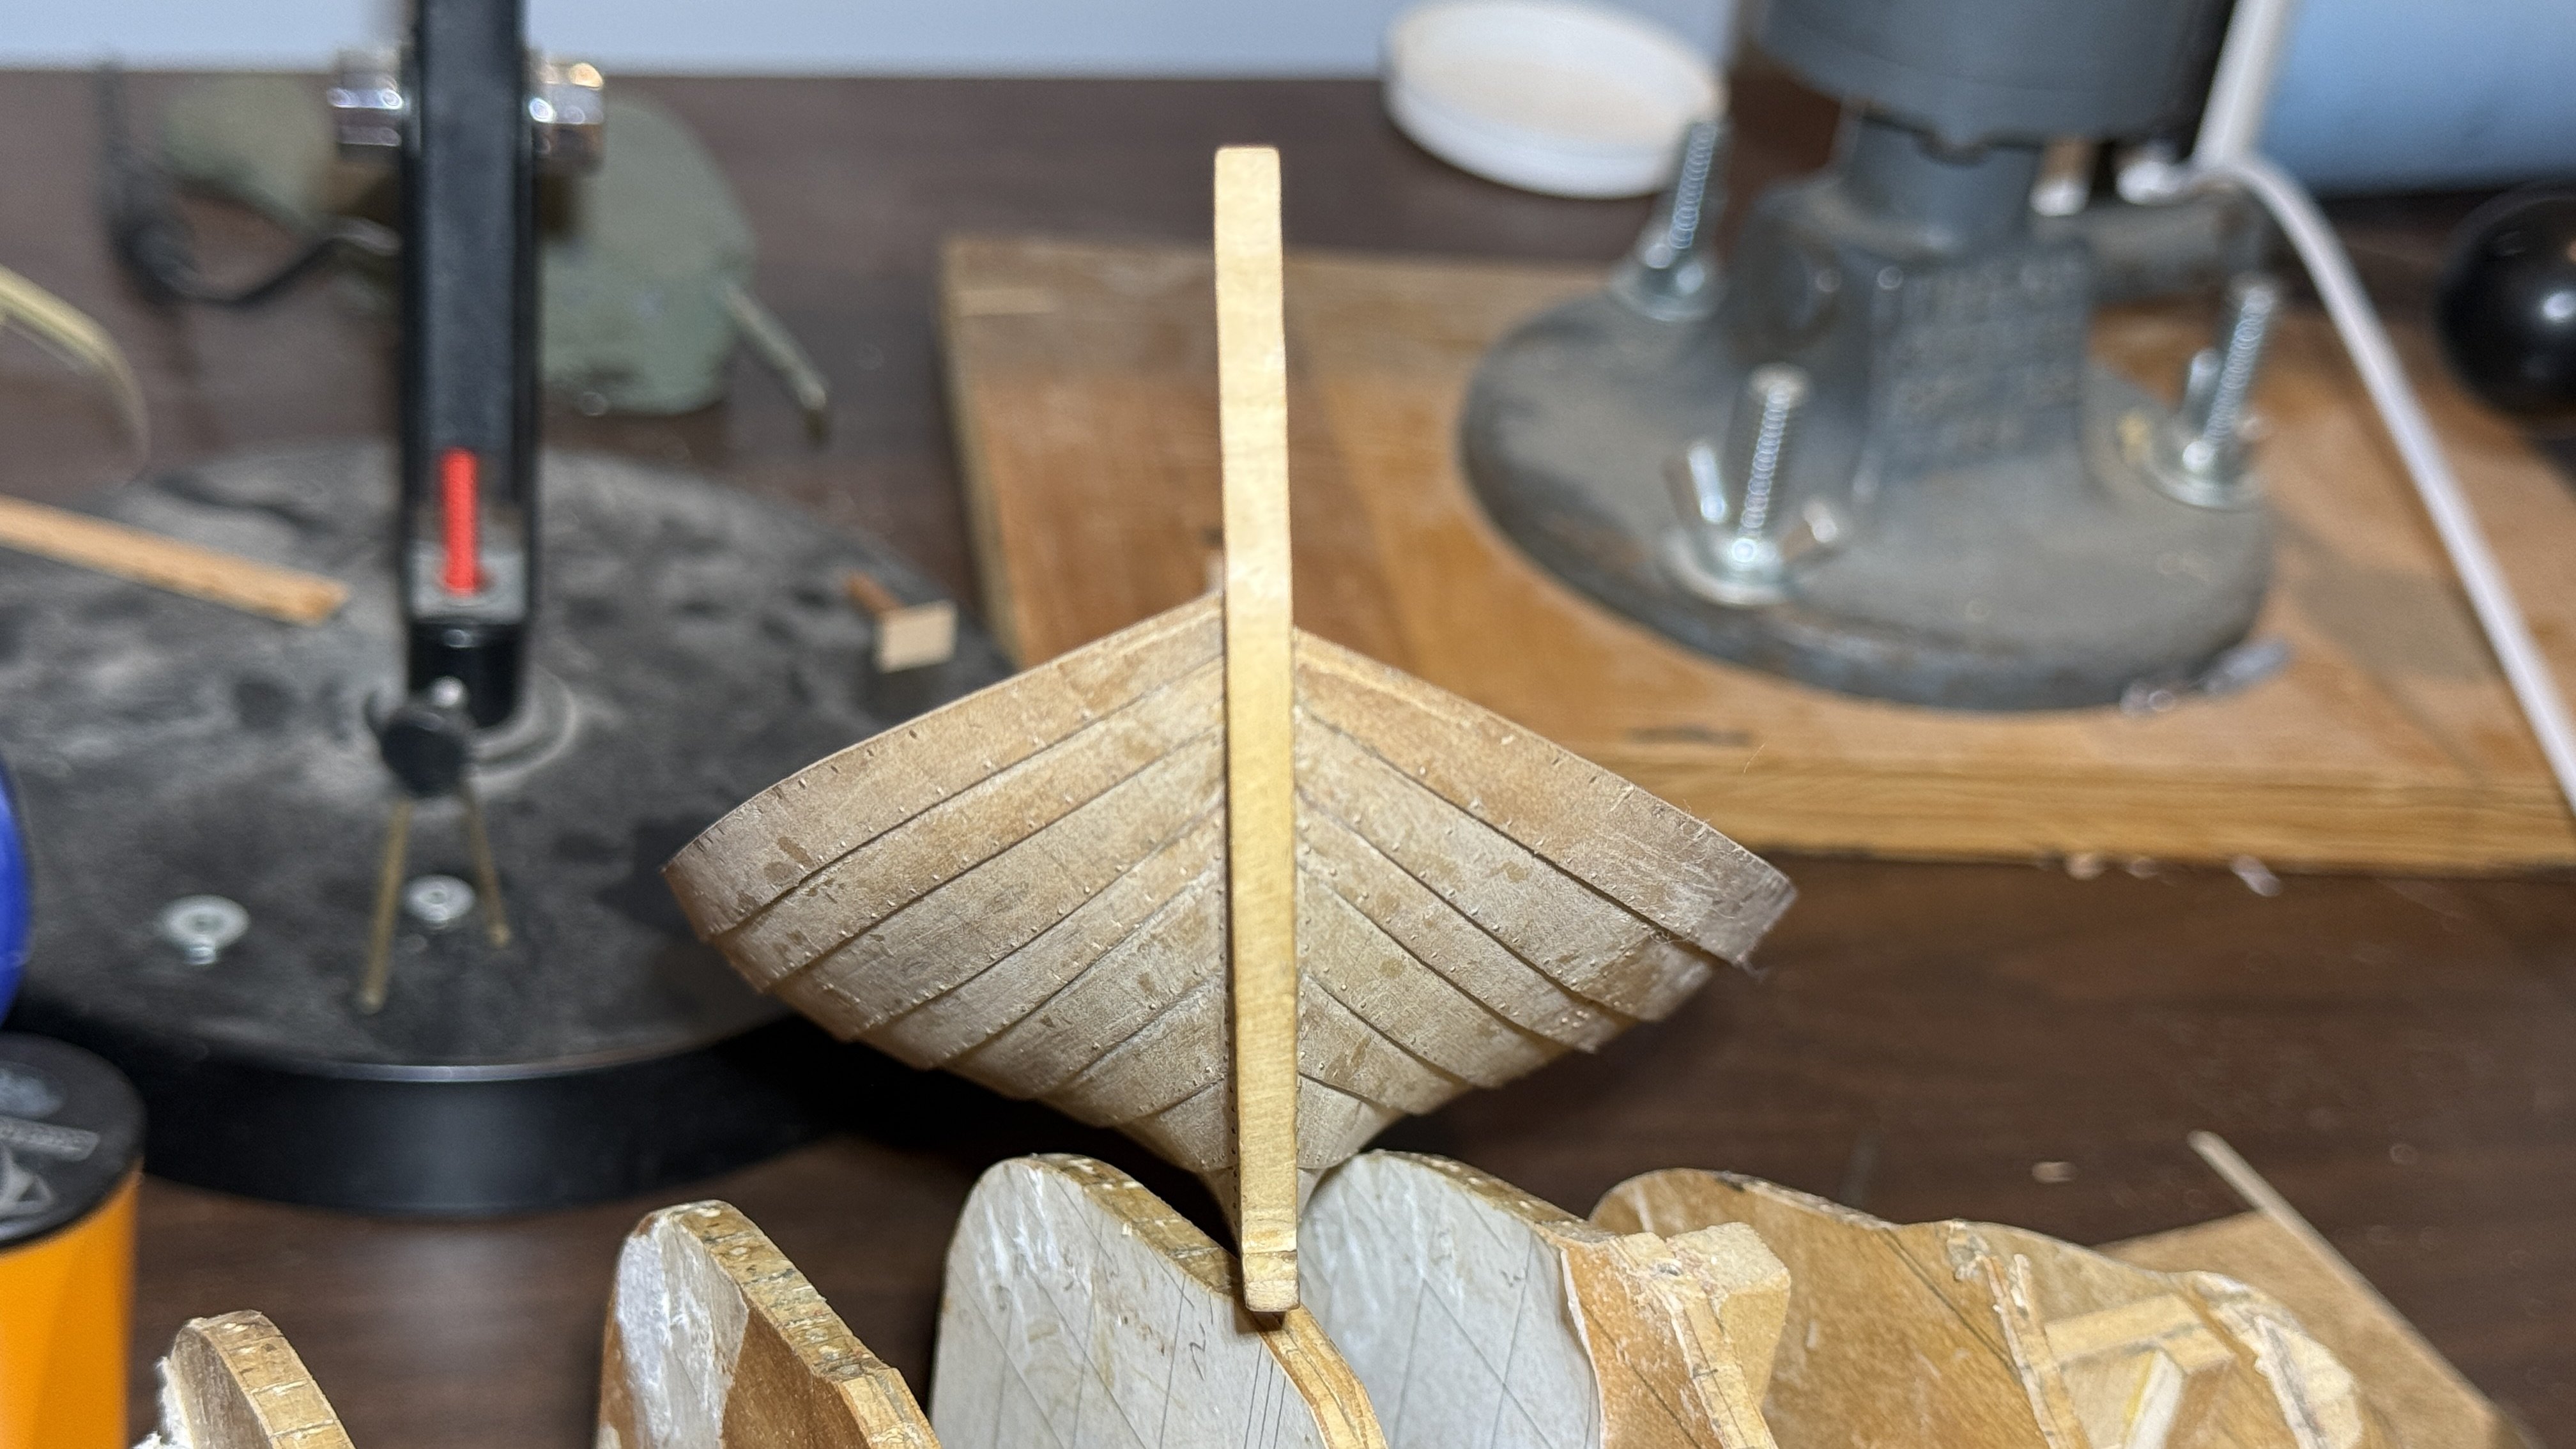
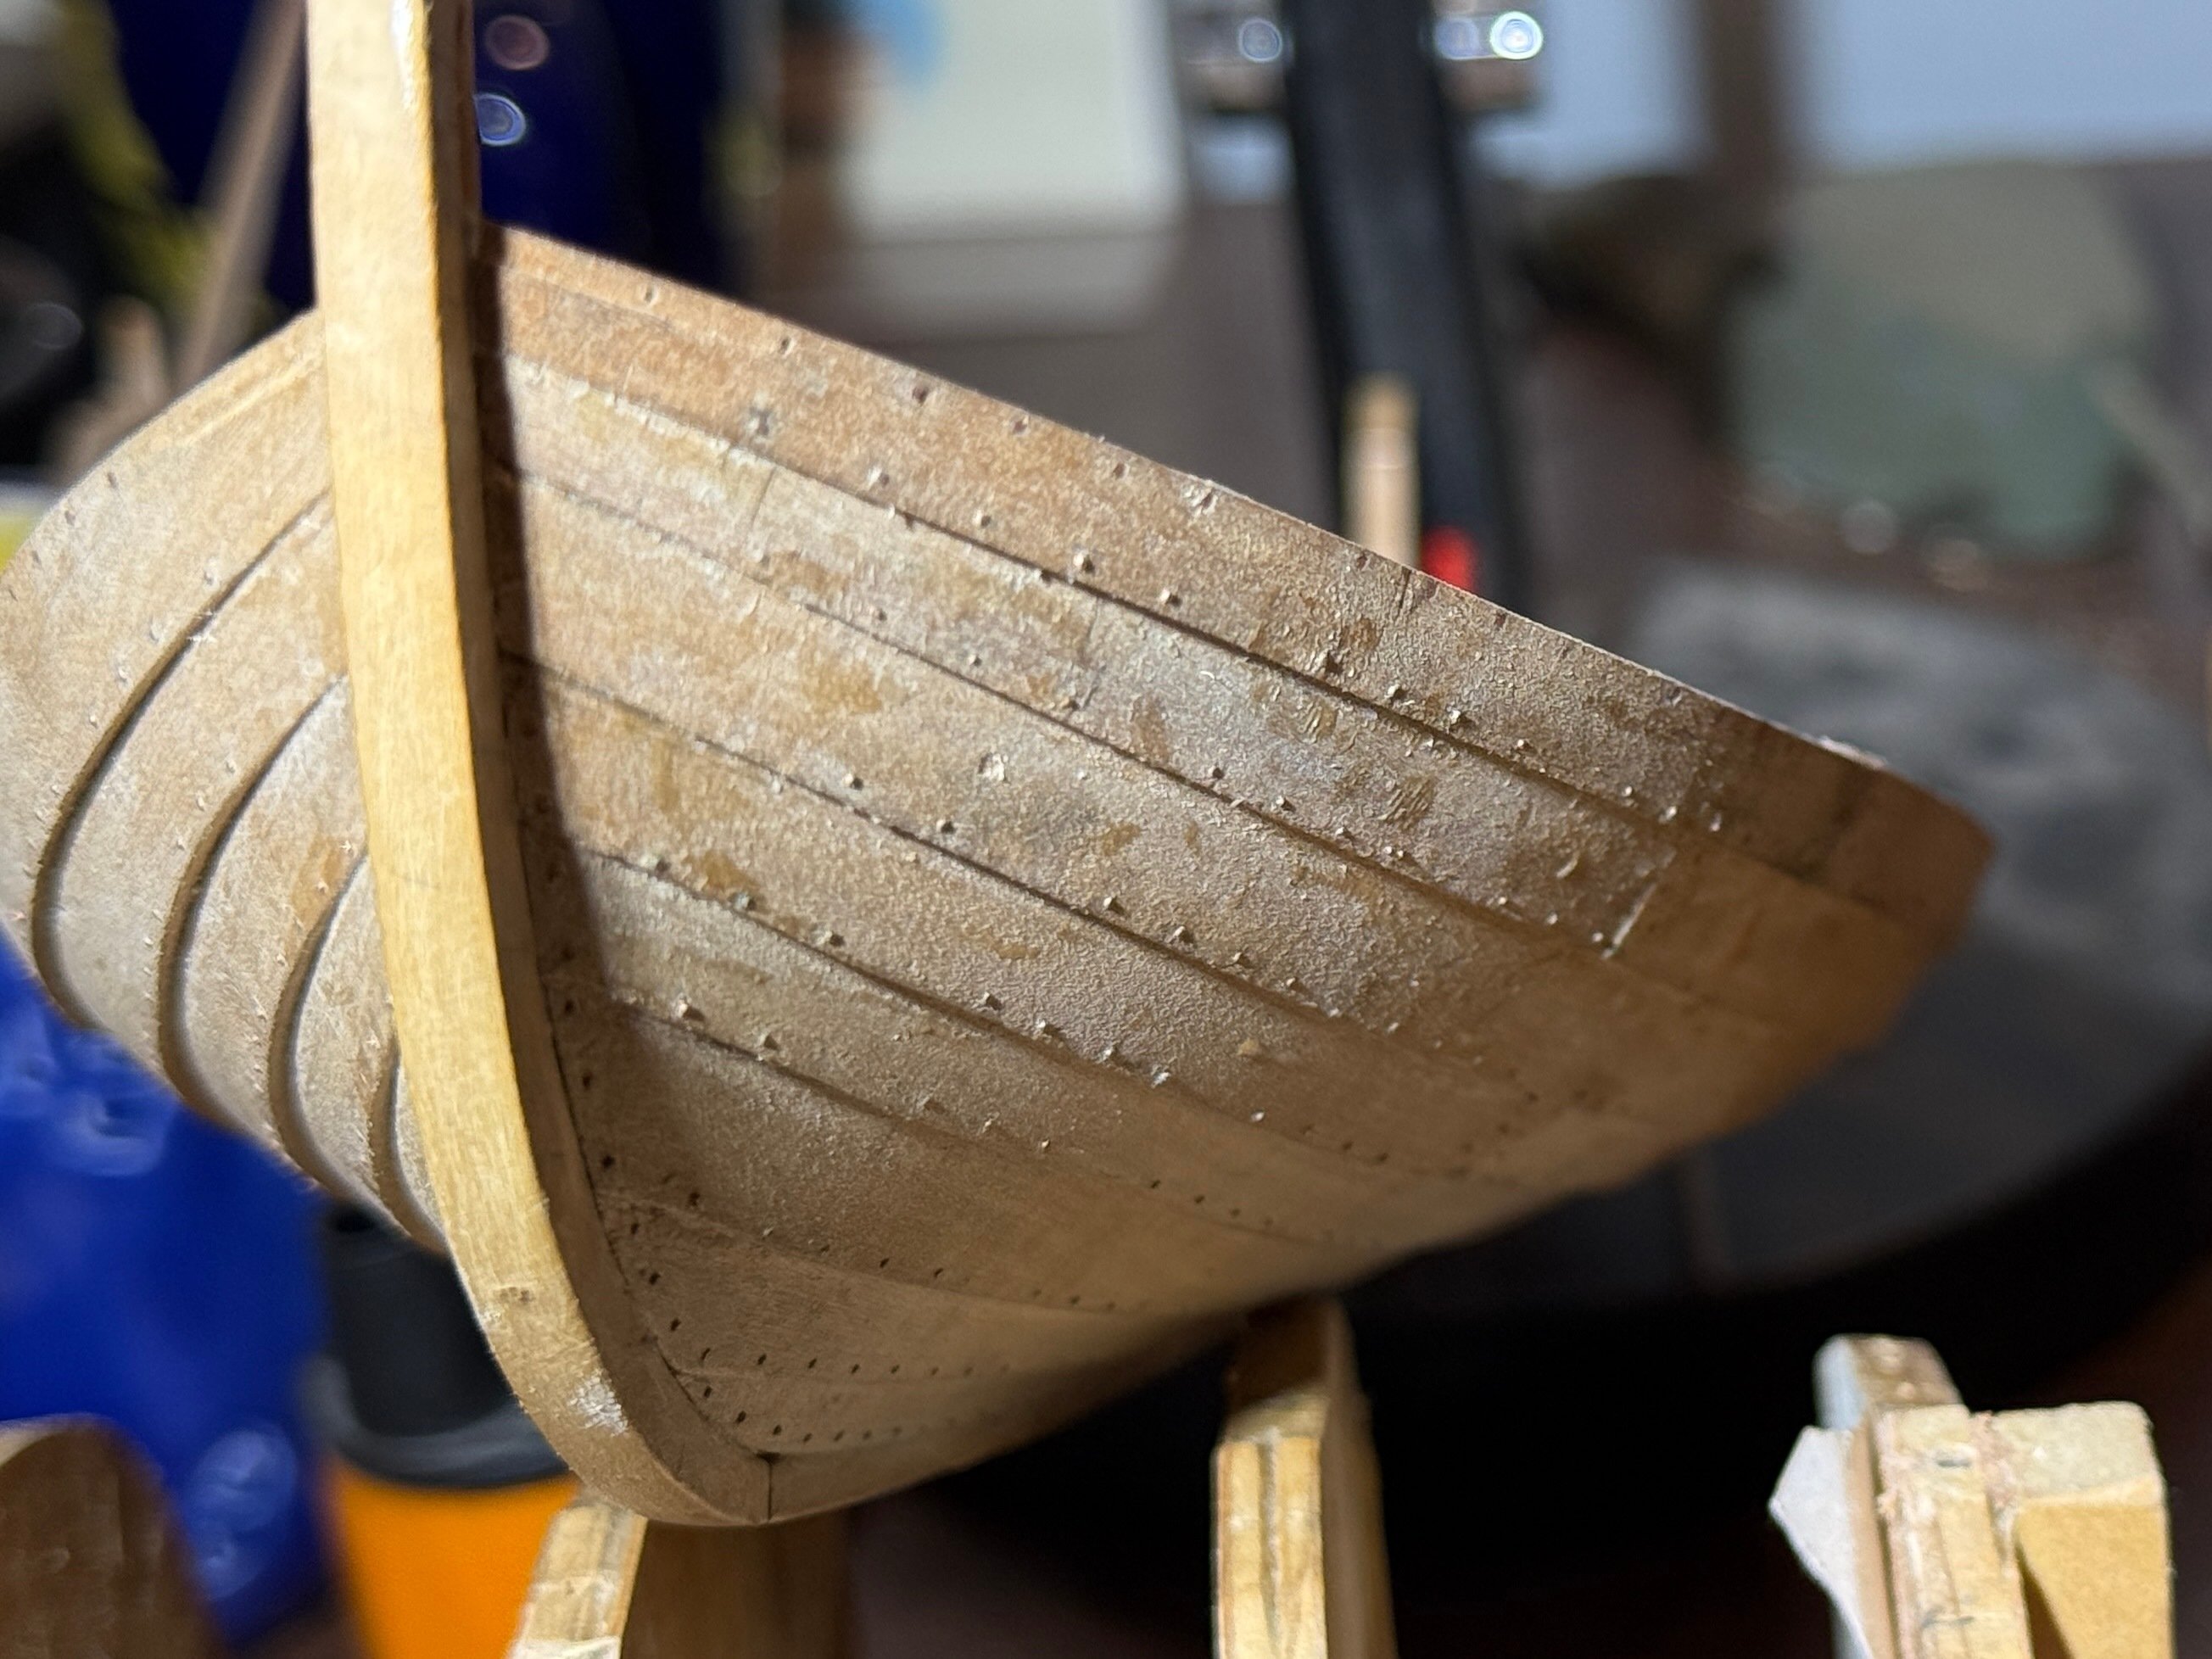
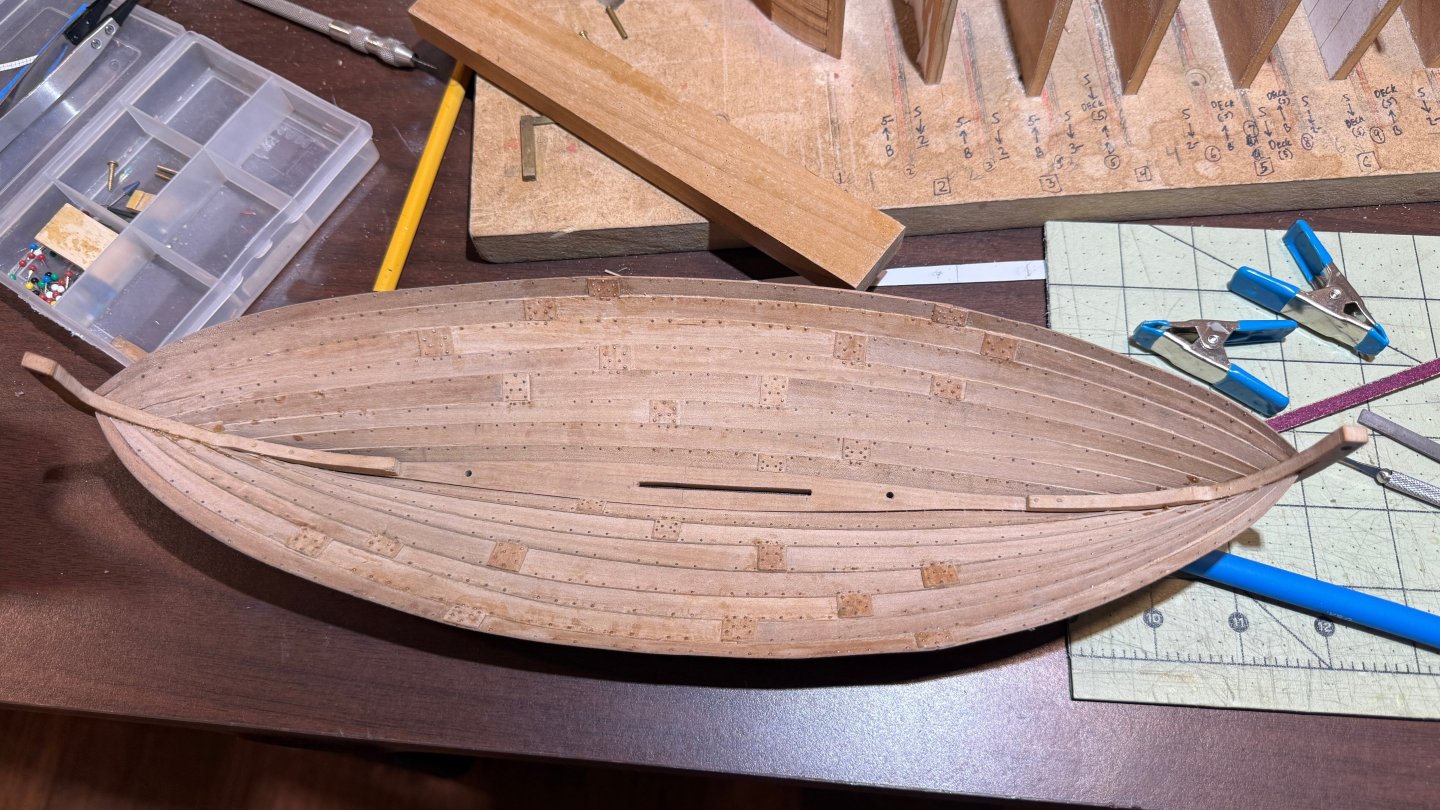
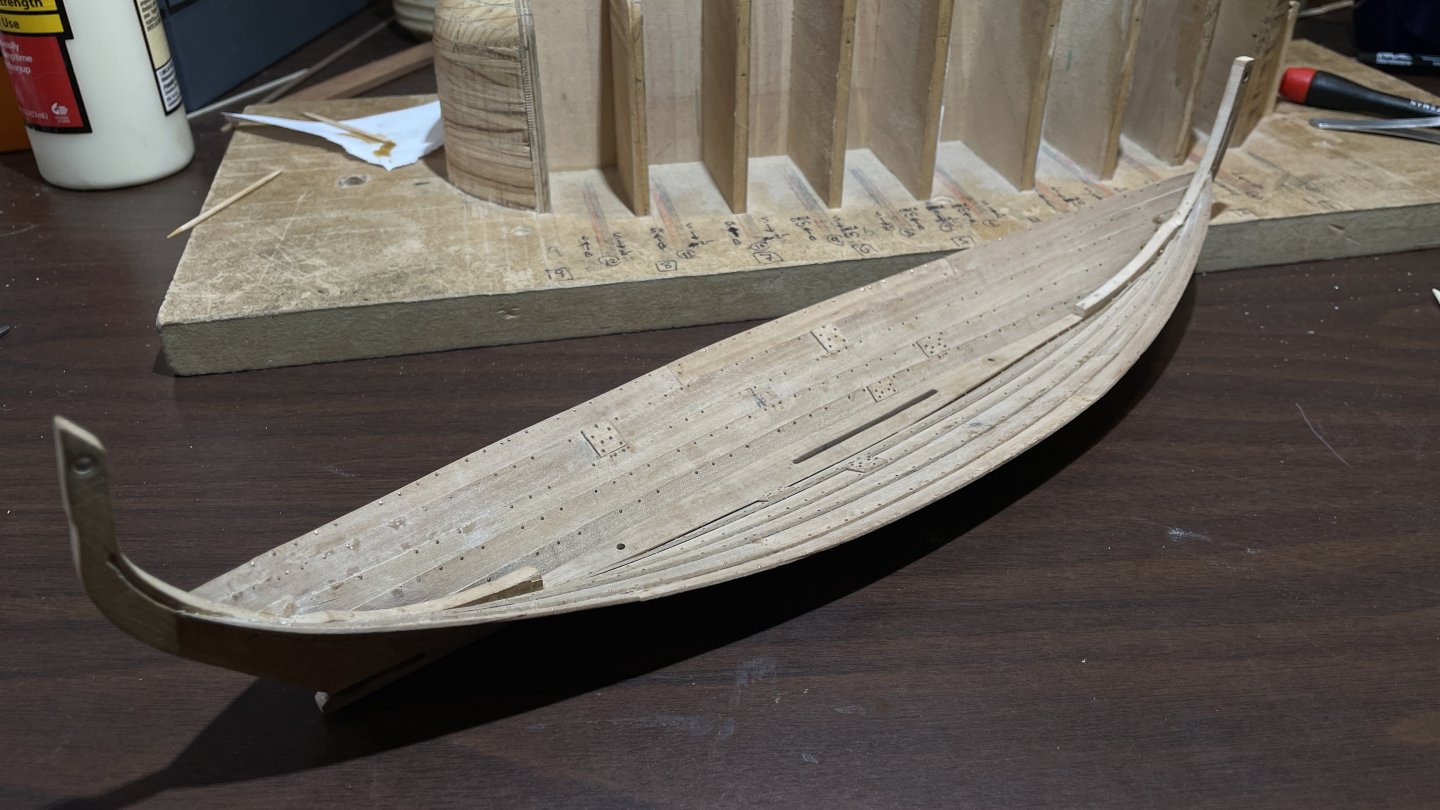
Since the last update, only 4 strakes added to port and 3 to starboard. That makes me 75% done with the hull, minus some touchups that will be needed at the end. Not much to show for 10 months, but I did have a really good summer, including 3 trips to Europe (the first since before COVID). The first of these was back to Denmark, which I think I last visited in 2008. I saw Christian Nielsen's model of this same boat (Christian Nielsen is the grandson of the builder, also named Christian Nielsen), revisted her sistership Viktoria in Roskilde, and even traveled to the small island of Fejø to see the workshop in which she was built. 100% done with the hull by New Year's Day?


- 24 replies
-
- 7
-

-
- De 13 Søskende
- sail
- (and 5 more)
-
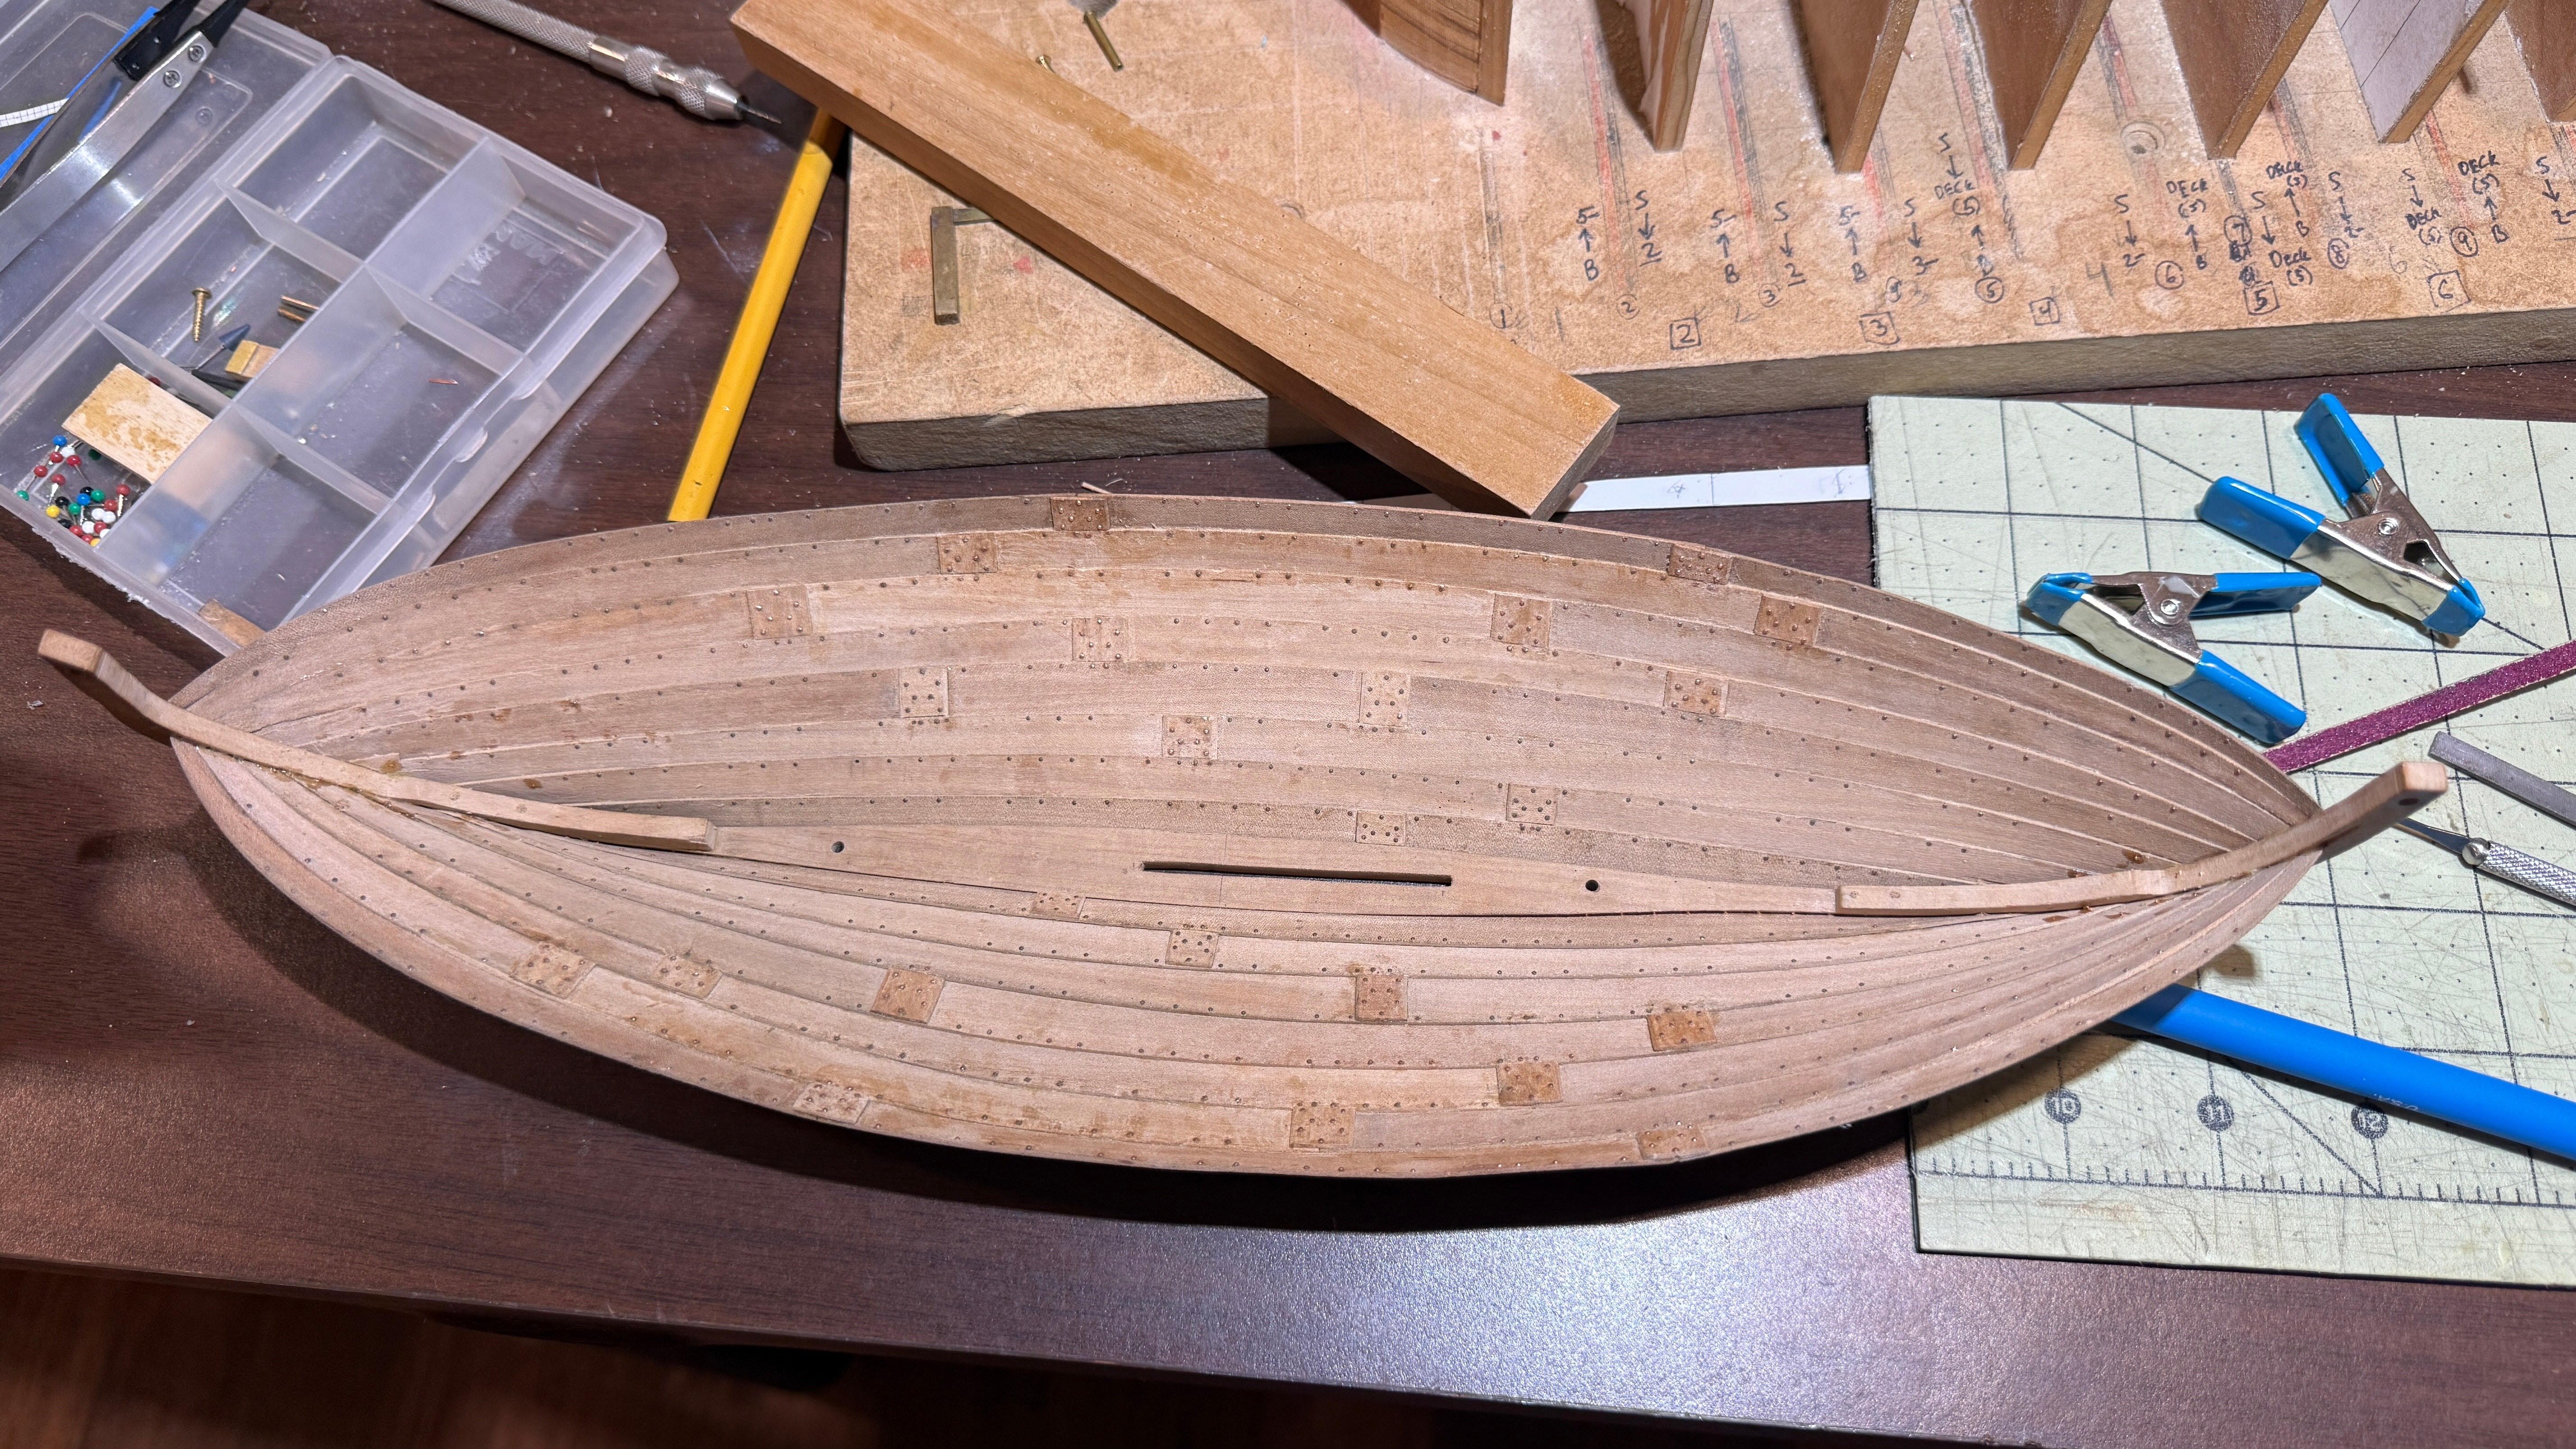
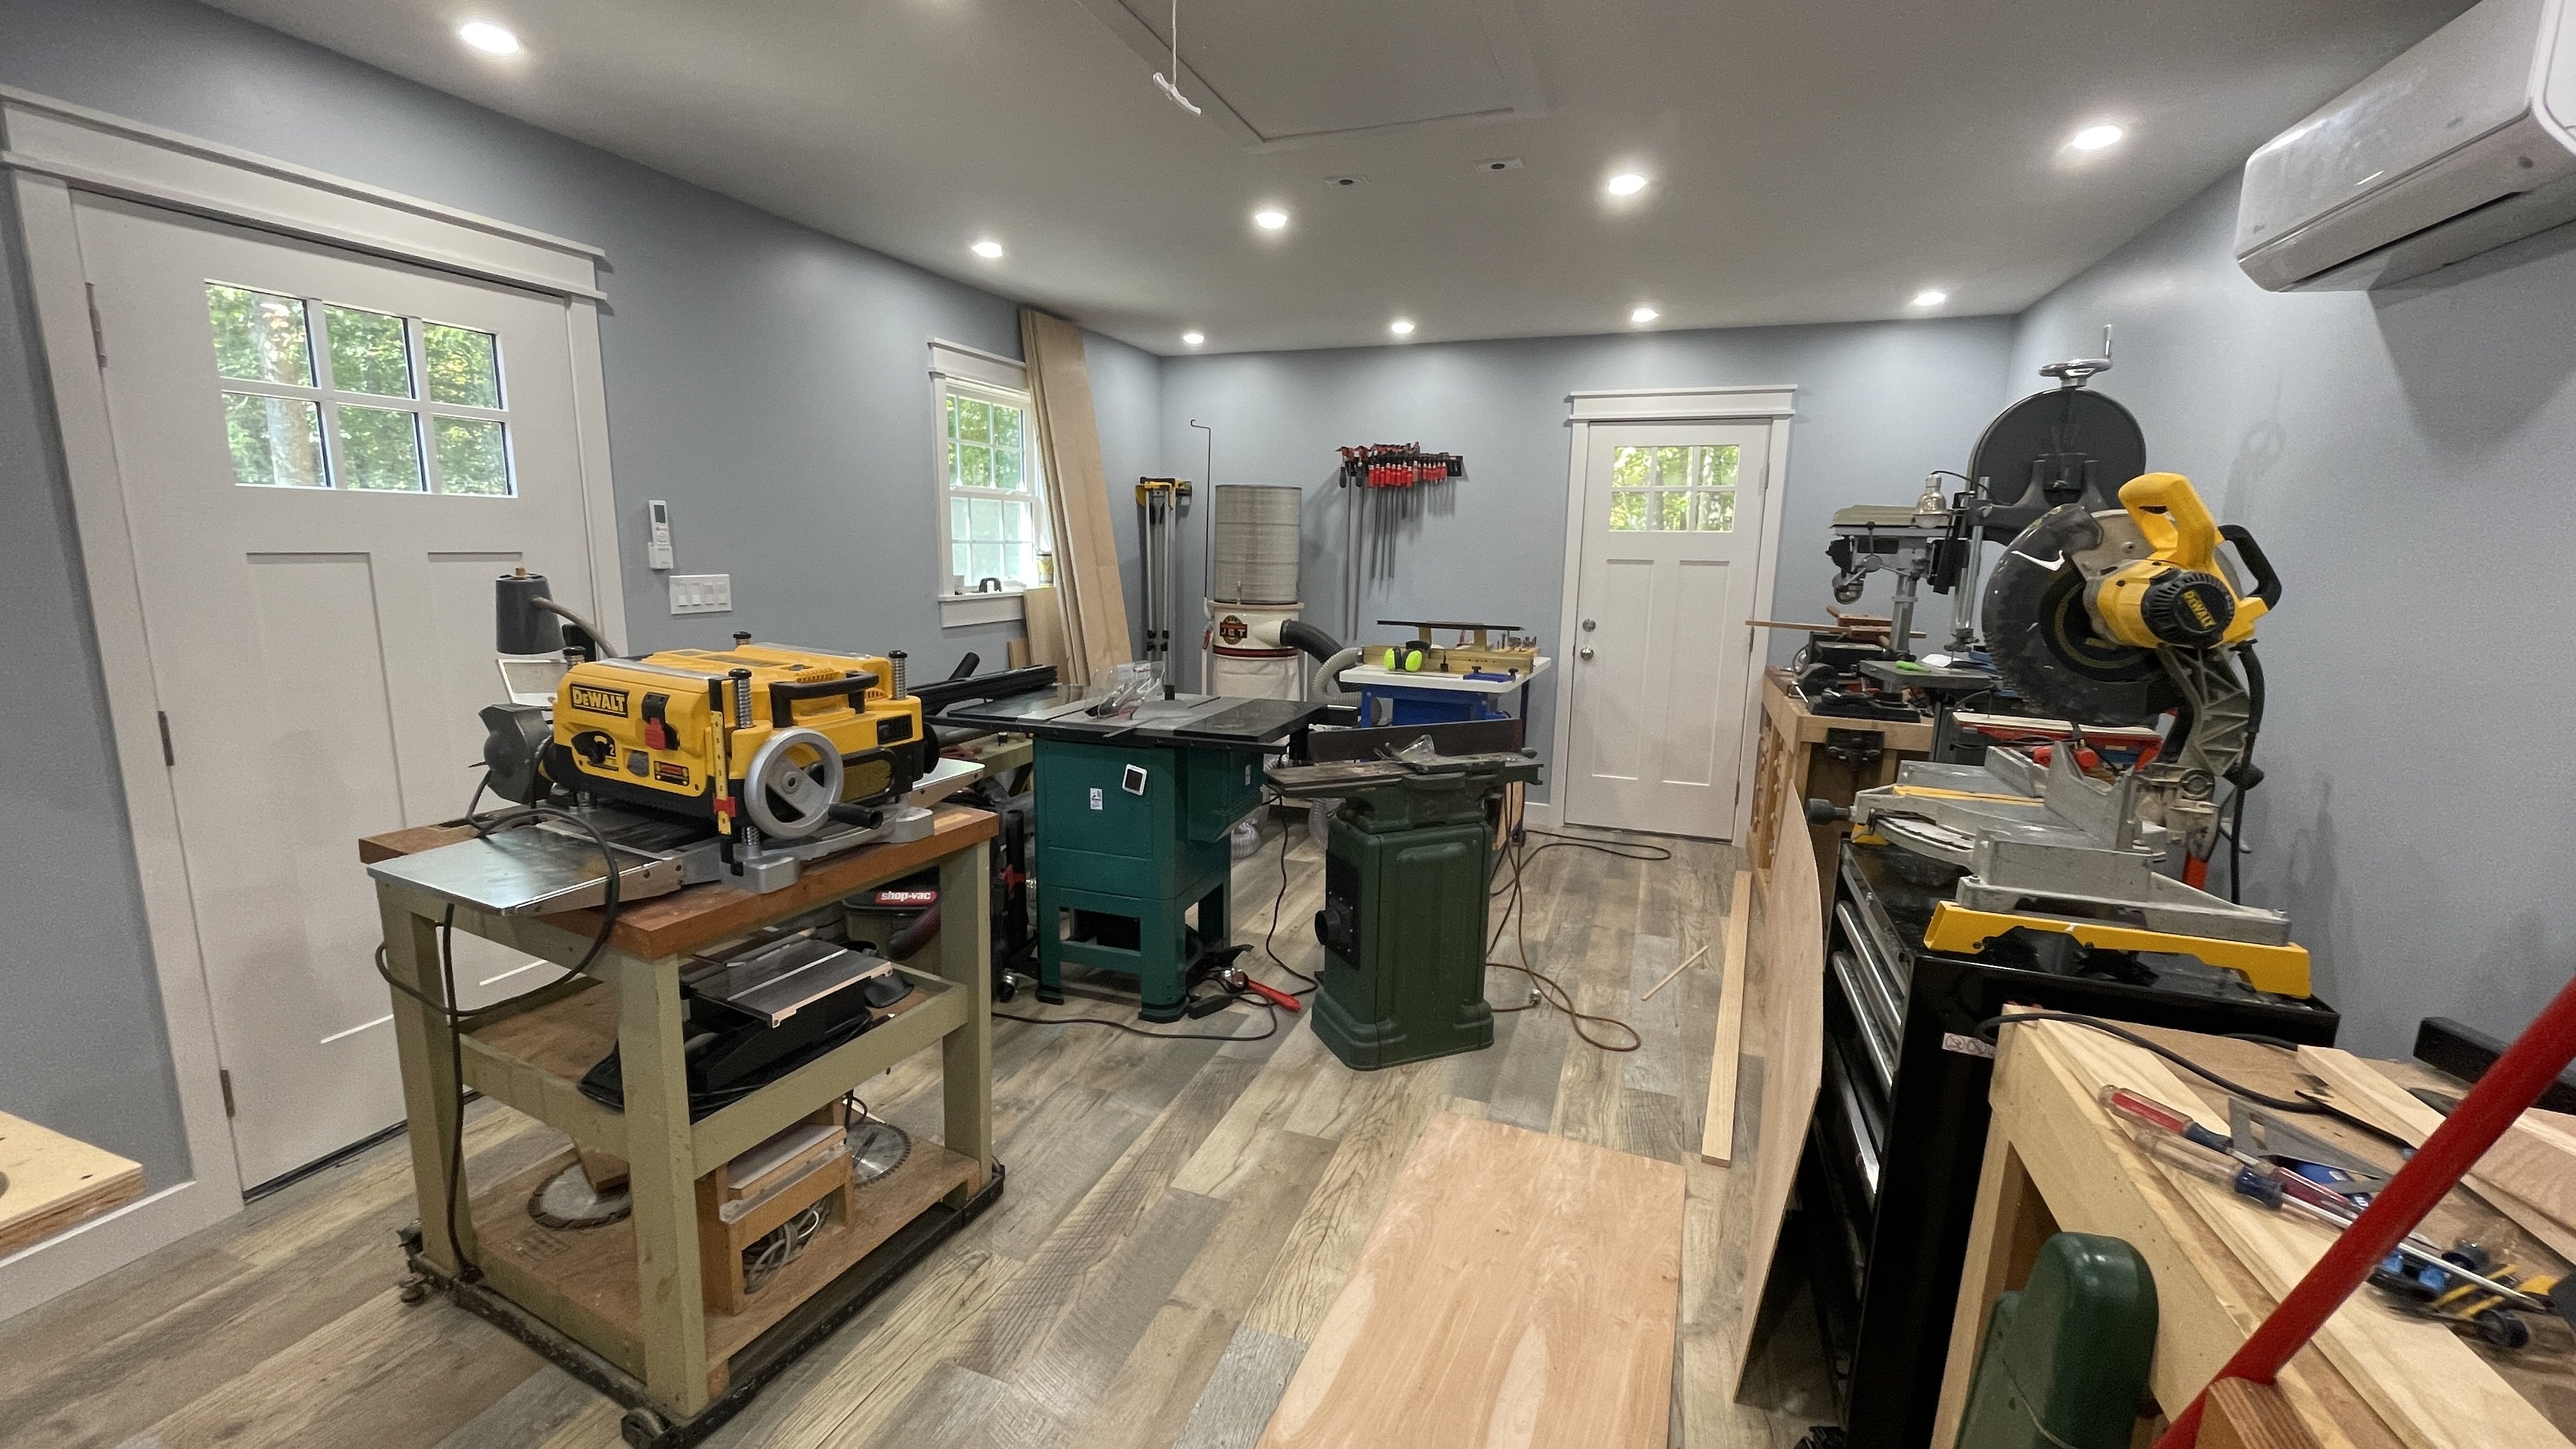
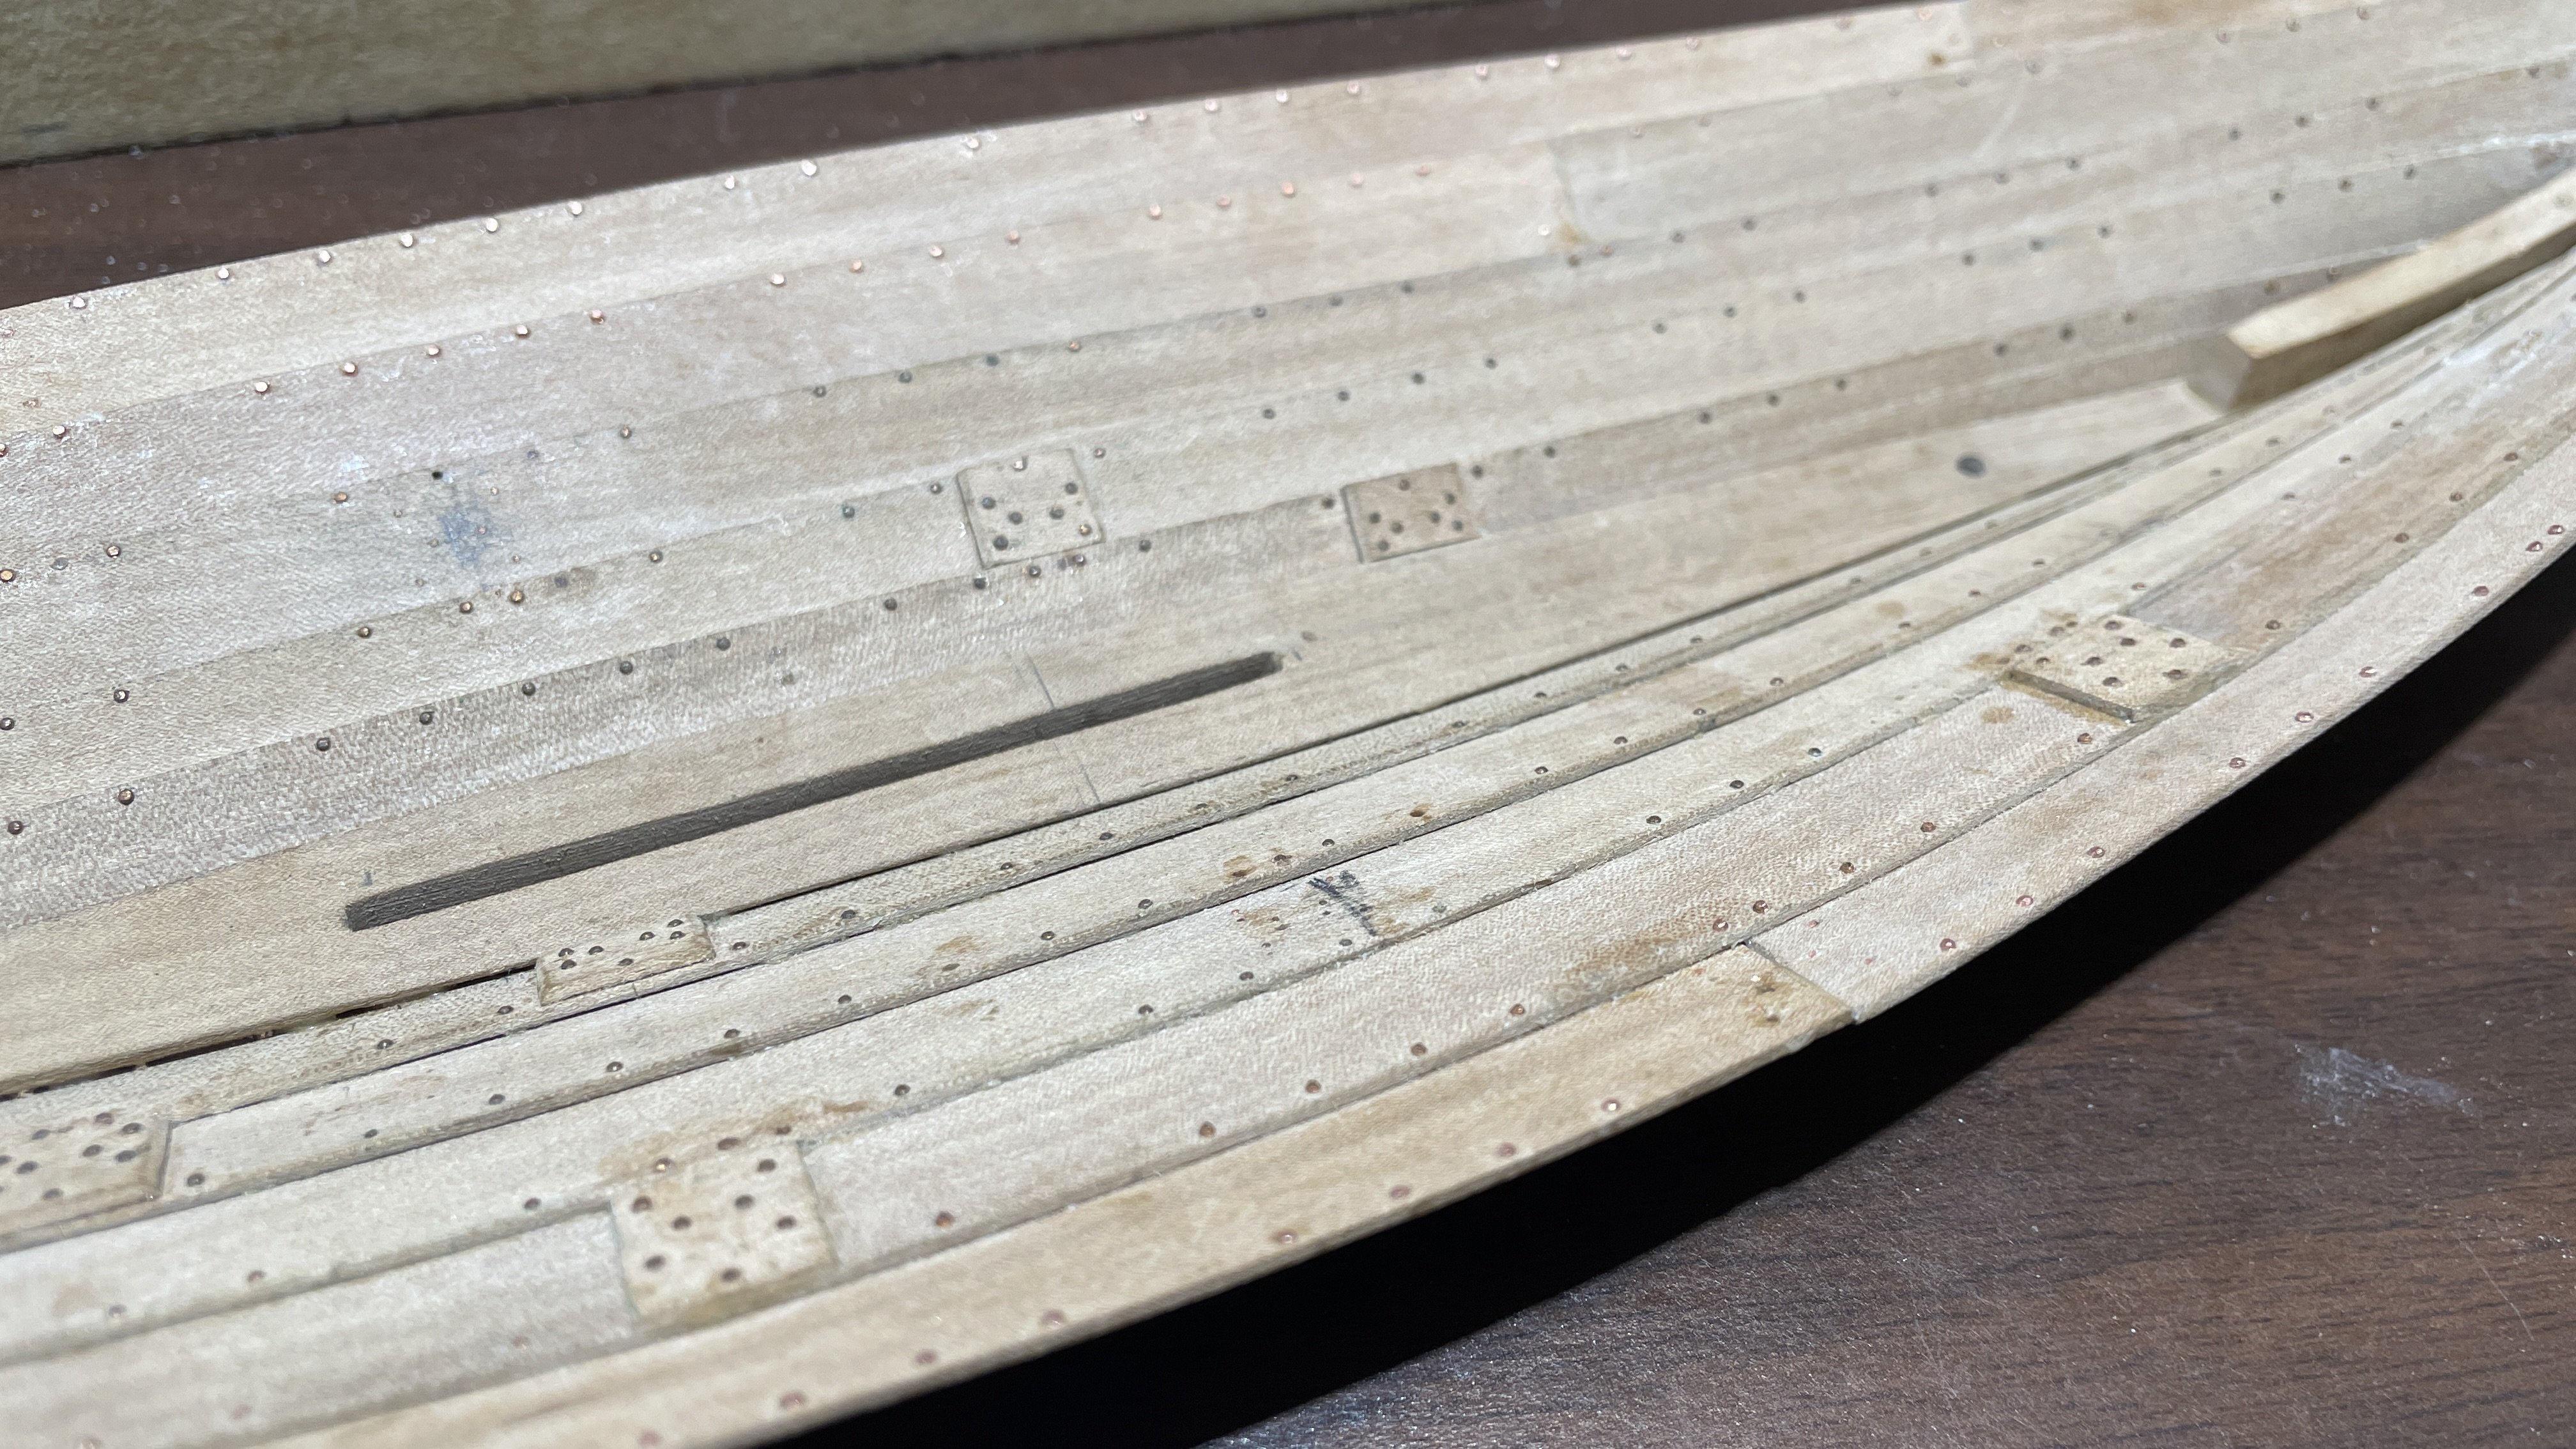
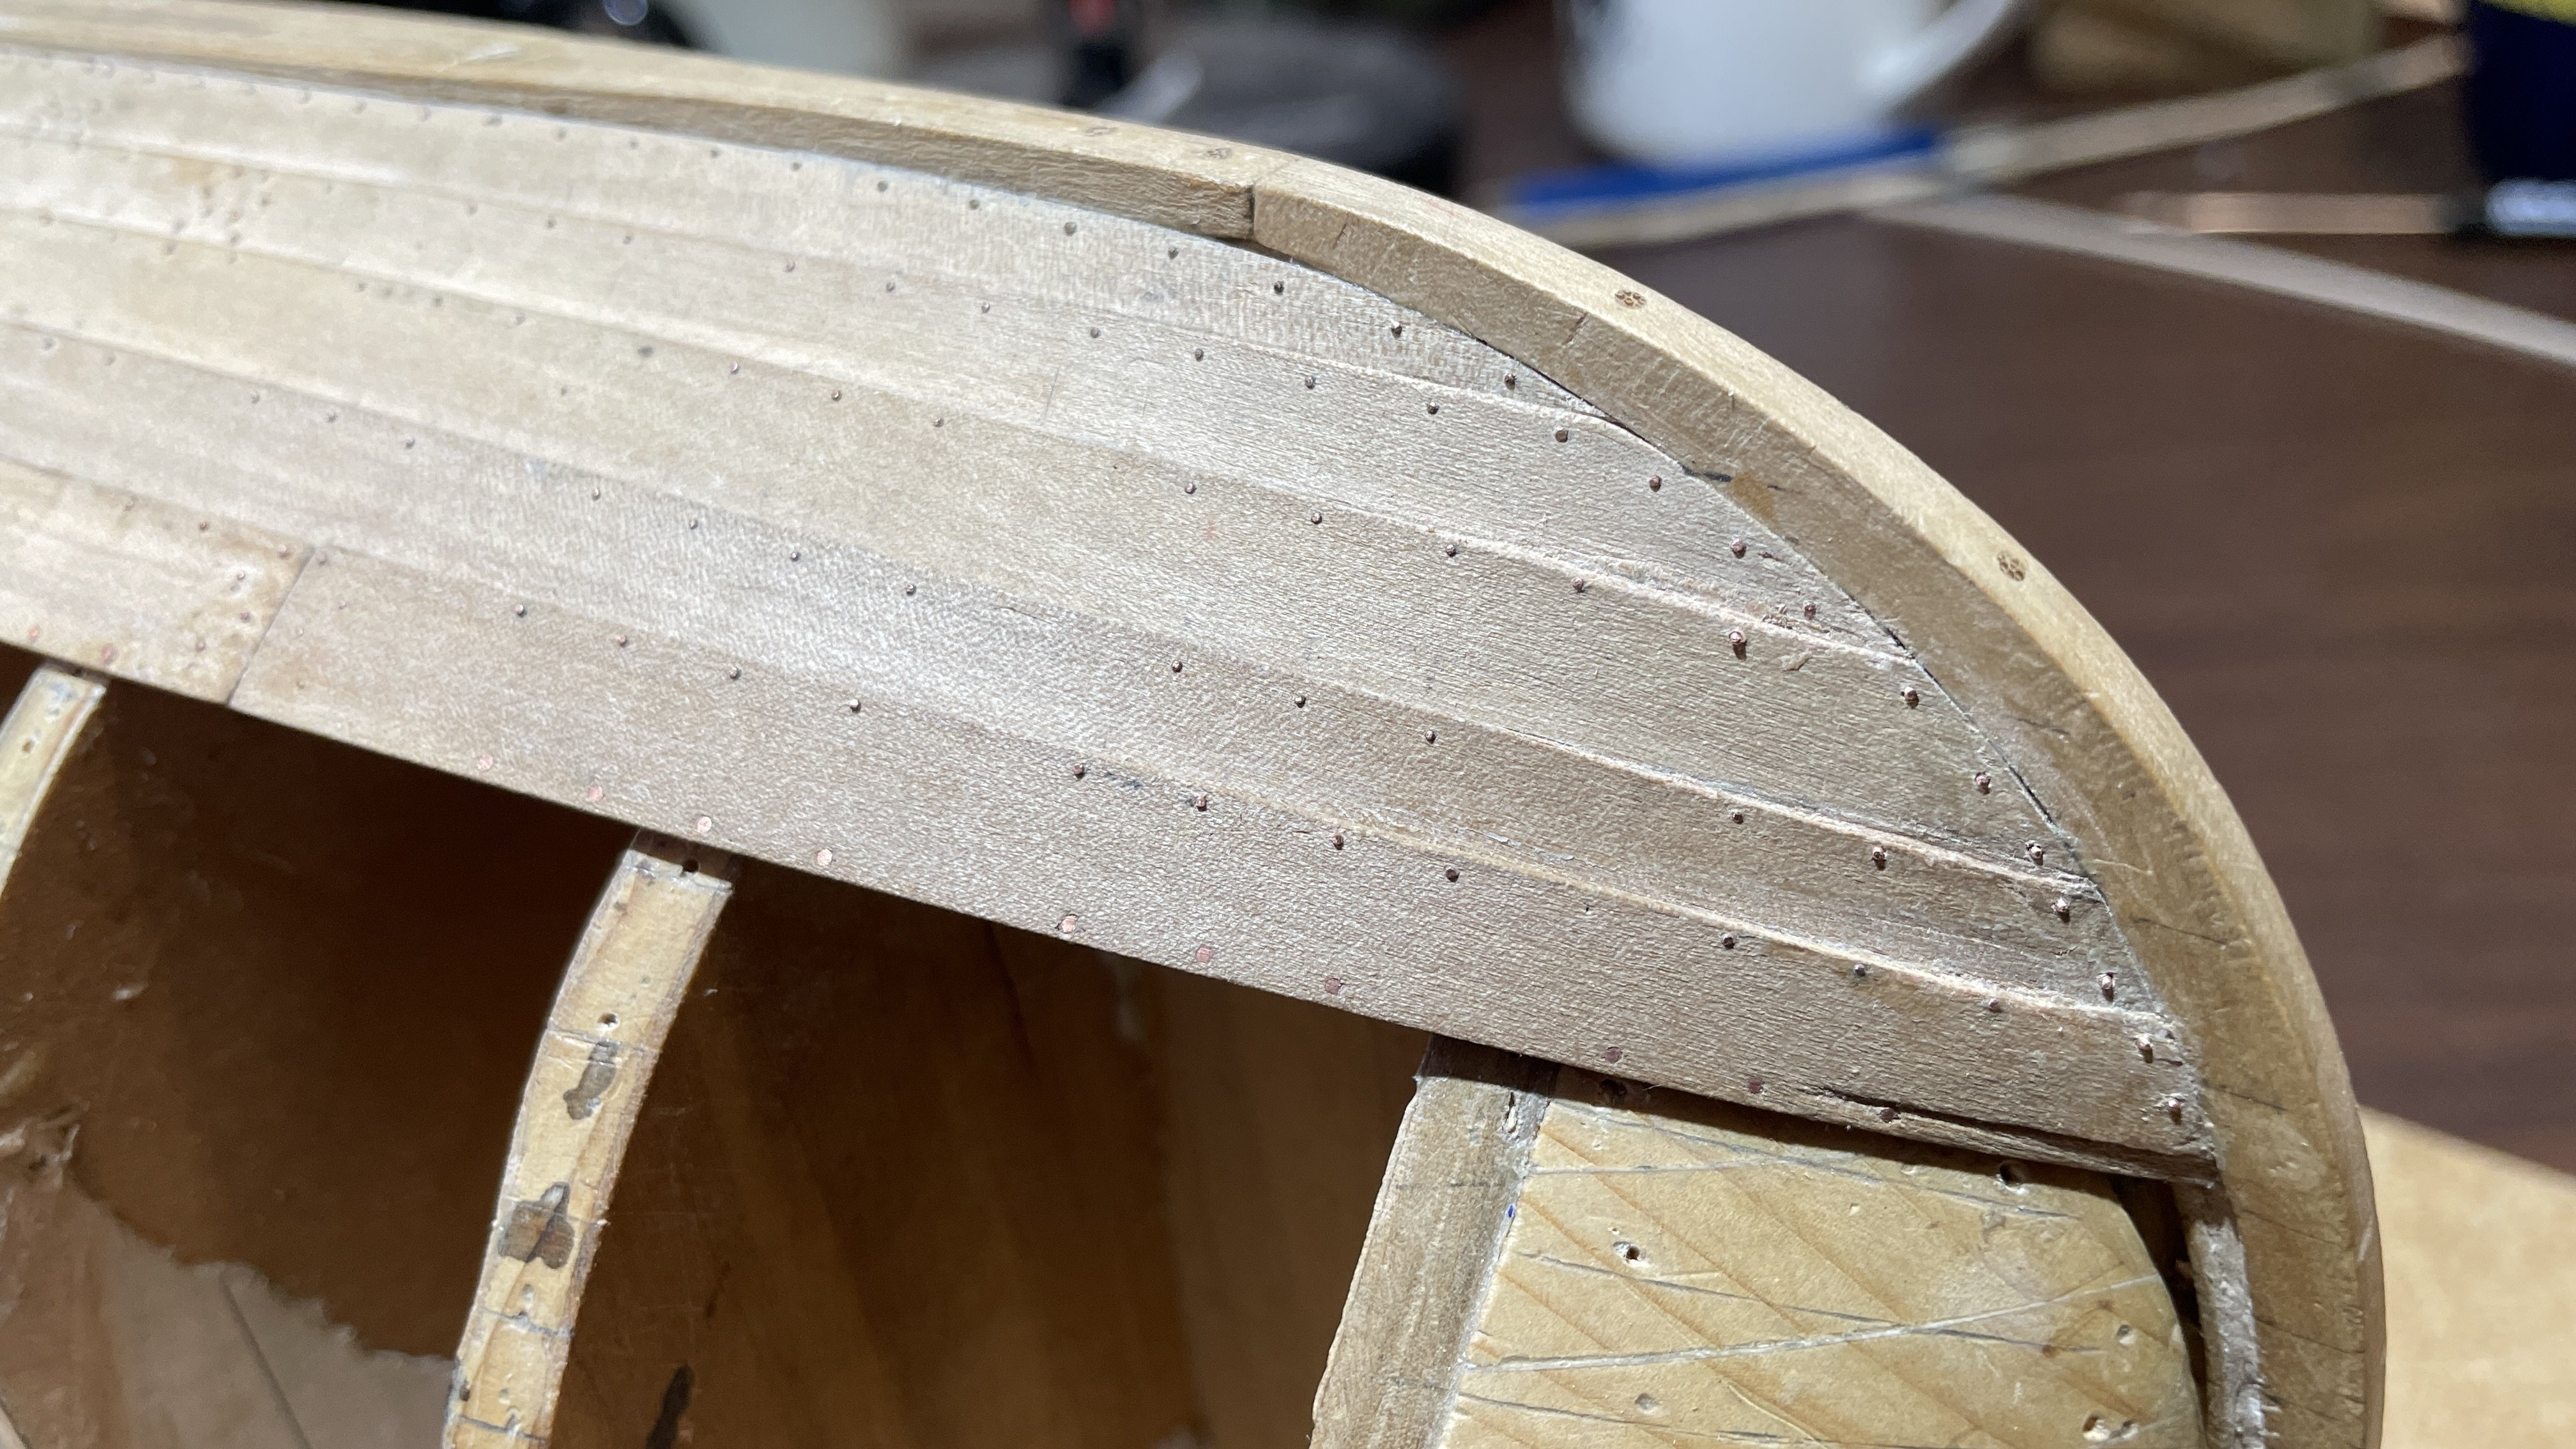
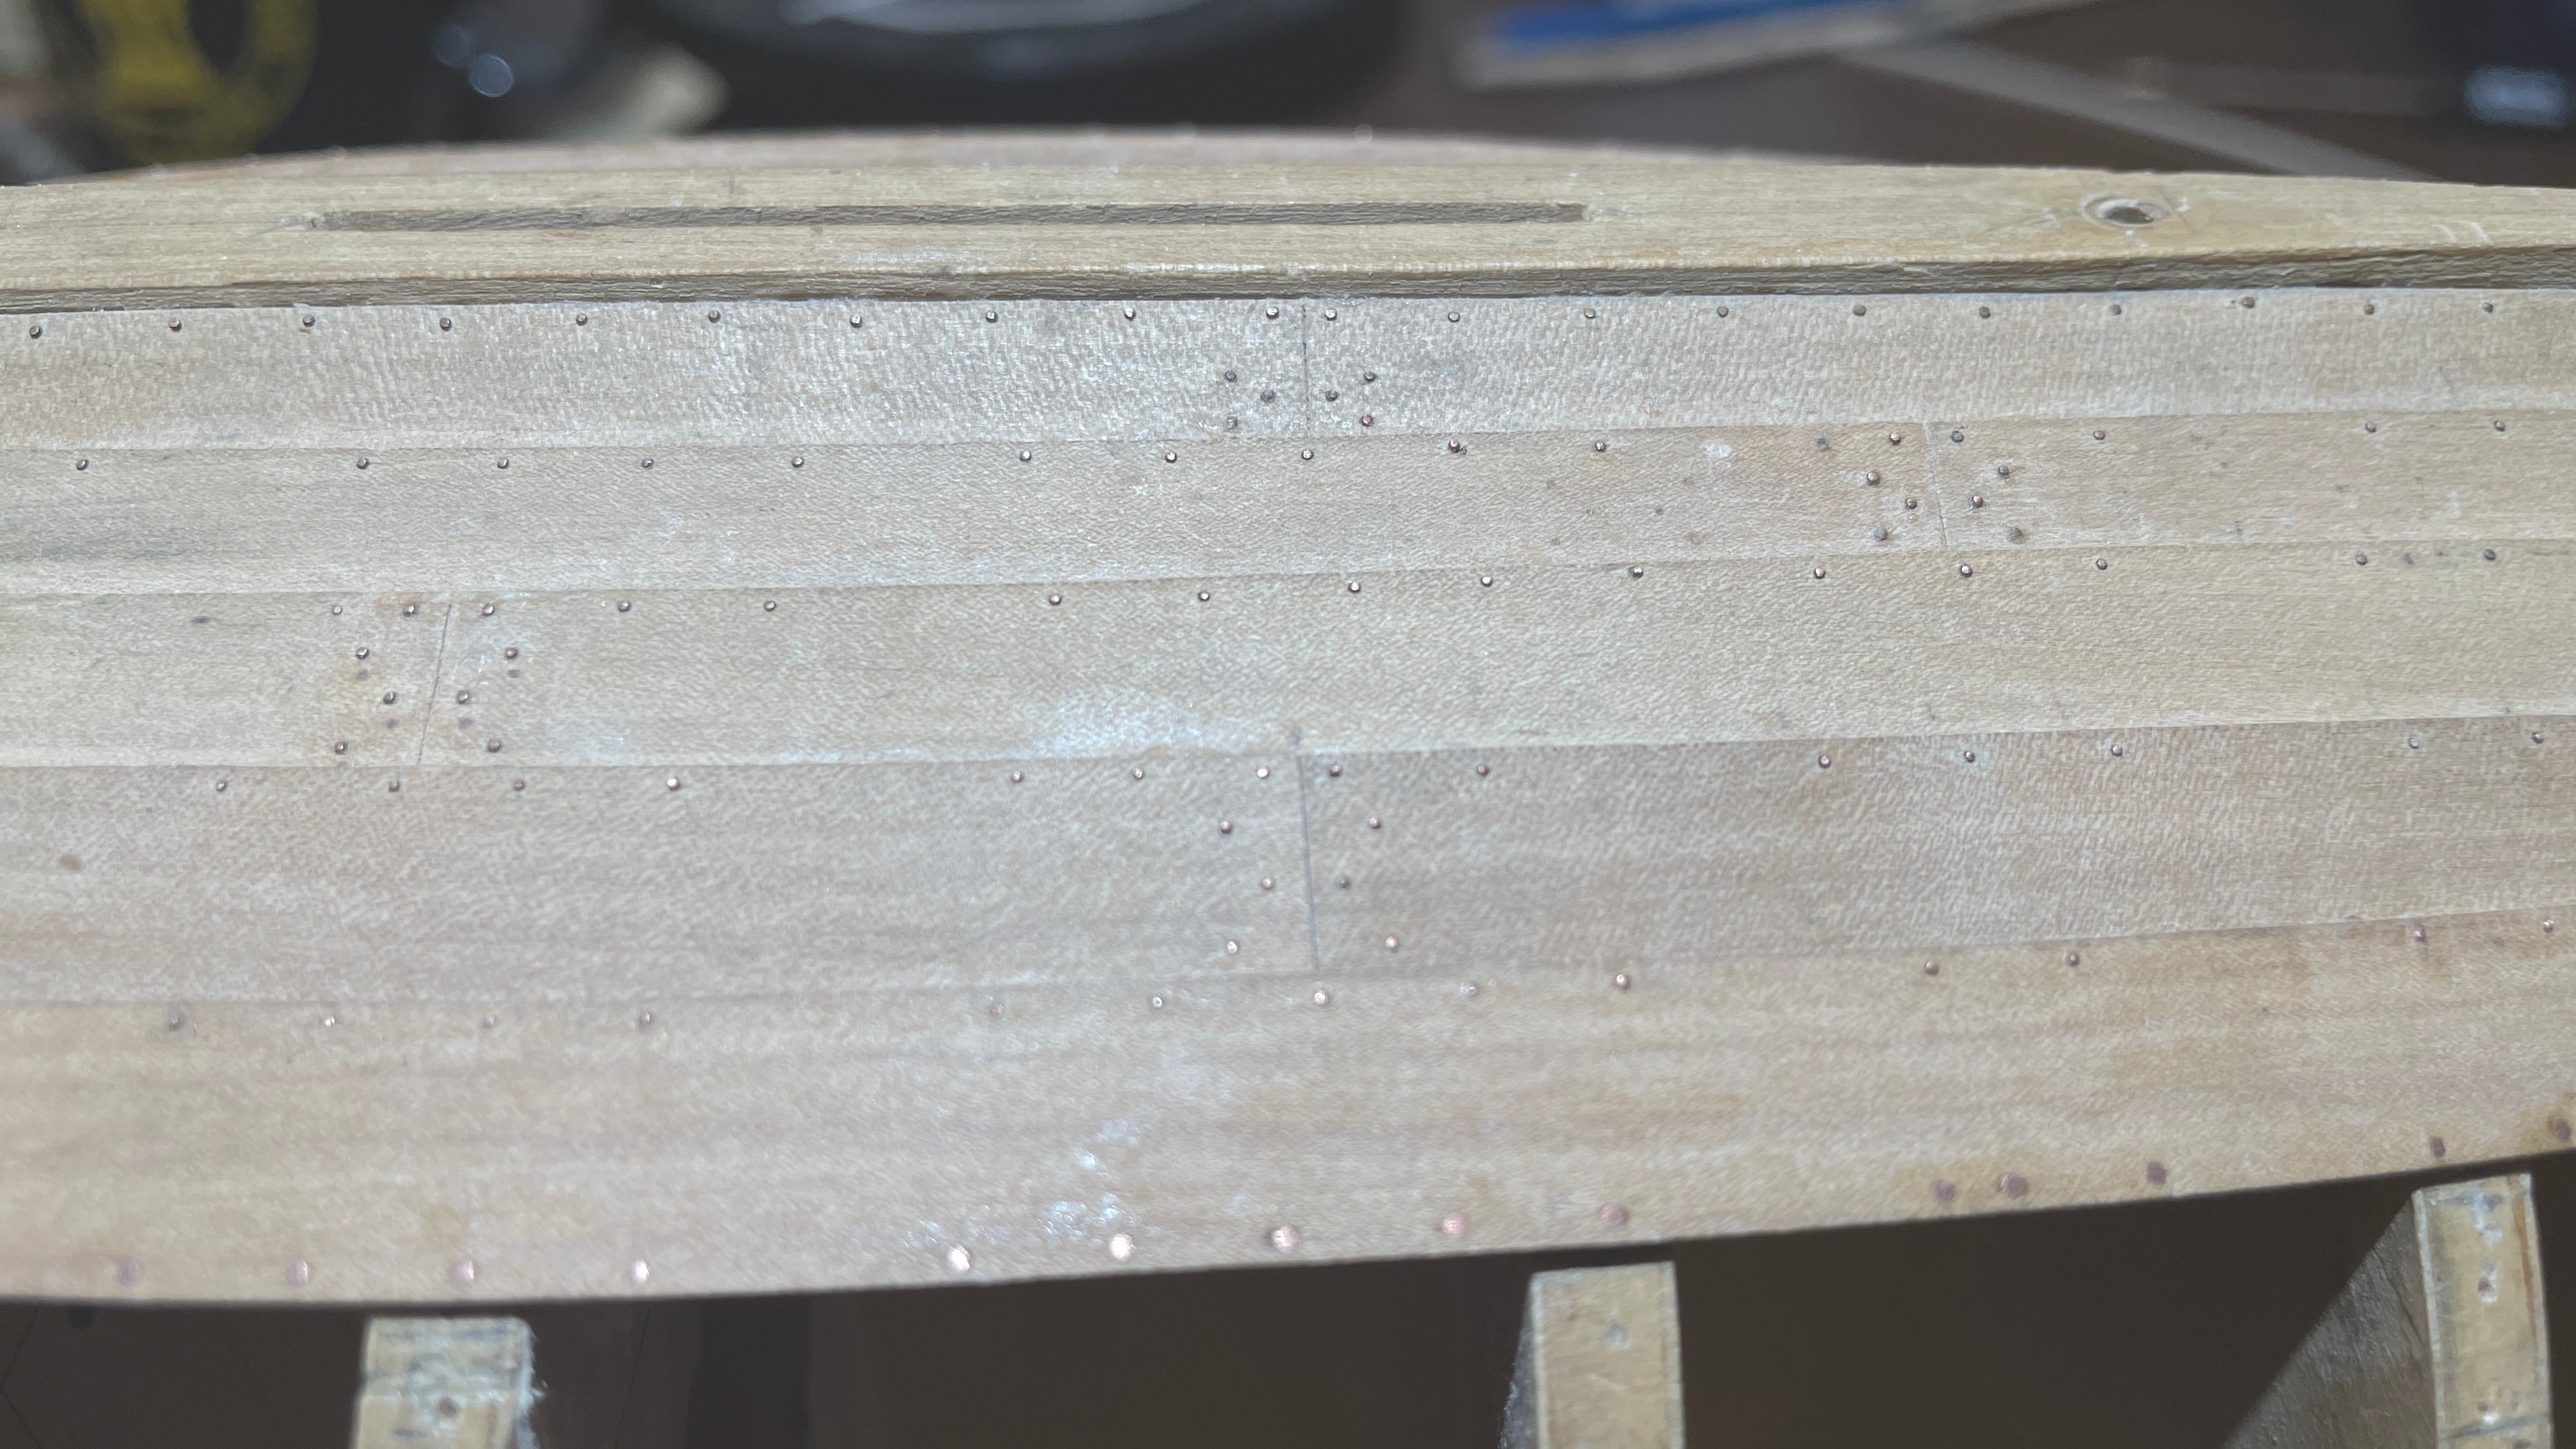
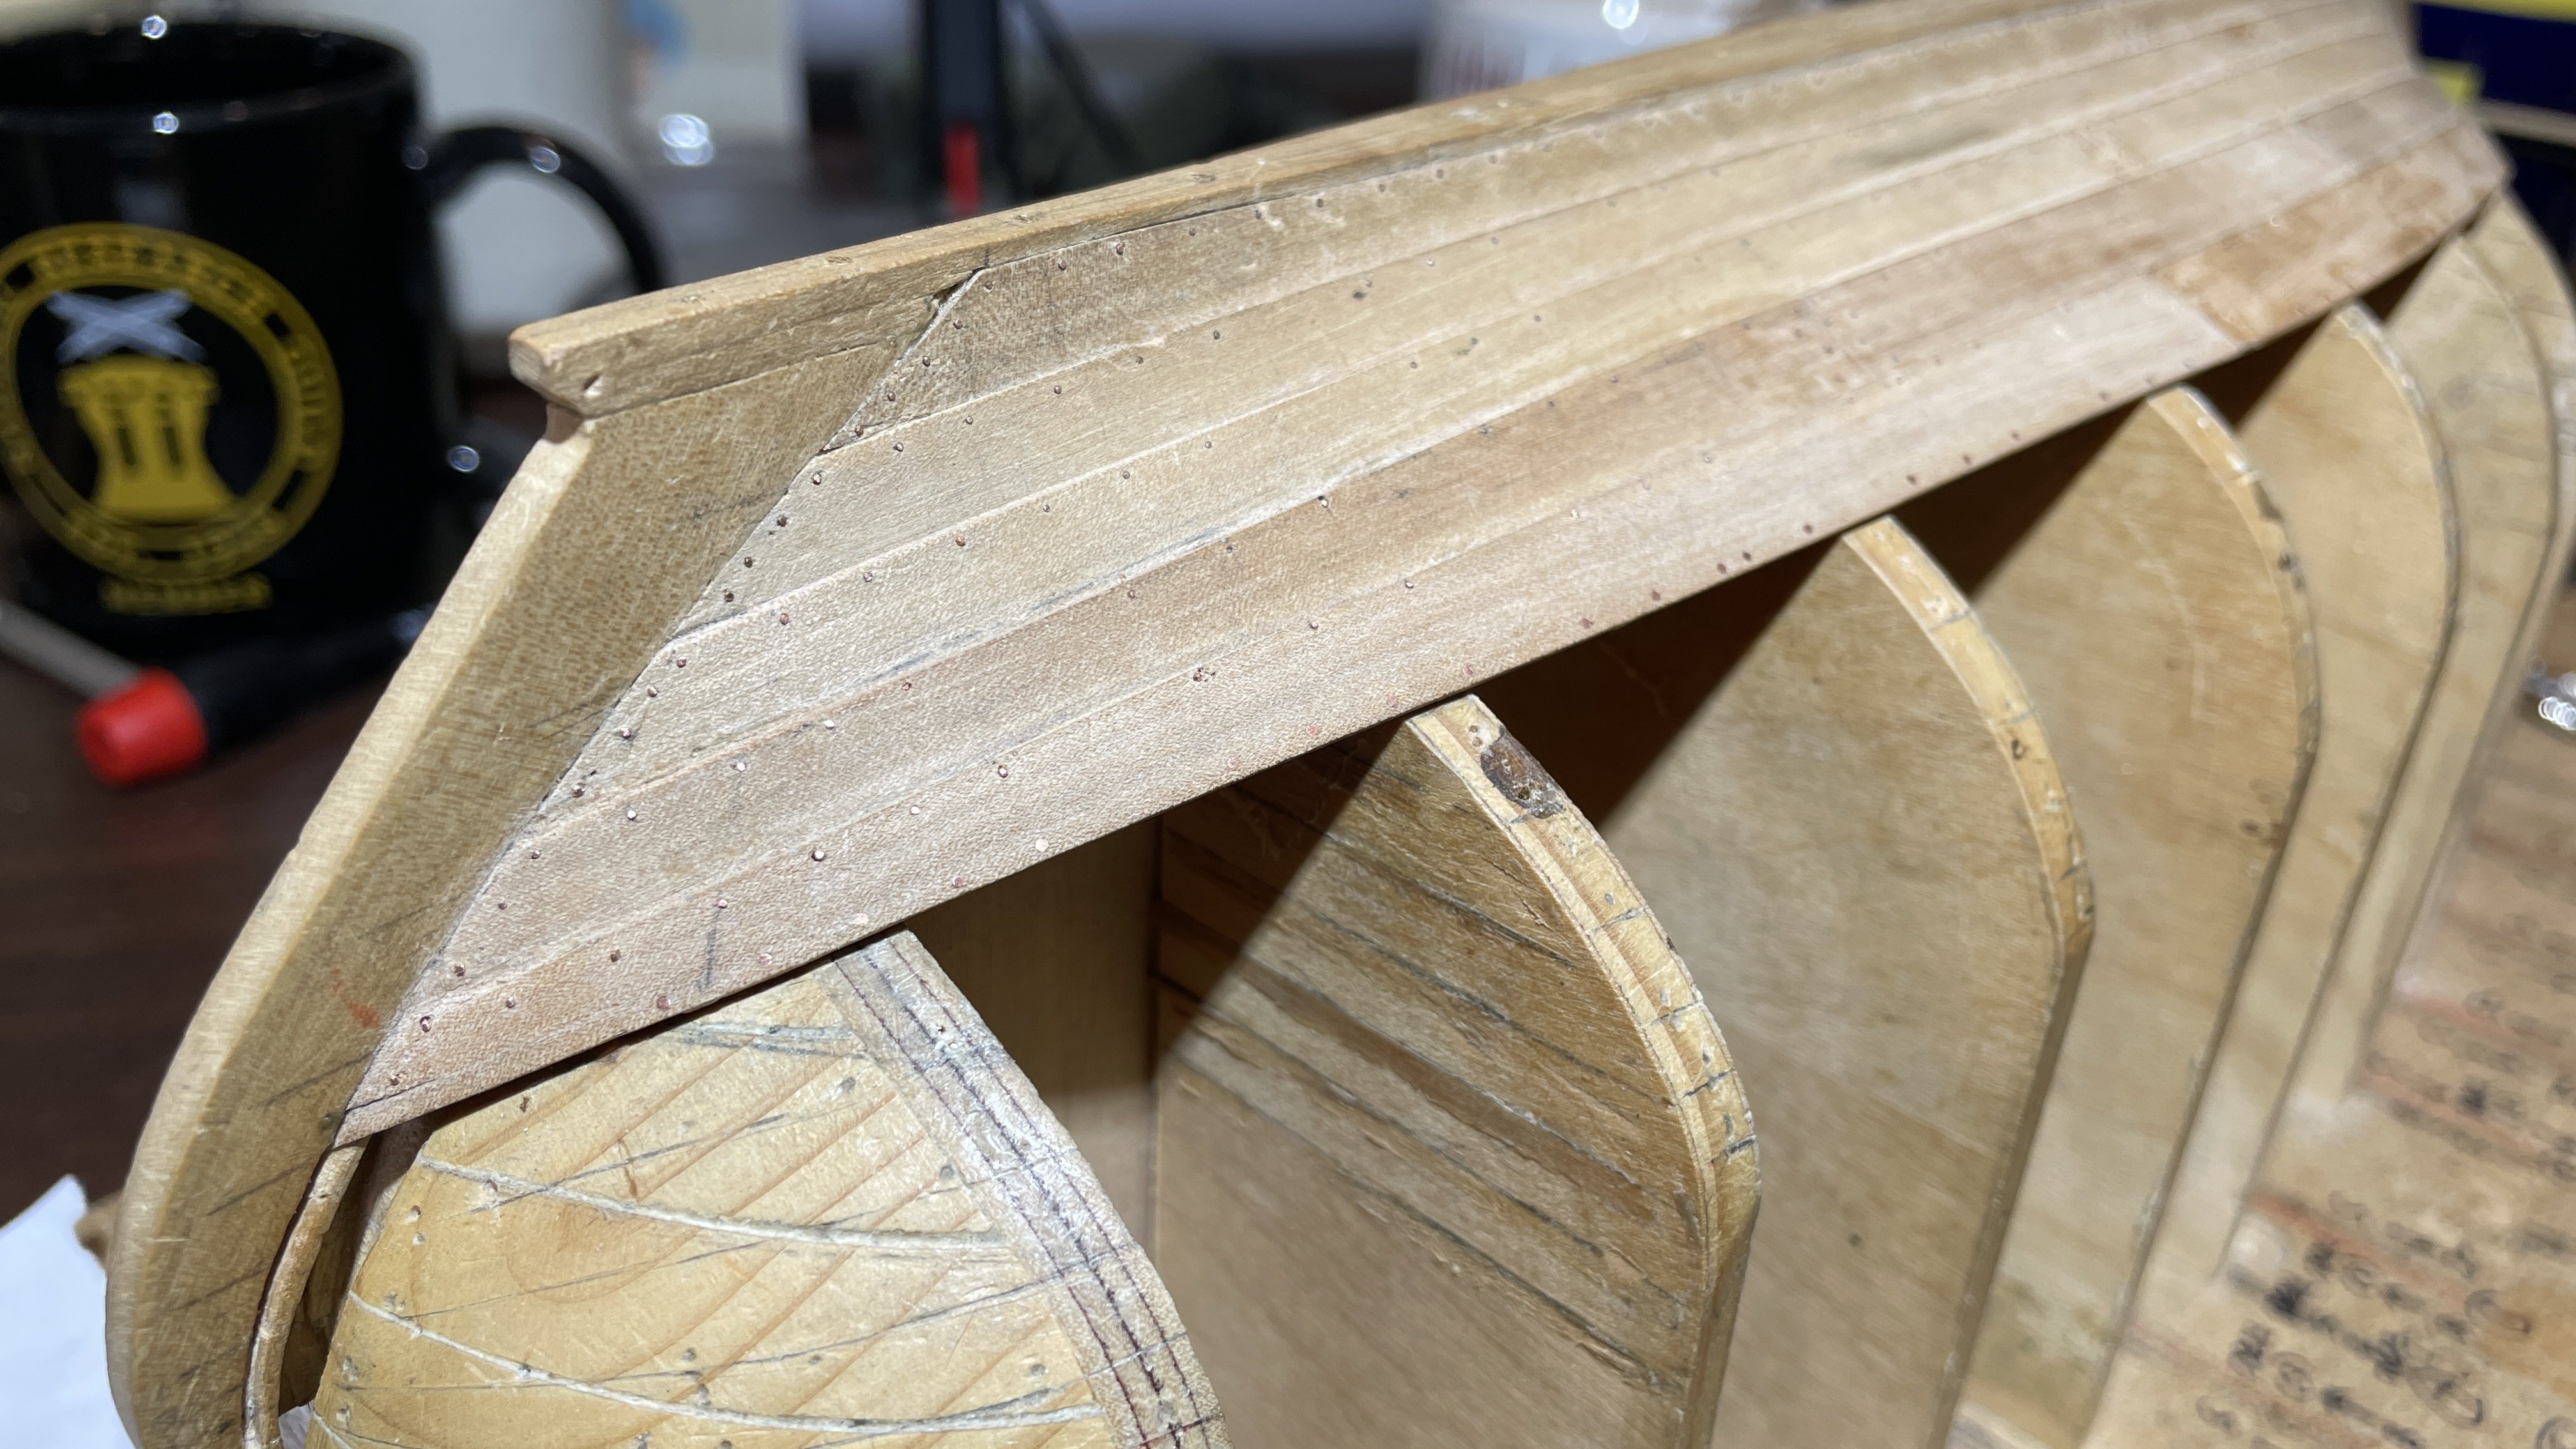
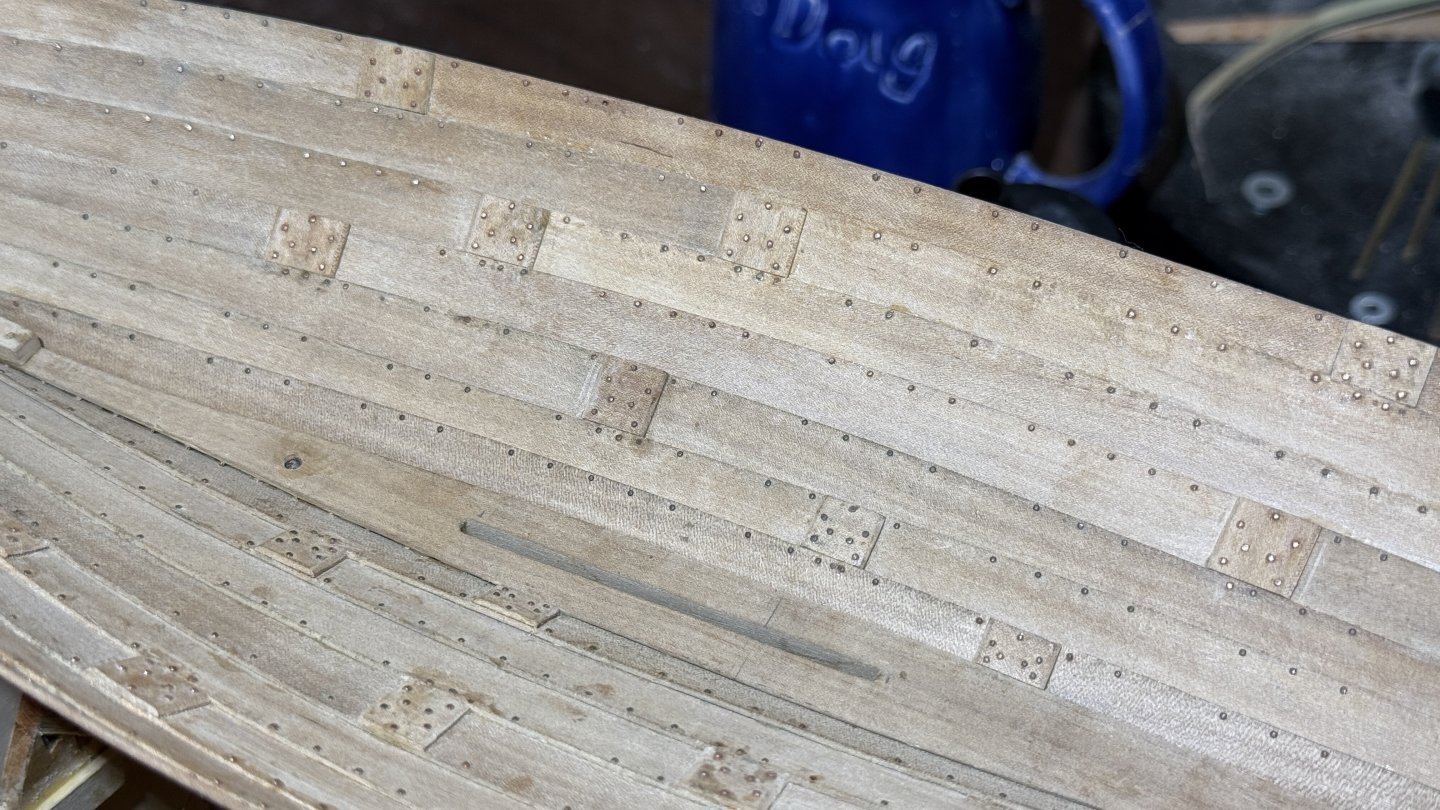
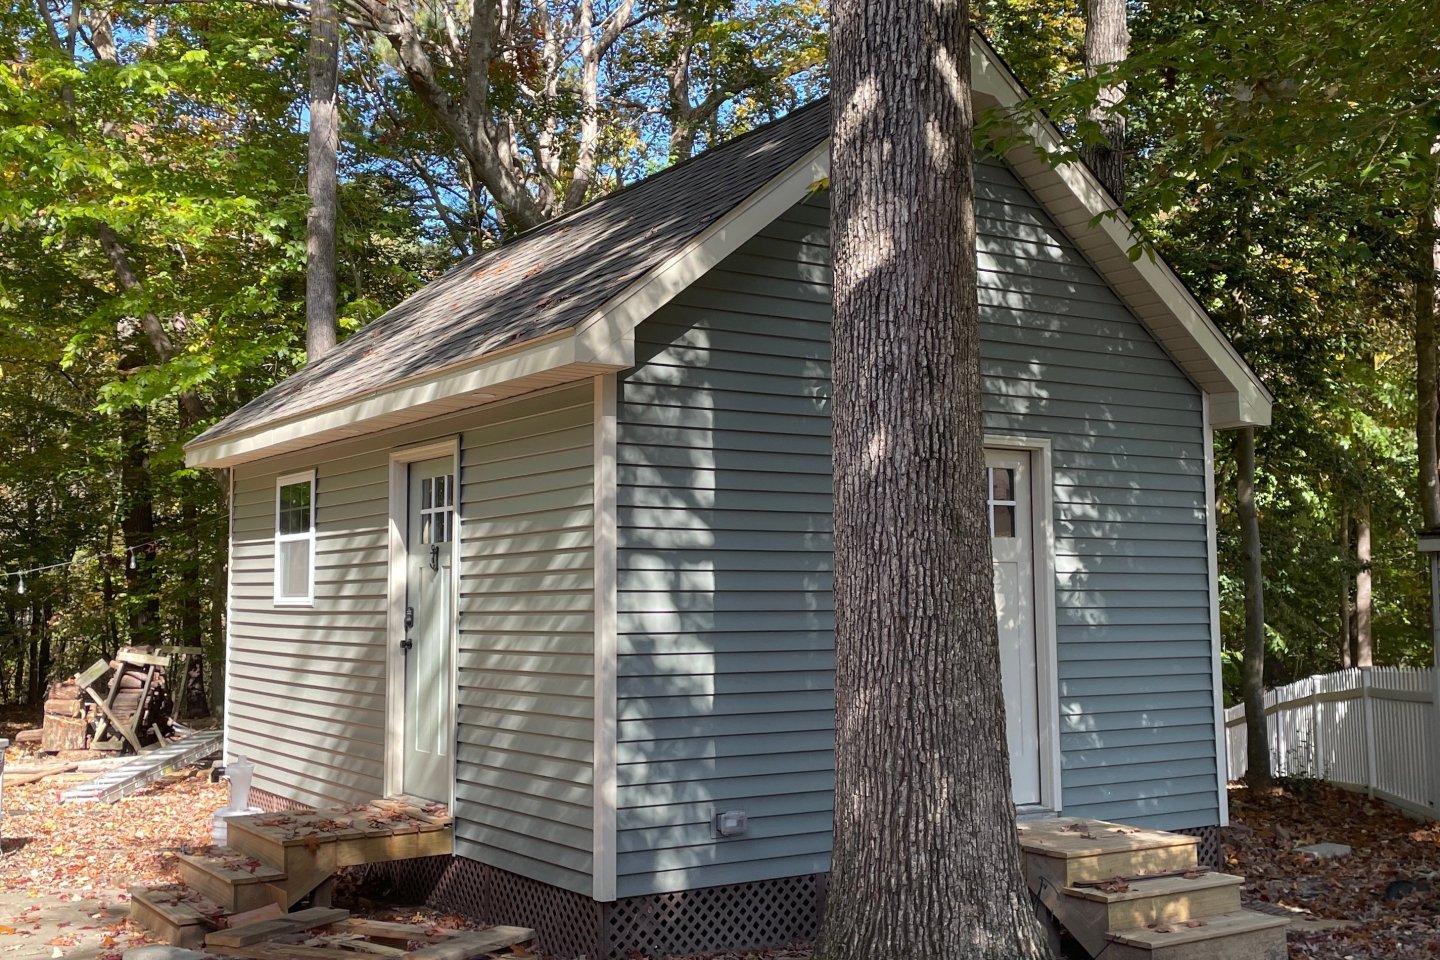
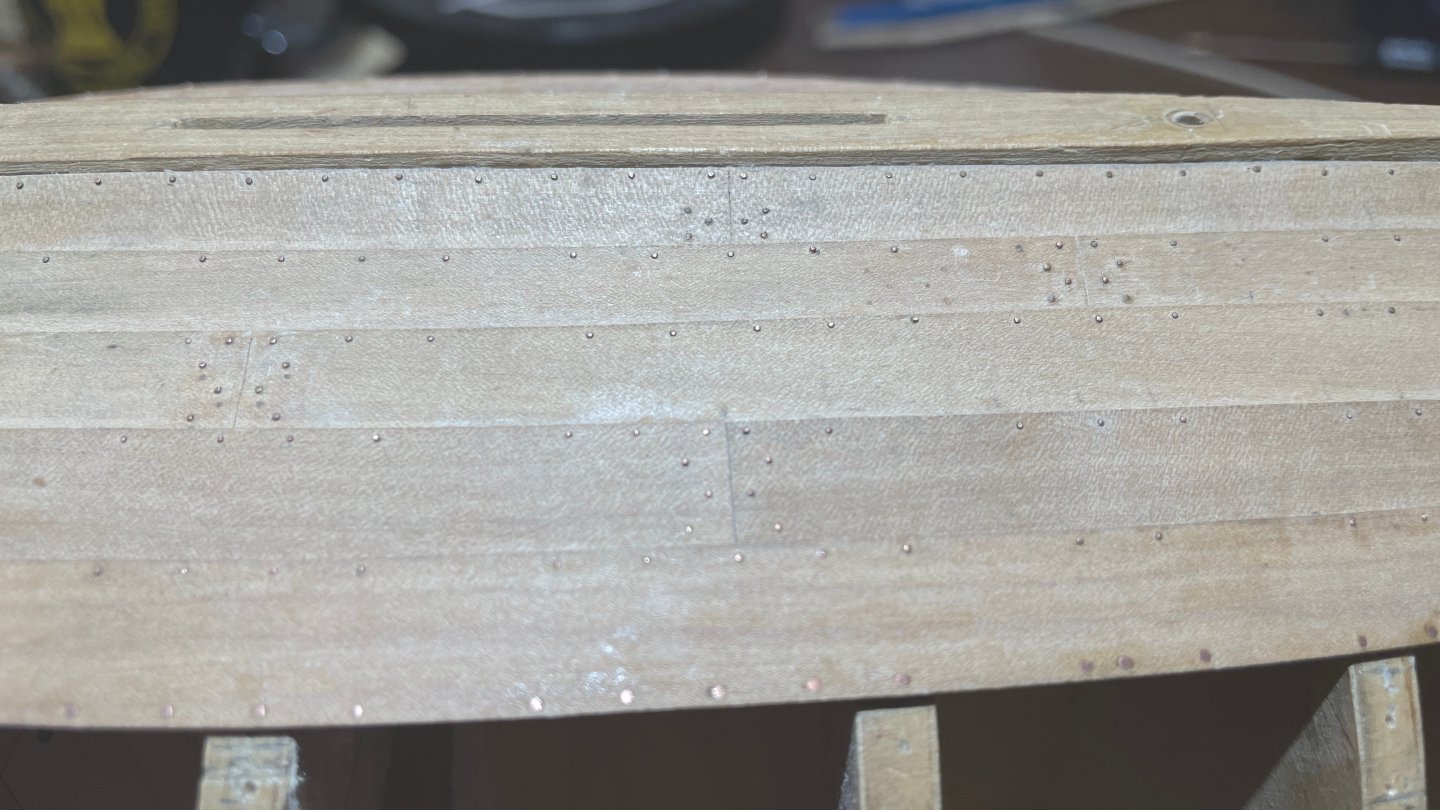
It has been almost 2-1/2 years since I showed any progress. The model was set aside while I designed and built a new shop for my larger tools. The old shop was far too crowded, had poor light, and no heating or cooling. I did 99% of the work myself. A lot of things I did for the first time (including bending aluminum trim) and it took a lot of research to ensure I was doing it correctly and to code. I'm glad to say that project is finally finished. When the model was set aside, 5 of the 6 planks forming the 4th strake were in place. Since finishing the workshop about 3 months ago, I've only managed finish the 4th strake and add the 5th. As there are 10 strakes, this is a small milestone - half way through the planking. Most of these rivet heads shown here wiIl be covered by the deck, which is at the top of the 5th strake amidships and about the top of the 3rd at the stern post and forward end of the cabin. I included them as practice and also for the sake of construction photos such as these. I stopped adding the butt blocks. Some where never added because they interfered with the building jig. For the others, clamping the next plank in place sometime drove the faux rivet heads into the block. I'll add the rest when all the planking is complete. I know people for whom the hull is only a chore and the rigging is their true love. I am the opposite. I truly love a nicely formed hull, so I've spent a great deal of time to do the best job I can. I've fallen short of my own expectations (which did NOT include perfection), but I am not entirely displeased with the results so far. I don't mind learning from mistakes, but the bad part is that I repeat them too many times. My new favorite saying is "I never make the same mistake twice. I make it 4, 5,6 times, just to be certain." Worse than repeating mistakes is when I cannot figure out how the mistake occurred. The most painful mistake has been asymmetry of the planks at the ends. I measured and re-measured so many times I am flummoxed how this is occurring. I thought the problem might be cutting the gain too wide and later using it to line up the next plank, instead of using the next mark on the stem or stern post. You don't want the gain on the plank underneath exposed! But I know I did not cut them wide enough to account for the errors I have encountered. I was unwilling to replace the planks due to the risk of causing more harm than good, and the time it takes to shape a plank and add all the faux rivets. Some bad planks were not discovered until one or two more had been added. I resorted to scoring a curve along a spline clamped to the hull. The spline is aligned with the point it needs to be at the stem/stern and lies right along the plank edge starting a few scale feet away. This picture is exagerated - I never had to trim off quite that much. In a few cases where the offending plank had already been covered by others (no exposed edge), this effort resulted in a hole in the hull where it meets the stem or stern post. I repaired these with a putty made of wood glue and sawdust. I will use the same to fill in the gap left you can see above where the garboard strake meets the stern post - another dissappointment. I used dust from the same wood as the planks and it blends in rather well. It is still noticeable - I would say it detracts from rather than ruins the appeal. If I were leaving it natural, if not happy, I'd be at least satisfied with the results. It matters even less given the exterior will be painted and the repair will be covered up on the inside. So, not executed as hoped or planned, but acceptable. Those in my model club are chiding me for being too picky, but I feel I could do better and I think it is OK to strive for it. Onward we go.....


- 24 replies
-
- 6
-
-
- De 13 Søskende
- sail
- (and 5 more)
-
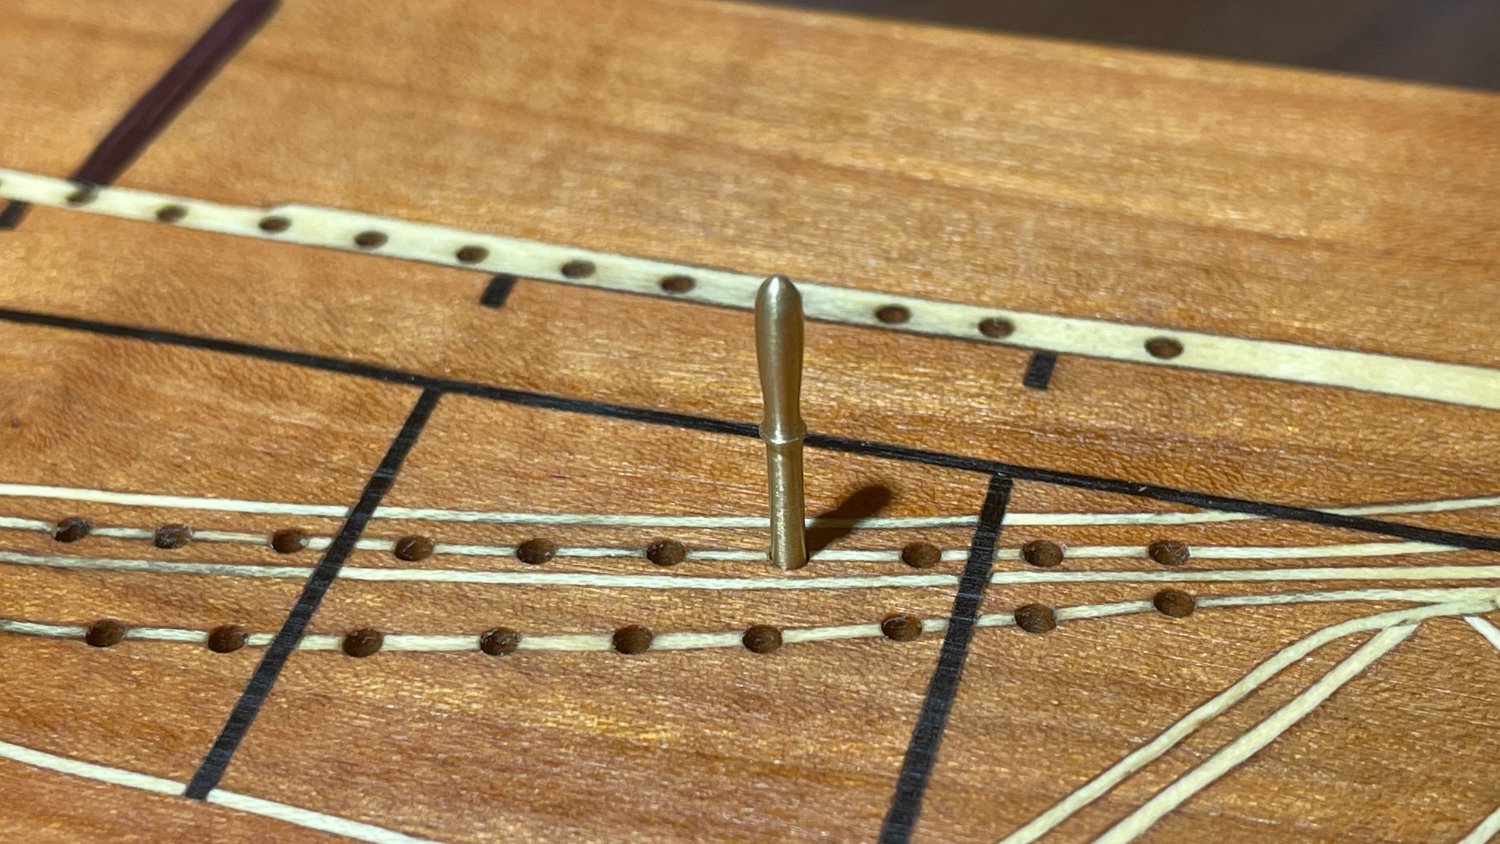
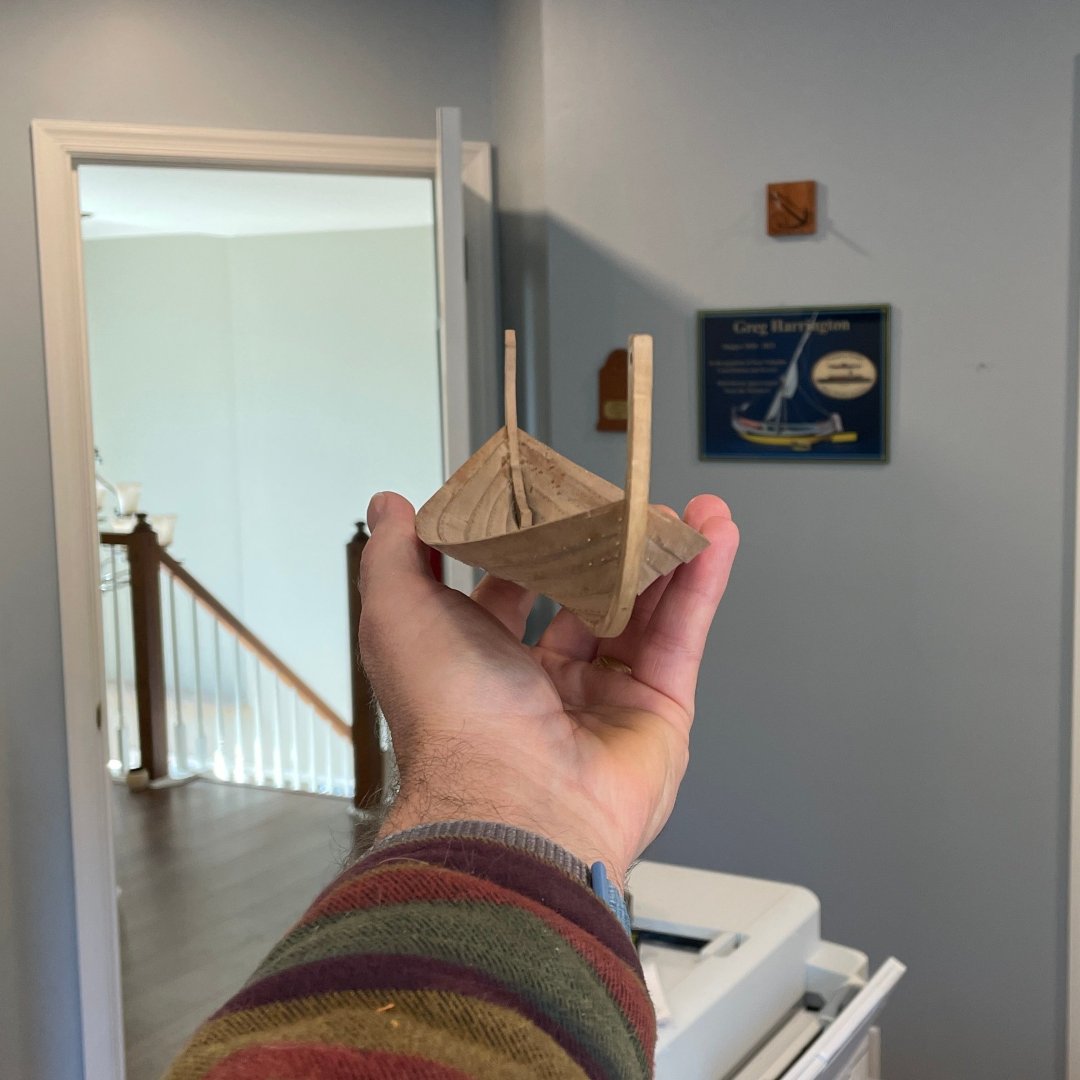
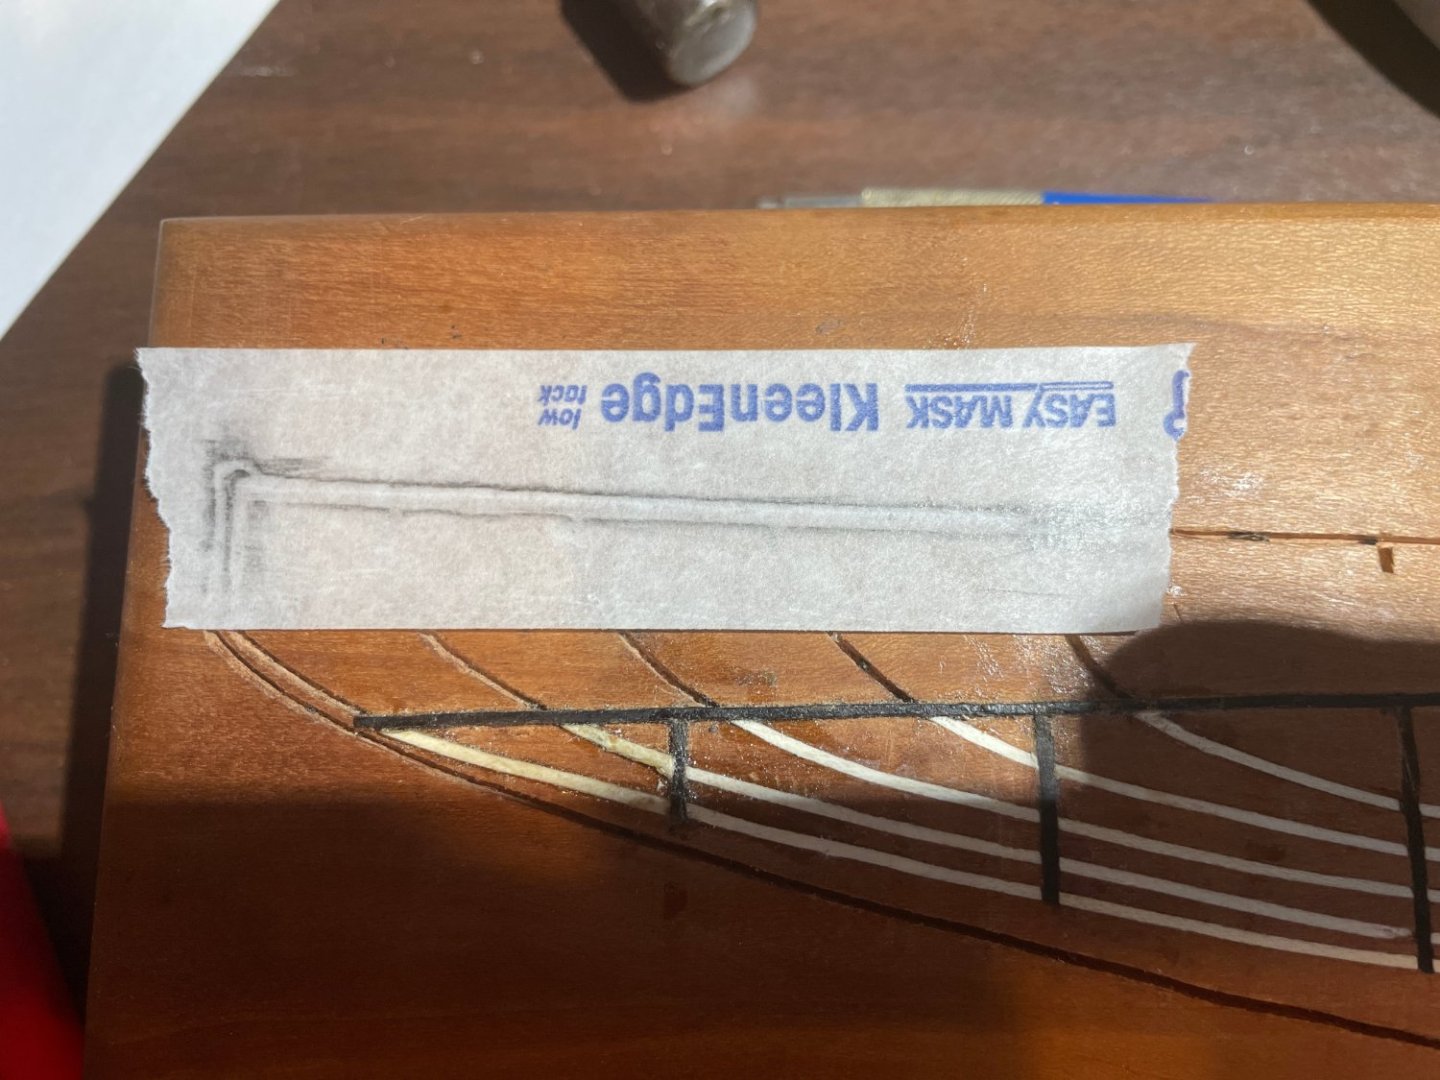
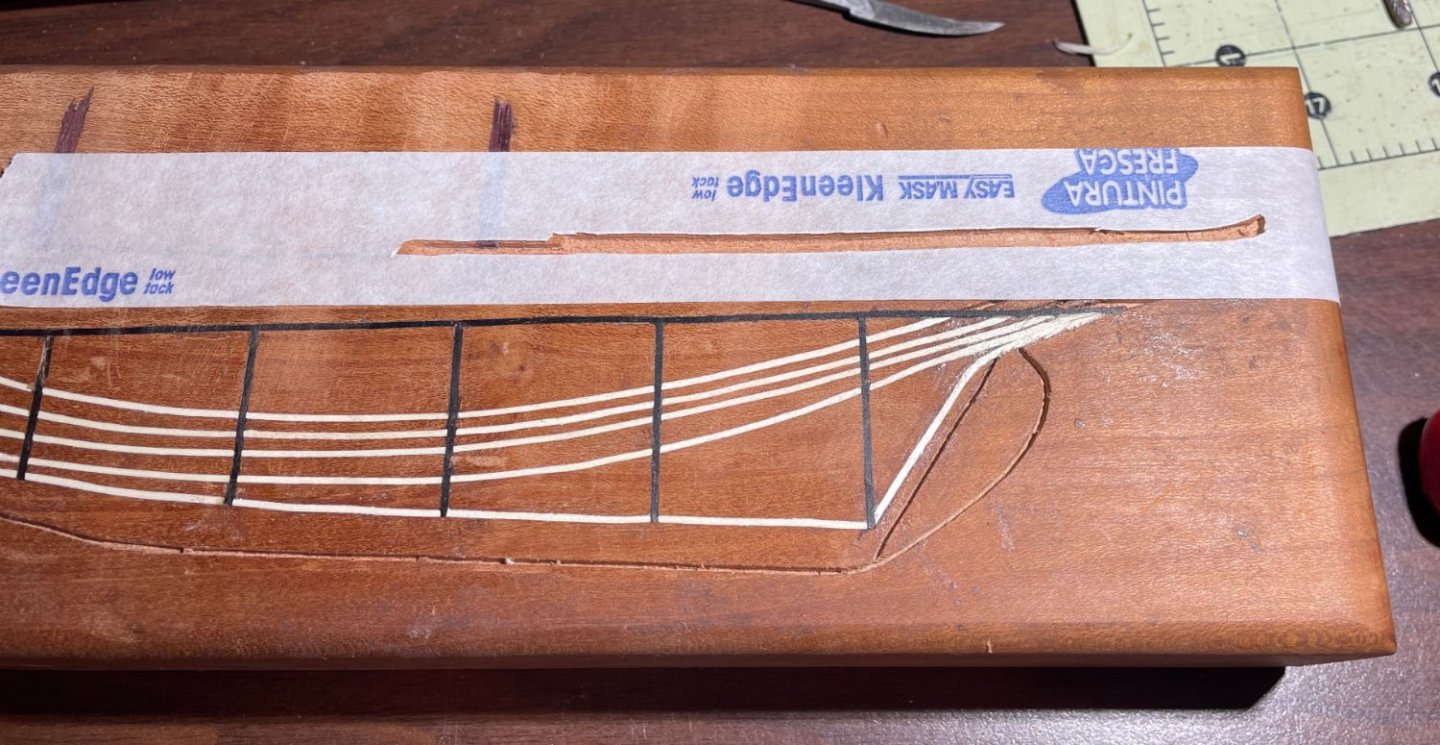
I see my post was moved to "Non-ship/categorised builds". I get that, because it closer to scrimshaw than a boat model. But when I looked at the rest of the posts in the category, I was dismayed my ship-themed item buried among dozens of plane and tank models. Why are those even on this site at all? At least mine is a ship. It was also changed to "finished", which isn't quite true. Not a problem. But as noted earlier, there are still a few details to add. This is the first of the belaying pin counting pegs.

-
I was certain I had compared them before, but as my memory is highly suspect, I double-checked. The dimensions of the web file and CD ROM files are the same. For example, 8415 x 6139 for the construction drawing of De 13 Søskende. More than adequate for building a model - you can see the grain of the paper.
- 24 replies
-
- 2
-
-
- De 13 Søskende
- sail
- (and 5 more)
-
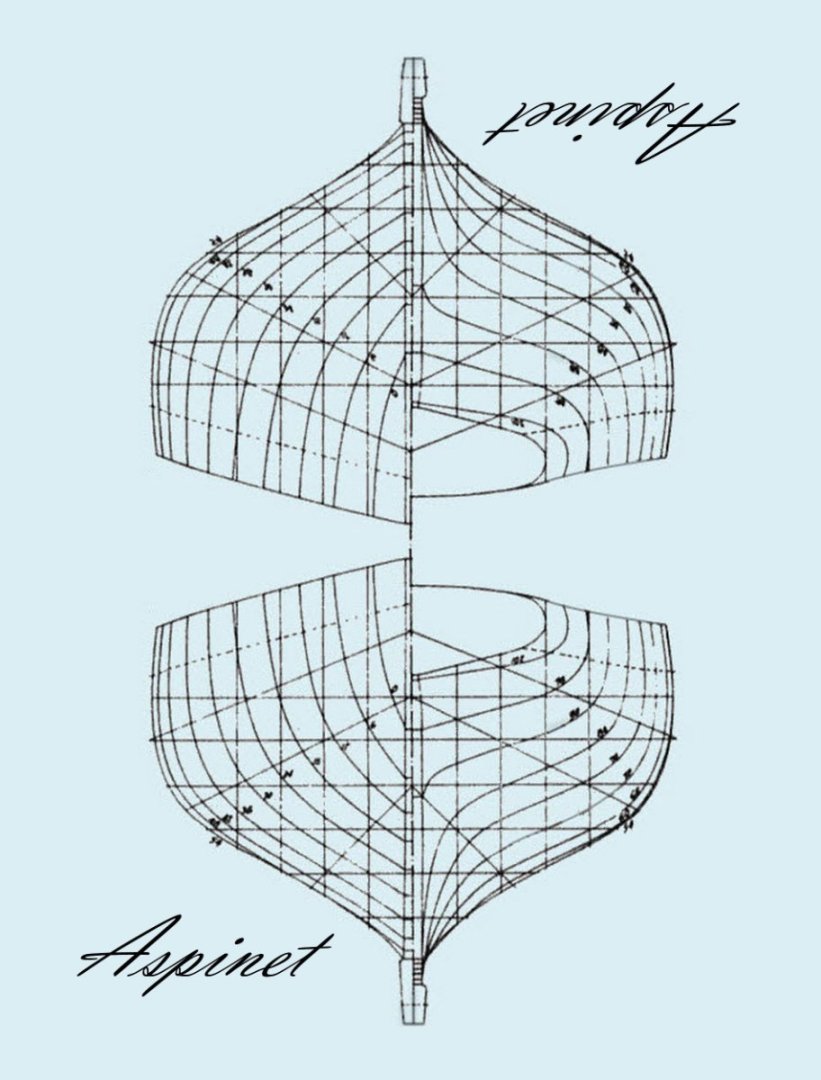
The sad thing is, I bought the book and decided to build the eel drifter. Years went by and a CD with high-res scans was made available. So I bought that too. More years went by, and now all of the drawings in that book can be downloaded for free from the Maritime Museum of Denmark. This includes the German drifter: Lines Sail plan Construction Maybe you already have these in your research. I'll search out your build log also.
- 24 replies
-
- 3
-
-
- De 13 Søskende
- sail
- (and 5 more)
-
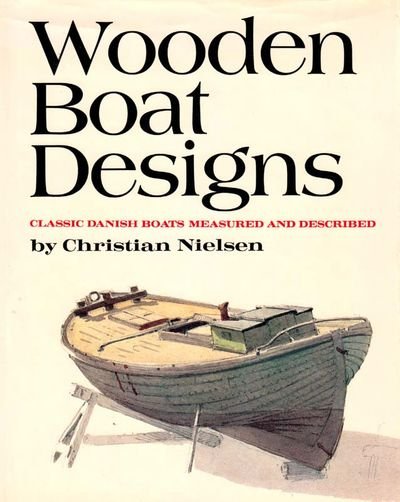
It most definitely is. I first learned of eel drifters from this book: All the boats are Danish, with one exception: it includes a German eel drifter for comparison to the Danish one. It specifically states the German boat design was adapted by the Danes. This article (same author) has the same information in somewhat greater detail. However, I'm sorry to say I think the Danish design is the more handsome one 😉

- 24 replies
-
- 4
-
-
- De 13 Søskende
- sail
- (and 5 more)
-
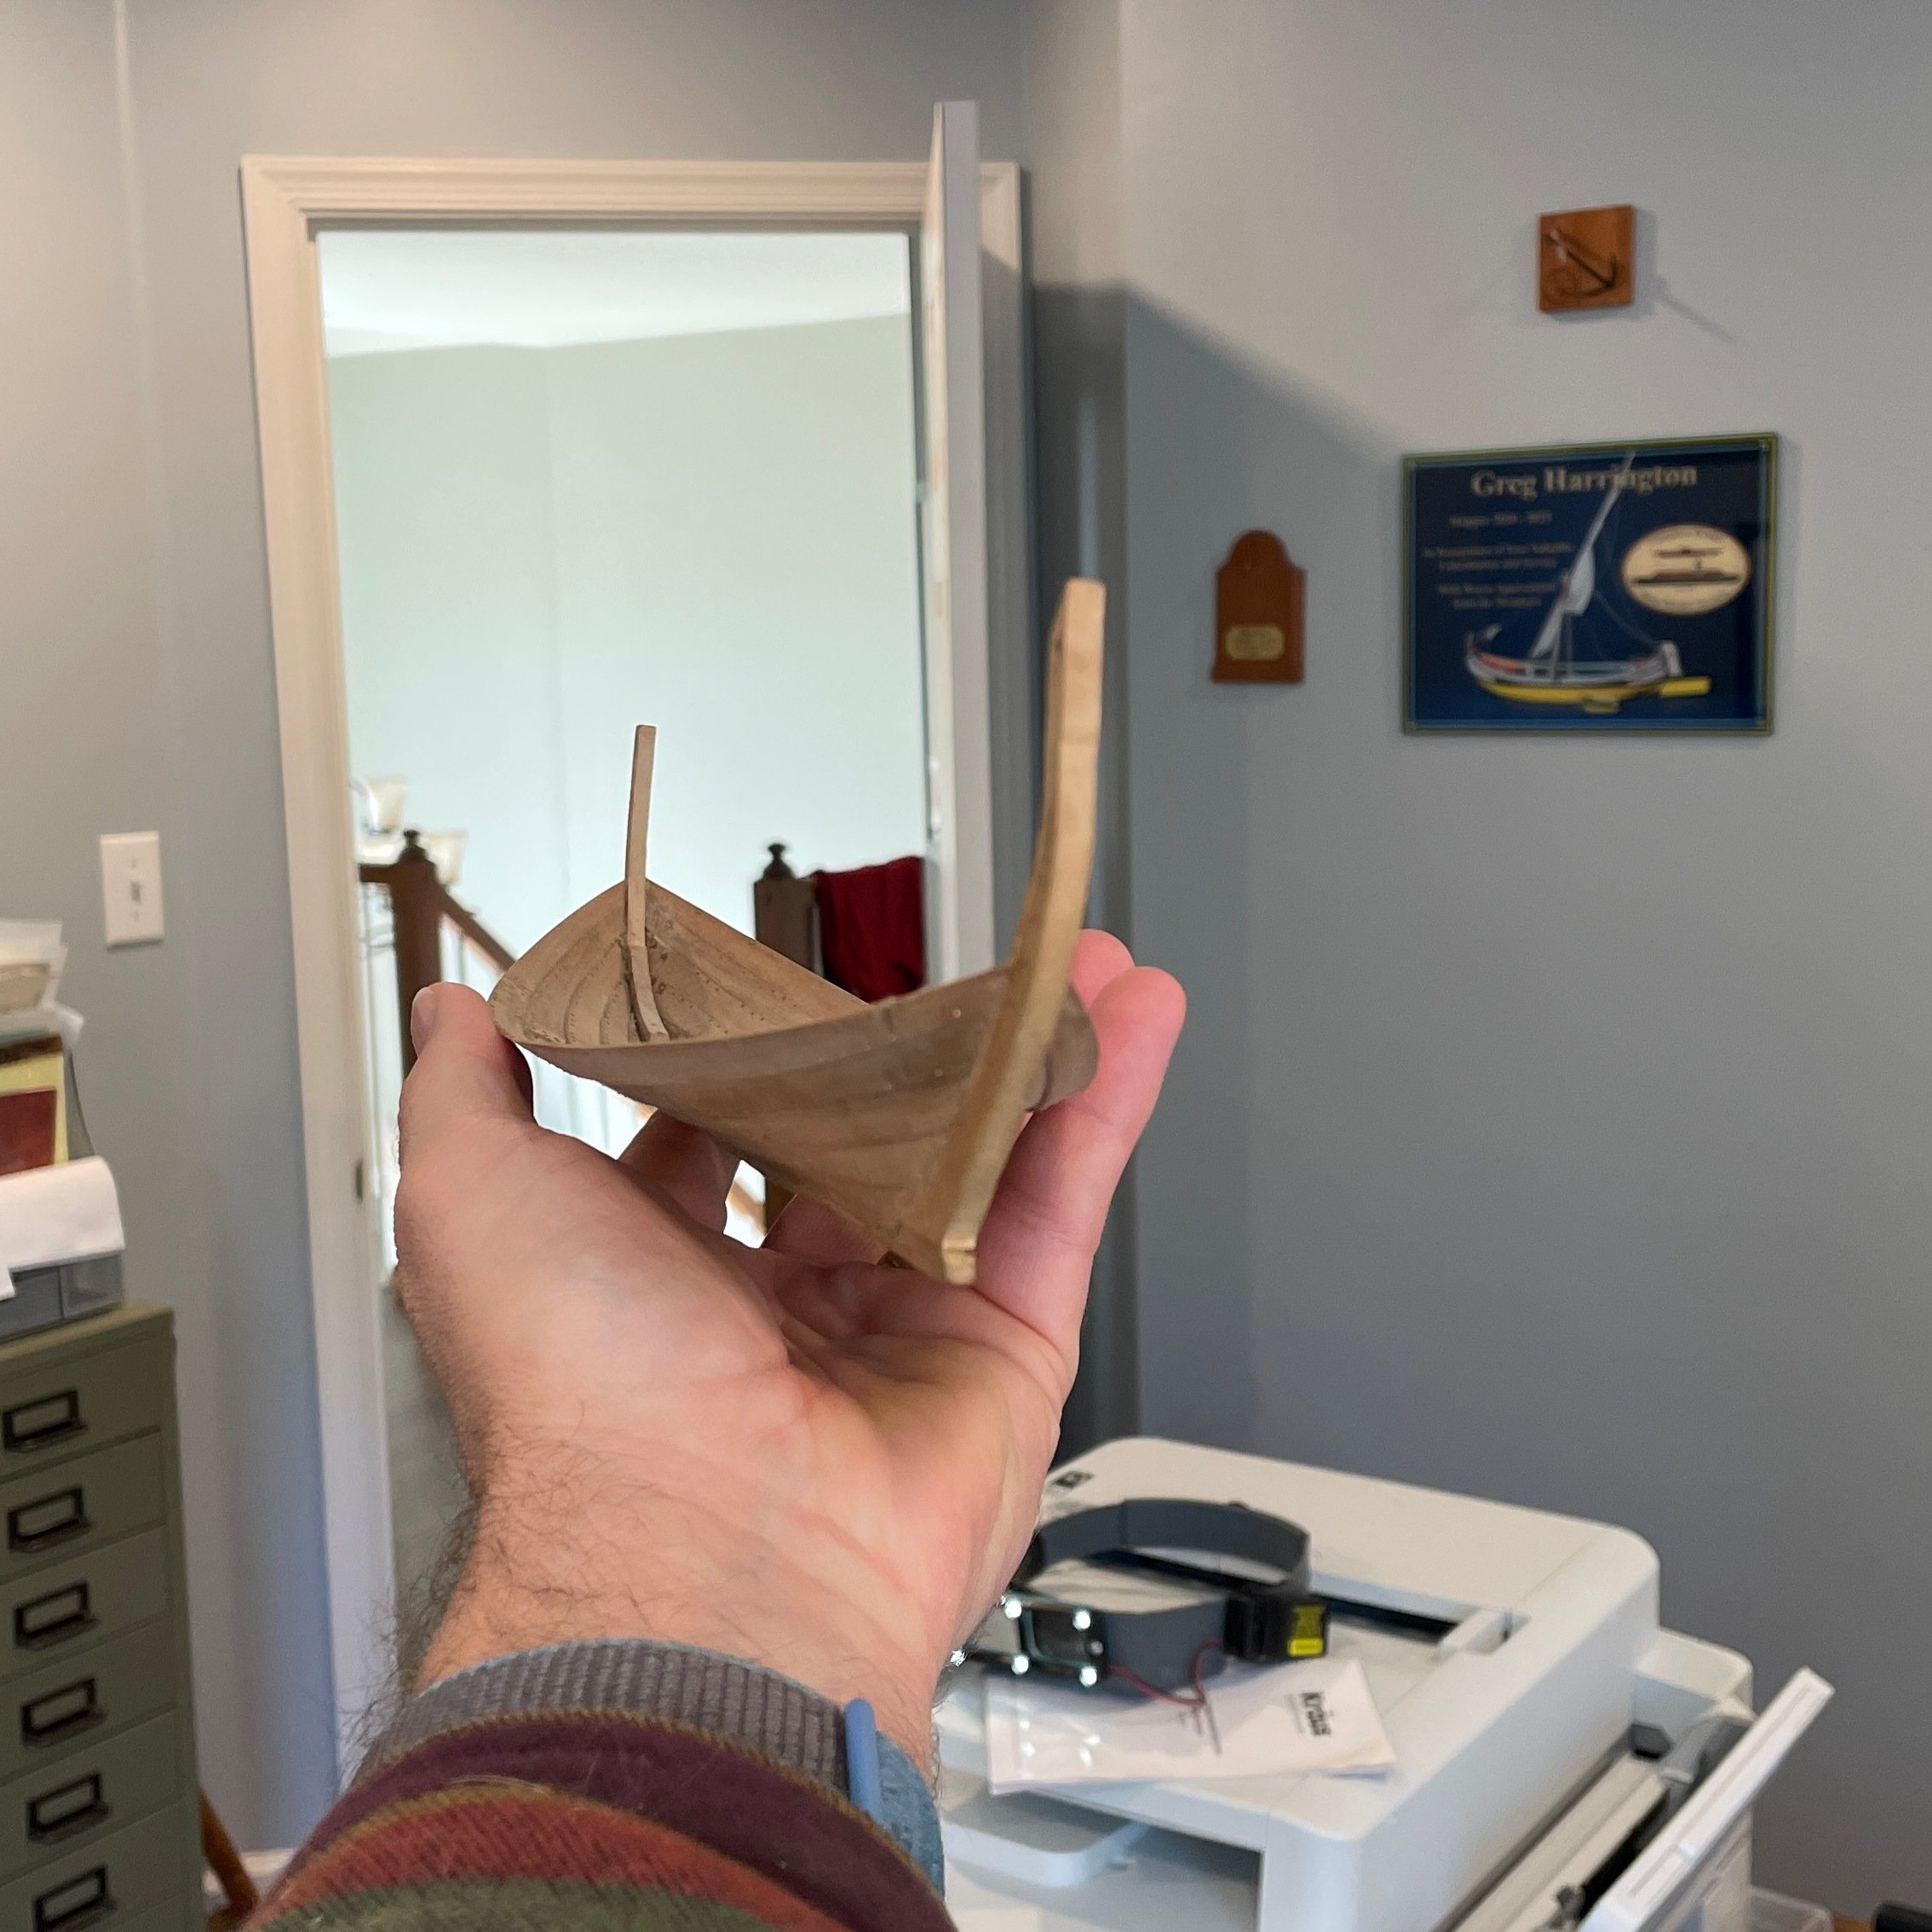
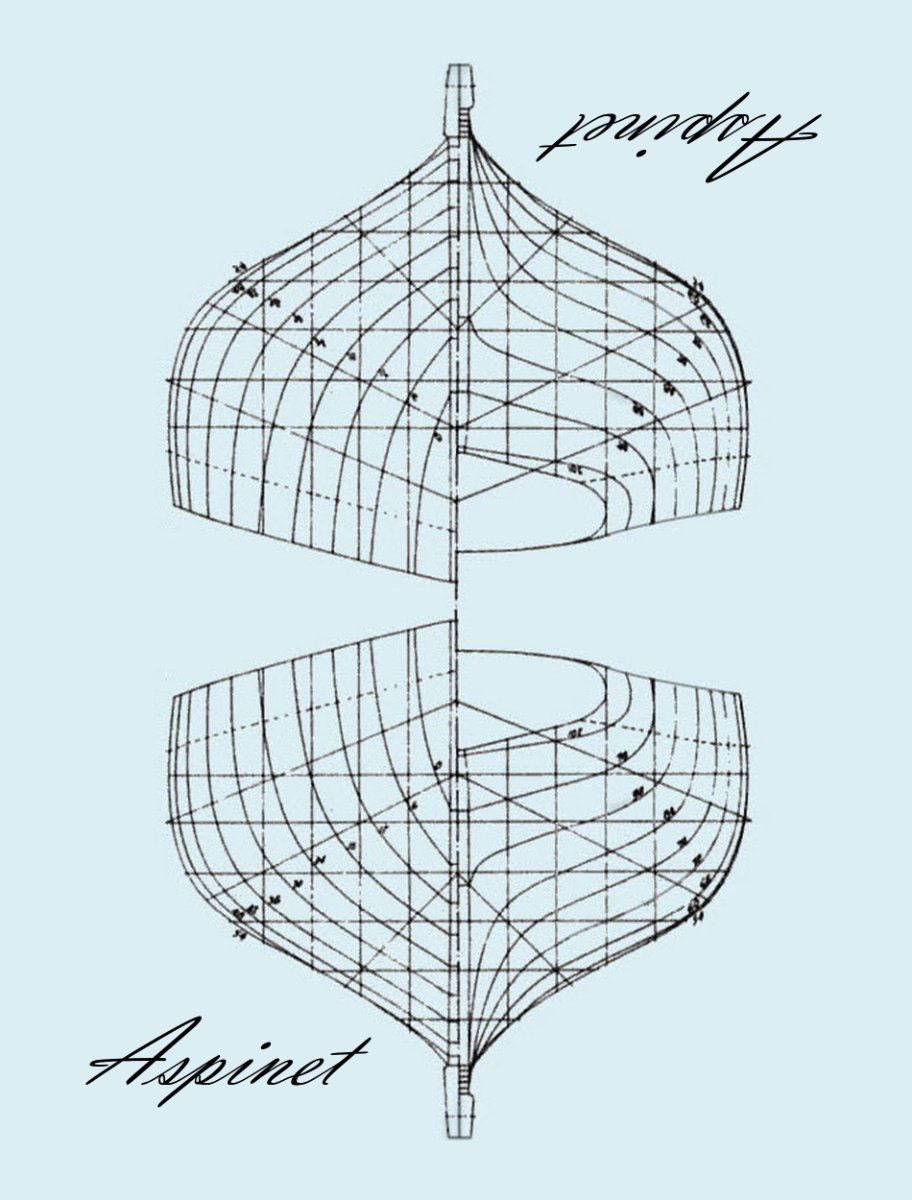
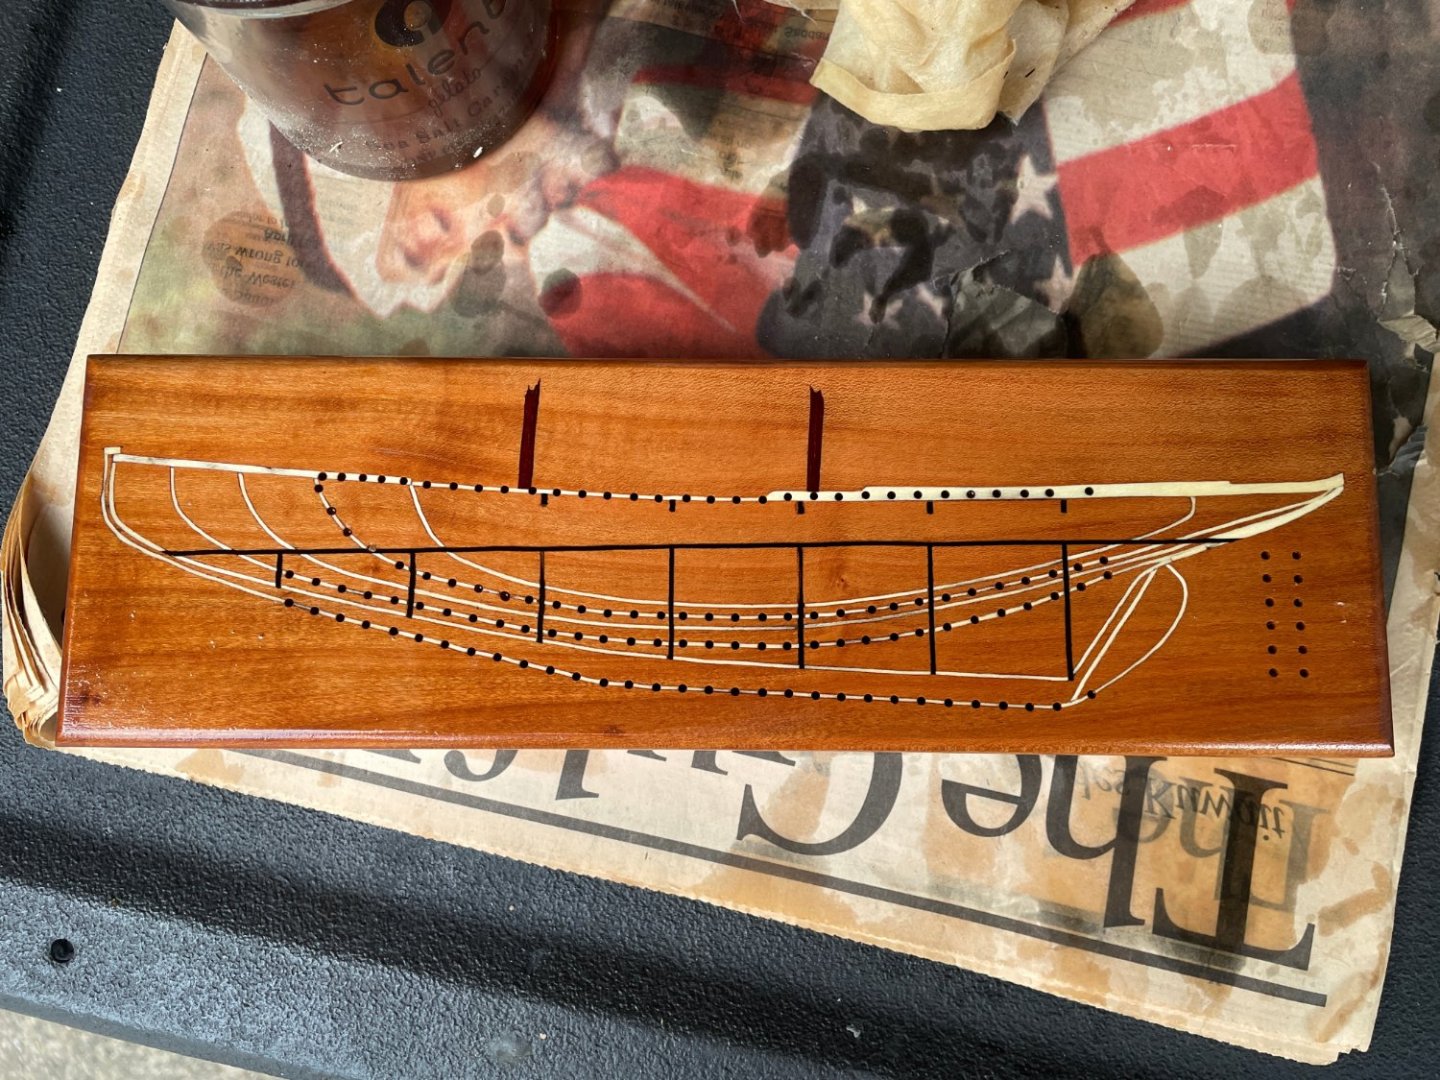
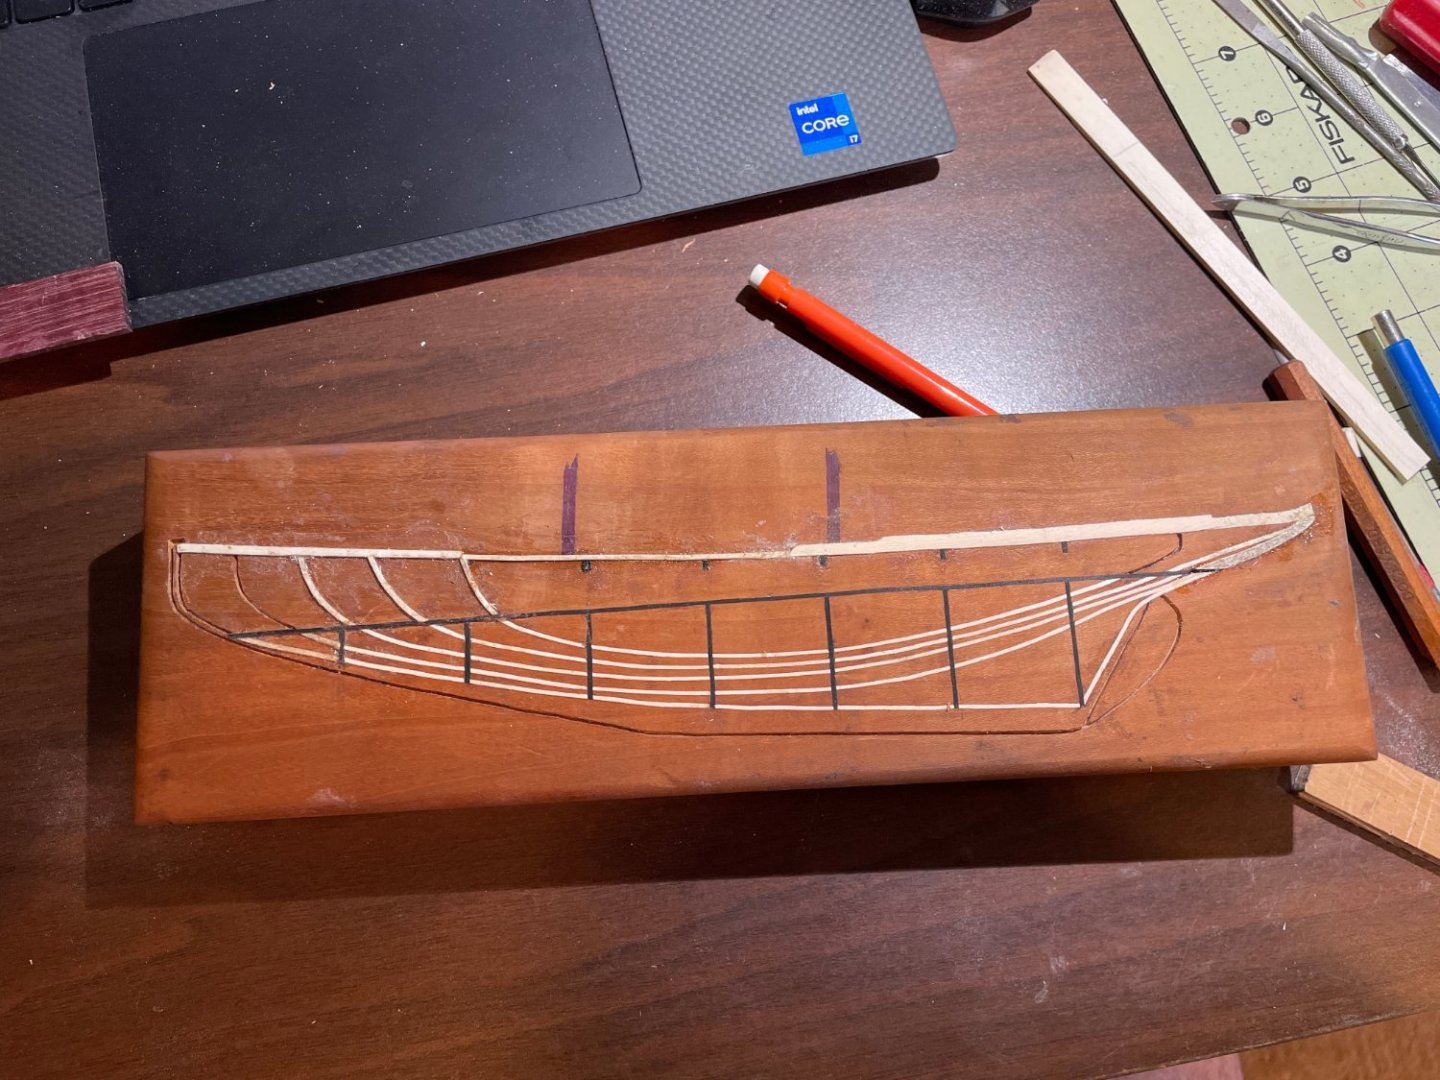
Yet to be done: Turn belaying pins to use as the counters, one set from brass and other of some white metal (aluminum, stainless?) Inlay some belaying pins or other decoration on the sides? Inlay the name "Aspinet" or add a brass plaque? If I inlay the name, I would carve it out and fill it with colored epoxy (after several trial runs). No way I could inlay script letters and I would not want blocky ones. The plaque would be safer.
-
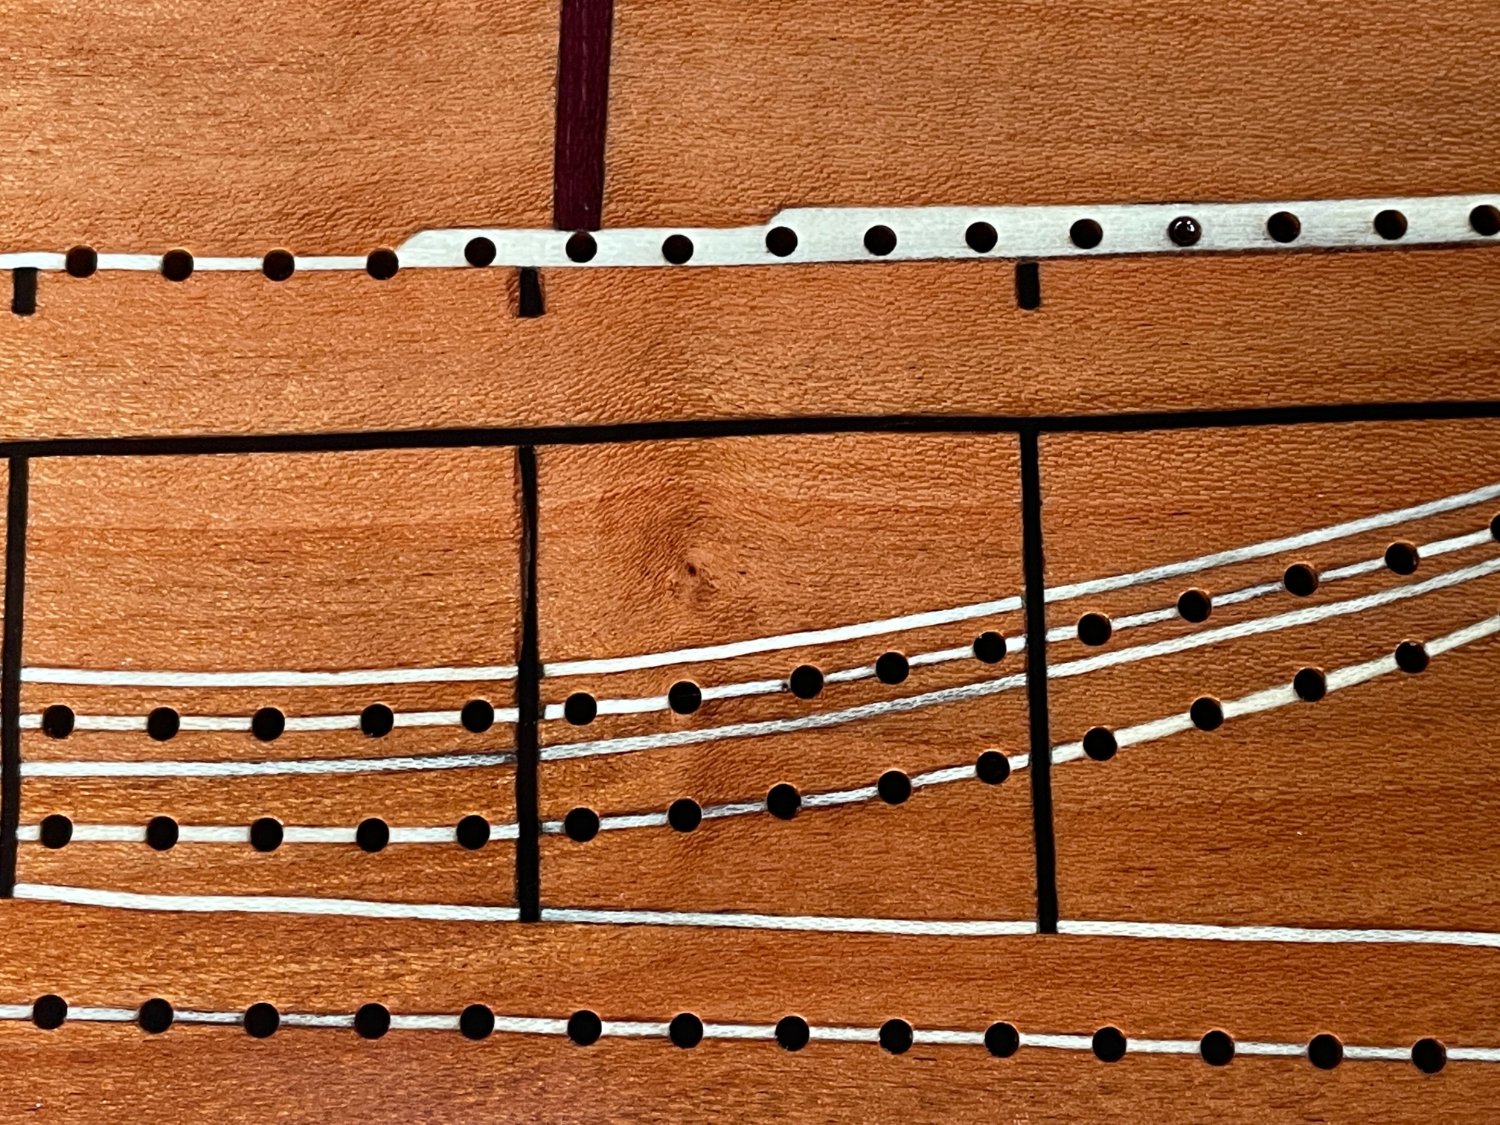
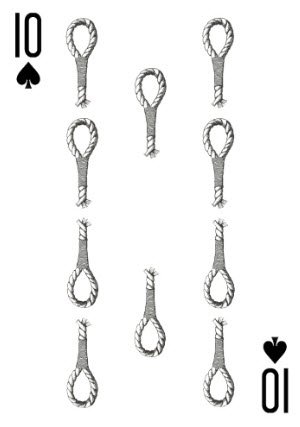
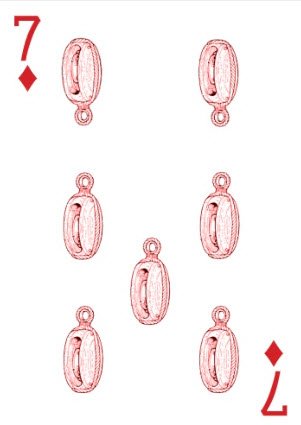
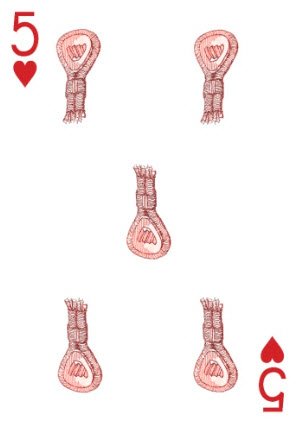
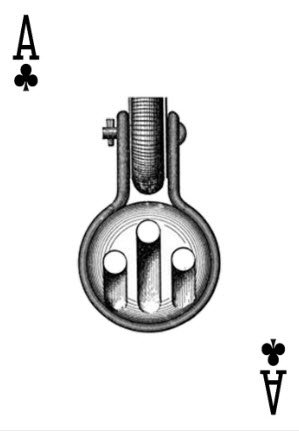
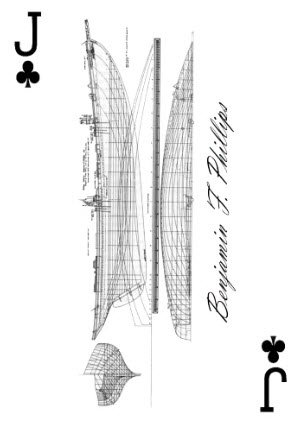
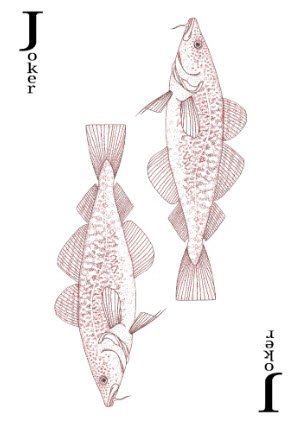
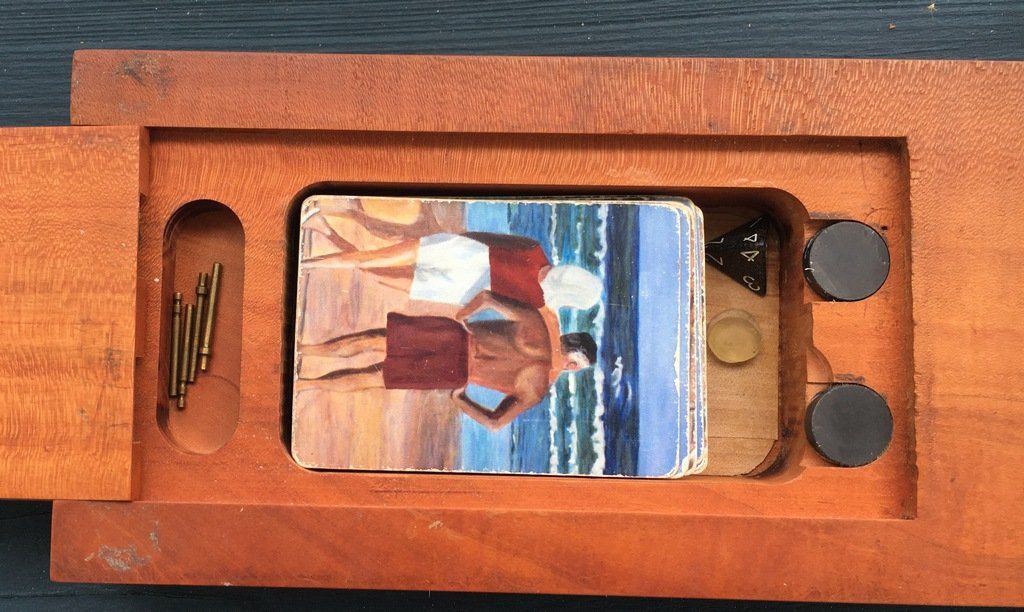
I had custom cards printed by youreondeck.com Backs are the body plan for Aspinet Spade pips are replaced by eye splices Diamond pips are replaced by rigging blocks Heart pips are replaced by .... hearts Club pips are are replaced by deadeyes Each face card is a different fishing schooner from Chapelle's book Though not used in cribbage, the jokers delivered with the poker deck may as well be custom. Since it fished the Grand Banks (or so I presume), I made them cod.
-
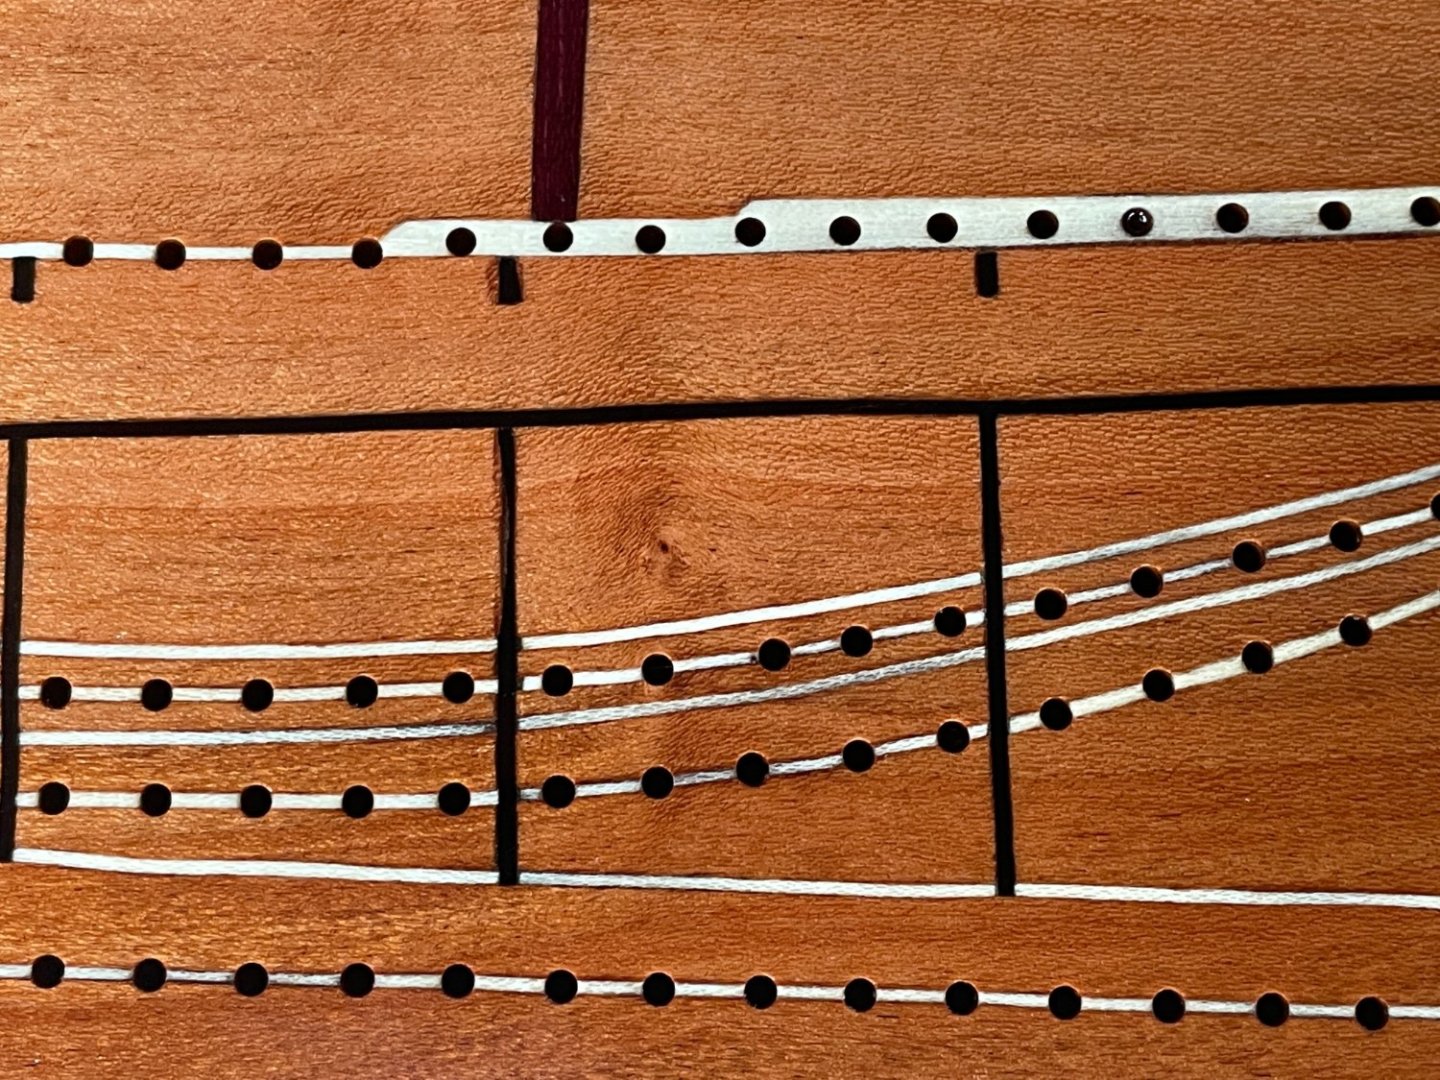
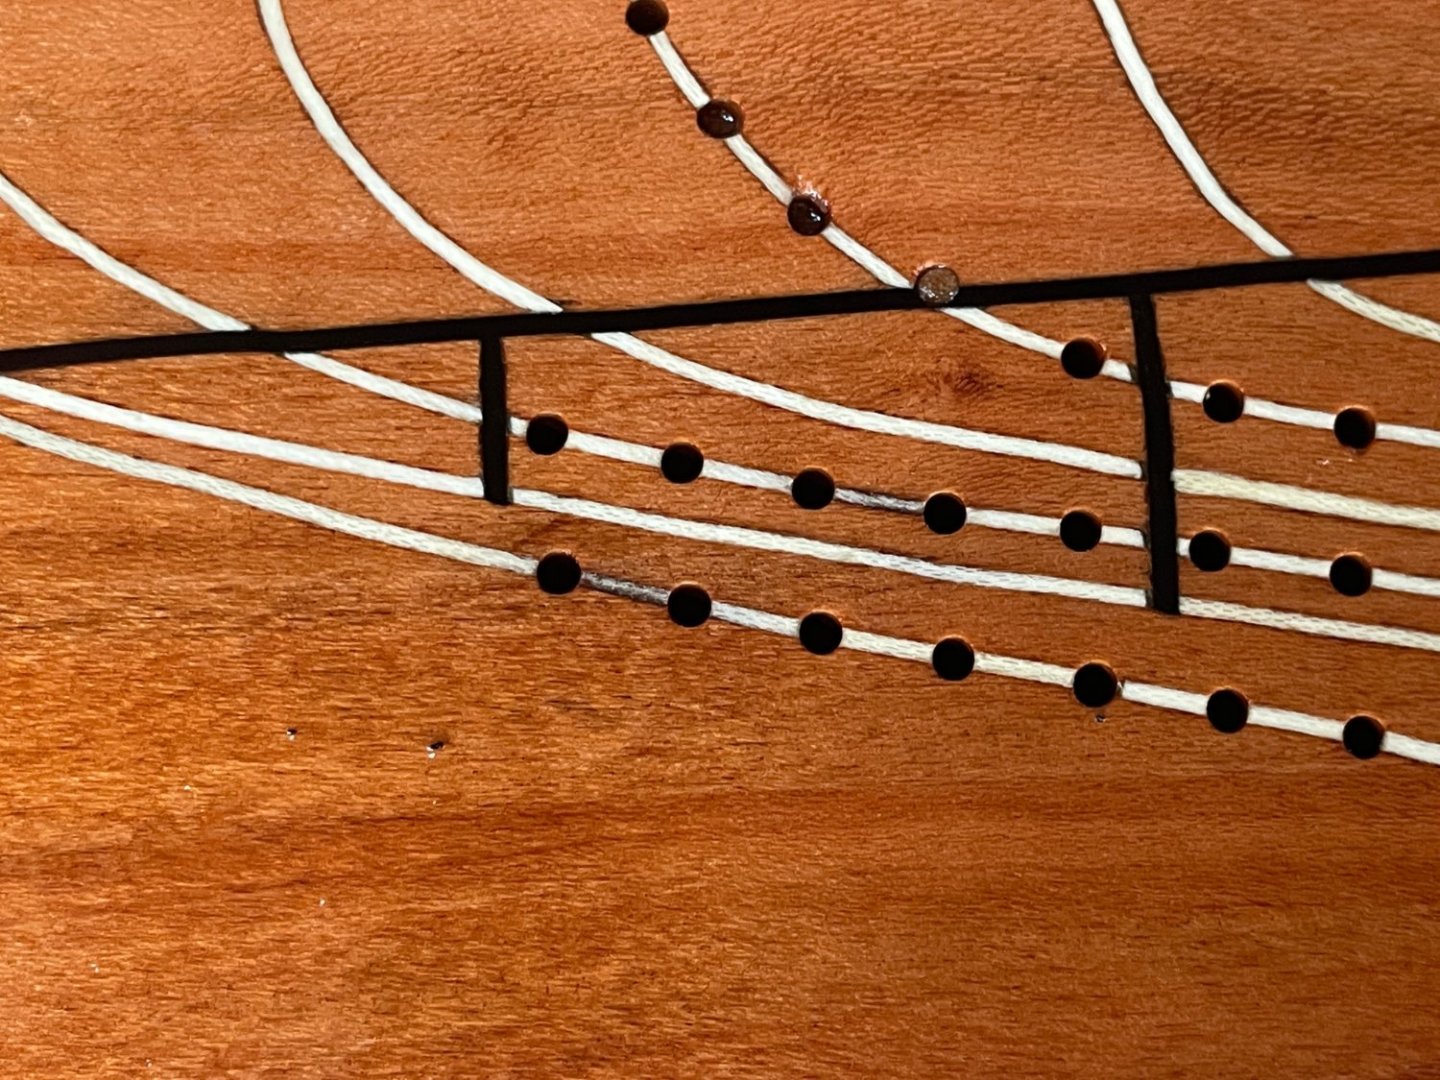
I am pretty disappointed with myself for over-sanding and over-estimating how far I was driving the holly into the grooves (as opposed to just crushing the top that got scraped and sanded away). The pieces that were driven in well are still nice and white. Those that were not got sanded too far, and the glue is making it look gray. However, most people said they like the effect (maybe just being kind), and I'm afraid that if I try to fix it at this point the cure will be worse than the disease.
-
After applying Watco Danish Oil
-
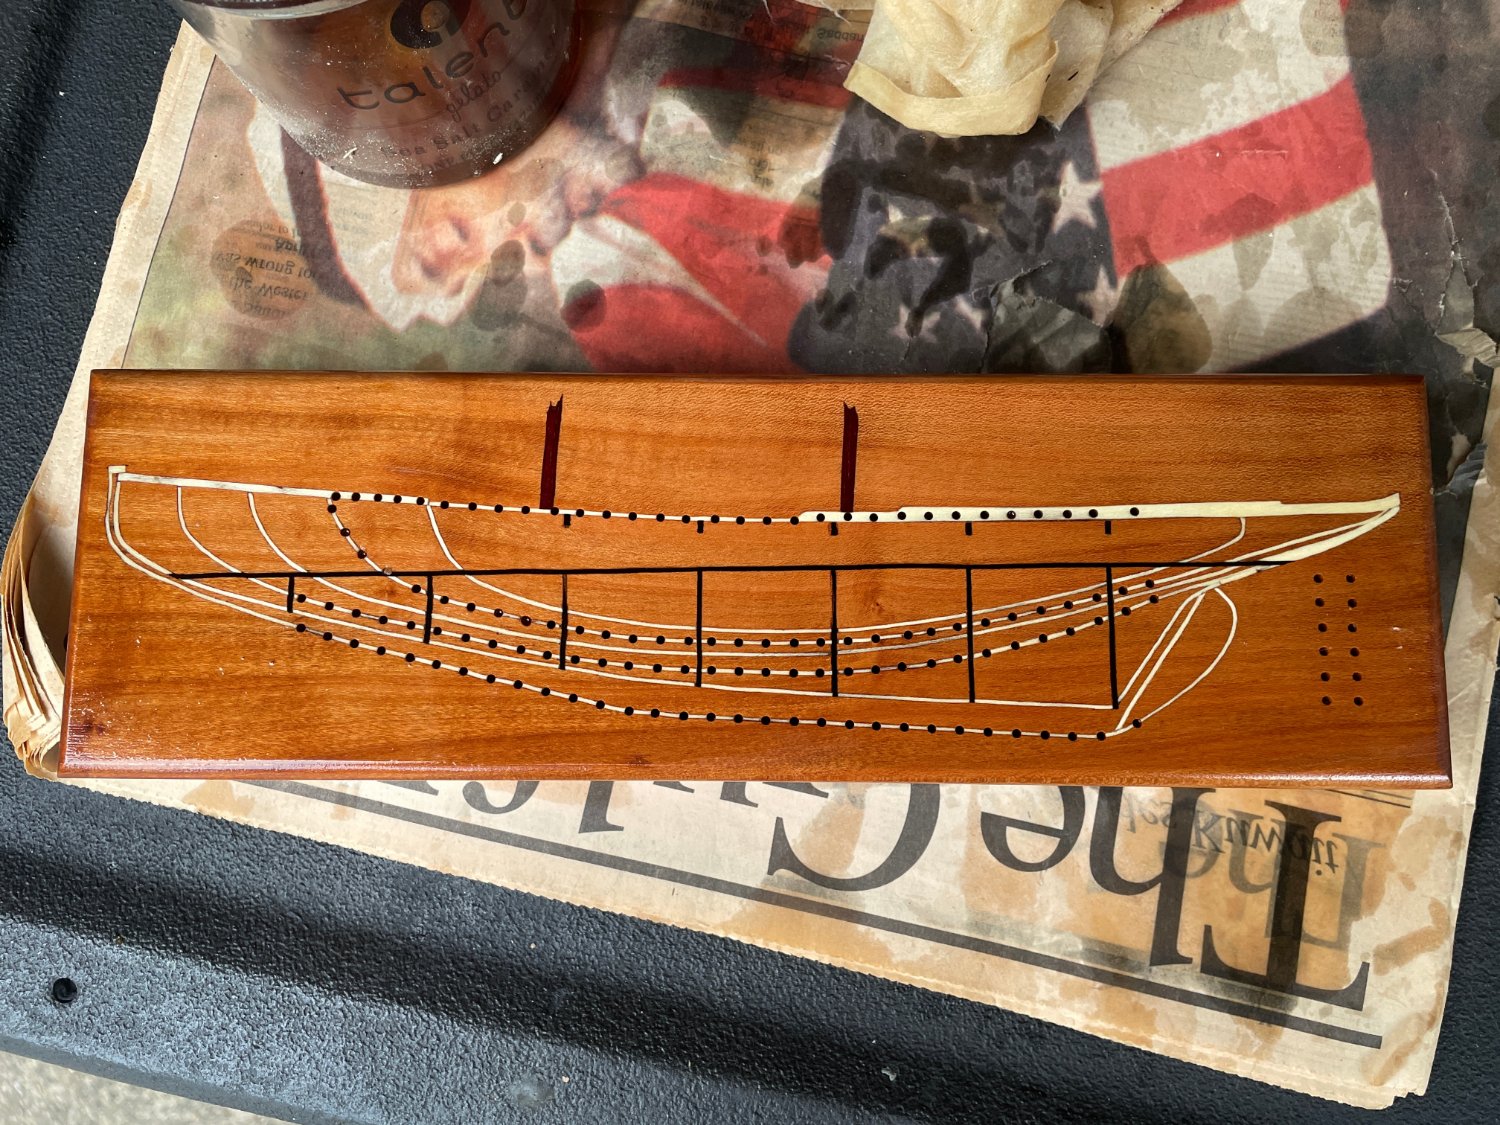
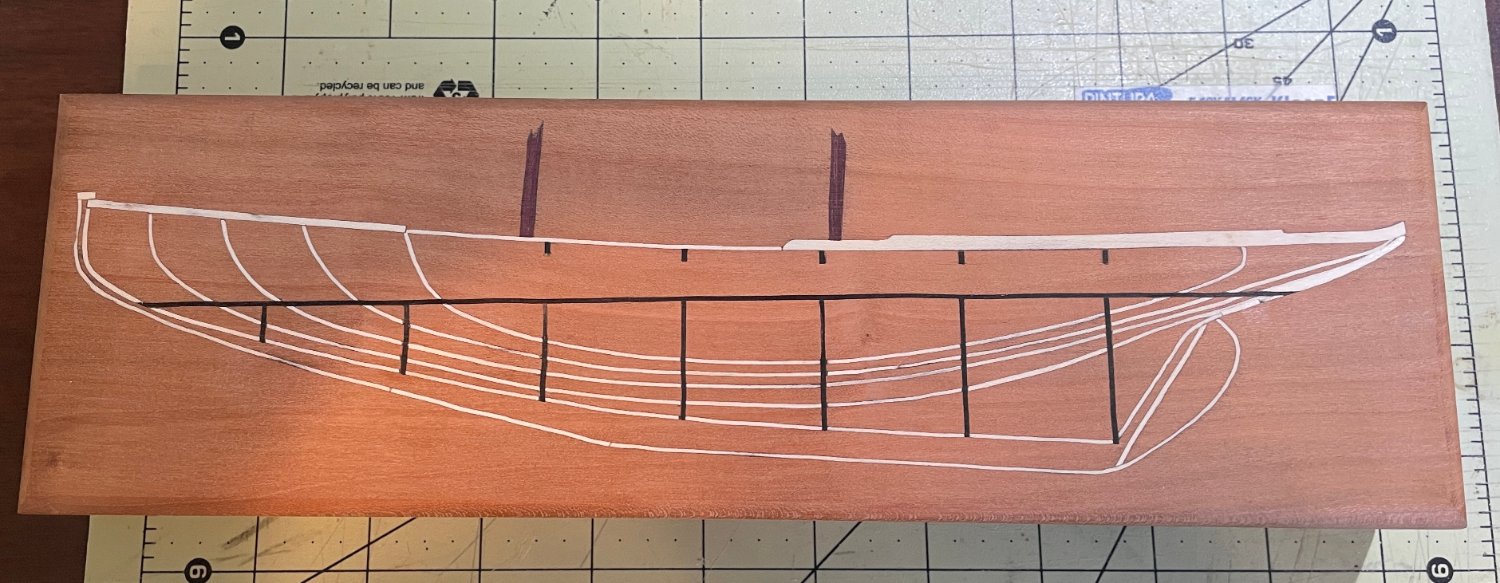
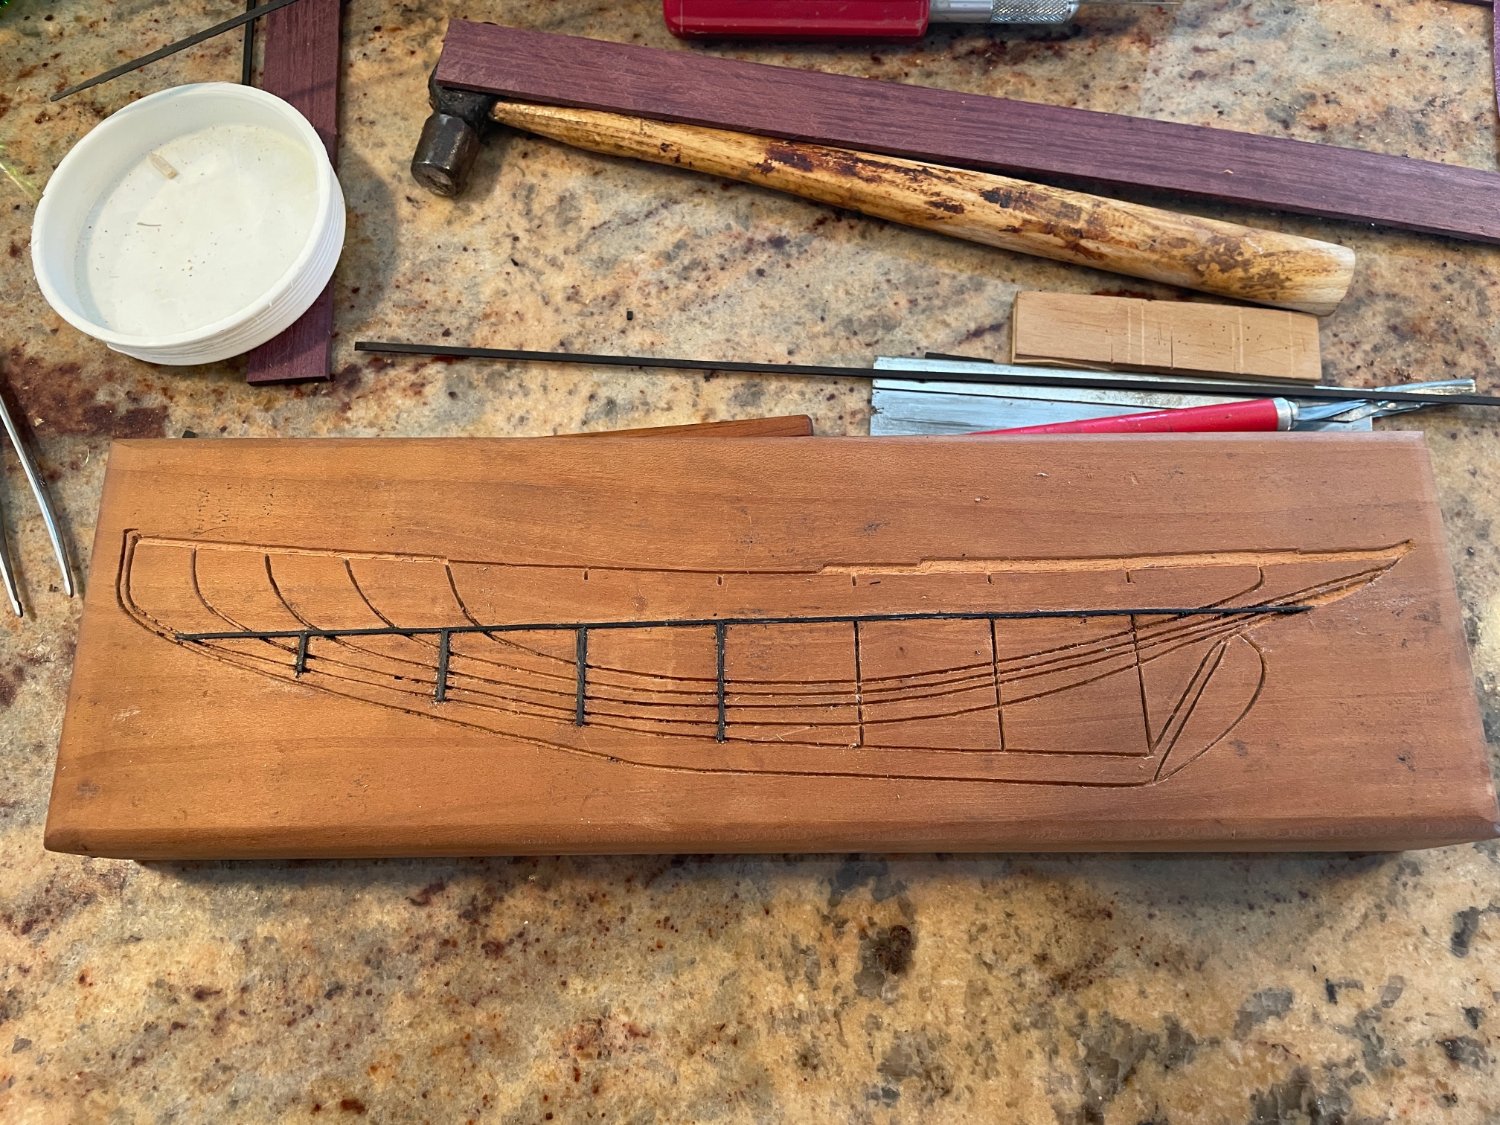
Mostly done with the inlay at this point.

-
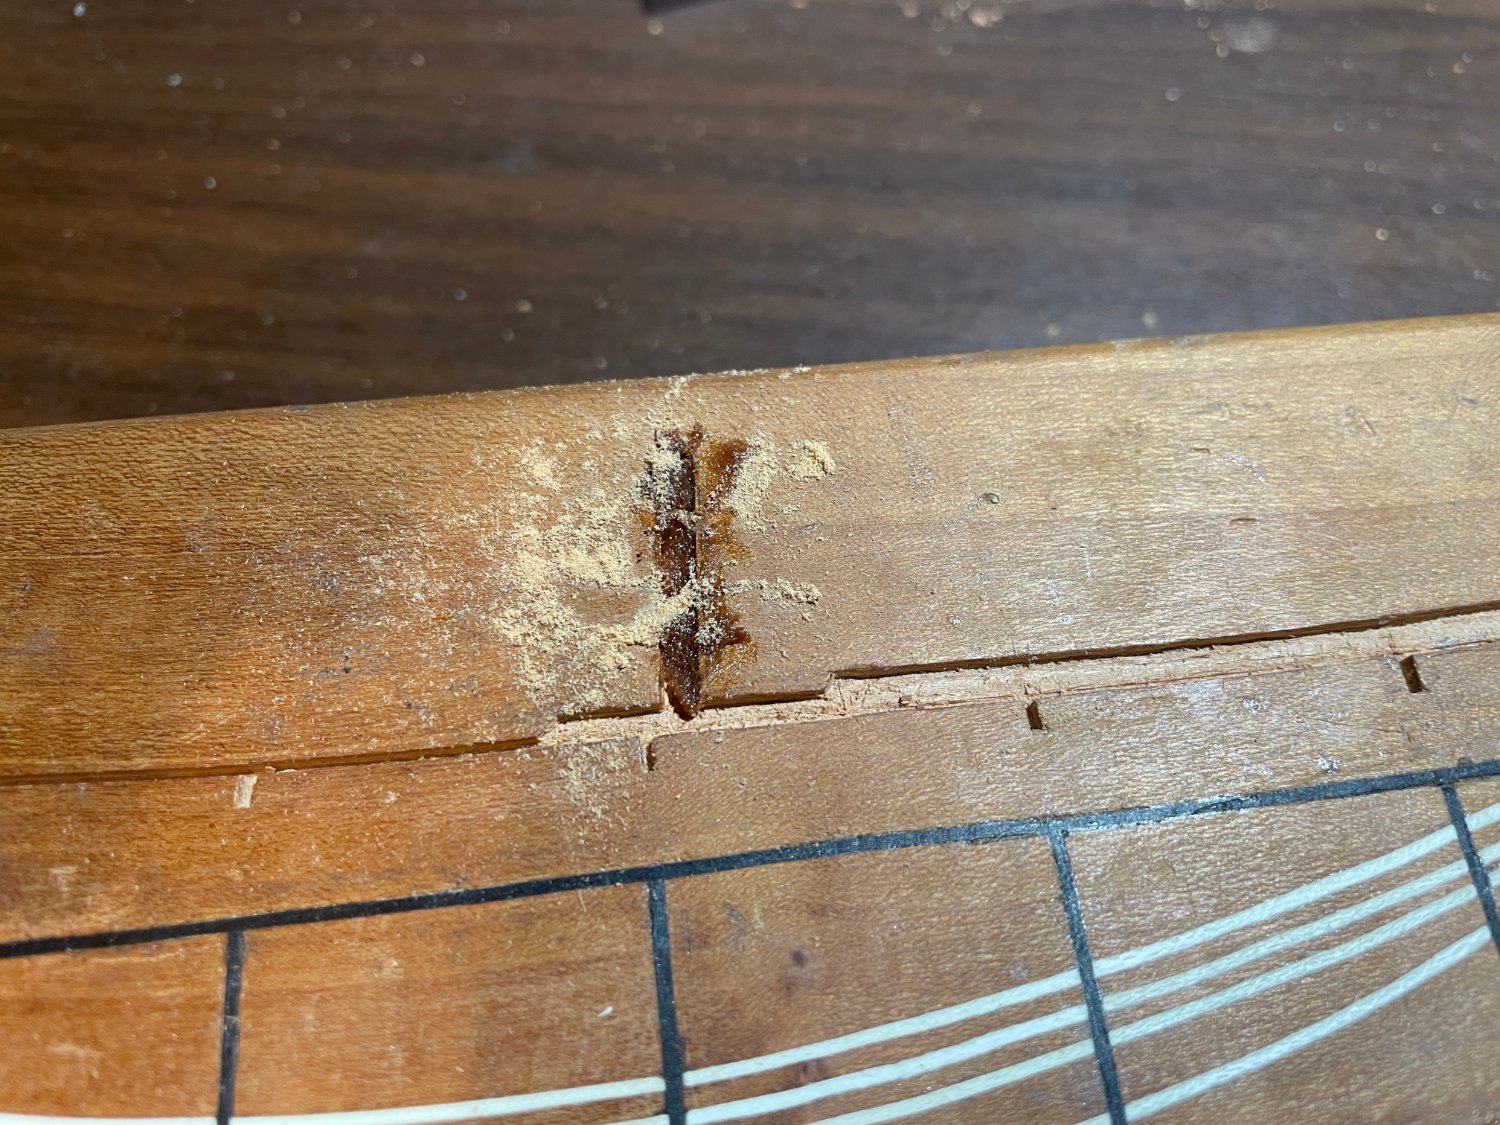
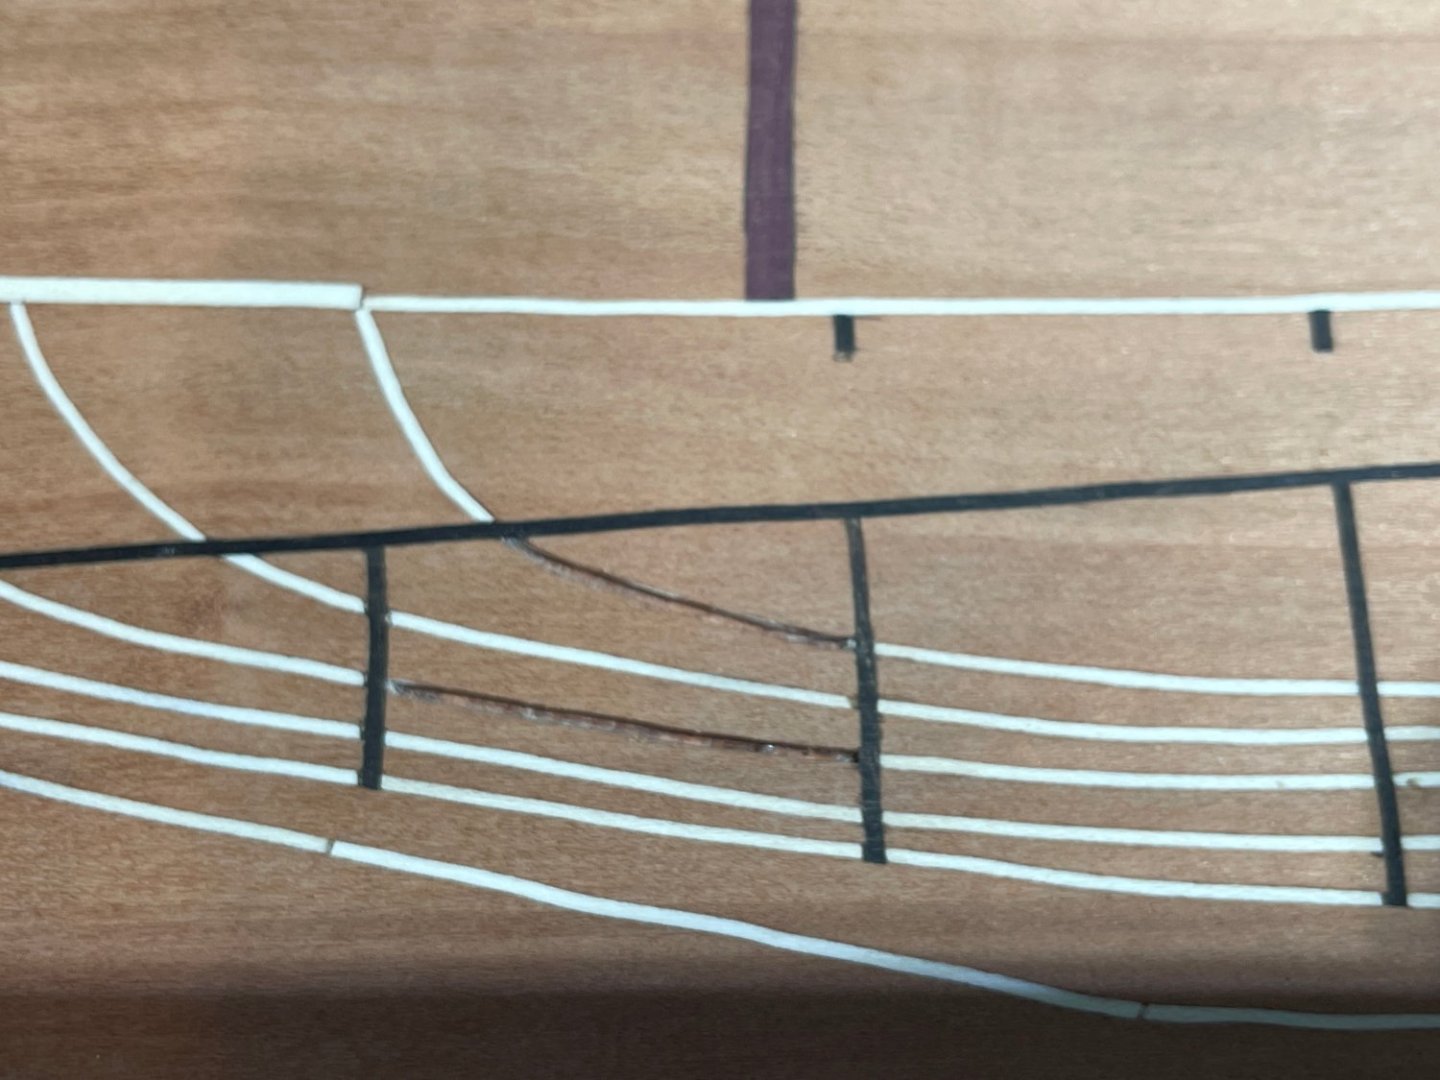
Some gaps were revealed after scraping well and a light overall sanding. I gouged out the worst areas to rework.
-
Moving along....
-
The masts are another mystery species of wood. Both were given to me by a friend whose late husband did working as a hobby. I regret choosing the purplish tone. A darker brown would have been better.
-
I steamed an pre-bent the holly for some of the tighter curves. The holly would bend well enough dry, but this way I wasn't fighting it so much.
-
I managed to get a pretty good fit on each piece. But to be sure, I mixed some cherry sawdust in with the glue, hoping the color of any visible glue line would be a better match.

-
I tried doing a rubbing for the areas that were not just narrow grooves. Cutting with a knife was more accurate. In either case I cut well outside the trace mark and slowly sanding my way in.
-
The first few buttock lines. I'm using TiteBond liquid hide glue, as it does not discolor the wood and has a decent working time. Before fully curing, it cleans up very easily. It becomes the consistency of rubber cement when partially dry and is easy to scrape away.

-
I was originally just going to do an etching or another relief carving. At some point I got the crazy idea I could do inlay without any prior experience. Here the first few pieces are going in. I don't know the species of wood, only that it is very black and very brittle.

-
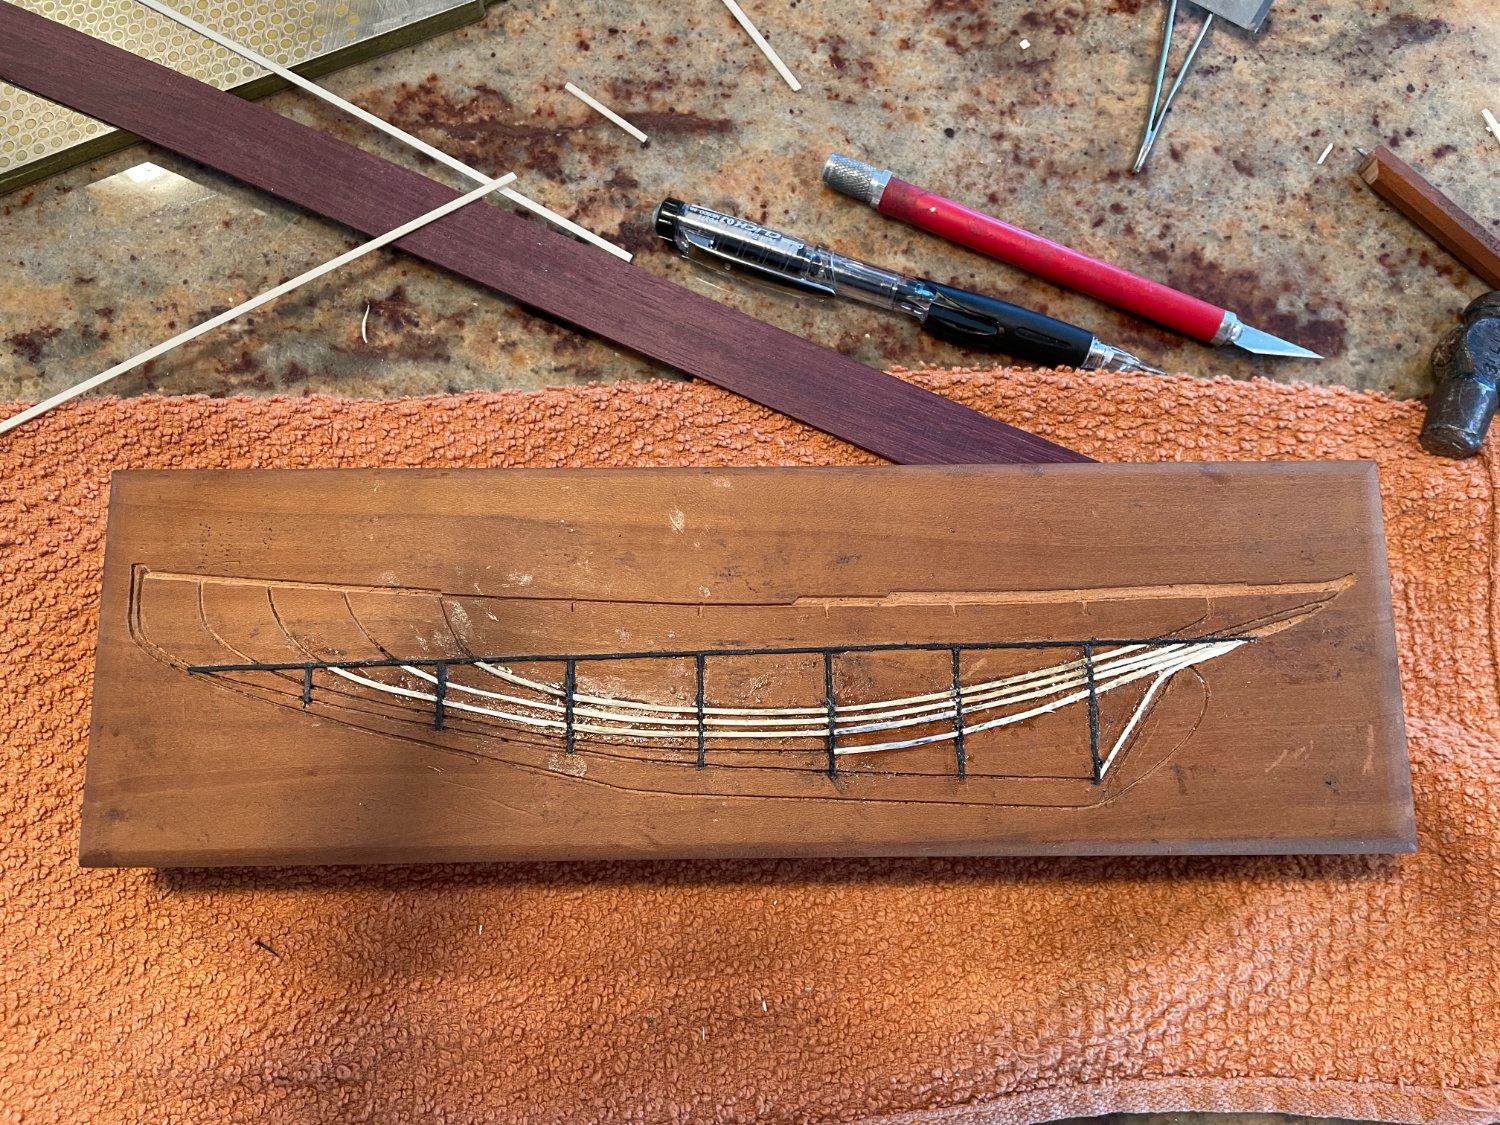
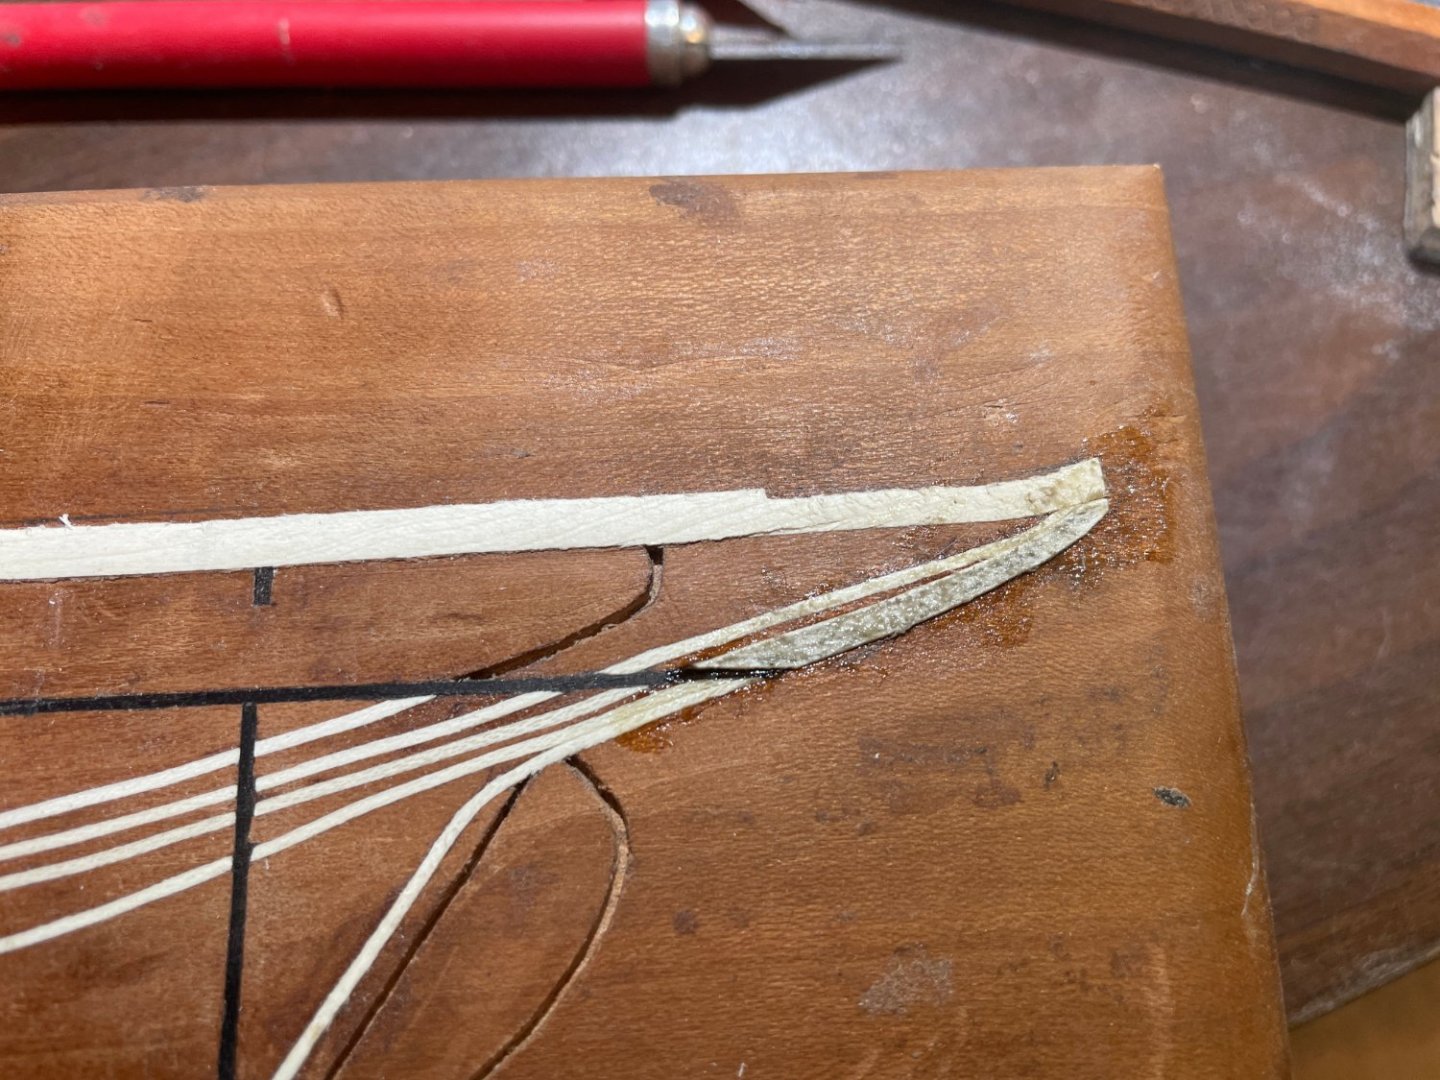
The chisel is from a set of micro chisels with much longer shanks. This one broke when I carelessly applied too much side pressure while working on my dad's board. The broken part hit the brow of my eye. No glasses on. Learned a lesson there. I held on to broken chisel. Now that I needed a narrower chisel than any in the original set, I cut back some of the wood and squared up the round shank that was exposed to my desired width. Then I filed away a chisel point. Nearly all the carving was done by using the chisel as a scraper, not driving the edge into the wood. As mentioned in the previous entry, I started by running it sideways at a slight angle. This simply helped me stay in the groove scored by the hobby knife. I then scraped away with the back of the chisel instead of the side, gradually moving it upright for the full width.

-
All the lines scored and opened up a bit (V-groove) by running my chisel sideways and at an angle as a scraper.
-
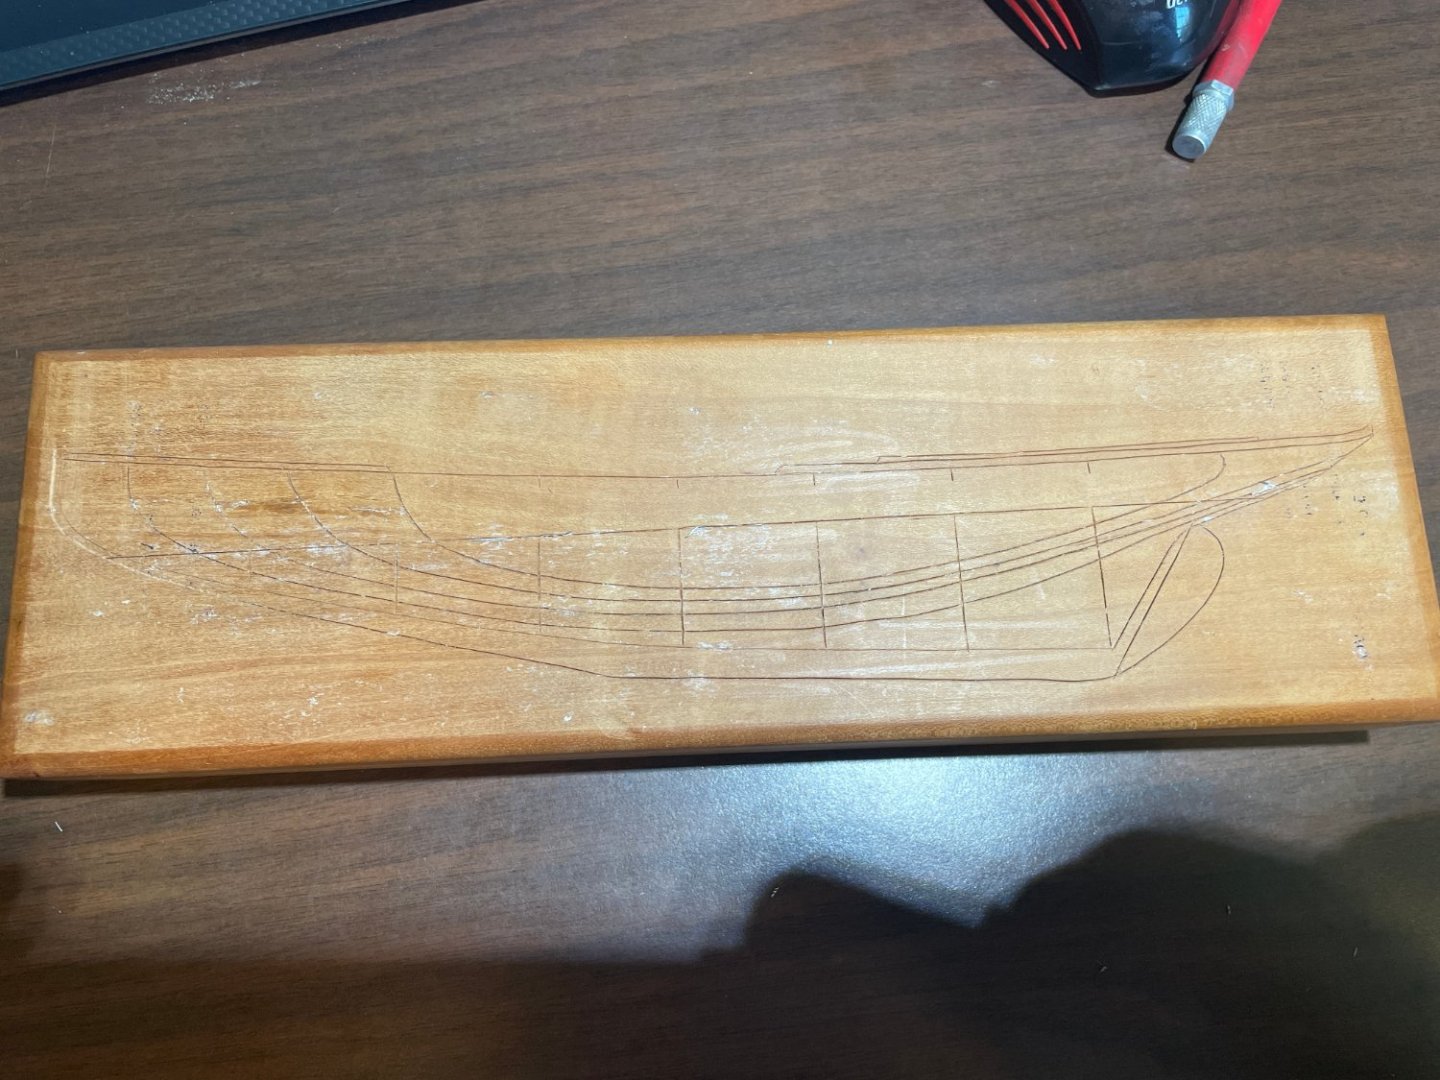
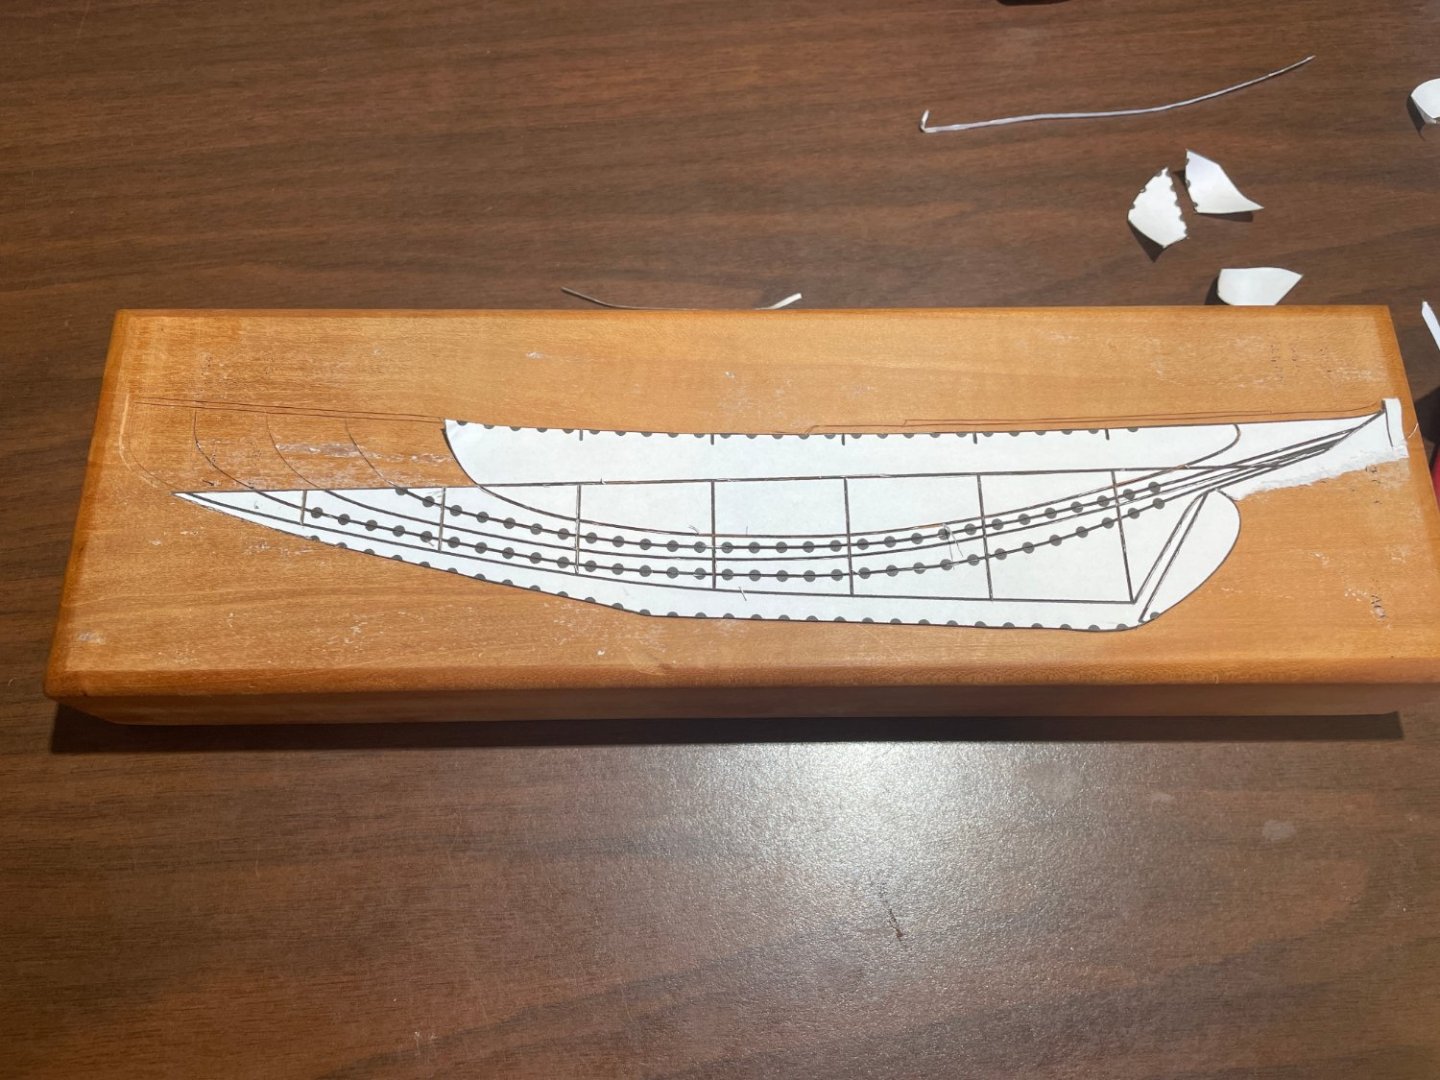
I started by scoring the lines with a #11 hobby knife blade. There are a few wobbles here and there. I would have gotten better results if I'd cut out templates to press the knife and chisel against, but I got the impression it wasn't needed after a deceivingly successful test run doing it freehand. Even when applying light pressure, it is difficult to keep the grain from taking the knife off line. The template was made by pasting the scanned drawing into Solid Edge 2D and "tracing" the lines and holes I wanted over it.
-
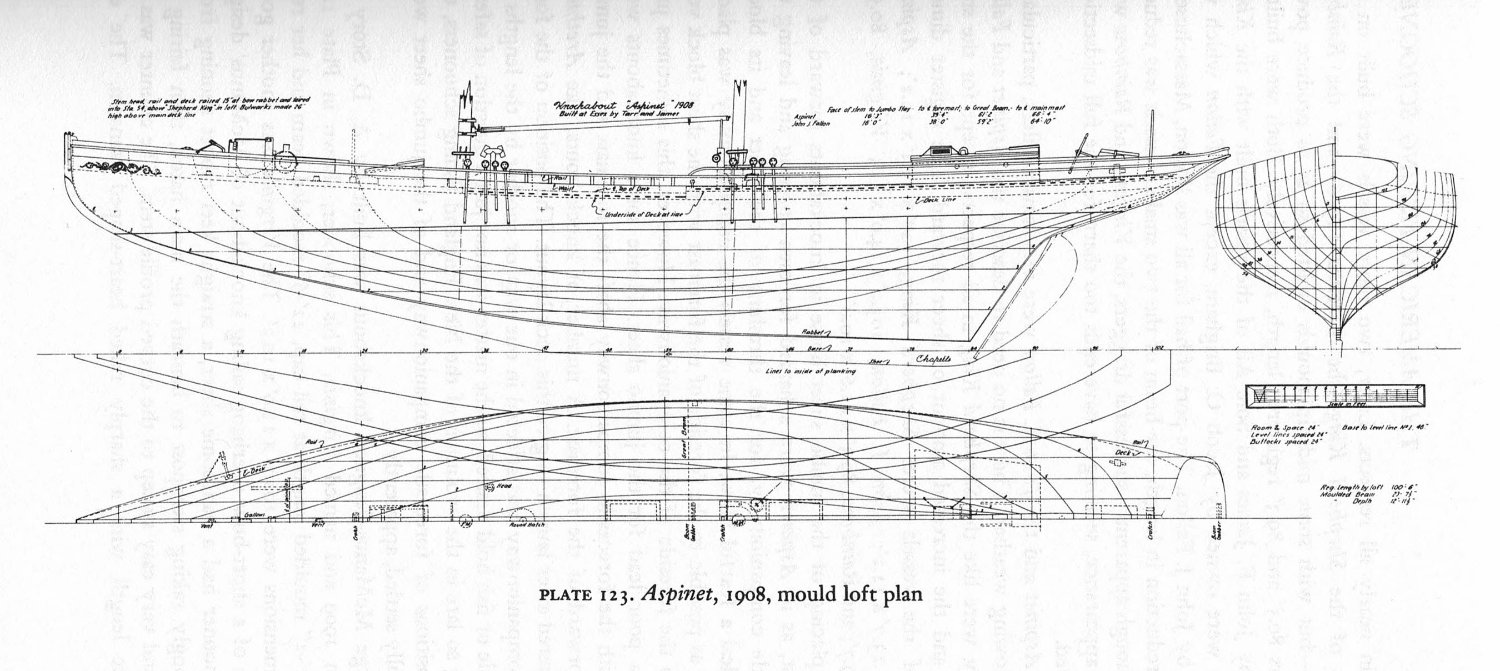
Drawing from "American Fishing Schooners" , Howard I. Chapelle

-
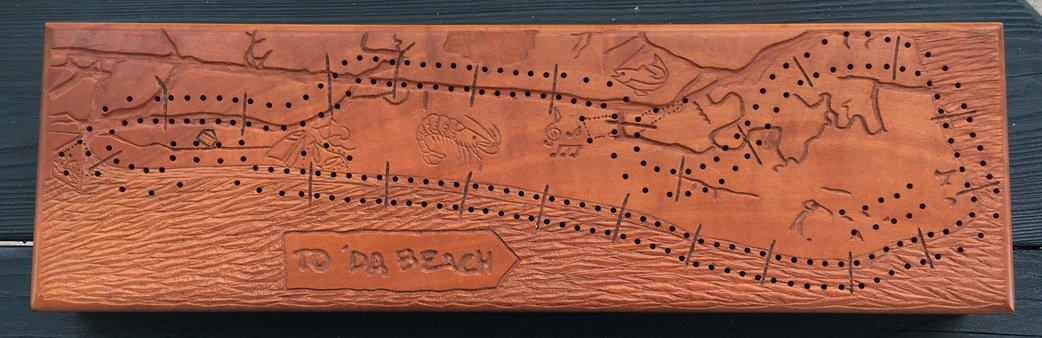
This is not a ship model in the strict sense of the word. I hope you will allow it. This is my first attempt at wood inlay. I was inspired to build a board for myself when, early on in the process, I damaged the one I was making for my father. There is a big chip from the router on the bottom of the board, hidden except when you turn it upside down. I started over and set aside the damaged piece. Years later I've finally gotten around to making it. The wood is from a cherry tree felled by Hurricane Isabel in 2003. It was in the back yard of one of my wife's coworkers. Very pretty color! The finish is Watco Danish Oil. The board I made for my father is a relief carving of the Isle of Palms, where my mother lived as a child and where they both are now in retirement. It's nothing to do with the new board, but I'll show and explain his board too. You start at the house near the left/south end of the island. There are a few novelty features that we never play, but it was fun to add them. The first is for the inside player only. If you peg 5 you have to do a 3-point penalty loop. You've stopped to watch the ladies play beach volleyball (thus the bikini) at the Windjammer (their logo is the sail), a very popular beach bar owed (partially?) by my aunt's childhood classmate. The second is for both players. If you land at 40 you have to play a hole of golf at Wild Dunes. There is a four-sided die for your tee shot. If the inside player lands at 80, he/she has a 2 point diversion while listening to my sister sing (music notes) at Morgan Creek Grill. The outer player has a similar penalty for charter fishing (hooked fish). The outer player has a 3-point penalty for swimming in Breach Inlet (badly carved "dangerous current" sign at far left). Incidentally, this is where the submarine Hunley exited the intercoastal to attack the USS Housatonic. The shrimp is just for fun. The local shrimp are excellent. The "To 'Da Beach' sign depicts the one at the end of their driveway. Not Aspinet (clearly) Keep reading and I'll get back on topic The card backs are a painting my aunt did of my parents and their dog at the beach. A new deck was given last Christmas to replace these worn ones. OK! So much for the background. The following posts will be all about my new board.
-
Keith, it will be the slowest train you've ever boarded, but glad to have you along for the ride...
- 24 replies
-
- 1
-
-
- De 13 Søskende
- sail
- (and 5 more)