HOLIDAY DONATION DRIVE - SUPPORT MSW - DO YOUR PART TO KEEP THIS GREAT FORUM GOING! (89 donations so far out of 49,000 members - C'mon guys!)
×


justaguyinvegas
-
Posts
25 -
Joined
-
Last visited
Content Type
Profiles
Forums
Gallery
Events
Everything posted by justaguyinvegas
-
 @Nirvana I am not Andrew. That is another build log. Thanks anyways though!
- 32 replies
-
- 1
-

-
- Model Shipways
- Miss Adventure
- (and 2 more)
-
Well, here is the finished model. I may add more pictures when I build a new stand for it. It's kinda weird being finished. I keep thinking of what I have to do next. I hope you all like it.


- 32 replies
-
- 6
-
-

-
- Model Shipways
- Miss Adventure
- (and 2 more)
-
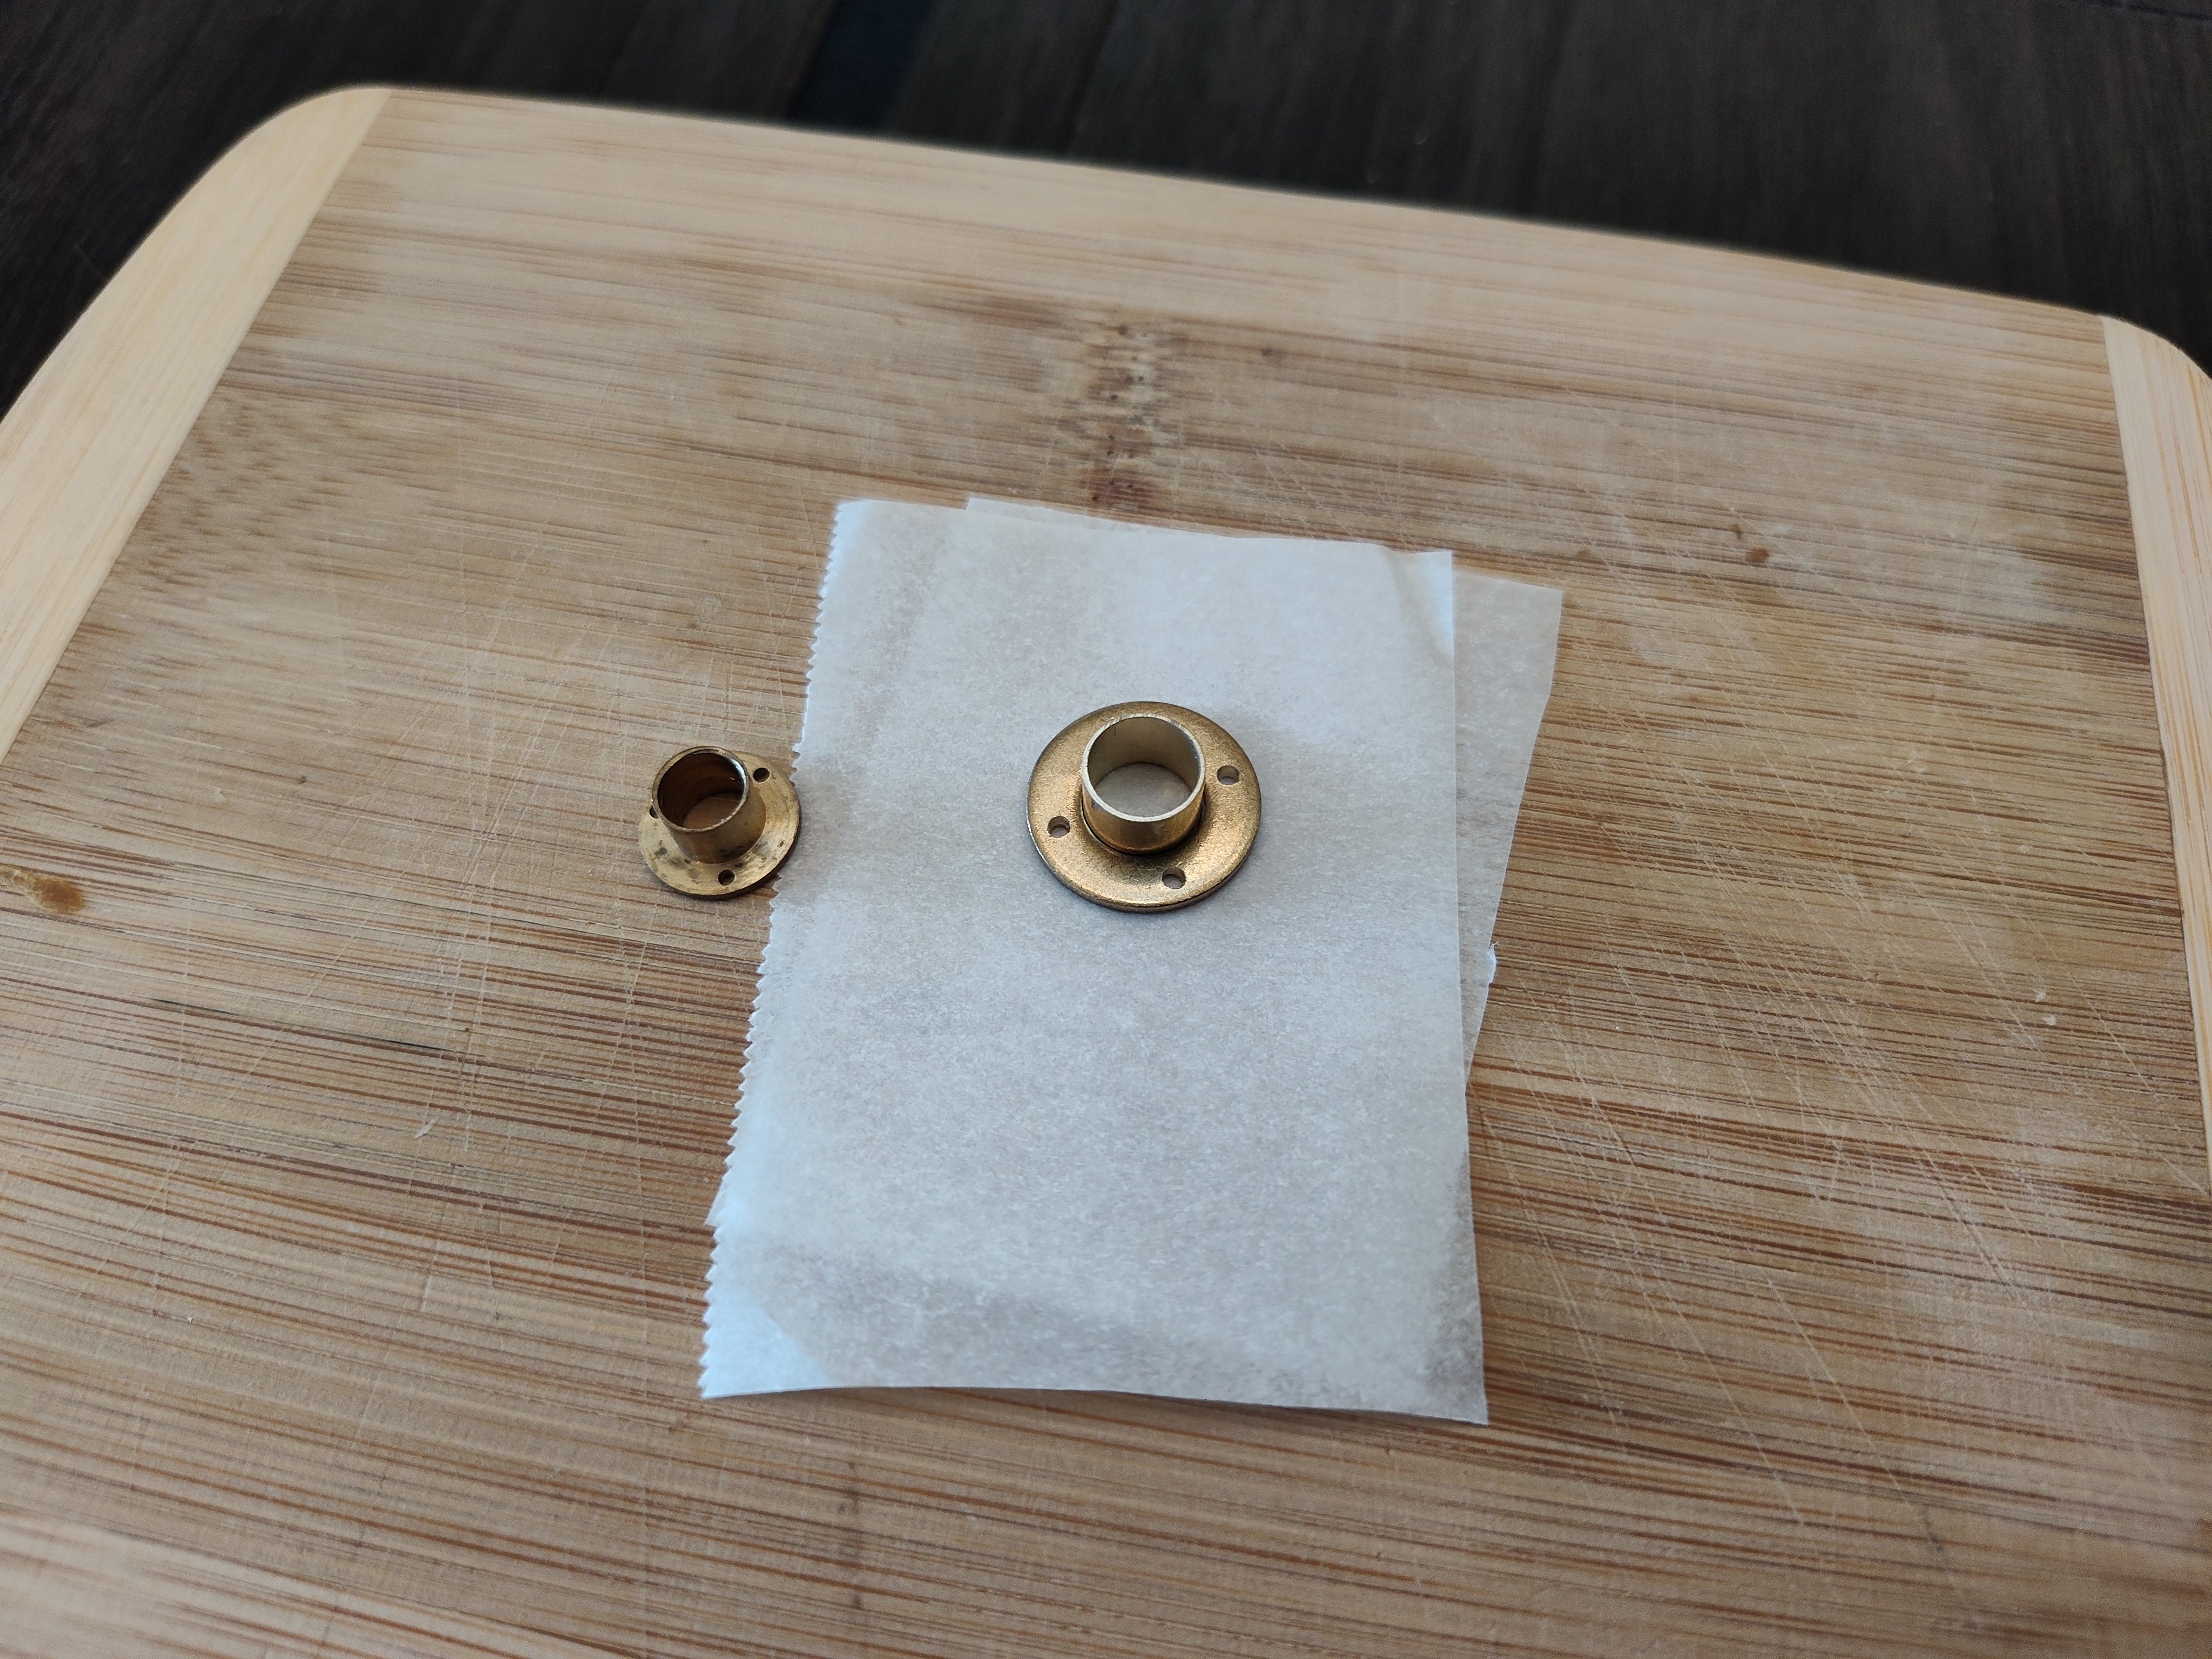
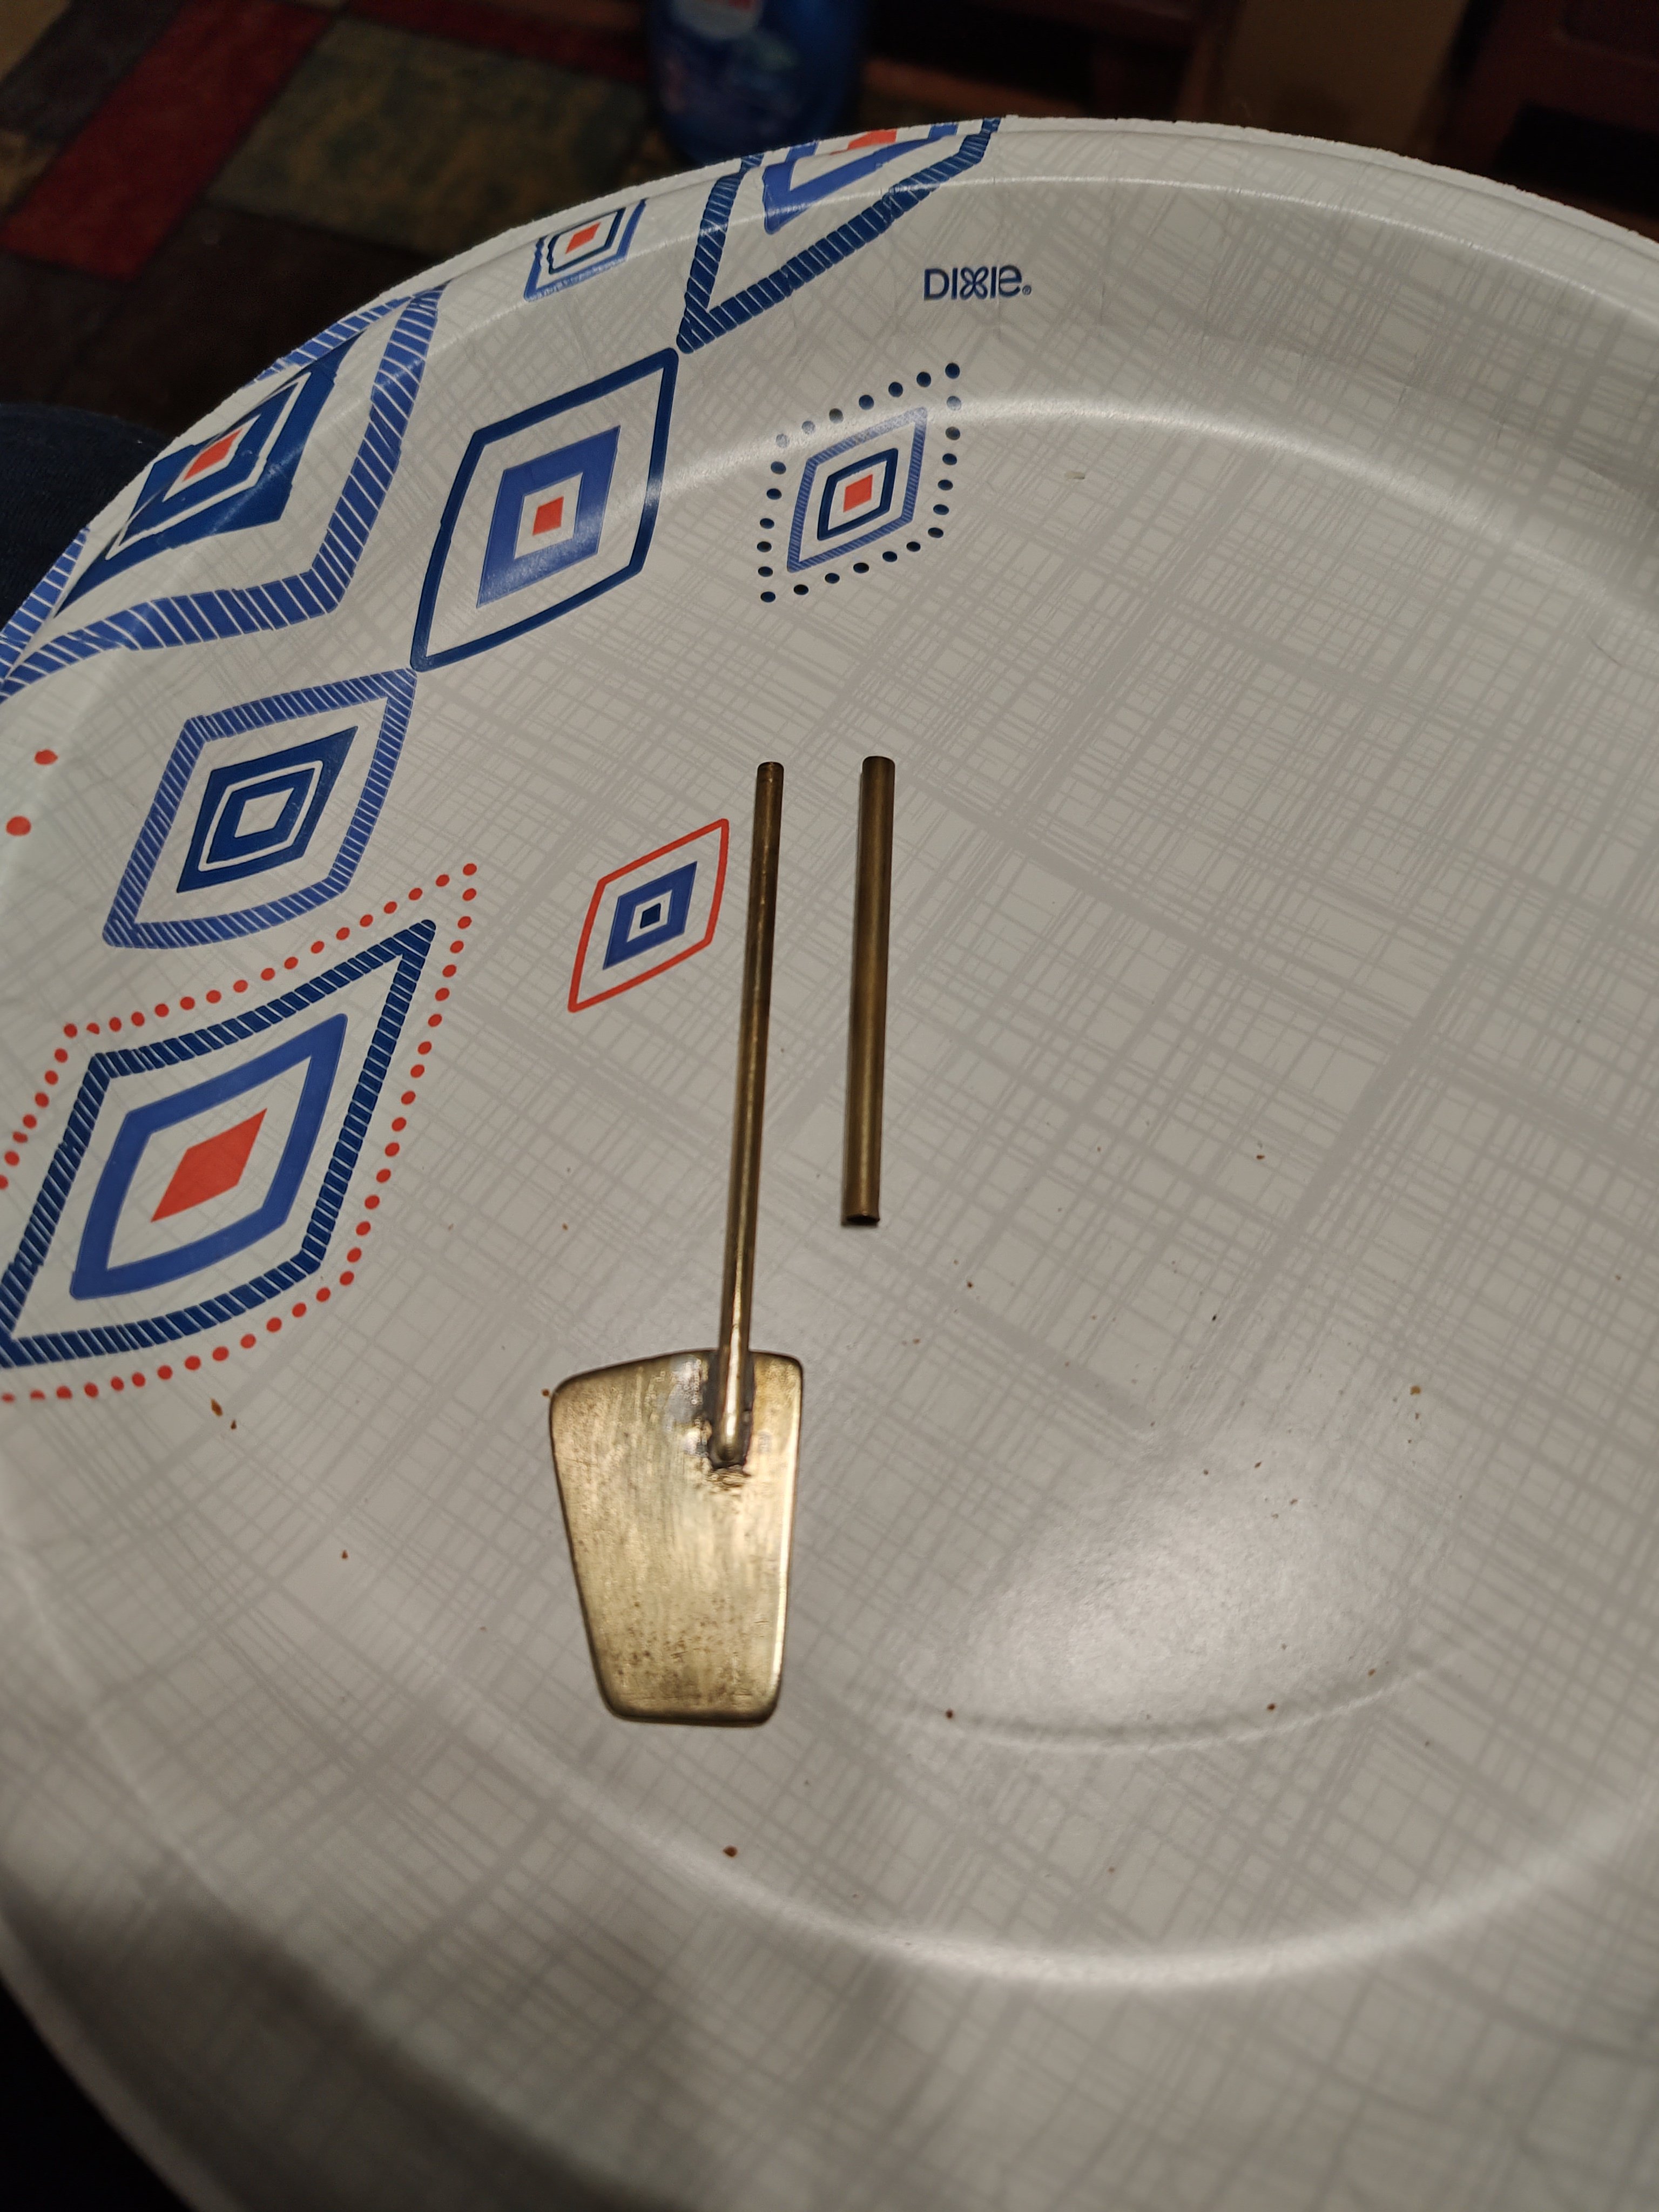
Deck hardware and exhaust going in. Once again, the exhaust included with the kit was just too small so I fabricated a better one using a brass washer and a bit of brass tubing. The intake ports needed very little fitting so those went on quickly. The boat is just about finished so this is probably my last post before the big reveal and glam shots. Stay tuned...

- 32 replies
-
- 4
-
-
-
- Model Shipways
- Miss Adventure
- (and 2 more)
-
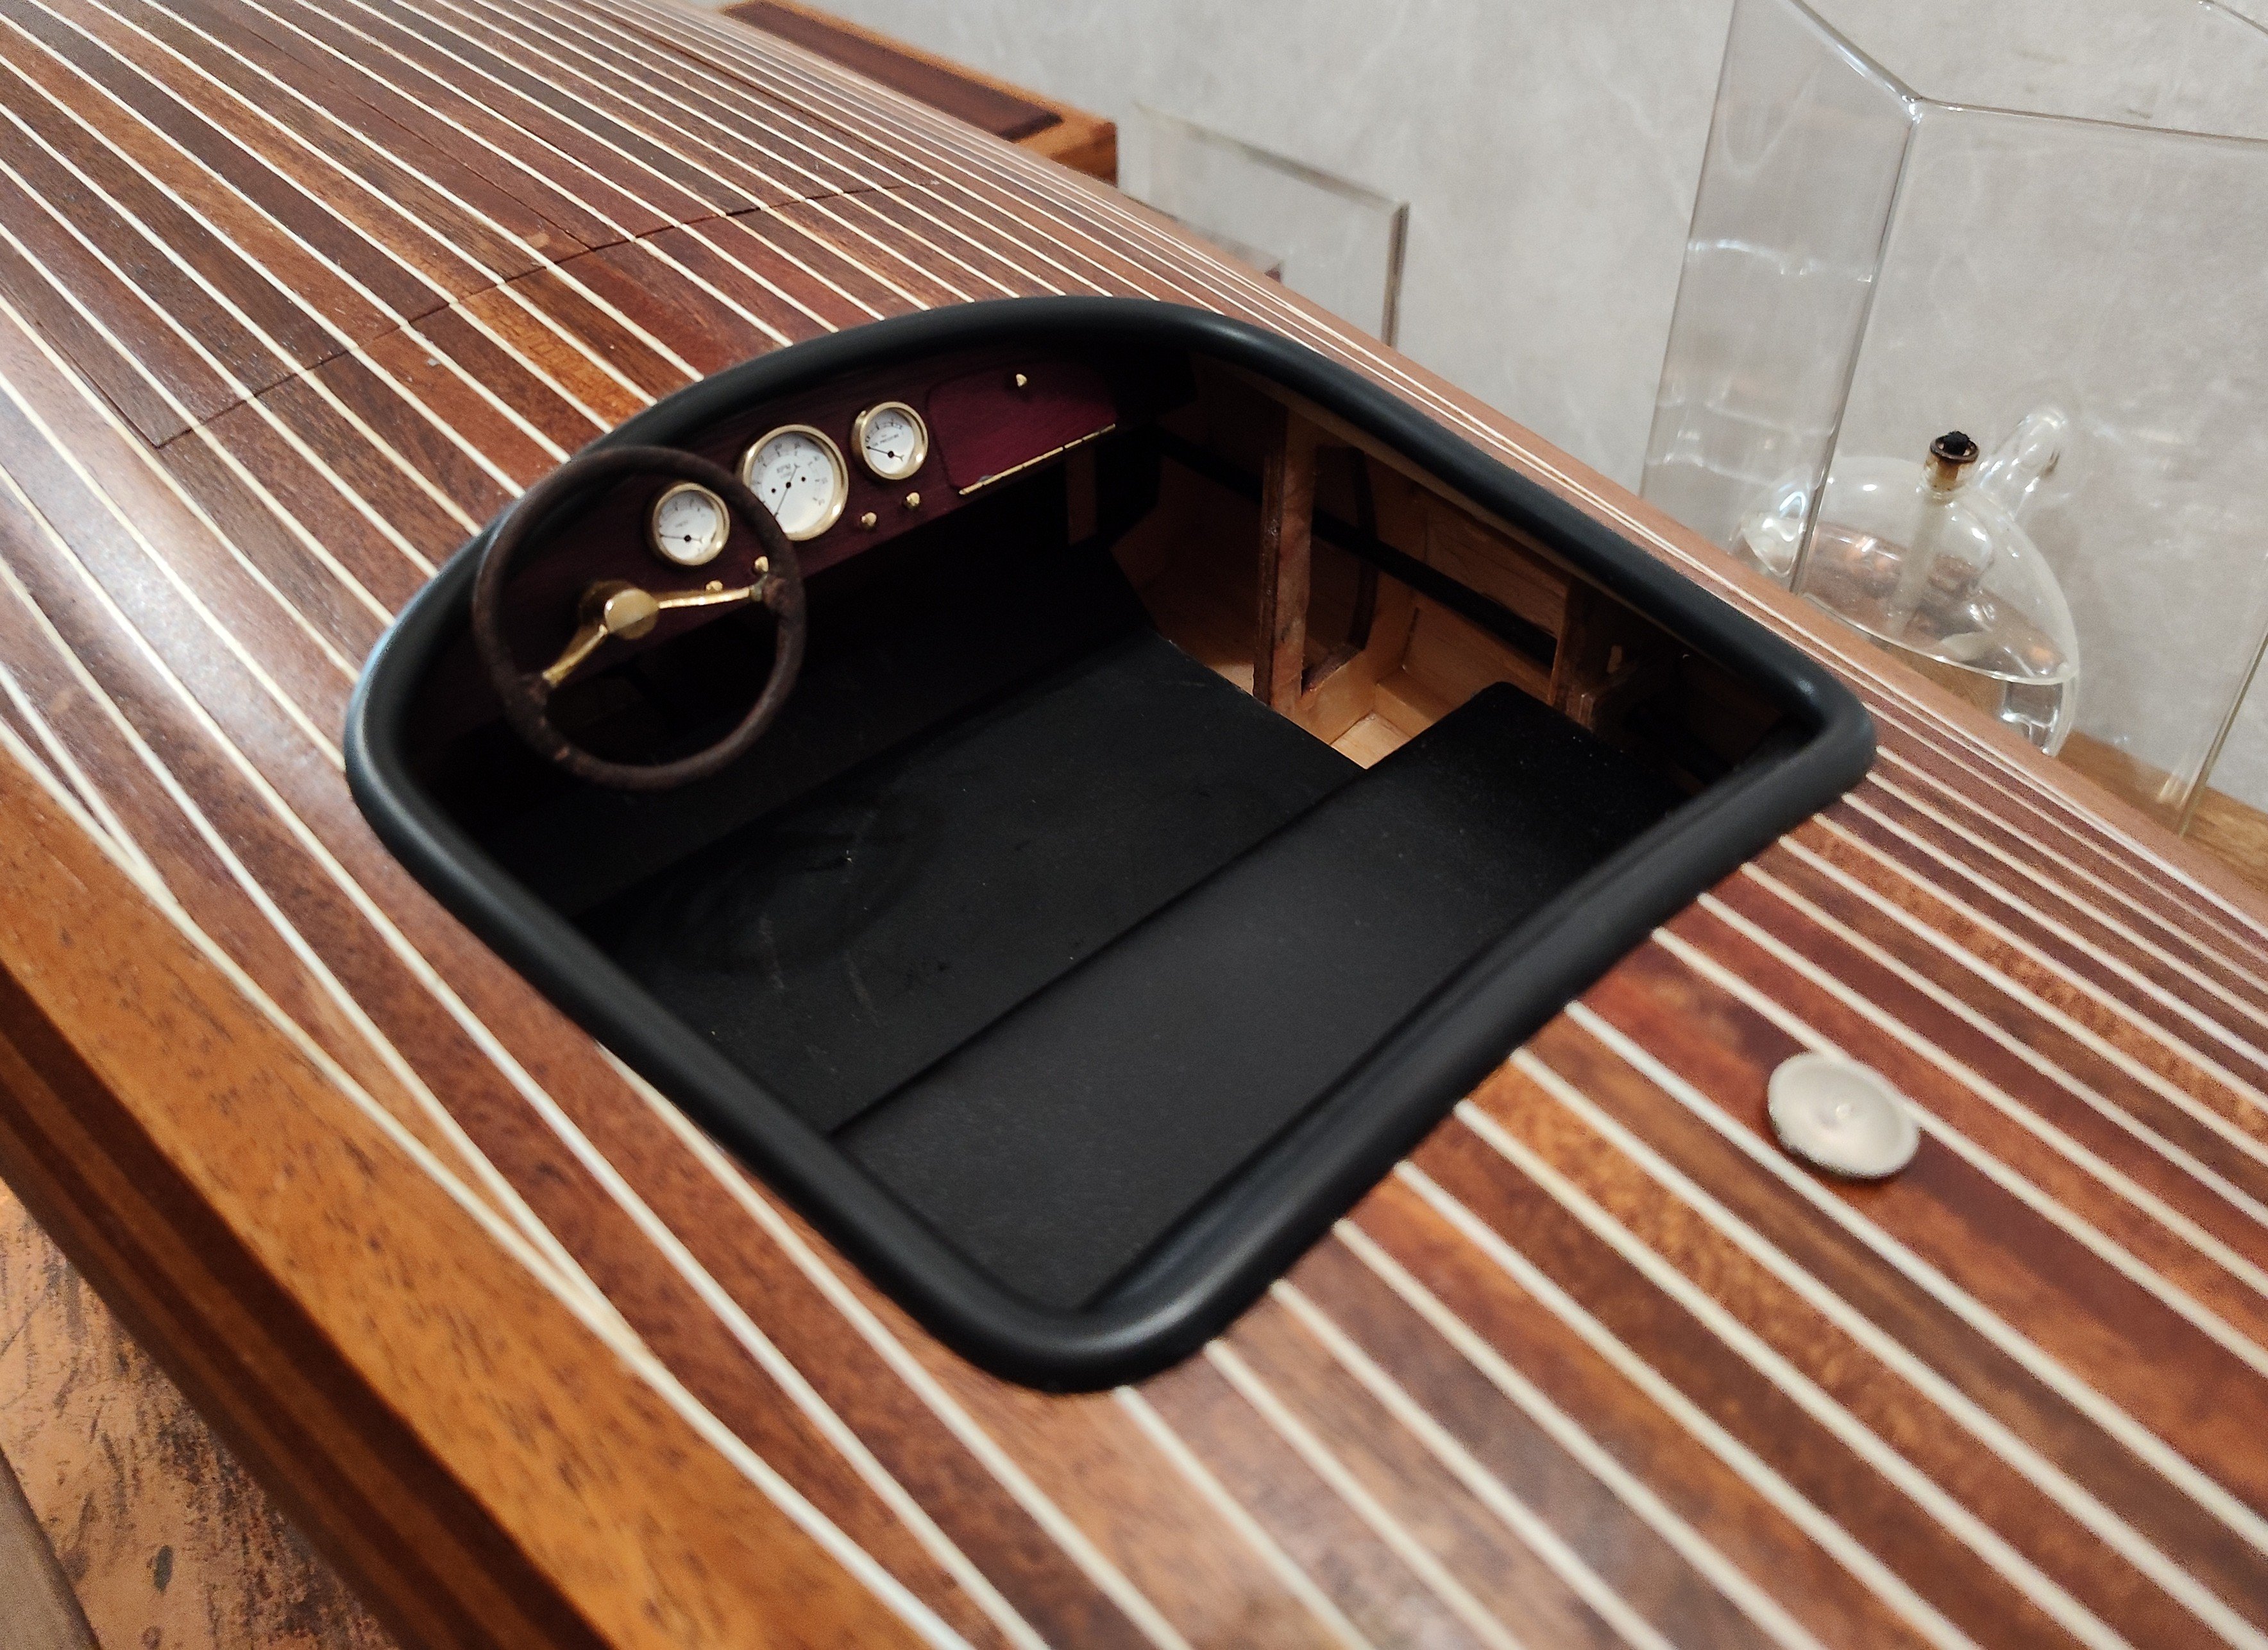
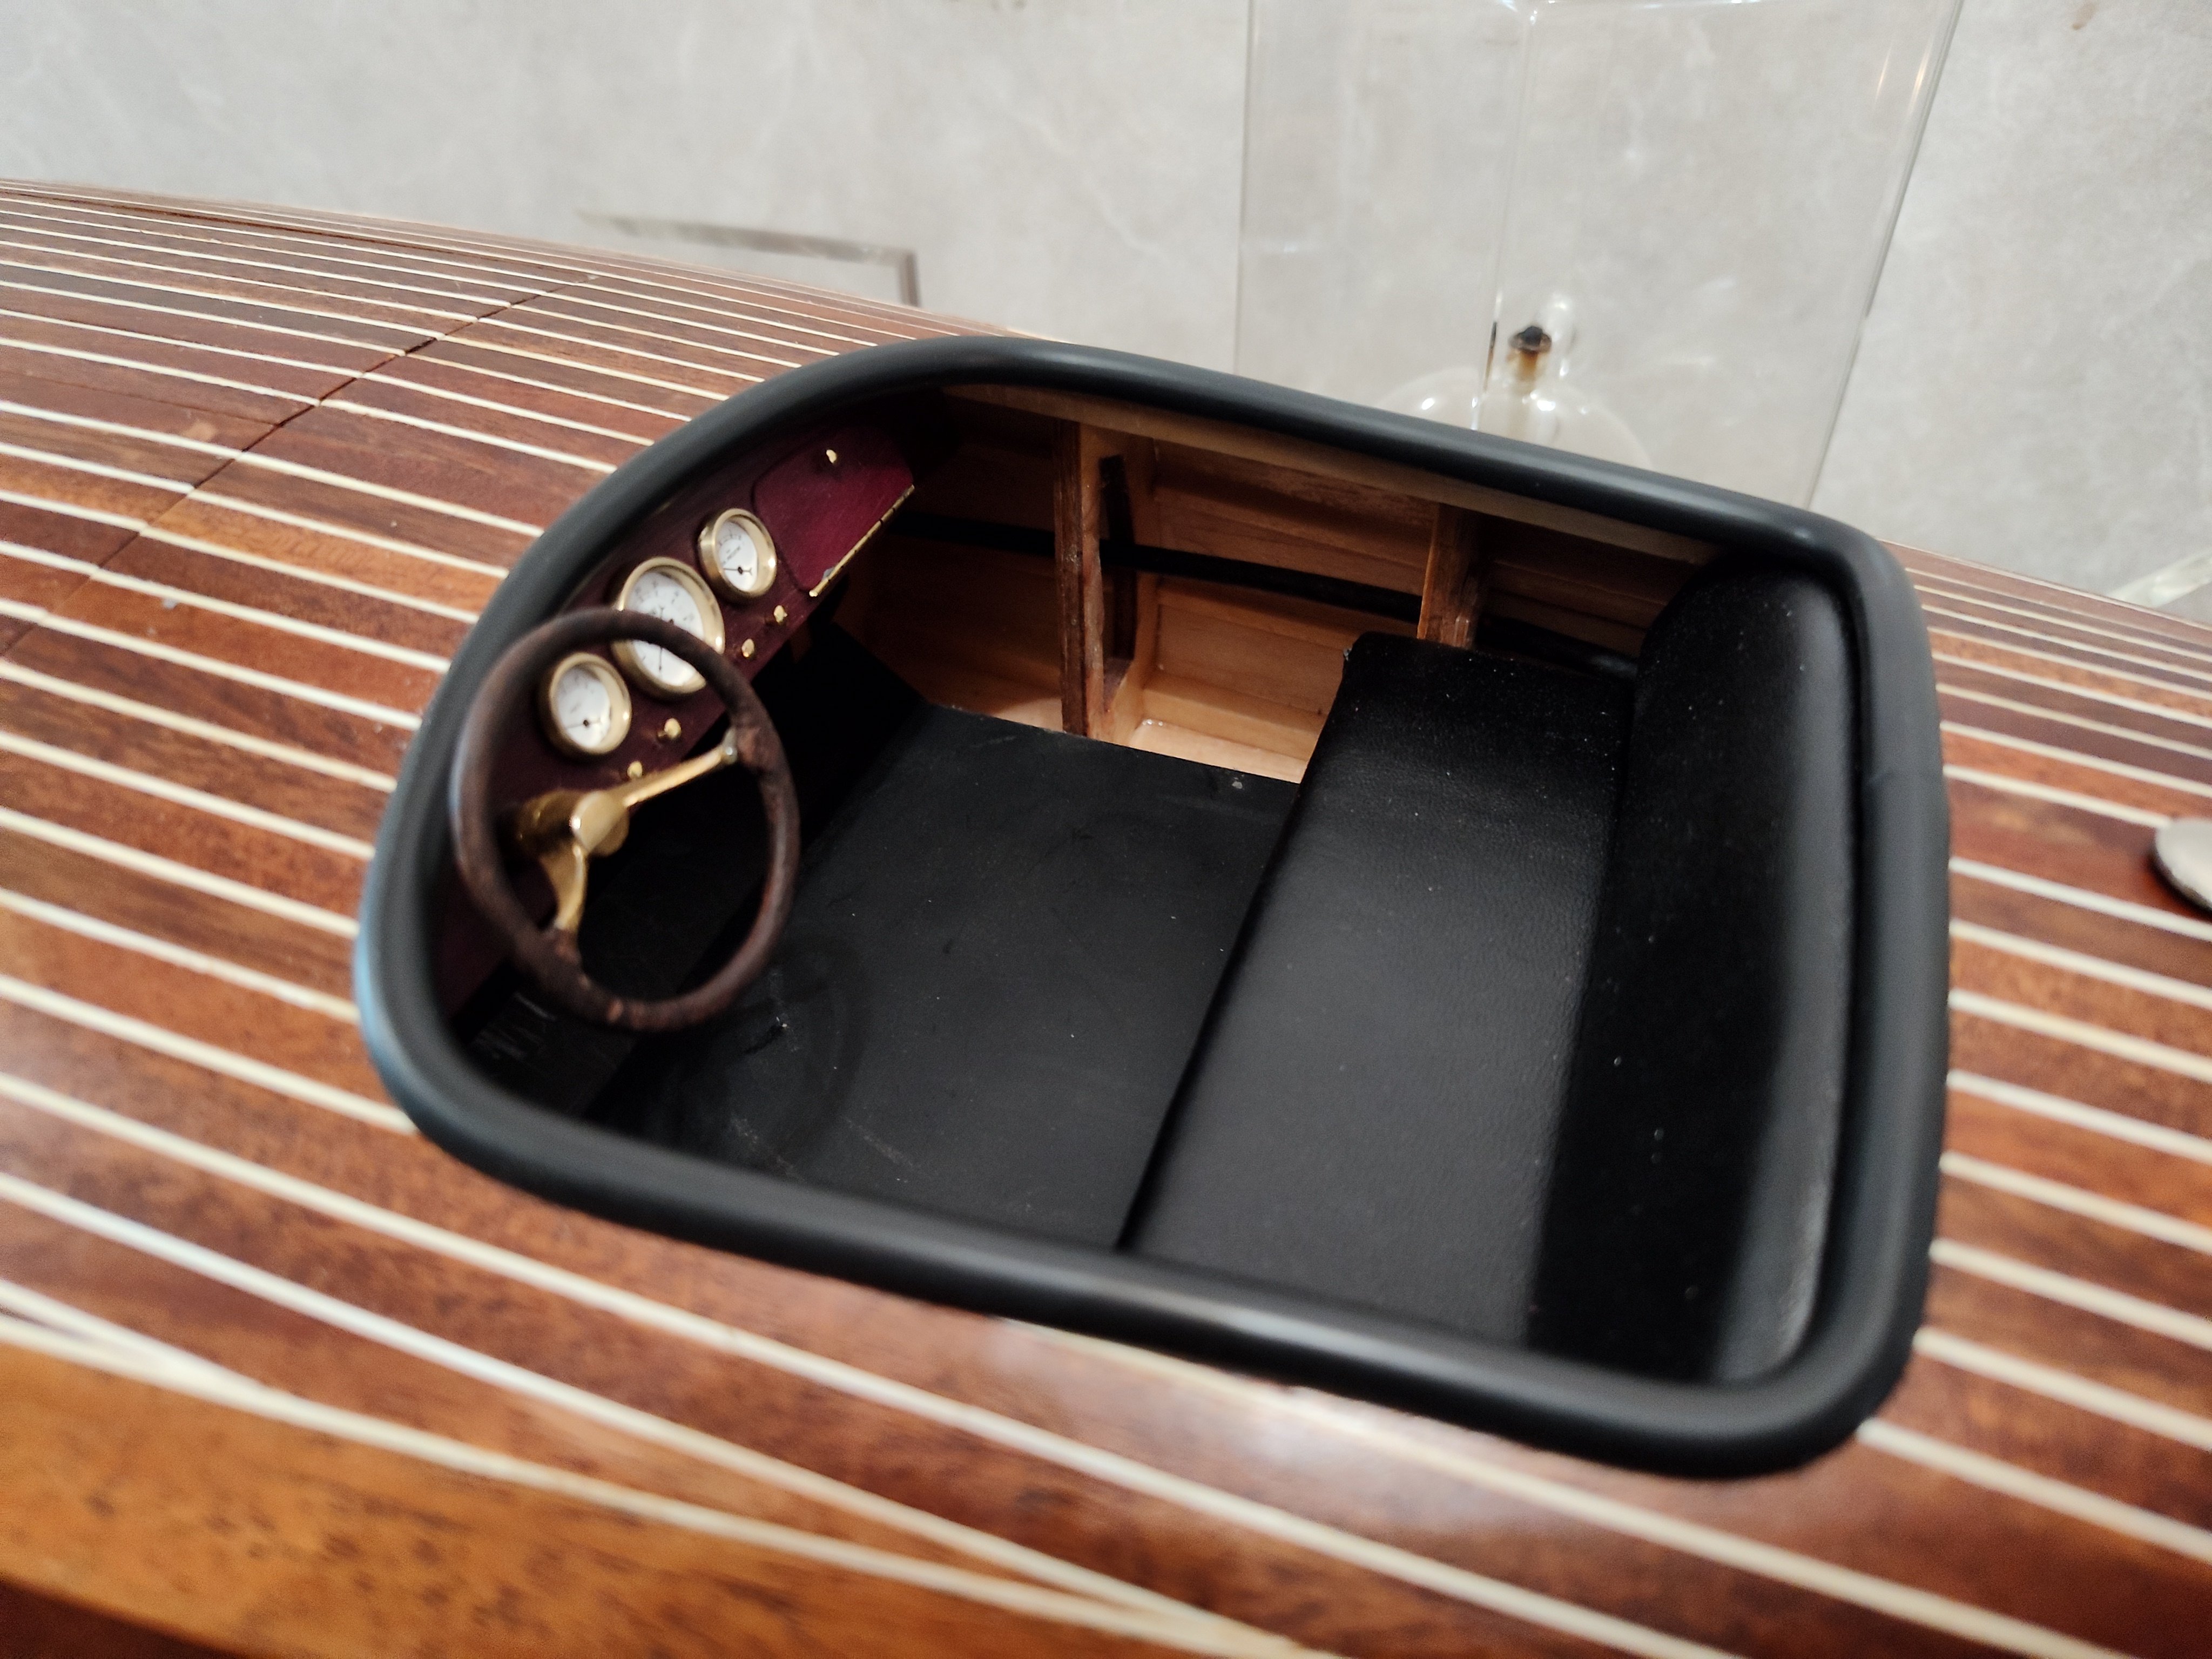
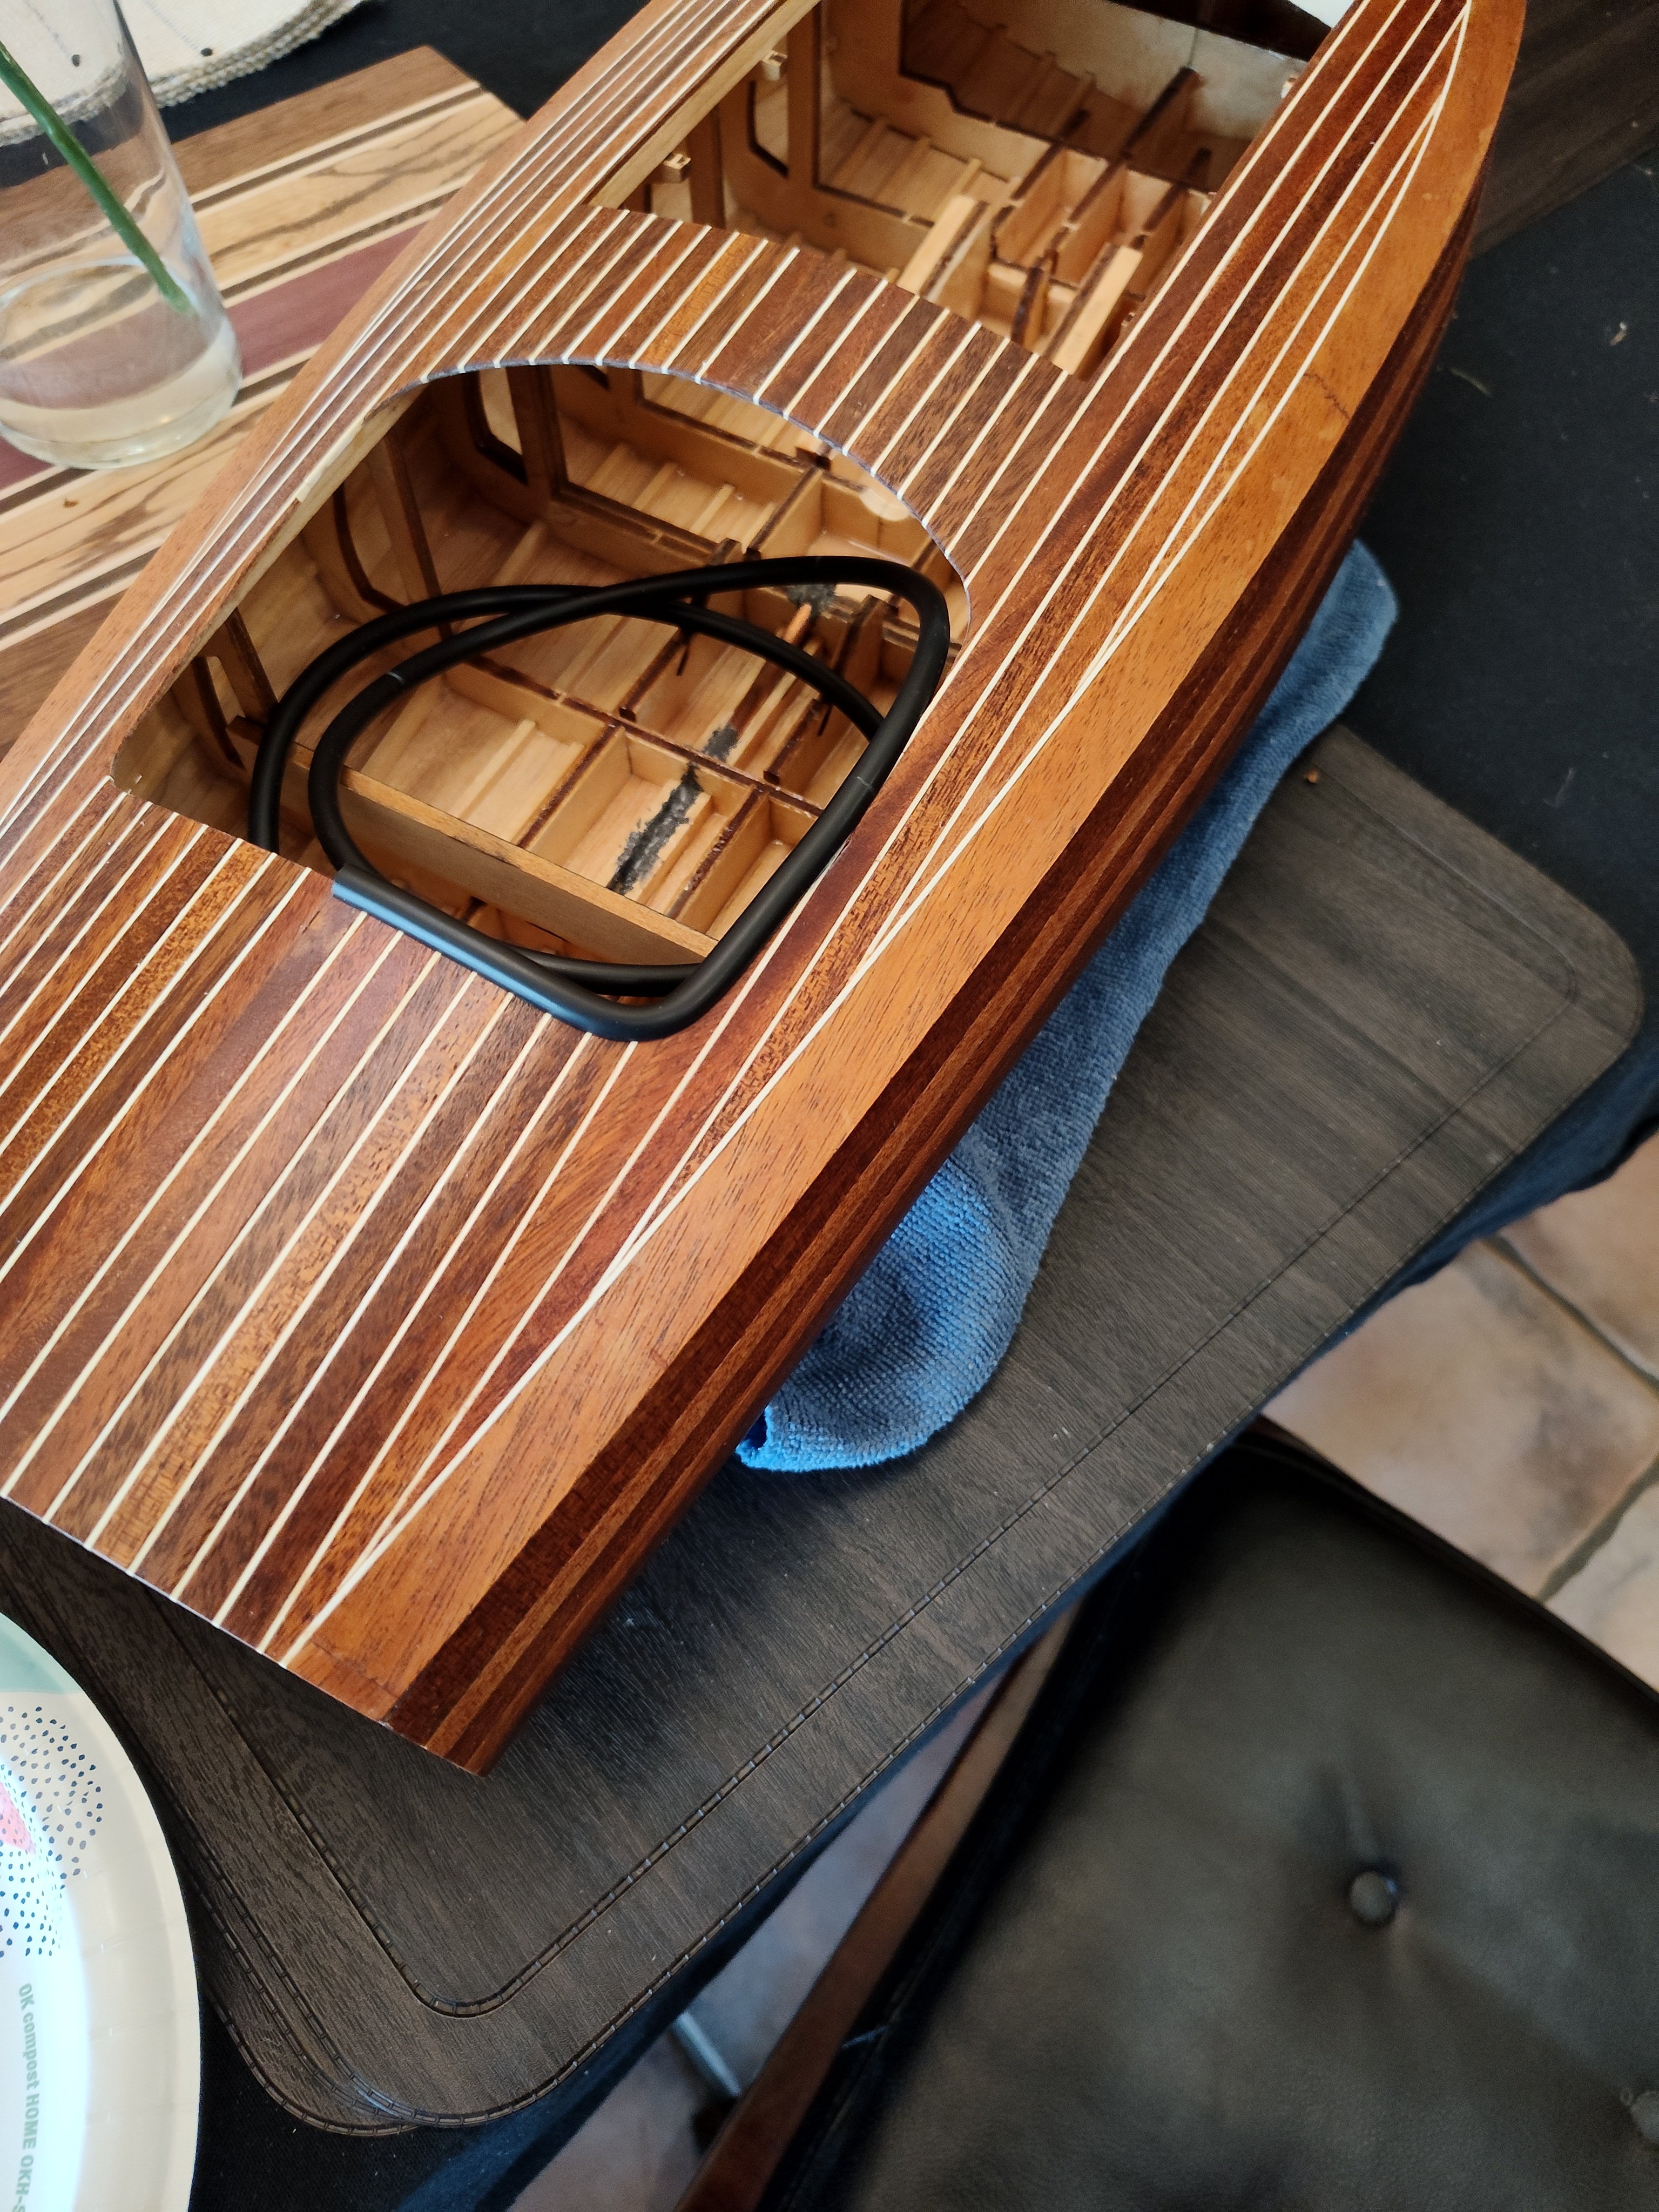
The cockpit is pretty much done. I still want to re-do the seat back. I would like it to have verticle pleats. I need to figure out he best way to do that.


- 32 replies
-
- 4
-
-
-
- Model Shipways
- Miss Adventure
- (and 2 more)
-
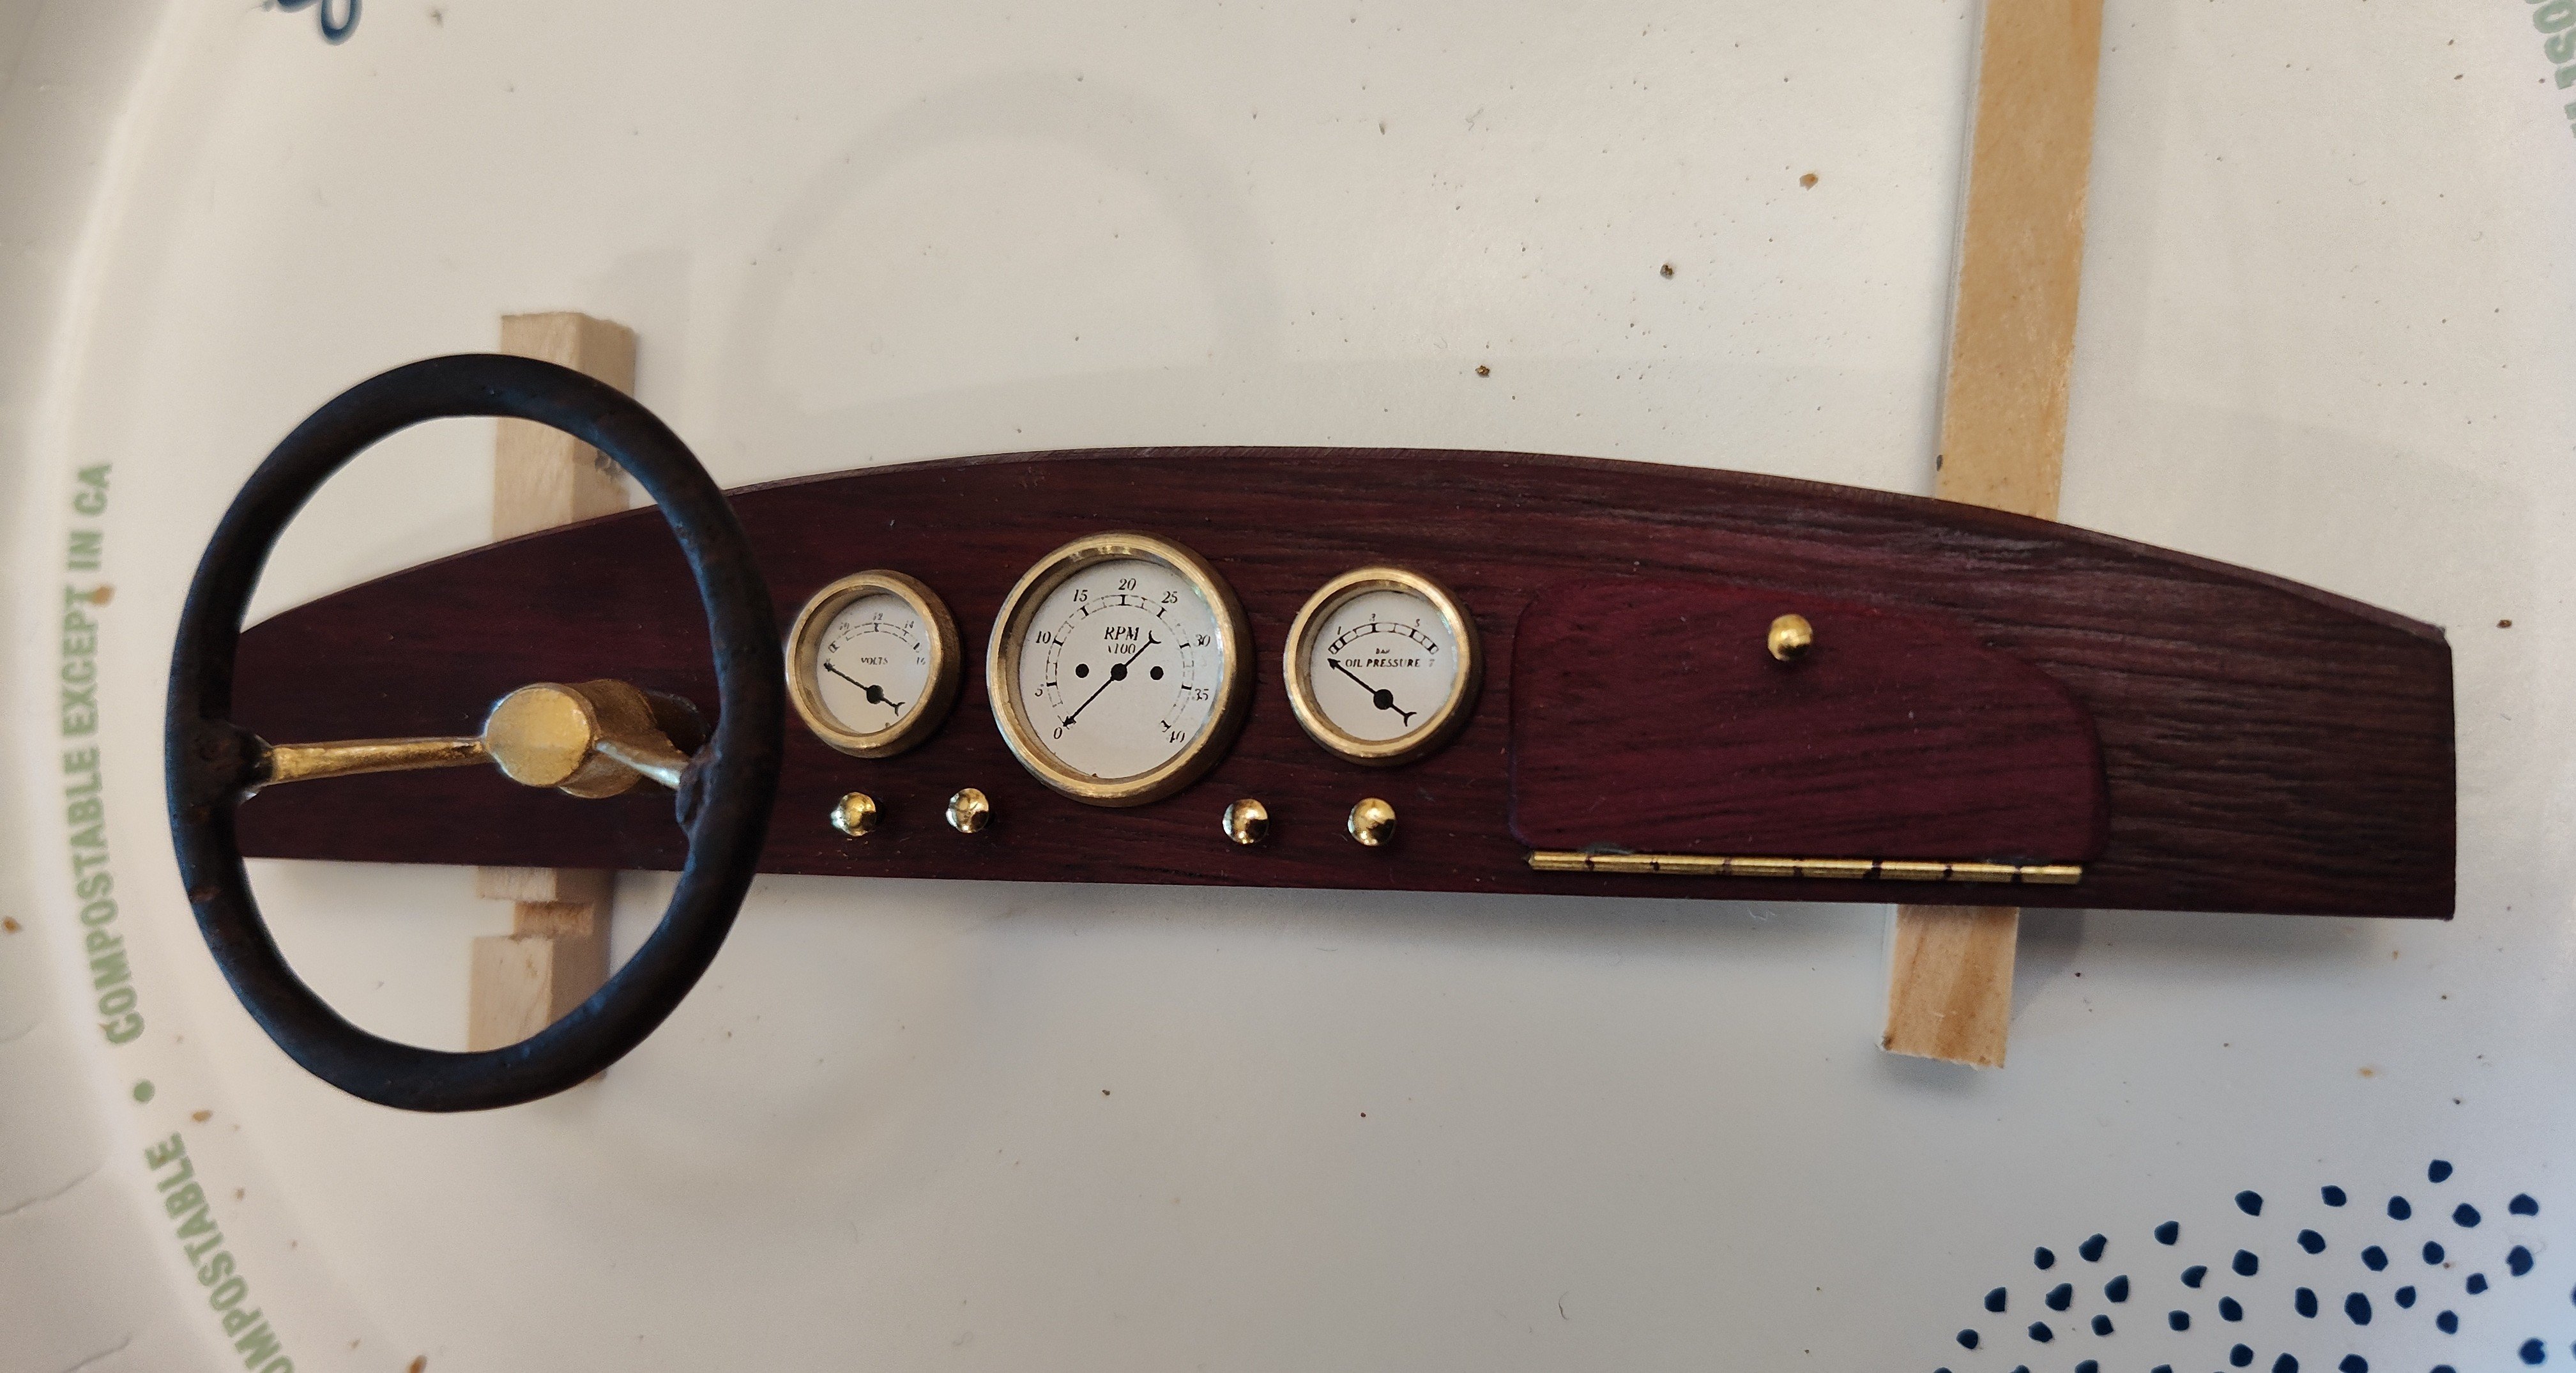
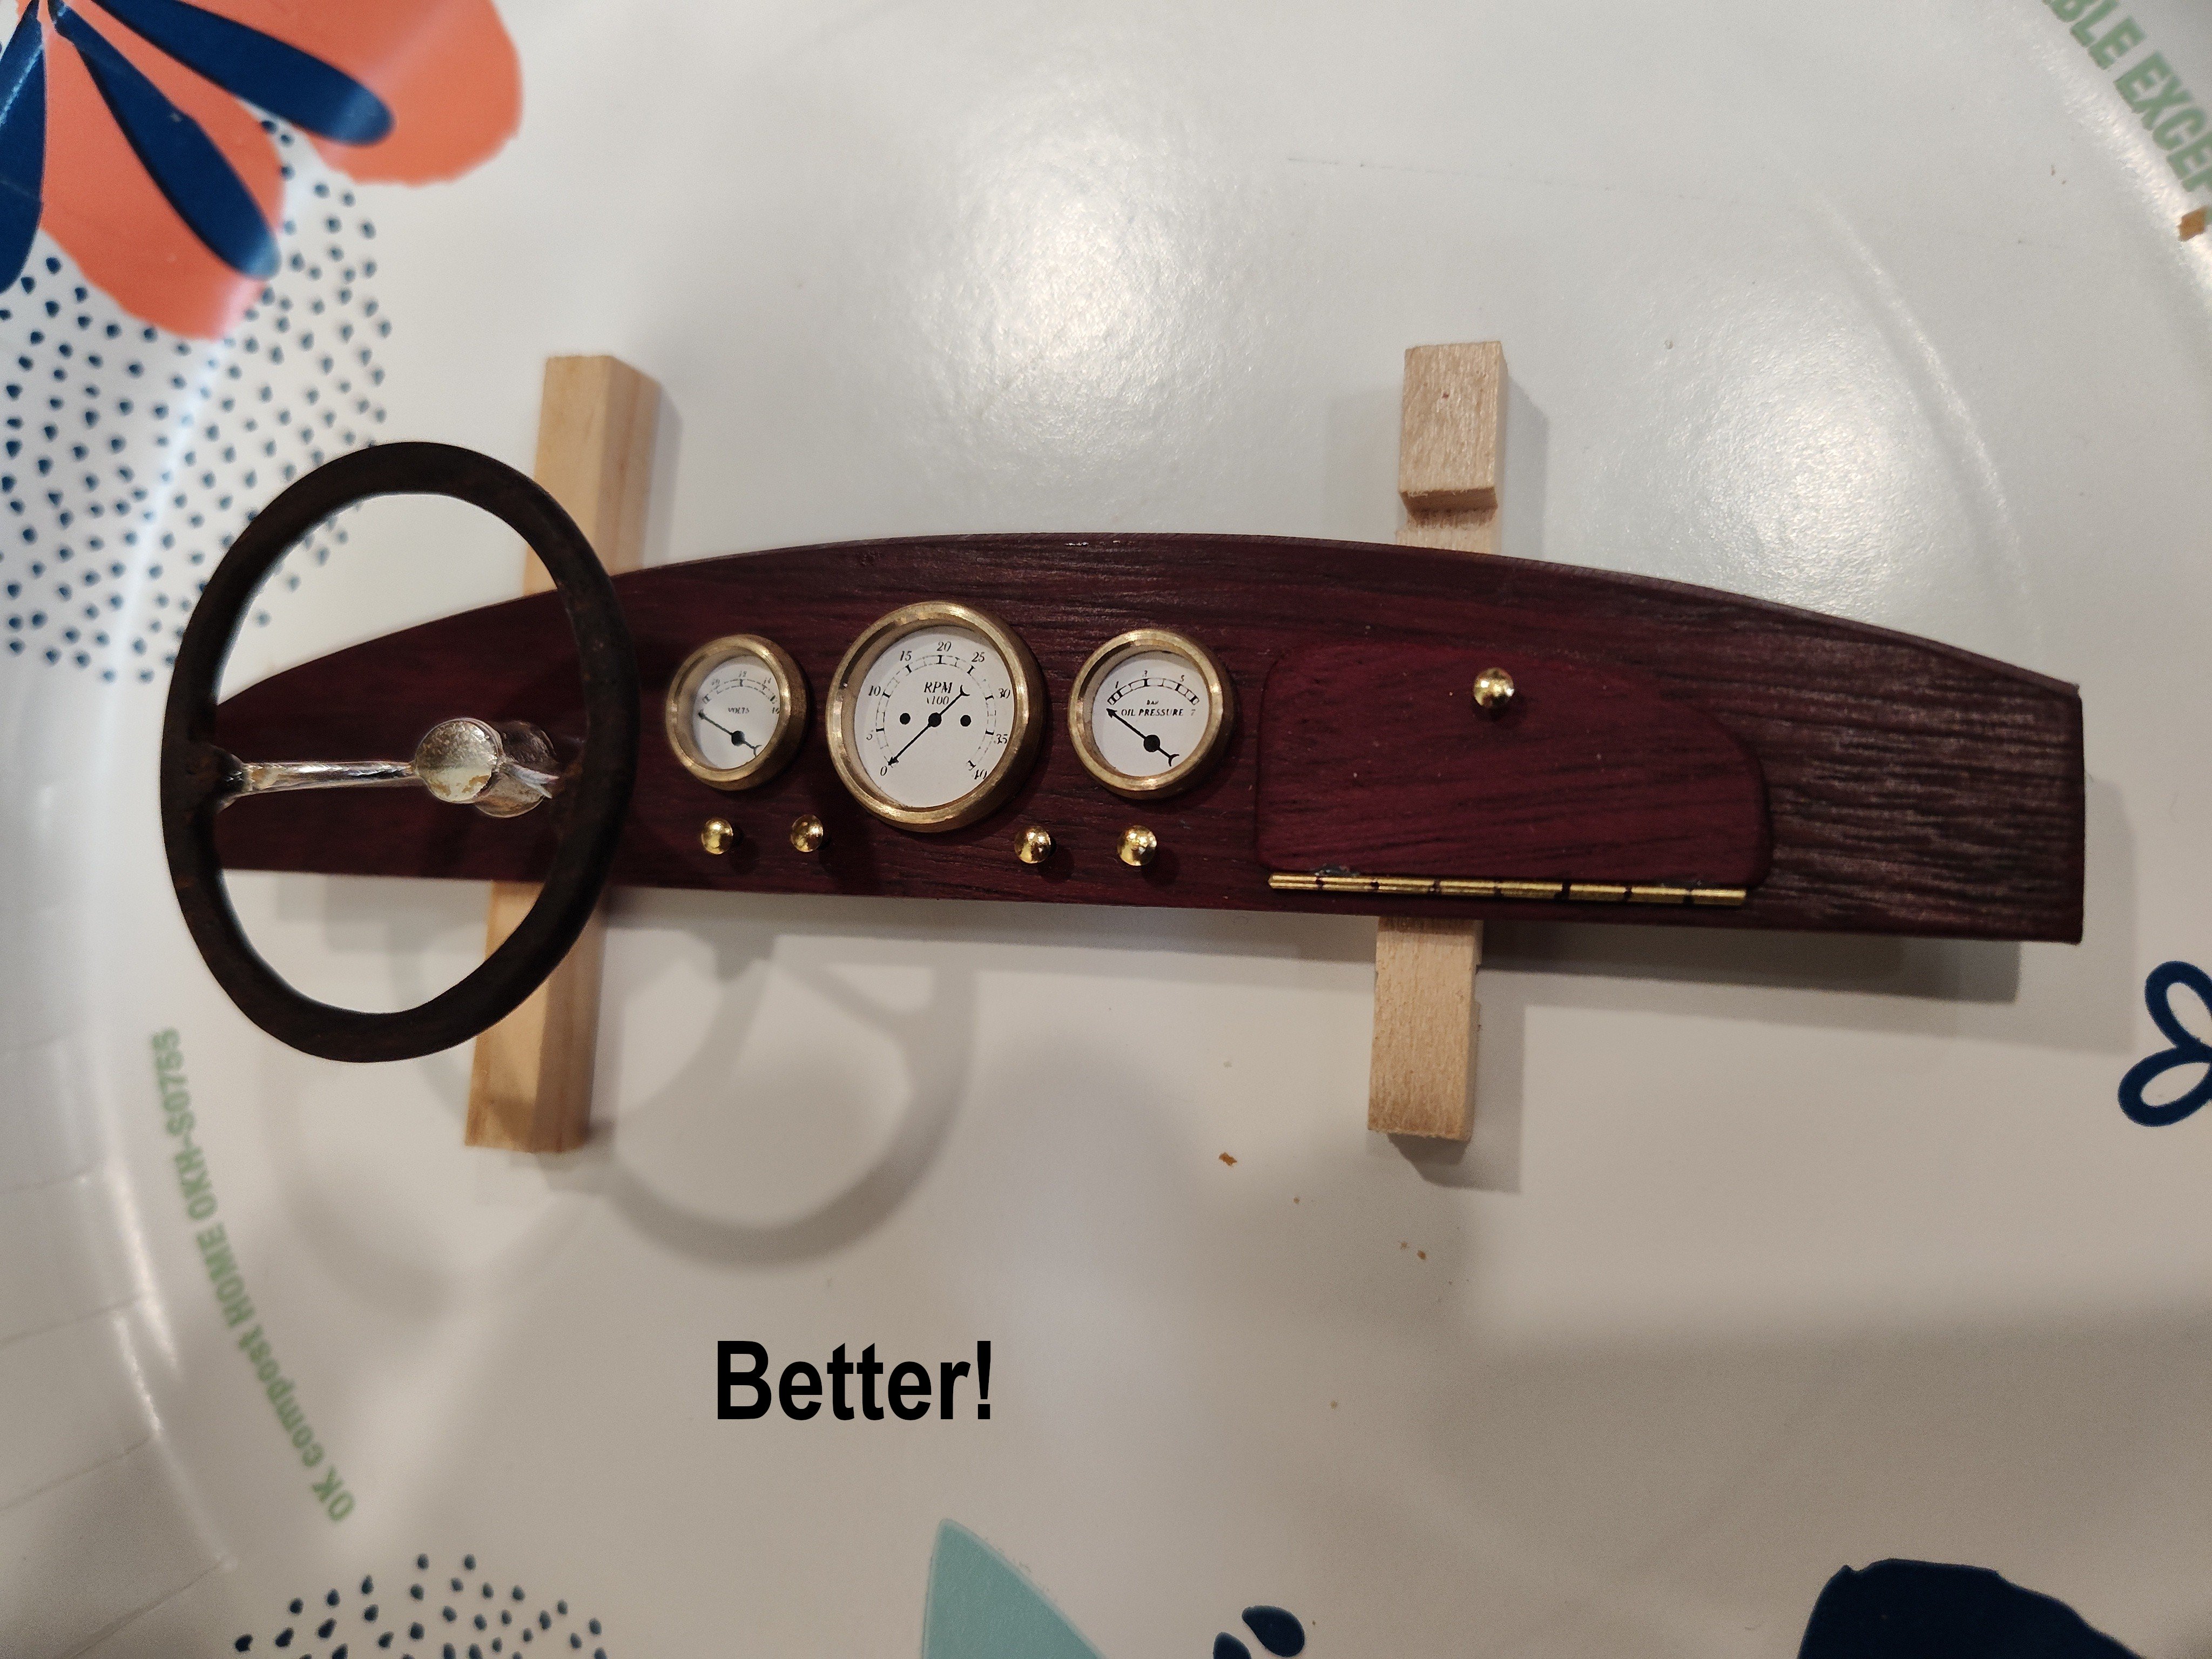
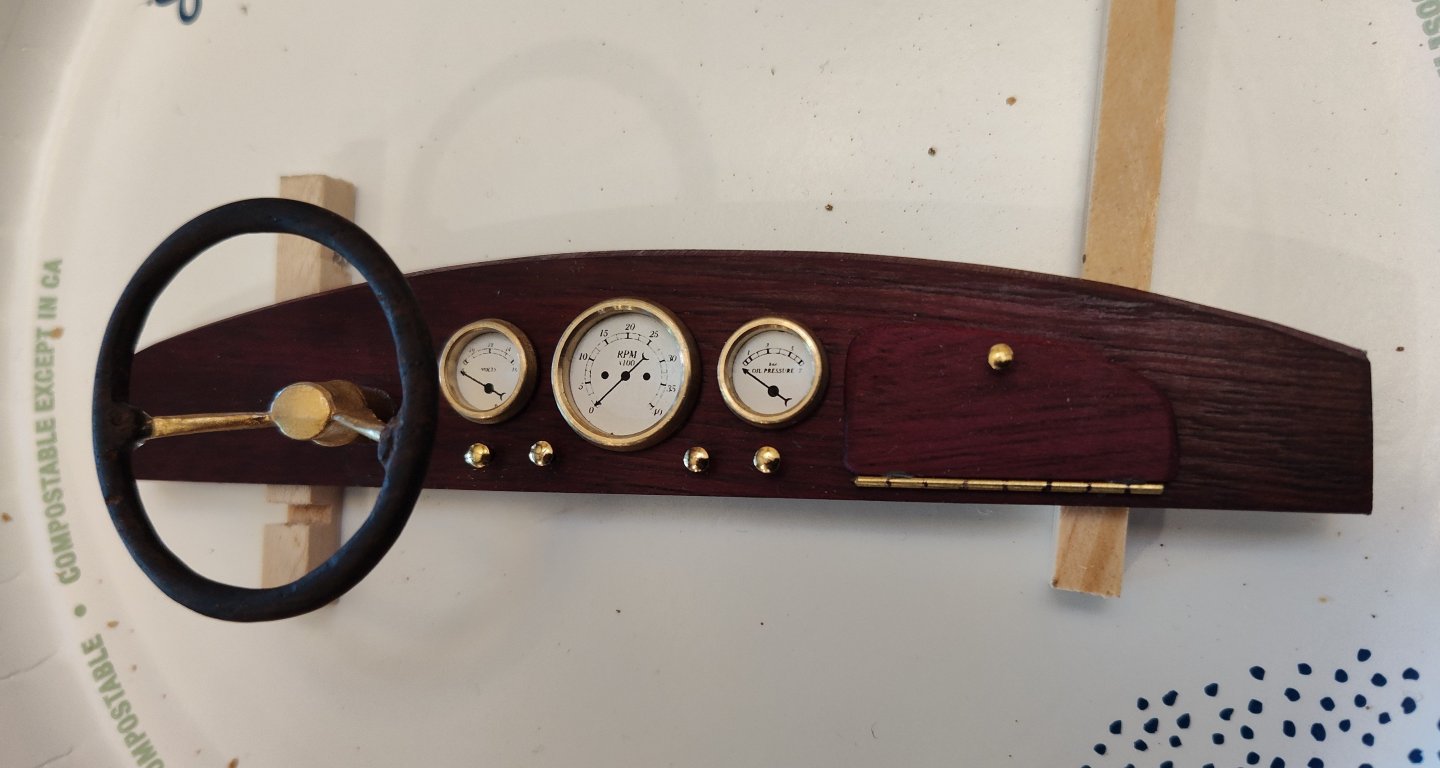
I remembered I had some Rub n Buff gold leaf so I tried it out on the steering wheel yoke. It's not perfect but it isn't triggering me anymore.
-
Moving on to the Dashboard I decided to go with my own dashboard design. The included photo-etched instrument panel was just too small and unusable. The only thing I kept from the kit was the steering wheel yoke, and even it bothers me since it is chrome and not brass. Oh well.


- 32 replies
-
- 4
-
-
-
- Model Shipways
- Miss Adventure
- (and 2 more)
-
A word about scale This kit has an identity crisis. It doesn't know what scale it is. The web page for the model says it is 1/16 but the box says 1/6. I know for a fact that the boat the kit is based on is small, so I am going with 1/6th scale. A lot of the hardware in the kit is unusable since it is not to scale. The instrument panel is a joke. The cockpit coaming, exhaust, and rear cleat are also too small to use. I will be replacing all of these parts with something more suitable. The hero of this kit is the mahogany planking. That's where most of the money you spend on the kit goes. I want the hardware to match the quality of the boat itself. Cockpit coaming I used a larger coaming than what came in the kit. I used super glue gel since it would have been too difficult getting epoxy in that little groove in the coaming. I was wondering if I wanted to do partial coaming or do the whole thing. I went with the whole thing. I'm happy with how it turned out.

- 32 replies
-
- 4
-
-
- Model Shipways
- Miss Adventure
- (and 2 more)
-
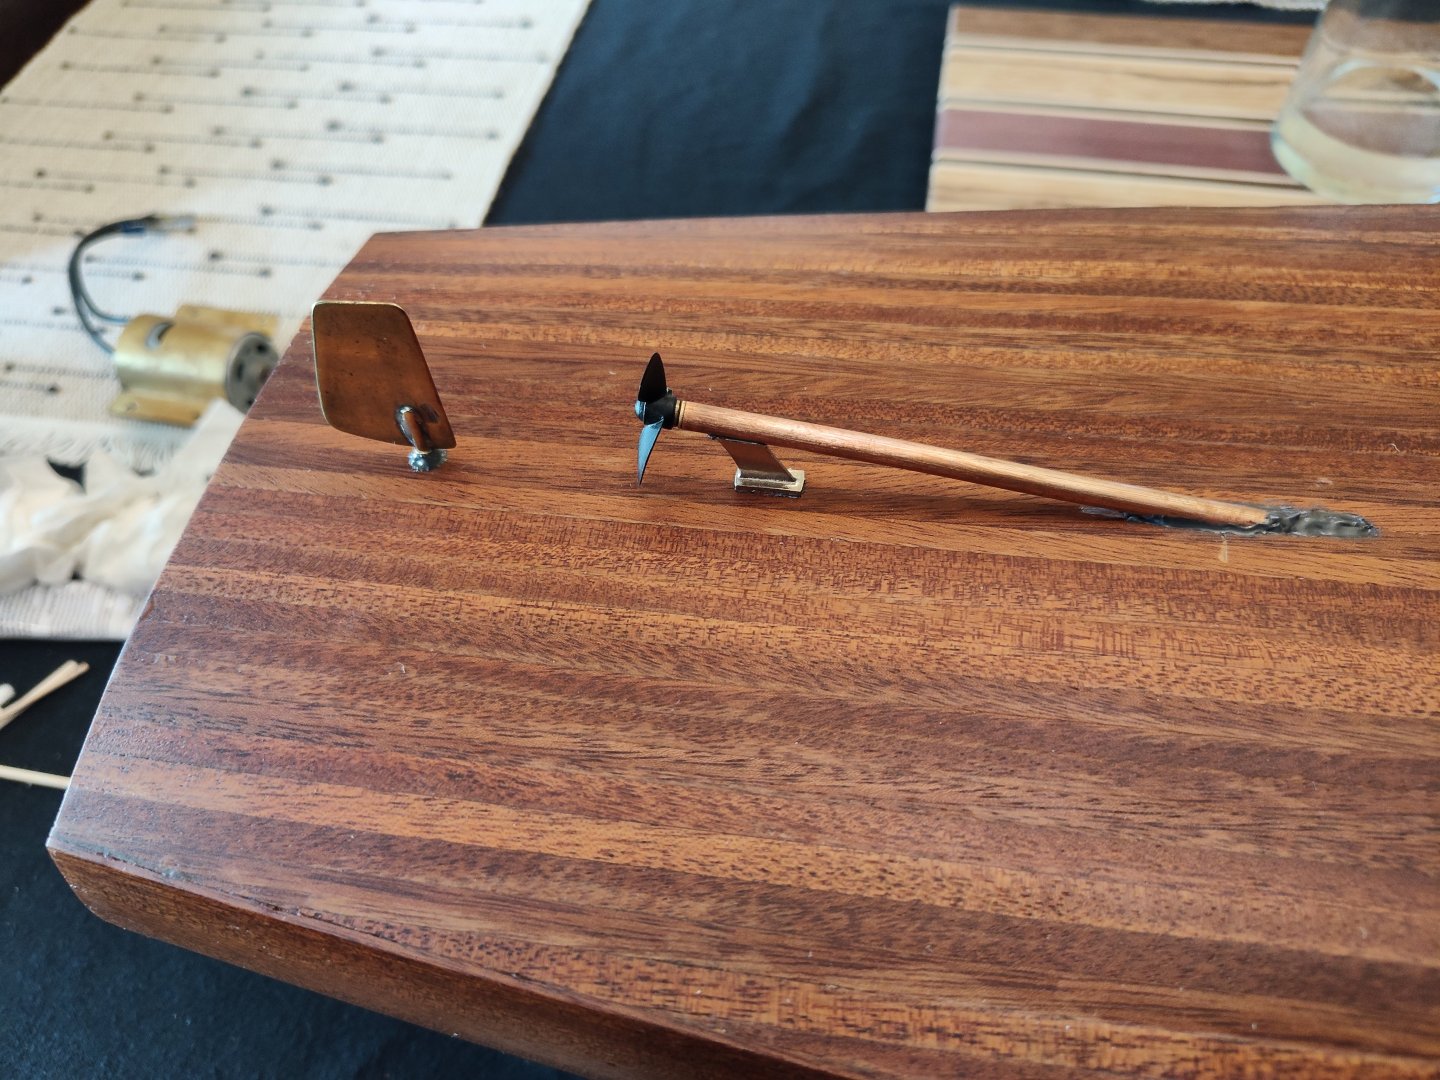
Running hardware going in. I used JB weld for all of this. Getting everything lined up took a while but I am happy with the outcome.
- 32 replies
-
- 7
-
-
- Model Shipways
- Miss Adventure
- (and 2 more)
-
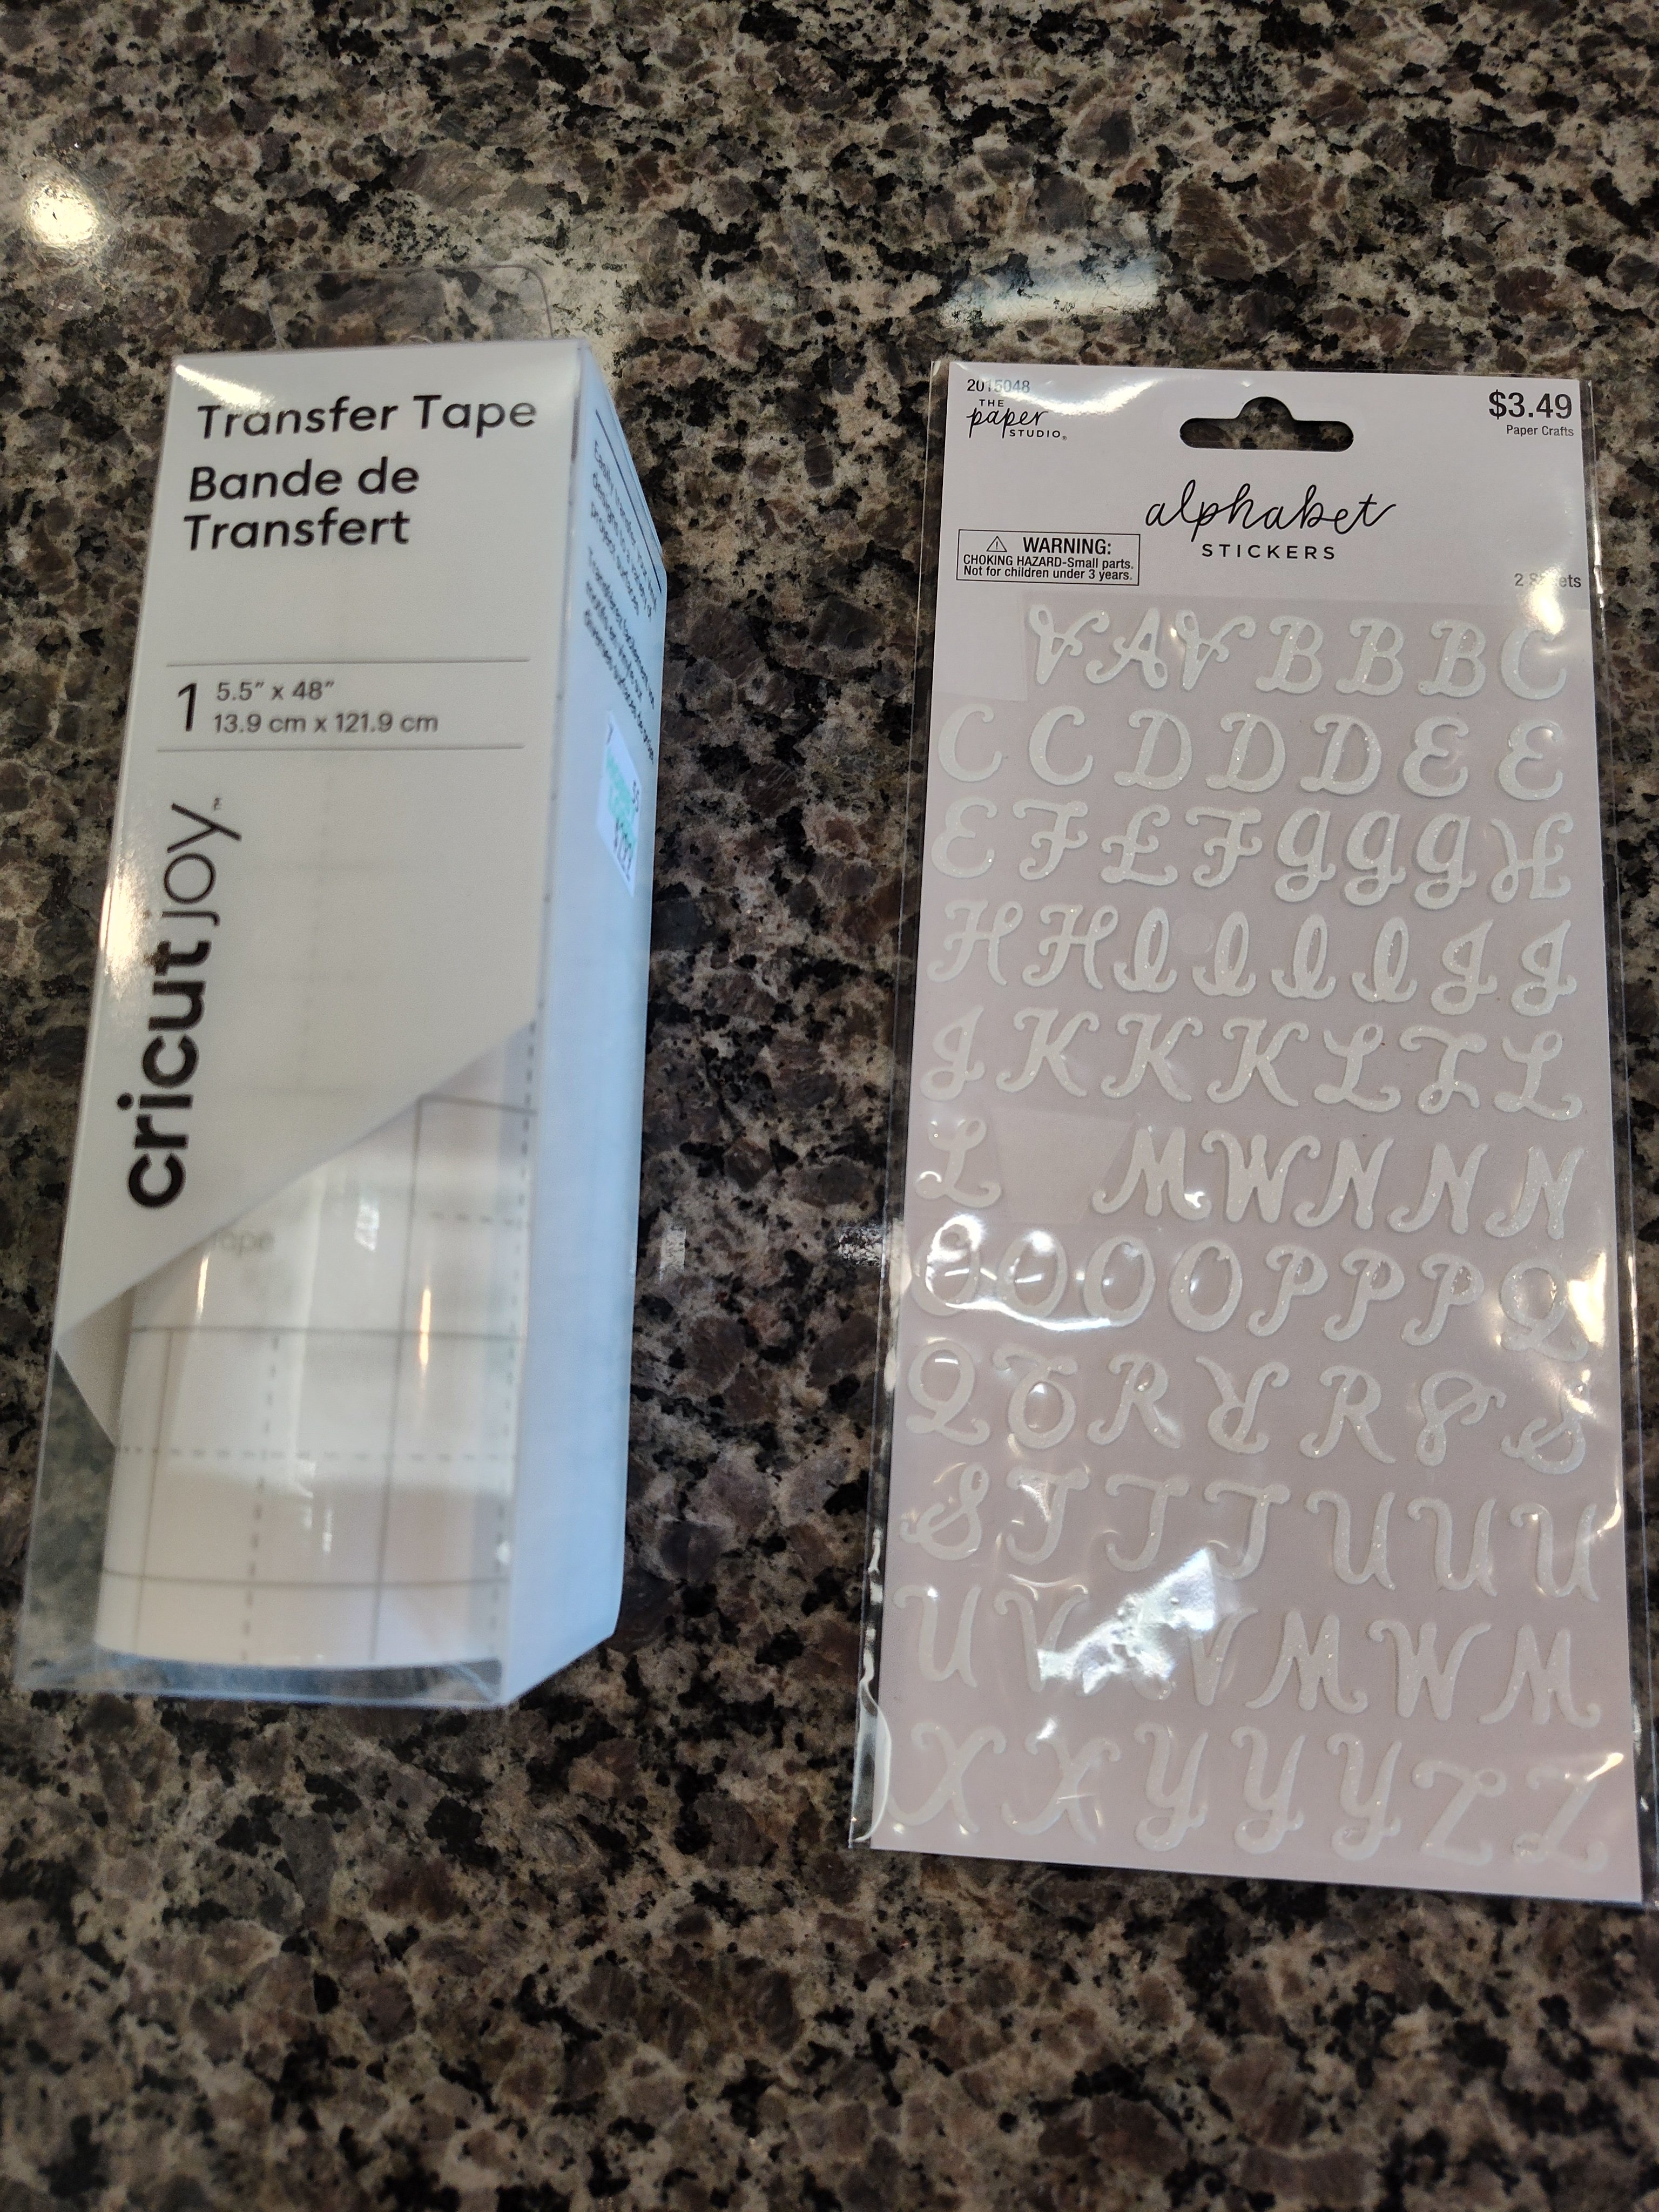
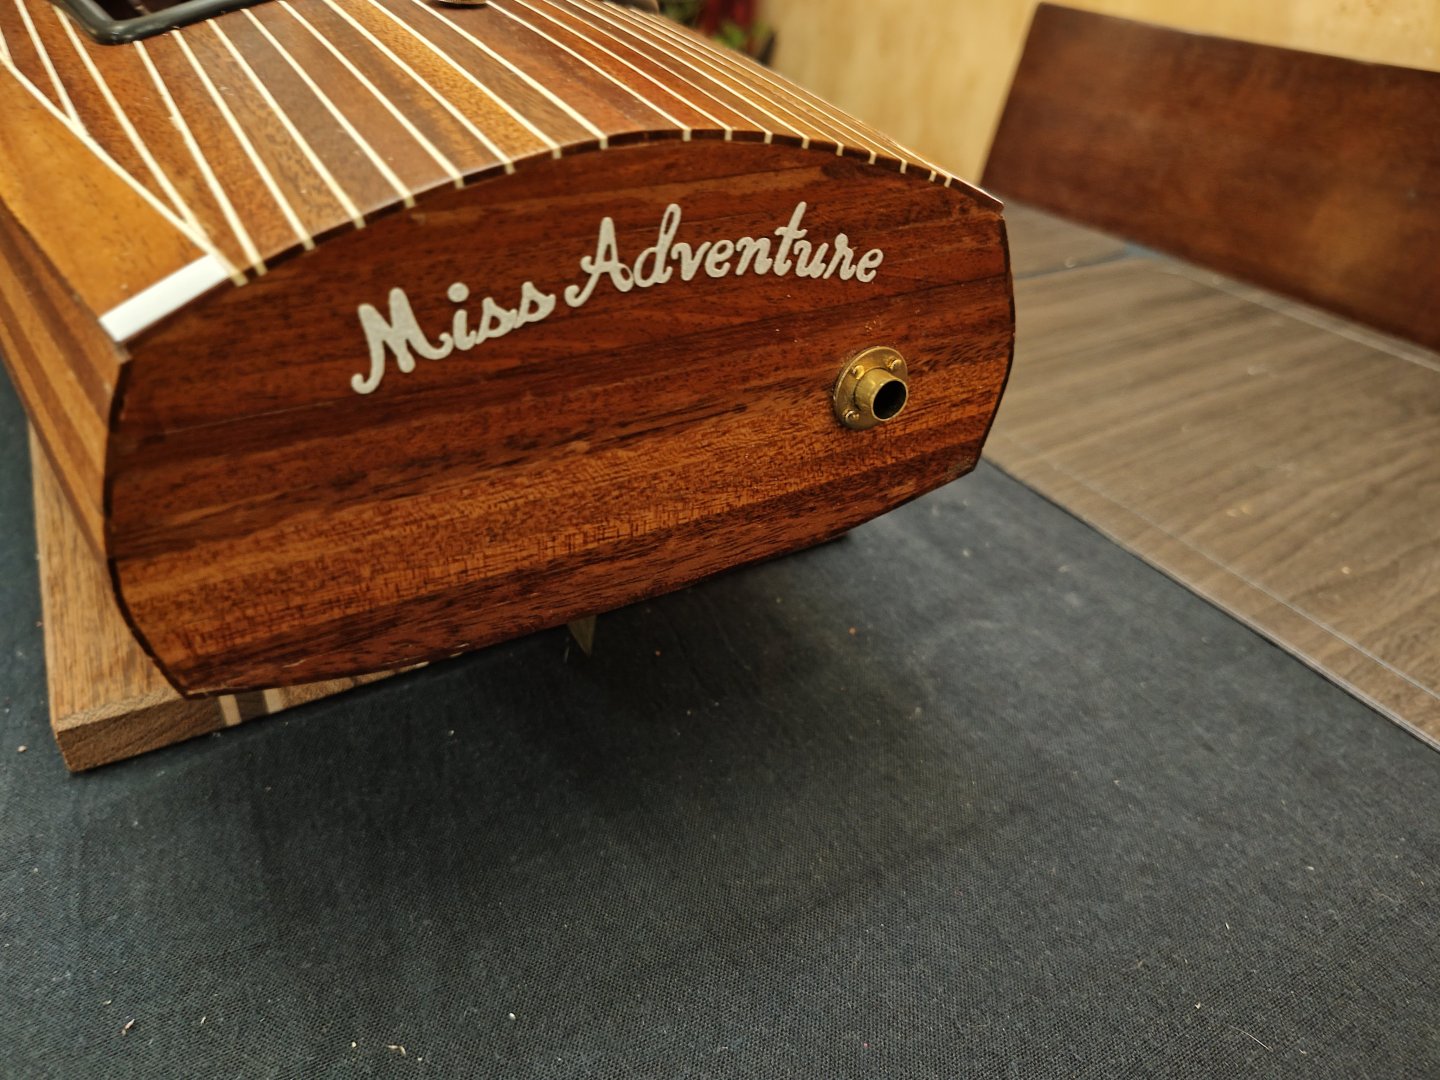
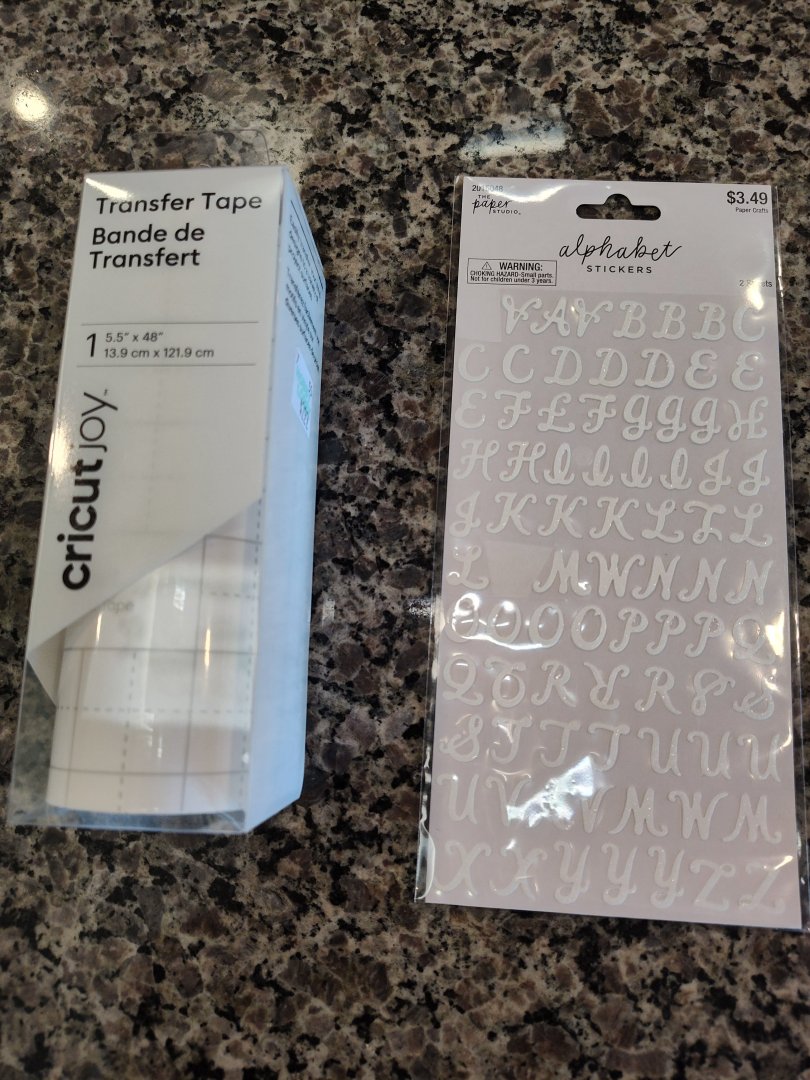
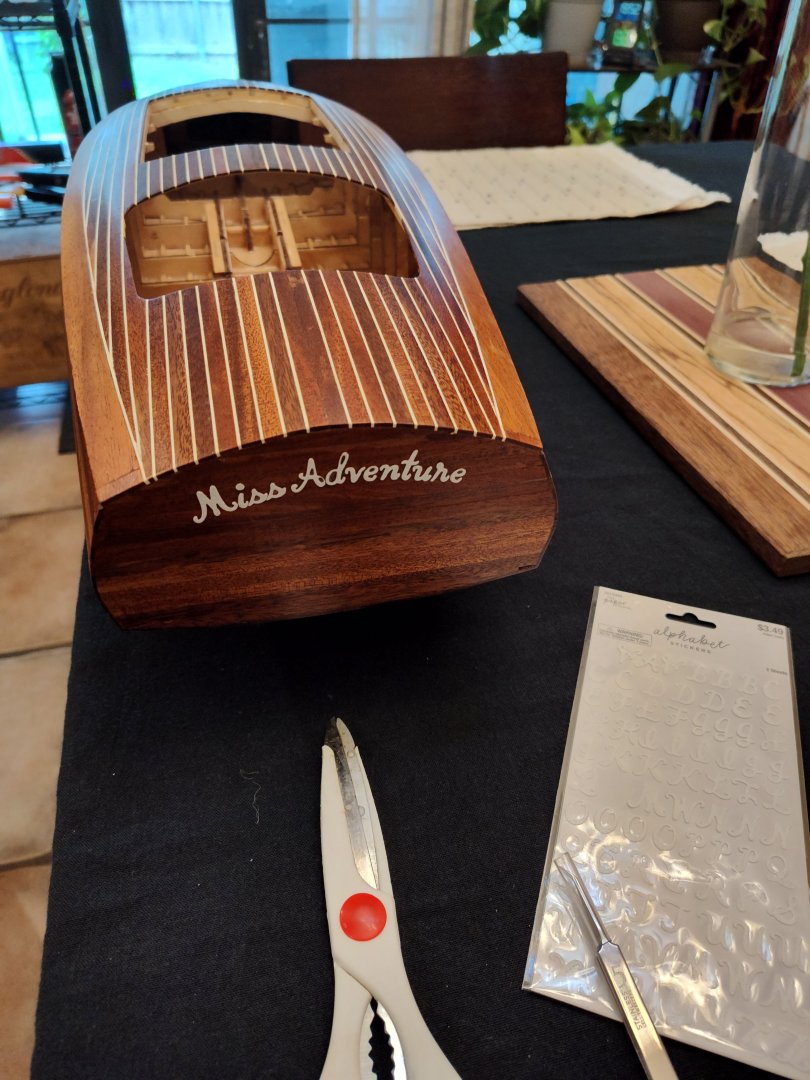
I finally got the last coat of Urethane on the hull. I found some vinyl lettering on sale at Hobby Lobby and was thinking maybe... It actually turned out better than I thought.
- 32 replies
-
- 4
-
-
- Model Shipways
- Miss Adventure
- (and 2 more)
-
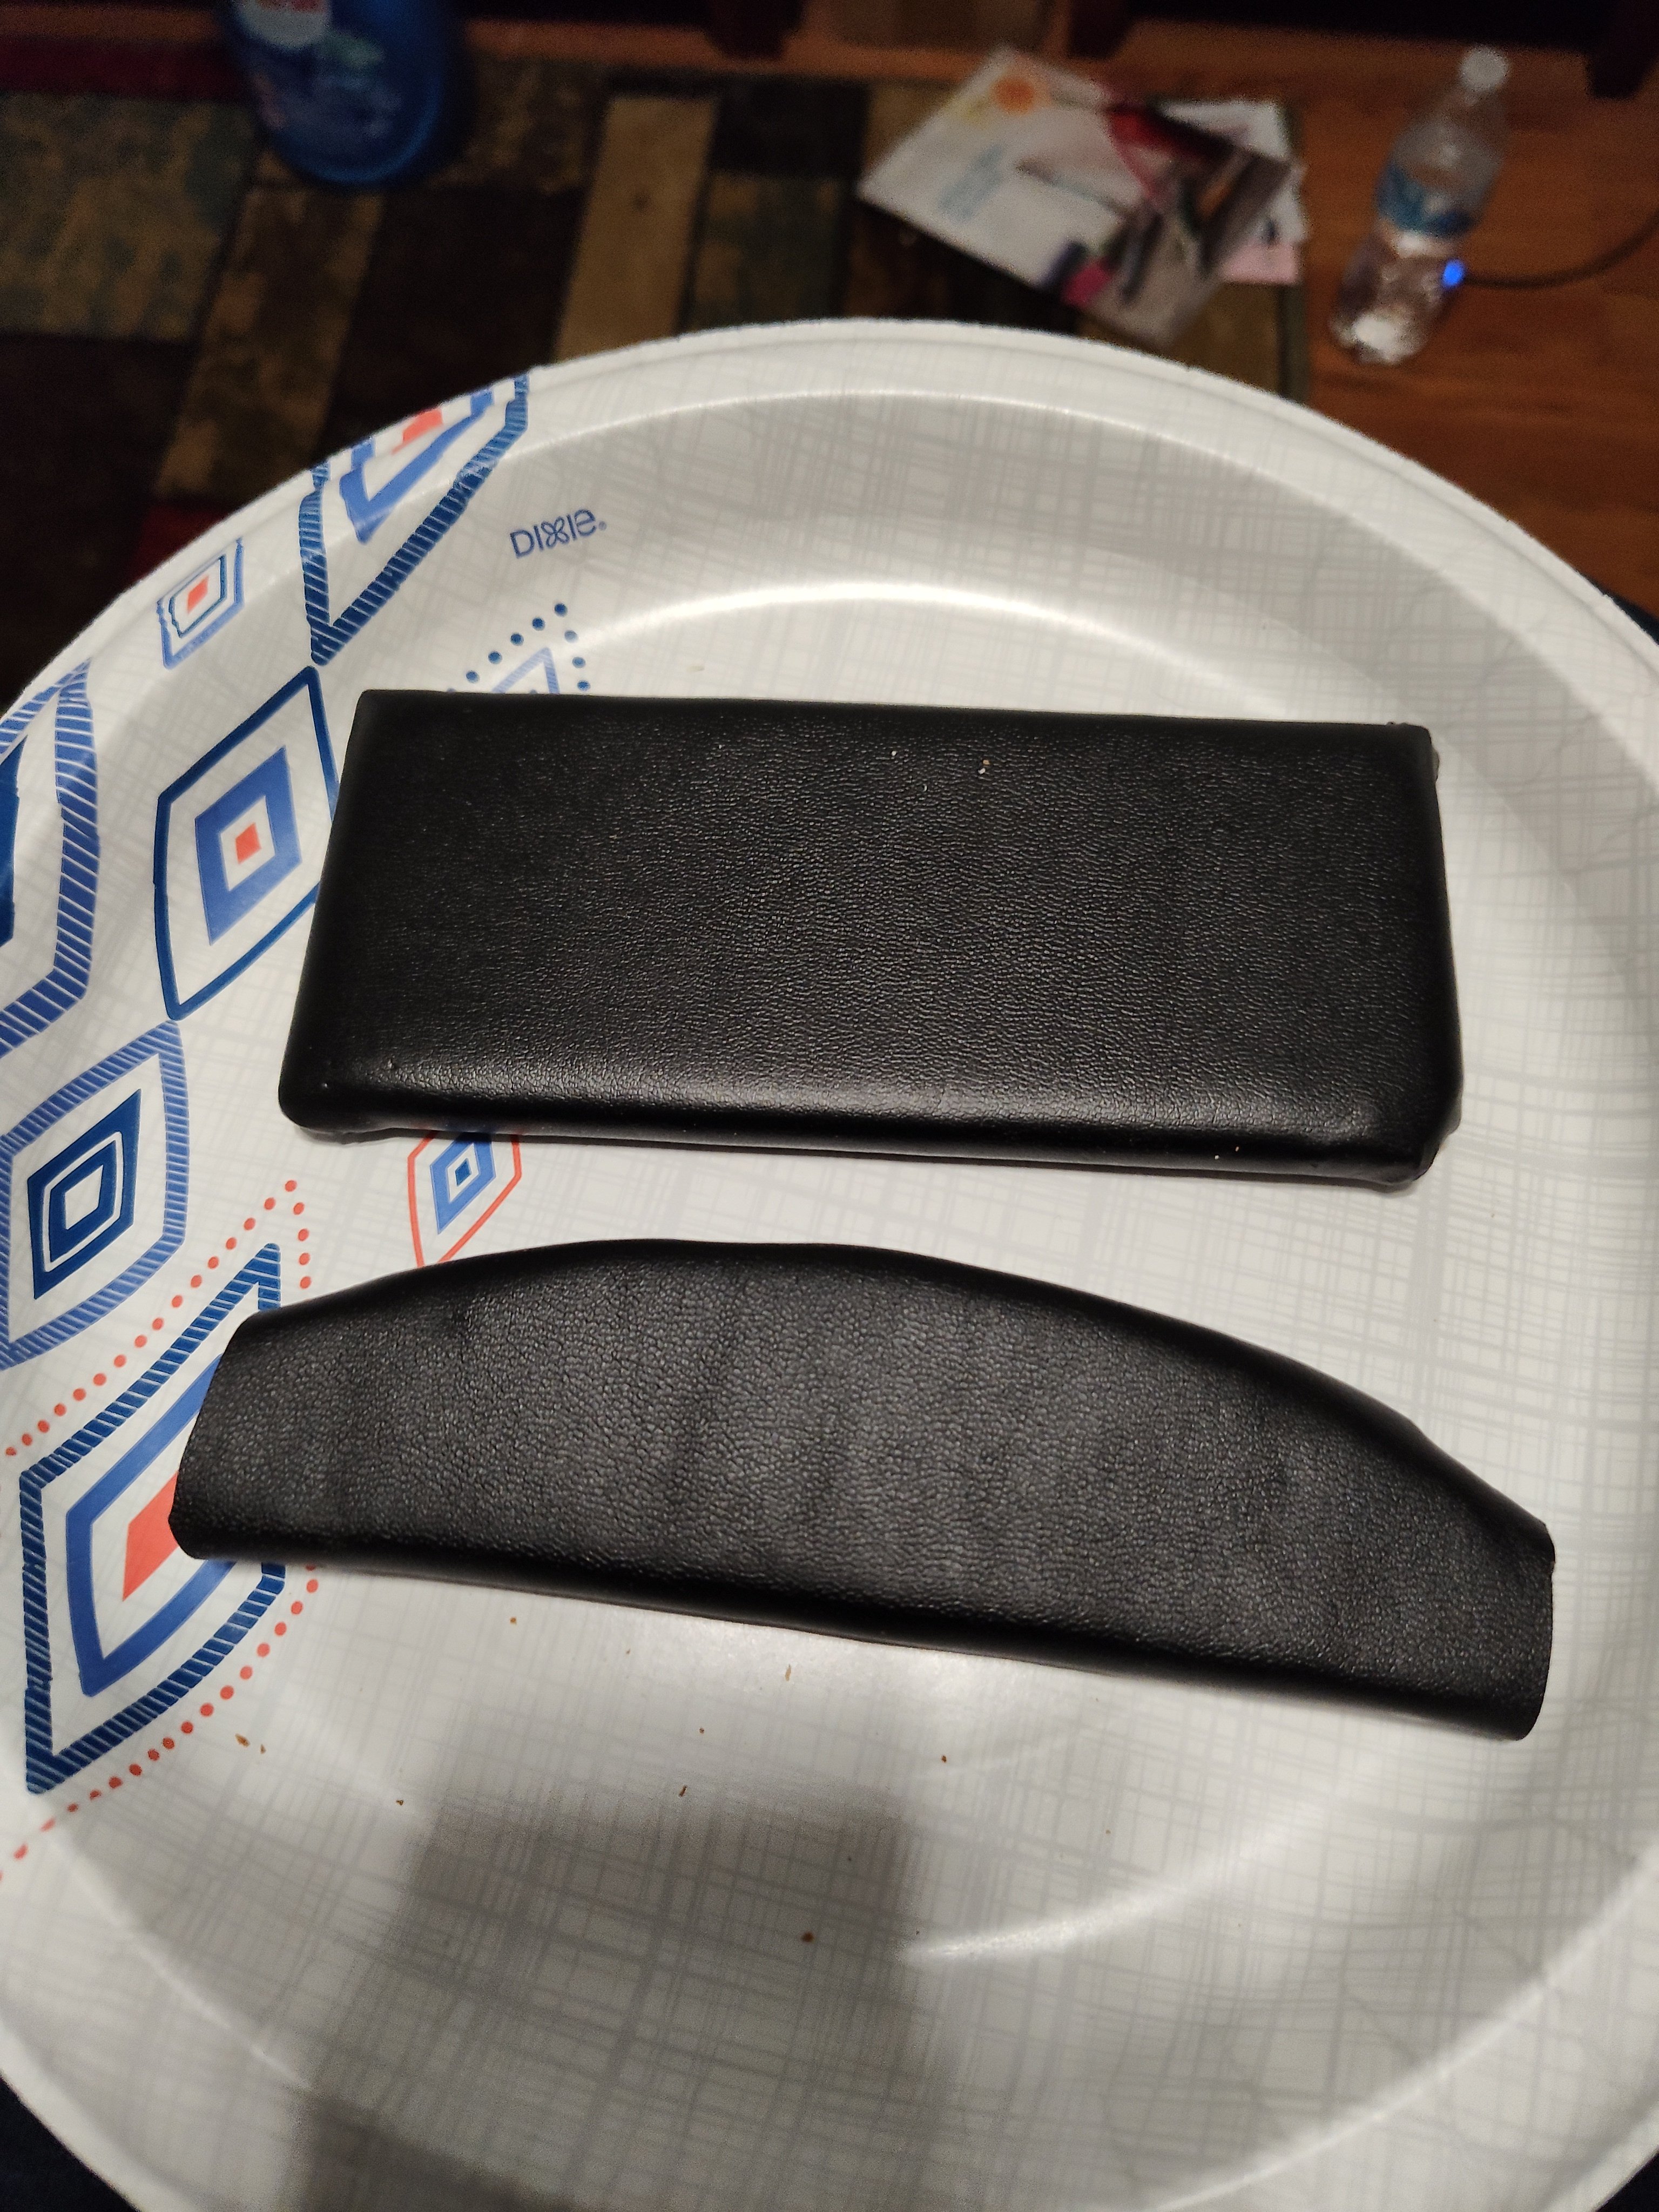
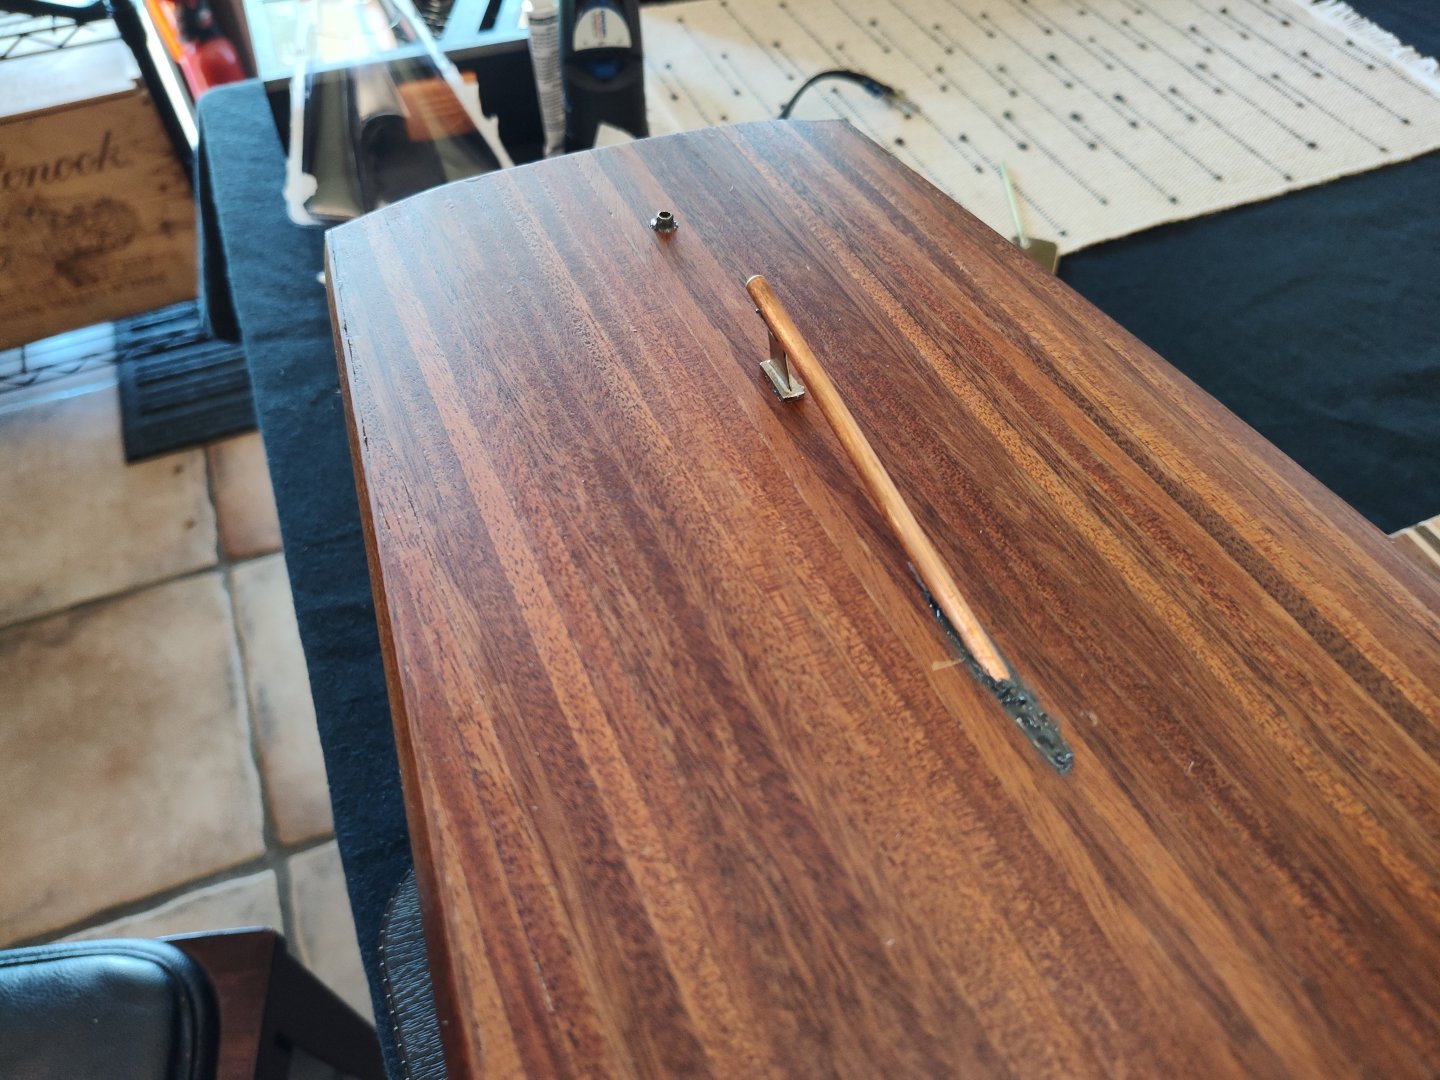
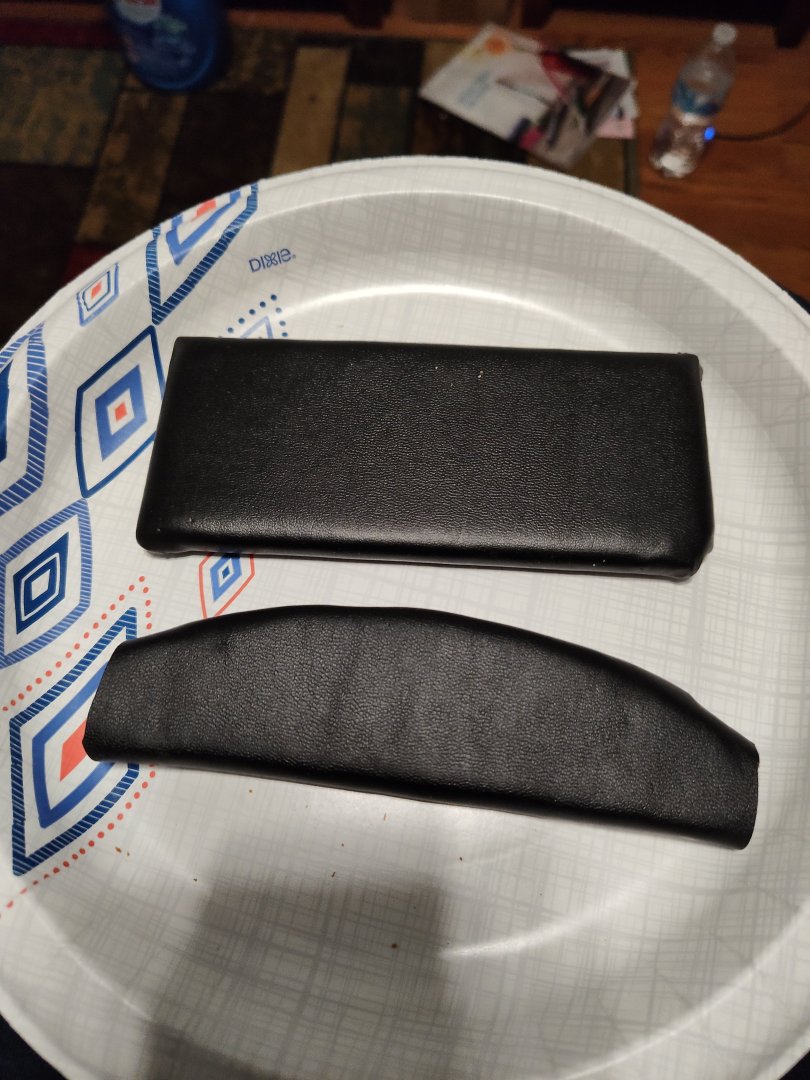
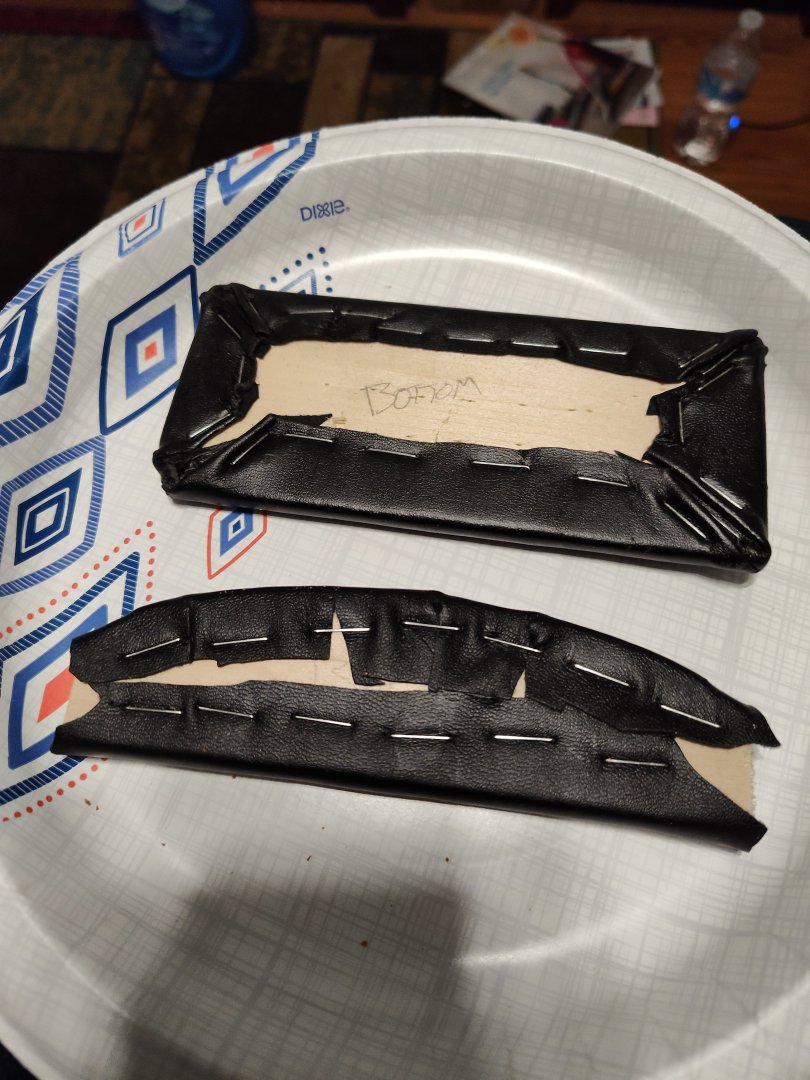
I started to get to work on some other stuff.. I didn't like how the kit used thick plywood for the rudder so I got some scrap brass, cut it to shape, then braised it to the rod. I still need to clean it up more. I used pleather scraps and thin shipping foam to upholster the seats. I used a regular stapler to secure the edges. It's not great but I can redo it later. For expediency sake, this is fine.

- 32 replies
-
- 3
-
-
- Model Shipways
- Miss Adventure
- (and 2 more)
-
More Spar Urethane. I don't know why the camera makes it look this way. It looks much better in person.
- 32 replies
-
- 2
-
-
- Model Shipways
- Miss Adventure
- (and 2 more)
-
5-10-2025 Now we are getting more up-to-date. I decided on using Minwax Helmsman Spar Urethane in a satin finish. It has good moisture resistance and durability. I prefer satin finish since gloss is pretty unforgiving of any imperfections. I plan on two coats of brush on and a final coat of spray. Here is the deck after the first coat of Urethane. I hate that the margin planks were not long enough the reach the back of the boat. I had to add a piece of mahogany planking to finish it out and it looks kinda janky. I may put some kind of fitting or hardware there to mask it.
- 32 replies
-
- 7
-
-
-
- Model Shipways
- Miss Adventure
- (and 2 more)
-
And so it sat for three more years while life got in the way. I gave me a lot of time to think about how I want to finish the wood.
.jpg.5b856f395e87aee9c2daacfa12555a58.jpg)
-
@NirvanaOoops. I forgot to mention it. I did epoxy the entire interior for strength and watertightness. You can see the shininess of it in post #7.
-
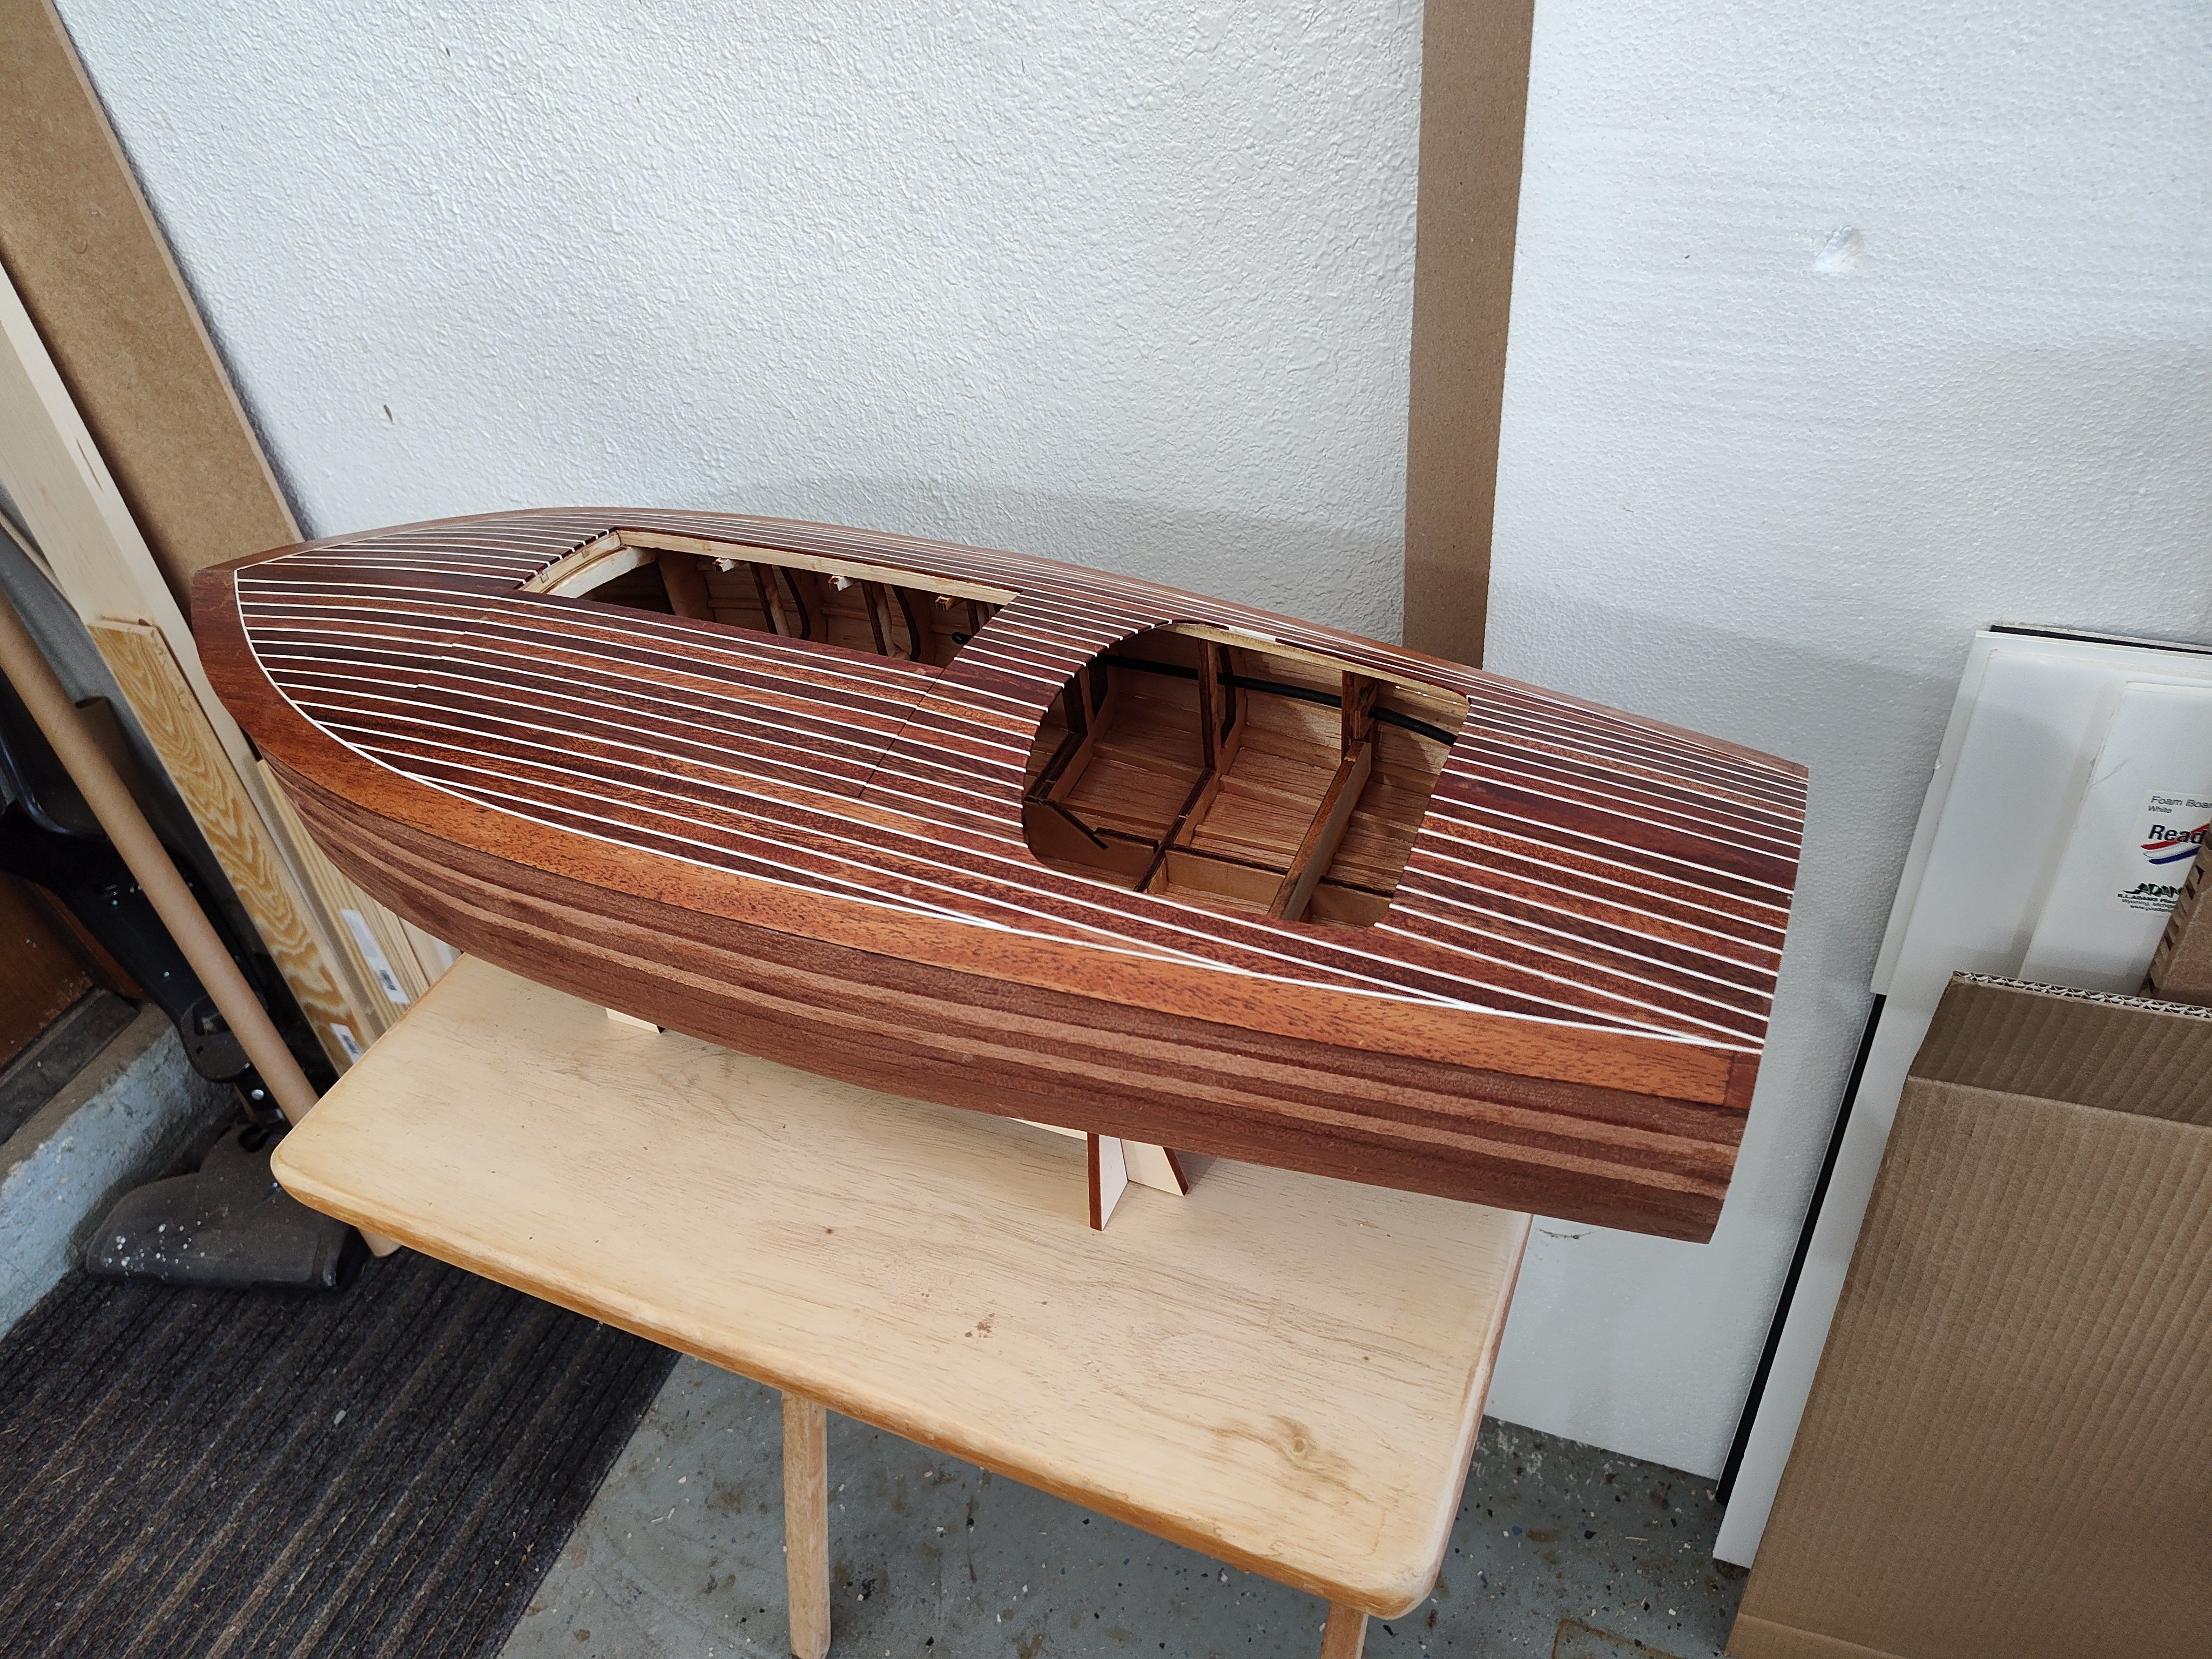
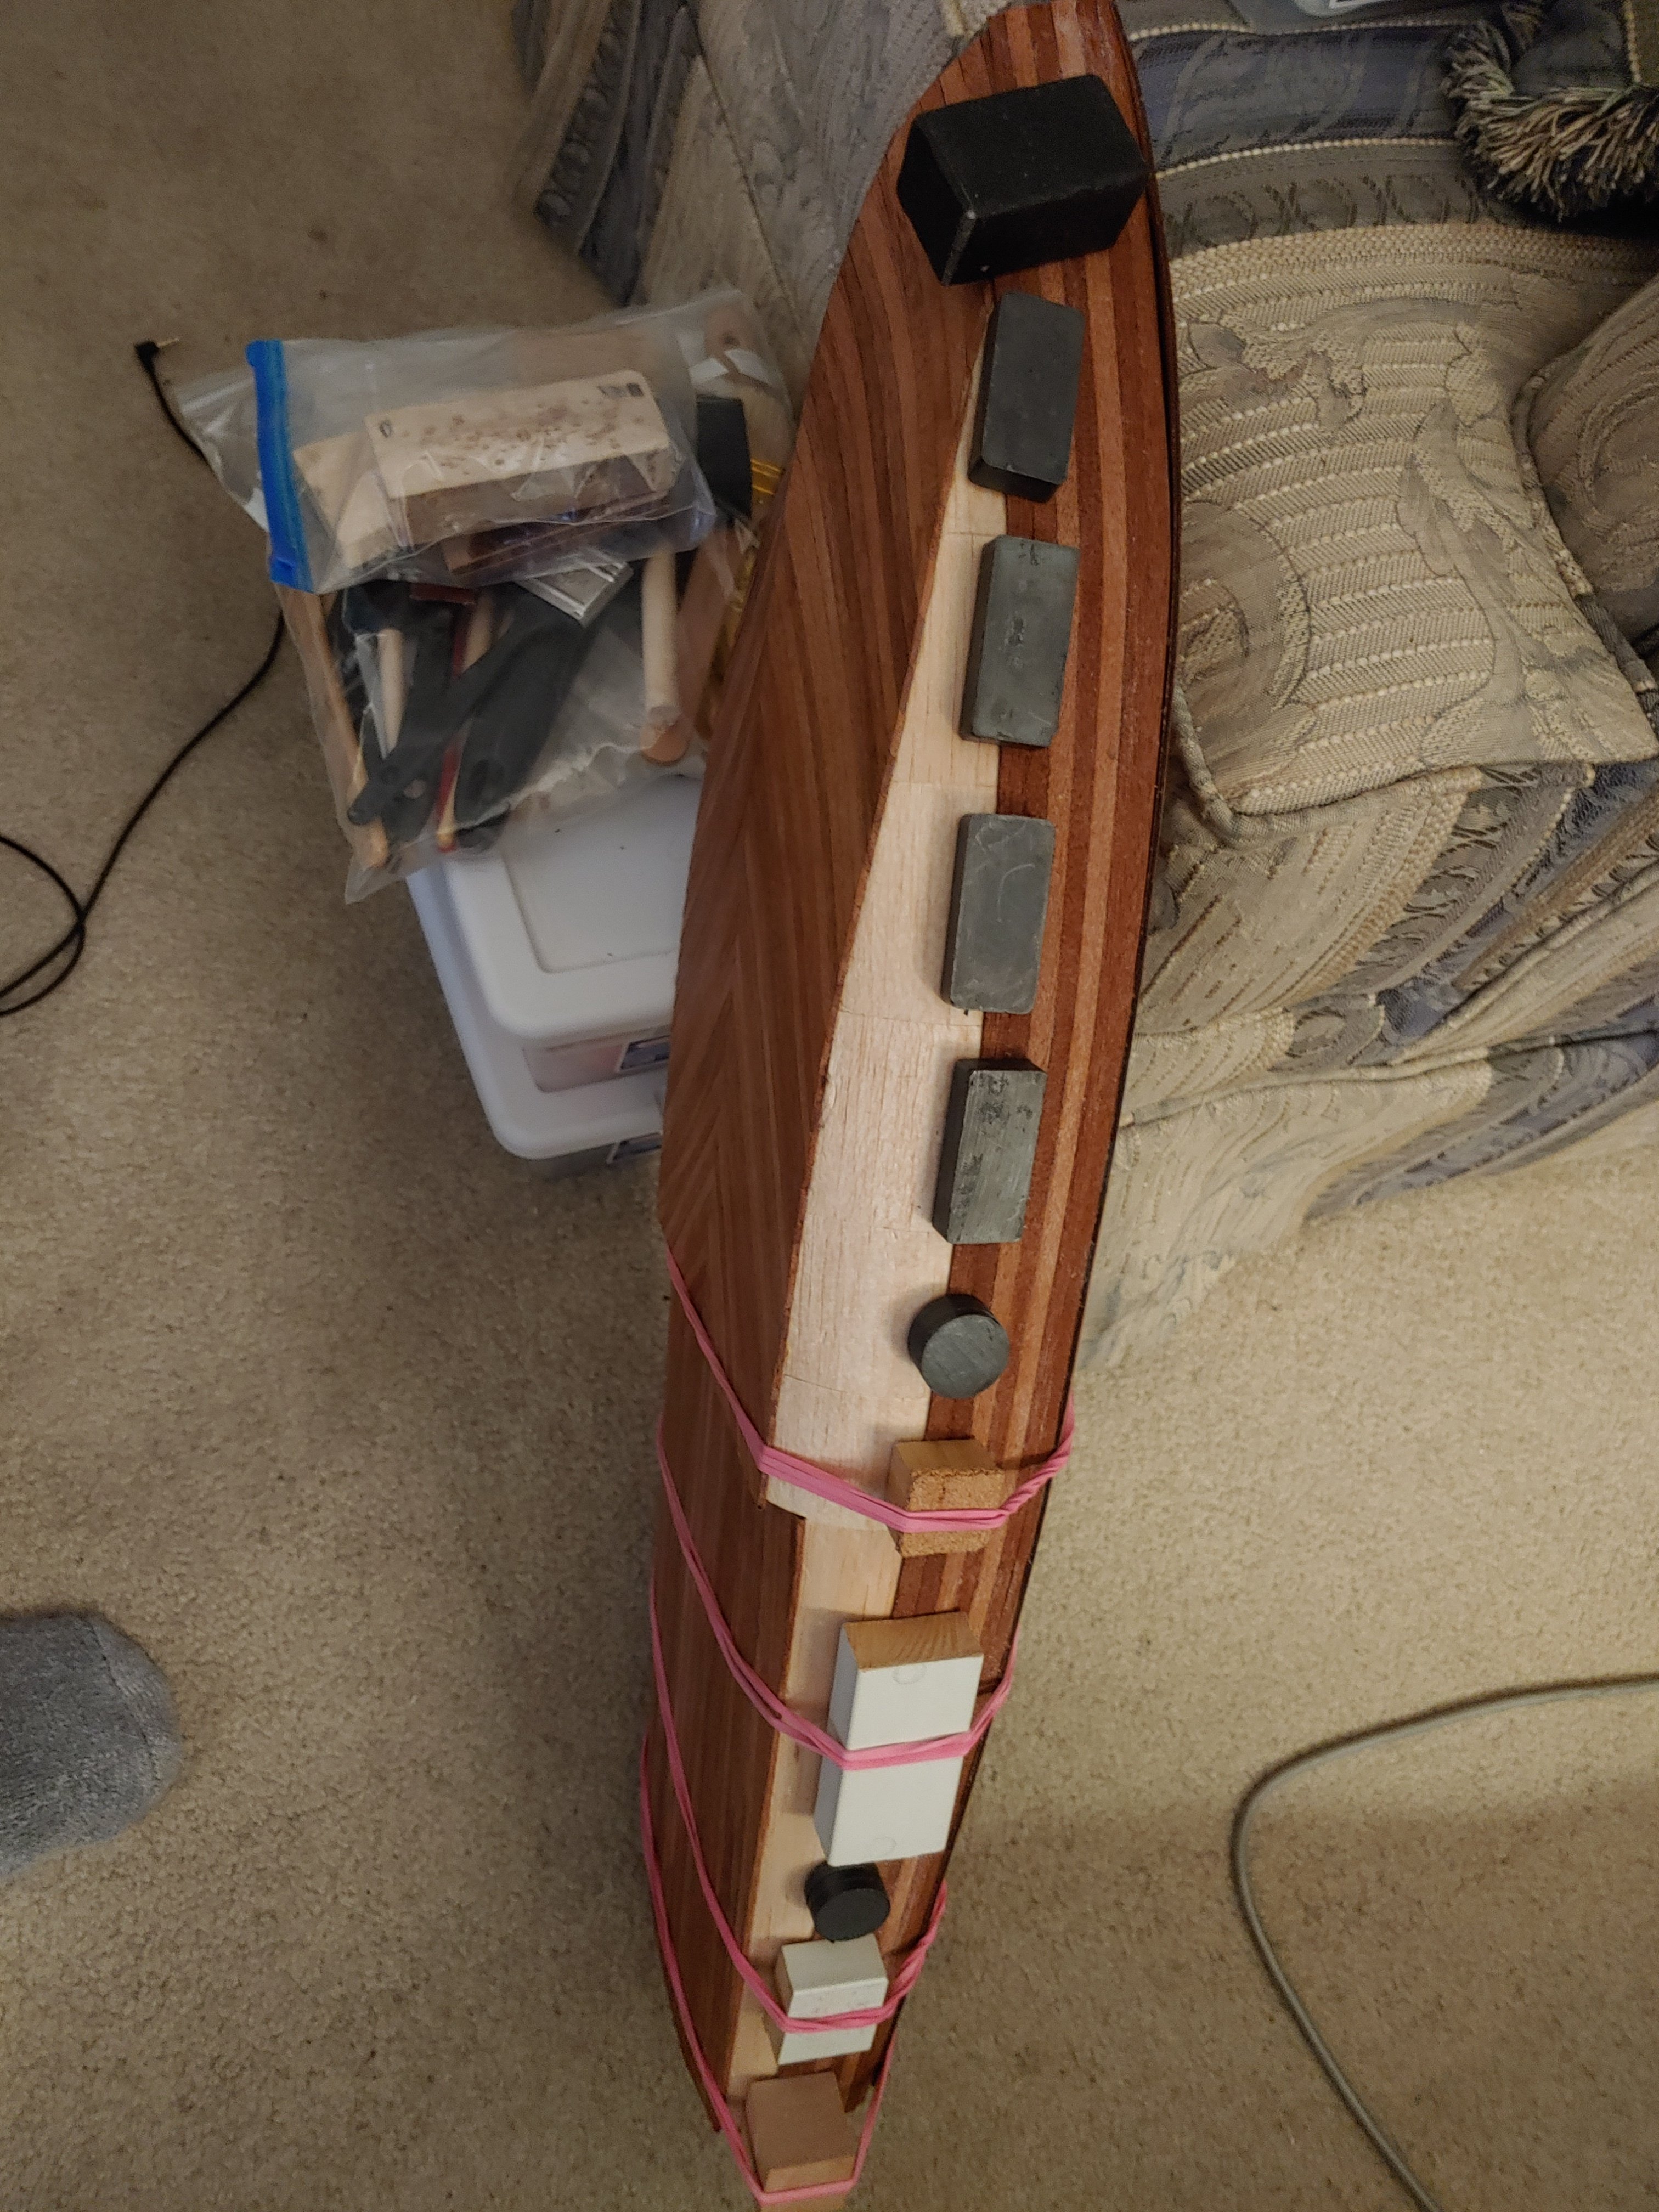
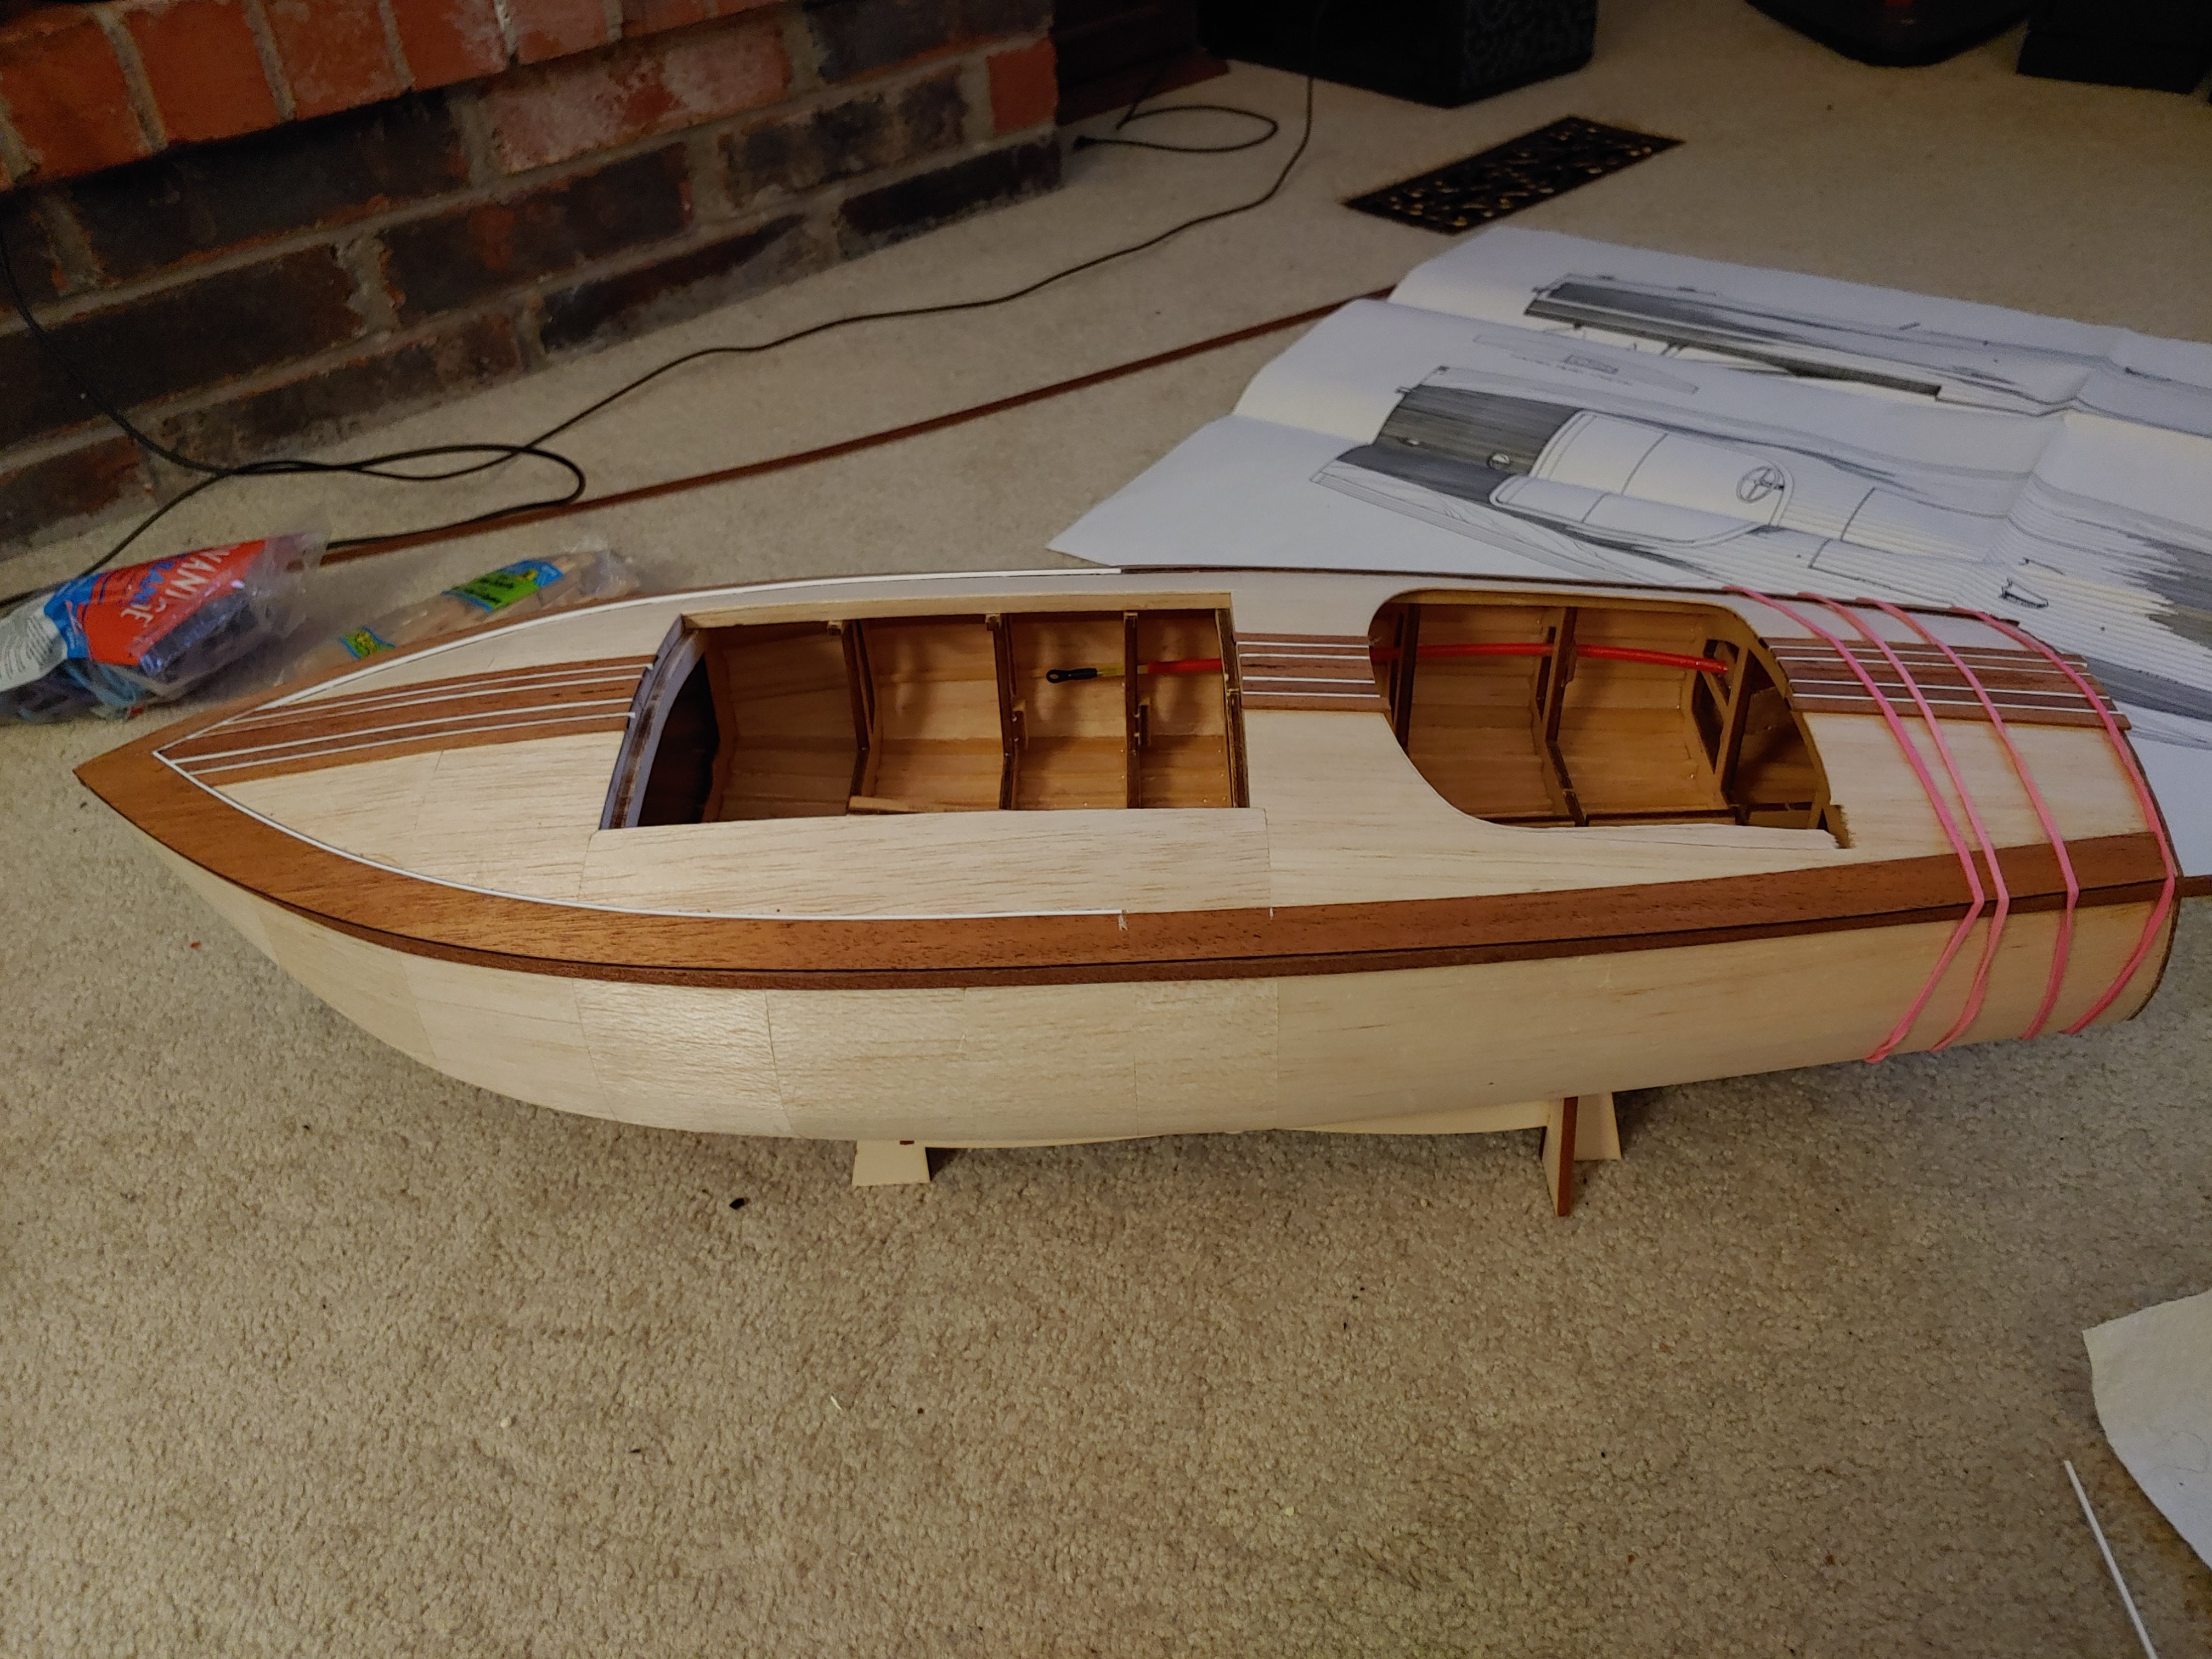
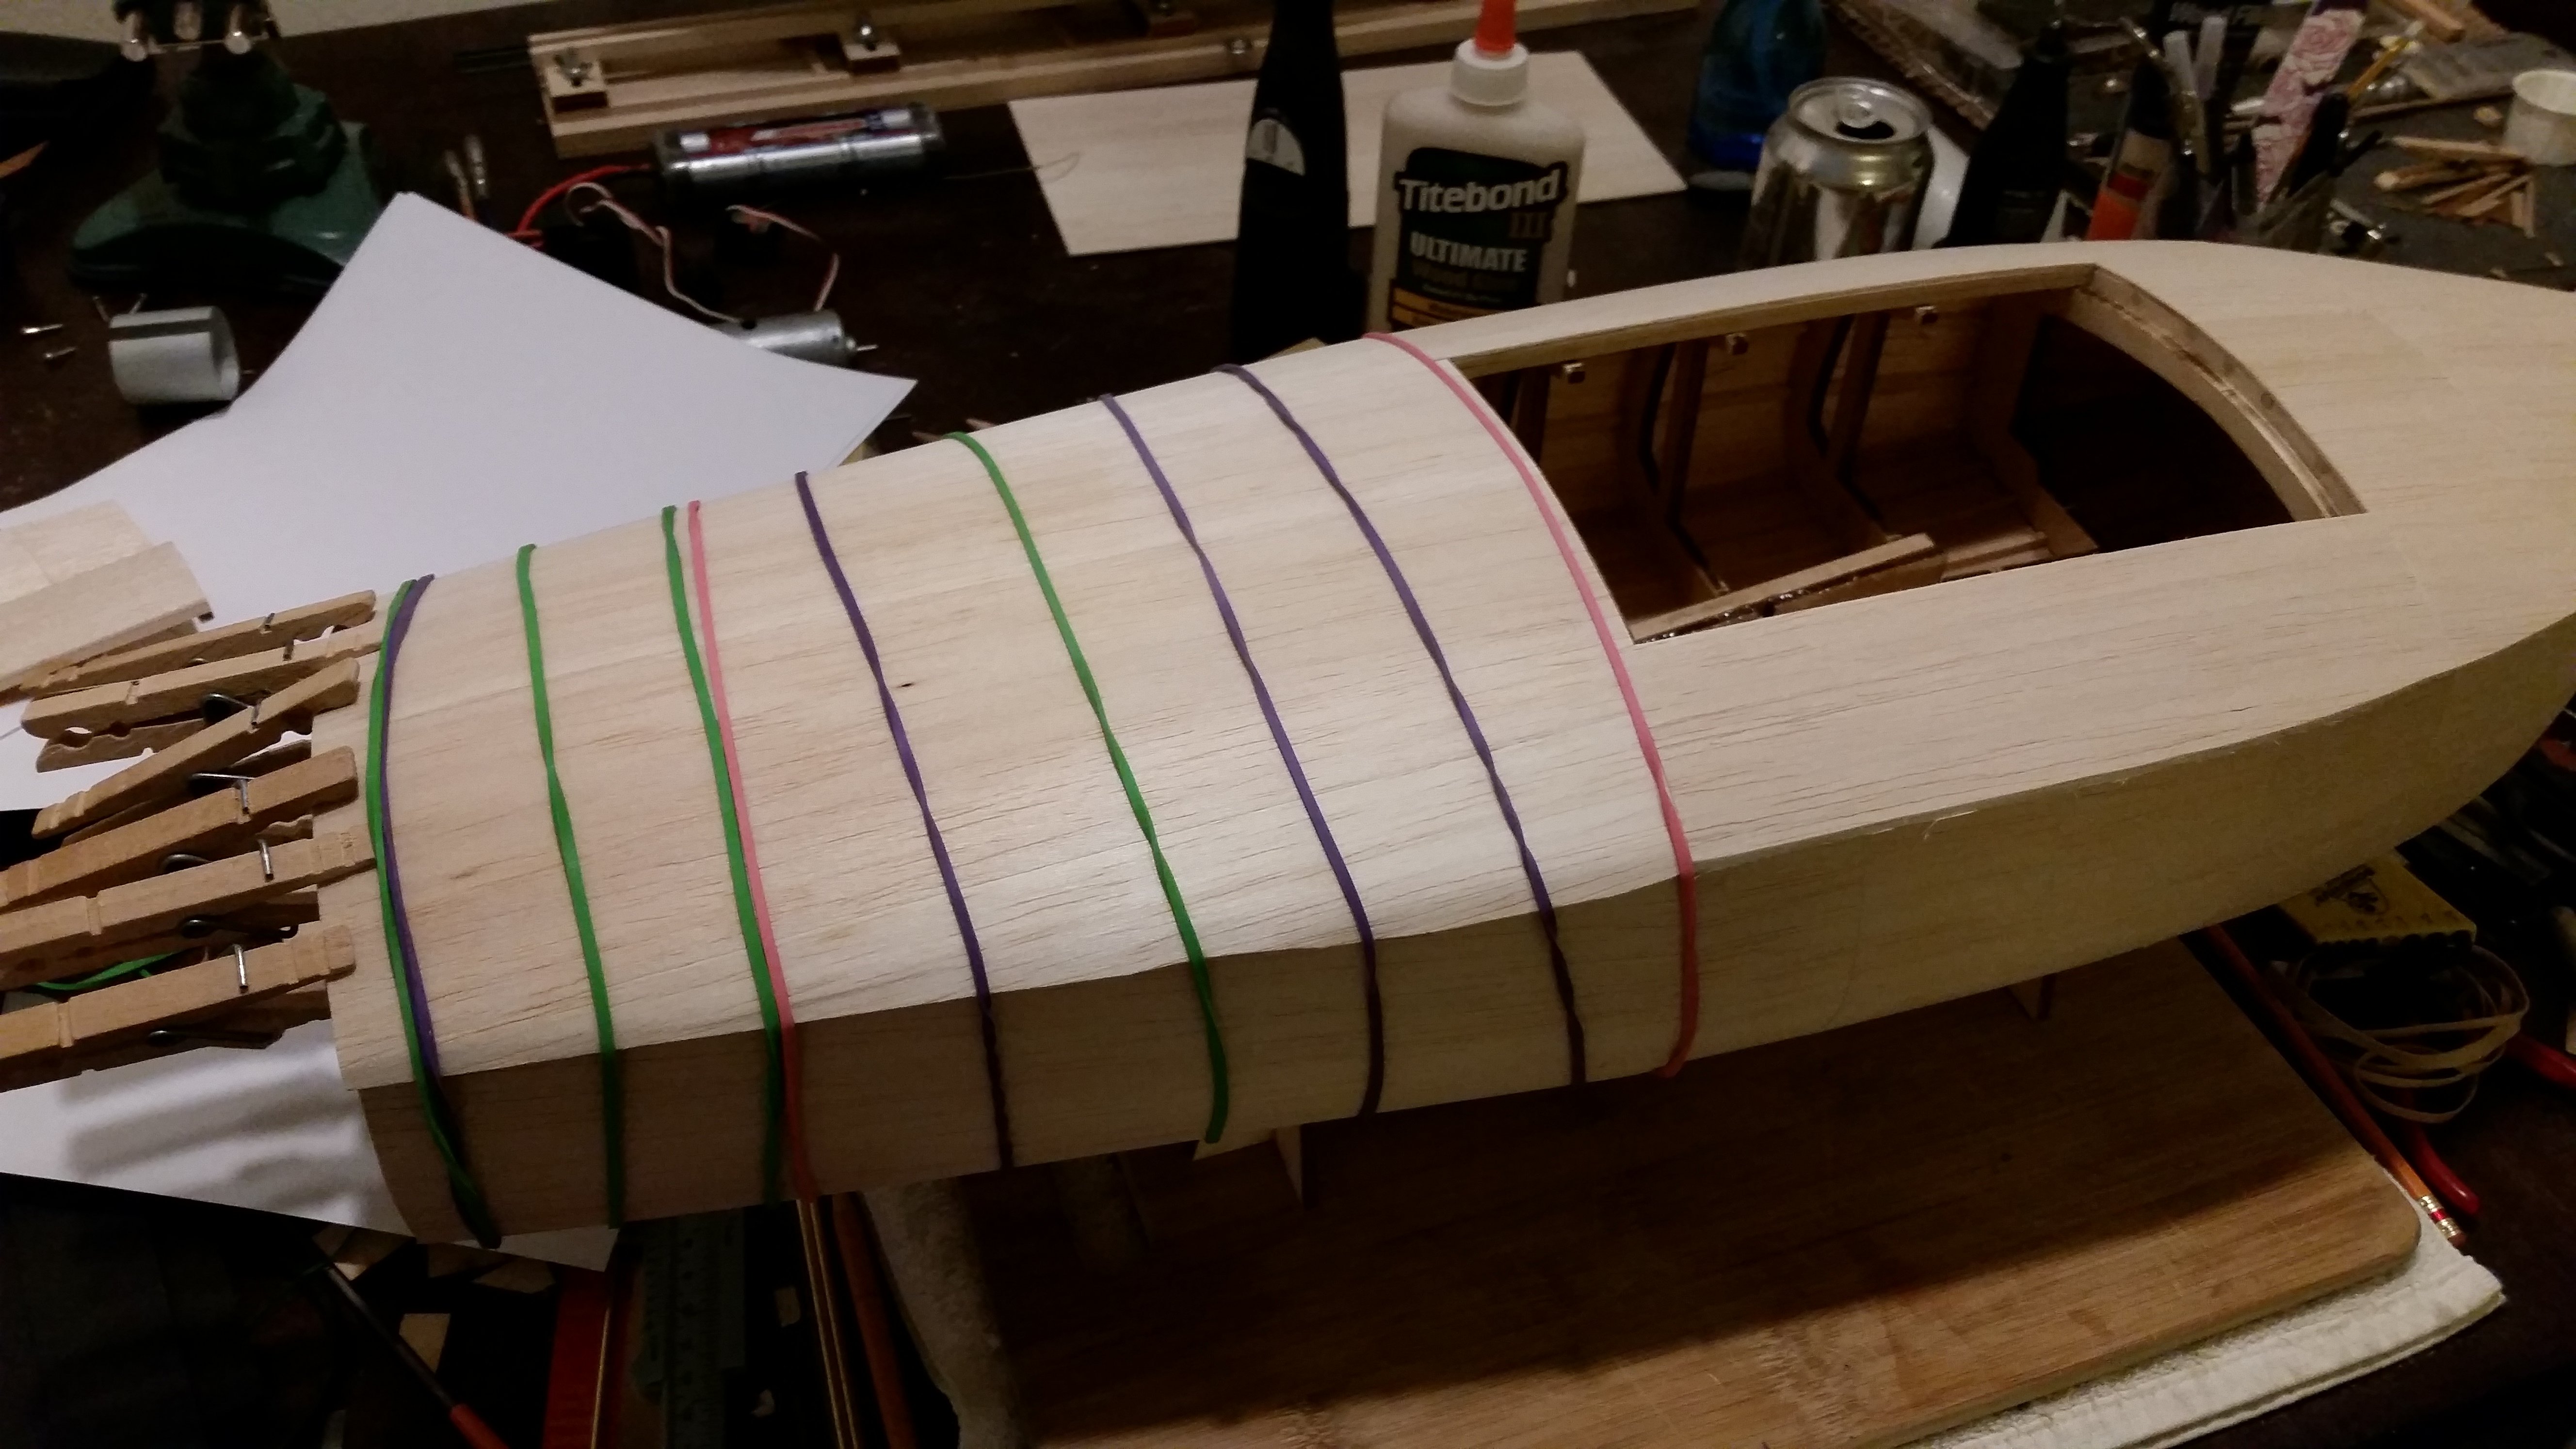
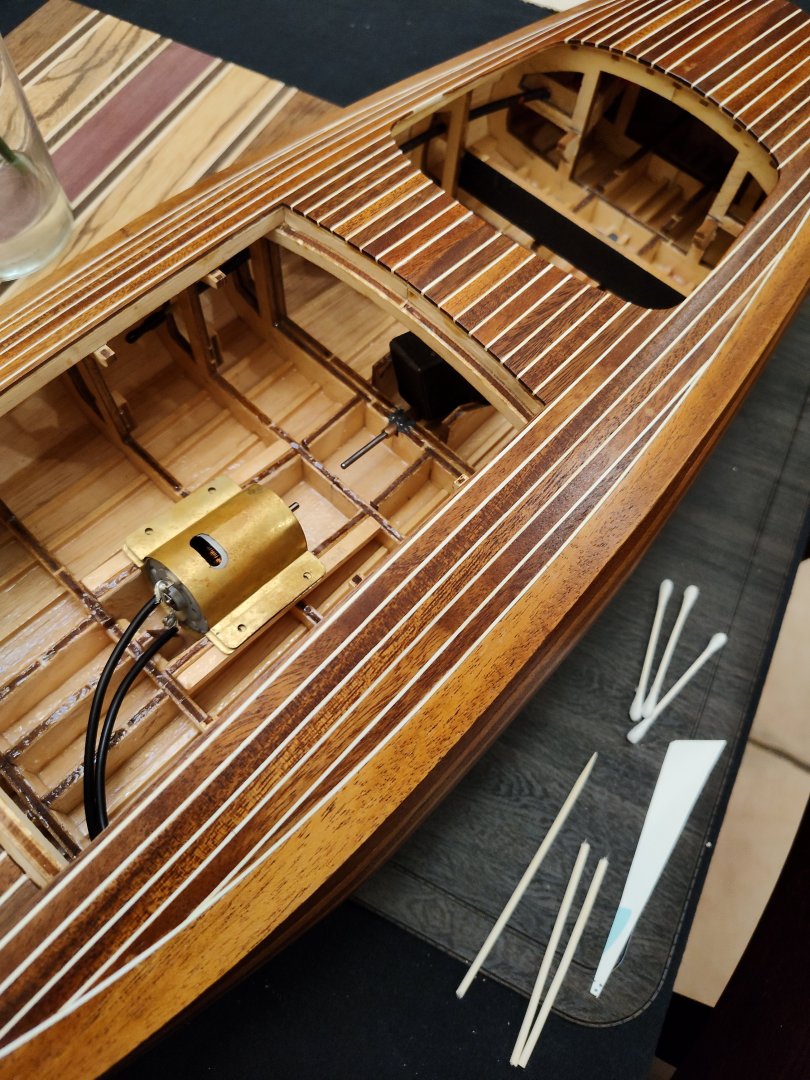
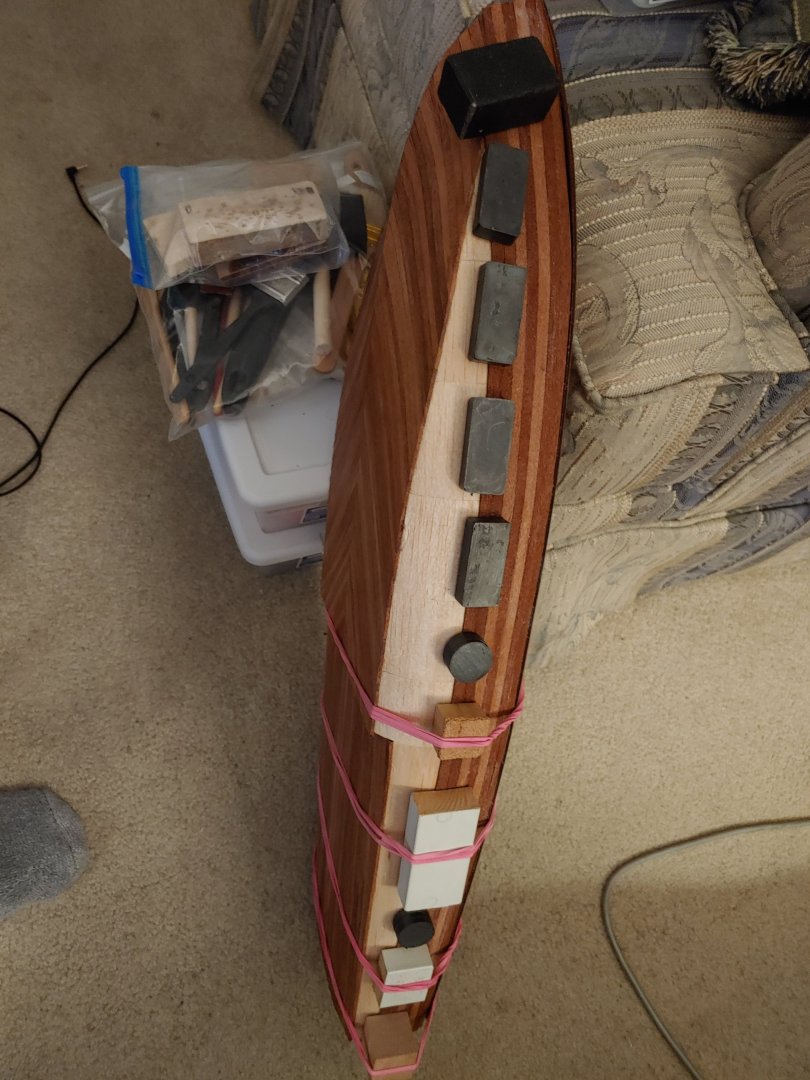
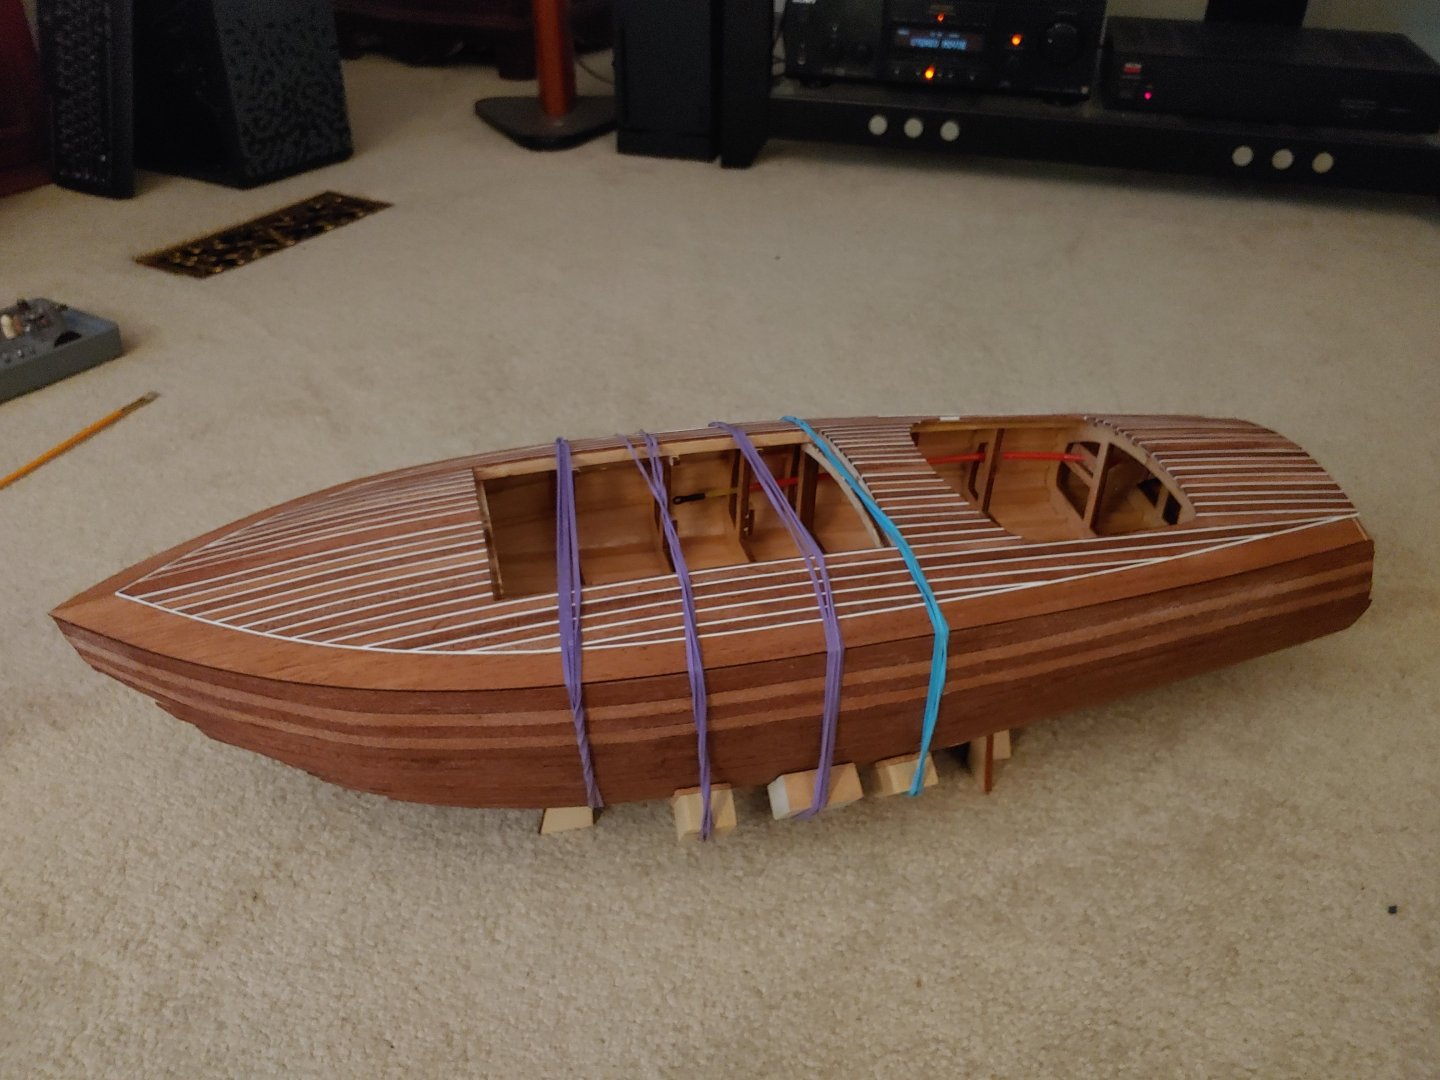
2-26-2022 On to planking the sides. I noticed in the pack of extra long planks that I ordered that there were four planks that were lighter colored than the rest. I ended up using them as kinda racing stripes down the sides of the boat. I like the effect. I had to come up with some creative means of clamping the planks to the model (I used Tightbond III throughout) so I used magnets and rubber bands.

- 32 replies
-
- 4
-
-
- Model Shipways
- Miss Adventure
- (and 2 more)
-
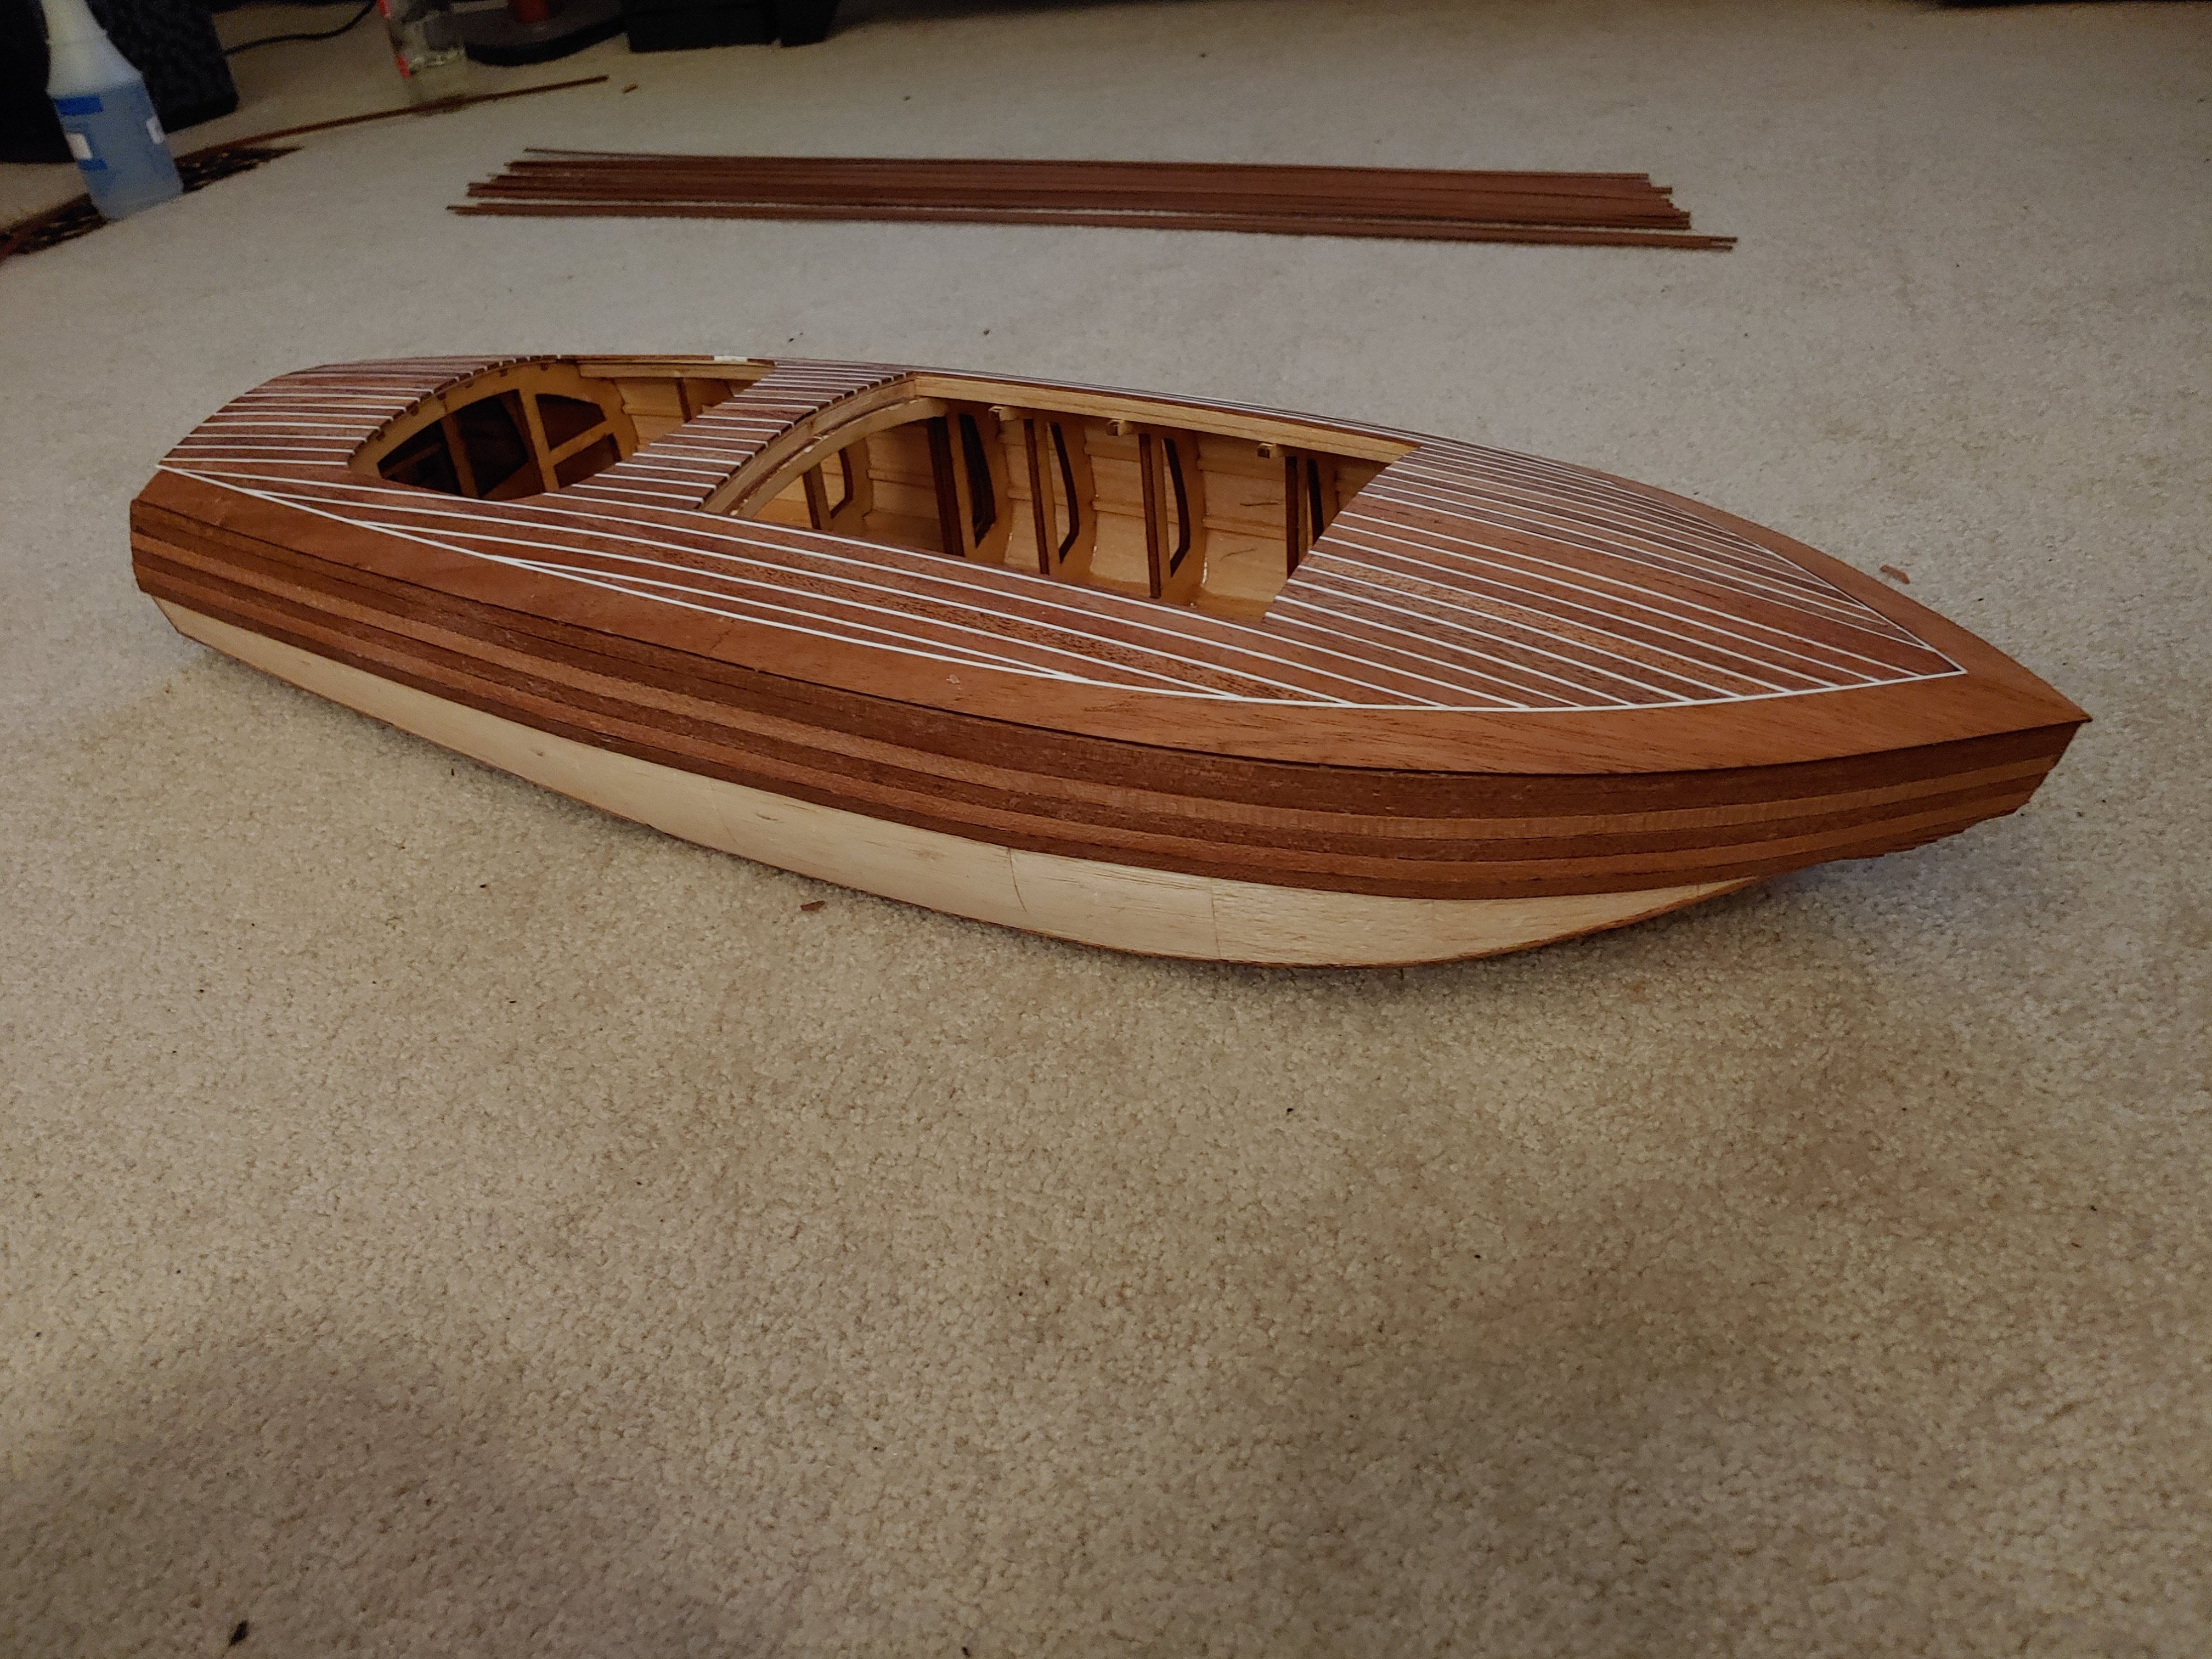
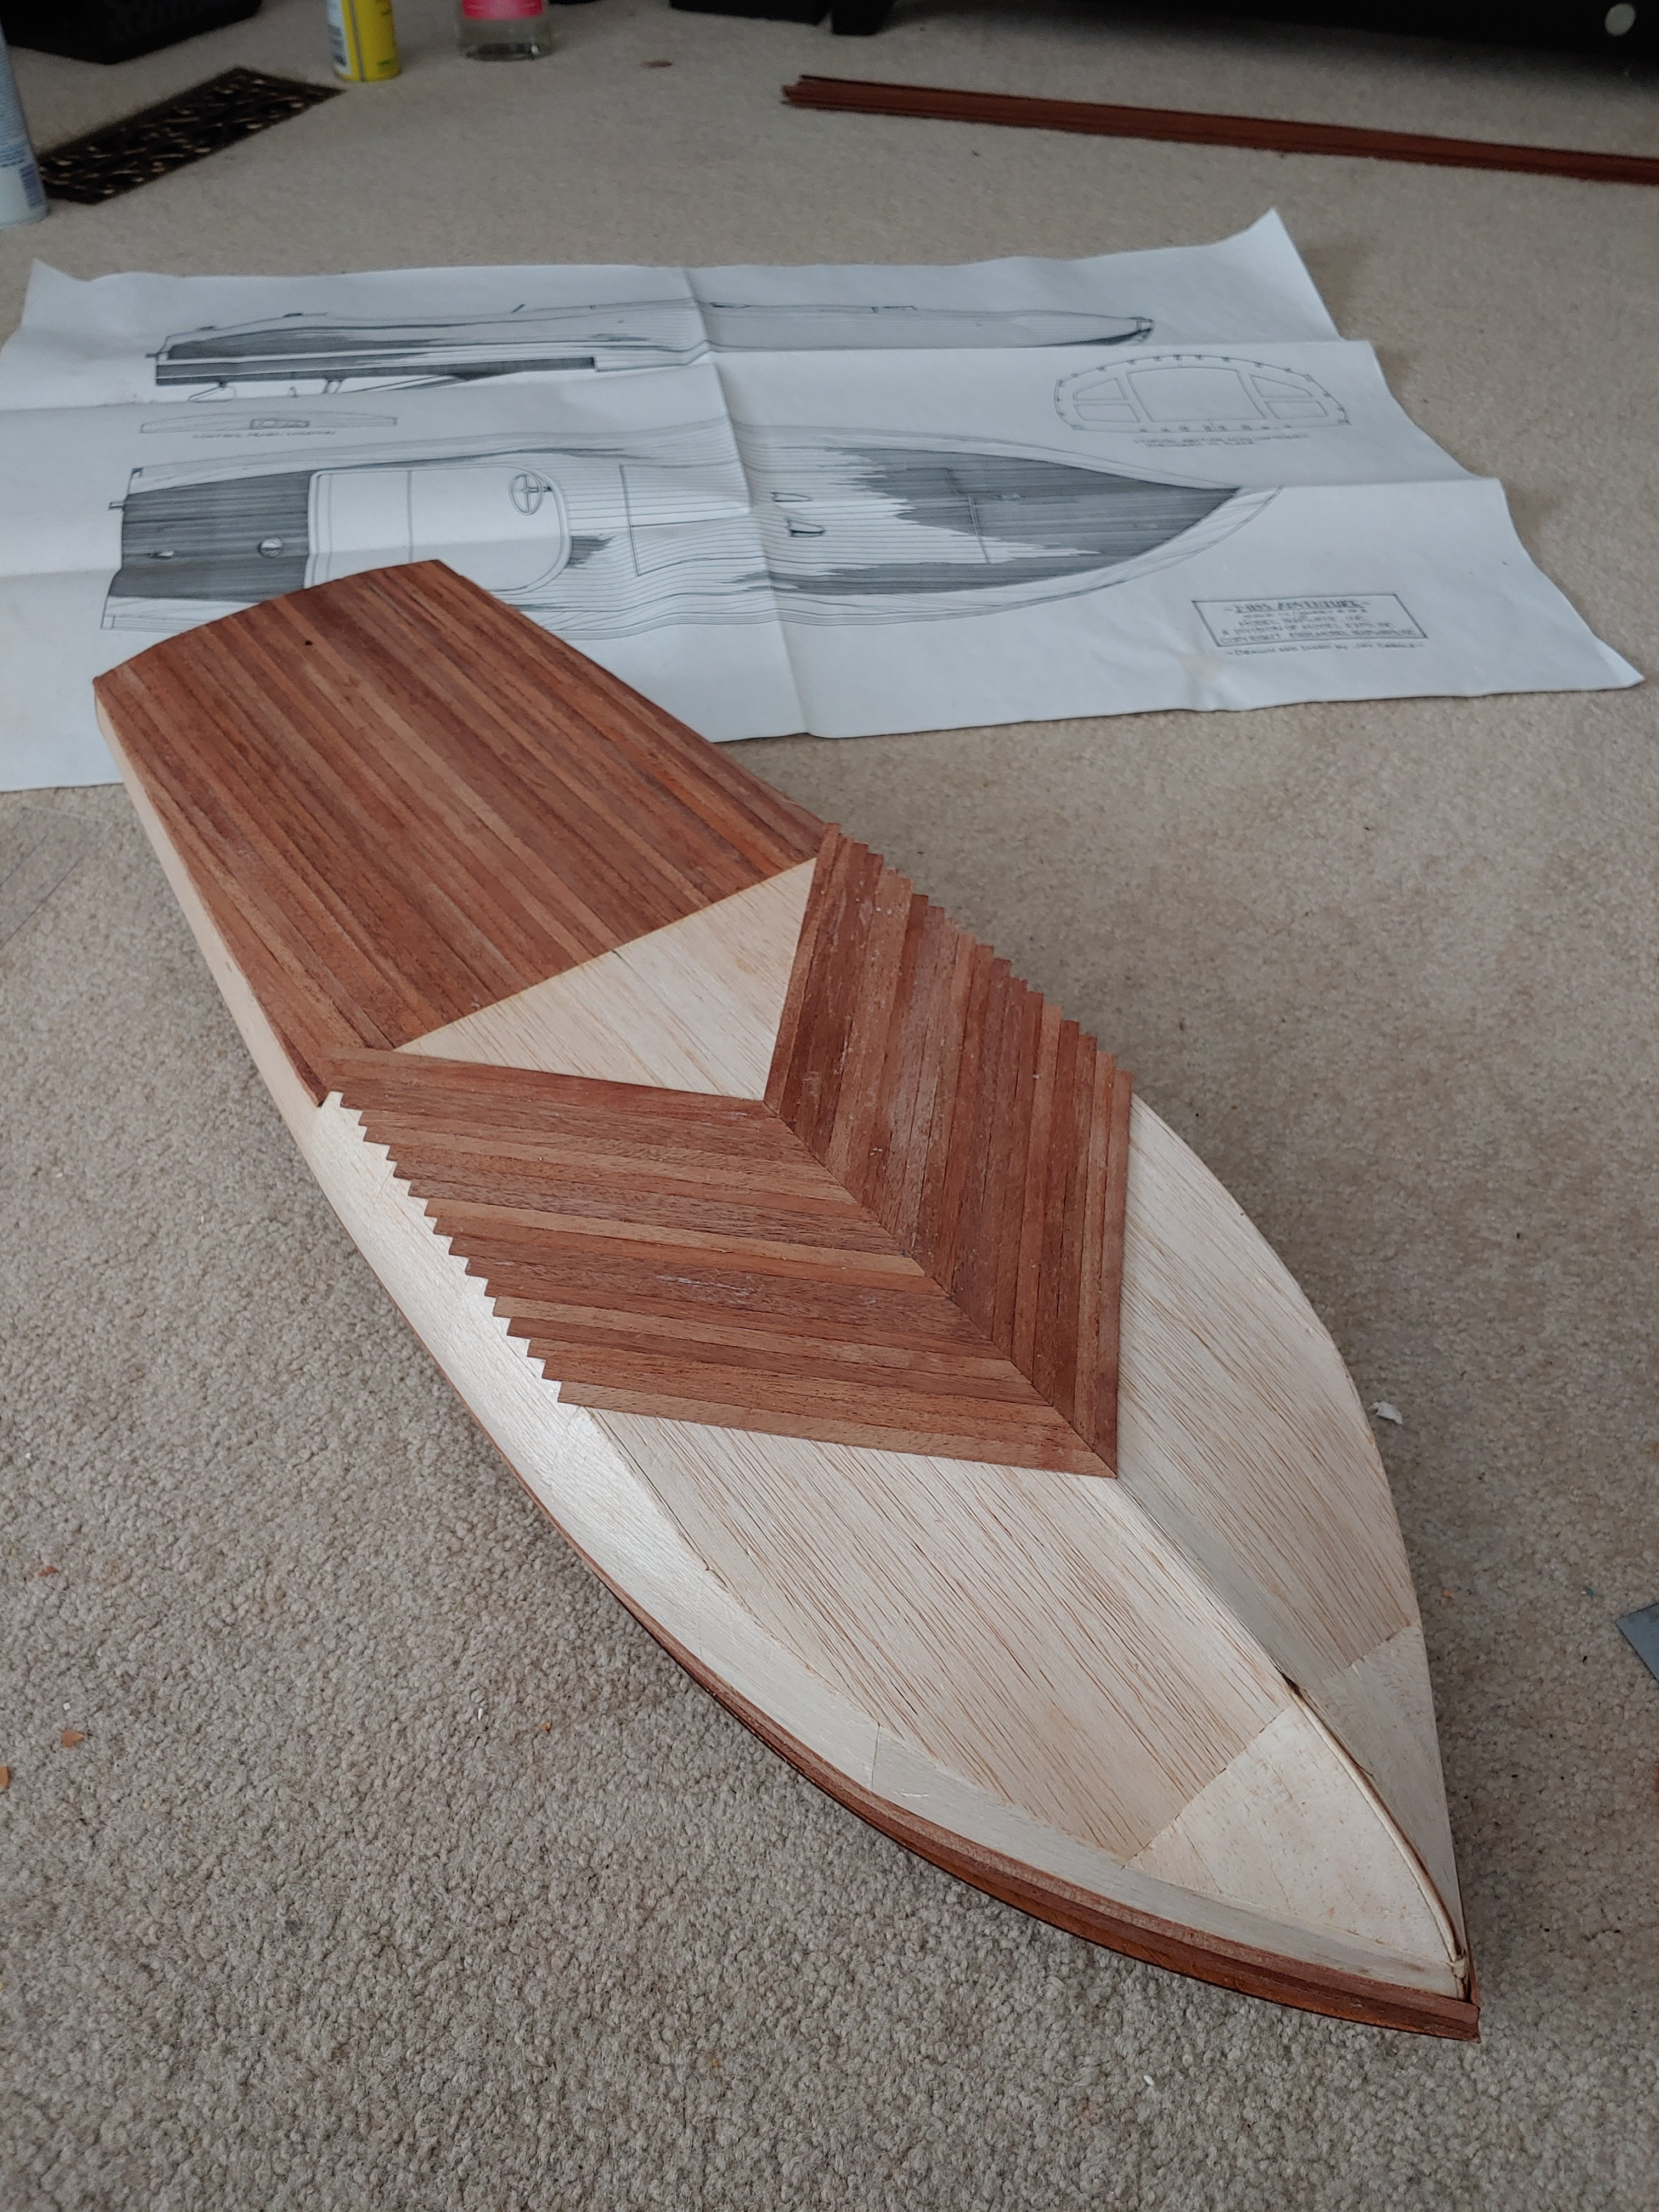
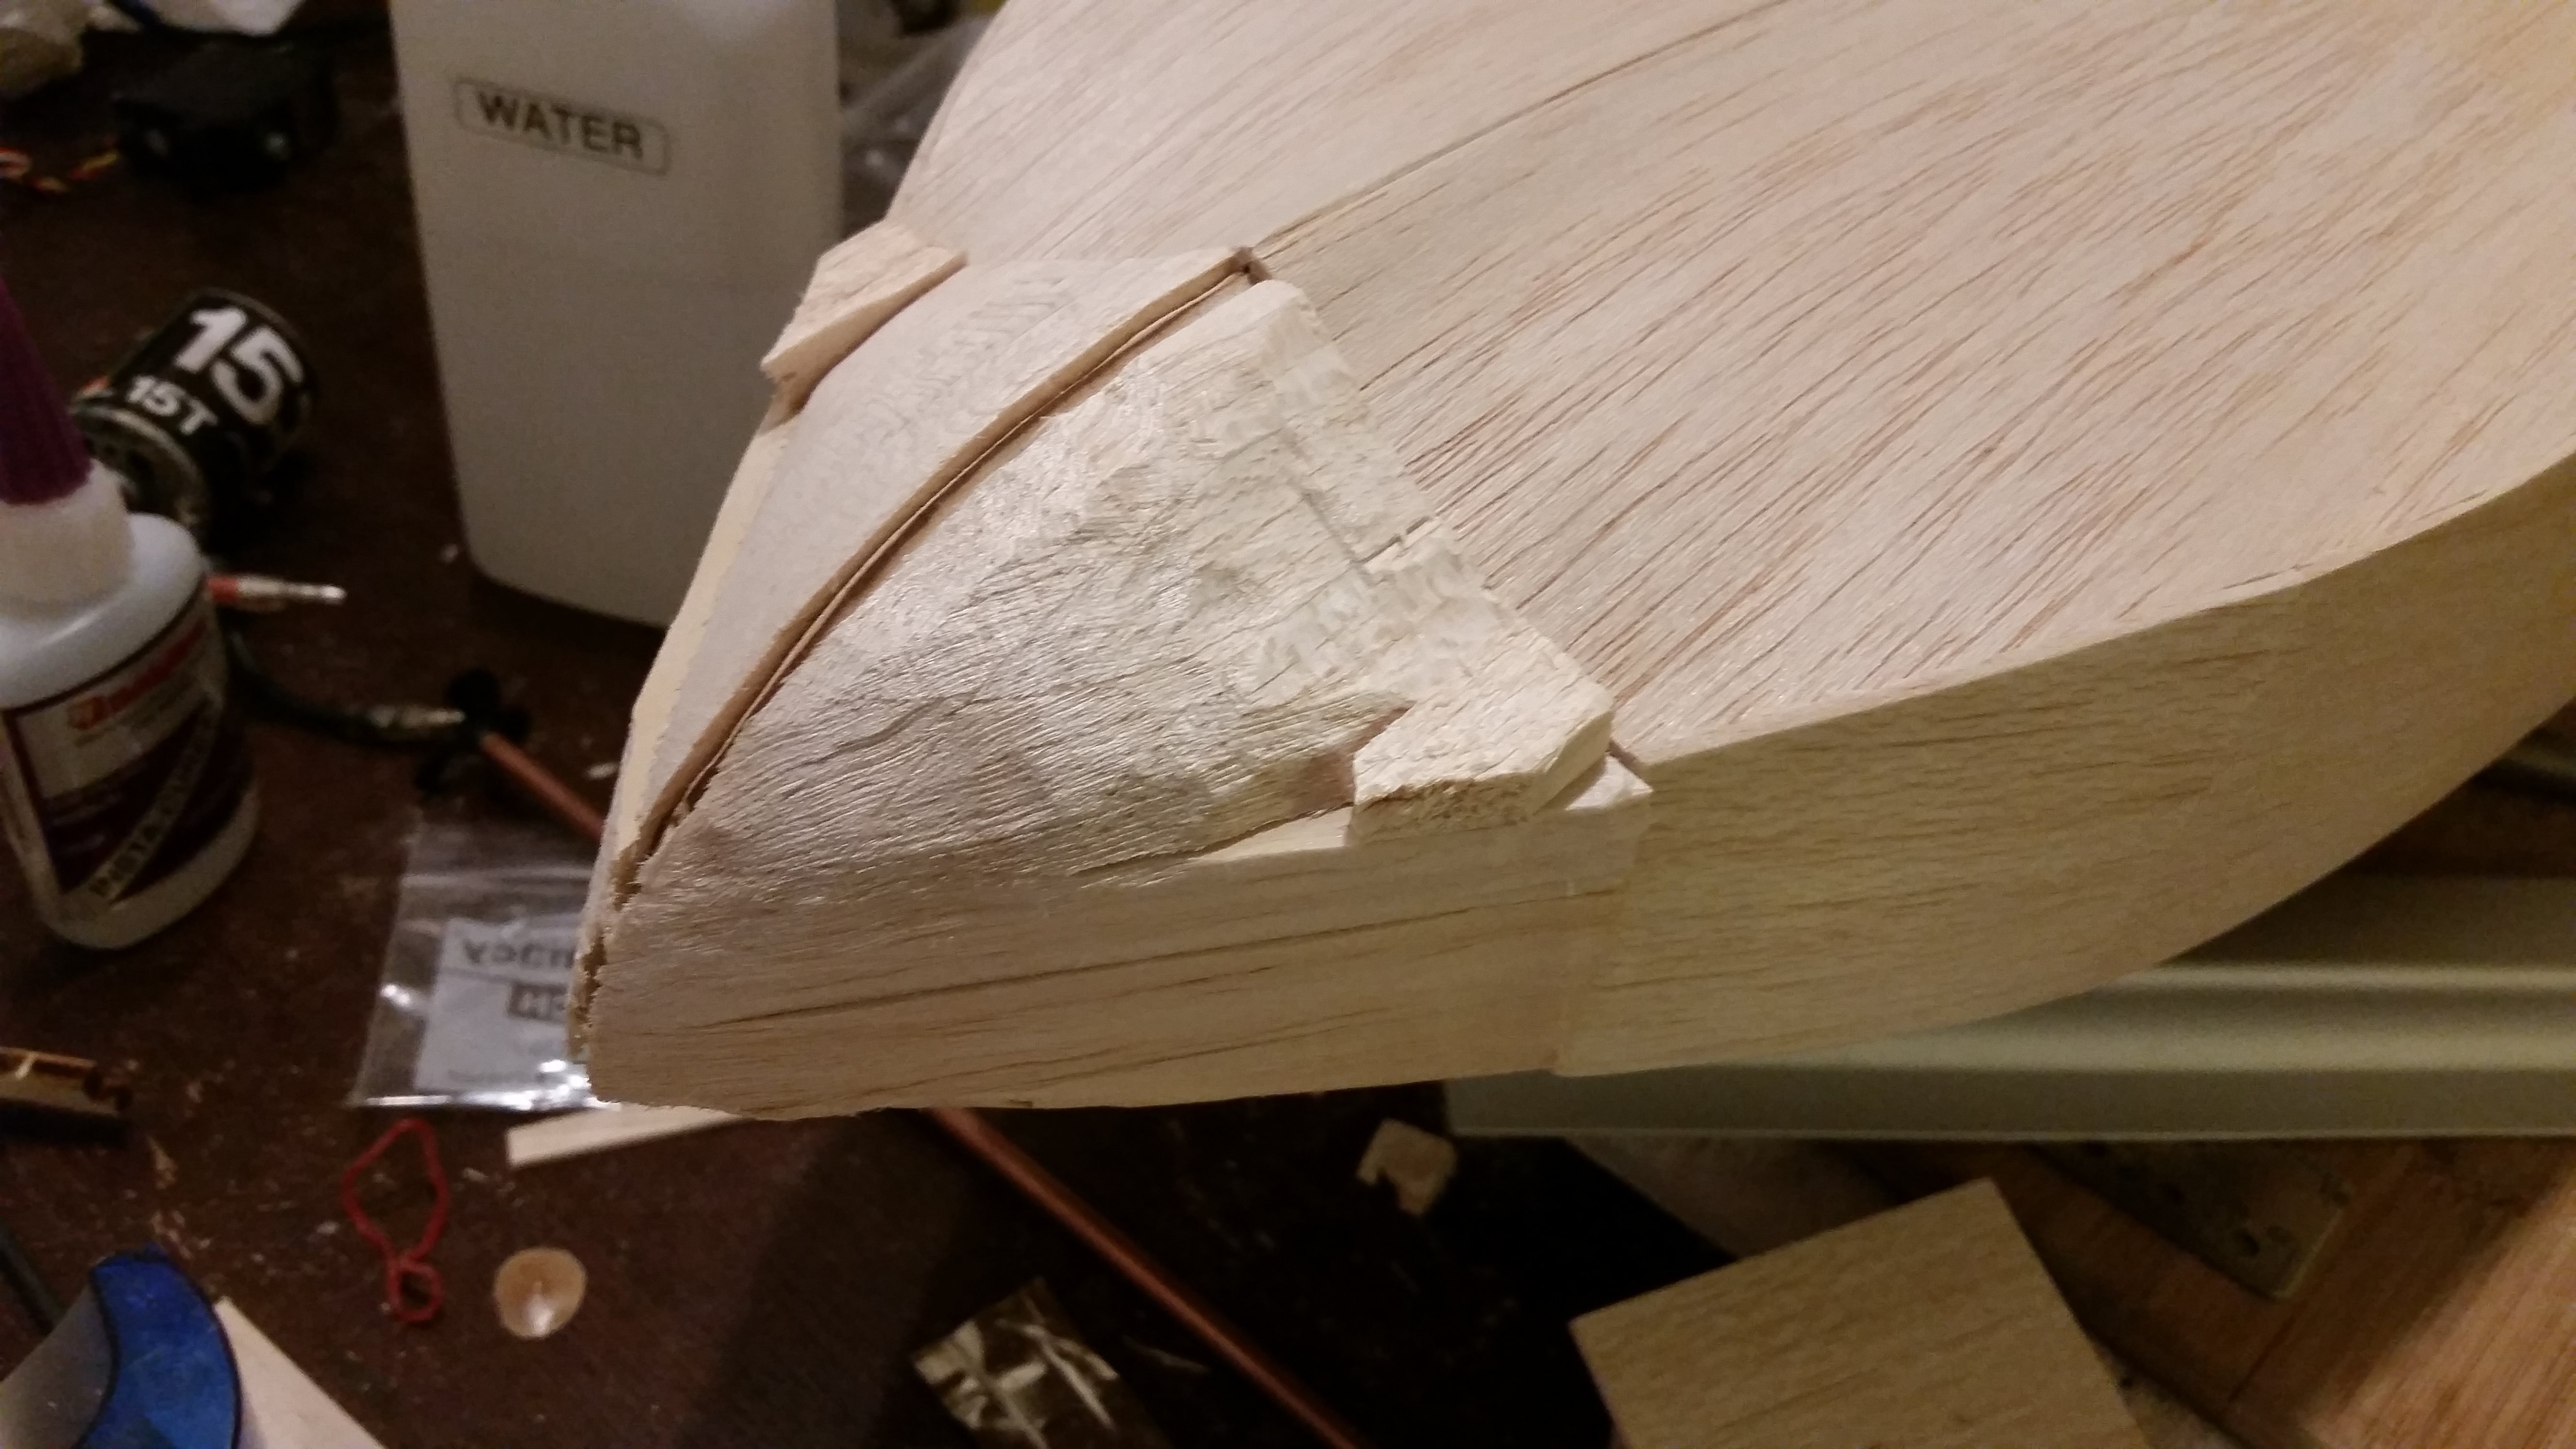
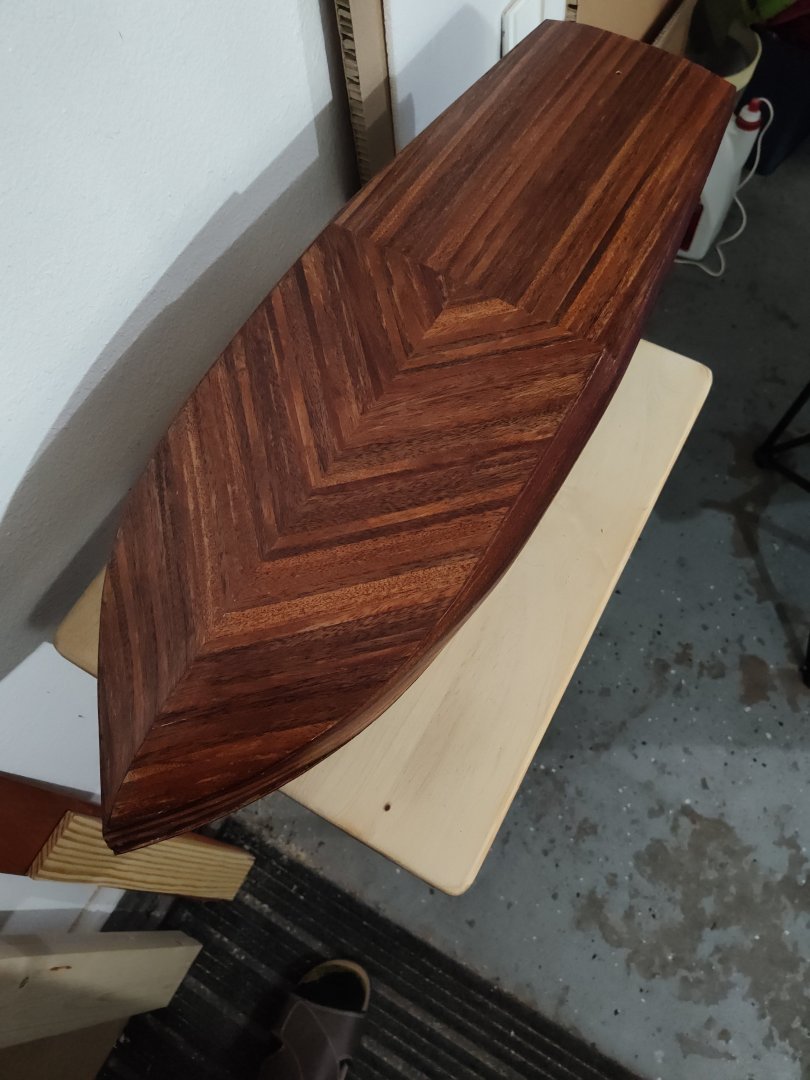
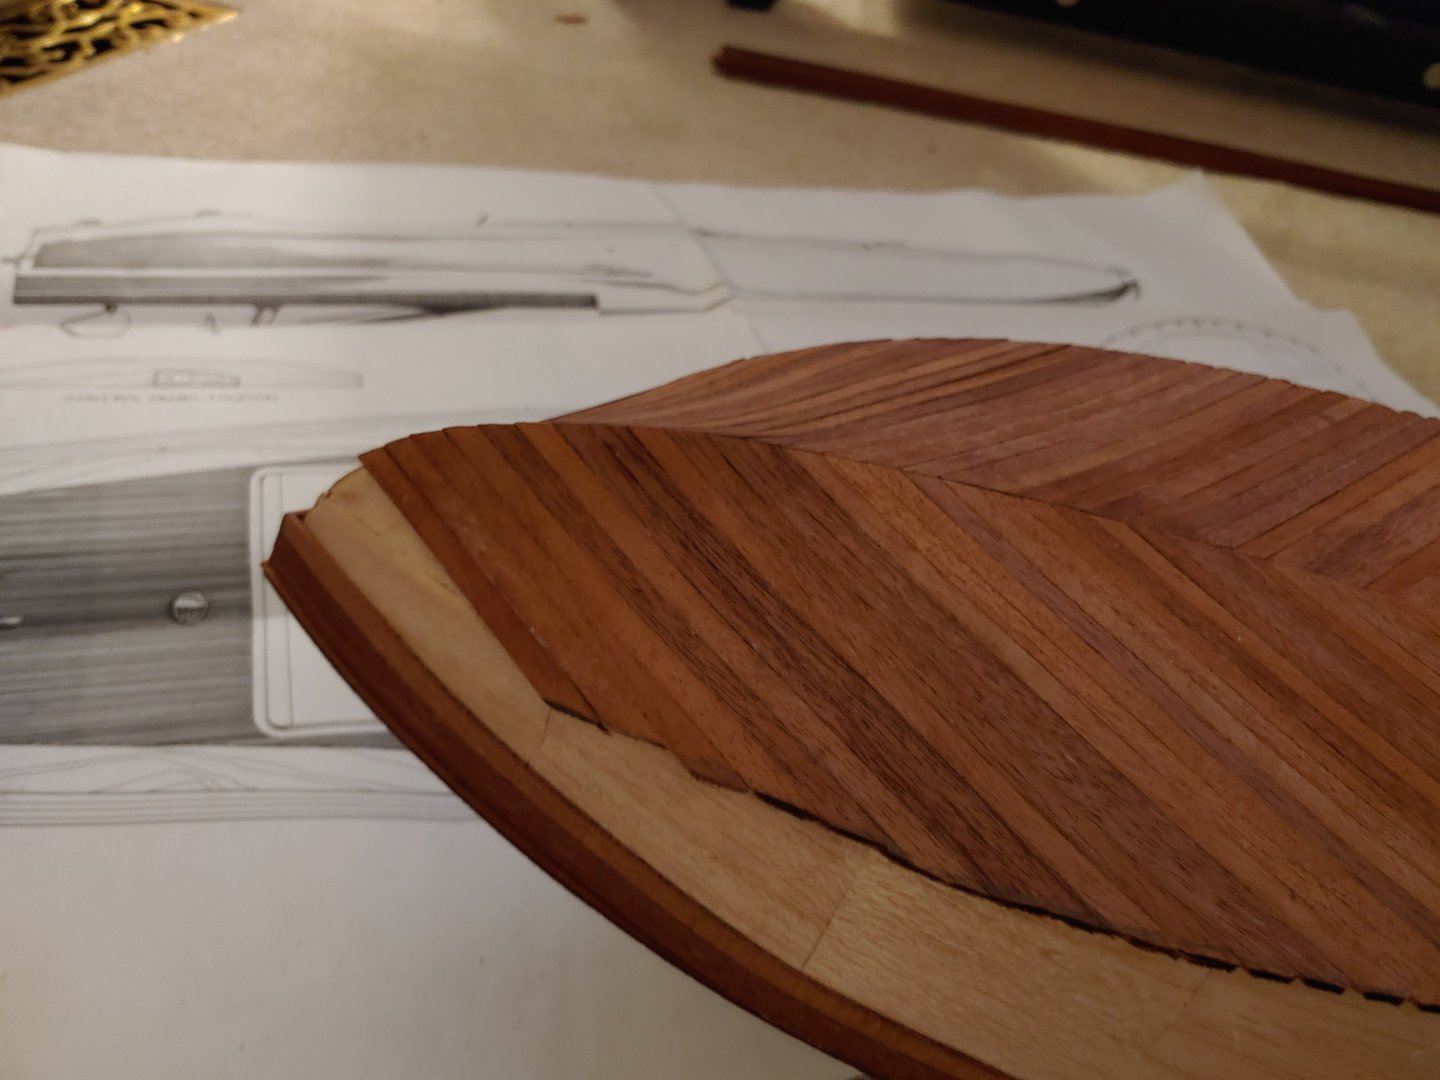
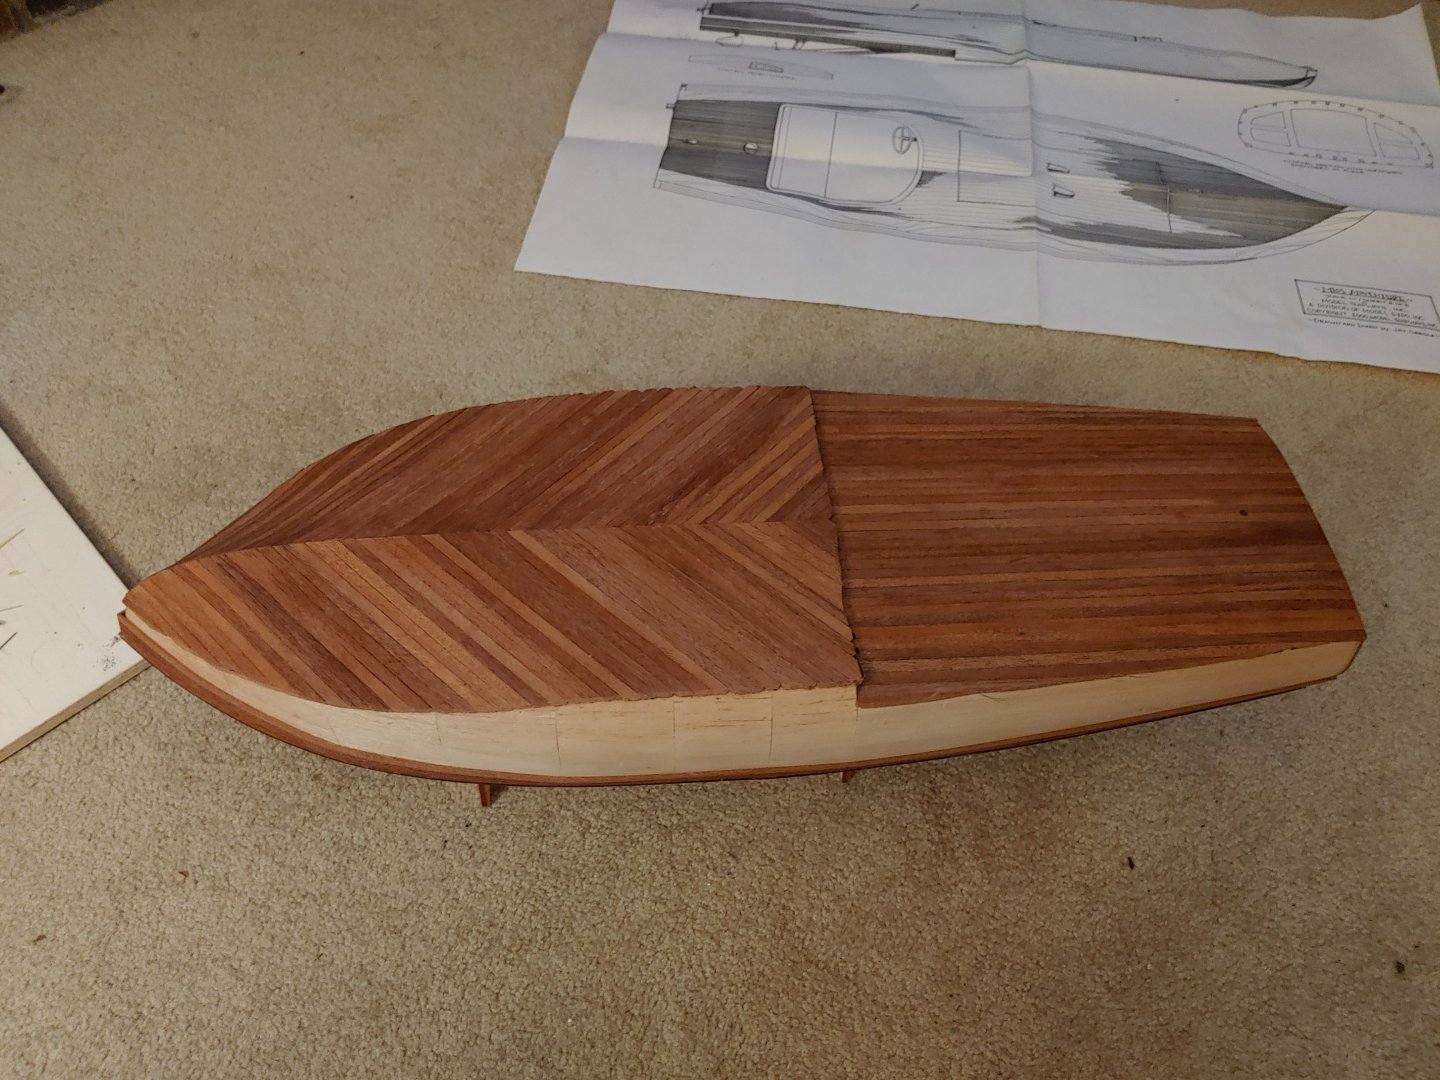
2-19-2022 I was apprehensive about planking the compound curves on the bottom of the boat until I saw some old plans for flyer class racers using a dihedral type planking for the bottoms of the boats. I decided to go this route and I am very happy with the results. It did require a bit of bending and mitering.

- 32 replies
-
- 4
-
-
- Model Shipways
- Miss Adventure
- (and 2 more)
-
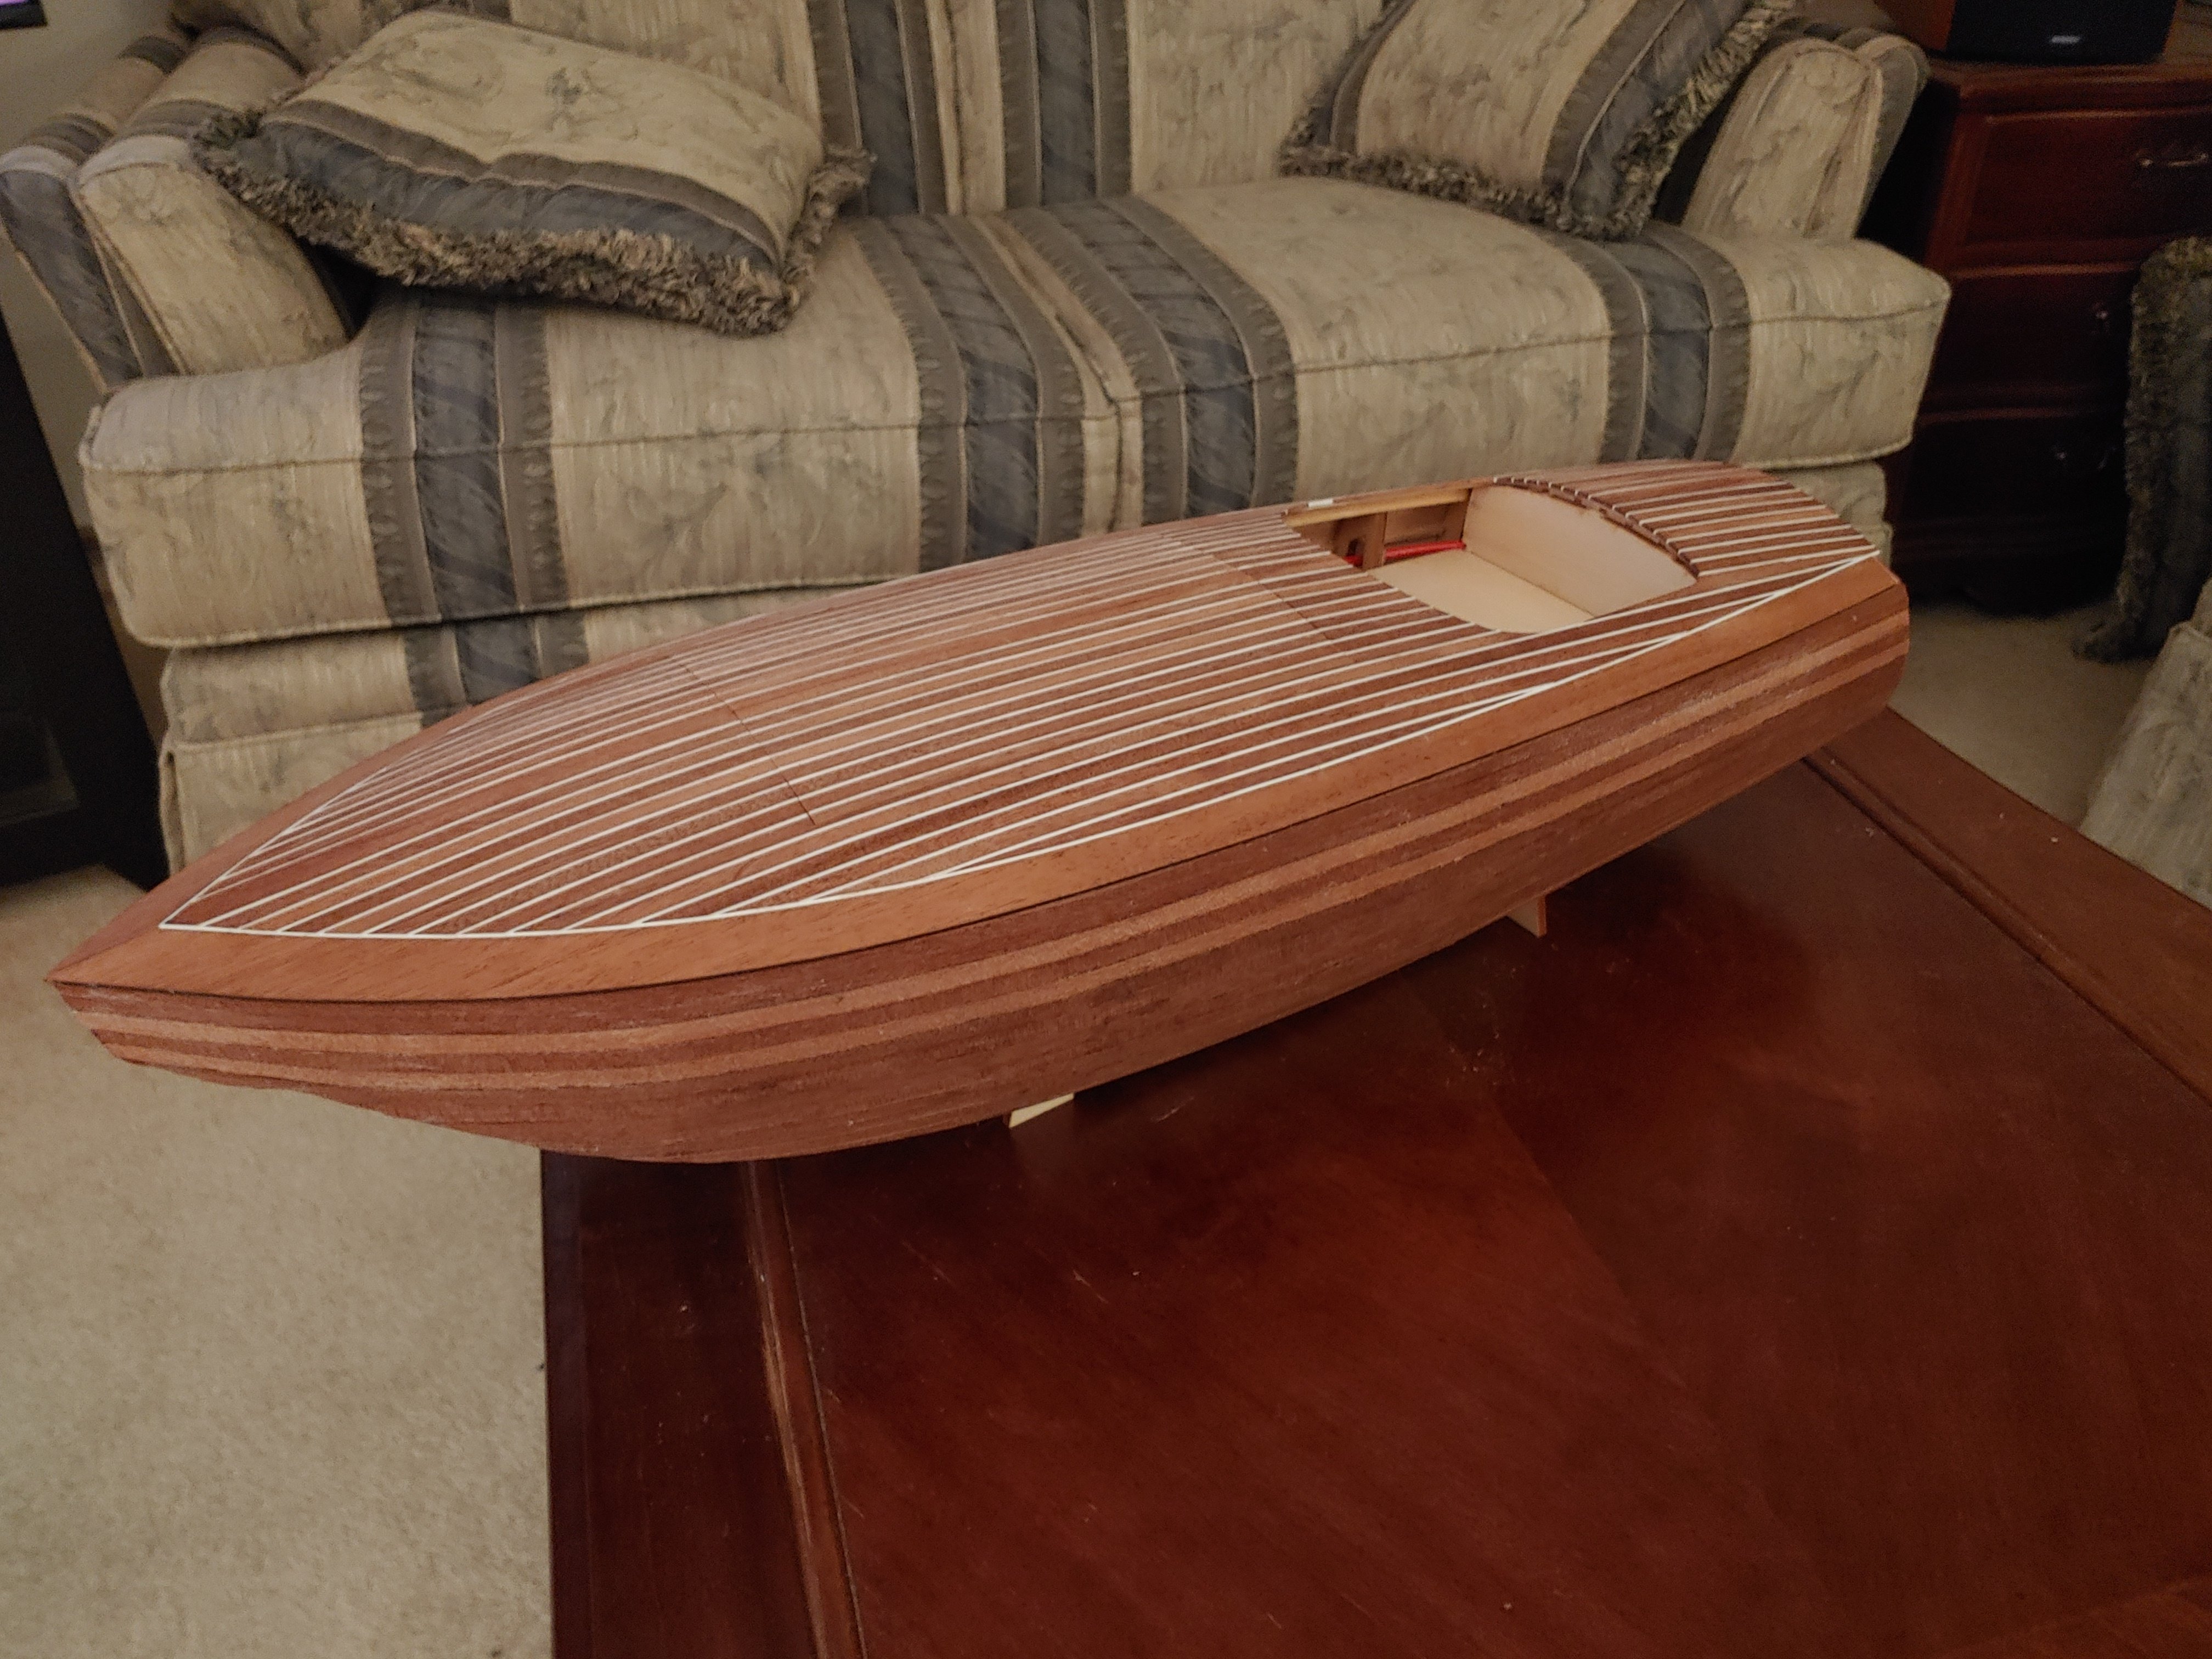
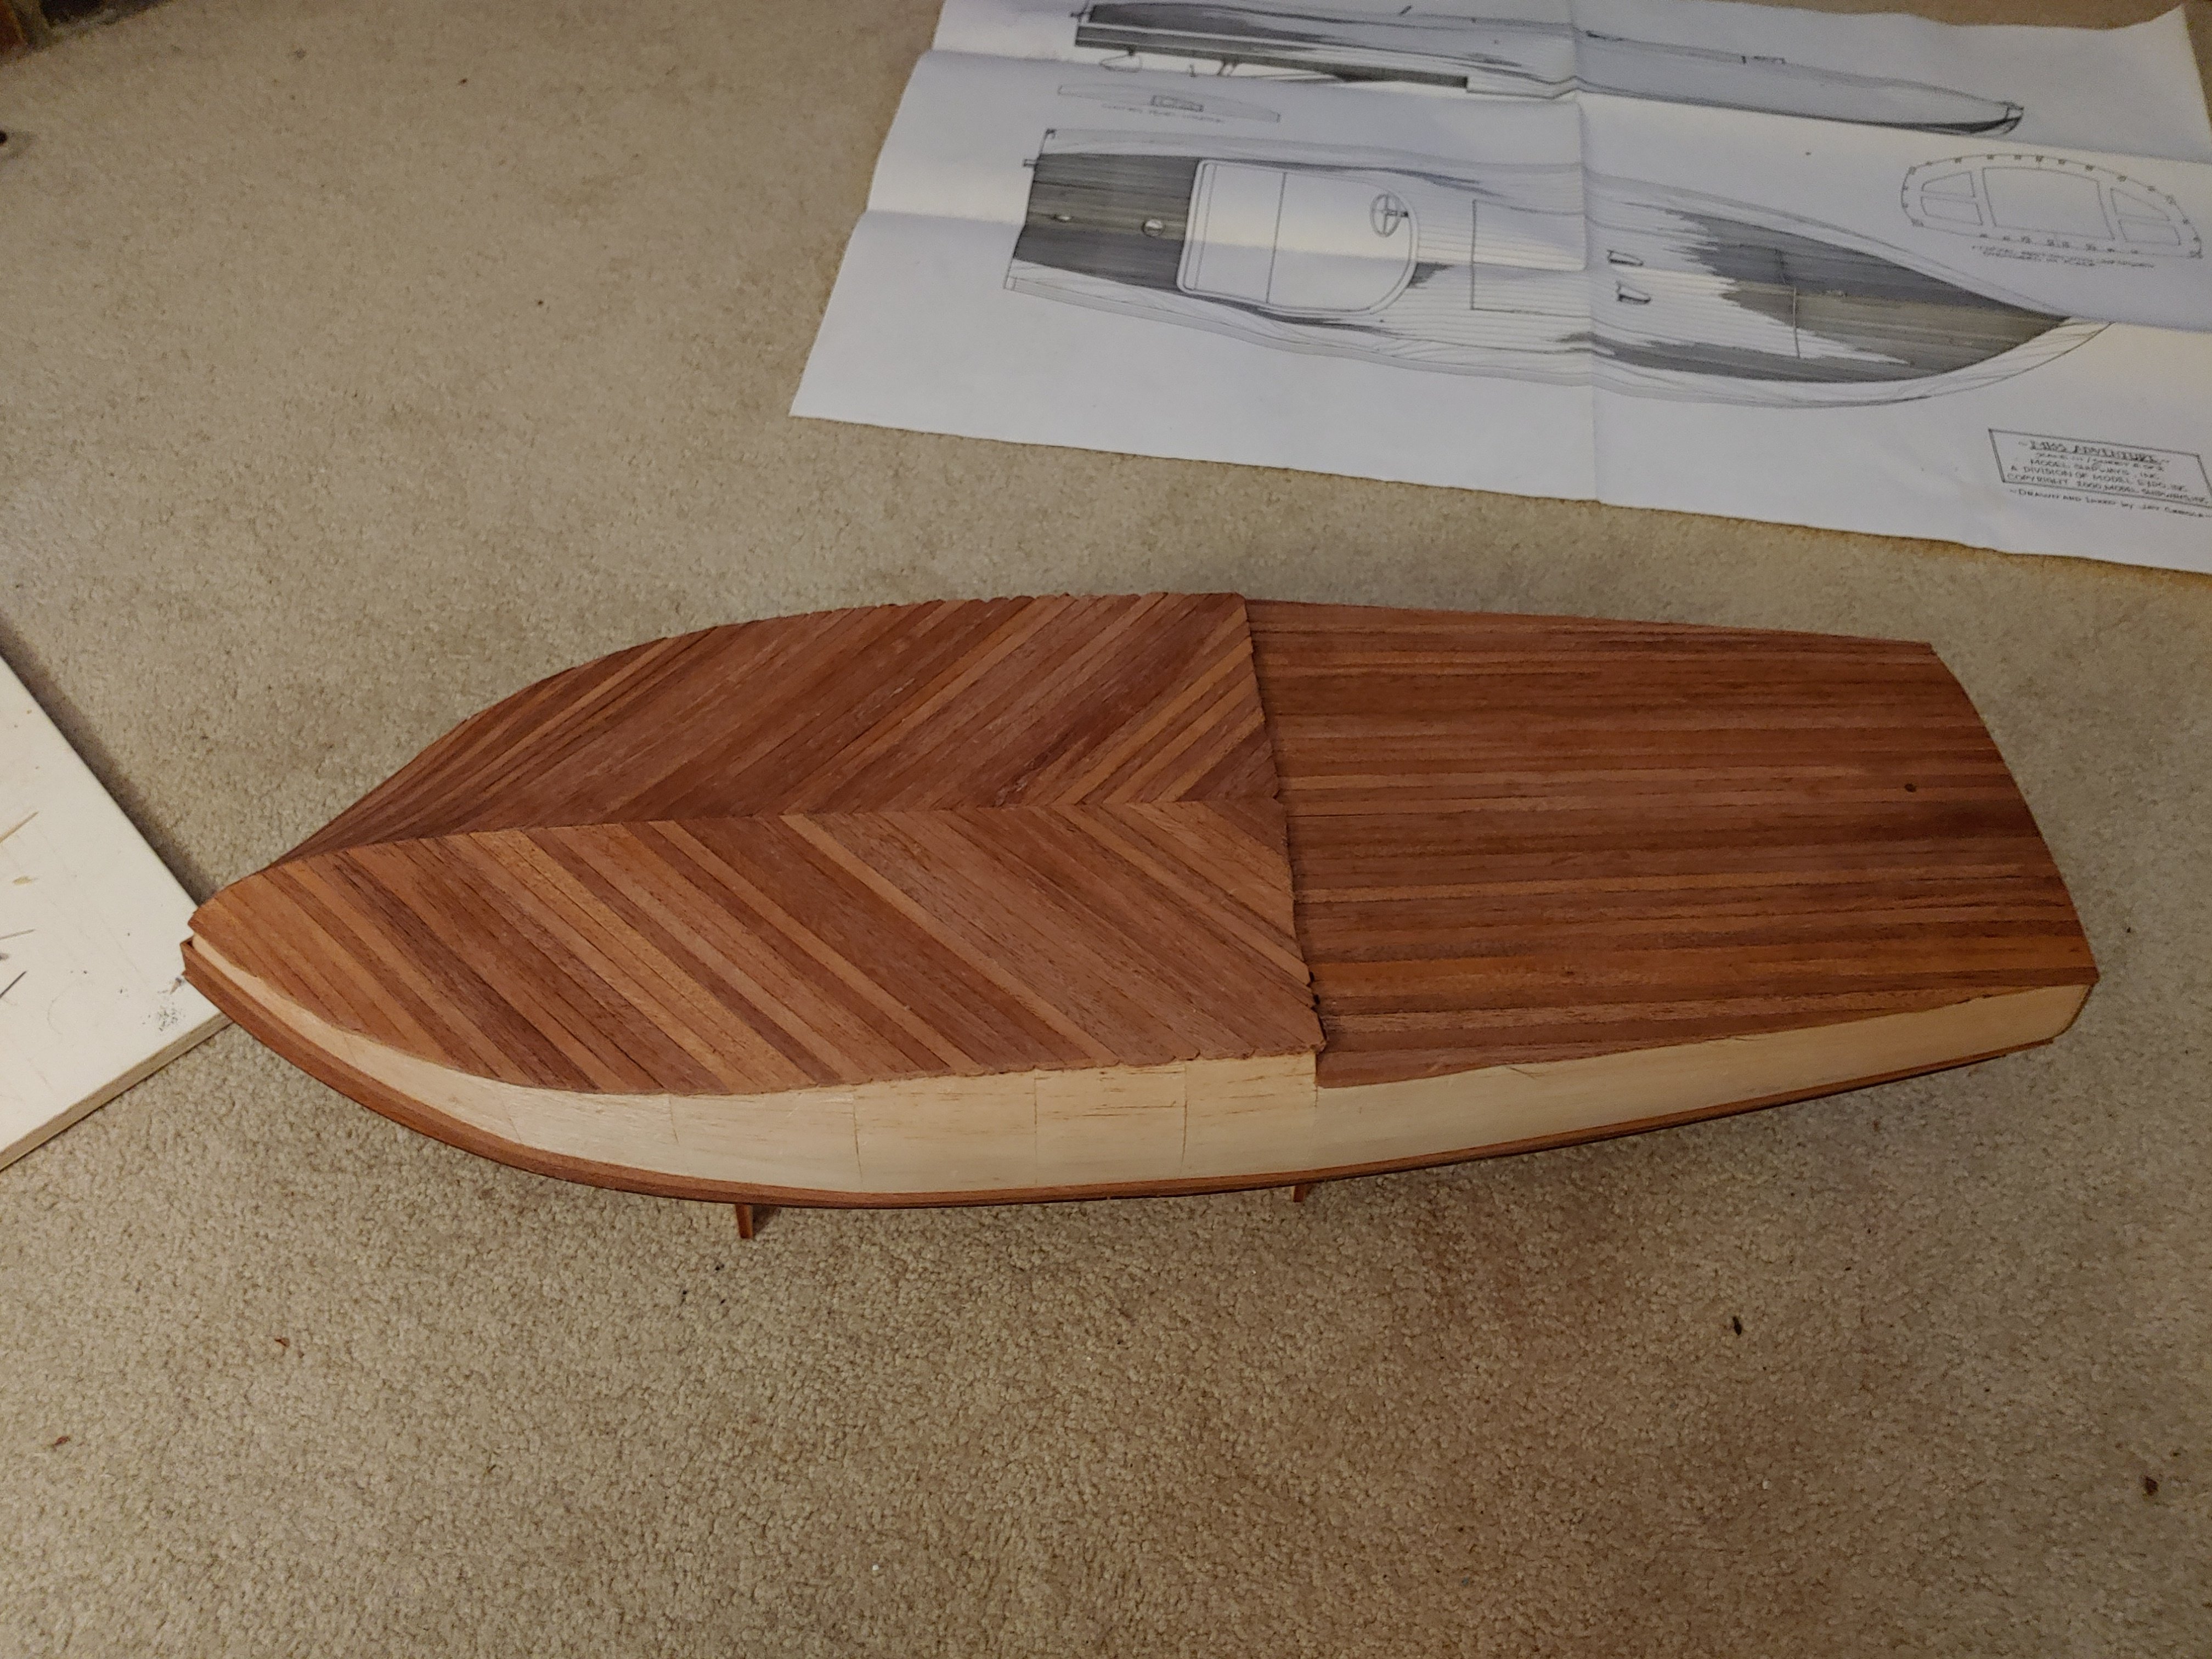
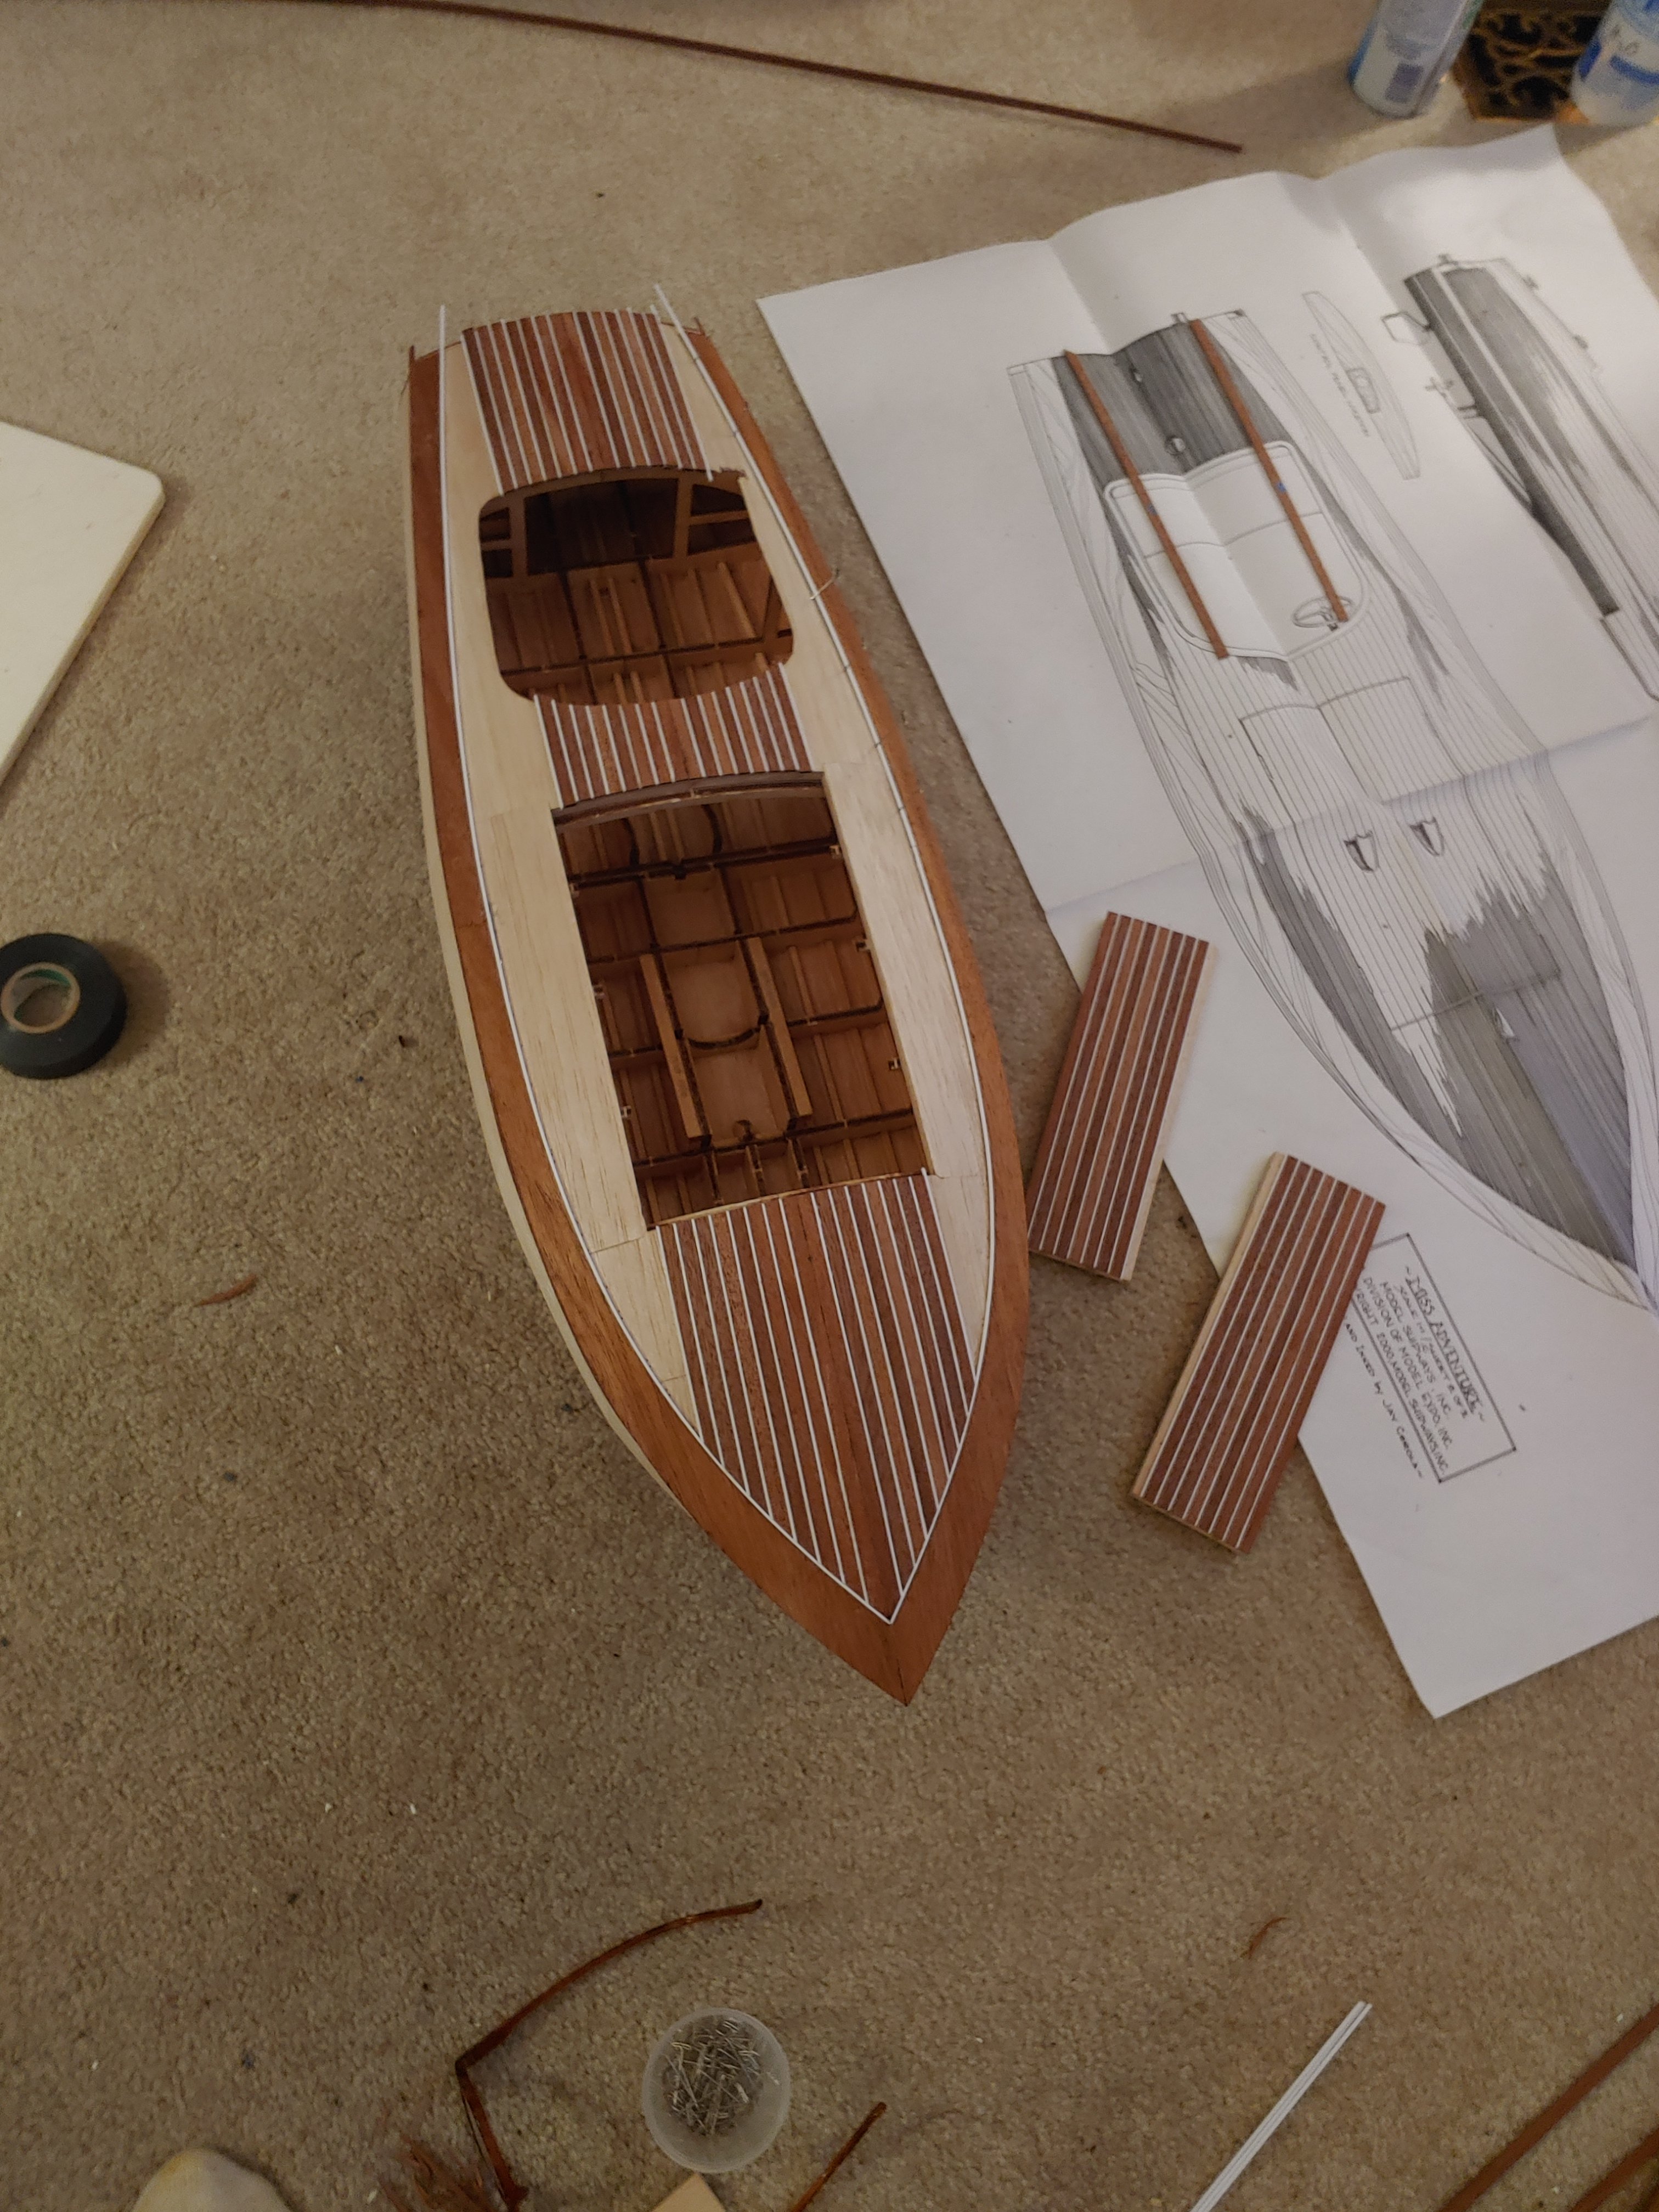
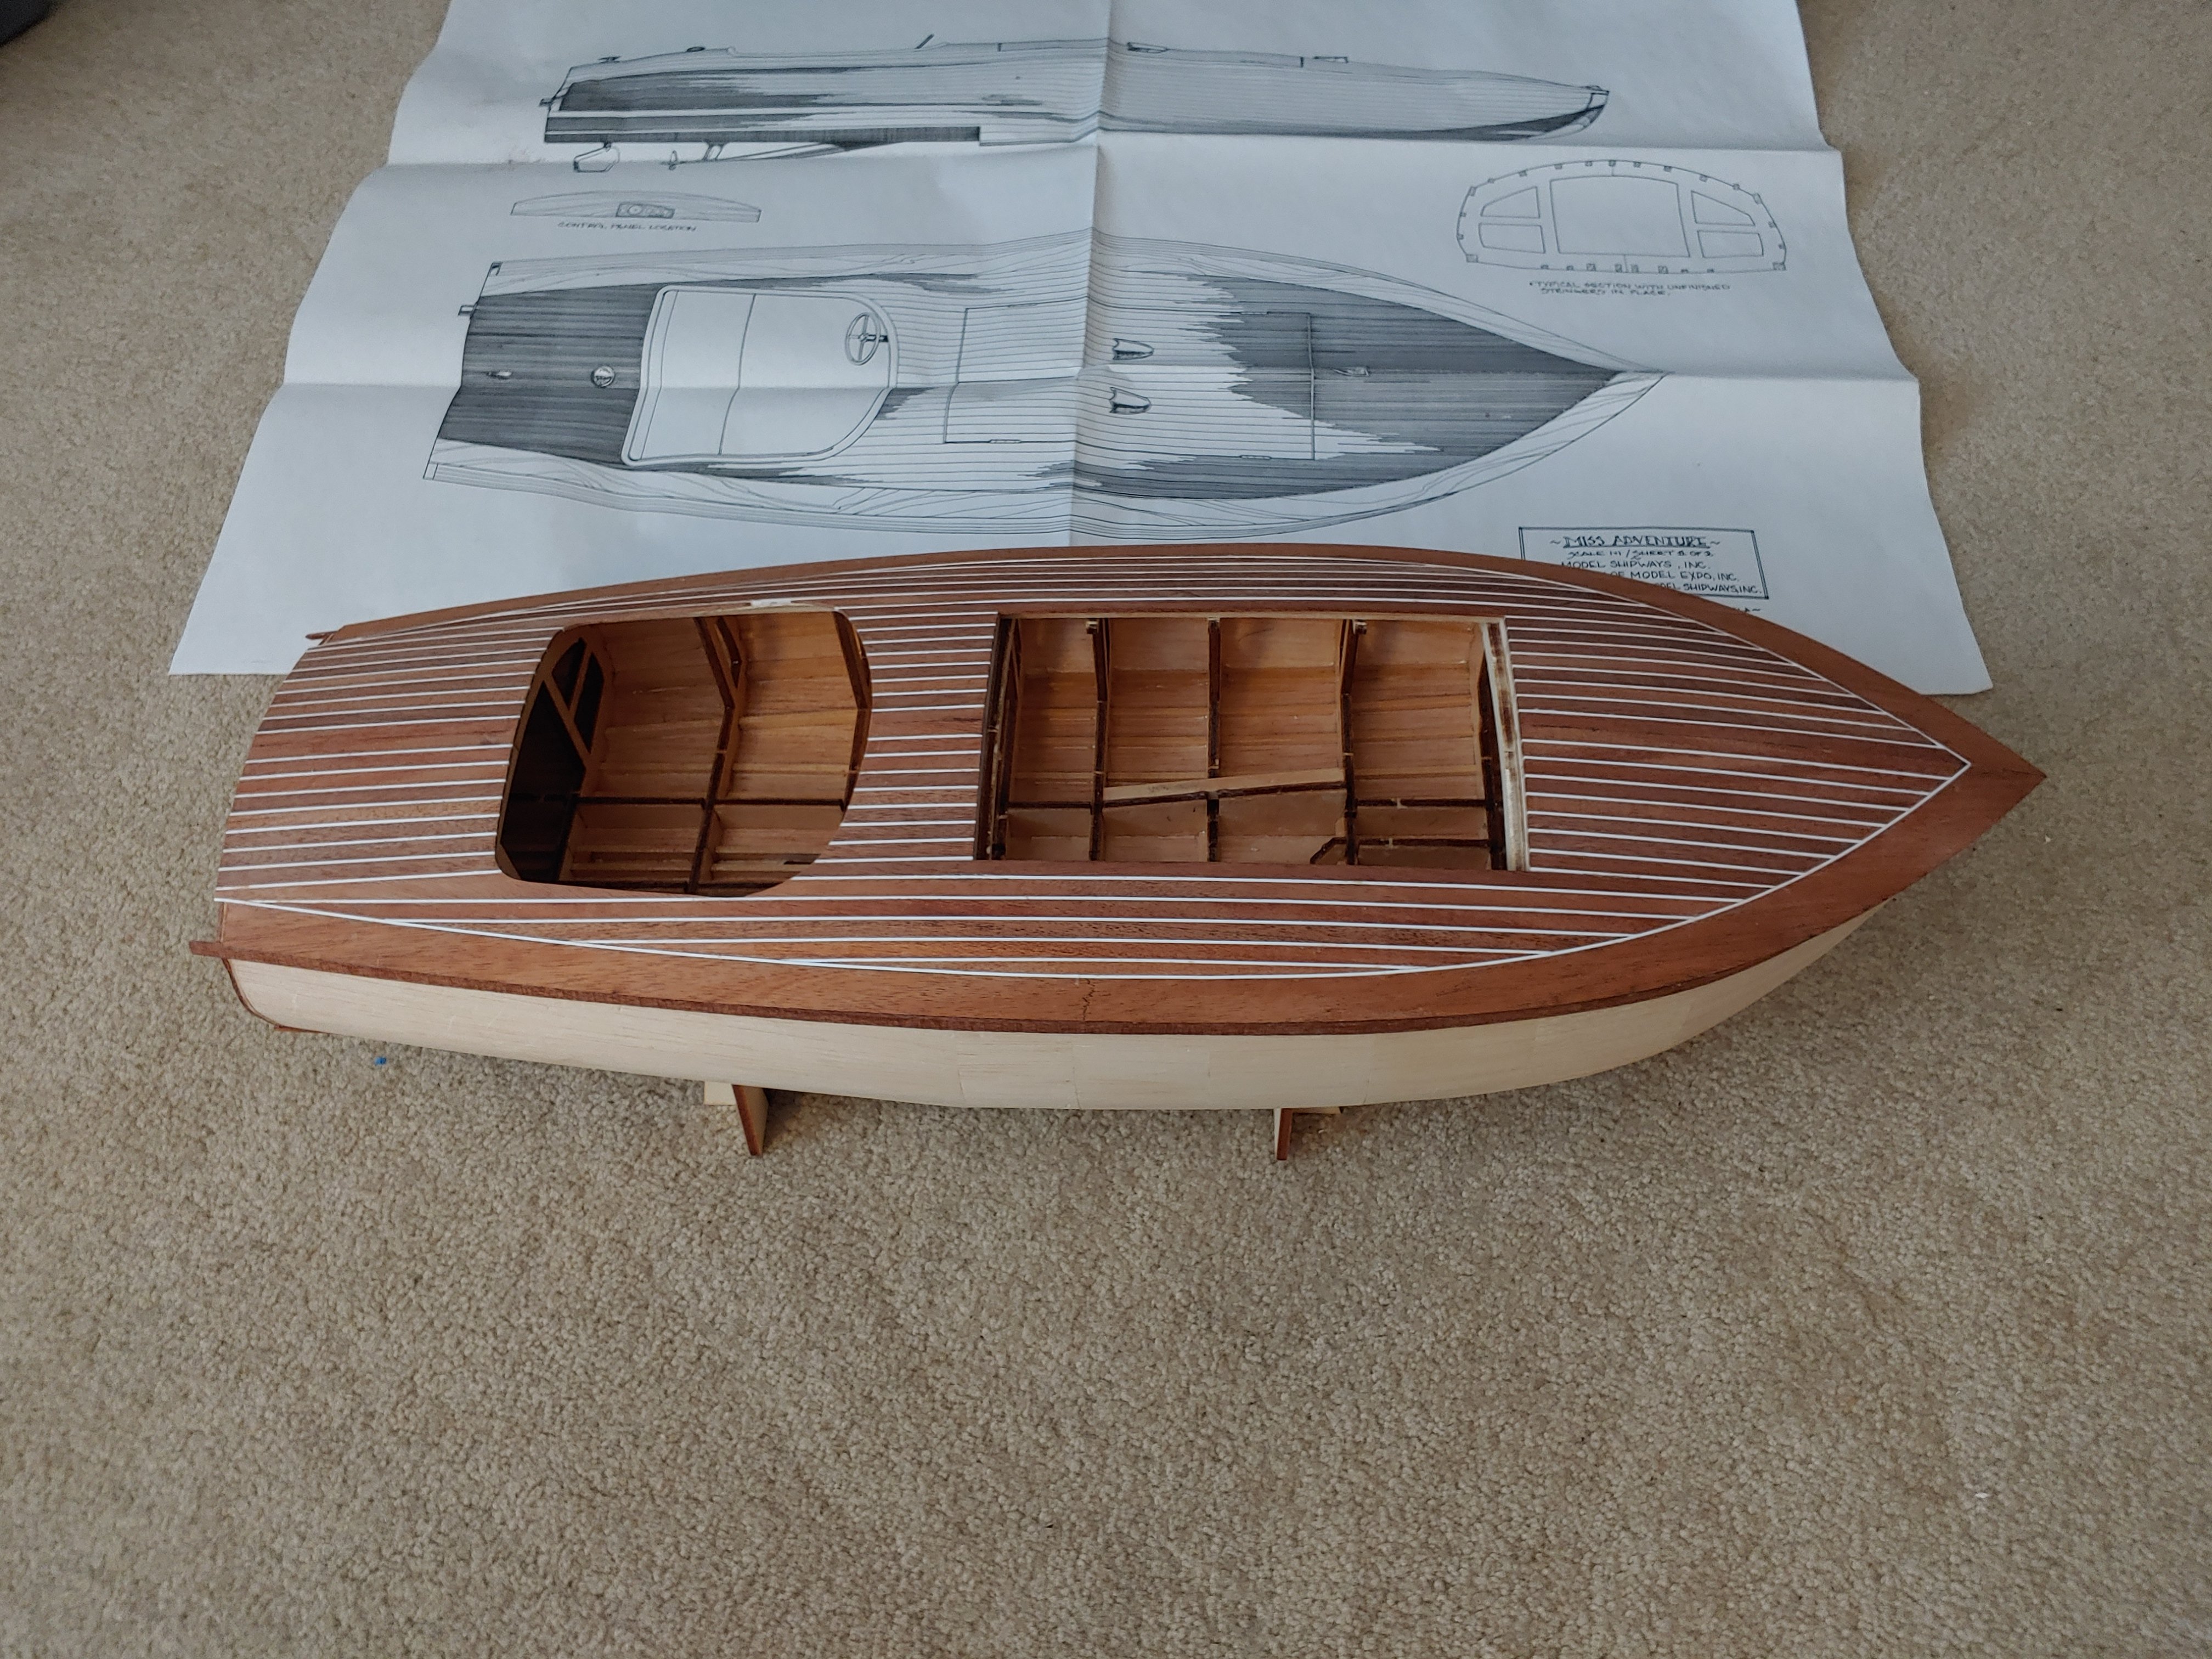
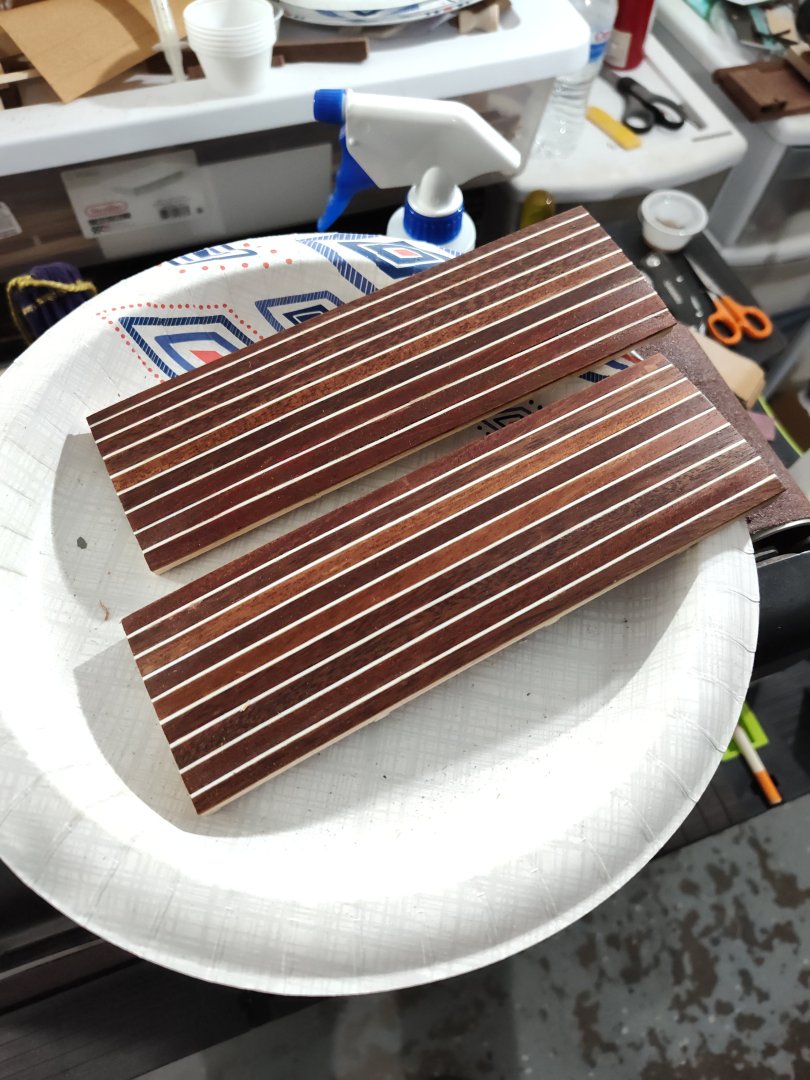
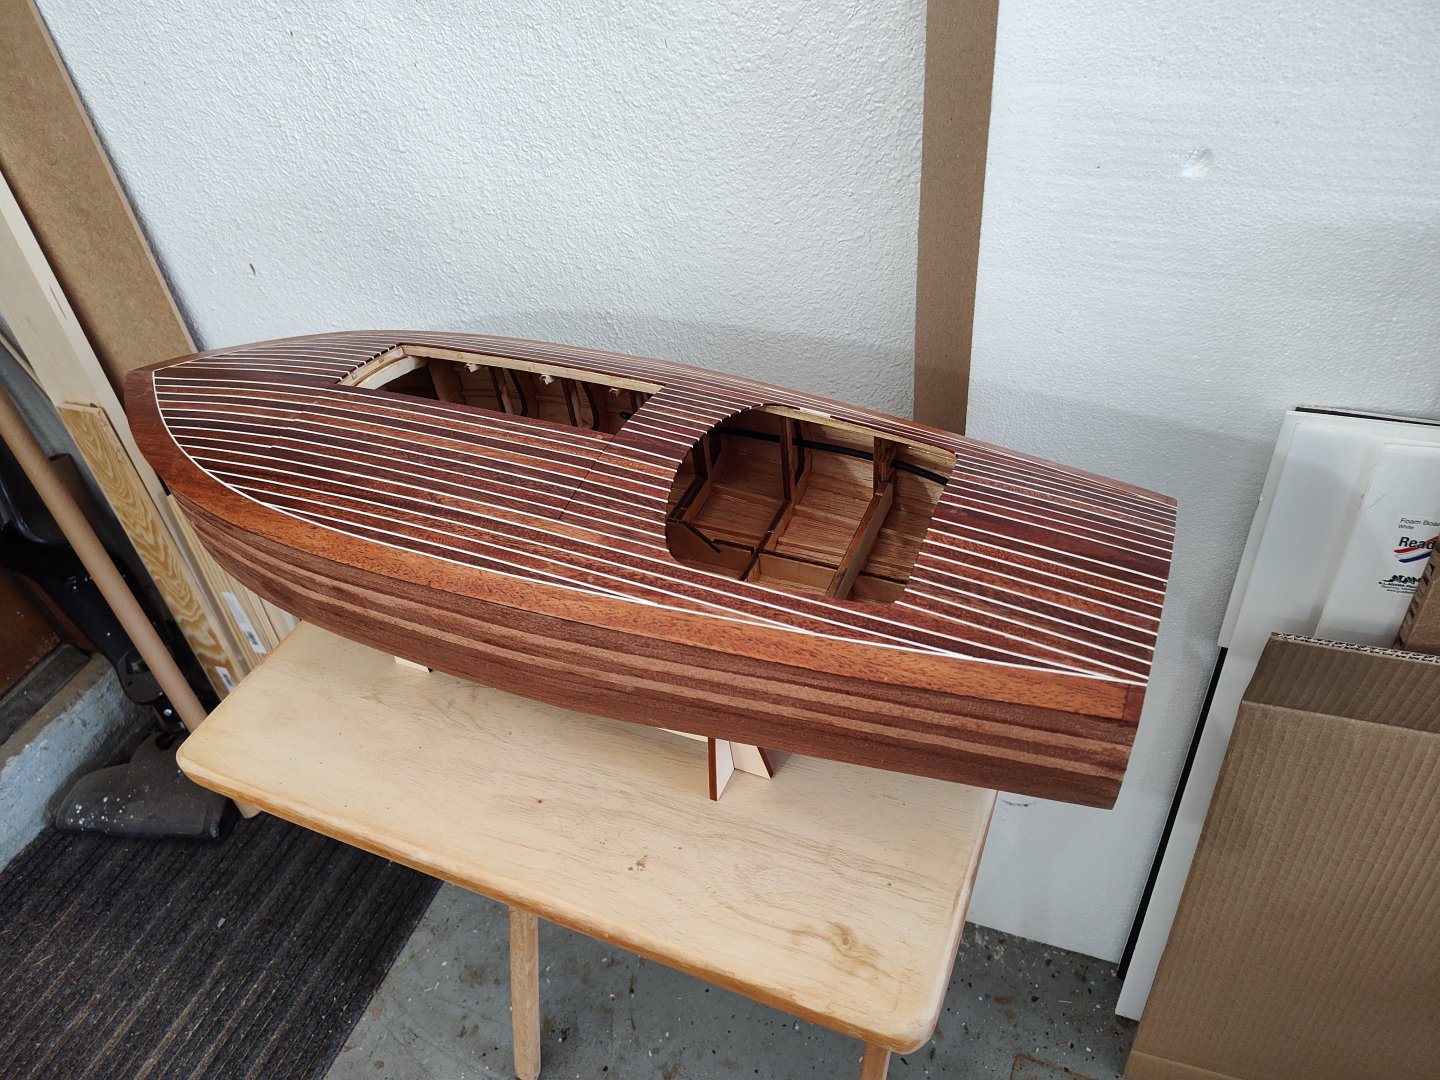
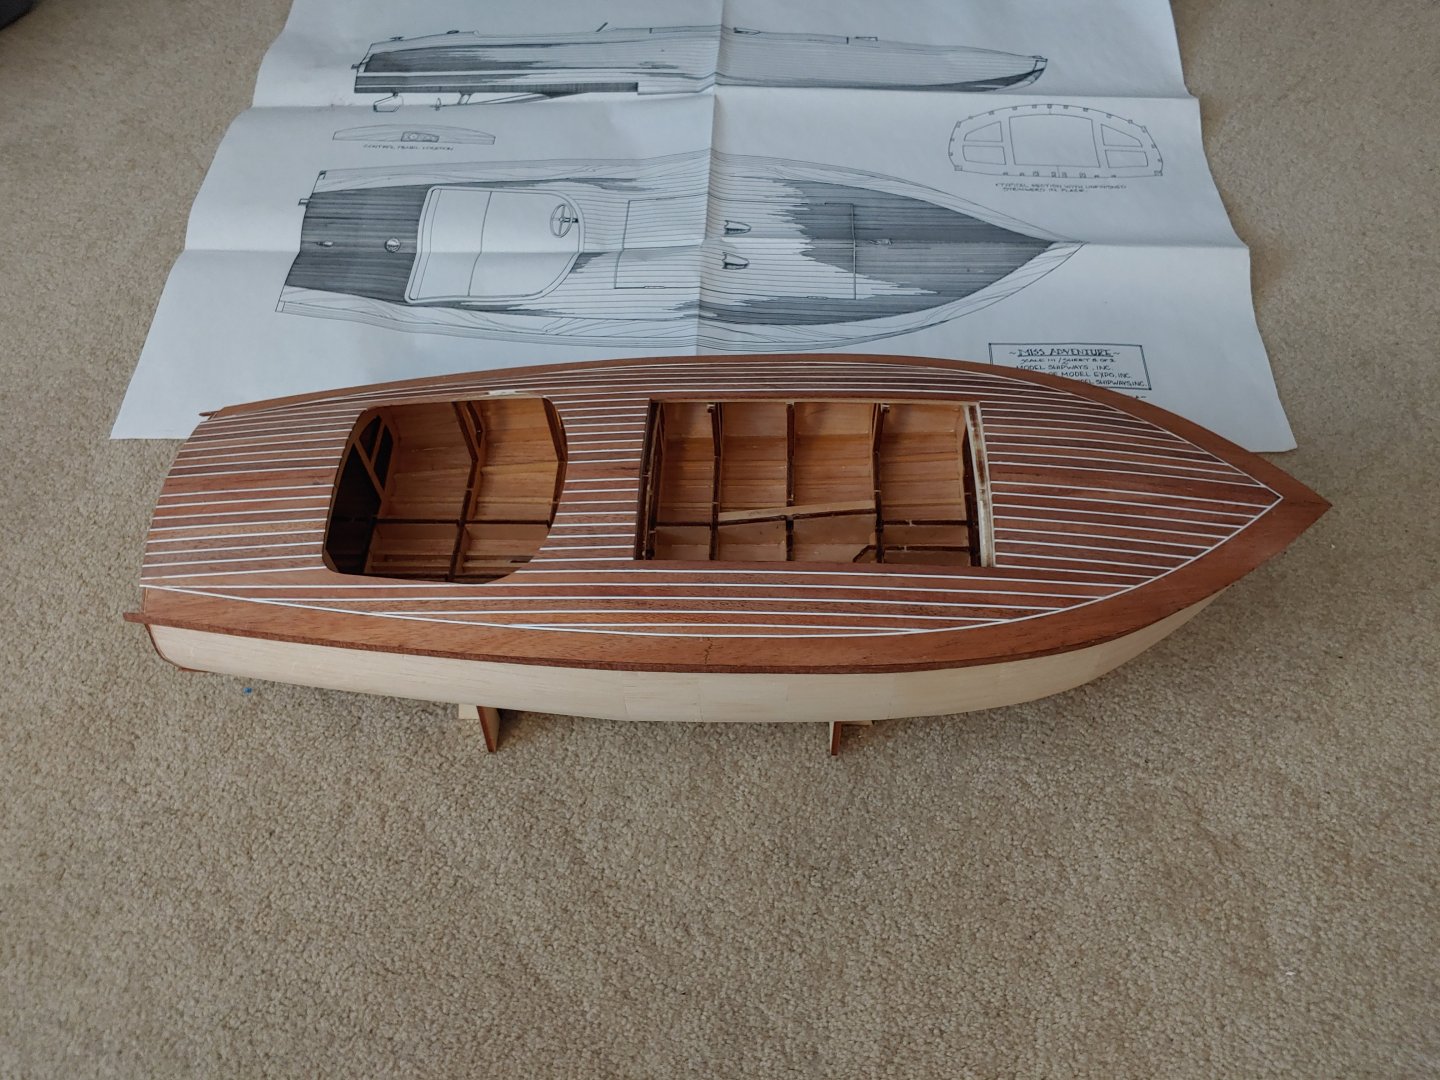
1-9-2022 Back at it! One thing that bothered me about this kit is that earlier versions of it came with mahogany planks long enough to plank the sides with one contiuous piece, where as later versions (like the one I am building) had shorter planks requiring you to butt some together to make the length. I ended up ordering the proper length planks from MACK products as well as some cockpit coming that was more true to scale than the one that came with the kit. Another departure from the kit is that used styrene strips to simulate caulk lines on the top deck. I felt like the finished model looked too much like a mahogany torpedo so I use the caulk lines to add some character. A word about the margin planks that came with the kit...they suck. They are not solid mahogany but very thin mahogany plywood which is very easy to sand through. I decided not to even touch them and left a little overhang from the deck to the sides. I also was careful to use the same plank all the way down the deck for consistancy.


- 32 replies
-
- 4
-
-
- Model Shipways
- Miss Adventure
- (and 2 more)
-
After epoxying the interior, it sat in this state for a few years. I just kinda lost interest for a while. Planking seemed like such a daunting task.

- 32 replies
-
- 1
-
-
- Model Shipways
- Miss Adventure
- (and 2 more)
-
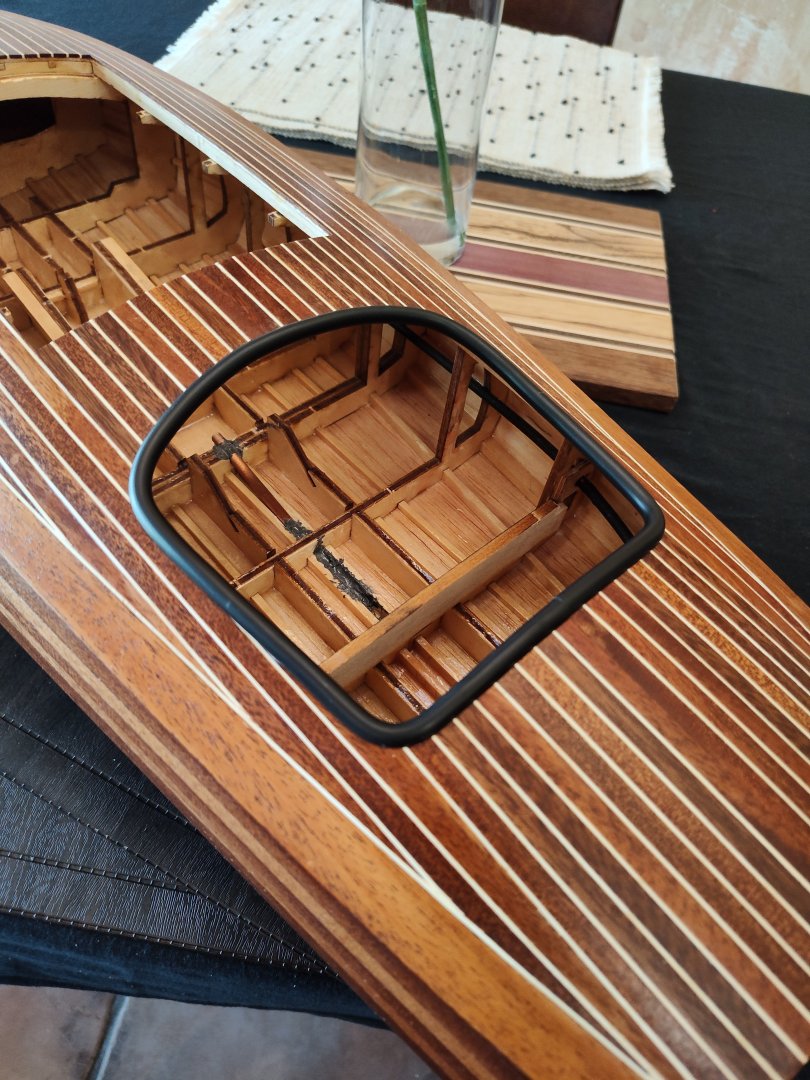
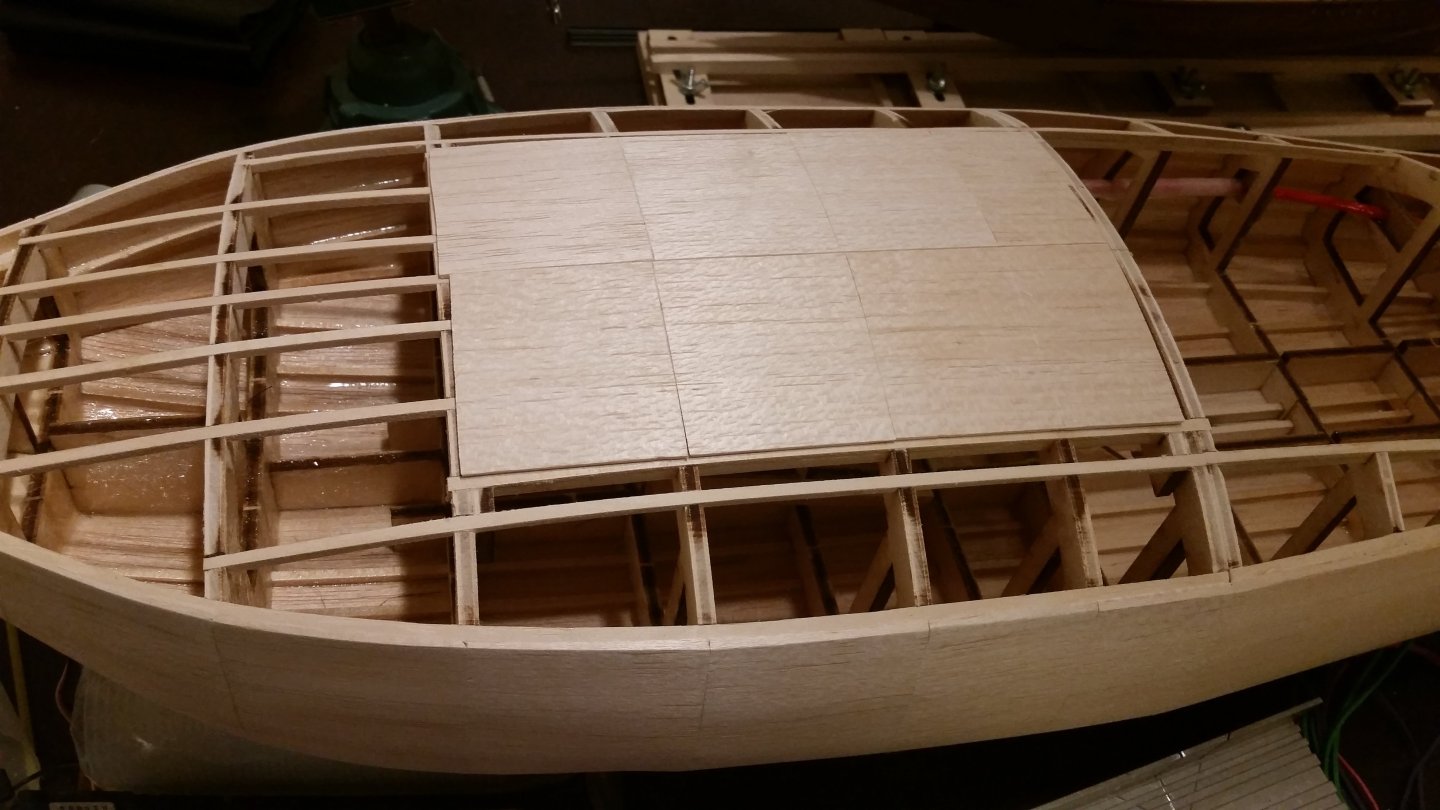
5-28-2016 I used a great amount of care in building the hatch covers. There is compound bends in them both and I made sure to have them done right. I sheeted each one in four pieces of balsa so the profile wouldn't be affected. The back part of the deck was sheeted all at once, then the cockpit was cut out of it.


- 32 replies
-
- 4
-
-
- Model Shipways
- Miss Adventure
- (and 2 more)
-
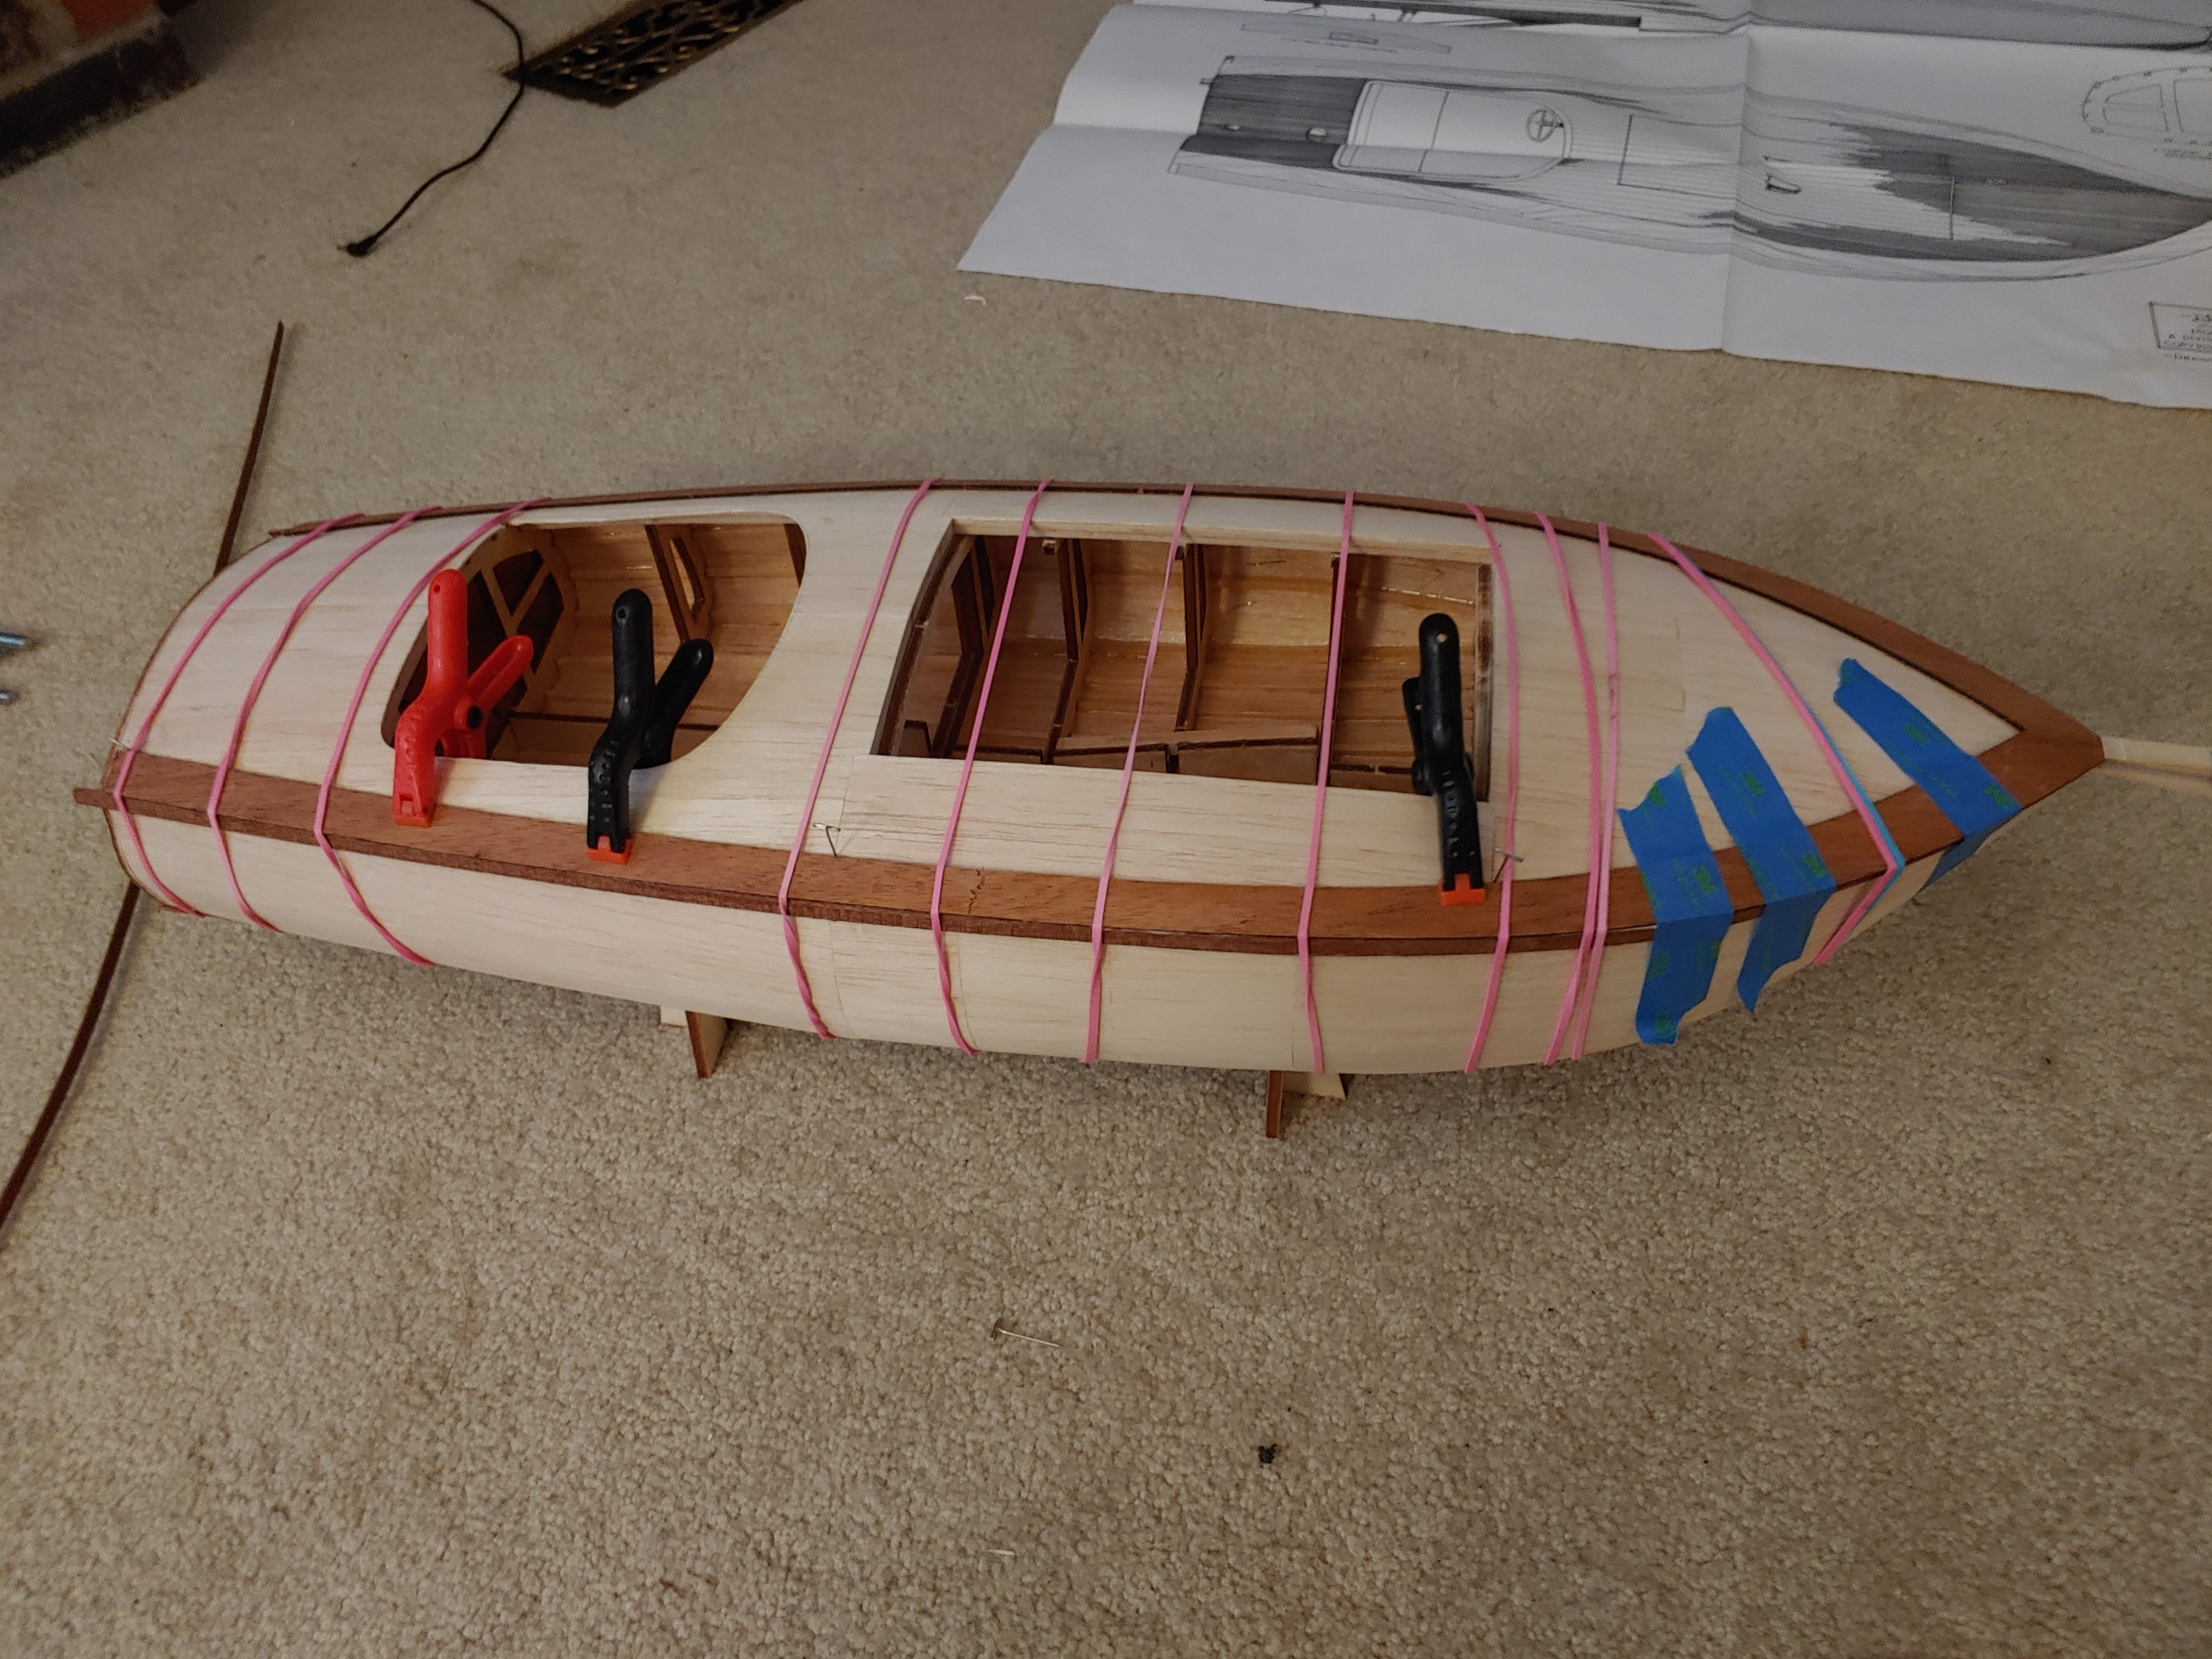
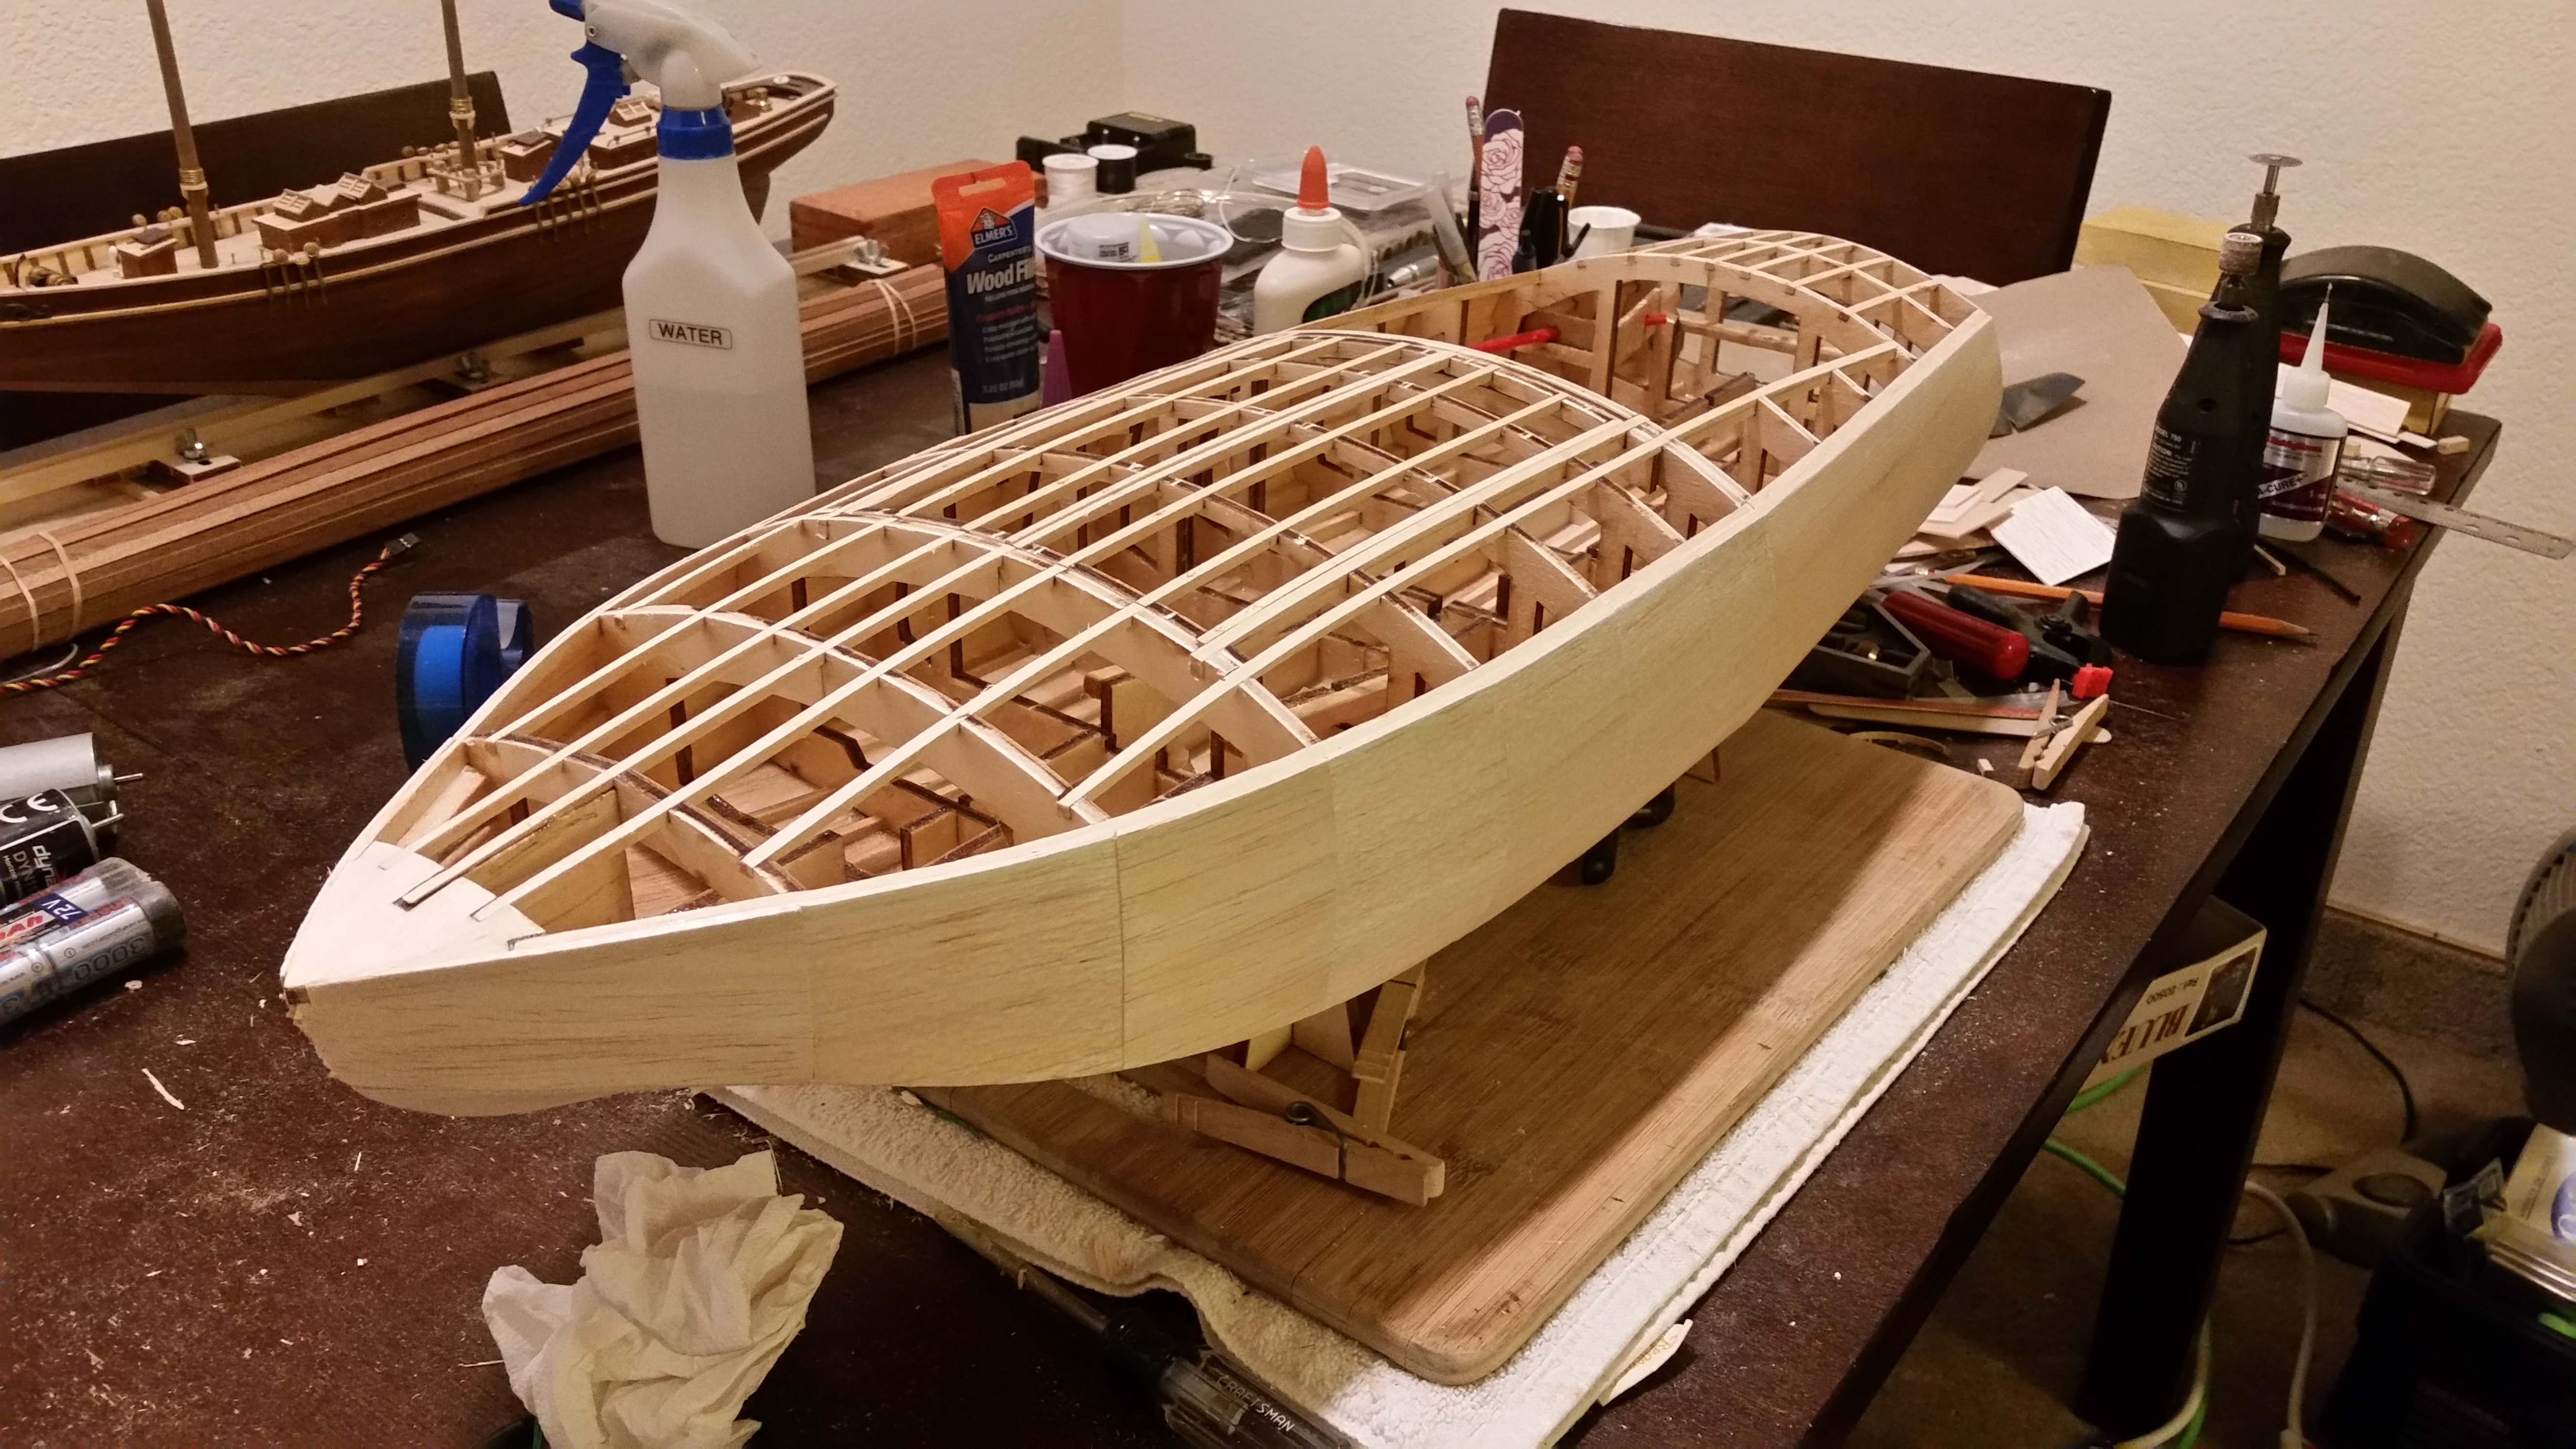
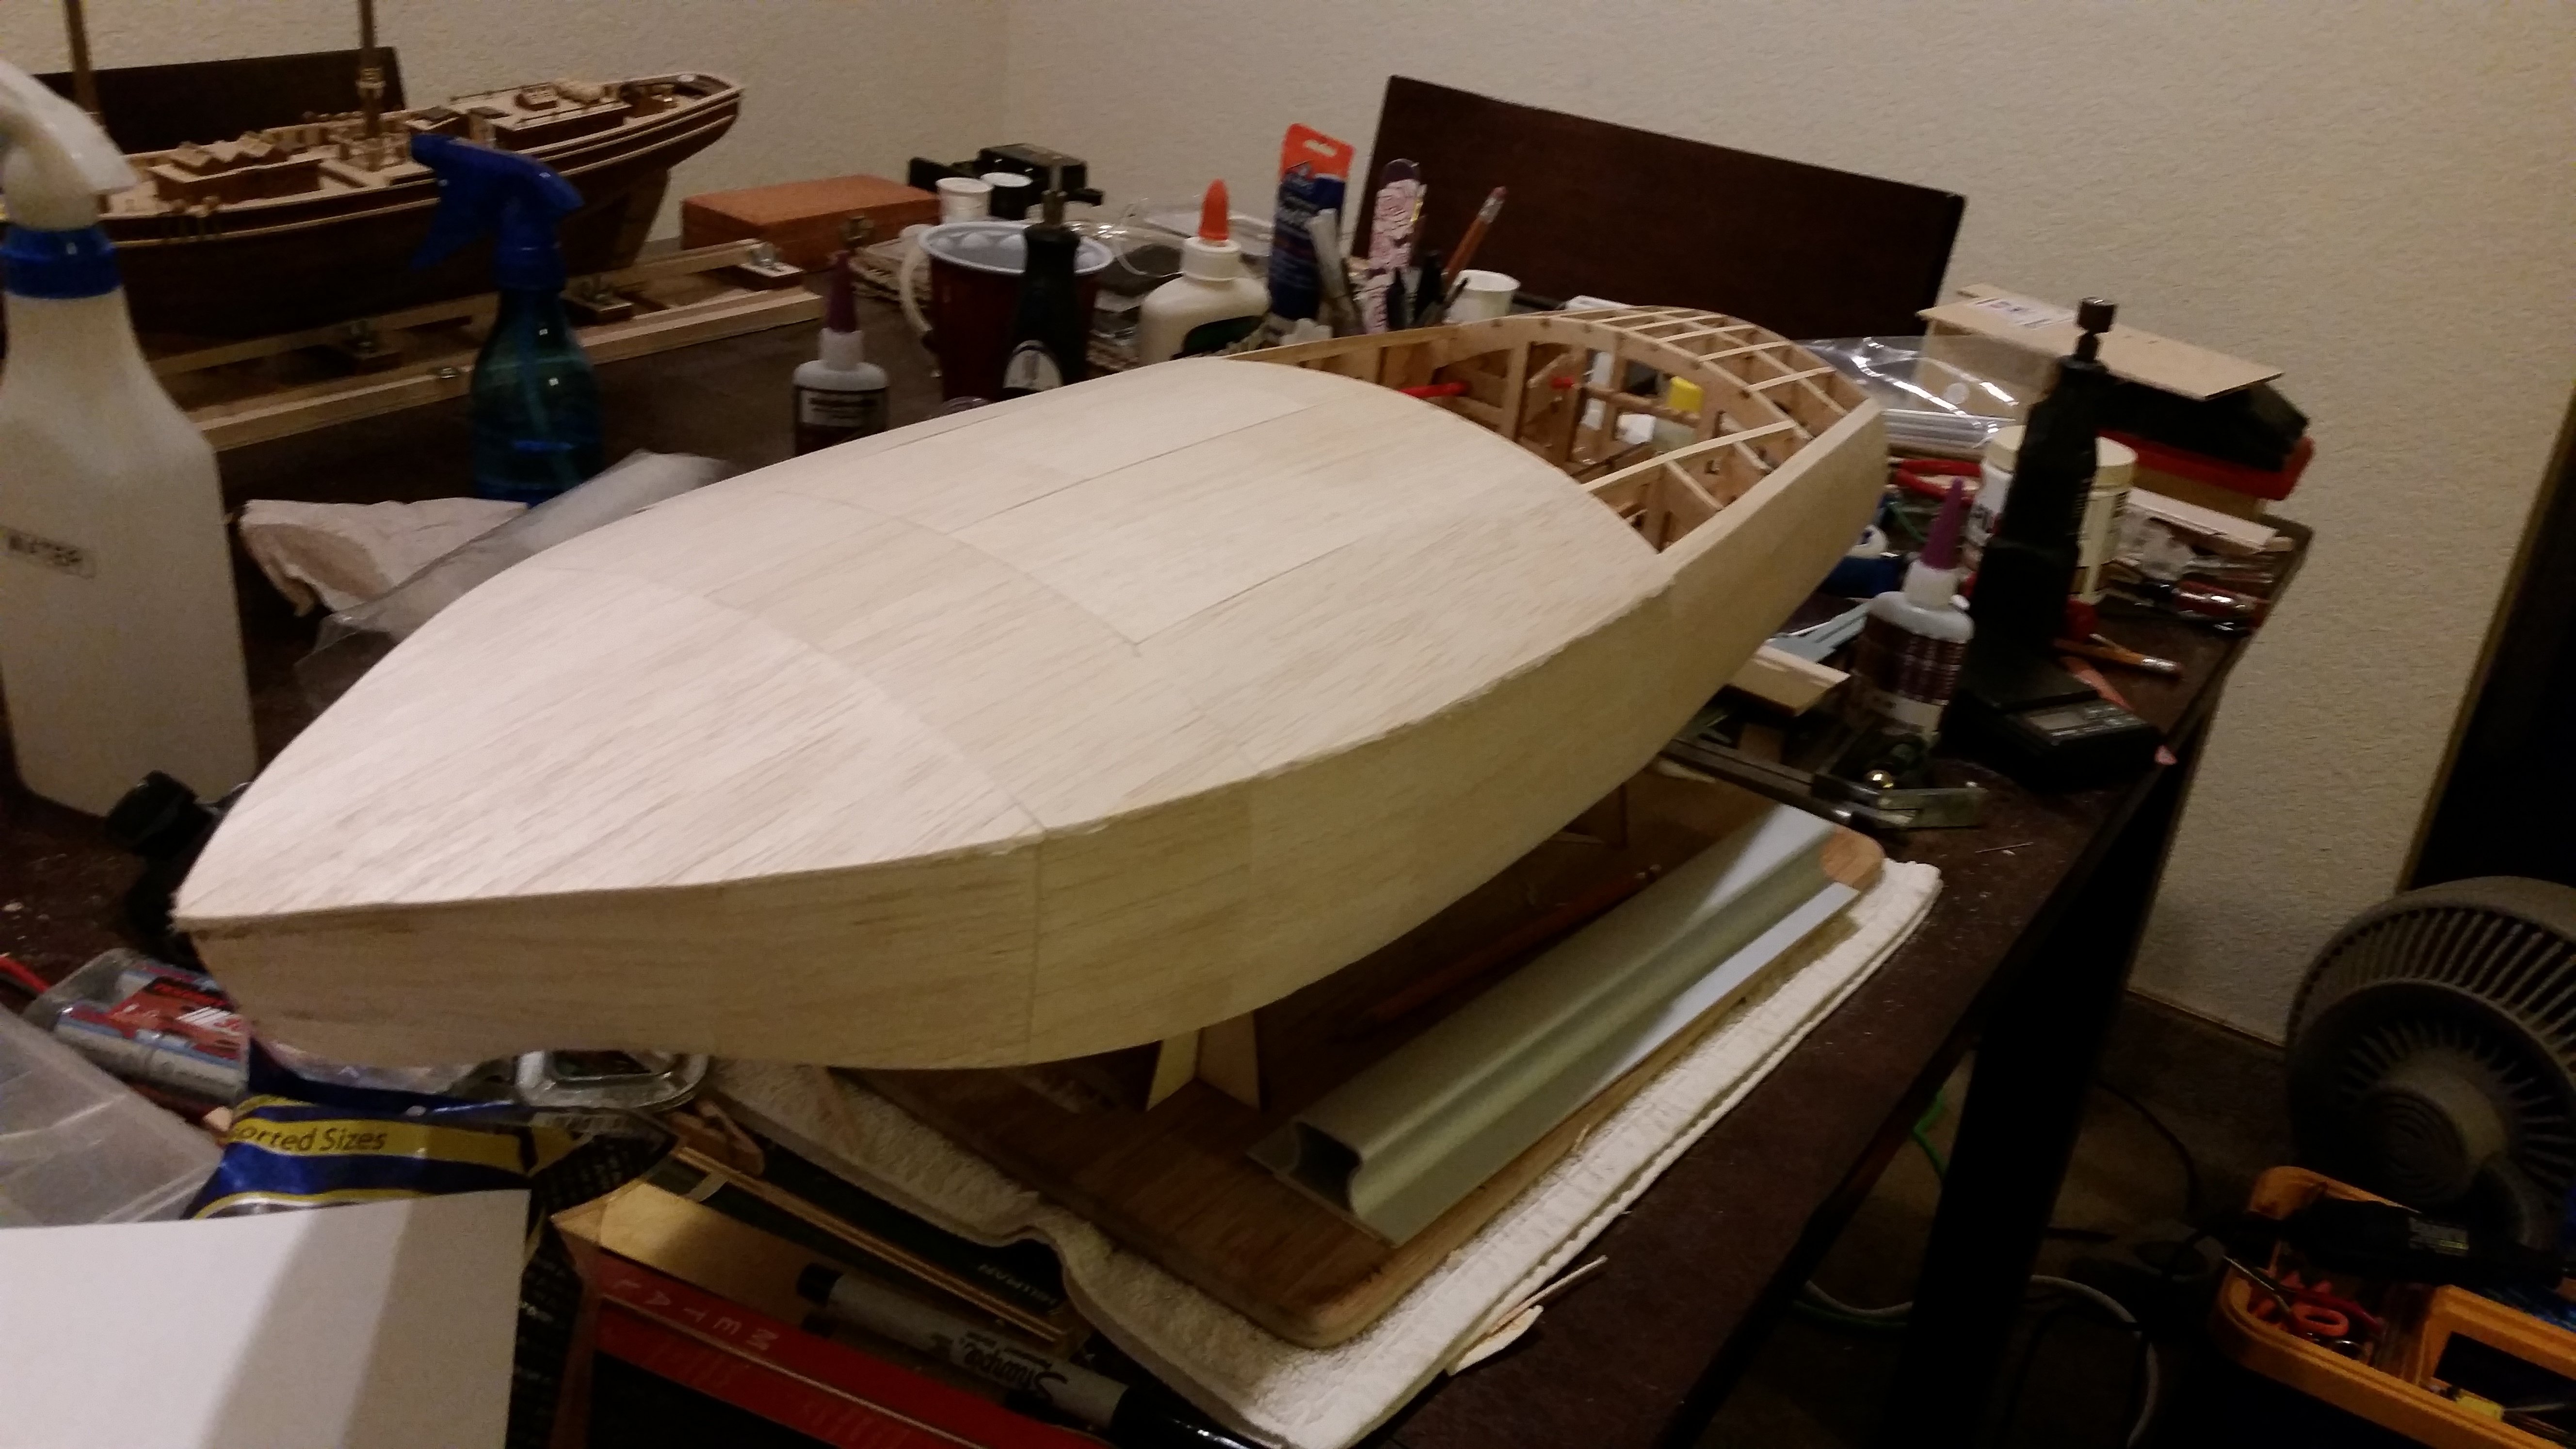
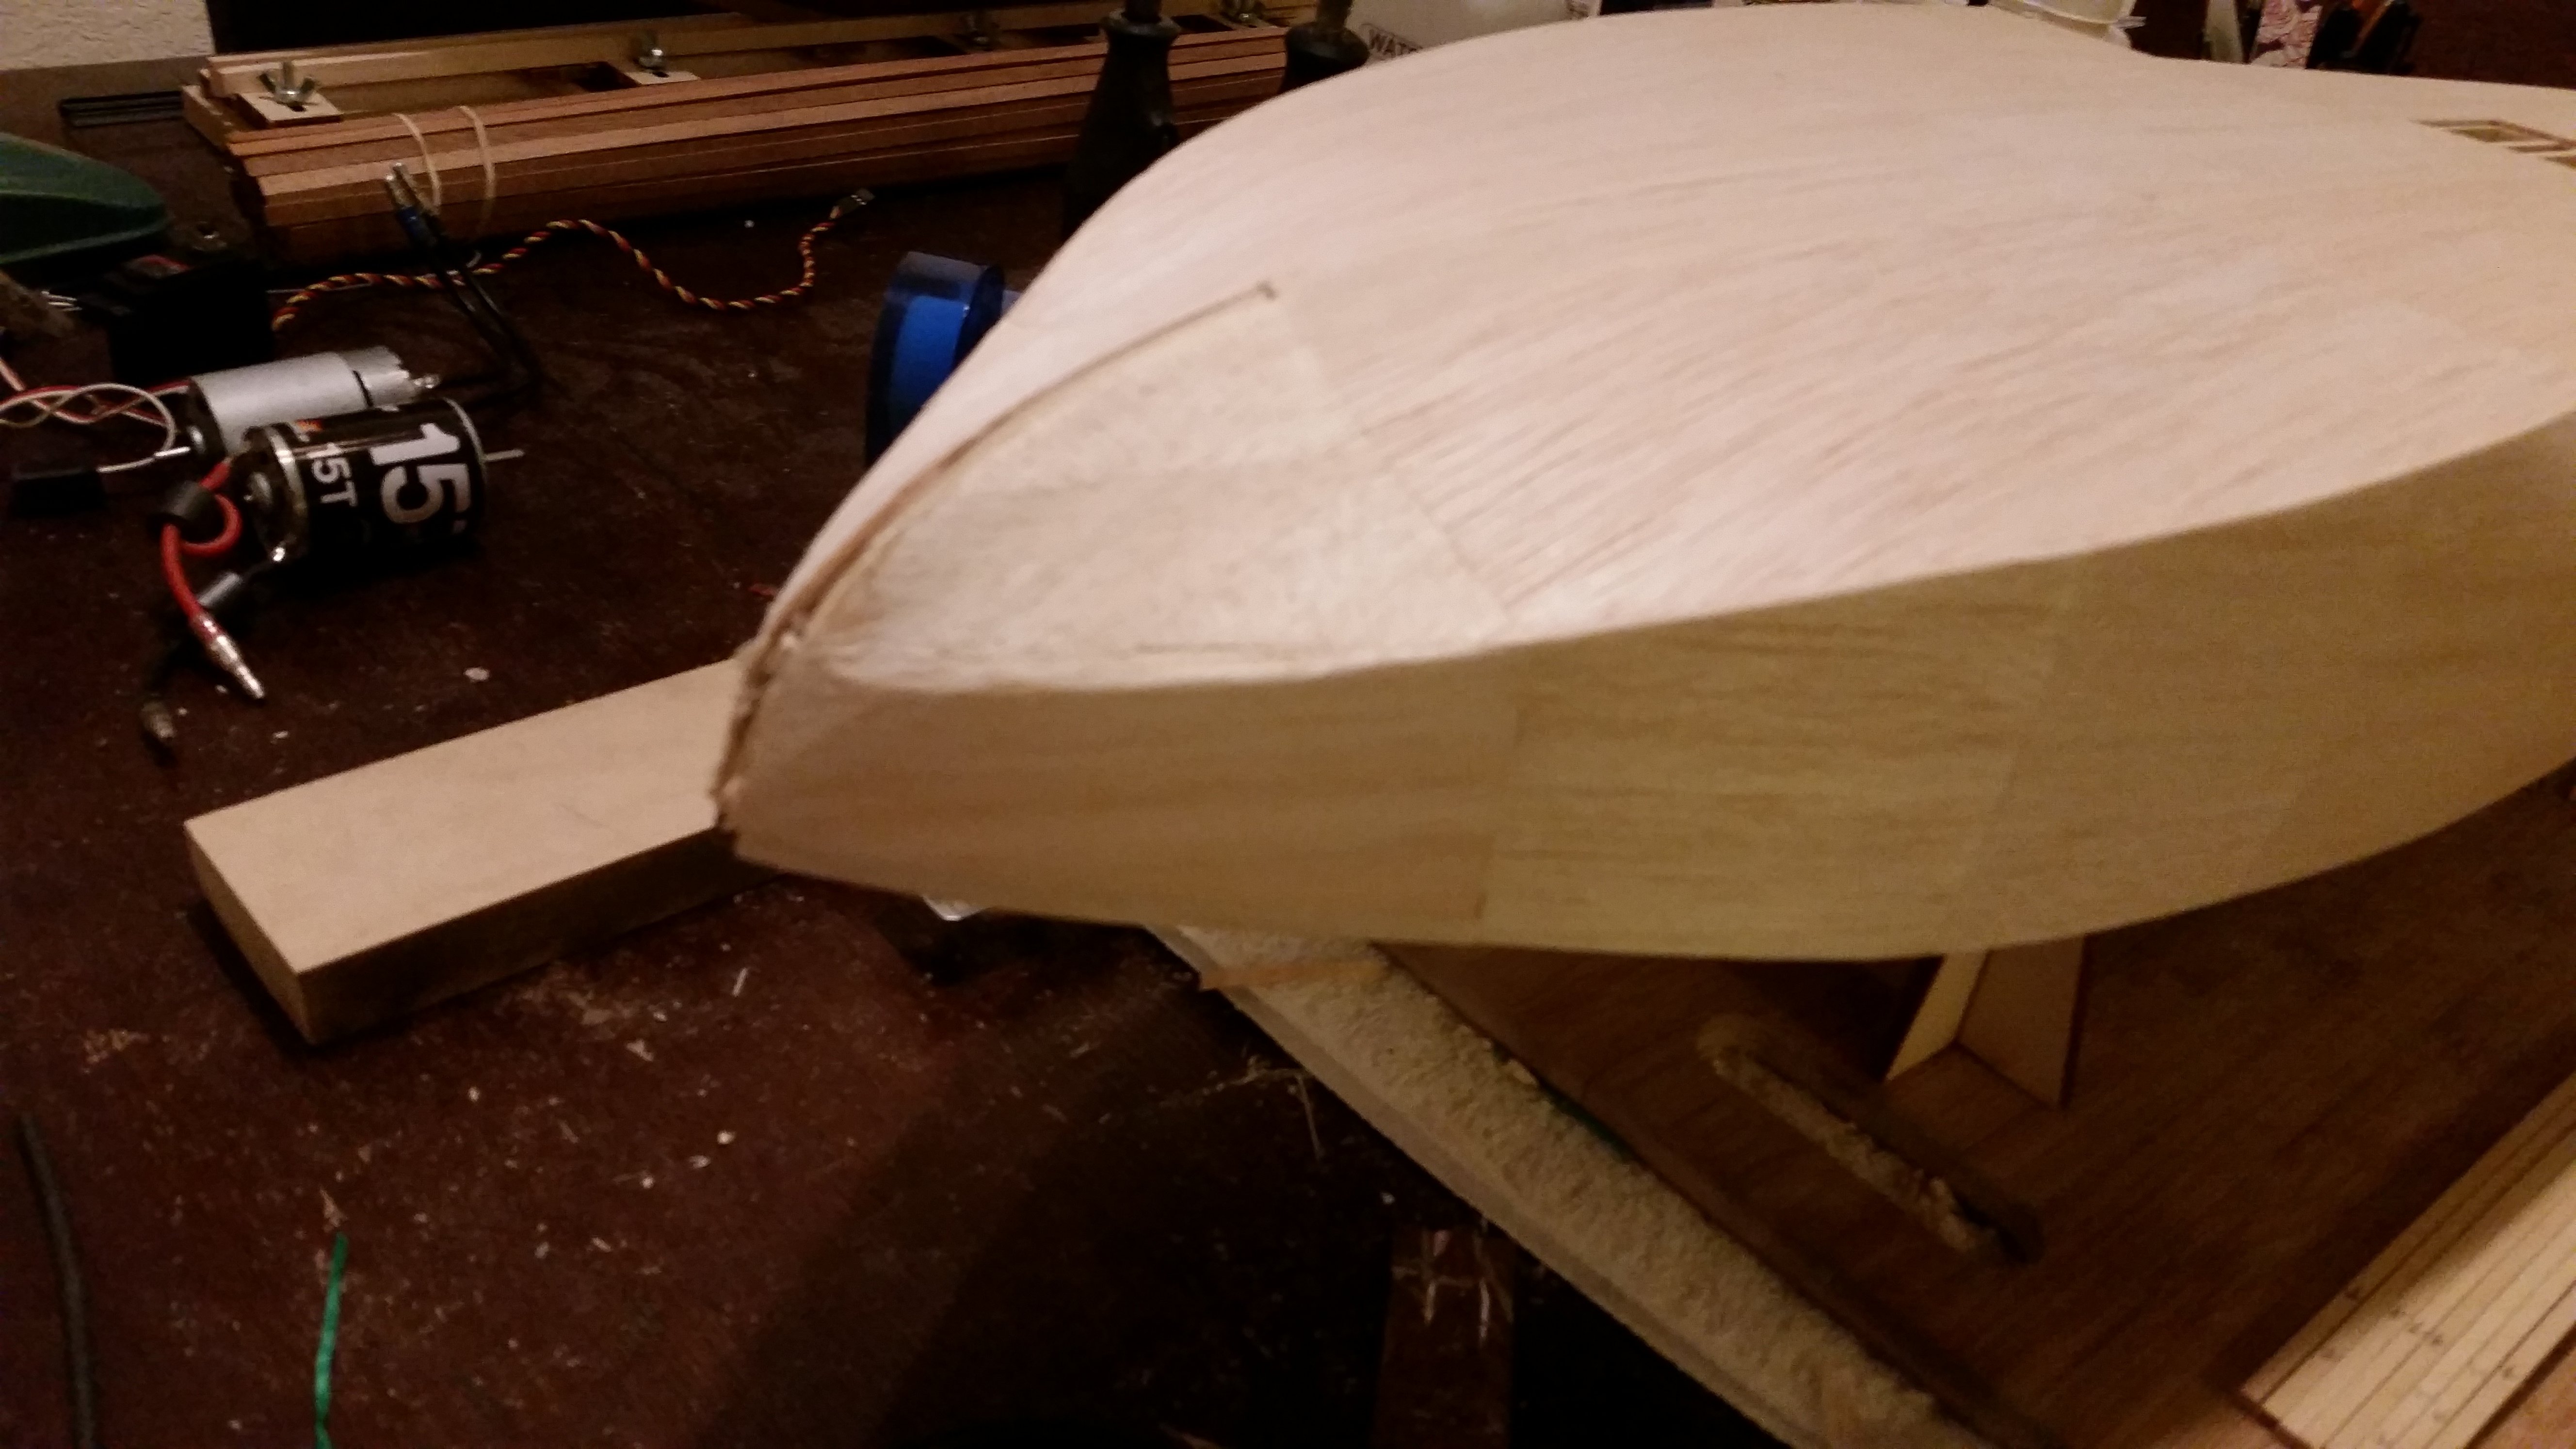
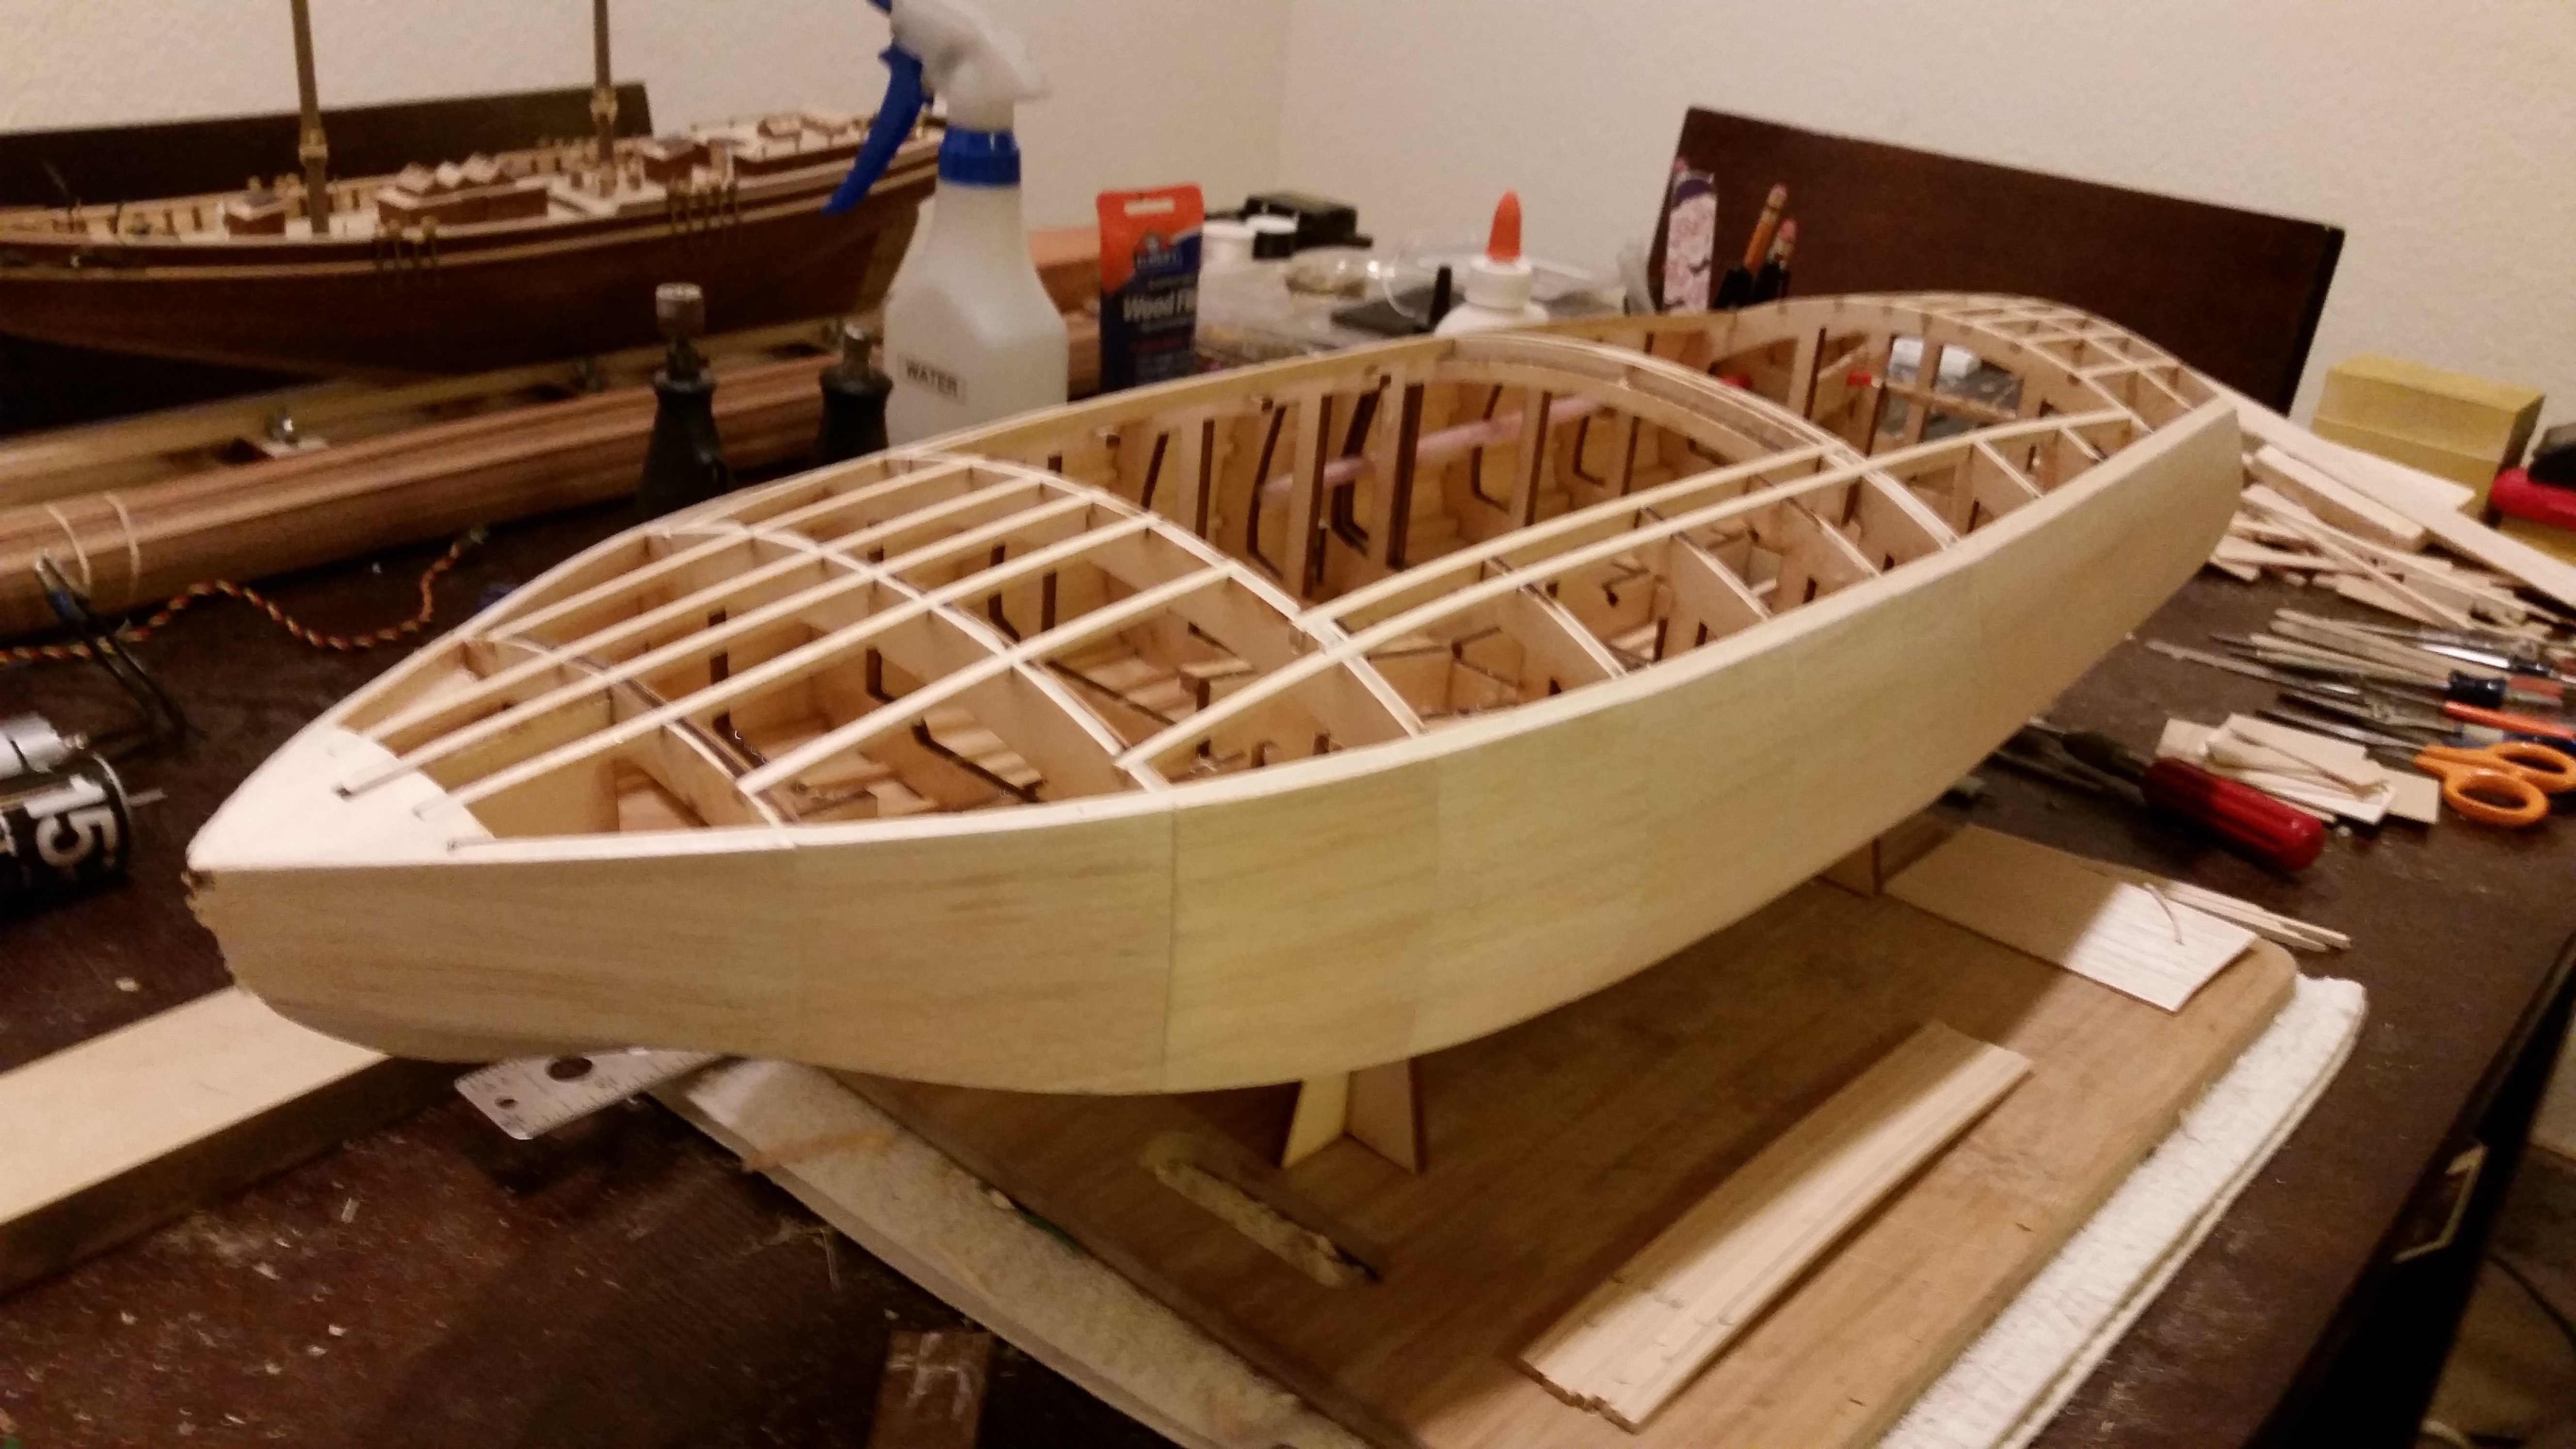
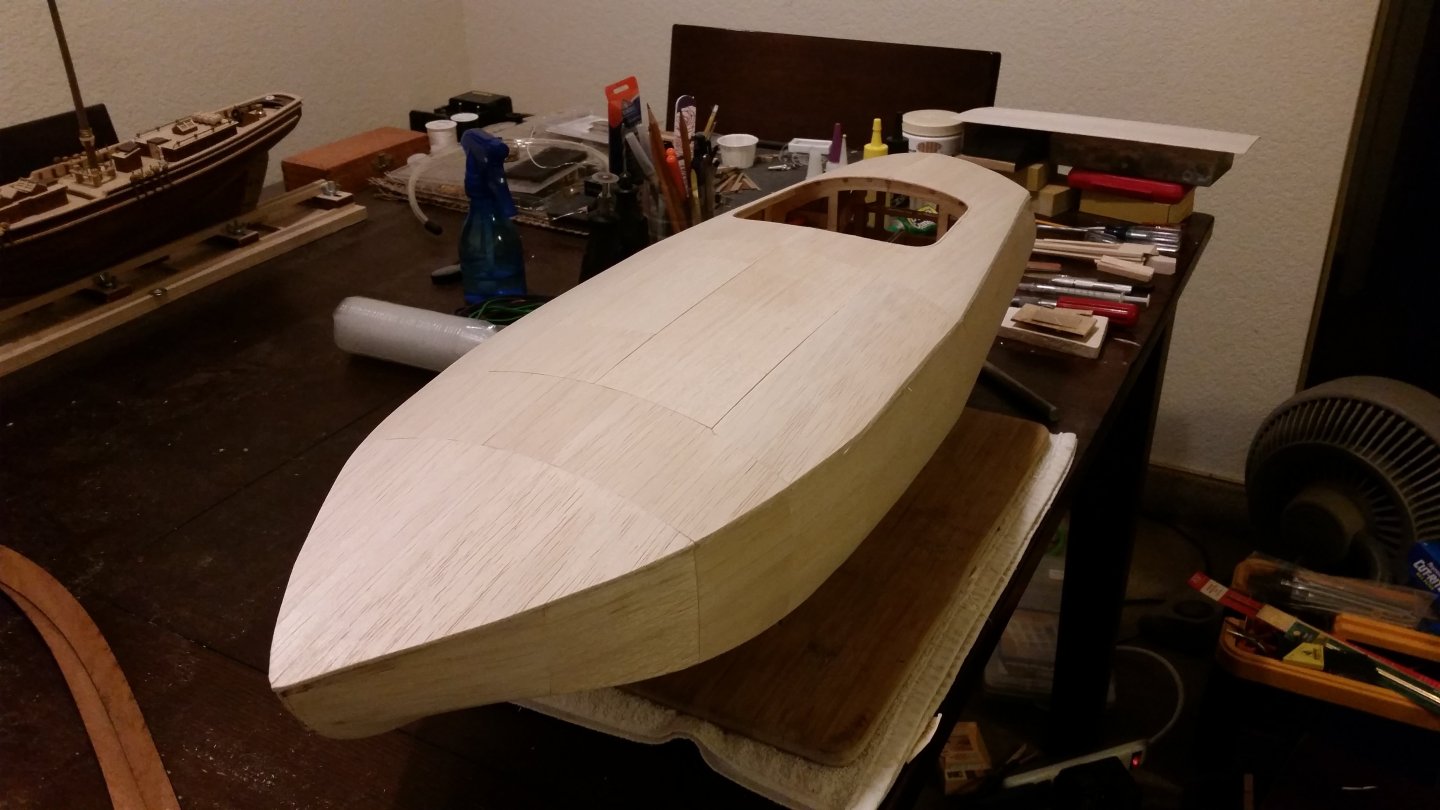
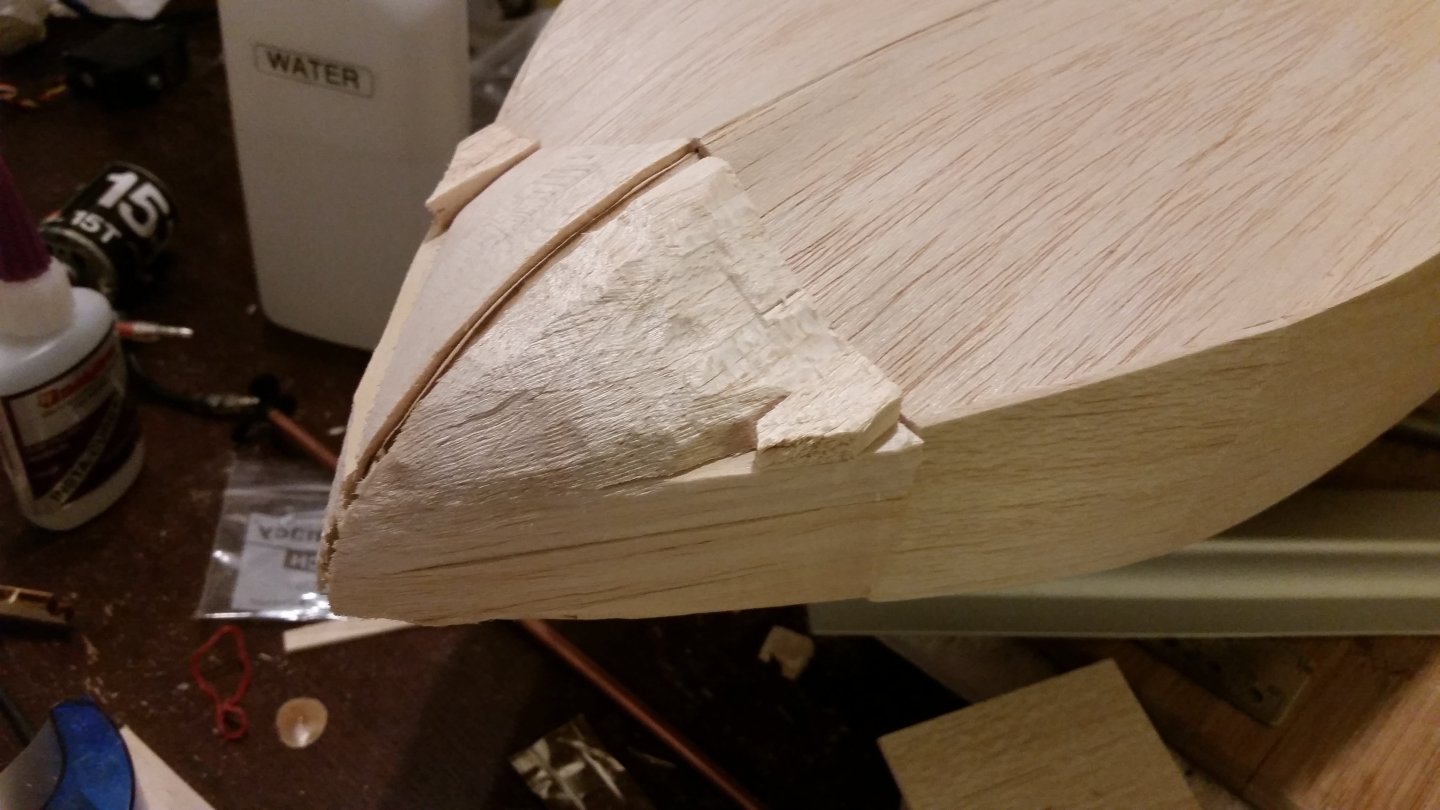
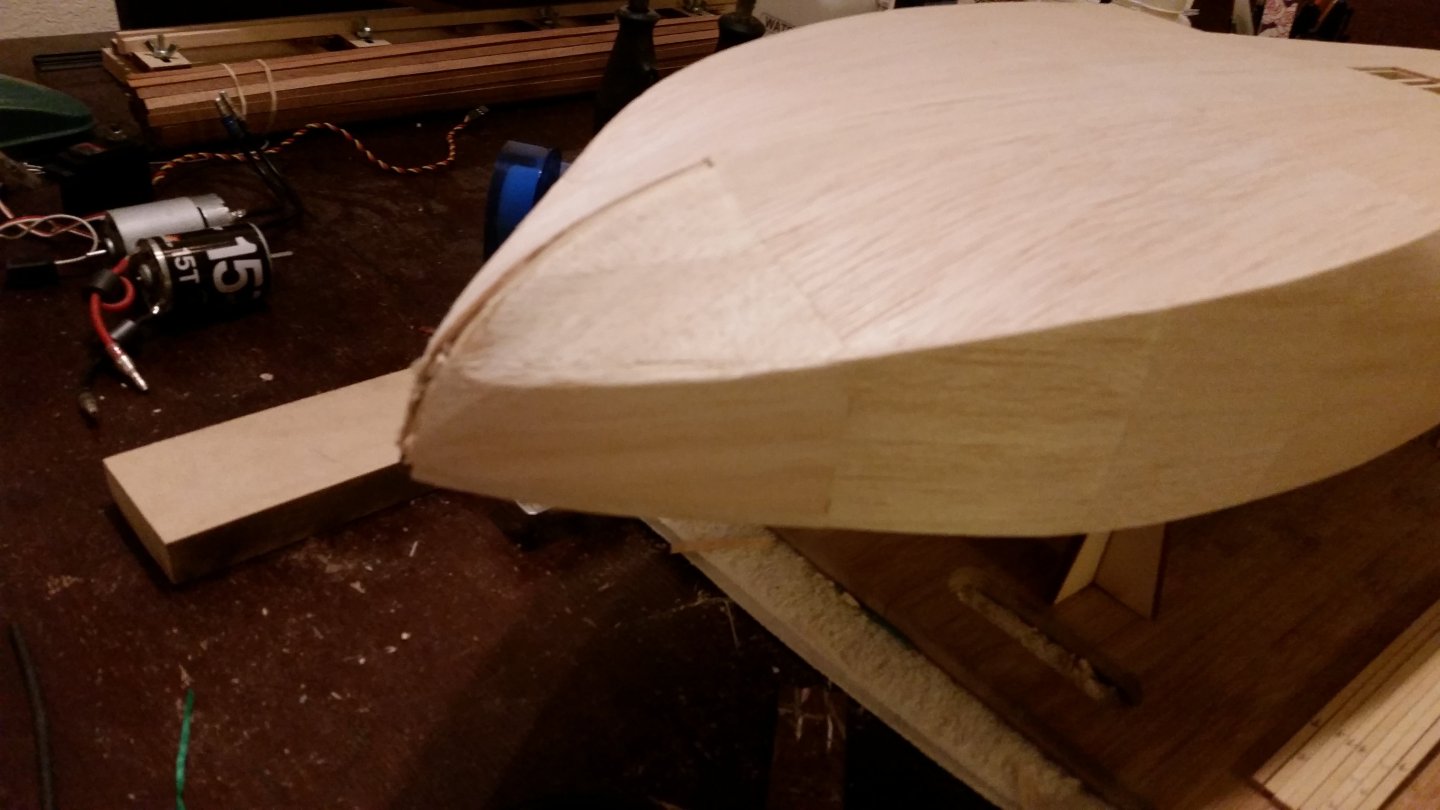
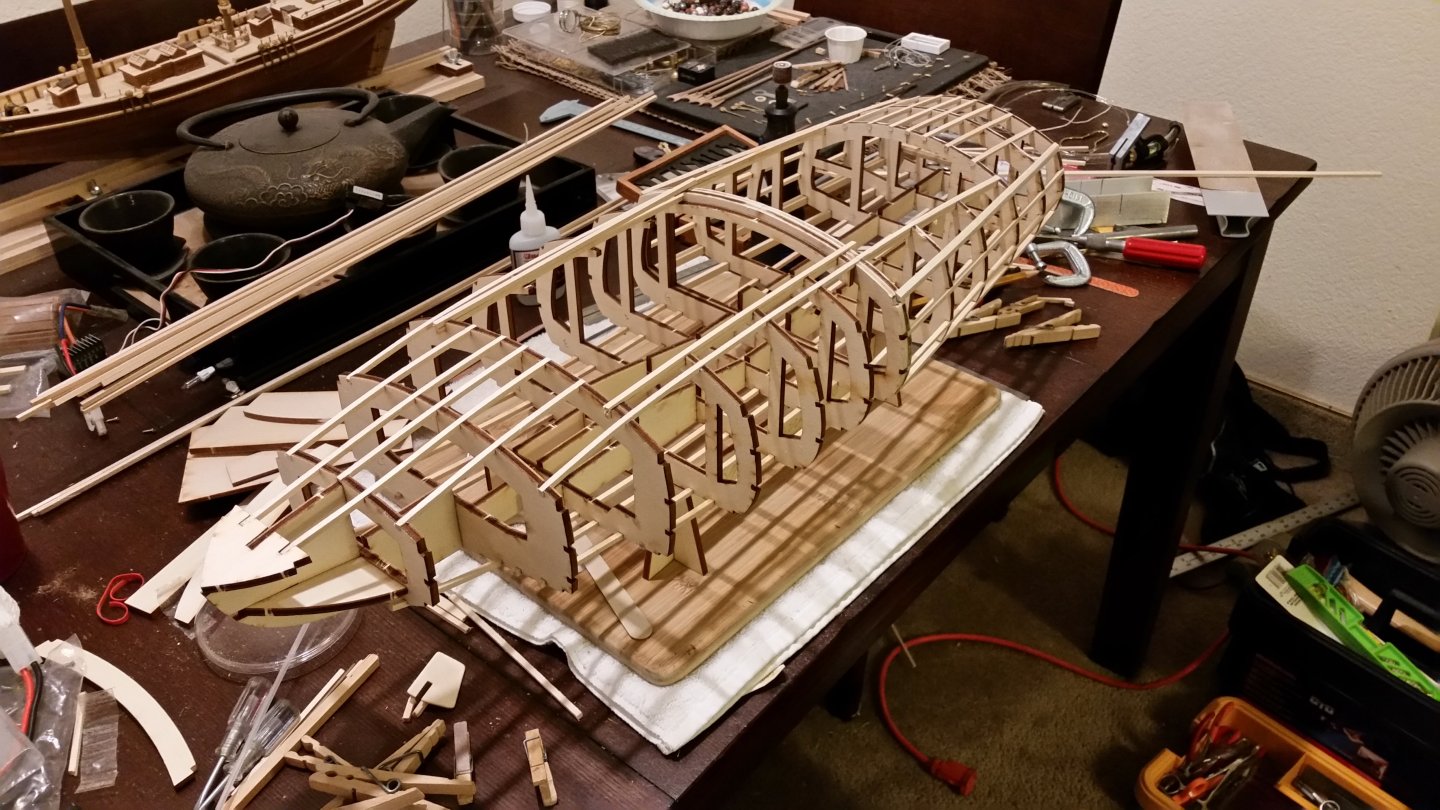
5-2016 The thought of trying to make a decent planking job by just gluing to stringers and frames gave me a lot of anxiety so I decided, like many others who have built this kit, to sheet the whole thing in balsa so I have an even surface to plank to. Since the bow is such a compound surface I ended up using balsa blocks carved to shape. I sheeted the bottom and sides first because I plan on epoxying the inside of the boat.


- 32 replies
-
- 2
-
-
- Model Shipways
- Miss Adventure
- (and 2 more)
-
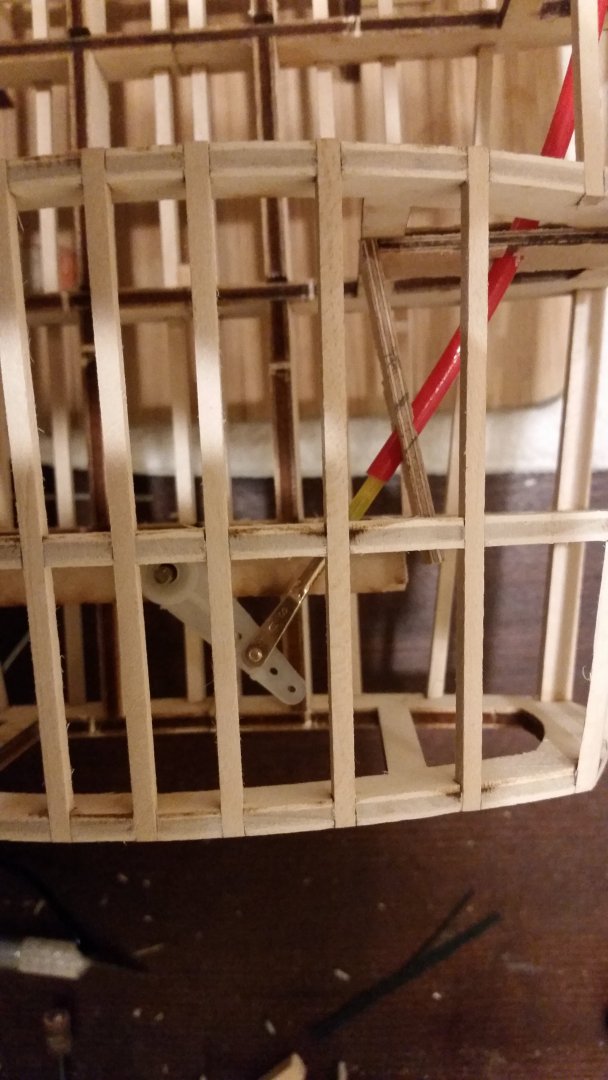
5-14-2016 I figure now is the time to install the pushrod for the rudder since I wont be able to do it easily later. I decided to upgrade to a slop-free Sullivan Gold-n-Rod. I used a nylon armature from my box of old parts.
- 32 replies
-
- 2
-
-
- Model Shipways
- Miss Adventure
- (and 2 more)
-
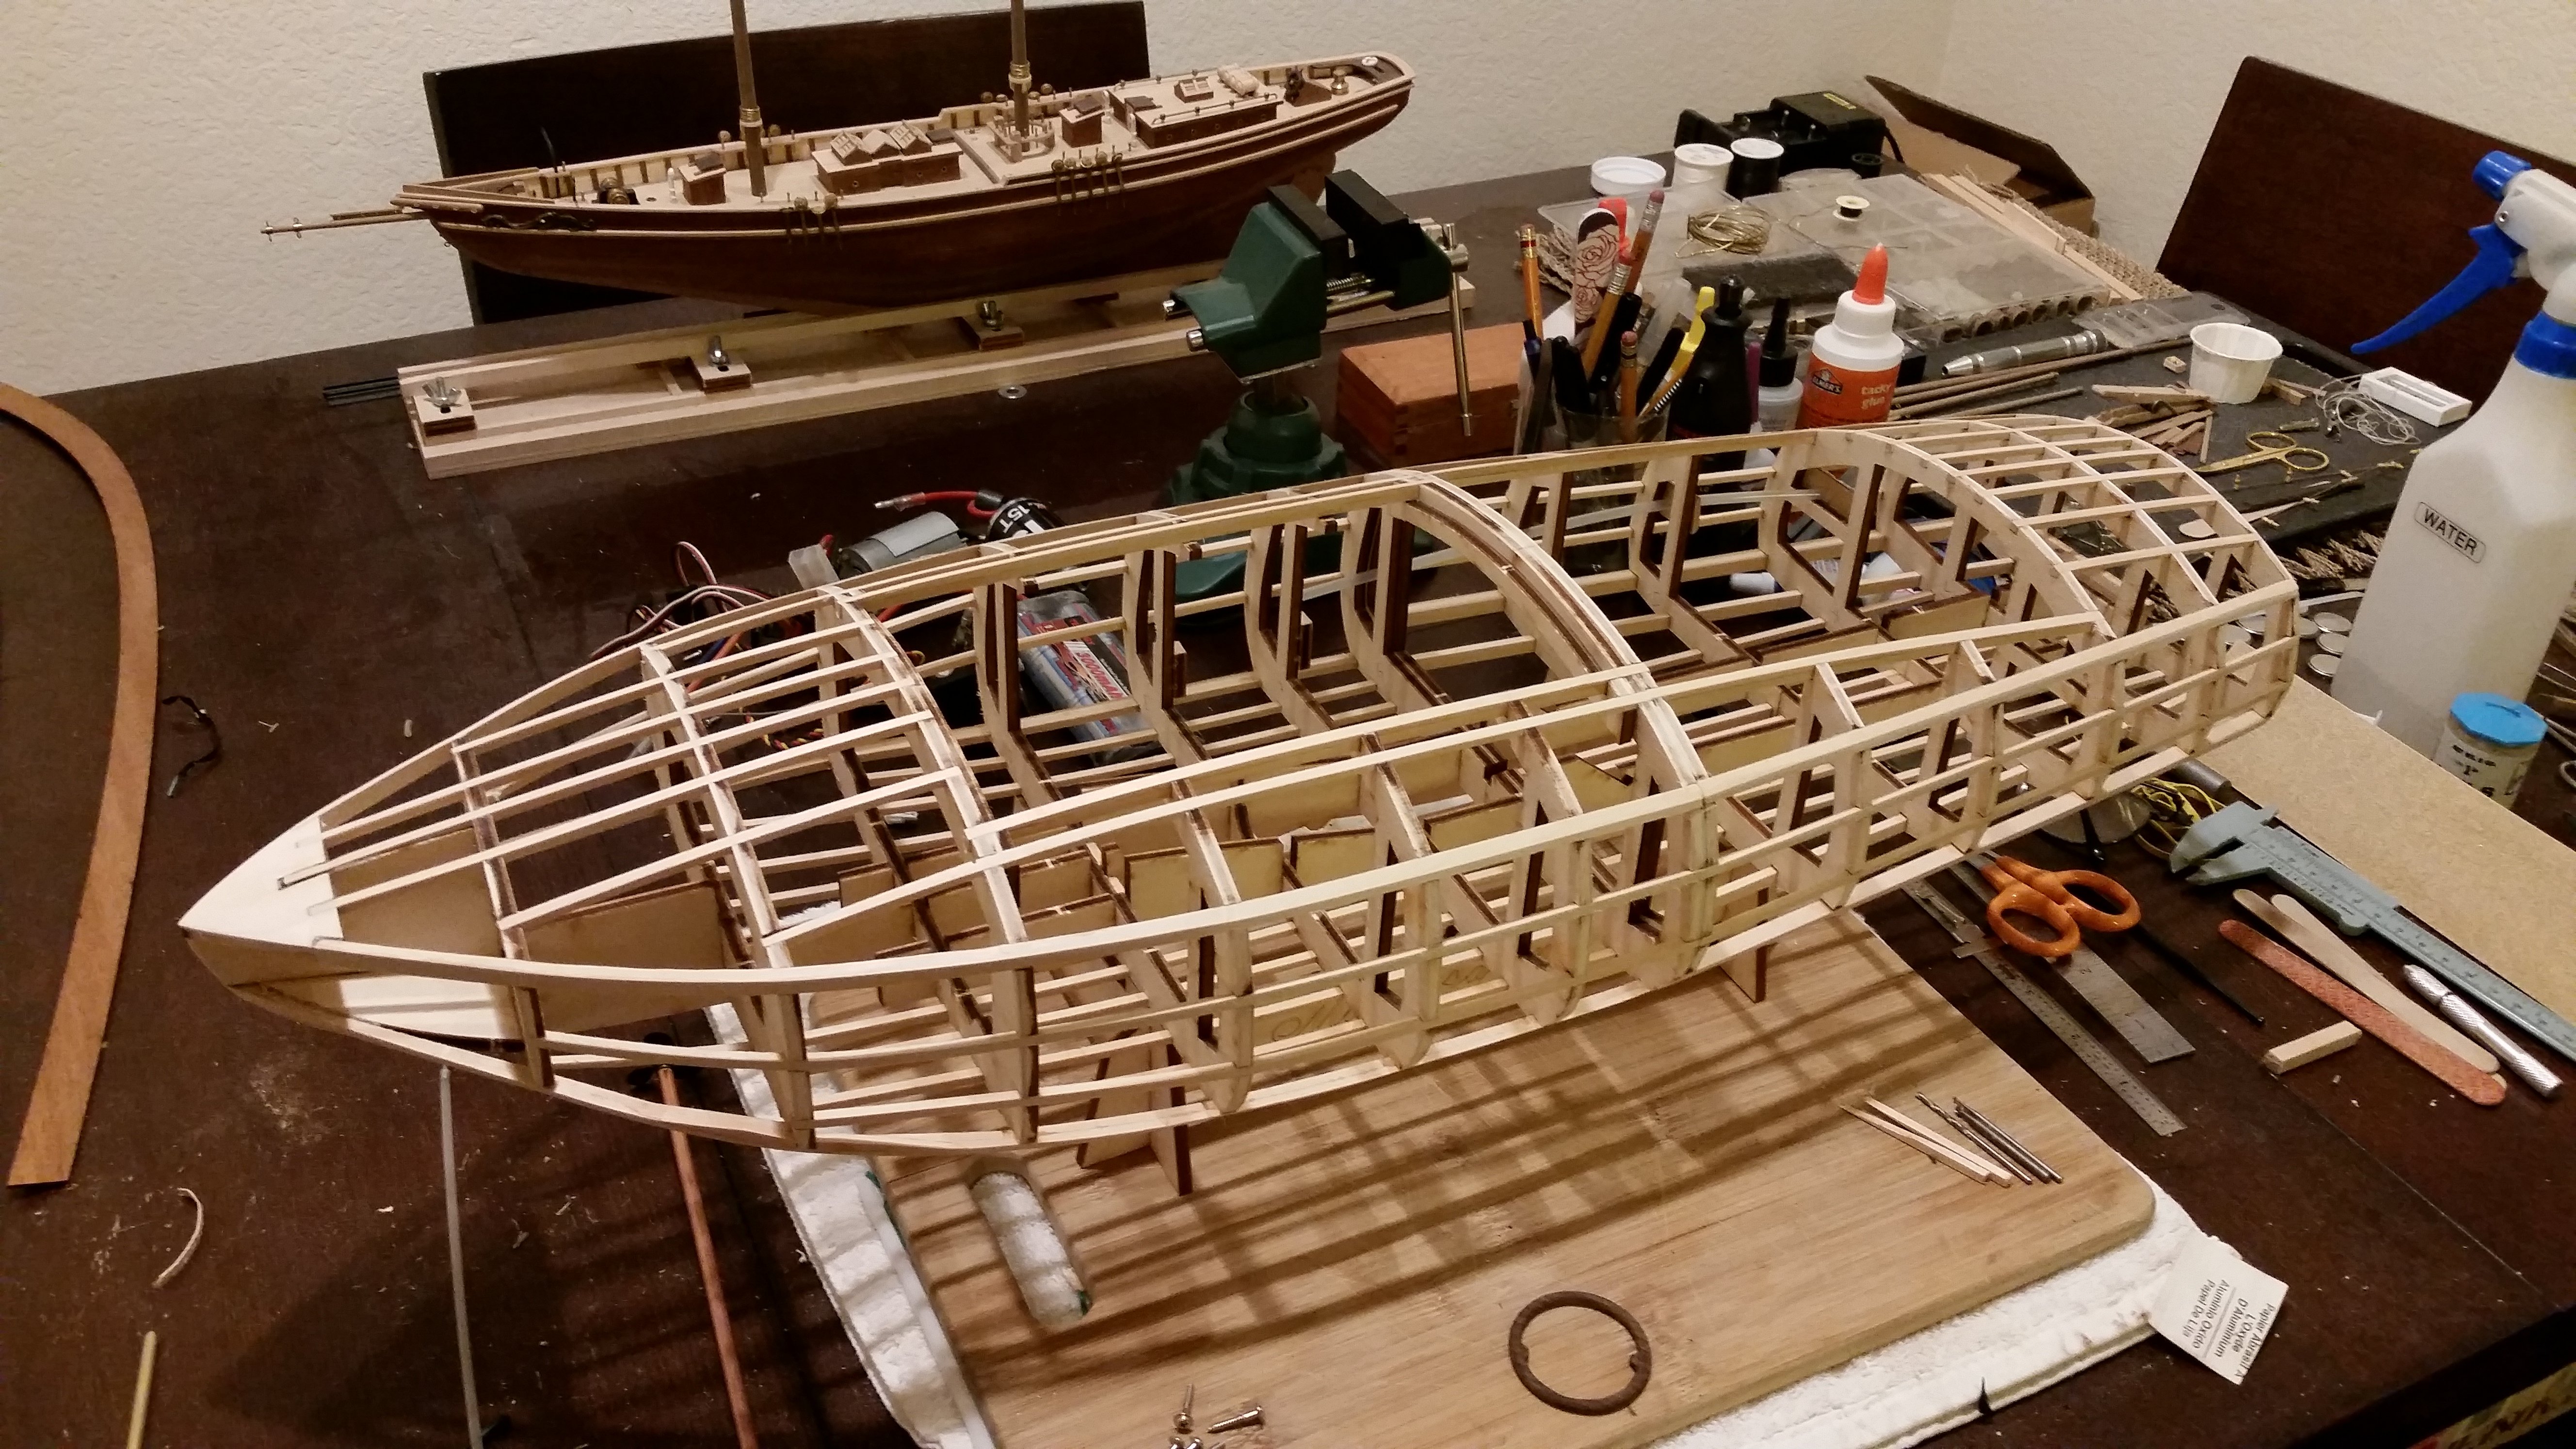
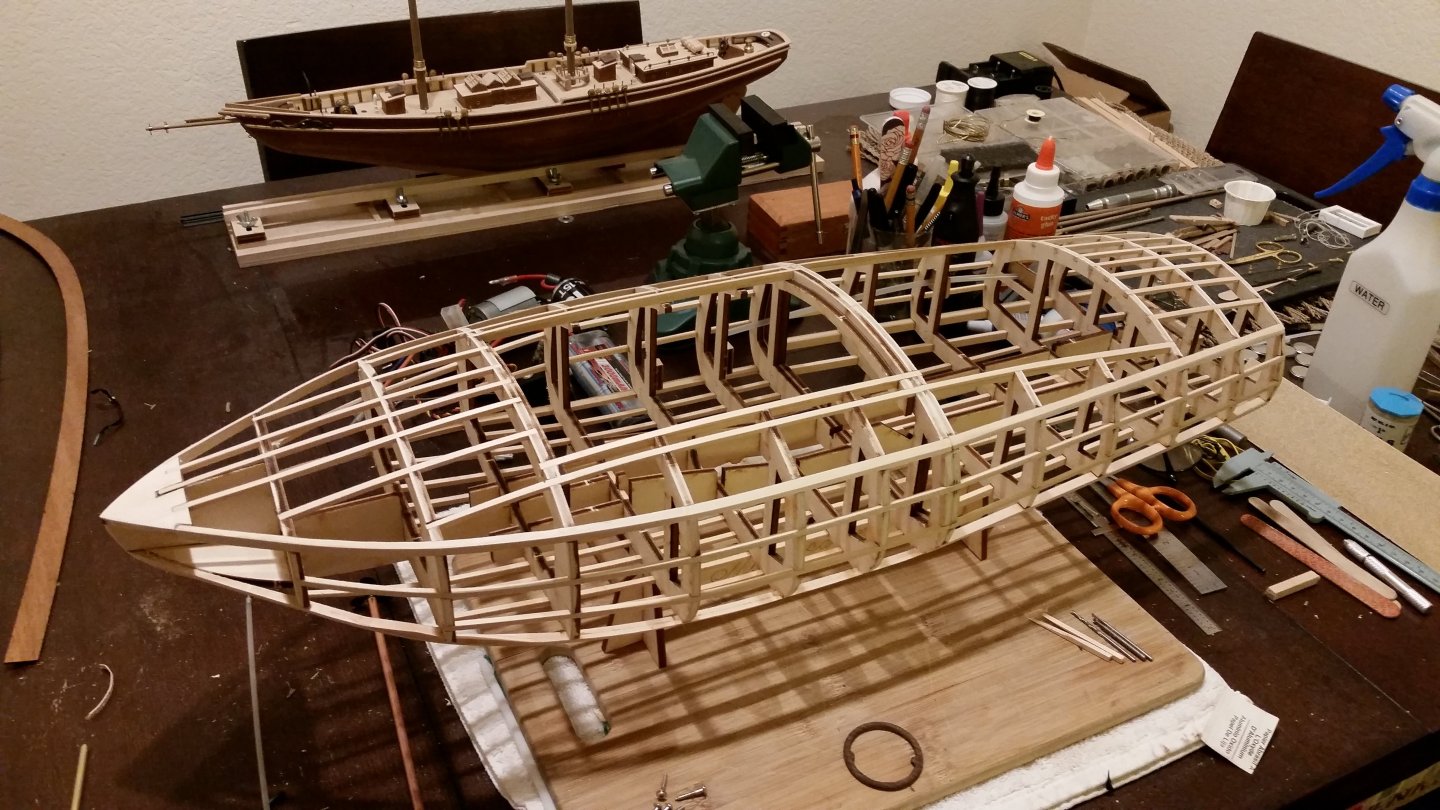
5-14-2016 Frame-up finally done. It went pretty straightforward with no problems. (That's my yet-to-be-rigged Bluenose II in the background)
- 32 replies
-
- 1
-
-
- Model Shipways
- Miss Adventure
- (and 2 more)
-
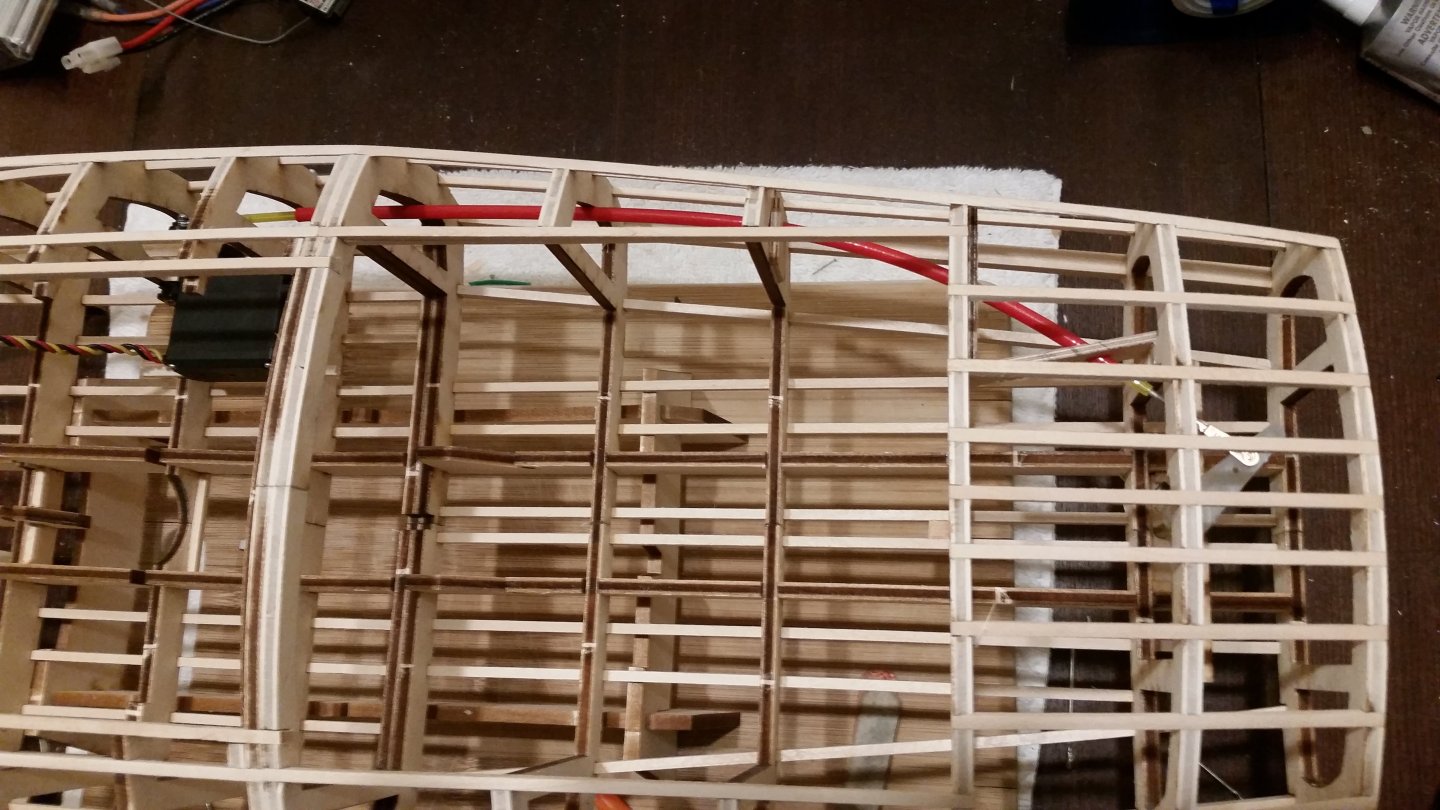
I am finally getting around to making this build log. I started this kit in 2016 and since then have had long stretches of time of not working on it. I am finally near to completion so I thought it was time to share my experience. I will be posting the actual dates taken from the meta data from my photos. I have done a moderate amount of kit bashing to this kit since I felt some things needed improving. 5-9-2016 Frame-up mostly done. It's a good idea to bend the stringers before you glue them on as not to create tension that can warp the frame
- 32 replies
-
- 1
-
-
- Model Shipways
- Miss Adventure
- (and 2 more)