


RadMan
-
Posts
79 -
Joined
-
Last visited
Content Type
Profiles
Forums
Gallery
Events
Posts posted by RadMan
-
-
Whew... time to paint now.
-
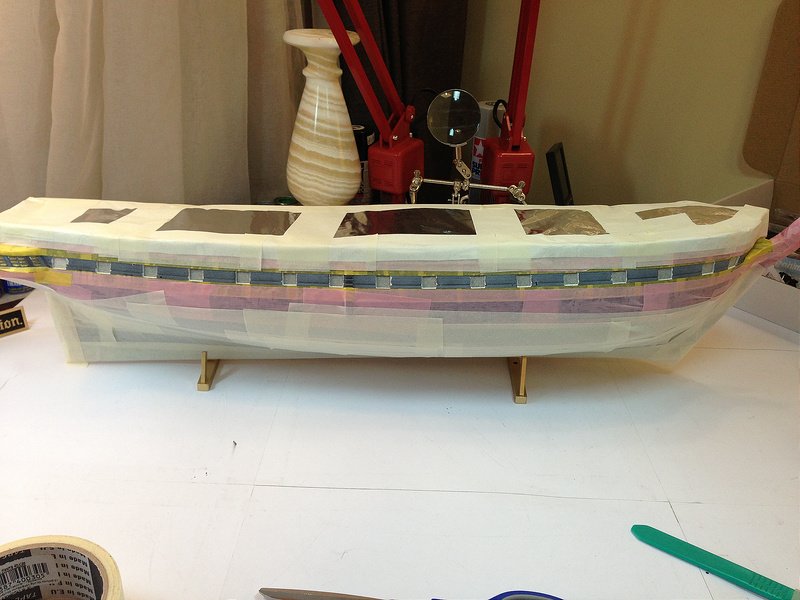
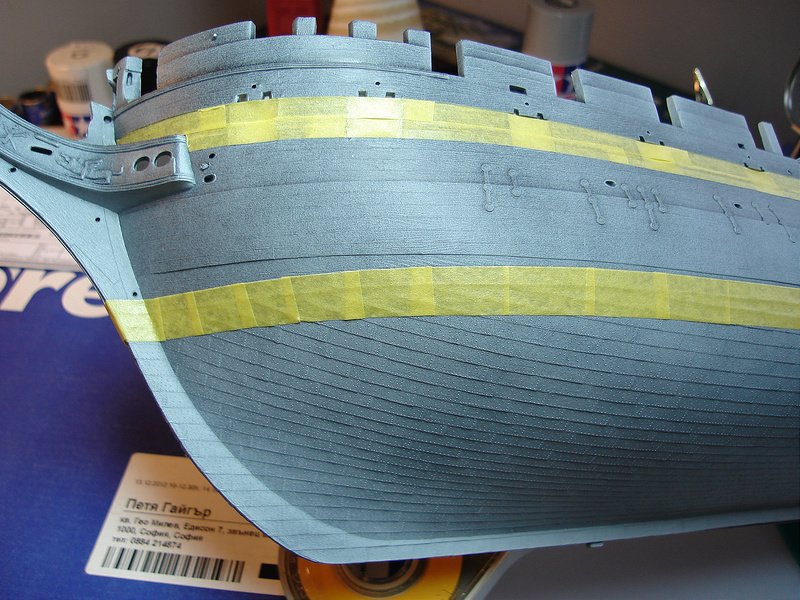
The white stripe:
I have spent way, way, way too much time taping the sides of the hull. The curves around the aft windows were especially hard to tape. Even when I think I got it right, the next day, the tape would lift...ugh! I started with Tamiya tape, then I completely taped off the rest of the hull as well as the interior cannon door windows, to be sure that the white spray paint only goes where its suppose to.
We will soon see whether it was worth it.
-
March 23, 2012
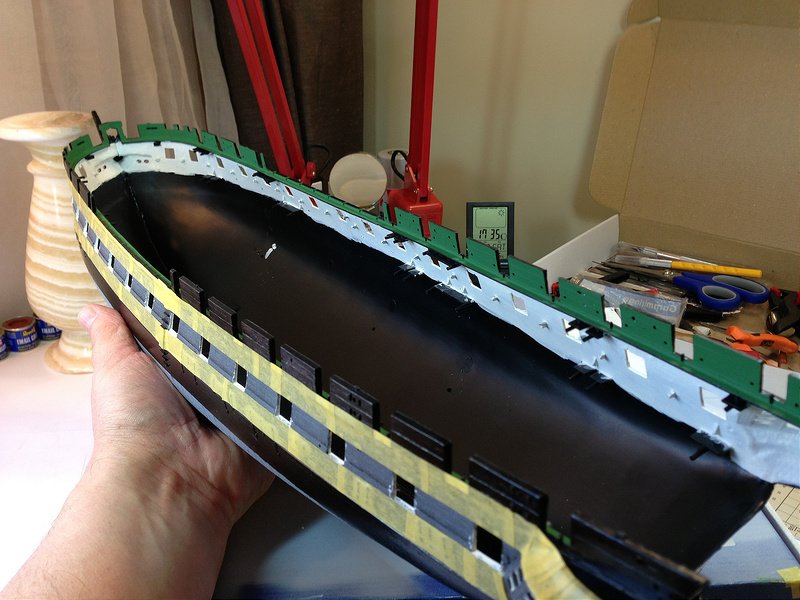
The interior white and green is finished. Starting prep for painting the white stripe on the exterior. Note: I have not painted the copper hull yet because I knew I'd be handling the ship a lot and didn't want any fingerprints or scrapes on the paint. I will probably paint it after the white stripe is finished. I will paint it in parallel with the AndyMech method of wood-graining the gun deck.
-
March 23, 2013
After regrouping, I decided to experiment with different brush heads. I also cut the brush handles short so I could maneuver my hand better inside the ship. I also thinned the white paint, and laid several more coats of white. Seemed like this took forever. I also finished the green bulwarks. The result turned out pretty good considering my start. Also, it is of note that this interior will be mostly out of site...so no harm done.
The flat brush worked best, the big fat round brush was worst (what was i thinking?!?!?!)
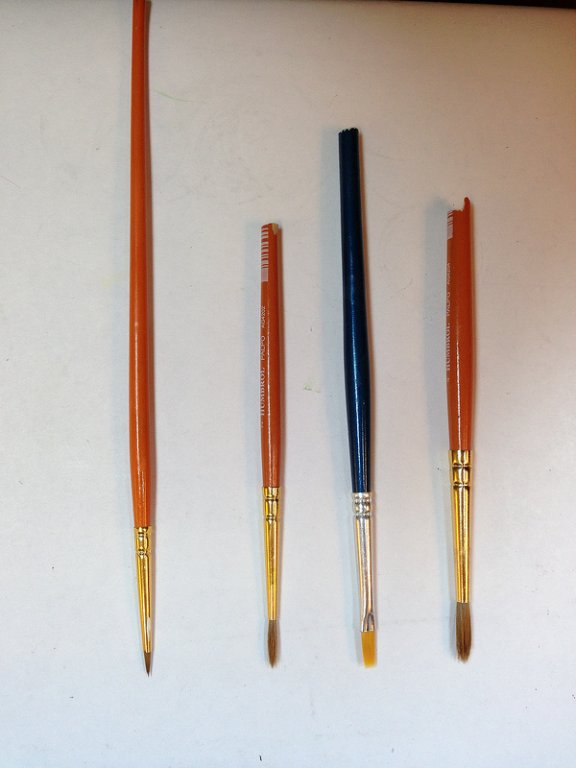
the final result:
-
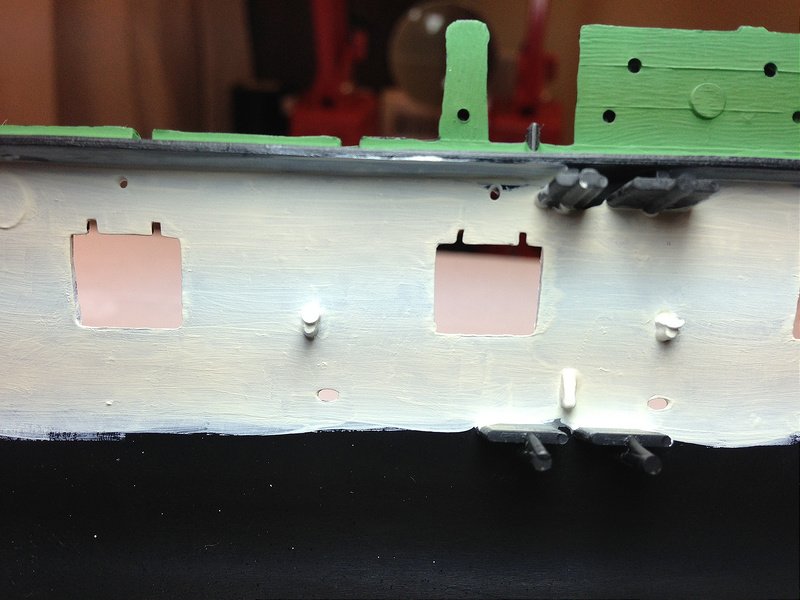
March 13, 2013
I have been in the process of painting the white interior bulkhead for the gun deck. What a PIA! I really should have painted this before cementing the hull together (I noticed that a few guys who are building the Constitution for their second time did exactly that). It was a complete disaster. I should have thinned the white paint more and I should have put on thinner coats...I did neither at first.
Here is my "3rd grader" paint job:
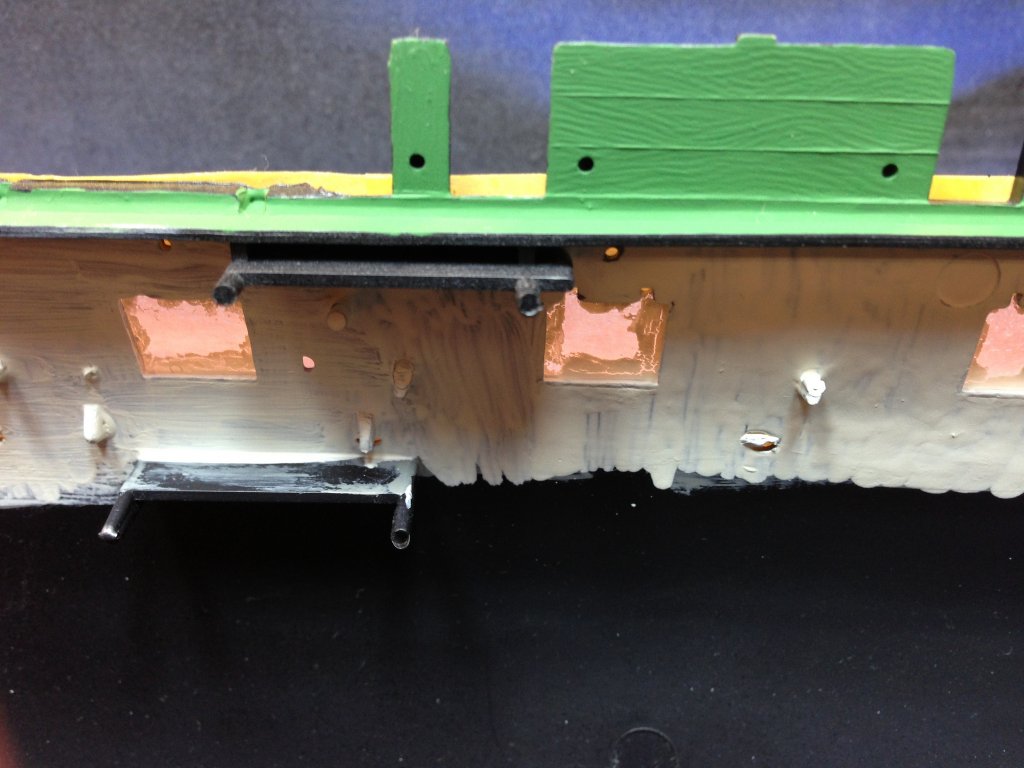
and another view
-
February 19, 2013
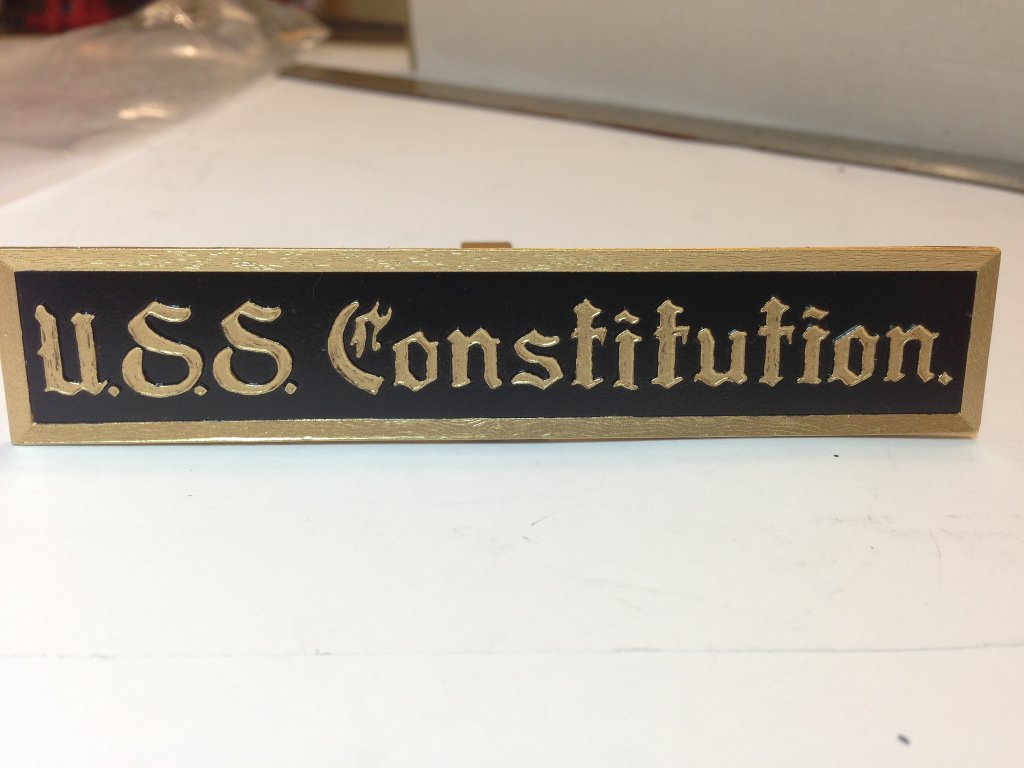
I painted the gold trim and lettering for the ship's placard. The gold enamel is so thick that I had quite a bit of trouble with the fine detail. I tried to thin the paint a bit, but it seems like its not mixing well. I mixed Humbrol enamel thinner with Revell gold enamel paint. I think I just need to use a power mixer, so next time I'll put a small wire in my cordless drill, bend the wire a bit, and mix. I think the gold will need to be much thinner to paint the gold trim on the ship and gallery.
I need to do some touch-up on the "U" and the "C".
-
Looks like you're getting ready to glue the gallery to the rest of the stern. When I dry-fit mine, the alignment doesn't look good. I have quite a good gap where the bottom of the gallery fits to the two halves of the hull. Did you have a similar fit issue? I think I may just need to do some aggressive trimming, still it doesn't look like it will be easy, because its not obvious why it isn't fitting. I will take some photos later.
-
Hard to believe you got that detail with a marker. Nicely done. Though you have inspired me a bit... but instead of painting or using a marker, I may try to printout a small half-naked photo of my wife on nice photo paper and glue it over the existing frames. LOL, I hope my wife isn't reading this....its just an idea at this moment.
-
btw, how did you do the detail for the framed painting above the couch in the Capt's stateroom? with a microscope? and is that a real mirror I see in there? I am really curious how you are able to do this micro work. Can you explain how you accomplish it?
-
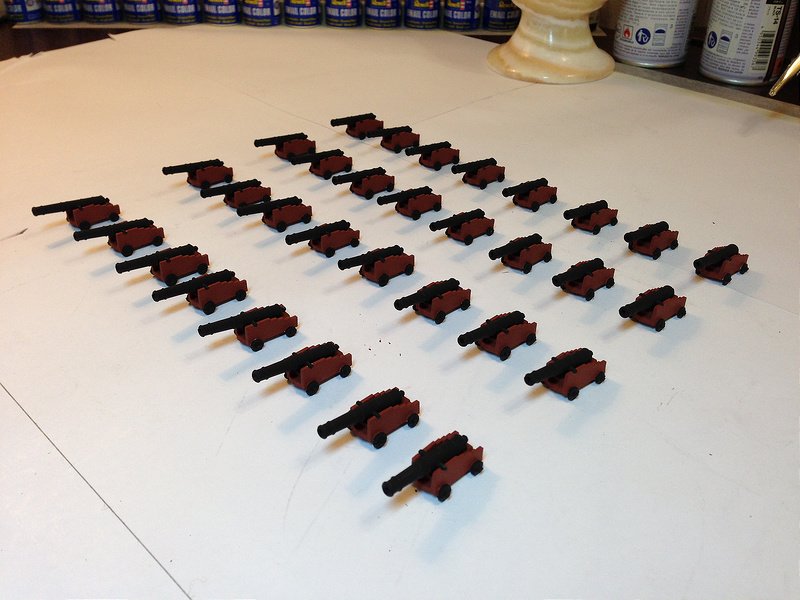
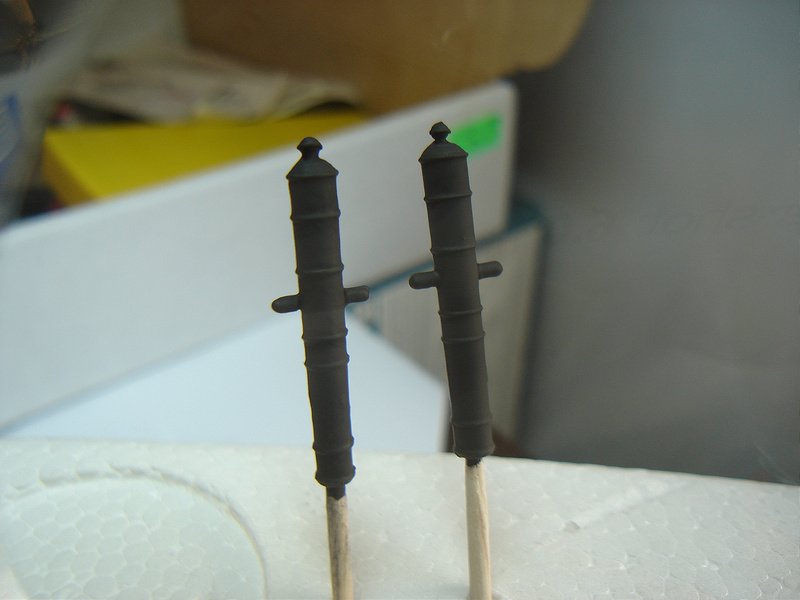
The cannons are now completed. I must say that the cannons lambsbk sent me were superior to the existing ones in my kit. Maybe the US kits are better (I am using a German kit), or if these cannons are from his 1970 kit, maybe they just made stuff better back then.
-
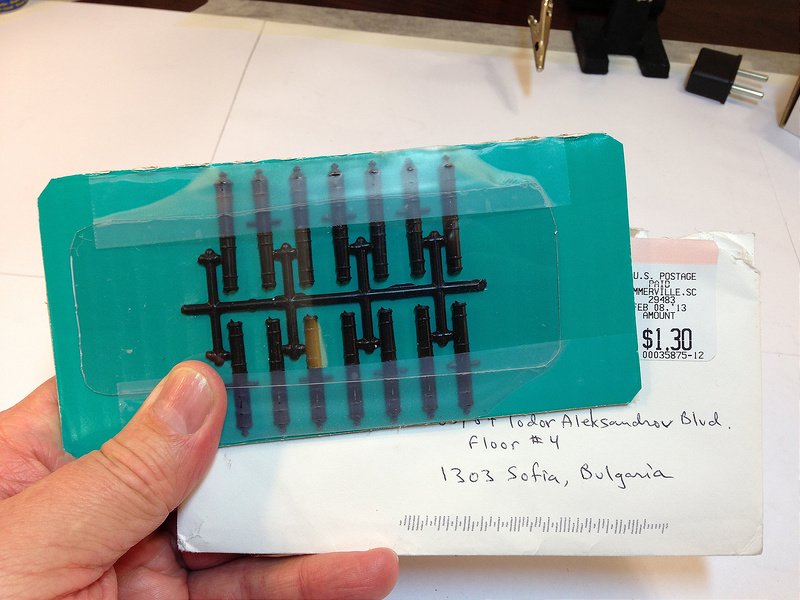
Well, regarding my cannon problem... a member of this forum has graciously come to my rescue. lambsbk, generously sent me 7 new cannons from his extra parts... they arrived to me here in Bulgaria last Monday. Wooo who!!!
How great is this!!!!!!!
(note: the yellow spot in the photo is a mystery...the cannons were in perfect condition)
-
(1) The kit was missing a piece for one of the 33 Gun Deck cannons (I swear I didn't lose it! and yes I knowthere are only 32 on the gun deck and one topside). Anyway, I started with 32.5 cannons.(2) Gluing... there is a pin-and-hole arrangement which are suppose to align the two halves. However, inmany cases they misaligned the halves. I glued several together this way before deciding to just cut off thepin and align the halves myself.(3) Painting...I massively FUBAR'd some of the first cannons I painted. It took me probably 6 cannonsbefore I figured out how to paint them.(4) Un-painting... I decided to use some brush cleaner and wipe off the botched paint job on my first 6cannons... to my HORROR, the brush cleaner started to melt the plastic and broke off one of the trunions!!(5) Re-painting: I repainted the 3 cannons I doused with brush cleaner, they still look crappy. I put a secondcoatof black on the other 3...they too look crappy.(6) Conclusion: I will hide the crappy cannons on one side of the ship.The photo below shows the difference between the 'good' (right) and 'bad' (left) cannons (sorry for photoquality because it really doesn't show how badly I painted the (left) cannon). Note on the left cannon howthe paint fills in the area between the knob and the base of the breech... its suppose to be round but mineforms a 45 degree angle... oh well.... what to do. Any suggestions??
-
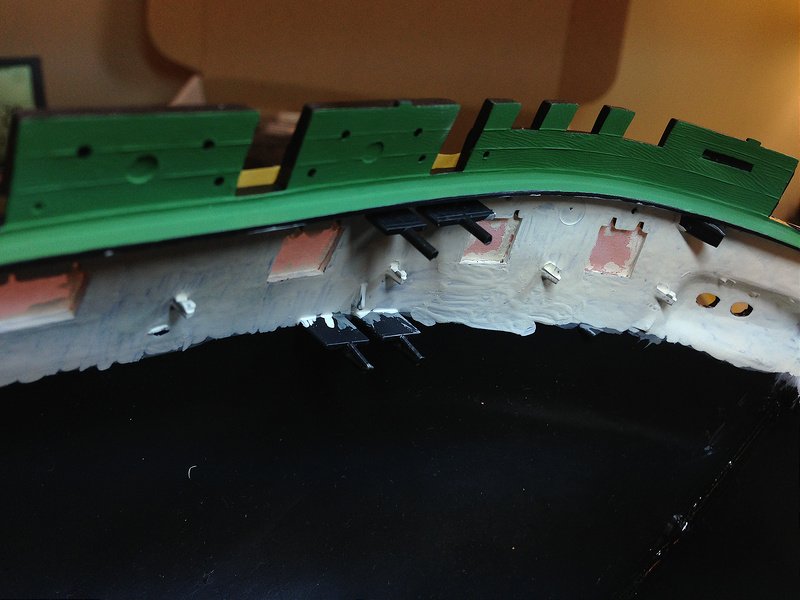
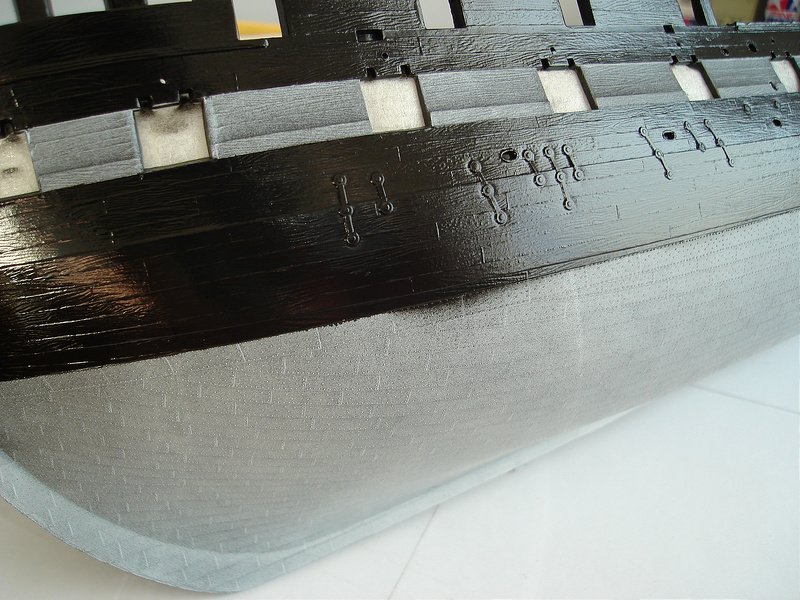
bleed-thru.... happened in a couple of spots, but obviously not a problem because I will paint copper overthis.
-
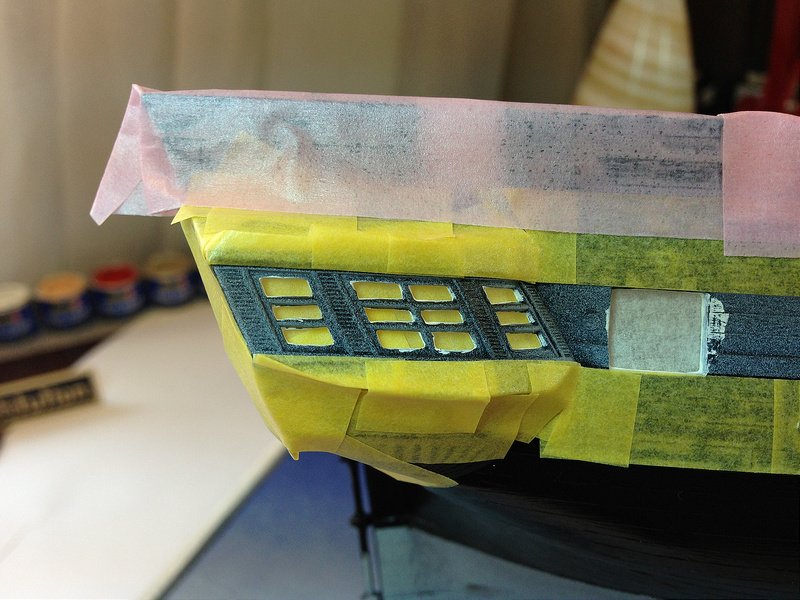
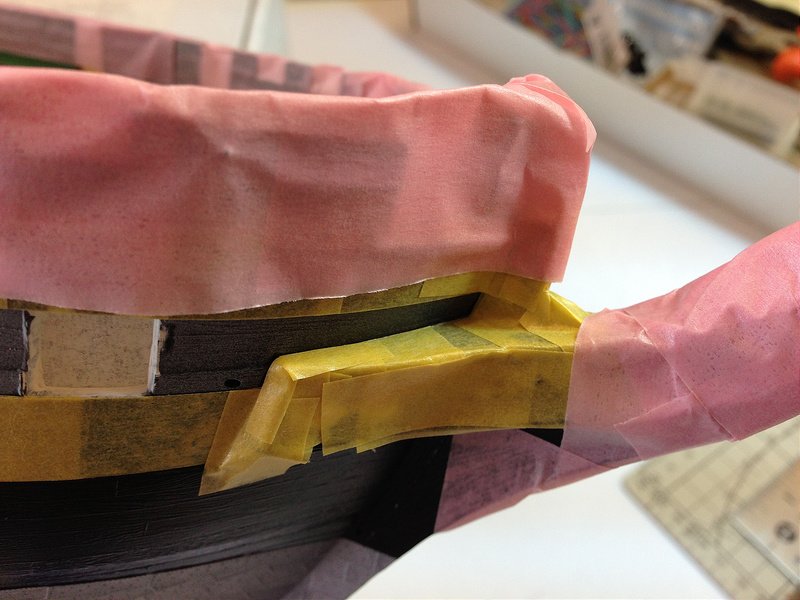
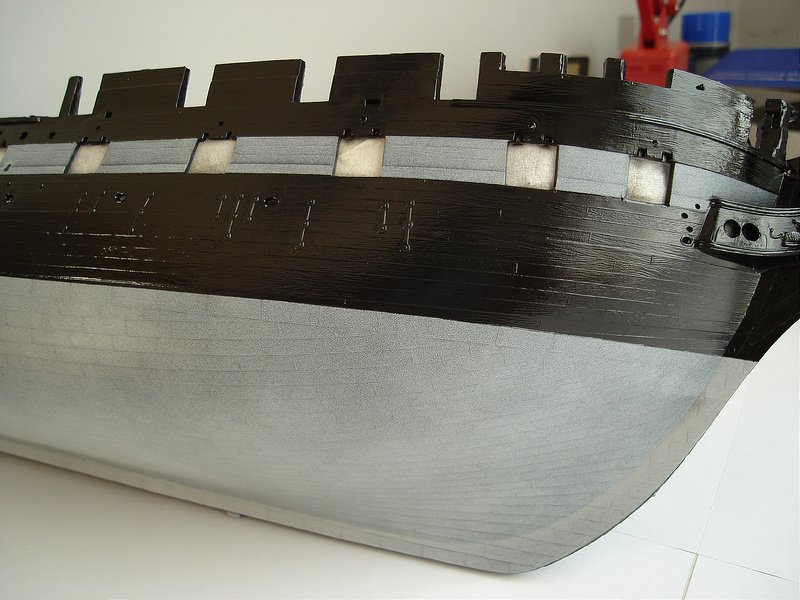
Here you can better see the "molded line", which is above the bottom of the cannon doorways. Did anyoneelse paint their white-line this way???
-
-
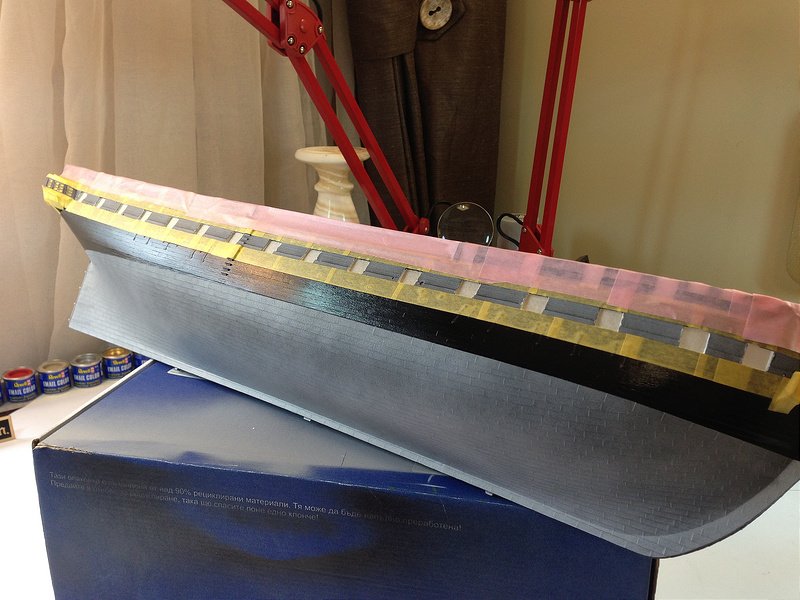
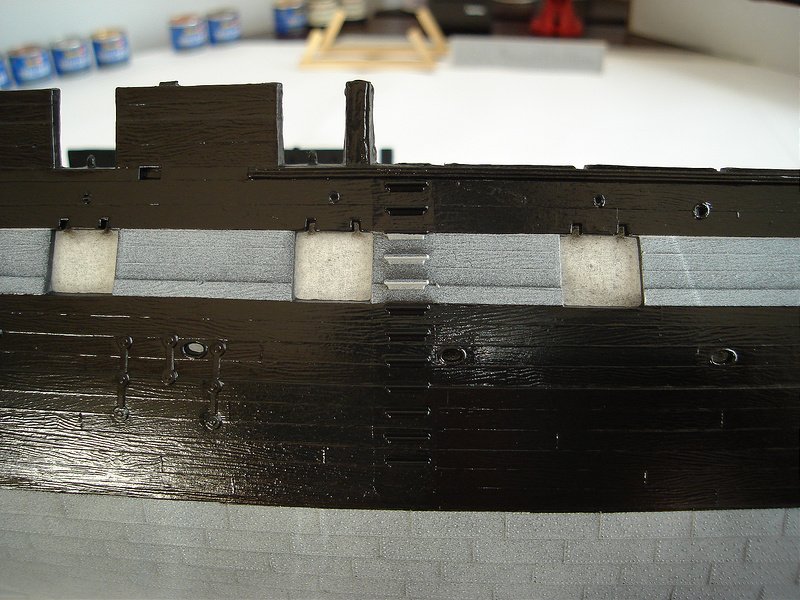
After taping with the Tamiya tape, I used aluminum foil to cover the bottom and standard masking tape toattach the foil to the Tamiya tape. I got some minor bleed through at one or two places but was generallyecstatic with the overall results.
-
Next was taping off the hull before painting. I used Tamiya tape. I had to trim the tape in small sectionsespecially around some of the curves for the hull plating. It was a huge P.I.A. and much more timeconsuming than I imagined.Another note: There seems to be a bit of controversy about the white line. In photos of the real USSConstitution, it spans the entire height of the cannon doors. However, the model has a molded line about1/8" above the bottom of the cannon doors...this seems to imply you should stop before the bottom of thedoors. I did not. My white line will span the entire height of the cannon doors.
-
Cannons: First of all, I am missing half of a cannon. I am not sure what I will do about this yet.
Secondly: many of the cannons had bad injection marks. In addition, there is an alignment pin which in most
cases, if used, MISaligns the cannons. Unfortunately, I glued a lot of them this way. The last half of them Ijust cut off the alignment pin and they went together perfectly.I wish I could start these over. Some of the better ones are shown below.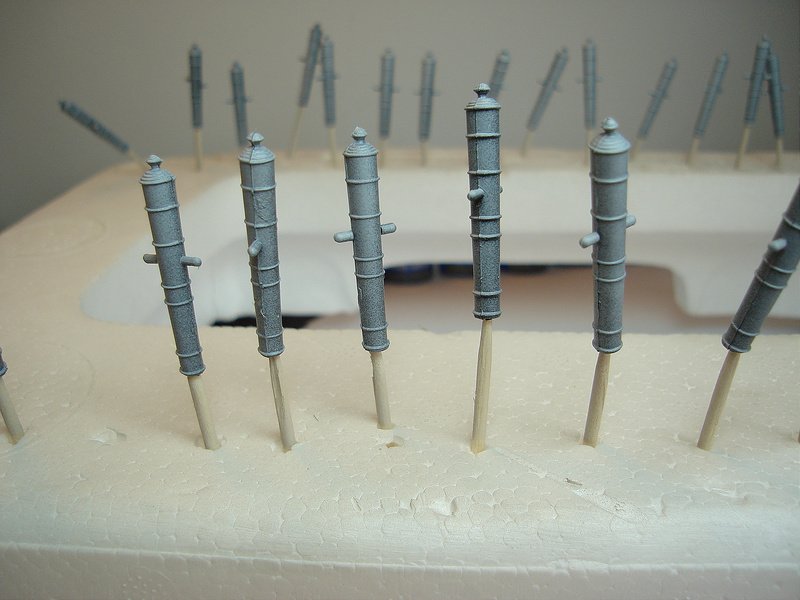
-
-
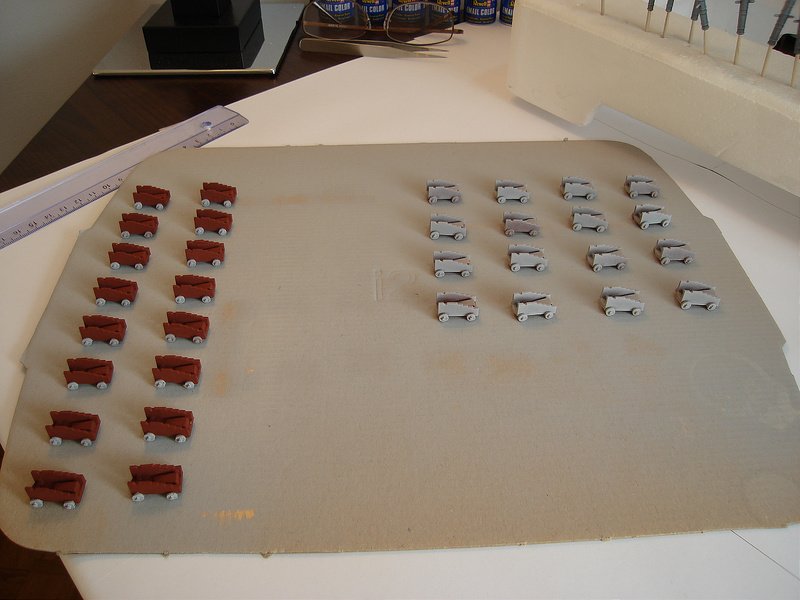
04 JANUARY 2013Cannon time!!! I decided to start assembling the cannon's because....ok, I was influence by others on thissite including AndyMech. I also think it's a good place to practice painting.I had trouble with the first few red carriages...brush marks were bad. Later, I discovered that one big juicycoat of enamel was far superior to light coats. You had to just keep moving and let the paint flow. Doublebrushingover the same spot left big brush marks.
-
-
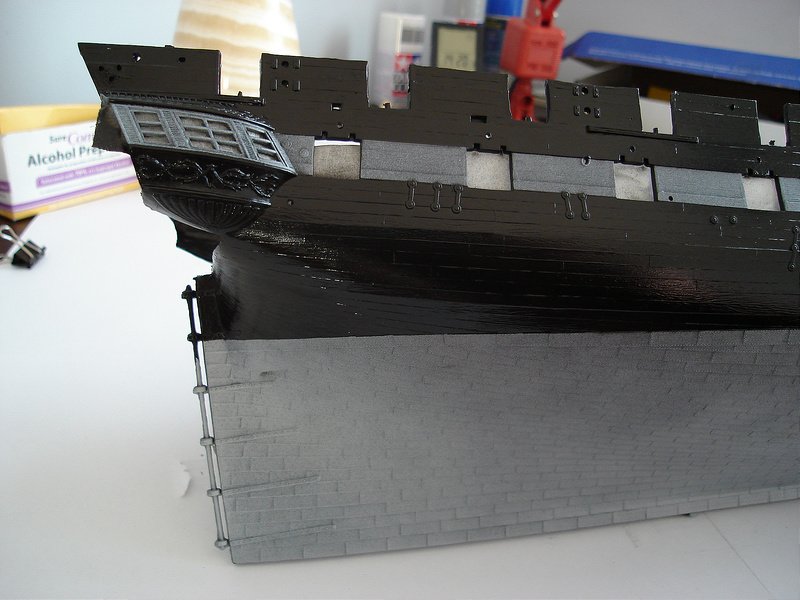
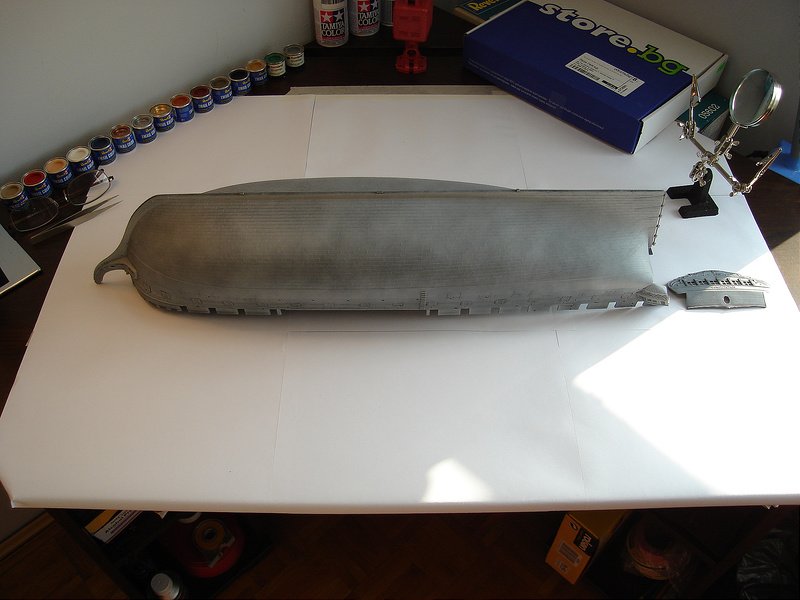
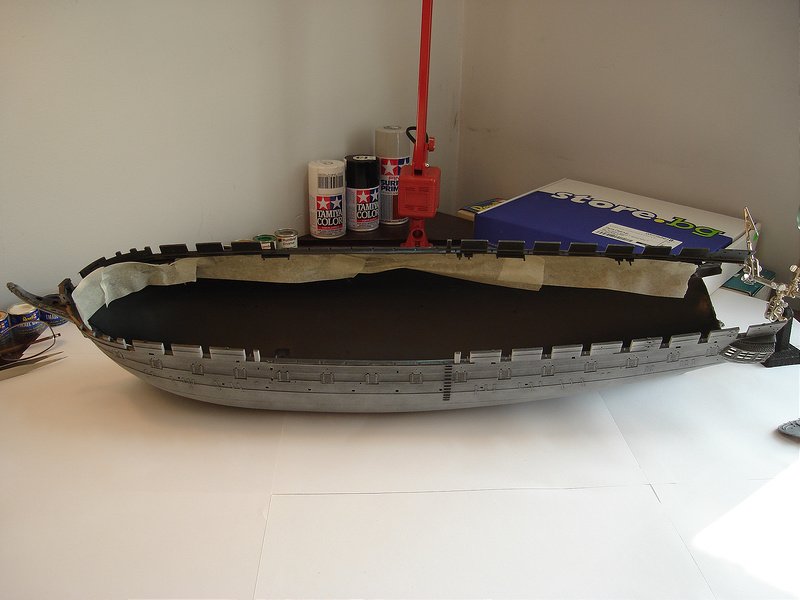
04 JANUARY 2013The hull is primed. I fitted the cannon doors in place because it seemed a good way to prime them and italso prevented flow-through drips. I also taped over the windows. (I have not fitted the plastic windows yet)
-
03 JANUARY 2013
Cementing the hull: I trimmed and cemented the hull. I used ordinary binder clips for clamping. The hull fit
together fairly well, but I wouldn't say it aligned perfectly. I dry fit it a few times and came up with thestrategy to apply glue to the stern part first, snap that together and then proceed with the rest. Snapping thestern together first seemed to help the overall ease of alignment...still i was nervous as hell doing it!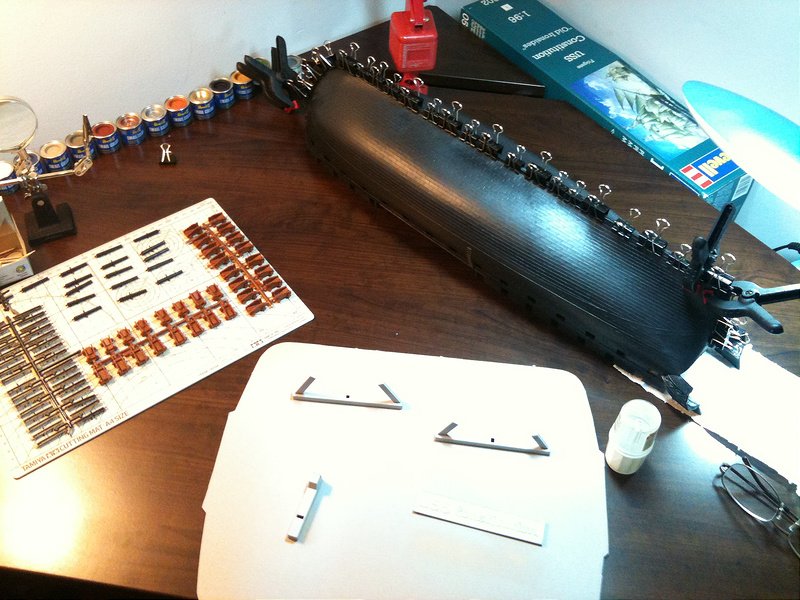
-
03 JANUARY 2013Painting - In general I am crappy at painting. I believe the painting will be more challenging for me than theconstruction. I am going to try to brush paint as much as possible. I decided to brush paint because it issomehow "more personal" than to spray everything. I believe it will be more technically challenging tobrush paint.With that said, I do intend to spray paint the black part of the hull and the white stripe on the hull... LOL. Icould only find one can of Tamiya spray in Black (TS-14 Black) and (TS-45 Pearl White). I could not findany copper spray paint.Dilemma... to prime or not to prime. I decided to at least prime the big parts. For primer, I went with TamiyaFine Surface Primer (gray).Since I am in Bulgaria, my Revell kit had German instructions (in addition to the English). The Germaninstructions seemed to have some better details for some of the riggings, especially the sail riggings. I alsohave the exact Revell of Germany paints.


USS Constitution by lambsbk – Revell – 1/96 - PLASTIC – With Fiber Optics
in - Kit build logs for subjects built from 1751 - 1800
Posted
Everything looks great... don't worry about progress, all this micro work you are doing takes time.