qaz_666
-
Posts
47 -
Joined
-
Last visited
Content Type
Profiles
Forums
Gallery
Events
Everything posted by qaz_666
-

Montanes by ricardo - OcCre
qaz_666 replied to qaz_666's topic in - Kit build logs for subjects built from 1751 - 1800
Thank you so much my friend, and talking about to start a new build log, I don't think so because my camera is broken...maybe some pictures made by the phone but that's all!Best regards, Ricardo. -
Montanes by ricardo - OcCre
qaz_666 replied to qaz_666's topic in - Kit build logs for subjects built from 1751 - 1800
Than you so much my friend! My next project is a spanish fishing ship from '70 decade, is my wife's caprice... Best regards, Ricardo.
-
Montanes by ricardo - OcCre
qaz_666 replied to qaz_666's topic in - Kit build logs for subjects built from 1751 - 1800
Thank you Volunteer! -
Montanes by ricardo - OcCre
qaz_666 replied to qaz_666's topic in - Kit build logs for subjects built from 1751 - 1800
Thank you Barbossa -
Montanes by ricardo - OcCre
qaz_666 replied to qaz_666's topic in - Kit build logs for subjects built from 1751 - 1800
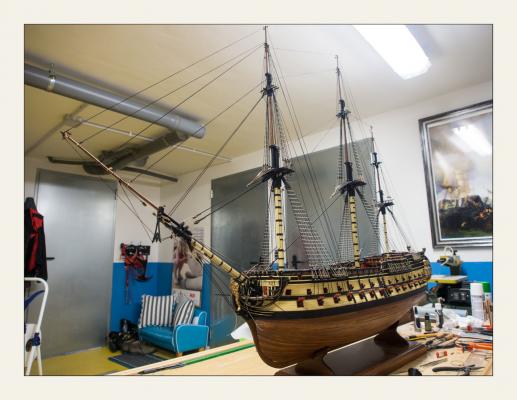
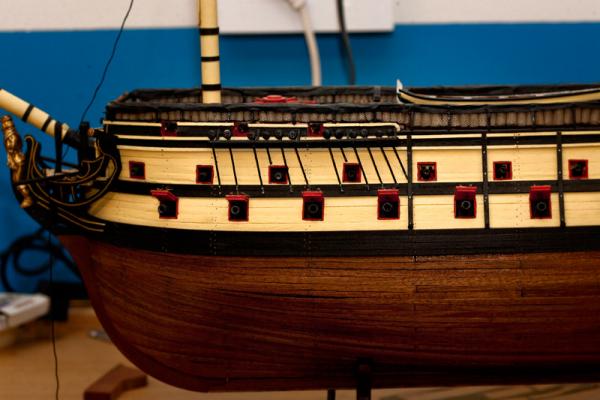
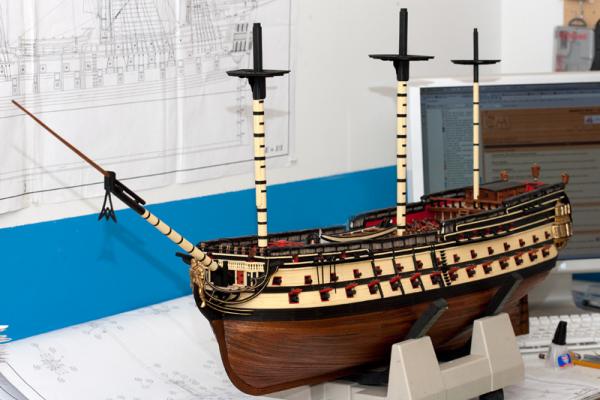
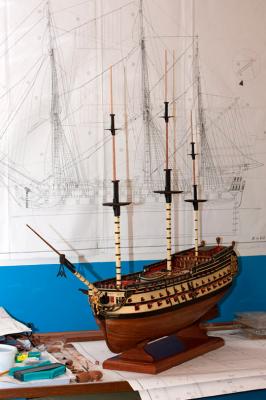
Well, the Montañés is finished . At the end, I placed the flag that had bought years ago. I did another one in paper, and was pretty cool though, but I couldn't find the tone of yellow that I would have liked. I was also complicated thing because I could not print fine colors in my printer so, I have chosen the flag from Artesania Latina. You can see both together in a photo so you can judge them . Anchors have been changed by larger ones , were also purchased a couple of years ago on a visit to Madrid ( I think it was in the same package as flags ) also added chain rudder, and the latest maneuvers were braces and bowlines . After all these years (4), I managed to make a success of the model. The truth is that it was a nice project. With its ups and downs , like everything in life , but I learned a lot about this type of ships, especially its rigging. I'm pretty proud of how it turned out in the end, I think it has been worth all the effort to improve this kit Montanes. Some things badly there, but the truth is that the planes of the rigging are quite painful. Too bad for oCcre at this stage Oh my God, I wish I coud made better photos but I couldn't find a decent background. I'm gonna make some reforms to accommodate the boats, and at that time I will make the story as it deserves. And now, if you do not feel bad, I'll summarize the Montañes ... "MONTAÑES, Spanish Ship of the Line 80 cannons" - Trafalgar, October 21, 1805 - TIME 0- 80h : Structure and covered decks , cabins ... to put the first timbers to planking the hull. 80 - 160h : Planking finished and varnished gunwales included . 160- 162h : Stem, stern and keel. 162- 172h : Open the gunports. 172- 200h : Gunwales, open the 3rd gunport in the castle, seats of ease, bow elevation including upper cheek, lower middle and upper head rail, and also the gratings and the catheads. 200 -240h : Stairs, fife rails for belaying pins and model pin rail fixed to bulkwarks, bell, kitchen chimneys, stern and galleries ( with windows and curtains), outside cabins . 240- 325H : Cannons with rigging, cannon portholes, winches, plating, stern gardens, lining tables, chests, cabinets and lights signal flags, poop lanterns and hammock netting with iron cranes, more or less 280 hammocks. 325- 380h : Lower section of the masts and fish . 380- 392H : Fore channels and tee plates made in steel and dead eyes. 392- 396h : Fitting the blocks to the masts. 396- 421h : Shrouds : 1h each pair ( 25h ) 421- 431H : Stays lower section with the mouse .... 2h each stay (10h) 431- 450h : Ratlines: clove hitch around 1200min (20h ) 450- 478h : Standing rigging masts and shrouds and ratlines topgallant masts ( 28h ) 478- 500h : Stays and contrastays of masts and topgallant masts (22h ) 500 - 556h : Turning and painted the yards, and stay sails ( 56h ) 556- 570H : Small boat 1 : (14h ); Small boat 2 and oars: ( 9h) 570- 656H : Square sails ( 86h ) Total approximate ........ 670H QUANTITIES -Thread 20 coils of 20m and 100m. 500metros Occre 300metros proposed in the instructions but there are maneuvers that do not appear and I do not have waste. - Nail Over 3000 nails. - Knots 1610 clove hitches in the ratlines. CHANGES / MODIFICATIONS - All artillery - All of the thread - Modifying seats of ease - Modifying tee plates - Open gunport on castle. - Added howitzer to 24lbs on the poop. - Added 280 hammocks with iron cranes and net. - Added signal flags lockers. - General Modification every cabin decor and adding doors jambs, architraves and skirting. - Added another boat with oars and columns in the pit. - Change anchors from other 75mm. - Added railings to the tops . - Changed many pulley blocks and rings and rings and to respect the scale - Stand Solid sapele 3cm - Change flags. FINISHES 1. Used paints (acrylic) Naples Yellow, "Pebeo" result 24 Black Smoke, number 301 "Vallejo" Cadmium Red Vermilion, number 504 "Vallejo" 2. Others Spray paint Black matte enamel number 576 of "Titan" Shellac "Mongay" Bitumen of Judea "Mongay" Mixtión varnish of "Mongay" Gold leaf Dye dark oak cabinetry 35th "Louis XIII" For blackening metals "Beretta" Whitetail "Ceys" Cyanoacrylate brush "Loctite" SOURCES CONSULTED - "Rigging Period Ship Models" Lennarth Petterson - "Historic Ship Models" by Wolfram zu Mondfeld - "The Vessel of 74 Cannons S.XVIII Isidre Oliveras - "The Ship of 68 guns 1752" by Isidro Rivera - And of course all the friends of all the forums I visit, (I did not name all that are many who have helped me over the years and sure I leave it to any in the pipeline) and the constant visits to the Naval Museum in Madrid and the photos I take. See you at the next one! Ricardo.


-
Montanes by ricardo - OcCre
qaz_666 replied to qaz_666's topic in - Kit build logs for subjects built from 1751 - 1800
Thank you both, Anja and Sjors, for those kind words Best regards, Ricardo. -
Montanes by ricardo - OcCre
qaz_666 replied to qaz_666's topic in - Kit build logs for subjects built from 1751 - 1800
Finishing the Montañés... Tomorrow, I'm going to upload the last pictures with the ship finished. Best regards, Ricardo.


-
Montanes by ricardo - OcCre
qaz_666 replied to qaz_666's topic in - Kit build logs for subjects built from 1751 - 1800
Thank you so much!!! And yes, you are right, the model is really finished... Anyway, I like that you like -
Montanes by ricardo - OcCre
qaz_666 replied to qaz_666's topic in - Kit build logs for subjects built from 1751 - 1800
Continue... Topsail, Topgallant sail and fore royal sail from foremast.. I hope you like


-
Montanes by ricardo - OcCre
qaz_666 replied to qaz_666's topic in - Kit build logs for subjects built from 1751 - 1800
More advances: all the stay sails and the mizzen course are in place. Best regards, Ricardo.


-
Montanes by ricardo - OcCre
qaz_666 replied to qaz_666's topic in - Kit build logs for subjects built from 1751 - 1800
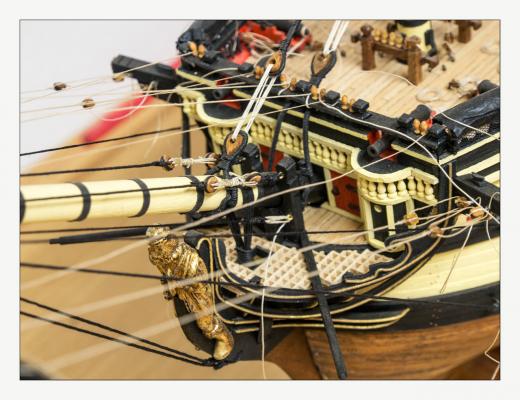
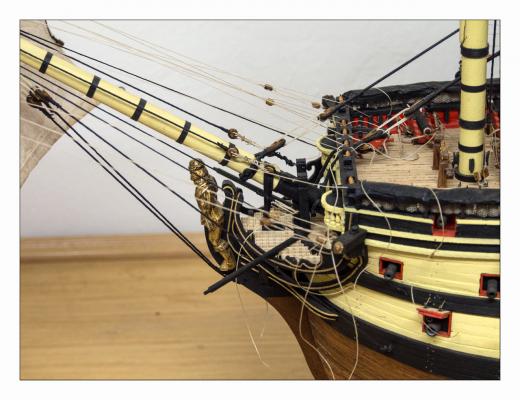
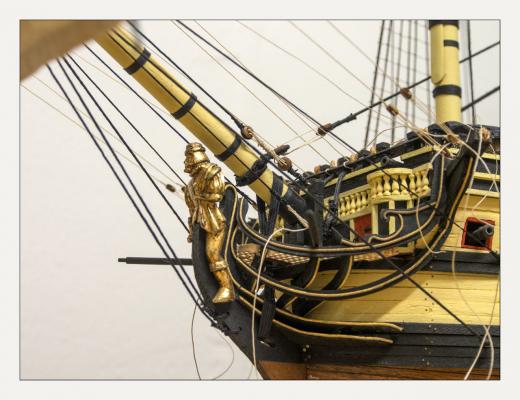
More pics... I added a second boat on the deck and also you can see the sails of the bowsprit: spritsail course and topsail, outer and inner jib, and fore topmast staysail. Enjoy, Ricardo.


-
Montanes by ricardo - OcCre
qaz_666 replied to qaz_666's topic in - Kit build logs for subjects built from 1751 - 1800
Well, the end has happened. Always get care, and when I see one of these things in the forum I was put the willies praying that does not happen to me. By going to catch a big brush to varnish the wooden terrace of my house I have rotated and elbow I hit the boat. It sounded a "crack" sound and as my heart has shrunk. I turned and I saw the jibboom in an unnatural position Time to attach the sails...


-
Montanes by ricardo - OcCre
qaz_666 replied to qaz_666's topic in - Kit build logs for subjects built from 1751 - 1800
Direct orders from the Admiralty (my wife). If you get sawdust then it must be cleaned! -
Montanes by ricardo - OcCre
qaz_666 replied to qaz_666's topic in - Kit build logs for subjects built from 1751 - 1800
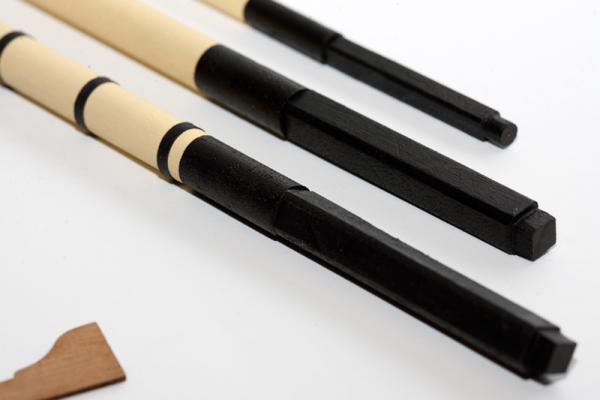
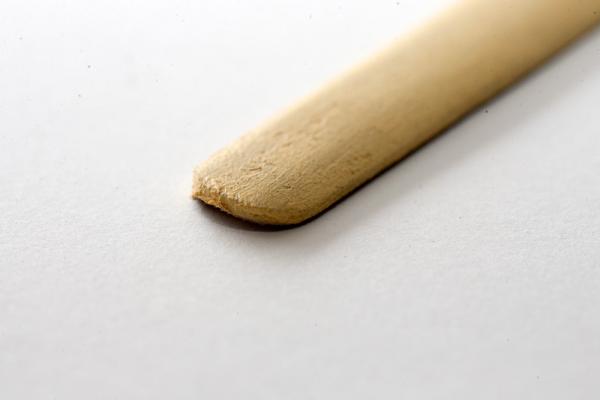
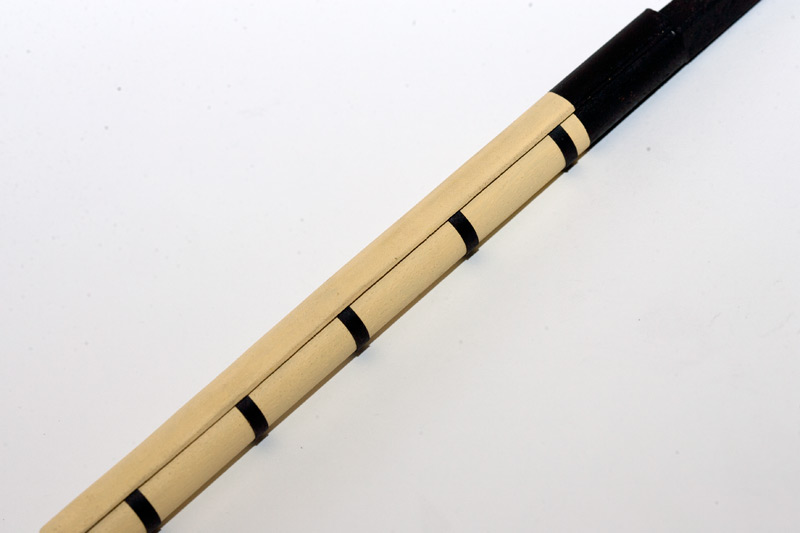
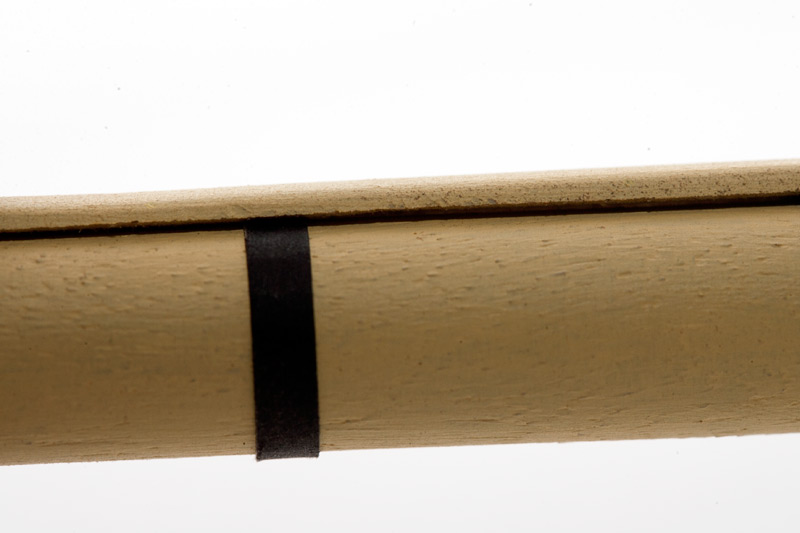
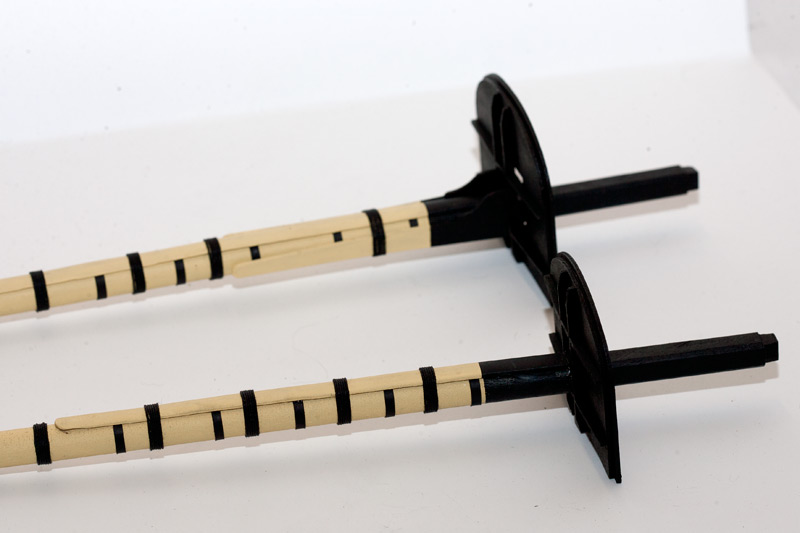
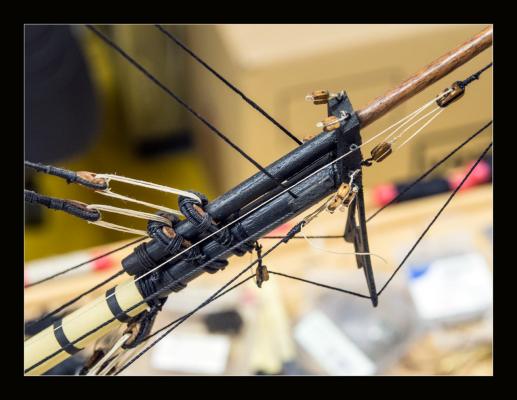
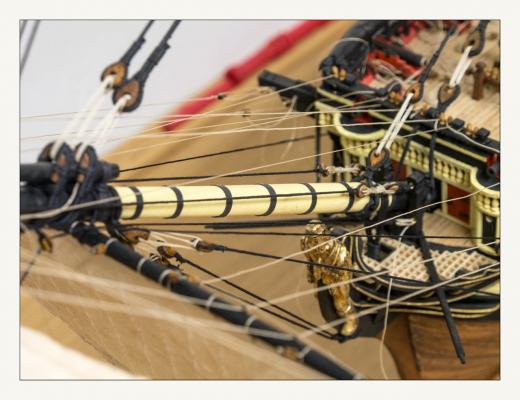
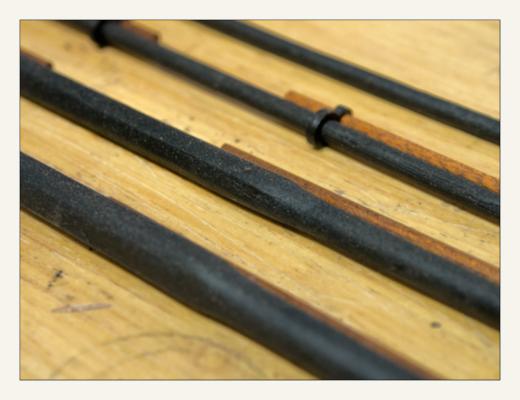
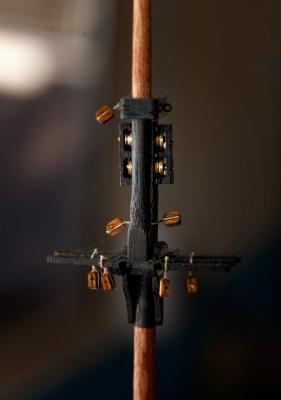
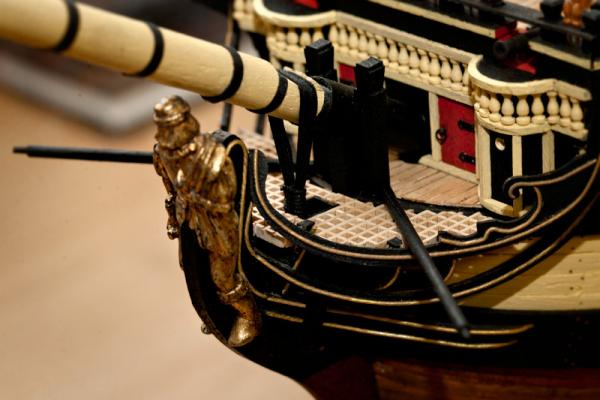
Jibstay, martingale stay, bobstay and bowsprit shrouds and lot more! I hope you like! I also have all the yards turned and painted, so I have that I no longer play any tool to the end of this project, and whether some touch up paint at the end of everything. For the octagonal section of the yards I used thicker sticks to get the octagonal smooth turning and then I have the rest of the yard. The effect has been decent, not perfect but still very apparent. Best regards...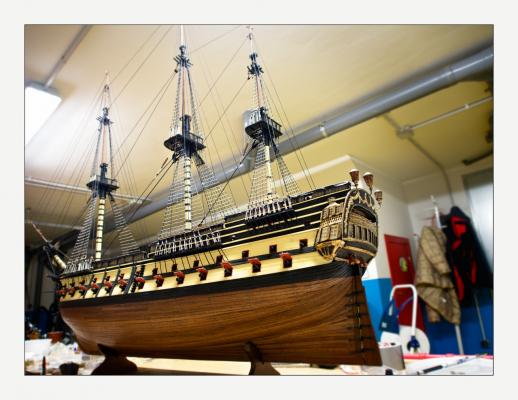
-
Montanes by ricardo - OcCre
qaz_666 replied to qaz_666's topic in - Kit build logs for subjects built from 1751 - 1800
Stays and backstays on the model. I strictly follow the Petterson in that stepsand was very useful since the kit planes are pretty bad and incomplete. Best regards, Ricardo.


-
Montanes by ricardo - OcCre
qaz_666 replied to qaz_666's topic in - Kit build logs for subjects built from 1751 - 1800
I finished all the ratlines. There are more than 1600 knots and clove hitches, you know... many hours of knots


-
Montanes by ricardo - OcCre
qaz_666 replied to qaz_666's topic in - Kit build logs for subjects built from 1751 - 1800
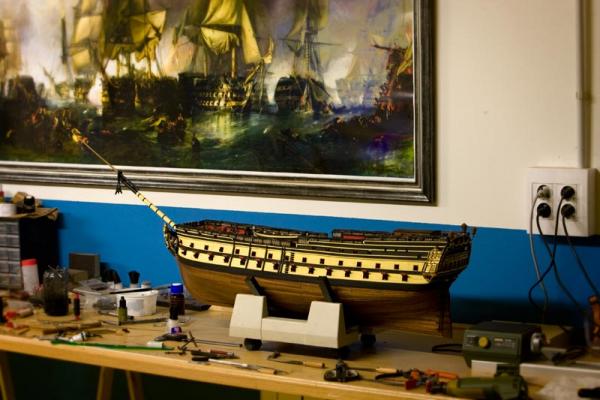
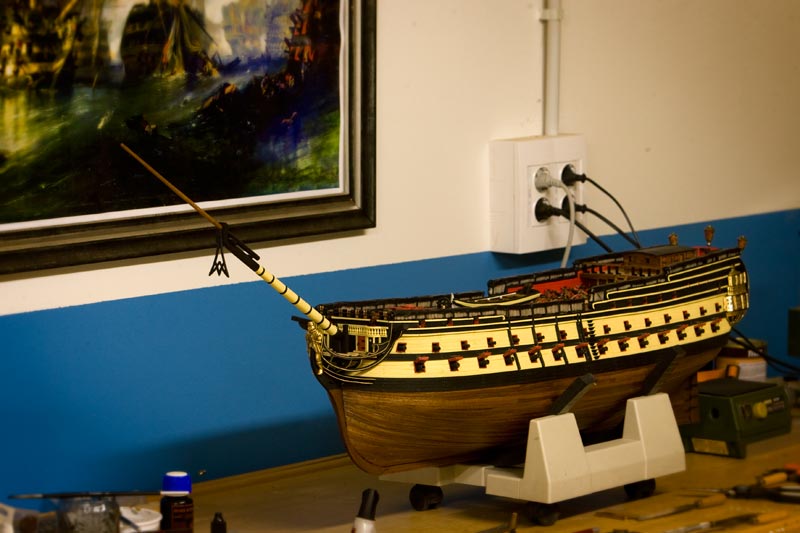
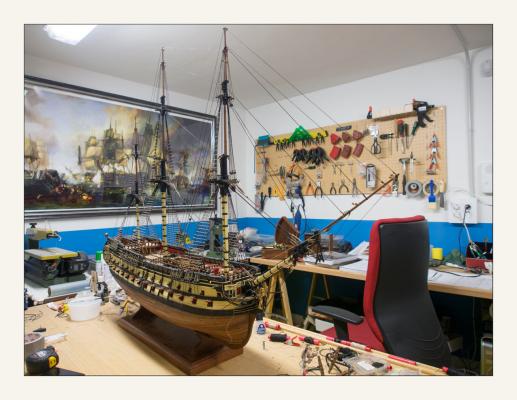
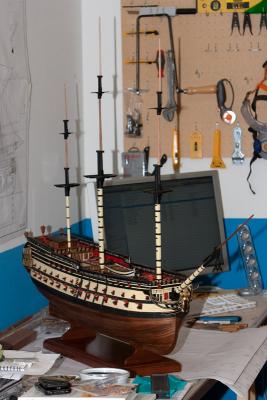
thank you guys :blush: Here you can see how my shipyard looks.I really can not complain, consists of three tables as I said earlier , there are three cabinet doors placed perpendicularly between them and taped to the wall but one that is where I do the boat . Photo 217 : general view on the left is the table of power tools, a router , a cutting disc mower marquetry and wood lathe , various tools and accessories. Front desk for computer and drawings . Turn right at the table photo of boats , I can sit on either side like to model the ship. Photo 218: Power tools , from left to right: marquetry saw, small circular saw, wood lathe , drill and milling machine column . Photo 219: table documentation , right although not seen in the photo ( you can see in the general view ) I have the computer and internet for some music ... Photo 220: Side cabinet where the models have some book, and all I need to do "potions" as paints, varnishes, stains , etc ... Photo 221: Tools of varied hand , there is much for the tables, but we again little thing , usually bought according to need , I have only a chisel and gouge a size you need on one occasion, several files, sandpaper mouse sander, parts , many clips different size and little ... Broadly speaking is all , there are more things for the drawers , but that's about it ... And yes, the car sleeps on the street


-
Montanes by ricardo - OcCre
qaz_666 replied to qaz_666's topic in - Kit build logs for subjects built from 1751 - 1800
Thank you Joe, I like that you like I'll keep uploading pictures.. Cheers! I have not treated the thread with anything. The Amati thread is so good and almost with any fluff. No comparison with oCcre thread. Best regards -
Montanes by ricardo - OcCre
qaz_666 replied to qaz_666's topic in - Kit build logs for subjects built from 1751 - 1800
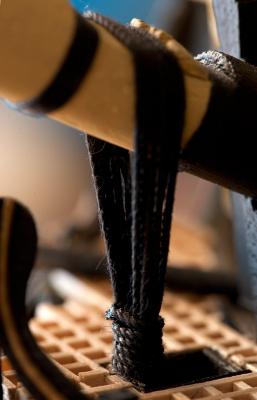
Different stages in the rigging... you can see the stays, the mouses, the ratlines, the different collars served and the crowsfeet of the tops...For the rigging I followed the Petterson. I'm gonna to upload these pictures in high resolution so you can appreciate better the details. They look better in large! Enjoy! Best regards!


-
Montanes by ricardo - OcCre
qaz_666 replied to qaz_666's topic in - Kit build logs for subjects built from 1751 - 1800
To build the model mouse stay I followed the Mondfeld.First you have to carve a basic shape built up from wood, the the vertical threads and at last the horizontal ones. Be patient! In the last pic you can see the fore stay and the preventer stay fully served with the mouses... Enjoy!


-
Montanes by ricardo - OcCre
qaz_666 replied to qaz_666's topic in - Kit build logs for subjects built from 1751 - 1800
Thank you guys! More pictures...time to fore shrouds and dead eyes... Note: you can see the serving in the first pair of shrouds. Enjoy!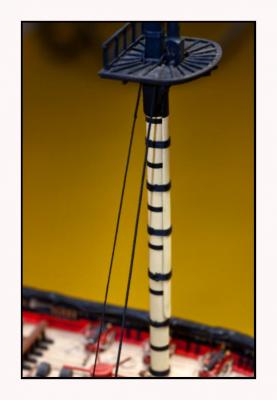


-
Montanes by ricardo - OcCre
qaz_666 replied to qaz_666's topic in - Kit build logs for subjects built from 1751 - 1800
thank you so much Sjors!!! -
Montanes by ricardo - OcCre
qaz_666 replied to qaz_666's topic in - Kit build logs for subjects built from 1751 - 1800
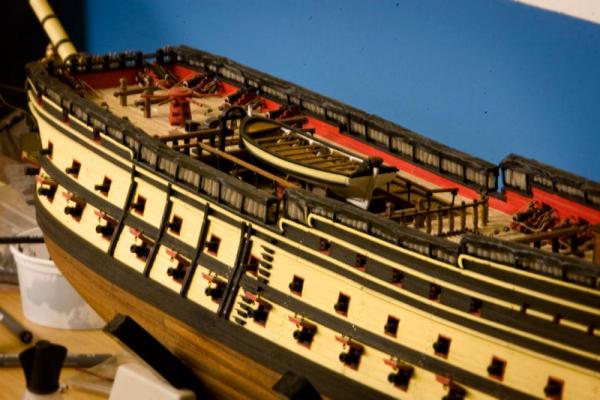
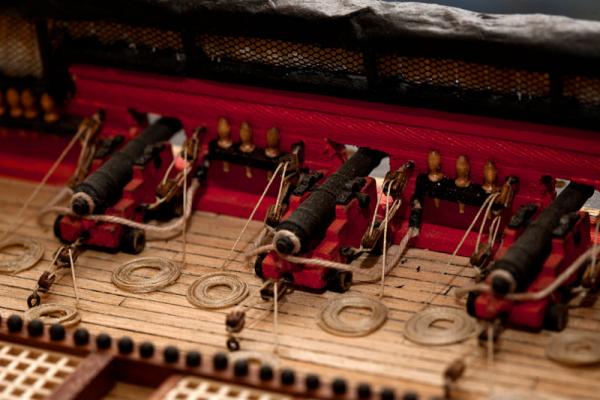
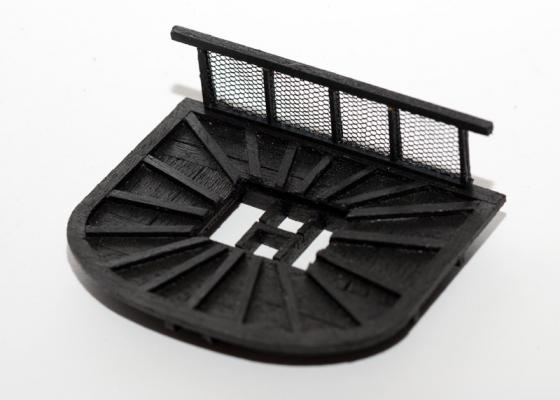
Some details in decks as the ladders and guns...I began the rigging. I replaced all other thread of the kit by another from amati without any fluff.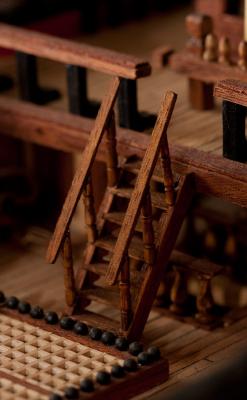


-
Montanes by ricardo - OcCre
qaz_666 replied to qaz_666's topic in - Kit build logs for subjects built from 1751 - 1800
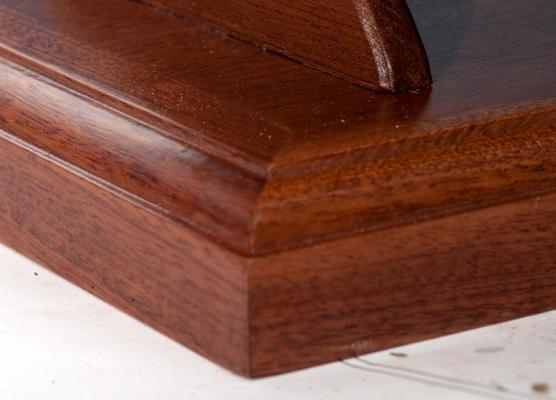
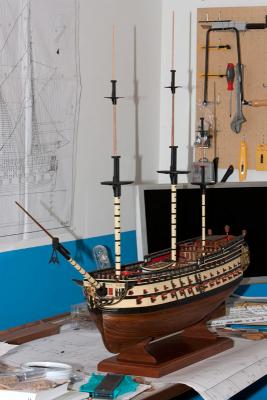
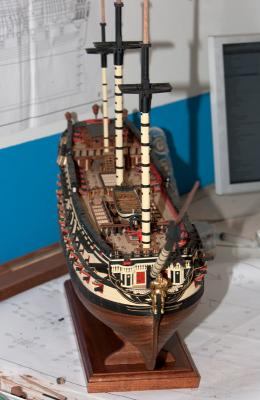
Finished the bowsprit, the foremast, the main mast and the mizzen mast, and placed the boat on the final stand, is made of sapele 3cm I recall, it was handle to a carpenter and the truth, I do not remember the price but it was cheaper than one of those industrial selling in stores and finish is superb ... the pedestals cut patchwork that overran the carpenter, so I gave them to the saw and made a perimeter molding. Leads through bolts to the inside bottom of the boat, the keel. Another batch of photos

-
Montanes by ricardo - OcCre
qaz_666 replied to qaz_666's topic in - Kit build logs for subjects built from 1751 - 1800
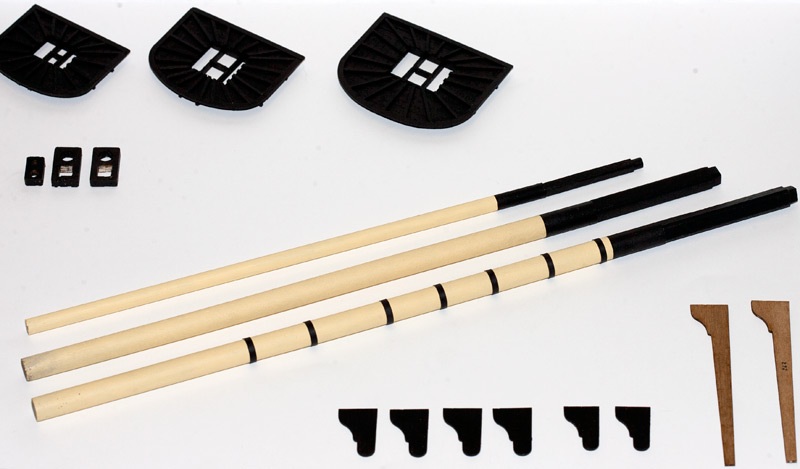
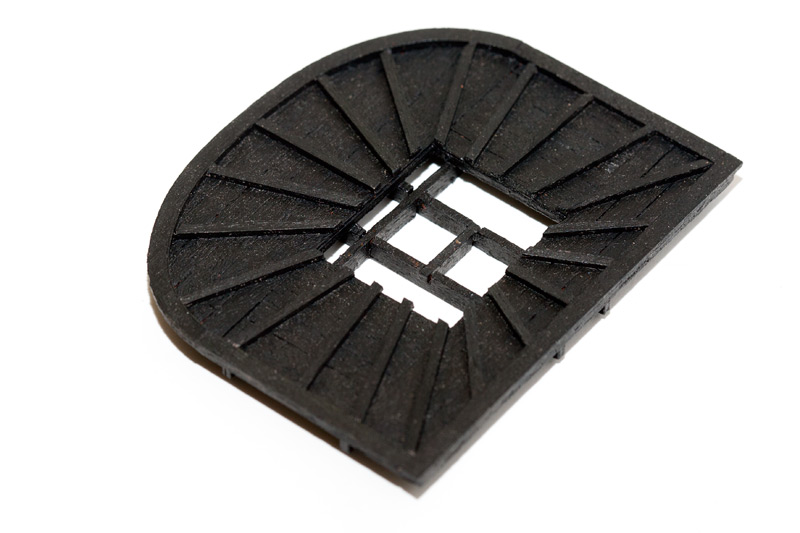
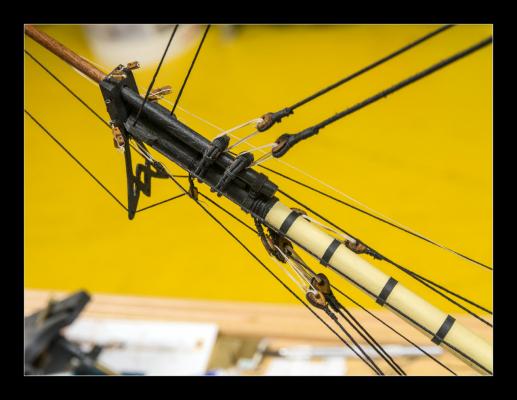
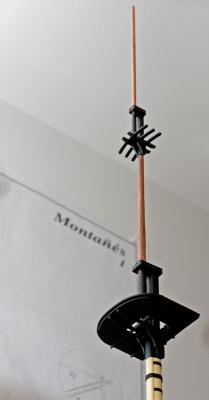
Masts and components. After completing the hull and stern is time for the masting and rigging. I carved the fist into a round shape. These pics represent the foremast and main mast in the lower section and their lower mast trestle trees. For the mast heads I used the disc saw. All painted in acrylics Naples Yellow and Smoke Black