AStevenson
-
Posts
13 -
Joined
-
Last visited
Content Type
Profiles
Forums
Gallery
Events
Everything posted by AStevenson
-
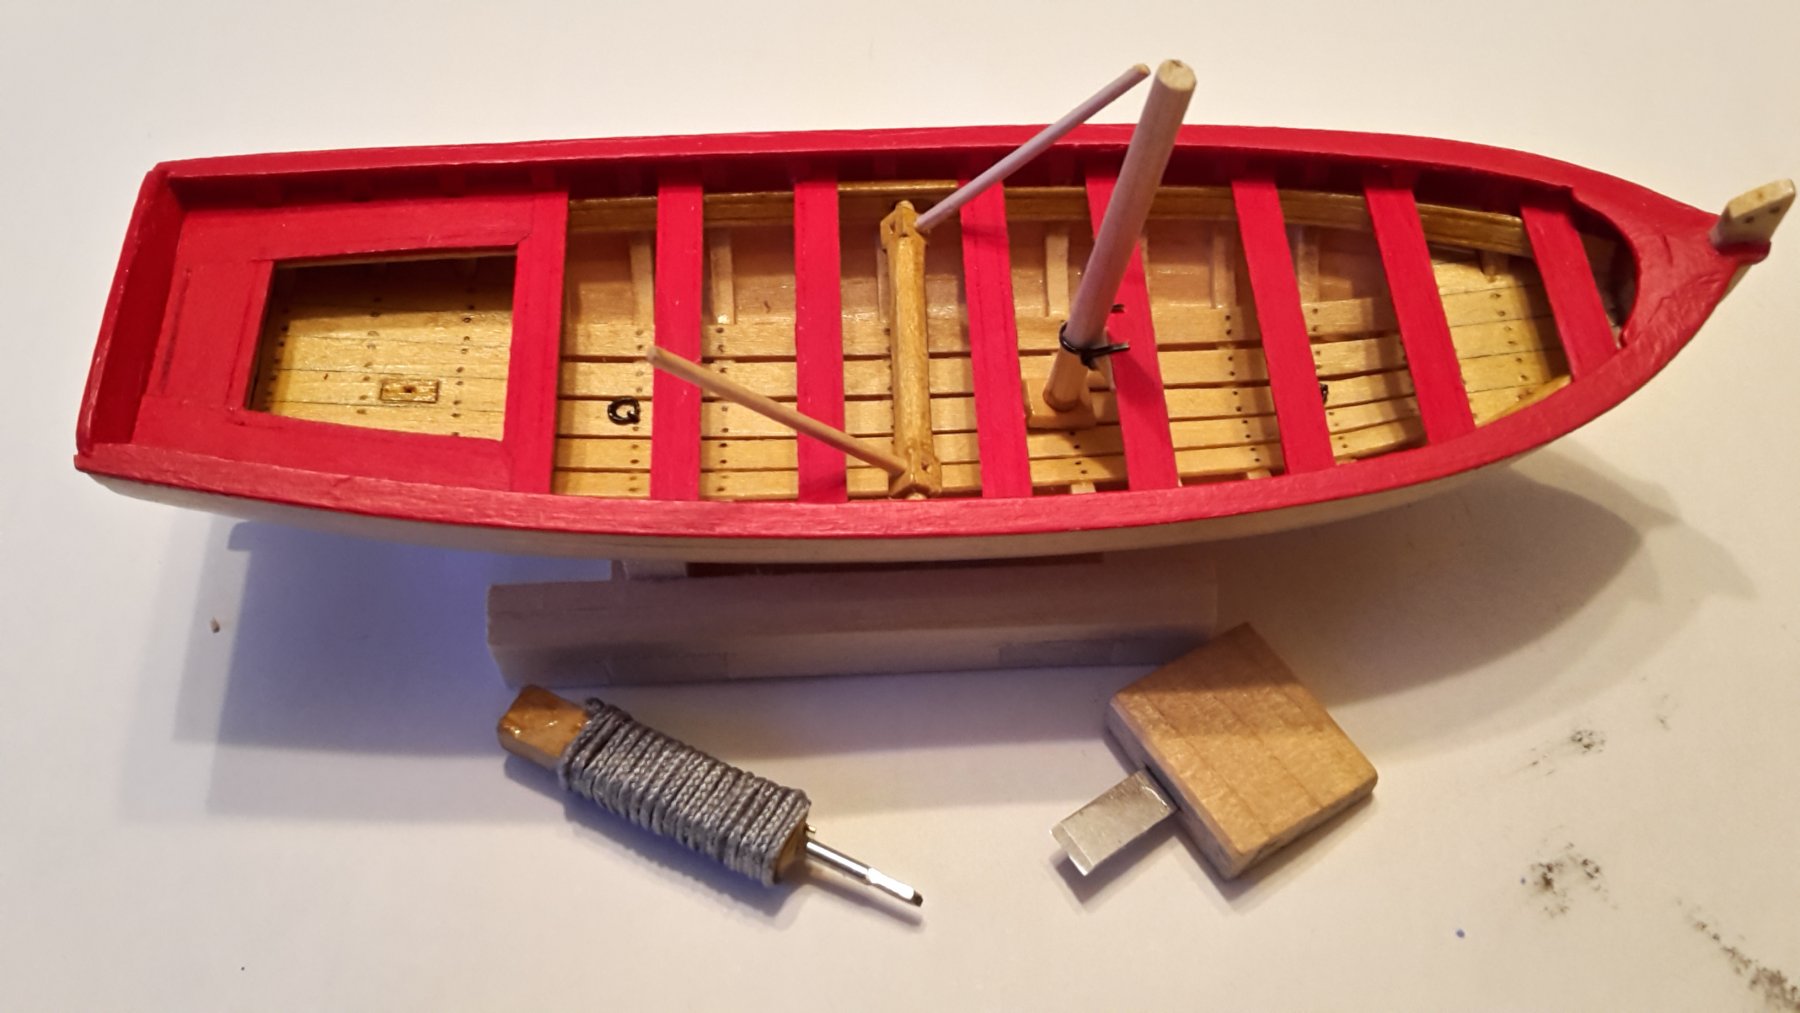
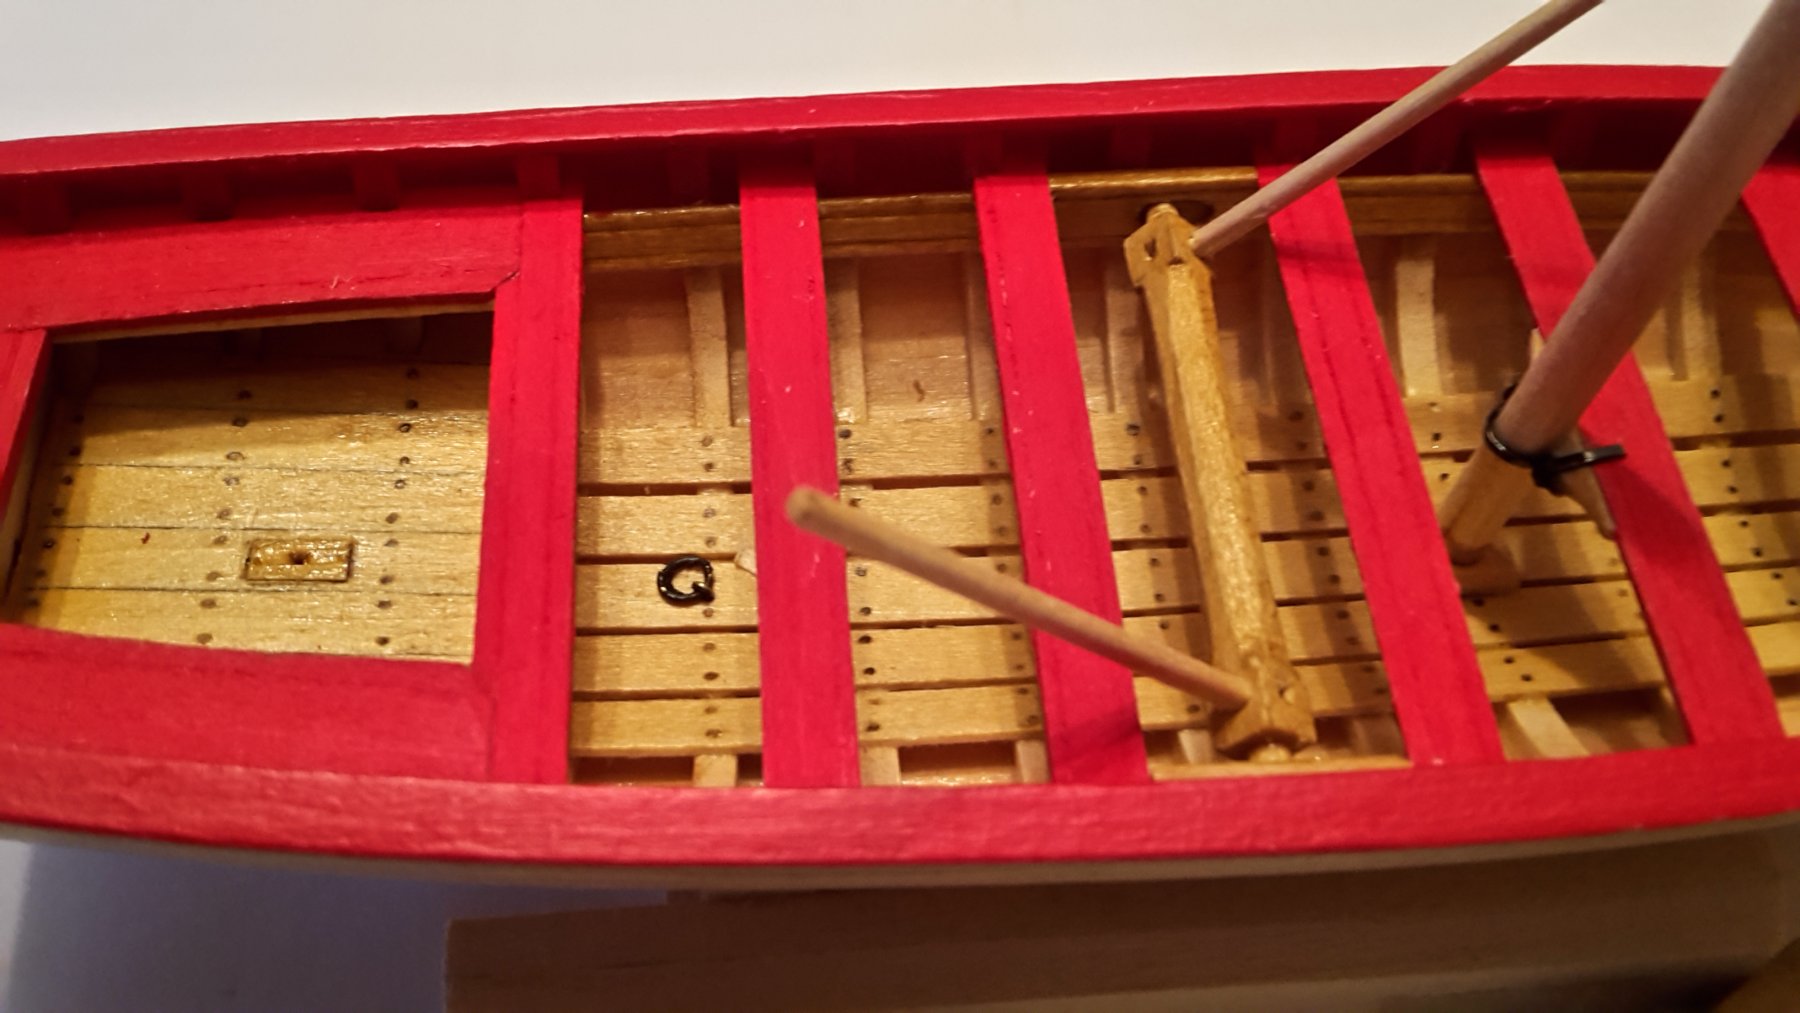
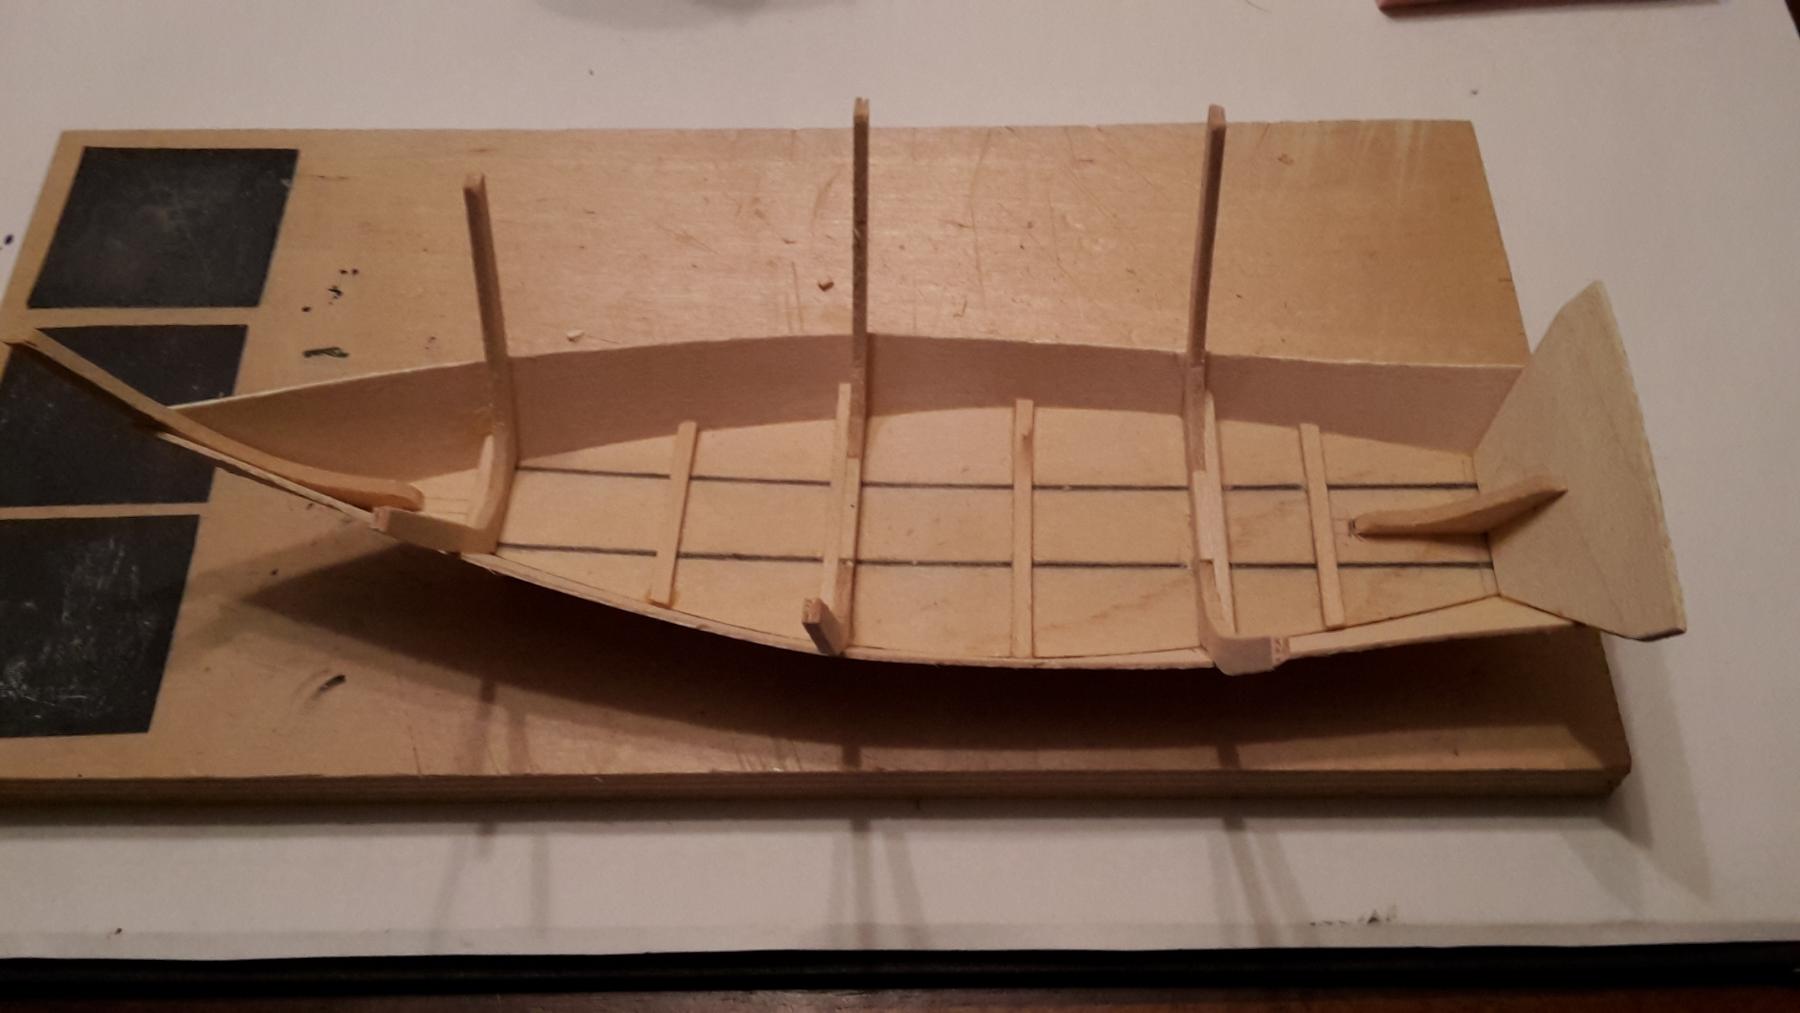
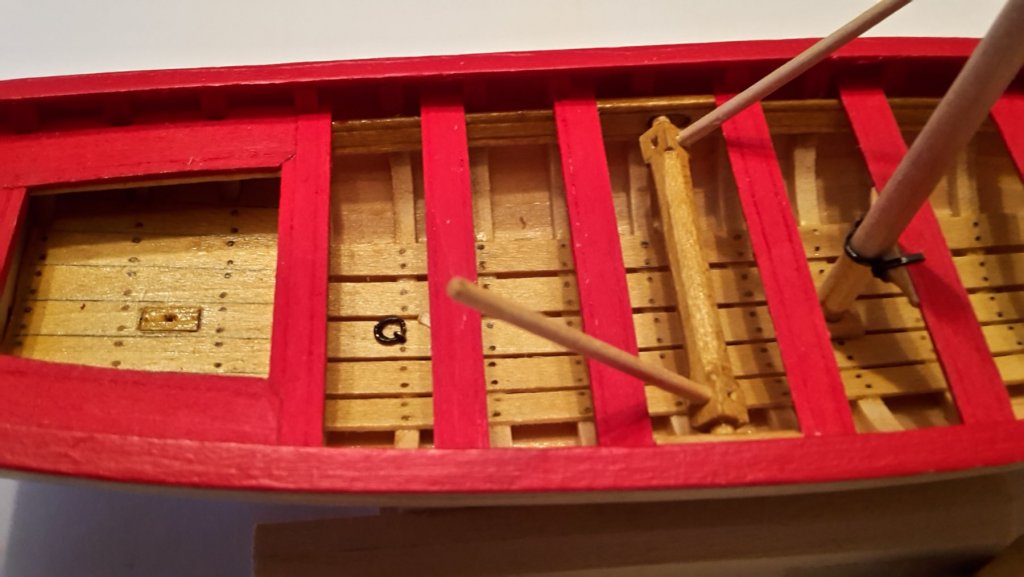
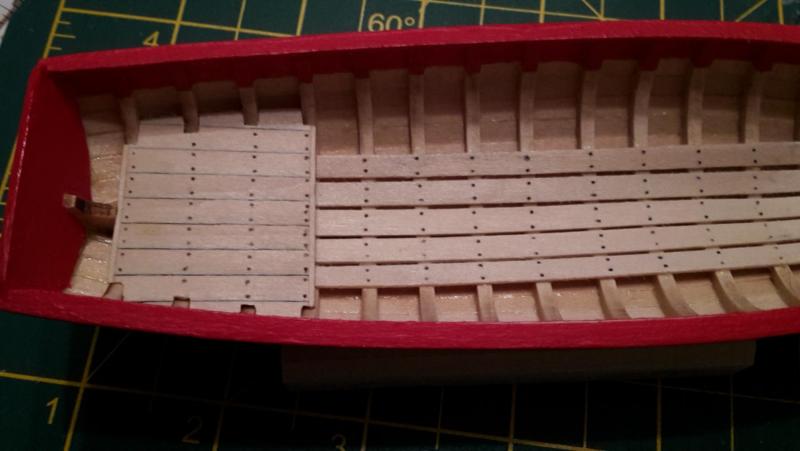
 Still plodding along ... The seats have been completed, although I have held off gluing the seats forward of the windlass until later. I still have the locker hinges to install as well as the reinforcing knees. I followed BobF's build with regards the windlass and also the davit (see pg 6 of his log). Instead of actually installing the davit, or BobF's hole and pin, I decided that a 'plug' would have been installed over the hole - this explains the little rectangular cutout on the stern decking. I'm guessing that something would have covered the hole ... just to stop someone twisting their ankle. I also adopted BobF's windlass design ... which I think he found in some books. On one side, there is a basic hole for the windlass while the other side has an elongated hole that allows the windlass to be 'twisted' out and removed. Since the load comes from over the stern, I elongated the hole forward rather that aft - I think this makes the most sense. I'm currently looking at the stern with a view to notching it with some reinforcing. Also, my own manufacture of two tools! The first just a blade installed in an offcut of wood for trimming - seems to get used all the time. The second a nail cut down to be used as a mortise (as used on the windlass). I'm really enjoying this build ... it gets put away for a week or two and then pulled out for a pleasurable afternoon. I'm enjoying it so much that I have just order another kit ... sticking with Chuck's designs, the next one will be the Syren.
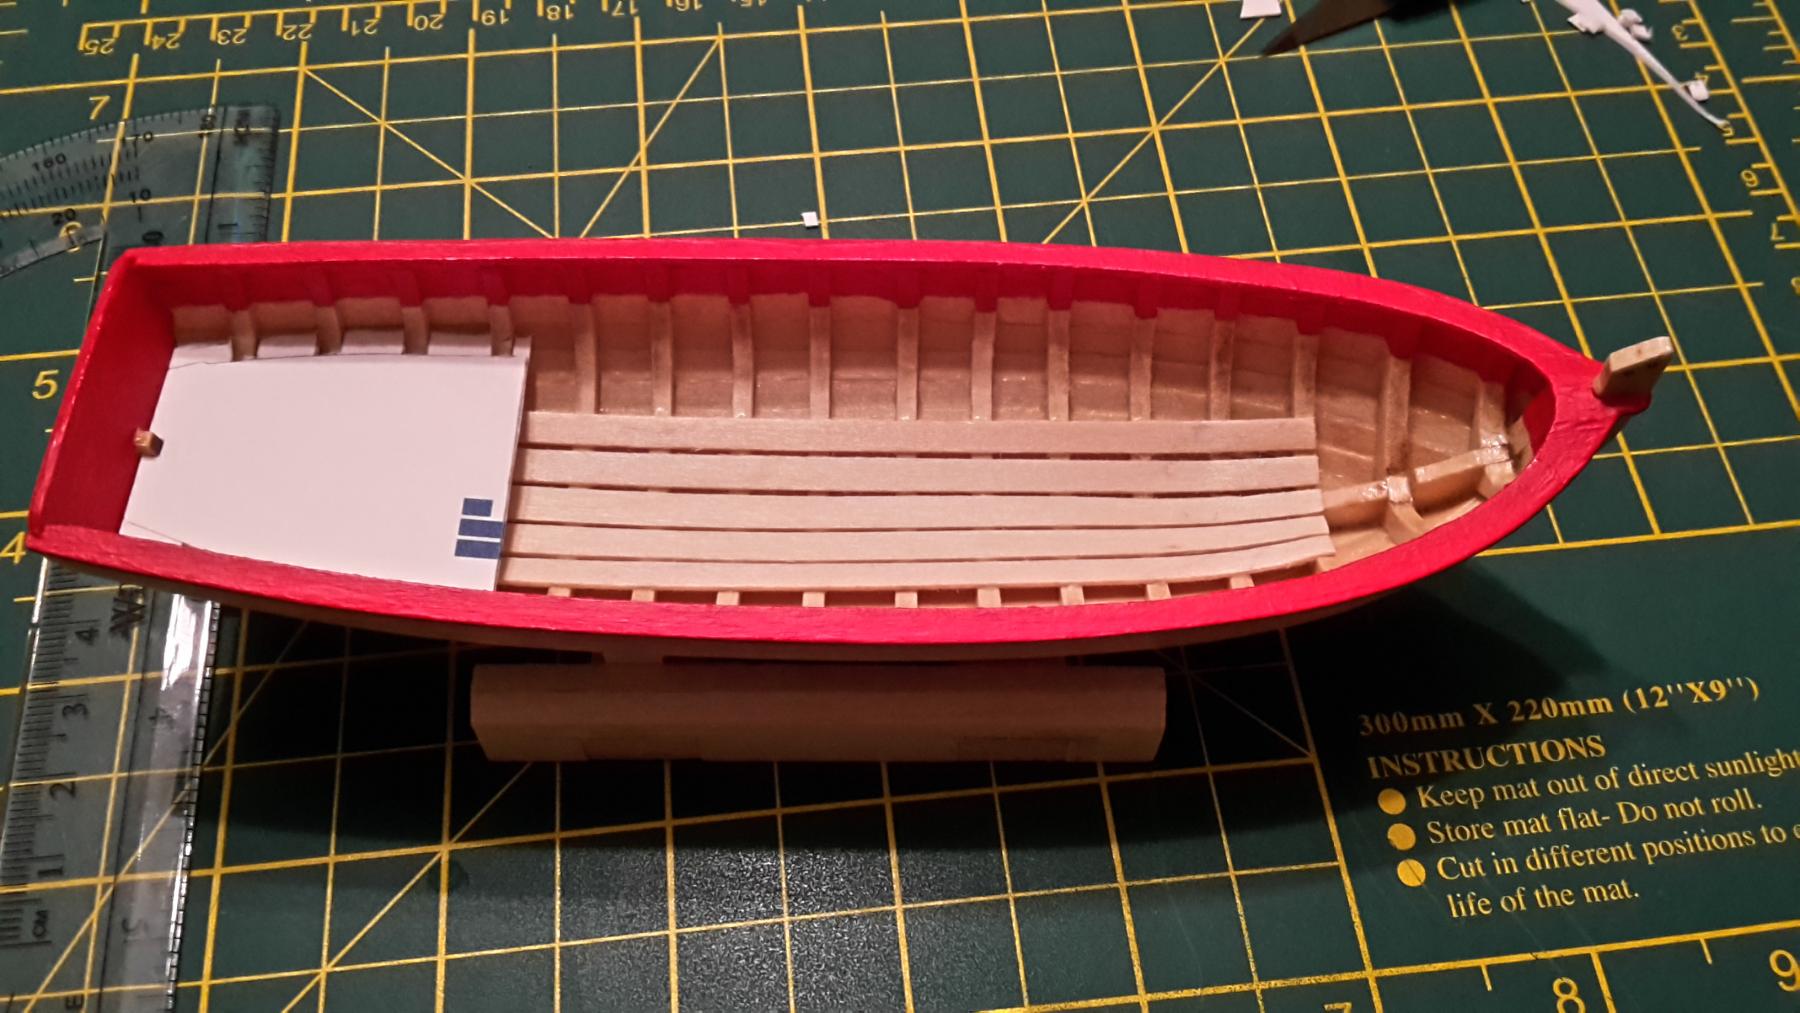
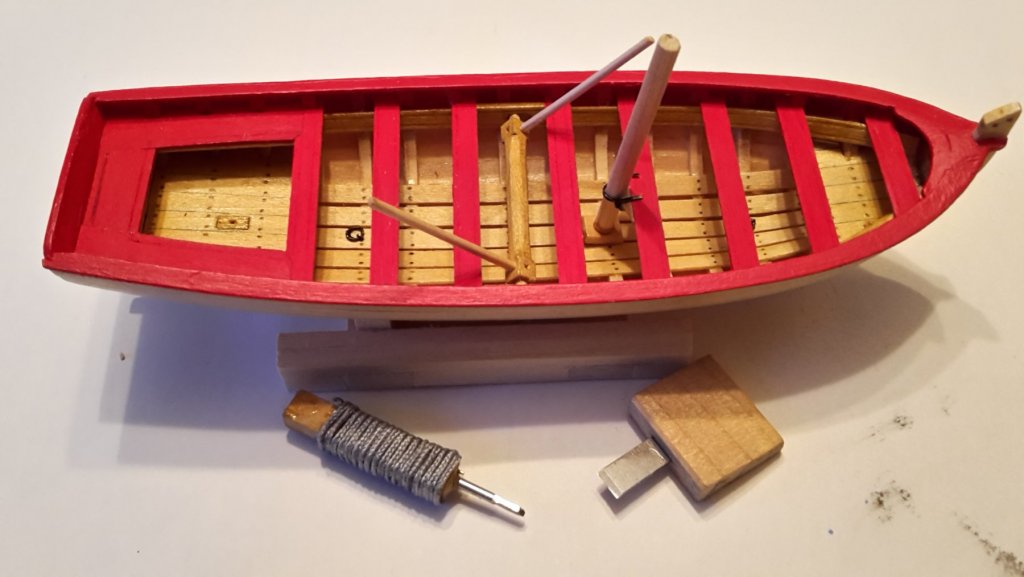
-
Steve - Looks great! You've inspired me to pull mine back out. What are you using for the black paint?
- 165 replies
-
- 1
-

-
- finished
- model shipways
- (and 1 more)
-
Thanks very much for the comments Steve. I've been enjoying your log too and suspect that we're both paying attention to BobF's build. I have the risers ready and rings in mind, but am wondering about the windlass? BobF (and others) run into a problem that the risers are not vertical. At the moment, I still have the option to sand the ribs vertical for the riser which is what you seem to have done and what Chuck has in the instructions. If you look at the National Maritime Museum models (second link) you'll see that BobF's "fix" seems to be exactly how it was have been done originally. You can also see that it would have allowed the windlass to be removed when needed, which is an interesting detail but not an easy to model. Any thoughts? Were the windlass wire pins tricky? http://modelshipworld.com/index.php/topic/1465-18th-century-longboat-by-bobf-model-shipways-148-tri-club/page-9 http://imageweb-cdn.magnoliasoft.net/nmm/supersize/d4057_5.jpg
-
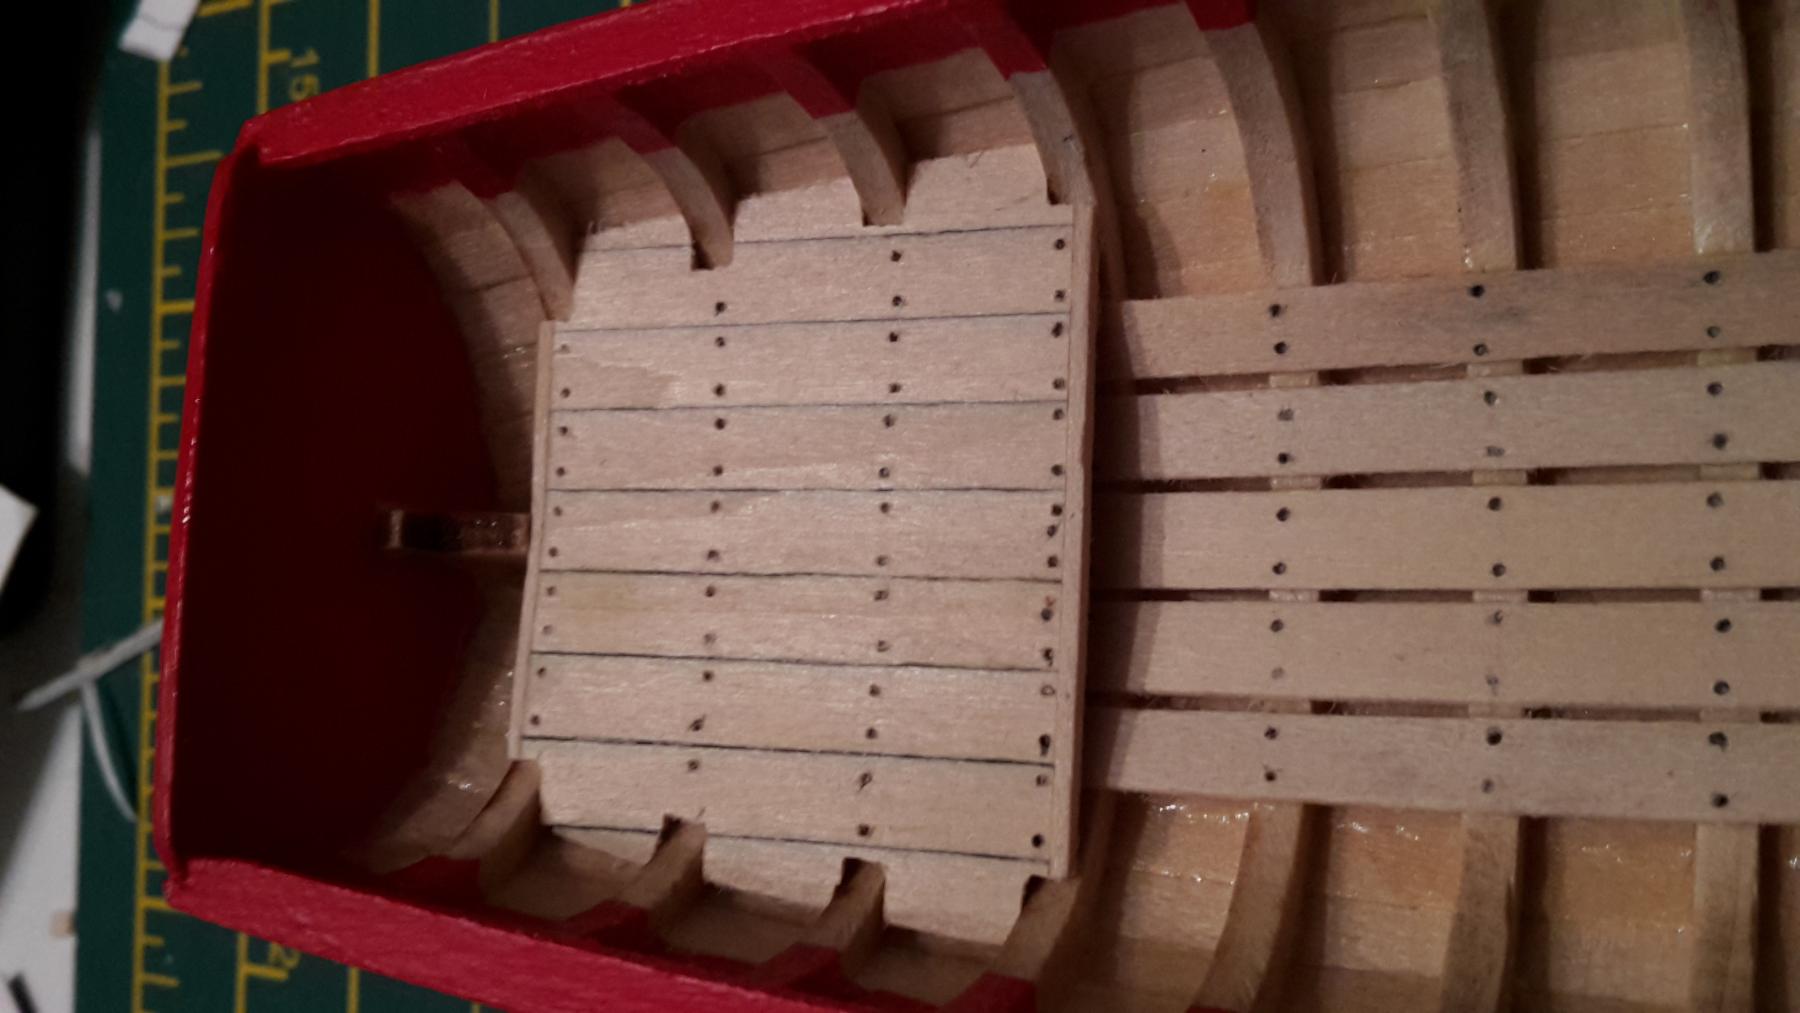
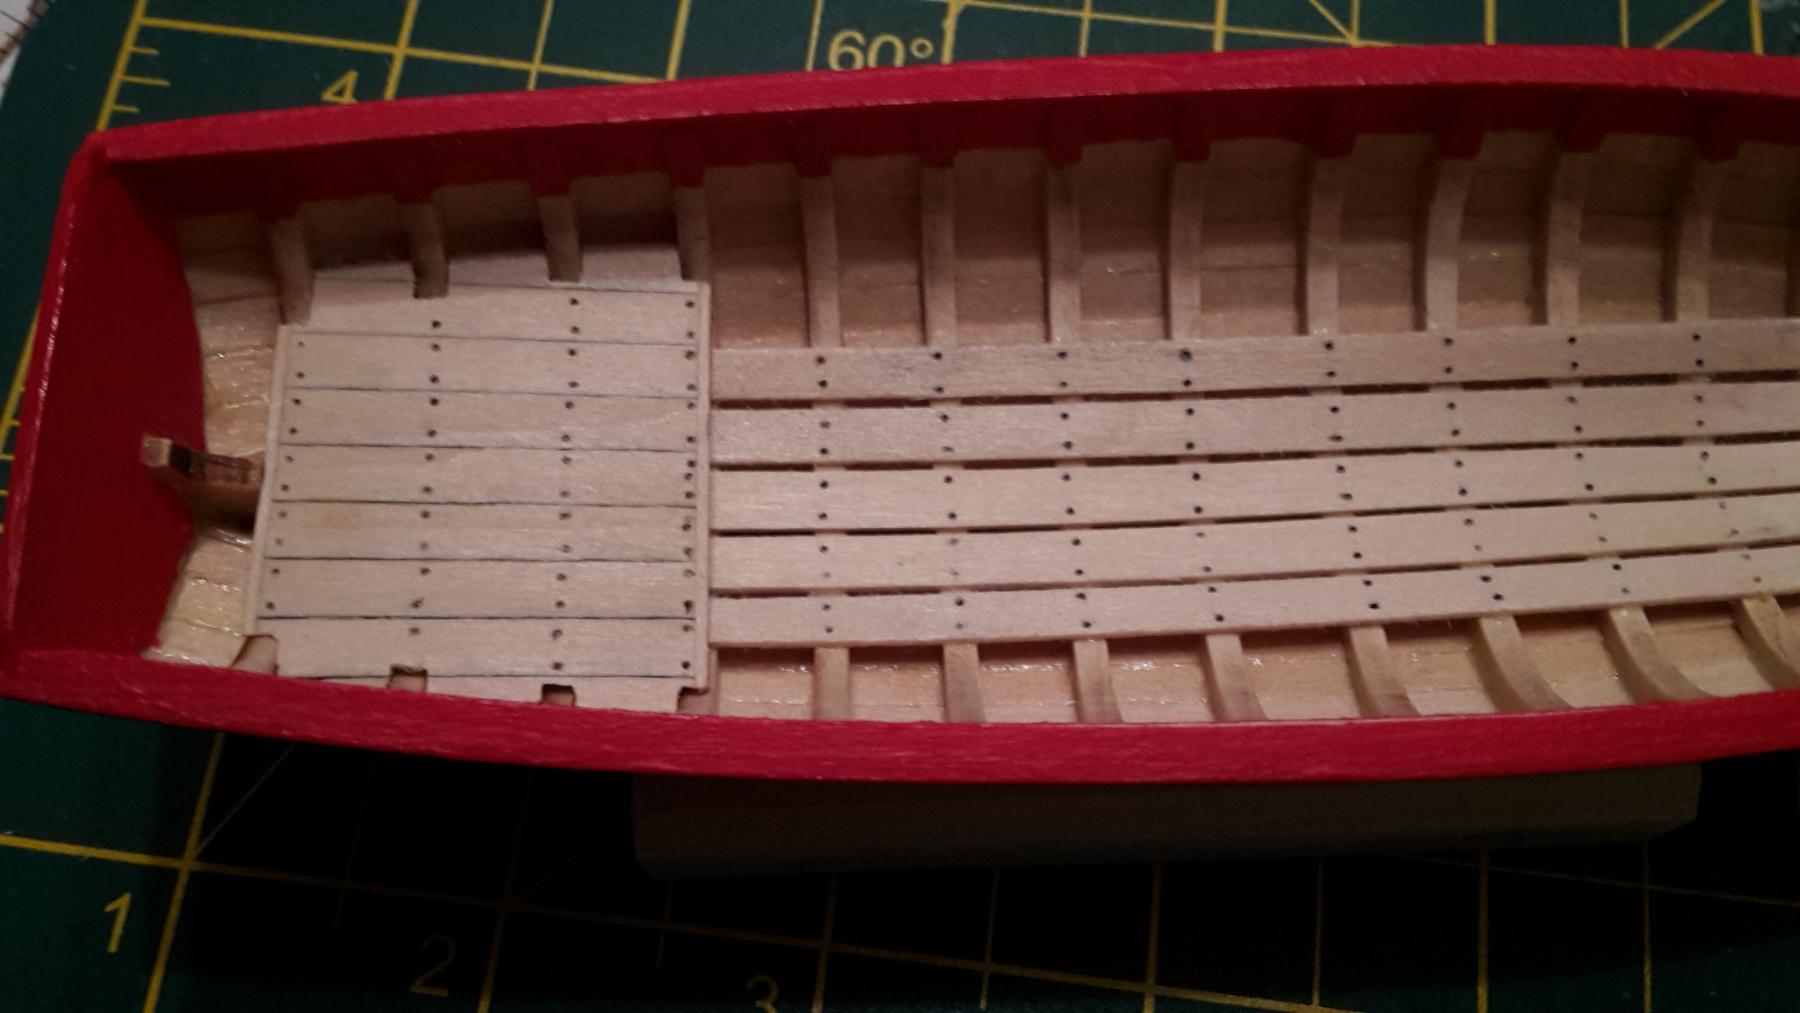
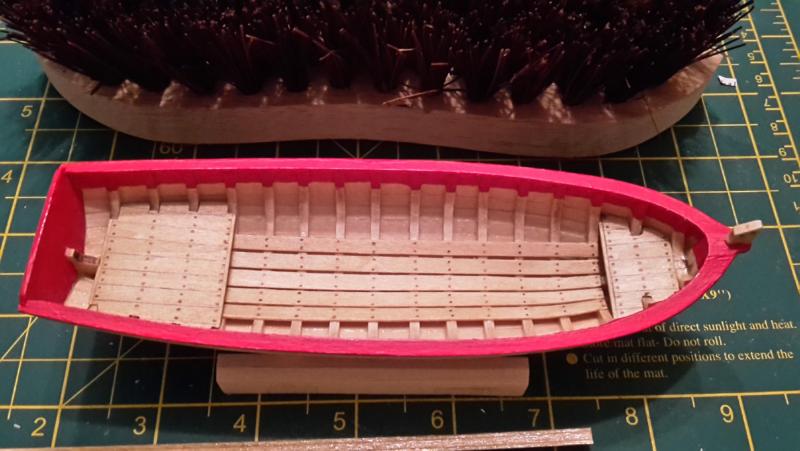
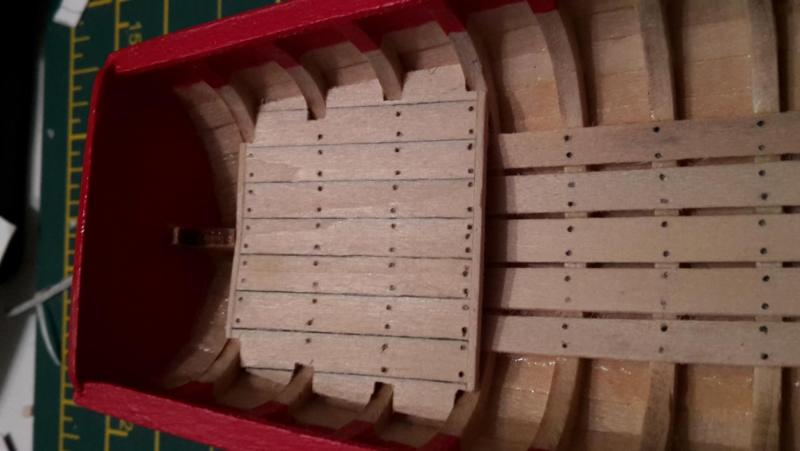
Still working on the floorboards ... At first, I tried drilling very small nail holes (no. 78) and then marking with pencil (as above). I was unhappy with the result and decided to try BobF's nailing approach by cutting down natural bristles from a scrubbing brush. The bristles aren't perfectly round and required a larger drill (no. 75). I'm still not 100% happy with the result, but it is time to move on. Hopefully the imperfections in the nailing effect will be "lost" in the finished longboat. The picture below shows the bristle nails with a coat of light oak varnish on the floorboards. For future reference I need to be more careful in lining up the drill bit on the faint lines I drew. It isn't easy!!
-
We attached the first garboard planks. We wet them first in boiling water to soften them and then clamped them to the ribs to get the shape we needed, even thou the instructions did not tell us to. Then we dried it using a hair drier. Once the garboards had taken shape, we then stuck them on the boat. Unfortunately the boat took a slight wonk! [Dad: Andrew means that the boat has warped a bit] The big questions are how should we fix the wonk and should we have wet the garboards to get them in shape in the first place or just glued them on dry? Hmmmmmmmm. Andrew.

-
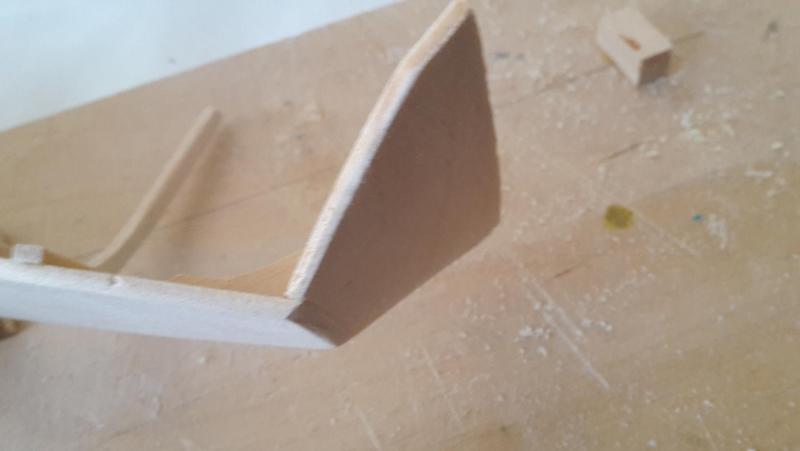
Thank you for the nice comments. After all the ribs were glued to the floor, the next step was to sand back the edge of the floor to make it even with the ribs. This took a long time. After that I sanded the stern floor at a 45 degree angle to match the stern. Then we sanded the bow support into a V shape and glued that to the floor as well. We are now ready to build the sides! Andrew.

- 11 replies
-
- 4
-
-
- dinghy
- Midwest Products
- (and 1 more)
-
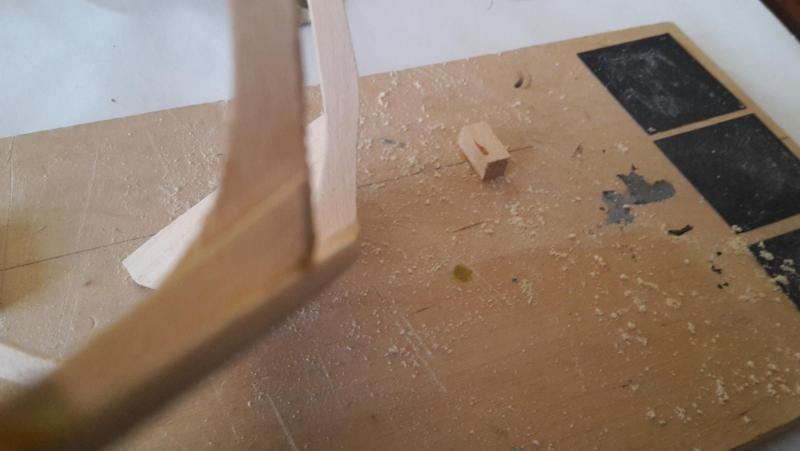
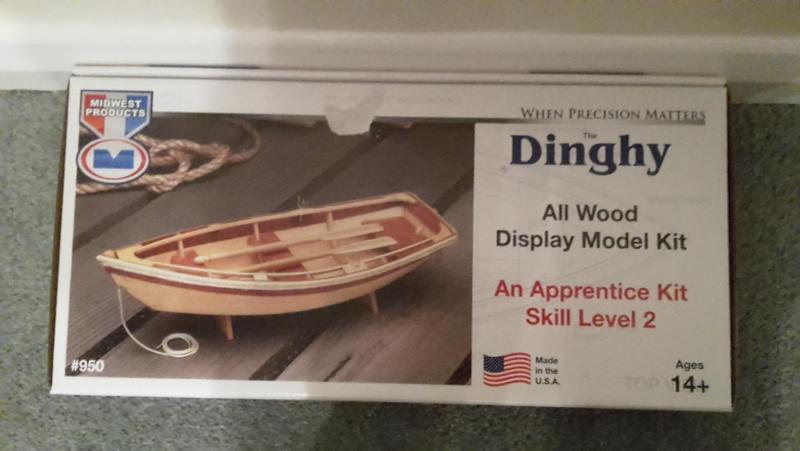
Hello. My name is Andrew. I am 9 years old and this is my first wooden boat build. I am posting this under my Dad's account. He is building a longboat and helping me with my boat. The "Dinghy" is made by Midwest. We started by making sure all the pieces were in the box and reading the instructions. The next step was the draw guidelines on the floor of the dinghy. This was so we knew where to glue the ribs. After that, we made the ribs and glued them to the floor. I am enjoying building my first wooden boat. Andrew.

- 11 replies
-
- 9
-
-
- dinghy
- Midwest Products
- (and 1 more)
-
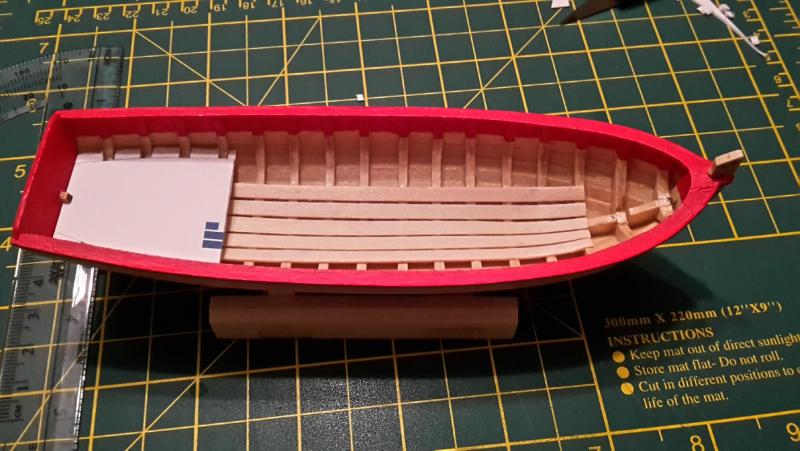
Thanks for the nice comments, I've taken a go at the stern deck, but am not quite happy with the result - it is close, but not quite right at some of the ribs. At least my template here is close, but it is the process is tedious to cut out and file the back side of the notches - hard to be accurate when hand filing. I've tried simulate nails by drilling small holes and then pushing in a pencil. The effect seems okay, but smudging is a bit of an issue. I'm going to visit the hardware store to see if I can find a cheap nylon brush with the right sort of bristles to act as nails. This seems to offer a clean look in other posts. The lead marks (graphite) sand out pretty easily, so shouldn't pose a problem
-
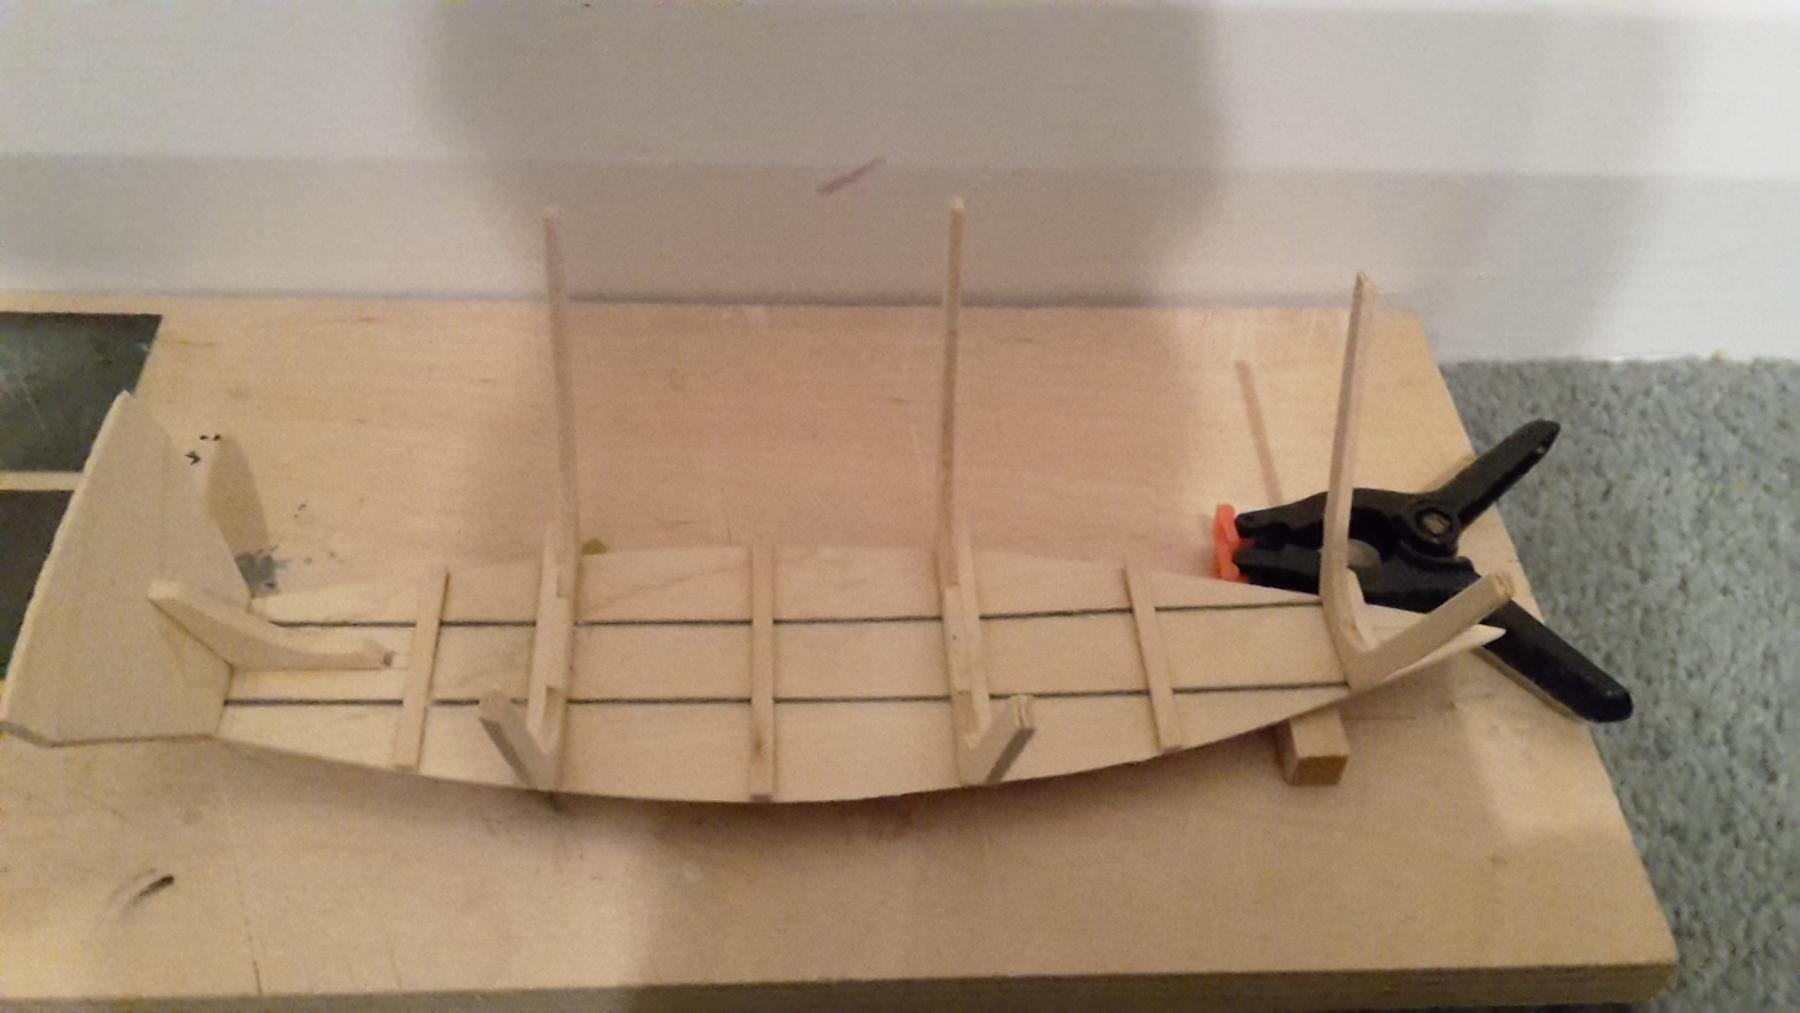
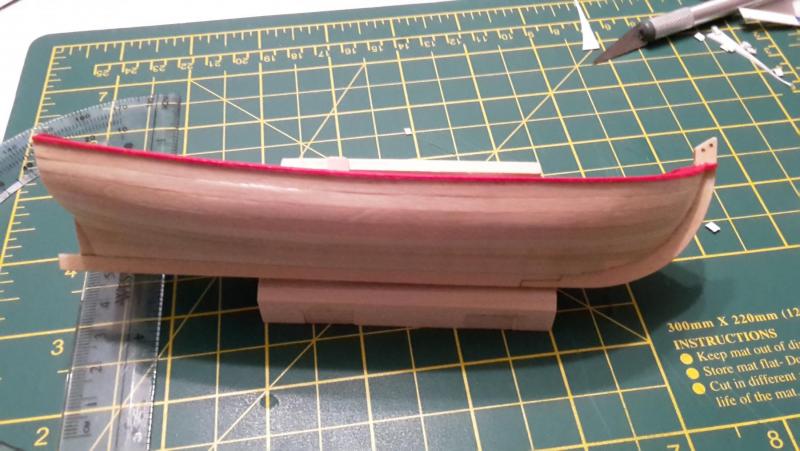
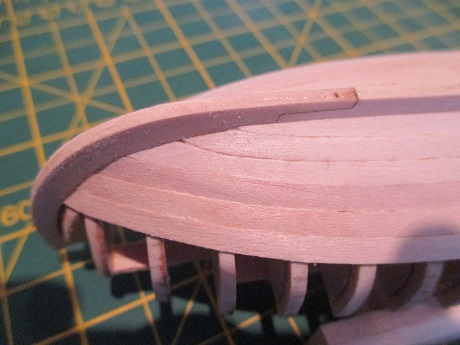
I put this model down for a long time, a little disillusioned with the planking as I approached the gunwale. It rises a little too sharply at the bow and there is a slight asymmetry between the port and starboard sides. Funnily enough I was much happier with it when I pulled it out of the box and over the last month have hollowed out the middle, added the cap rail, dabbed on a splash of colour (using Chuck's Windsor and Newton "Crimson" acrylic) and also added the floorboards. I'm really enjoying it again, especially with results to show from every session. As you can see I'm starting to build a template for the rear platform. This seems to be an area where a bit of patience is rewarded ...
-
And a couple of other photos of the planking ... One thing you might notice is the scratches on the stem. I tried to be careful, but evidently not enough. I'm not sure what to do about this right at the moment ... maybe I can sand it out later.

-
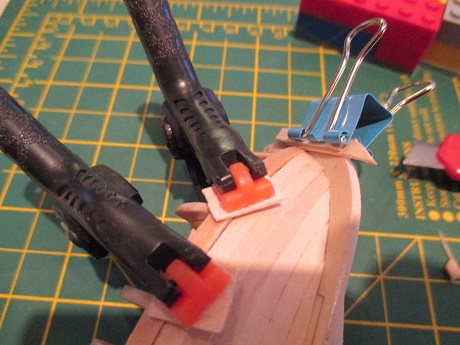
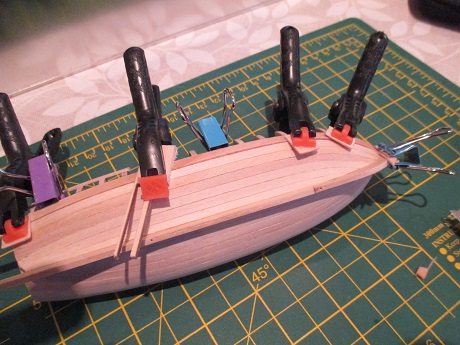
I followed BobF's technique for laying out the planks and measuring taper. There are some differences though - at the centre of the boat, my model will have 10 planks from keel to gunwale. This works out at very close to to the width of the planks in the kit, so minimal tapering was required. After laying six planks, I remeasured and adjusted the marks on each bulkhead. Chuck's instructions were slightly different - laying two planks along the gunwale first and then working from the keel. I was nervous about shaping and sizing the middle plank. Here's a link to BobF's instructions: http://modelshipworld.com/index.php/topic/1465-18th-century-longboat-by-bobf-ms-148-tri-club/page-2 There are good comments from other builders on shaping the planks. The first five were shaped horizontally by dipping in boiling water for about 30 seconds and then clamping onto a board. I found that it took several attempts on each plank to get the curve right. Some broke, some buckled, there might have been some swearing but it CAN be done! I used Chuck's hairdryer approach to dry the planks, but found that on the 'final' shape it was better to let the plank dry properly (for several hours) for it to retain shape. Patience is key. Some of the planks were formed over several days - working for about 10 minutes each day, Once the shape was formed, I sanded the edges so that each plank sat neatly against the lower clamp. This isn't easy as the planks twist easily. After that I glued in position (Titebond waterproof white glue) and fixed with a series of clamps and binder clips. The final step was to set the width (taper) of the plank. I did this by filing the free plank edge down to the planking marks on each bulkhead (and using a razor knife at the bow). After plank #5, the horizontal bend is smaller and I found that it was easier to clamp the wet planks directly to the bulkheads. Even at the this point, I still found that I was wetting the plank several times before I got the shape I wanted. Here's some pics of the the first shaping of starboard plank #7. I'll wet the plank again at least a couple more times before getting it to align with plank #6.
-
I spent a long time working on the first plank and studied all the build logs. It isn't just getting the fore/aft position right, but also the taper getting. I think I did okay, but with the benefit of hindsight I think a bit more taper at the front would have helped. On this first plank, there was no taper at the stern. You can also see the holes I drilled in the keel to, eventually, attached the model to a stand.
-
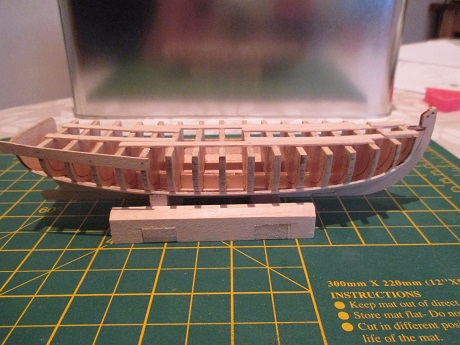
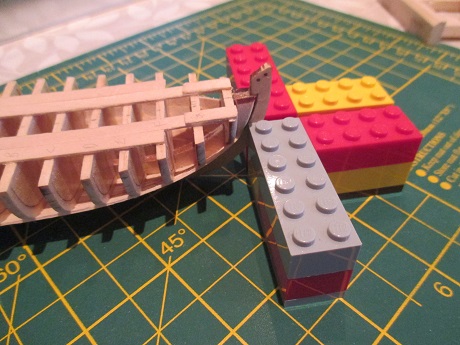
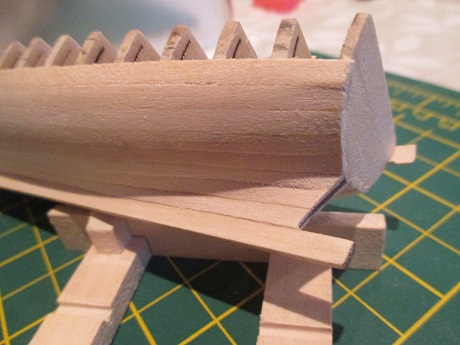
This is my first post on MSW. Let me apologise in advance for errors I make in posting. I will try to remedy them as I can. There are some terrific longboat builds going on, which have been a great resource. I find myself frequently referencing BobF, Bob Riddoch and Chuck, among (many) others. Many of the techniques I have used have been directly copied from these builders and I greatly appreciate the wisdom they have shared. While I am trying to duplicate the skills and techniques that these builders illustrate, I am under no illusions about matching the quality of their builds. In my posts I will only try to document my own experiences. After researching Chuck's Longboat kit and visiting the original model at the NMM in Greenwich, I finally started my build in Sep14. I'm now (Jan15) nearing the finish of the planking ... so slow progress. A couple of points on the build to date ... 1. Read the instructions several times!! I was in such a rush to get started, that I glued the false keel/keel/stem together and varnished without notching or drawing the beading line. I have no doubt that it would have been easier to notch before gluing. However, I worked slowly with a razor knife and, in the end, I was happy with the notches. 2. The laser cut bulkheads went in easily enough. Since I'd varnished the keel, I did have to sand each bulkhead notch slightly slightly for fit. Someone had the smart idea of using lego squares to help set the frame. I think I did a decent job getting all the ribs square, but struggled to get them perfectly horizontal. In the end, I decided that what I had was good enough. It was easy enough to fair the bulkheads for planking. I did add the transom at the this point and used some temporary braces for support (you can see one in the photos below).