HOLIDAY DONATION DRIVE - SUPPORT MSW - DO YOUR PART TO KEEP THIS GREAT FORUM GOING! (89 donations so far out of 49,000 members - C'mon guys!)
×


MarkCC
-
Posts
33 -
Joined
-
Last visited
Content Type
Profiles
Forums
Gallery
Events
Everything posted by MarkCC
-
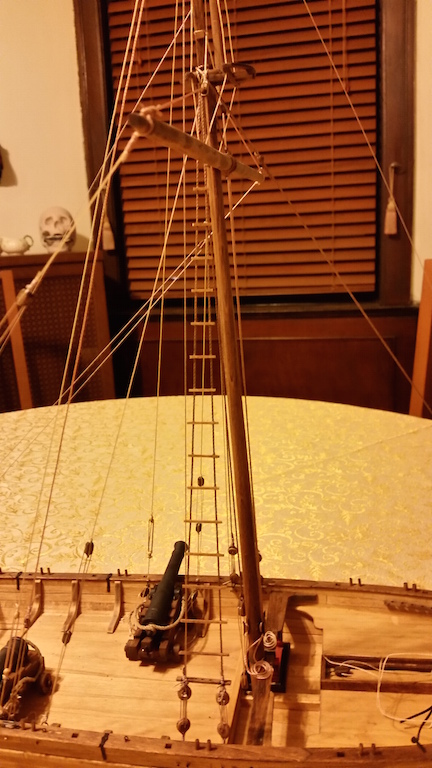
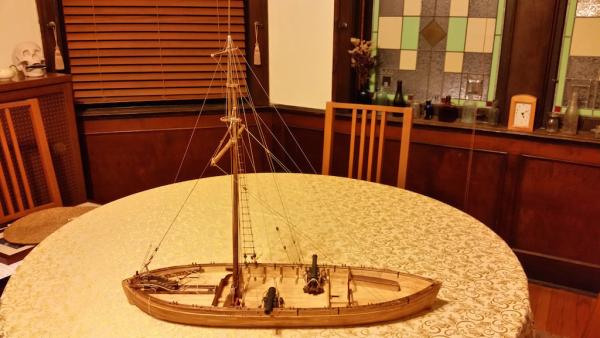
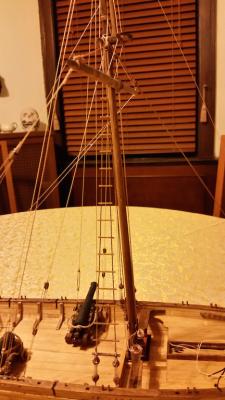
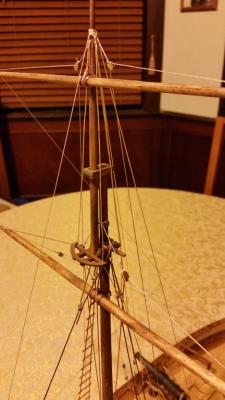
Hi All. It has been a while since I updated this buildlog, but progress has been continuing. I am mostly done with the rigging at this point and am trying to figure out how to get nicely formed coils of rope. Anyway, here are some pics showing the current state of the build. Mark
-
Wow, that looks really nice. How do you get the ropes coiled so nicely? Mark
-
Thanks Chuck. I think I have a pretty good idea how I will proceed now. I agree with your comments in that build log that this seems like an odd location to have a fire fueled stove, right under a wooden beam like that. Perhaps the federal safety inspector who signed off on the project was on the take? Mark
-
Hmmmm..... You are correct. The cook stove does not appear to be mentioned in the instructions, though its construction does appear in the plans. I'll definitely tackle that now. So what would such a stove look like in terms of the colors of the bricks? I would assume they would be a darkish red with maybe some black. Would there be mortar between the bricks? Also, what is the material of the frame in which the bricks fit? It appears that it is wood. Any suggestions are much appreciated. Mark
-
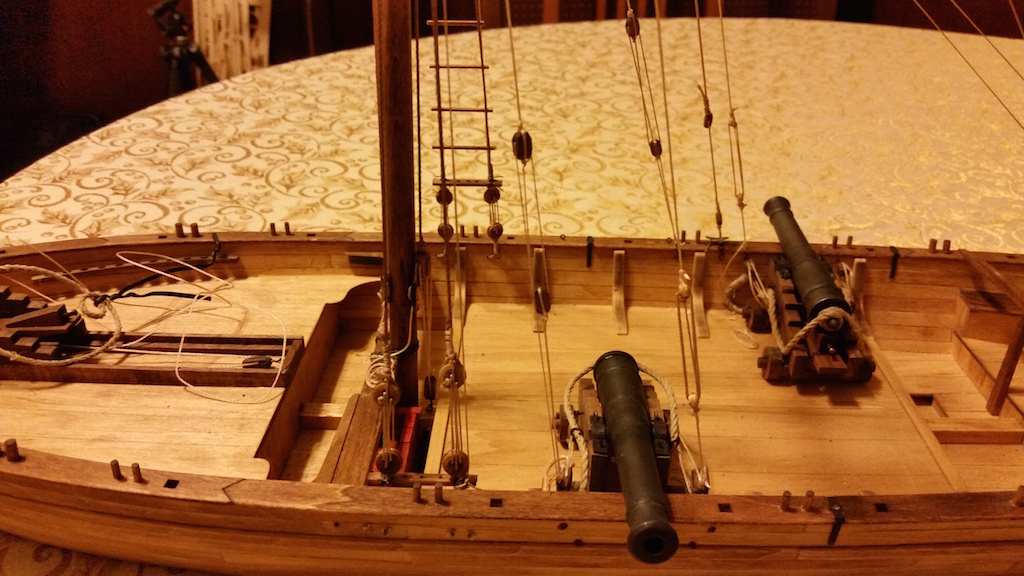
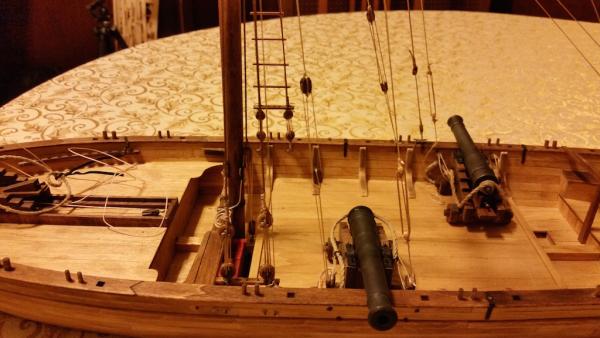
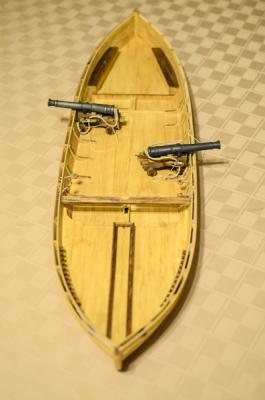
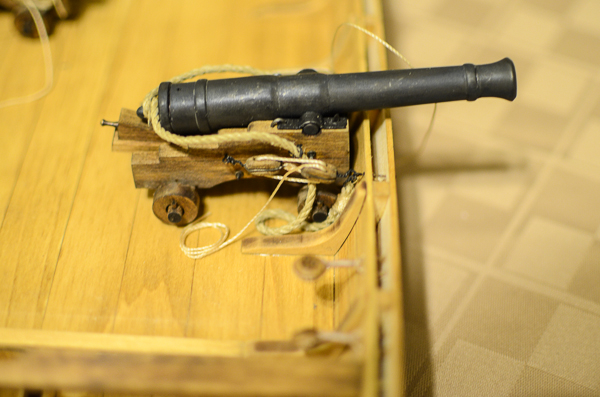
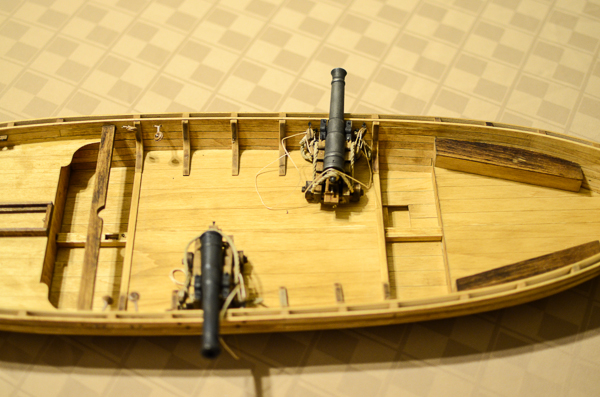
Quick update with some new pics. I am finding out that just like in school, I am a lousy note taker so I am not keeping up with all the details of how I am doing things. No worries though, this way I will have the opportunity to learn the same lessons a second and likely even a third time down the road. My Philly has guns now! As you can see I have built and mostly rigged the two 9 lbrs. Building the gun carriages was pretty uneventful. I had a heck of a time with the gun barrels however. My first attempt at blackening resulted in most of the "black" rubbing right off. So then I decided to try using acrylic paint, but I did not like the result so I striped that off. Next up I tried using some artist quality oil paint... liked that less than the acrylic so off it came. Then I went back to the blackening solution, this time I went over the pieces really well with acetone followed up with isopropol. This time around the blackening stuck pretty well. Then, taking a suggestion from the manual, I shaved some charcoal off a drawing pencil and buffed the barrels with that. I ended up satisfied with the final result. Next up I had a lot of fun rigging the first cannon about 5 times over as I tried to figure out what should go over-and-under what and where. One thing I really struggled with was getting the hooks right on the blocks. Most of them lost all resemblance to actual hooks by the time I was finished. One thing I learned was that they have to be kept pretty short and close to the block. My first attempt left no space between the double and single block when the gun carriage was snugged up against the hull. I have not yet figured out how I am going to position the side tackle falls. You can see my first attempt to create a loose coil on one of them. I also realized too late that it would probably have been easier for the rest of the build had I left the cannons off of the carriages. Unfortunately they were already secured in place. One thing I am not happy with is how the lines sag and drop. The threads are stiff and defy "gravity". I want to figure out some way to make them droop and fall more naturally. Other items of note include: The shot garlands. Broke one of them in half while trying to sand them smooth. Not a whole lot of wood along the sides. The gun track for the 12 lbr. Pretty straightforward. I made sure to have the carriage assembled so I could use it to make sure the width of the box was correct. The mast partner. That went pretty smooth. The instructions were pretty clear and the supplied jig worked perfectly. The lower deadeyes. Again, these went pretty well. The hawse holes. I was planning on trying to line the portion inside the hull with either a paper tube or possibly a piece of thin wall tubing. But my impatience got the better of me and I decided that when all was said and done the difference would not be noticed by anyone but me. Now to finish up the 12 lbr. Mark
-
Hey Chuck. Actually, yes and no. Since this is my first build I dutifully studied many articles and demonstrations of planking. Thus I was thoroughly intimidated before I ever began . So on the one hand I was pleased to find out that planking is actually not so bad. On the other hand each and every plank turned out to be a learning experience. Cutting, shaping, beveling, soaking, over soaking, under soaking, bending, clamping, gluing.... I am definitely glad however that the planks are fairly large and relatively few in number. It made for a nicely manageable task for a first attempt. Mark
-
I have been slowly making progress over the last couple of weeks. So this is a good time for an update. Because of all the irregularities in the planking I had a lot of sanding to do. I started with 60 grit and worked my way down to 200. I found that the foam backed sanding pads you can pick up at the hardware store were very useful here. Not so much for sanding with, but rather I cut out some squares large enough to span 4 planks. Then I wrapped pieces of sand paper around the squares, the resulting sandwich was easy to contour to the shape of the hull while still providing some firmness. So after sanding for a couple of days I went ahead and stained the hull. I used Minwax Golden Oak for the hull, and Provincial on some parts for contrast. Even though I used the Minwax sealer, the rtesults still came out a bit blotchy. Next I added the knees and chests. These pieces were really simple to stain, just dip em in the can. As you can see I did not remove all of the laser burn marks, by this point I was pretty tired of sanding and I decided I could live with result. A perfectionist I am not! Next up was drilling the holes for the various pieces of hardware that need to be attached to the hull. The supplied templates made this pretty easy. After this point, things have slowed down a bit as I have been trying my hand at blackening the brass and cast parts. One of the 9lbr cannons came with the back end pretty badly flattened out. The good folks at model expo sent out a replacement which arrived pretty quickly. Mark

-
Chuck, I am impressed with how well you are able to get the planks to butt up against one another. I used essentially the same procedure as you describe, but with somewhat less success. I do however feel like I was getting the hang of it towards the end. Mark
-
What Kurt suggests is essentially what I ended up doing, using a piece of heavy weight card stock to determine the shape of the plank. I think that all of the bow and stern planks needed to be cut from the 3/4" wide stock from the kit, but I had plenty left over (as I was told would be the case). The only problem I ran into was not having the patience to get the final shape right so that the plank edges would line up smoothly. That I chalk up to a combination of climbing the learning curve and my built in impatience. I have always been a bit of a measure once cut twice sort of guy . Mark
- 259 replies
-
- 2
-

-
- Gunboat
- Philadelphia
- (and 1 more)
-
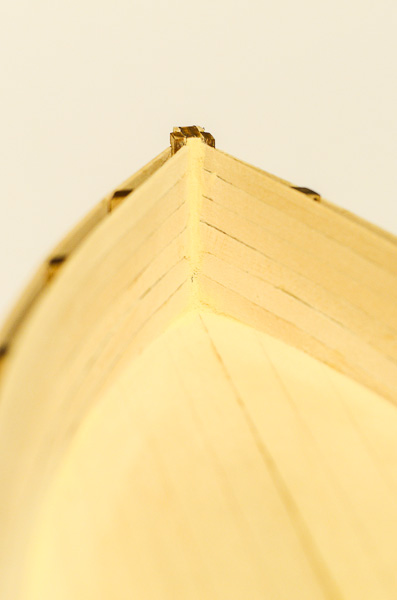
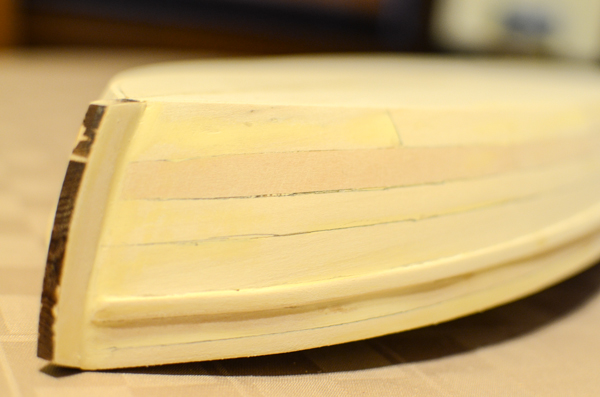
So I got the hull closed up and started sanding... and sanding... and sanding.... At this point I am now appreciating that it would have been easier to do a better job planking as opposed to relying on sanding to take care of sloppy workmanship. To be quite honest, I did not realize how many irregularities I was creating. The following pics don't really show how rough the planking was before sanding. Here is a closeup of the port side prior to any sanding. This was the first side I worked on and shows the most mistakes. Somehow I did not realize how poorly the planks were lining up until I started getting ready to sand. The main problems I ran into, aside from the overall problem of being impatient that is , were: Not taking enough care to make sure that the edges of the planks met up smoothly and were properly beveled. Getting a nice smooth curve to the edges was challenging. I definitely got better as I went along though . Lots of gaps between planks. Some of the planks bowed up at the edges while drying during the bending process. I suspect that I may have over soaked them and/or clamped with all the force along the midline of the boards. Depressions left in the wood from the clamps. Eventually I started using scrap pieces of wood to distribute the forces more evenly. But I still ended up with plenty of dents in the hull, kinda similar to what you see on any car which has been parked on the streets in Chicago for a few years. I did not really understand how the plank ends were supposed to fit into the rabbits at the bow and stern posts. When I assembled those pieces I left the gap too small and did not properly bevel the leading edges. This resulted in a lot of carving to try and get things to fit. Here is a pic showing the other side of the hull after applying wood filler and sanding from 60 grit through 200 grit. Still a lot of work to do. Quite frankly I expect that my hull is going to more closely resemble the state of the real think after it was raised from the bottom of the lake, as opposed to when it was first built. No worries though. I am enjoying the journey and looking forward to seeing what other mistakes I will be making once the hull is finished! Mark

-
Hi All. Just adding a quick update, photos to come soon. I have been slowly working down the hull with the outer planking. Despite my best efforts to properly shape and bevel the planks there are plenty of small gaps and slight bulges. Overall I am fairly satisfied though as I "think" the imperfections will be minimized after the application of some wood filler and sanding. I have all of the planks for the bottom strake rough shaped and bent. Just puzzling over how best to clamp them in place. I am thinking of using rubber bands, but I am quite open to suggestions. At this point I am "aware" of two issues to I wish I had paid closer attention to earlier in the build. When putting in the inner and outer top strakes I was not paying attention to how they met the bow and stern posts. I forsee some reworking in these areas. One of the photos above this post shows the worst of the issues where the inner and outer strakes meet the stern post at very different heights. How I did not realize that was not right at the time completely escapes me. I'll chalk that one up to being overly eager to get started. The other issue is how I am going to eventually mount the model. This one I saw coming while the hull was still open, thanks to Chucks build log. But for some reason I did not want to pursue a solution because I wanted to jump right into the planking. So I put off really thinking about it until I was about to close up the hull completely. We all know how well that strategy tends to work out. I was able to mark the location of the false keel on the bottom of the hull, as well as the locations of the frames. I have ordered a pair of brass pedestals from model shipways and I am confident I can carve out openings for the tines to fit up into the hull on both sides of the keel. What I am pondering at the moment is how best to screw into the bottom. I don't think I have enough room to work to be able to use Chuck's method of embedding a nut in the keel. I may simply have to use a thin wood screw, with a carefully drilled pilot hole to prevent splitting the soft basswood. Once I have resolved the above issues and laid the last planks in place I will proceed with the final sanding and staining. Mark
-
THE BLACKEN-IT TRIALS
MarkCC replied to Erebus and Terror's topic in Metal Work, Soldering and Metal Fittings
Hi Bart. I am following your Philly build and am just about to the point of trying my hand at blackening the cannons and associated fittings. A couple of questions. 1) Did you use Blue Jacket's Pewter or Brass Blackener? 2) Have you done any more parts and are you still happy with the results? Mark -
I know I have beveled some of the planks, but not all. One problem I see coming with the lower half of the outer hull is that the way I am cutting the planks from the wood stock is leaving wavy edges. I am trying to sand them smooth, but not sure how well this is going to work out. Mark
-
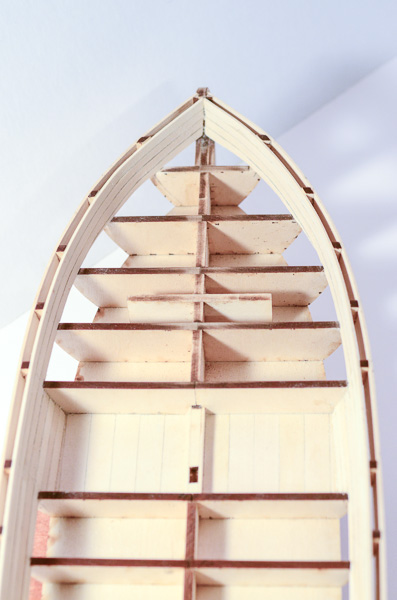
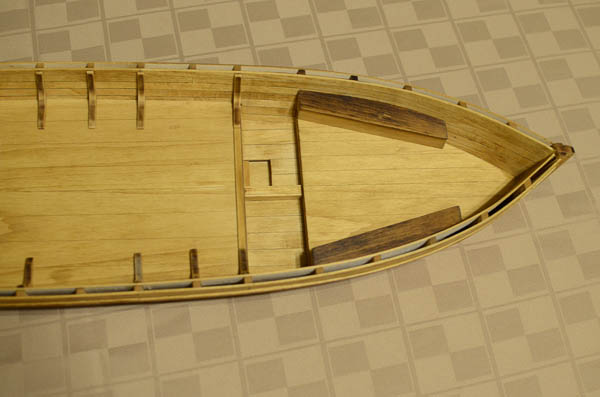
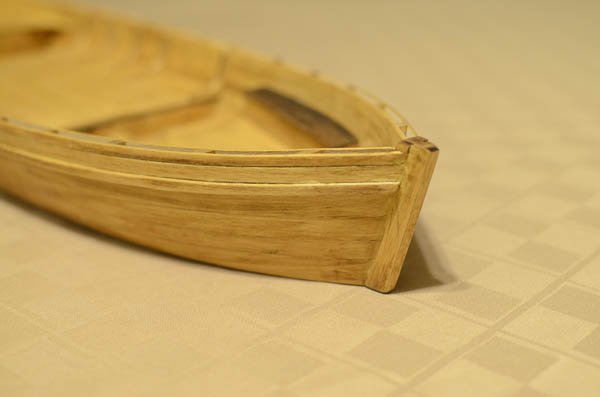
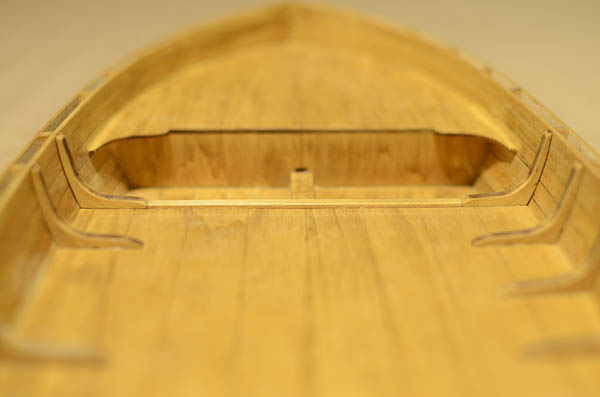
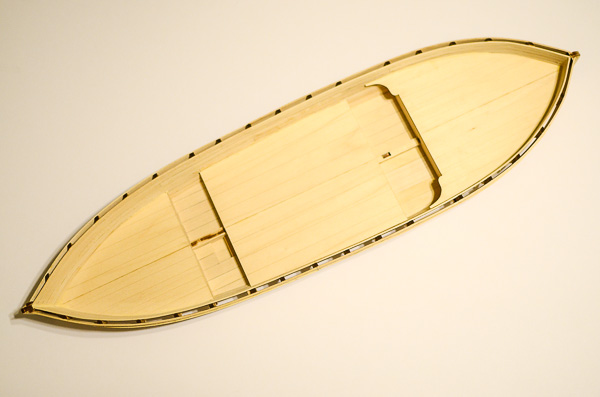
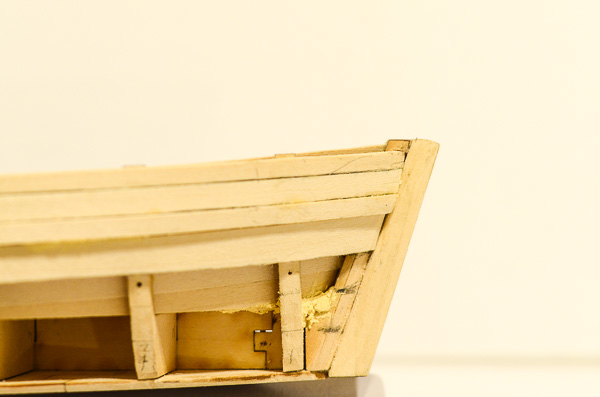
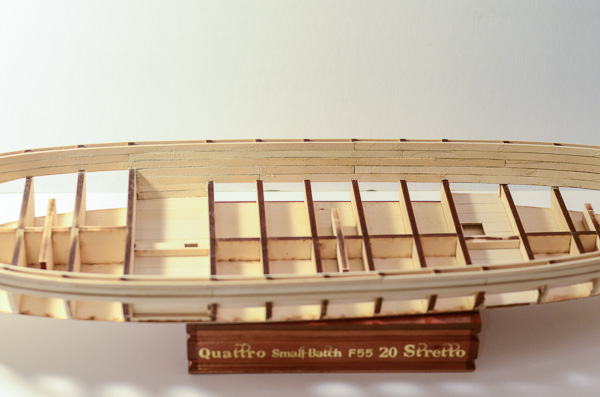
As promised, here are some pics showing the current state of the build. I am not sure if I should have waited till after varnishing the interior of the hull before laying down the decks. As you can see I did not spruce up the bailing well like the other Philly builds are doing. It seemed pretty straightforward, but I want to stick to the kit plans as much as possible for my first build. The learning curve is steep enough without adding extra degrees of difficulty myself. Despite what the instructions say about the deck pieces being oversized, I found that they were not quite wide enough. Maybe that has something to do with how I did the inner planking. I had to fill in gaps between the deck and inner hull with wood filler, I hope that the filler will not stain too differently from the rest of the wood. It does not really show up in the pic, but there were some obvious gaps which I had to fill. I expect that when everything is added to the deck these imperfections will not be too noticeable. At least that is the hope . Here is a closeup of the bow where you can see how I left a gap which I also filled in with putty. This next view shows how I was not paying attention to the height of the top inner strake as compared with its counter part on the outer hull. I expect that sanding will take care of this, but it definitely shows a lack of attention to detail as I was laying out these first strakes. So far the whole experience is turning out to be a lot of fun, and I am pleased with how it is going. Thanks to Chuck, Bart & Steve for posting your builds. They have been helpful. Mark

-
The strake ends at the stern ended up pretty poorly for me. Yours look gorgeous, mine looks like it was put together by a crew of drunkards . By the time I realized some of my early mistakes I felt that going back to correct them would likely end up with a worse mess. I will have pics up in a couple days in my build log. Sanding will take care of many of my gaffes, and I am hoping that once everything is in place on the deck the rest won't be so visible. I notice how you used a spare piece of wood to maintain the spacing between the outer and inner strakes right at the stern post. Nice. Mark
- 259 replies
-
- 1
-
-
- Gunboat
- Philadelphia
- (and 1 more)
-
Turns out that is exactly what I did. Worked way better than I though. I really expected it to be tough to make the axles both round and centered. But that turned out not to be the case. I now have the inner hull planked and largely sanded, and the deck installed. Began working on the outer hull below the gunwale. Took me a bit of reading and thinking to realize that you have to carve curved planks out of the larger pieces of wood in order to bend to the shape of the hull. For a while there I was thinking that the 3/4" wide pieces were way too large and that there were not nearly enough of the 3/8" wide ones. Turns out that reading once through the instructions quickly is not enough... who'd-a-thunk it. I'll have some pics to post soon. Mark
-
Progress! I have been slowly planking along. Started with the top strake, inner and outer. Then went down to the gunwal on the outside before going back and working on completing the inner planking. Other than making a mess with the glue and pencil marks no disasters have befallen. At least I don't think I have make any mistakes which will not be sanded out. Since I am spending a lot of time waiting for planks to bend and glue to dry, I figure I will get started on the 9lb gun carriages. Does anyone have any clever tricks for carving the round axles out of the square wood? Mark

-
I have not even begun to think about the rigging. I have no idea how I am going to approach that particular part of the build. Keeping my focus on the hull for the time being. Mark
-
Makes sense to me. On your advice I have planked the outer hull down to the gunwale and now am working on the interior. Should have some pics up soon. One thing I am finding is that it is impossible, at least for me, to avoid smearing glue on the planks. But I figure that will all sand off so I am erring towards having a little too much glue (for structural integrity) rather than too little (in an attempt to keep things clean). My impression is that the planking on this kit is relatively straightforward, not too many planks and fairly large. Yes? So far I am doing alright, but I am glad I did not go for something like a frigate for my first build . Lots of smaller planks. I think I would have been overwhelmed. Mark
-
This is the way I interpreted these pieces as well. It looks pretty clear from the drawings that they are their to support the inner planking down by the cockpit floors. Mark
-
I am at almost the exact same point in my build. Only real difference being that I am working on the inner planking first as opposed to the outer. I am also planning to stain the interior before going too much further. Mark
-
Hi Kurt. What you say about staggering the butt joints makes good sense. Thanks for the tip. Mark
-
Hmmmm... For the inside I was planning on following the same butt joint pattern as for the outer hull. I think I will map out the lengths needed tonight and see how things work out. Mark
-
Thanks for the advice Chuck. "Smart ---" answers work for me , so long as the information is there I'm good. Although the drying time question seems a bit obvious on the surface what I was wondering was if 'dry to the touch' is good enough, or whether overnight is necessary to avoid shrinkage. I did soak, clamp & glue the uppermost inner plank along the port side last night. Soaked for about 20 minutes. Let them dry in place for a couple of hours then glued. Checked it this morning and no signs of cracking or warping , so I figure I am good to go. The next question to ponder is how to make sure I get all of the needed plank lengths out of the available stock. Mark
-
So I am ready to start planking the hull. I will be soaking the planks in warm/hot water and then clamping them to the bulkheads to dry in place. The planks are 1/16" thick. How long should they soak and how long should they be allowed to dry in place? Mark