DONATION DRIVE - SUPPORT MSW - DO YOUR PART TO KEEP THIS GREAT FORUM GOING!
×


Livingstoneman
-
Posts
69 -
Joined
-
Last visited
Content Type
Profiles
Forums
Gallery
Events
Everything posted by Livingstoneman
-
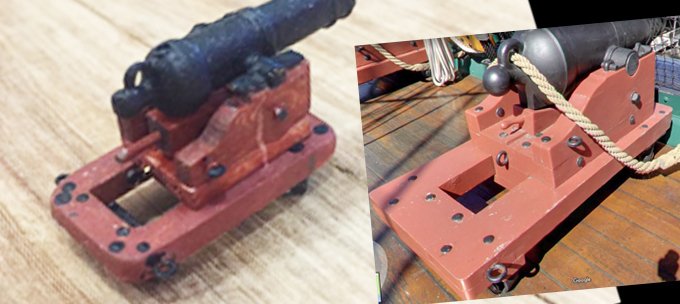
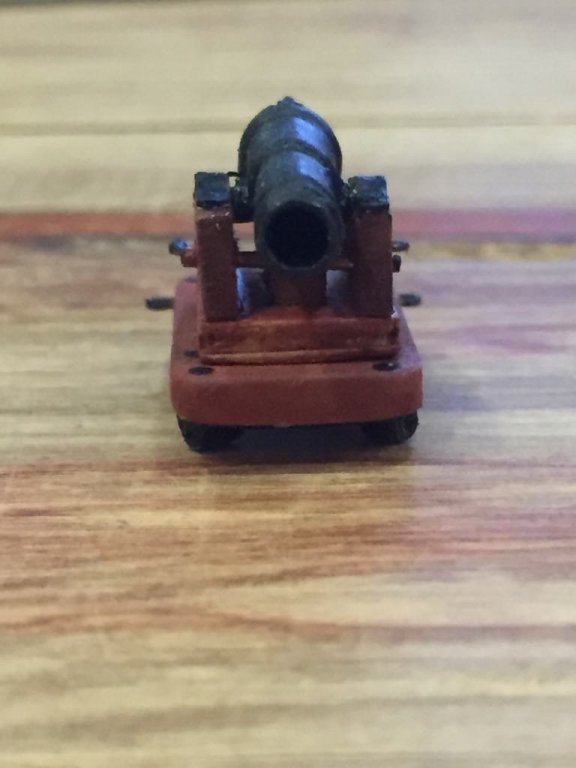
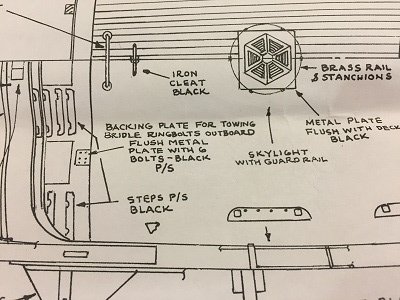
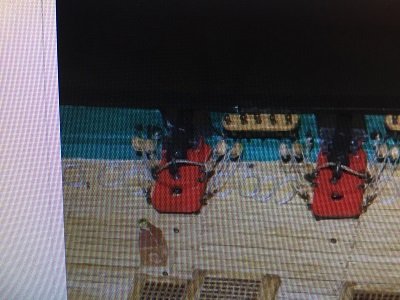
Spent the weekend working on my first Carronade. I looked at the current on on the ship, the blueprints and other models. And of course, they were all different. Ha! So I decided to go with the current look. It took me a while to get the positions correct and the spacing of the wheels as the frame has to overlap that inner slant bulwark thing. I saw that the drawing said to use iron oxide color, well I actually used real red oxide.but again found out that it is darker than the current frame. The current frame is more of a brownish pink. Some molders paint them red. Was this the older version color? Or maybe they did it to make the Carronades flashier. I had to drill out the carronade to make it look real. I had a difficult time painting the brass eyelets. The paint just rolls off it and when it drys I can just scrape it off with my finger nail. hmmmm Well here it is, any comments before I mass produce 19 more? Thanks .
-
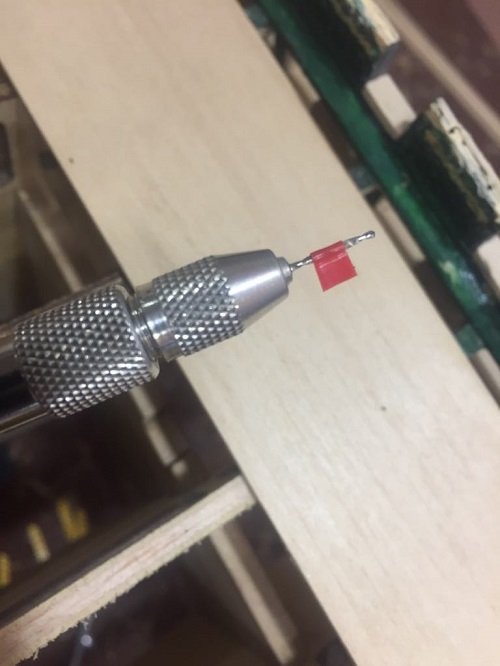
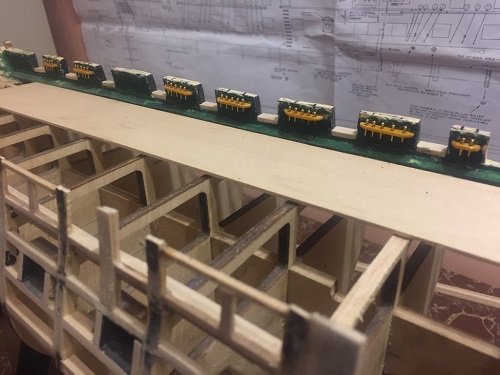
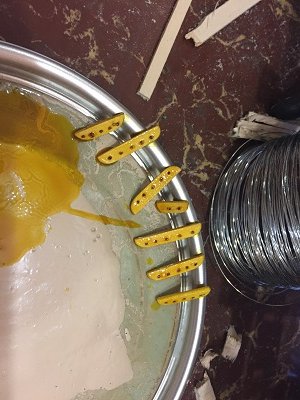
Well, more months have passed by without a stitch of work on my Constitution. So this month, I have been inspired to fix up my work area to make it easy to do my build. Today I have continued to work on my pin rails as that is what my mind wants to do. HA. I got some picture frame wire about the size of #63 drill bit (0.71mm). I cut each length to 5mm. Then Super glued 2 of them in each pin rail. I tried my dremel to drill a hole of a #63 into the side of the bulwark but found it too big, tried my mini dremel, better but still not the best, then tried my hand held finger drill and it did the job. Had to be careful not to got too deep, just about 2mm. The pins are about 0.87mm so a #65 bit should do it. Installed them but without glue for now as I might have to remove them for planking, etc.

-
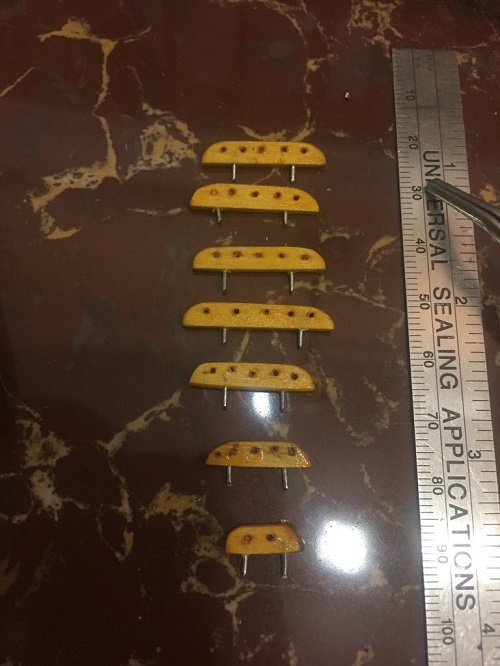
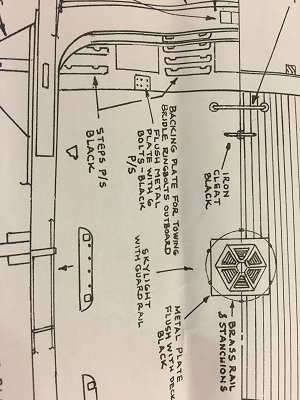
ok, its been too long since I have worked on the constitution. Time to get back to the impossible task! Today I decided to work on the pin rails. Don't ask me why, I just felt like doing it. To do this, I had a few challenges. I noticed on the prints that the prints say there are 6 holes in the rail 4 round one and 2 square. But on the Constitution today has 5 holes. 3 round and 2 square. I looked on other builds and they made 5 holes. So after doing a few test, I found out that the pins simply are too large to effectively place 6 in the area required. So 5 it is. So I made the 7 rails to fit on the second course from the top and drilled holes. I then varnished them with the only varnish in the village which was way too light, but I'm thinking it will get darker with age.

-
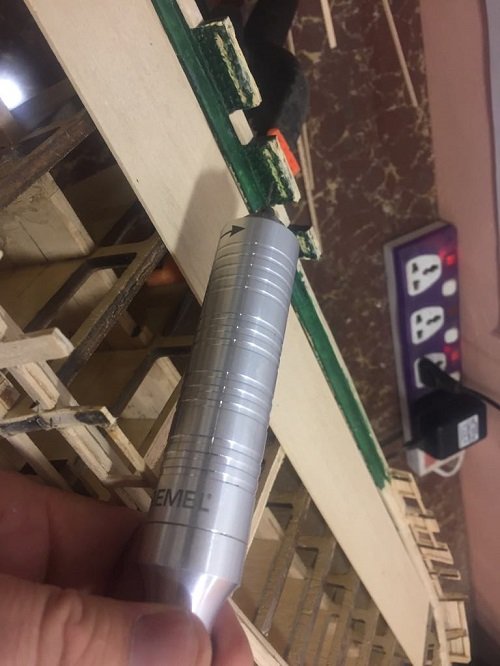
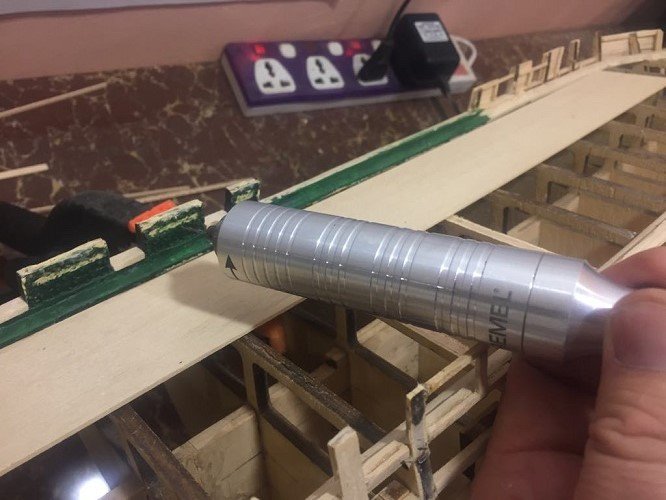
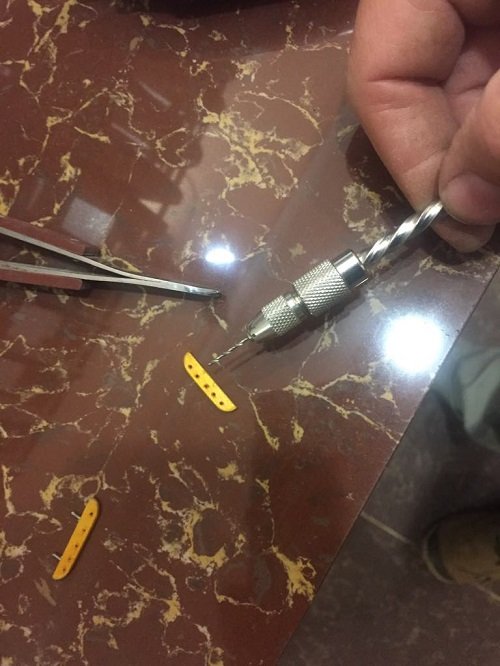
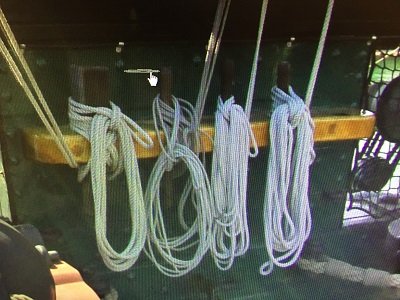
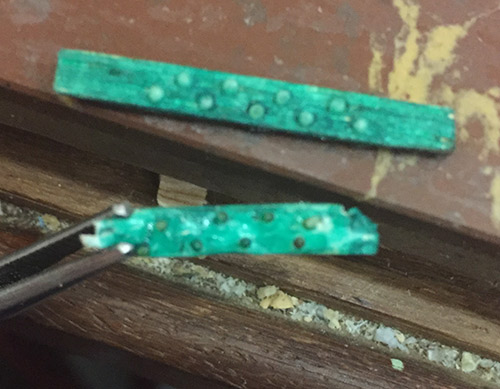
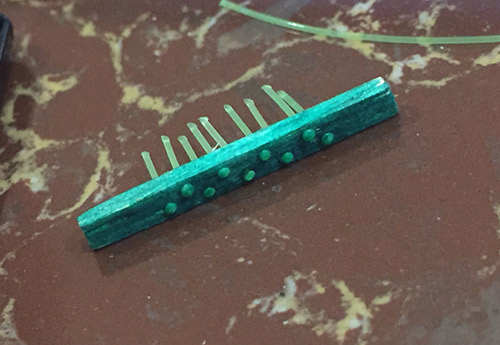
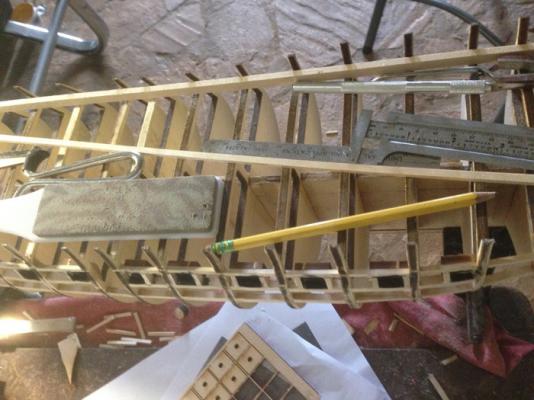
ok, I managed to find some 0.28mm or 10Lb green fishing line and tried it again and using a 0.20 drill. the results are below. But when I show my wife she says she likes the larger one as it is rounder and looks more like rivets. But again, not accurate. The smaller one is better and almost perfect I would say, but when melting, the balls don't melt always in a perfect dome. And a bit of black ends on it. So when comparing them both, I will go with what people will see and recognize. The accurate small one cannot be seen as well with the naked eye, and from a distance, looks like a drilled hole. Which I am trying to avoid. But with the inaccurate large one, it is obvious from a distance that there is a dome thing and it resembles a rivet. As you will notice from my comments, I am going by site not accuracy. Its going to be sitting above my fire place where it can be admired by visitors, not a Museum. HA! It is easier to paint the green on before putting the fishing line. Plus I doubt if paint will stick to the fishing line.
-
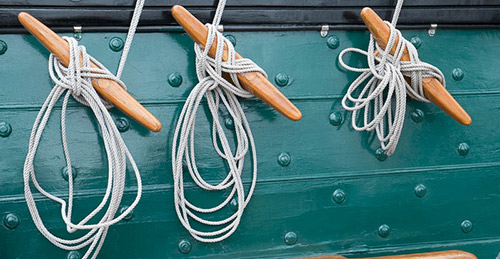
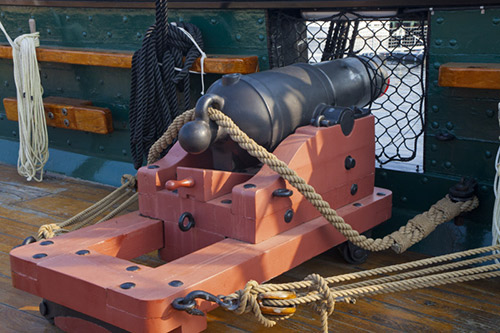
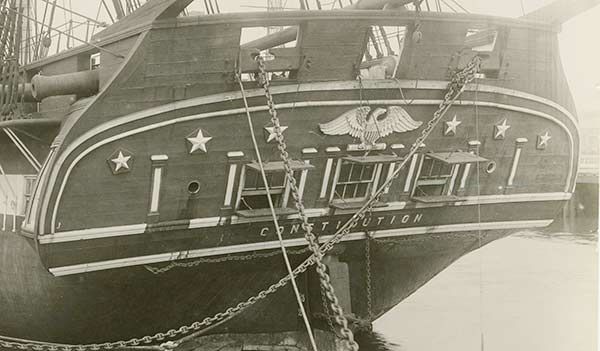
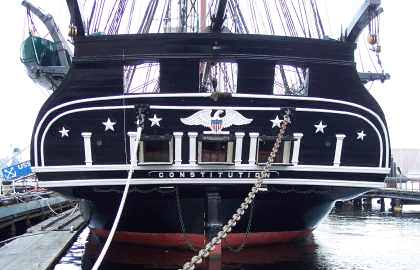
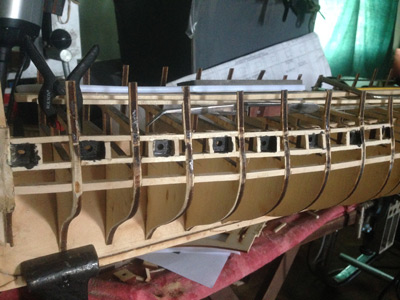
Here are a few pictures I found of the inner rivets.
-
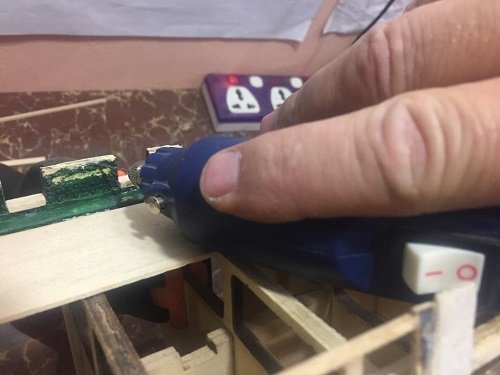
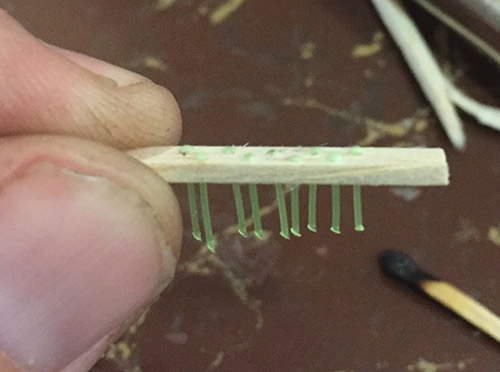
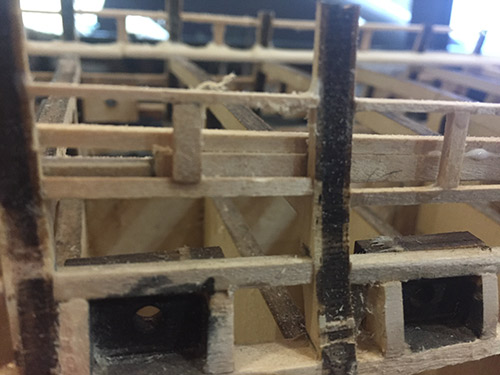
Today I did some research on the inner rivets. I looked at Usedtosail and got the idea from him. saw a few original photos of the connie and decided on a plan. At first I wanted to just paint it like many others have done like xken but thought of the challenge. So I got some of the prep work stuff only to find I had no wire, So I am using fishing line instead. It is 30lb Visibly Green, 0.019 in dia. Drilled the holes 1/4" apart on the bottom and staggered it on the top. Its far from the original as the rivets would be smaller than a hair, but it looks good to me. The main thing I am trying to get is the bumps of the rivets.
-
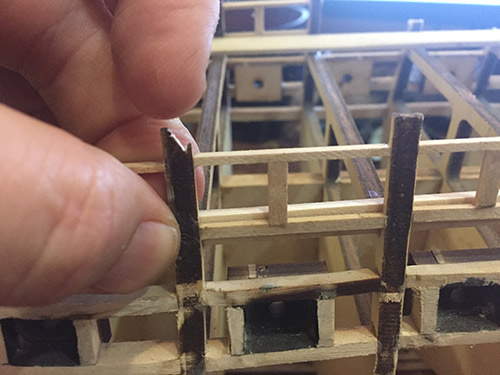
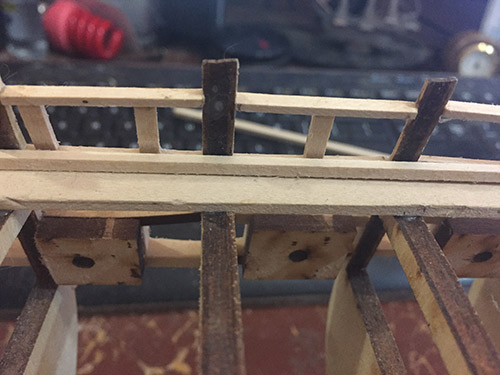
Huge mistake was found while putting the inboard plank sheer strip. I apparently made the spar deck gun port framing way too low! I cannot just leave this mistake as the cannons on the deck would be too high. BIG mistake...ughhh. So I will have to take apart all the framing and move it up until the frame is flush with the sheer strip....
-
Got up in the night and just worked on the stern. I probably should have stopped, but i just kept going. Insomnia.

-
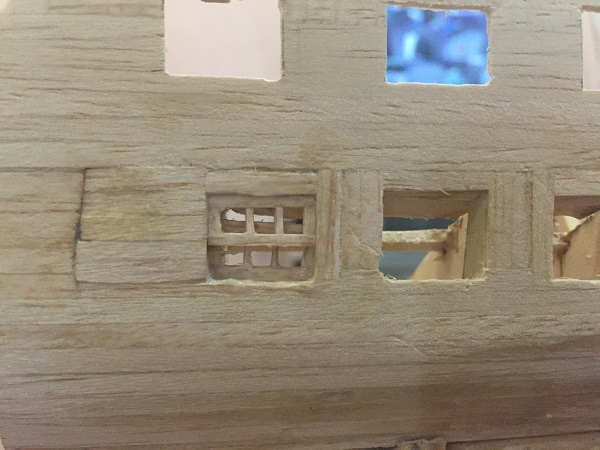
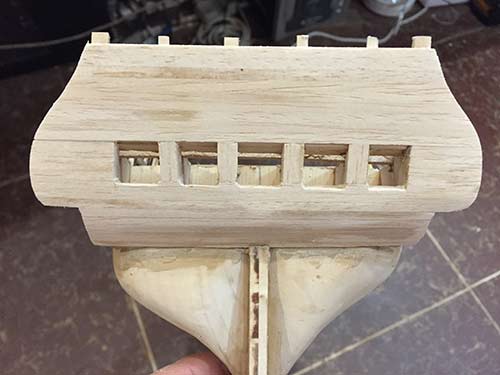
The Balsa strips at this point is being used for the windows on the stern.
-
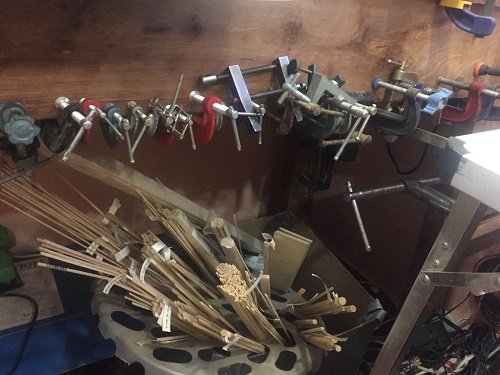
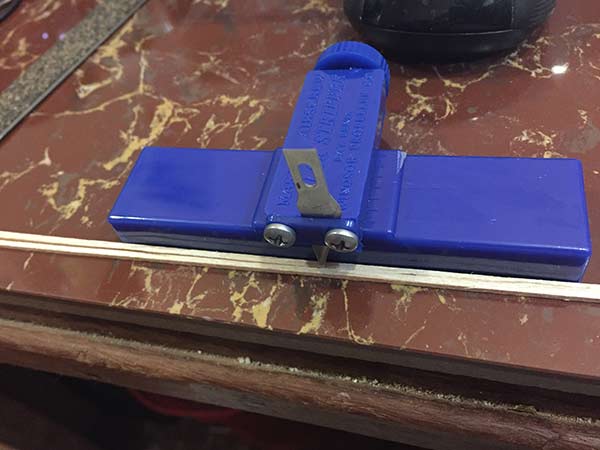
Just got this balsa stripper in. It works great!
-
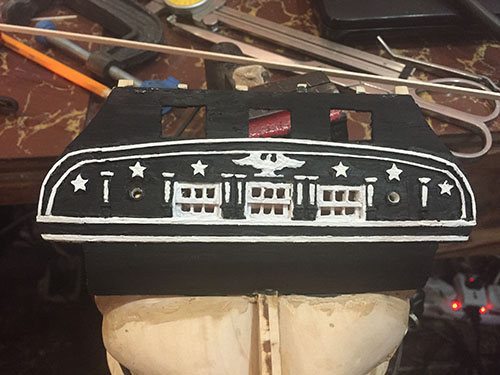
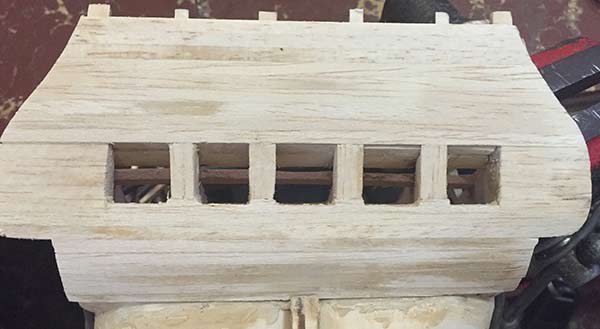
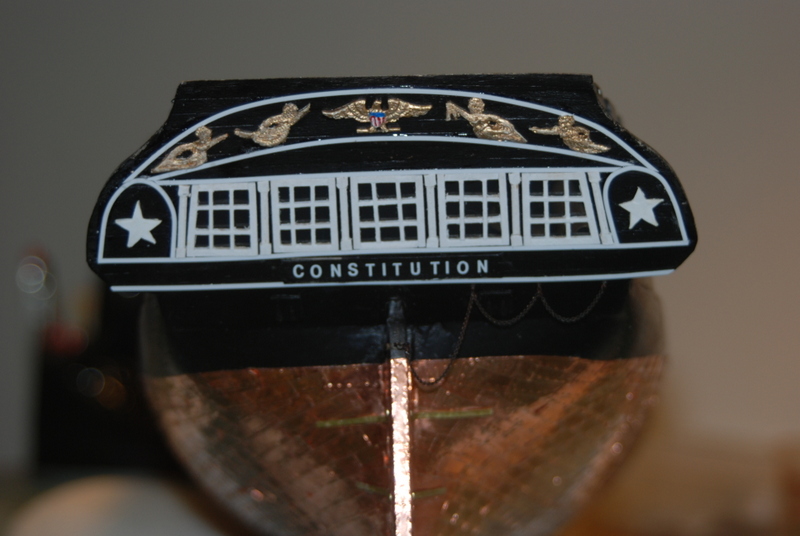
Today on my day off, which is Saturday, I worked on the stern and decided on the 3 windows. It took some hours but I am pleased with the new look. Once I paint it black, the imperfection on the wood, should fade away.
-
I found another build that did have 5 windows and looked great, hmmmm decisions....
-
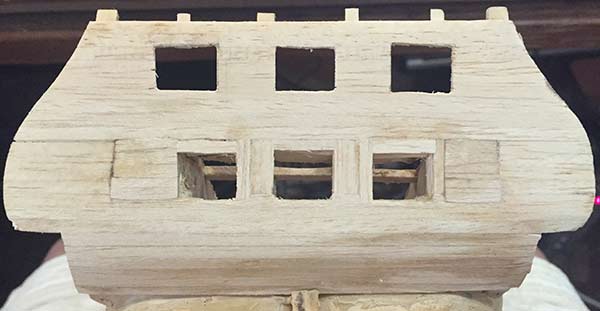
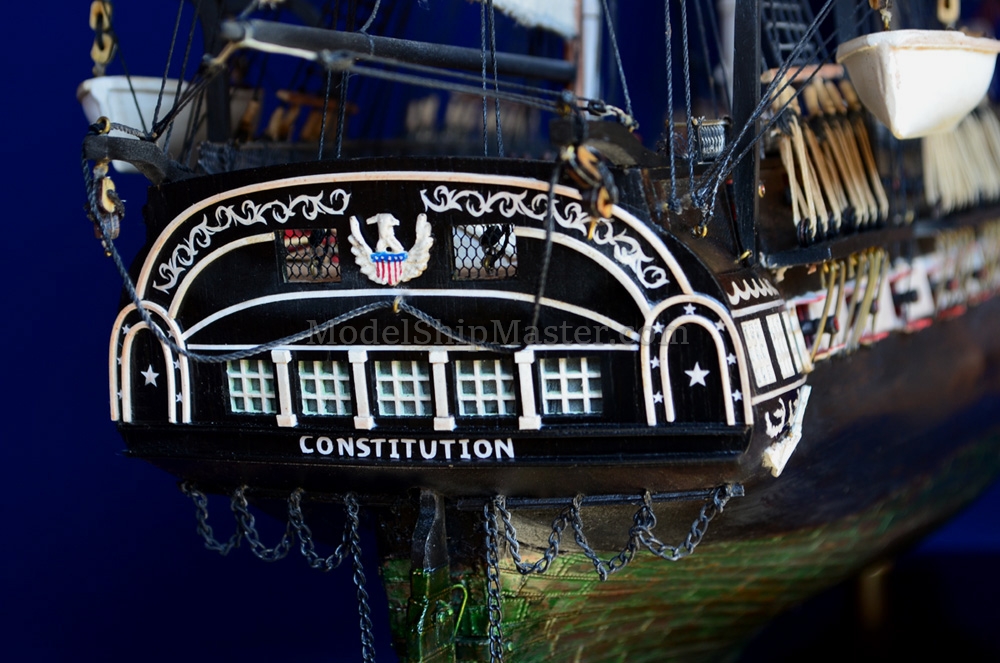
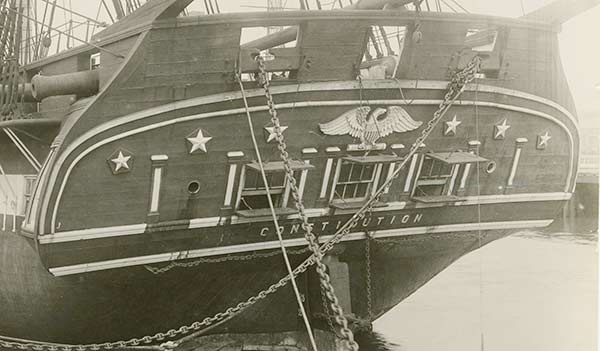
Thanks Jon for the heads up! I took a look at that discussion and found it very interesting. I was just following USEDTOSAIL on his build of the USS Constitution. because I figured he did all the research and him being a professional should know what is best. But it seems that there is some doubt about the window thing. Also At what year did they have that amount of windows etc. I did look ahead of USEDTOSAIL of his finished stern, and as you can see from his build, it has 6 windows. but what I didn't like, was all the white. The white frame and supports were just bunched together making the whole back area strip white. To me it was not very impressive as a black area with a white trim would. A white trim with black around it reminds me of our Marines in dress code. Not sure why. Anyway, so after looking over many builds and photographs and gravings etc, I have decided to go with the August 14th 1914 black & white photo. The two extra windows will be boarded up with a peep hole in the center. And I will attempt to make the window panes also the same. That slide up and down. So thanks again for the tip....
-
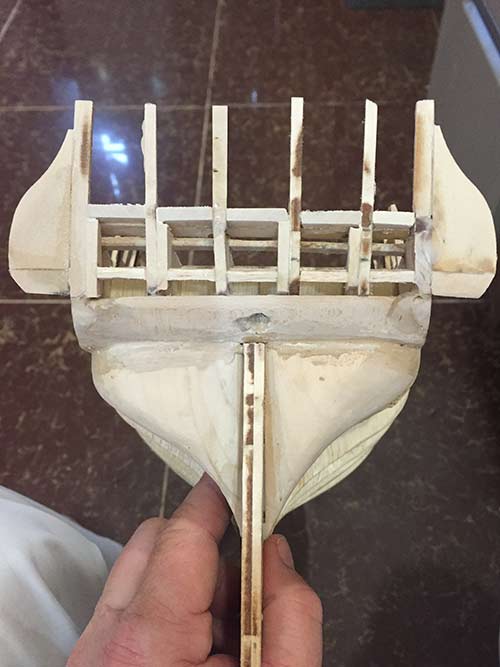
Worked on the back of the ship. I think it went well.
-
Did some work on the stern. Went with the 5 windows as my wife said the 6 windows are not pleasing to her eyes, and that it should be an odd number. And the 3 windows version i didnt like as much because I love french windows. So the magic number is 5. I will be putting the planking on today.
-
Hello to everyone! I am back from the States after 3 months of fundraising for the orphanage here in Zambia. The giving was down so we'll have to cut a few projects until next year. While there, I did pick up some balsa wood for planking. I will be getting a wood slicer to cut the wood into the proper widths. It has been so long that I just looked at the boat and plans and had to make sense of where I was at and what I was doing. I finally found out that I was building the top deck gun ports. So I worked on it last night and finished the port side. while the Storage wars on.


-
I will be leaving Zambia in a few days to go to the States on a tour to show our new orphanage video. Now I will be there for about 2 months. During my time there, I was thinking that I could buy extra parts for my USS Constitution that I might need for the next year. So my question to all those who have built the Constitution is, what should I buy? Please be specific, like the size of wood etc. I will not get to the any of the ropes this year, so that's out. I heard I might need more copper for the outer hull, but I also am doubting I'll get that far. You can see from my current photos what stage I am and could estimate how much I could do in a years time. Thanks! Livingstoneman
-
Started to work on the spar deck gun ports. Did some measuring with the prints and looked at many other builders and found several variations. So I just picked one that I liked and was close to the print way. One thing I am a bit concerned about is that once the spar deck is on, will the guns be at the proper height to fit squarely in the port. So one idea is to make one gun and put a temp deck on with the right thickness. That would ensure me that I got the right height. If I don't and make it too low or too high, then I will have to shave or build up the bulk head deck support. This could be bad as the deck might ripple up and down. Hmmmm. I think I will go with the making of the gun...

-
Thanks! As my first build, i will see where I am at as far as skill is considered. I am thinking that I will do a viking long boat next.
-
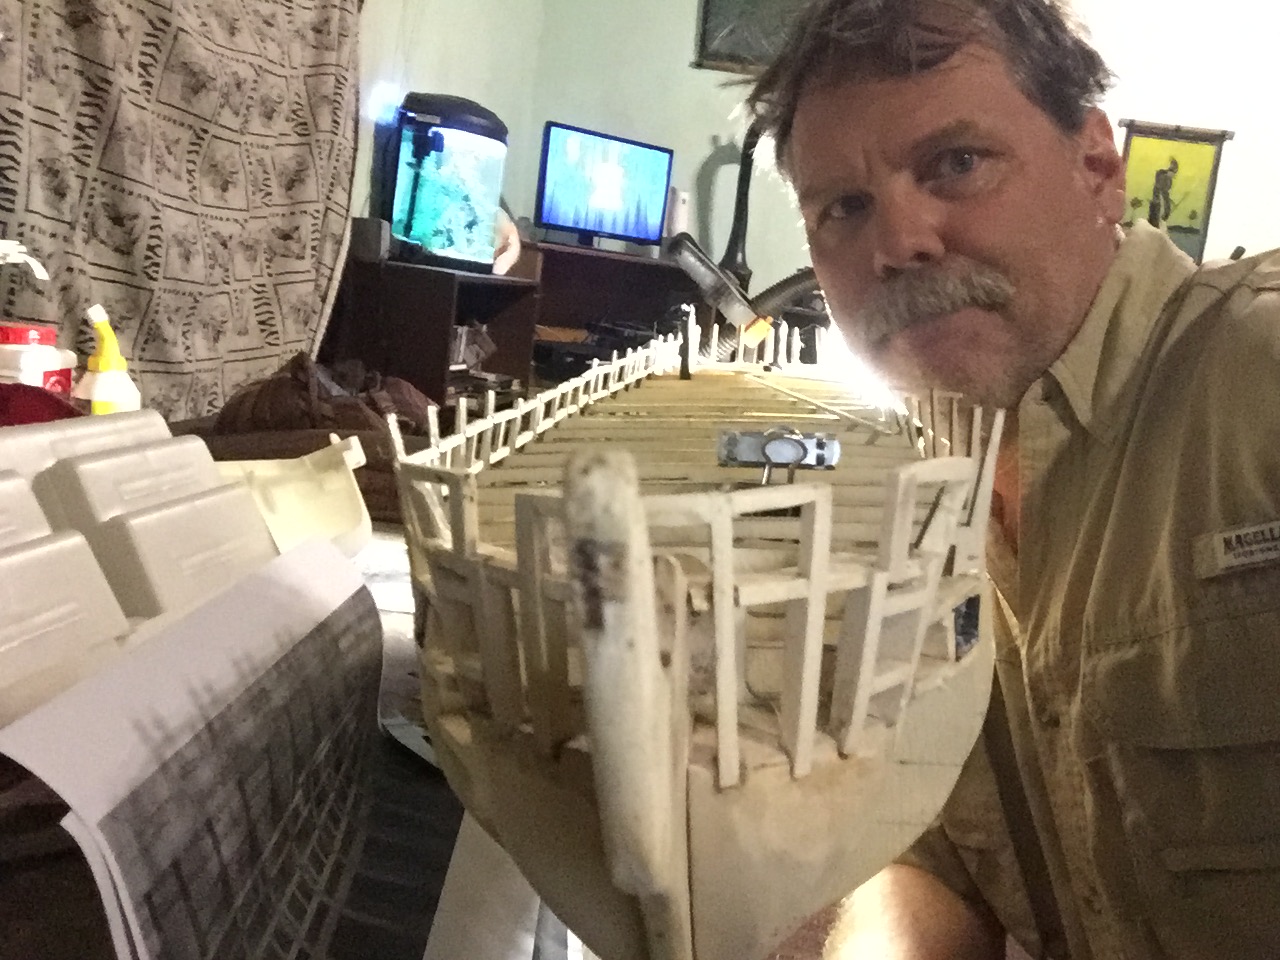
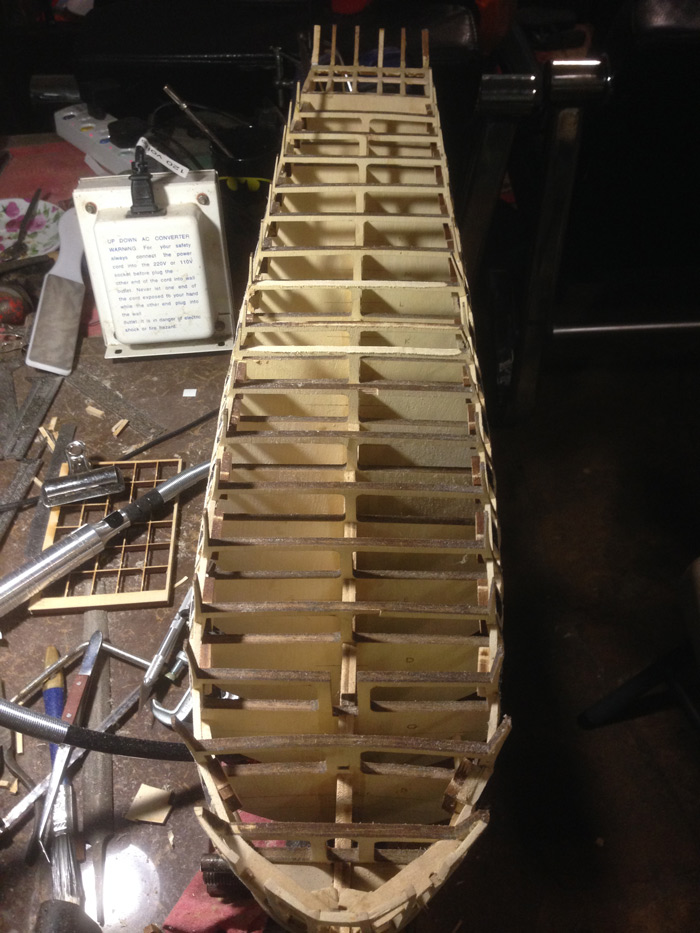
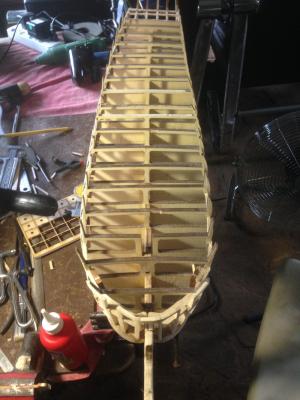
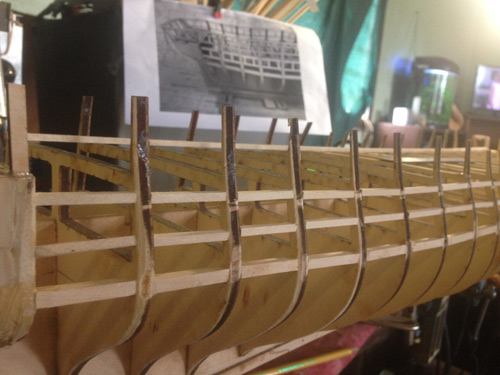
Well, today I freaked out! I went to go about doing my model, but I then felt something was off. I then looked from above and boy was I in for a surprise, the entire frame of the boat was curved like a banana! How did that happen, then I figured it out. When I was making the dummy cannon ports, I was wedging them in between the bulkheads. This caused a curling effect. So to fix the problem I got my measuring tool and measured the other side of the boat and bent the bulkheads to the same width as the opposite dummy port. Only a few bulkheads are very noticeably warped. But once the top deck is on, you will not see it. During my building of the port box's, my wife unplugged our 220v to 110v transformer and took it into the kitchen to blend something. Well when I got to my station, I was wondering why the plug to my new dremel was unplugged, so I plugged it in. And when I stepped on the pedal for a brief second, that thing spun a fierce hurricane. I stopped and questioned the force of it only to see what had happened. After a brief argument with my wife, I tested the dremel and all is still working..... I should get my own transformer soon! So, for the past 2 days I have been working on those ports, and it all turned out ok. No more banana nightmare. Lesson learned...No more wedging!


-
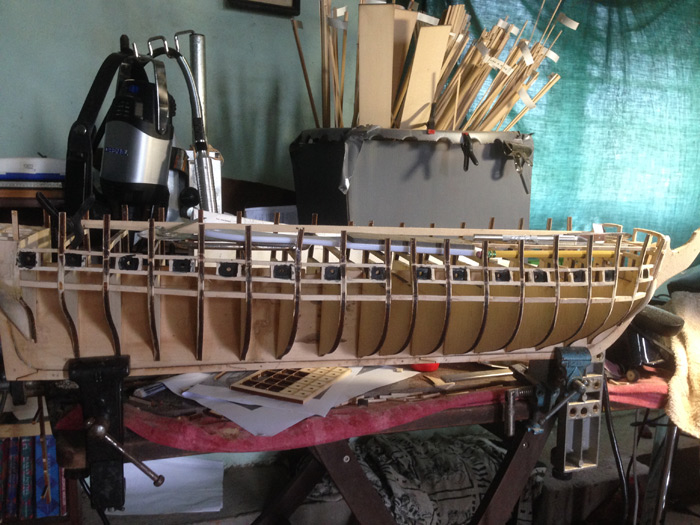
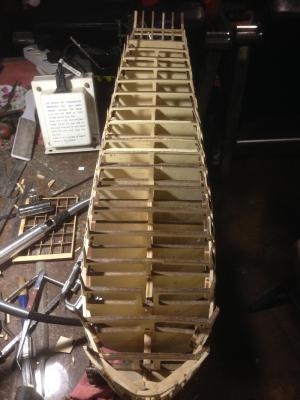
Today I finished the gun ports on the starboard. Took 3 days but I am satisfied. Now to do the port side.

-
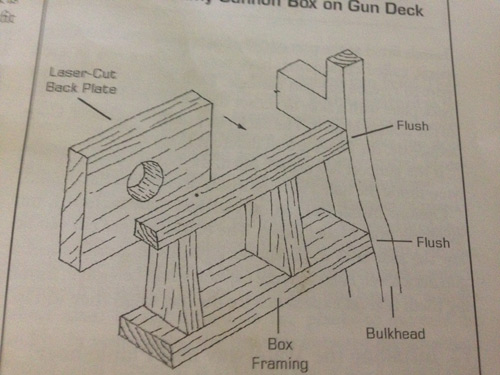
Ok, getting into the groove. I worked on the dummy gun port framing box's and got about 1/4 of them done. There is a bit more shaping or correcting of the box's but it should be no problem. I tried in the beginning to cut the framing box's exactly and it was very difficult and time consuming, so I found out if I just cut it larger, glue it, then the next day just shape and trim it with my new Dremel, it becomes much easier. I gave the ports a bit of black just to give myself a hint of encouragement. It looks good to me!

-
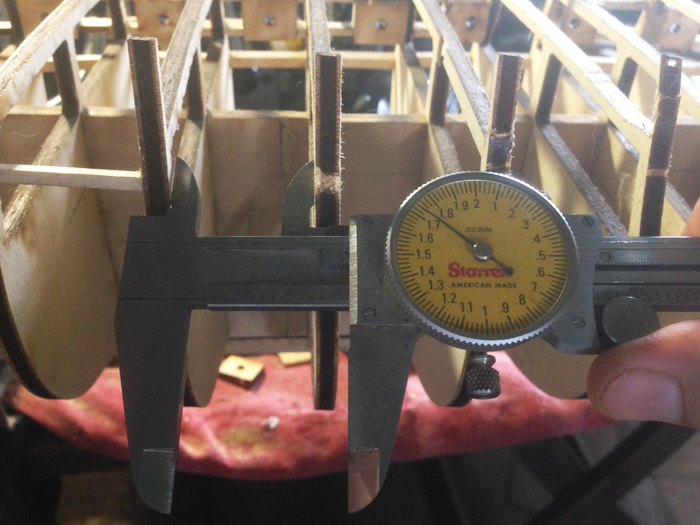
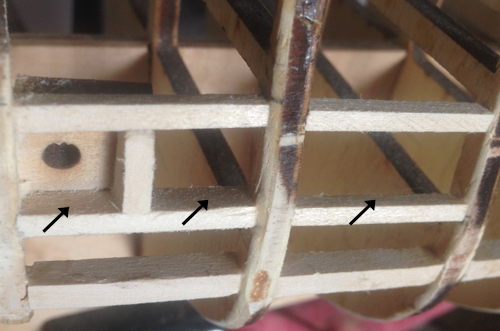
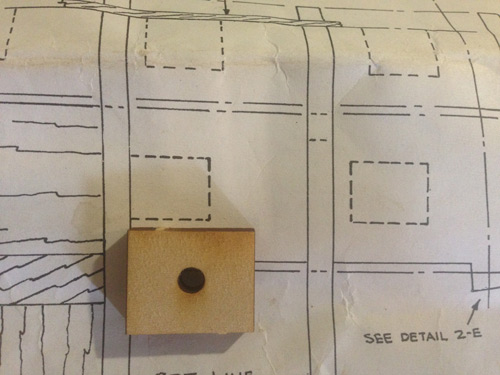
Ohhh, ok, I finally figured it all out. The picture I was going on from eken was ok for him as the gun port framing box can be just 1/8 inch X 1/8 inch as he has modified his Gun deck to be real and therefore no need to give it a deep dark dimension. He can just roll up his new ordered Guns up to the 1/8 inch support. So was all that bottom line a loss, not quite. I can use it as part of the top framing box on the port side. The bottom of the framing box of the first gun port on the stern became 3/8 Inch X 1/8 inch with a bit of tapering, including the center vertical support. I checked and every Gun port box will be a bit larger, so customizing is a must. In the photo below, you can see the difference in depth from left to right. The right bottom frame box will be replaced. So another lesson learned. It would have been nice if the plans explained this better. Thanks to all who showed me this! Livingstoneman
-
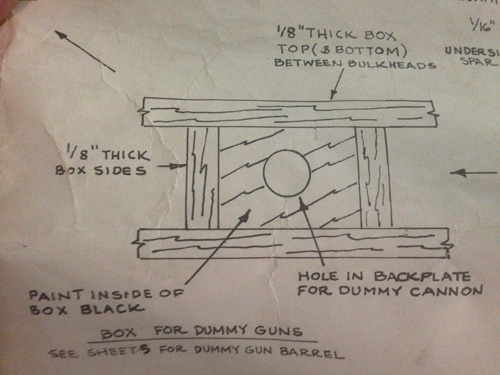
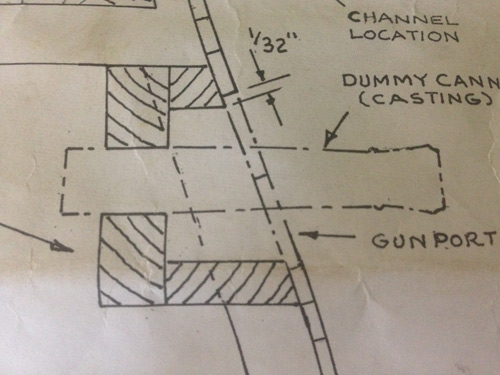
Today, my off day, I worked on the leveling of my deck or should I say evenly bowing it, & dummy gun ports. The gun ports were fun and went ok. I have been following eken and his work. But 2 things are bothering me. 1. on a few drawings, it show a thicker wood at the bottom of the dummy gun ports, and yet on another drawing it says 1/8 X 1/8 (Which I did) I see that by leaving it 1/8 the dummy black cannon port will be tilted slightly and not vertical. I think it will be fine as its supposed to simulate darkness. 2. On the end of the boat where the first dummy gun port goes, if I follow the prints, it looks like I will have to shave off almost half of the dummy port to fit to the left next to the bulk head. Is that right? Waiting for help.. Livingstoneman
-
Thanks for the tips! I will get to work on this as soon as I get the chance. Need to go to the farm where my large greenhouse is. My 500 tomato plants are in trouble with early blight. Grrrrrr. Thats what I get to grow tomatoes in the rainy season. Lessons learned.. Livingstoneman