Engineer57
-
Posts
44 -
Joined
-
Last visited
Content Type
Profiles
Forums
Gallery
Events
Everything posted by Engineer57
-
 mtaylor, schooner and Canute, thanks for the likes.
 -
Yes Tim, so far straight runs. Thought I could do that on the upper areas. Going down I did plan on splitting them up. Thanks,
-
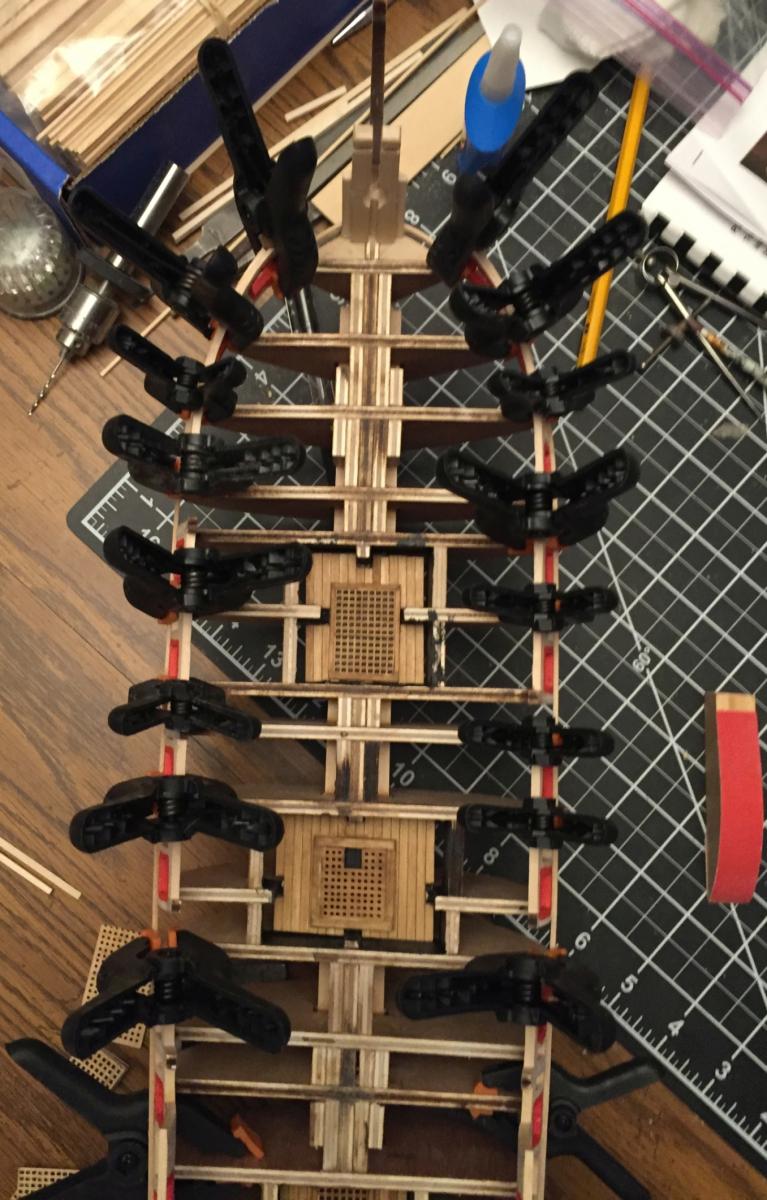
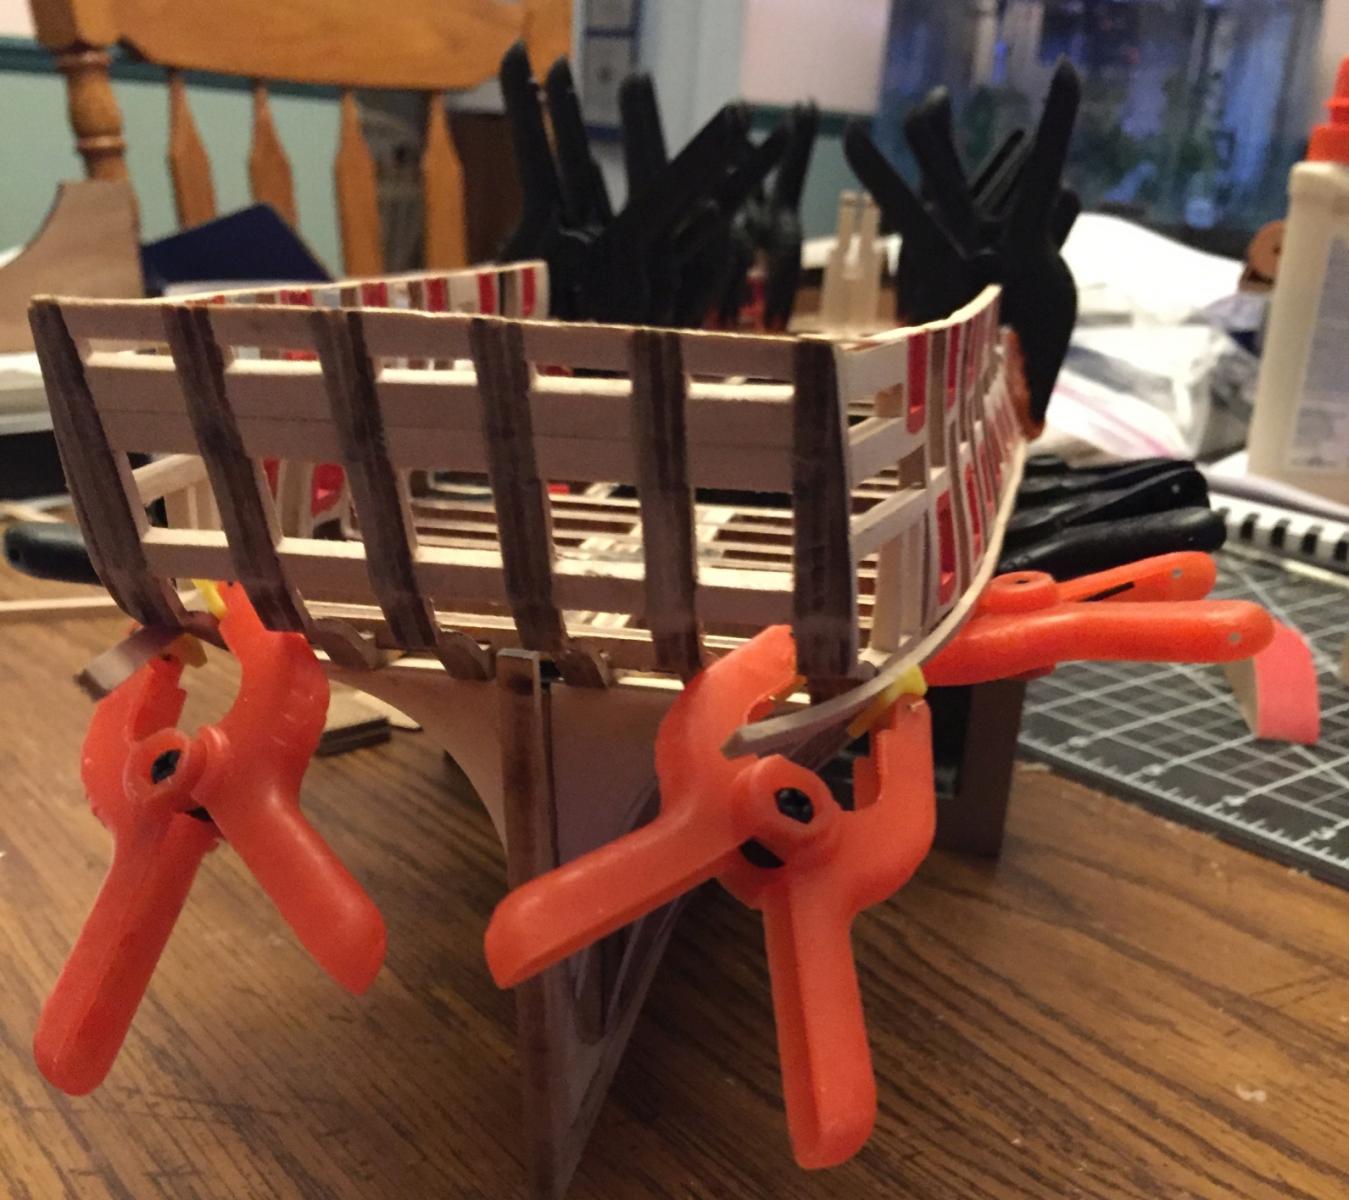
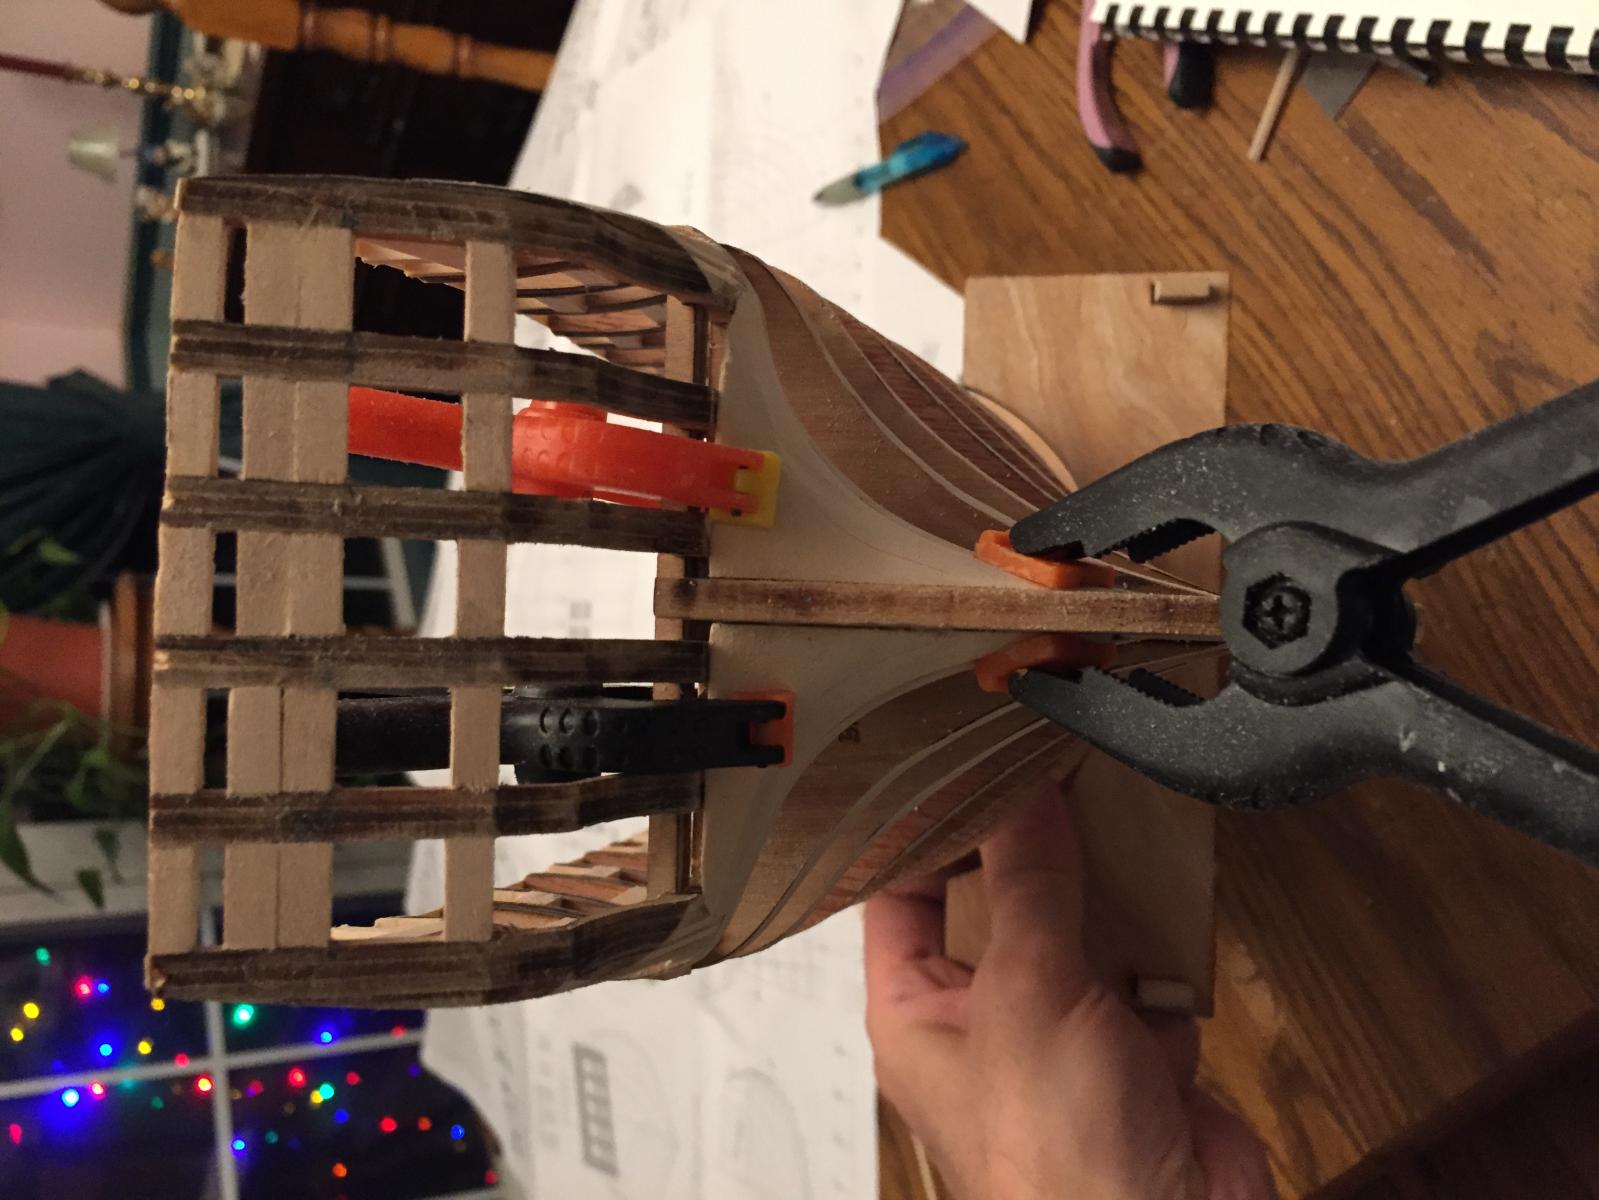
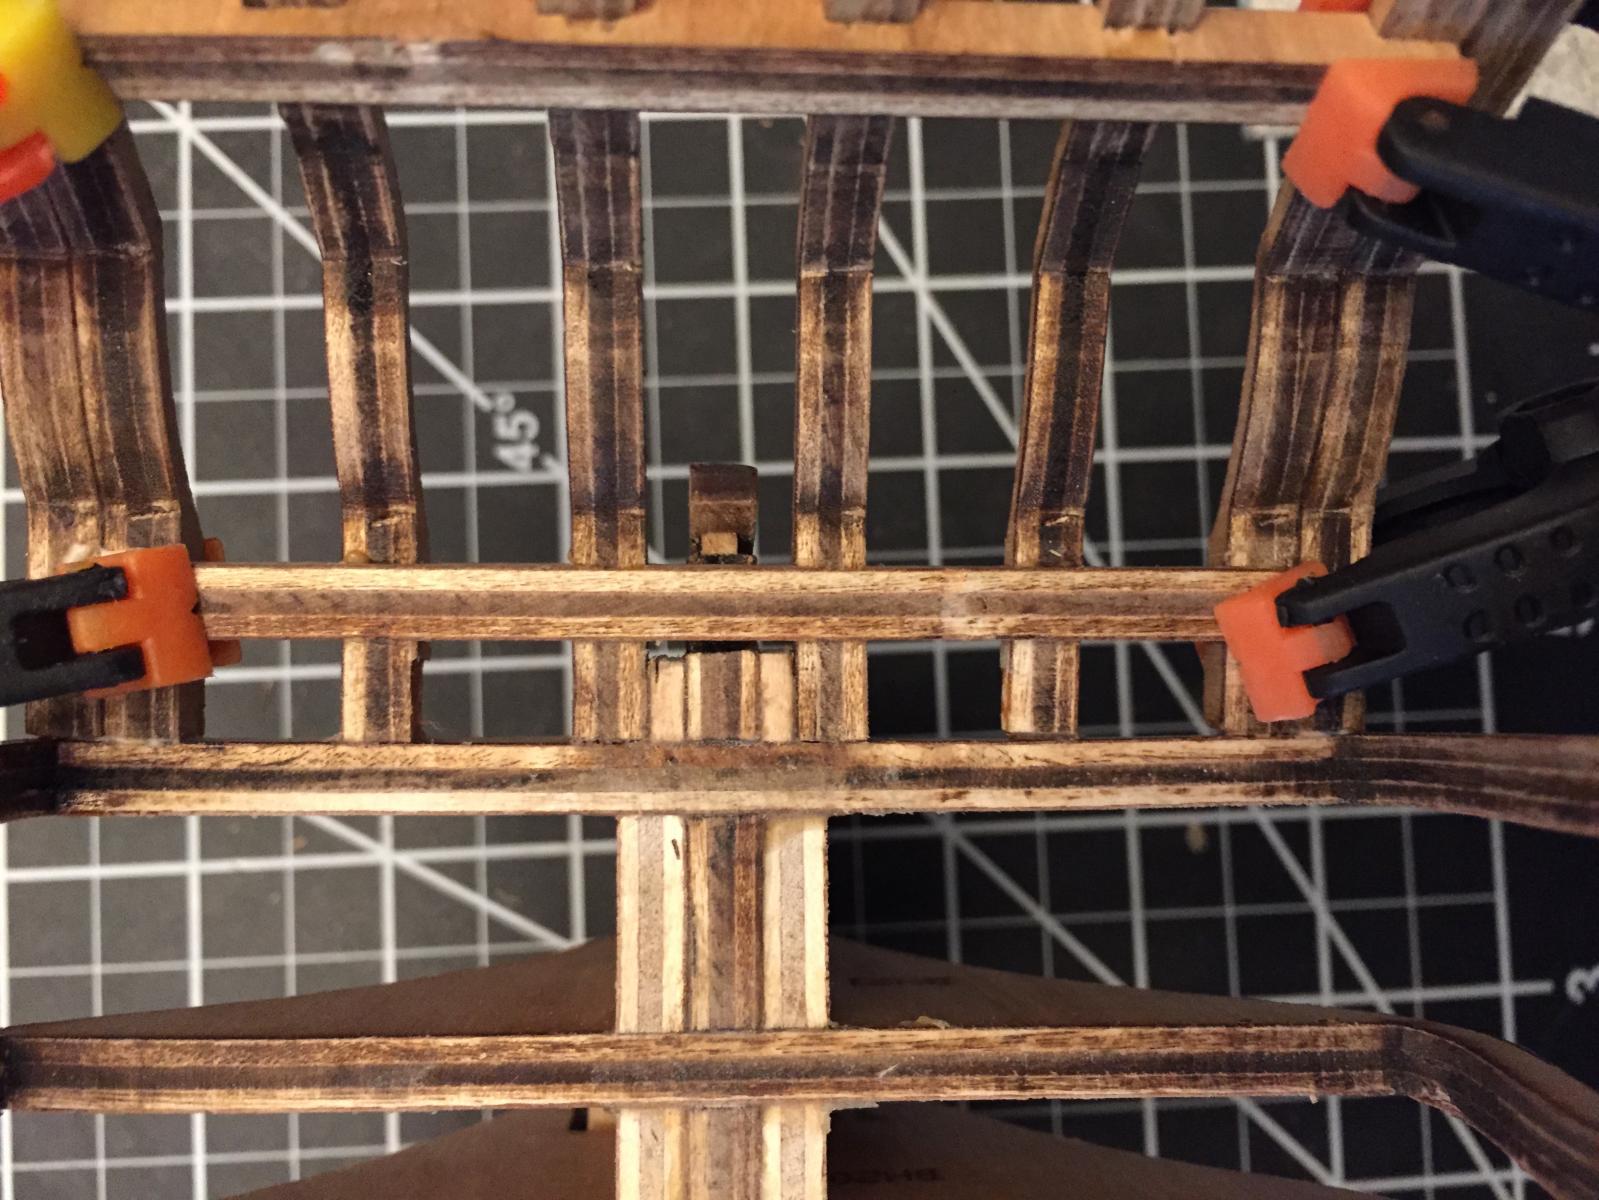
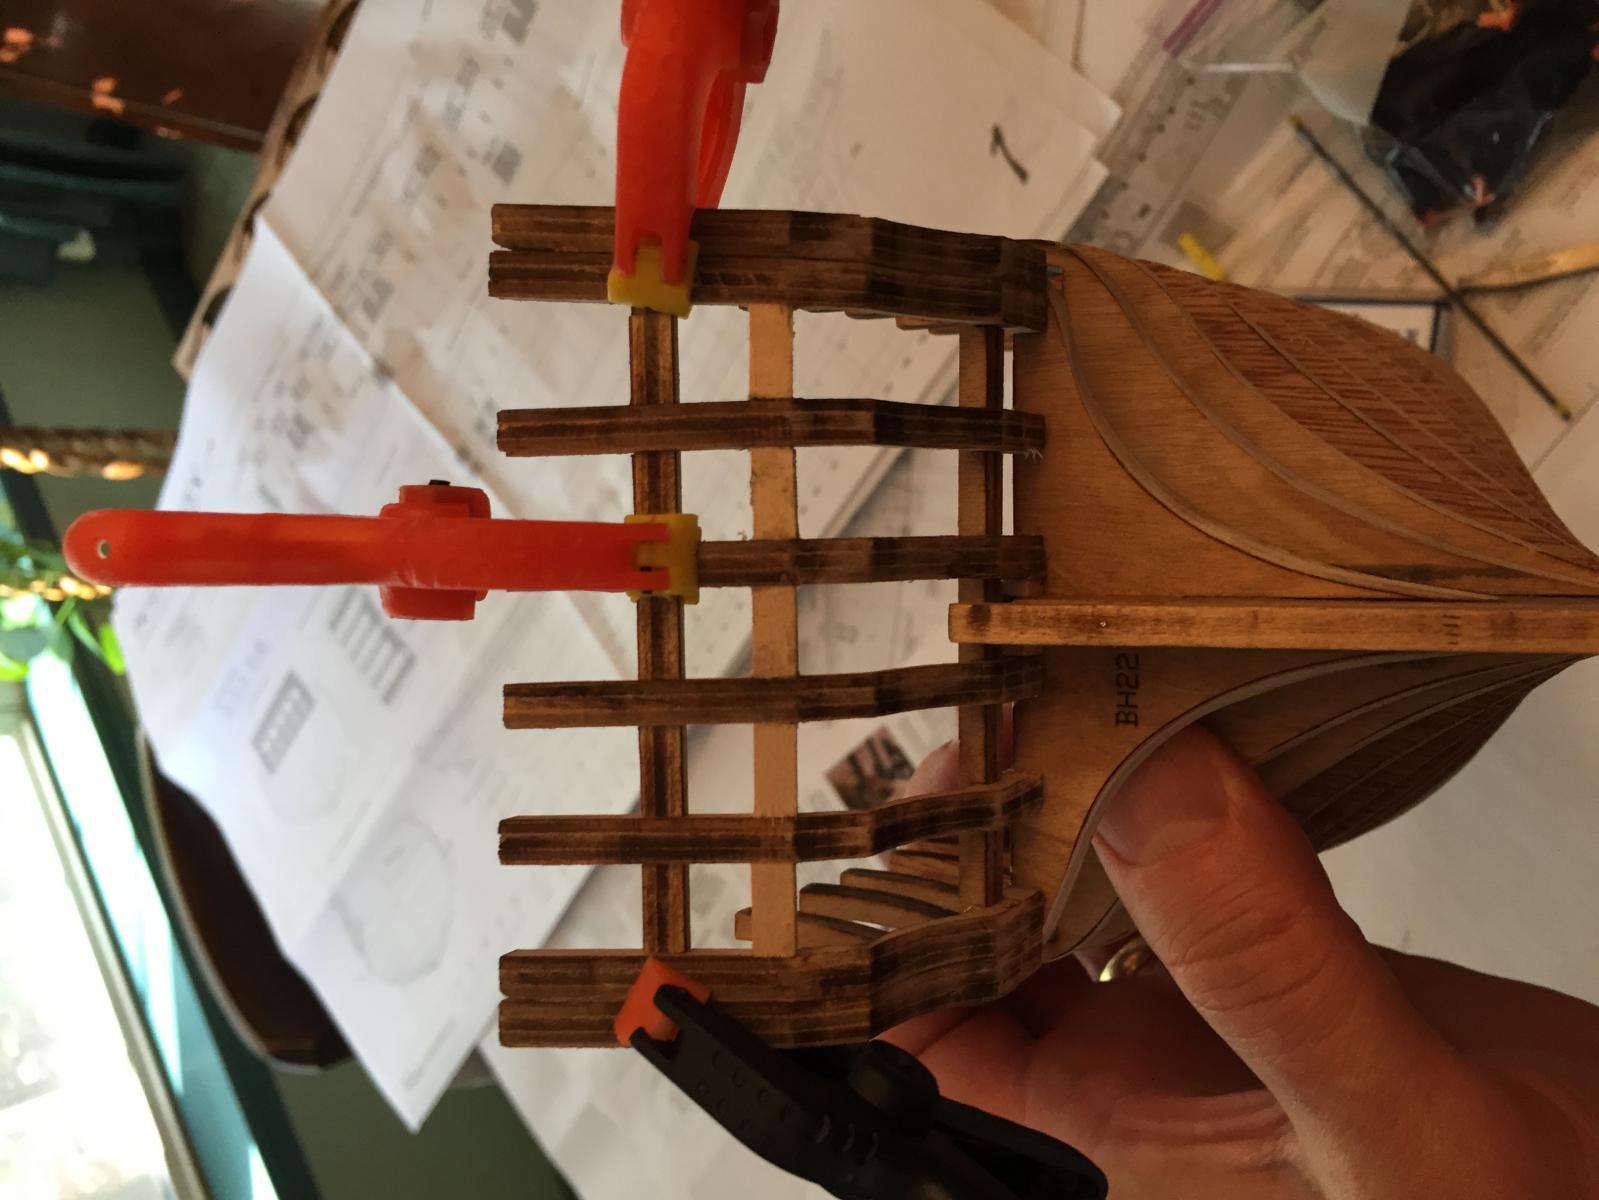
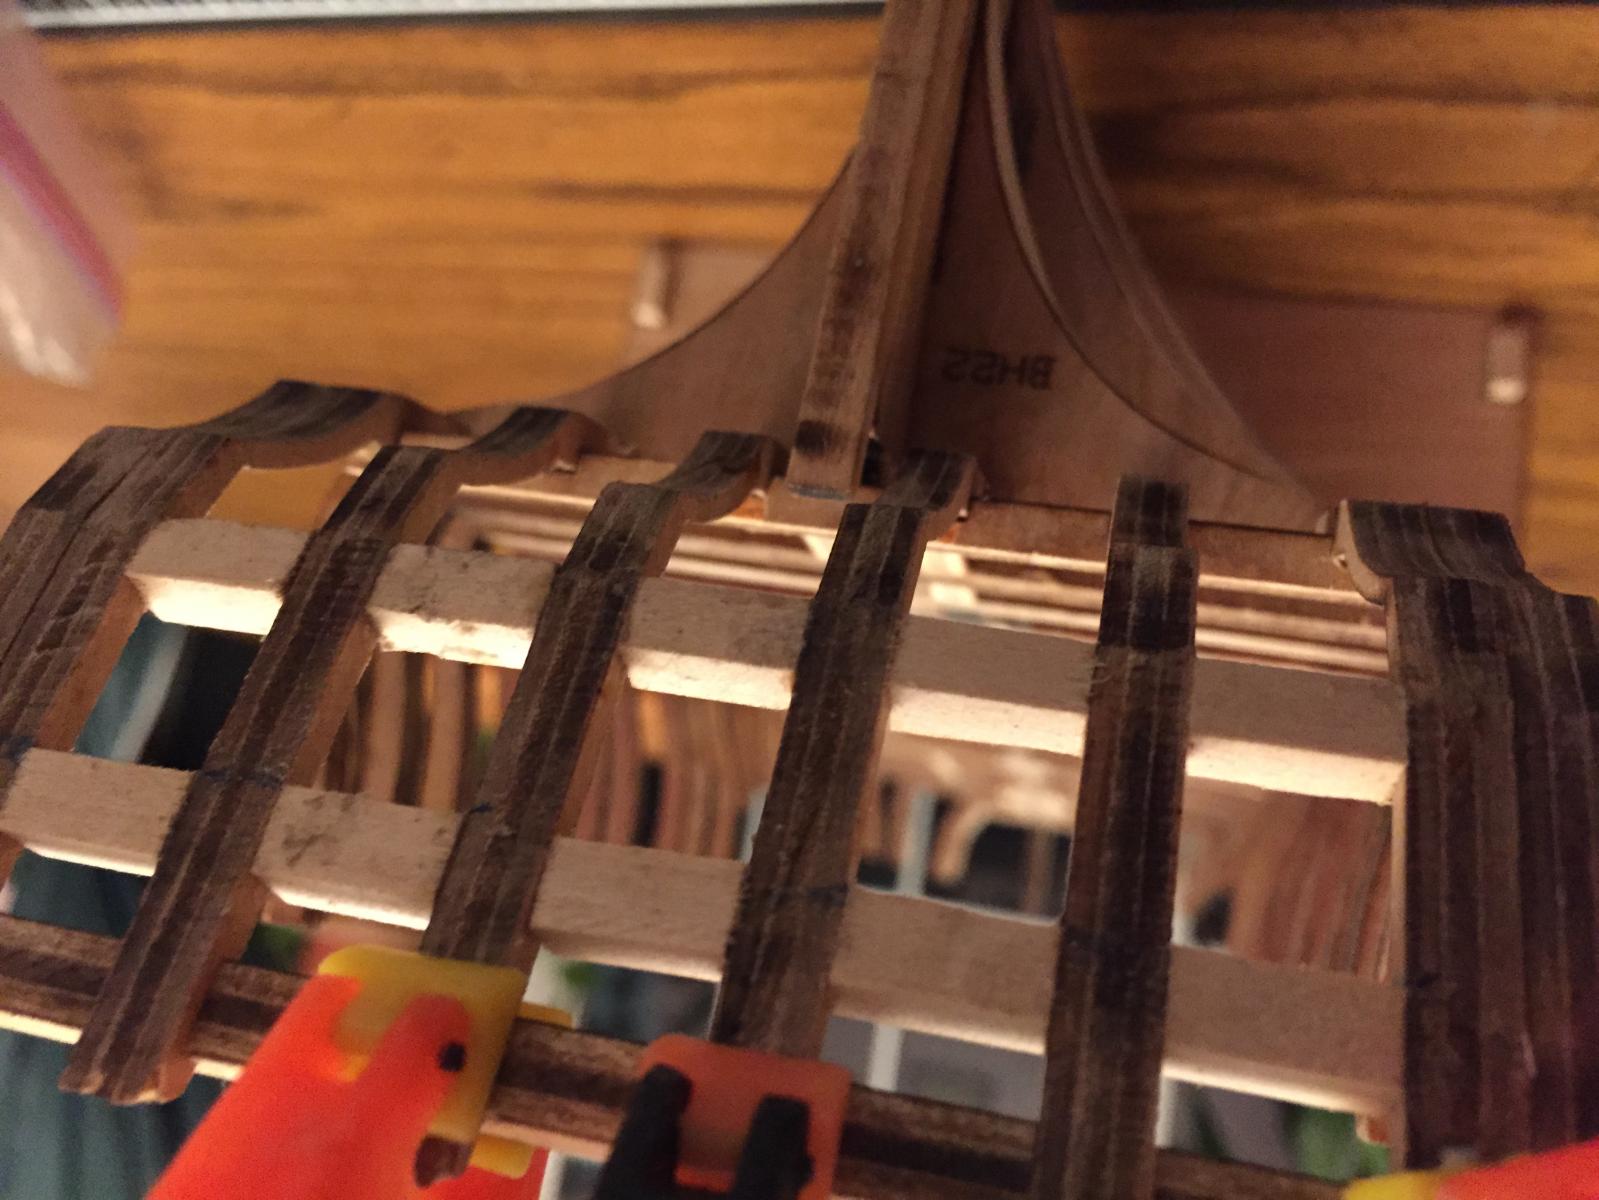
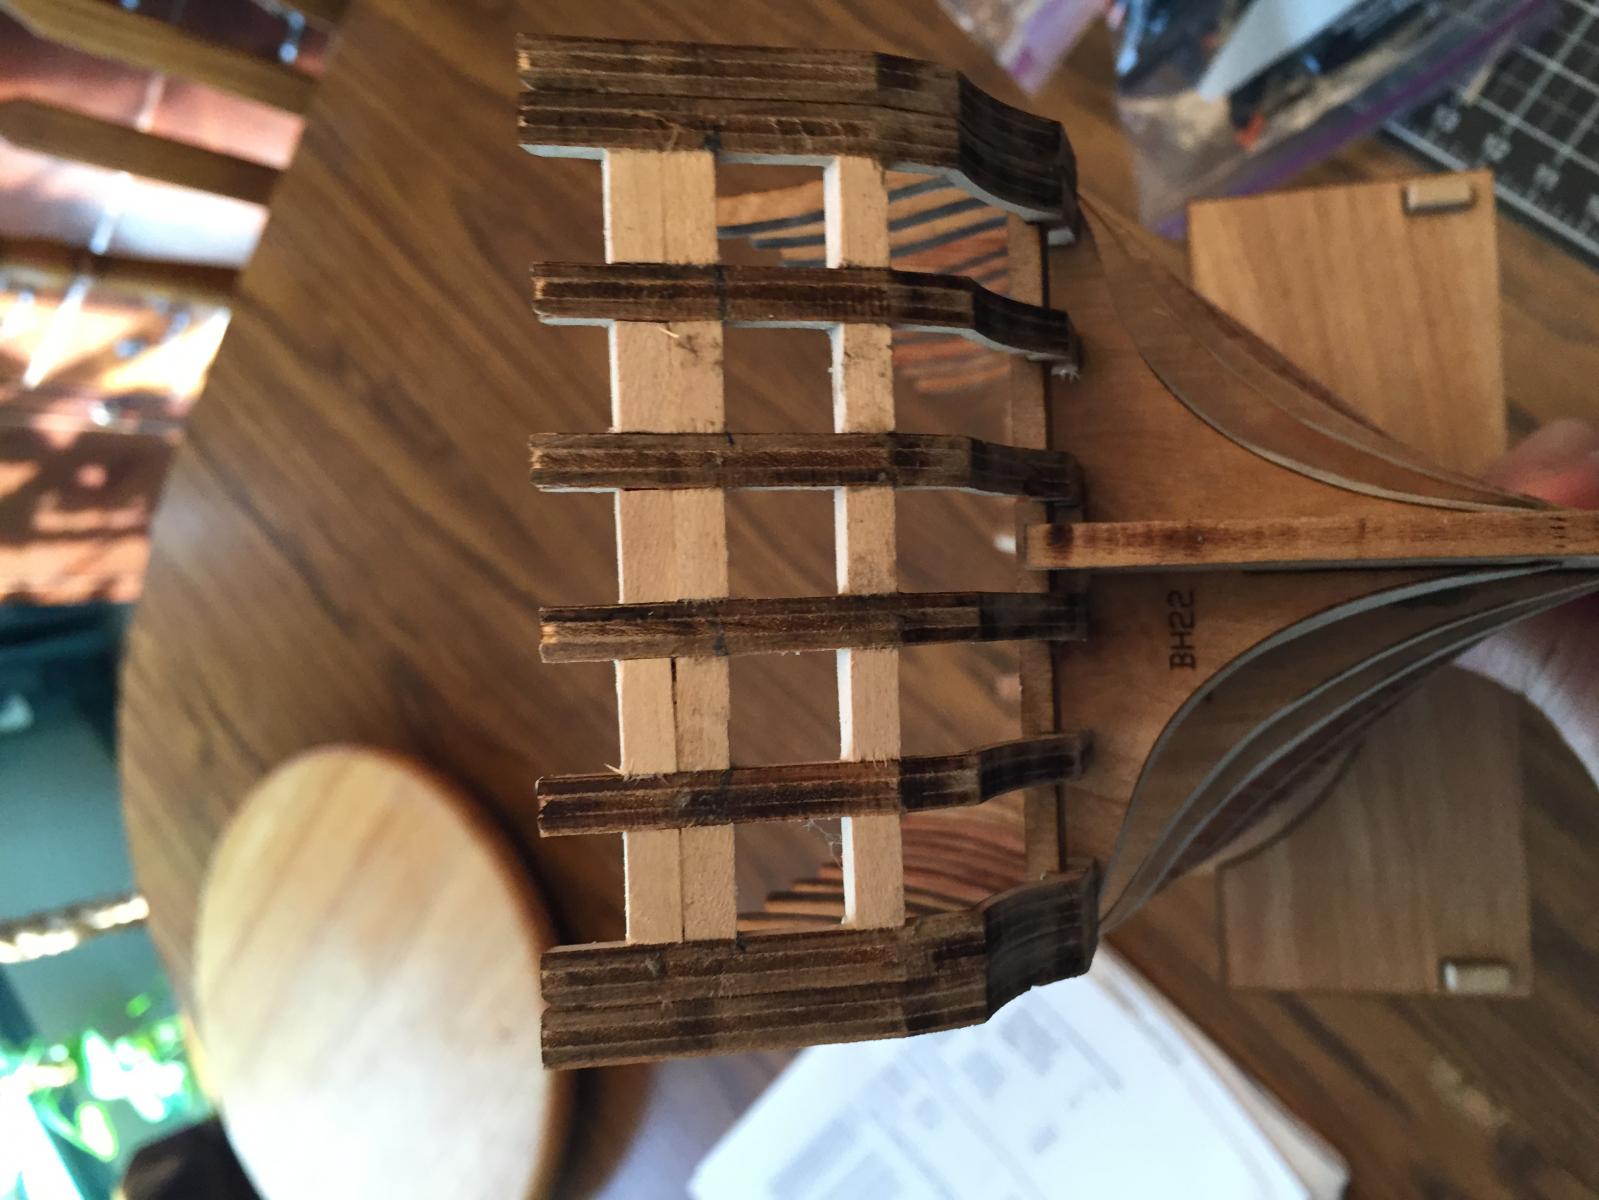
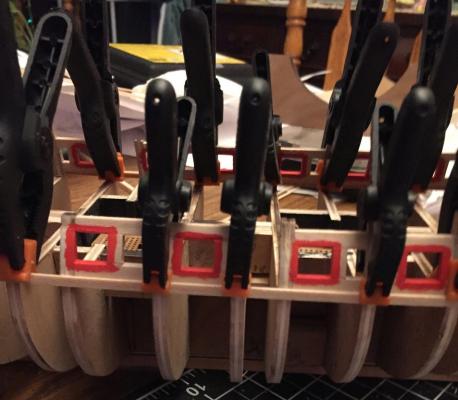
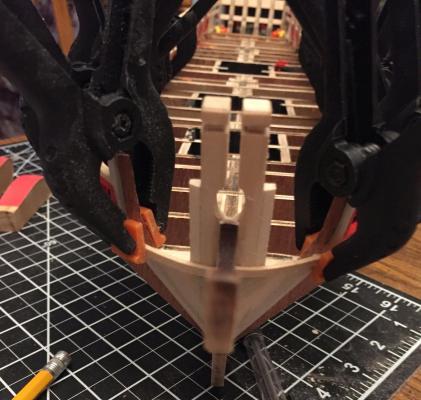
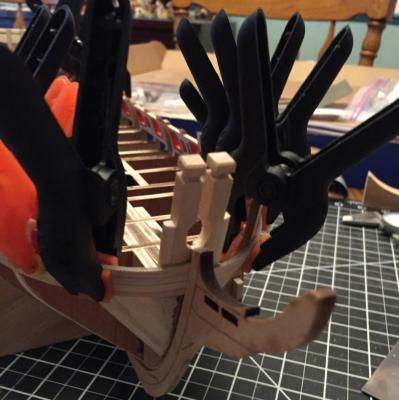
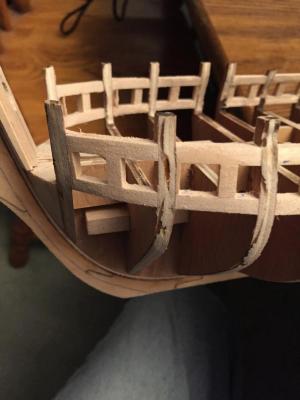
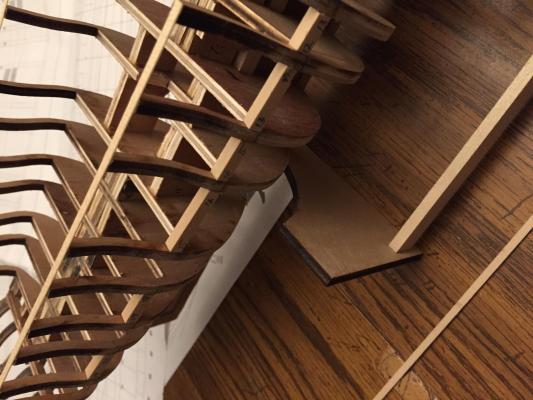
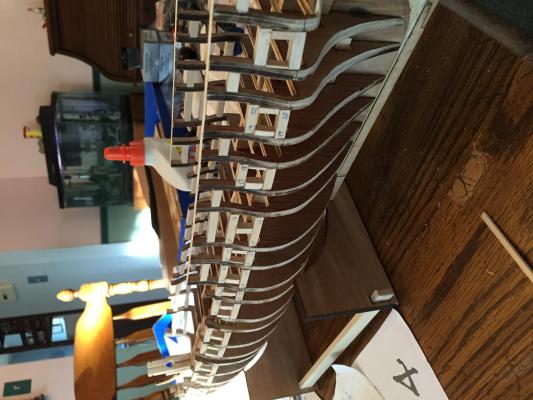
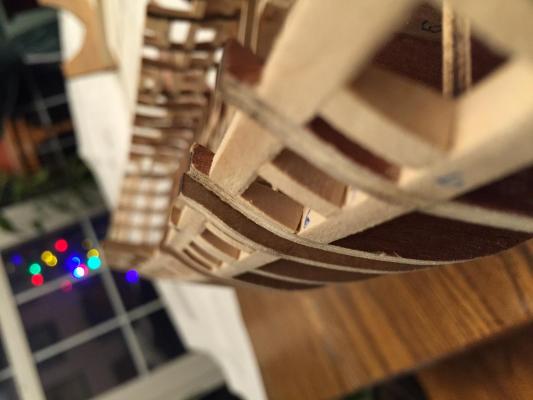
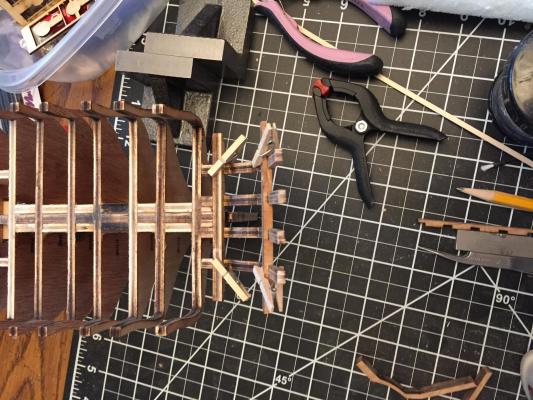
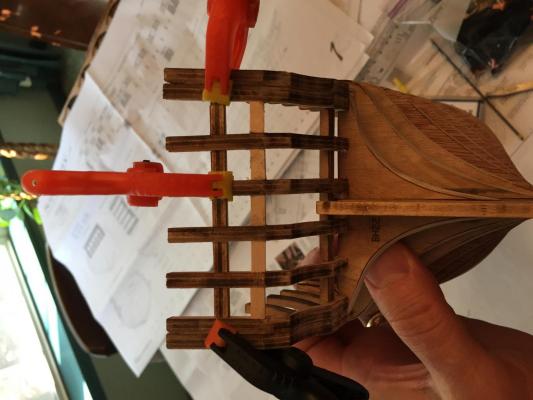
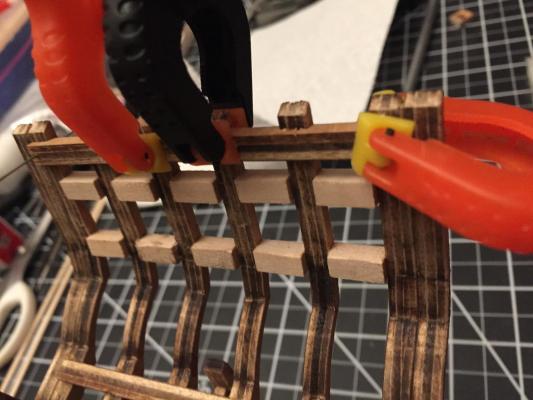
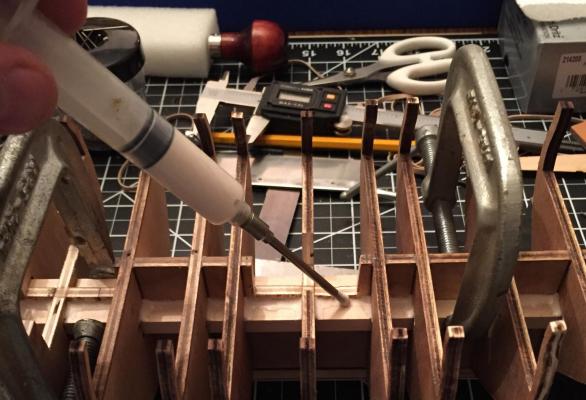
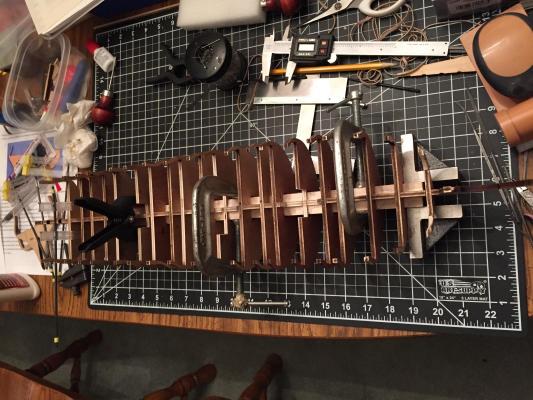
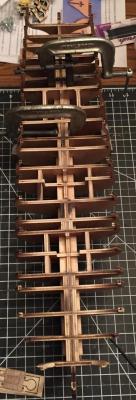
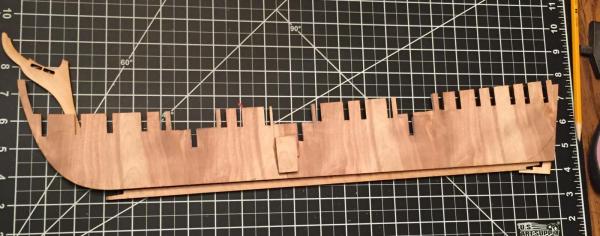
12/26 – 12/29/15 - With some trepidation I started practicing the art of using an electric planking bender. I use a piece of 1.5” PVC pipe with a cap on one end to make a soaking tube for the planking stock. Once the wood is soaked I practiced curving and twisting a plank. It actually went smoother than I expected. As with everything, practice helps. Prior to soaking I am darkening one side of each plank with pencil lead to simulate caulking and sanding a taper on the other side to allow planks to fit together better over the curve of the hull. Seems to work fairly well (so far). I started with the plank just below the lower framing board under the gun ports. As of today I have seven planks bonded on each side going up. Lots of clamps, and the occasional having to release and re-bond an area when a gap occurred. Fairly even side to side, but not perfectly identical. Will have to cut back around the gun ports in some areas. Really wish the provided planking stock was a bit more uniform. Keeping fingers crossed as I go.


-
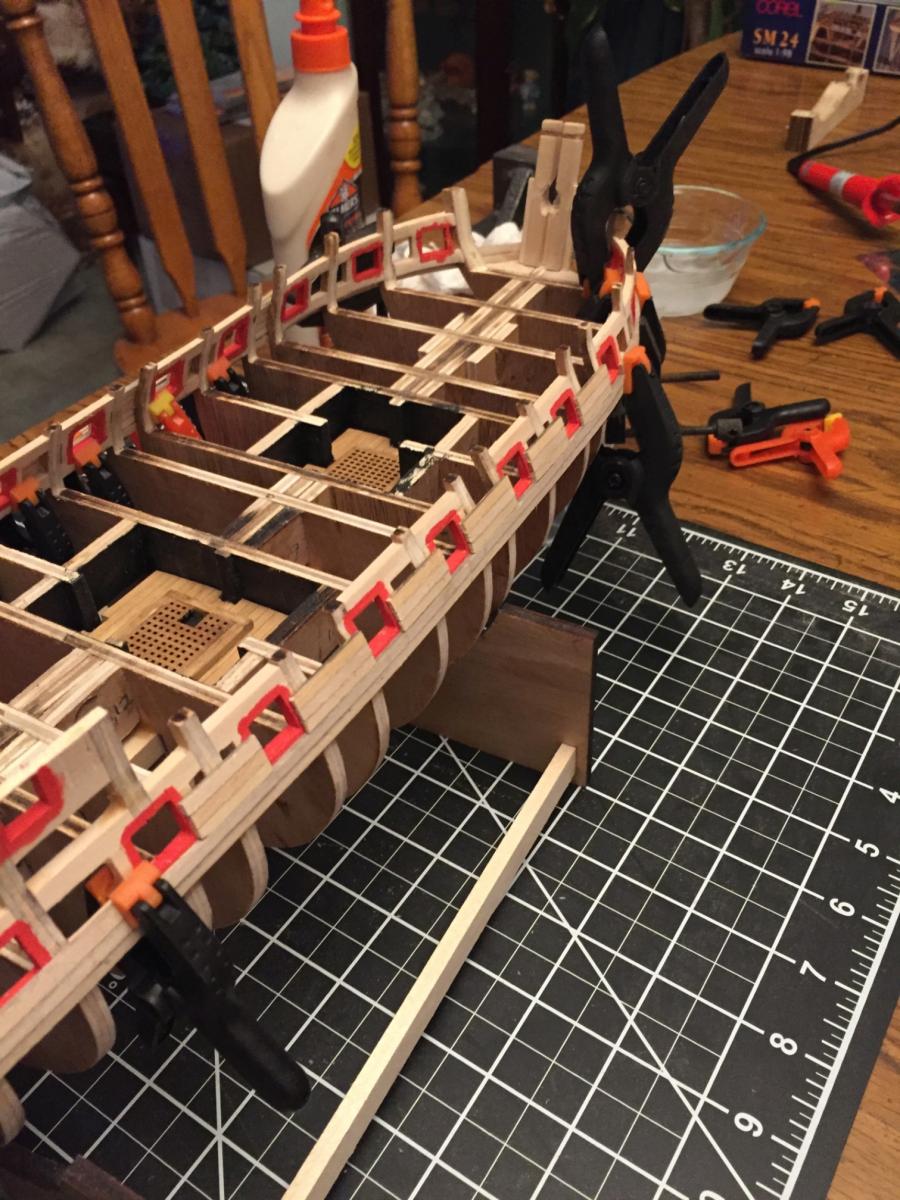
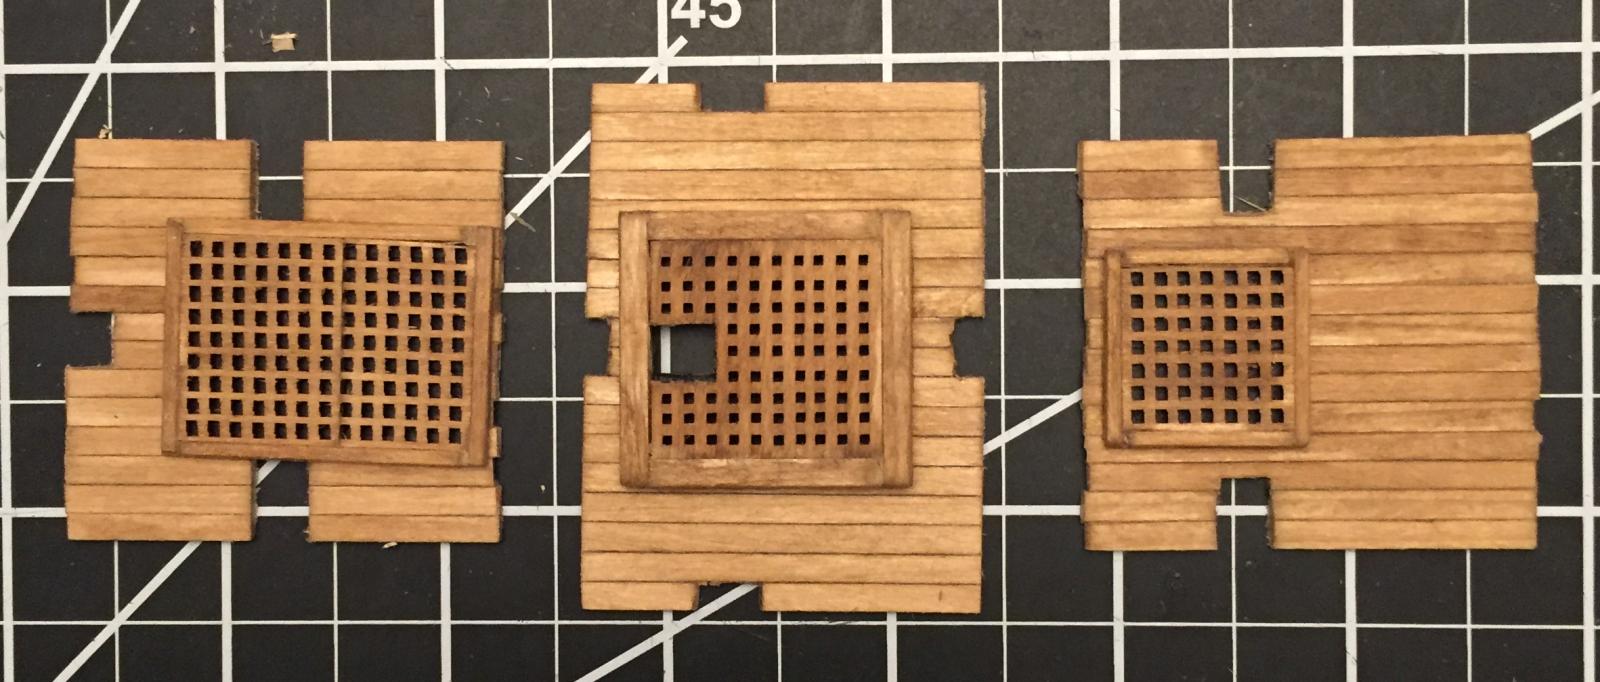
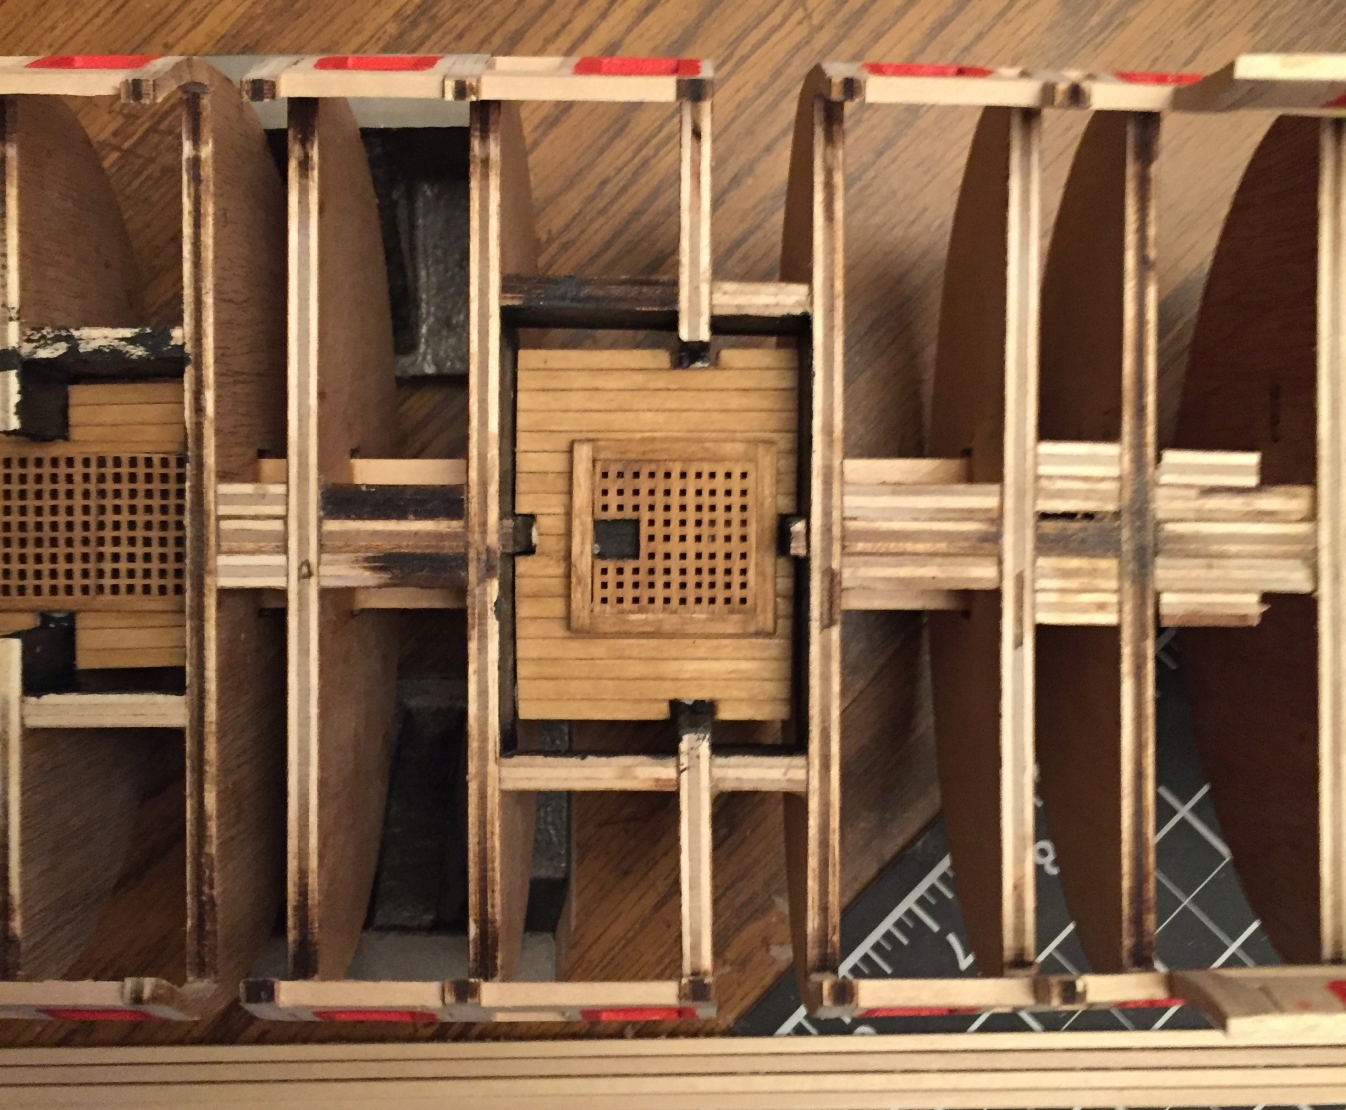
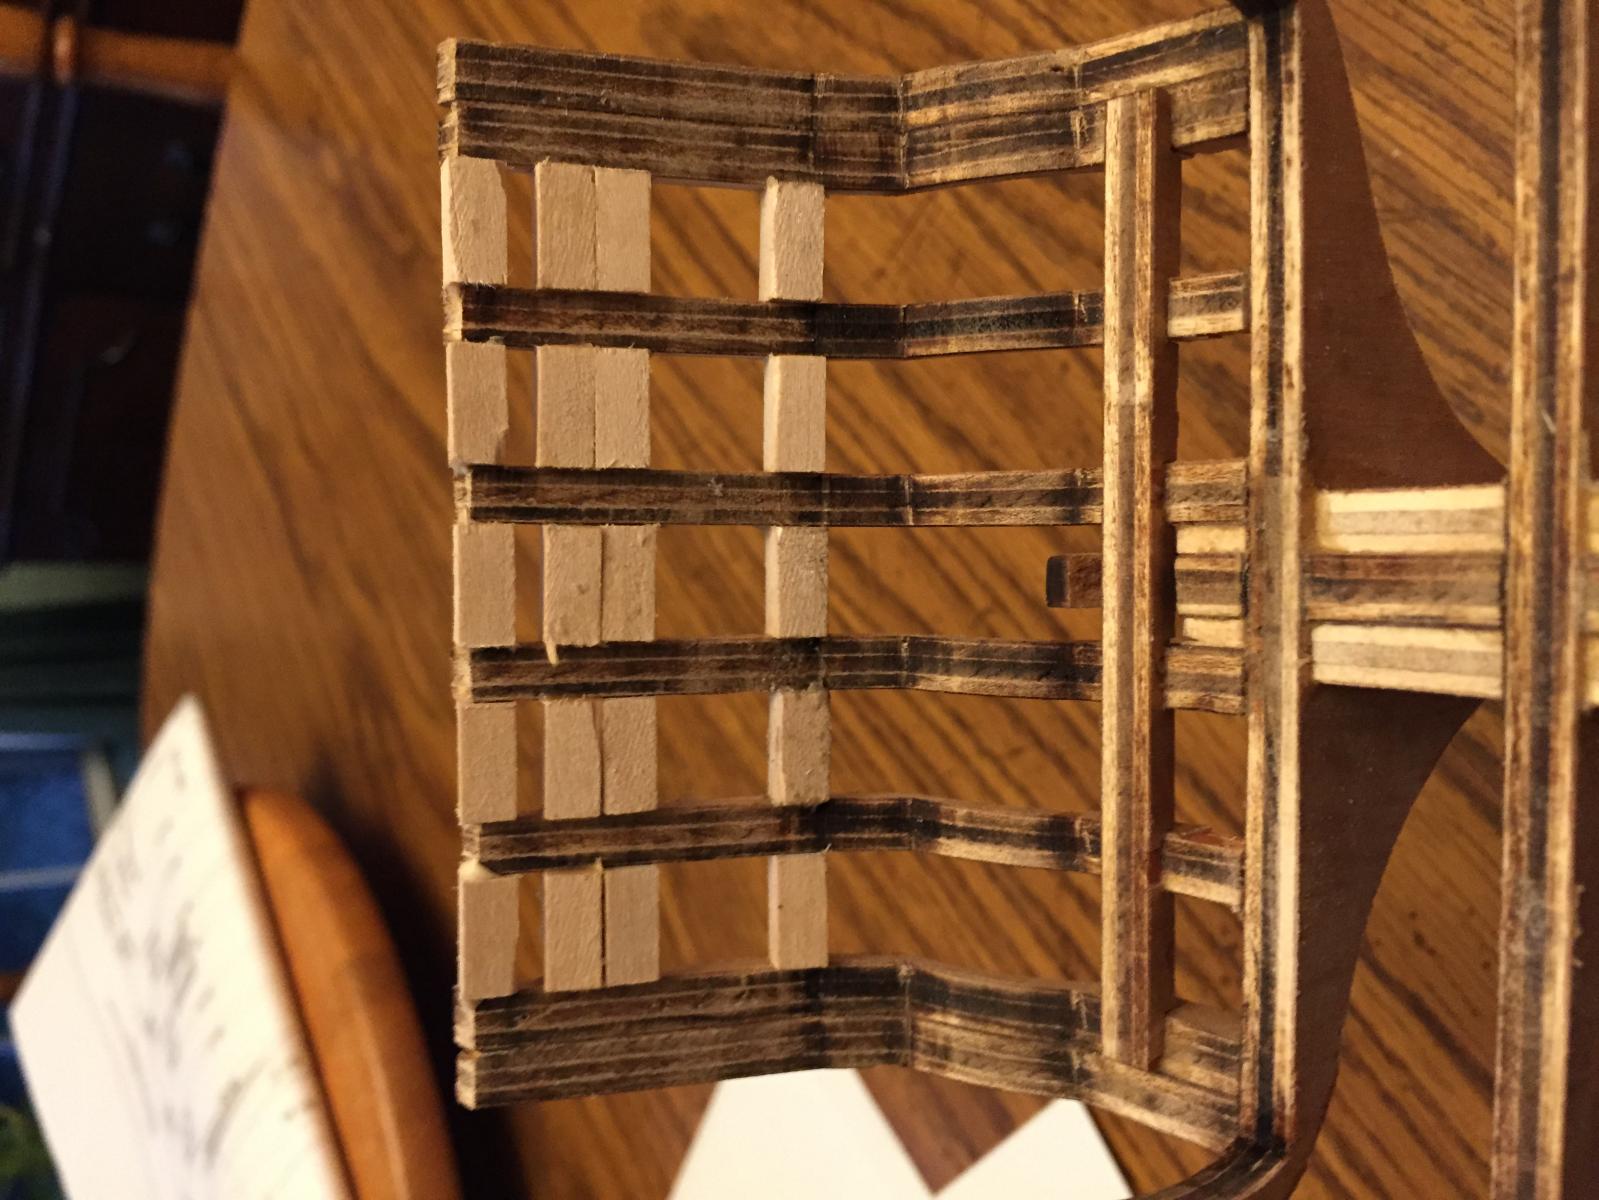
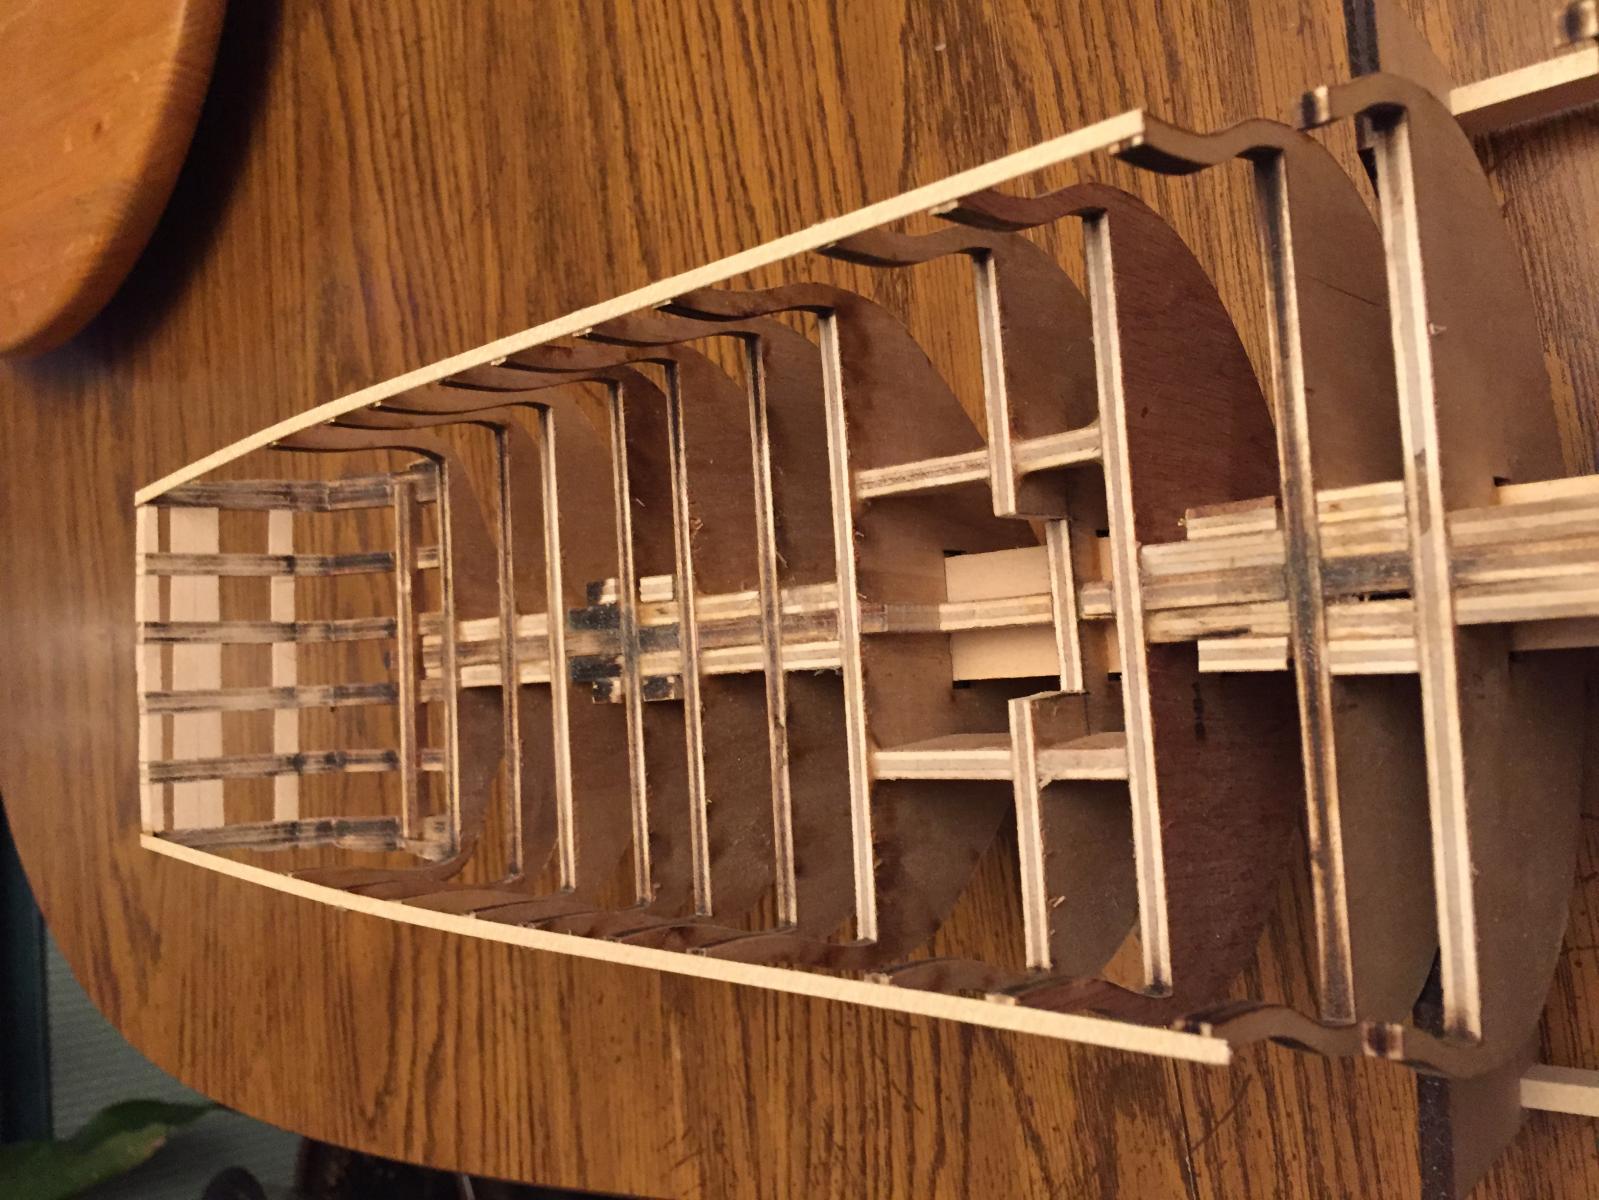
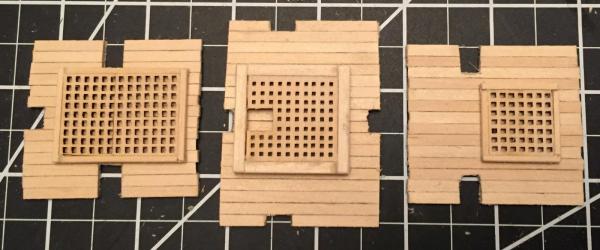
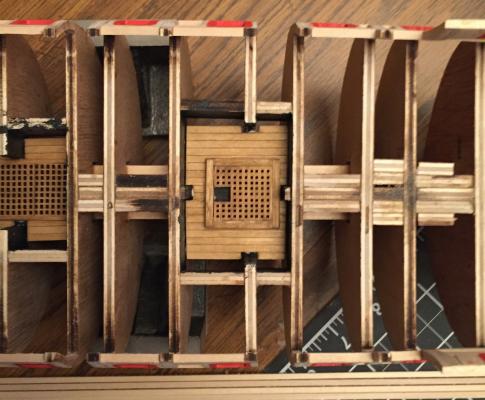
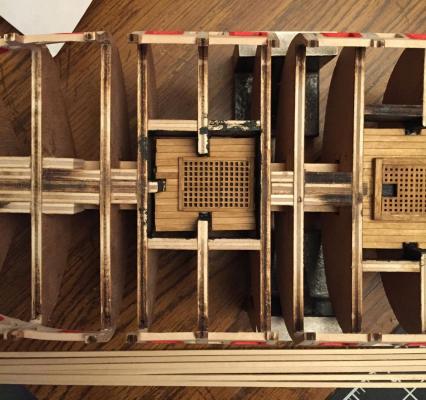
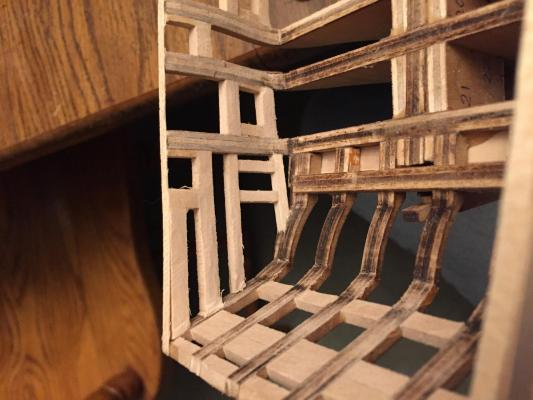
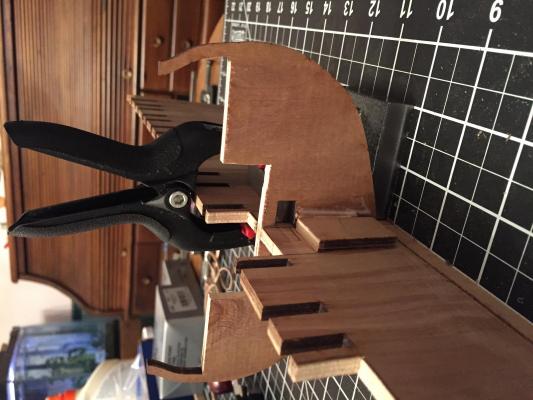
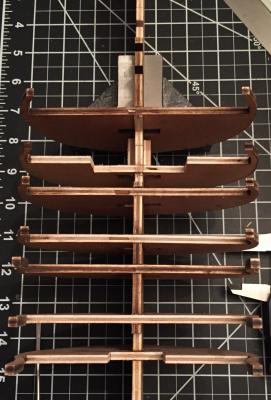
Well the re-saving the iPhone image trick worked, Thanks again Tim I! 12/20 – 12/25 - Finished the gratings, sanded and stained them. I then assembled the berthing deck sections, sanded and stained them. After they dried I marked the locations that the gratings would be bonded and painted the areas black to make it look like they had more depth. After bonding the gratings in place I bonded the deck sections to the frames. Since I now faced planking I went back and read some more about how to do it. I also asked Bob Rafine for advice. Thanks again for all of the positive responses.
-
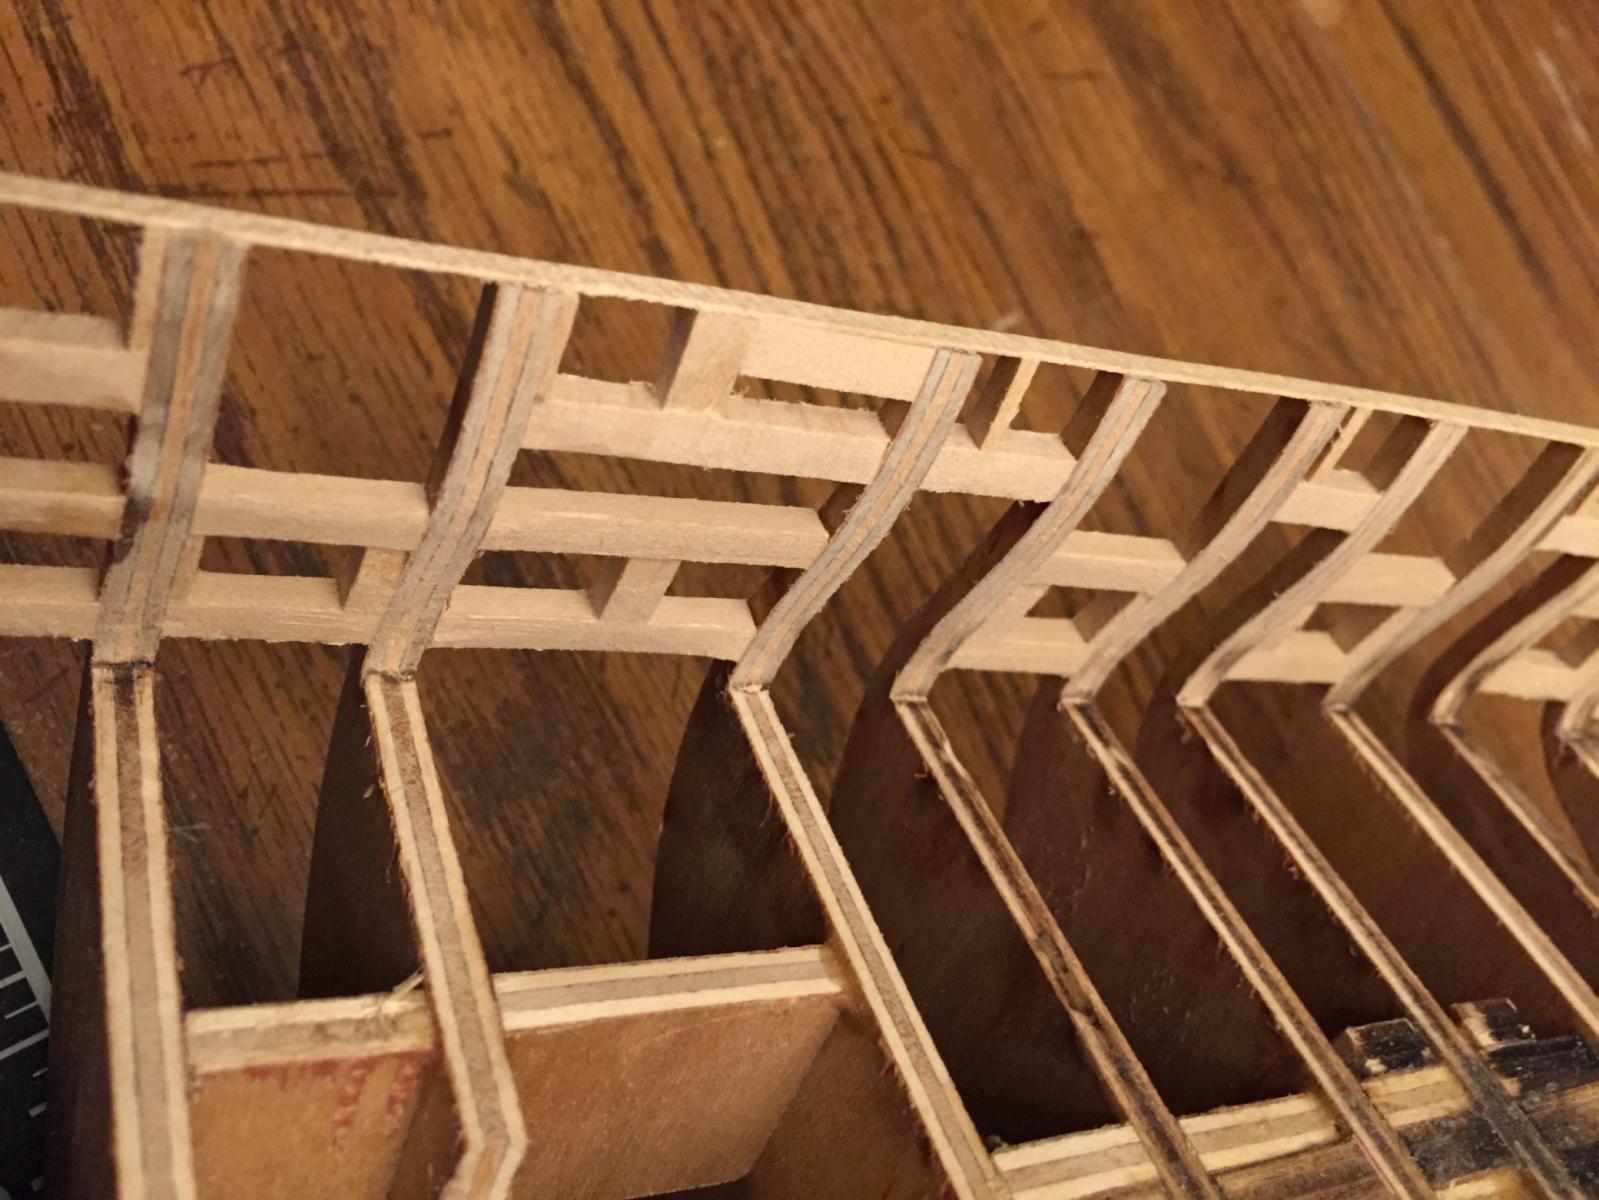
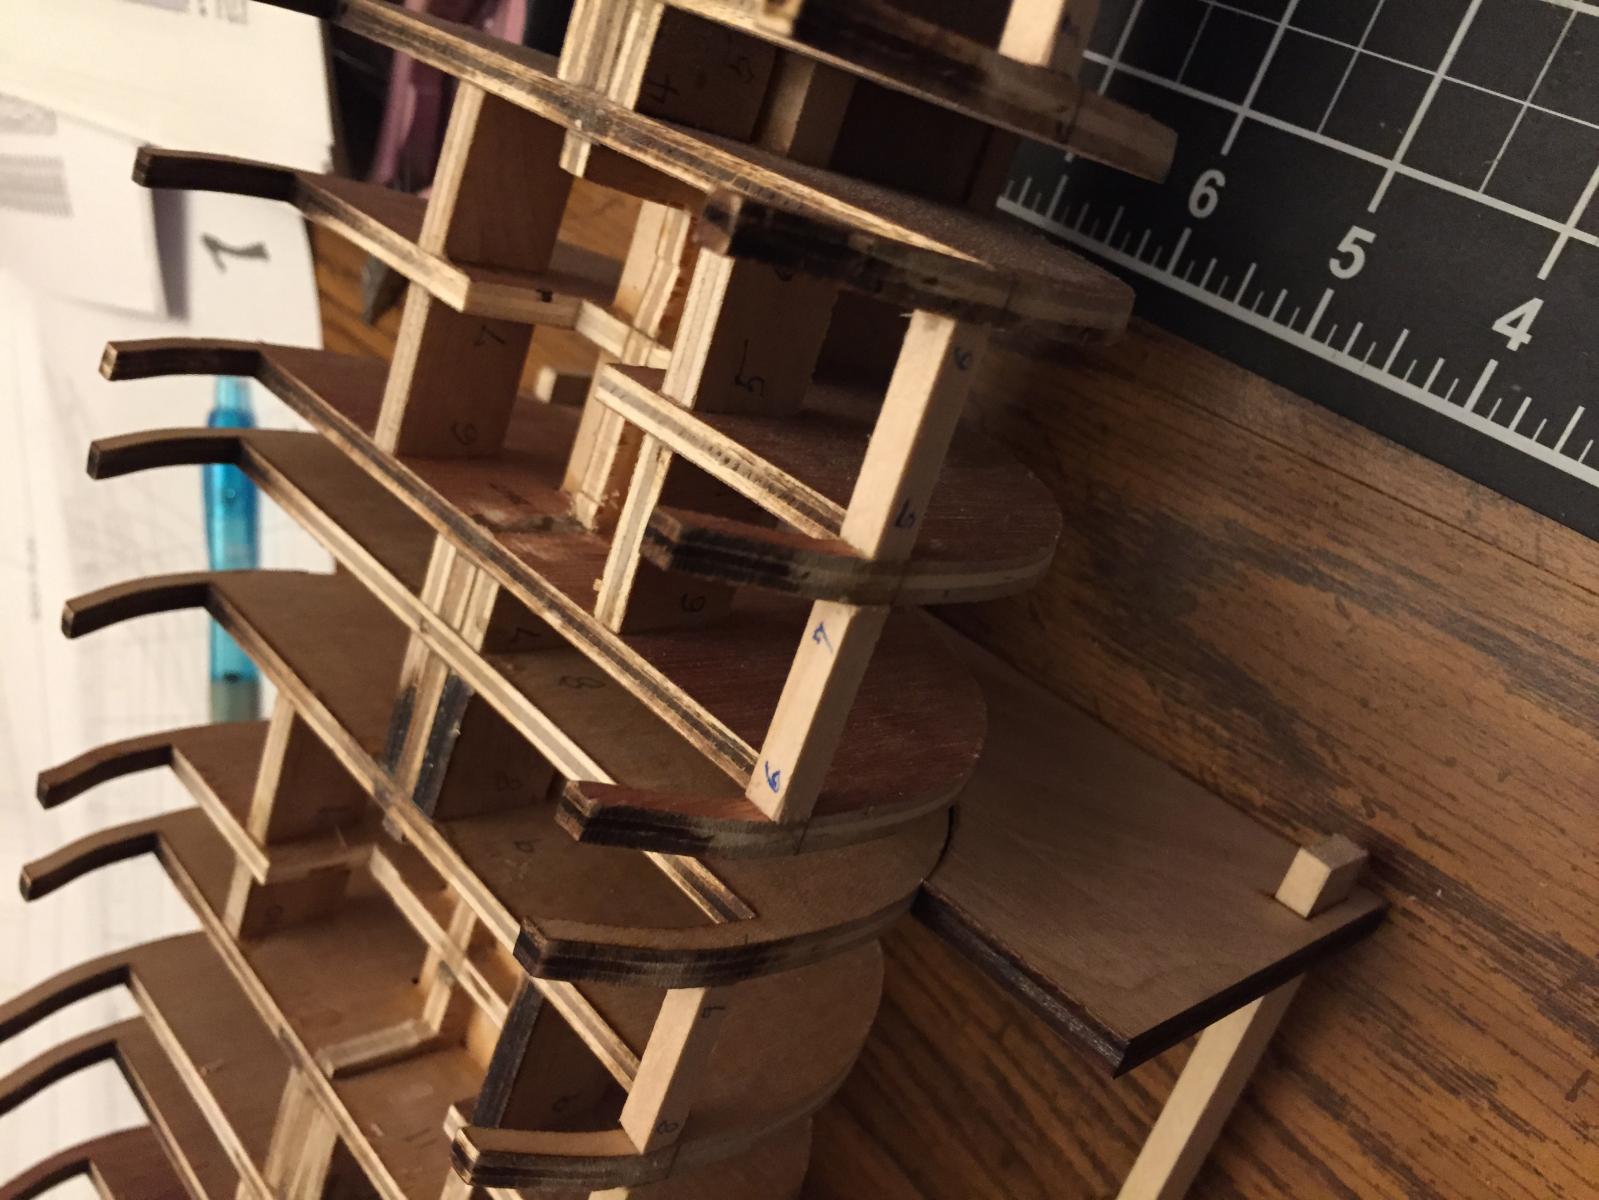
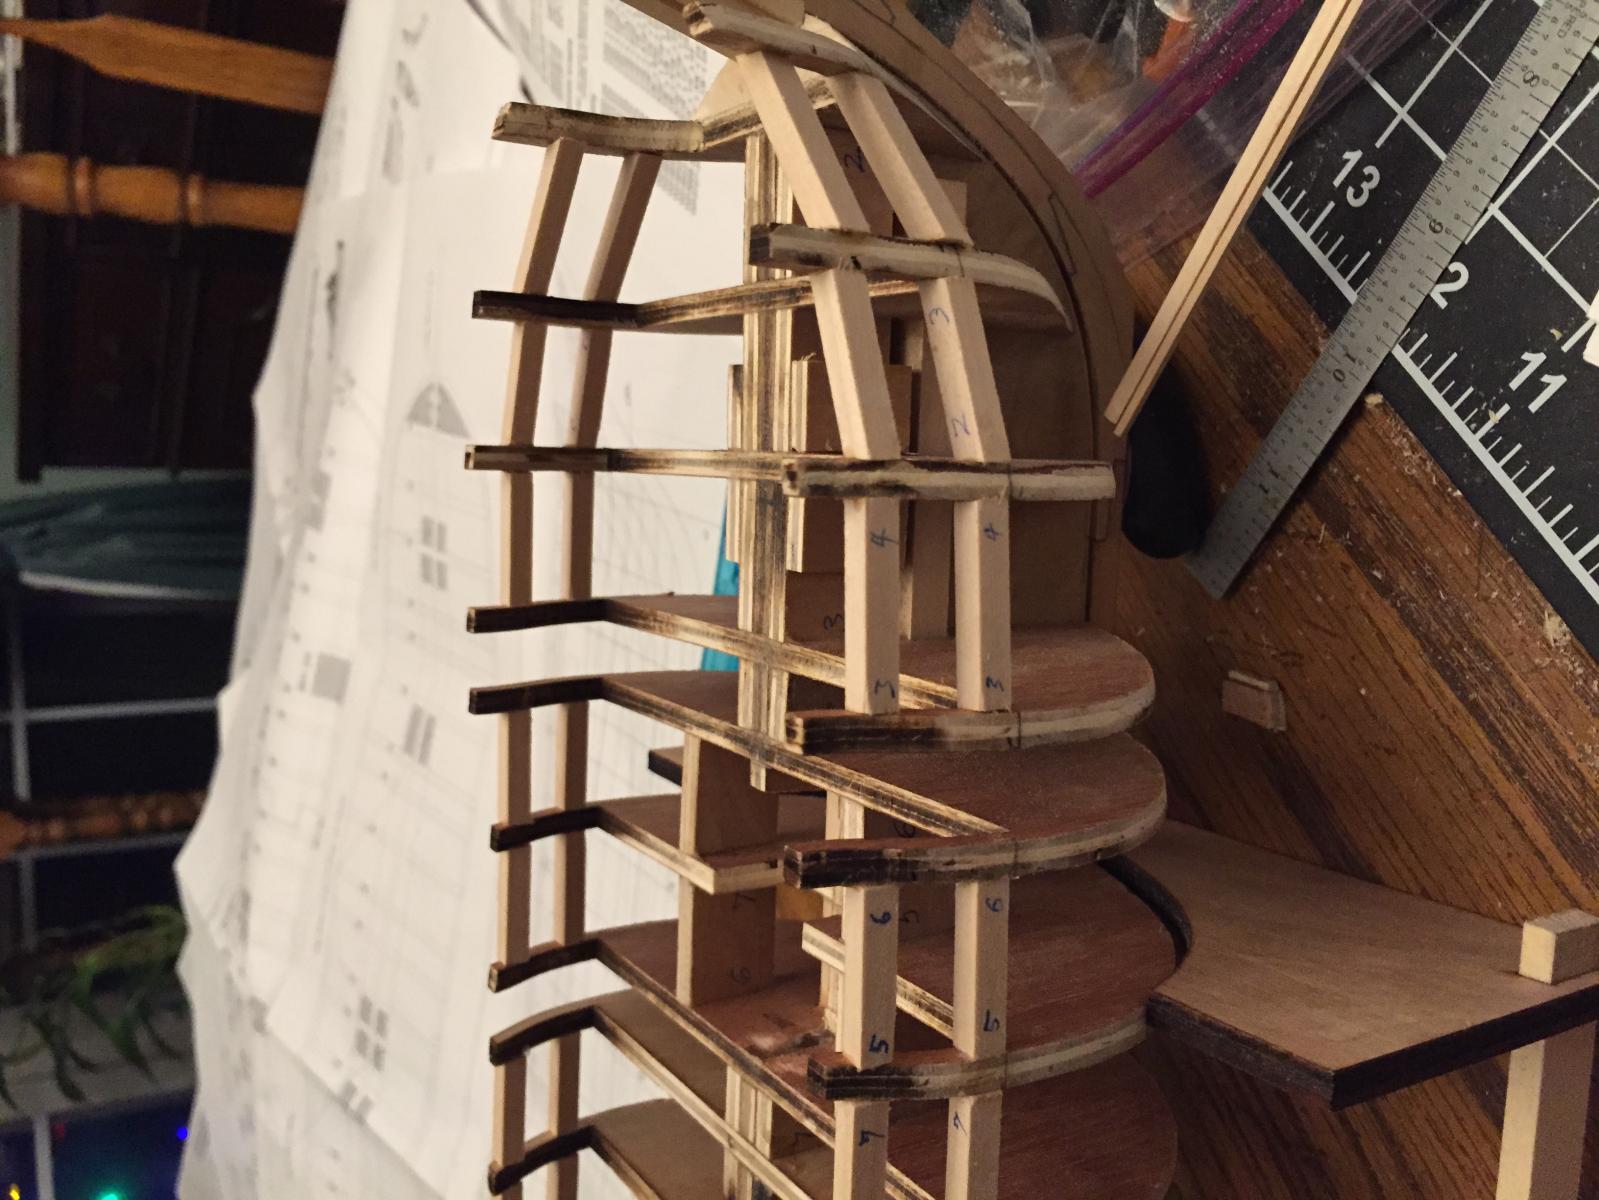
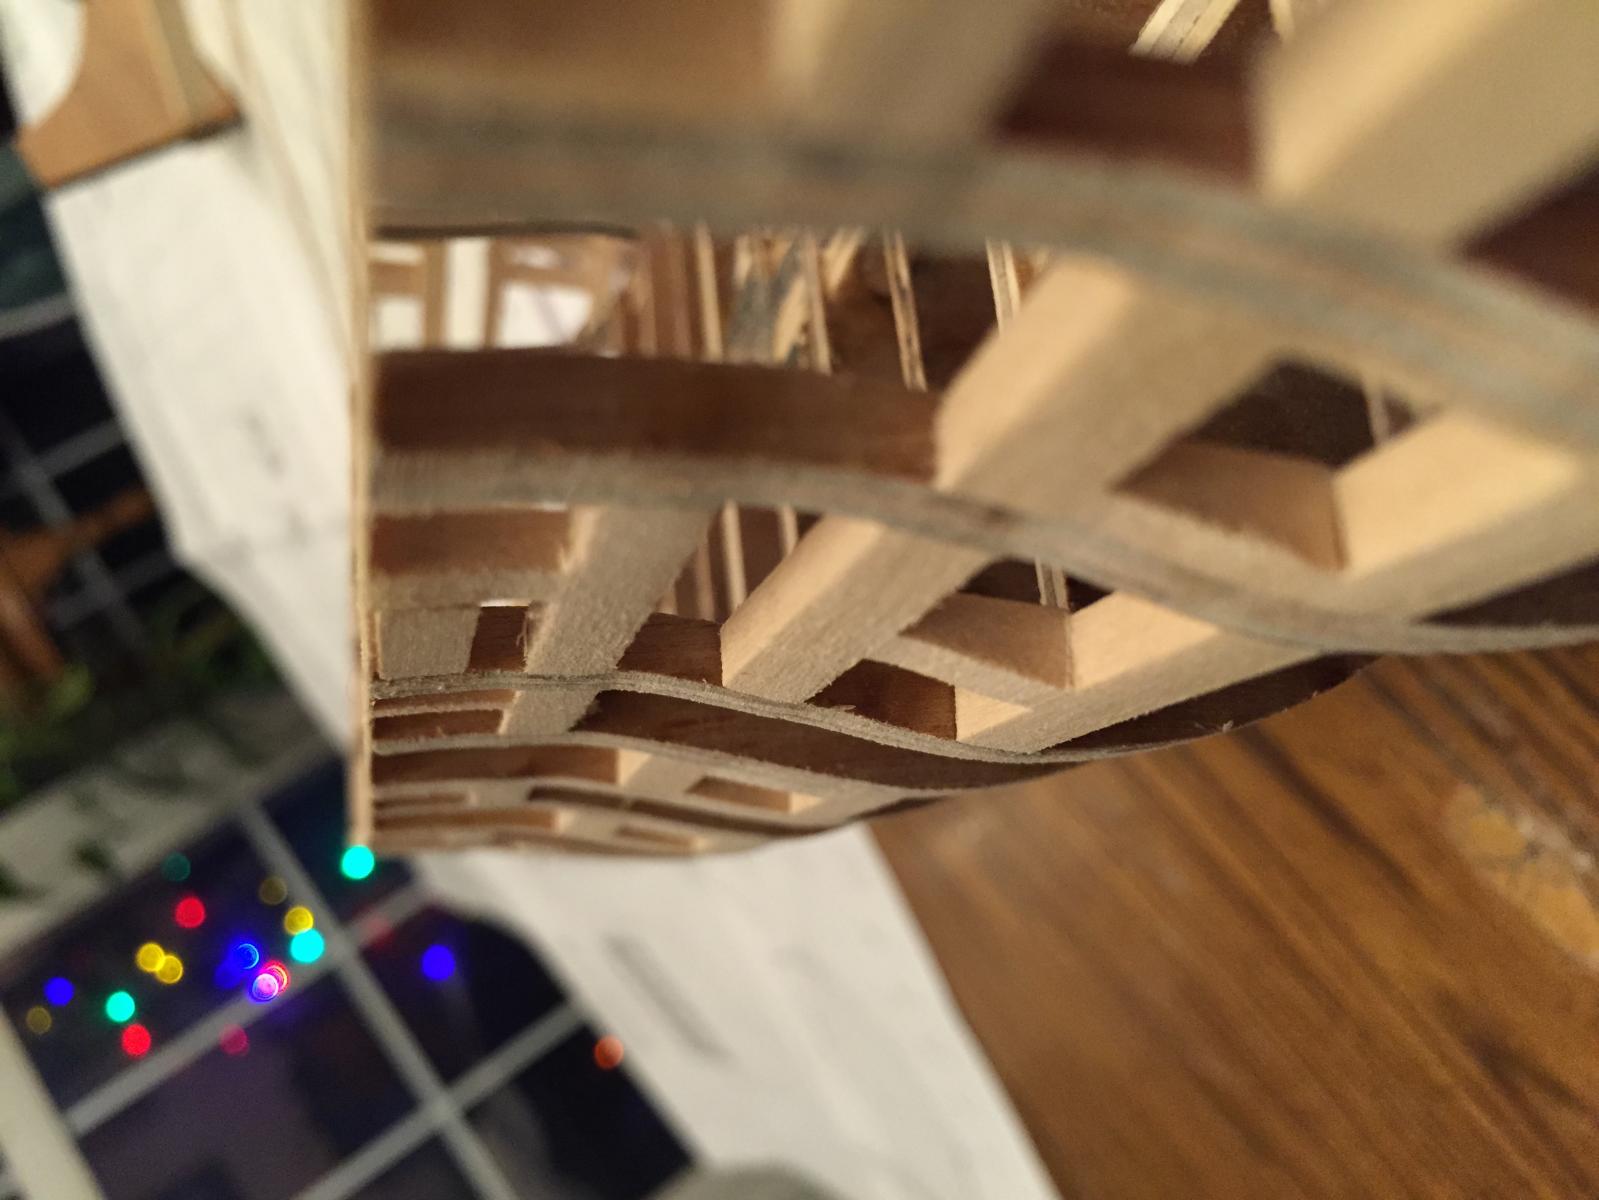
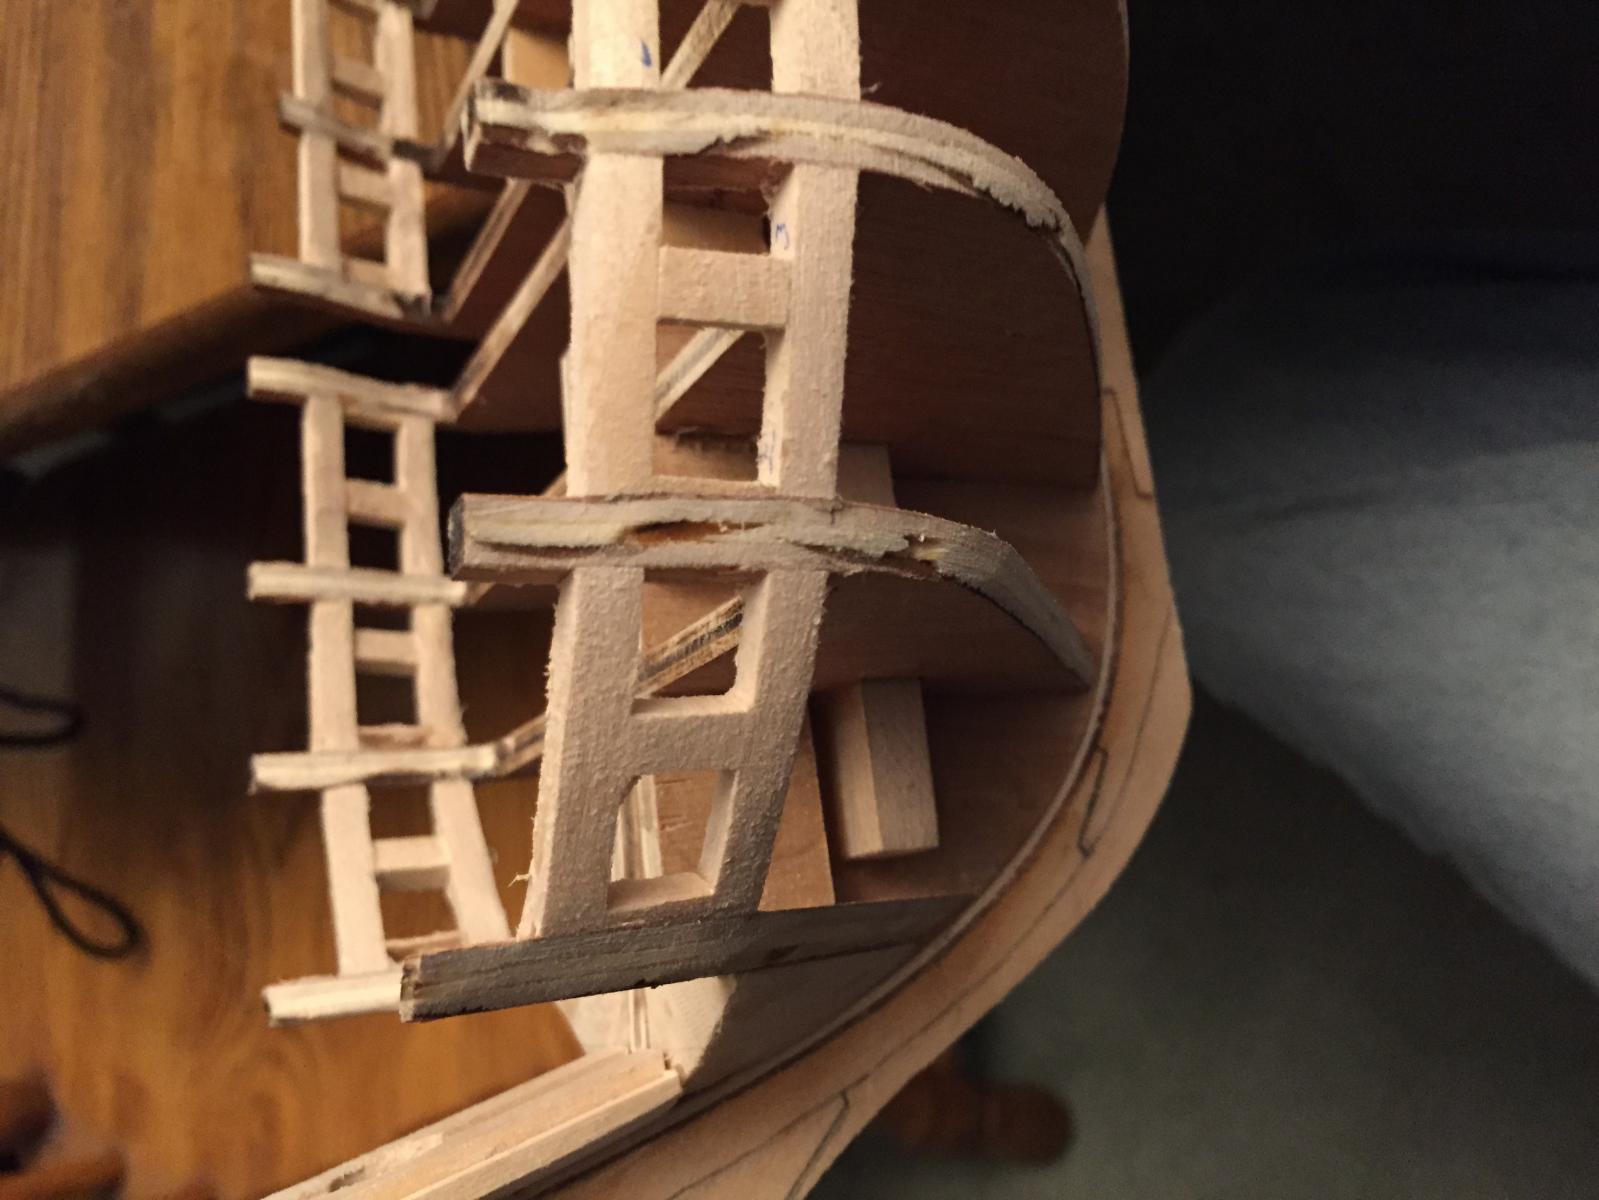
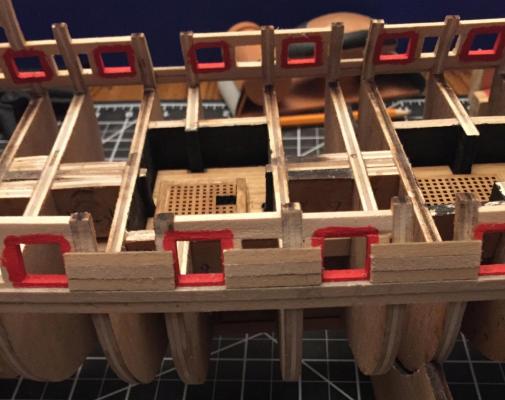
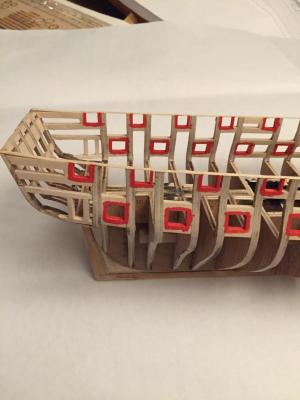
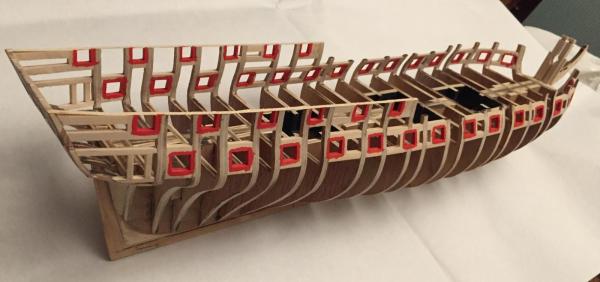
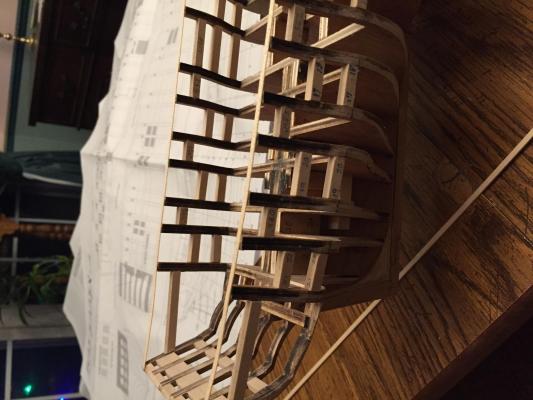
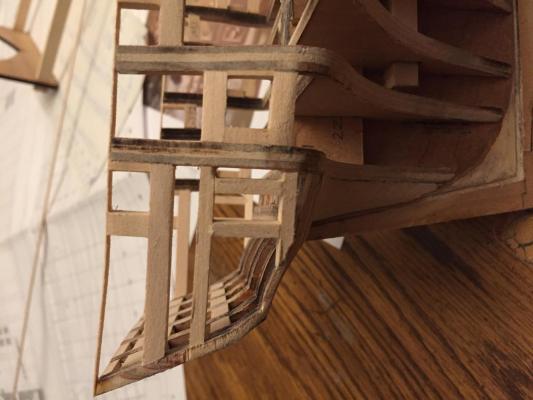
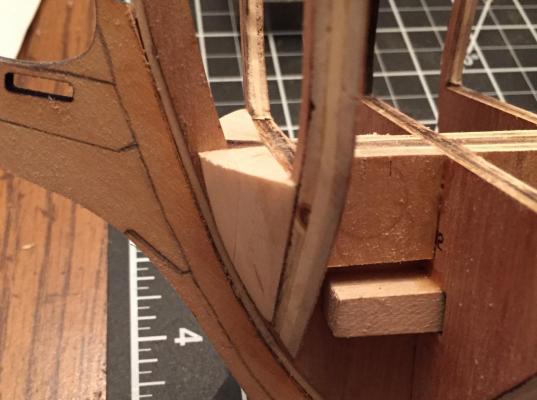
12/13 - 12/19 – Sanding the upper bulkhead extensions takes a long time and a lot of patience. Occasionally I loosen one of the gun port framing pieces and have to re-bond it and wait. I have the tops of the frames thinned to about 1/8” (3.1mm) and they are about 5/32” (3.9mm) at the bottom by the deck. That is still a bit thick based on the dimensions from Takakjian’s 1/24 drawings of the cannon and gun ports which, when allowing for plank thickness of 1/16” (1.6mm) ea inside and out, suggest a target thickness of 5/64” (2mm) at the top and 1/8” (3.2mm) at the bottom. I do not feel comfortable going any farther until I get a layer of planking on the outside. Even then I might leave things as they are. I used wood filler to smooth out the transition from frame #1 to the bow filler pieces which were not perfectly shaped, then sanded the area to make it uniformly contoured. I also painted the gun port frames red. I tried to make the laser cut gratings match up to the drawings and felt very frustrated. Finally decided to piece together the correct size gratings from the provided ones. Looking at the drawings in Takakjian just made things worse because she shows a finer grid (more holes per unit length) and different relative dimensions than the kit drawings. To use the majority of the kit supplied parts I will stick with the laser cut grid pattern and fit together what I need. More later.


-
Tim, I will try the re-saving trick and see if that helps. Apple features..... Thanks
-
Yes it is an iPhone 6.
-
Test posting of picture rotated sideways in my folder. Seems to still orient the image so that it is wider than it is tall. These pictures are from my iPhone and were taken with the camera held in the "normal" vertical position. If I took a picture with the camera sideways then it comes out "correct" when posted. Does not matter how I orient the image in the folder on my computer. So unless someone knows how to override it, I guess I cannot take any more pictures with the phone/camera upright but have to turn it sideways. I will apologize now for the rest of the images I already took vertically. I will retake the ones I can with the new orientation. Very frustrating.....

-
Tom, all of the pictures are oriented correctly when I select them from the folder on my computer. Don't know why they come up the way they do. Open to ideas..... Is there some way to edit them once they are posted? Tim and Aaron, thanks for the positive feedback. Santa added to my collection for building after this kit is done. A Corel HMS Victory cross section kit. It will be sitting there a while. I have made more progress and will post it soon, been off for Christmas activities. Thanks,
-
Bob, Thanks for the info. I can do what you did for the spacing. I also picked up a proportional divider and if I can figure the scale difference may be able to pull stuff off of the drawings. (Maybe???) Based on your comment about using fingers to hold planks I assume you are using CA and not carpenters glue for the planks? Plank bending is going to be an adventure....
-
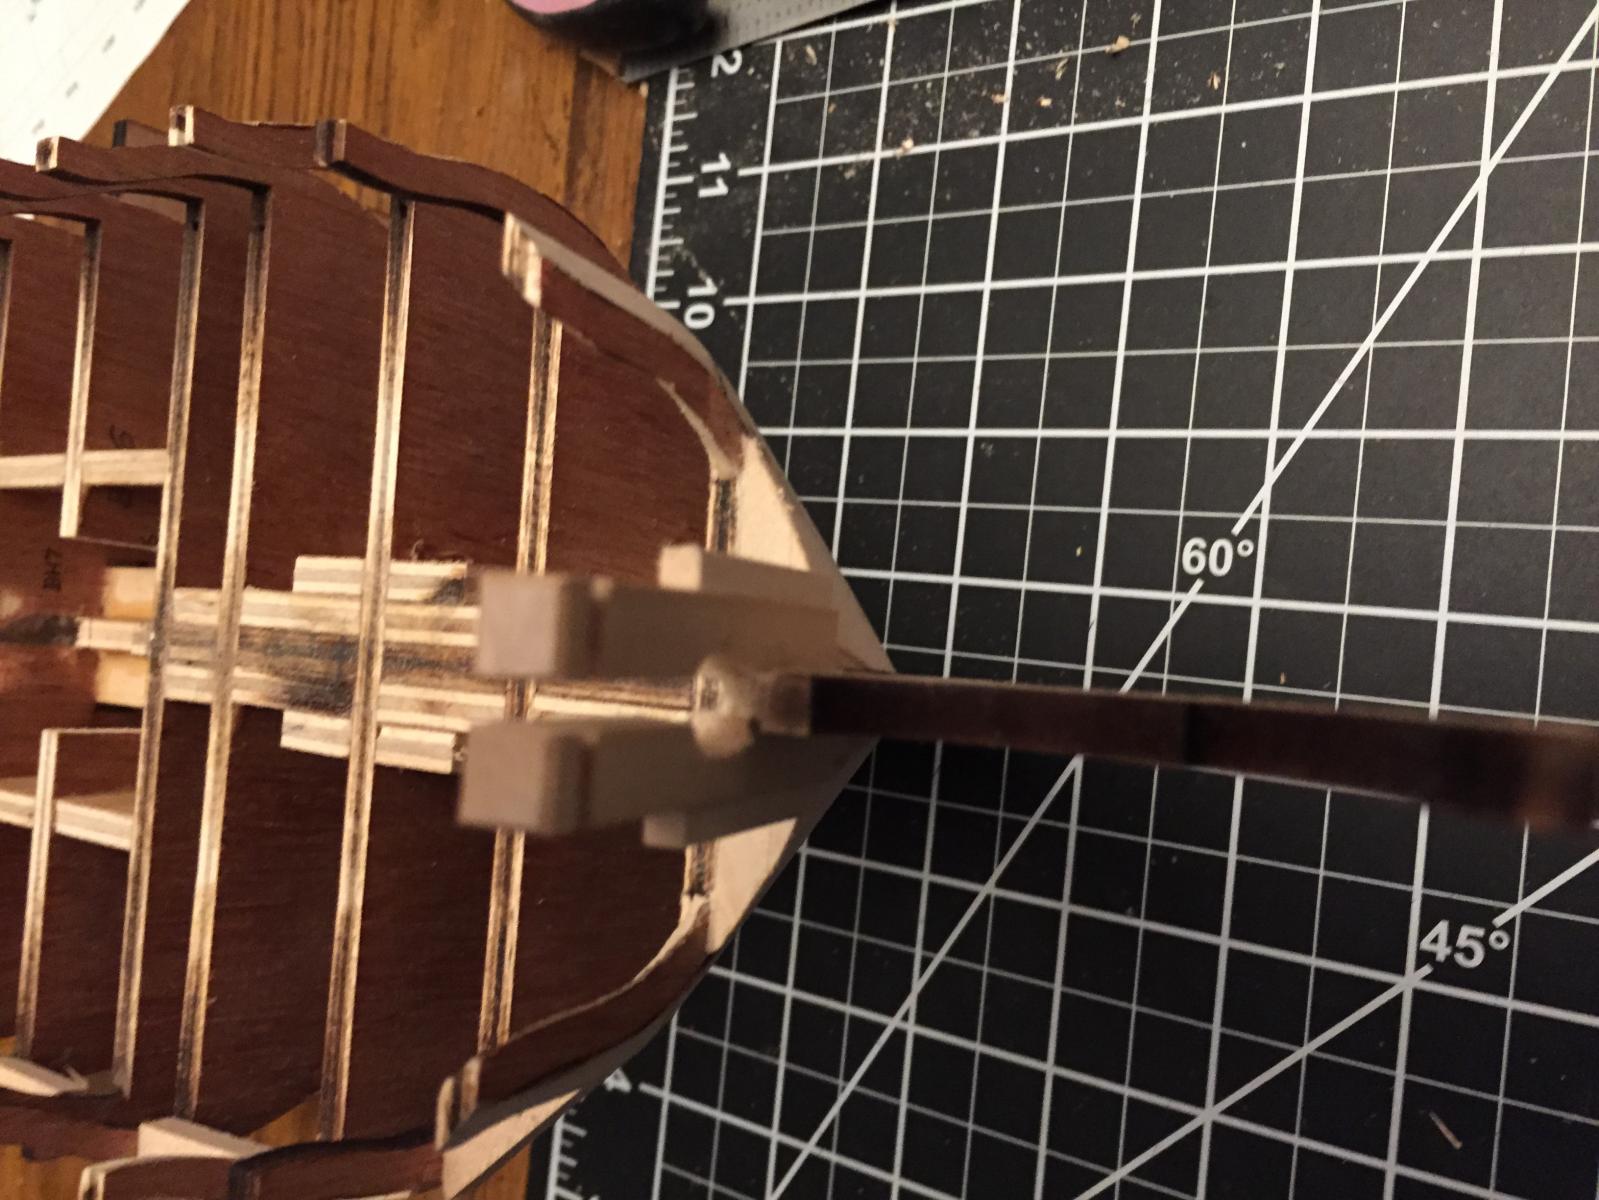
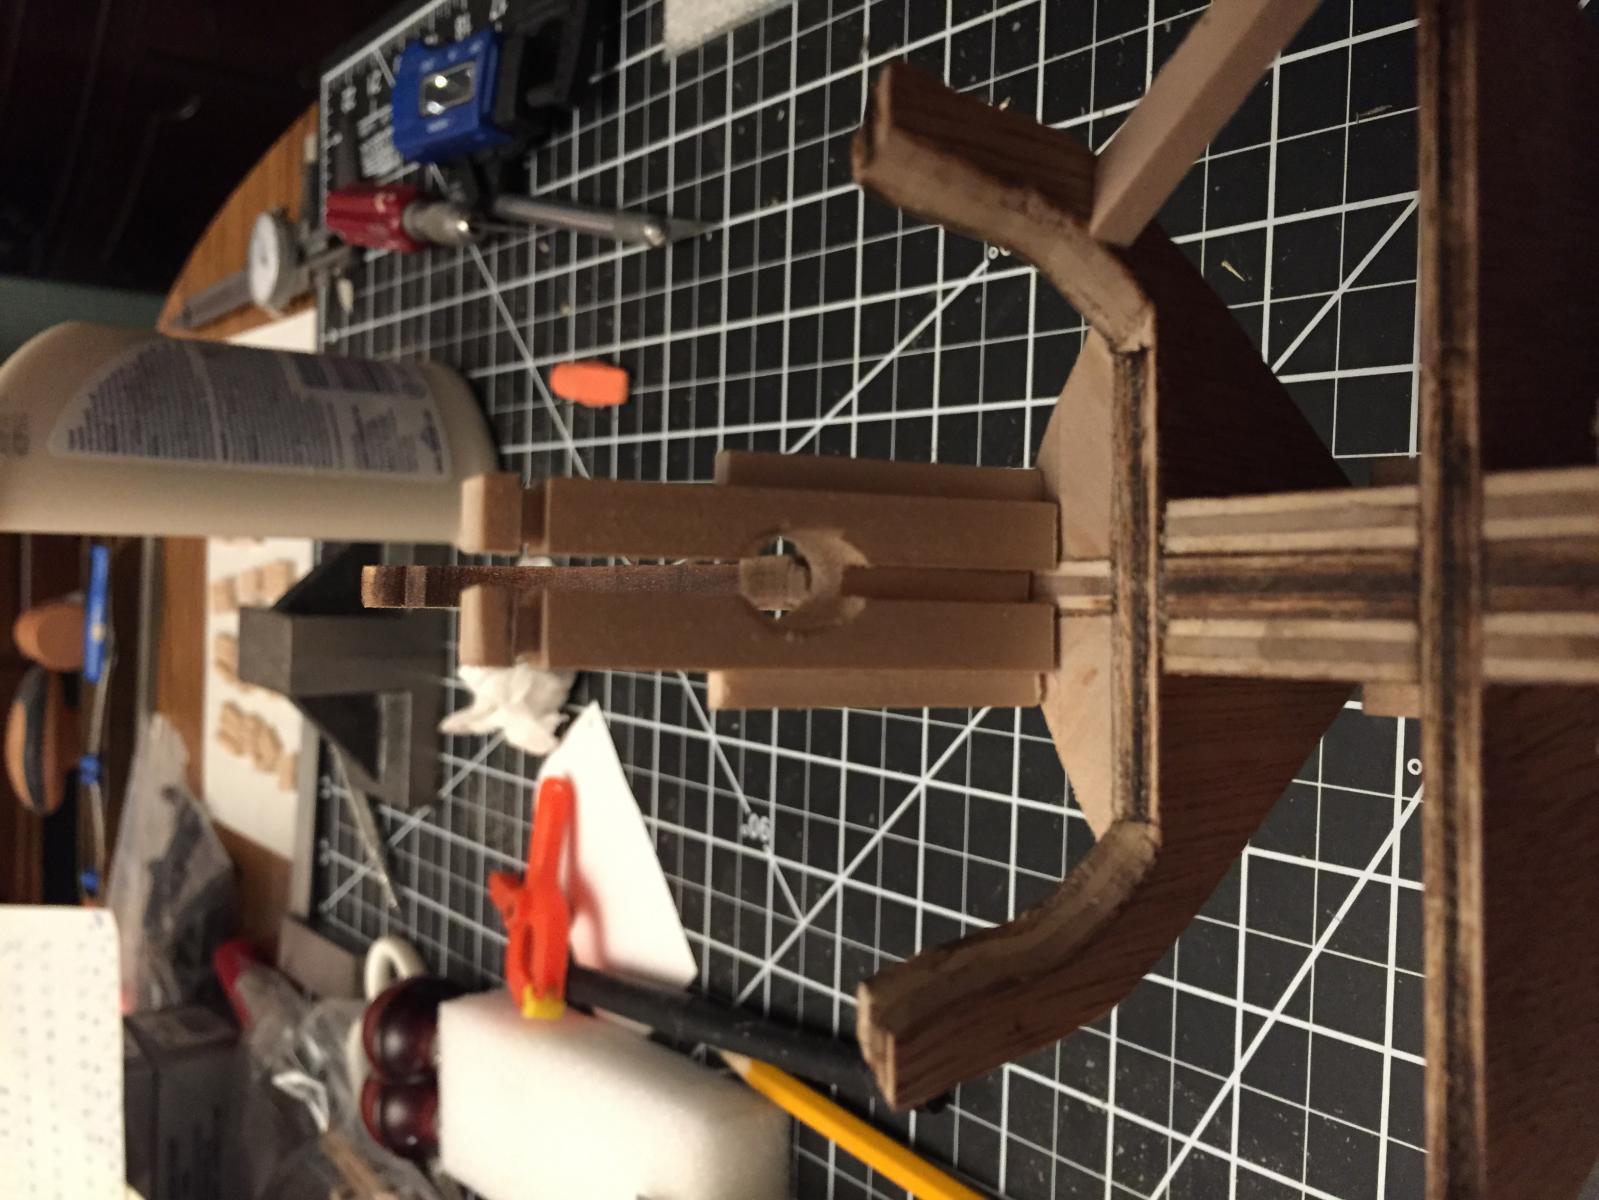
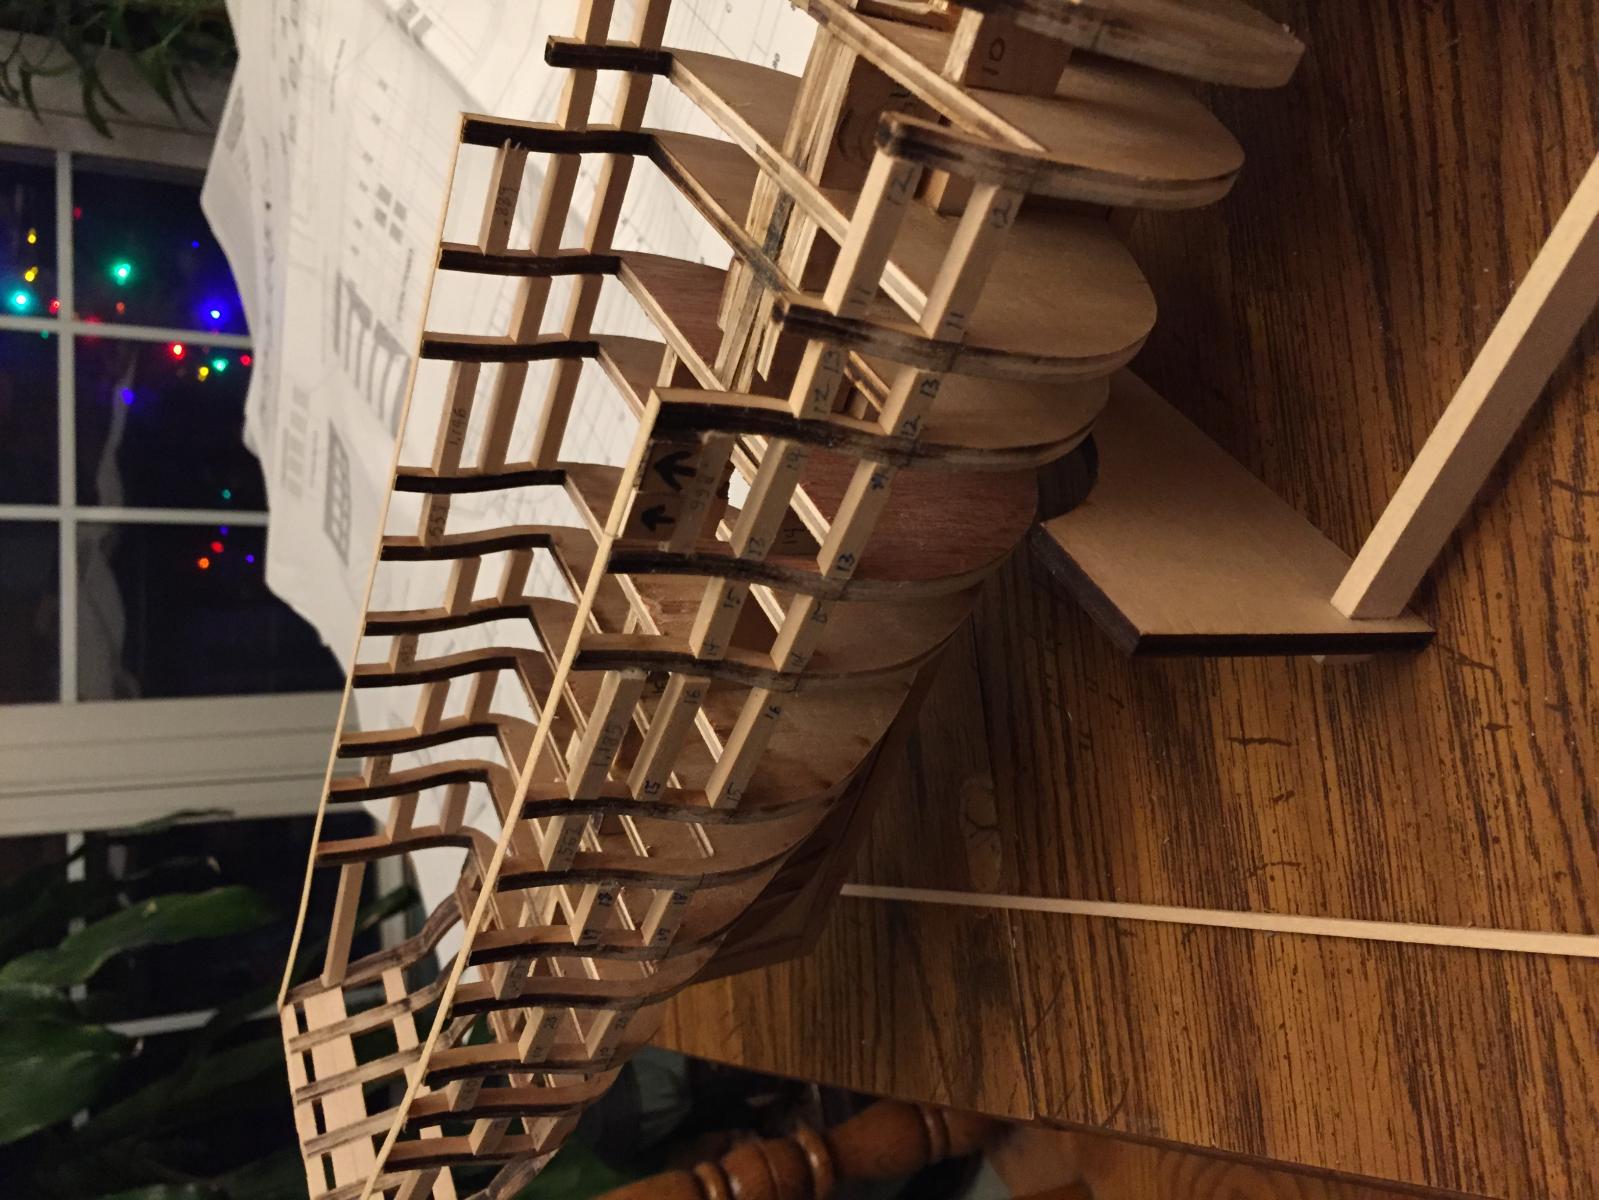
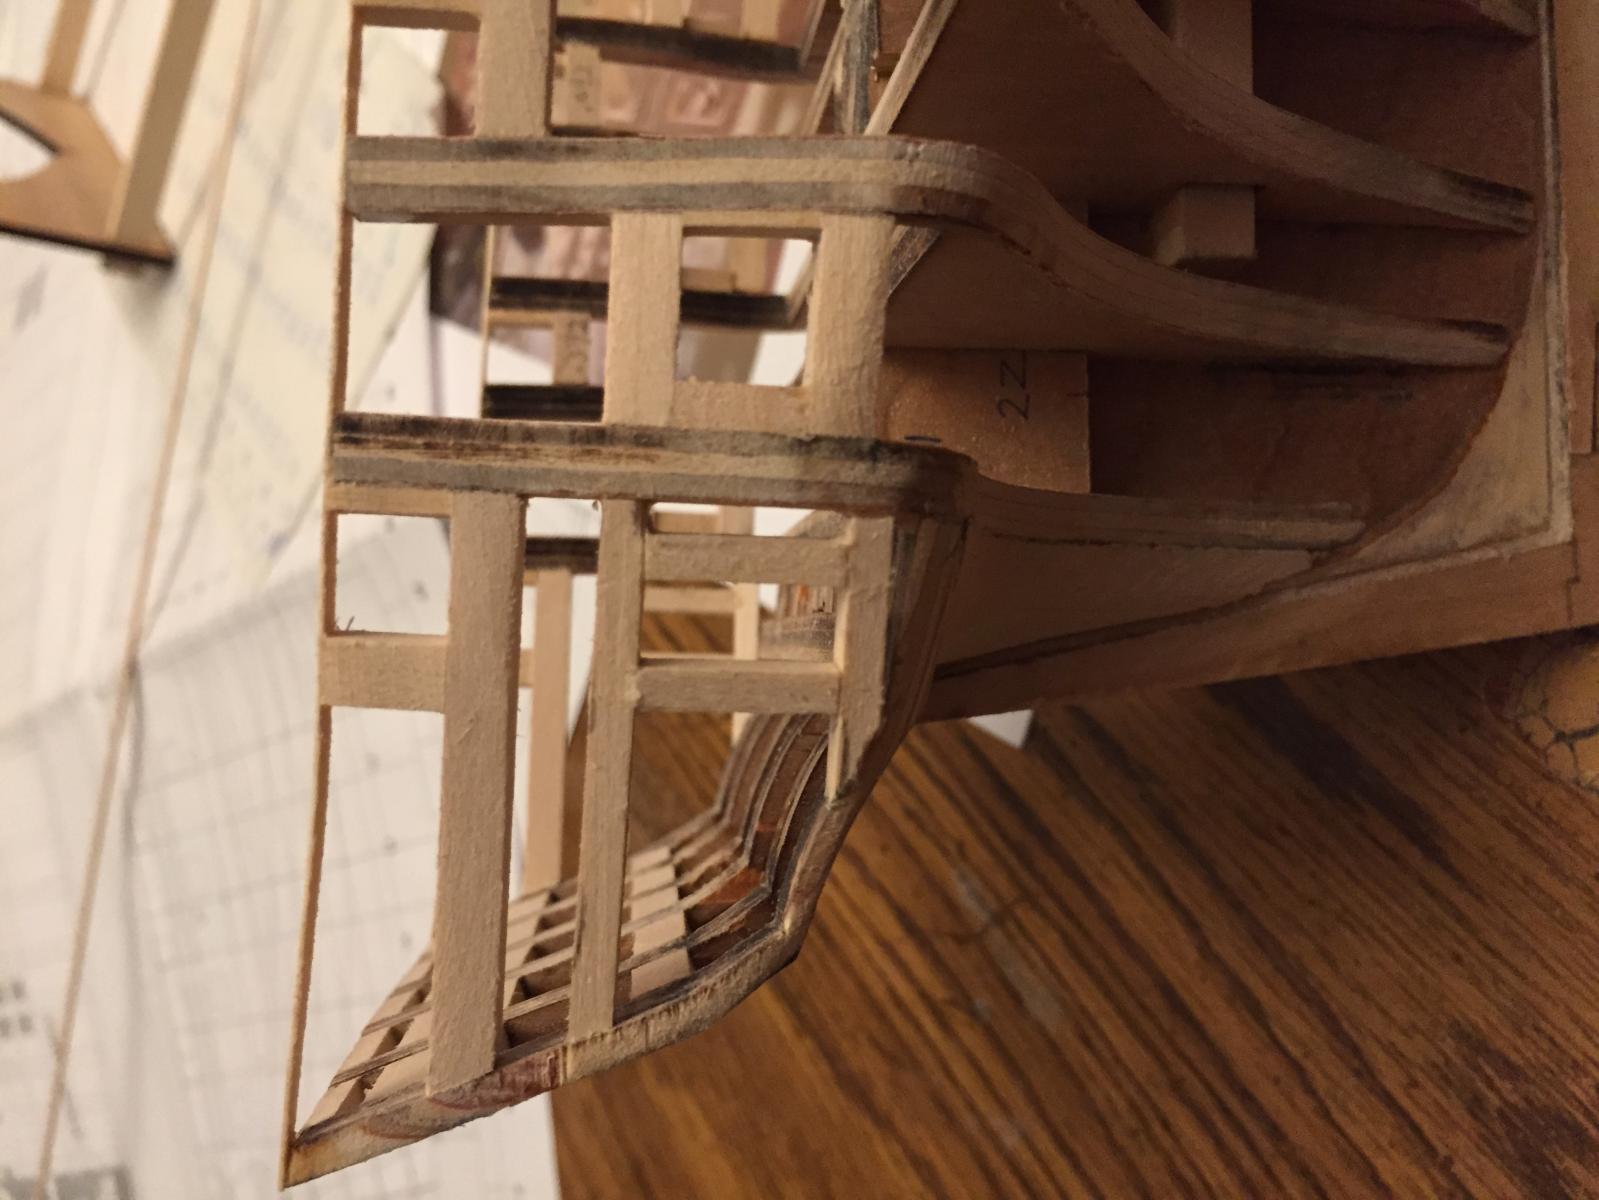
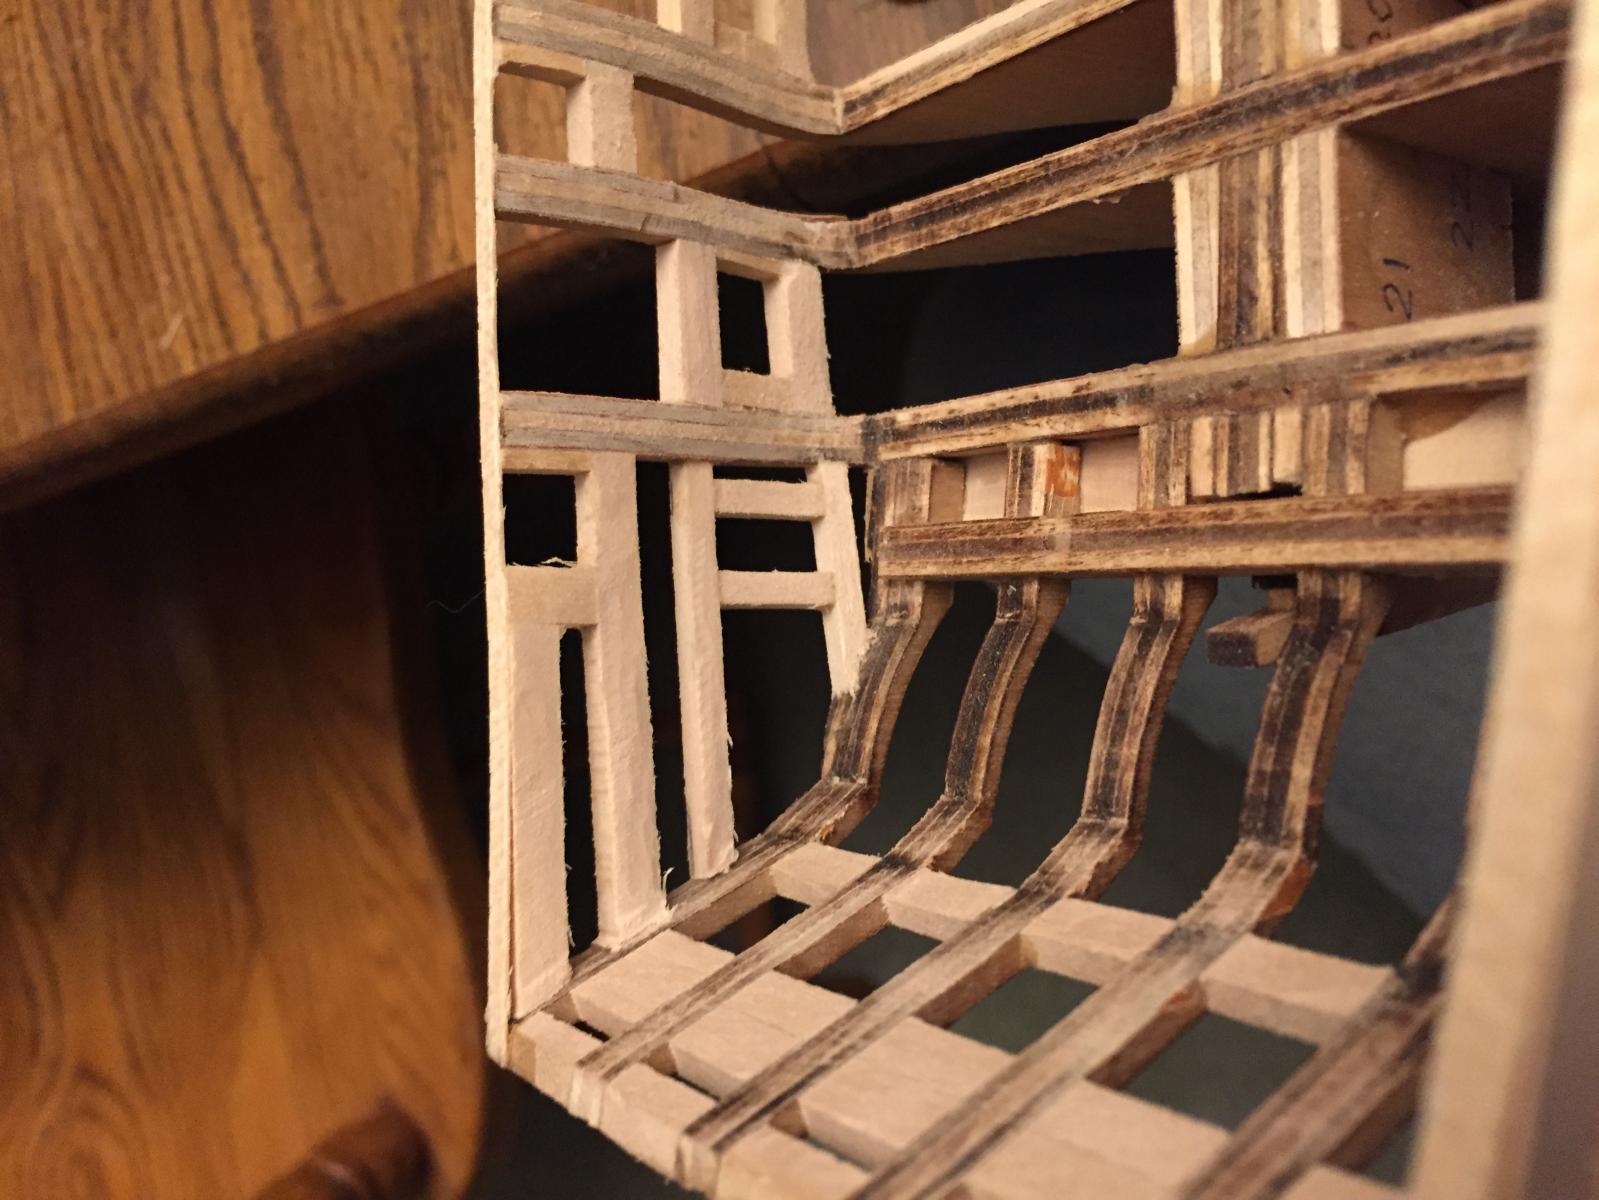
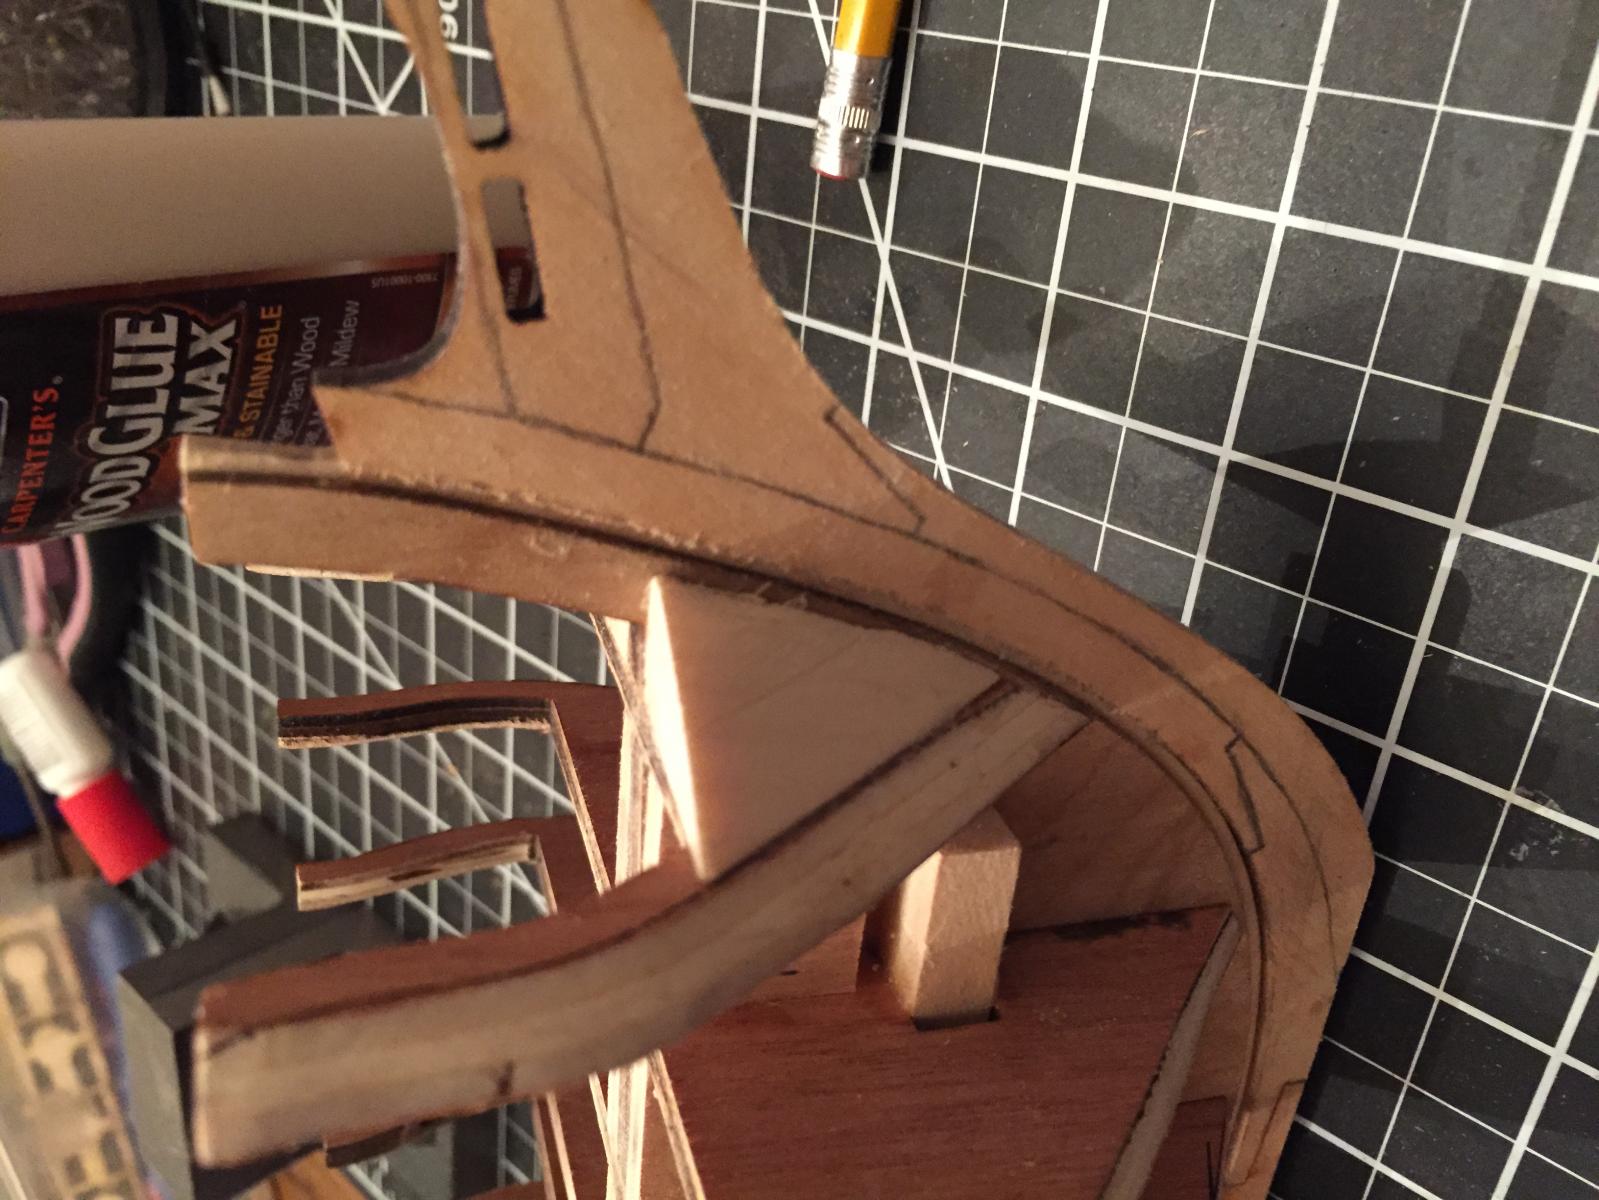
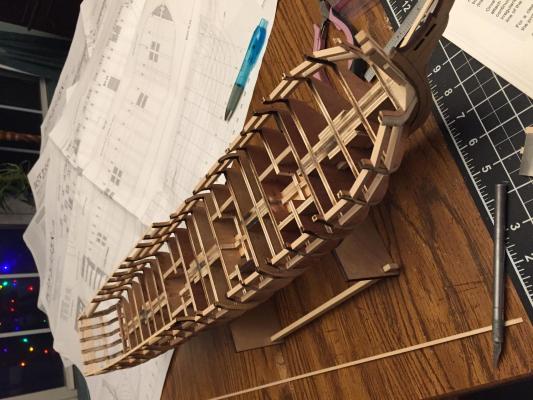
First of all, thank you to everyone who has liked my posts and to those who have replied. As you can tell I am posting a lot to catch up to where I have built. 11/26 – 12/12/15 – Read Rafine’s log repeatedly. Decided to order the AOS book by Portia Takakjian, “The 32 Gun Frigate Essex” for reference. I am also reading through other build logs to see what can help me with this and I bought a copy of planking techniques for Model Ship Builders by Donald Dressel. I thought the change to the knights heads that Rafine made looked better than the kit set-up so I fabricated them and added them to the bow. I measured the spacing between the BH’s and cut the parts to make the gun port framing. Starting in the stern I built the framing forward on the starboard side and then the port, carefully checking my measurements and adjusting as I went. I also made the stern filler blocks and bonded them. Once everything was bonded and fully dried I started sanding. After the AOS Essex book arrived I added the door framing to the quarter galleries as Rafine did. I have finished sanding the outside profile and have begun the more difficult interior surfaces. I had to make two special sanding blocks to allow me to reach all the surfaces I wanted to sand.


-
Bob, Thanks for the encouragement. So I do have a few questions. 1) How do you figure out where to place the openings for the hatches in the false deck since the plans/drawings in the kit are not exactly to scale? I tried lining up the mast hole openings and they do not line up. 2) How do you bend your hull planks? Electric planking bender, jig or some other way? 3) How do you clamp the planks? Thanks
-
11/21/15 – Started fairing the bulkheads for planking. Just by feel and observation, hard to know what is “right”. Removed cabin bulkheads from laser cut sheet. 11/22-24/15 – Assembled cabin bulkheads and completed stern cabin framing for windows, etc 11/25/15 – Thanksgiving break!


-
Quick question. I looked through how to post pictures but did not see how to control orientation?? Seems random. The pictures all look normal and upright in my computer folder.... Engineer57
-
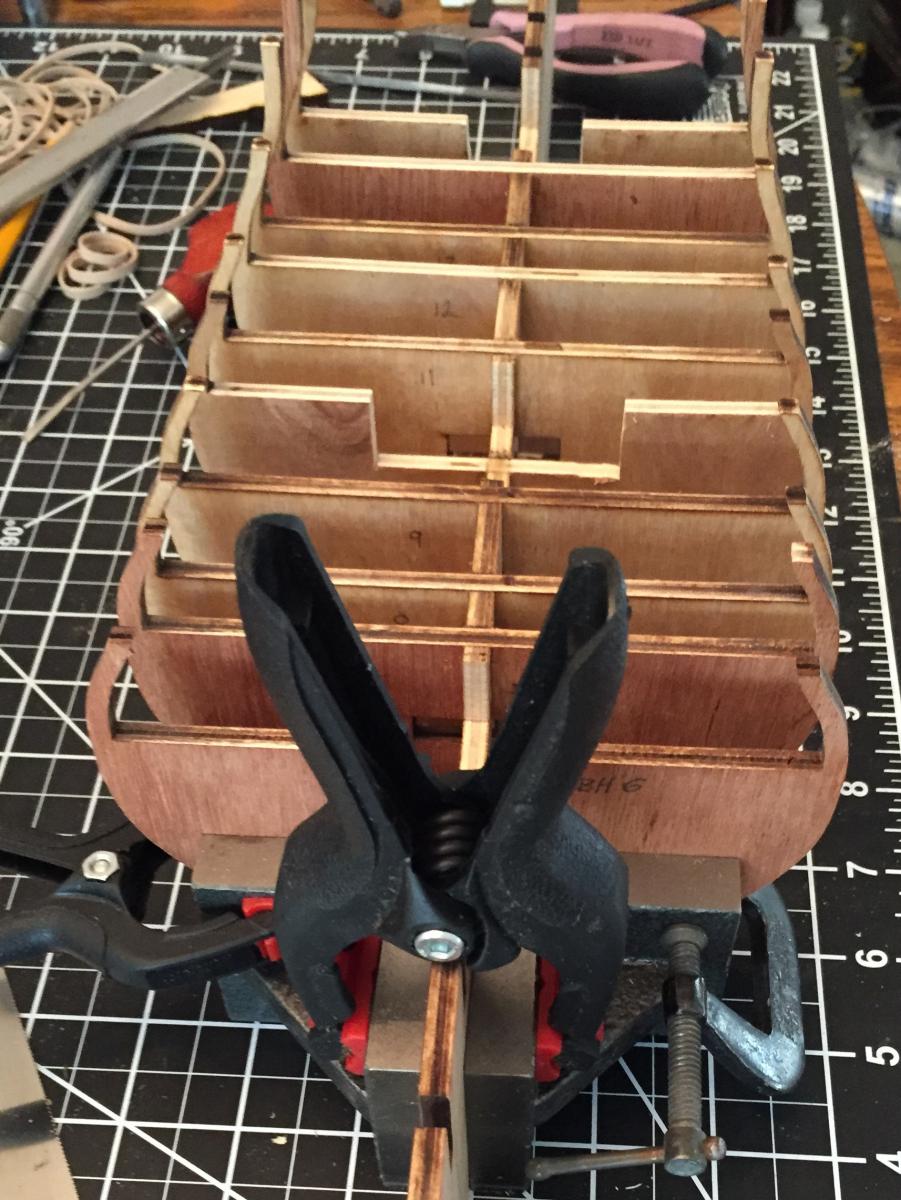
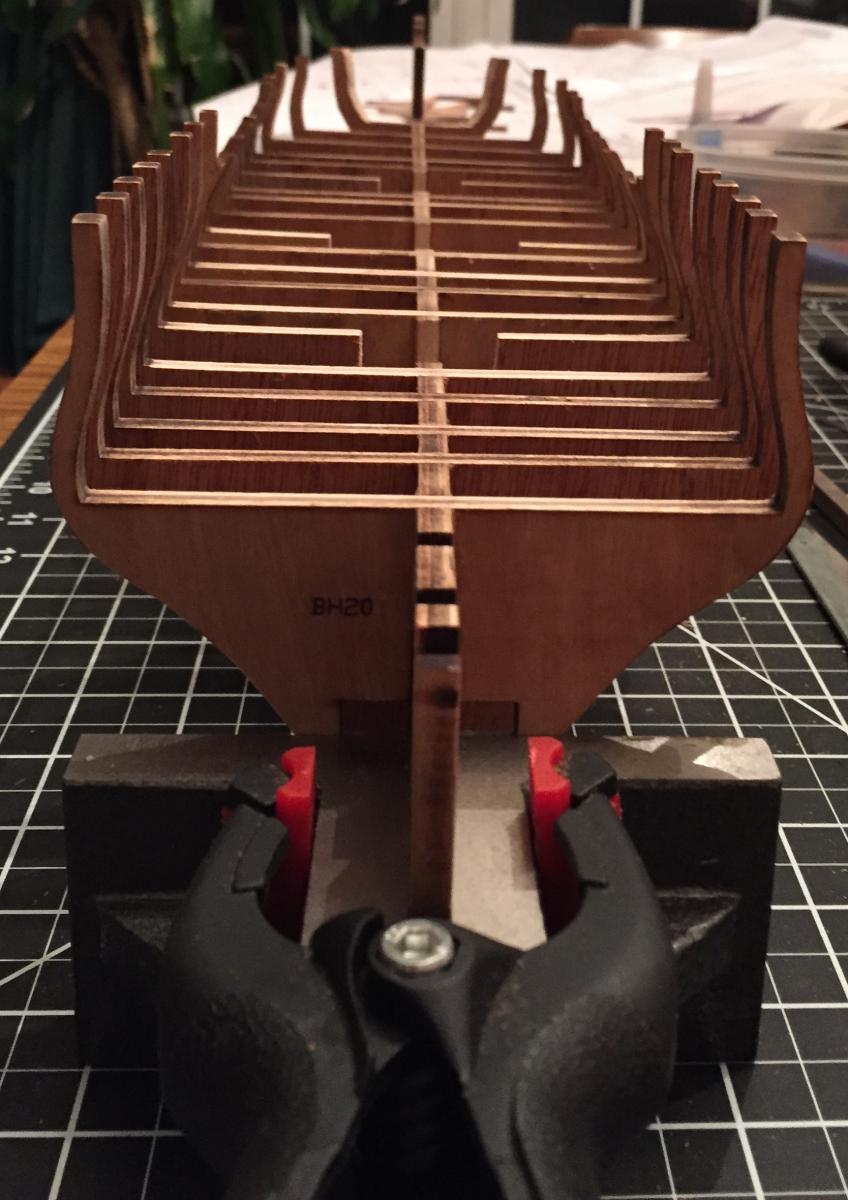
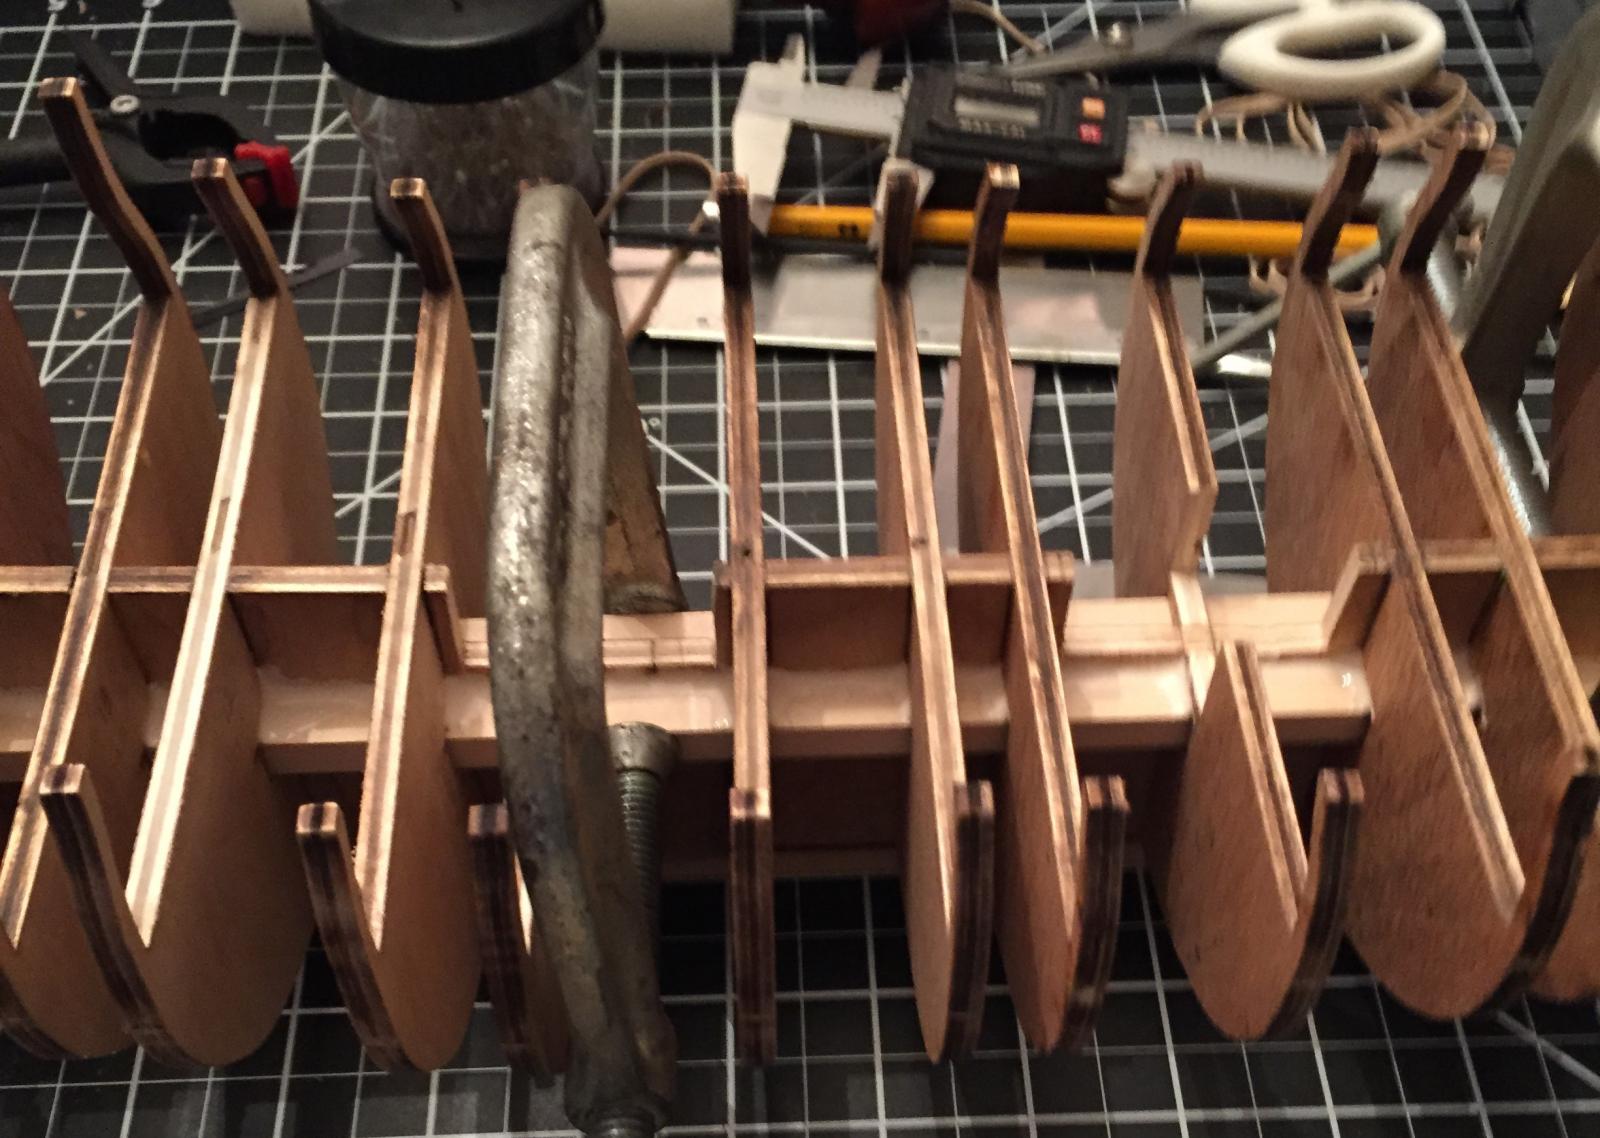
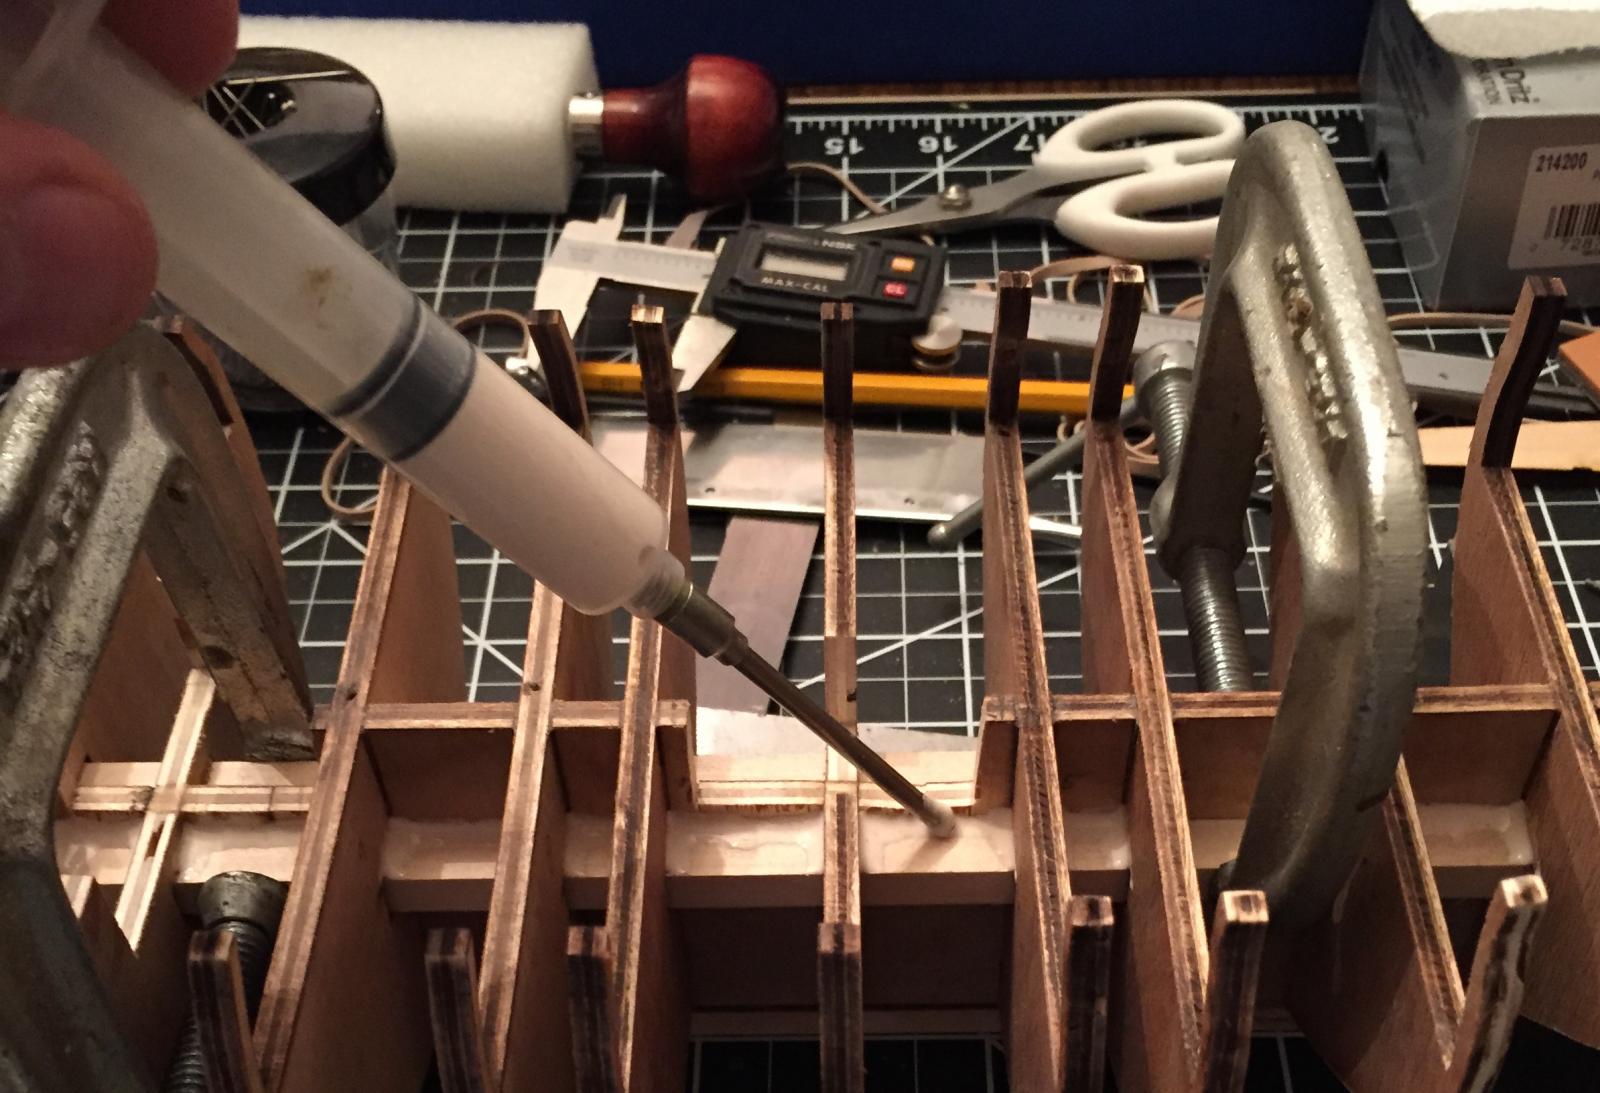
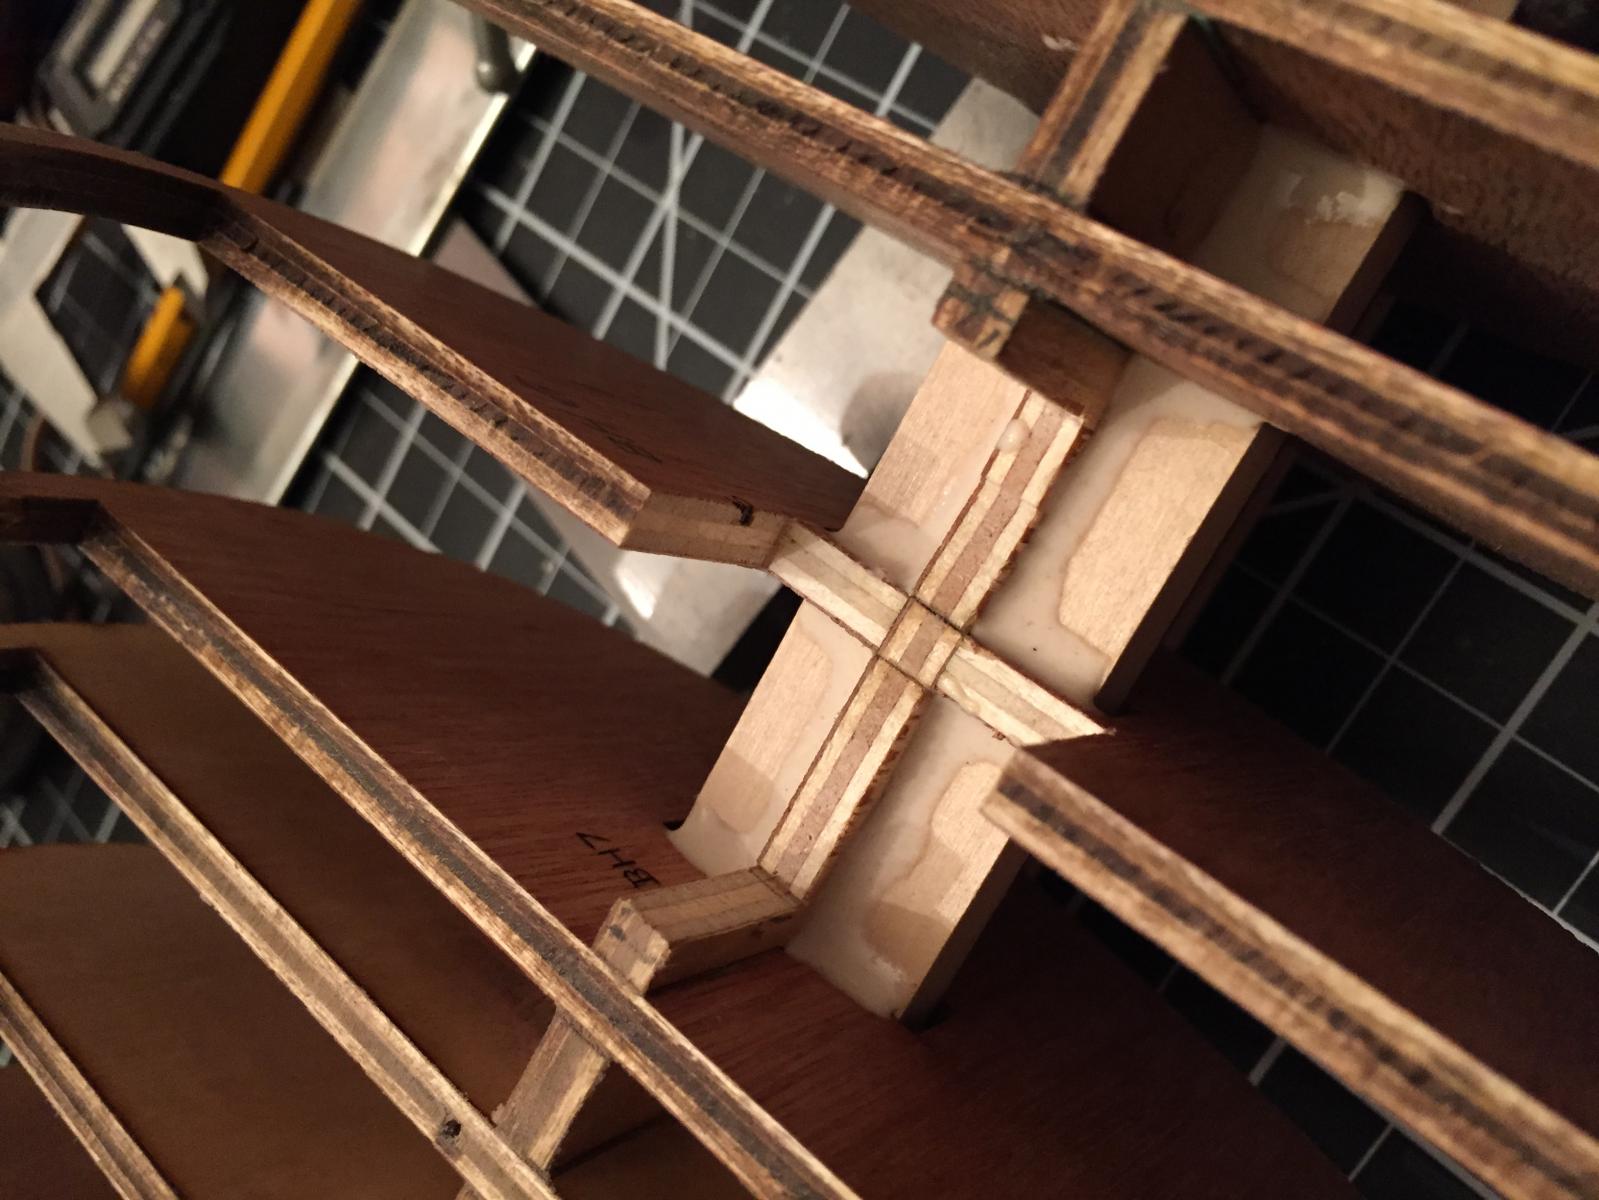
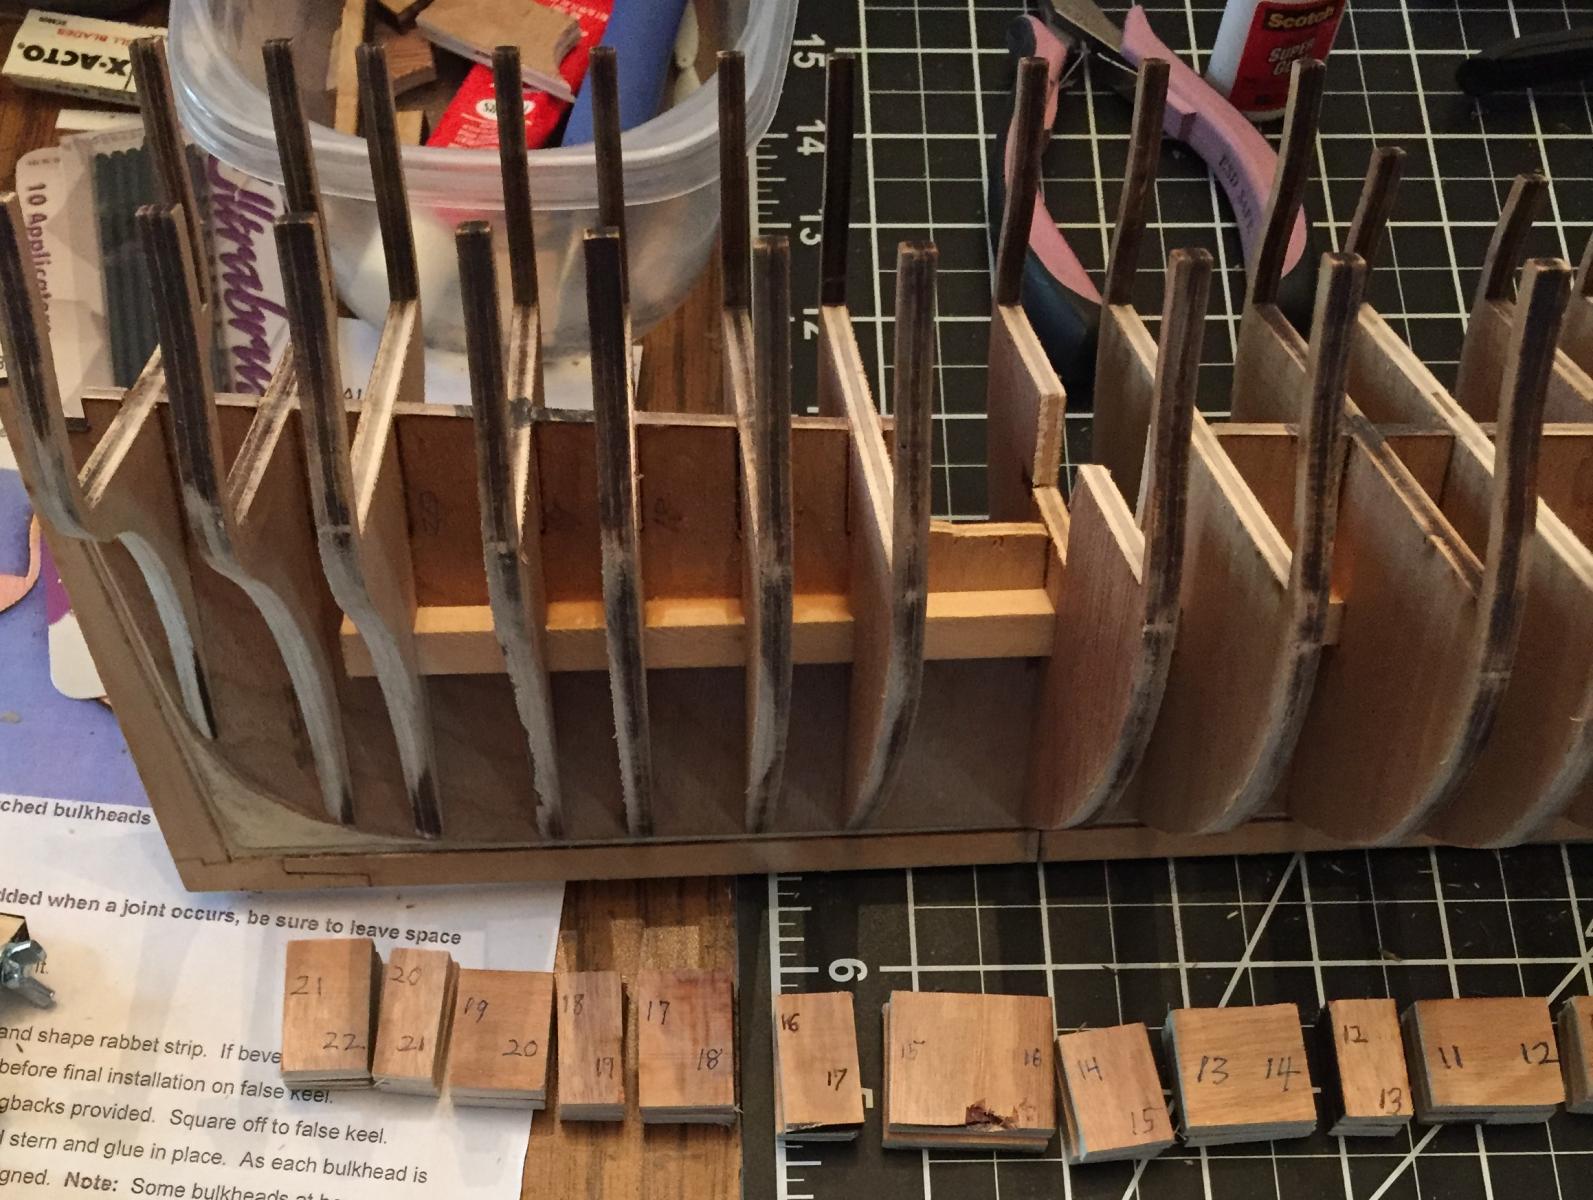
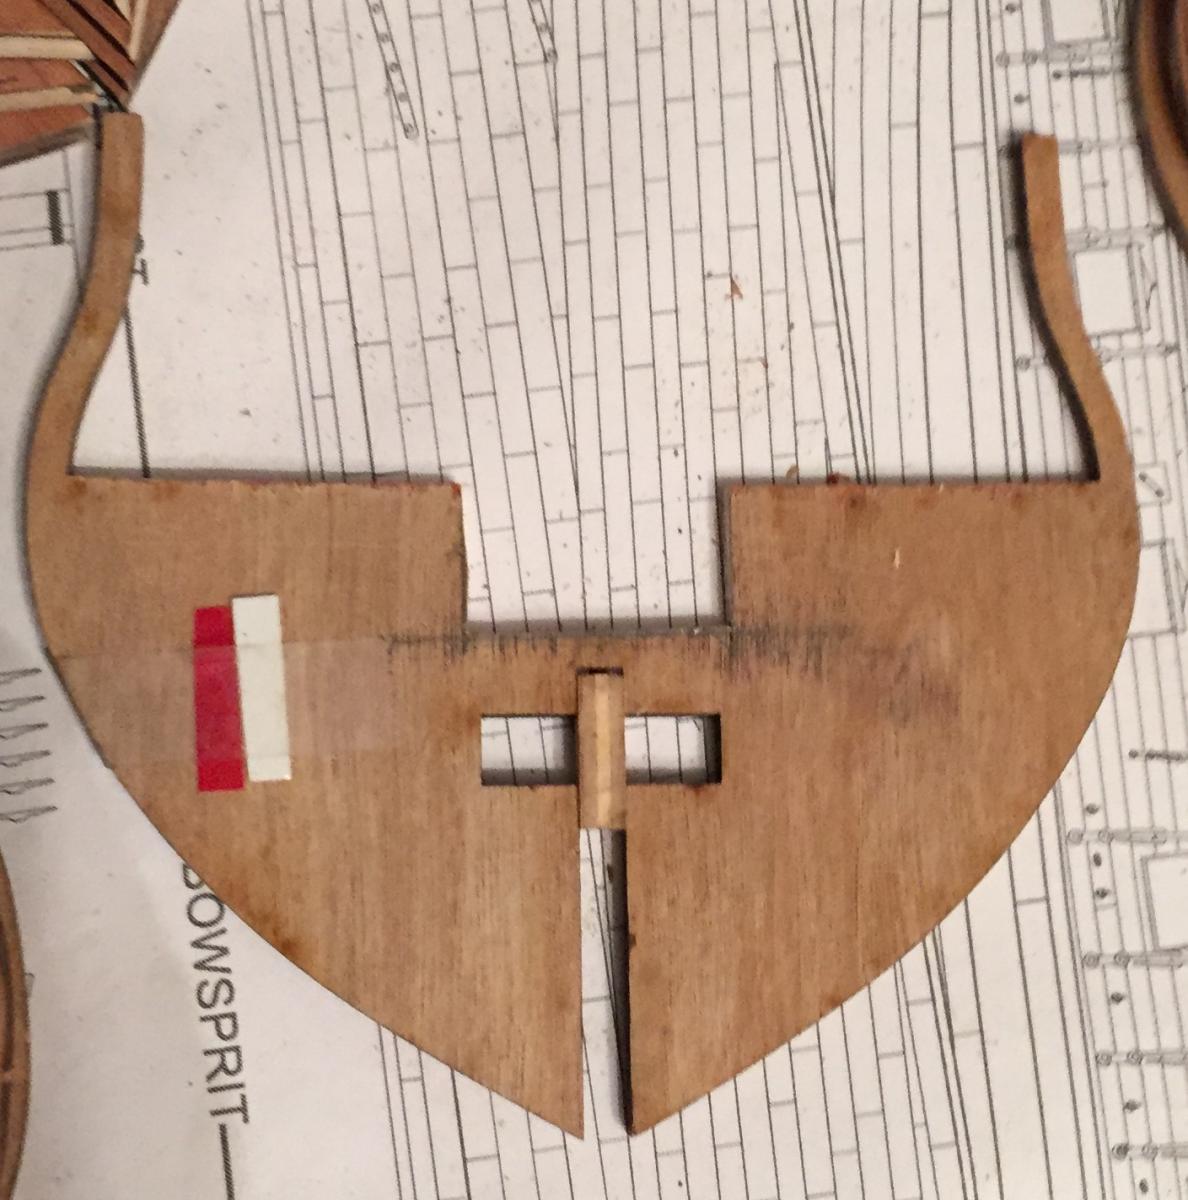
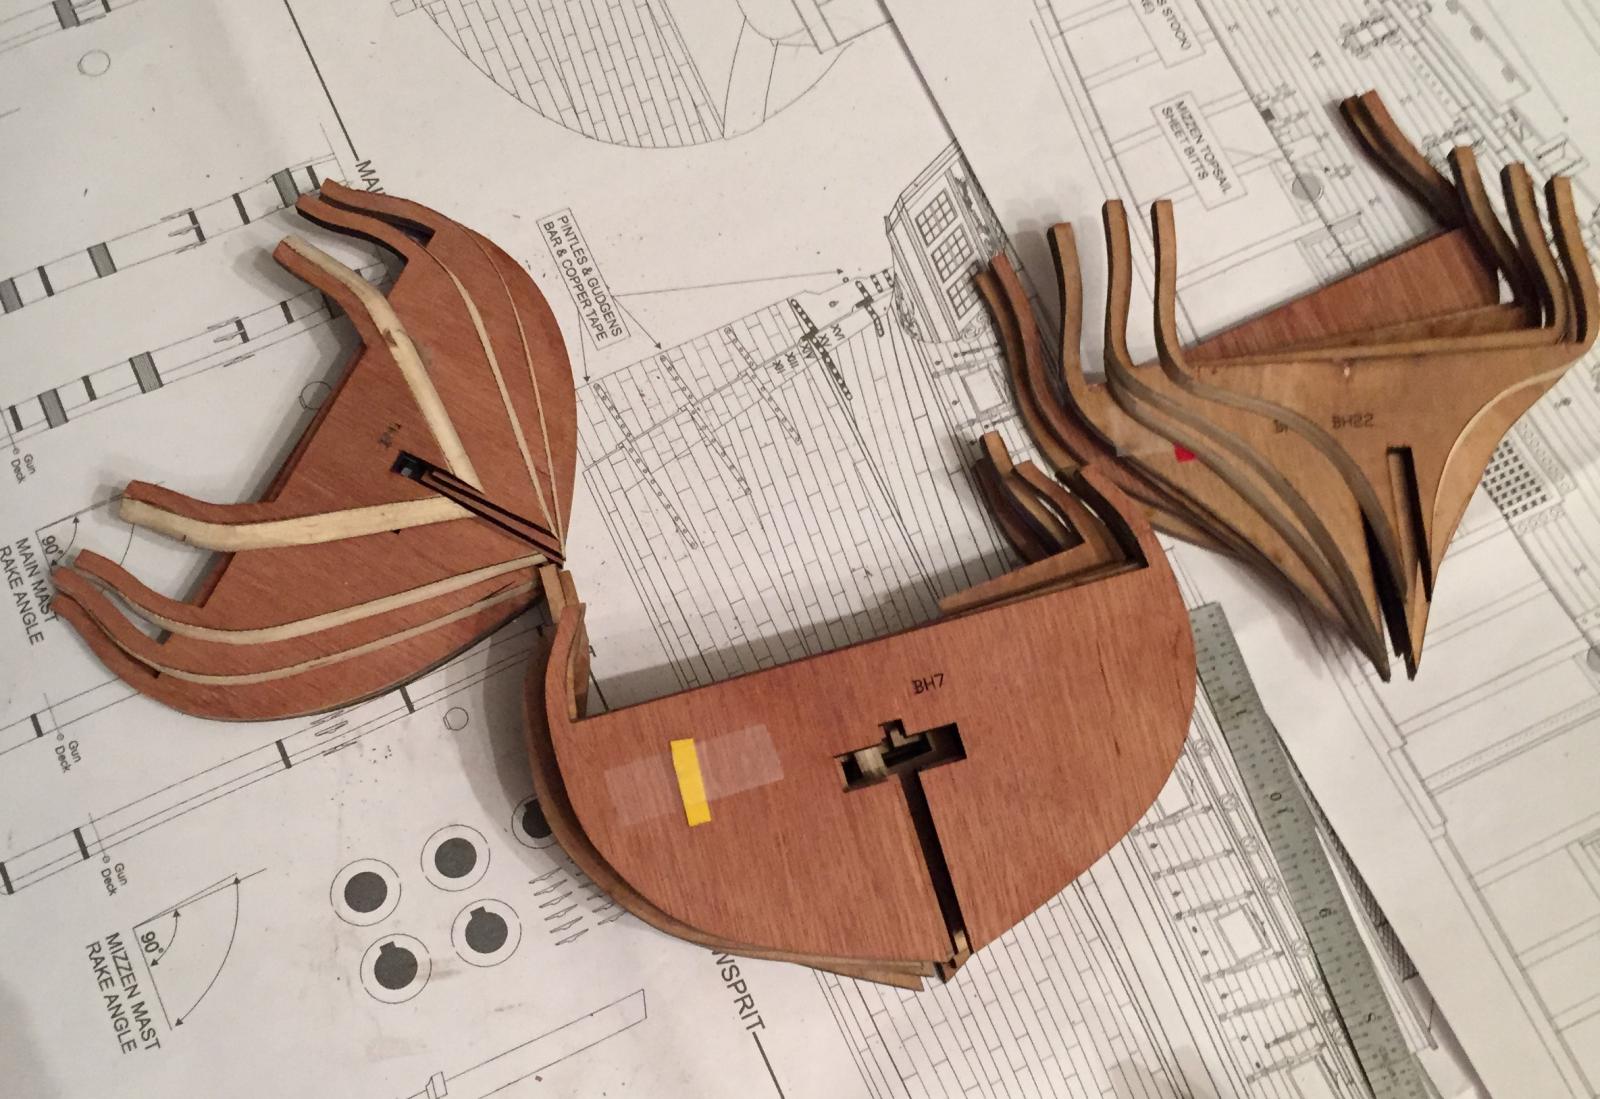
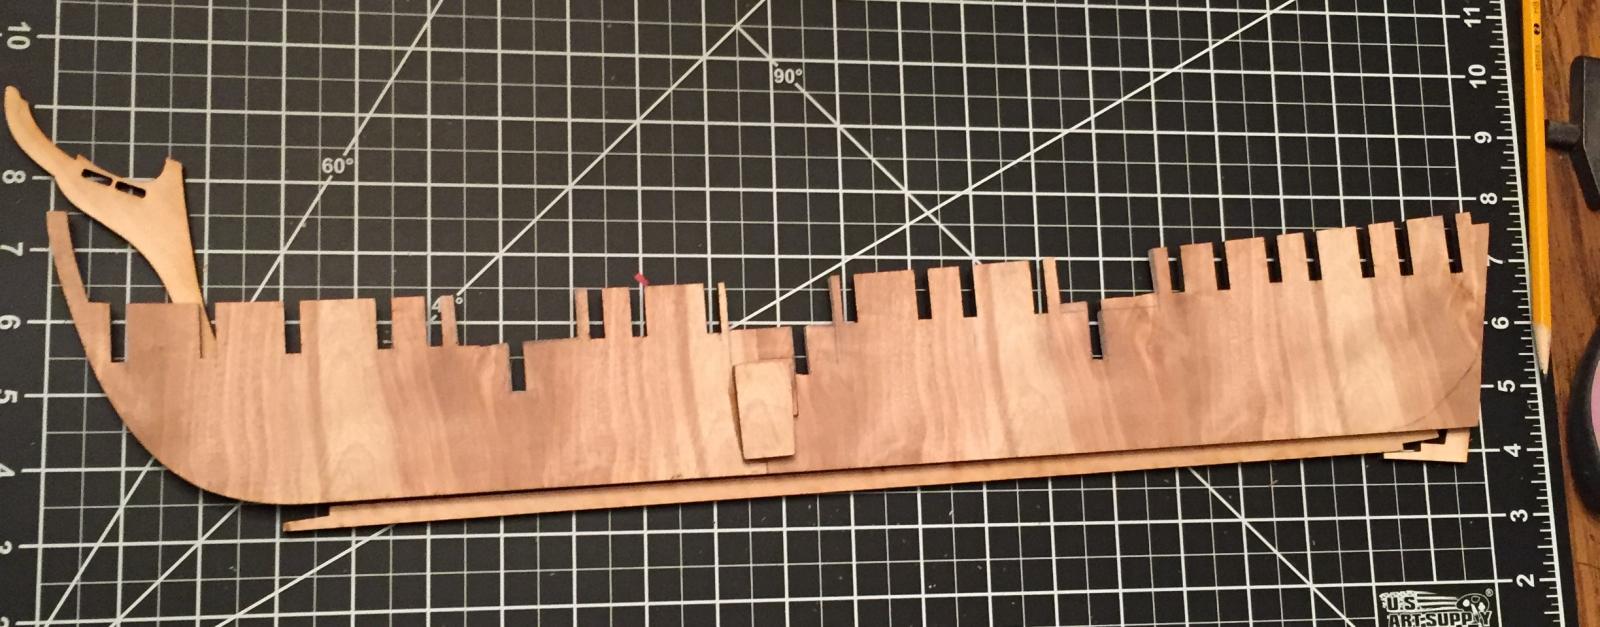
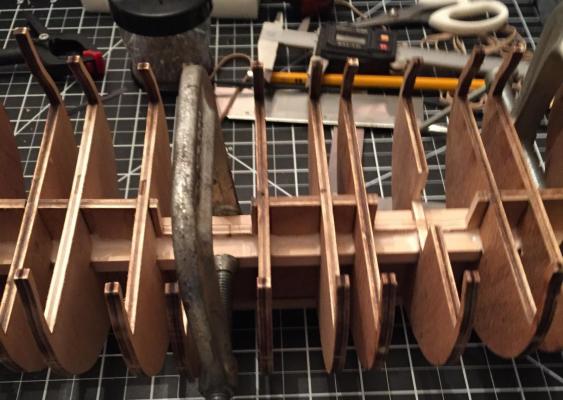
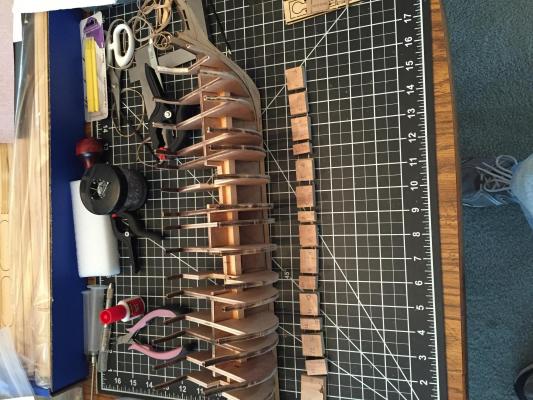
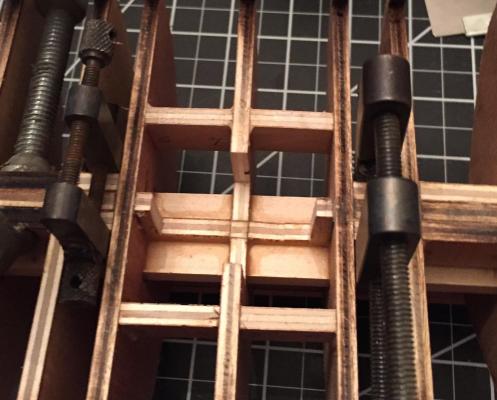
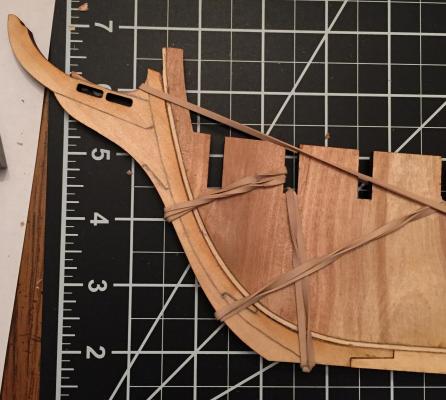
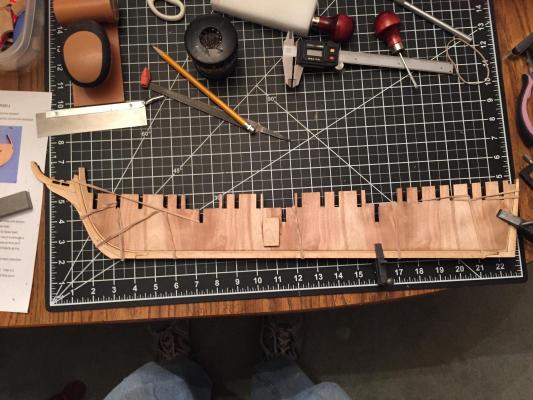
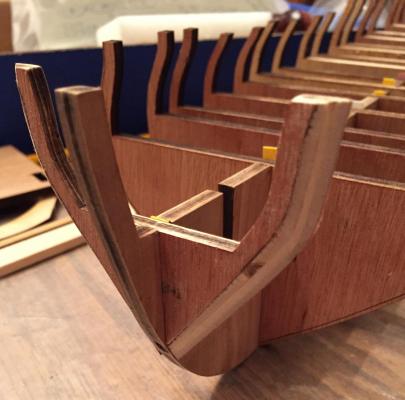
11/6-21/15 – I modified three of the BH’s to allow space for the 3rd deck cut-outs. I had to fill part of the precut slots using scrap from the same sheet the bulkheads came from. See the pictures in the previous post. I also then had to deepen the notches in the bulkhead former to allow the newly modified BH’s to sit at the correct height. Finished sanding bulkheads, cut plastic shim stock to fit bulkheads, half on each side, and bonded all 22, about 2 or 3 a night except weekends when I could do more. I fitted and then bonded the two strong backs on either side of the bulkhead former to assure a straight keel line. Measured distances between bonded bulkheads and cut fillers per instructions using my Micro-lux table saw. Bonded fillers and also cut and formed bow spacer in front of bulkhead 1, then bonded into place.


-
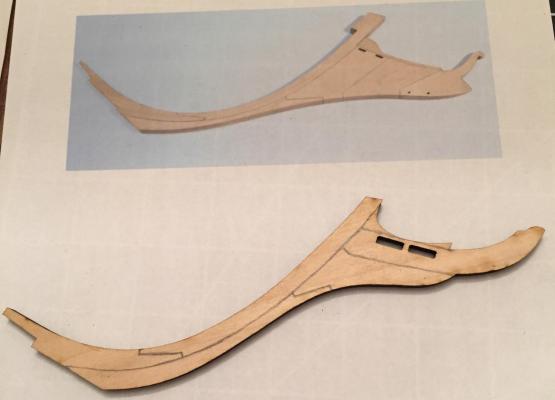
First off thank you for the likes. Please feel free to ask questions of offer advice. 11/4-6/15 – Started sanding off burn marks on bulkheads and tapered bow bulkheads to etched lines. Completed through bulkhead 17 with only one broken part, glued for overnight repair. I think I will do shallow 3rd deck cut-outs that do not interfere with the pre-notched longitudinal stiffeners that are new to the reworked kit. Maybe ½” to 3/4" deep to show some depth through the 2nd deck gratings and hints of the gangways/stairs. I used a picture from the instructions for the USF Confederacy that showed the lines between the wood segments used to fabricate the bow, keel and stern pieces to estimate location and then marked those on the Essex parts using a fine pencil. It helped me understand how these were made on the real ship and may show up though the paint, we will see. I drilled and pined the parts as suggested after bonding them over the Rabbet strip. I cut the bearding line before bonding the BH’s using a small chisel and sandpaper.


-
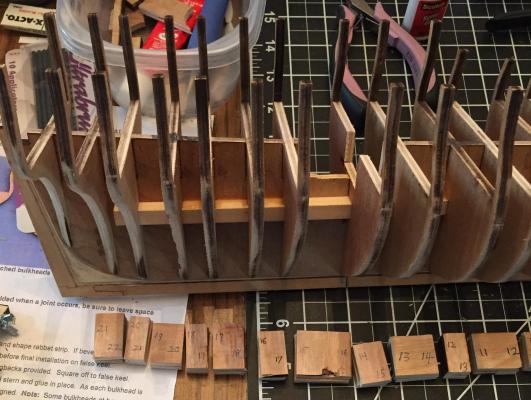
11/1/15 – Cut out and dry fitted BH1-BH22. Sanded top surfaces flat. (see pictures) Sanded a few notches to help adjust fit. Some of the BH fit snug while others have various amount of gaps. Seems that the “new” version of the kit fixed the problem of BH’s being too thick to fit into the laser cut slots on BH 23 and BH24. Used a feeler gauge to measure gaps. 11/2/15 – Obtained plastic shim stock to fill gaps as noted: Note that I use shim stock ½ the gap thickness to fit on both sides of the BH’s to keep their positions. The new kit does not have cut outs for the berthing deck because the BH’s are set up with notches and two strongbacks to stiffen the assembly and prevent any warping of BH23 and BH24 from curving the whole frame assembly. Debated doing third deck cut-outs anyway and finally decided to do some version of them. Sincerely, Engineer57


-
I ordered the kit 9/28/15 and received it 10/14/15, 2 days before vacation. Started the kit on Halloween ( ) 10/31/15. I spent an hour or so just looking at documentation and parts. It is the updated version of the kit. Dry-fitting part BH23 and BH24. Cut two reinforcing plates from same scrap. Bonded 2 parts together and on reinforcing plate, left overnight. Went on Model Ship World (MSW) to look up other builder’s logs for Essex. Tim I. and Bob Rafine, both are doing a kit bash but still very relevant. I plan to follow Rafine’s log although I may not do all of the kit bashing he has done since I have a 1 year deadline to meet. We will see how things go. Sincerely, Engineer57
-
USF Essex kit build – I spent a while reading on Model Ship World (MSW) to understand the status of this kit since it had a lot of issues when it first came out. When Model Expo offered their incentive in Sept 2015 (50% off and then if you finish the kit within one year and send them 4 pictures of the completed kit they will offer store credit for the complete cost of the kit, so essentially you get it for free) I decided to jump in. I had been eyeing an Admiralty model anyway and that tipped the scales. As I noted in my Introduction posting I have been building models for a long time. I never seriously tried a wooden ship model before so I am new to this specialty. I plan to use the kit materials, not replacing the wood with other types unless I run into a very good reason to do so. Since most of the Essex is painted and I do not want to spend the extra money it does not seem necessary to substitute. That said, if I have other material in my shop that can be used for some detail or extra feature I will use it. Please note that I will eventually post what I have been doing, but I may not always check this site as frequently as some of you appear to do. I will gladly answer questions and I am sure I will have lots myself. If I do not respond to your post right away, please do not take it as lack of interest or that I am ignoring you. I don’t do social media because it eats up a lot of time I would rather spend doing other things. I am not retired yet so when I have time to build I will be doing that versus posting. But I will be glad to share with this community since it is helping me so much. Sincerely, Engineer57