Engineer57
-
Posts
44 -
Joined
-
Last visited


.thumb.jpg.6d6ee4bdbfaac2c58ecc77e7b80ae374.jpg)
.thumb.jpeg.fc5d633a7b34428fcf19419a73d56d55.jpeg)


-
 EricWilliamMarshall reacted to a post in a topic:
USF Essex by Engineer57 - Model Shipways - Scale 1:76.8 - As built
EricWilliamMarshall reacted to a post in a topic:
USF Essex by Engineer57 - Model Shipways - Scale 1:76.8 - As built
-
EricWilliamMarshall reacted to a post in a topic:
USF Essex by Engineer57 - Model Shipways - Scale 1:76.8 - As built
-
EricWilliamMarshall reacted to a post in a topic:
USF Essex by Engineer57 - Model Shipways - Scale 1:76.8 - As built
-
EricWilliamMarshall reacted to a post in a topic:
USF Essex by Engineer57 - Model Shipways - Scale 1:76.8 - As built
-
EricWilliamMarshall reacted to a post in a topic:
USF Essex by Engineer57 - Model Shipways - Scale 1:76.8 - As built
-
EricWilliamMarshall reacted to a post in a topic:
USF Essex by Engineer57 - Model Shipways - Scale 1:76.8 - As built
-
EricWilliamMarshall reacted to a post in a topic:
USF Essex by Engineer57 - Model Shipways - Scale 1:76.8 - As built
-
EricWilliamMarshall reacted to a post in a topic:
USF Essex by Engineer57 - Model Shipways - Scale 1:76.8 - As built
-
EricWilliamMarshall reacted to a post in a topic:
USF Essex by Engineer57 - Model Shipways - Scale 1:76.8 - As built
-
Duanelaker reacted to a post in a topic:
USF Essex by Engineer57 - Model Shipways - Scale 1:76.8 - As built
-
 Bob and Canute, Turns out I still had some of the Micro Krystal Klear that I have used for model railroad structures and vehicle glazing. It worked great. Thanks! Zapto, Thanks for the compliment. Just the single layer of planking for this model. I am nominally following the kit instructions with some deviations/mods per Bob Rafine's version. If you have not read his log please do so. The difference is that I am working with a newer "corrected" kit. So some of his notes about how he had to fix parts in his kit have been accounted for in the newer kits. More pictures to come,
 -
Bob, I am familiar with the product but had only used it for glazing, not as an adhesive. Thanks!
-
Bob, or anyone else with experience, how do you glue the wood window frames to the "glass" without making a mess? If the window glass is plastic (acrylic or styrene) sheet using CA adhesive will fog it. I don't think the elmer's wood glue will stick to plastic very well (unless you have experience otherwise...) so I am not sure what to use. Thanks everyone for the likes. Thanks!
-
Thank you Bob, It's always nice to get a particular stage done. I went back and read part of your log again this evening. I guess I need to think about doing the tree nailing of the deck before I go too much further. I am also going to try tour sandwiched window idea. Thanks again!
-
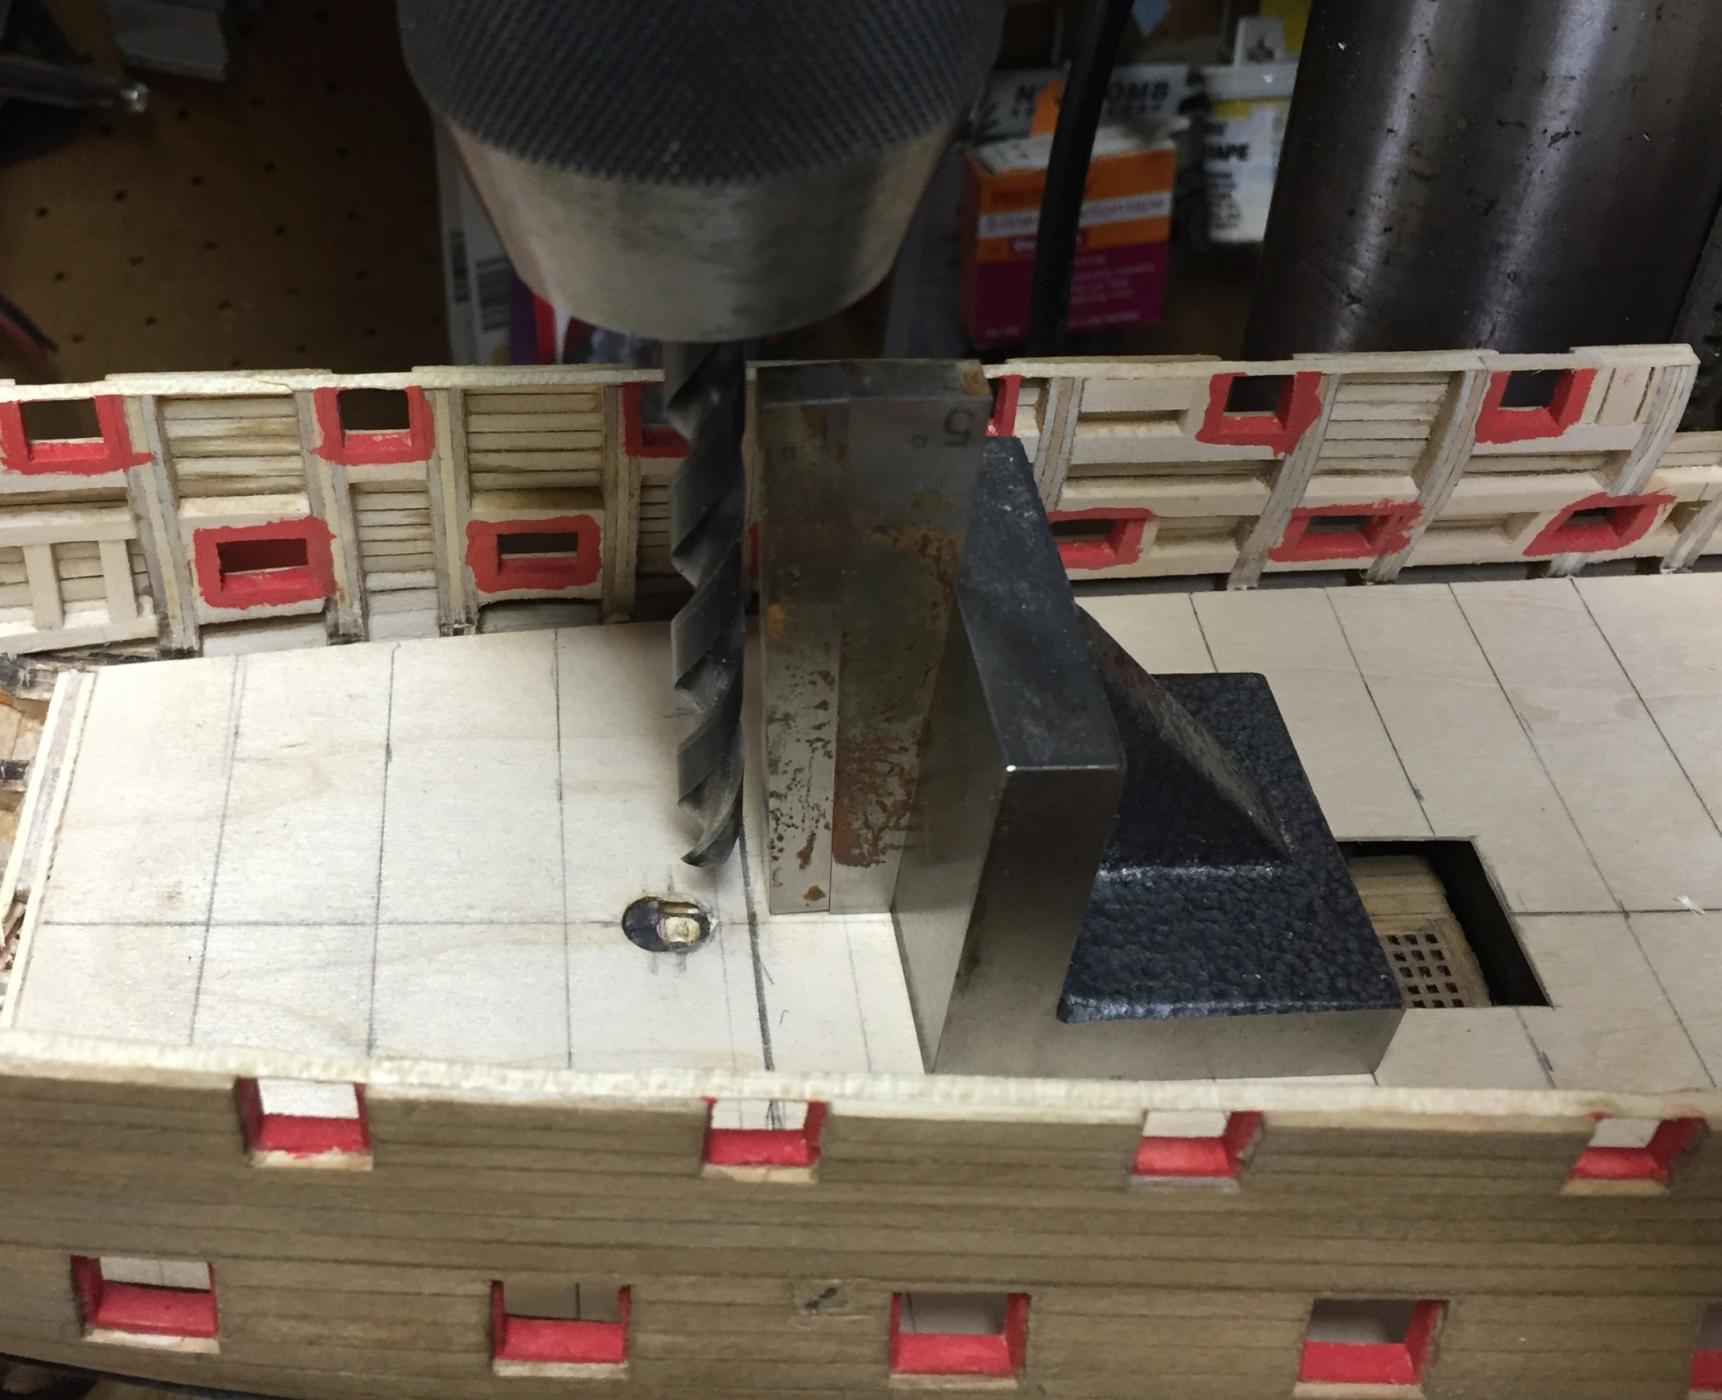
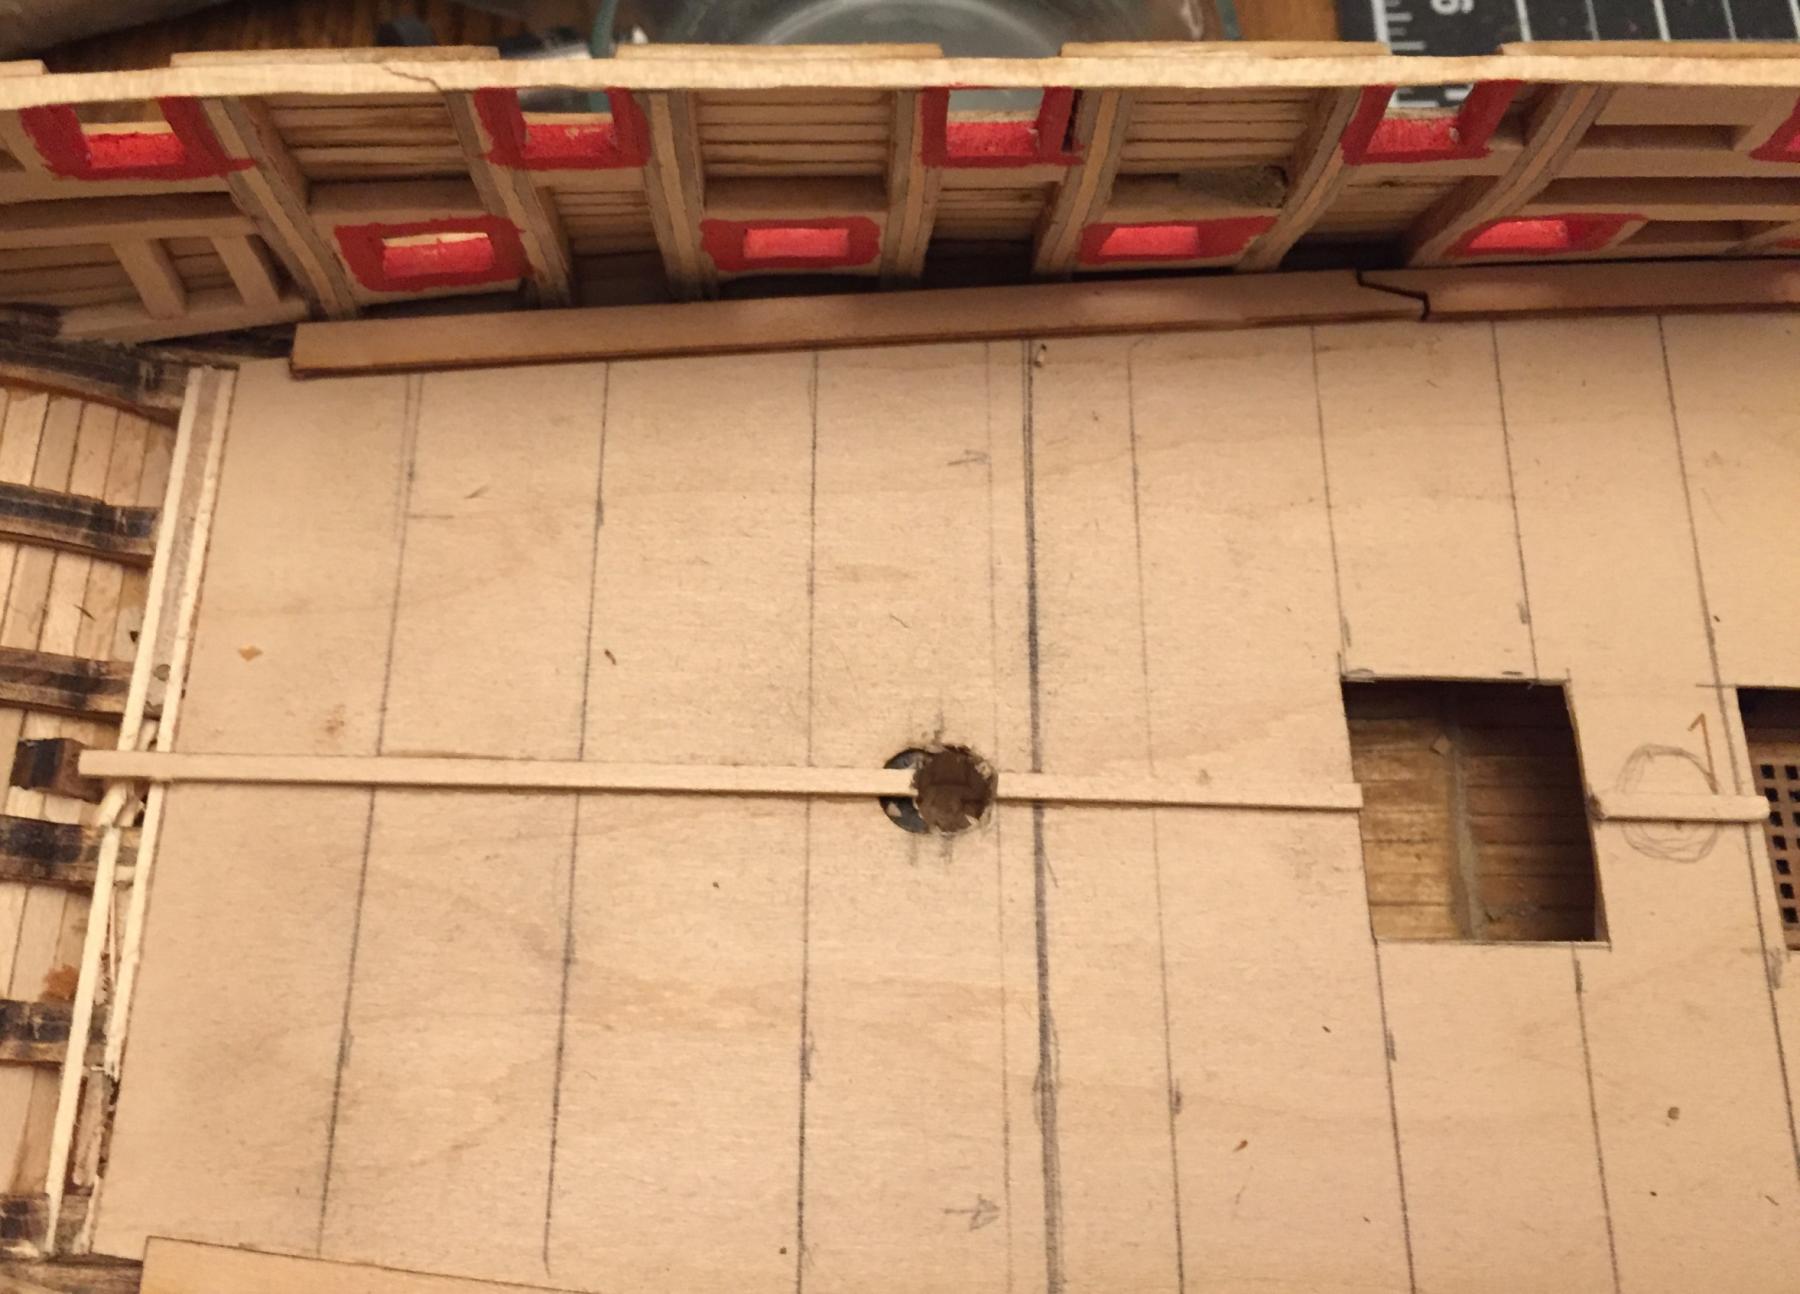
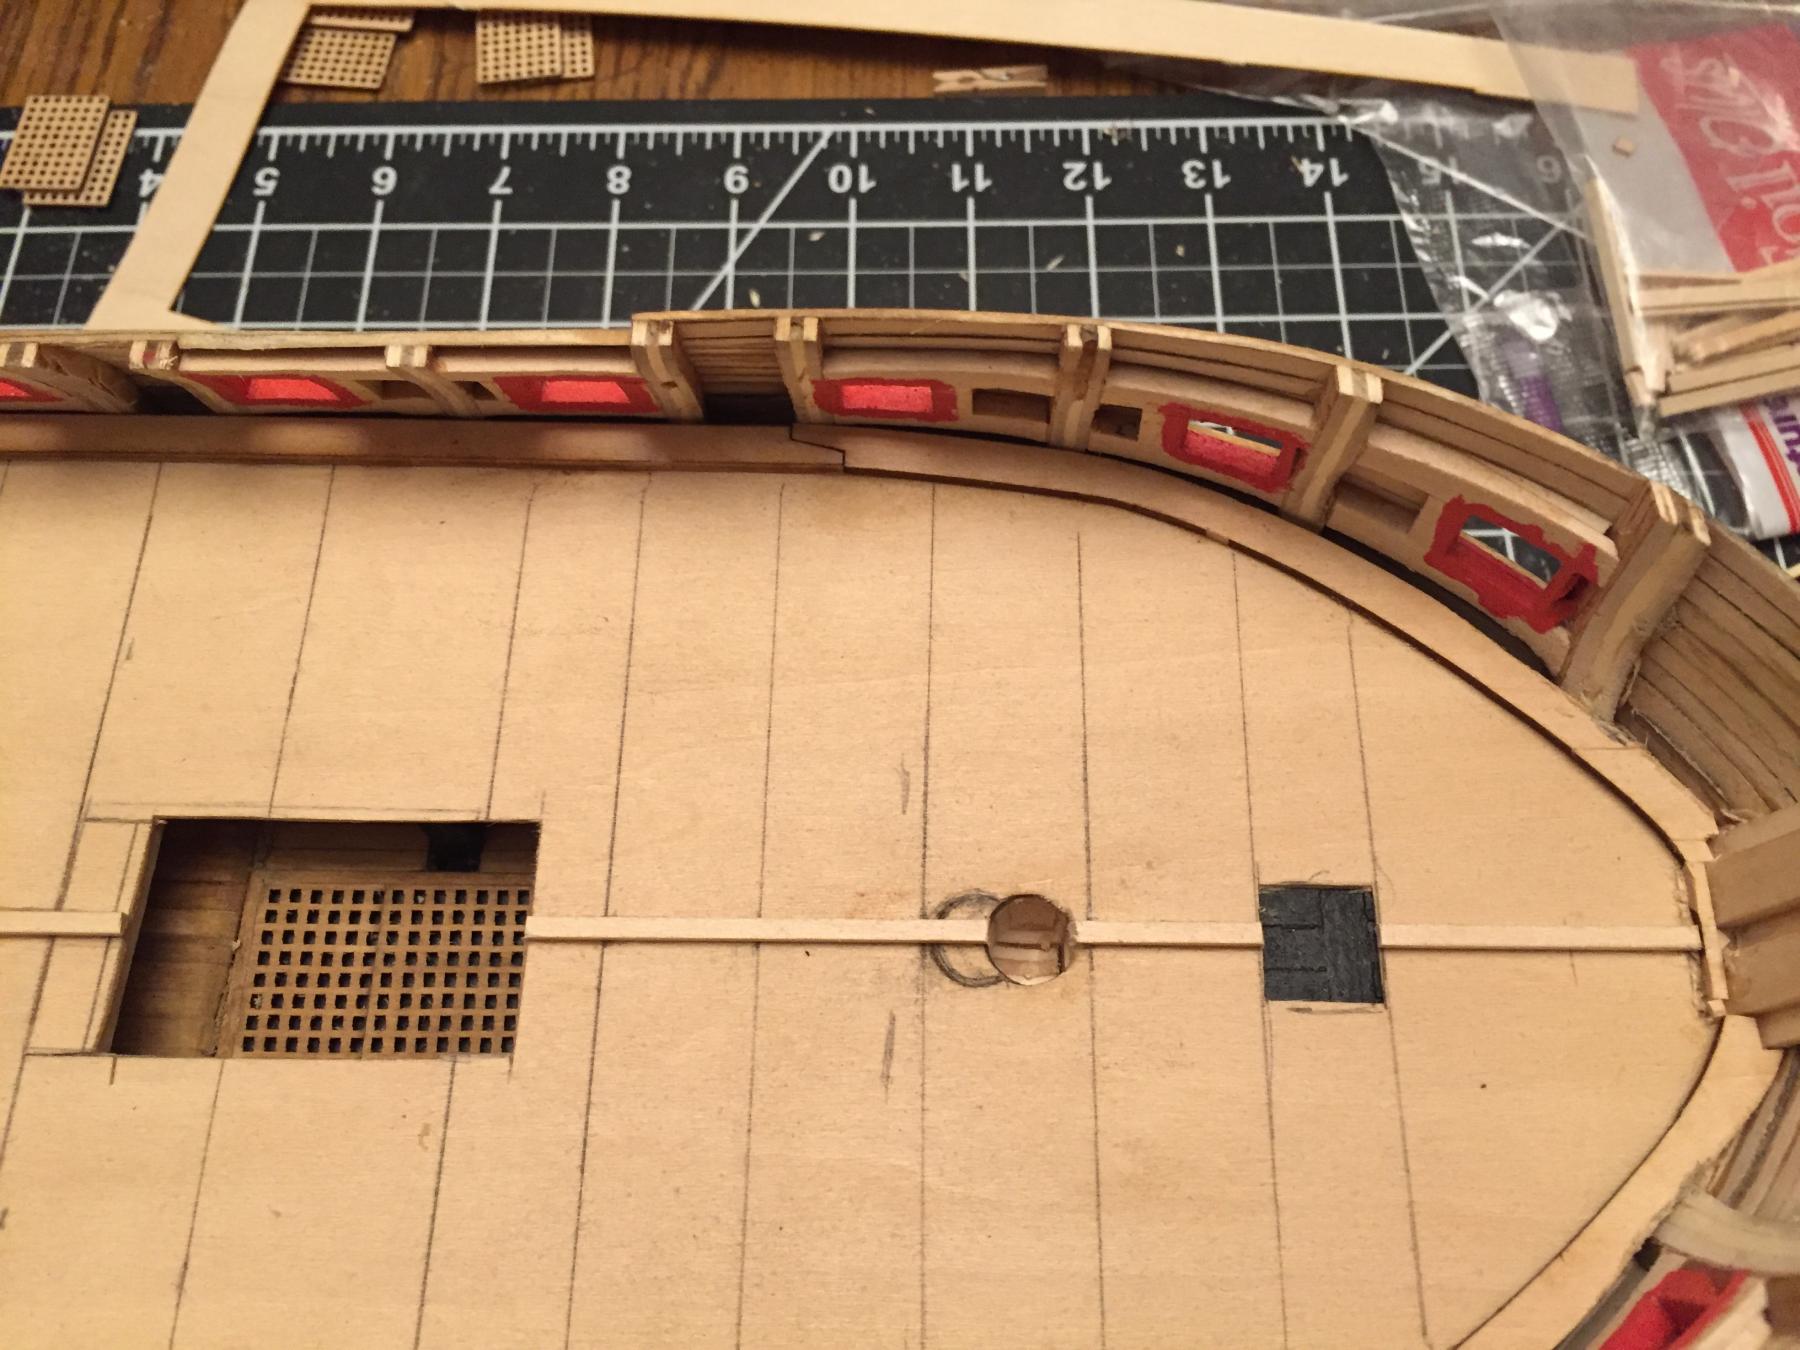
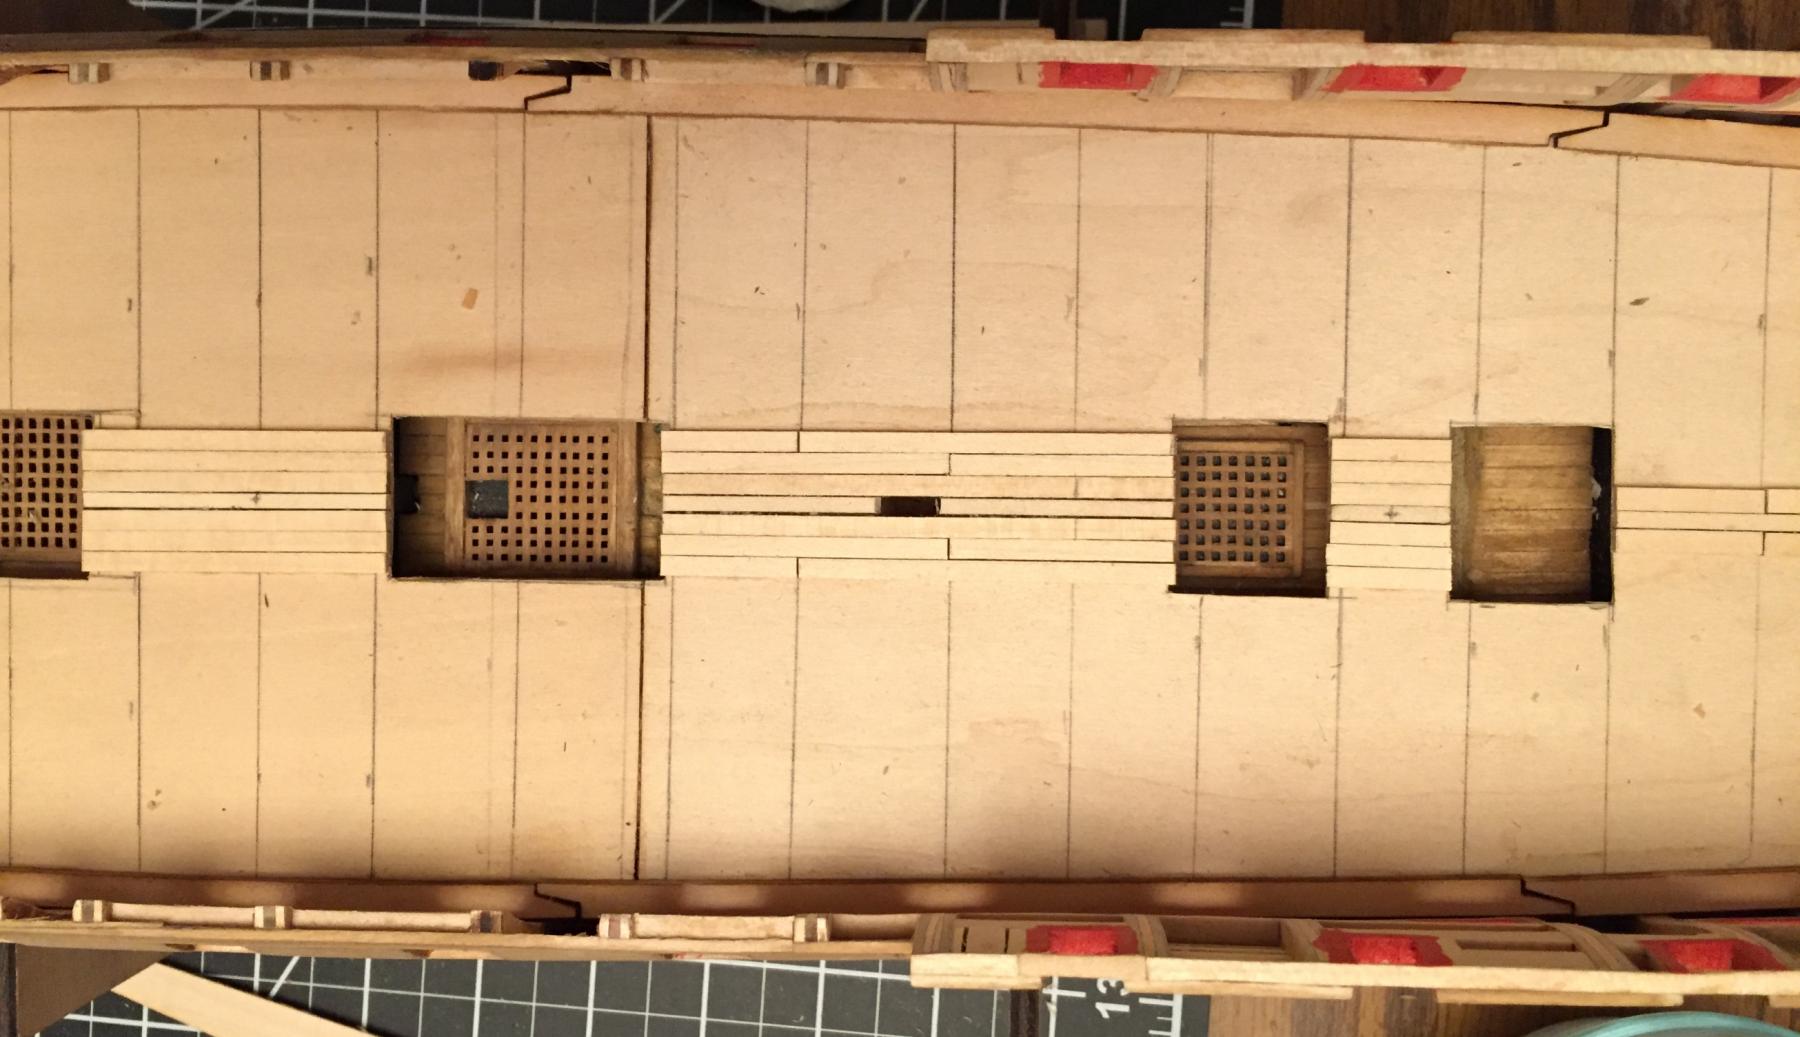
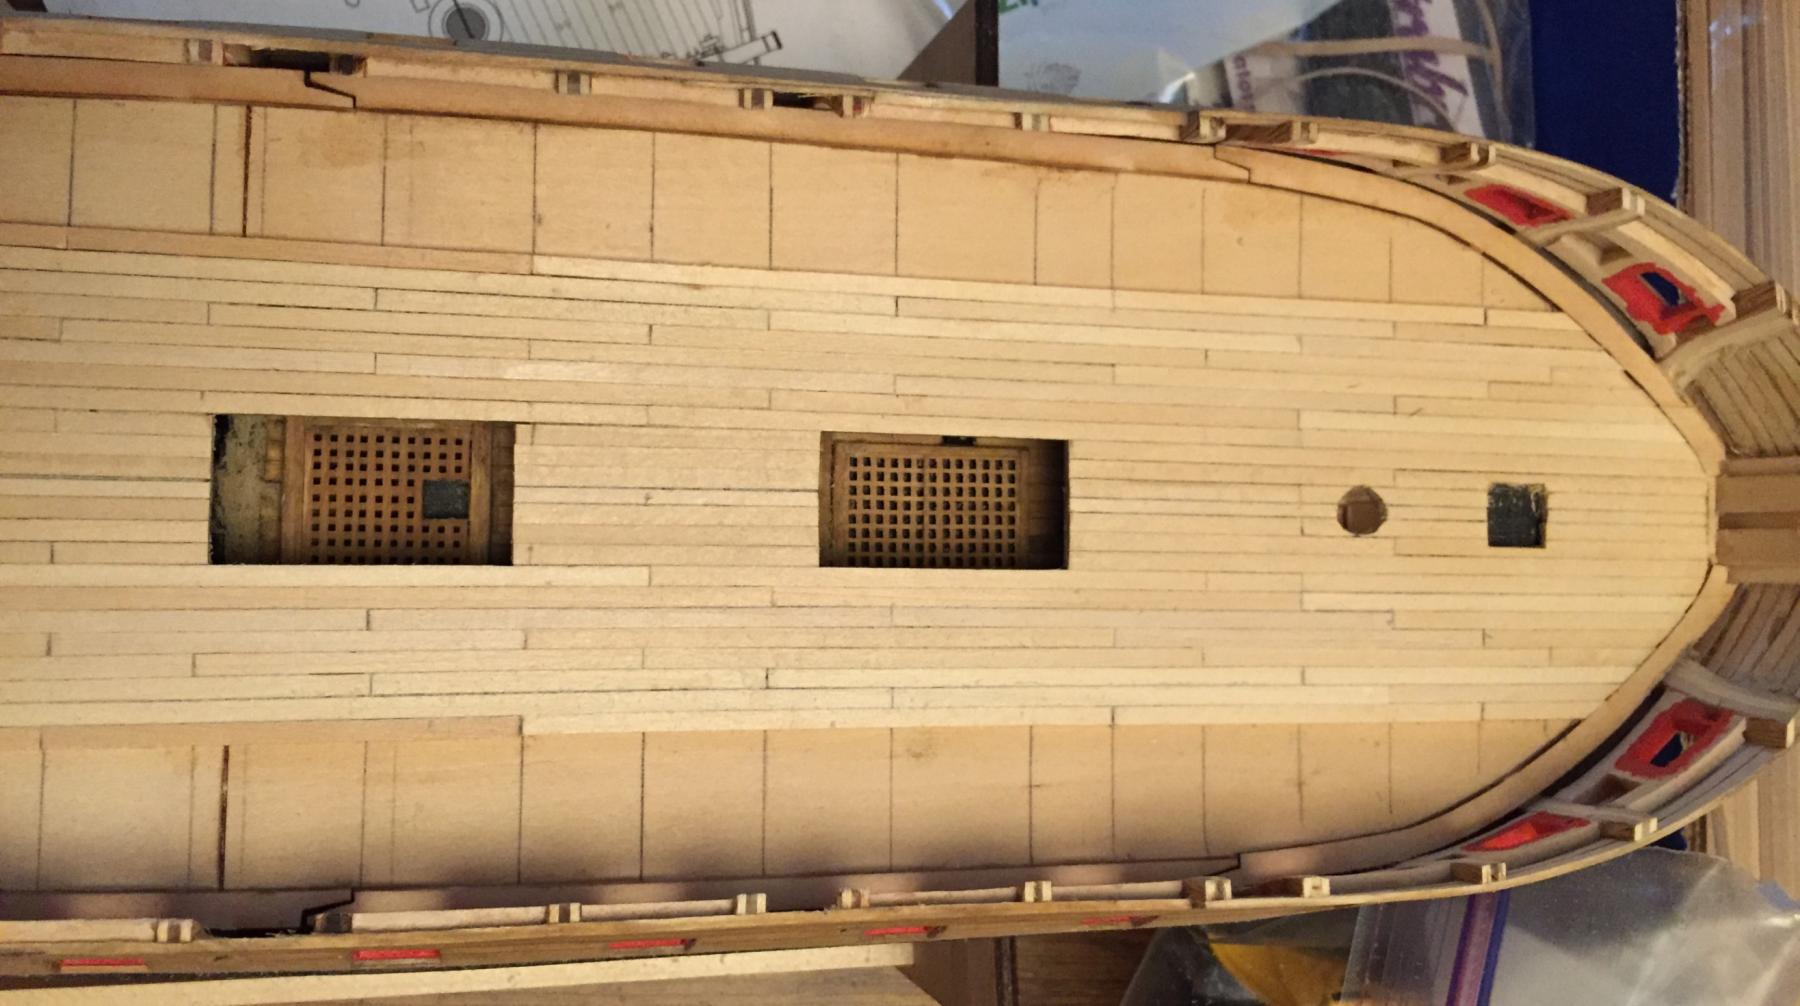
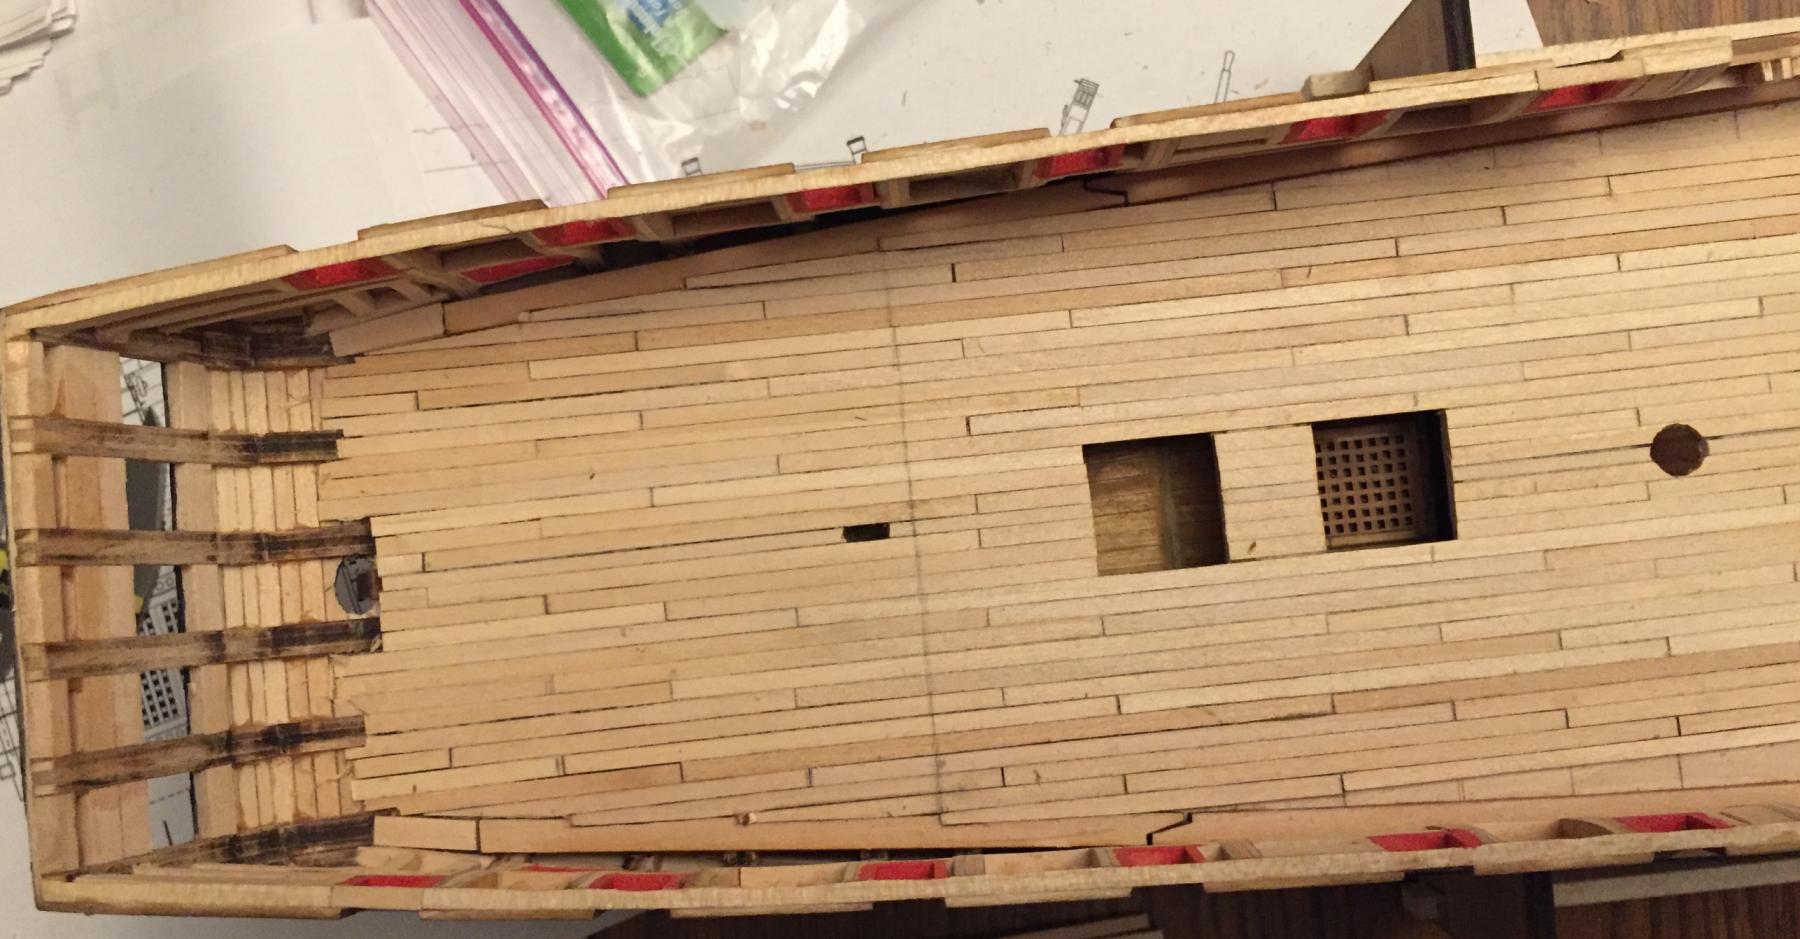
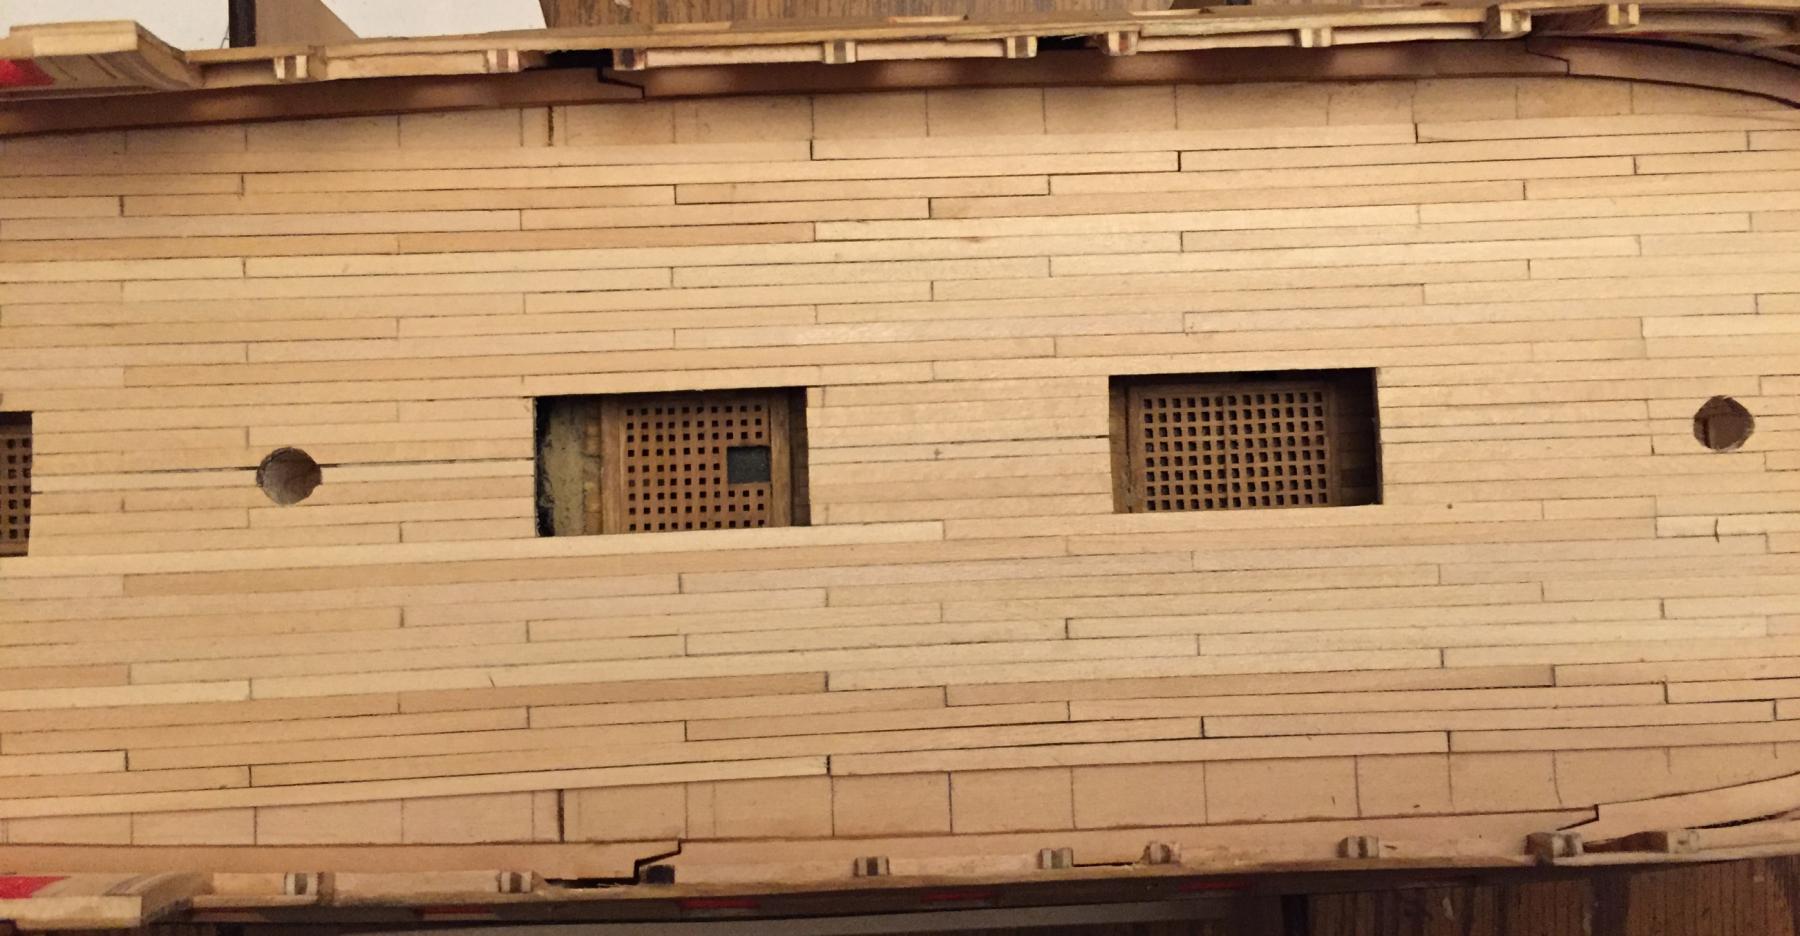
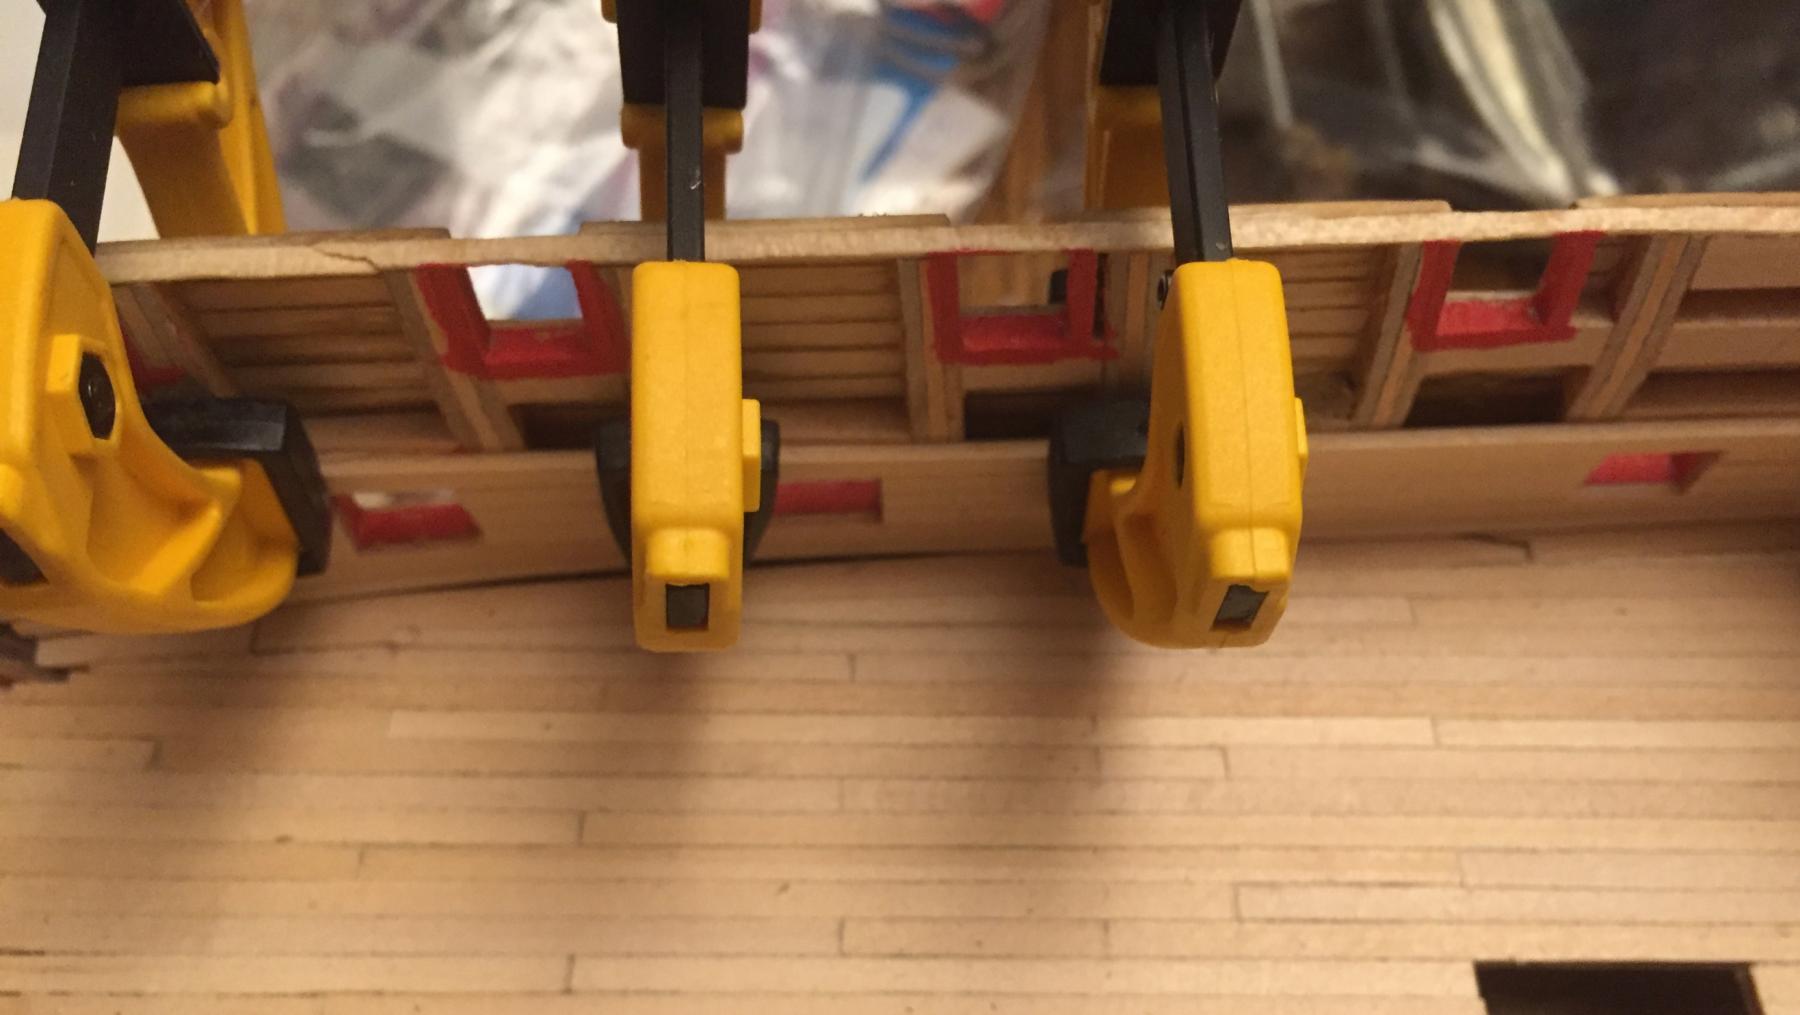
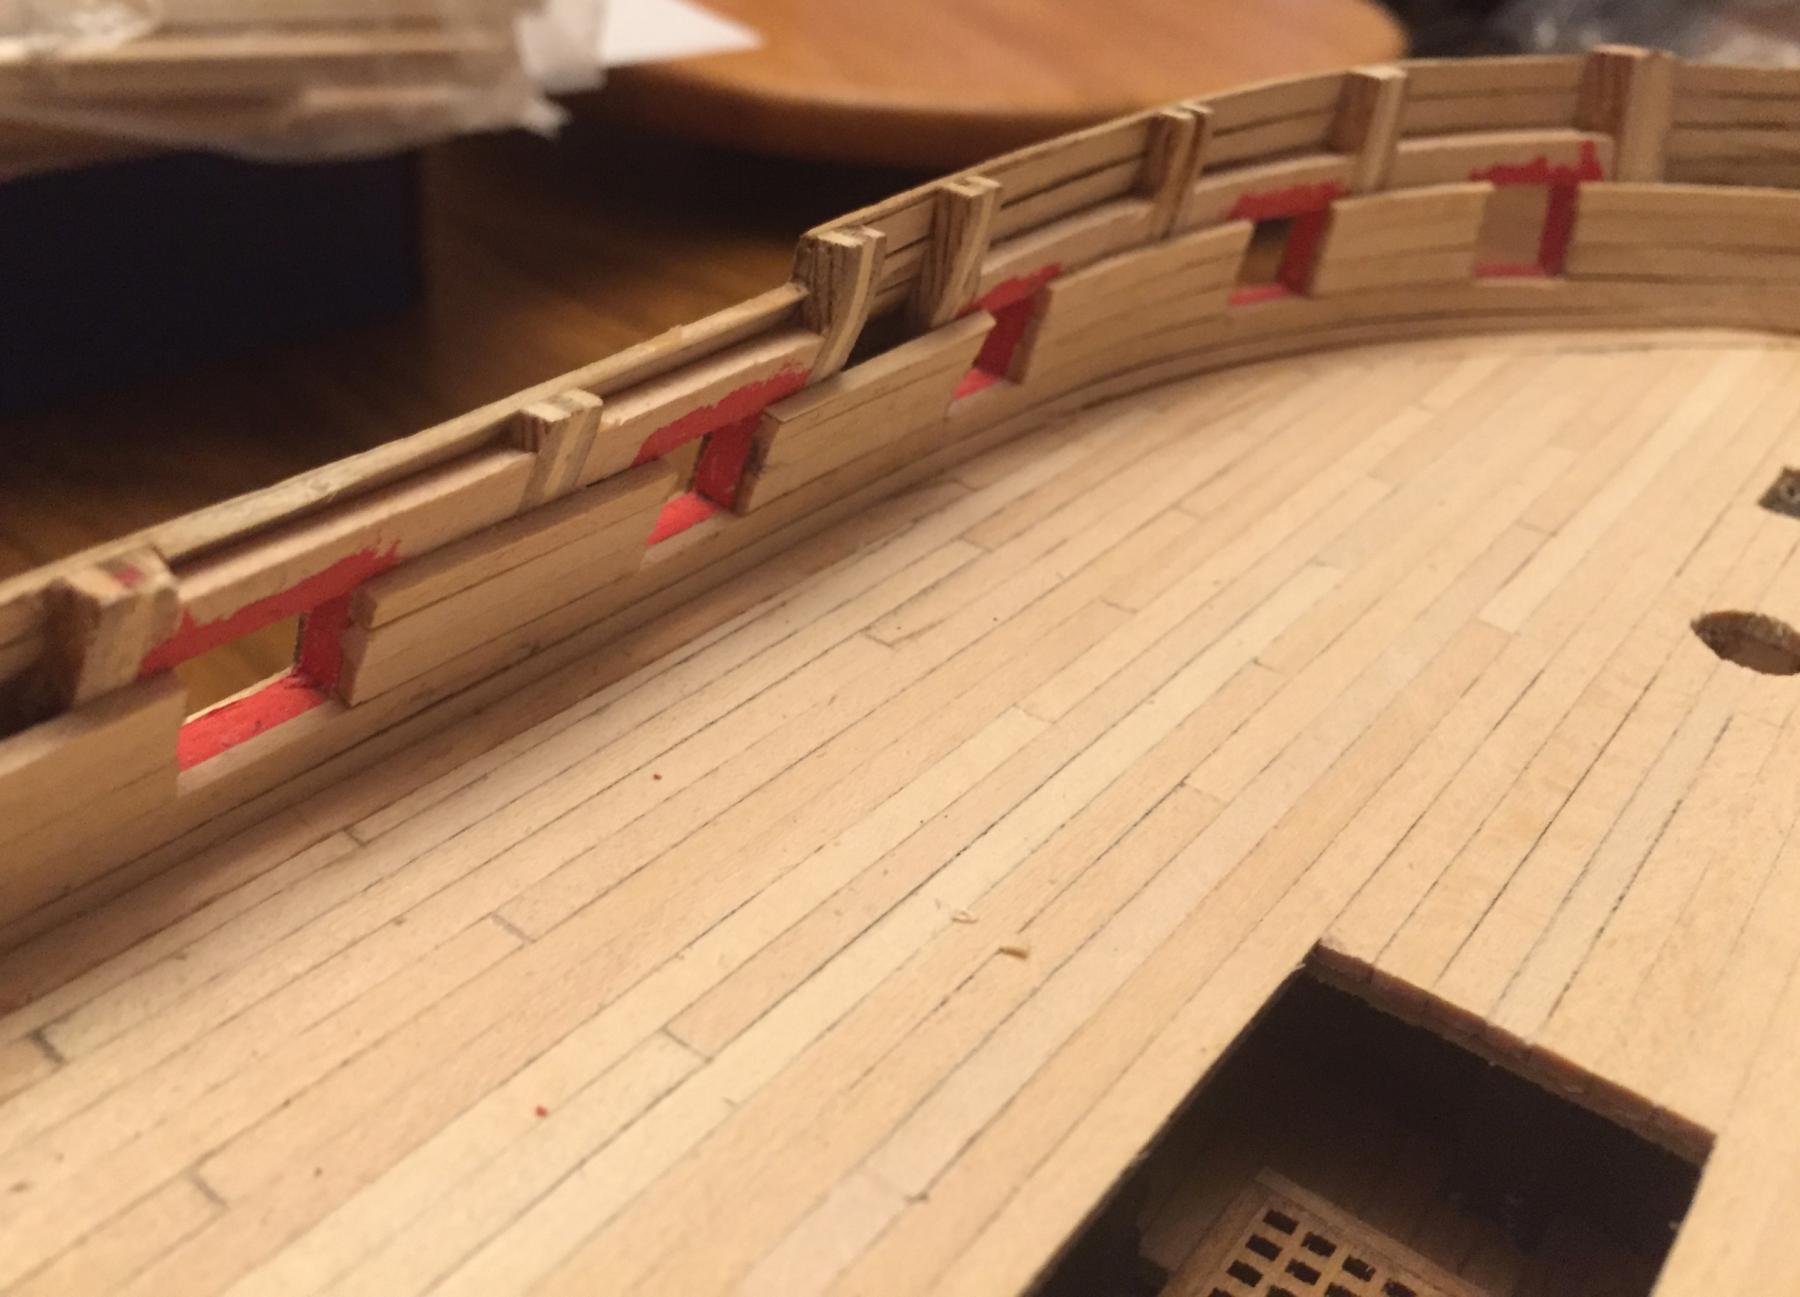
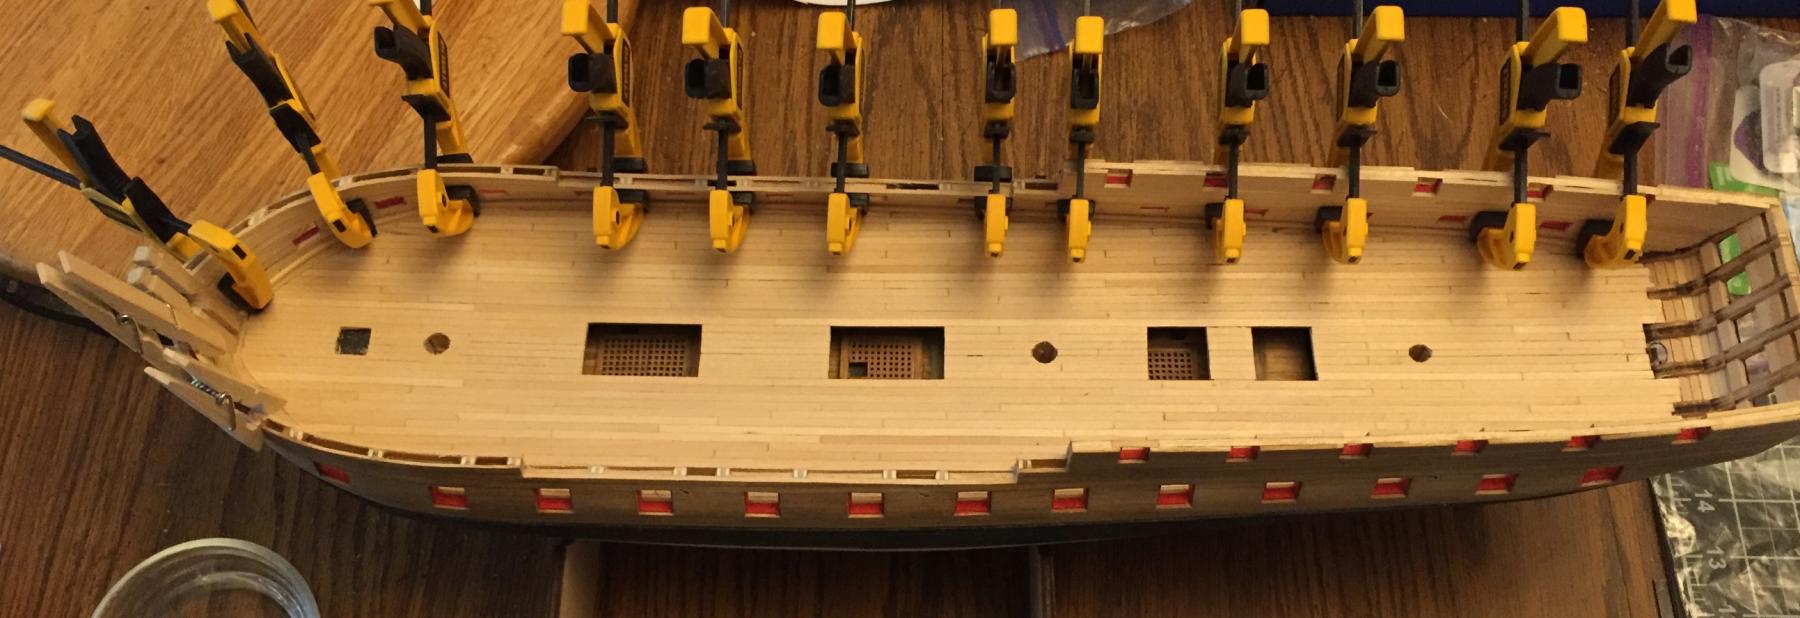
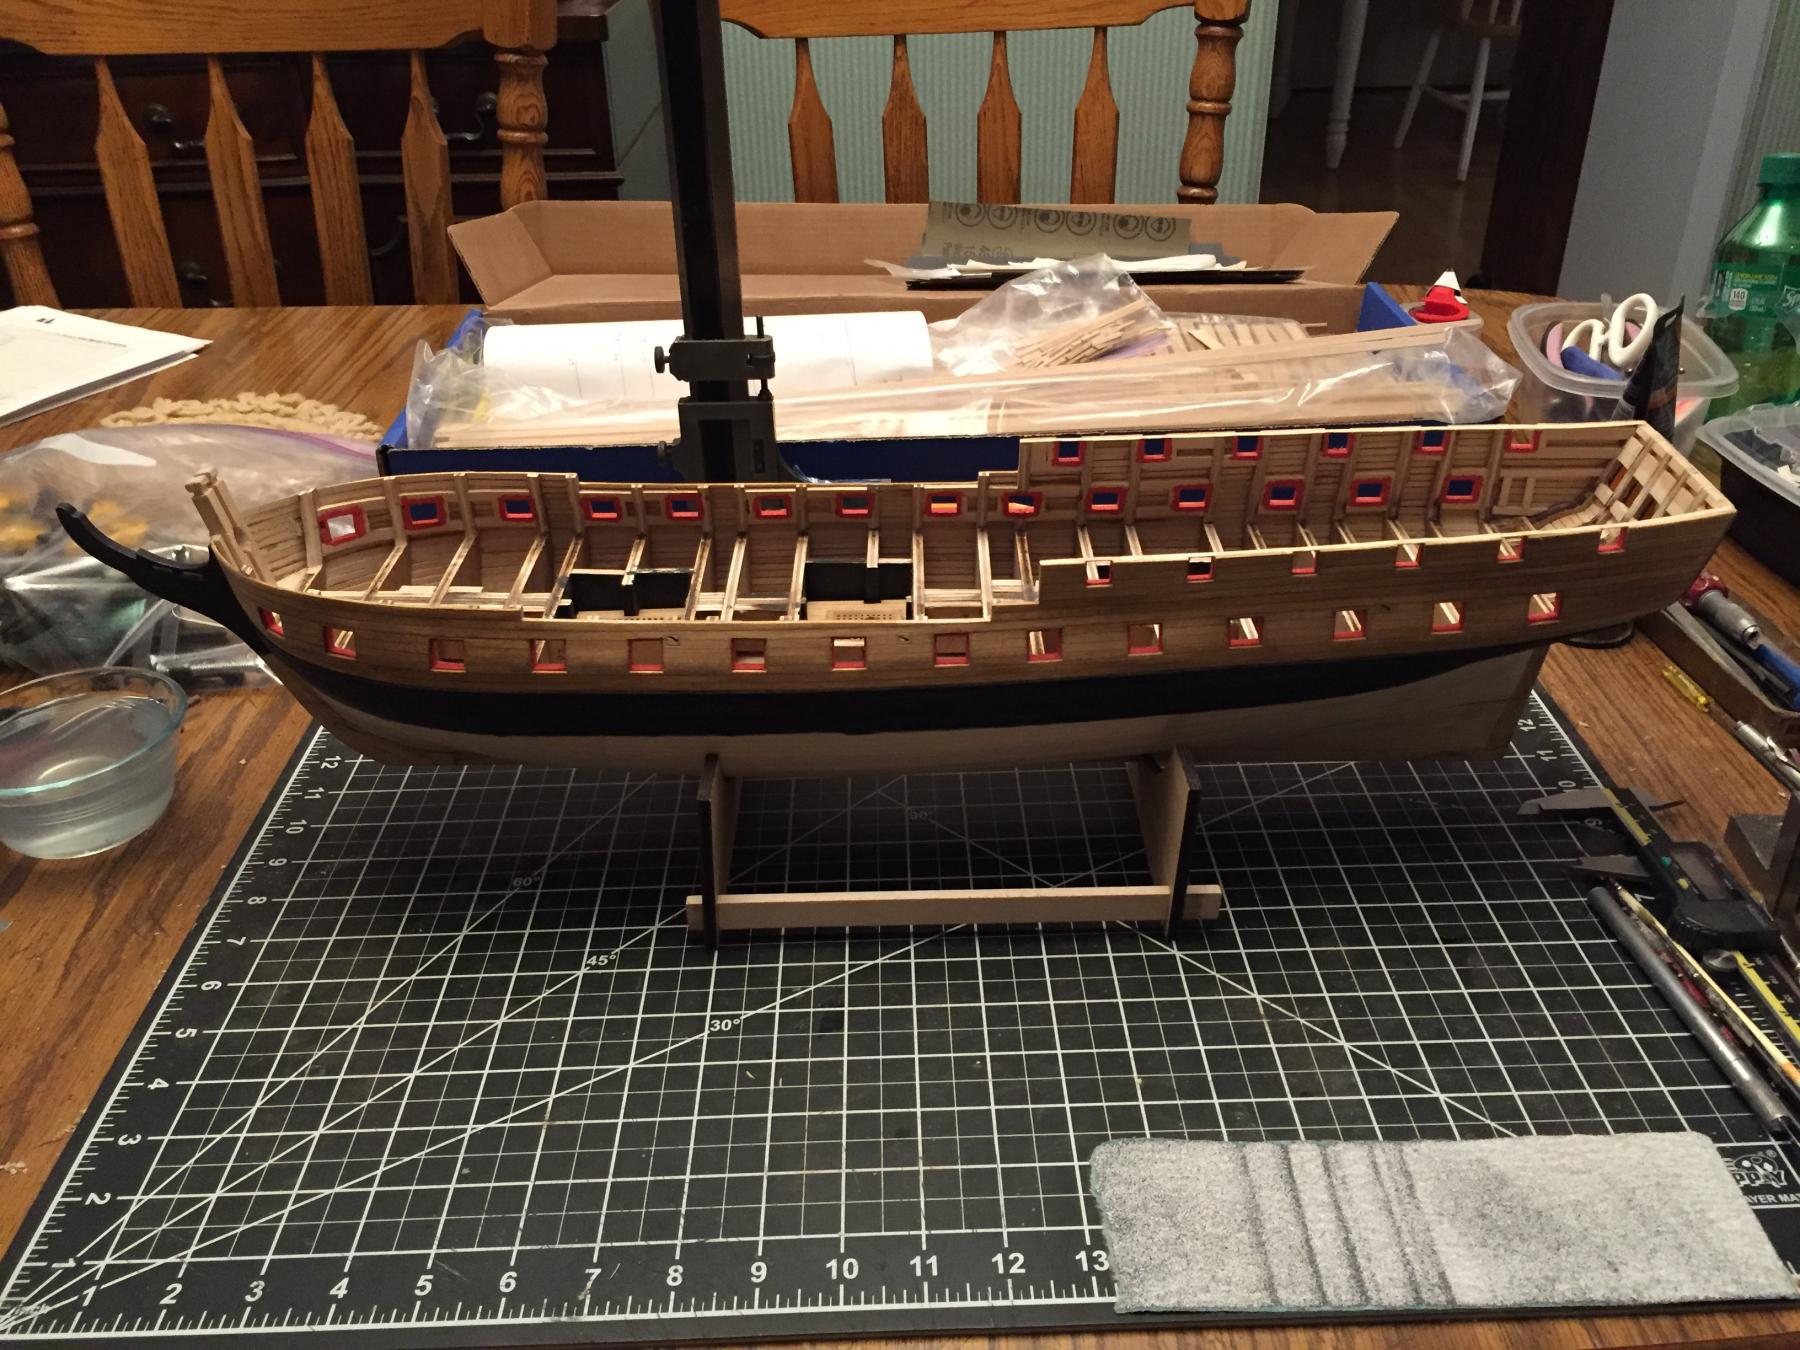
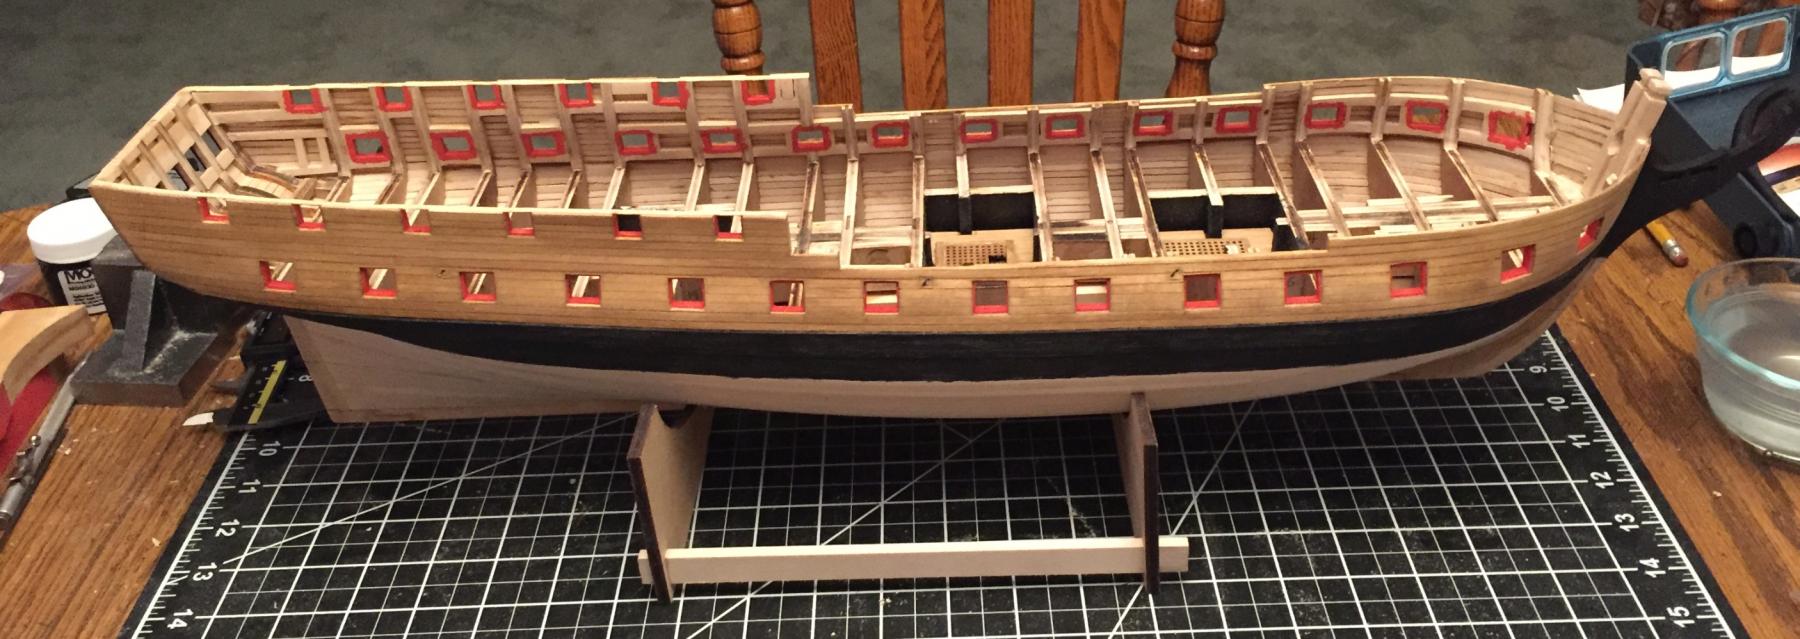
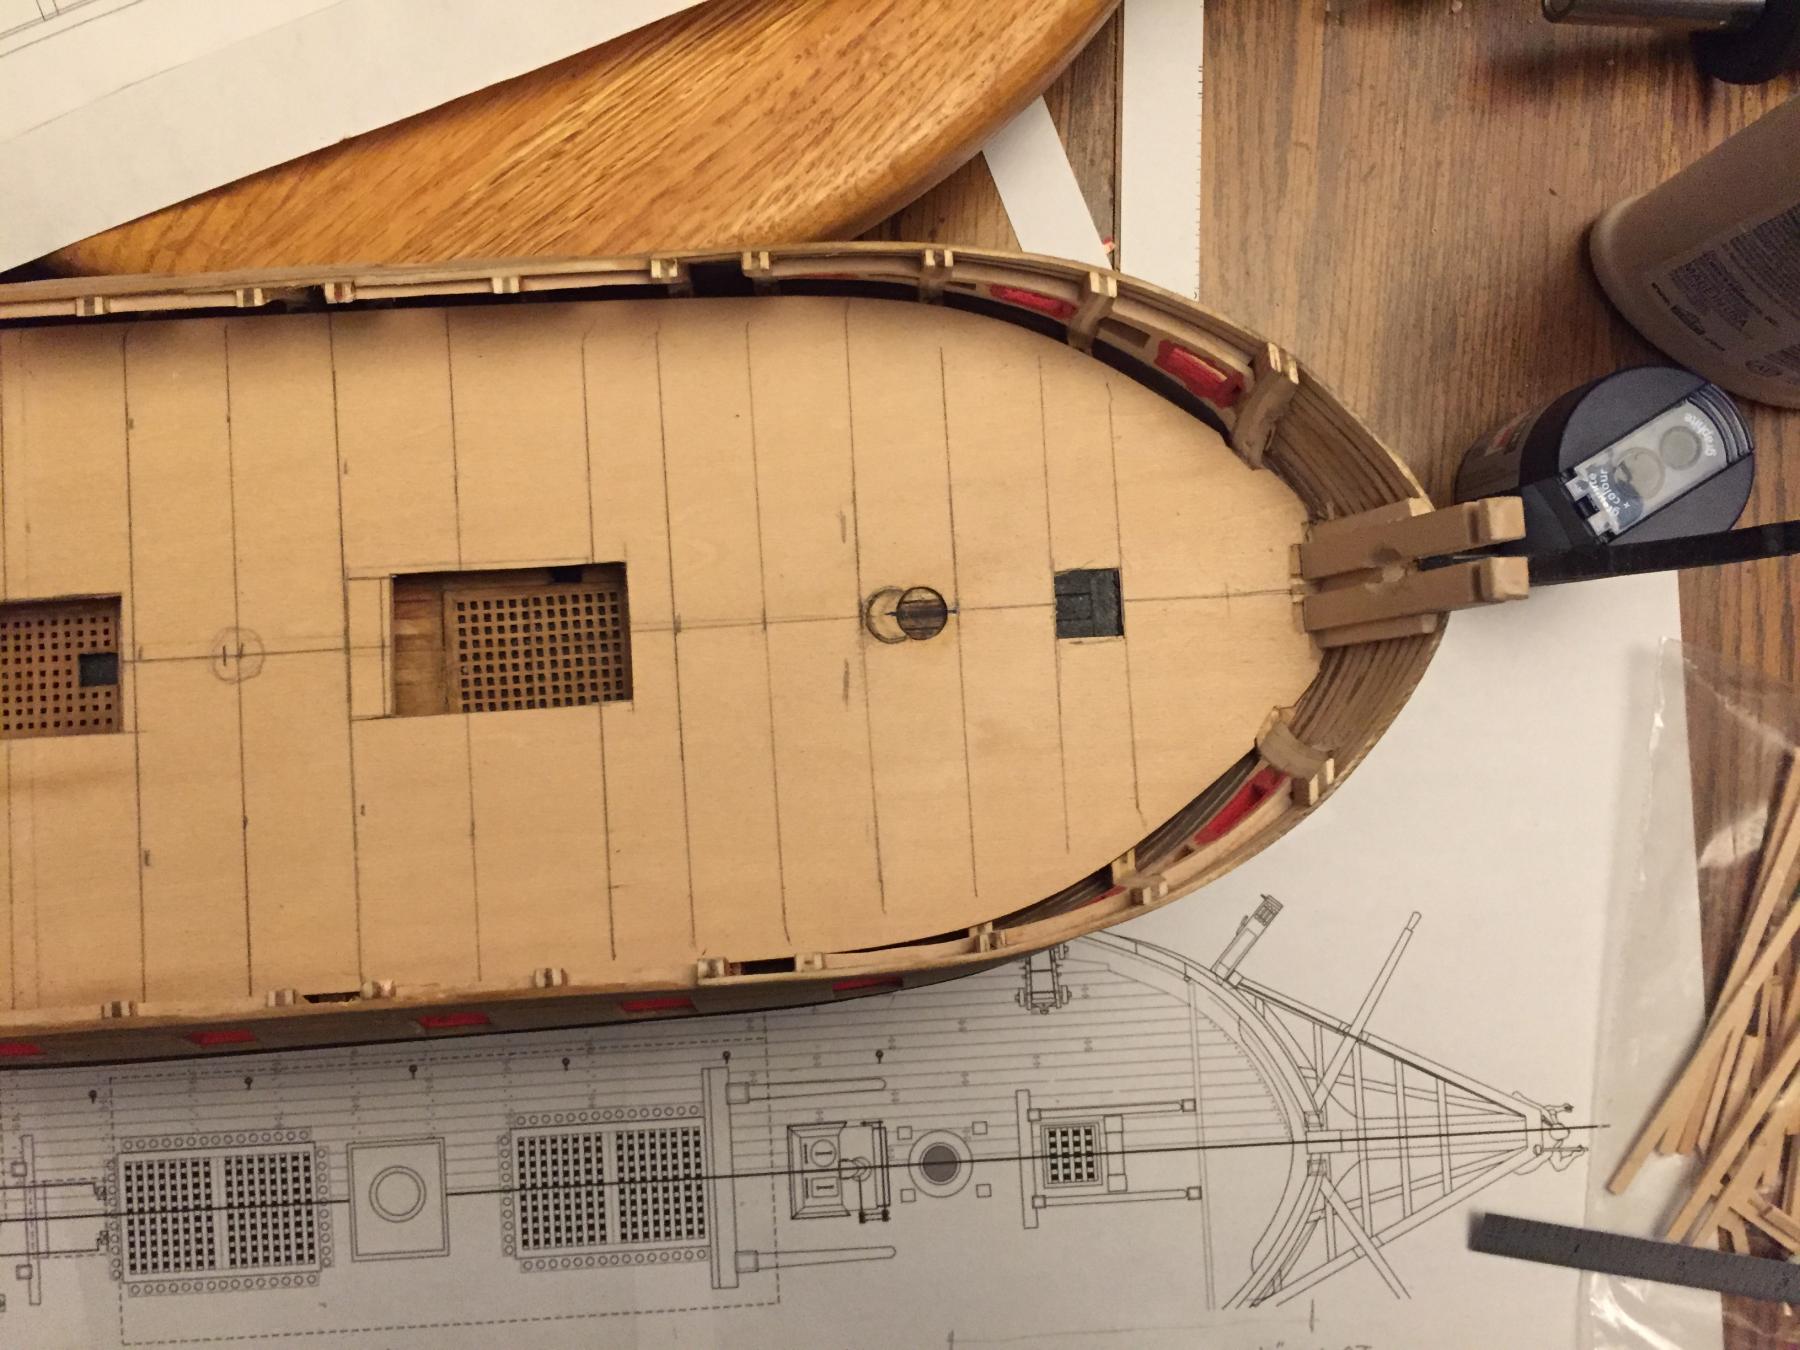
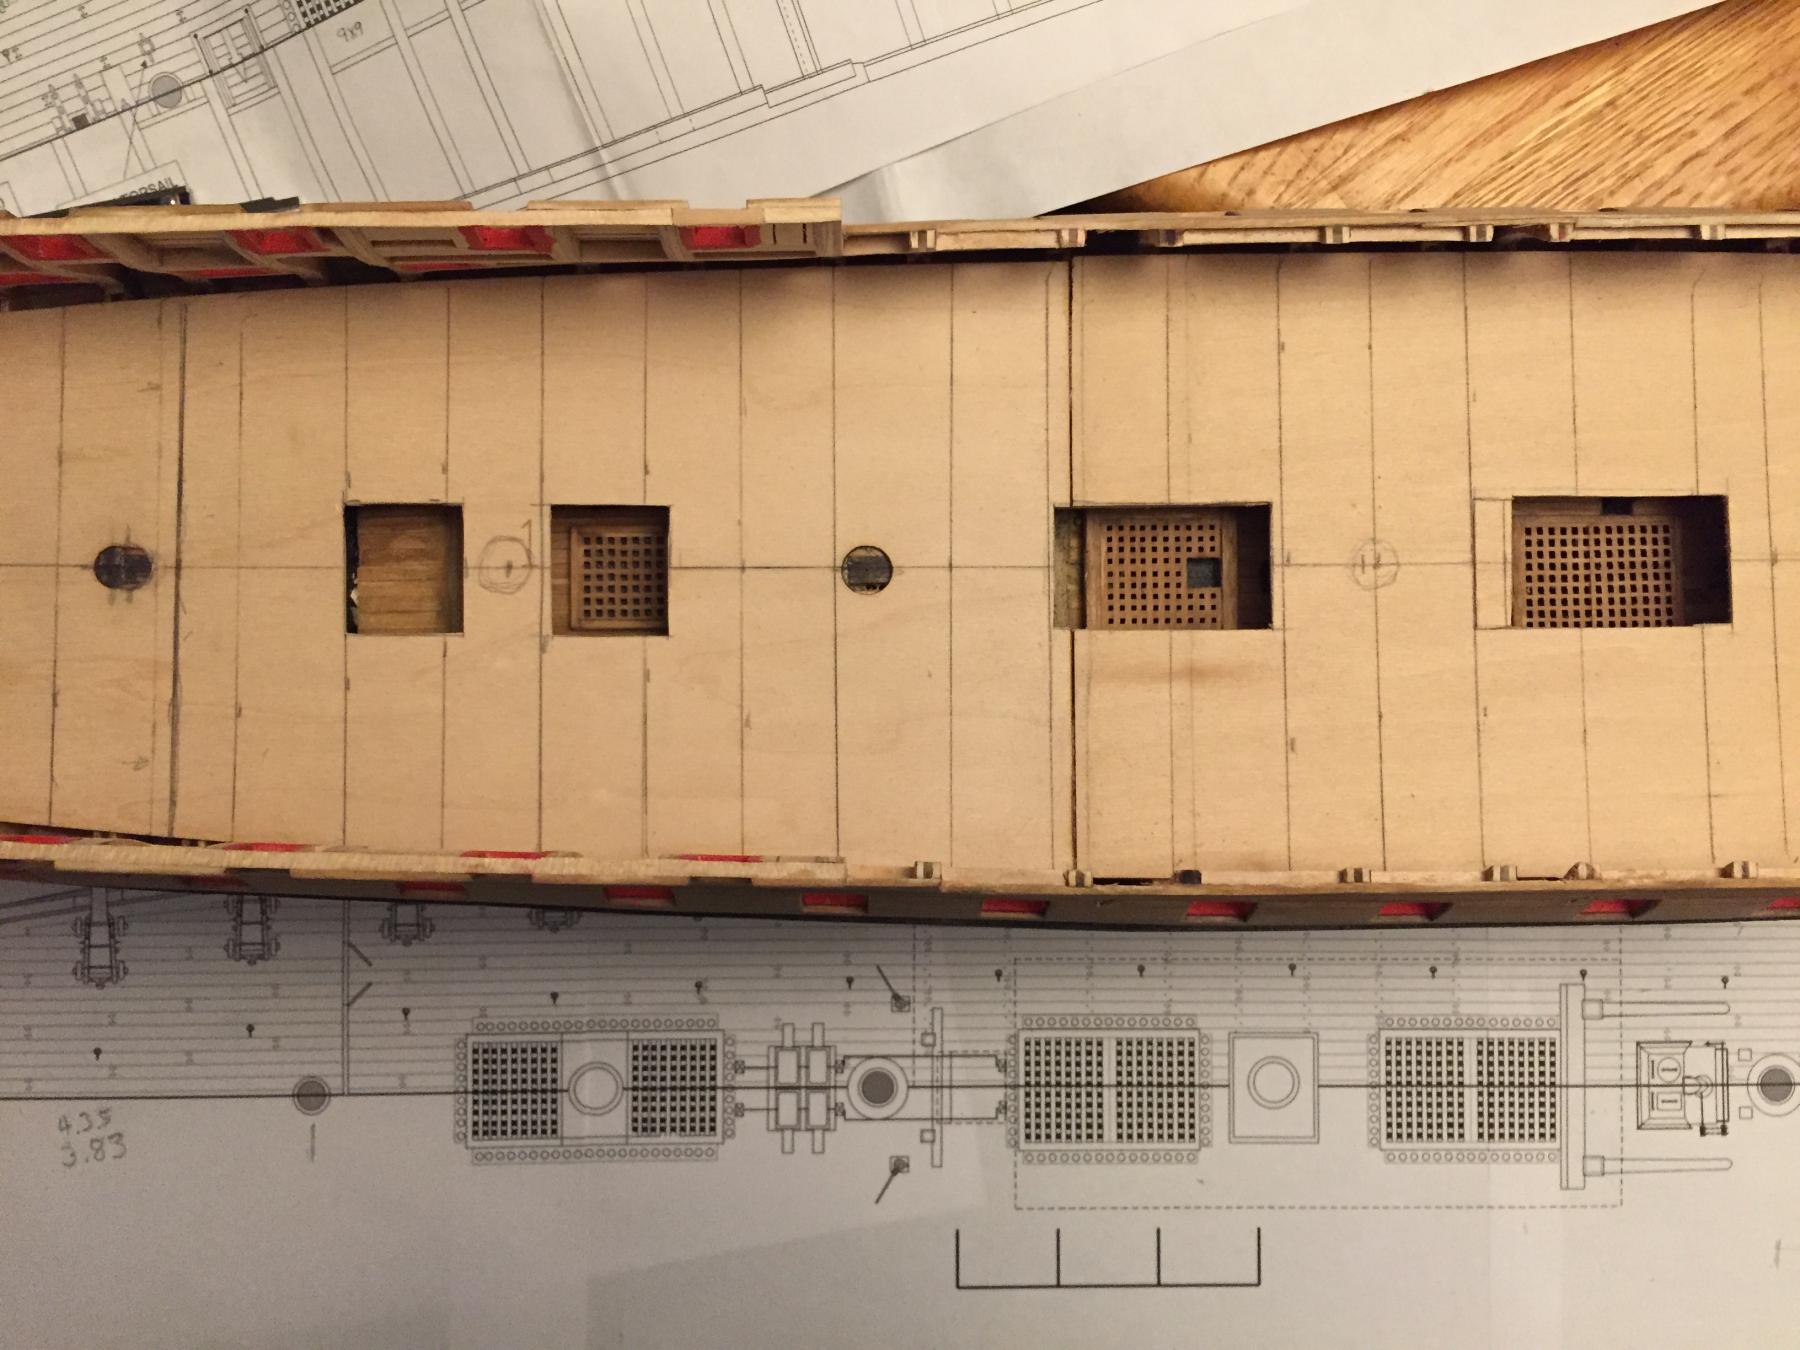
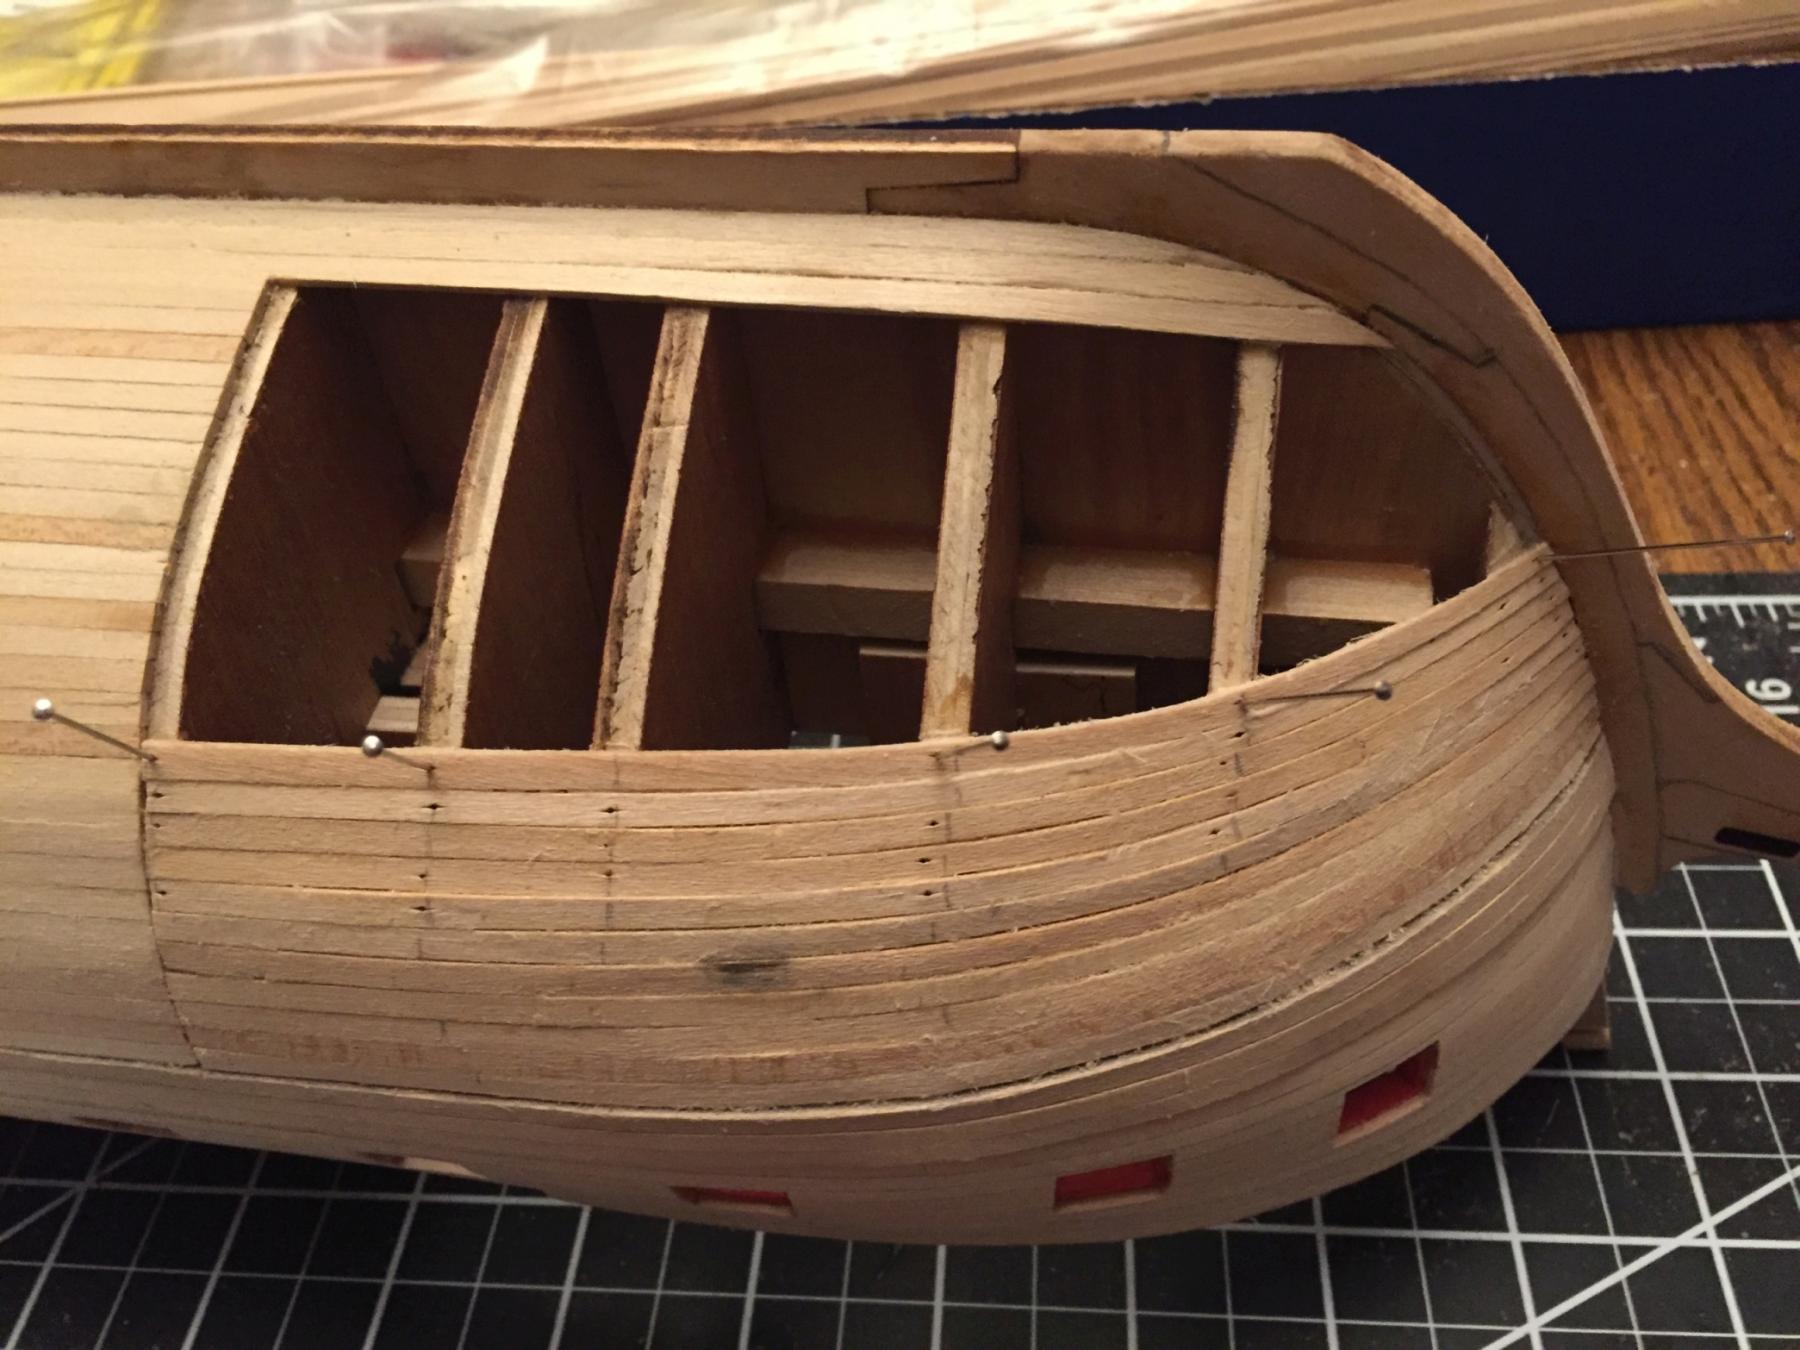
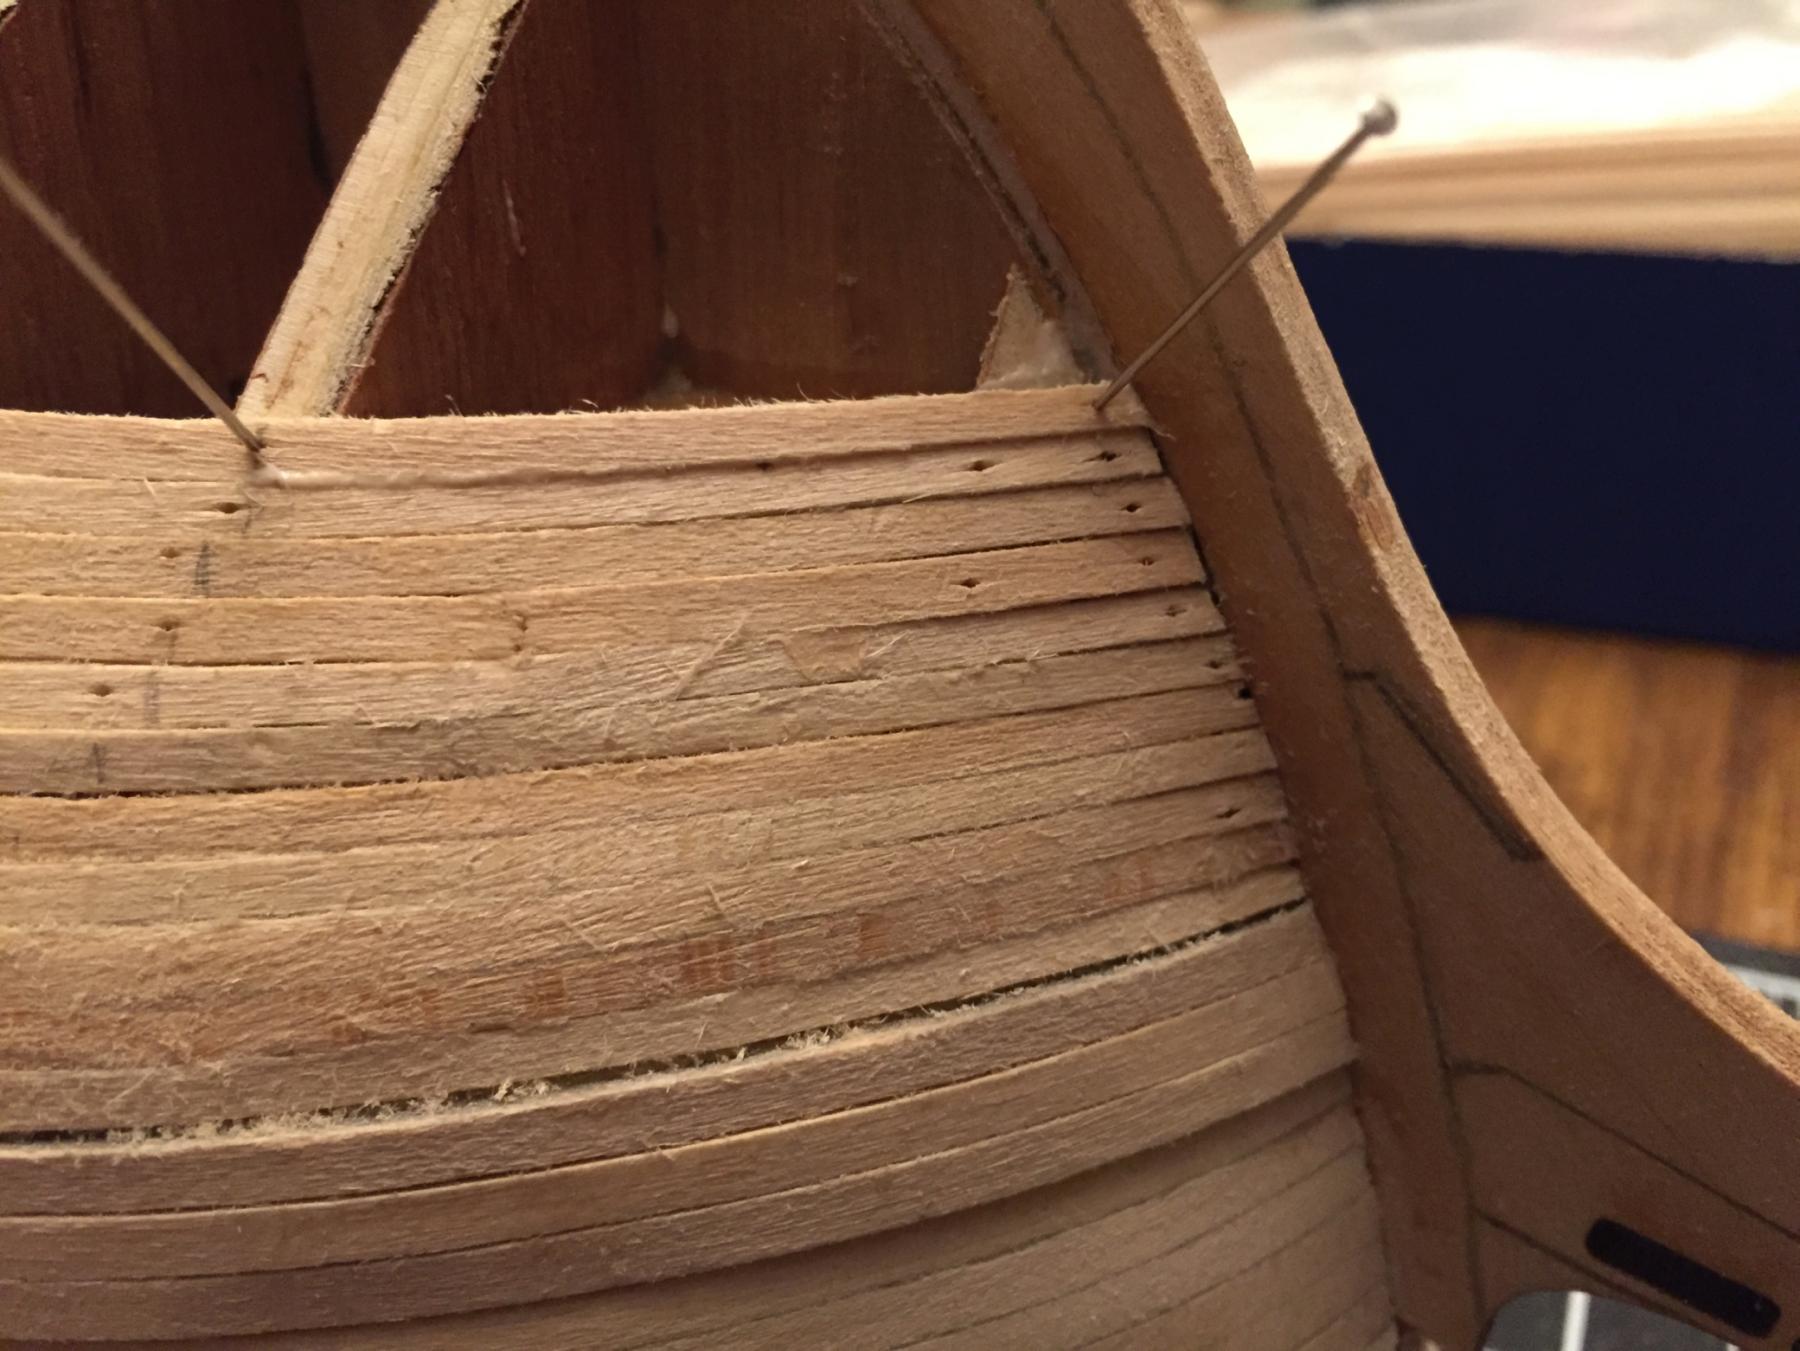
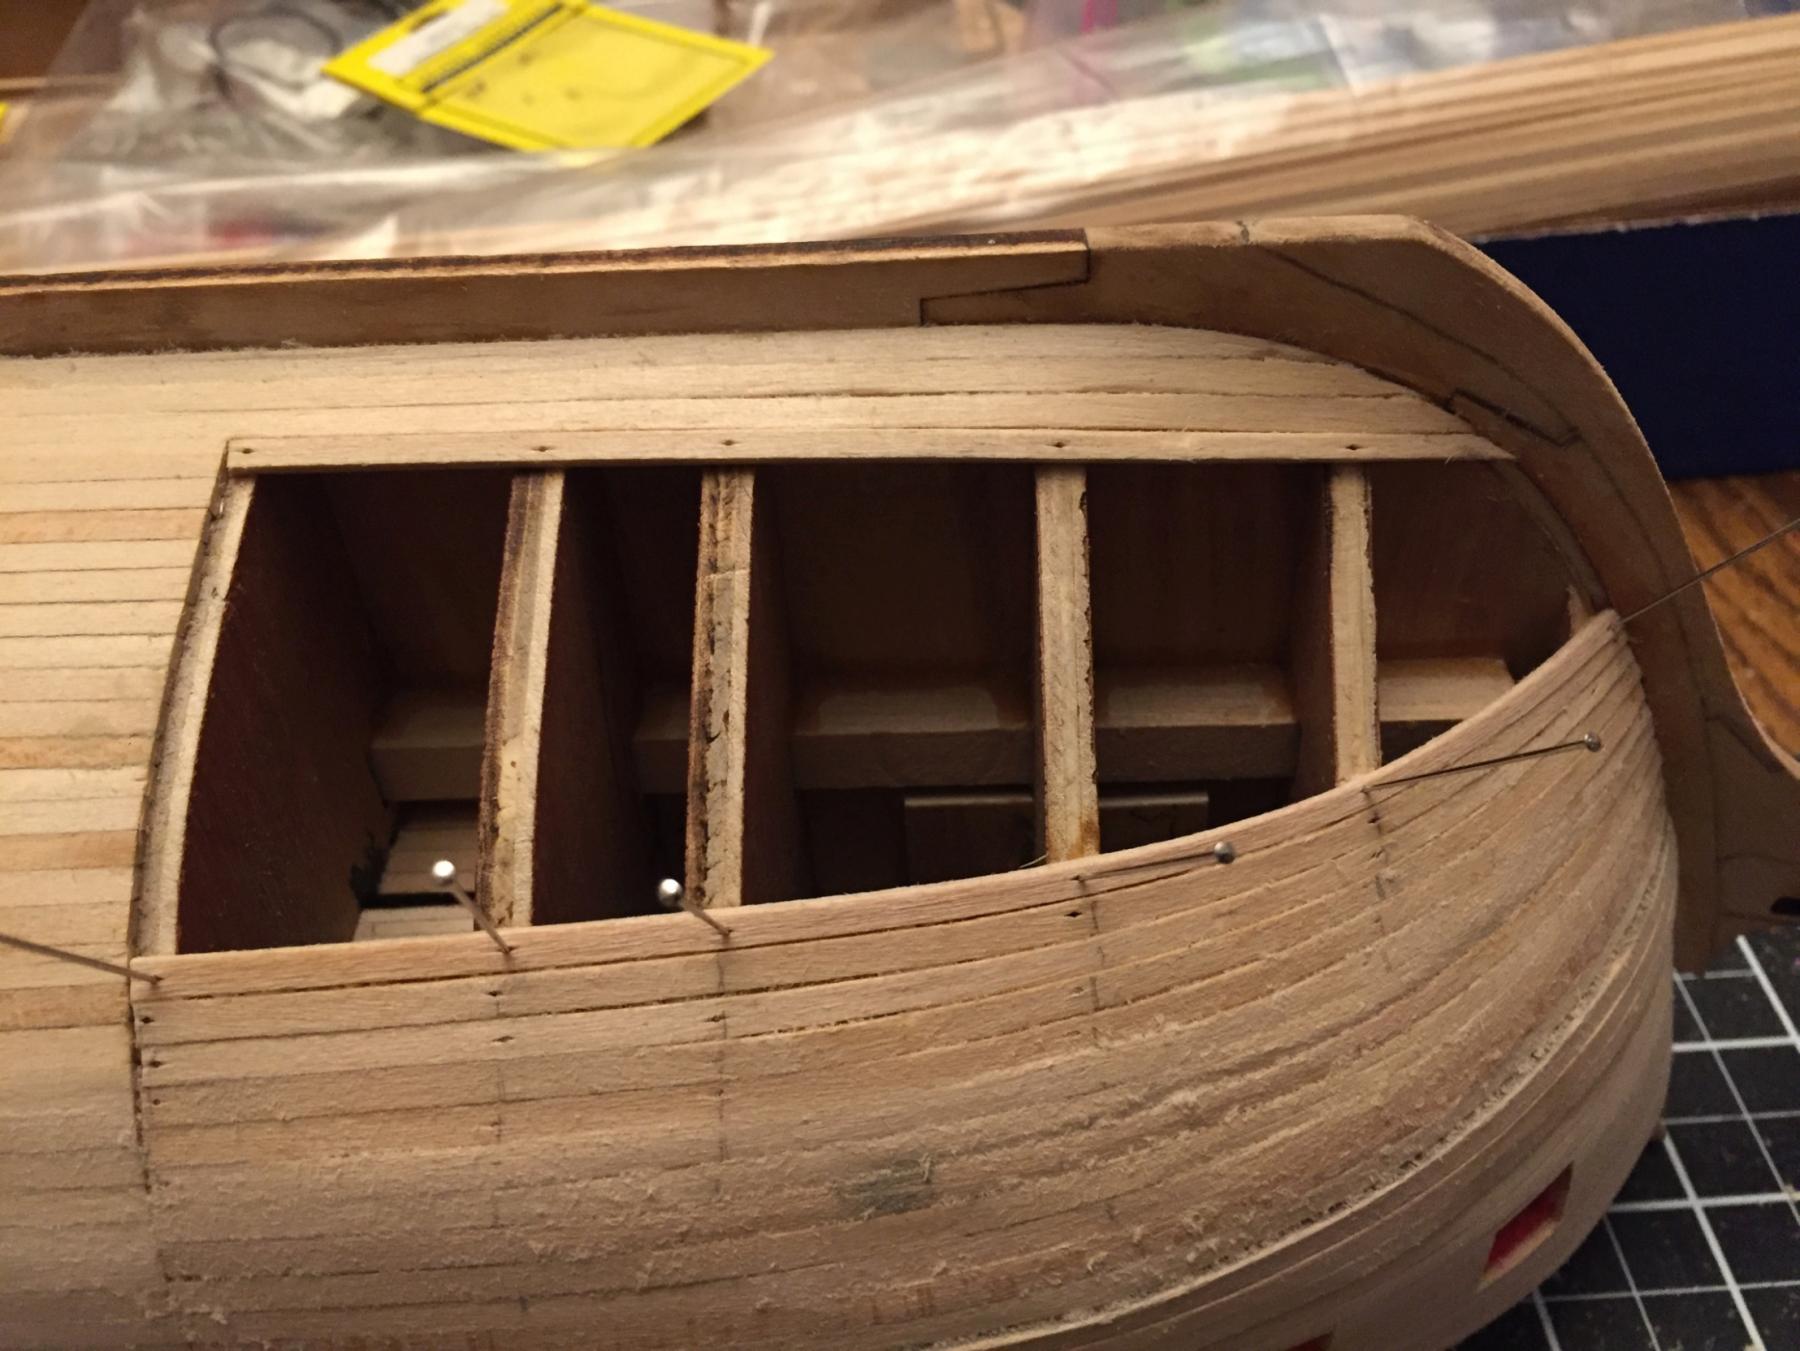
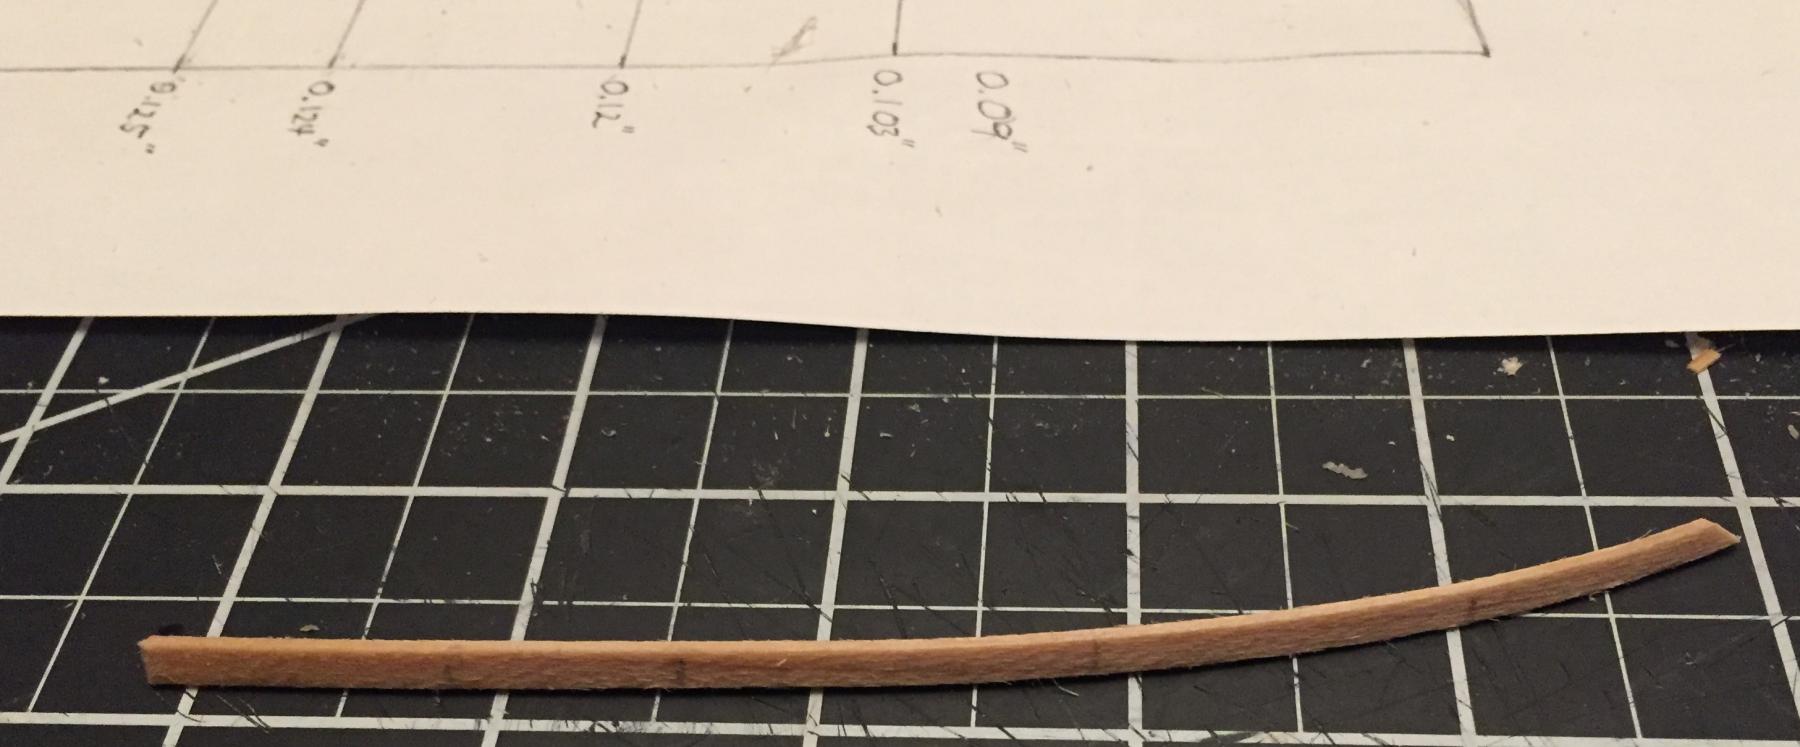
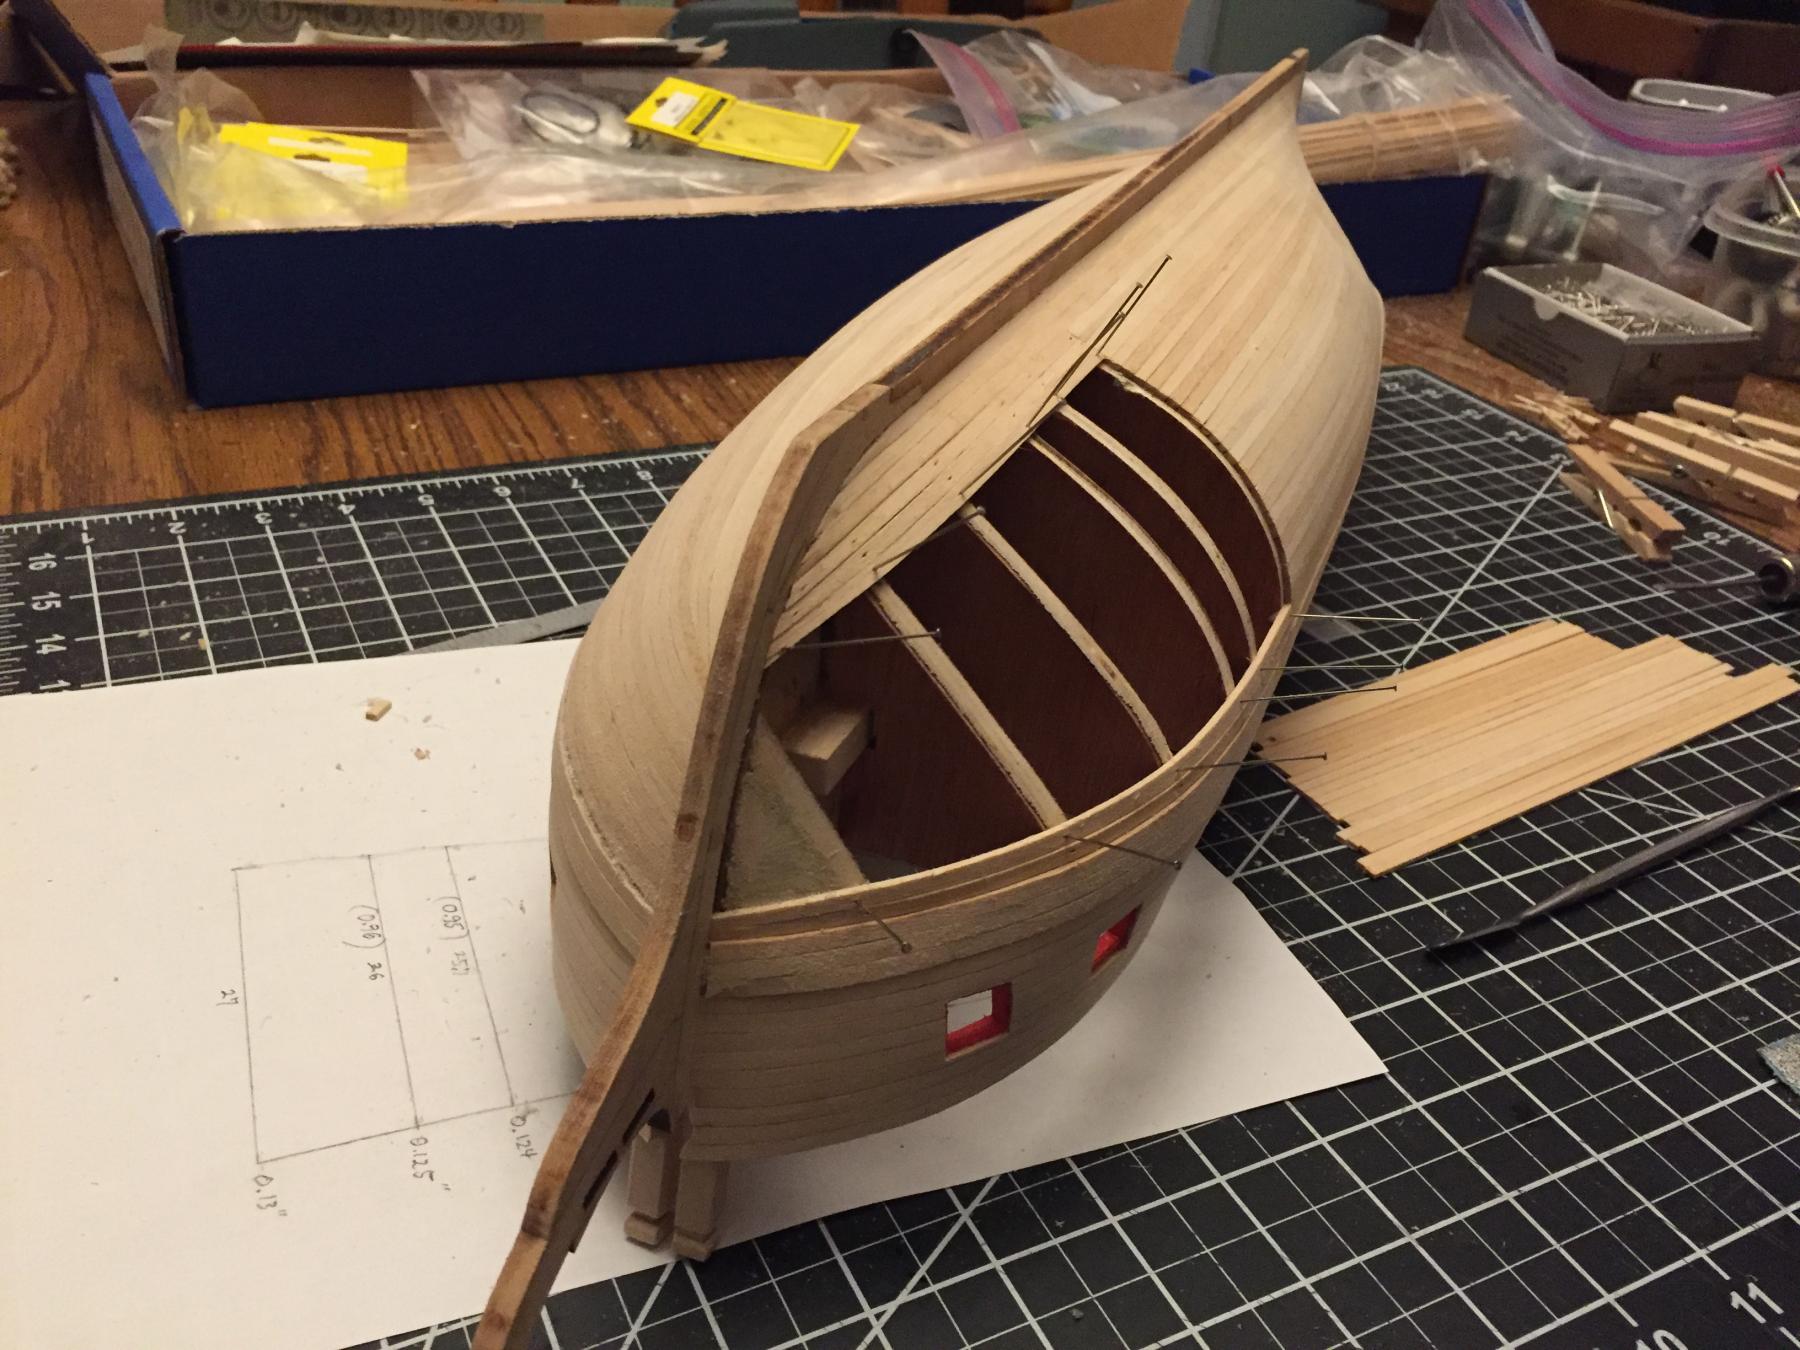
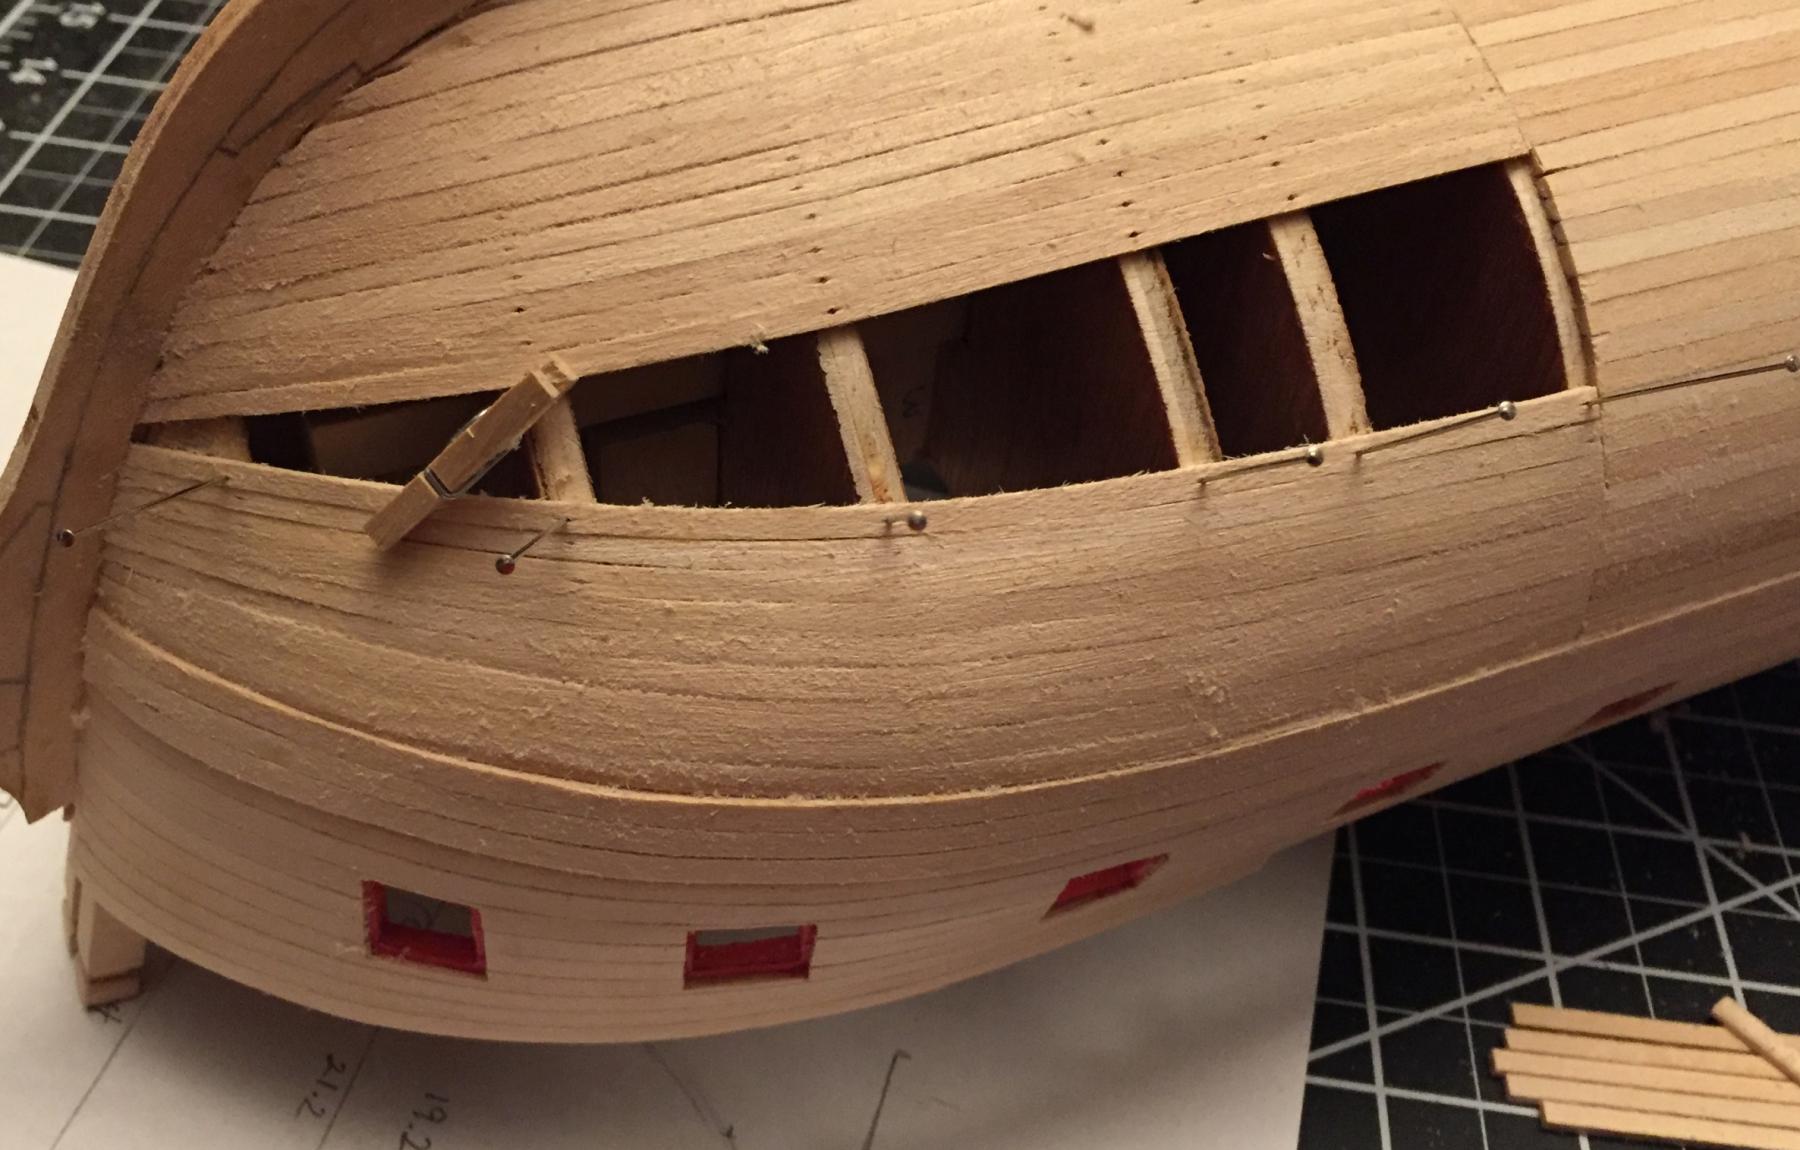
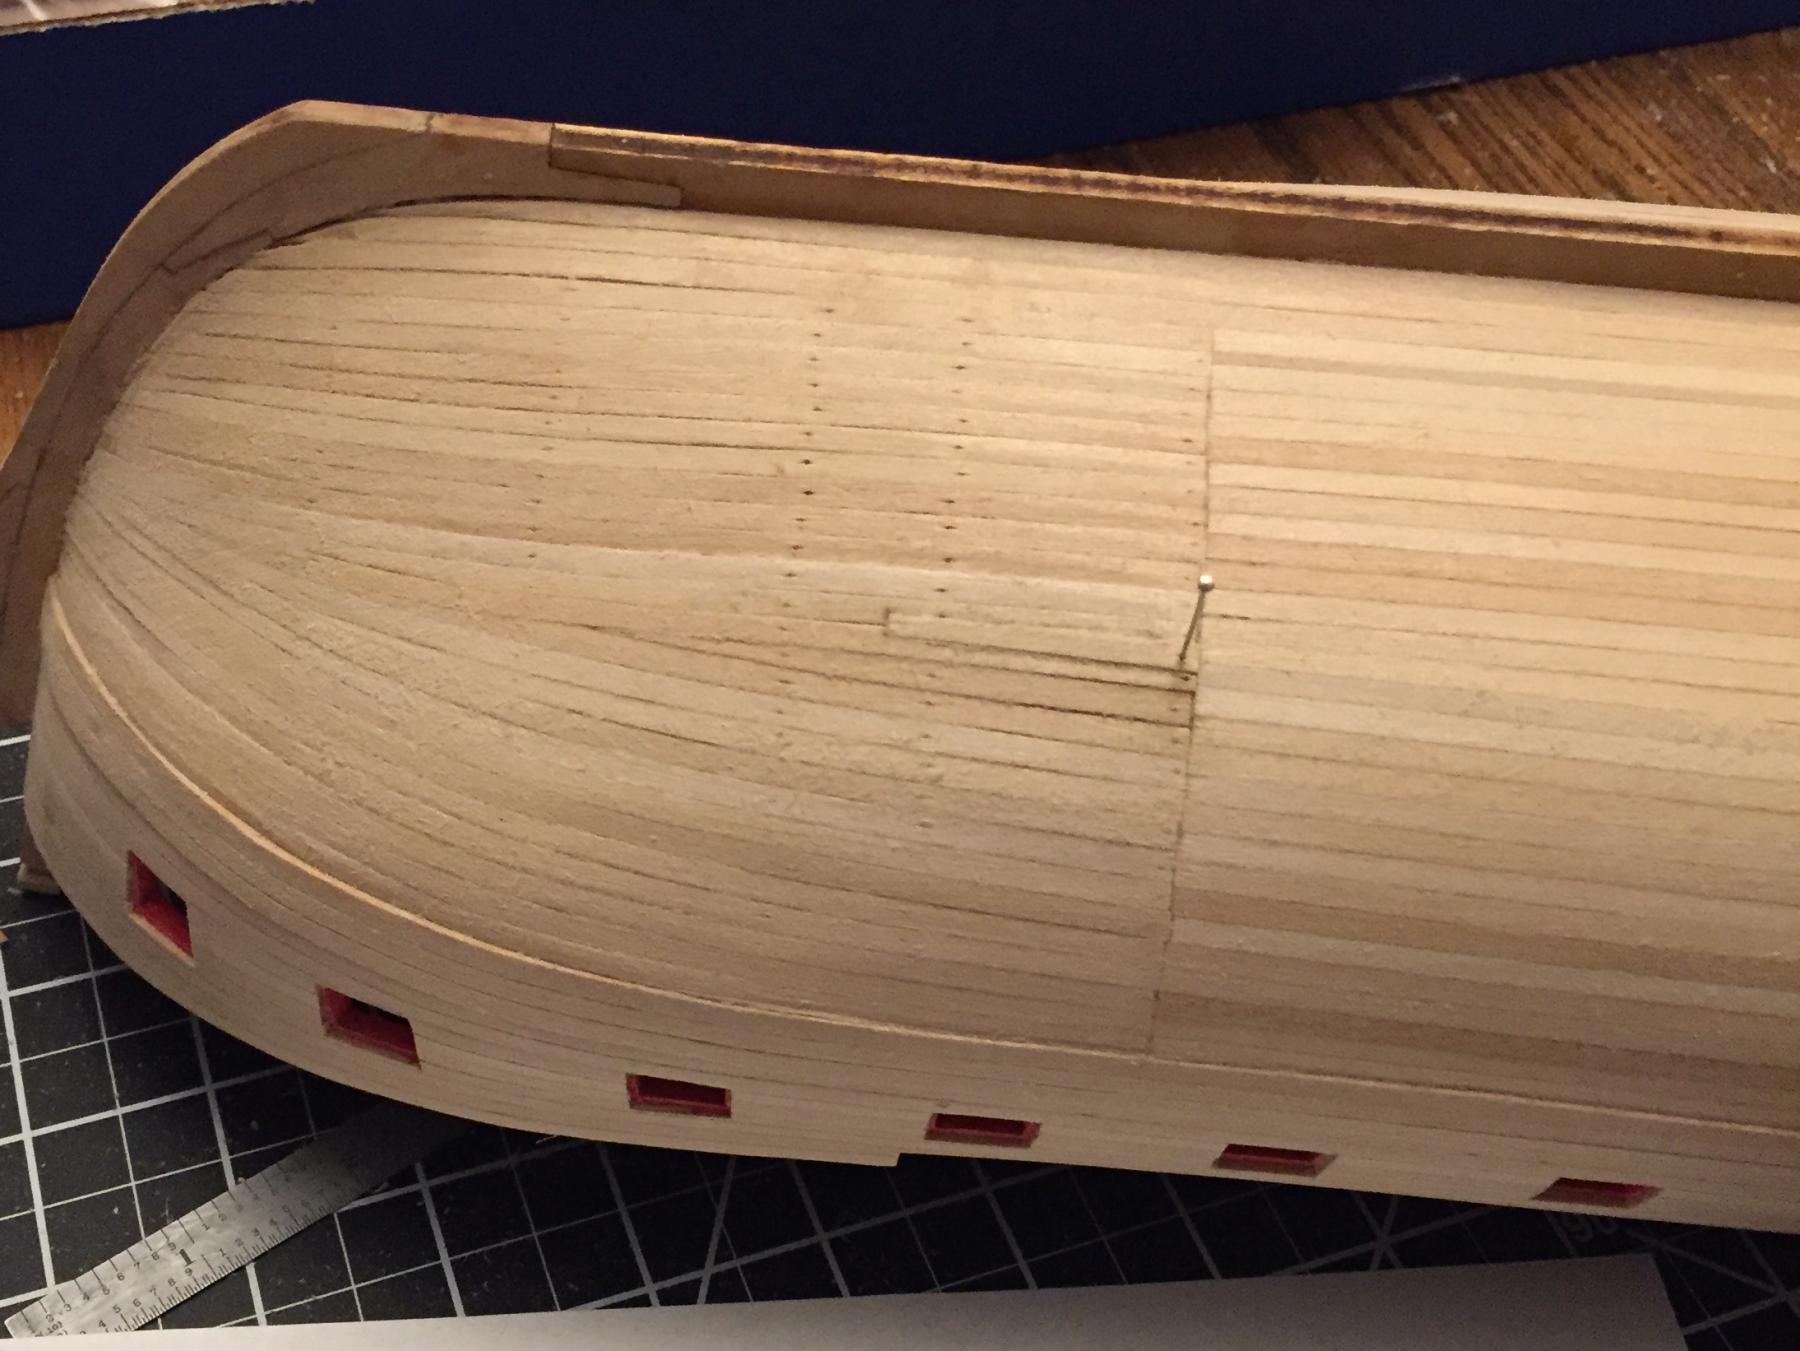
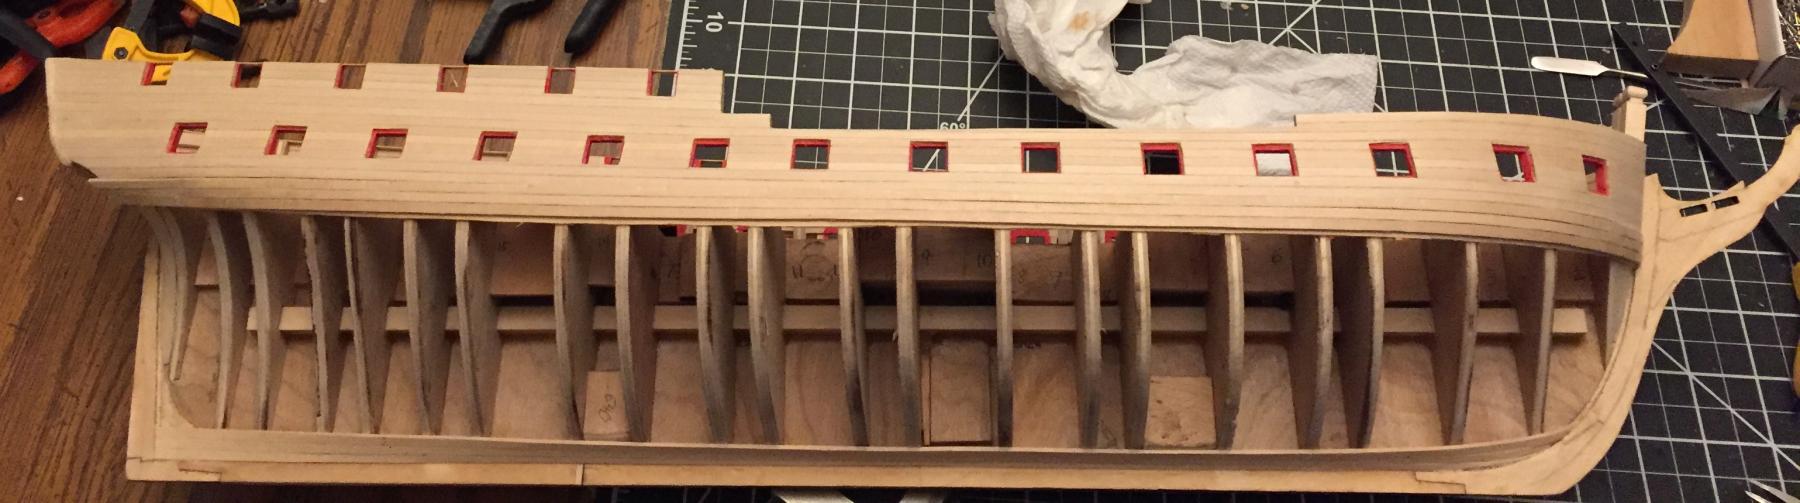
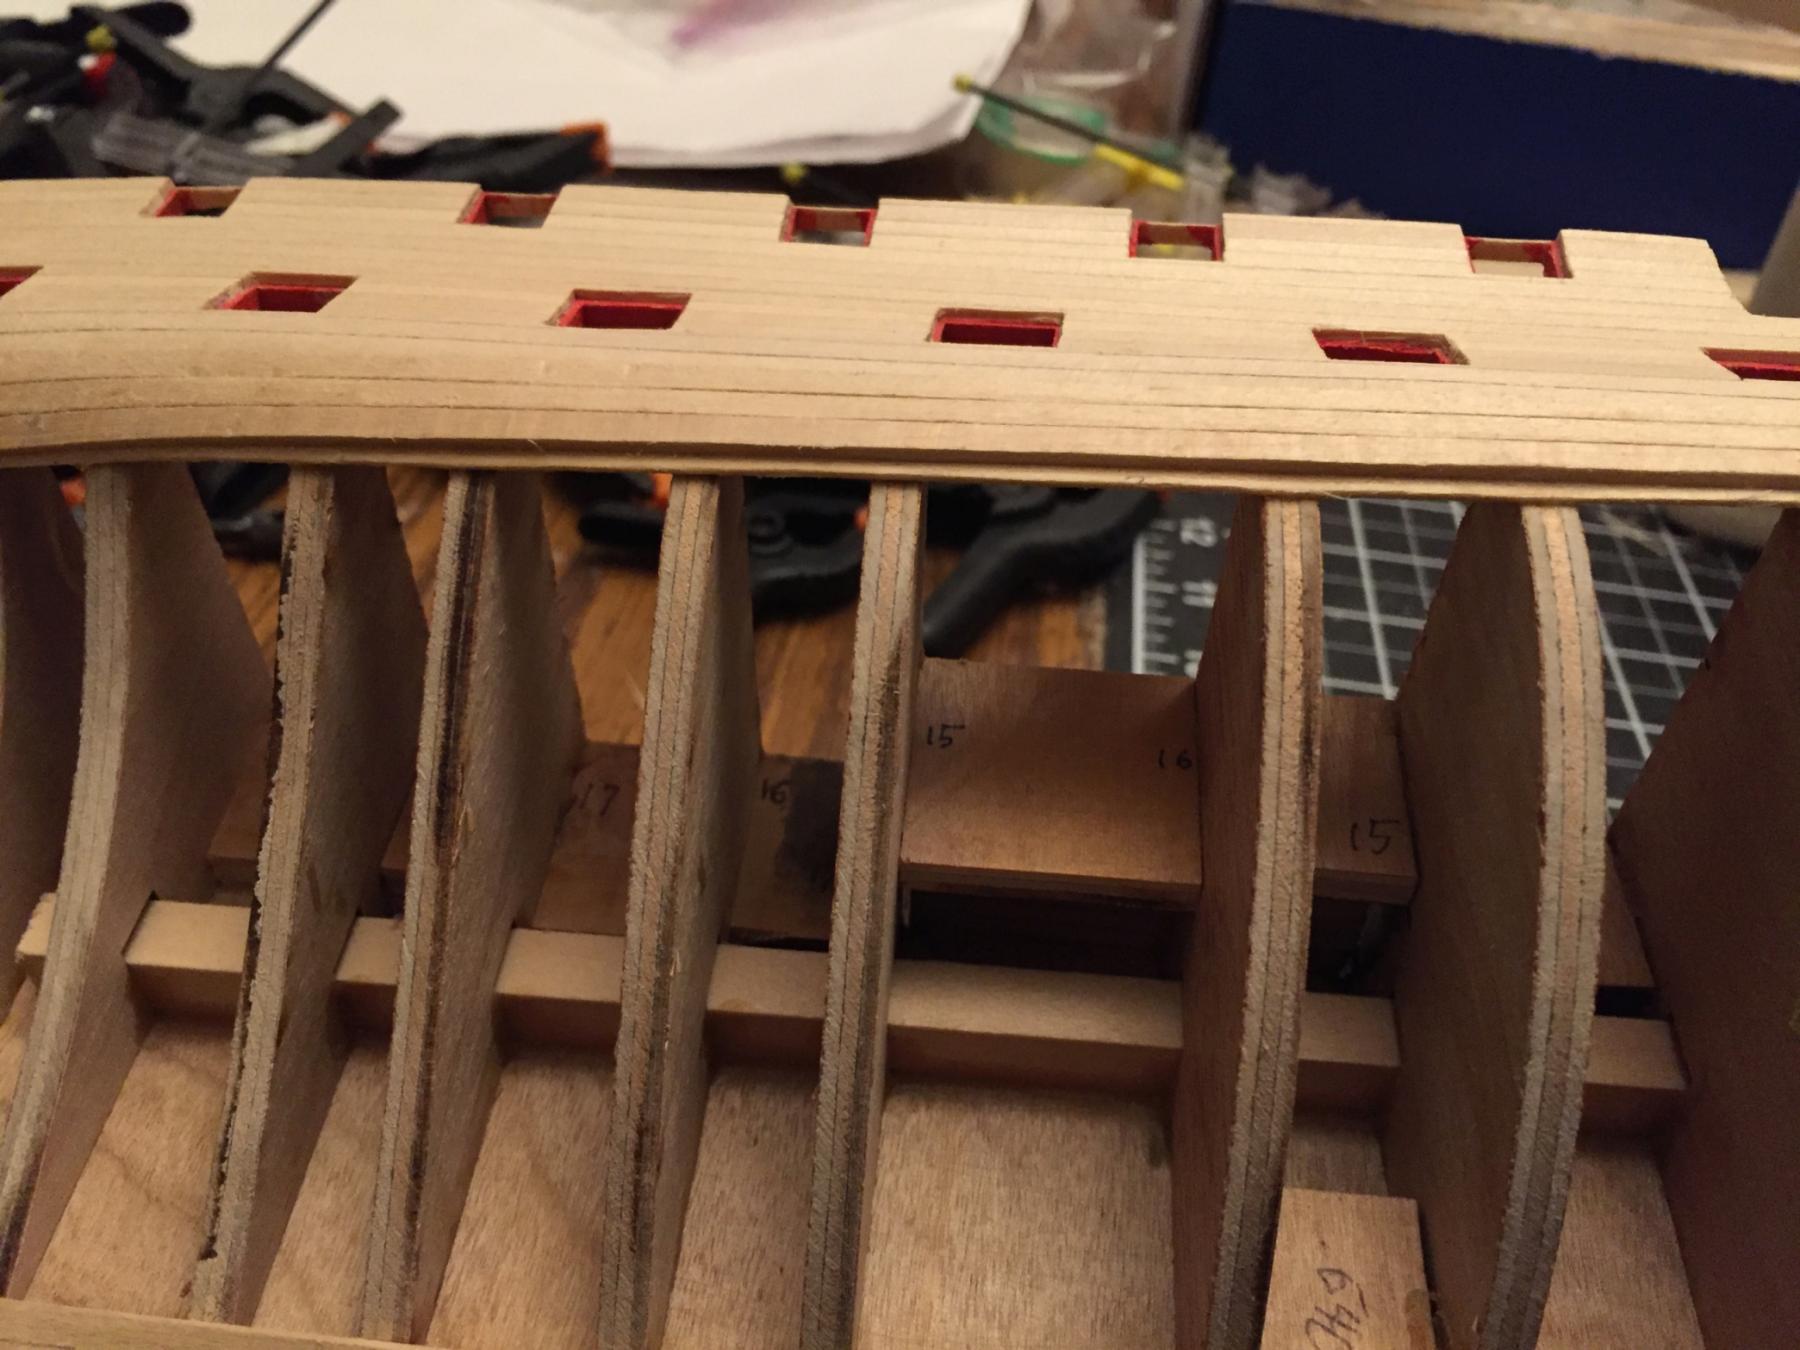
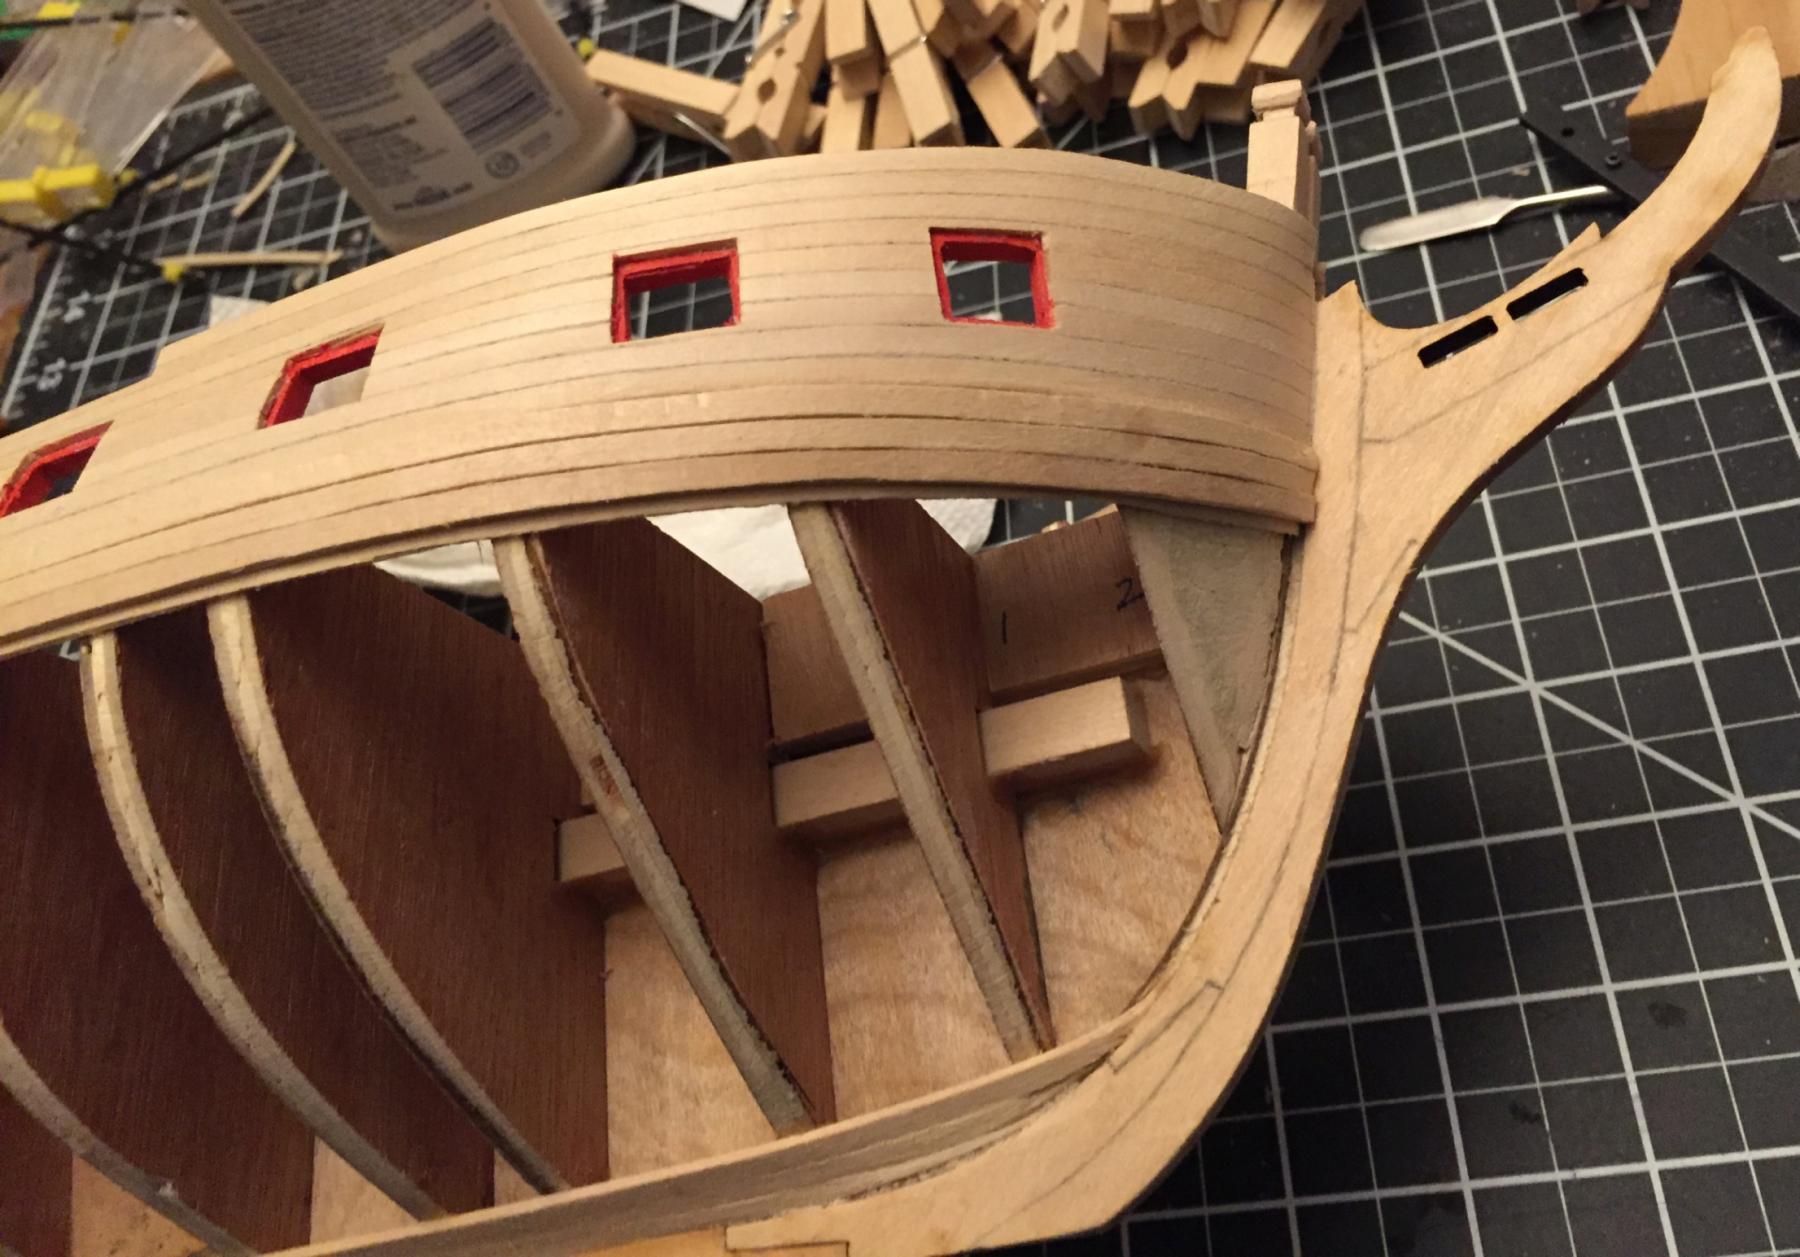
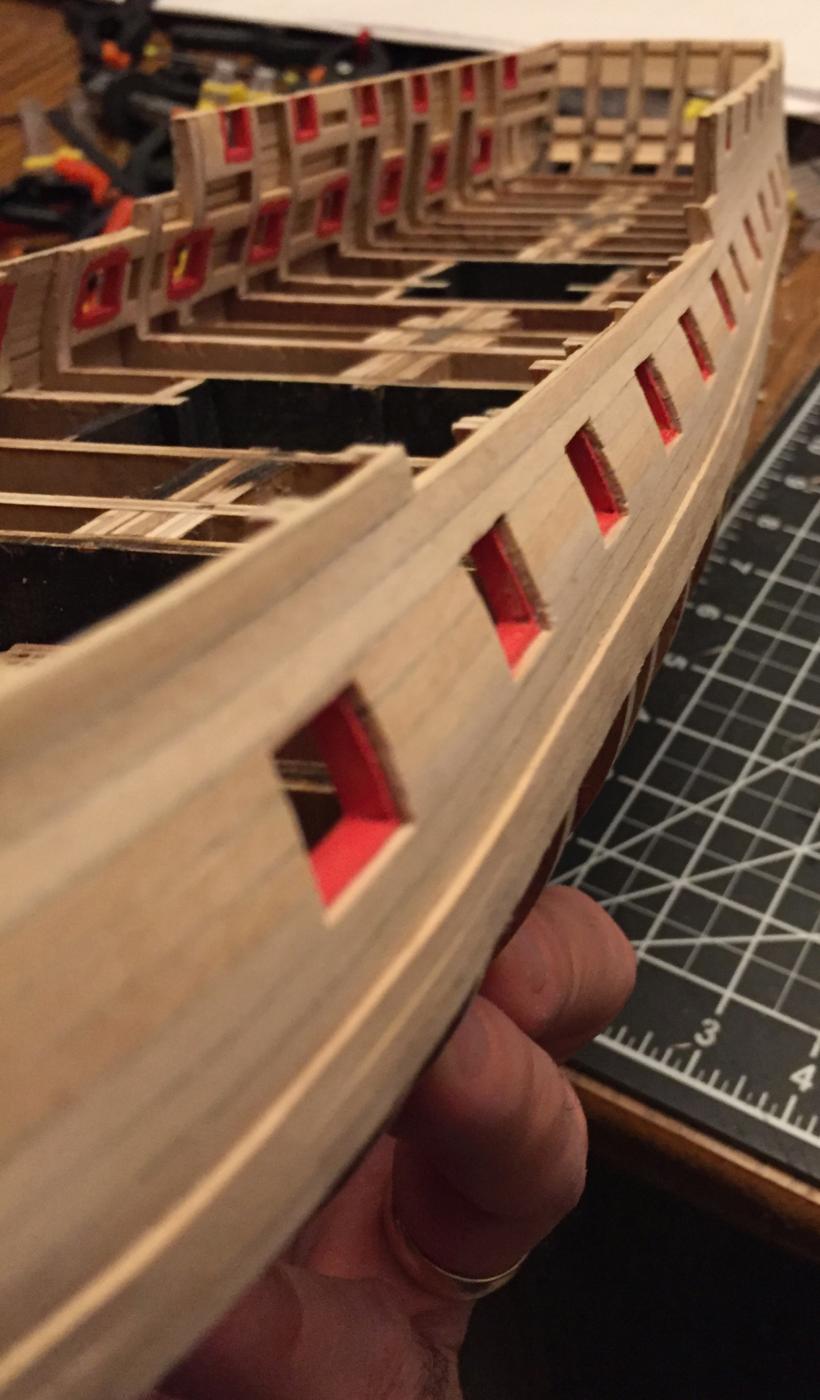
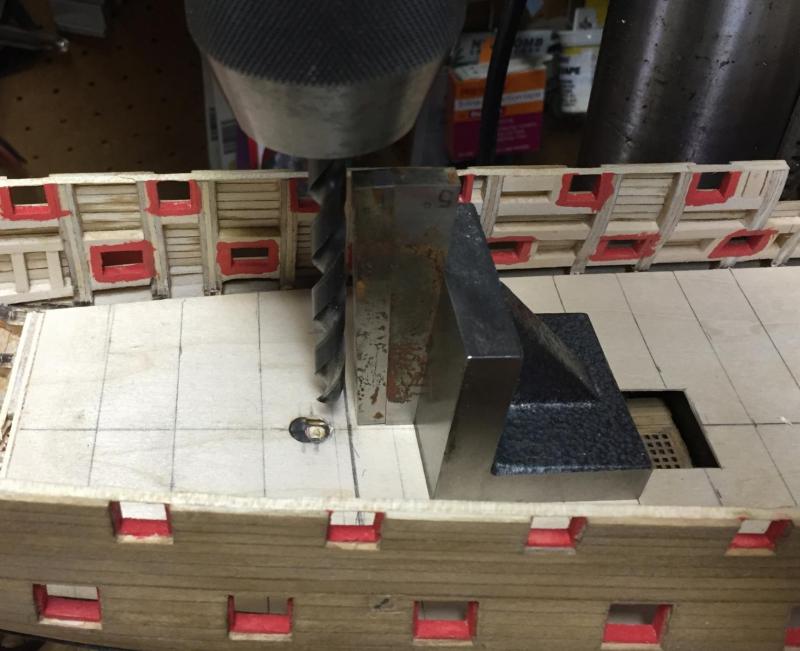
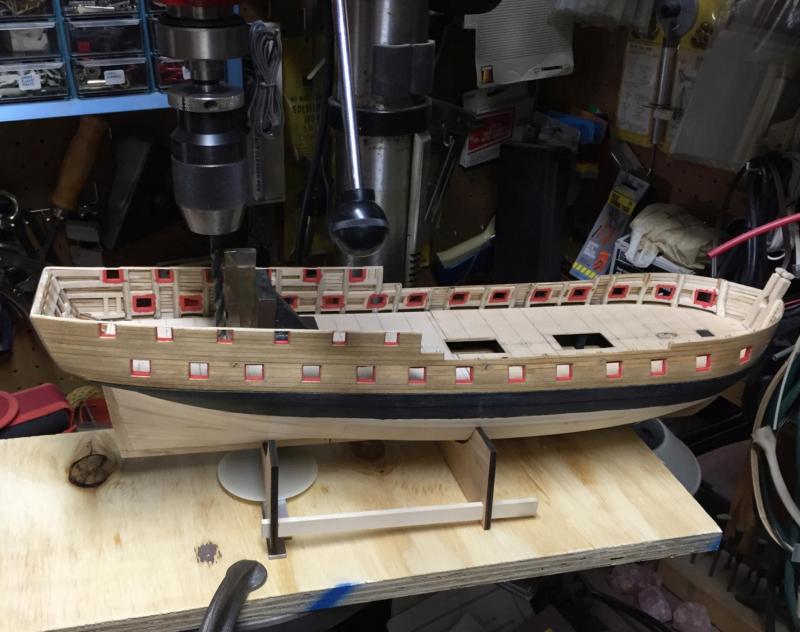
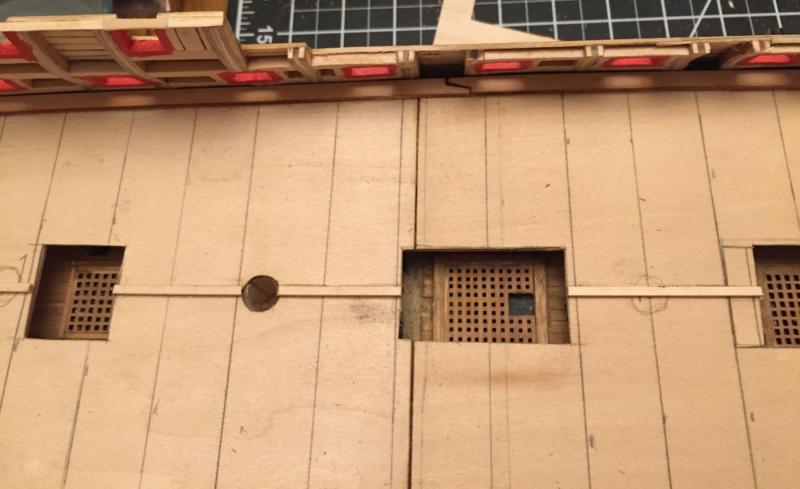
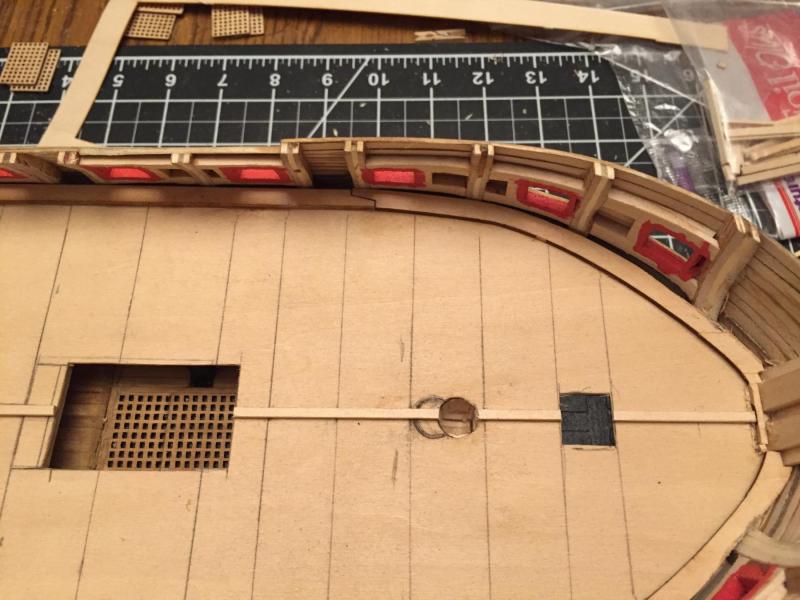
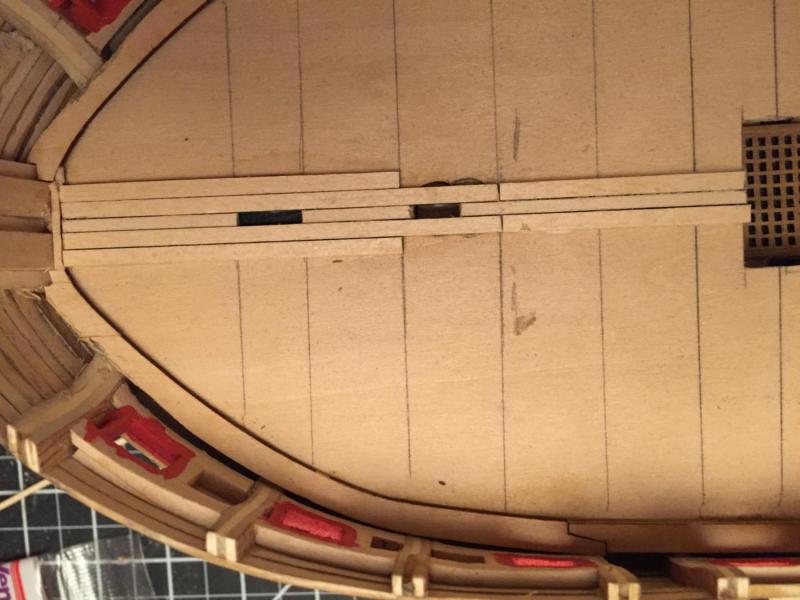
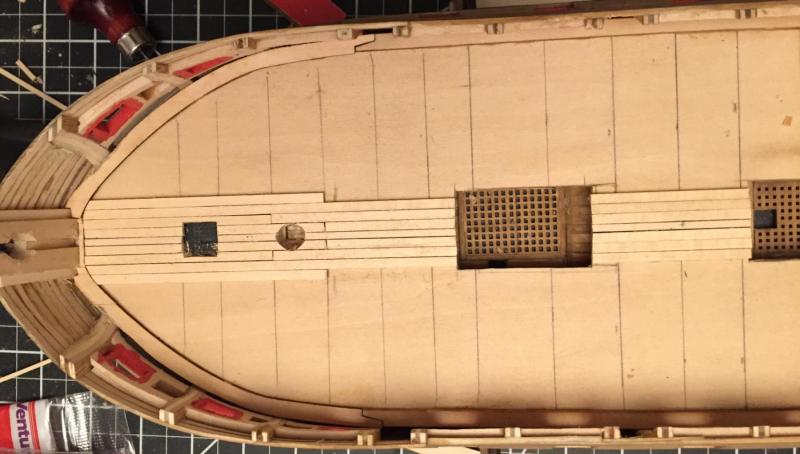
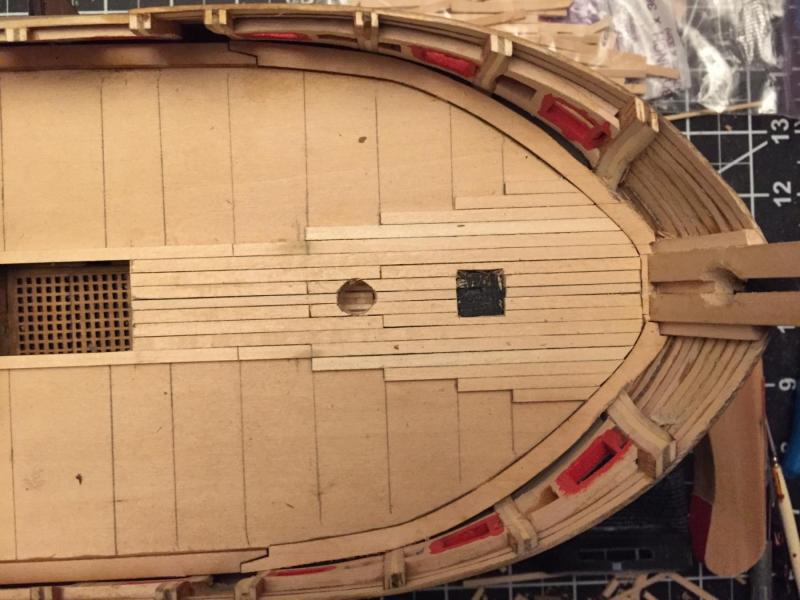
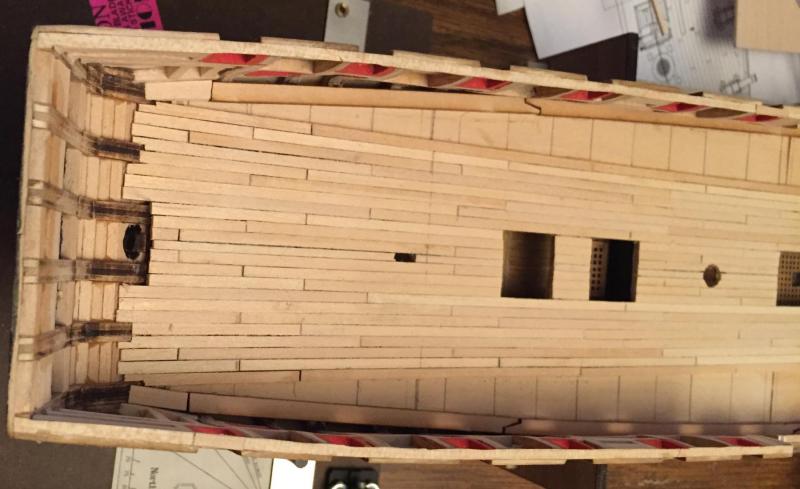
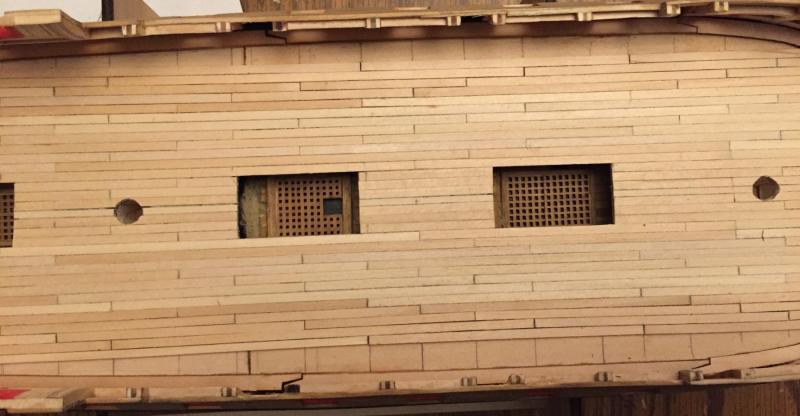
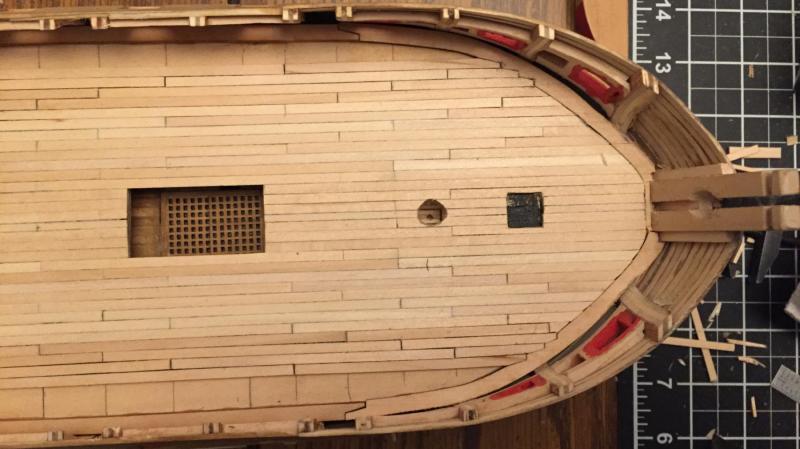
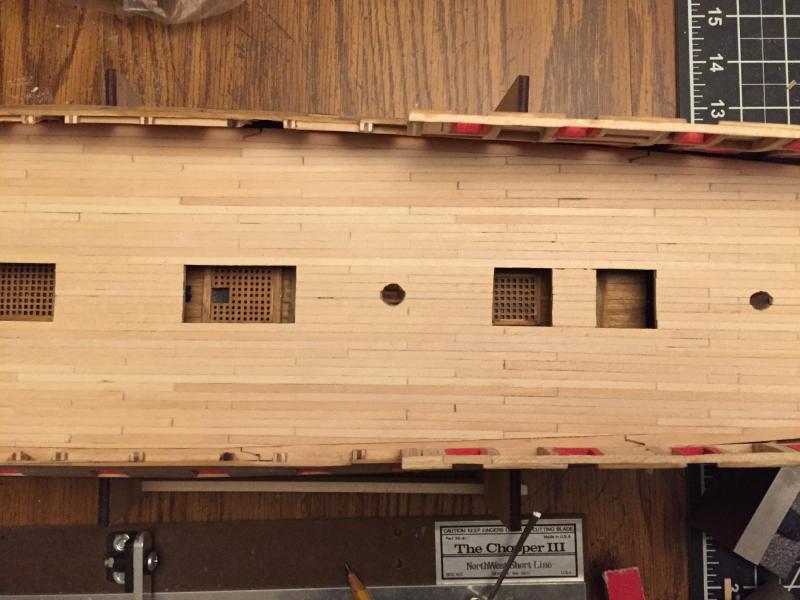
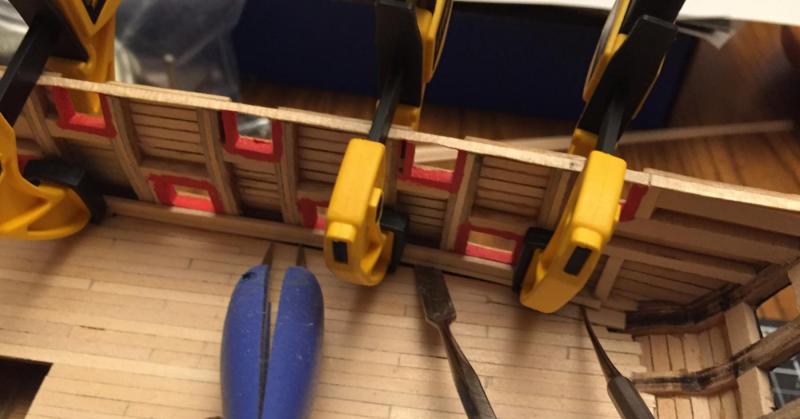
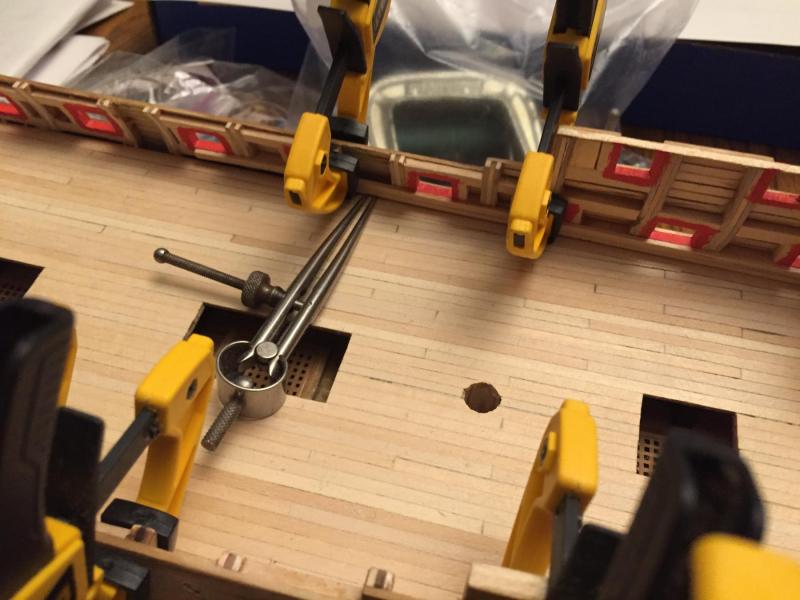
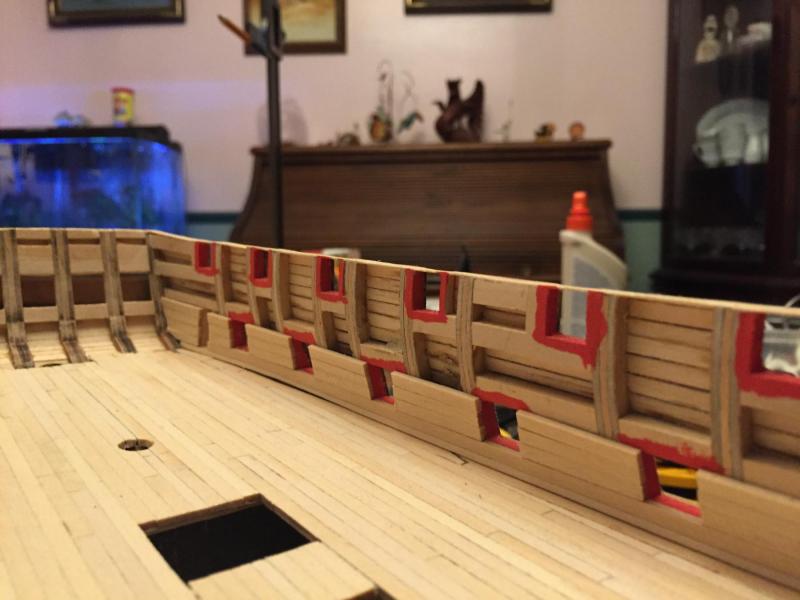
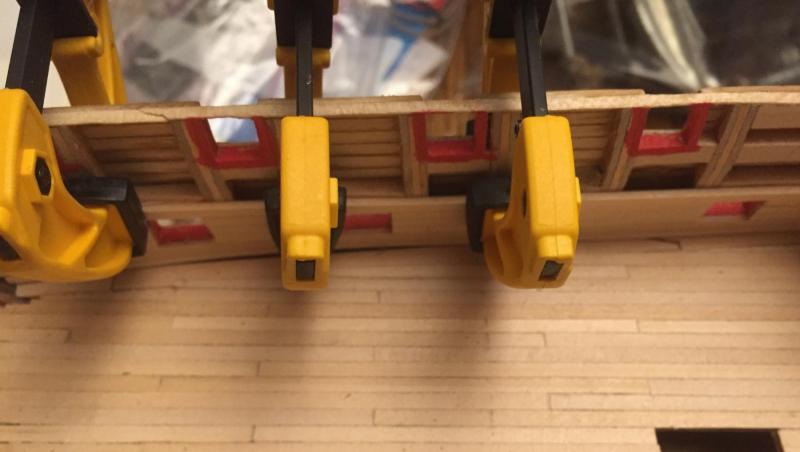
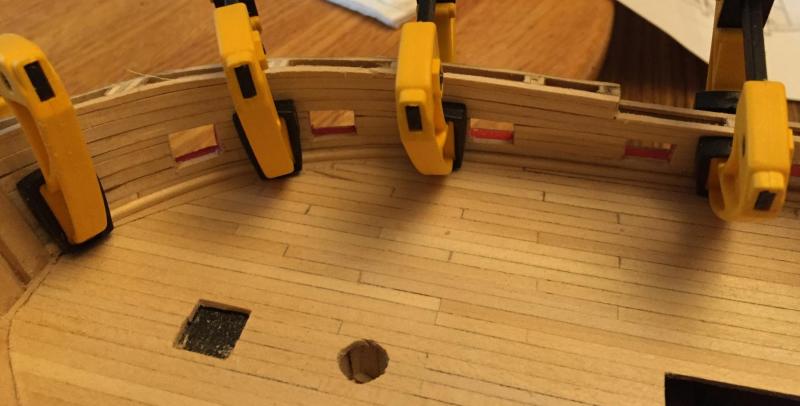
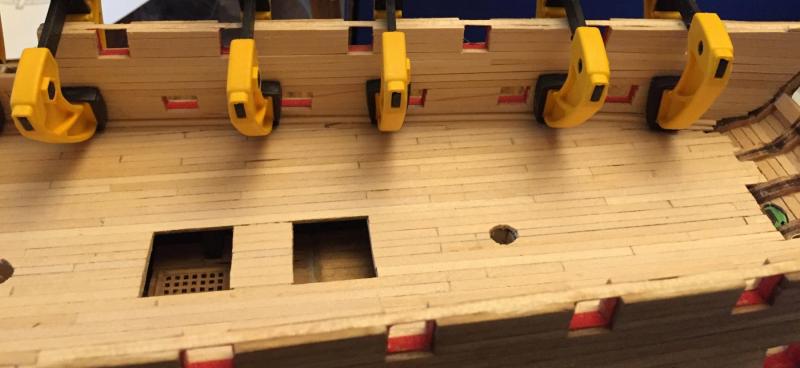
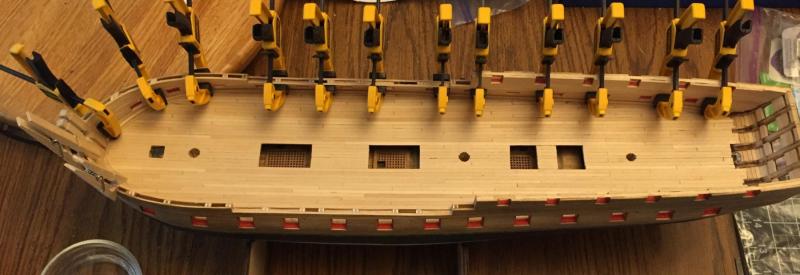
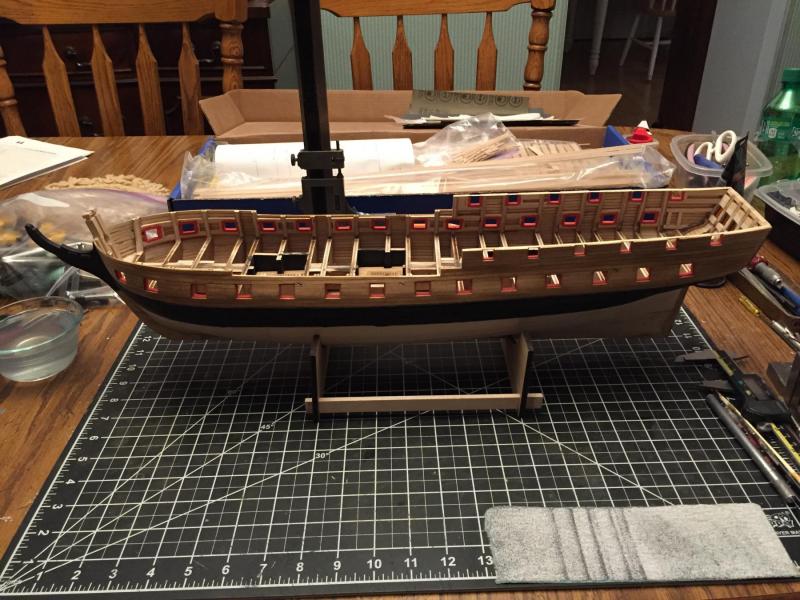
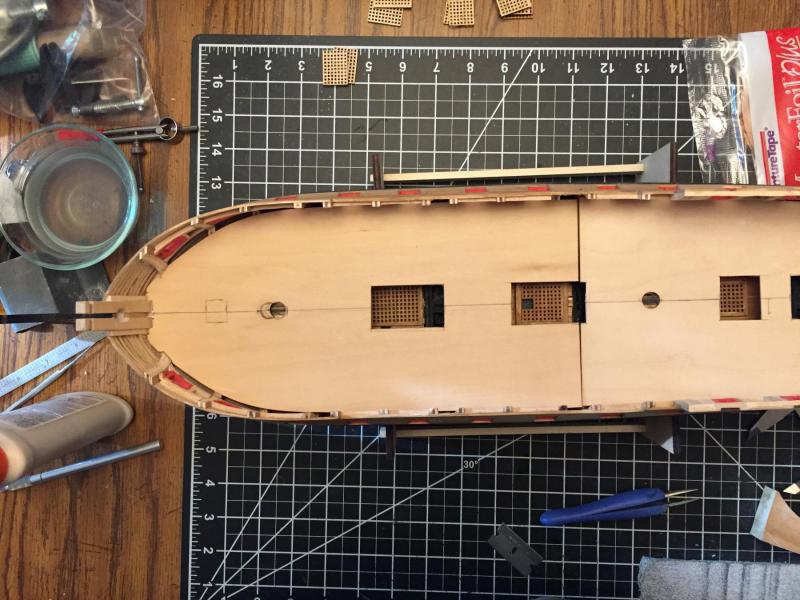
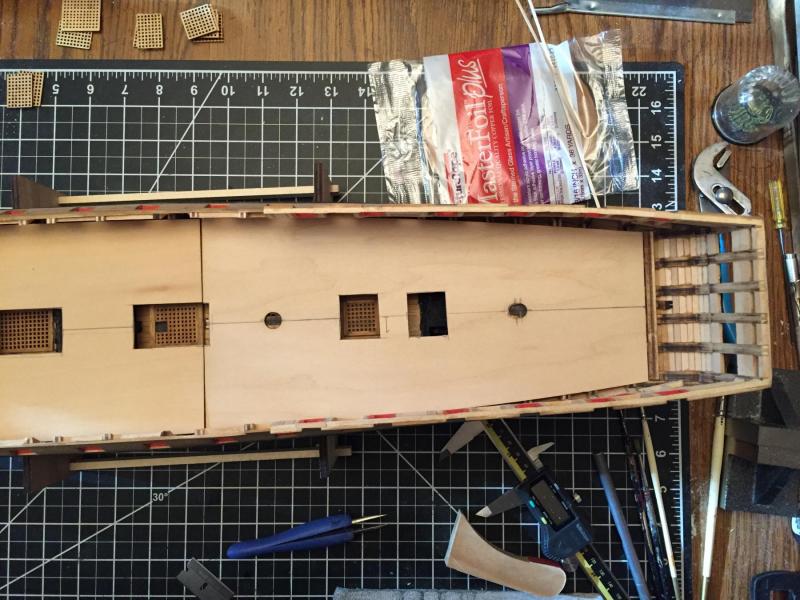
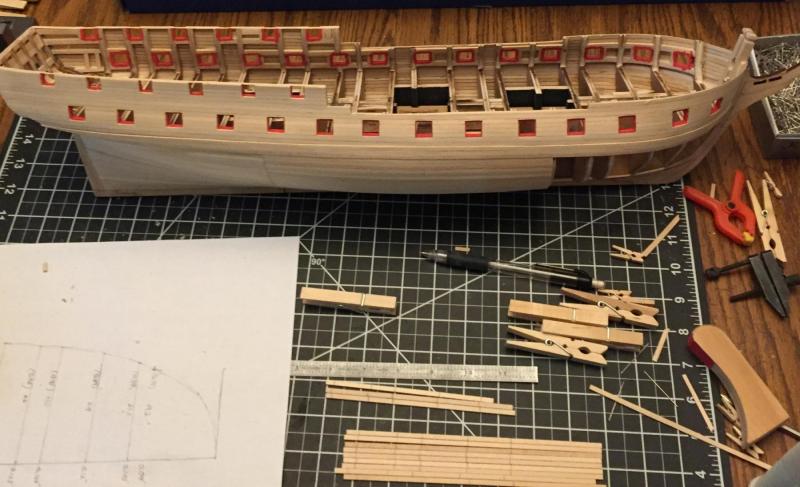
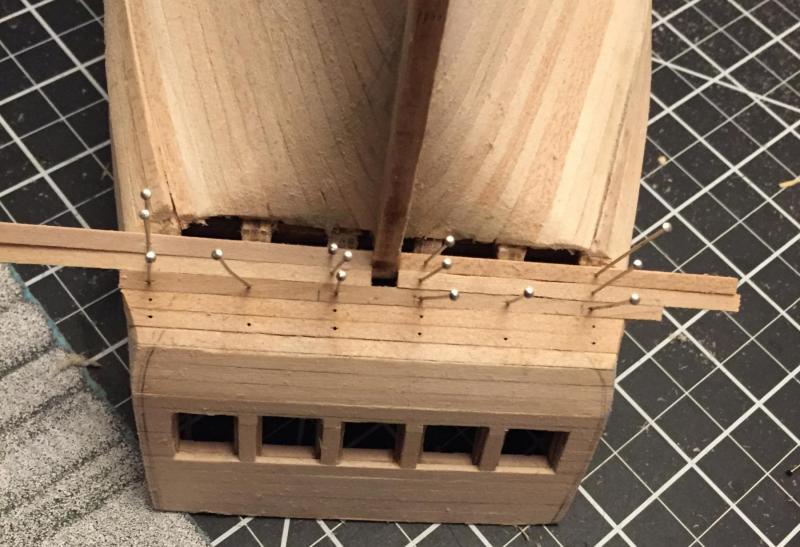
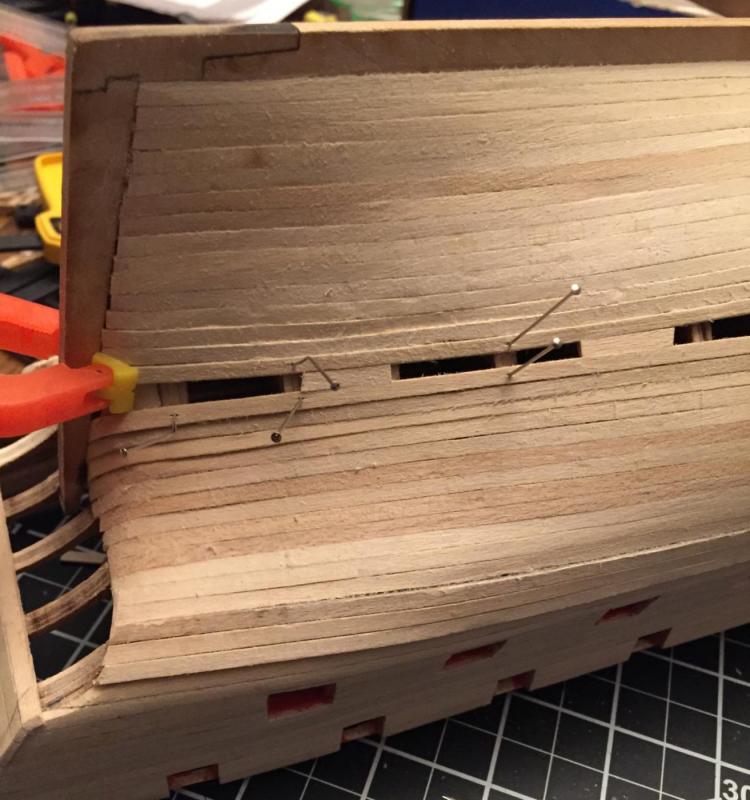
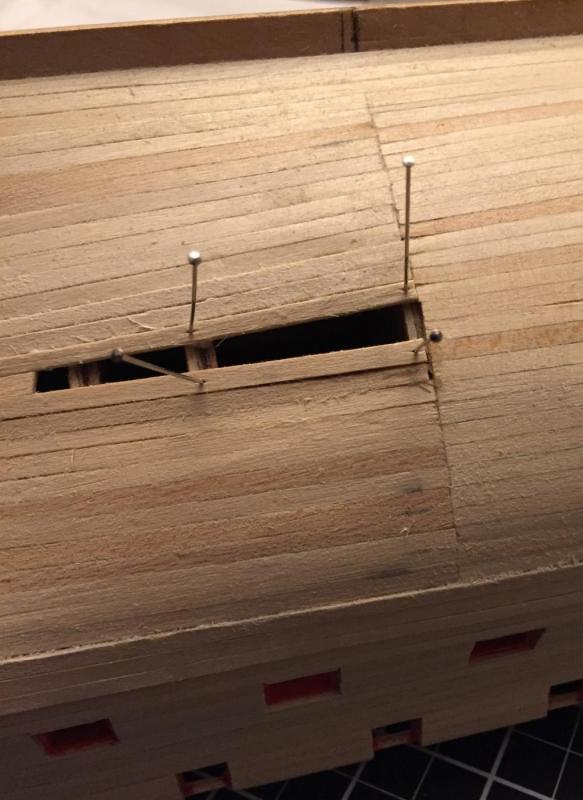
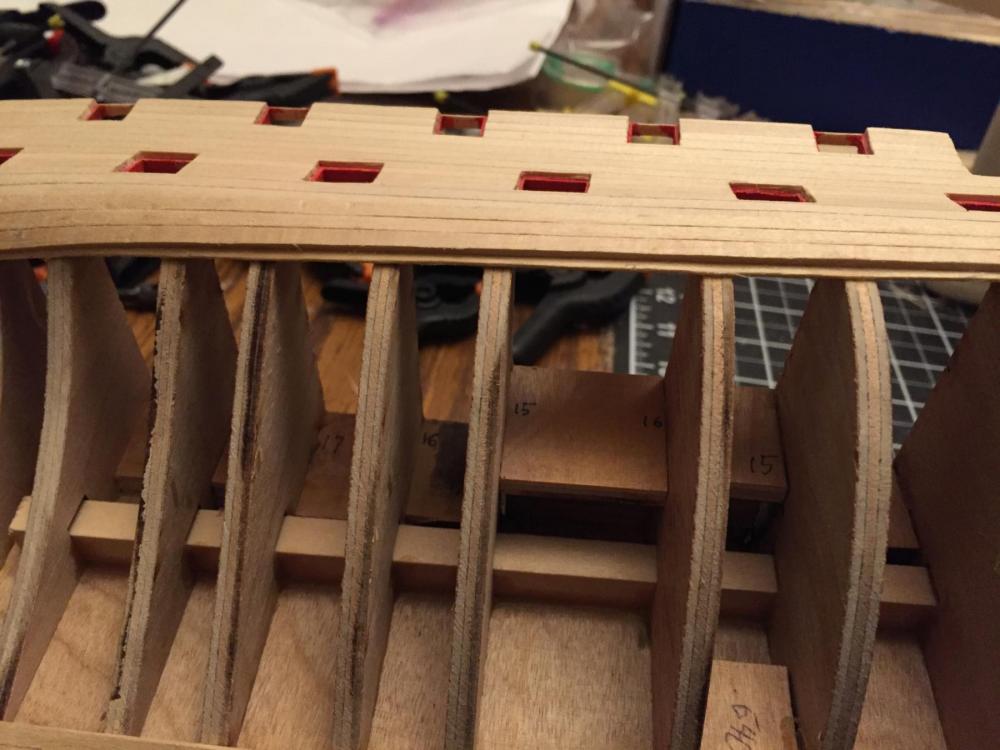
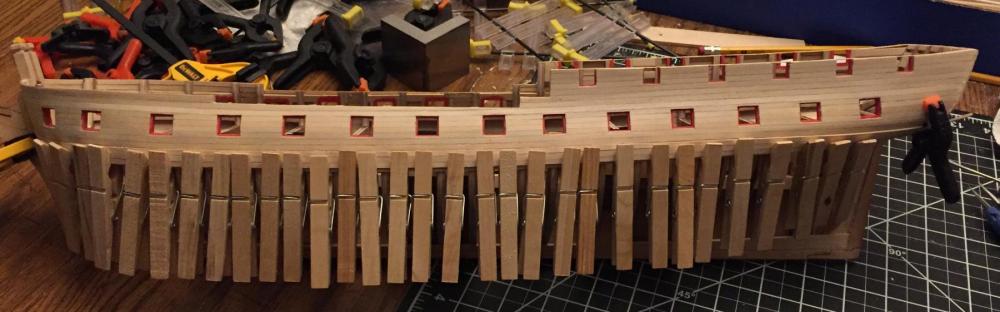
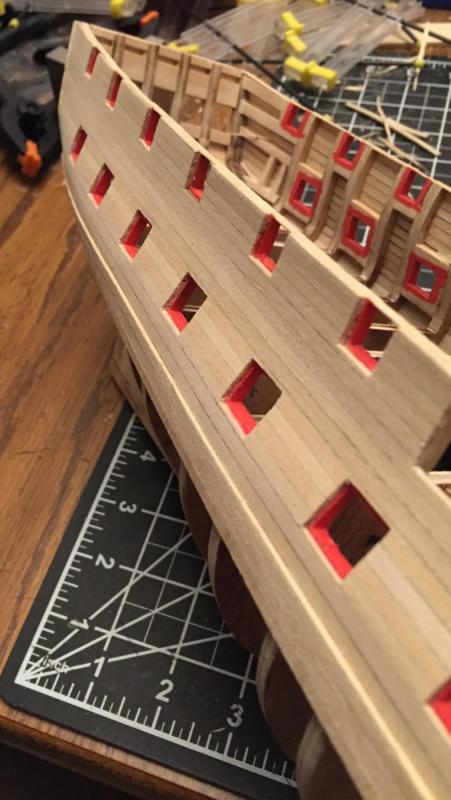
Hello everyone, Longer break than I planned due to increased time doing PT on my shoulder. That is officially done now. Vacation was very enjoyable, we covered Niagara Falls to Bar Harbor and I got to see the replica of the Gun Boat Philadelphia at the Lake Champlain Maritime Museum and watched the 4 masted schooner Margaret Todd sail in Frenchman's Bay. I have made some more progress. After a lot of measuring and comparing notes across multiple sources I decided to shift a few features and go forward. The mizzen mast shifted forward slightly and the foremast stayed where the false deck located it. The length of my gun deck to the bottom of the window frames at the centerline came out approx 0.43" short. I do not know why but suspect a combination of things including not getting the stern frames at precisely the correct angle. There may still be something off in the kit, but at this point I cannot prove what if anything that might be. After gluing the false gun deck in place I used two metal angle blocks with a right angle block and set the drilling angle for the masts to match the drawings. I mounted the hull on a board on my drill press and shimmed the back part of the cradle upward until the drill was parallel to the angle blocks. I carefully marked the location of the beams that would be under this deck so that I could use the marks to cut the planking to length. I decided to cut individual planks rather than follow the instructions to do full length and mark them after the fact. I think this way you get a more realistic looking deck. I started in the center and worked outward after the margin planks were dried. It took some creativity at the bow to fit the margin planks around the knight heads. Then it just takes patience to cut and bond the planks in the correct pattern. Continue the pattern working outward until you hit the point where you have to joggle the planks into the margin planks. A really sharp small chisel helps here. At the port and starboard edges you need to custom sand planks to fill the remaining gaps to the margin planks. After sanding the deck I started the bulwark planking. First the board under the gun ports was carefully positioned and allowed to dry. They I used a variety of tools to make sure the plank below that was pushed up against the first plank. I split the planks at the first row near the sixth and the second near the eighth gun ports to allow me to soak and bend the bow sections and then apply the rest to the stern. Where the gap to the deck was less than 1/16" I did not fill it since the waterways will cover them. The I worked my upwards and ended by applying the waterways. Next will be planking the inside of the stern.


-
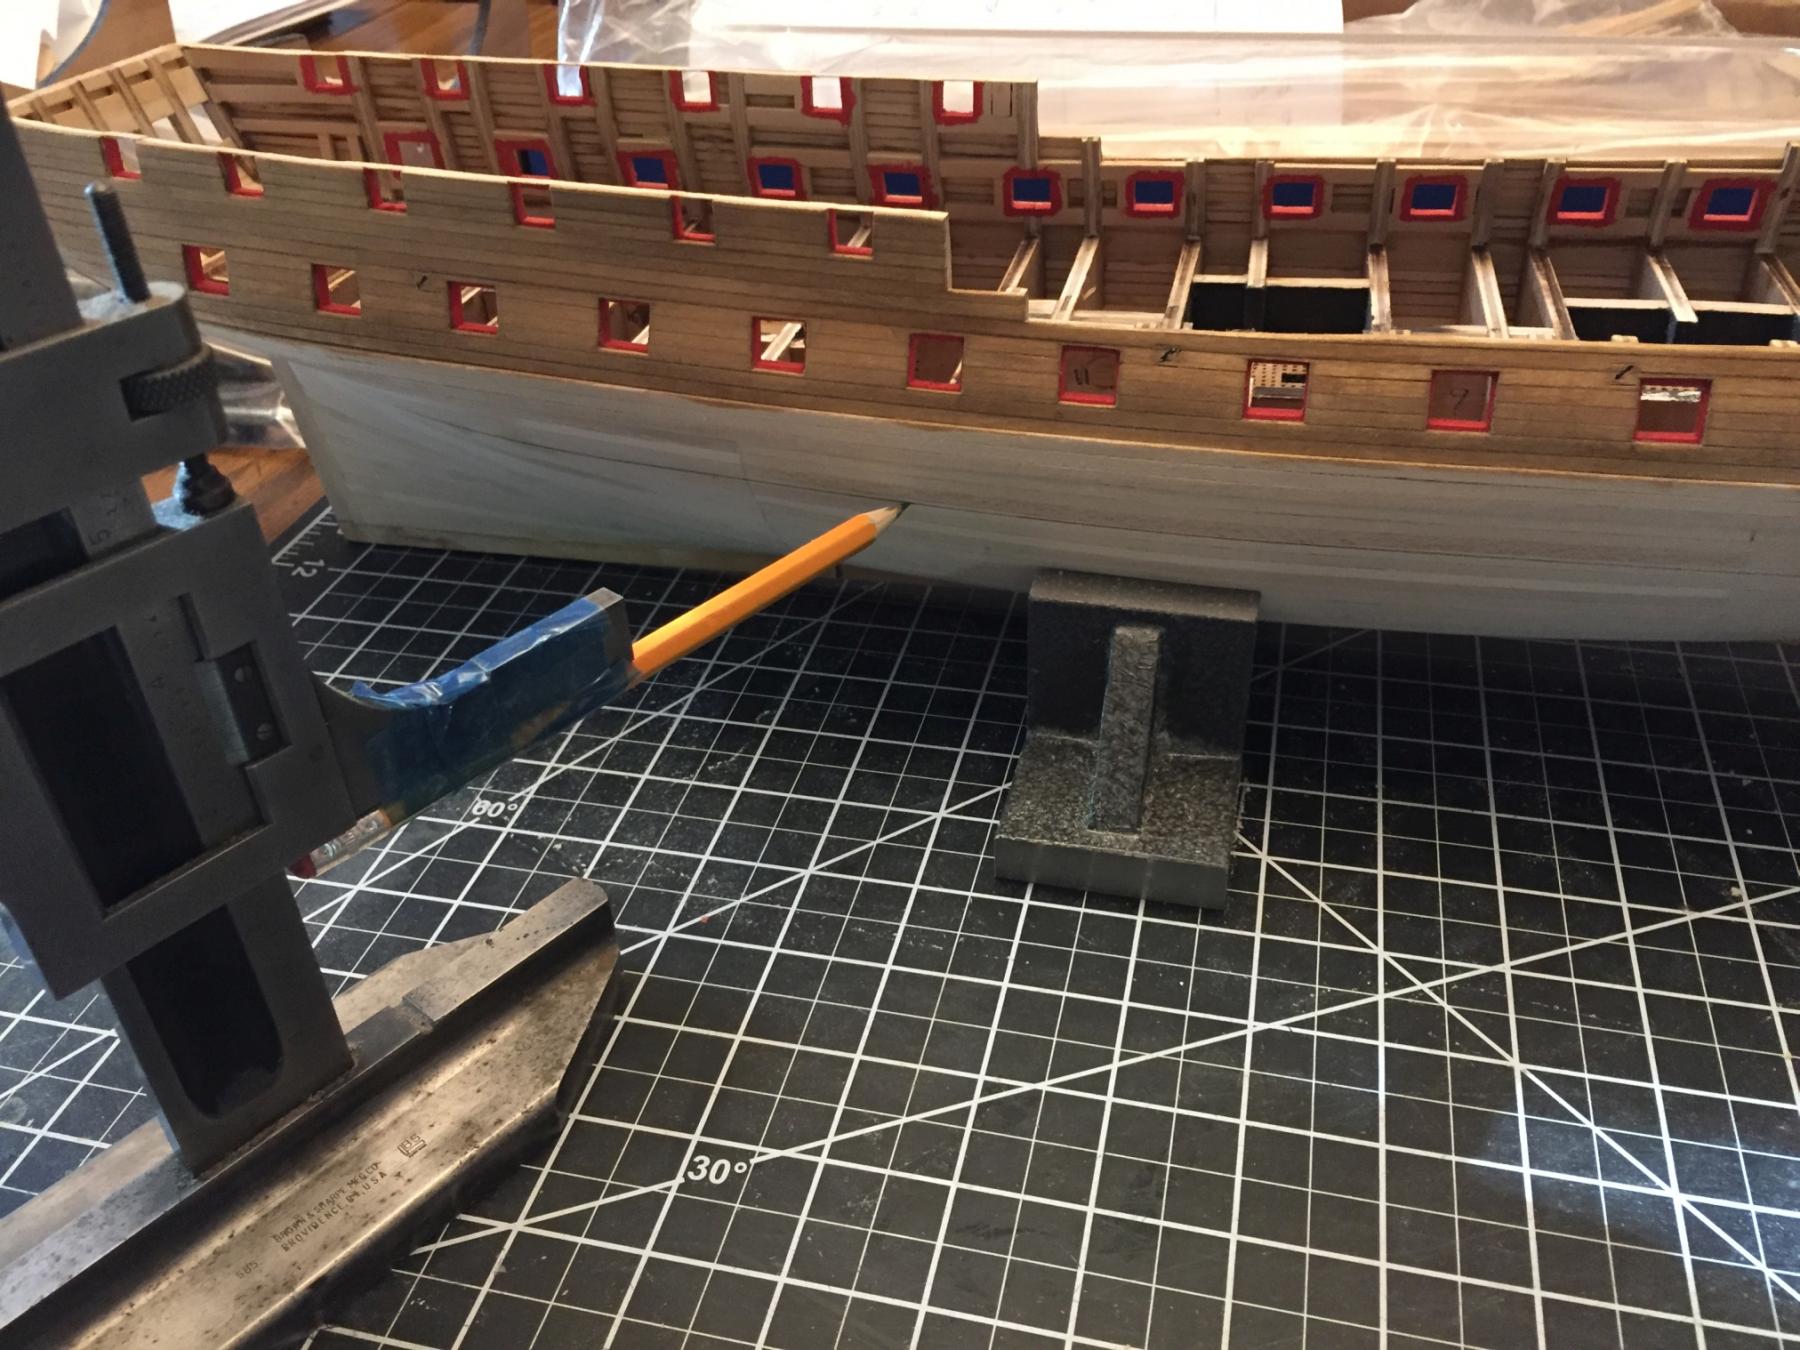
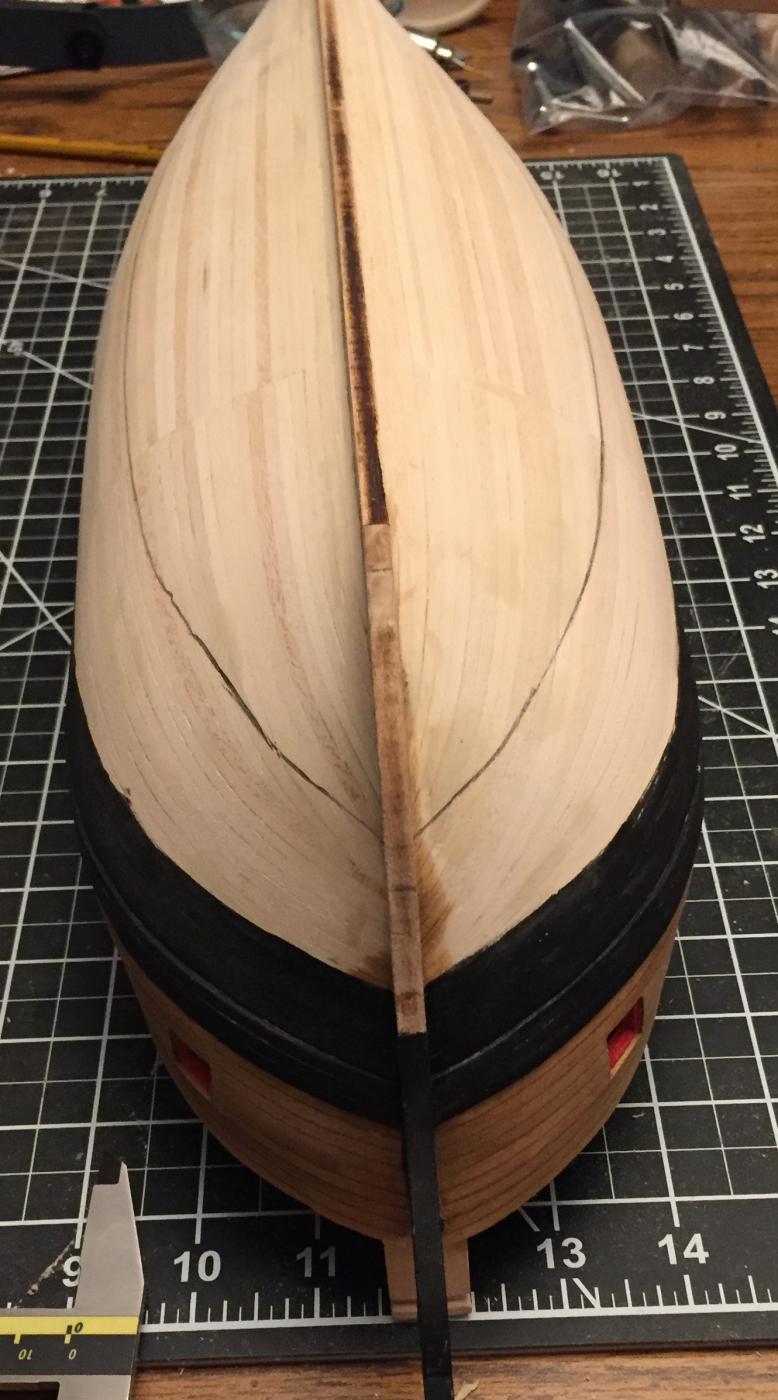
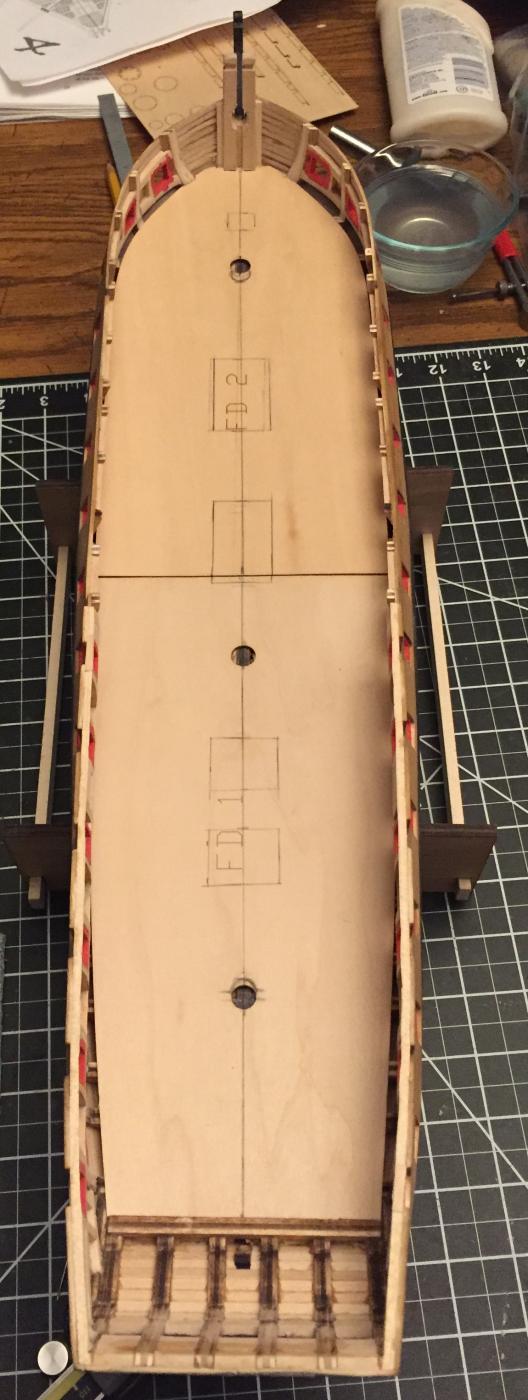
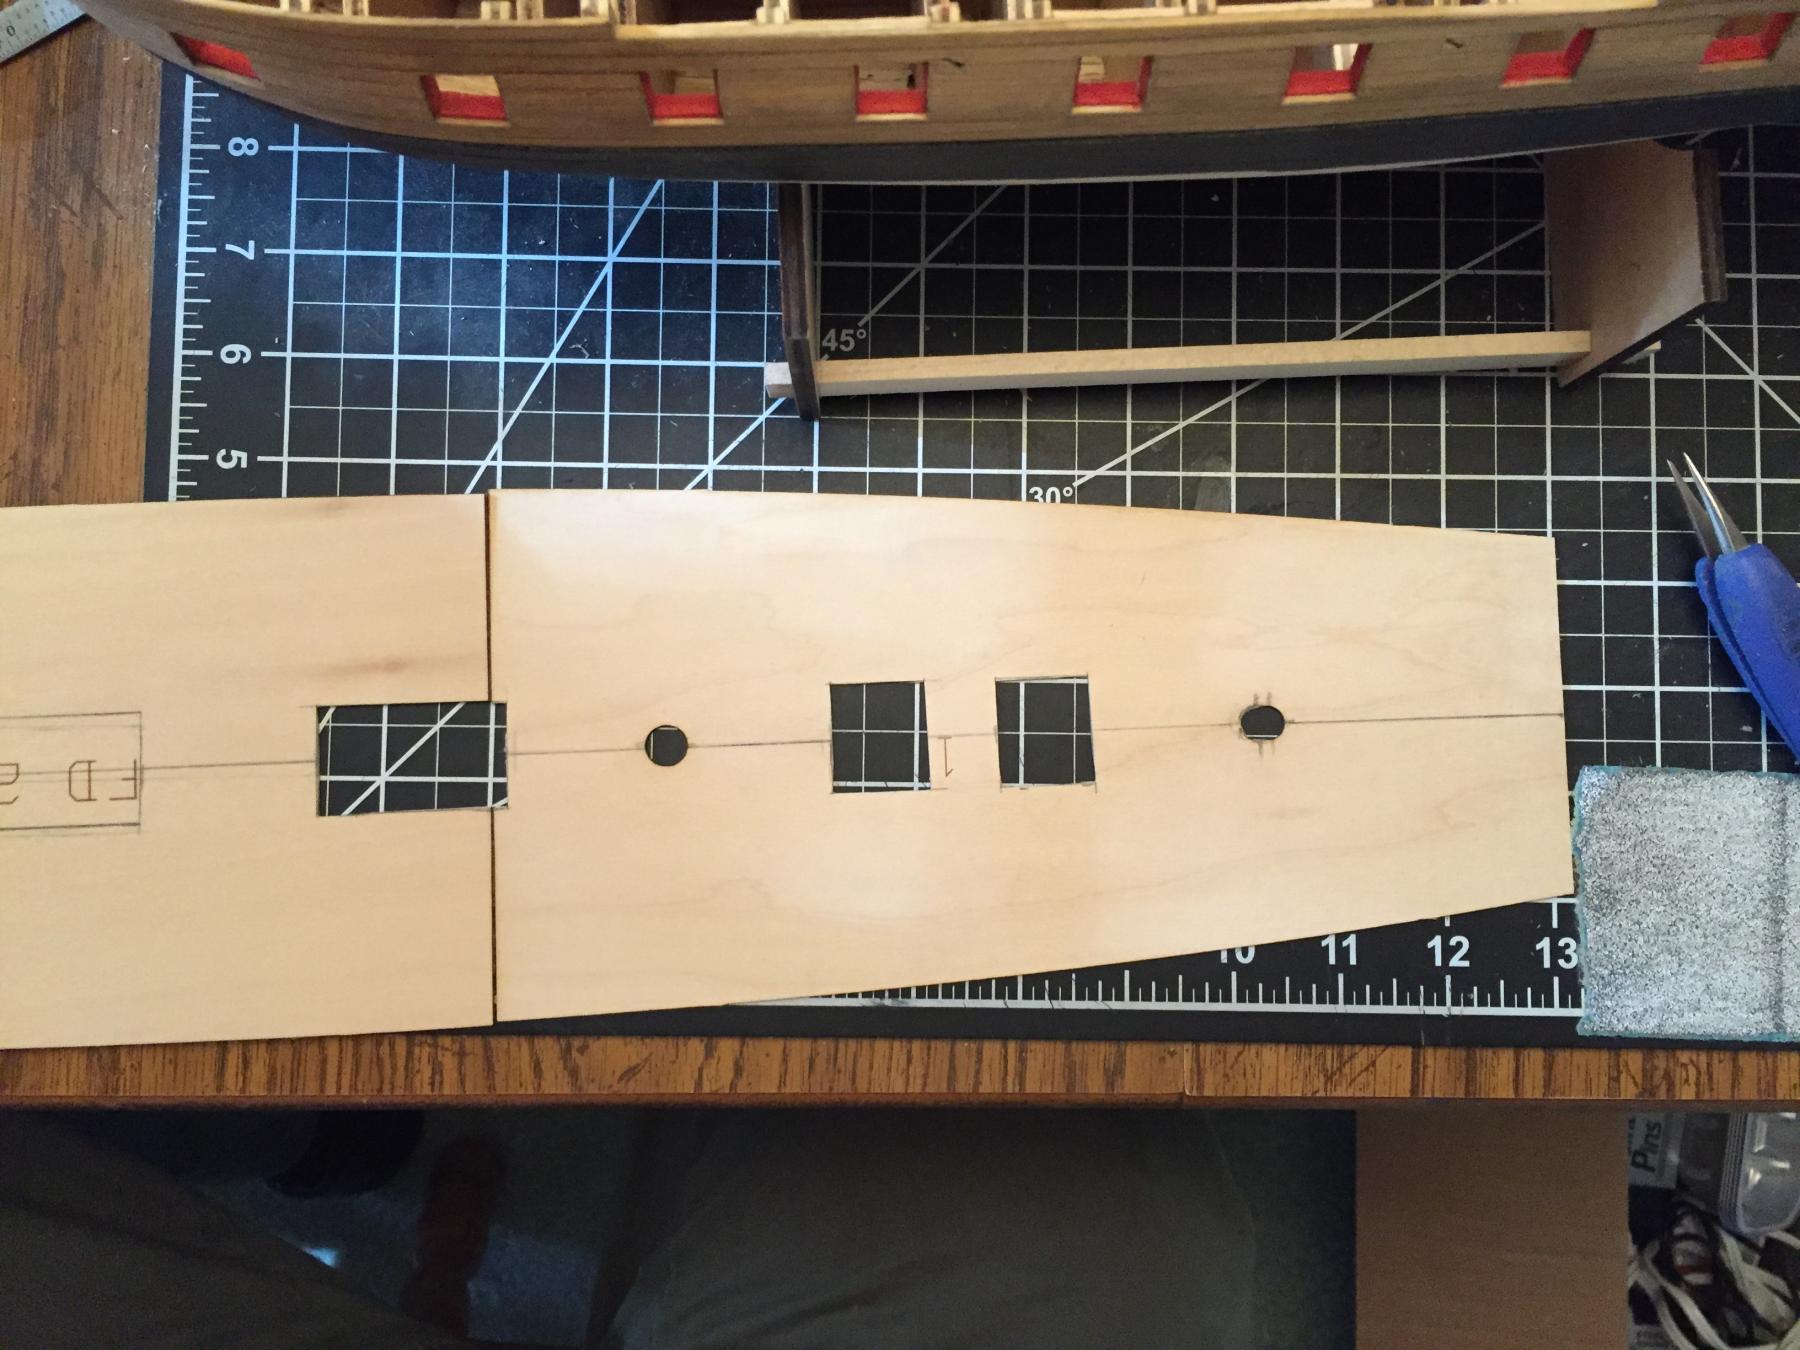
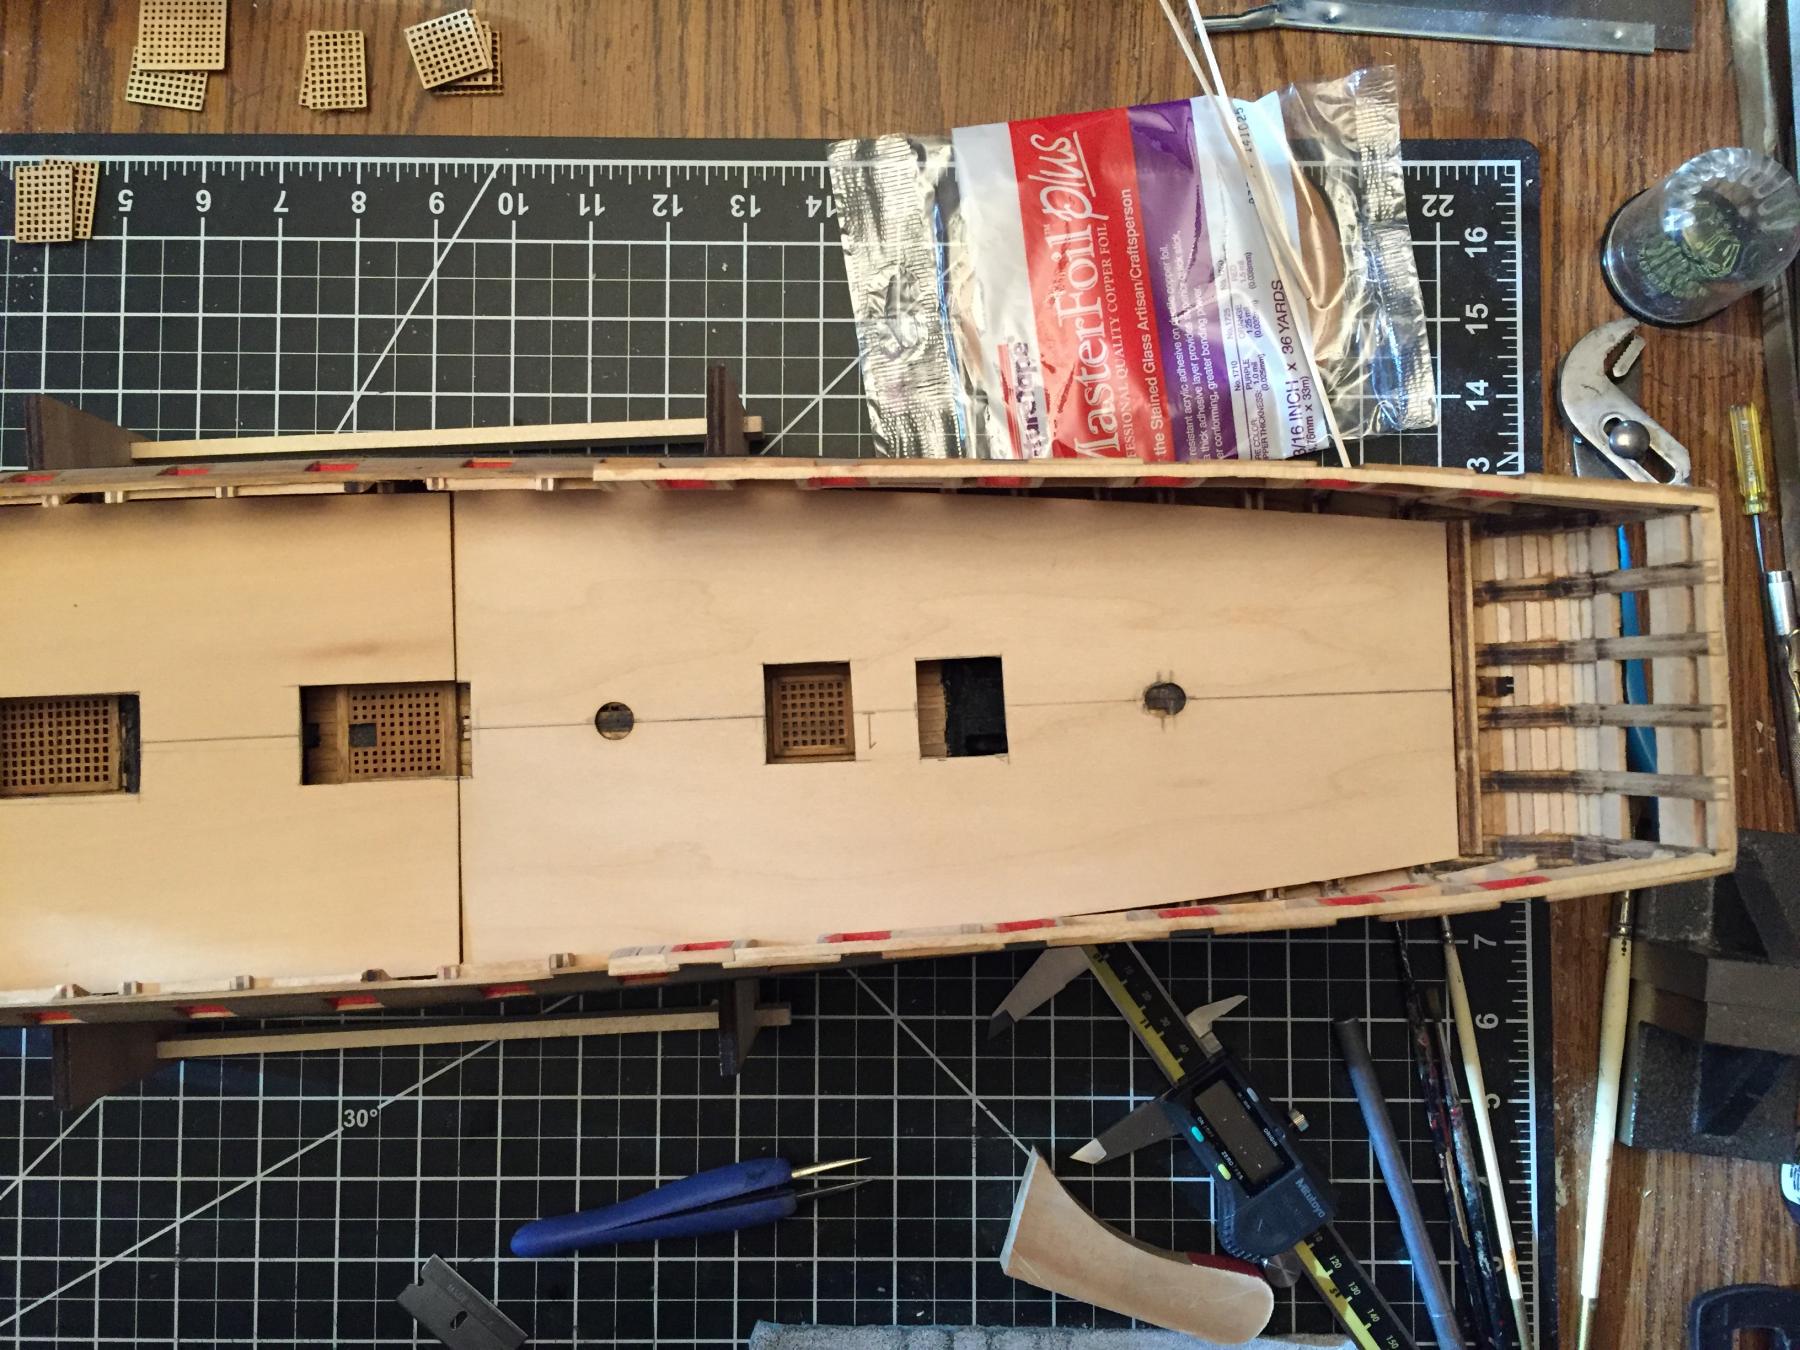
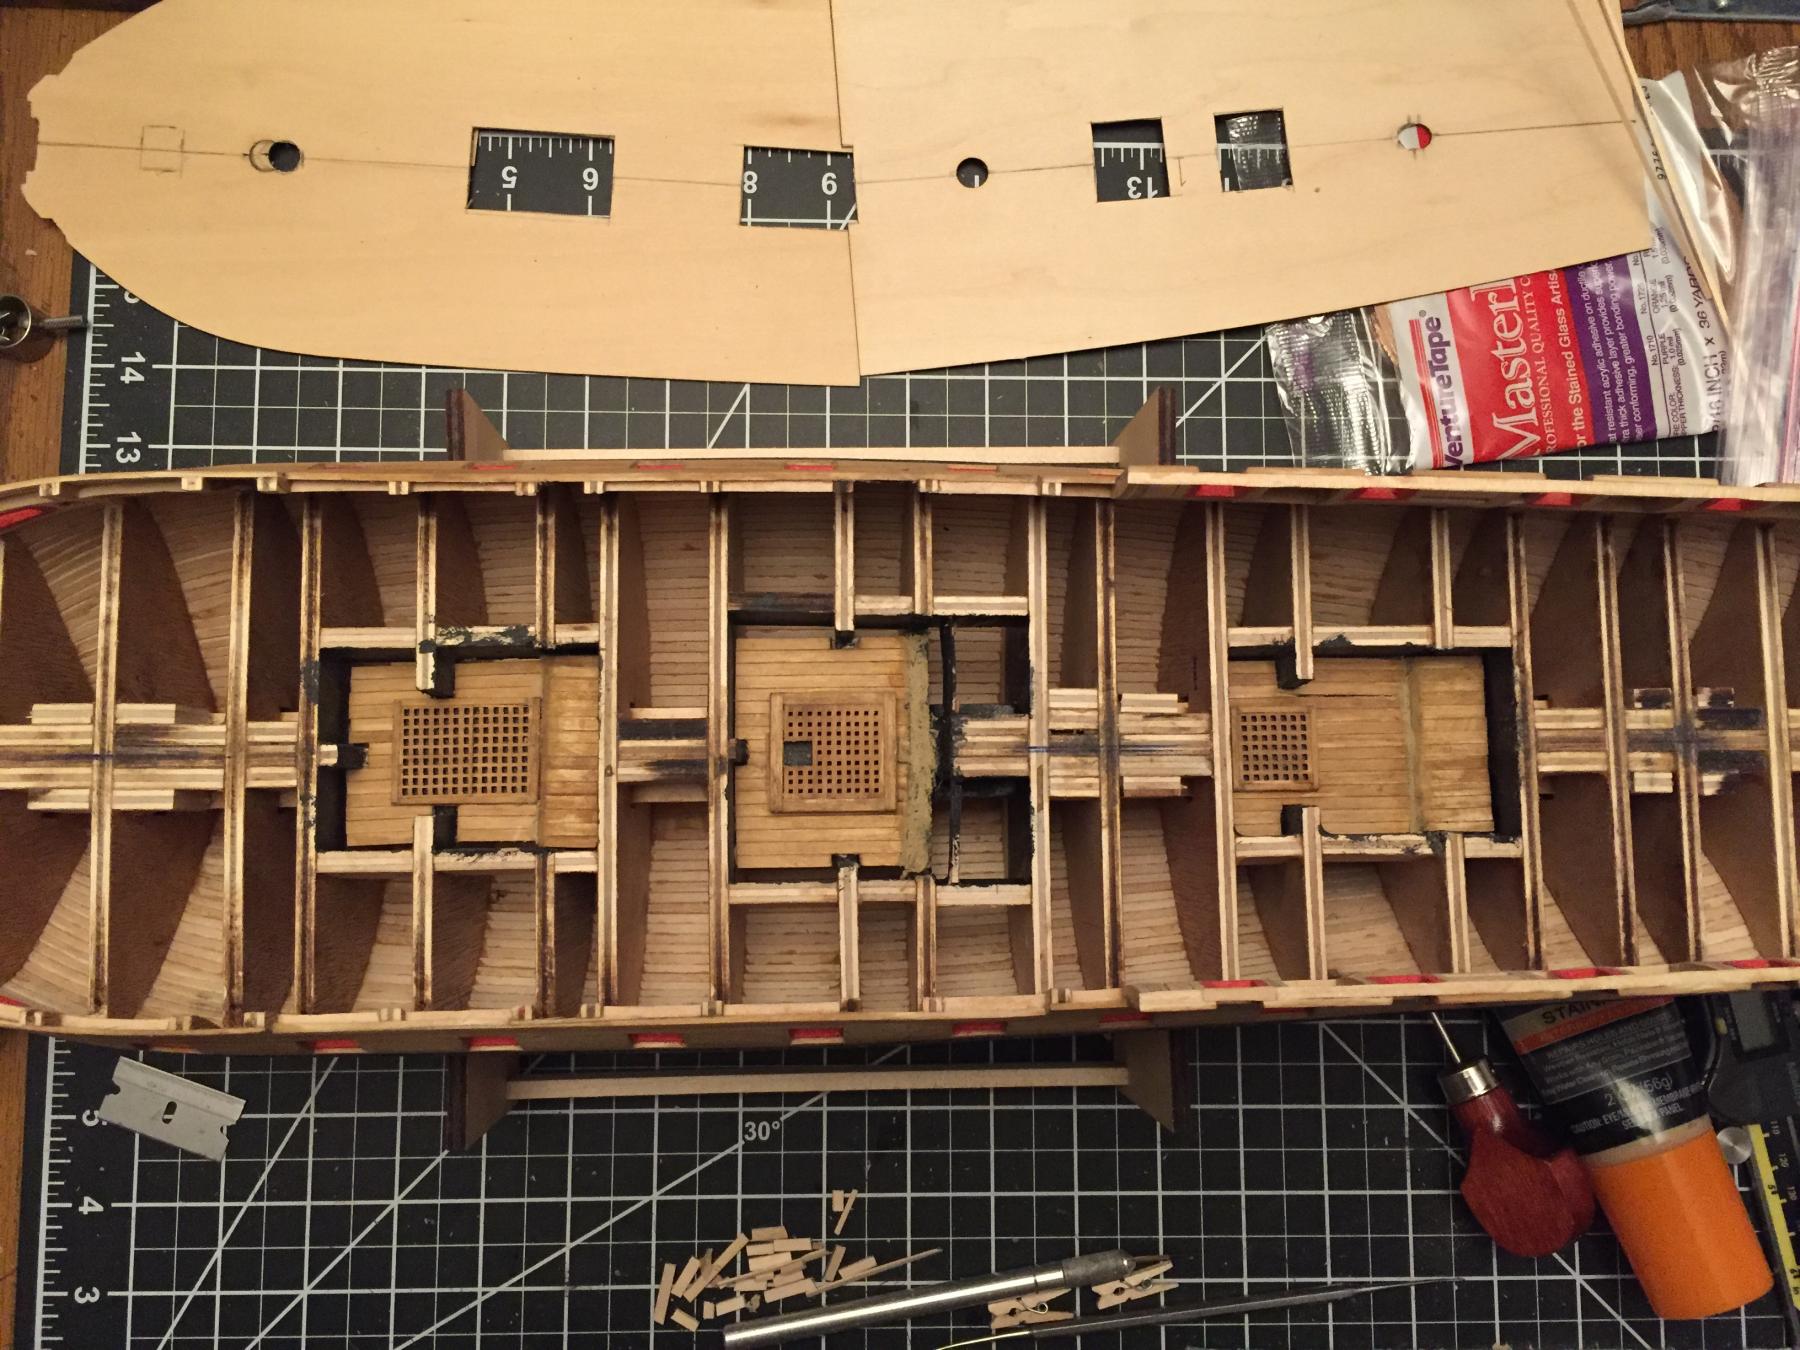
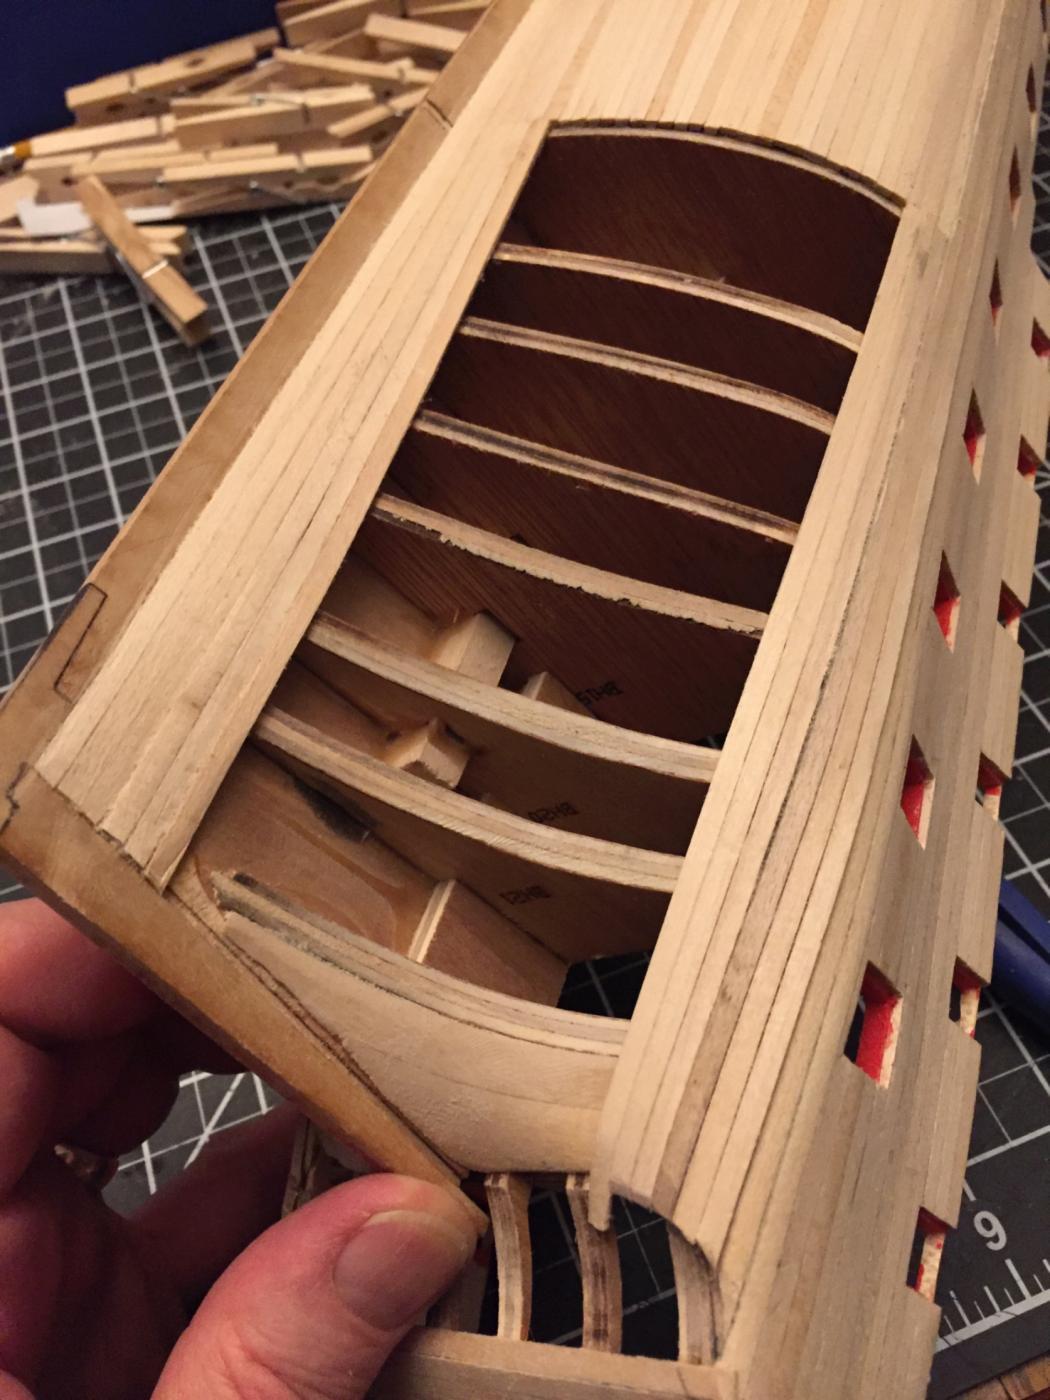
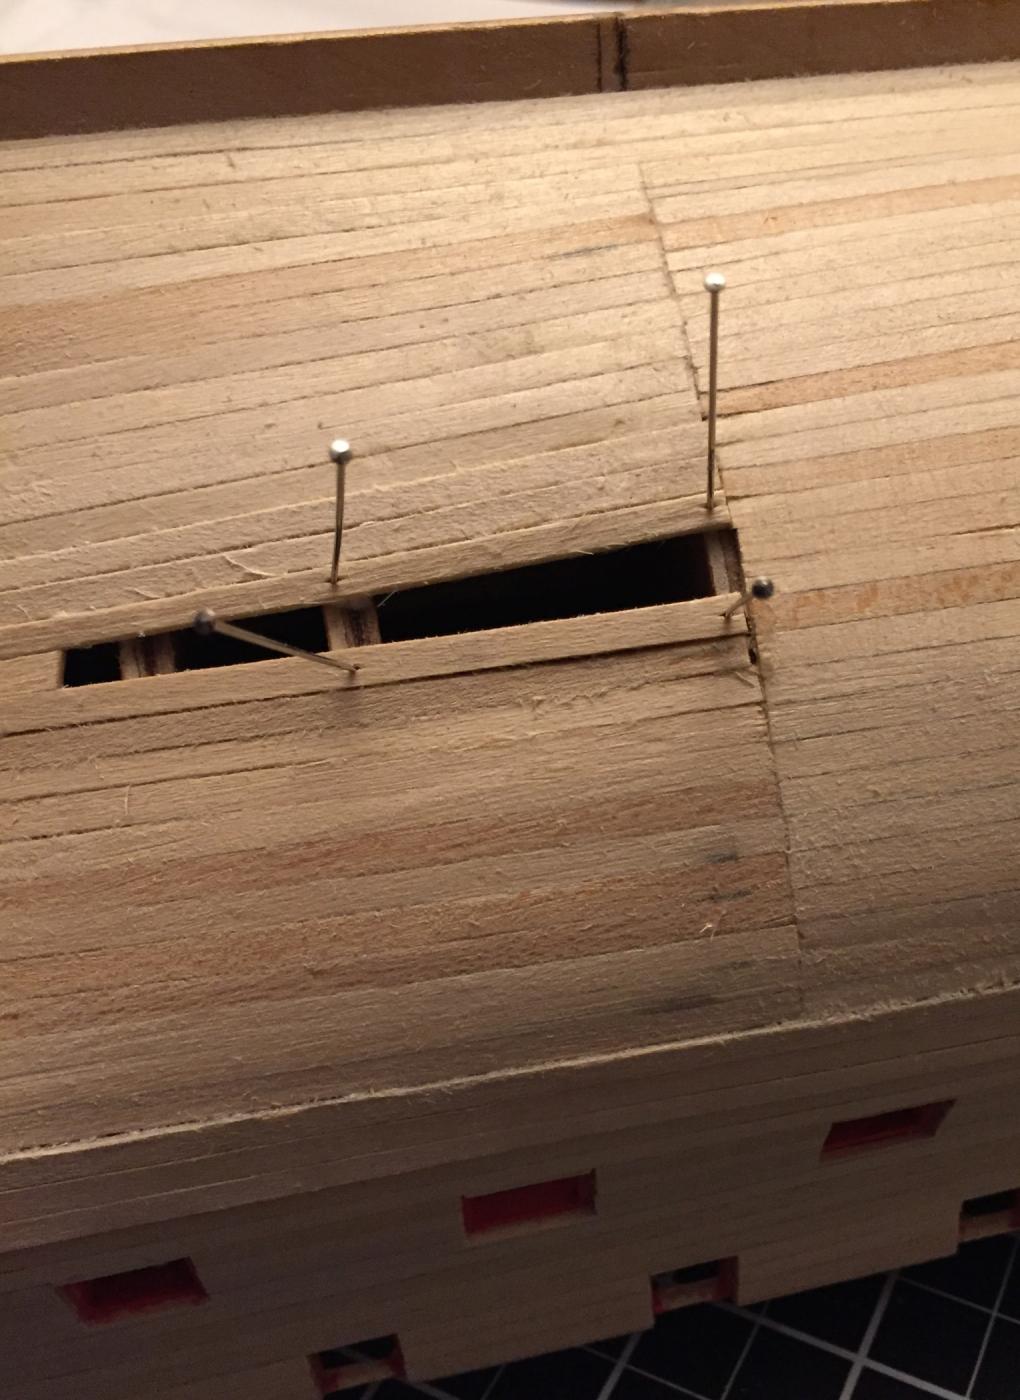
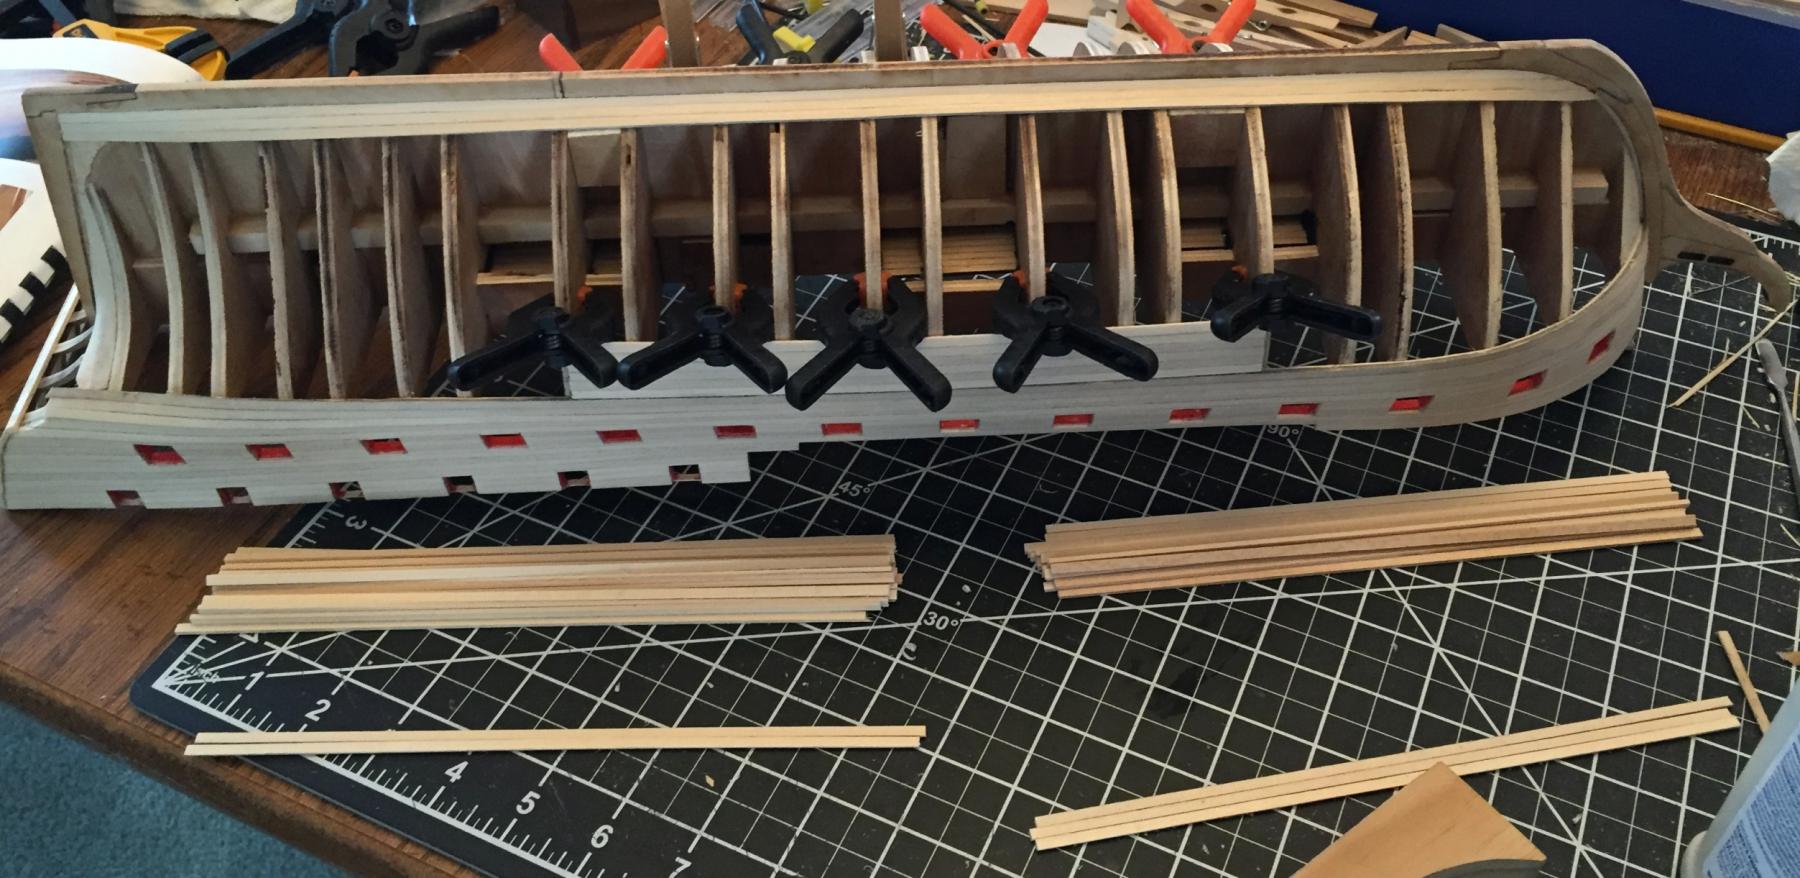
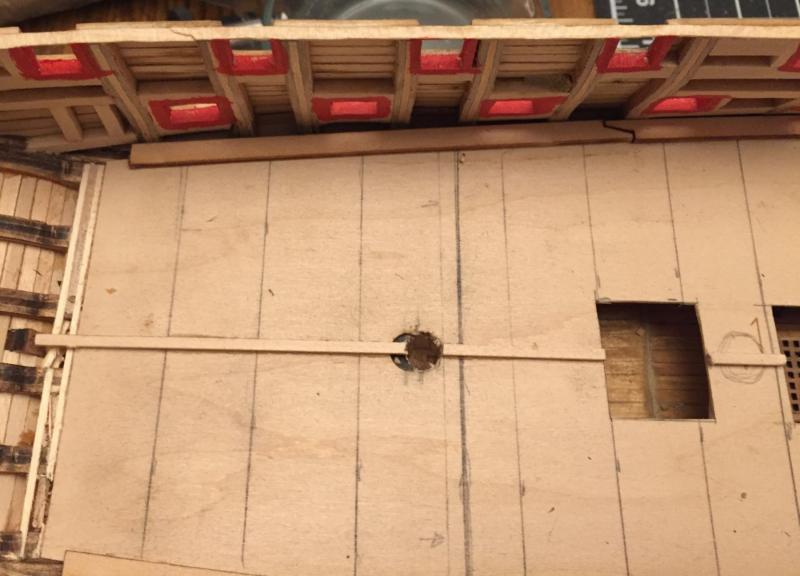
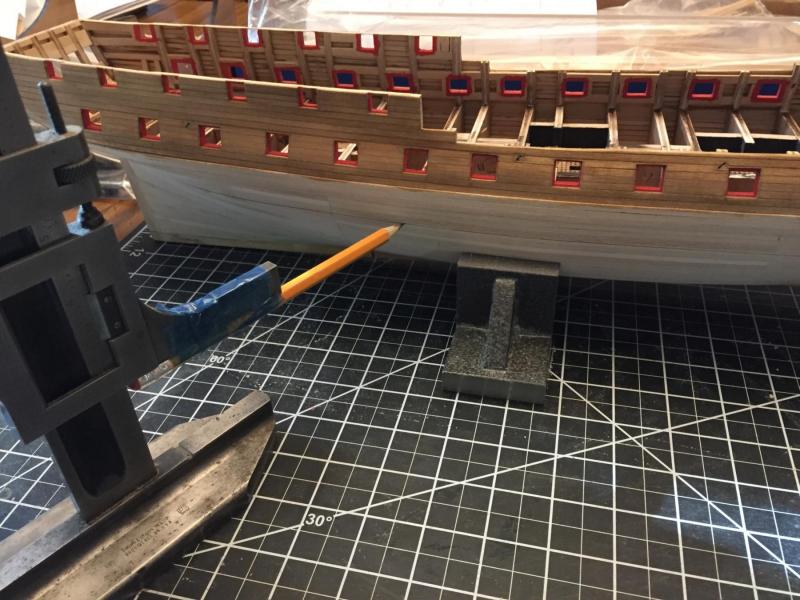
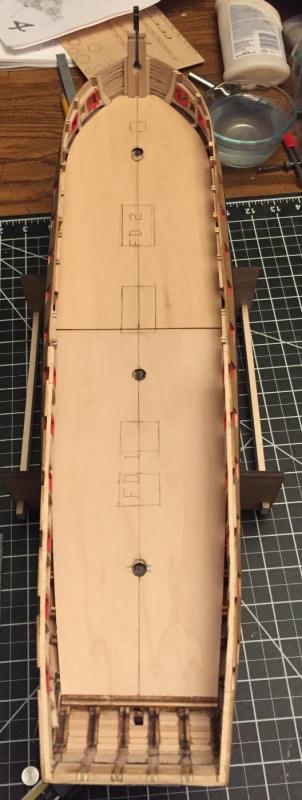
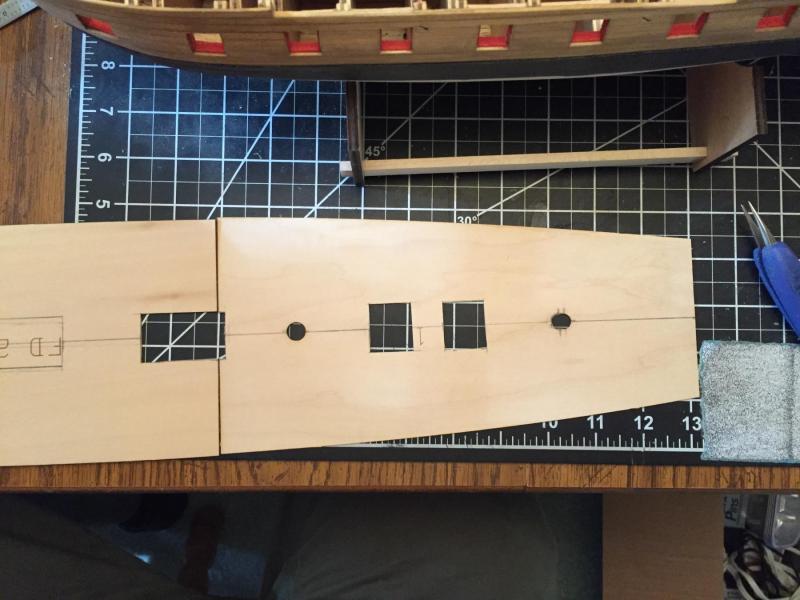
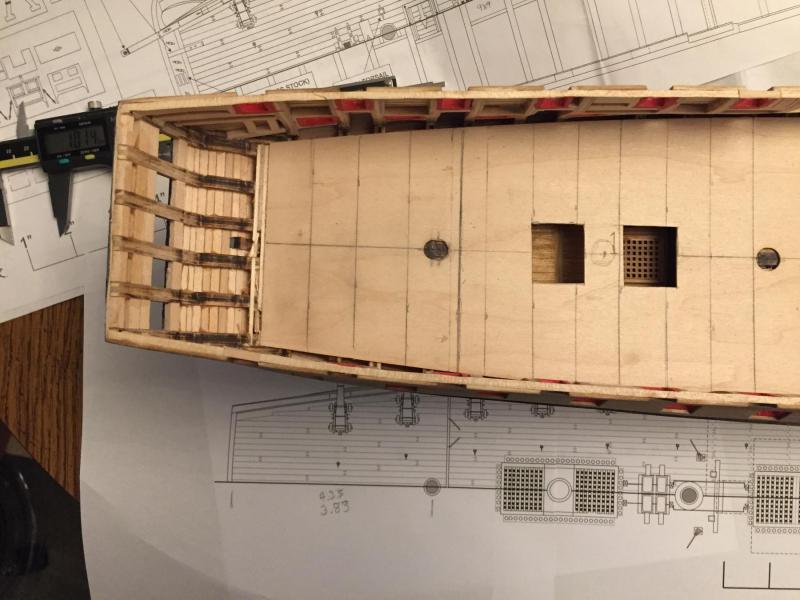
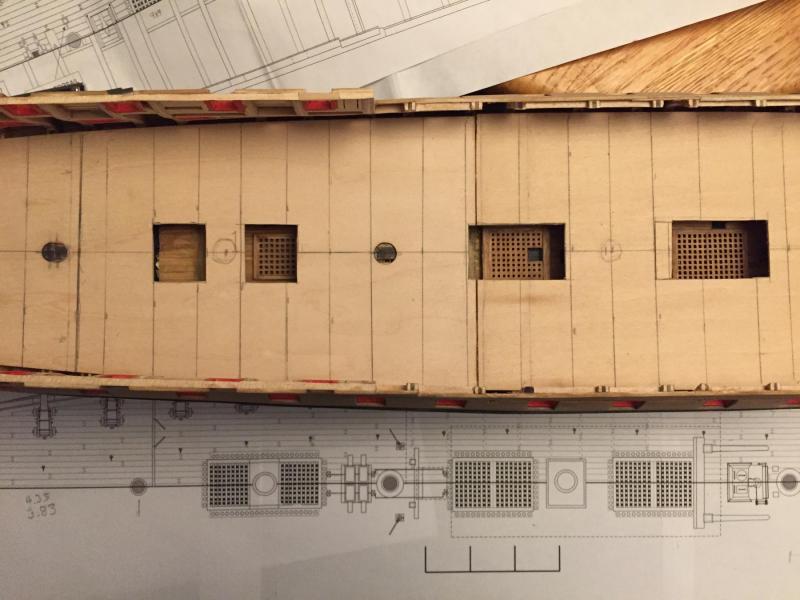
Thanks everyone for the likes! And here is the next set of pictures of my progress to date. I used a vertical caliper as a scribe for the hull lines by taping a pencil to the arm. The hull (keel at the front) has to be propped up in front to get a correct run for the top of the copper plates and the blend point for the lower to mid runs of copper plates. Then I painted the areas of the hull black that would not be copper plated.starting below the gun ports, as well as the stem and stern areas. Amazing how that changes the appearance of the model. The false deck was giving me fits because I could not get things to line up correctly. After much measuring and some helpful feedback from members here I determined that the fore and main mast holes in the false deck fit correctly but the distance from the mizzen mast hole and the main mast are off slightly. I ended up moving the mizzen mast hole 0.15" forward. Also when I laid out the grating positions and cut them into the false deck I saw that my earlier attempt to show the lower deck and gratings was short by various distances on all three areas. I modified the frames by cutting and reframing the lower areas and extended the planking to match. None of this will probably be visible, but I wanted to try and get it right. After more adjusting and fitting I decided it was as good as it was going to get, so I glued the false deck down and then marked the lines for the under framing to help me cut the decking to the correct lengths when I get to that point. I will be taking a couple of weeks off for vacation, more when I have progress to report.


-
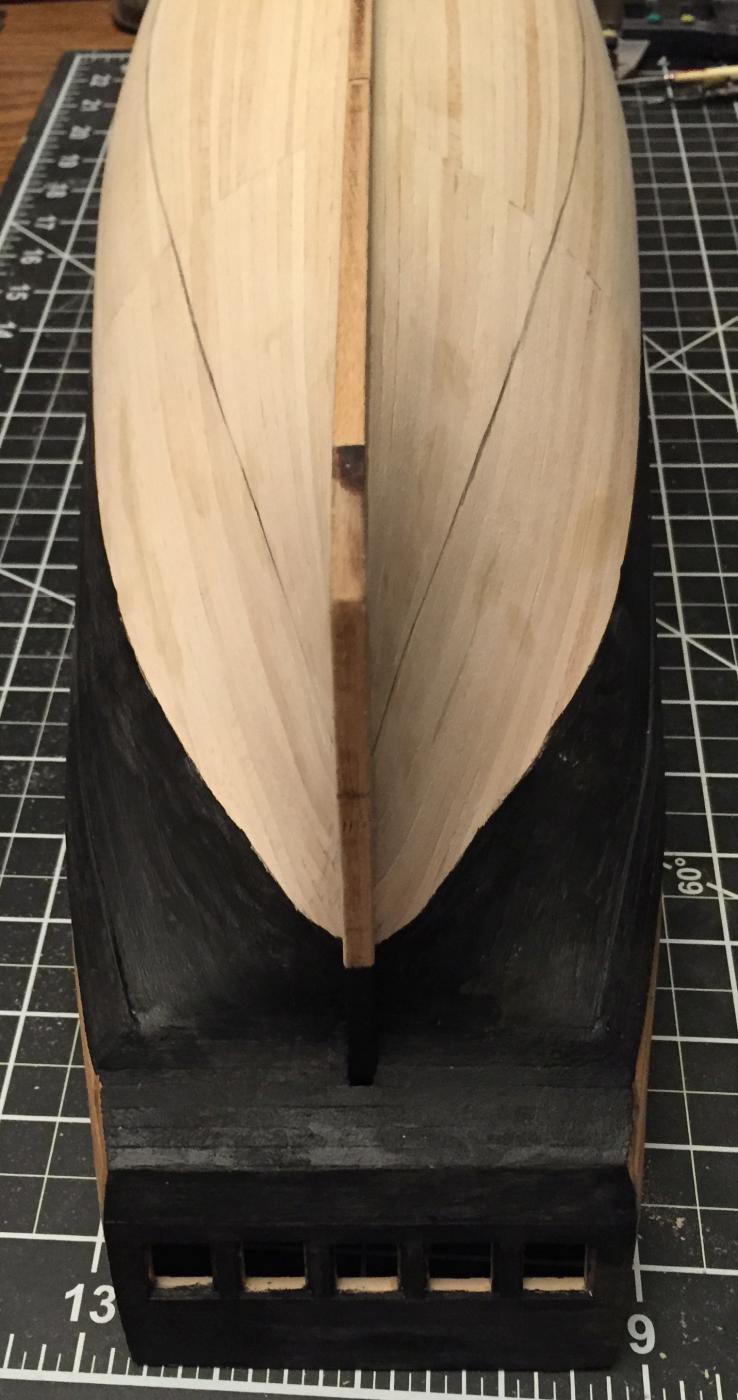
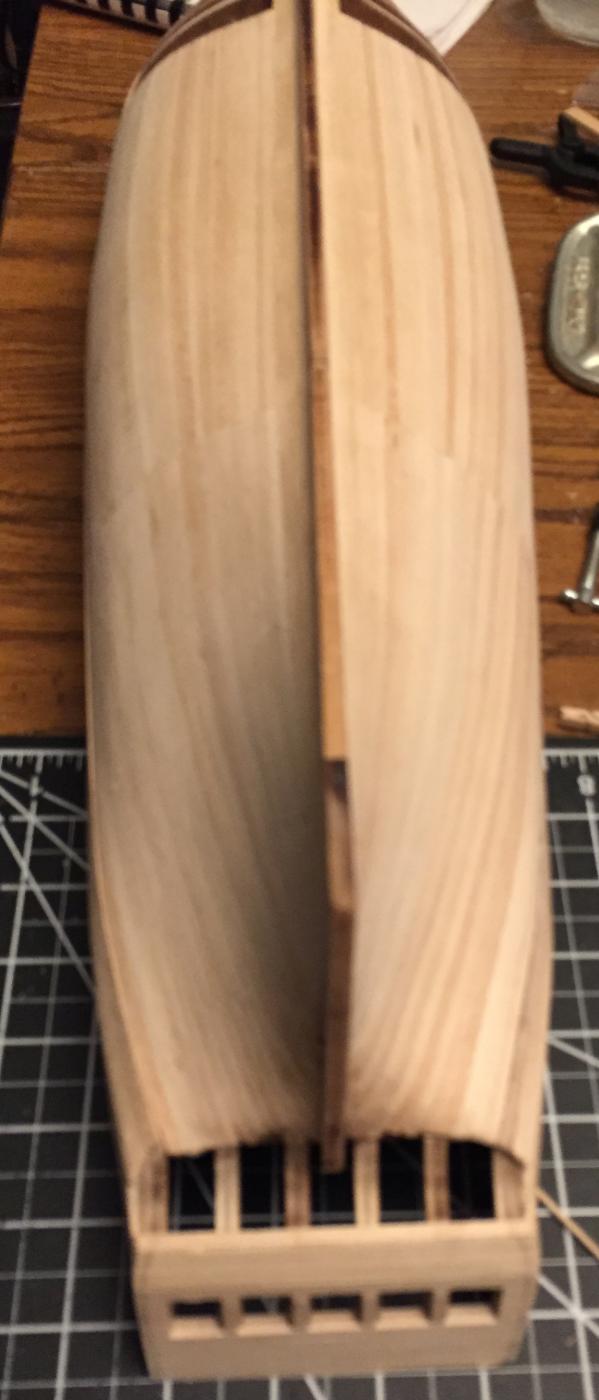
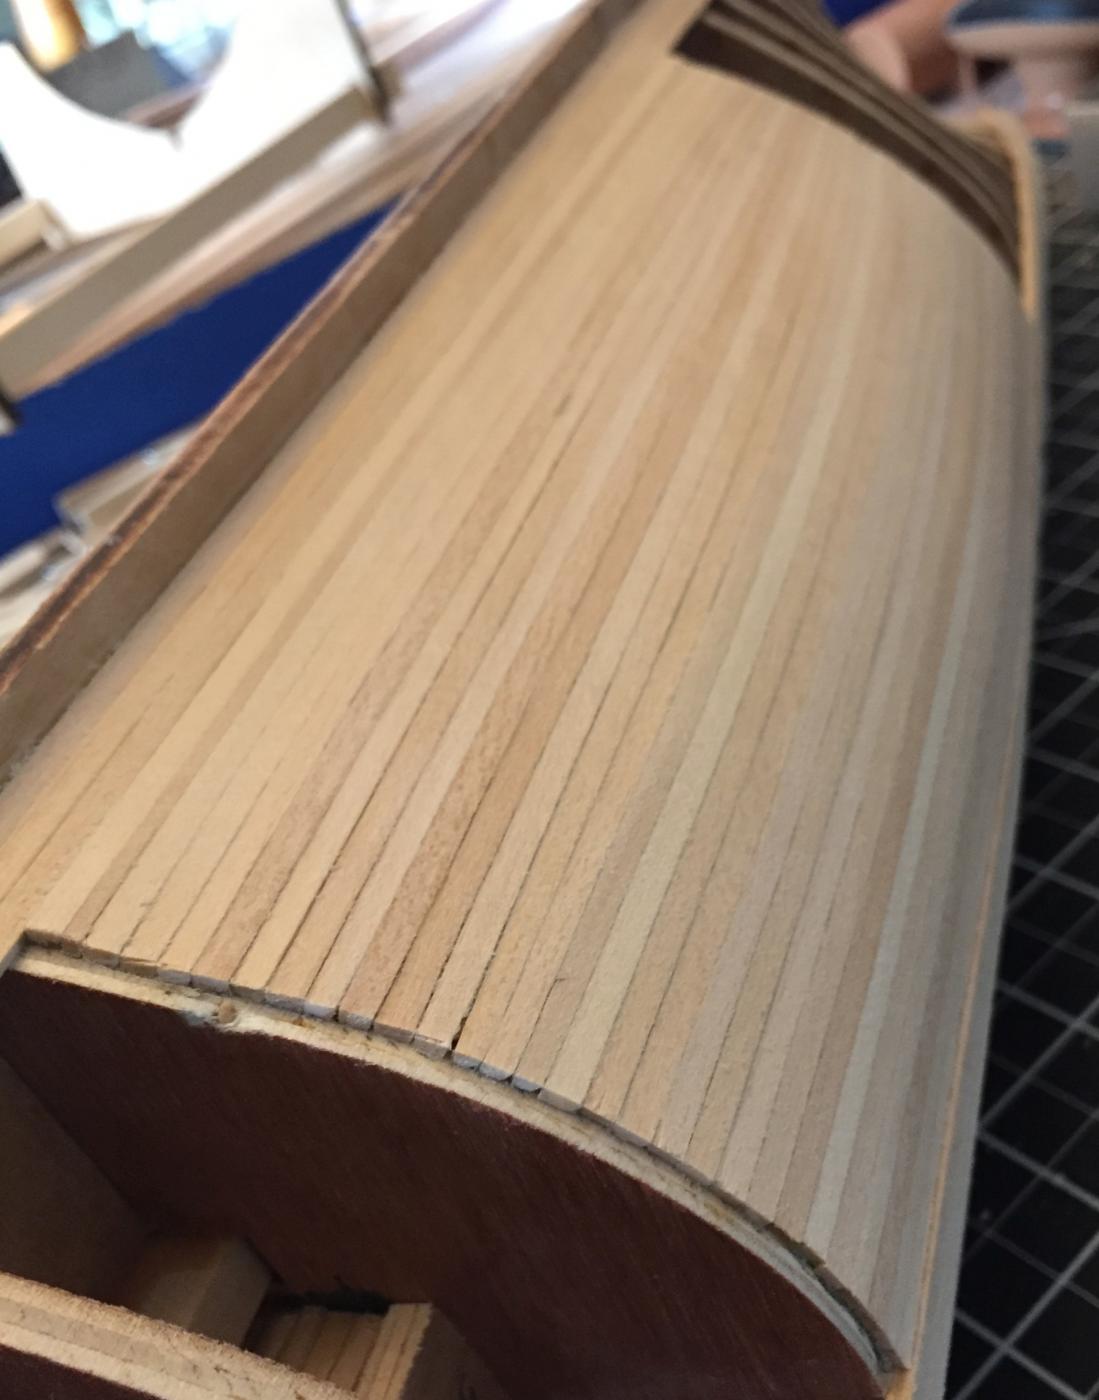
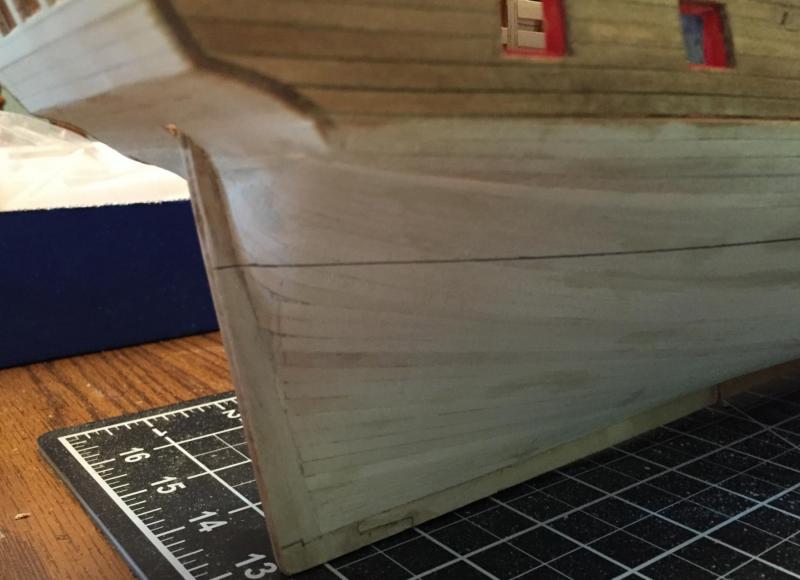
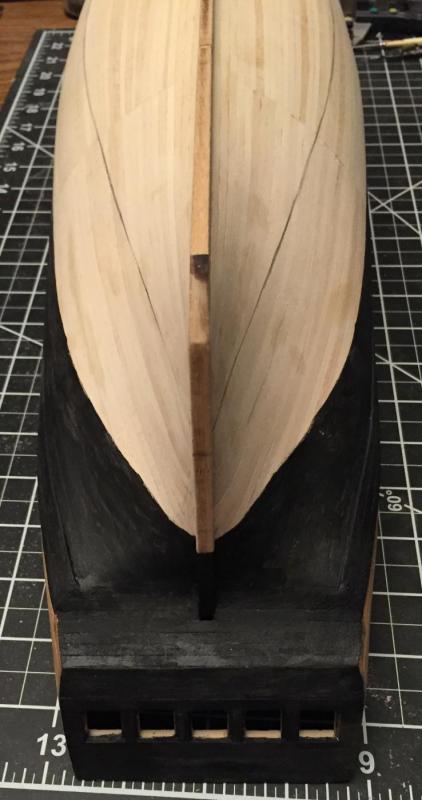
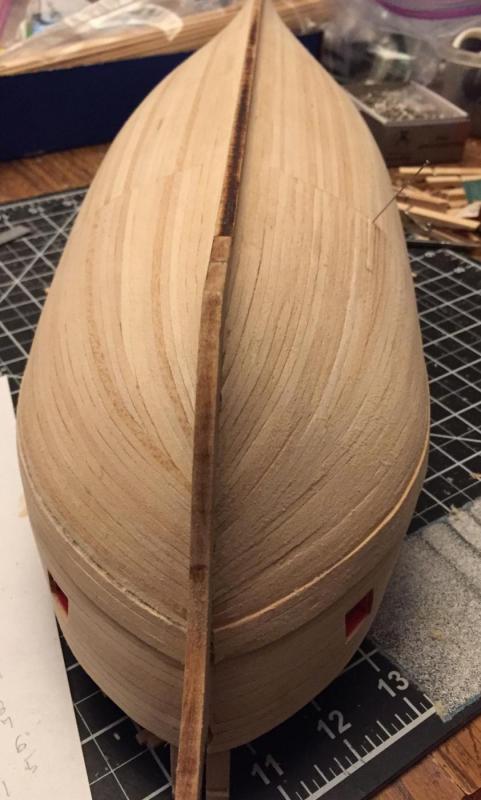
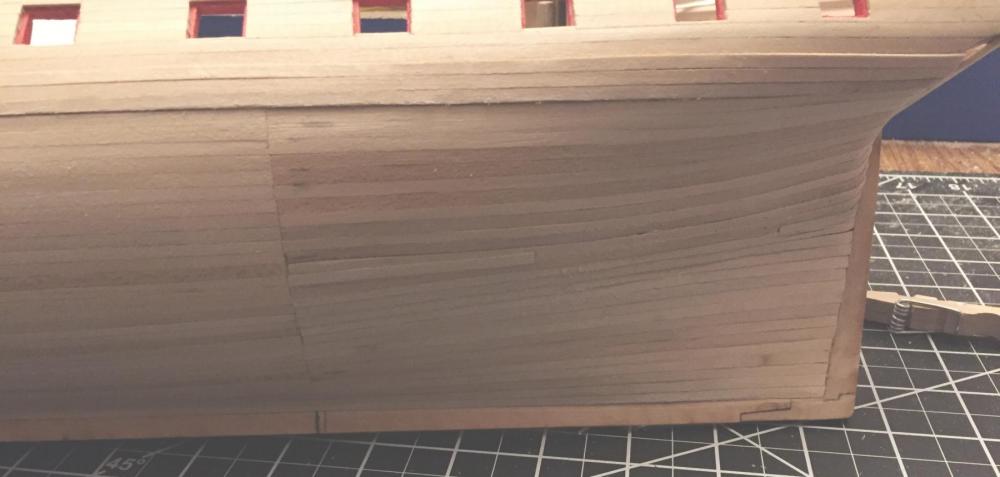
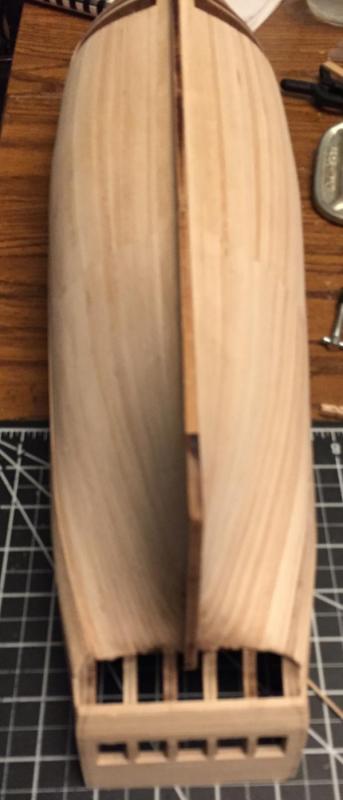
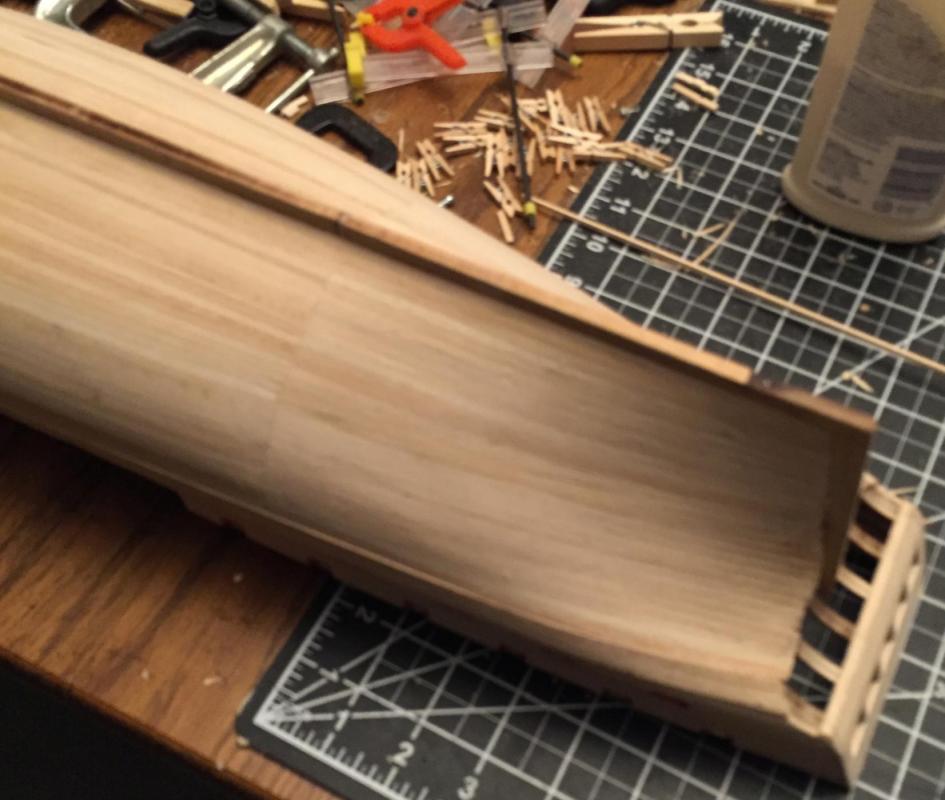
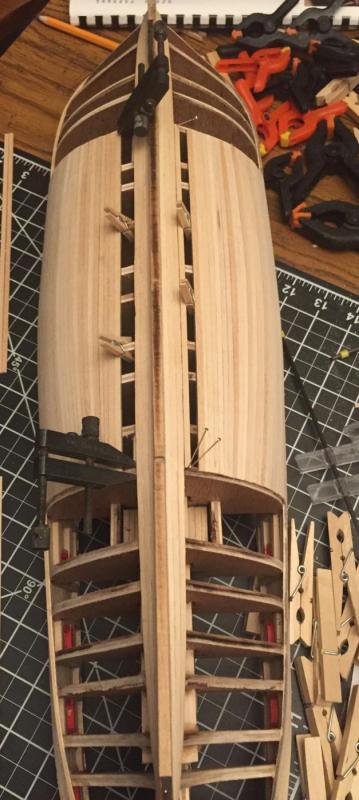
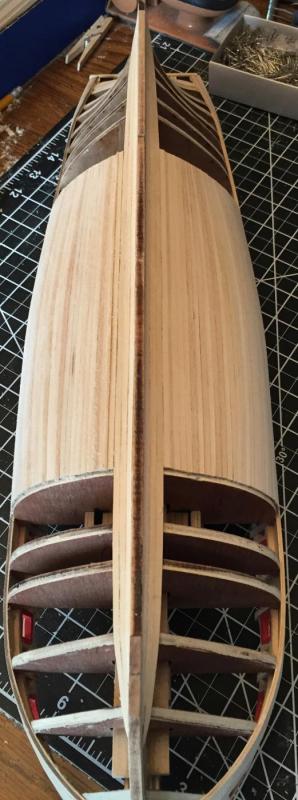
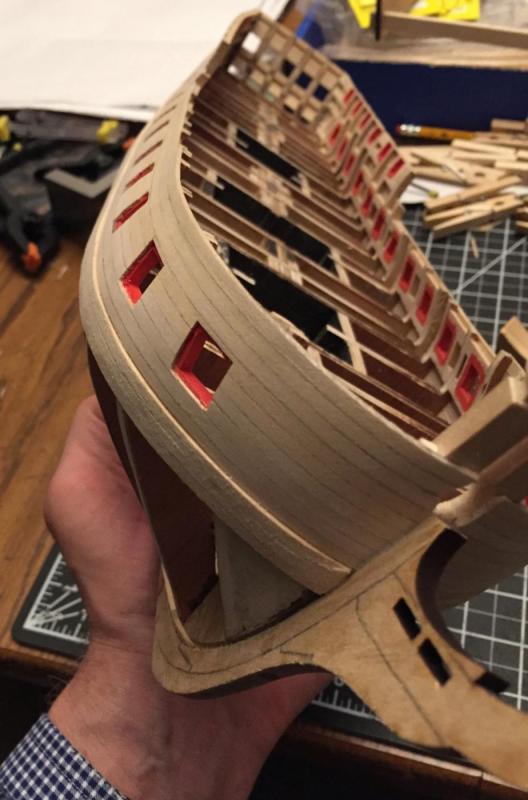
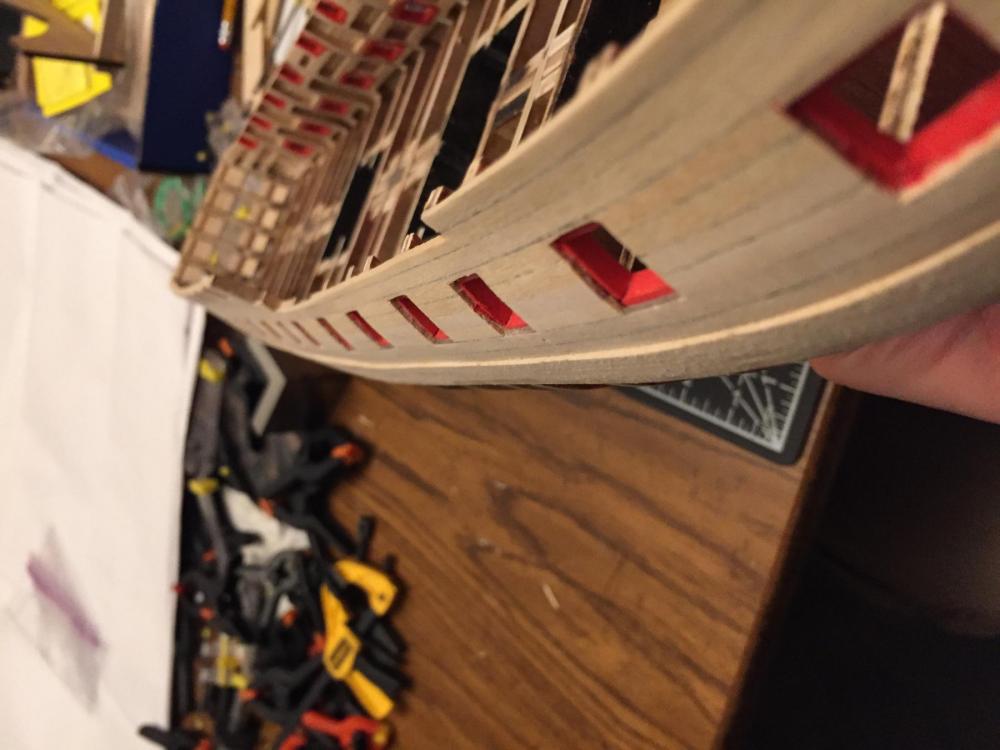
Here is the belated update of my progress so far. I finished planking the port and starboard sides of the bow. Since I had never done this before it was a lot of experimenting and I did each side a bit differently. I was not worried that they would look too different since I am planing on painting and copper plating the hull per the model instructions. By this point I had gotten better at tapering and bending each plank. You can see where I simply tapered some planks to points to make it all fit about 1/3 of the way up from the keel. On the other side I tried to taper each plank more but still could not get it all to lay in the way I wanted. However when looked at next to each other it came out looking pretty good. After sanding and a bit of filling it looked much better. Then I went to work on completing the stern above the rudder. As you can see there was not a uniformity to the two sides at the stern with planking stopping shorter on one side than the other. I did some creative fitting and filling and in the end (pun intended) it came out fairly acceptable. That's it for now, more tomorrow.


-
Thank you for the feedback and encouragement Wes. I figured that creative adaptation was going to be the answer, I am just worried about making a decision at this point that creates a problem later. I guess the challenges are what makes the end result worth it.
-
Hello everyone. I am finally to a point in my recovery from the shoulder surgery that I have started building again. I will post pictures soon, but I have finished planking the outside of the hull and am trying to fit the false deck. I am having problems getting my model measurements to sync up with the drawings. Mast positions do bot match the spacing of the laser drilled holes in the false deck, etc. Does anyone have similar issues and how did you get things to line up? Do I trust the drawings fully?
-
Thank you Bob for the positive feedback and thanks to mtaylor and Canute for the likes.
-
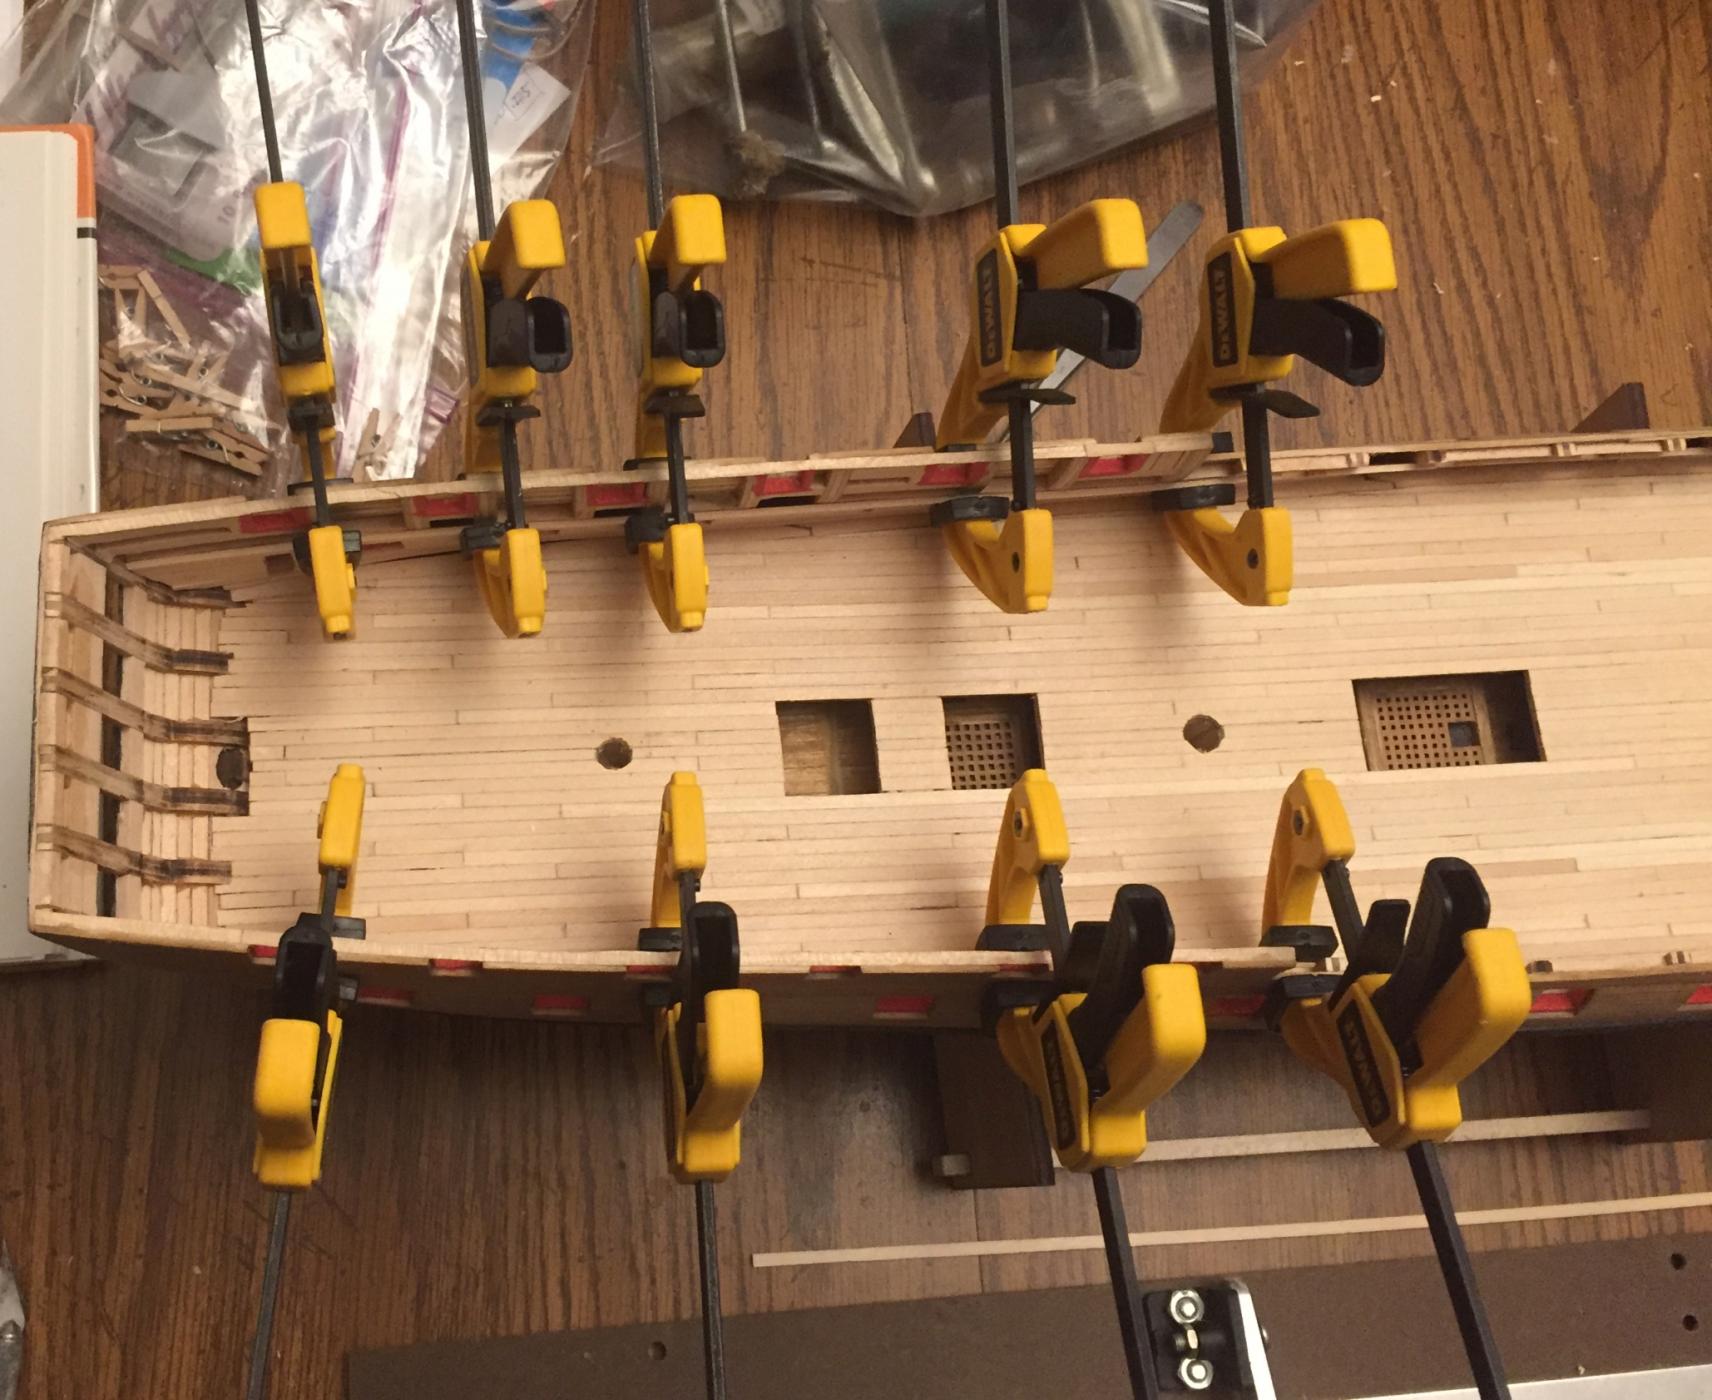
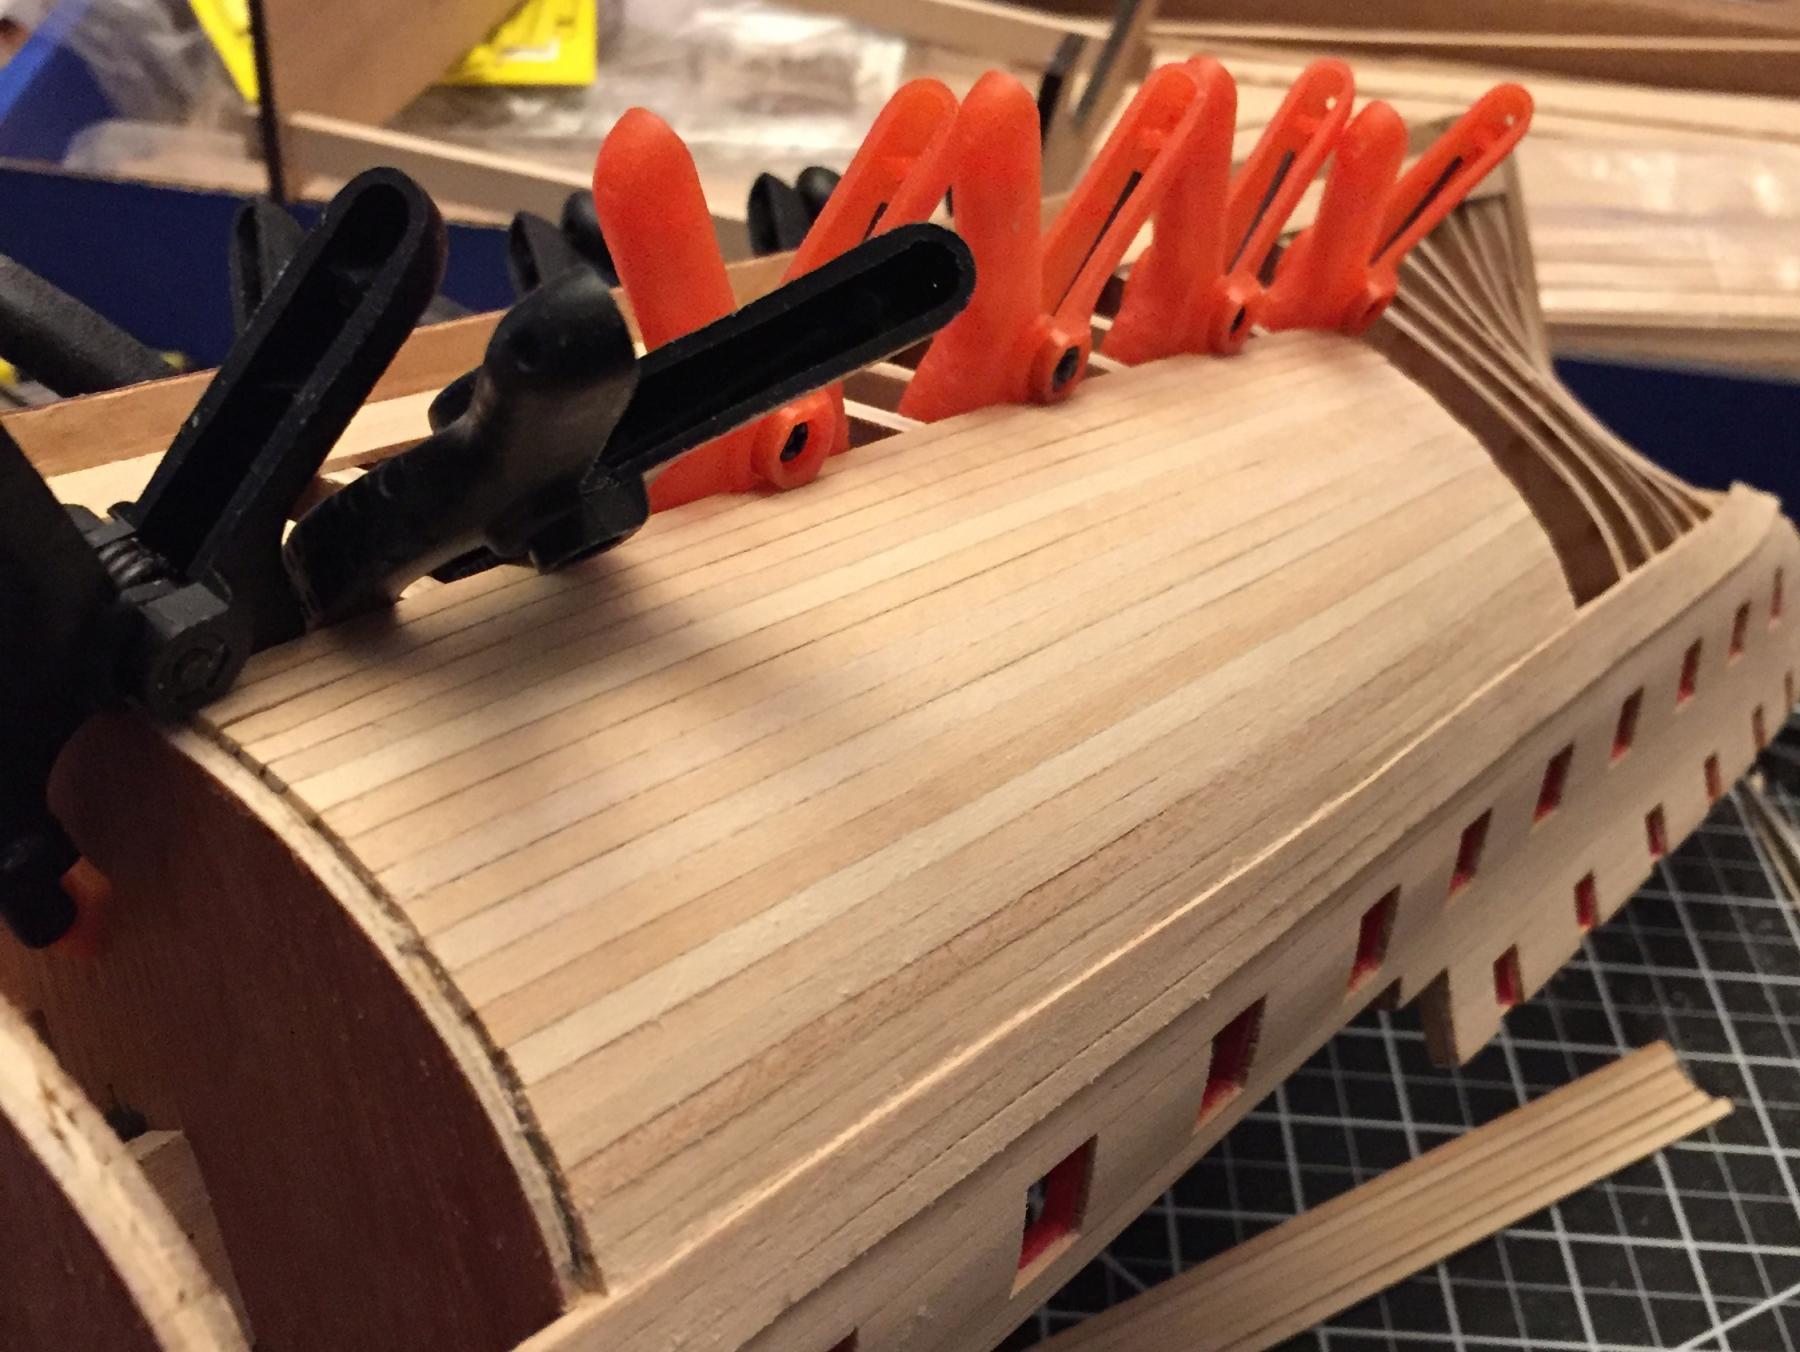
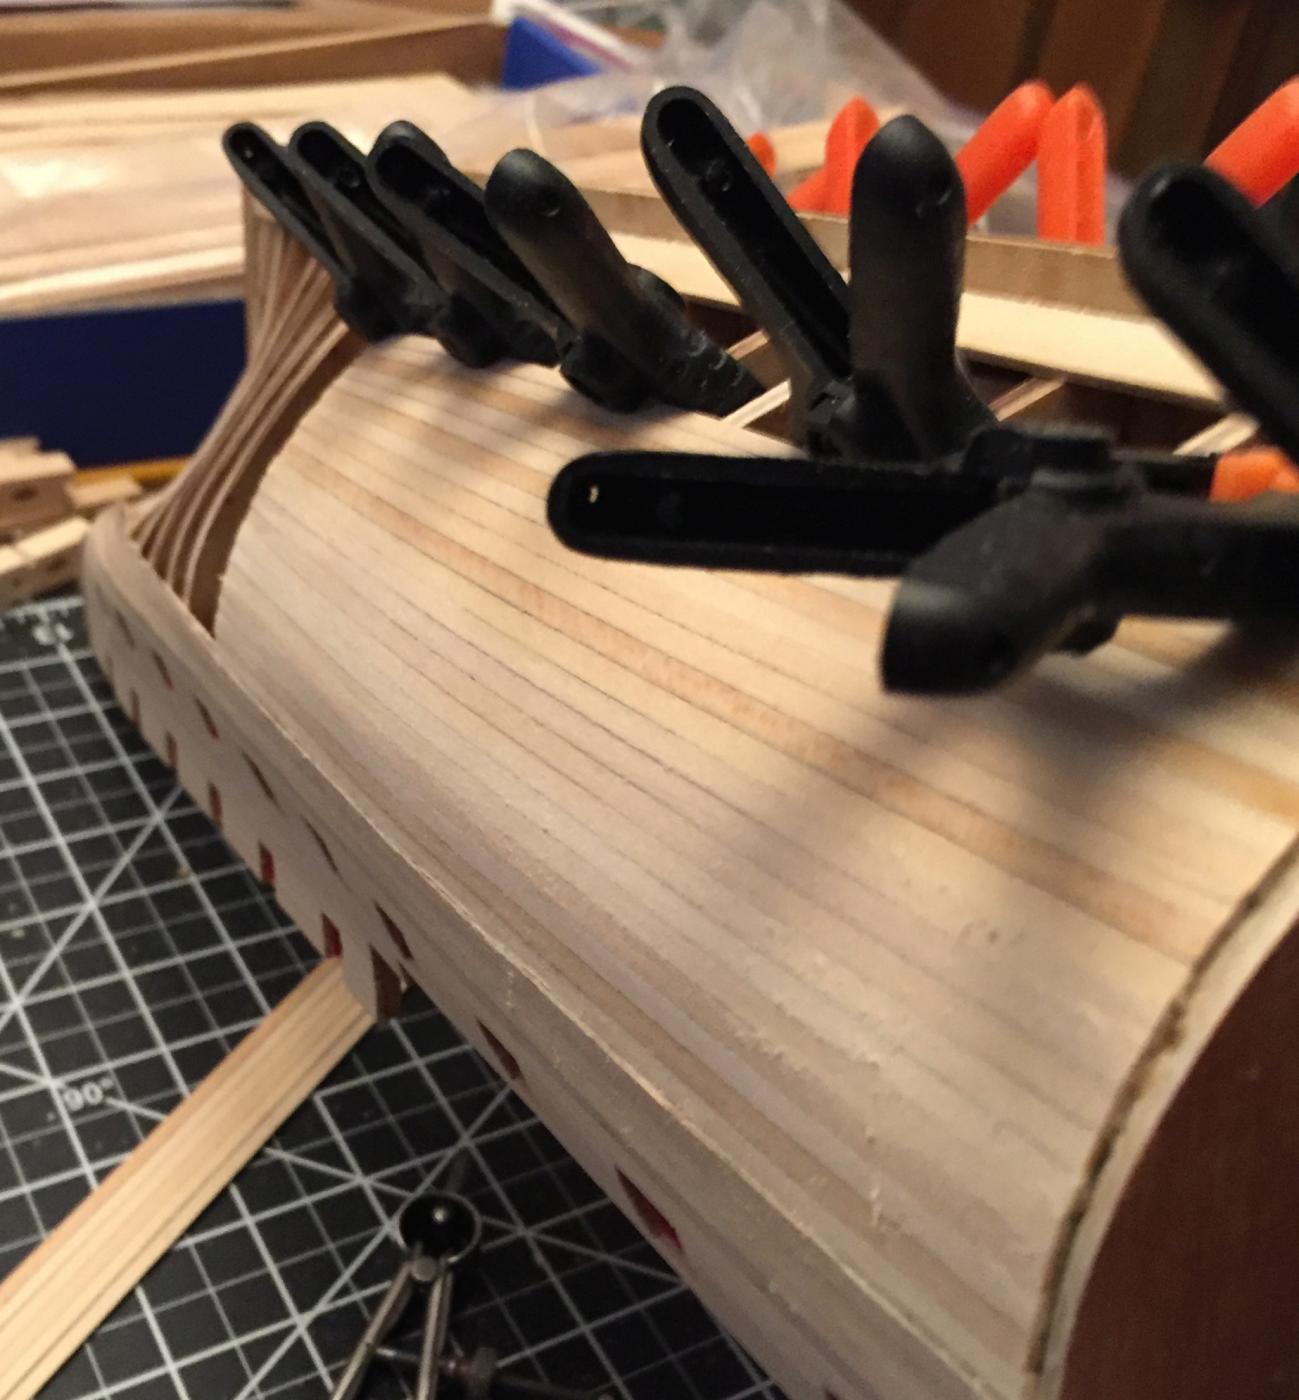
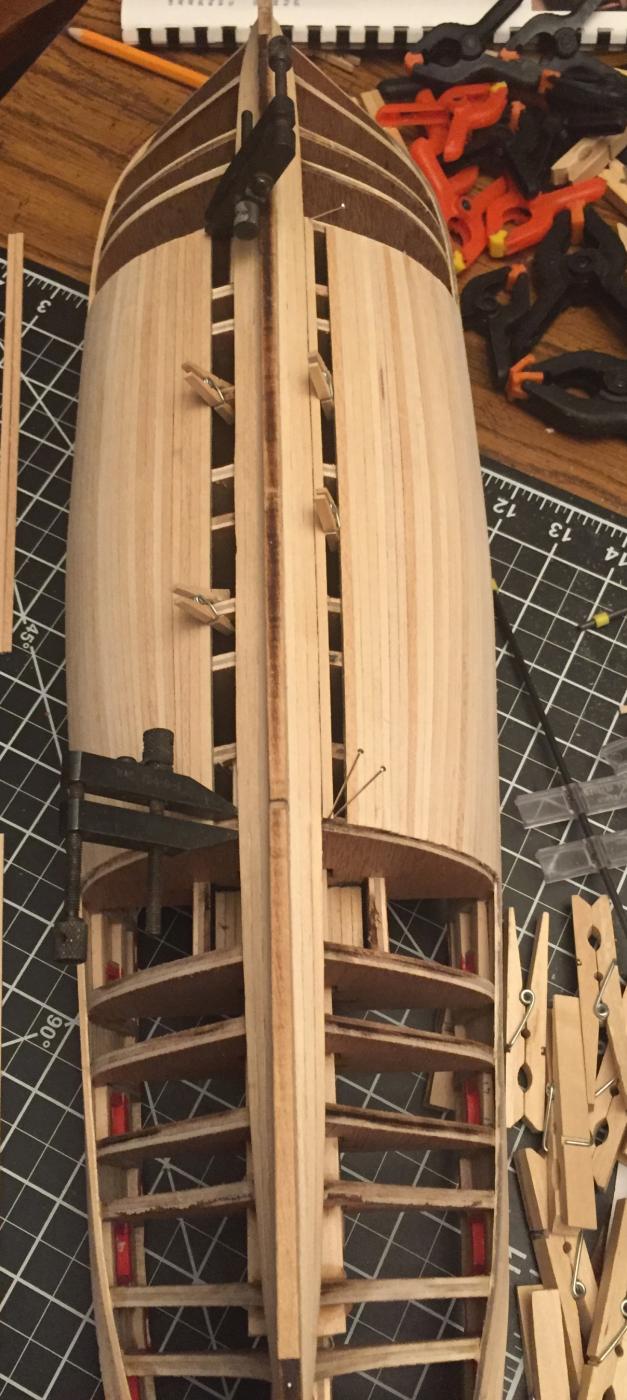
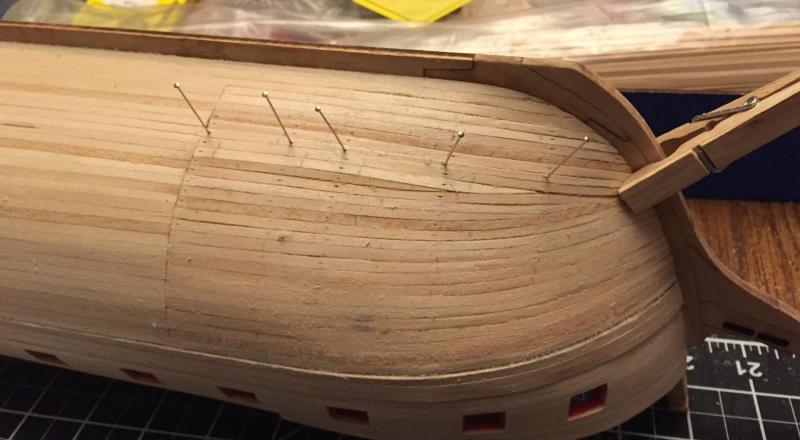
And finally the stern planking. This is more challenging due to the need for fillers. It looked rough at times but it all sanded out pretty well with minimal need for filler. The clamping became more of a challenge. This catches everyone up to where I am except for the few bow planks I have tried. That requires carefully tapering each plank to fit and is driving me a bit crazy so far. once I start up again I will post progress. Thanks for the likes and encouragement.


-
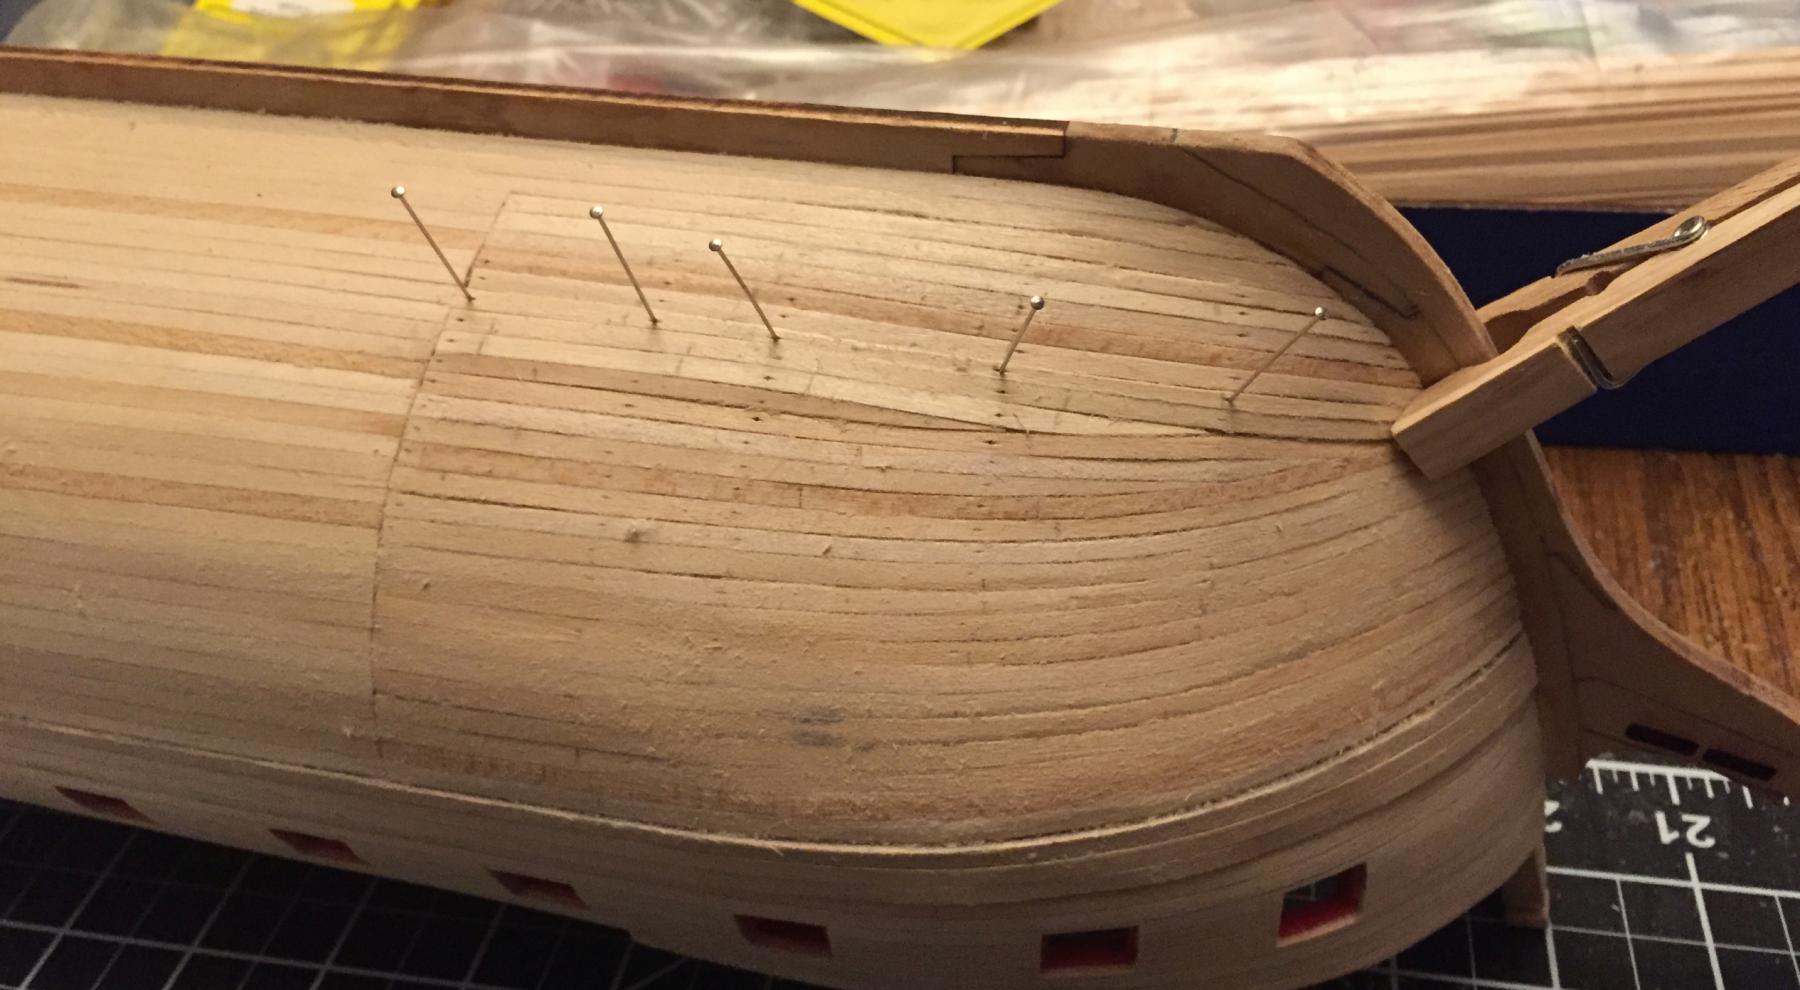
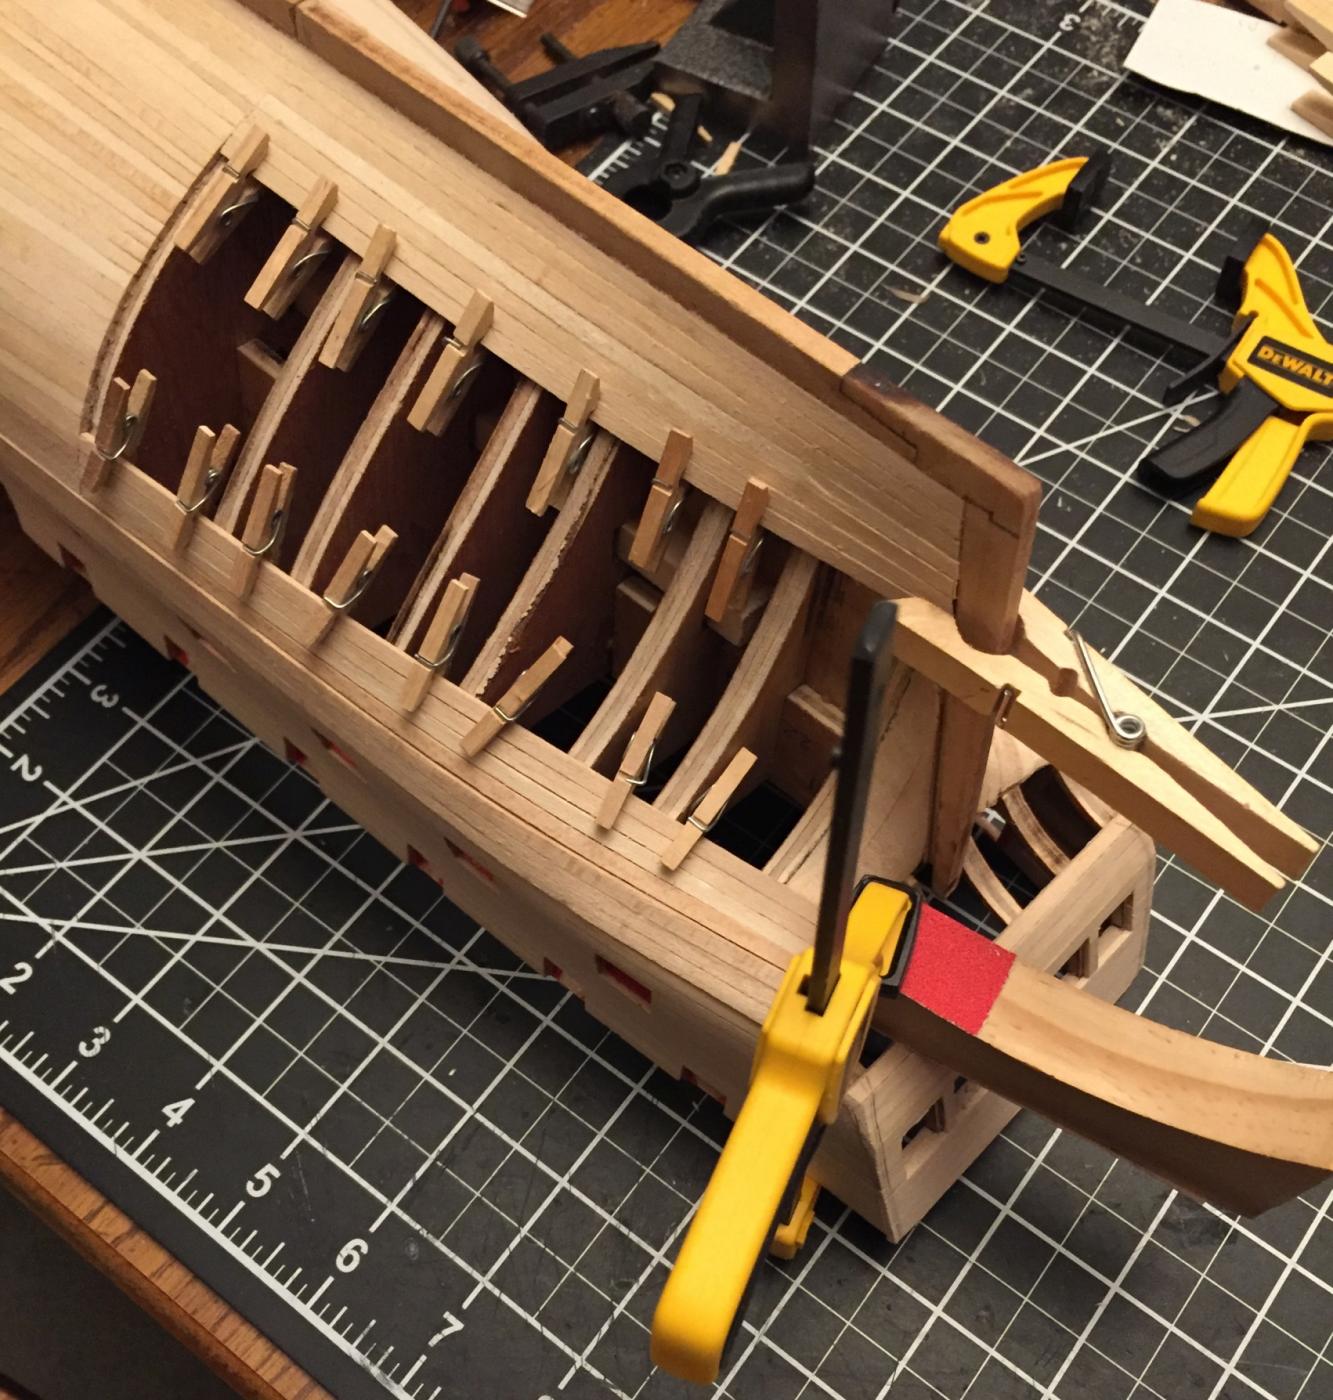
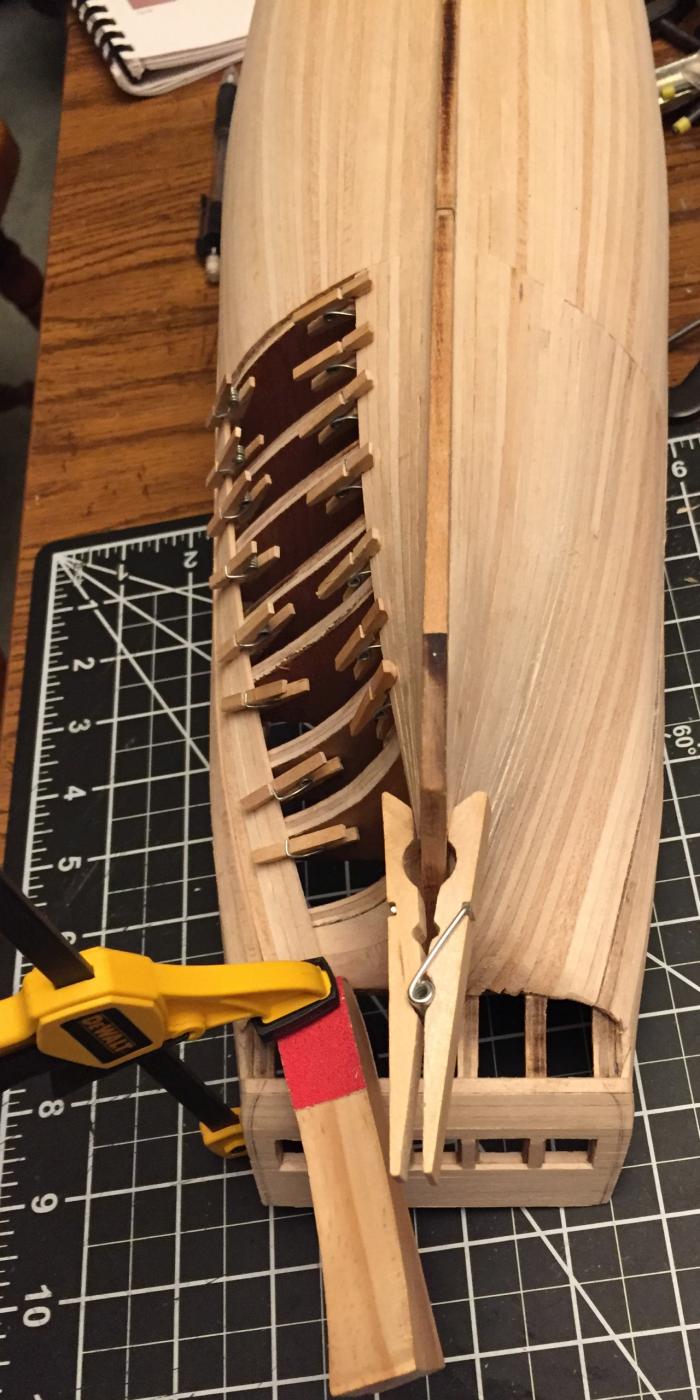
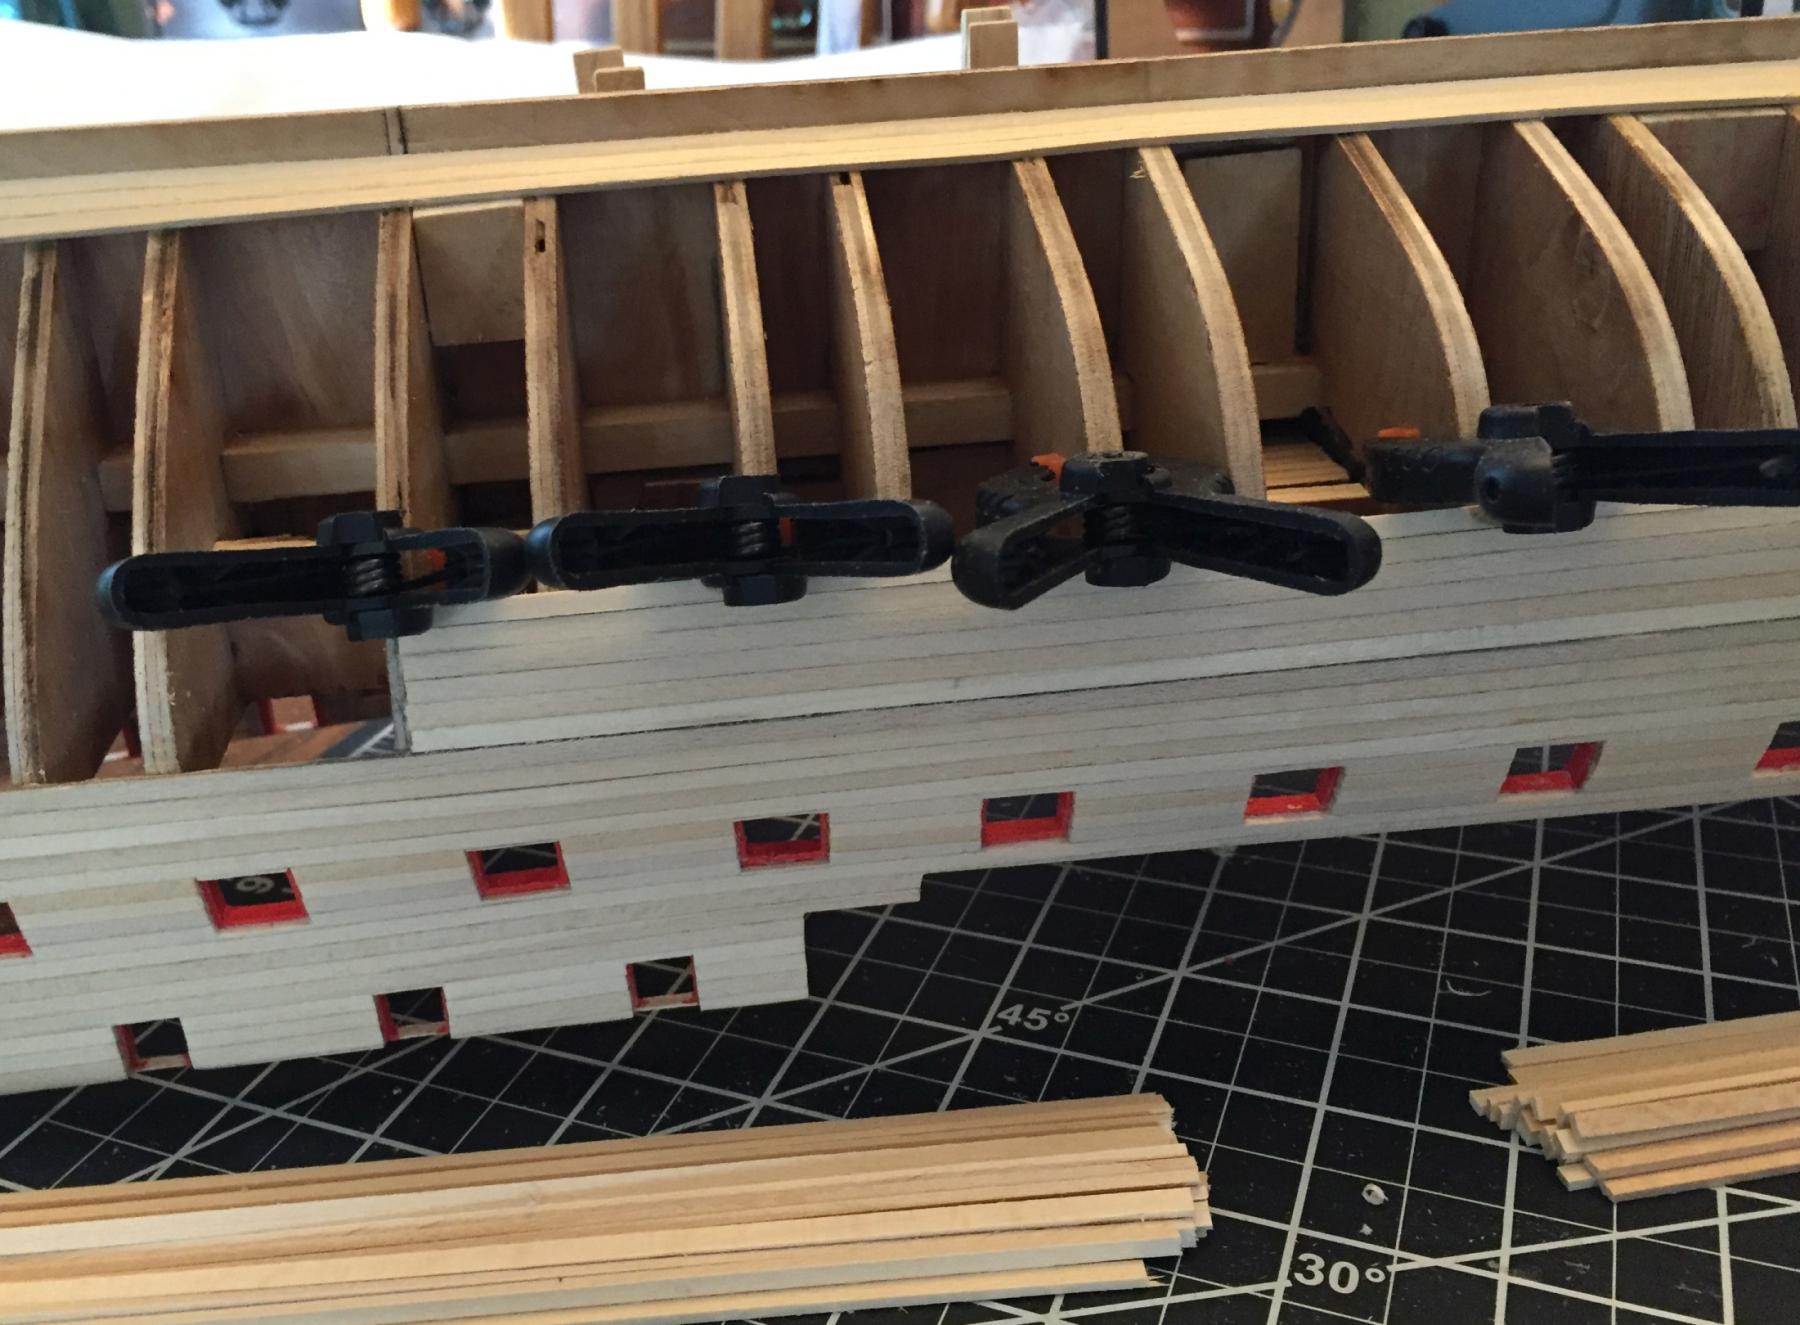
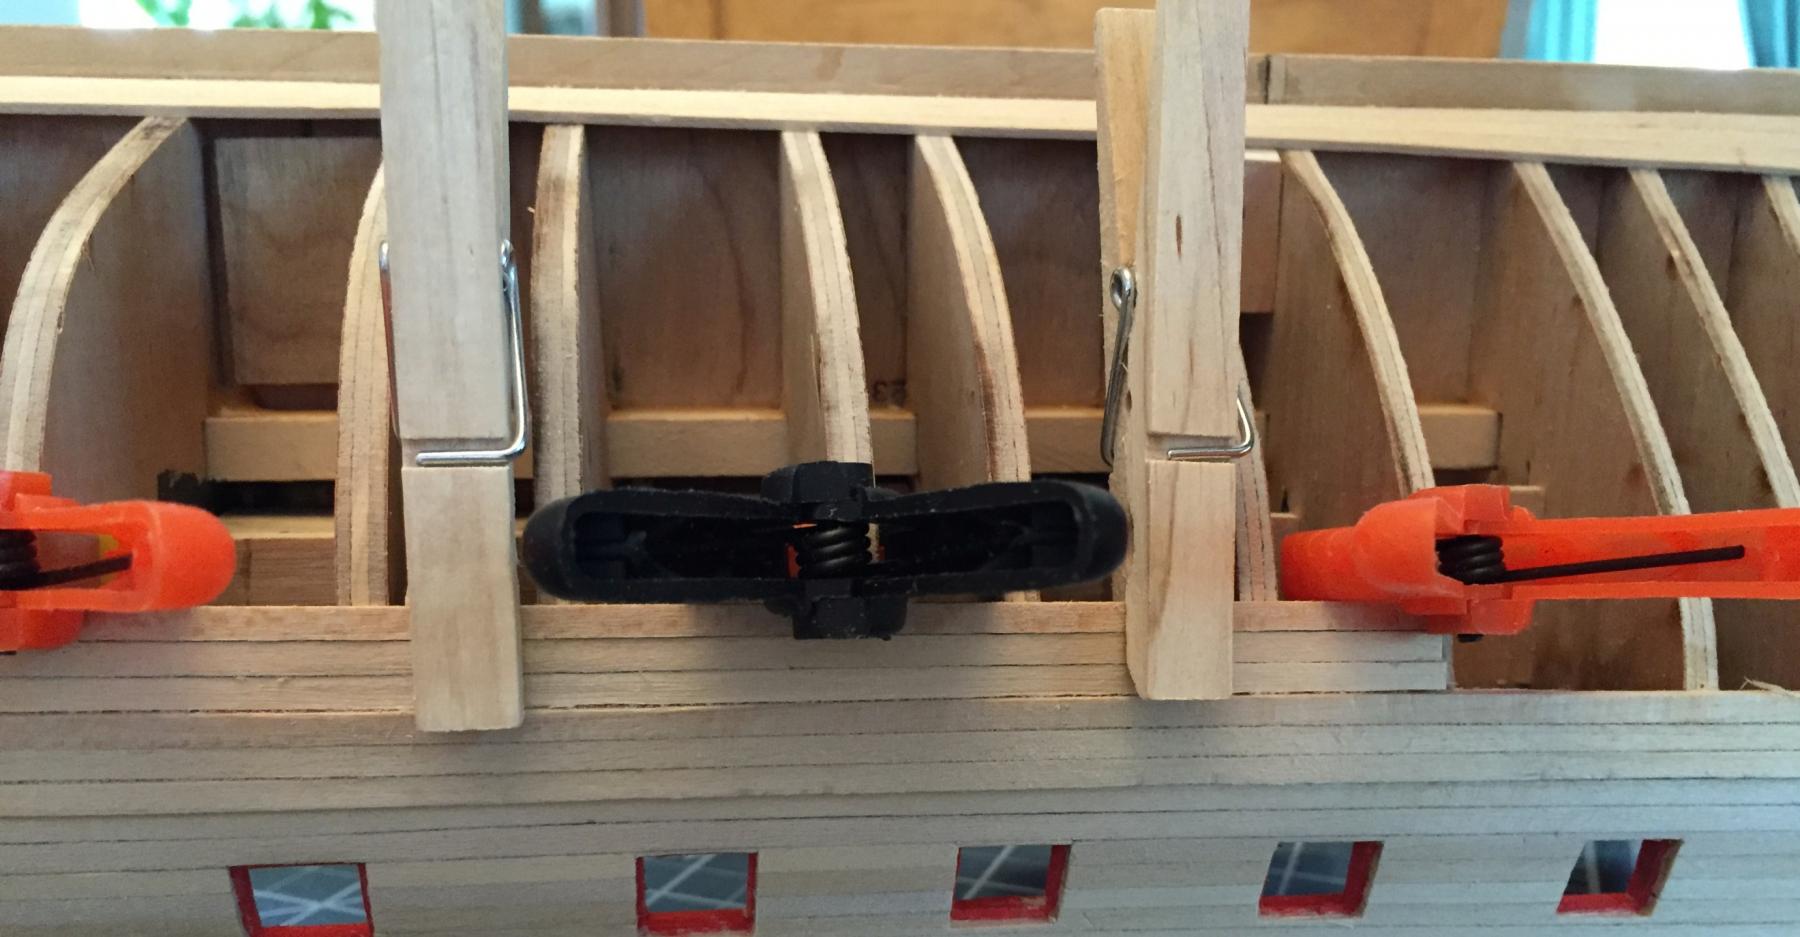
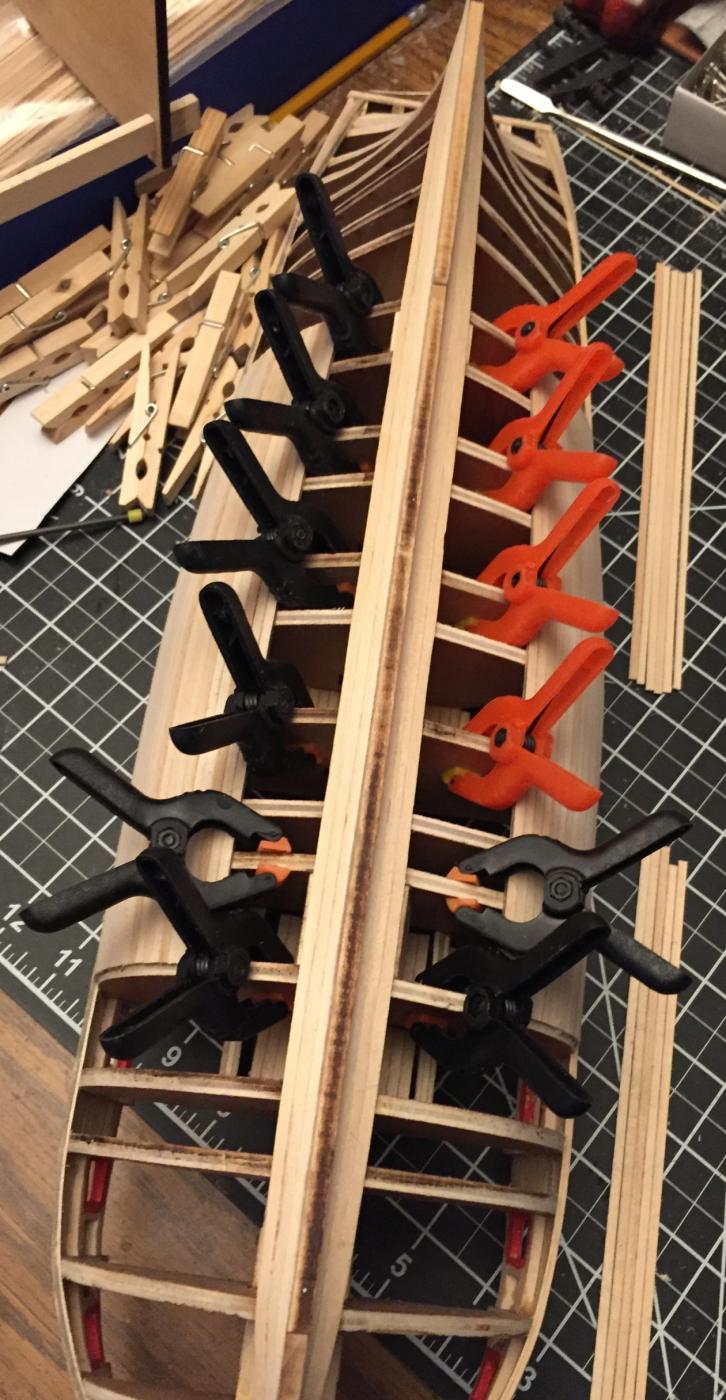
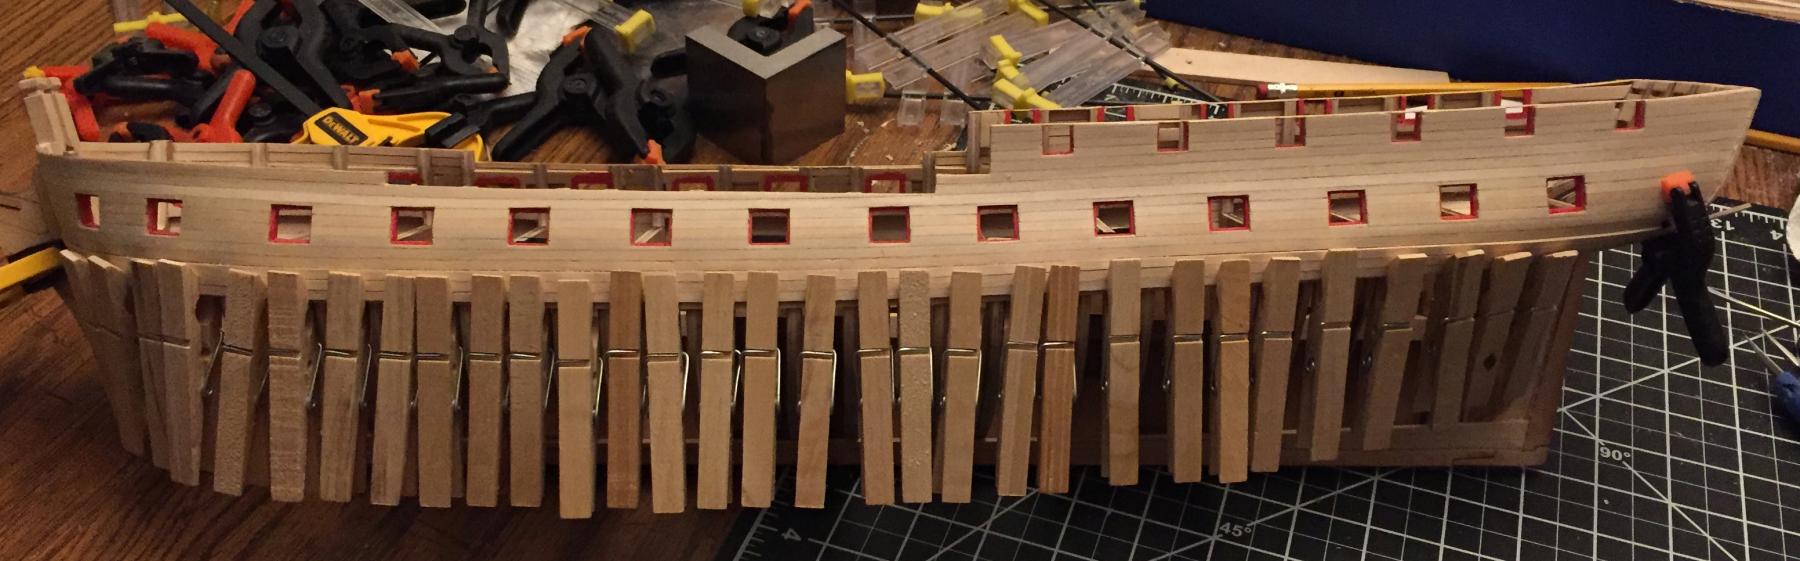
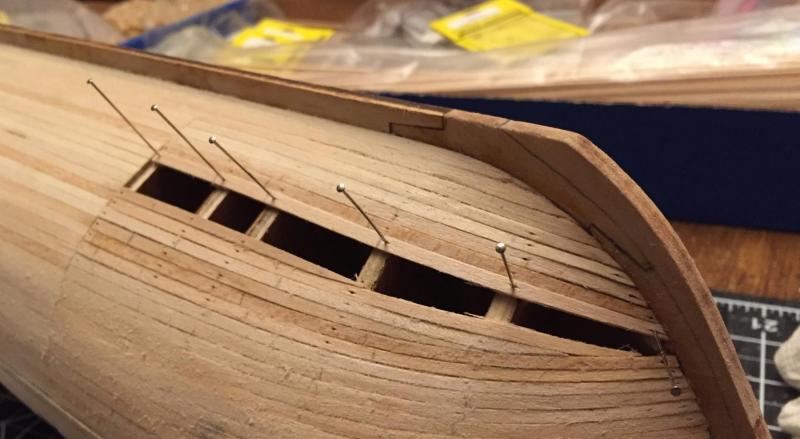
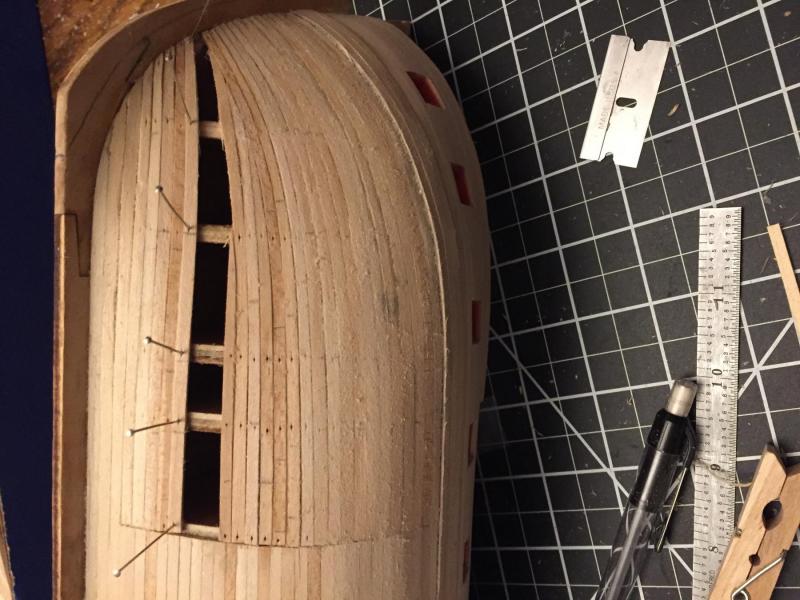
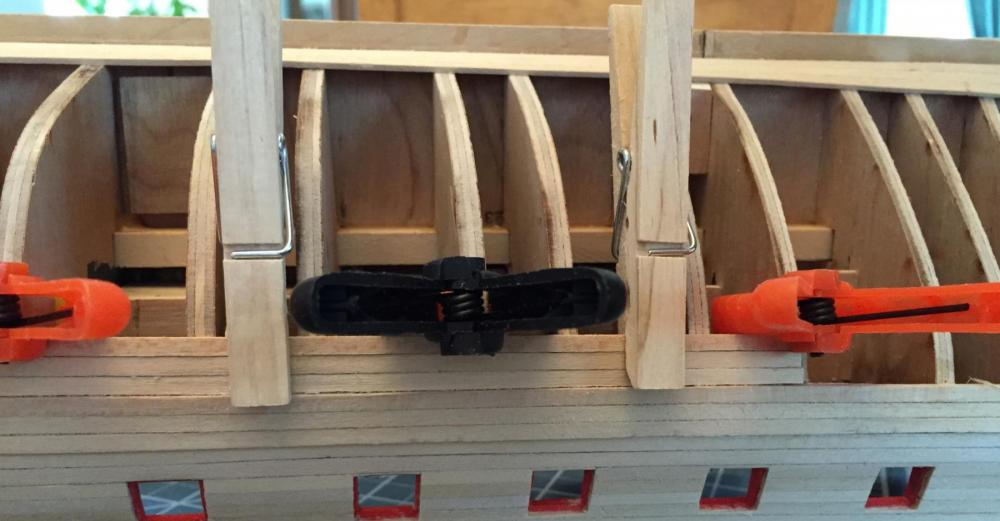
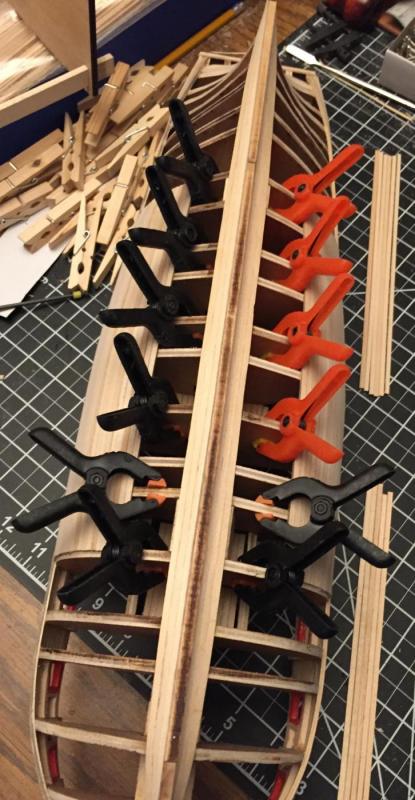
I did not do anything on the ship for a couple of weeks after the injury since the arm hurt too much. Then I started working on the lower hull planking. I decided that since I was both painting and putting copper on the hull I would follow the kit instructions and apply the planks in three sections: Center, Aft and Bow. Center and aft went pretty well. The bow is not done yet because of the surgery. Hope to start back up soon. You will see that I varied the clamping depending on where I was in the process, having to go to smaller ones and finally pins to hold while the adhesive cured. You should also be able to see where I tapered planks on the lower portion closer to the keel to get everything to fit correctly. These pictures are of the center section work. I will post the stern section next.


-
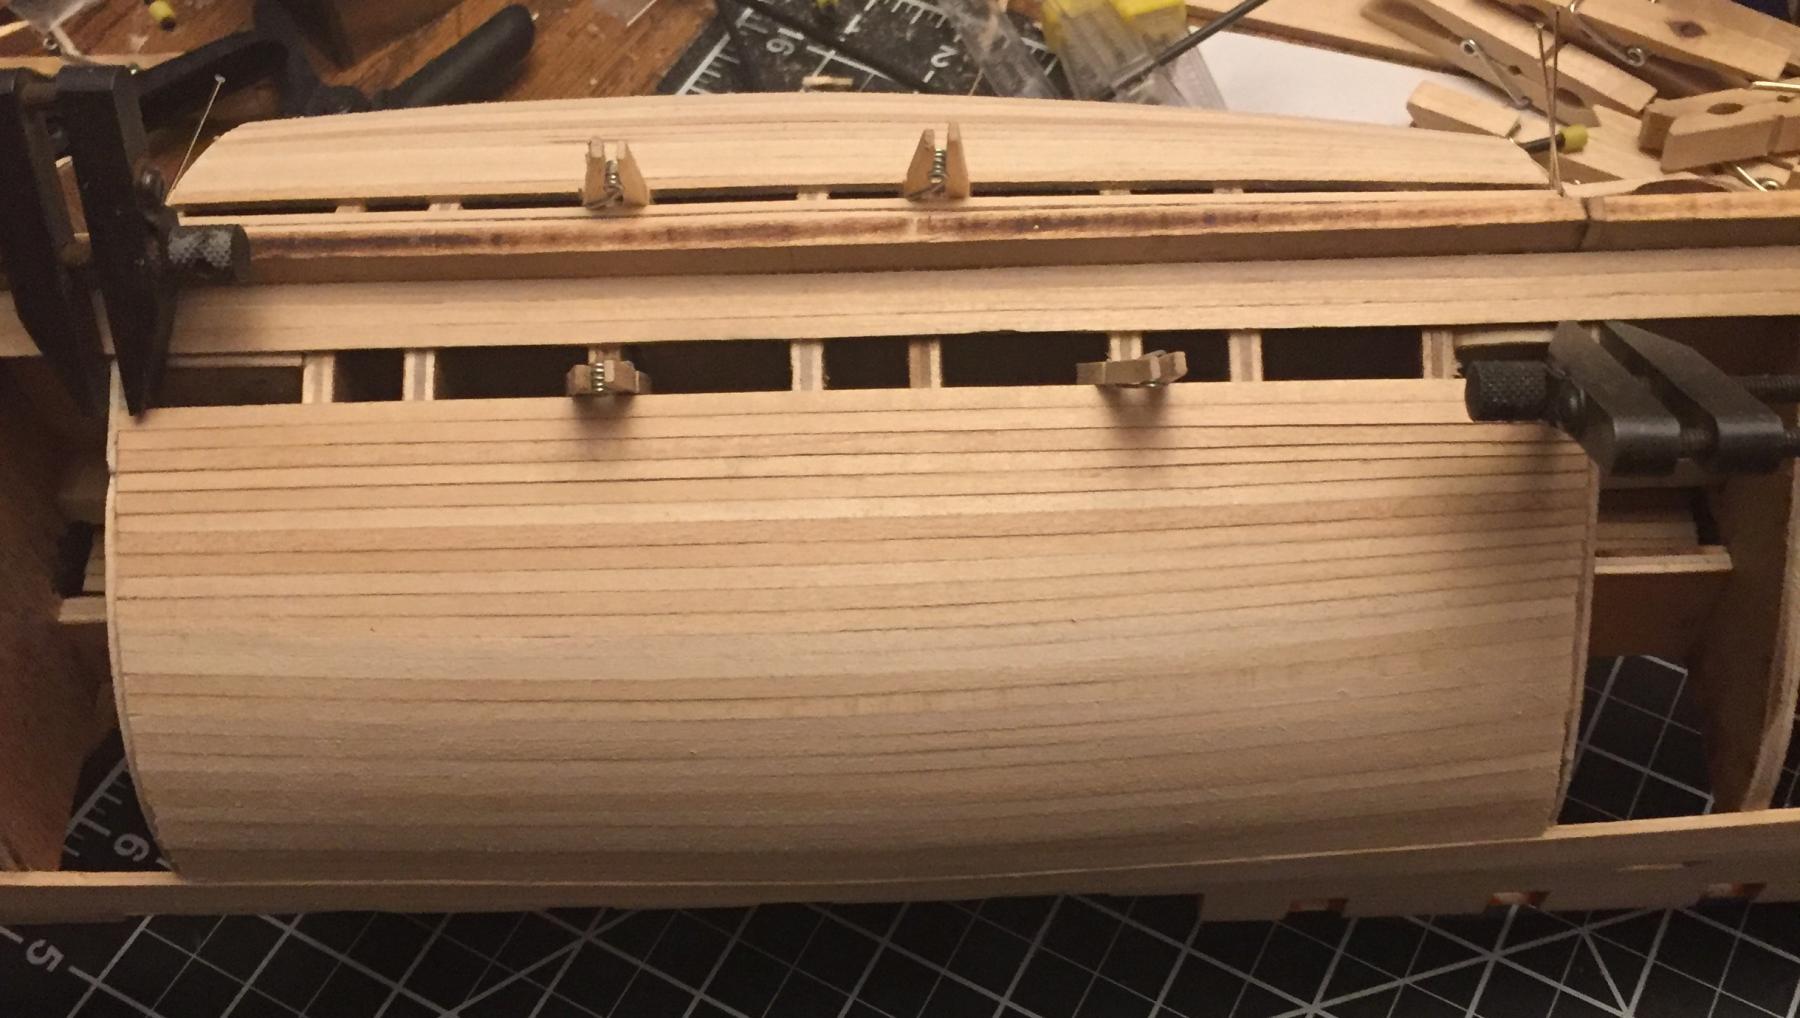
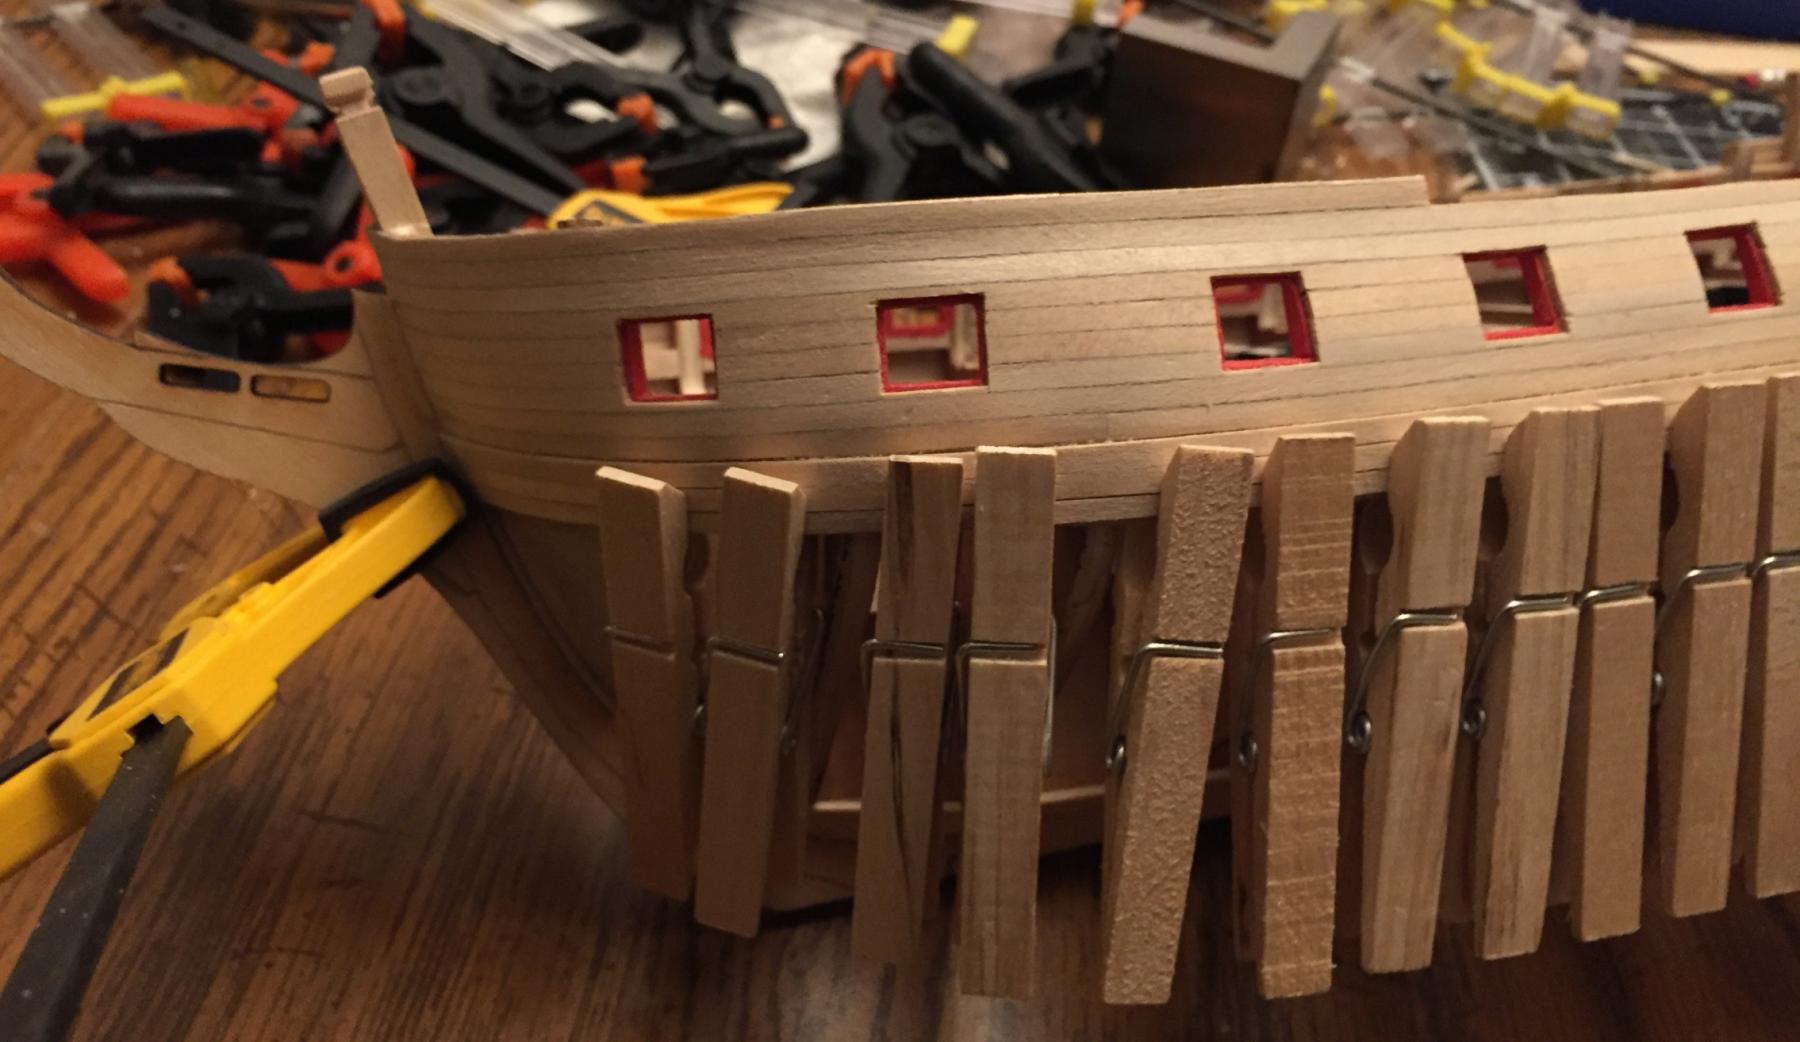
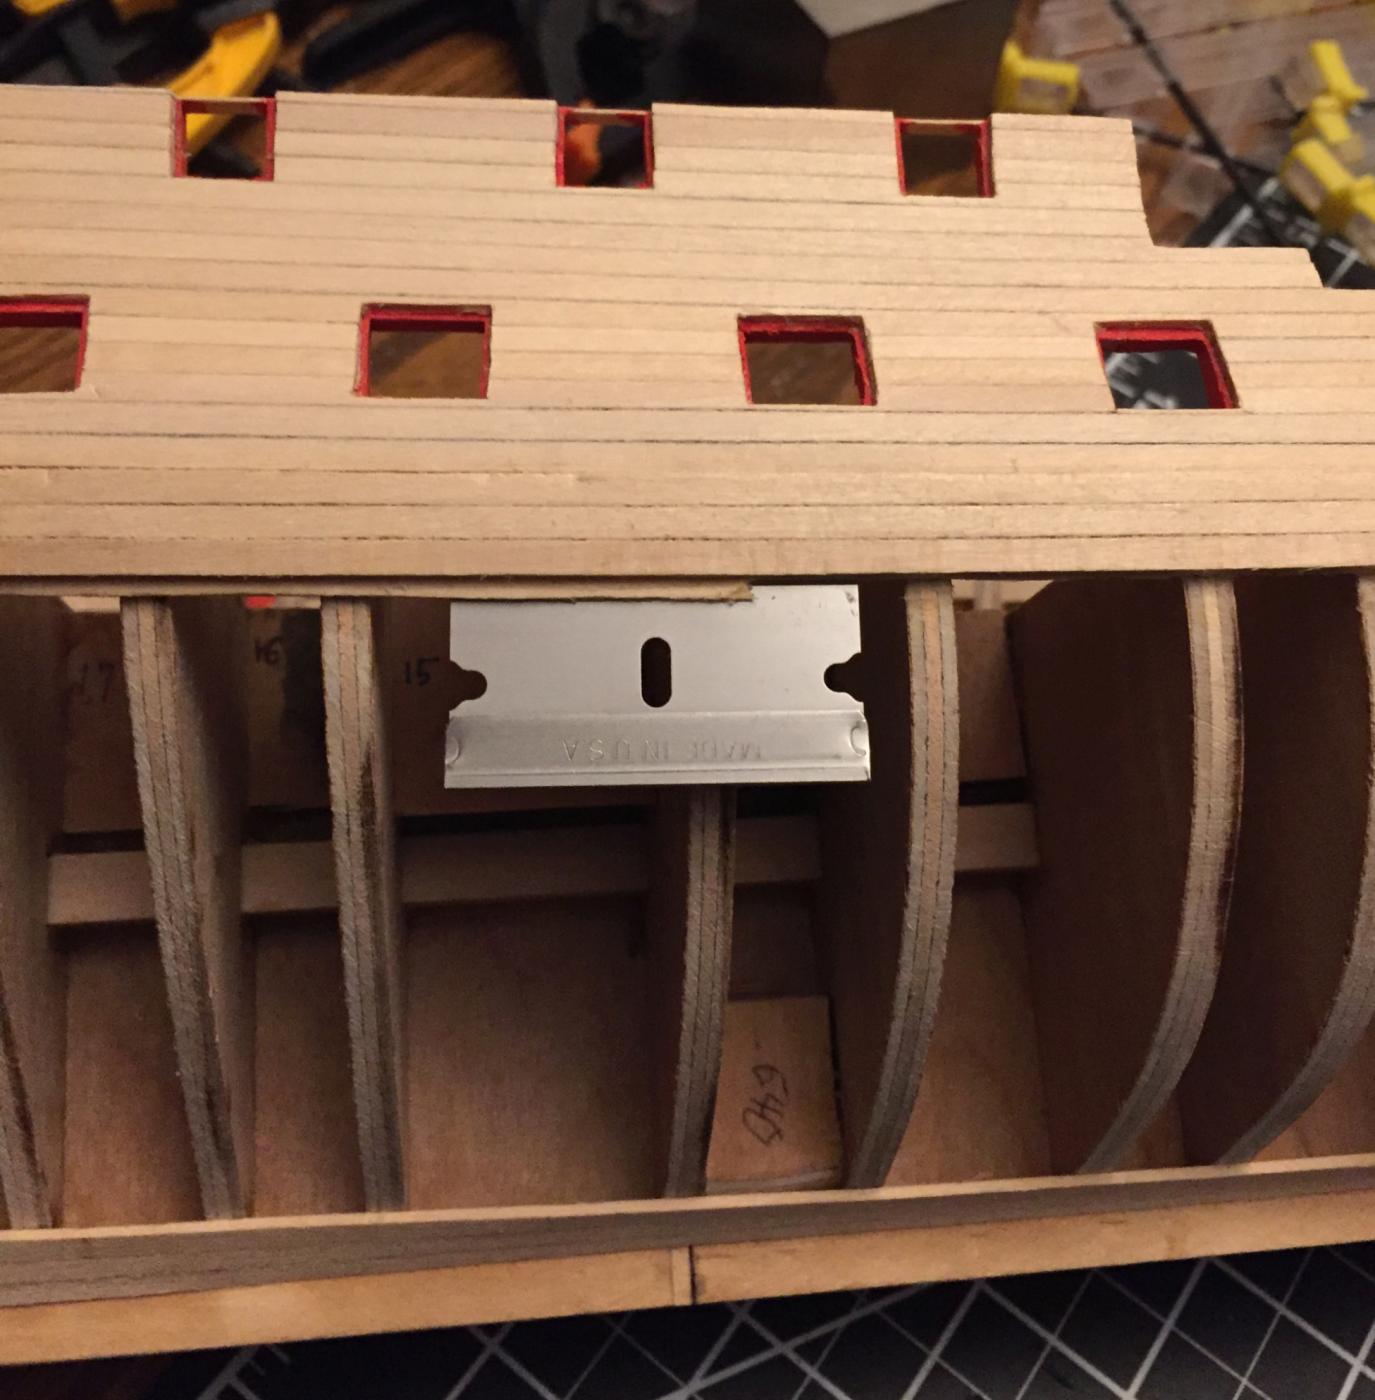
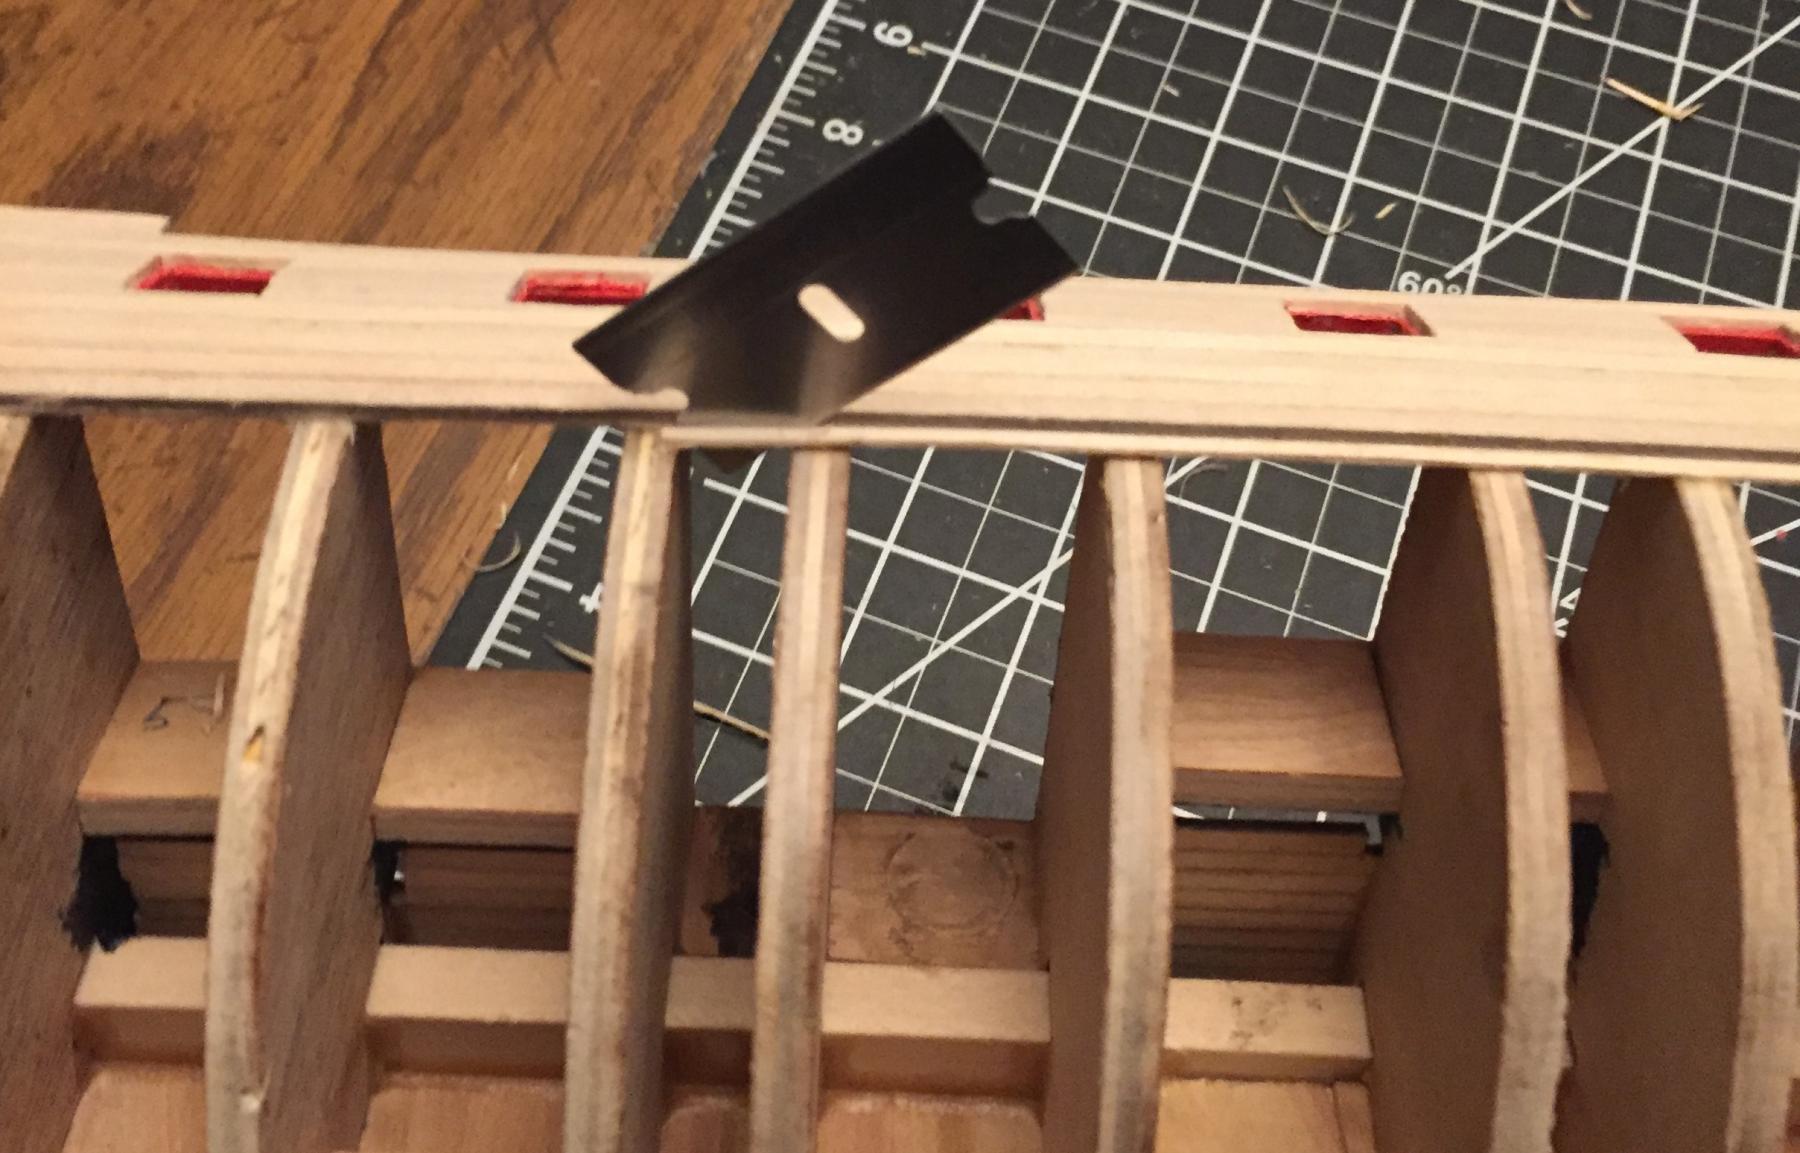
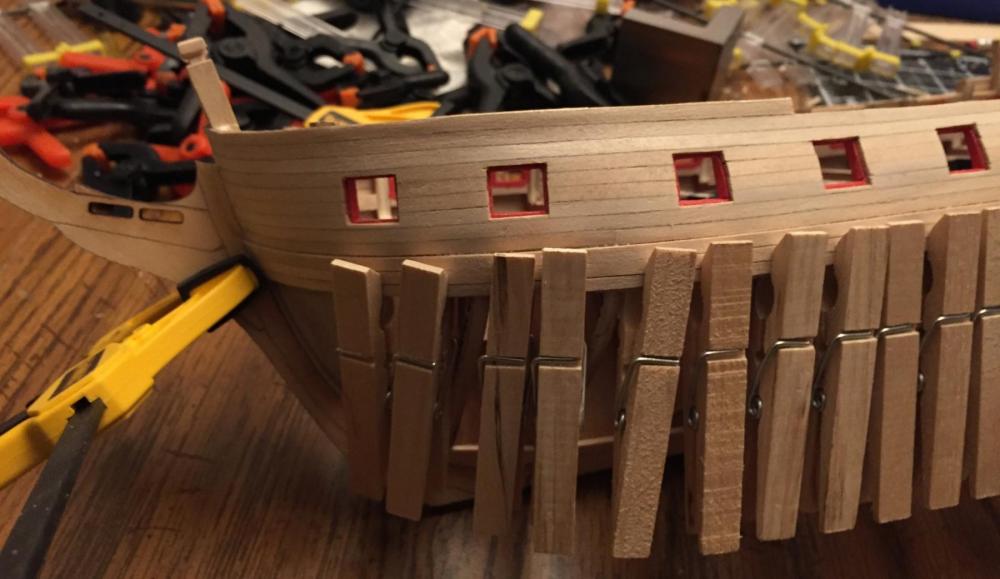
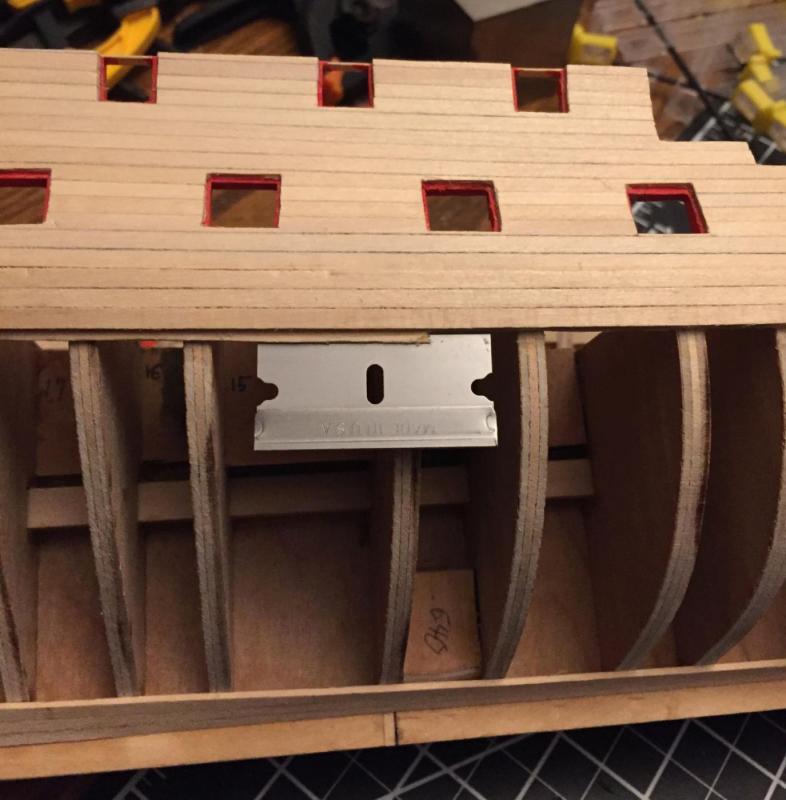
Hello, So it has been 5 1/2 weeks since my shoulder surgery. Hope to get cleared to go back to work by this Friday. Here are the pictures of the progress I had made up until the day before I was injured. I was completing the application of the wales. The images show the three planks being completed on each side over the 1/32 strips to bump the wales out. The images with the razor blades show the excess 1/32 material extending beyond the lower wale planks that I carefully trimmed off after everything was dried. I did use some filler to handle a few gaps and results look pretty good. The next time I will bevel the edges of the planks even more. I will post further progress soon.


-
So, it turns out my shoulder injury was really bad and I only got a few planks put on before I had to stop. I tore 3 of the 4 tendons in my right rotator cuff. I had successful repair surgery 3 weeks ago and now cannot use the arm for 3 more weeks and then can start physical therapy to get it back to normal. So the Essex sits patiently. I will post pictures to catch up to where I am. To quote MacArthur' "I shall return," just not yet.
-
Just an update, I am still working on the kit. I injured my right shoulder so things have been moving very slowly. I will post some more planking progress soon.