tennfox
-
Posts
46 -
Joined
-
Last visited
Content Type
Profiles
Forums
Gallery
Events
Everything posted by tennfox
-
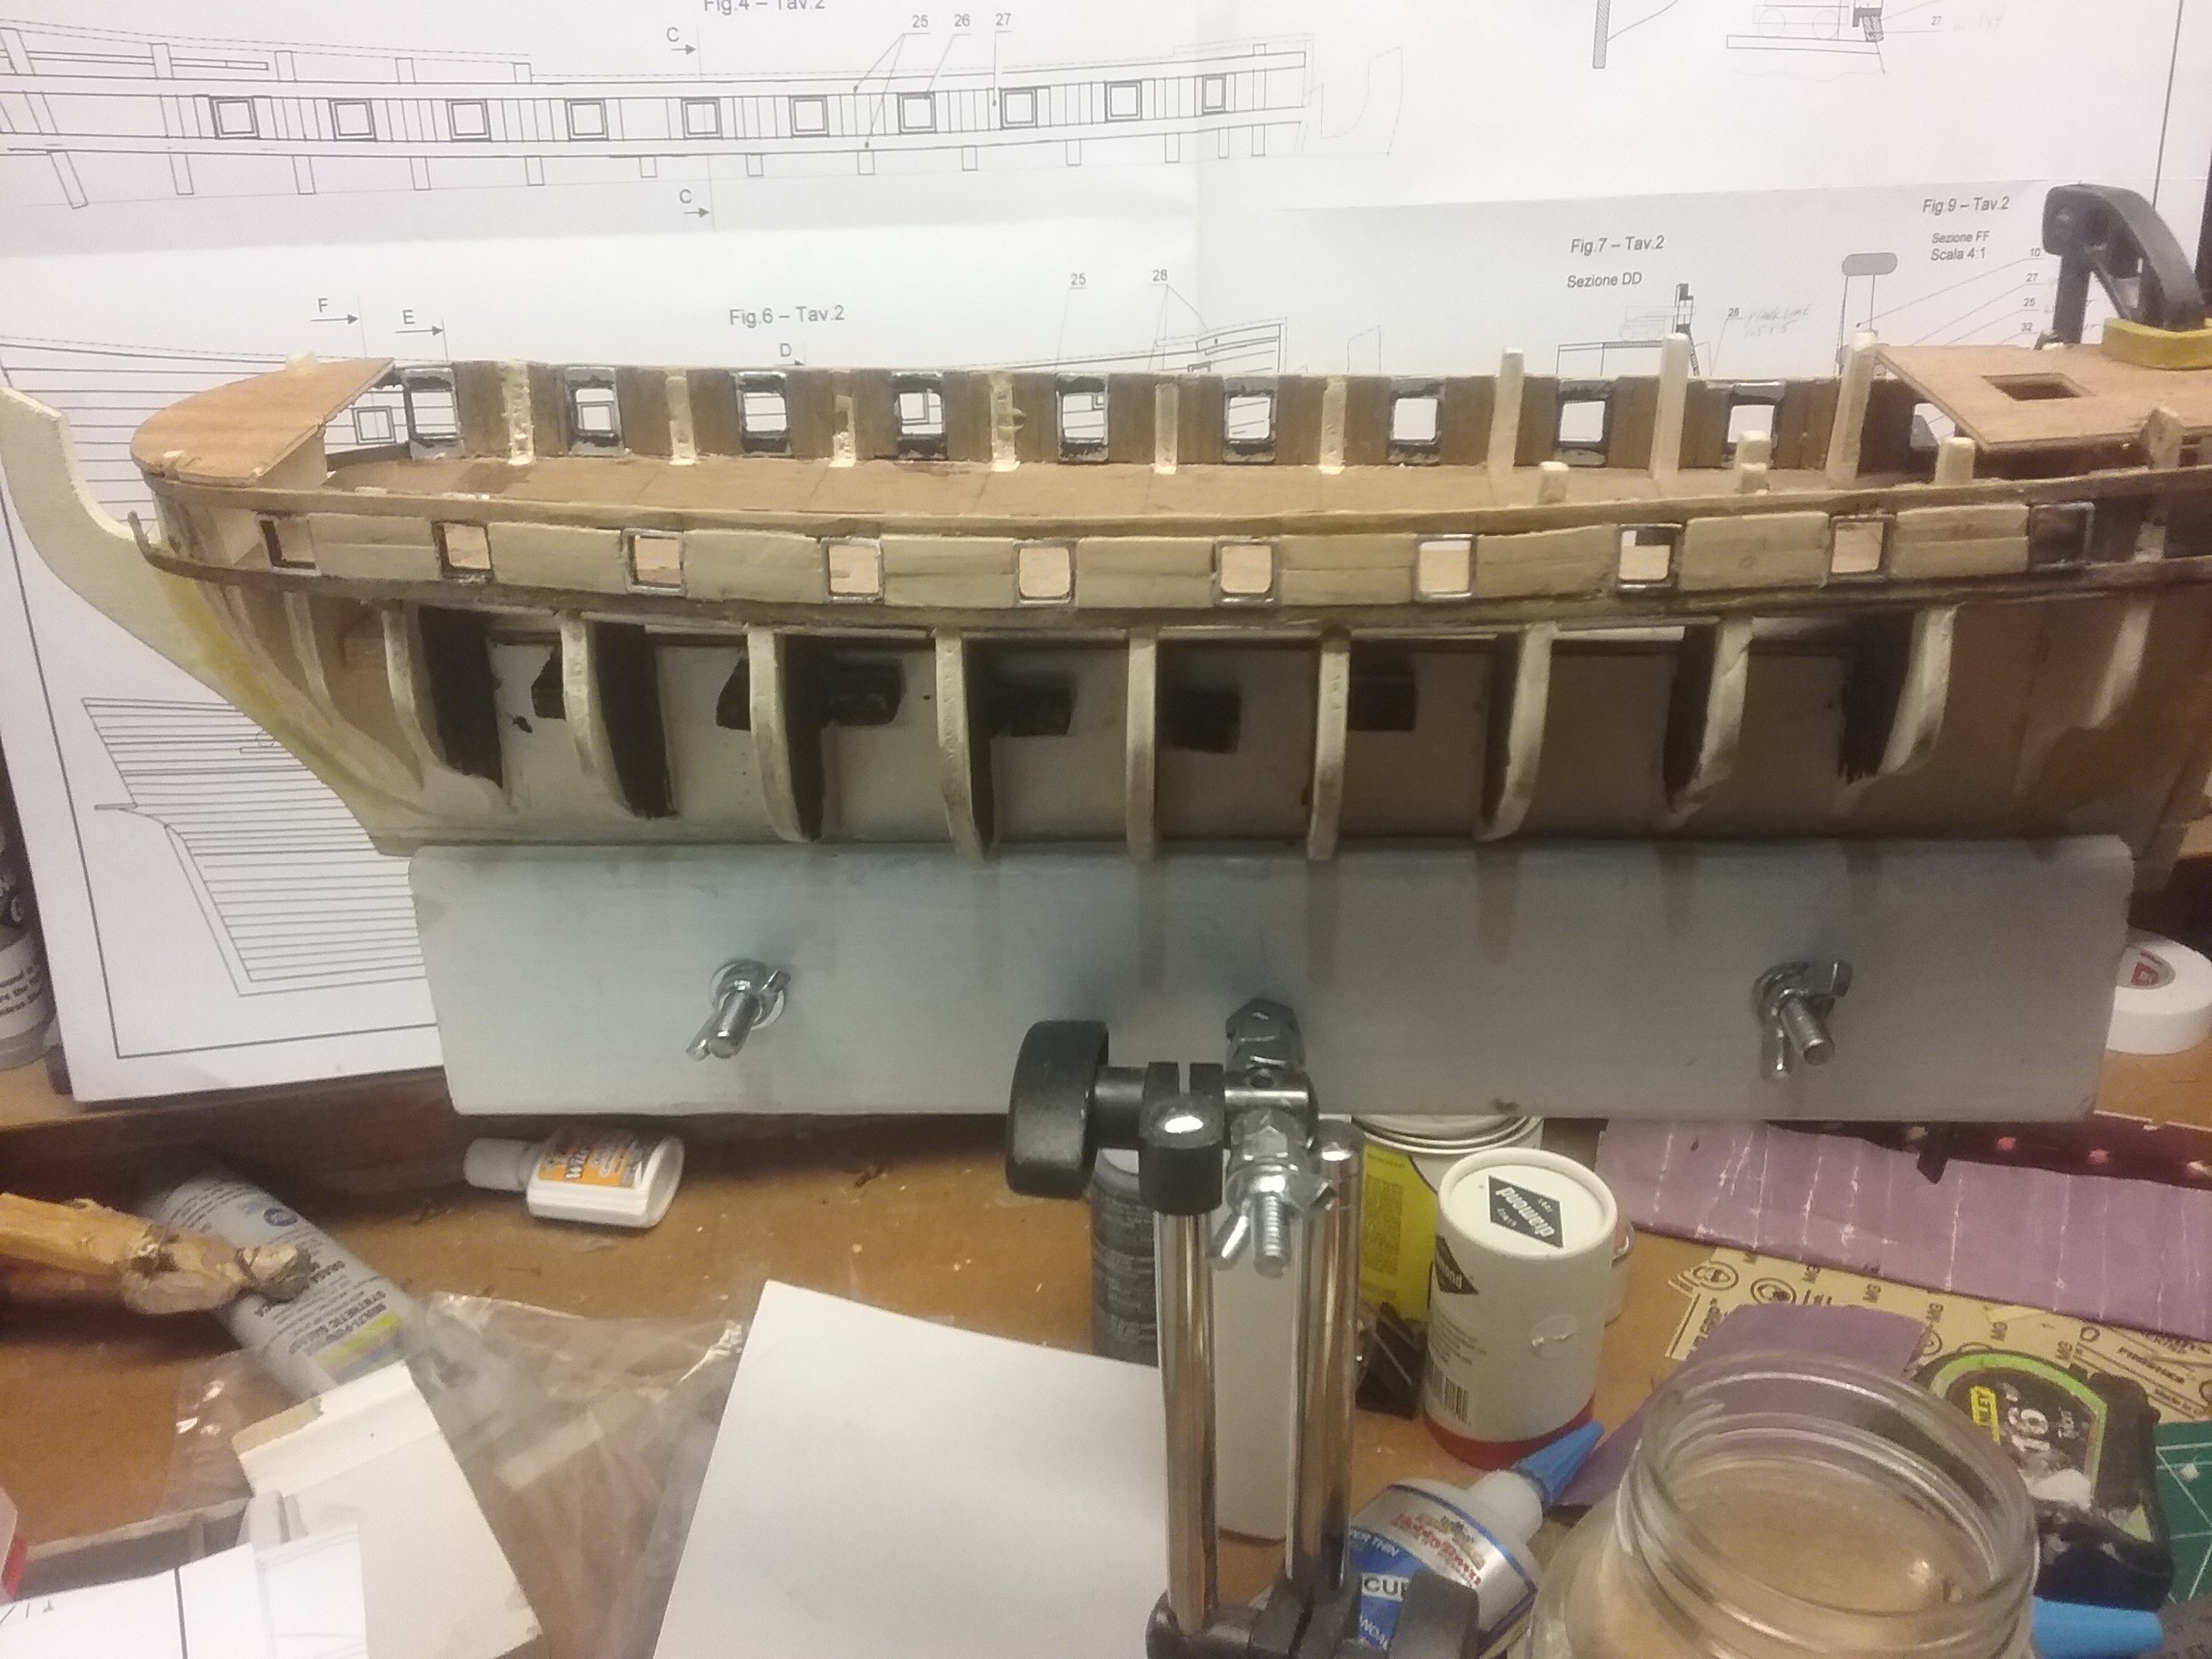
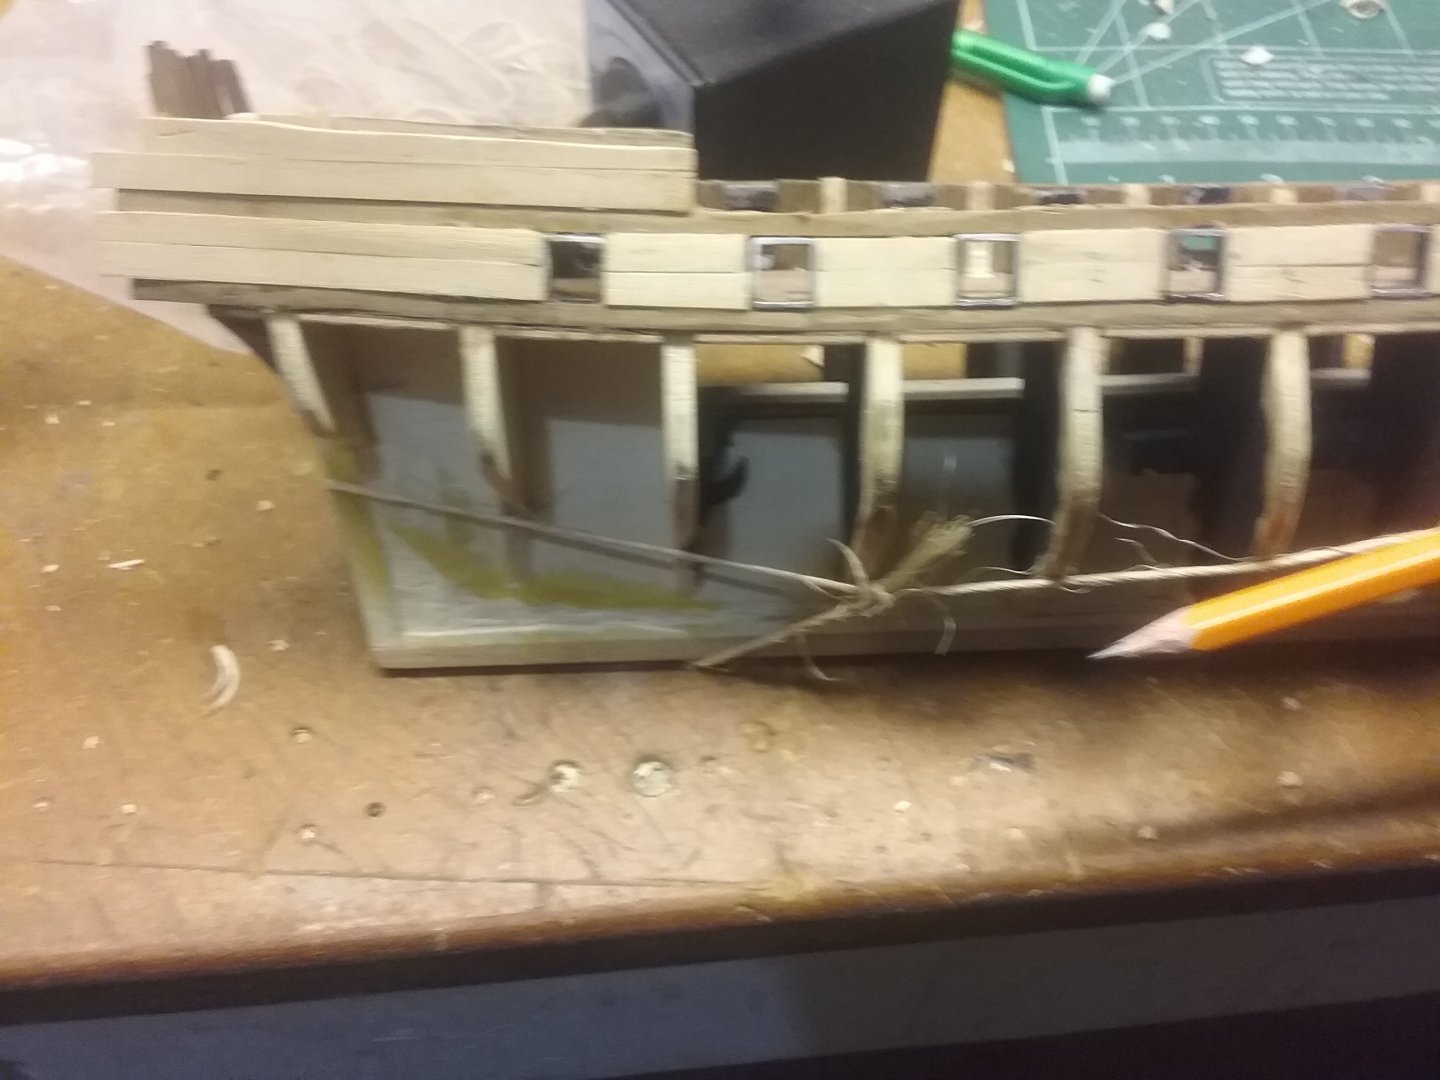
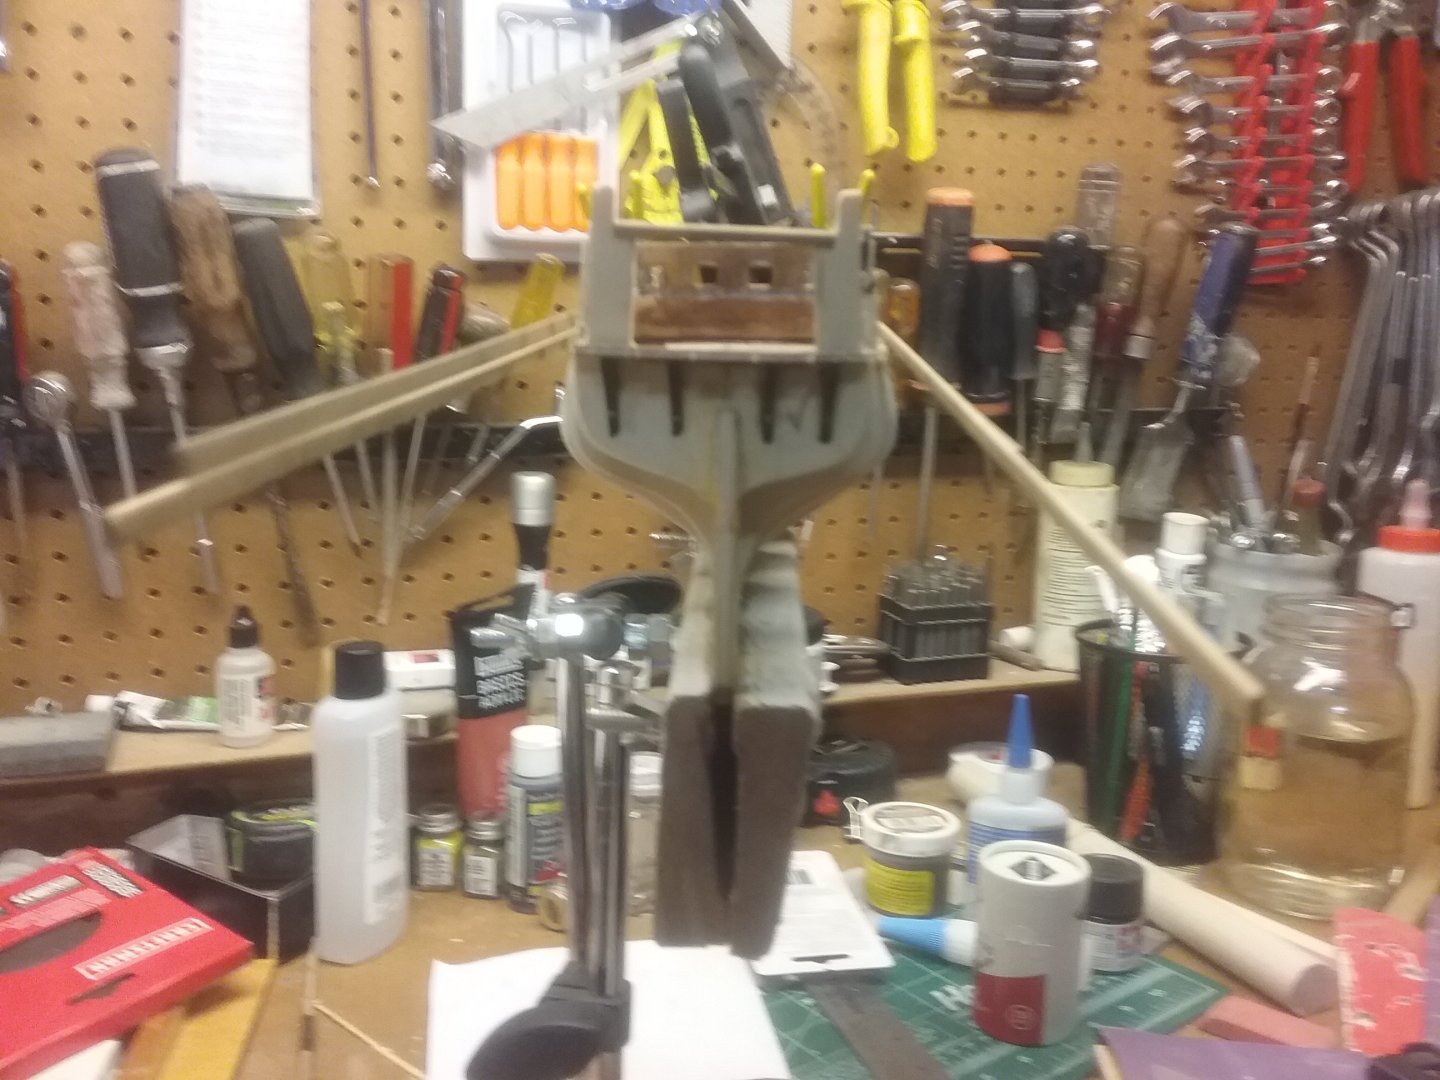
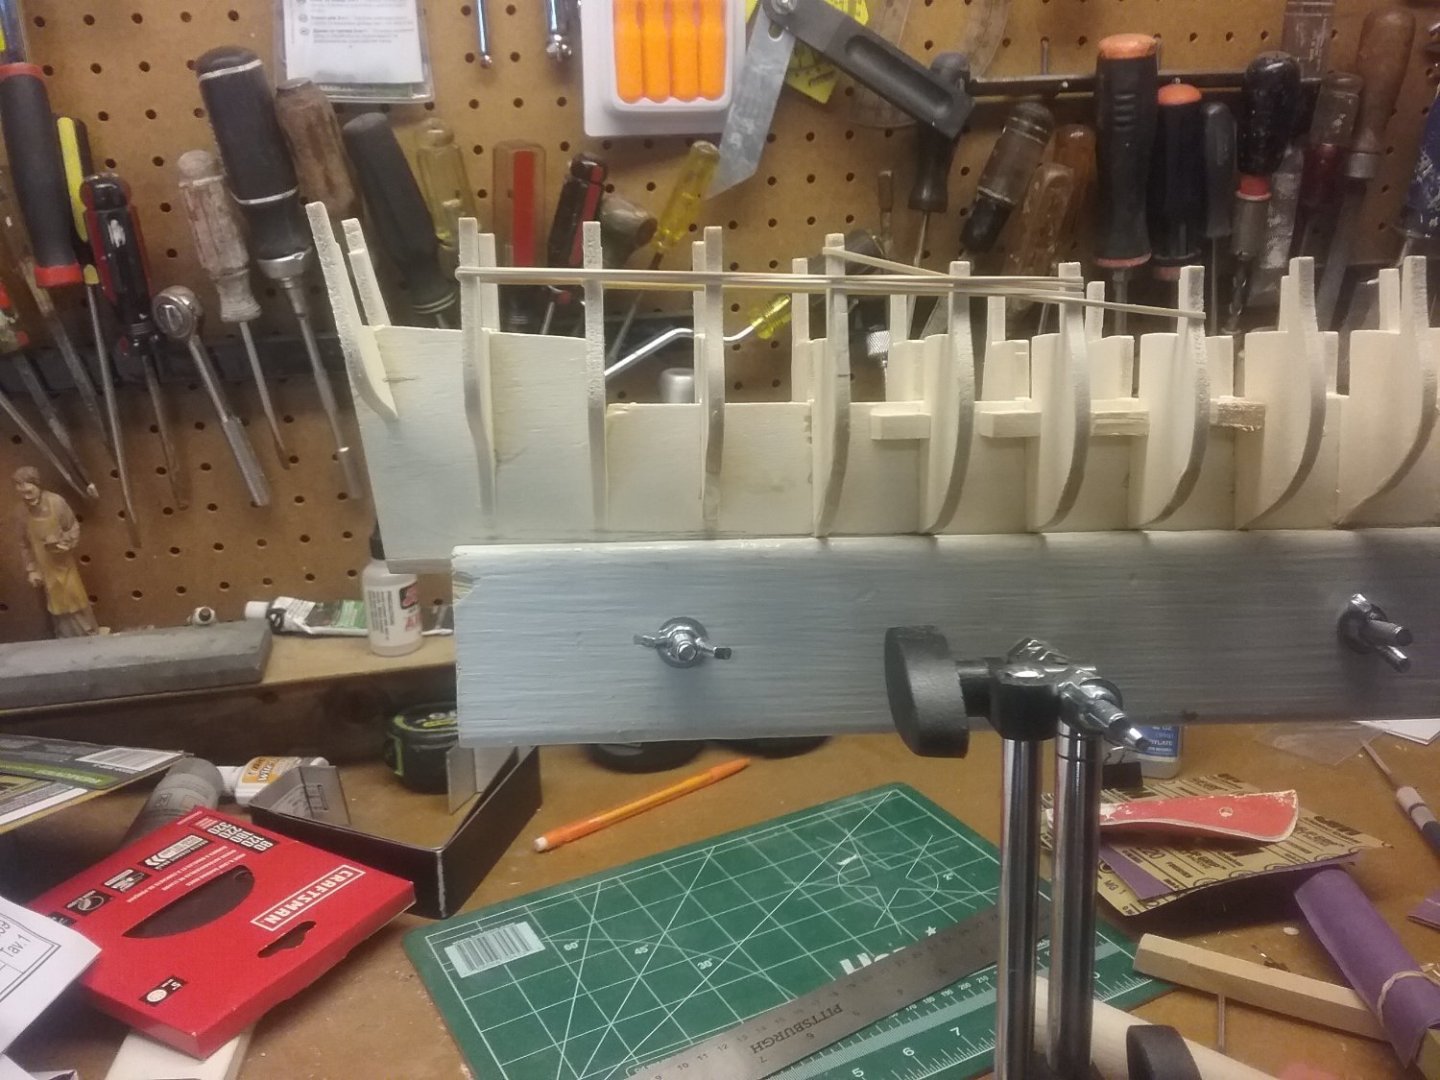
I first attempted top use rubber bands on the bow and keel. Snapped the bow just like @Old Collingwood. Glued it ball and tried using twine thru the ports at the bow and around the rear keel. Used a pencil to tighten. As you can see, its a lot straighter. My thought is to try to plank the middle of one side ((after I get it all laid out), first , to hold the new shape then remove the twine and continue planking. I'll keep you posted


-
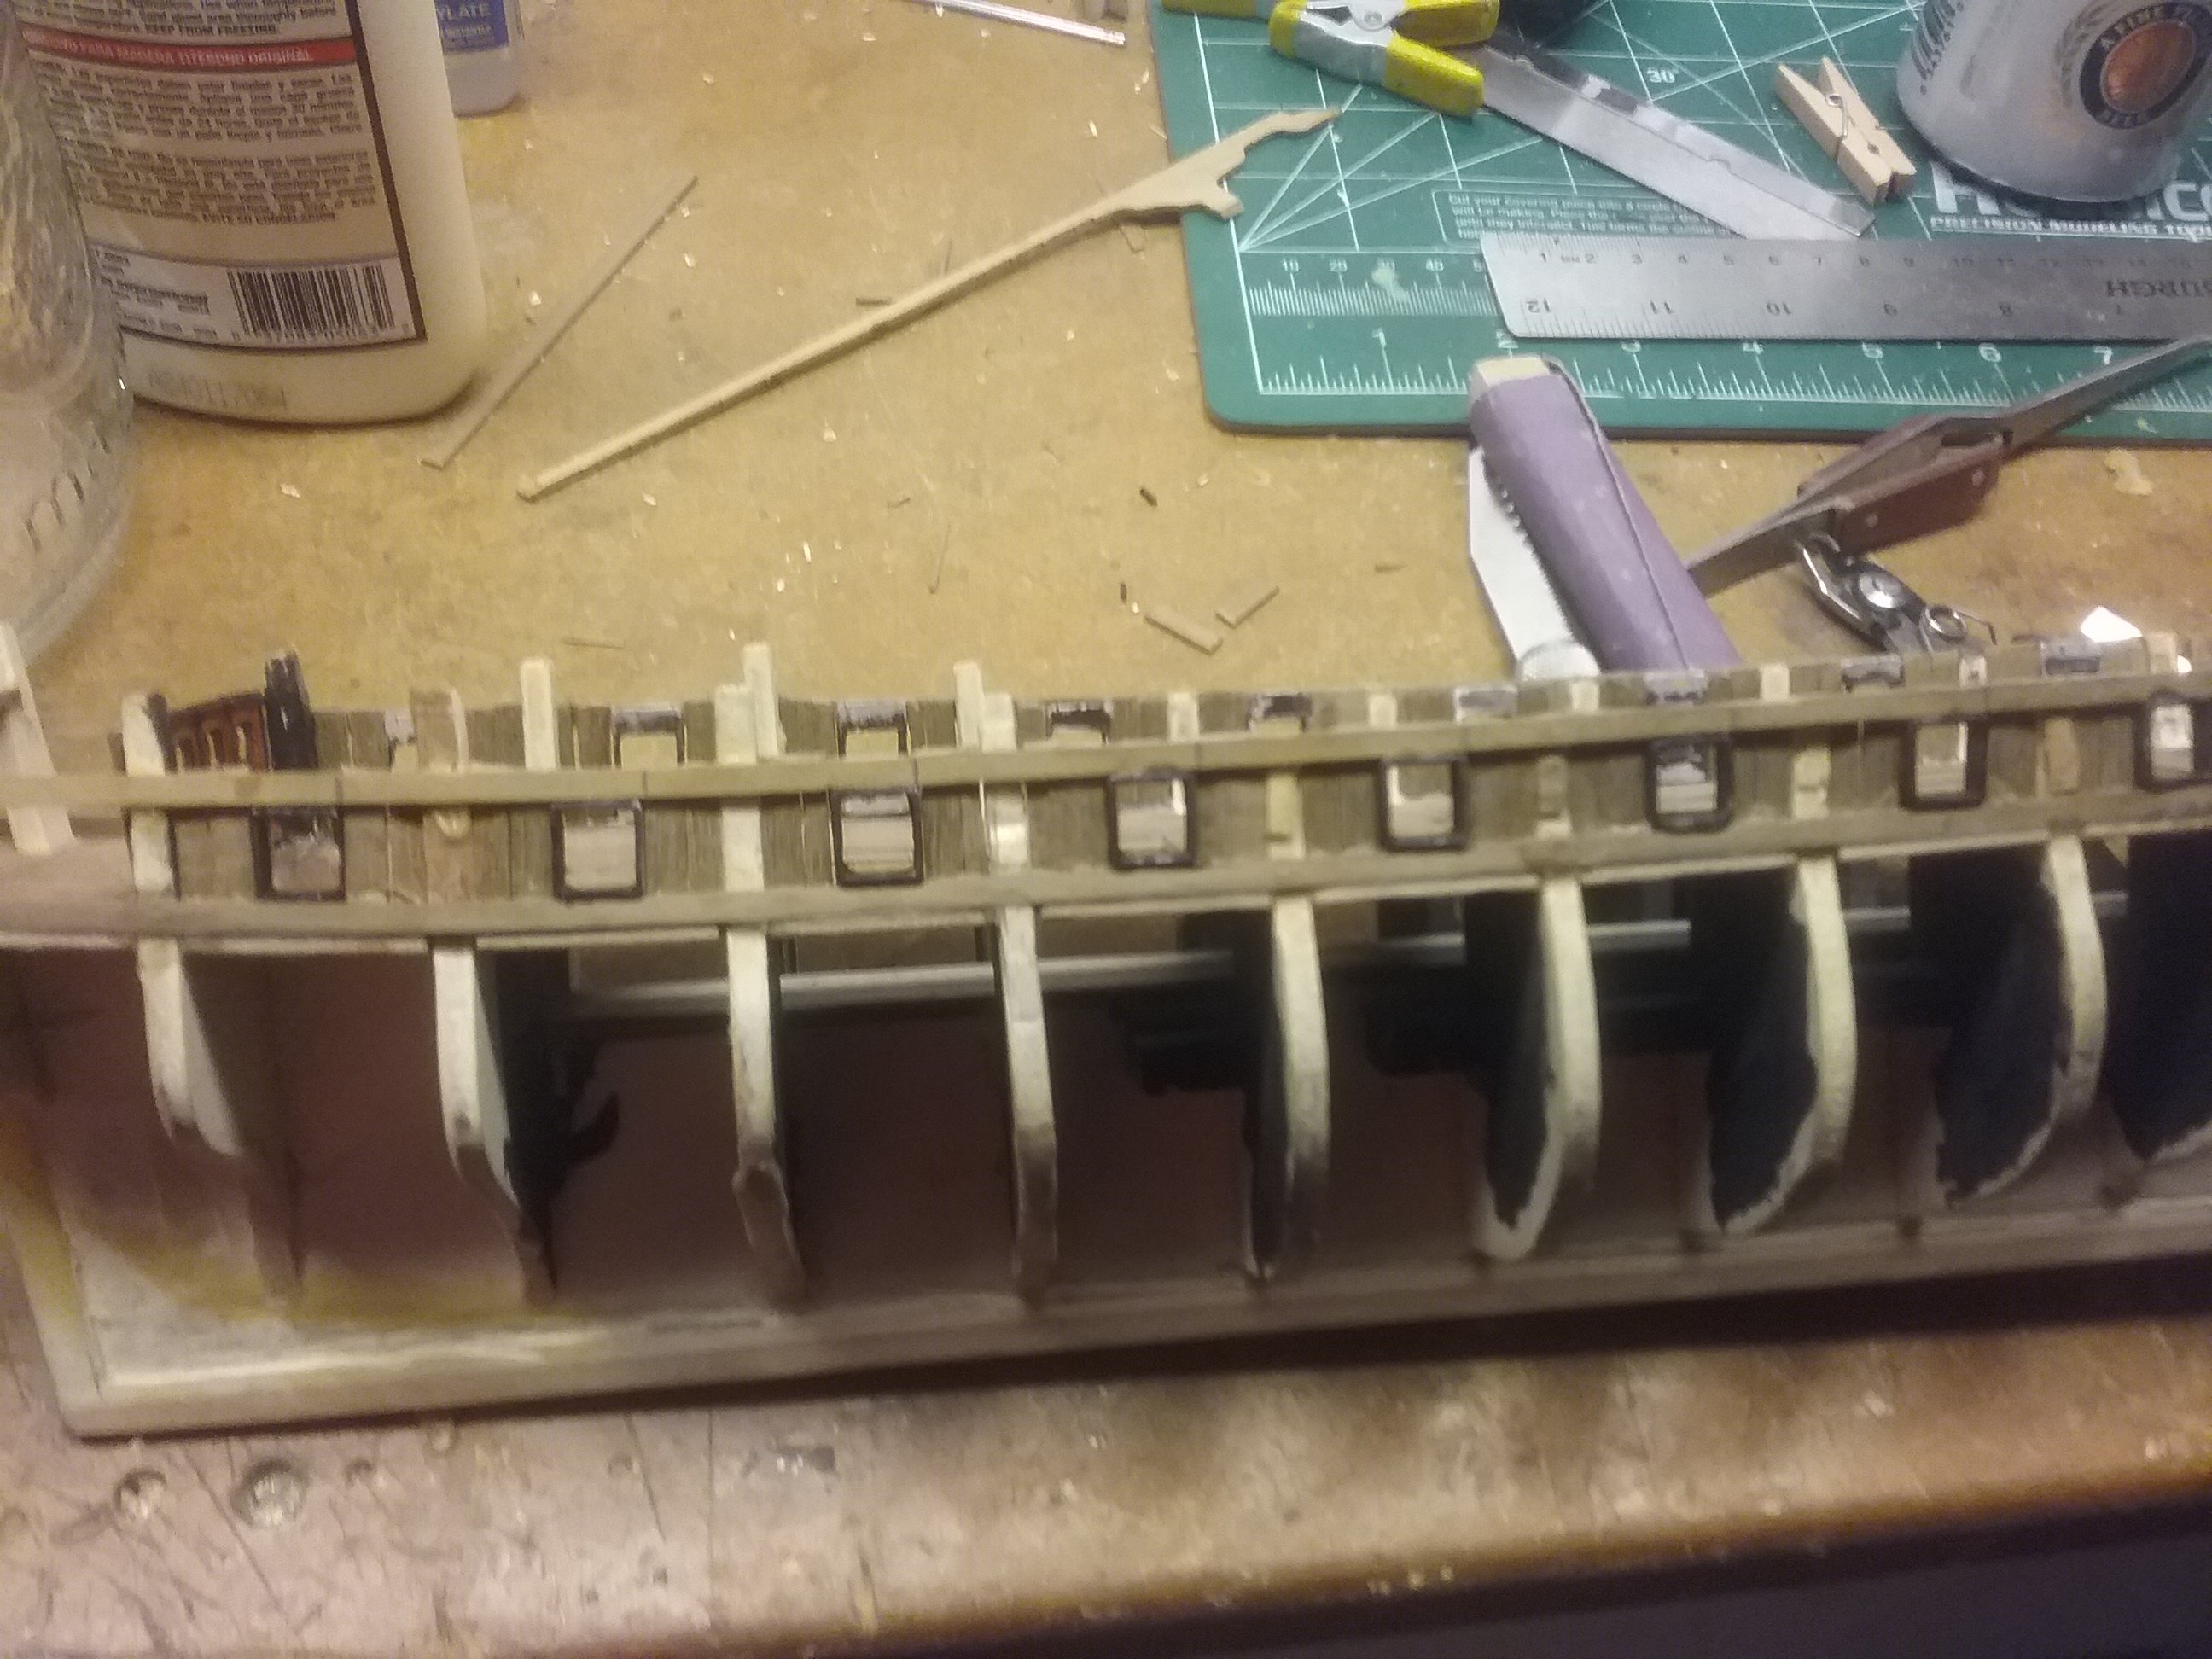
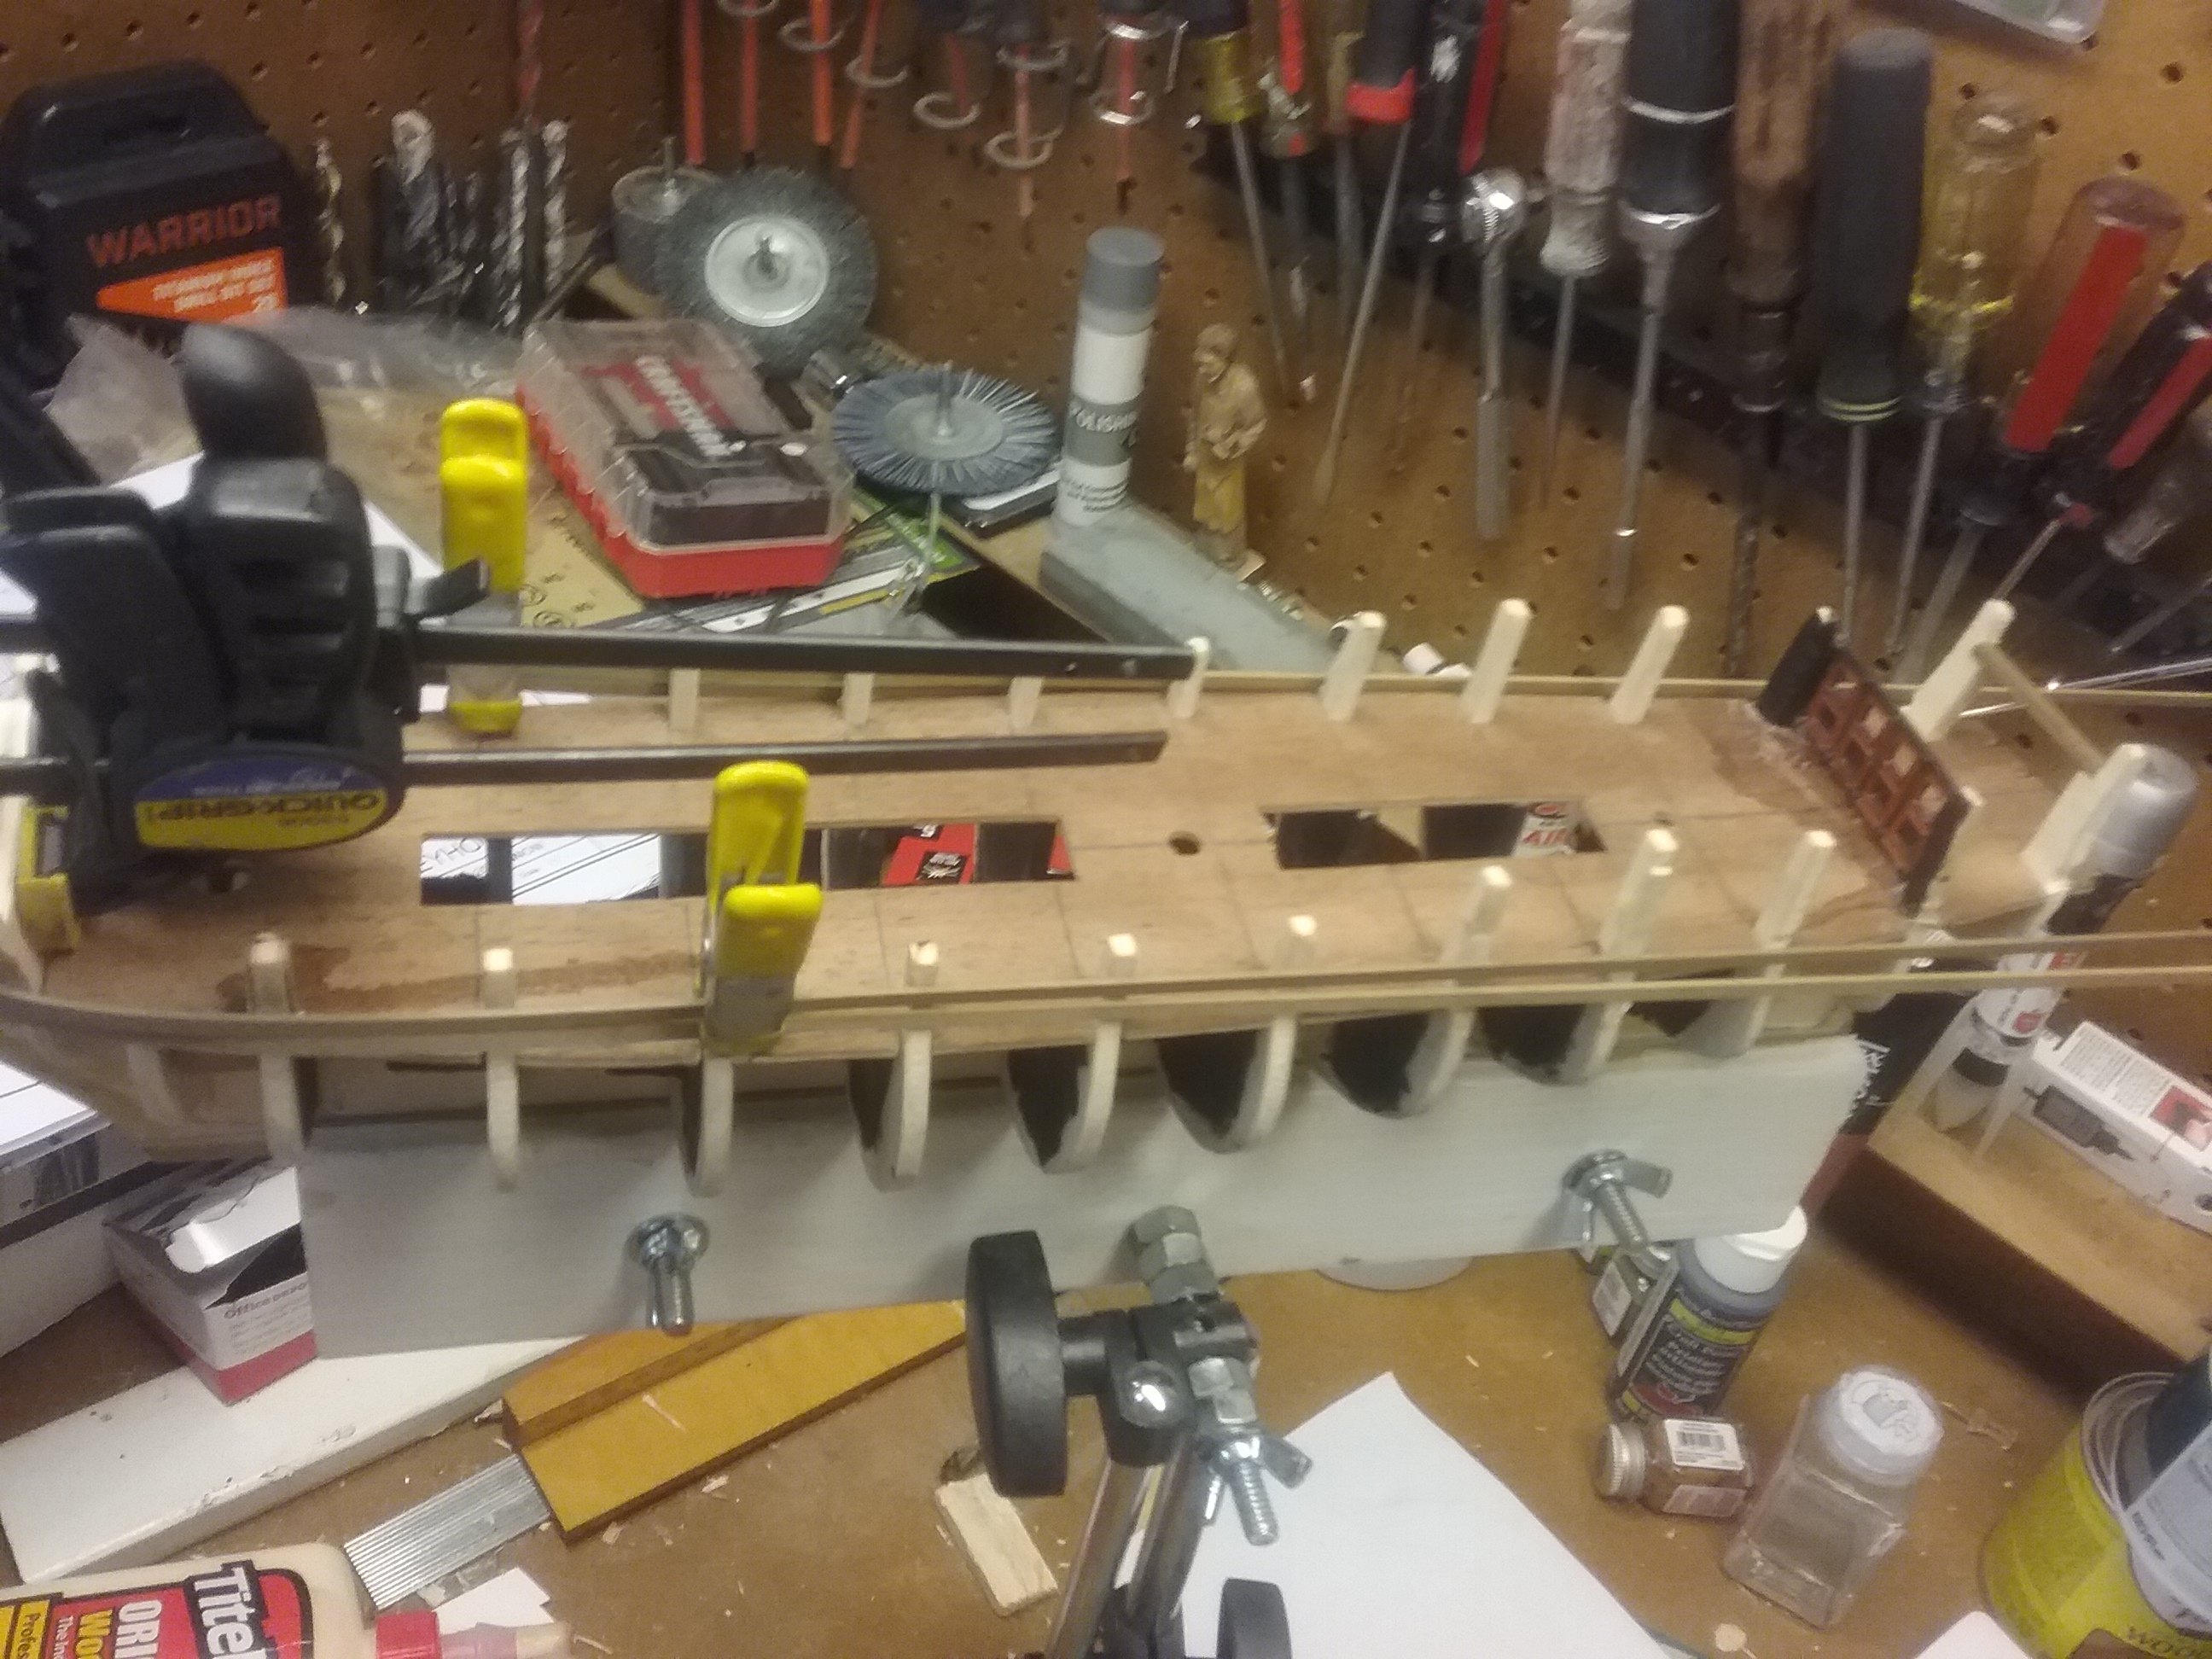
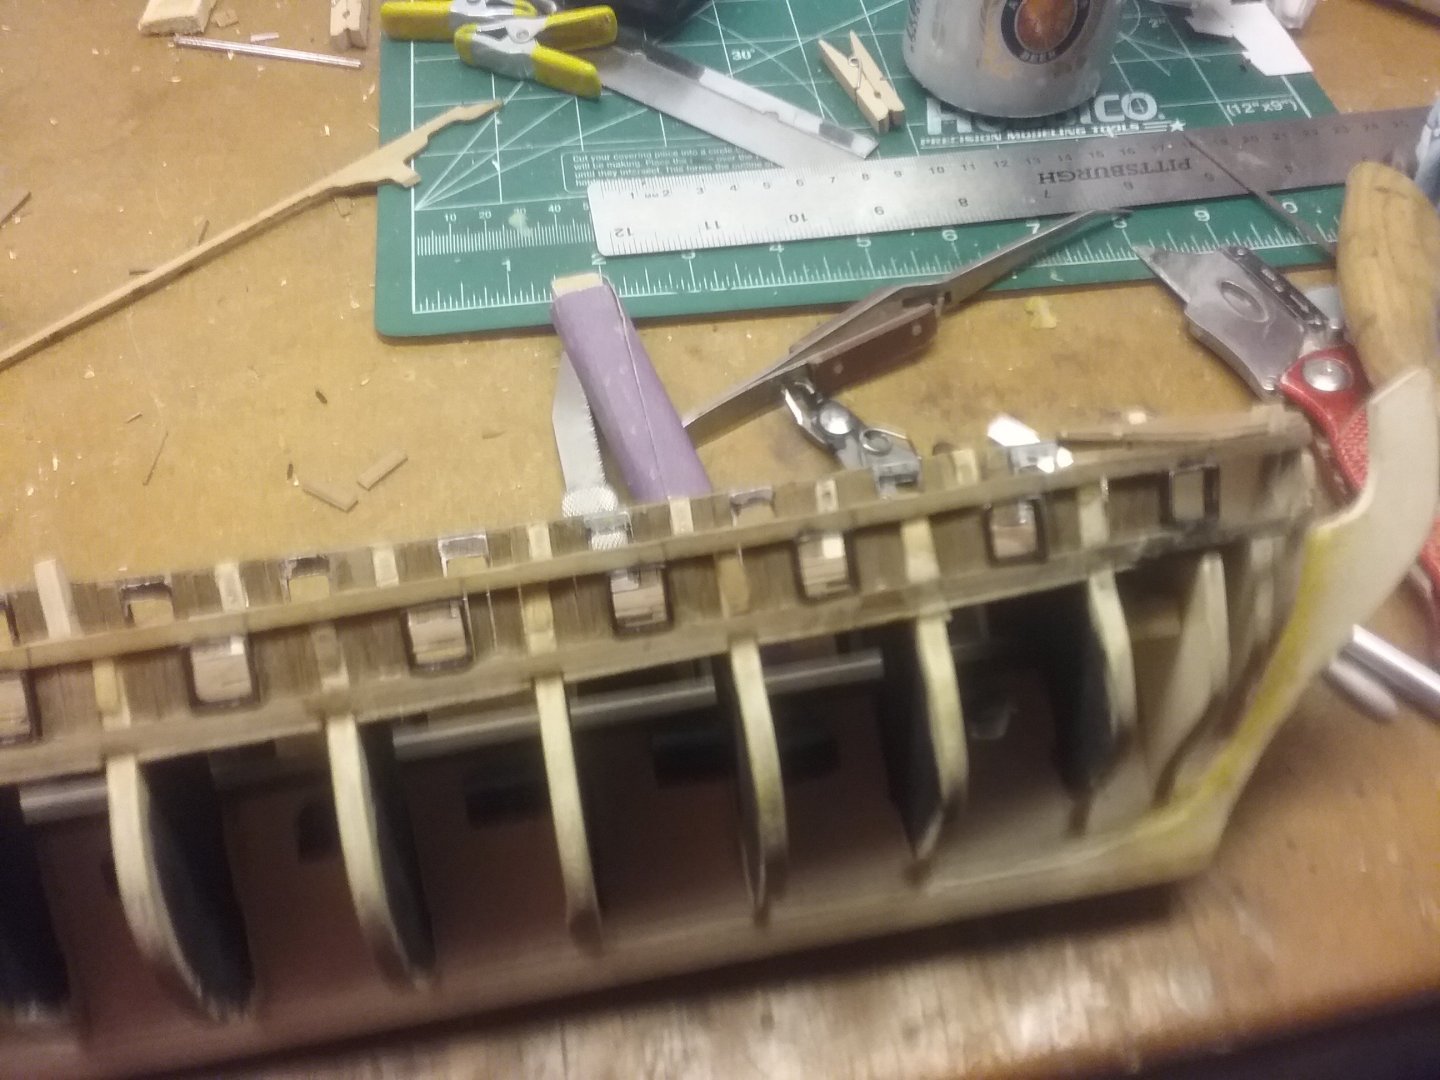
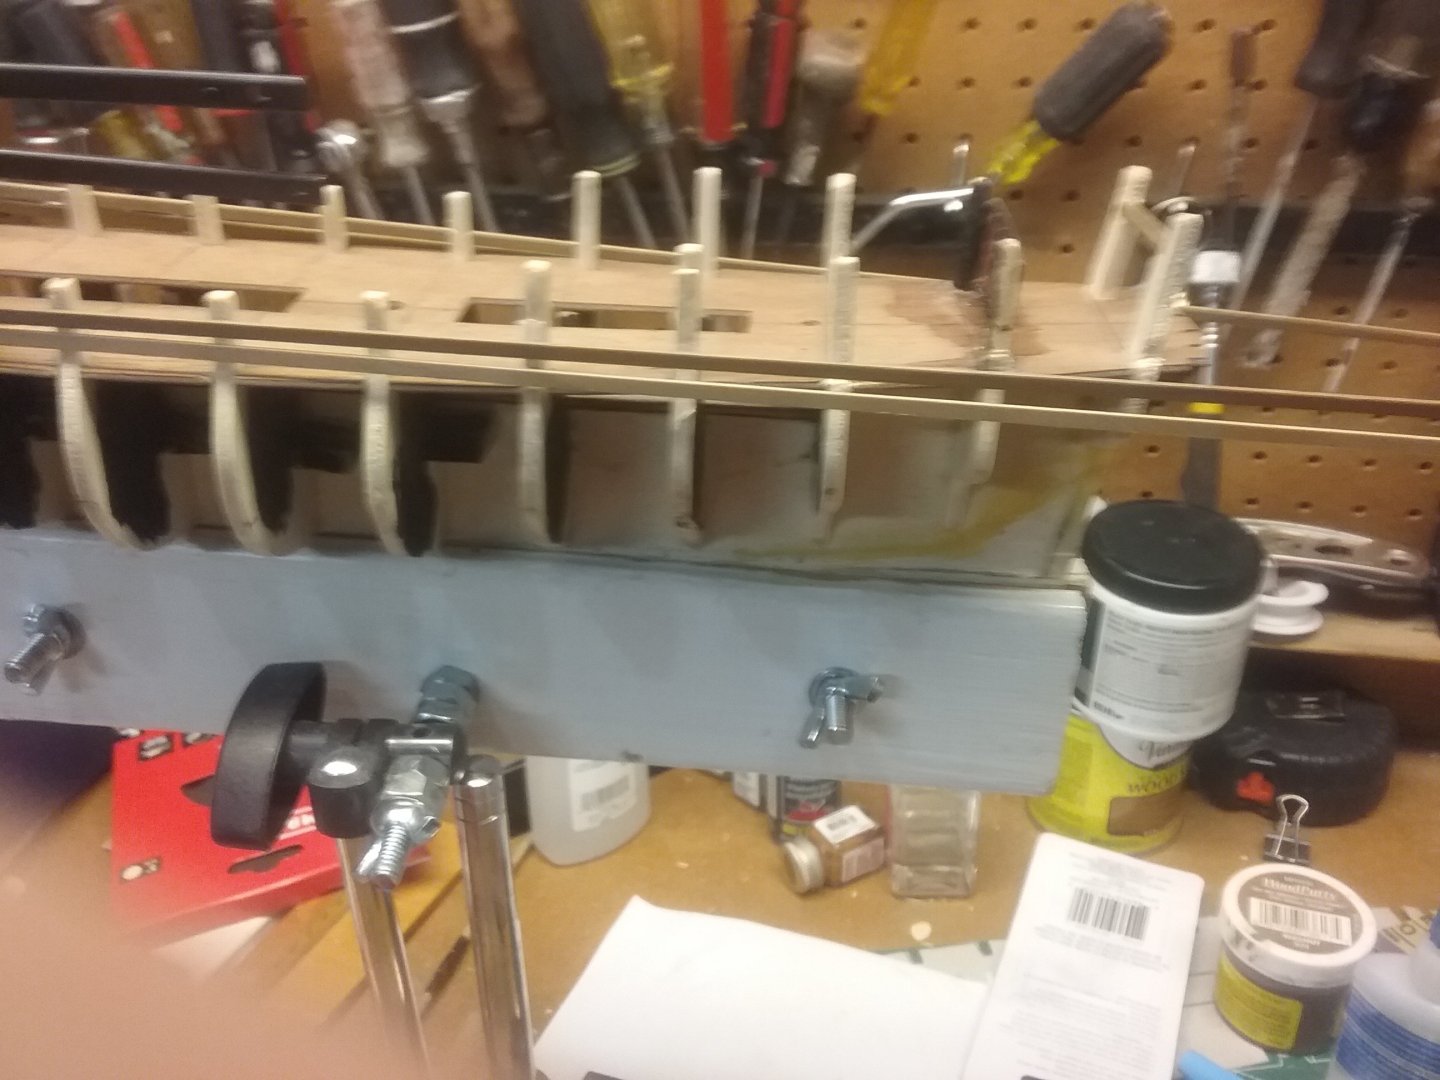
I've been working on the ports and getting ready for the first planking. One question. I notice i have a little twist in the frame. I'm sure i can straighten it or during the hull planking. Is there a trick to hold the twist straight while you plank? I'm sure I'm not the first to encounter this.

-
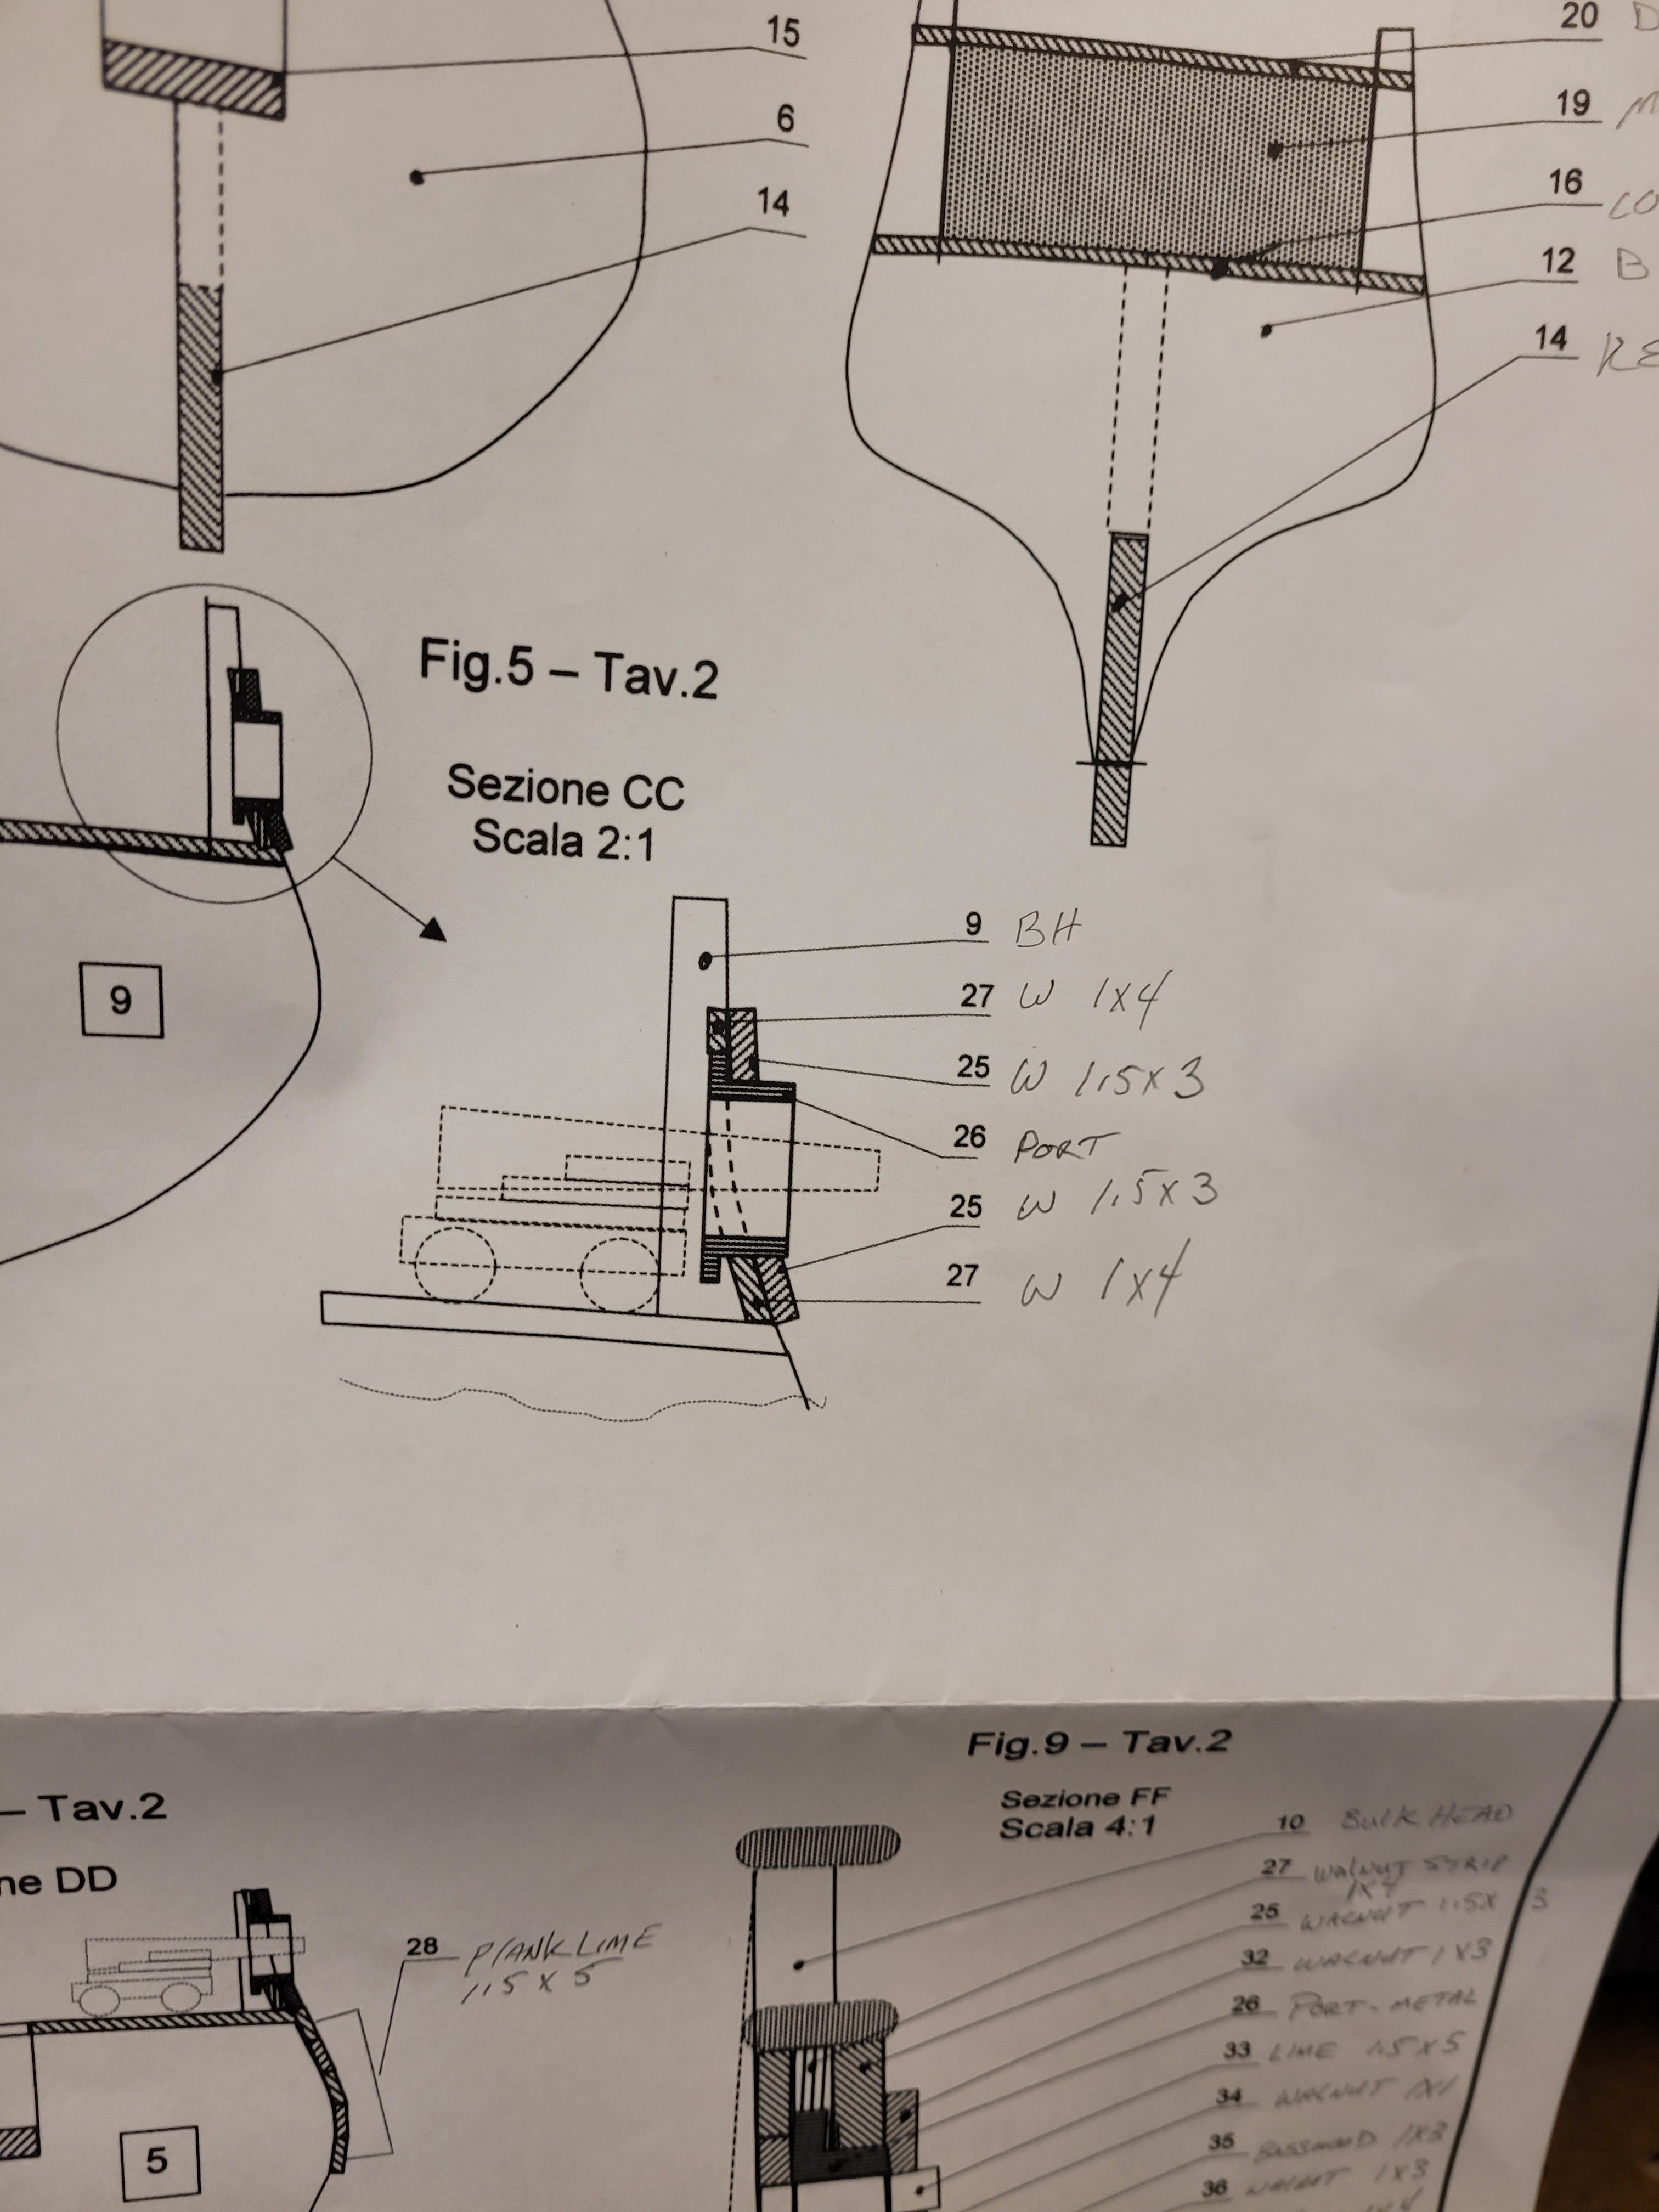
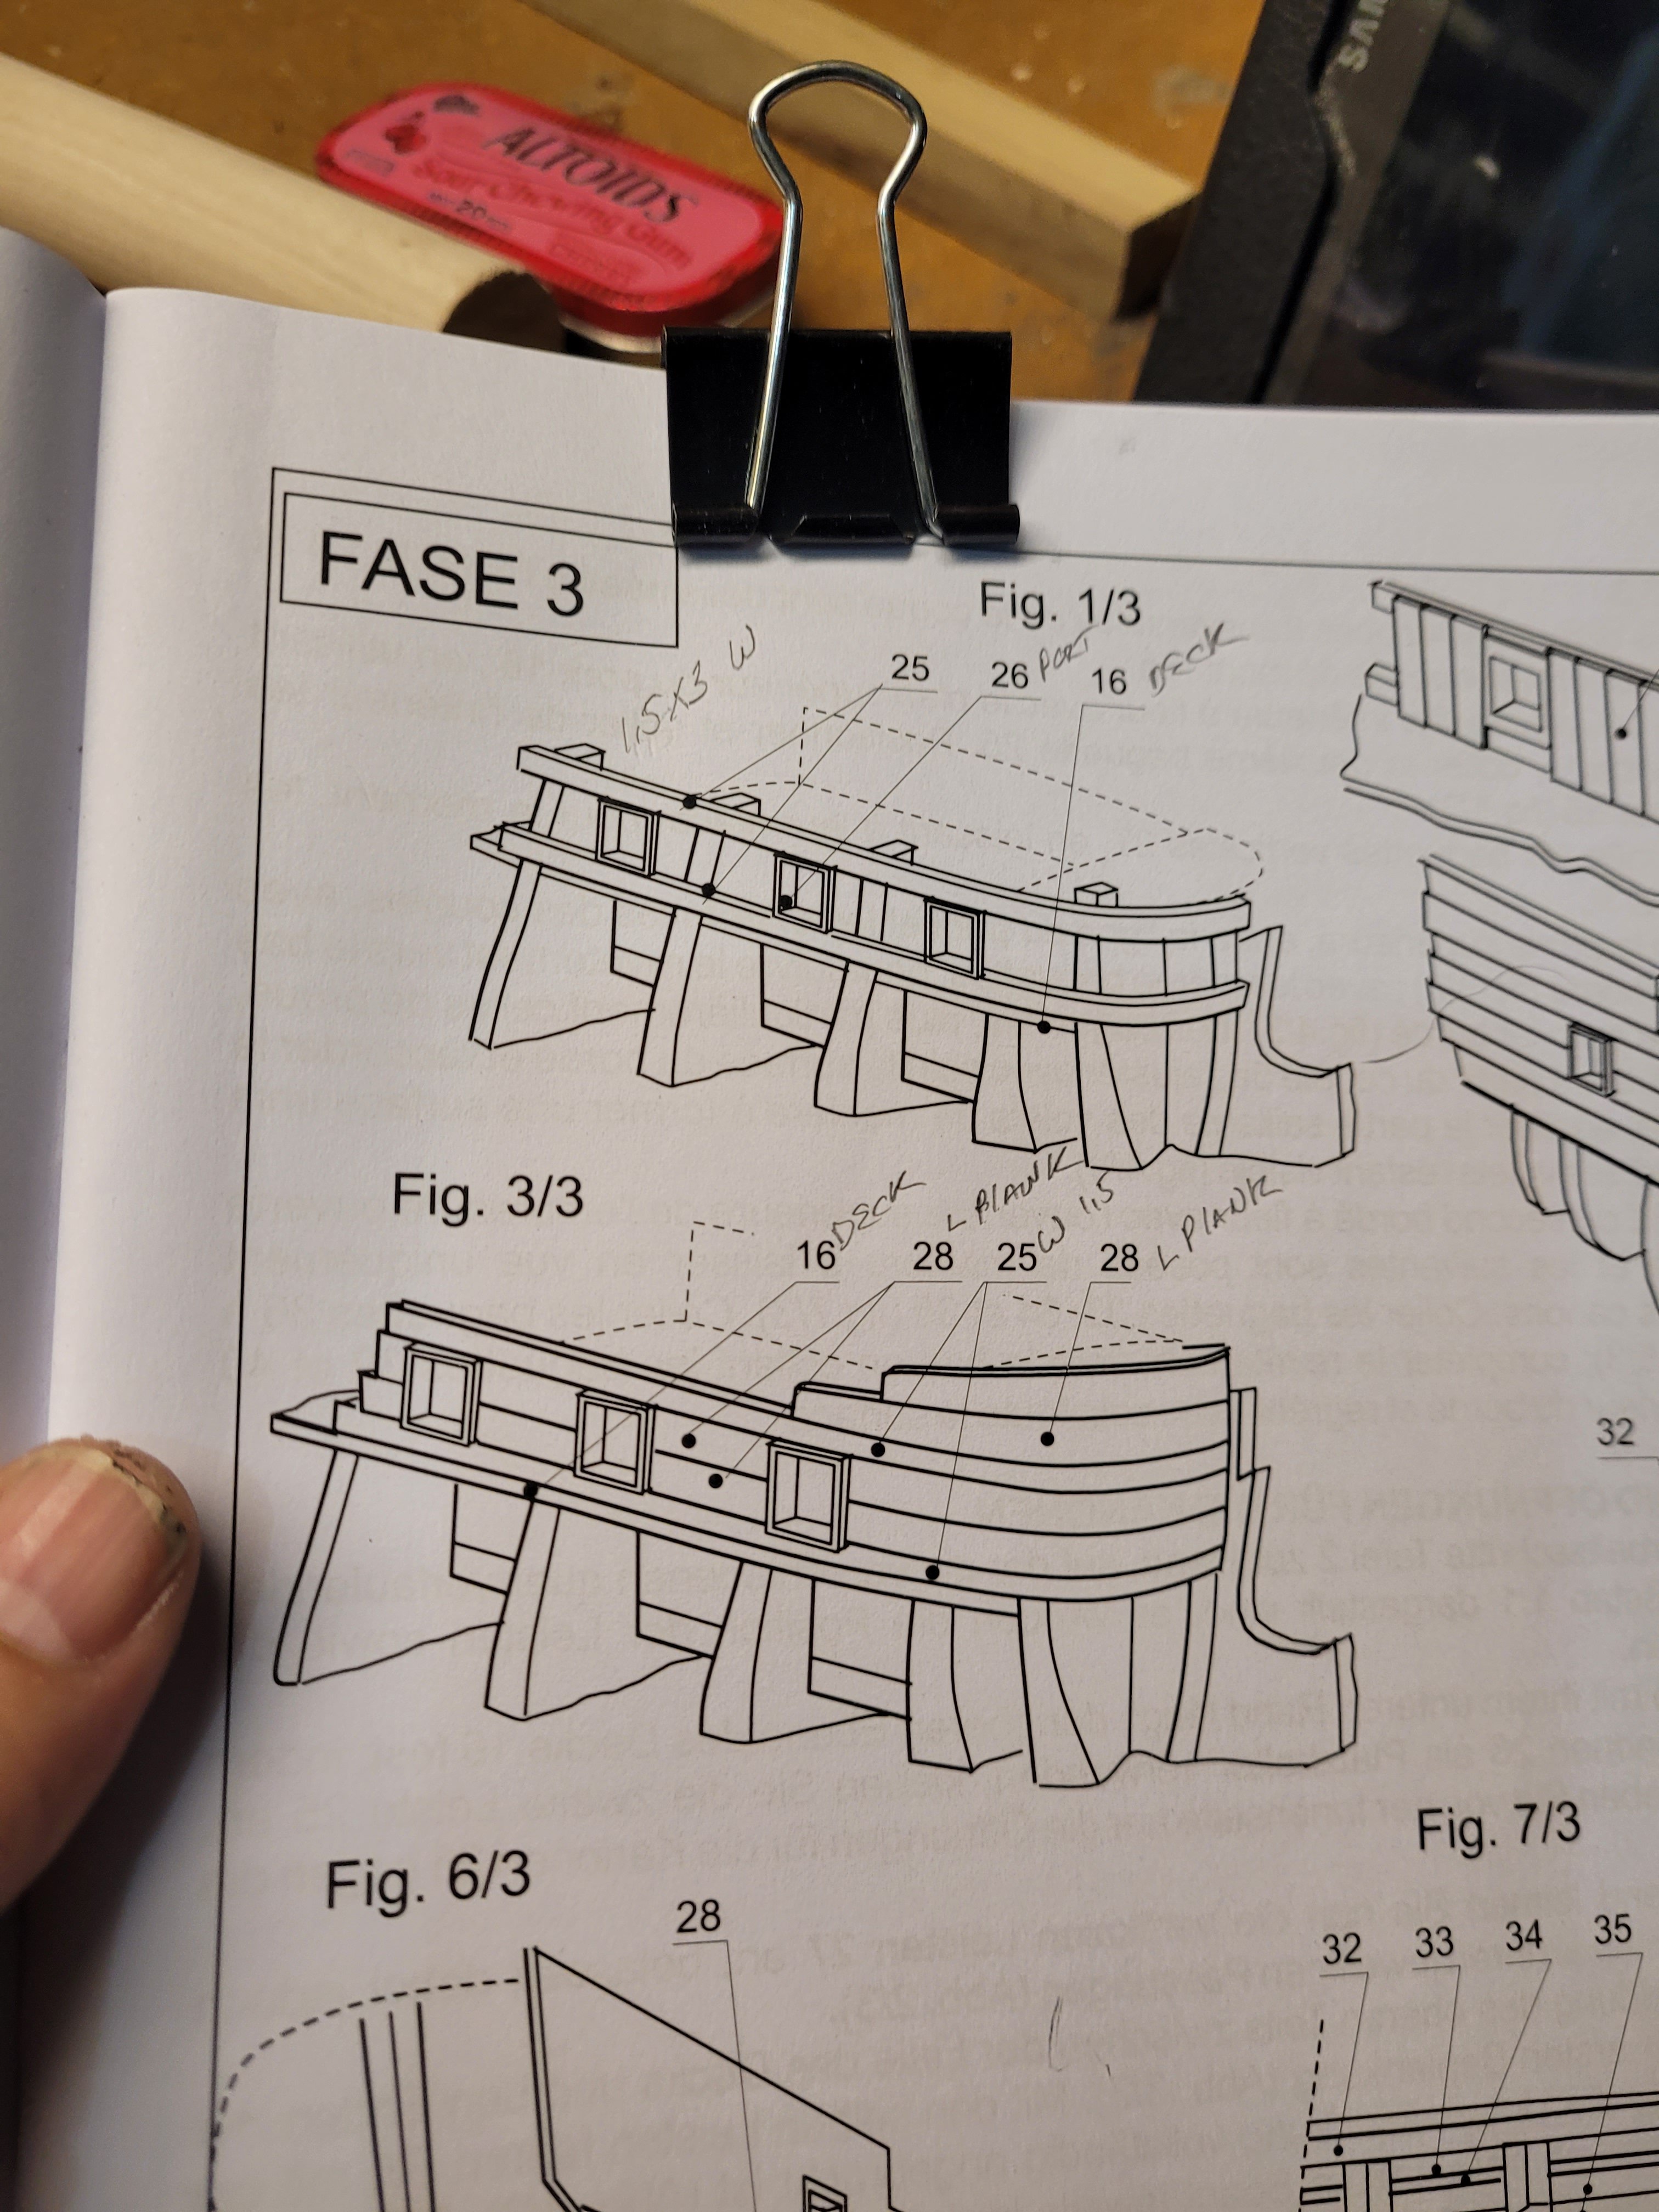
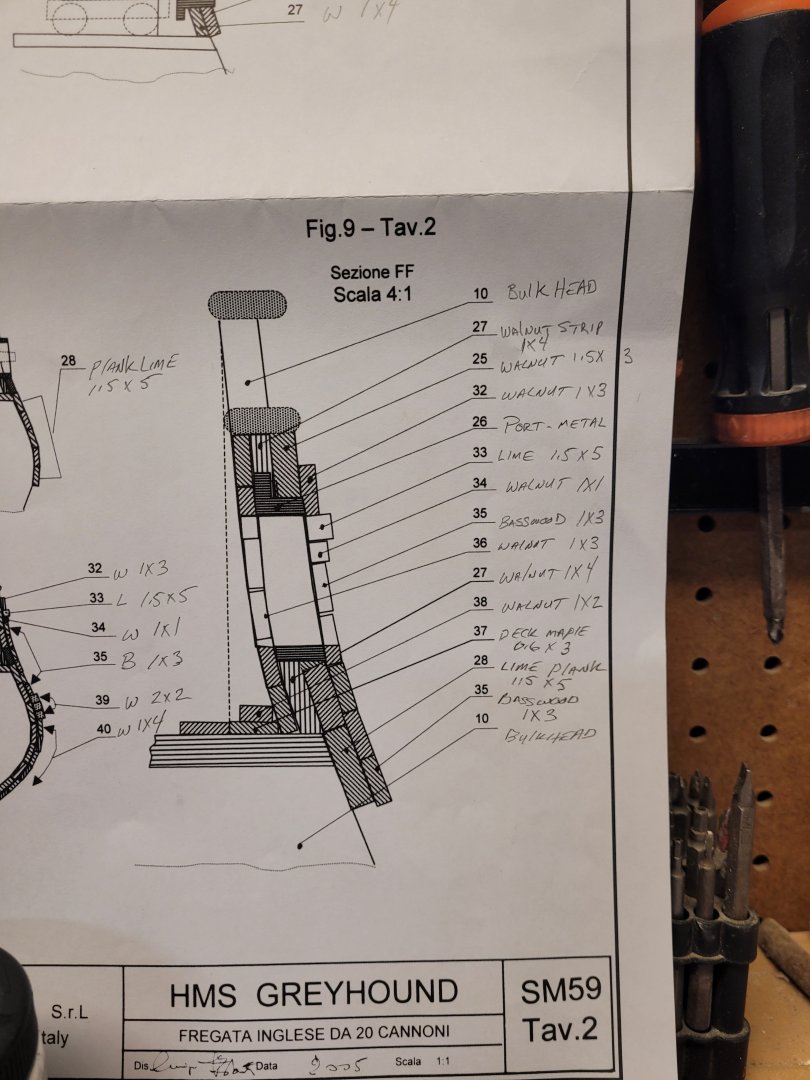
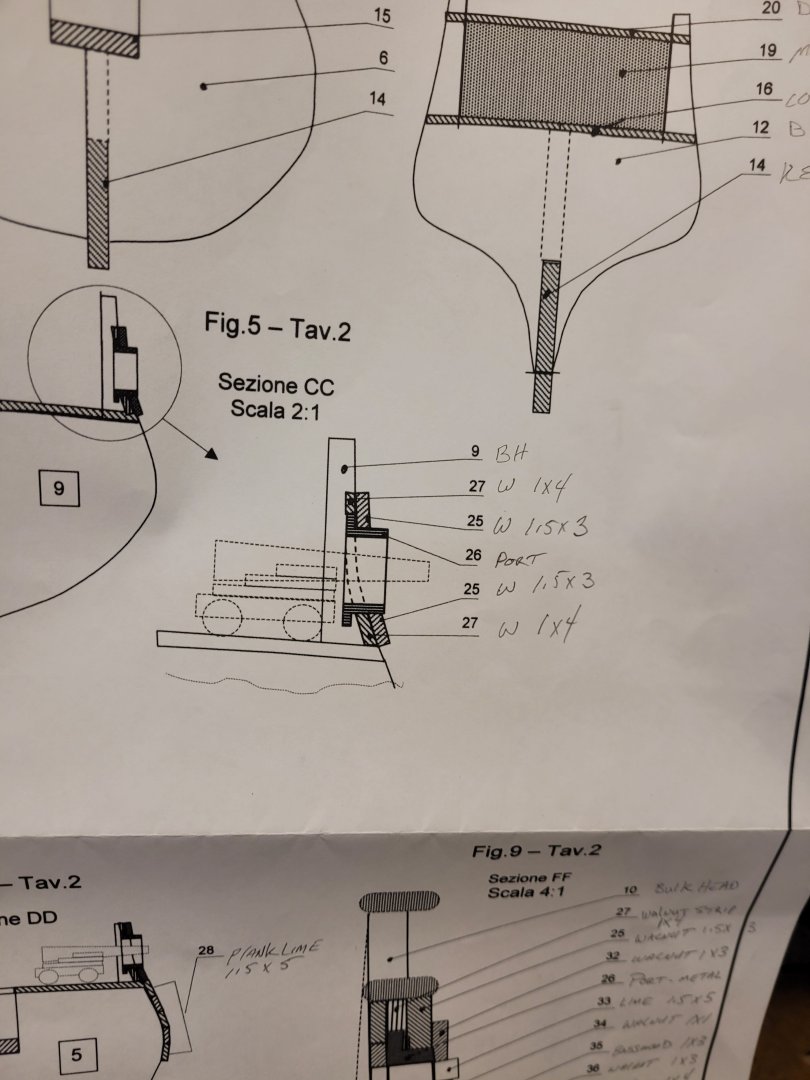
This is getting to be frustrating. @Srenner @Old Collingwood @hamilton Can you lend me a hand? Ive looked at yalls builds and it looks like Im doing the same as you. Using 1.5 x 3 for the starter strip for the ports. BUT, The instructions say 2 different things. The instructions photo1 say 1.5 x 3, but the big fold out papers (Map) show 1x4 then 1.5 x 3 on top. I transferred the item to the number to keep things clear, and its even more confusing. The instructions dont have any of the other things the "maps" have. w = walnut, b=basswood, l=lime. Can you give me a little insight on how to proceed? Ive glued the bottom 1.5 x 3 walnuts in already, but I can acetone them off if I need to use the 1x4.

-
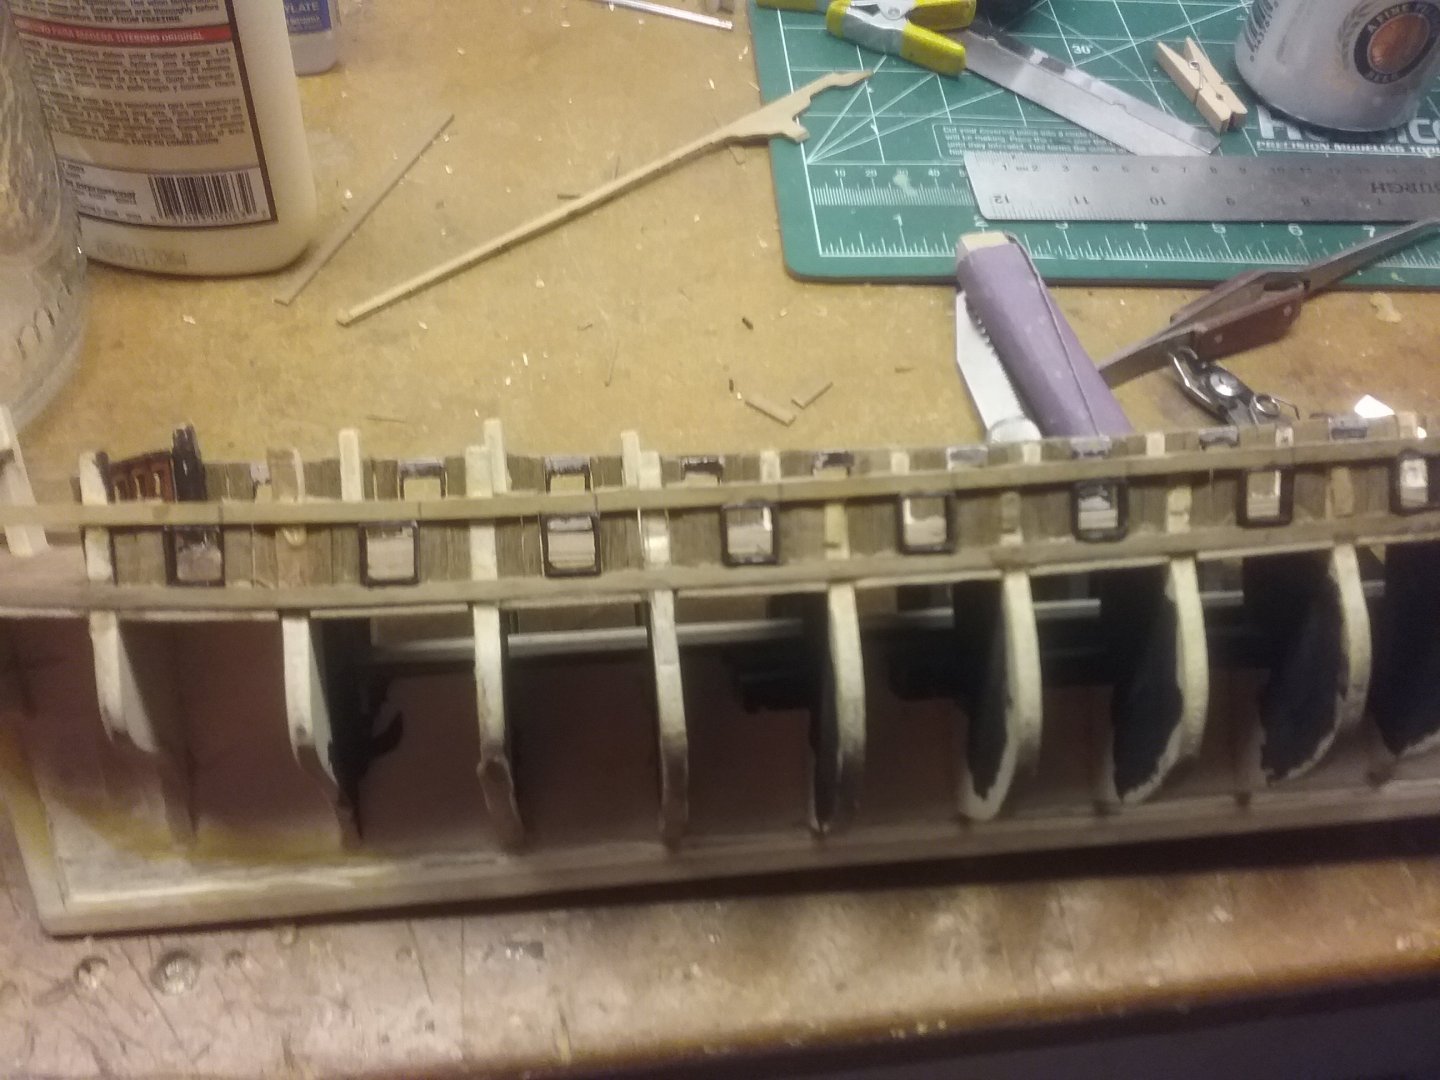
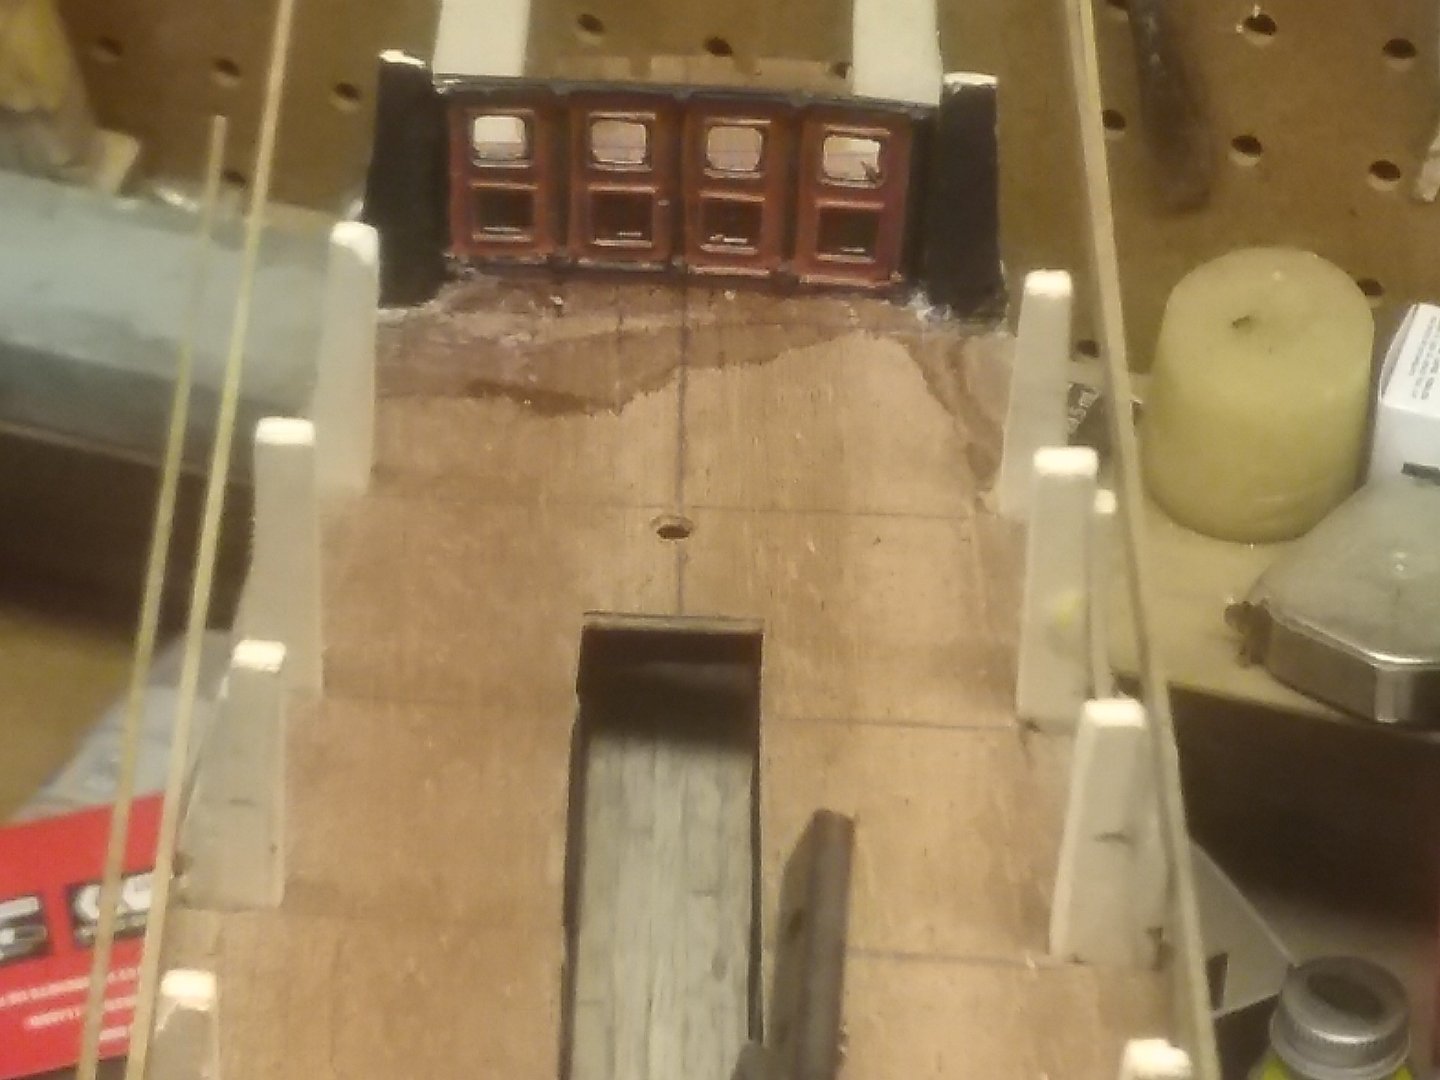
Back at it. Had to redo the rear rabbit. Now bending the walnut to frame the gun ports. Taking it slow and trying to dry fit one or two steps ahead before I glue.

-
Im still working thru everything... The protector did not have a coppered hull so I have to figure out how to taper. Ive been reading up on planking and plan on using a 'fan' to mark off the hull.. but I am very open to any help anyone can give to save me any frustration with this.
-
honestly this ship is so.......(not for virgin ears)... that I think any way you get it done is the right way......
-
gotcha... as I was thinking on it I think I may build the smaller ones and sand the deck back on the others that are almost right. Little bit of both. BH2 is really slim and needs to be built up, but 4-5 may need a bit of sanding and filling... Im just going to lay the planks and fill or sand to them. I still have to cut a rabbit and fair the hulls..... just trying to get my game plan down. Thanks again!!!
-
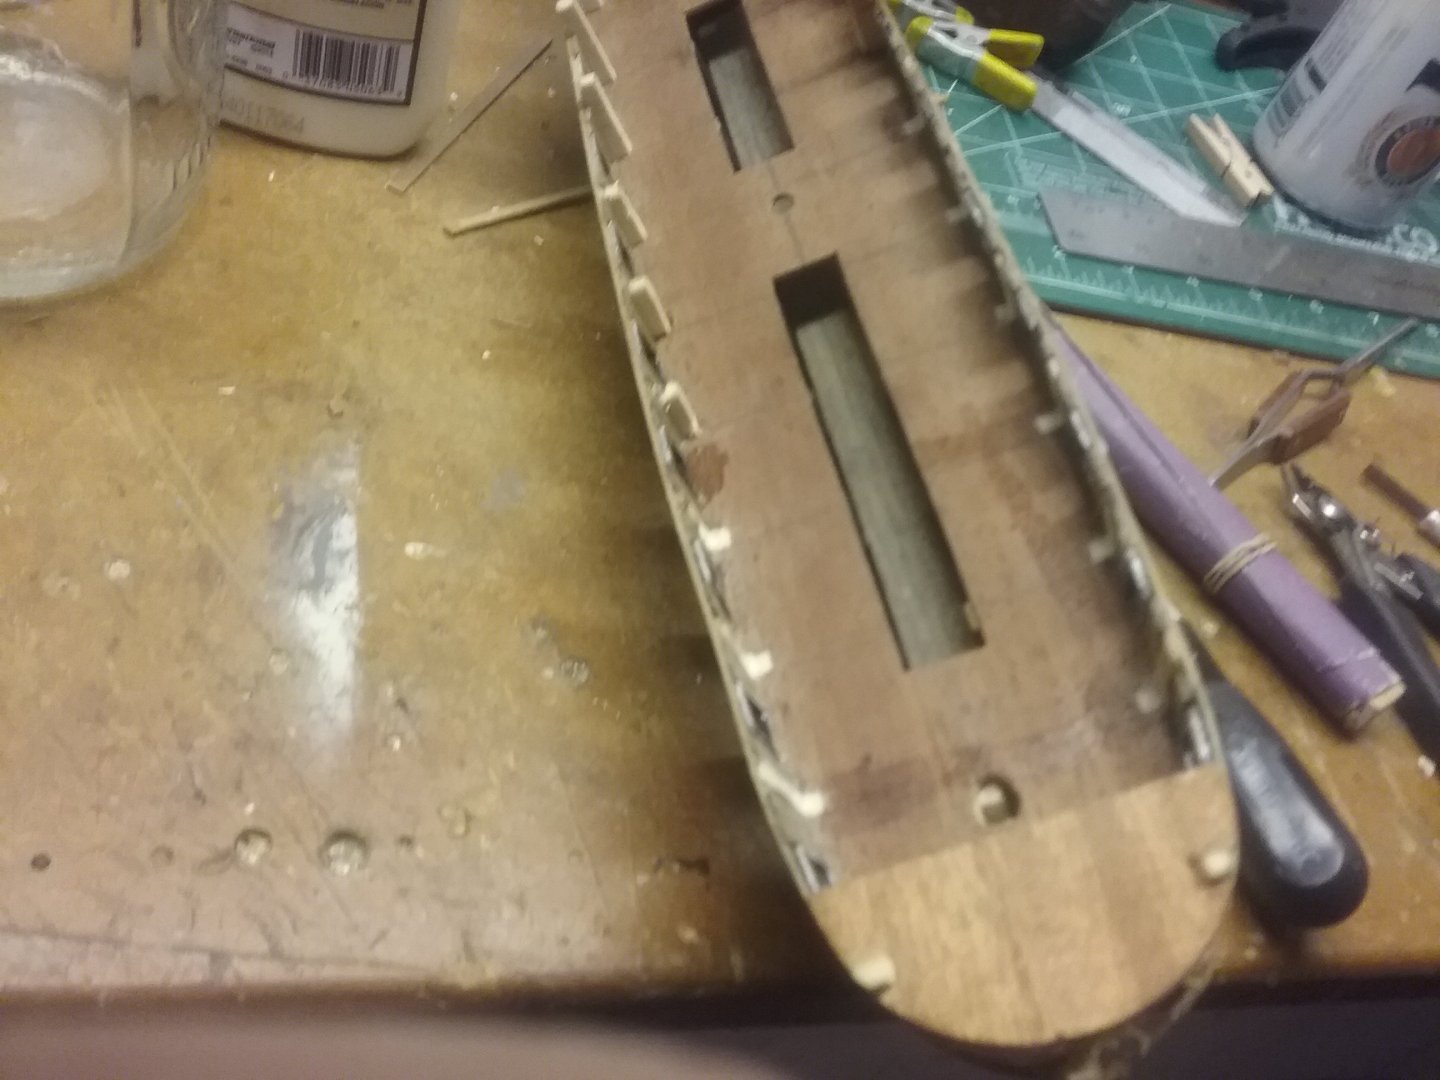
I test fitted the 1 x 3 strip and noticed bh 2 3 4 5 6 were recessed already while the rest were even with the deck. Im thinking I've either got to shim those or trim the deck back to be even . Working thru it in my head ... If I shim, I'll have to shim a large portion of each bh. That will definitely screw up the lines and flow of the hull. I'm still trying to see if trimming will do worse...glad I'm not in a hurry

-
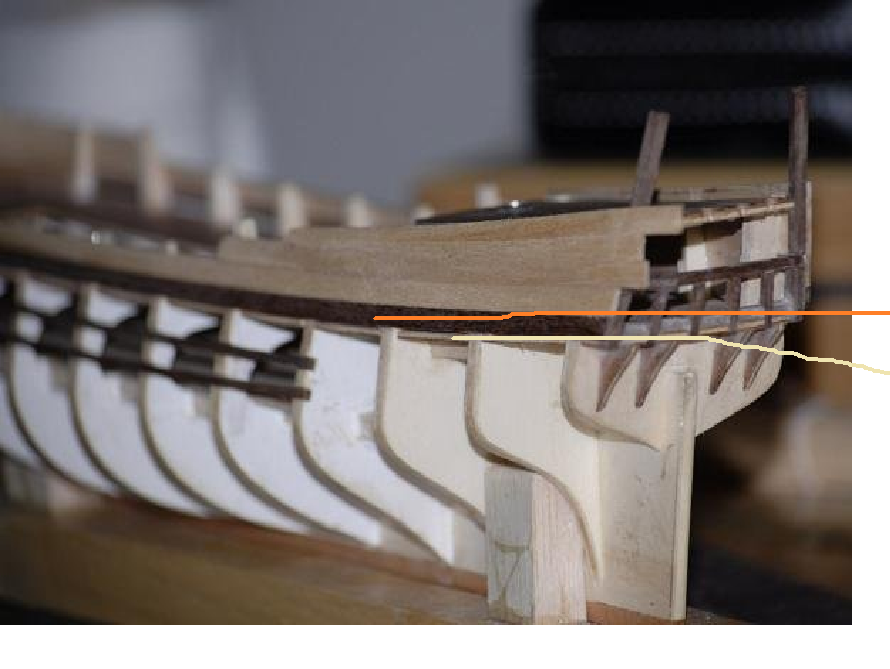
Heres a better explaination of what im looking at This is OC model and the right one is Srenners. It looks like Srenner cut into the BH and set the first walnut strip into the BH on top of the deck. The top walnut looks the same. I see that OC did not cut in and planked over the top. Im trying to figure out which way worked better down the line. if all the planking's will smooth out at the end or did they need a little tweeking? I know OC didnt make the greyhound standard, but the planking is the same. Im trying to avoid any pitfalls you all encountered. Thanks
-
Im starting see what you mean... It looks like your bottom picture.. The walnut strip (1st one) is recessed into the BH and laying on top of the deck so the walnut is flush with the deck and BH. Did you have to soak that strip to get the bend for the bow so you could mark it or was clamping it sufficient?? by cutting into the bh, doesnt that mess up the transition from the double planking of the hull since those planks are not recessed? As always you are tremendous help...Thank you
-
ok.. gonna have to process that a while..trying to figure out how that looks.... if i see it i can do it. is that first piece of walnut supposed to be even or inline (looking from above) with the edge of the deck? is that why the instructions show it cut out?
-
ive glued the deck down and ive been looking at everyone's build logs for my next steps. Should the outside of the bulkheads be even with the deck? and the first strip of wood for framing the ports goes on top or even with the deck? i believe i have to notch the bh and the strip will become even with the bh? is that correct? heres Hamilton's start the bh looks even with the deck.
-
Thanks for the help... My ancestor stated that she was a 20 gun frigate. ive seen 24, 26 and 28. @allanyed im assuming she was 5 window just due to size and the bostons make up from a book on revolutionary war ships listing the 2 as sister ships.
-
I am attempting to recreate the 1779 Frigate "Protector". Not much is known about her. In April, 1778, the General Court resolved to build a frigate of 28 guns which would carry two hundred officers and men. This vessel was built at Newburyport and was named the Protector. In the fall of 1779 it was nearing completion. The launching of the Protector, which was the largest ship in the Massachusetts navy, was a matter of more than usual local interest. Stephen Cross who was in charge of the construction of the frigate wrote a letter to the Board of War in July, 1779, which throws light upon the minor naval duties of the Board. it appears she was built right after the Boston, which was built by the same company in Newburyport,, Stephen and Ralph cross. I know she had 5 windows on the captains cabin, and that's about it. I'm going to venture a guess and say the figurehead on the bow was a man with a shield and maybe a sword or spear. a model on this page shows the Boston with a roman soldier with a shield and spear. Maybe the rear decor was a shield above the window or maybe crossed swords. Just guessing here. I know there is a wealth of nautical knowledge here and I'm asking for the best educated guesses on the stern decor and figurehead. Since we have 3d printers anything is game. My distant grandfather was aboard her during the revolutionary war and I would like to do her justice. thanks
-
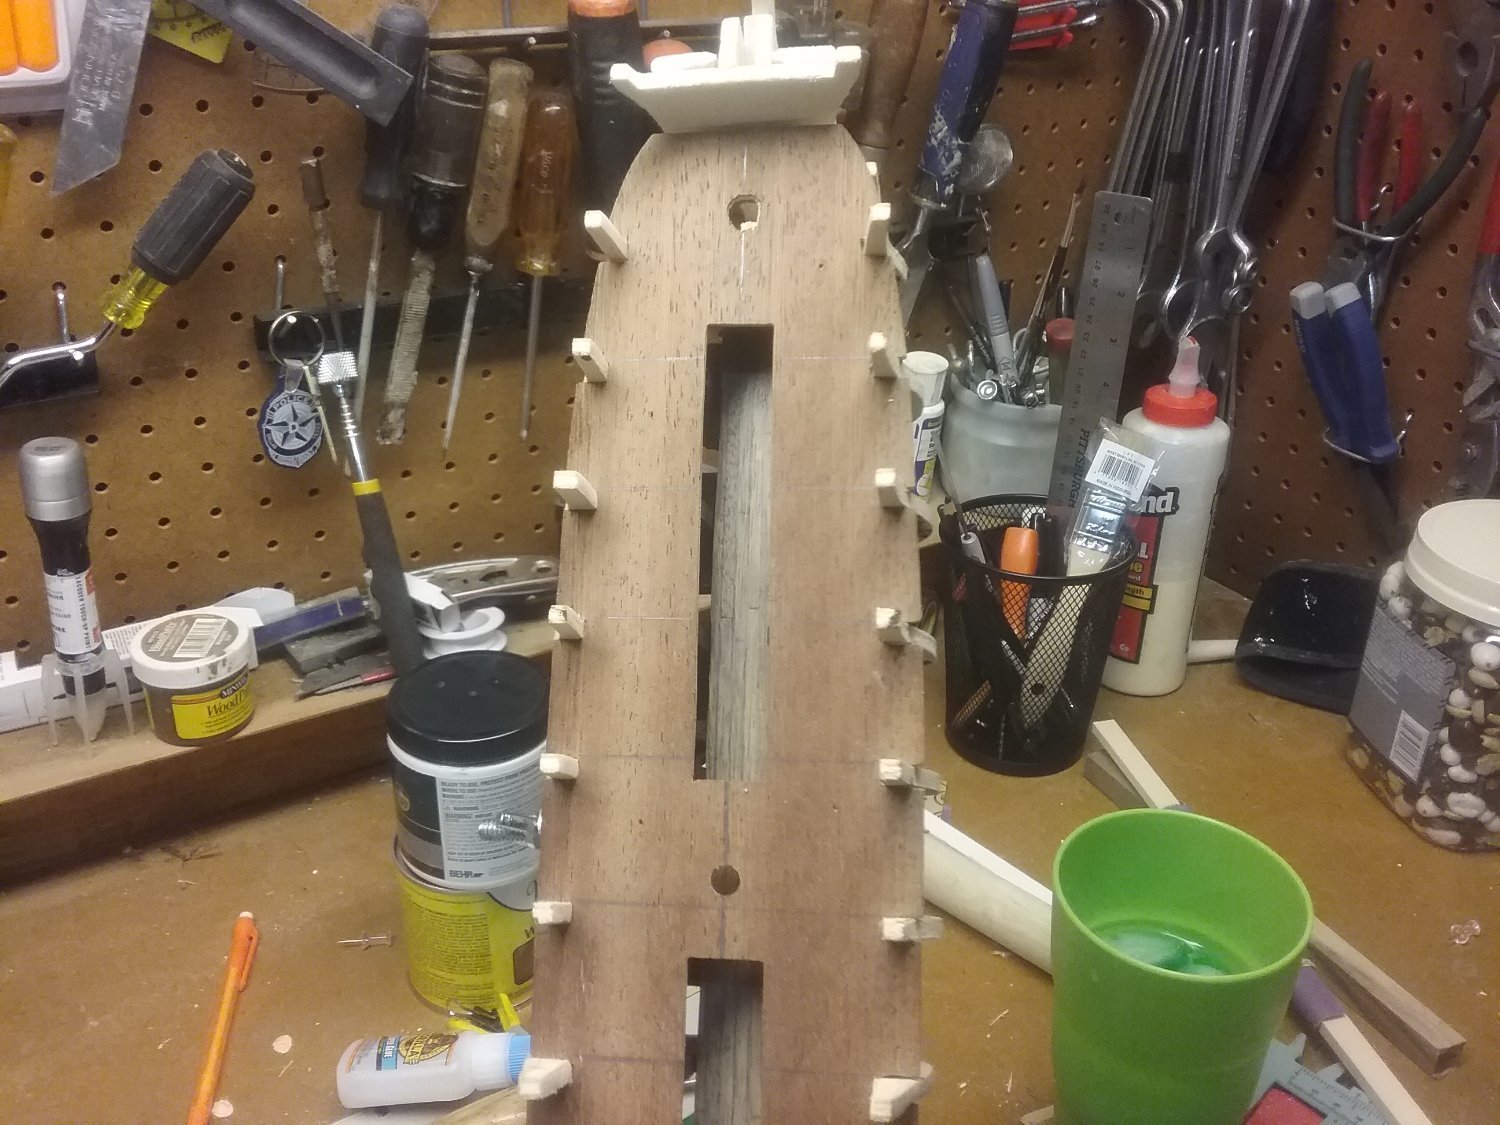
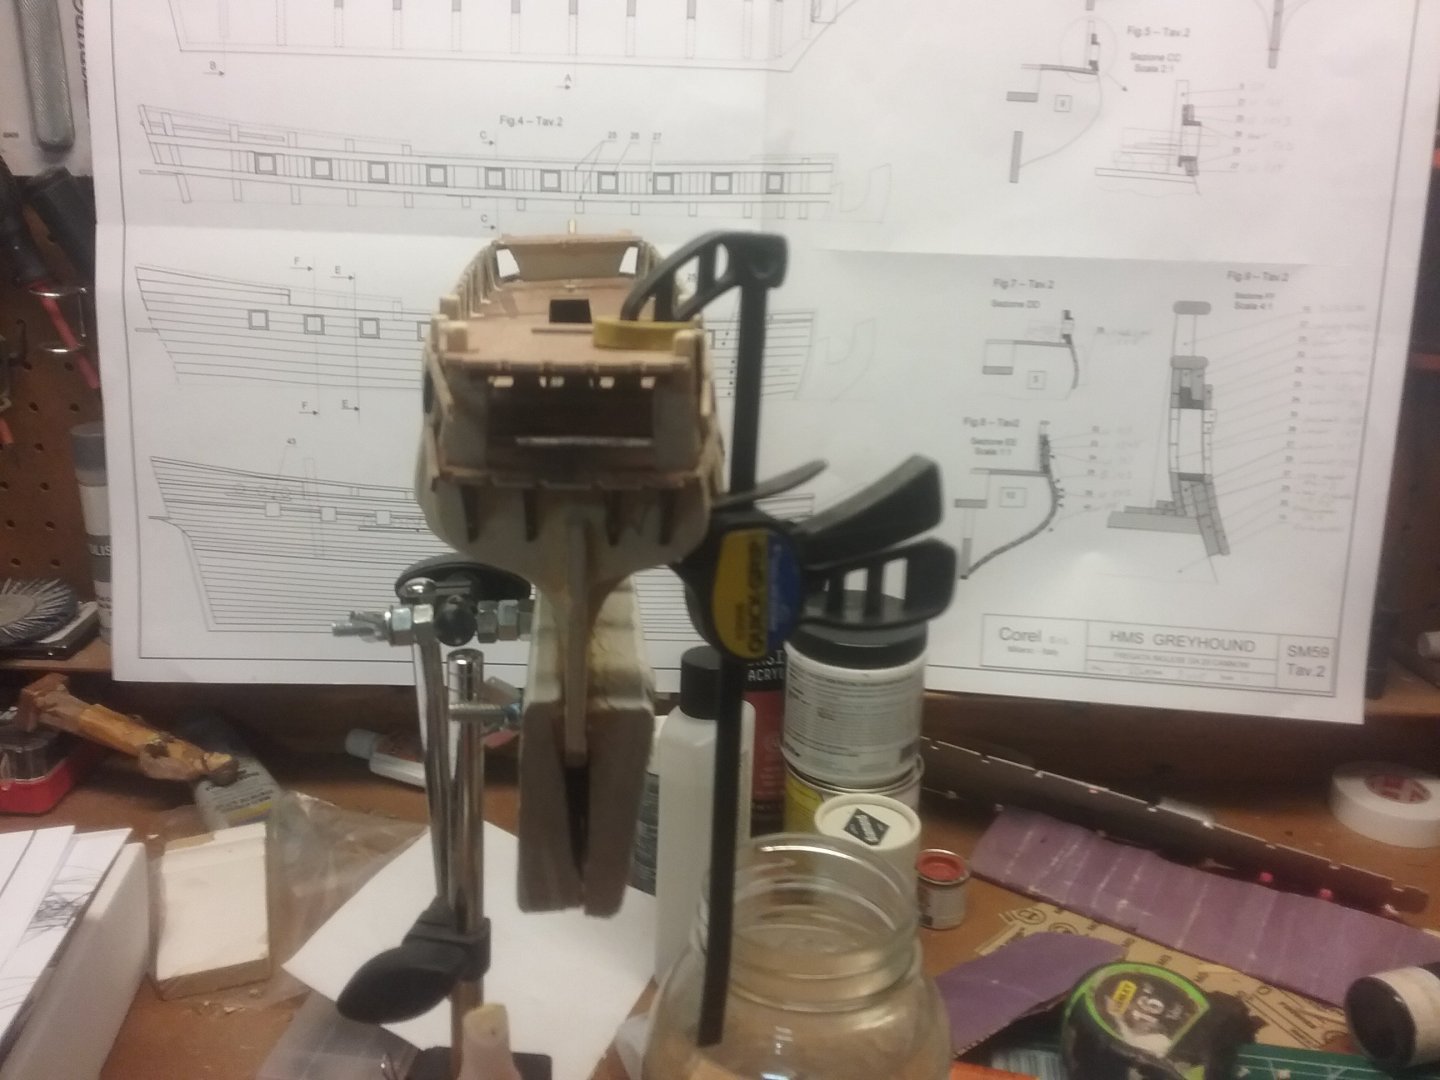
Ok, Rant time. If you are thinking about doing this kit here area few helpful hints. You better be married. So you will already know: frustration, disappointment, and confusion. This kit should come with a bottle of whiskey. If there was a test you had to take before you could be allowed to build scratch built... this would be it. Seriously, 1. bulkhead 9 and 10 need to be built up. 2. do not glue the bulkheads before you put on the deck, test it first. 3. be prepared to alter, build or modify most every part. I answered my own question about putting the upper deck on... You have to. But I found out that 13 bulkhead didn't line up anywhere close so I had to take it off. Most of the BH were too thick for the deck to sit without bending. Those had to be sanded and the cut outs on the deck had to be opened. I made a cardboard template of the deck that I'm going to use to cut the deck planks so I can plank it right. I may end up planking the template and just gluing that to the deck...That remains to be seen. I've never seen a "kit" where nothing fit right or the cut outs didn't matchup. I had to enlarge the front mast hole because that was off a little too. Rant over... Thanks for letting me vent.
-
Thanks!... I just ordered some basswood strips that Ill use on the lower, just to be safe. I can practice ageing them before I do the upper more visible decks. Any thought on my 2nd question on planking the whole deck before putting it on? I plan to put a lot of time to the deck. Inking the sides, cutting and staggering the breaks, and pencil tree nailing them. I think its too small to use toothpicks for the tree nails, so Im keeping it small.
-
Yea, but the kit shows it some kind of Maple... I didnt want to mix woods on visible areas. I plan to age the wood like @Old Collingwood with vinegar and steel wool. Turns it a cool greyish. Thanks Ill just pic up some for the lower deck.
-
Ok. Got the bh in and painted them for shadowing purposes. On to installing the decks. Question for @Old Collingwood @hamilton @Srenner 1. Was there enough decking to do all the decks, even the lower? 2. I if you had to do it over would you deck the upper main deck first, aside from the edges if your cutting the bh back, before installing it? It looks like you have to work under the front and rear decks in the instructions.
-
Sorry for the lack of explanation. When Im building and posting images Im using my Tablet and its keyboard is not the best. Those pictures are perfect. Thank you. Do you have any photos of your rebate/rabbit along the keel and stern? Just trying to see how far back you started cutting into it. I will definately hit you up on how to frame out the cannon ports. Ive seen a few builds and each build does this differently. Thanks again...
-
@Old Collingwood how much did you have to sand off of 24? Seems like they are a little too proud. Did you trim before or after you glued?
-
I think I've gotten the bh pretty close. Im gluing them in place then I'll lay some planks and do more filling and sanding. I've been studying everyone's s builds, and i think I'm going to follow @Old Collingwood on the bow and put #24. I at a 45' . I can use all the help I can get for the planking, so the 45' will help. I may even put filler blocks in between some of the bh.to aid in the smoothing.

-
That really helps.. Thank you. I didnt know about that. It look like it narrows and tapers...
-
Thanks OC... ive been studying your build a lot since you have a lot of great pictures to go by.. I did notice that towards the end the pictures dont show, only dead links. Im still sanding and building on the BHs im finding more spots that are flat, too round, and just bad. Thanks for all the help, it is EXTREMELY appreciated.
-
Im very new to the ship building lingo, Could you explaint "knee of the head"?
-
Thanks! I checked the planking and I may have 1mm -1.5mm of space between the keep and the bottom of the bH when planked. a bit of the plywood shows. Not sure how to deal with that yet....