HOLIDAY DONATION DRIVE - SUPPORT MSW - DO YOUR PART TO KEEP THIS GREAT FORUM GOING! (Only 72 donations so far out of 49,000 members - Can we at least get 100? C'mon guys!)
×


flyenrw
-
Posts
43 -
Joined
-
Last visited
Content Type
Profiles
Forums
Gallery
Events
Everything posted by flyenrw
-
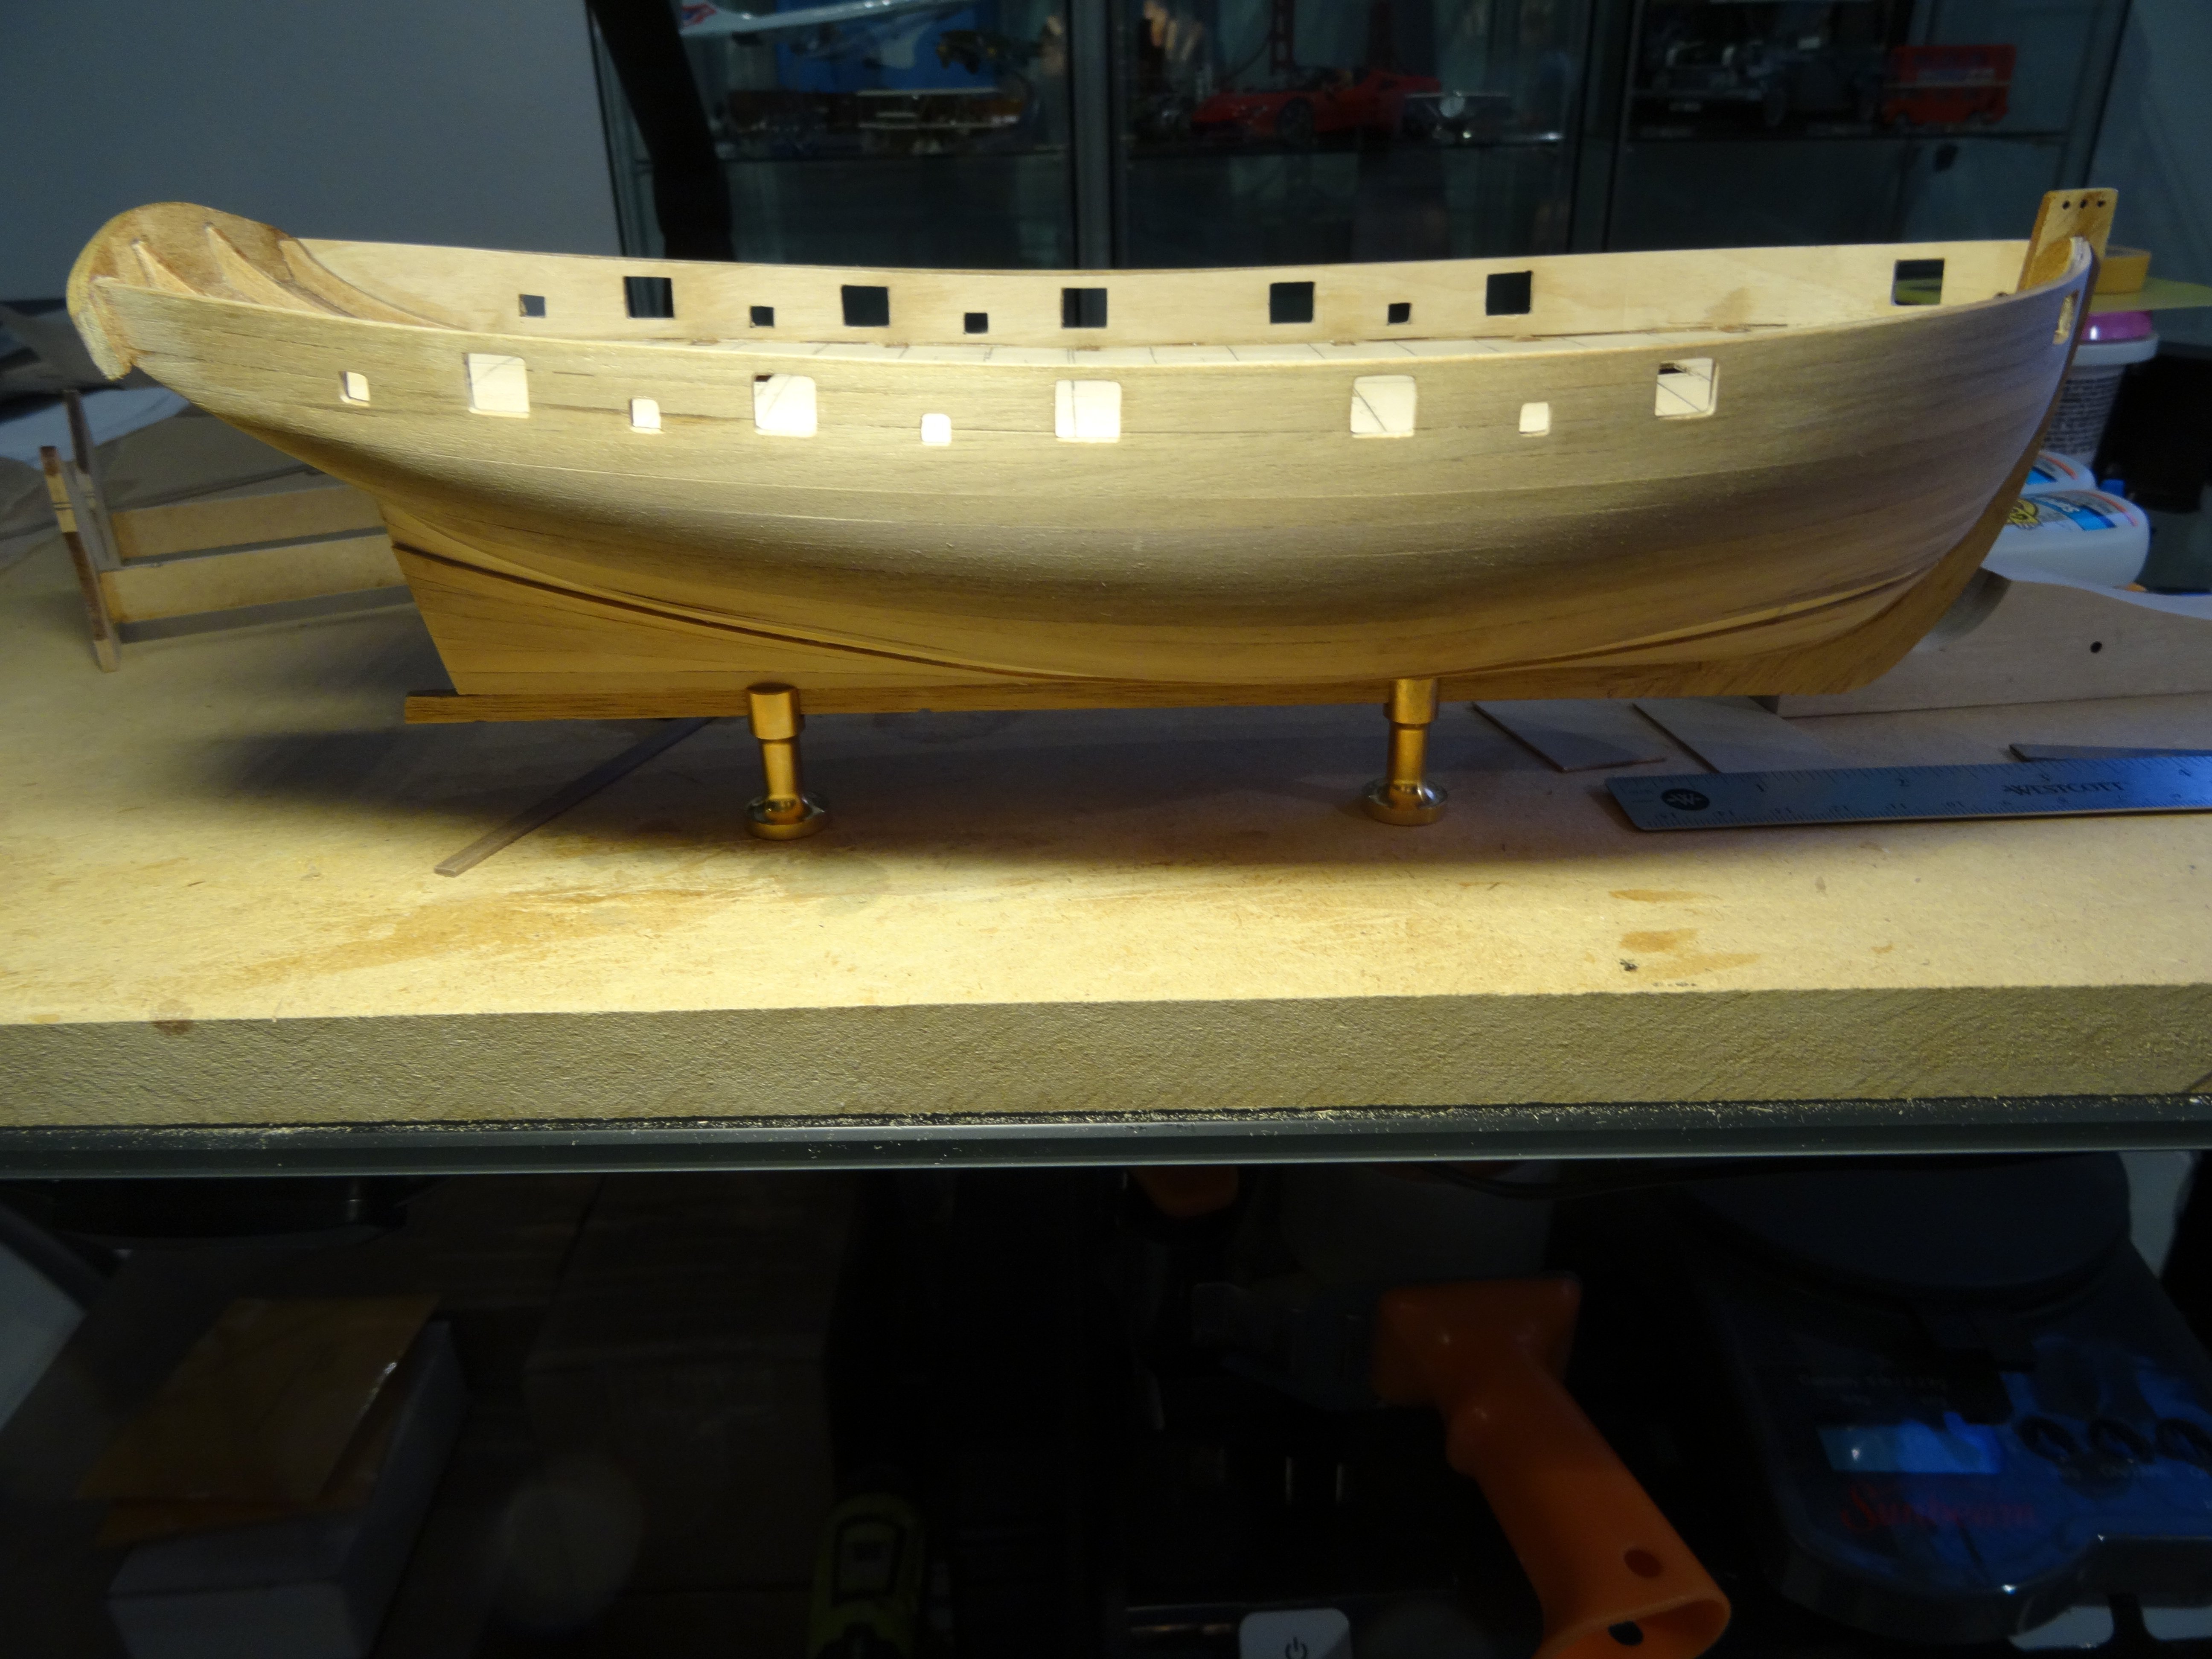
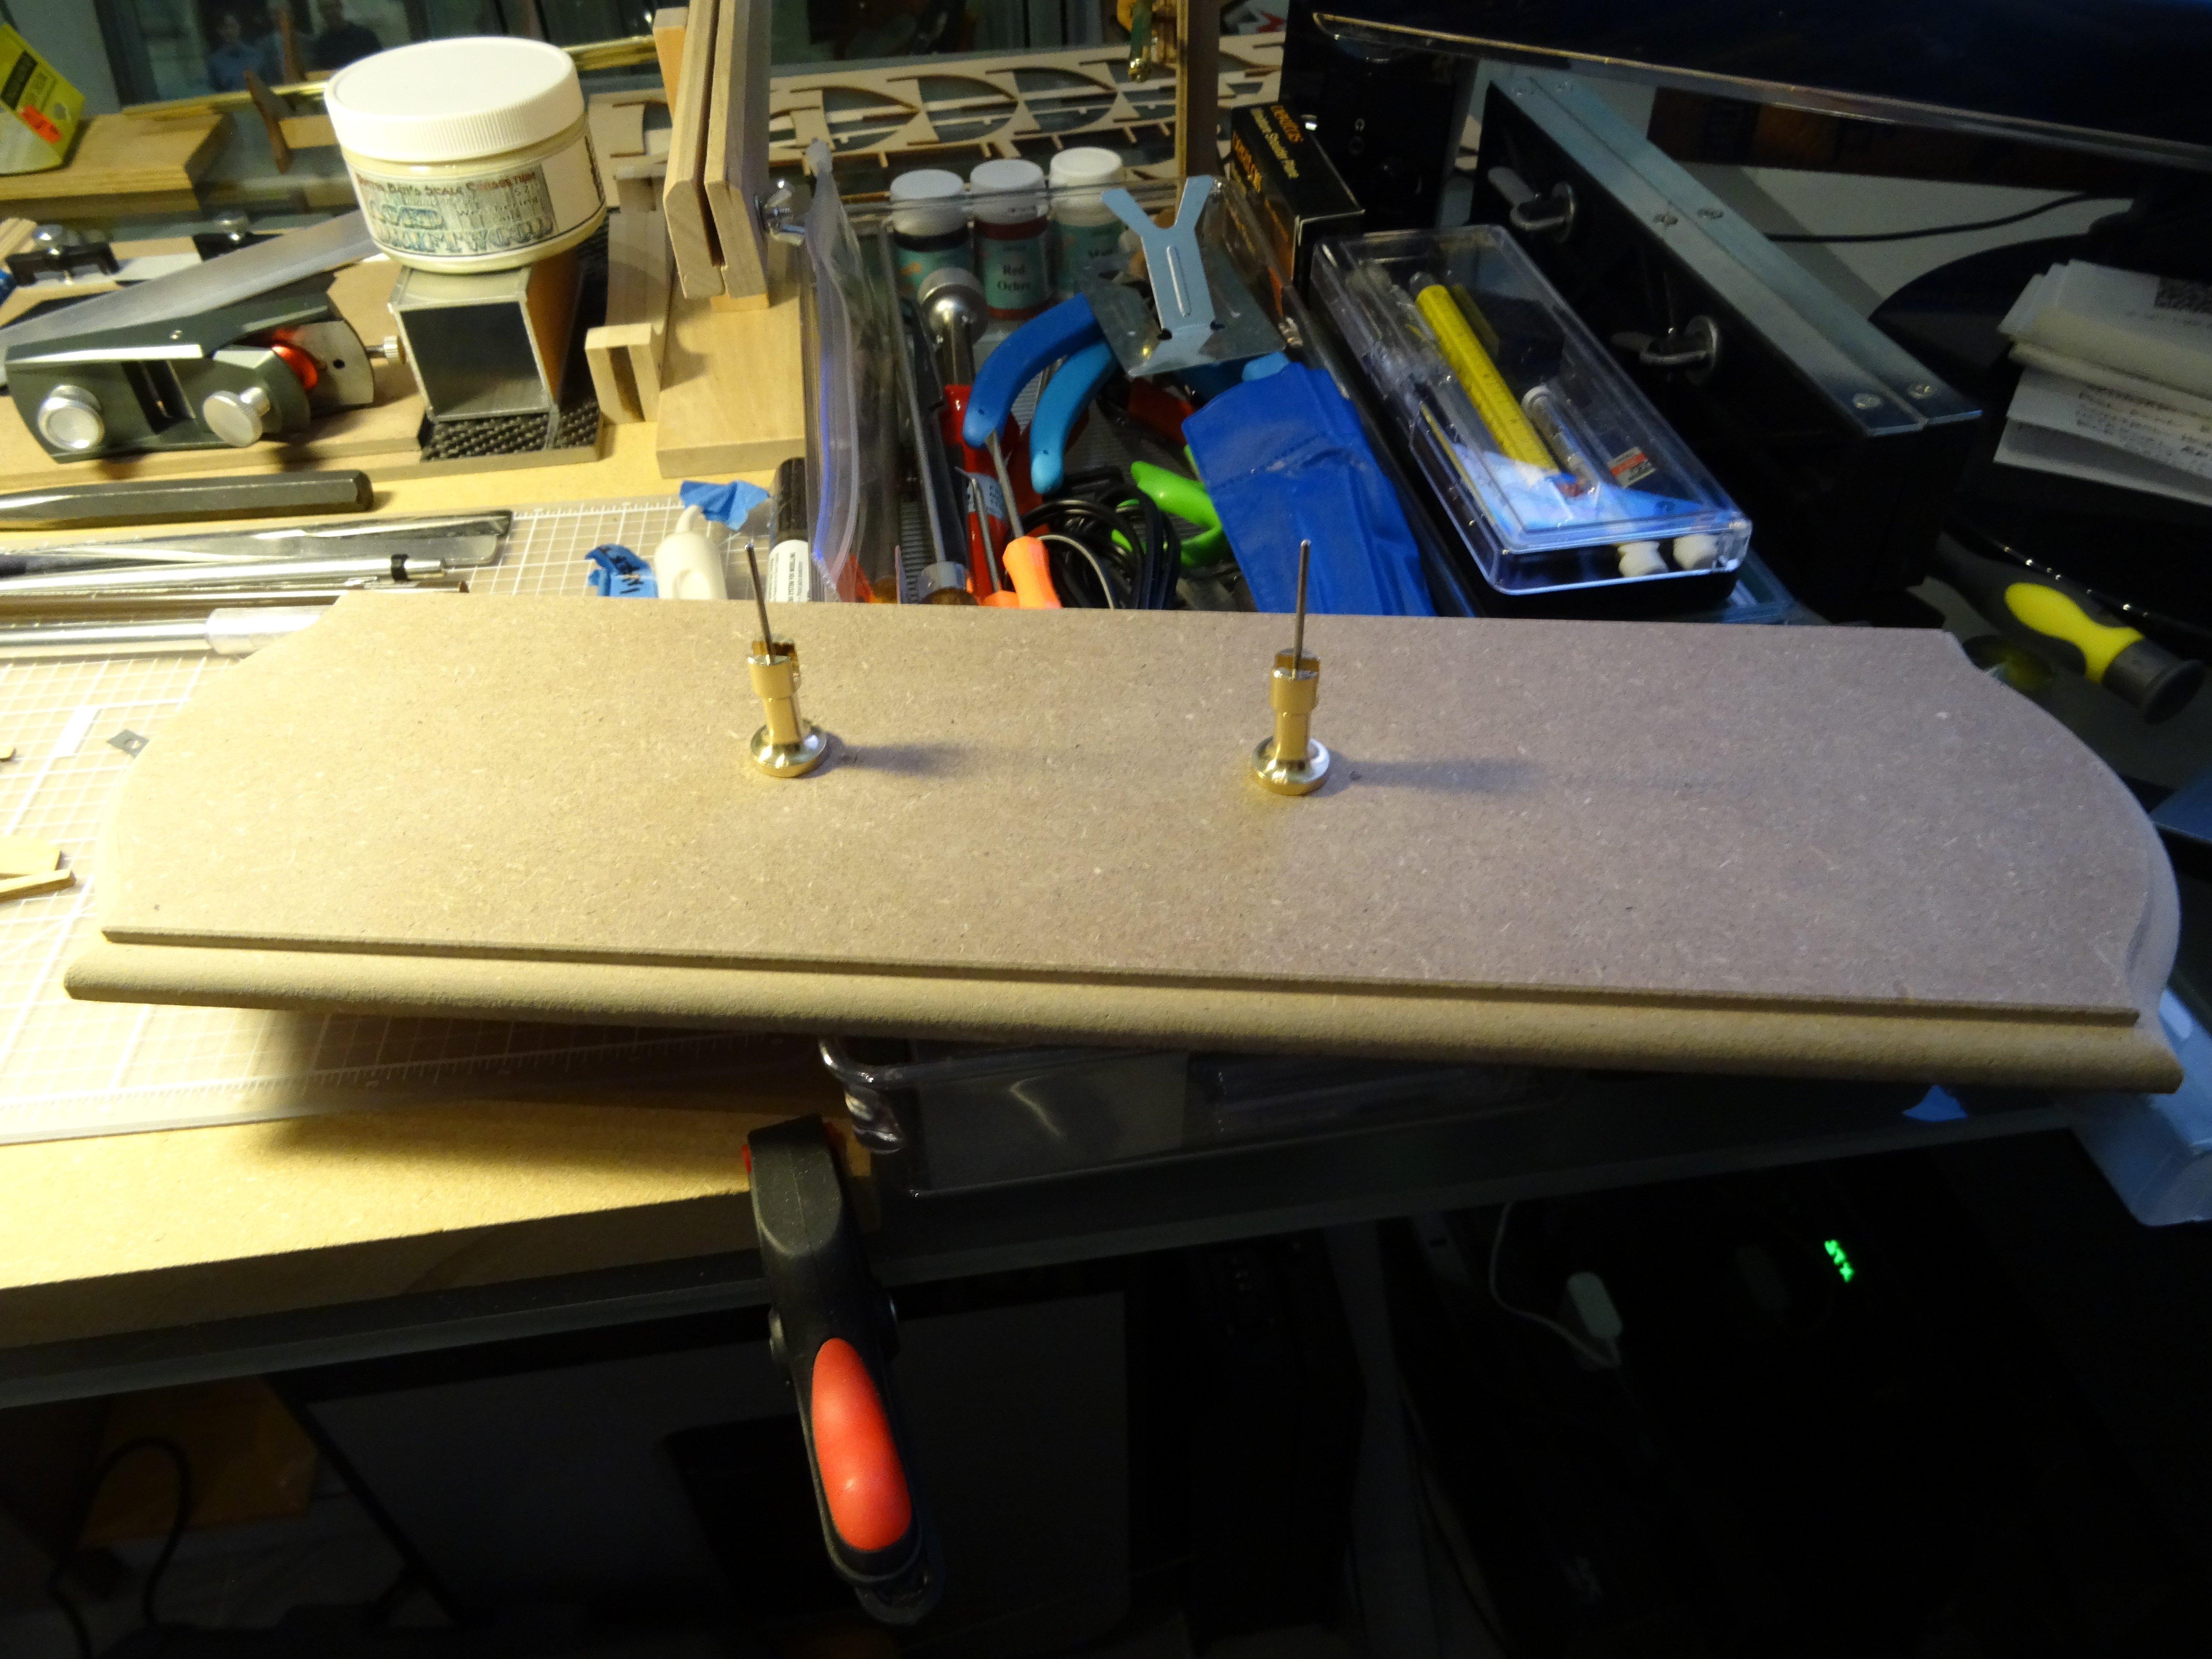
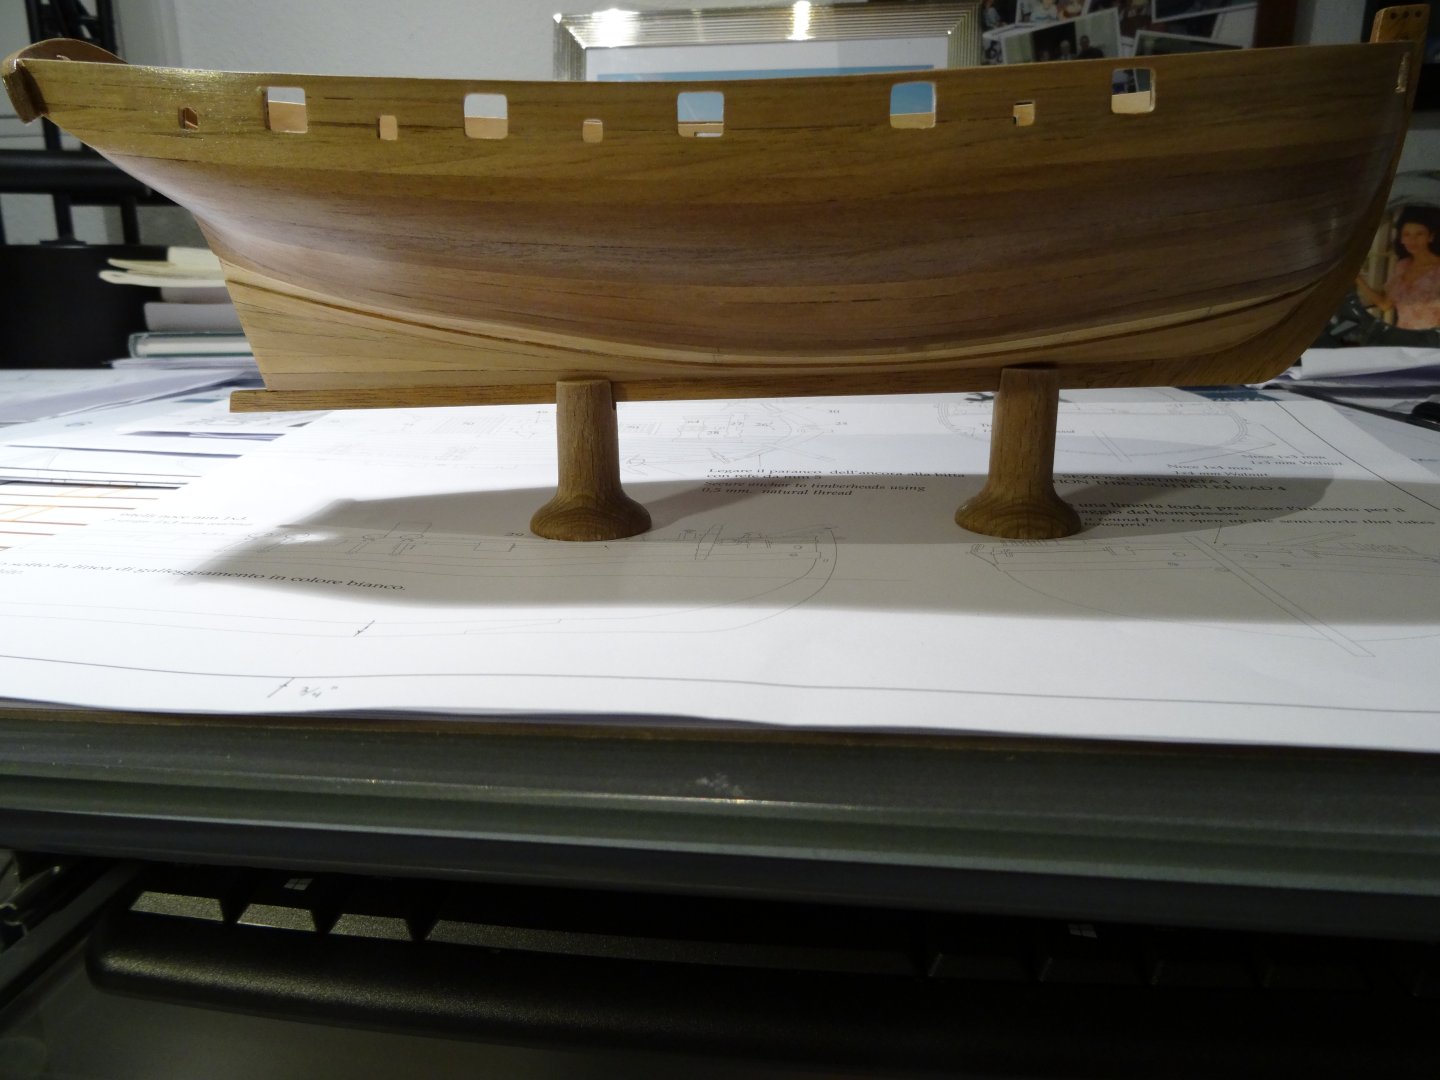
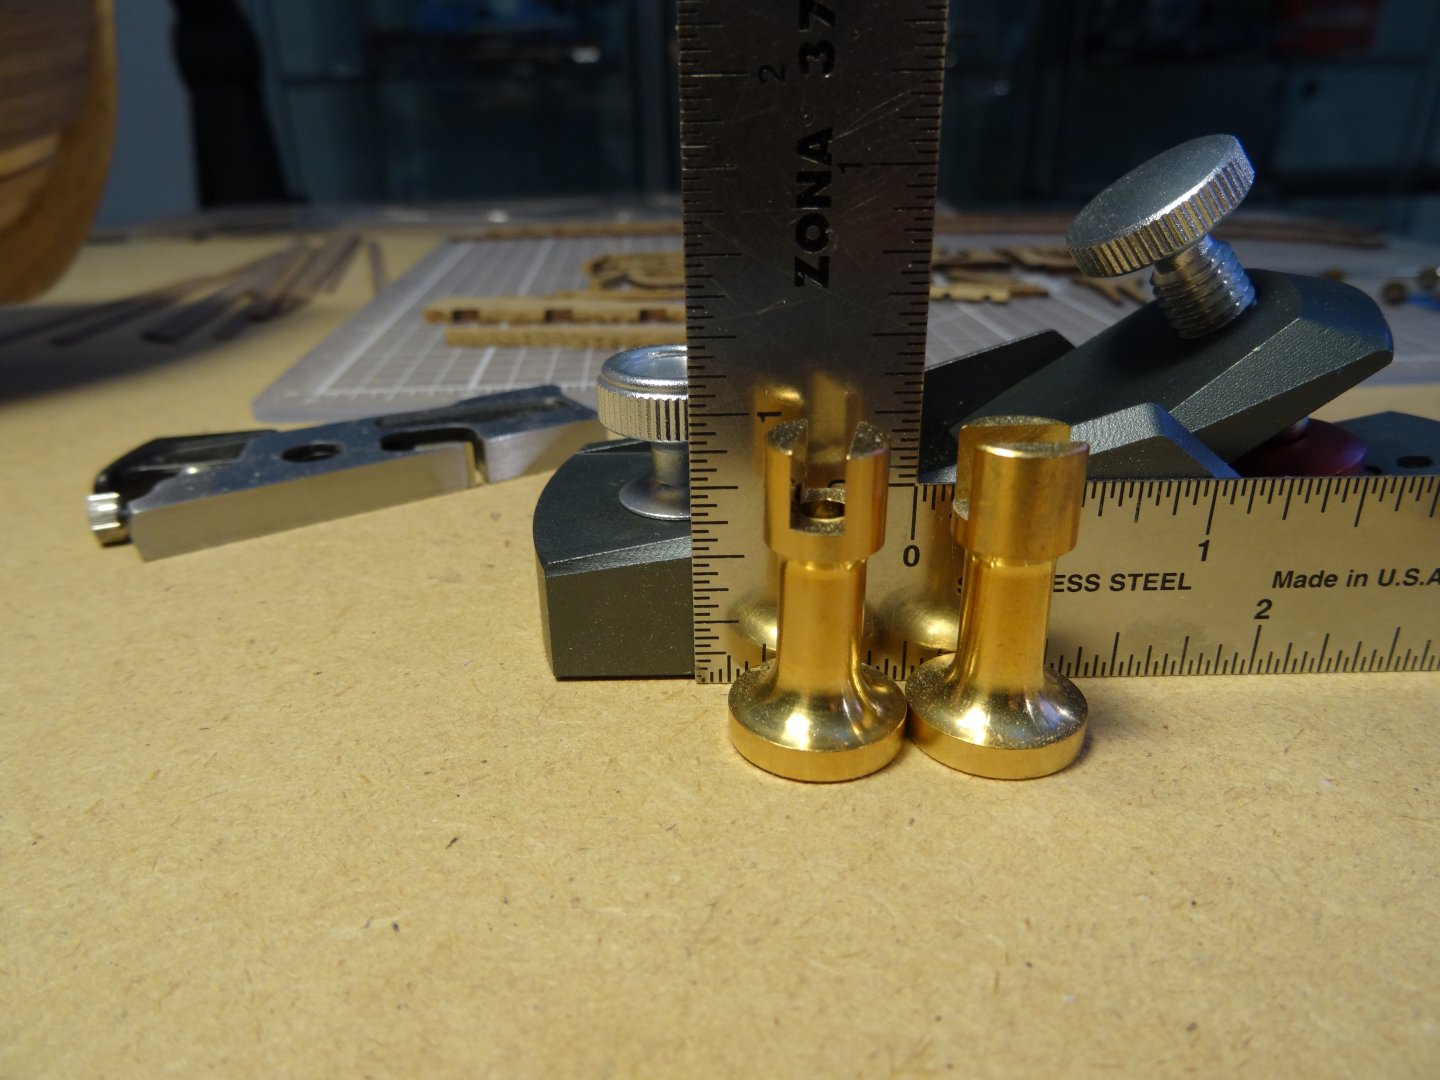
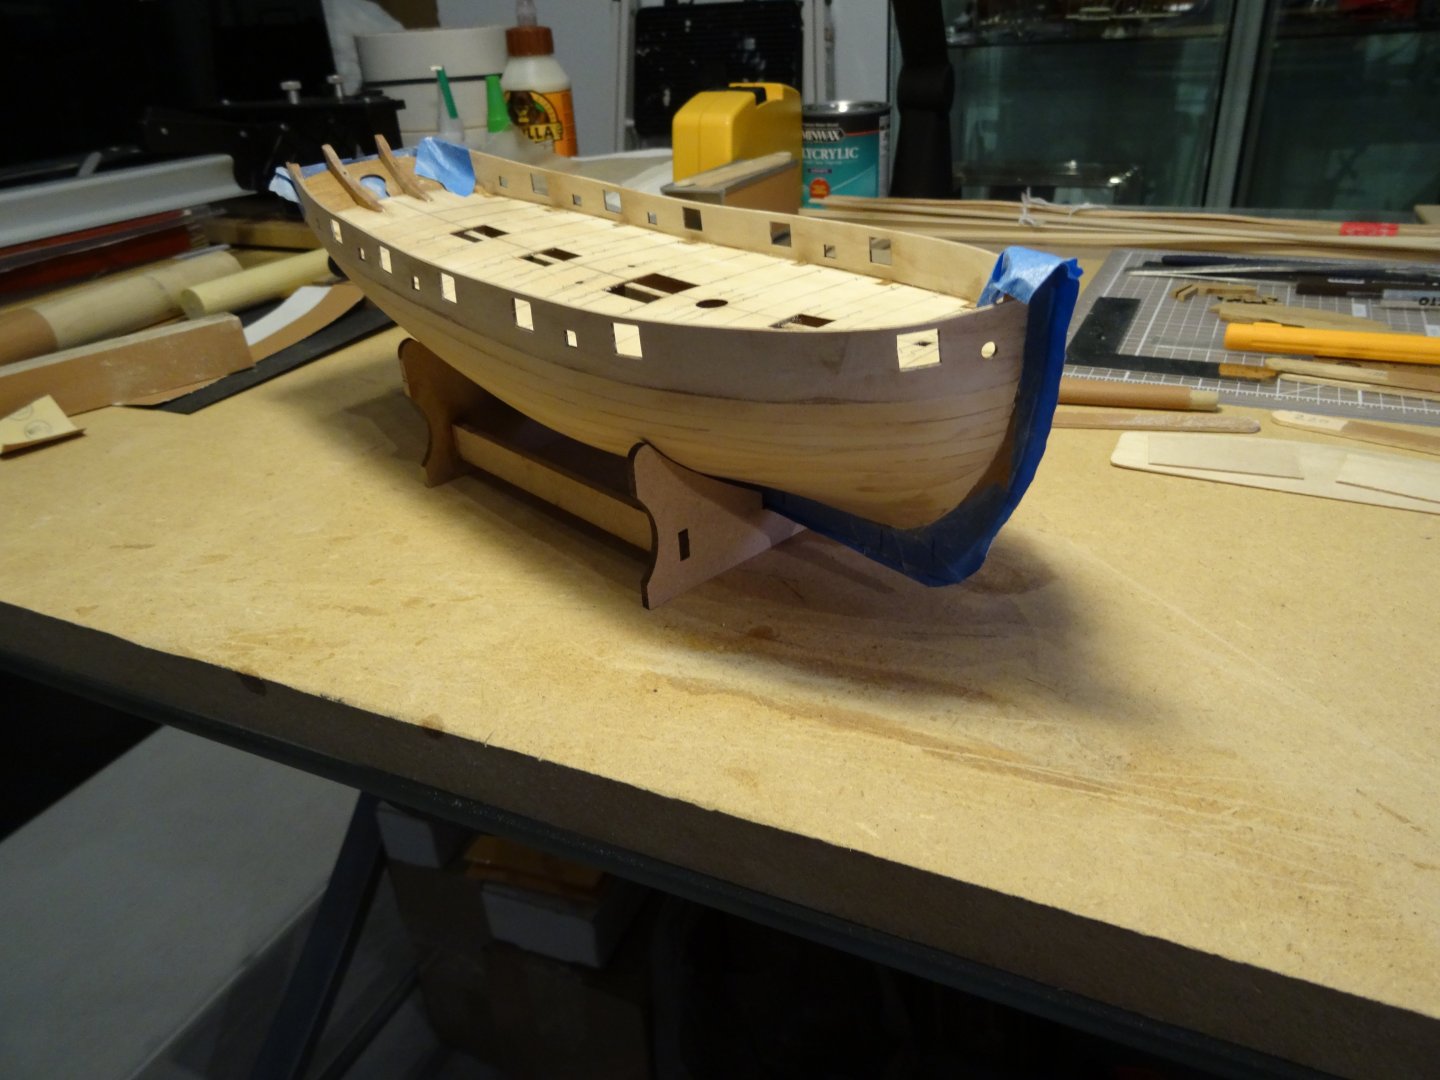
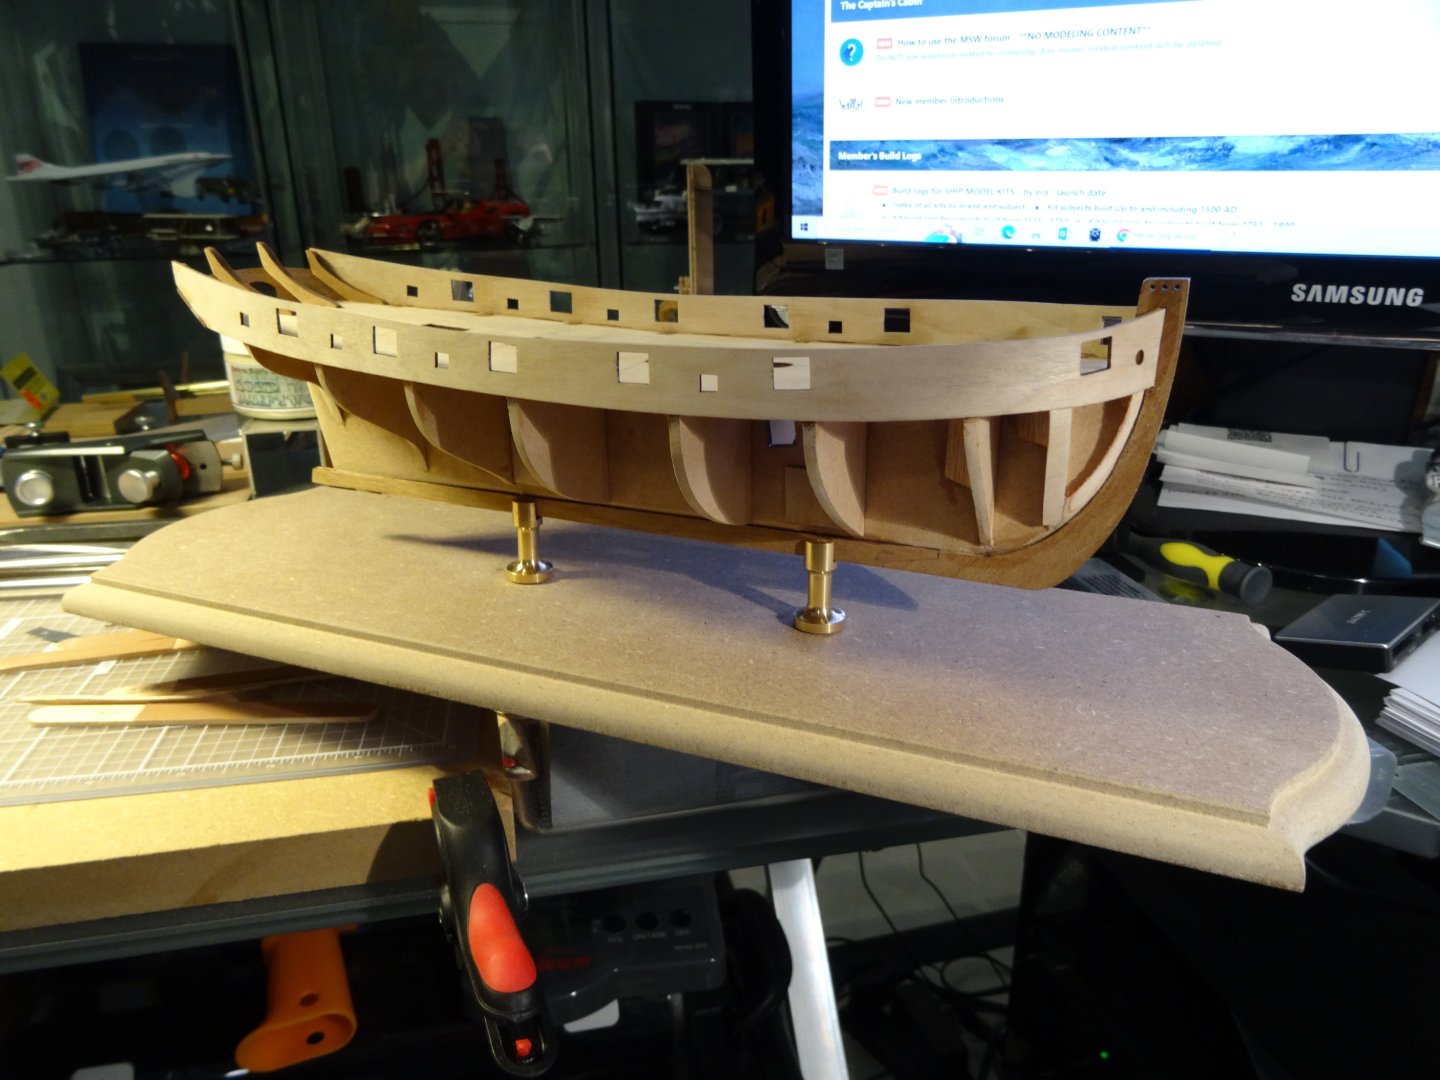
 So , I got to work! chopped off the tops of these wooden pedestals just received and adjusted the heights accordingly. There is 1/8th rise between the height of each pedestal from the rear to the front. The finished height of the rear pedestal with a 1/4" capture of the keel, is 1 3/8". The finished height of the front pedestal with a 1/4" capture of the keel, is 1 1/2". 'To view the picture of the metal ruler resting in the slots of the adjusted height pedestals, there is a noticeable incline , even if only just 1/8th inch. At this scale, that works out to 8 inches. In full scale, I believe that would really stand out, like a stop sign! So now I look forward to finishing the hull planking and sealing the wood on the hull.
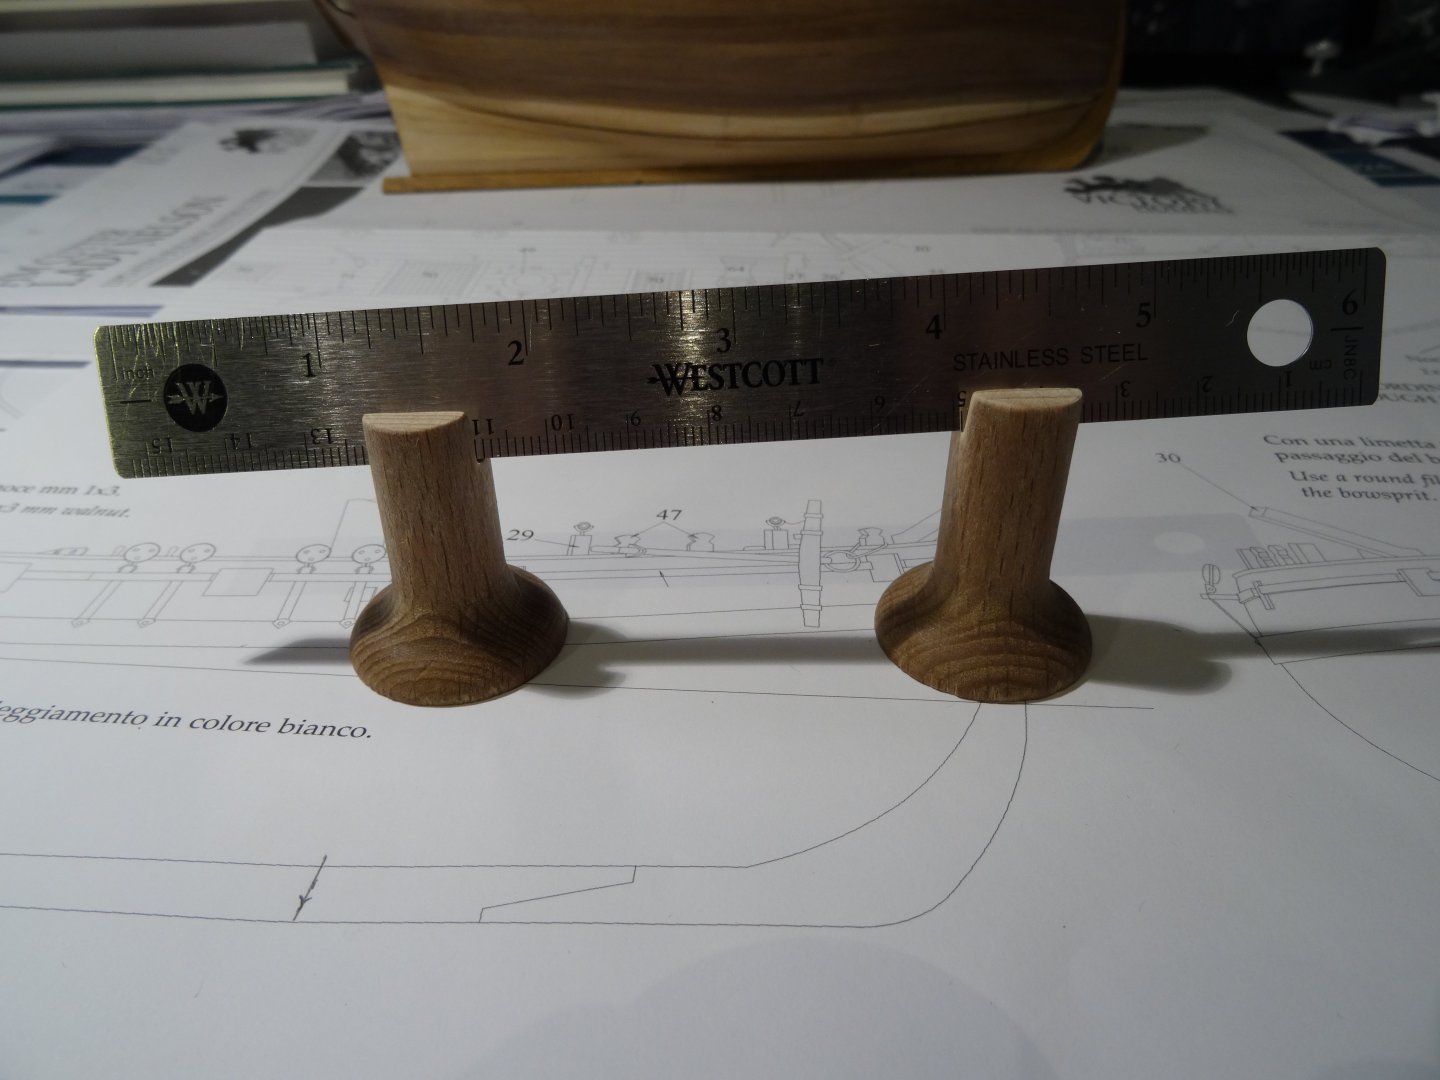
- 39 replies
-
- 5
-

-
- Amati
- Victory Models
- (and 1 more)
-
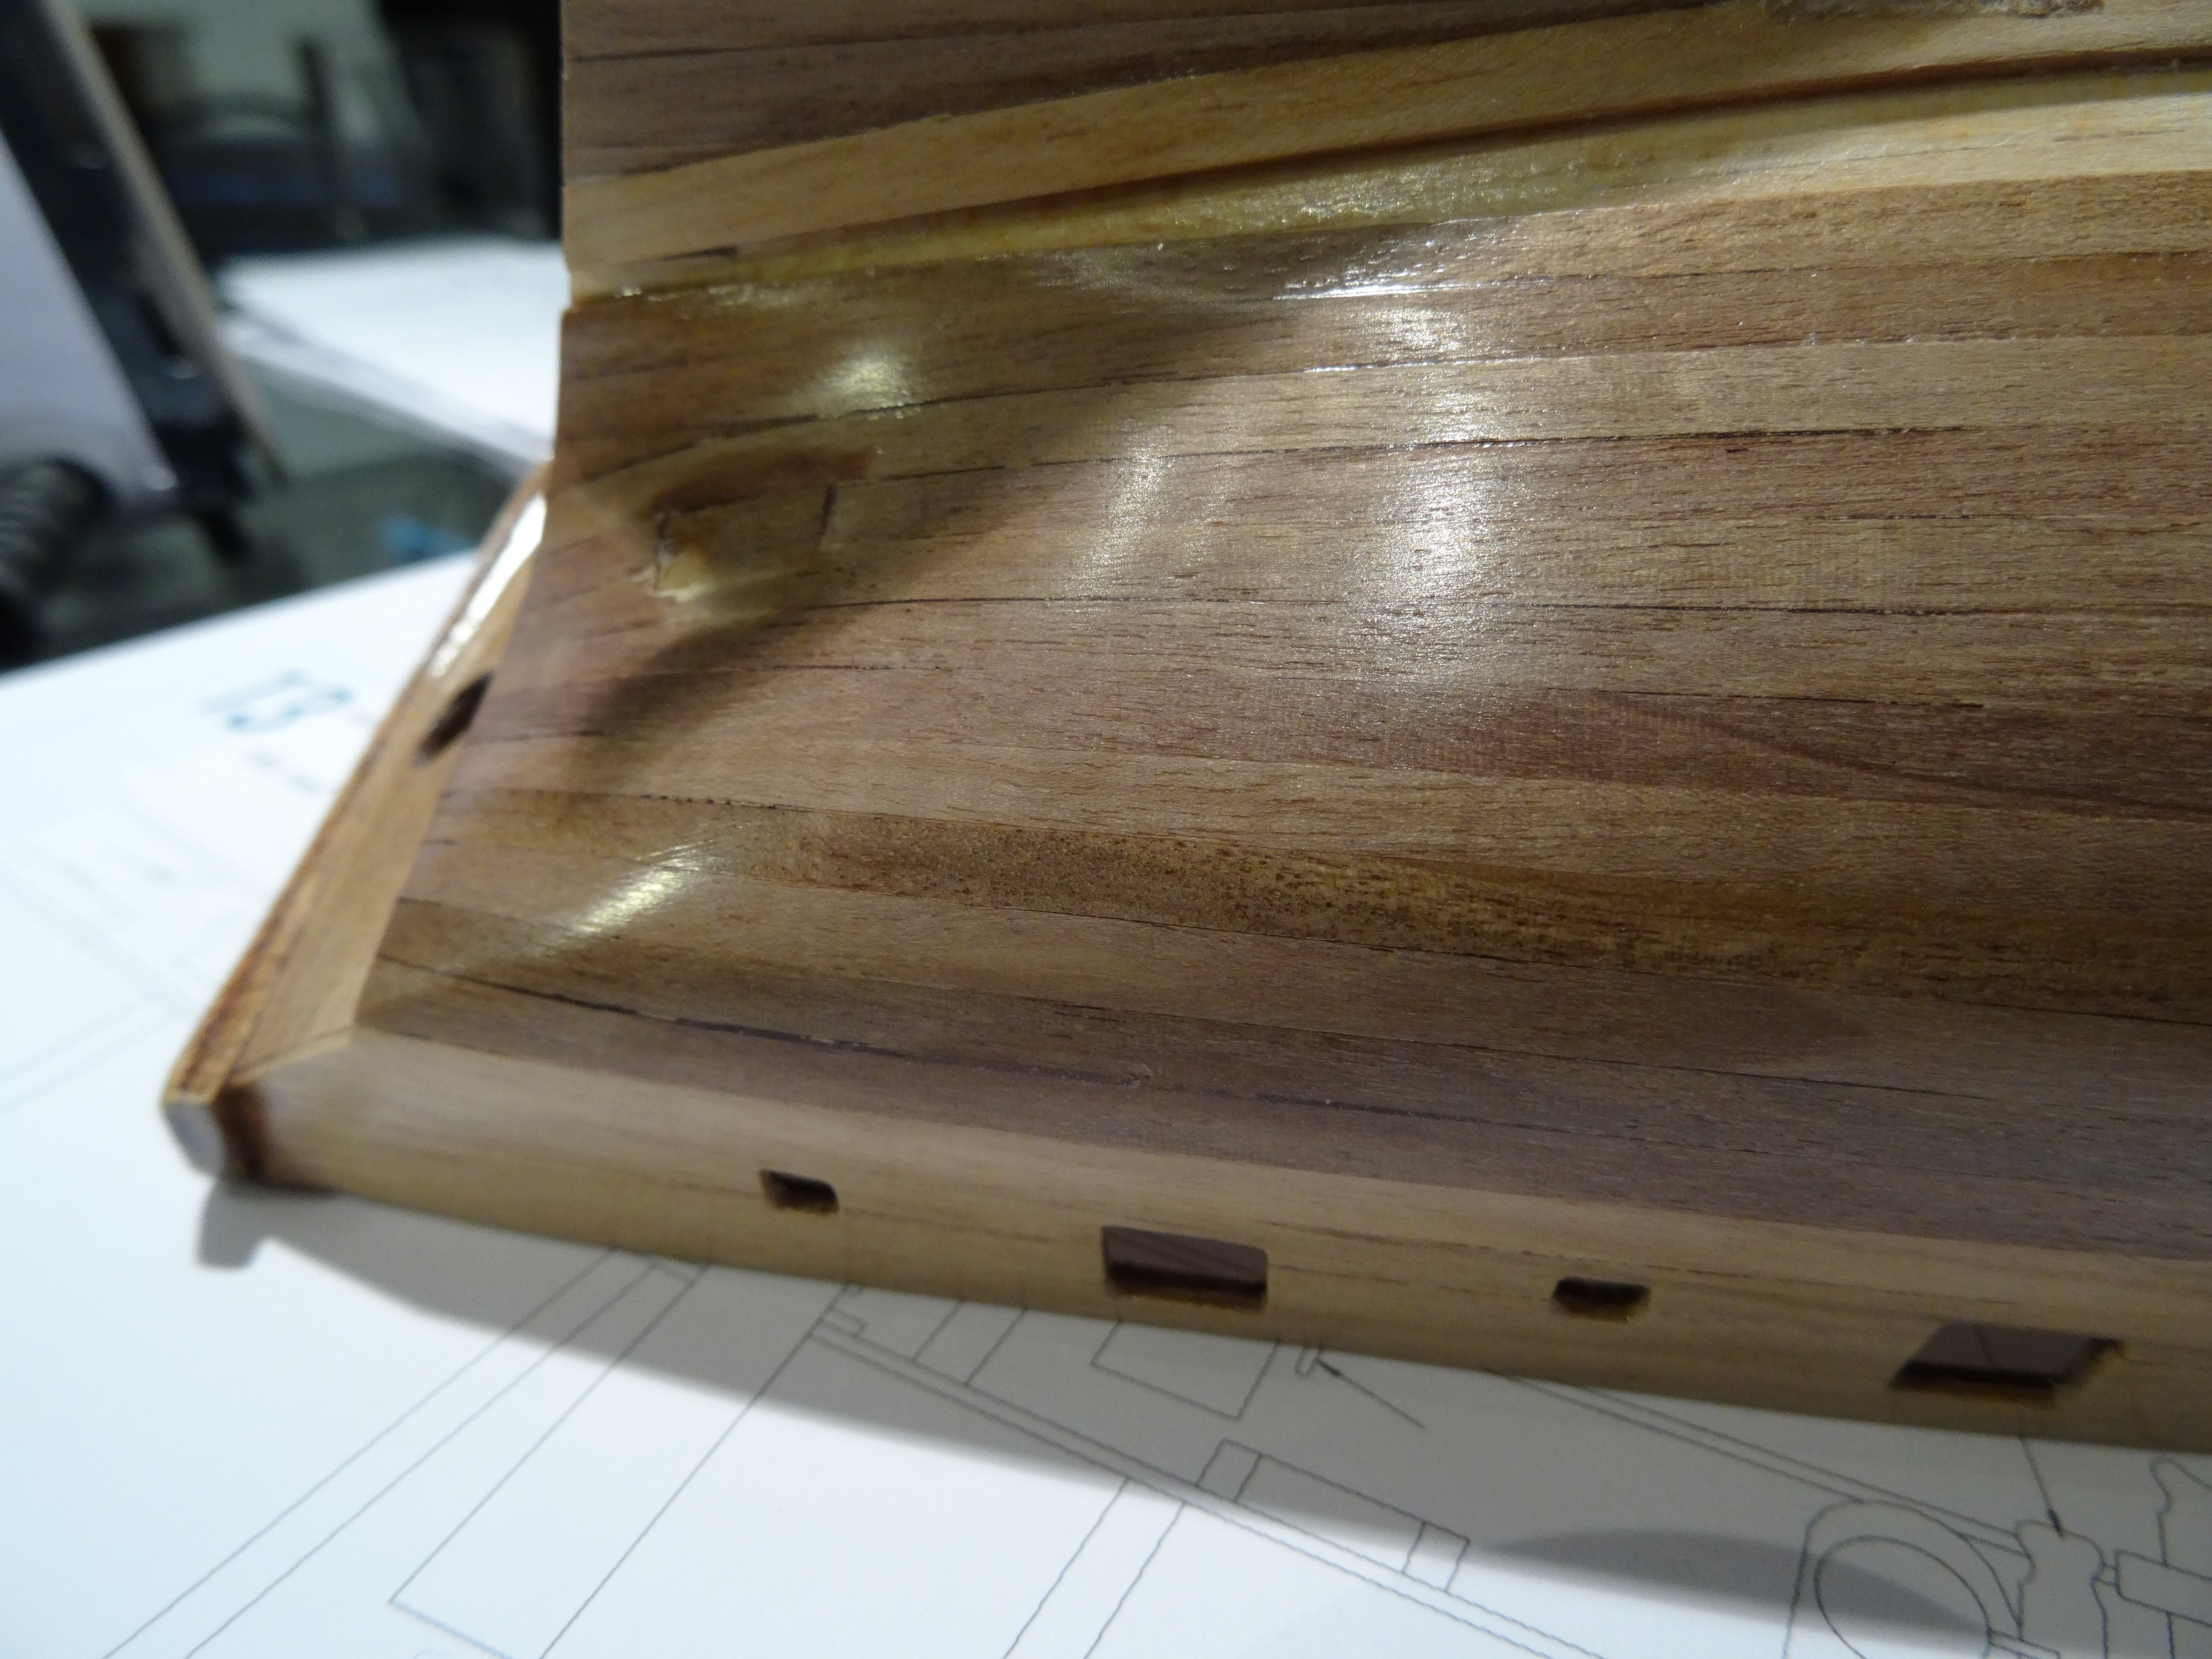
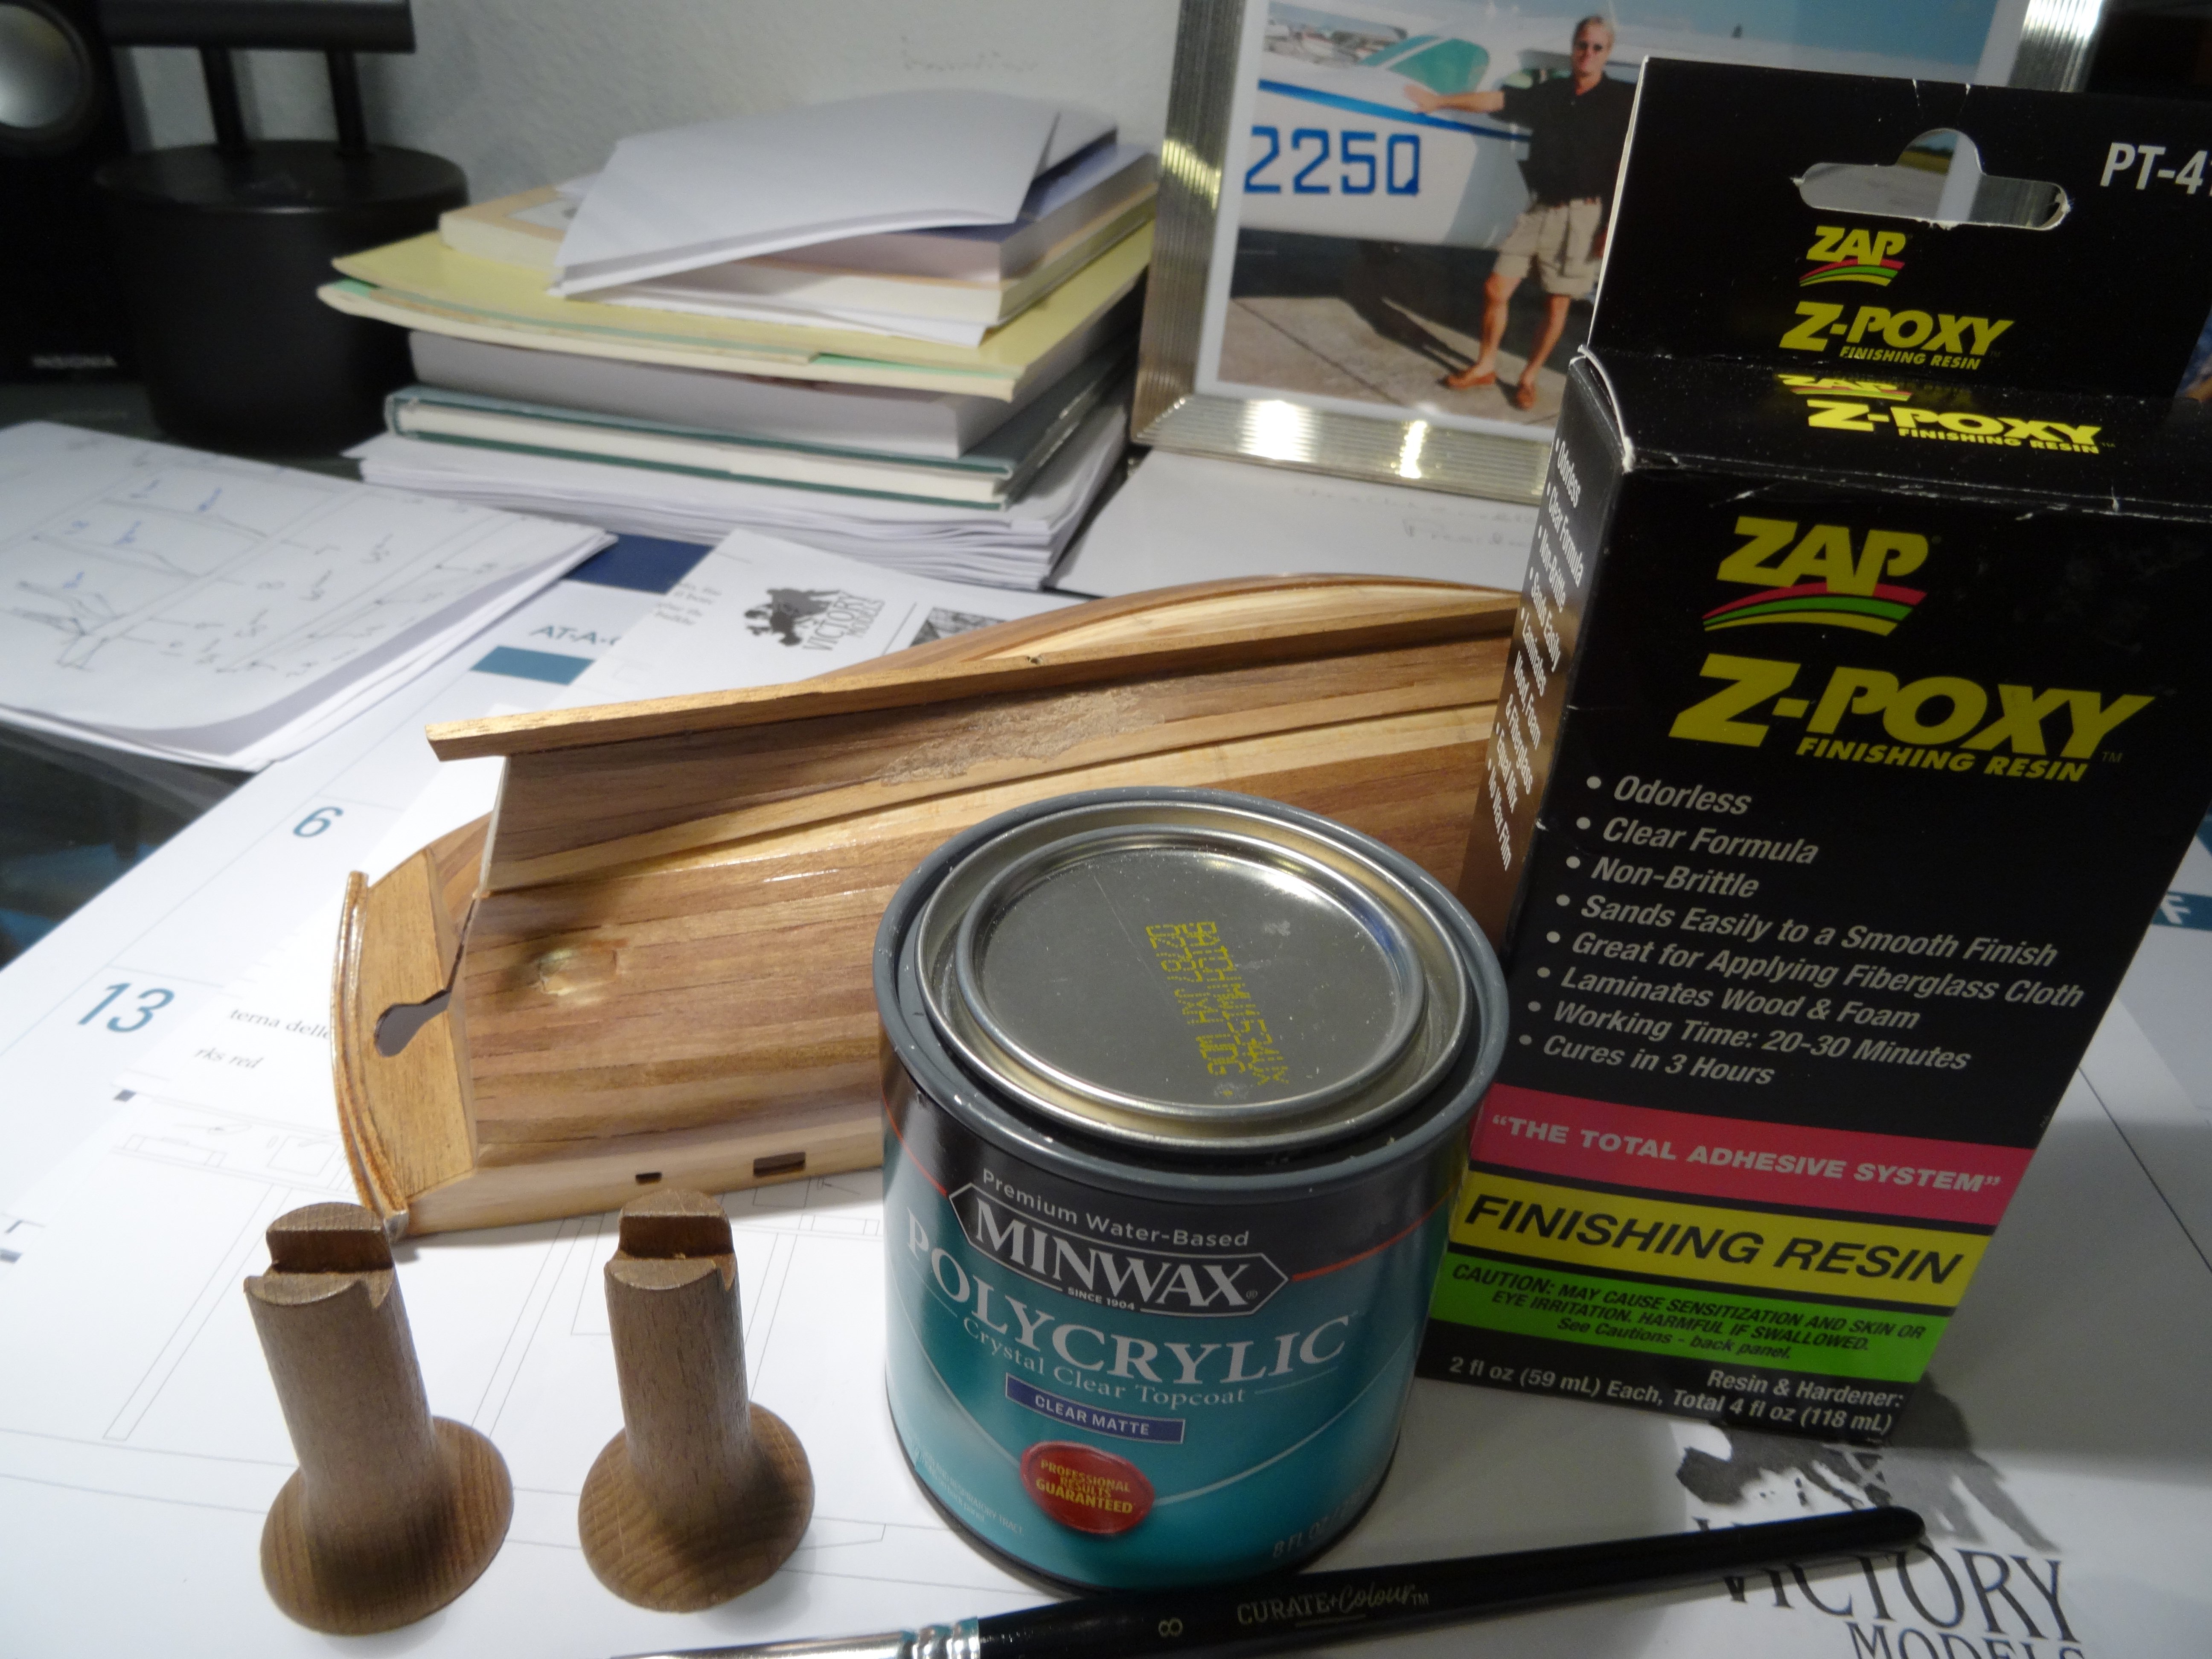
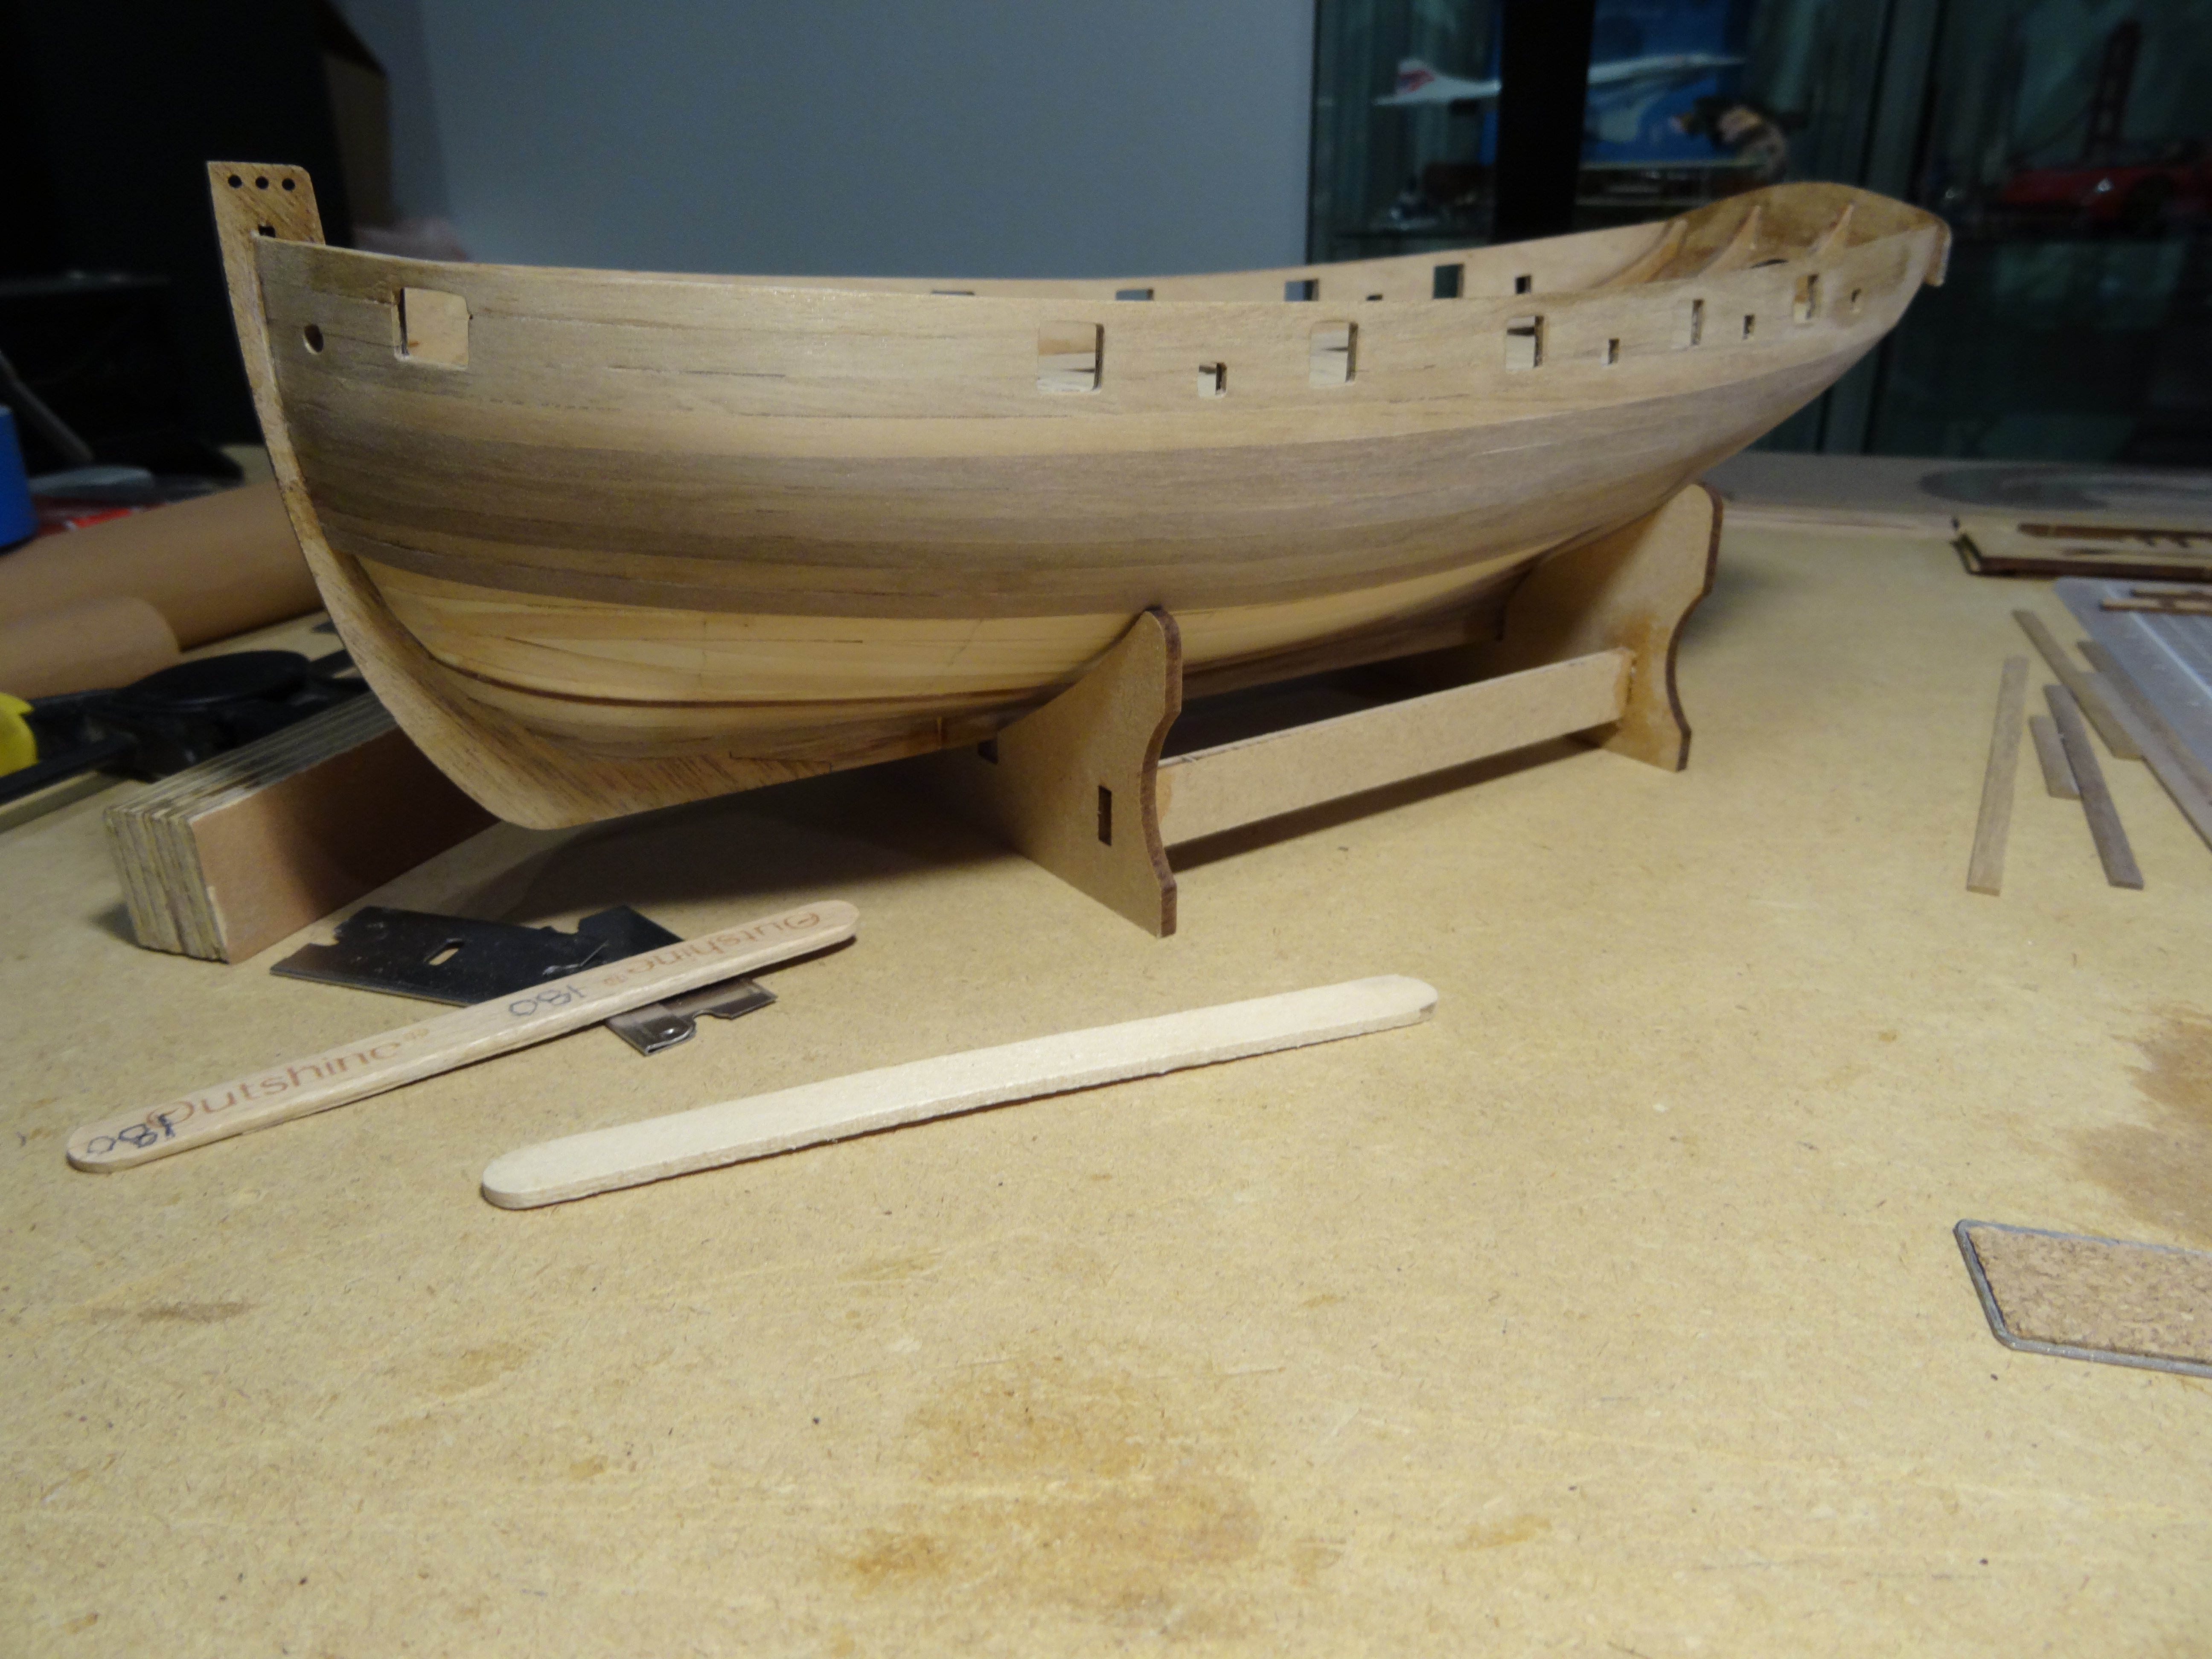
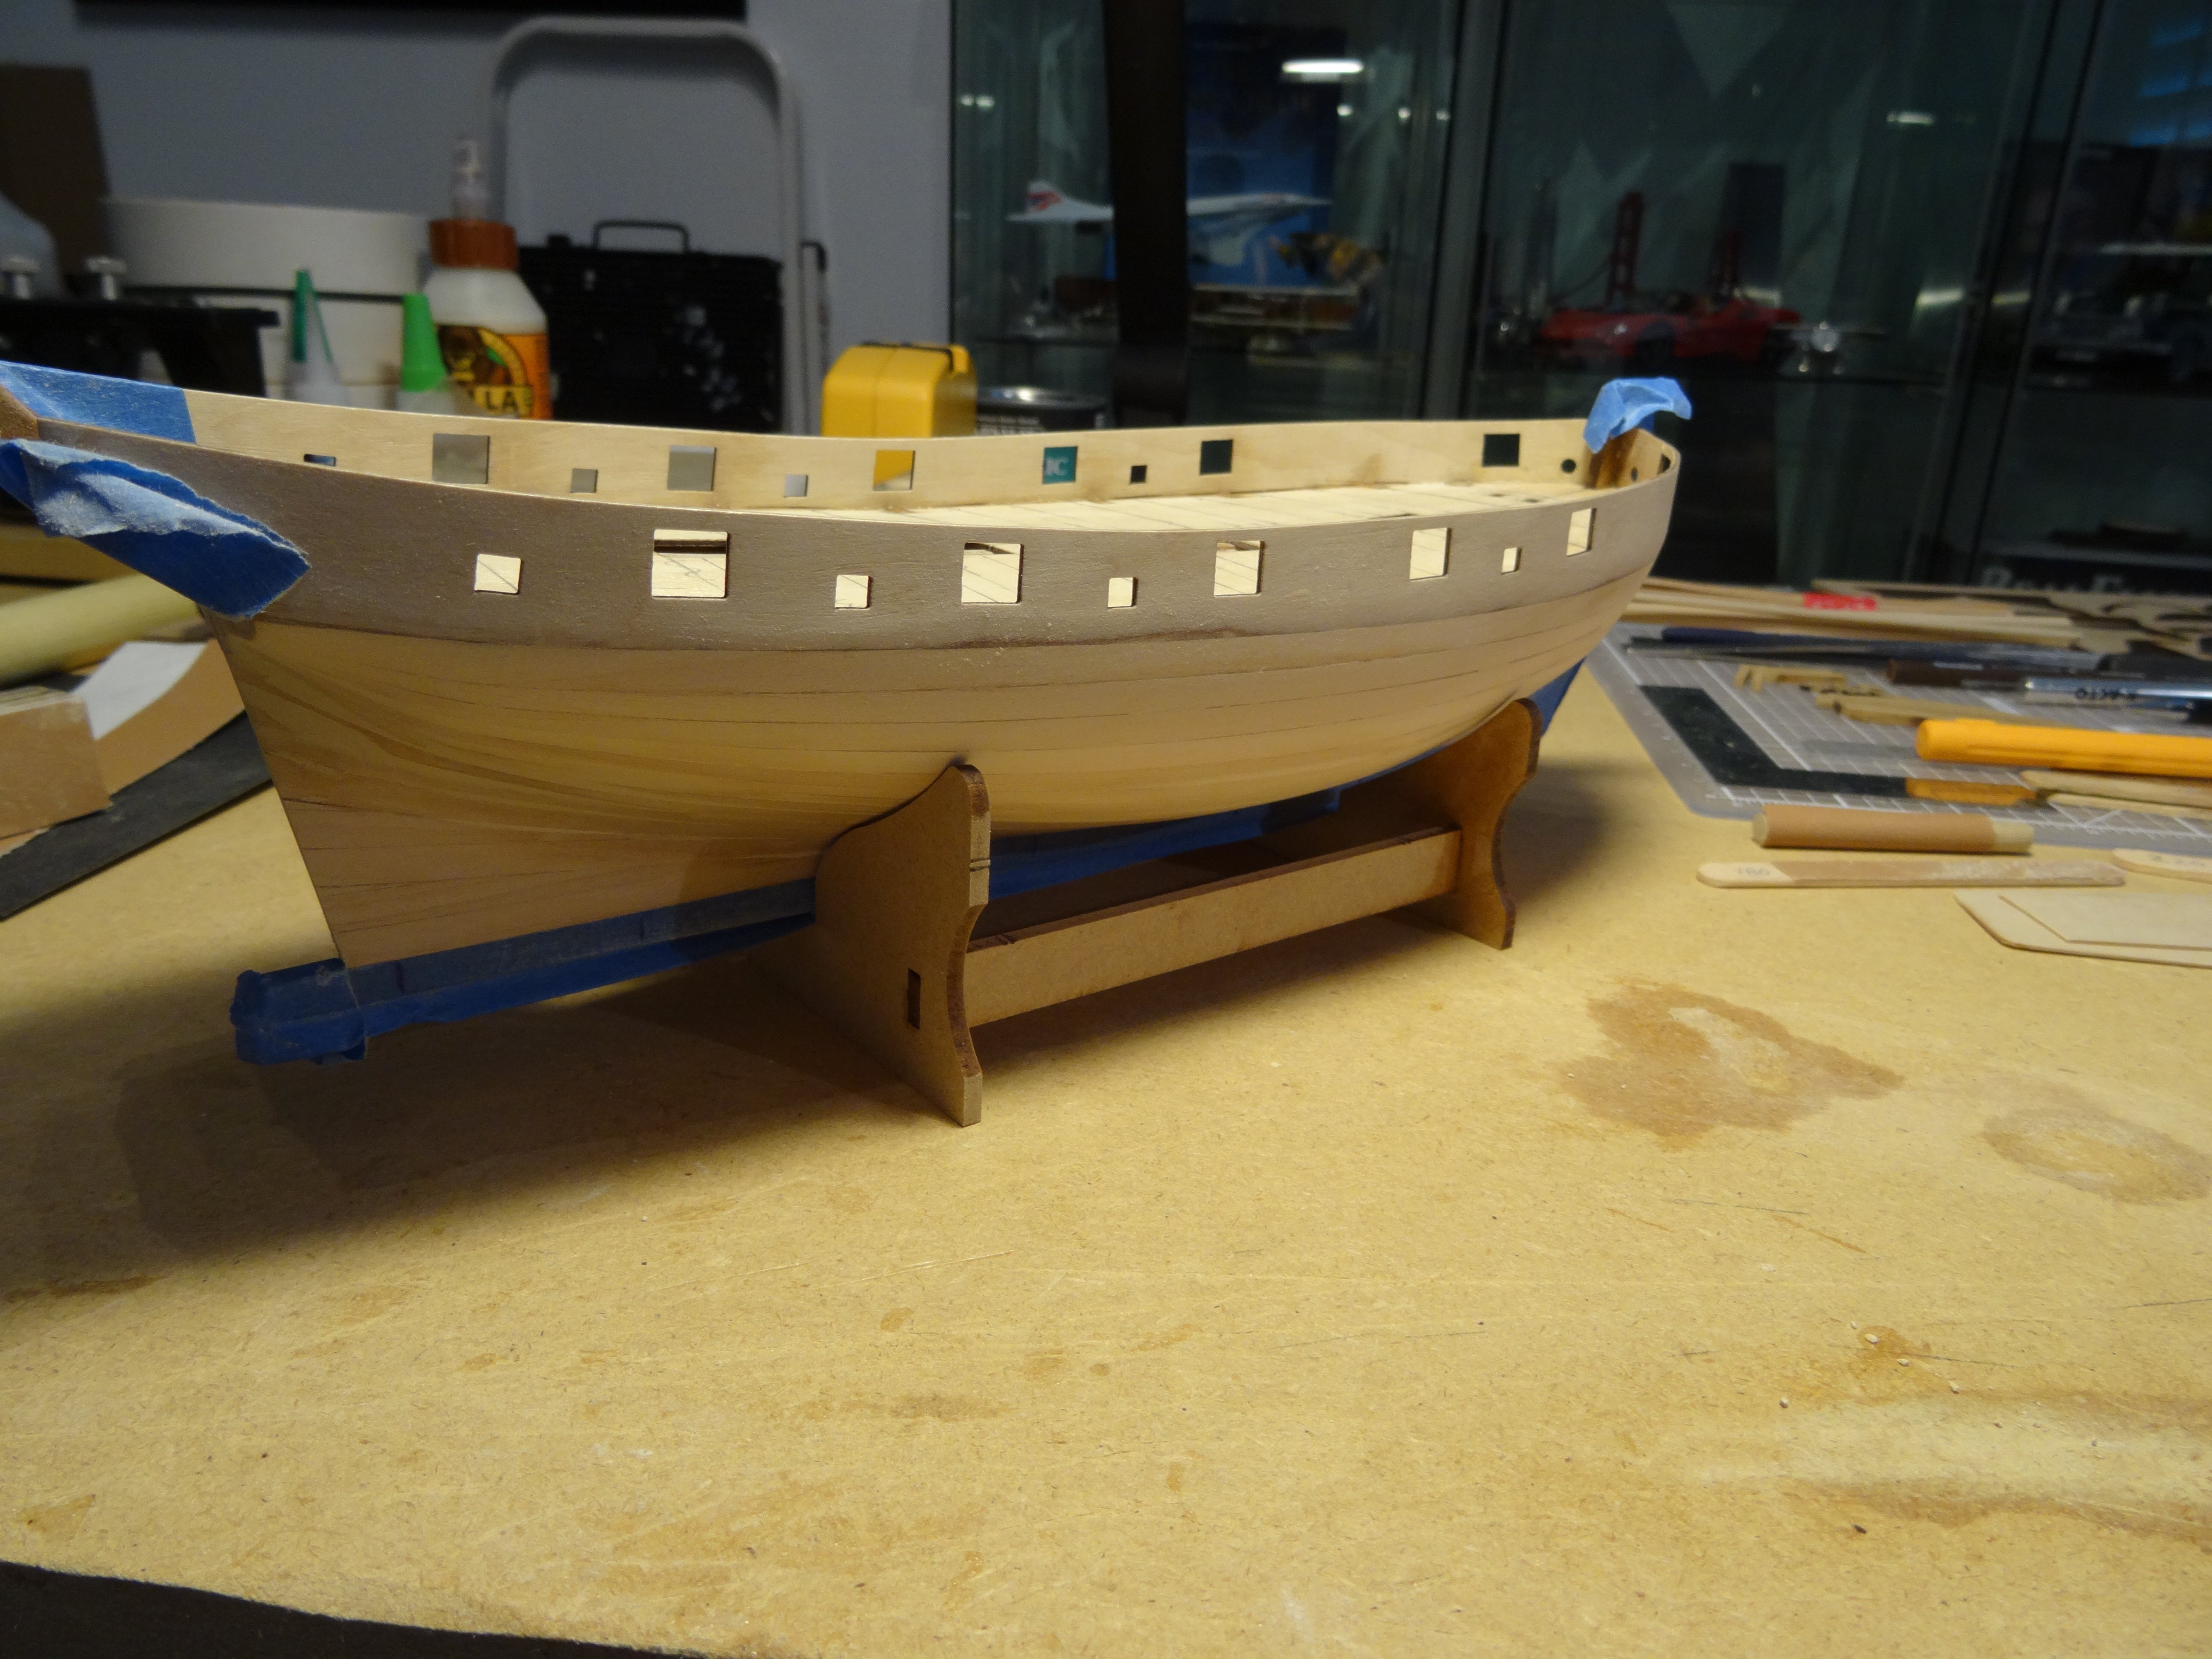
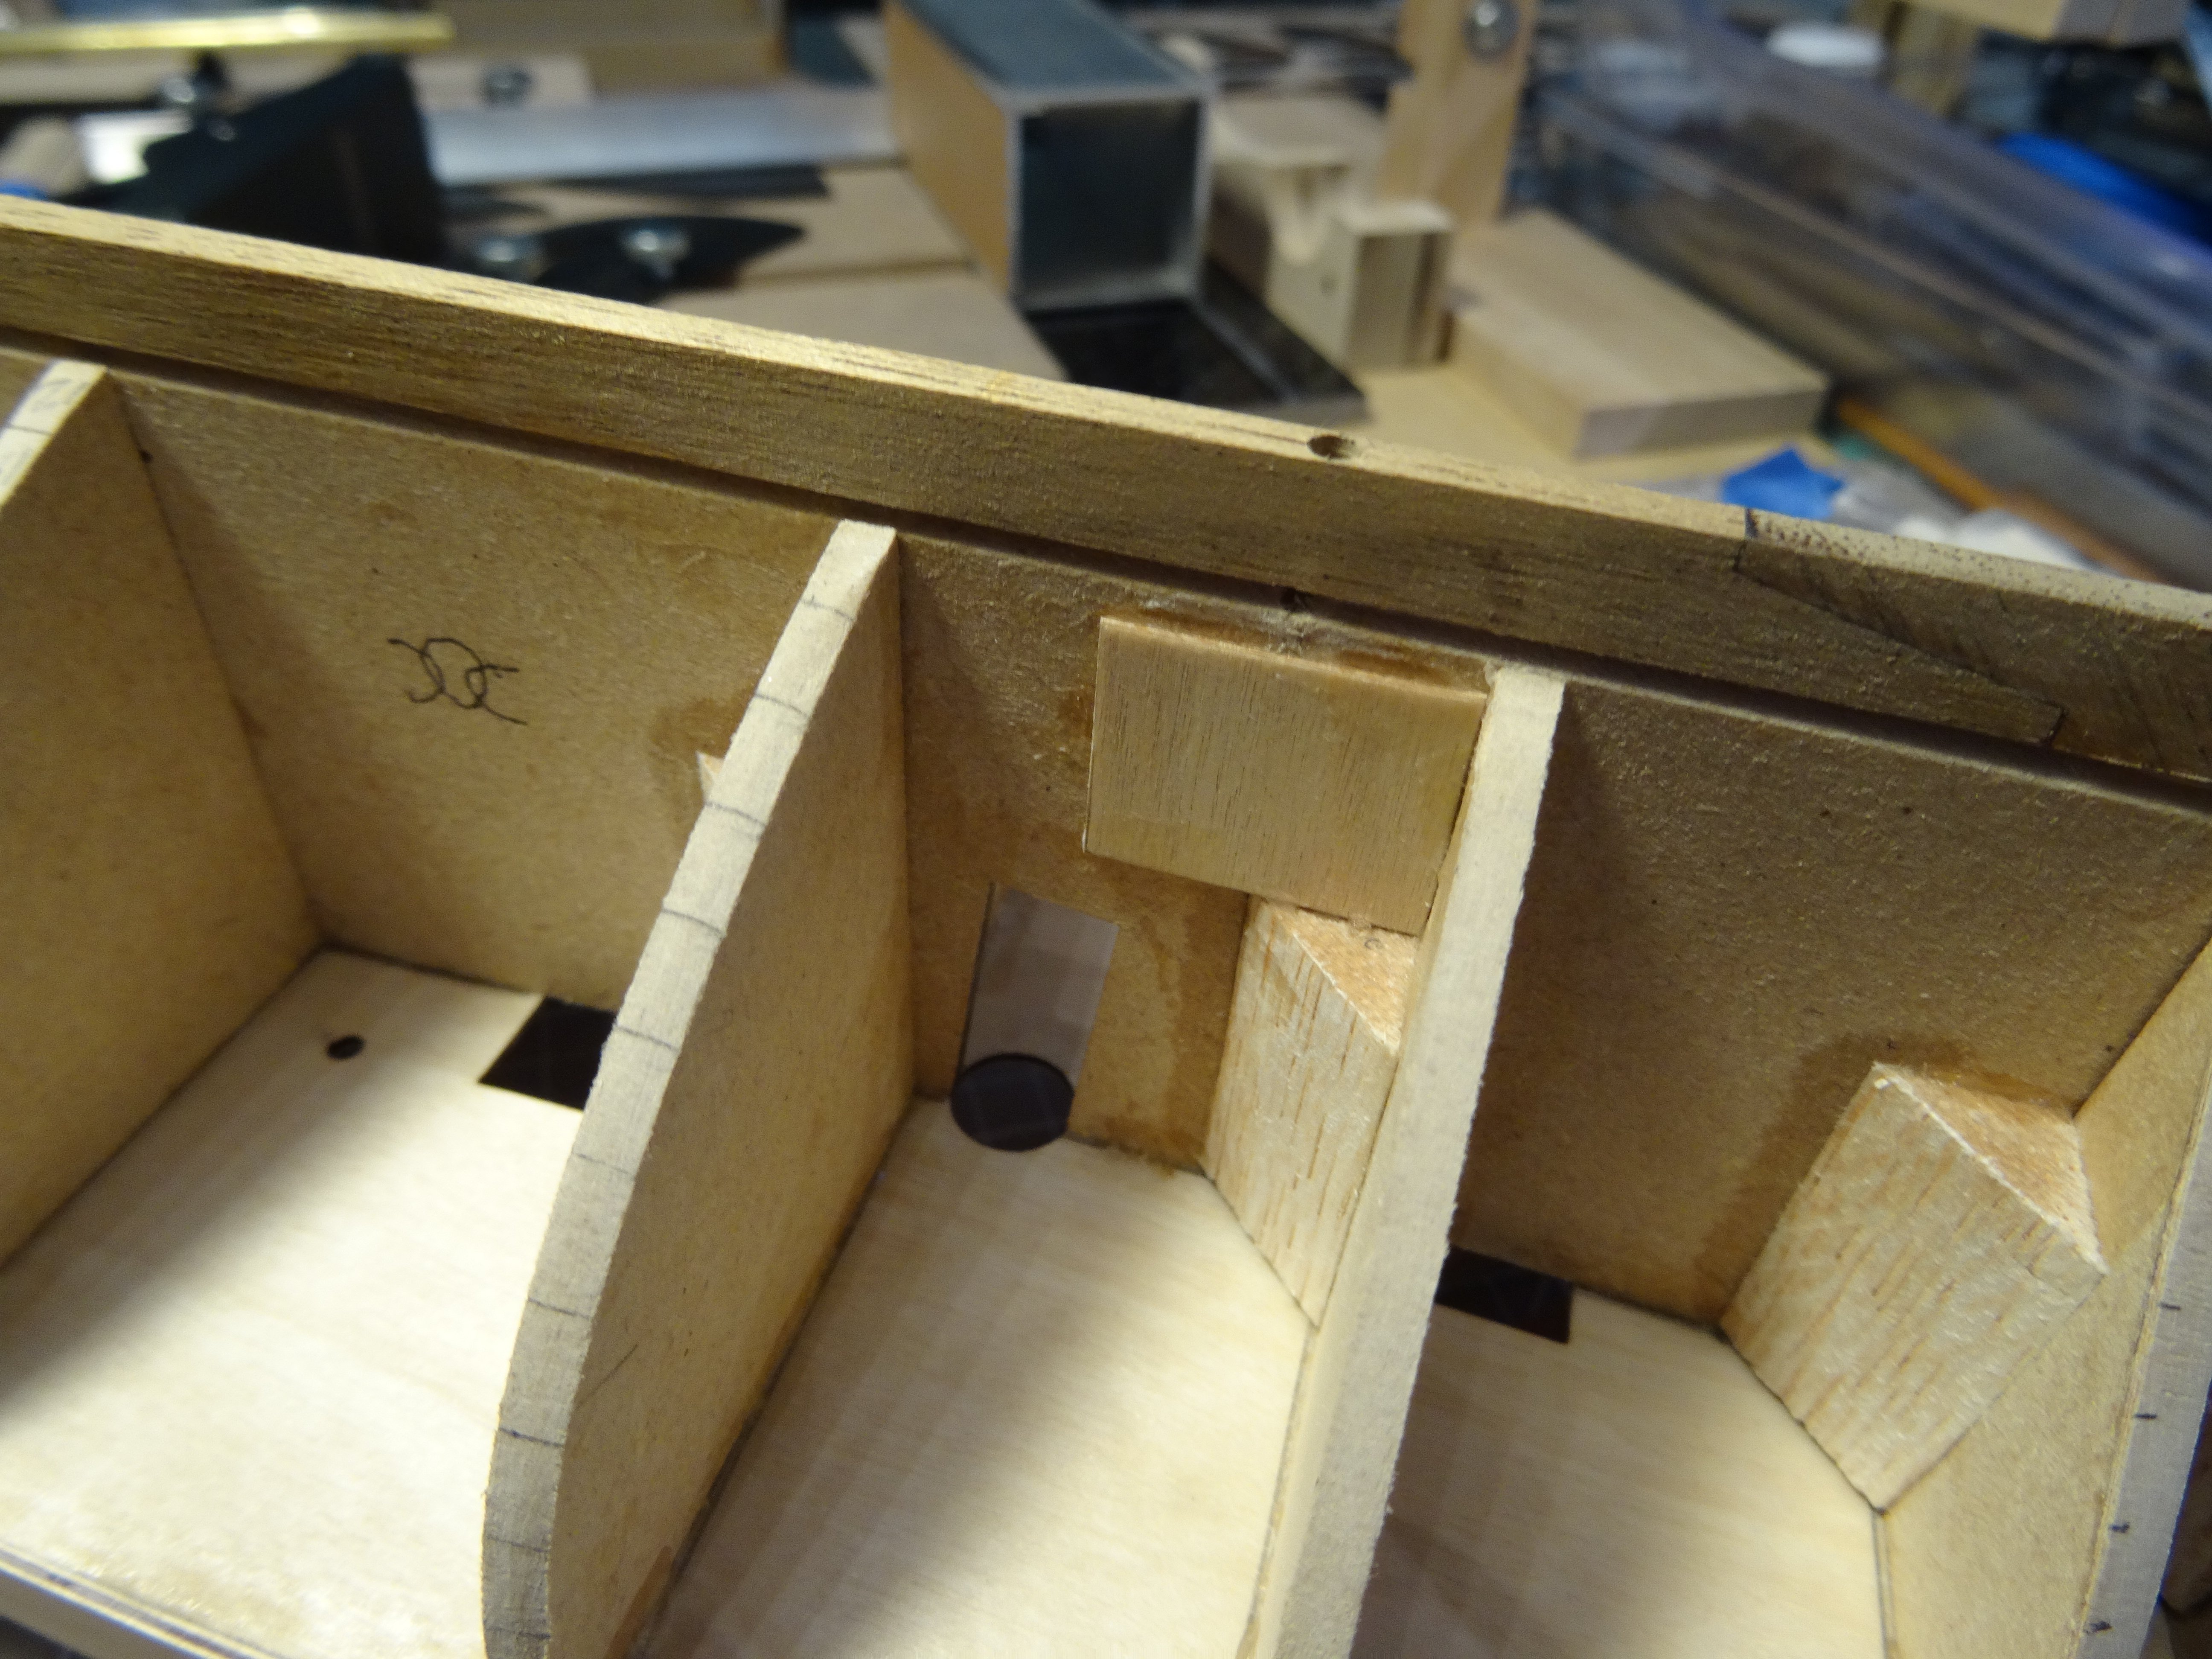
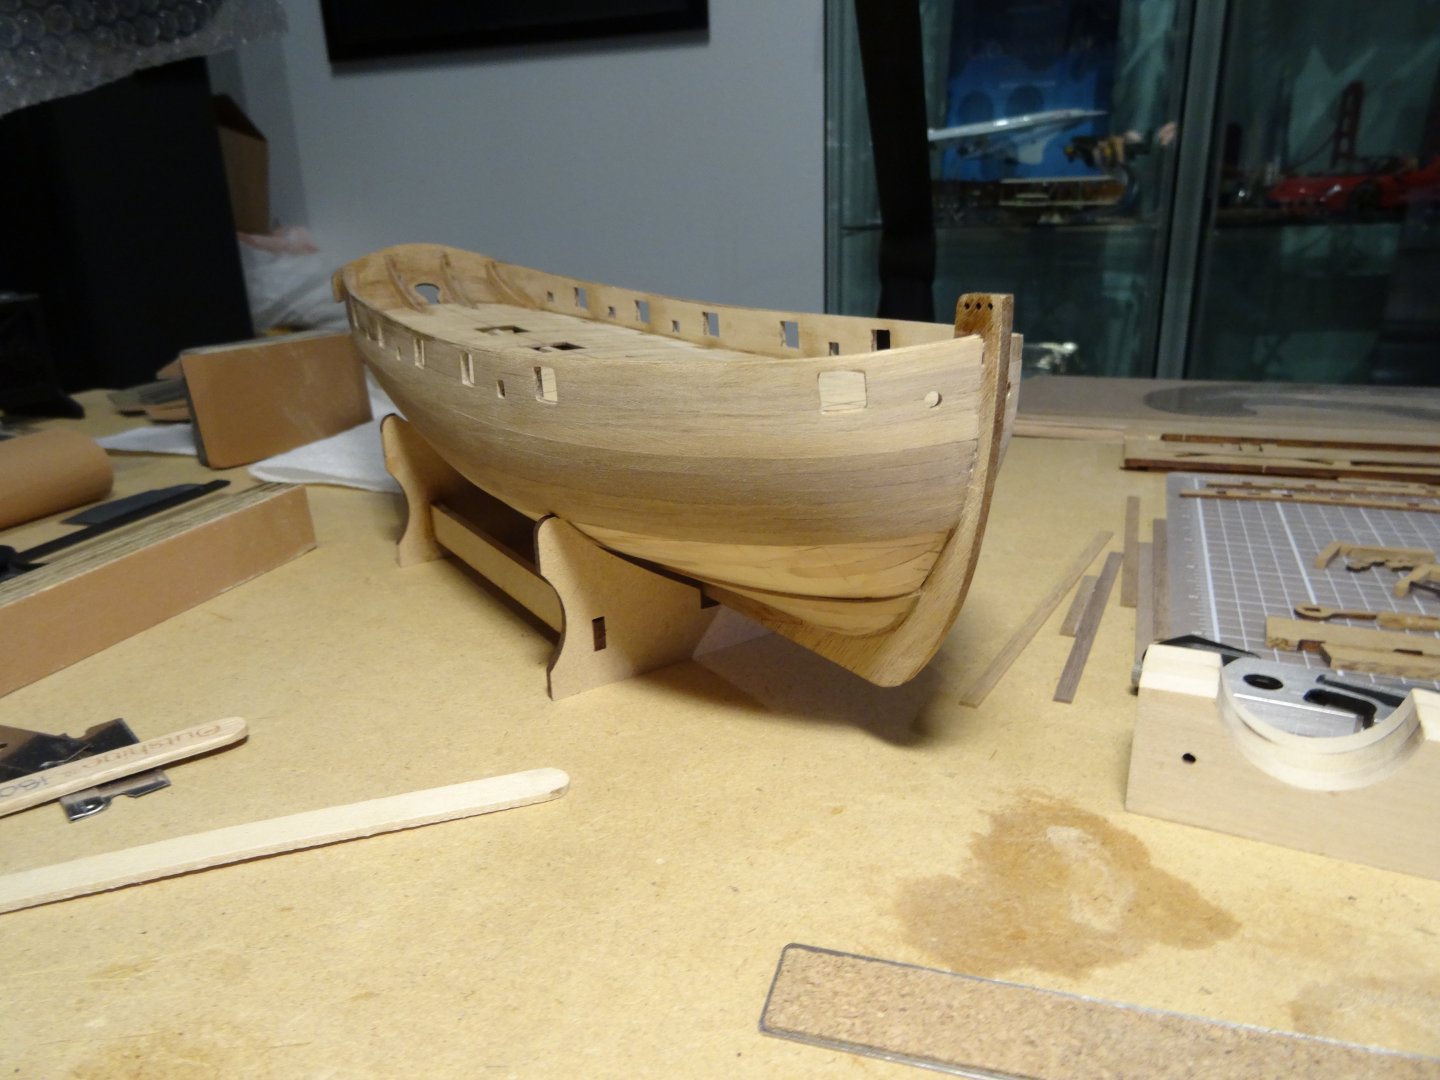
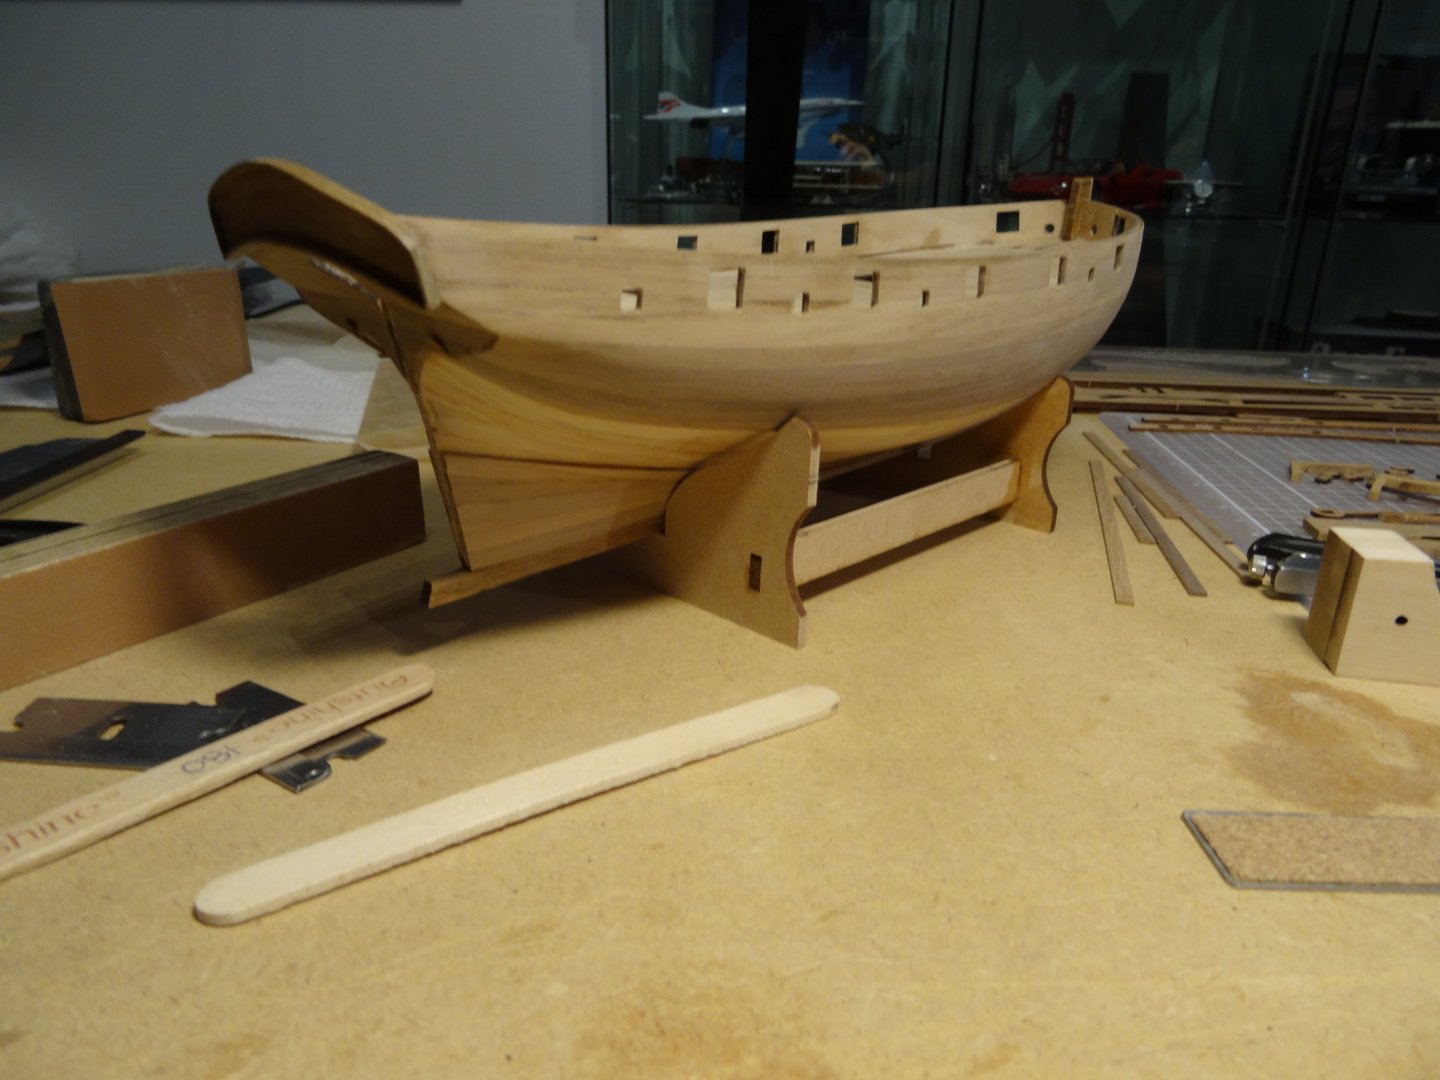
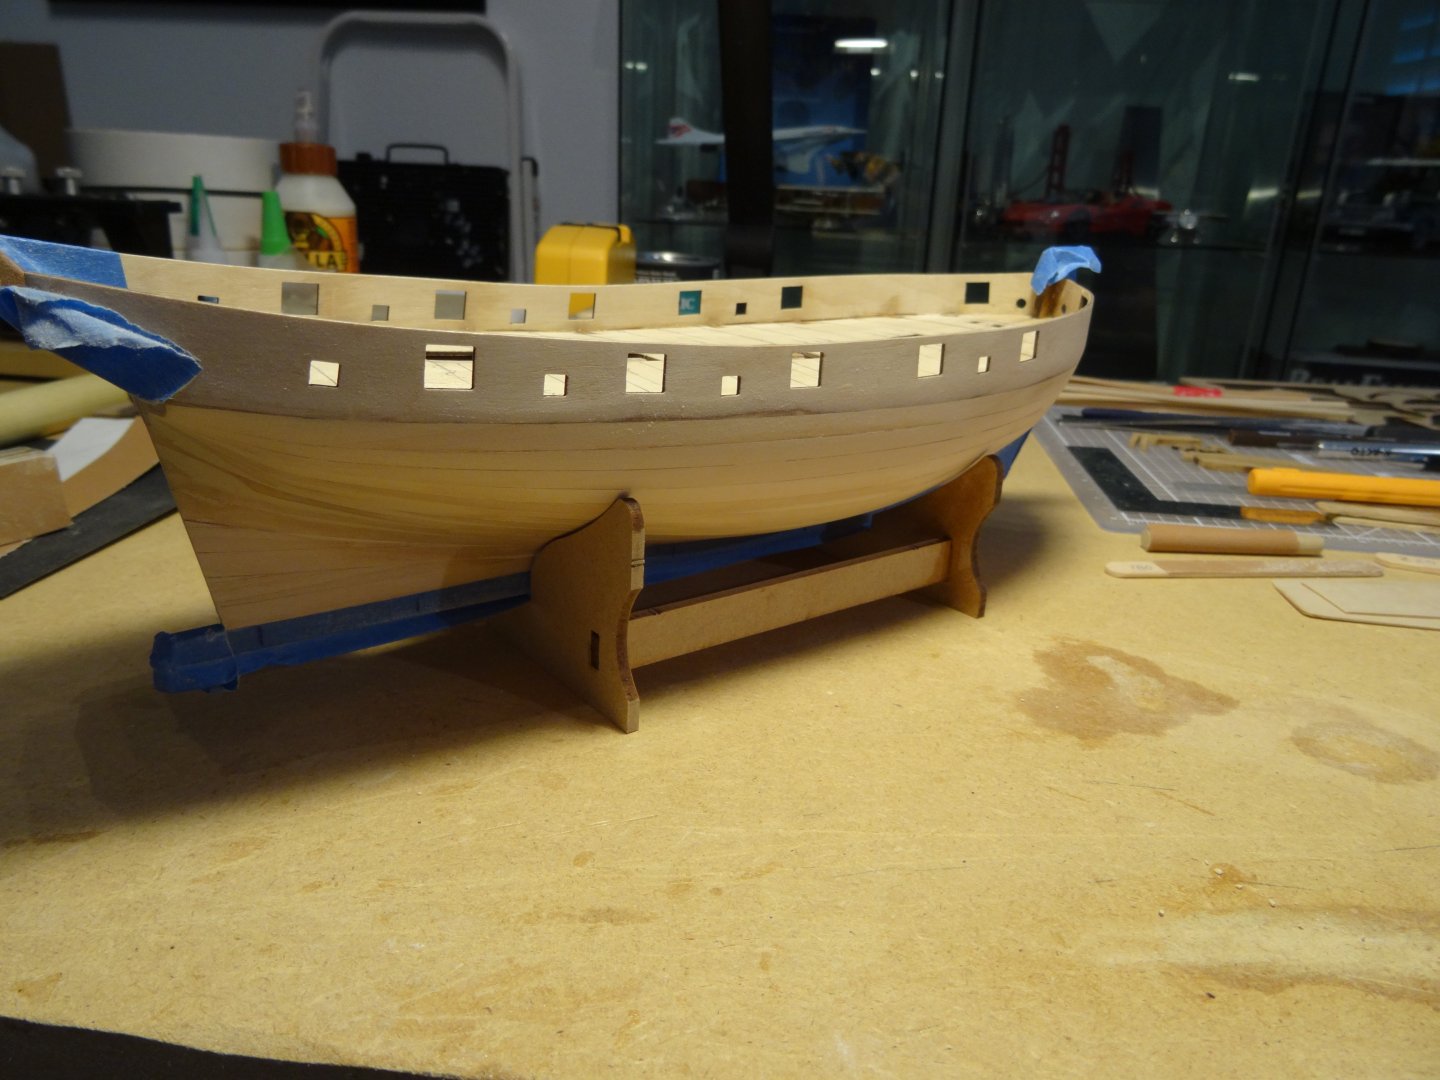
Really fast delivery over the Pond from the UK to Florida in just a week, put a big smile on my face considering the wrath of Hurricane Milton, just around the corner! I ordered ( 2 ) , 51 mm wooden pedestals by Amati, from Cornwall Model Boats, to alleviate the discrepancy created in the Waterline by a parallel support using same height pedestals and the provided cradle. Again, looking at SHEET 3 of 5 in the Amati plans clearly shows the keel at an upward angle, from left, to rising to the right. That resting angle, is negated on even height pedestals or the provided cradle. My intensions are, to cut the angle into the two wooden pedestals, so that the waterline is properly placed across the Hull. " A Beginners error" , having been working on my project and being distracted with impending Hurricane, errands and a slip and fall where my wife ended up in the Emergency Room with a broken nose, right wrist and a list of other damage, I just didn't pay attention to the limited thickness the Hull planking is. I saw a curve I wanted to create and went at it too vigorously, only to enter the inside of the hull. I felt like Urkel, " Did I do that! Yup! Well fortunately for me it is in the bottom paint zone and won't be seen! I enlarged the hole, and with walnut planking used, filled the opening with the wood glued in place with thick CA. Using ZAP Finishing Resin and Top Flight Micro balloons Filler , I made a past that I spread thin with a cur Baseball card as a Squeegee. When hardened, I very carefully sanded it with 320 grit sandpaper and have coated the area with MINWAX Clear matte, Polycrylic which I am using to finish all the wood Hull. With a couple more planks to go, I'll be finished the hull planking. The two wood Pedestals are shown in the picture, with the material finishing products I am using. Gotta go for now and help my Son button down his house windows for Hurricane Milton just around the corner!.


- 39 replies
-
- 1
-
-
- Amati
- Victory Models
- (and 1 more)
-
Hi Dan, yeah , I look forward to starting my decking too, for the completed look it adds. The wooden pedestals I ordered from Cornwell Model Boats have already entered our country. That was real Quick over the pond! Great selection of products! Another few days, I'll be able to work out the proper resting angle of the keel. Looking forward to simple pleasures! In the mean time. Florida cannot escape from a new Hurricane due here by mid week. I wished I was eating the spaghetti instead of being part of the models. We're in direct path of this beast right now! I'm hoping the sheer winds in the Gulf of Mexico, near Florida will effect and chop off some of the high 150 + mph winds before it gets to landfall. I've experienced 70 mph winds a few times, but never double that.... I think it would sink my boat! I've started to finish the hull wood in a Matt finish polycyclic. Used also as a base coat to get rid of the heavy wood texture often seen when paint is directly applied to bare wood. It will provide a nice seal and smooth finish for all painted surfaces. I've applied four coats so far. Very light build up , 320 dry sand paper in between with a finish of 400 grit for painted surfaces. All the exposed wood looks nicely rich in color with it applied. Also, I'll use a light touch of white primer which will keep the white bottom paint even in color without blotches. Being water based, I can paint it inside the house. Dries real fast. No oder . Out side, with all the rain we have been having, humidity is running average 75 percent, ...absolutely impossible to spray any acrylics, lacquer or enamel paint. My base and pedestals will be painted with acrylic lacquer. Probably not for another couple of months when the intense humidity is gone. Take care , Roger
- 87 replies
-
- 1
-

-
- Lady Nelson
- Amati
- (and 1 more)
-
We are our own worse critic... It doesn't look like an abandoned Jurassic Park yet! Looks to me like you have a great start and once all the wood is fashioned and in place, you should be very pleased! The Hull turned out well. The planking looks real tidy. My ship ran aground , hit a reef. Too vigorous a sanding , not realizing just how much I had taken off already! Fortunately, with patient repair and skill with finishing reason from RC aircraft, it's repaired and unless you know it happened, it will be covered with bottom paint. Non the less it bummed me out as I worked thru all the learning curves...I've got a pretty big note book by now! Really Dan, keep up the good work, as it's turning out well. Best Regards, Roger
- 87 replies
-
- 2
-

-
-
- Lady Nelson
- Amati
- (and 1 more)
-
Dan Looking good, if to pick up a ( fine ) diamond file 90 degrees or flat, you'll be able to square up the corners to your liking. Have a look at Tamiya! Yeah that transom is enigmatic , took a lot of pondering to get what was needed to finish it. I was relieved when I came across Amati 51 mm wooden, (walnut) pedestals. I ordered them and they have shipped from Cornwell Model Boats. Being that they are wood, I can cut one smaller for the stern and adjust as needed. Dan, You're so right, how awkward the waterline turns out when the keel is horizontal to its display base. That feature is just totally disregarded by Amati, when supplying two equidistant pedestals or the cradle that also displays the keel parallel to the base. Shame!, but we conquer and overcome!
- 39 replies
-
- 2
-
-
- Amati
- Victory Models
- (and 1 more)
-
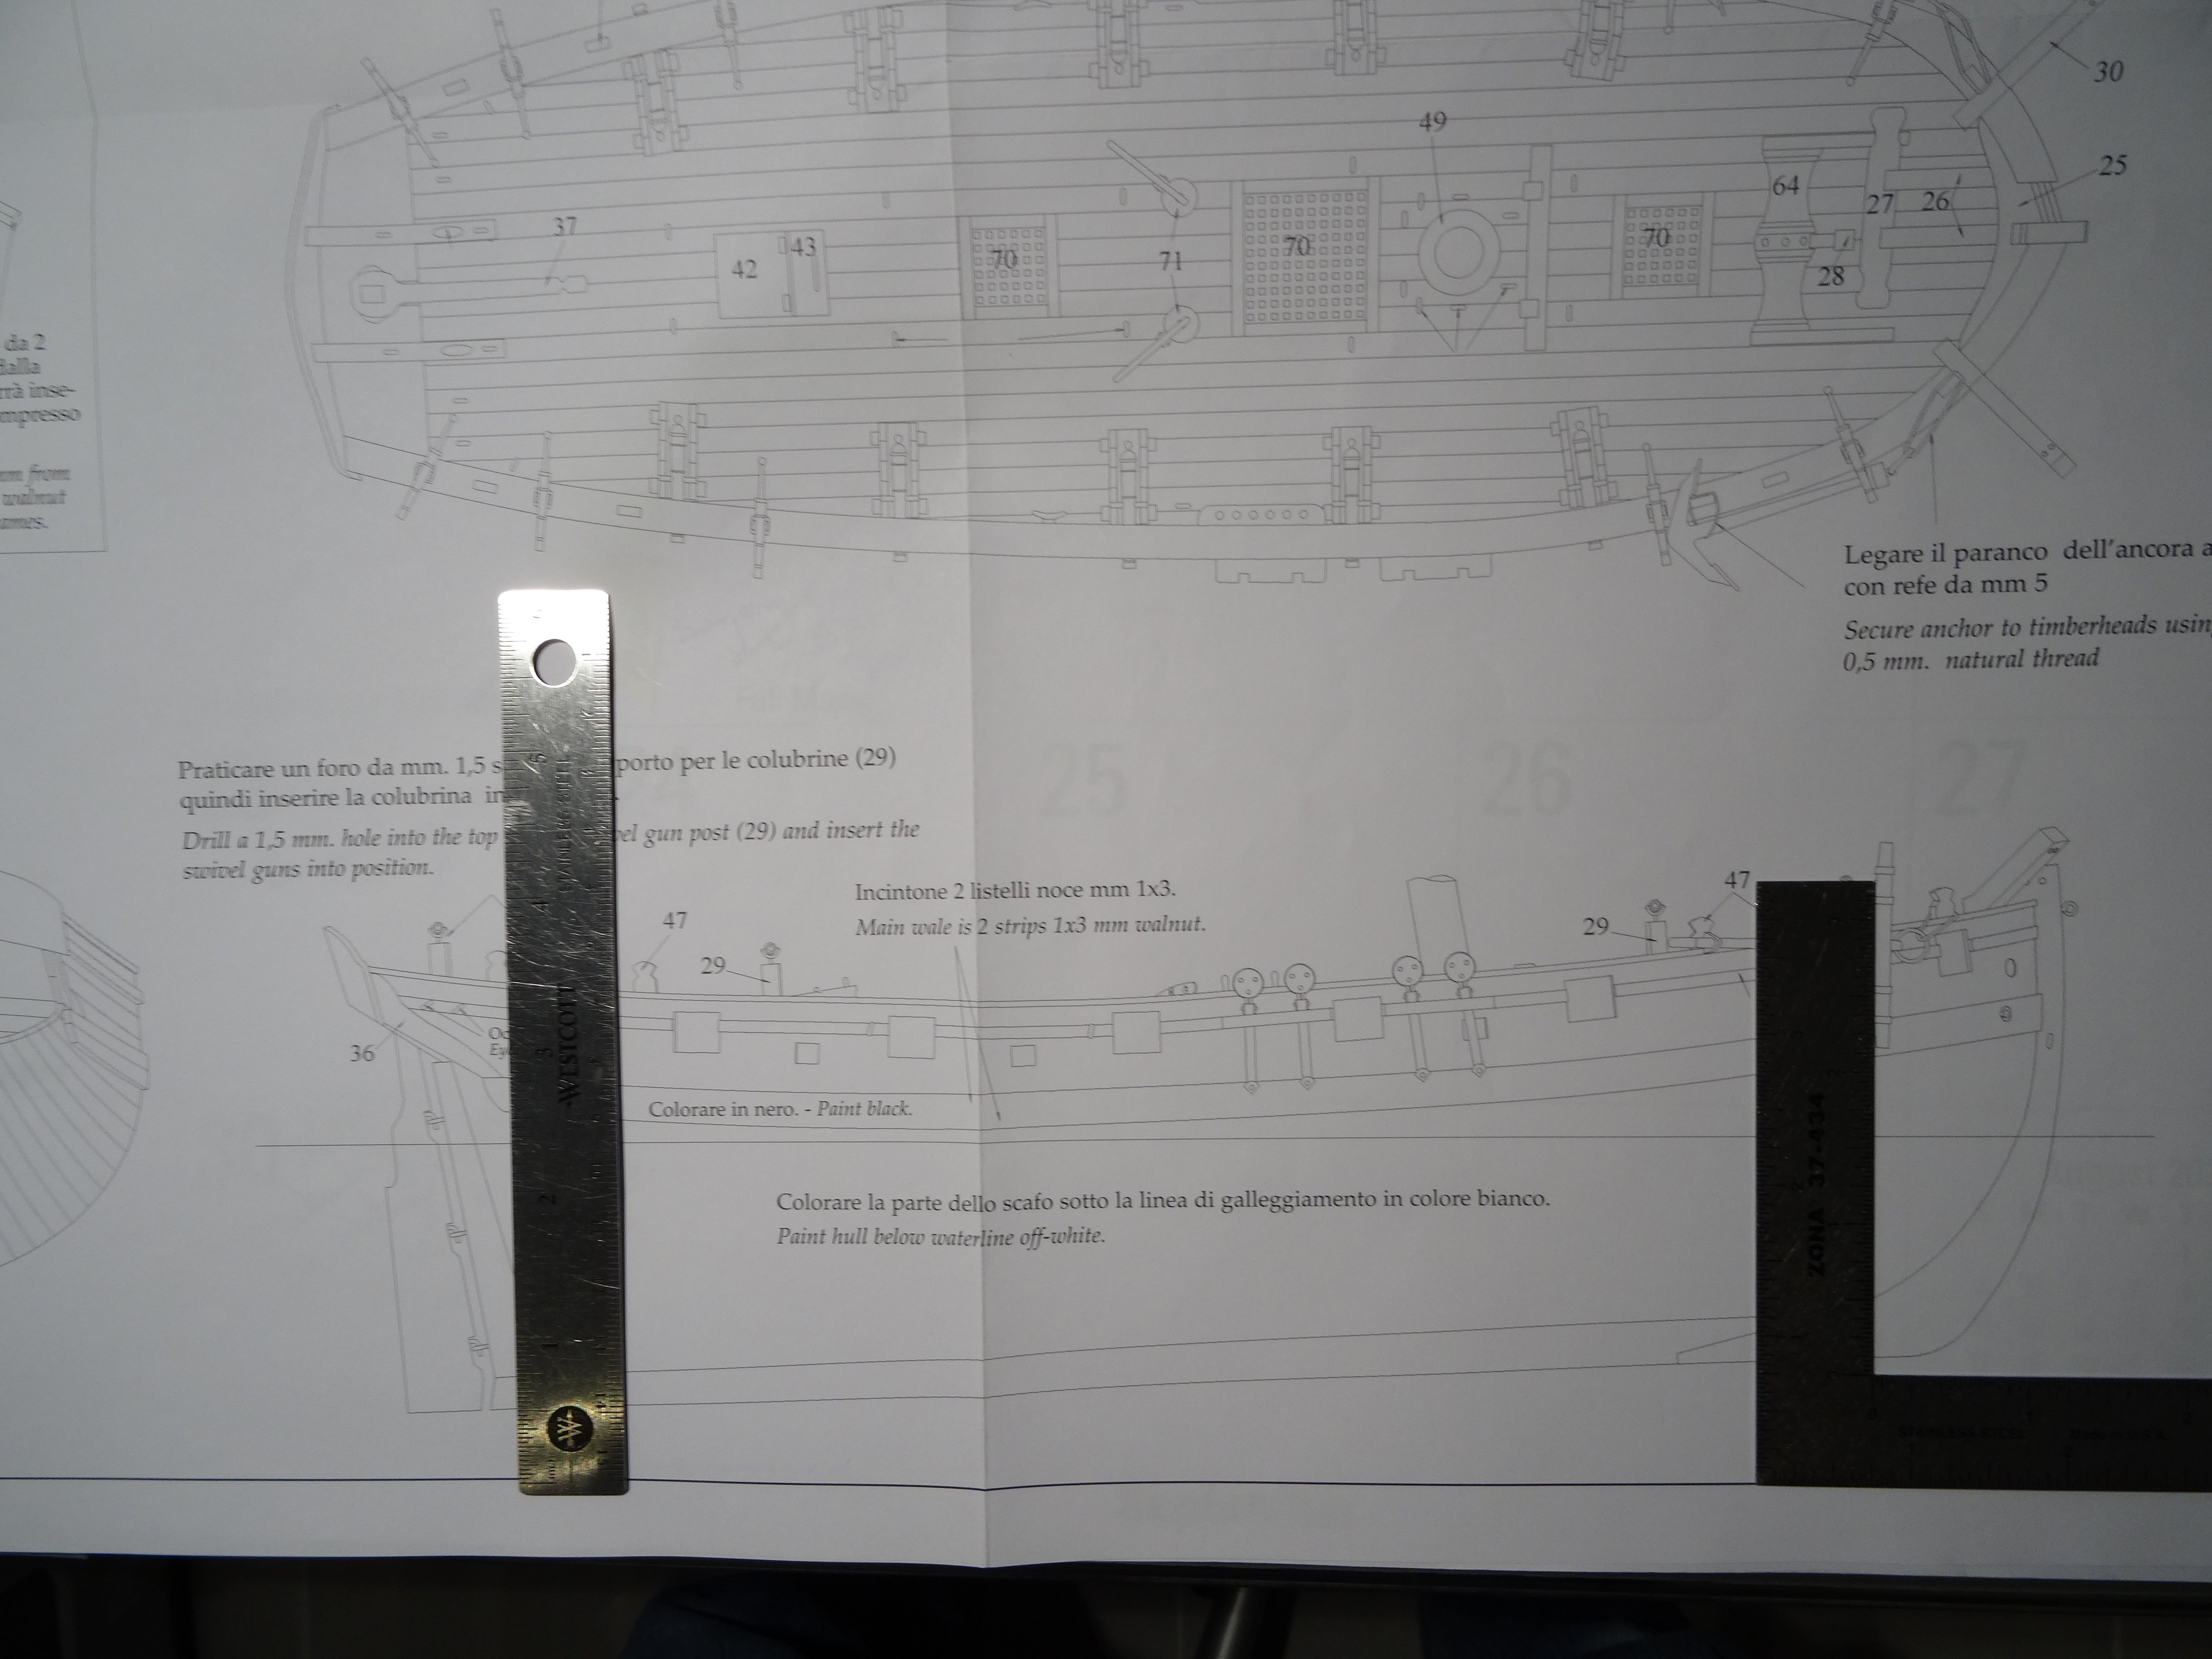
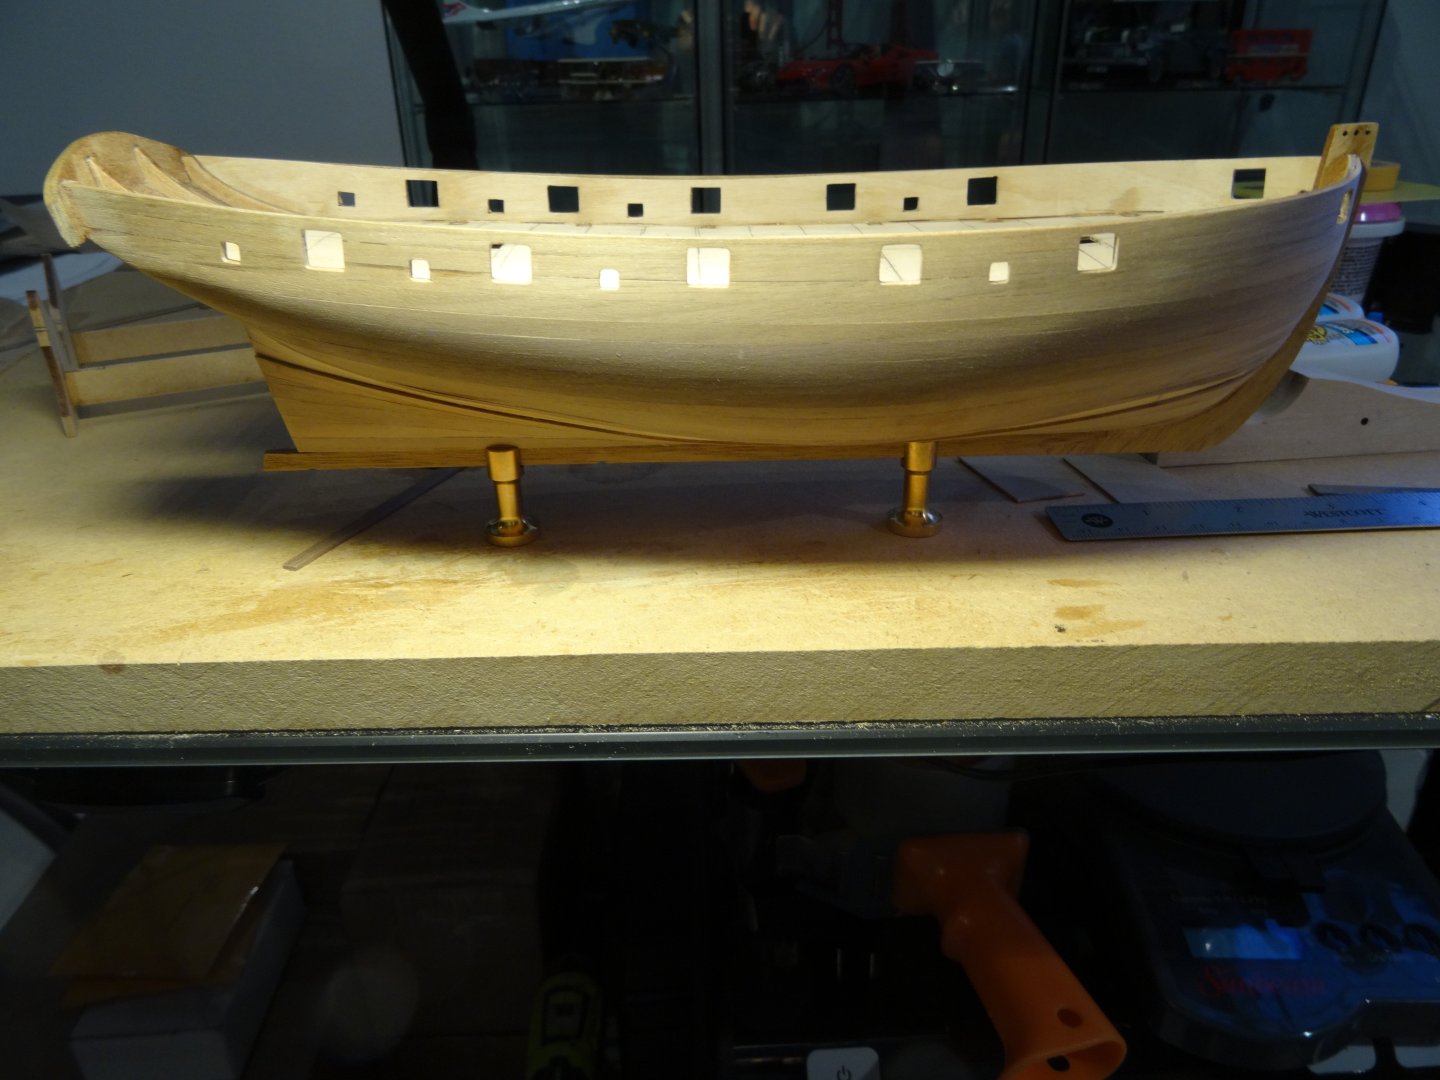
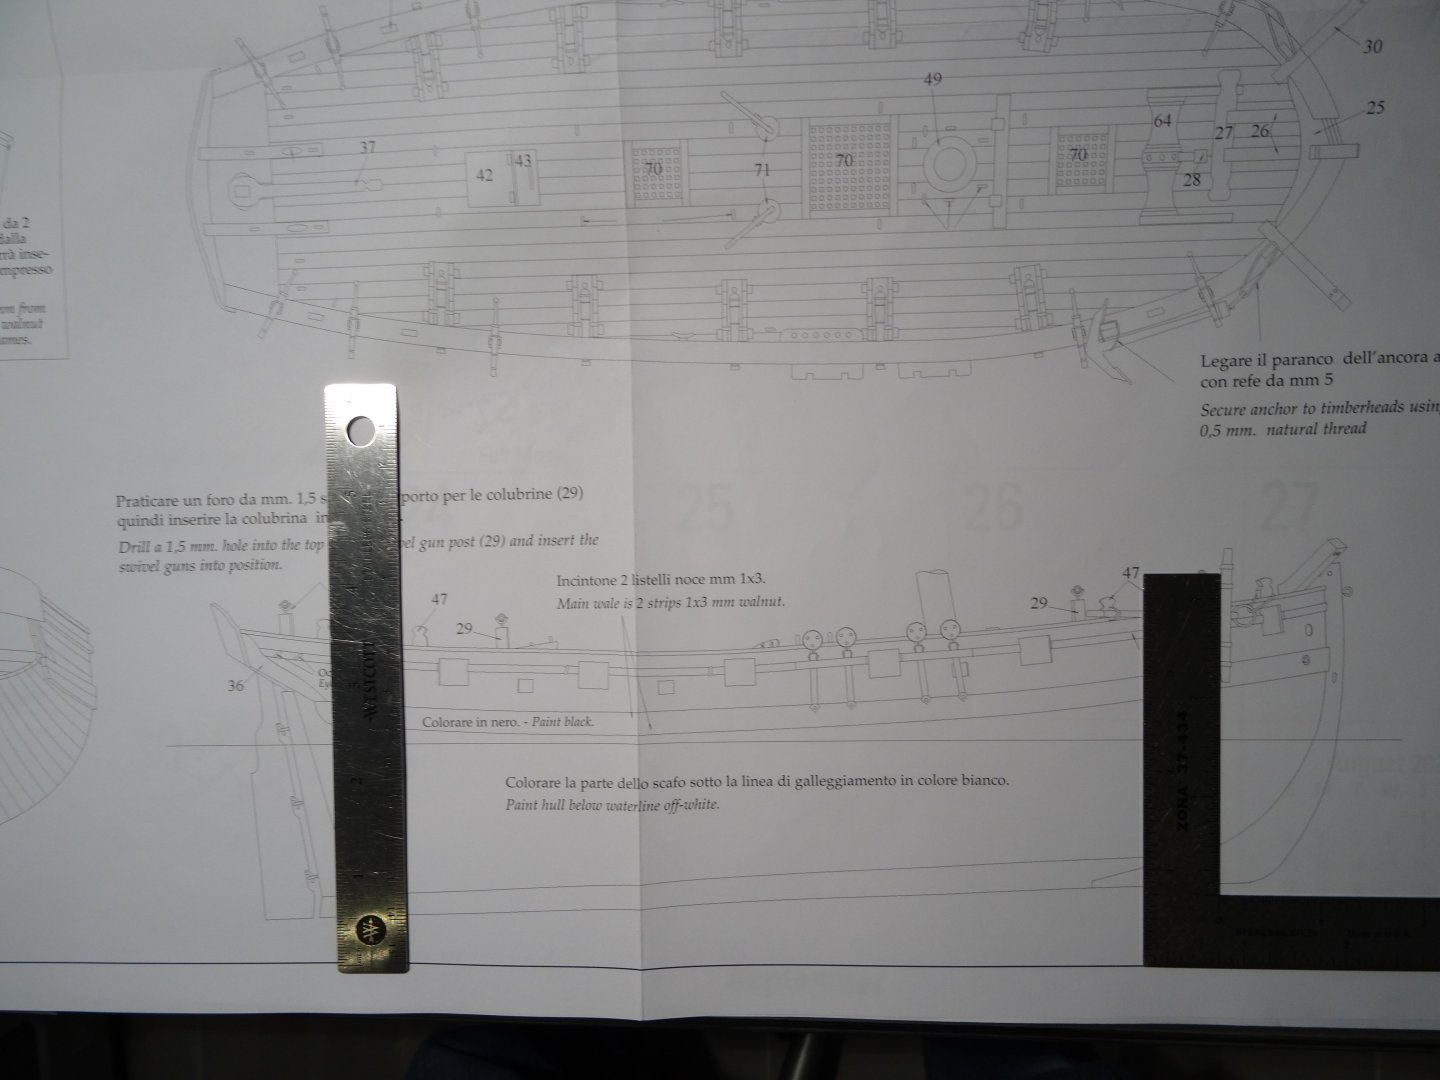
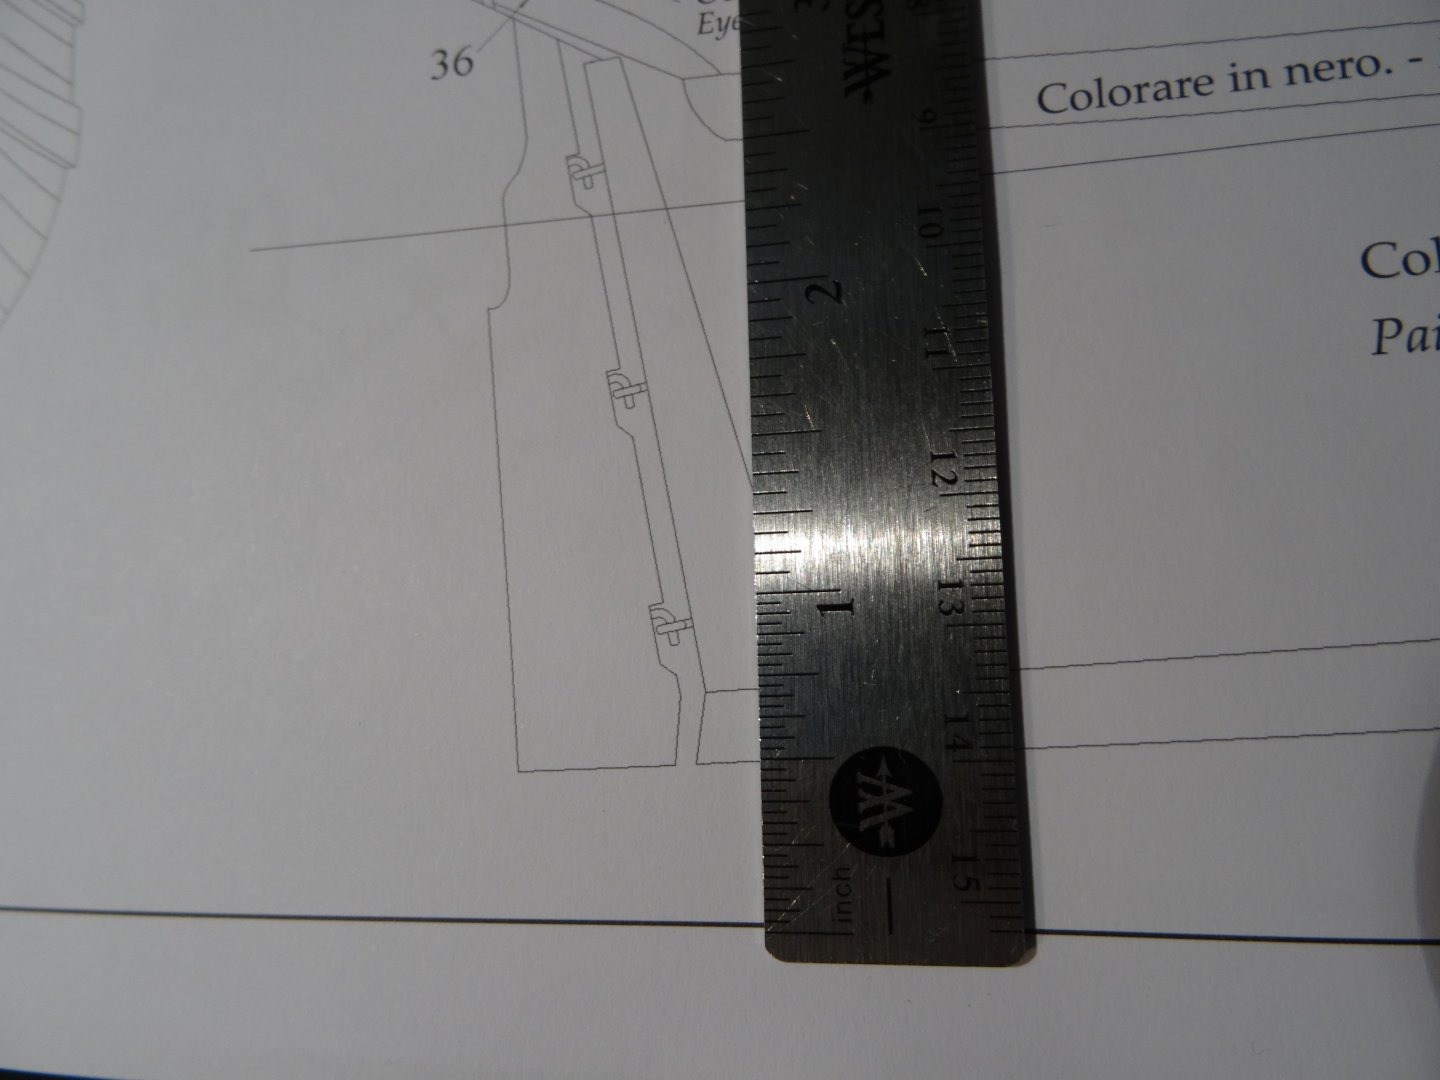
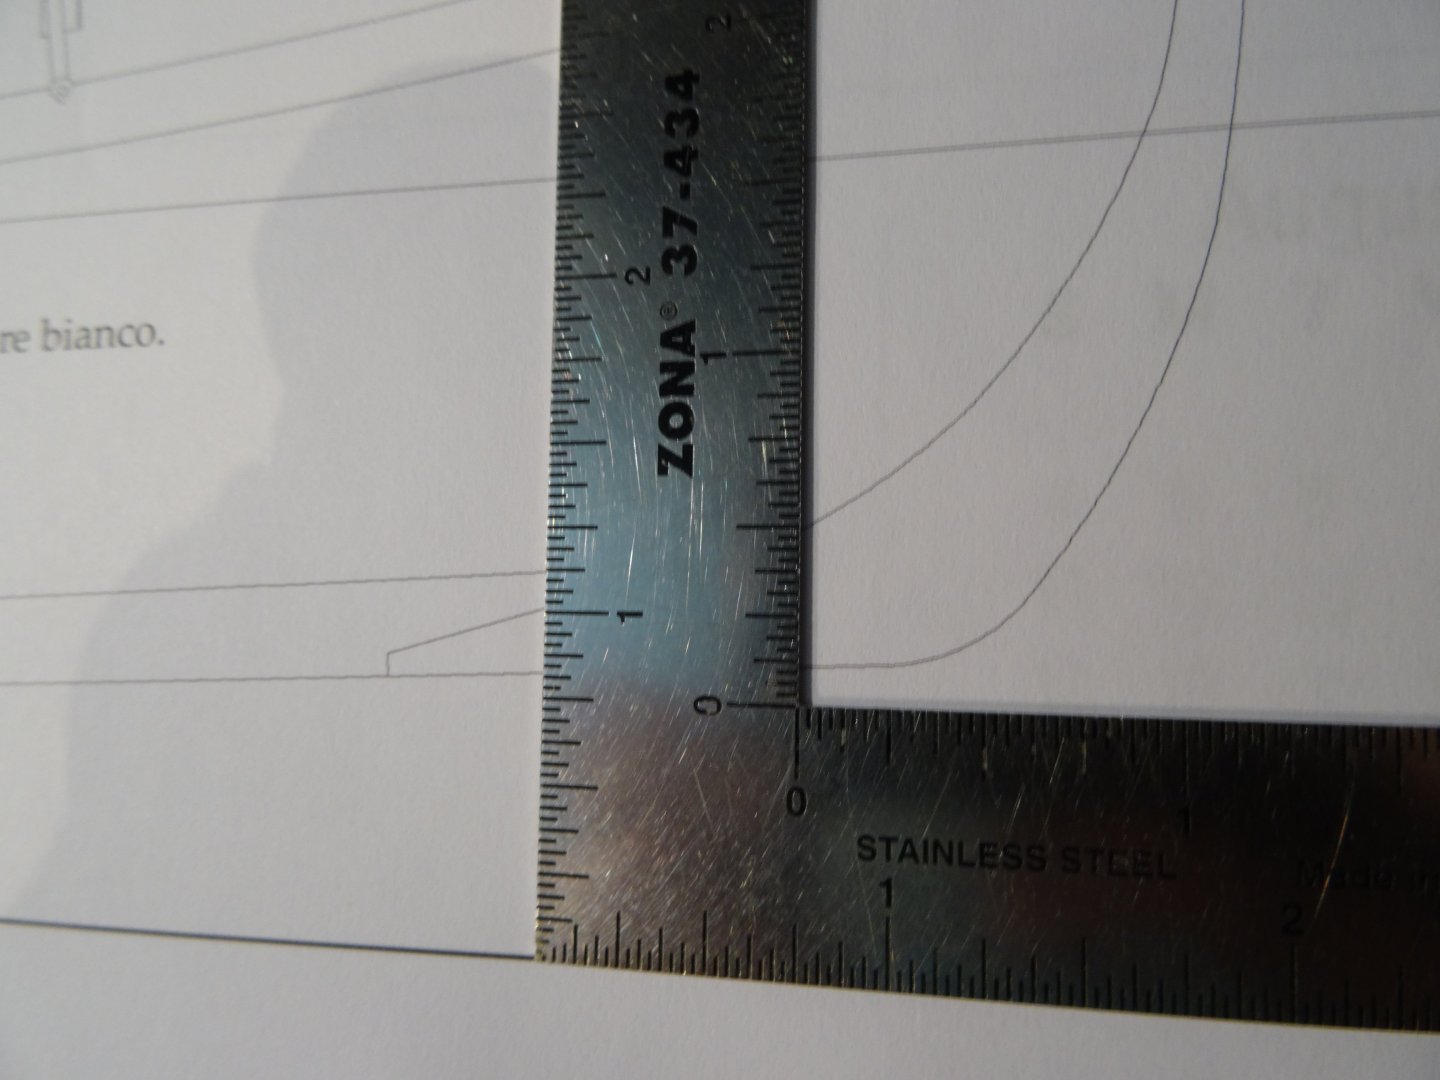
Hi Dan and Thanks for the encouragement, as it is too easy, to find fault in our own work ! I also give thanks to all who have marked a Thumbs up to segments of my build. That is appreciated very much! It's the overall view that we all typically strive for and perceive first and if that's a home run, great! This is my first model ship and considering the complex nature of a ship build no matter the size, I'm happy with my progress so far. But sometime the inexperience eye doesn't see the entire picture with enough detail, to place stop signs in the build process. I will reiterate my thoughts , that as simple a kit this may be, all construction details are not covered well! With that approach, it makes this kit a more Mid Level build than an First model inexperienced build. Just my humble opinion! As any ship sits in the water, it's displacement determines it's natural water line. Even a free standing bath tub represents this if placed on water! To place a cargo hold in an incorrect location, the ship will list. Something visual has bothered my eye of this model finished from the many builds I have admired so far. I came to realize it was the various locations and placement of the water line and how it effected the overall shape and the outline of this ship! This is so easy to do as we utilize the plans and parts provided for the build. To best of our knowledge, all details are properly provided in the instructions! Here is my point! The plans clearly show on ( Sheet 3 of 5 ), a Starboard profile of the Lady Nelson indicating a water line, low in the stern and the bow proud of the water. Well guess what, I didn't notice this important detail until just now, several weeks into my build, as I near the end of the second layer of planking. The kit provides two brass pedestals as shown in my photos, that are exactly the same measurements. This places the Keel basically horizontal! If an artist where to paint a picture of a field with a Horizon and that Horizon were tilted down left or lifted up right , your eye would pic up the down hill or up hill direction as not being horizontal! This creative angular direction is done with intent to carry or place ones sight to view another feature of the painting! So here's the rub, if one chooses to paint the waterline as the plans indicate it to be, then mount the ship on the pedestals, the bow of the ship will be perceived as pointing down by 3/8" and the stern rising high respectively! The only way to overcome this illusion is to improperly paint the waterline, when the ship sits in the cradle horizontally or provided brass pedestals. Technically, one pedestal for the bow should be 3/8" higher! As per plan profile Illustration. So in my build I have finished drilling holes and securely mounted brass tubing perfectly perpendicular for even height pedestals. Things that make you go HUMMM! I have devised a plan to bend the bow mounting wire I'll be using to offset the angular discrepancy, as I raise the bow pedestal with a collection of washers to the height needed. This really was a fortunate find for me, before doing all the hull waterline painting. Possibly I'll be able to find a pedestal that is 1 3/8" tall for the Bow to be placed in the correct position. I hope this helps others with a decision how to address this dichotomy.

- 39 replies
-
- 3
-
-
- Amati
- Victory Models
- (and 1 more)
-
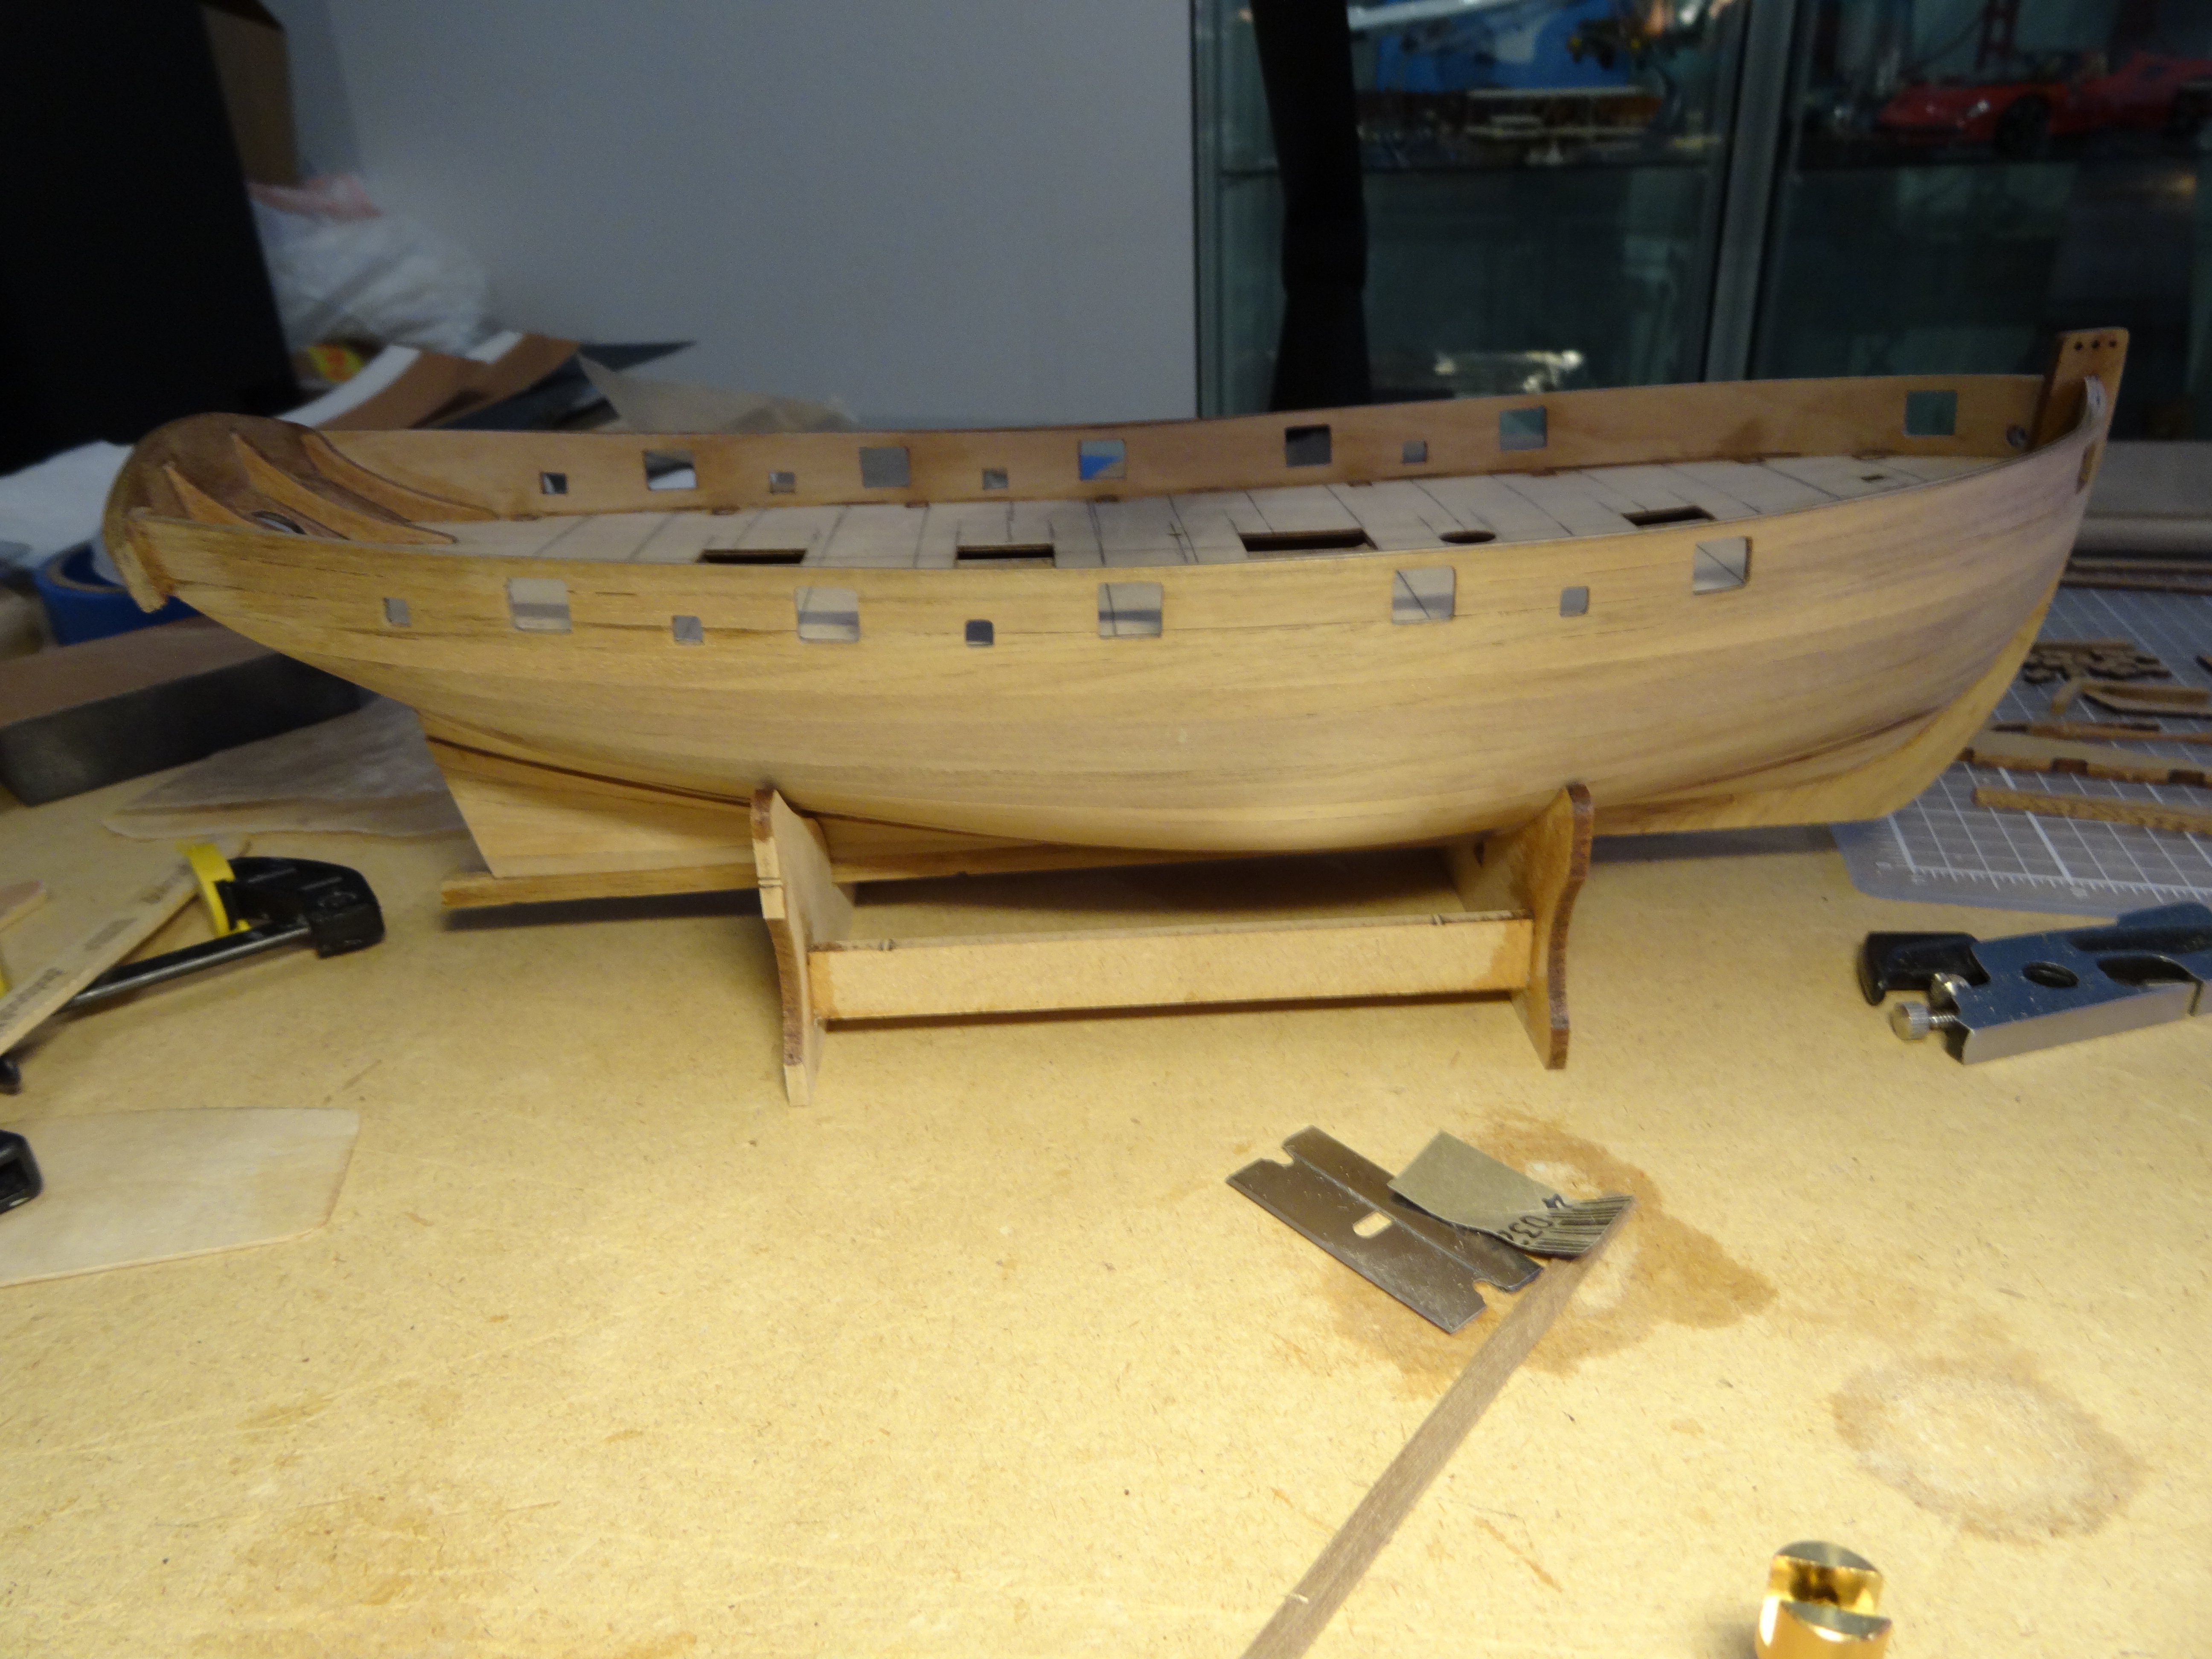
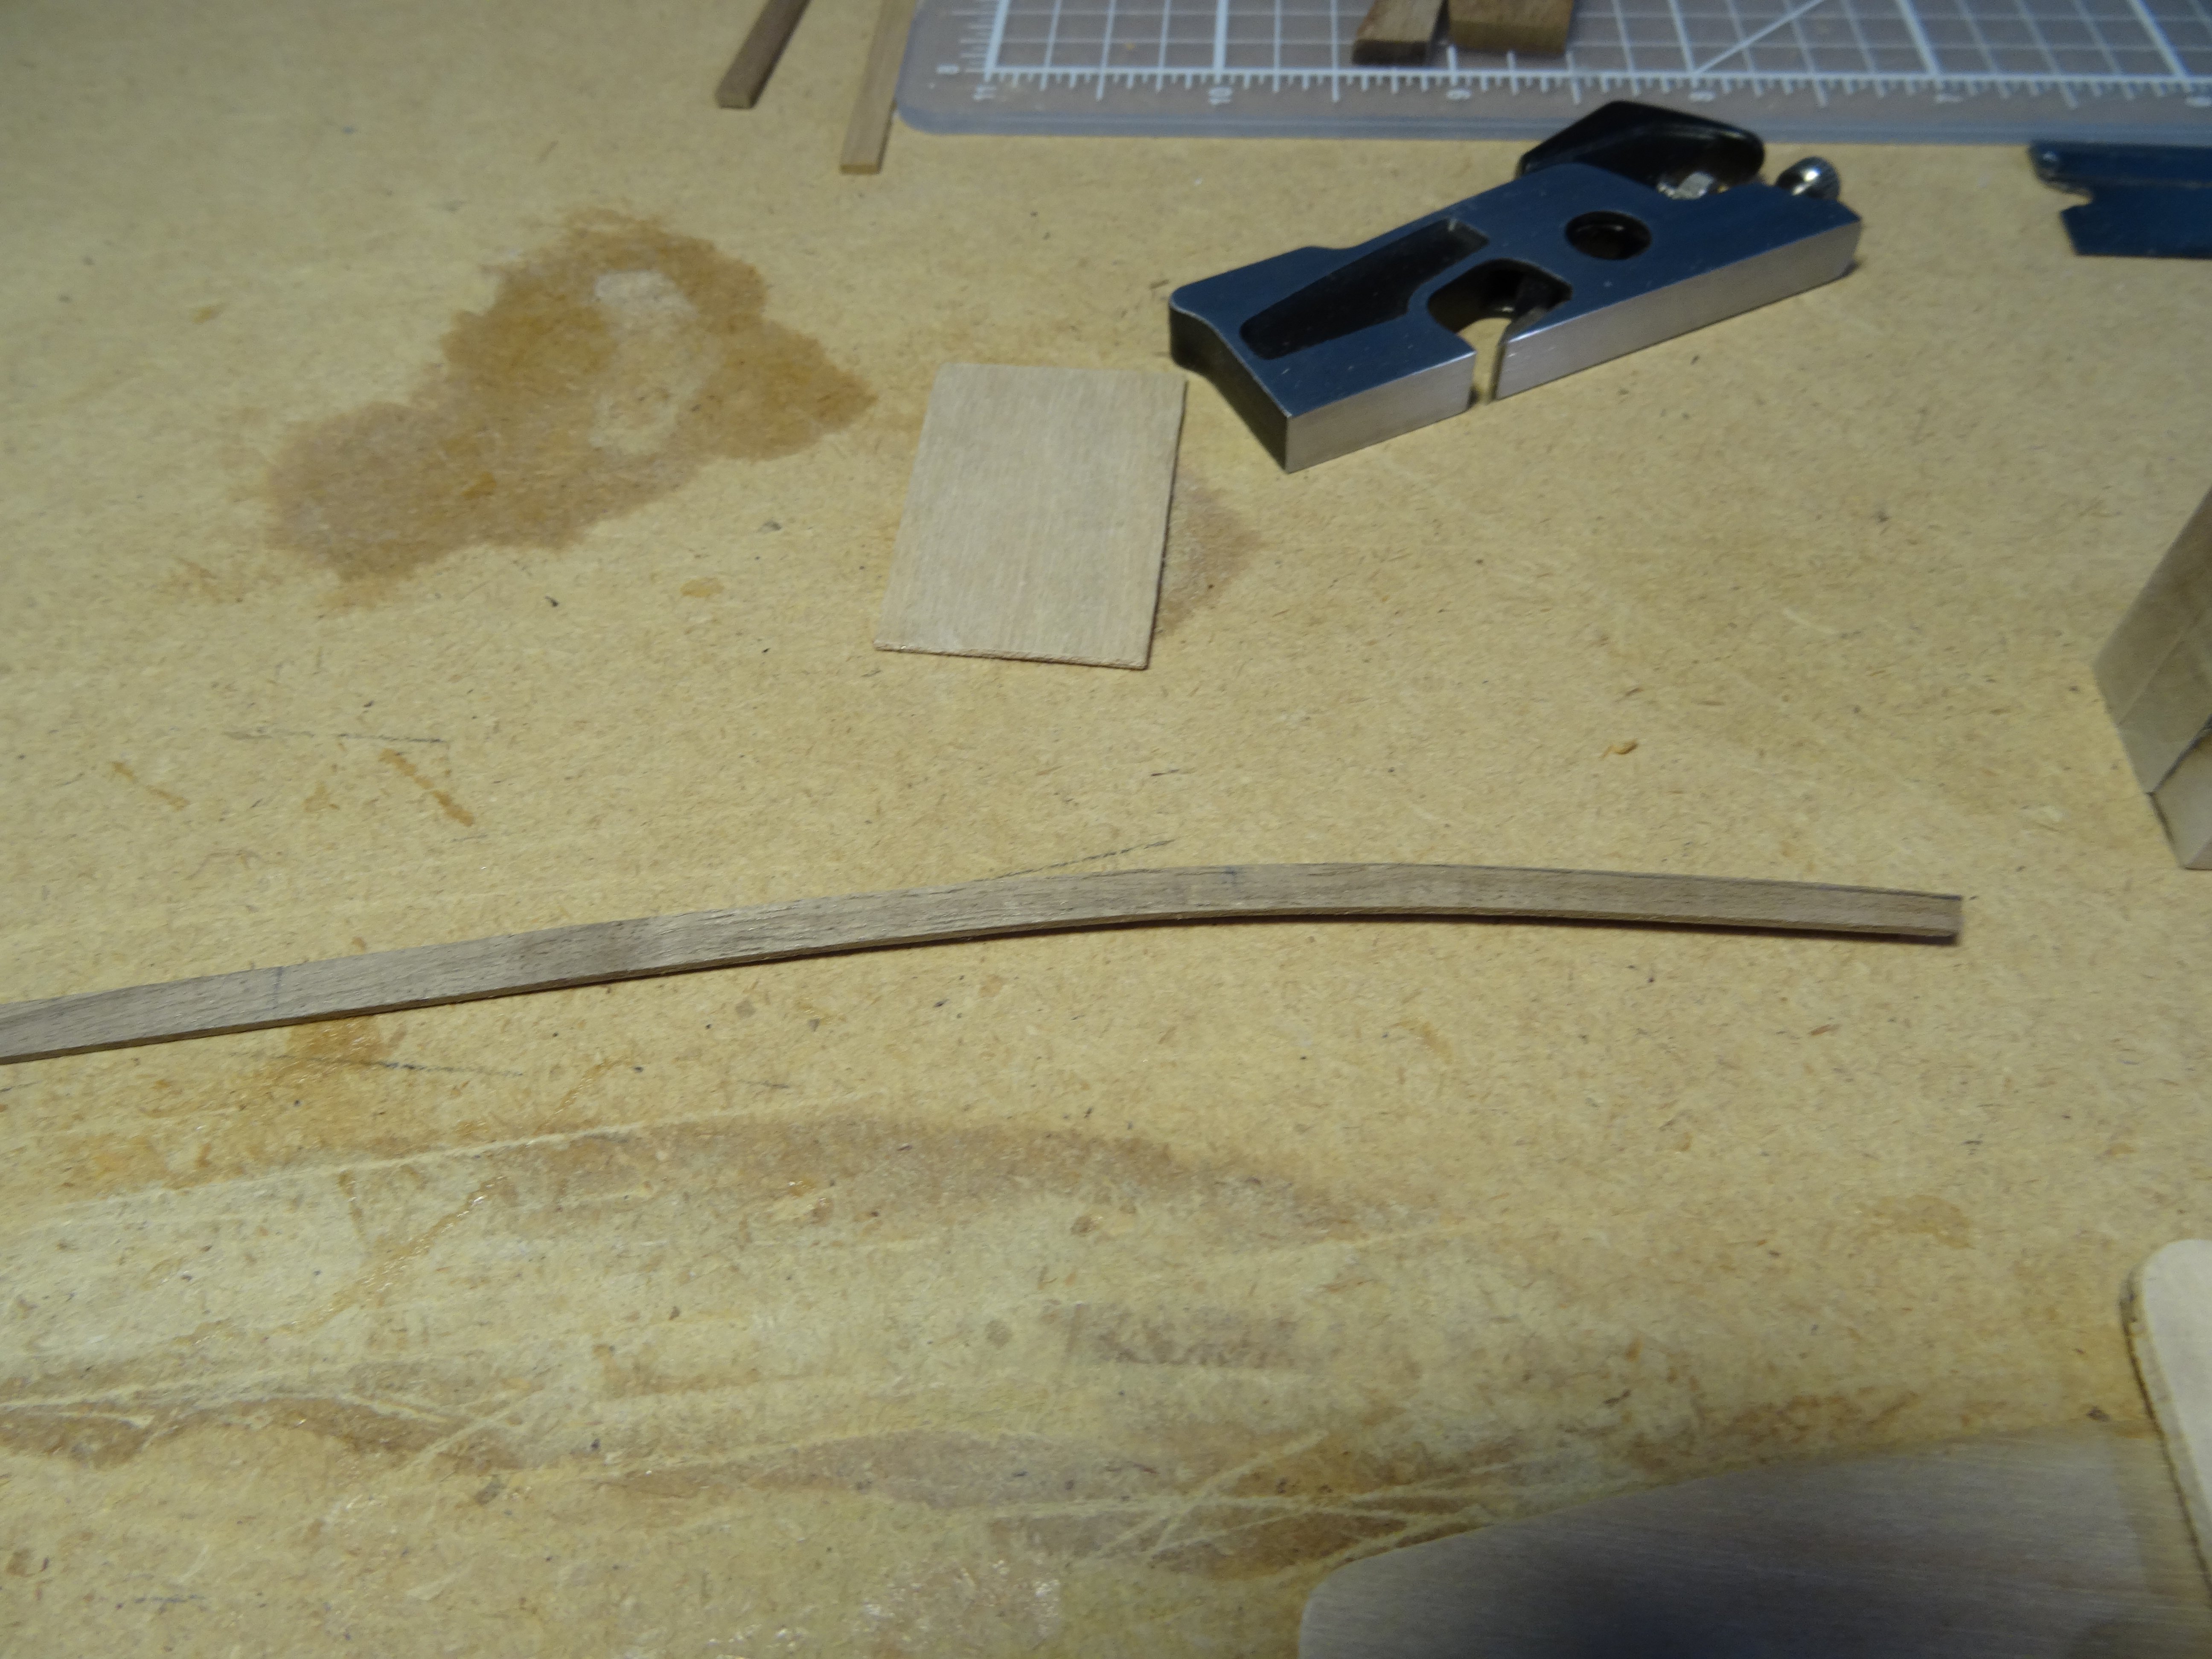
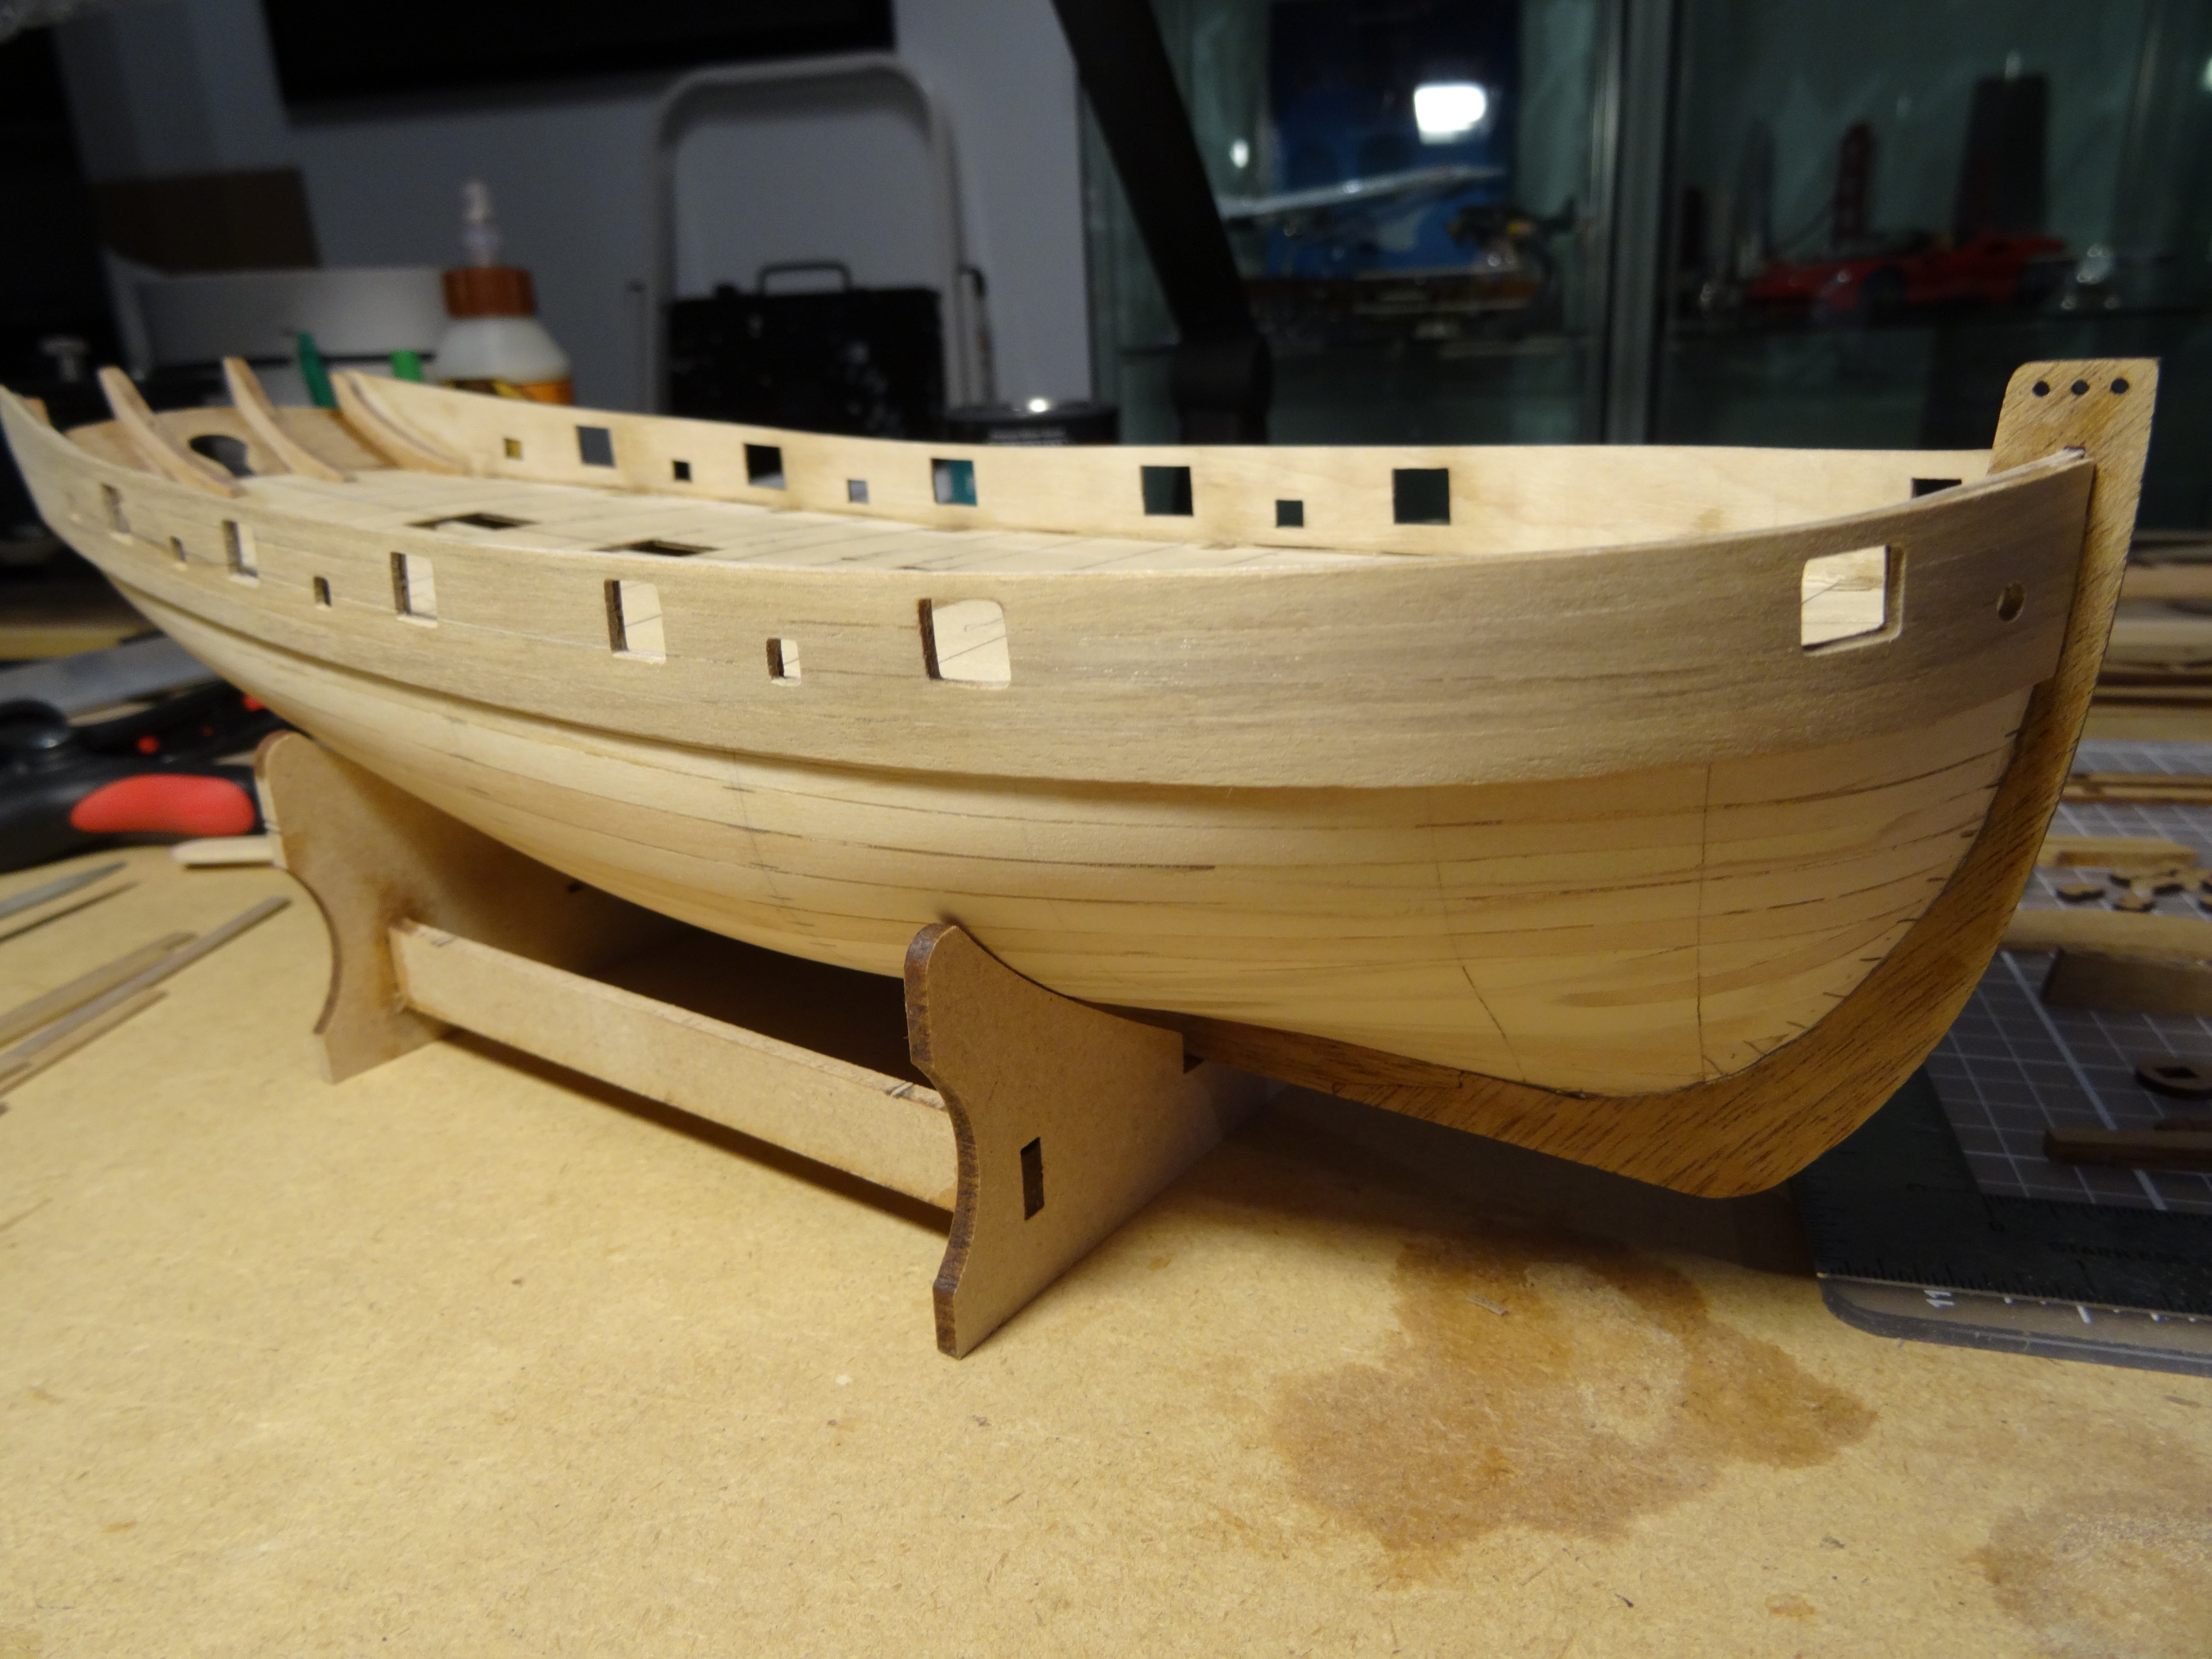
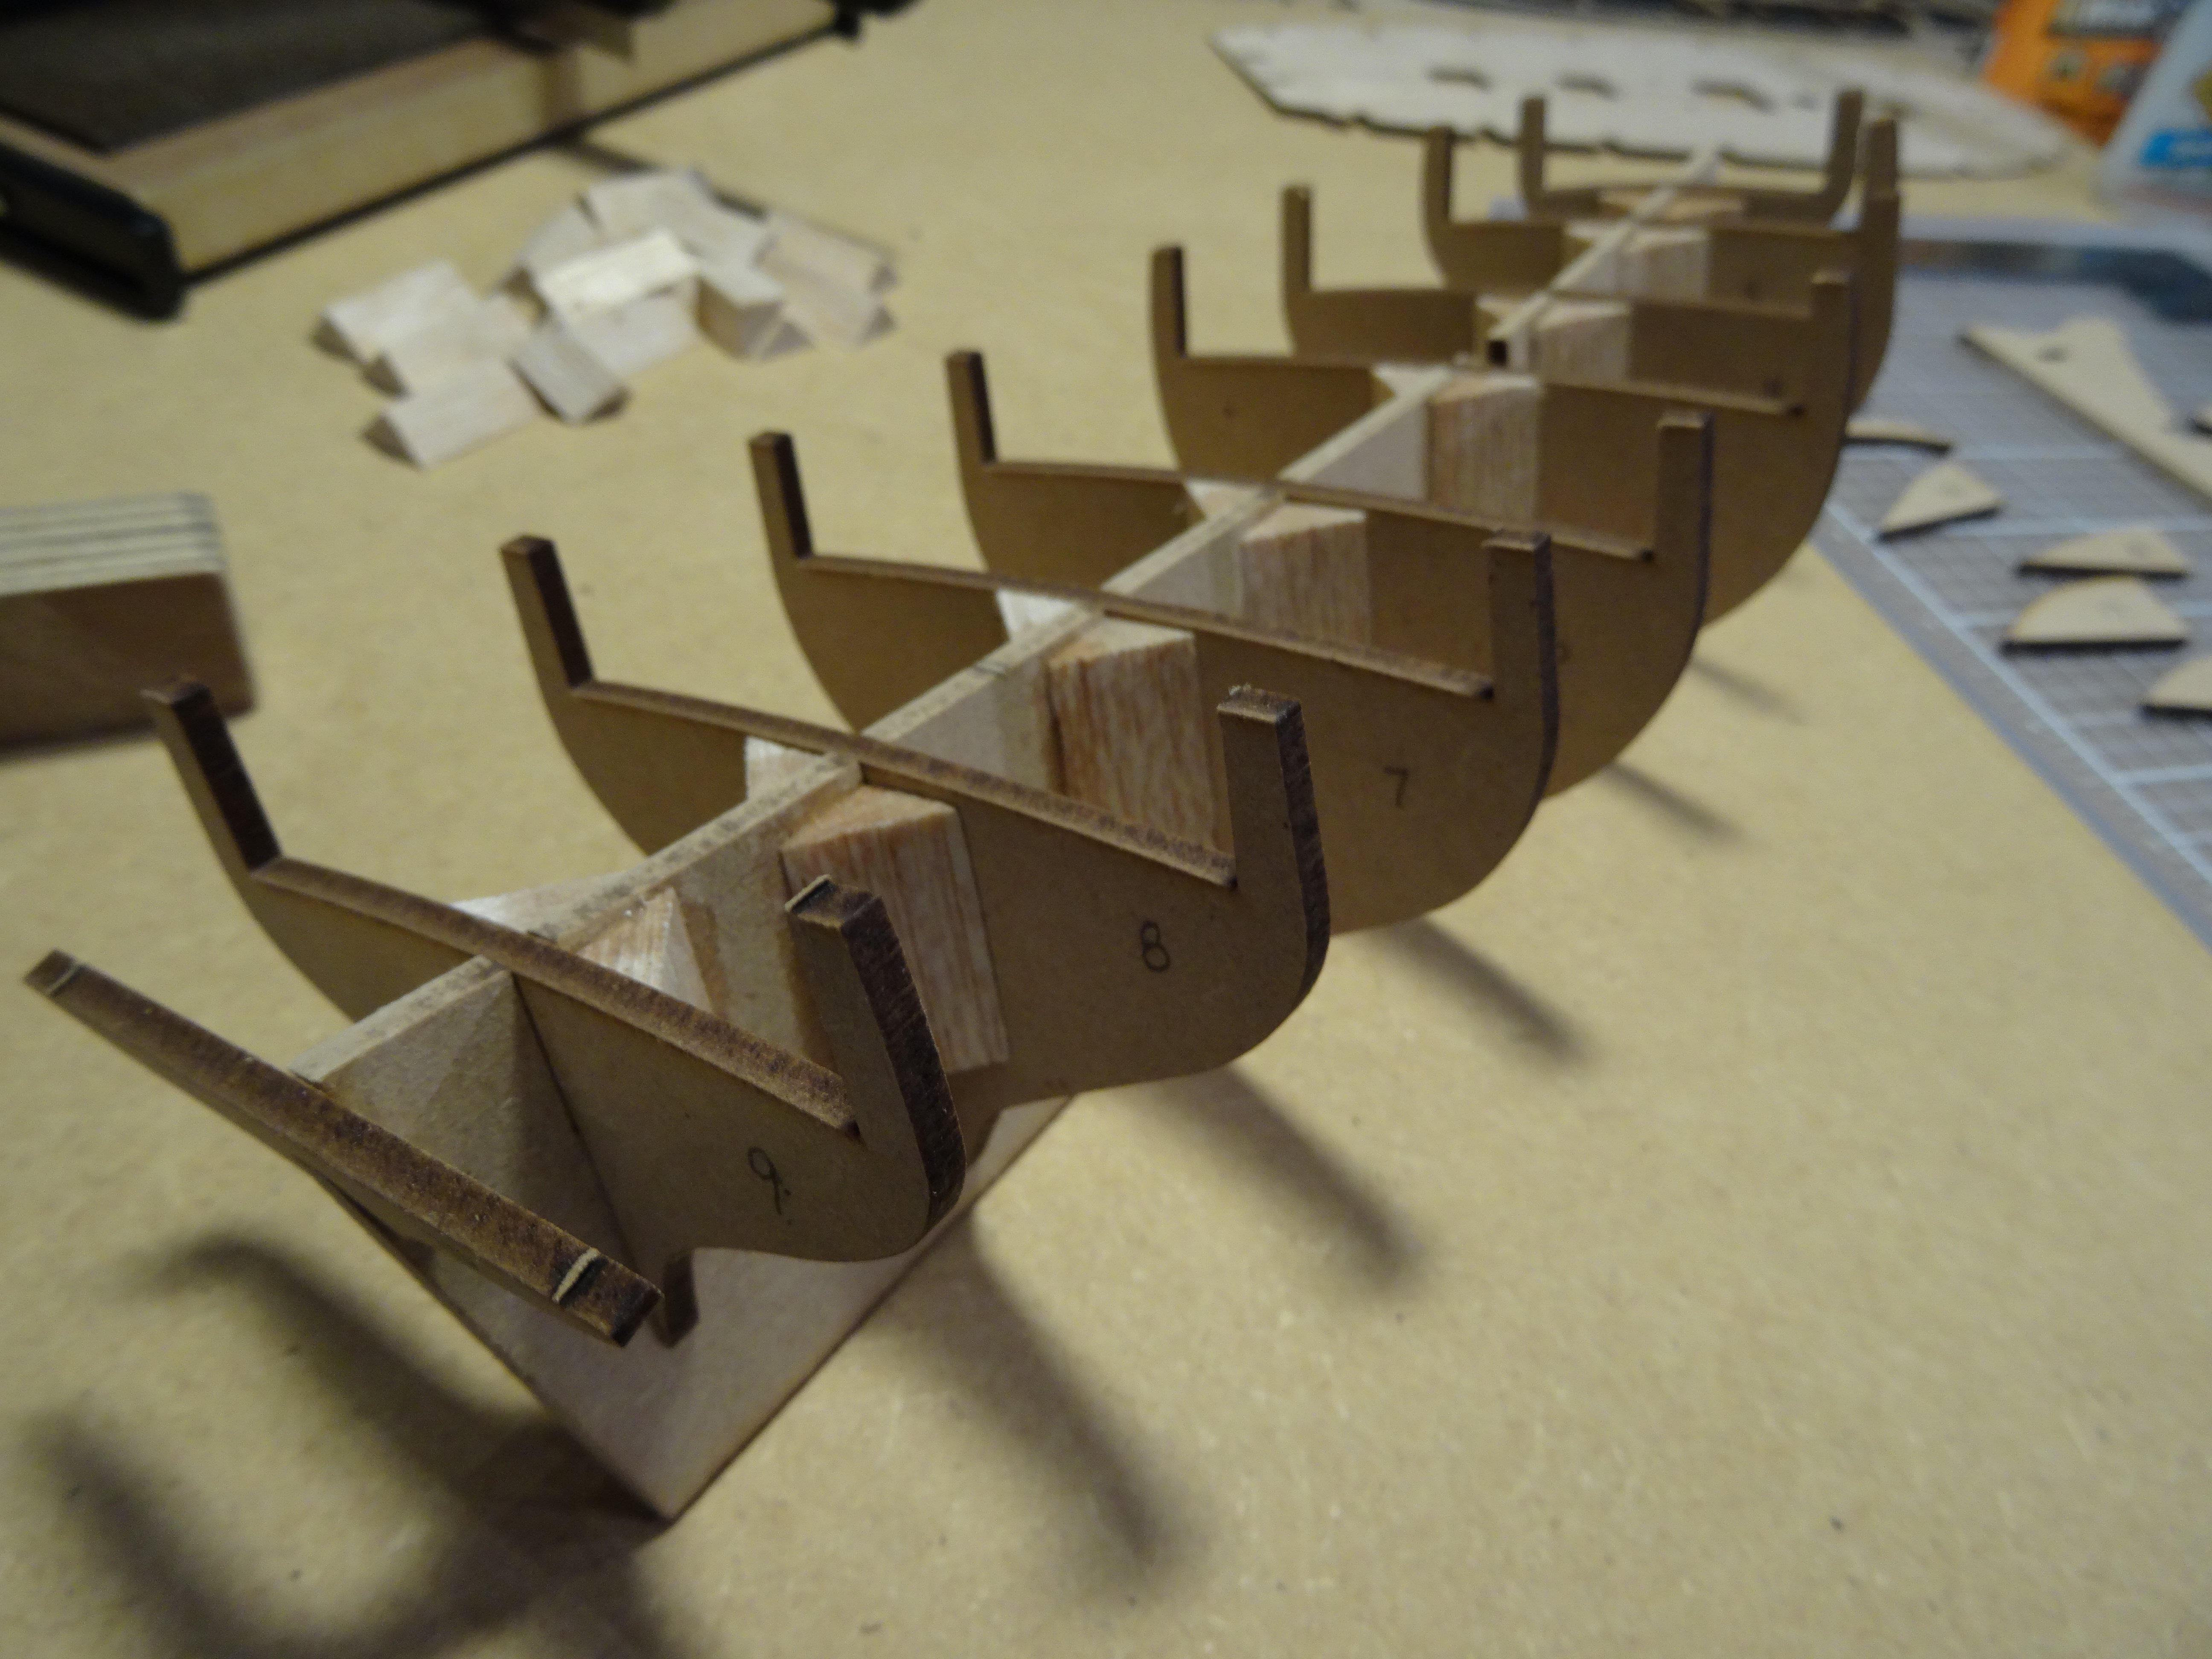
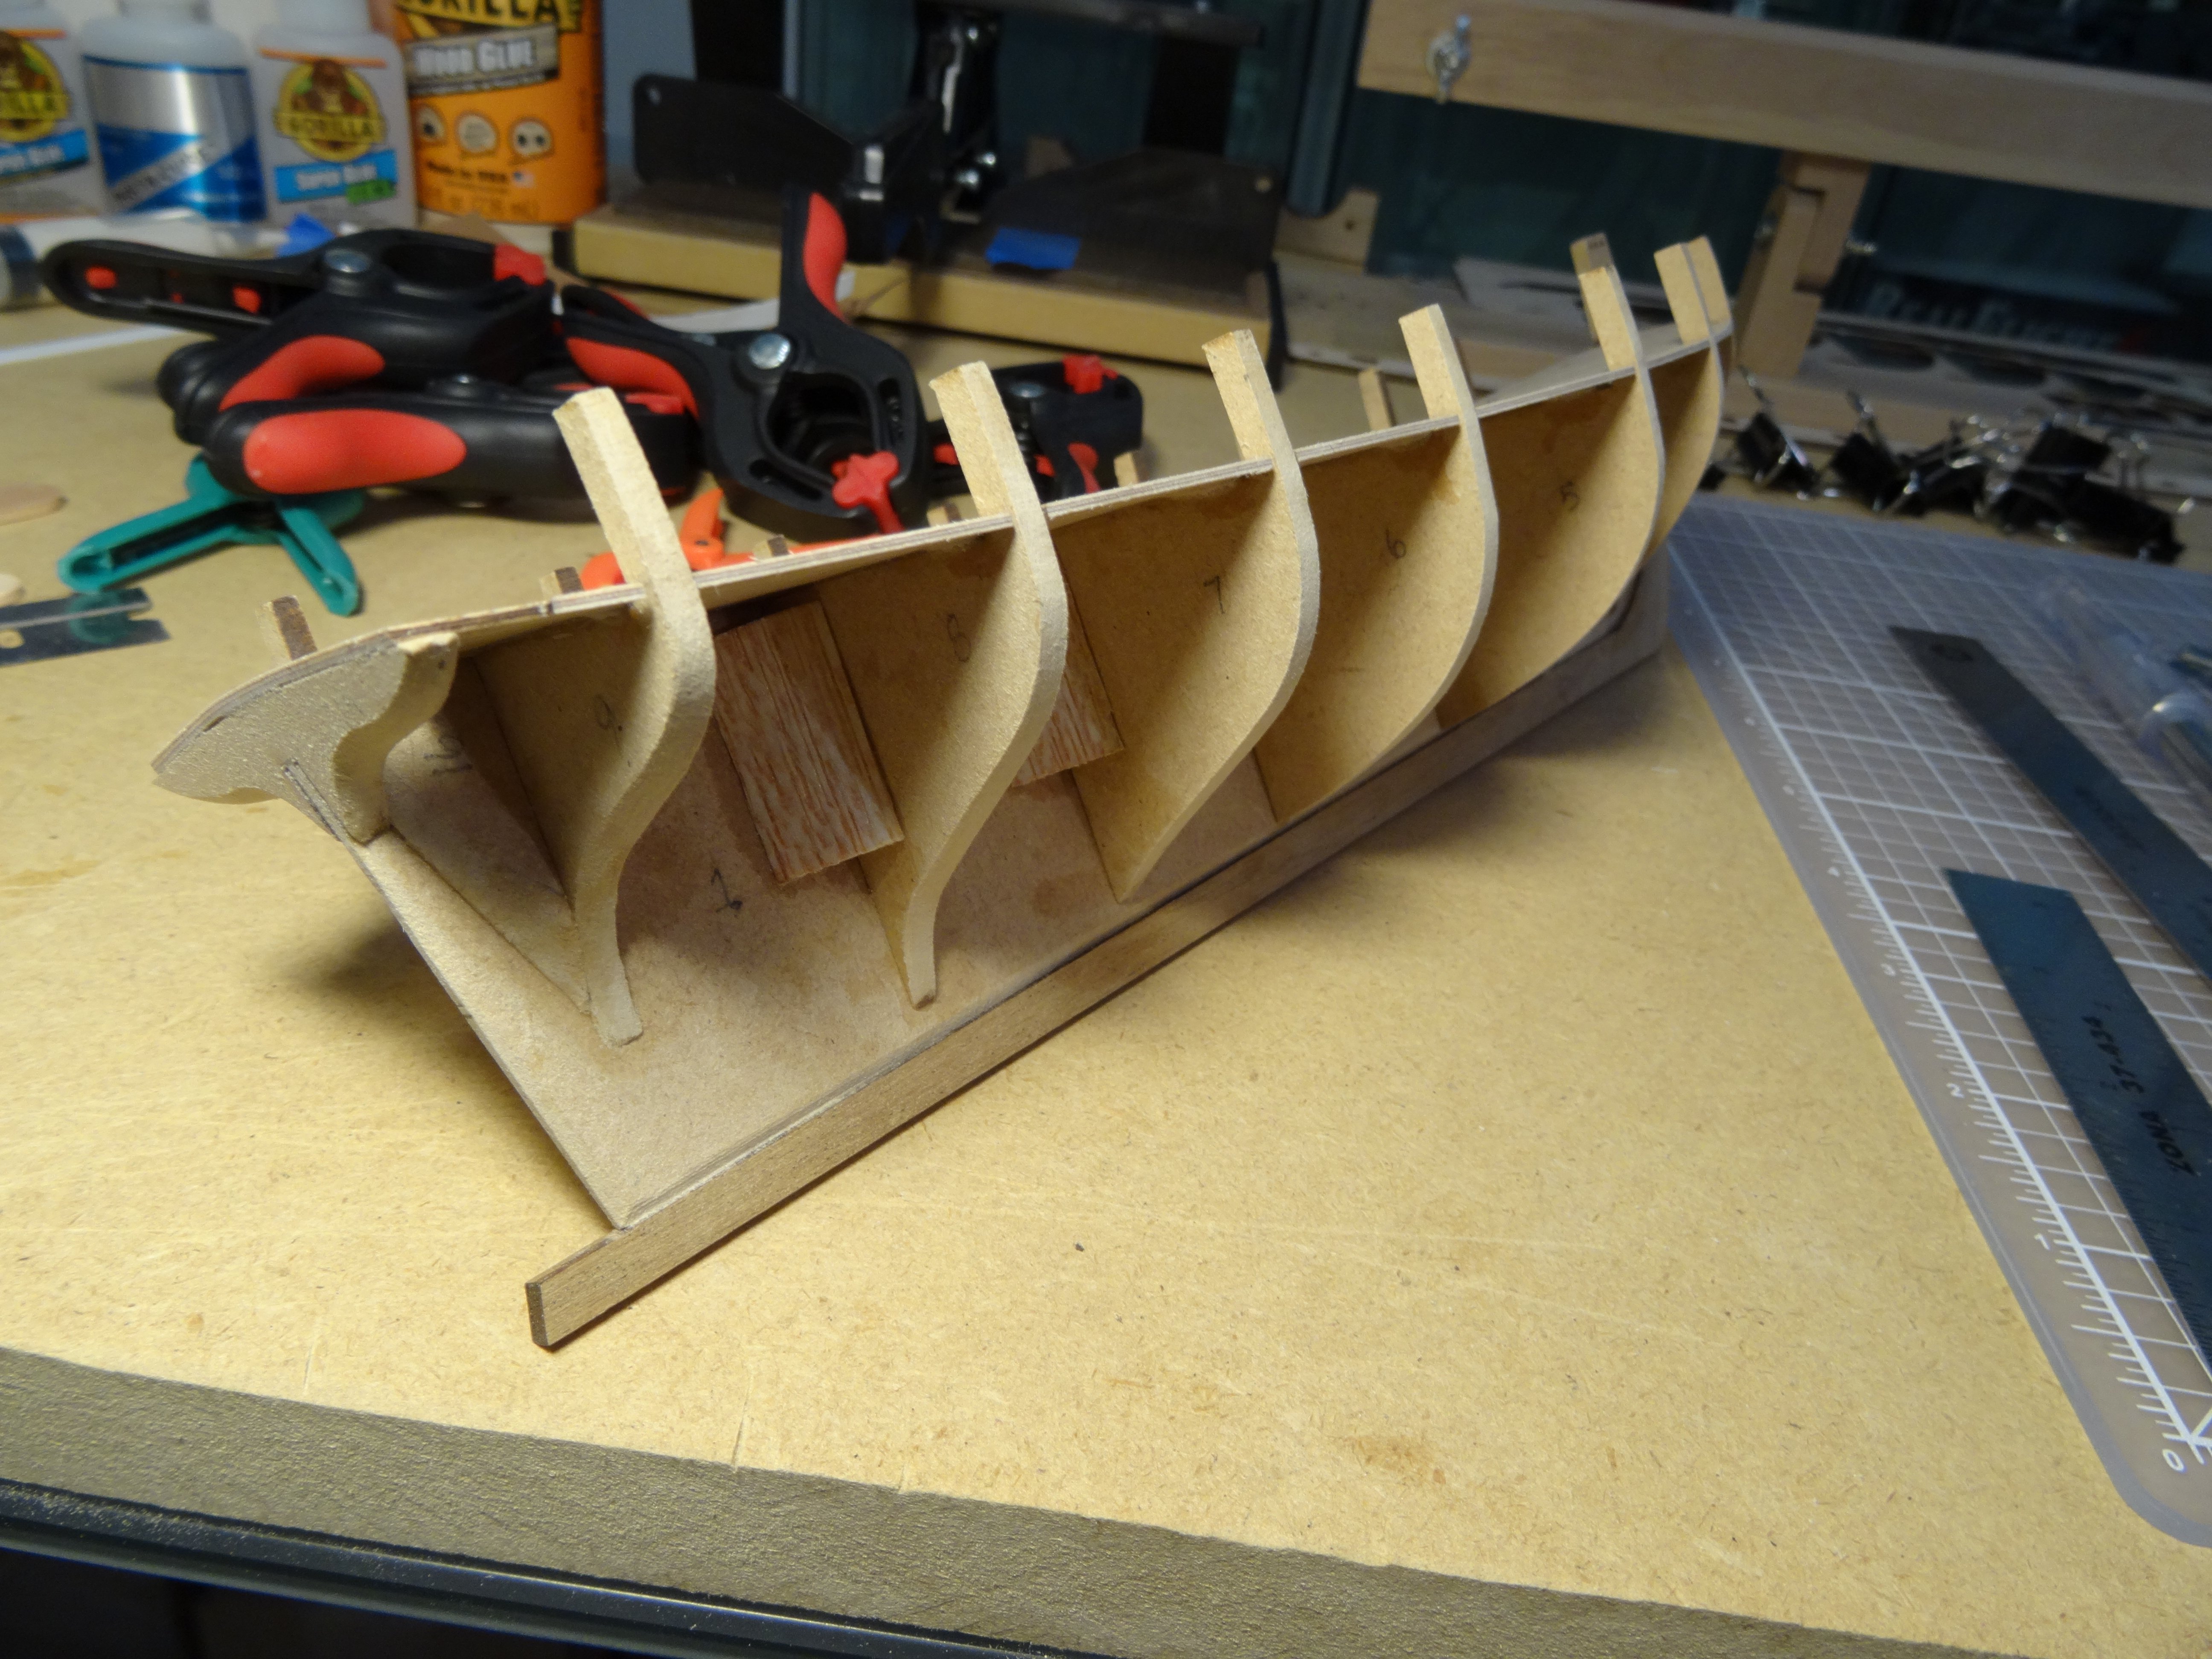
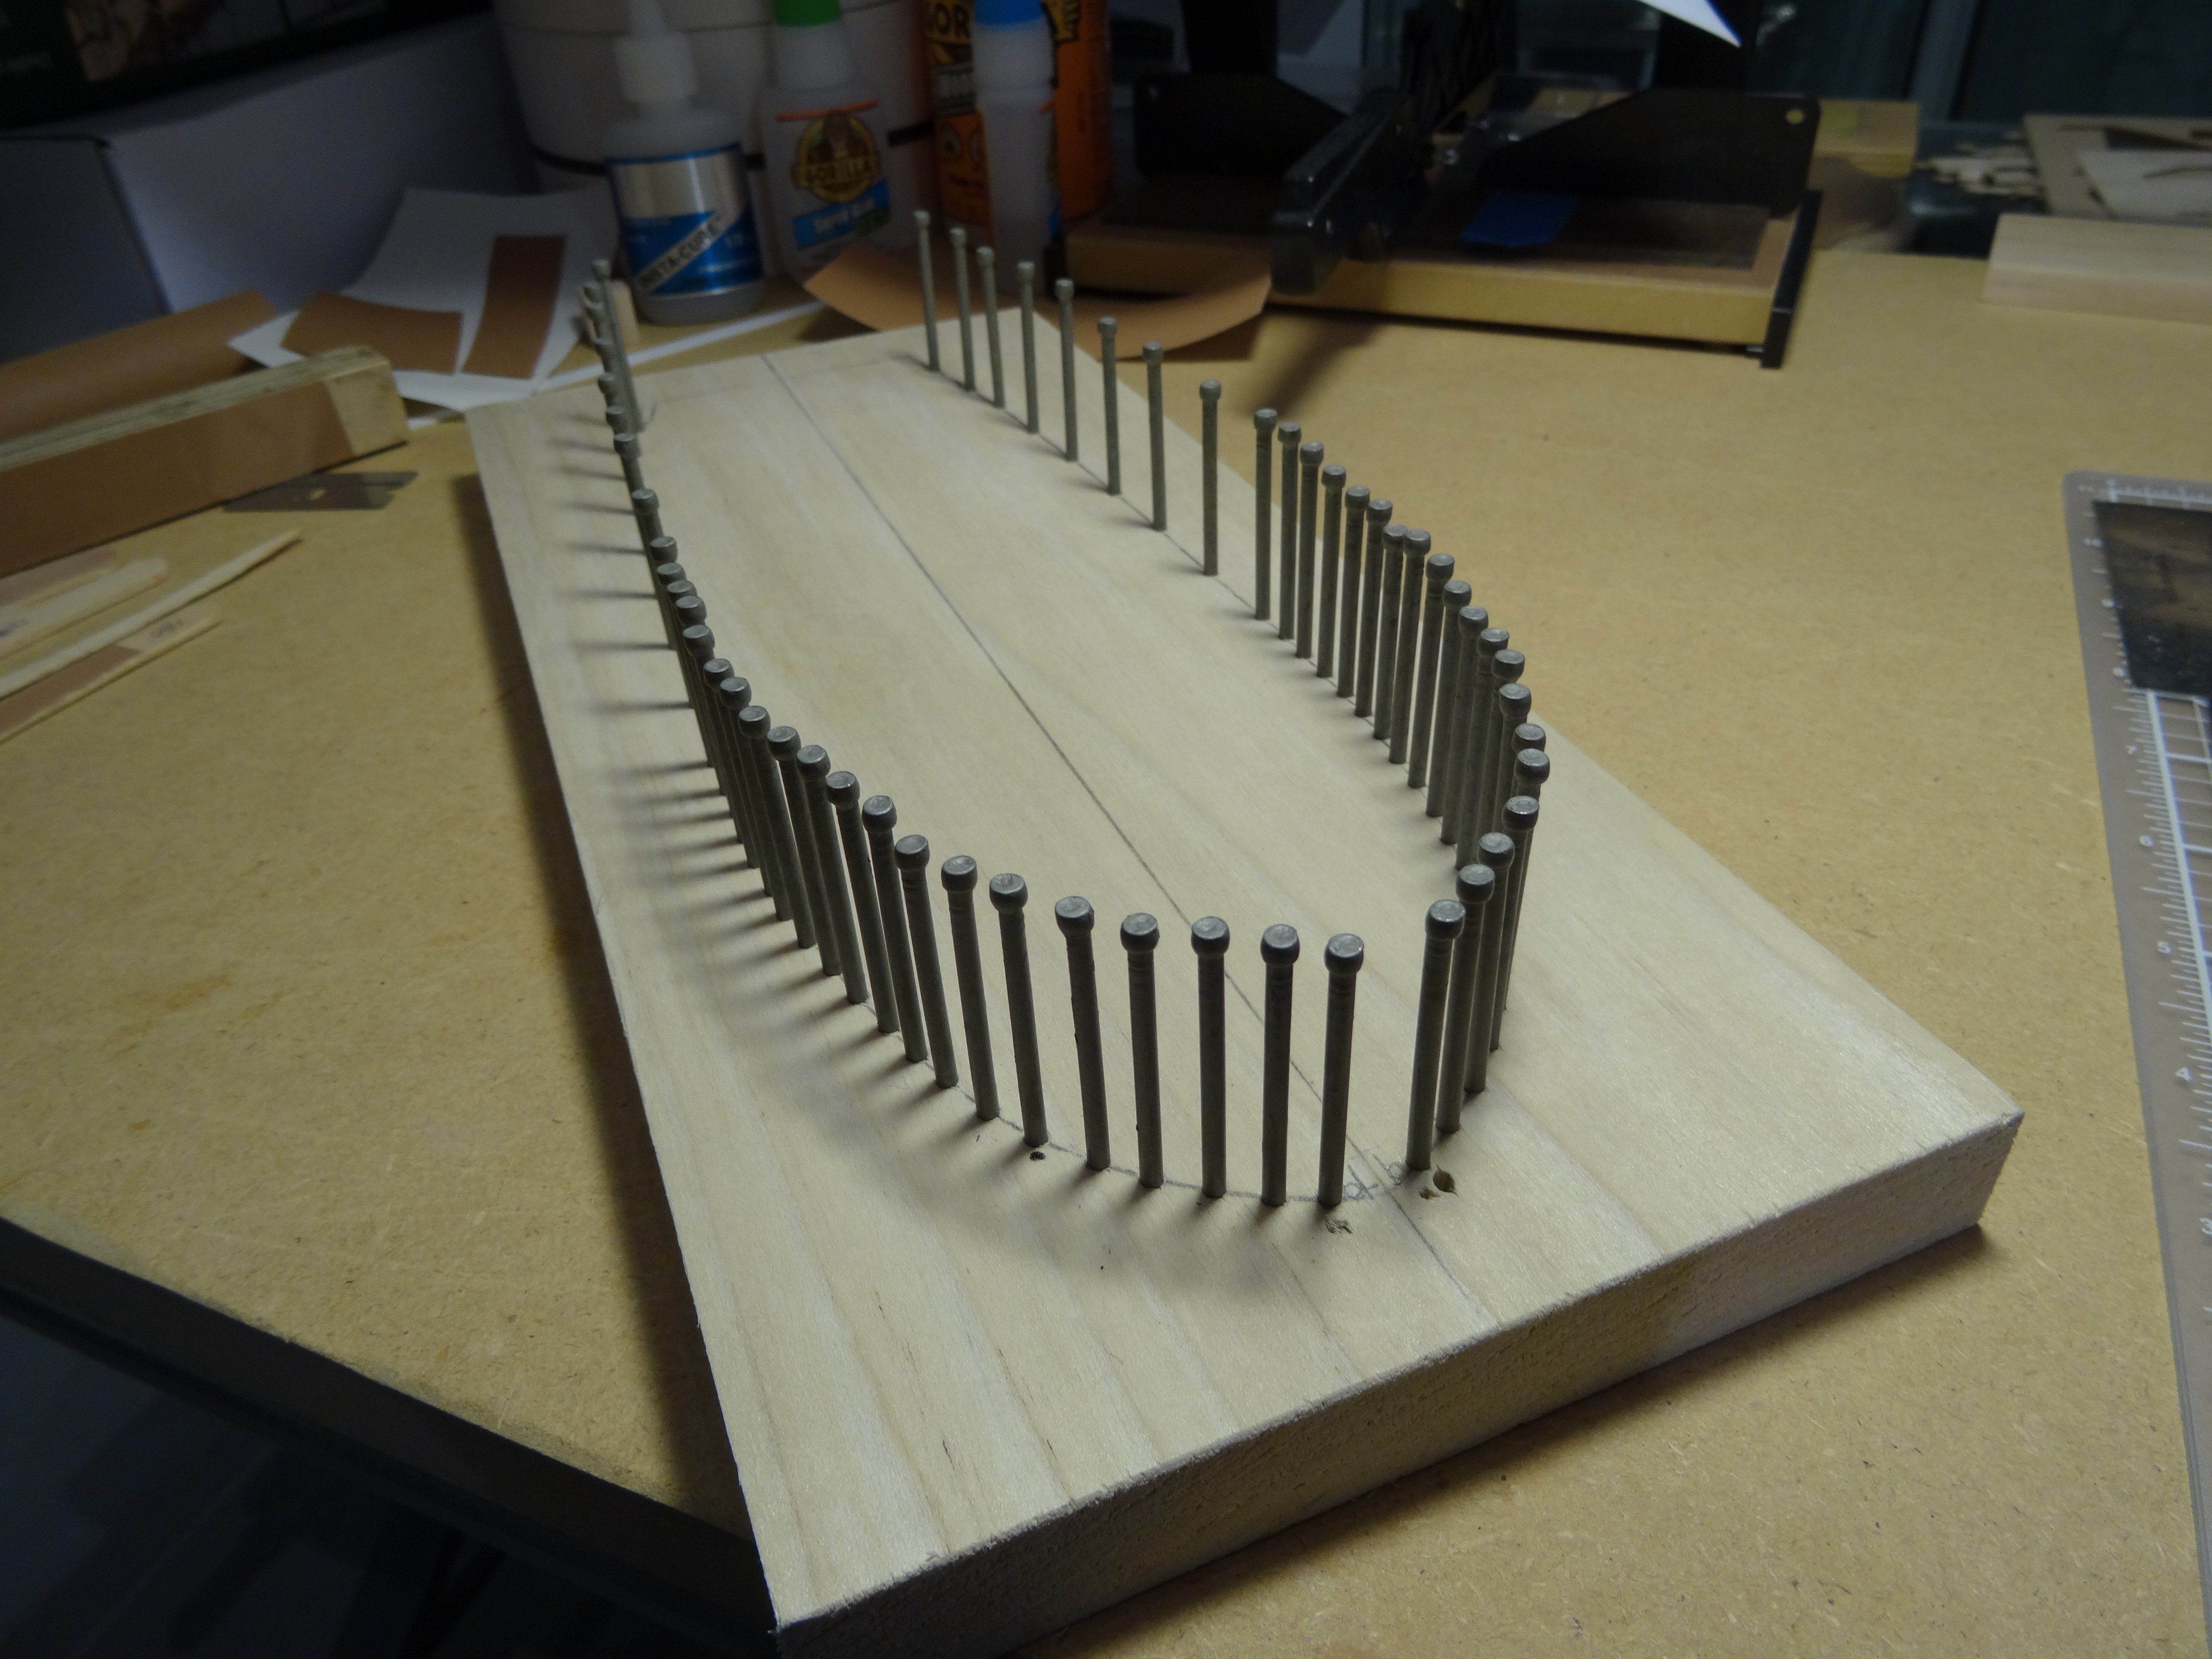
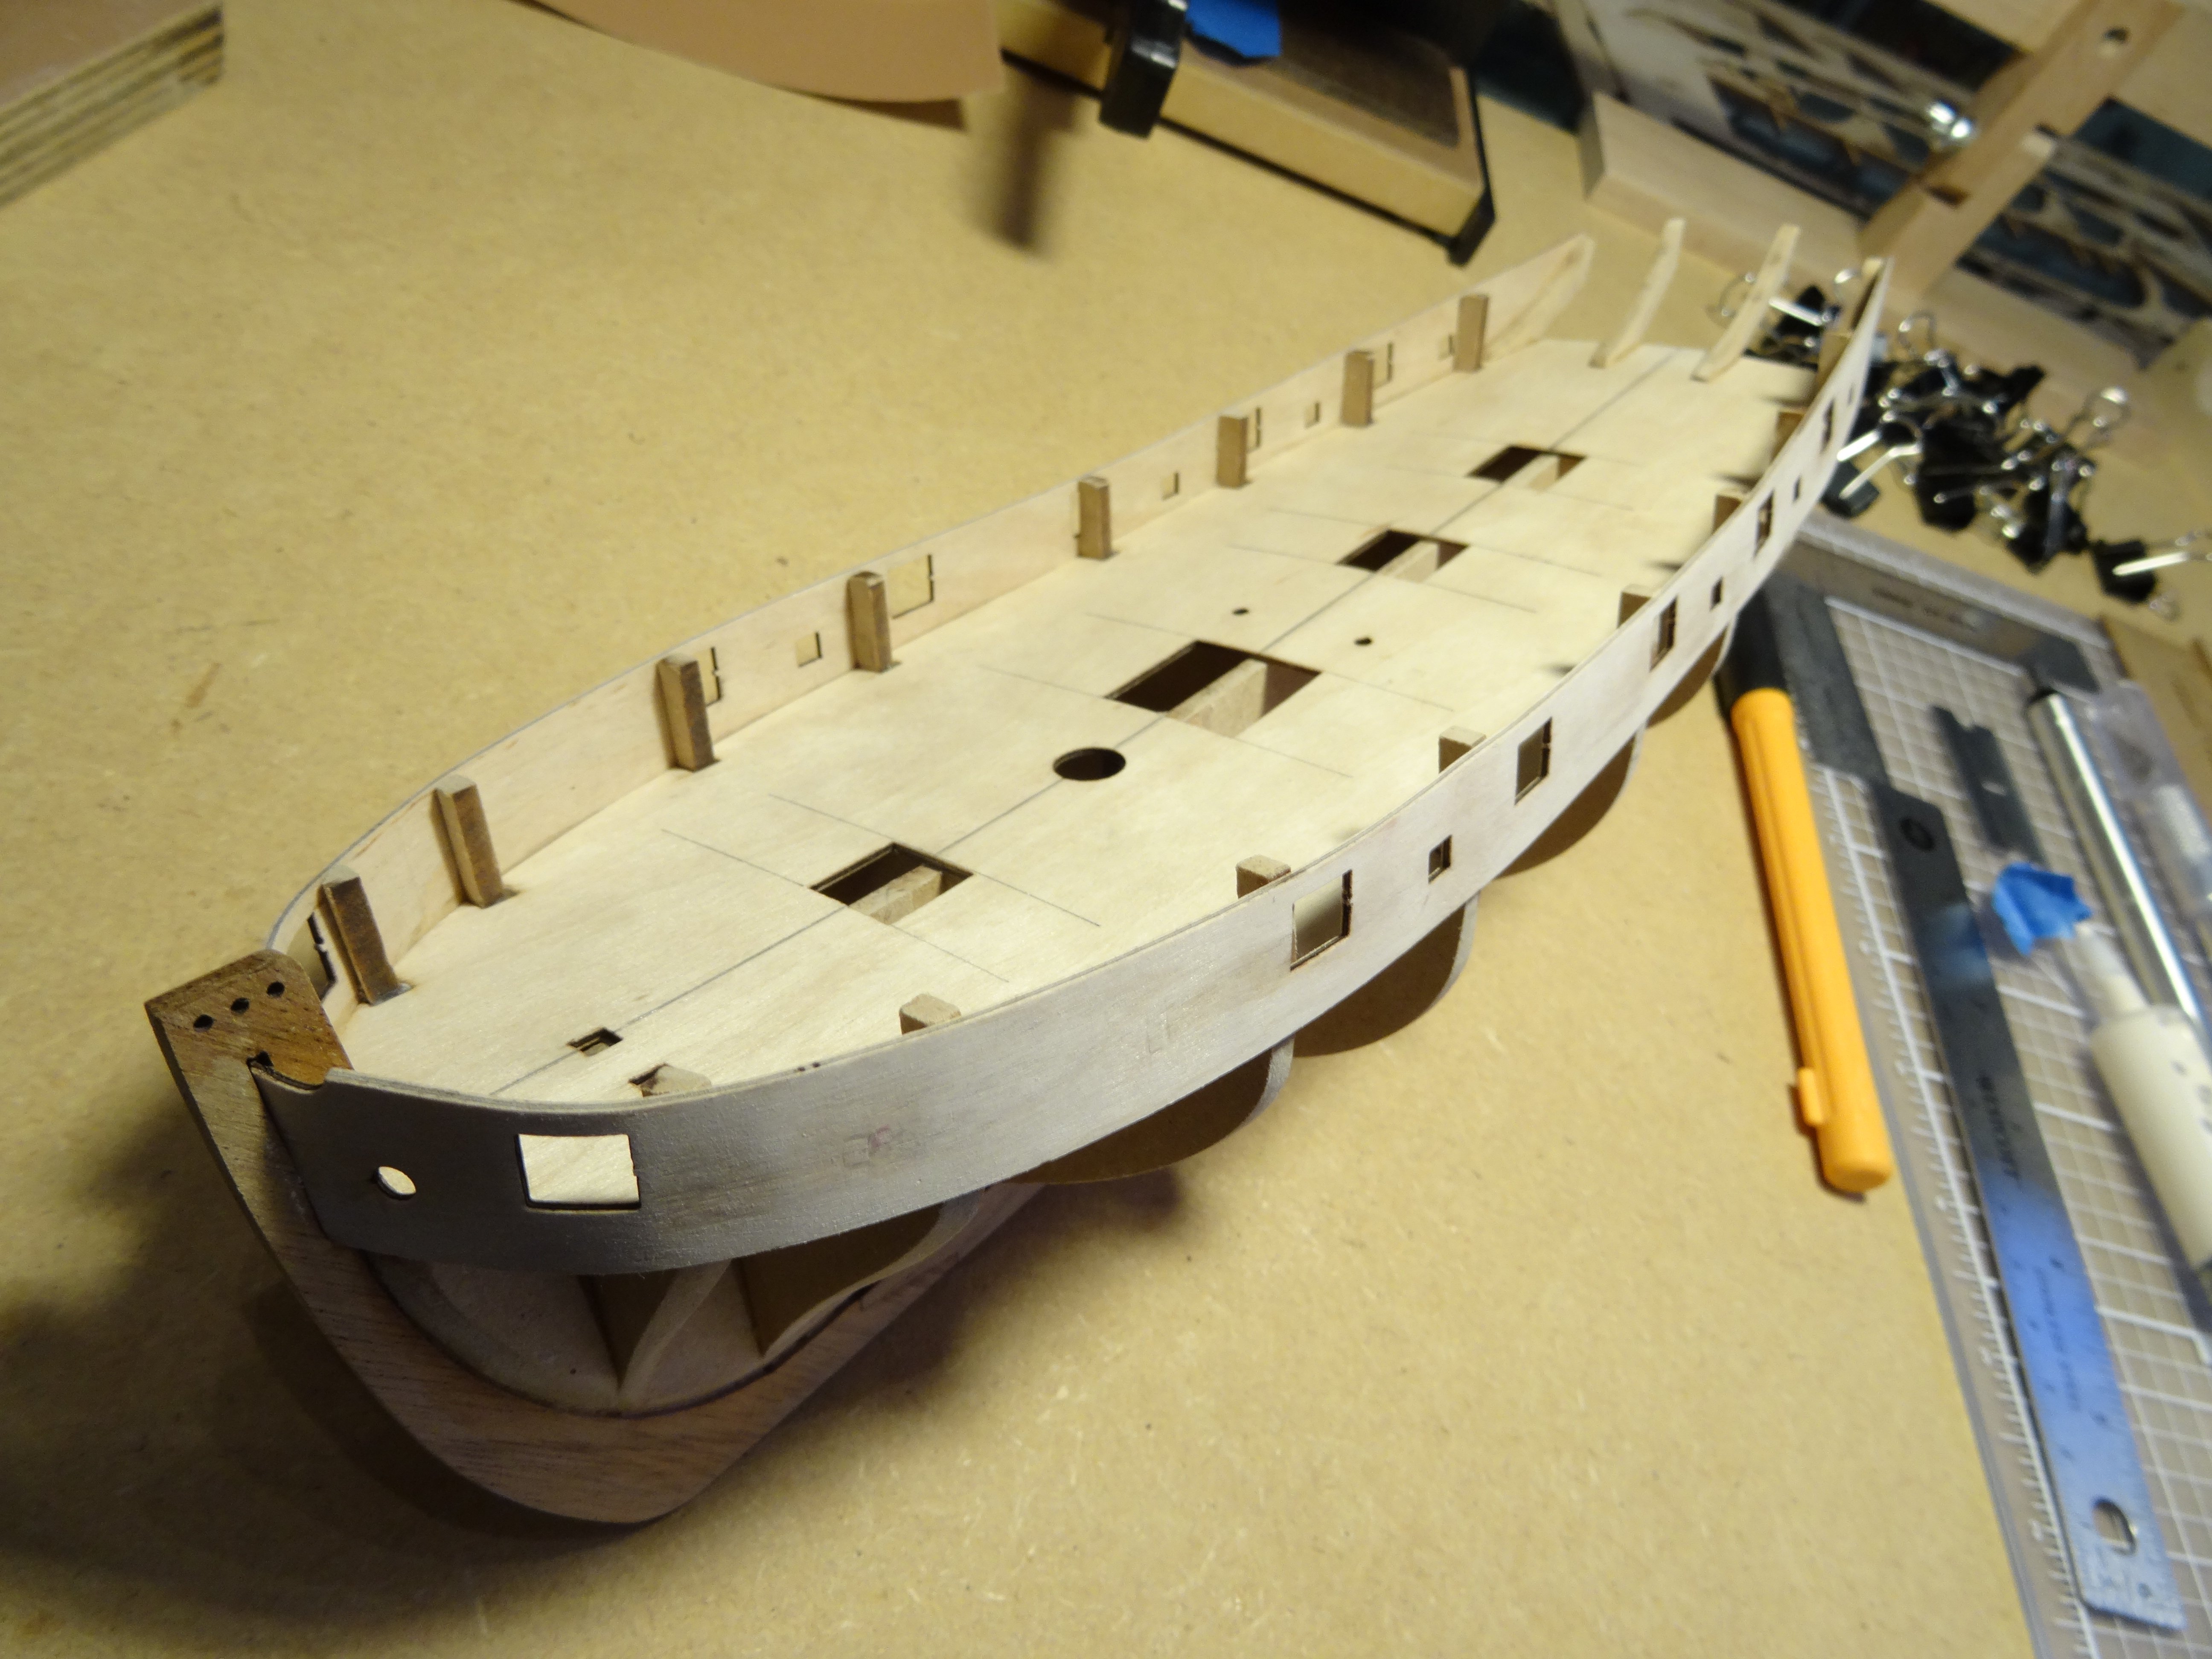
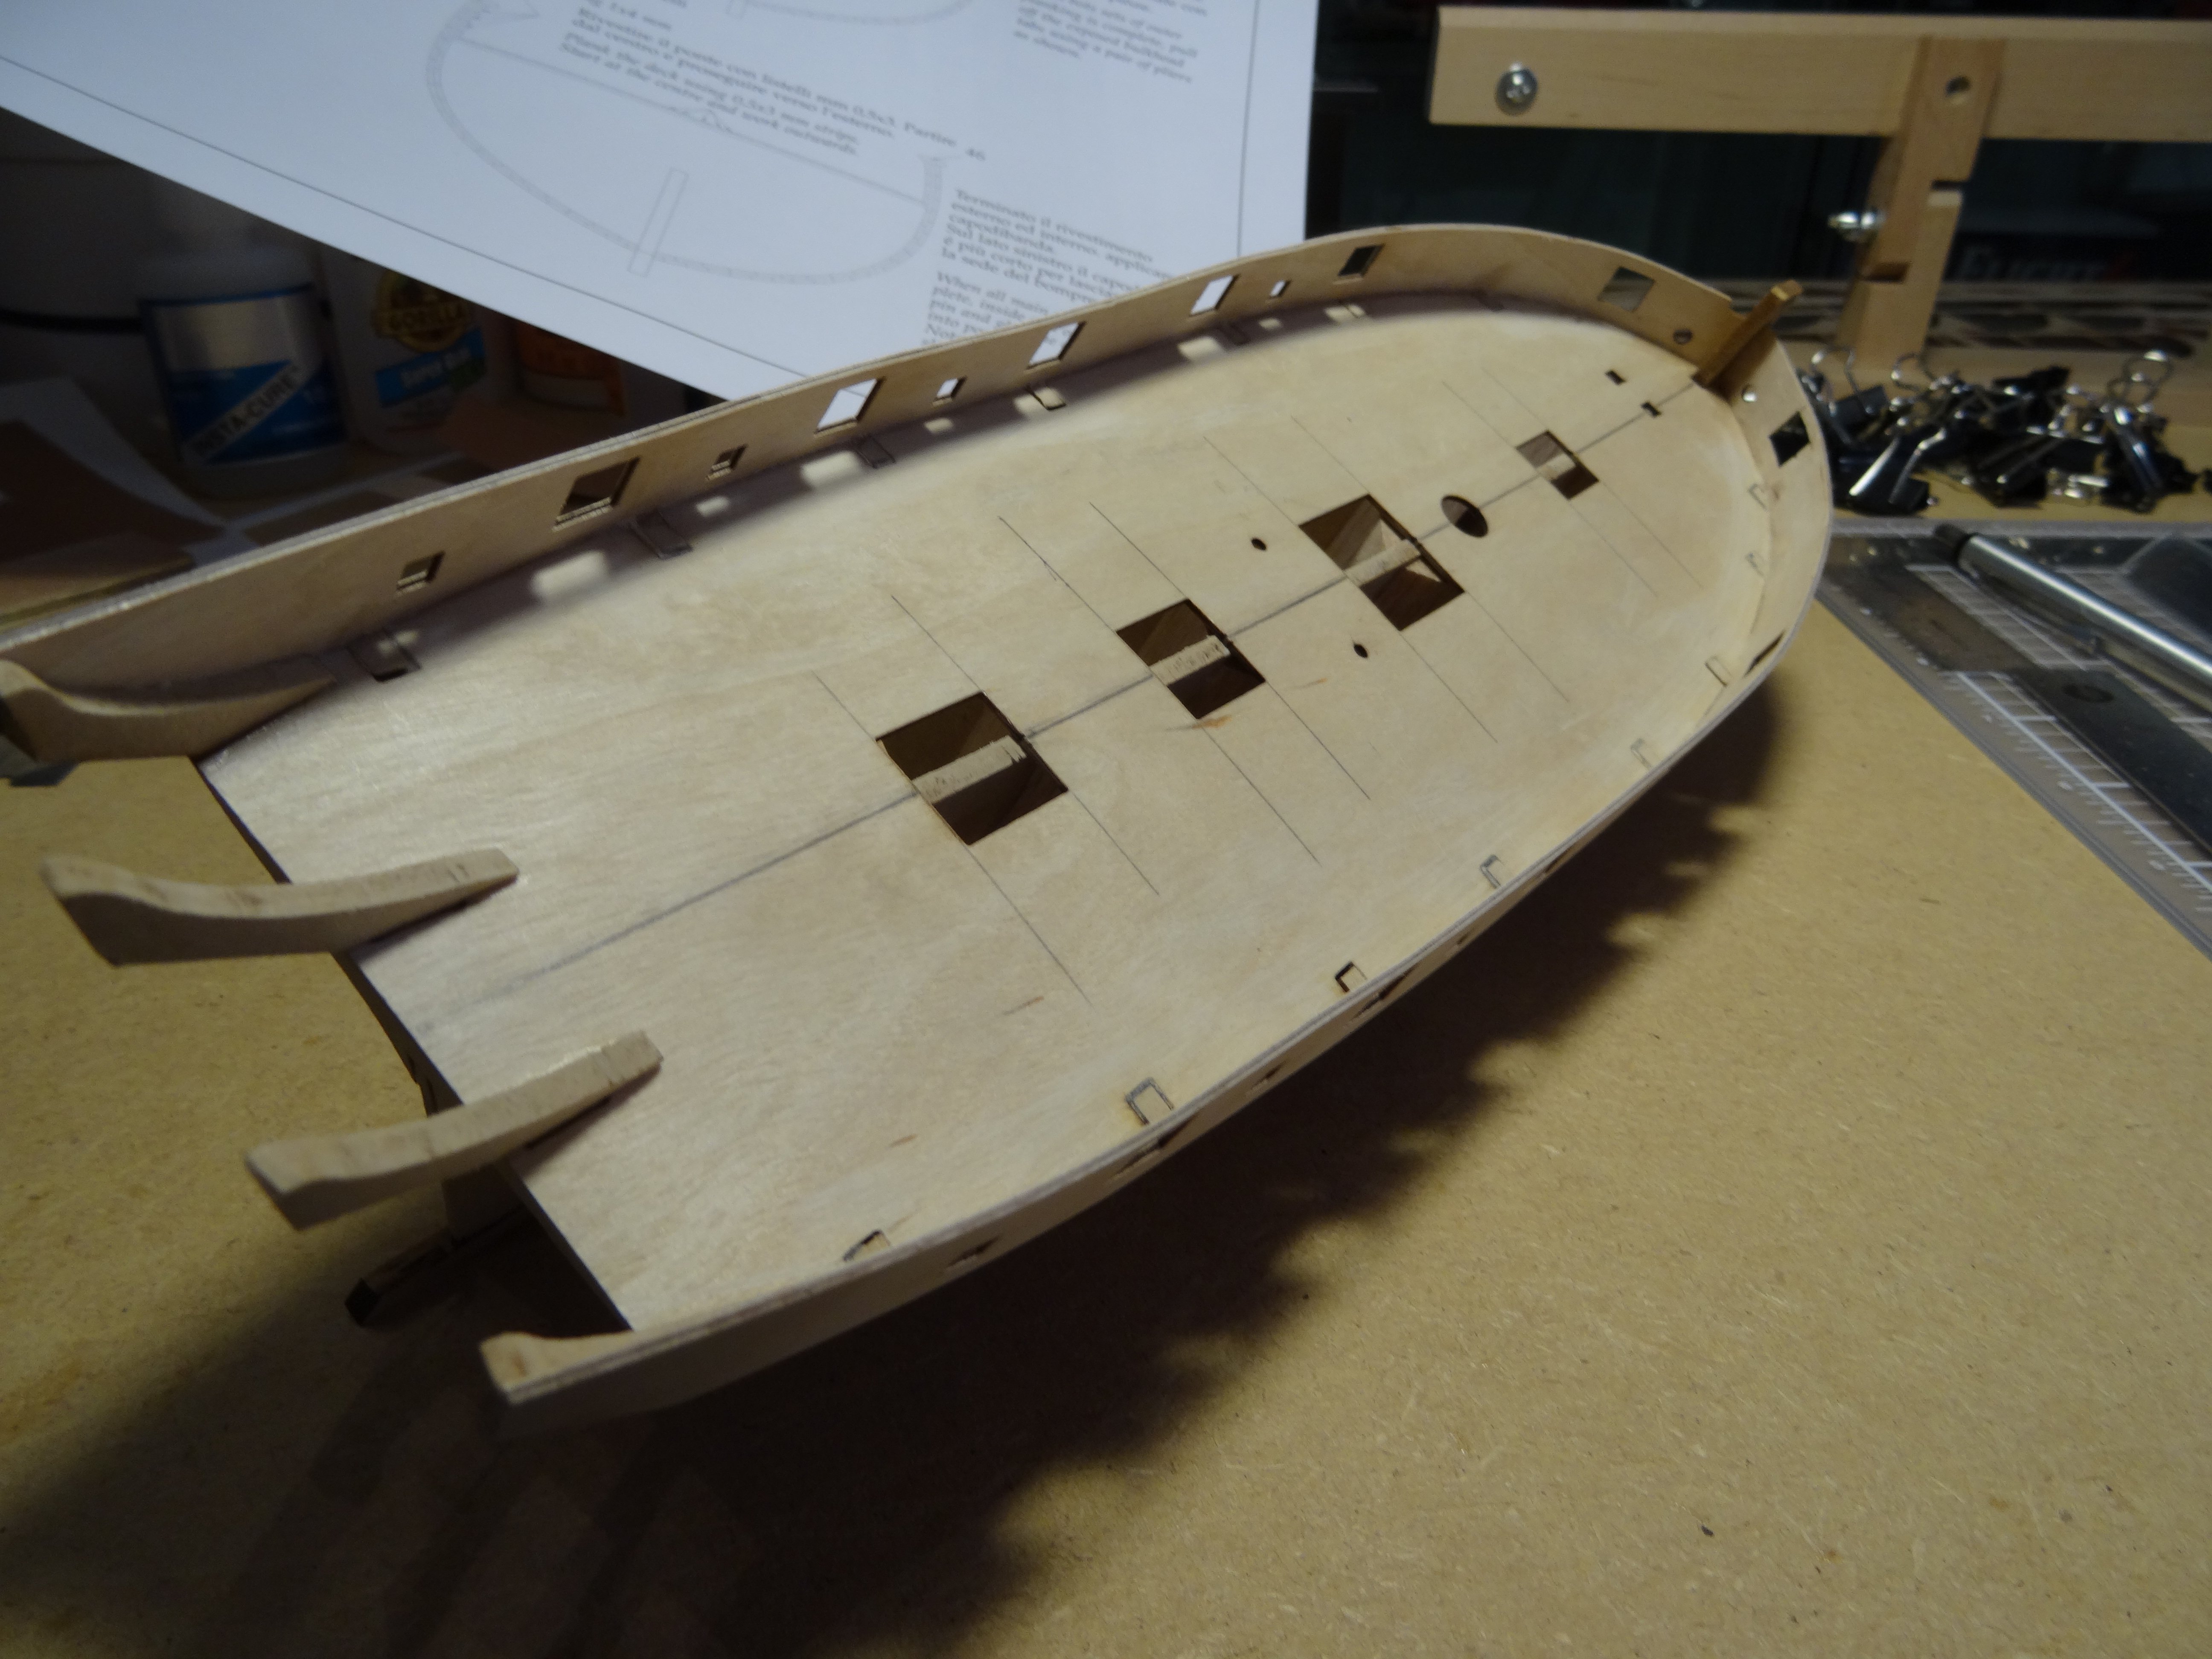
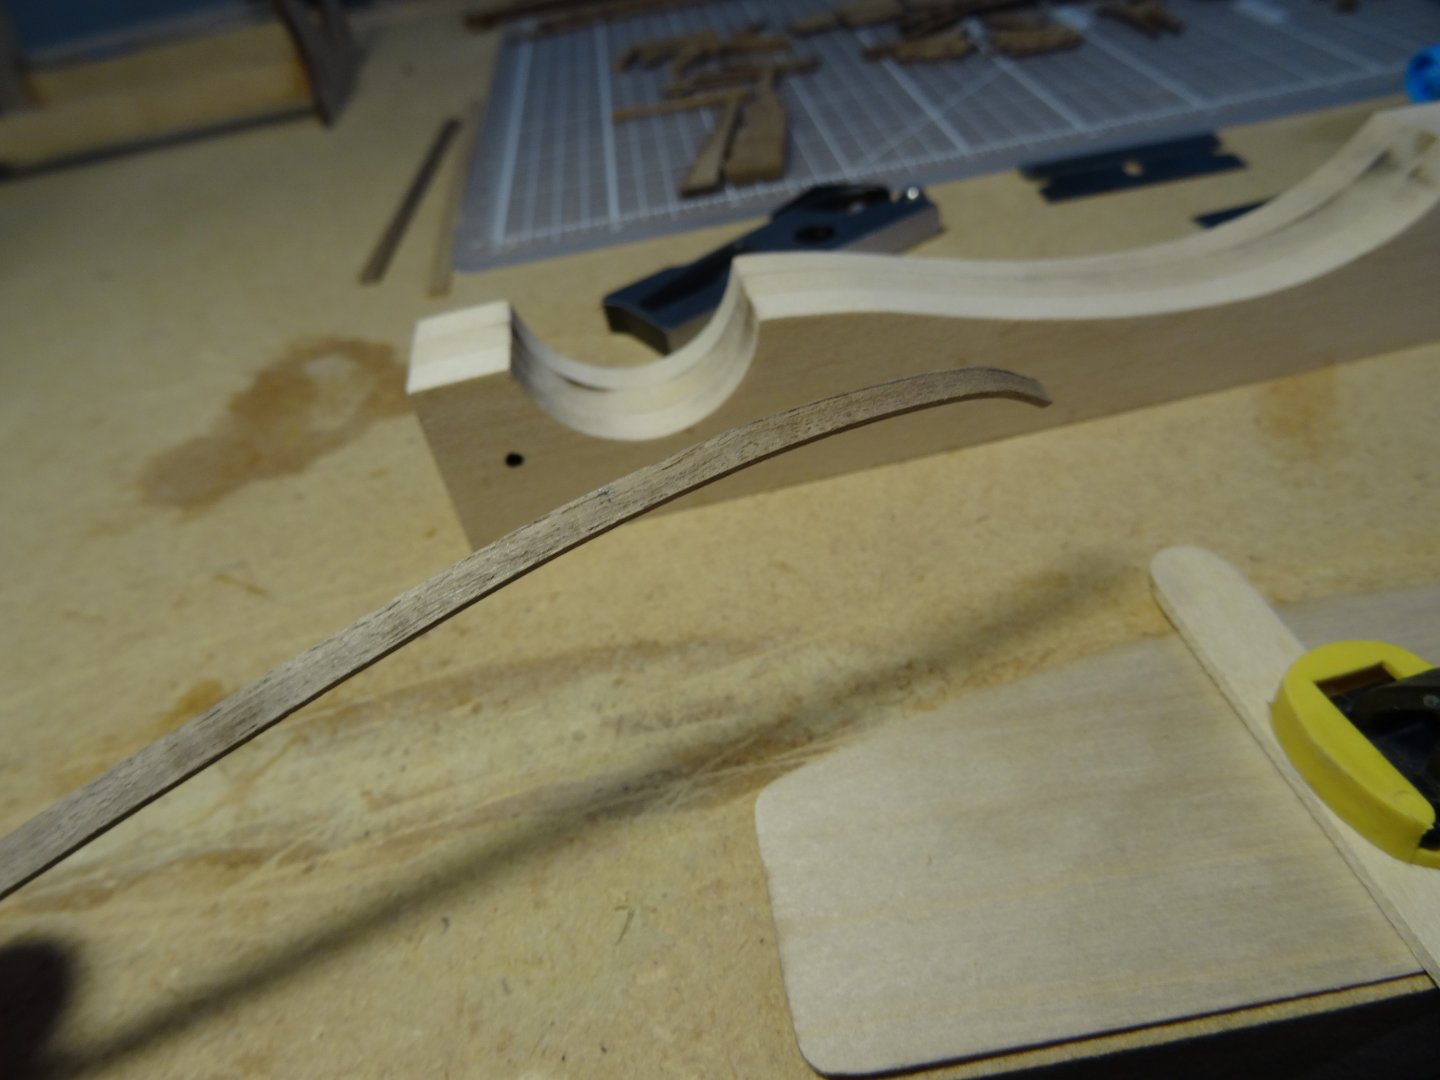
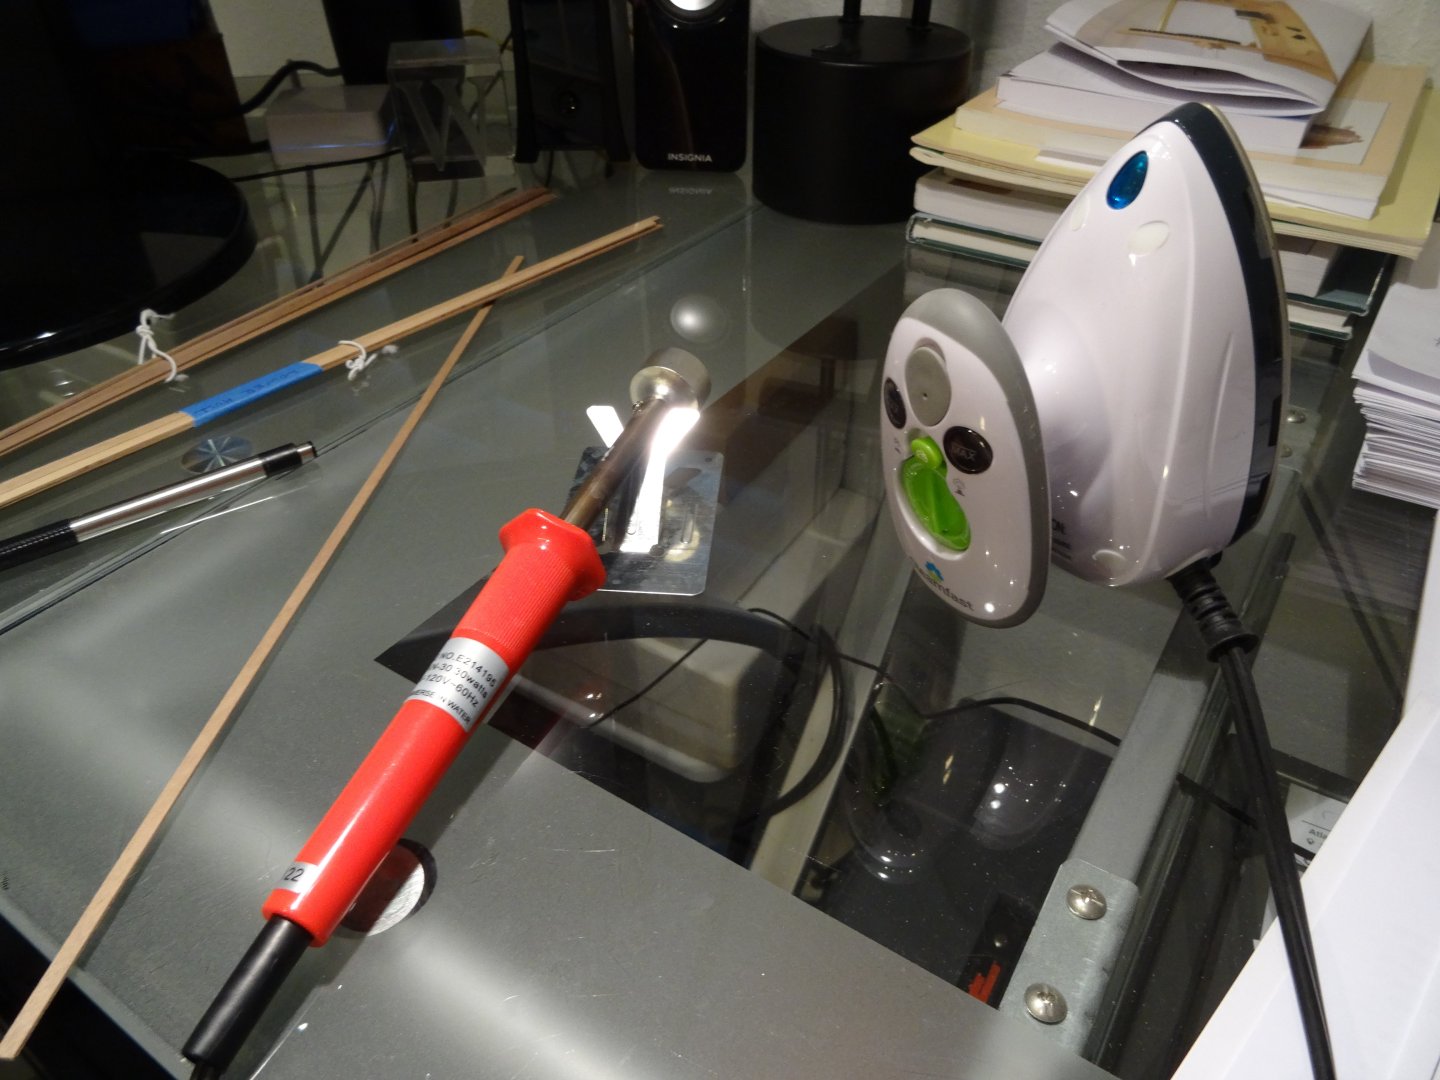
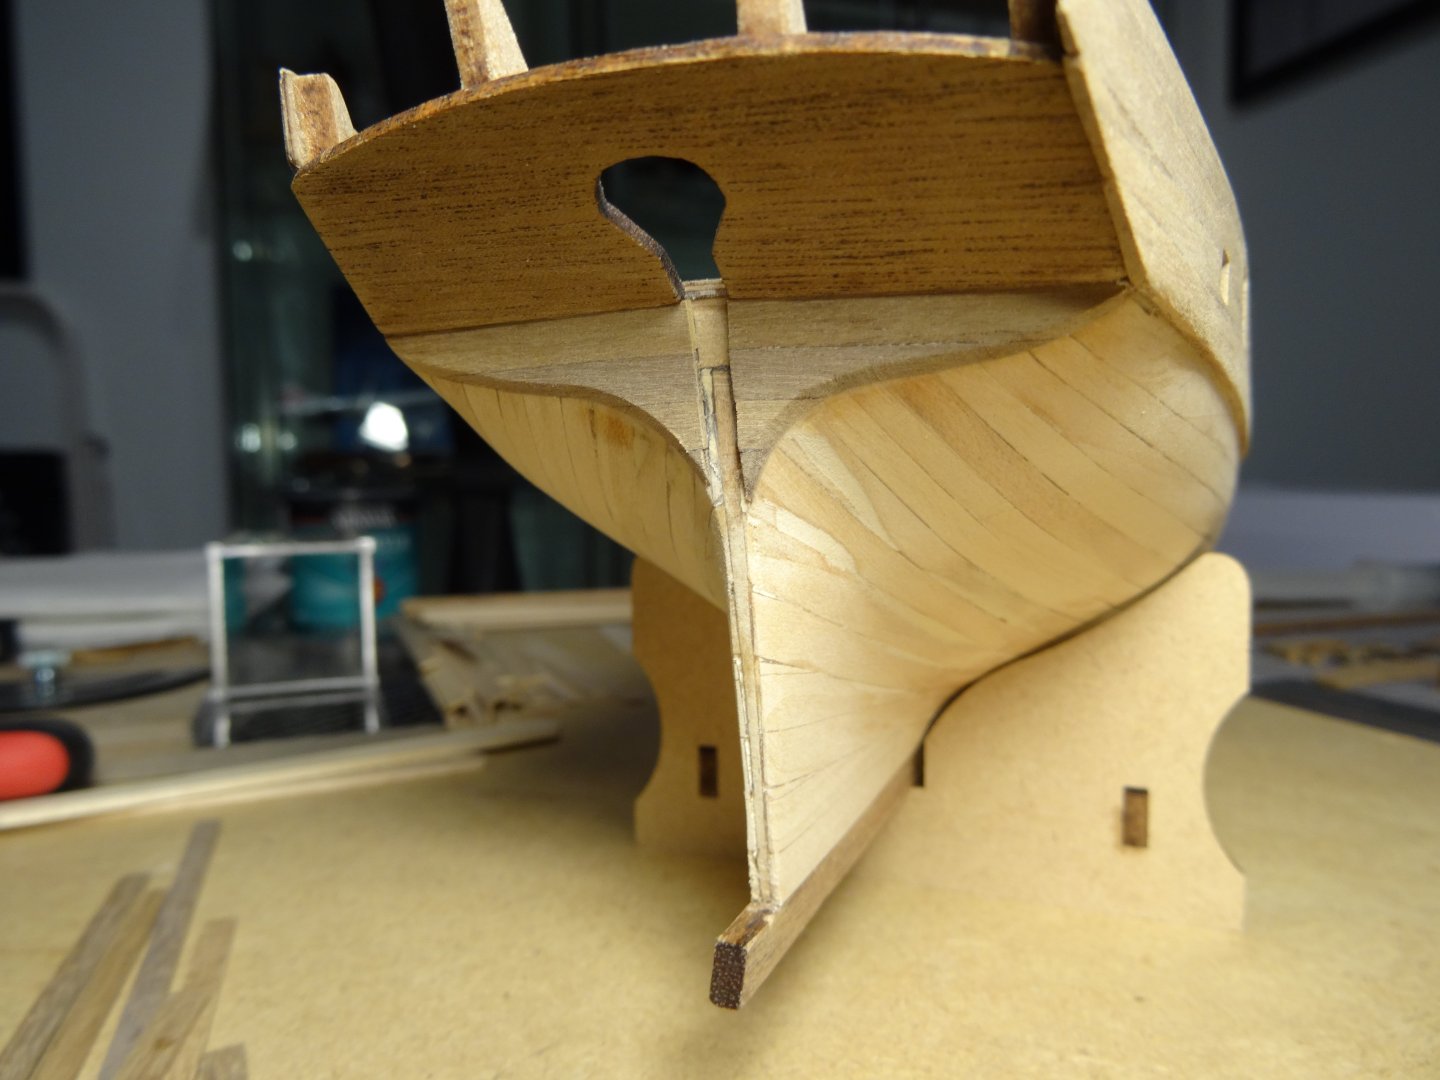
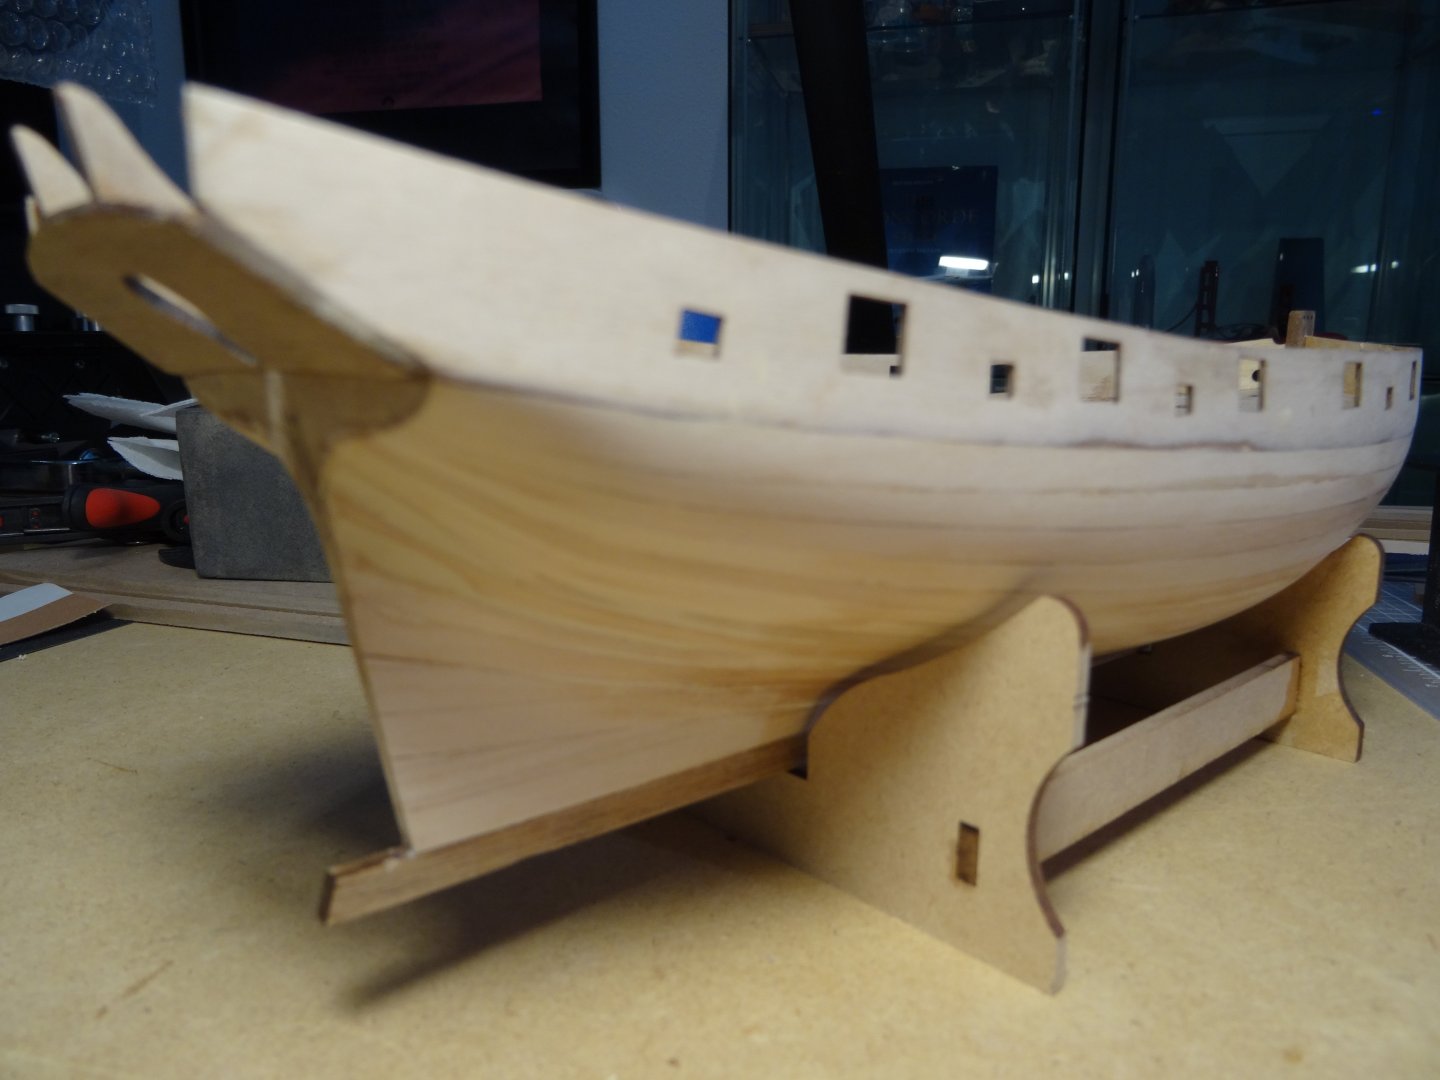
Well, my plans got redirected , as I thought to do the decking before the hull planking, but the natives got restless! I just simply screwed up with my choice of Pearwood ordered for the decking material , thinking it was a much different color than what I received. It was very Red Brown! Not what I wanted! So I chose and ordered some cherry wood and in the mean time, so not to waist time, I continued on with the hull planking. It was like forcing me to take my medicine! BUT, I'm getting thru it while waiting for Hurricane Helene to pass by later this evening. you can now hear the wind ripping up, outside! Definitely getting stronger! Fortunately for us, it's far enough away, we'll only have gusty conditions, like 50-70 mph winds and lots of rain. The waterfront conditions are already showing the flooding with projected storm surge for our area of 5-8 feet. We are not too far from the Manatee River, which will take on the surge and Flood certain inland tributaries near by. Definitely a sit and wait situation! So make it so, as Capt. Picard would say! I wanted to see the transom finished, for the hull to start taking shape, so I completed that feature. Obviously after the planking is finished, I can add the Wales and wood in-between the gun ports and au sundry details. Soon to start the decking! Pictured are the tools and methods of bending the planking I decided to use, as shown below in the photos. Bending the planking in a Lateral method as illustrated in Chuck Passaro's here on MSW and videos was a no brainer for me to choose to use. It proves to be faultless and without a doubt, the best WAY TO GO! Still, viewing , measuring and lots of patience is the secrete sauce for planking! I figure , I'm about half way there to the finish line. i goffed up and really thought the Pear wood


- 39 replies
-
- 4
-
-
- Amati
- Victory Models
- (and 1 more)
-
Hi Dan, Looking good! Hidden under paint, as the Aussies say, No worries mate! I think it turned out well,, as I especially see the even spacing horizontally with little rise towards the bow. Steady as she goes!
- 87 replies
-
- 1
-
-
- Lady Nelson
- Amati
- (and 1 more)
-
Howdy, Johnathon....I wanted to swing by your build as I noticed and appreciate your having a look at what's happening on my work bench. Your Lady is coming along well. You mentioned starting with limited skills , but you've proved to yourself, that's not been draw back. Where you are in the build, right now, is light years ahead of what you probably felt you could accomplish. To me, you recently mentioned the hull and planking detail seen beyond bottom paint,..... I feel is a reflection of all the wooden boats at dry dock. I can't make comparisons as this is my first Ship build too, but to me this Lady is no beginner and considering how your ship looks, you're pointing true north. Best Regards, Roger
- 83 replies
-
- 1
-
-
- Lady Nelson
- Amati
- (and 2 more)
-
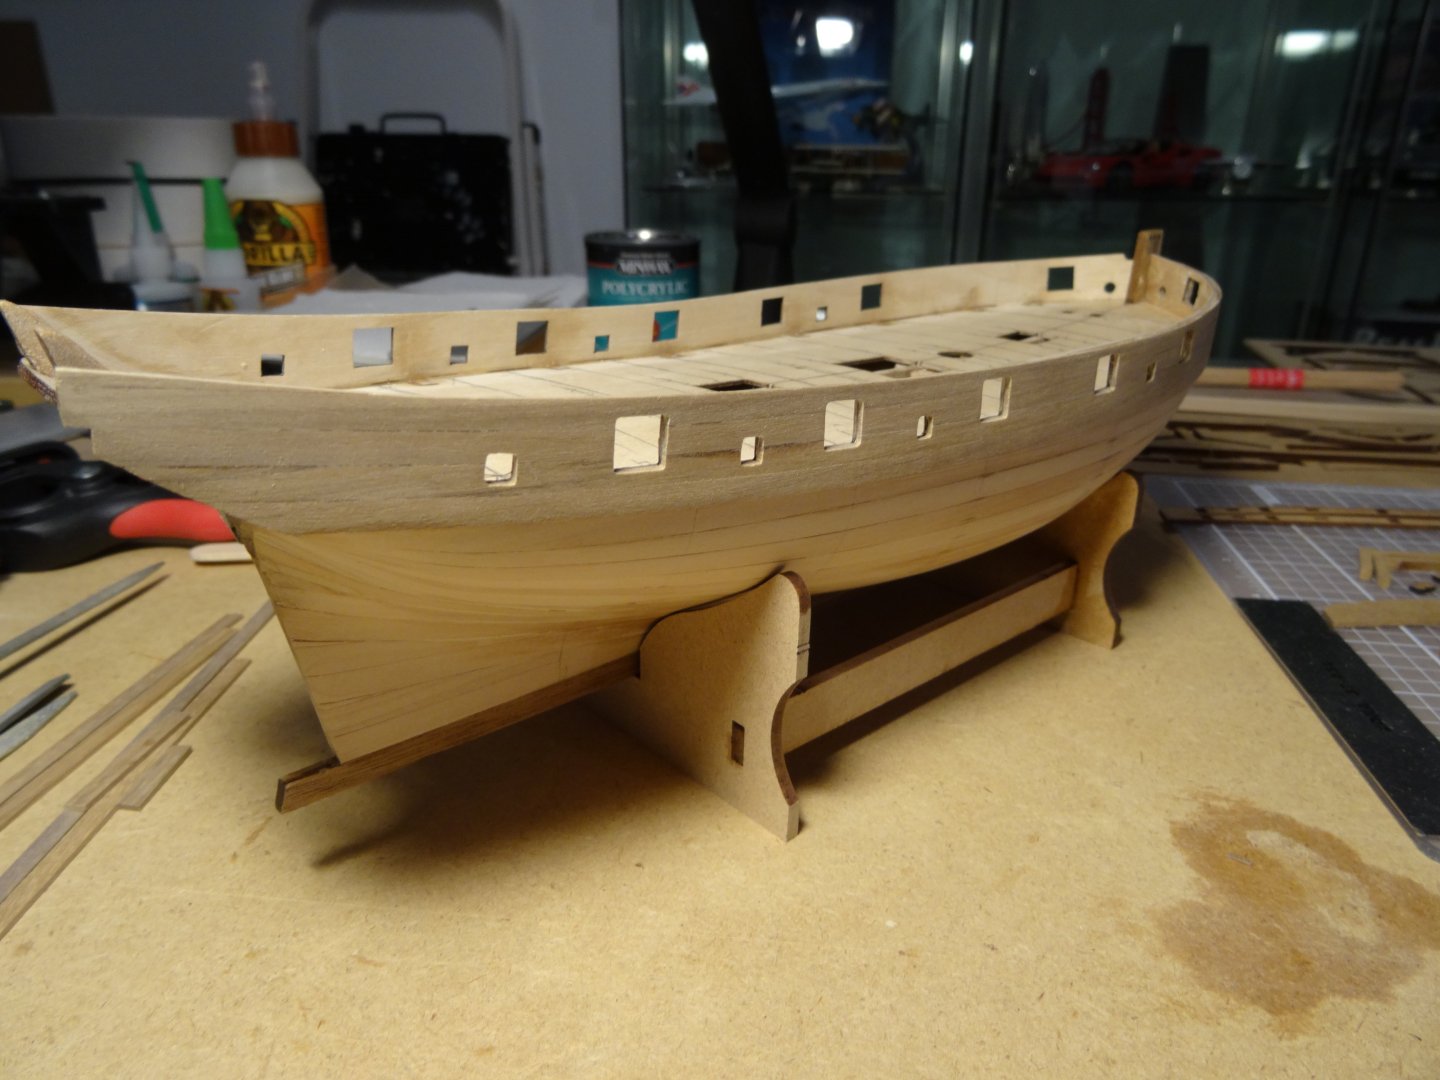
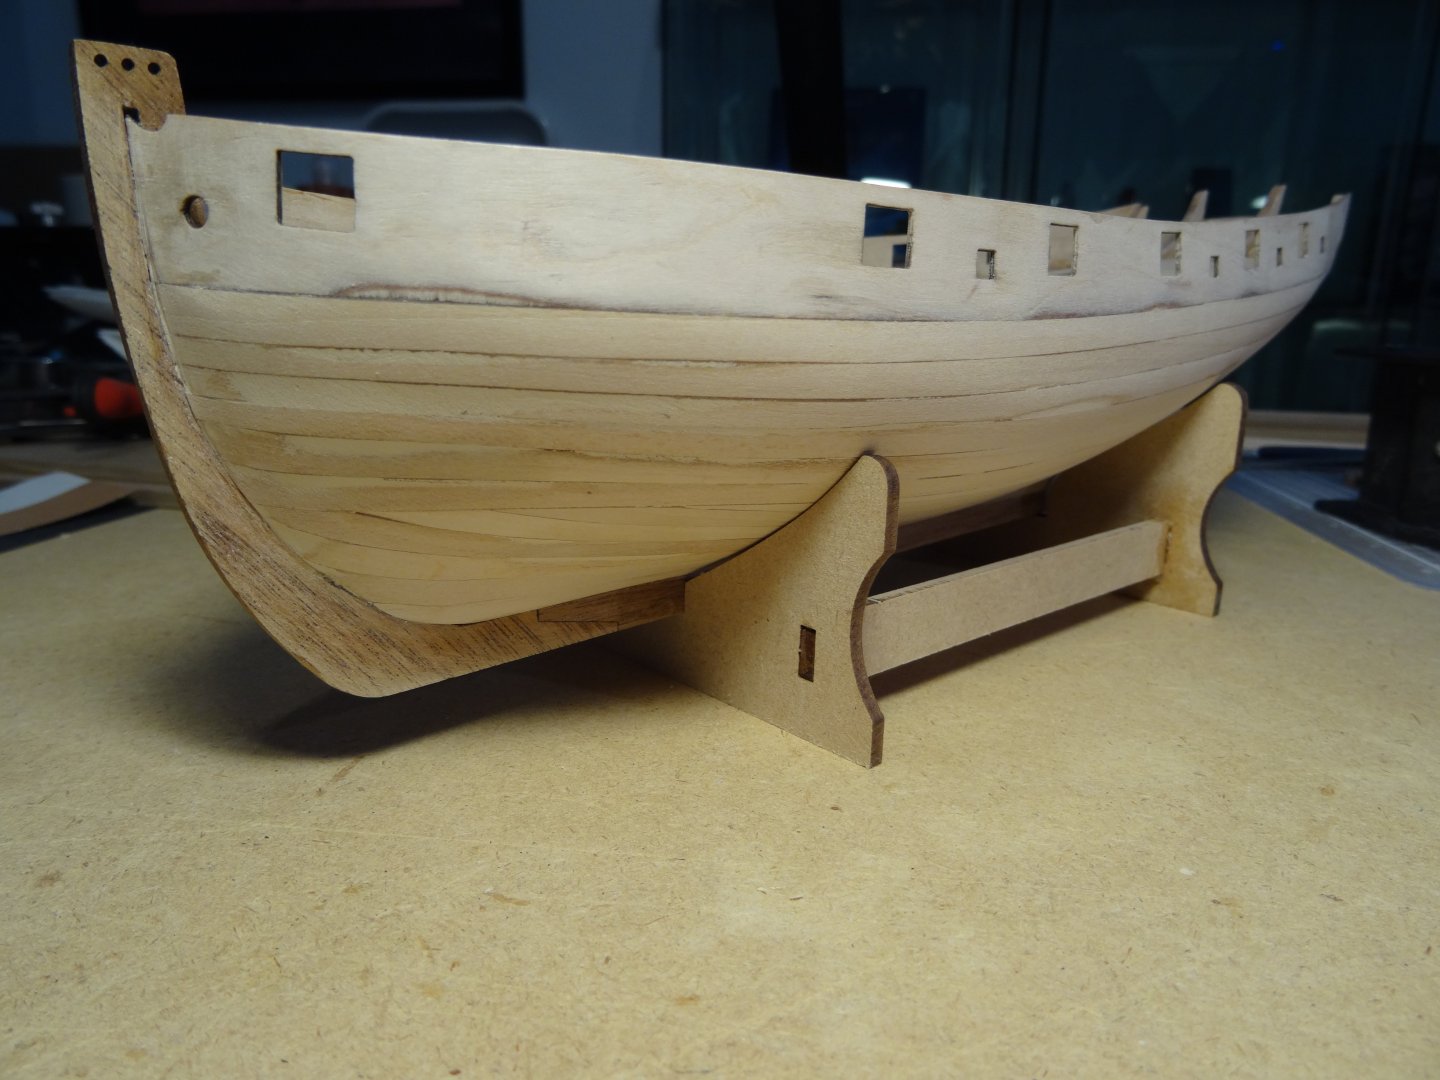
I felt it was a turn of the tide to see the second planking started and honestly looked forward to how that will end up looking, I'm hopeful! As earlier mentioned, I ordered some Pear Wood from Syren Ship Model Company to replace the deck material supplied and received notification today that it had been shipped. So I wanted to finish the upper Bulwark before starting the decking. I covered the transom second wood planking and the outside starboard Bulwark today. I have been building and flying RC model aircraft since dinosaurs walked the earth and CA glue has been my Go to adhesive. It's like fast food, for building. Had I used any other glue, I would not have been able to accomplish what I did today. I like it because, when I have a thought, as to what I hope to accomplish when I sit at my bench, I want to Make it so, as Captain Pilchard would say!

- 39 replies
-
- 5
-
-
- Amati
- Victory Models
- (and 1 more)
-
From the other side of the pond, here in Florida.....Nice Job Dan! While building, I have learned a little more about navigating MSW and what does what while having a walk though the info. I noticed your post and wanted to let you know I appreciate you having a look at my build. As I view yours, I can see by your careful and particular approach to the planking, it has paid off with a nice and most important, faired hull. Also, I too, recently came to see Chuck Passaro's planking method for lateral bending, but for me, not giving up, I haven't figured the best point of starting the bend. My biggest Nemesis, is keeping the plank in contact to the formers, which his method is the key! , but I believe I had tapered too much of the plank near the bow and had created a sine wave in the planking. Before I begin my outer planking, I really need to understand the mess I created! My hull is faired pretty well, with acceptable transition between formers, but it sure, looks like a patch work quilt! Thank God it's only a plug at this point. What saved me, is I came to realized the importance of not forcing a plank to take a direction it wasn't meant to go!. I look forward to seeing your progress, Best Regards, Roger
-
Well, it goes without saying, I've got a few more grey hairs, Lucky for me, they all blend in! This was truly a learning experience! I would image it to be similar to experiencing G-forces in Centrifuge astronaut training! I learned a lot! WHAT NOT TO DO! BUT ! Many errors in my ways for this first step planking, cannot be used on the outside skin, yet to be applied. Another learning curve ahead. I thought I knew a little bit when I started after reading various methods of the process, and then I found the cocky street kid in this kit, that kicked my butt! ( My humble thoughts ), The week link in this build, Leaves construction steps for a little more experienced builder without noting a process or an alert to a particular step. By no means , no regret, I like this little ship far too much! I'm getting thru this build, but I wouldn't call this a first time build kit, because there are Far Too many rocks to turn over. Argh, fifty lashes for this builder.....it hurt so good. I decided to try my my hand at yet, another mind bender and replace the strip deck with a Four Butt Shift . What really prompted the decision was that the kit material was of pretty poor quality. The supplied planks are twisted every which way and the edges are fuzzy! I felt it was too small a scale wood to deal with trying to clean them up, let alone pencil the edges for simulated calking, they would have ended up looking more like leaves had been stuffed between the planks. So, I purchased some wood from SYREN Ship Model Company and look forward to a nice clean finish to start the deck. That's going to give me more time to learn more about properly attaching the out layer of finish planks. ship builder
- 39 replies
-
- 3
-
-
- Amati
- Victory Models
- (and 1 more)
-
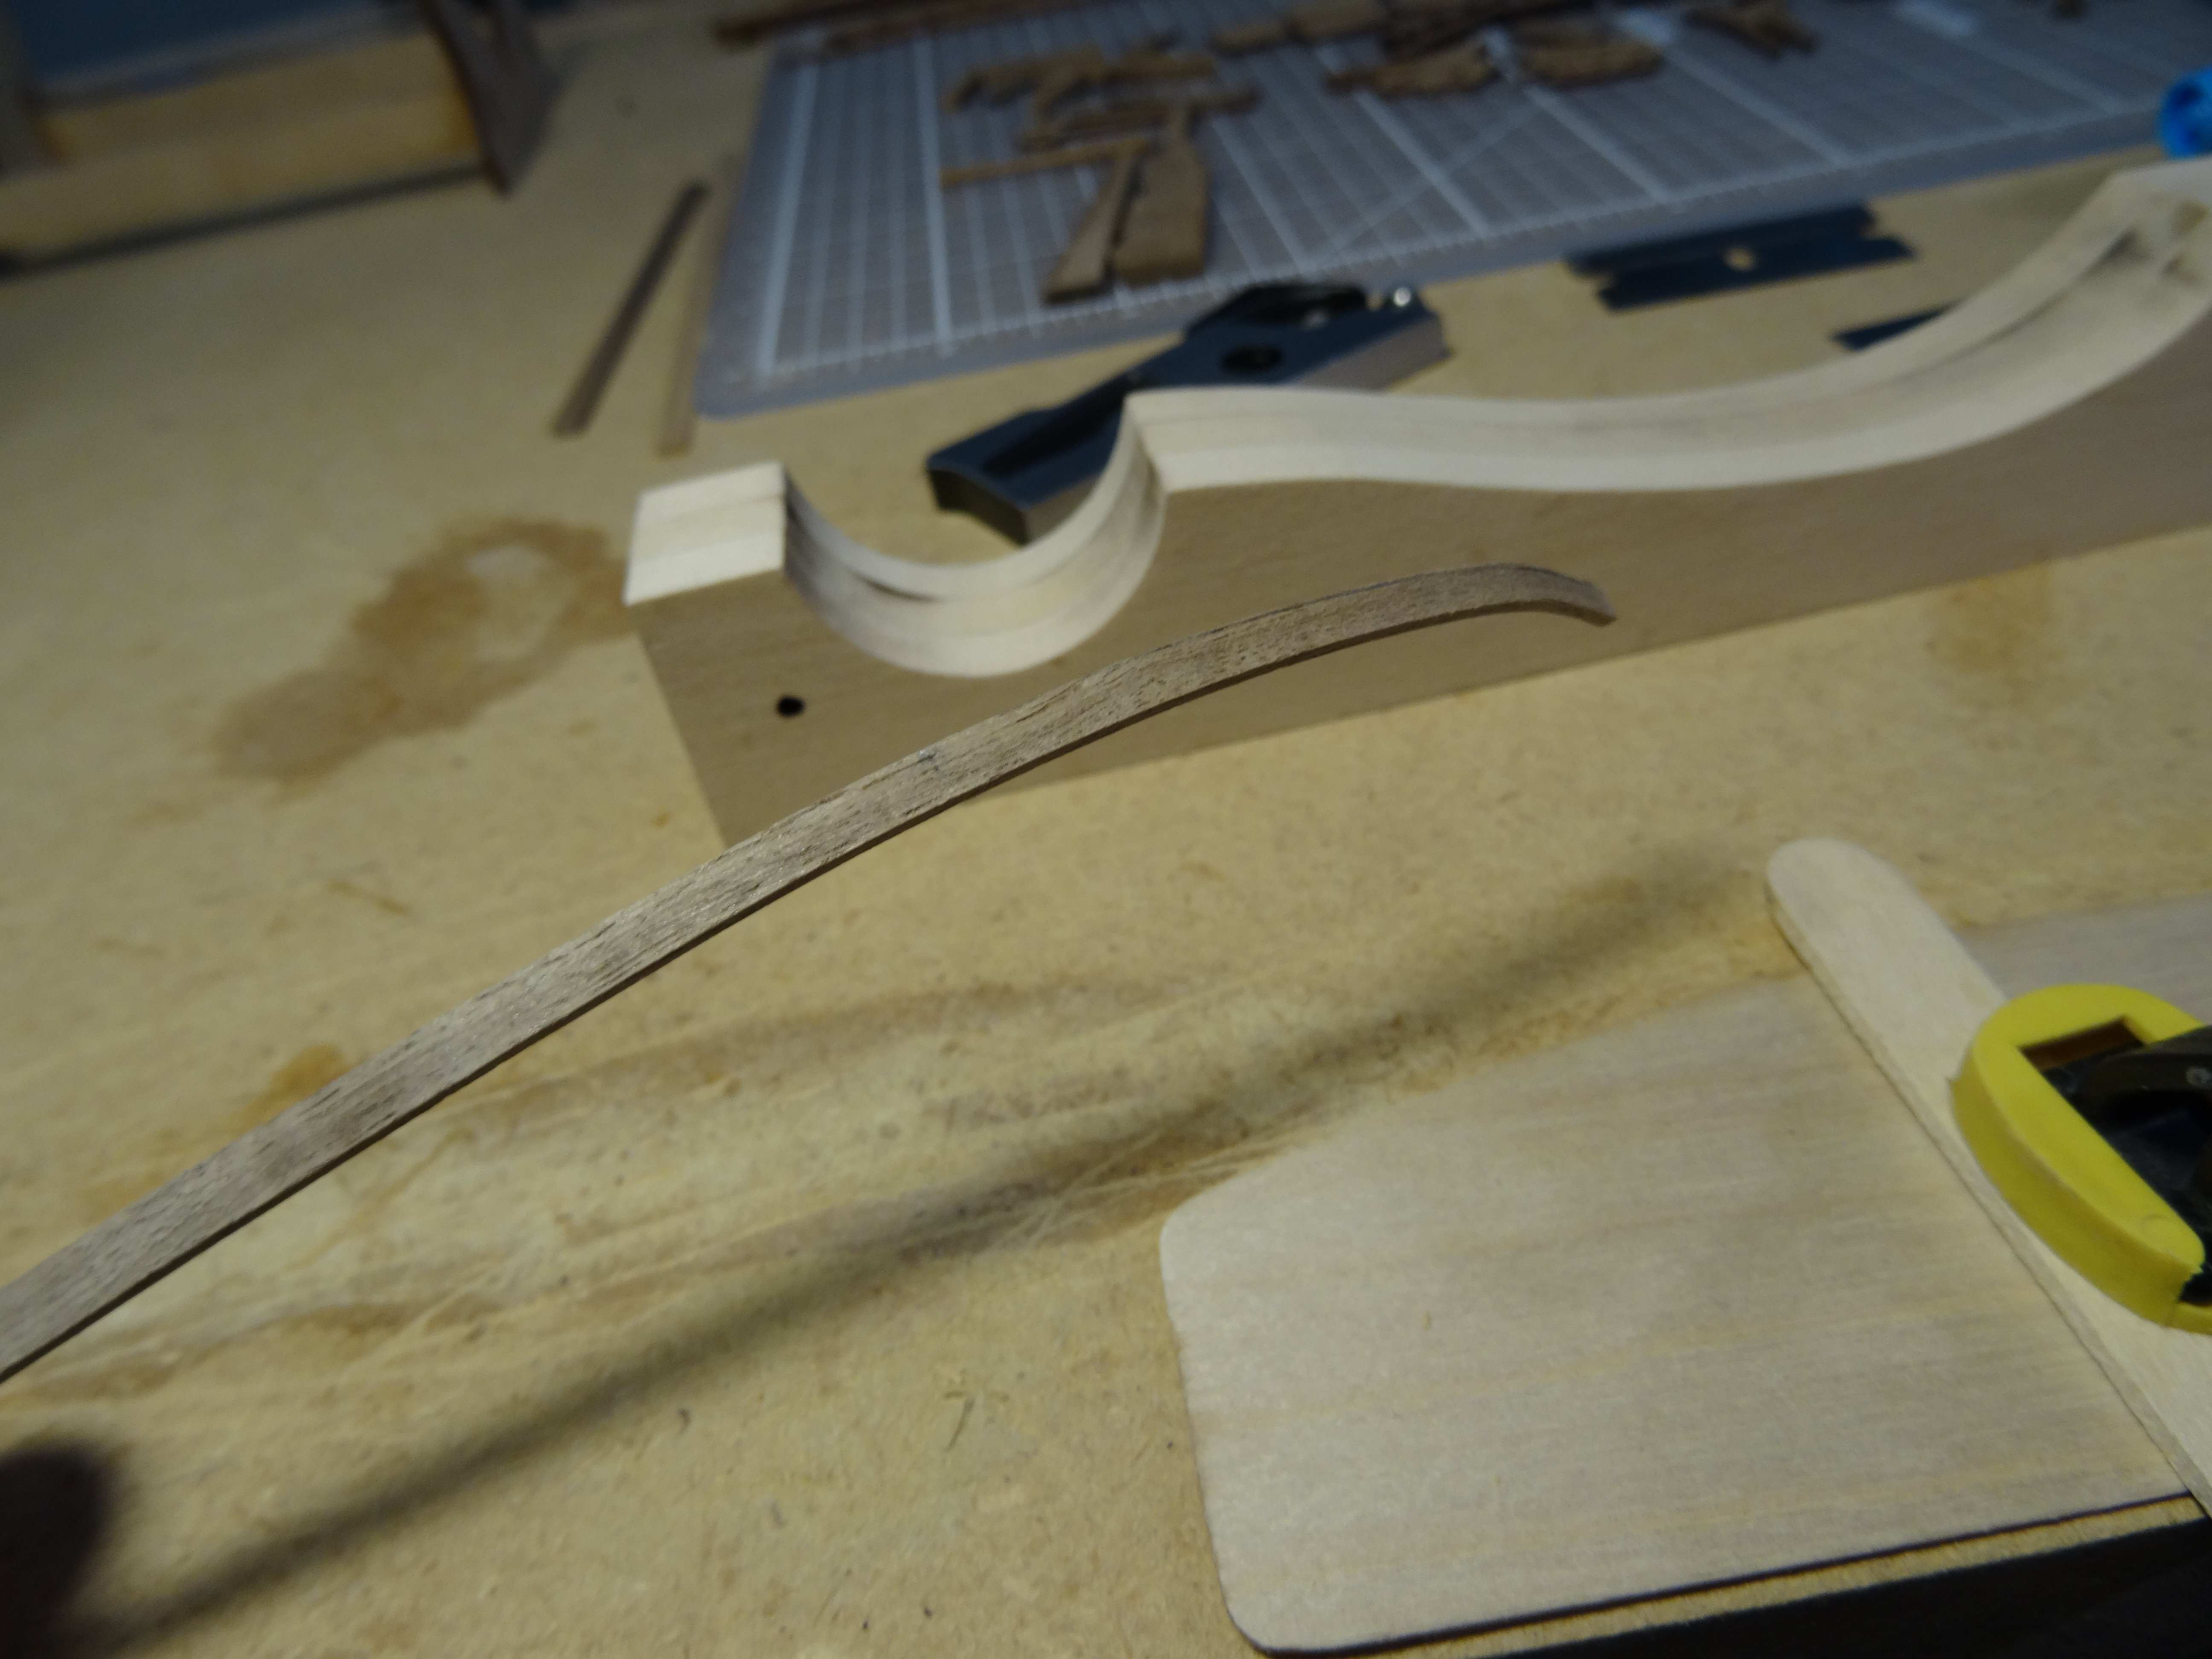
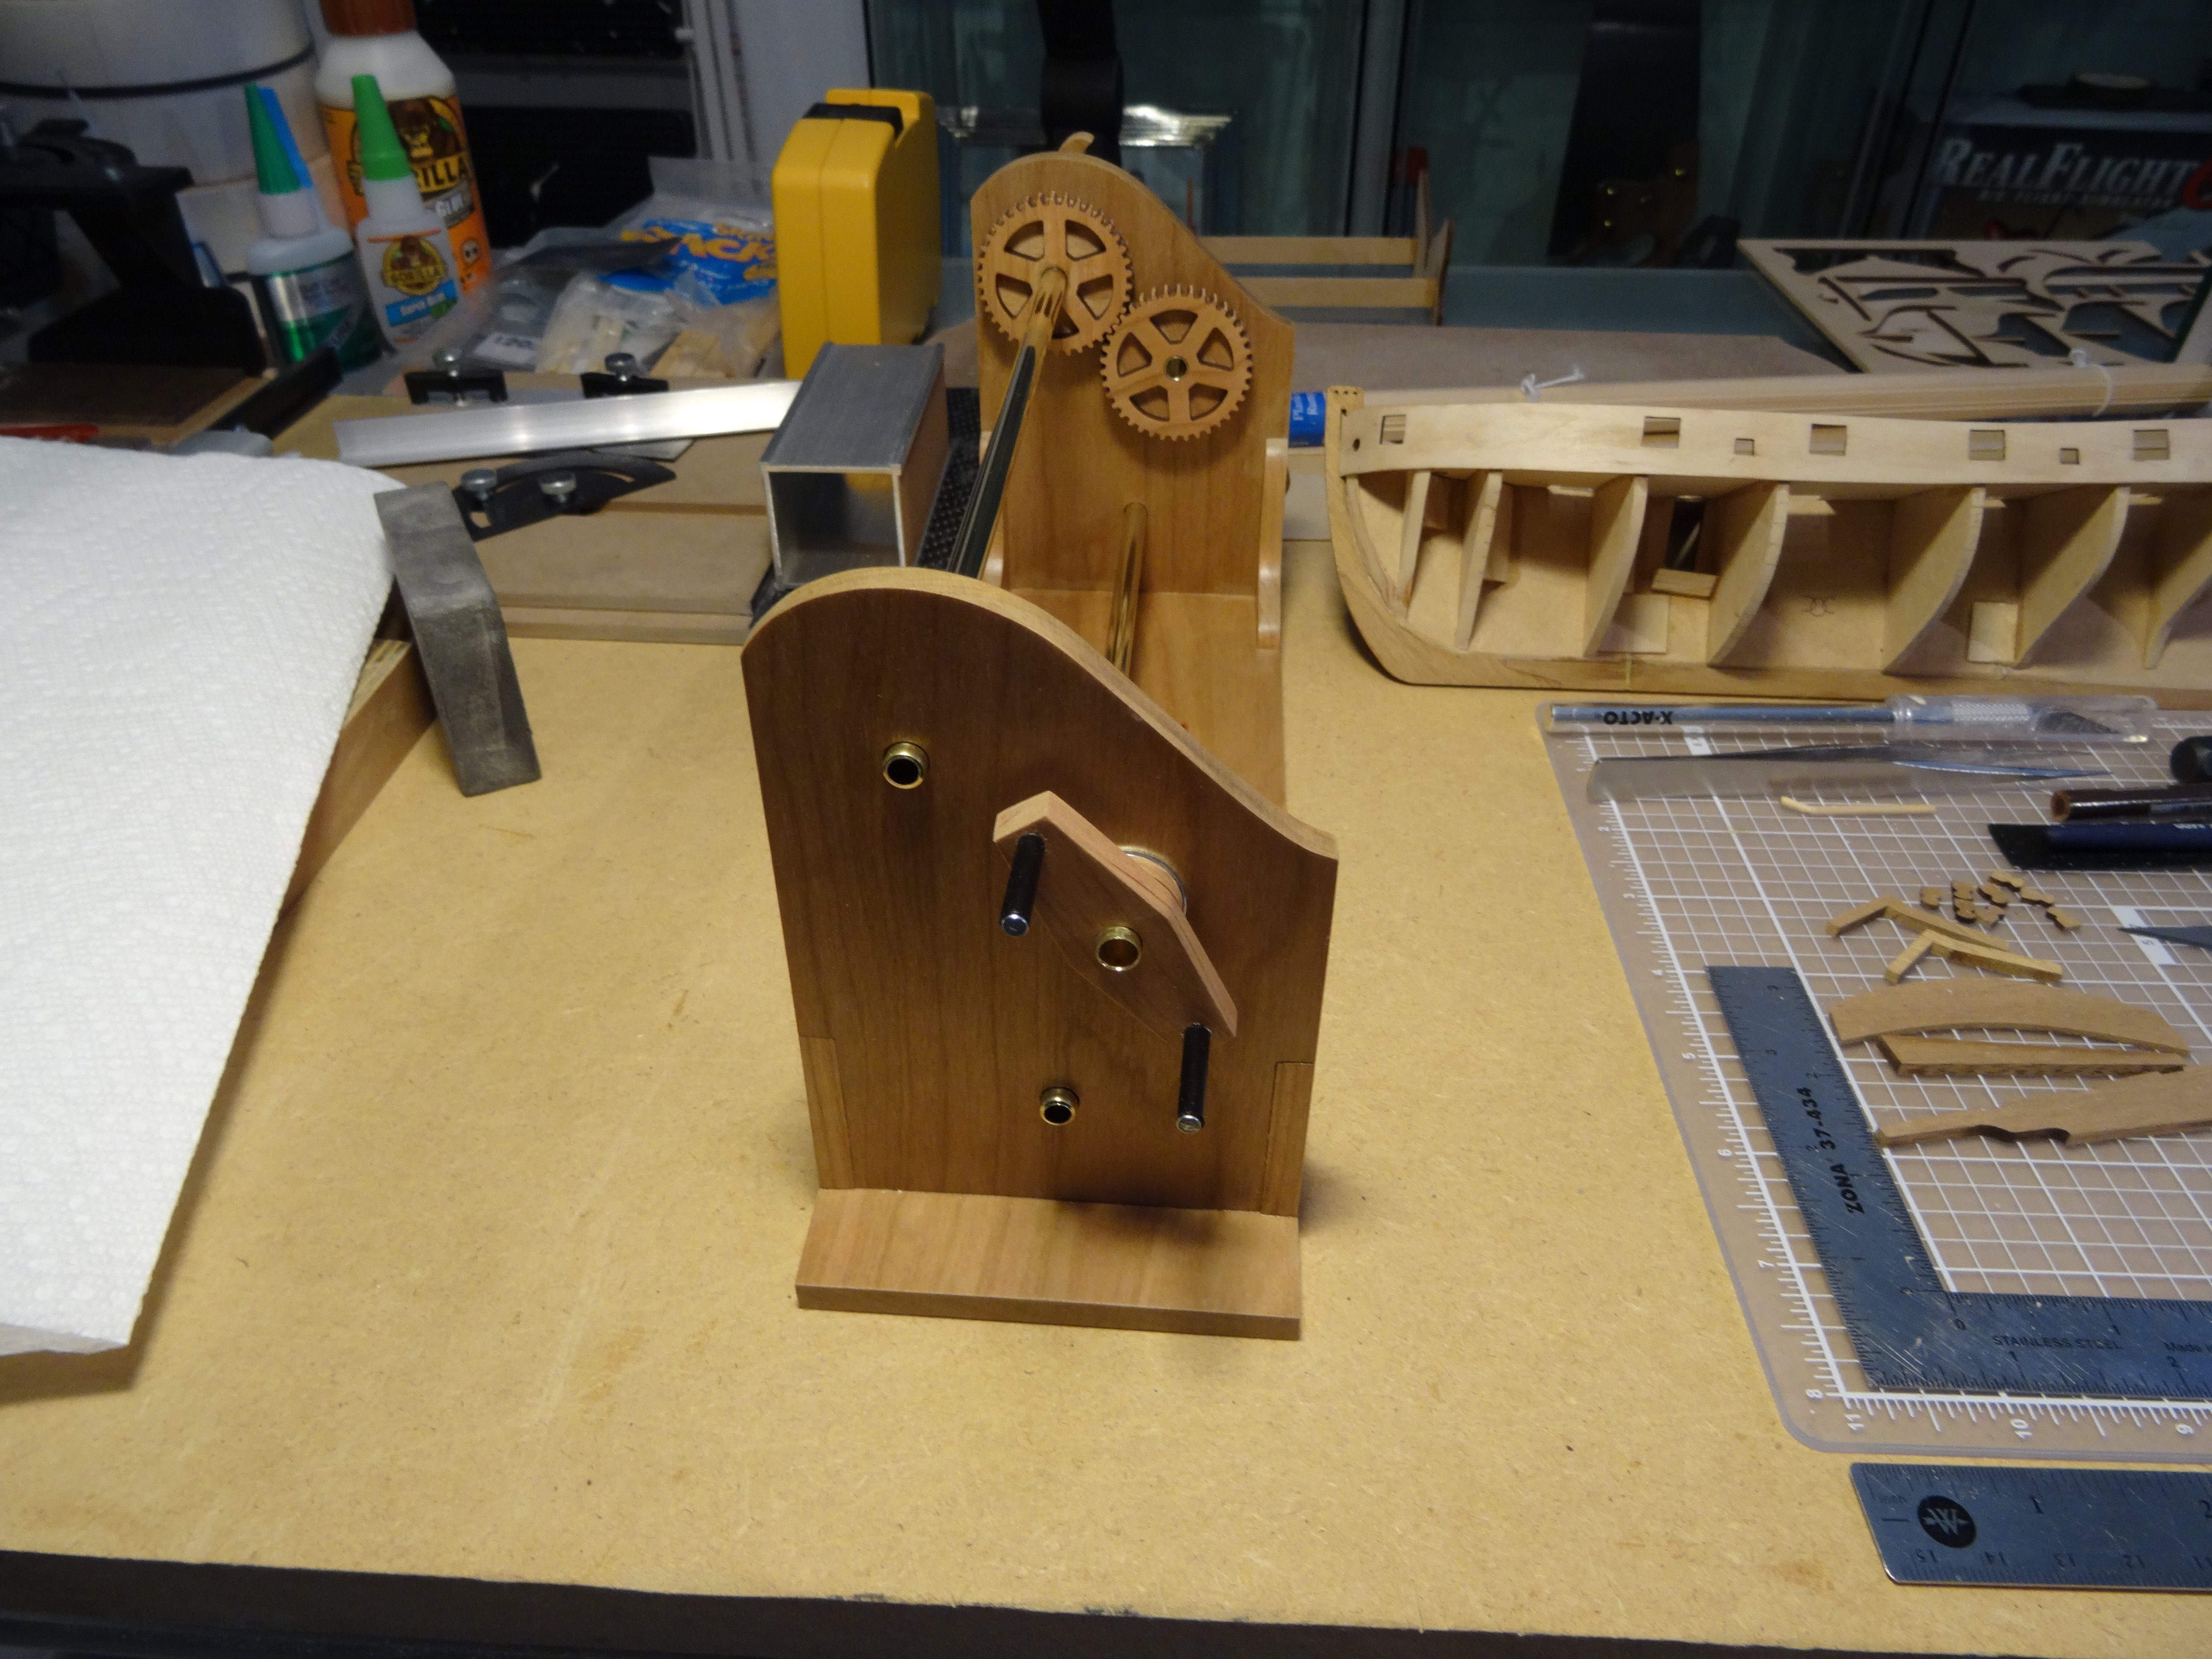
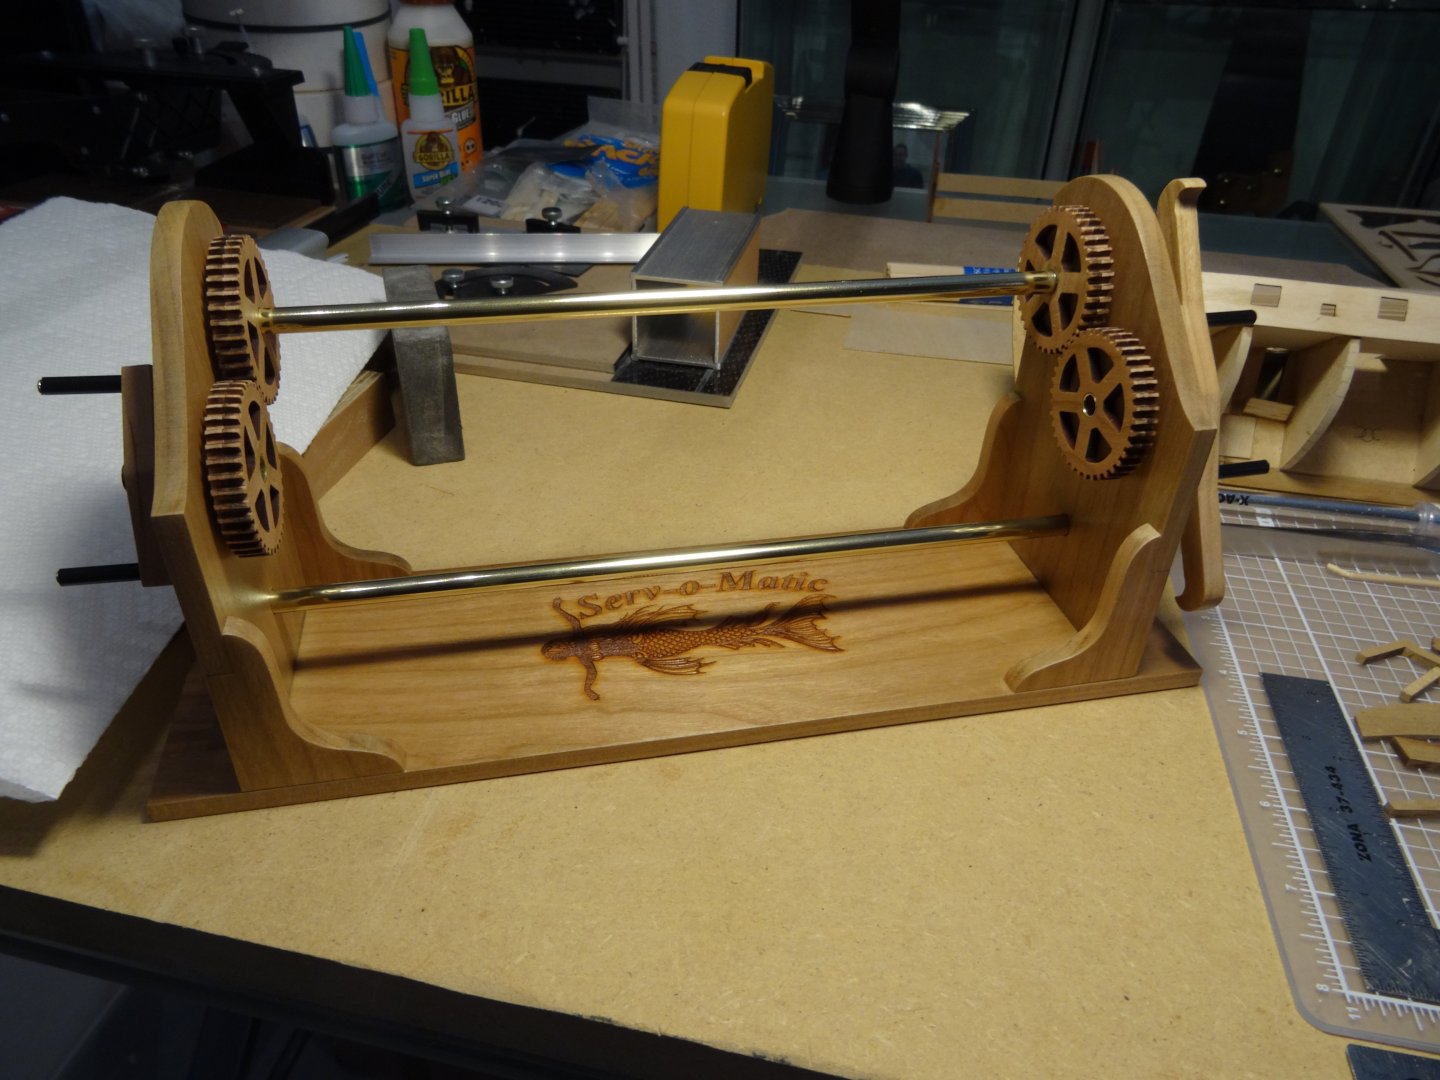
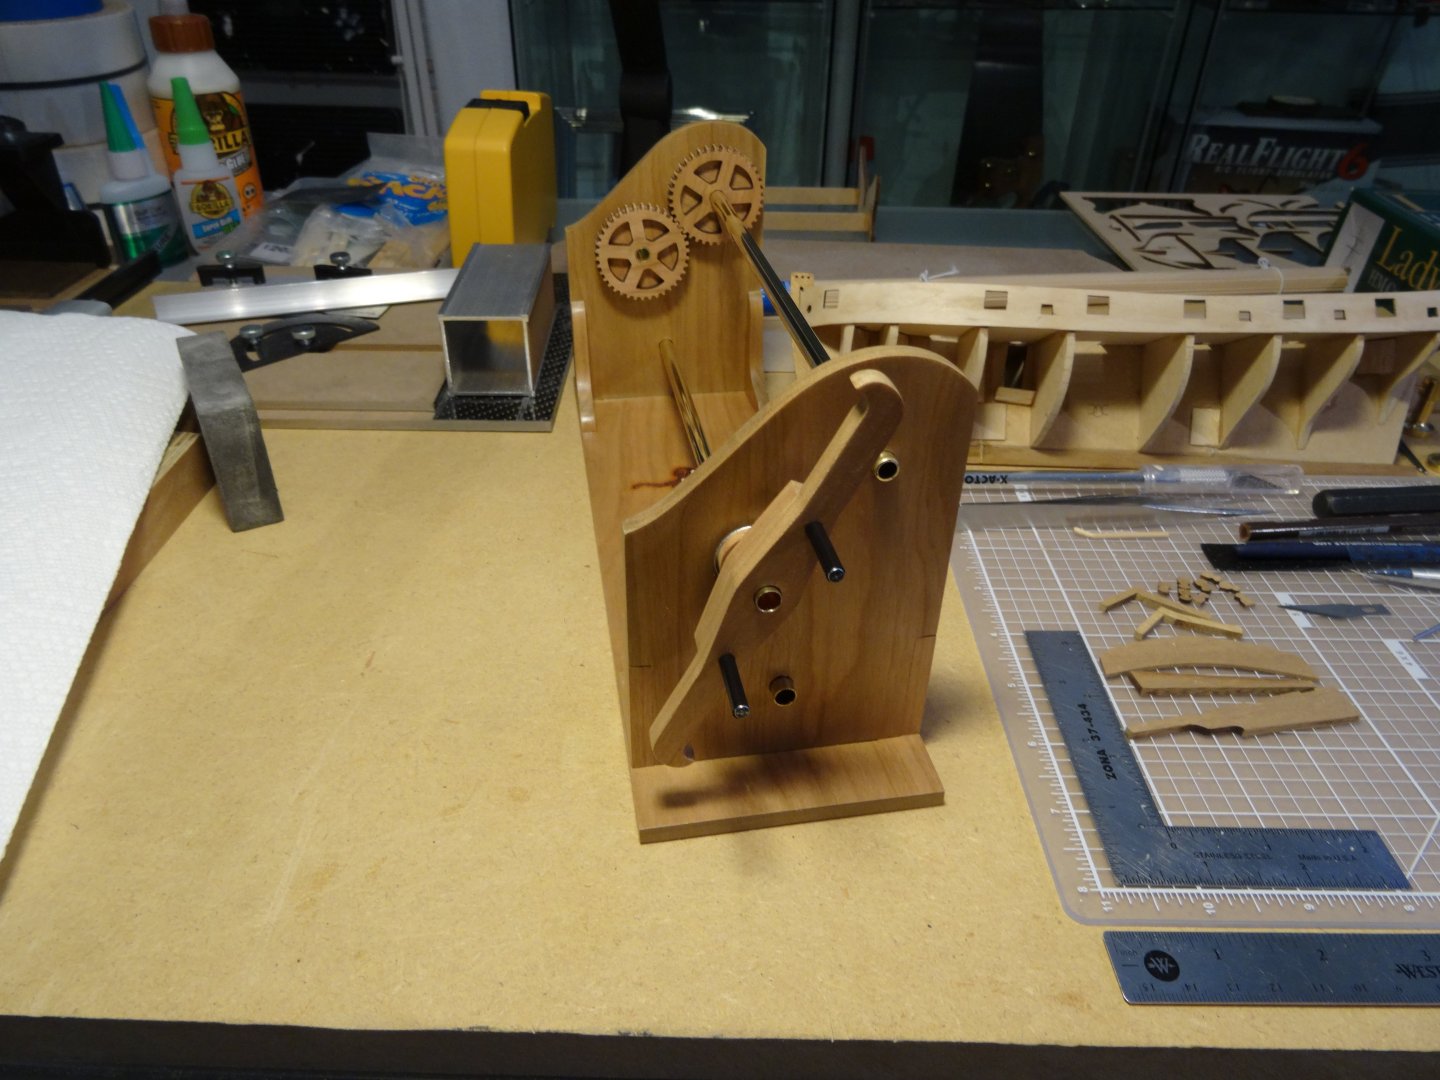
When I hear someone comment, ( Well I'm board ), I can't help but think of all the things I've learned when building my Lady Nelson. Honestly, I had not heard the terms, WORM, PARCEL or SERVE a line, until involving myself in this new venture of building model ships. Now, my eye is drawn to the detail of what is being viewed with insight, when admiring these scale Ships. So, I did some research while avoiding my next build step of planking the deck and hull, sort of circumnavigating the earth instead of my project! I found this serving machine at SYREN, Ship Model Company. To see the finished product, built in the 1/4" Cherry wood, was a done deal for me. OH and the embossed Mermaid, nice touch, that makes it officially nautical! This product is solidly built, with simple features that will ( SERVE ) the test of time! Sorry, Had to do it! I look forward to creating the rope detail that this little machine will assist in making for my Lady Nelson. When building the kit, I used Gorilla Wood Glue, wiping off the over squeeze glue with a damp rag. The sanding was done with 220 sandpaper as my go to cut down and to prep the wood of glue spill, with a finish paper of 320 grit. I had a can of MINWAX, Water Based, POLYCRYLIC Clear Satin, having applied 3 coats between drying. With all the Humidity here in Florida, as every day has been rain, this product was perfect! There was no trouble in it drying and the finish was free off the dreaded milky capture of water from spraying in humid air, all in my HOT Garage, I'm sure helped a lot! I felt 3 coats was ample coverage to keep the wood looking clean, providing a solid base for a very light sanding with 320 grit paper, that would remove paint, not wood and provide ease of maintenance with the last coat. I added the 11/16th length of black colored nylon tubing," I happened to have in my stuff ", for just a little more body captured by the nails, used for raping the line. Without a gun to my head, this build took one week.....a little here and a little there!, with the final assembly this morning!

- 39 replies
-
- 3
-
-
- Amati
- Victory Models
- (and 1 more)
-
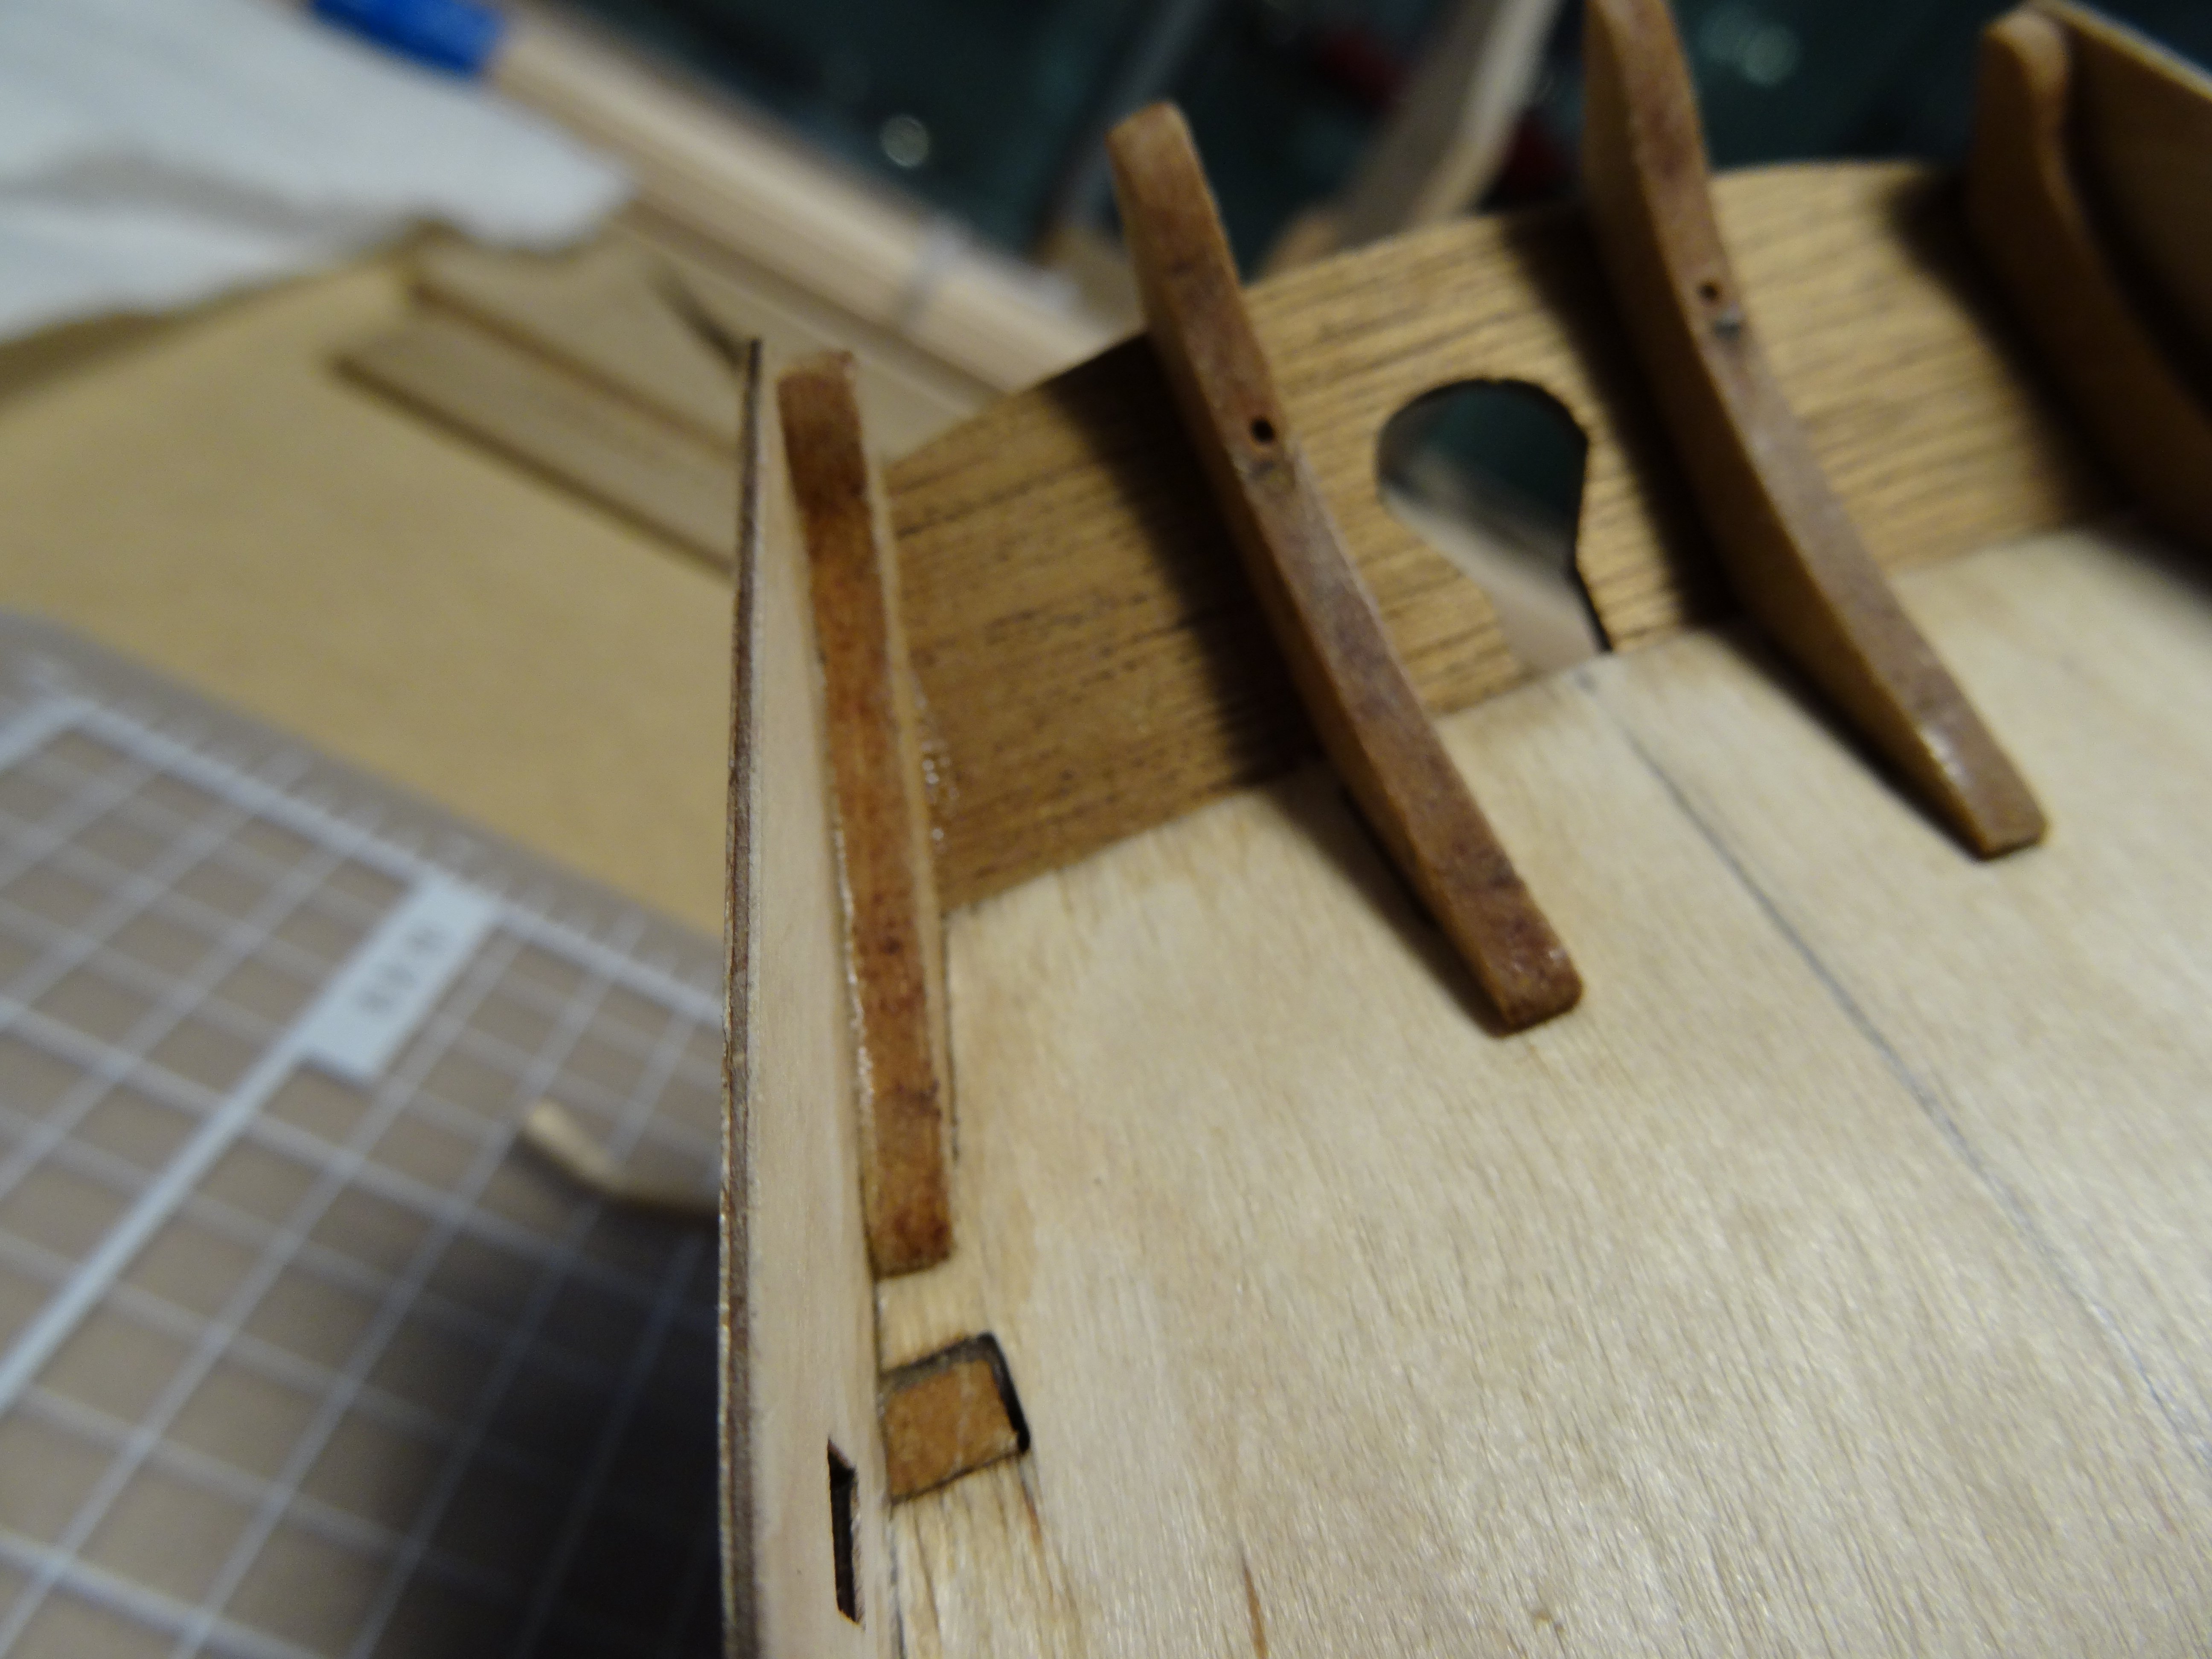
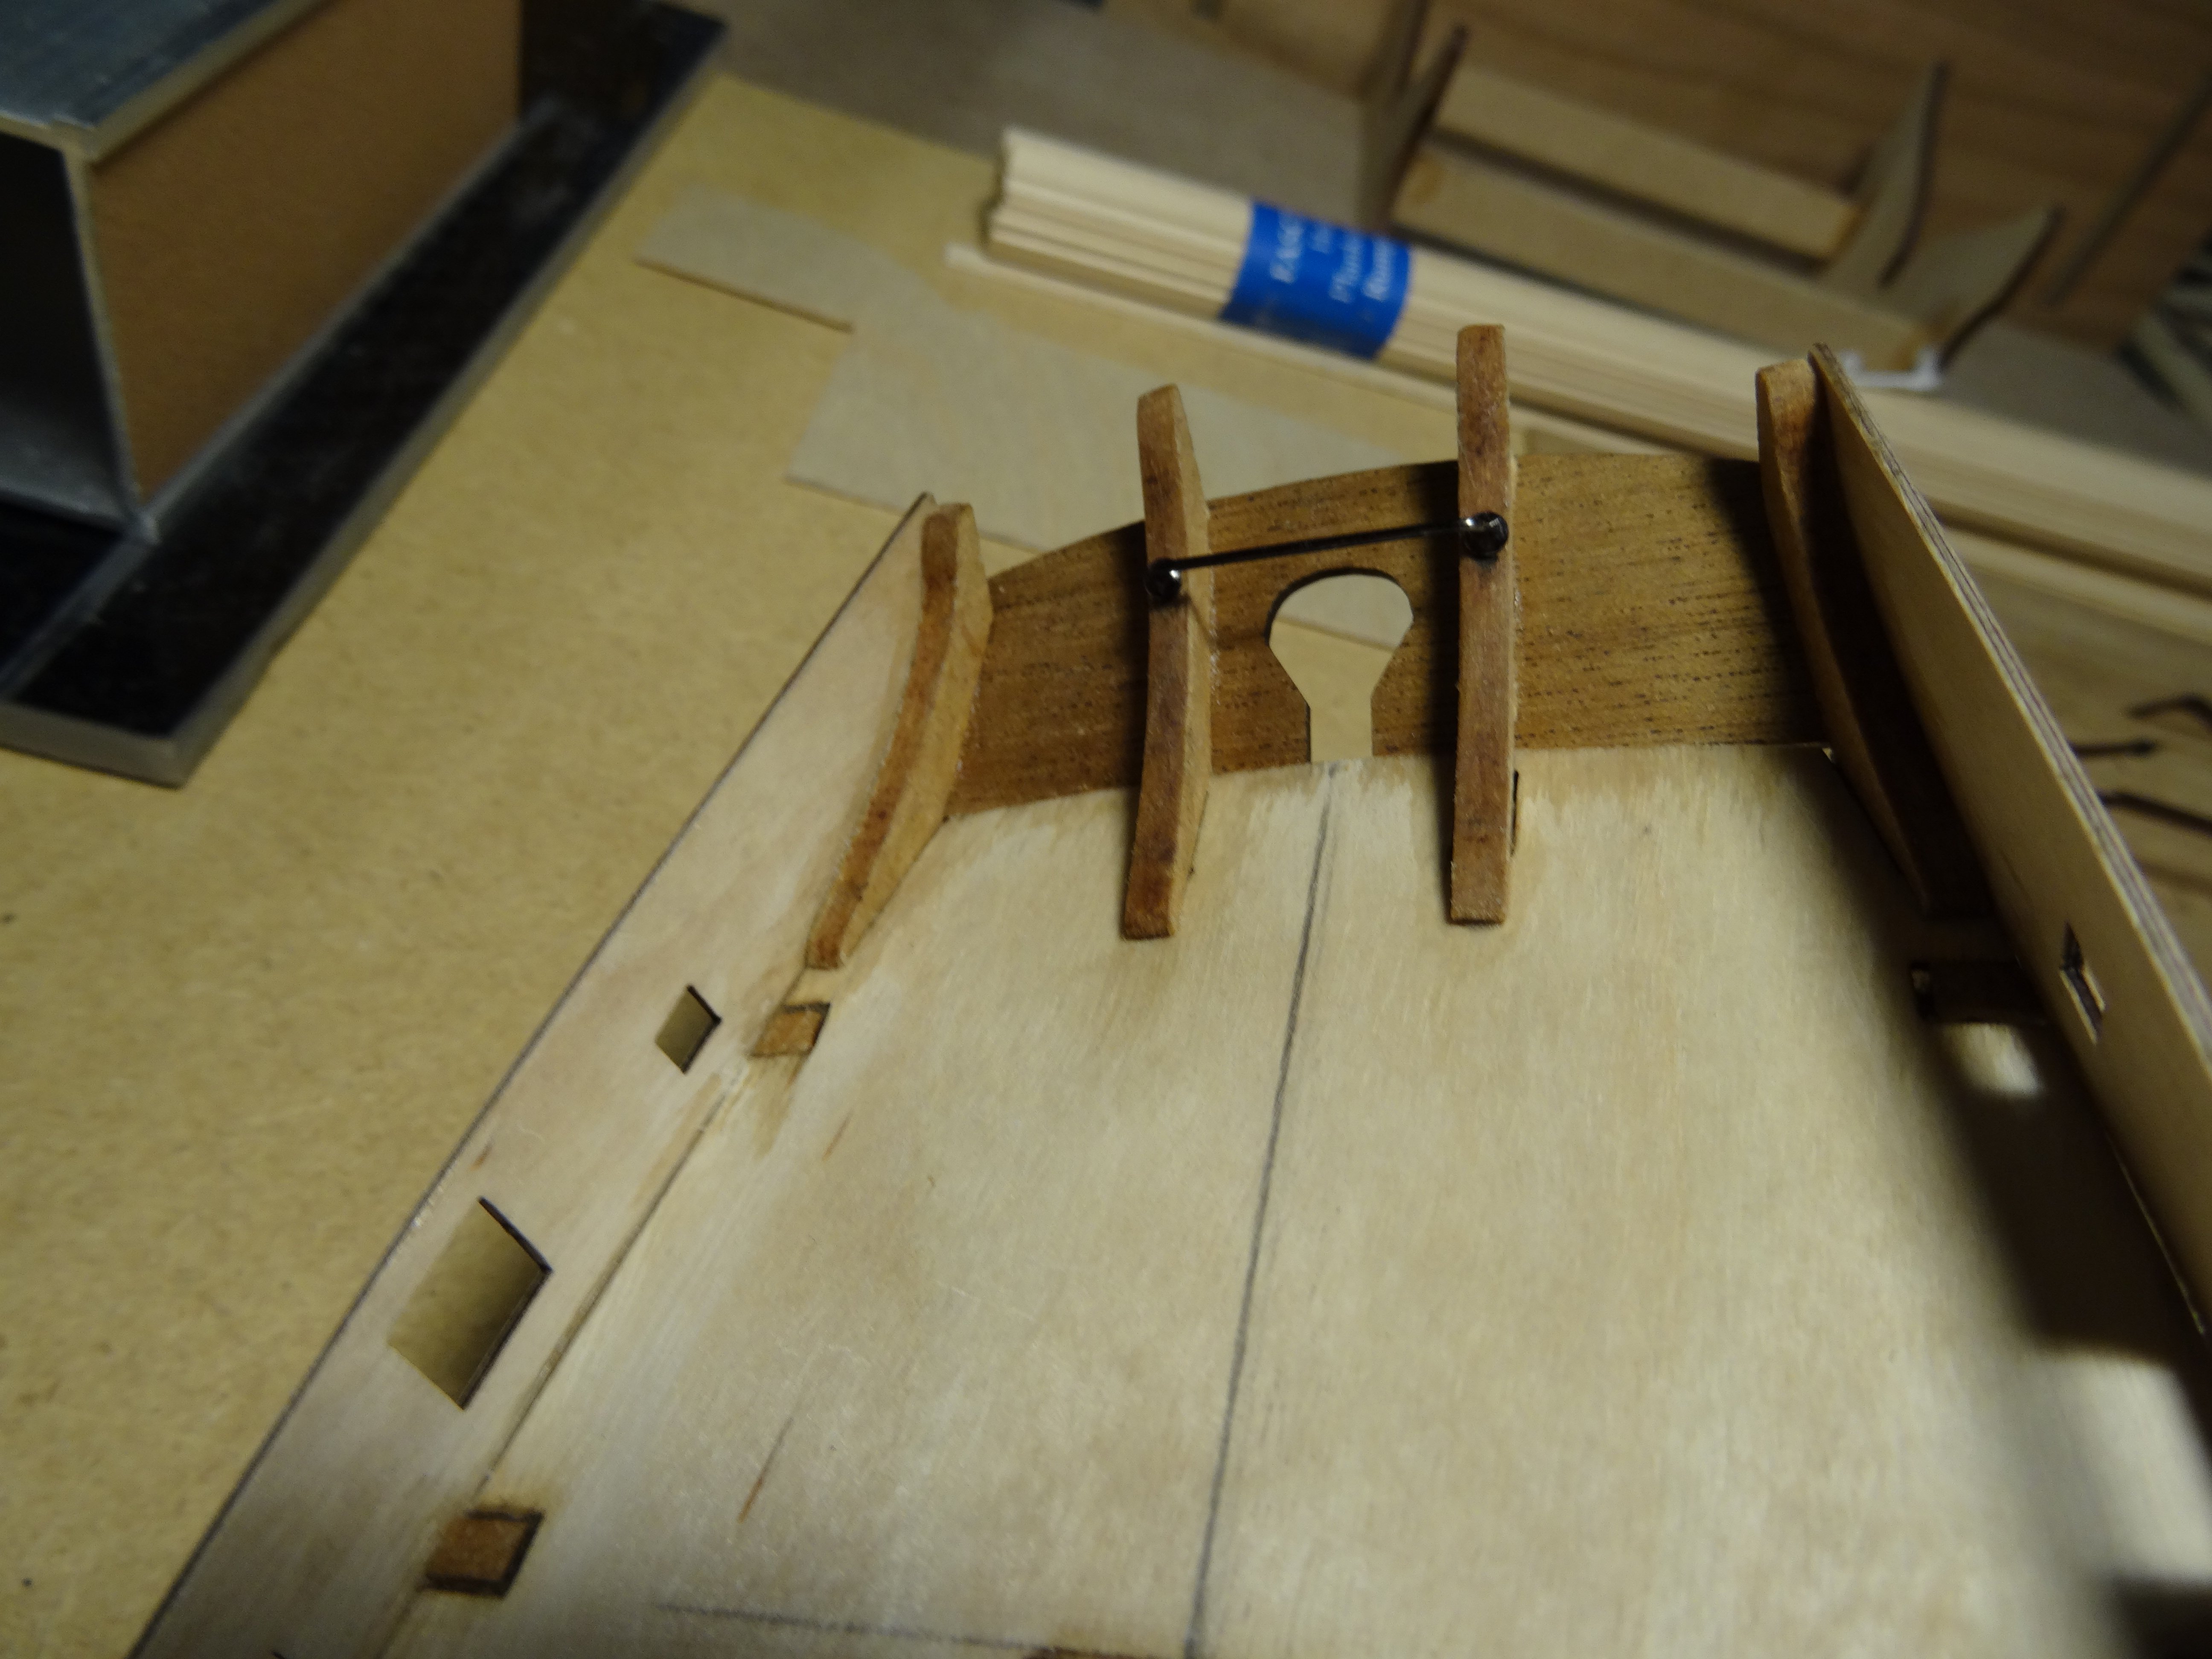
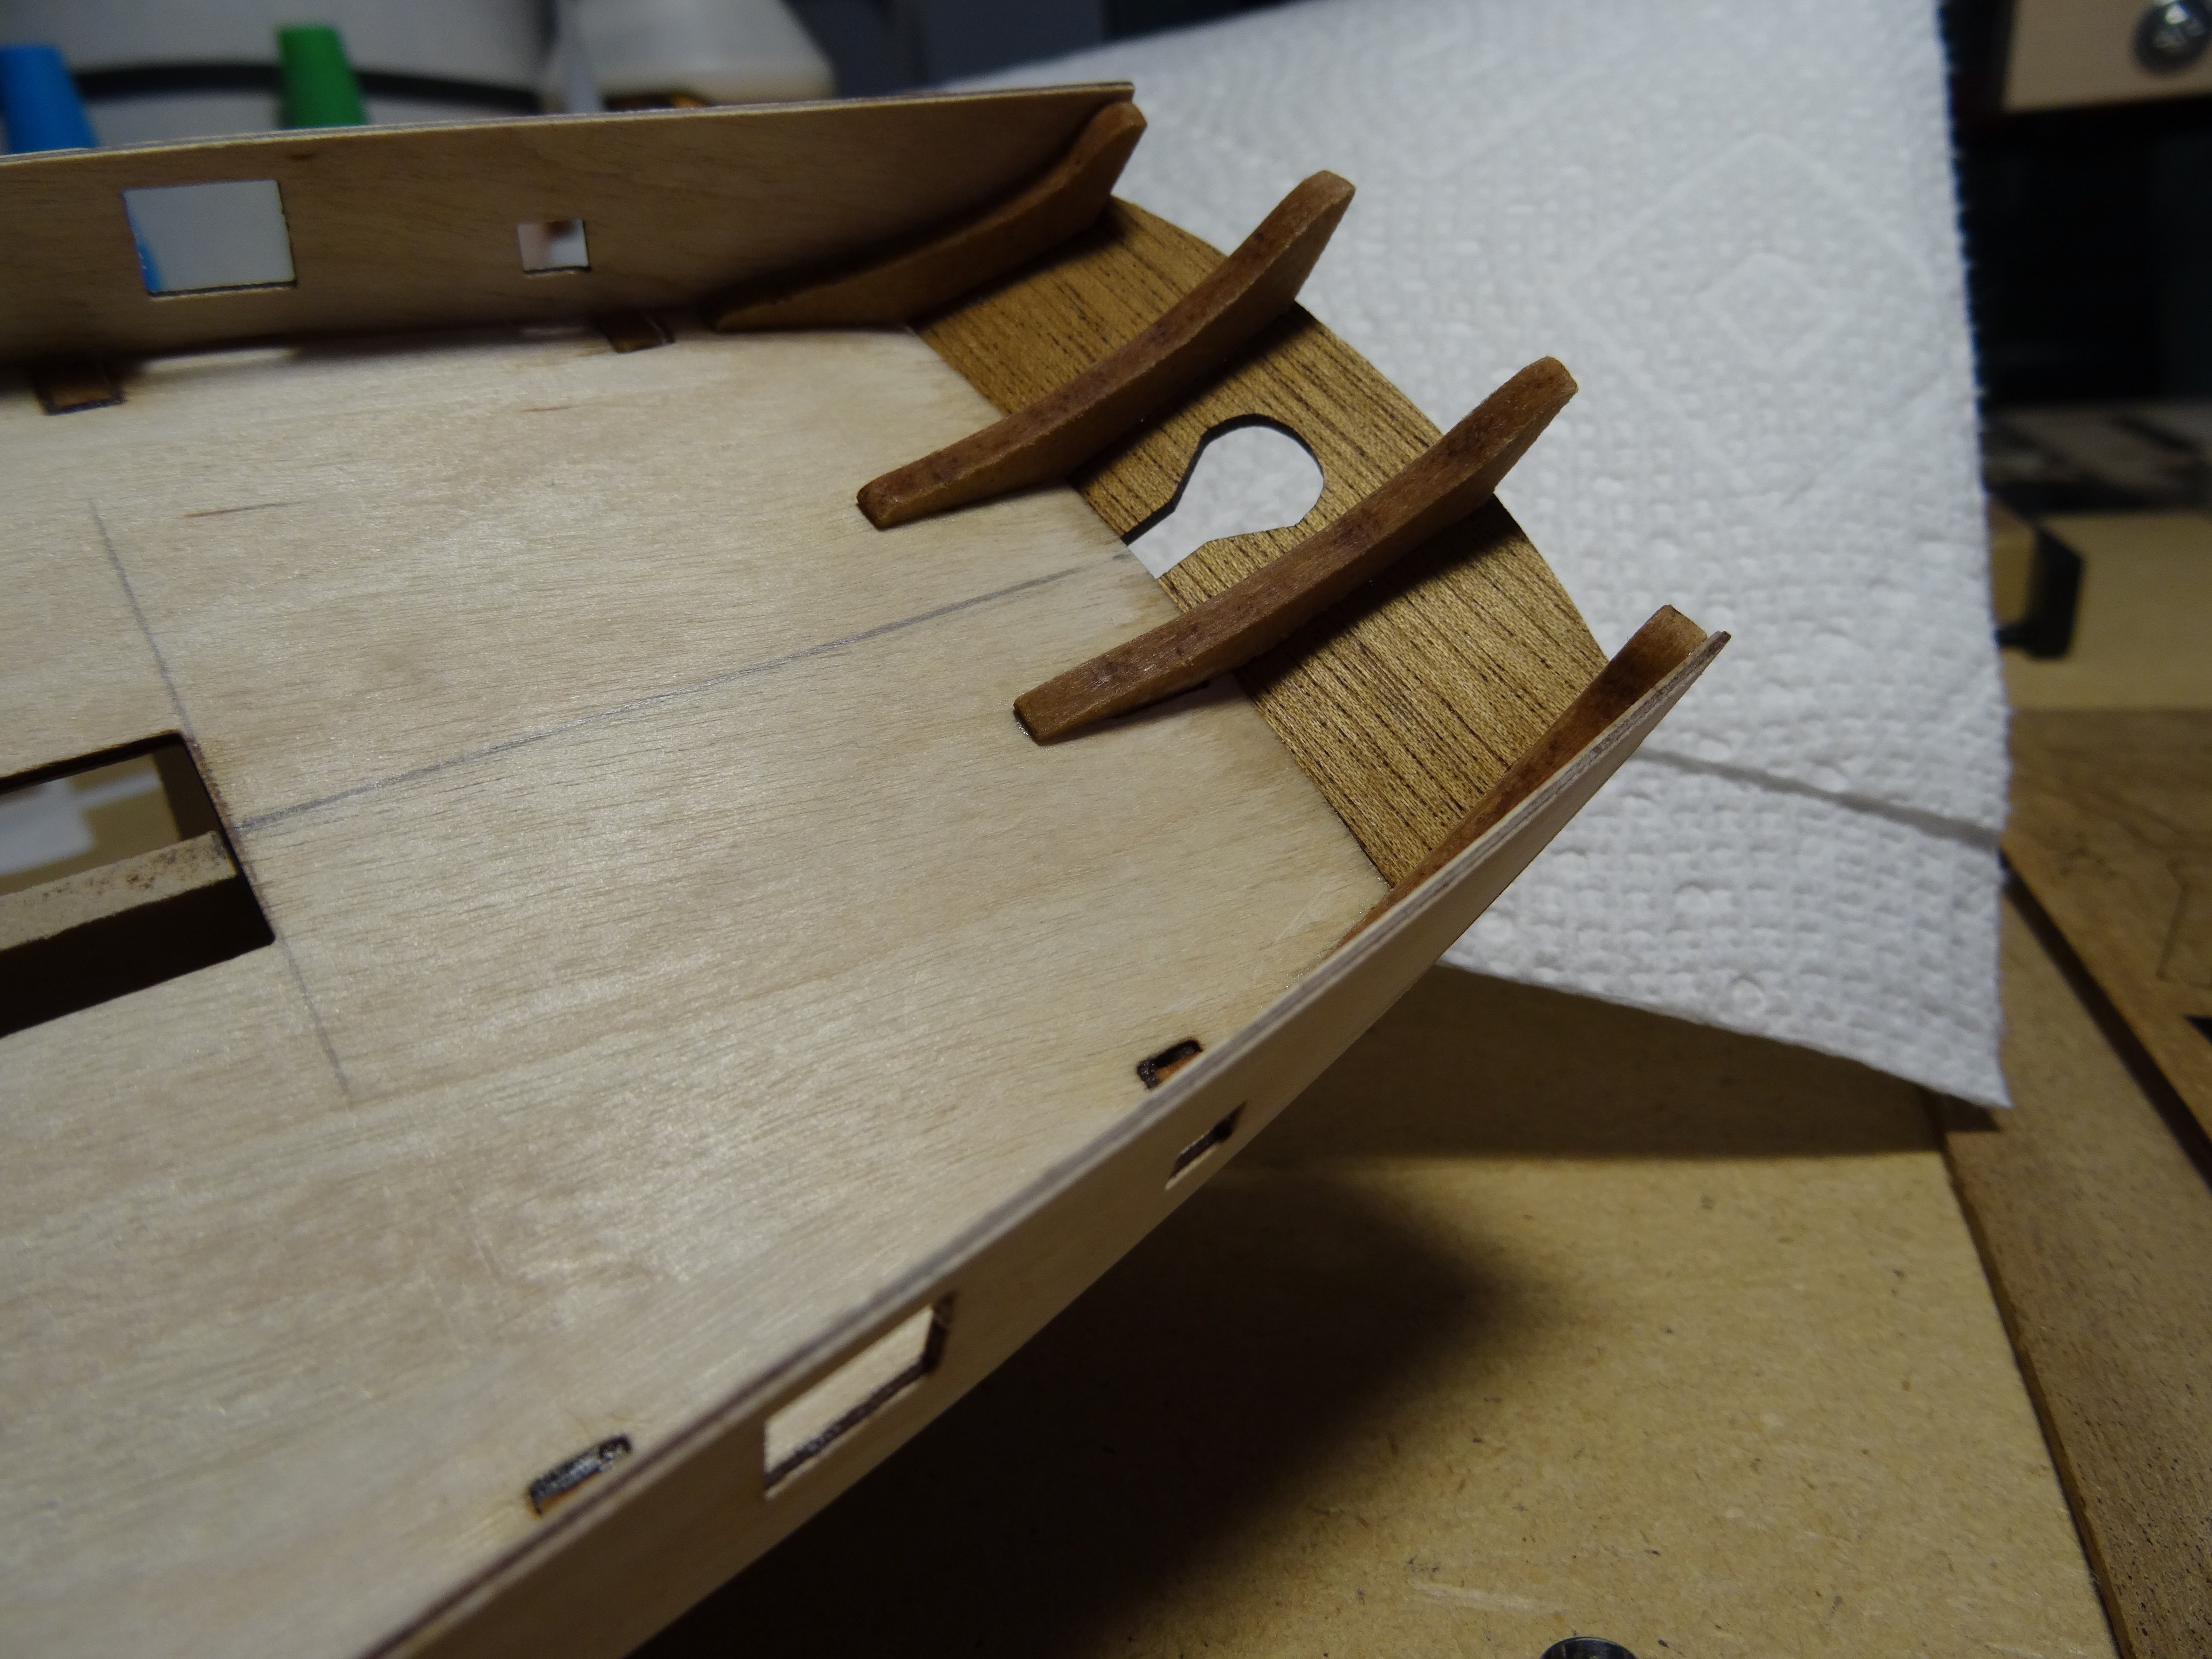
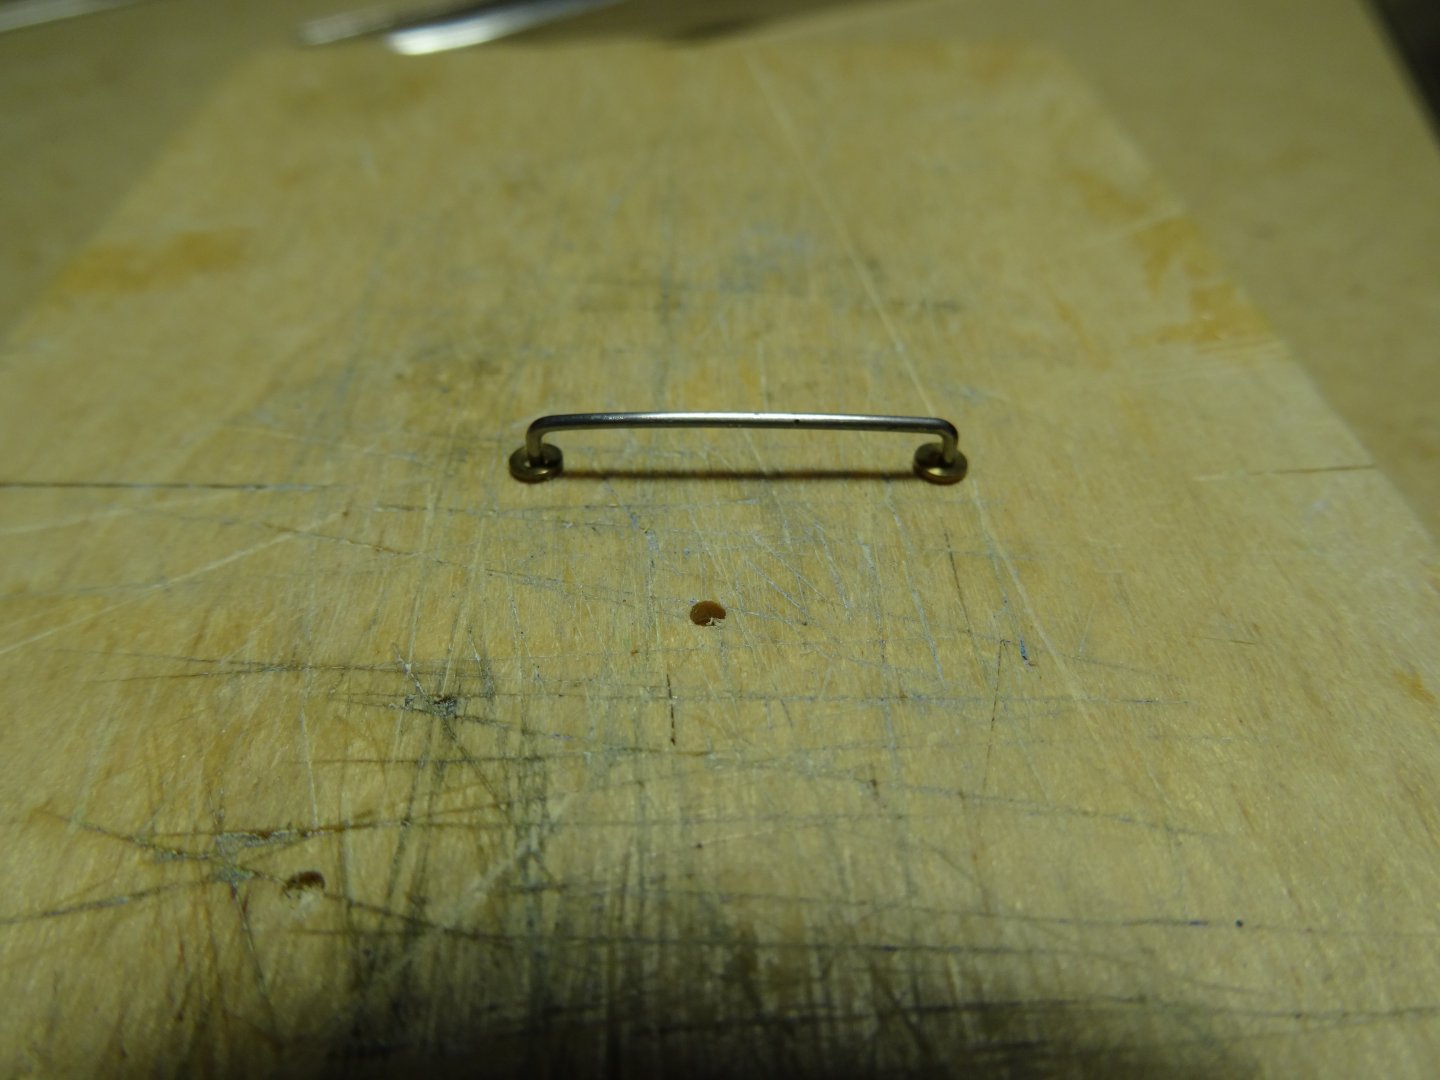
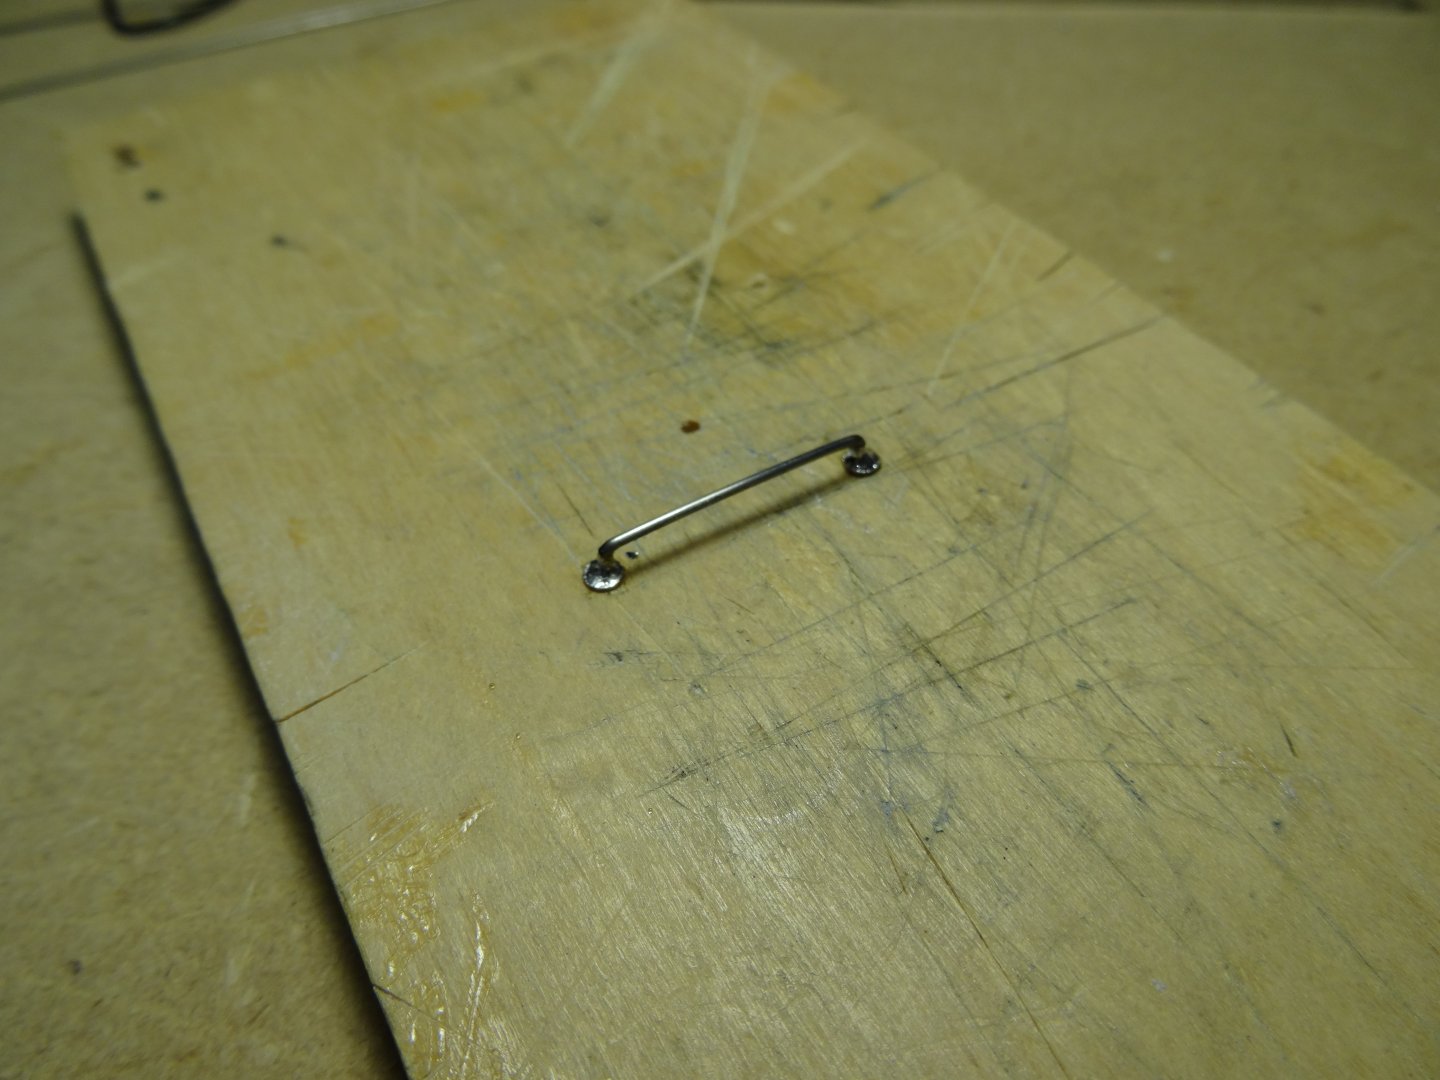
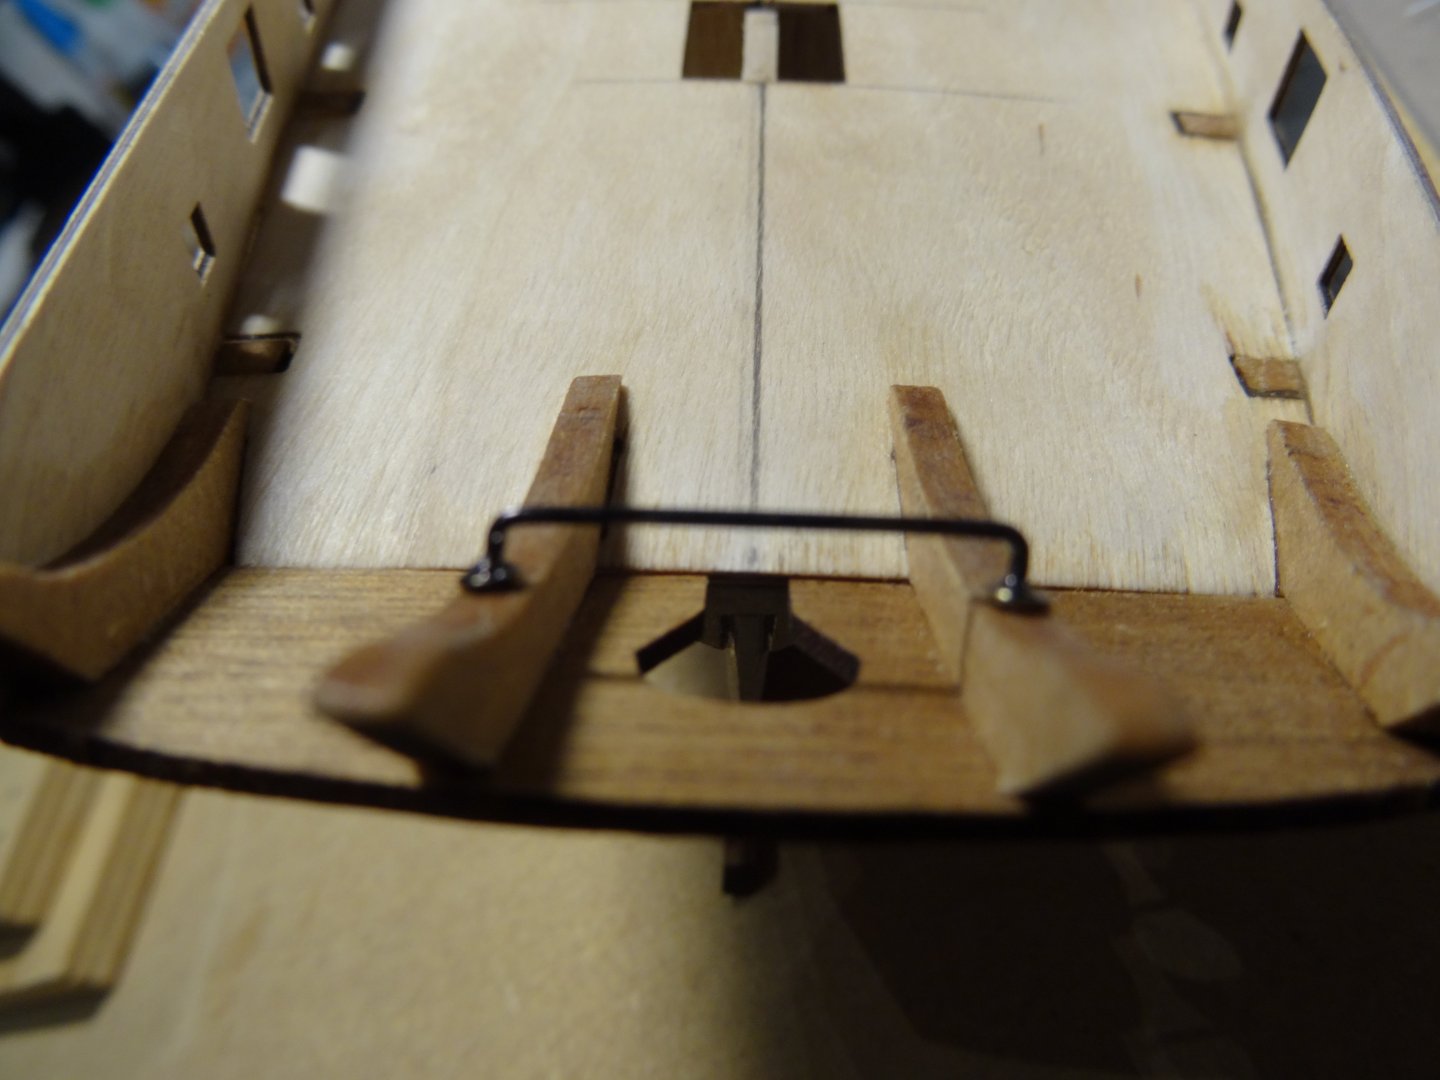
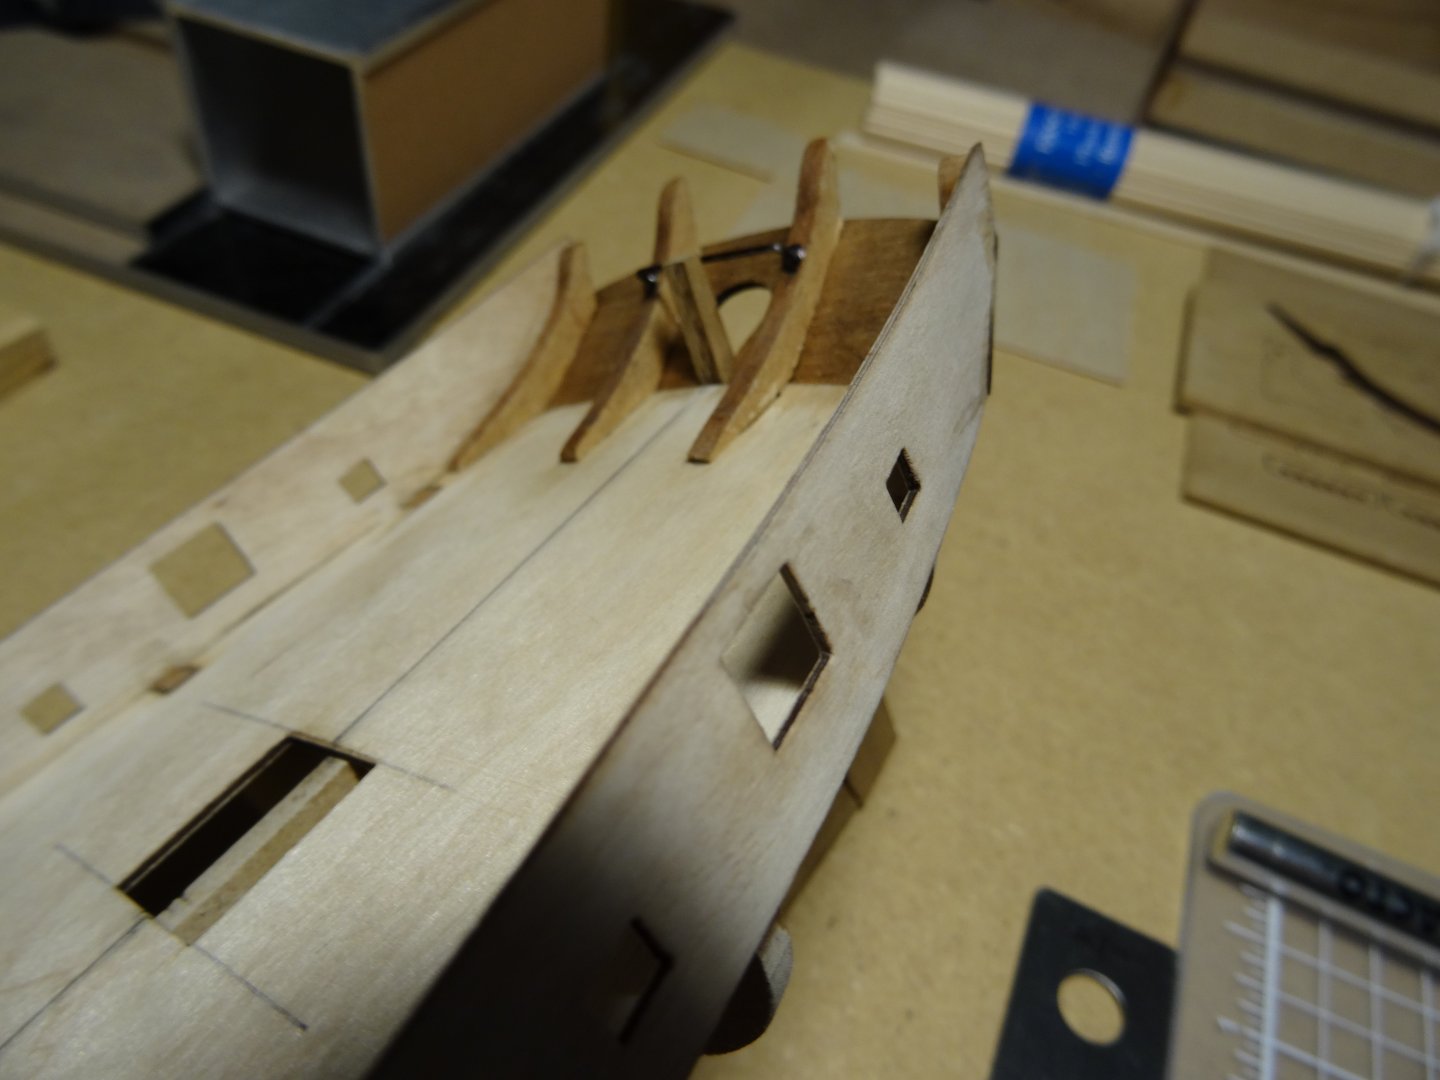
As I was perusing the instruction sheet for this build I noted the single attached block for the main sheet on the transom Knee. The first thing that went though my mind was, that in the full scale, I just couldn't fathom how a single eye bolt would work out with the forces of a 52 ft Cutter. In real life, I've sailed boats to 70 ft and took for granted the equipment used on those boats as what was needed to do the job. So , as earlier mentioned, I really no nothing about sailing ships from this period in time. I have found little in the way of hardware detail for ships of this period and specifically Cutters. In my recent search for how to plank my model, I've been gathering as much info as I can eat! Having found and purchased items from SYREN Ship Model Company, I noticed Mr. Chuck Passaro's preliminary build, here on MSW. I then took a close look at his English Revenue Cutter, Cheerful 1806. In doing so, I noticed right away the rigging was much more stout and realistic, as it turns out, the model was designed from Original Ship Plans! Stretched between the middle two transom knees was a simple traveler bar and given the size of this ship made more sense for strength in the real world. So I thought, simple enough, I'll make one of those! Here is how I created the traveler........using a .032 piece of piano wire, I cut it to the width used and left about 3/16th leg either side, to mount the traveler to the center two knees, after the ends were bent to 90 degrees. To create a base plate, I soldered one ea. , 00-90 size washer to the legs. Gave them a quick wire brush polish with my dremel, then put some black magic marker to the surface for a temporary impression of the finished color. when it's ready to be fastened, I'll strip the marker color and properly prime and paint the metal. It's small, but I like the extra rigging detail the traveler adds. If anyone might share their view, I still would like to know if the single eye bolt mainsheet attachment is realistic , or the liberty of model design! Here are a couple more pictures with the build. I had intended to replace the tiller with a design I will fabricate. The last photo shows the top of the rudder post interfering with the traveler. I will be reducing the height of this by approximately 1/4". It looked to stand proud and at attention! The one thing I noticed with tiller boats, is the point of attachment of the tiller was much lower on the stem of the rudder. The configuration in the kit to me, with so much of the rudder post coming thru the transom, looks out of scale, especially the donut of wood to attach the model's tiller. Just my thoughts!


- 39 replies
-
- 1
-
-
- Amati
- Victory Models
- (and 1 more)
-
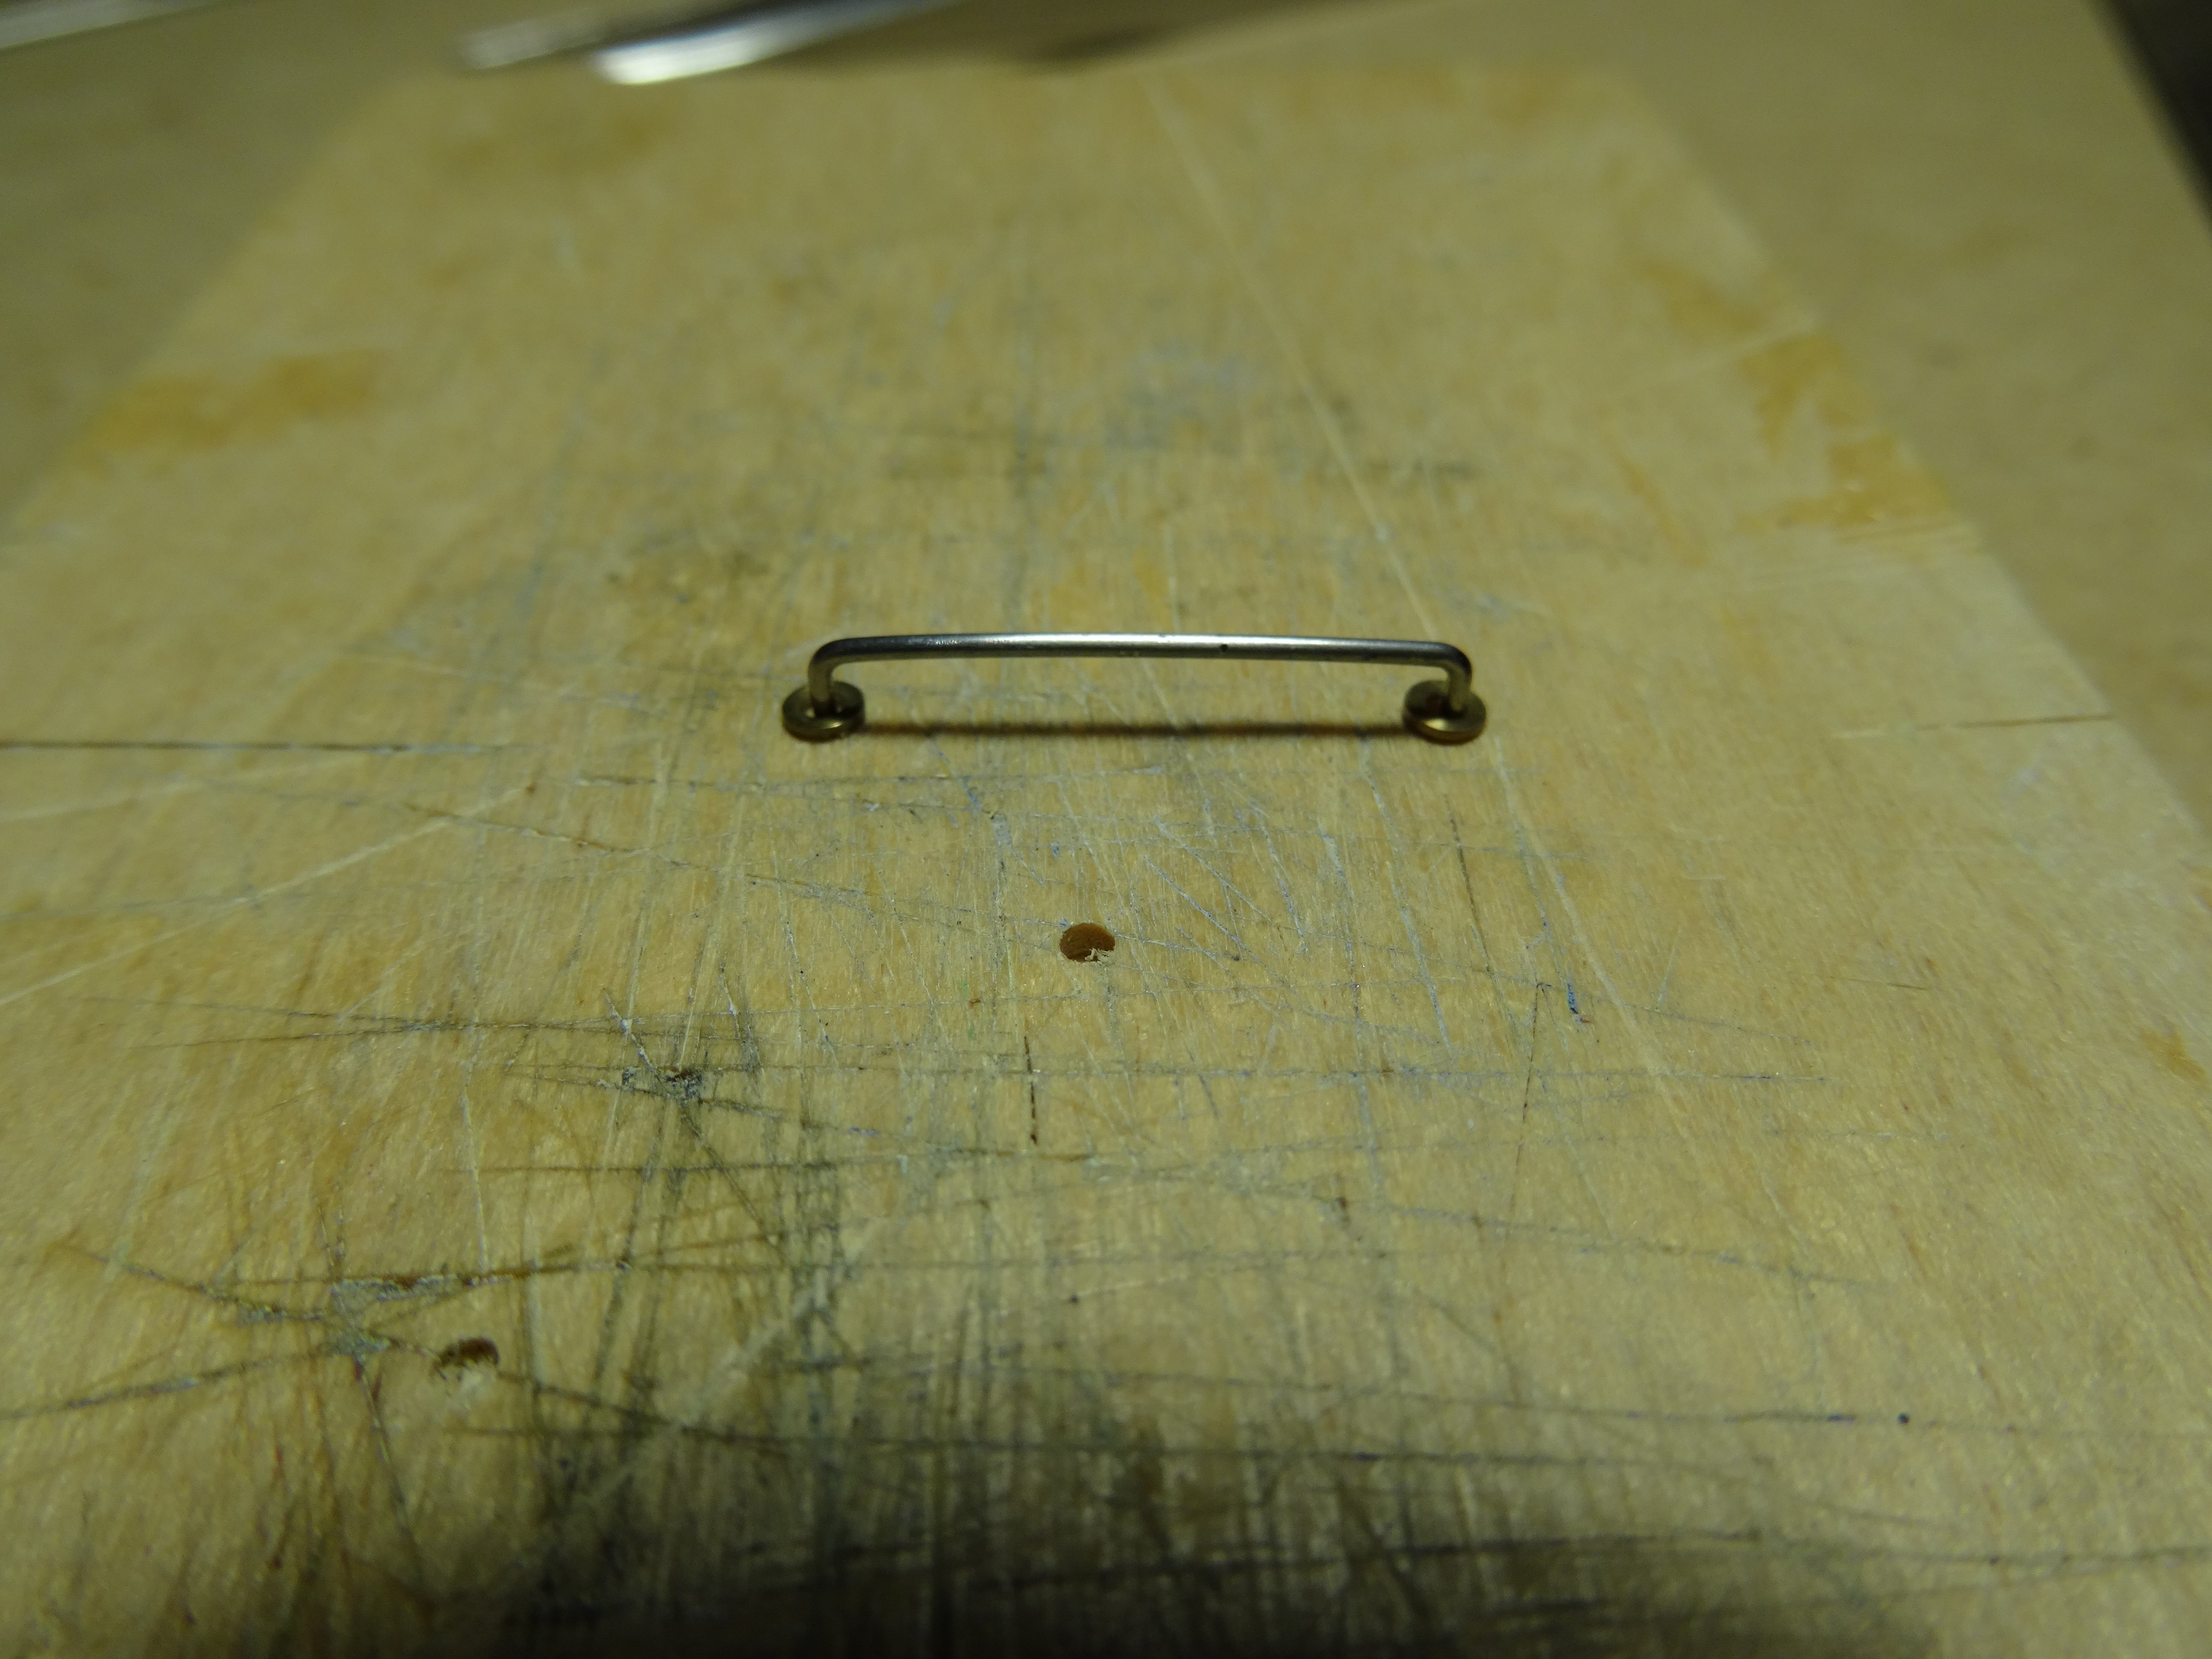
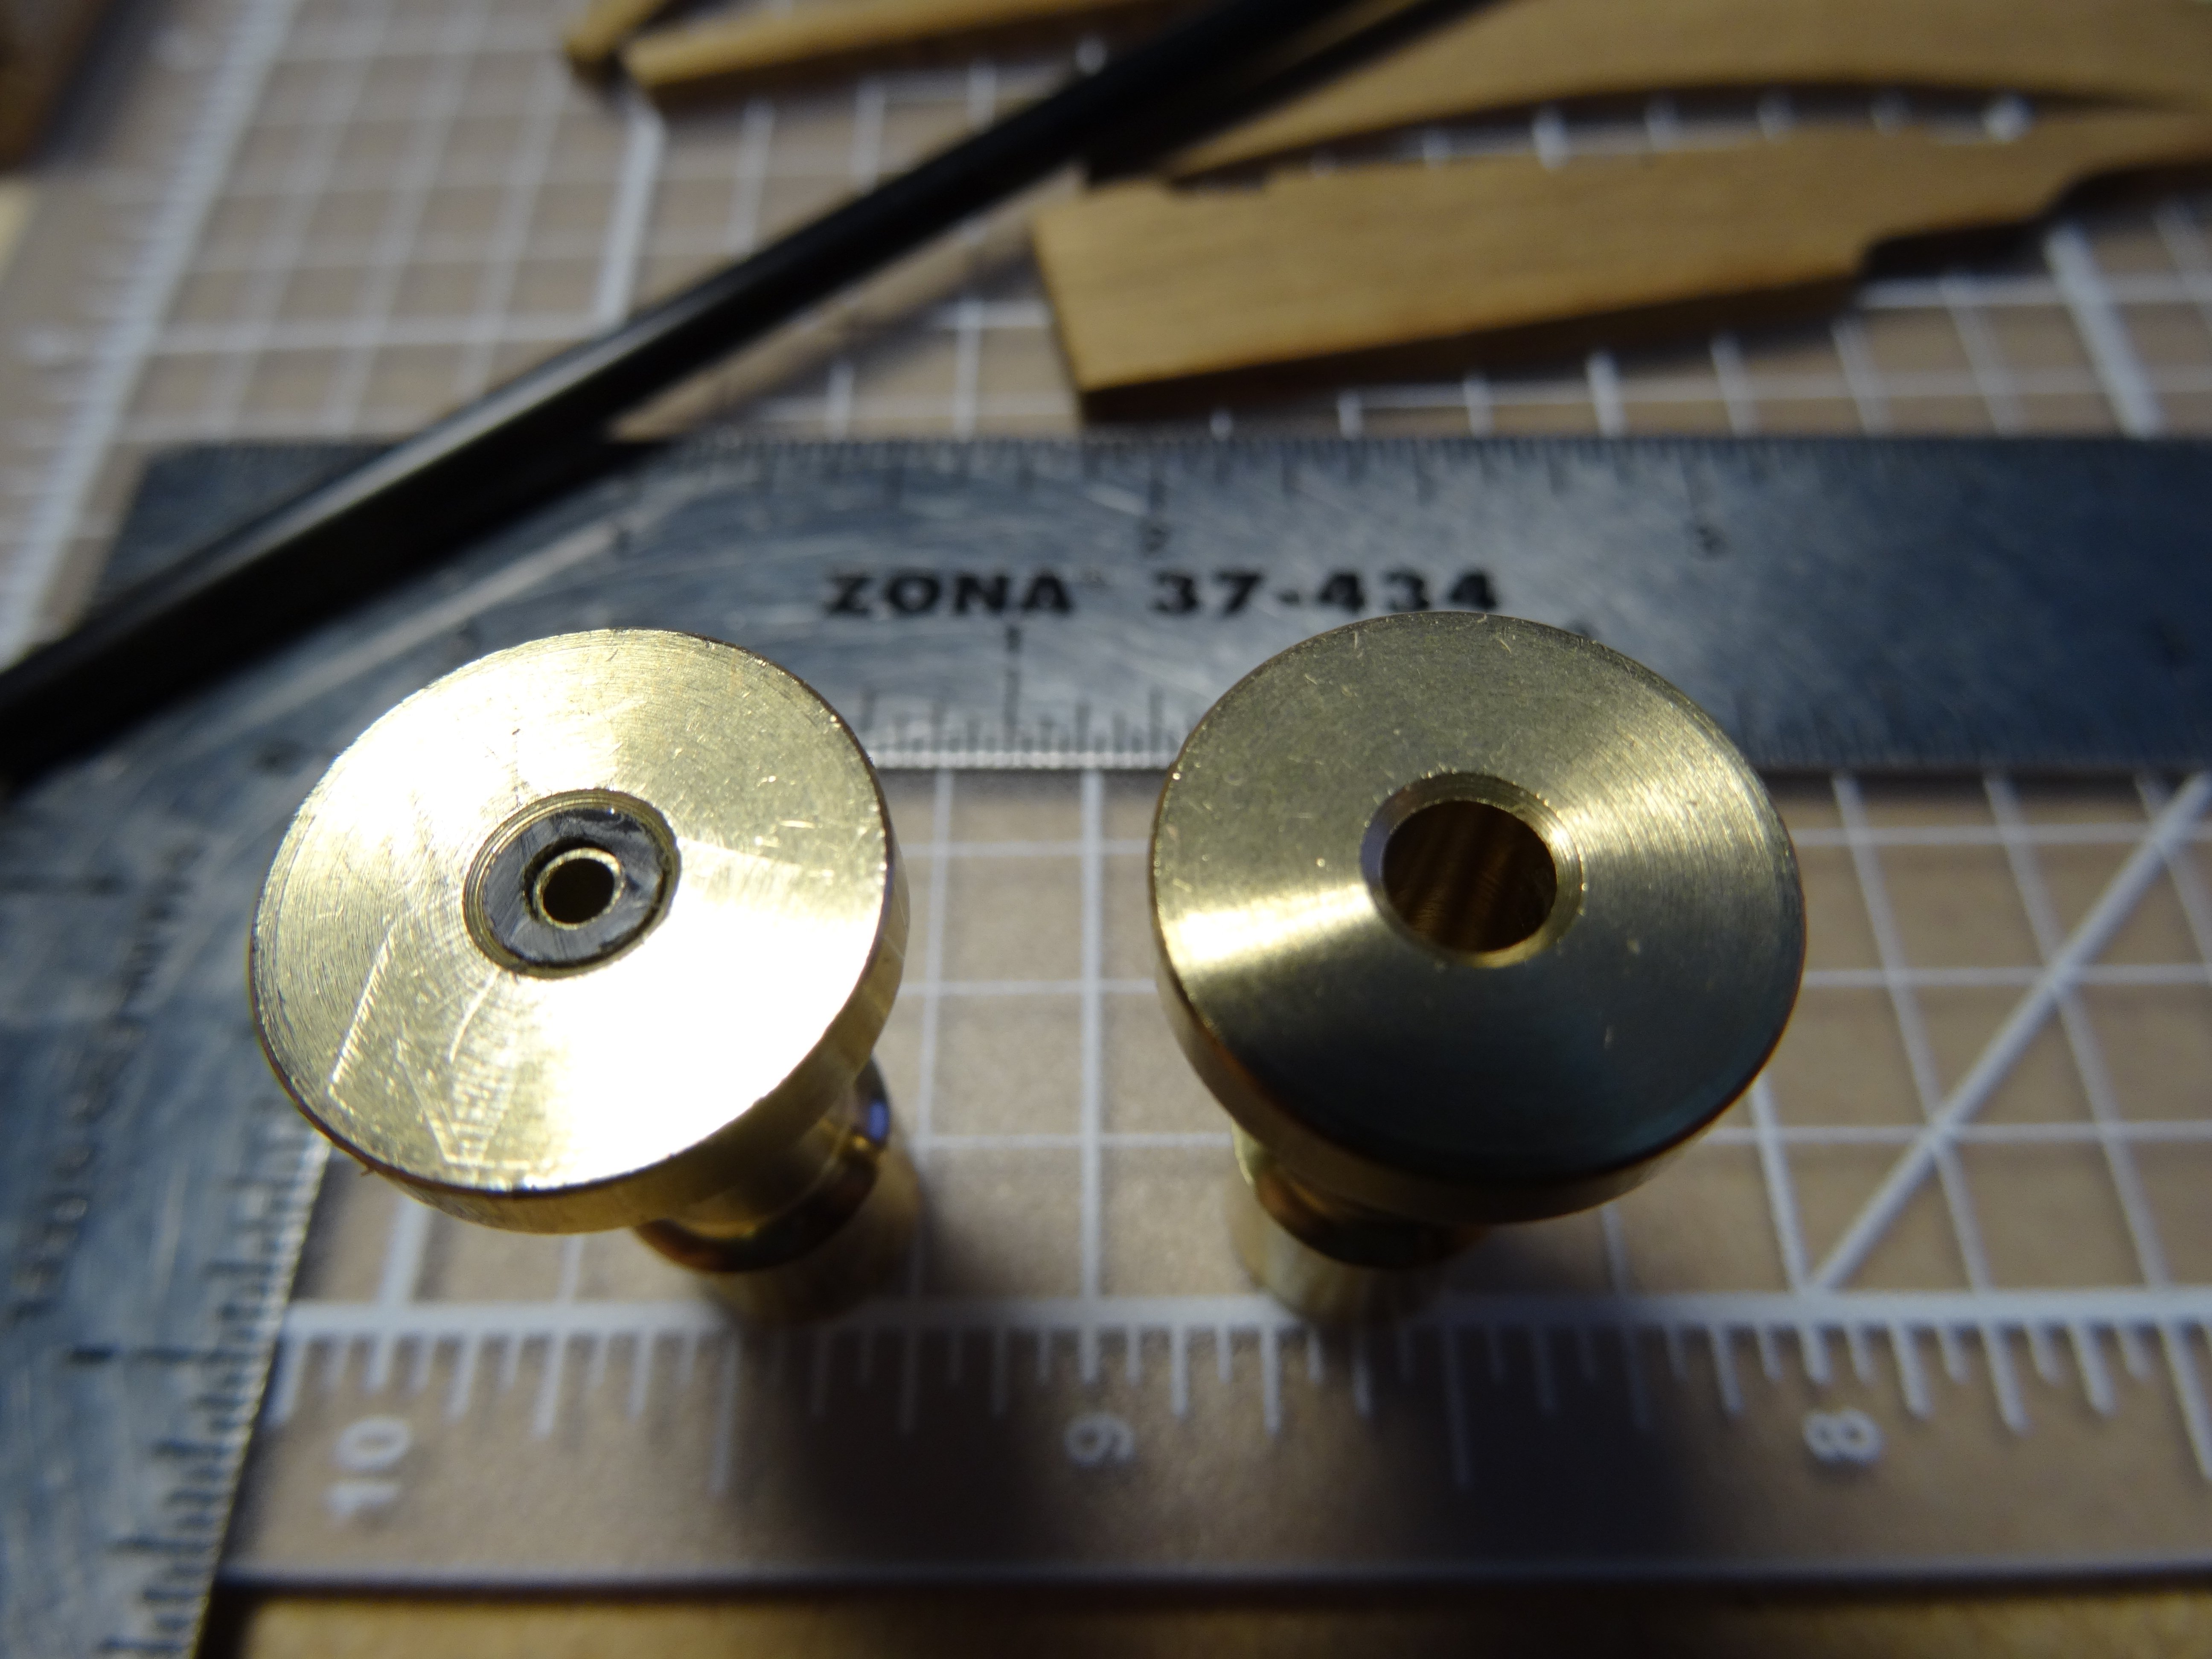
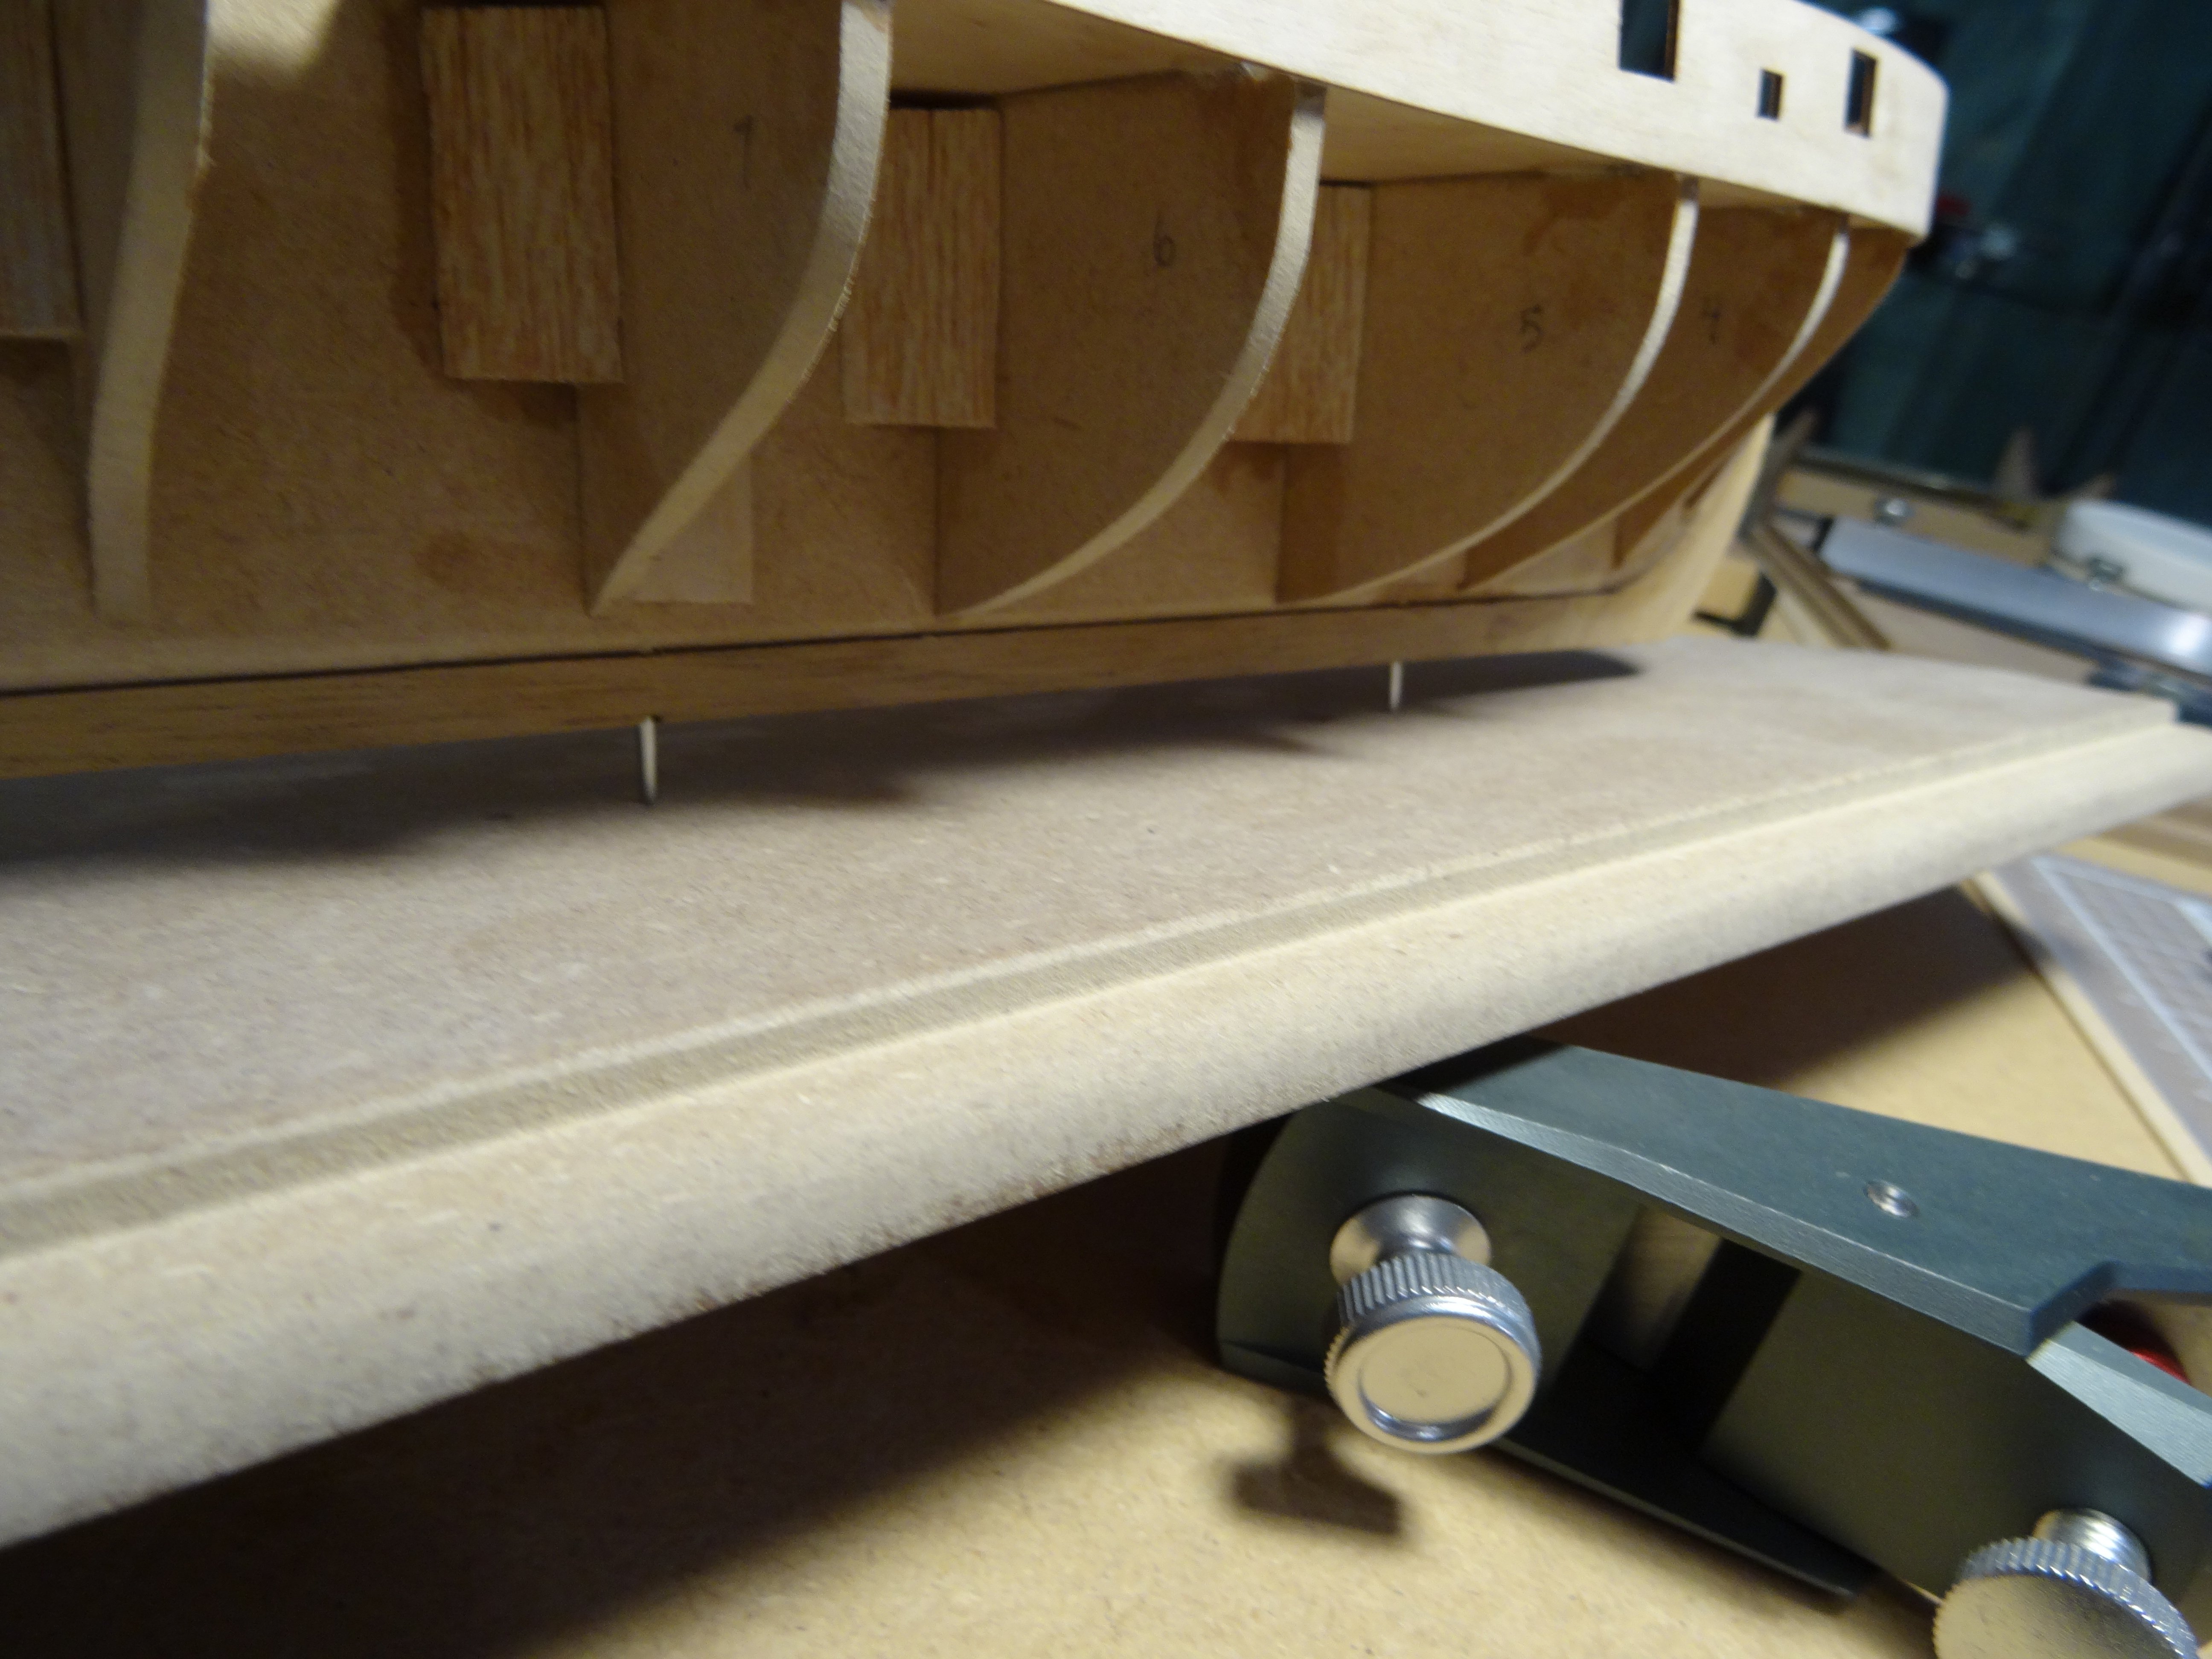
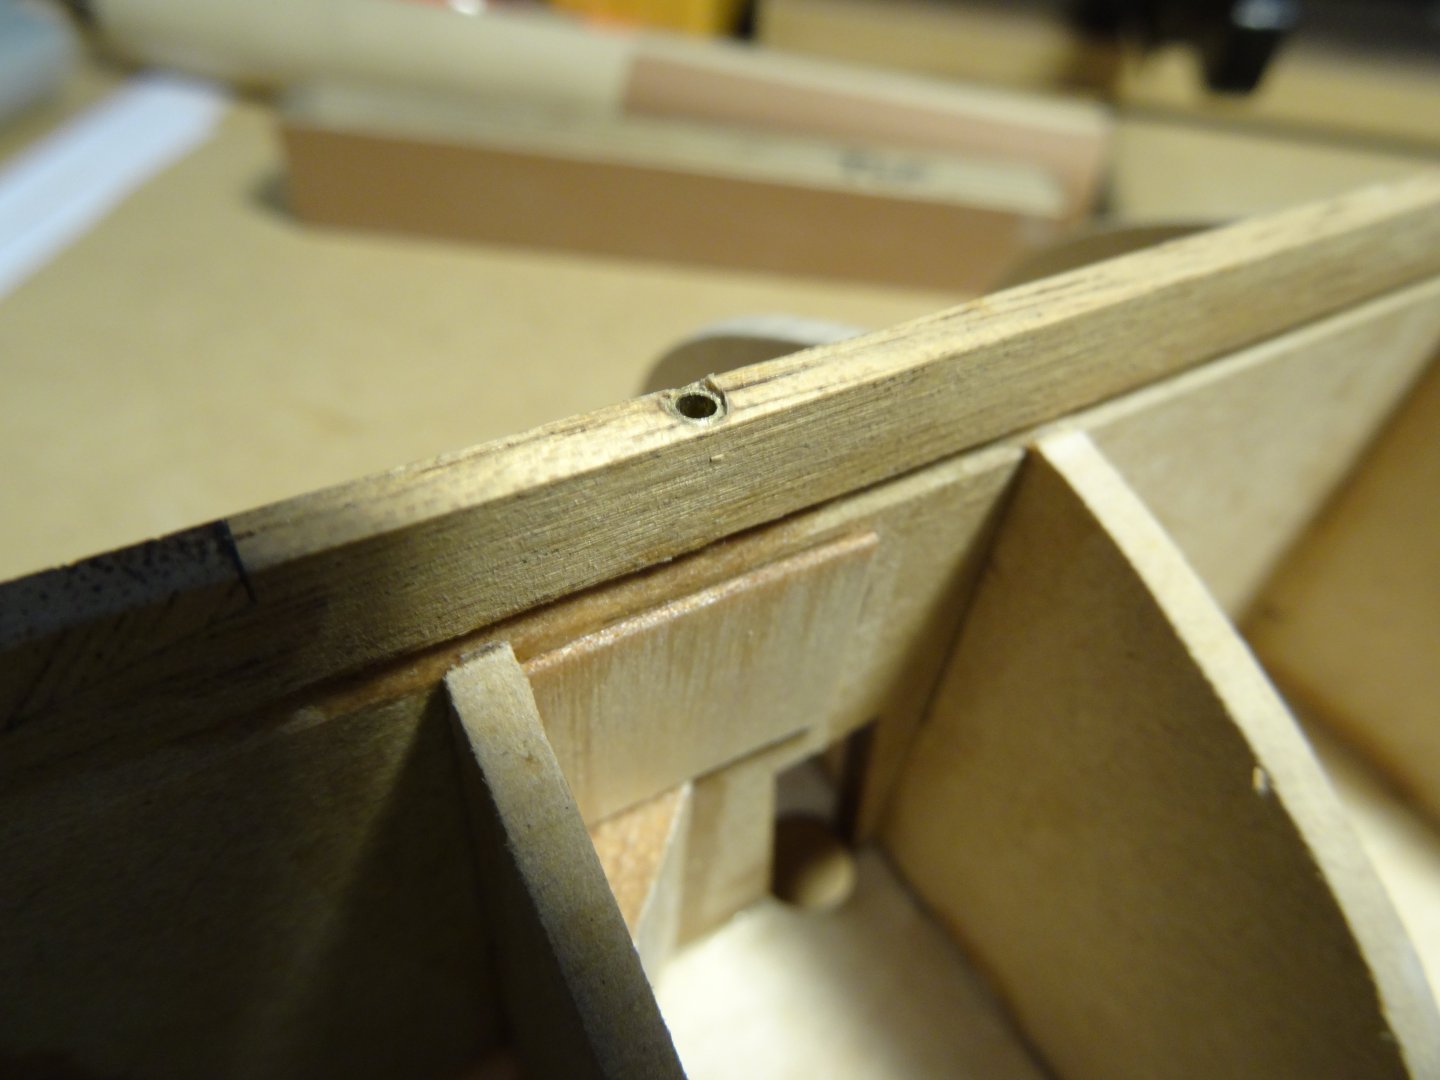
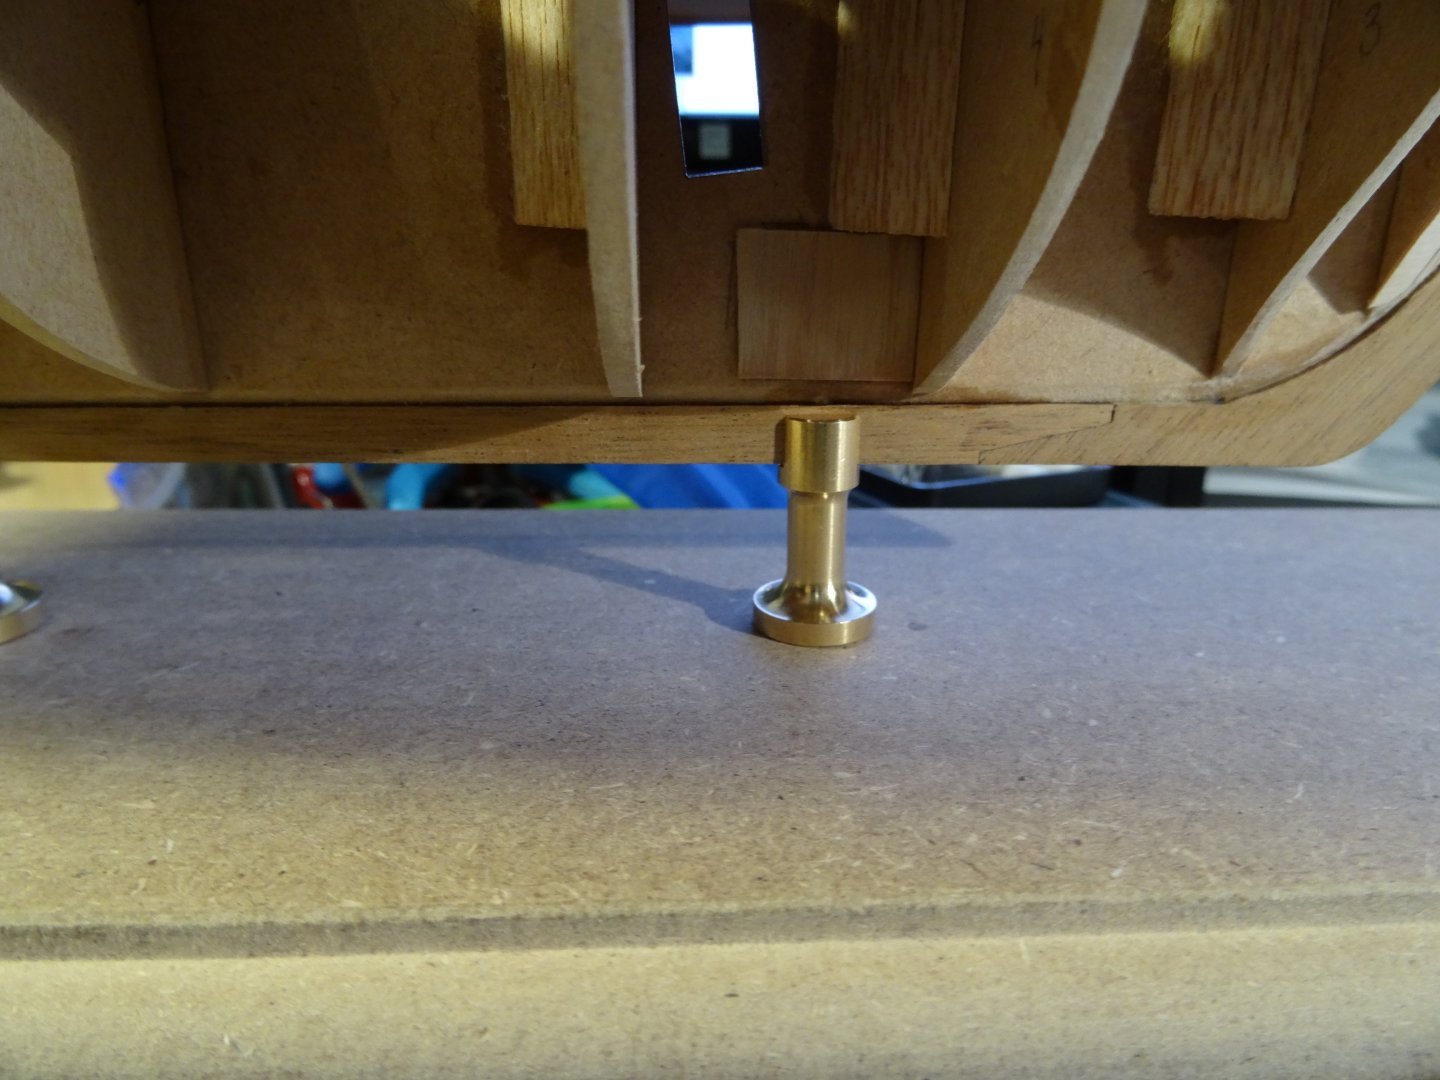
Thanks Chris, Its a journey, that's for sure! I had a look at your kit and build postings and it looks like you'll have your hands full for a while! The ship really has nice lines. Looking forward to your progress. I've been flying RC aircraft and Helicopters since dinosaurs walked the earth! That's when you actually built what you flew, unlike this day and age, you have Foam and ARF's to get you in the air! Most of the builders are seasoned and scale competitive flyer's to compete in the Florida event called Top Gun. I think subliminally, I really yearned to build again!, and all compasses pointed to Ships. So with building in mind, I thought I would detail the method I used to mount my Hull to it's display board. Before I drilled the pilot hole for the 3/32 brass tube glued into the Hull, I shored up the outside edges of the keel former left and right sides with a 3 ply, 1/32nd birch plywood and CA glued the ply to the former. This MDF material that mfg.'s have come to use, is as a frail as cotton candy! So the ply really gives that overkill support I like, for the next time I bump into my model. I measured the ID of the Pedestals to be 5/32. Too sloppy to fit over 1/16 piano wire so I built up the interior with a very snug Nylon tube about the same size OD, cut to a length of 5/8. Pushed it inside from the bottom of the pedestal and then drilled out the center of the tube to 3/32 so to fit the brass tube that will inset into the center of the pedestal. That way, the pedestal will always be centered to the 1/16th wire.


- 39 replies
-
- 5
-
-
- Amati
- Victory Models
- (and 1 more)
-
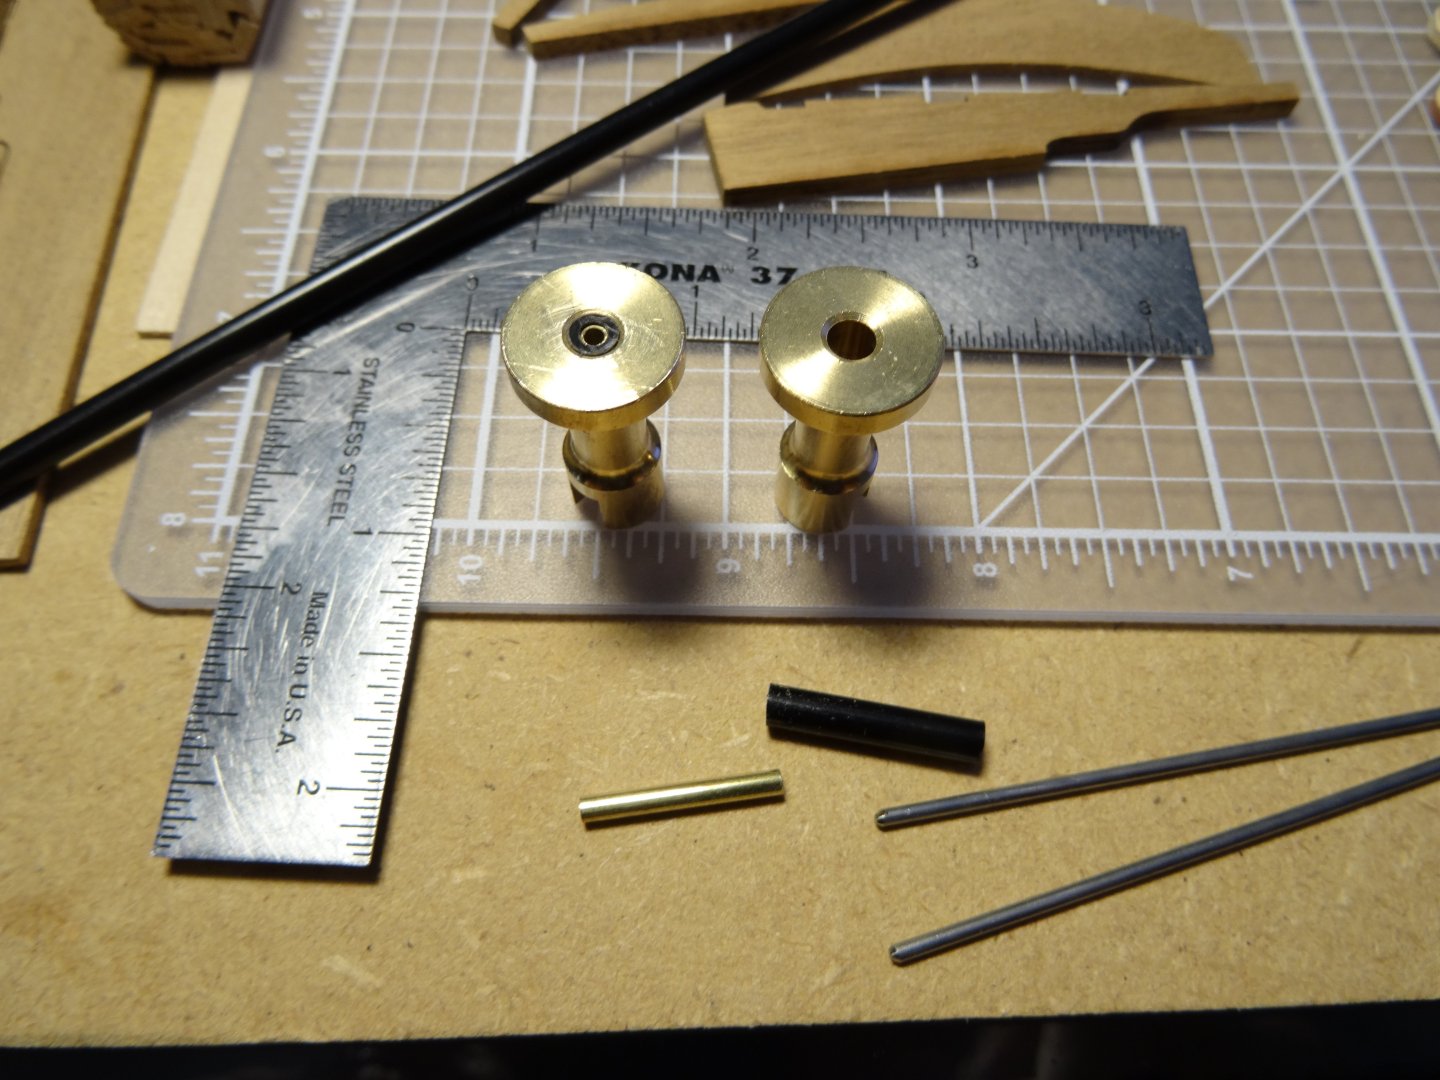
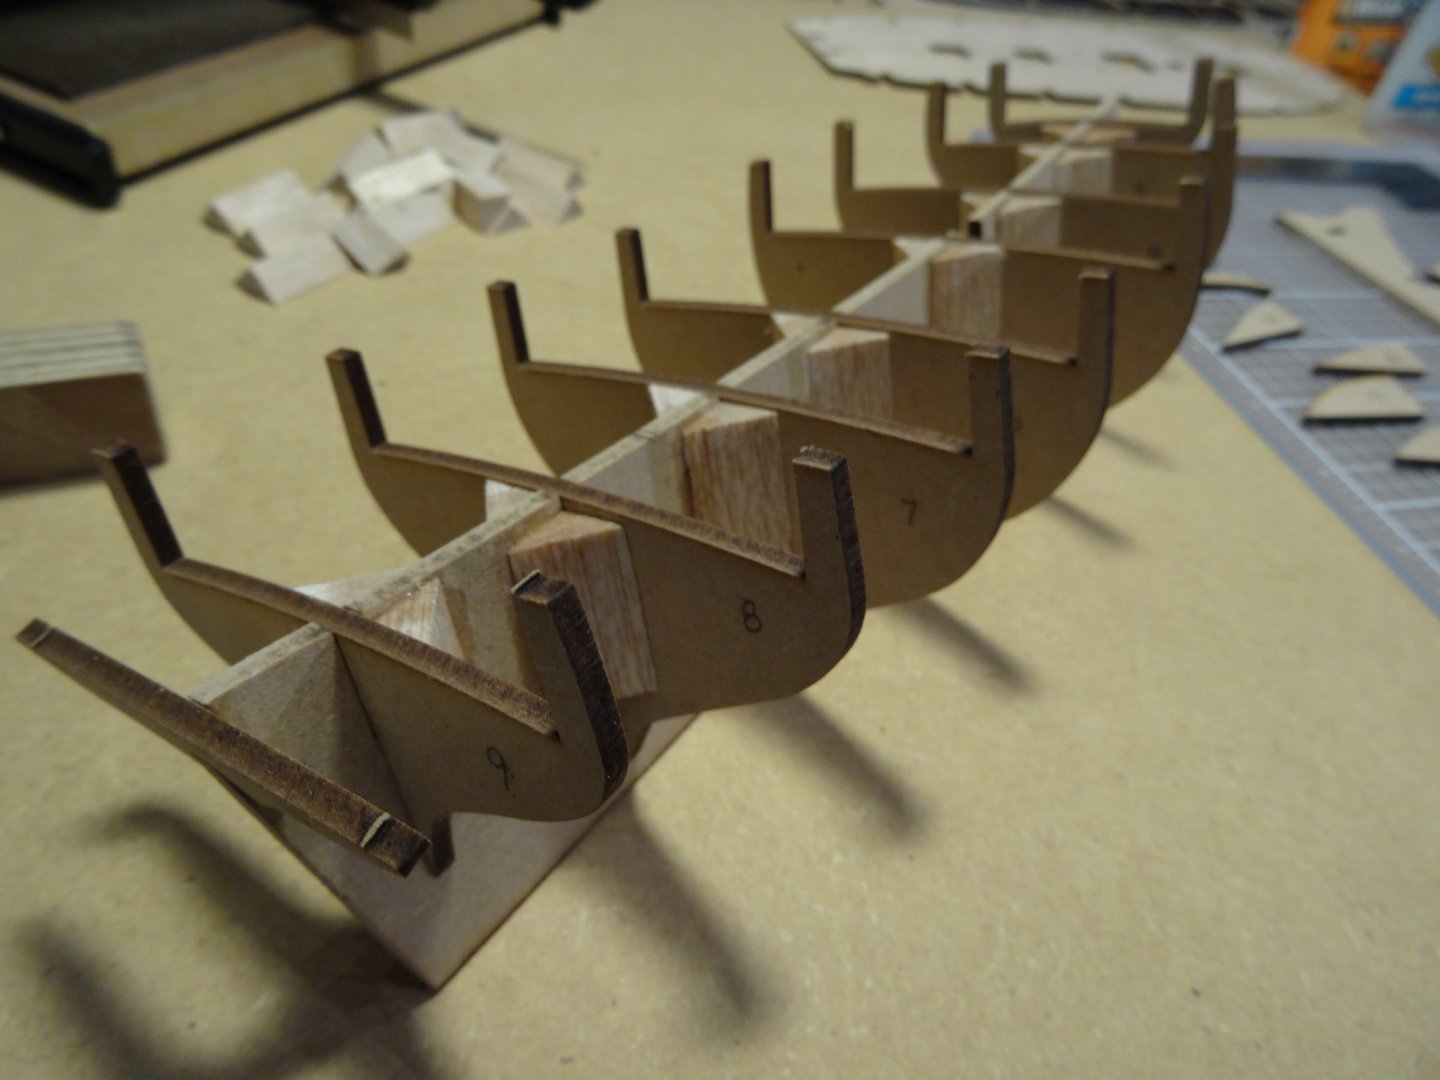
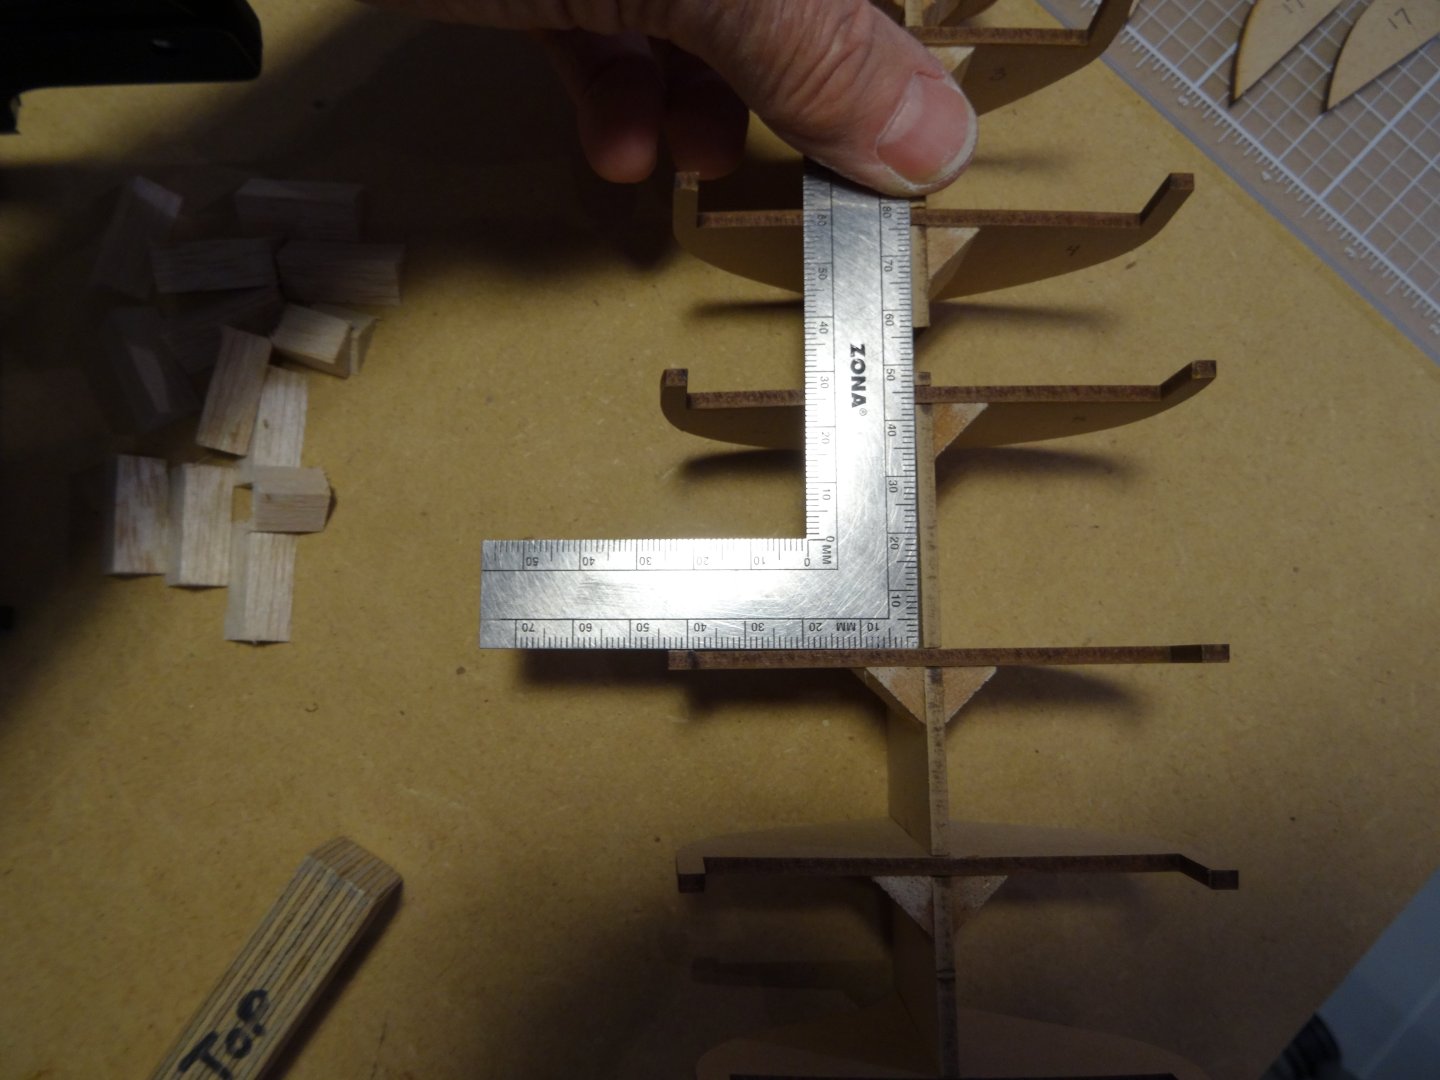
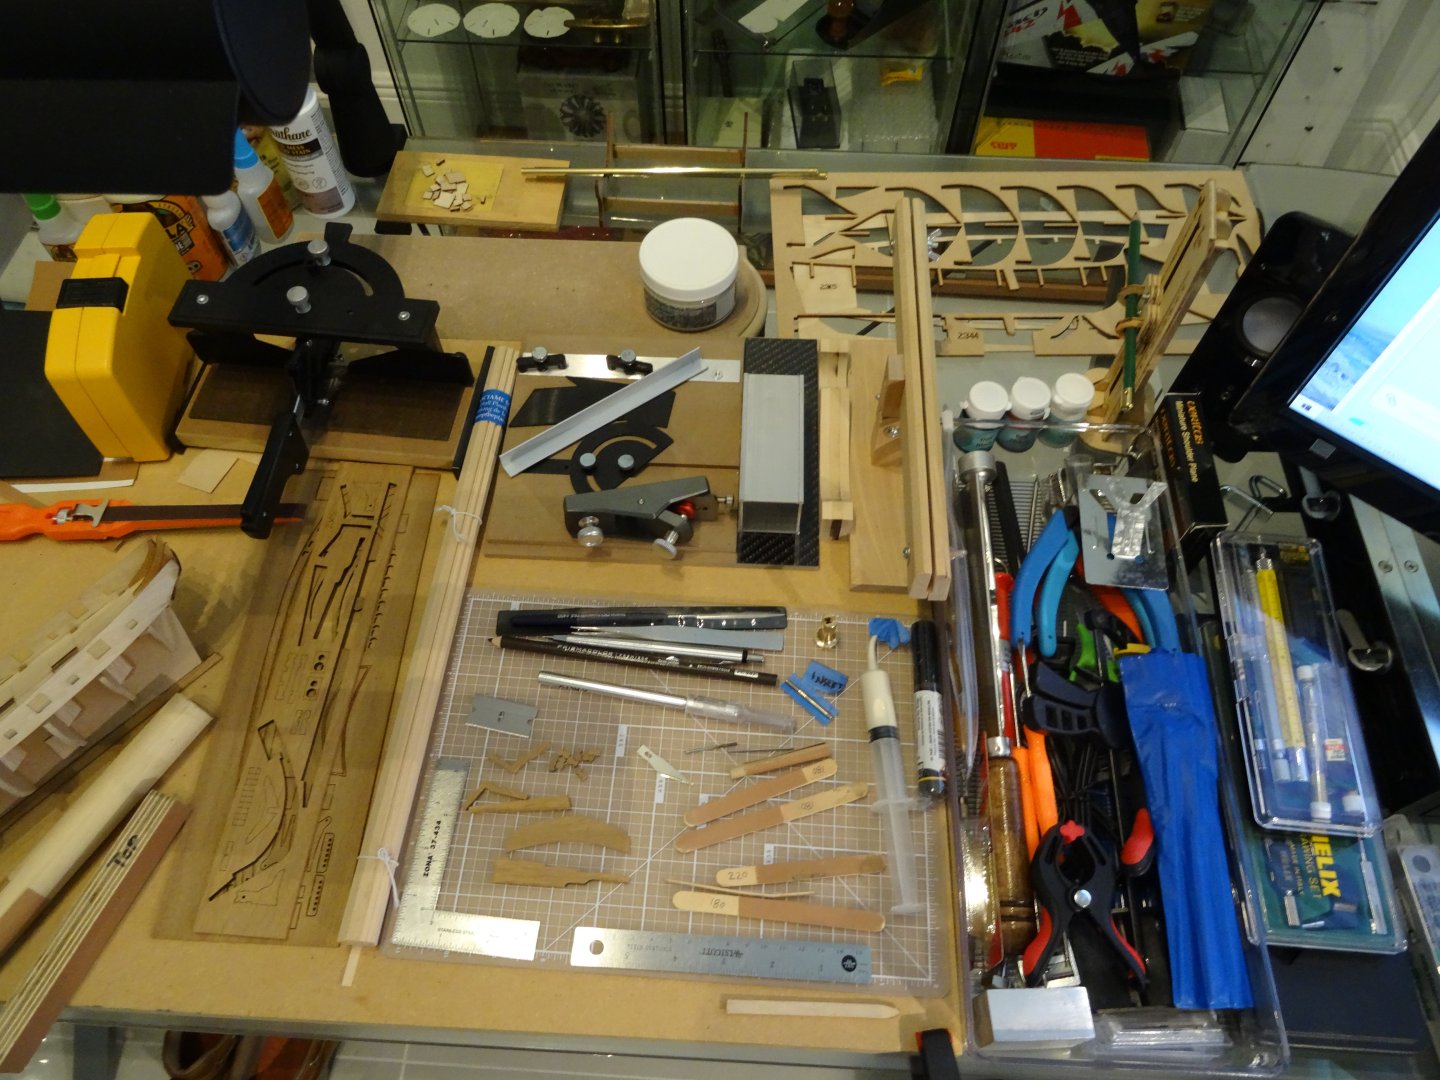
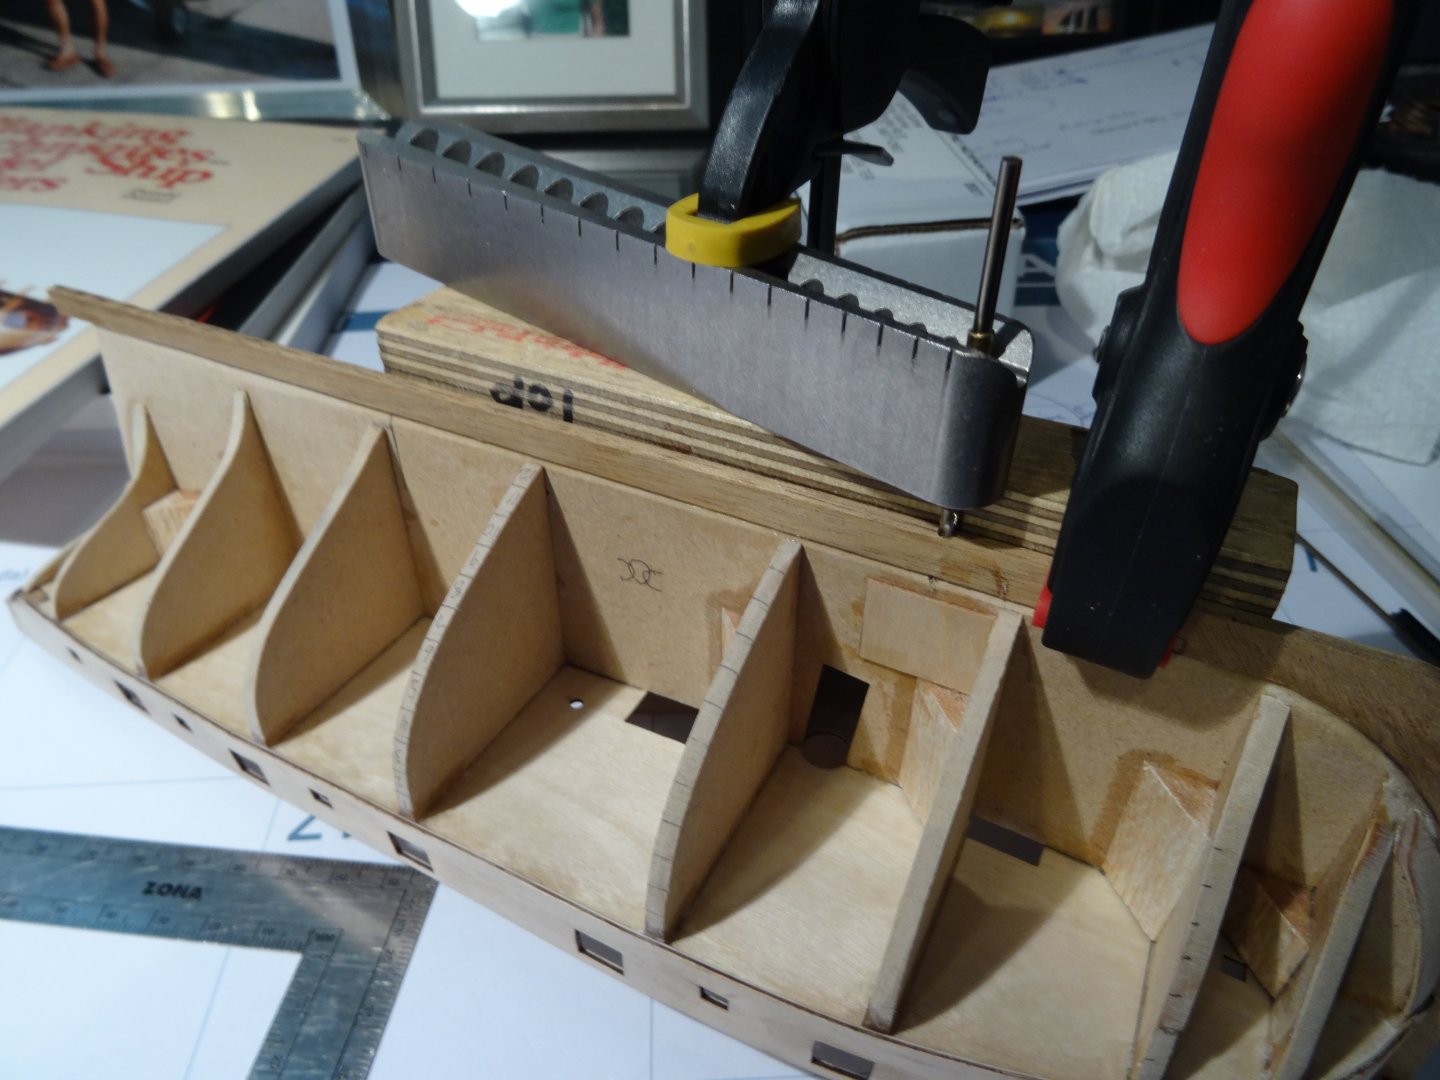
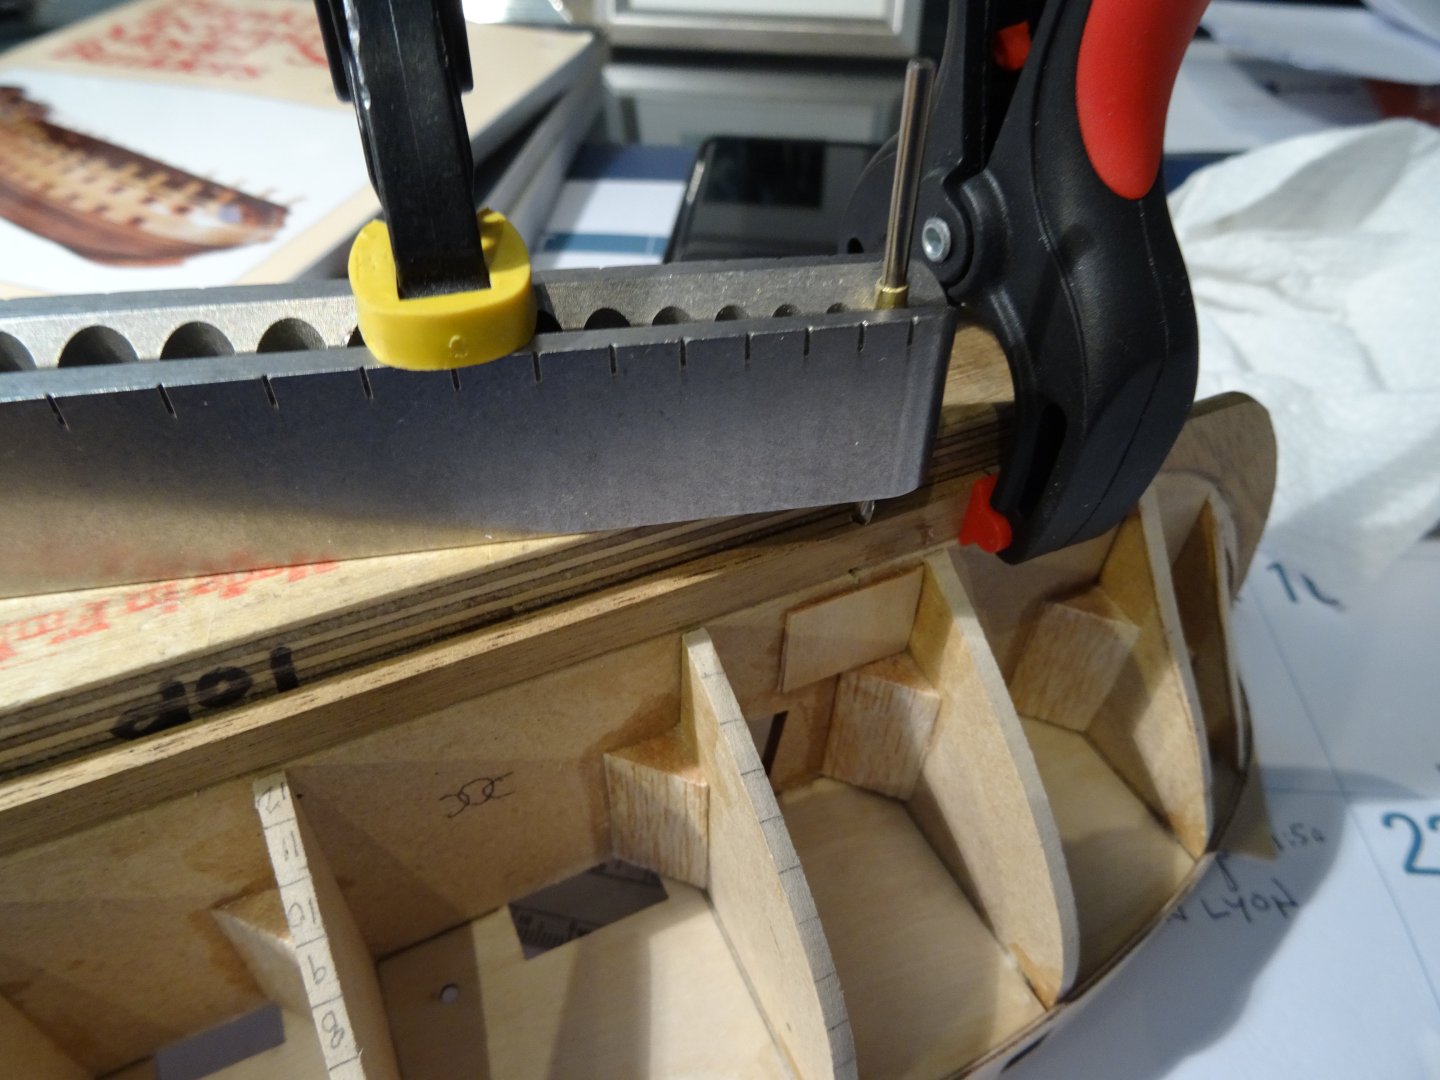
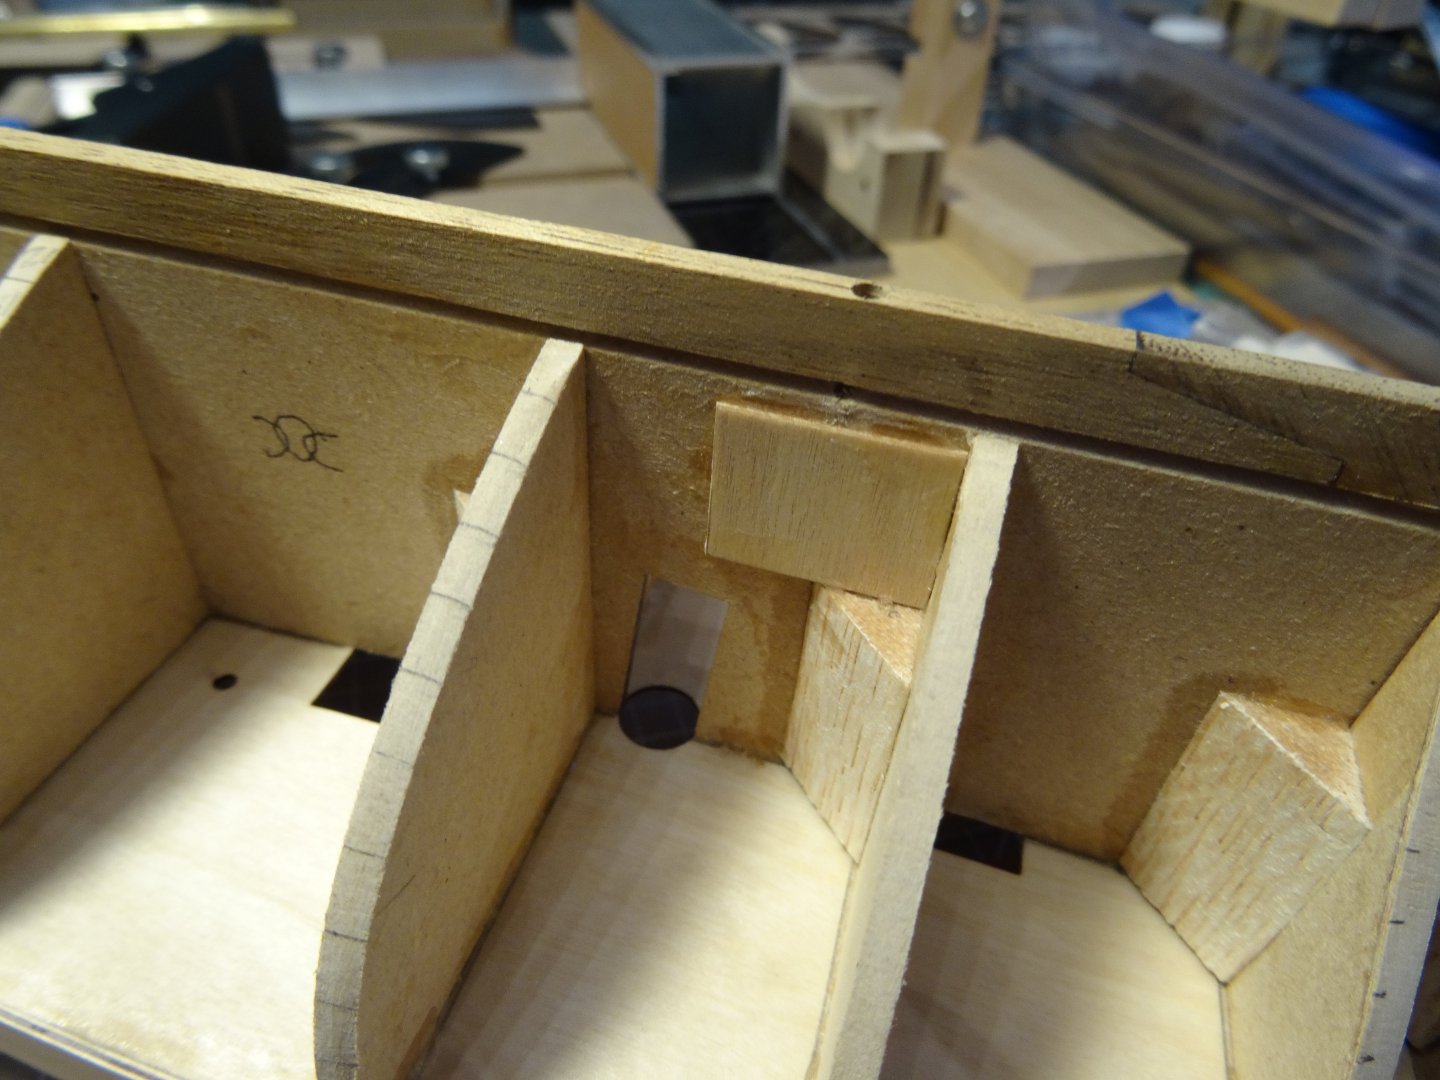
What it is that provides motivation for me, when building a model, such as a wooden boat, is taking on a bit more than I am skilled to do, then applying those newly learned skills to my project. There are so many more steps involved when building a model boat made from wood. Much like any new skill, it must be mastered though conscience effort, ( Visual Thinking ) to include all the steps applied for that particular application learned. NO SHORT CUTS! Hence the challenge and reward of accomplishing your vision of the completed project! You show me instructions on how to assemble an IKEA cabinet and bam! It's done! Open the plans to build a model ship, and you unfold the plans of History, Research and Skills to be learned. Hopefully I'll learn the rhythm and artful soul of this hobby! With a few other tool boxes and tools not shown, all recently purchased is a product of a commitment to build. There is nothing like falling short of the proper tool to ease the pain, or apply it if you miss! This is the start of my Amati kit, Lady Nelson. As I view the pages here on MSW, there is incredible talent. All well deserved for putting in the time to do it correctly! So right now, I feel like a retarded Moose in the woods, getting my antlers hung up on all the branches of my build! Its one step at a time ,from here on in! *So my first lesson learned! As I hear the term BLUFF BOW, especially with a model of this size, ( Quite small), It would have been helpful to fill the forward spaces between the formers with hard Balsa wood, to assist forming the shape of the Bow as the formers are tapered. That would just give such a positive picture of the visual line the planks will run. The stern on this little ship is pretty sexy as well and those filler blocks would ease the stress of shaping the strakes in that location. But with the help of the You Tube video , by Tom Grigat (A time lapse construction build in Motion) and the book by Donald Dressel, Planking Techniques for Model Ship Builders, I can picture how, the correct way to lay the planks will help overcome the Bull and Plow method we might be prone to use! LIKE, All clamps on DECK! Get out the entourage of nails ,rubber bands and anything sticky! My gosh, I've see how skill, puts this one to sleep with ease! I see this now, but hadn't read the concept until after the completion of a few steps as shown. *I found my formers to be down right loose! So I came up with using 90 degree hard balsa supports to assure they would be square to the backbone. * I found the hull attachment to the display base, rather vague, but knew I had to formulate something before the planking goes on the hull, as I want to use the supplied brass pedestals. The keel is 1/8th inch thick, like walking on THIN ICE! *So this is how I did it!....I used my V-Drill Guide. LIKE A MINI DRILL PRESS. Blocked a true 90 degrees placed block of wood, clamped next to the keel. Since the smallest hole on this tool is 1/8th, I needed to drill a hole 3/32, for a brass tubing sleeve I would glue inside the keel. So I sleeved the hole of the tool with a 1/8th length of brass tube. That gave me the 3/32nd diameter I needed to drill the keel. The ID of the 3/32nd brass tube is 1/16th. Perfect for my plan. Why, because I will use a short length of piano wire glued into the base when completed as the alignment pin to slide into the glued in keel tubing. So not shown, are the brass pedestals in-between the display base and the hull, I would like to sleeve to 1/16th, the interior of those bases which are 5/32. That way, the pedestal will not float around and will slide over the 1/16th wire. Then the Hull will come to rest on the Pedestal and can be lifted off if needed.
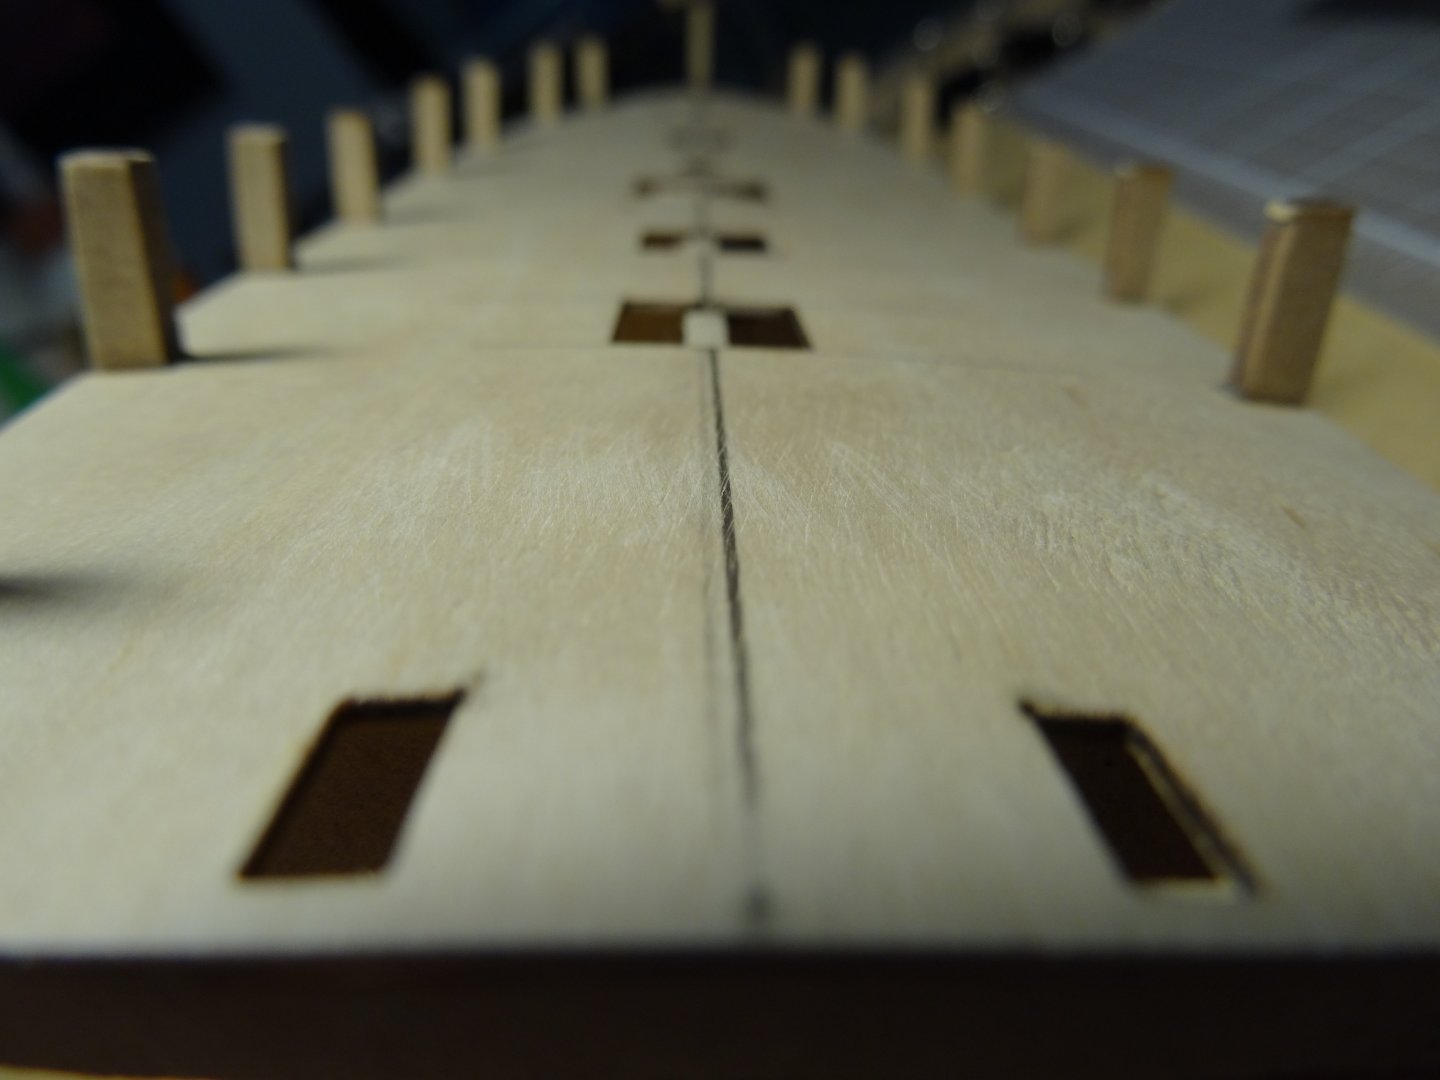

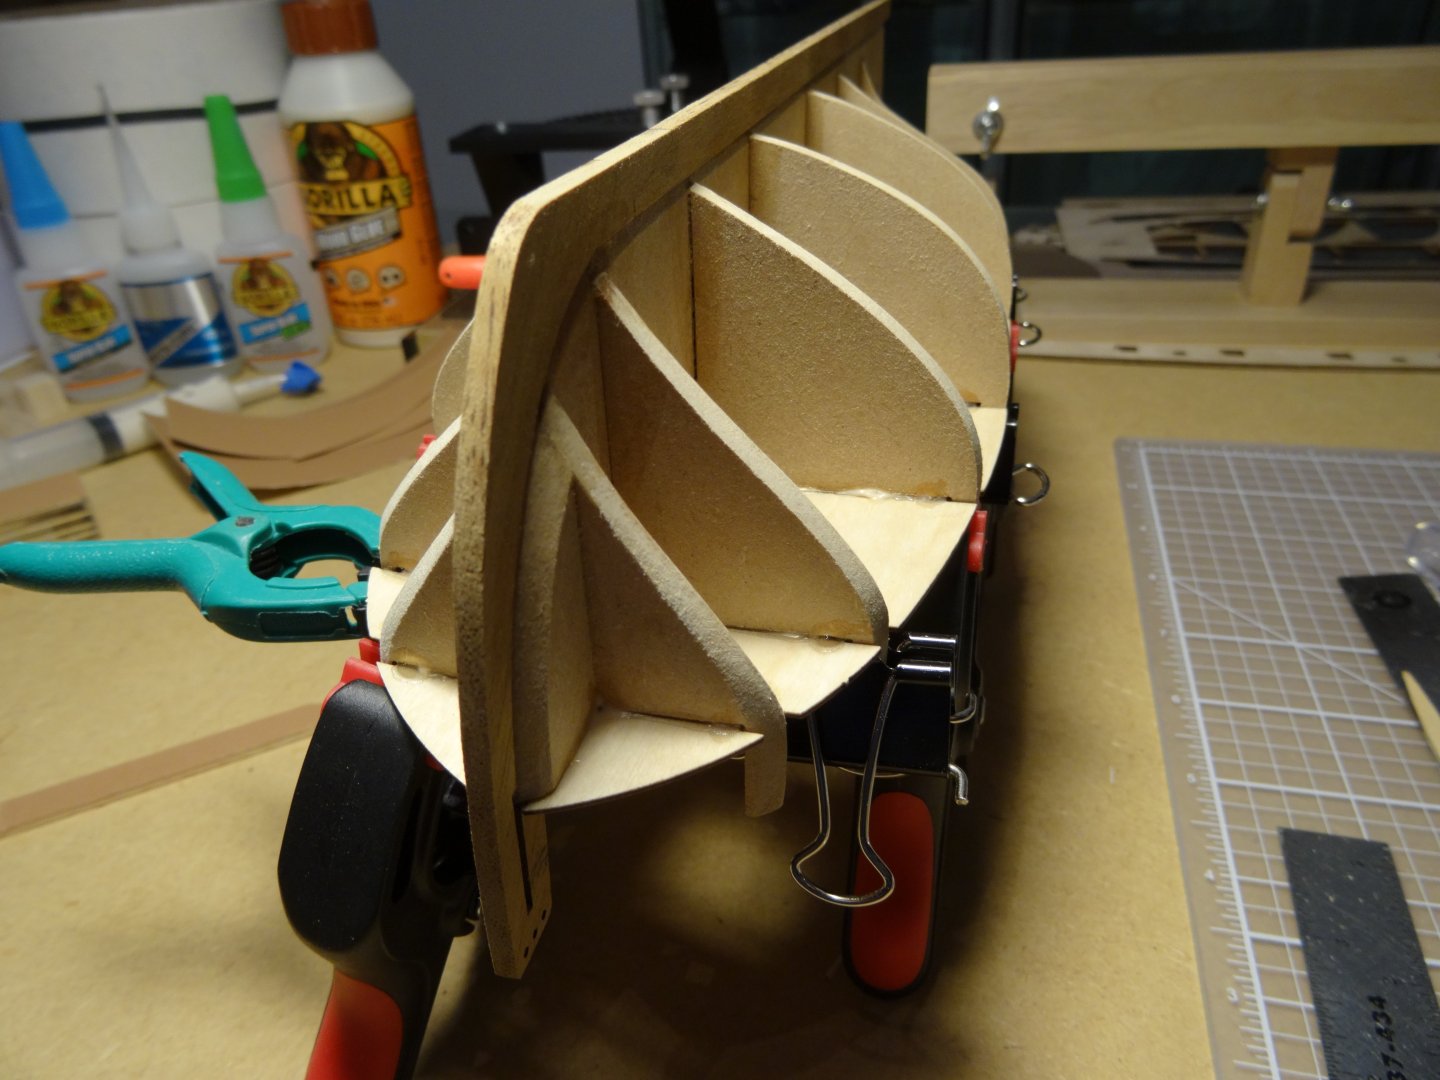


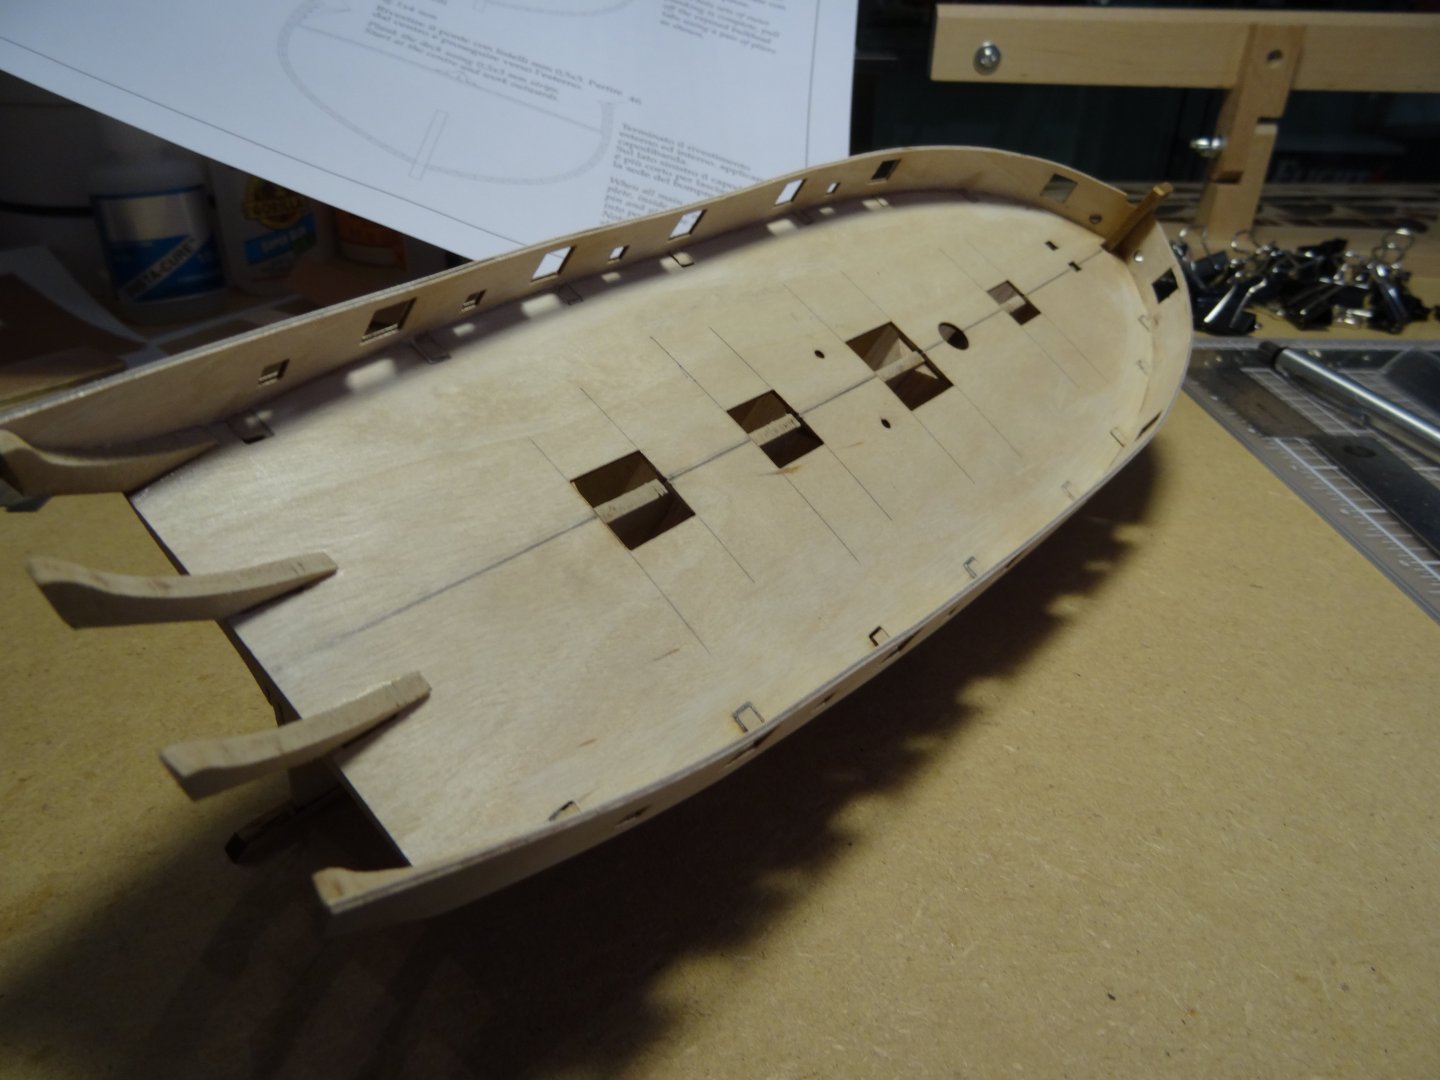


- 39 replies
-
- 8
-
-
- Amati
- Victory Models
- (and 1 more)
-
Going back to 1976, with the Bicentennial Celebration, inspired by the Tall Ships that sailed into Newport Rhode Islands, Harbor and having been raised with the local Heritage of Herreshoff just up the road, wooden boat building had made it's impression on me. Out of admiration for the craft and the art form that wooden boat building is, it wasn't long before I had subscribed to Wooden Boat Magazine. I was drawn to the flawless , high gloss finishes of the intricate woodworking marvels, whether 12 1/2' or larger. It was all about the mystery of how nothing was straight and built with such grace and non stop detail! A replica of L. Francis Herreshoff's, 72-foot Ketch, Ticonderoga was in the harbor during that Bicentennial Celebration, though the Hull was built using the West System, the beauty of that boat spilled over, exposing the crafted of boat building. It was around that time I discovered our family tree had a Shipwright in England, going back 6 generations. The photo I was shown displayed a 5 masted Schooner, with a massive crew of boat builders, all with tools in hand, standing before the Hull at Dry dock, like ducks in a row for the attention of the photograph taken! It was at that time, I had been subliminally hooked on the sexy curves of a hull and it's rigging. It has been with appreciation of detail and for many years, I found myself building and modeling a variety of different hobbies and have come full circle back to boats. What should I build? That's when I came across M S W and with a little bit of research, decided upon the Amati kit of Lady Nelson. Stay tooned as I get my act together, to bring that ship to life! ( As best I can! )