W4LKR
-
Posts
33 -
Joined
-
Last visited
Content Type
Profiles
Forums
Gallery
Events
Everything posted by W4LKR
-
This is looking really good! Thanks for the inspiring photos. Yesterday I got my Bluenose kit out for the first time in a while. No time for modeling in 2019, hoping this year will be better. I'm still installing bulkheads...
-
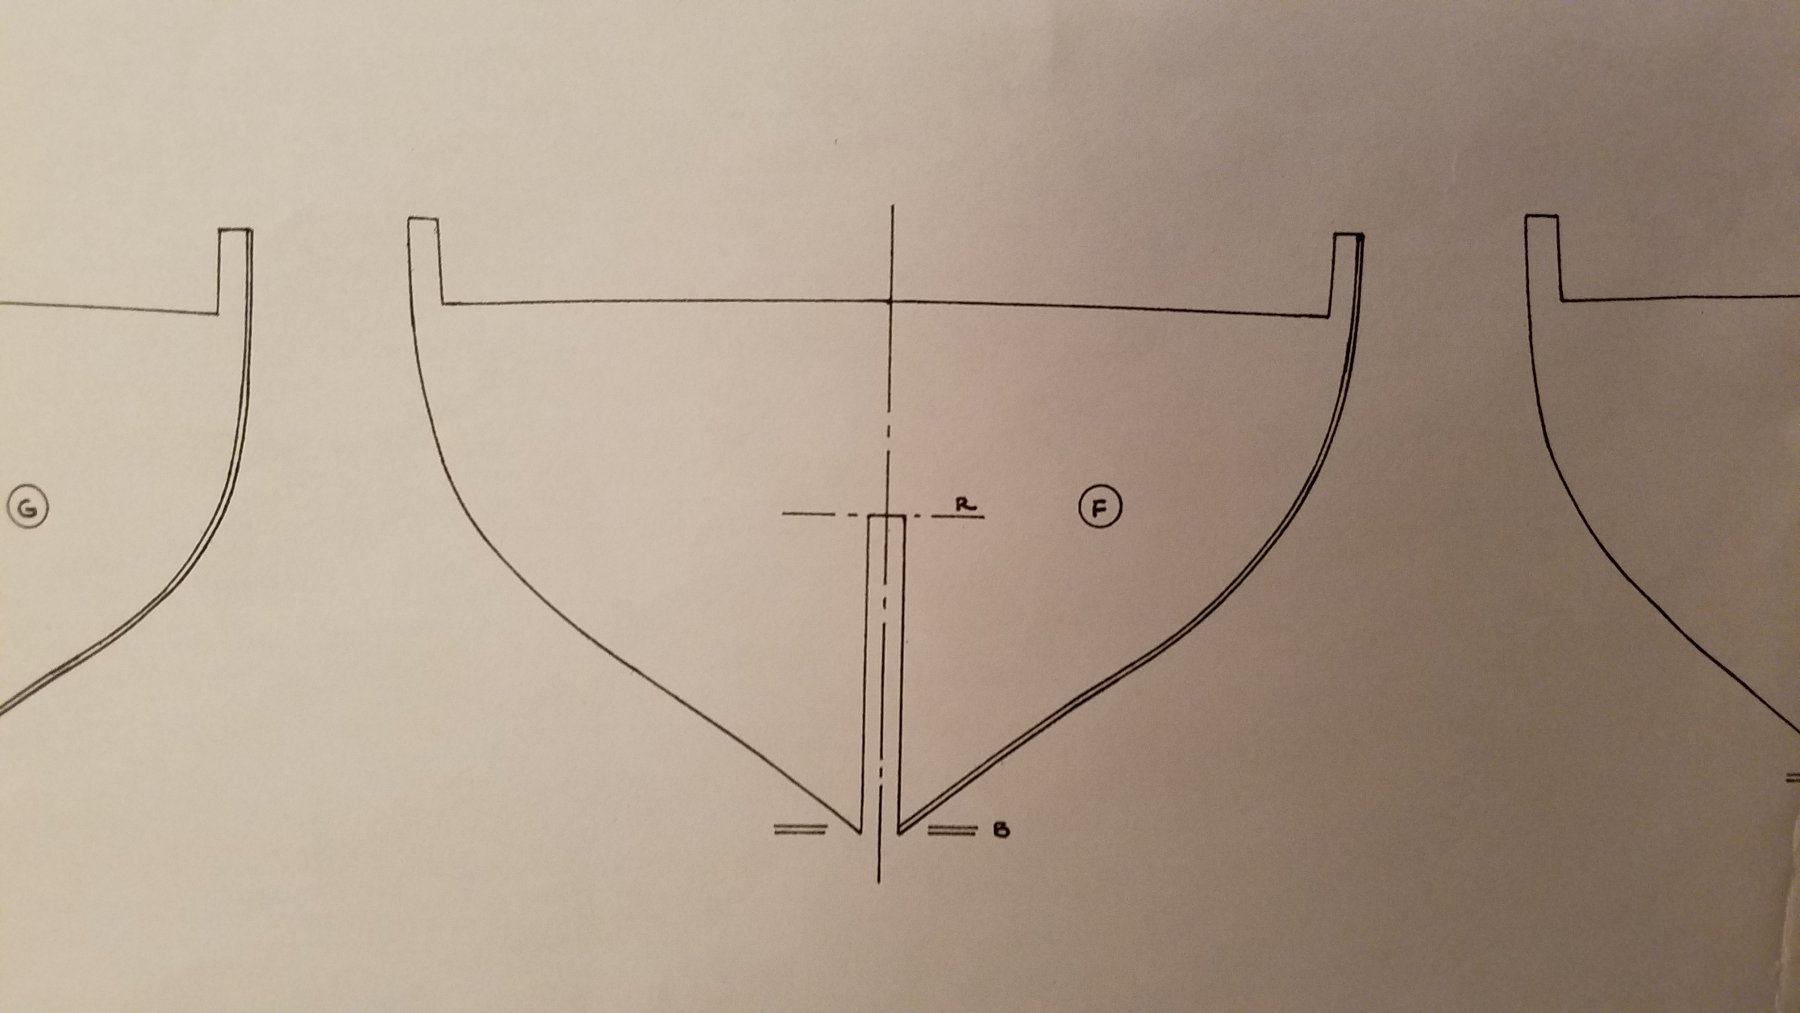
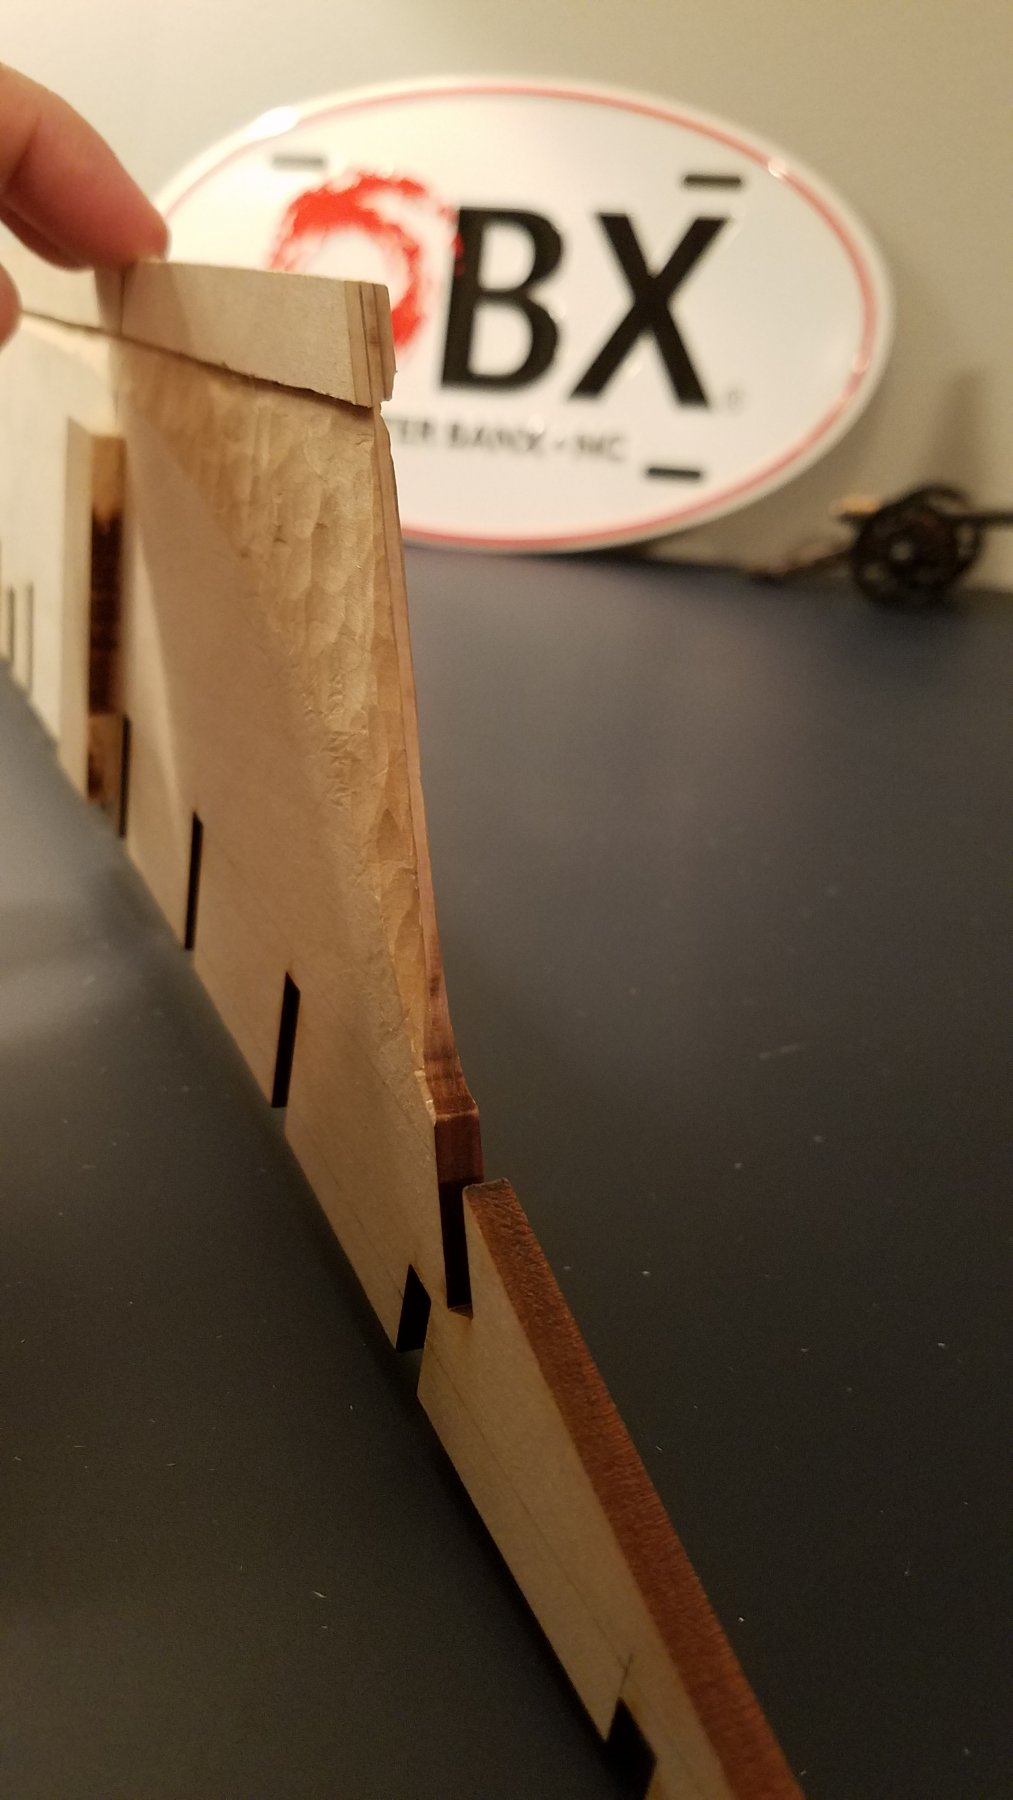
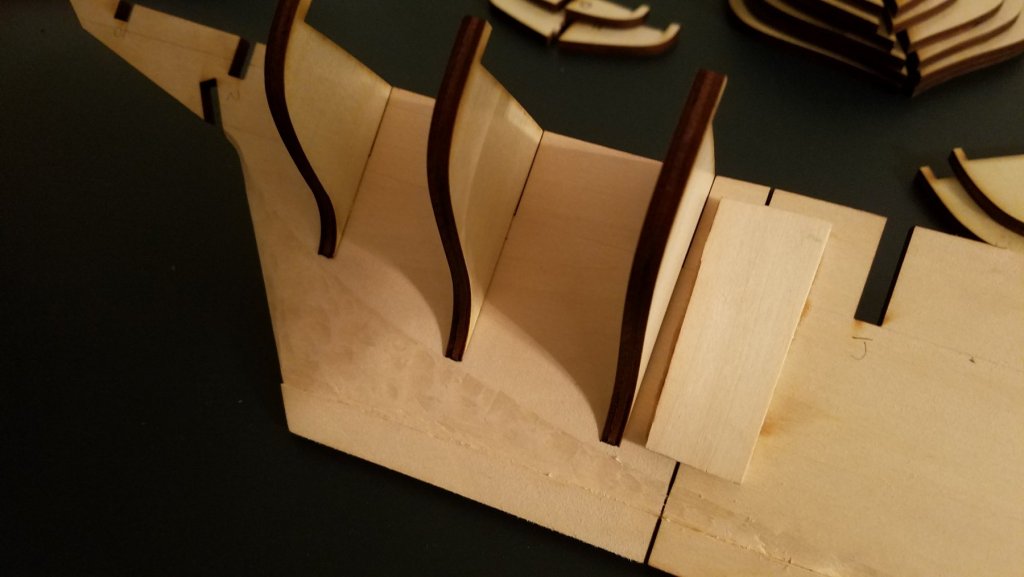
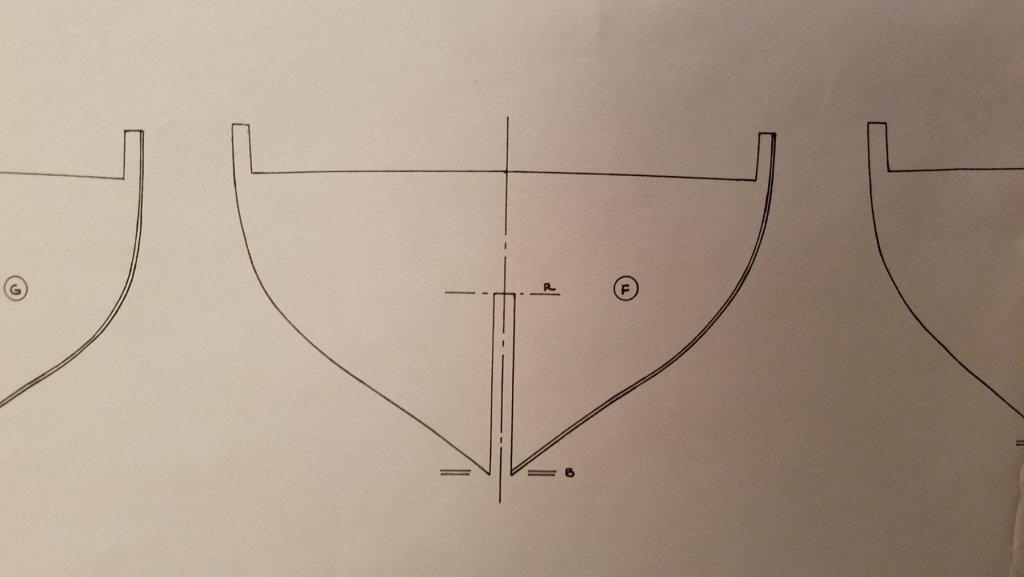
I'm building the Bluenose kit by Model Shipways. I've recently completed the rabbet, tapering of the stern and stem. Pretty soon it will be time to install the bulkheads. While looking at the plans and test fitting the bulkheads to the slots in the keel, I've noticed a couple of things: 1. Some of the bulkheads don't extend down to the bearding line that marks the upper edge of the rabbet. Here's a shot of bulkheads K, L and M. The middle bulkhead (L) in this image is the least offender. I would think this is a problem because it will interrupt the curved profile of the planking. Is there a best practice in this scenario? I've considered scratch building replacements for the bulkheads that are undersized. Another member who is also building this kit used wood putty to sculpt in some filler at the very bottom, but I'm less confident in my ability to get a good result with that method. 2. The plans also depict each bulkhead with a second edge line drawn just inside the true edge. The second line marks the forward edge after faring, whereas the outermost line marks the aft edge which in theory receives almost no faring I suppose. I'm curious if I should trust the lines depicting where the fared edge should fall after sanding. If so, would it be worthwhile transferring the forward fared edge line from the plans to each bulkhead and then trying to do some preliminary faring before attaching it to the keel? Or would I be better off installing all the bulkheads and doing all faring after all bulkheads are installed?
-
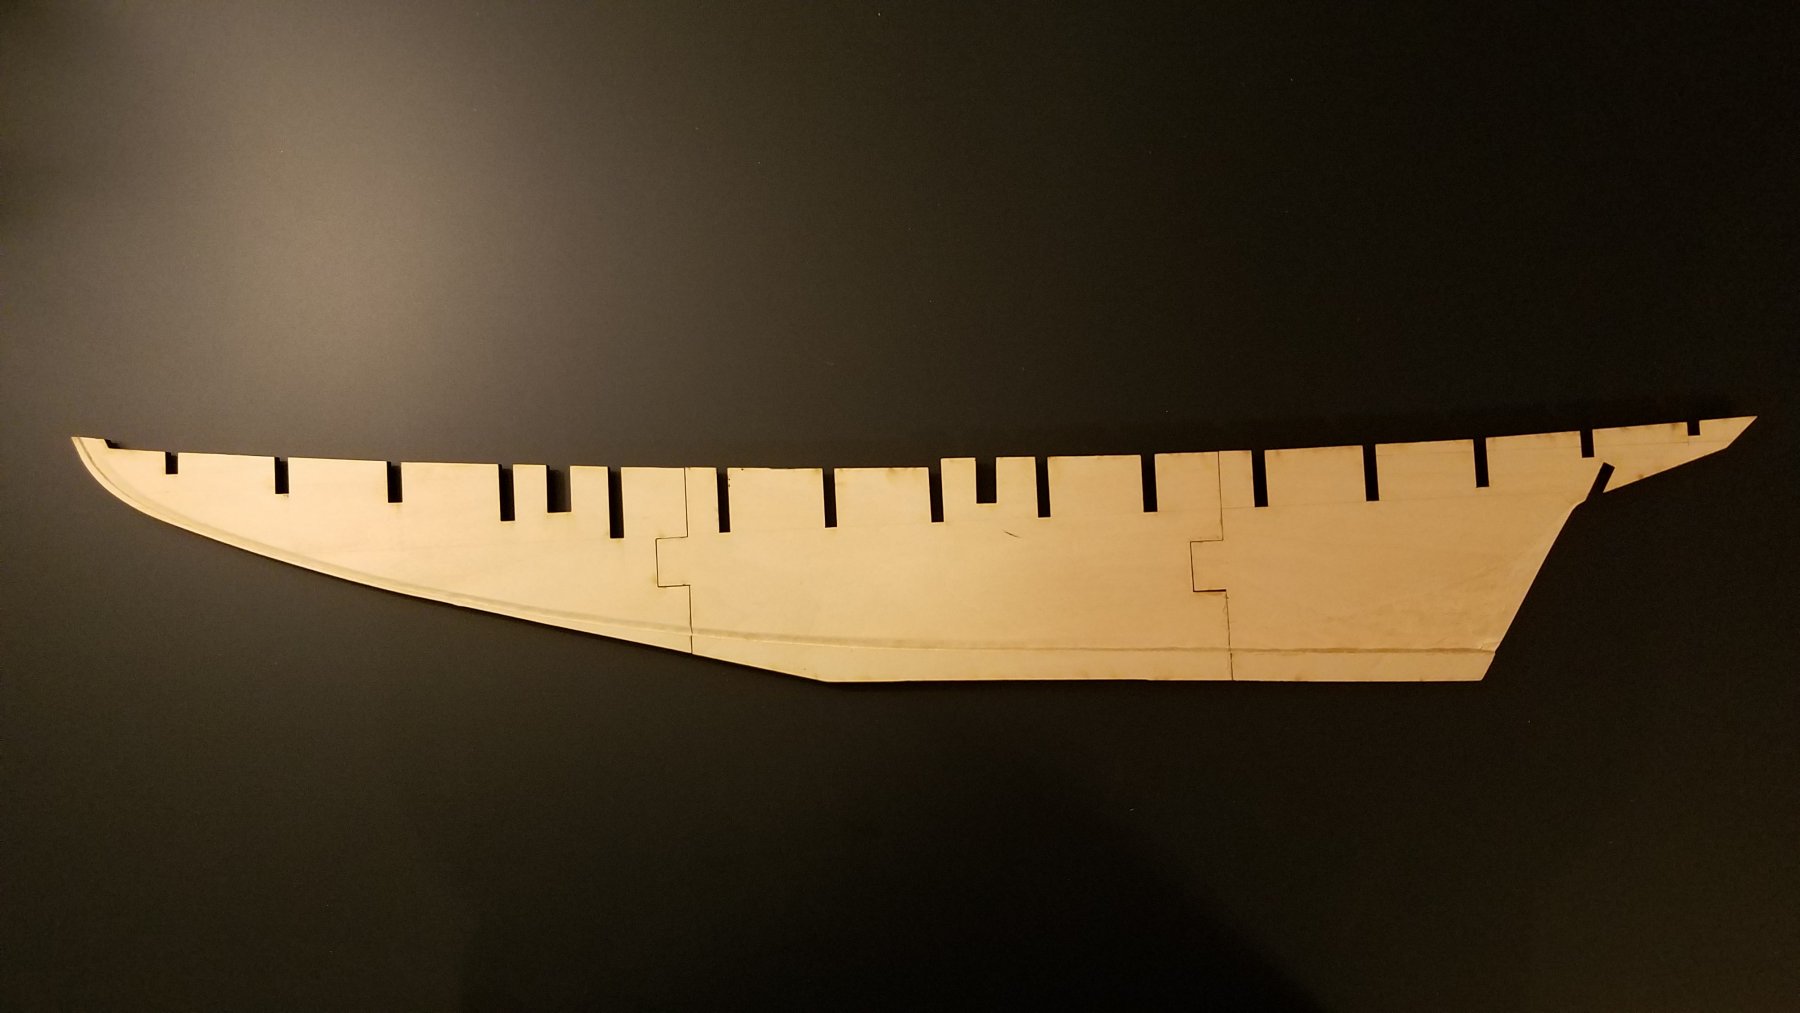
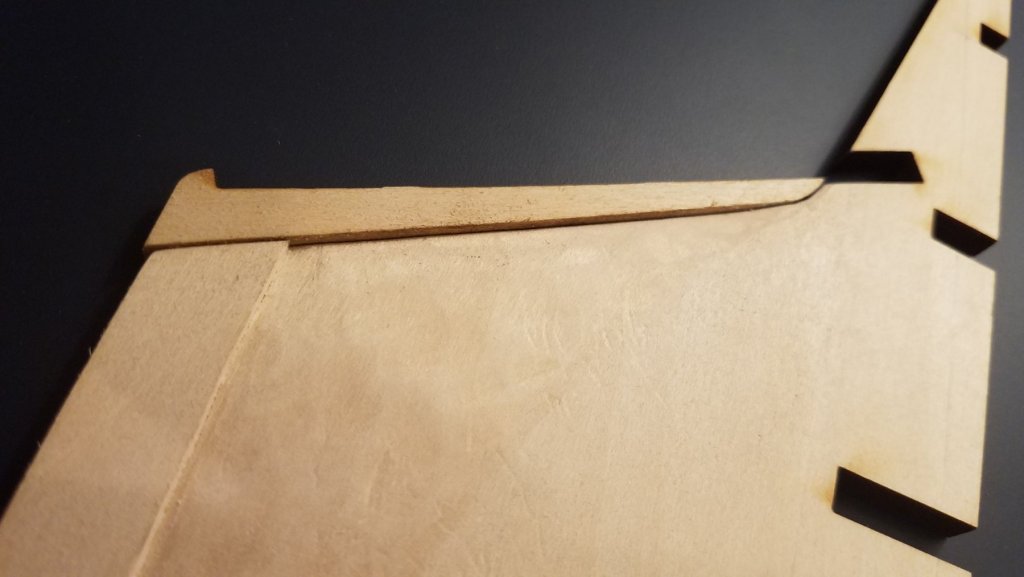
Before I glue on the sternpost I've got a question. As you can see below, my tapering job gradually decreases as you go upward from the rabbet to where the top of the sternpost sits against it. At the rabbet, the stern is tapered to the thickness specified in the plans, but I wasn't certain about how far upward to take it. I'm afraid it's not tapered enough at the very top. Should the stern's thickness be uniform from rabbet to "top"?
-
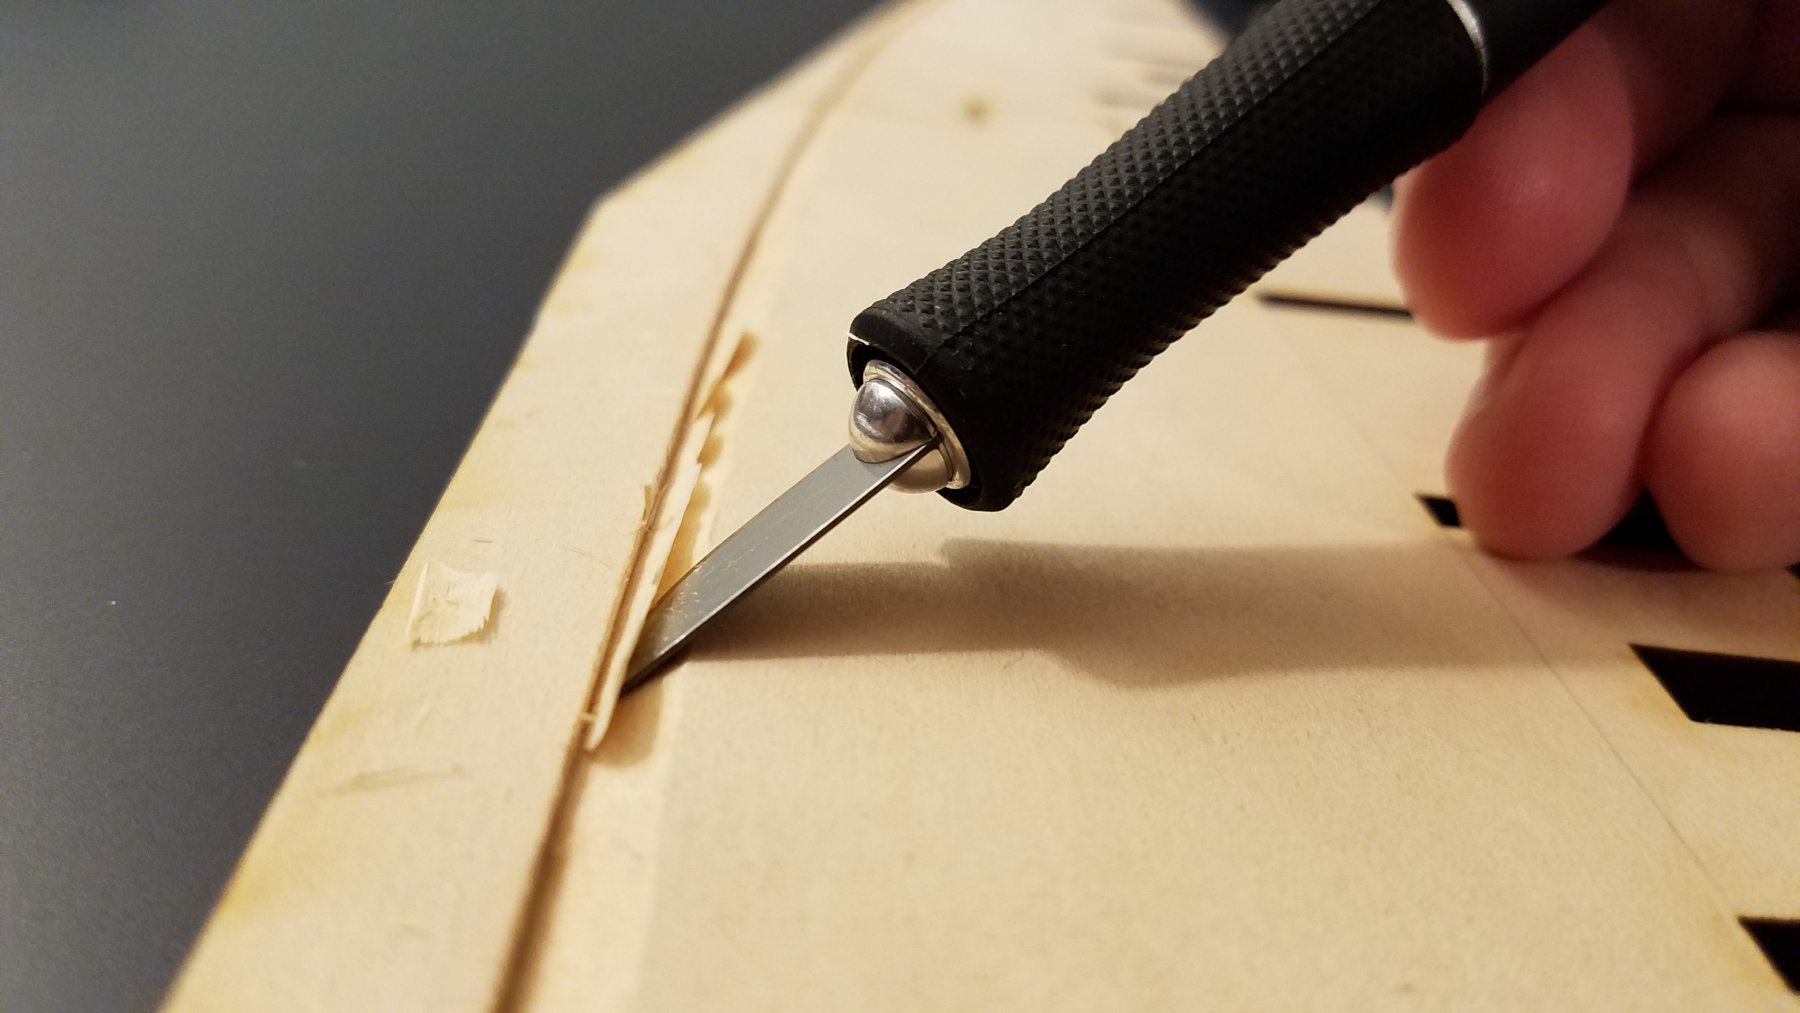
This is my first serious attempt at building a wooden ship model, something I've thought about for years. My wife encouraged me to finally do it this year, so here I go. In addition to the included instructions and plans I'm following Bob Hunt's practicum from Lauck Street Shipyard. I've also viewed most of Gary Brinker's video log and am following CPDDET's build here in the forum. Let's see if I can not screw this up. Inventory of the kit took about two hours, mostly due to my lack of experience reading ship plans. I still have a few Britannia parts I can't identify in the plans, but the total part count added up so I moved on. As I told CPDDET, my kit's bulkhead sheets are....weird. There's some kind of tacky, almost sticky coating on one side of the plywood. Cutting the bulkheads free was challenging with the only blade I owned at the time - a #11 X-Acto. Since then I've gotten some #10 blades which are much better for freeing laser cut parts from the plywood sheets. Up to this point I've assembled the keel and finished cutting the rabbet and tapering the stern. The rabbet came out better than I expected. The stern tapering was the more challenging of the two for me. I have little to no experience carving wood and just tried to take it slow. For some reason I struggled with a #17 chisel blade. It worked well for the rabbet and also the aft edge of the stern, but I had trouble using it to create the gradual taper from the bearding line to the aft edge. For me the #10 blade was easier to control for this task The result was a pretty irregular dimpled surface that I'm not totally satisfied with. I had a couple of mishaps tapering the stern. A small chunk blew out of the starboard side of the stern's aft edge, right above the rabbet. I considered gluing it back it but have decided the stern post will cover it so why bother? It could have been worse and I'm glad the breakage didn't go all the way through the keel. I'm thoroughly enjoying this build. About 9 hours invested so far. Next up -- tapering the stem.


-
I've read Mastini's book as well, and I wasn't looking forward to checking the bulkhead symmetry and then fixing it. Since you didn't find any issues I'm going to assume my kit is okay and forgo that step. Like you said, with laser cut parts I would hope they are close enough to symmetrical. Thanks for sharing your findings.
-
Thanks Dave, I guess it would help if I stopped to read carefully...
-
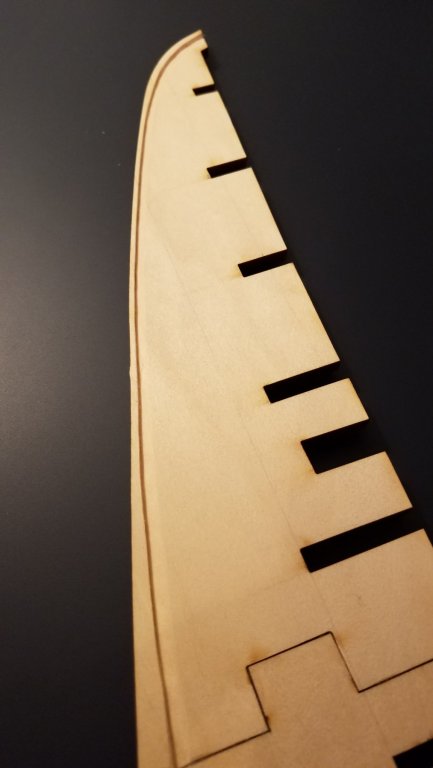
Hey Dave, I'm a little late asking this question as you've moved on to the bulkheads, but maybe you can clear something up for me. I'm still obsessing over the rabbet and have probably cut it a little too deep, but oh well. Before I move on to the bulkheads I'm going to taper the stem. My practicum doesn't talk about this step, or if so it must come in a later chapter. The kit plans are unclear to me. I see the general shape of the taper, but how far down the keel does it go? There's one diagram in the plans that could indicate a fairly short section of taper, not even going down to the "bottom" of the keel. How far did you continue your taper from the foremost point on the stem?
-
Hey Dave, thanks for posting your build log. I just started my MS Bluenose as well and its great to compare notes. This is my first model ship too. Currently I'm halfway through the cutting off the rabbets. Like you I agonized over starting this step but am pleased with the results so far. Yours looks great. My inventory of the kit took nearly two hours. In the end I have several Britannia parts I can't identify in the plans but the total part count adds up so I called it good. Just curious if the plywood sheets in your kit have some kind of sticky coating on one side? Mine do. It's not a big deal but it was harder than I expected cutting the bulkheads free. I've never seen plywood quite like this. My keel joints required some light alterations to result in a clean edge both top and bottom. I also reinforced them with some scrap pieces glued to the sides, overlapping the joints. This isn't in the instructions but I felt it necessary. I'm also using Bob Hunt's practicum from Lauck Street Shipyard. It's been helpful and it actually calls for the keel joint reinforcement so I felt better about doing that. Once I finish the rabbets I'll get another thread going and share some photos. You can read my log and see what not to do :) Looking forward to following your build!
- 389 replies
-
- 2
-

-
- bluenose
- model shipways
- (and 1 more)