
Phil B
-
Posts
40 -
Joined
-
Last visited
Content Type
Profiles
Forums
Gallery
Events
Everything posted by Phil B
-
First coat of white.

-
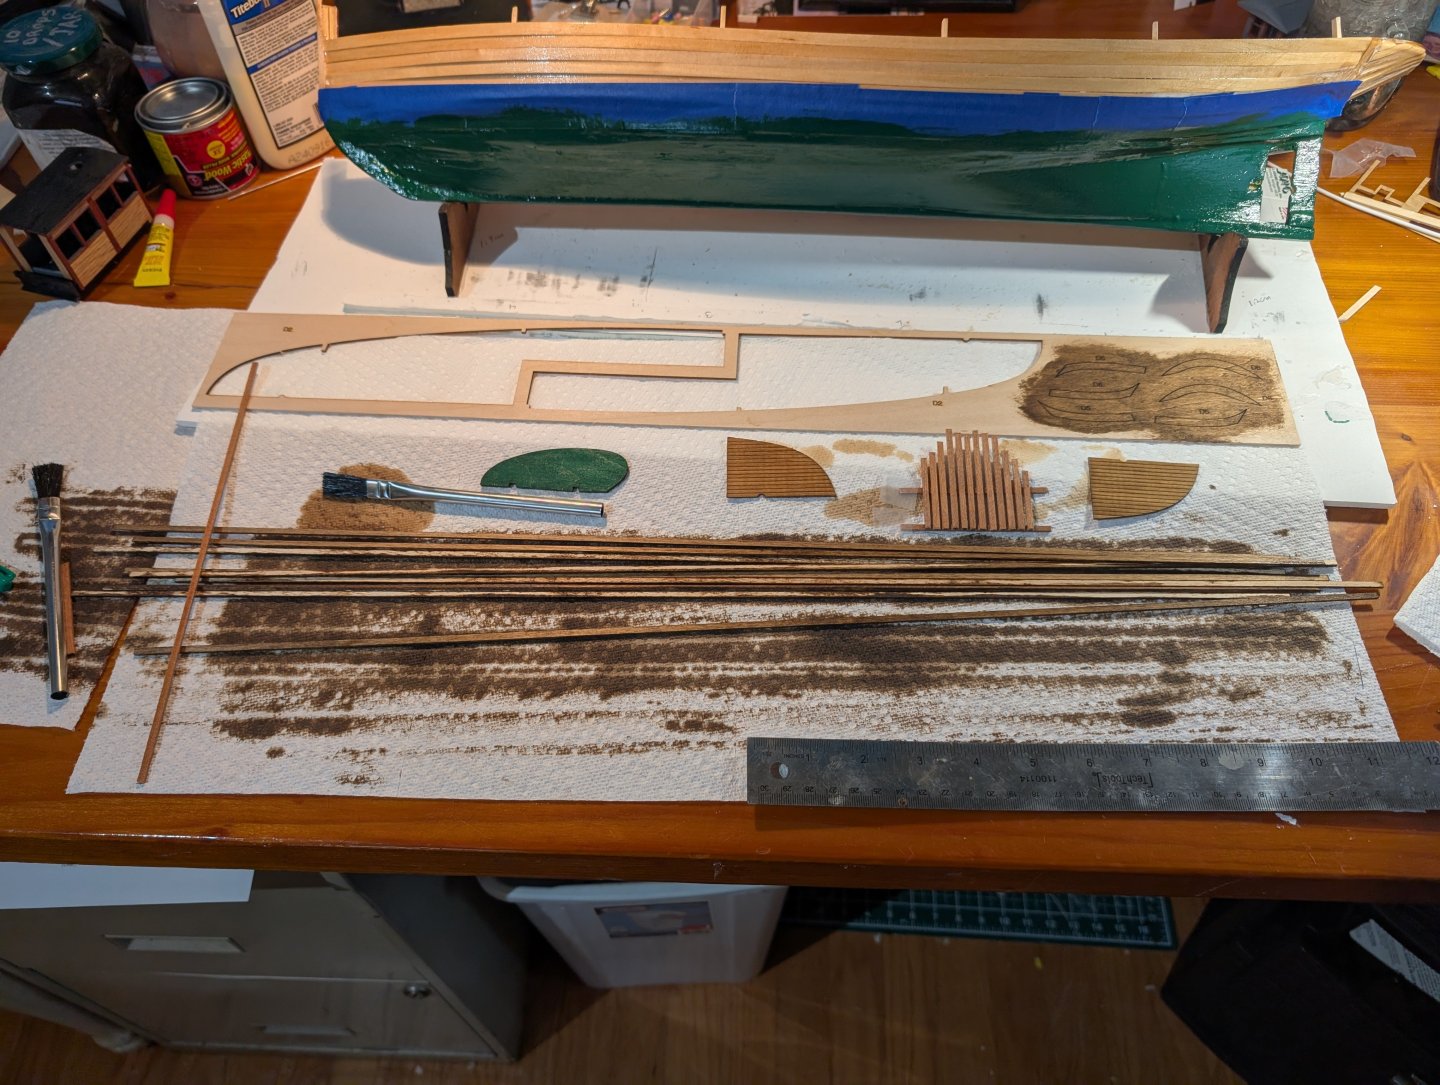
I decided to get the staining process going while the hull painting is going on. Figured I mine as well have these parts ready when I need them.
-
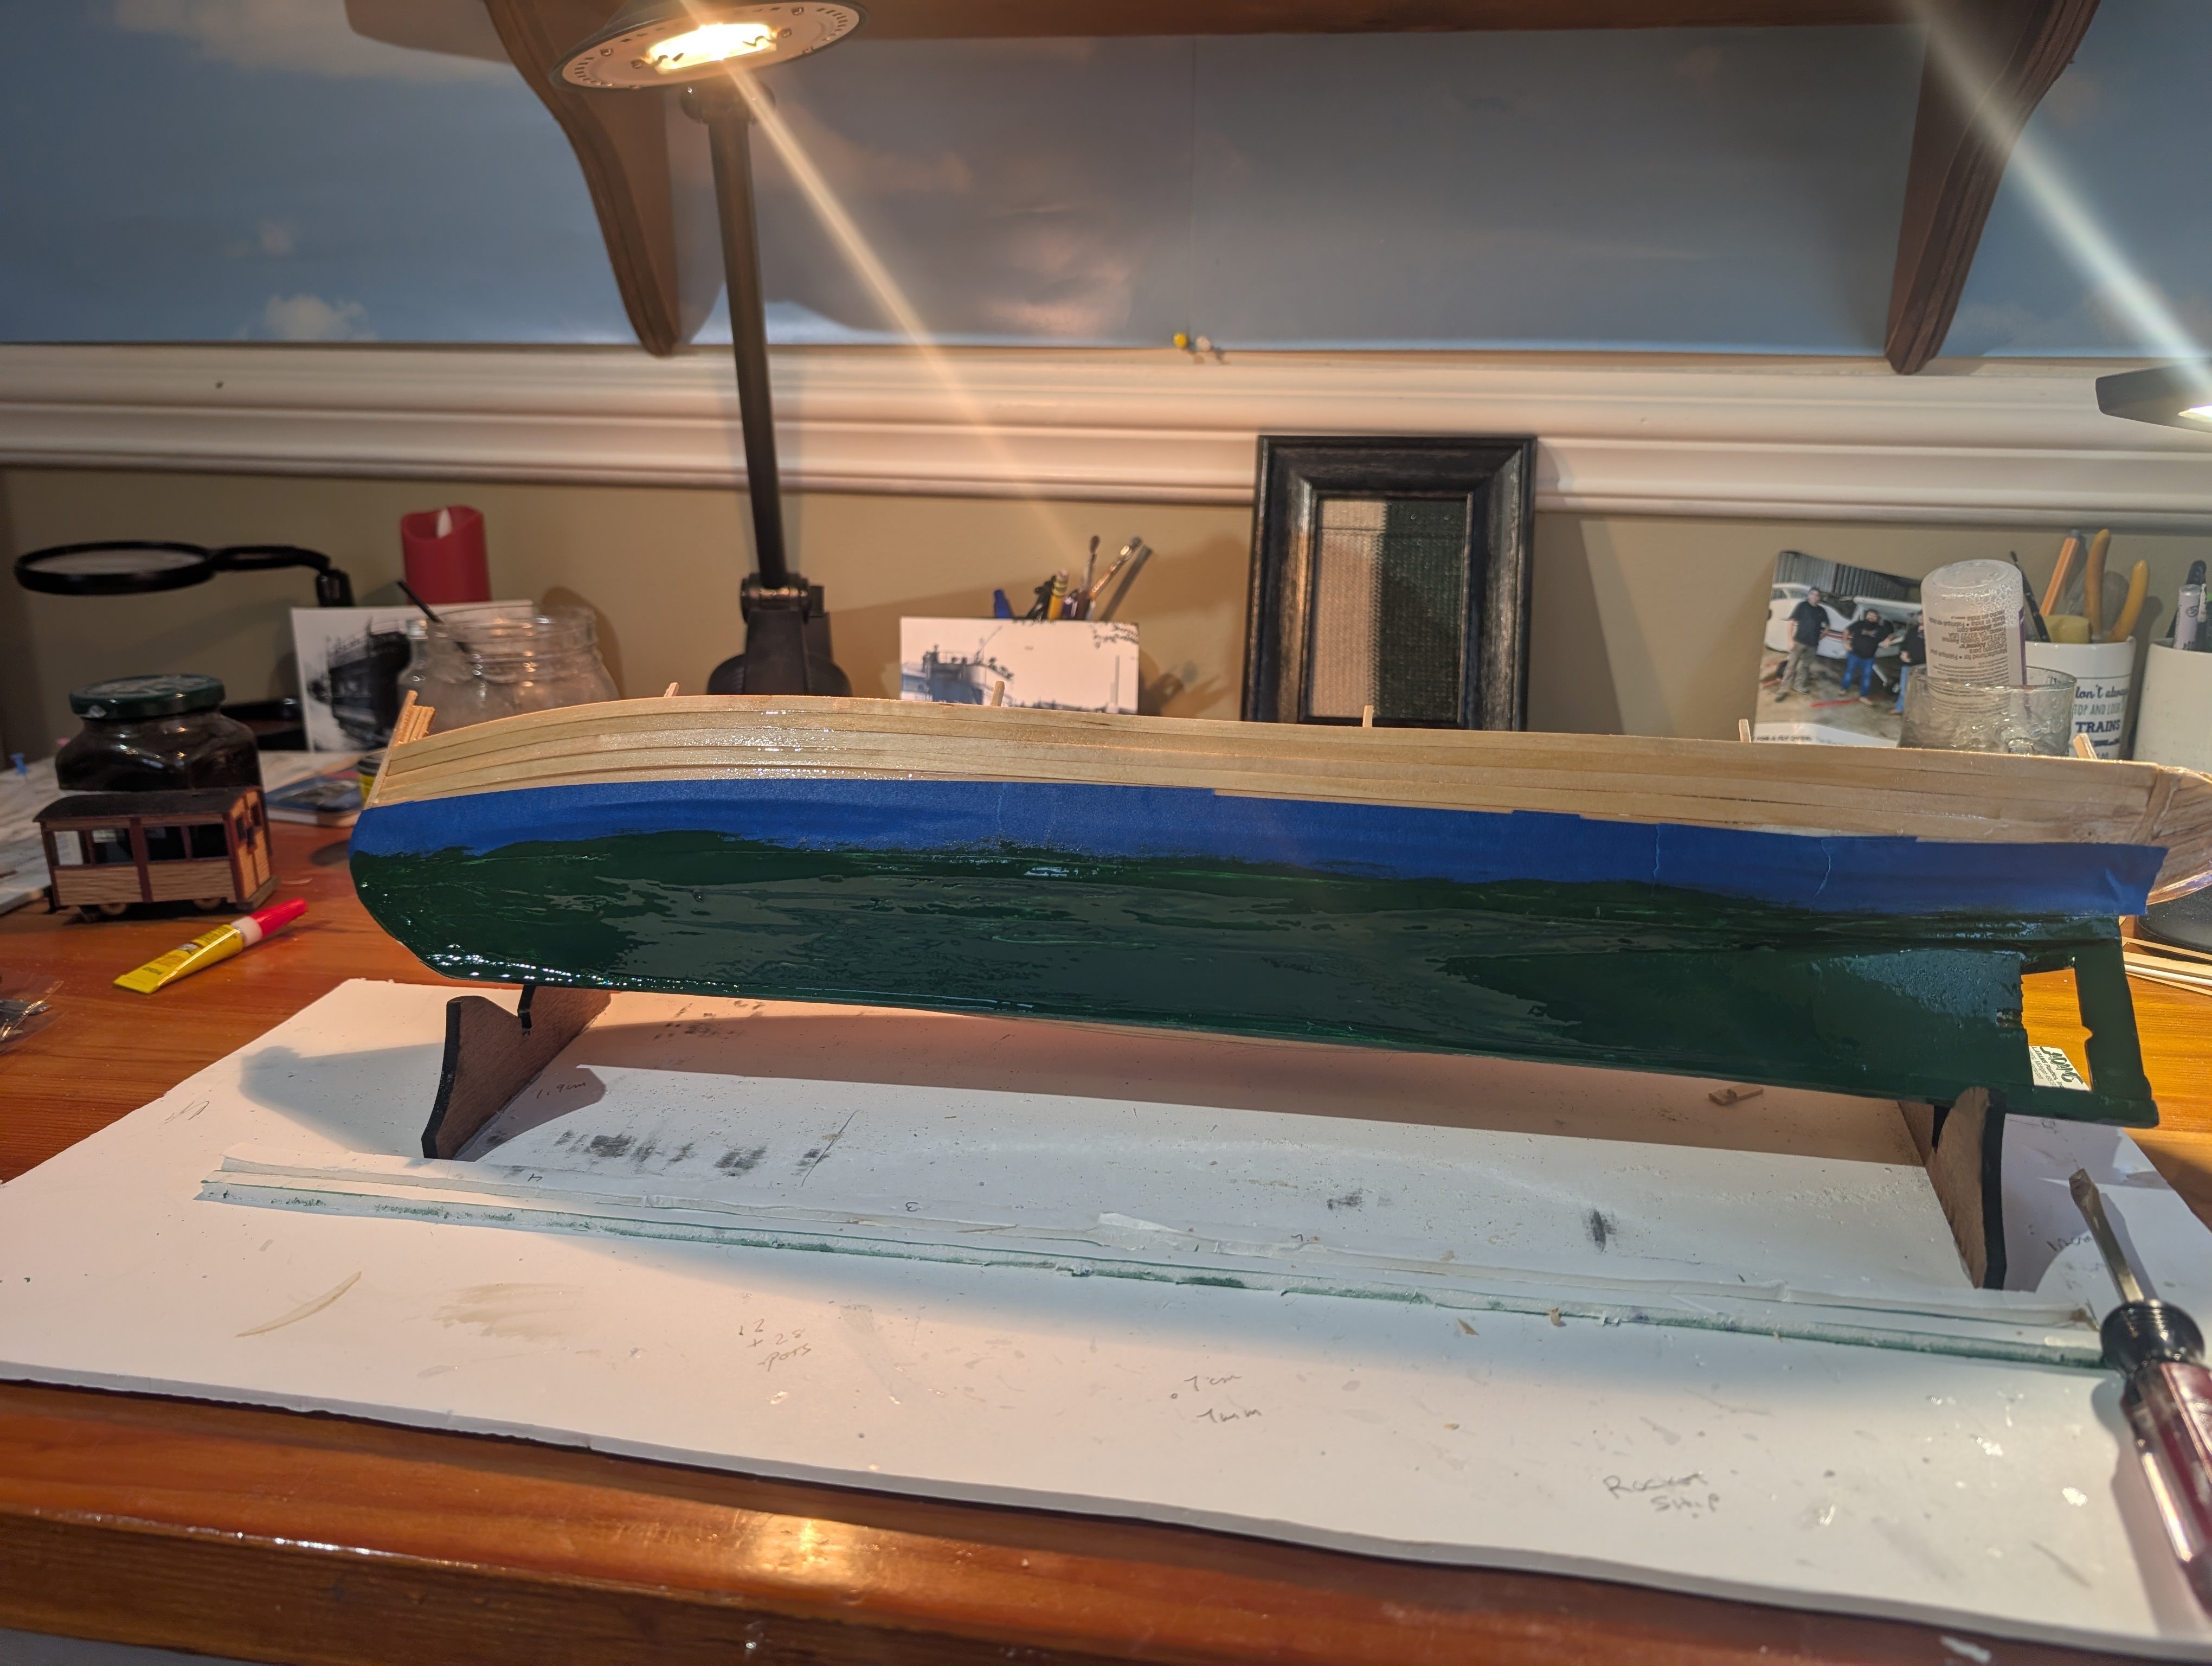
First coat of paint on the lower port side. I was intrigued by the use of green for the waterline paint. I believe it was Tim who used green. I usually use some version of red for antifouling paint. I dont know if the green is historically accurate, but its certainly a nice change. Phil

-
Thank you John.
-
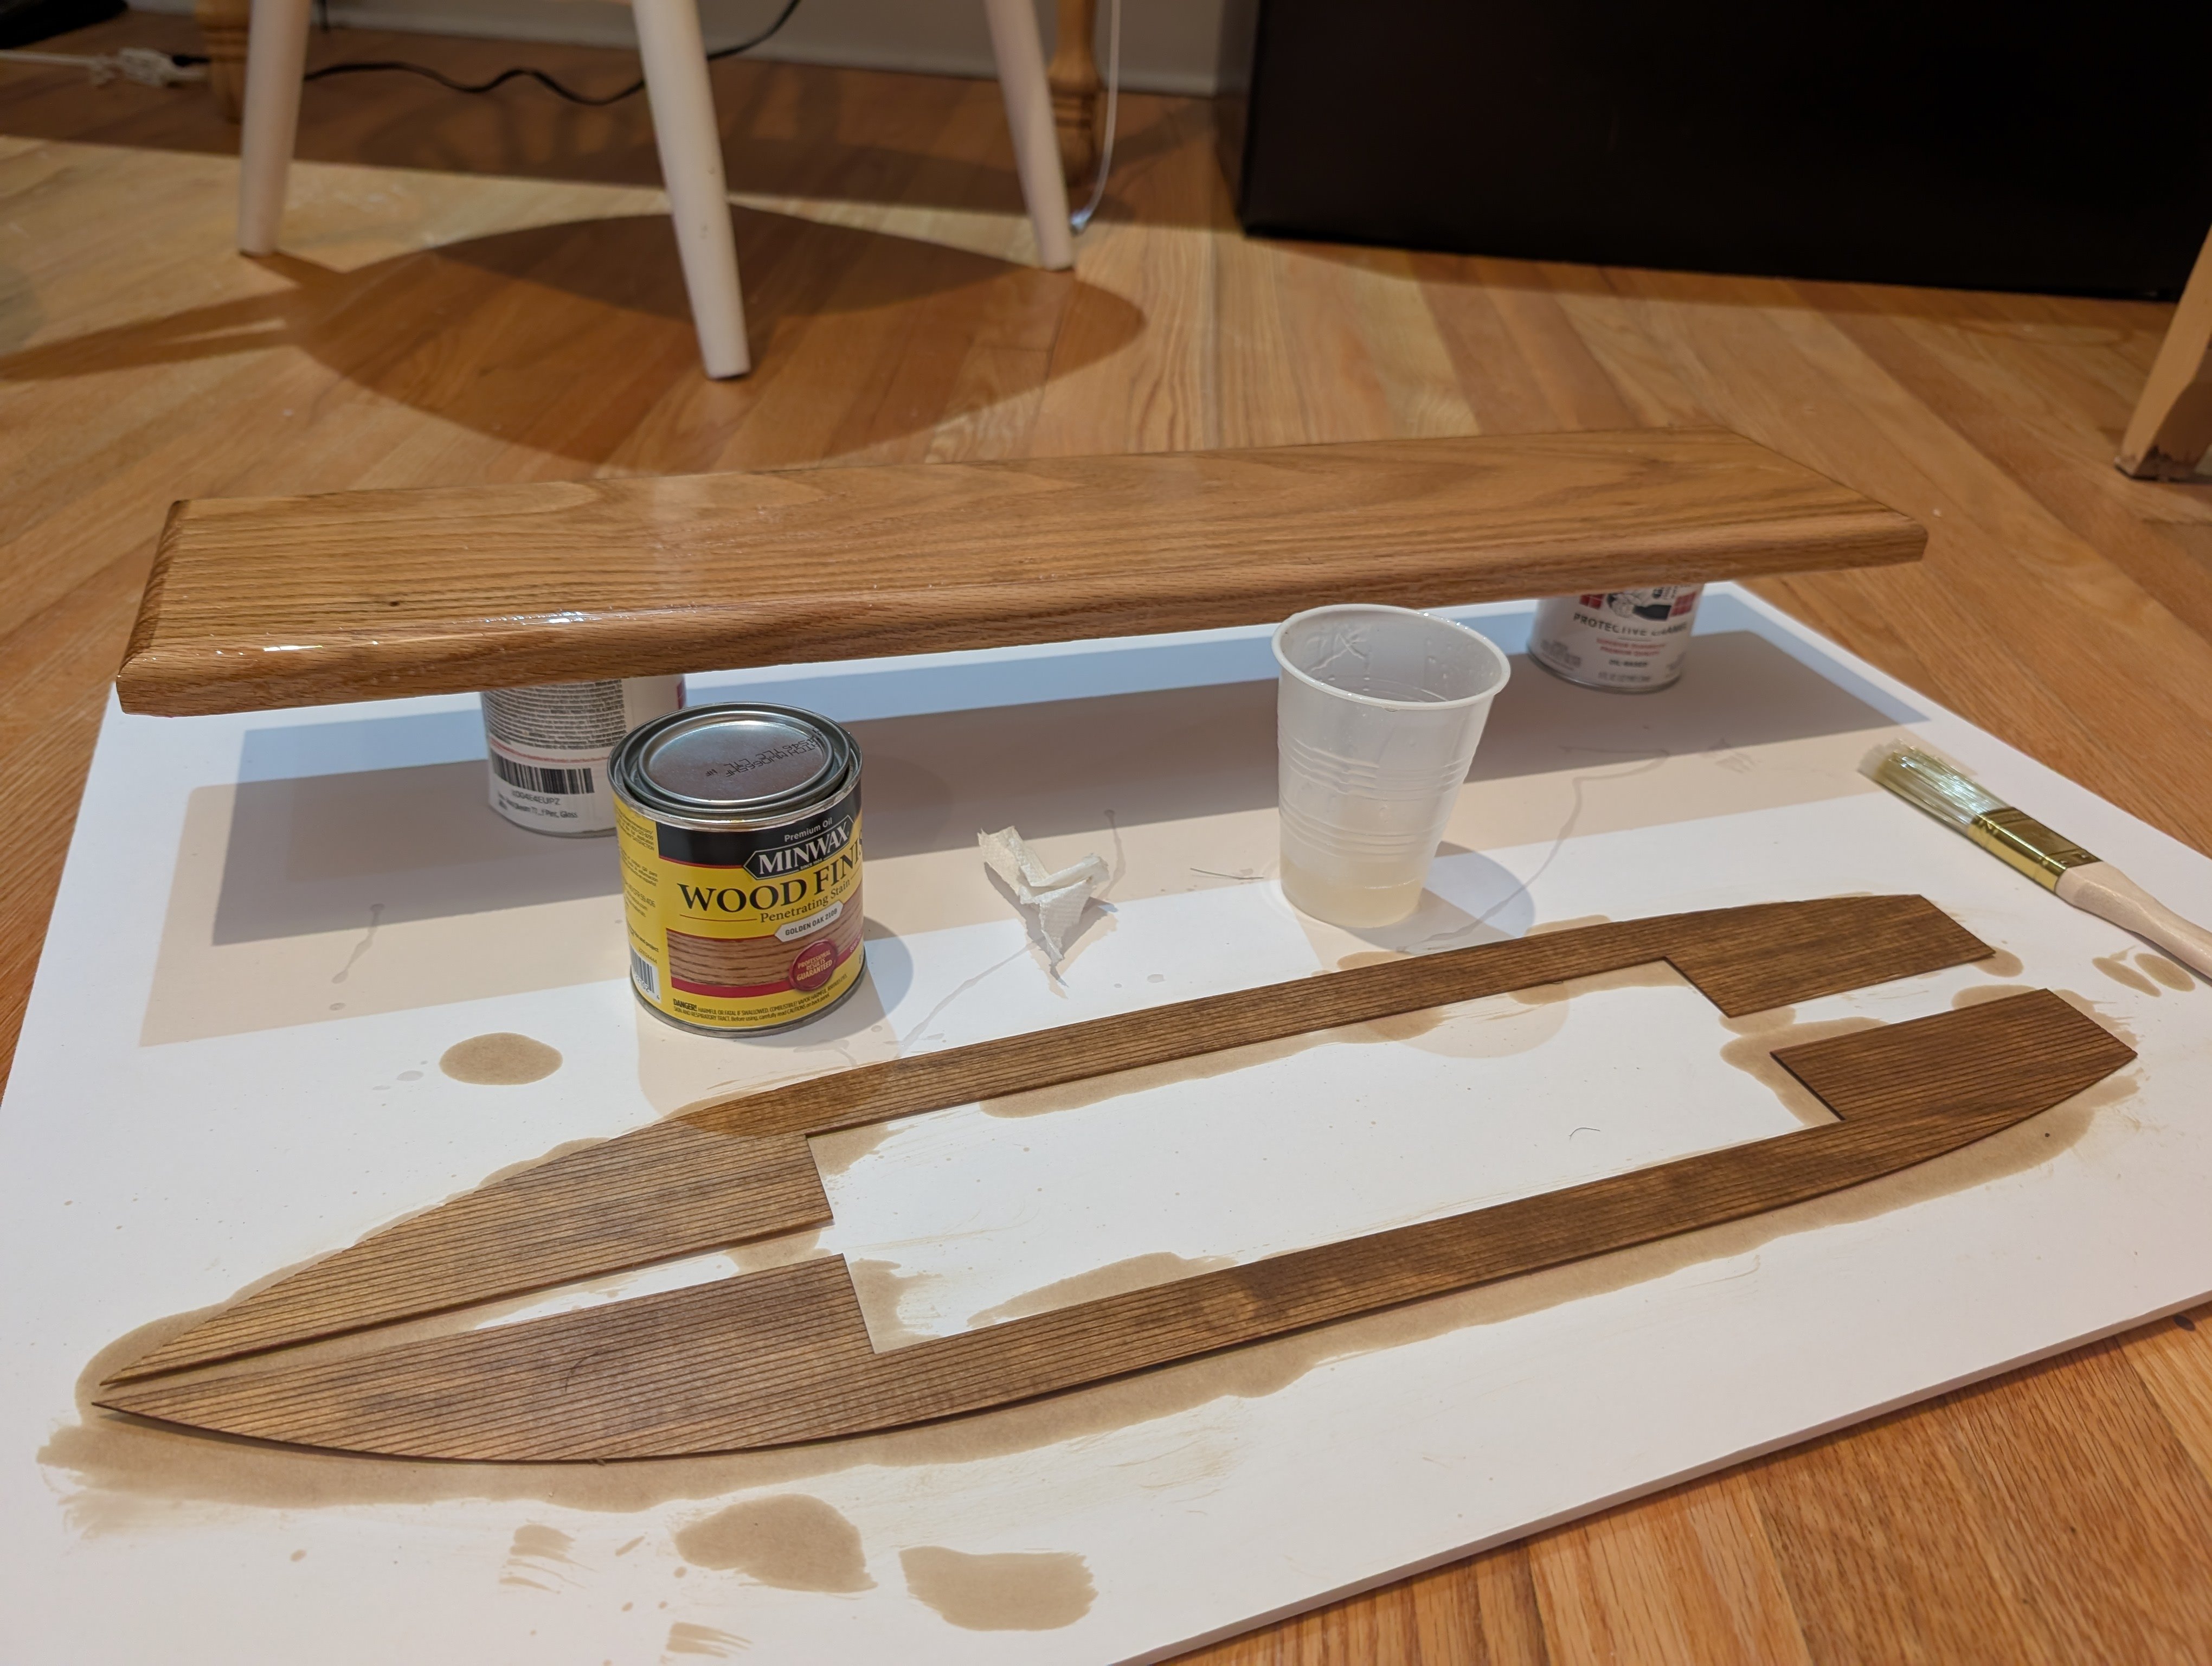
While waiting for the epoxy to dry I figured I would stain the decks. I used my trusted go to stain, Minwax Golden Oak. For some variety, i have a darker stain that can on the deck houses. I tossed around the idea of adding nail holes but I decided against that. Really not visible in this scale (unless they are bleeding rust). I also epoxyed the oak display stand that i put through Dad's old router table a few days ago. Pedestals were ordered yesterday. More on that when they arrive. Phil

-
Thanks Rod. I am using your build and Schooners build for some guidance. BTW- I noticed that the 3 of us are all out of NC! Theres a coincidence 😁
-
Thanks for sharing your thoughts Palmerit. Phil
-
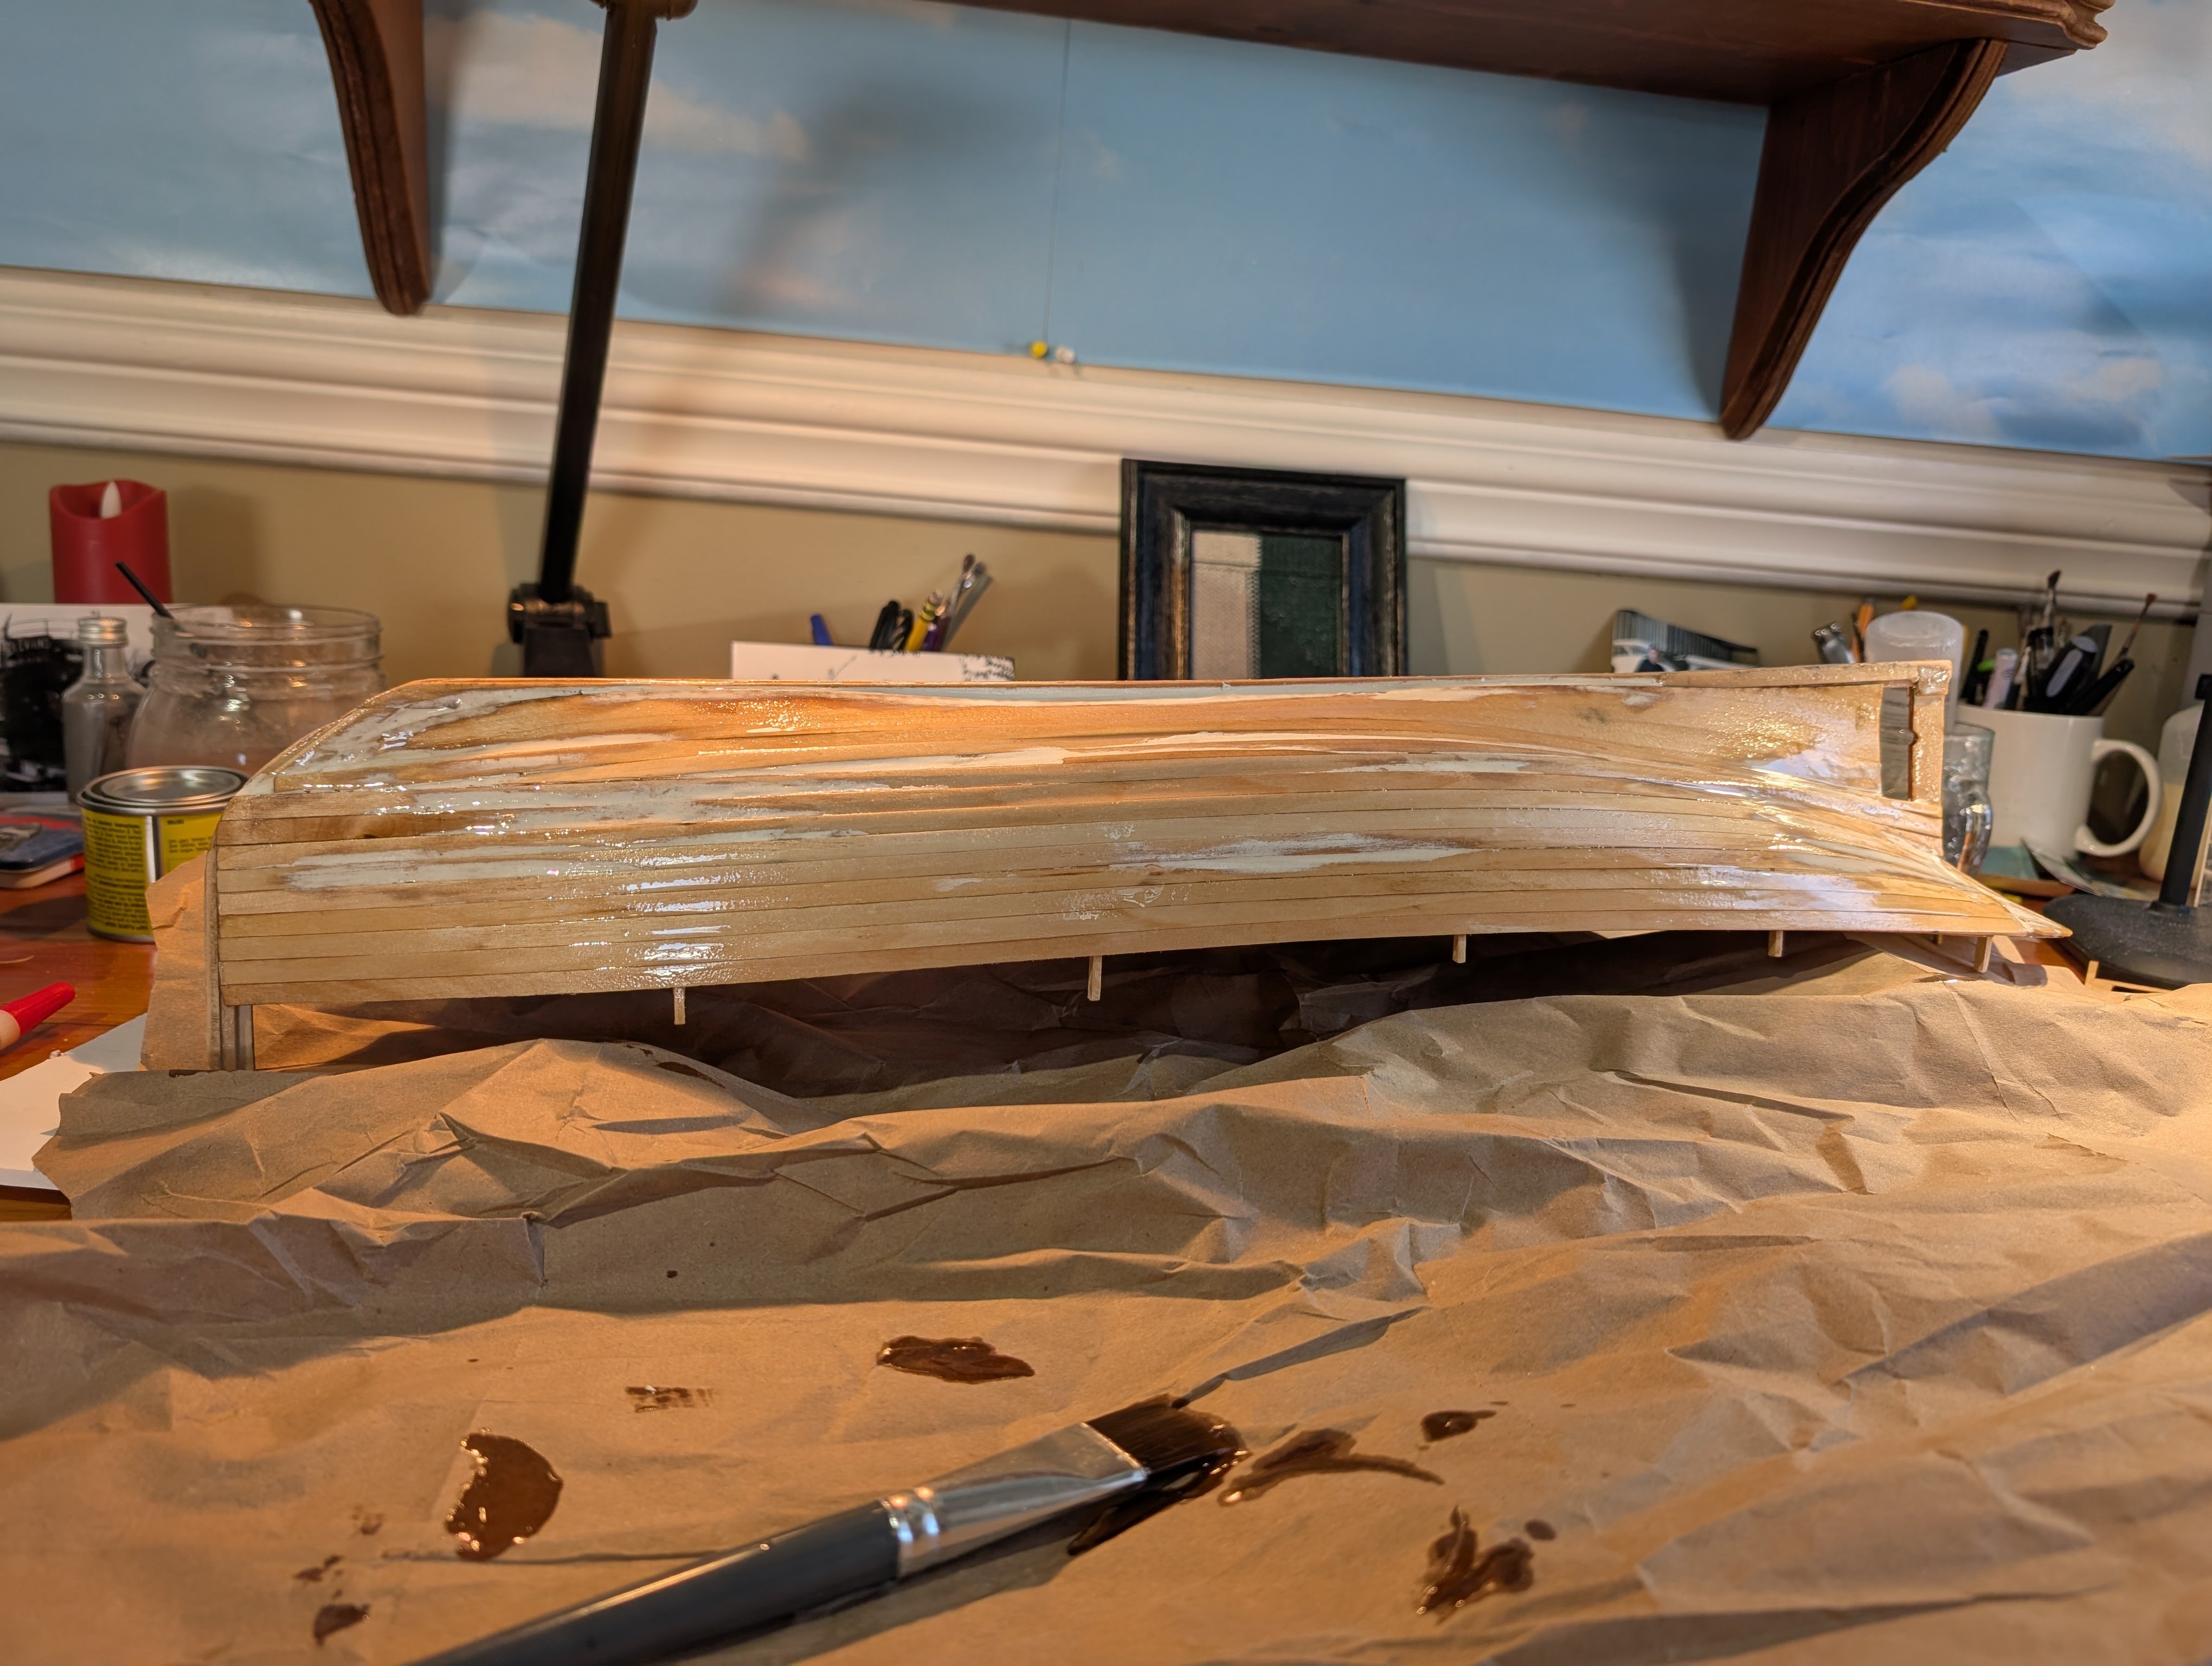
Planking, filling and sanding are done. I like to put a coat of epoxy on to help smooth her out and provide a good base for the Rust-Oleum paints that are coming next.

-
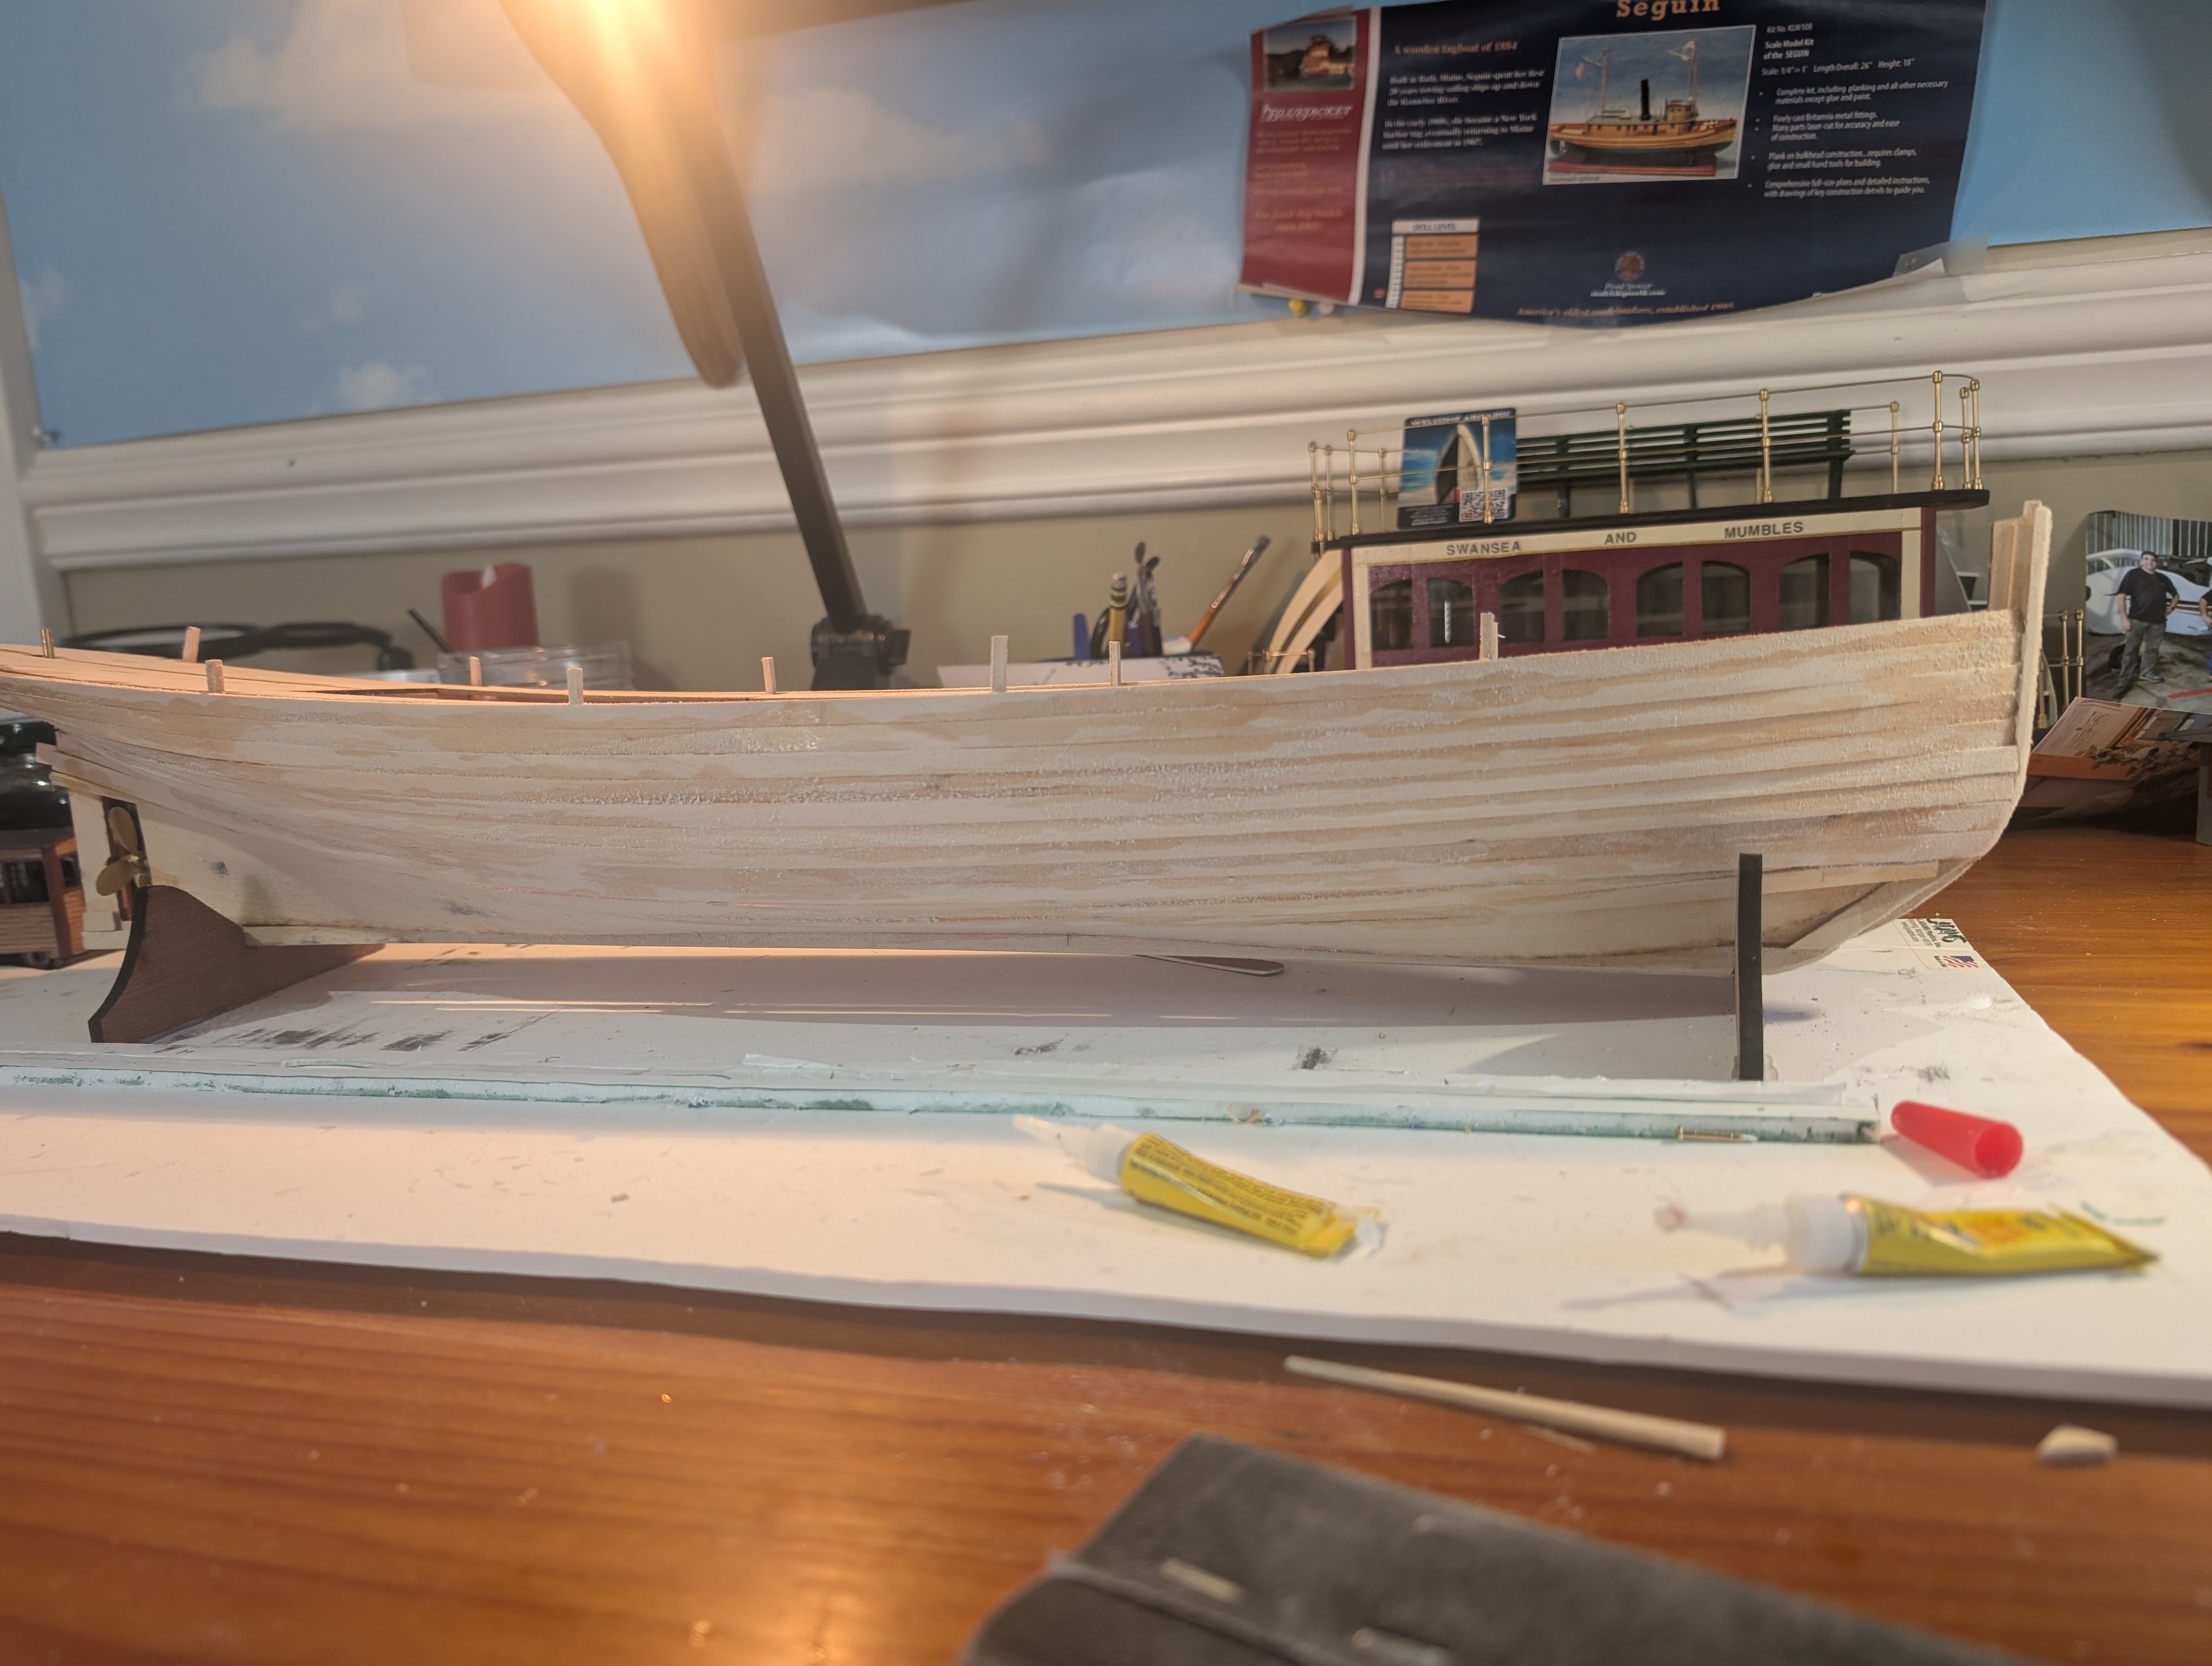
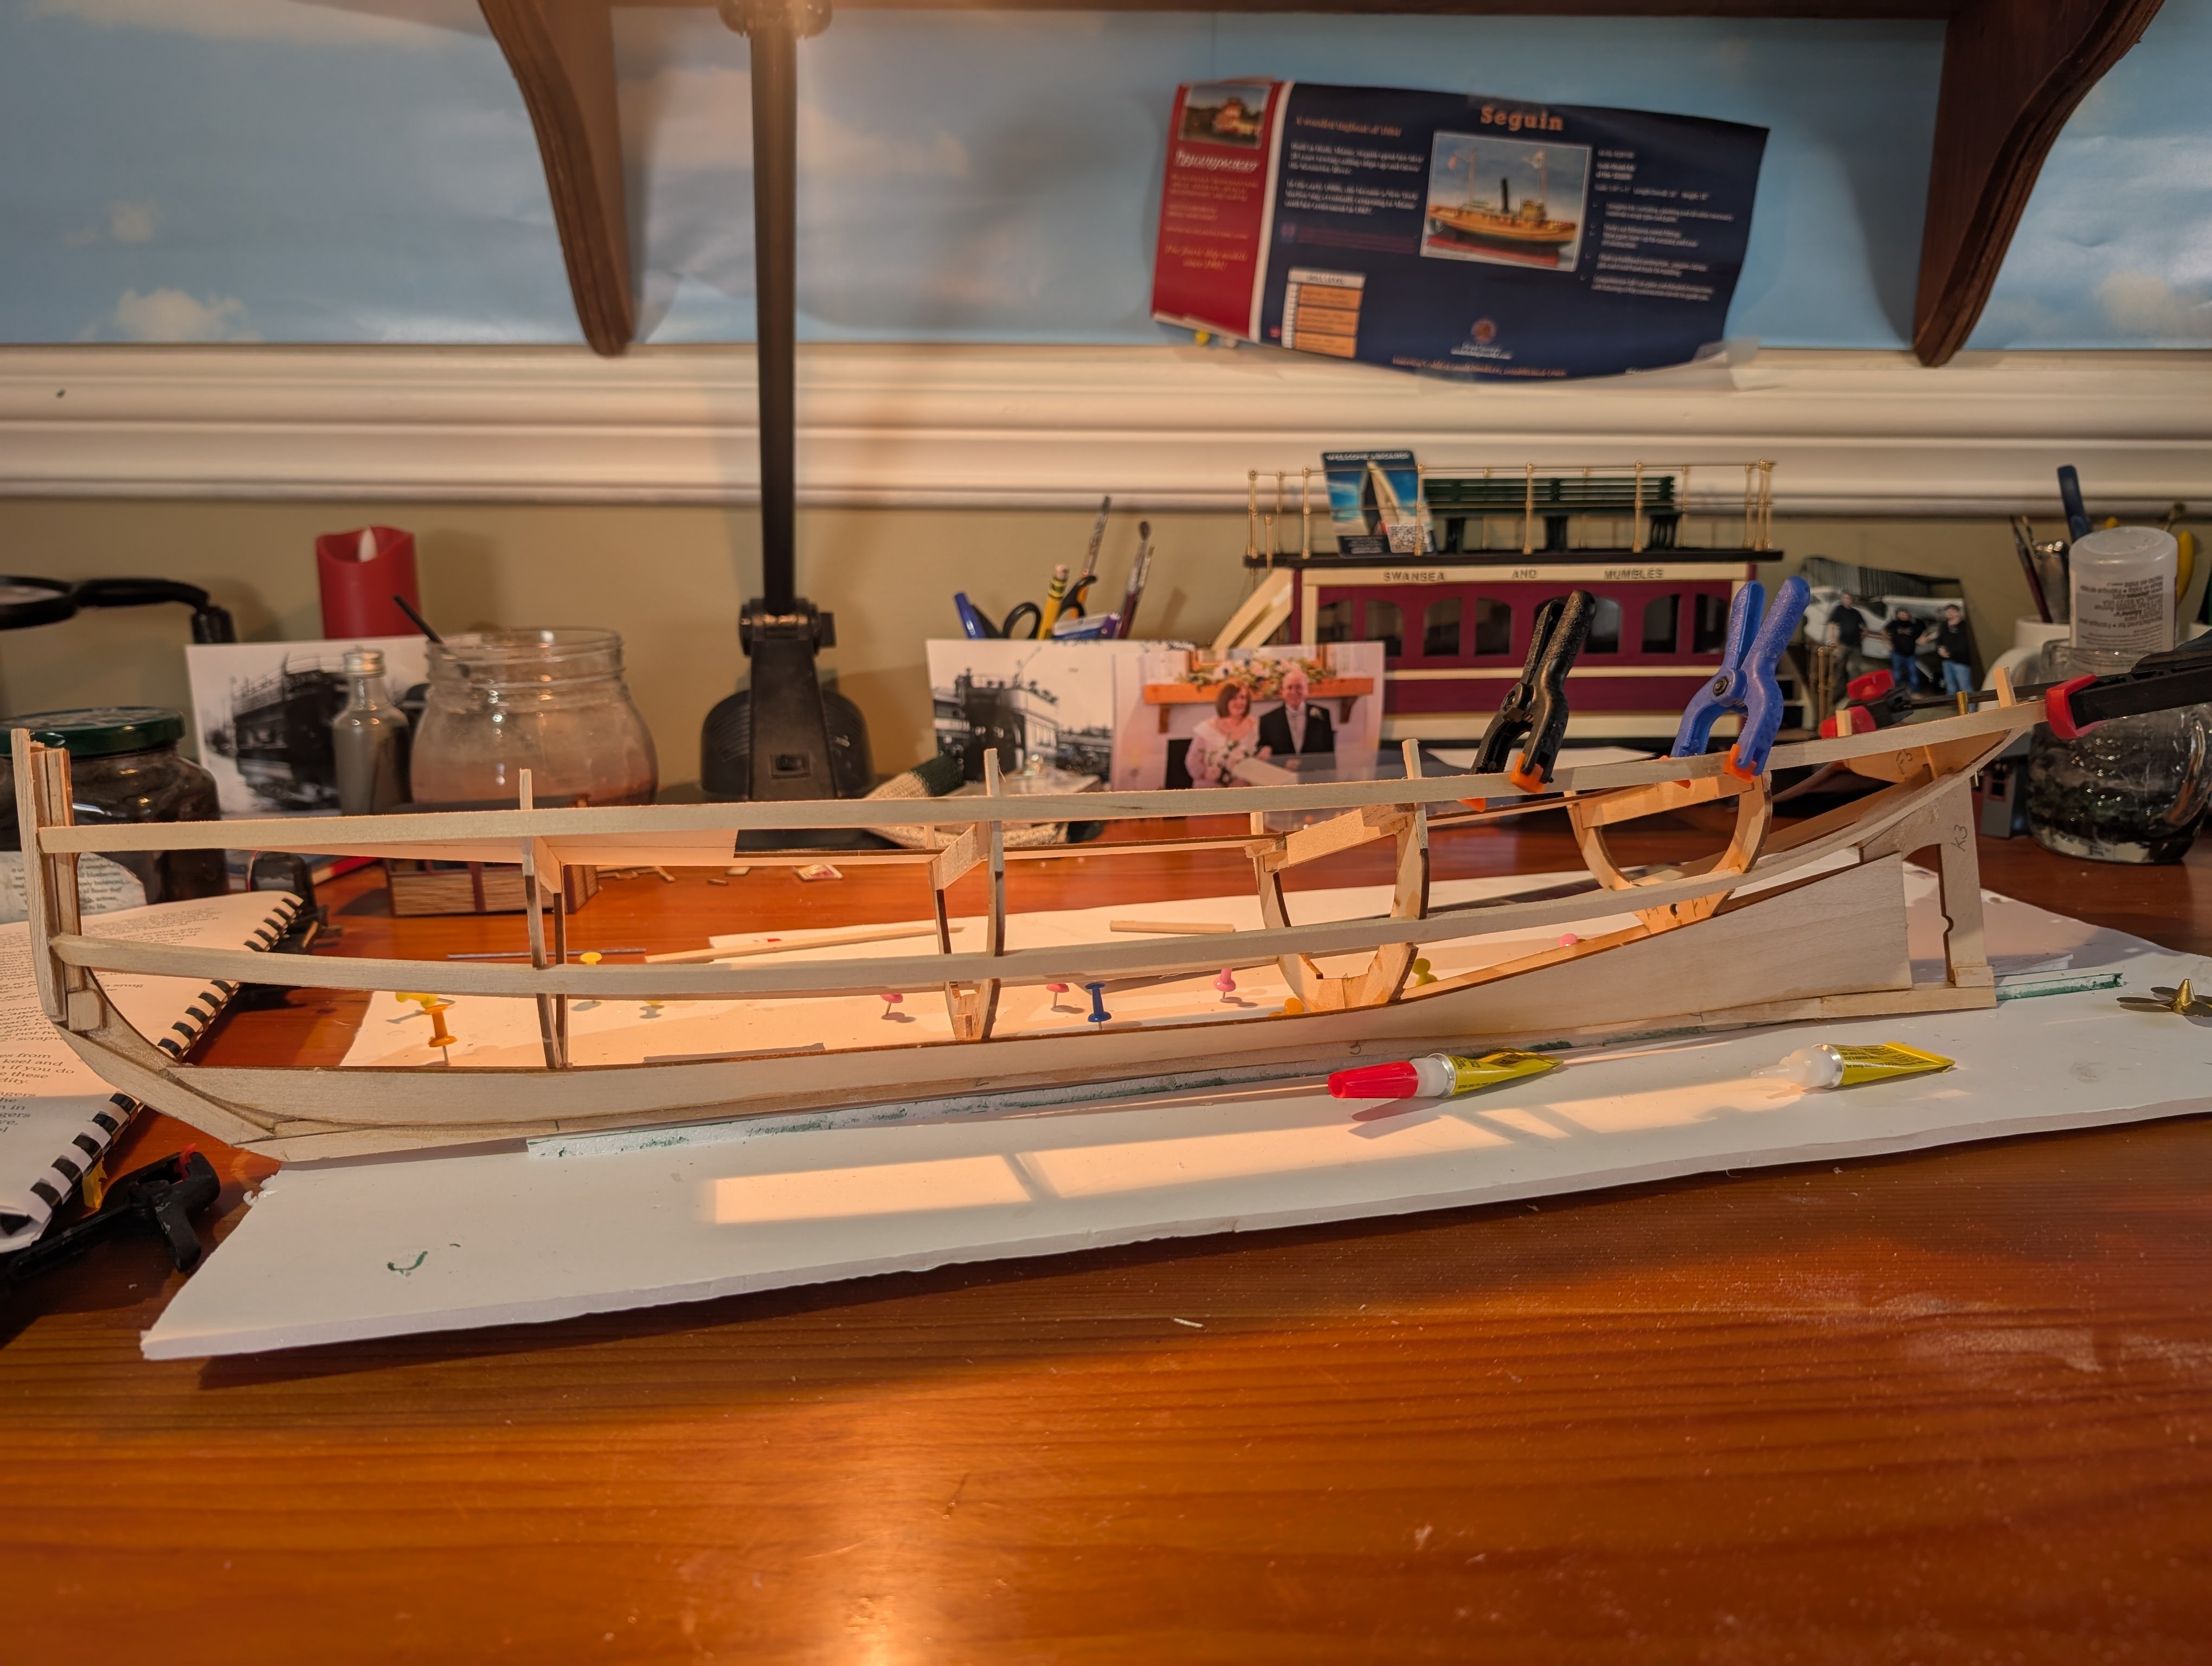
The planking is done except for the stern. Now starts the endless job of sanding, sanding sanding.

-
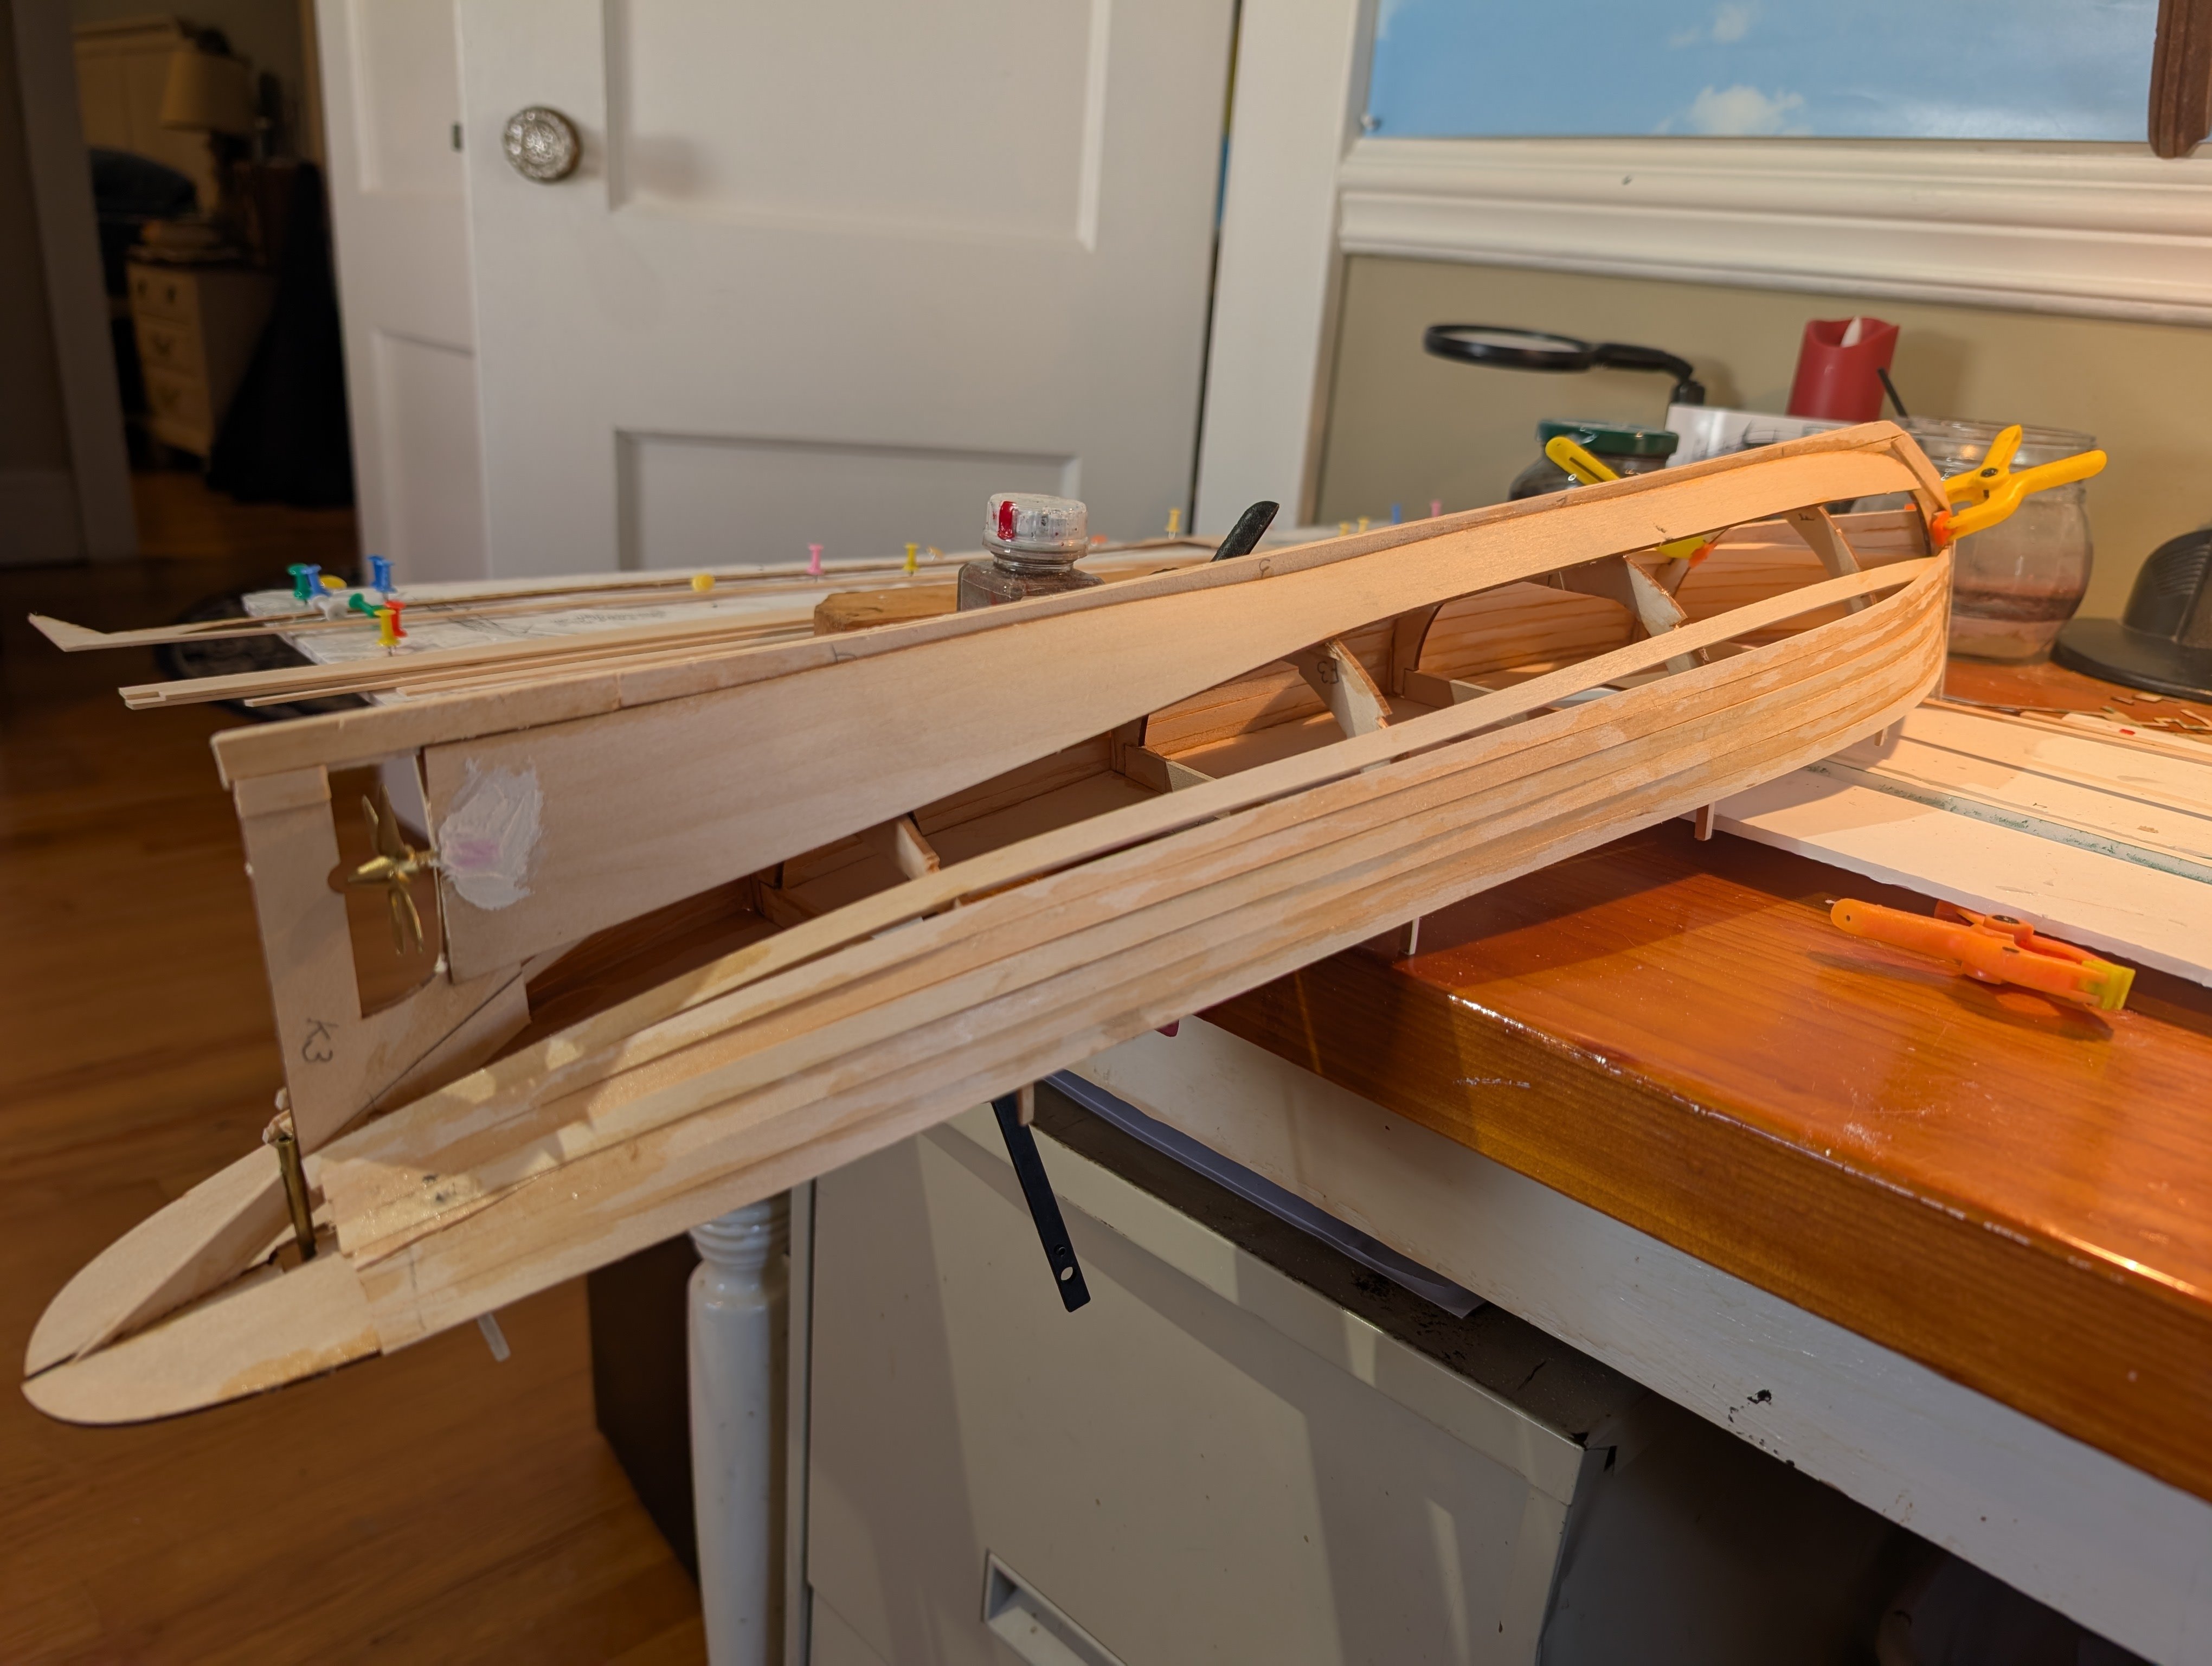
Continuing the planking process. I forgot to install the propeller before I put the garboards in position, so as a consequence I had to cut out a slot to fit the propeller shaft into. Then I just filled it in with a little filler.

-
Thanks Jacques. I'll keep that in mind. I figured most people would find it boring to see the same build described for at least the third time.
-
Thanks John. I appreciate your comment. Super glue makes everything go fast, sometimes too fast. Since the photo was taken. I've gotten half of the planking done. Phil B
-
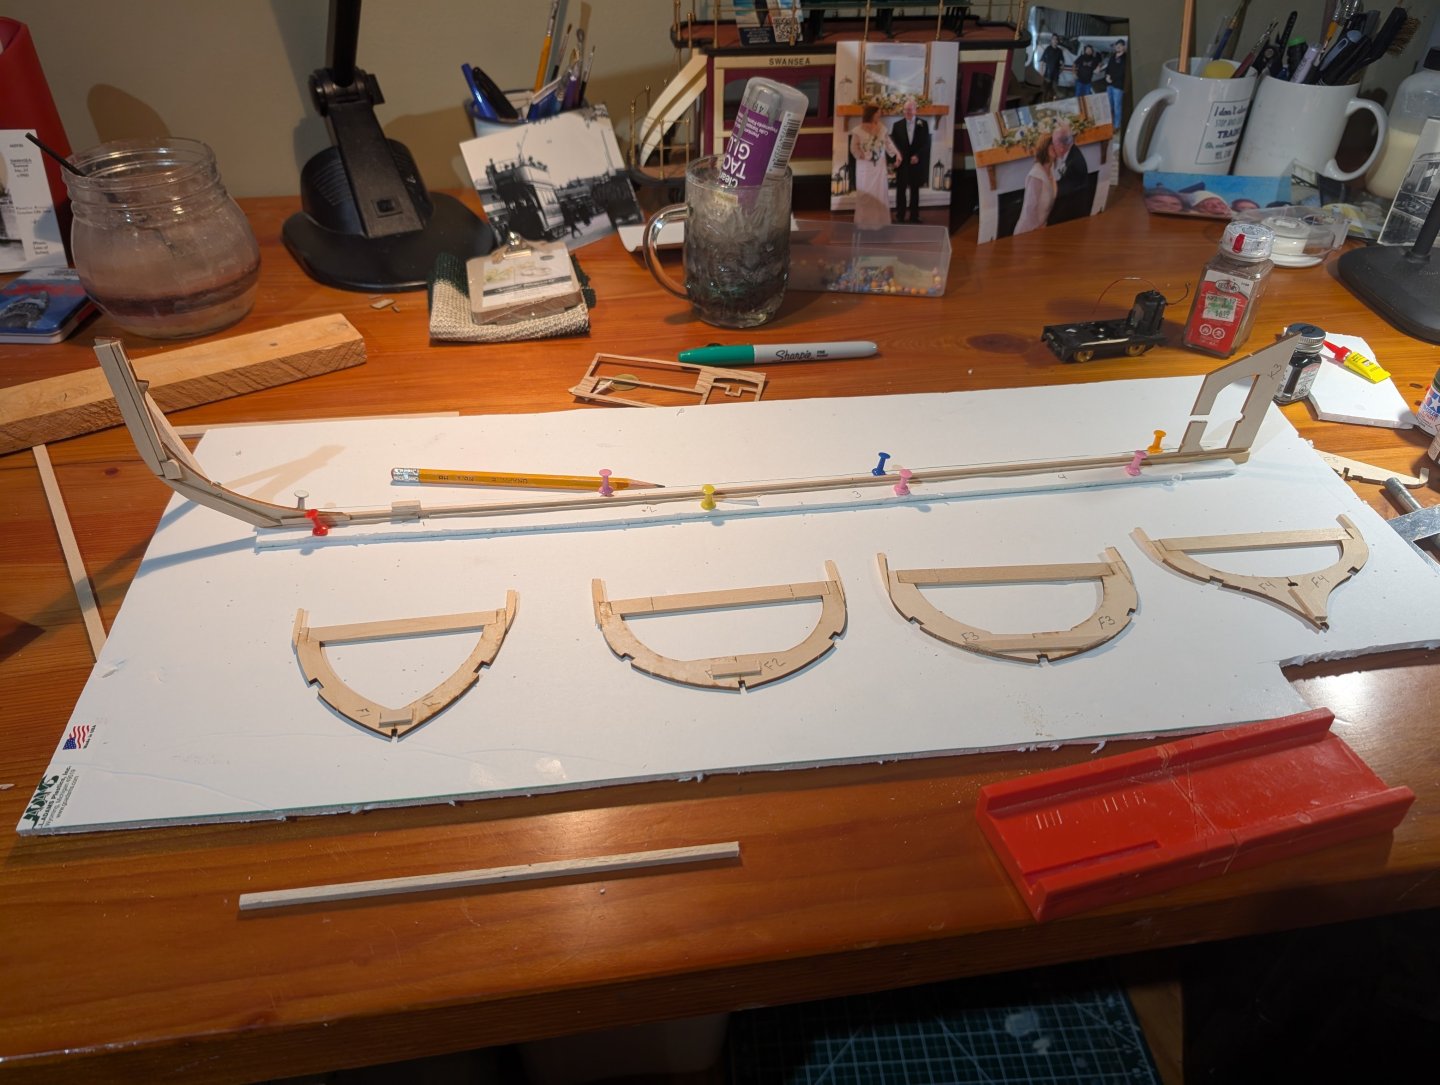
Here is the ship as she is looking this morning. I just started the planking process. Unlike some of the previous builds that did a lot of steaming and soaking of pieces to make them more pliable, I literally manhandled them into position and using an abundance of super glue and clamps was able to make the curves more or less acceptable
-
Phil, there's a photo of the boat at the start of the thread. Sorry you missed it. Since the Seguin's build has been described at least twice on this group I will refrain from doing that a third time. The quality of the work on the previous two builds I'm sure will be far superior than my own efforts. So instead I will focus on posting occasional photos and showing the group the progress as I move along, gladly accepting any comments or suggestions as I move through the build. Phil B
-
Thanks Tim! I appreciate any advice anyone has for me. I just finished reading through your entire Seguin build. You did a fantastic job documenting the process. It will provide a ton of valuable resources as I work through this build. To be honest, I'm really a scratch builder and plans and instructions and nautical terminology is something I find somewhat intimidating. But in spite of my "kit neurosis," I am am going to give this all I got. With you and Rods builds I feel like I have a decent chance of completing the project. Wish me Luck! Phil
-
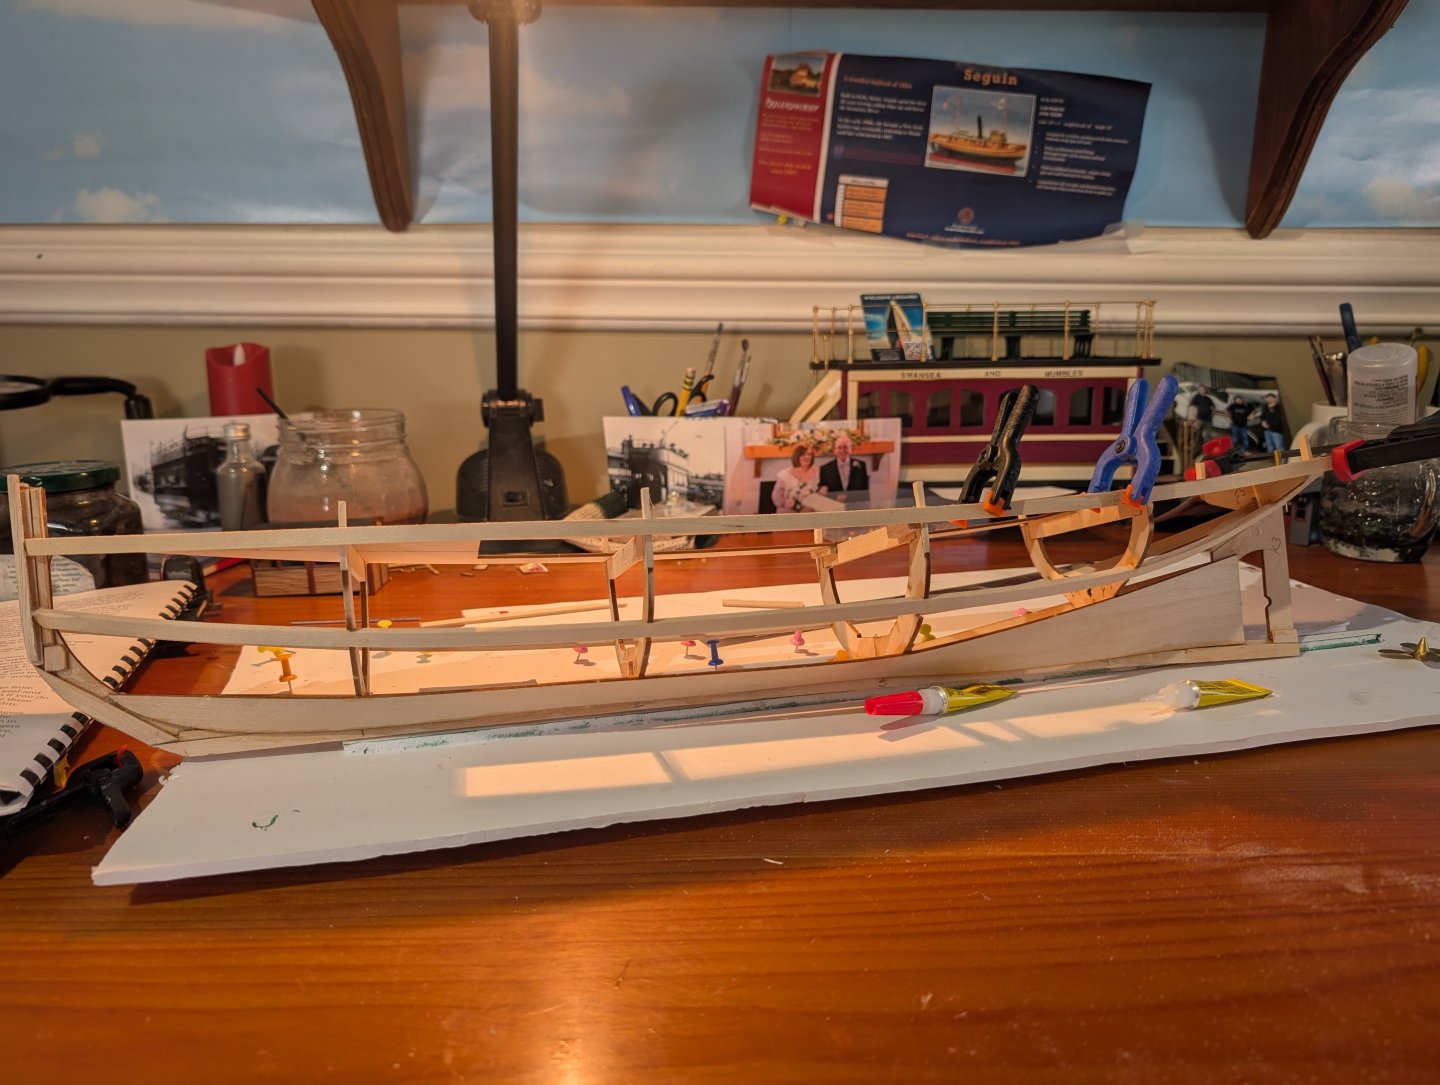
I started building my model of the Seguin a few nights ago. I read through Rods entire build that he posted a number of years ago. It gave me the courage to get this project started as I have had the kit for quite a few years. I remember seeing a built-up version of the Seguin in a hobby shop many, many years ago with my father and always thought that it was a grand vessel. So here I am taking a stab at it. I know some have failed but I do have some experience in building model ship kits and scratch building. So armed with Rods excellent build log I feel pretty confident that I can do it. Here is a picture after a few nights works. Wish me luck!
-
Hi Rod, Just read through your entire build of the Seguin. Your work is incredible! I just started building it tonight. Ironically, I purchased it almost at the same time you completed yours. It's taken some time for me to get started (life is busy). Thanks for documenting your build, the instructions are somewhat difficult for me to follow. Phil B Landis, NC