HOLIDAY DONATION DRIVE - SUPPORT MSW - DO YOUR PART TO KEEP THIS GREAT FORUM GOING! (Only 72 donations so far out of 49,000 members - Can we at least get 100? C'mon guys!)
×


Alex Parker
-
Posts
28 -
Joined
-
Last visited
Content Type
Profiles
Forums
Gallery
Events
Everything posted by Alex Parker
-
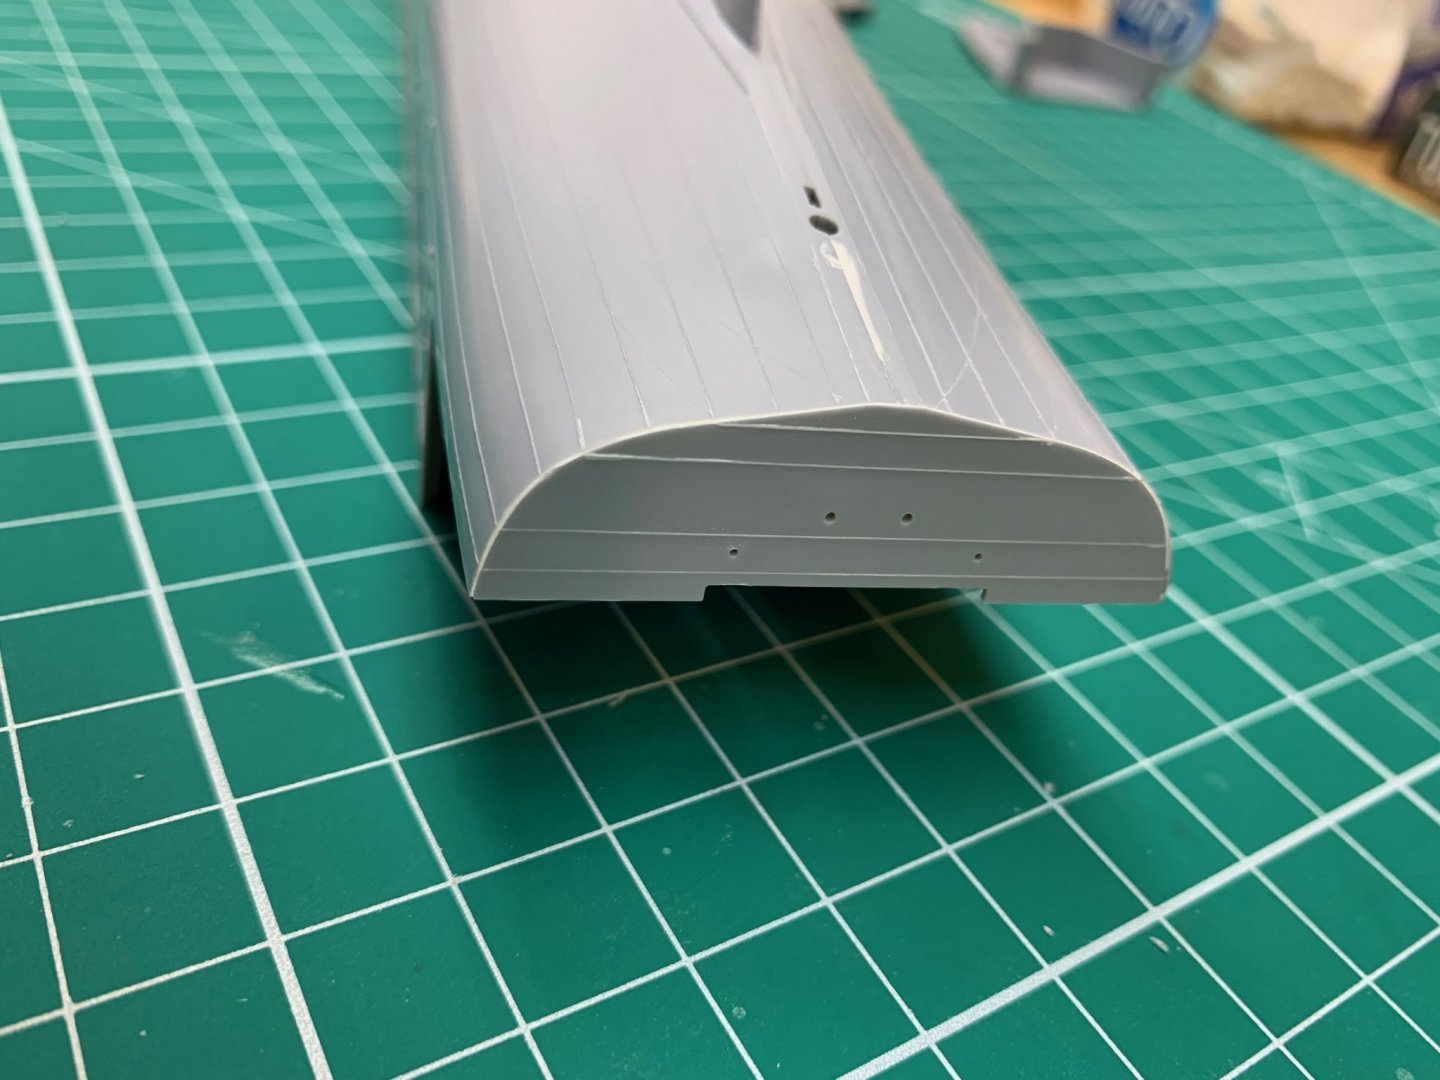
The stern plate did not fit nearly as perfectly as the hull halves did, requiring a touch of Perfect Plastic Putty all along the seam to blend it.
- 49 replies
-
- 10
-

-
- gambier bay
- hasegawa
- (and 1 more)
-
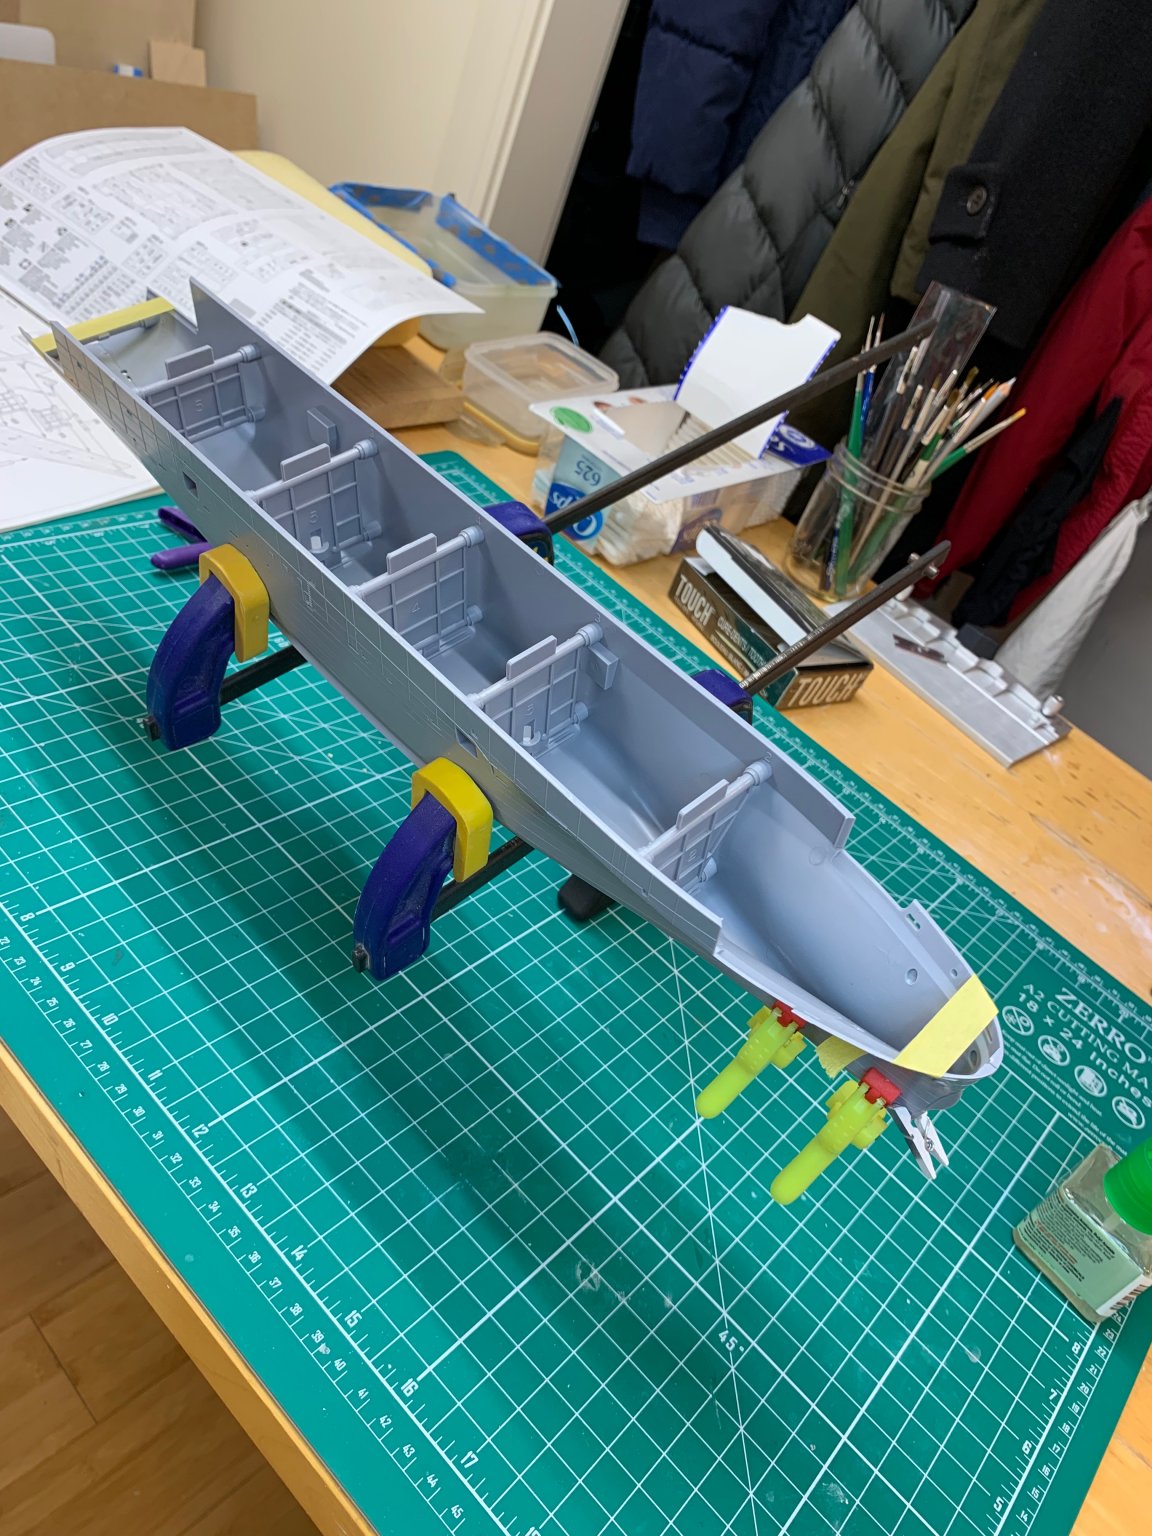
Here are some early process photos. Hasegawa provides these excellent bulkheads that socket into the hull sides and make a very strong, rigid structure. Unfortunately, when test-fit, they left a ~0.5 mm gap between hull halves along the keel. I solved that by lightly filing down the sockets on each hull side so they fit ever so slightly deeper onto the bulkheads. This allowed the hull halves to join almost perfectly. Required a tiny bit of putty at the bow and aft of the rudder. I lightly clamped up the hull while the Tamiya extra-thin cement set.

- 49 replies
-
- 9
-
-
- gambier bay
- hasegawa
- (and 1 more)
-
Hi all, I'm new to this forum, and relatively (re)new to model building. Like many of us, I built plastic kits as a pre-teen in the 70's, dropped it, then returned to the hobby in my 50's. My motivation was mostly liking to do stuff with my hands (I also build furniture) and a growing interest in WWII history, particularly naval aviation and, for that reason logically, particularly the Pacific war. Until now I've been doing only airplanes, moving up through 9 or 10 of them in increasing complexity to try and build some skills. The most recent was also the most complex, an Airfix 1:48 Supermarine Walrus (which as a flying BOAT I guess is legit to at least mention here) with the full Eduard PE treatment inside and out. Plus, this was my first foray into rigging a biplane. Wanting to keep ratcheting up the challenge level, I decided that now was the time for a ship. The specific choice of escort carrier Gambier Bay (CVE-73) was a combination of seeing the Hasegawa kit on sale for a very good discount and having recently read the excellent Last Stand of the Tin Can Sailors by James Hornfischer, which describes the heroic fight put up by Task Forces 1, 2, and 3 in helping to repel a much more powerful Japanese fleet from entering the Leyte Gulf and wreaking havoc on MacArthur's famous landing there. Gambier Bay was lost in that engagement, as were several other USN ships. I also purchased the "detail-up" PE kit that Hasegawa sells for Gambier Bay. In addition to a bunch of little details for the deck ordnance and such, this kit completely replaces the kit plastic for the masts and radar hardware (really most of the superstructure), and will without a doubt be the most complex PE construction job I've yet tried. So far I have made a basic assembly plan, and started building the hull. The assembly plan is basically to ignore a lot of the Hasegawa sequence, which bounces around between hull, deck, and planes/ordnance before tackling the superstructure, and do this instead: 1. Build out the hull, deck, and lower superstructure (the plastic part) separately, adding none of the deck hardware and ordnance, and only as much PE hull detail as lies within a solid color area of the complex Measure 23 camo scheme. 2. Separately make any PE parts that will get the measure 23 camo colors but cross color boundaries and can't be masked over. 3. Paint everything above the lightest hull grey color (I will use Gunze Mr Color lacquers for all of it), then paint the Measure 23 camo (which requires mixing colors, so I want to do it all at once so I don't have to match) on everything, going lightest to darkest color. I plan to grey out all the darker colors a bit to give the "scale attenuation" effect. 4. Paint all the PE bits that go on the camo areas separately, then glue them on. 5 Spray the main deck with deck blue, and probably brush paint all the other deck surfaces to work around the molded-in hardware that needs to be light grey. Use the decal sheet to guide masking off and spraying the ship number and landing strip lines on the deck (no way are decals going to settle over that texture). 6. Build and paint all the deck hardware and ordnance, then install it. 7. Take a deep breath. 8. Build the PE superstructure, and paint it. 9. Take a second deep breath. 10. Try to do a decent job of rigging it with EZ-Line. 11. Build and paint the aircraft that are provided (9 total).
- 49 replies
-
- 7
-
-
- gambier bay
- hasegawa
- (and 1 more)