HOLIDAY DONATION DRIVE - SUPPORT MSW - DO YOUR PART TO KEEP THIS GREAT FORUM GOING! (Only 72 donations so far out of 49,000 members - Can we at least get 100? C'mon guys!)
×

gsxdent59
-
Posts
85 -
Joined
-
Last visited
Content Type
Profiles
Forums
Gallery
Events
Everything posted by gsxdent59
-
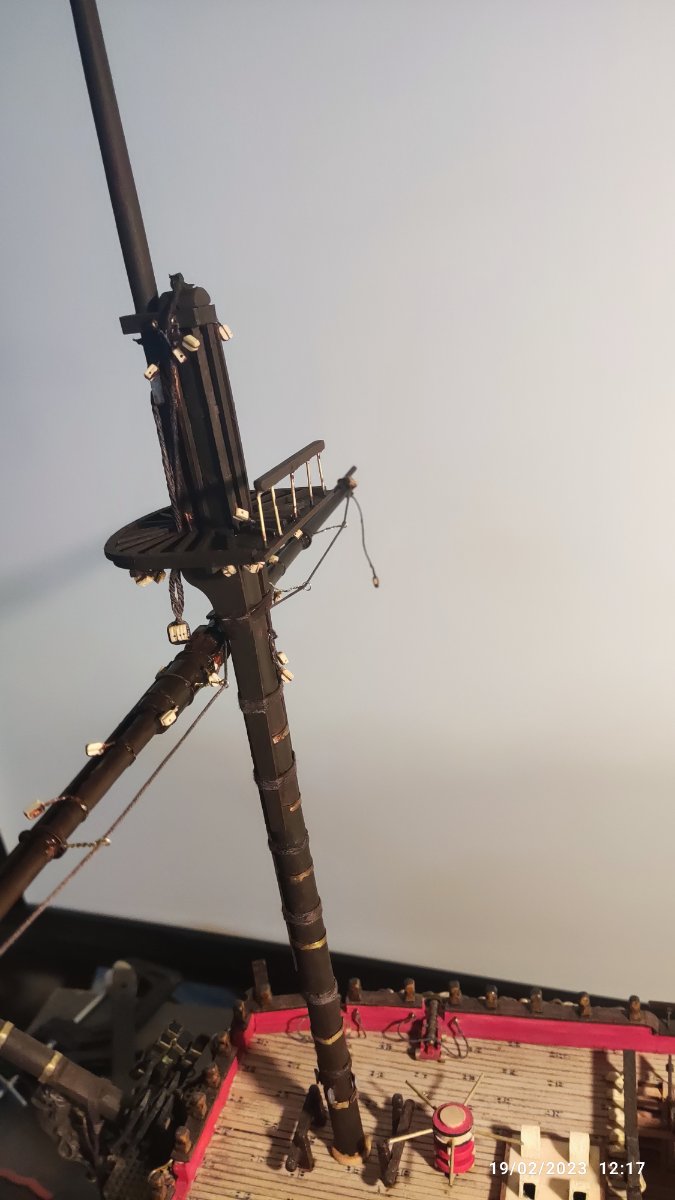
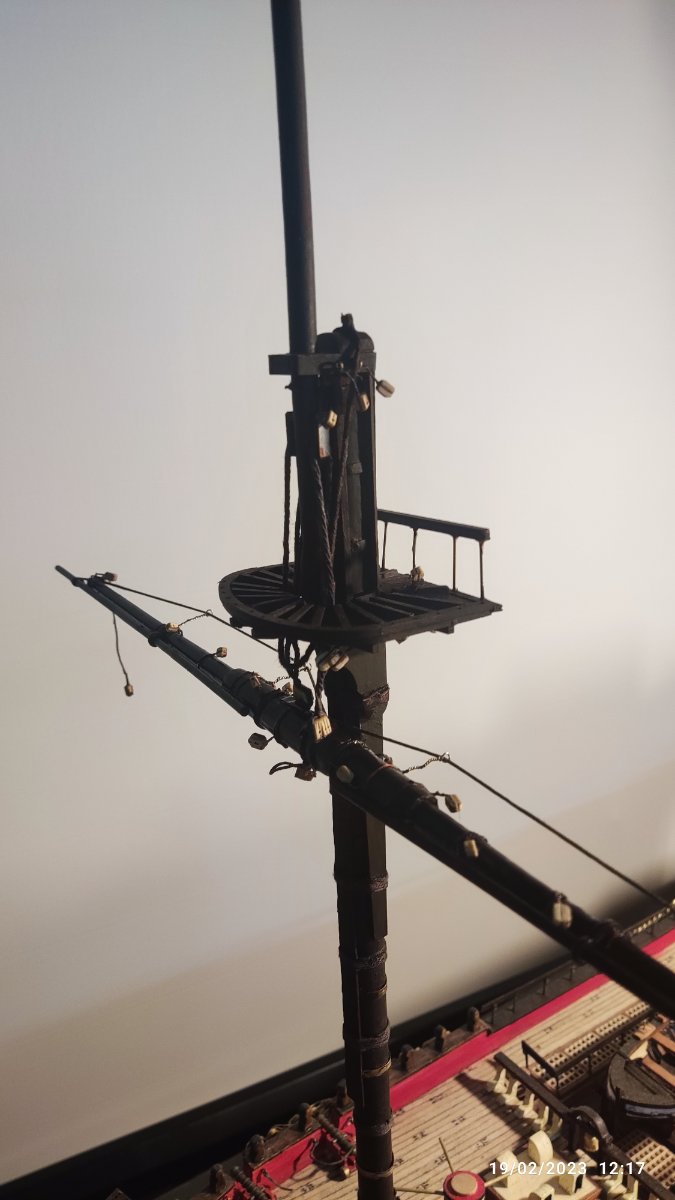
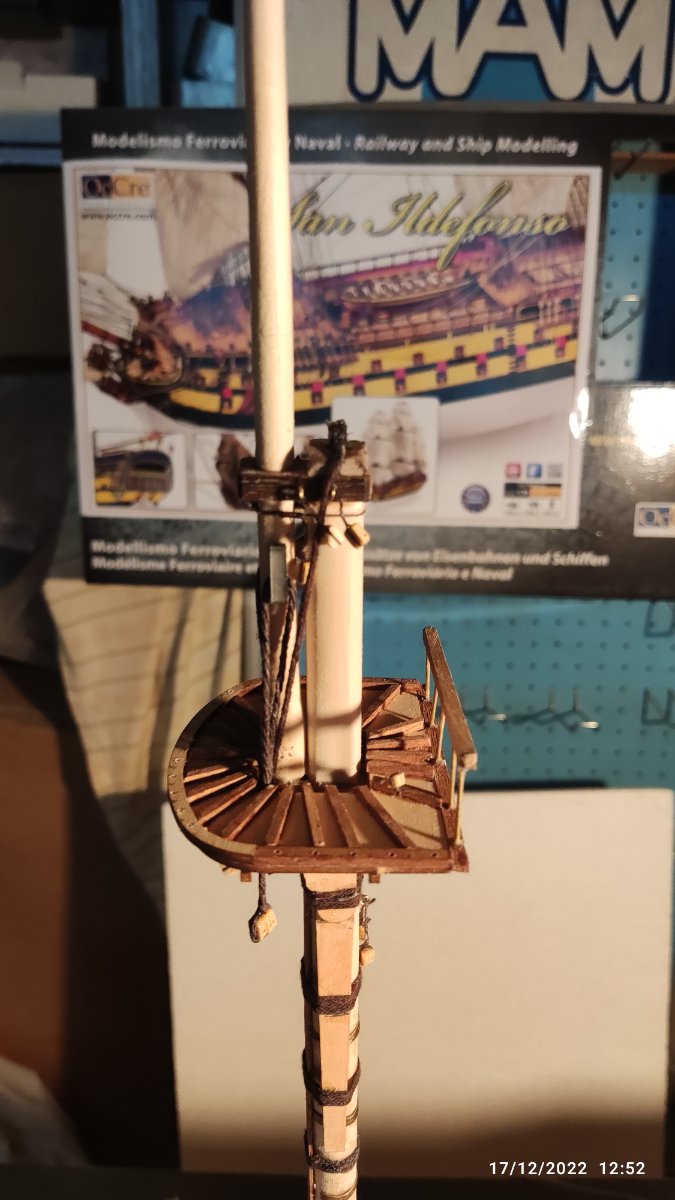
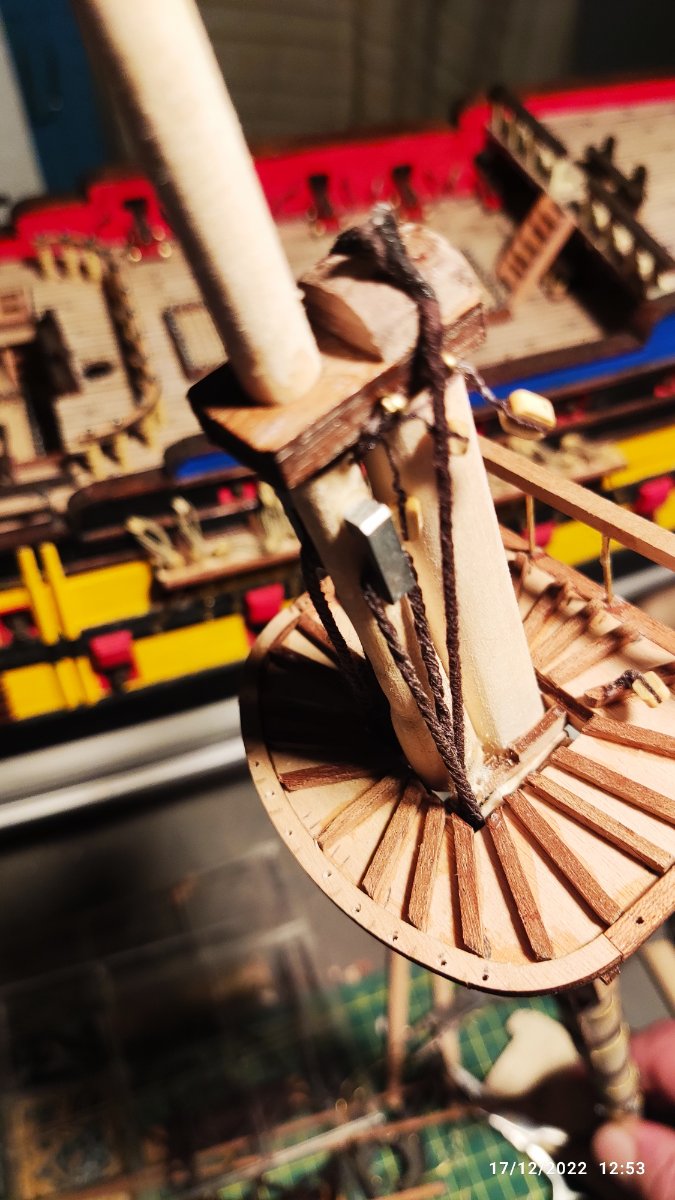
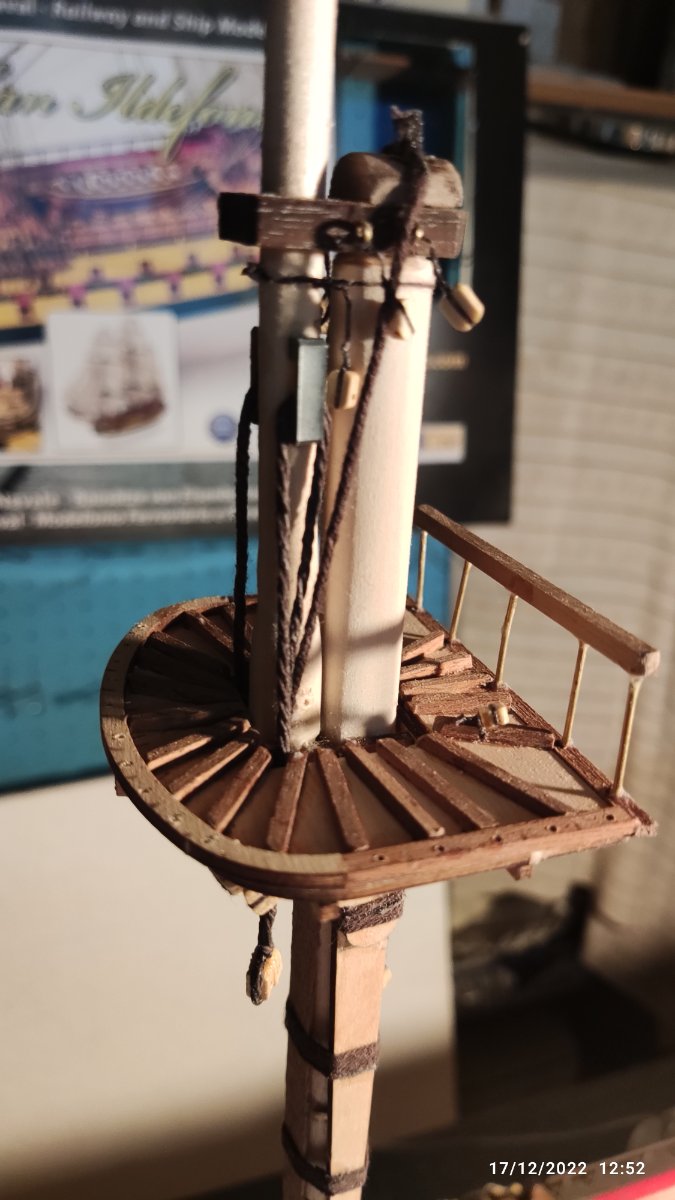
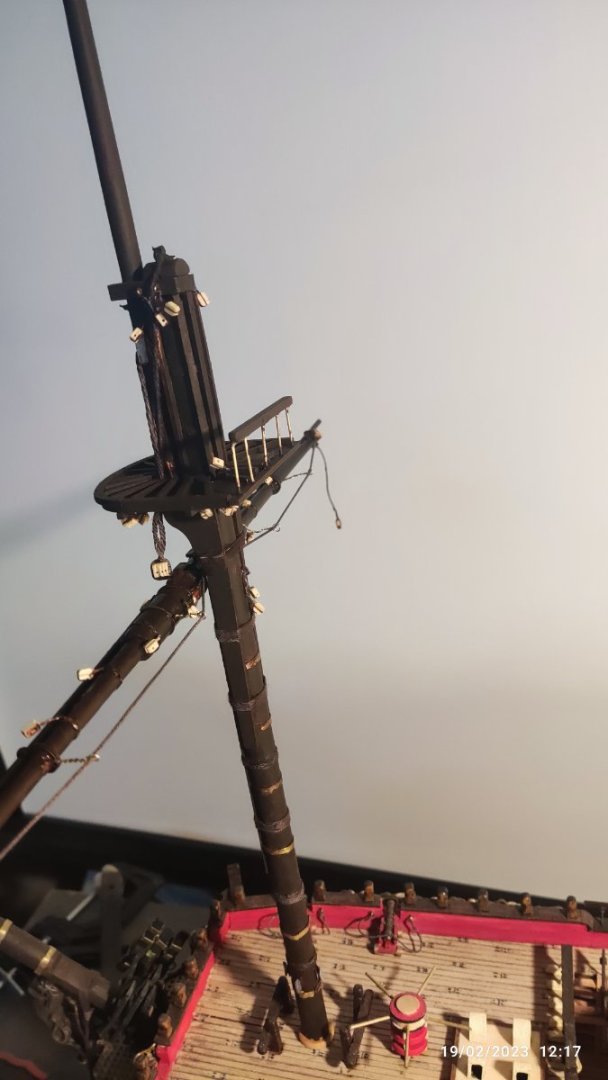
Now i have finish the front mast. Three parts. Placed all the blocks,pulleys and wires. Start the yards now.Four for each mast...I finish the lower. A lot of work ...wood,metal,and prass parts...I don't cement the yards now. First i will make all the ladders for each mast and after i cement the yards,for easier work.


-
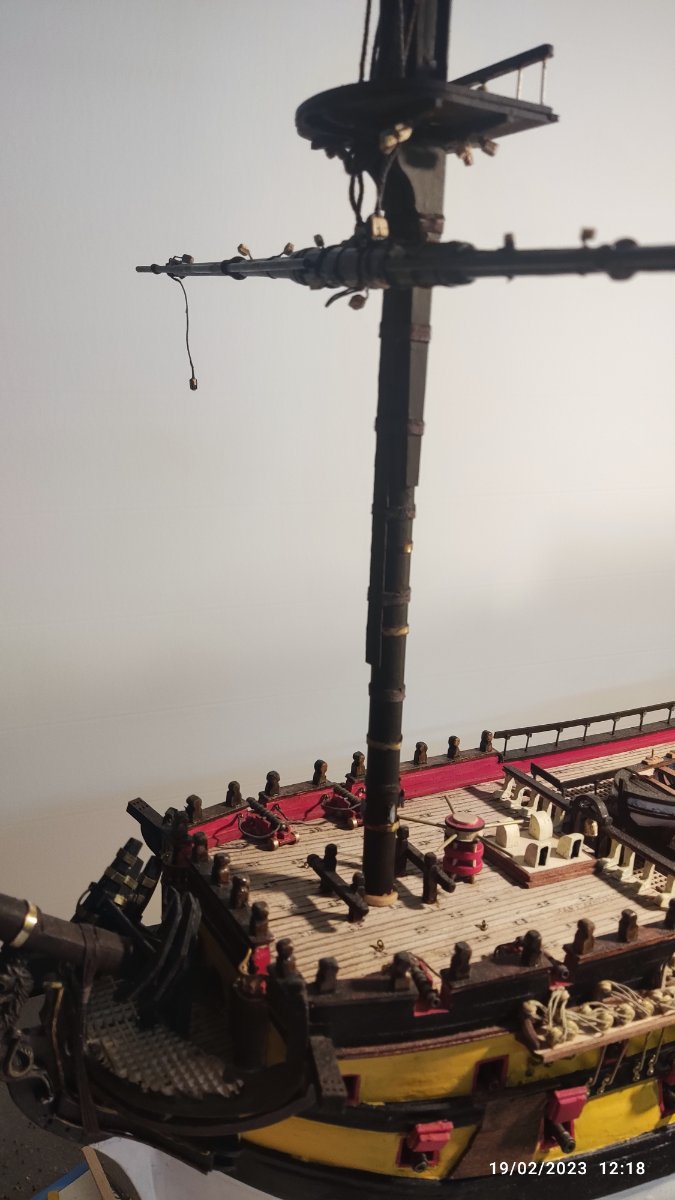
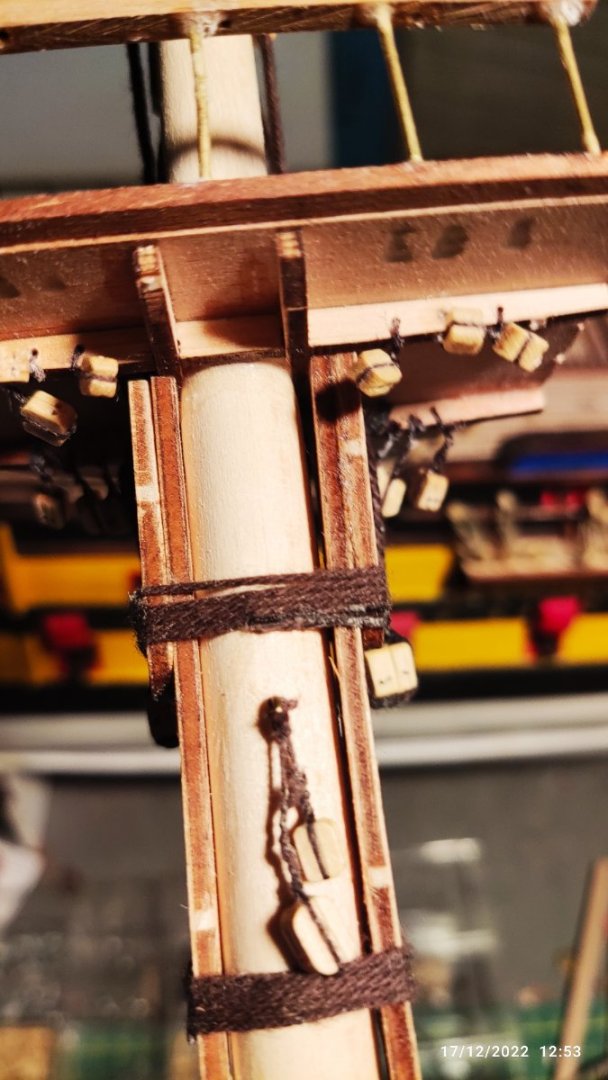
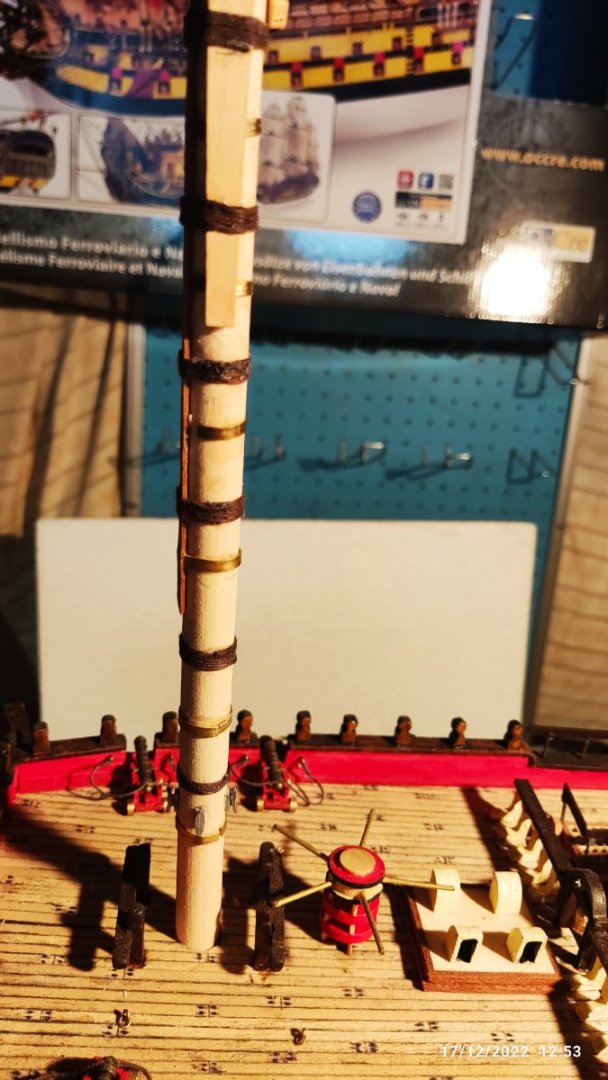
Starting the formast. A lot of work, sanding to take the shape, tied up all nessesery parts as shown in pictures. All mast will be painted at the end.


-
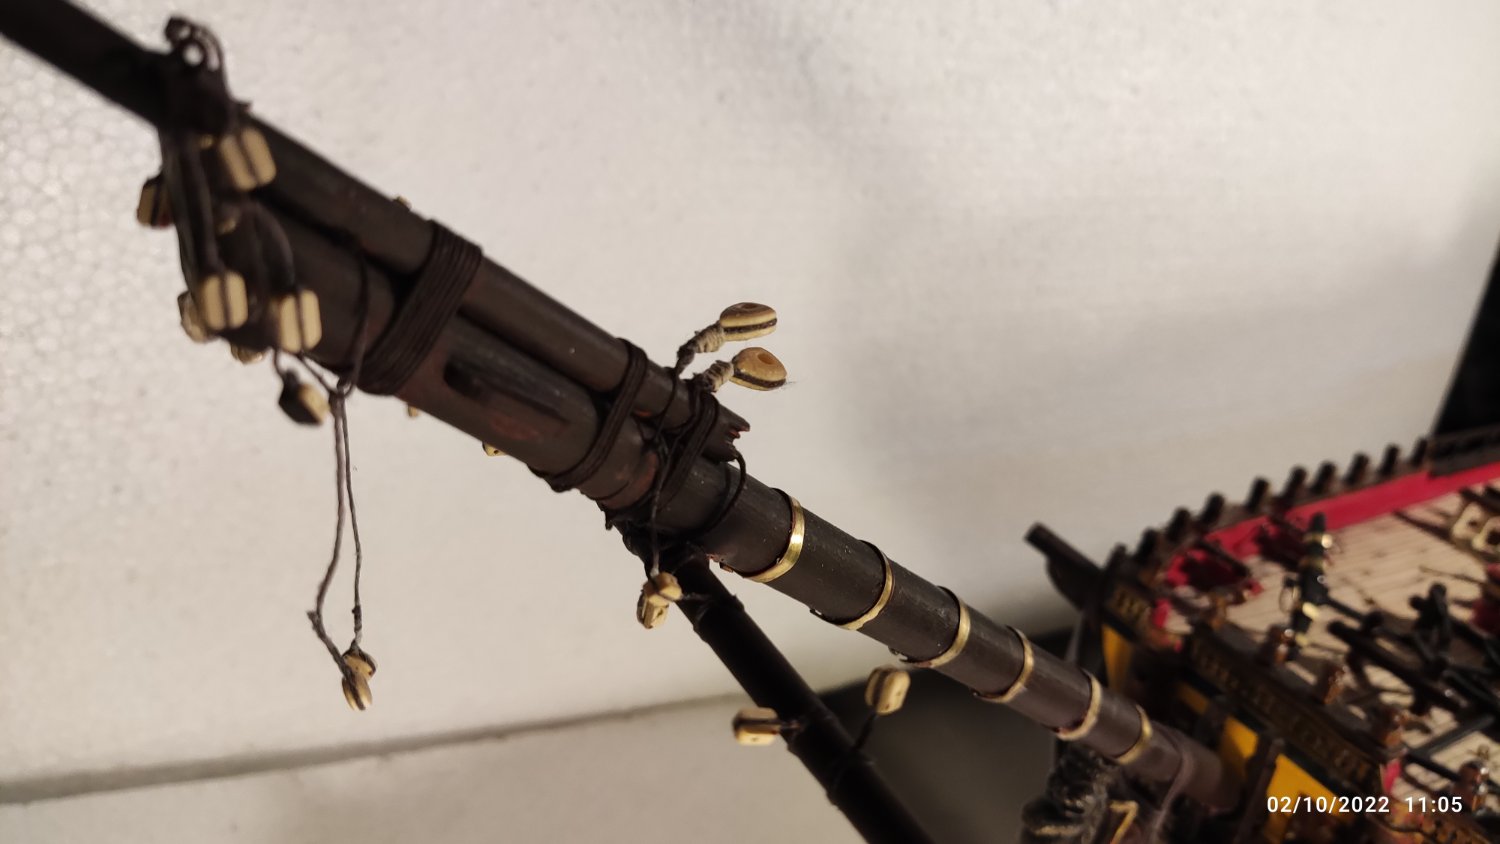
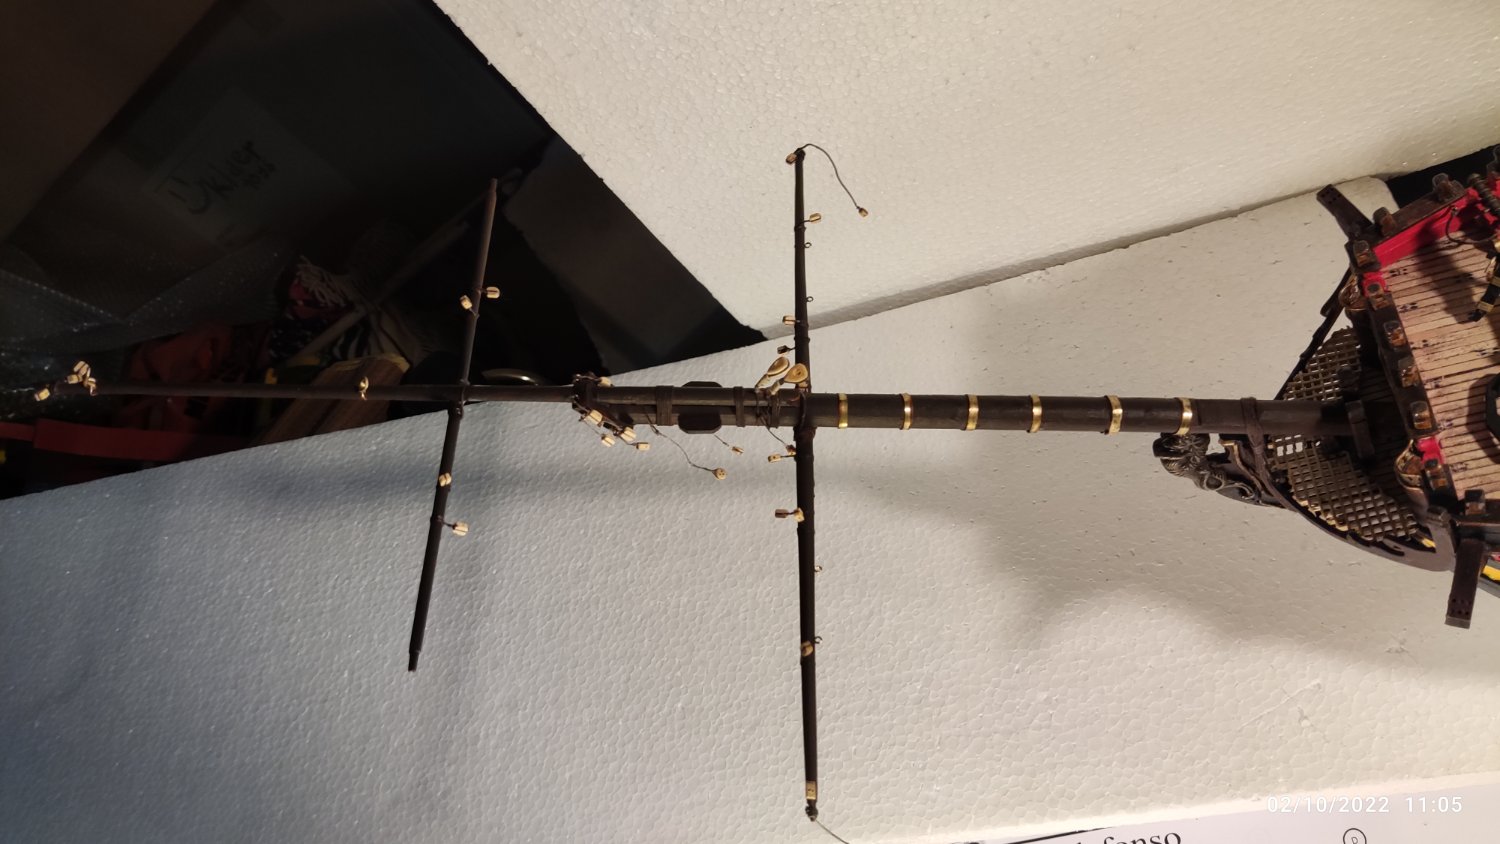
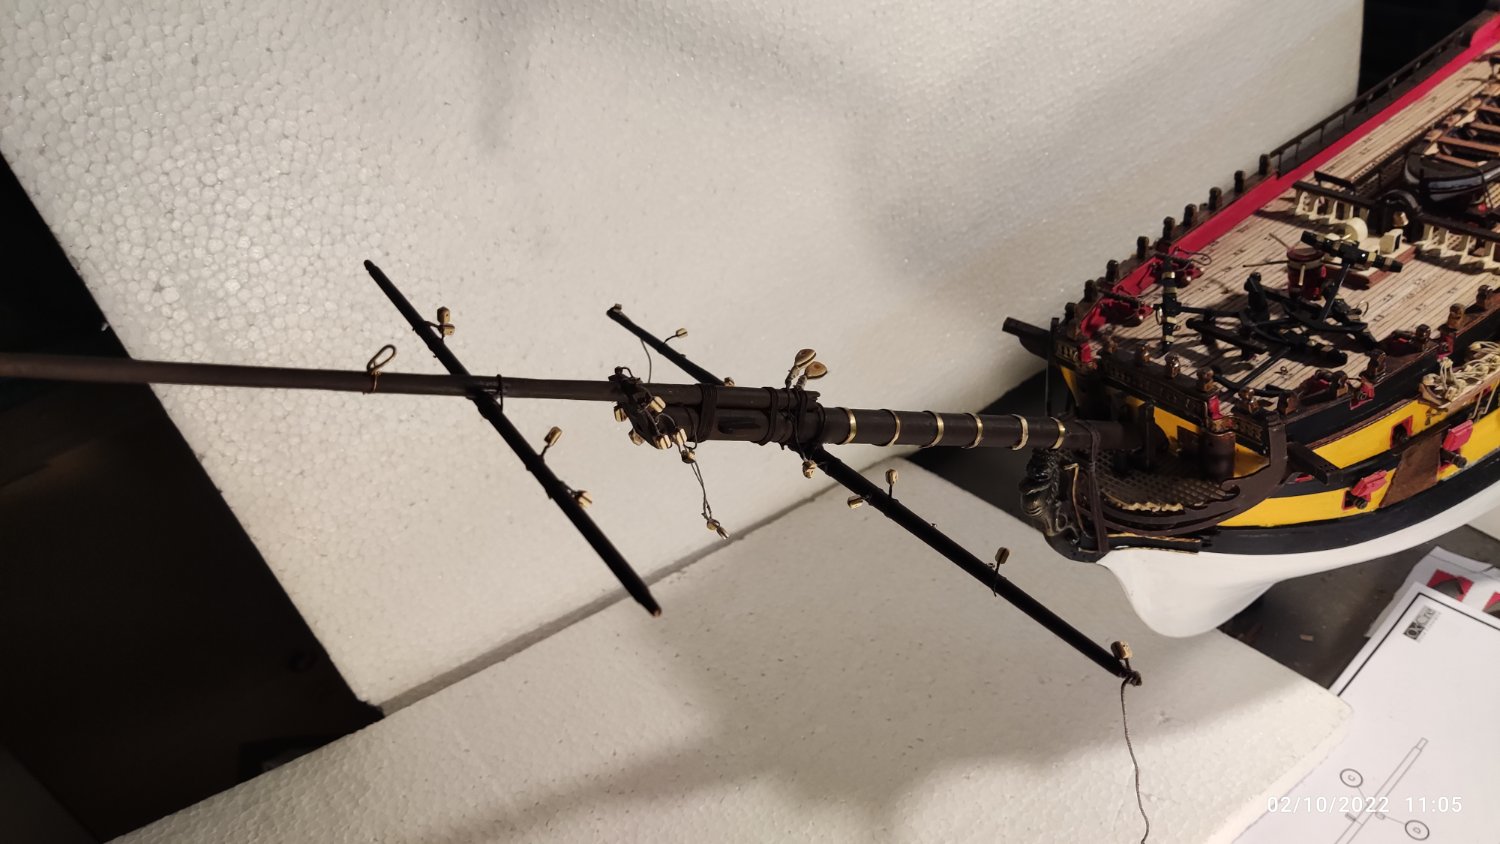
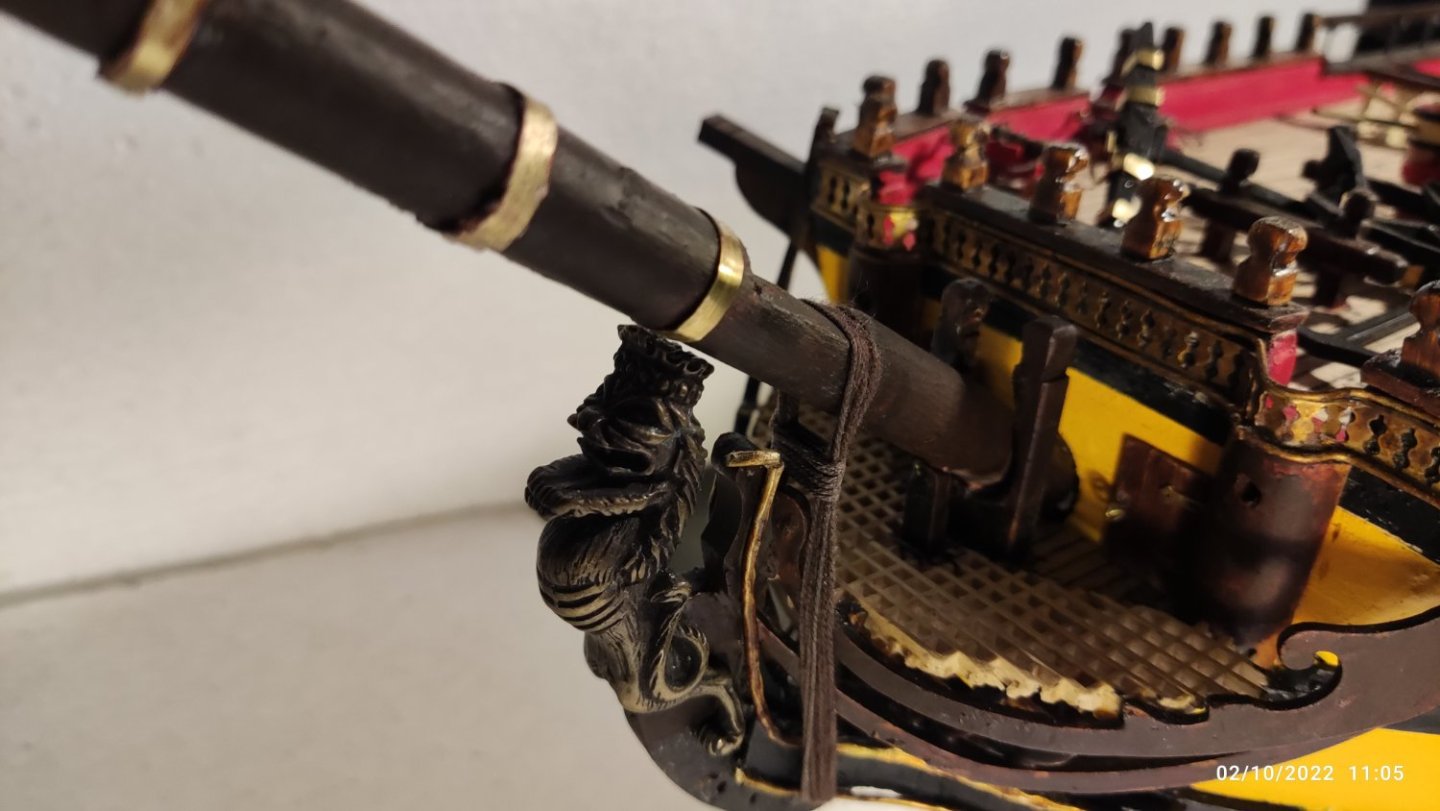
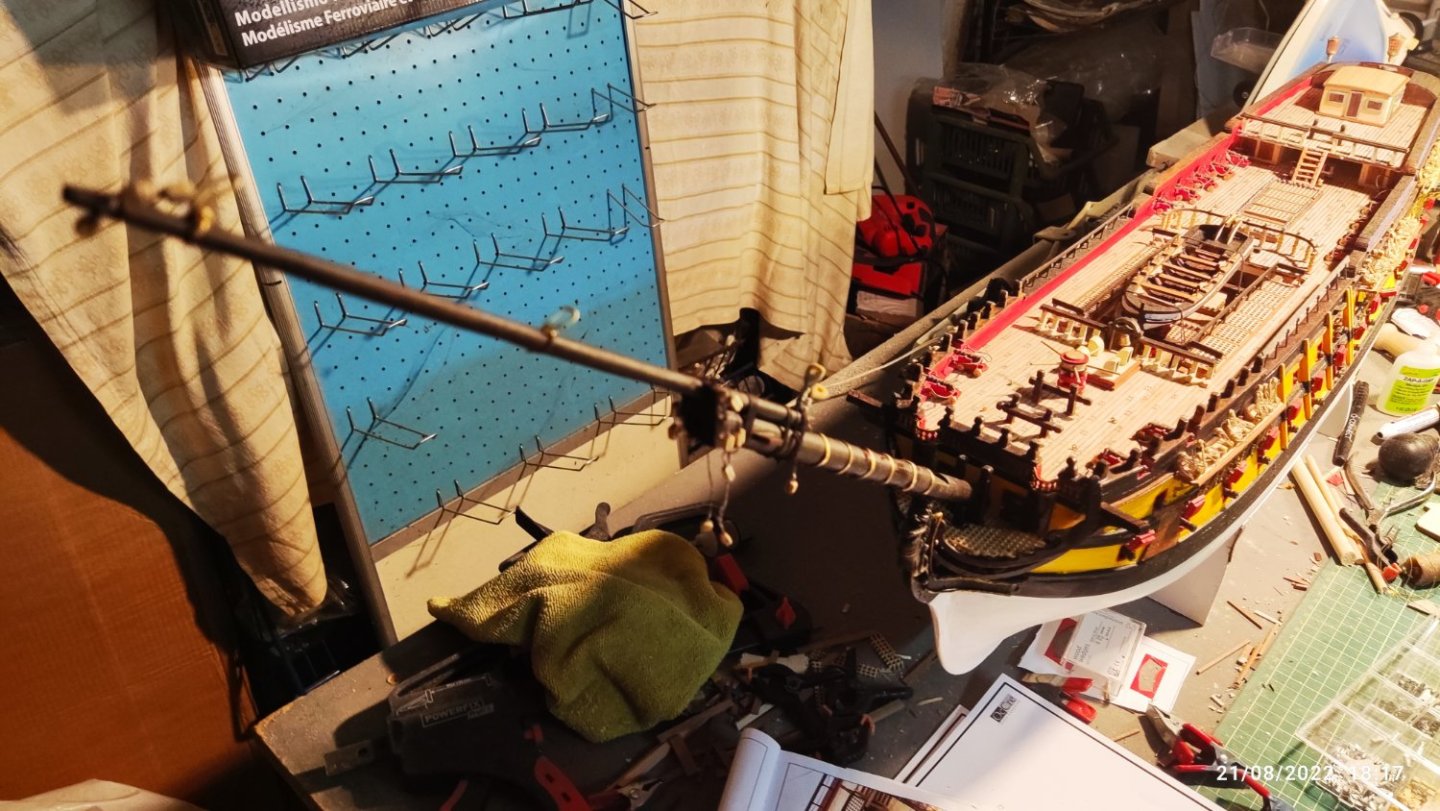
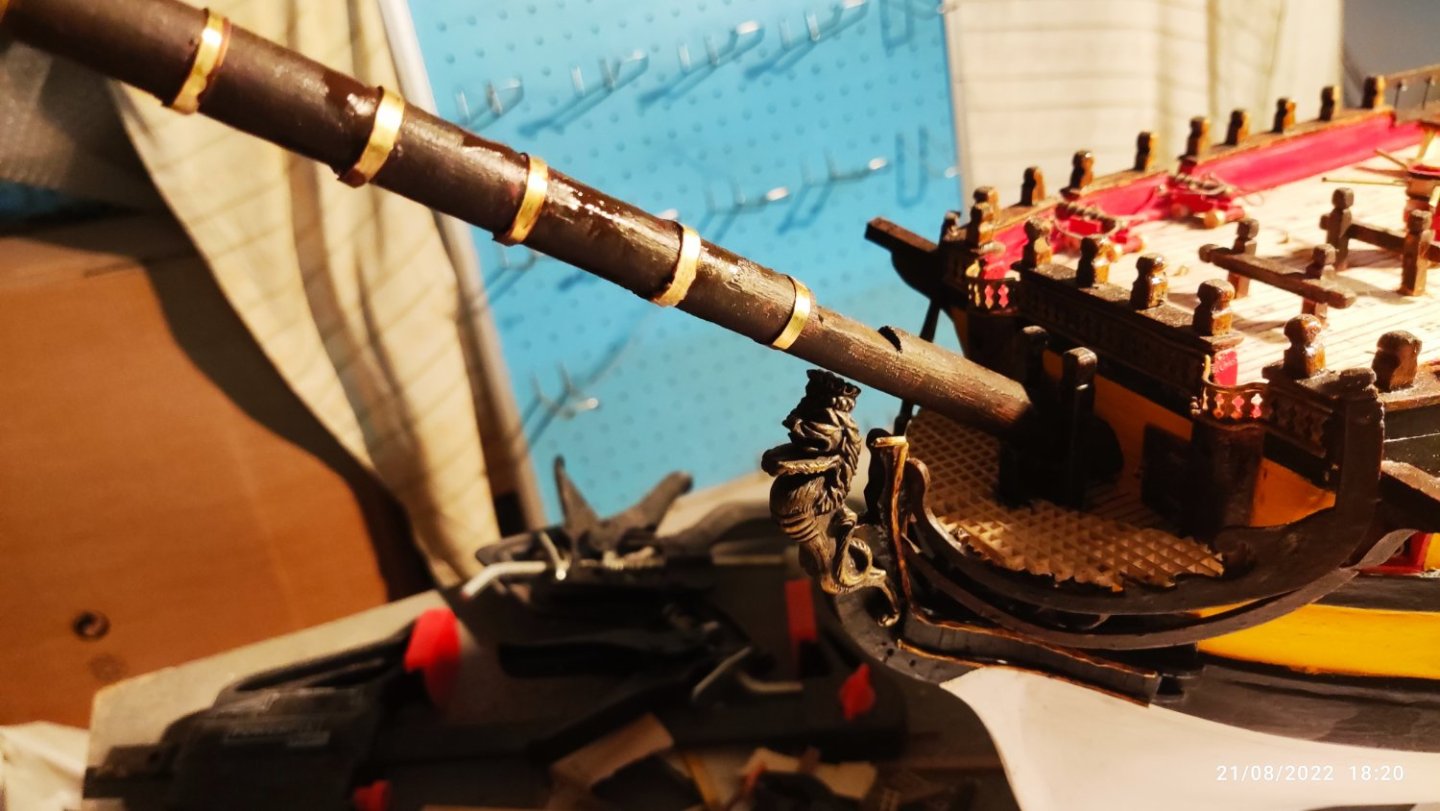
Now i finish all the bowsprit with the two sail yards. All the hooks,rings and pulley blocks are fitted on place for future use. I cement all the structure in place and a cotton thread 0.50mm putted around the hull and the bowsprit as shows in the fotos. Now is time for the foremast.


-
Now i start the Main bowsprit. Two pieces ,one 12mm diameter and the boom from 6mm on base 4mm at the end. I use sand paper to give the right shape. Assembled together by viewing the plans that are 1:1 in scale. I put all the eyebolts and pulley blocks as shown in the plans, using cotton thread. That will be used leater for threads from musts. With the bowsprit in place, the length of the model is completed. Now is 49,21 inch long or 1,25 meter

-
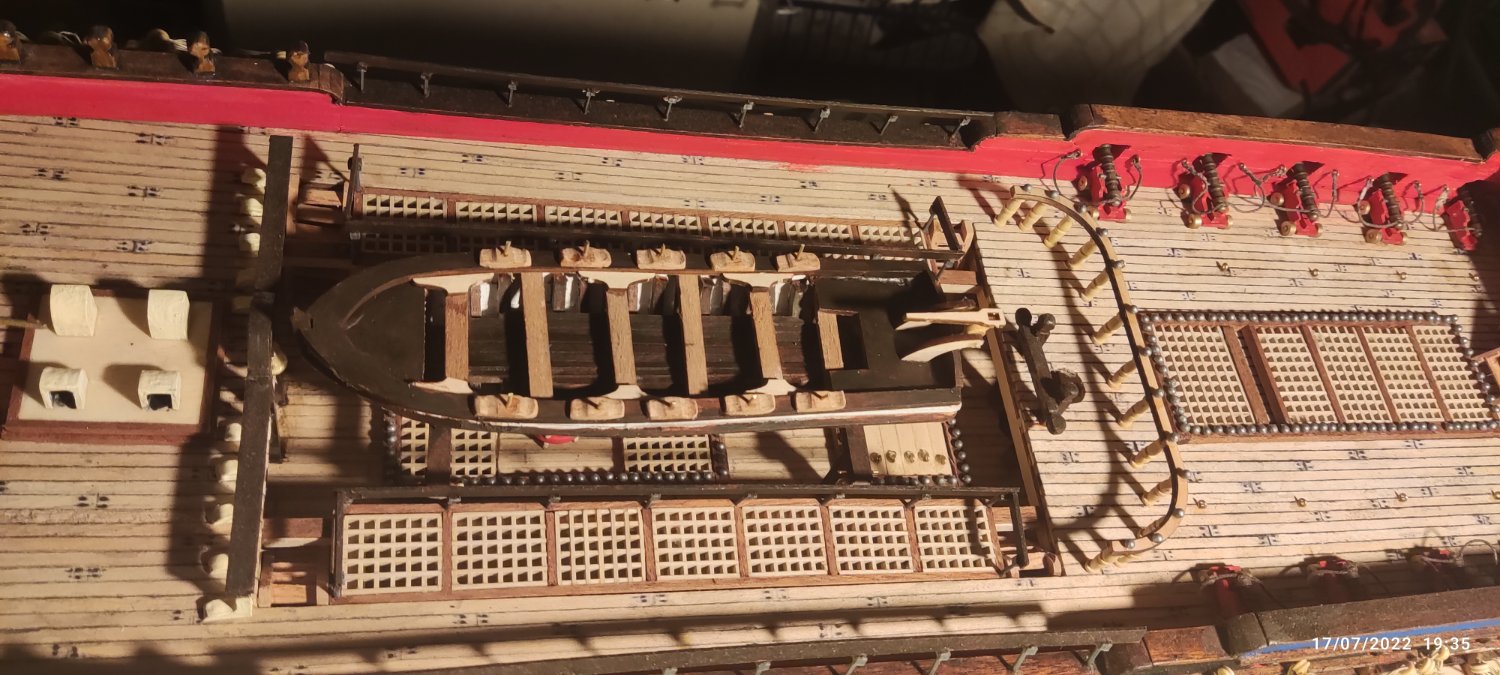
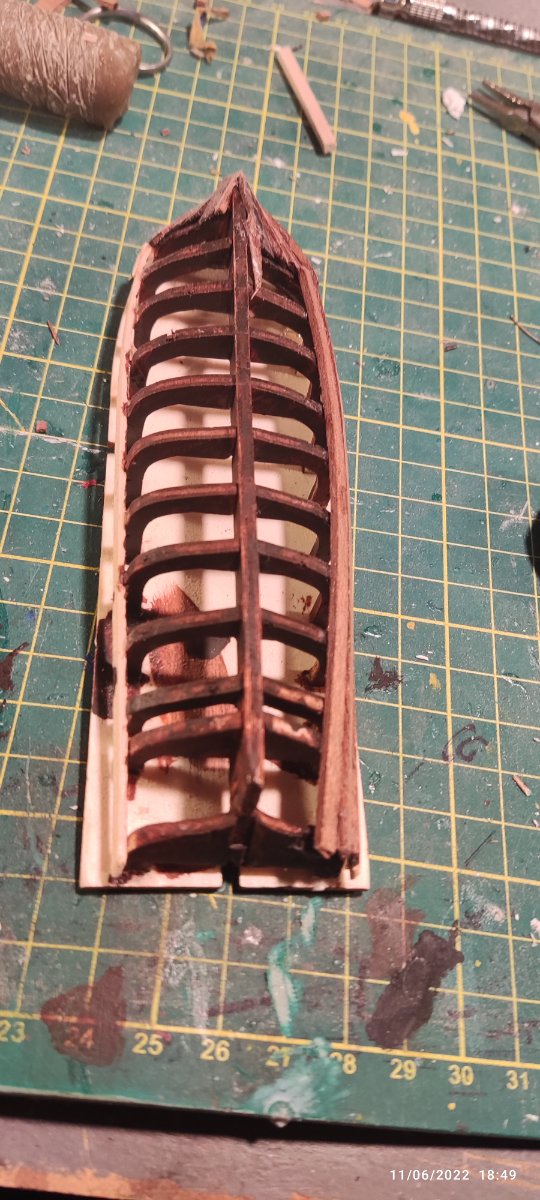
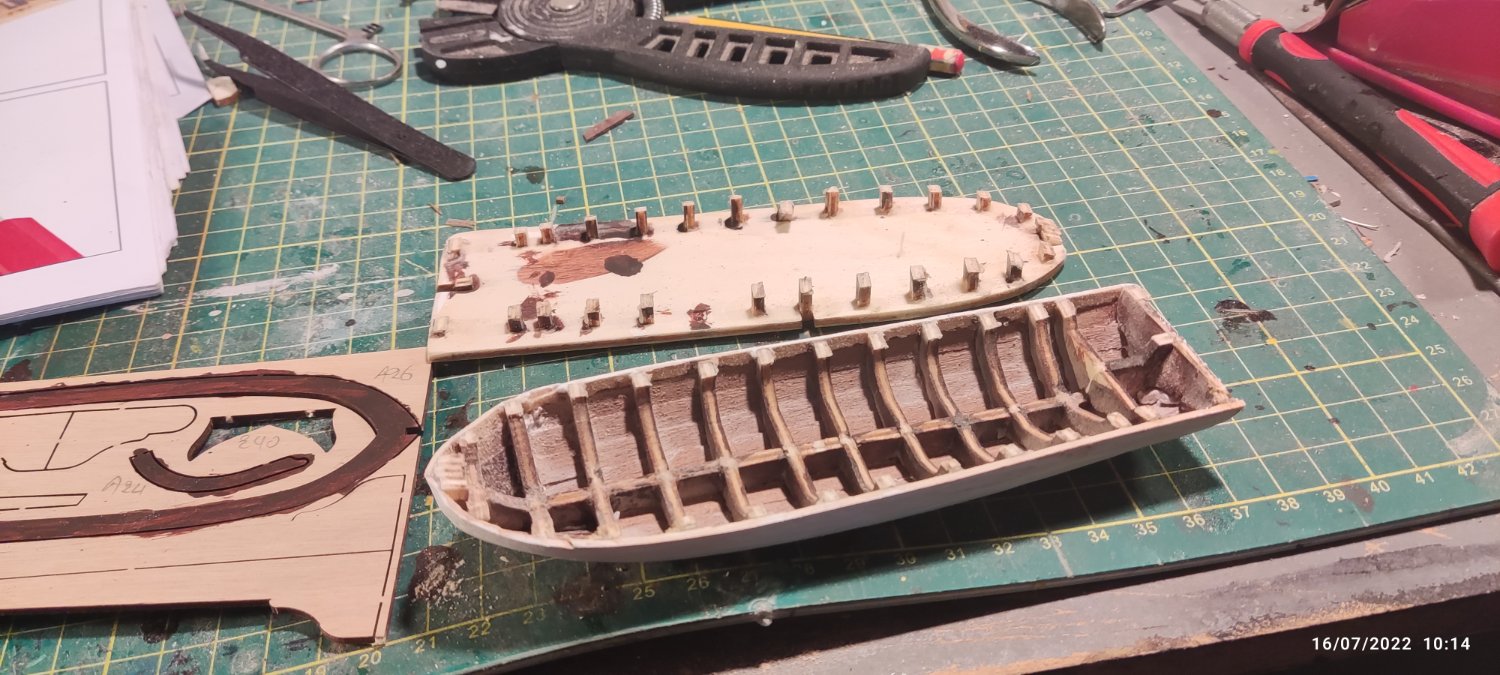
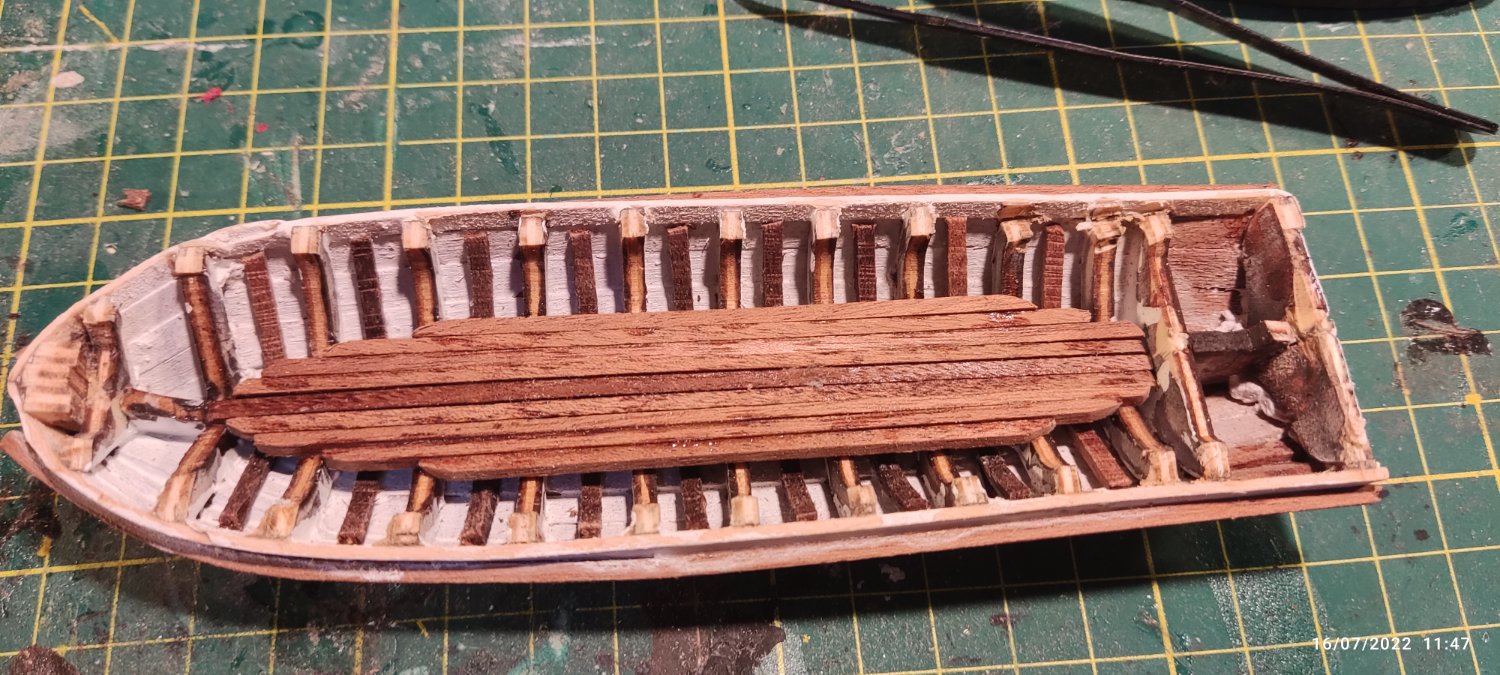
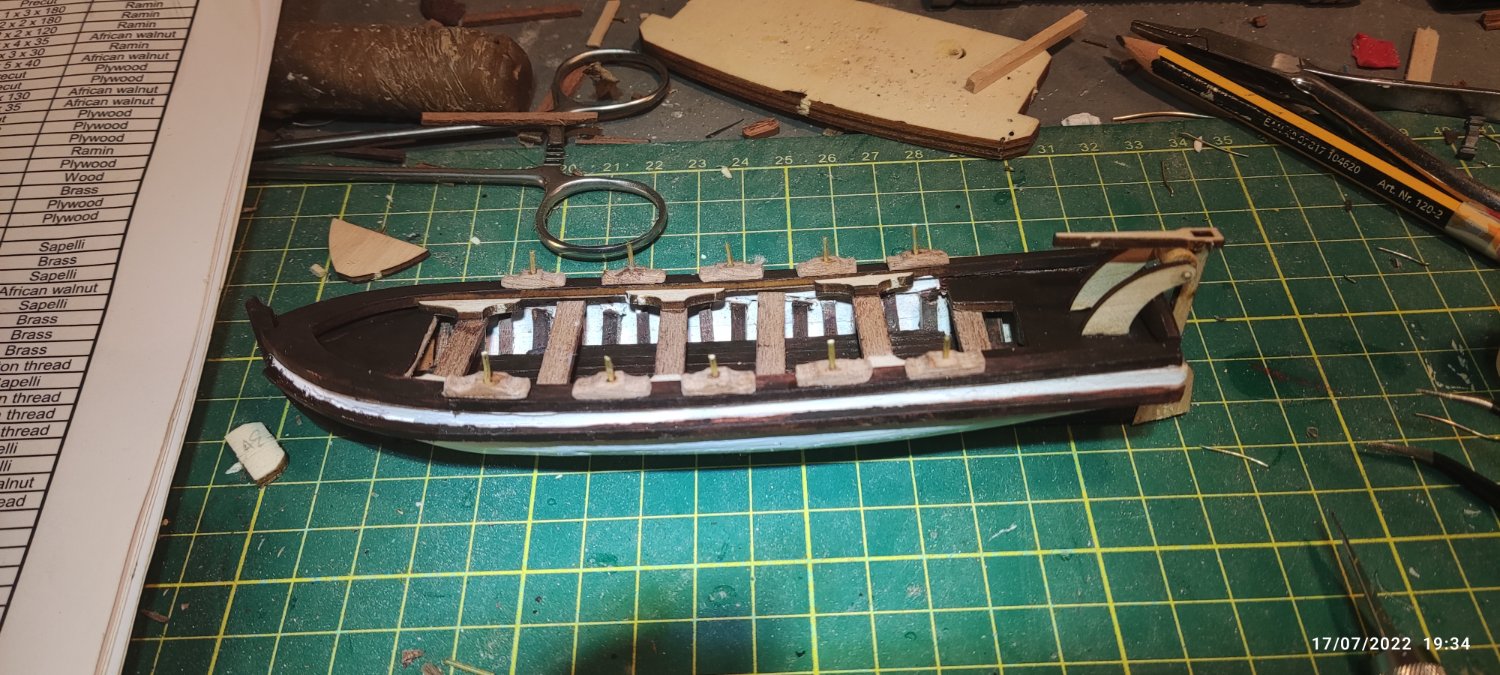
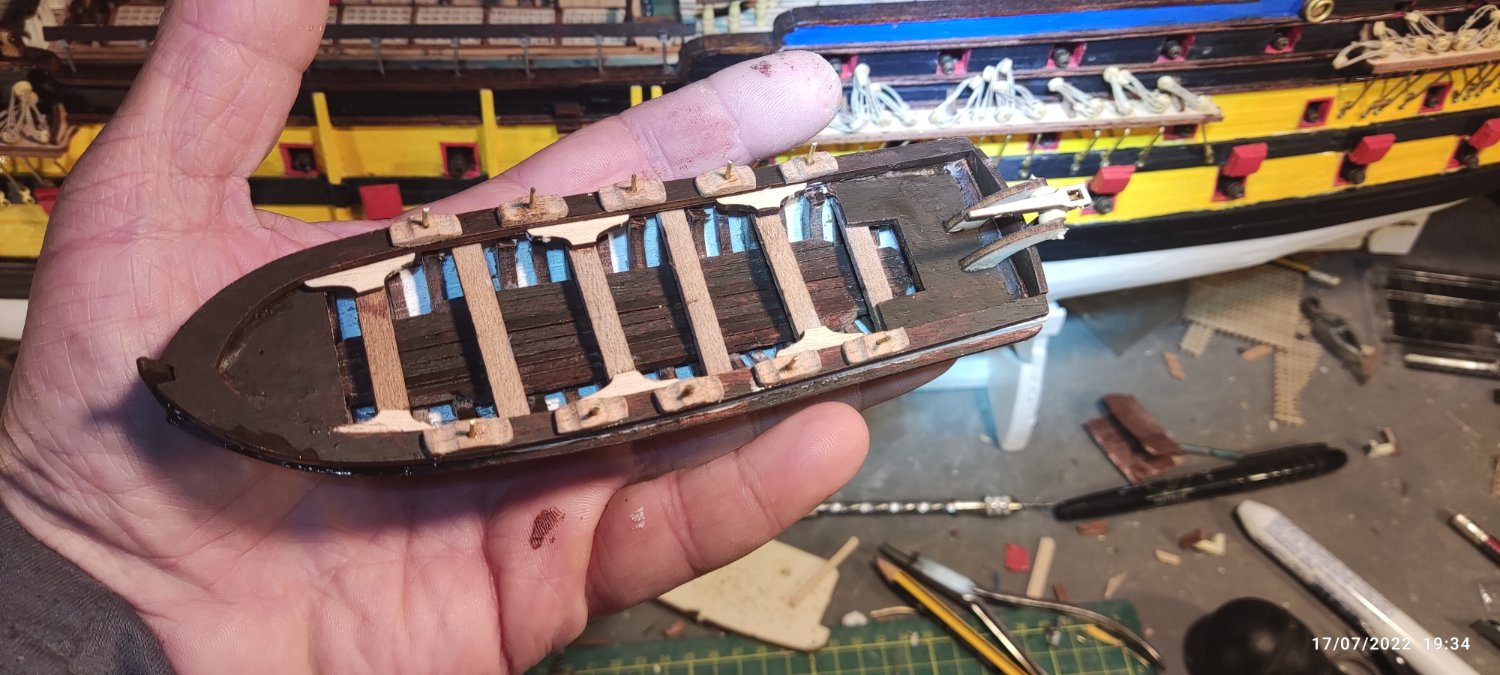
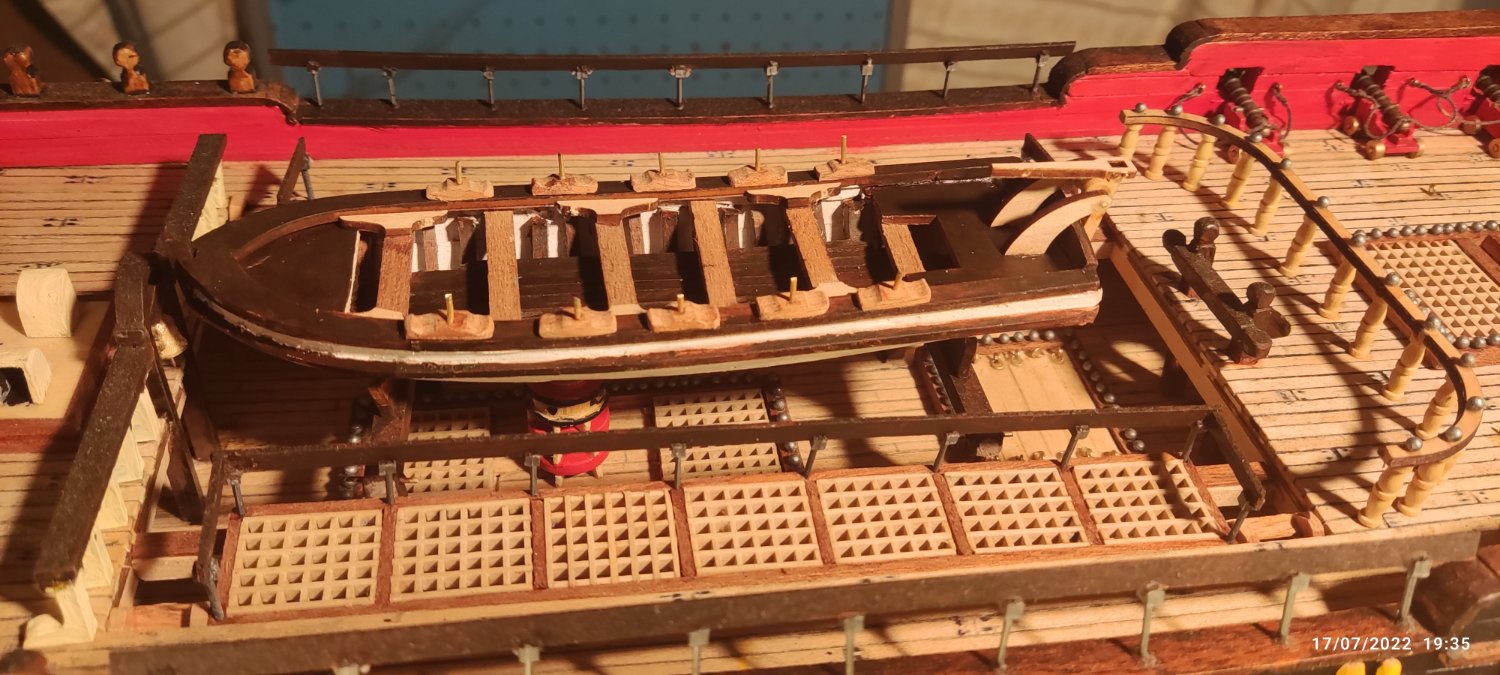
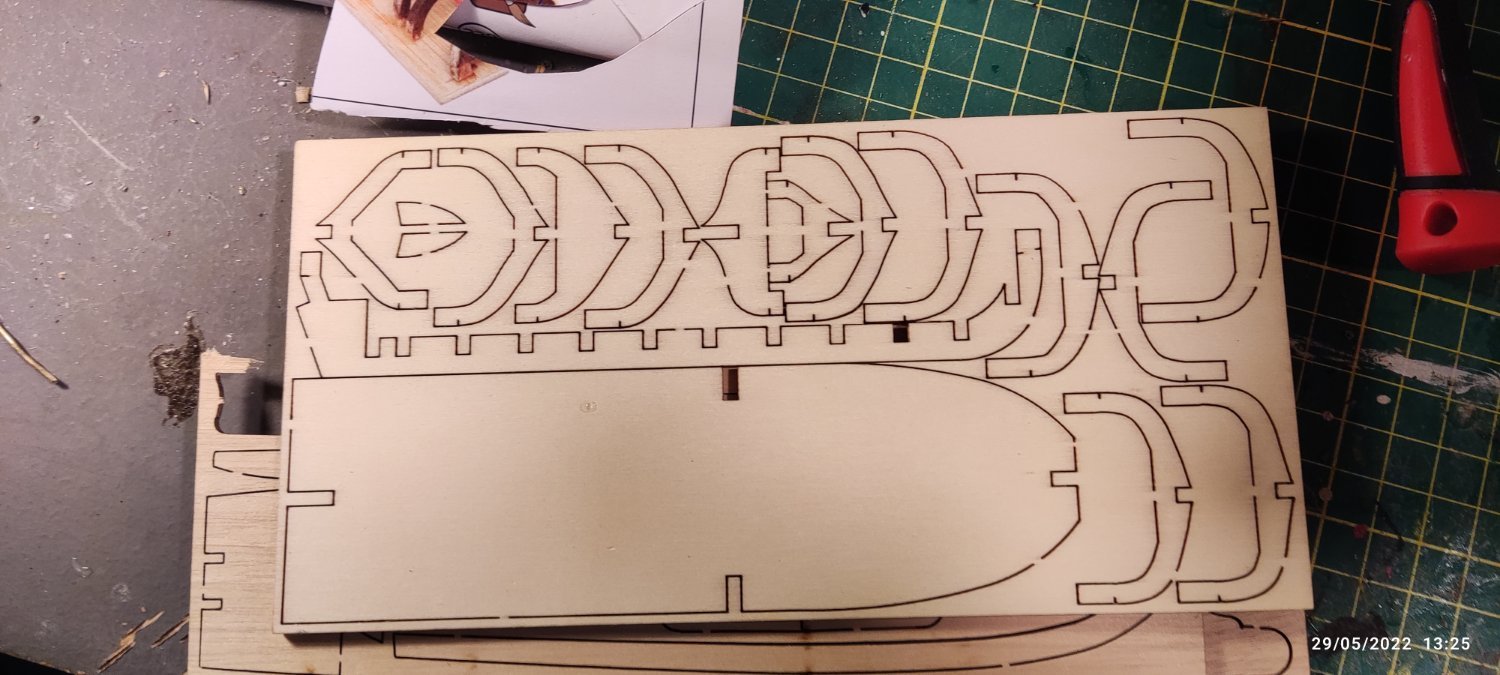
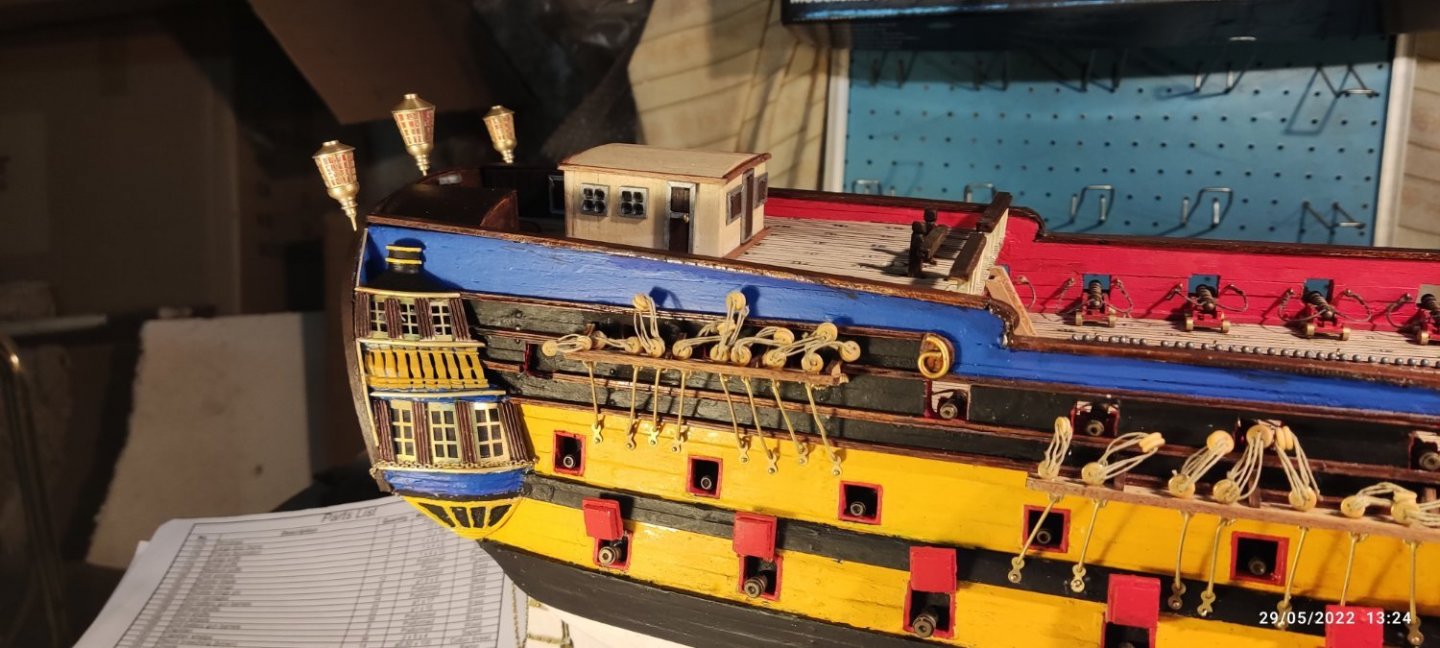
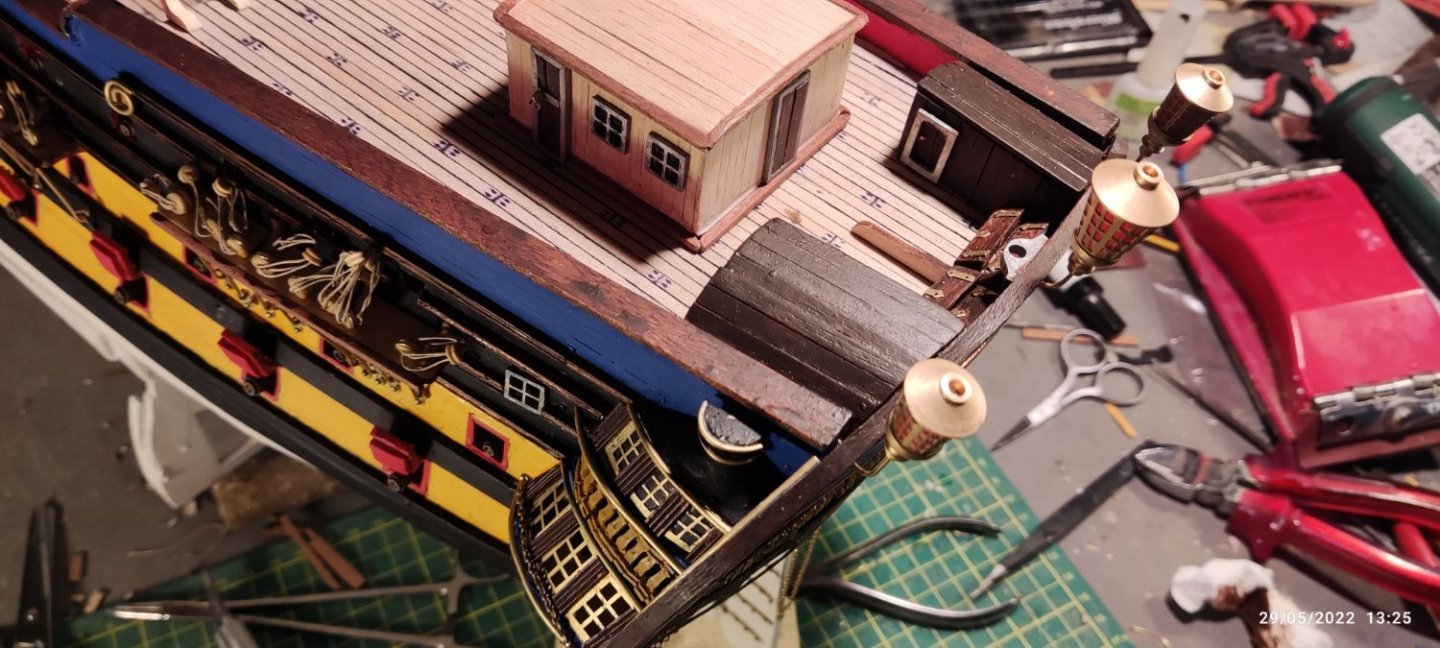
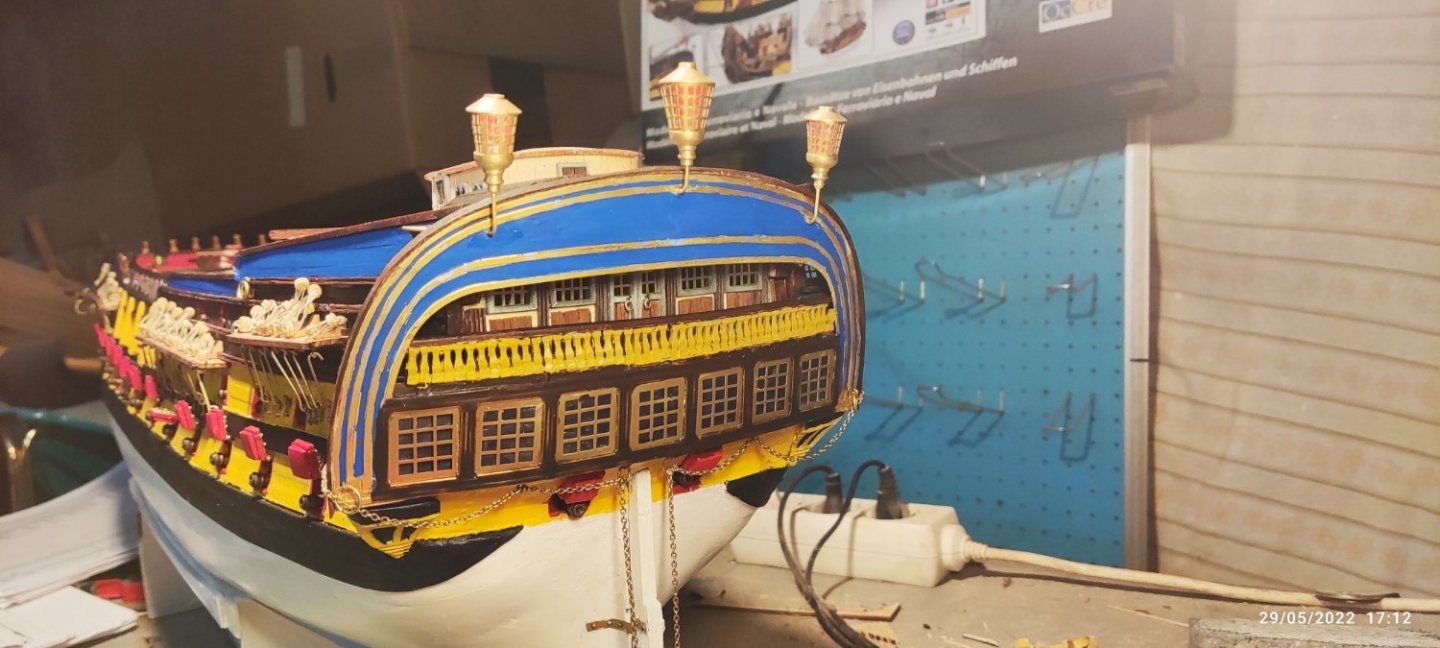
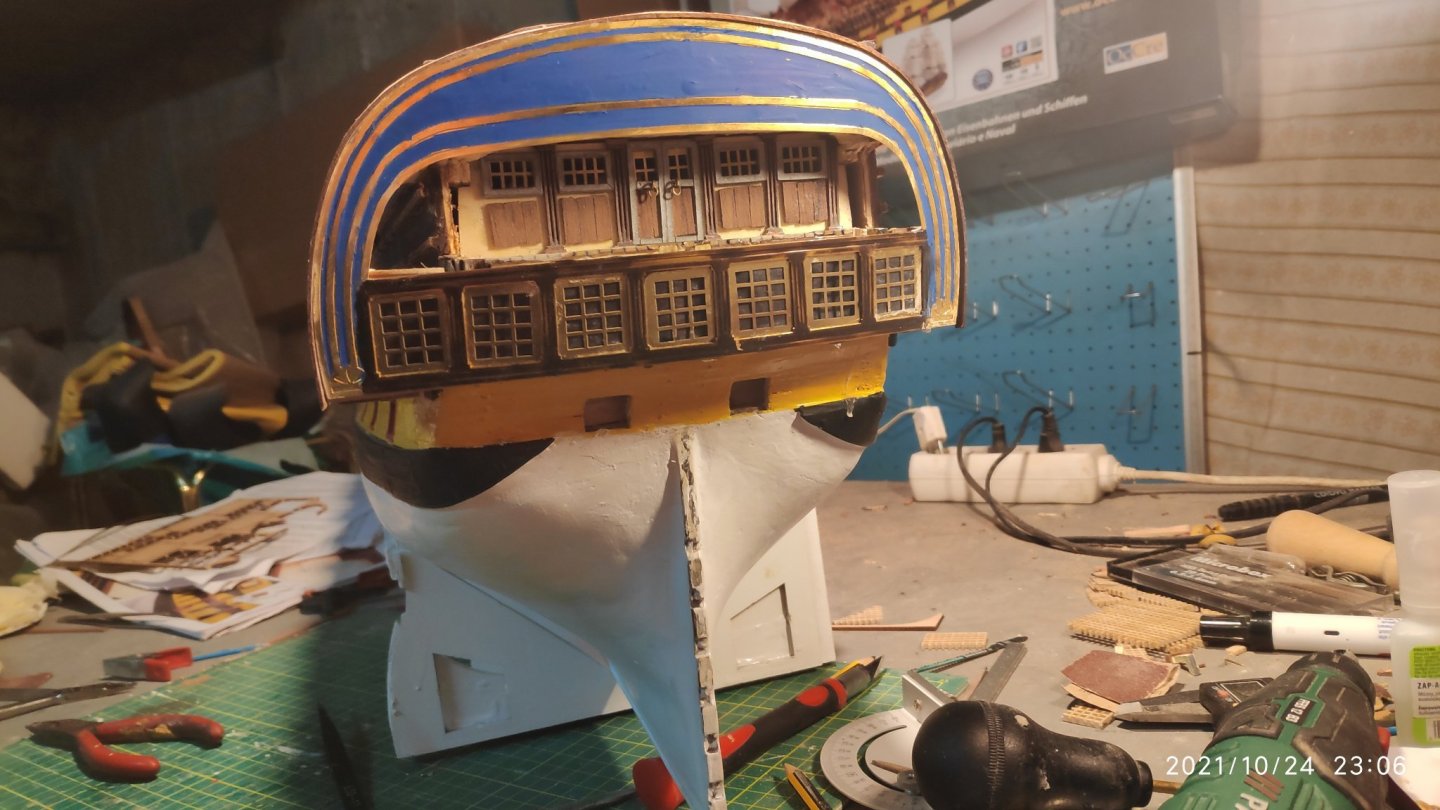
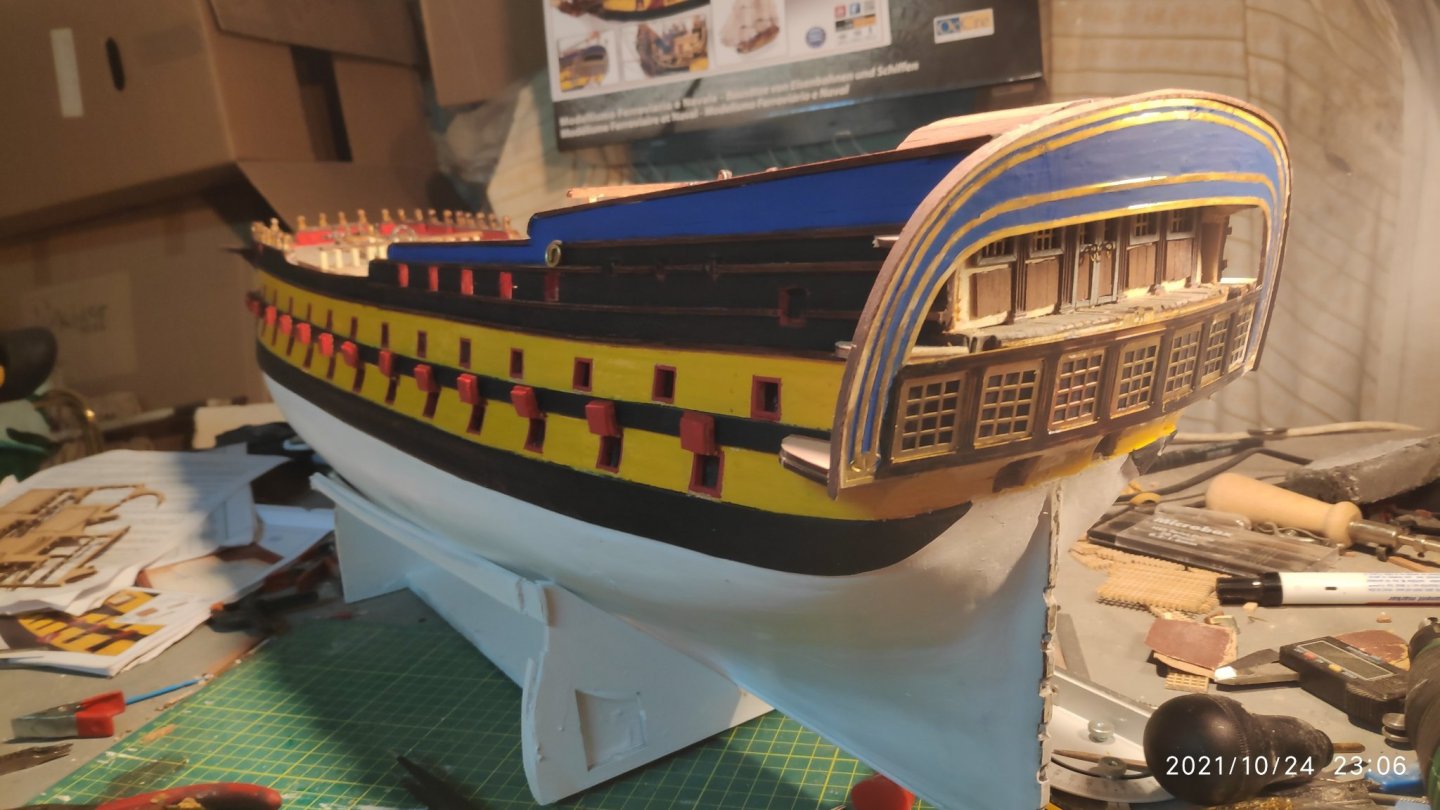
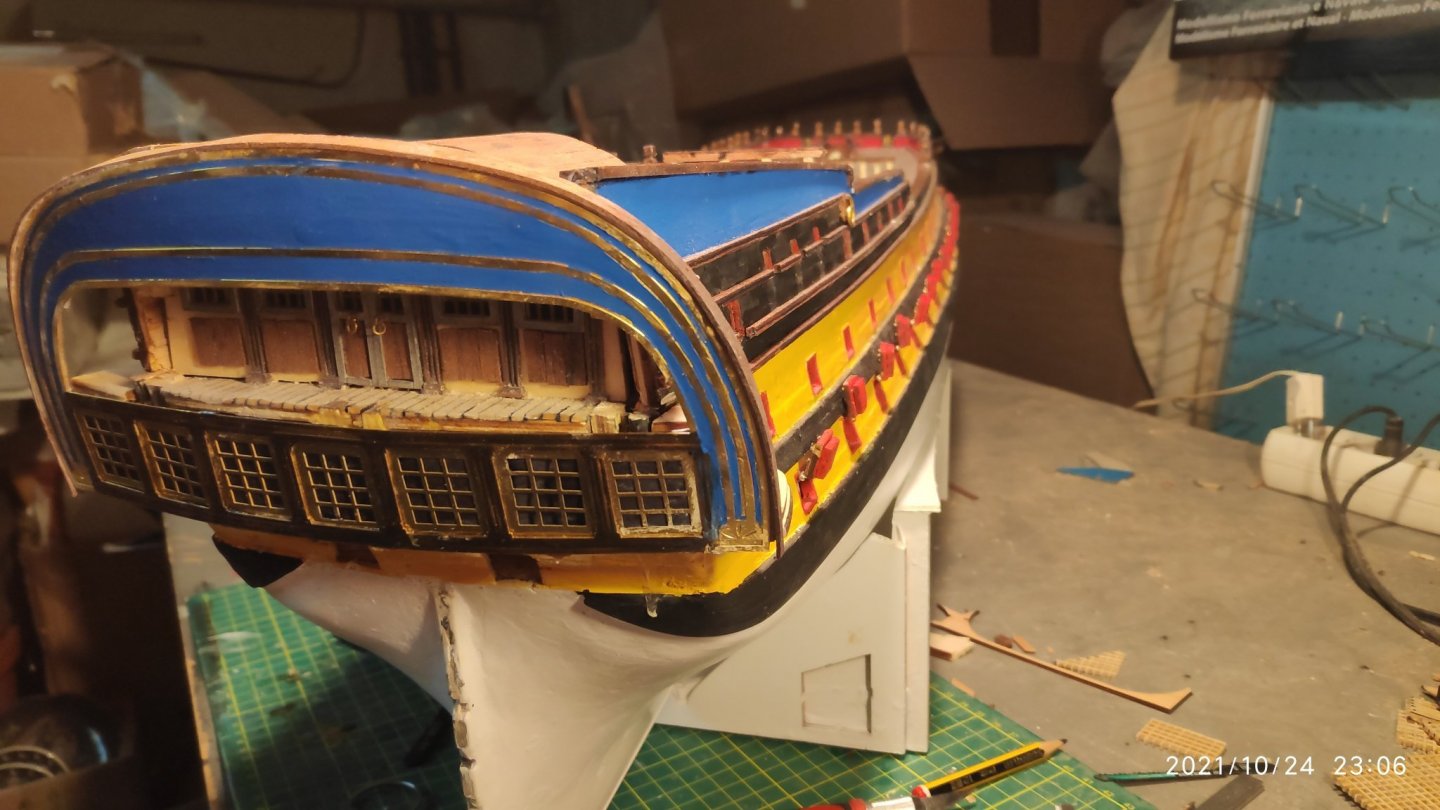
Now i finish the stern cabin. Too many pieces, from wood,metal and brass. After painting, i put the chain as show in the manual. Many columns side by side close all the stern balkony. Three lanterns are made and glued as show in the pictures. Also i make the four anckors from a metal part and wood with brass inforcments. Is't glued in place yet,because these parts must be the last to be fitted, as i will need to have all of the masts in place first. Now is time to make the barge (helping boat) .I make the two support for the barge, glued in the center of the lower deck The barge will be made the same as the ship....nothing easy in this model....


-
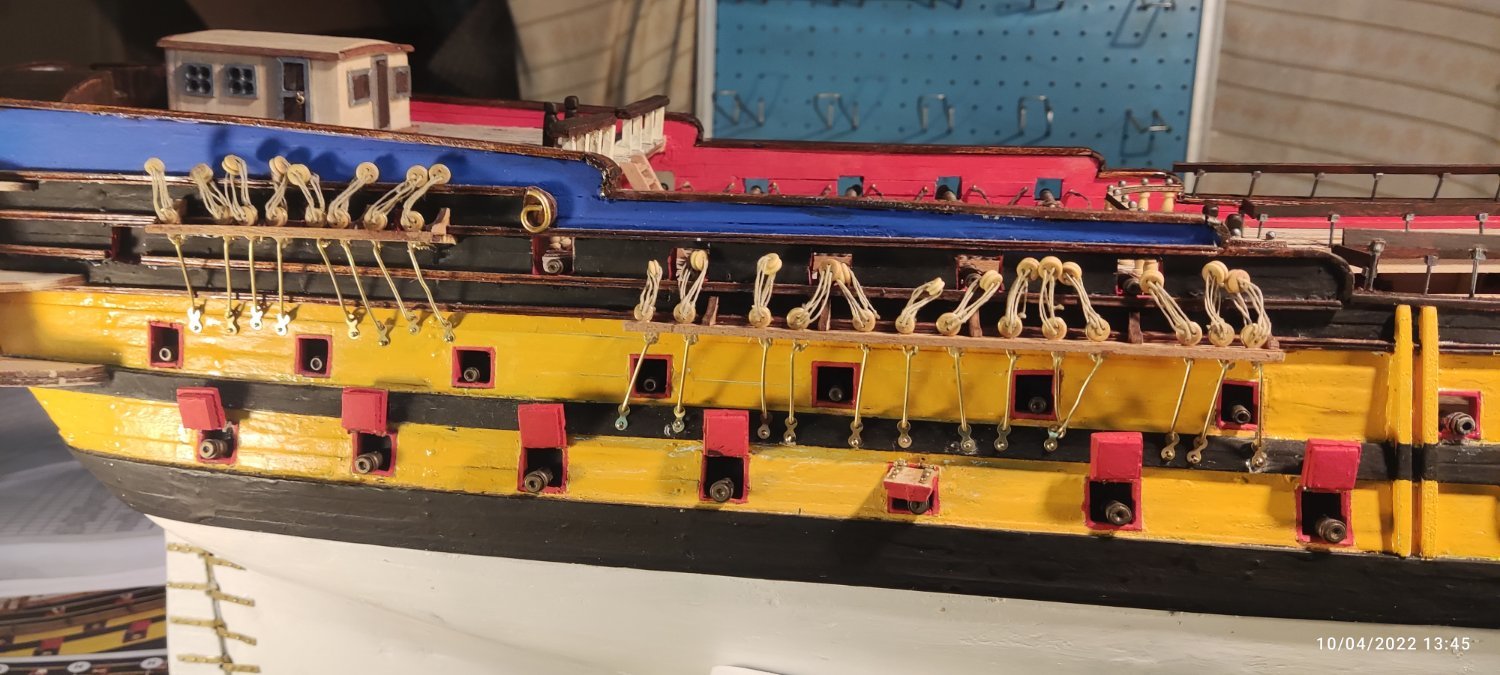
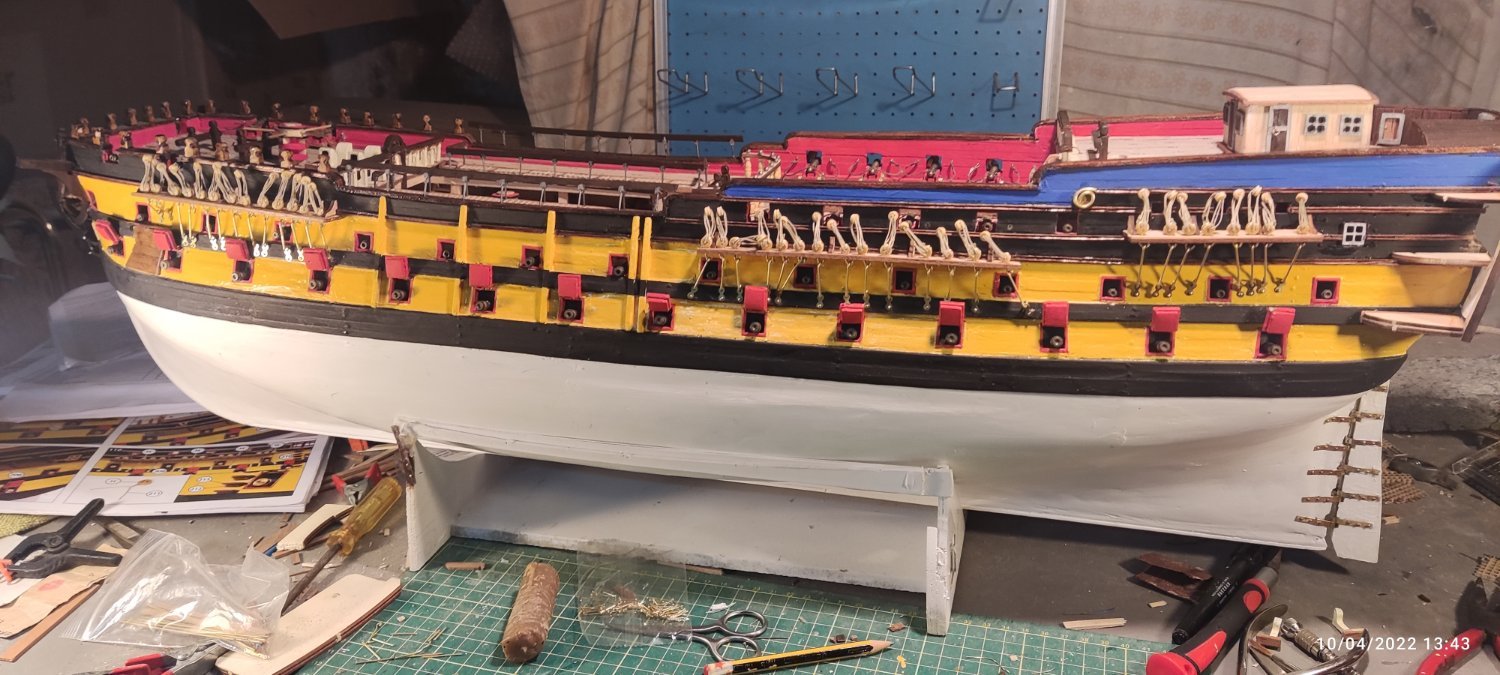
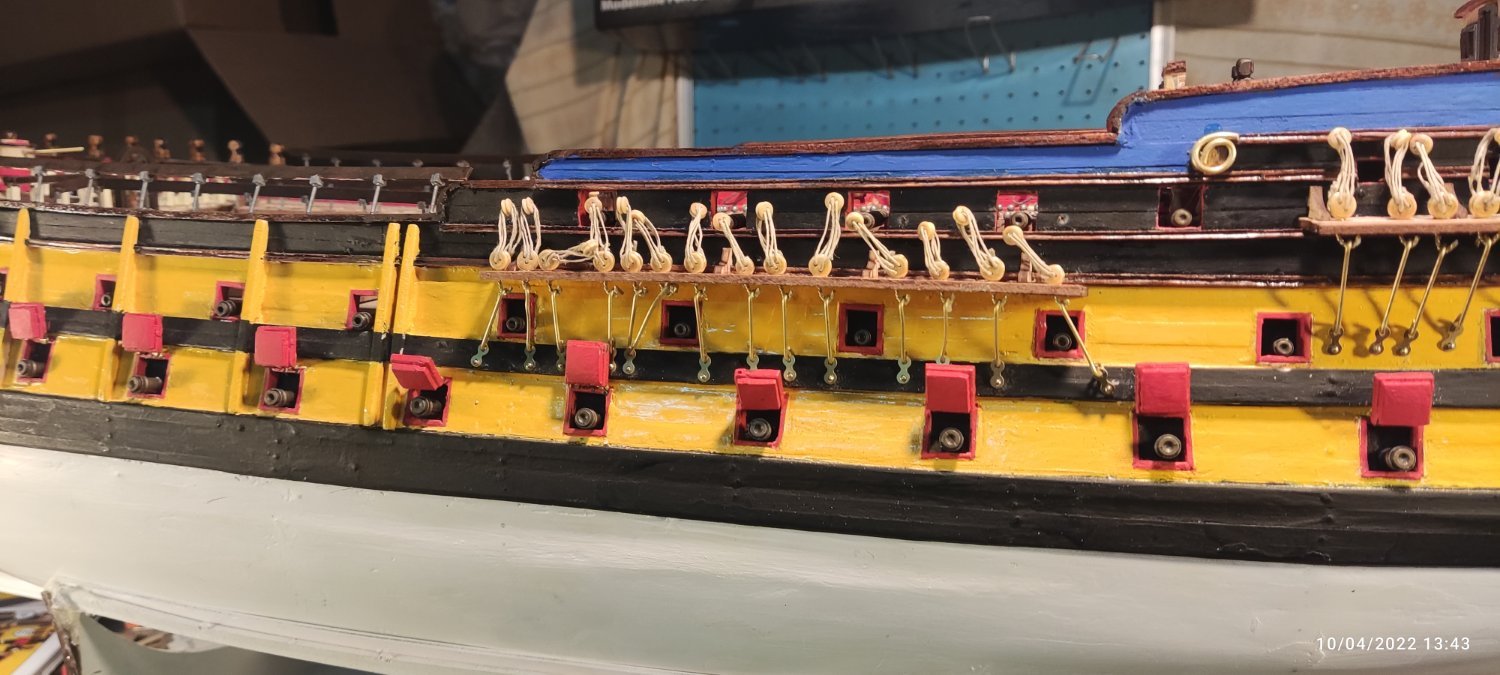
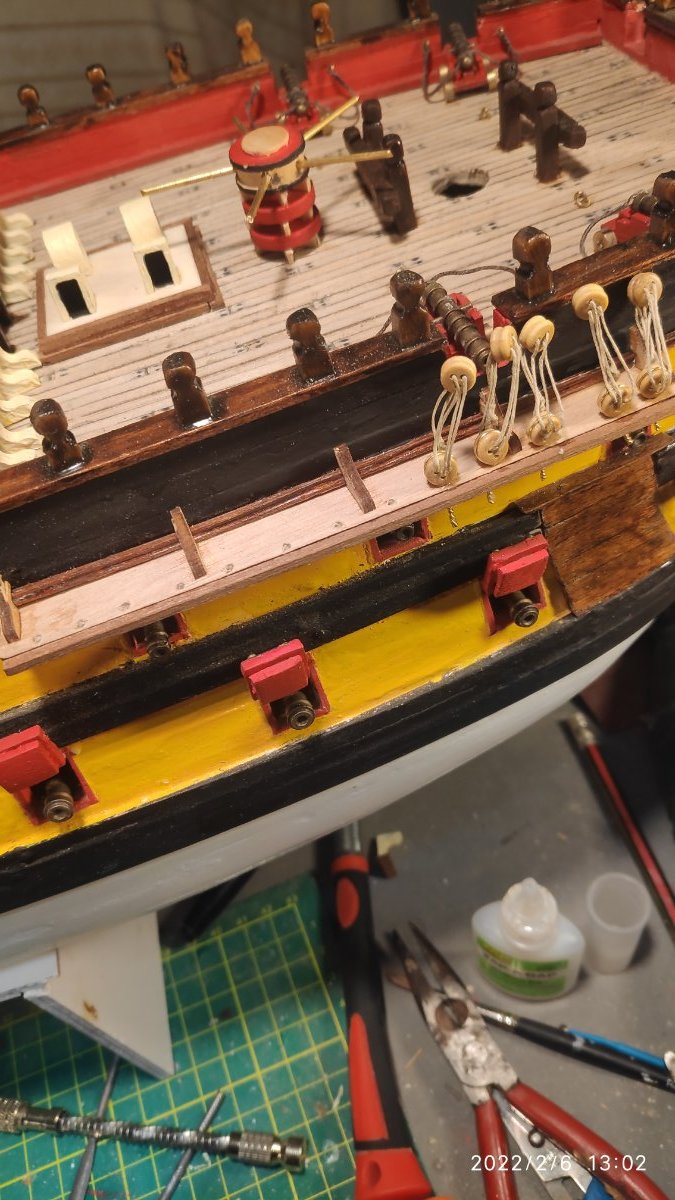
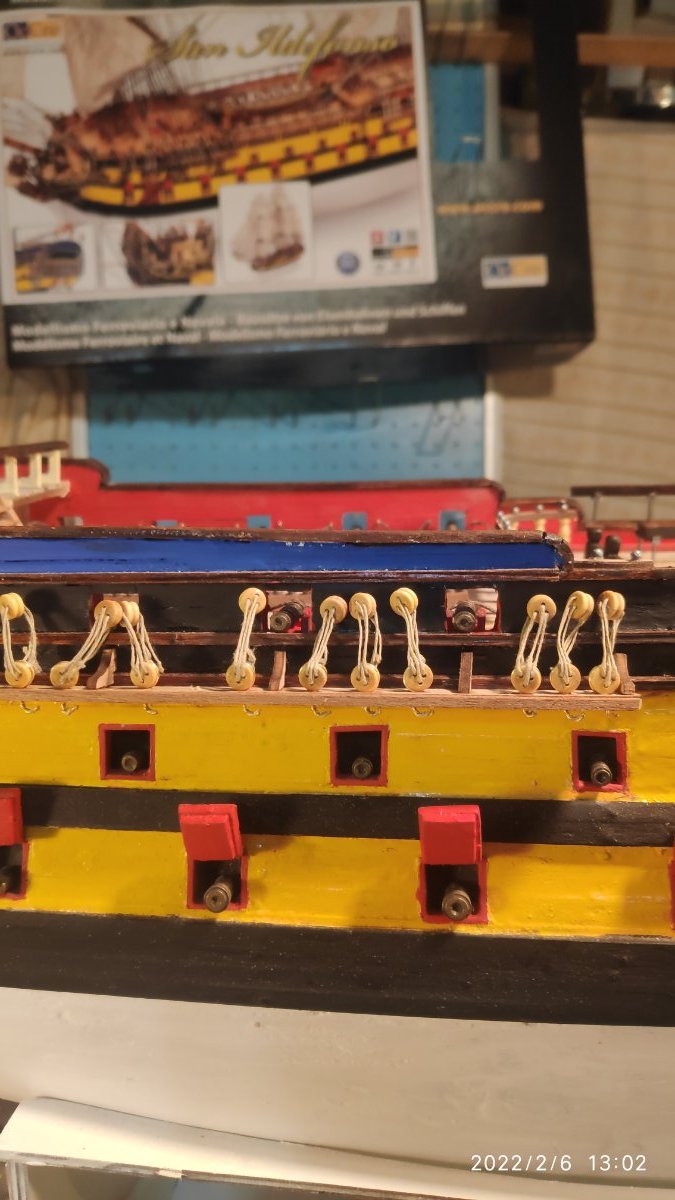
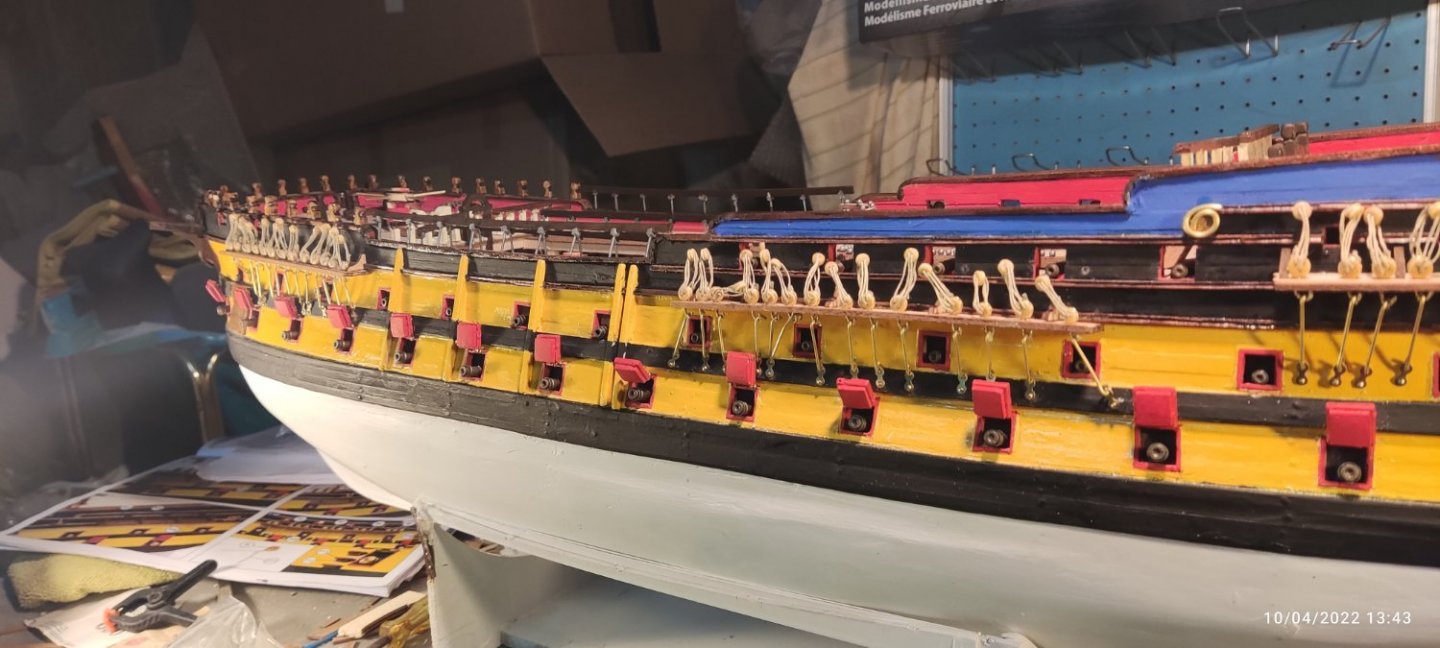
At last i finish all channels,fitting all clump blocks (72 total) both sides of hull and nailed with pins...In the upper free block will be attached the threads from ladders for the three musts,just as the manual said...Attention needed that the clump blocks doesn't cover the gunbarrels from behind in any way


-
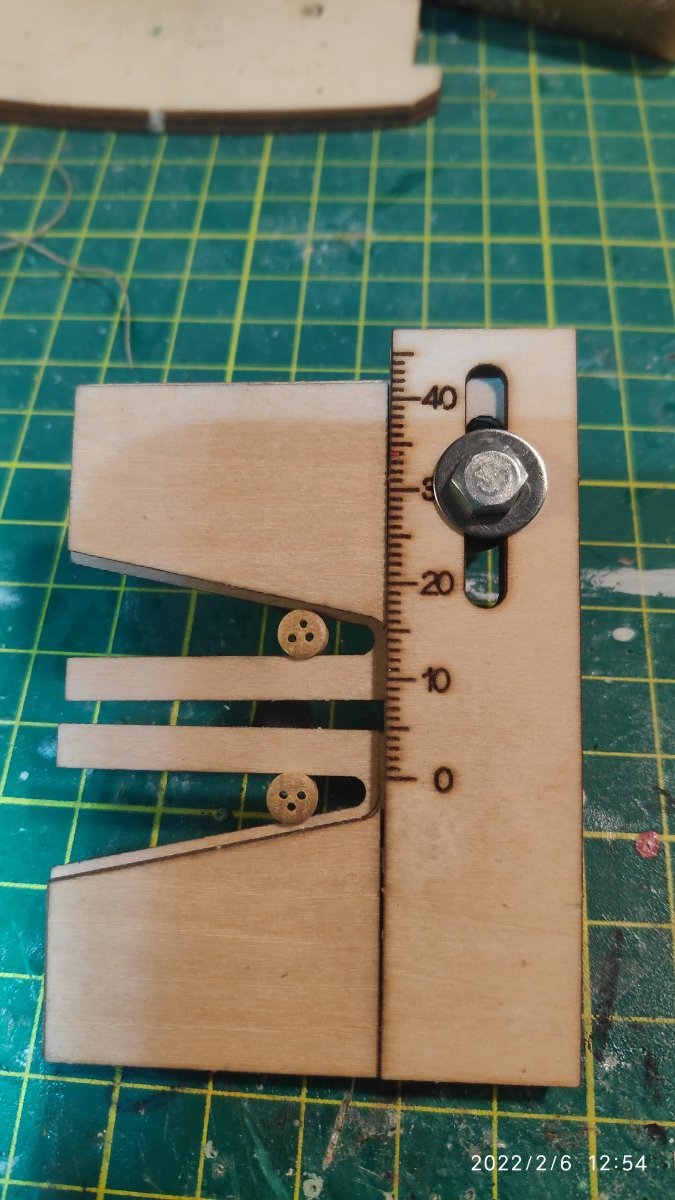
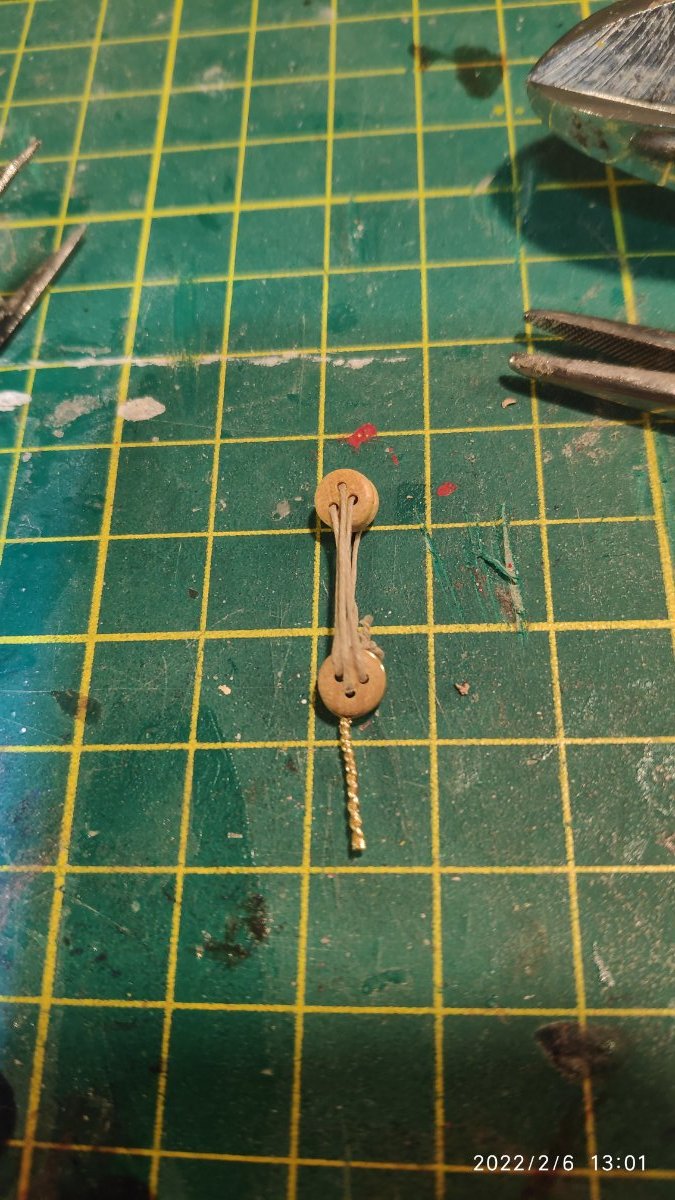
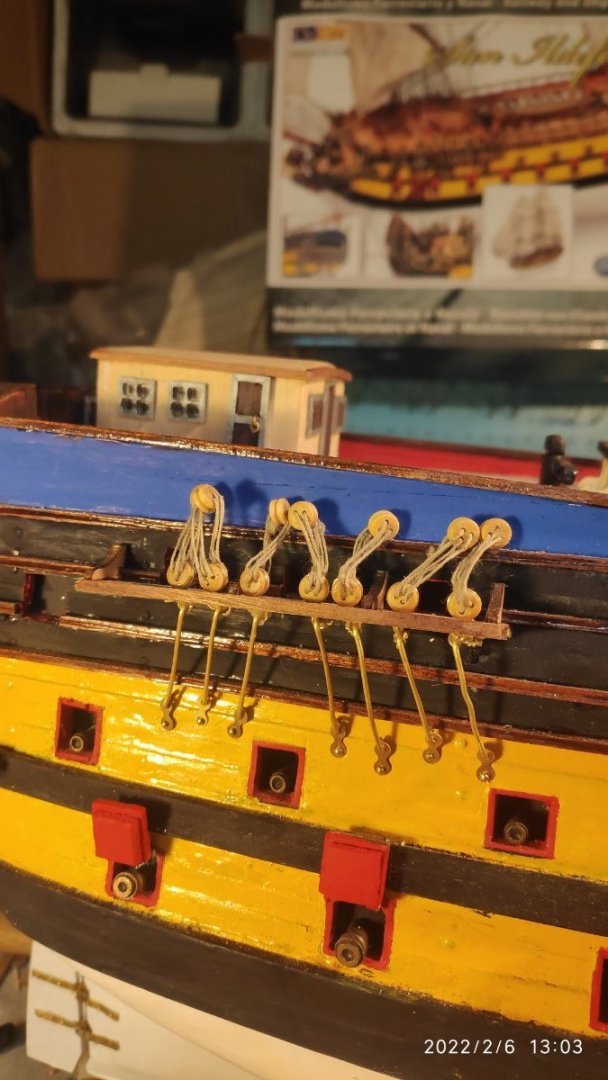
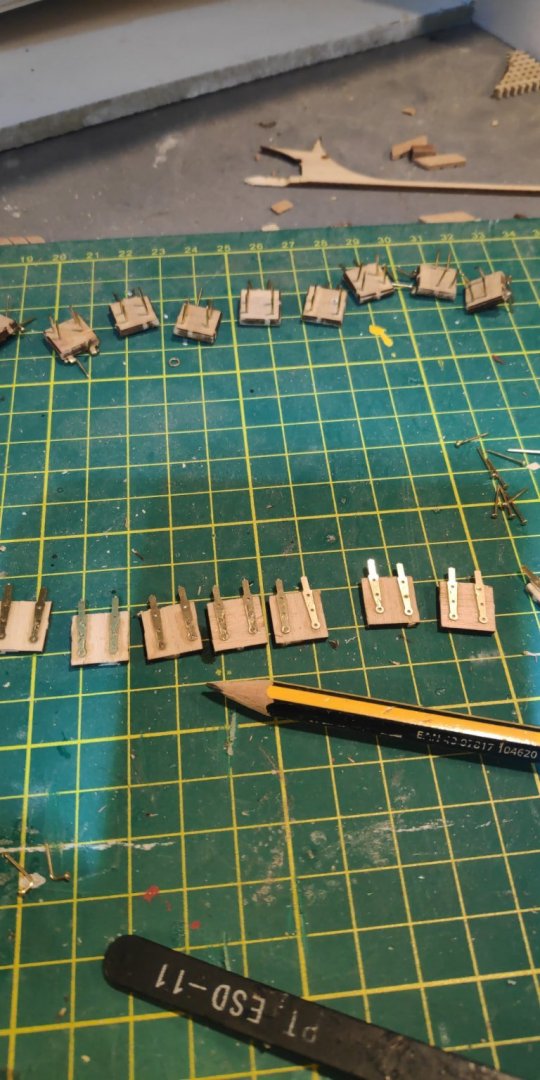
Two years after i start the kit....Now i make the the channels,three for one side and other three for the other. I make the necessary holes on them to fit the the clump block slings. For that i use a simple after market equipment to make all the the clump block easy and the same lenght. Then fit the clump blocks using lengths of brass wire and pass them through the holes in the channels. See fotos. They will be held from below by a length of wire and pinned directly to the hull using pins and brass links. All this job must be done for all six channels,both sides of the hull.


-
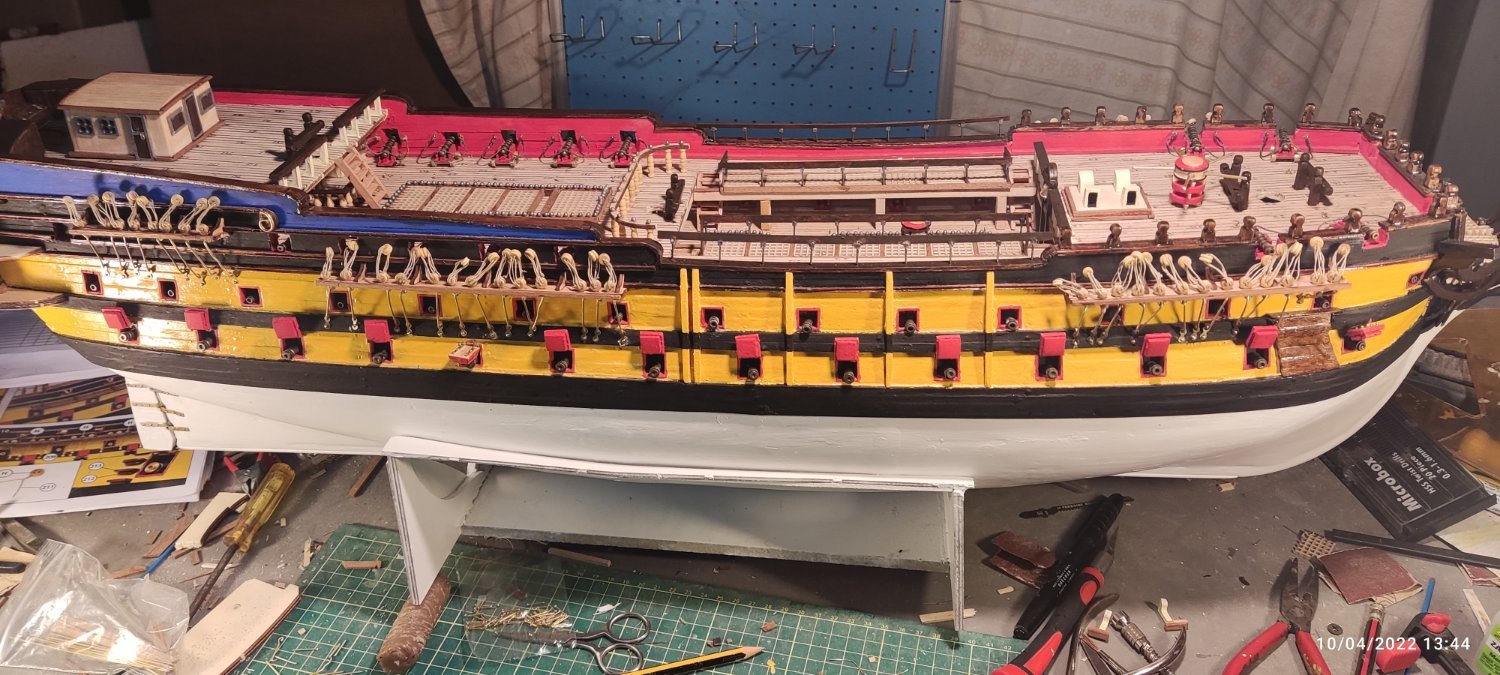
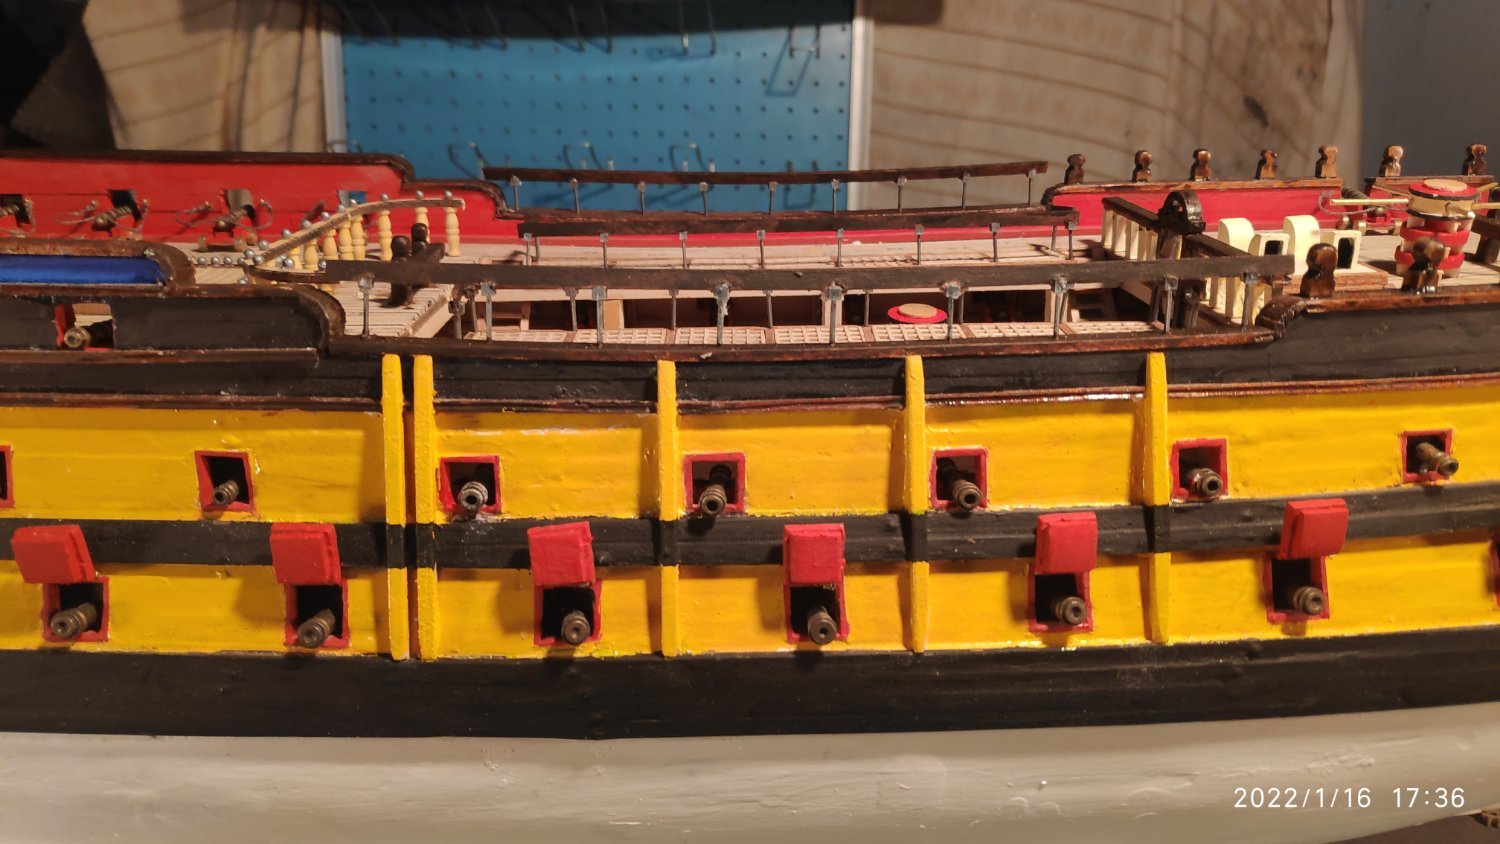
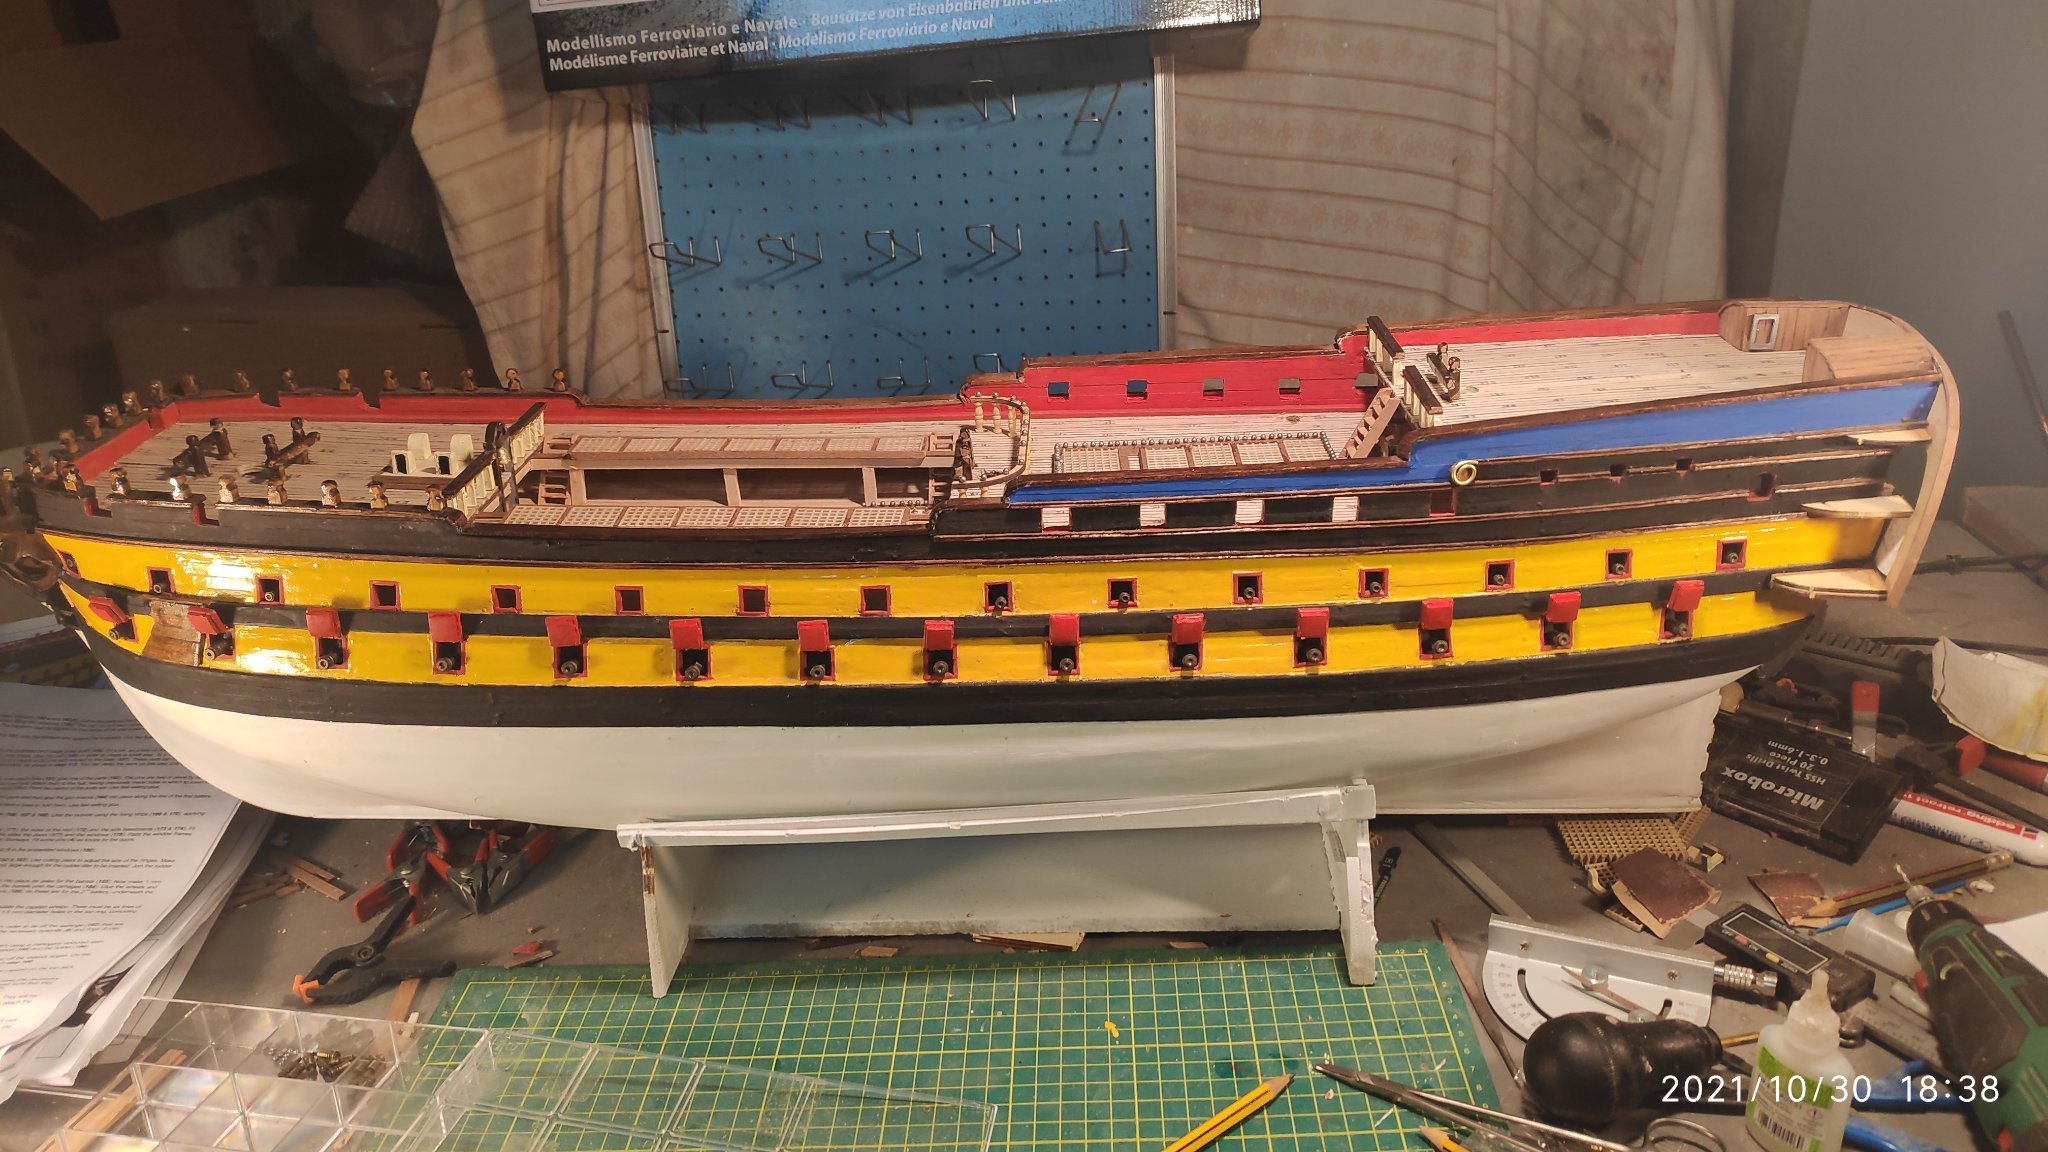
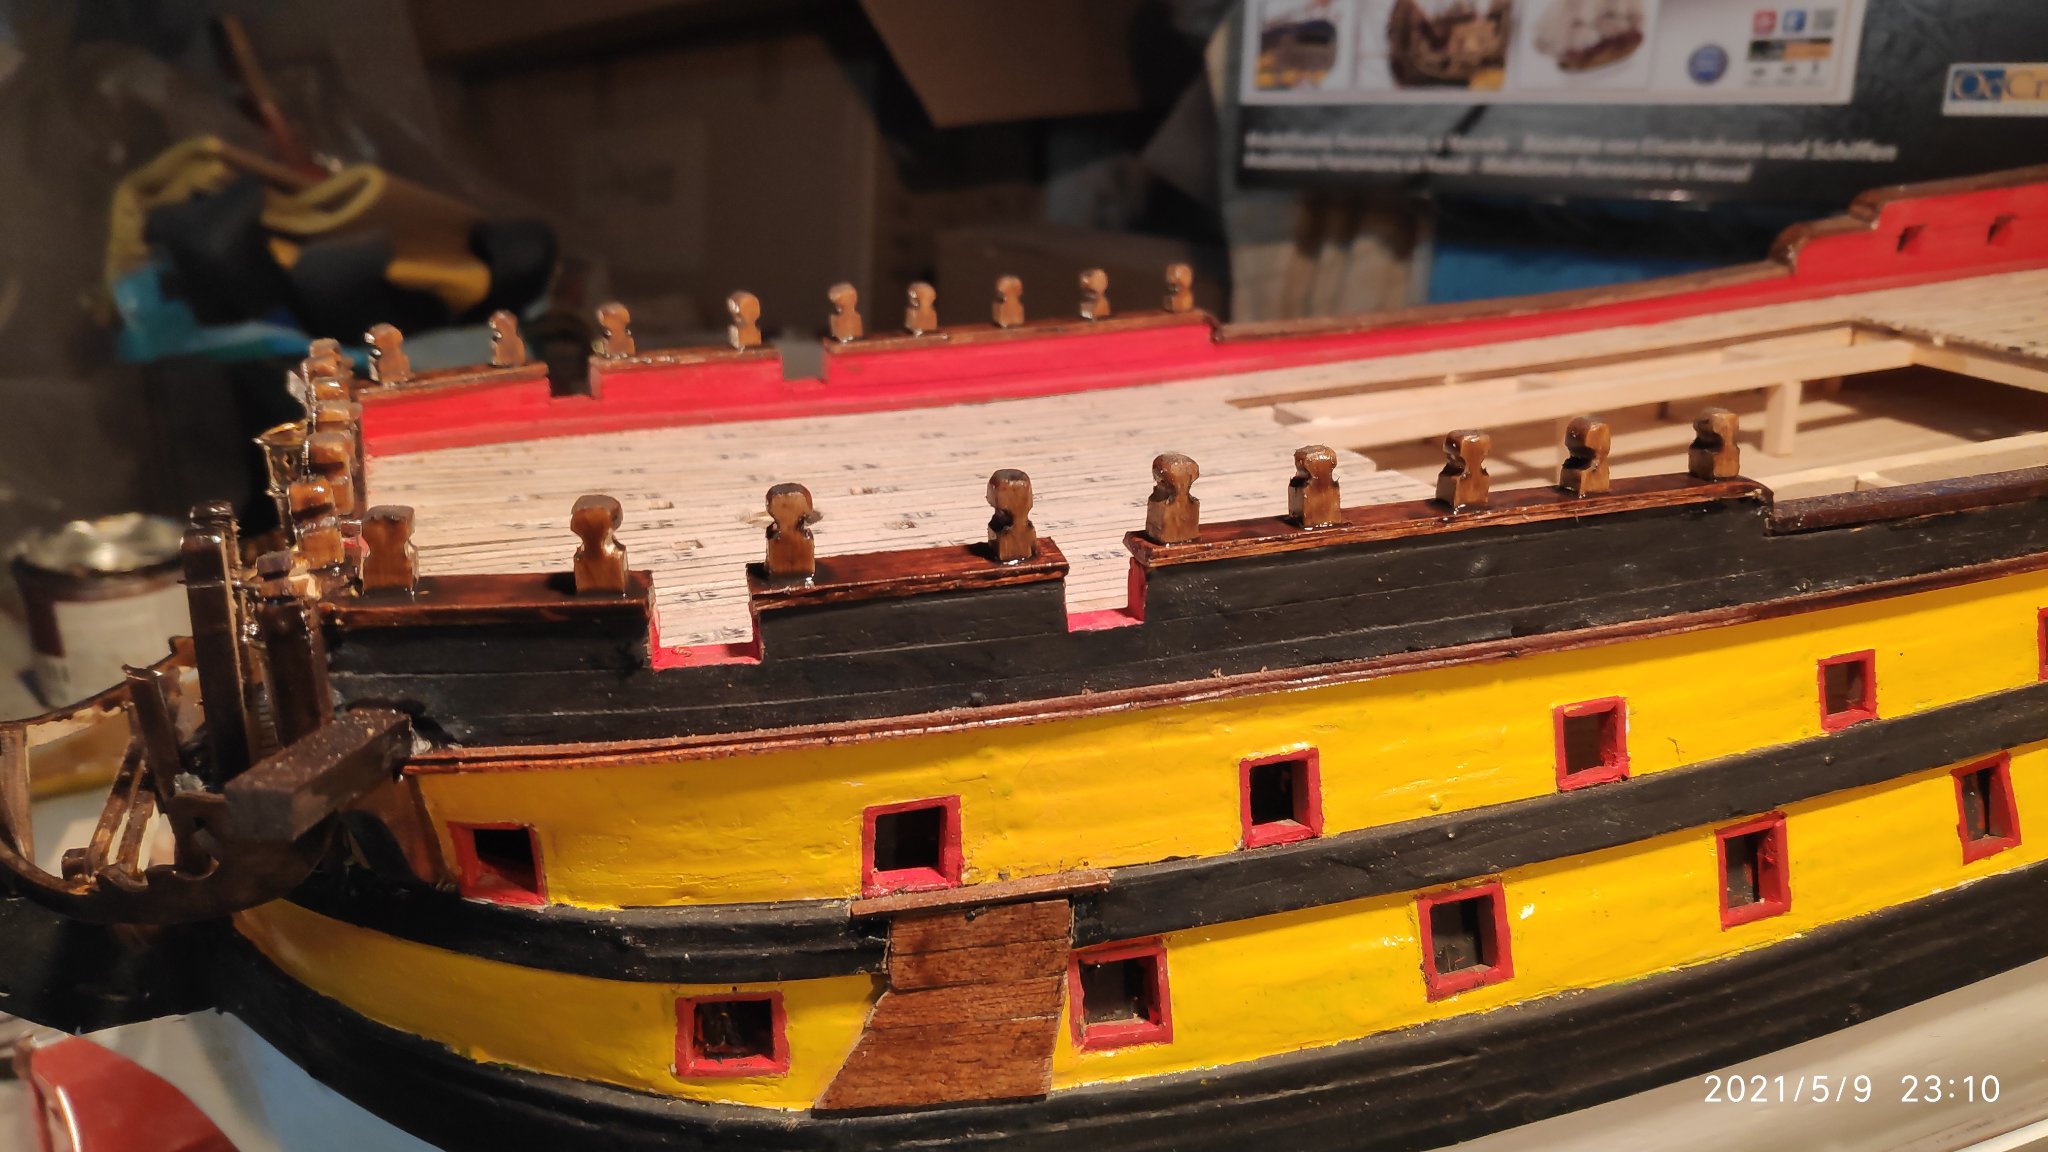
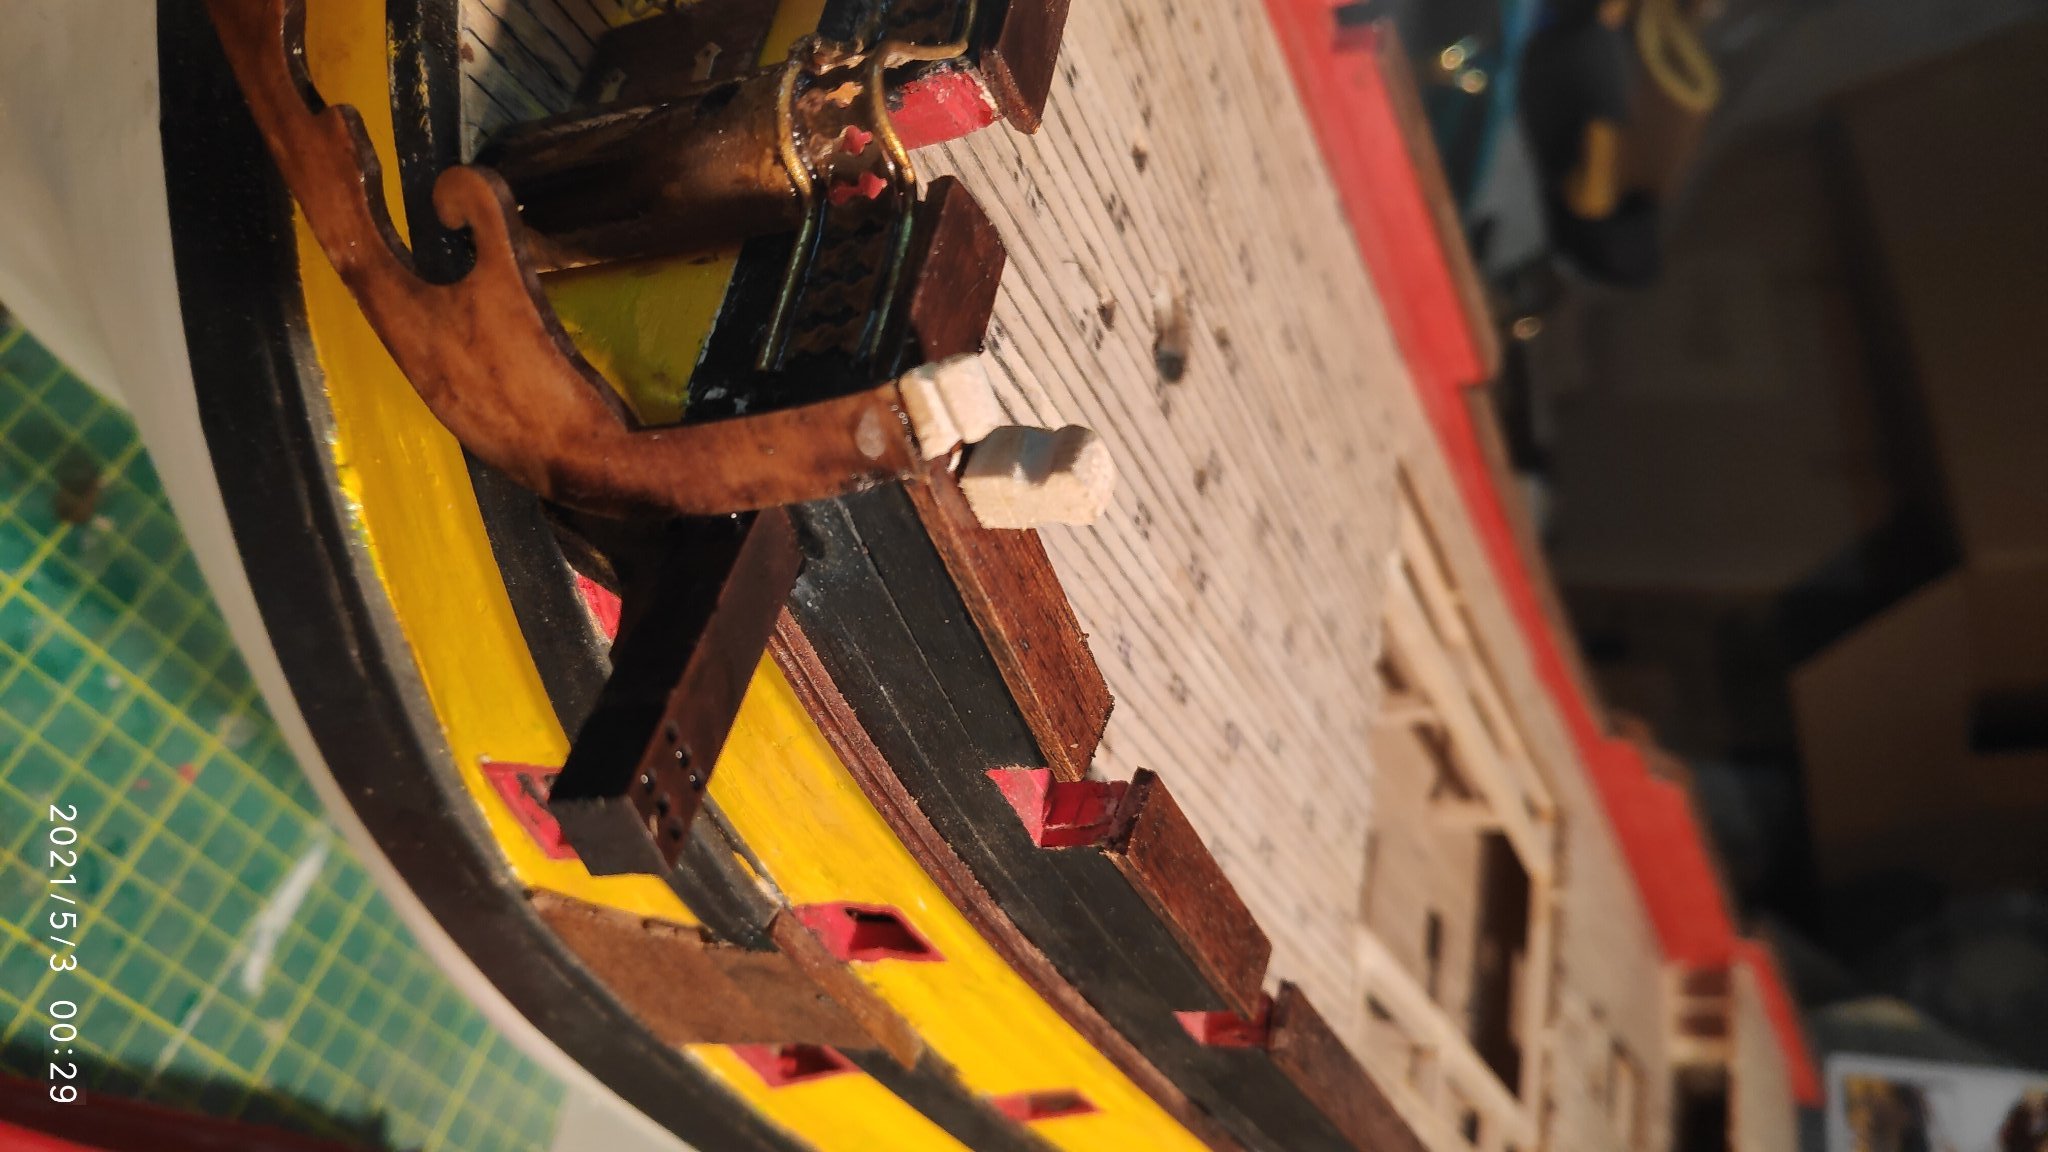
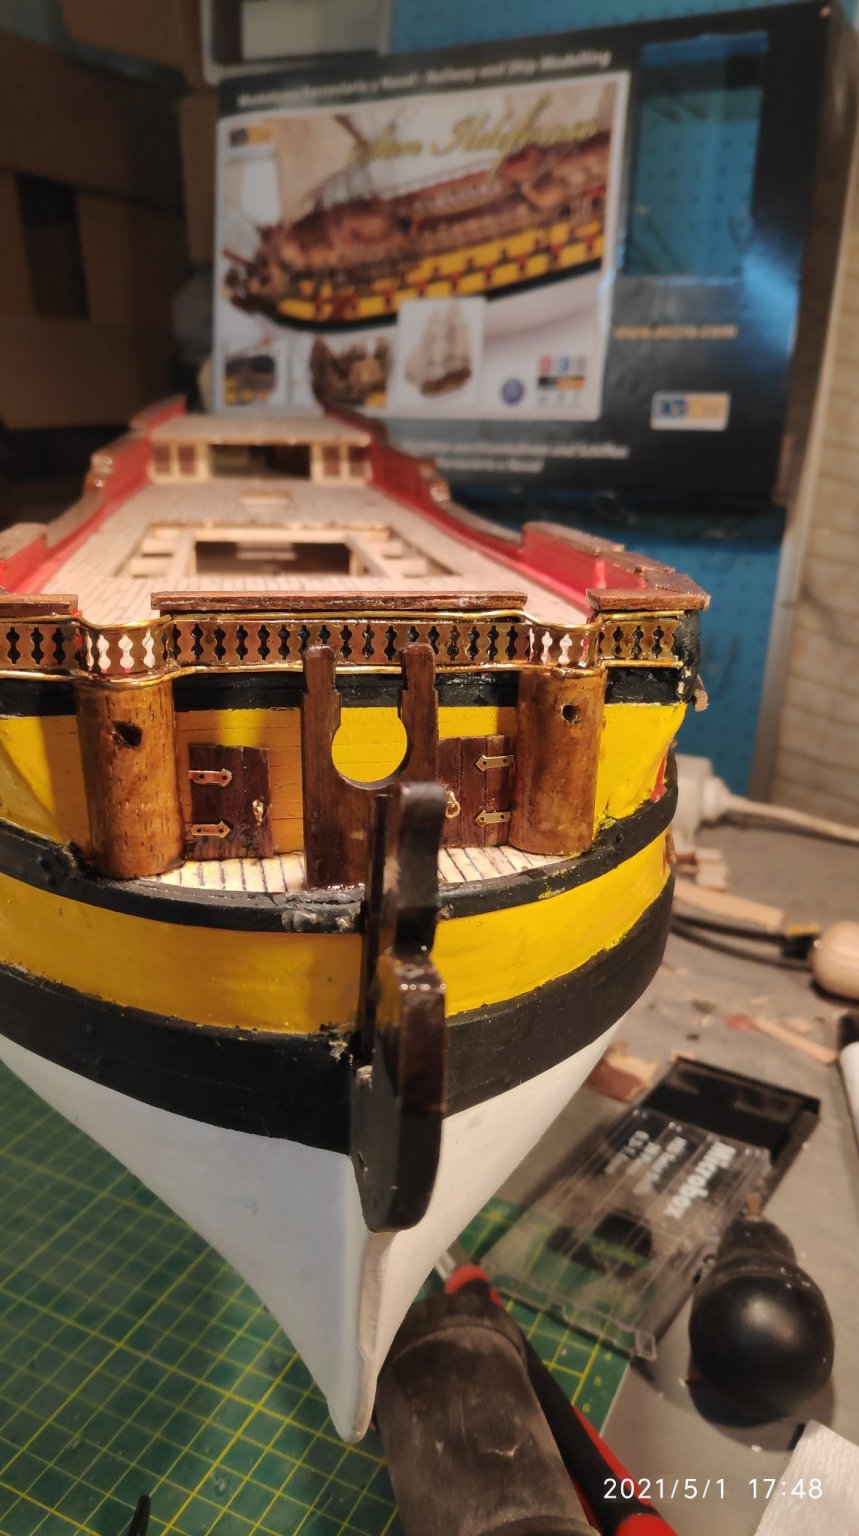
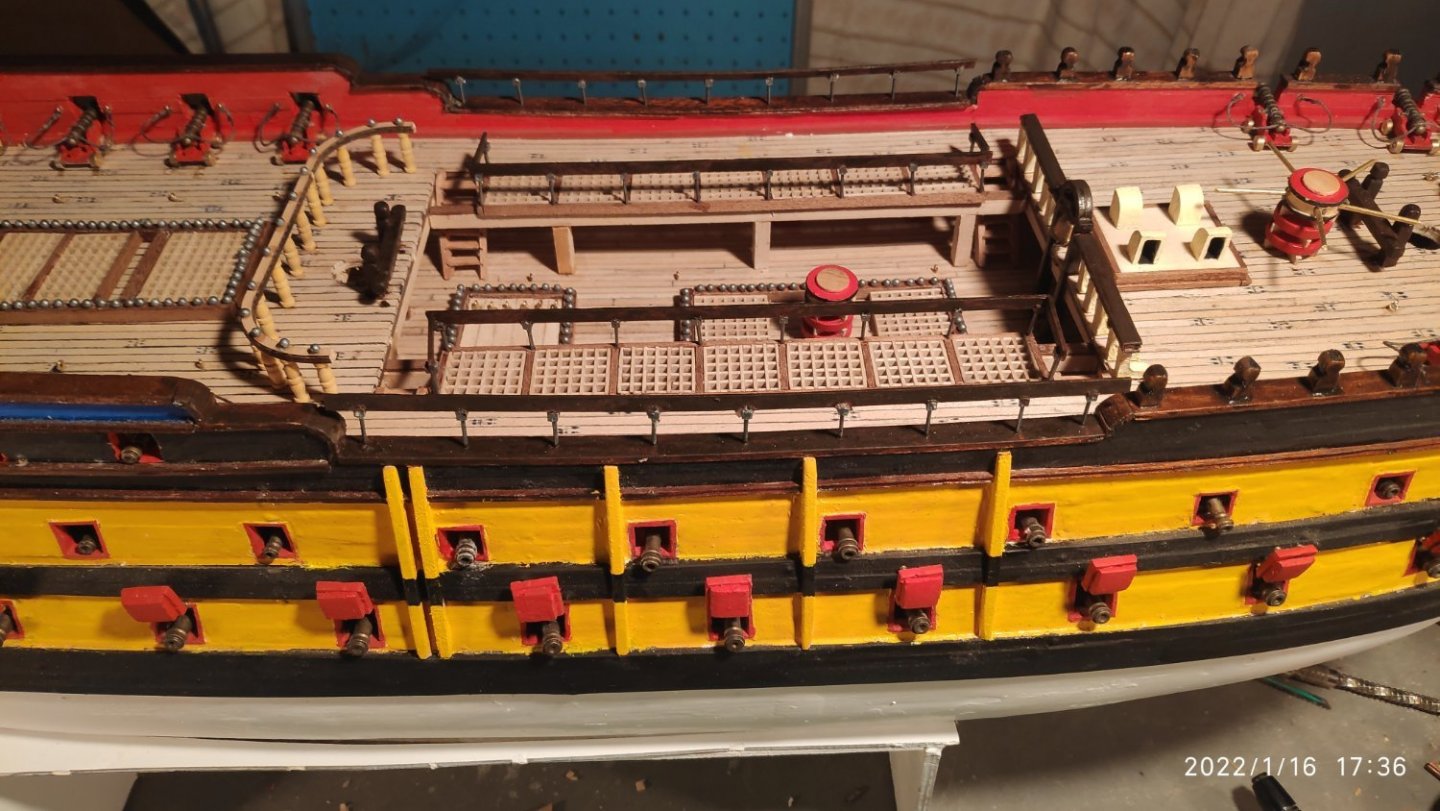
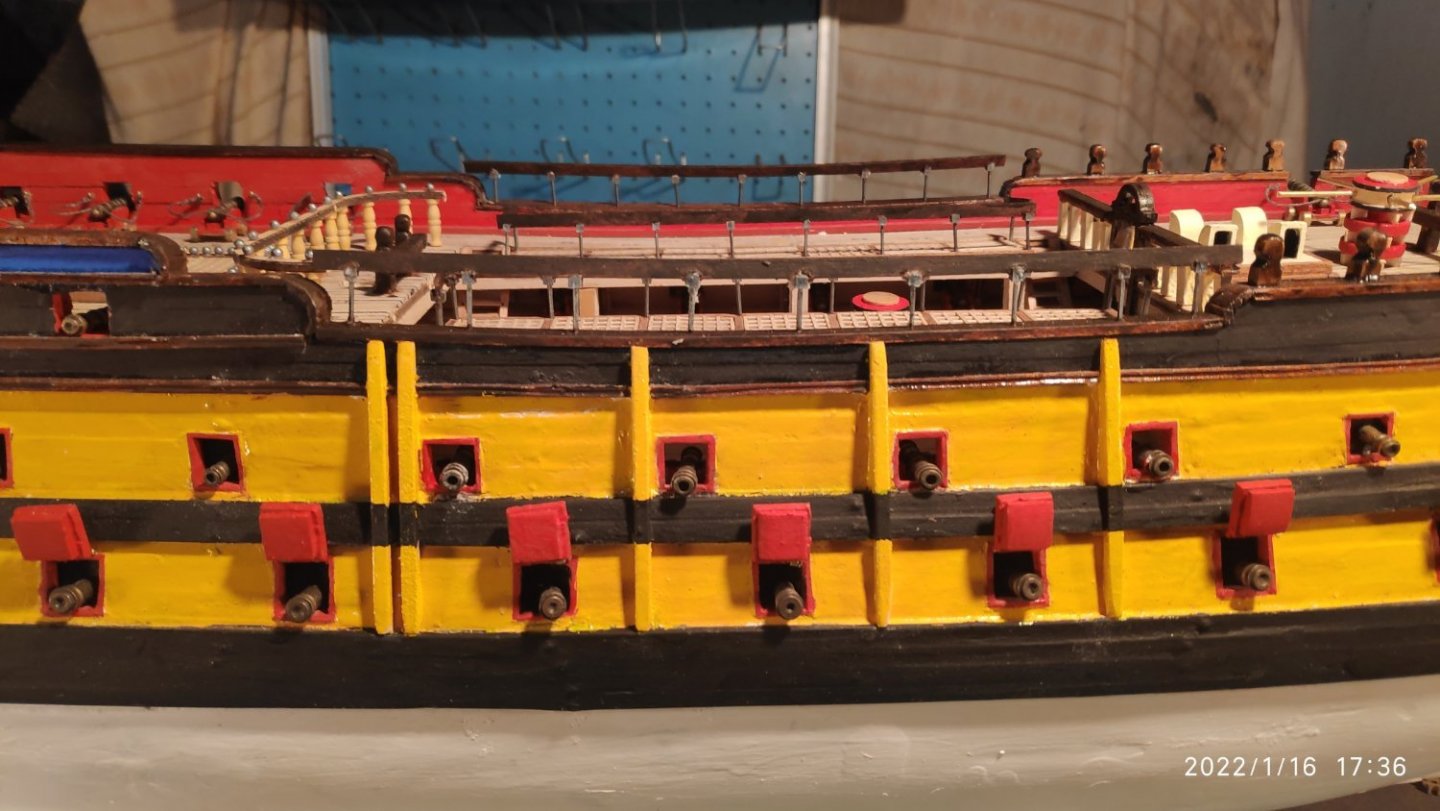
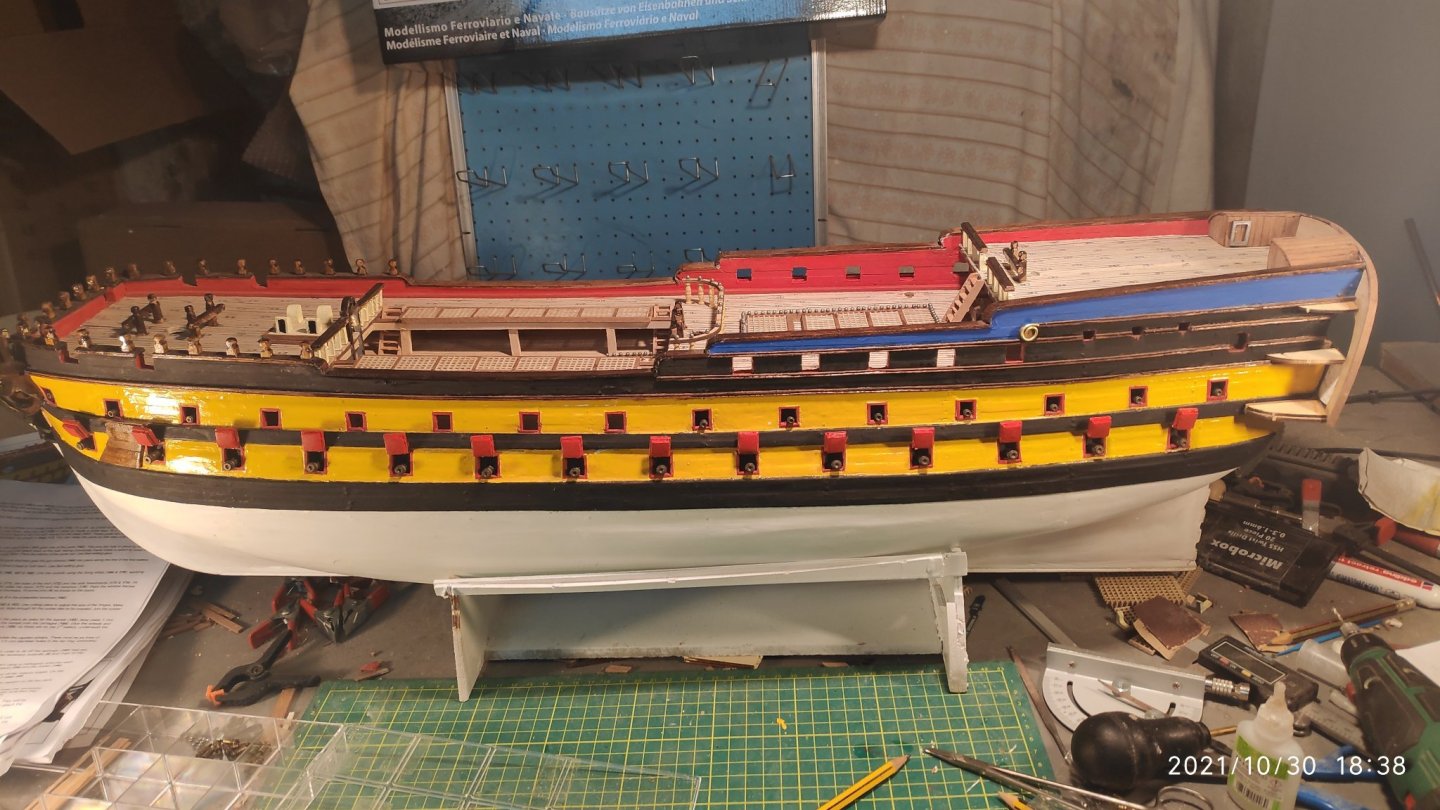
Now i make 5 fenders on each side of ship. I cut them so they fit to the shape of the ship and paint them yellow. After i make the railings of the deck. Make holes and glue metal parts and above them i put 1X4mm sapeli wood. Two railings at the side of the ship and two at the edge of the deck.
-
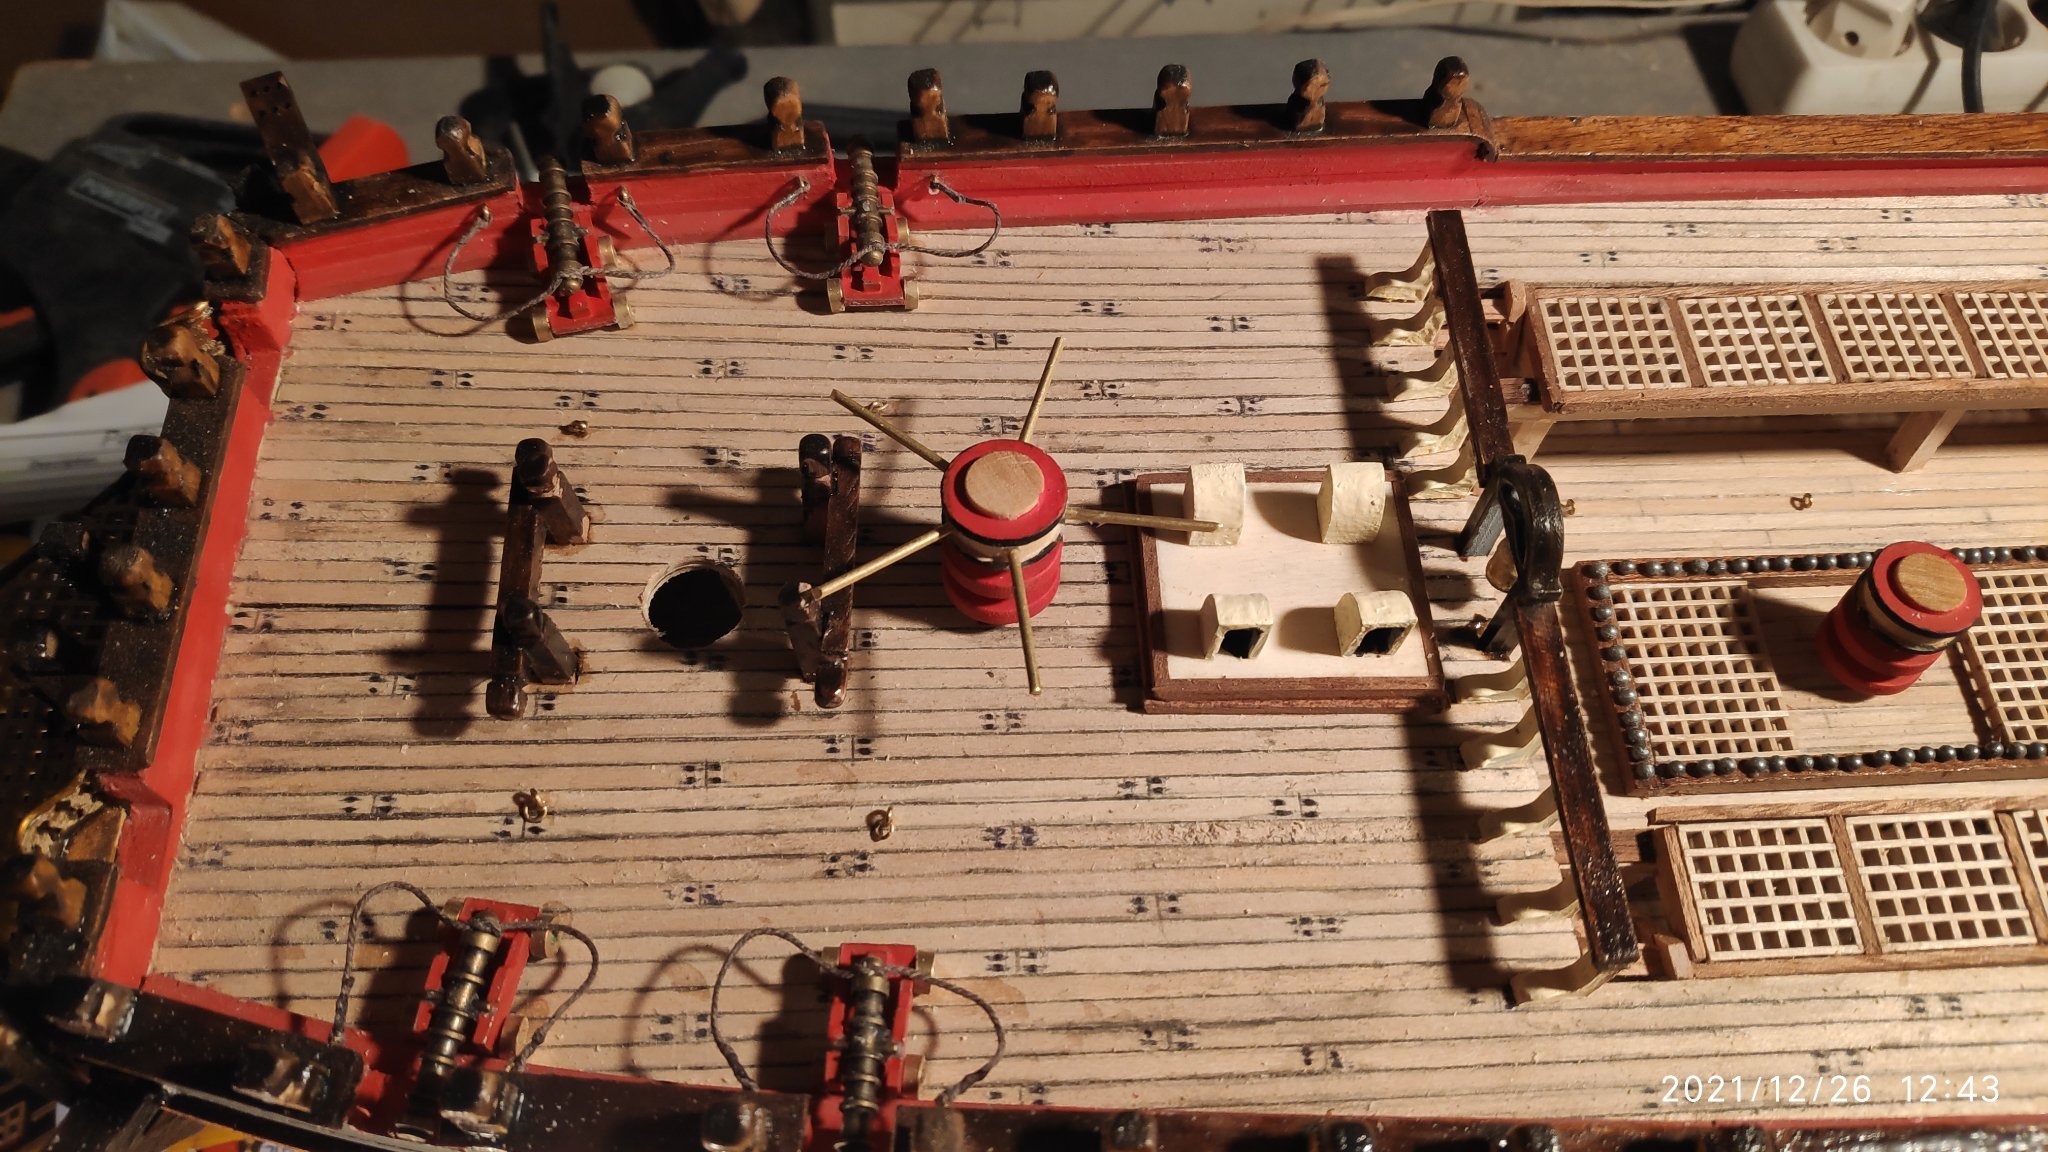
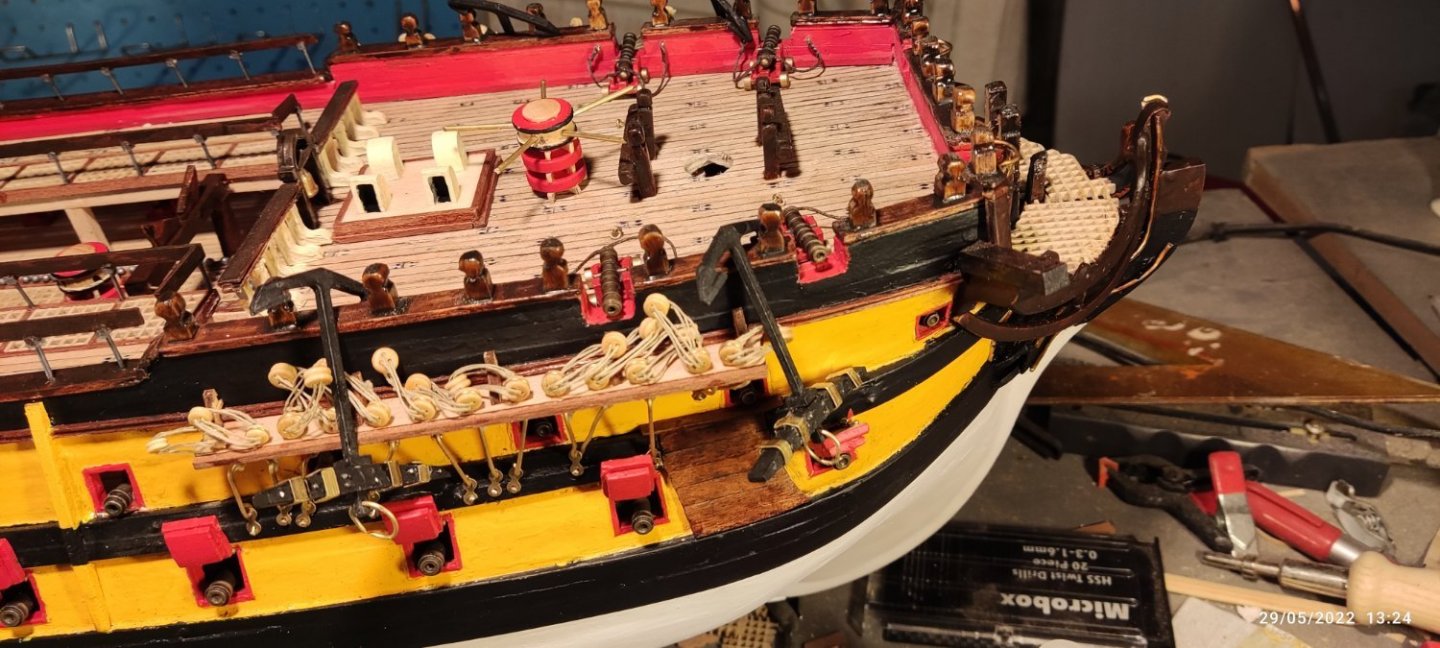
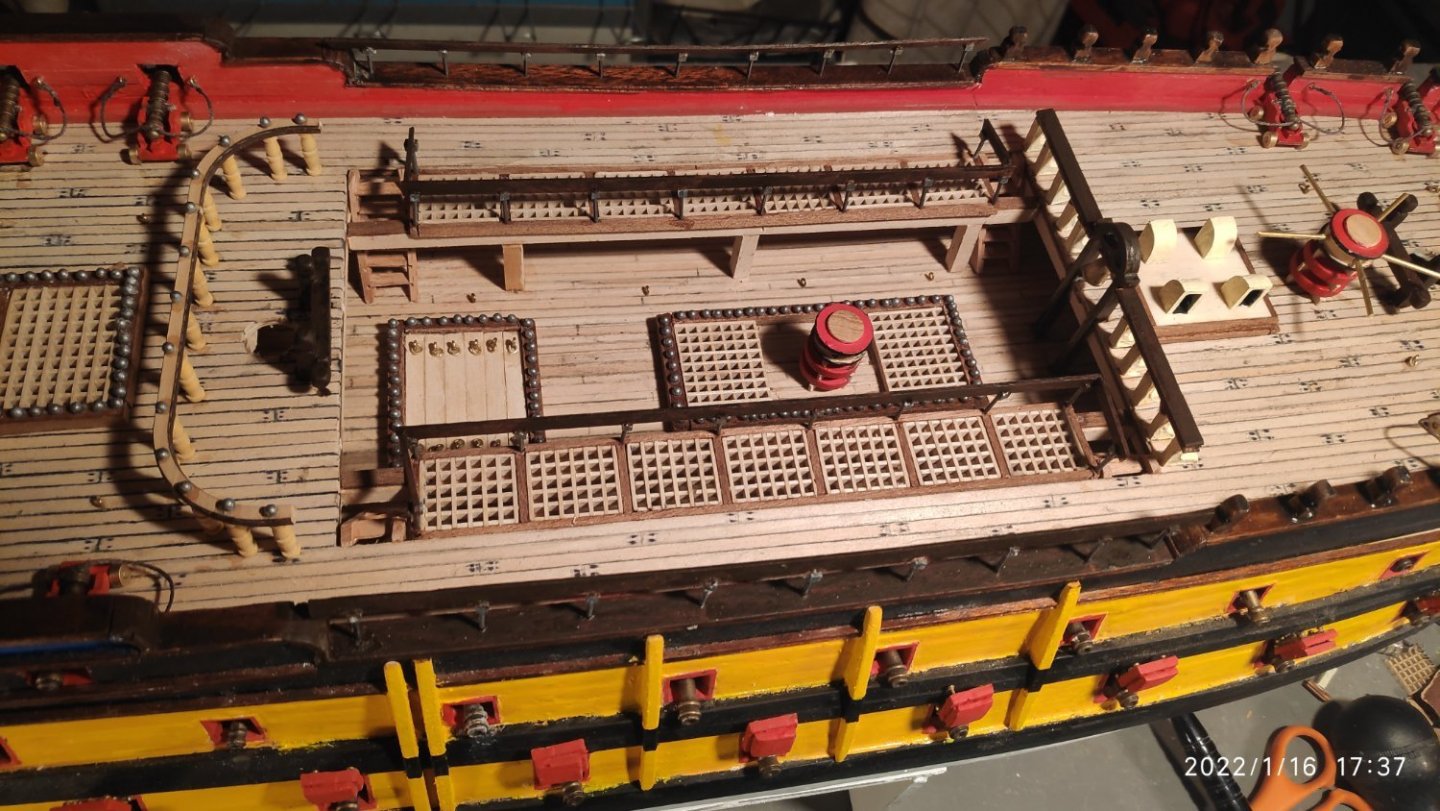
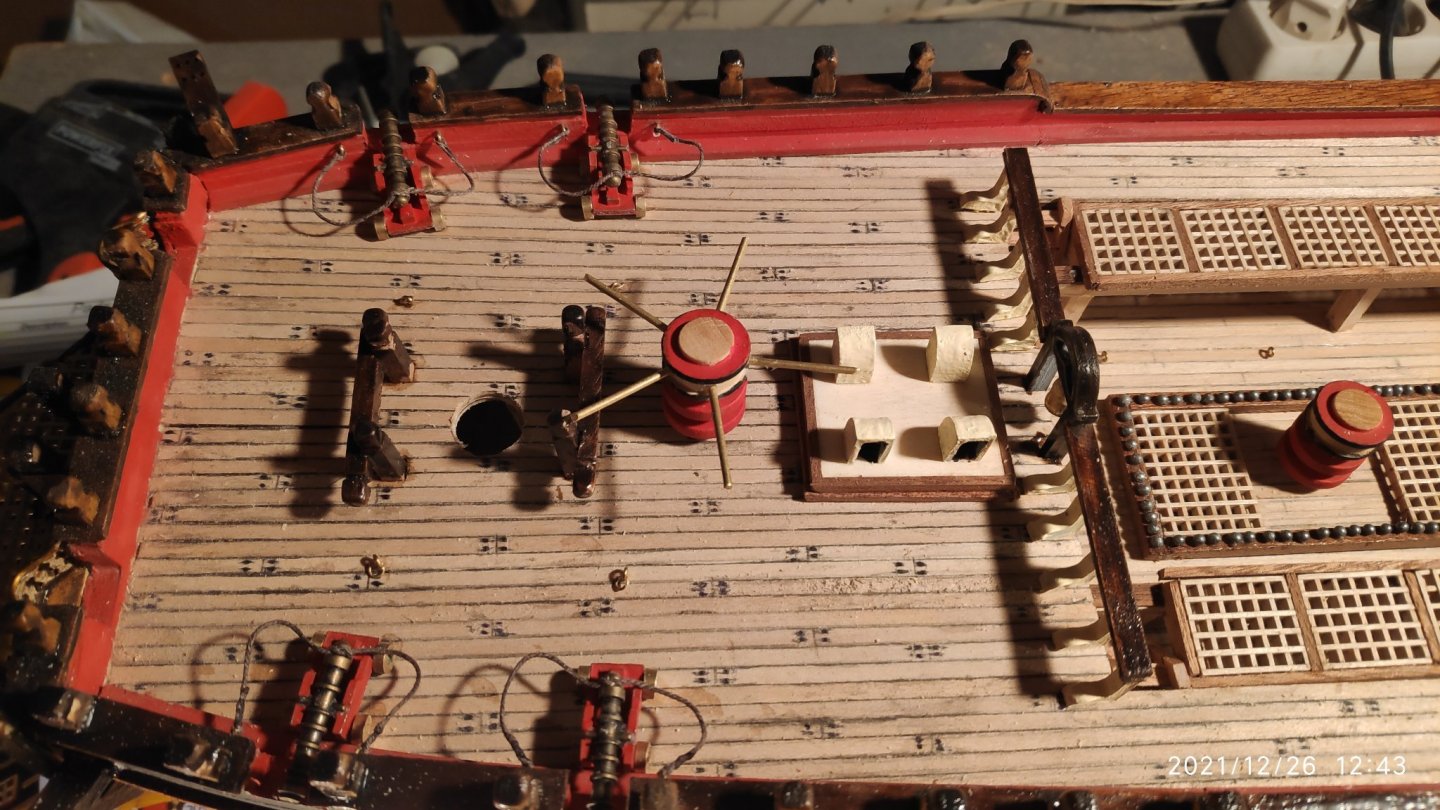
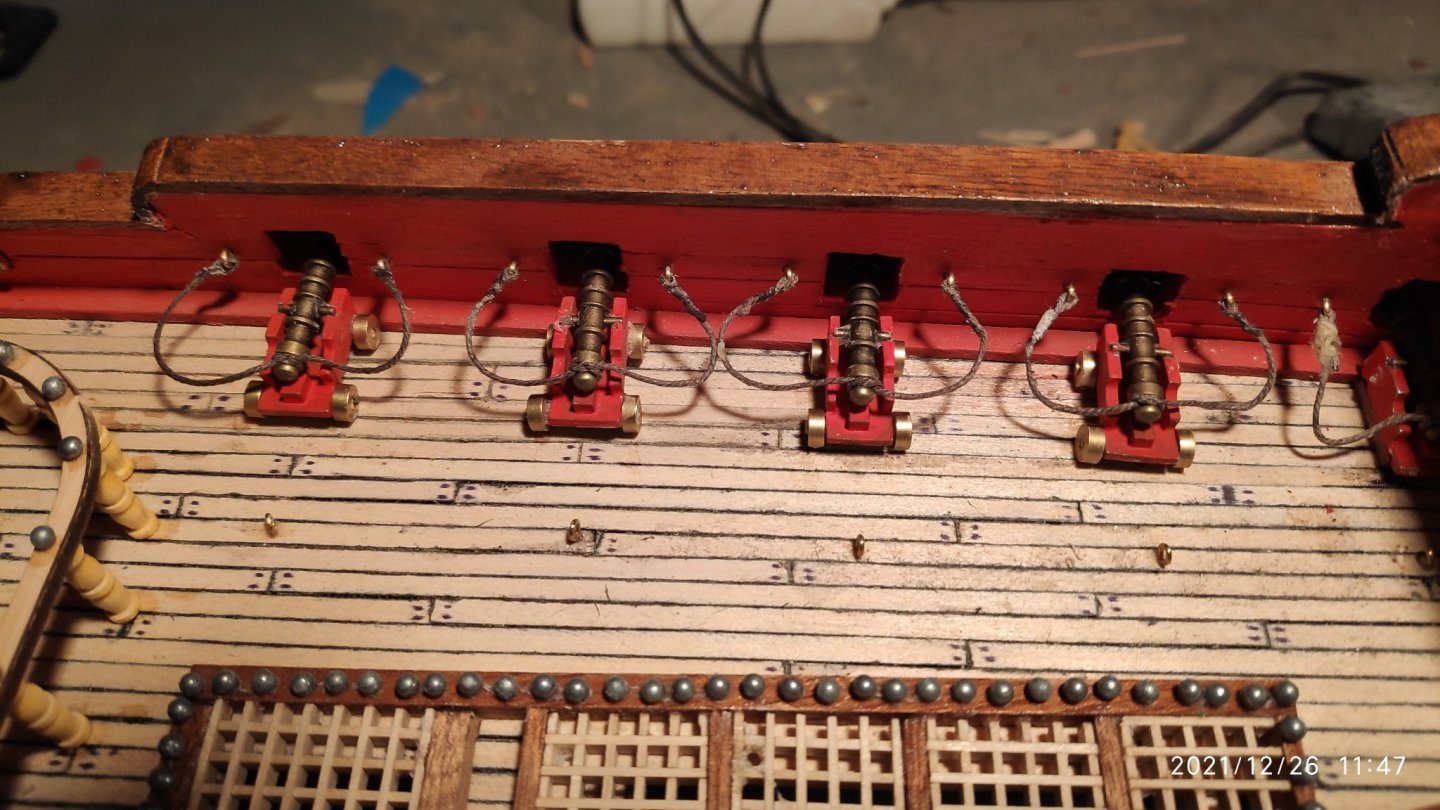
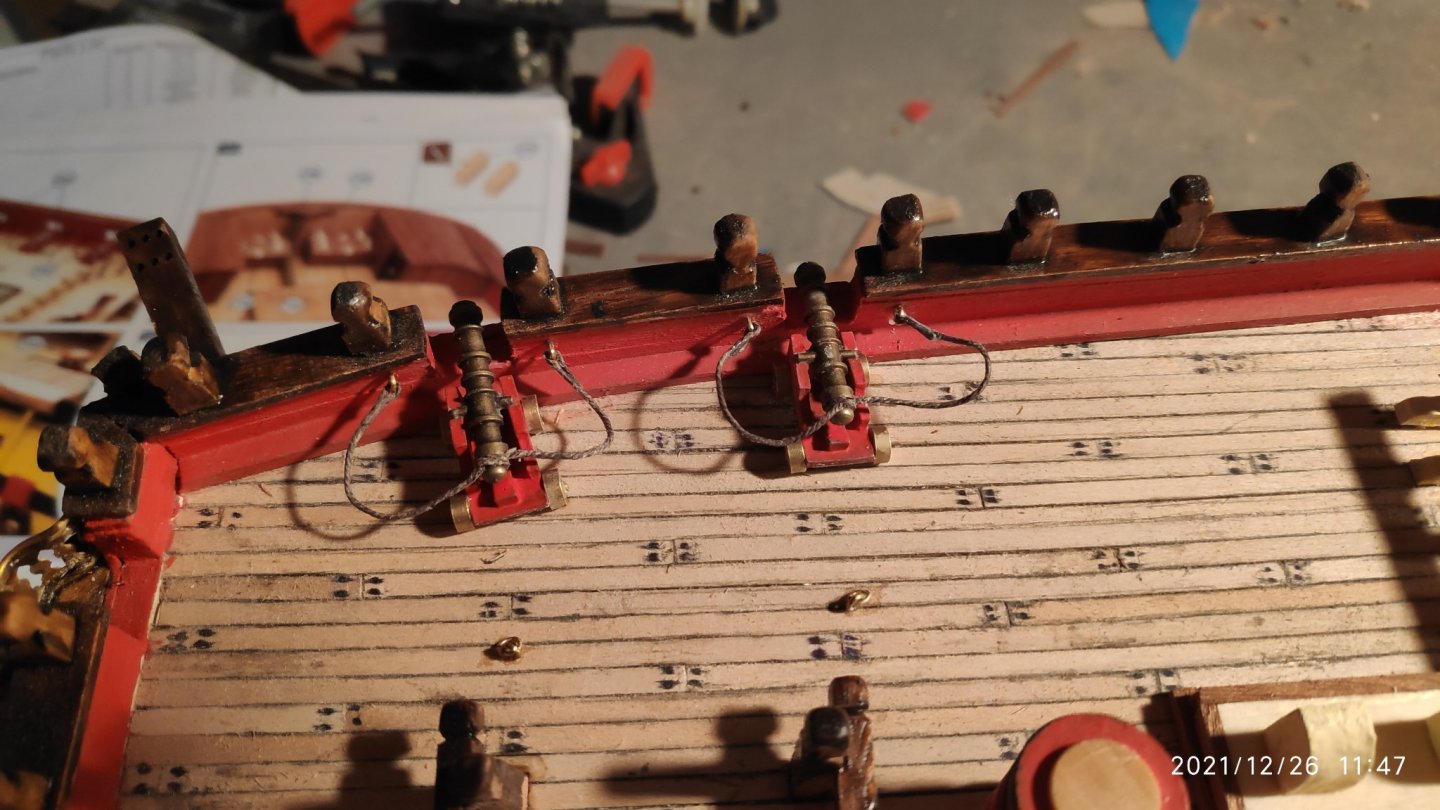
Now is time for the cannons that are visible from the deck. Each cannon consists of : The metal carriage, that was painted red, the cannon barell that is also metalli made from copper, four metal wheels and two axes made from brass wire 1mm diameter. 22 such complexes were made and placed in the corresponding gun ports, in order to complete the armament of the ship. In their place they were attached with a 1.5 mm cottom wire lashing with two eyebolts that were fixed to the bulwarks on either side of the gun ports. Also on the deck behind each cannon were put eyebolts as indicated in the drawing. The two capstans were painted and glued in place with the front having brass handles for its rotation by hands from the crew of the ship
-
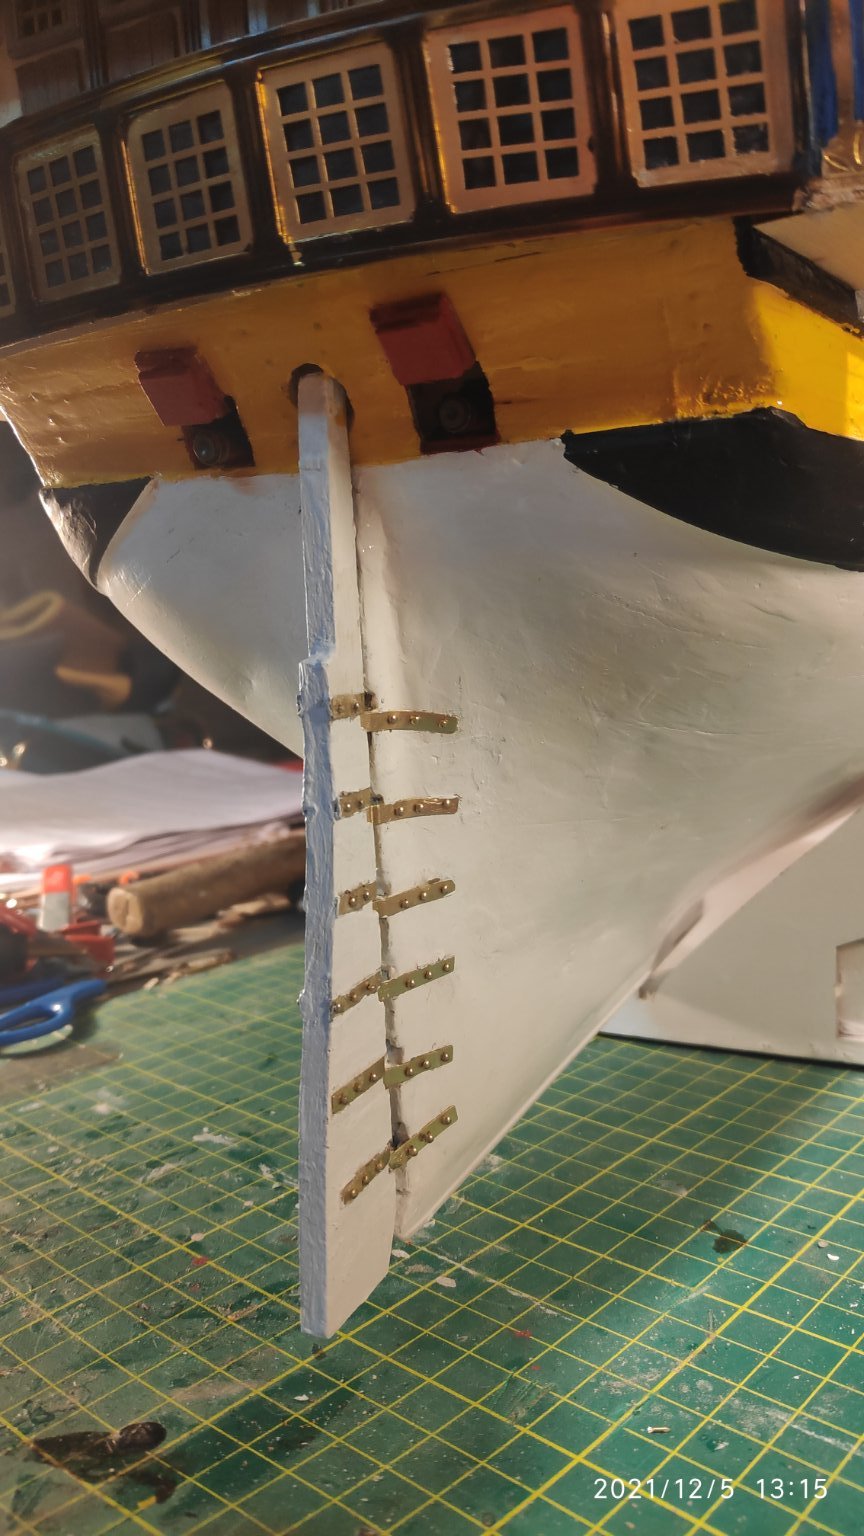
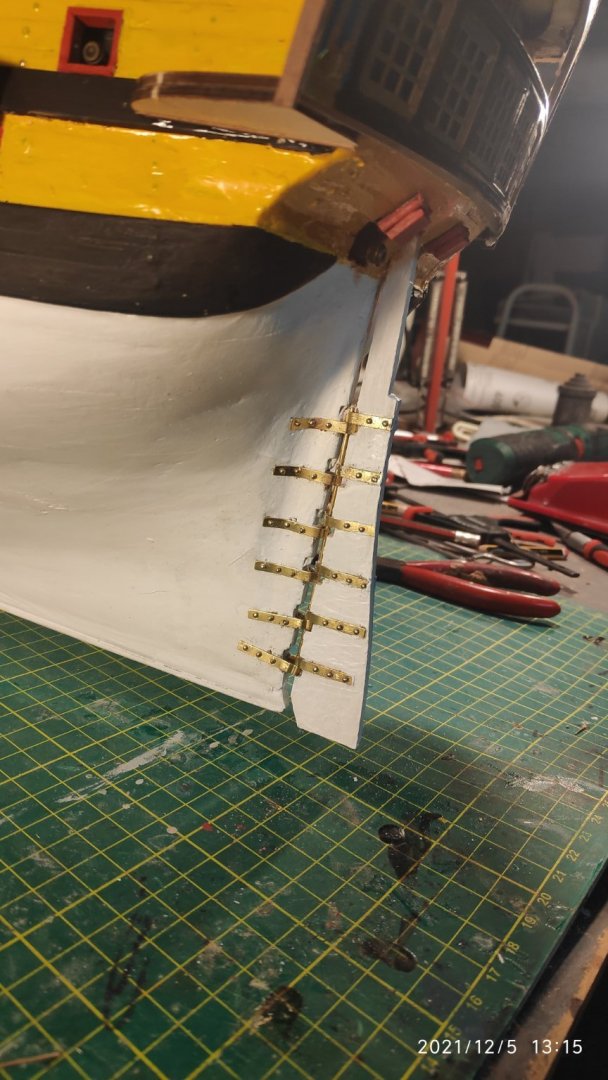
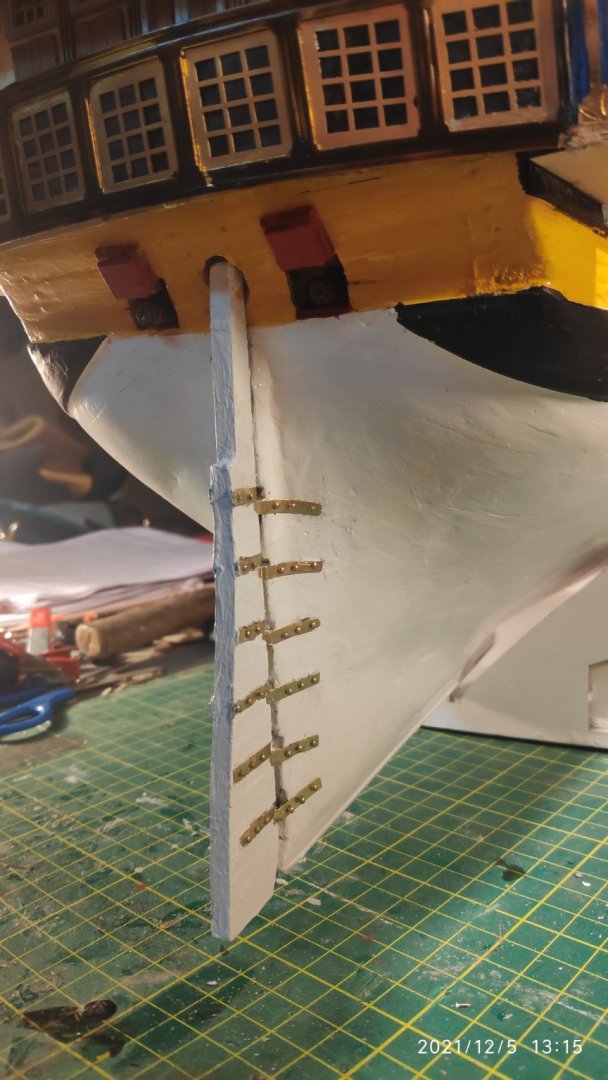
Now i make the rudder blade. I use 6 pairs of hinges. I Join the rudderblade to the hull using the hinges and hinge pins. Some of the pins must be shortened because the depth is not enough and they will be visible to the other side. A brass wire used to connect the rudder blade with the hull.
-
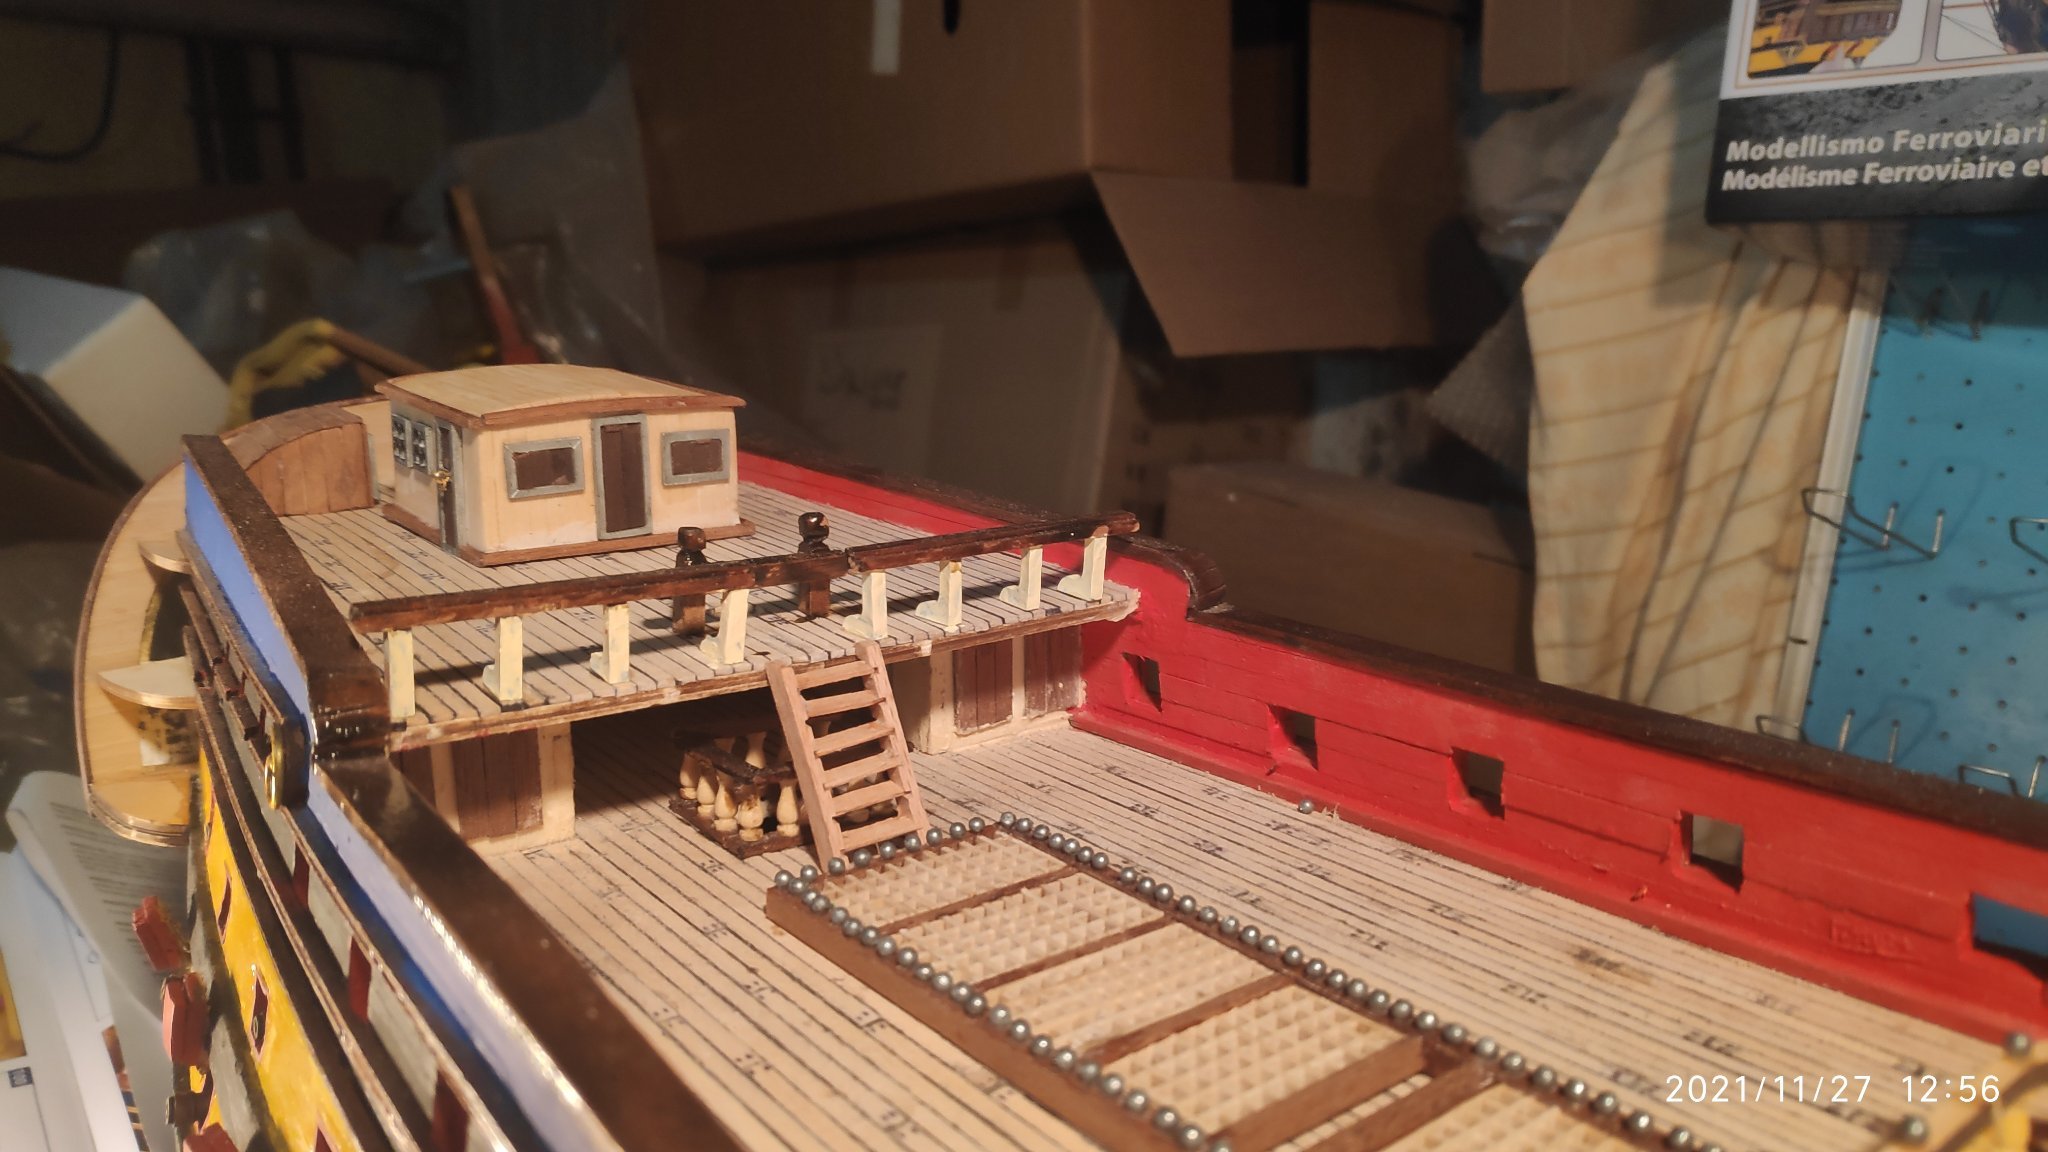
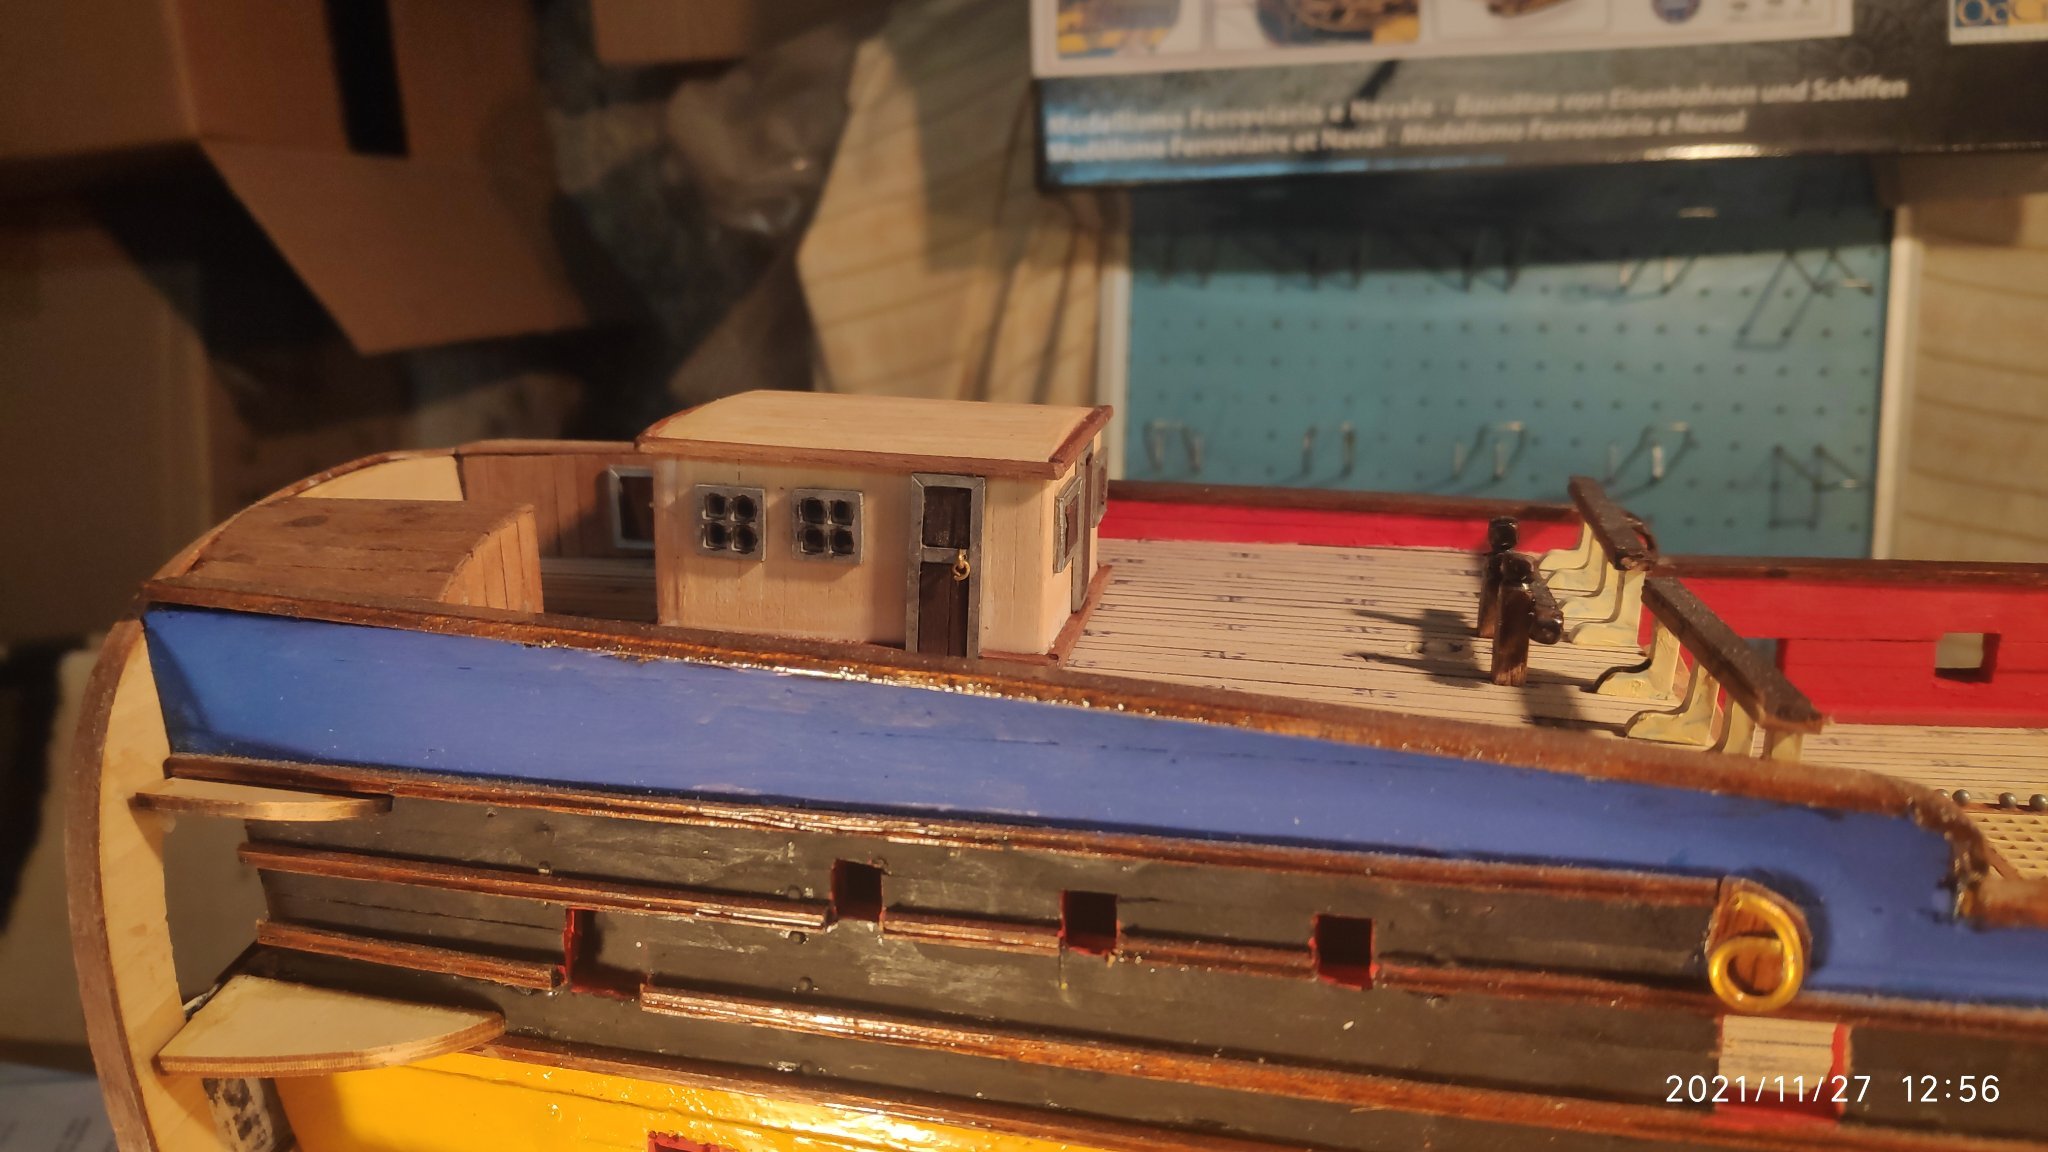
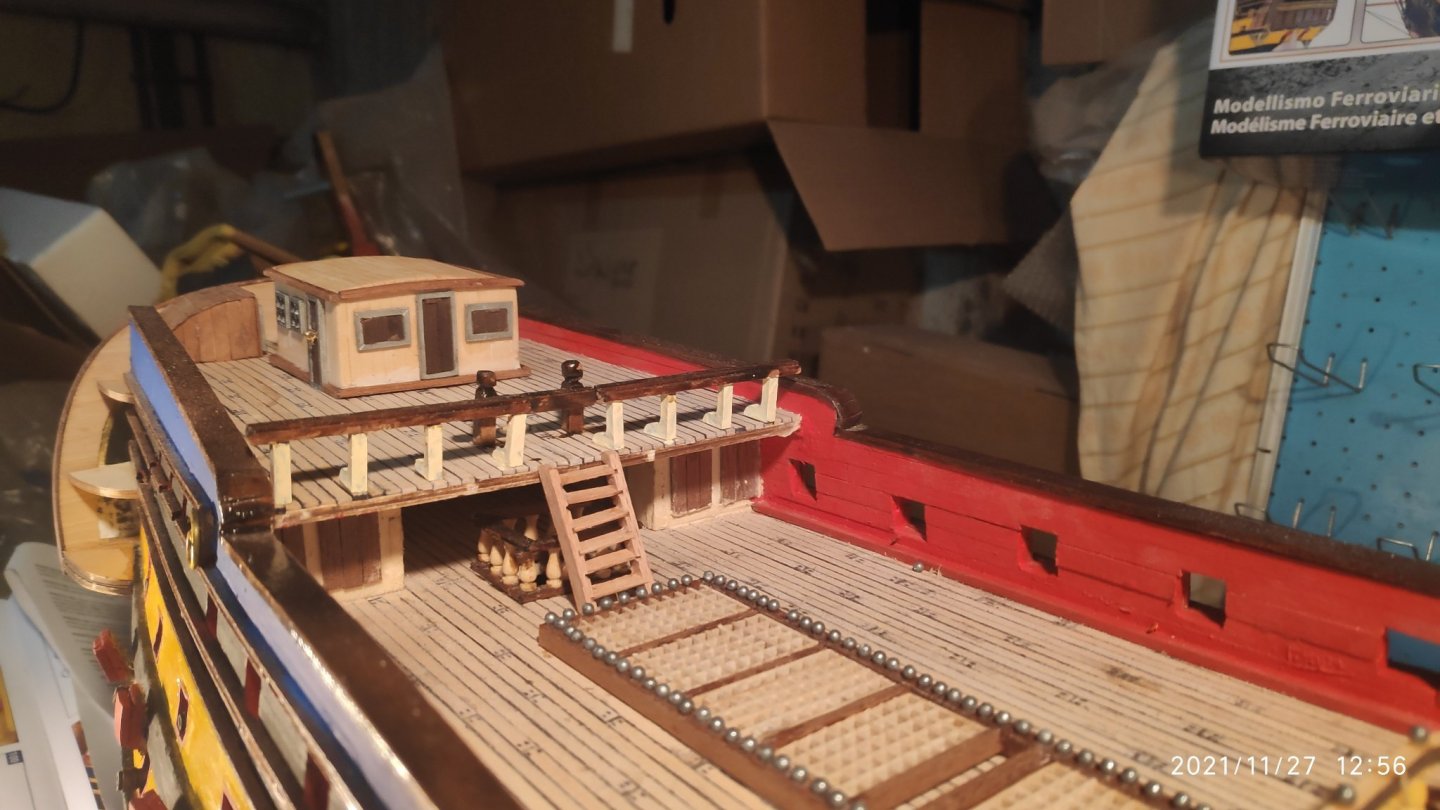
Now i make the rear upper deck cabin. A rectangular construction,lined outside using the same lining strips as in the deck. I glue the front roof and baseboard finishes, the sides of the roof and the side baseboards all with sapelli wood. Then i glue the the metal doors and windows and put the knobs for the doors. Then i place the cabin on the deck. One more job is done....many others come....lucky me....


-
Now is time to fit the gun barells. In gun ports that aren't seen now after fitting the decks, i have glue vertical pieces of wood near the gun ports,before installing the decks.You can see that in earlier fotos,when i make the deck fitting. So in that vertical wood pieces,that i have paint black,i make a hole and in that hole i glue the gun barell in every gun port. The rest guns will be full detailed,because they are in the deck and is visible.
-
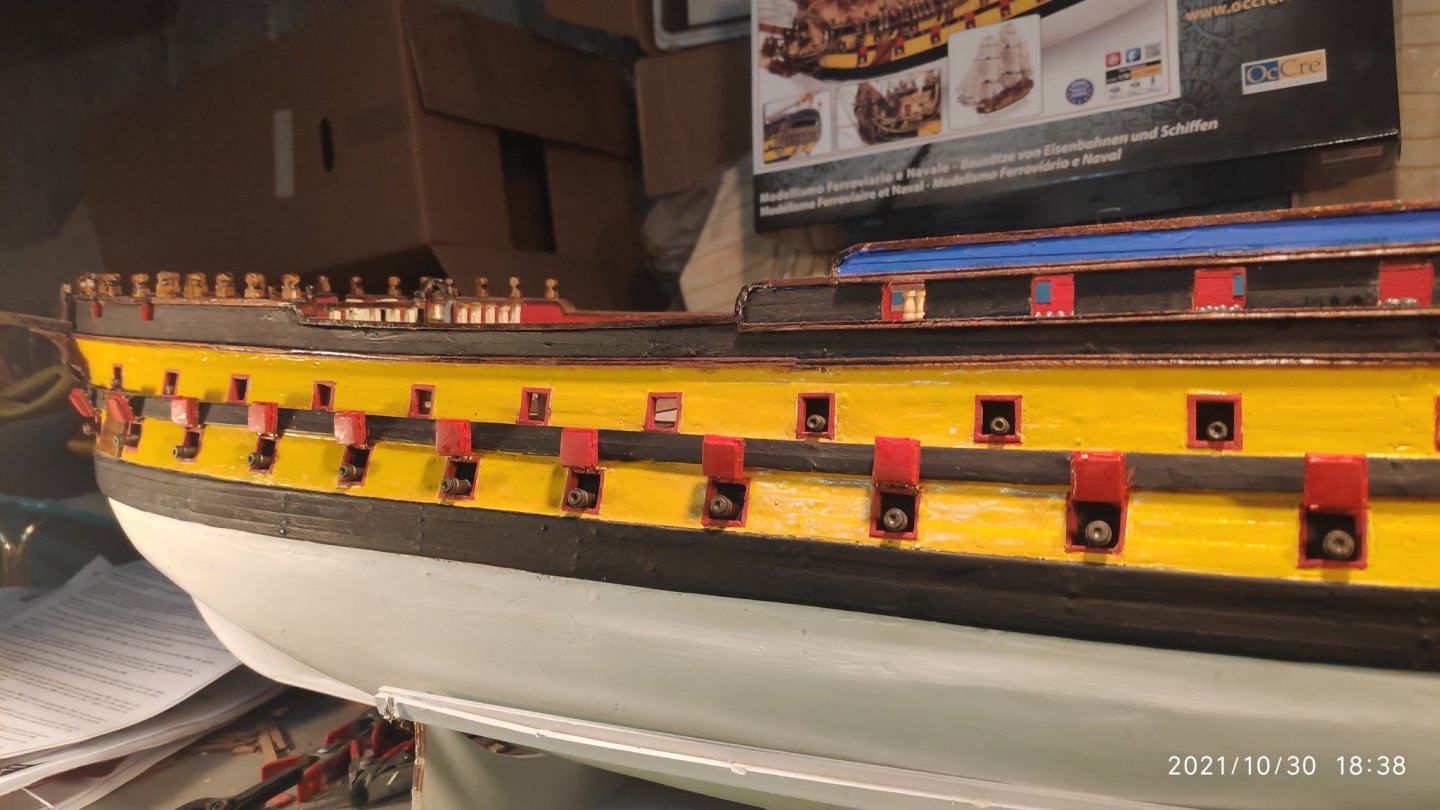
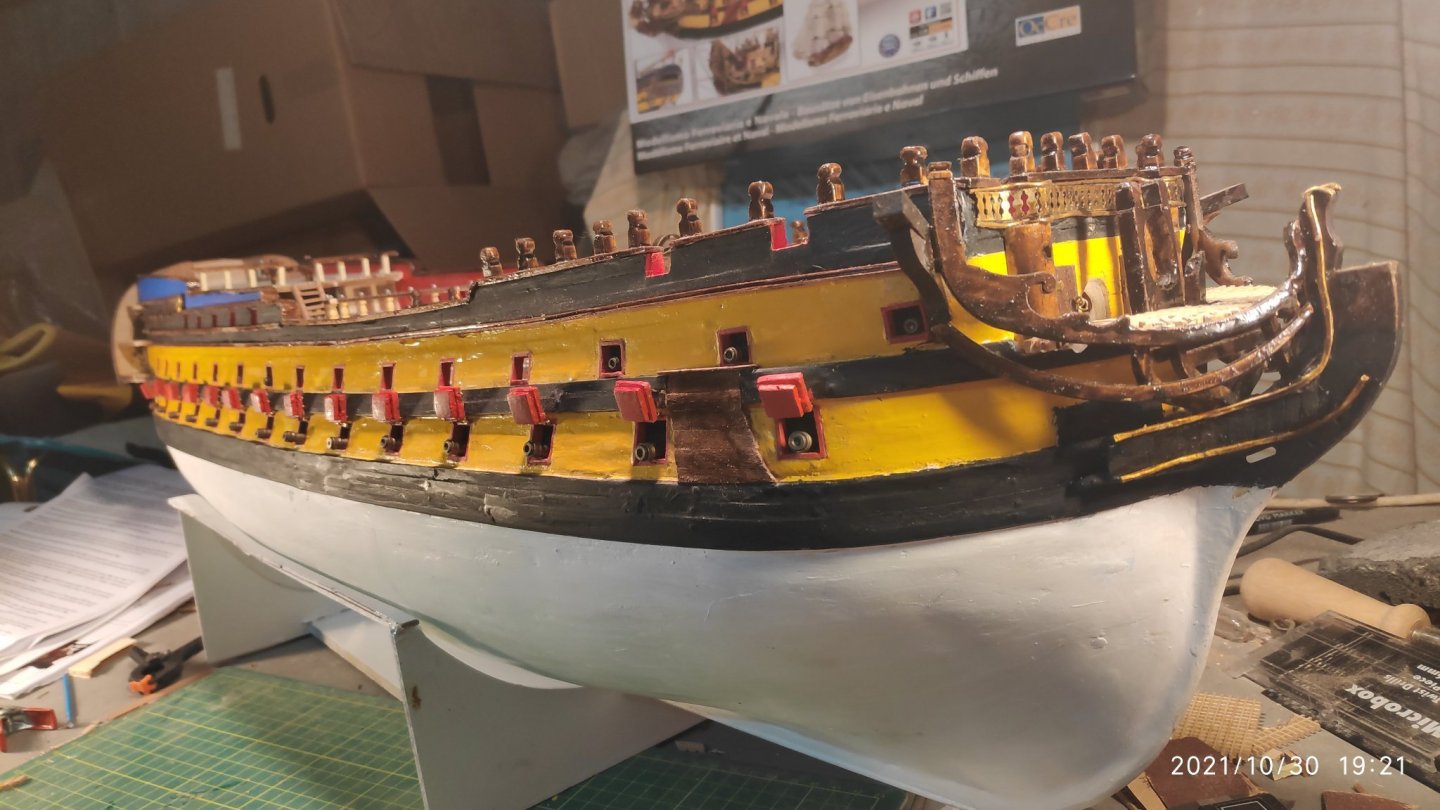
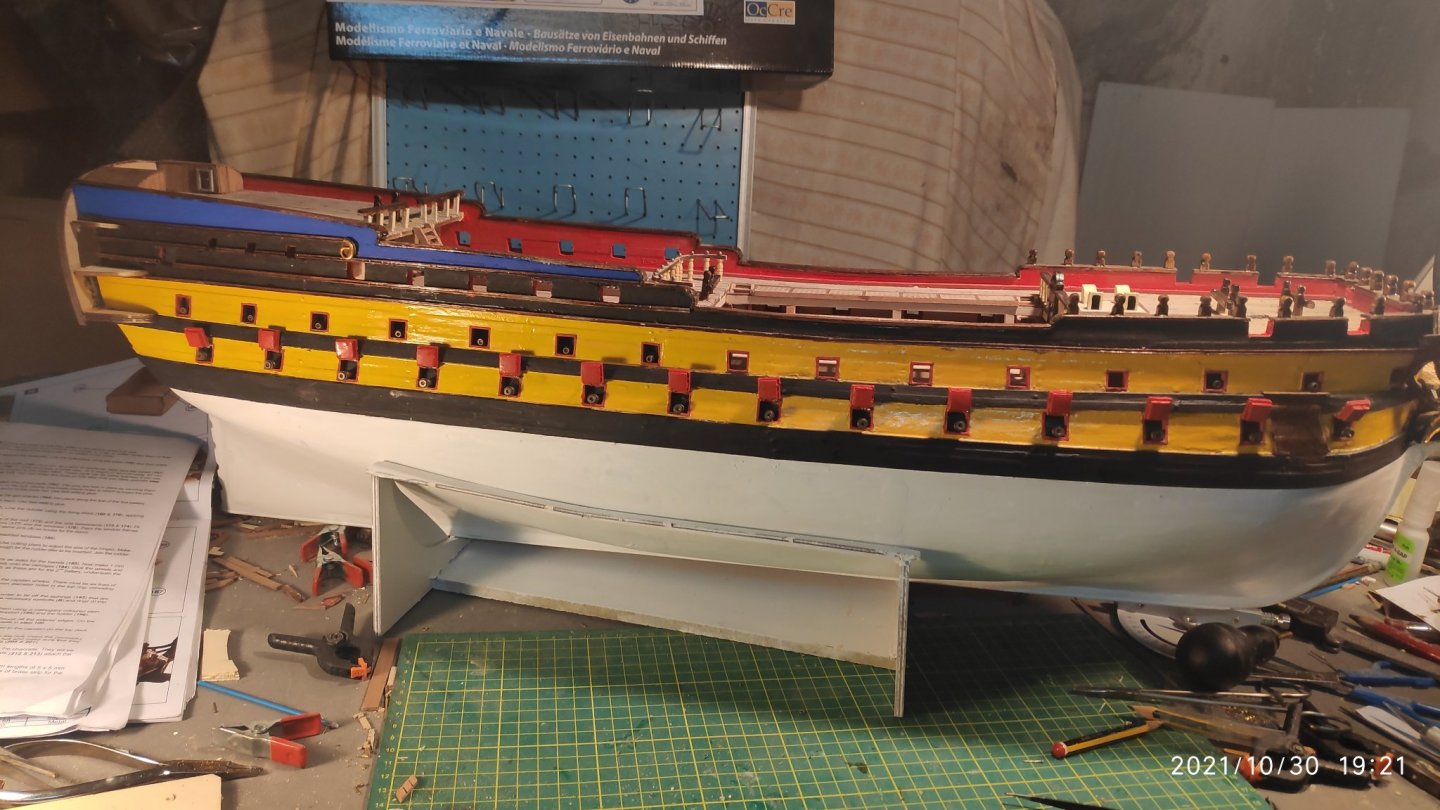
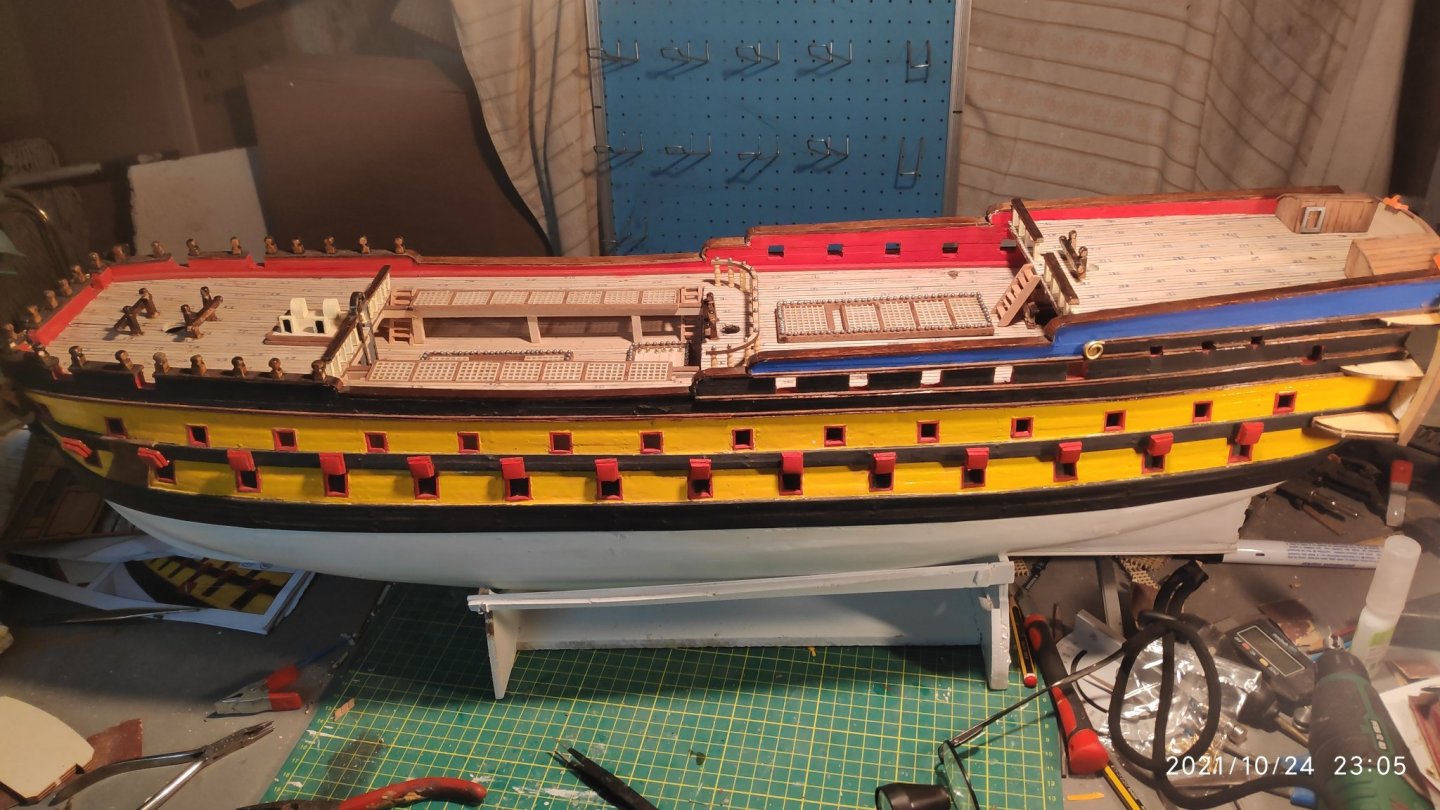
After weeks of job i finish the gun ports and glue them to the hull. They can open and close but they will be set in open position to put after the canons. I put also the rear cabin decor...
-
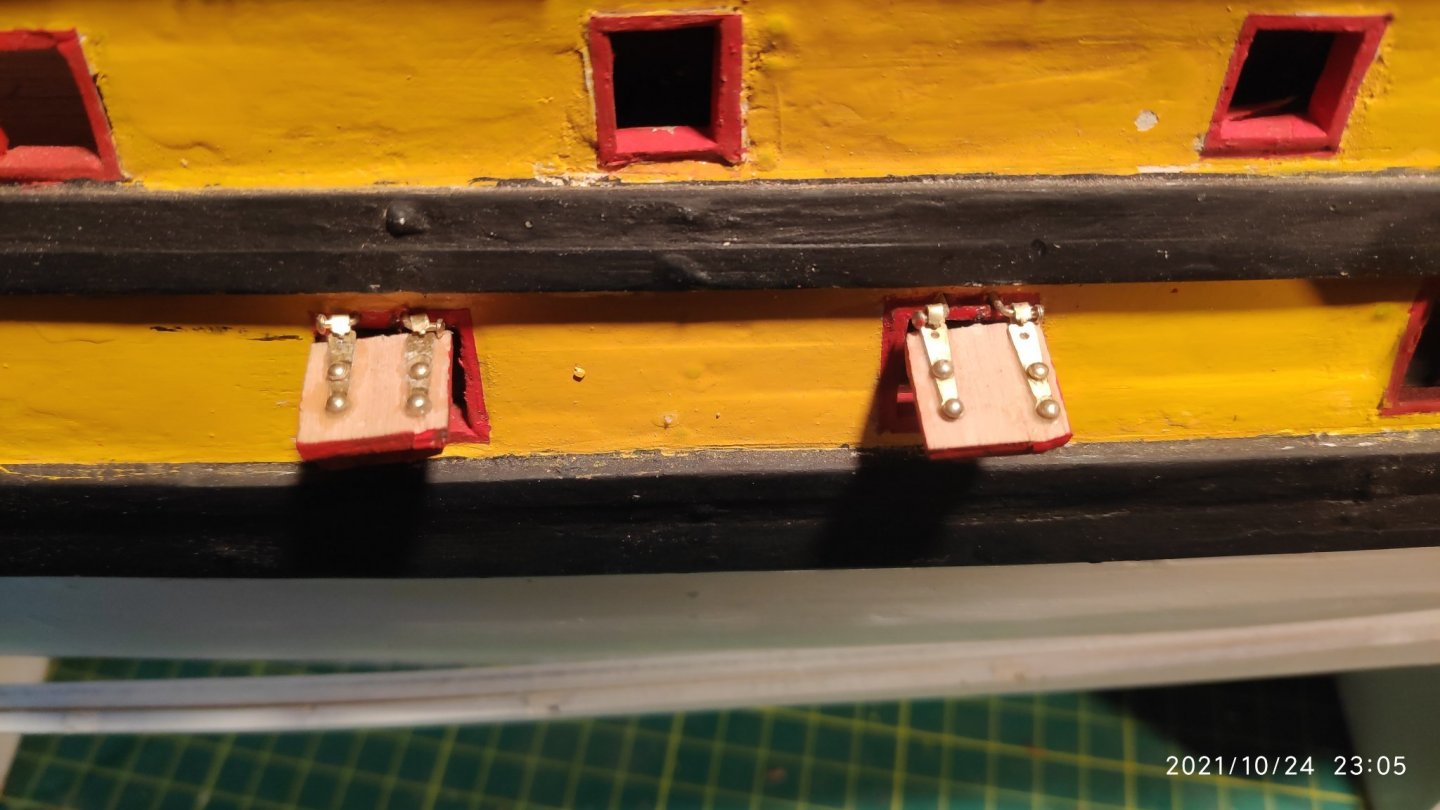
Now is time for the gun ports,they will be fitted in the lower deck only. I must make 28 gunports, from 2 piece of wood,an external (the biggest) and an internal (smaller) glued together an in each external piece i must glue two brass hinges and make the gunport lids using pins bending them 90 degrees. This a very difficult job and time spending job,because all part are very small....
-
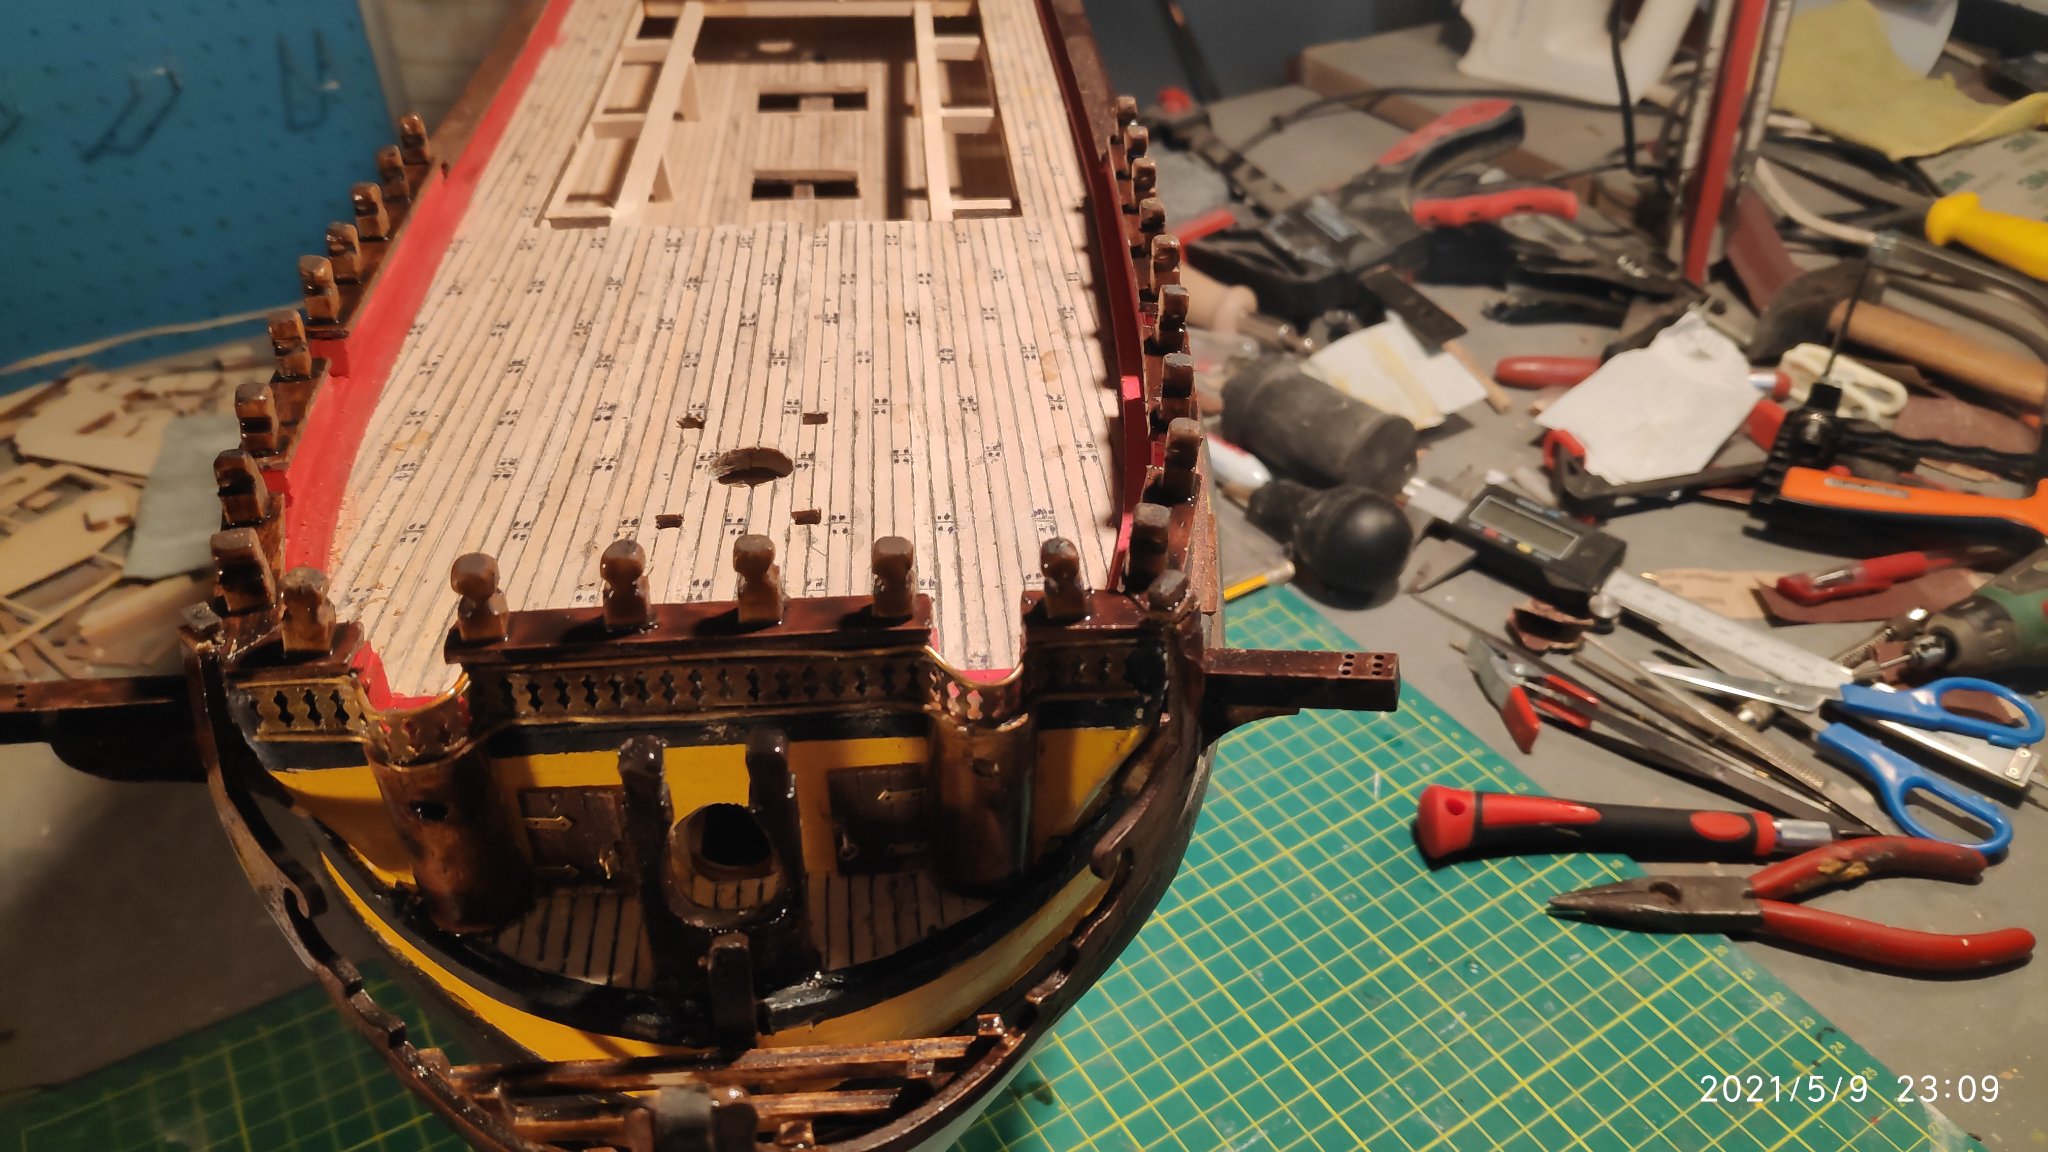
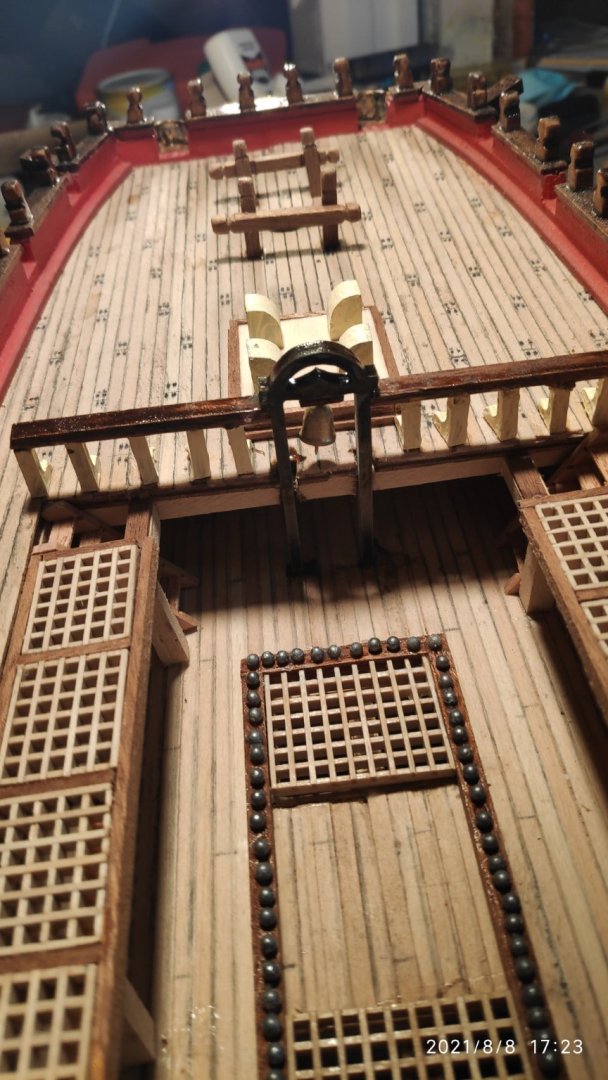
Now i glue the columns onto the railing handrails and then i glue the whole assembly onto the deck. Then i glue the finishes(canon balls) coincide on the columns. Also i glue the railing handrails .Also i glue the last Samson post i front of the hole of the third mast

-
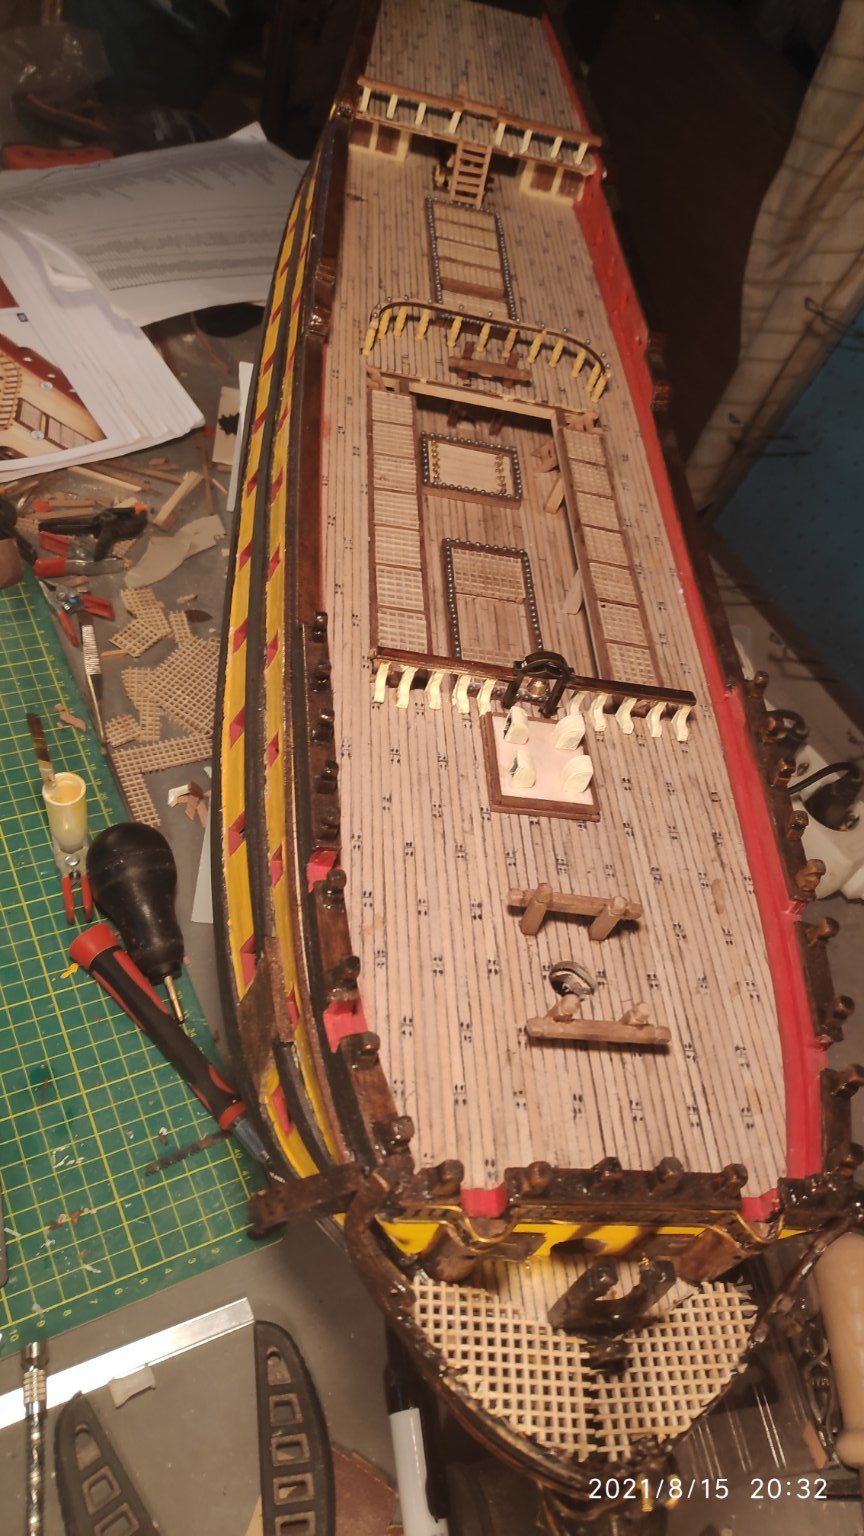
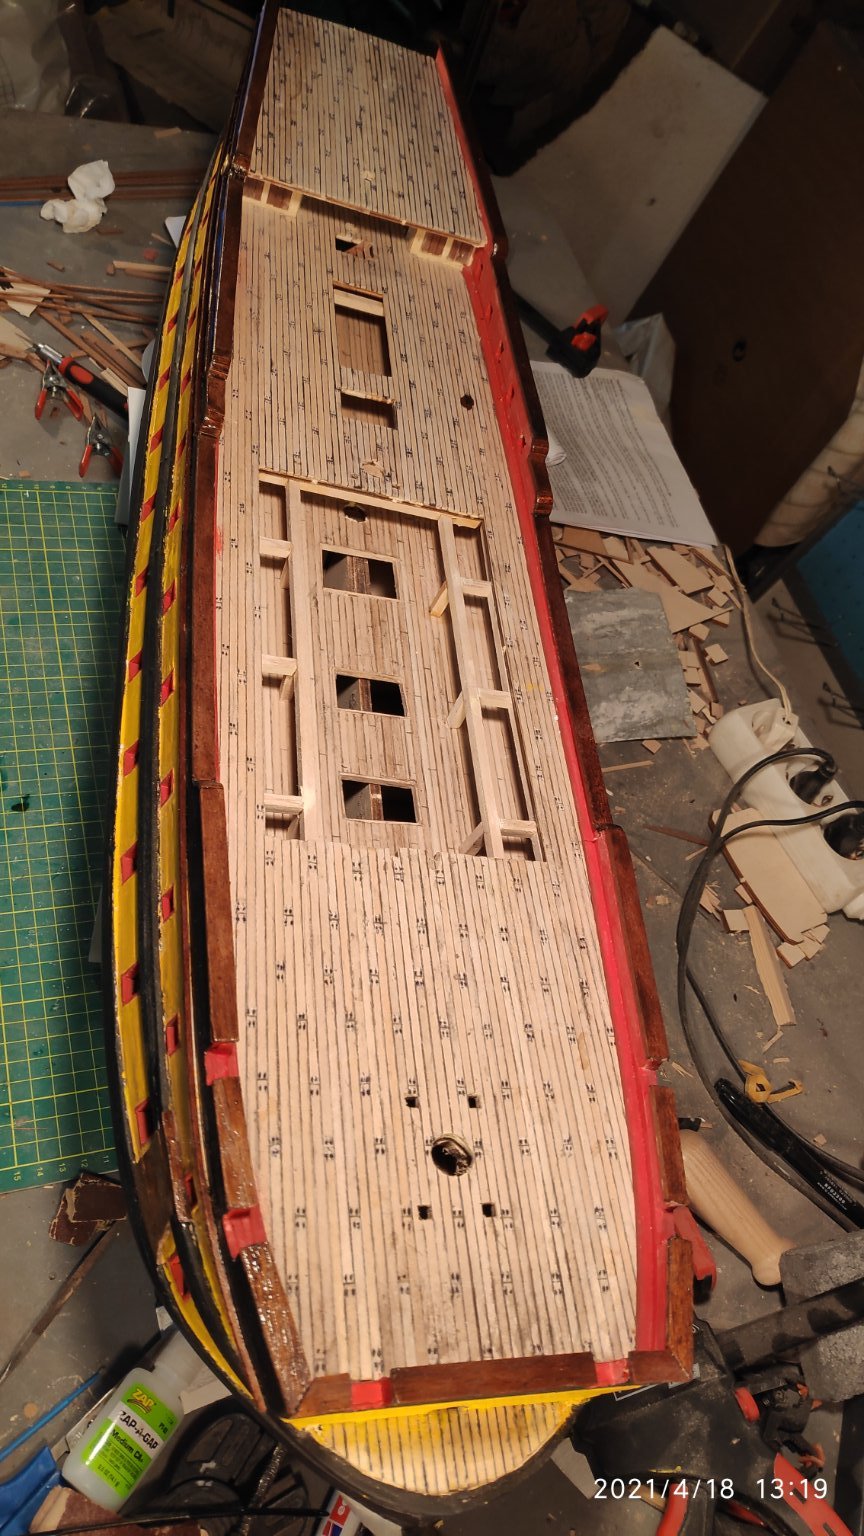
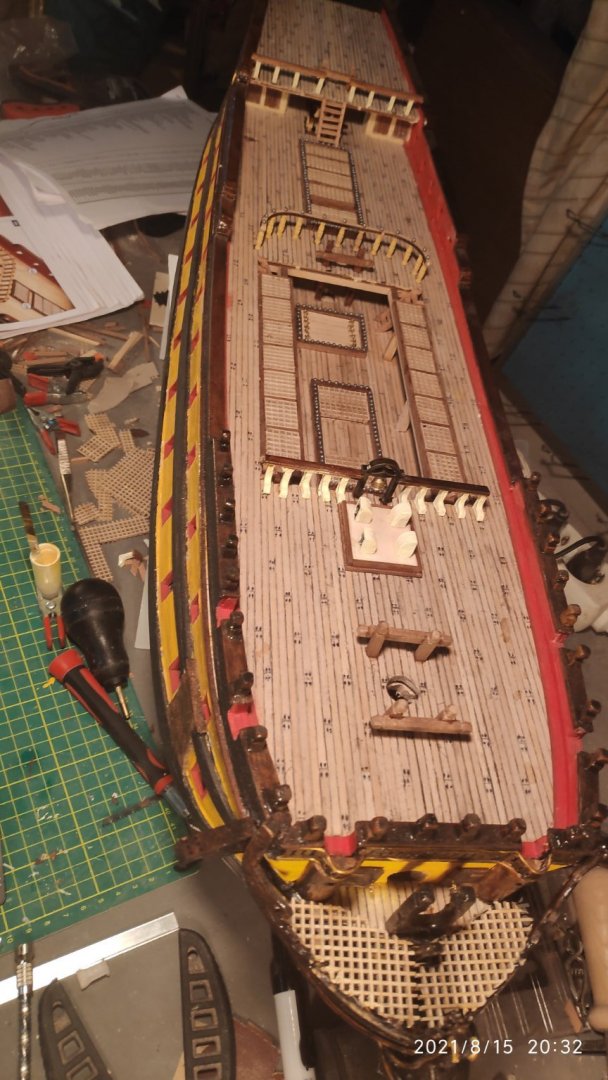
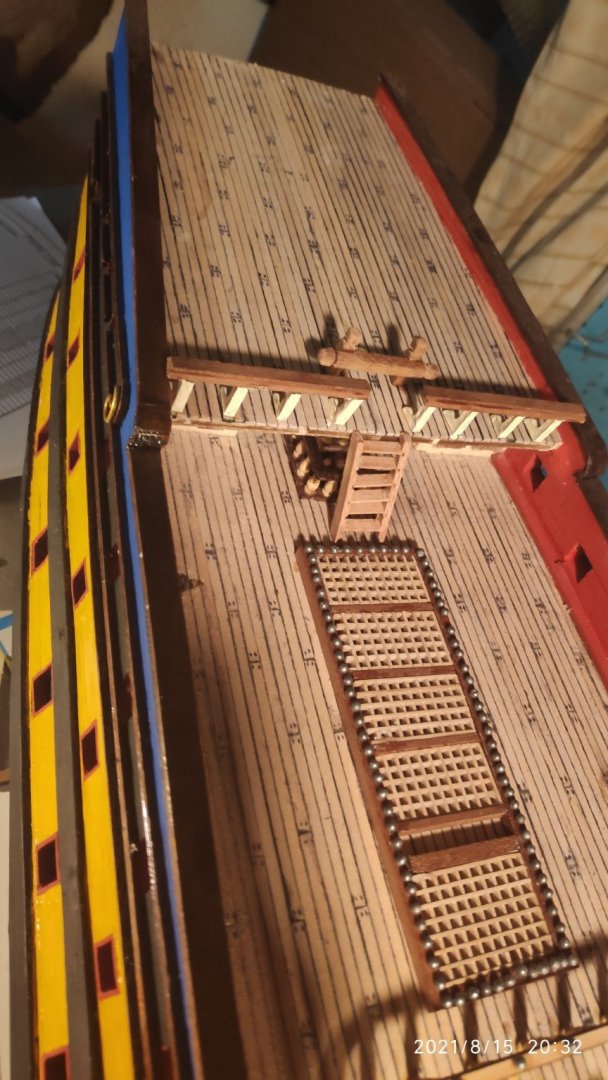
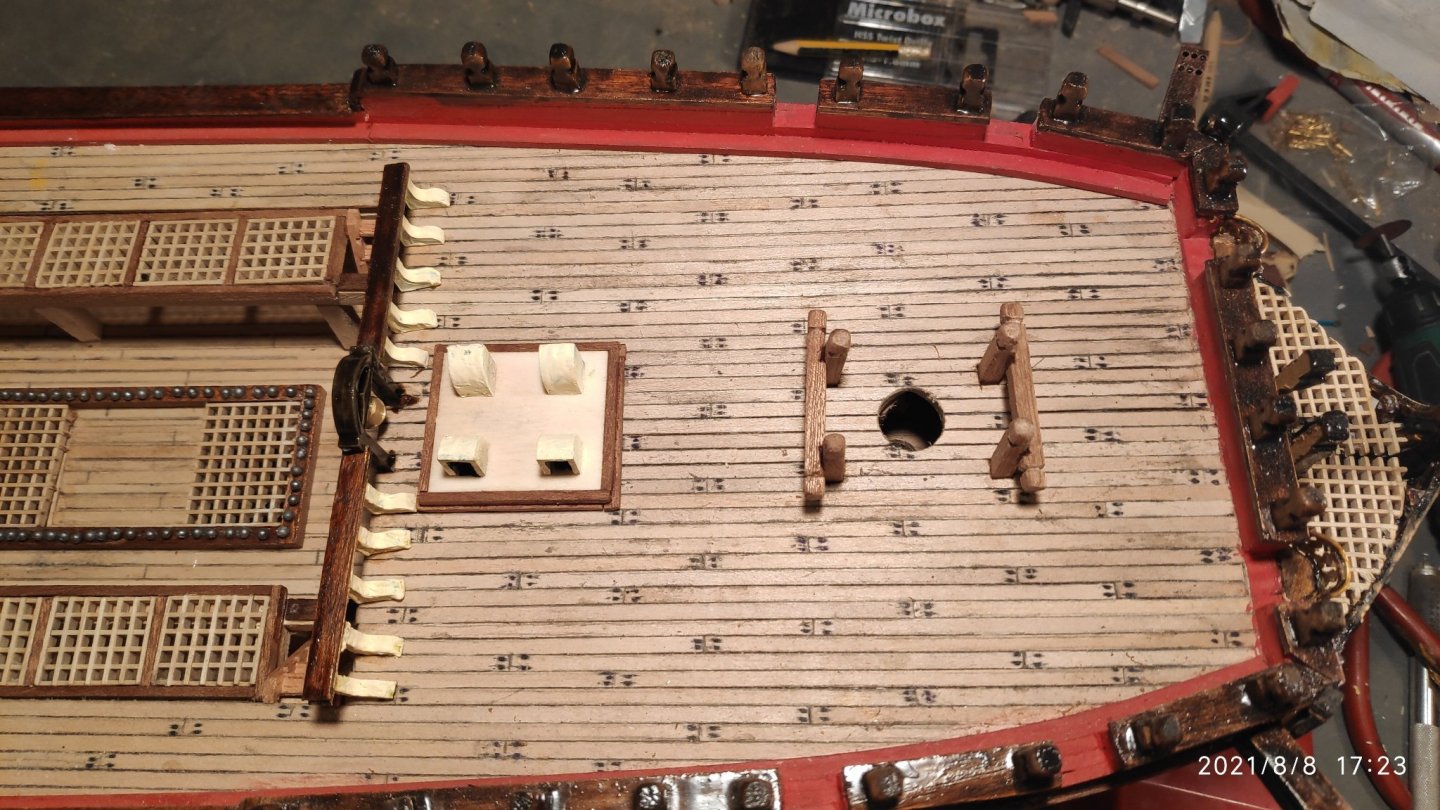
Now i made some things for the deck. i make five stairs, the hatch,three Samson posts,the chimneys and the bell post with brackets and handrails left and right.

-
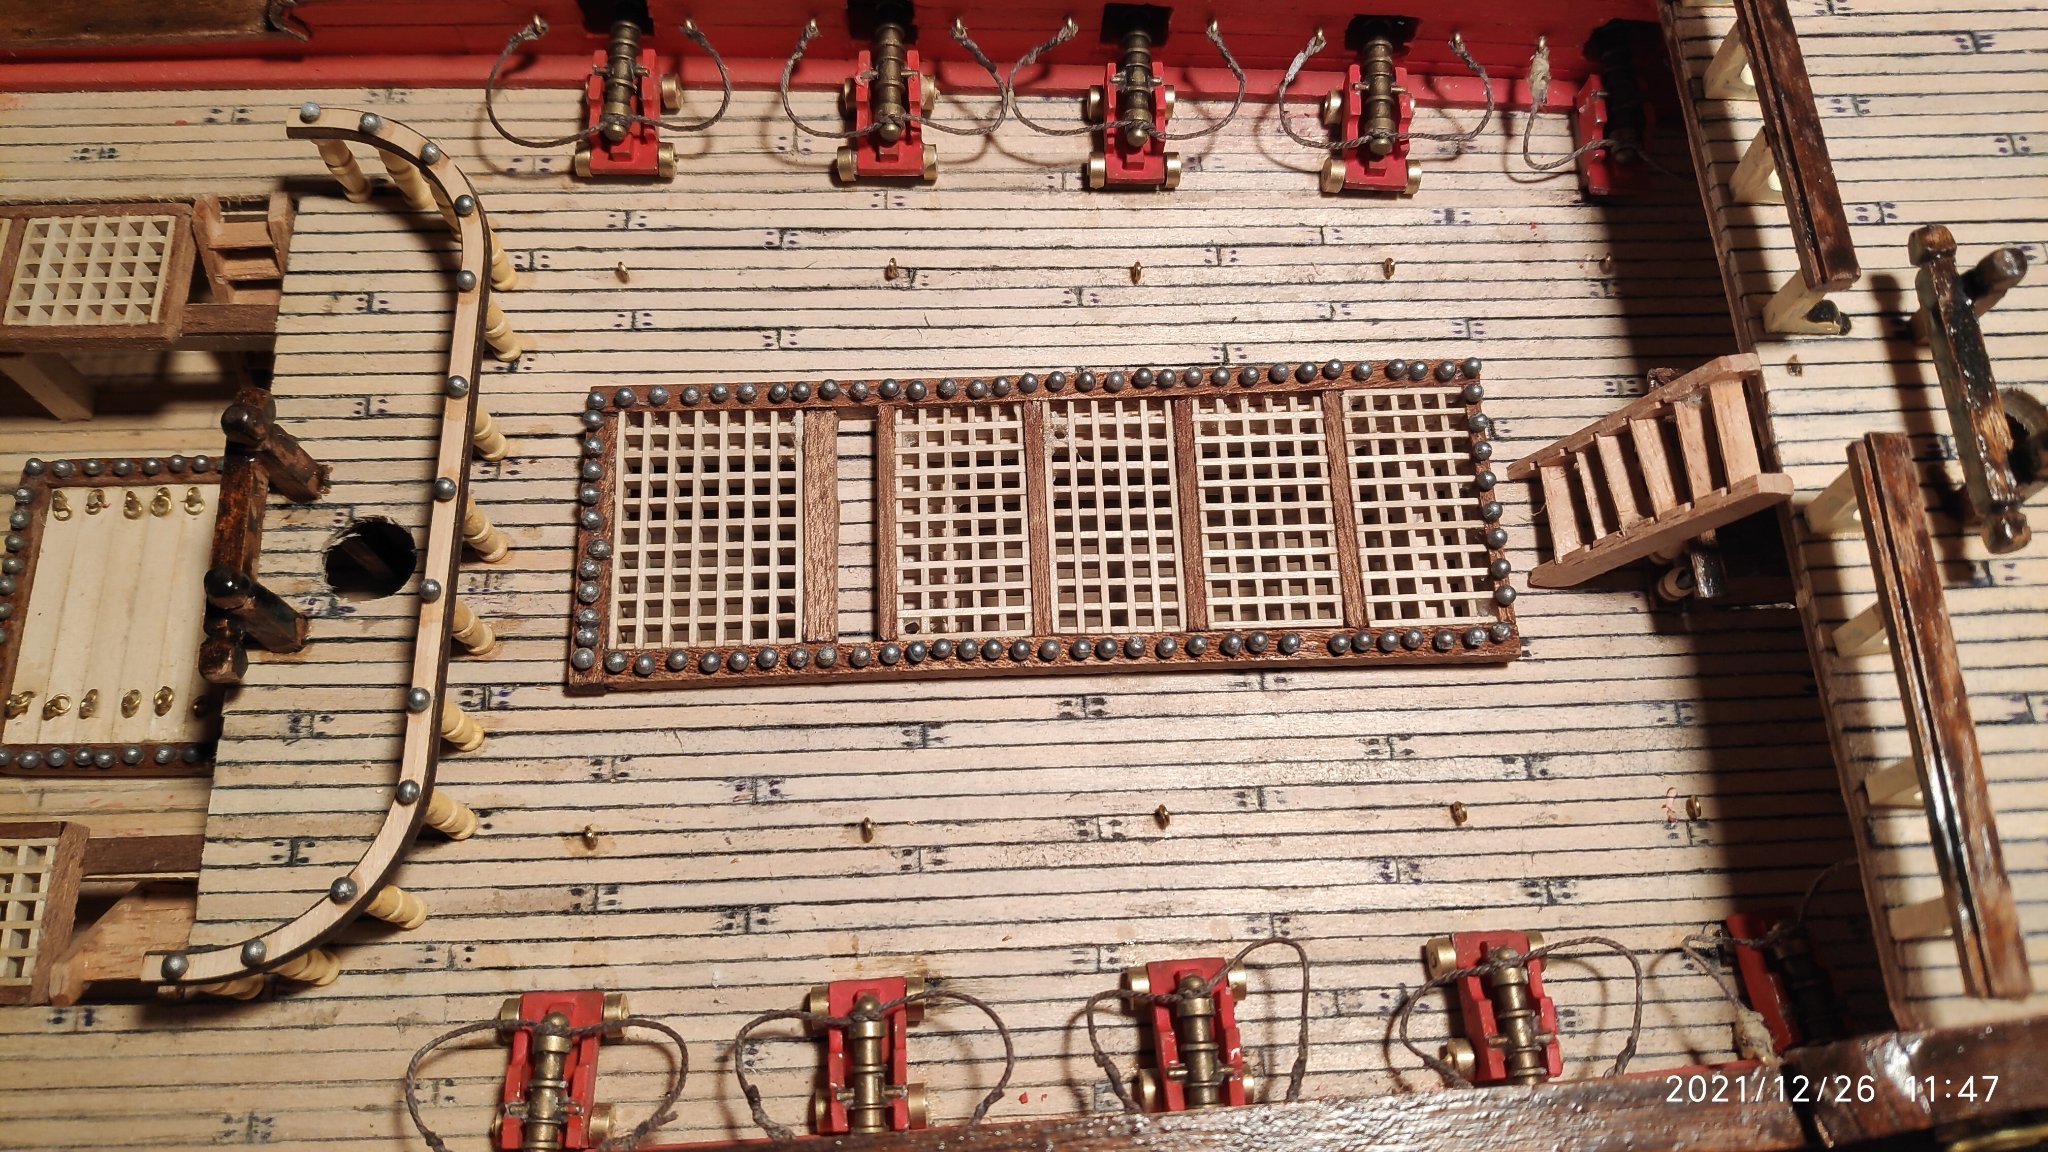
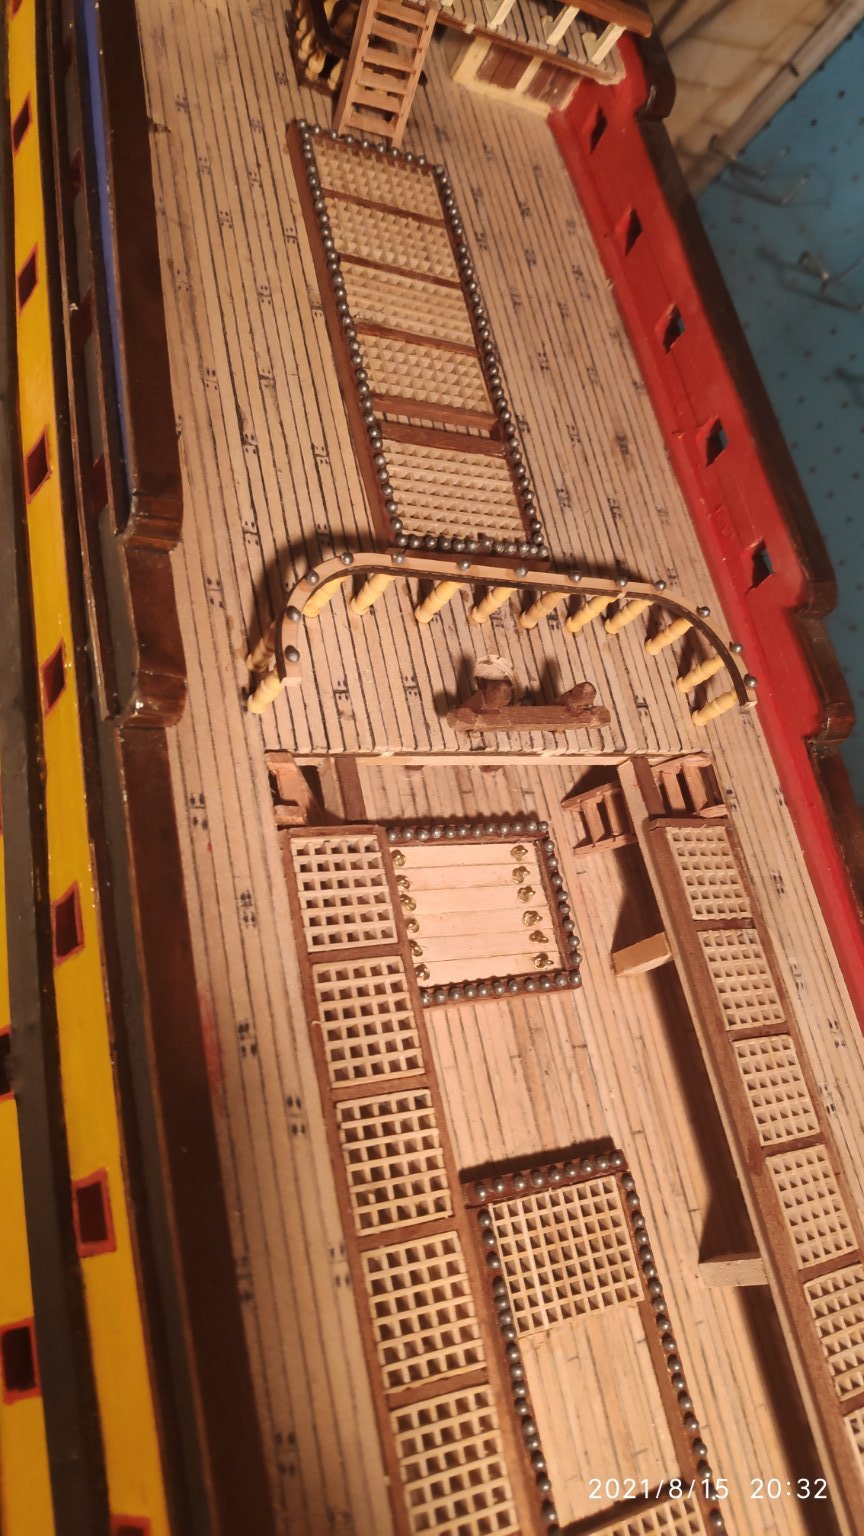
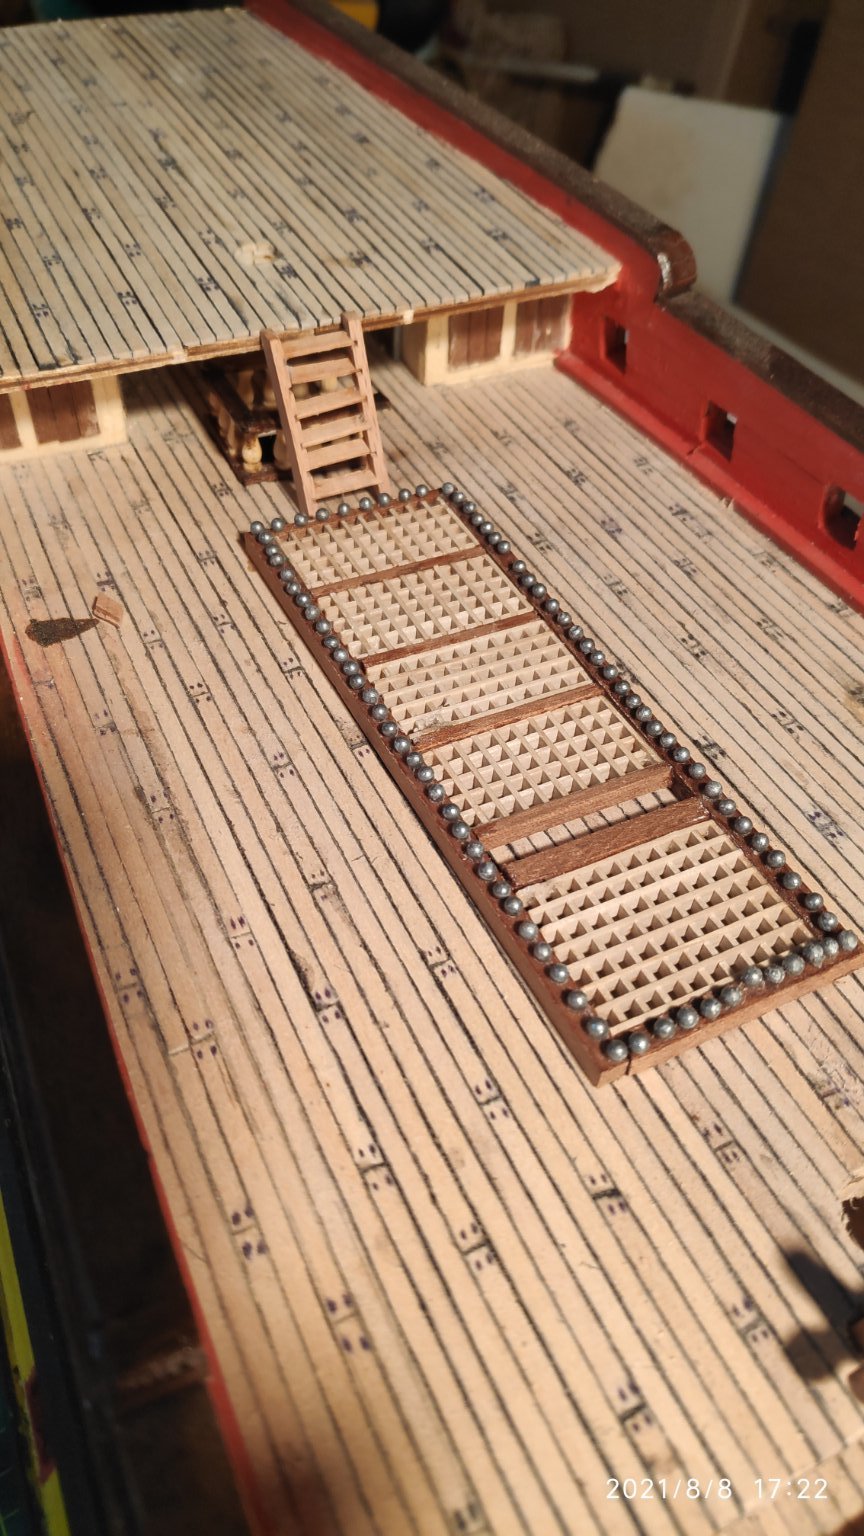
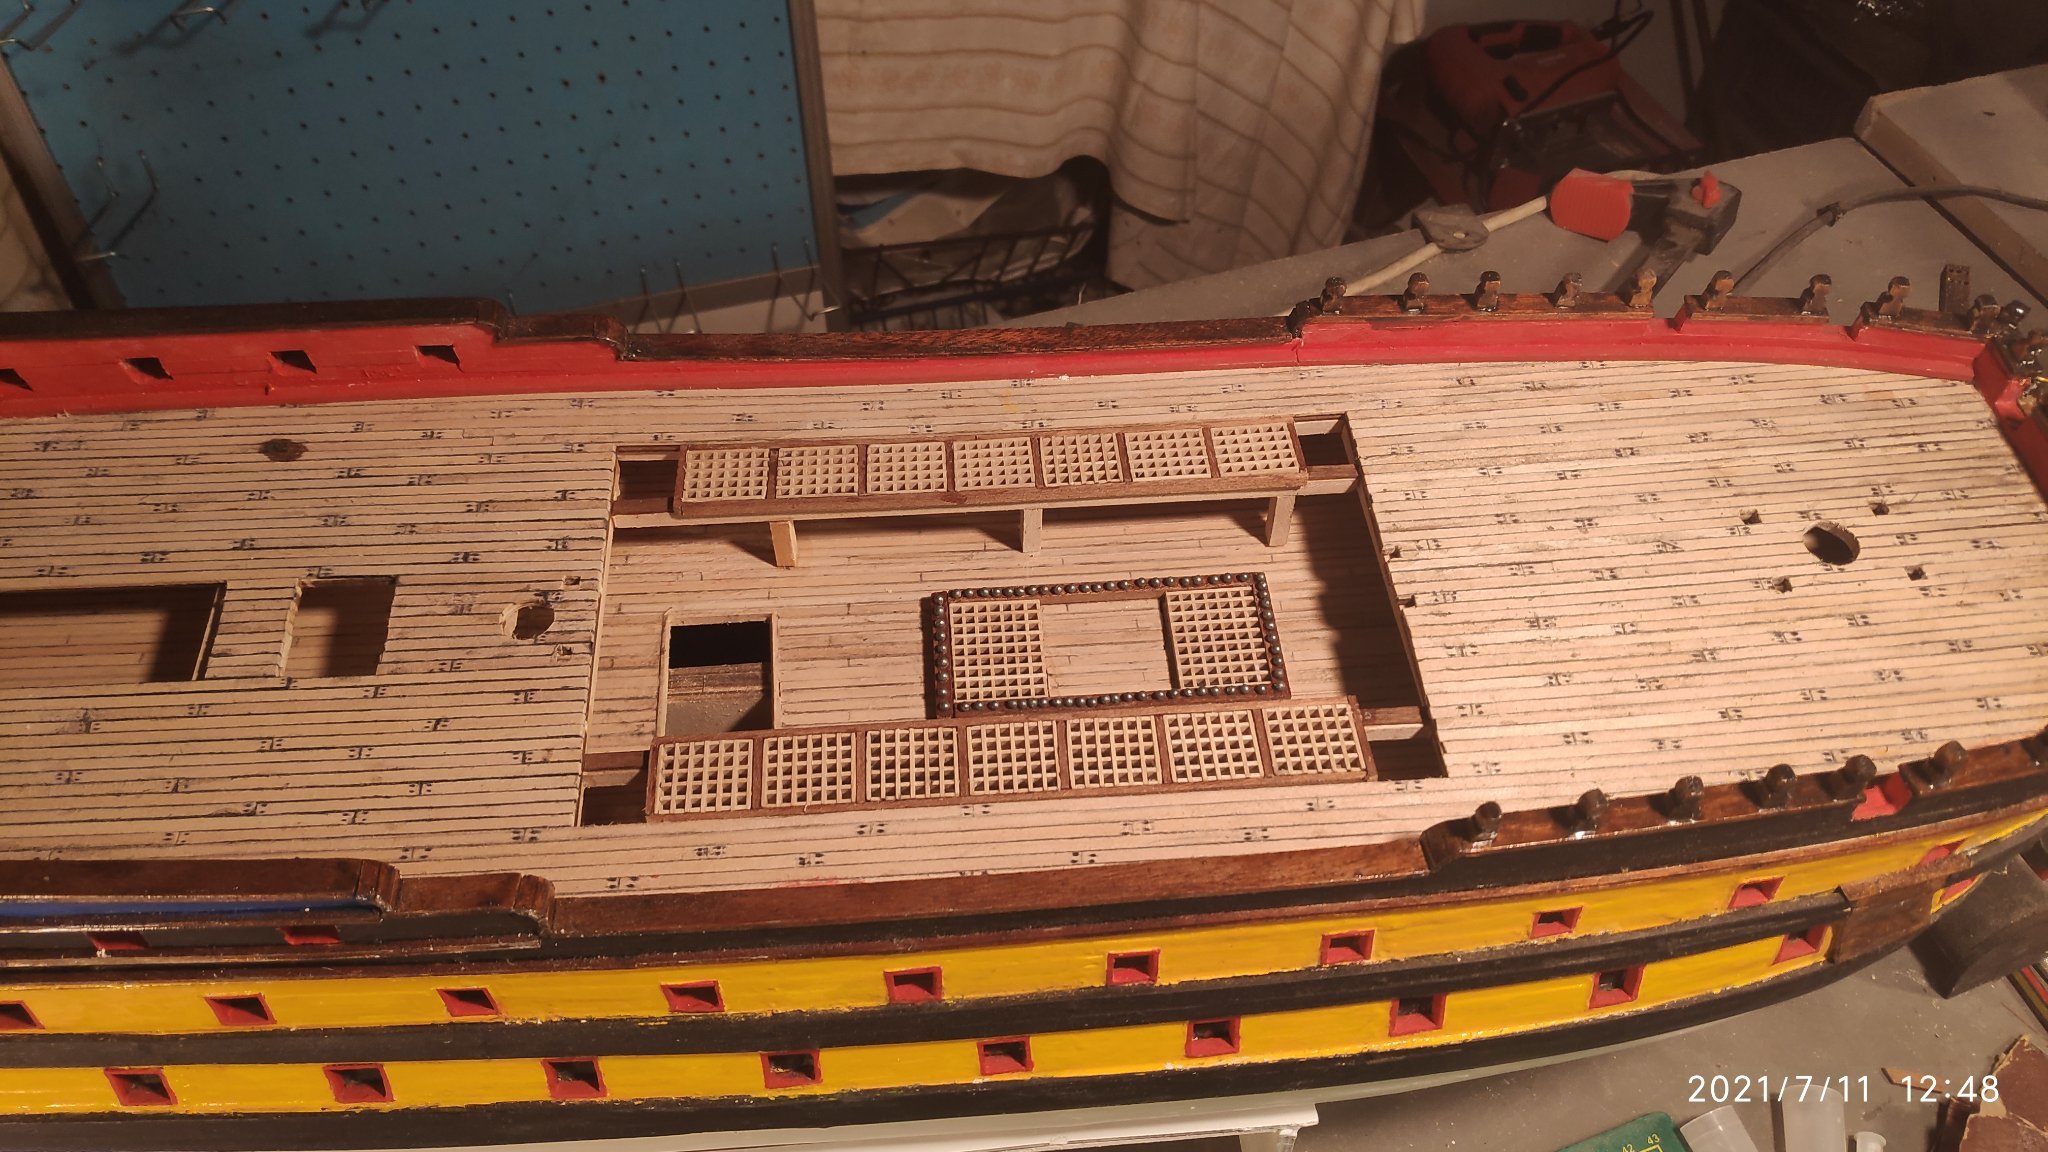
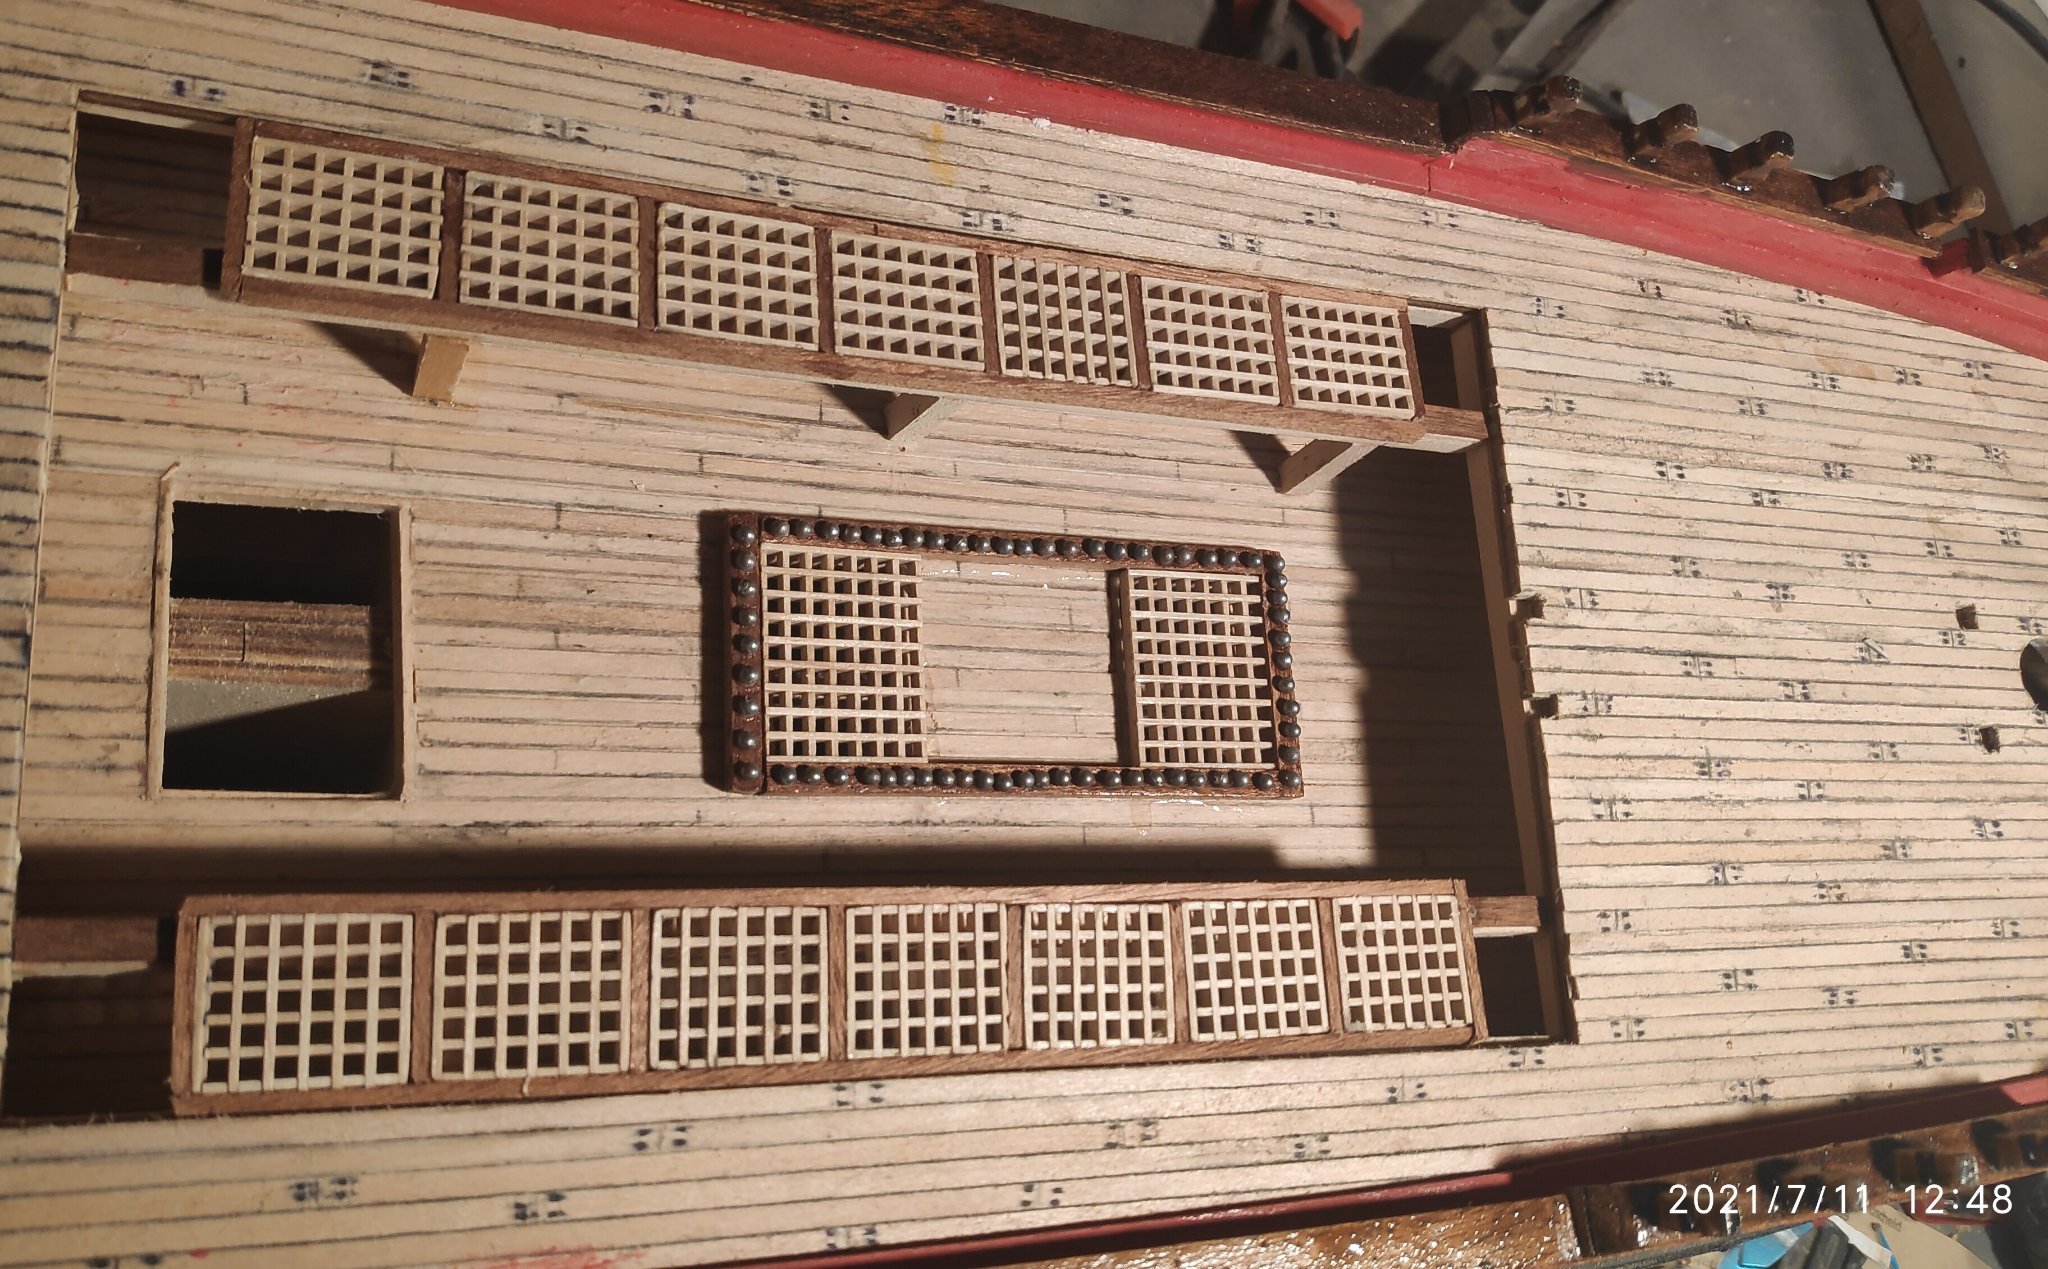
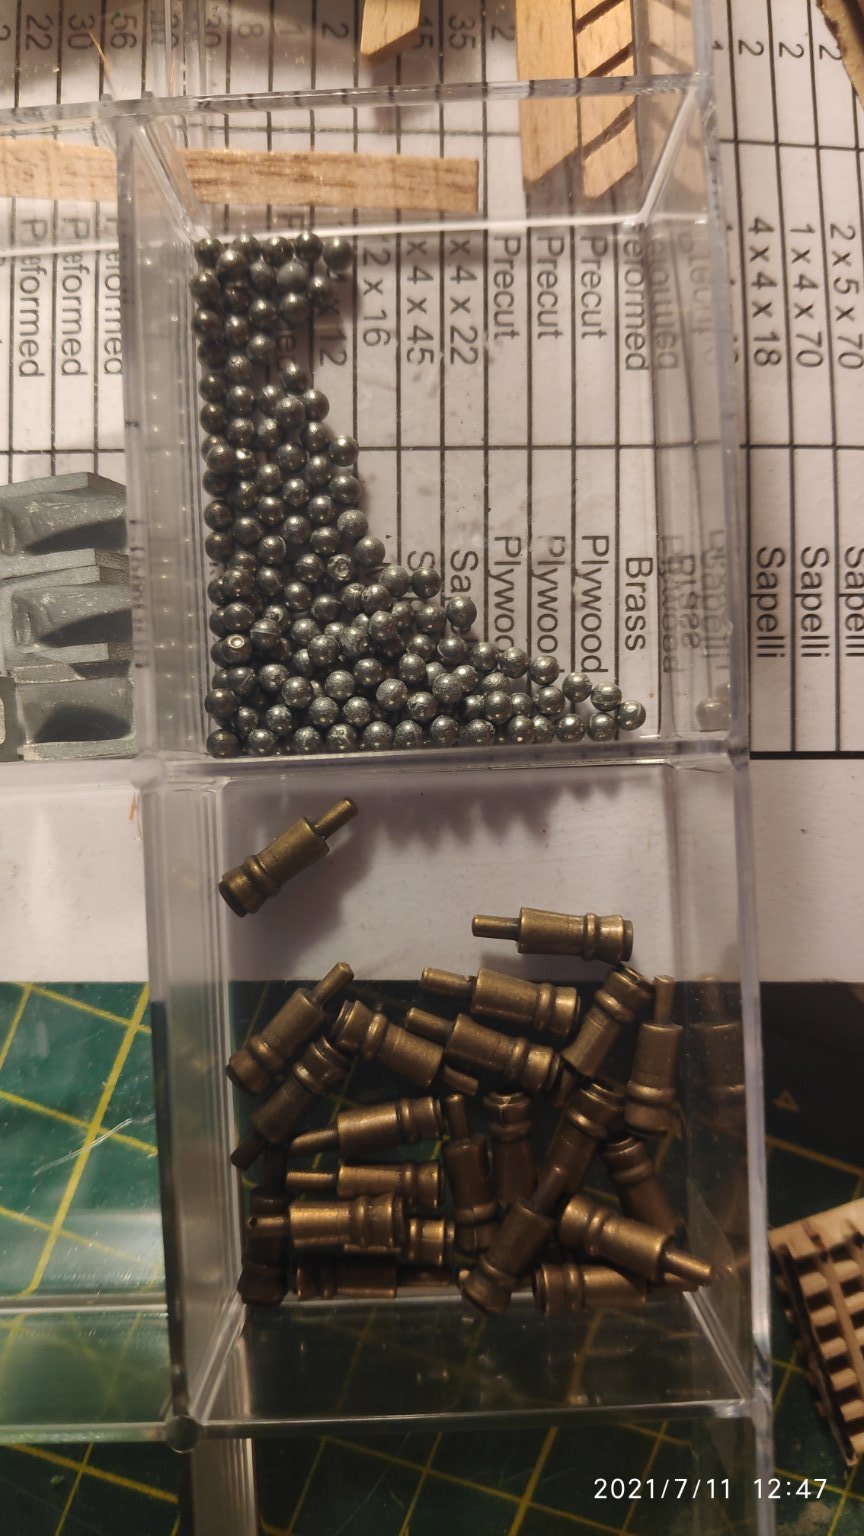
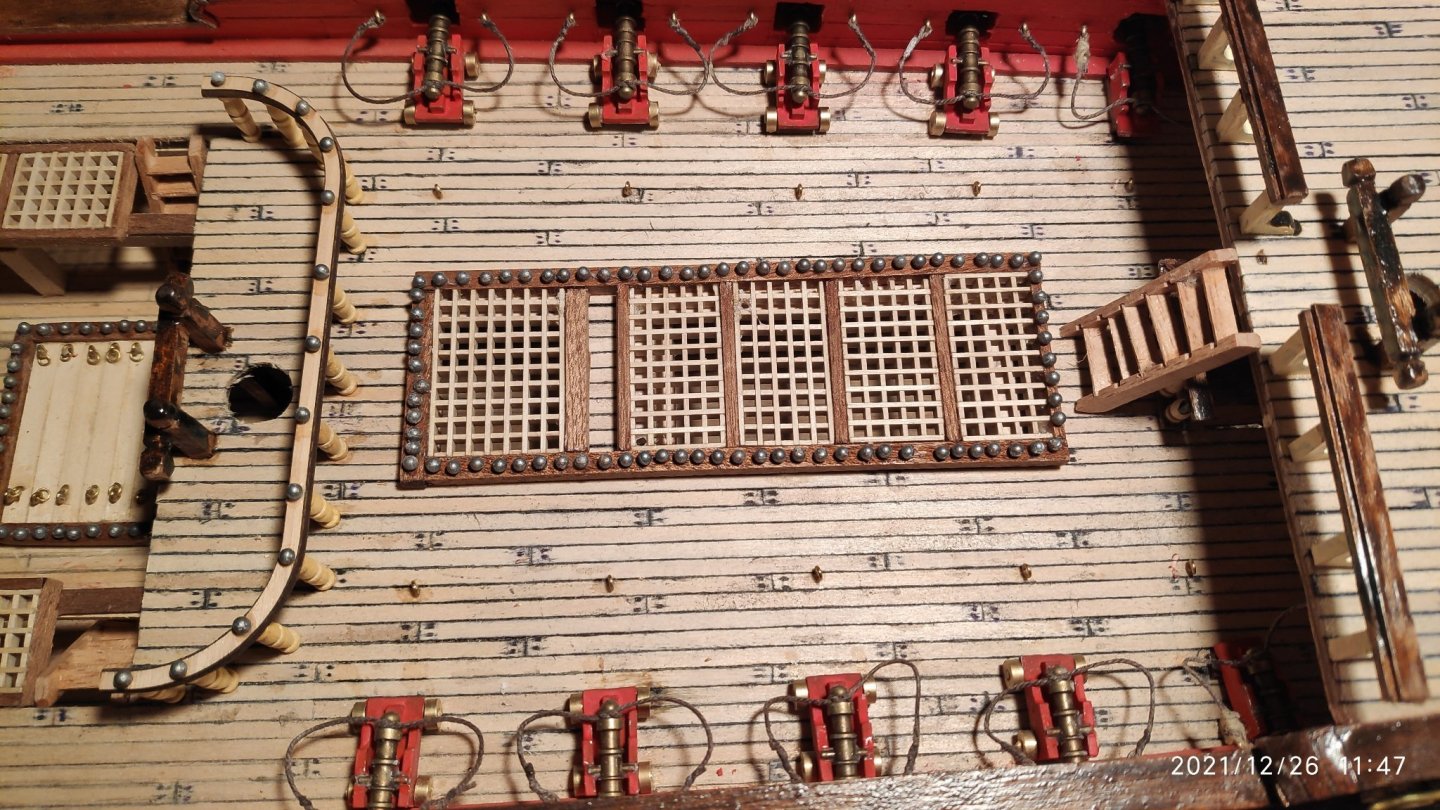
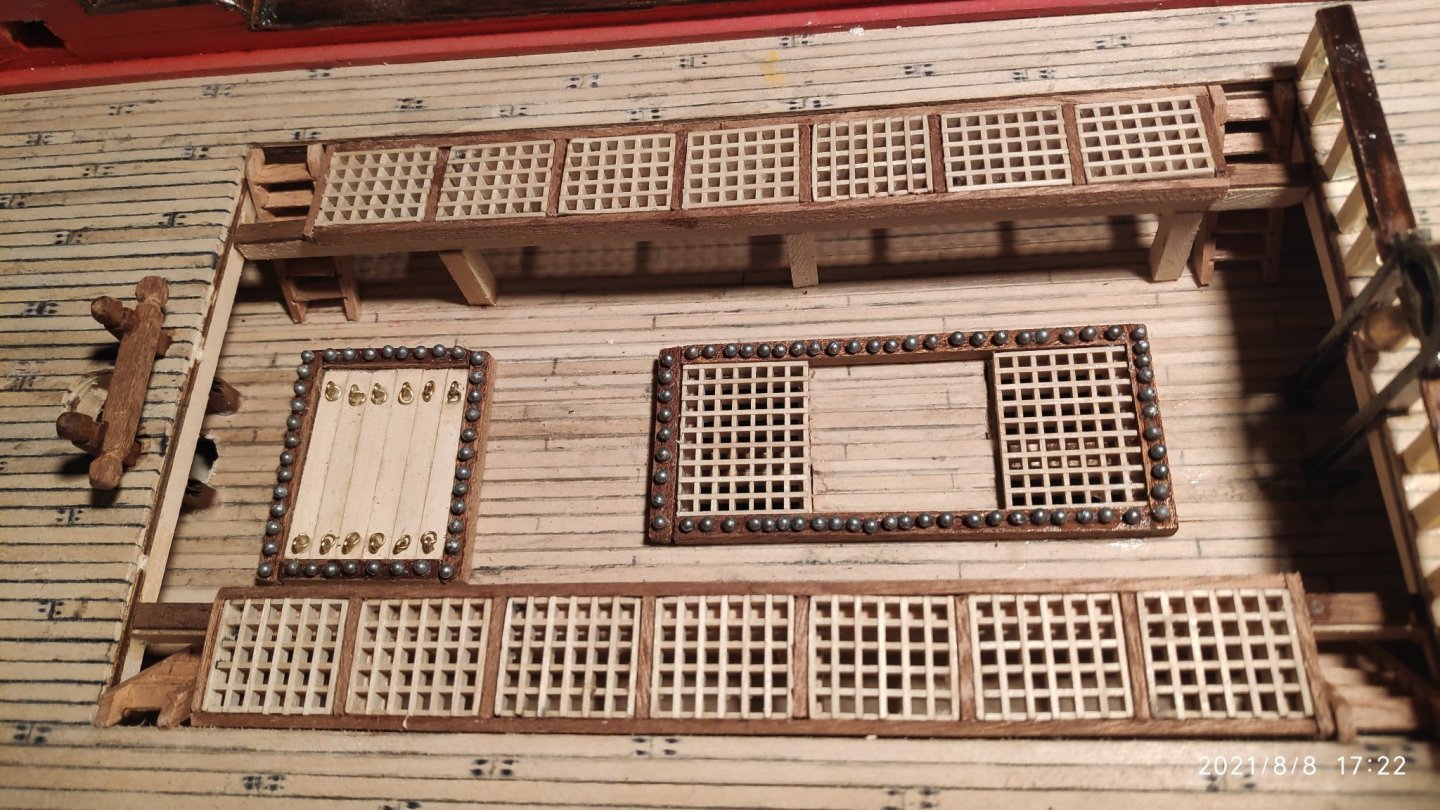
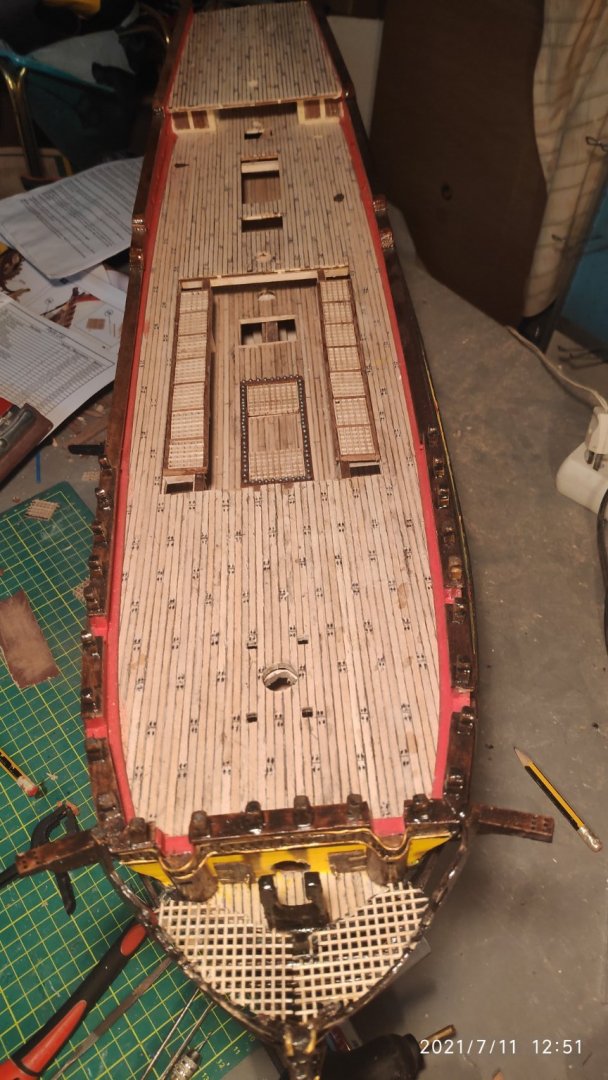
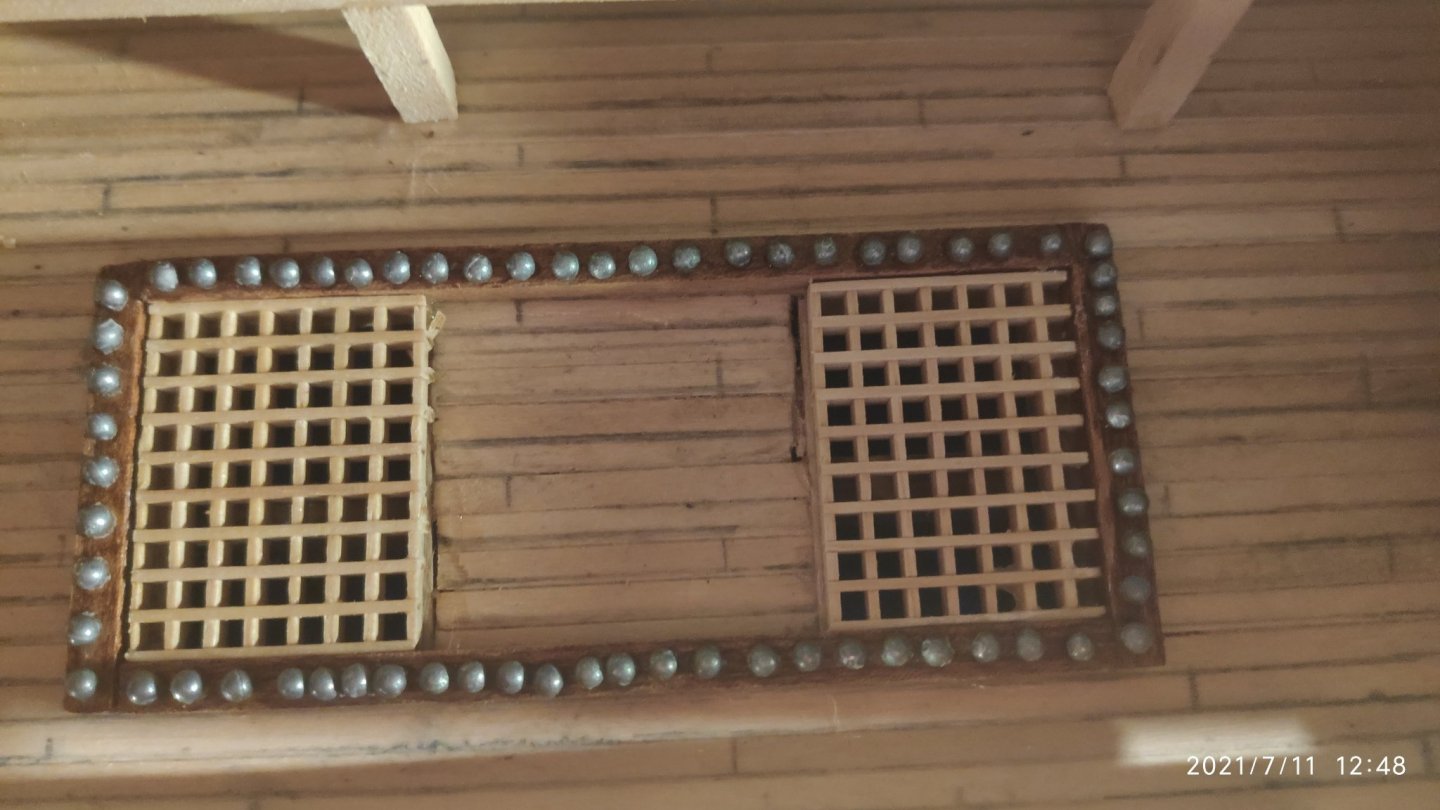
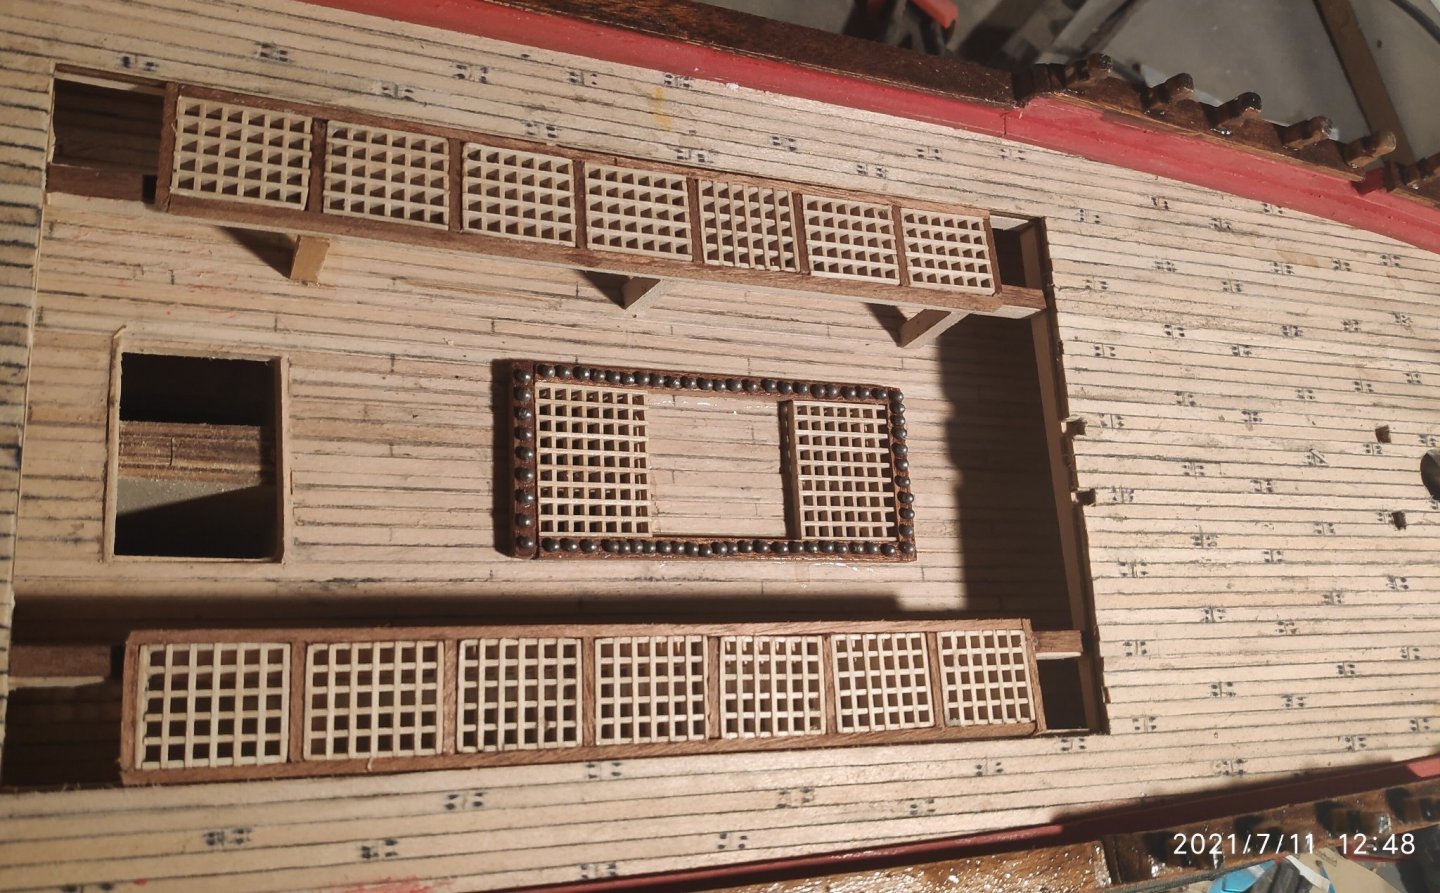
Now i made the grating sections,7 for each side and the frames also... I made also the grating sections of the lower deck. Above this sections will be placed the small boat of the ship. The difficult job here is the iron balls, the ammunition for the cannons,that must glued all arround in the frames. To do this is make small blind holes,so the balls can be placed and glued...See the attached fotos...Continued...


-
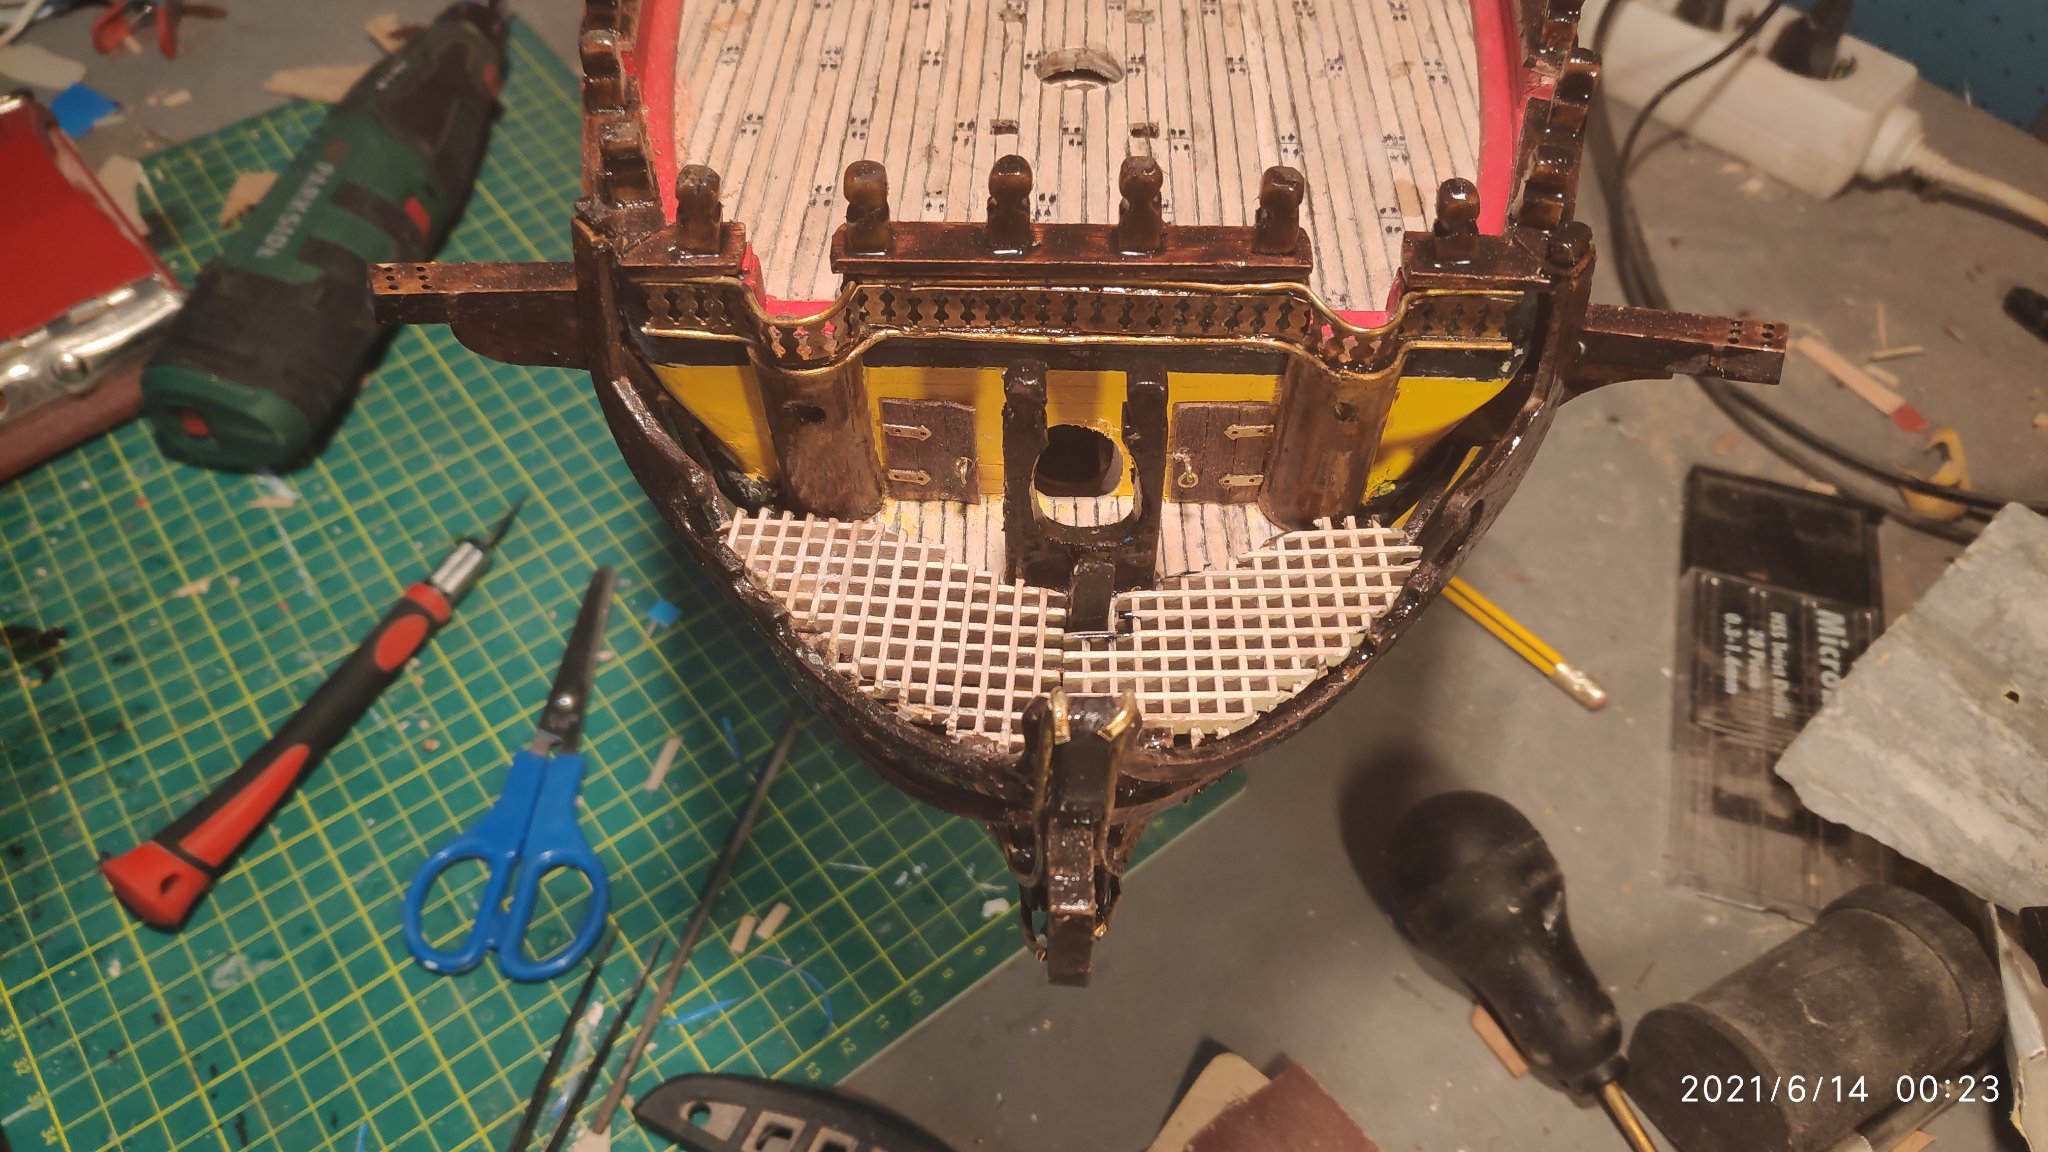
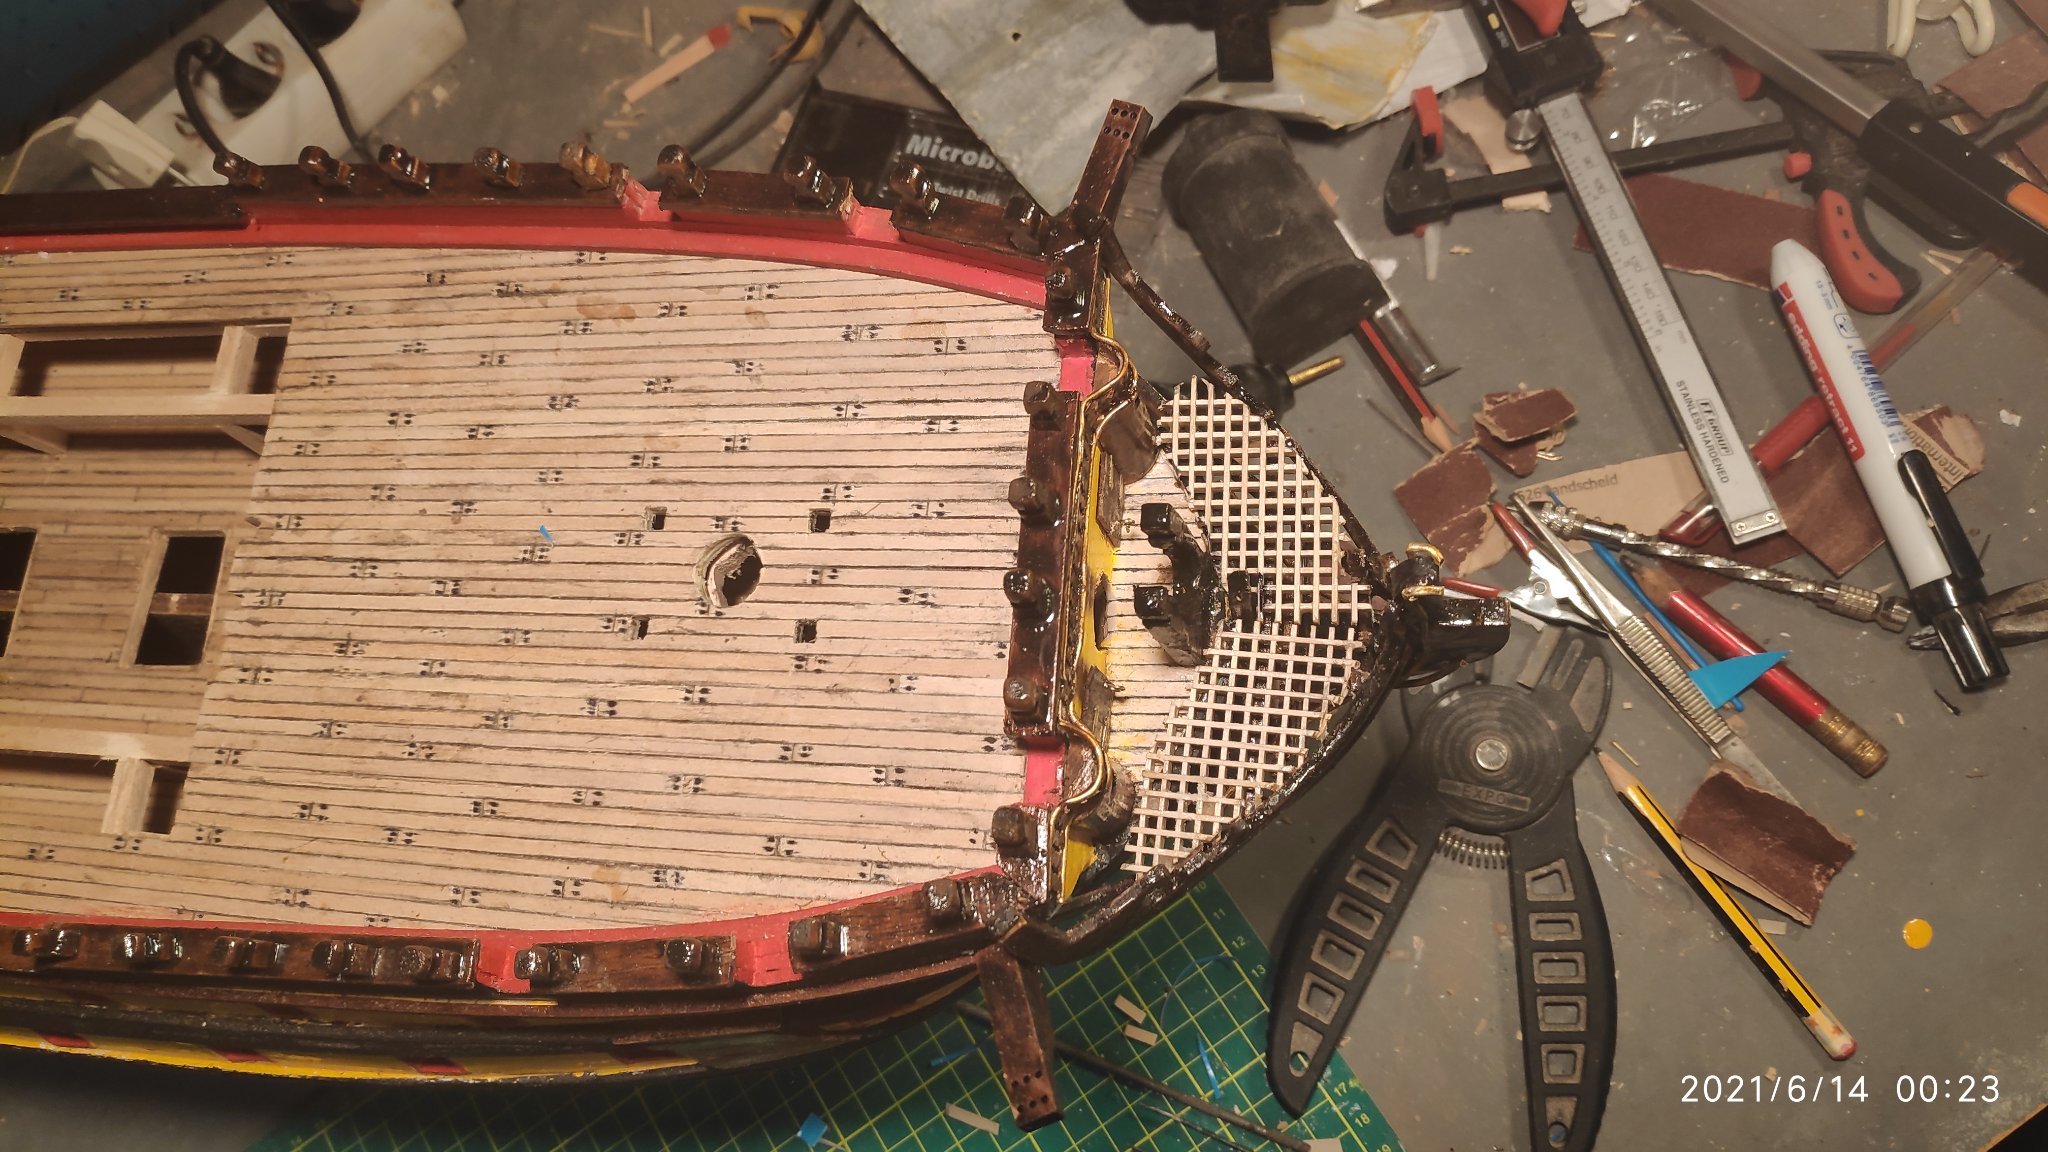
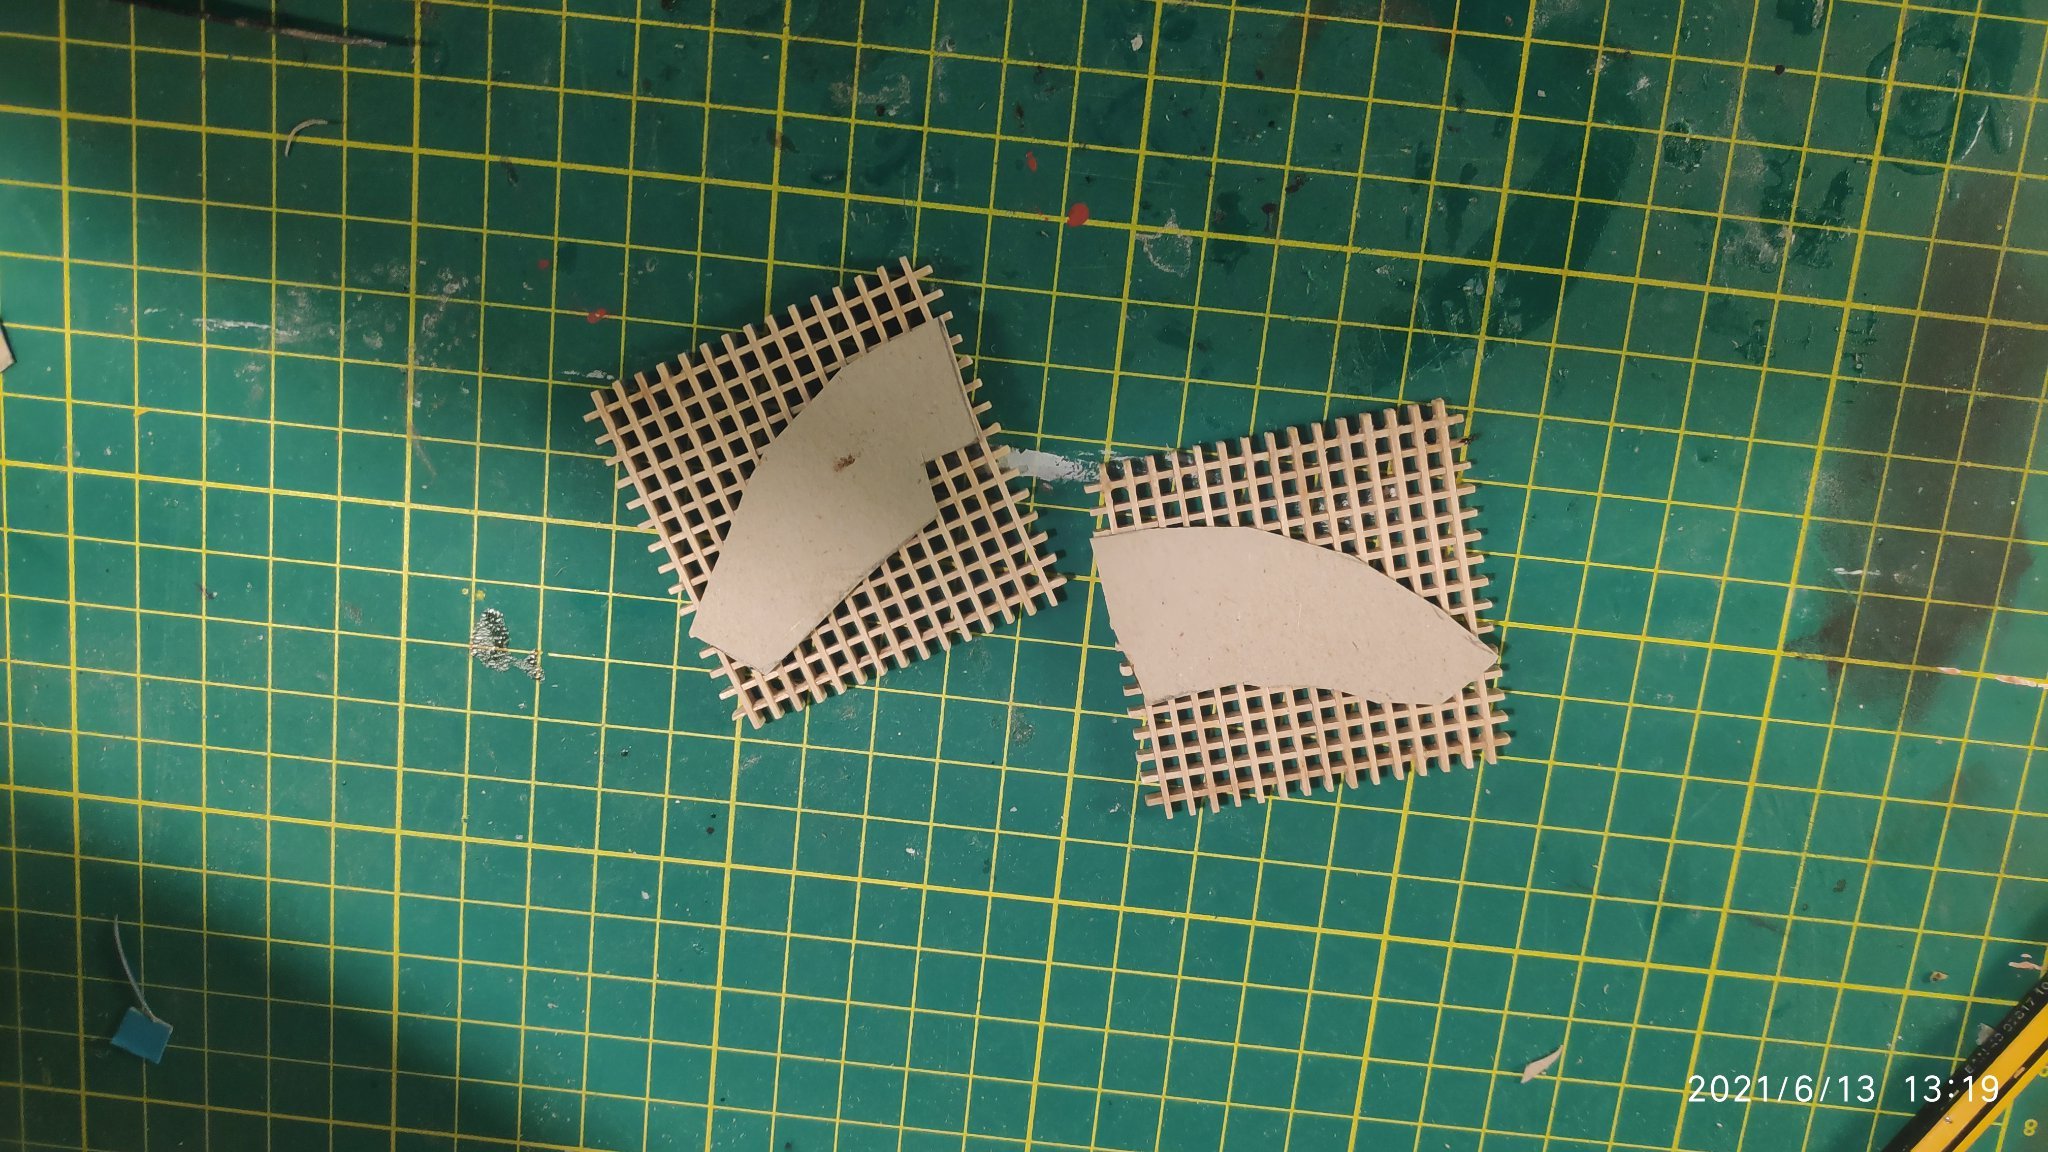
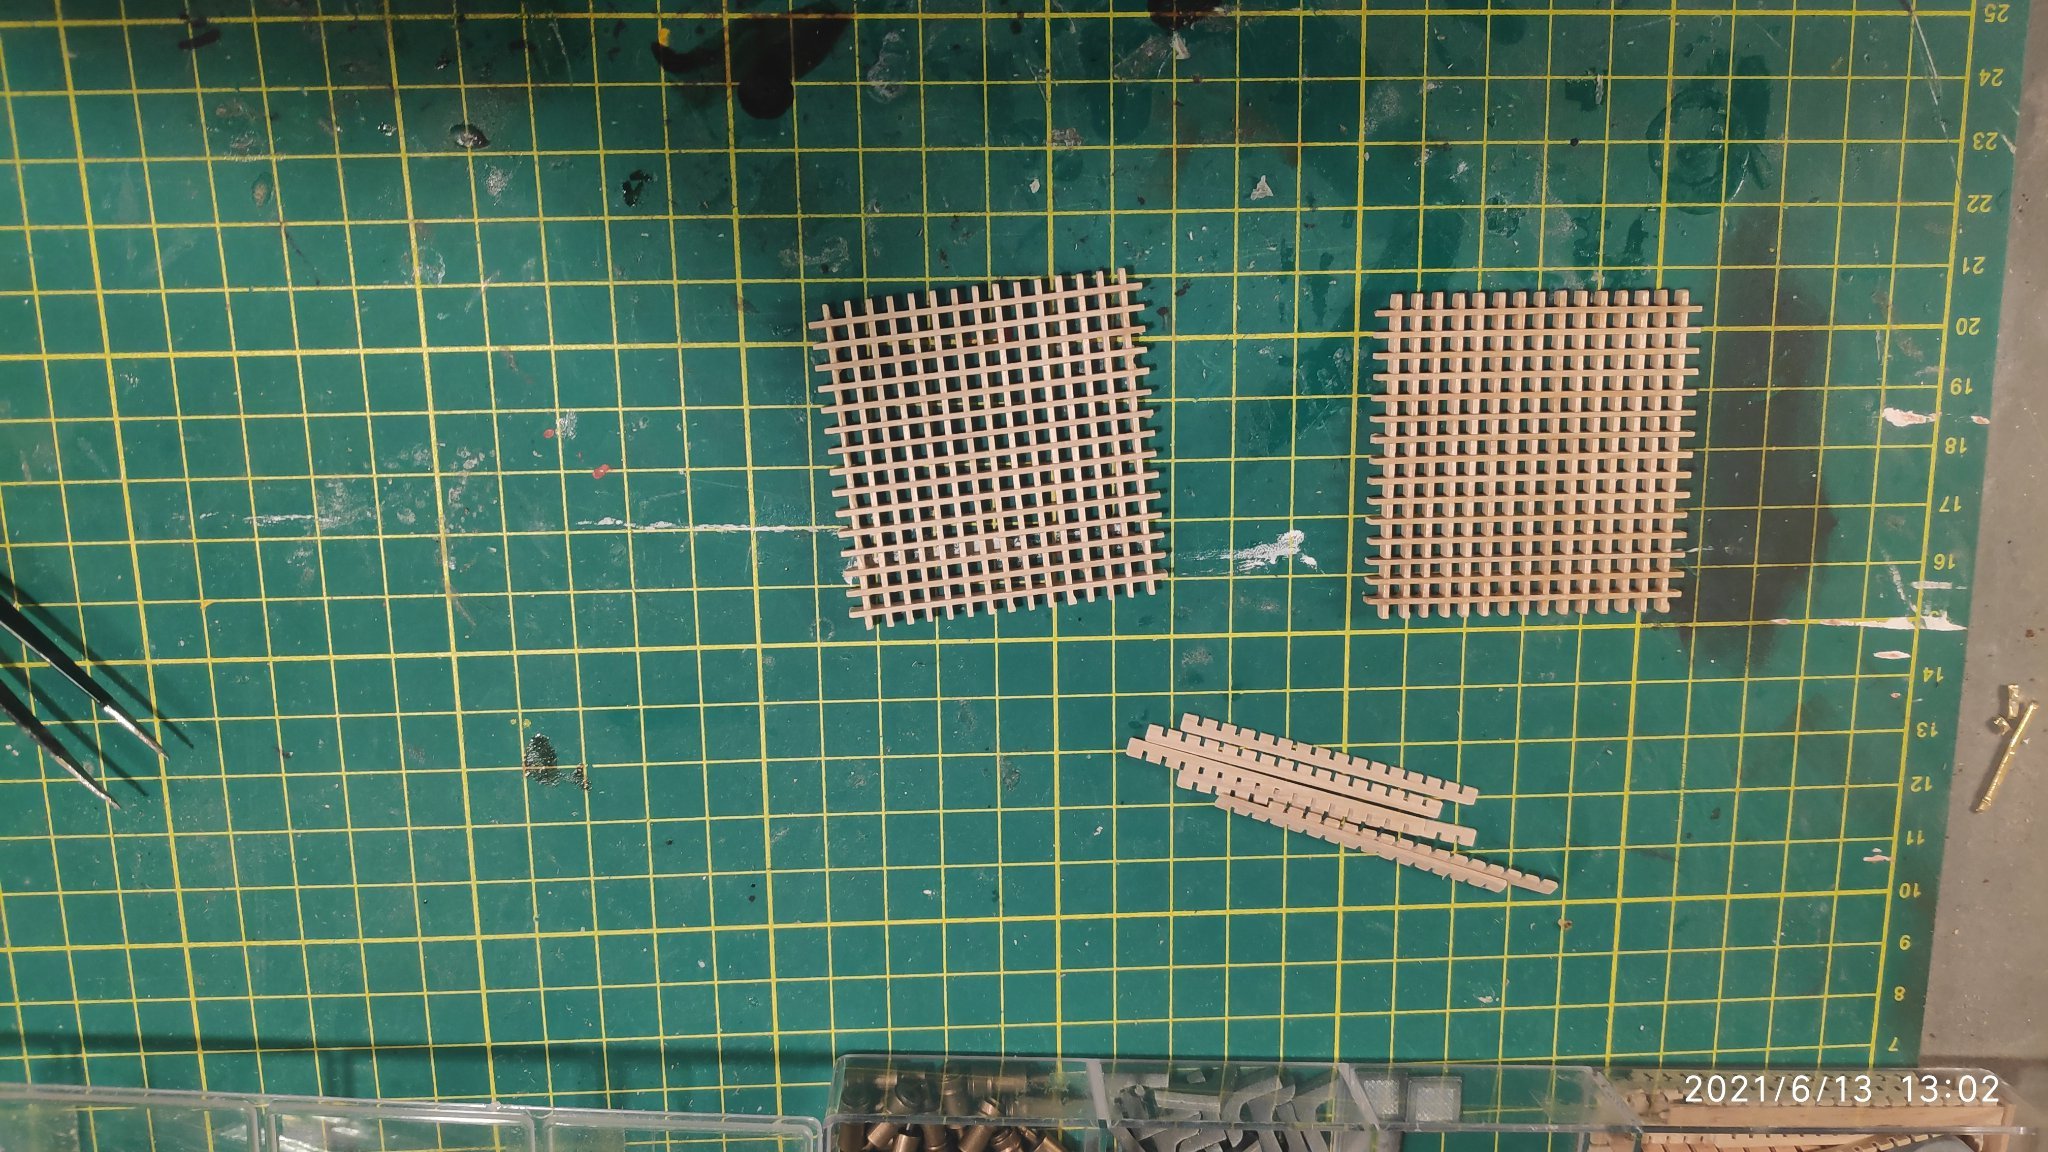
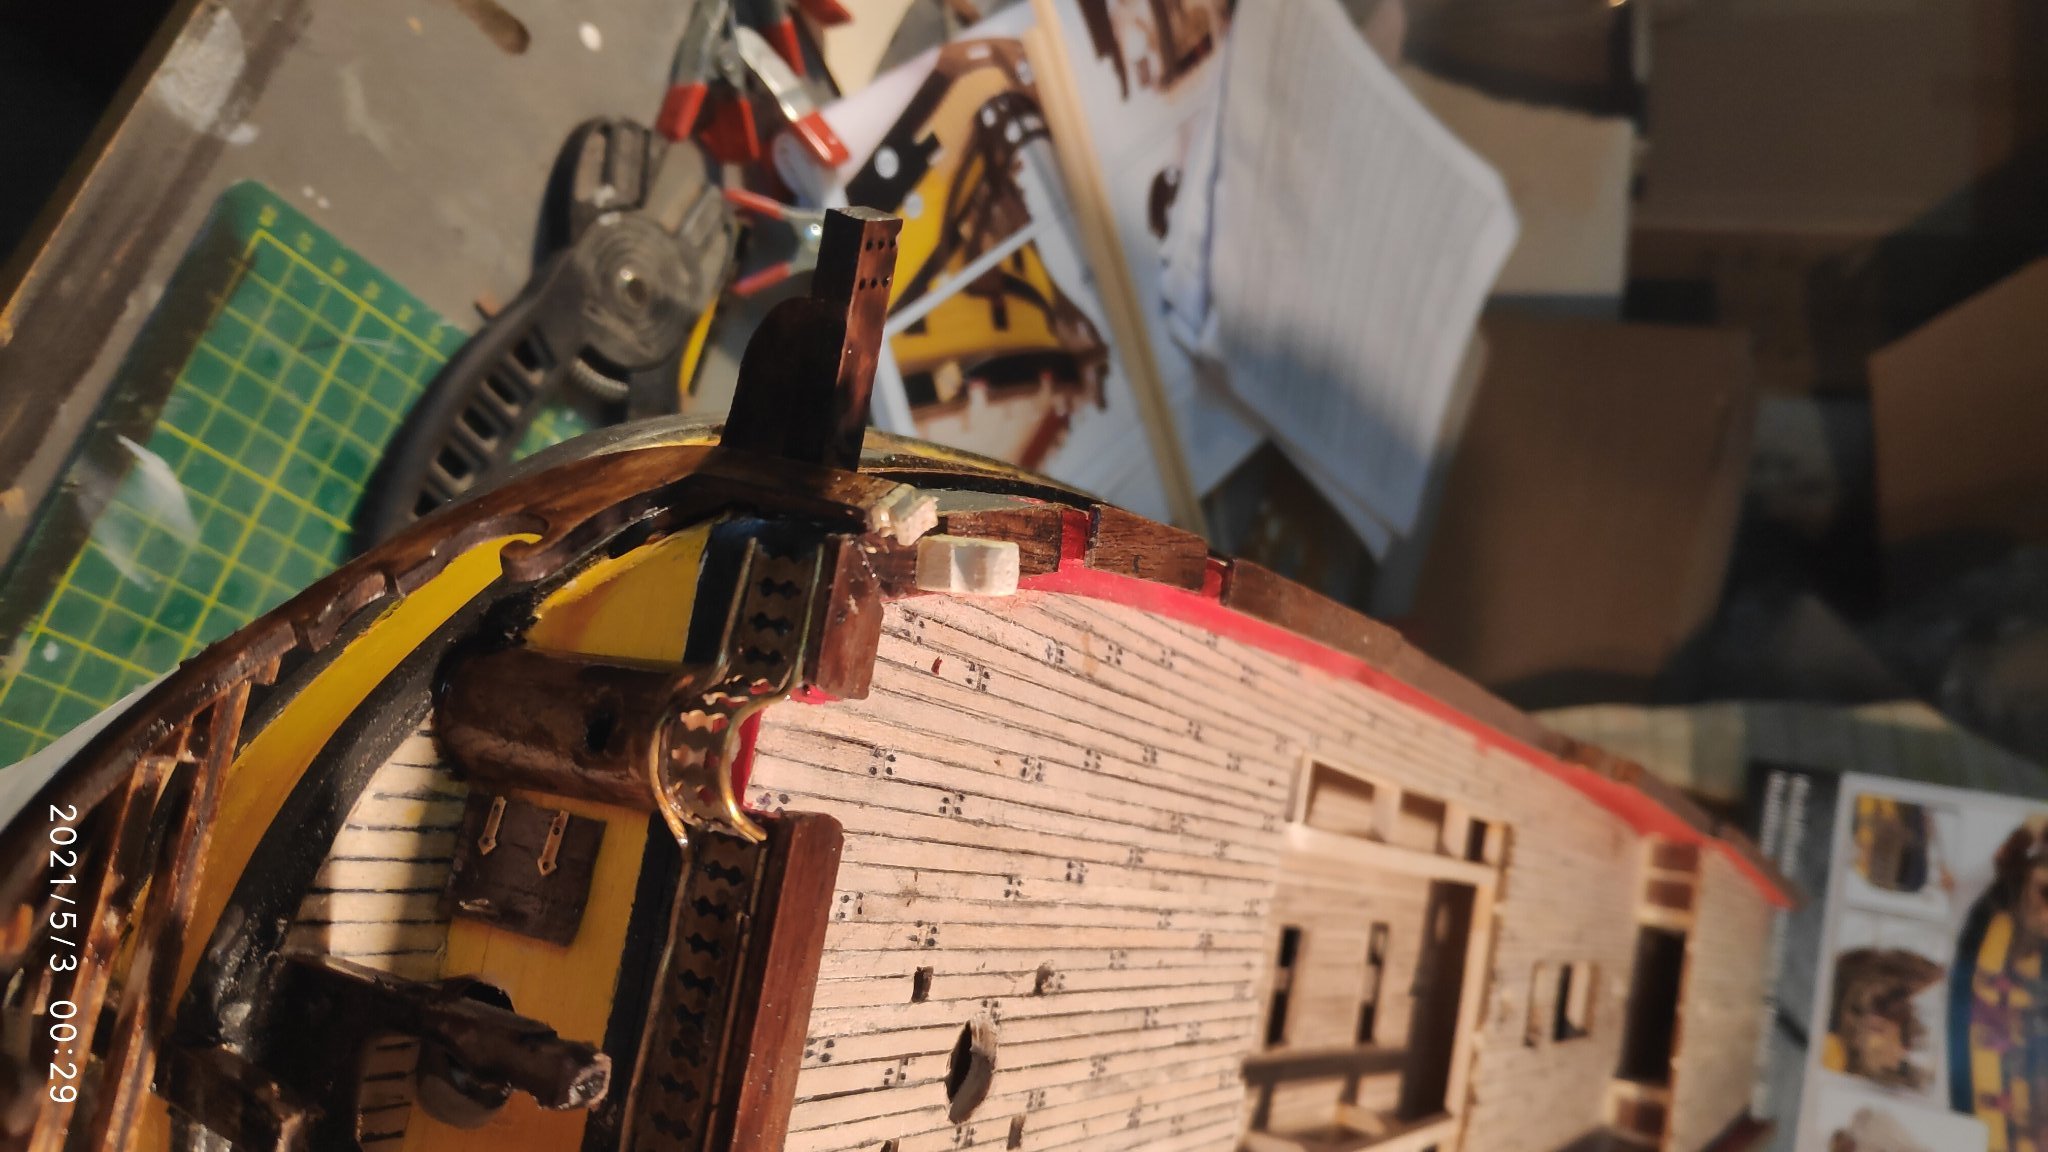
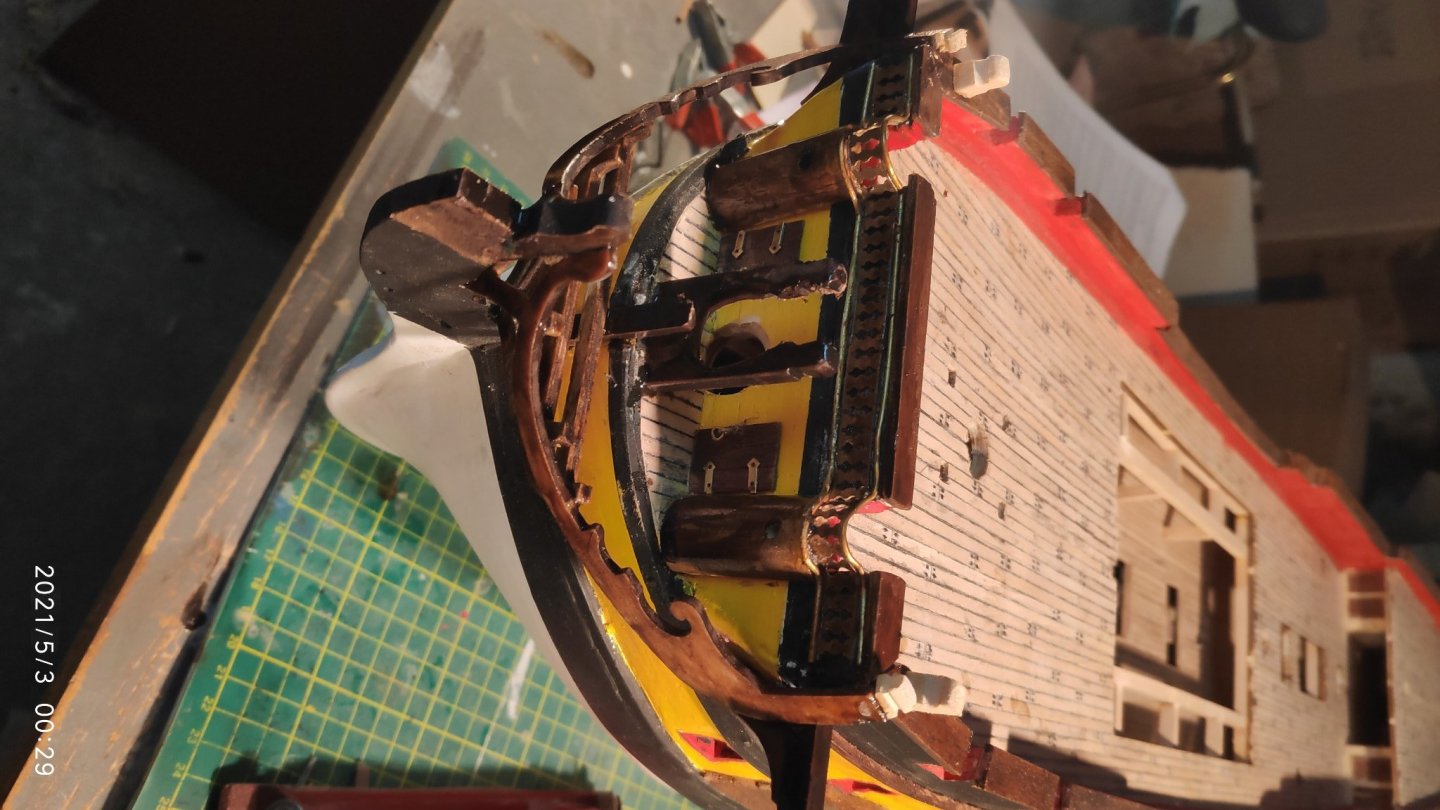
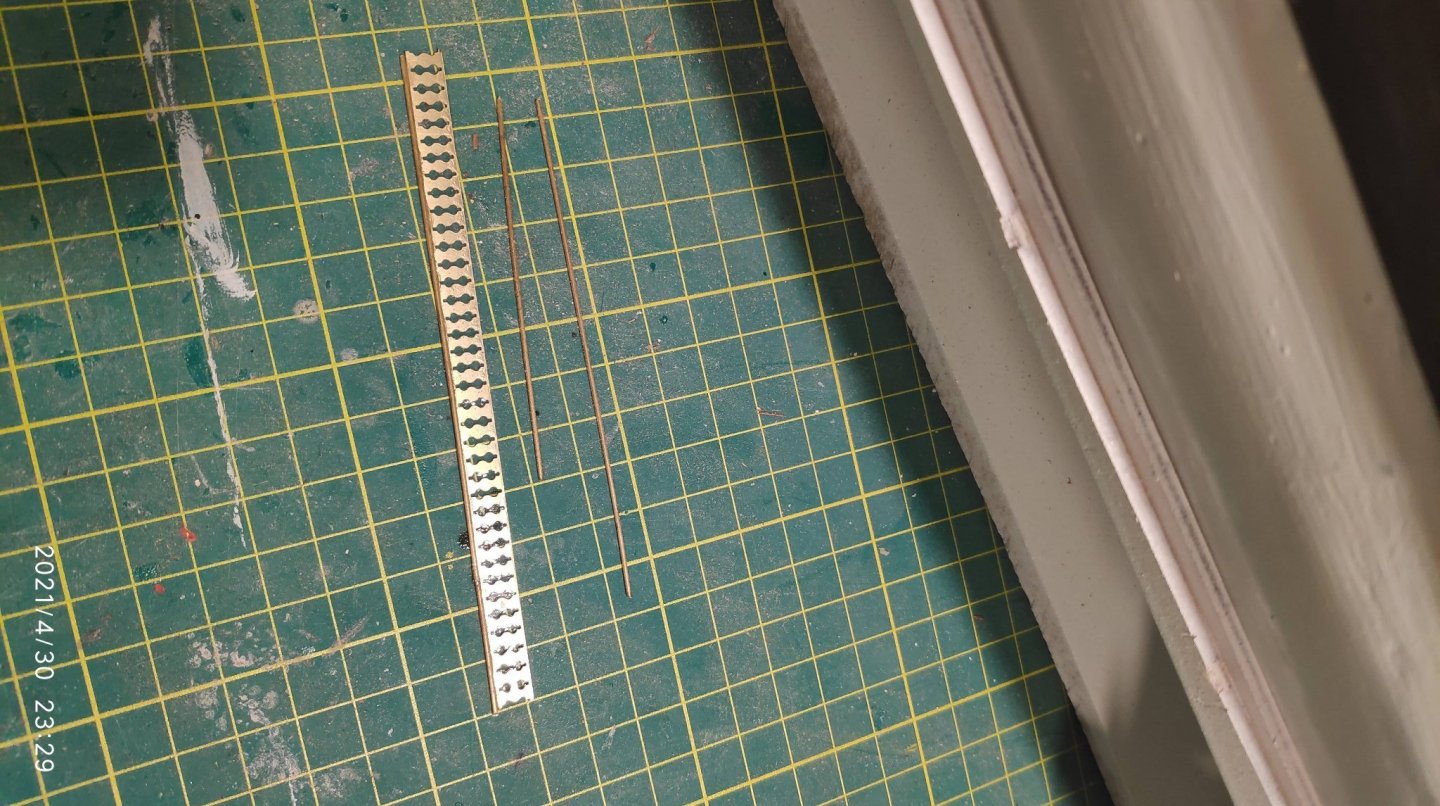
Now i make the stem rubbing strake brackets and the decoration using brass wire, make it a little flat using a hammer. Two holes 3mm also for the anchor ropes. Make up two gratings, 5X5 cm square shape. I must cut them,to adjust their shape,so can fit in place..i use a part of paper,as a guide,cut it an adjust it,so can fit properly. After i use it as a patron,to cut the gratings,and glue them in place...Be continued...


-
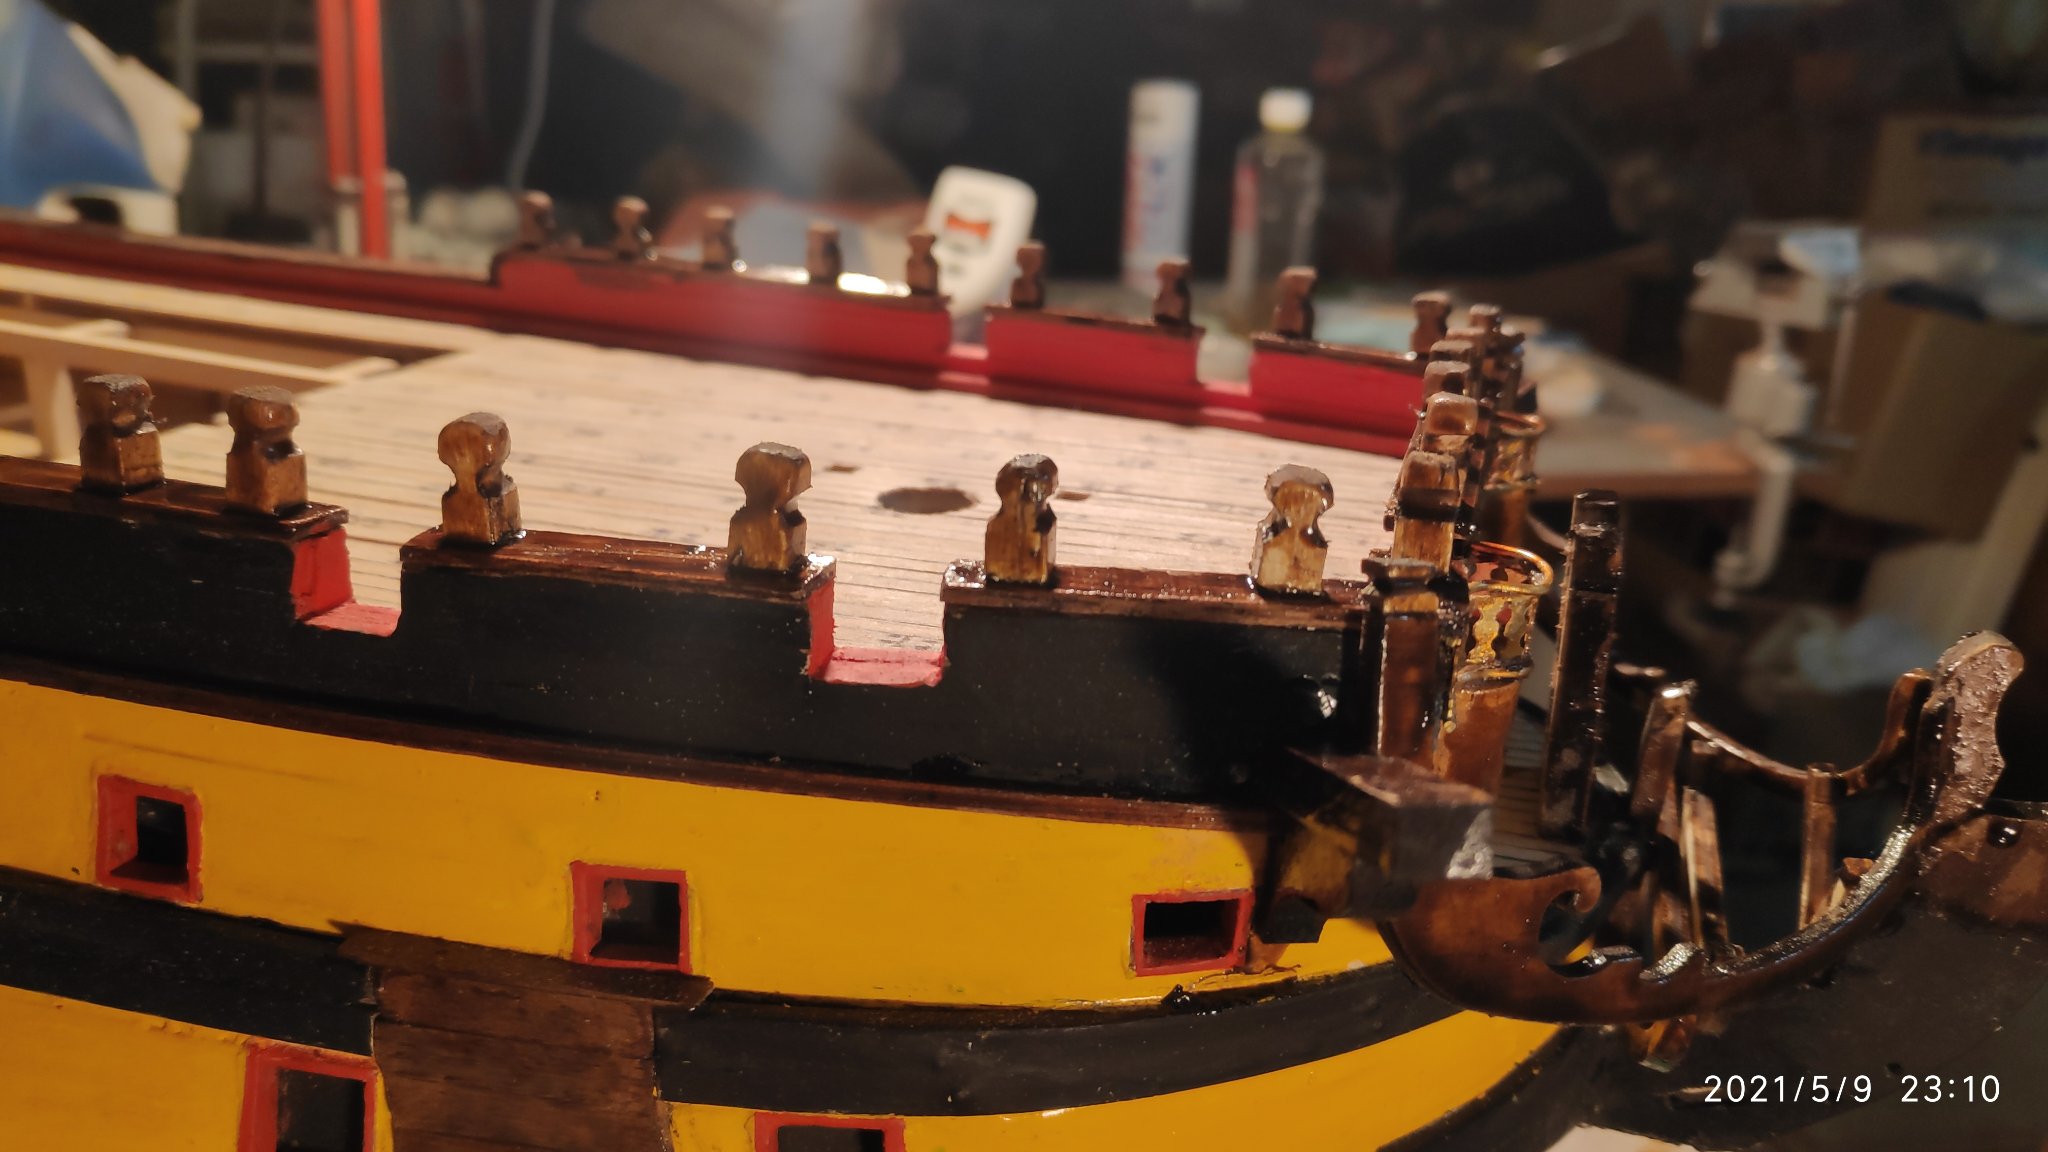
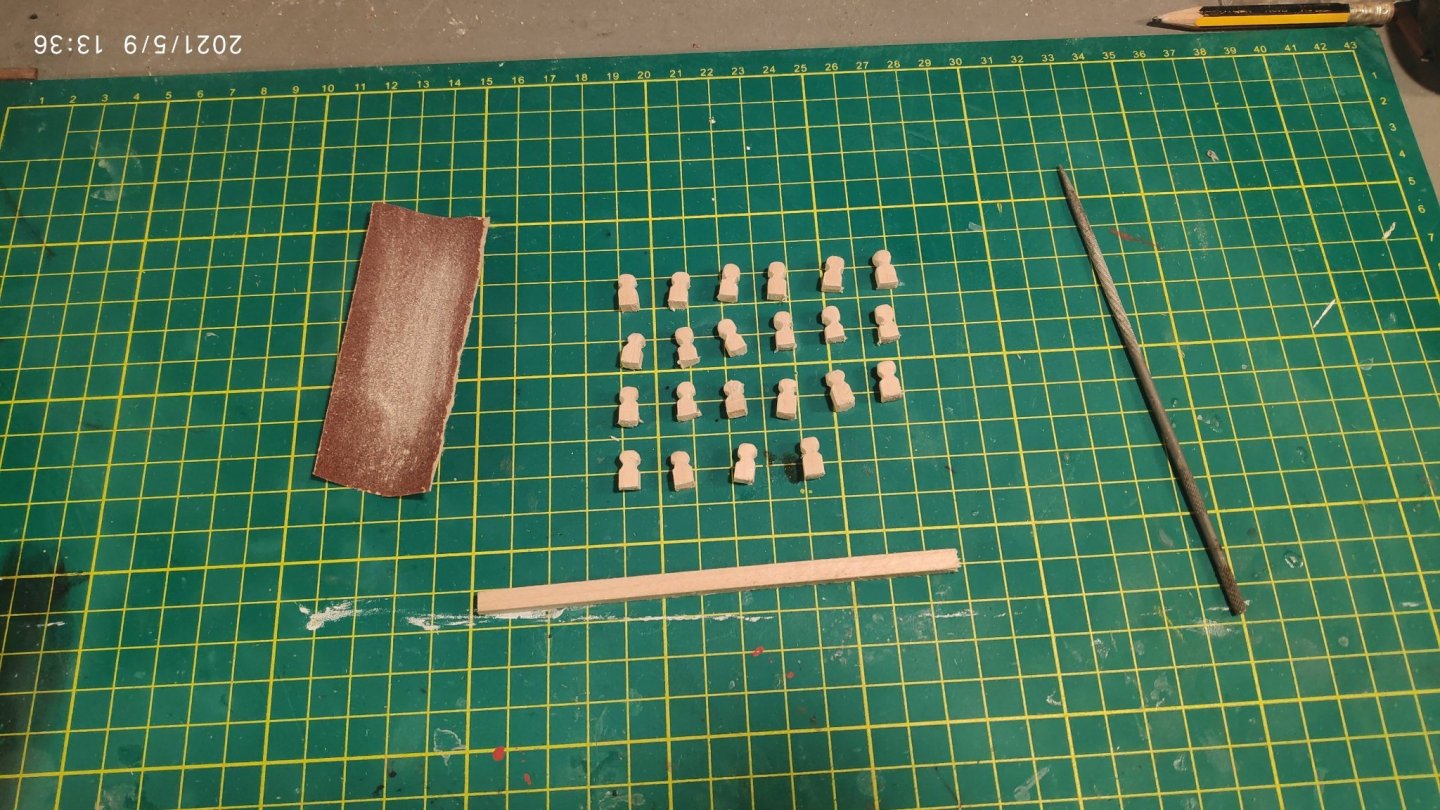
Now i make 24 Samson post by hand from a piece of wood 5X5 mm using hand file and sandpaper. They are glued in the front of the ship. Left 9 pieces,right 9 pieces and 6 in front. I paint them also with dark varnish the same as the galland rails.


-
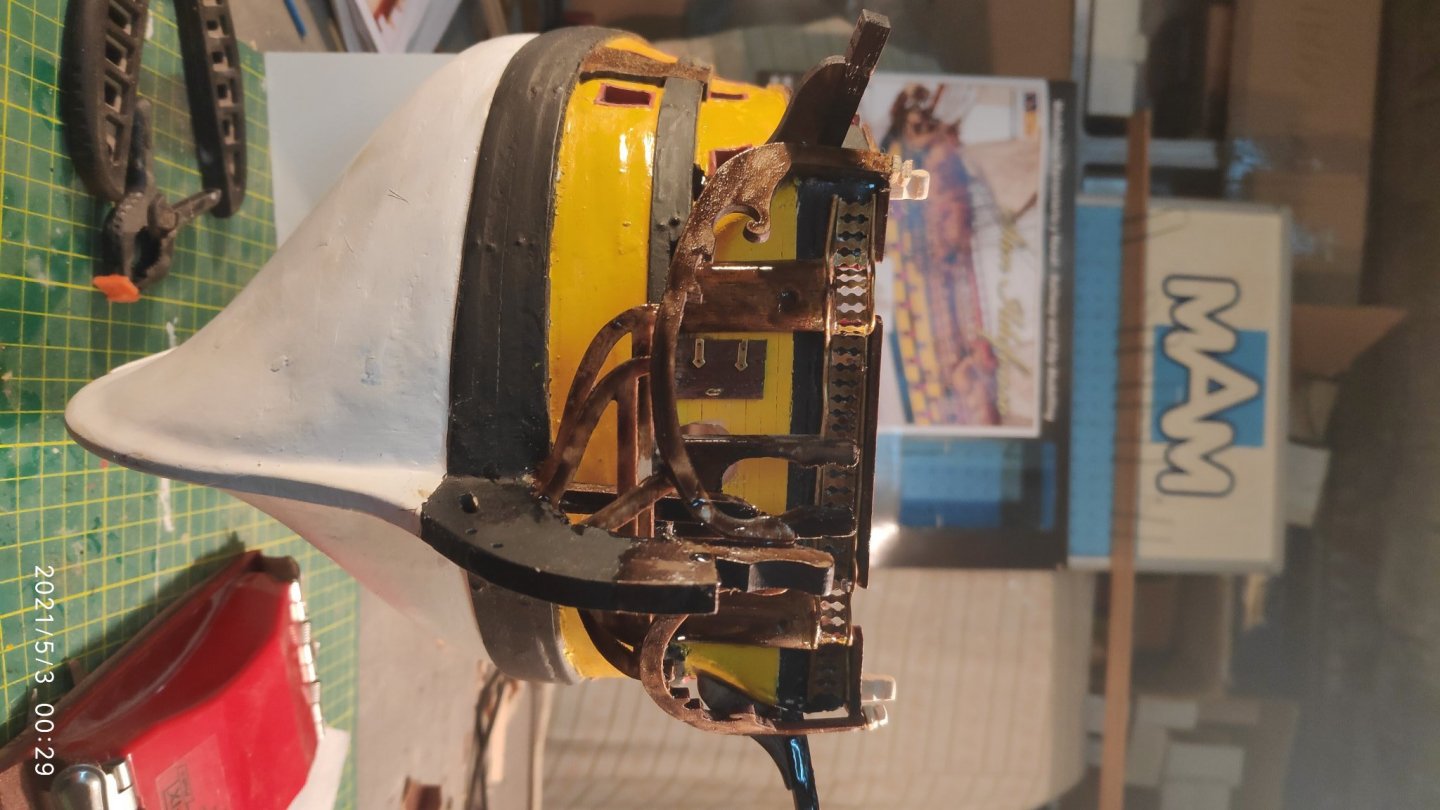
The decoration of the bow continued. The two pieces must glued making the right curve,as seen in photos,so a left them some hours in water to be more soft and not to be cracked,just like we made with hull planking, but this wood is more easier to bend. So in photos you see the painted parts in place. Also the two davids...i thing that are used to raise the small boat of the ship...are clued in place with the brackets to support them. Now i must make by hand...26 samson post to glue them in the front gallant raills of the ship 10 left and right and 6 in the front, made from a piece of wood 5X5X10mm and using a hand file,to make the neck,as you see in photos....now we have job to do.,.....and the decoration of the bow is continued with new pieces....


-
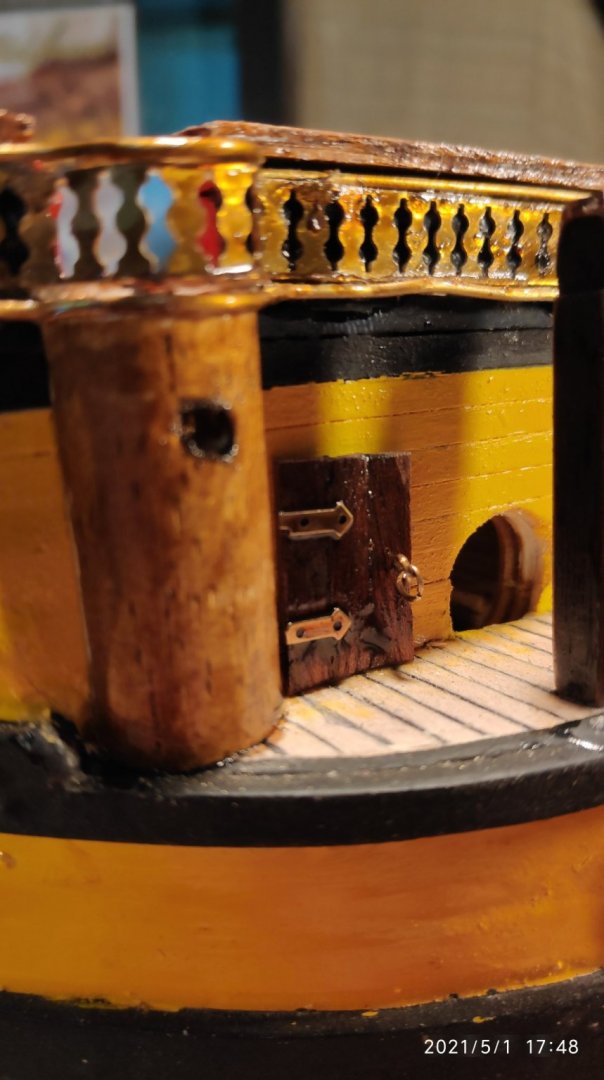
First the two heads glued just under the gun ports of the front frame. After glue the decoration (Brass) after i give the right shape. Above and unter a brass wire 1mm diameter is glued. I make the twoo doors,from 3 planks (1X4mm) i put the hinges and the doors handles (one eyebolt and one small ring..). The decoration of the bow continued...

-
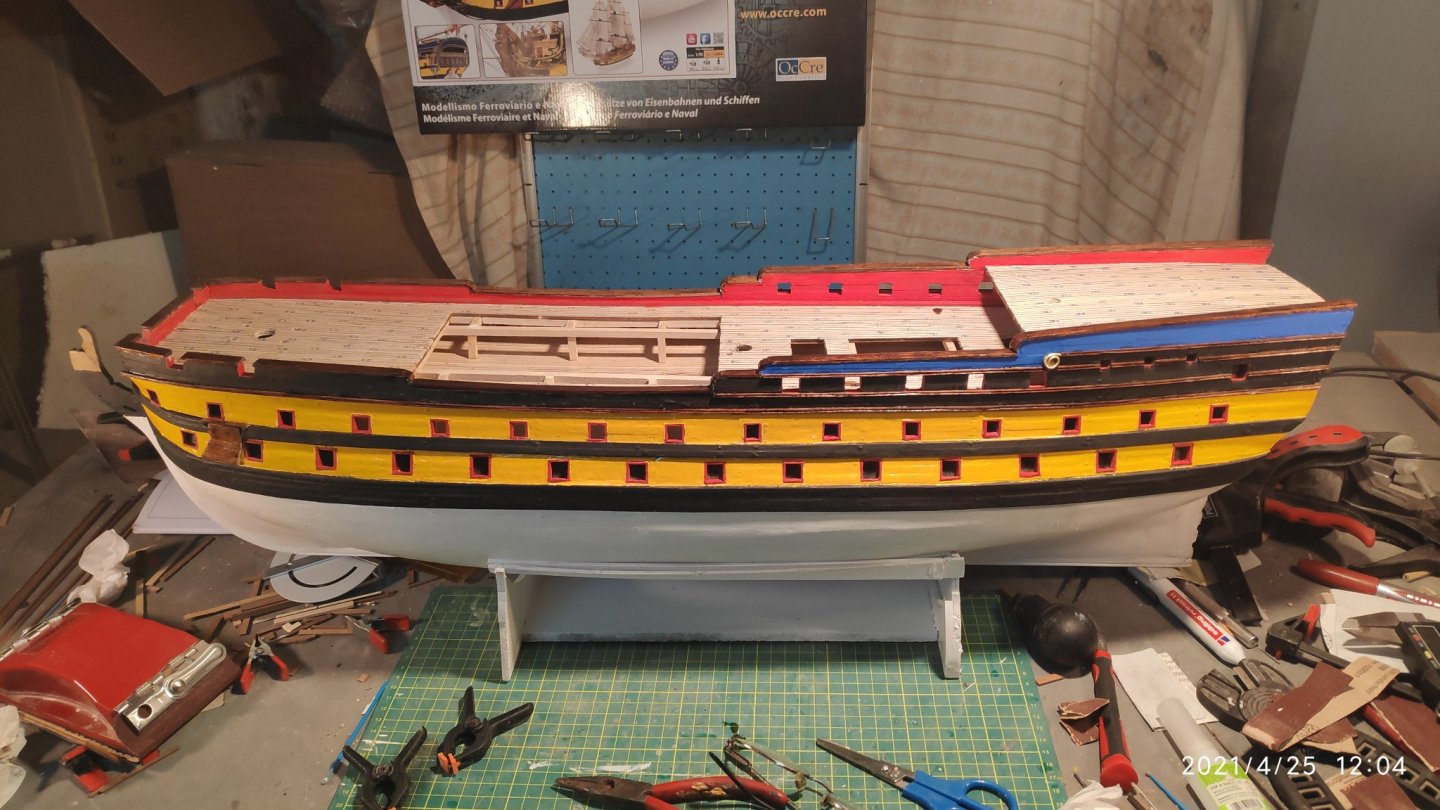
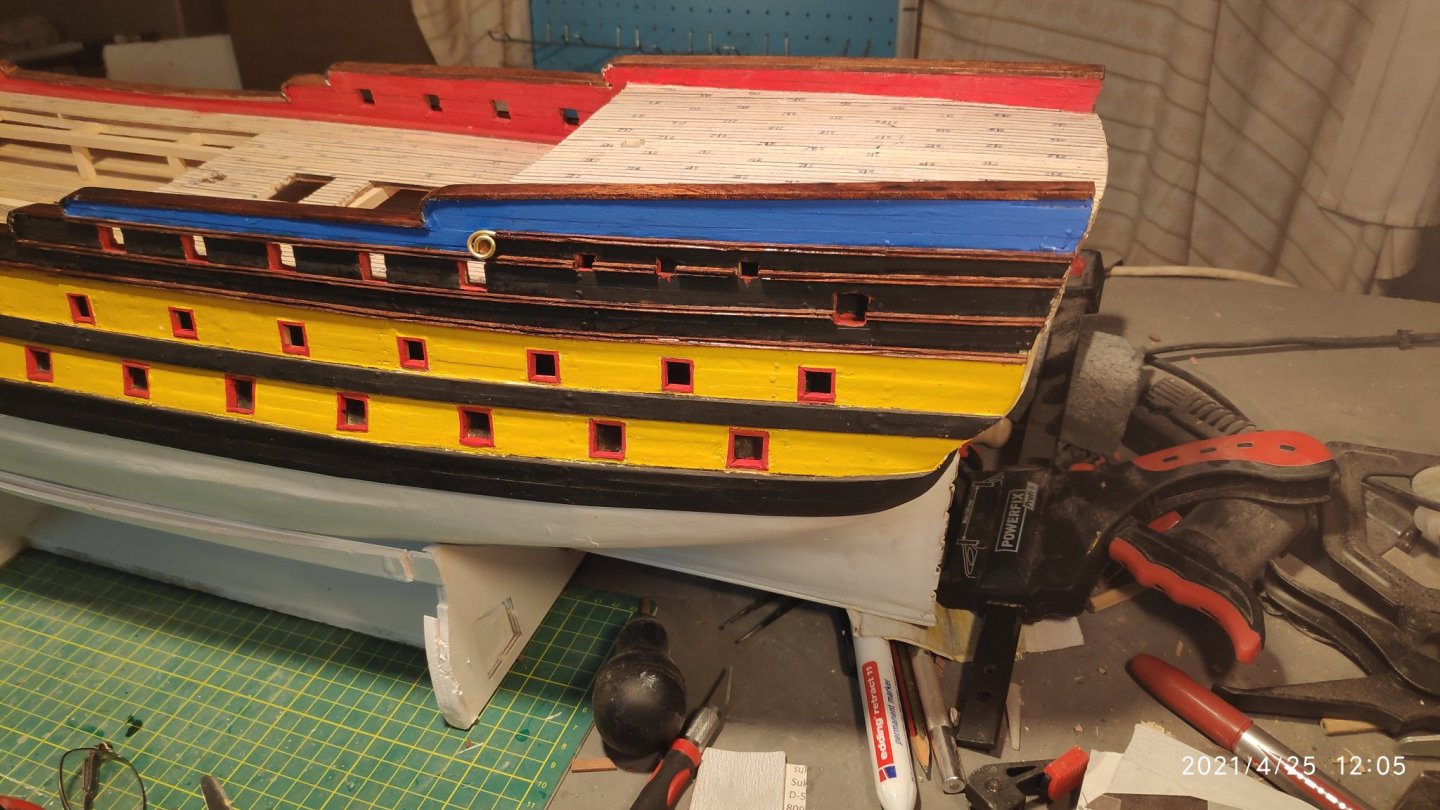
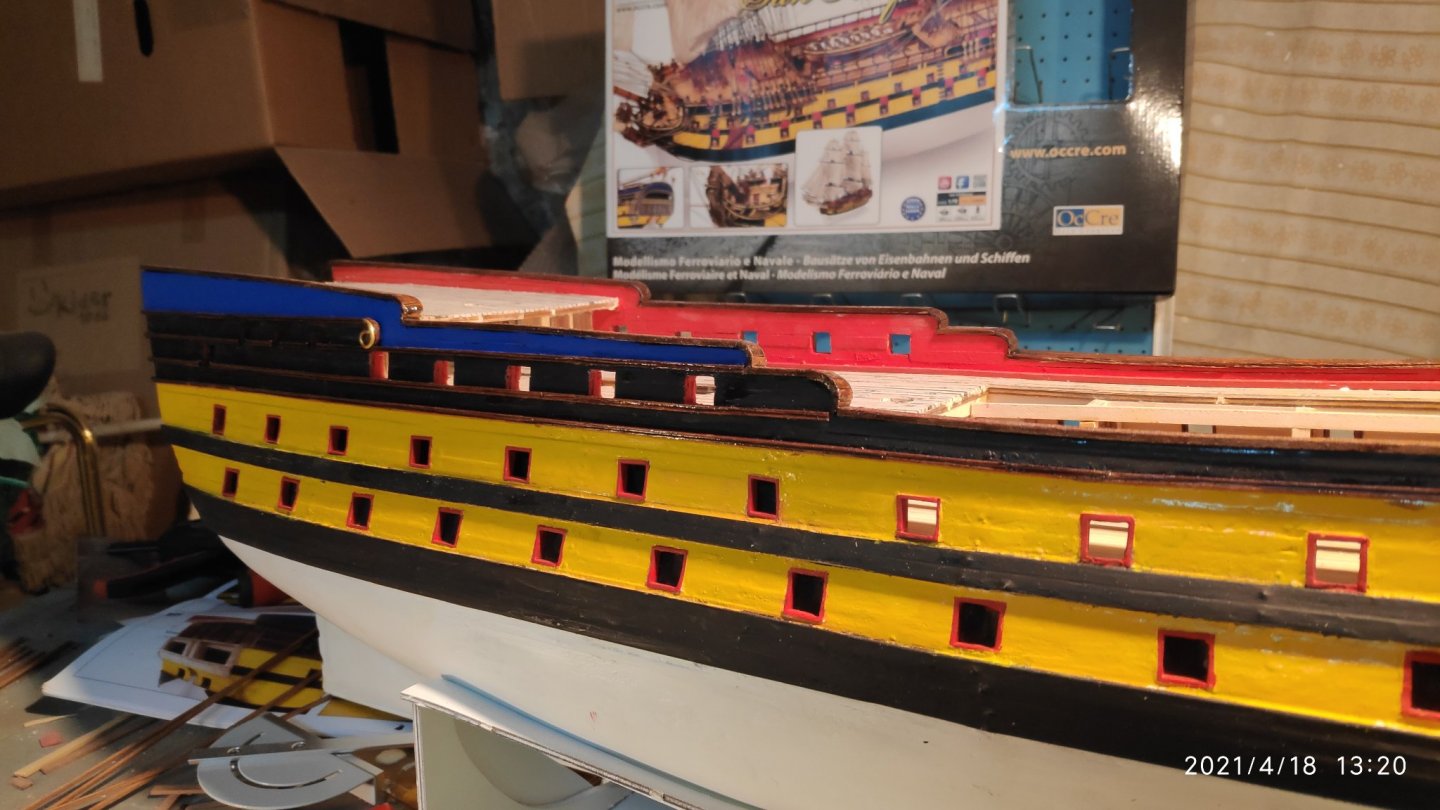
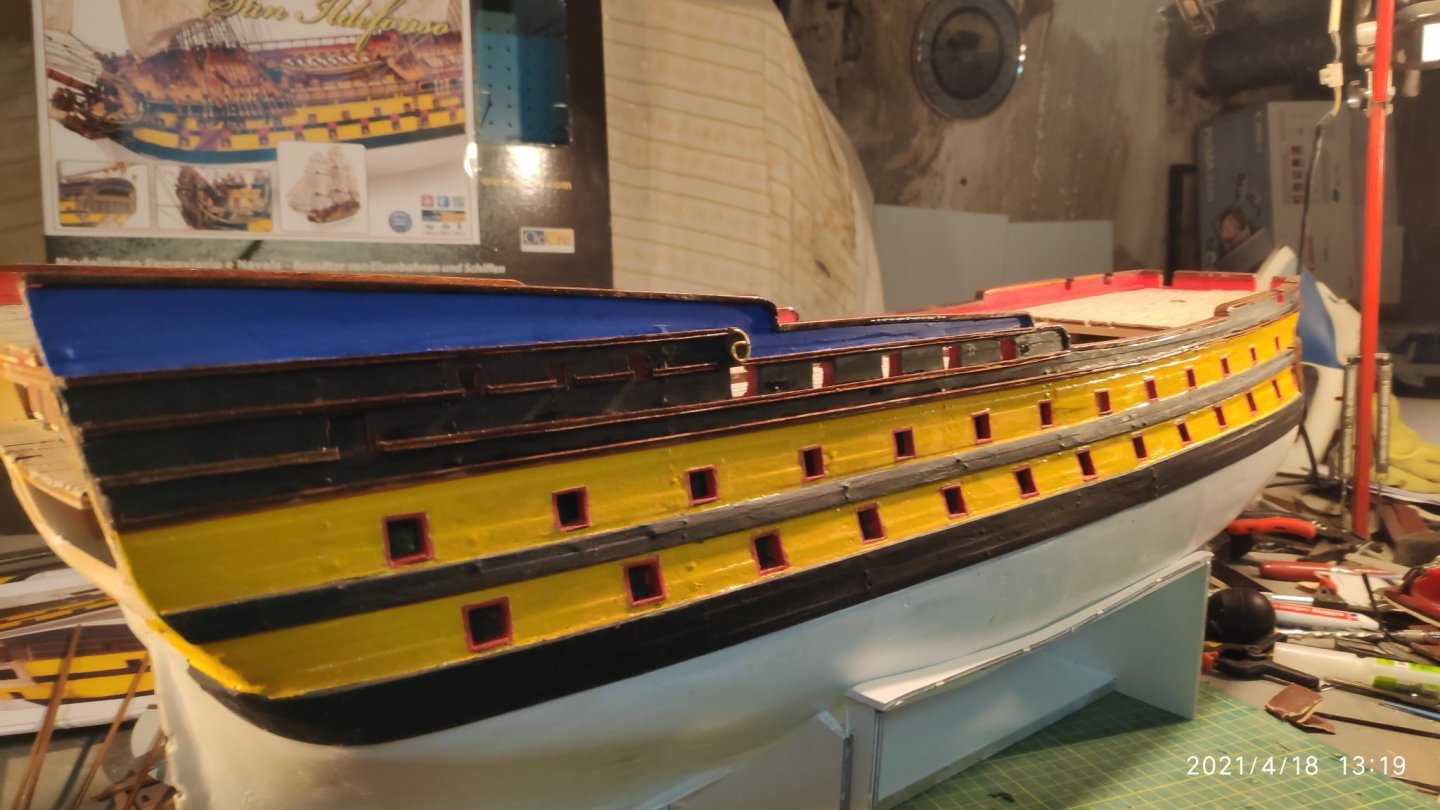
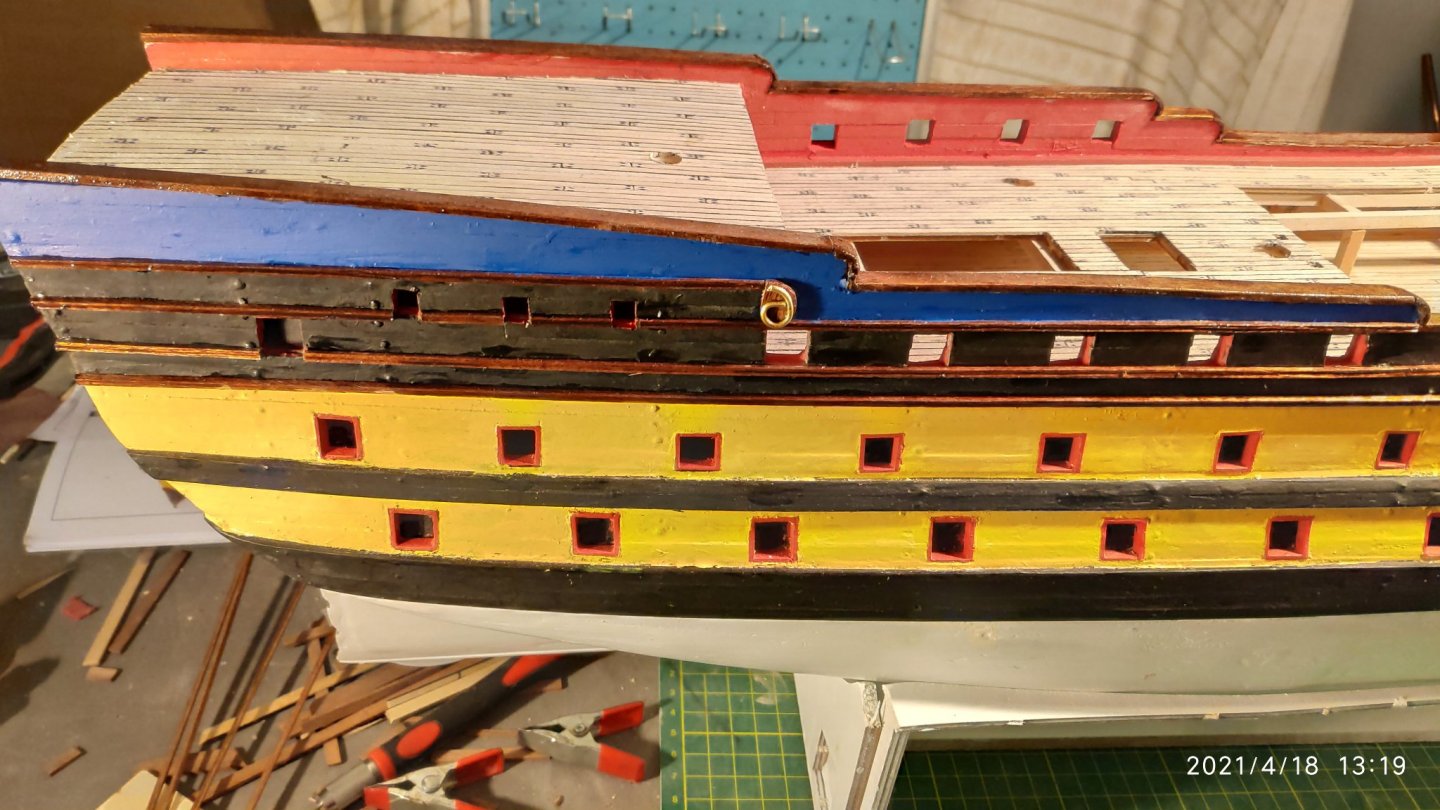
Now the left right of the ship is finished...the colors will be refresh if nessesery after i finish the hull and don't need to touch it with my hands. Now start the bow...interesting things there....

-
Finish the gallant rails and varnish them dark brown. i put in place the rubbing strakes and paint the colors between them,as instructed. I made with a hand wood file a slot allong them. Difficult job in a 2X2 mm strake...For the curved strake,between upper and second strake,i use brass wire as instructed.Now the same to the other side of the ship...

-
the wash board maybe used for ptotecting the ship from the anchor....