MORE HANDBOOKS ARE ON THEIR WAY! We will let you know when they get here.
×


gsxdent59
-
Posts
85 -
Joined
-
Last visited
Content Type
Profiles
Forums
Gallery
Events
Everything posted by gsxdent59
-
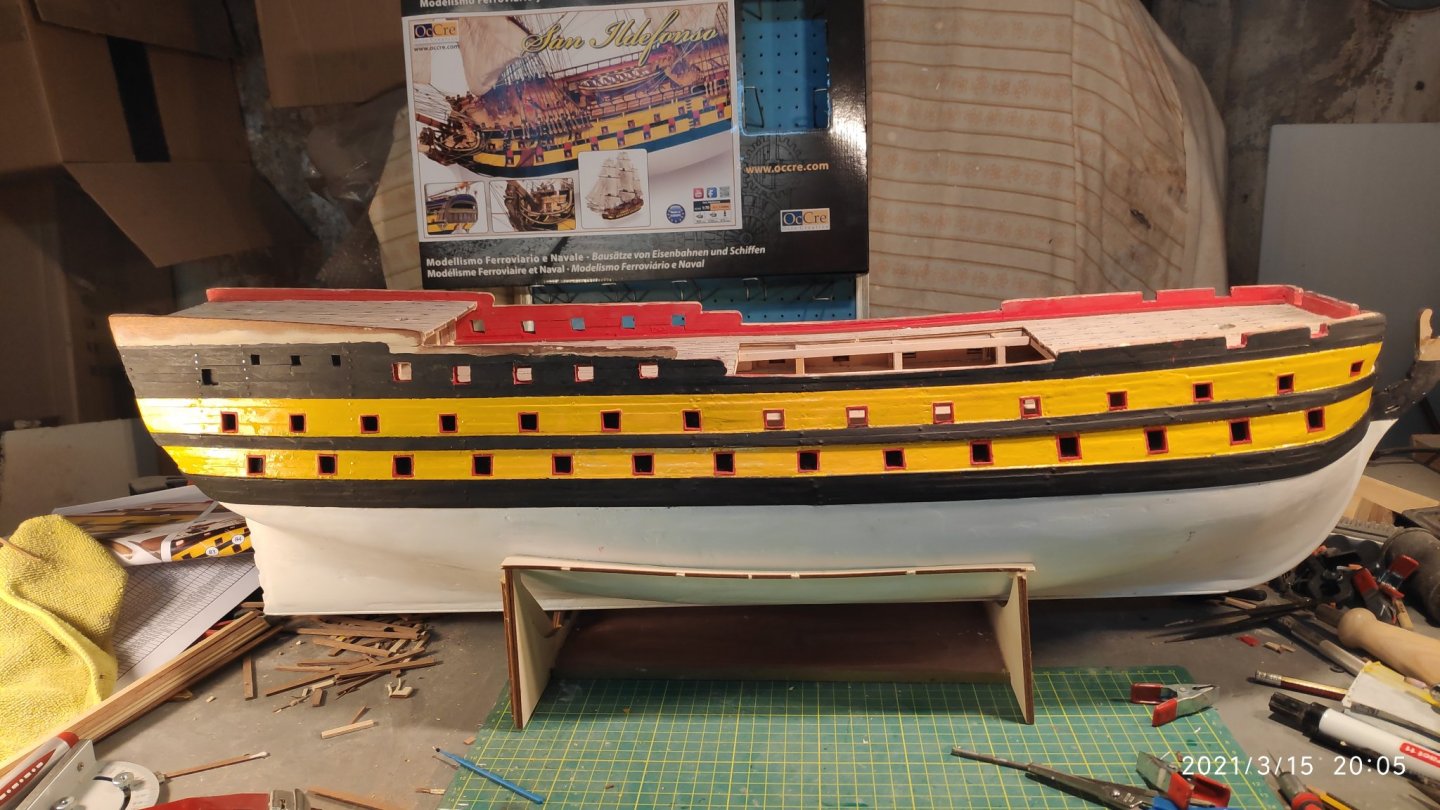
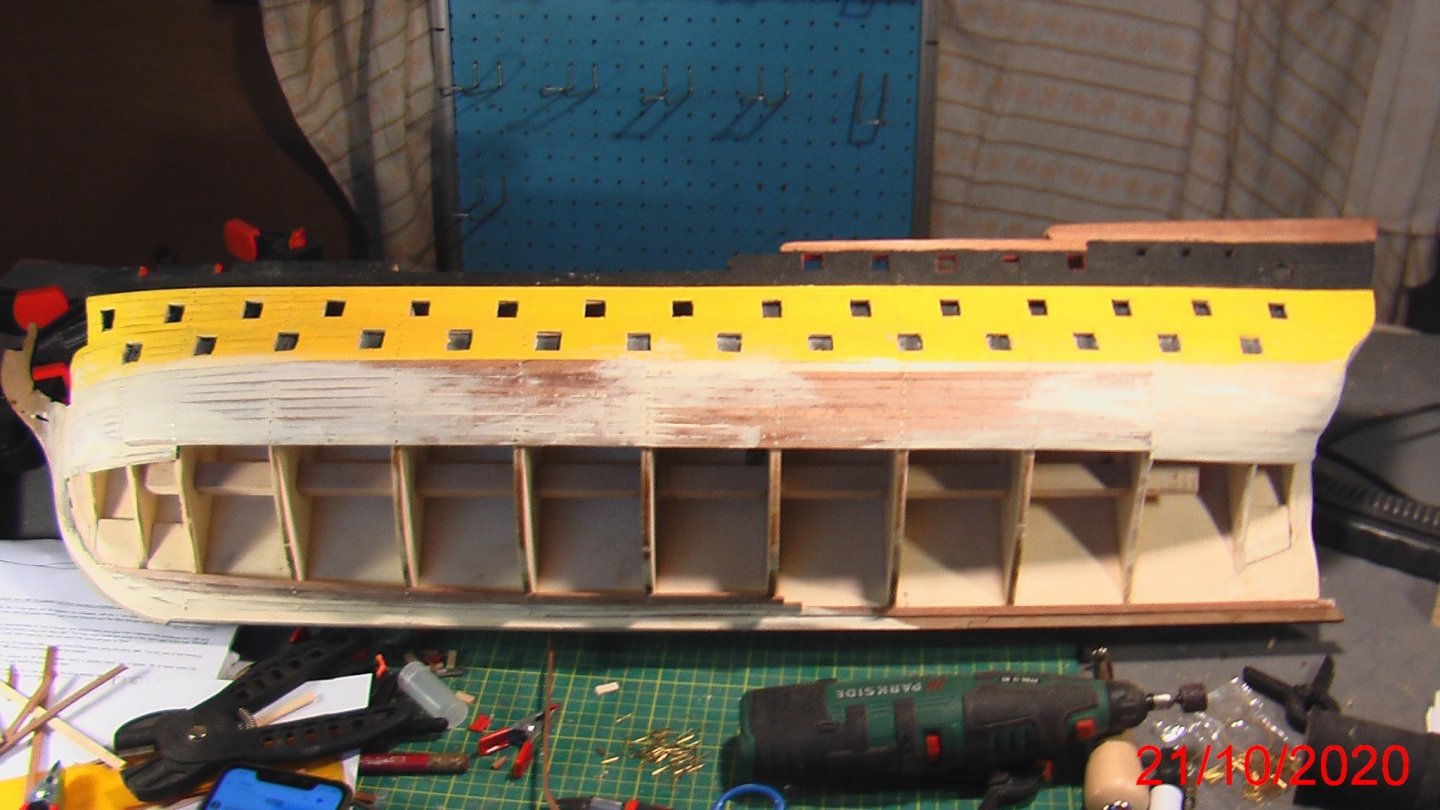
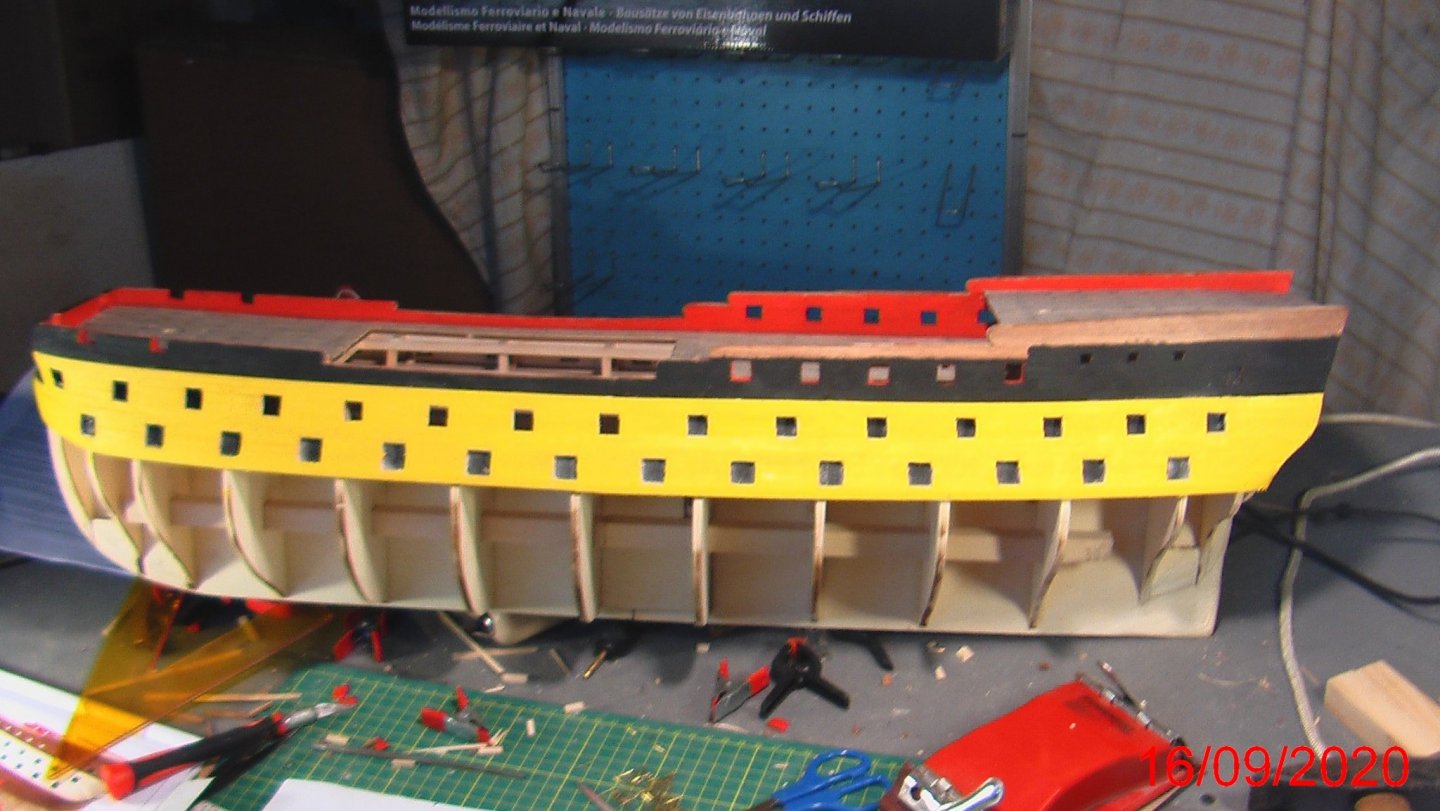
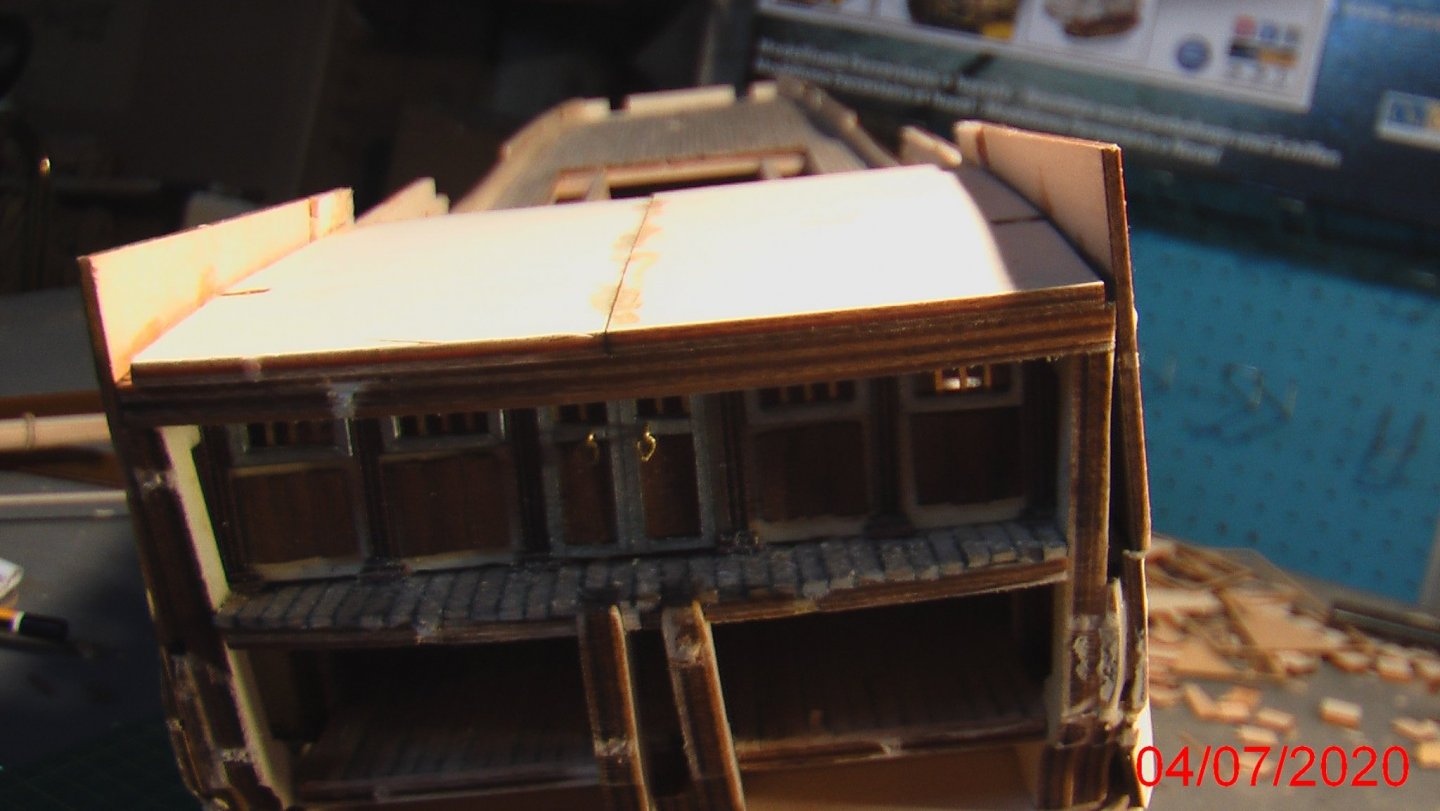
Now i made the wash board in right side of the ship. Also i made the gallant rails of the right side. The curves are made from small pieces and sanding after. Now the same in the other side of the ship

-
Now i finish the left side of the ship. The same job with the gunports... To be continued....

-
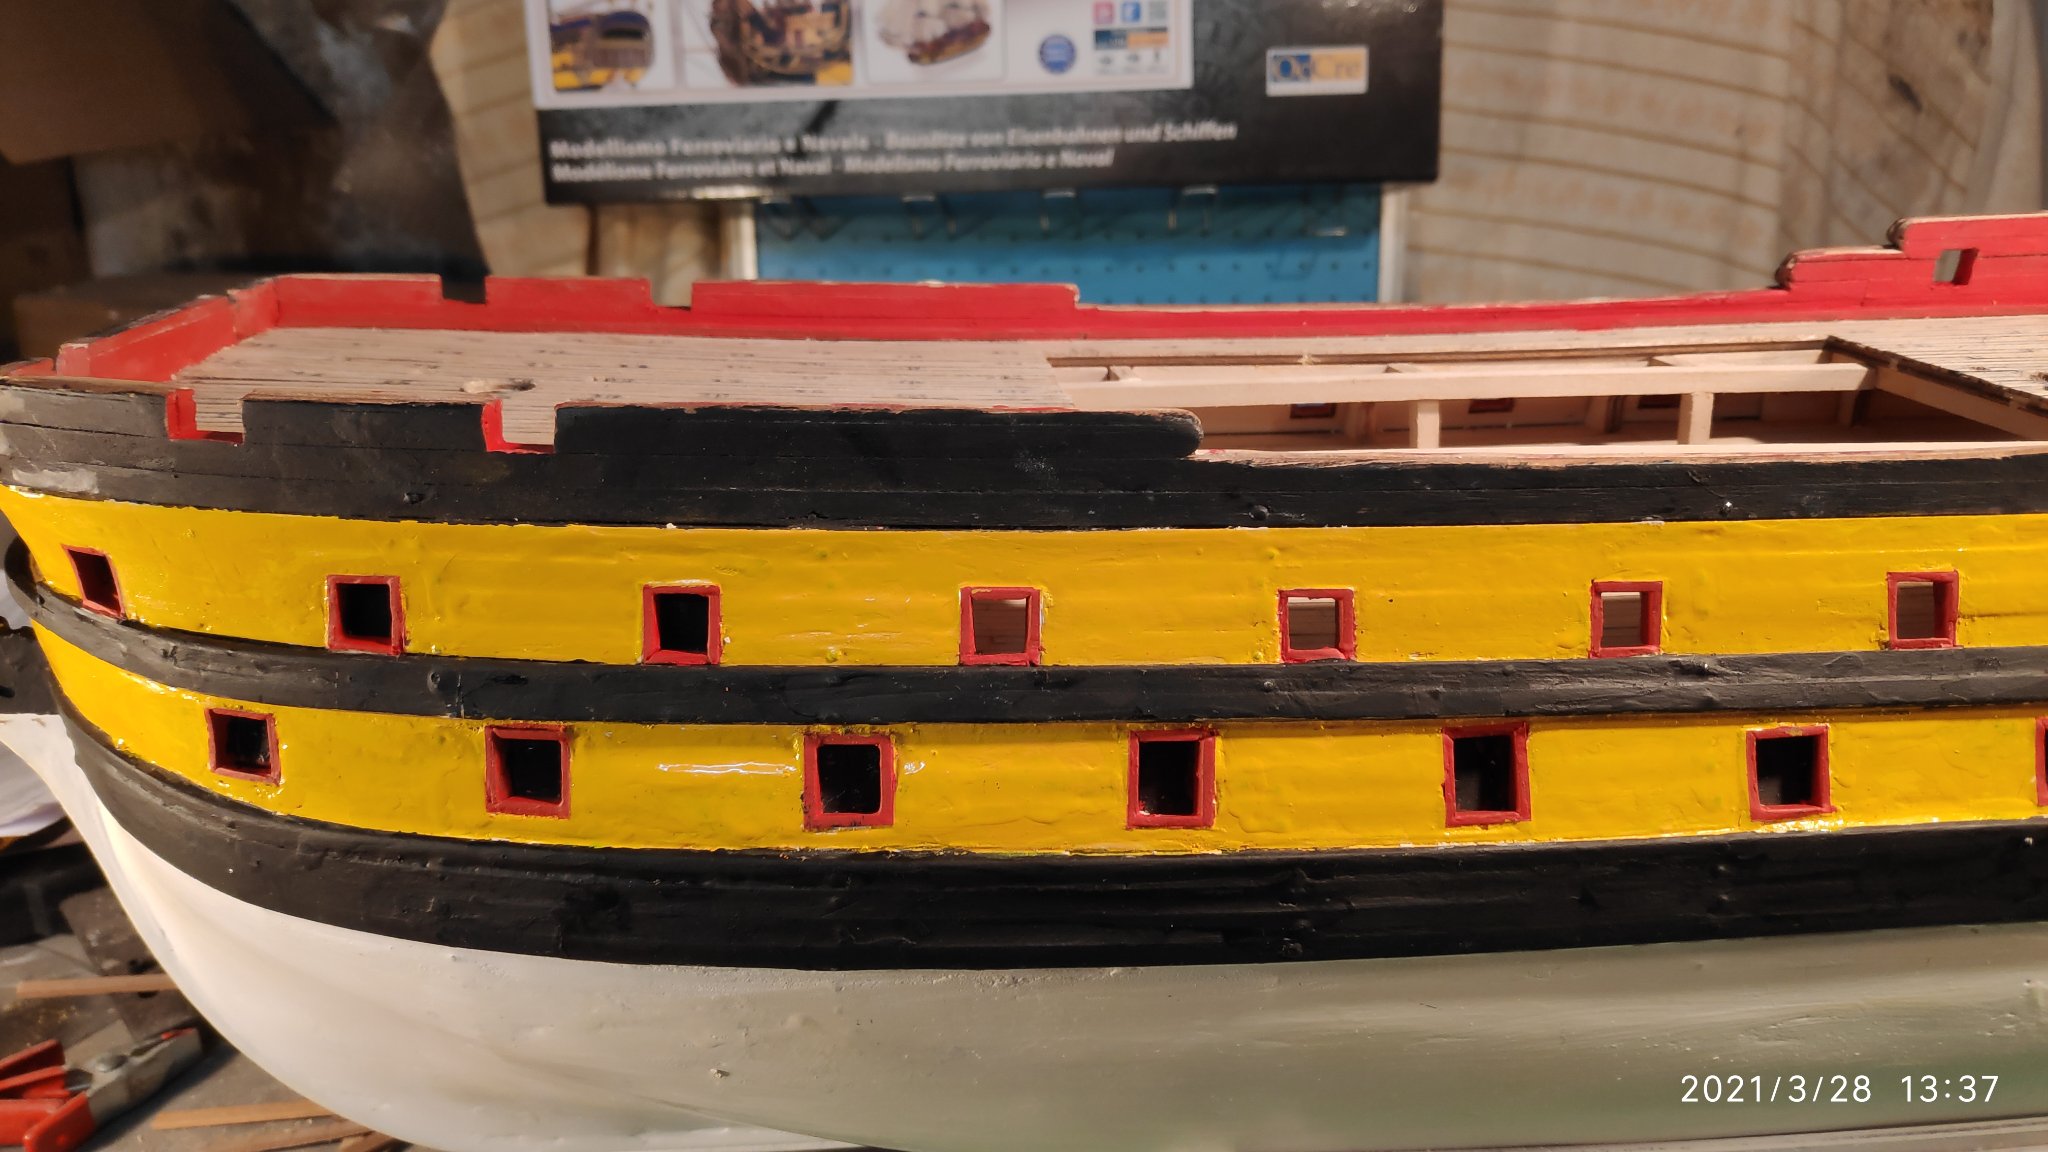
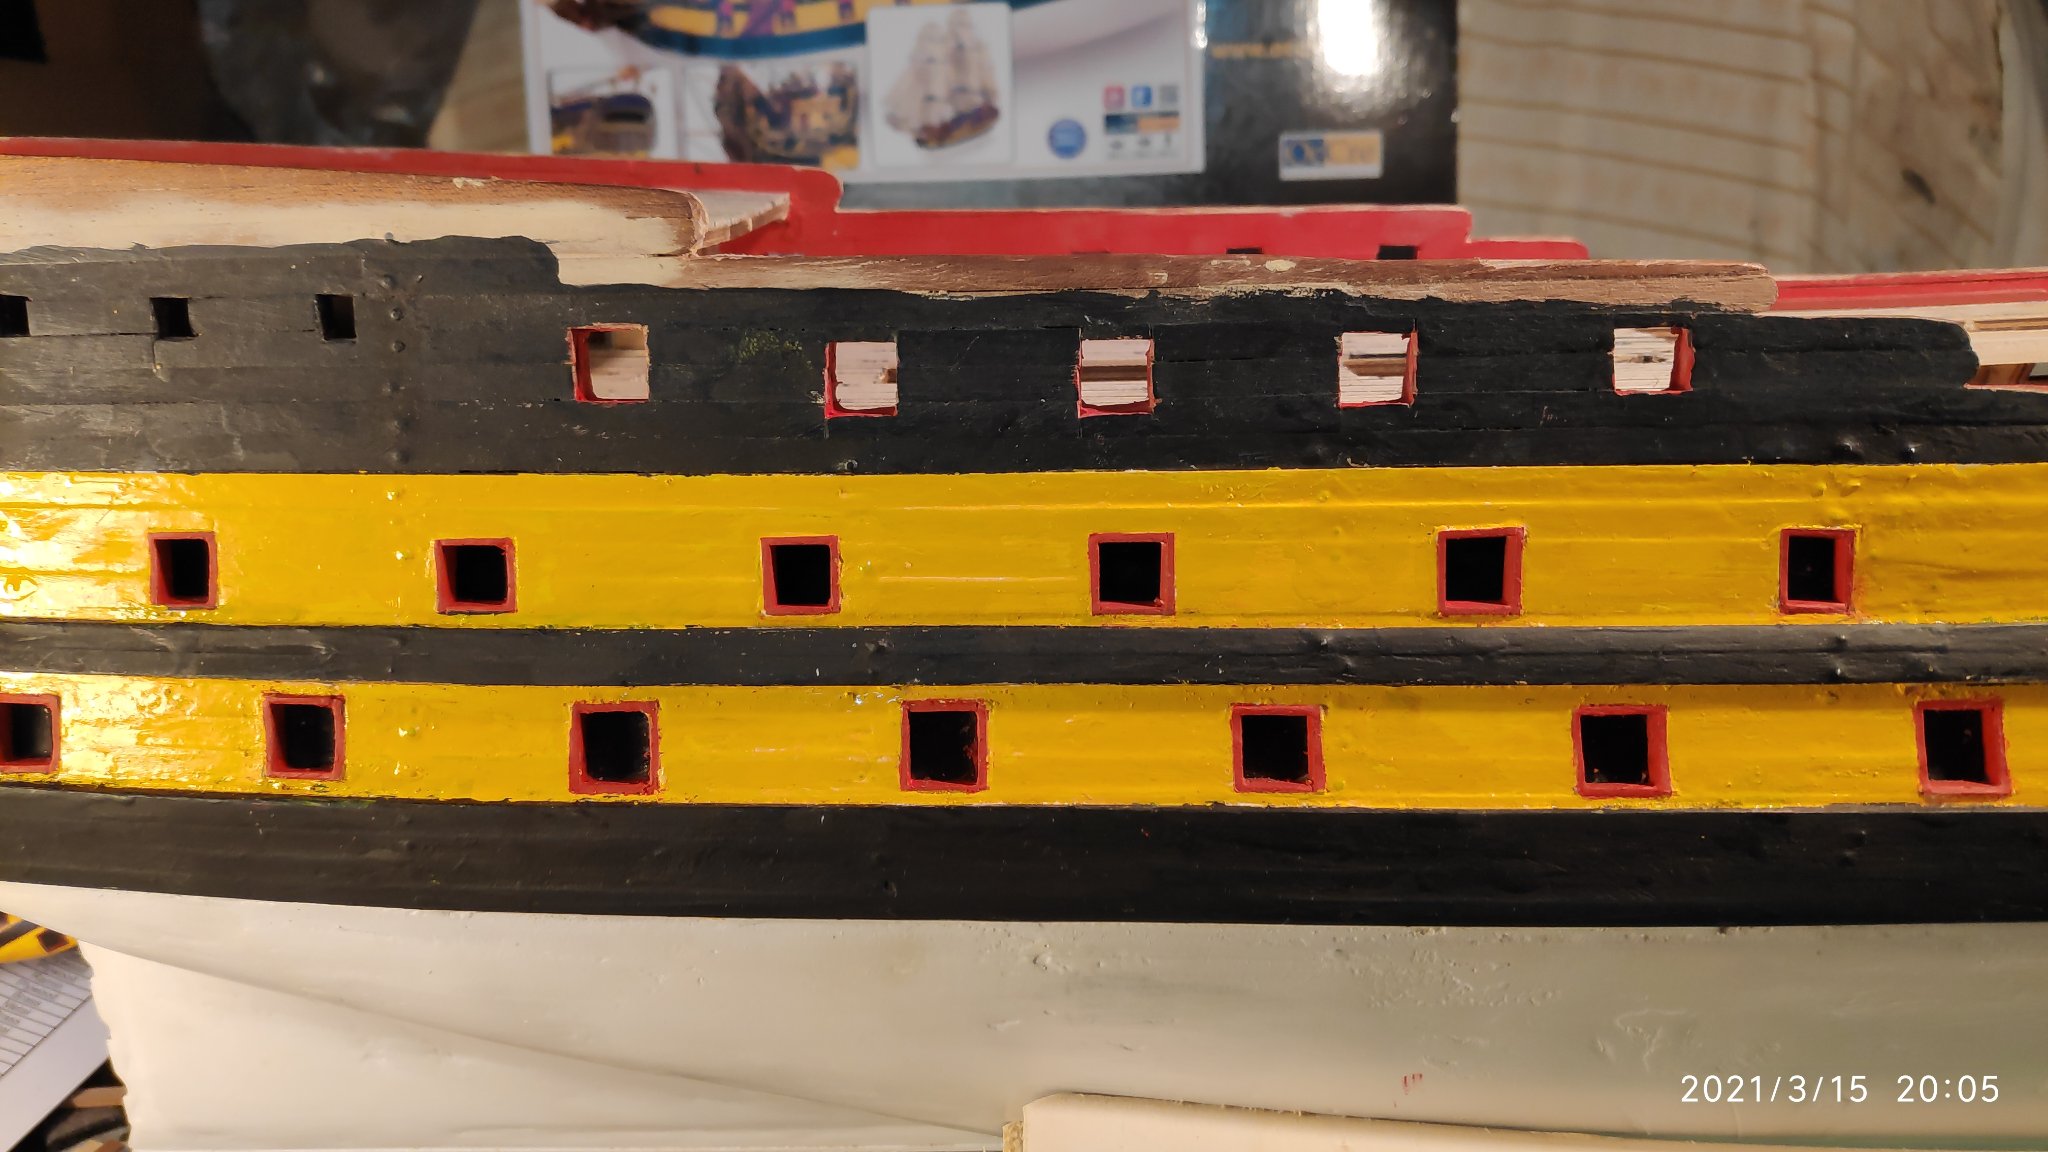
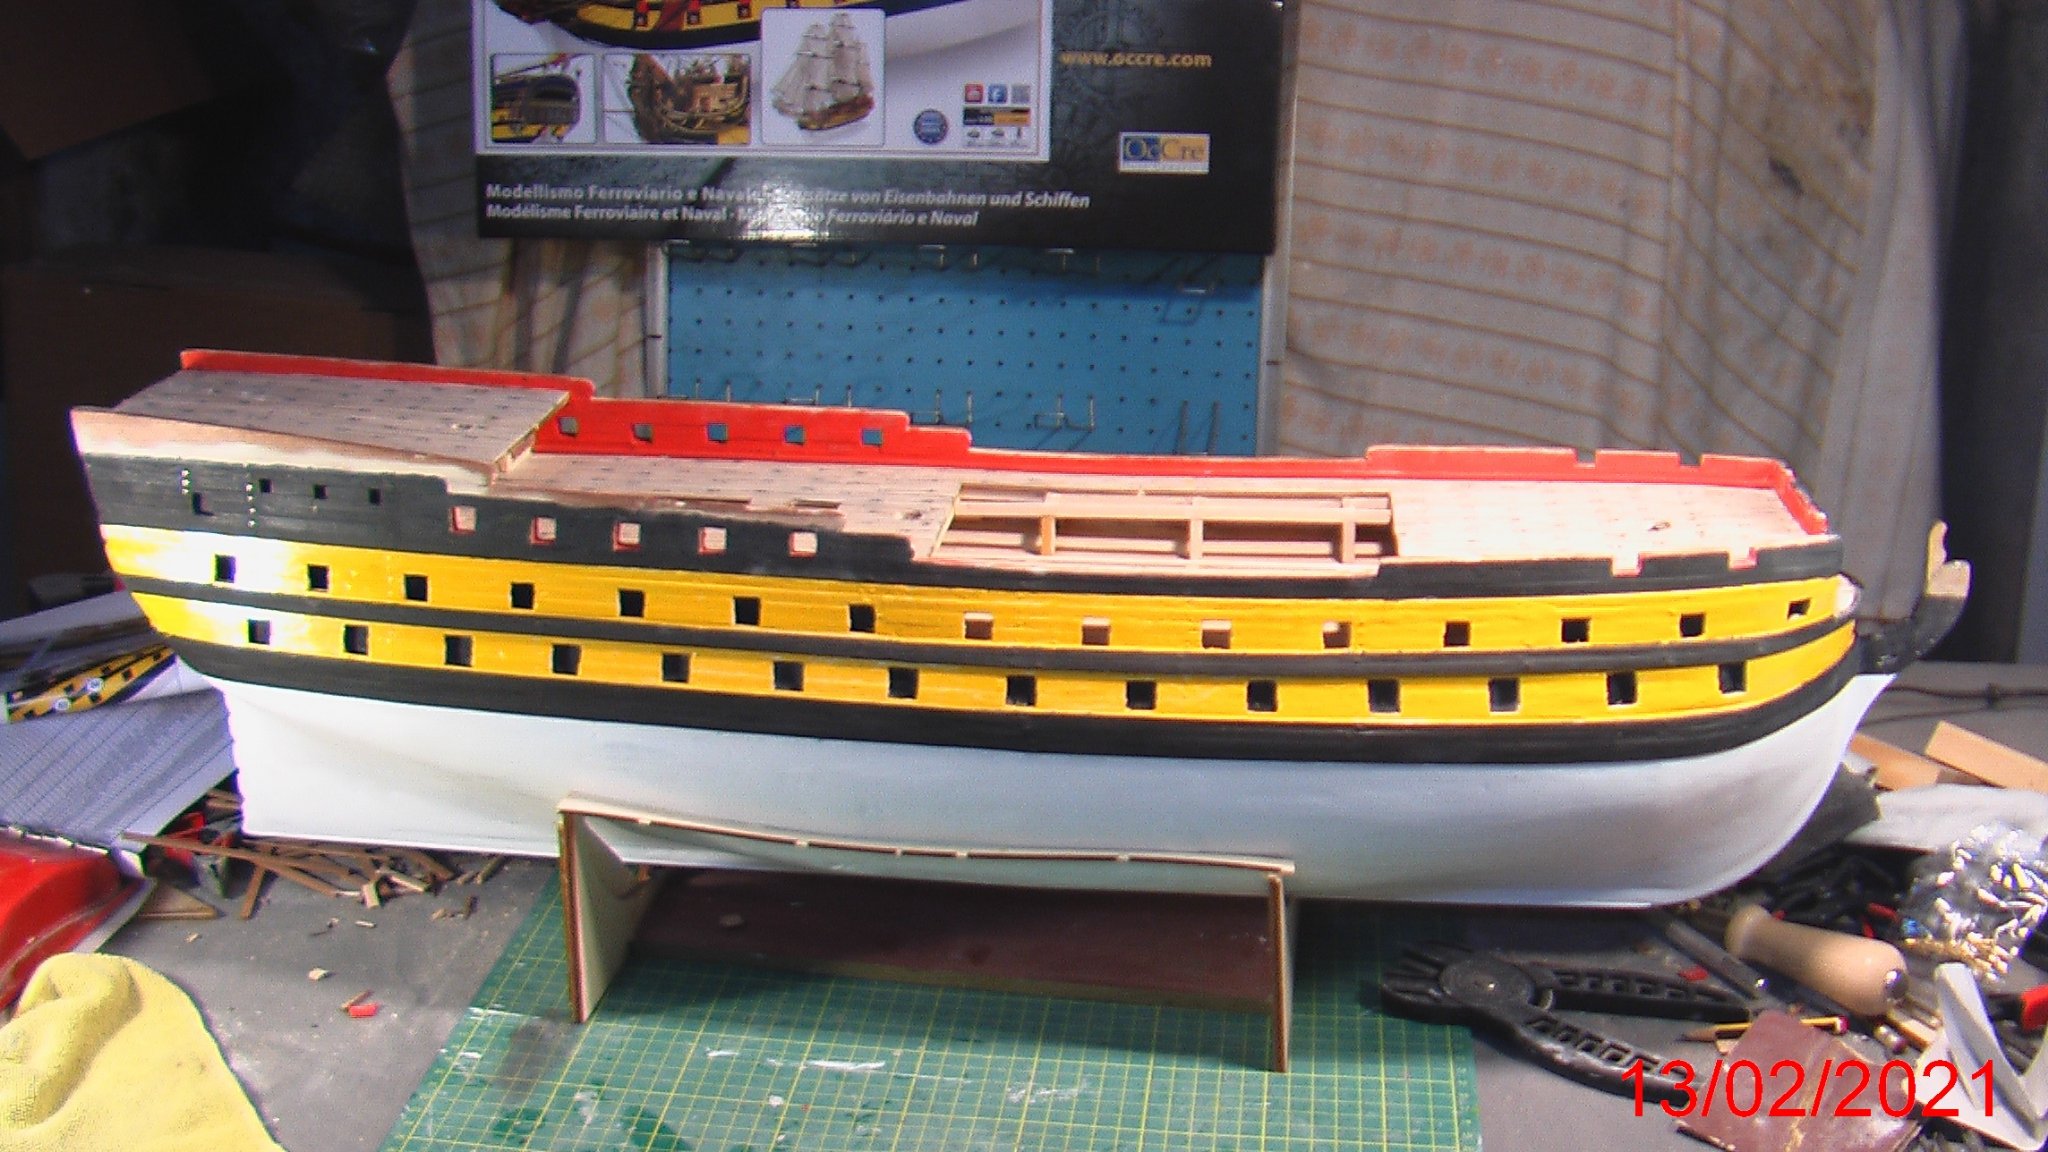
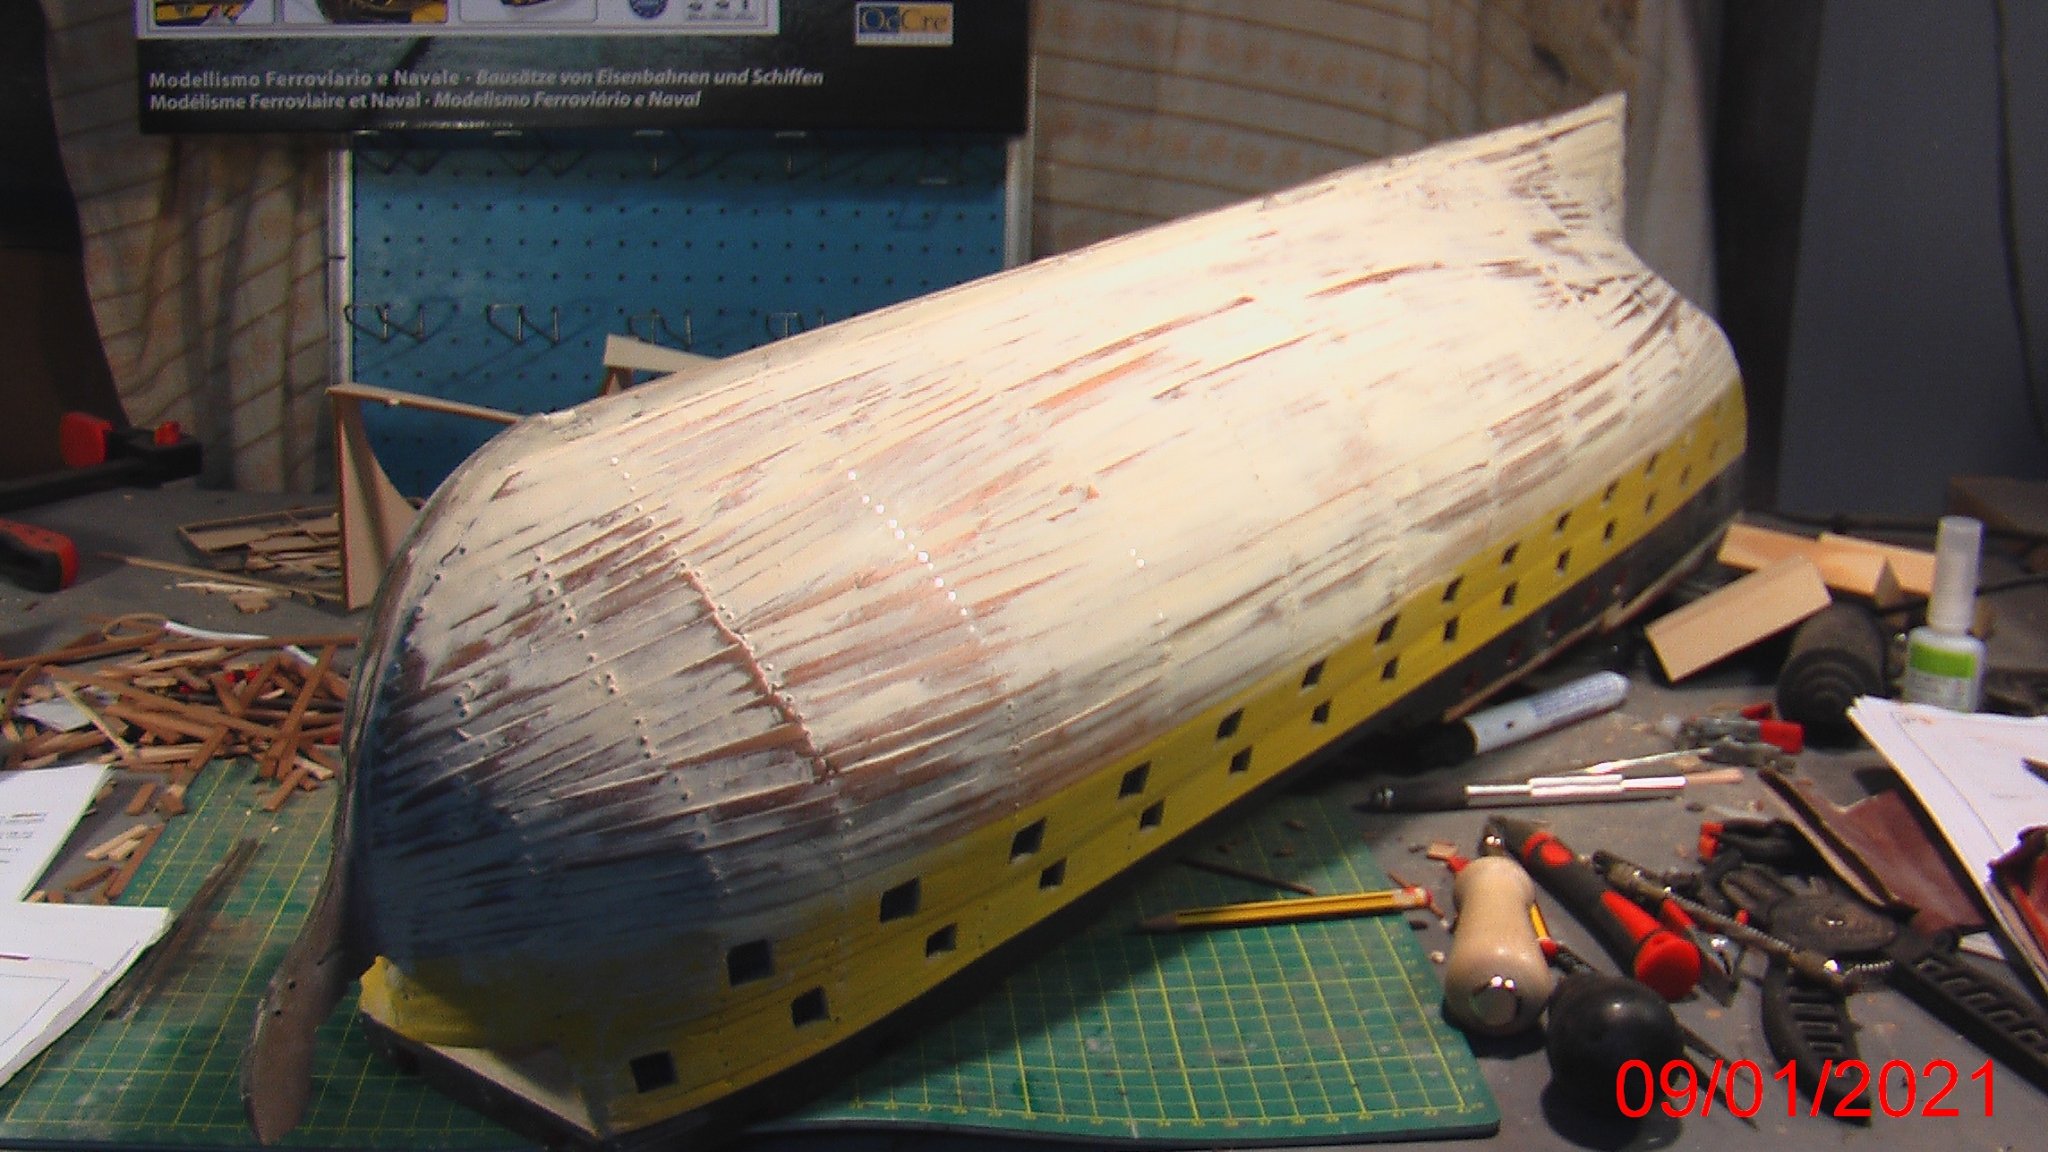
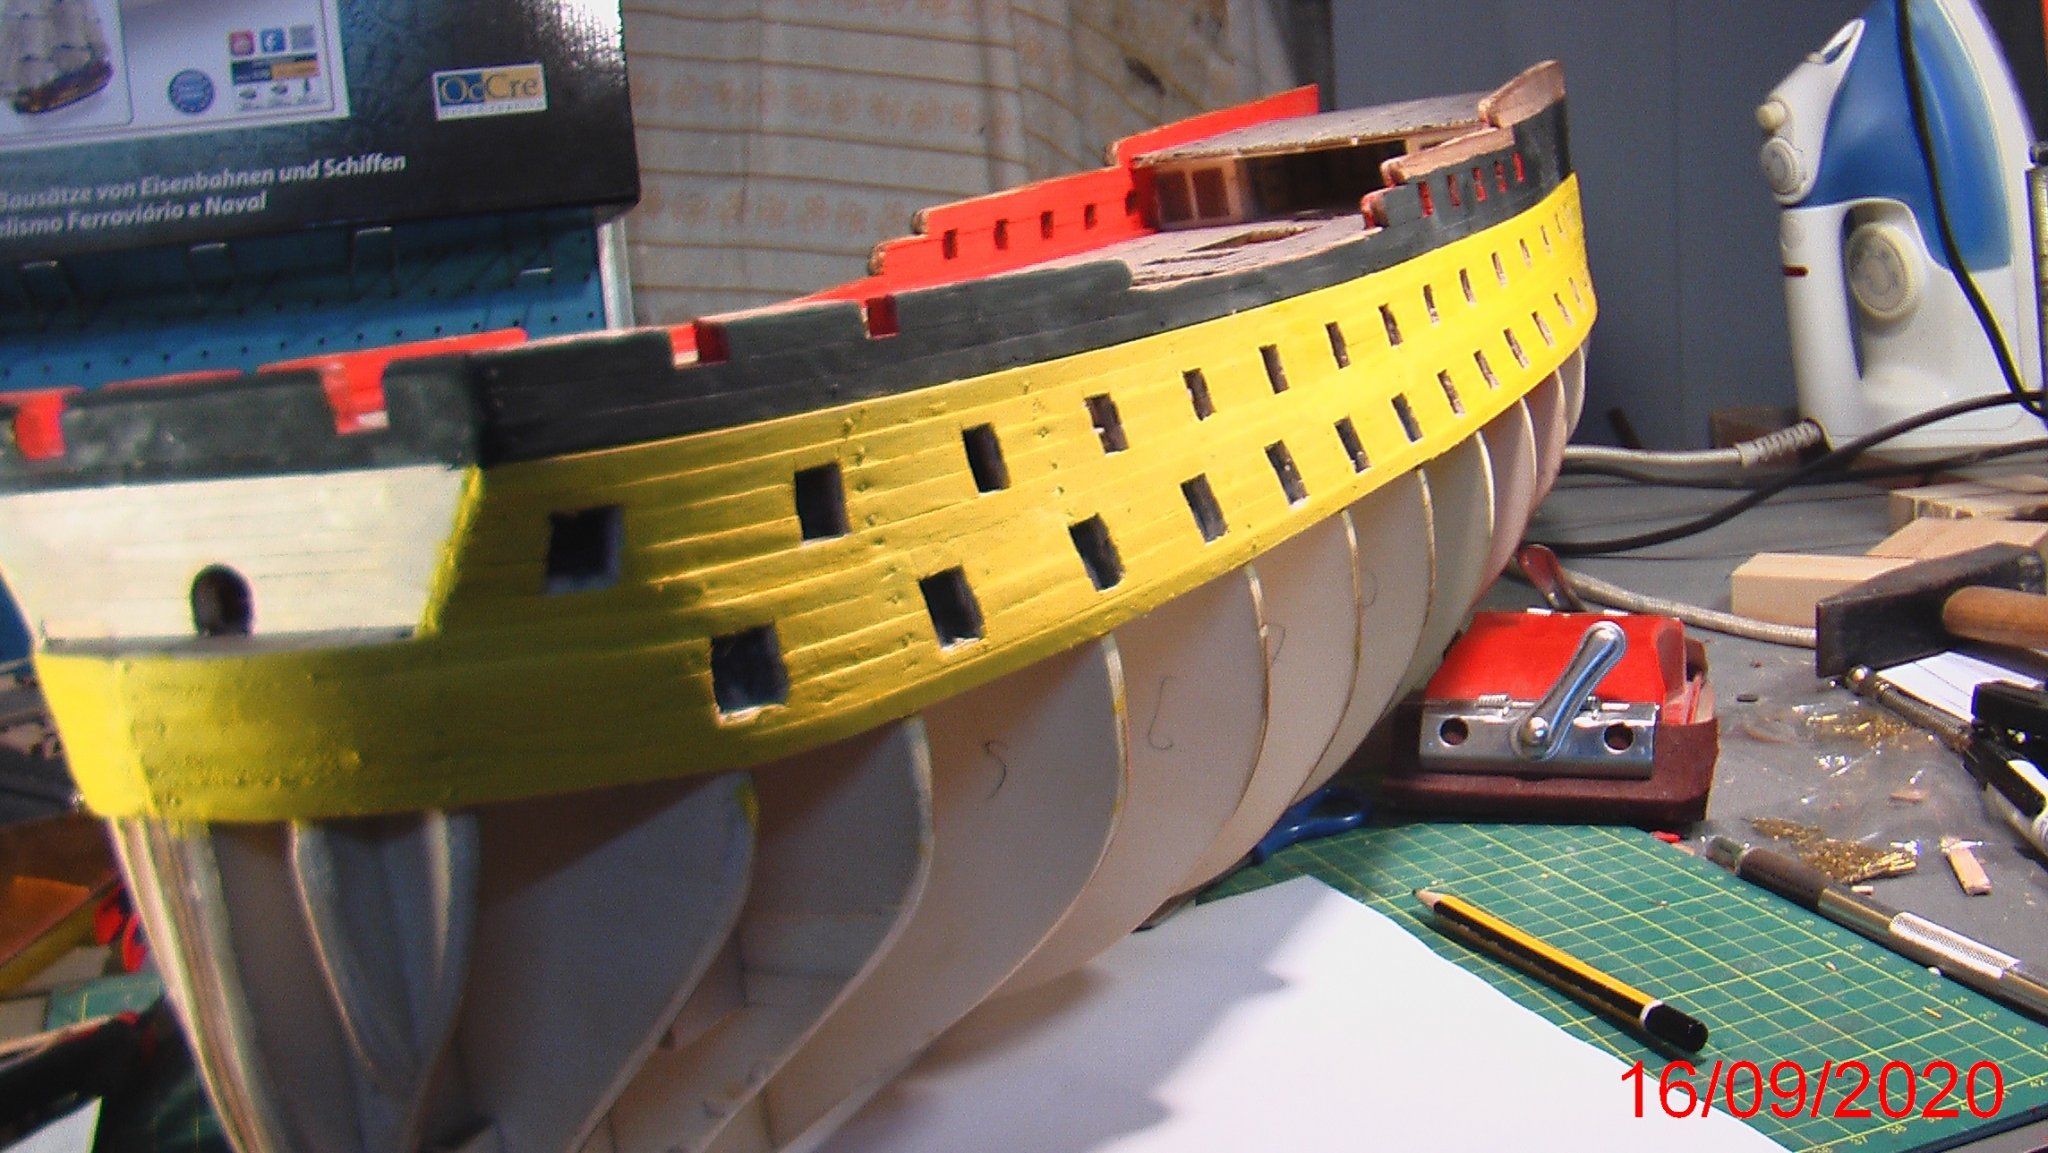
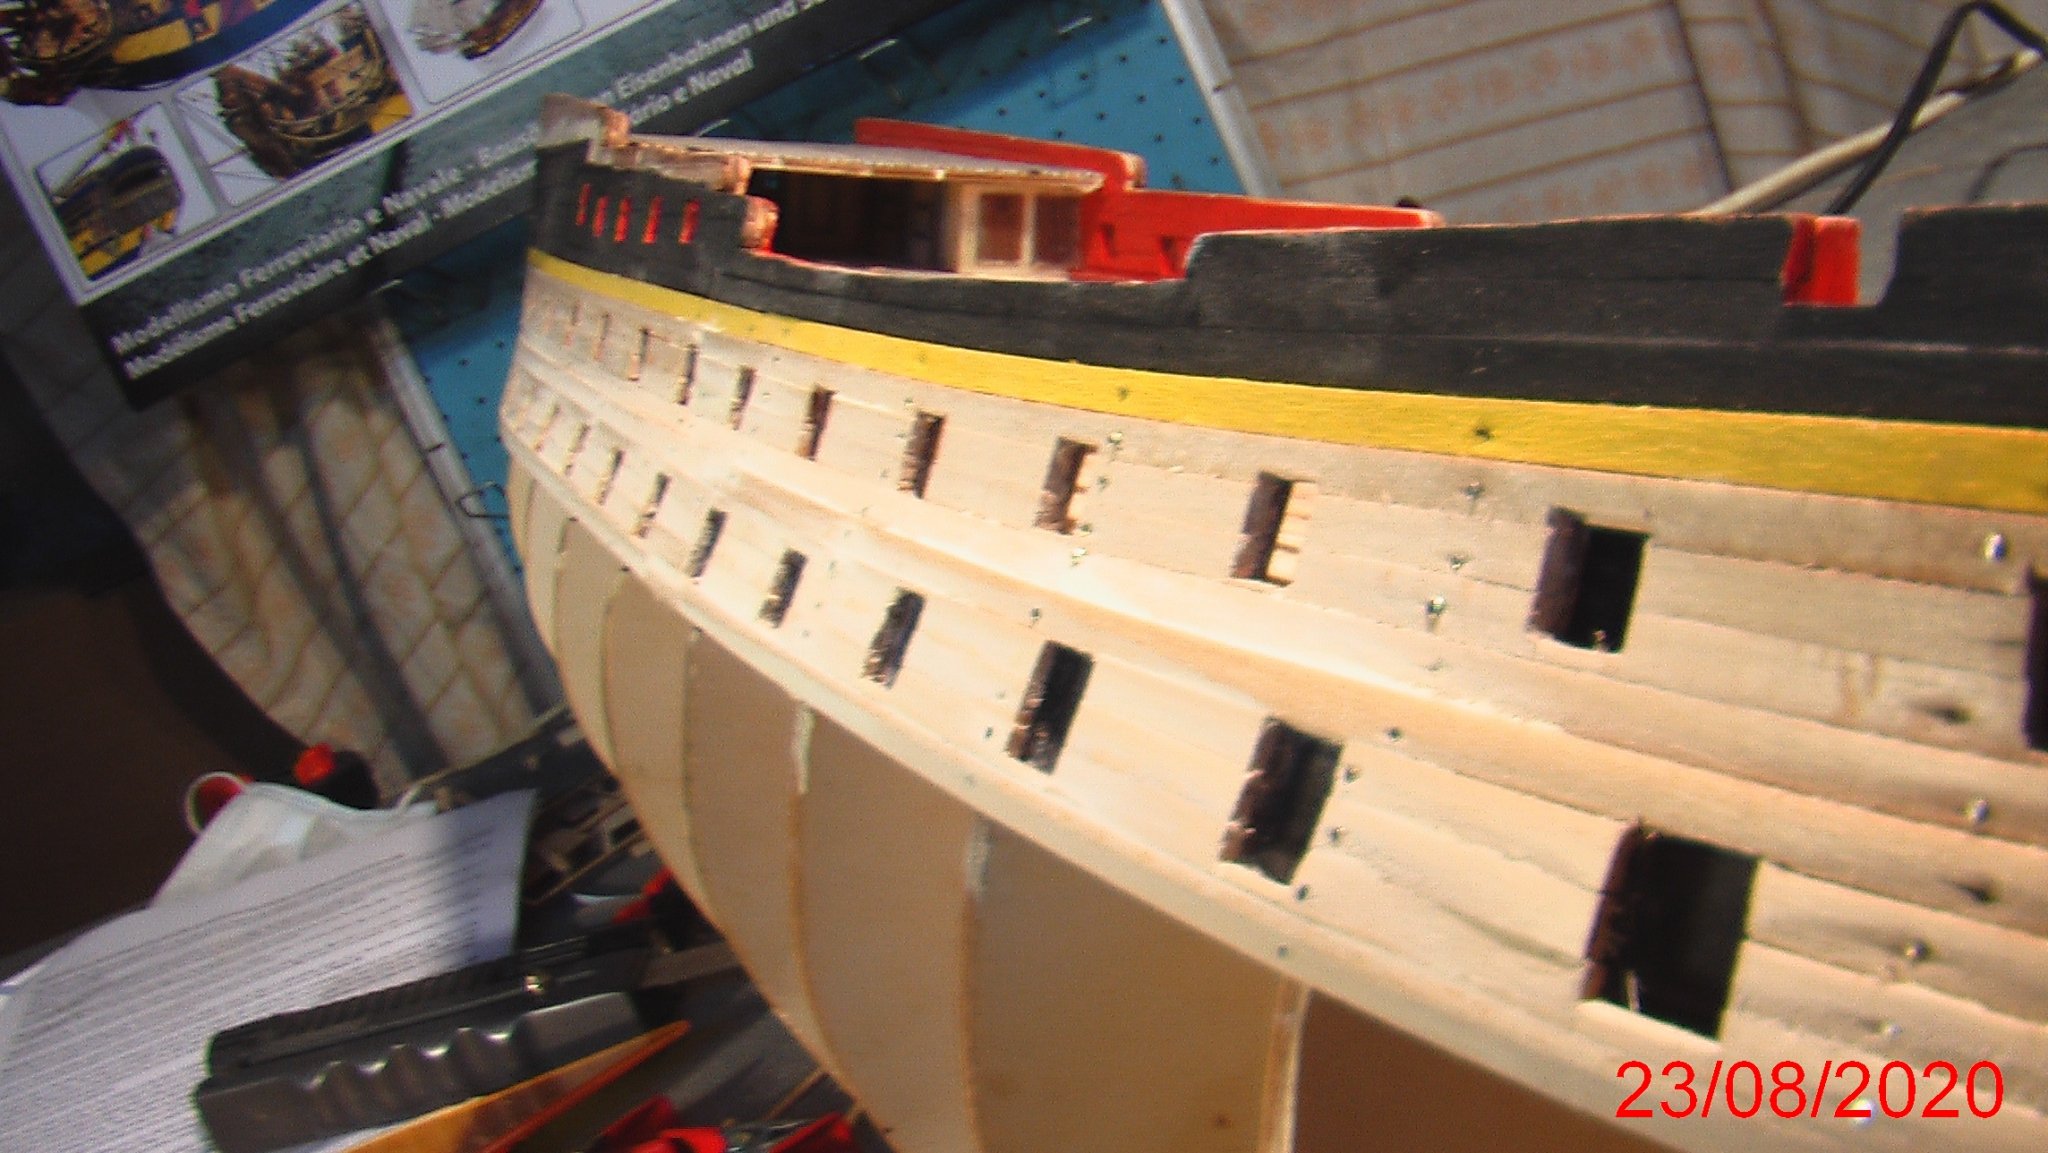
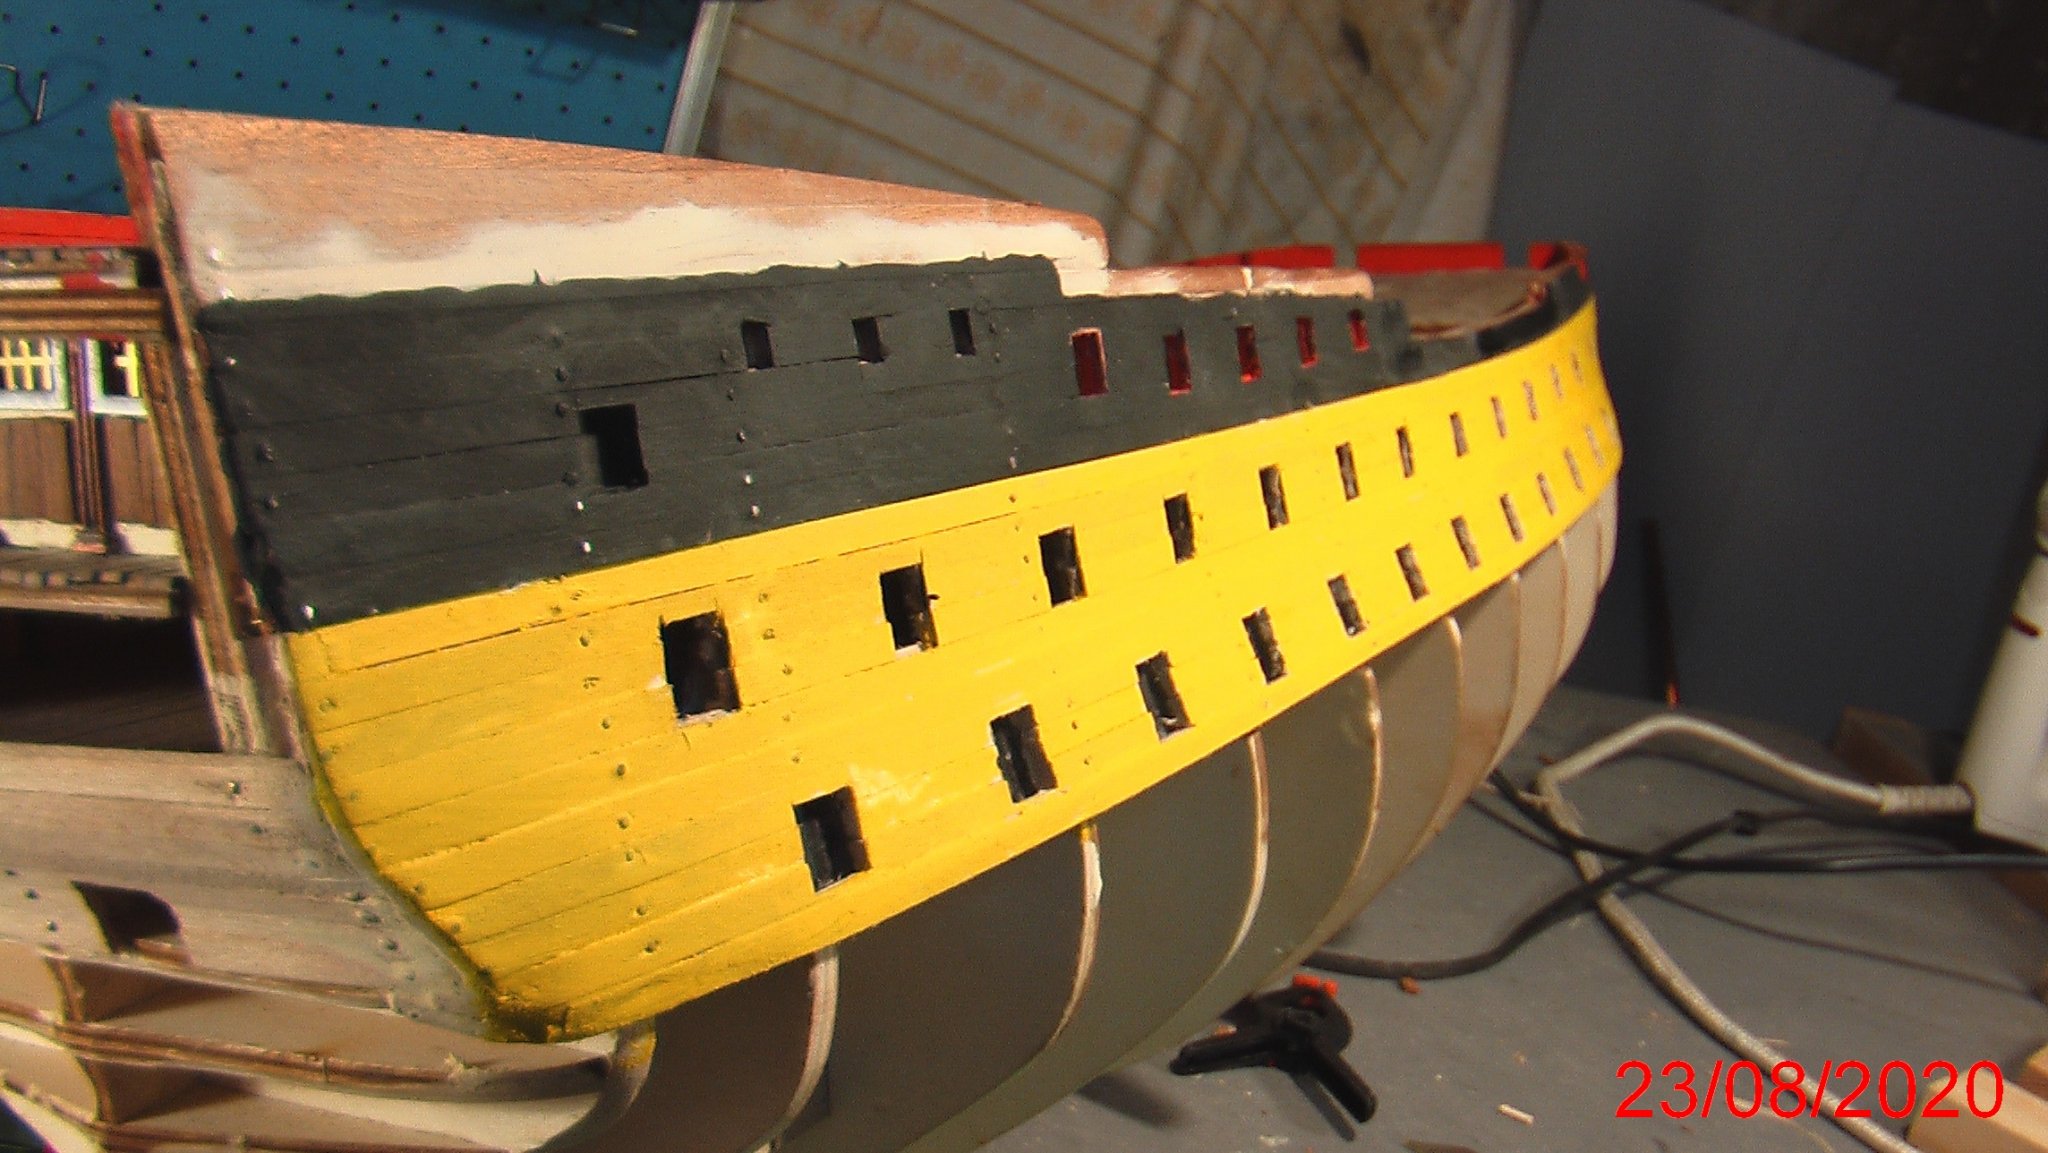
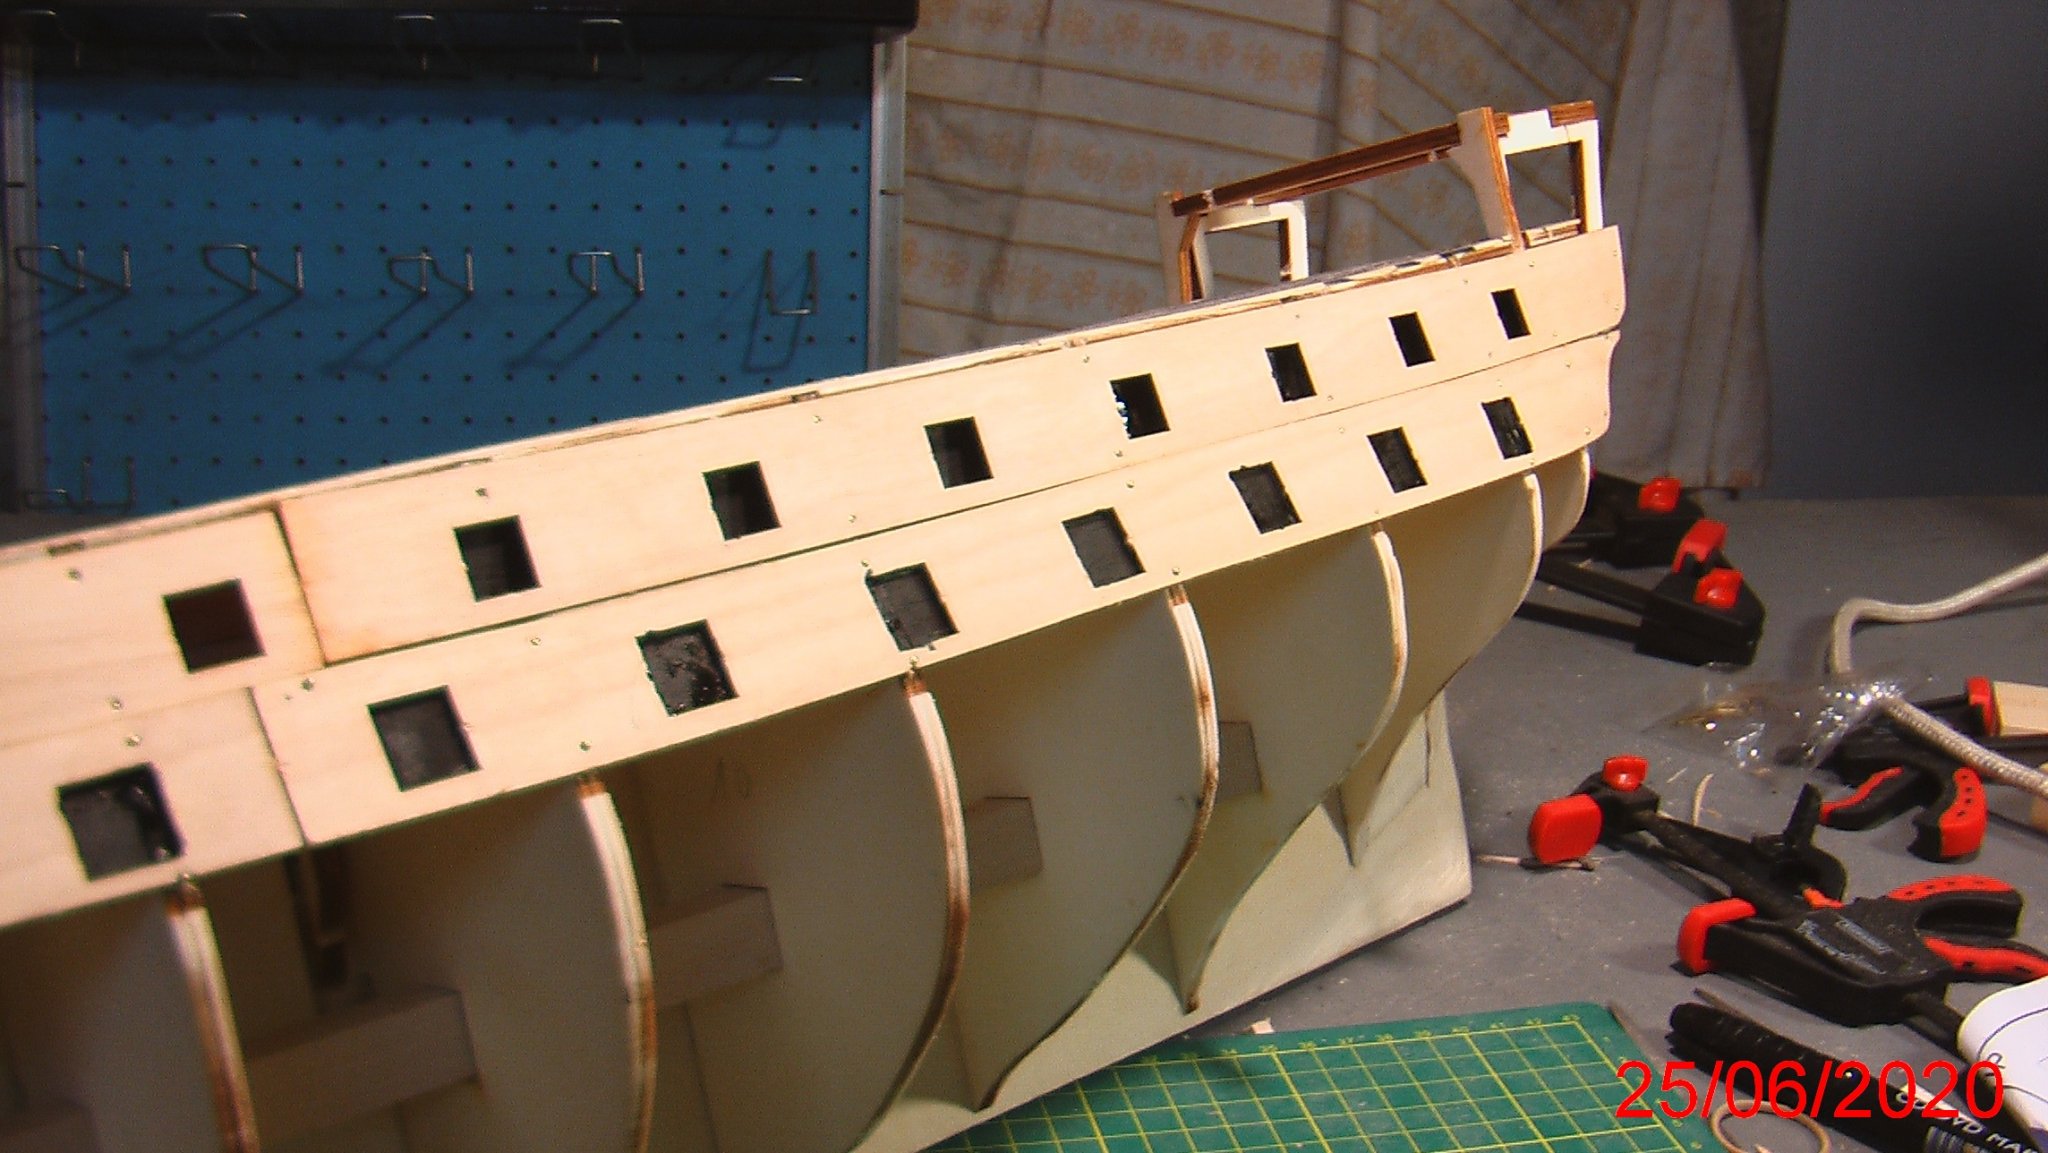
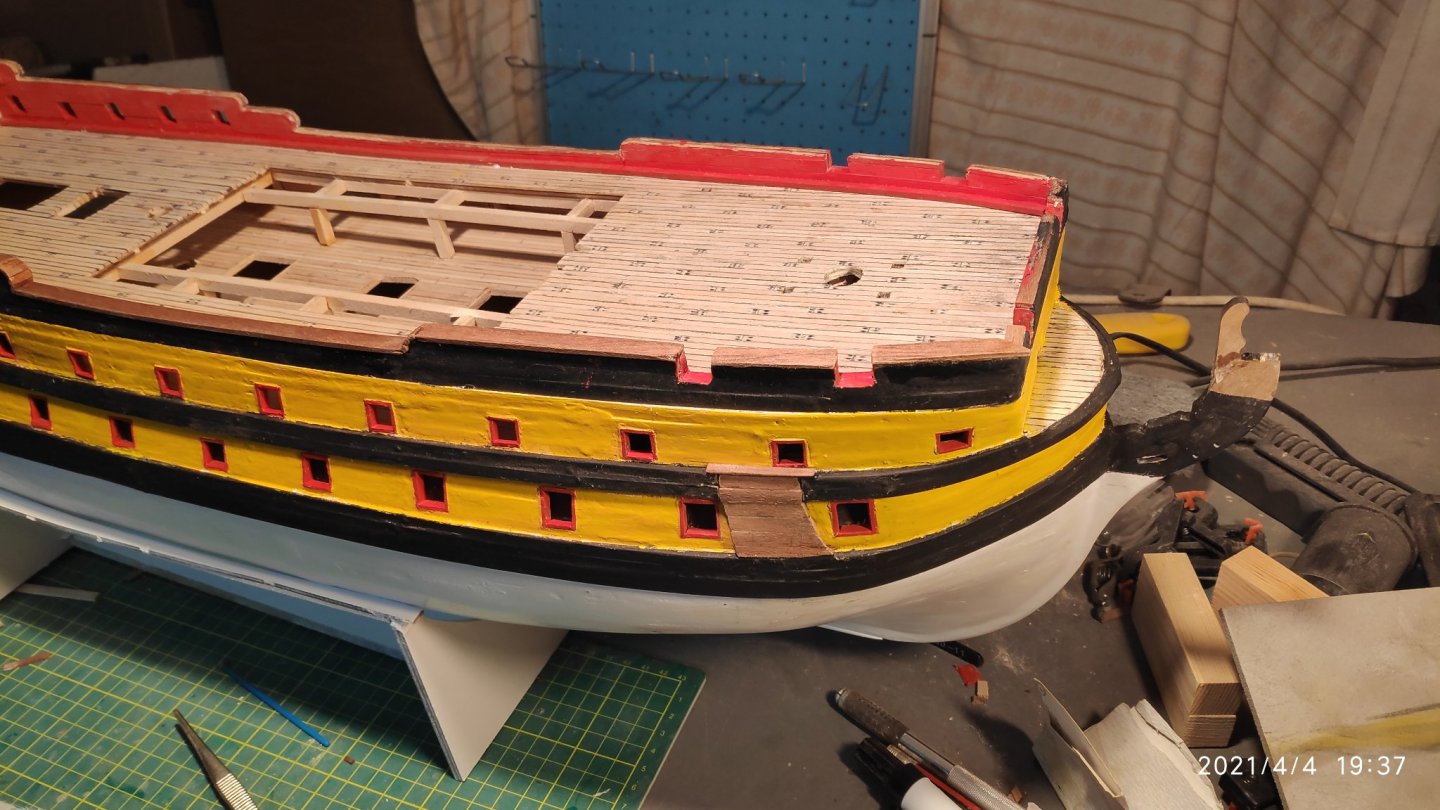
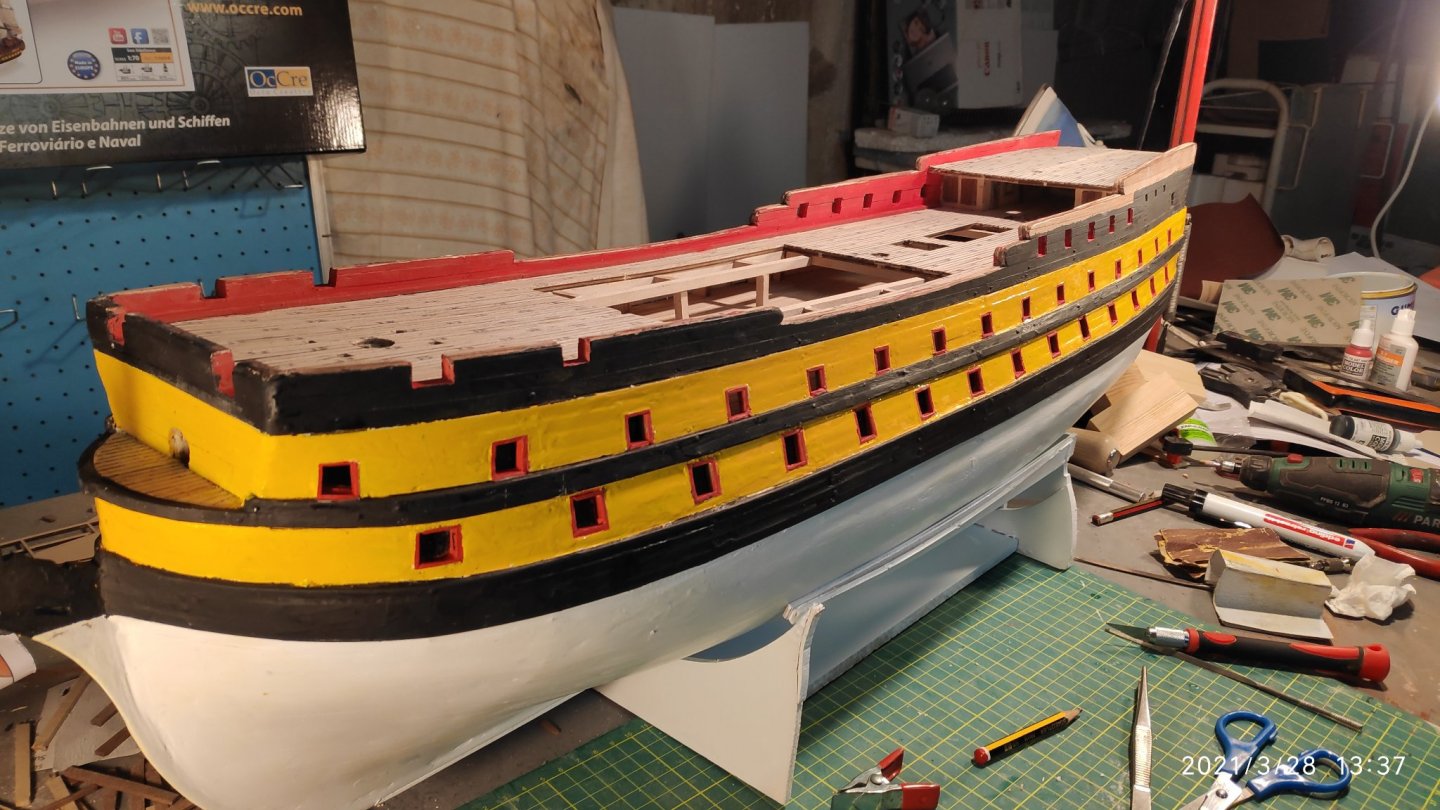
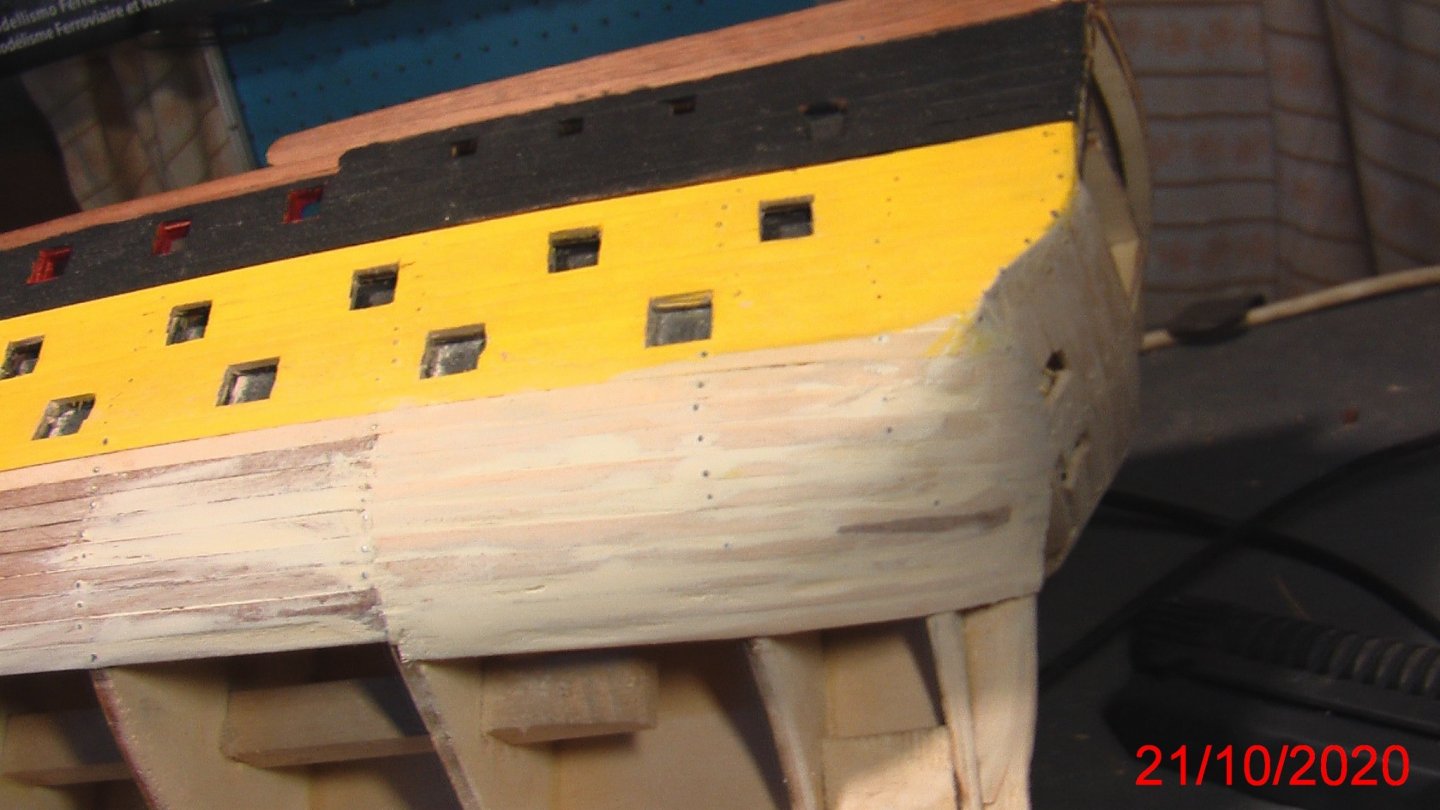
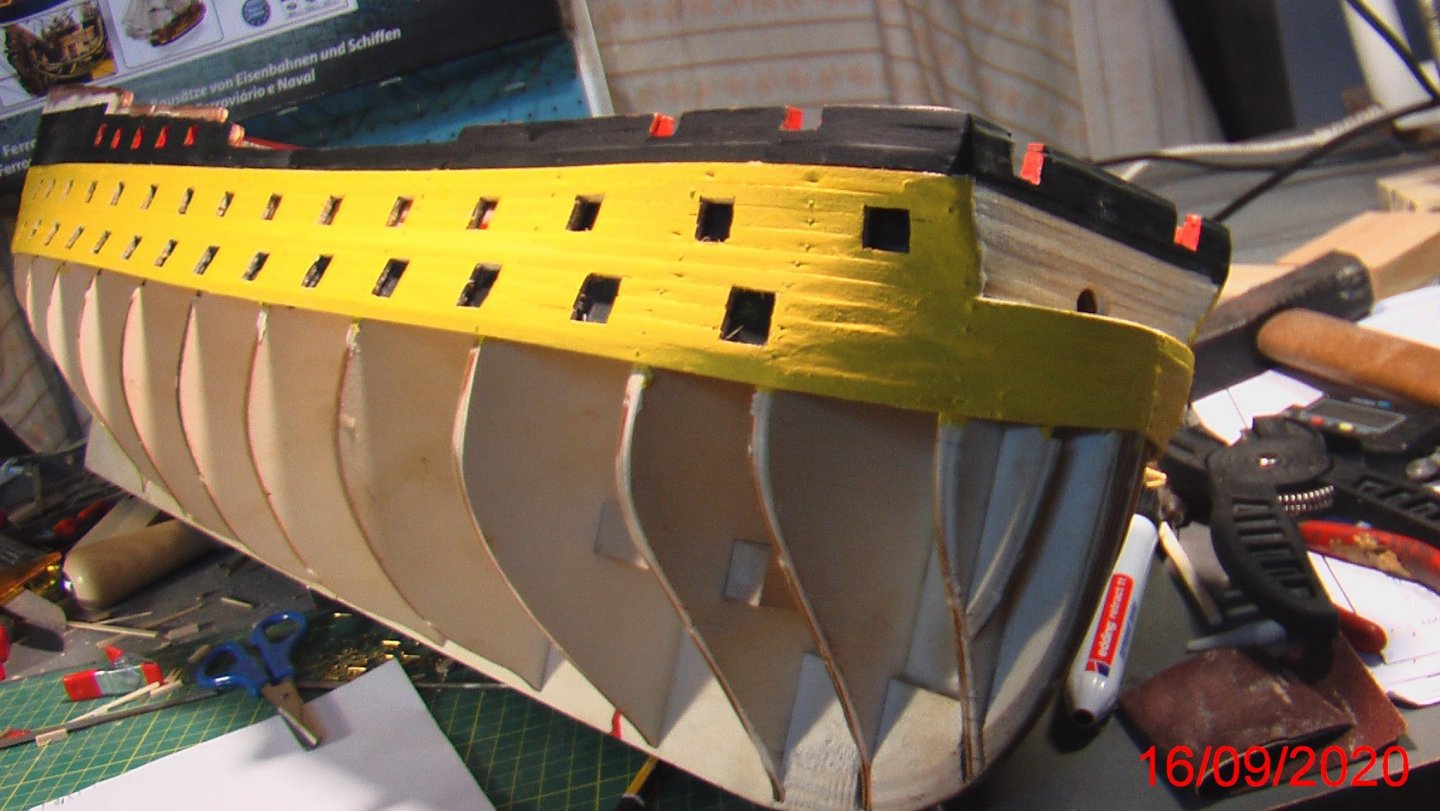
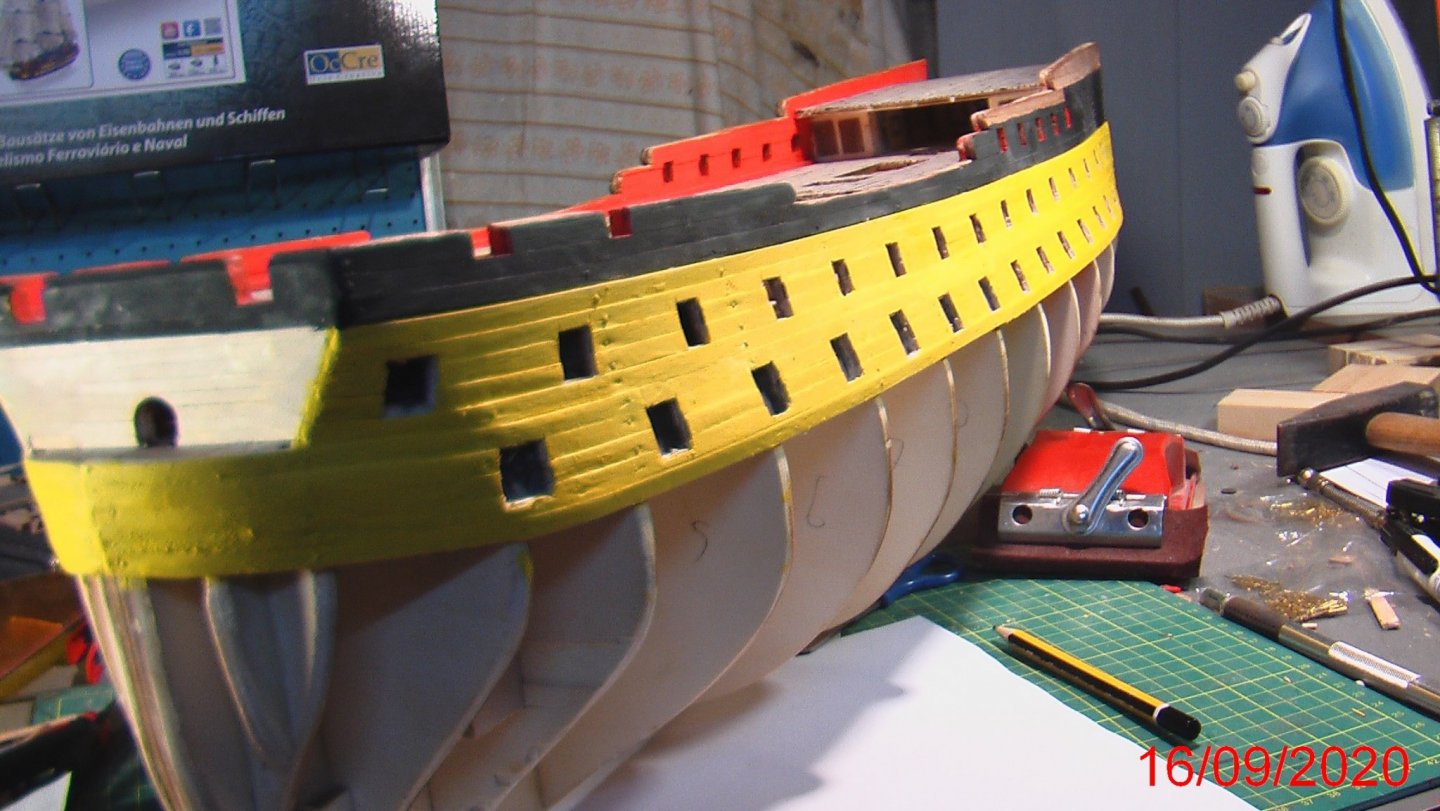
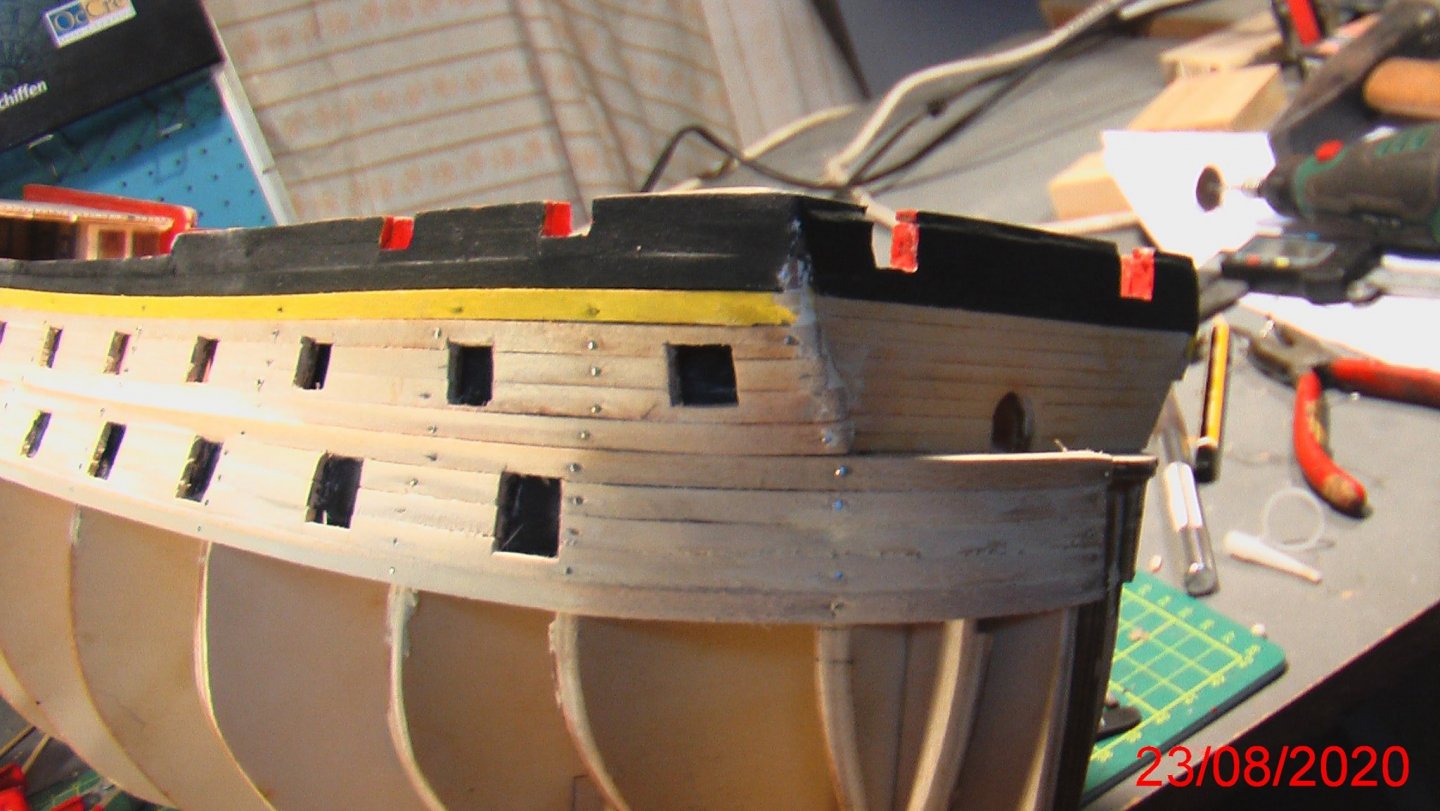
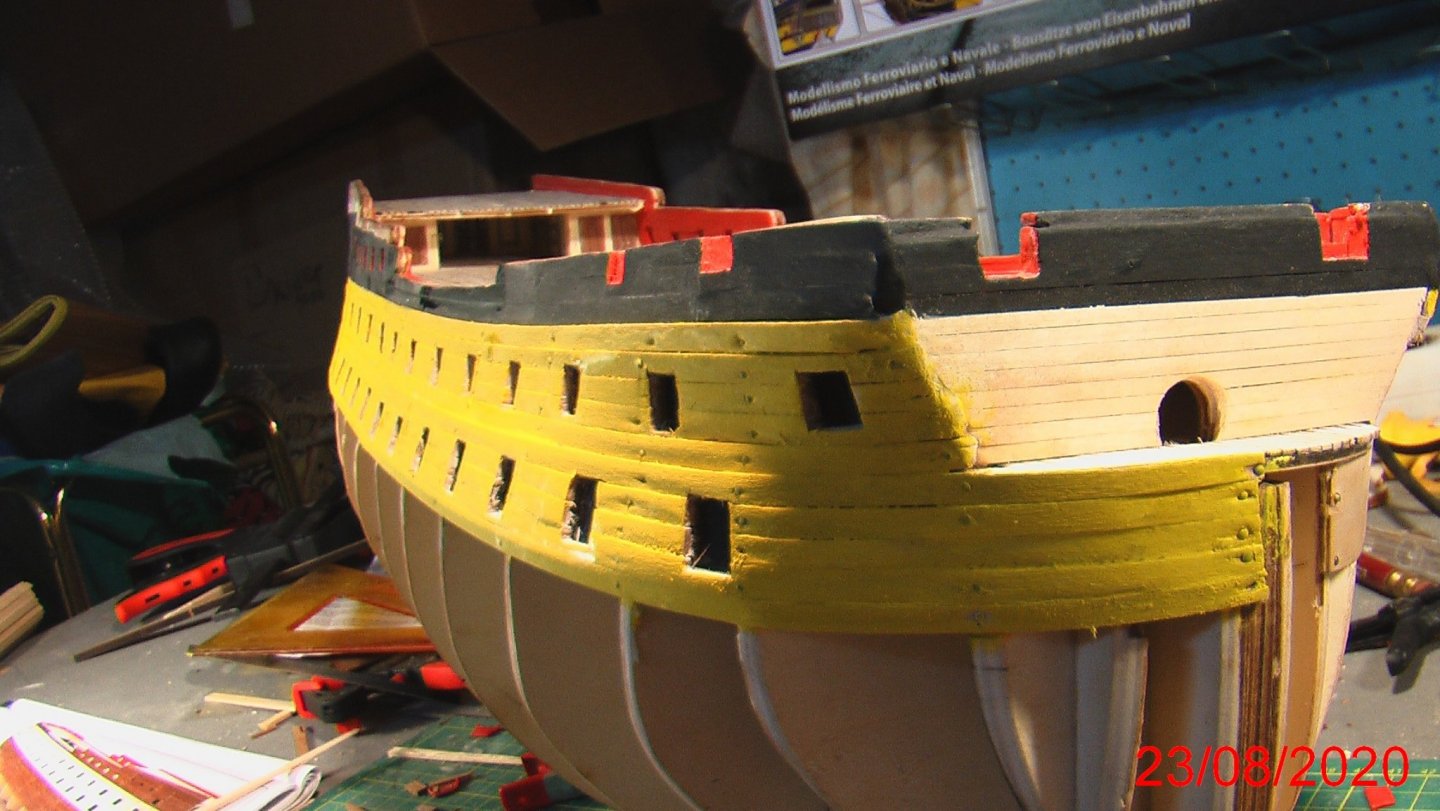
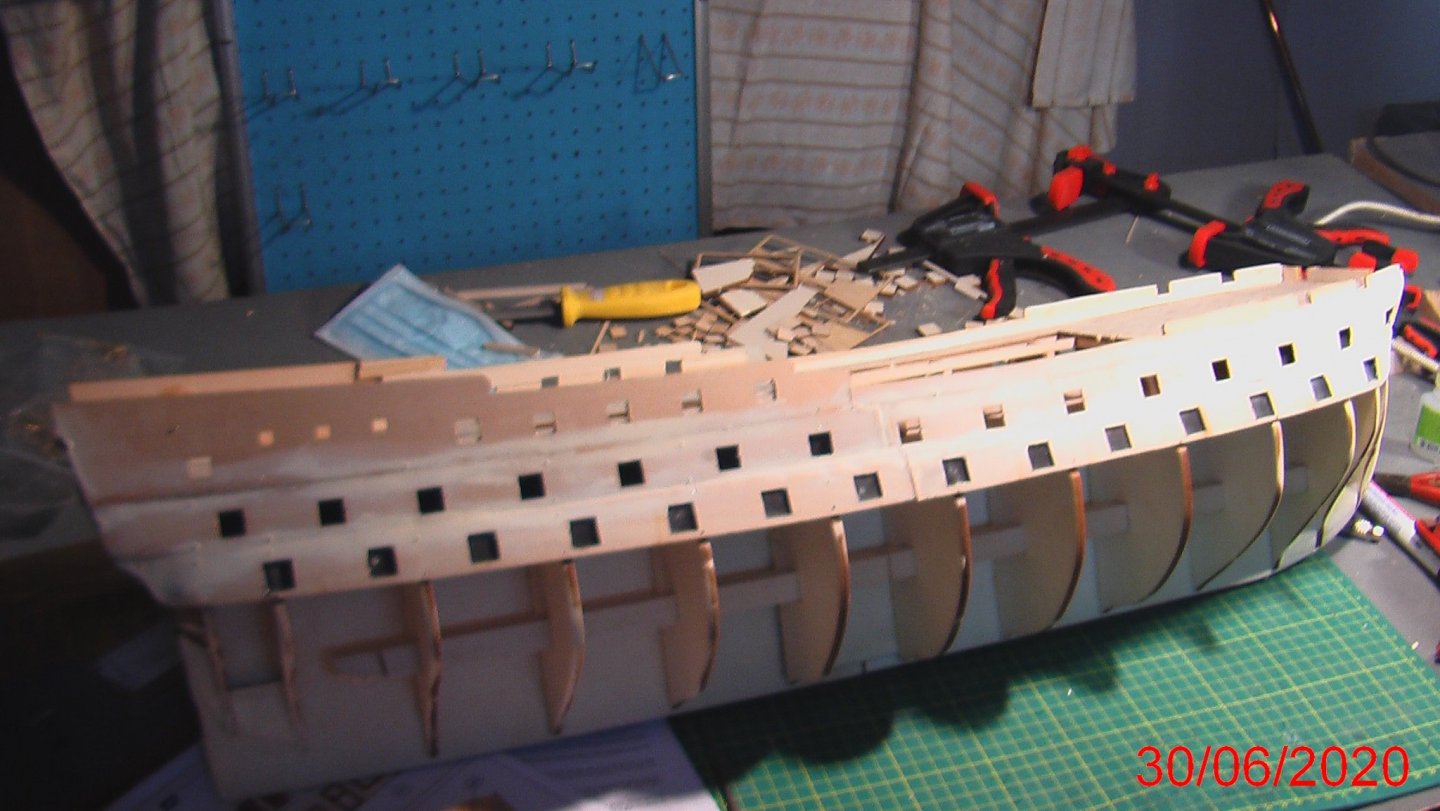
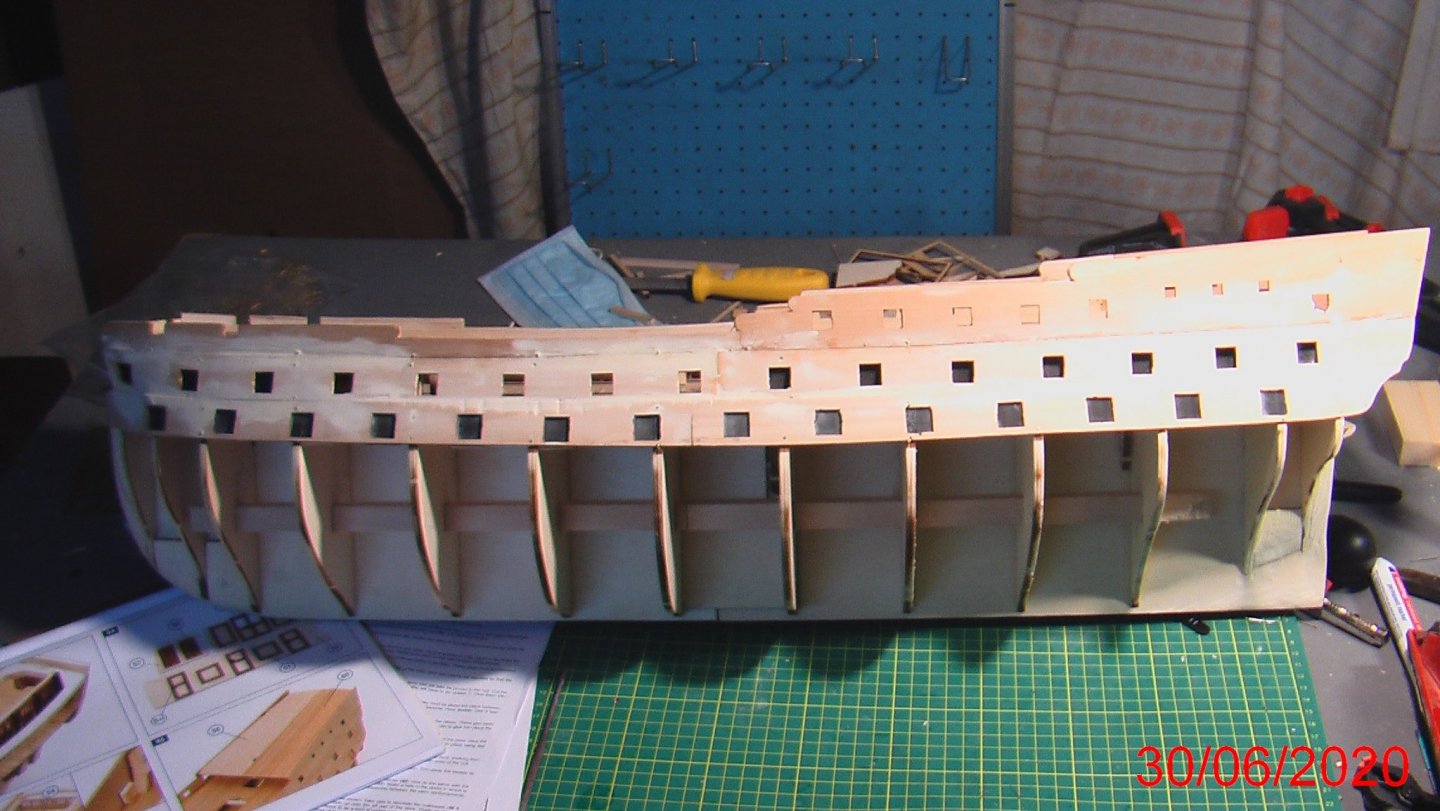
Finally i have finish the frames of the right side gunports. Four planks 10-12mm cutted in 45 degrees for each port. After closing small gaps arount frames,sanding and correct the yellow color. Masking and painting red the frames. Small corrections also..Now starting the left side...with the expierience it will be faster and better. To be continued....

-
Thank you George,that means a lot for me....you are an expierience builder
-
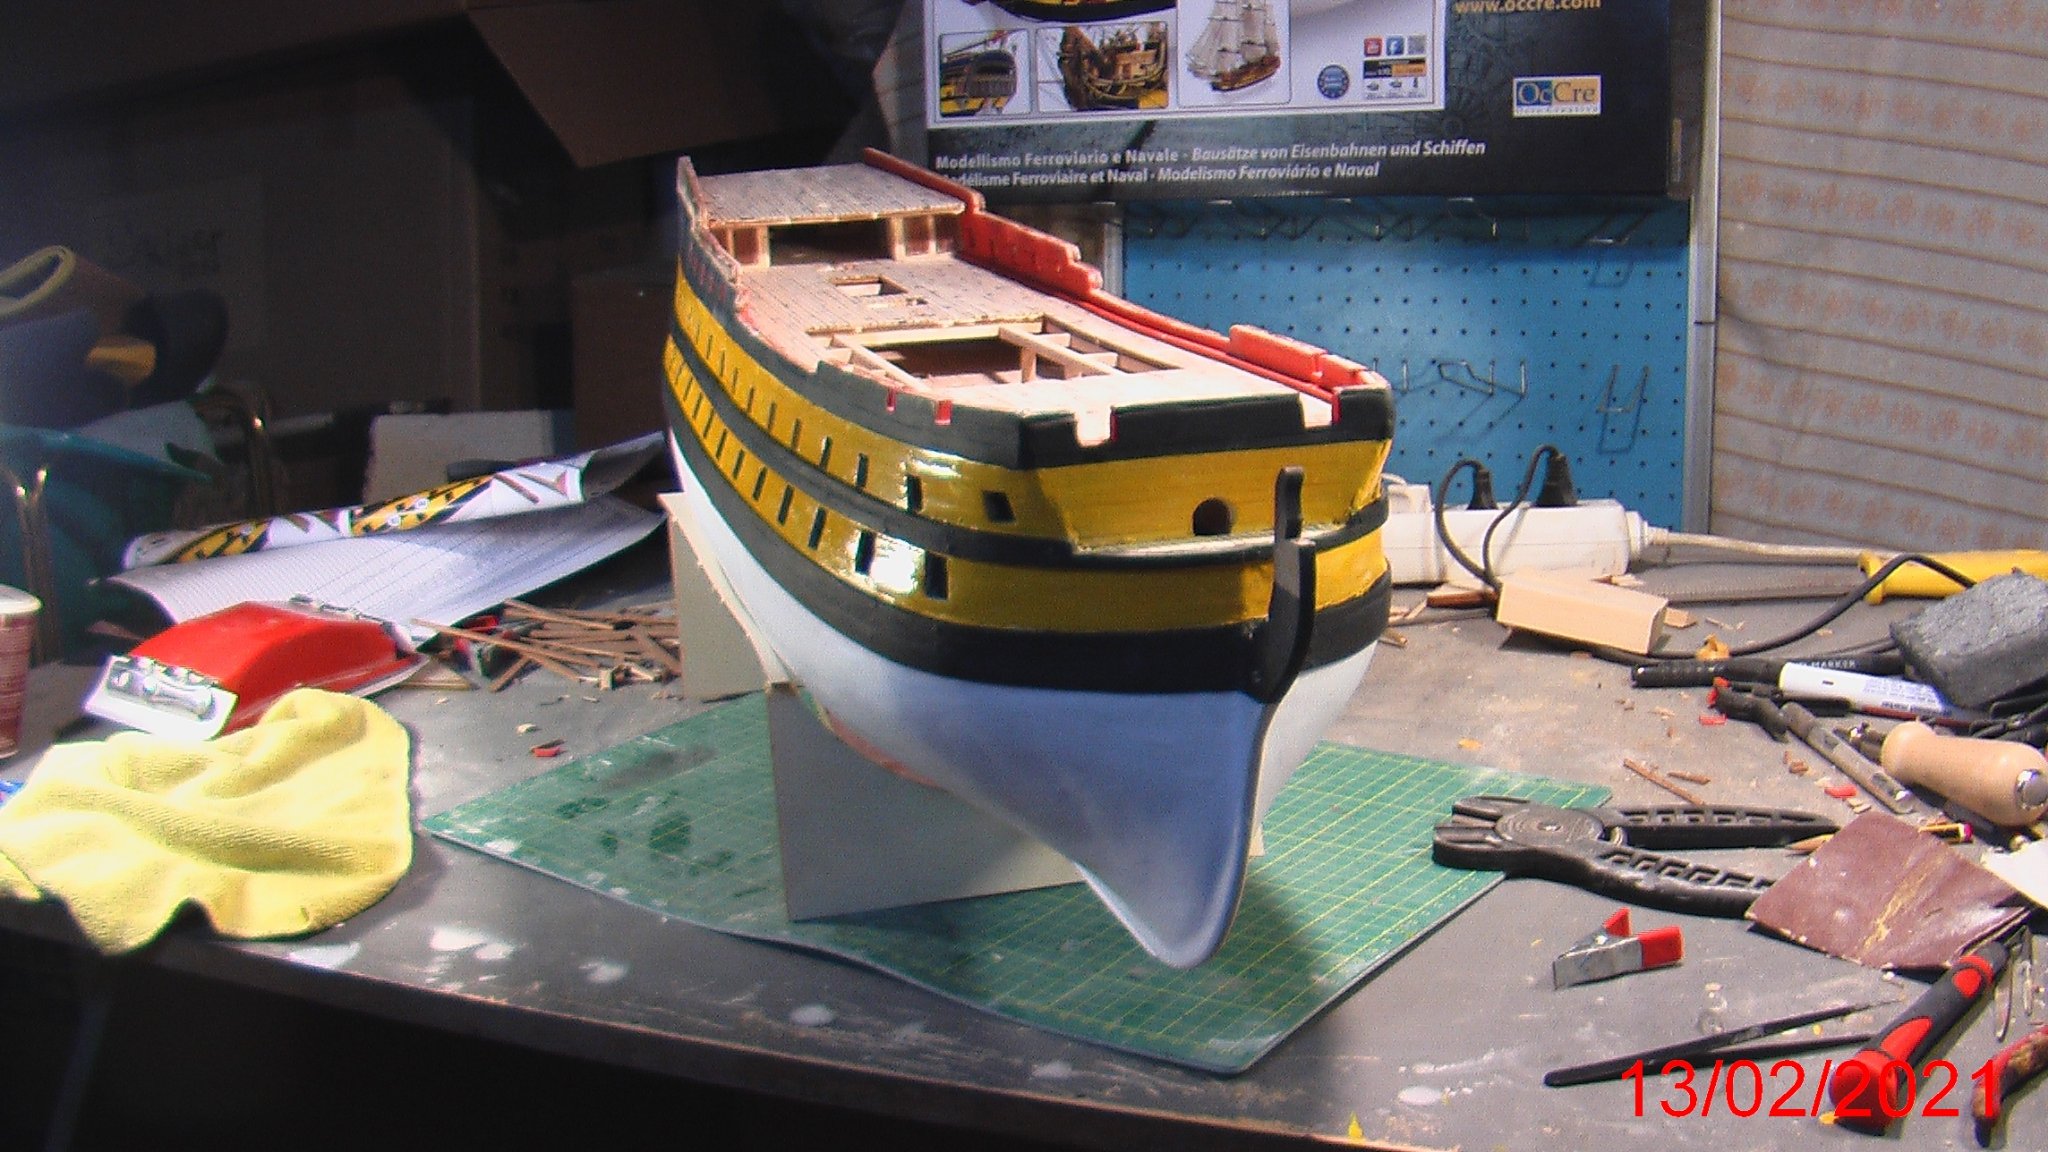
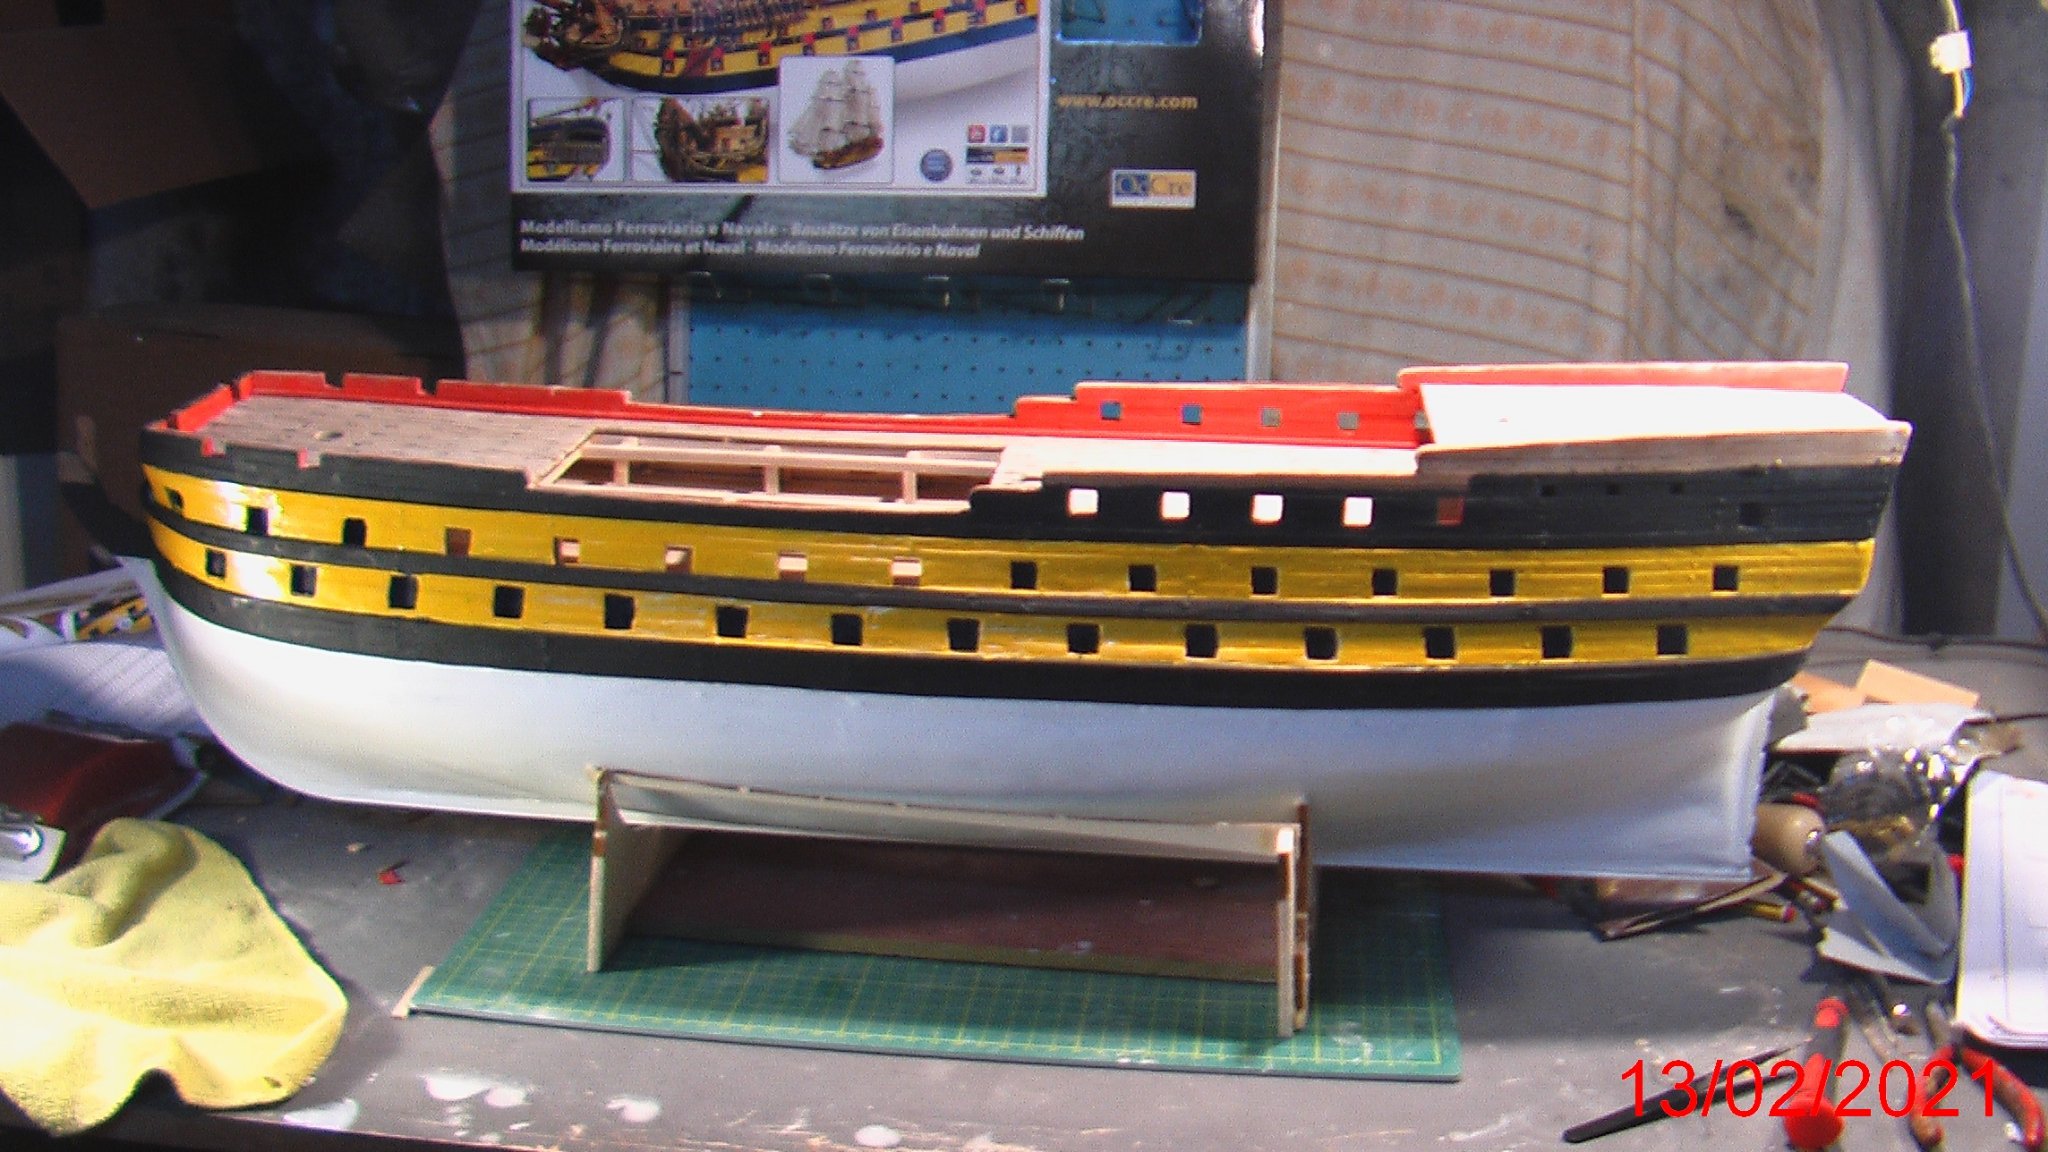
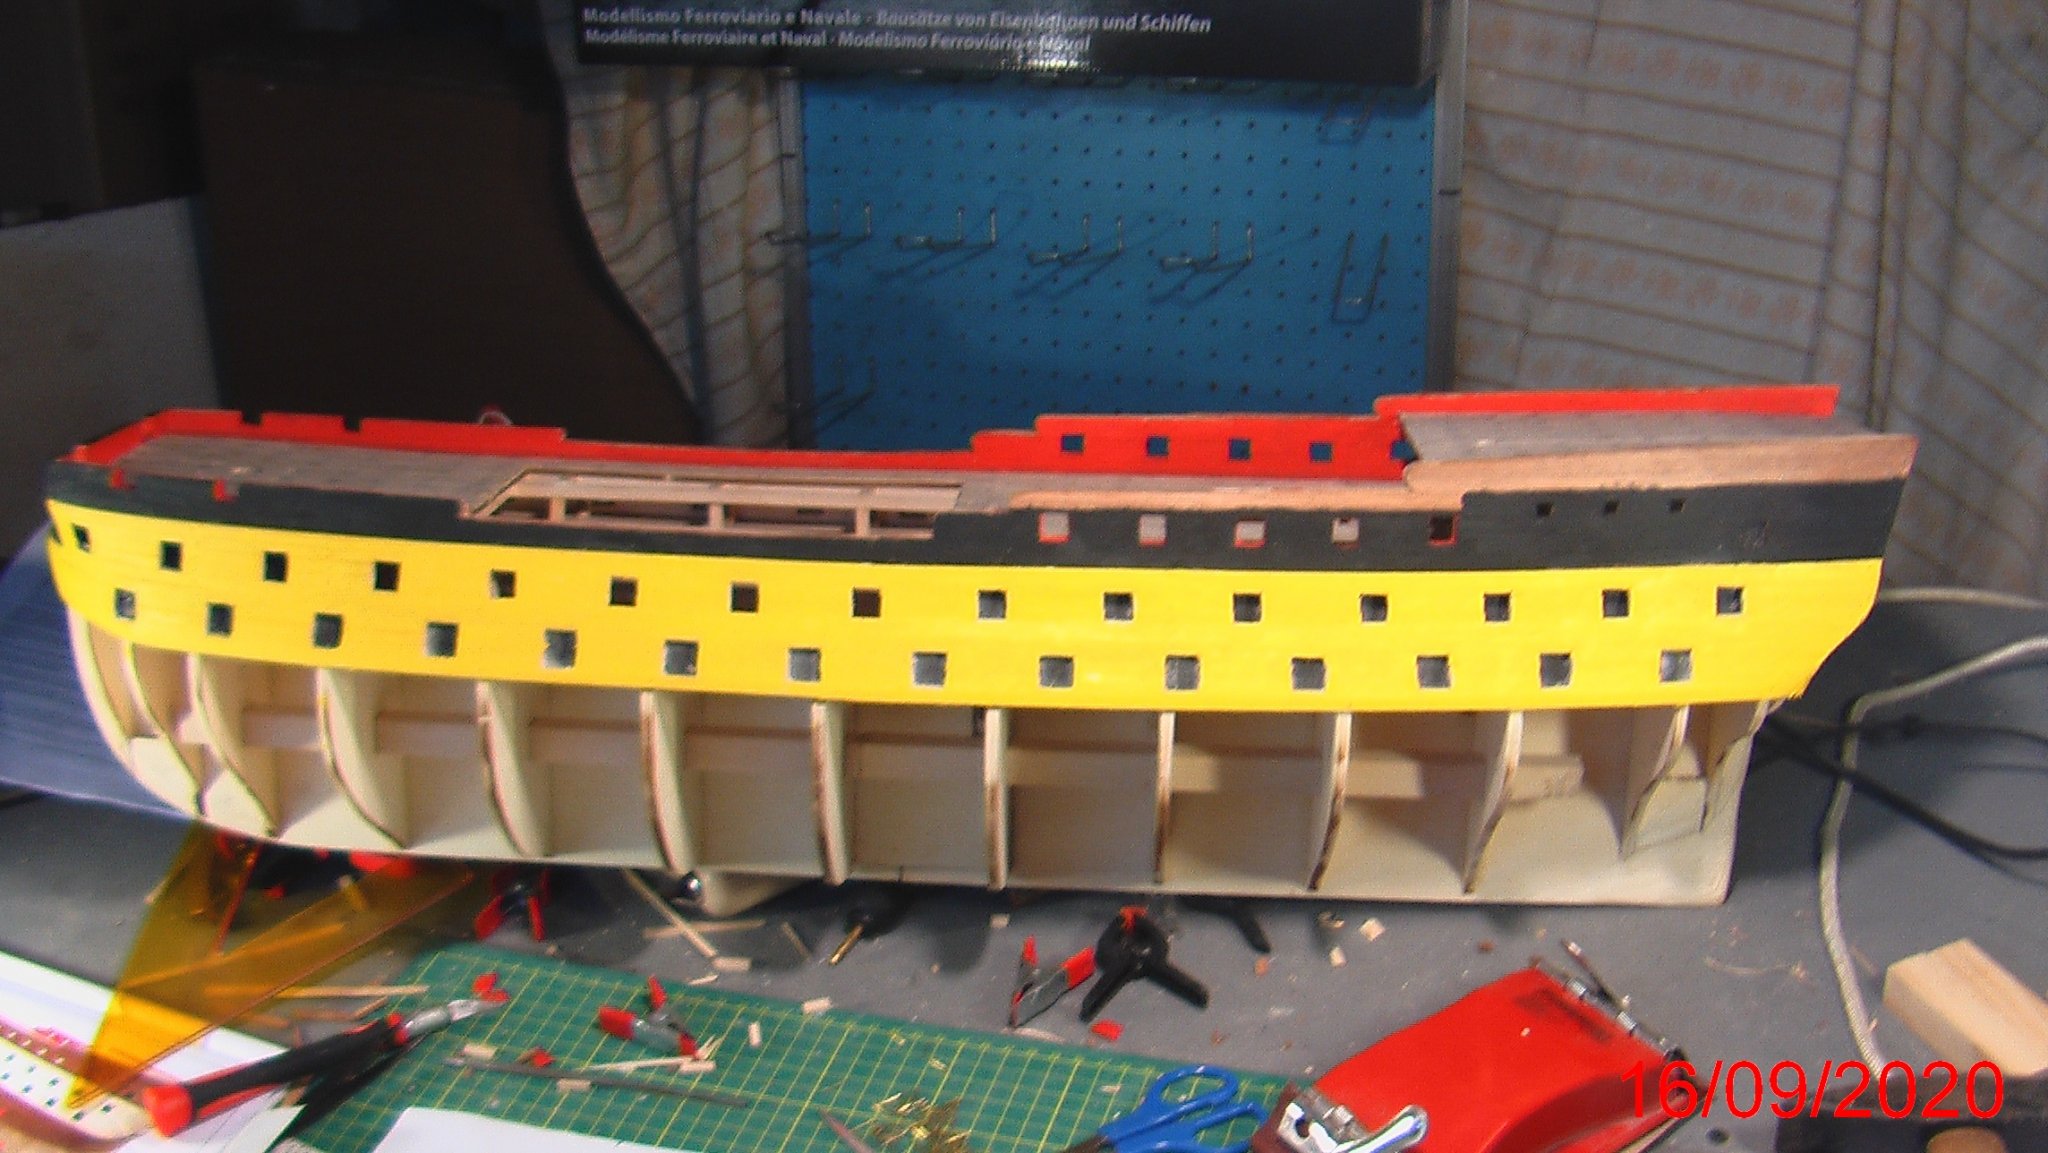
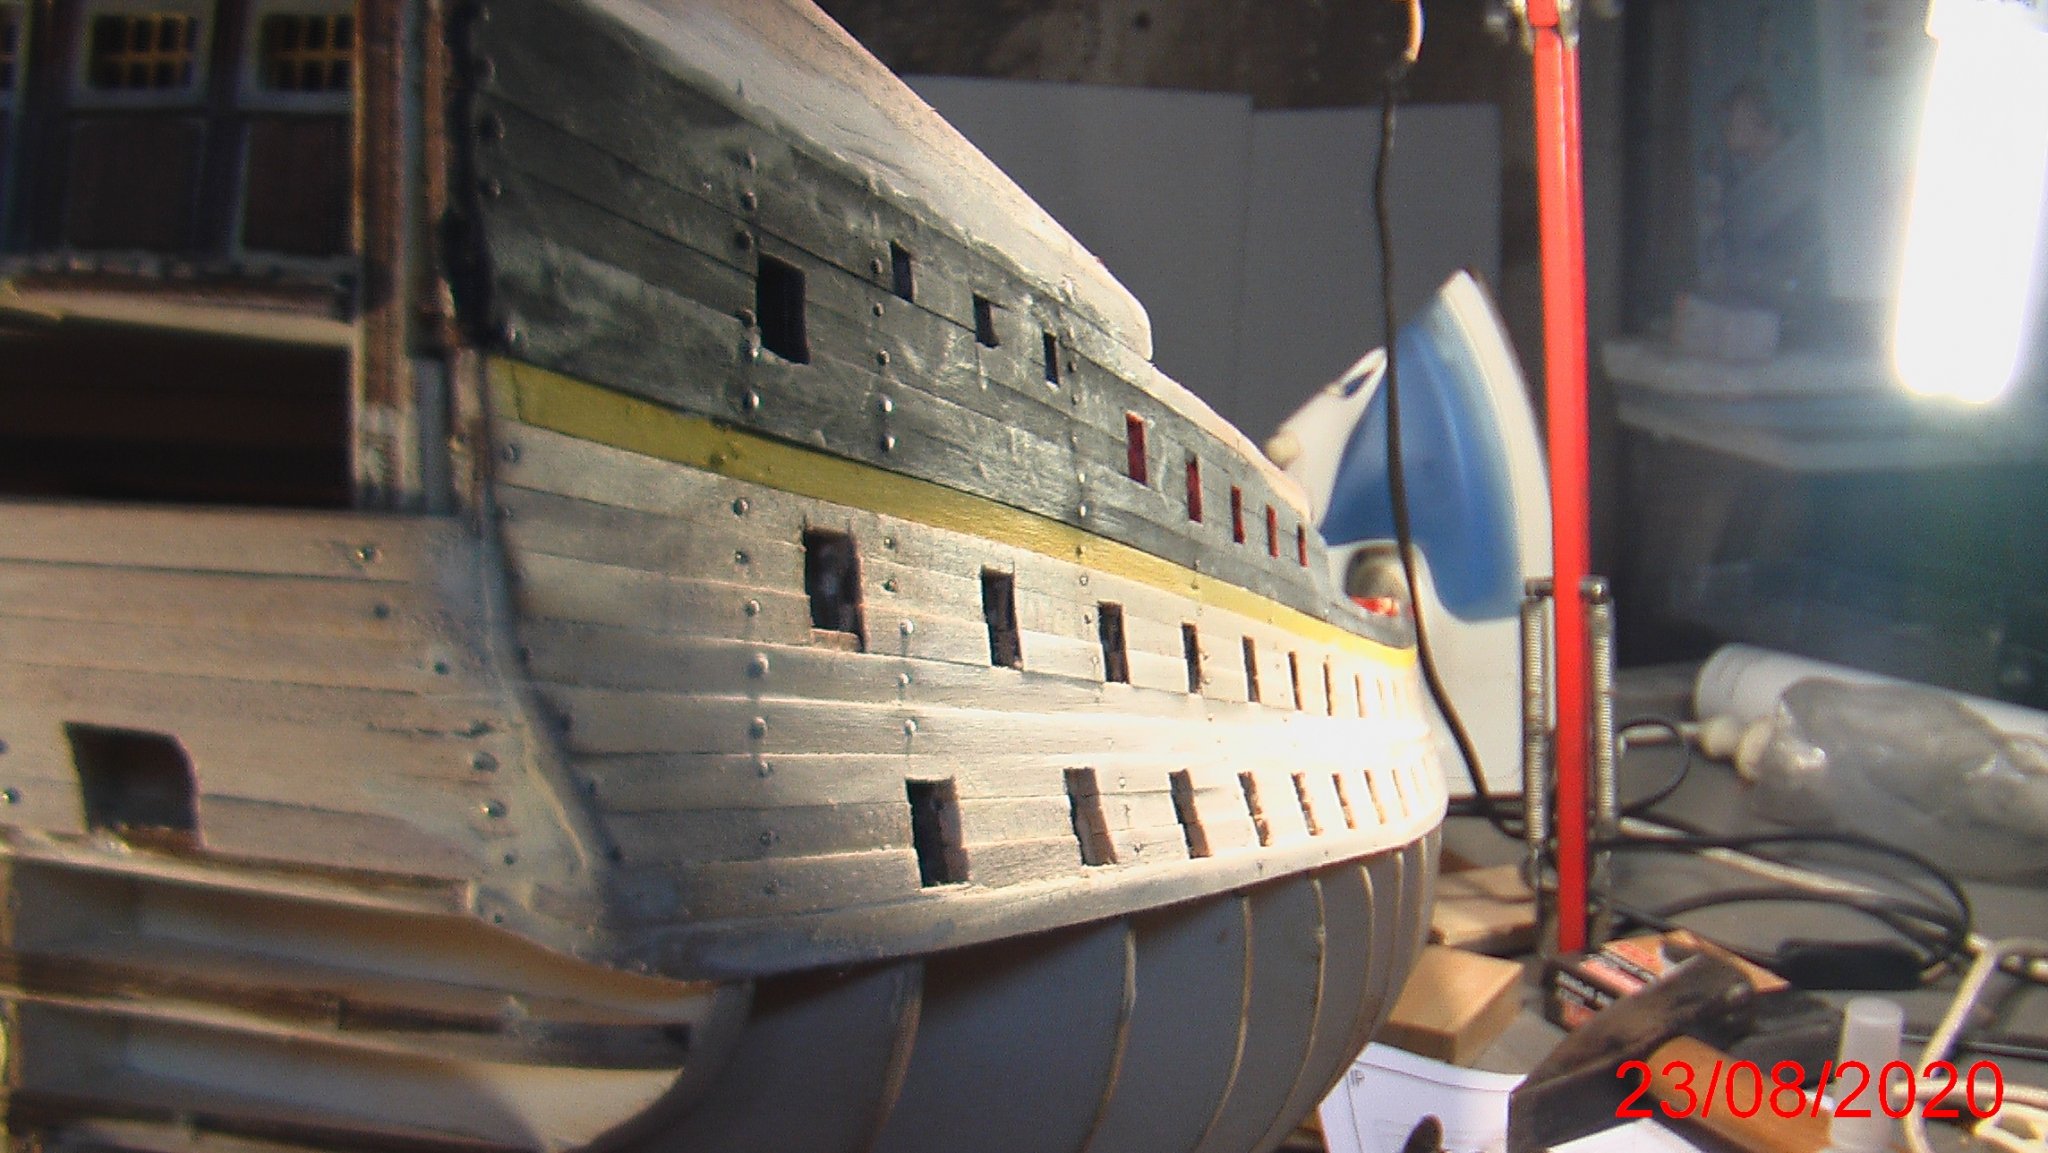
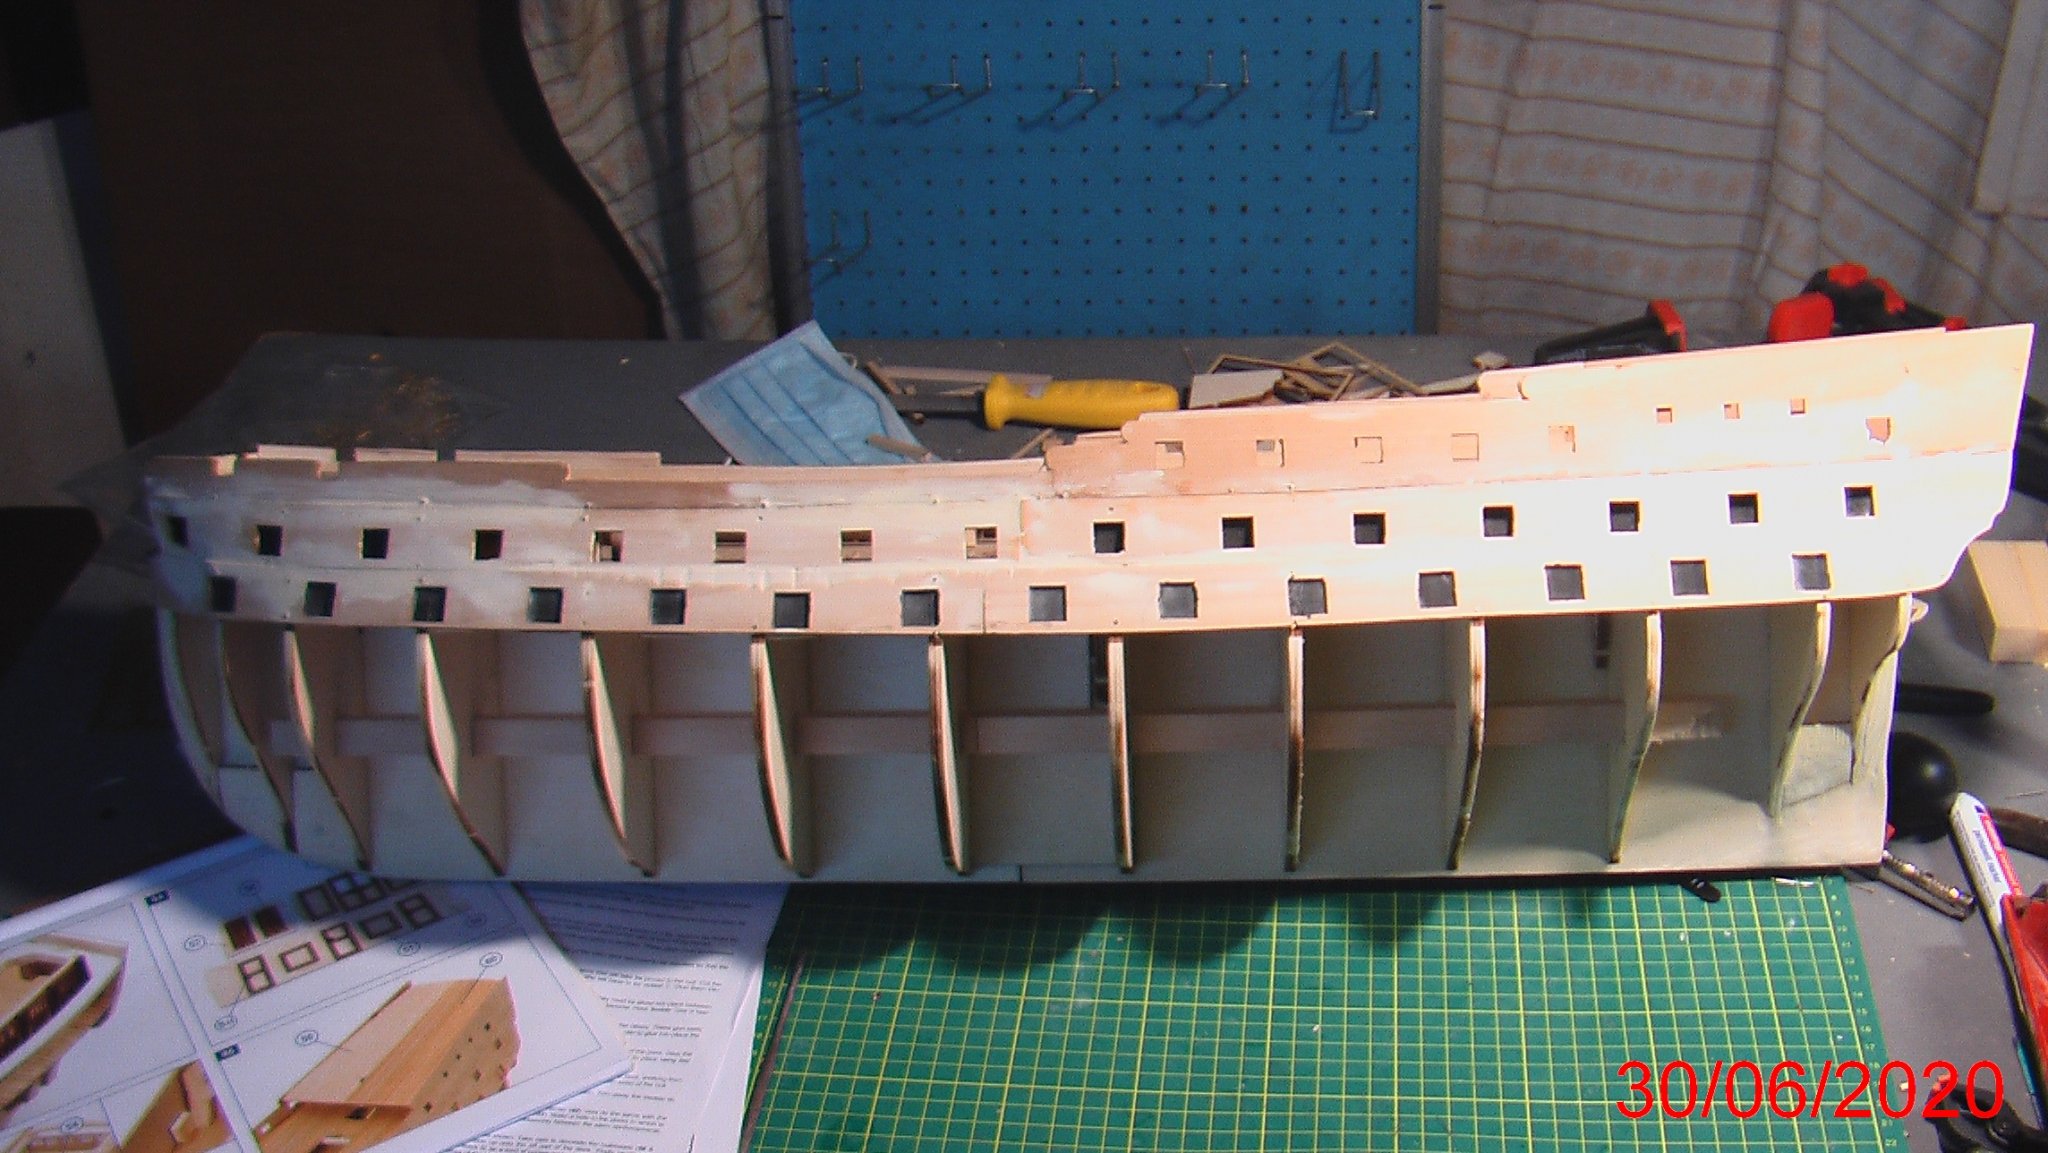
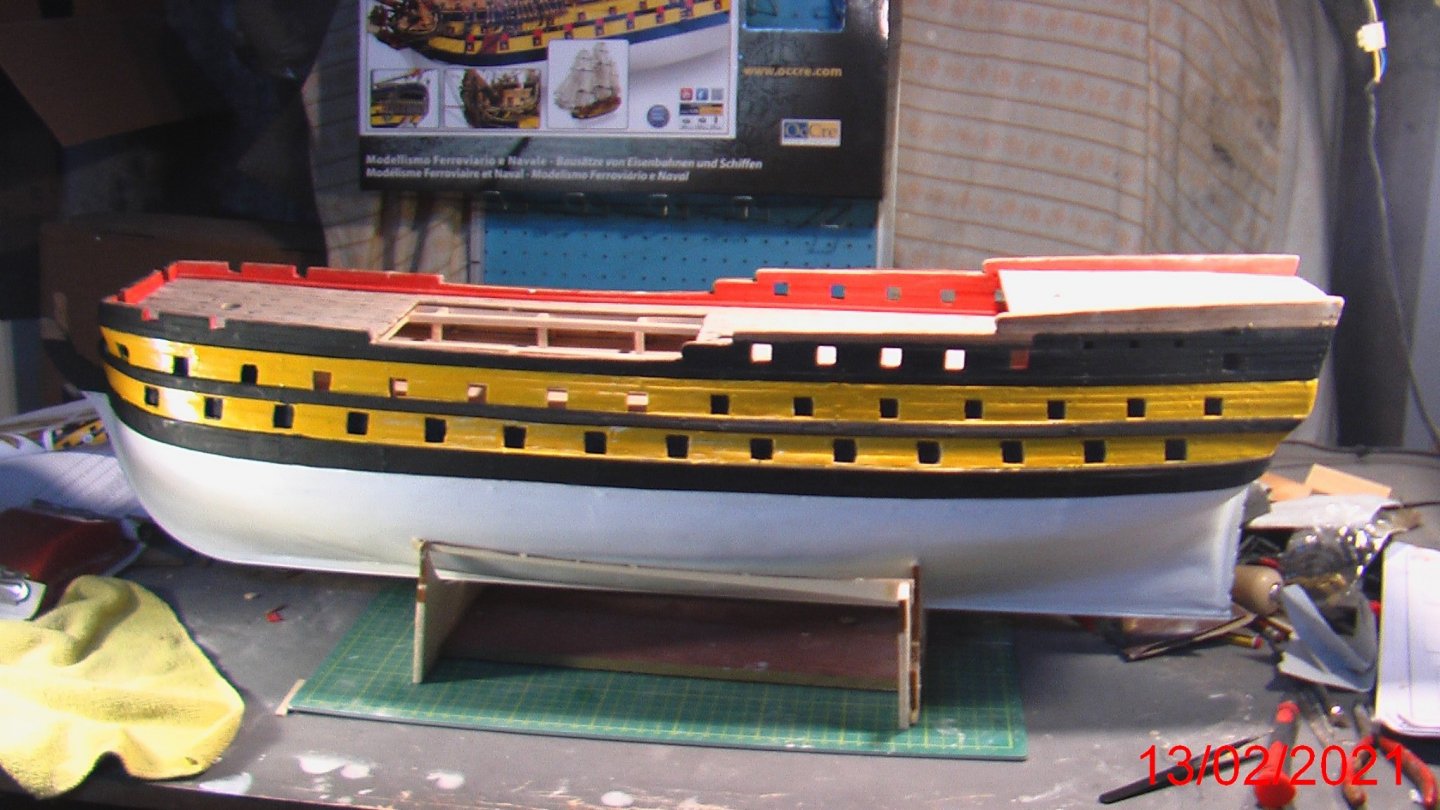
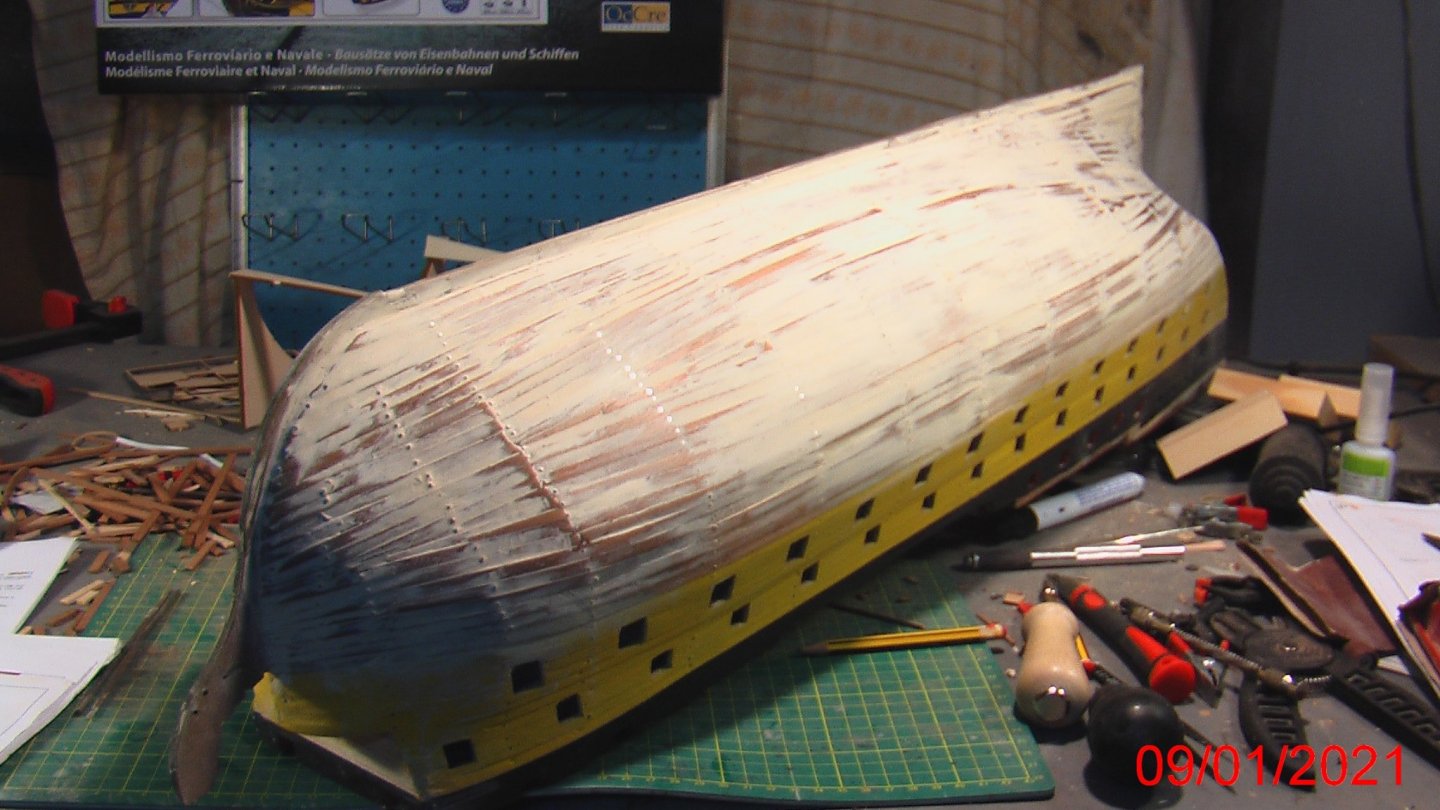
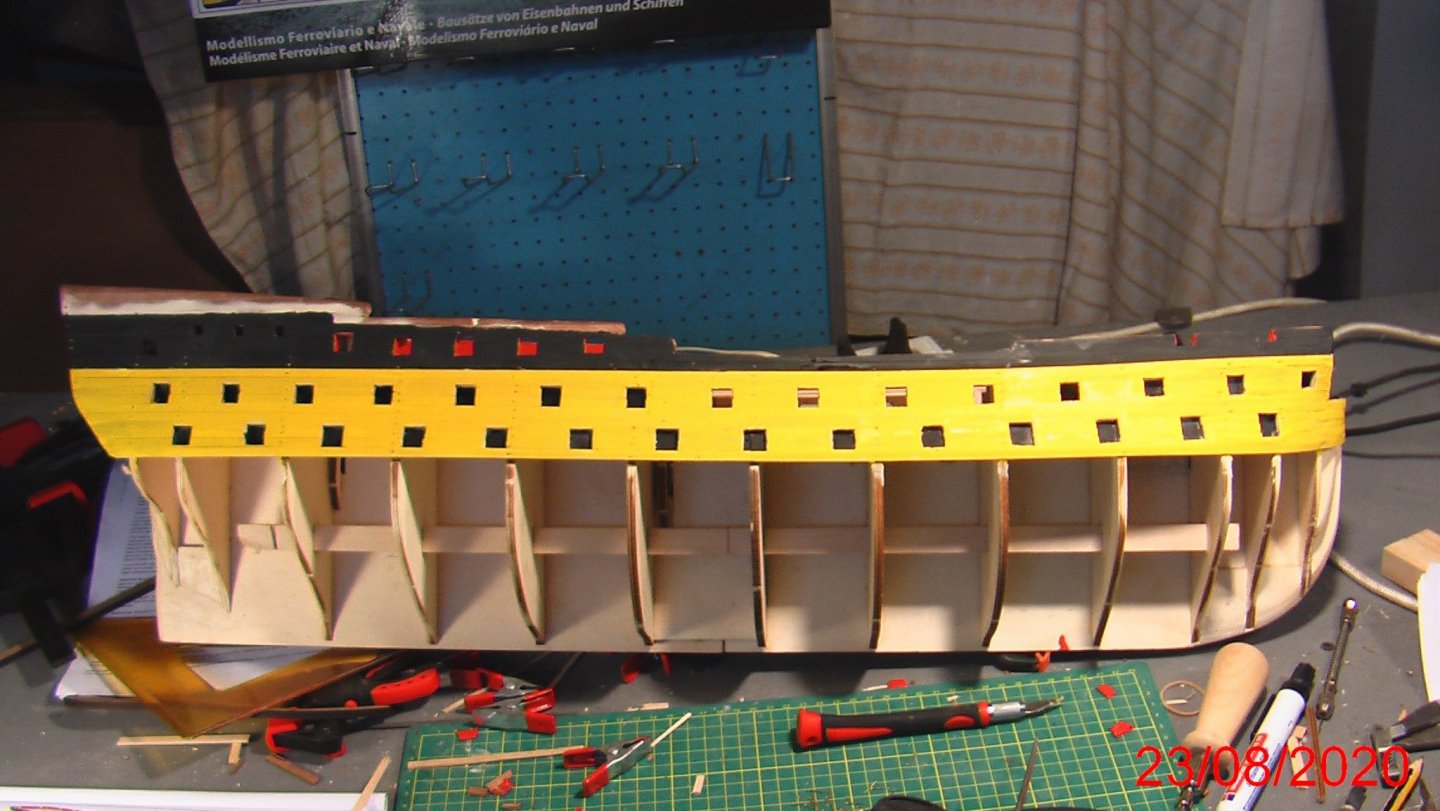
After one year from the beginning i have finished the painting of the hull. I put and paint the black strips on the side of the ship. My yellow paint was no mat so some reflections are visible...maybe i must repaint it with mat paint...i will see... Now i must make the frames of the gunports, paint them red and cover any gaps with the hull around them. Is a a very challenged job...

-
Hello George from Holland. Yes sanding the hull is nessesery to make it completly smooth. I have no rush. I take my time to do it and also the nails too. When i finish it and pain it you will see it. Yes in gunports i must sand also to make the frames. Thanks.
-
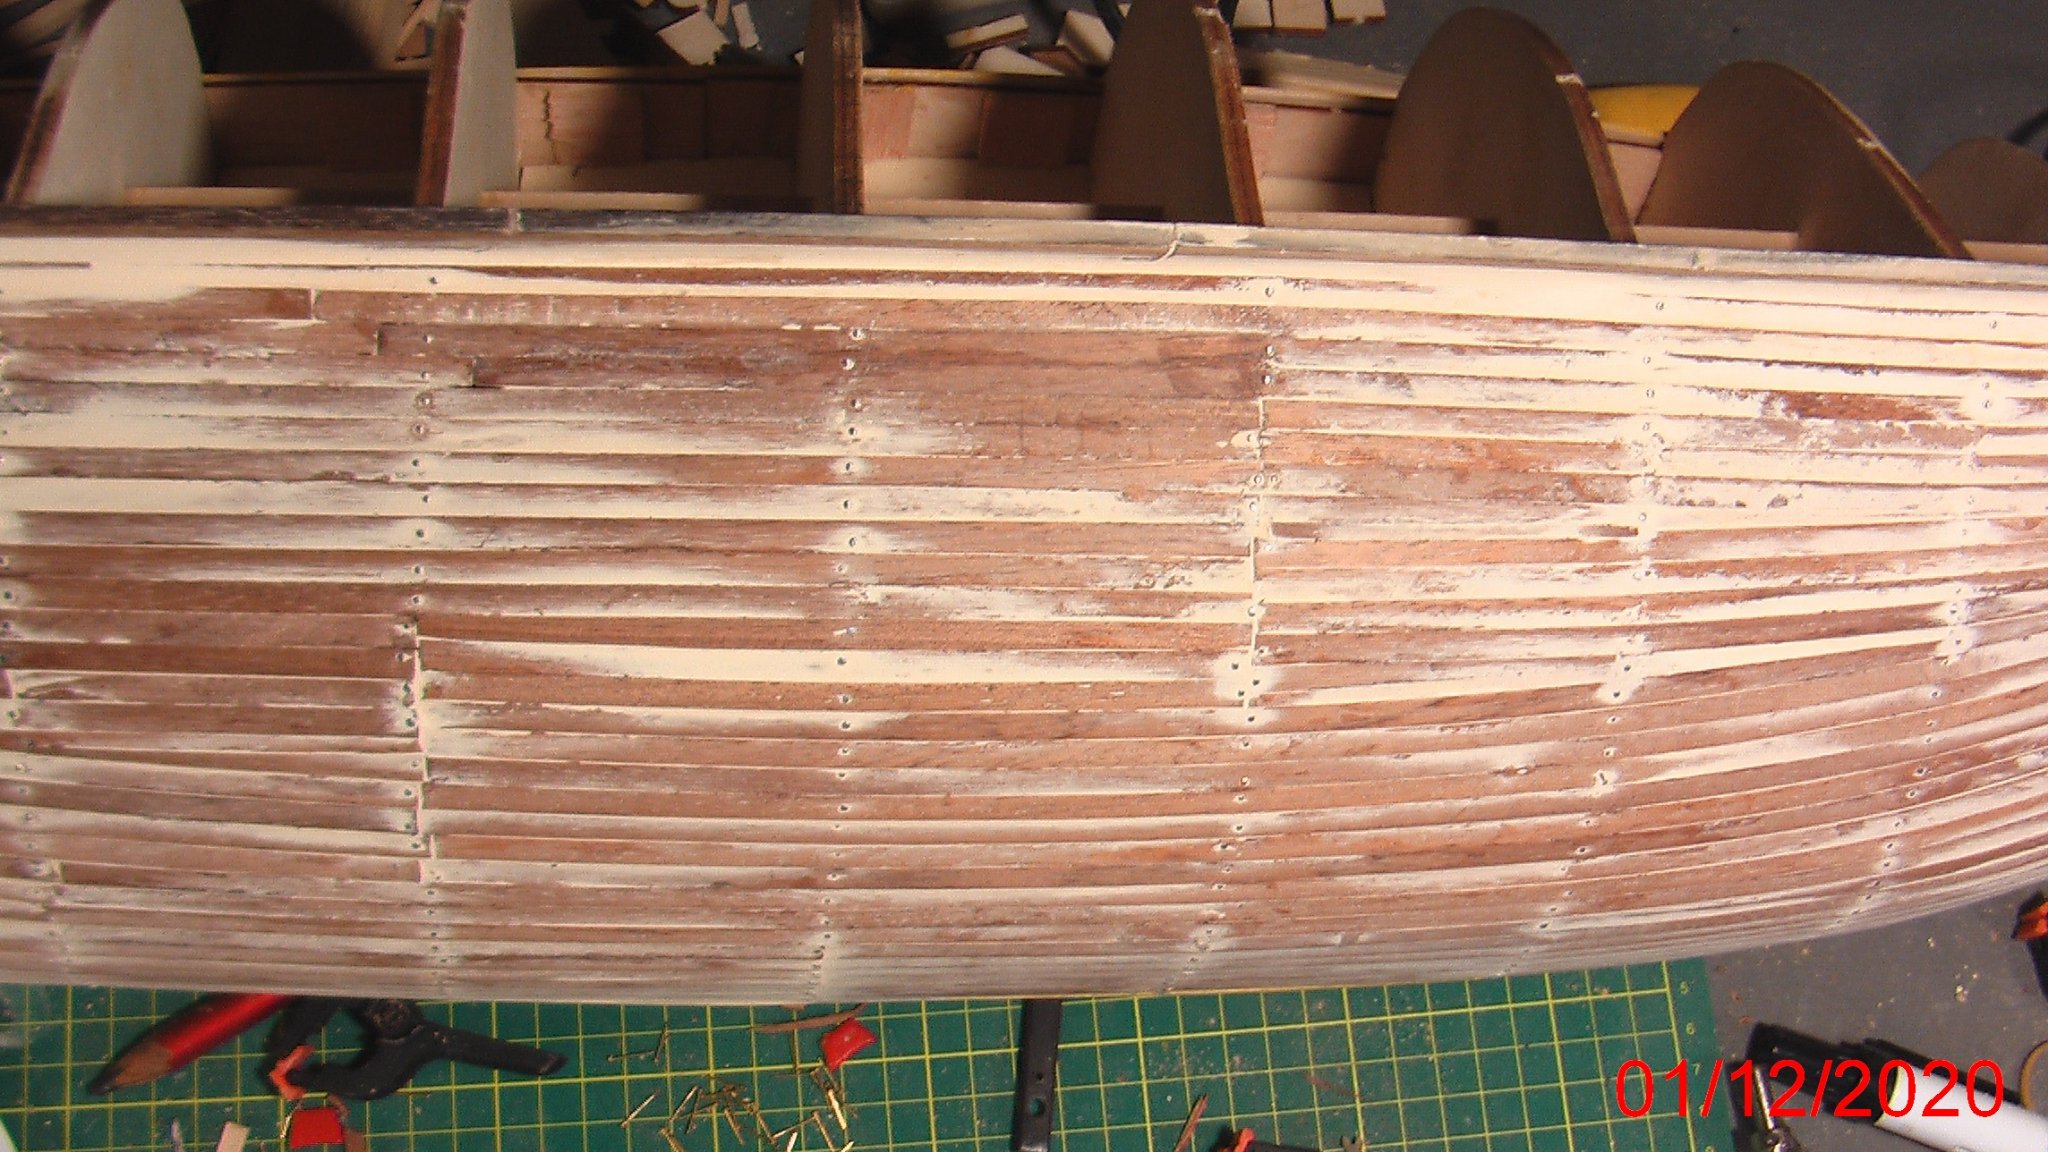
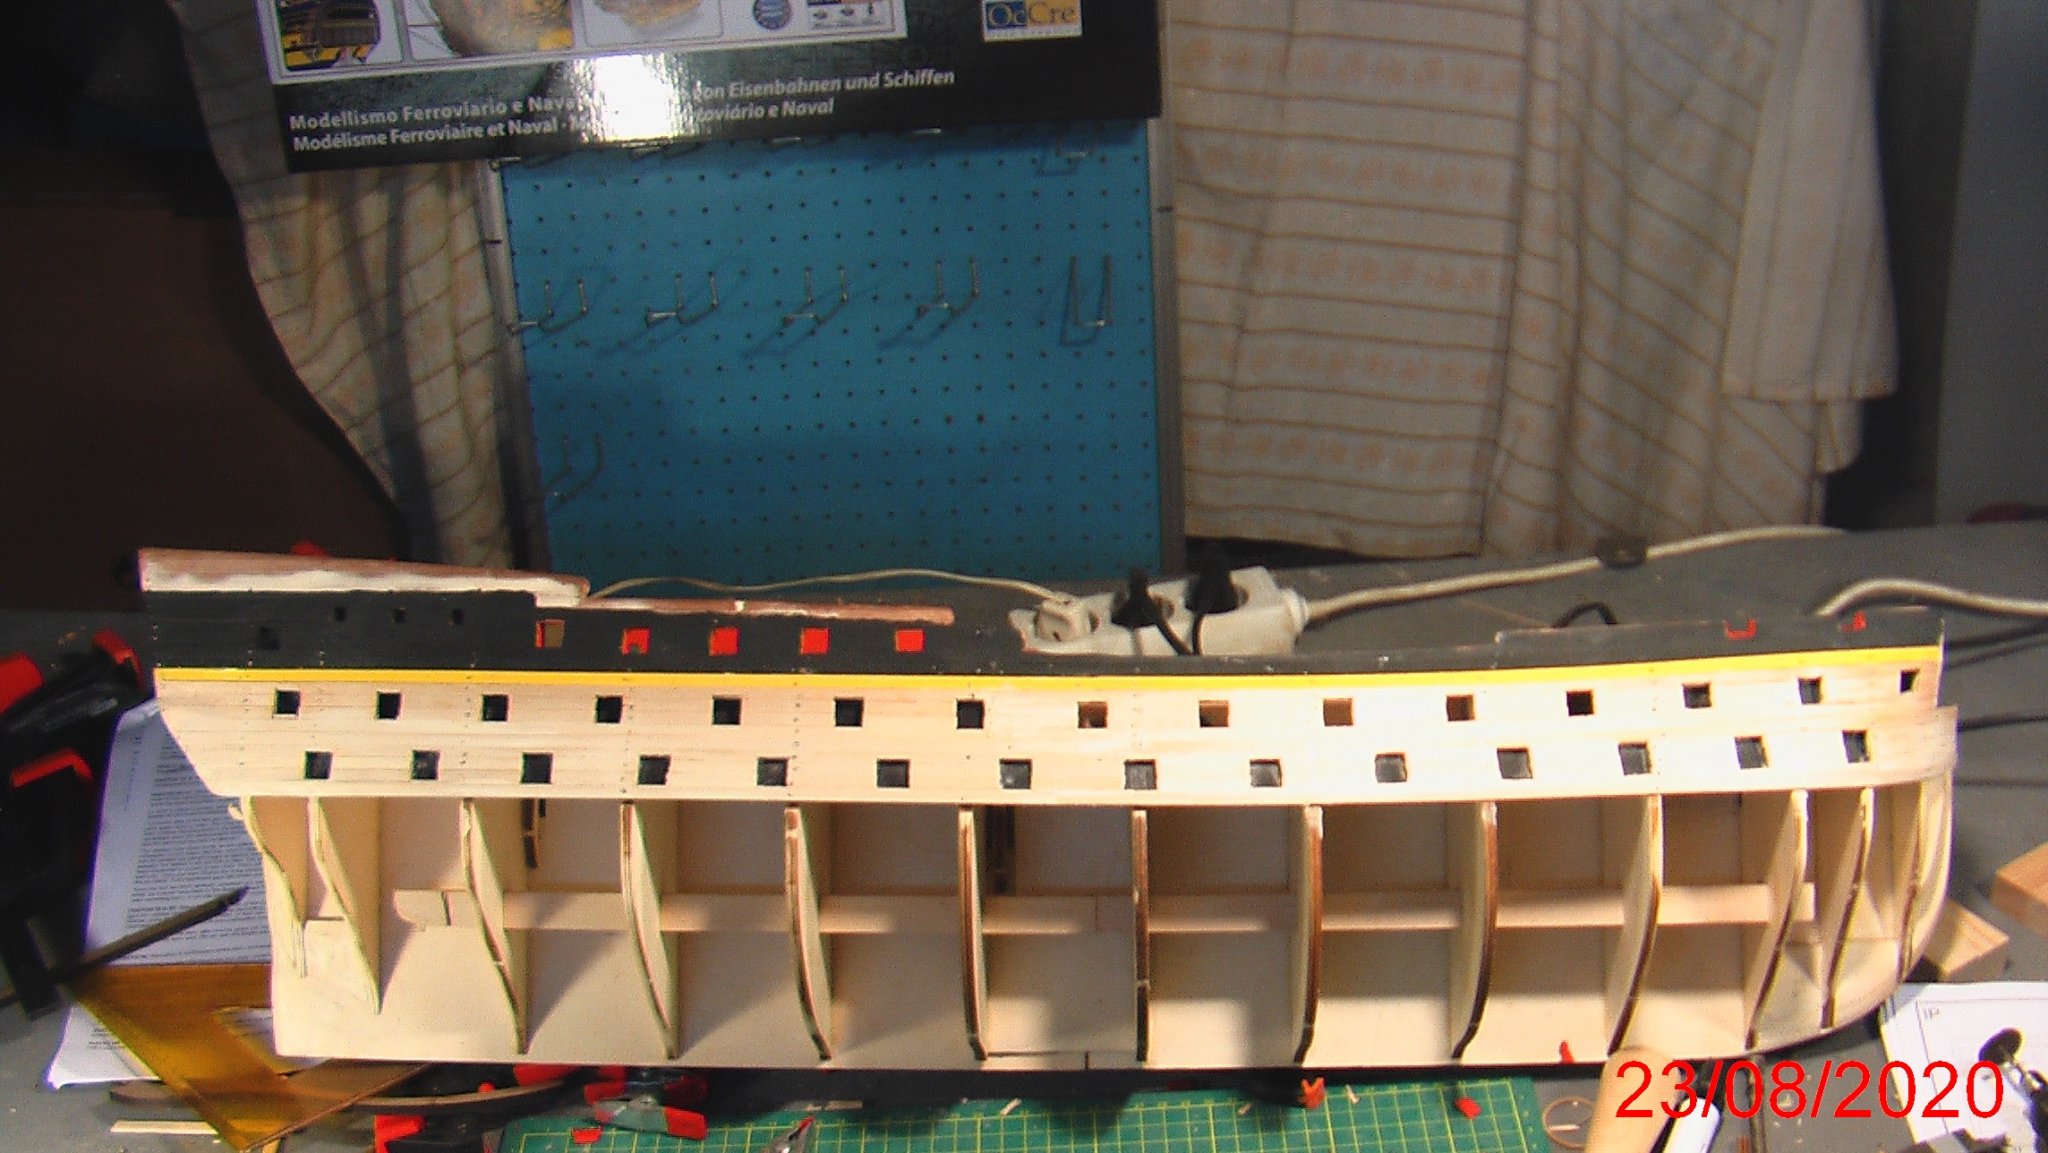
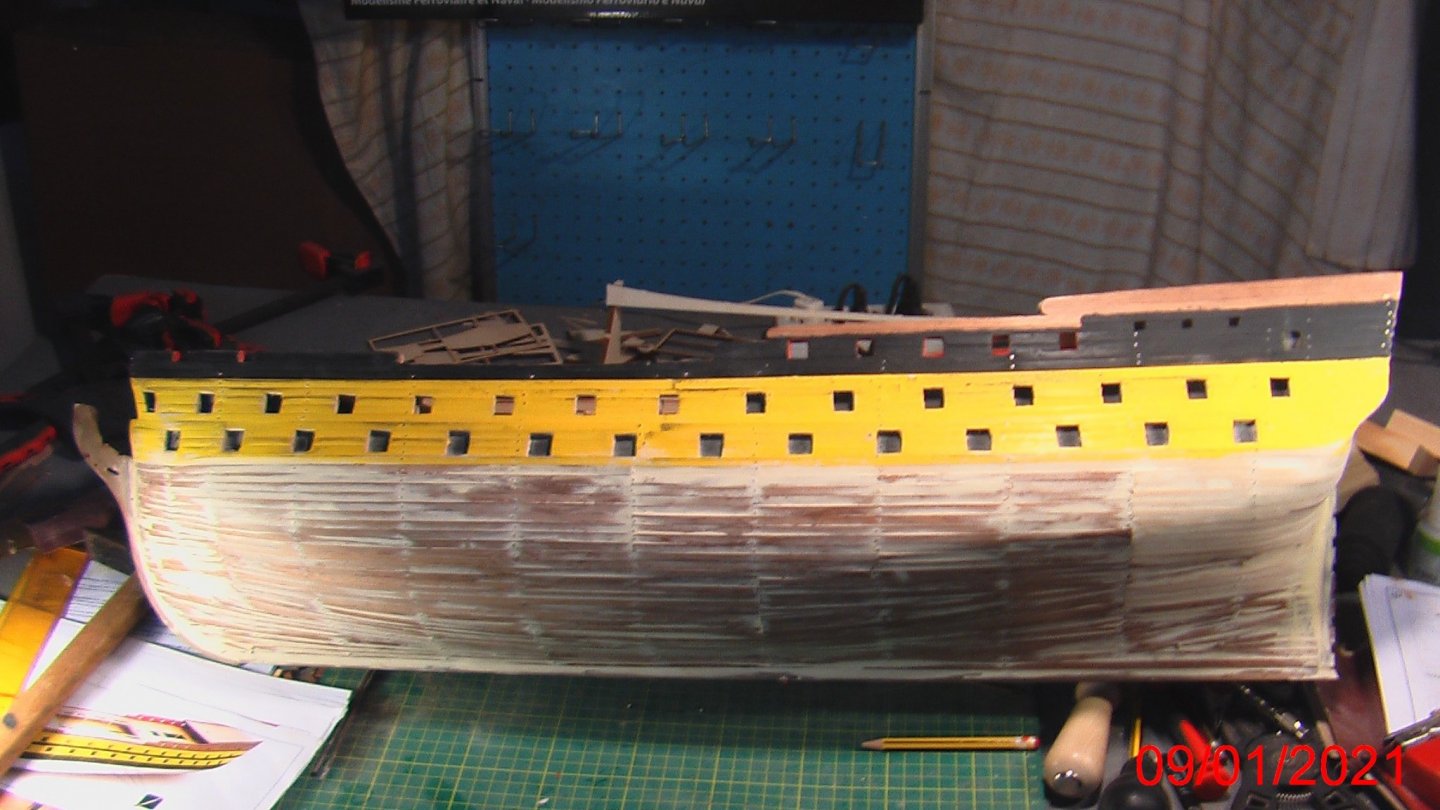
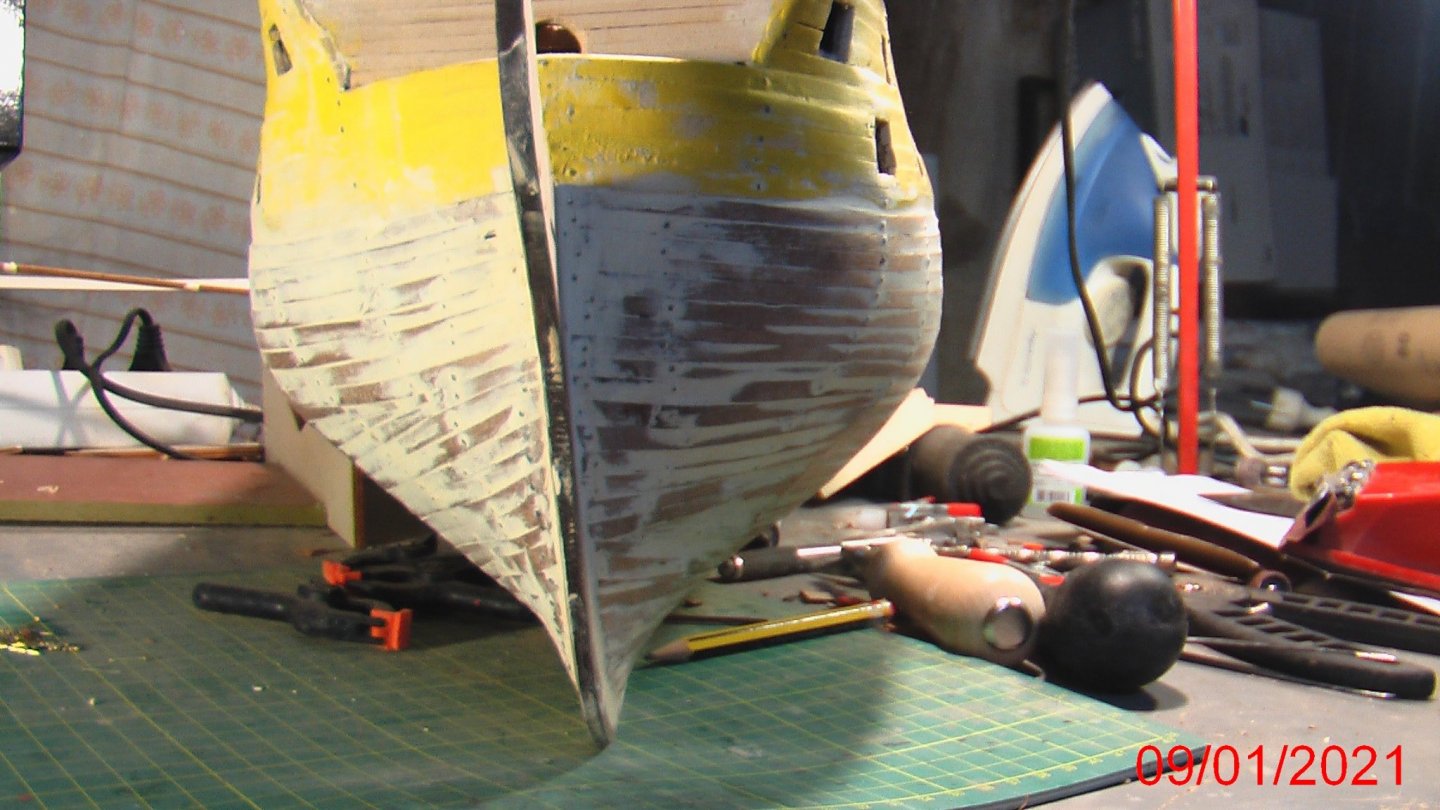
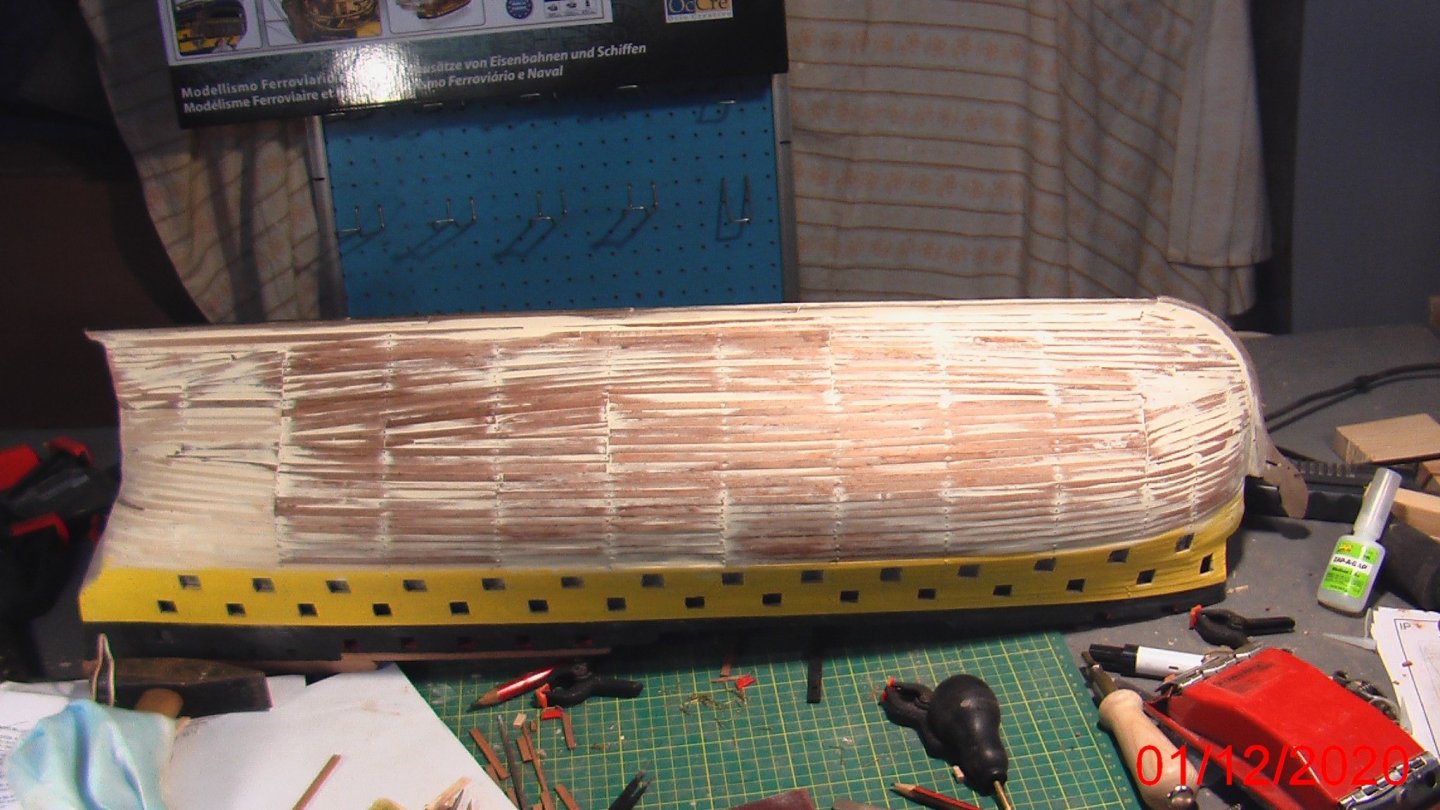
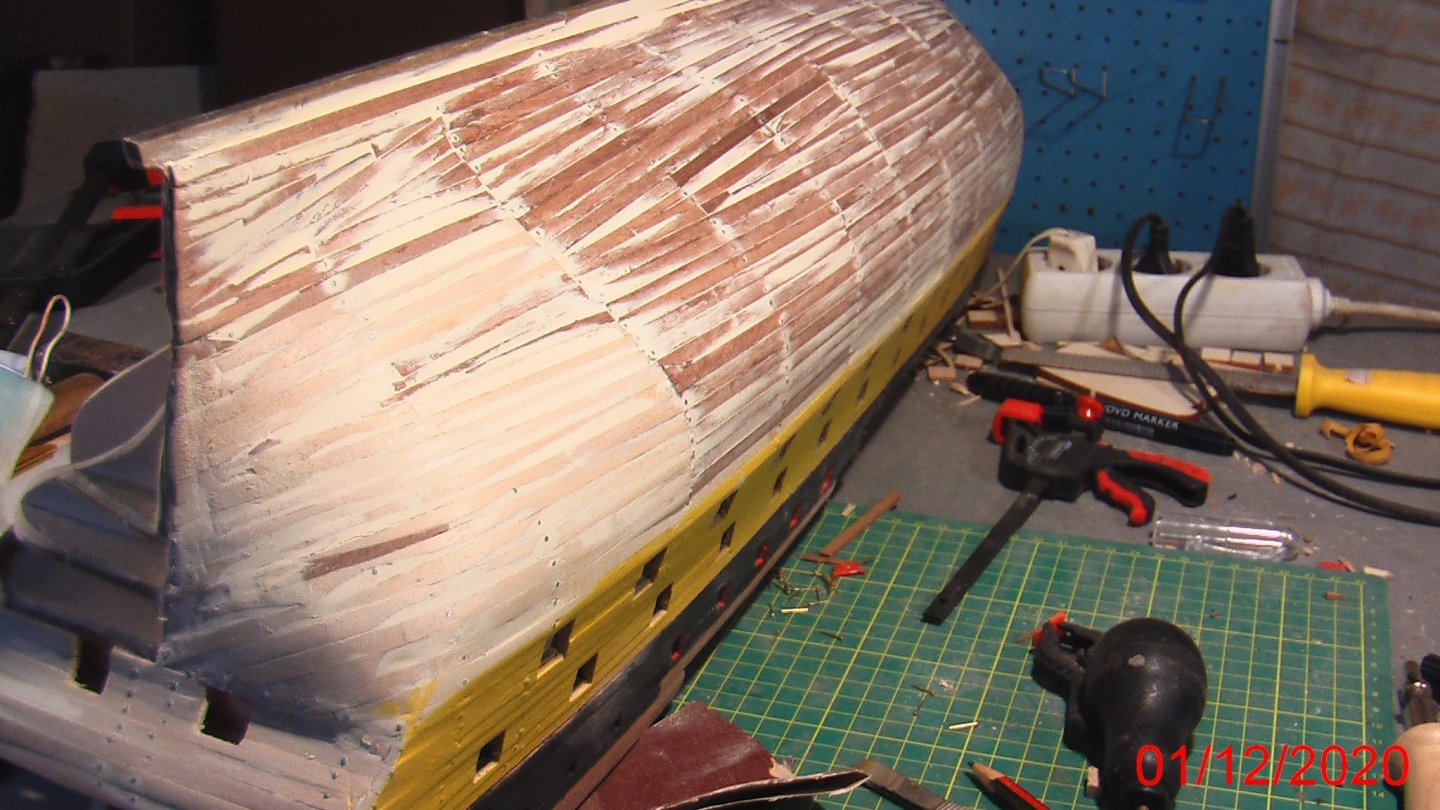
After one month i have finish the planking of other side. I put in place the base of the stern. Now i must trim well all hull so the heads of the nails not to be seen after i paint it white. Hull must be completly smooth. Next step is to place the rubbing strakes (4+2 for each side under and above the gun ports) to paint the white and yellow area well. Lets see....

-
Hi Captain... i have finish now the planking of the other side of the hull. Soon you will see photos. Yes is a beautiful ship and big...also... Have you made other wood models? If not you must build one easier and after go to this...if you have expierience ok...
-
Oh...your name George also??? too funny!!! I am glad George I follow your job...too many models...seems that you love it.....and you make exellent work...bravo... About the nails....there are too many of them as you see...i will try to cover them with wood putty and sand them well to make the surface smooth...i difficult to remove one by one all the nails and if i remove them ,i must put wood putty to cover the holes,so i will smooth with hard sandpaper the head of the nails ( the metal is soft) to make them flat and put there some wood putty..Lets see if my idea works...
-
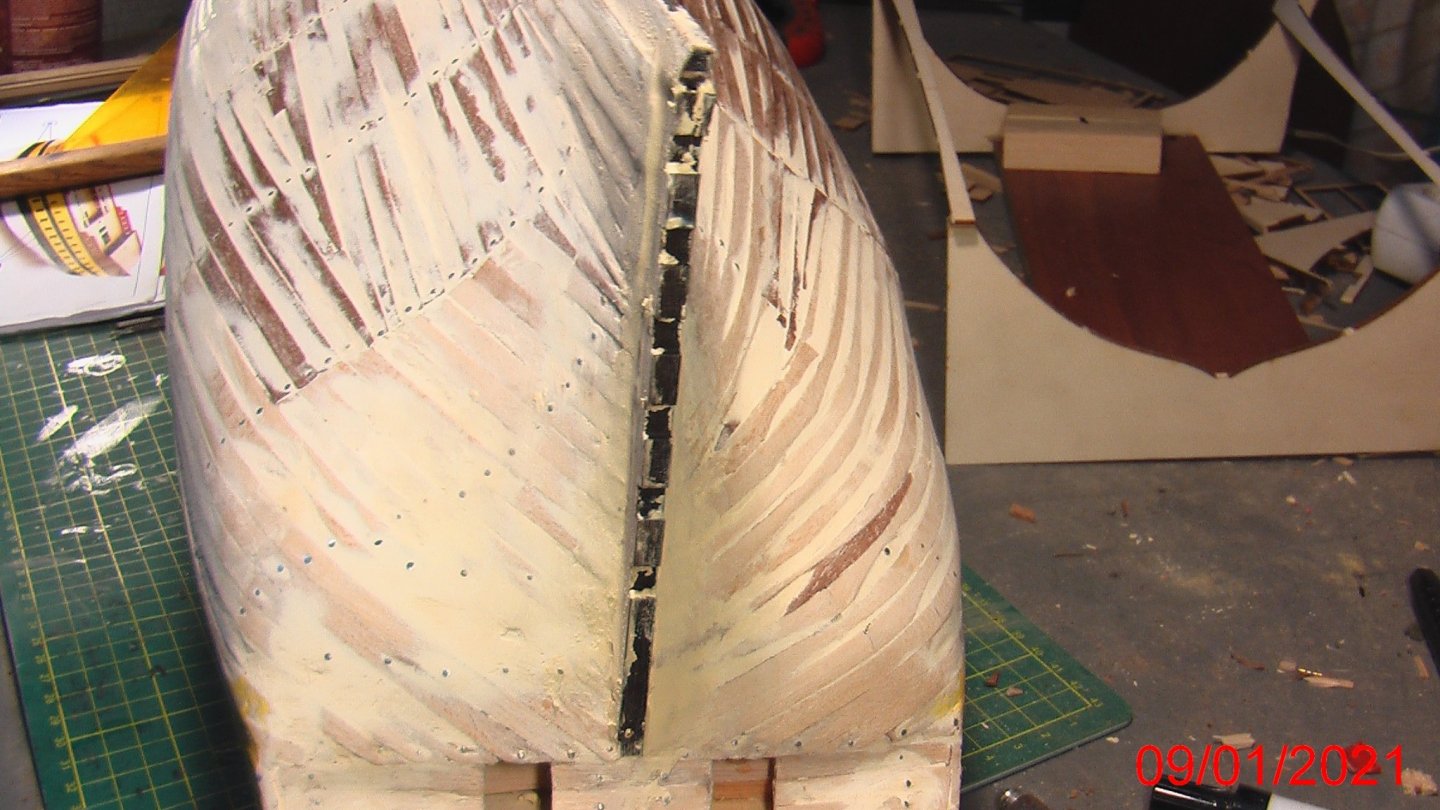
First i must response to friend catopower. Yes the wood for planking the lower part of the hull is sappeli and yes is more difficult to bend. So i use in stern, where the bending is more difficult , lime wood strips,i have some spar,you see it in fotos they are white. To the friend Sjors now,my name is George. Yes as you see,i follow the instructions and i planked all the lower deck....but ok, they send me more planks after, to complet the planking of the decks. I am not satisfied with the yellow and red paint,so i will paint it again after but i will sand it again,this is right. About the nails...you suggest that i must remove them? How is possible to do it without make damage? If i paint it white,they don't be covered? i will sand all the hull again to make it smooth,and the head of the nails too. I have seen your photos and always i have your model for helping me.. Thanks for that and for your advice.... George from Greece
-
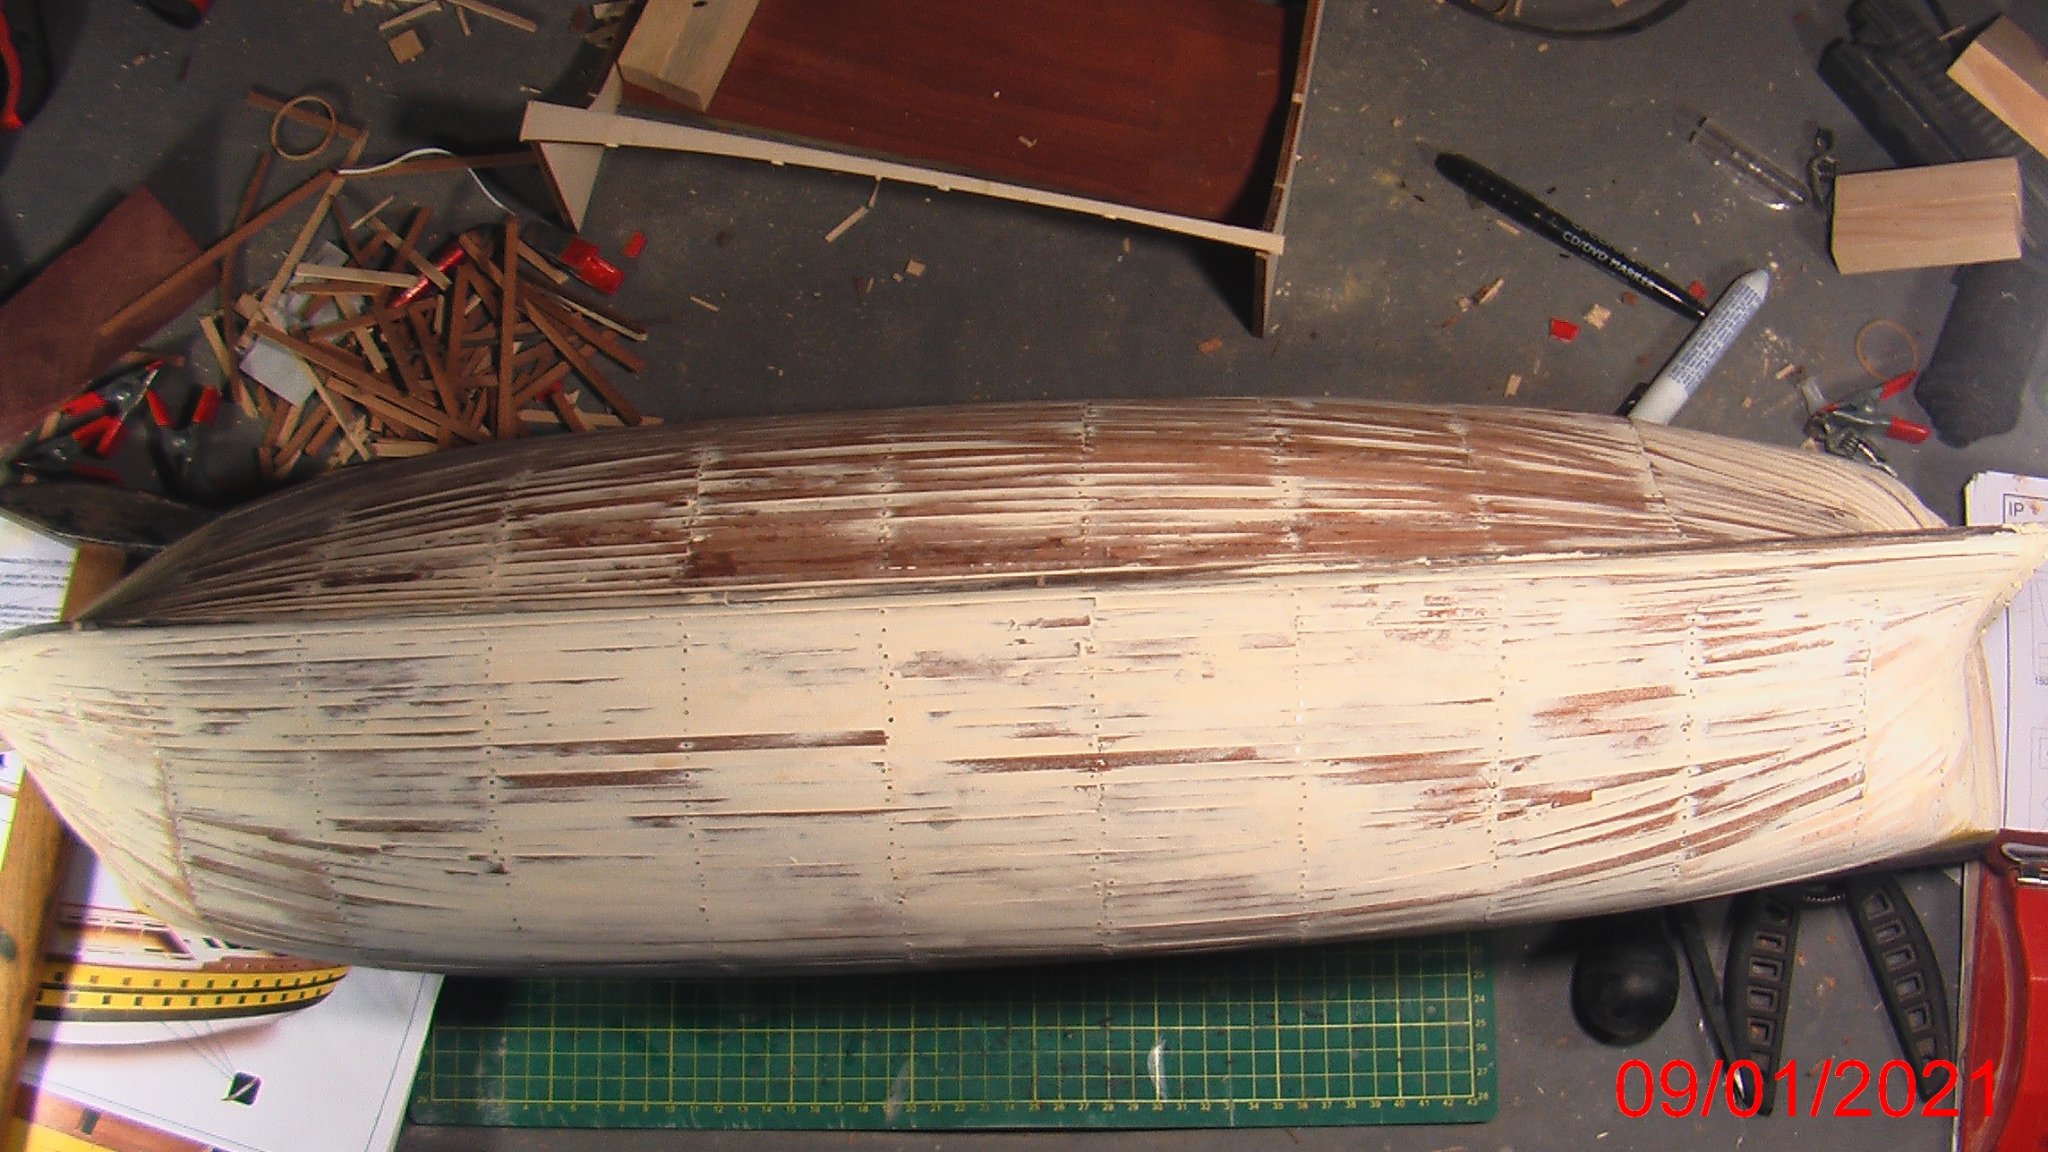
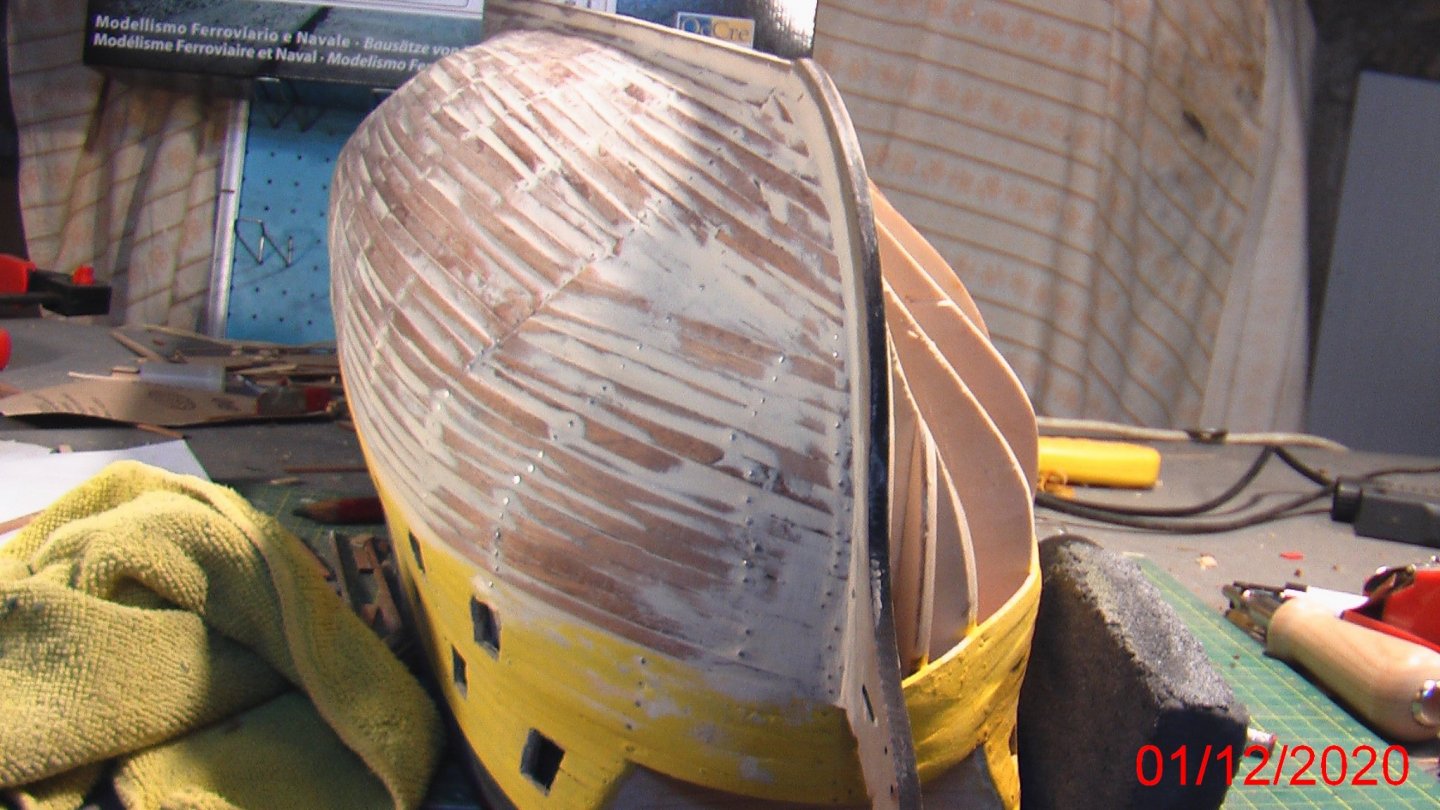
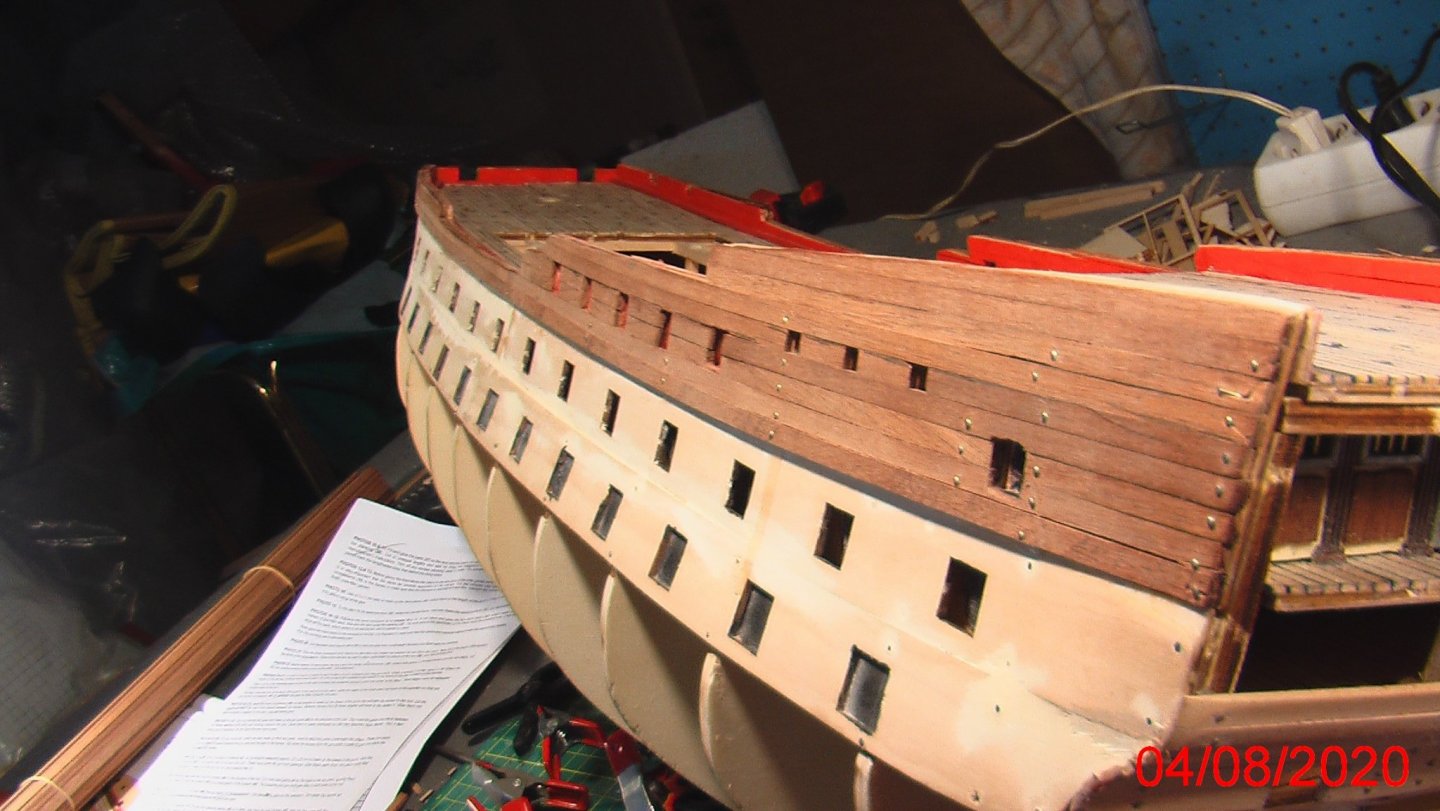
Finally i have finish the left side. Is not an easy job. I keep the rule that any of the planks narrowed than the half of 5mm. Now i have close the small gaps with woodputty and after i start to sanding and smoothing ready for painiting white.... Now i start the other side,with the expierience i think will be easier...

-
ΙI start the planking of the hull. Isn't the easier job... I reduce the width of the planks in bow and stern... I use white planks in stern because they are more flexible for that curve...All hull will be sanded with sandpaper good after i finish it all and paint it white...

-
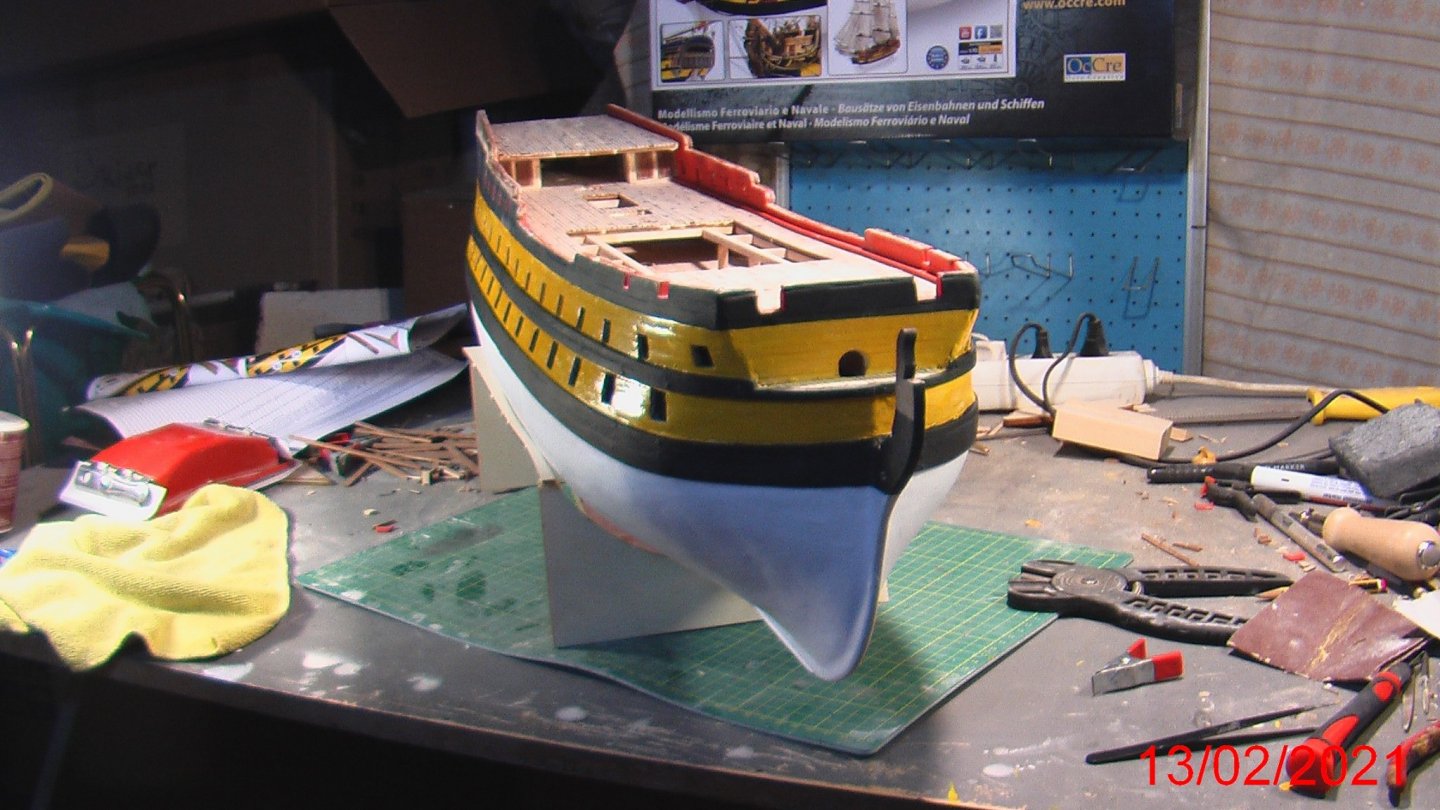
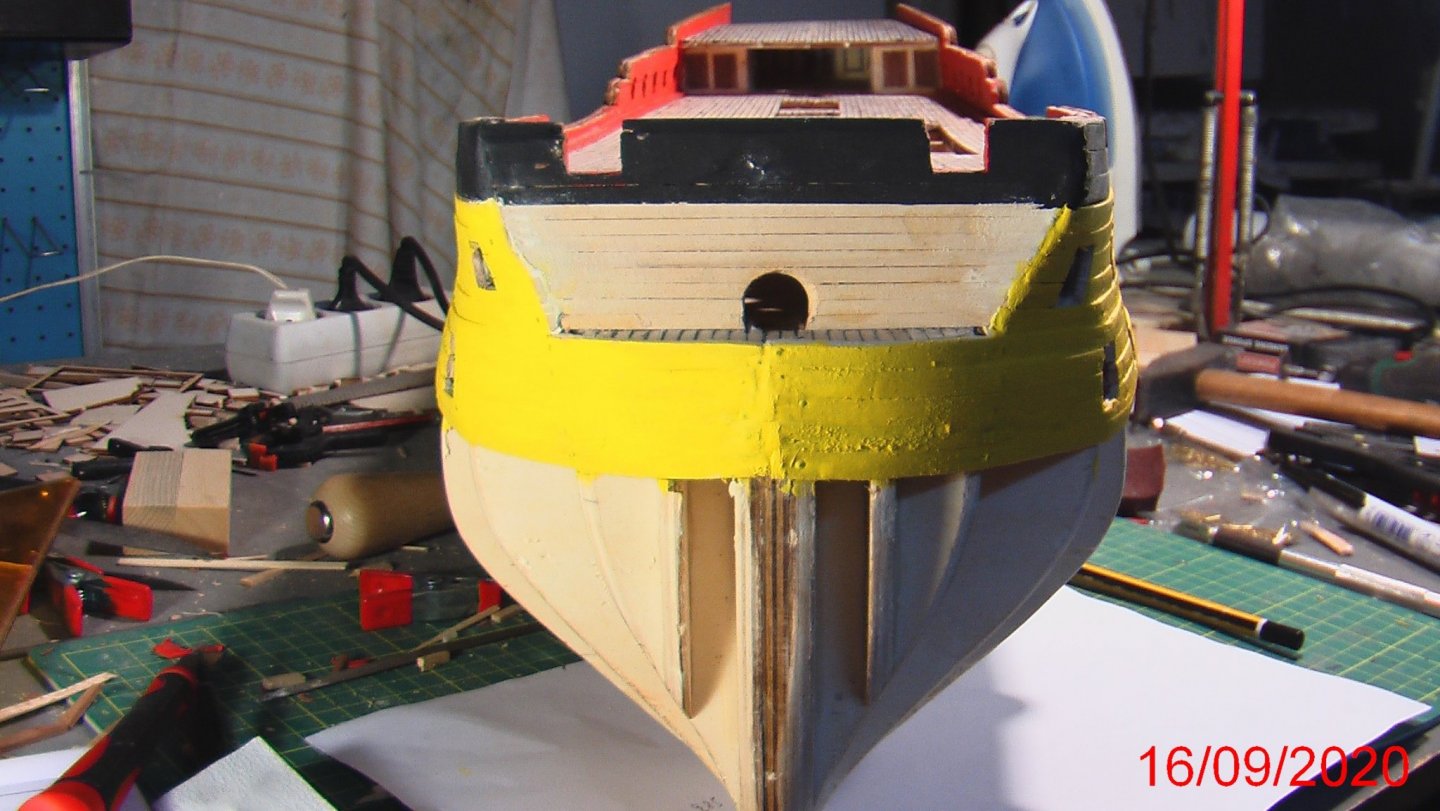
Now i have finish the planking of the gunports of the other side of the ship and stick together the two sides in the bow in the front. I paint it yellow also and i will paint it again after,if needed. Above the yellow area will fit black wooden strips,so the rest yellow area will be finished better .Now...is time for the hull planking (one layer...) In the center will fit 30-34 planks 5mm width and at bow and stern i must reduce the width to fit properly...isn't the easier job...Lets see about....I will keep you posted....

-
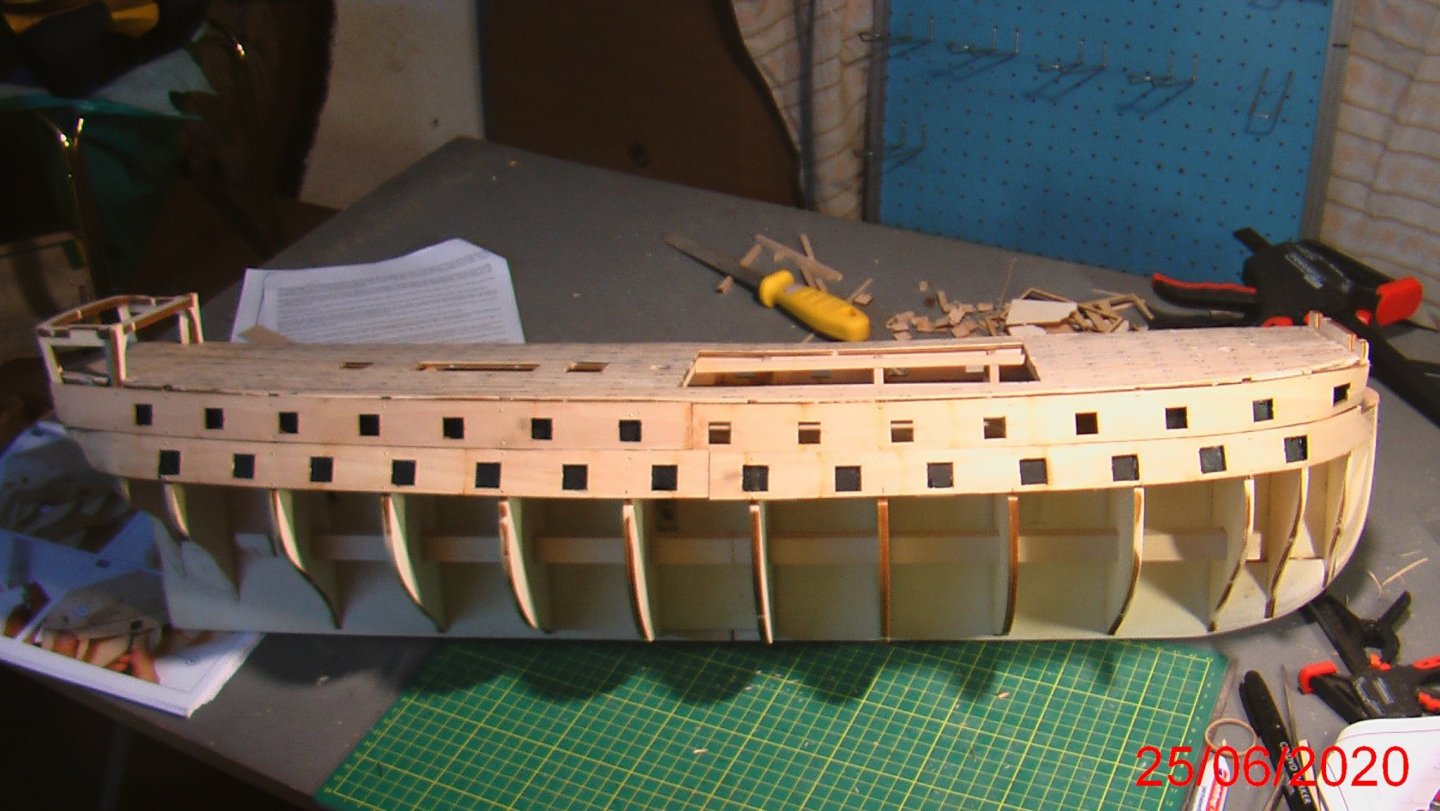
Now i have finished the planking of the right side of the hull arount the gunports. I make the openings for the gunports and sanded when needed. All this is painted yellow accorting to the plans. Continue now to the left side of the hull....


-
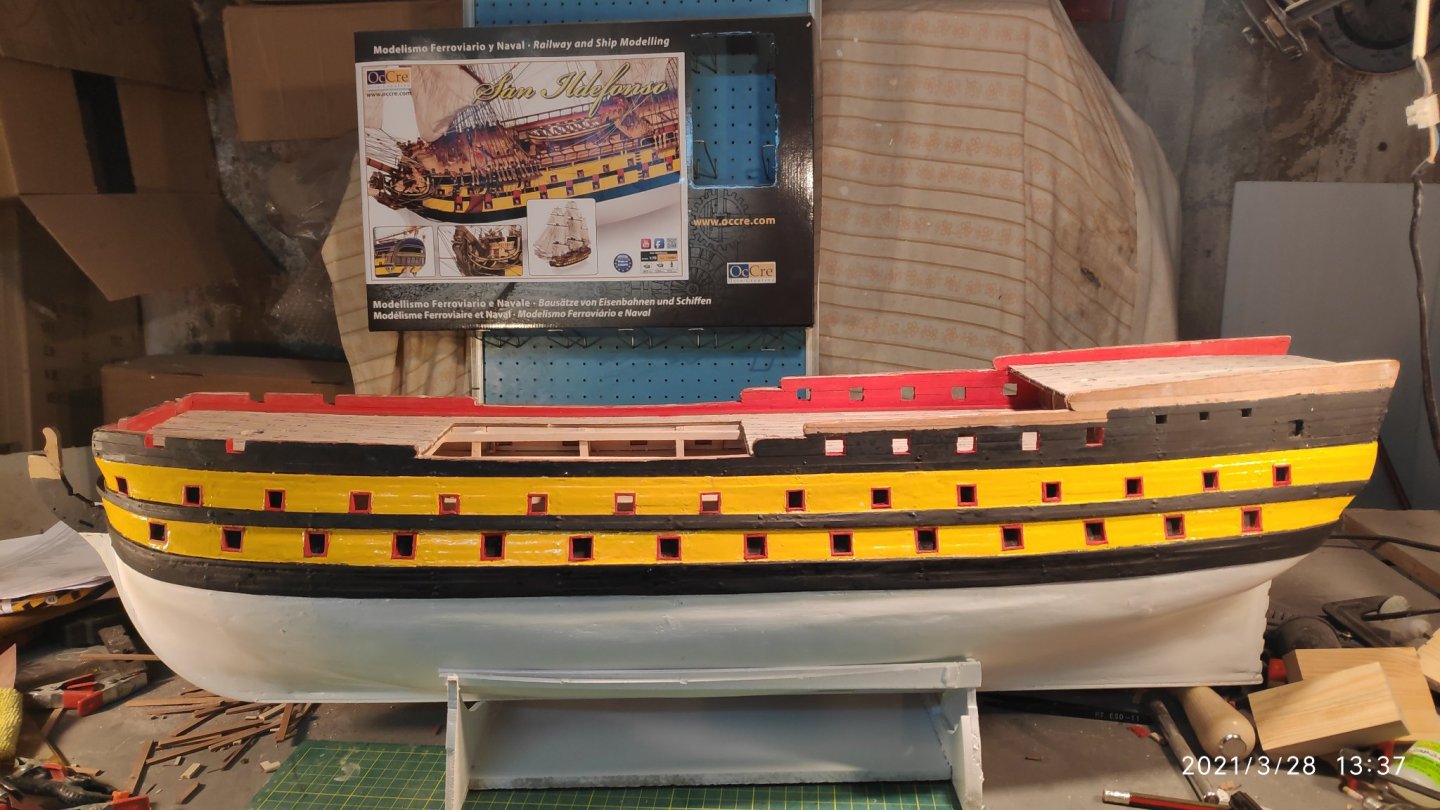
Thank you my friend Clare.Yes,San Ildefonso is a very beautiful ship and thats i have choose that. And also because the model is big....above one meter long....so all details are visible....and a lot of work for the builder...that's we like...right? The delay for the planks was from the coronavirus pandemia,so i hope that was once and i don't need to face that again...
-
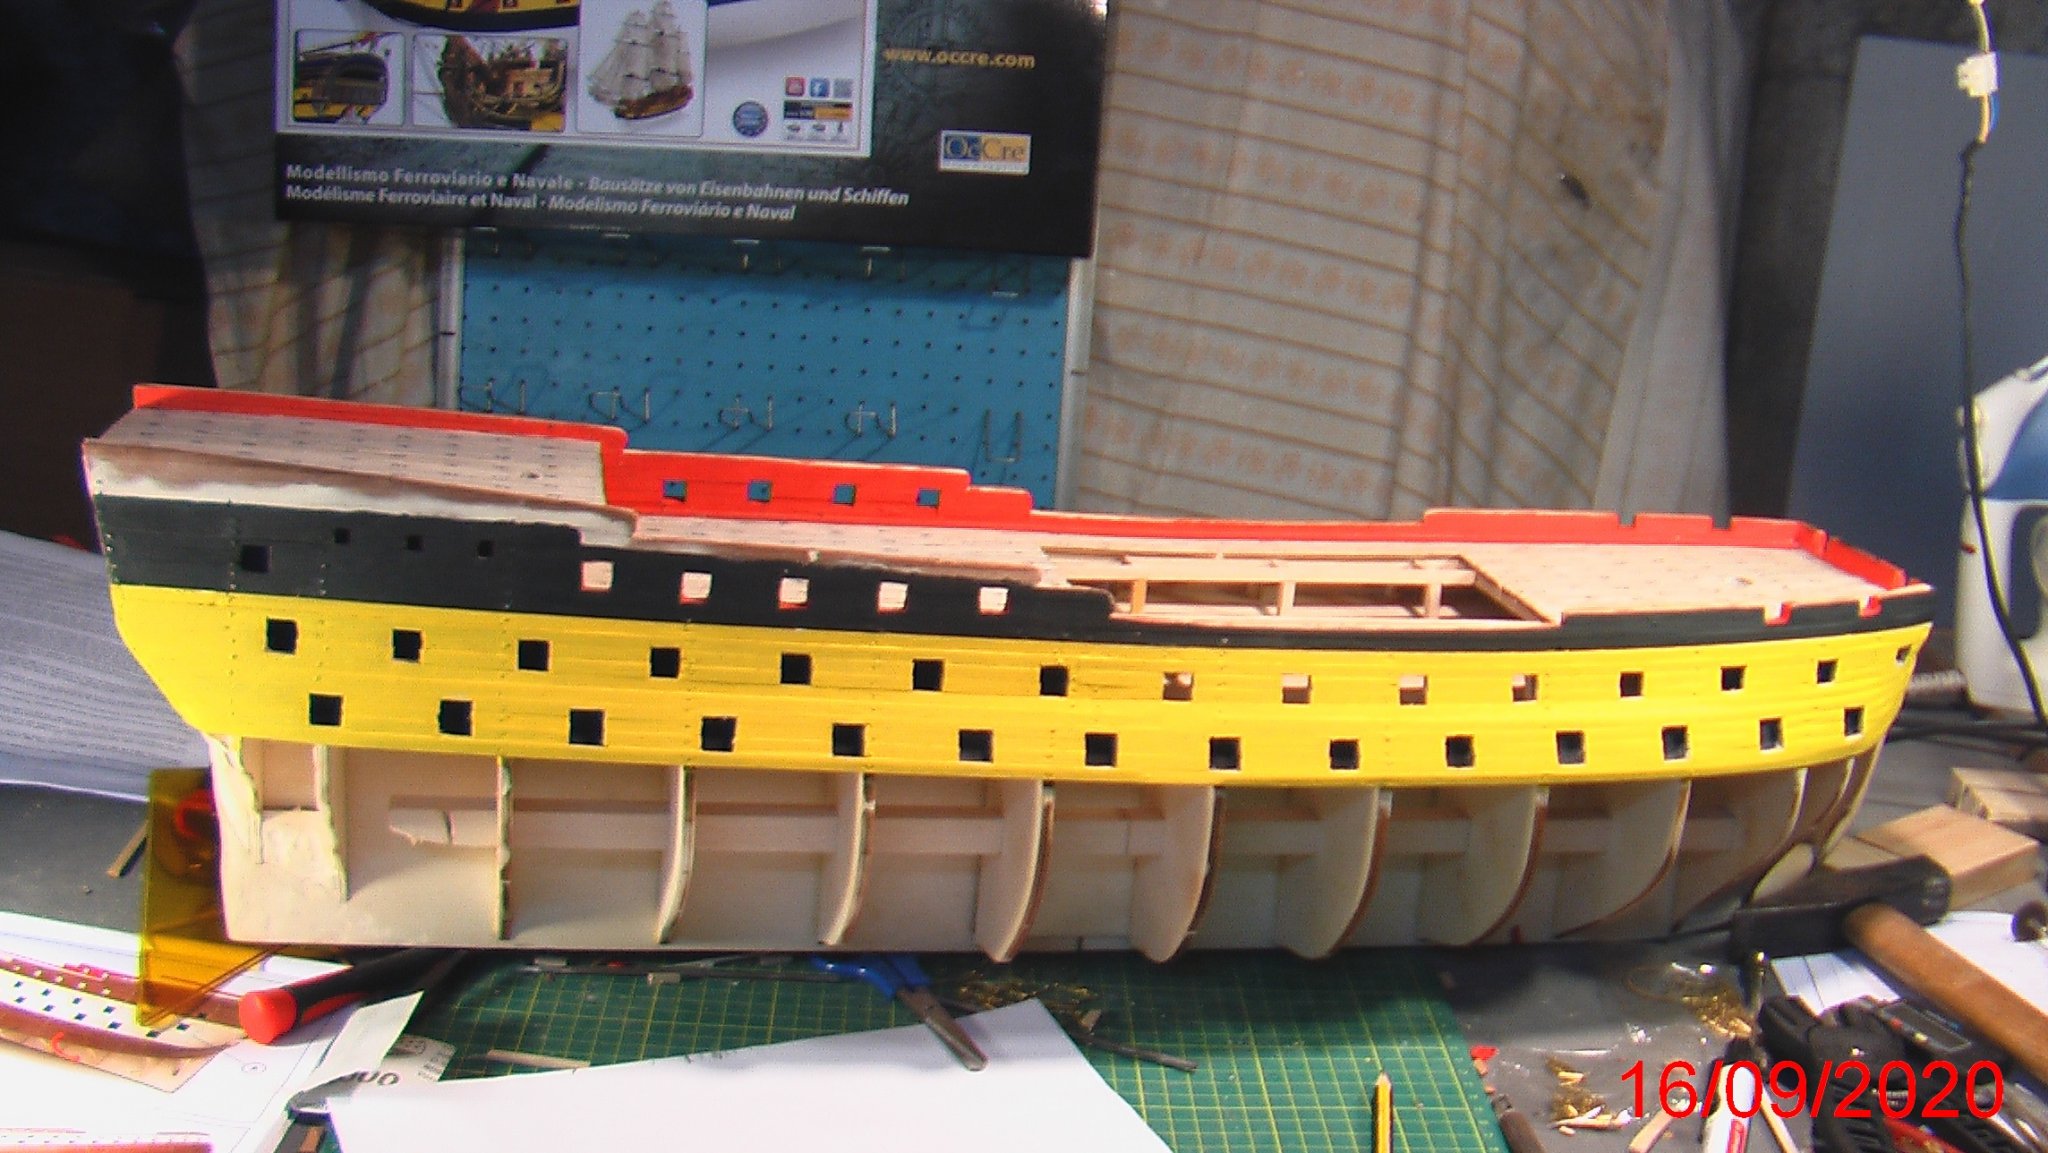
The first upper part of the hull is planked now with sapelli planks. Now i will sand it and paint this upper part of the hull, black. Continue after second sector of the hull,gunports...


-
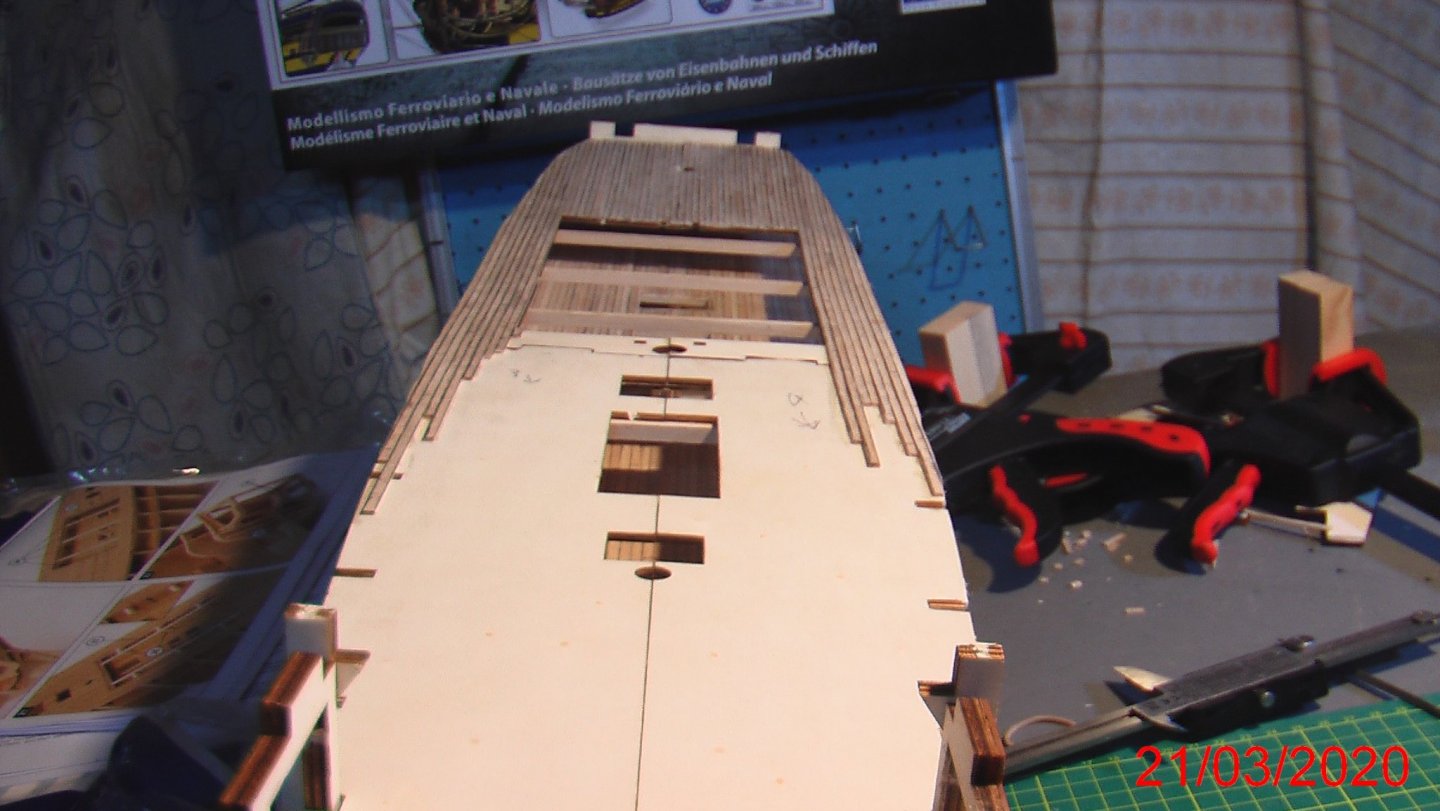
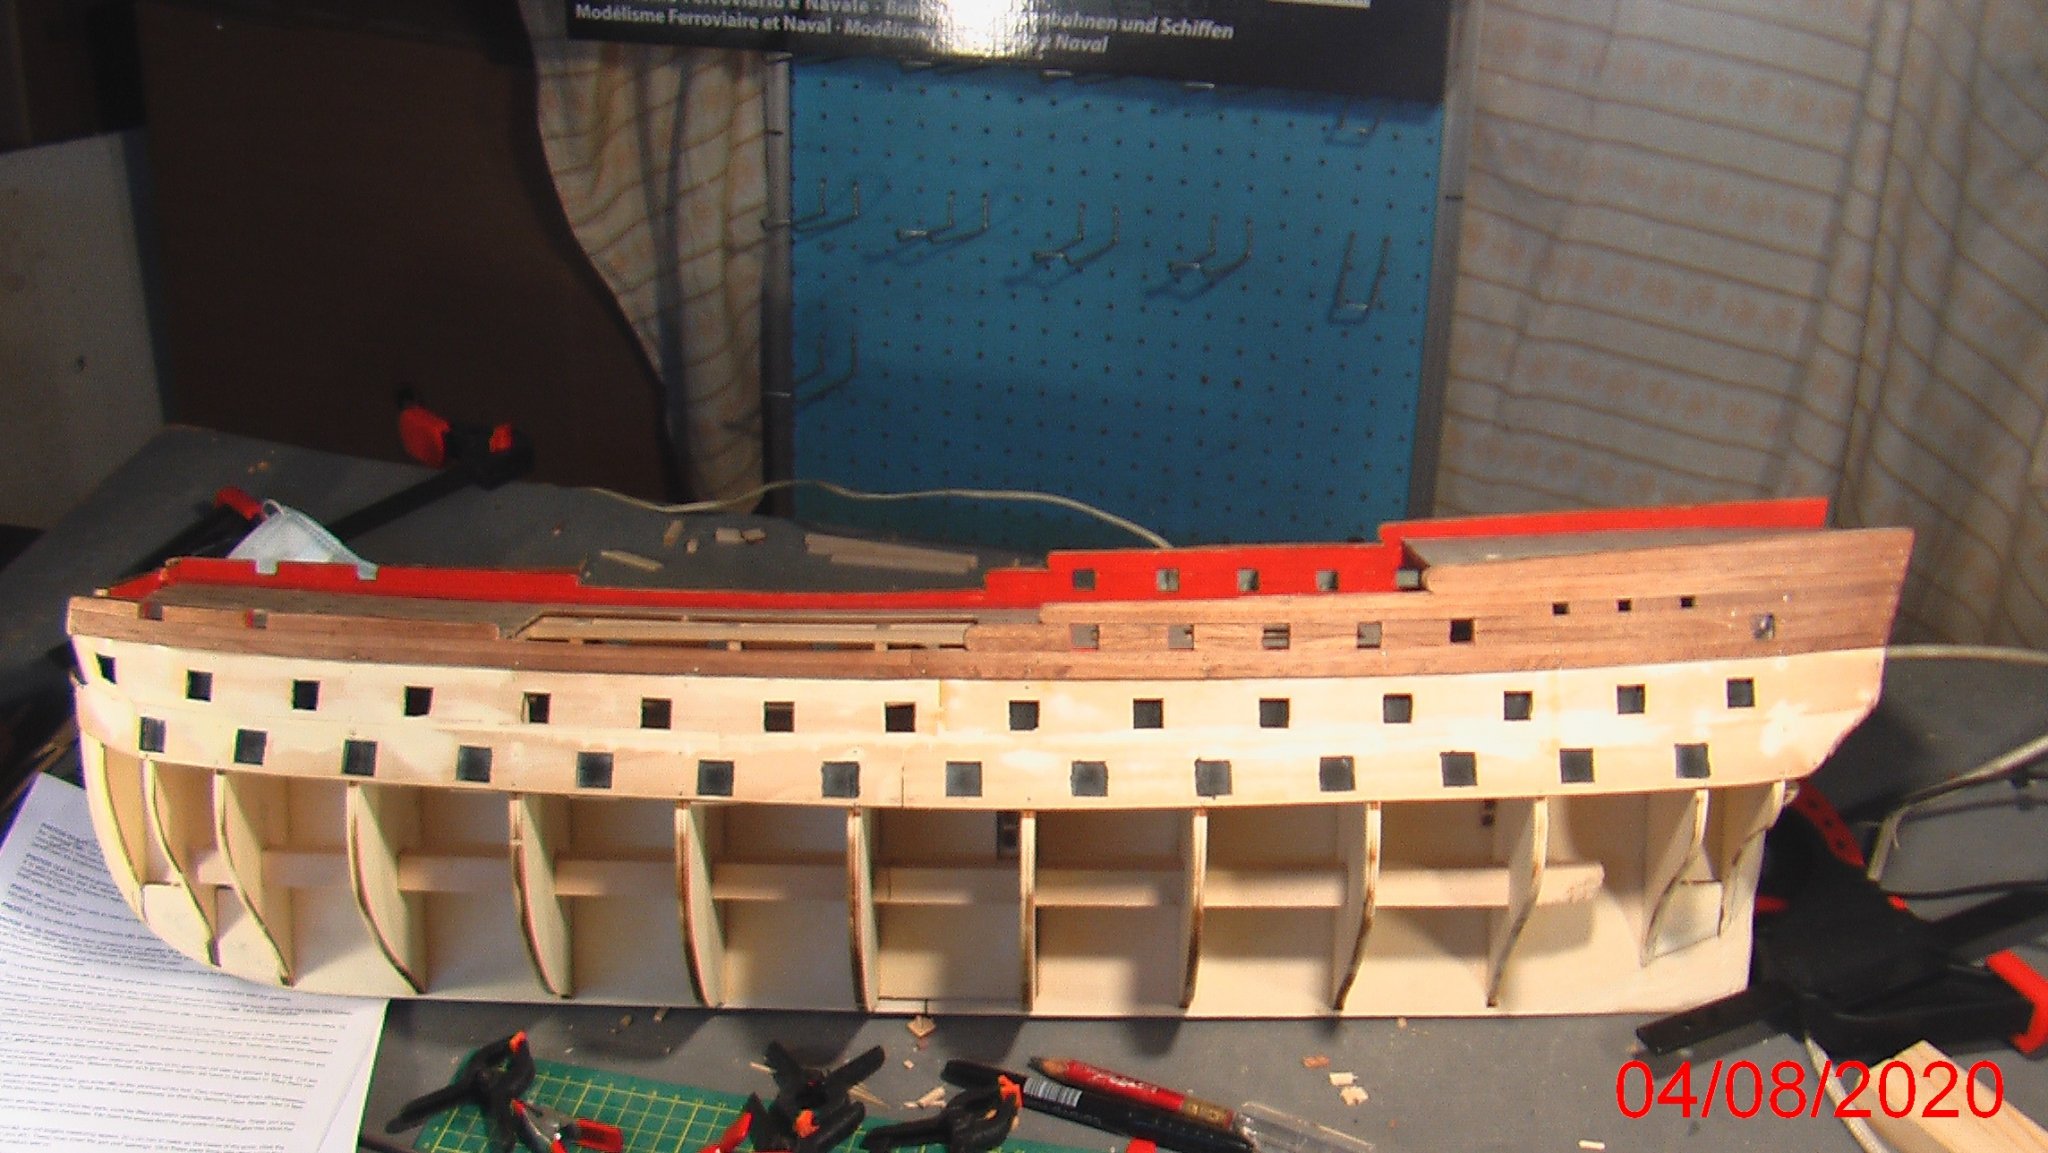
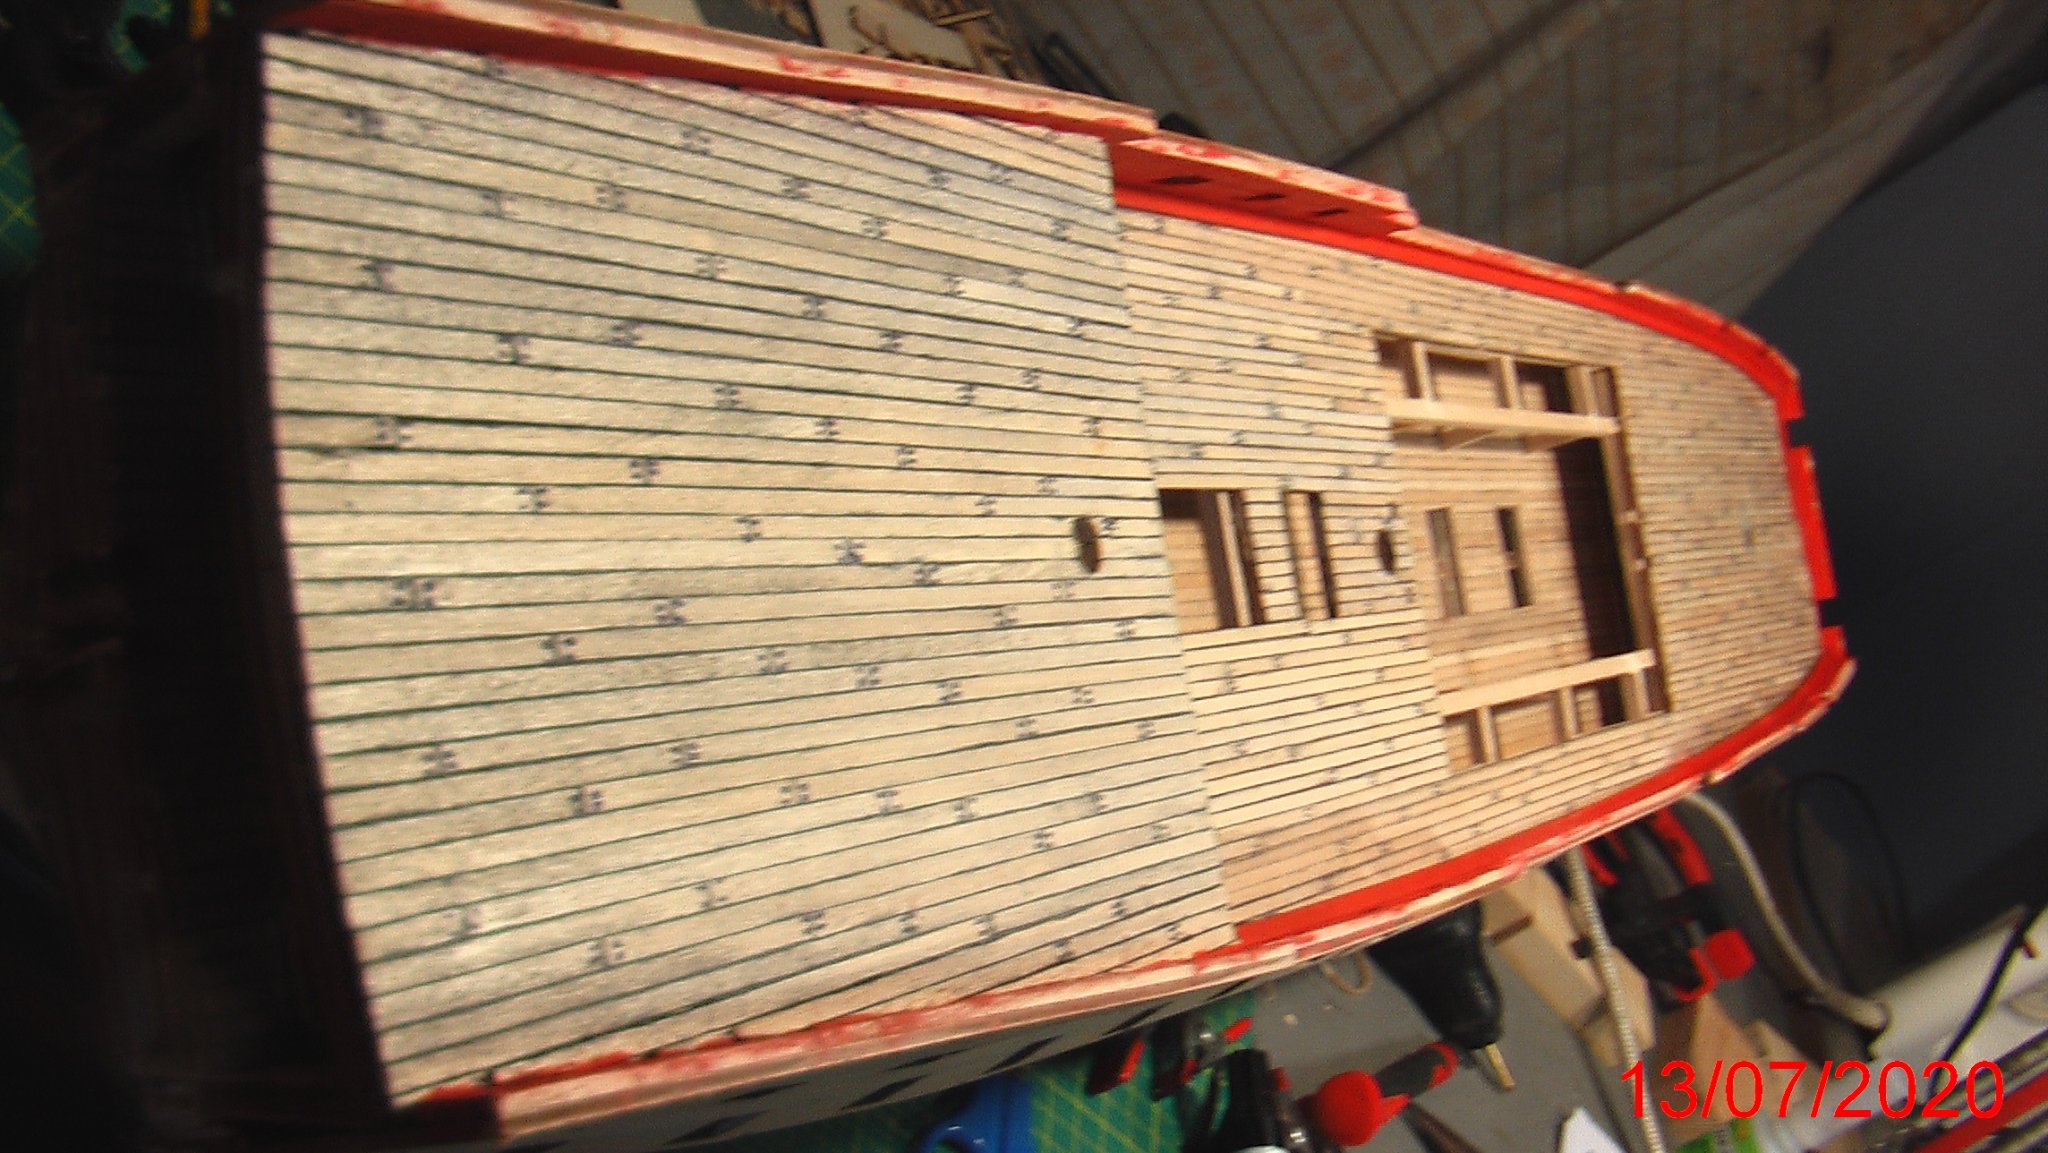
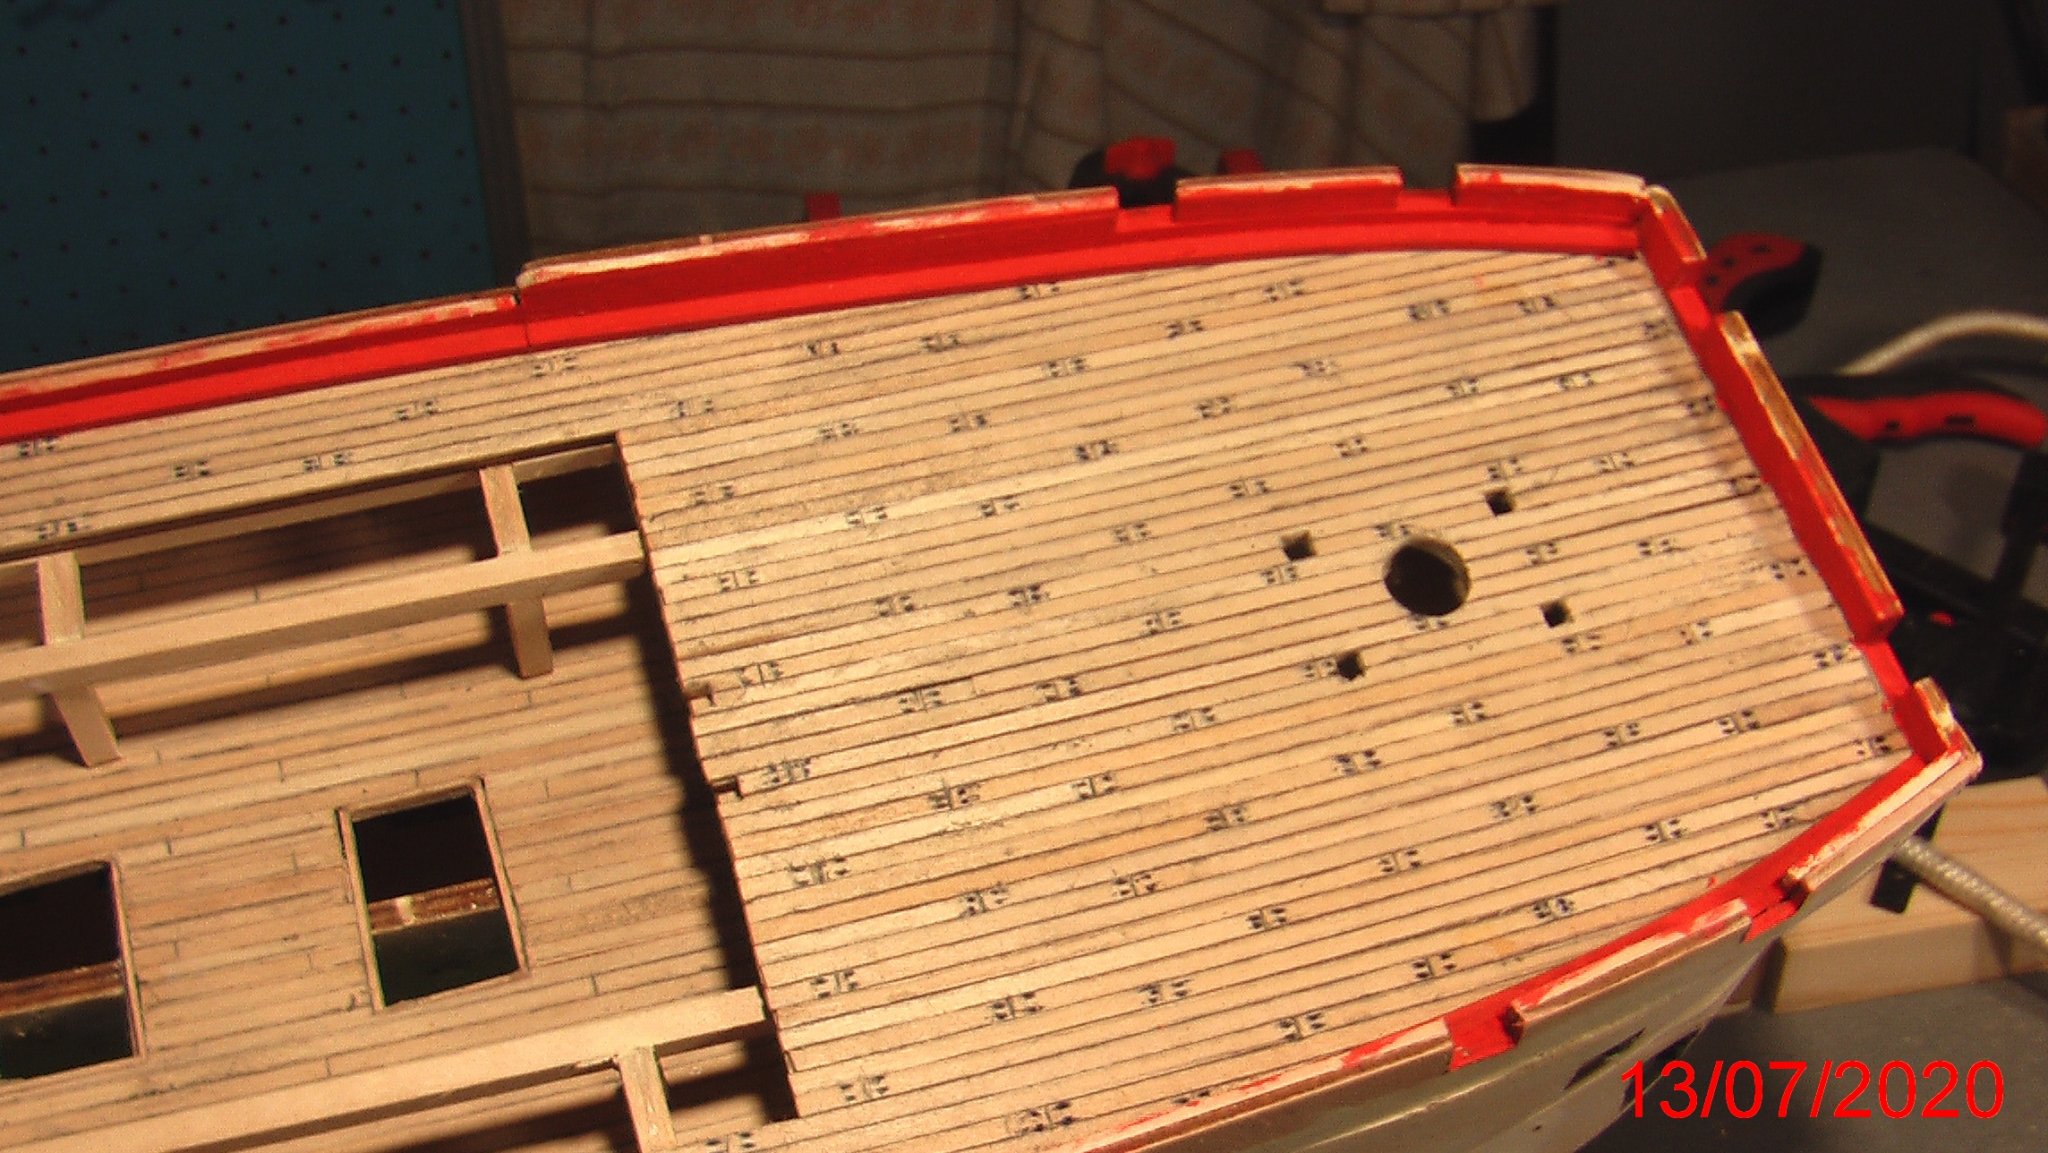
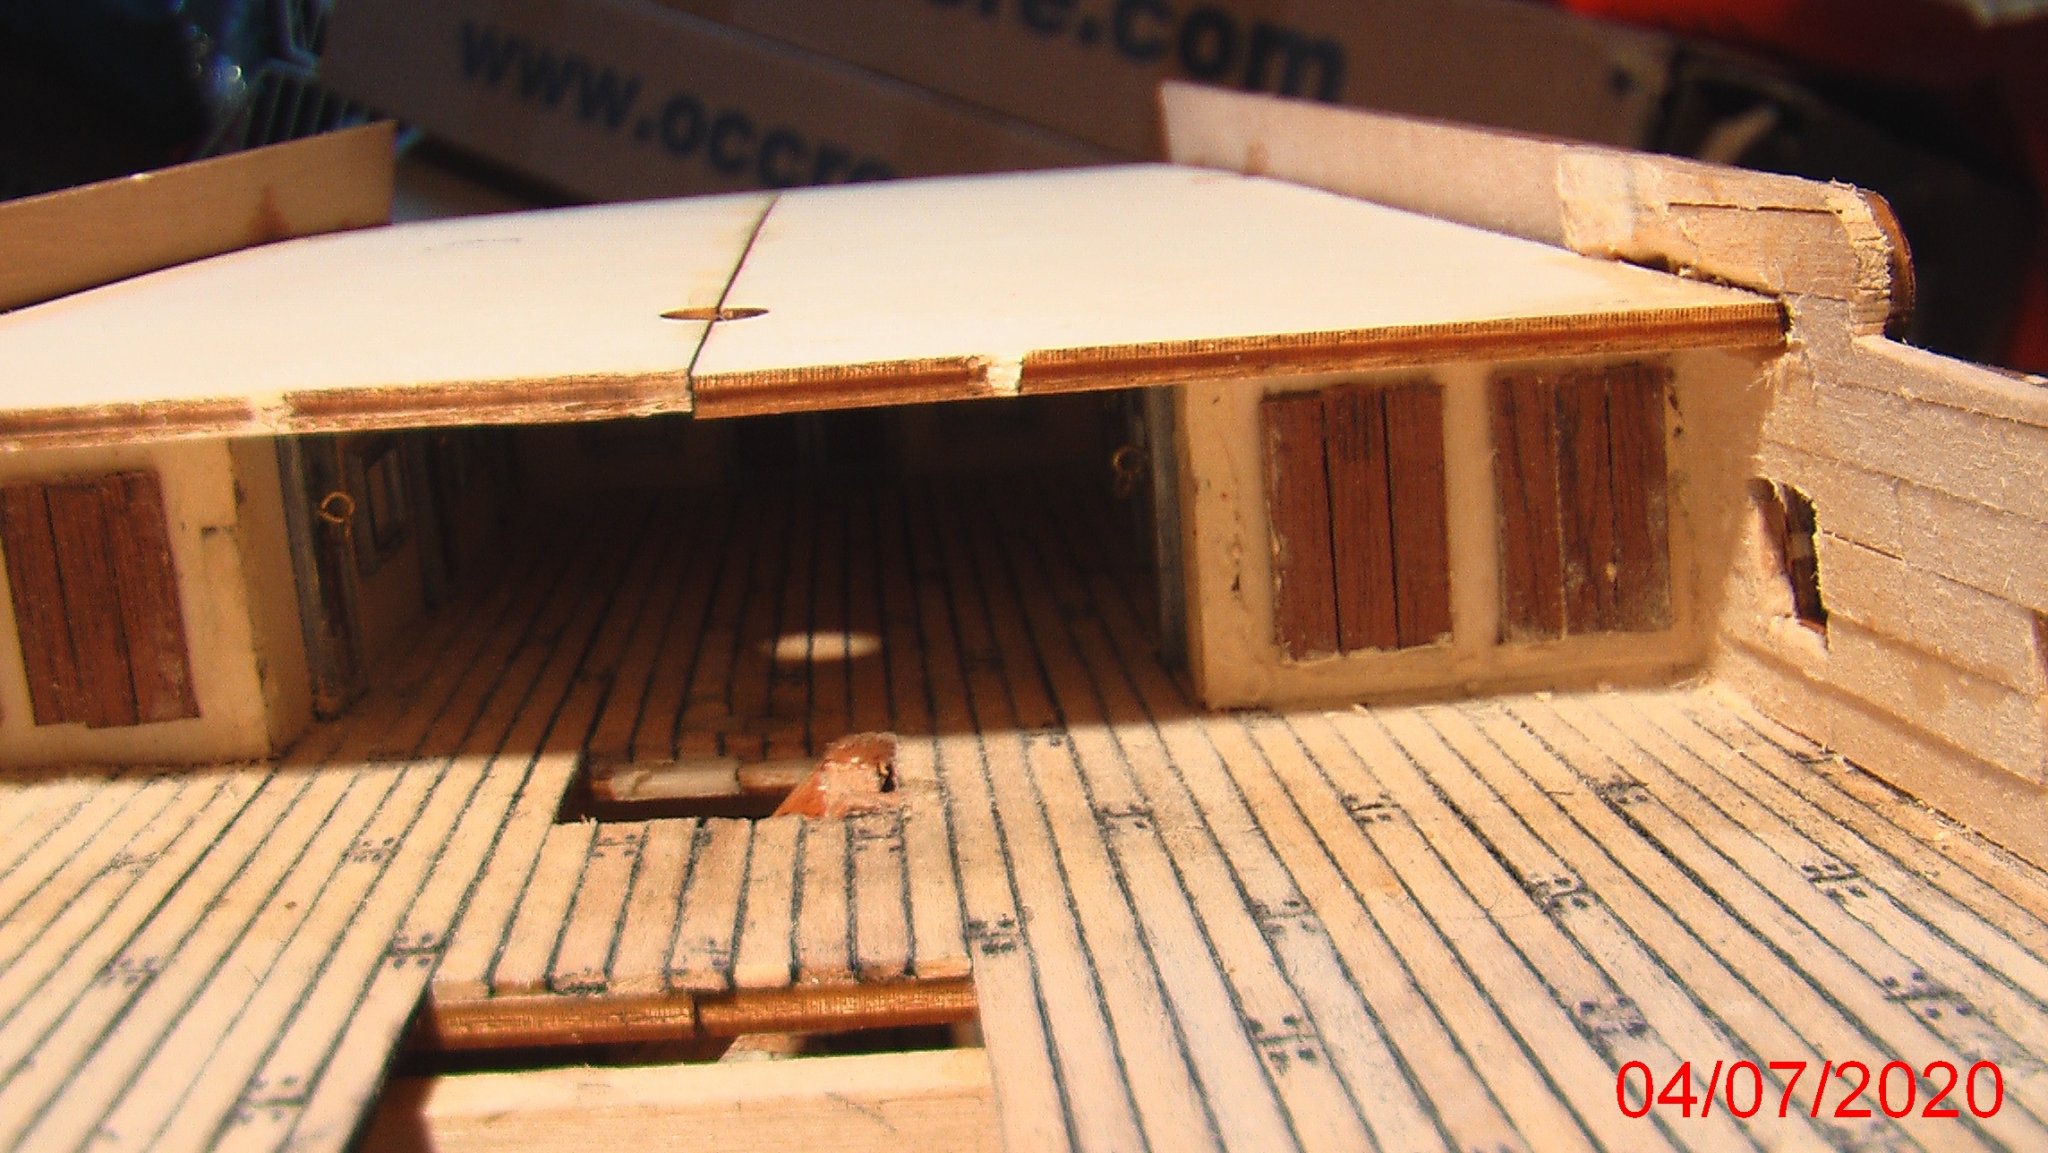
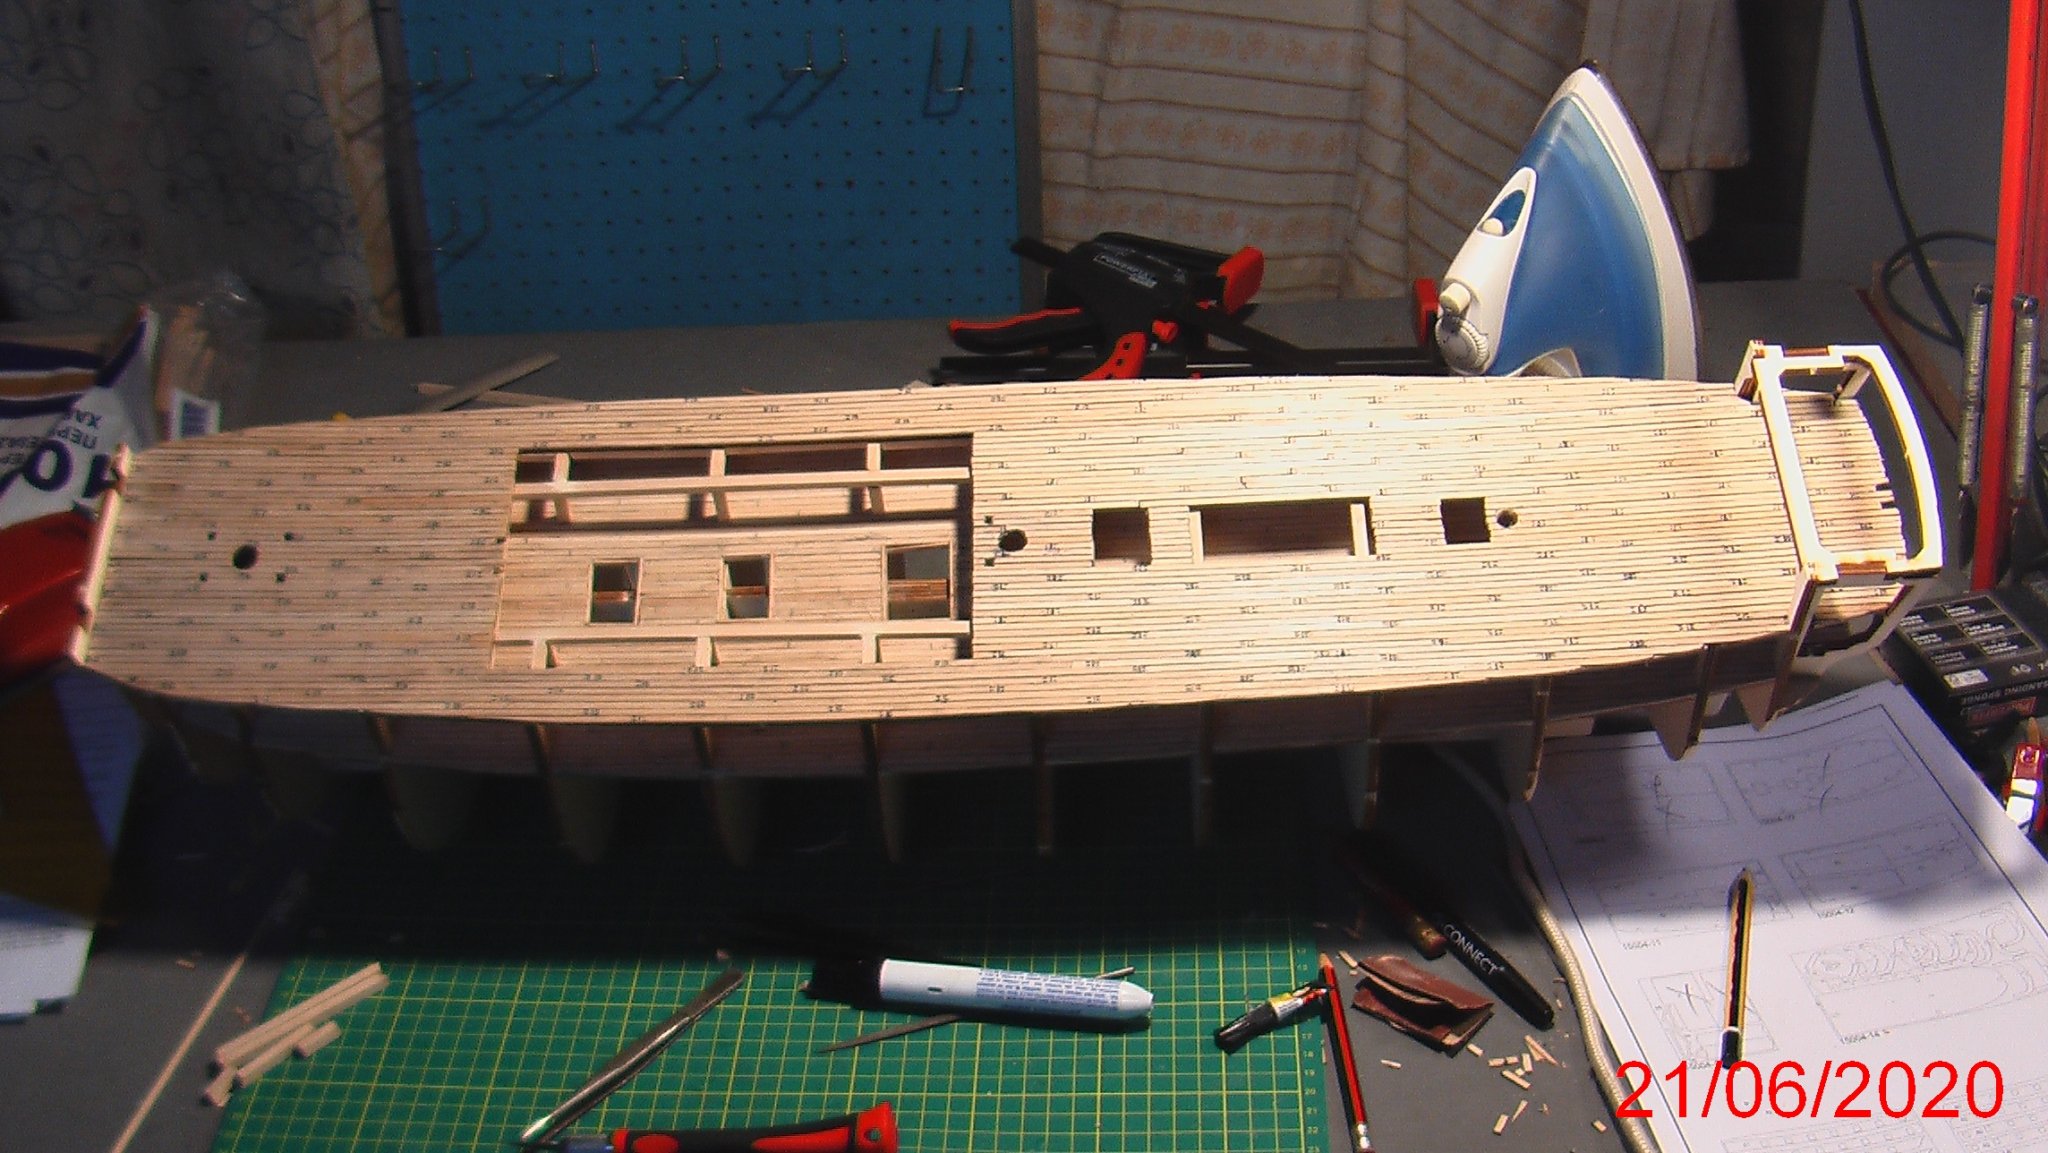
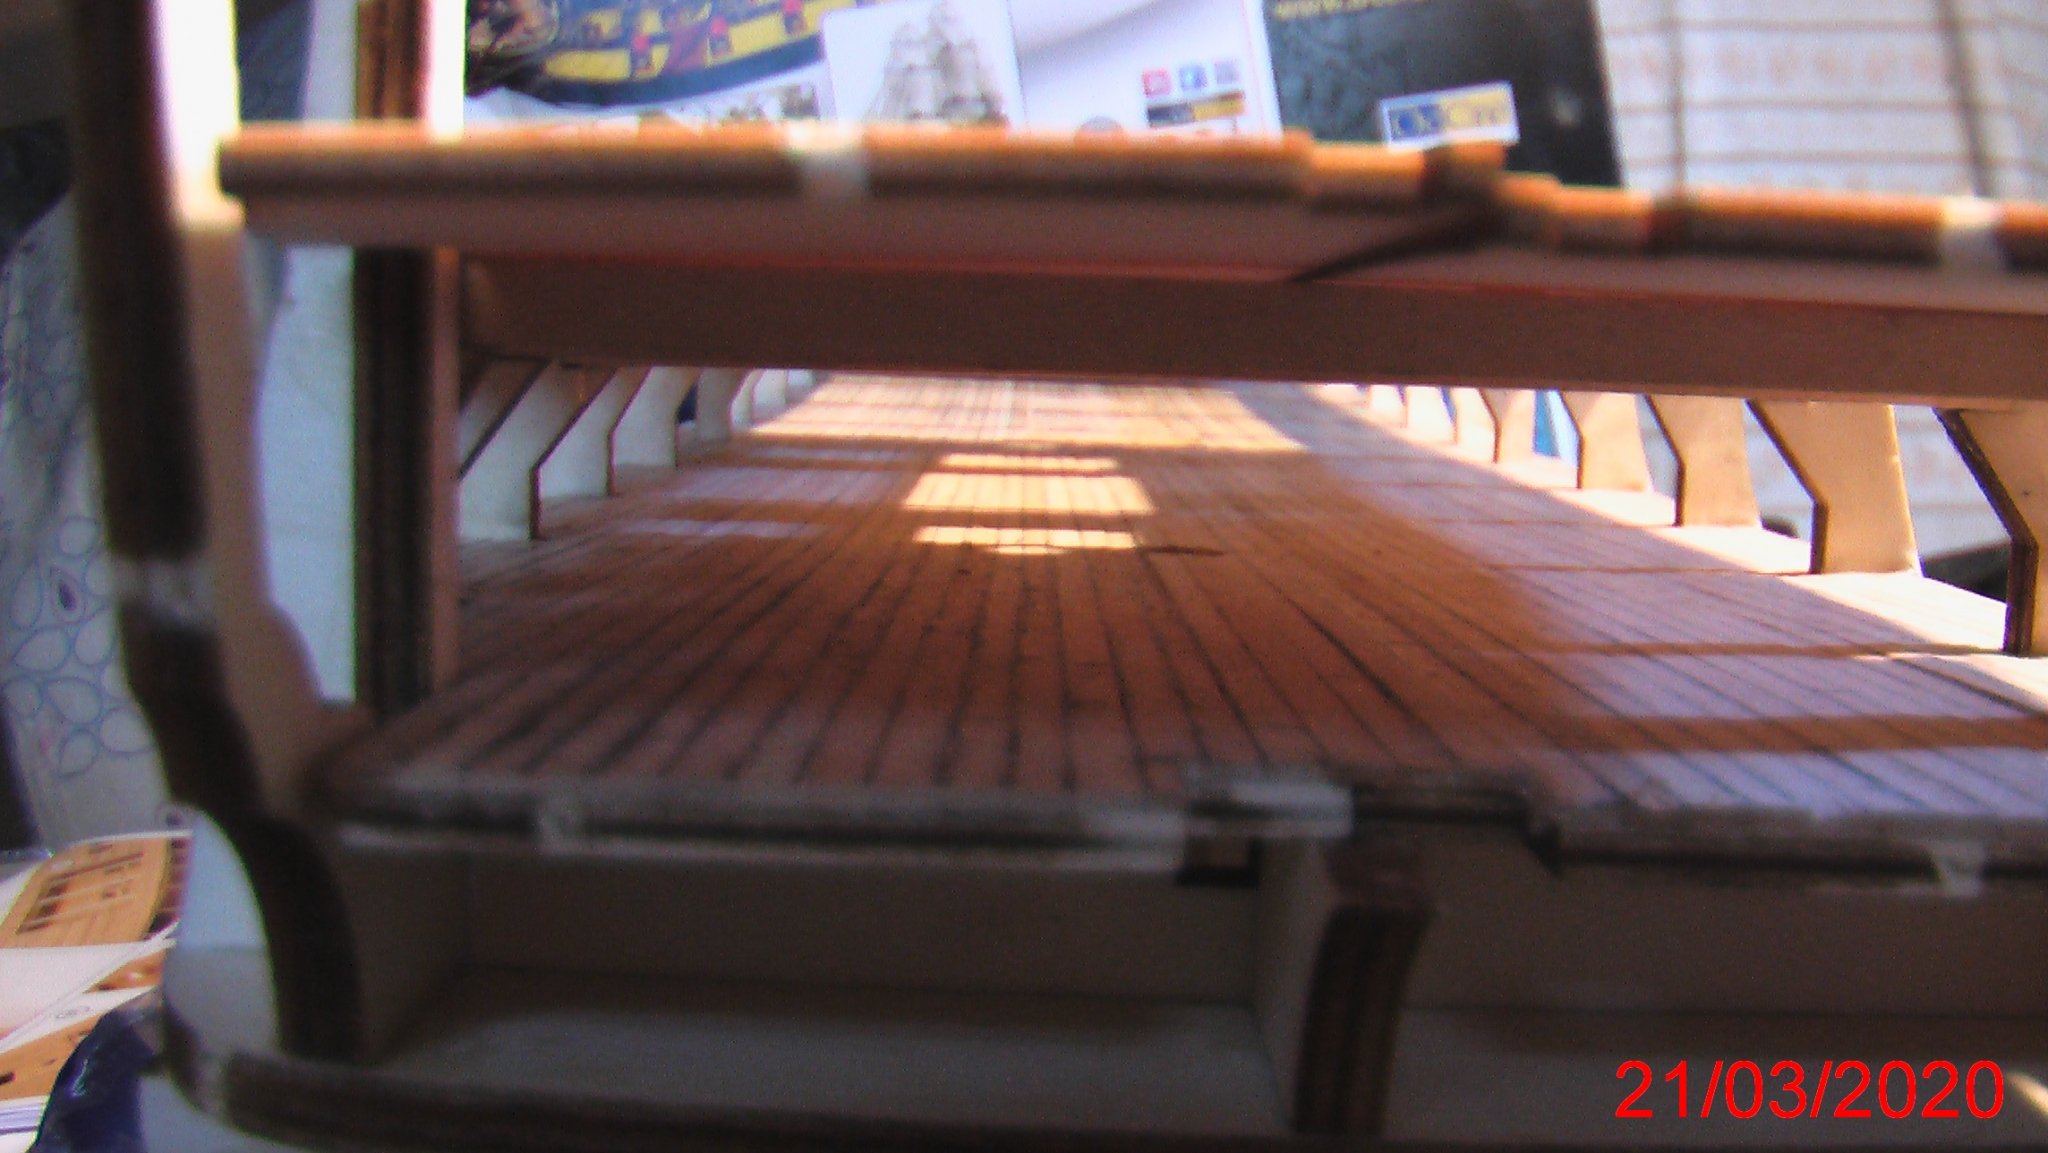
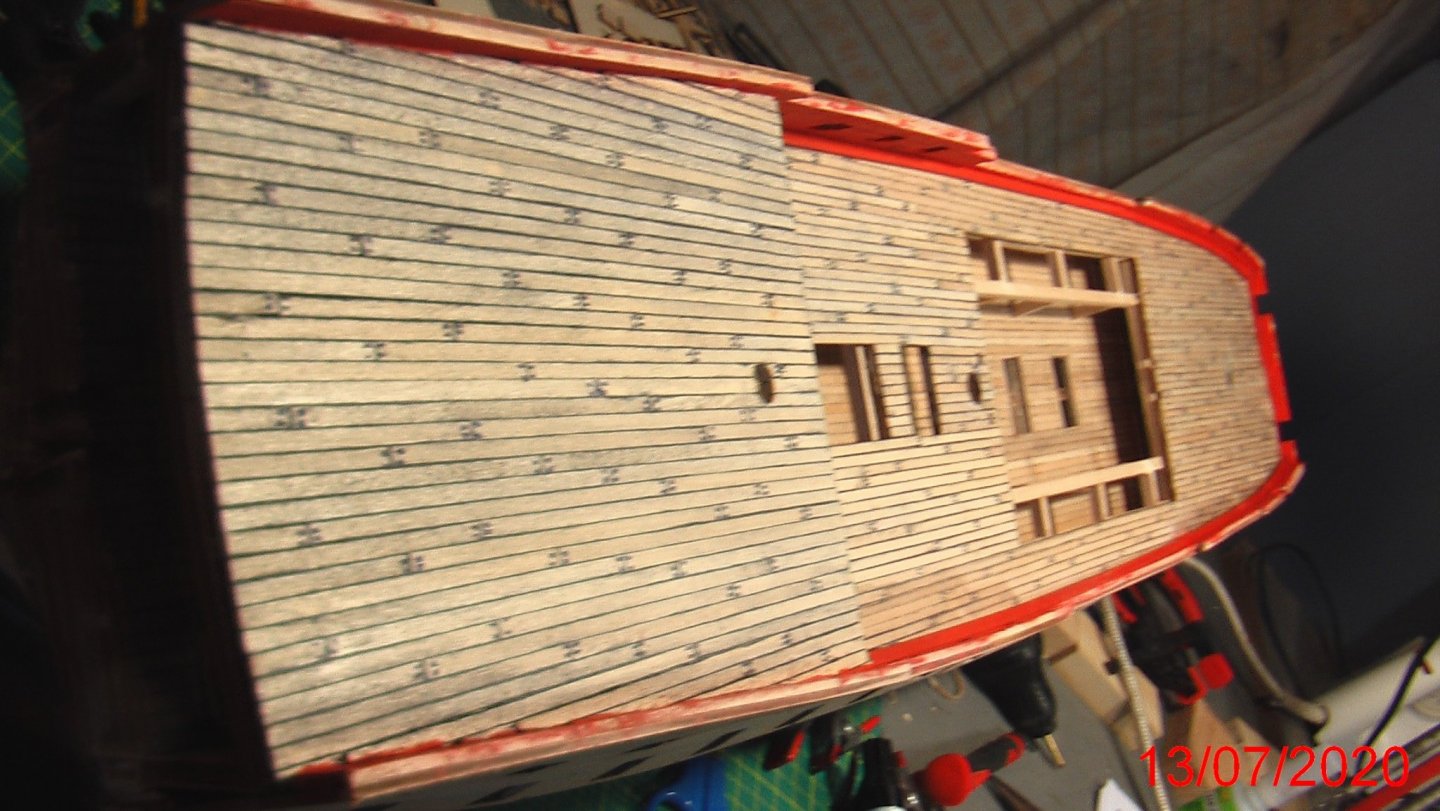
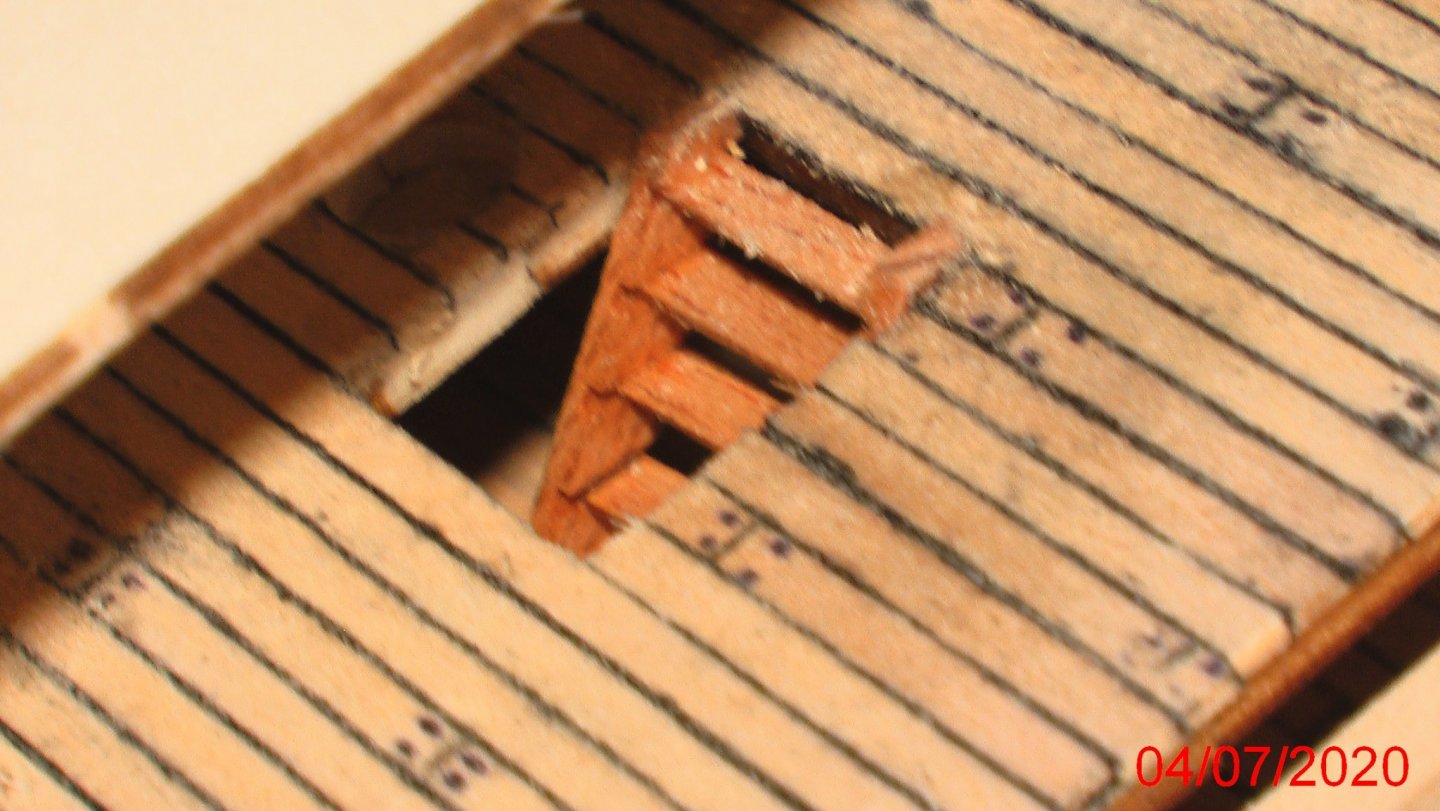
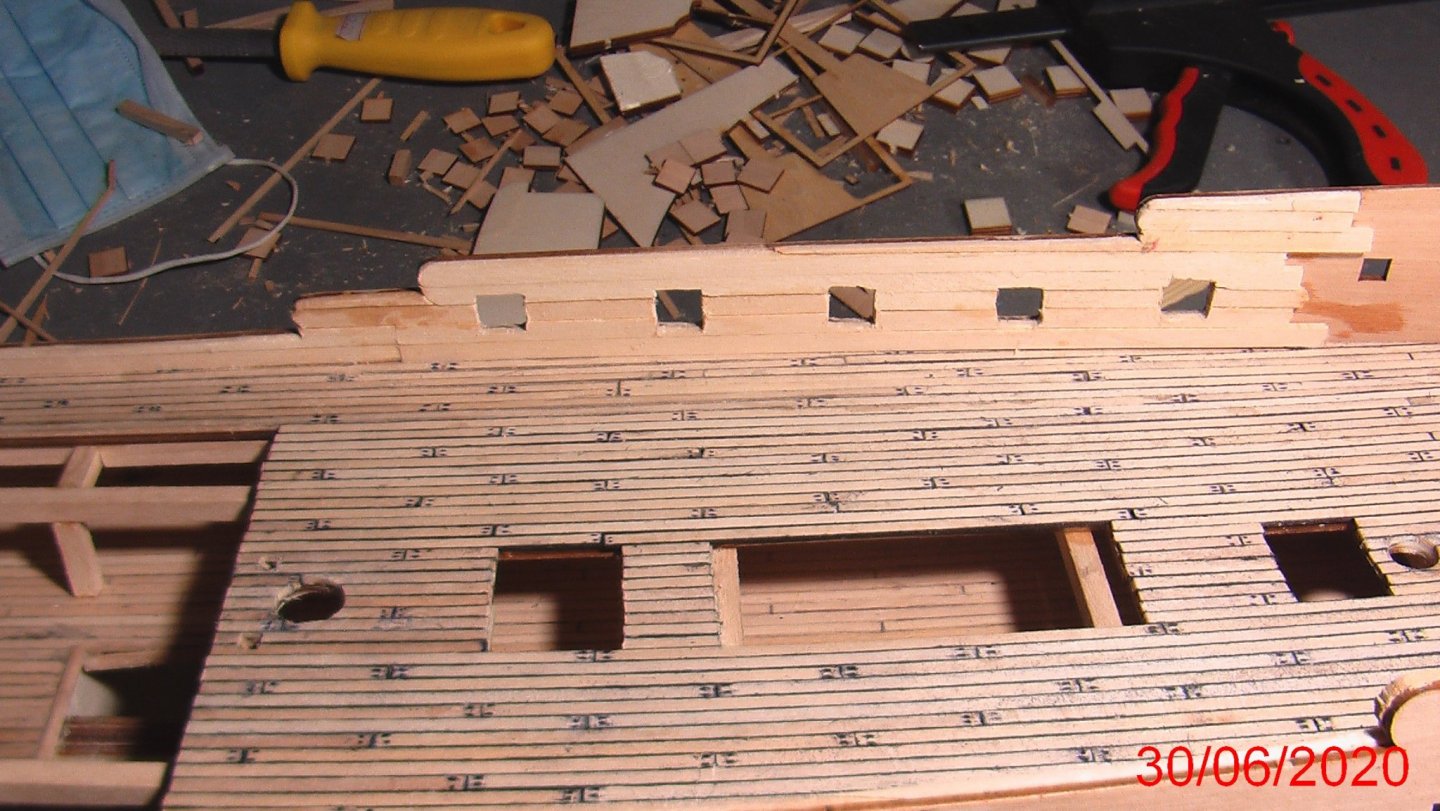
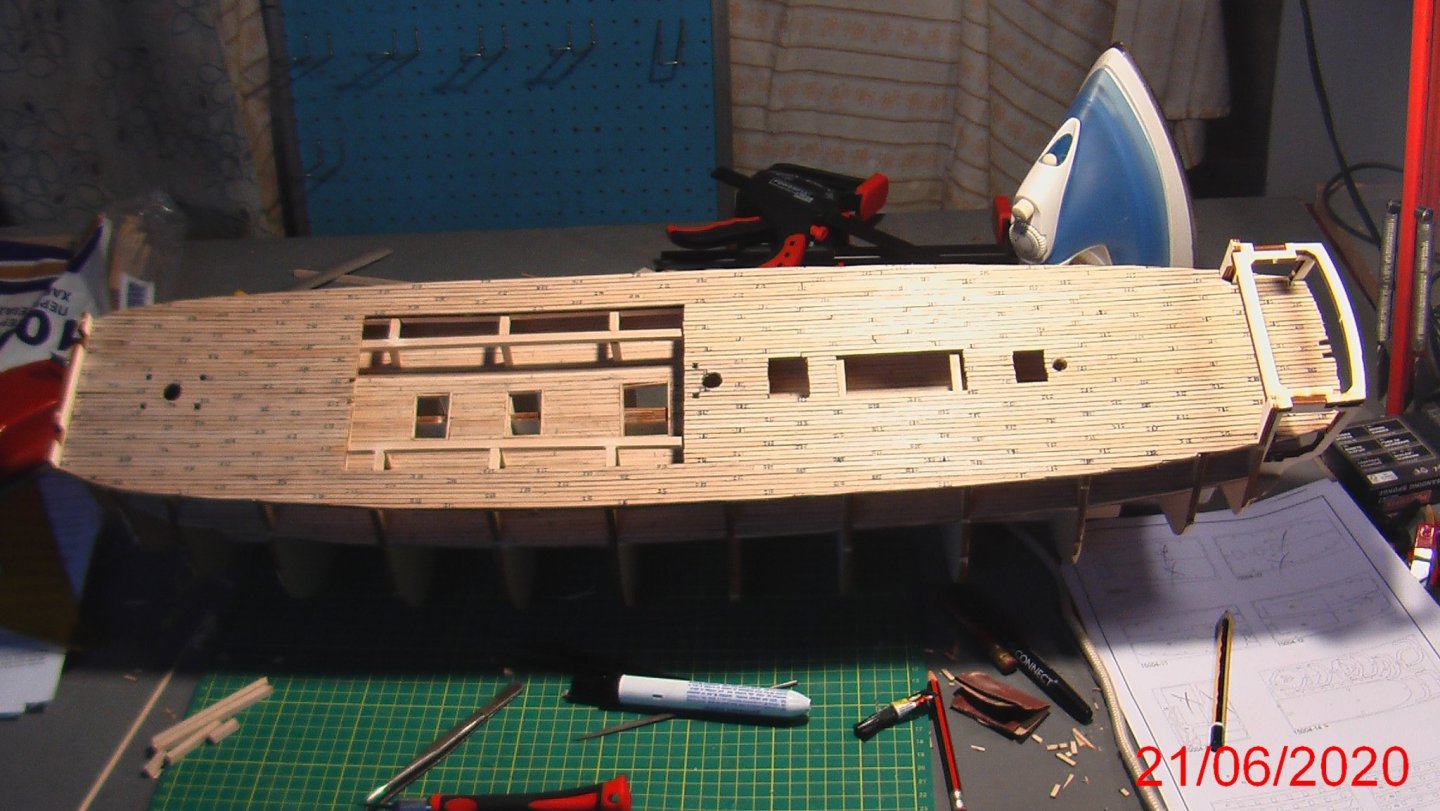
Now i finish the planking of the third deck. I put a plank inside the bulkheads along the deck and paint it red as you see in the photos. Why red? There is an historical explanation: Not to be seen the blood from wounded or killed salors in the fight,because they fight side by side with the enemy's ship... Now is time for the external planking...the most important job...


-
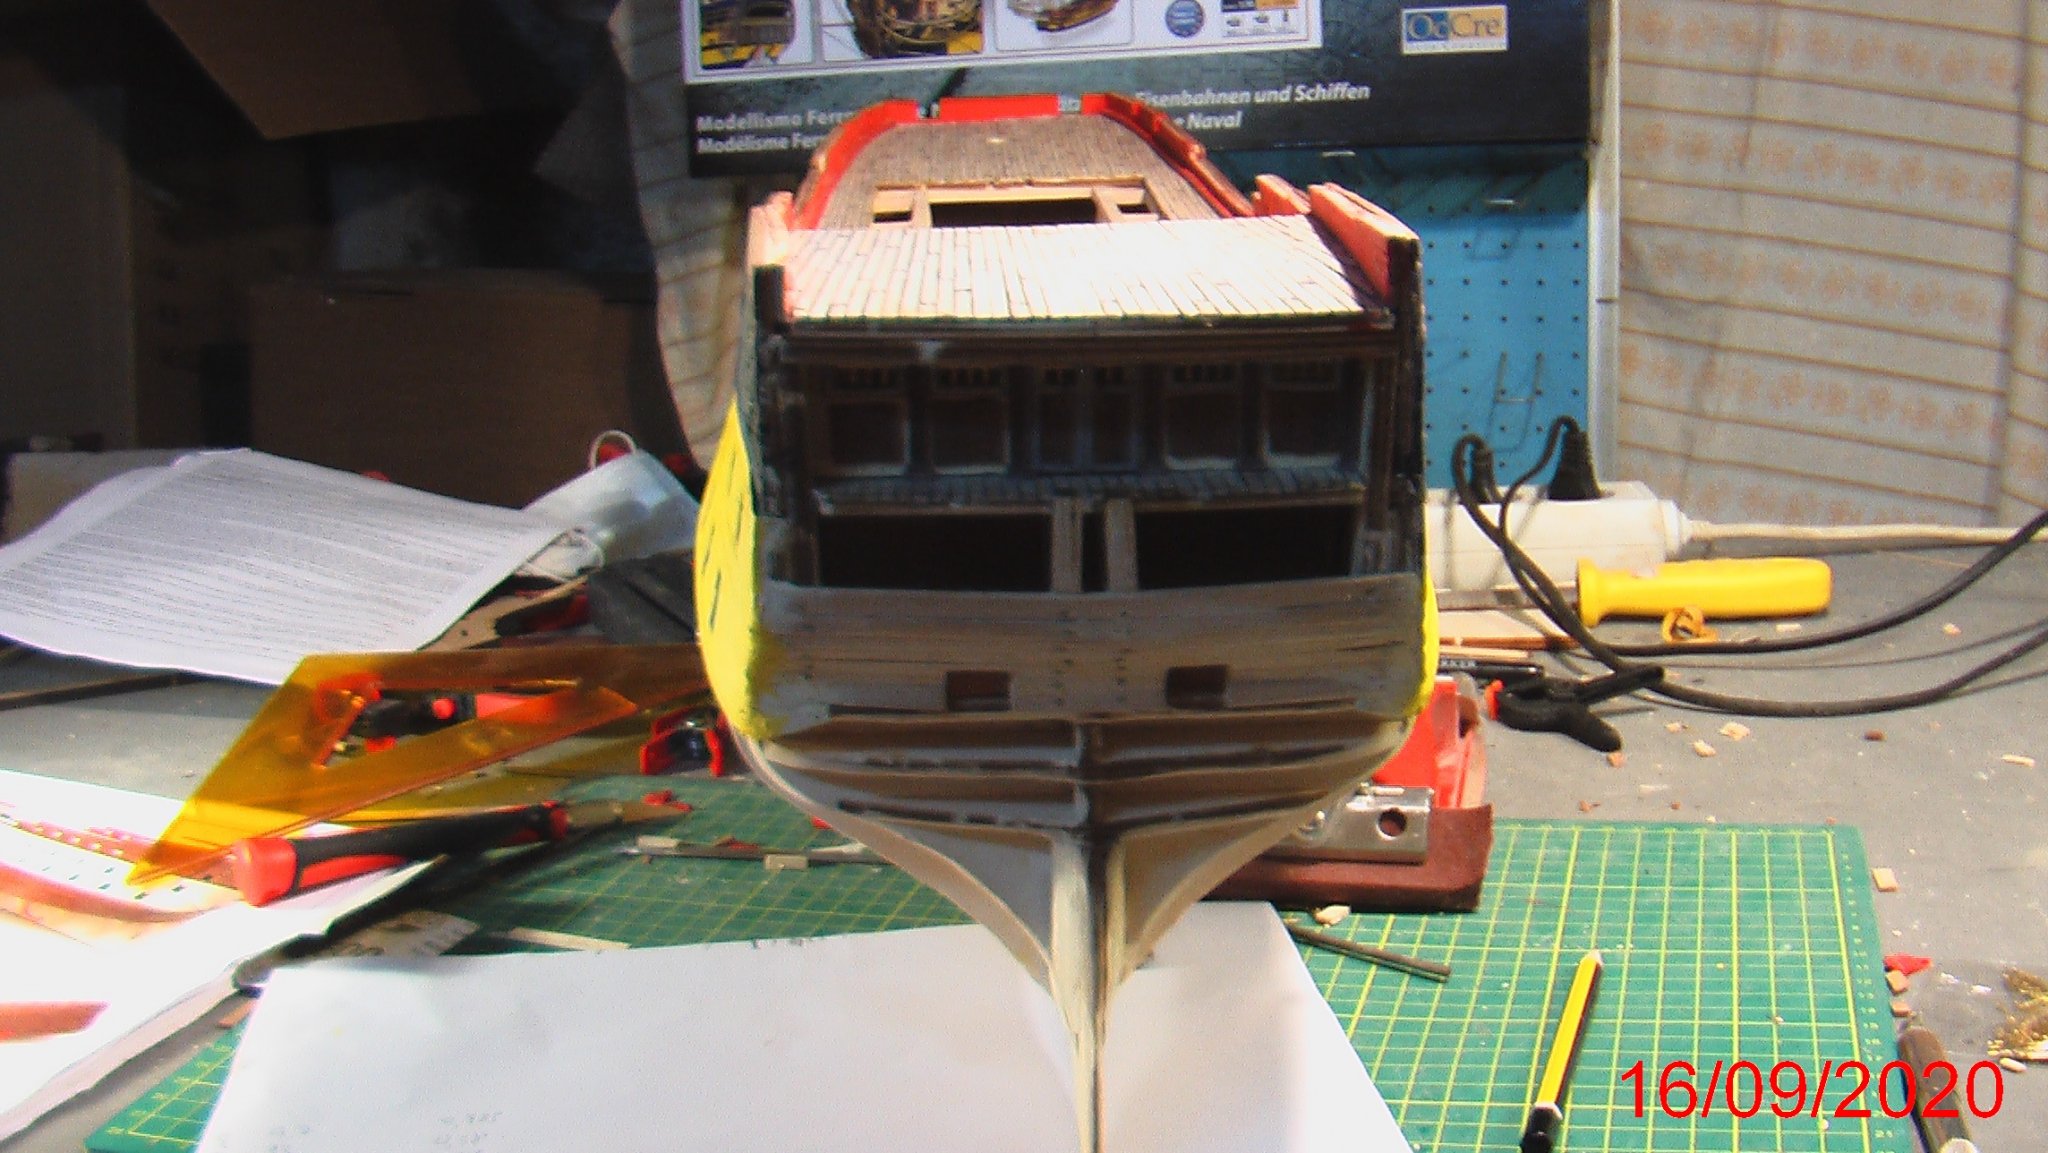
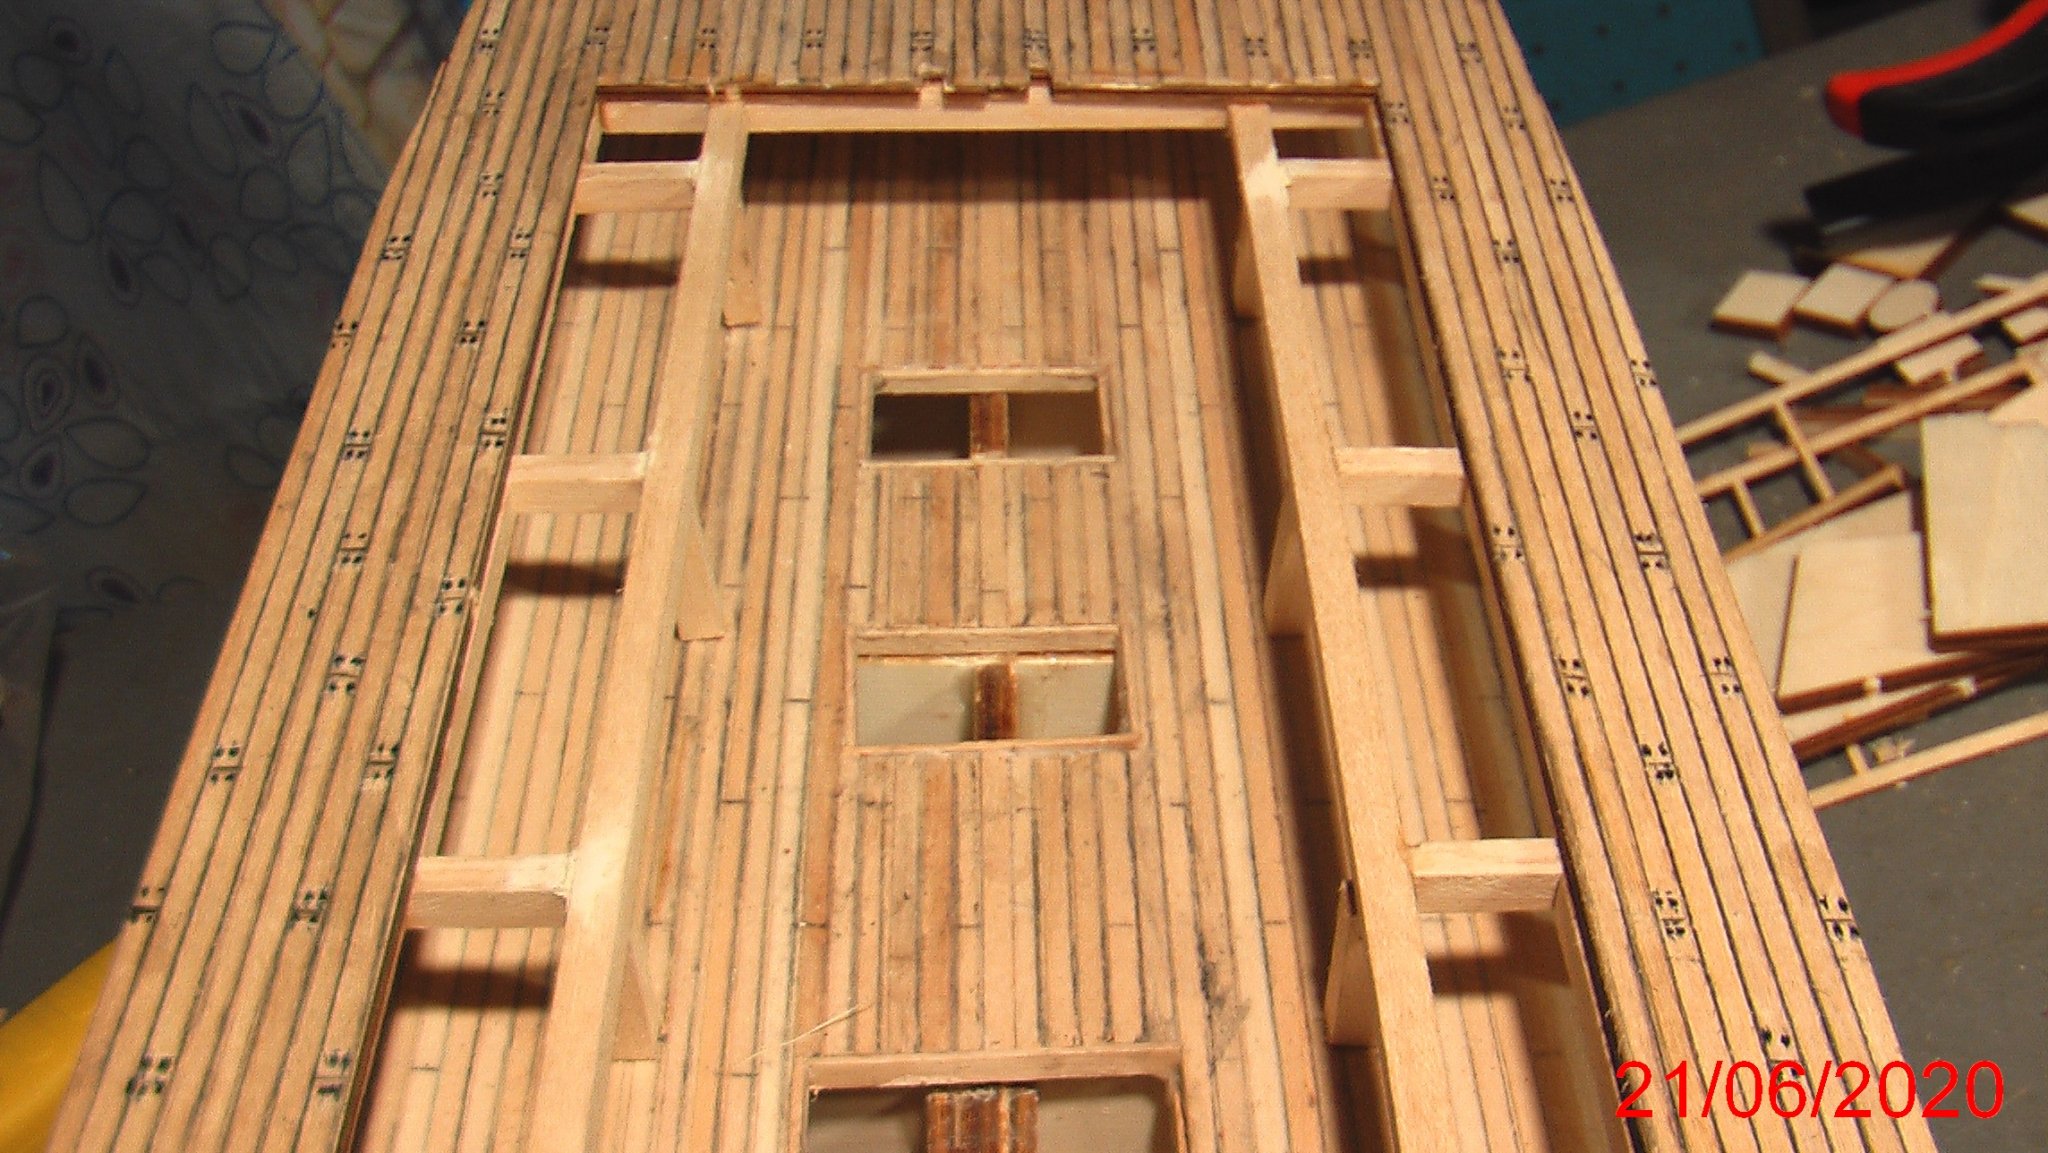
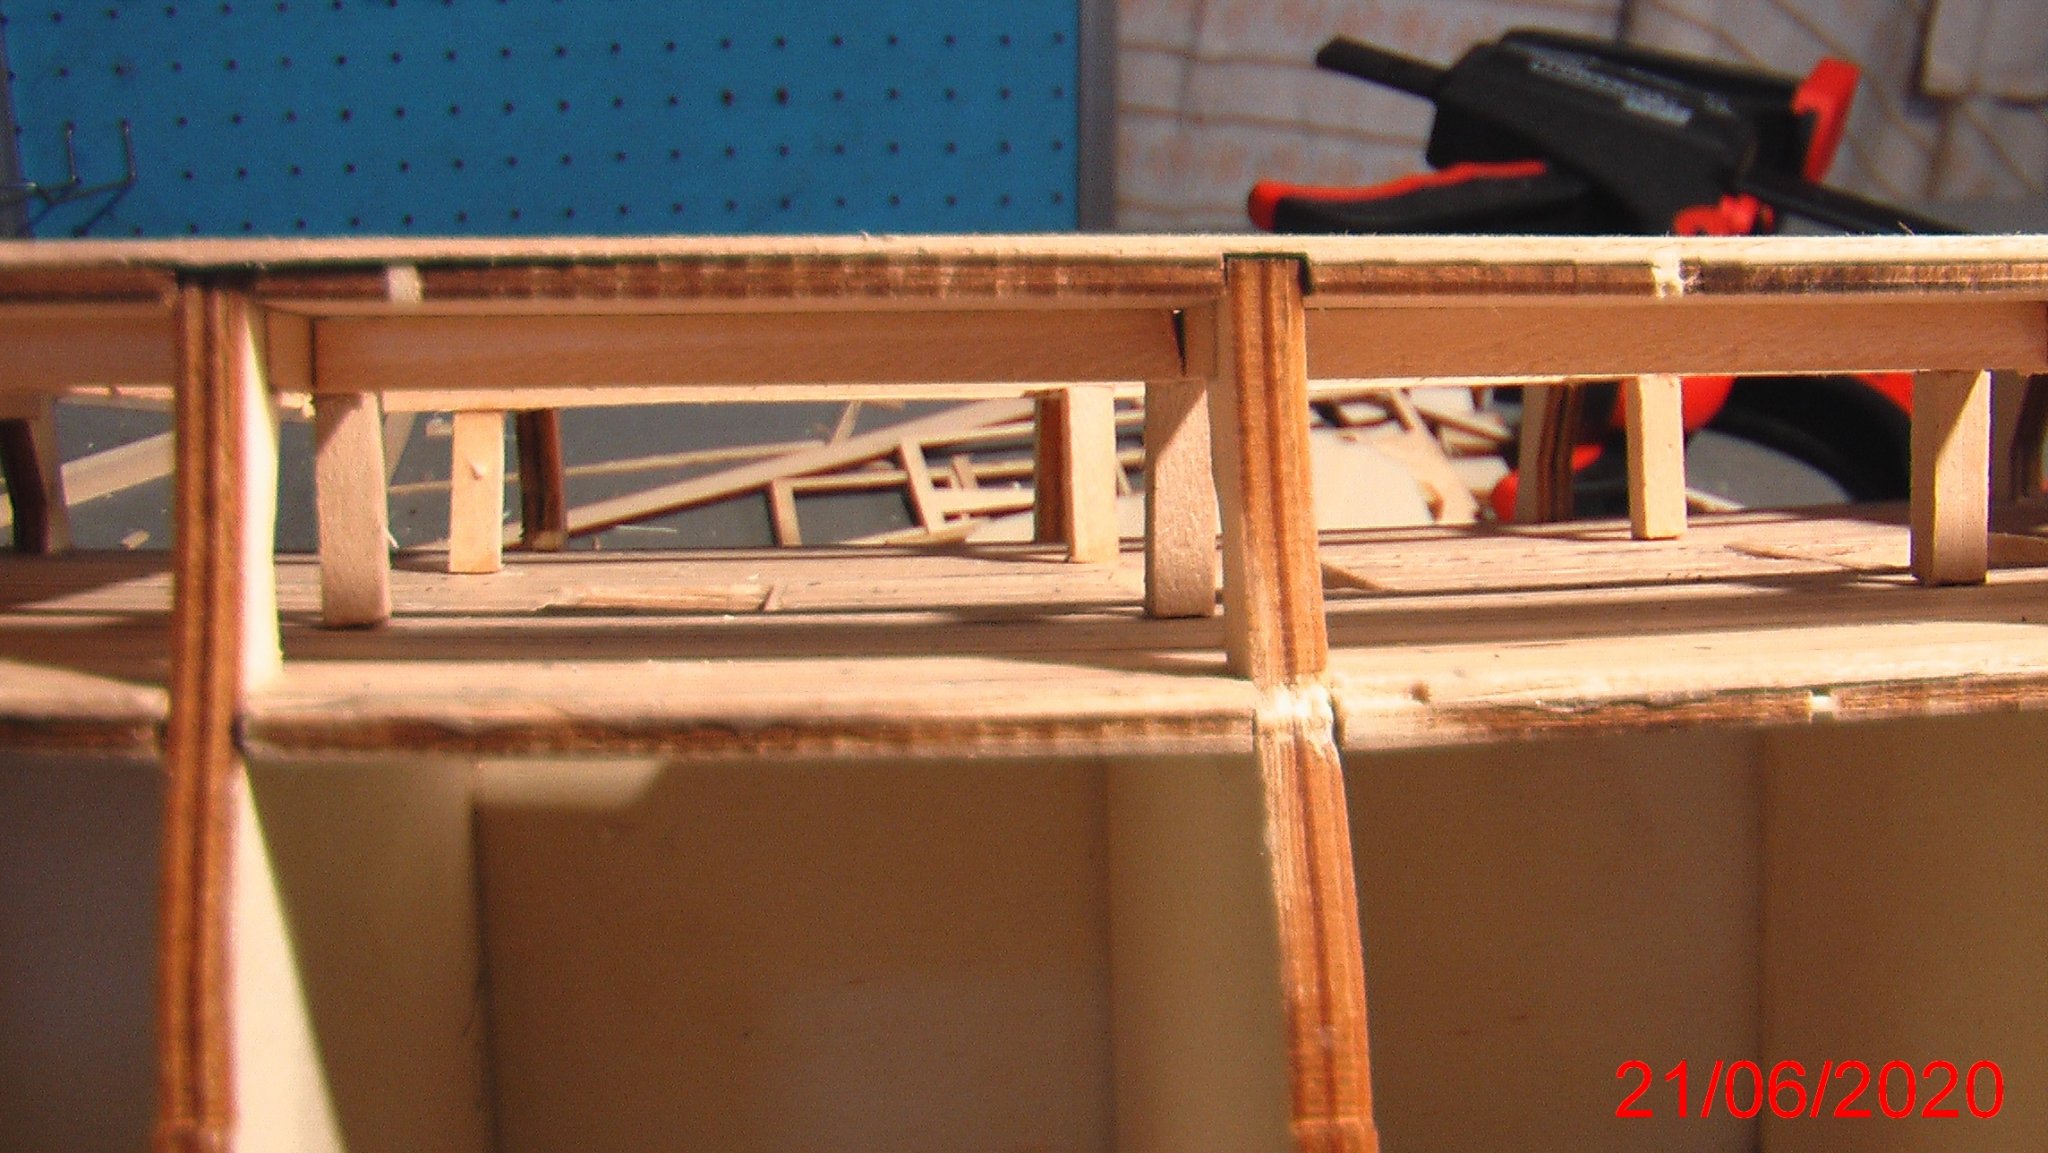
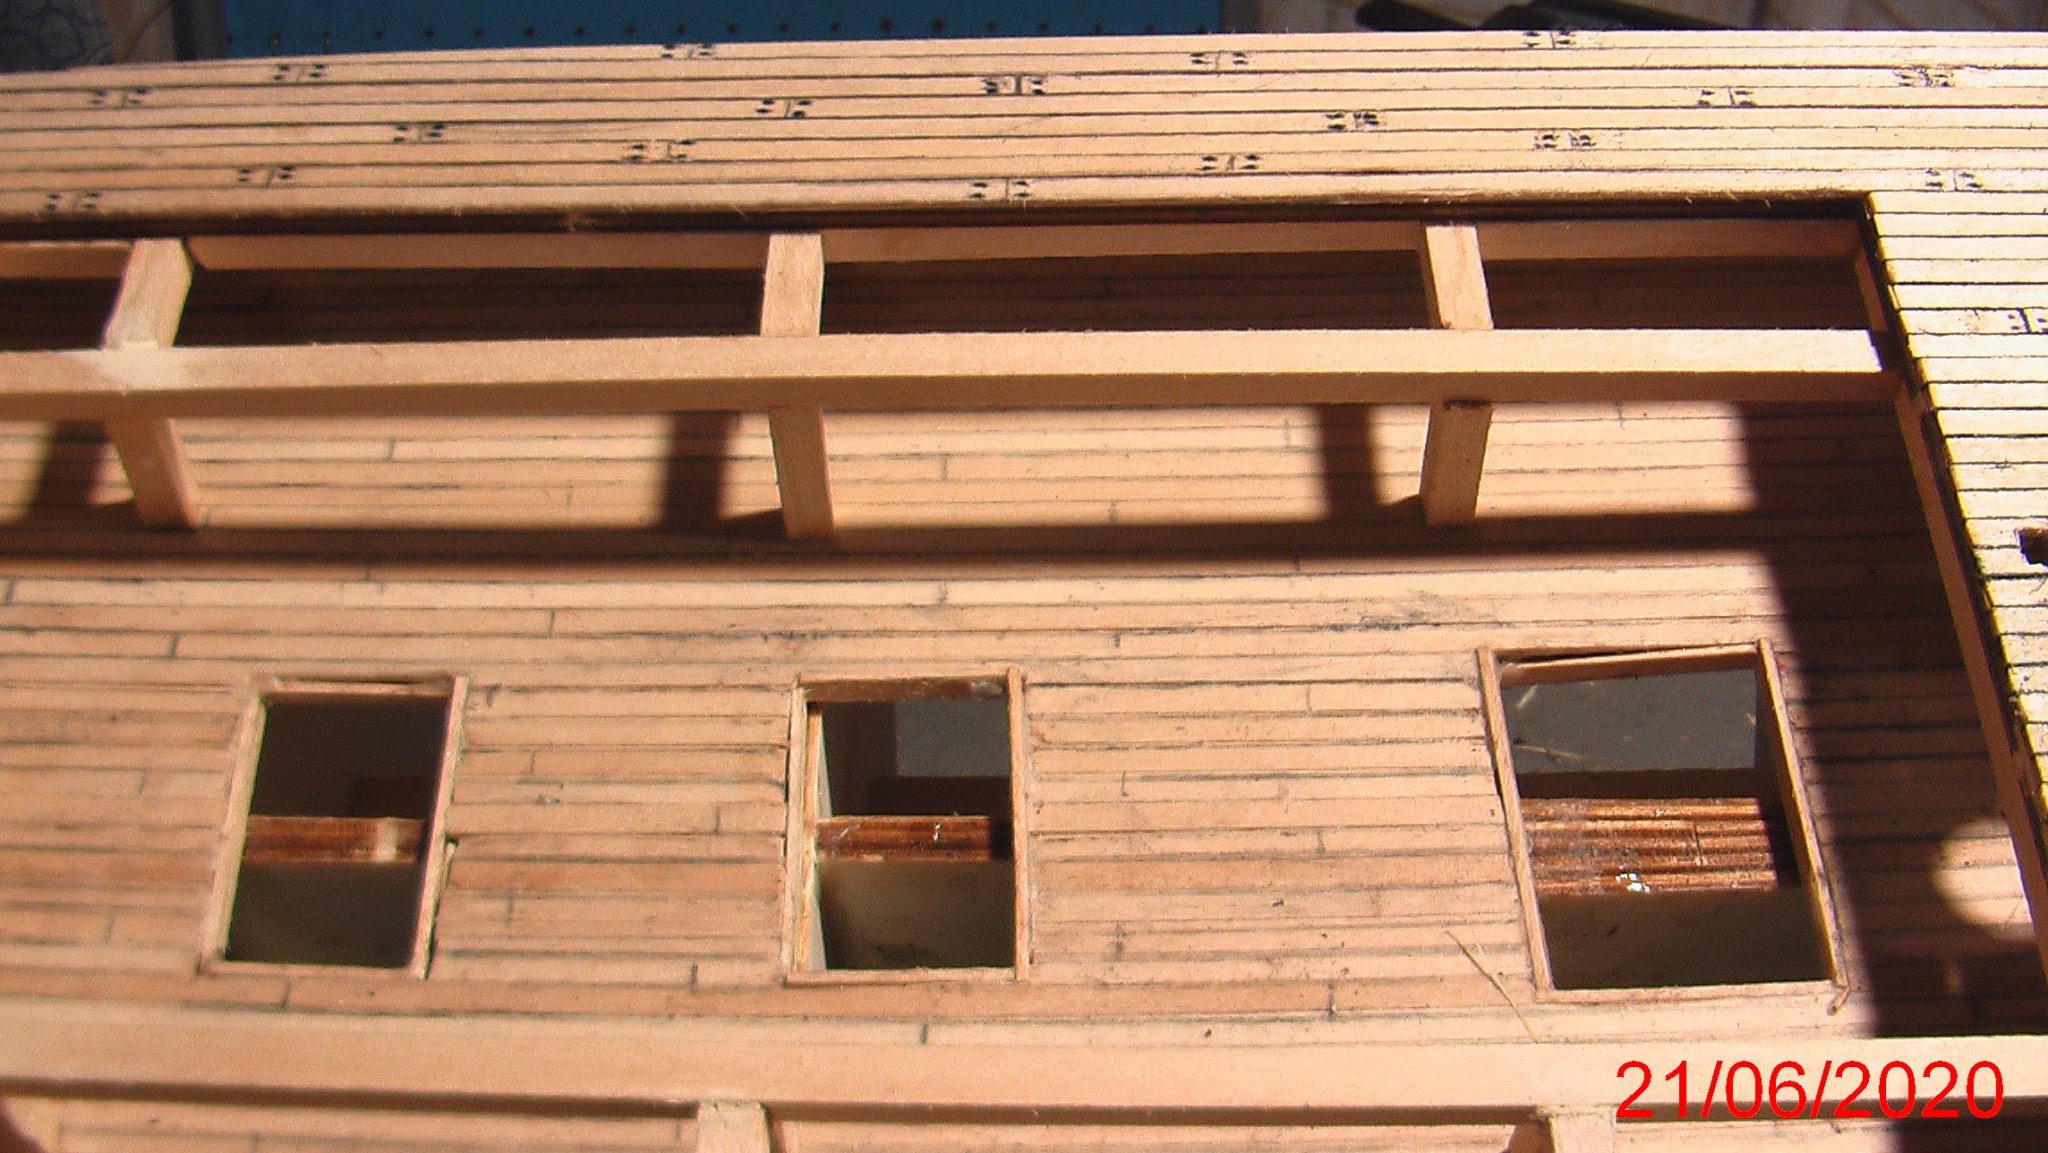
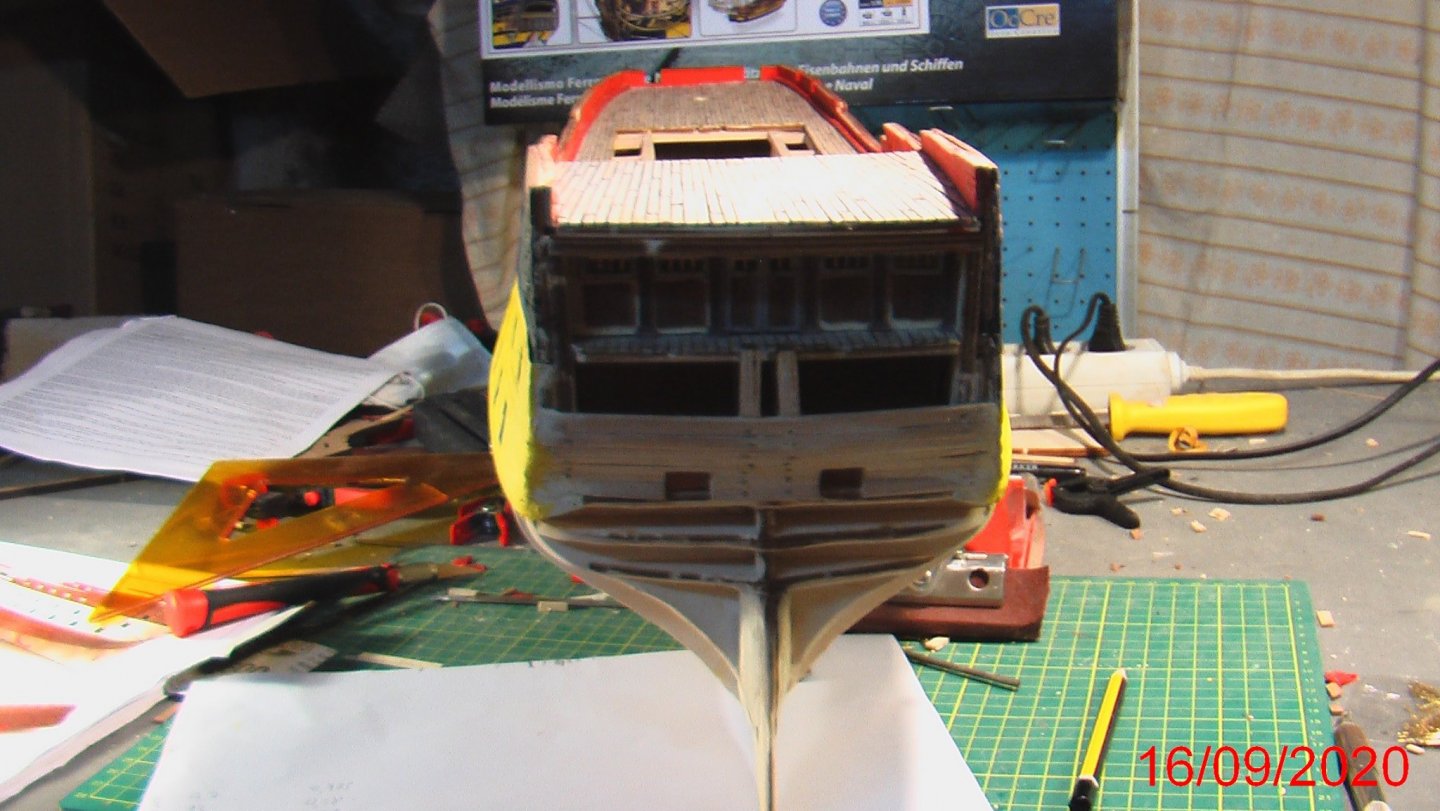
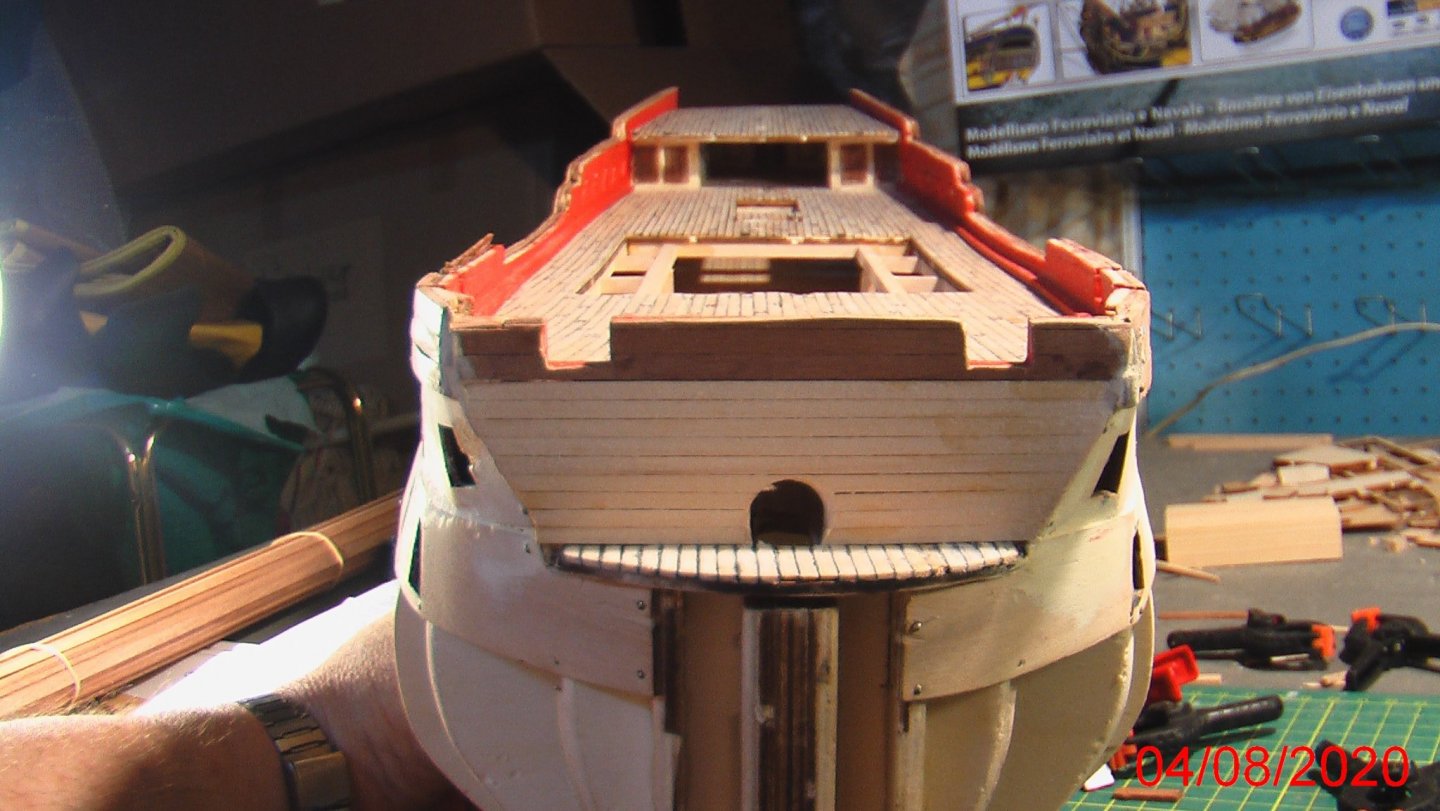
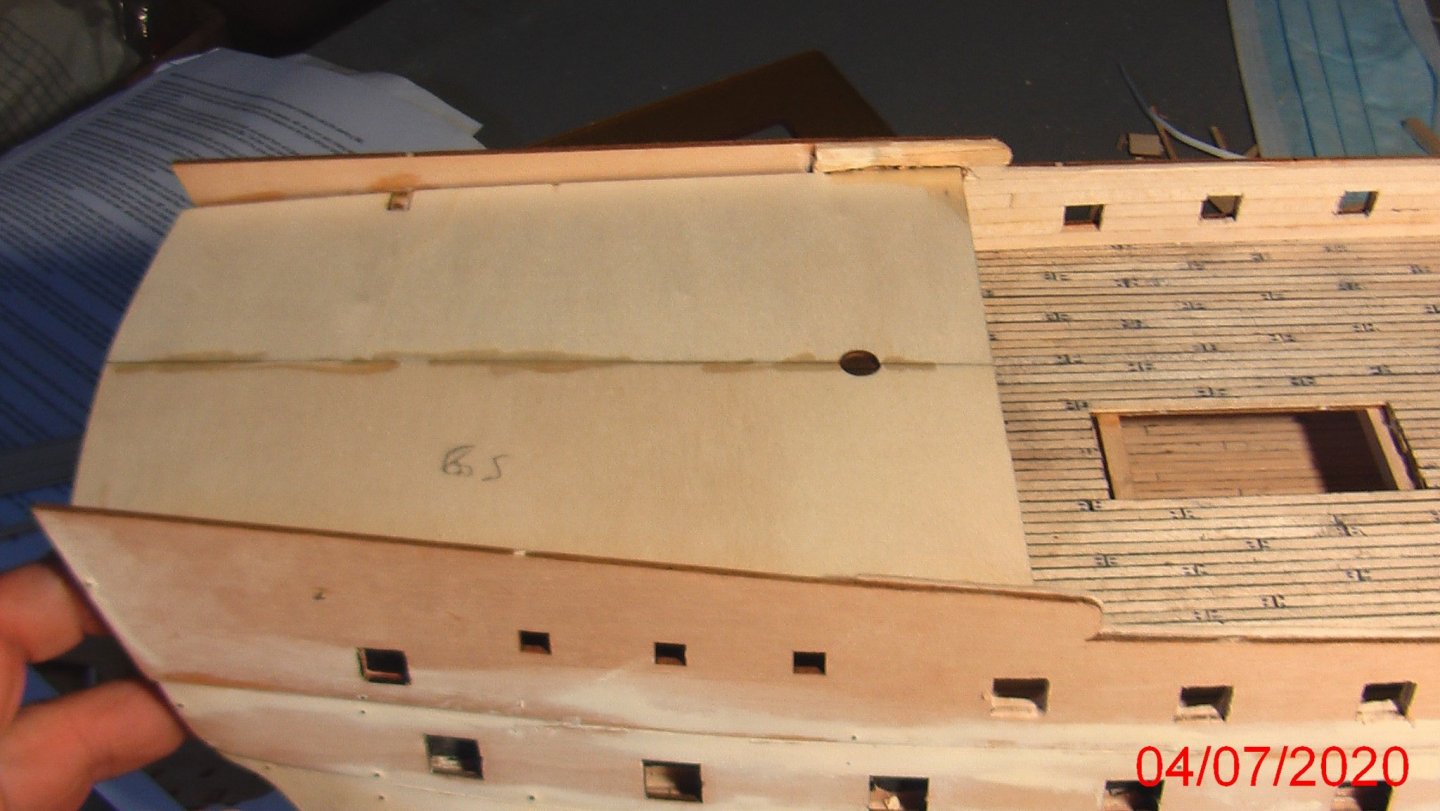
I finish now the cabin. Three parts in a shape of Π ... from wood,metal and cooper parts like the rear part of cabin. A ladder with 7 steps made in front,lead to lower deck,as you see in the picture from beh ind. After i glue the third deck and i start now to plank it and also the remain bulkheads left and right.


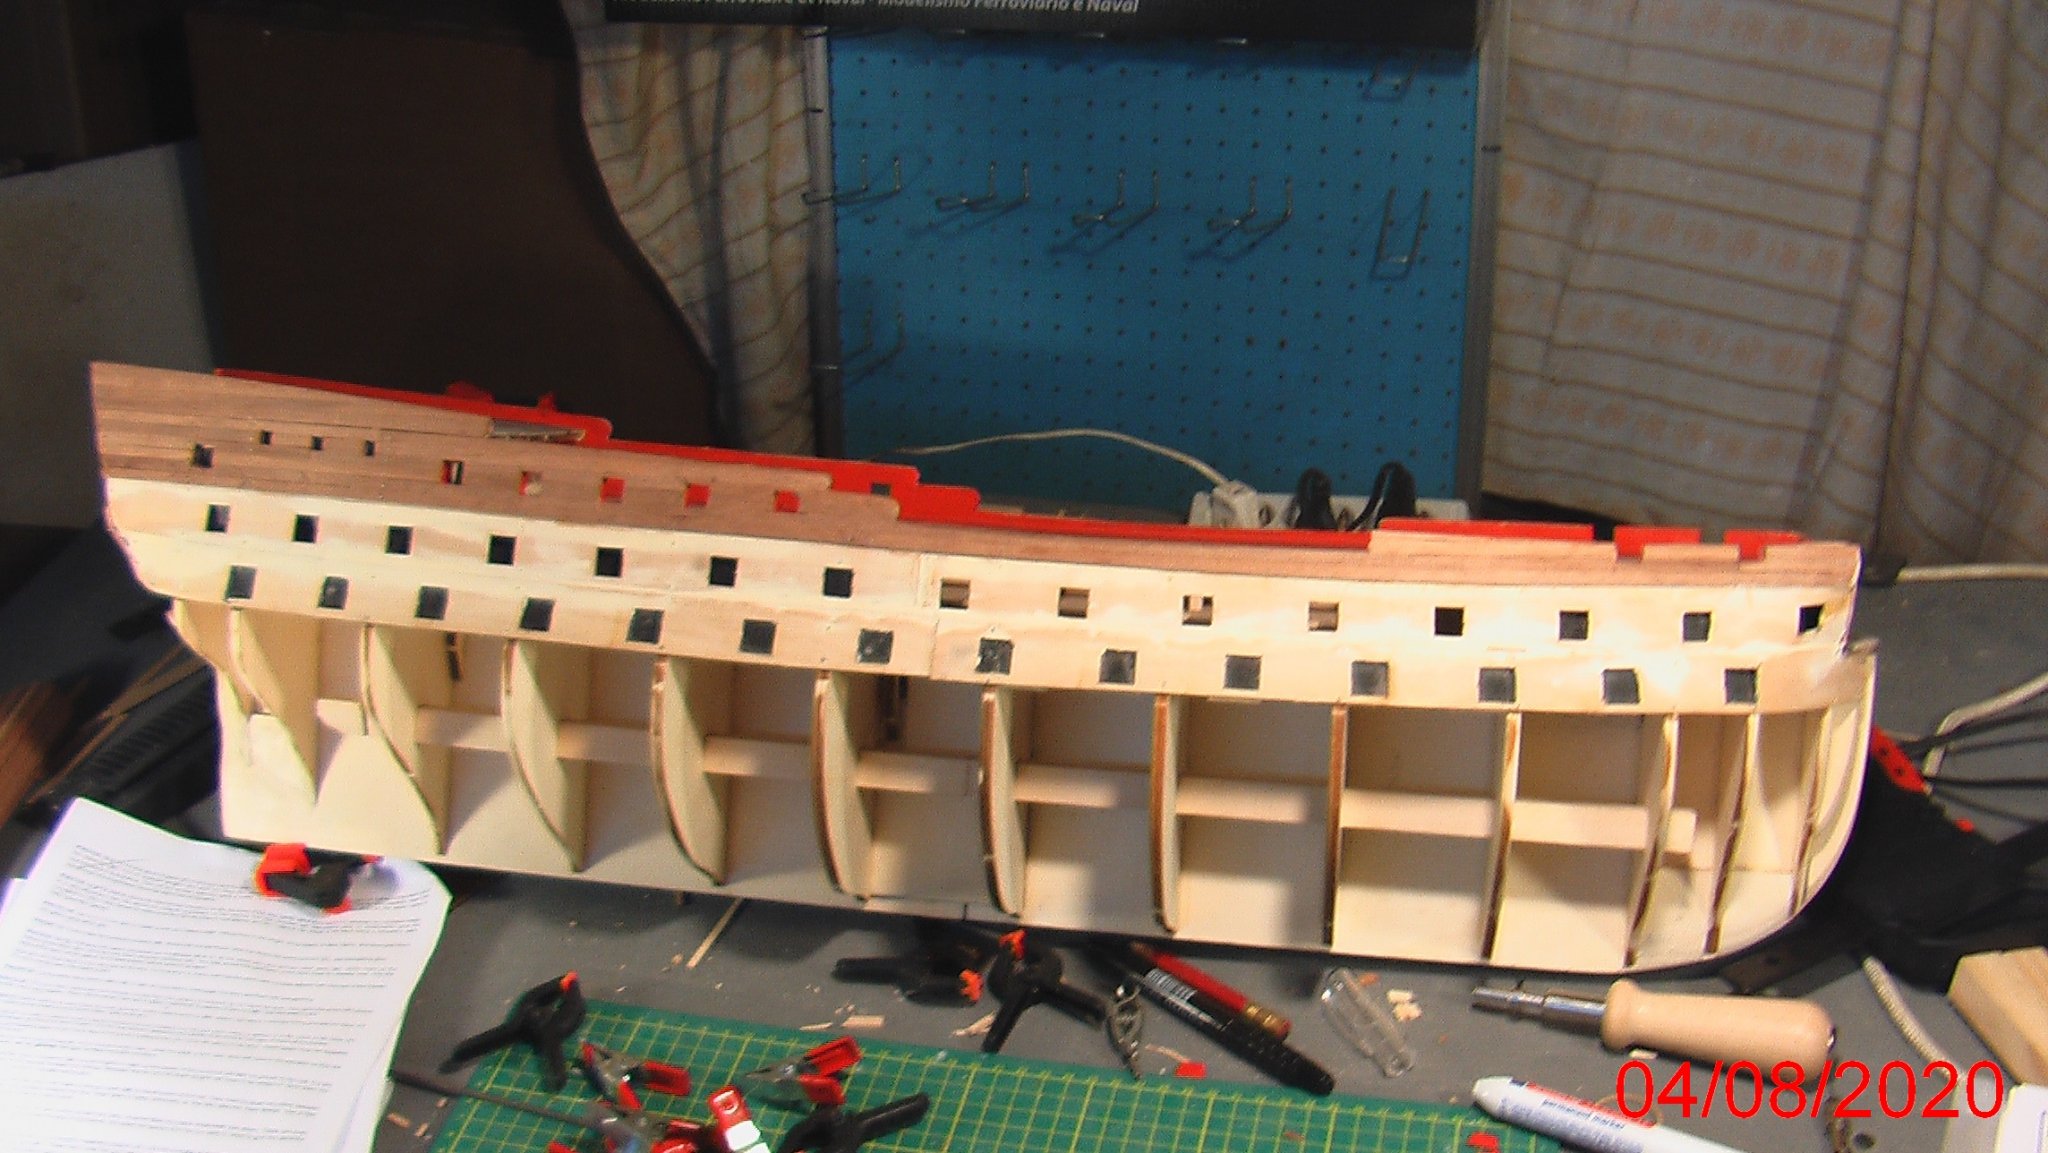
-
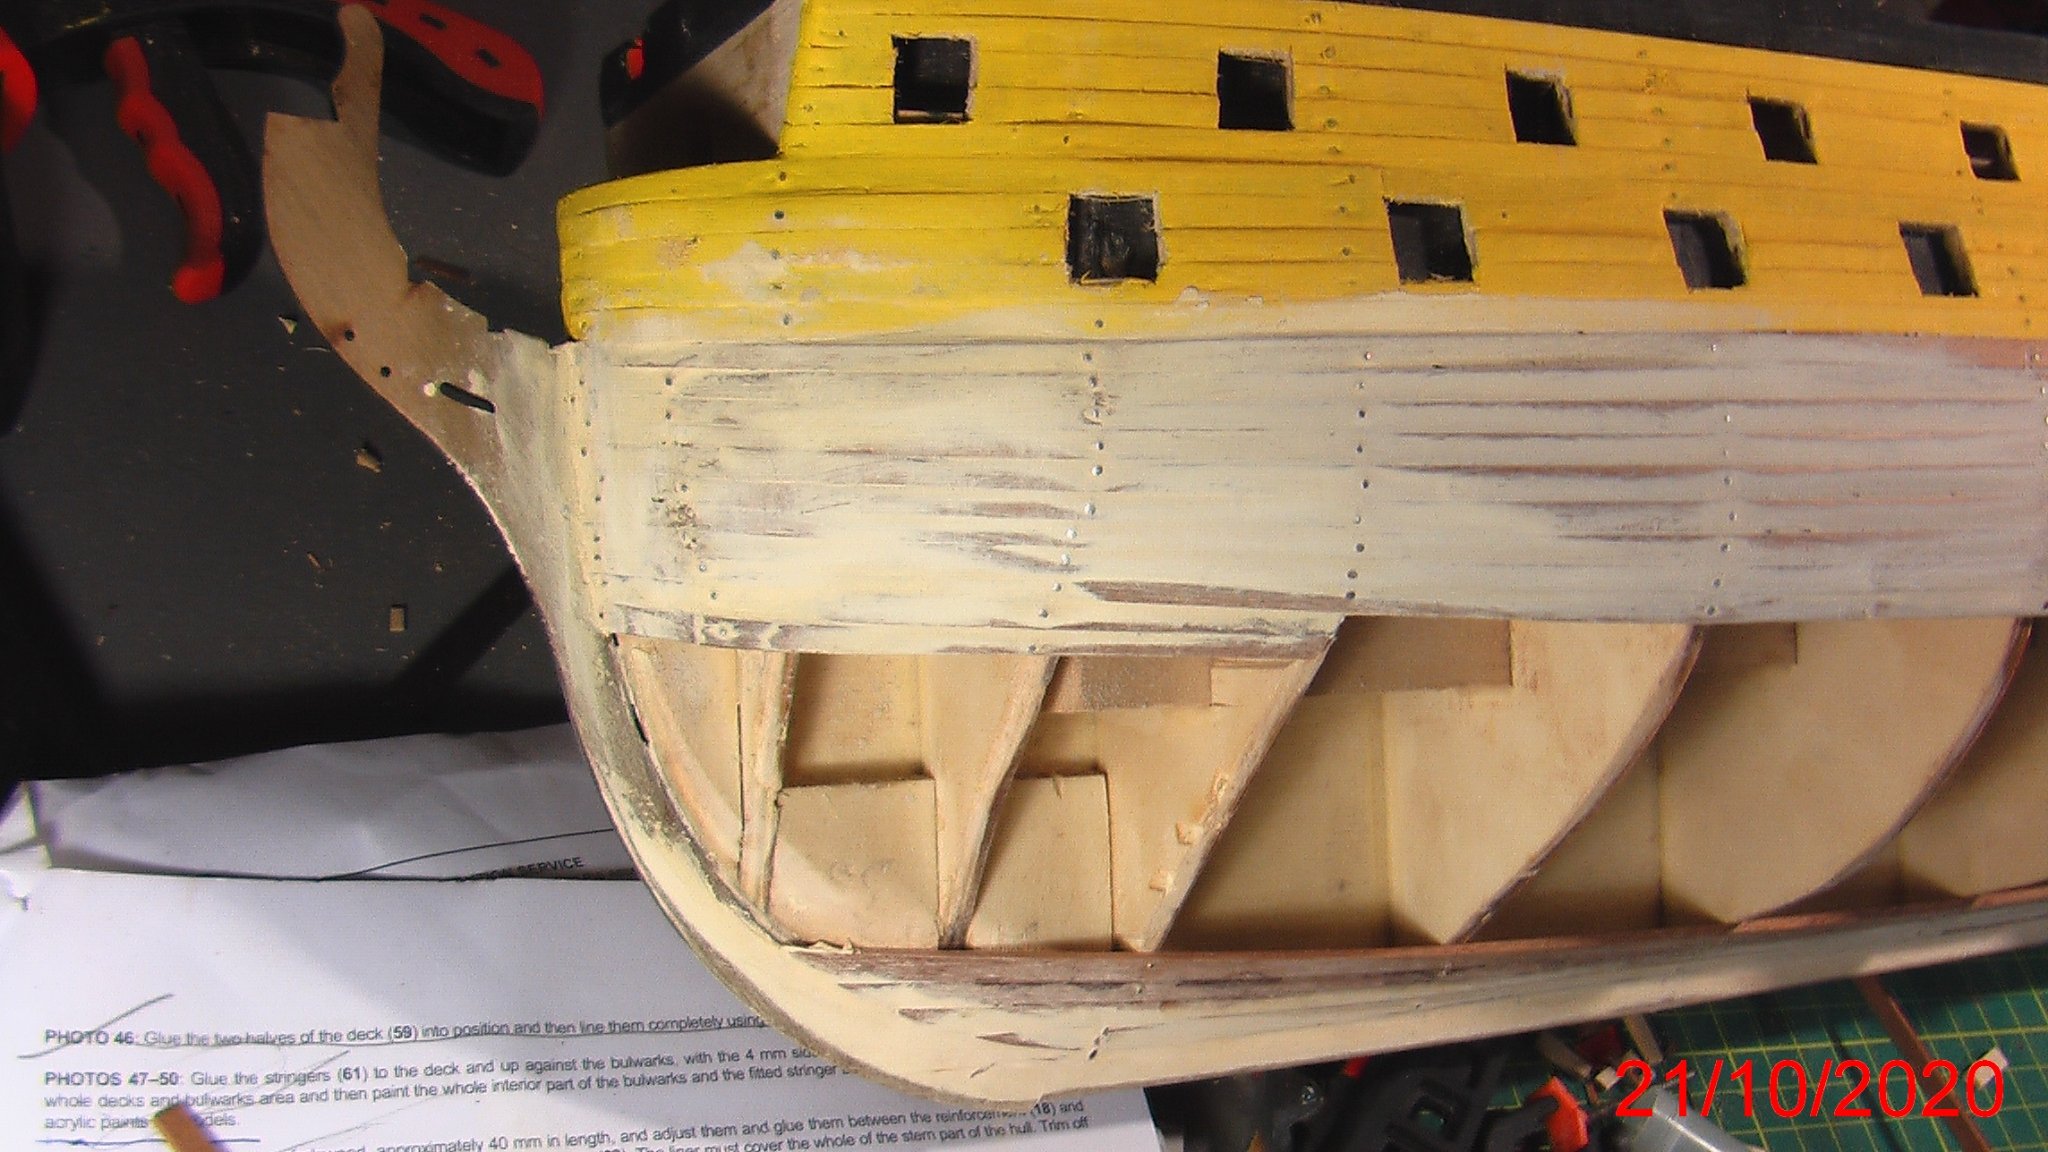
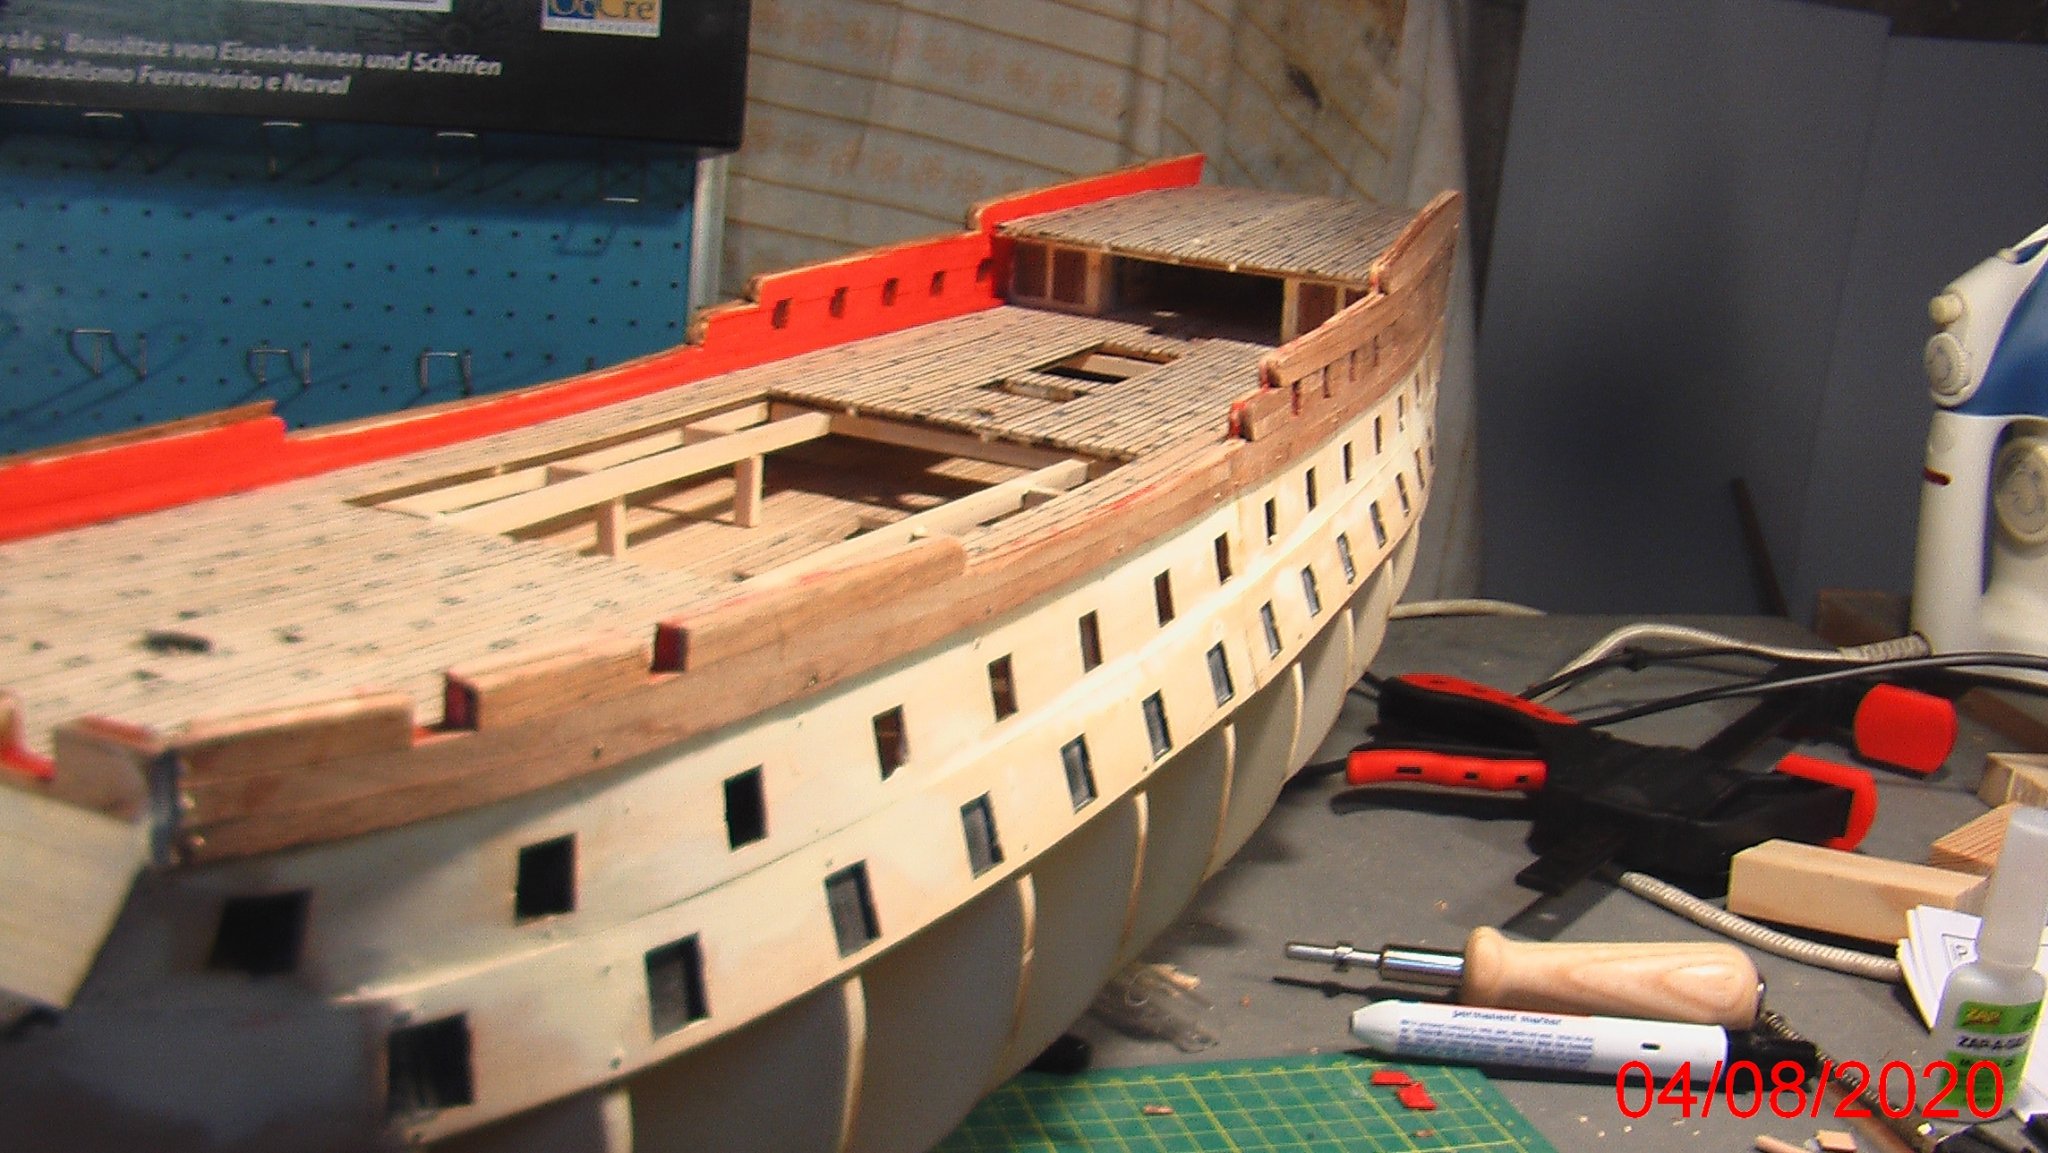
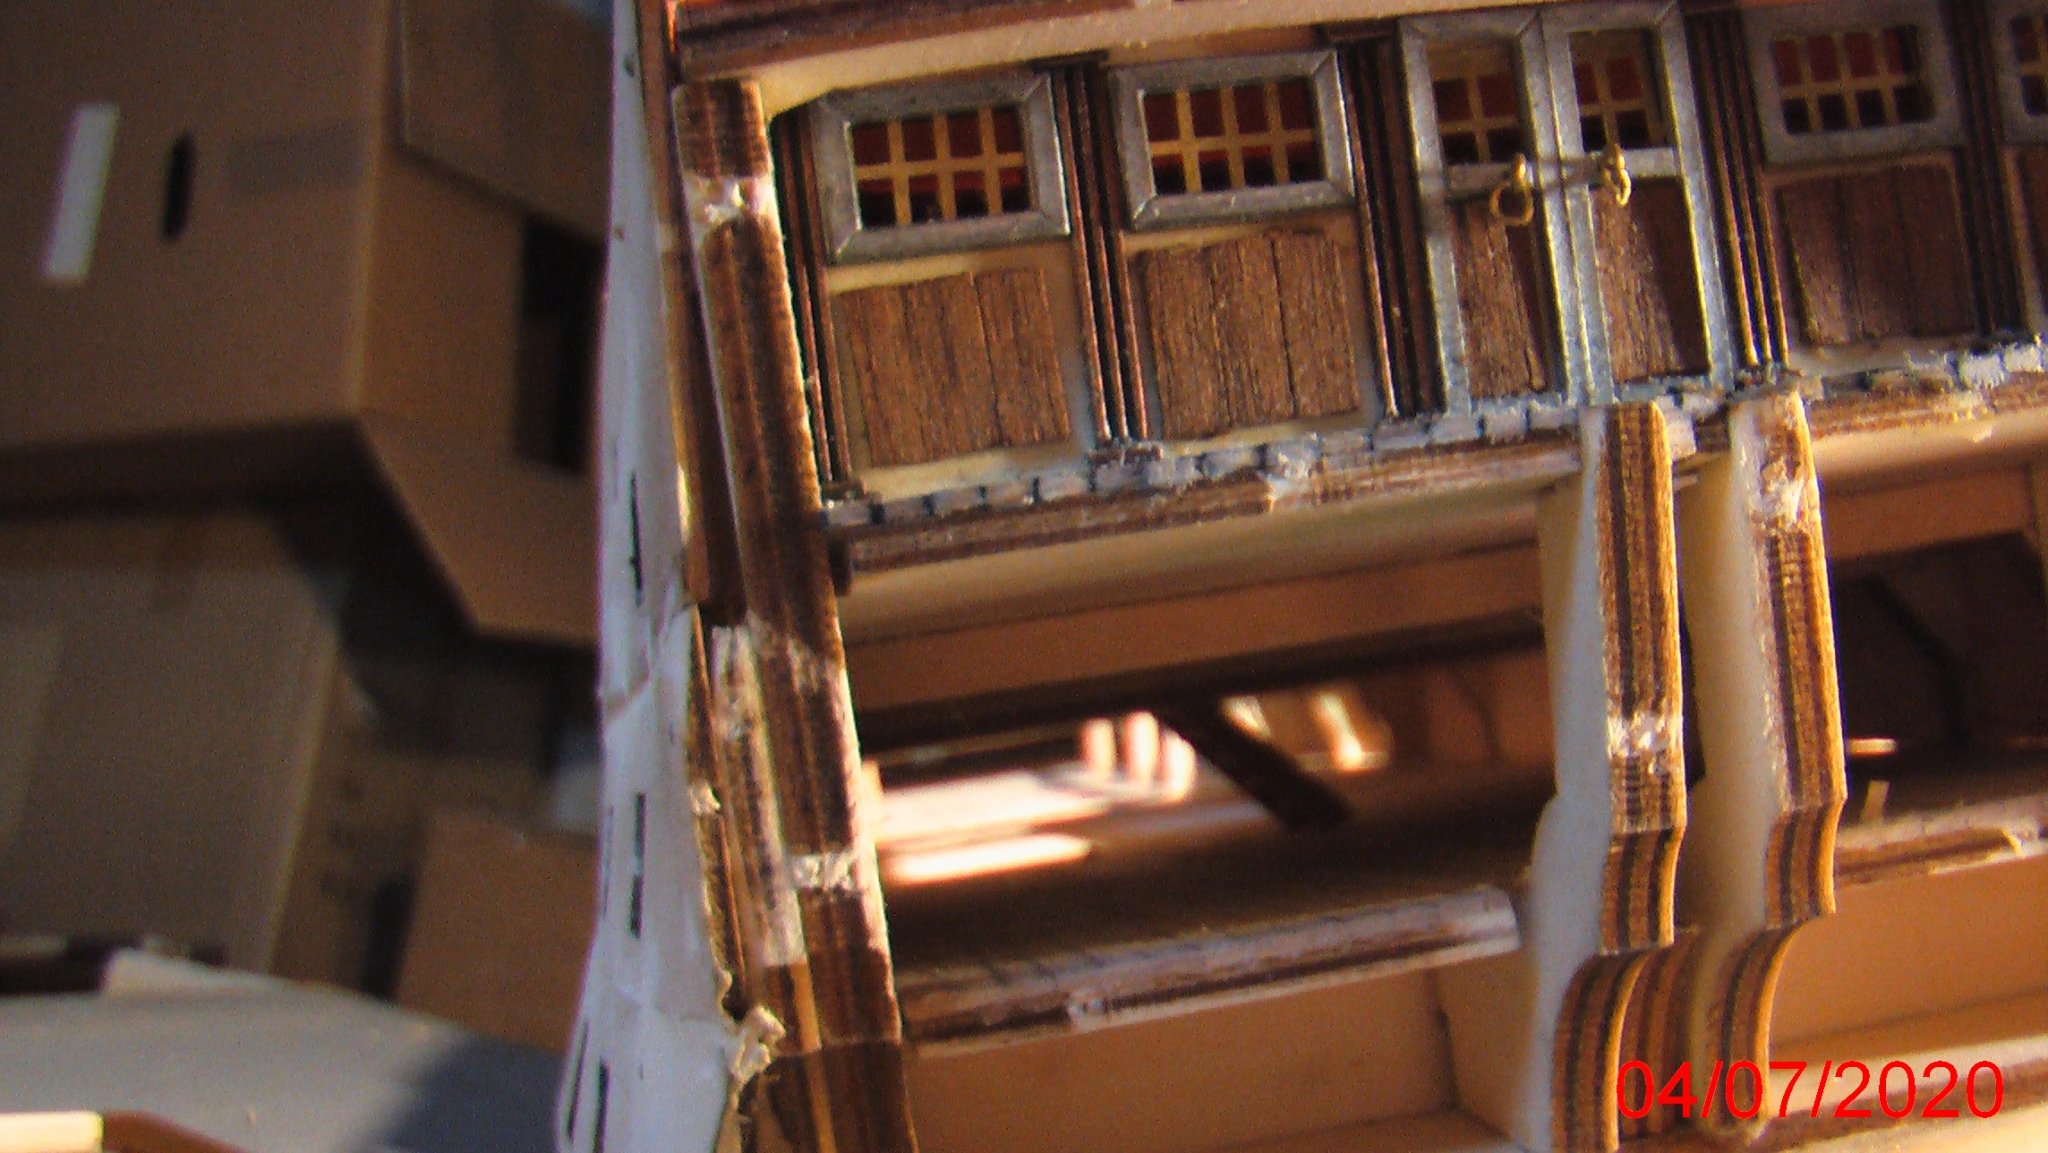
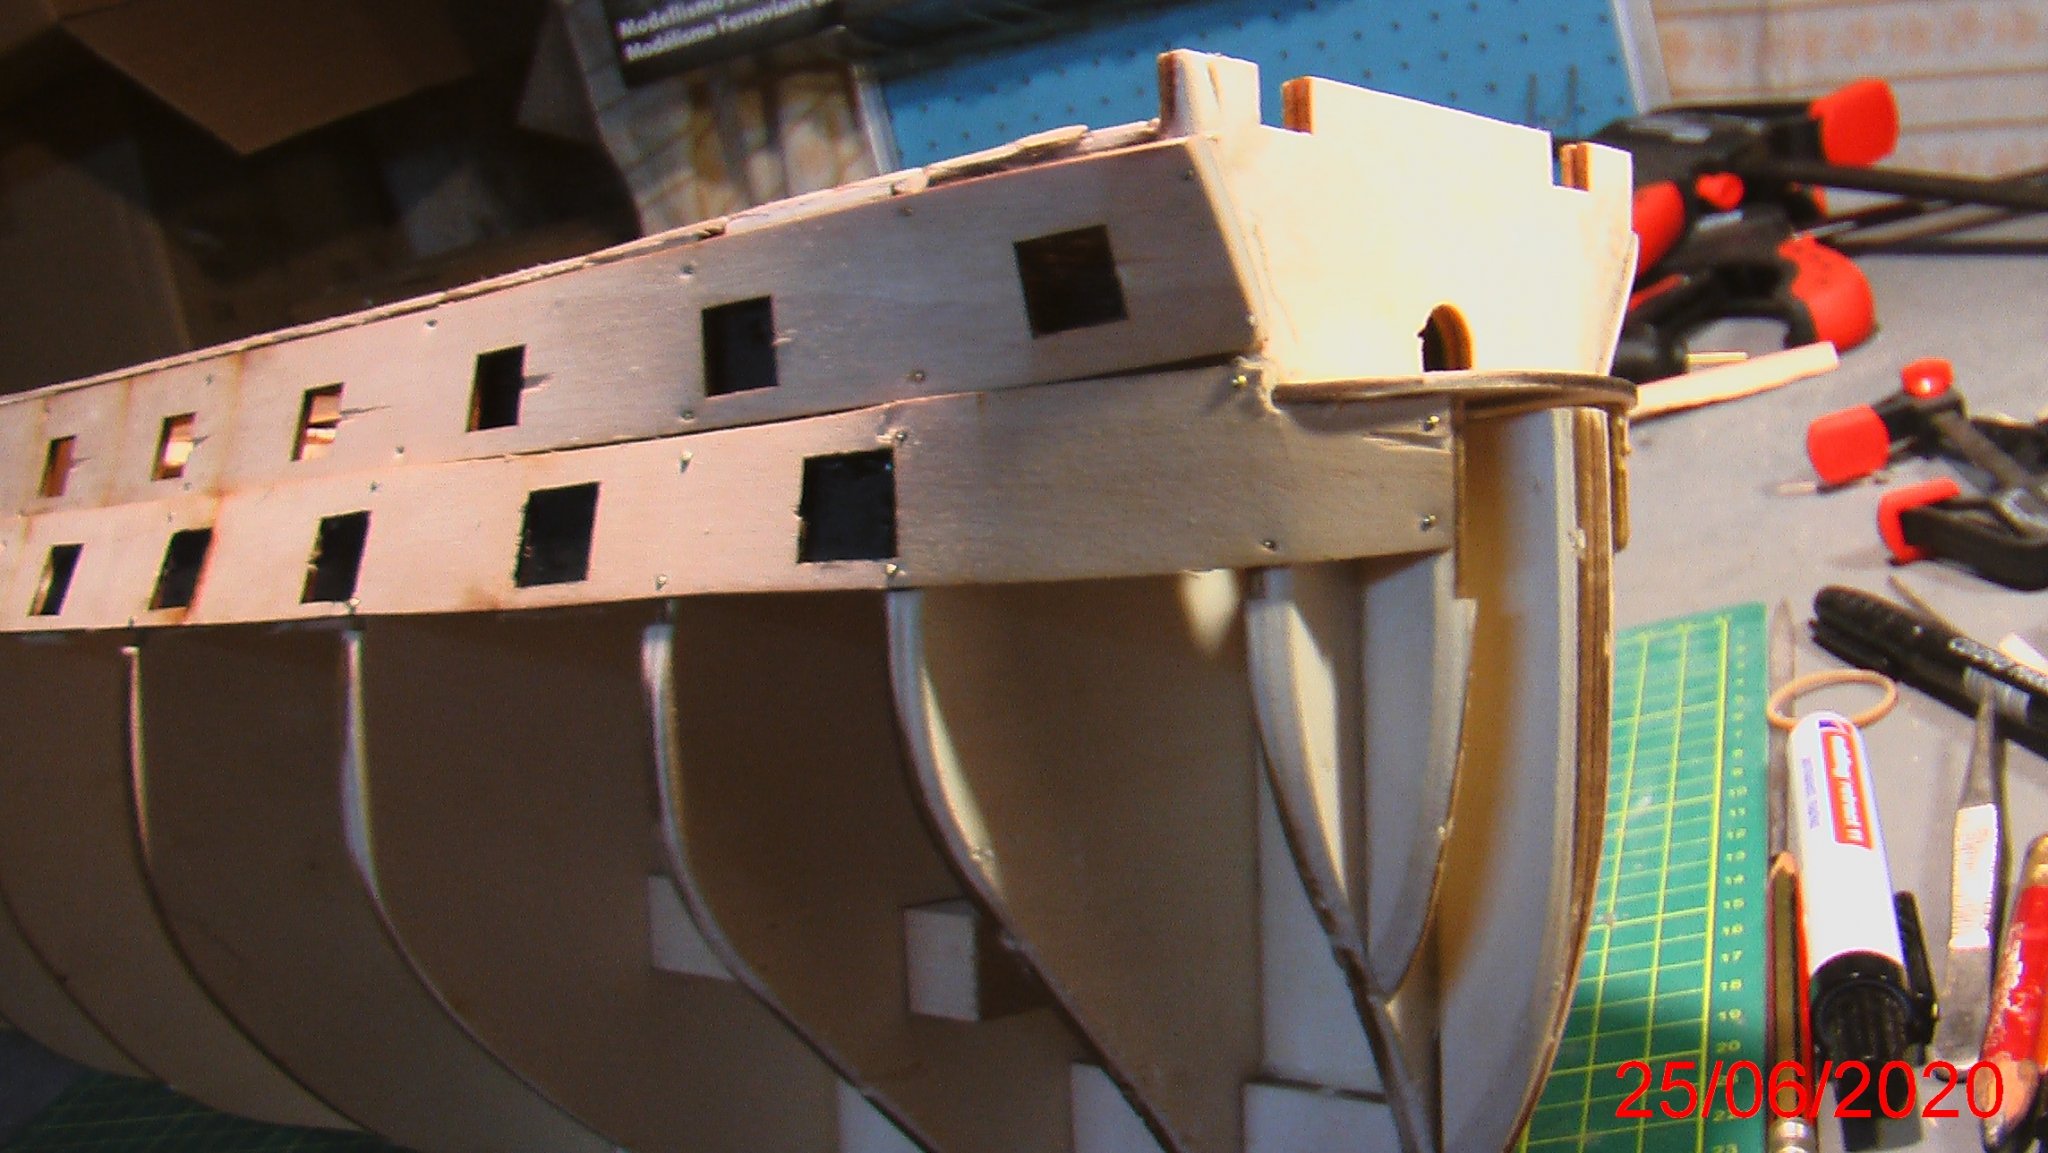
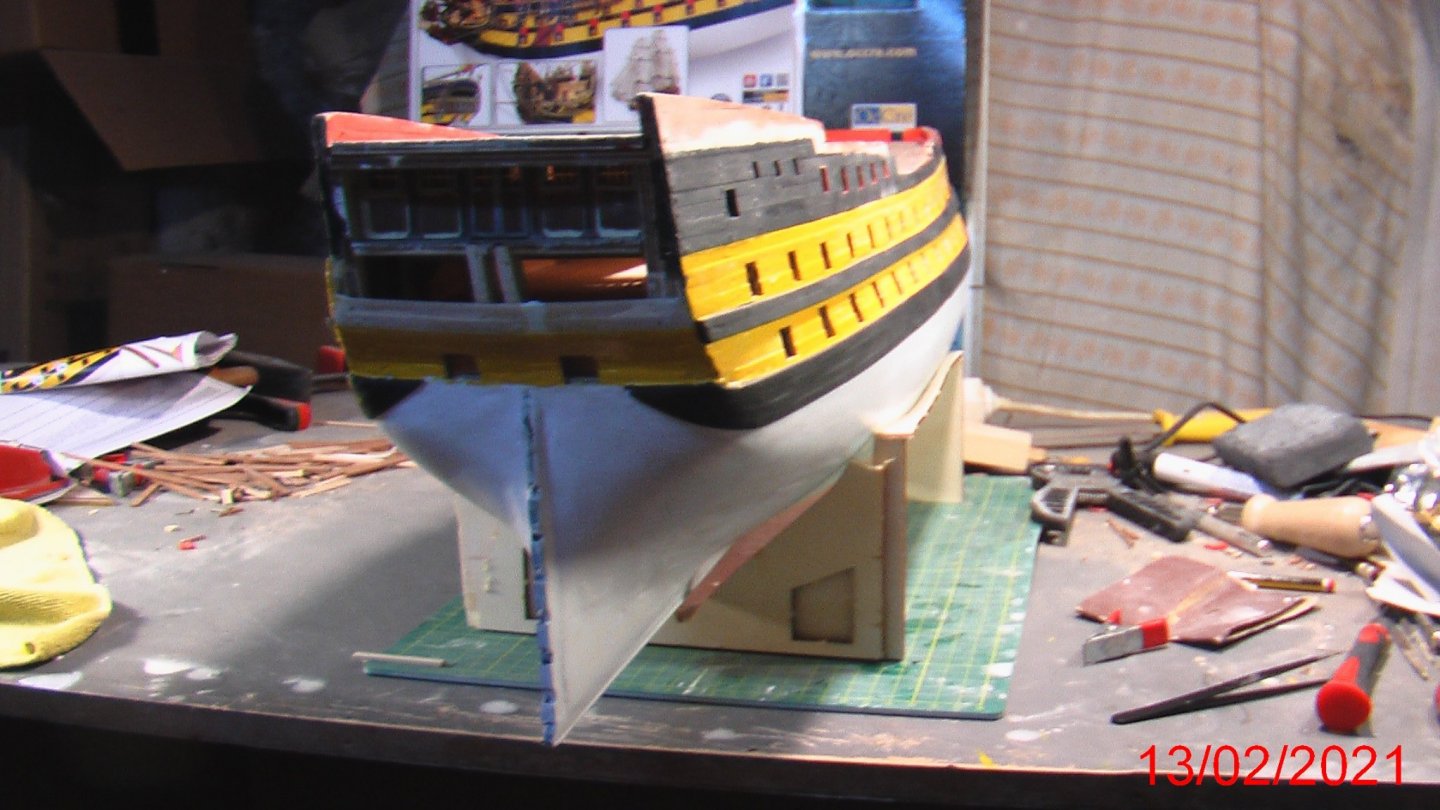
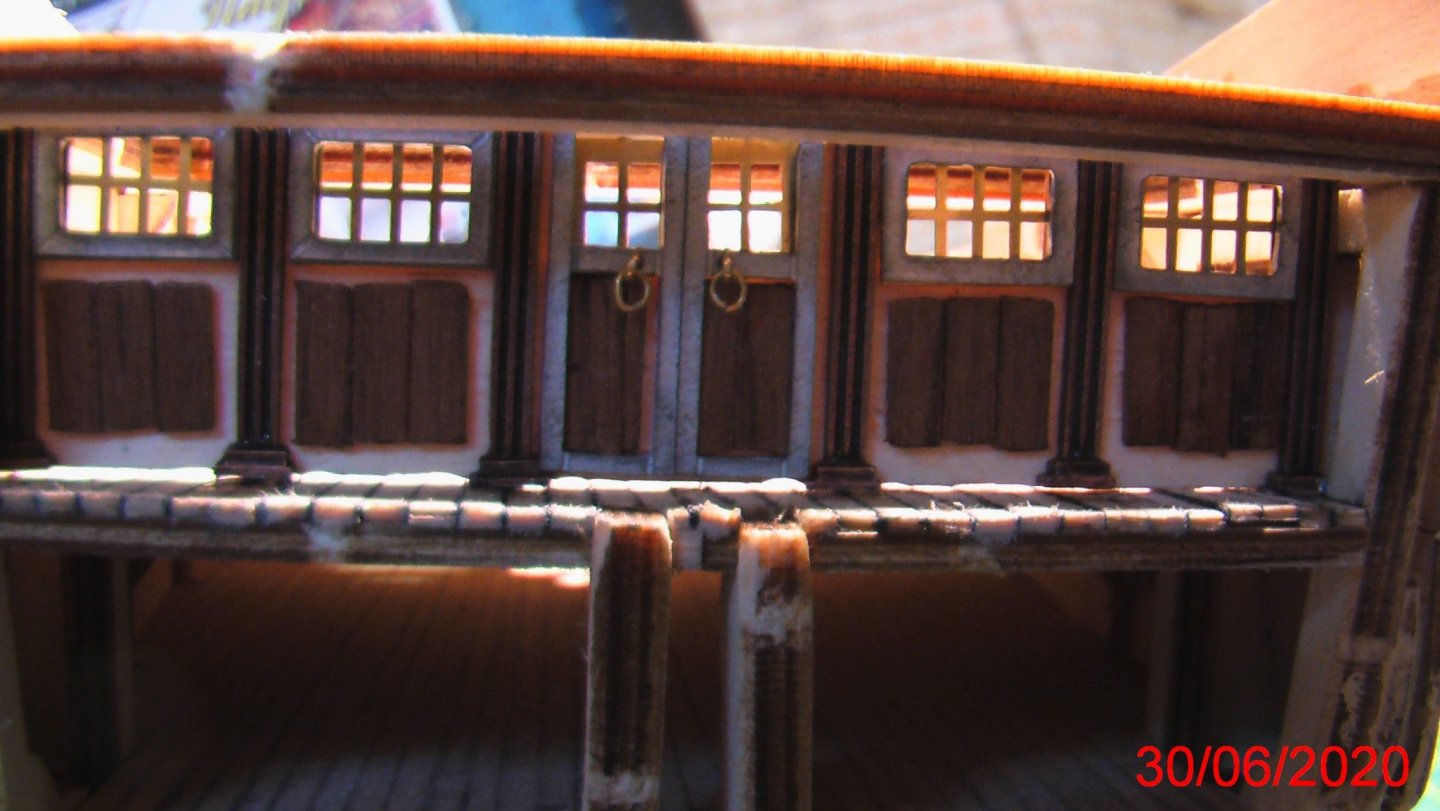
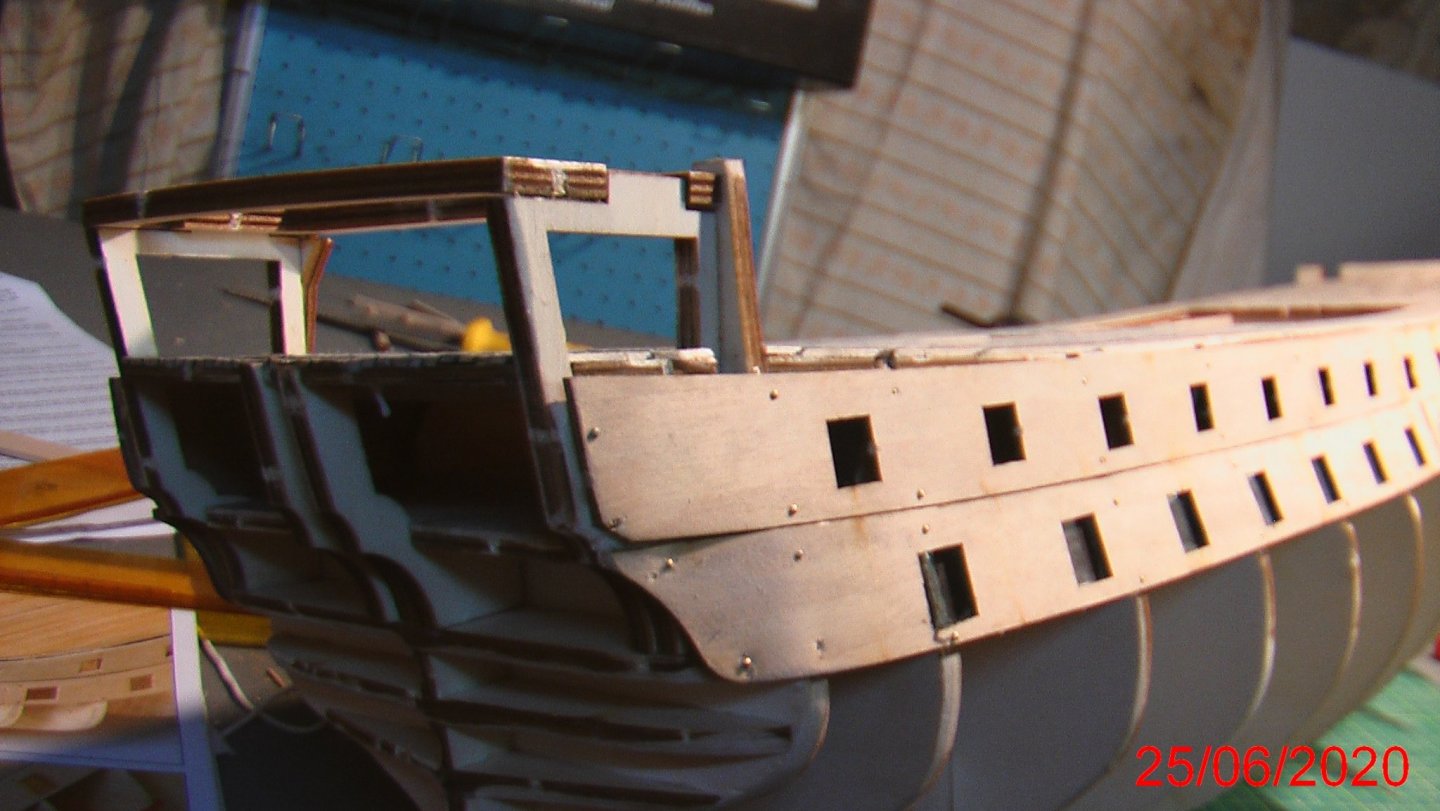
Now i have put the final bulkheads,so the shape of the ship is now visible. I cover the inside of the bulkheads with planks,opening the gun ports. I start the rear entrance of the cabin. As you see in the photo is a difficult part,to make all of this must glue wooden,brass,metal pieces together as seen in plans. Now i glue all this in the rear of the cabin... Now must make the rest part of the cabin...


-
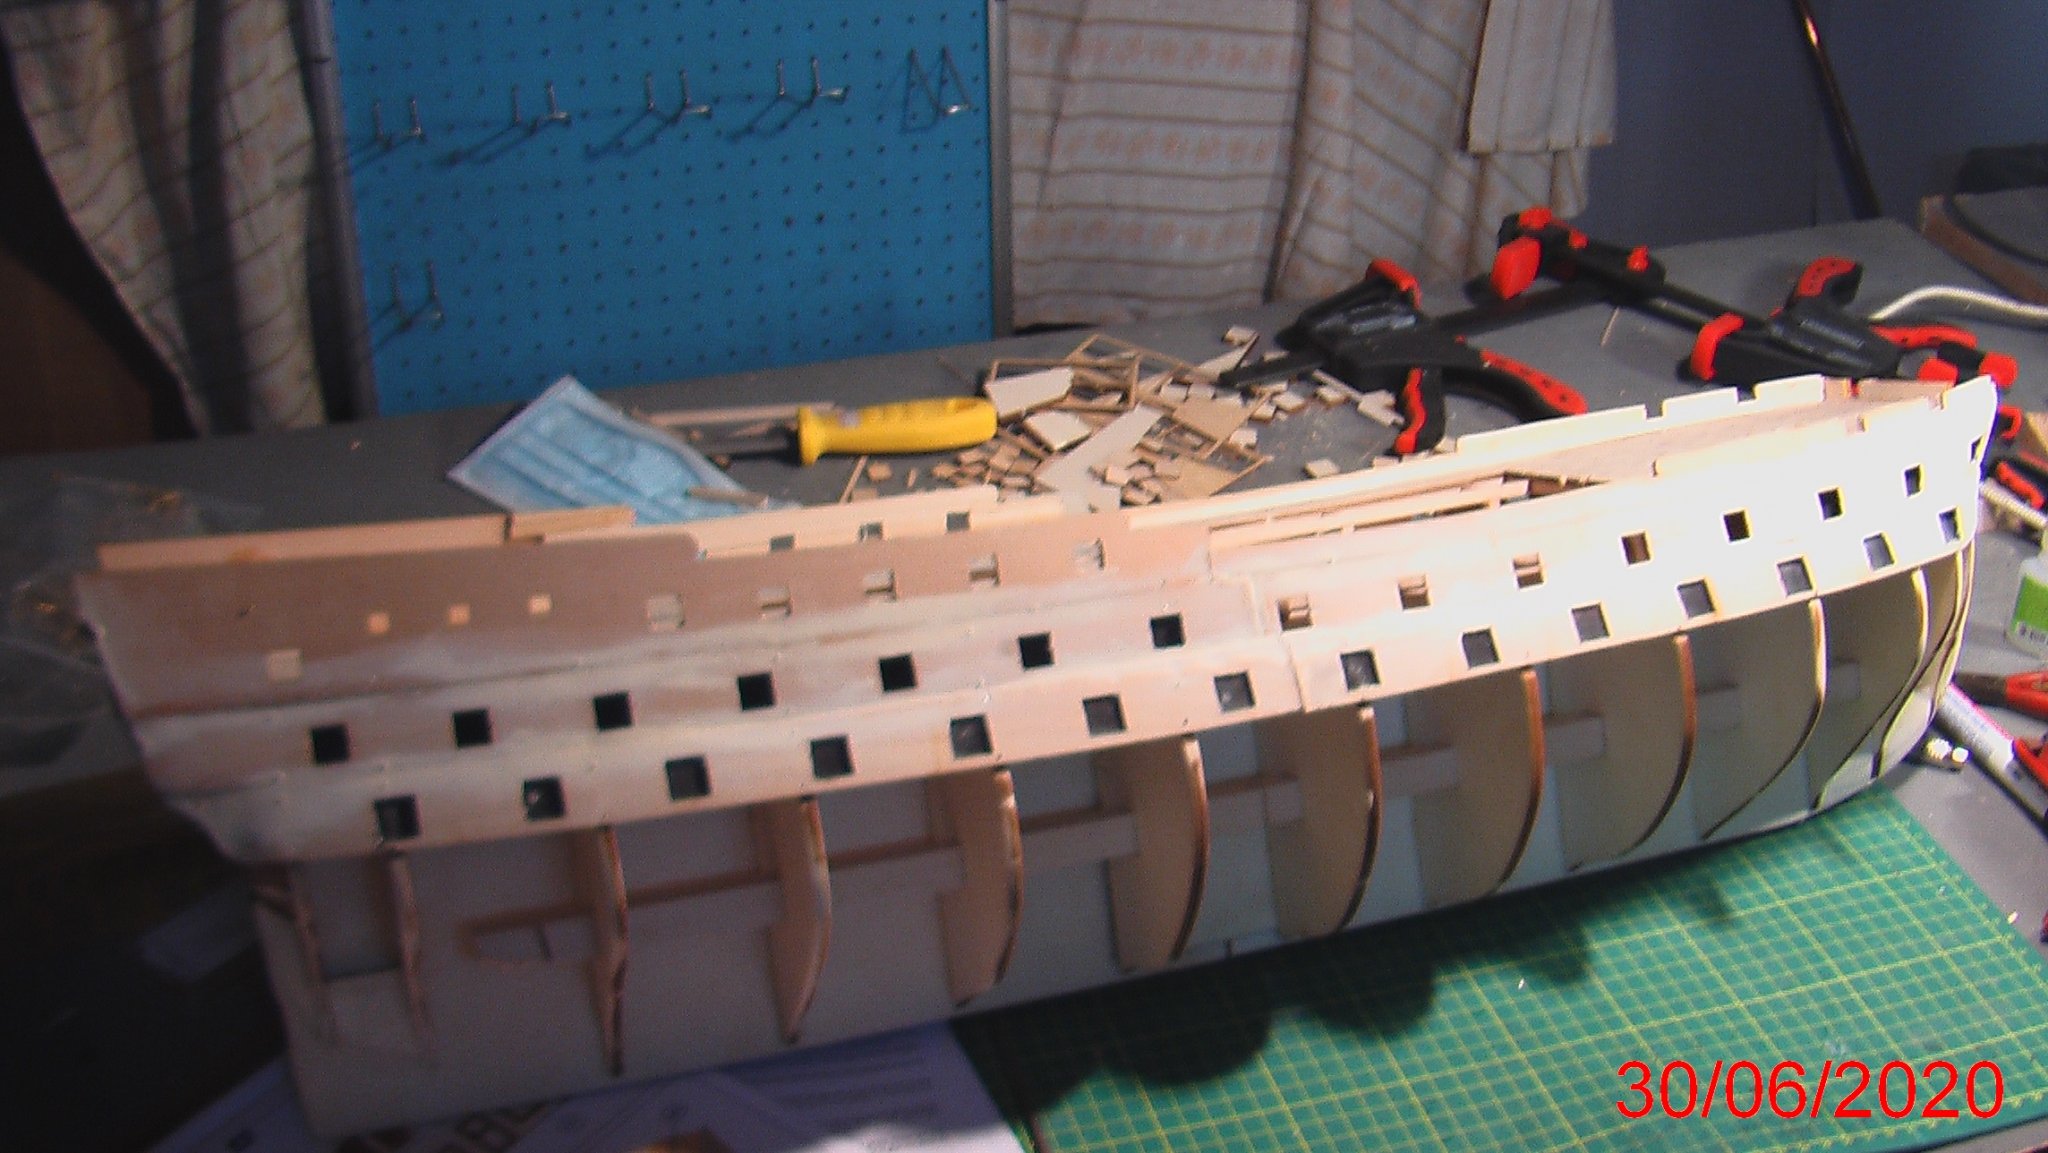
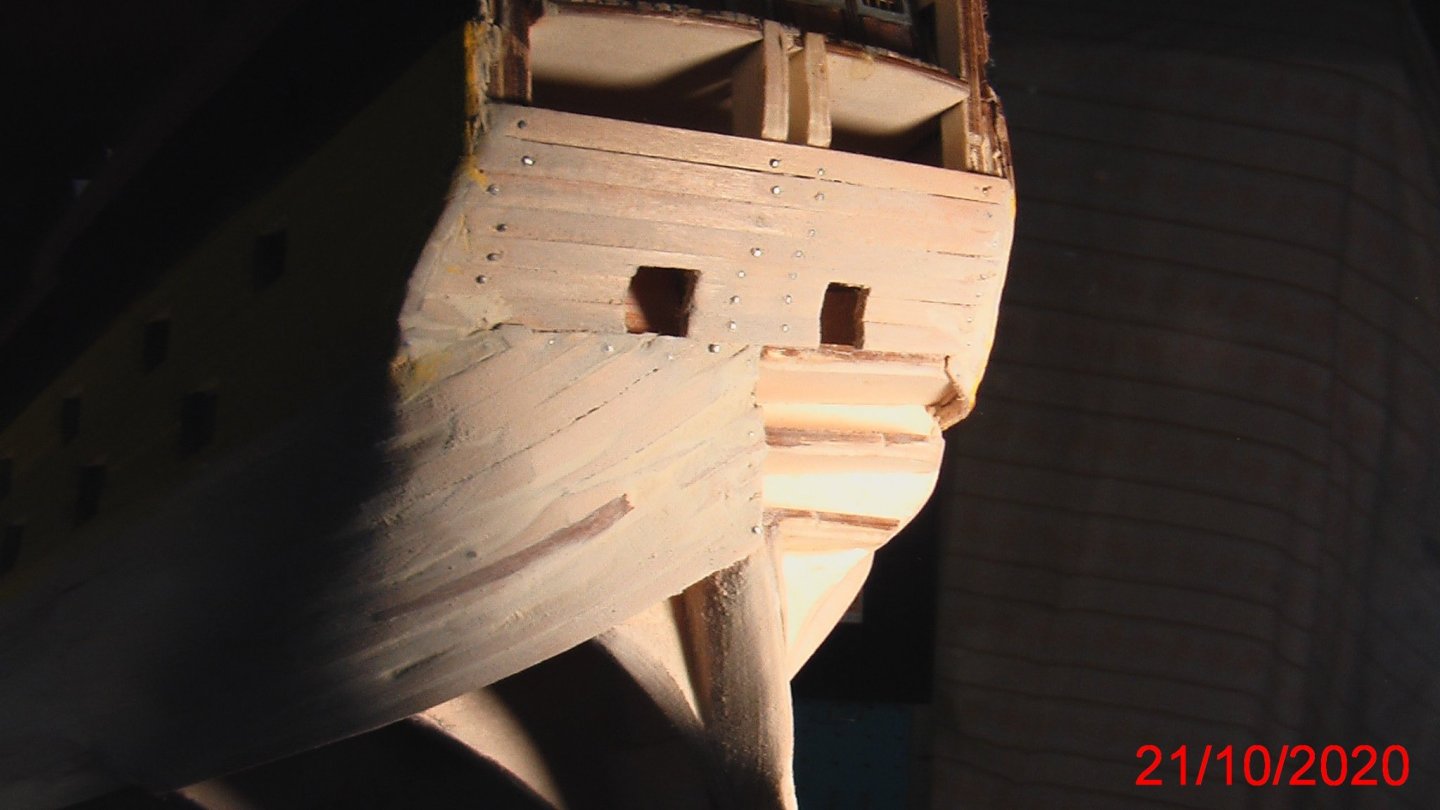
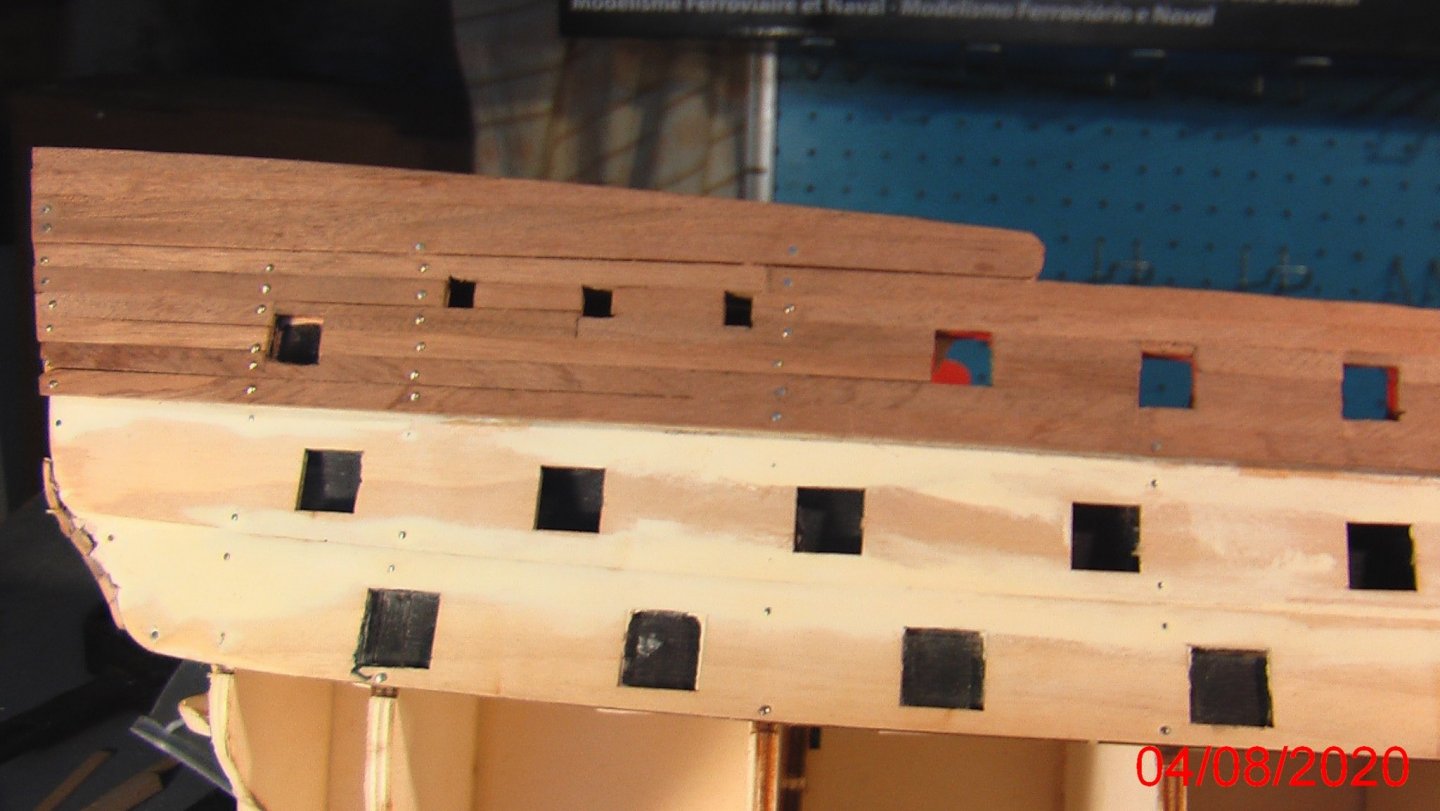
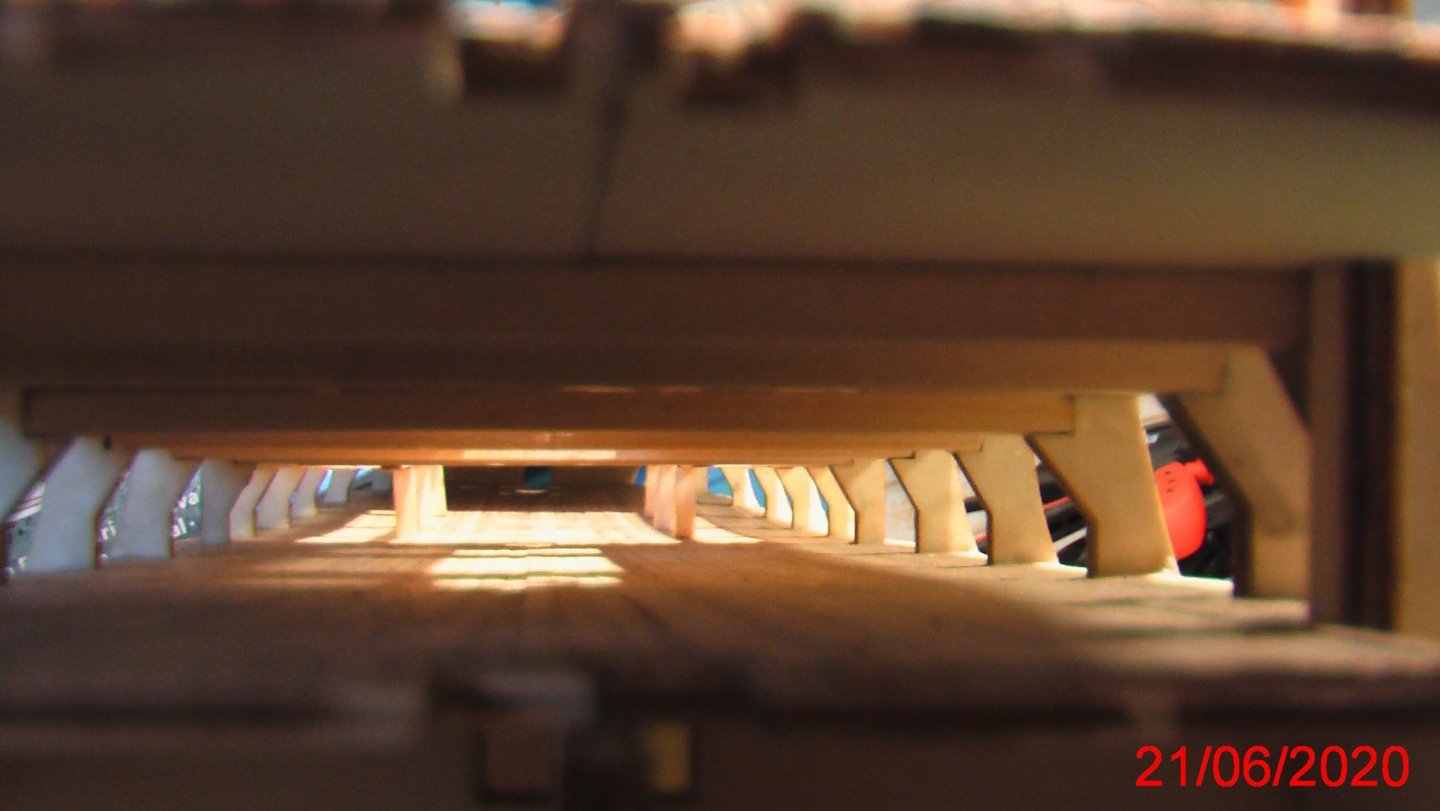
Now i have put the gun ports. Little attention to curve them at bow and stern. All this will be sanded so the second planking will be smooth and paint it in colors black and yellow. Back of every gun port there is a piece of wood paint with black color where the guns will be glued...


-
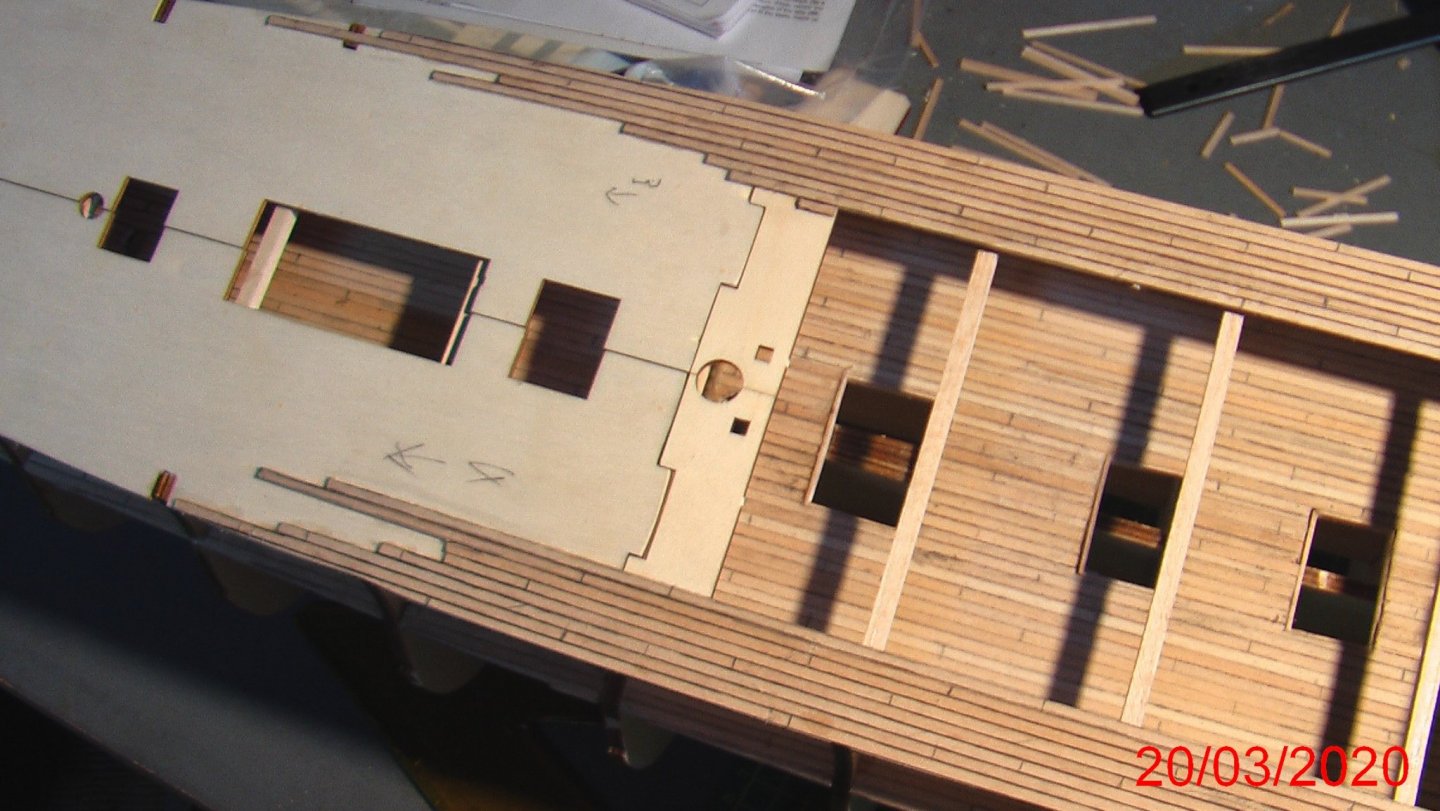
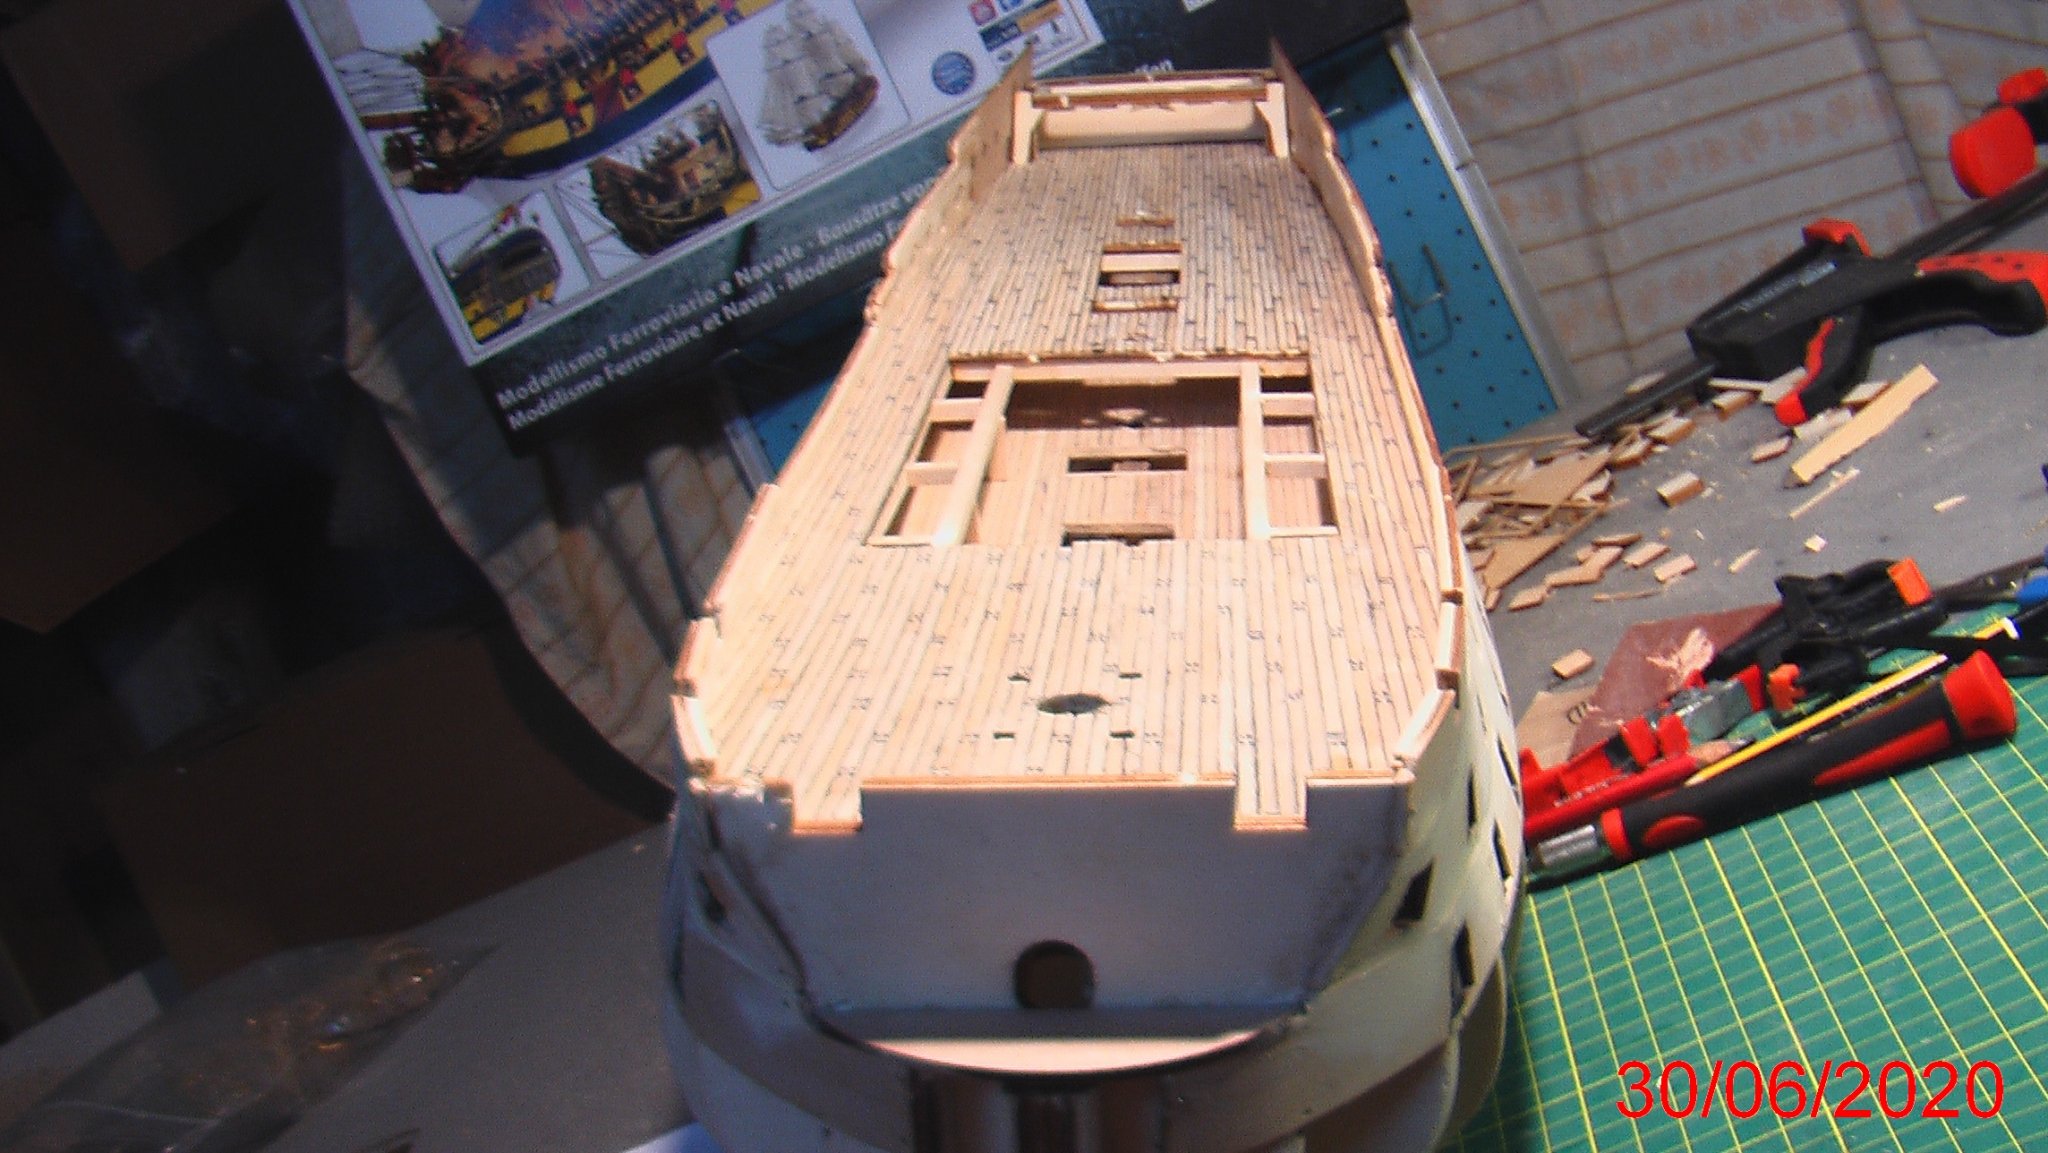
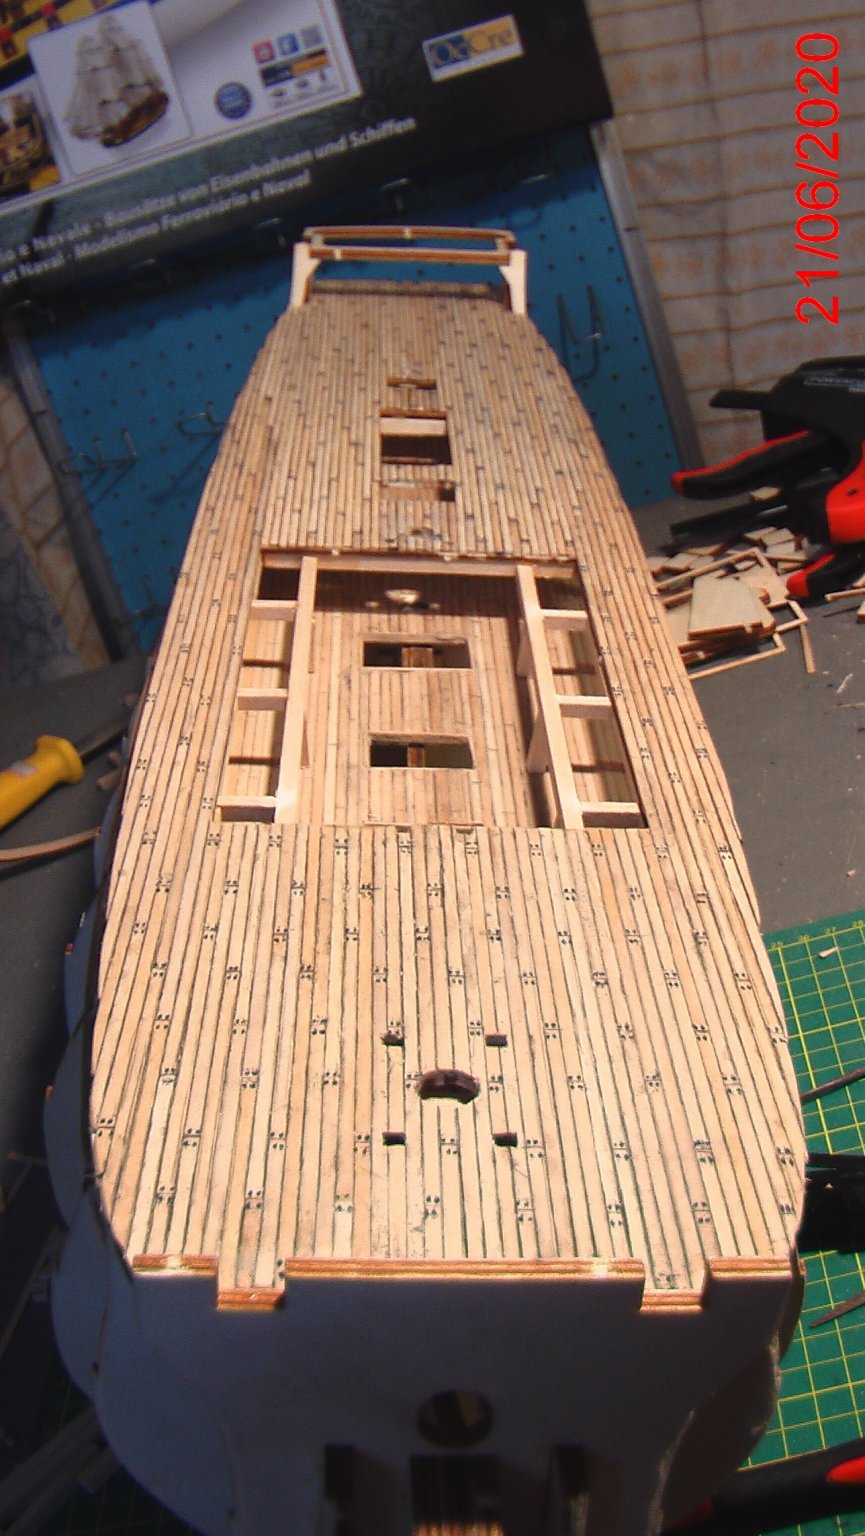
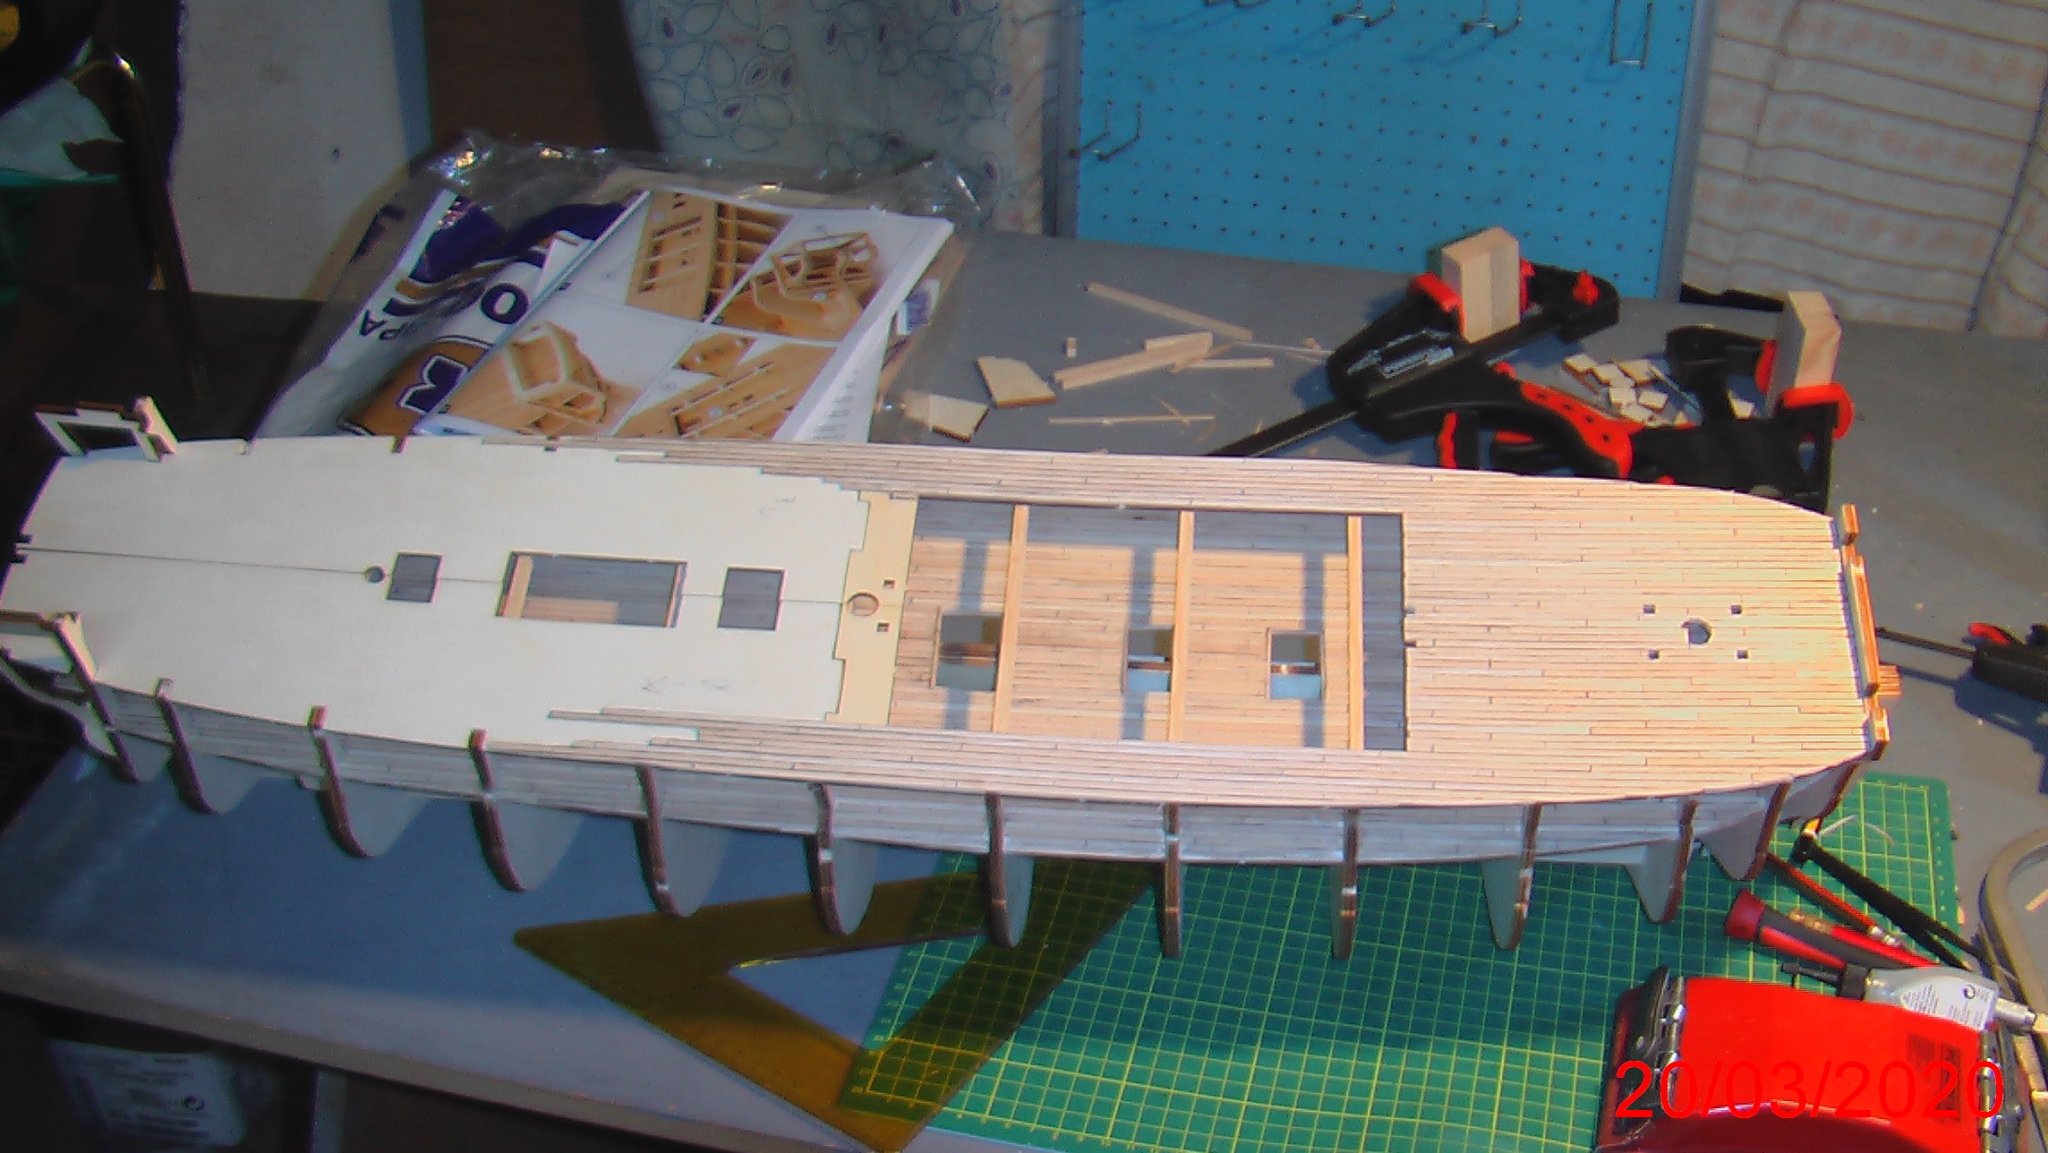
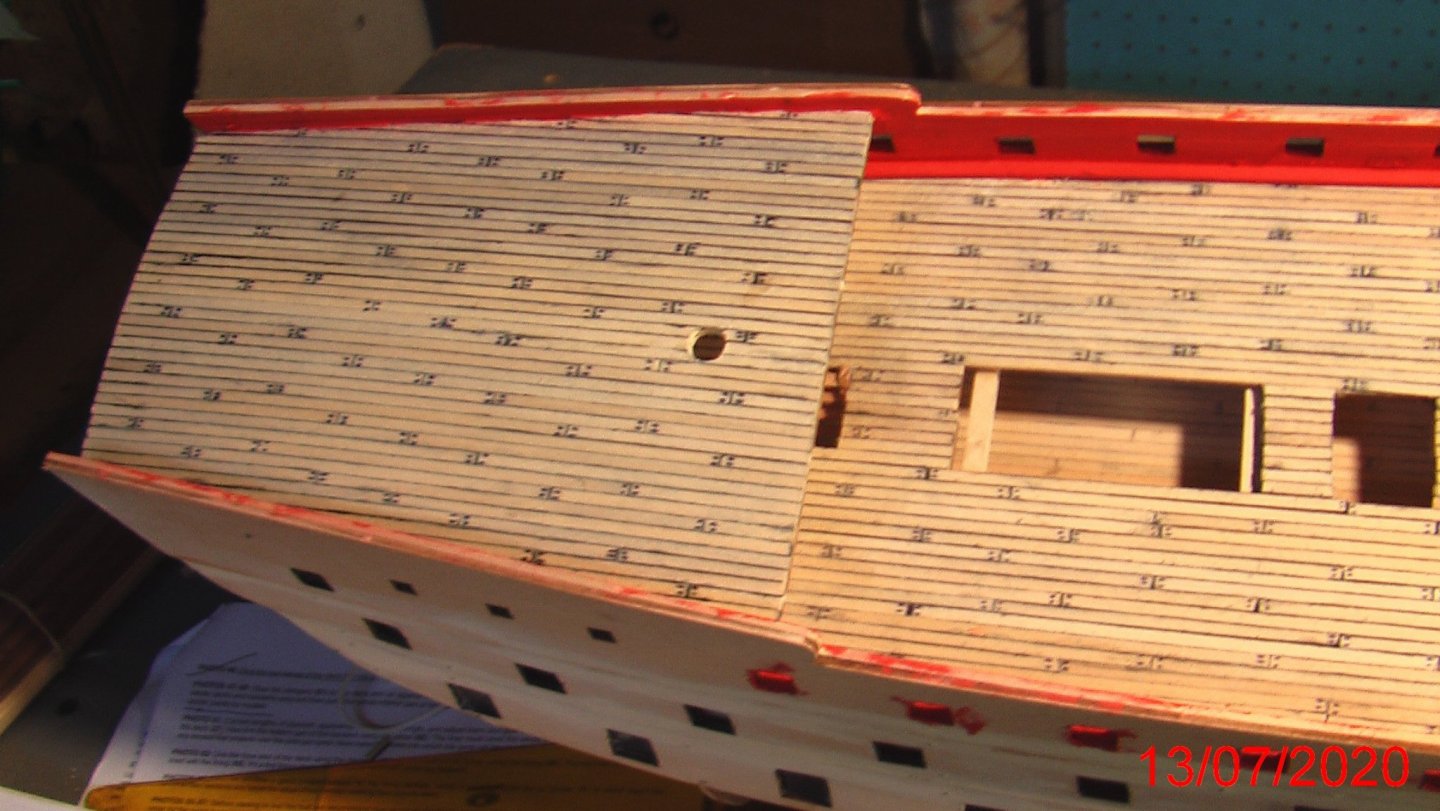
I have finished the planking of the second deck and i put black dots i every plank change,like the nails. The absorblable wood sometimes make the dots not like circls,but like a line,so i scratch the excess ink..maybe there was a easier way for black dots...Anyway is done...also i put the beams and rods in the center of the deck,as described in the manual. So contune now futher...


-
Finally,the planks are in my hands...so i will continue and finish the deck...soon new fotos...
-
June is here but still OCCRE can't send me the planks. Quarantine is valid in Spain....so waiting....
-
After one month still waiting for planks from OCCRE. The COVIT-19 stop my hobby...they wrote to me that when they can, they send me the planks...So waiting..
-
Now i have place the 4 parts of the second deck,i glue them and start the planking in the ship,because i think i can cover better the gaps and the deck will be placed correctly. But as you see in the pictures,i stopped in the half of the deck...because the planks 1X3 mm are finished...!!! I havn't damage any of them,i use every sinlge of them,but...isn't enough. I wrote to OCCRE and they answer that they will send me 60 planks more....Good service from OCCRE but why? The two members here SJORS and IOANNIZ who make the same ship they don't wrote something. Anyway,i must wait now the new planks to continue,hopping that this will not happen after again...