Grisha
Members-
Posts
28 -
Joined
-
Last visited
Content Type
Profiles
Forums
Gallery
Events
Everything posted by Grisha
-
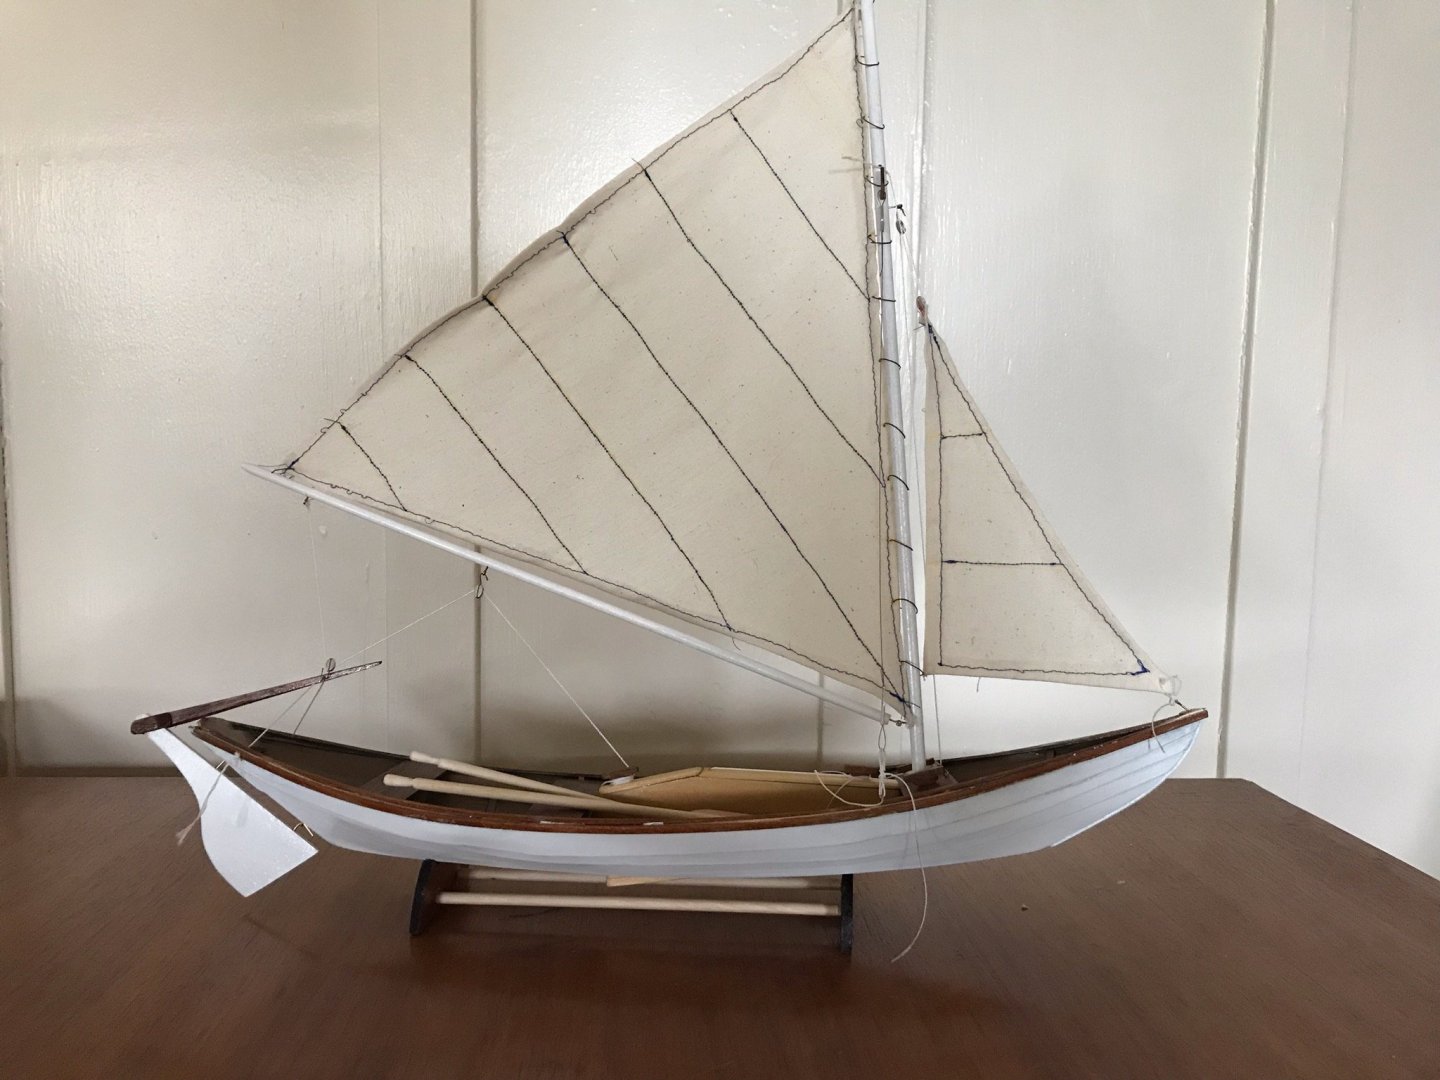
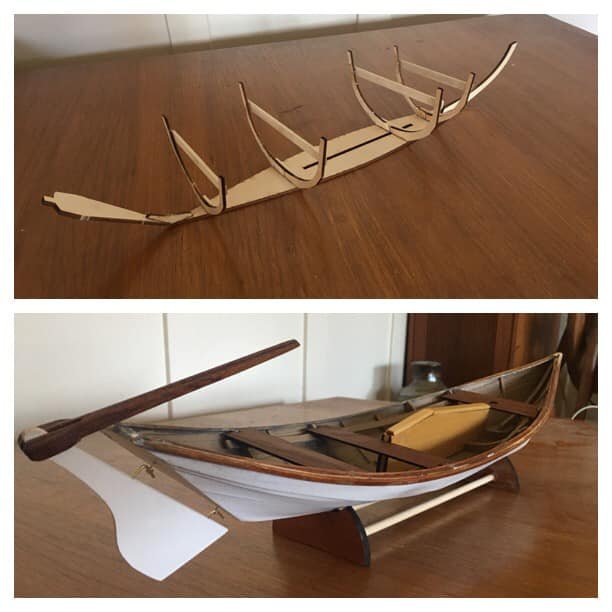
Sure, here's the finished model. I don't have oarlocks because my planking was funny and the sheerline looked too curved to put the plates on and the back of the jib isn't attached to anything because I came up short one eyepin (I think I used it at the end of the boom where the sheet was supposed to be attached another way. But It looks like a boat, all things considered! Thanks for the help!
- 60 replies
-
- swampscott dory
- finished
-
(and 1 more)
Tagged with:
-
Well, I didn't do one or two minor things I didn't have enough of this or that for, but I think we'll call the boat complete. The best part is that whittling the tiny handles on the oars put an idea in my head and has me now doing something I'm better at than model boats: whittling! (first project pictured below) This has been fun. I might do another some day.
- 60 replies
-
- swampscott dory
- finished
-
(and 1 more)
Tagged with:
-
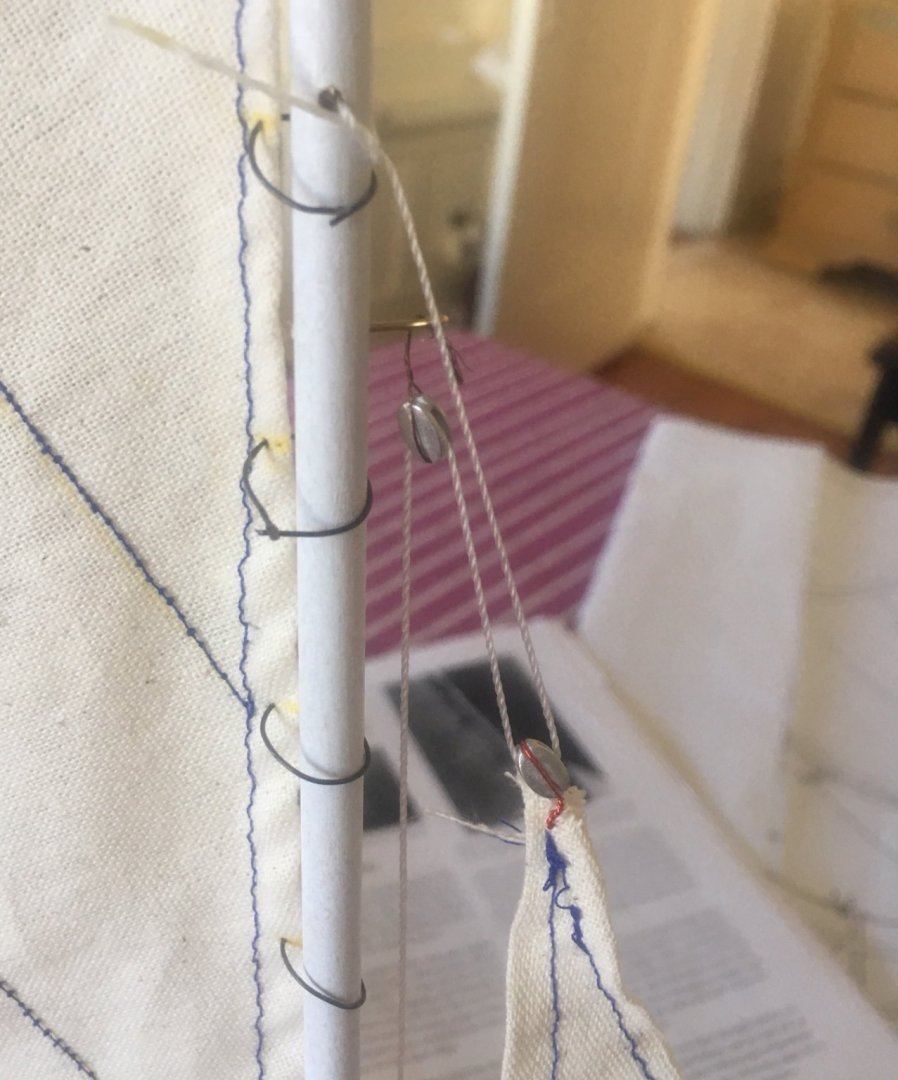
My last little bit of confusion is the blocks and sheets for the back corner of the jib but I seem to be out of eyepins anyway so I may just let it flap. All that’s left is making the oars and putting in the oarlocks, I think. Oh I still have to do the main halyard but that seems straightforward.
- 60 replies
-
- swampscott dory
- finished
-
(and 1 more)
Tagged with:
-
OK, this part did not go very well. I'm not clear on how some things are meant to be attached so I did some half-assed stuff like just poking the wire I'd used to strop the blocks through the top corner of the jib. (I was also using the wrong wire at that point because the thin copper wire has a ton of strands, I guess? and I couldn't get it to twist together into something I could bend into a hook very well.) The bottom corner of the jib is attached to the eyepin in the stem head just with a piece of thread sewn through it and tied in a plain old knot through the pin. It works but I'm afraid it doesn't look very neat. Certainly at this point I'm in the home stretch.
- 60 replies
-
- swampscott dory
- finished
-
(and 1 more)
Tagged with:
-
I didn't work on the dory much for a bit, but I got back to it and finished the main sail (wish I'd chosen a thread with less contrast, maybe) and made the little cleats which was kind of fun and satisfying. I like the little fiddly bits like the cleats and the mast step. I must have made the wire hoops for the sail/mast too big because I barely have any left for the boom, but at this point it's clearly the S.S. Good Enough! Currently puzzling a little over the rope traveler in the back but I think I basically get what it's supposed to look like/do.
- 60 replies
-
- swampscott dory
- finished
-
(and 1 more)
Tagged with:
-
I'm going to take a moment here before I start bumbling through the rigging to allow myself a sense of accomplishment. It's taken forever, I've asked one million questions, and I've made significant errors at every step, but here we are.
- 60 replies
-
- swampscott dory
- finished
-
(and 1 more)
Tagged with:
-
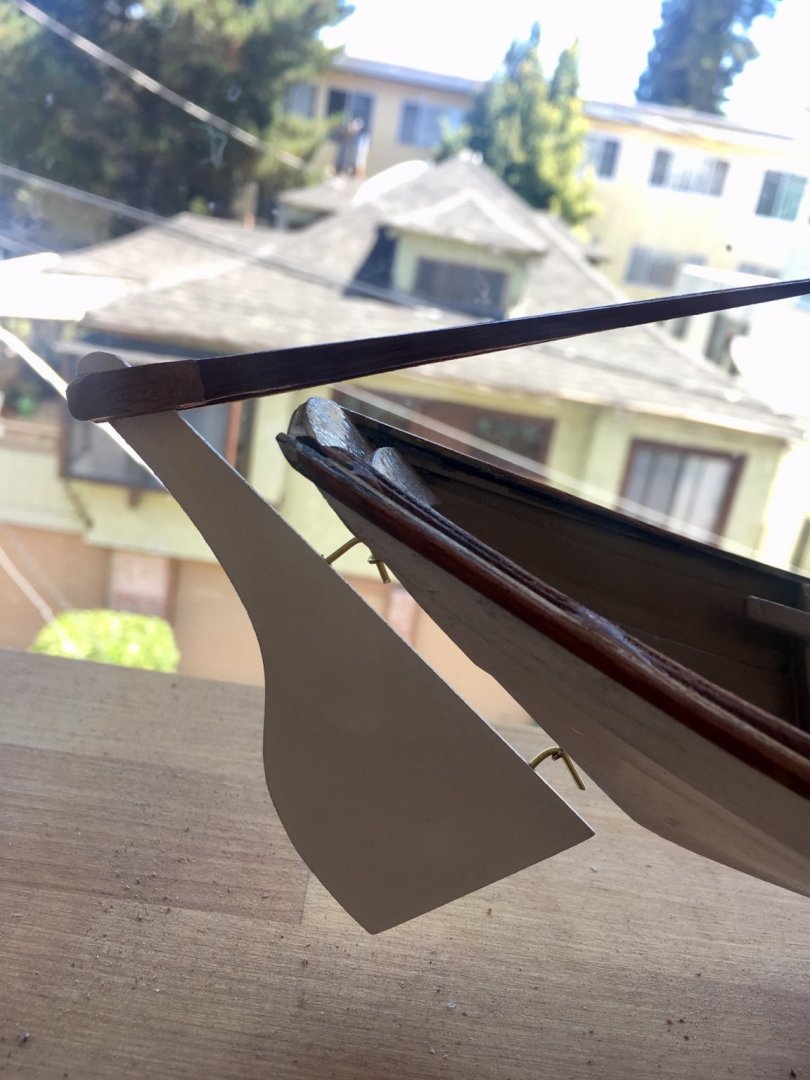
This is I think way further from the boat than it's supposed to be but it's the best I could do and I think it looks alright.
- 60 replies
-
- swampscott dory
- finished
-
(and 1 more)
Tagged with:
-
Yes, I slowed a bit and didn't post many pictures as I was spending a lot of time waiting for enamel to dry, sanding it, and painting it again. It looks alright now. In retrospect I wish I'd left the inside natural and put on gloss enamel, but the buff color doesn't look bad. Currently I'm puzzling over mounting the rudder. The instructions say "mount the rudder, using brass eye pins and bent brass rod pintles as shown on the plan." It's another of those things where 1) the photo is dark 2) I'm not quite sure what the plan is suggesting, and 3) I'm not sure quite what, among the little metal fittings, is a rod pintle. I've googled what a pintle is and am clear on the concept but...yeah. I may call the guy who works with Bluejacket to answer questions, unless someone is able to describe it here. I'll post another picture soon.
- 60 replies
-
- swampscott dory
- finished
-
(and 1 more)
Tagged with:
-
Amusingly I almost ordered that New Bedford Whaleboat before I saw there were difficulty ratings. I'd have been really up a tree.
- 60 replies
-
- swampscott dory
- finished
-
(and 1 more)
Tagged with:
-
So, I get that a lot of my questions, for people who do more stuff like this than I do, sound like "I'm here to write a novel. How do I hold the pencil?" I have another of those. I put one coat of enamel ("Flat Depot Buff") on the inside of the hull and it looks...terrible. Rough textured, uneven thickness. What's the deal here? Do I need another coat, or did I do something really wrong, or do I need a specific size/kind of brush or? (It doesn't look quiiiiite as bad as the picture but it's, you know, not what I was hoping for.)
- 60 replies
-
- swampscott dory
- finished
-
(and 1 more)
Tagged with:
-
Linseed oil finally got here. Wondering if I can use any old cloth, like maybe an old t-shirt, to apply it, or if it'll shed too much/what people do use.
- 60 replies
-
- swampscott dory
- finished
-
(and 1 more)
Tagged with:
-
I wonder if I should just be using this instead of waiting for the linseed oil. Or does this eventually go over the coats of opaque color?
- 60 replies
-
- swampscott dory
- finished
-
(and 1 more)
Tagged with:
-
Waiting for linseed oil to finish the centerboard box and maybe the bottom piece which isn't too glue-y. It looks like I'm going to have to trim the seats because it somehow ended up too narrow to just pop them in.
- 60 replies
-
- swampscott dory
- finished
-
(and 1 more)
Tagged with:
-
Centerboard box is together, looks ok. Cut a path through the #2 frame. Drilled a hole in it/the centerboard using a drill bit the next size down (with my fingers, ouch, because it was too tiny for the pin vise to grip.) Not sure what the hinge pin looks like so I put one of the brass-colored pins with a loop in it through there at least for the moment. I think I need to order some finish* for the centerboard and box before I go further. I'd like to go ahead and finish it rather than painting it because, unlike the rest of the boat, it doesn't have tons of glue on it to mess things up. *linseed oil? I read a long thread of recommendations varying from sorta "detailed set of things for experts" to more straightforward and linseed oil sounded nice and basic. I'm going to ask my friend who repairs tons of antique radios what he thinks.
- 60 replies
-
- swampscott dory
- finished
-
(and 1 more)
Tagged with:
-
Minor delay ahead: the tool set from Blue Jacket includes drill bits #75, 67, and 51, and the kit calls for drill bits 56, 65, and 70.
- 60 replies
-
- swampscott dory
- finished
-
(and 1 more)
Tagged with:
-
After I glue the centerboard assembly in place, I'm about to put in the cleats and the bent ribs that go up the sides over them, but ninety steps ago I placed frame #2 completely wrong, and it's where one of set of cleats and ribs should go. Not sure what to do about that. I think I may do the centerboard assembly with wood glue, as I keep having to correct for the fact that, even without accelerant, CA glue sometimes sticks things firmly in place before you've got it quite where you want it. I think why I had such a bad first start on this is that, I'm finding, a lot of how this goes together is learned through mistakes, and it's kind of maddening to make a bunch of visible mistakes on something that cost a hundred bucks (and another hundred for tools, paint, etc.) I'm surer of what I'm doing now, though that's purely relative and I still don't know how a lot of it is done *well*, so that it looks good.
- 60 replies
-
- swampscott dory
- finished
-
(and 1 more)
Tagged with:
-
Frames cut off and cut 1/16"-ish below the edge of the top plank. Strip wood glued fora rail and a rub strake. That whole assembly needs some sanding as it does not look like one piece. Now working on the centerboard assembly.
- 60 replies
-
- swampscott dory
- finished
-
(and 1 more)
Tagged with:
-
Soooooo the next step. (Not counting the gripe which is pretty straightforward.) I'm supposed to trim the planking to the sheer line "as shown on the plans." I wonder if I'm just being completely dense but I don't see the sheer line anywhere on the plan and don't really know what this means. I'm also a little curious about how to cut the frames off 1/16" below aforementioned sheer line without damaging the planks though I'm assuming the answer is just going to be "veeeeery carefully."
- 60 replies
-
- swampscott dory
- finished
-
(and 1 more)
Tagged with:
-
- 60 replies
-
- swampscott dory
- finished
-
(and 1 more)
Tagged with:
-
Off the board. No clear idea whether I have the right amount of overlap. There is a lot of glue on this here boat.
- 60 replies
-
- swampscott dory
- finished
-
(and 1 more)
Tagged with:
-
Both garboards on now. There was some trimming and sanding and they are very slightly askance but it's fine. I have one plank clothes-pinned on for the next layer but it doesn't lie flat on the garboard. Hoping a good soak will fix this--otherwise I think my boat is going to have some big gaps and not look remotely seaworthy. If this step goes ok, I get to separate the frames from the board and work upside-right.
- 60 replies
-
- swampscott dory
- finished
-
(and 1 more)
Tagged with:
-
One garboard plank glued. Very glad the guy I called via Bluejacket told me to get accelerator. As suggested, it's moved back from where I had it dry-fit in the picture above (now a tiny overhang on the transom, and I just discovered very thin wood doesn't sand well) and I have demonstrably not mastered the art of getting a tiny bit of glue to go where it needs, but...it's on there. It does look like I'm going to have to trim a lot from the stem to get the front edge to line up at all.
- 60 replies
-
- swampscott dory
- finished
-
(and 1 more)
Tagged with:
-
Here's the catch. I assumed the front edge of the garboard would slope right down the curve of the stem. It doesn't. Not even close. See photo from the facing side: there is a ton of overhang I assume would bump up against the other one, which will have the same issue. Does this mean I've placed the stem too far back onto the bottom piece? Is my best bet to trim it with an Xacto and sand it down? Or....?
- 60 replies
-
- swampscott dory
- finished
-
(and 1 more)
Tagged with:
-
Now here's what's next. I've tried to dry-fit the first garboard to see how it's going to go. I started with the straight back edge as close to the corner with the transom as possible. Fitted this way, it looks easy enough to have the bottom line of the garboard conform to the (beveled) curve of the bottom piece.
- 60 replies
-
- swampscott dory
- finished
-
(and 1 more)
Tagged with:
-
The frame is now glued to the board for planking. As is probably visible, some combination of the placement of frame #2 (which is supposed to be closer to the center...I didn't see measurements anywhere so I just eyeballed it and set it where the width of the frame matched the width of the bottom piece) and the fact that the frames weren't quite perpendicular to the bottom piece (I wasn't sure how to make them so--if I put an object with a right angle up against the frame, I assumed it would get glued in place along with the frame) means that two of the frames are askance and one "foot" if you will doesn't quite touch the board. I don't think it'll be a huge issue but I assume it will make the garboards fit a little less closely. We'll see. I got debonder but I'm reluctant to undo very much, especially now that I understand that debonder makes the wood un-glue-able.
- 60 replies
-
- swampscott dory
- finished
-
(and 1 more)
Tagged with:
About us
Modelshipworld - Advancing Ship Modeling through Research
SSL Secured
Your security is important for us so this Website is SSL-Secured
NRG Mailing Address
Nautical Research Guild
237 South Lincoln Street
Westmont IL, 60559-1917
Model Ship World ® and the MSW logo are Registered Trademarks, and belong to the Nautical Research Guild (United States Patent and Trademark Office: No. 6,929,264 & No. 6,929,274, registered Dec. 20, 2022)
Helpful Links
About the NRG
If you enjoy building ship models that are historically accurate as well as beautiful, then The Nautical Research Guild (NRG) is just right for you.
The Guild is a non-profit educational organization whose mission is to “Advance Ship Modeling Through Research”. We provide support to our members in their efforts to raise the quality of their model ships.
The Nautical Research Guild has published our world-renowned quarterly magazine, The Nautical Research Journal, since 1955. The pages of the Journal are full of articles by accomplished ship modelers who show you how they create those exquisite details on their models, and by maritime historians who show you the correct details to build. The Journal is available in both print and digital editions. Go to the NRG web site (www.thenrg.org) to download a complimentary digital copy of the Journal. The NRG also publishes plan sets, books and compilations of back issues of the Journal and the former Ships in Scale and Model Ship Builder magazines.


.thumb.jpg.bf5337598c5f0ace4c407b1b14574c06.jpg)


