Grisha
-
Posts
28 -
Joined
-
Last visited
-
 GrandpaPhil reacted to a post in a topic:
Swampscott Dory by Grisha - FINISHED - BlueJacket Shipcrafters - Scale 1:12
GrandpaPhil reacted to a post in a topic:
Swampscott Dory by Grisha - FINISHED - BlueJacket Shipcrafters - Scale 1:12
-
GrandpaPhil reacted to a post in a topic:
Swampscott Dory by Grisha - FINISHED - BlueJacket Shipcrafters - Scale 1:12
-
Grisha reacted to a post in a topic:
Swampscott Dory by Grisha - FINISHED - BlueJacket Shipcrafters - Scale 1:12
-
Grisha reacted to a post in a topic:
Swampscott Dory by Grisha - FINISHED - BlueJacket Shipcrafters - Scale 1:12
-
Ryland Craze reacted to a post in a topic:
Swampscott Dory by Grisha - FINISHED - BlueJacket Shipcrafters - Scale 1:12
-
egkb reacted to a post in a topic:
Swampscott Dory by Grisha - FINISHED - BlueJacket Shipcrafters - Scale 1:12
-
egkb reacted to a post in a topic:
Swampscott Dory by Grisha - FINISHED - BlueJacket Shipcrafters - Scale 1:12
-
ccoyle reacted to a post in a topic:
Swampscott Dory by Grisha - FINISHED - BlueJacket Shipcrafters - Scale 1:12
-
WalrusGuy reacted to a post in a topic:
Swampscott Dory by Grisha - FINISHED - BlueJacket Shipcrafters - Scale 1:12
-
VTHokiEE reacted to a post in a topic:
Swampscott Dory by Grisha - FINISHED - BlueJacket Shipcrafters - Scale 1:12
-
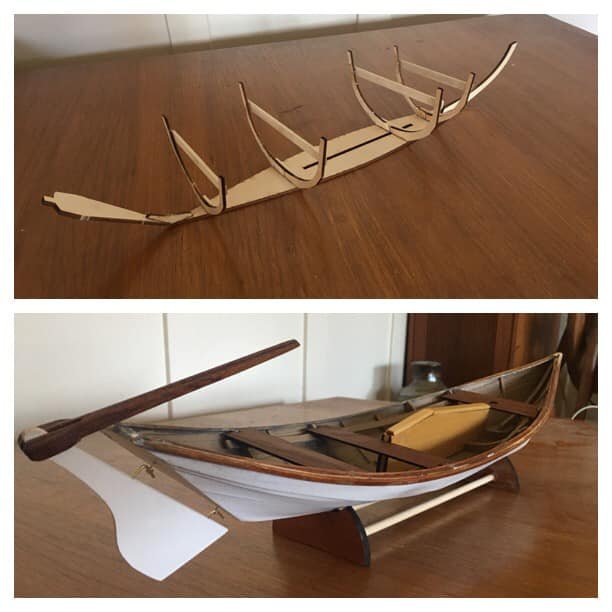
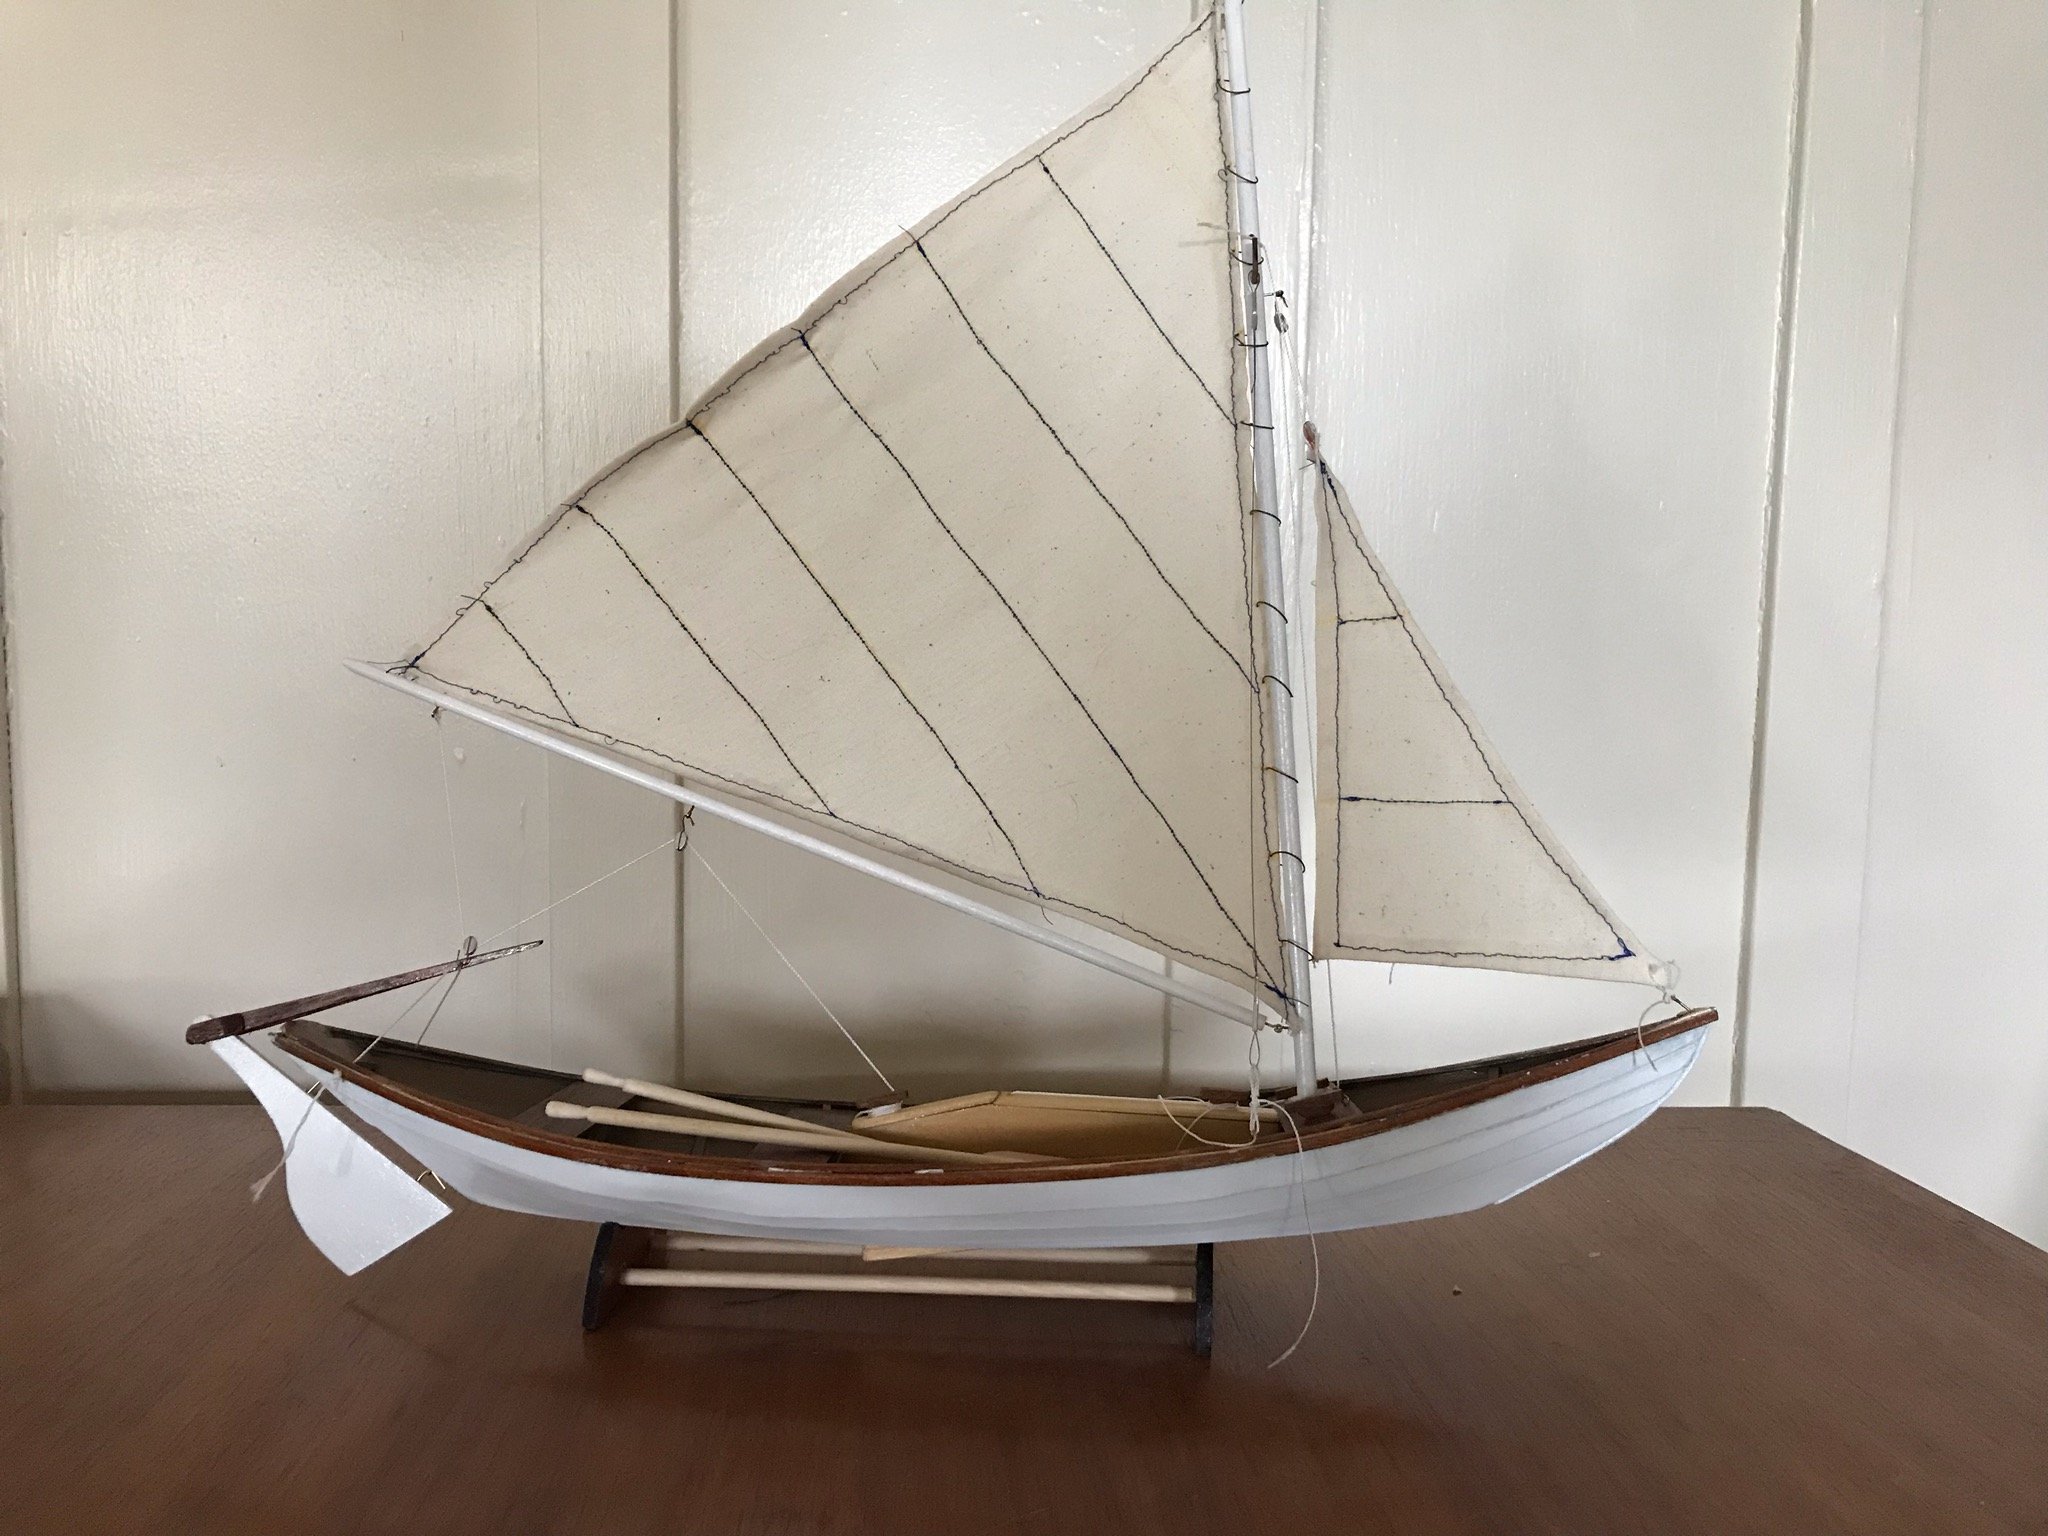
Sure, here's the finished model. I don't have oarlocks because my planking was funny and the sheerline looked too curved to put the plates on and the back of the jib isn't attached to anything because I came up short one eyepin (I think I used it at the end of the boom where the sheet was supposed to be attached another way. But It looks like a boat, all things considered! Thanks for the help!

- 60 replies
-
- 6
-
-
- swampscott dory
- finished
- (and 1 more)
-
ccoyle reacted to a post in a topic:
Swampscott Dory by Grisha - FINISHED - BlueJacket Shipcrafters - Scale 1:12
-
gsdpic reacted to a post in a topic:
Swampscott Dory by Grisha - FINISHED - BlueJacket Shipcrafters - Scale 1:12
-
Well, I didn't do one or two minor things I didn't have enough of this or that for, but I think we'll call the boat complete. The best part is that whittling the tiny handles on the oars put an idea in my head and has me now doing something I'm better at than model boats: whittling! (first project pictured below) This has been fun. I might do another some day.
.thumb.jpg.bf5337598c5f0ace4c407b1b14574c06.jpg)
- 60 replies
-
- 6
-
-
- swampscott dory
- finished
- (and 1 more)
-
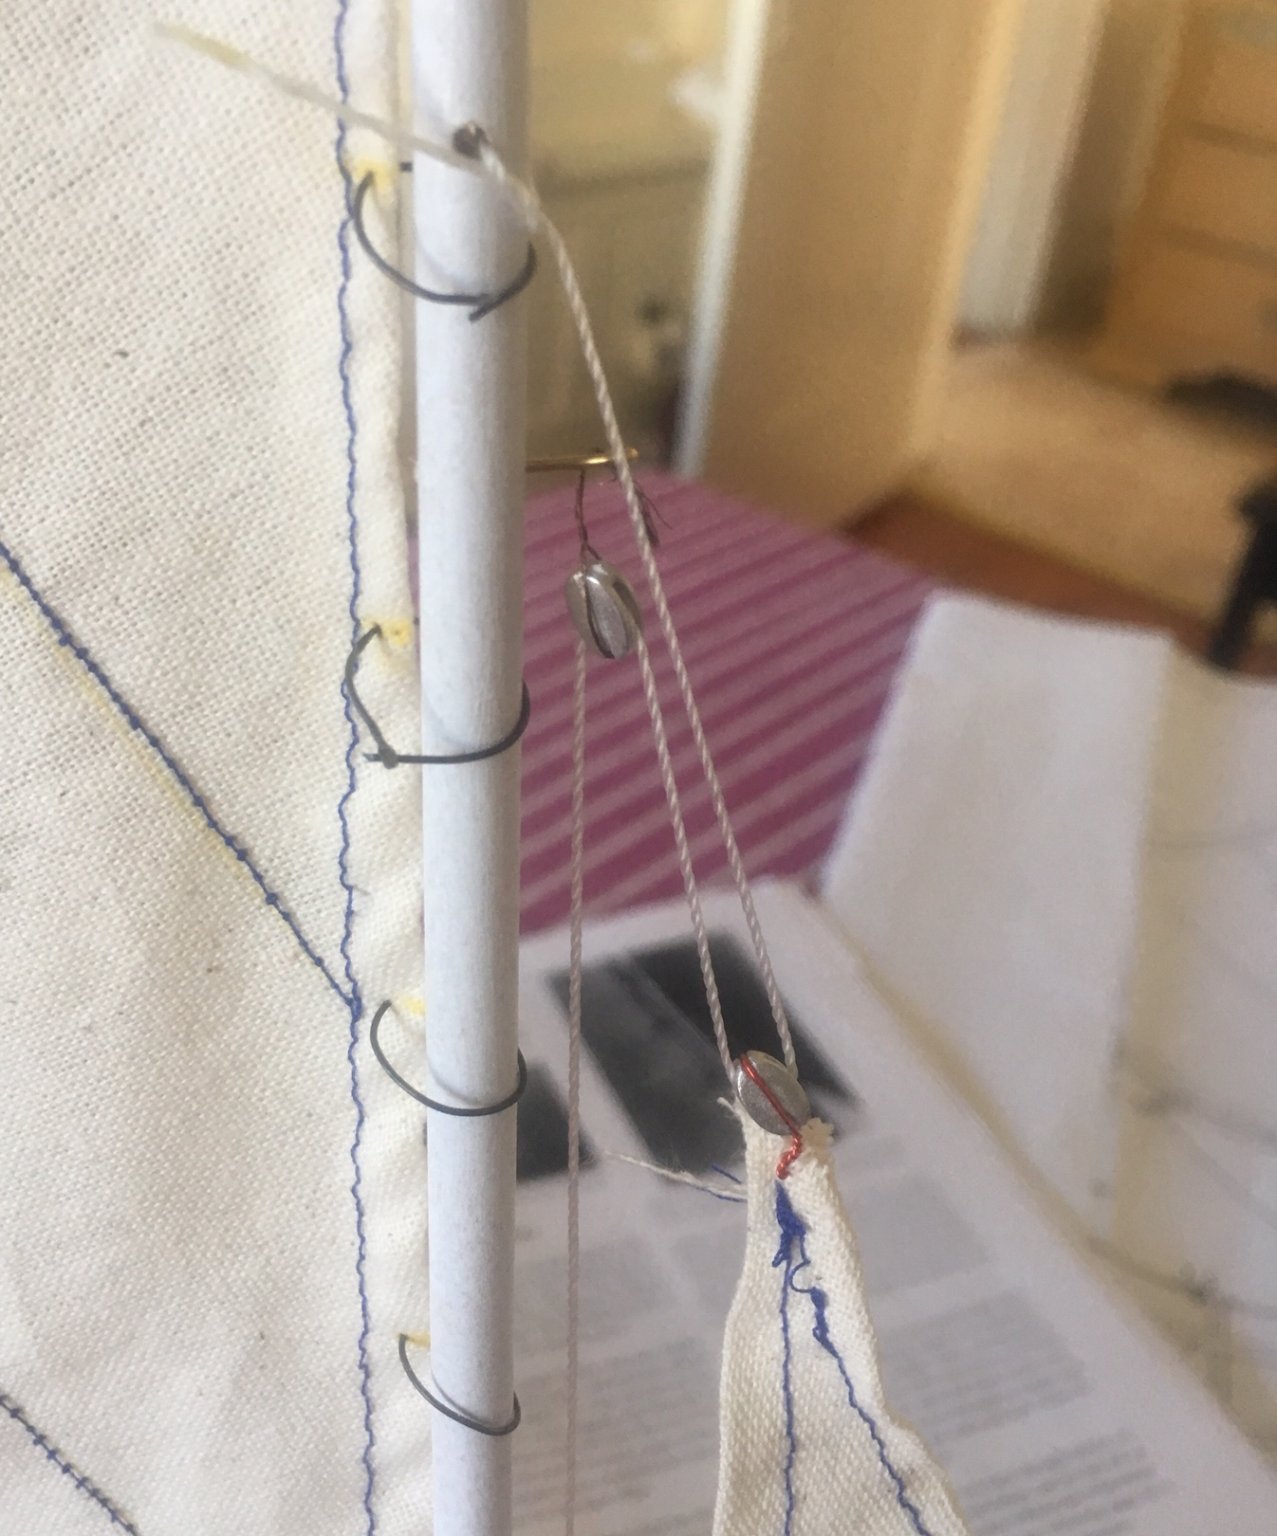
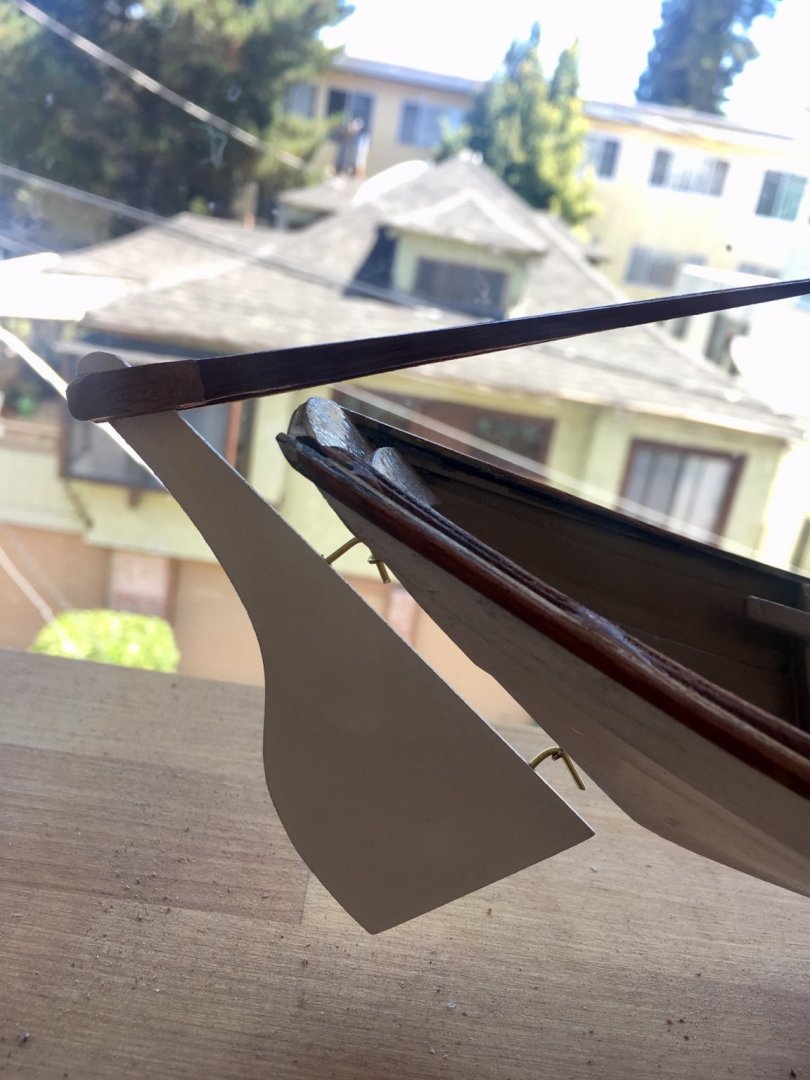
My last little bit of confusion is the blocks and sheets for the back corner of the jib but I seem to be out of eyepins anyway so I may just let it flap. All that’s left is making the oars and putting in the oarlocks, I think. Oh I still have to do the main halyard but that seems straightforward.
-
OK, this part did not go very well. I'm not clear on how some things are meant to be attached so I did some half-assed stuff like just poking the wire I'd used to strop the blocks through the top corner of the jib. (I was also using the wrong wire at that point because the thin copper wire has a ton of strands, I guess? and I couldn't get it to twist together into something I could bend into a hook very well.) The bottom corner of the jib is attached to the eyepin in the stem head just with a piece of thread sewn through it and tied in a plain old knot through the pin. It works but I'm afraid it doesn't look very neat. Certainly at this point I'm in the home stretch.

- 60 replies
-
- 3
-
-
- swampscott dory
- finished
- (and 1 more)
-
Grisha reacted to a post in a topic:
Swampscott Dory by Grisha - FINISHED - BlueJacket Shipcrafters - Scale 1:12
-
Grisha reacted to a post in a topic:
Swampscott Dory by Grisha - FINISHED - BlueJacket Shipcrafters - Scale 1:12
-
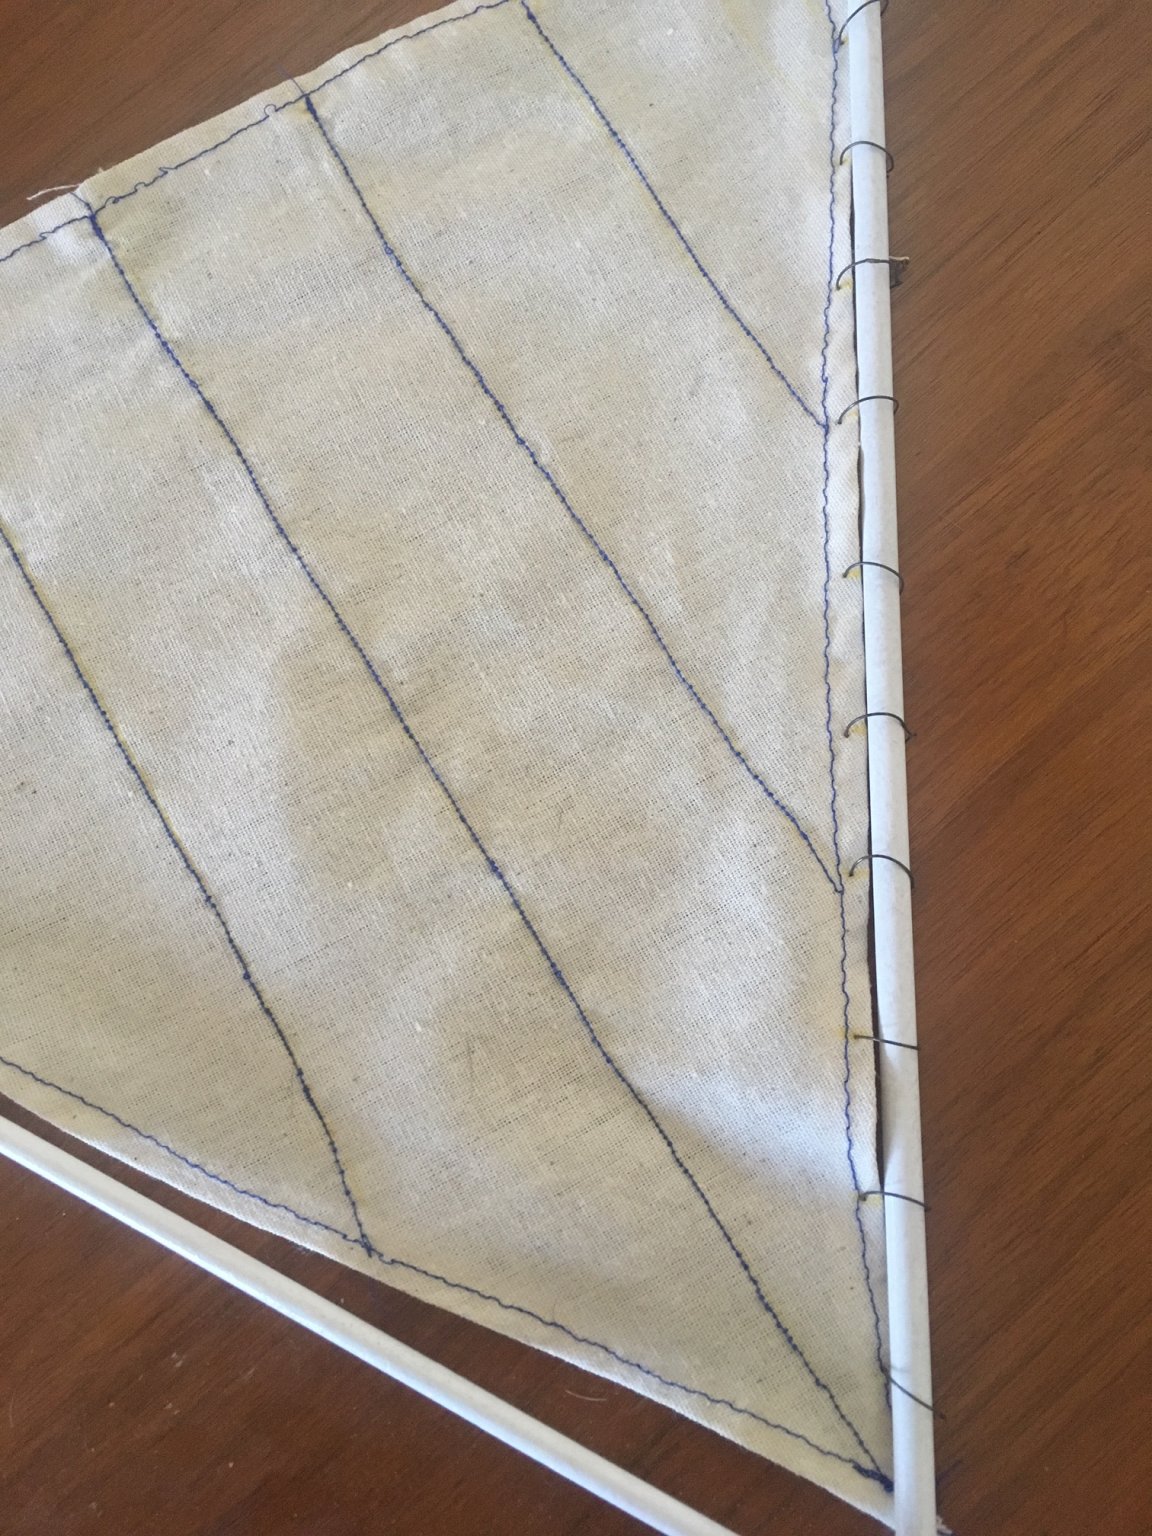
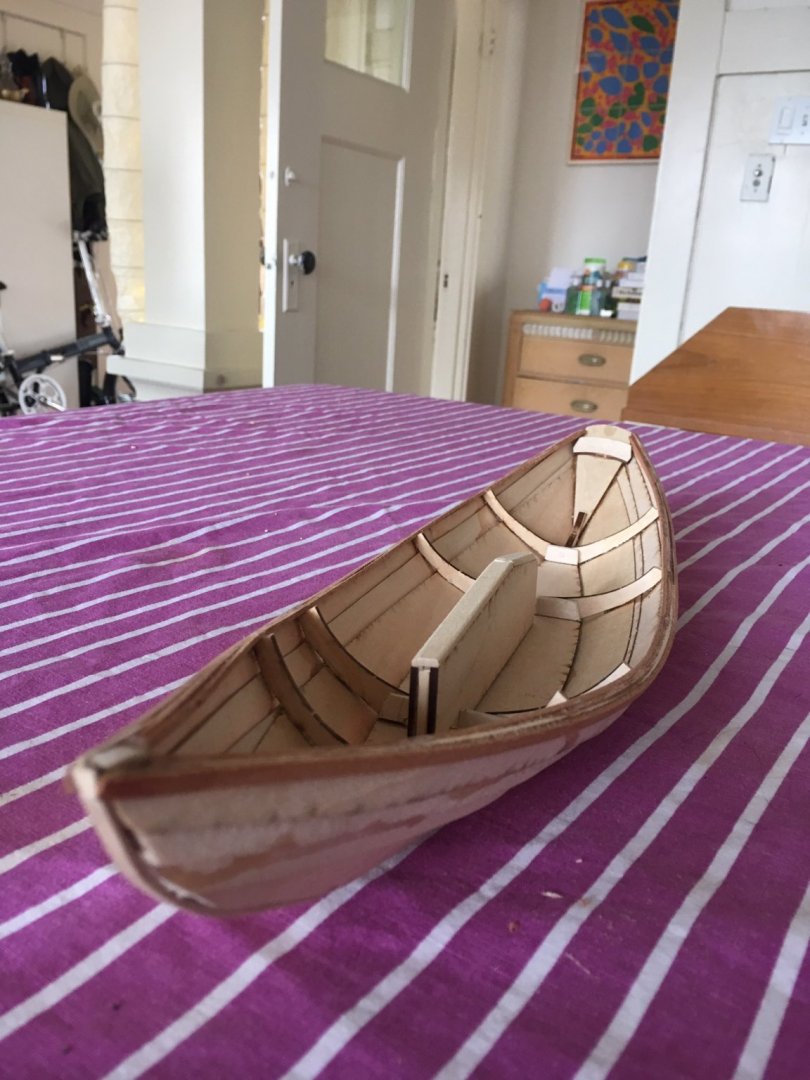
I didn't work on the dory much for a bit, but I got back to it and finished the main sail (wish I'd chosen a thread with less contrast, maybe) and made the little cleats which was kind of fun and satisfying. I like the little fiddly bits like the cleats and the mast step. I must have made the wire hoops for the sail/mast too big because I barely have any left for the boom, but at this point it's clearly the S.S. Good Enough! Currently puzzling a little over the rope traveler in the back but I think I basically get what it's supposed to look like/do.


- 60 replies
-
- 4
-
-
- swampscott dory
- finished
- (and 1 more)
-
I'm going to take a moment here before I start bumbling through the rigging to allow myself a sense of accomplishment. It's taken forever, I've asked one million questions, and I've made significant errors at every step, but here we are.
- 60 replies
-
- 7
-
-
- swampscott dory
- finished
- (and 1 more)
-
This is I think way further from the boat than it's supposed to be but it's the best I could do and I think it looks alright.
- 60 replies
-
- 2
-
-
- swampscott dory
- finished
- (and 1 more)
-
Grisha reacted to a post in a topic:
Swampscott Dory by Grisha - FINISHED - BlueJacket Shipcrafters - Scale 1:12
-
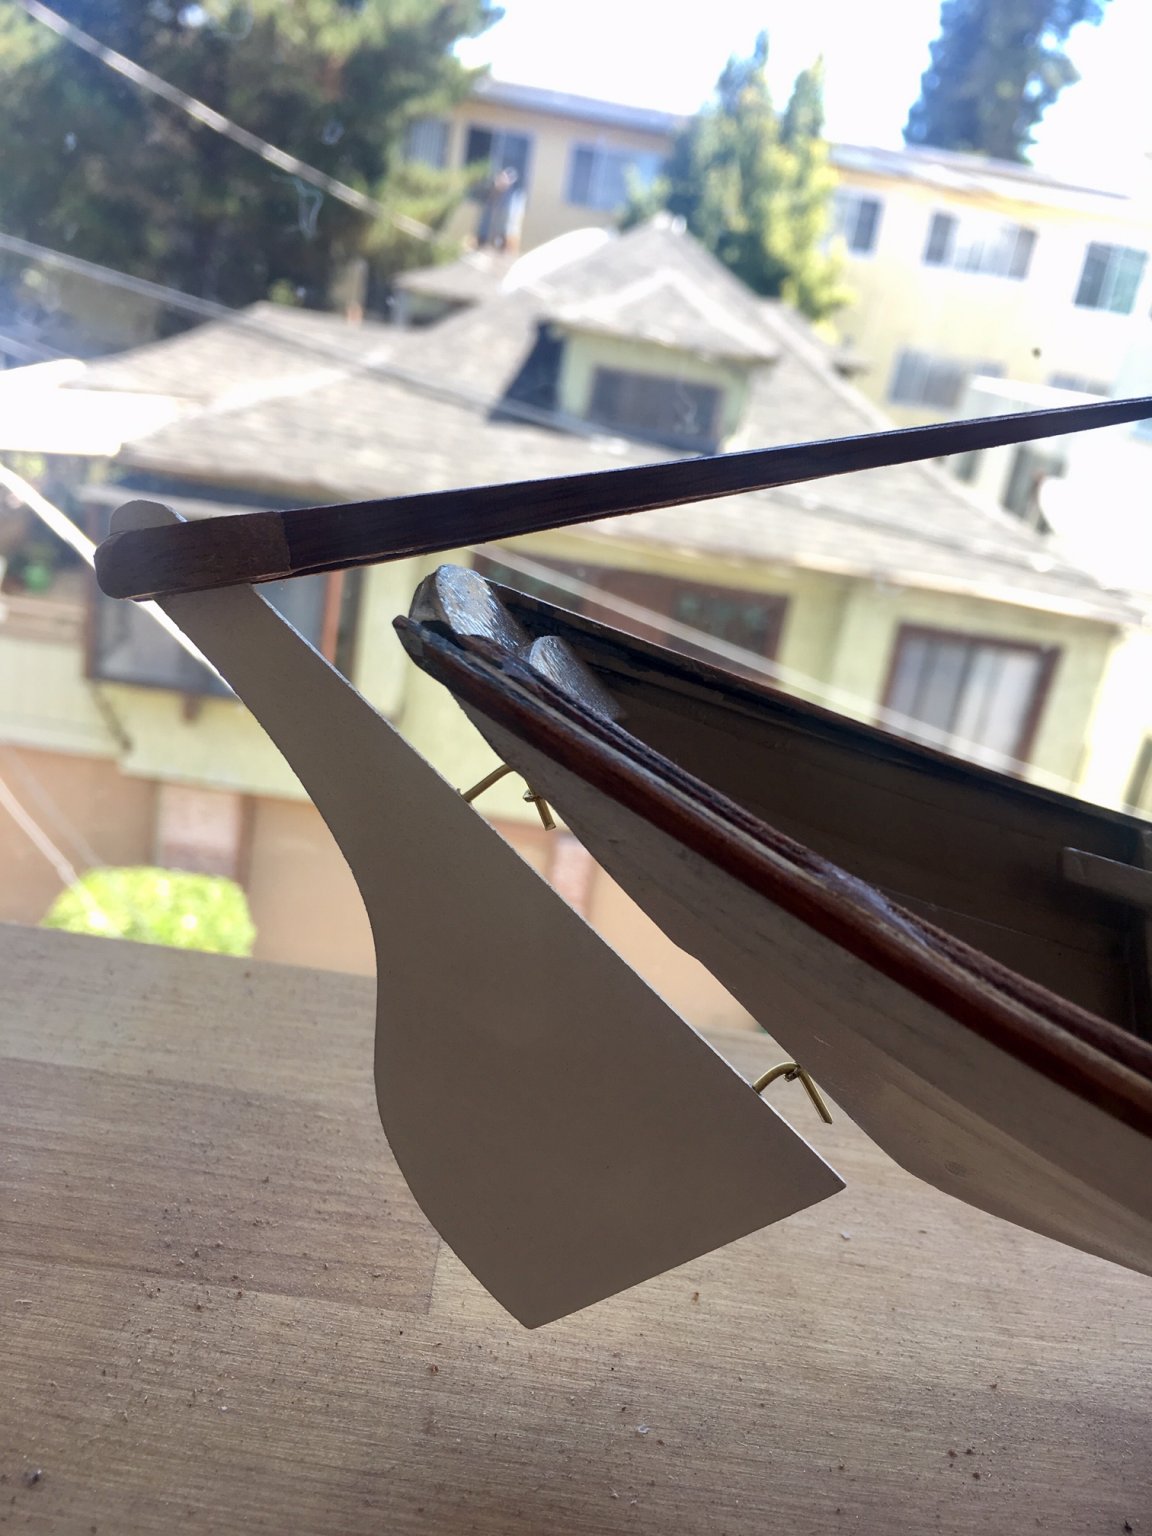
Yes, I slowed a bit and didn't post many pictures as I was spending a lot of time waiting for enamel to dry, sanding it, and painting it again. It looks alright now. In retrospect I wish I'd left the inside natural and put on gloss enamel, but the buff color doesn't look bad. Currently I'm puzzling over mounting the rudder. The instructions say "mount the rudder, using brass eye pins and bent brass rod pintles as shown on the plan." It's another of those things where 1) the photo is dark 2) I'm not quite sure what the plan is suggesting, and 3) I'm not sure quite what, among the little metal fittings, is a rod pintle. I've googled what a pintle is and am clear on the concept but...yeah. I may call the guy who works with Bluejacket to answer questions, unless someone is able to describe it here. I'll post another picture soon.
- 60 replies
-
- 1
-
-
- swampscott dory
- finished
- (and 1 more)
-
Grisha reacted to a post in a topic:
Swampscott Dory by Grisha - FINISHED - BlueJacket Shipcrafters - Scale 1:12
-
Amusingly I almost ordered that New Bedford Whaleboat before I saw there were difficulty ratings. I'd have been really up a tree.
- 60 replies
-
- 1
-
-
- swampscott dory
- finished
- (and 1 more)
-
So, I get that a lot of my questions, for people who do more stuff like this than I do, sound like "I'm here to write a novel. How do I hold the pencil?" I have another of those. I put one coat of enamel ("Flat Depot Buff") on the inside of the hull and it looks...terrible. Rough textured, uneven thickness. What's the deal here? Do I need another coat, or did I do something really wrong, or do I need a specific size/kind of brush or? (It doesn't look quiiiiite as bad as the picture but it's, you know, not what I was hoping for.)

-
Grisha reacted to a post in a topic:
Swampscott Dory by Grisha - FINISHED - BlueJacket Shipcrafters - Scale 1:12
-
Linseed oil finally got here. Wondering if I can use any old cloth, like maybe an old t-shirt, to apply it, or if it'll shed too much/what people do use.
-
I wonder if I should just be using this instead of waiting for the linseed oil. Or does this eventually go over the coats of opaque color?

-
Waiting for linseed oil to finish the centerboard box and maybe the bottom piece which isn't too glue-y. It looks like I'm going to have to trim the seats because it somehow ended up too narrow to just pop them in.
- 60 replies
-
- 2
-
-
- swampscott dory
- finished
- (and 1 more)
-
Grisha reacted to a post in a topic:
Swampscott Dory by Grisha - FINISHED - BlueJacket Shipcrafters - Scale 1:12
-
Grisha reacted to a post in a topic:
Swampscott Dory by Grisha - FINISHED - BlueJacket Shipcrafters - Scale 1:12
-
Centerboard box is together, looks ok. Cut a path through the #2 frame. Drilled a hole in it/the centerboard using a drill bit the next size down (with my fingers, ouch, because it was too tiny for the pin vise to grip.) Not sure what the hinge pin looks like so I put one of the brass-colored pins with a loop in it through there at least for the moment. I think I need to order some finish* for the centerboard and box before I go further. I'd like to go ahead and finish it rather than painting it because, unlike the rest of the boat, it doesn't have tons of glue on it to mess things up. *linseed oil? I read a long thread of recommendations varying from sorta "detailed set of things for experts" to more straightforward and linseed oil sounded nice and basic. I'm going to ask my friend who repairs tons of antique radios what he thinks.
- 60 replies
-
- 4
-
-
- swampscott dory
- finished
- (and 1 more)
-
Minor delay ahead: the tool set from Blue Jacket includes drill bits #75, 67, and 51, and the kit calls for drill bits 56, 65, and 70.
.jpg.414336091fc1f9df0fa7a15a82879100.jpg)