
Kurtis
-
Posts
89 -
Joined
-
Last visited
Content Type
Profiles
Forums
Gallery
Events
Everything posted by Kurtis
-
 Hey, I'm still here! 👀 I've made some fairly significant progress on the texturising, rigging and modelling this ship -- including setting up a figurehead which took me a long time! I'm still doing some final cleanup but I'm finally nearly ready for some renders. I've started working in a job full time so I haven't had as much time as I used to, but I'm still doing bits on this every night. I should be posting some more updates (comparatively) soon. Keep your eyes peeled!
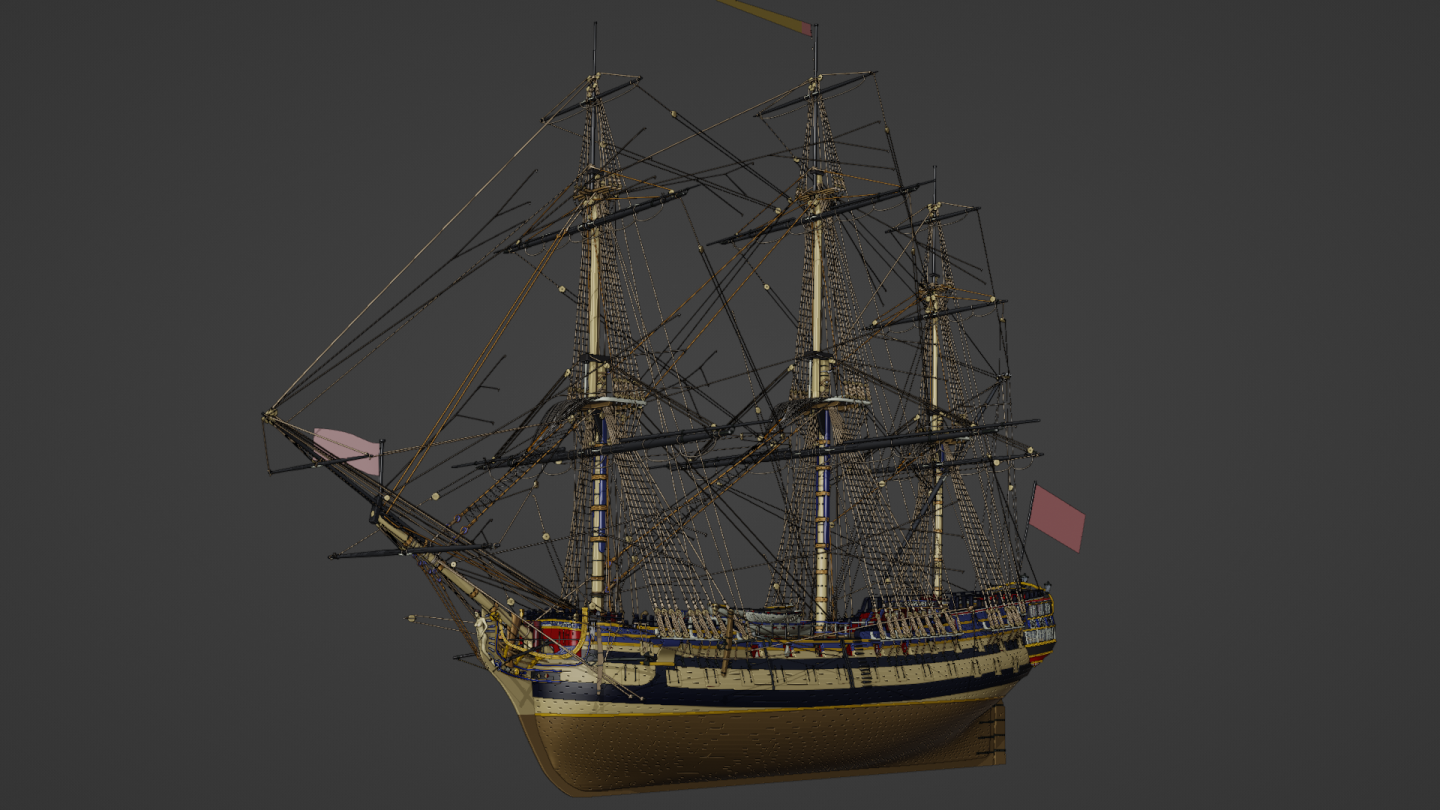
-
I would love to have a hard copy sitting on my shelf! I feel it might be possible with further tweaking as there's a lot of intersecting geometry, and each part / plank would have to be printed solo. It'd be a big job refining it , printing it all, and then finding ways to put it all together again. Some parts might need real world readjustment or refinement, and indeed the sails and rigging would have be the same as how you guys do them with your wooden models.
-
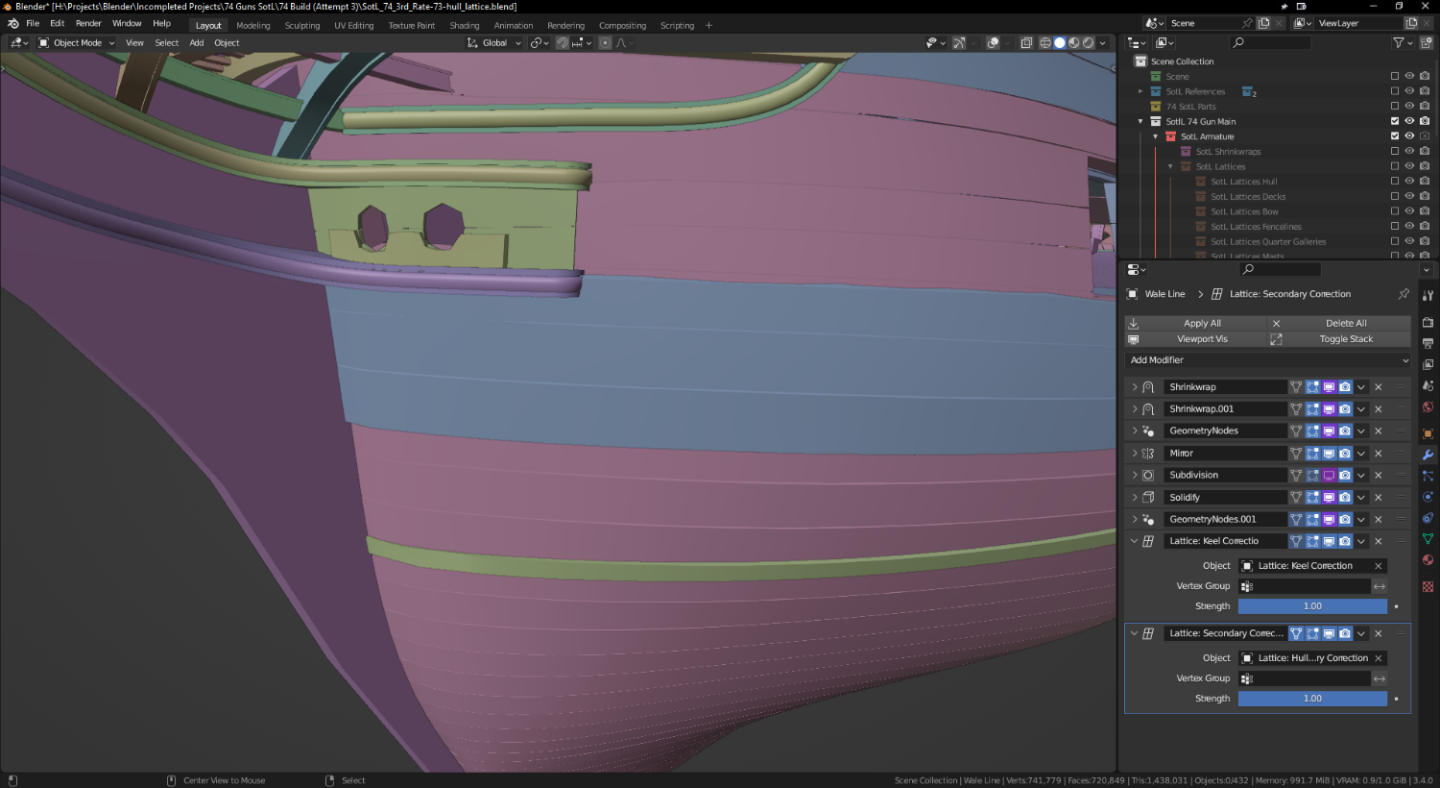
hi Kevin! I'd say it depends on what you want to do with the STL files. Converting everything into raw geometry and into STL itself should be easy enough, but I don't know how much of Blender's tools it will convert. With this, I've used lattices, modifiers, armatures, curves, and various other tools which may or may not convert well. I'm sure it's possible to convert everything into raw geometry and then into STL, but the trade-off would be losing the ability to (easily) customise the vessel or use the cloth simulators. Of course, this may not even matter if you have particular plans. I've yet to try the conversion for myself so it's all speculation on my end. If you would like, I can give the conversion a try when I'm finished and report on results after? I'm inclined to ask, what are you thinking in terms of taking it through the STL conversion process? What would be your end-goal?
-
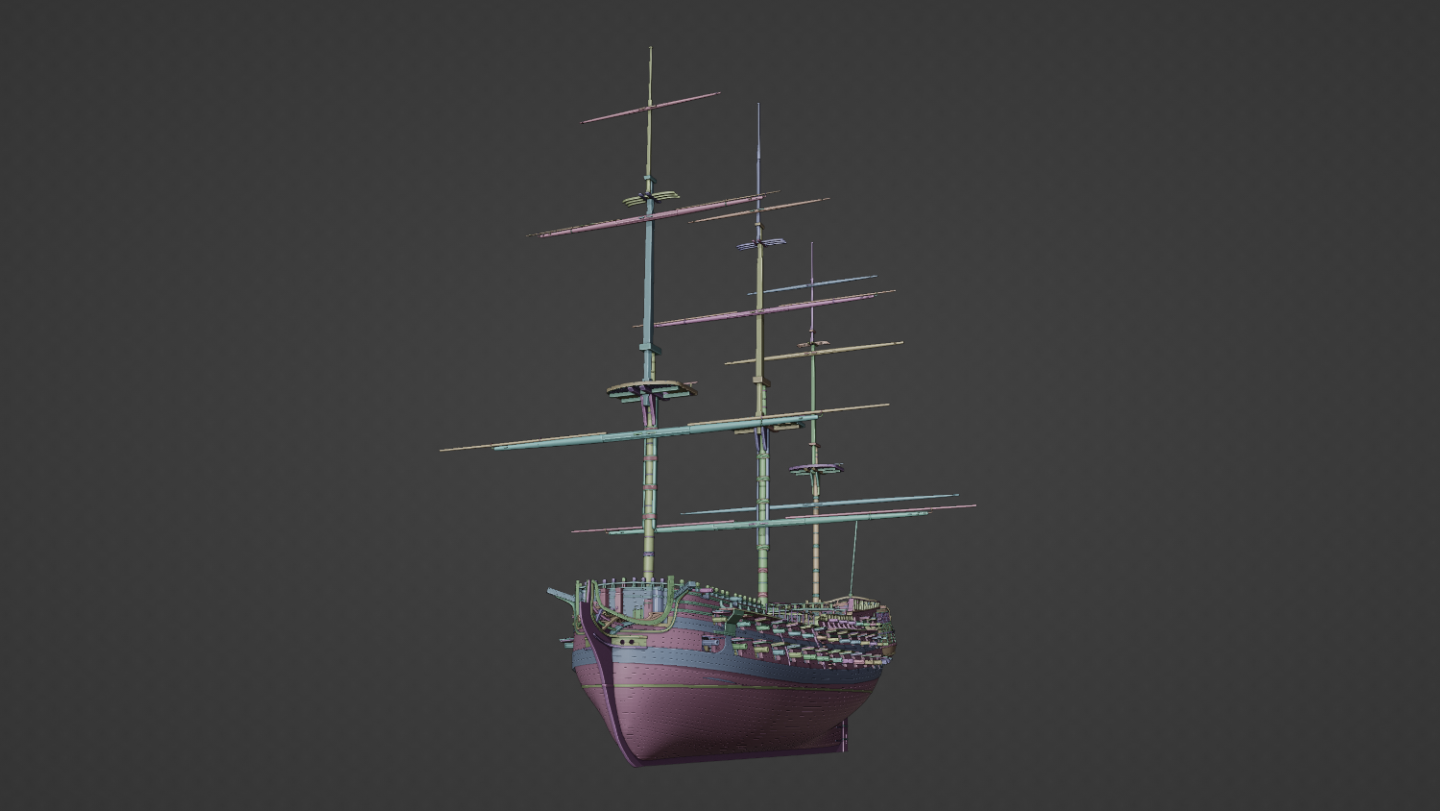
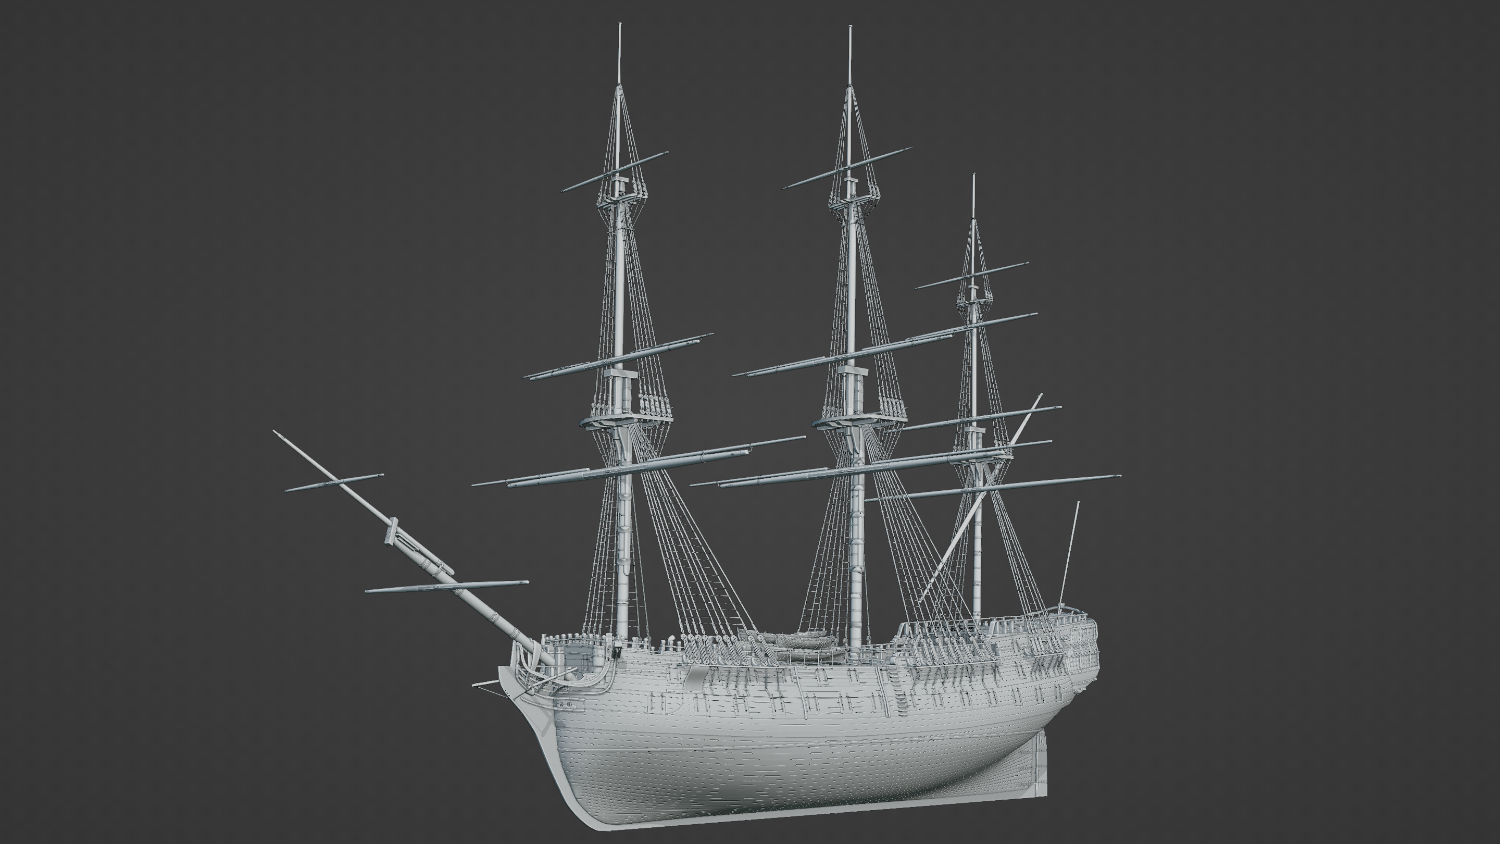
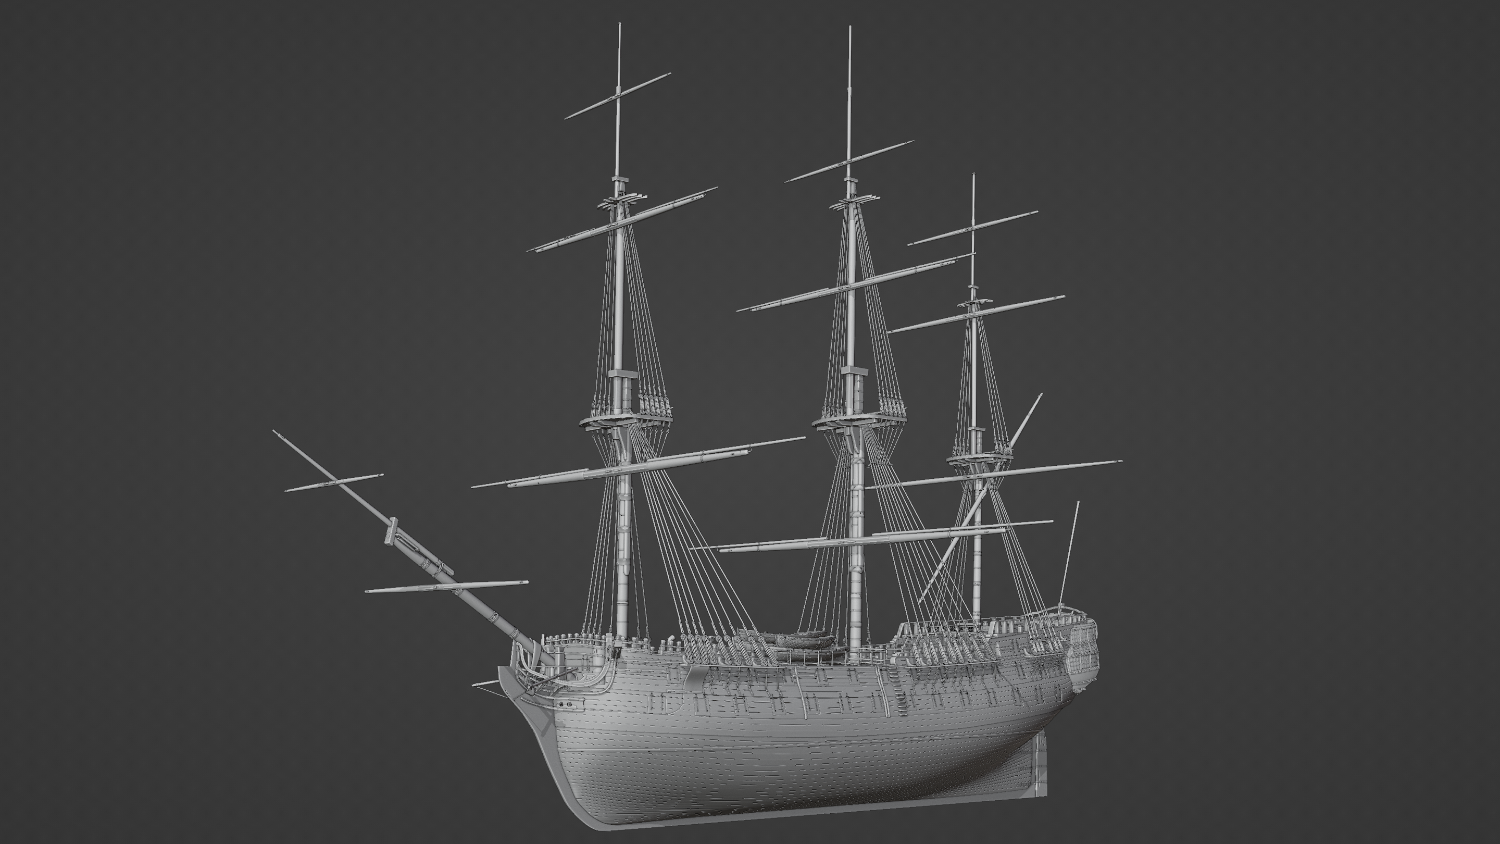
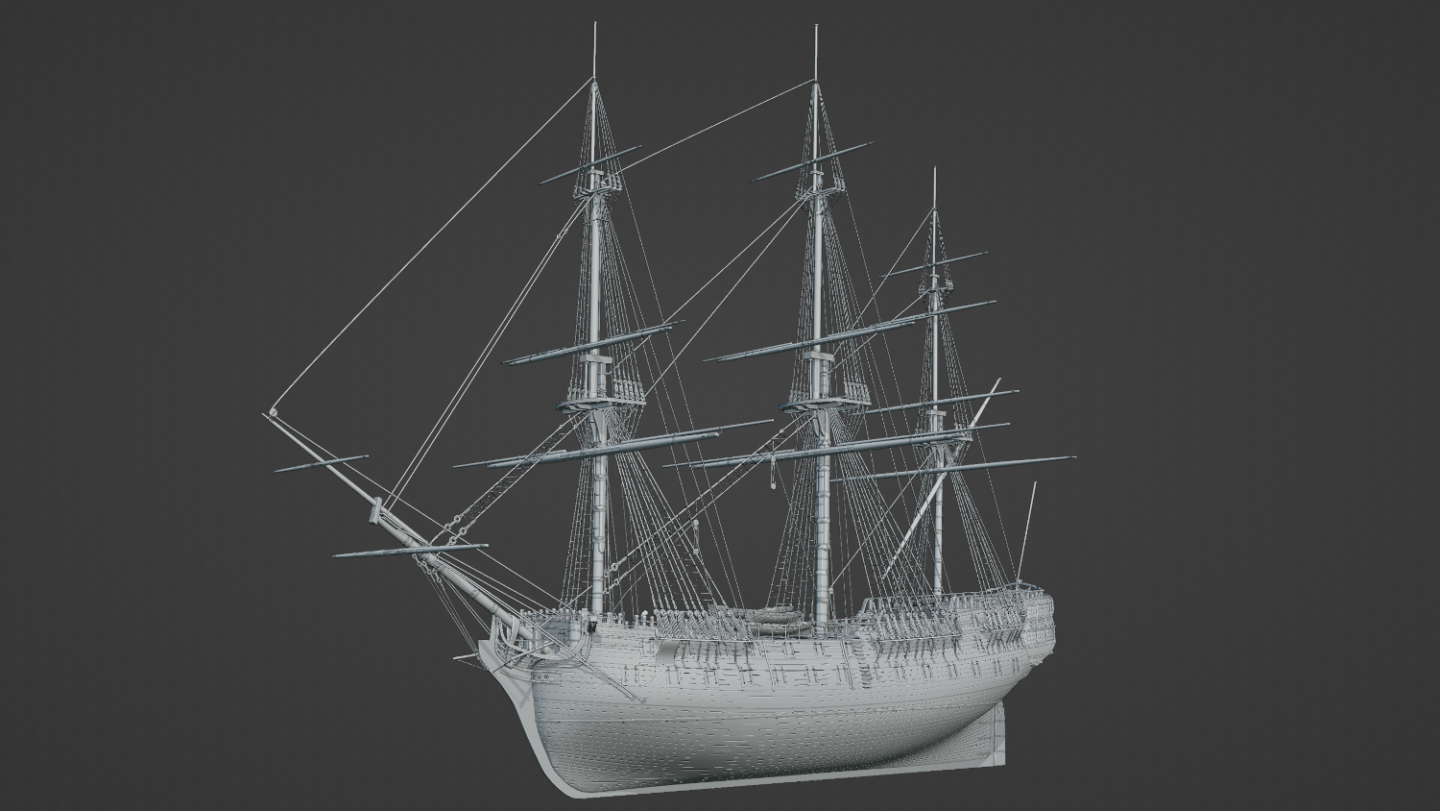
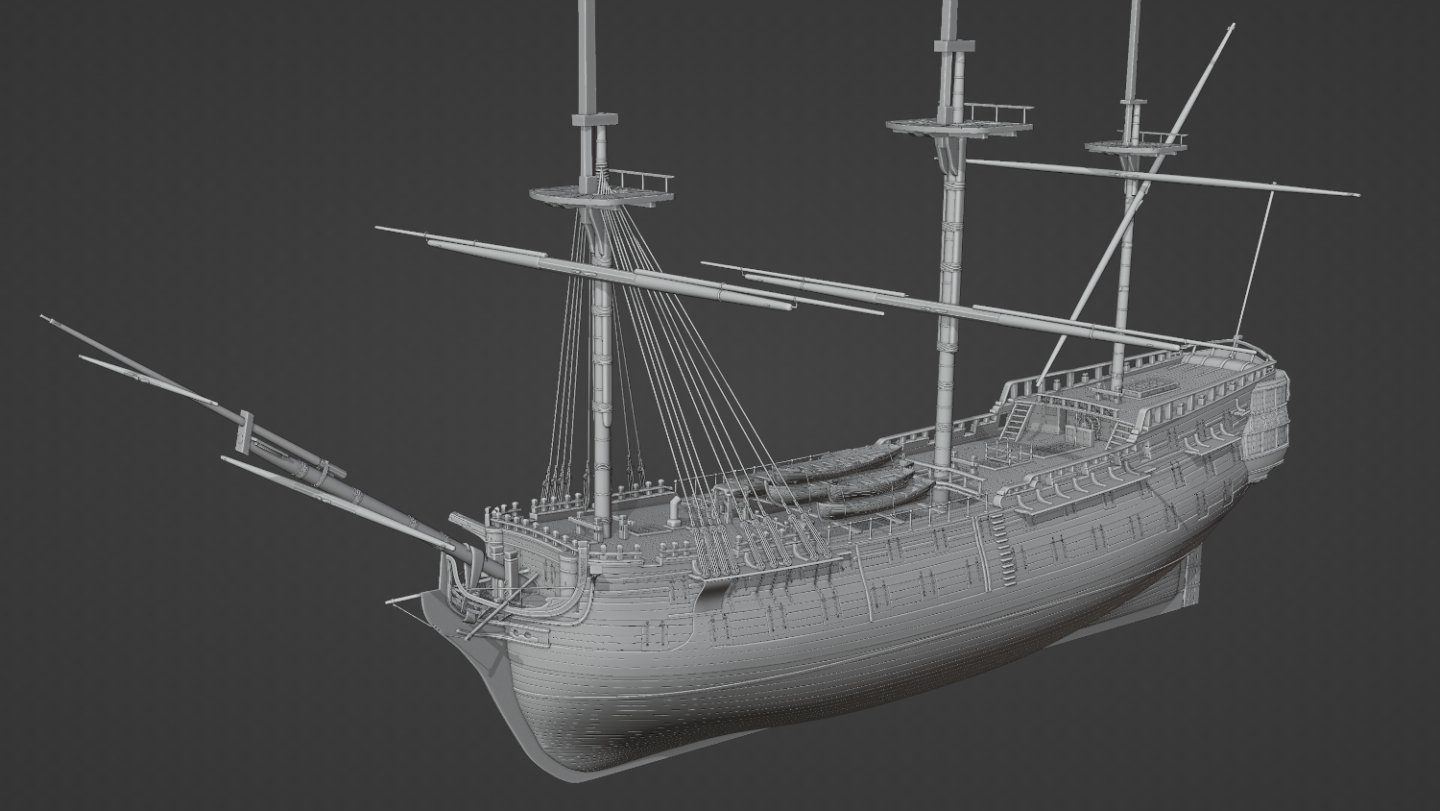
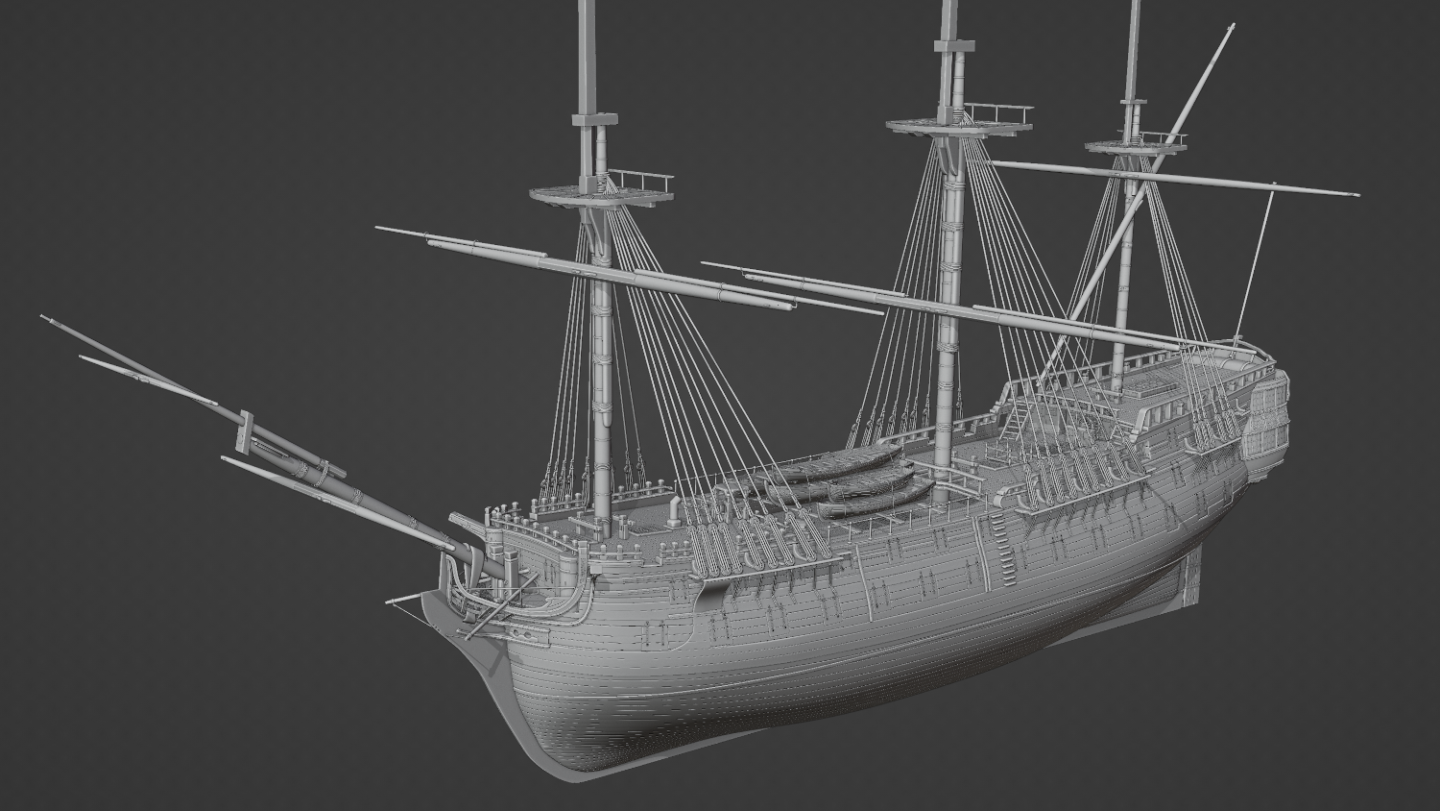
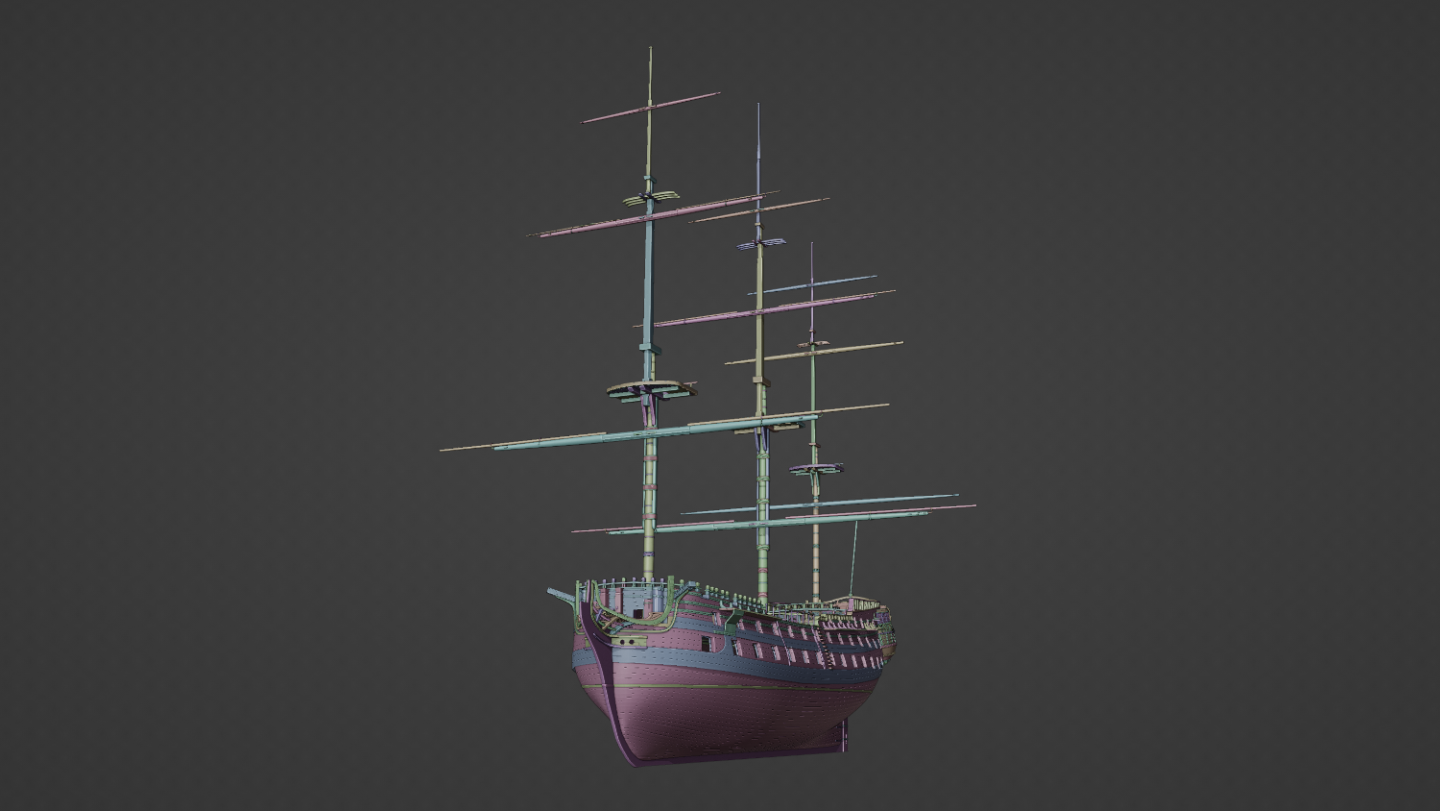
I haven't posted any updates here for a while, so I figure I'd pop up and let you guys know where I'm up to. I've pretty much completed most of the running and standard rigging at this point. I have brace-line, sheet-lines, tack-lines, lifts, braces and bowlines all installed. The only thing missing is the clew-lines which I'll likely to install at a later date cos there's a layer of complexity with those which I need to work around when it's time for furling up the sails, amongst other things. I've attached a video of a sail test if you are interested. Right now, I'm trying to work on a nice figurehead. The aim is to have a siren chained somehow to the ship like she's been captured and calling enemies to their deaths, holding a shield with Medusa donned on the front (thus the name.) Modelling humans is... a different beast though so I'll see how that one plays out 😄

-
Yeah, my first image is full of cringe. I don't look at it more than I have to! Thanks very much for your kind words. They do mean a lot and it helps keep mine (and I'm sure others) motivation up. Right now, I'm having to take some artistic liberties with the (stay) sails cos they're not quite fitting as well as I had hoped, but I still feel they pass and sell the illusion okay. I'll post some updates on them soon.
-
I've had a think about your posts and I understand what you're saying. I have some countermeasures in mind for the problems you've presented with the lines going through the sail like that, hopefully they work out 😅 I do think the pinching in the corners look unnatural in the images you've presented for a couple of reasons. Cloth tends to pinch like that if they're thin and elastic, but sails of that time are quite thick cotton like and made in strips sewn together (from what I can make out anyway.) I believe modern sails are made as single thin pieces so it makes sense they'd pinch like that. I do agree the sides of mine need tightening up though, especially where there's cringles for the various lines to go that hold it in place.
-
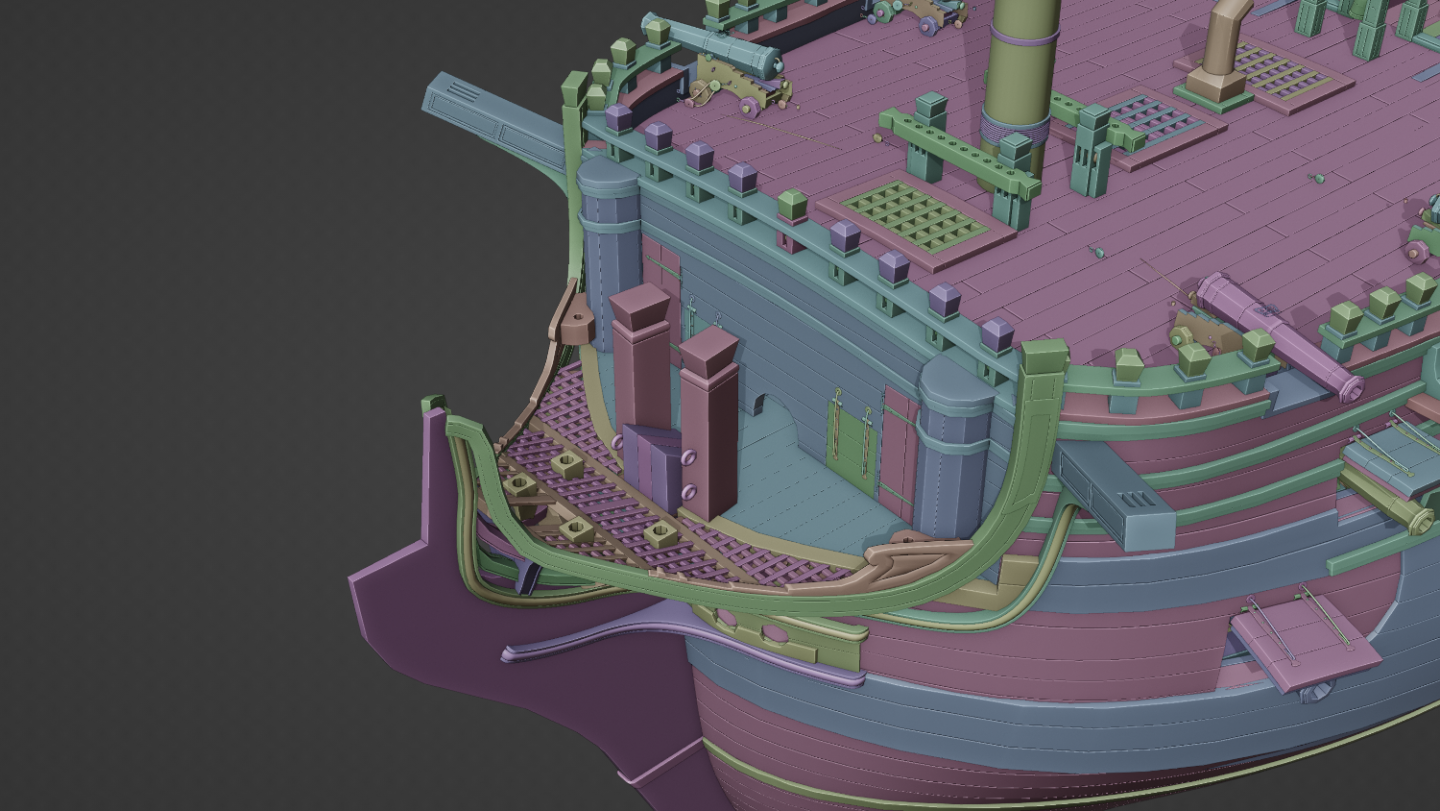
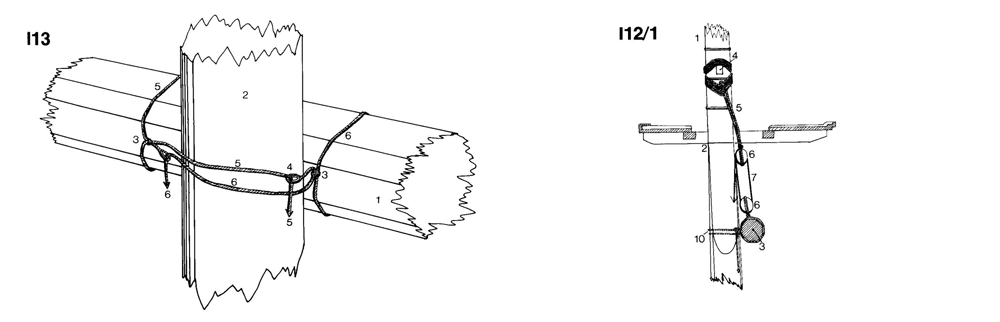
hi Nate; I appreciate the help! What you've described makes sense as it marries up with the information I already have, though I'm a bit unsure about exactly why you've asked me to stop work on the sails? I have a plan of action which involves completing the sails, and building the rigging around them. It might be backward but I feel it'd make the various rigging lines much easier. I know exactly where the cringles are and where to put the clew-lines for example. What I'm unsure about is more how and where some of the lines were supposed to terminate, or "belay." Originally I had all the stays and the yard jigs terminate at the belaying pins on deck, but I realised at some point that there are eye-bolts on the channels and the knight-heads which is where (as far as I can work out) they're supposed to go instead. I was also quickly running out of pins that I'm now presuming are more for the sails (and some of the backstays.) As far as I can work out, there's only three of these eyebolts on each channel, so I figure looking at the diagrams below, they were supposed to loop down from ends 5 and 6 on image I13, and then maybe come back up to the end on the tackle on image 12/1. The more I think about that though, the more it doesn't make any sense as that would put a lot of pressure on that eyebolt and it just wouldn't stay fixed so the more logical thing was that either the mount on I13 goes to the channel and the tackle on I12/1 goes to the belaying pins, or vice versa. It's such a minor area though that it nearly impossible to see unless you're right up close to it that I decided to just not model the terminating parts (5 and 6) and just put the tackle on I12/1 to the channel - at leat this way it keeps the deck belaying pins clear. That's in a nutshell what I was unsure about for most of the lines so far; trying to work out where all the other various lines are supposed to terminate. I've tried to keep them logical. The plan is to have a black/yellow theme with blue (and maybe red) supplementary tones. Kind of similar to how the original ship was. I'm not so sure about the interior though, I don't really want to make it a red because I feel that's very gnarish, but a crimson red might work. I'm thinking of making it a lighter colour that may or may not be historically accurate.
-
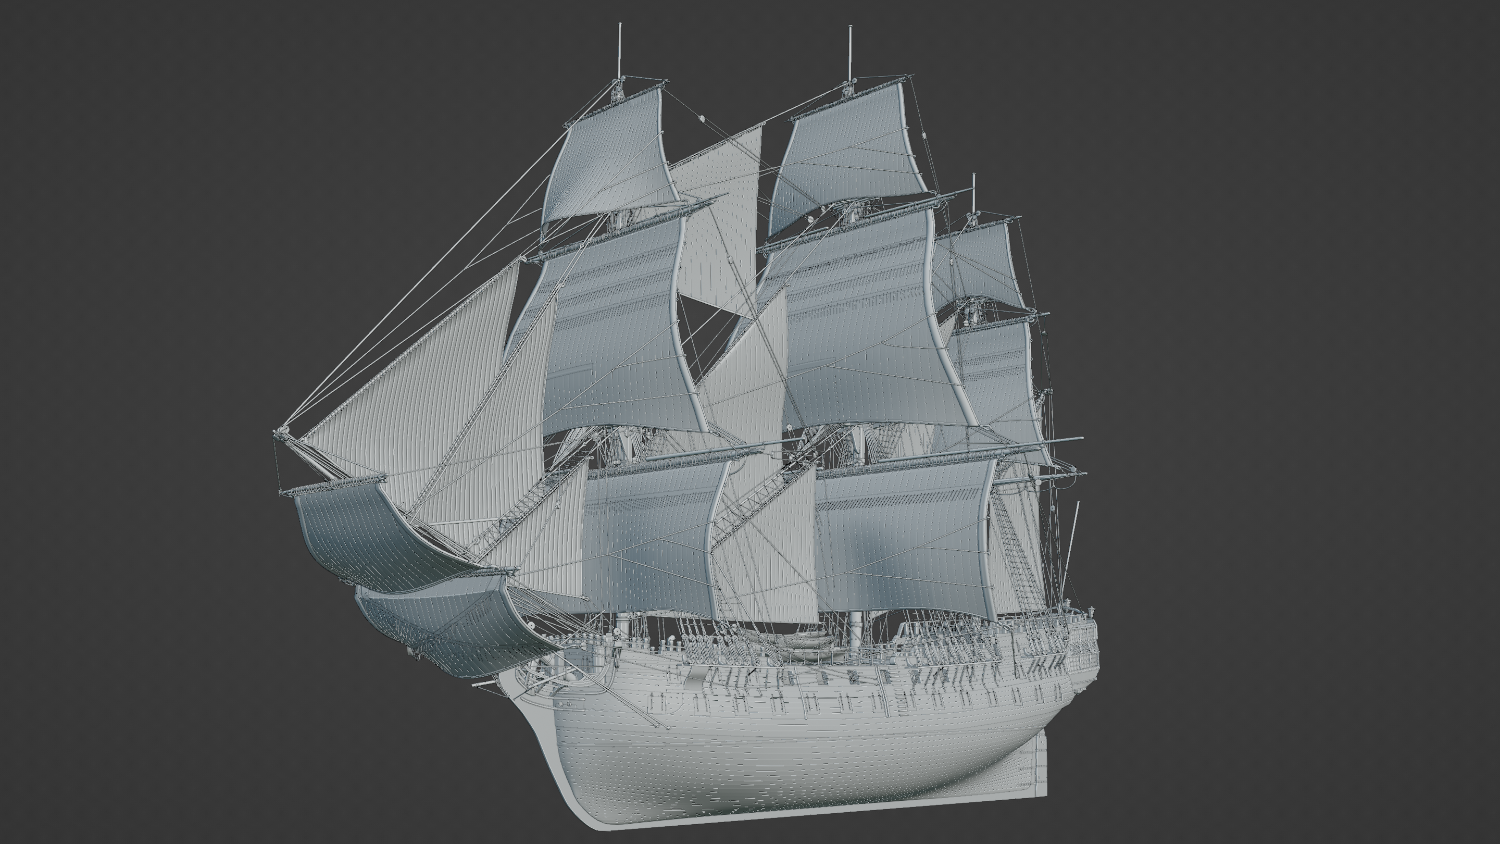
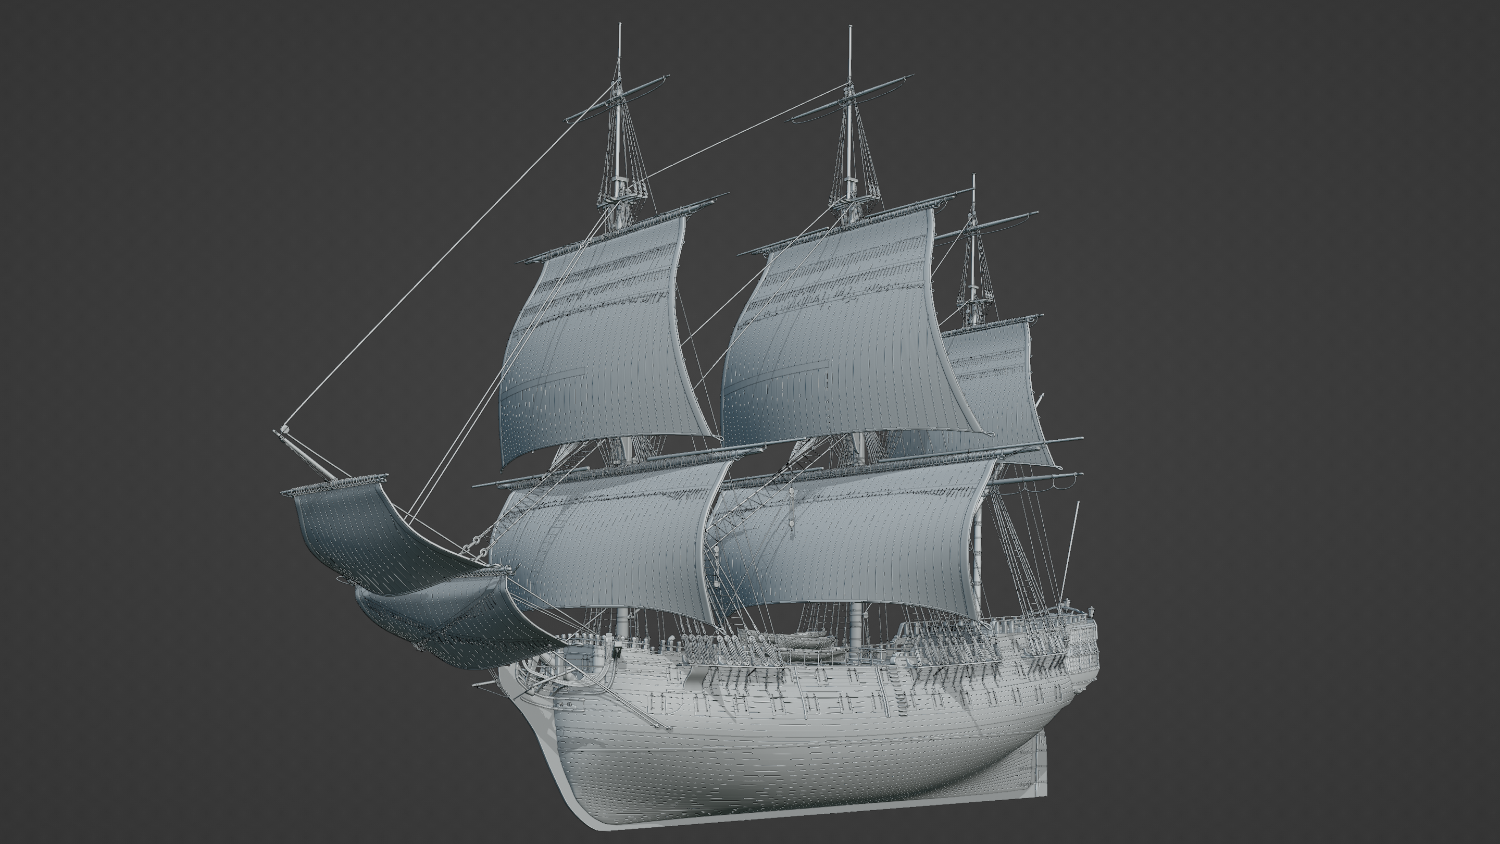
That's a great video! I definitely think it's worth £50, don't get me wrong. It's just simply money that I don't have right now. I've done a sail test for the first sails if anyone here is interested. One of them is a sail on its own, and another is with one of them "attached" to the ship. I still need to add the various lines.
-
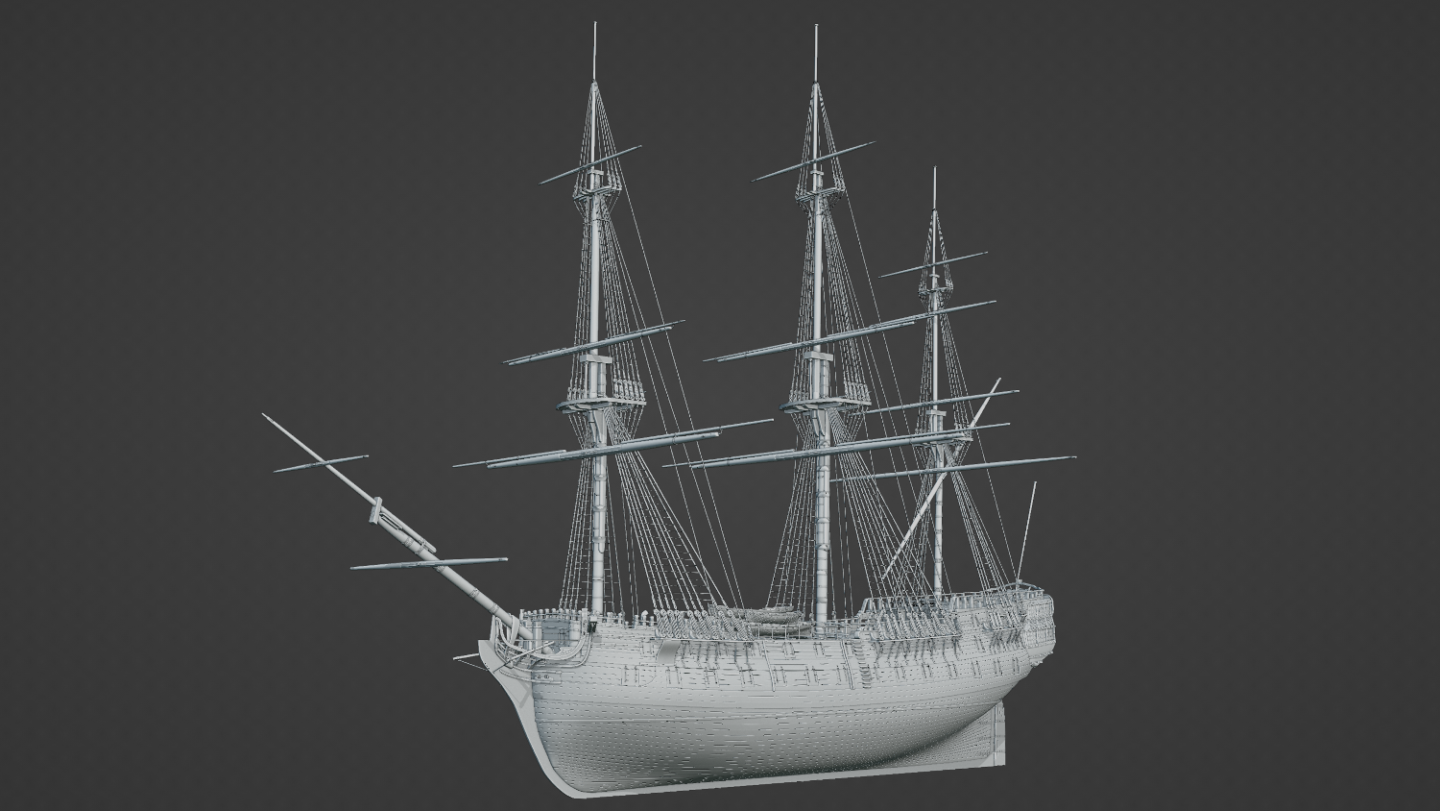
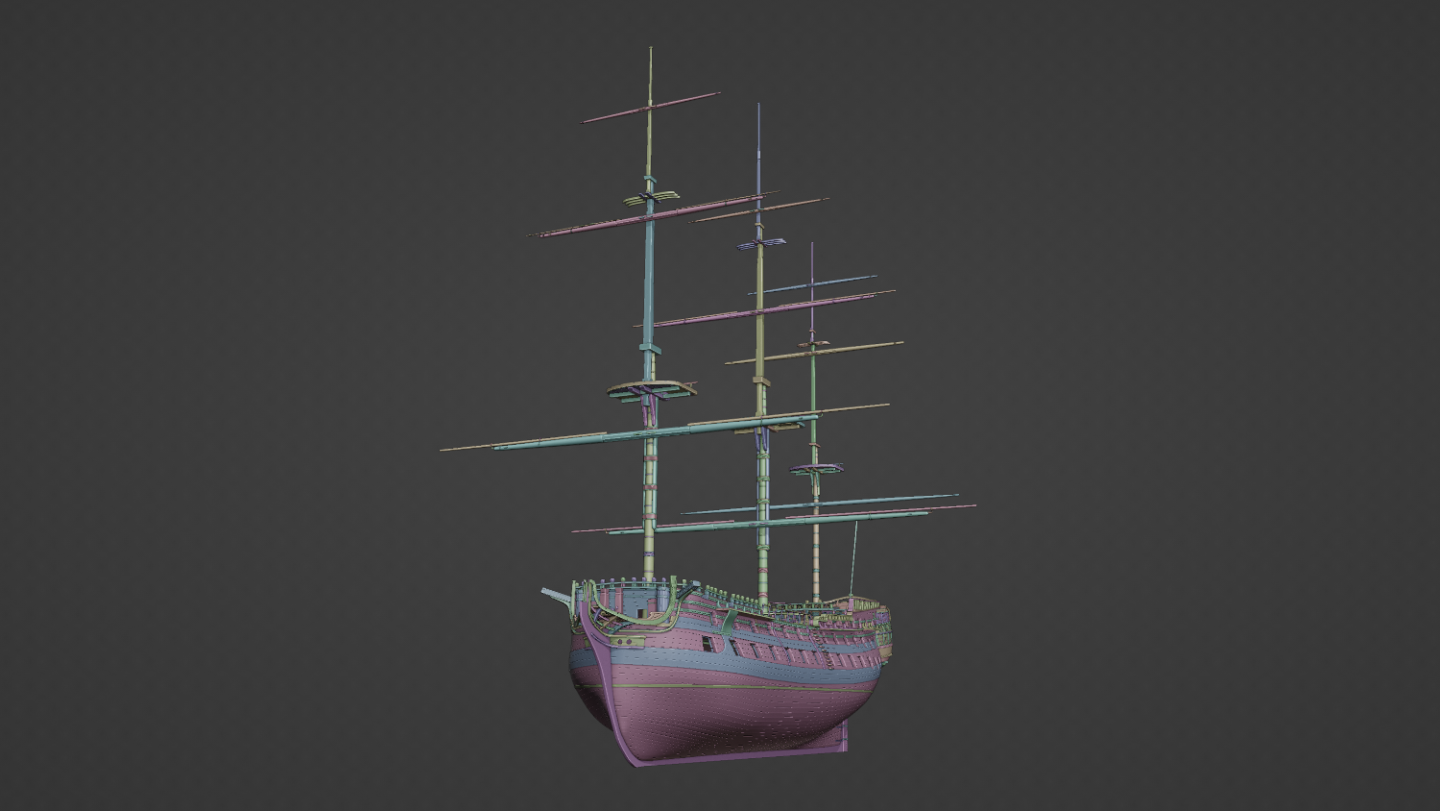
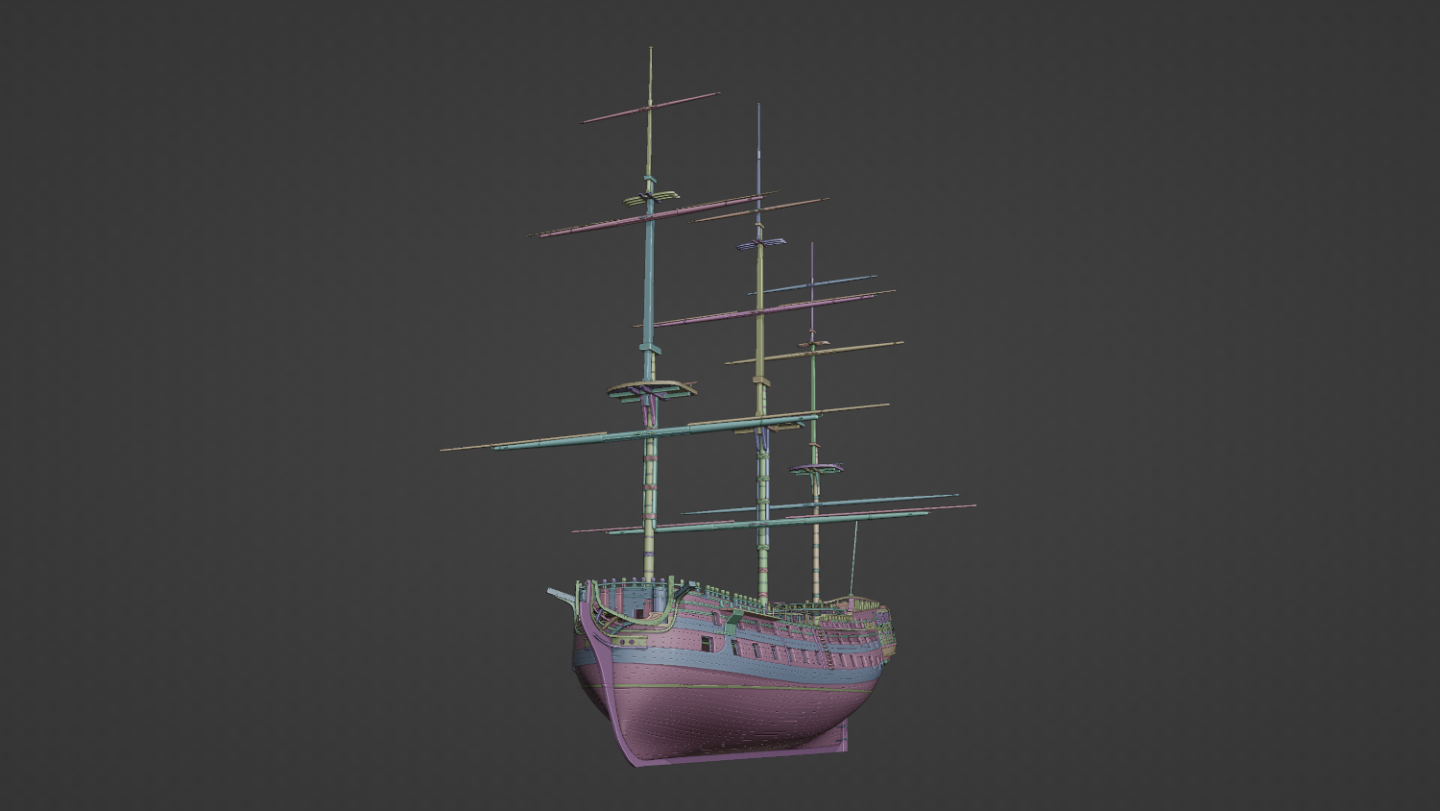
I've done quite a lot of work since my last main update here, only a lot of it was tweaking the various stays and other lines. There were a lot of things I was (and still am in places) unsure about Still, I have gone ahead and modelled the sails and have begun installing them. The bowsprit sails, course-sails and topsails are all ready to go. I just need to install the topgallant sails, and then I need to model and install the boom sail. I may do the various stay-sails but my computer is struggling so I might skip them for now. I'll have to see. After all that's done, I just need to link up the remaning hauling tackles / lines to the sails (so they're not just floating there ) and then I can just work on all the small jobs. Build the figure-head, decorate the quarter-galleries, build the anchor, decorate the side a little bit, and then add materials (colors) to finish her off. Then I can stick her in a scene! I'm very proud of the progress of this one and happy that I've managed to make it this far! I've had a look for that book but you're right, it's very expensive. The cheapest copy I could find was £50 or so and that's well out of my budget range for the moment. I'm working with what I have for now and I'll see if I can get this on the next project.

-
I see! Makes sense. I've actually wondered about those boats, how they were loaded and unloaded. I could only presume the stay tackles were somehow used and swung out. When I think early boat davits, I tend to think steamers so they feel a little odd seeing them on square rigged ships. It would make logical sense having them on the late ones though. As far as books go, the closest I could find was "Rigging Period Ship Models by Lennarth Petersson." It's a good book, but it's showing me how to rig a small frigate with a different layout so I'm having to use it as a cross-reference for similarities with the Anatomy of the Ships. I'll have a look for the one you mentioned. Thank you!
-
I've run into a mini roadblock. I'm trying to work out how exactly the lanterns were lit on the stern of the ship. There's good references for the shape of the lantern itself, but I'm curious about the innards and I don't really want to leave it empty or just stick a candle in it cos I can't imagine that being right. I'm struggling to find references for how the inside of the lanterns were built. If I was to hazard a guess, would it be a basic plate with a candle? Kind of like one of these? (image from here) I can't really see that thing giving off a lot of light unless the glass itself magnified the light somehow, like a lighthouse? I've read somewhere that lanterns like this used to use liquid wax with a wick, so not quite a candle. How would that work with the rolling of a ship? I've also seen some lanterns that have some kind of glass bottle inside them. Irrc, within that bottle is a wick with some kind of liquid, presumably wax. Would this be the best solution for shipboard use? /// A friend also found this: https://en.m.wikipedia.org/wiki/Kerosene_lamp Is it simply one of those?
-
Crows feet installed
-
Brilliant! Thank you
-
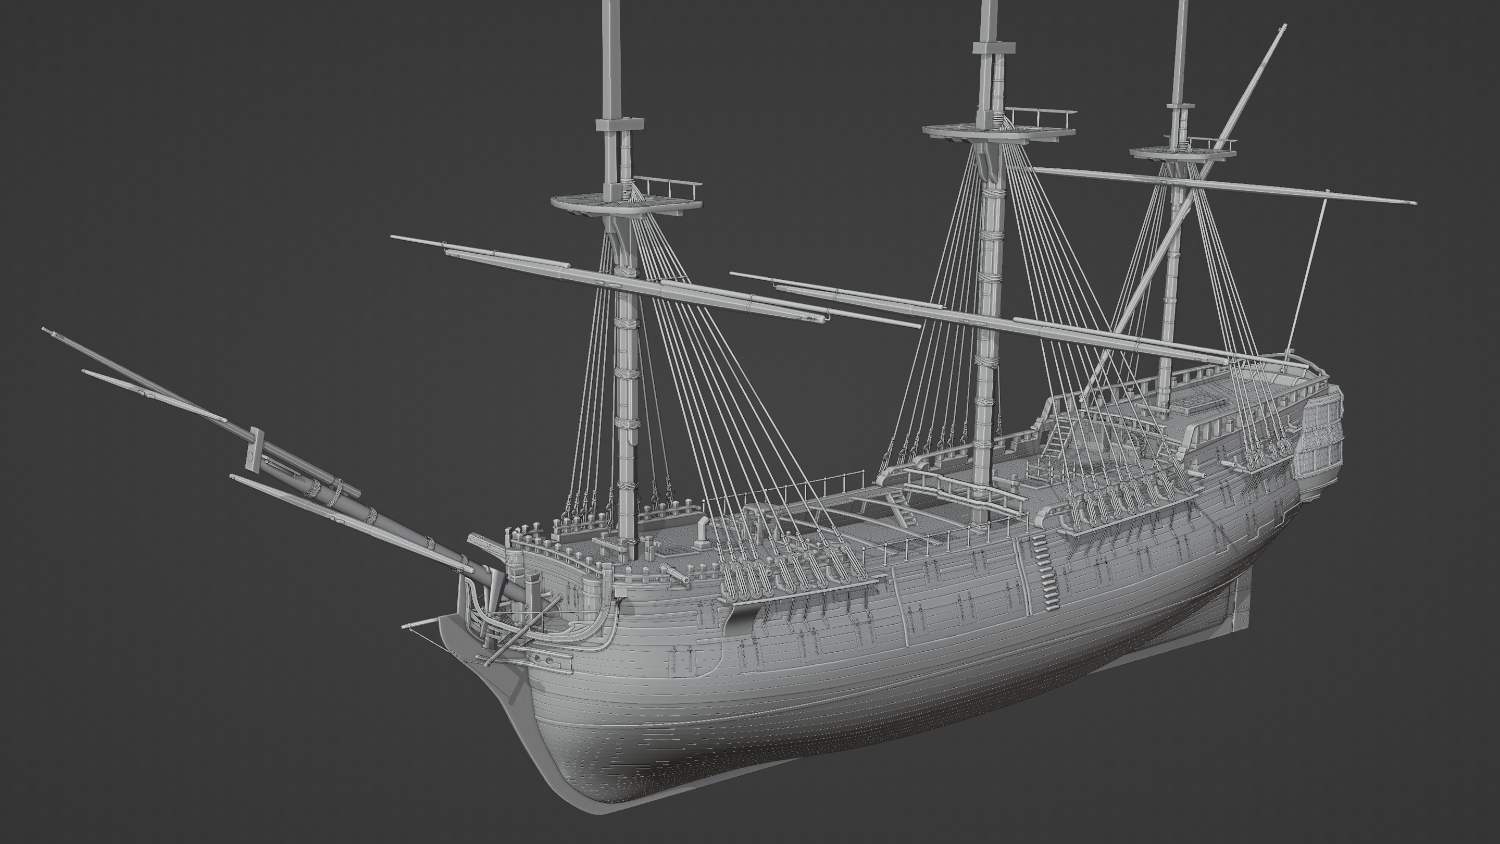
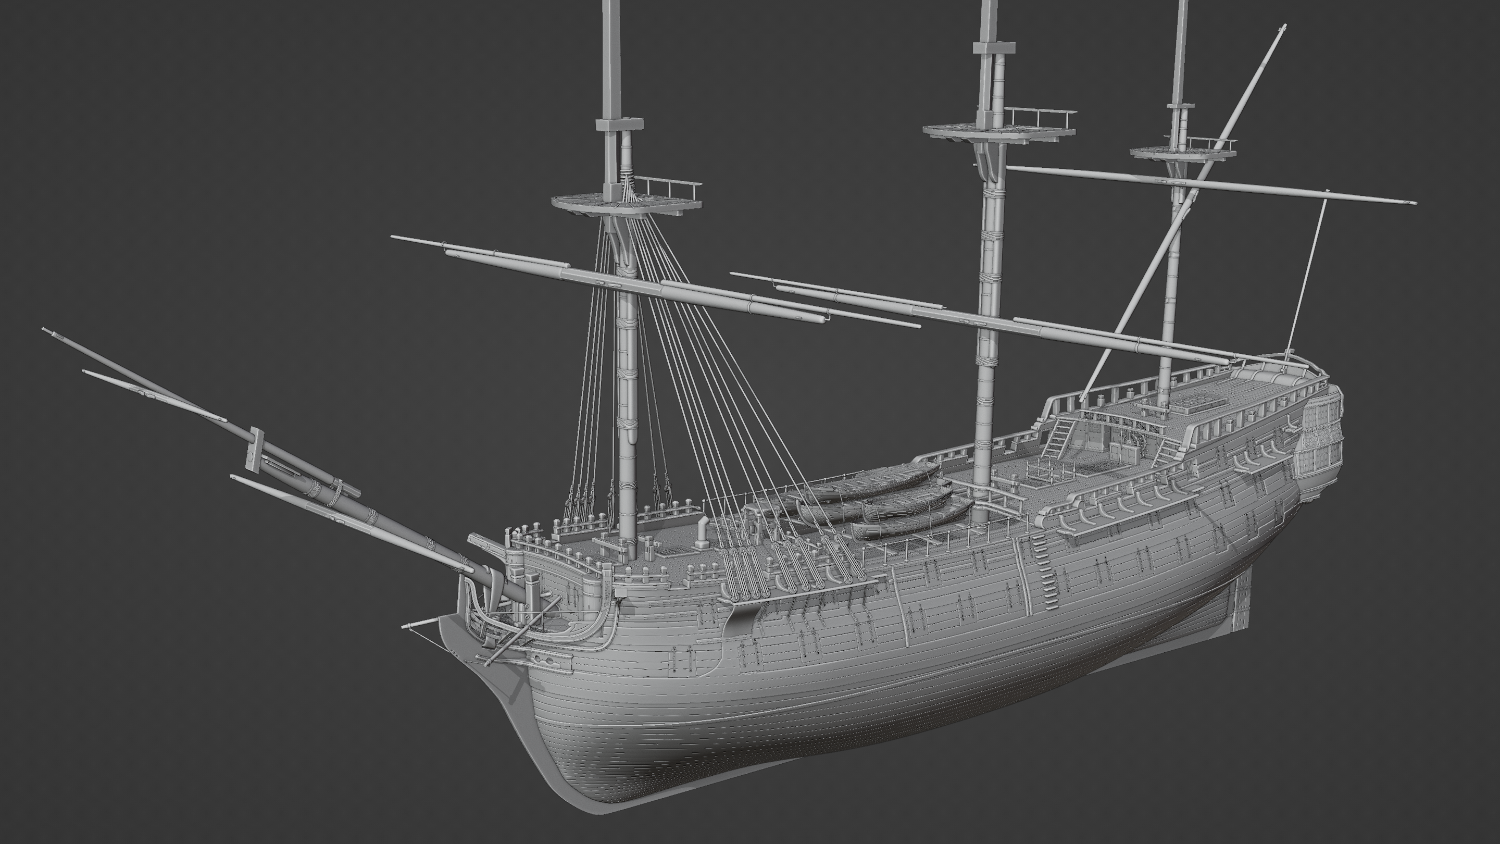
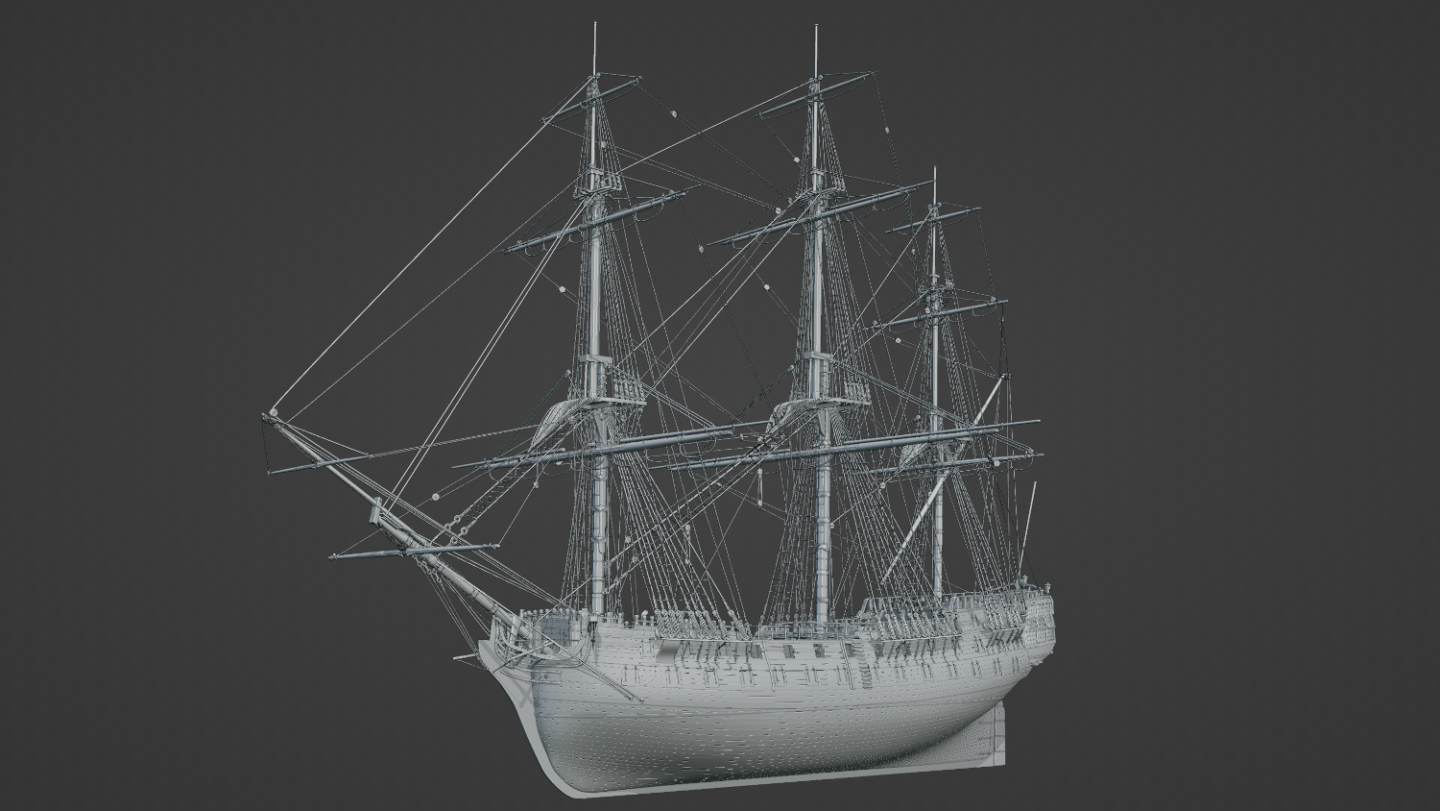
I've gone ahead and installed the various stays. I have a bit of a query; in the anatomy of the ship book, it mentions crow-feet but doesn't really give any information on how they're positioned or why they're used. Am I right in thinking that each "line" of the crowfeet goes through a hole in the top, which then feeds through a long block and then loops back through the top until finished? The block would then be seized at the next forward mast just below (or above) the yard? I would also ask if they get in the way of the sails, but they mustn't otherwise they wouldn't be used, and I haven't begun looking at the running rigging yet.
-
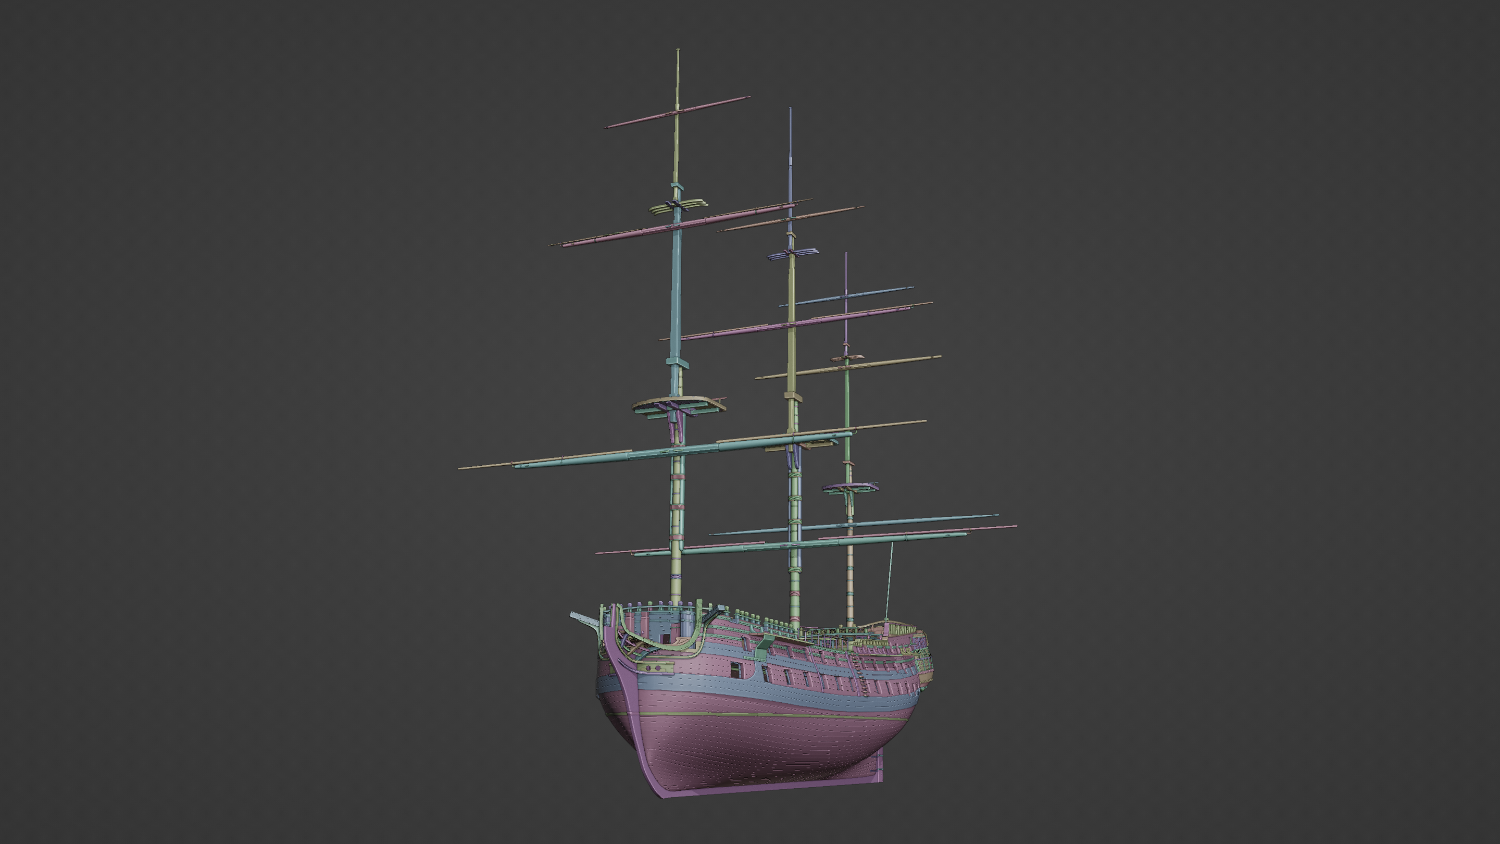
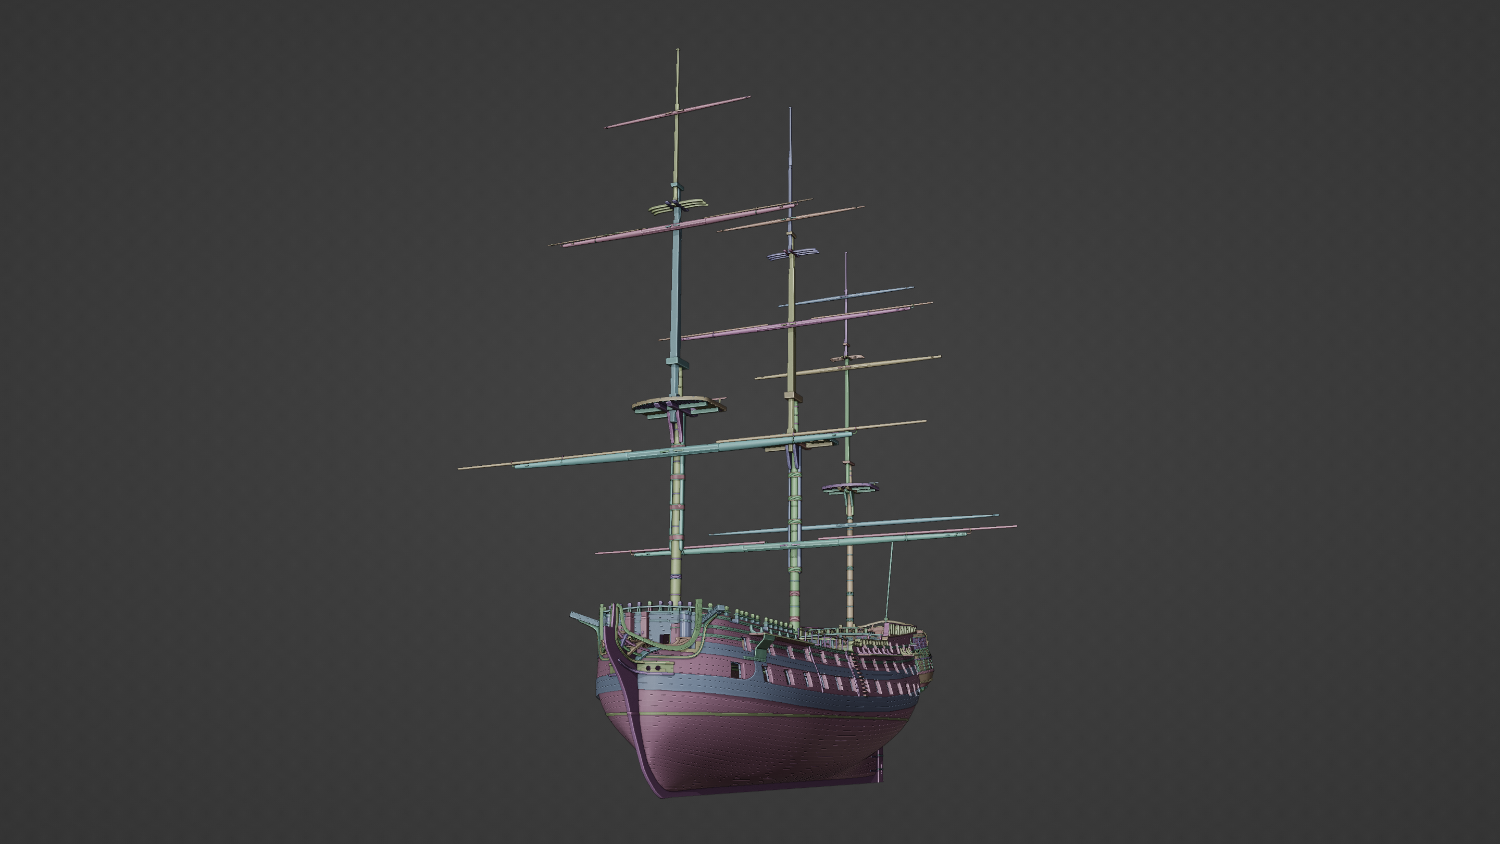
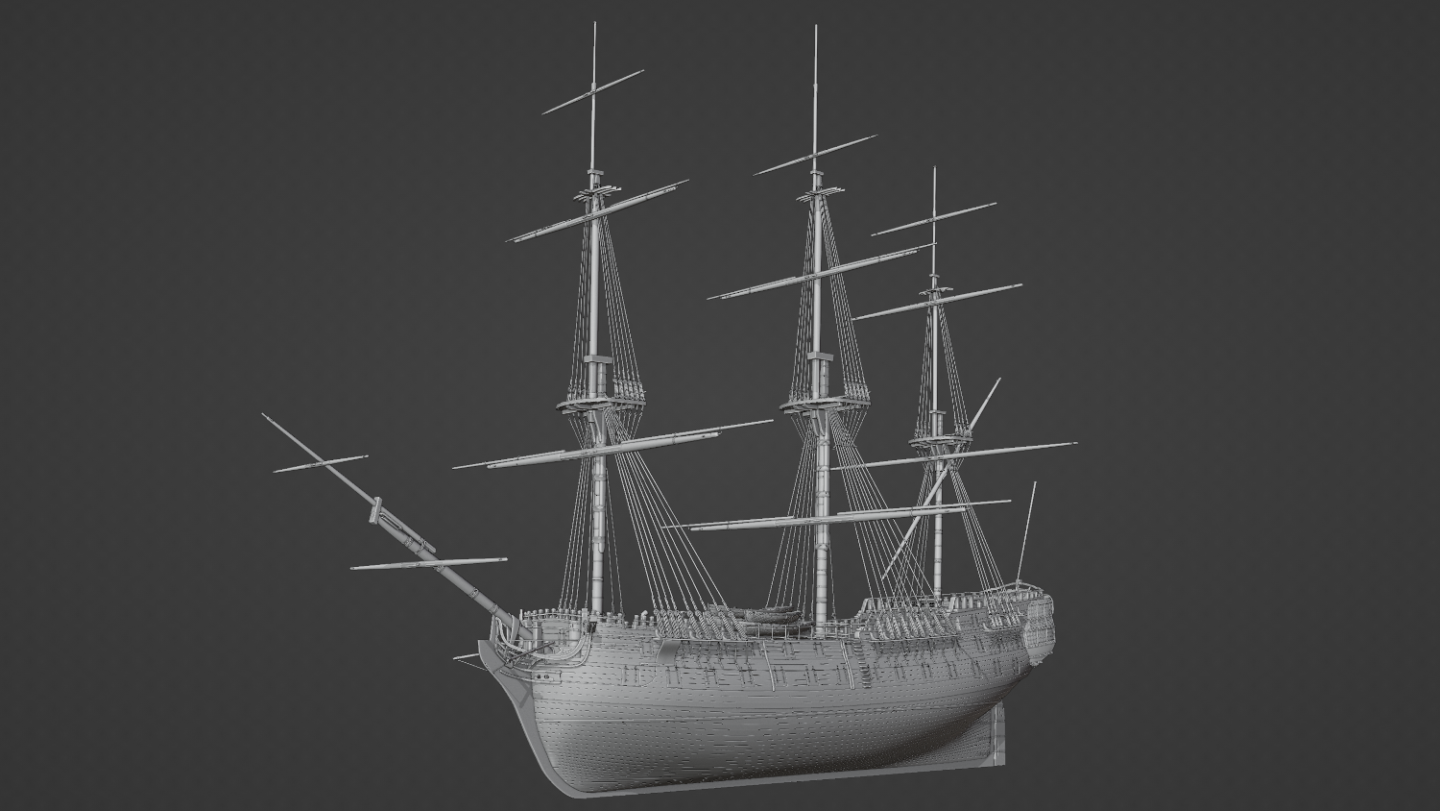
Backstays in place! Just working on the stays that go between the masts but the diagram isn't the clearest. @Martes I've had another look at the previous posts. I can actually see the bulge you were looking at and it sticked out like a sore thumb 😱 I think the keel is a bit too far gone now to try and make those kind of changes, cos the more I tried, the more dented and out of shape it looked. It's a task best suited for a rebuild I feel, unless the reshaping is comparatively minor. I appreciate the interest! I have a few ideas in mind for this ship, one of which would be releasing the model on a website like CGTrader. You'd be able to download it yourself, load it into Blender and do what you will with it. It does come with an asking price though, not too sure yet what I'd set it to. More personally, I also want to make some nice renders with it and potentially make an animation in the long-term (hardware allowing.) I don't think you'd be able to load it into Autodesk unless there's some kind of conversion tool. They typically work with simpler models, but I've used a whole bunch of Blender features that may or may not convert well. I'll look into it when I'm nearing completion.
-
Ratlines in place!

-
I've not seen that third post on any of the prints I'm looking at. Interesting! Were they ship specific or generally in place? I may add them cos they seem to add to the ship's authestics, but I feel they might've been a later addition to vessels in general cos I've noticed a couple of newer rigging techniques on the ship you've posted. I've gone ahead and readjusted the masts. Turns out doing so was much easier than anticipated! I also mishaped the topgallant and top-masts so I've gone back to those and tweaked them accordingly. I'm still a bit unsure with those dead-eyes. I understand that logic that people should be able to climb onto the ratlines, but most prints and references have them surprisingly high, so i've moved them back up a little. The ship still feels okay.
-
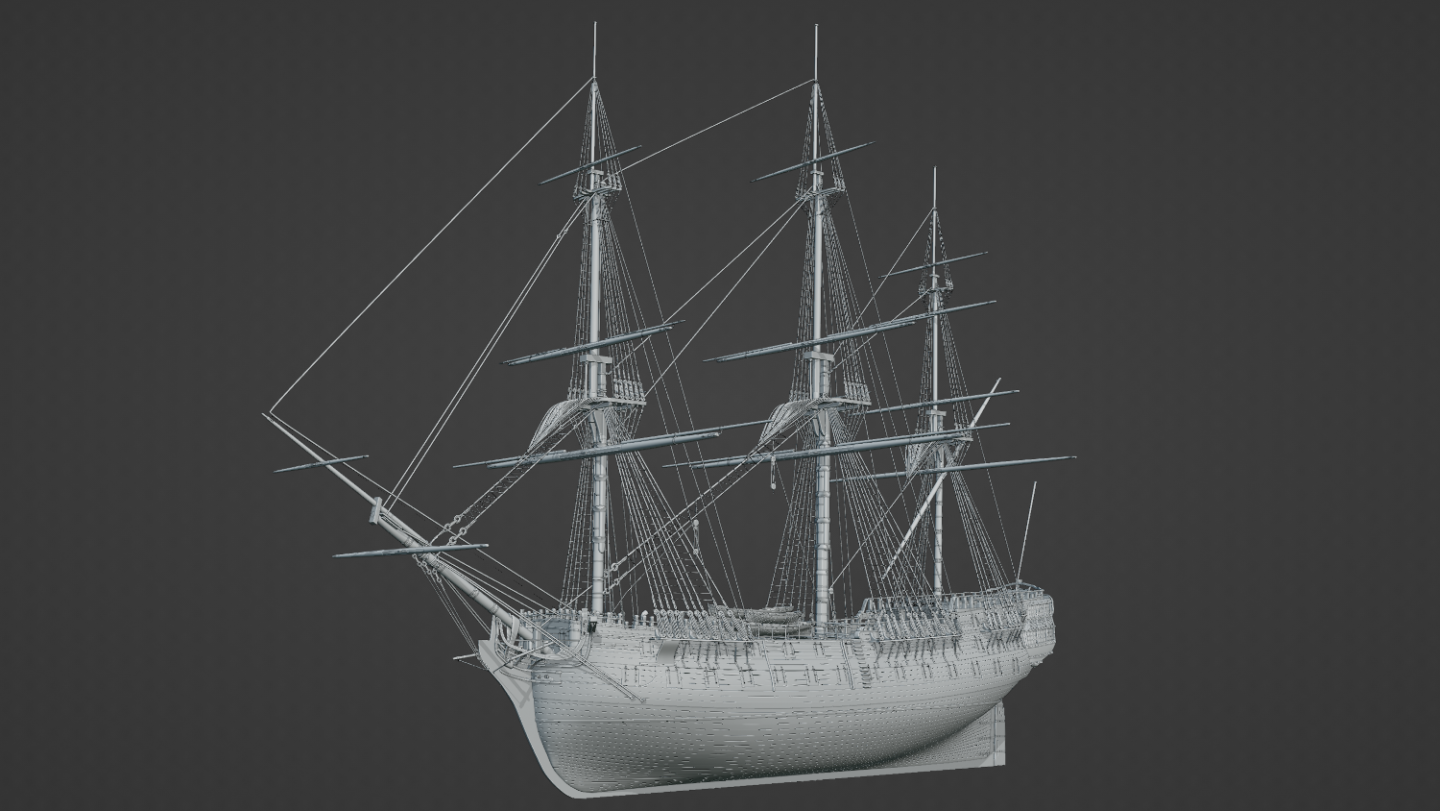
hi Nate; Thanks for your input! I wasn't too sure about the shape of the final part of the three bottom masts, the top-masts and topgallants are square from start to finish I've noticed so again it was one of those guesses. I'll look into reshaping the top-most part so it's square but I'd consider it a low priority right now (I'd have to reshape all those curves too... 😭) I was wondering about those dead-eyes too. How I have them was referenced directly from the print, but I think you're right... They do look a bit too far apart. They're an easy fix thankfully. I noticed the tops and trestletress were indeed perpendicular to the decks. I made it a point of making sure of that with this vessel. I've attached an image with updated dead-eyes and a side profile in orthographic.

-
I can barely hold in my excitement! I'm finally tackling the rigging! I know it's just the start of the shrouds on the fore-mast, but I'm pleased with the progress! Might need to thicken up the lines a little bit, and work on the bit at the top of the mast cos it looks a little weird at the minute, but pleased overall! ------
-
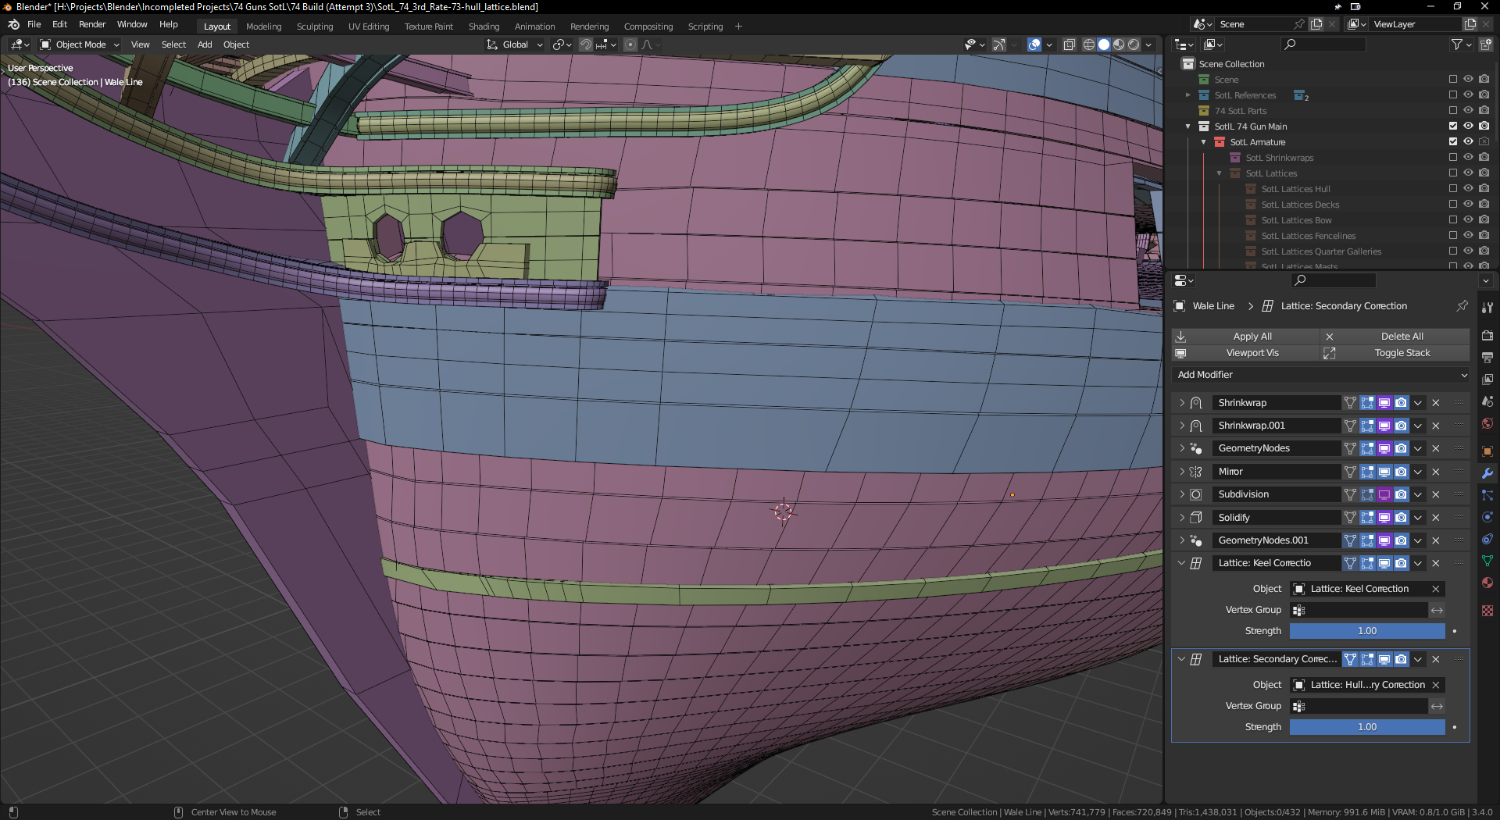
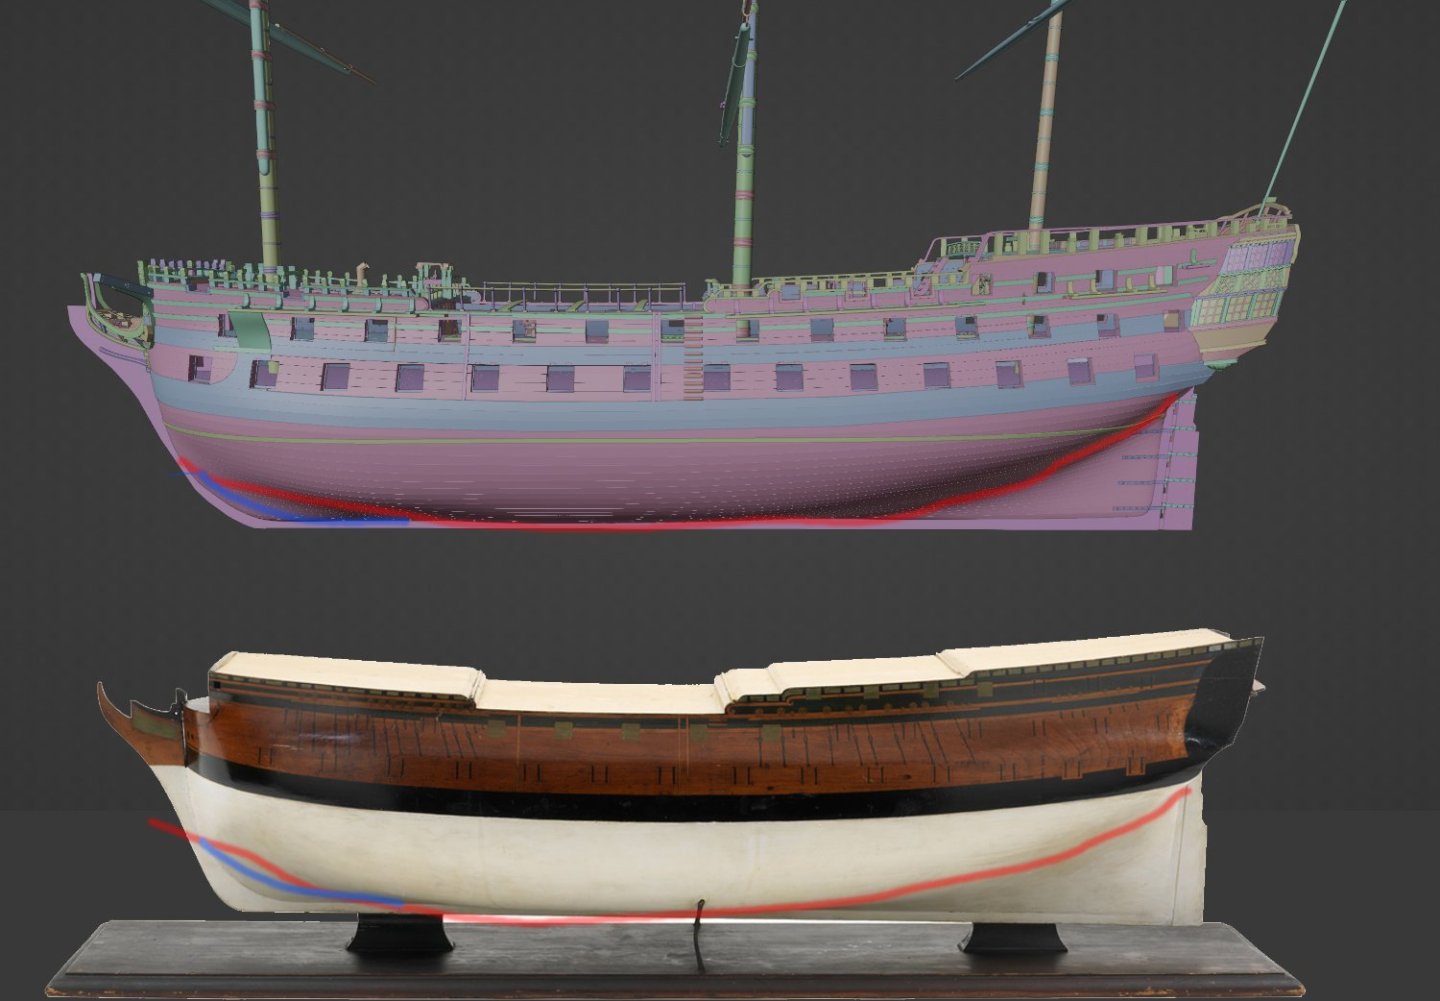
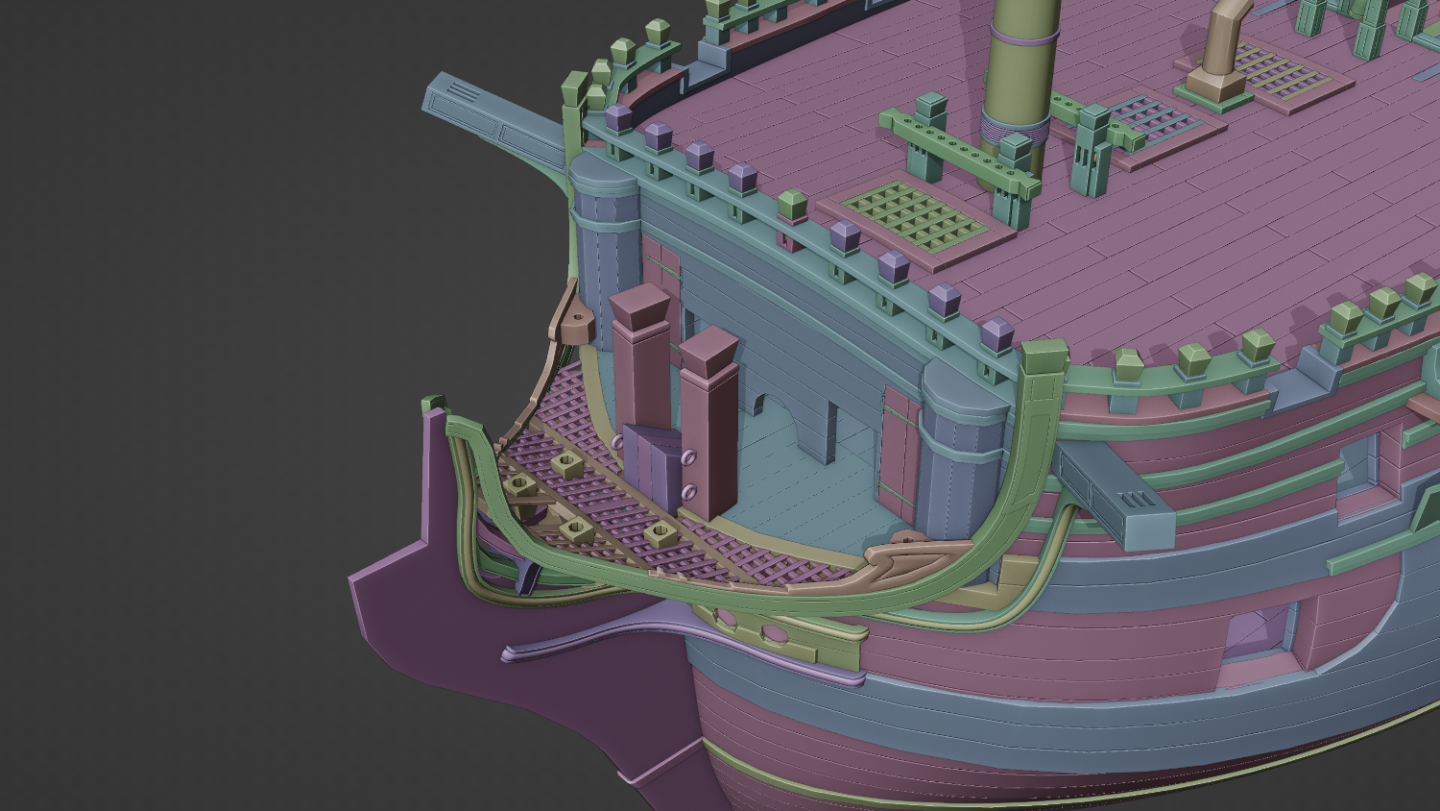
Alright, I've decided to backtrack to the last 'clean' version before I started attempting to fix the keel and hull cos it seems to be creating more problems than fixing. I've noticed the ports are a bit out of shape as well, but I've got some ideas in mind for the next build that should mitigate both problems. I don't think the mis-shaping is serious enough to effectively start over or that there's anything which can't be worked around as far as the rigging is concerned. @Martes I do genuinely appreciate the input and help, but I'm just not seeing what you're seeing right now. I usually understand the feedback that's been given when I've worked on other aspects of the ship (or other projects) and then come back to it and review earlier comments. I feel like it'll be the same with this, so I'm gonna drop trying to fix the keel for now and potentially come back to it at a later date. For the quarter galleries, I think that's just the way Blender has rendered the lighting in the viewport and no shadows were on. They're not actually that flat.
-
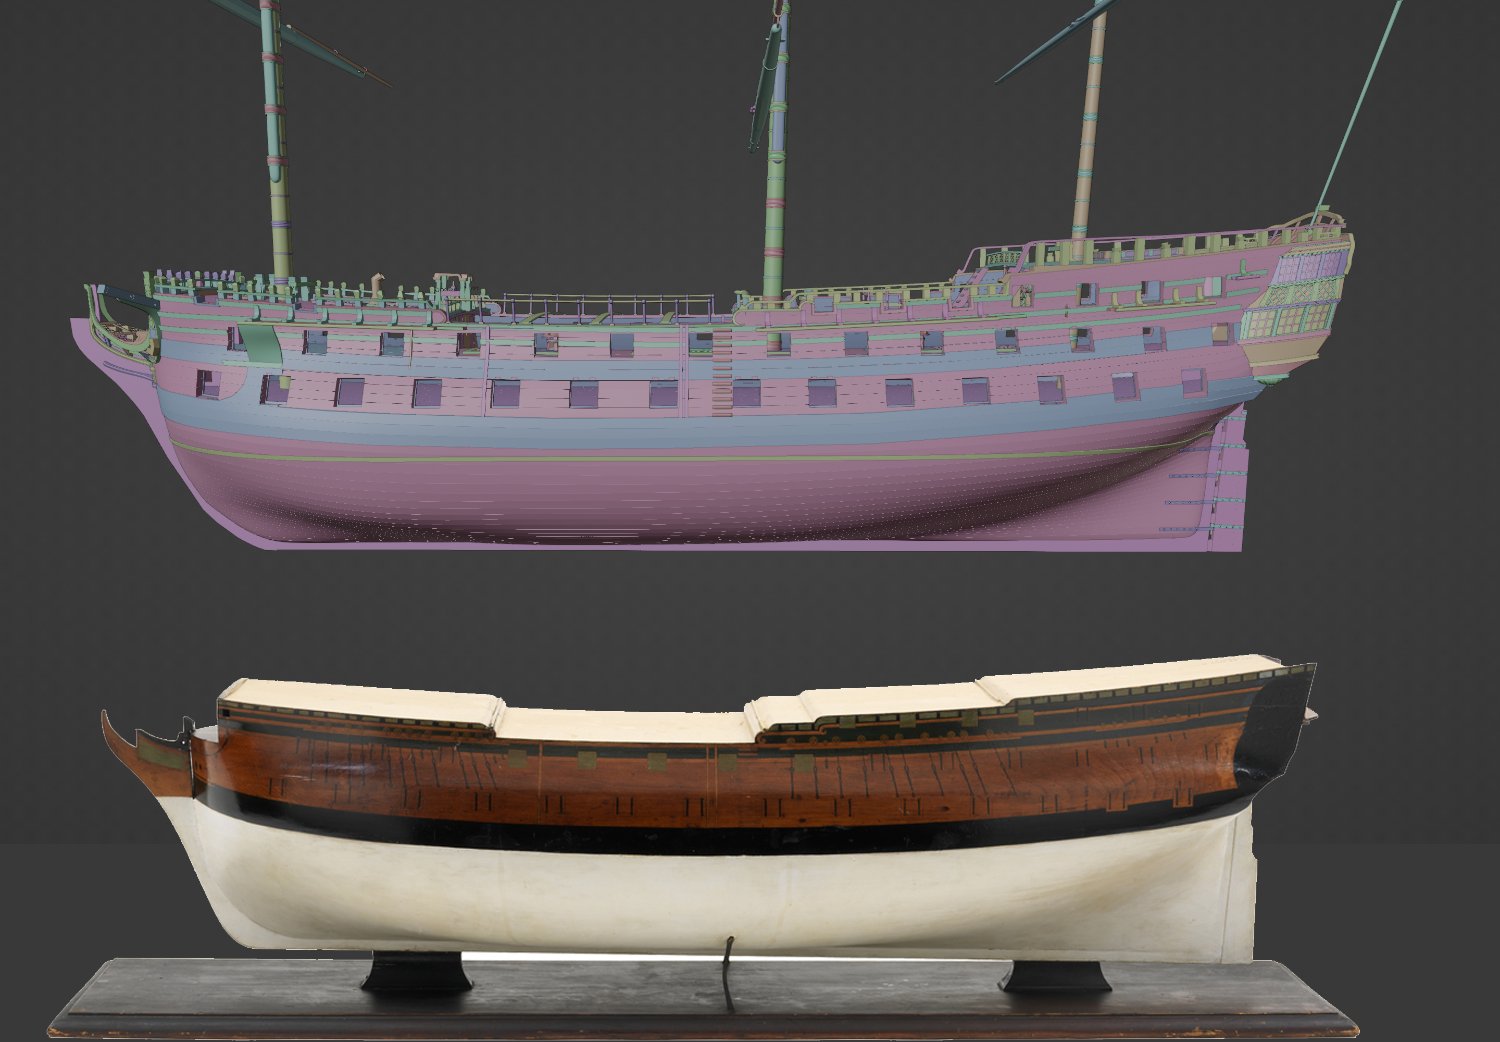
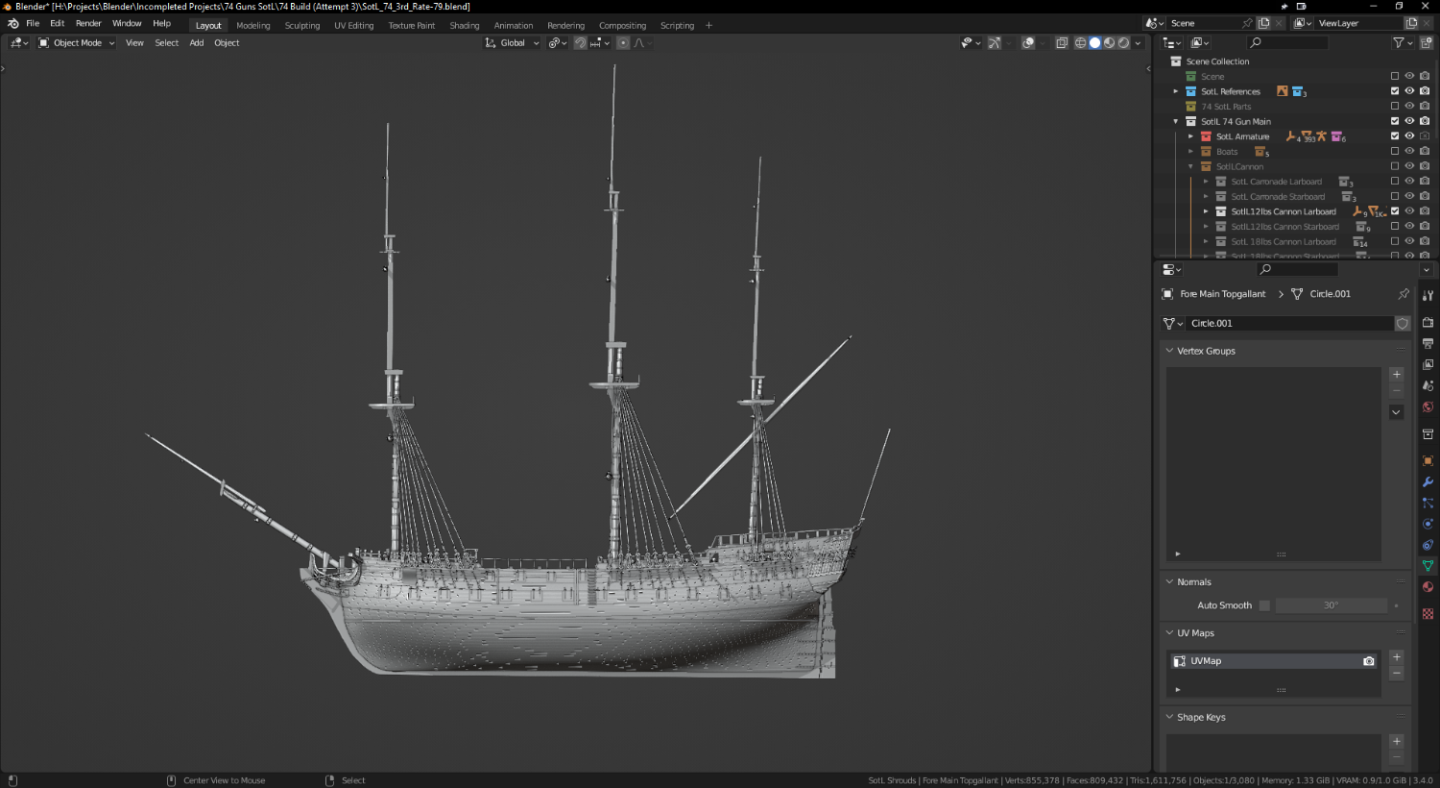
There's quite a lot of information in these replies, so I'll repsond to them once at a time. I think it's worth remembering that the keel is going to be rendered underwater so I think we're spending a bit too much time looking at it and trying to remedy it. I've had another go trying to correct it with that said but I am feeling a bit frustrated with this elusive "bulge." I've added an image to show you a bit more accurately what it is that I'm seeing. @3DShipWright Using the smooth modifier shrinks the entire thing down. Tools like that would've been better utilised much earlier on in the process. Yes, the entire ship is quads only. I make it a habit to ensure this. There are also no redundant vertices, if they're there, they're there for a reason. @Martes If you look at where you've circled number 6, it's actually a design of the hull. As the planking begins to curve upwards, they seem to split them in three places and add a second plank to fill the gap. The resulting shapes tend to be triangular. The rest of the vertices will be supporting loops. As for the bit with the hawse-holes. They're thankfully much easier to remedy! This! Of course, I appreciate every bit of help you guys have given me, you've all been amazing! I have a lot more materials to work with if I decide to try this again which I didn't have when I first started out. I'm thinking of having a go at a fourth rate next with everything I've learned with this, and then possibly a first rater, but I also want to get this done as well, even if it is imperfect.


-
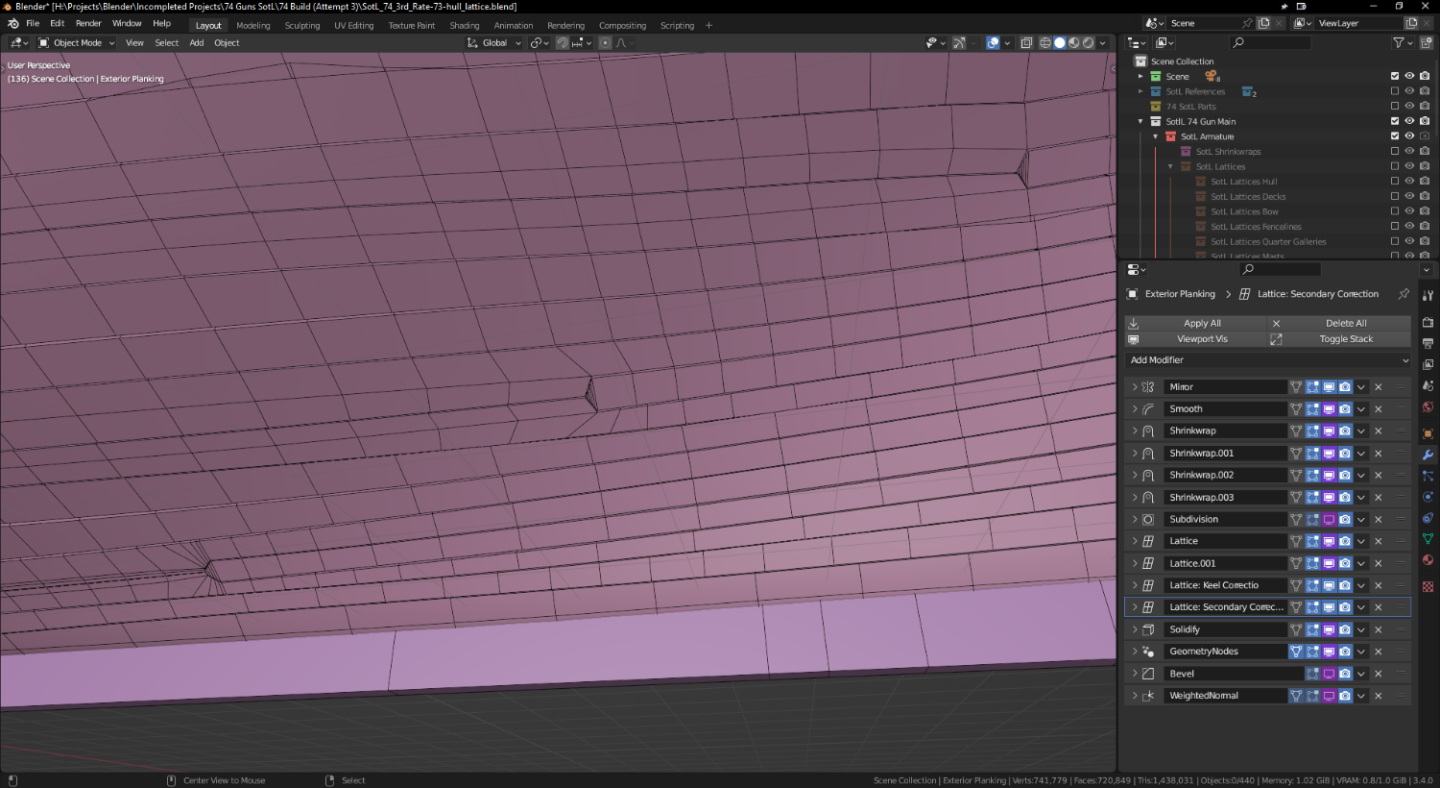
I've gone back to the original prints I was working on to see if I can adjust the shape of the hull. Doing this has thrown a spanner in the works for several other elements of the ship, particularly the gun-ports, so I'm gonna have to remove them, rebuild/tweak them, and then reinstall them. 🥶💀😫 I've attached a copy with some wireframes as requested.

-
I wasn't quite sure what you meant by "make them more tangent to the keel" so I just carried on smoothing out a bit more. My main worry doing this was pinching it too much. I've also gone ahead and scaled up the roundhouses on the X axis as well.
-
How is this? Quite. When I first started the bow section, I couldn't figure out whether the roundhouses were purely decorative pillars like you'd find on a quarter gallery, or if it served a functional purpose. I erroneoushly figured it must've been decorative so I built the bow as close as I could with that idea in mind. I originally had them as rectangular! 😅 It was later on when I realised I was wrong. I'm not too sure how to remedy it so I was planning on leaving it for now and giving it a closer look at the next build as I have other ships I want to tackle.
-
You're right! I was looking at that bit when I first started out and I could never quite get it to feel right. I've done some shape tweaking with that section of the bow with the the help of the guidelines you've given, so I hope it looks better to your eyes. I've also readjusted the roundhouses and the hawse-holes. Are these renders any better?