jeffBoats
-
Posts
18 -
Joined
-
Last visited
Content Type
Profiles
Forums
Gallery
Events
Everything posted by jeffBoats
-
Hello, Looking into getting a scroll saw as I've been fabricating many more pieces than expected for my first build. I'm on a budget but figure I could use it for other non-ship projects in the future. I saw these two different saws at Micromark in my price range, and was curious if anyone has used either of them and what their experiences were? https://www.micromark.com/16-Inch-Scroll-Saw-with-Flexible-Shaft-Attachment https://www.micromark.com/MicroLuxsup-reg-sup-Variable-Speed-Multi-Saw The non-MicroLux one seems like it could be used for a wider variety of tasks. Thanks for any input on these saws.
-
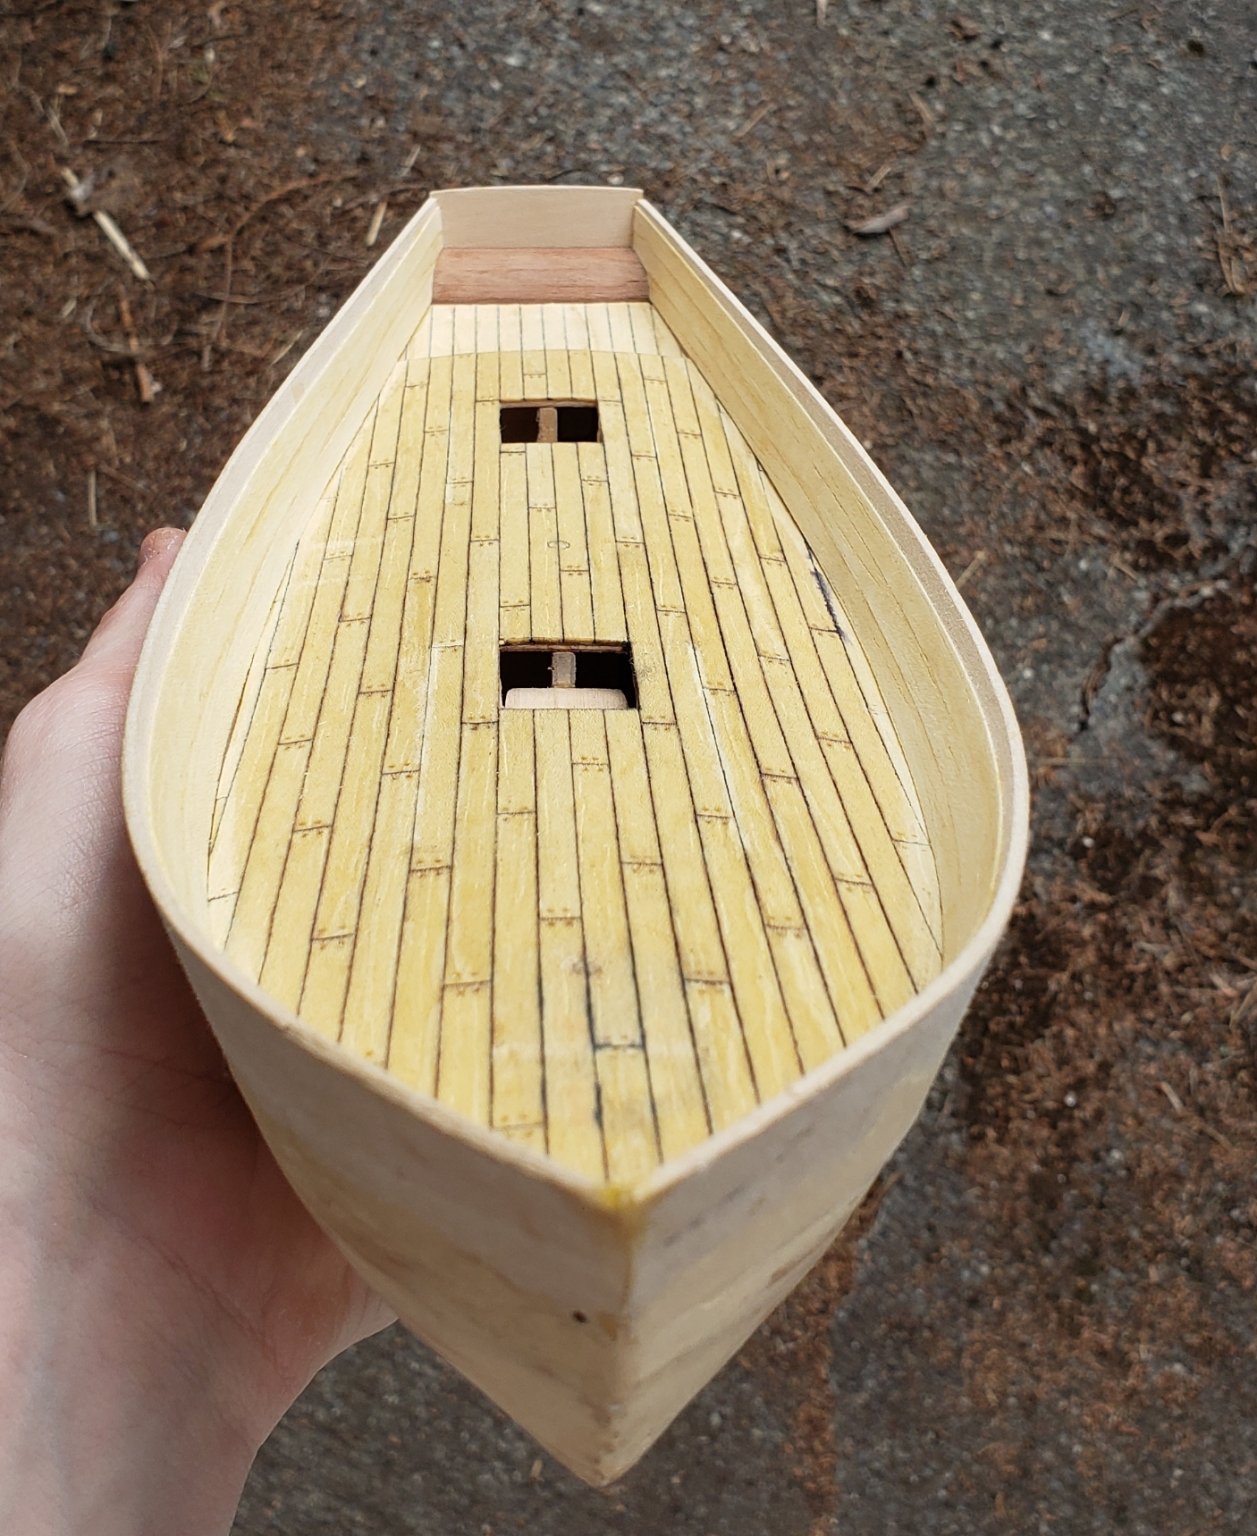
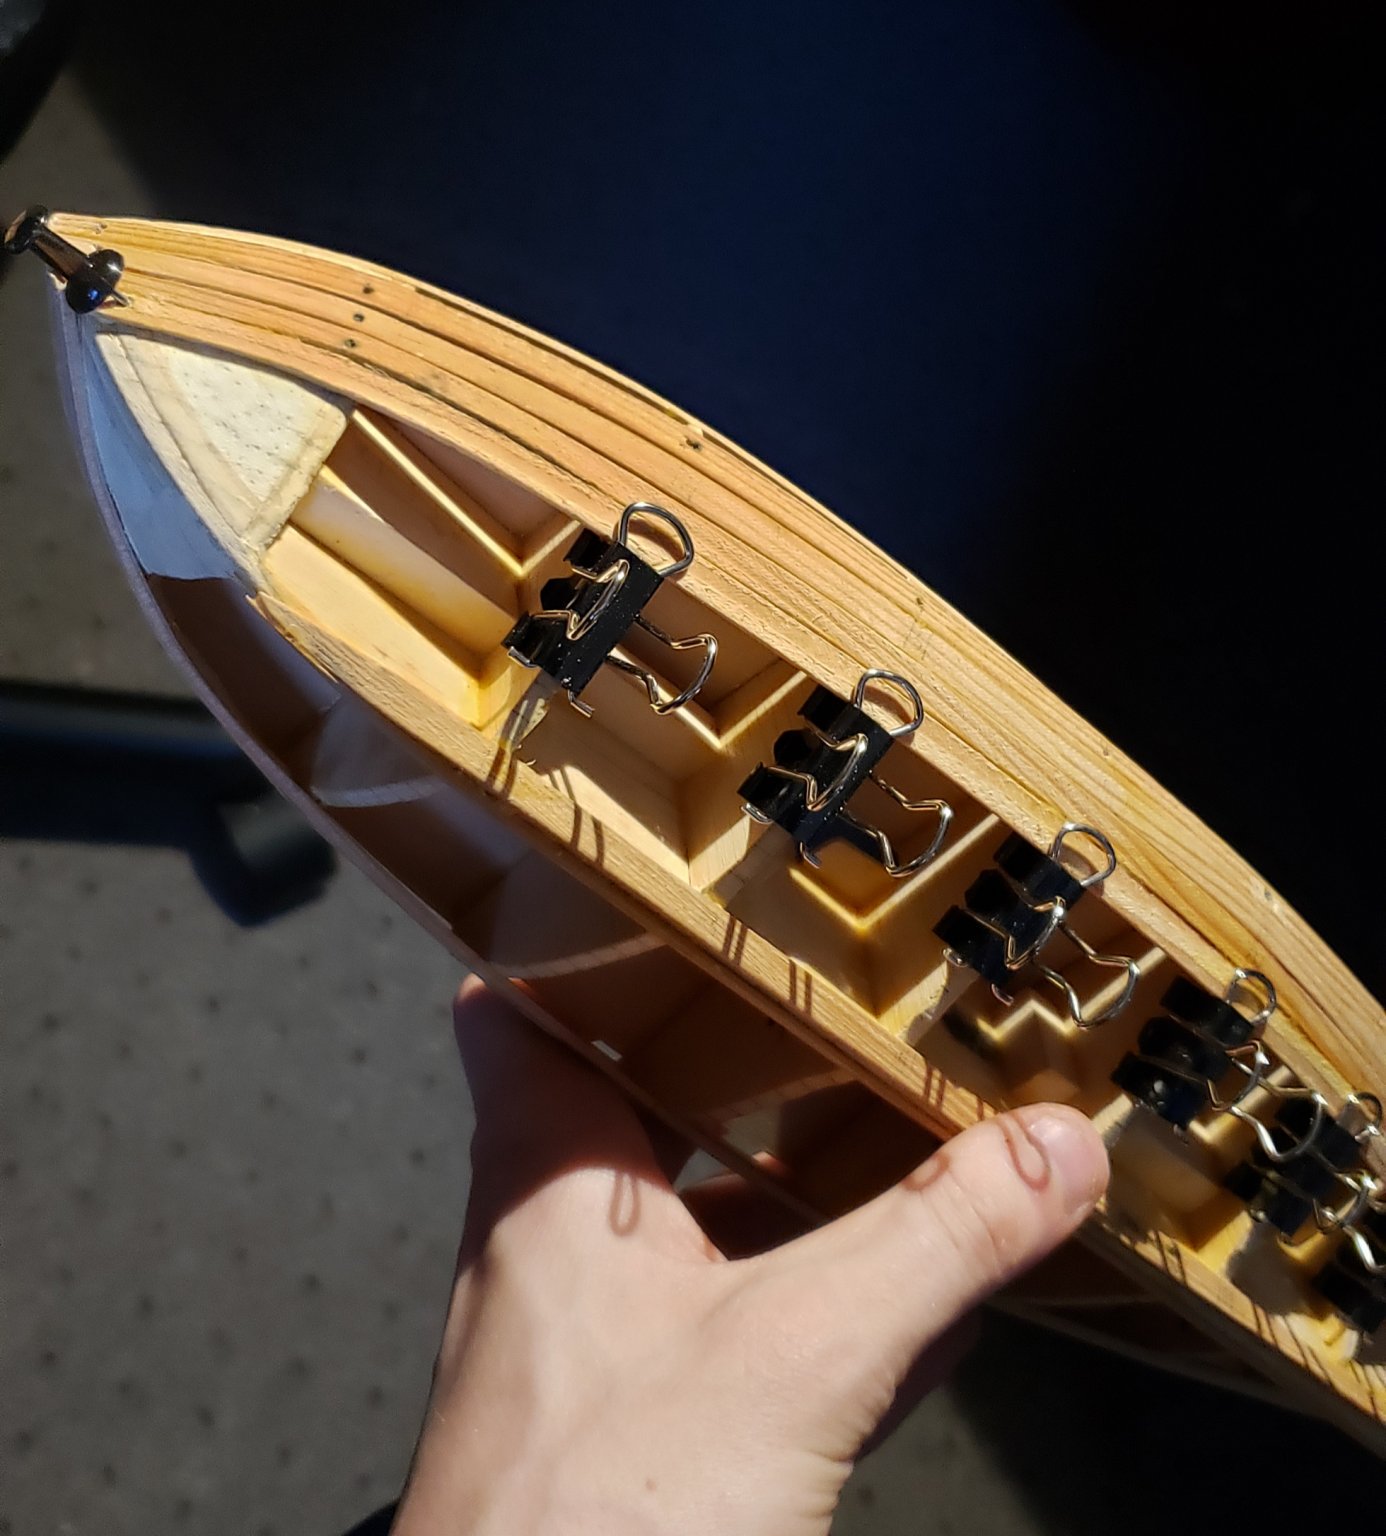
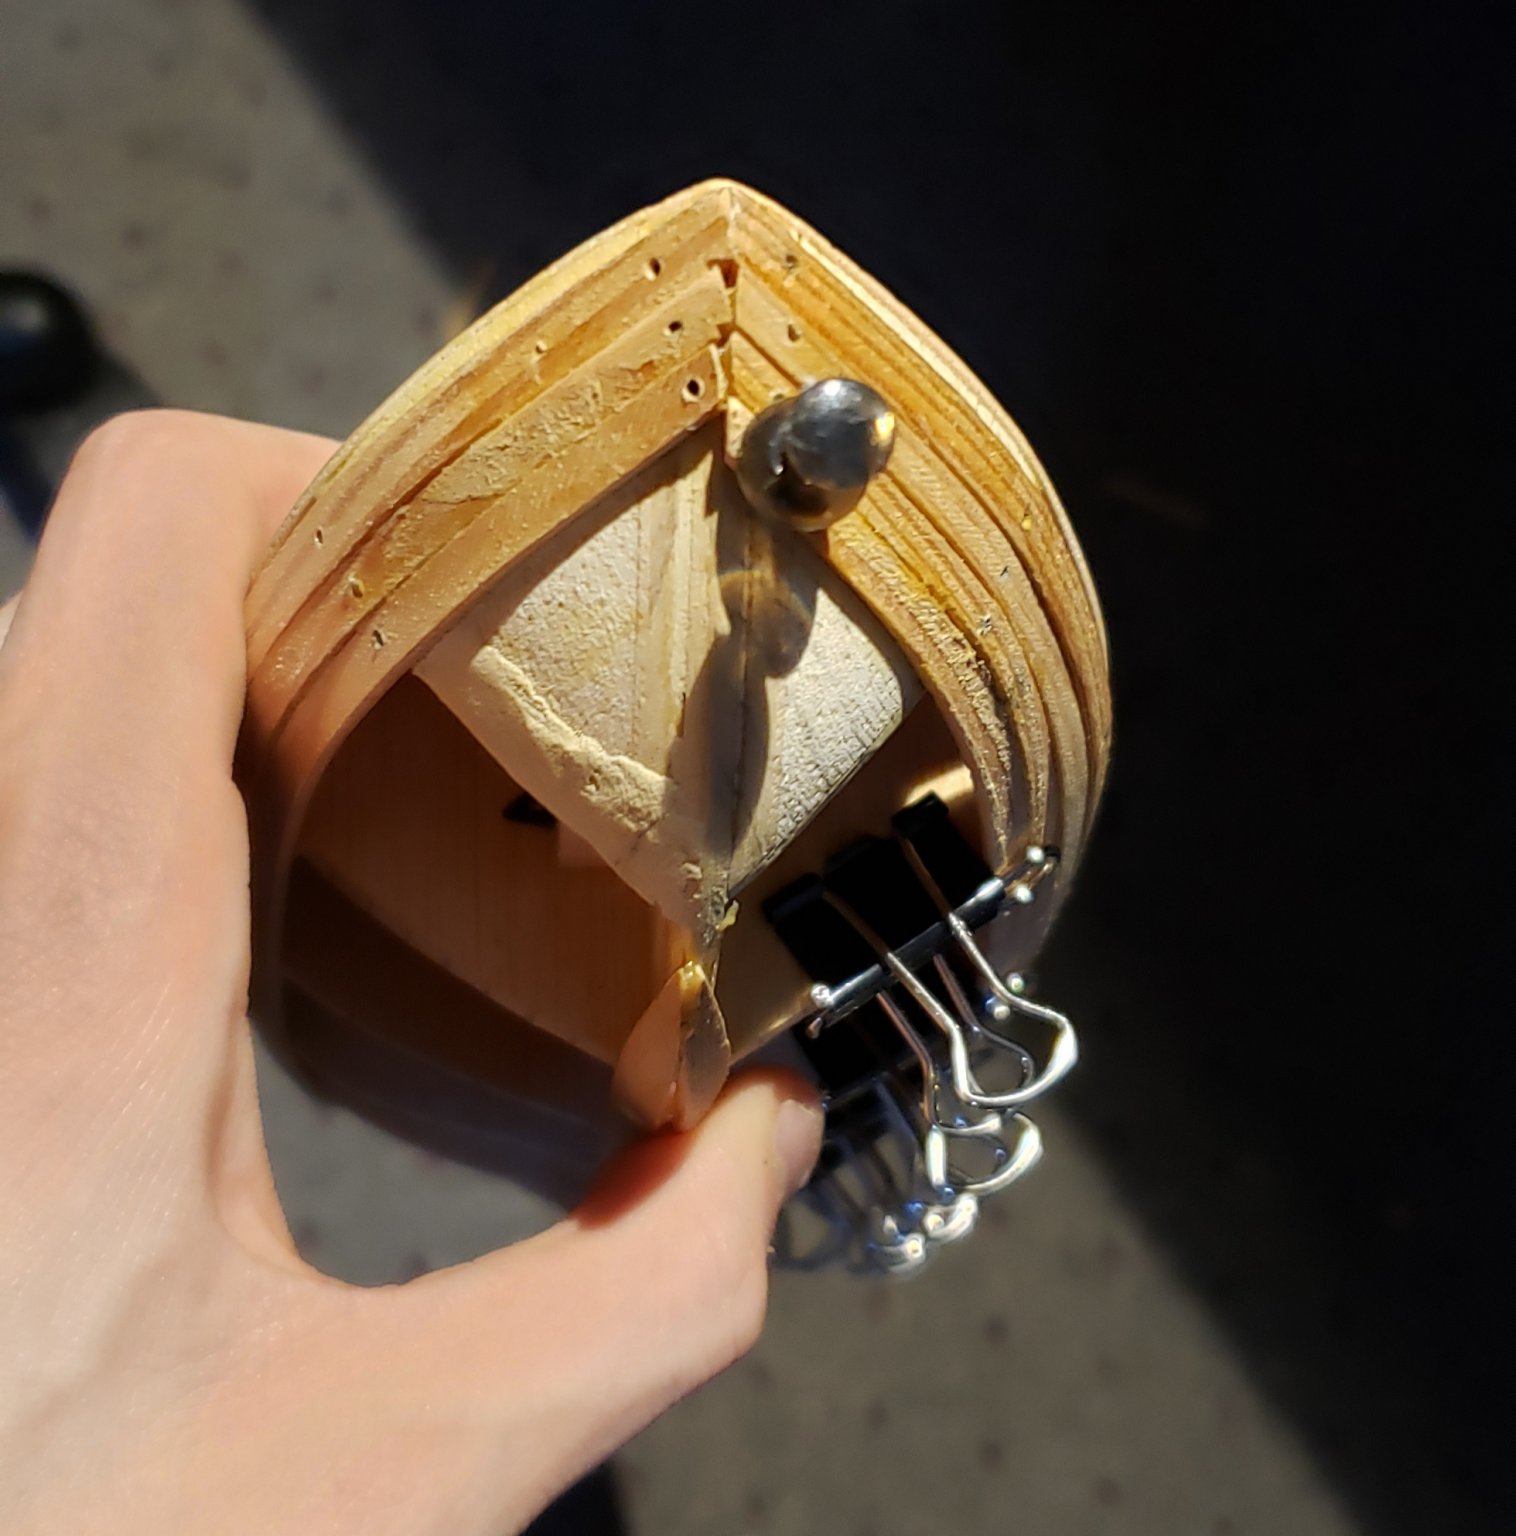
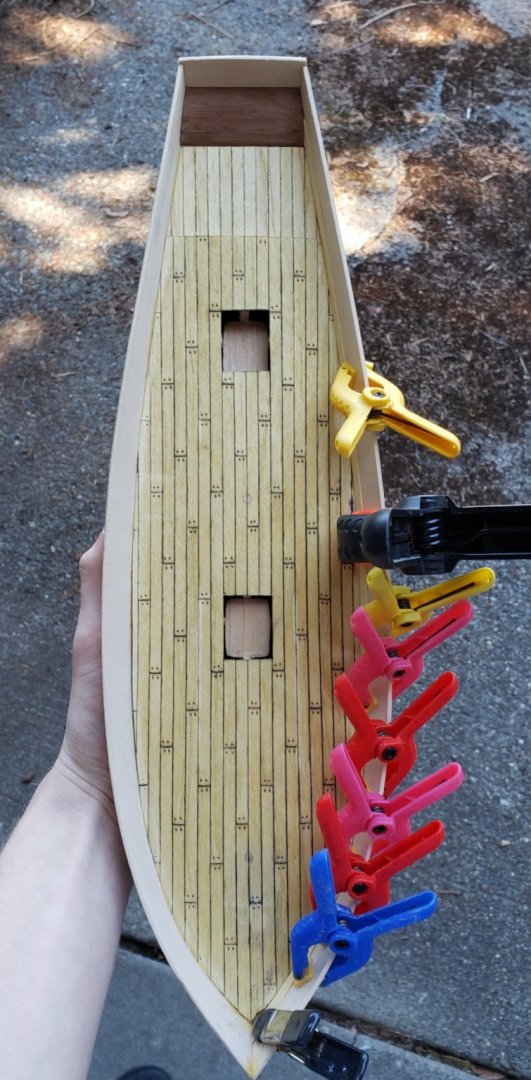
Almost done with inside bulwark planking. Unfortunately the bow is a bit crooked, just realizing this. After finishing inner transom planking, going to do waterways/deck step (and possibly stanchions?) Then I plan to get started with fitting the keel (I know I will have some work to do on the bow).

- 27 replies
-
- 1
-

-
- swift
- artesania latina
- (and 1 more)
-
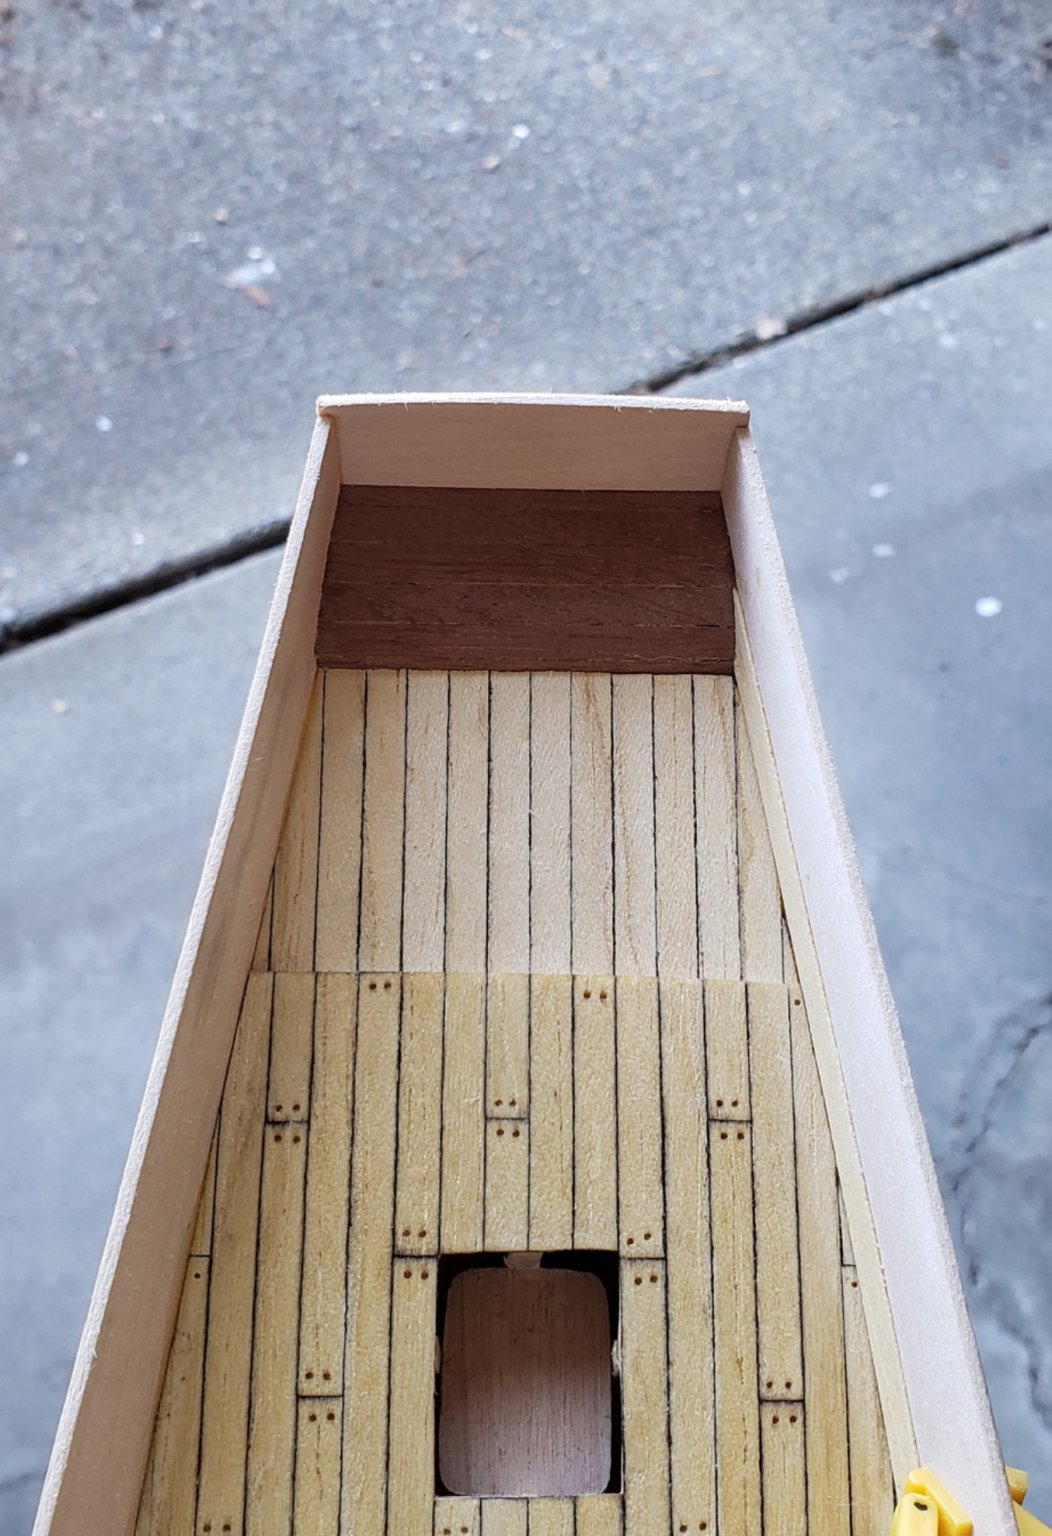
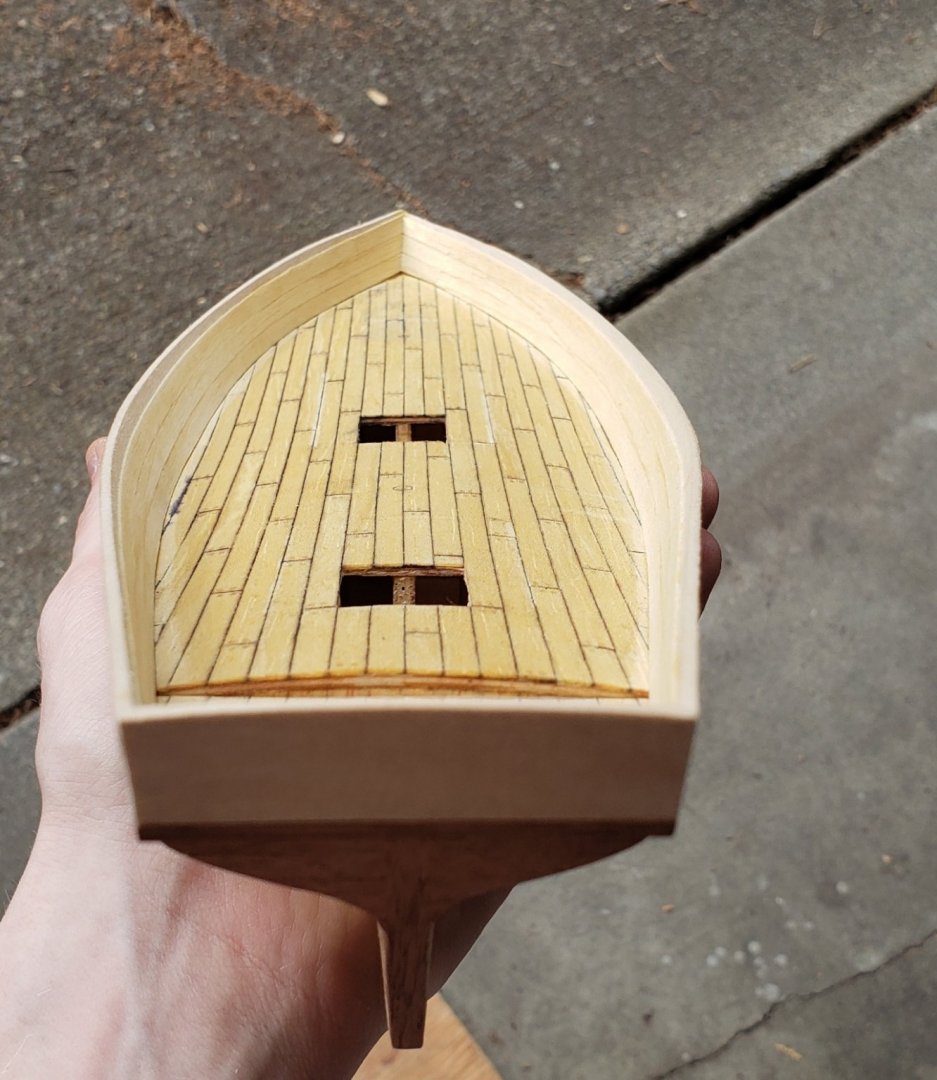
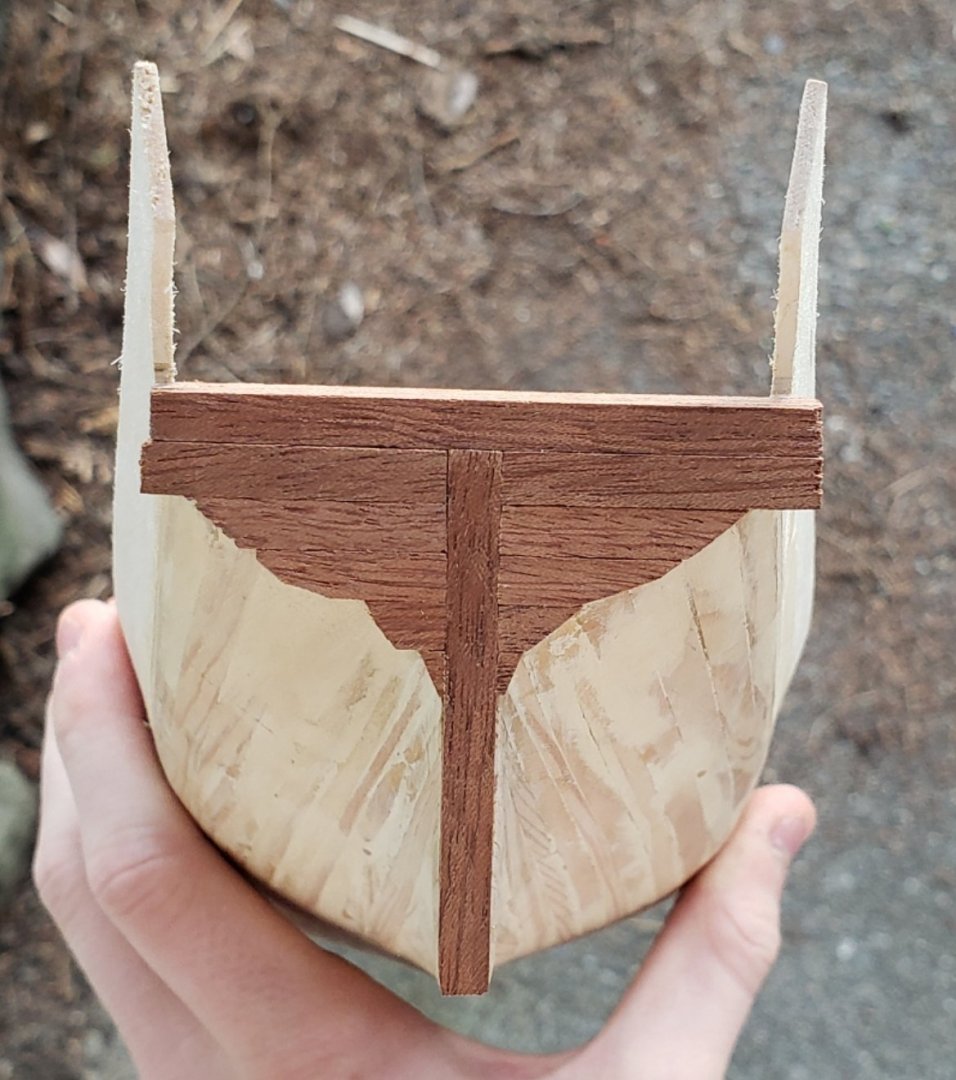
Continuing to work on the transom and stern area. Very satisfying to finally have some semblance of a "complete" hull! Still some sanding to be done - there are a few small gaps on the outside I might try and use some filler on. I saw some builders add in an extra plank of walnut on the seam between the deck planking and lower transom, but I don't think I'm going to - im nervous that would just create 2 more slightly uneven seams! As you can see, I also started on the inner bulwark planking. Not mentioned in the instructions but I think it will be a much better look. I'm using the ramin srrips provided (to match the deck) I have ruined some, so I purchased some basswood planks that I could use for the outer bulwark planking if I run out. I also plan to fabricate walnut waterways after I finish up with the planking. I used some diluted tung oil on the deck (3 coats) and I think it looks good. A bit of staining and unevenness (this was also because I taped off the contact points of the deck structures) The waterways will cover a lot of the obvious errors I hope. I plan to varnish in stages (the stern deck isn't varnished yet).

- 27 replies
-
- 2
-
-
- swift
- artesania latina
- (and 1 more)
-
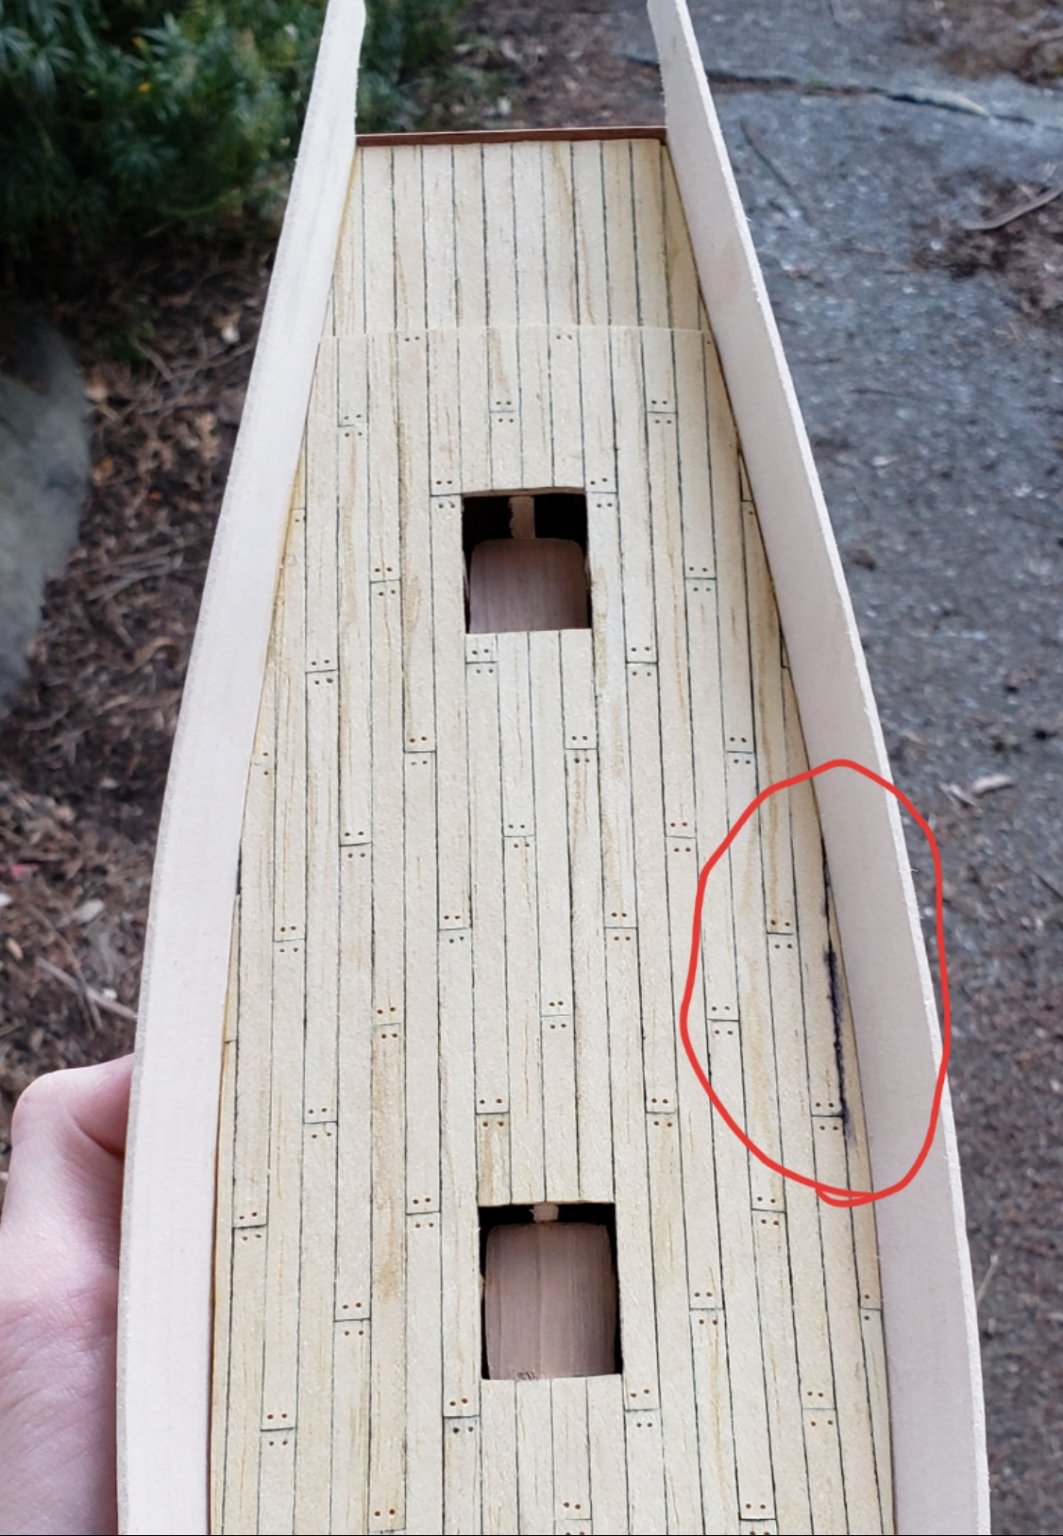
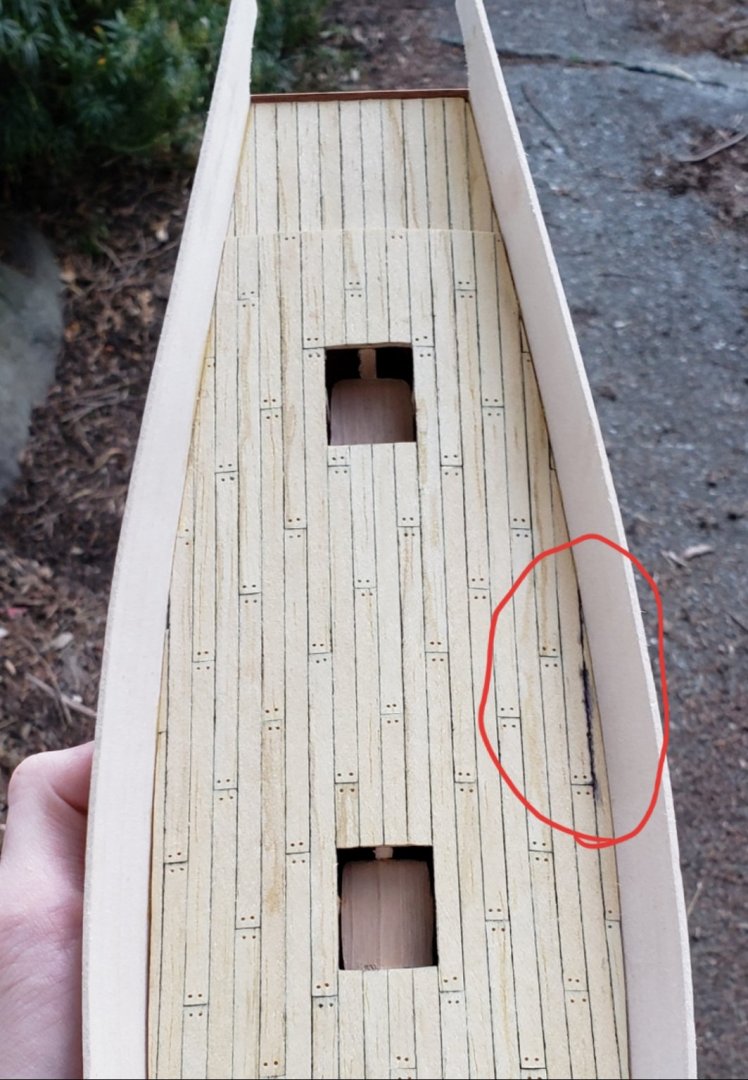
Started today on the transom. I didn't like how the upper transom used the 1.5mm thick strips and the lower part (where the keel will attach to? not sure of the name!) used the .6mm strips, so I chose to the 1.5mm strips the whole way down. I think it will work well- I made sure I sanded the hull down enough so that the added width didn't disturb the location of the stern post. Still some work to be done here. Frustrating problem - When putting the deck planking on, I tested different pens/markers for caulking, and some clearly didn't work. I think one of the test planks with the incorrect marker made its way onto the ship, as when I used some water to soak the bulwarks, I noticed the next day that some black had soaked through my planks Because of the location of the stain, i don't think its a problem with the whole deck, as I got most of it wet (the edges) putting on the bulwarks and no other staining. I thought about trying to remove those planks, but I'm pretty sure the waterway will cover most of it so its just an eyesore for now. I'm going to keep working on the transom and then start on the inner bulwark planking - im going to use the same ramin strips as the deck for this. the waterway will then attach to these planks and not directly to the bulwark (i think I'll be able to get a better join). I ordered some walnut sheet to make the waterway. I don't want to stain the ply pieces given for the waterways, but I like the walnut look especially considering the stanchions are walnut. Lots of tasks. Stay tuned!
- 27 replies
-
- 2
-
-
- swift
- artesania latina
- (and 1 more)
-
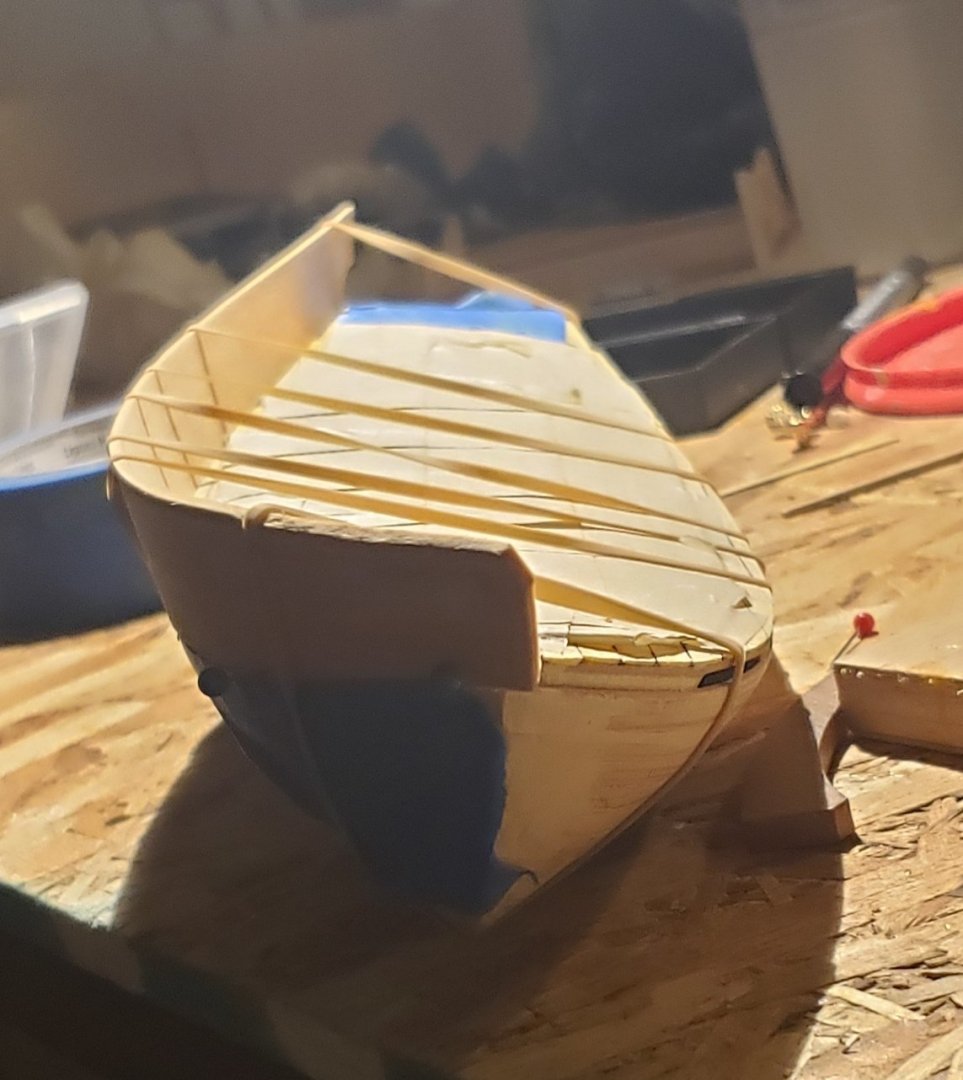
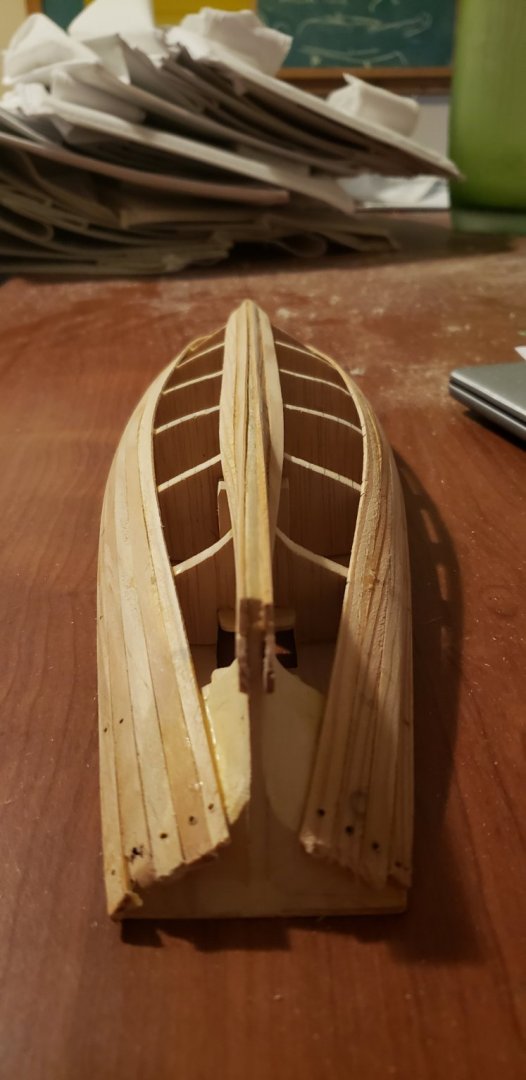
Change of location. The bulwarks are a bit tough to fit- mine are too splayed out in the midsection. Starboard side glued, port side still fitting. I intend to iron them out (maybe?) as they are still somewhat flexible.
- 27 replies
-
- 2
-
-
- swift
- artesania latina
- (and 1 more)
-
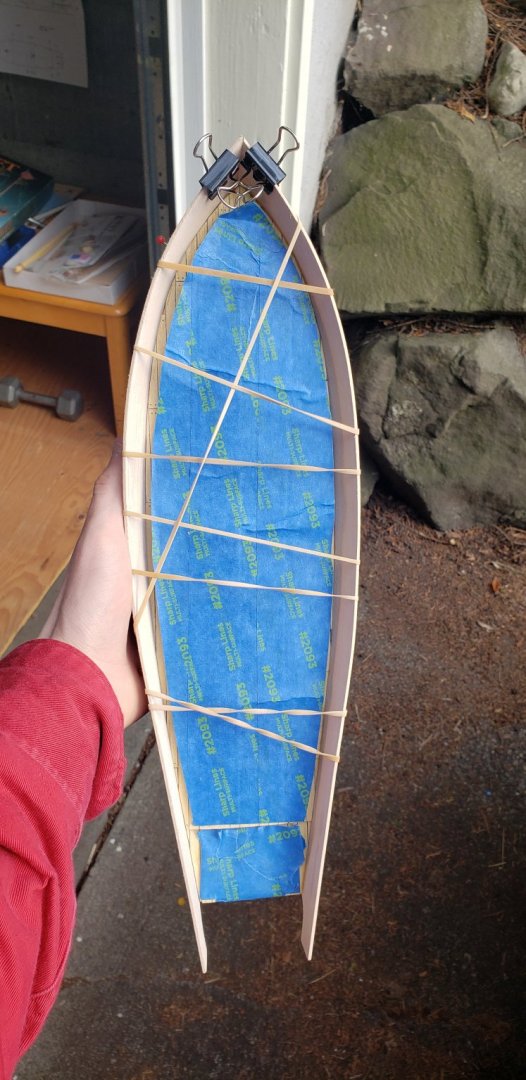
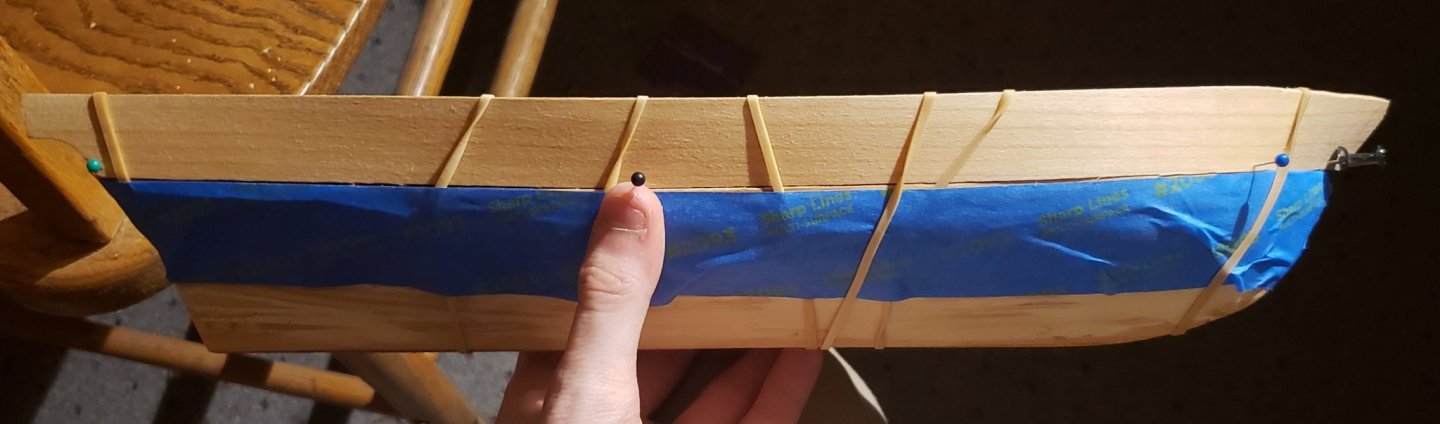
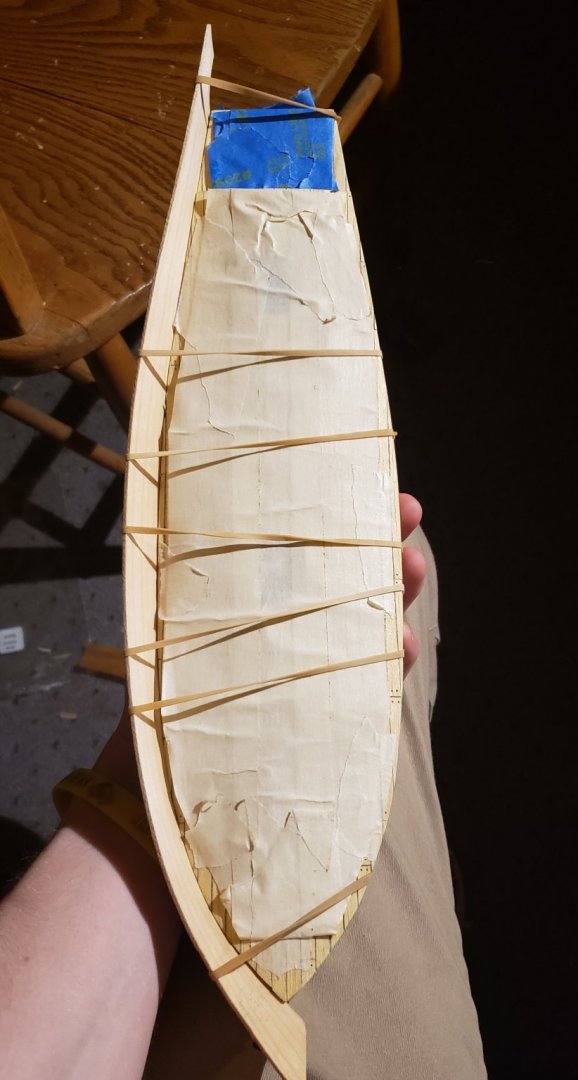
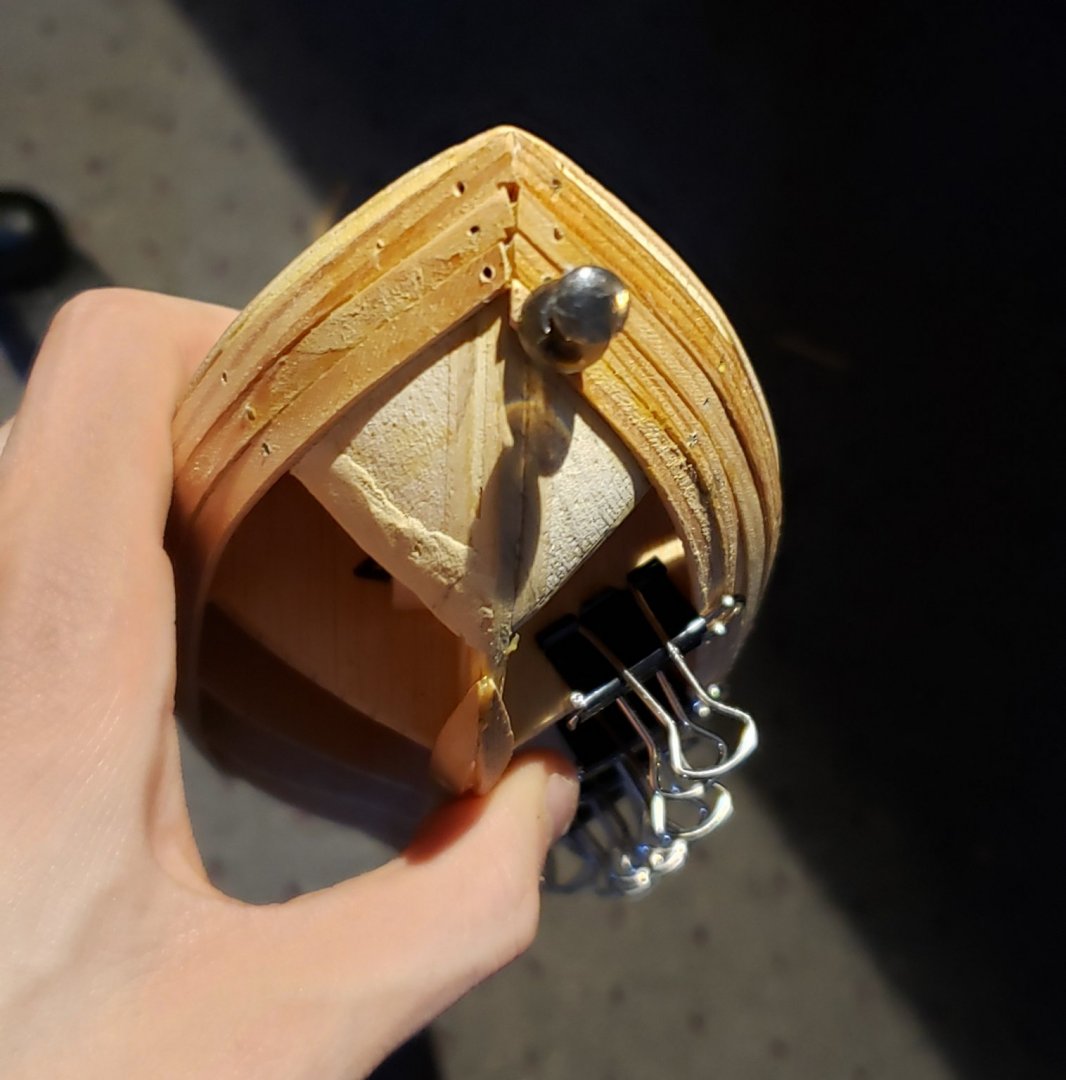
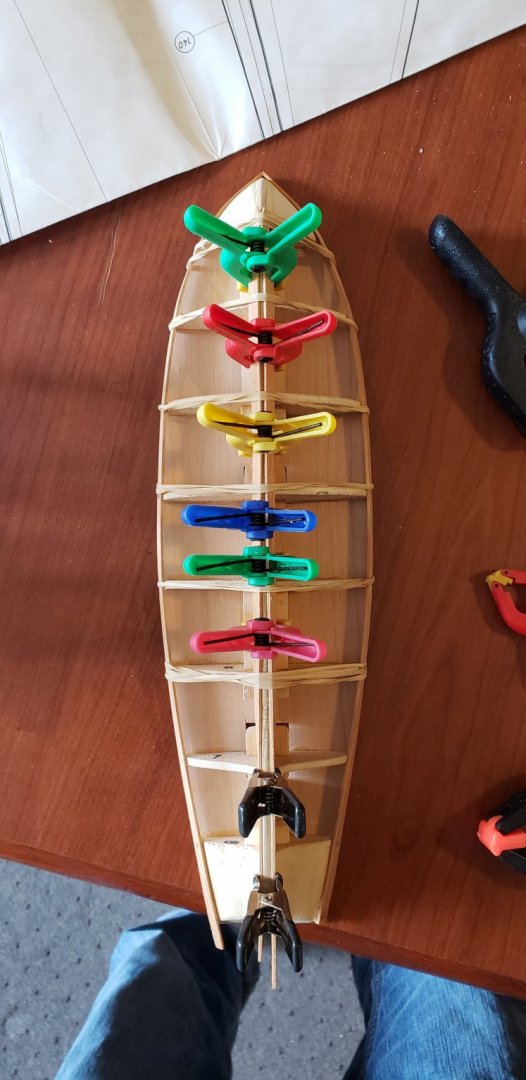
Tried the rubber bands and smaller pins and got a much nicer fit on the starboard bulwark. It still seems to be splayed out a little too much in the mid section...but it might work just fine. Going to let it clamp for the night and see what it's like in the morning. I accidentally caught the edge of a deck plank while trying to dryfit the bulwark but it's very small and will be covered by the waterway.
- 27 replies
-
- 1
-
-
- swift
- artesania latina
- (and 1 more)
-
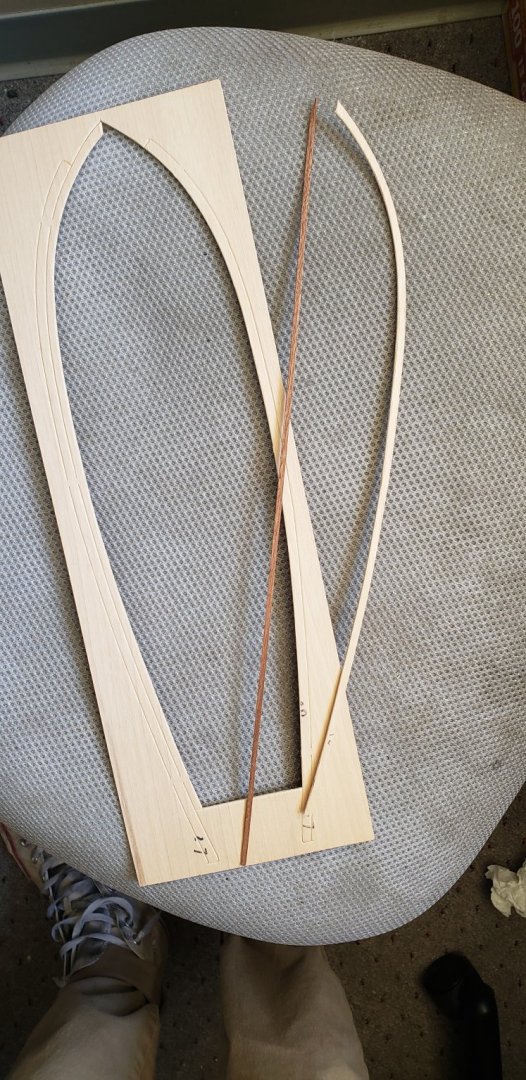
@OT1138 Sorry I'm still getting some of my terminology right I saw some builders use the walnut strips for the waterways (dc-ocker had a nice example in their log). I see now what you mean by the waterways being cut from the die-cut pieces. The picture on the box shows walnut waterways and caprail, but I think I'm going to use the die cut pieces for both of these pieces. Thanks for helping me clarify, the instructions are a fair bit confusing. Your build looks great! Today, I cut and started to bend the bulwarks - I used a 3mm thick piece of basswood, as suggested in some other logs. The bulwarks seem to be difficult to clamp in place. The bottom edge of my bulwark doesn't want to line up with the top of my first plank, and if I force it, the bulwark splays out and it's difficult to keep the angle between stern decking and bulwark at ~90 degrees. Haven't messed around with soaking it a ton yet, just working on getting an initial bend. I'm going to work on it some more this week - I think it'll be worth it spending some time to create a jig so I can have the bulwarks be symmetrical and at the proper angle relative to the dick. Any clamping suggestions for this step..? There's not a lot of room for pins on the bottom edge of the bulwark - I might try fitting some blocks with a \__/ shape to rest on the deck, and then I could clamp both bulwarks simultaneously ( rubber bands around the ships hull?), but these seems like a scary task right now! Will keep updating. Jeff

- 27 replies
-
- 1
-
-
- swift
- artesania latina
- (and 1 more)
-
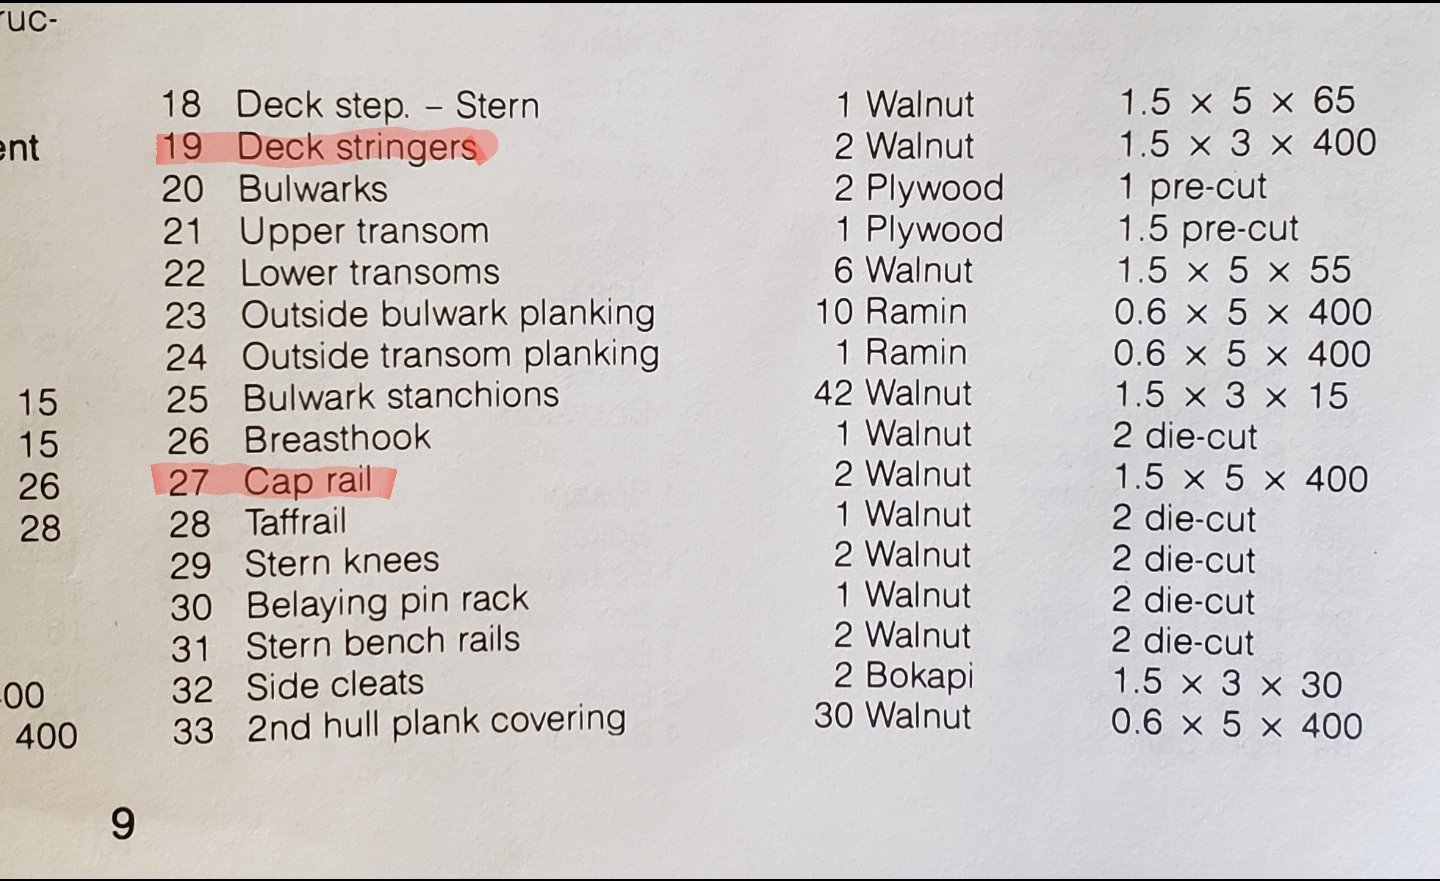
@OT1138 thanks! The kit sure is old but fun nonetheless About the stringers, rail - So in the ply cut sheet with the false deck, theres stringers and what seems to be the caprail pre-cut. The width is roughly 5 mm. However, in the instructions, the cap rail and stringers should be constructed with walnut strips (1.5×5mm and 1.5×3mm, respectively). I've seen most other builders use the walnut strips, which I like much better. Are the pre-cut pieces for a different part that I'm missing, or just as a back-up? Still nervous about the bending of the walnut!!
- 27 replies
-
- 1
-
-
- swift
- artesania latina
- (and 1 more)
-
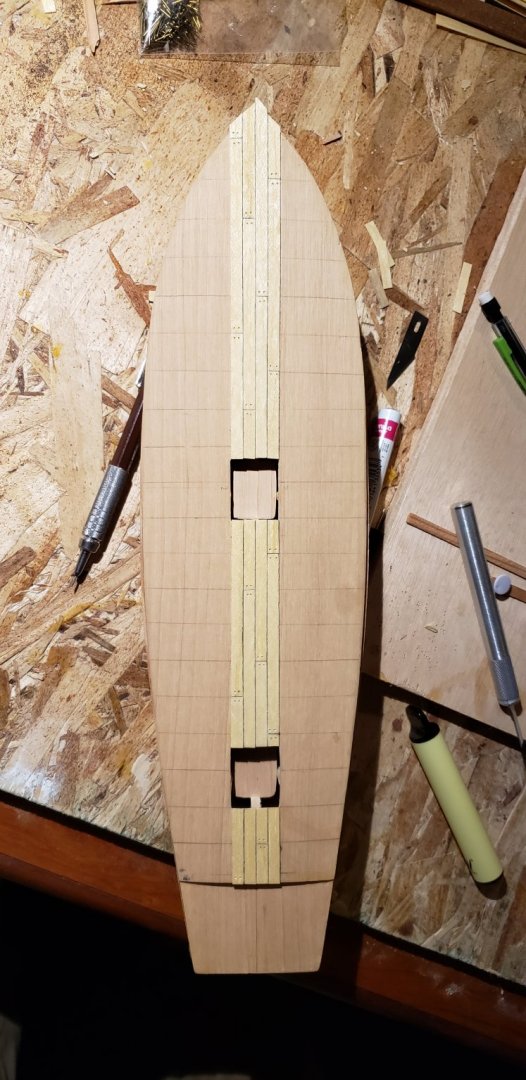
Busy day! Finished off the deck planking - didn't do trenails on the stern deck (thought it would be a bit too busy). I'm very happy with how it turned out, it was very relaxing. Next up - shape the hull a bit more, sand down the stern, and start making some bulwarks out of this basswood.. (I read some people had difficulty with the ply pieces)

- 27 replies
-
- 2
-
-
- swift
- artesania latina
- (and 1 more)
-
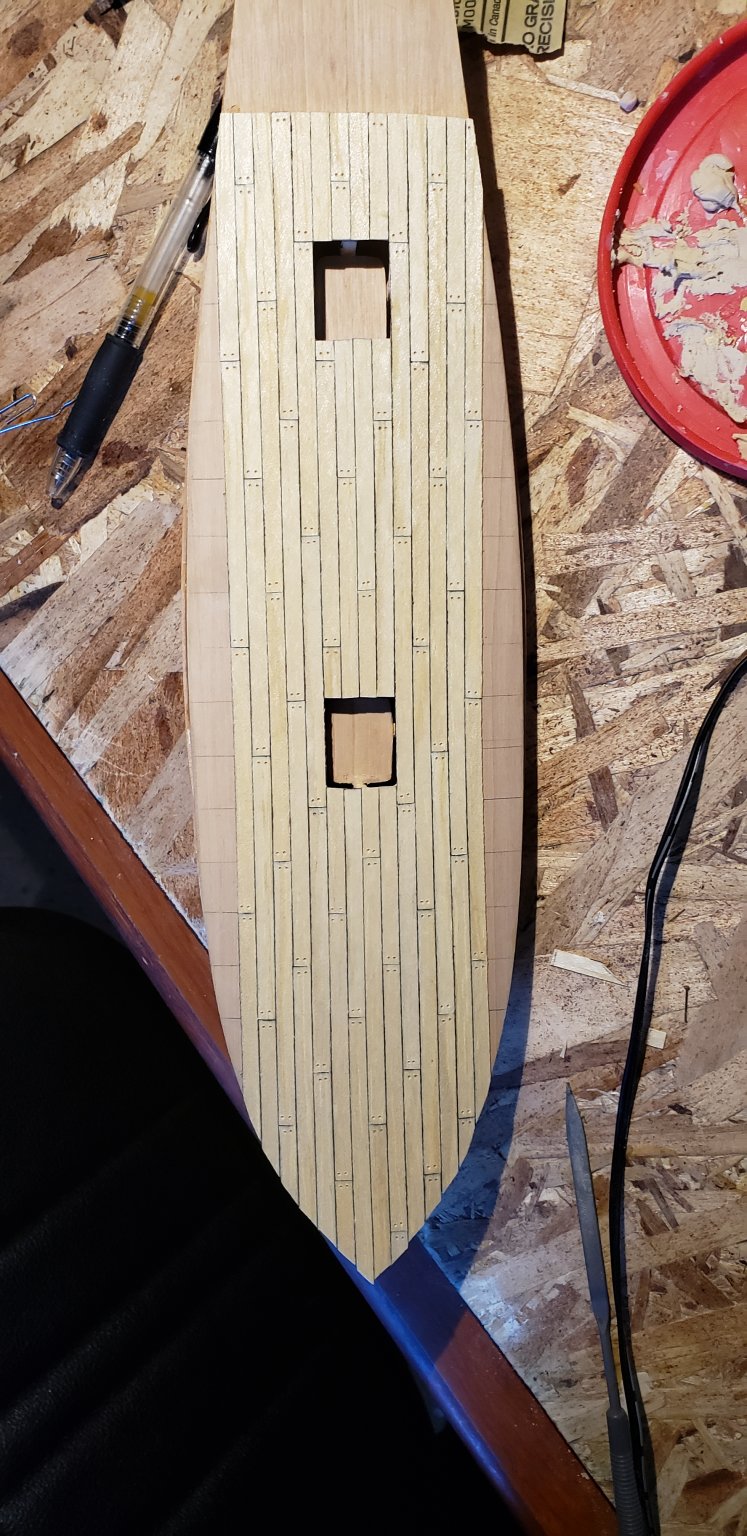
Deck planking going smoothly. I had a question - The kit says to use walnut strips provided for the cap rail and deck stringers. The kit also has cut-outs in plywood for these pieces as well that are pre-curved into shape. The walnut strips are certainly the "right" color in my opinion, but they look very difficult to bend into shape (they are bent along the "shorter" dimension of the strip) For the hull planking, I just soaked my planks for about 30 minutes, clamped them into place, waited to dry, then glued the plank into place. However I'm not sure if this is going to do the trick with these walnut strips...any suggestions for bending these? I'd prefer not to buy a plank bender/crimper, I could also stain the ply pieces with a walnut finish? Thanks
- 27 replies
-
- 2
-
-
- swift
- artesania latina
- (and 1 more)
-
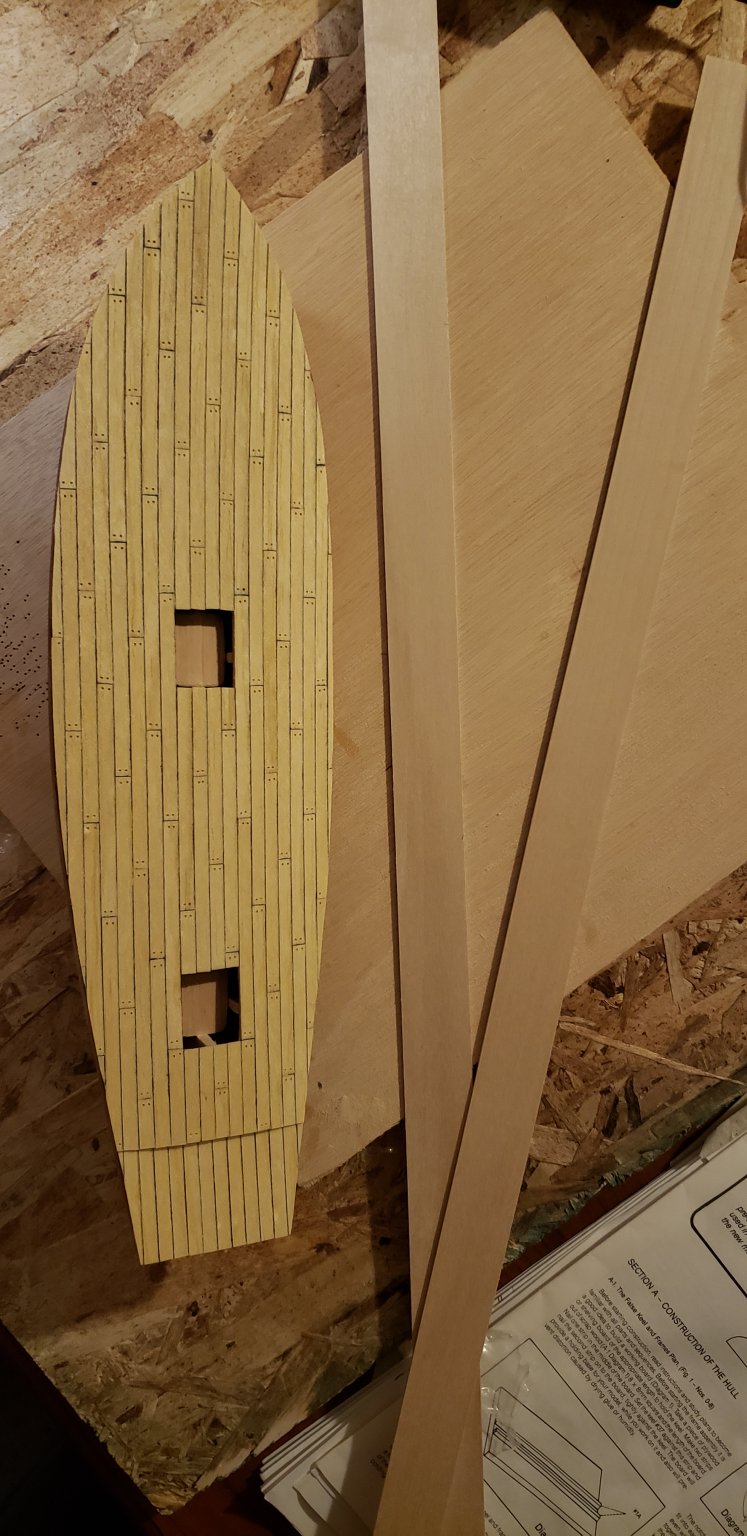
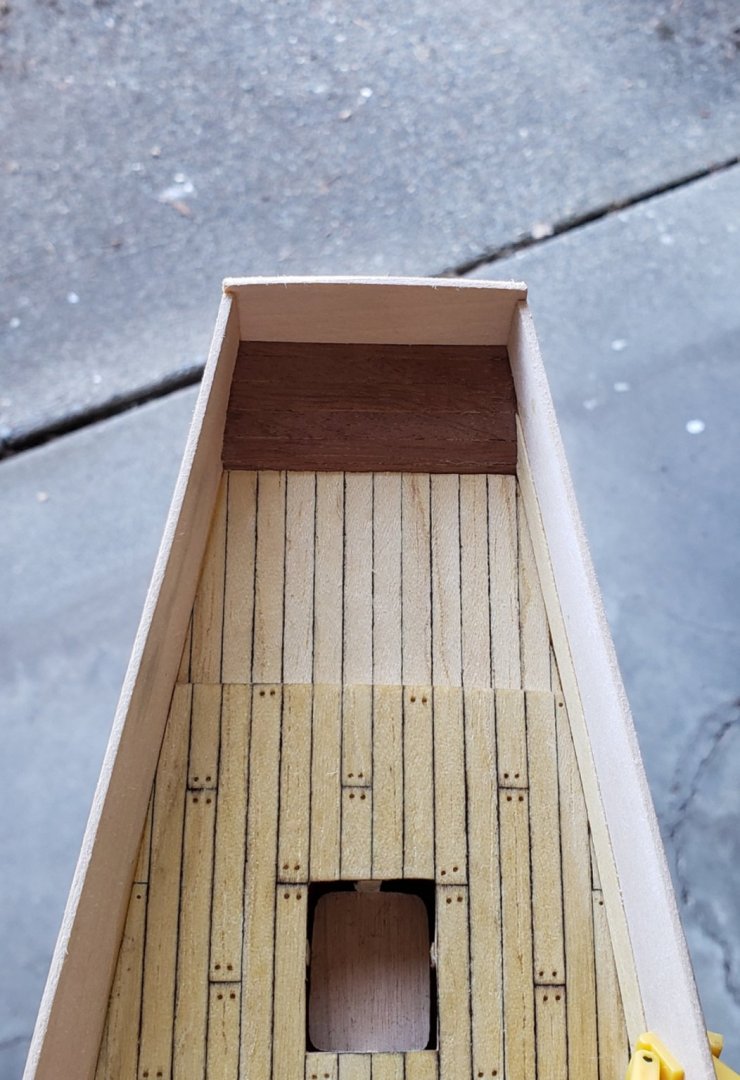
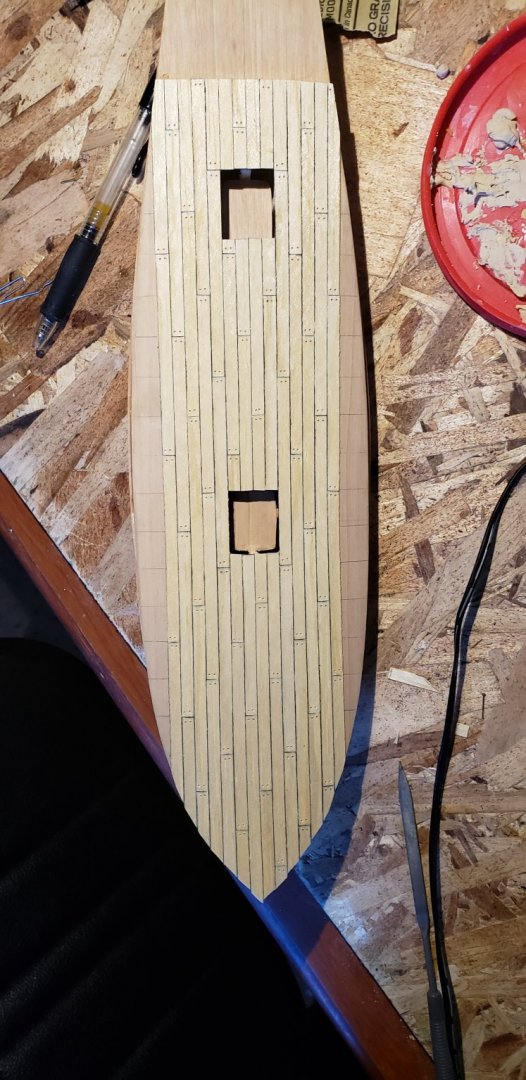
Started on the deck today, easy compared to the hull planking I'm doing trenails on my planks but I'm not sure if I will fill them in with anything or not.... I built a jig so I could cut 75 mm planks, and I'm using a 5-pattern. For the caulking, I'm using a sharpie (oil-based "paint pen" version). Will post again when it's finished, and my hull is a bit smoother...
- 27 replies
-
- 6
-
-
- swift
- artesania latina
- (and 1 more)
-
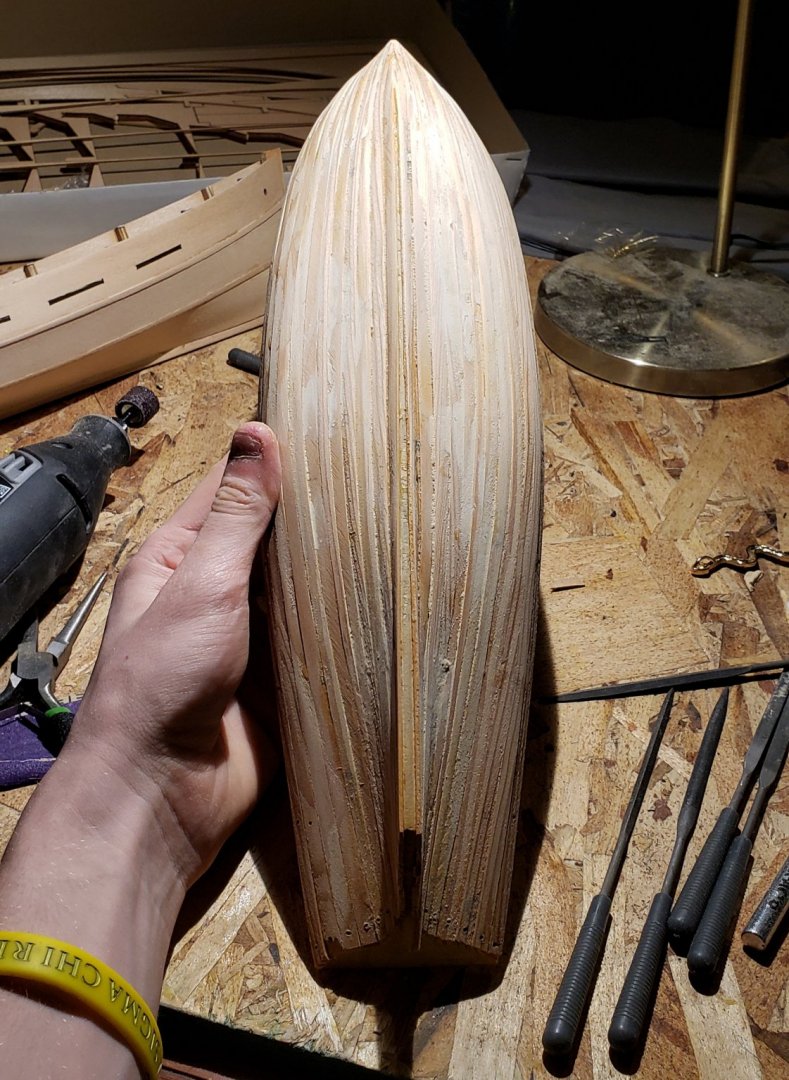
Finished off the first layer of hull planking. The last planks weere tough! I put a small amount of filler on, and I'm going to sand down the hull tomorrow. Im pretty happy with how the hull turned out, there were no gaps and it is (mostly) symmetrical. I'm excited for a different task 😁 @Cabbie thanks for the tips, I had better luck with the other planks!
- 27 replies
-
- 6
-
-
- swift
- artesania latina
- (and 1 more)
-
More planking. I think bulkhead 6 might be sitting a little bit low, as you can see by the big twist in the 2nd plank from the keel, between bulkheads 6 and 7
- 27 replies
-
- 5
-
-
- swift
- artesania latina
- (and 1 more)
-
Continuing planking. I'm mostly tapering by eye on the bow and plan to deal with the stern with stealers....The instructions aren't very good on this area. There is certainly some clinkering happening with the planks, but I think it is minor enough that I should be able to sand it down. Still practicing getting a perfect connection between planks on the bow!

- 27 replies
-
- 5
-
-
- swift
- artesania latina
- (and 1 more)
-
Getting started with my top and garboard planks. I had seen sone guides that said that the first plank on top often wasn't tapered...regretting that decision a bit but I think it will work out fine. I had some difficulty with the garboard planks (ended up using a bit of filler to ease the transition between bulkheads and false keel), but I am pleased with the end result. Wasn't sure about the transition between the plank and the false keel.... Keith + Jonny, thanks for the replies, I'm having a ton of fun already. I'm going slow with the planking but also recognize that there's another layer that could cover a lot of the imperfections. Stay tuned!
- 27 replies
-
- 5
-
-
- swift
- artesania latina
- (and 1 more)
-
I forgot to show pictures of the deck planking! I think I used a few too many rubber bands at some spots between bulkheads, added some extra curve I didn't want, but I managed to straighten it out pretty well after with a spray bottle and some clamps.
- 27 replies
-
- 7
-
-
- swift
- artesania latina
- (and 1 more)
-
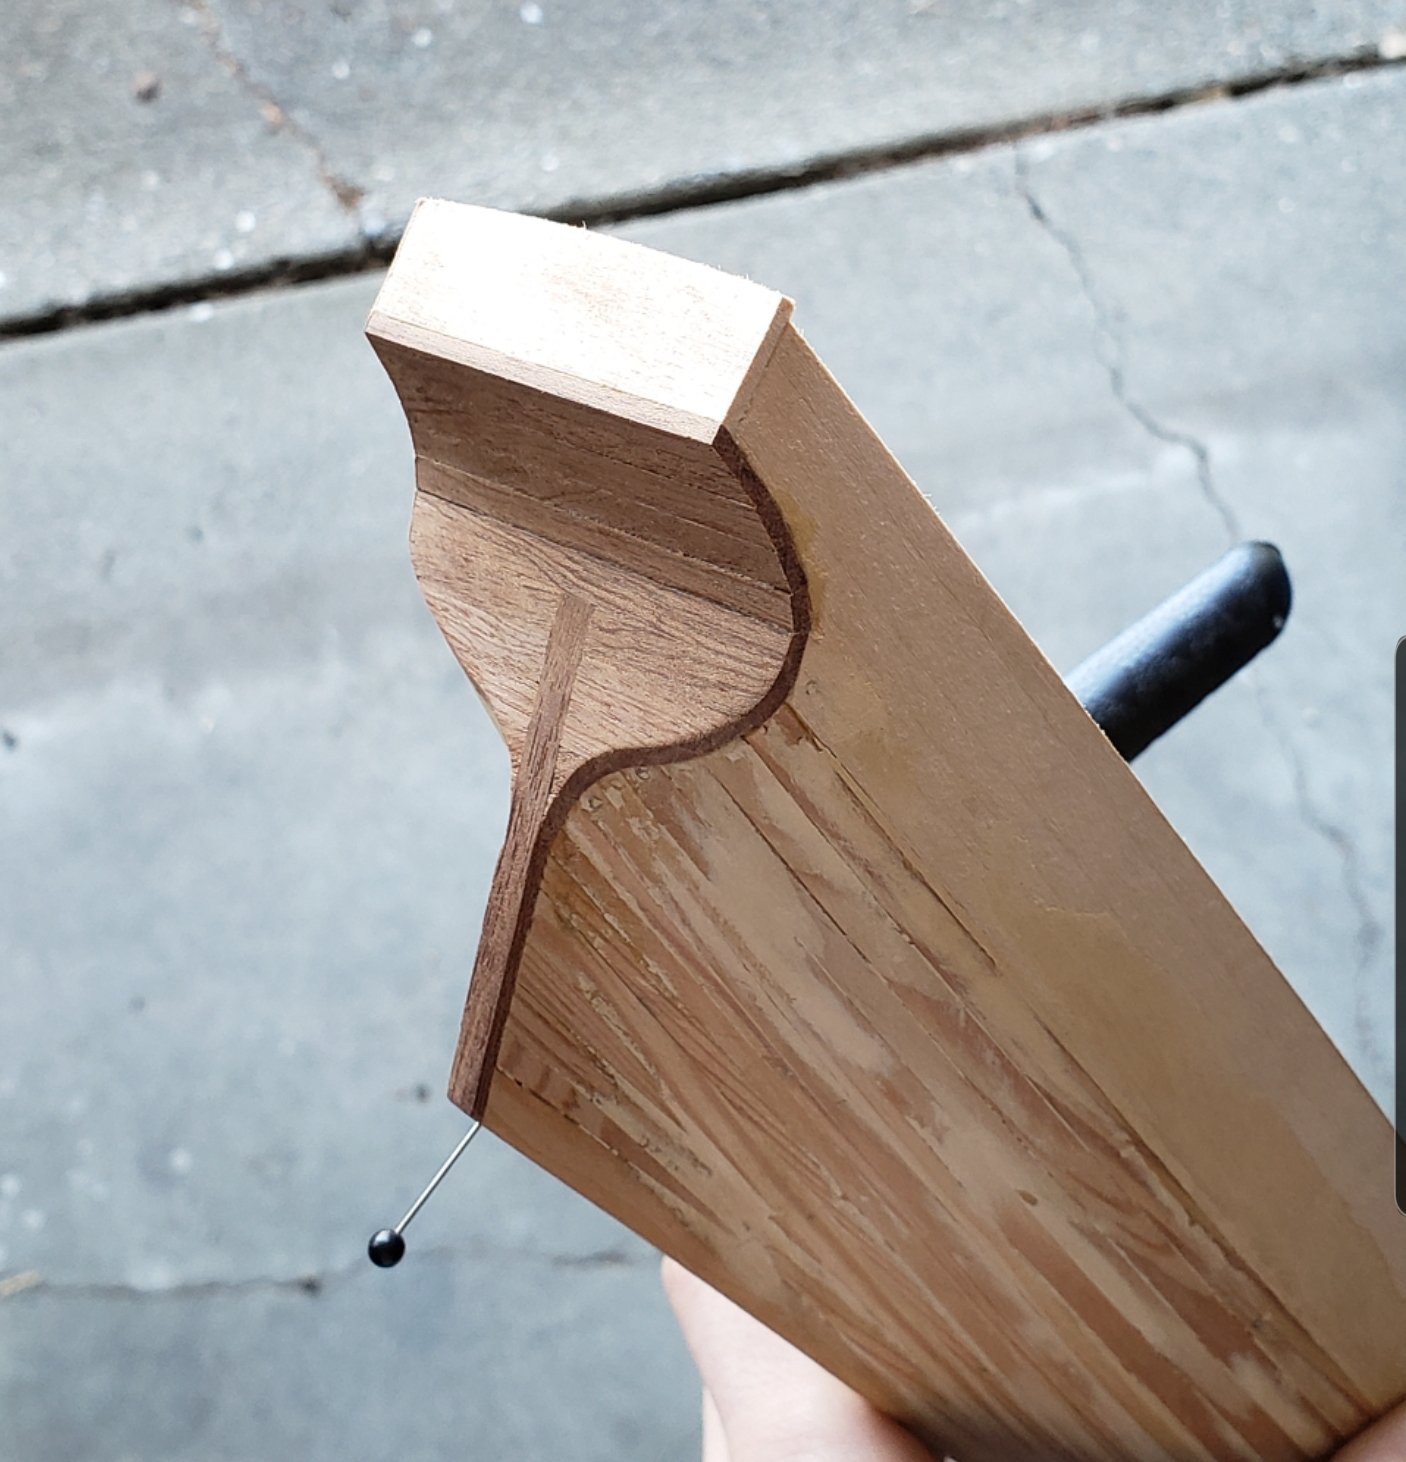
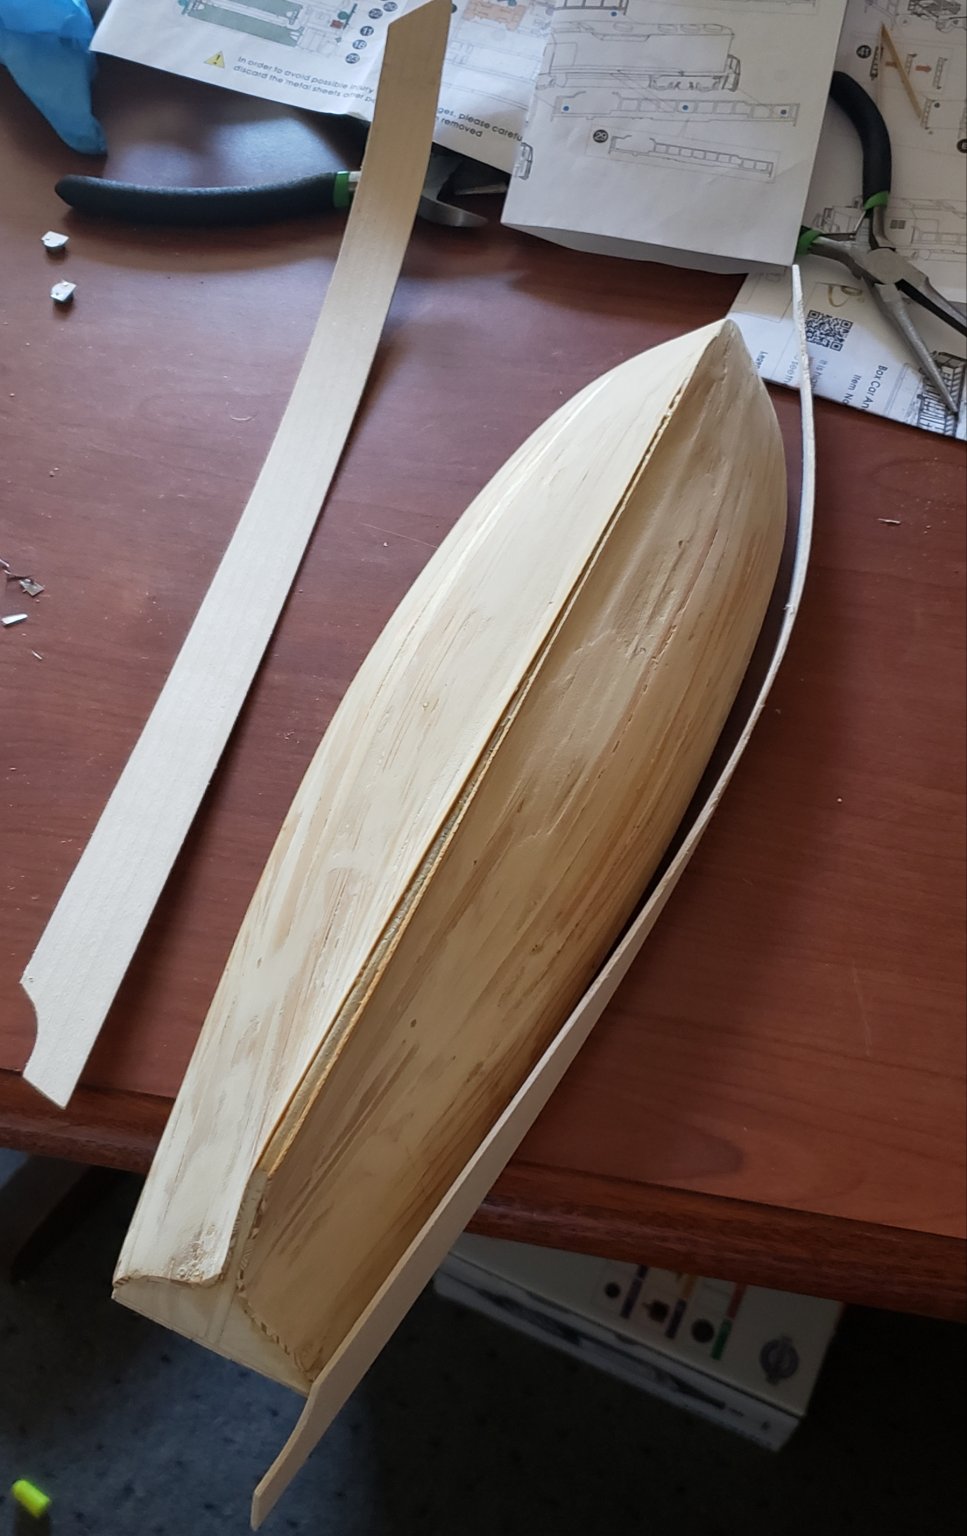
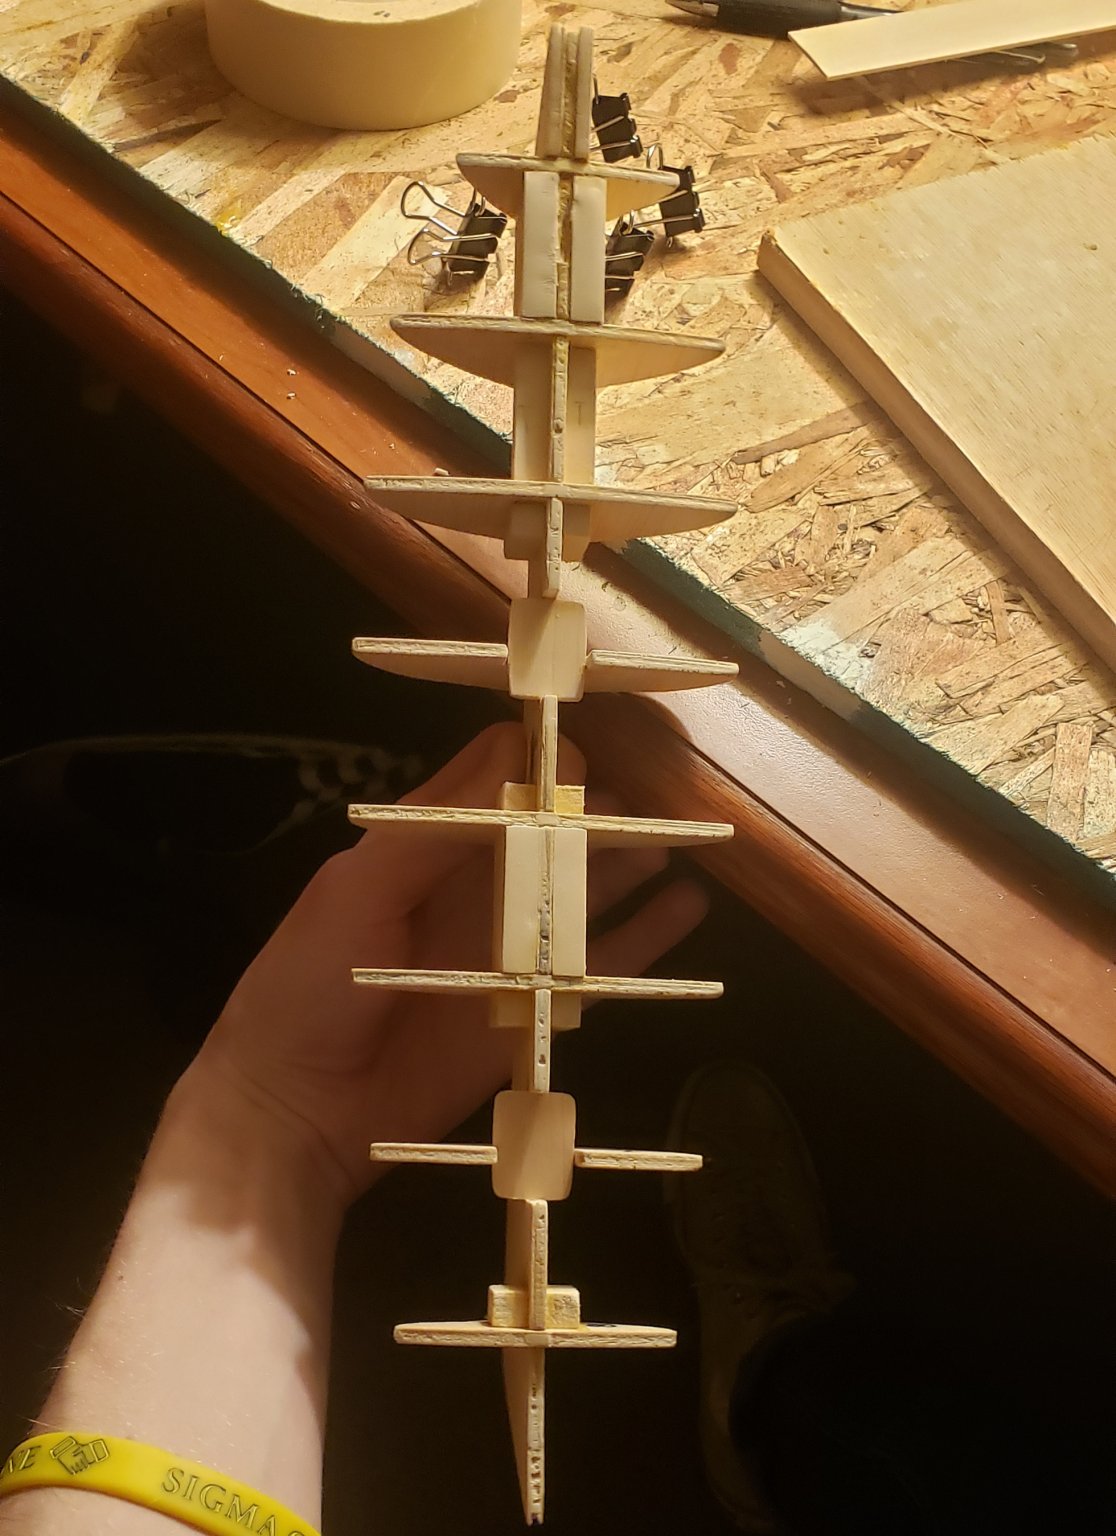
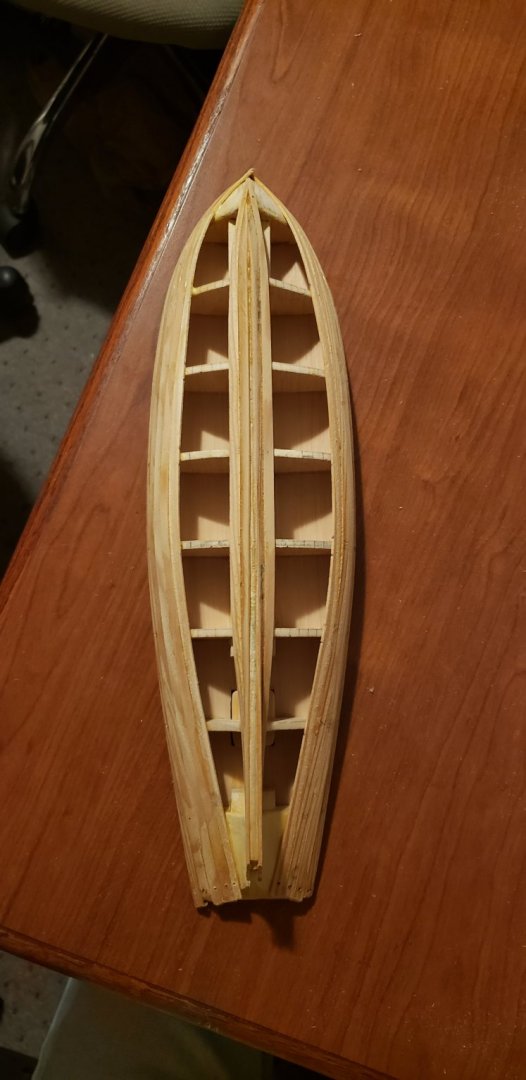
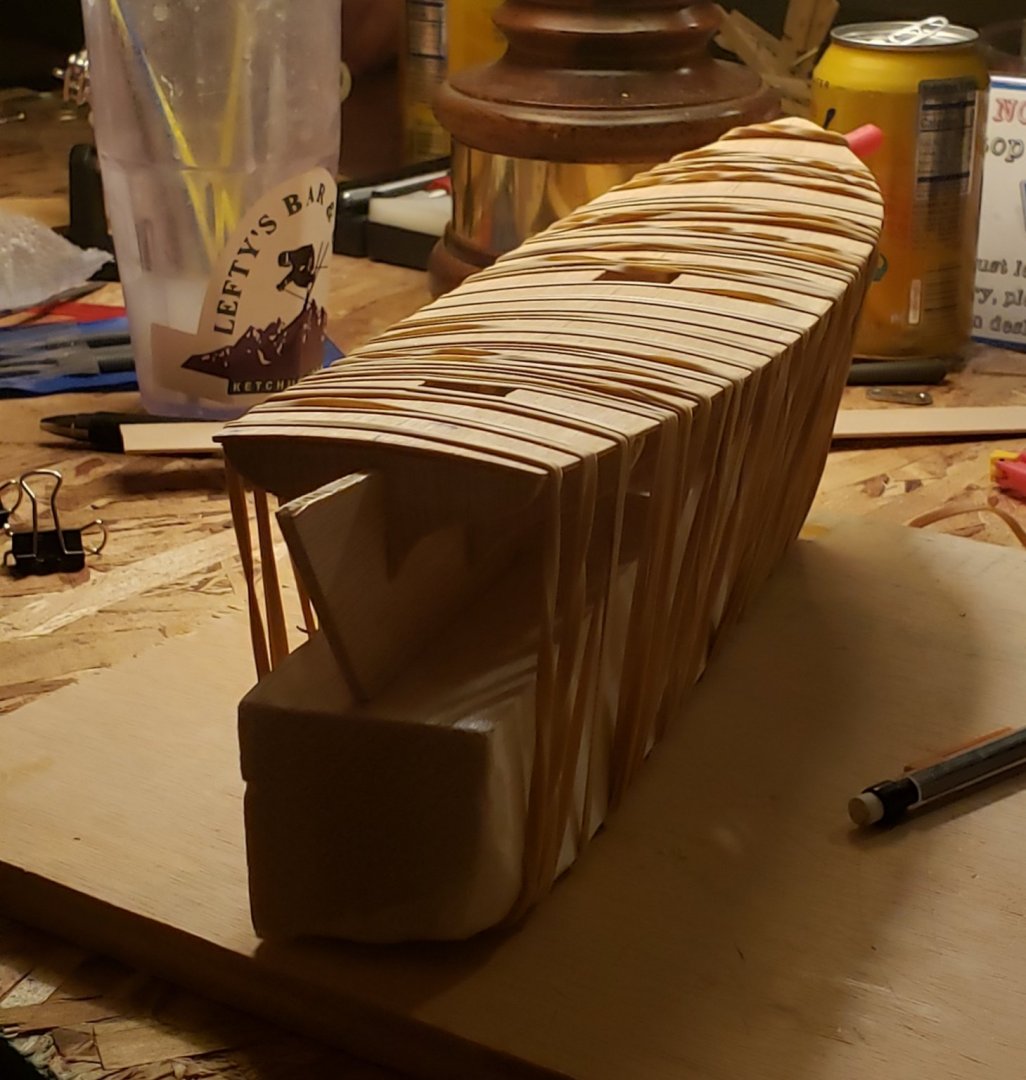
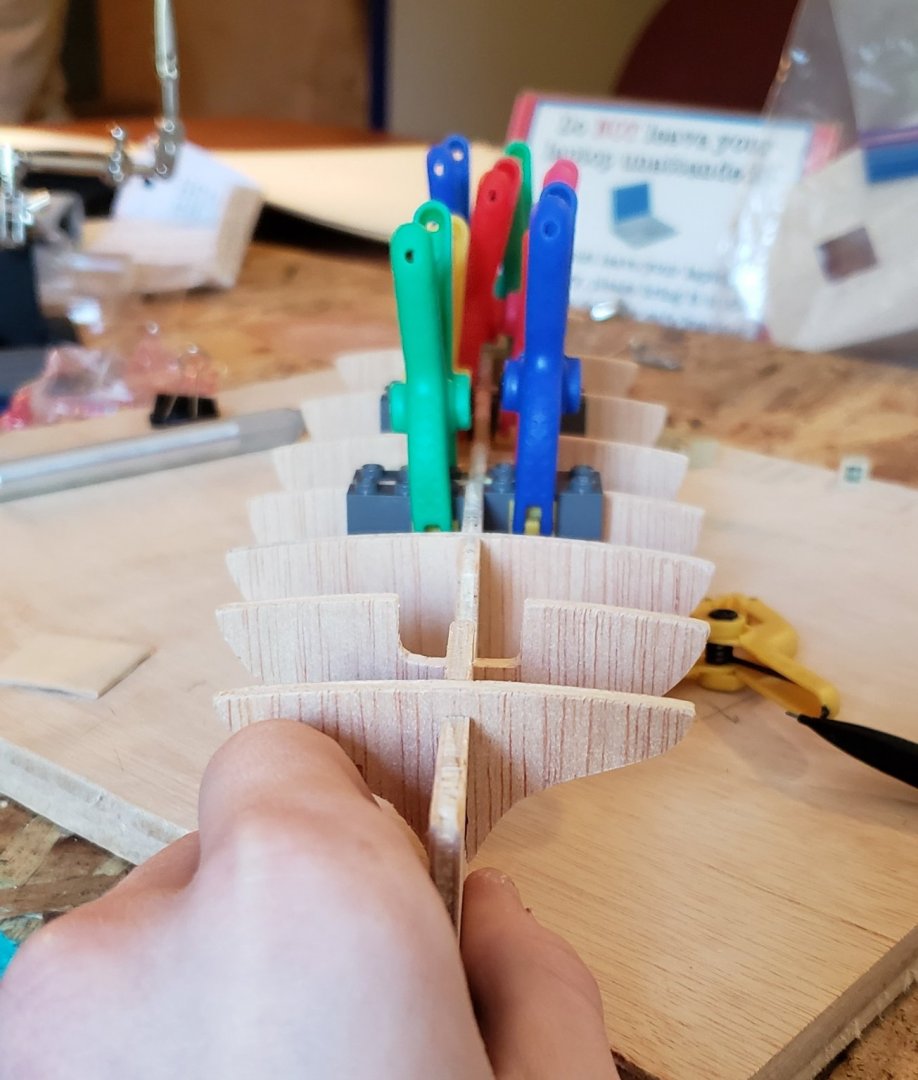
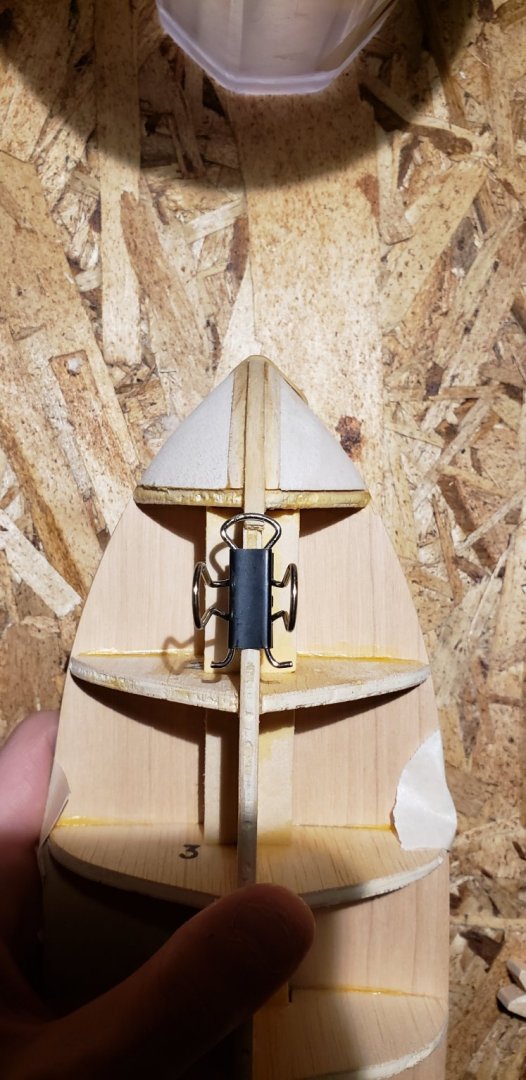
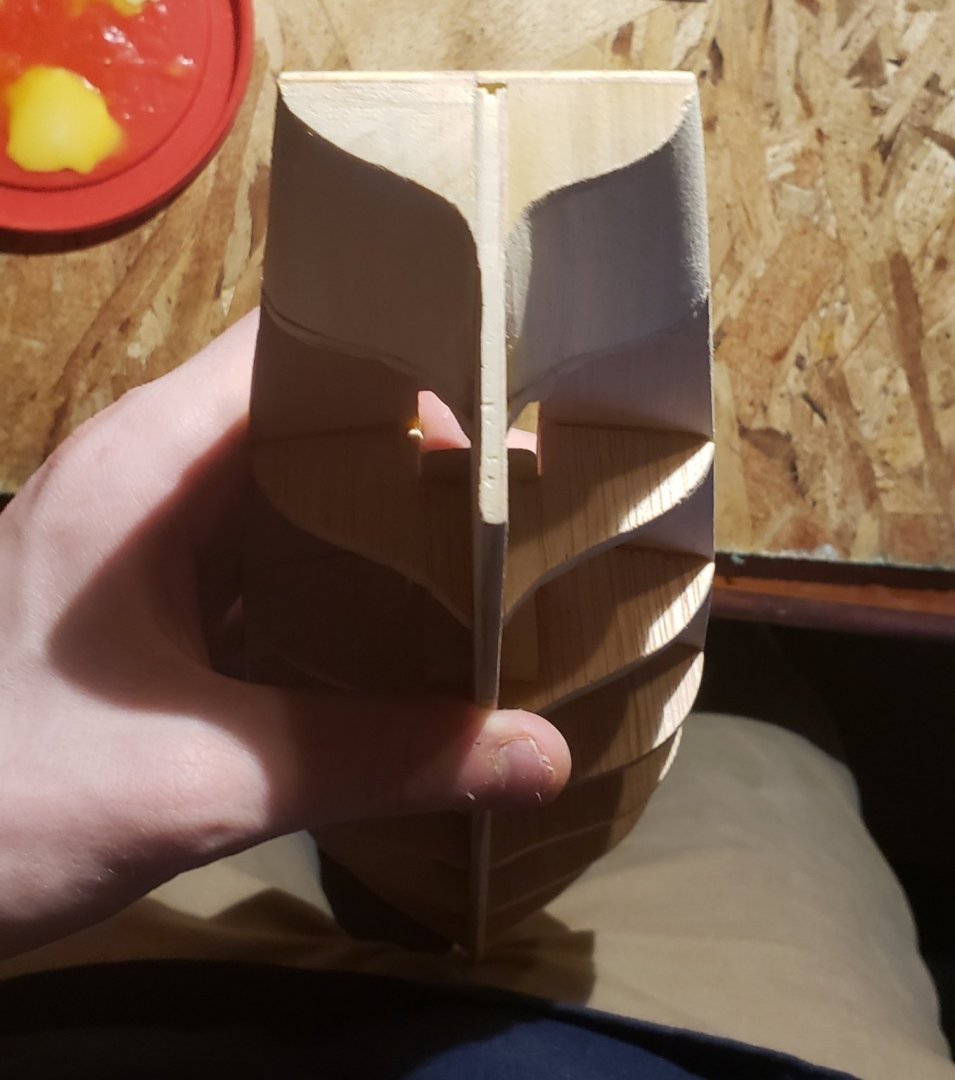
Got started with fitting the bulkheads to the keel. I used lego pieces to stabilize and get the angle as close as possible. The instructions didn't say to add supports between any bulkheads except where the mast is supported - I was nervous and thought it'd be good practice to add in some more supports. I was a little nervous about the deck sitting flat on these bulkheads, but I managed to get them a bit smoother. Next, I had to work on the filler pieces. The pieces the kit came with didn't seem to fit properly (the stern pieces mainly). They seemed a bit too small? I added some "layers" to the piece before shaping them so they could be the right size. For the bow pieces, I used the given pieces (two flat triangular shapes), but also added a filler piece using balsa wood. These went better than expected! I wasn't sure, but the keel seemed very blunt up front - this is probably the shape of the boat but I wanted a bit more of an angular shape to the bow. I added a small strip of wood onto the keel which extended it's length slightly, allowing me to make a "sharper" point. Stern pieces. We invested in a cheap dremel from Harbor Freight, which turned out to be very necessary. I was reading some other posts about the stern and I'm a bit worried as the instructions aren't clear how it's supposed to be done. I found some great examples in other logs, so I'm excited to work on it. I did a lot of shaping and fairing after these pieces were secured. Going well so far, almost time for planking...

- 27 replies
-
- 6
-
-
- swift
- artesania latina
- (and 1 more)
-
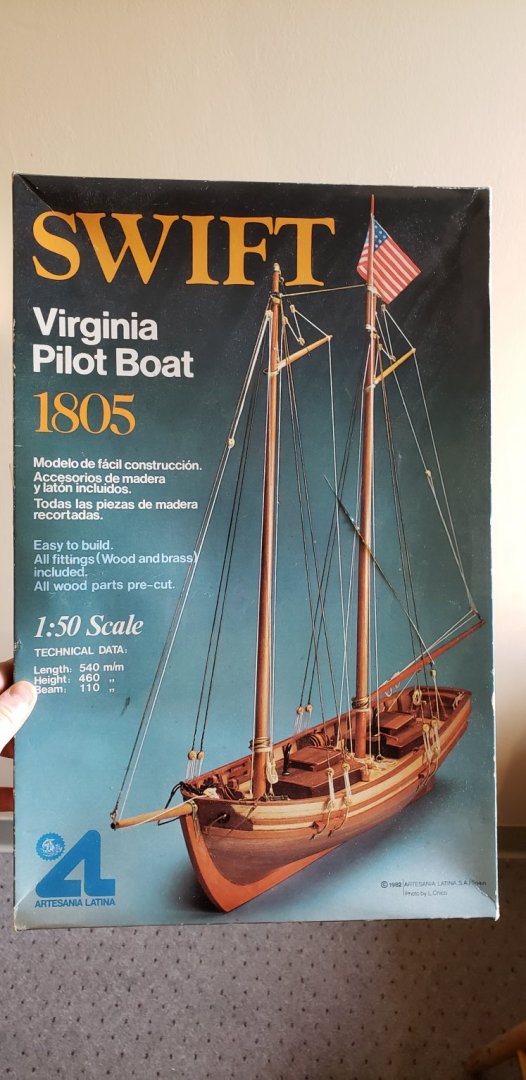
Hello! This is my first ever post on MSW. A friend and I recently found out about ship building and through looking at kits and build videos, we were immediately hooked - fortunately, it only took a couple days of "research" until we found MSW. Before we even had kits in our hands, we read through many build logs - the resources here are tremendously helpful, thank you all!!!! I have little woodworking experience and no modeling experience, but I was ready for the challenge. Looking at all of the beautiful boats on here is quite inspirational, and certainly narrowed my "type" of model to a wooden ship kit. As a college student, I was on a budget when looking for my first kit. The Swift kit by Artesania Latina seemed like a common starter kit, which I liked (there are already many build logs for this boat which is largely why I chose it!) I managed to find a "new" kit (the older version from 1982) on ebay for $70 with some tools/stand included. I have already started building so I will add to this thread. Bear with me - this is most likely going to be messy and slow!!!! Thanks again to everyone who's log I have already read.
- 27 replies
-
- 9
-
-
- swift
- artesania latina
- (and 1 more)