Swallowtail
-
Posts
19 -
Joined
-
Last visited
-
 Scotty W reacted to a post in a topic:
Swift 1805 by Swallowtail - Artesania Latina - 1:50 - first build
Scotty W reacted to a post in a topic:
Swift 1805 by Swallowtail - Artesania Latina - 1:50 - first build
-
clearway reacted to a post in a topic:
Swift 1805 by Swallowtail - Artesania Latina - 1:50 - first build
-
clearway reacted to a post in a topic:
Swift 1805 by Swallowtail - Artesania Latina - 1:50 - first build
-
Swallowtail reacted to a post in a topic:
HMS Terror by clearway - FINISHED - OcCre - 1:75 - upgraded
-
Thank you. Good tips on the jig and drilling the holes first - both will help!
-
 Swallowtail reacted to a post in a topic:
Swift 1805 by Swallowtail - Artesania Latina - 1:50 - first build
Swallowtail reacted to a post in a topic:
Swift 1805 by Swallowtail - Artesania Latina - 1:50 - first build
-
Oldsalt1950 reacted to a post in a topic:
Swift 1805 by Swallowtail - Artesania Latina - 1:50 - first build
-
ccoyle reacted to a post in a topic:
Swift 1805 by Swallowtail - Artesania Latina - 1:50 - first build
-
Paul Le Wol reacted to a post in a topic:
Swift 1805 by Swallowtail - Artesania Latina - 1:50 - first build
-
Paul Le Wol reacted to a post in a topic:
Swift 1805 by Swallowtail - Artesania Latina - 1:50 - first build
-
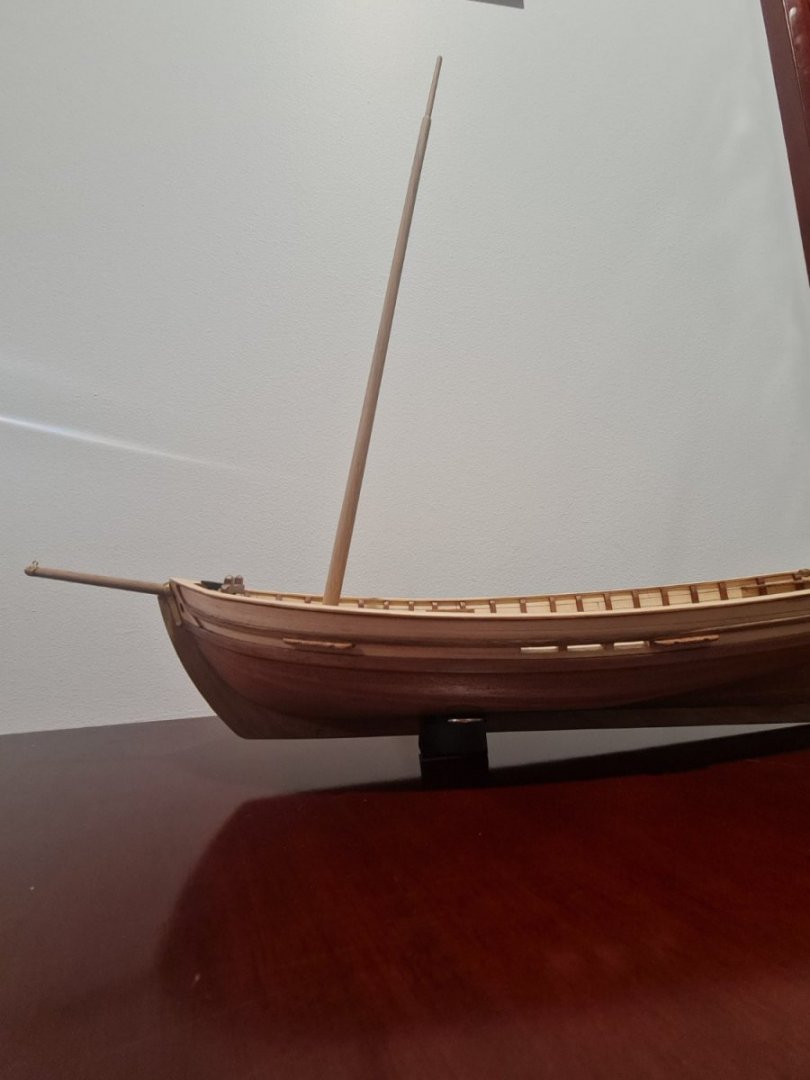
Two coats of varnish looking great. Fore mast tapered and shaped. It's sitting a couple of degrees too much rake when just slotted in, so I'll straighten it slightly. The instructions seem to suggest doing some of the standing rigging before inserting and gluing the mast, which seems odd. My instinct tells me to fit and glue the mast at the right rake angle and then do standing rigging to the fitted mast... but it's my first model so my instinct could well be wrong! What's the best way?
- 24 replies
-
- 3
-
-
- swift
- artensia latina
- (and 1 more)
-
Prowler901 reacted to a post in a topic:
Swift 1805 by Swallowtail - Artesania Latina - 1:50 - first build
-
Prowler901 reacted to a post in a topic:
Swift 1805 by Swallowtail - Artesania Latina - 1:50 - first build
-
ct mike reacted to a post in a topic:
Swift 1805 by Swallowtail - Artesania Latina - 1:50 - first build
-
And first light varnish coat on, ready for some sanding tomorrow. The varnish shows a couple of spots which need some tidyup, so that's also on the to do list!


- 24 replies
-
- 5
-
-
- swift
- artensia latina
- (and 1 more)
-
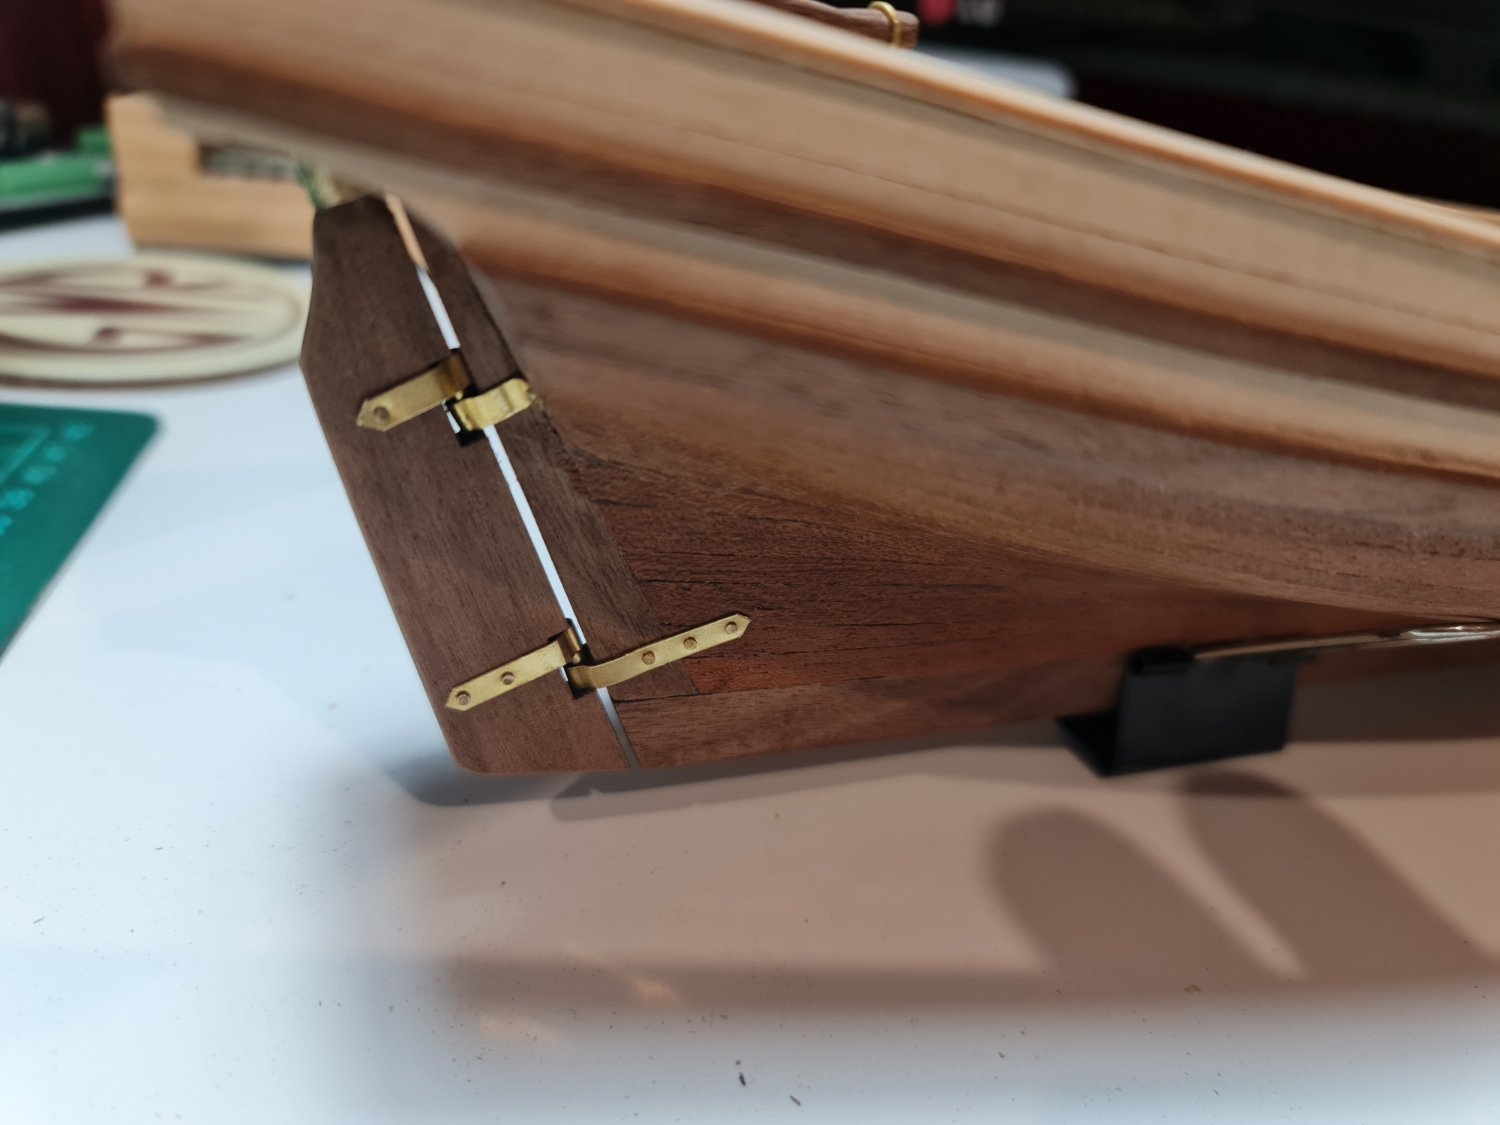
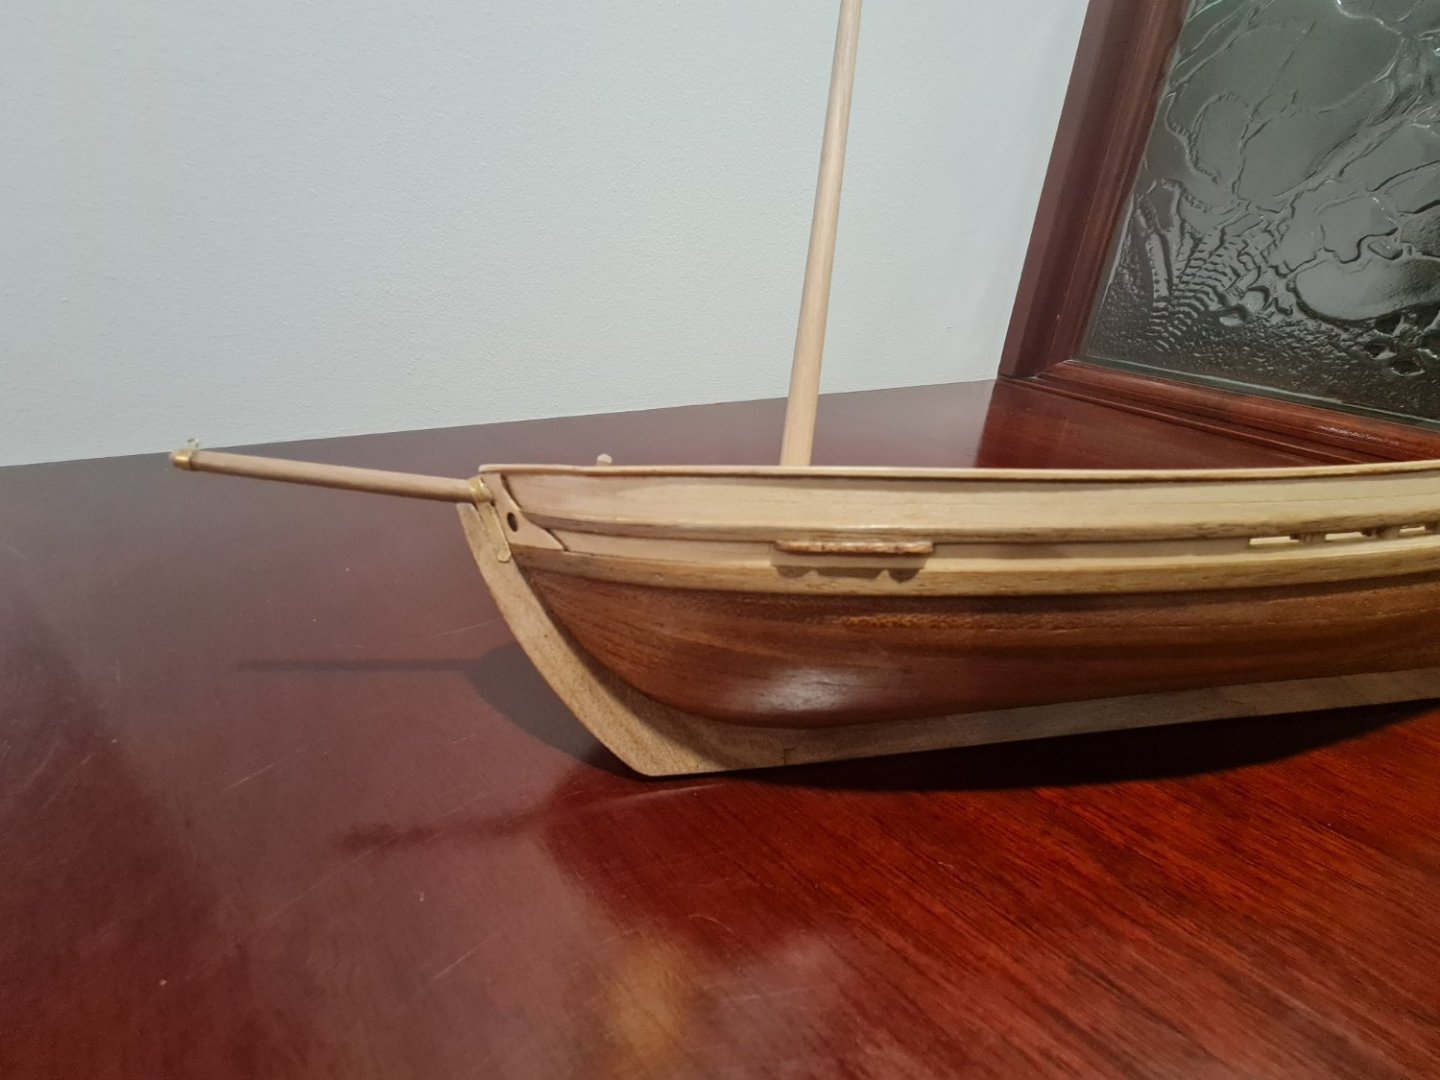
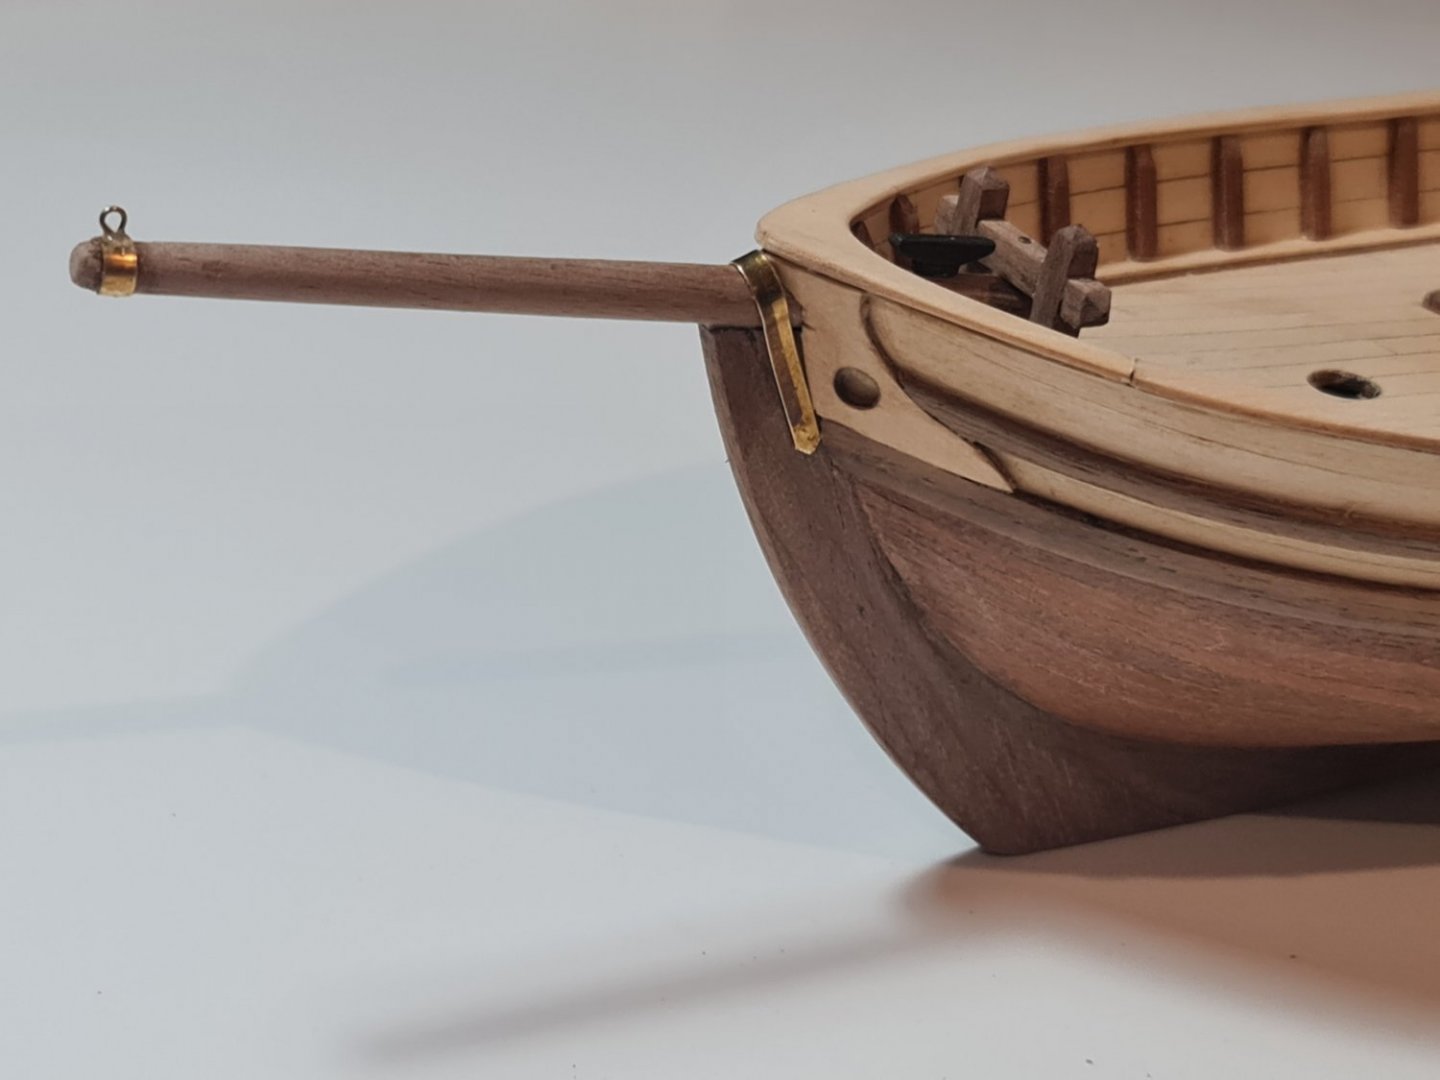
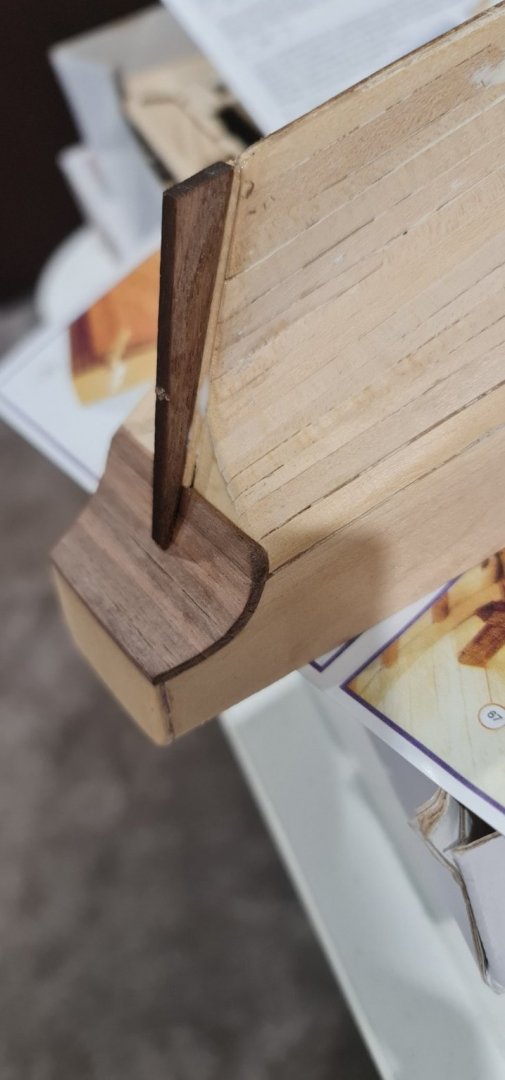
Bowsprit mounted. Cracked part of the keel in the process so fixed that and kept going. I don't think I've tapered the bowsprit enough in hindsight, but it's not coming out now...
- 24 replies
-
- 1
-
-
- swift
- artensia latina
- (and 1 more)
-
Swallowtail reacted to a post in a topic:
HMS Terror by clearway - FINISHED - OcCre - 1:75 - upgraded
-
Yes.... And no need to apologise This is my first ship build! That's next, I've just fitted the rudder, and I'm working on the bowsprit.

- 24 replies
-
- 2
-
-
- swift
- artensia latina
- (and 1 more)
-
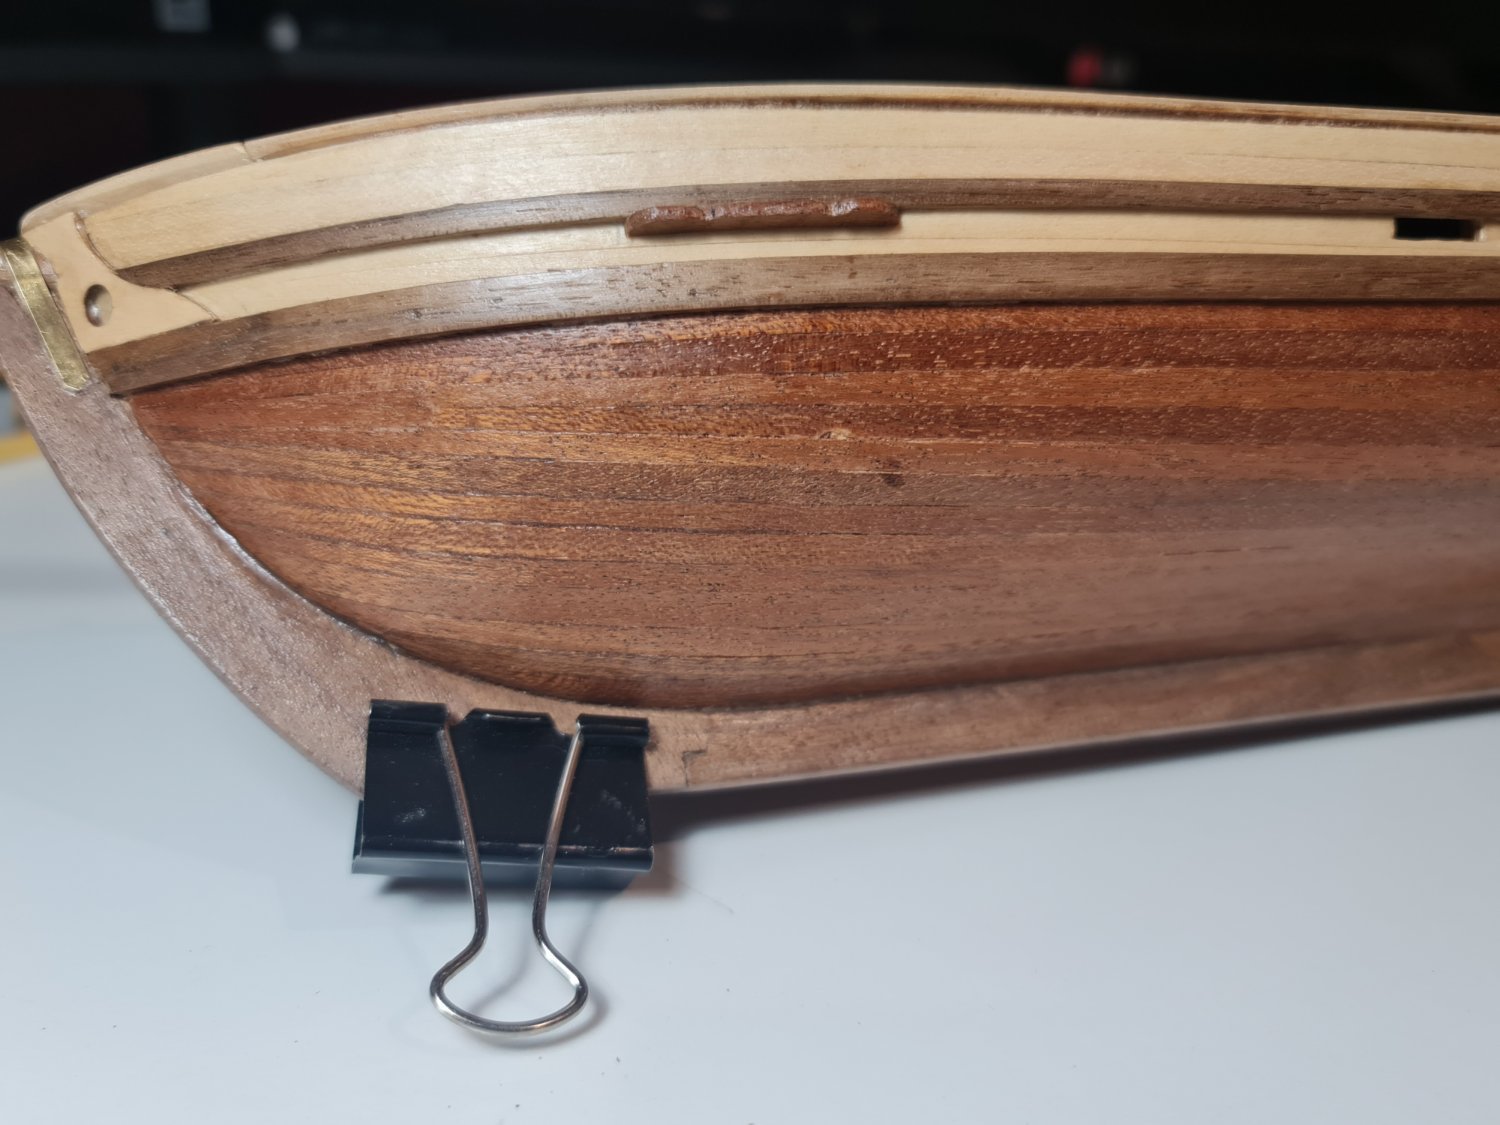
Well after how many years the hull is complete. I'll let it sit for a couple of hours then give it an overall fine sanding and then a first coat of varnish. Rudder and bowsprit next.


- 24 replies
-
- 5
-
-
- swift
- artensia latina
- (and 1 more)
-
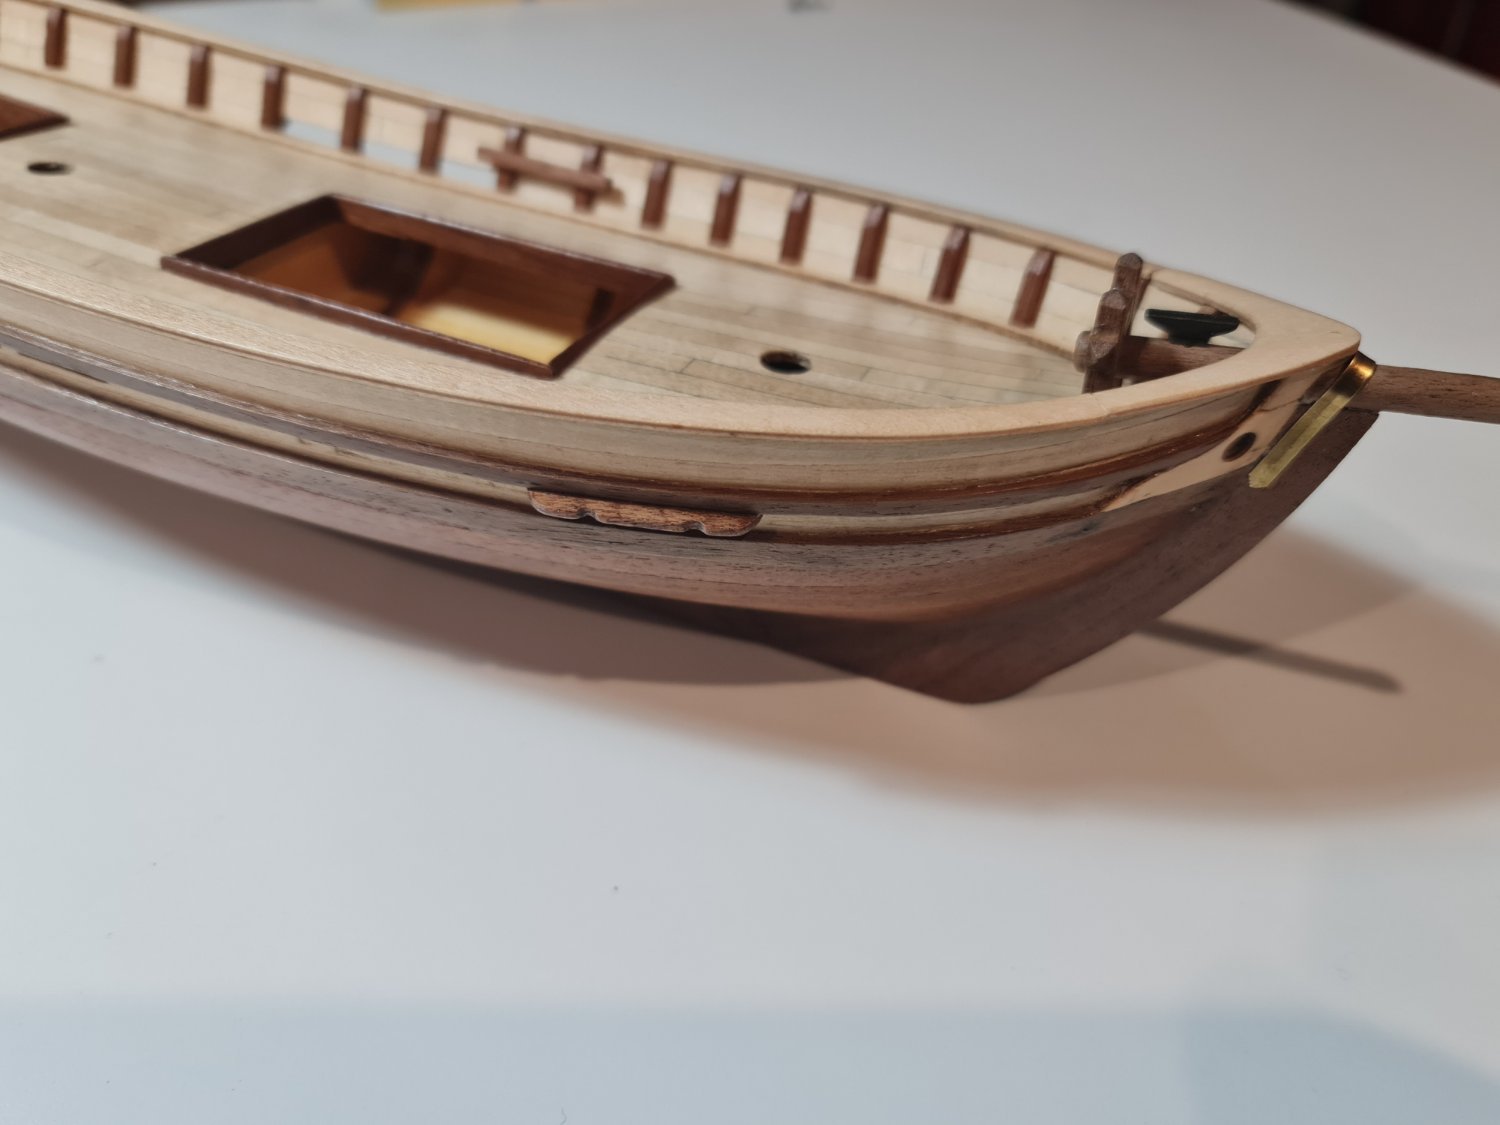
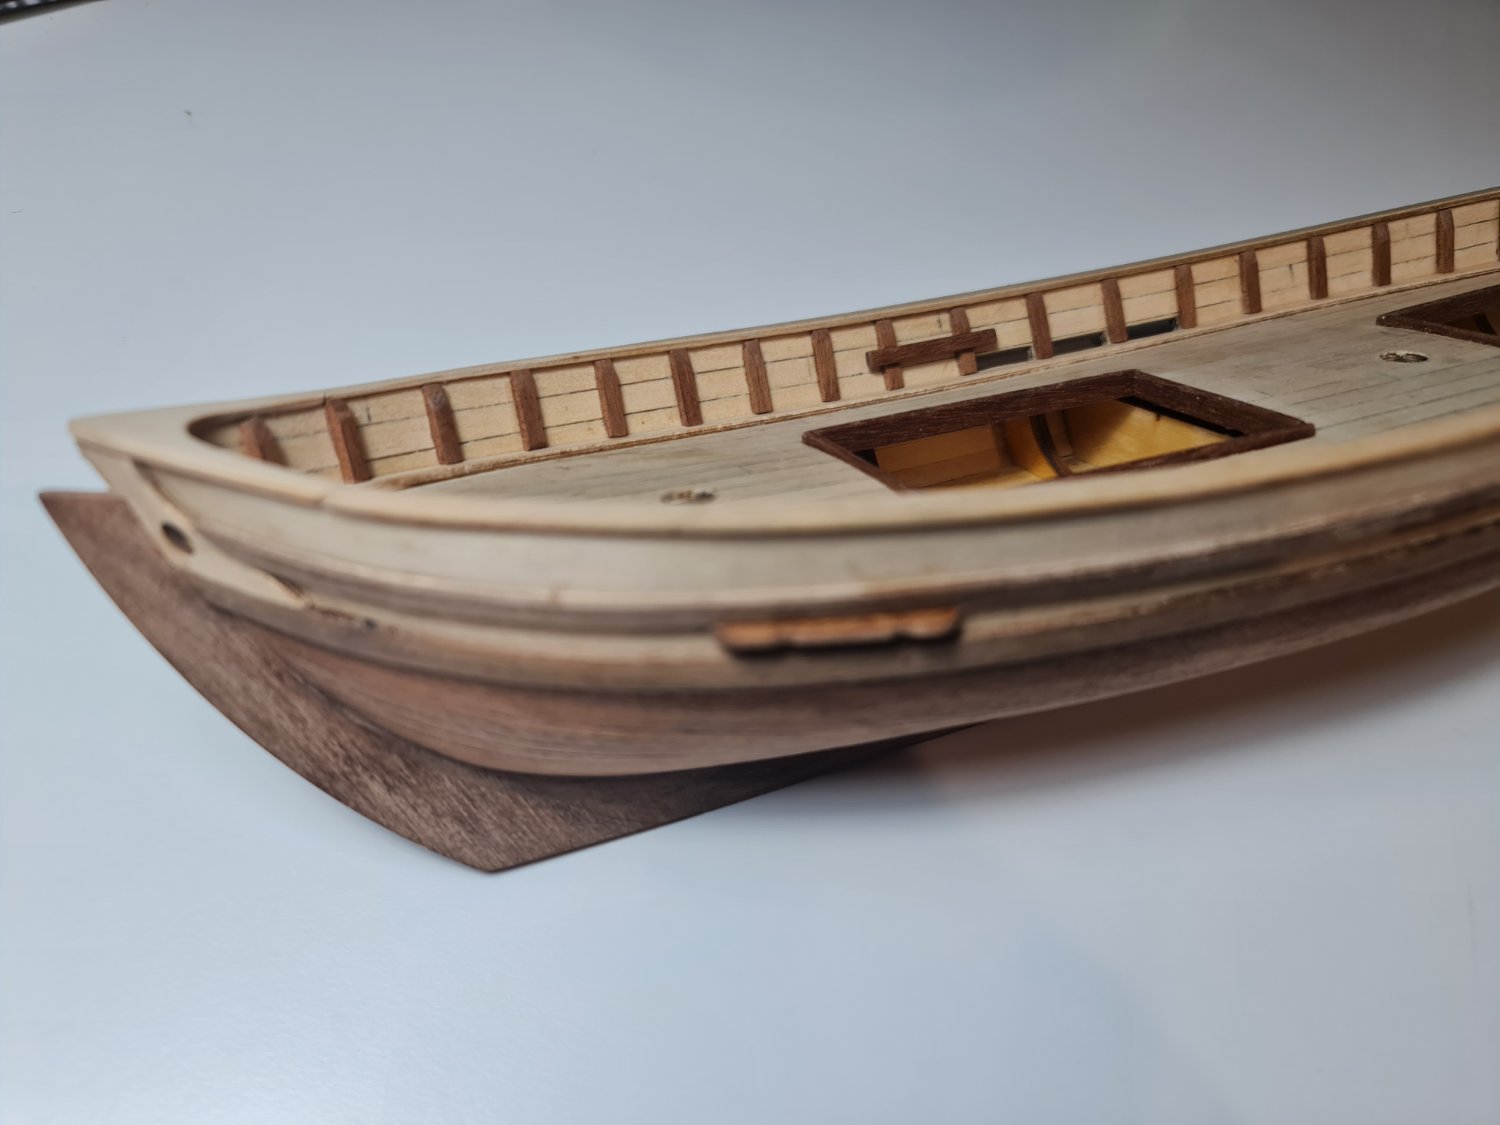
Wow 18 months since last post. I knew this would take a while, but that's nuts. I blame work and Covid haha. The hull is almost complete - gunwales, bulwarks, rails, etc. The side nearer the camera is still do do with bulwarks, but my neck needs a rest
- 24 replies
-
- 1
-
-
- swift
- artensia latina
- (and 1 more)
-
Swallowtail reacted to a post in a topic:
Virginia 1819 by aymodeler - Artesania Latina
-
Swallowtail reacted to a post in a topic:
SWIFT 1805 by Jeddahbill - FINISHED - Artesania Latina - 1/50 - Virginia Pilot Boat
-
Swallowtail reacted to a post in a topic:
SWIFT 1805 by Jeddahbill - FINISHED - Artesania Latina - 1/50 - Virginia Pilot Boat
-
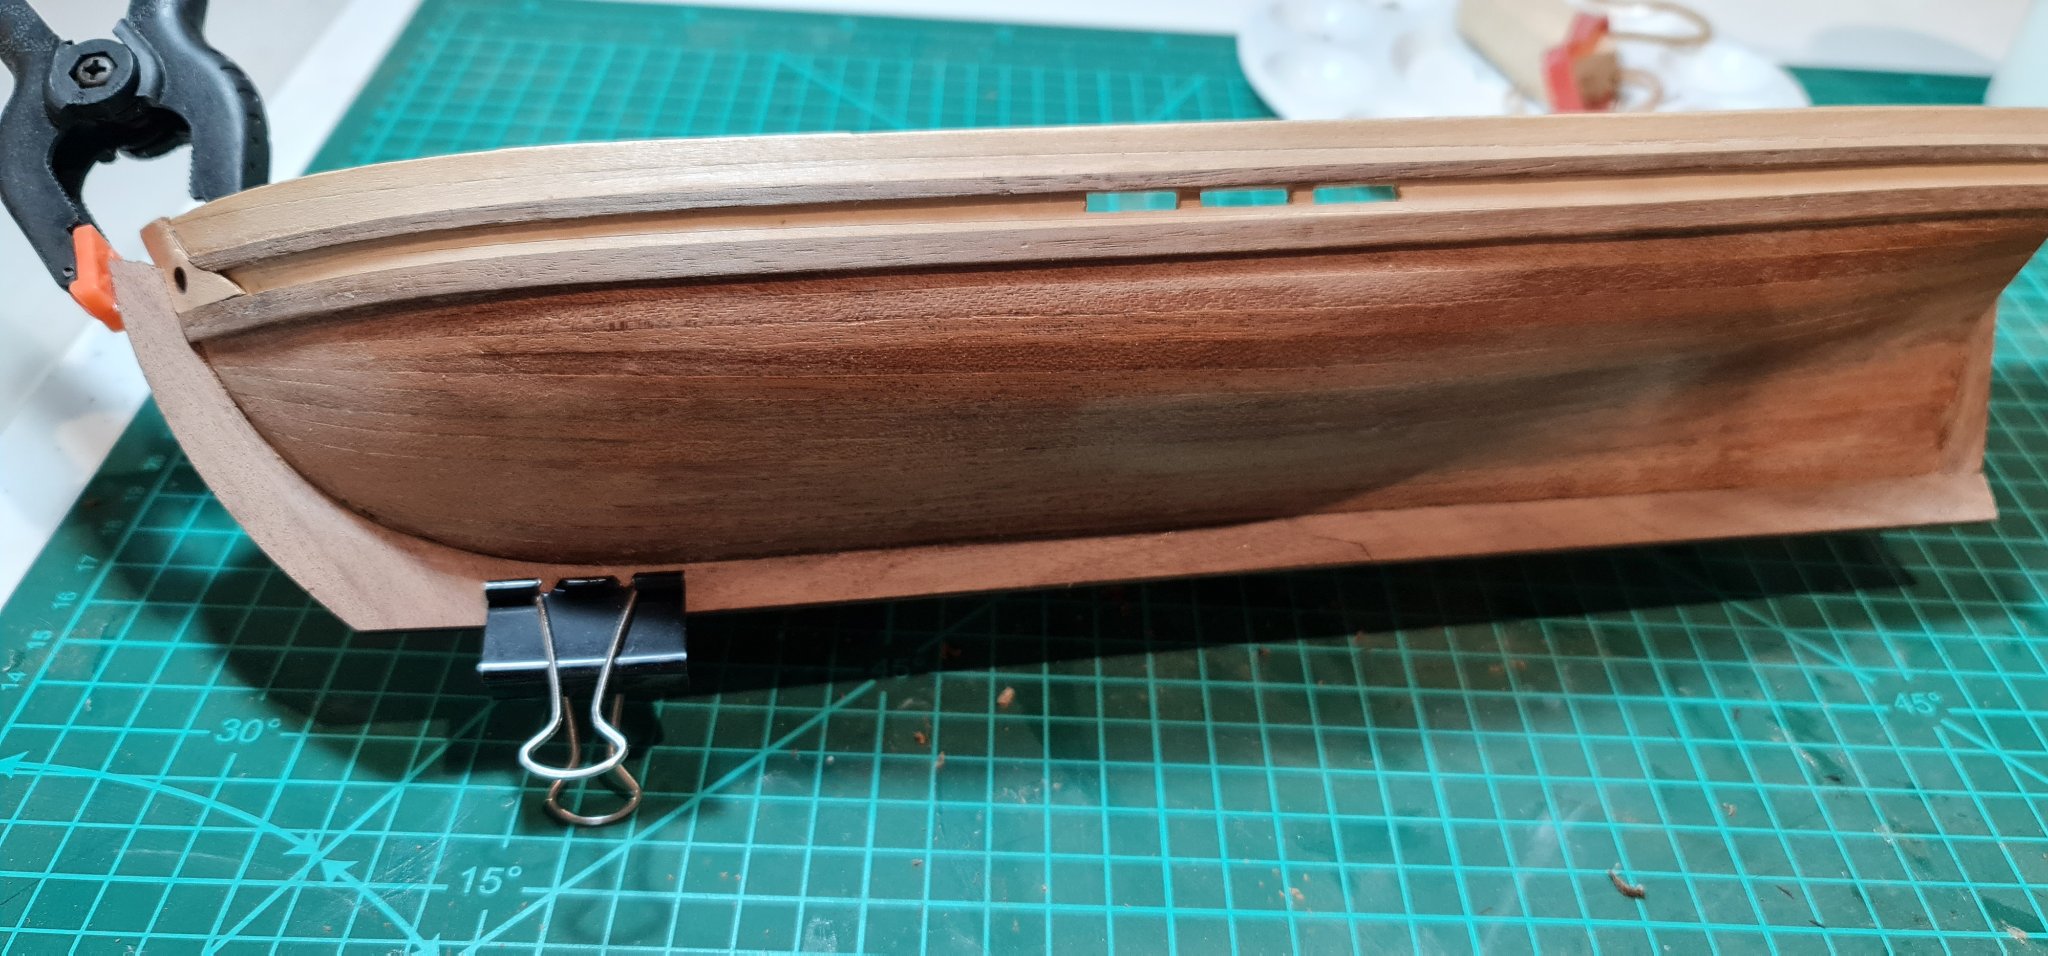
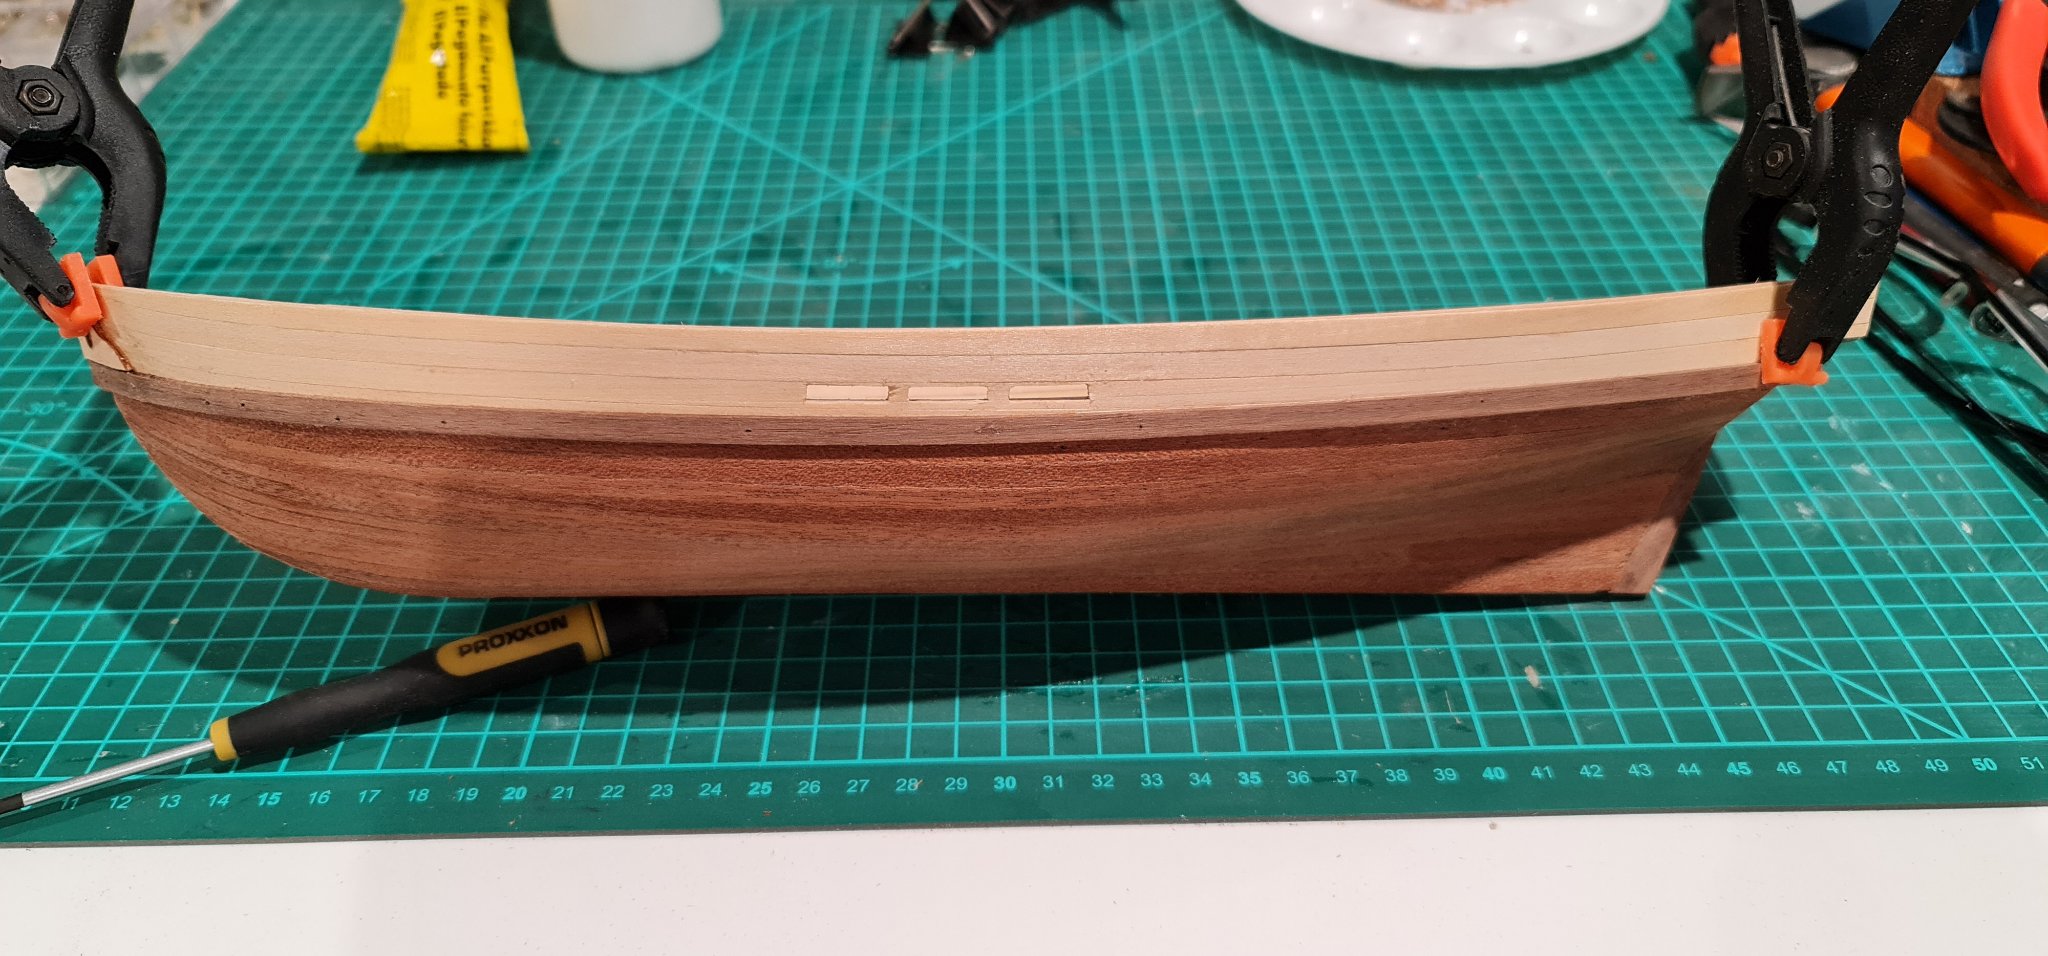
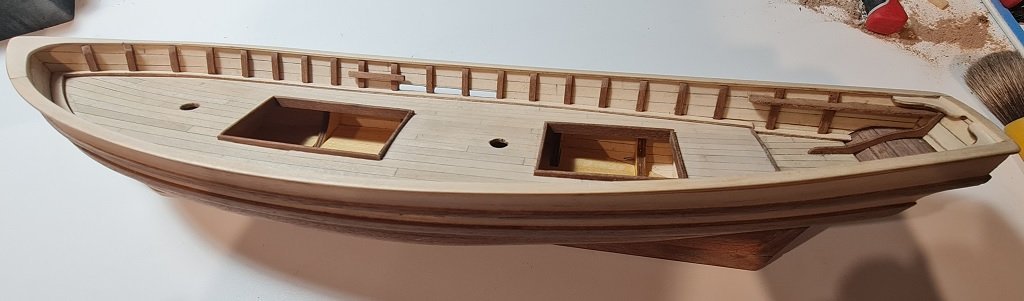
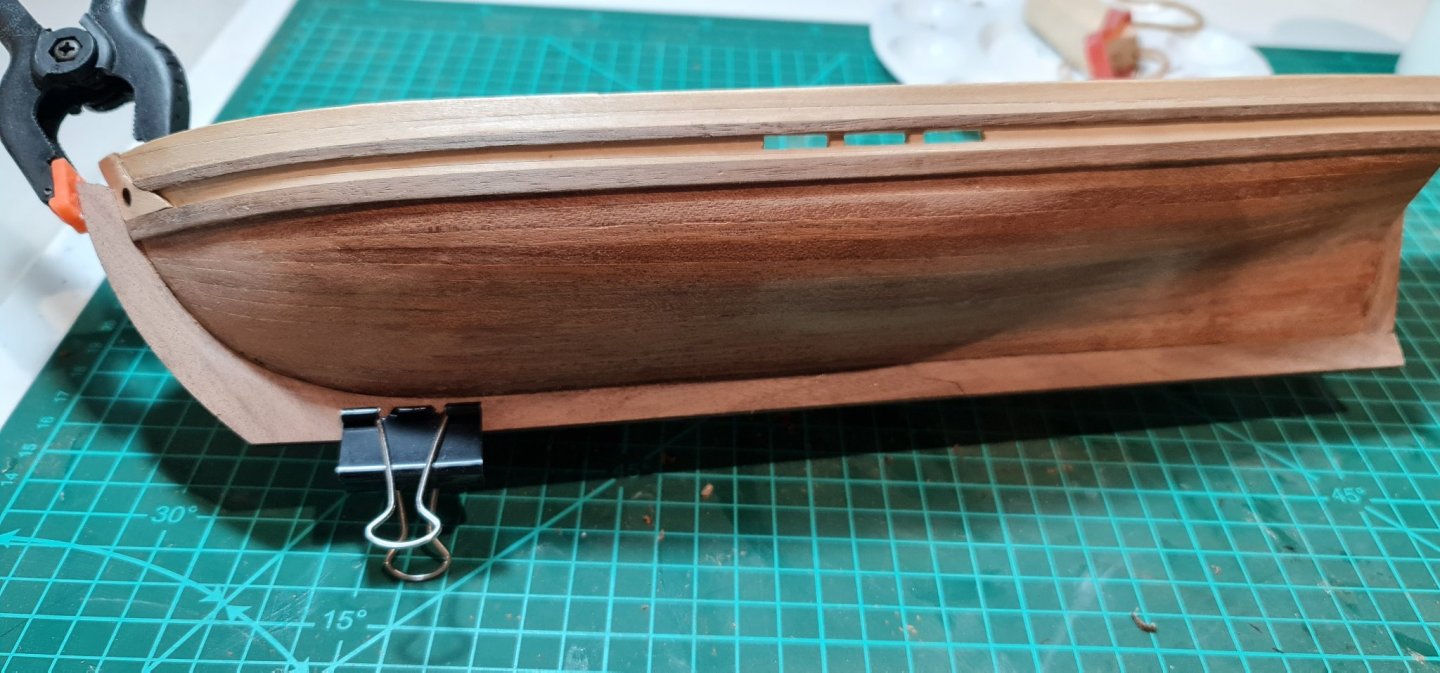
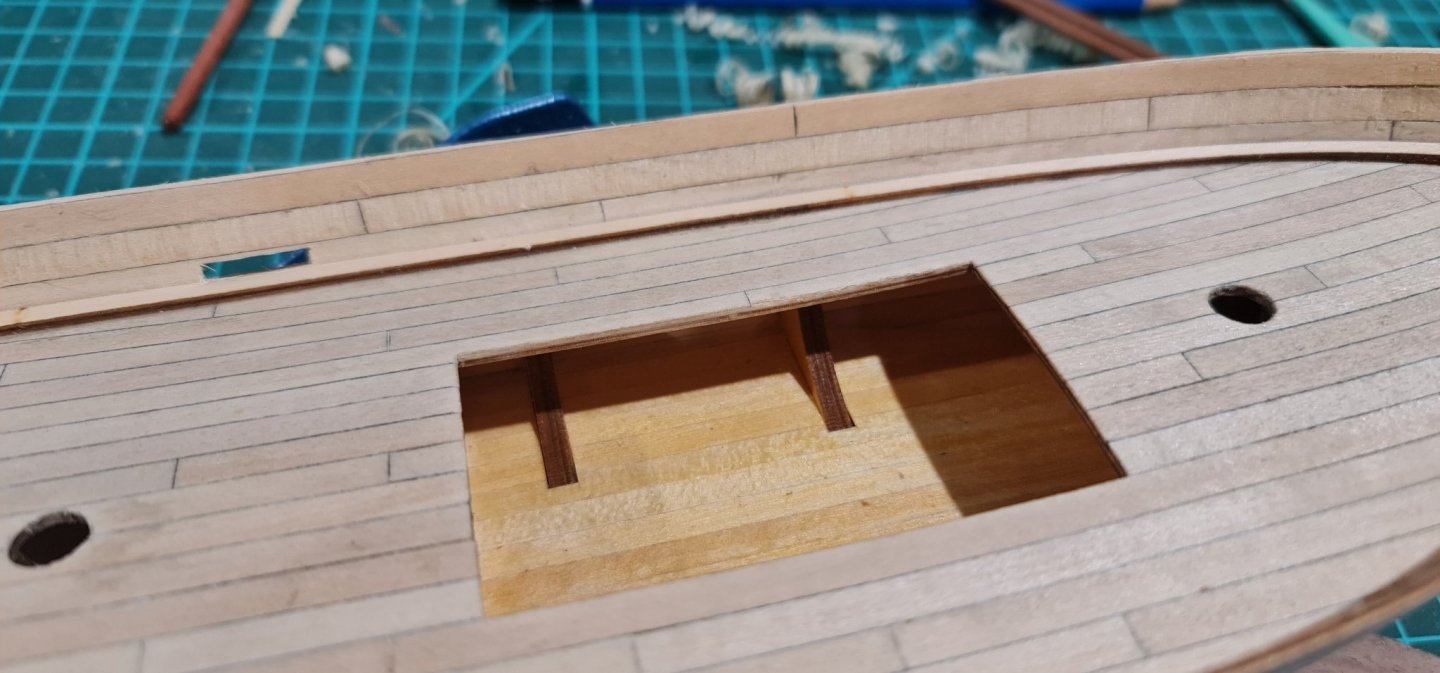
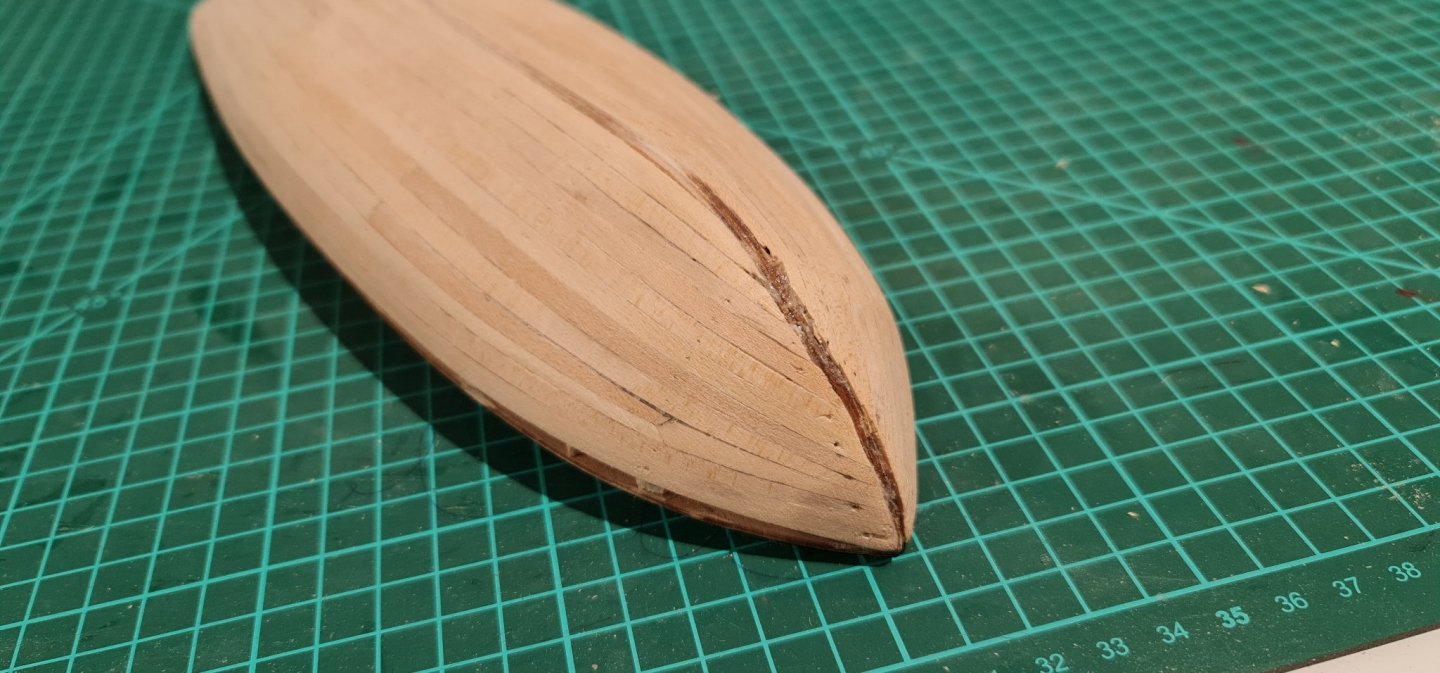
Well the planking is complete. Milestone! A little filling and final sanding to do, especially against the keel, but it's coming together. Strakes now being fitted, then caprails. Looking forward to getting the hull varnished.


- 24 replies
-
- 2
-
-
- swift
- artensia latina
- (and 1 more)
-
Swallowtail reacted to a post in a topic:
Swift by 3sheets10 - Artesania Latina - first build
-
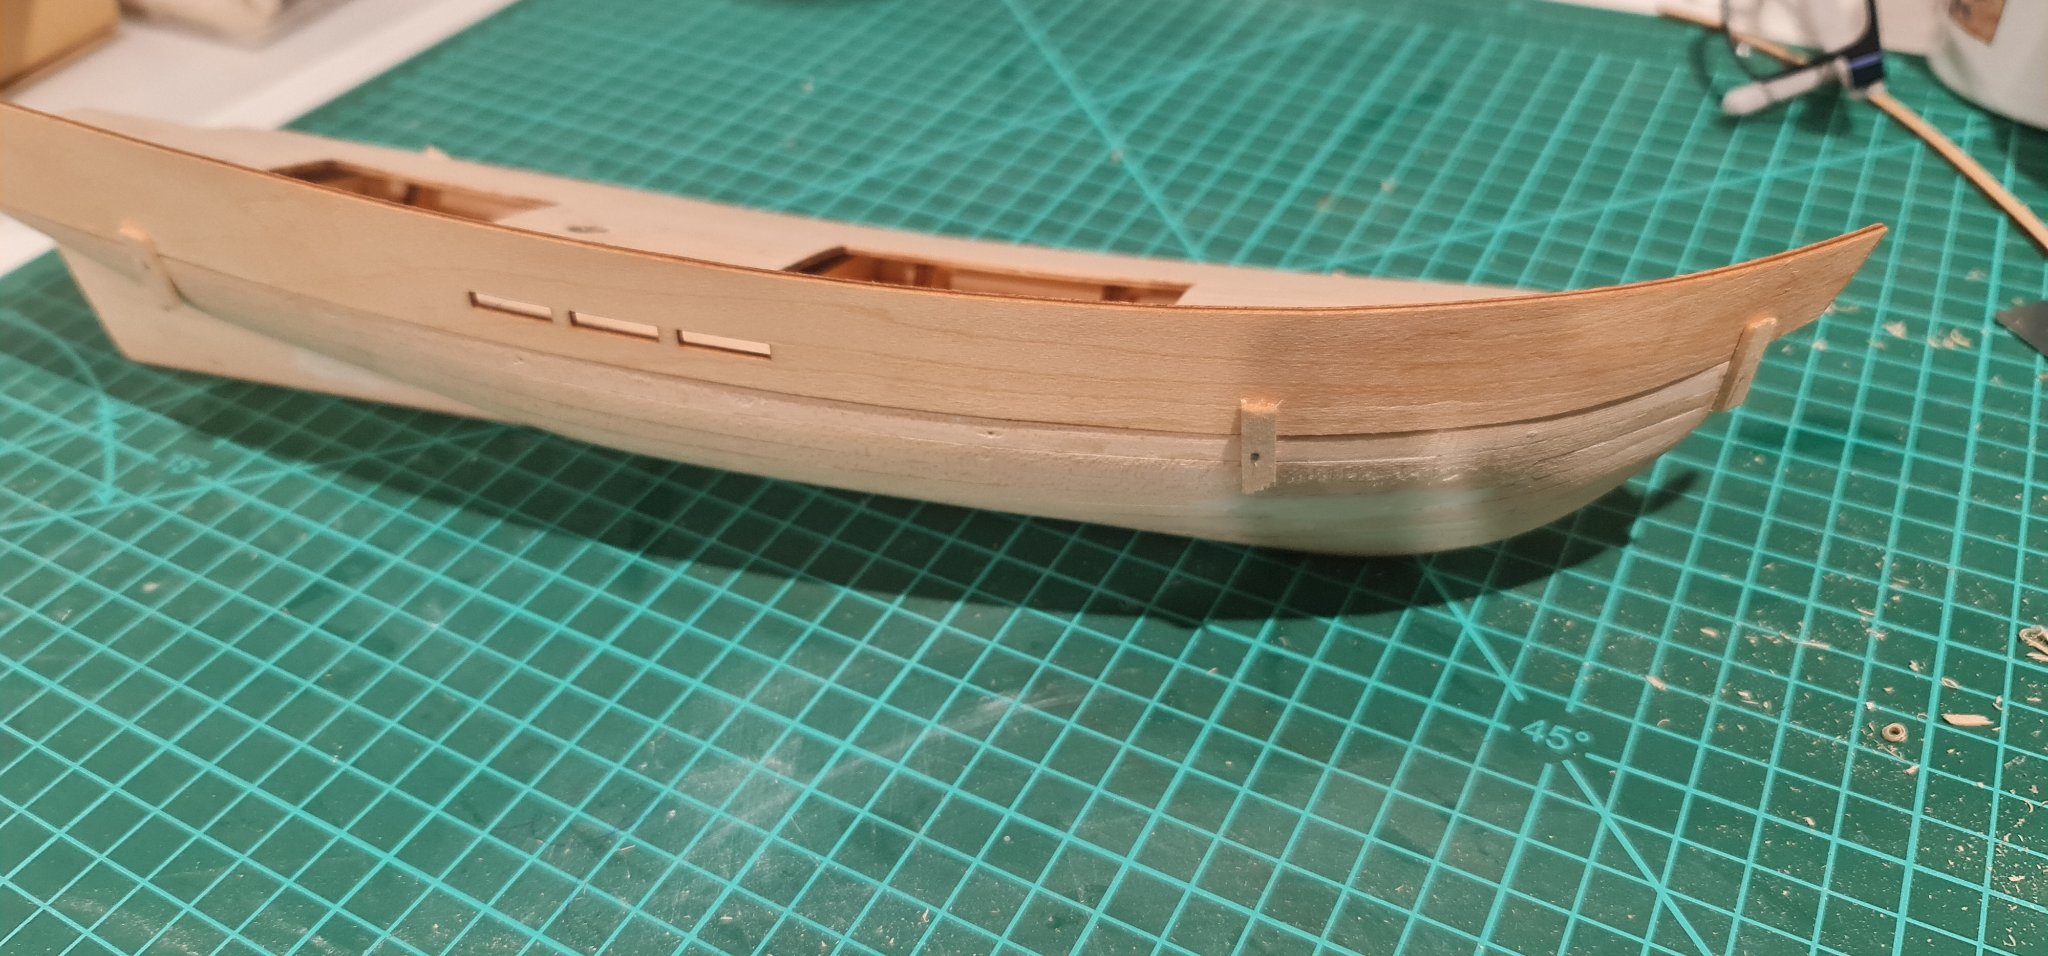
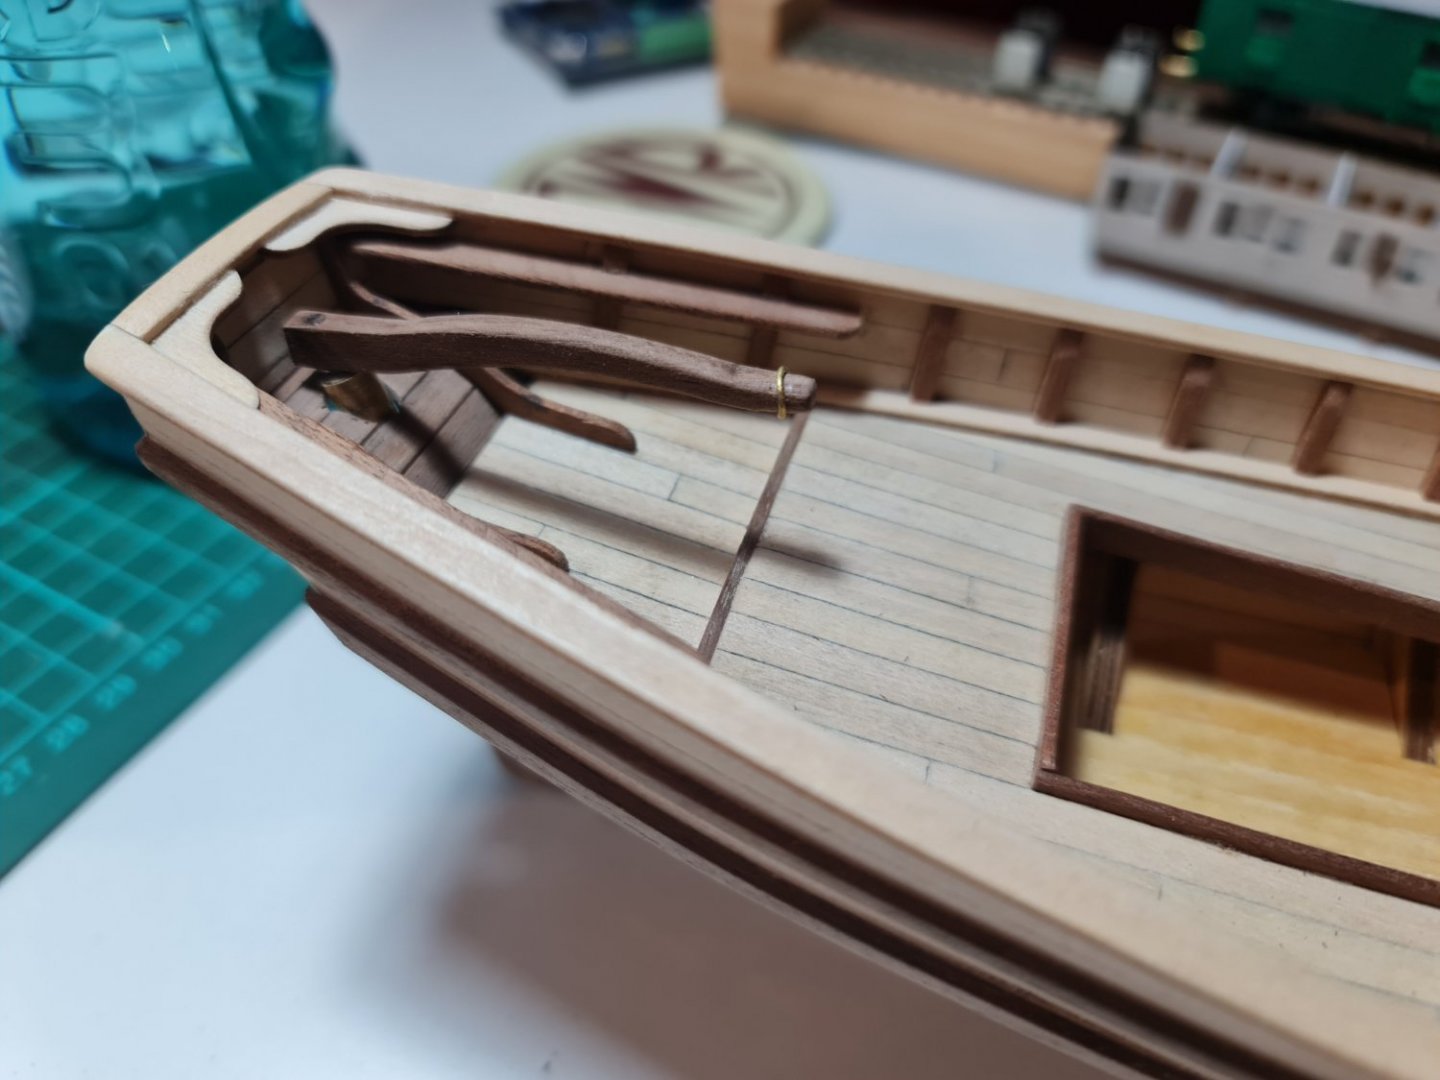
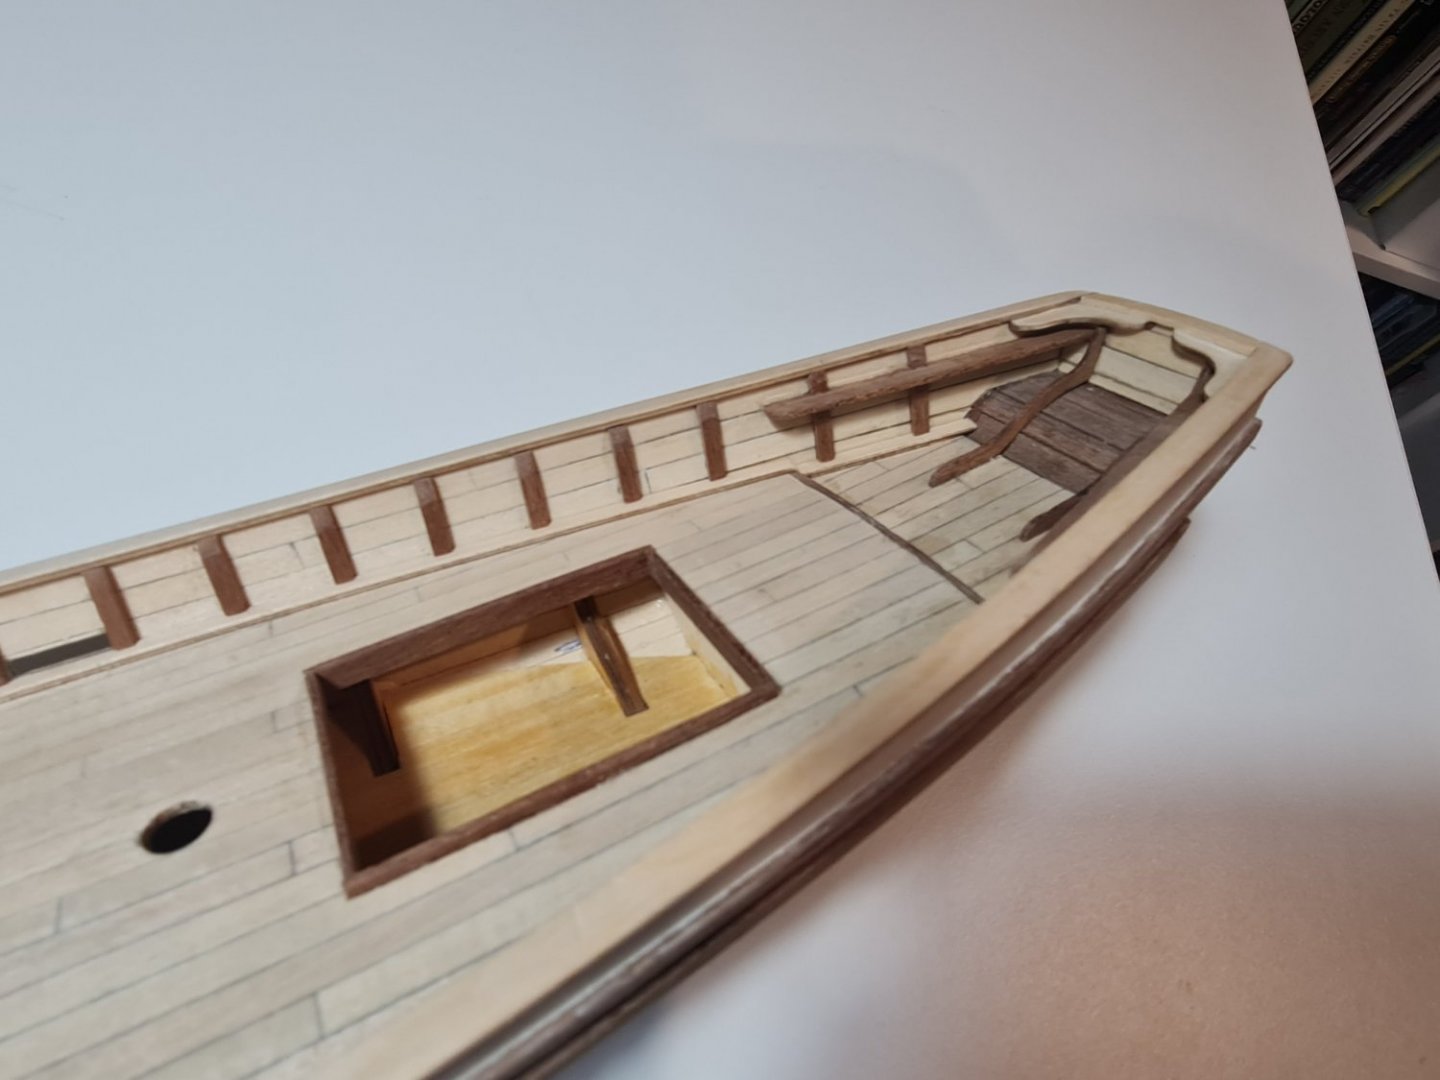
Bulwarks lined. I'm going to need to do some adjustments at the bow, the anchor holes are crowding where the jib will be. Some plans forming though.

- 24 replies
-
- 4
-
-
- swift
- artensia latina
- (and 1 more)
-
Swallowtail reacted to a post in a topic:
Swift 1805 by Swallowtail - Artesania Latina - 1:50 - first build
-
Swallowtail reacted to a post in a topic:
SWIFT 1805 by Jeddahbill - FINISHED - Artesania Latina - 1/50 - Virginia Pilot Boat
-
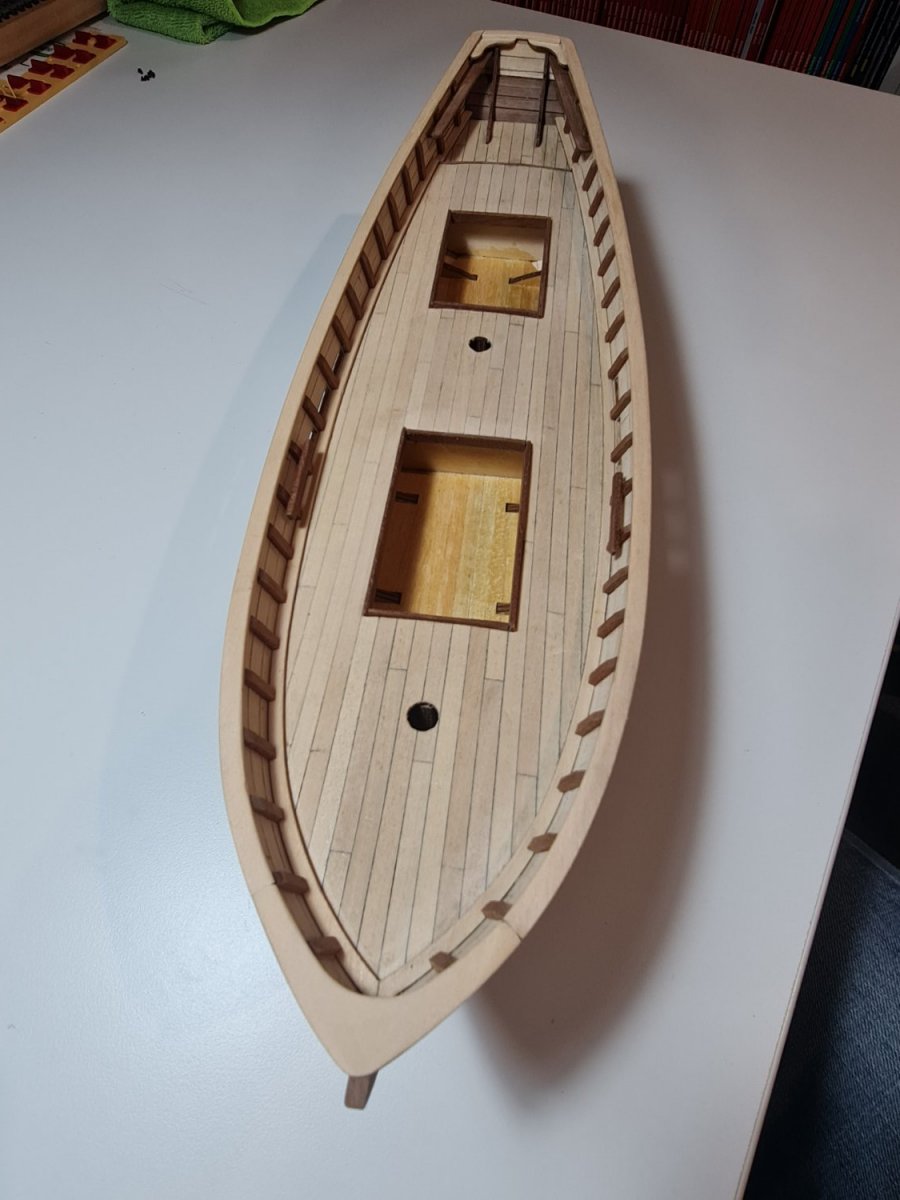
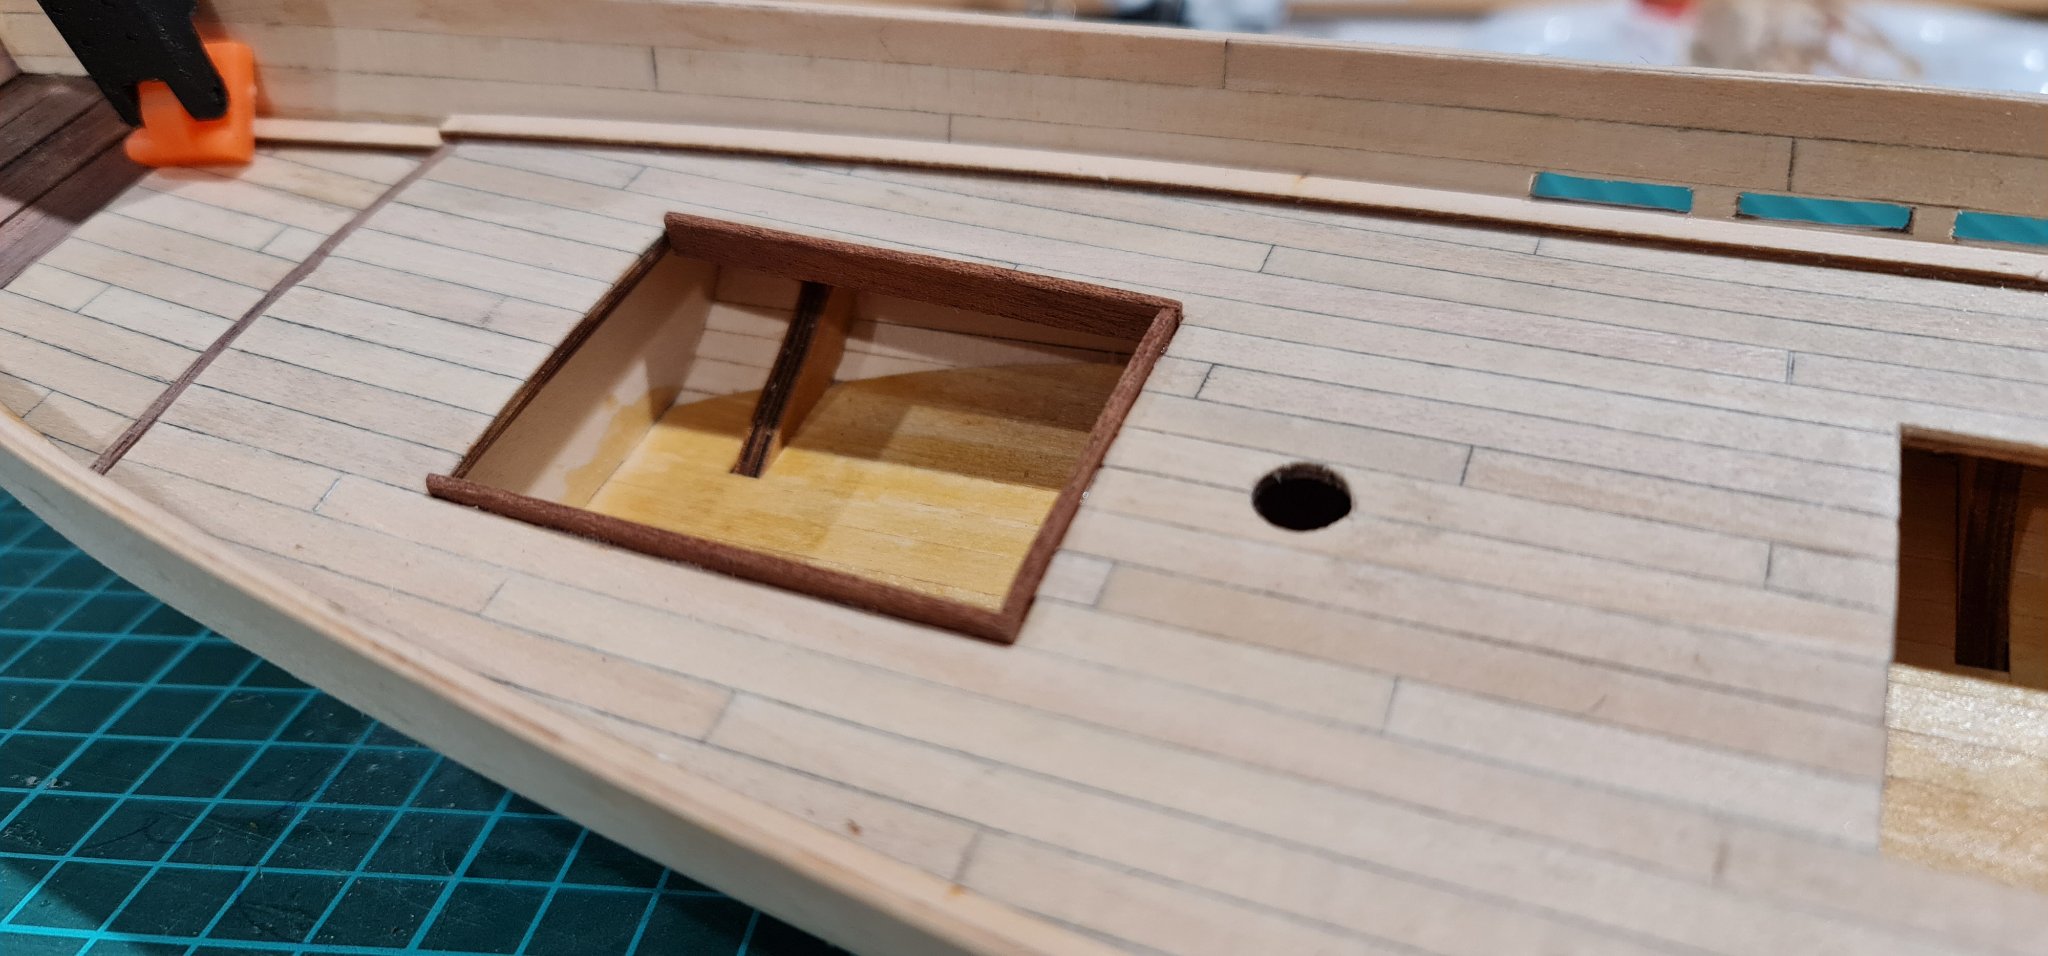
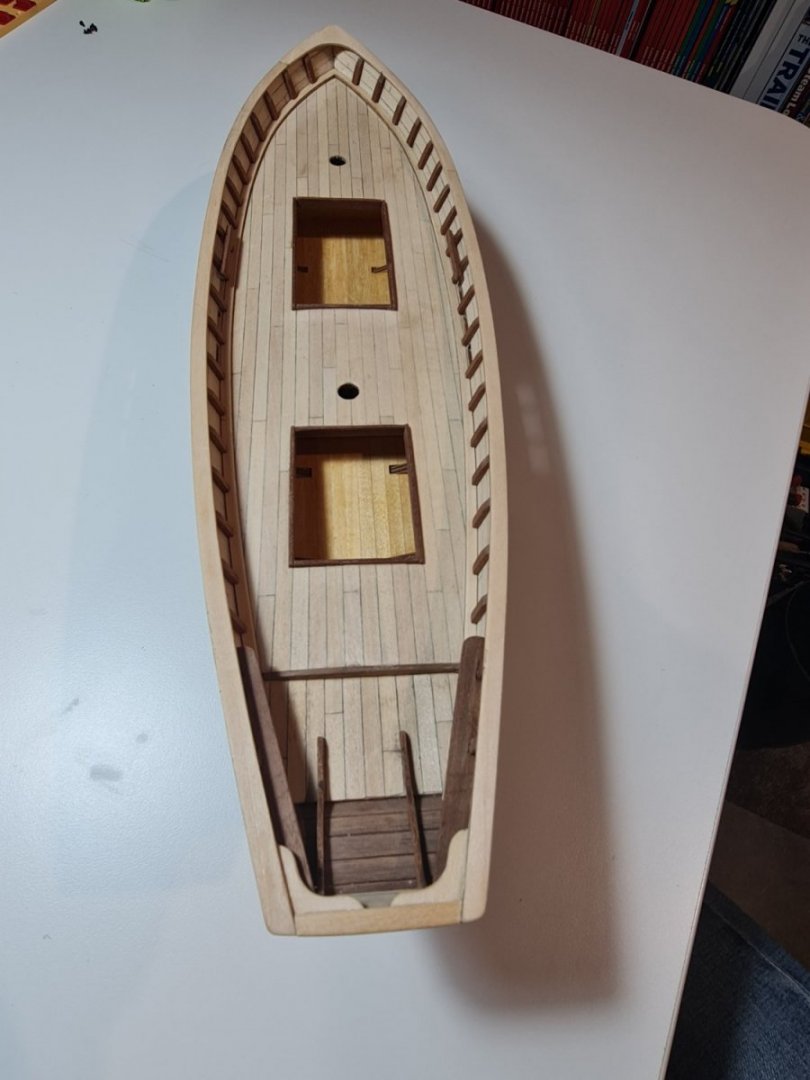
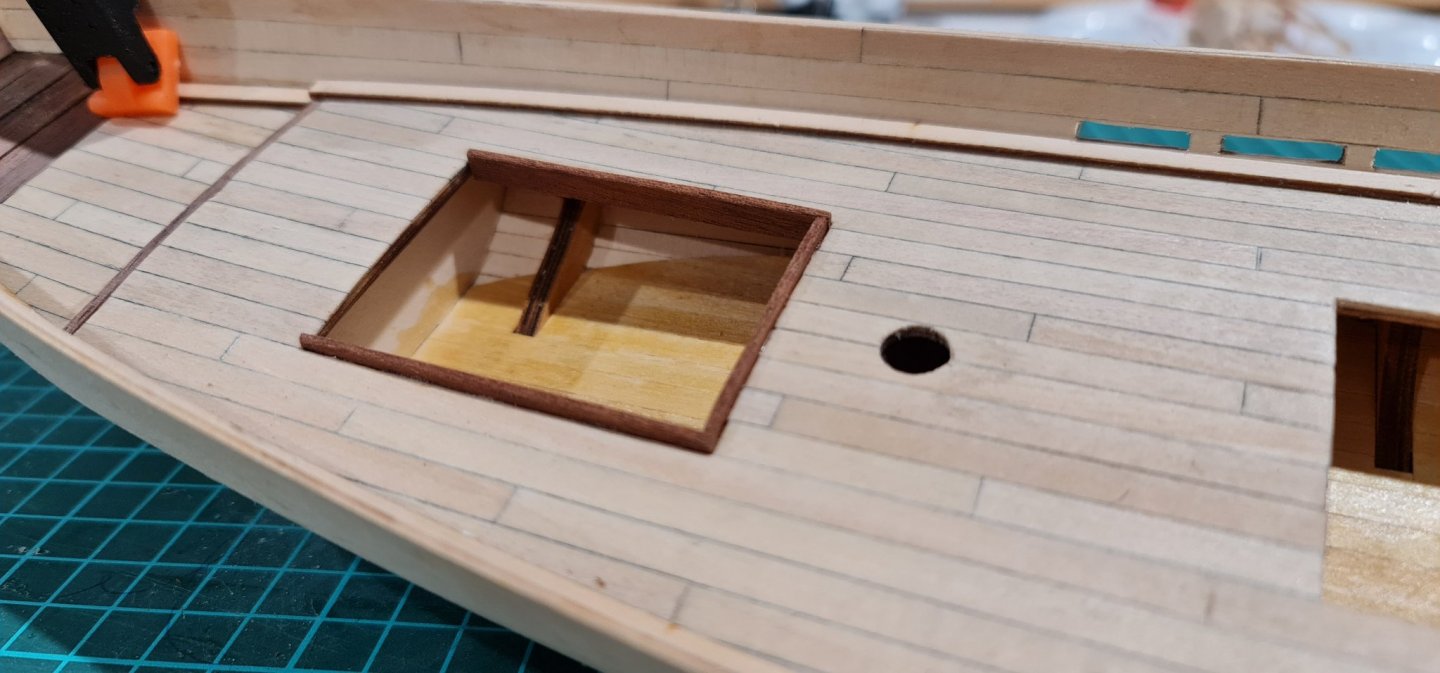
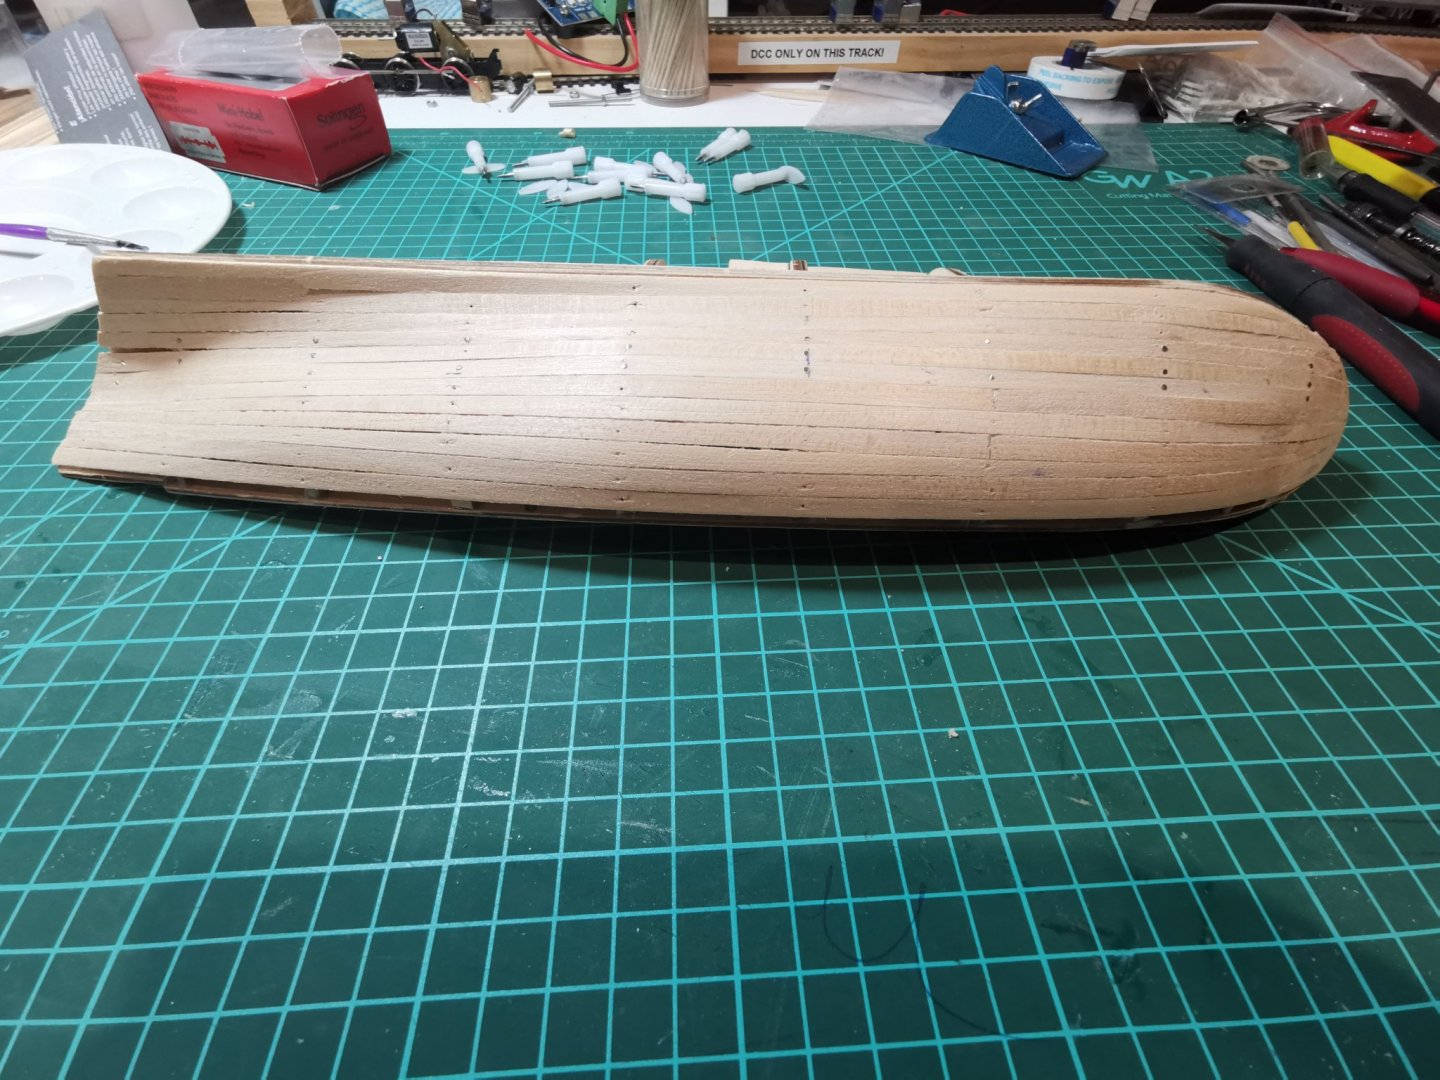
One side finished with top planking layer. Still to be sanded and finished off but coming together well. Don't look too closely, there are a couple of too skinny ones! Second photo shows lined bulwarks, and general progress on deck.

- 24 replies
-
- 2
-
-
- swift
- artensia latina
- (and 1 more)
-
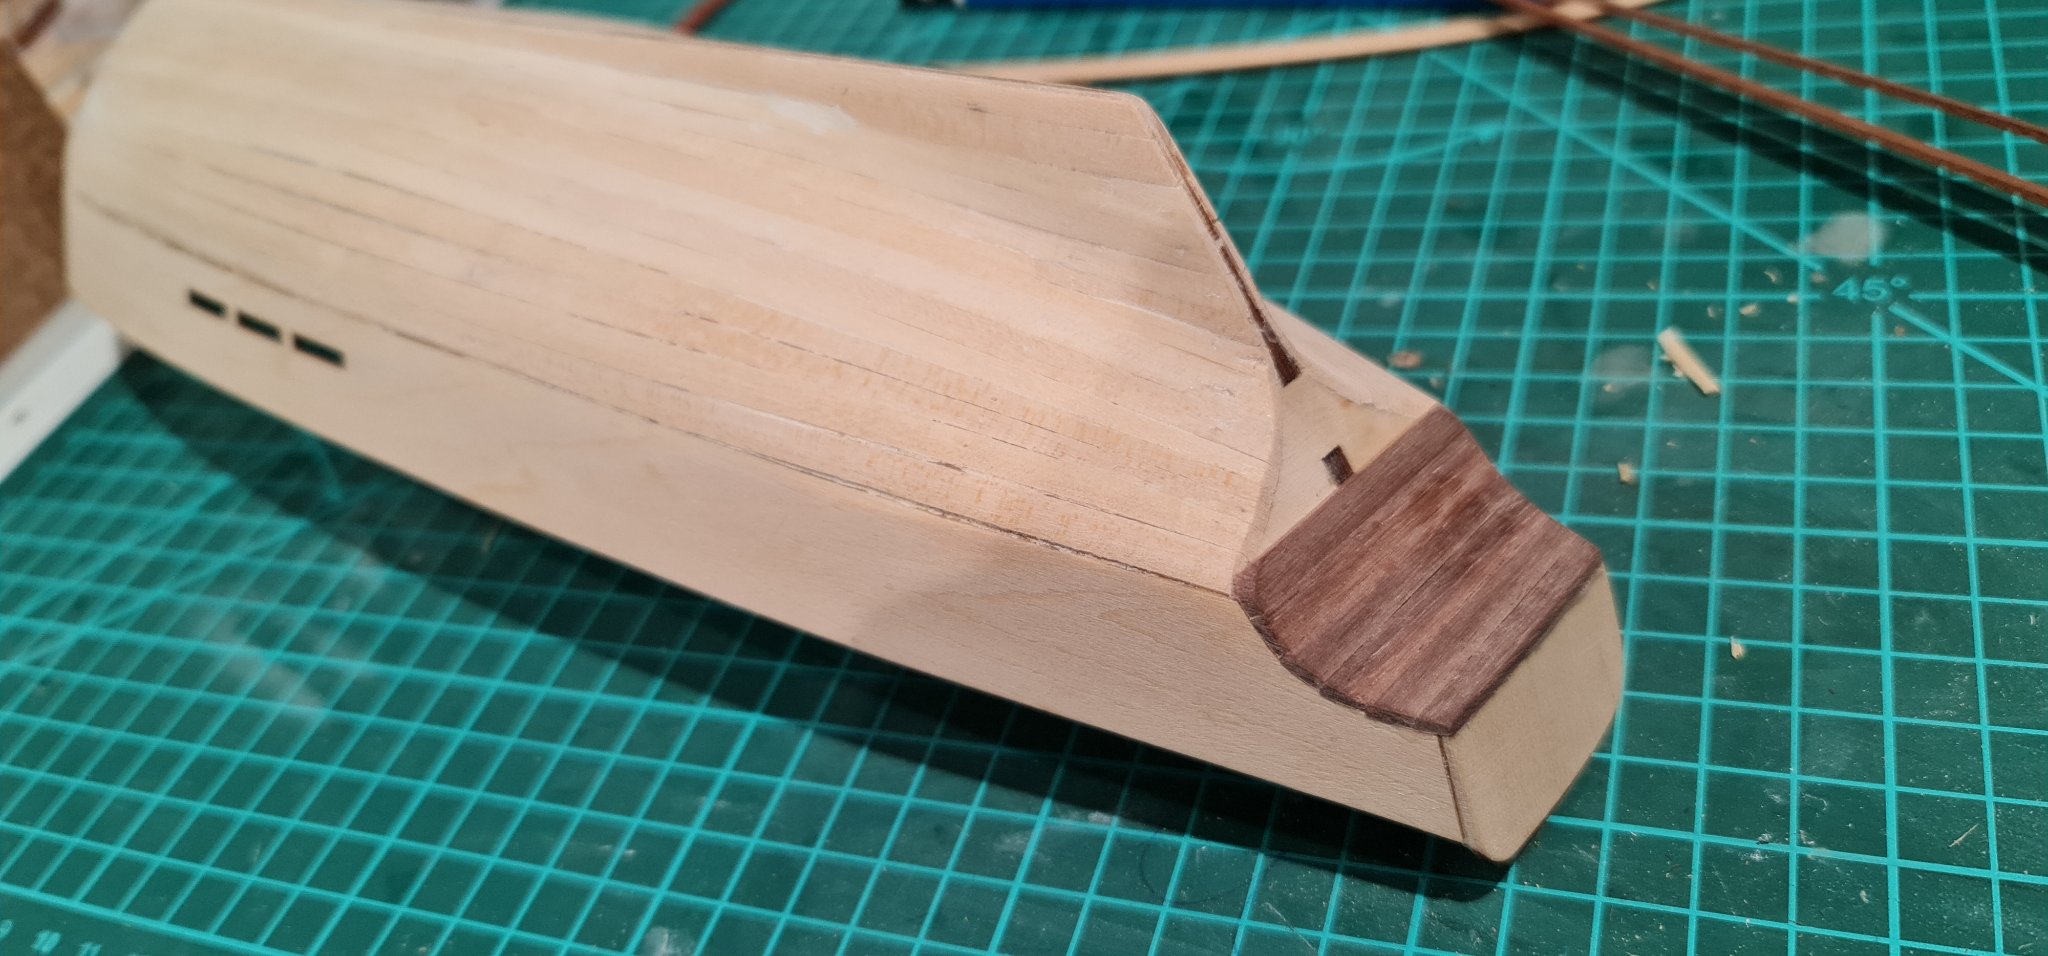
Steady progress... Bulwarks on, one now lined. I've planed it down to be 3 x planks tall, and it flows nicely. Interesting to see that the stern transom is narrower than the kit by about 8mm once the bulwarks are nicely fitted and flowing. I've gone with it, and she'll have a narrower transom. I've also packed the sternpost so it sits out a little, will have to see if that bites me later!

- 24 replies
-
- 1
-
-
- swift
- artensia latina
- (and 1 more)
-
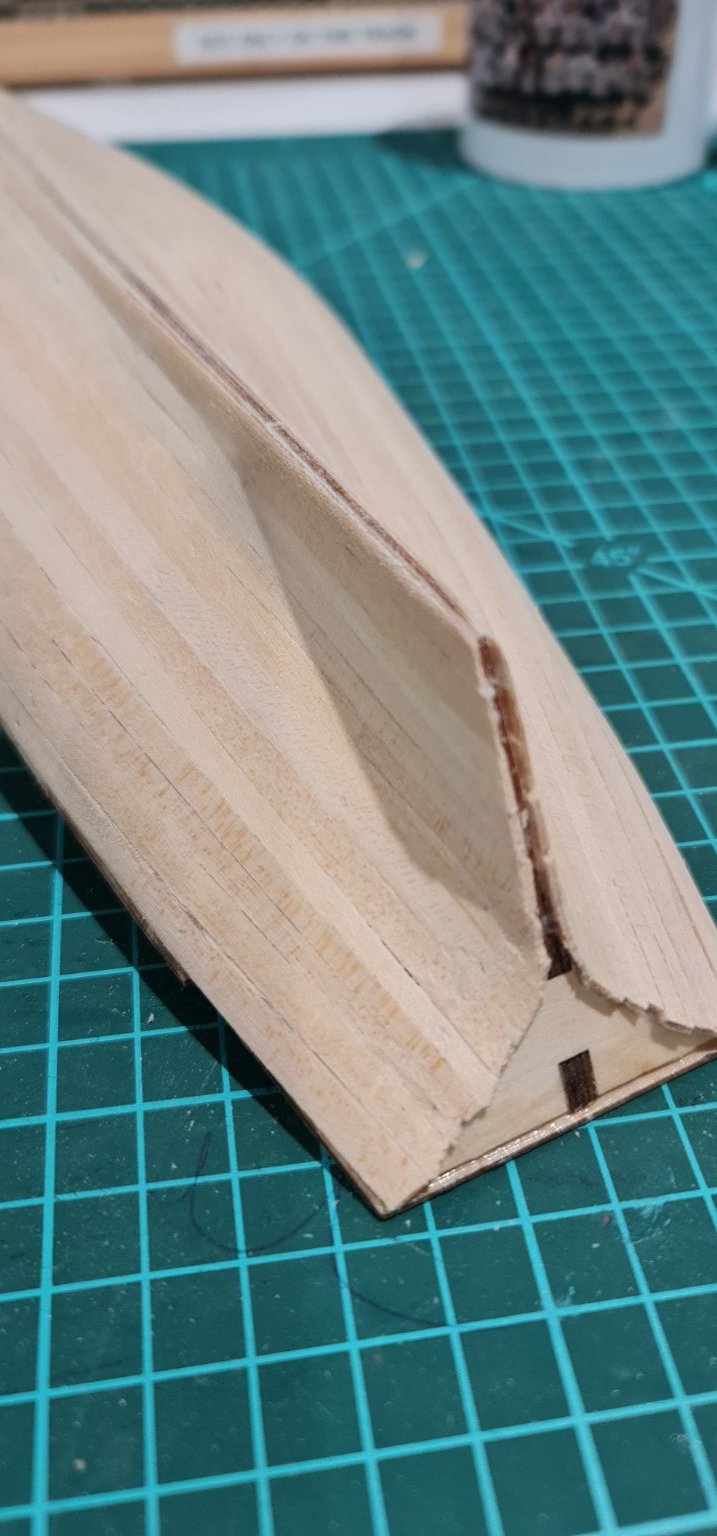
The bulwarks needed trimming on the bottom edge to fit to the top plank, and are also about 10mm too long at the front, so will need shortening. There seems to be a bit about this kit which is make it up as you go along...
- 24 replies
-
- 4
-
-
- swift
- artensia latina
- (and 1 more)
-
I decided to hold off on lining bulwarks until after they were fitted... I just can't see how bending and fitting them will be better when lined. Here is my method of not having to hold it while the glue goes off!

- 24 replies
-
- 2
-
-
- swift
- artensia latina
- (and 1 more)
-
Swallowtail reacted to a post in a topic:
SWIFT 1805 by Jeddahbill - FINISHED - Artesania Latina - 1/50 - Virginia Pilot Boat
-
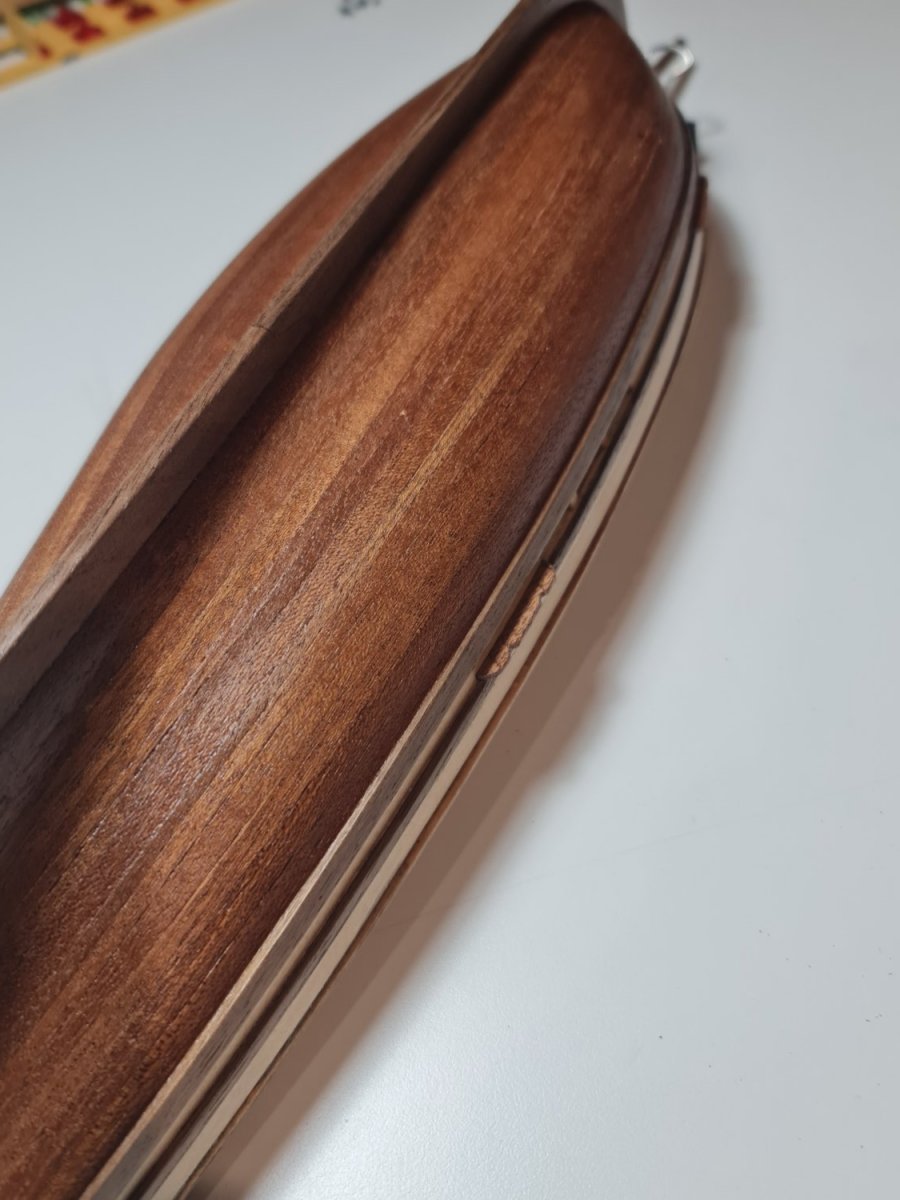
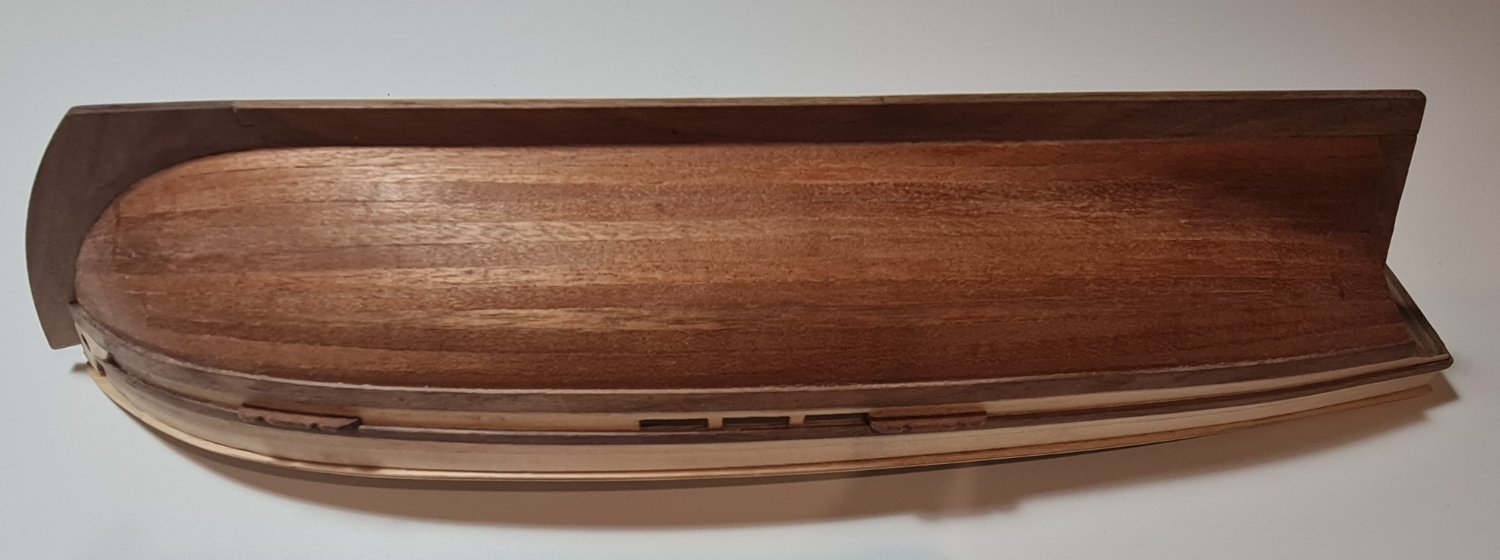
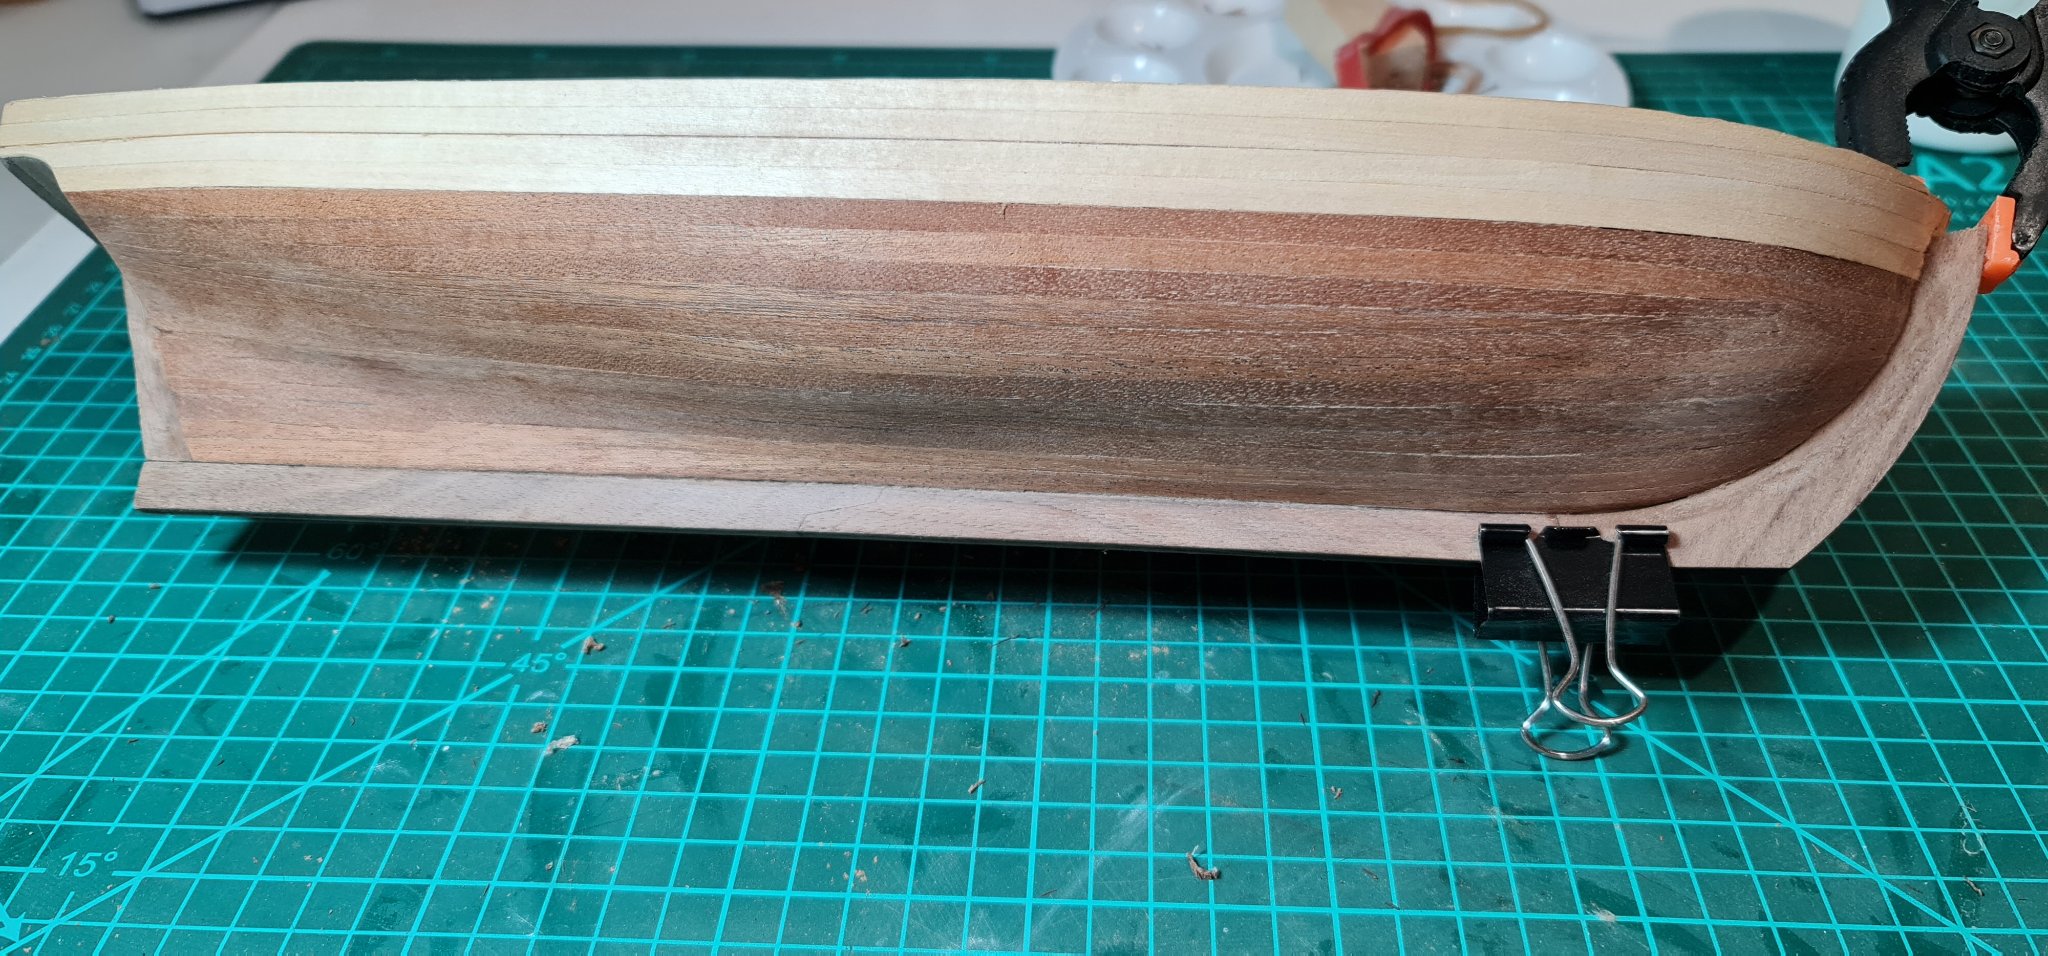
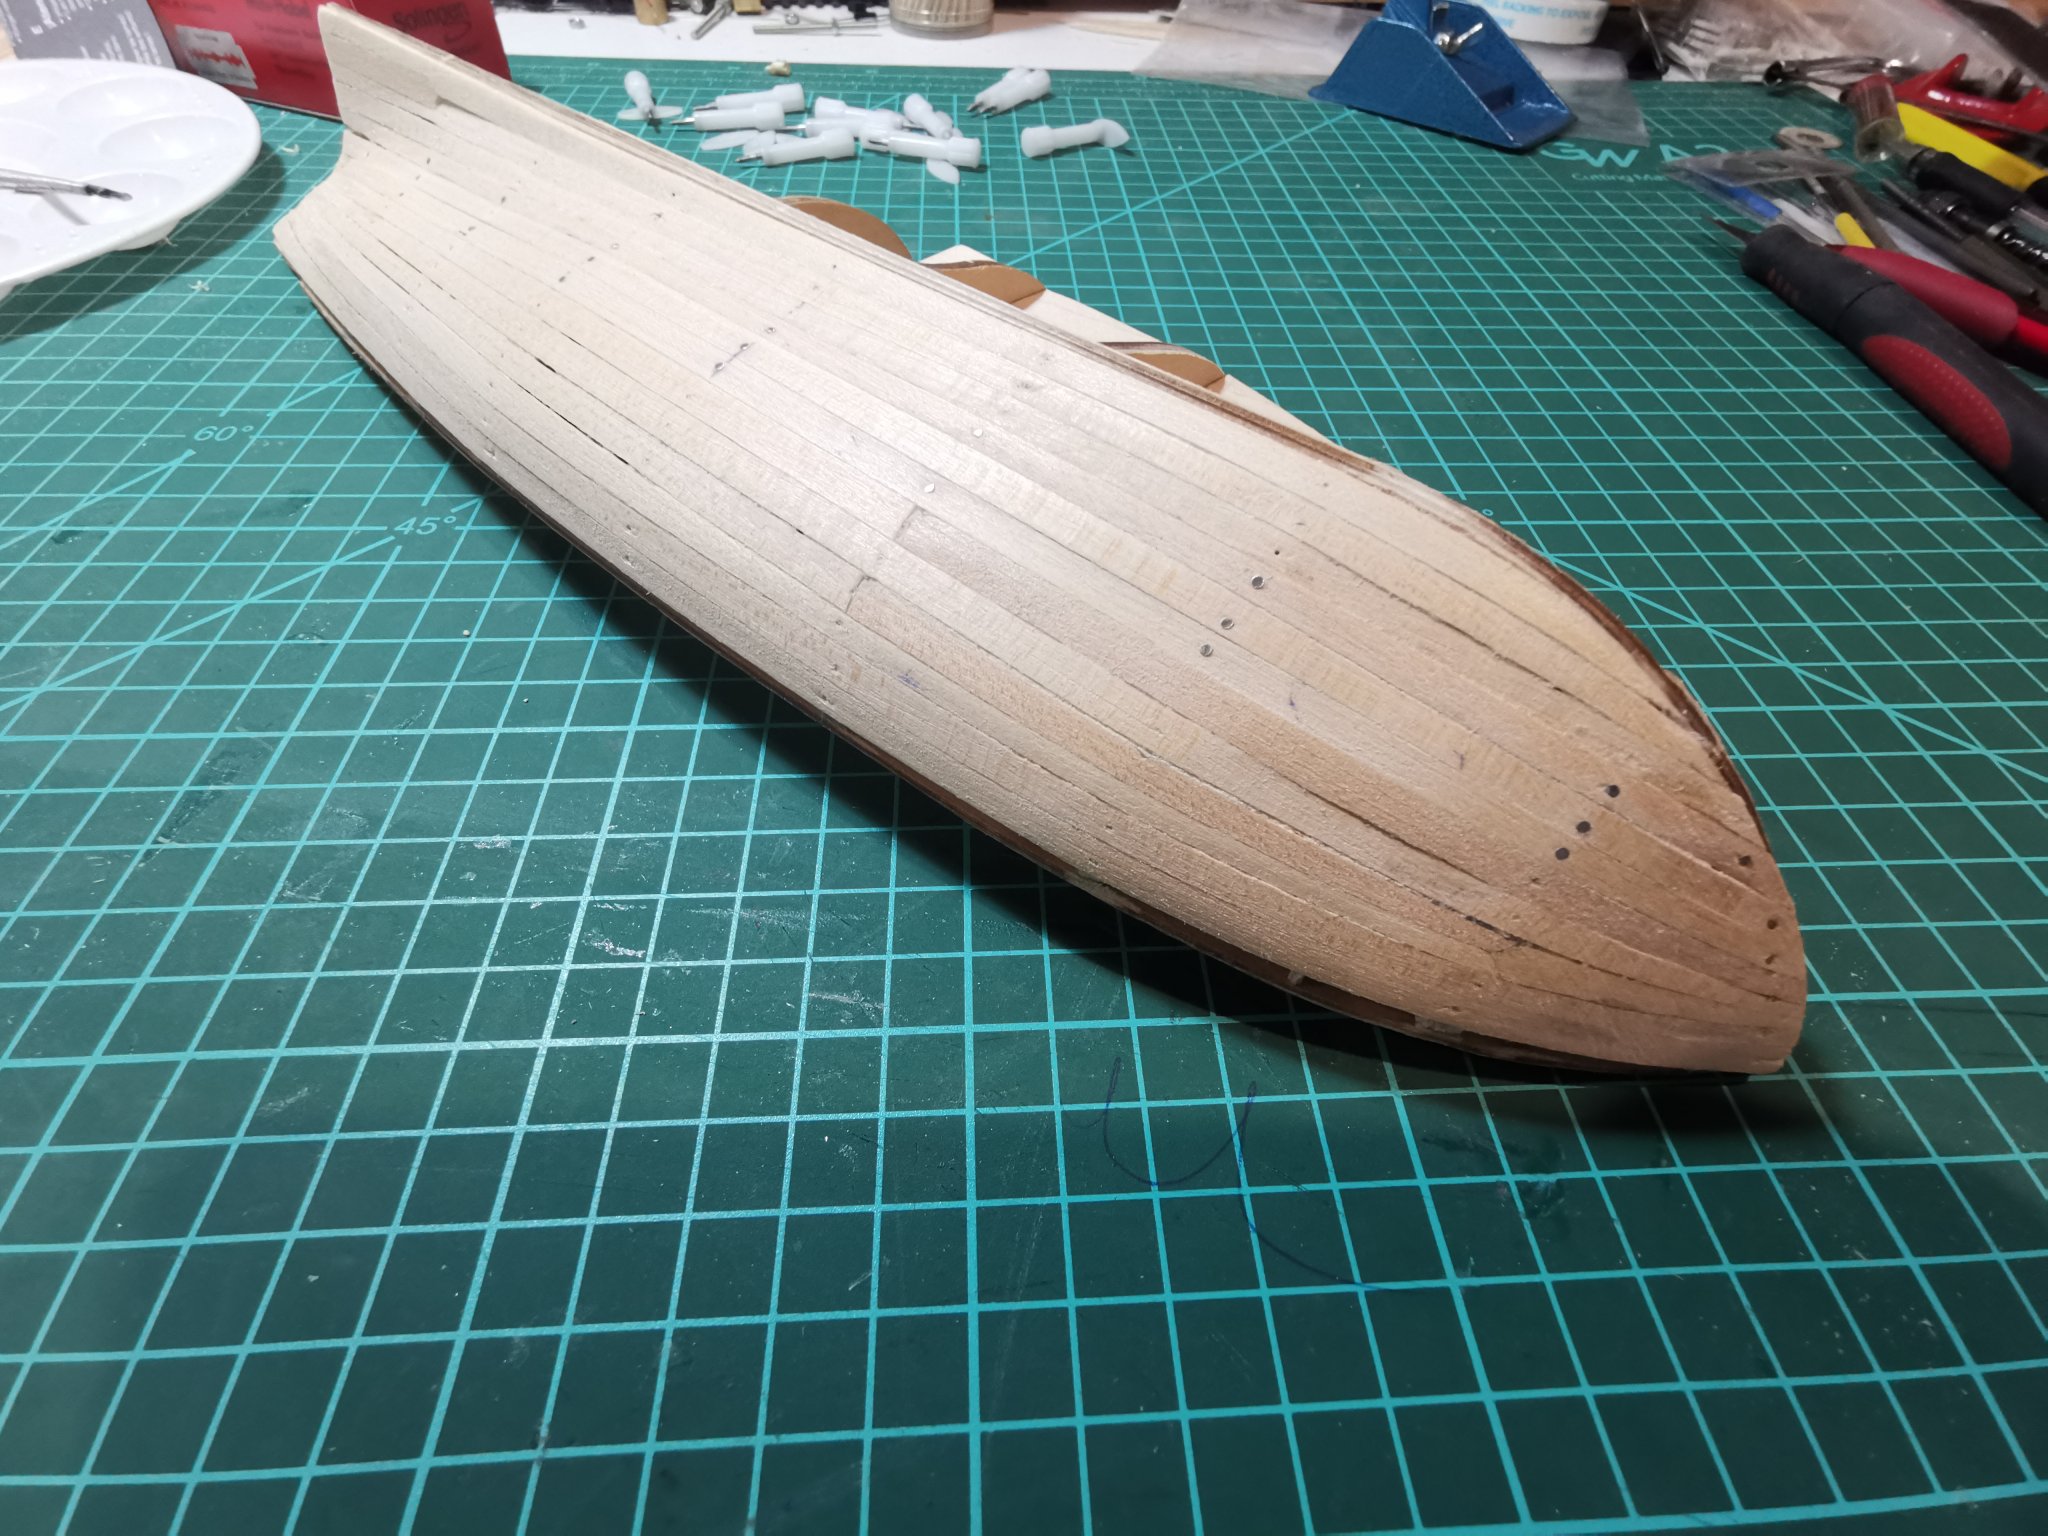
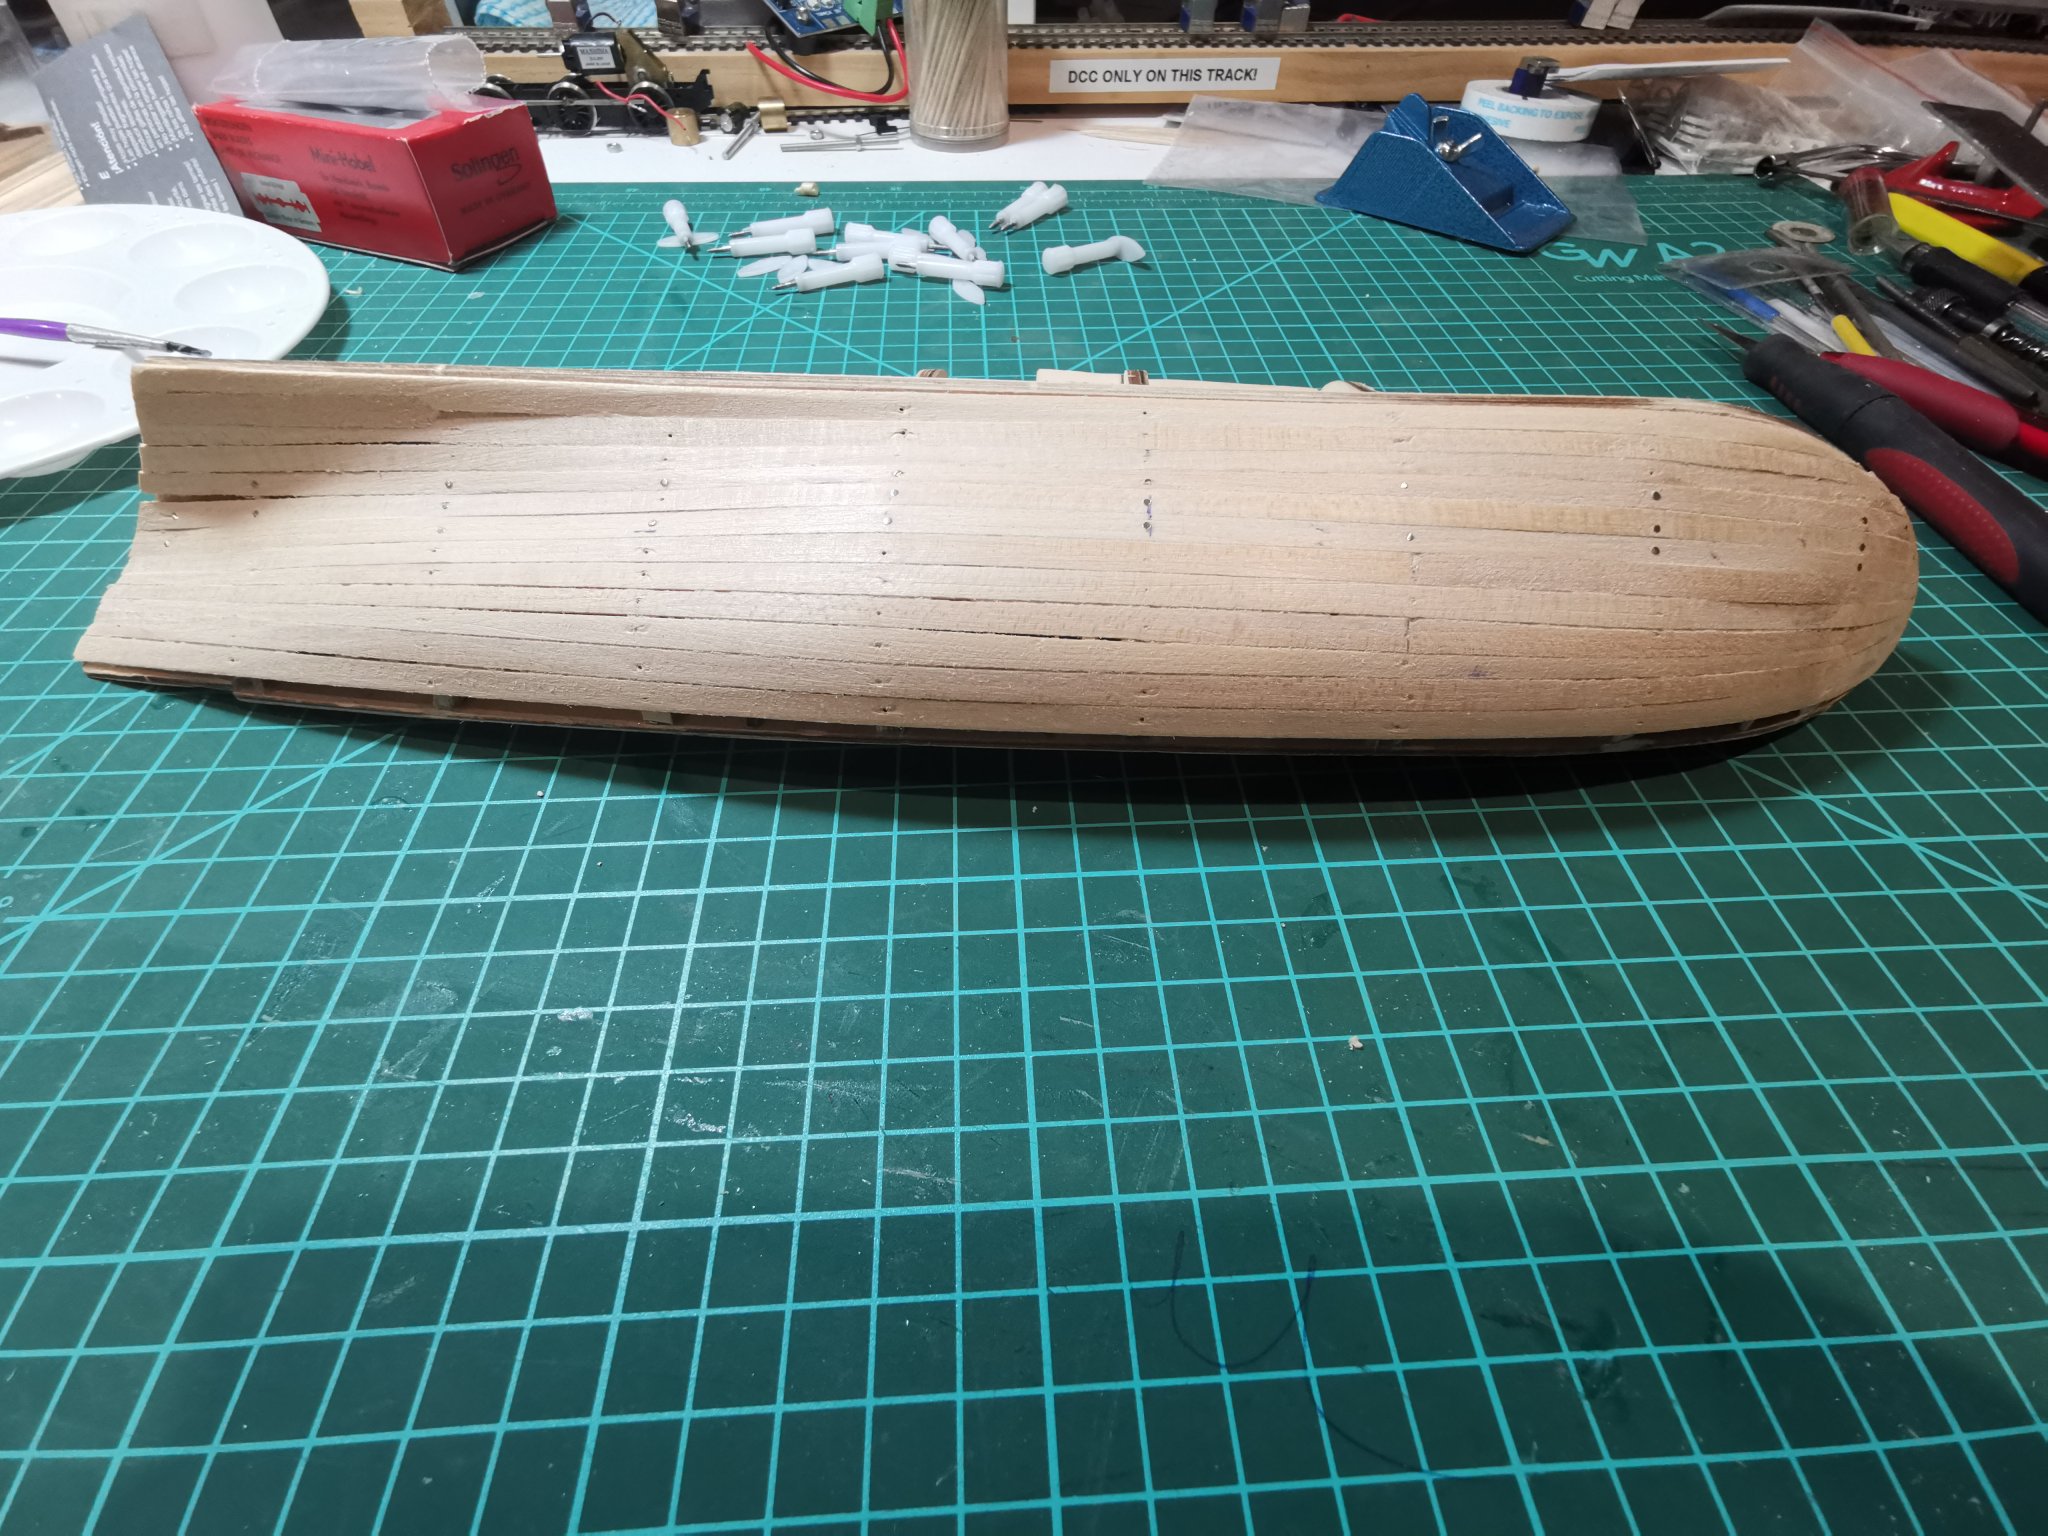
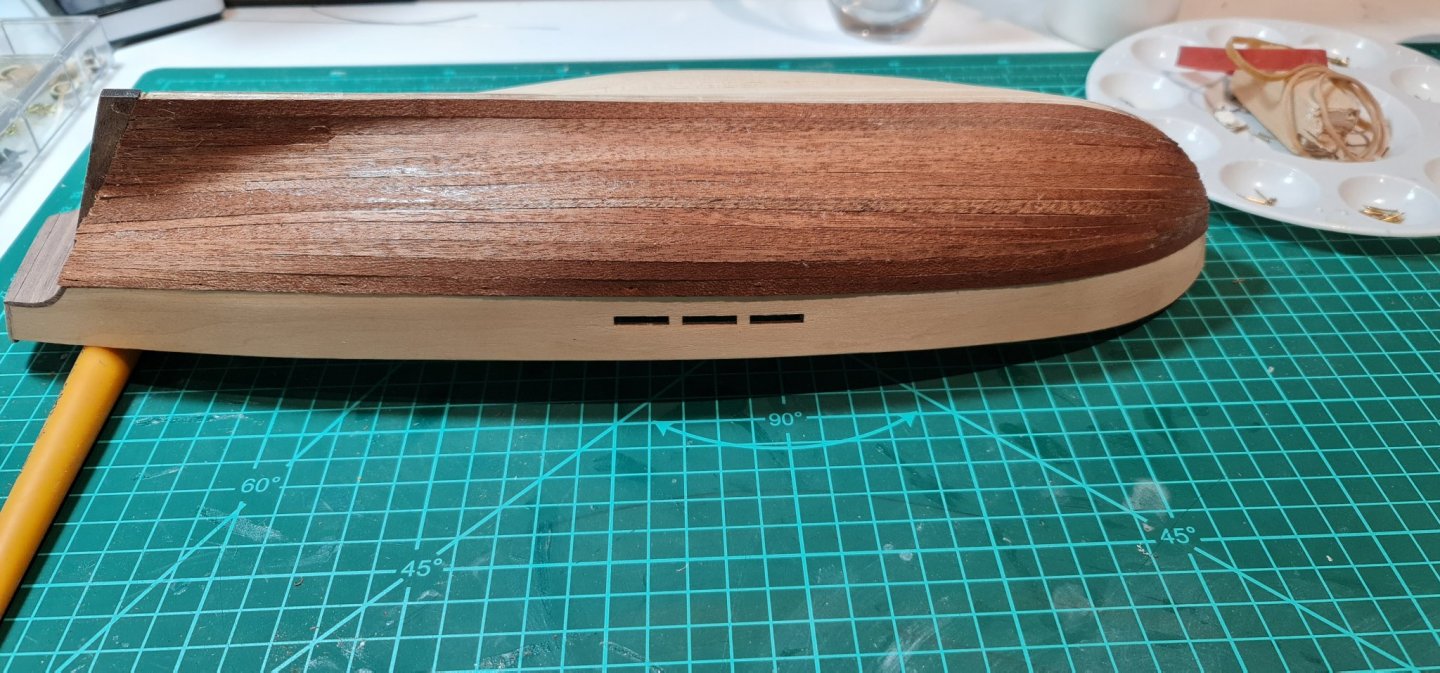
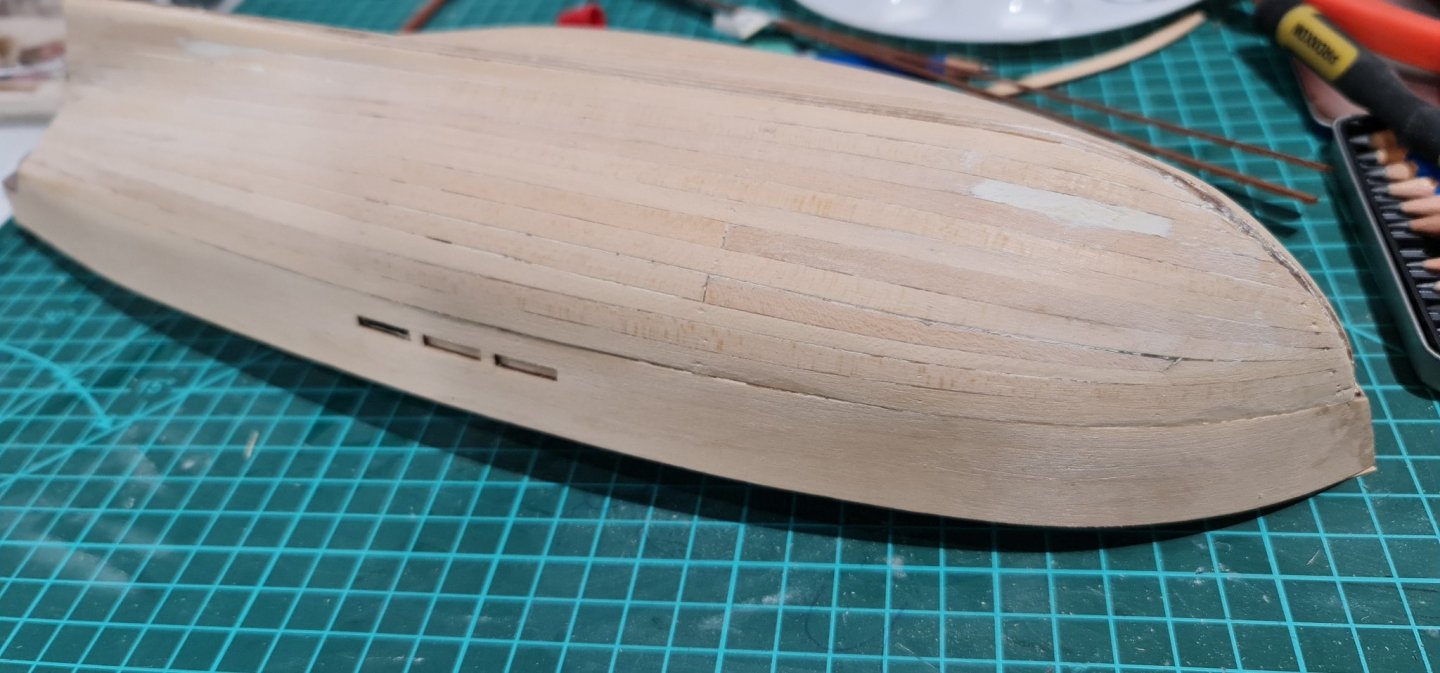
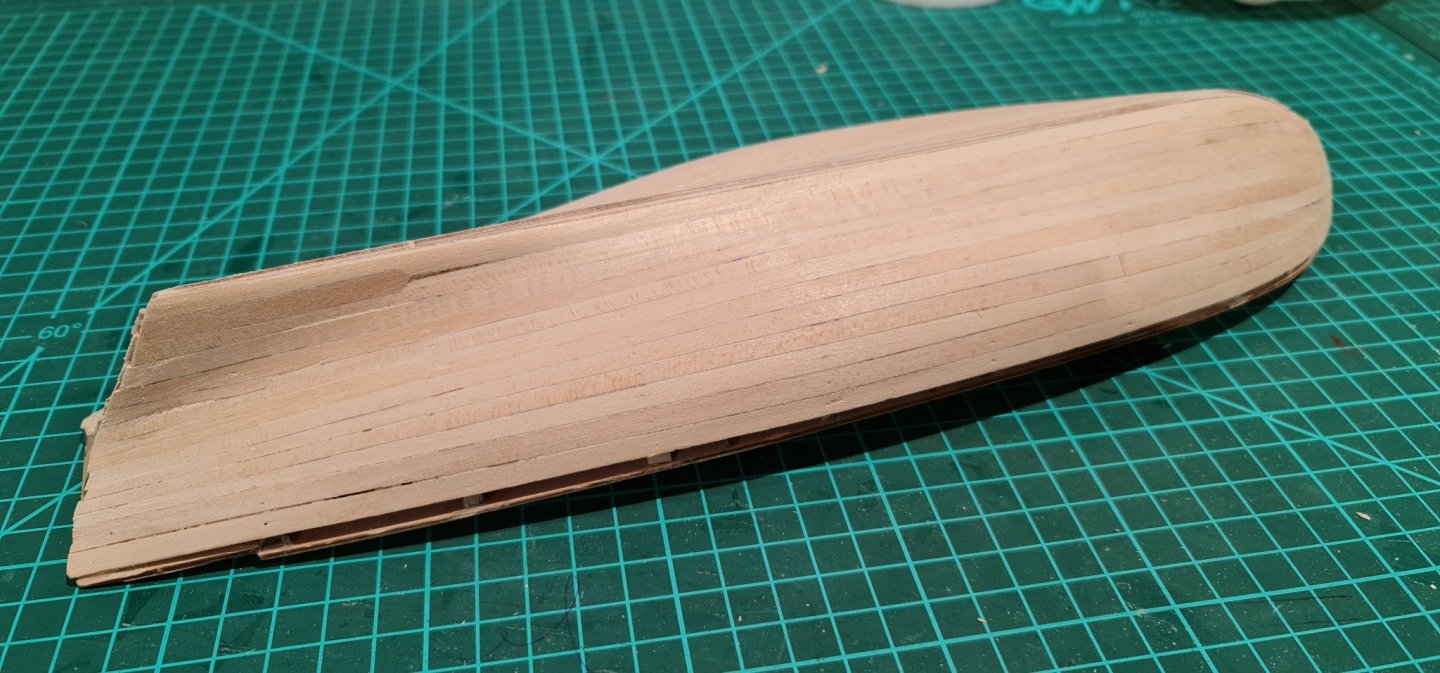
Well aren't holidays great... :) Did the other side this last week, much easier than the first - lessons learnt. Having ends to match and measurements to compare certainly sped things up! Planking is now done, and first sanding roughly complete. There are a couple of low spots to fill and then resand, then on to the next steps!
- 24 replies
-
- 2
-
-
- swift
- artensia latina
- (and 1 more)
-
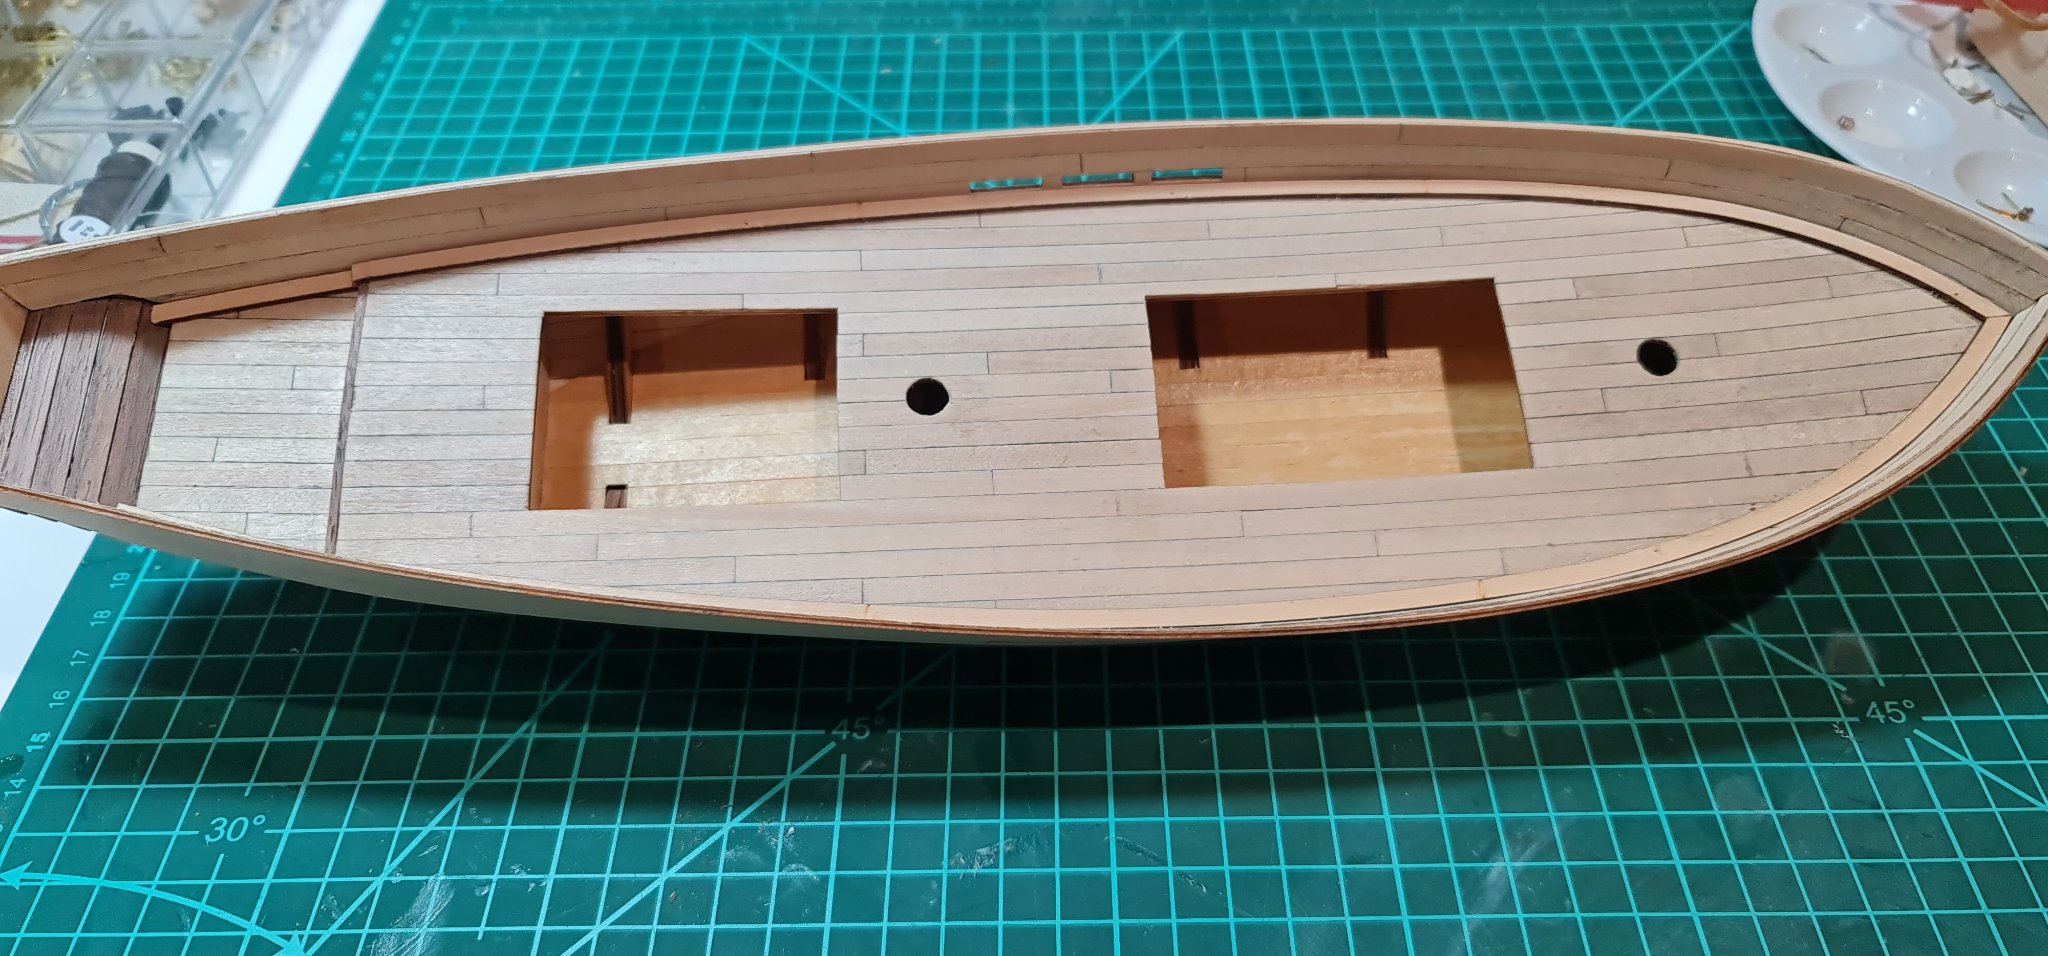
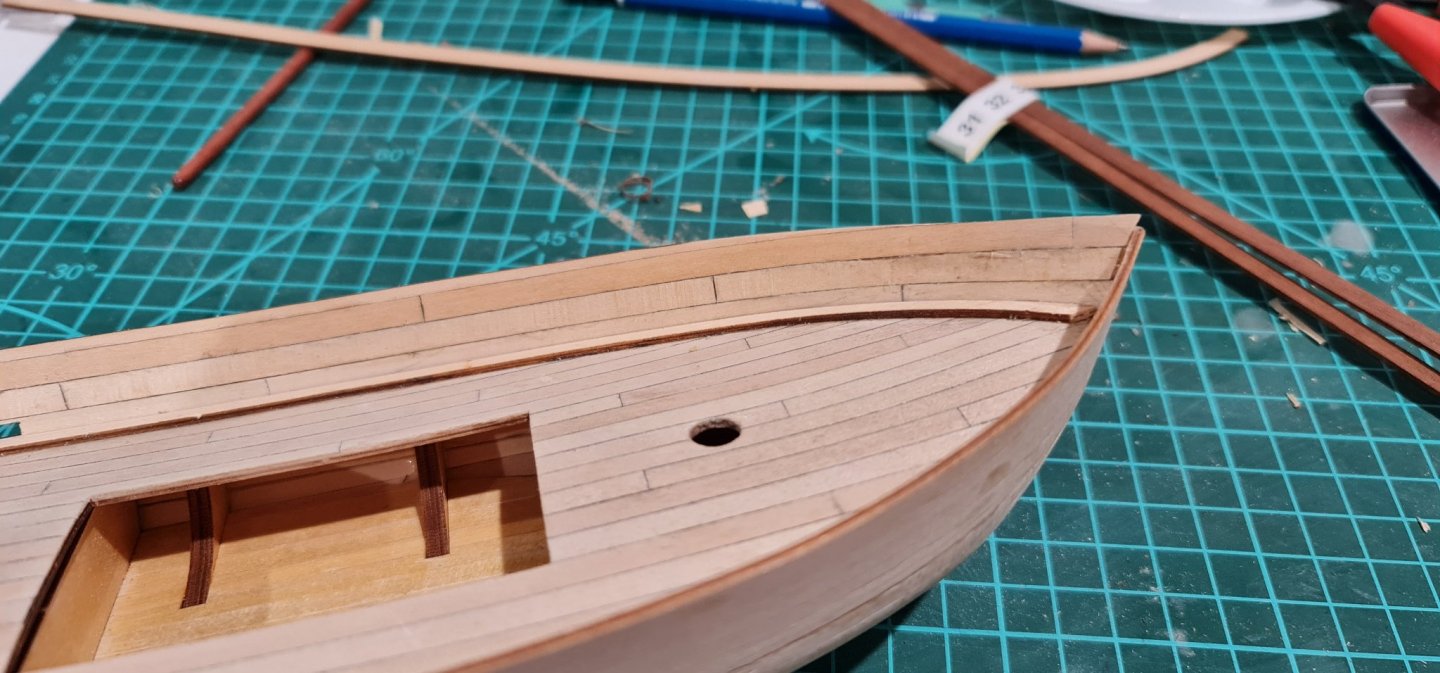
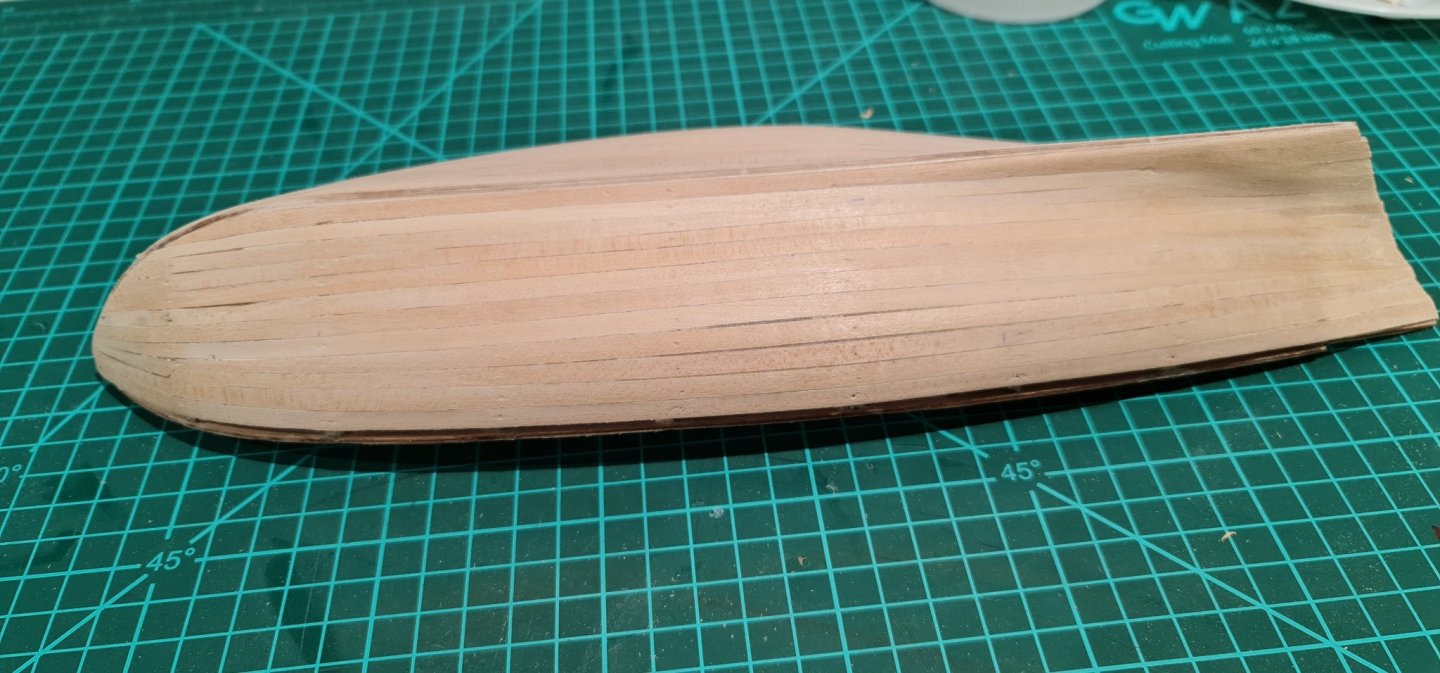
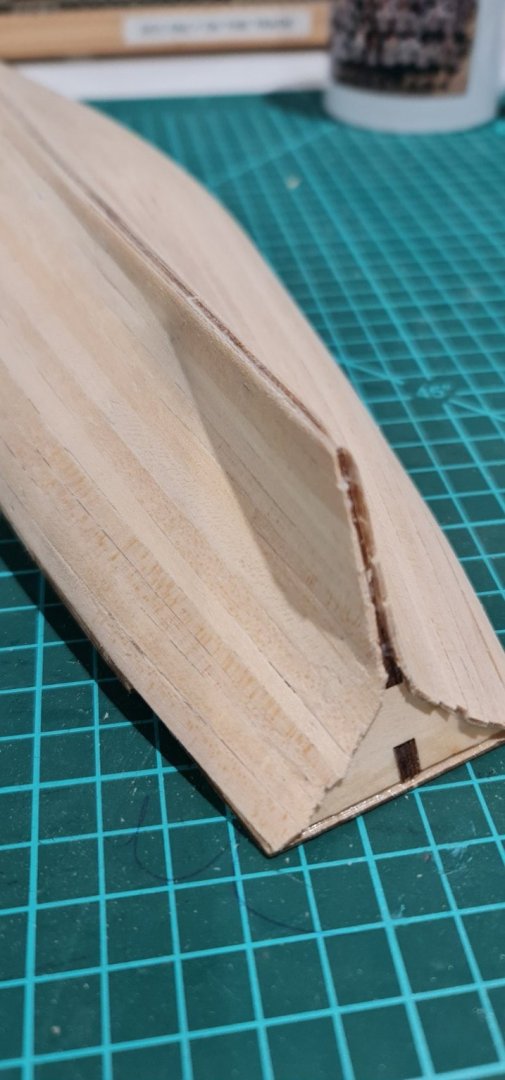
Really pleased with this so far. There is a little unevenness in some planks between bulkheads 1 and 2, but that will be easy fixed. The planking was tricky but I've learned a heap.

- 24 replies
-
- 3
-
-
- swift
- artensia latina
- (and 1 more)