Redshadowrider
-
Posts
301 -
Joined
-
Last visited
-
 Overworked724 reacted to a post in a topic:
US Brig Syren by Redshadowrider - Model Shipways - Scale 1:64 - First wooden ship build
Overworked724 reacted to a post in a topic:
US Brig Syren by Redshadowrider - Model Shipways - Scale 1:64 - First wooden ship build
-
Overworked724 reacted to a post in a topic:
US Brig Syren by Redshadowrider - Model Shipways - Scale 1:64 - First wooden ship build
-
PaddyO reacted to a post in a topic:
US Brig Syren by Redshadowrider - Model Shipways - Scale 1:64 - First wooden ship build
-
PaddyO reacted to a post in a topic:
US Brig Syren by Redshadowrider - Model Shipways - Scale 1:64 - First wooden ship build
-
PaddyO reacted to a post in a topic:
US Brig Syren by Redshadowrider - Model Shipways - Scale 1:64 - First wooden ship build
-
PaddyO reacted to a post in a topic:
US Brig Syren by Redshadowrider - Model Shipways - Scale 1:64 - First wooden ship build
-
PaddyO reacted to a post in a topic:
US Brig Syren by Redshadowrider - Model Shipways - Scale 1:64 - First wooden ship build
-
PaddyO reacted to a post in a topic:
US Brig Syren by Redshadowrider - Model Shipways - Scale 1:64 - First wooden ship build
-
PaddyO reacted to a post in a topic:
US Brig Syren by Redshadowrider - Model Shipways - Scale 1:64 - First wooden ship build
-
PaddyO reacted to a post in a topic:
US Brig Syren by Redshadowrider - Model Shipways - Scale 1:64 - First wooden ship build
-
Very Sorry…. We all know how plans/goals can be undone by real life and that is what happened here. Not only did the heat hold on what seemed like forever, health issues put a damper on most everything. My Admiral of 44 years got the big ‘C’ diagnosis earlier this Summer. Full attention was redirected to testing, 3 surgeries, and a final diagnosis in September that it had been beaten. Rechecking will be the rule from here on, but good news nonetheless. So, with that, I will, once again be working and posting here. I hope, you will, once again, follow along.👍
- 436 replies
-
- 4
-
-
- Syren
- Model Shipways
- (and 1 more)
-
Gammoning & Bumpkins…. Despite the continuing heat, we had a few days where I could get some work done on the Syren. I have been able to complete the bumpkins, including the mounting brackets. I tried the copper strips folded over, but I ended up using some card stock. The gammoning turned out to be easier than I expected, but ‘easier’ is very relative. To complete the gammoning I did make a small hook out of a RC control rod so that feeding the line would be easier.
- 436 replies
-
- 8
-
-
- Syren
- Model Shipways
- (and 1 more)
-
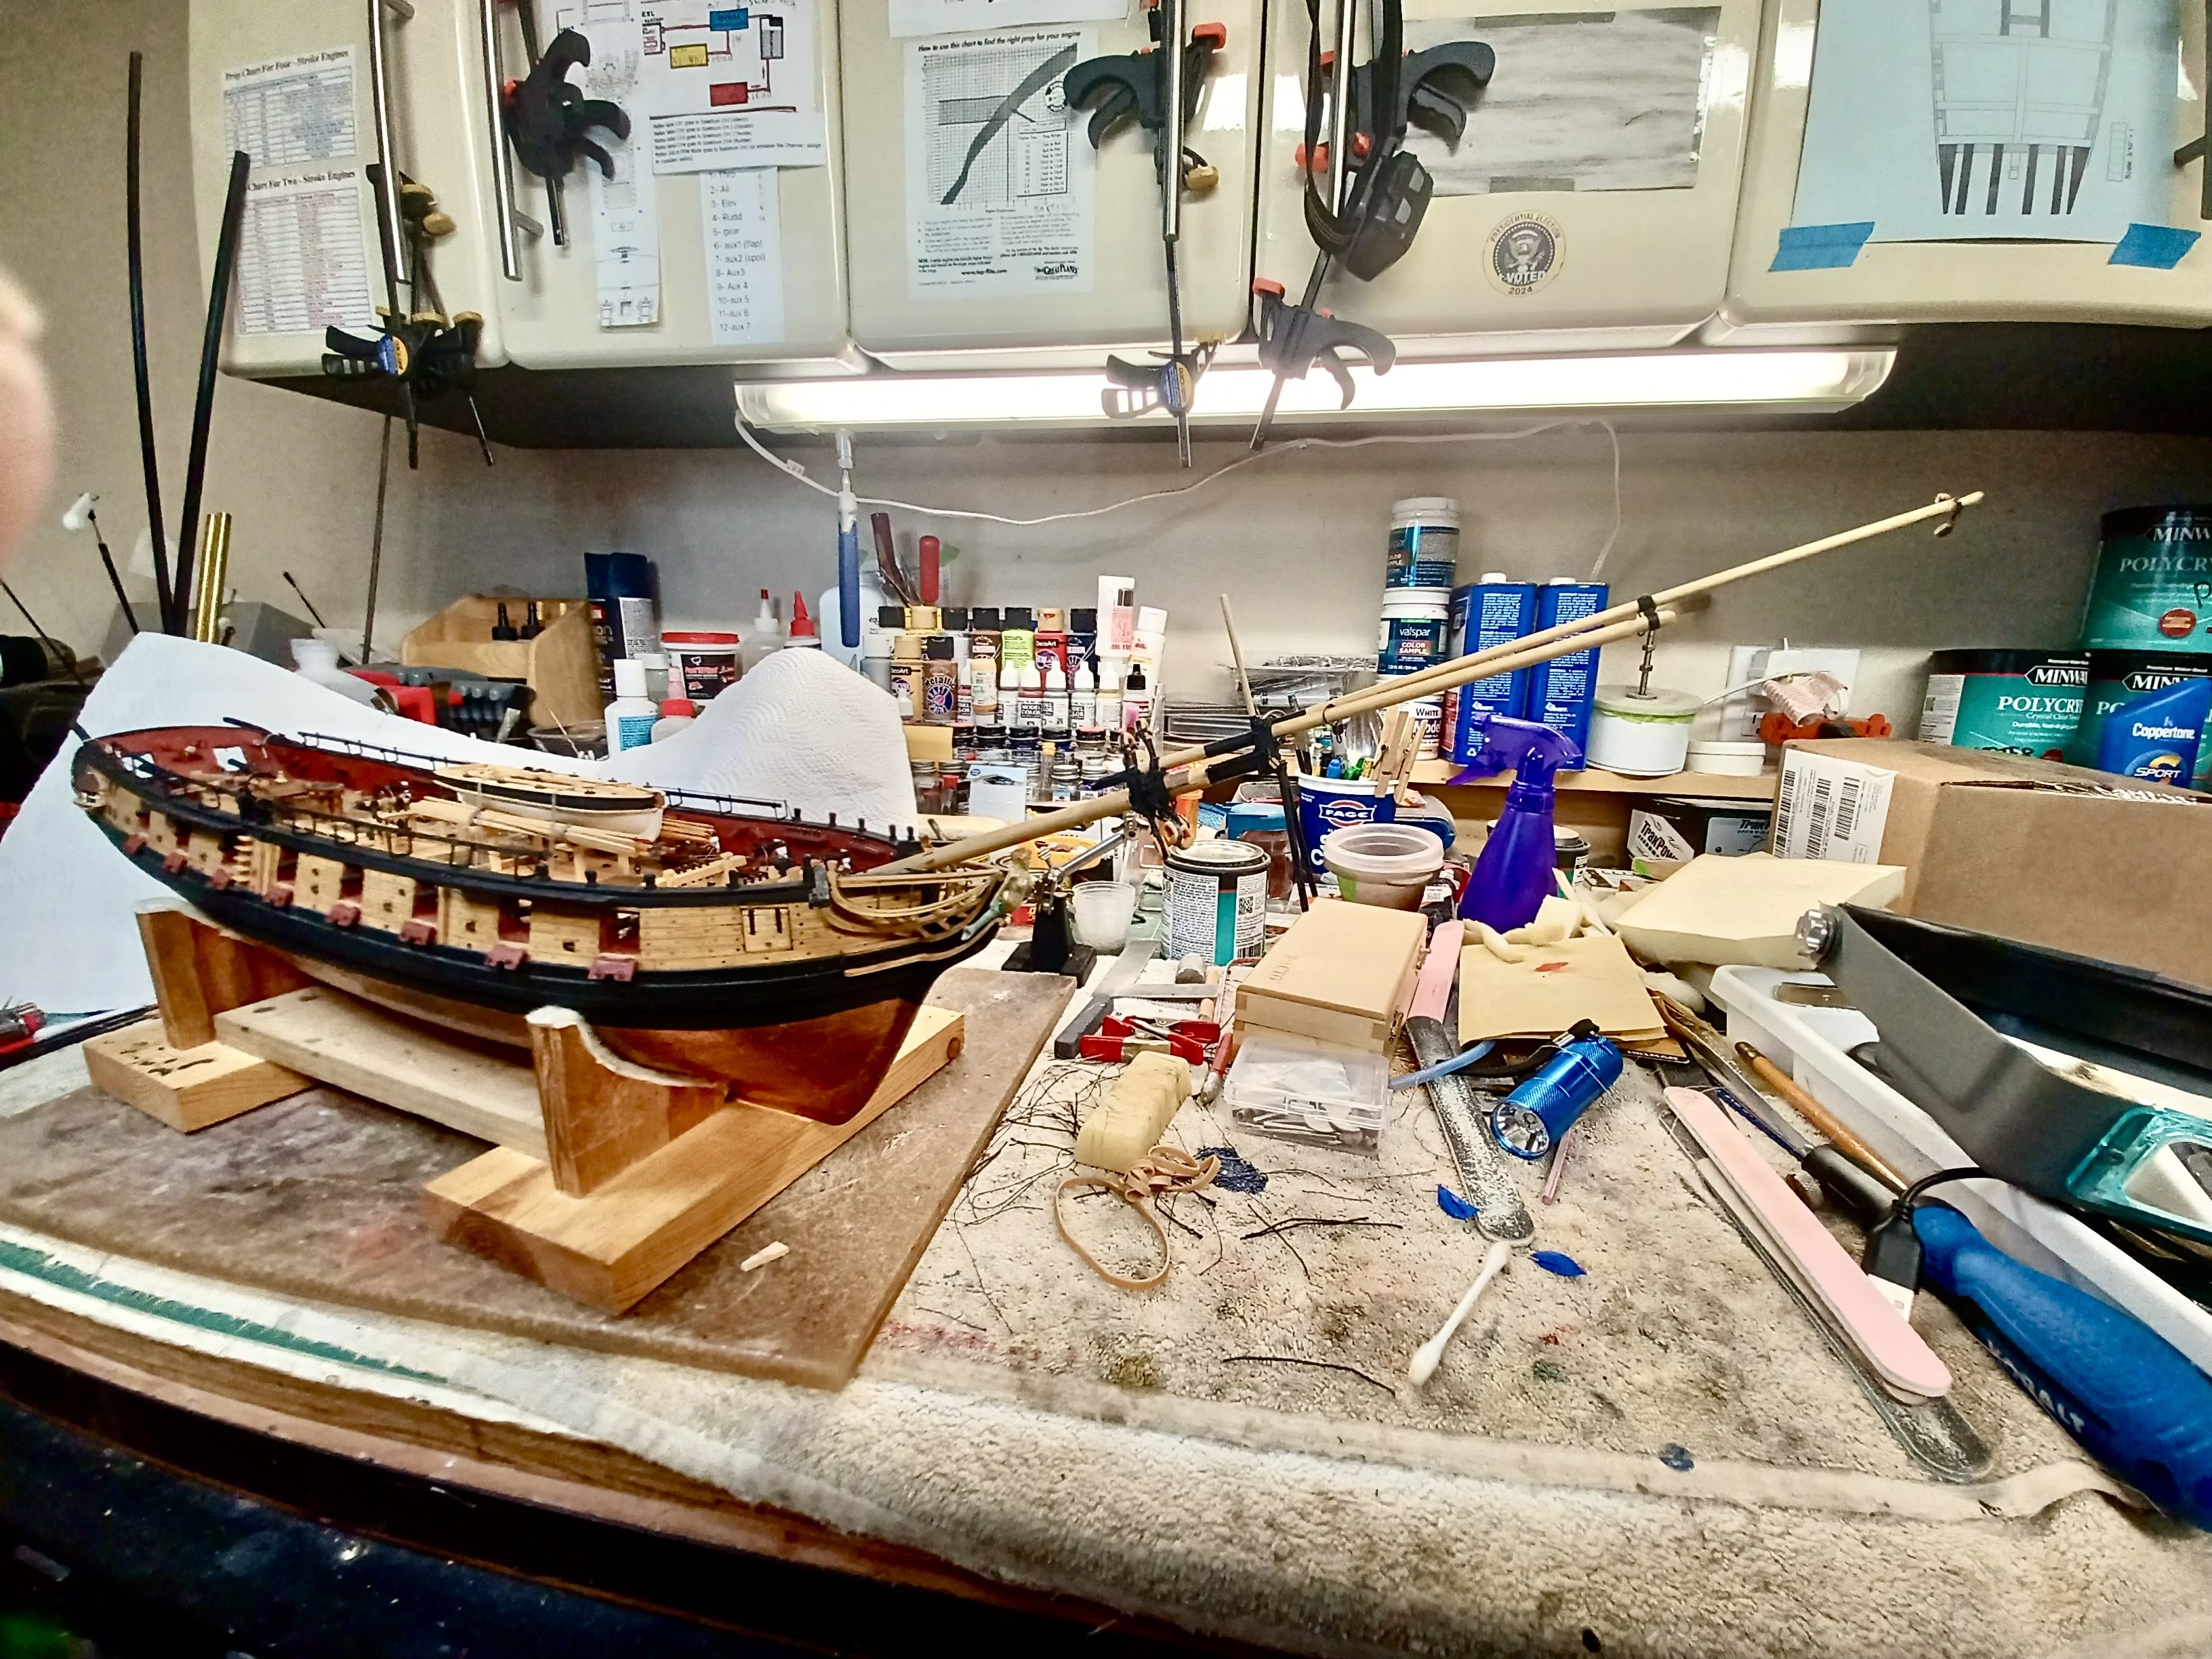
Sorry folks…heat index has been between 100-110 degrees F. I am ready to continue rigging the bowsprit and will do so when it cools down a little.
- 436 replies
-
- 2
-
-
- Syren
- Model Shipways
- (and 1 more)
-
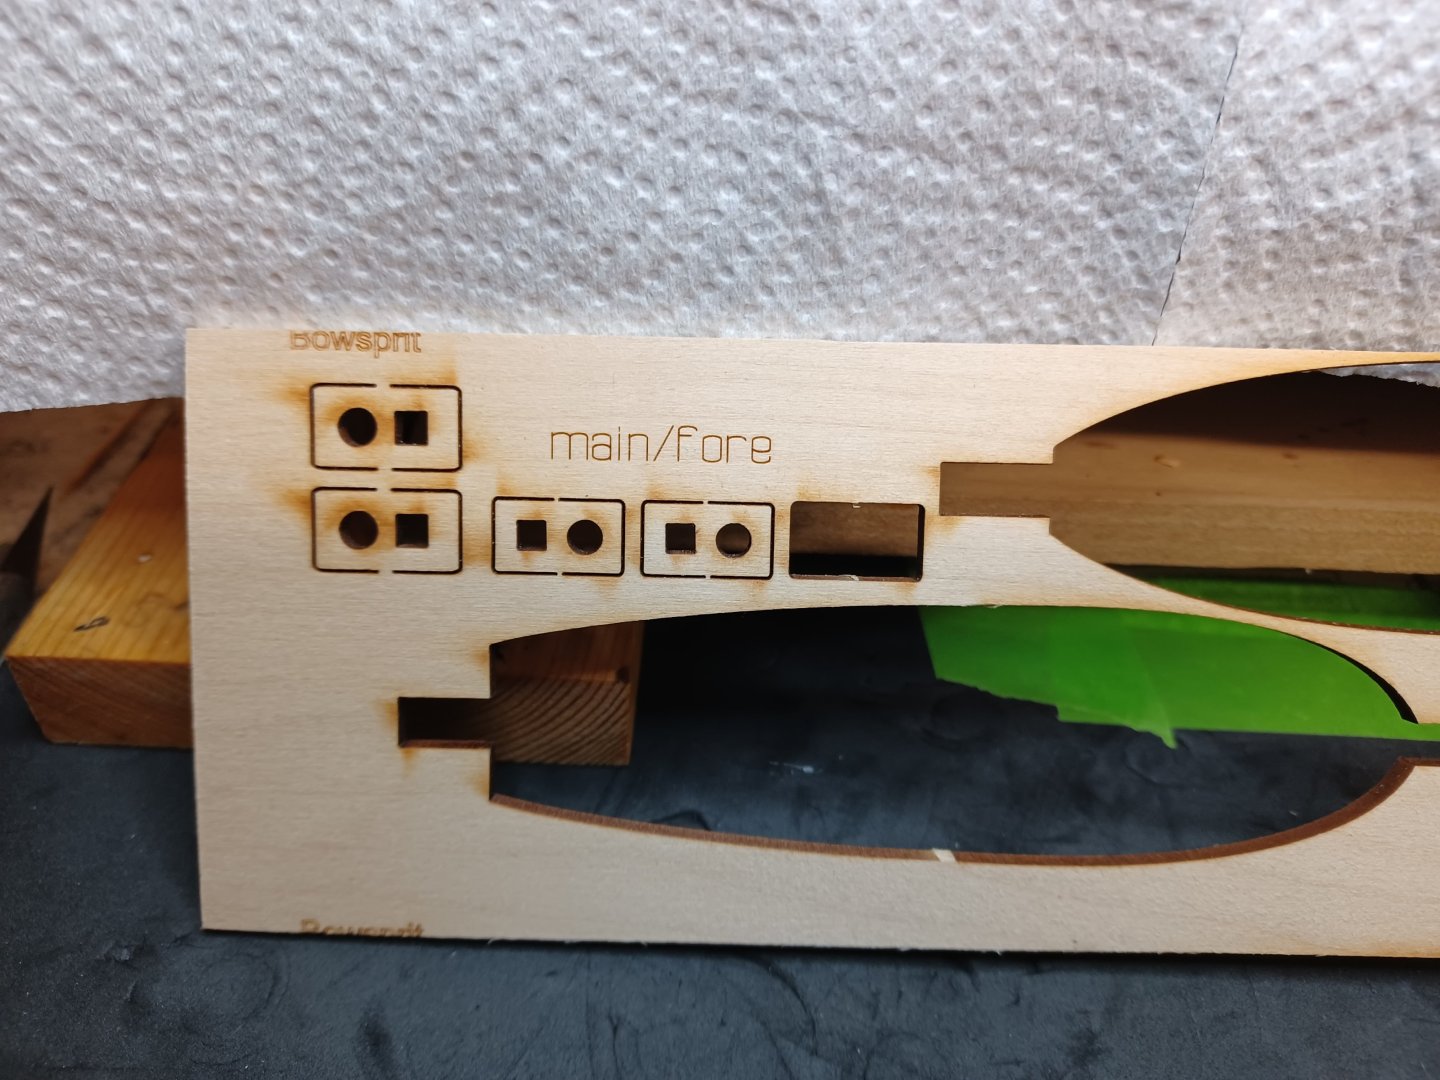
Newbie Note: What’s wrong with this picture? Give up?😁 Well, it’s a mistake I found by looking for something else. When I selected the part for the bowsprit cap, I used a part for the mast. It really didn’t make much difference, except for the room for mounting the jack staff and the wire brackets on the jib boom. There really isn’t much size difference between the two parts, but the bowsprit cap is just a tiny bit larger. The square and round holes on both parts are the same size, but the surrounding wood is wider by a hair. Just a reminder to watch your part selection.
- 436 replies
-
- 3
-
-
- Syren
- Model Shipways
- (and 1 more)
-
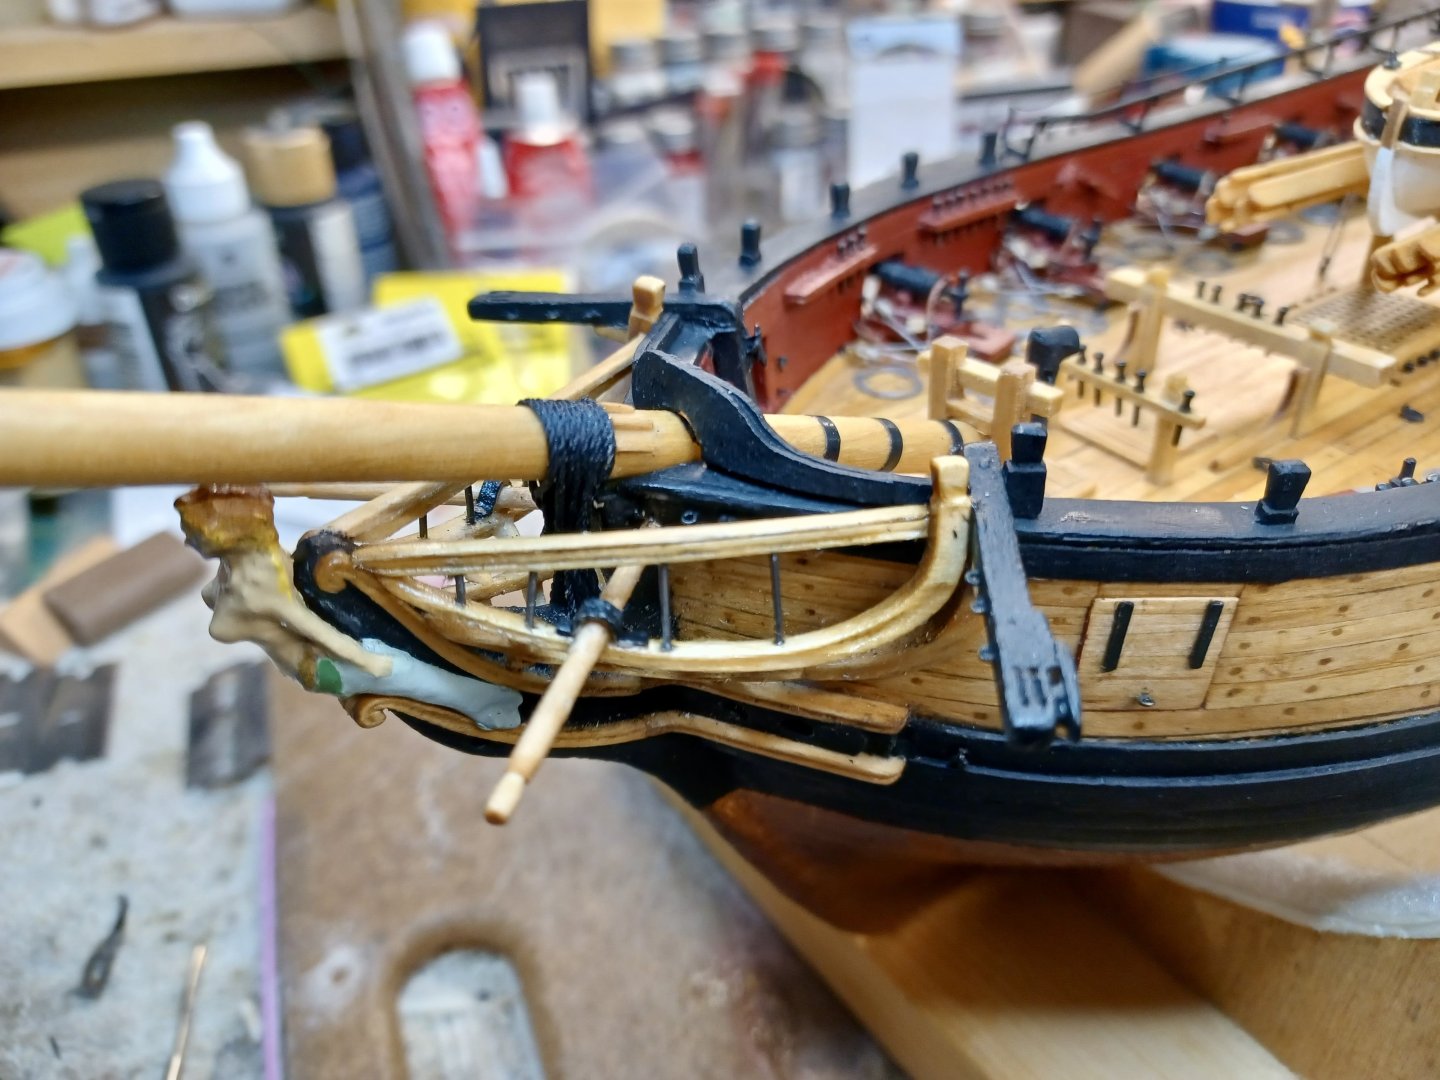
Thank you, @Dr PR After I completed the installs, I did think about how I could have done it differently. However, after, doesn’t help much to resolve the issue. Since the rigging is black, it is difficult to see how crowded it really is. The only thing I am wondering about is if the closed hearts are in a good position for attaching the follow on rigging. If not, I can see me redoing the whole section. That, however, will be a last resort. I can see me doubling up the closed hearts to conserve space. Thanks again for your comments and pictures.
-
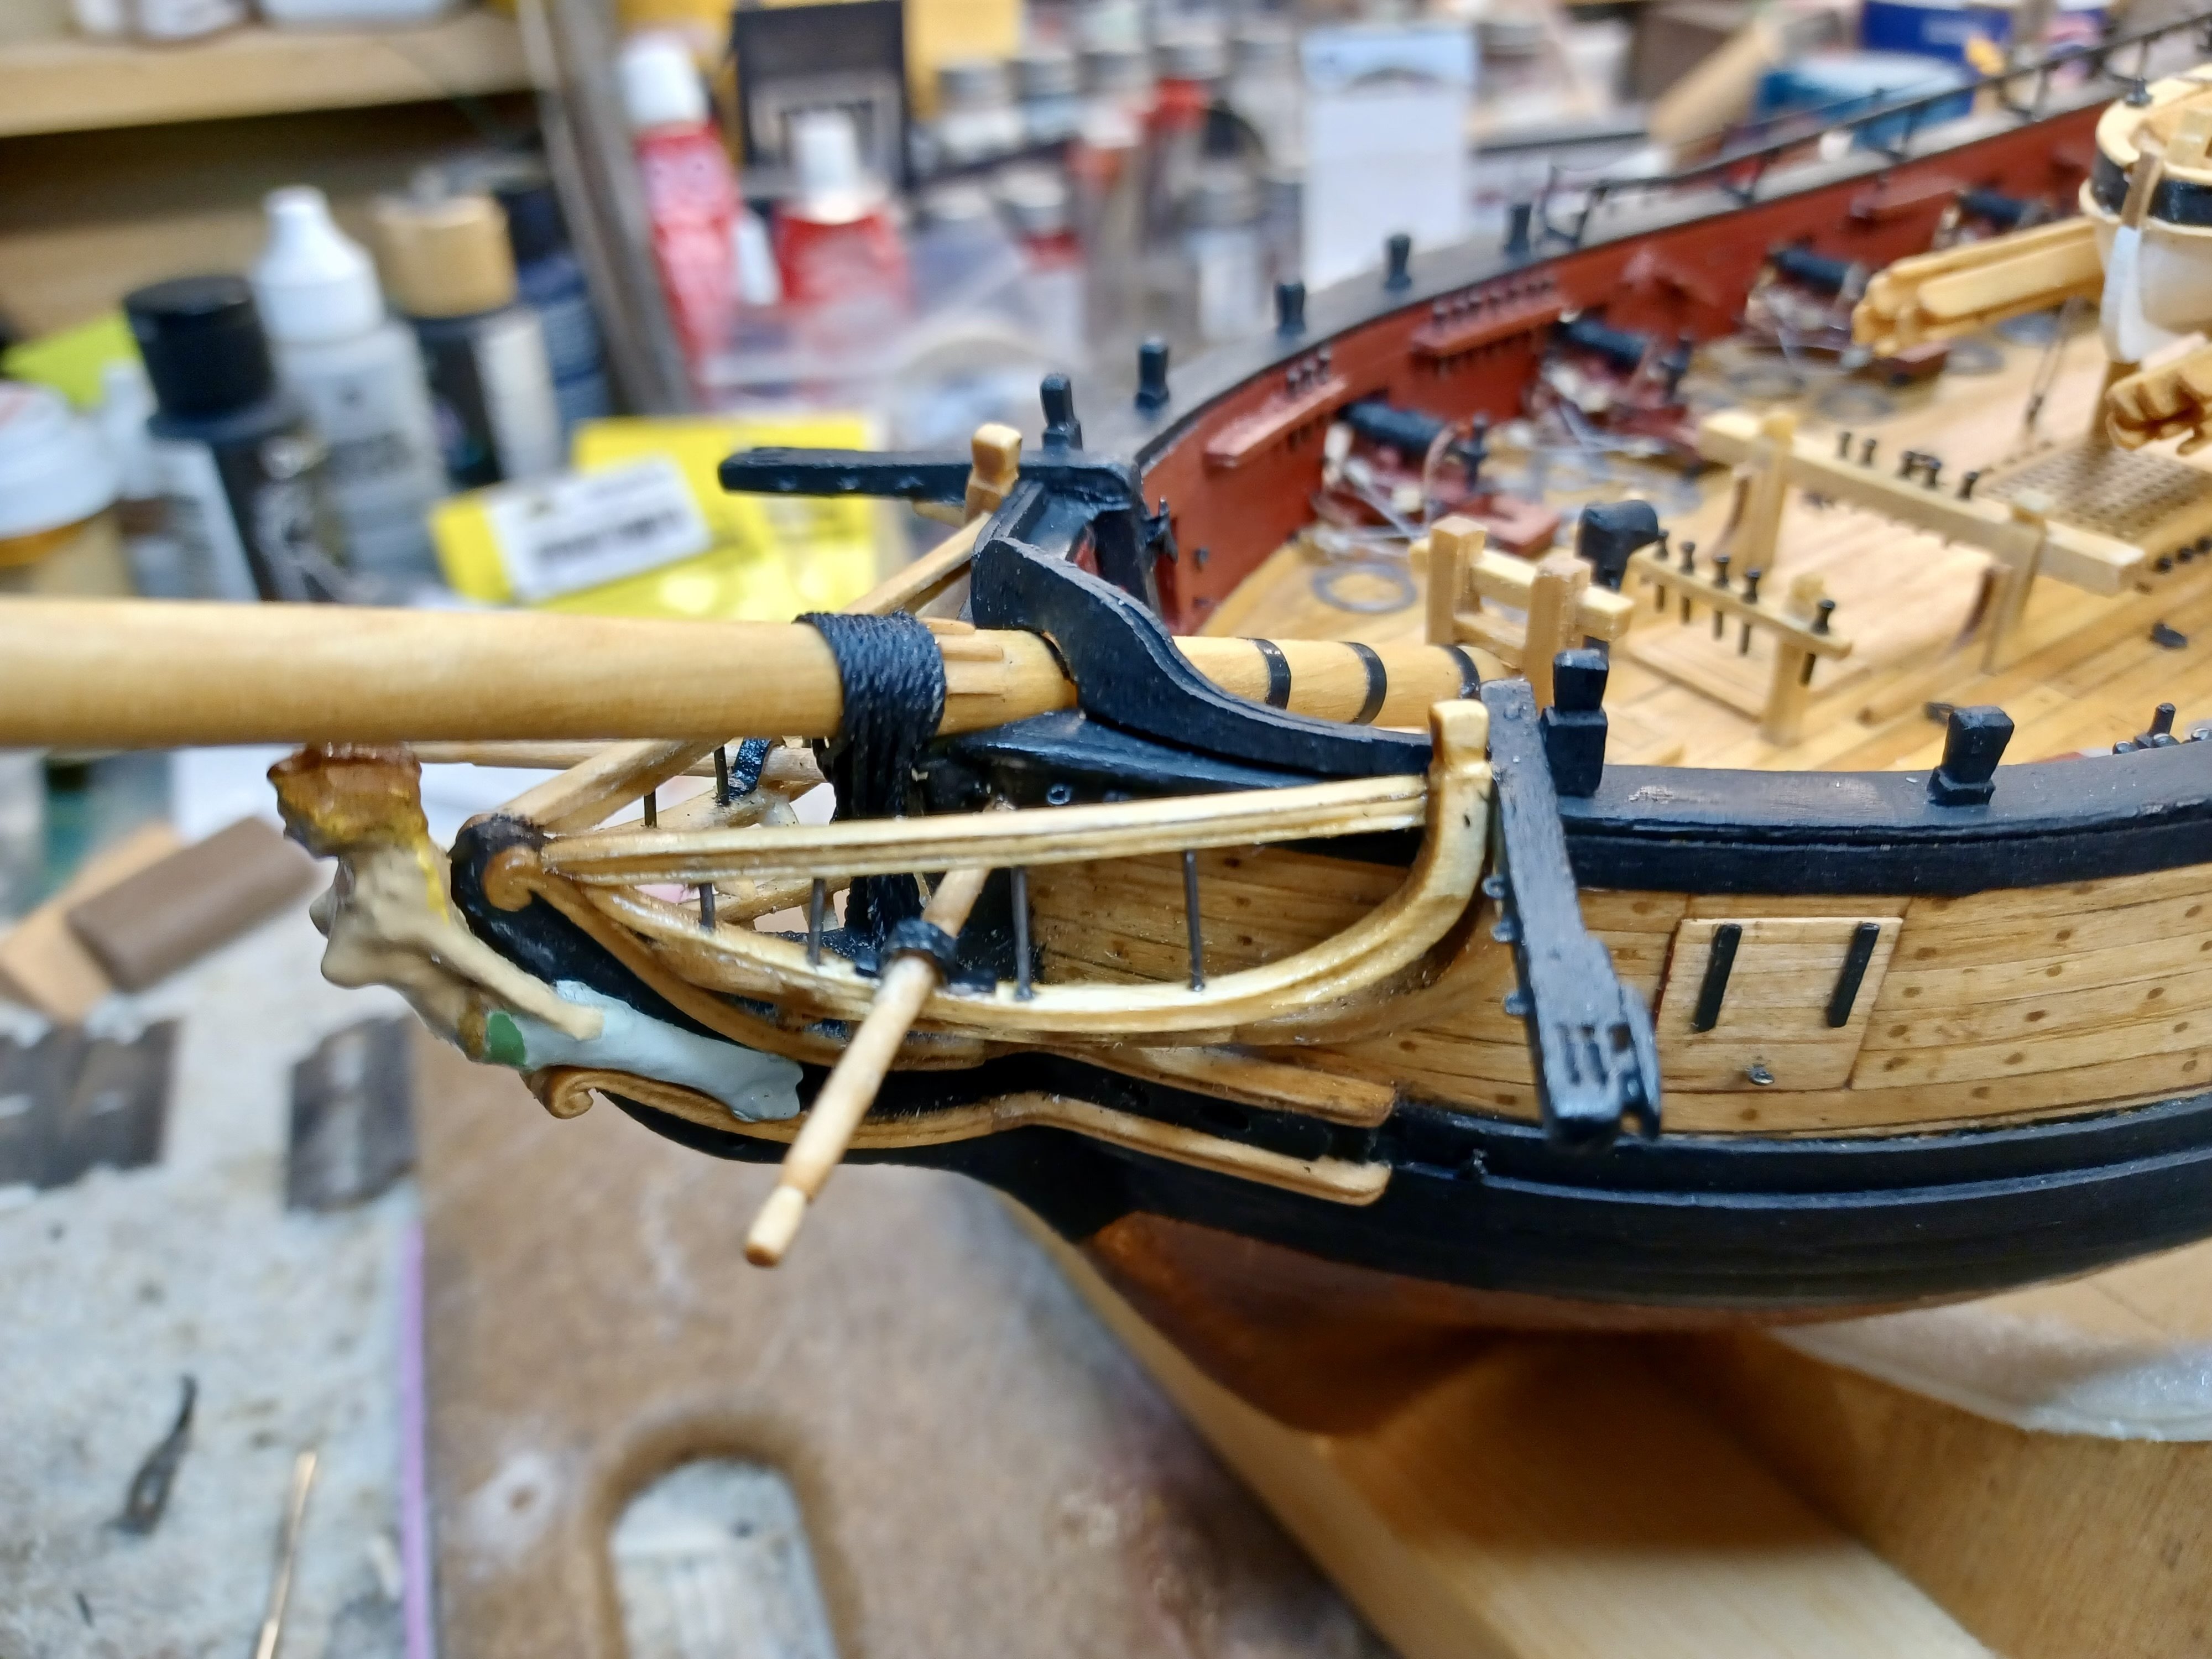
@PaddyO Thank you for the comments as they are appreciated. It’s exactly what I was hoping for when I started it. This is my very first build, and I find that many steps can be organized in a different order, and some I have yet to completed. I.E. I still have the netting to complete on the fire rails and the bumpkins are next on my list. On this step I found that rigging the open hearts and bobstays very difficult. Not because of the actual steps, but the space where the rigging attached under the jib boom. If I had to do it over, I would put some thought into doing it differently. I think the pictures showing before installation showed that I didn’t build them too big. I have measured all placements with dividers so everything is placed correctly. Unfortunately, this step is not very detailed in the manual or on the plans. If I was to do it over, I would reduce the line sizes to conserve space. Or, I would connect starboard and port lines differently. Here is a picture of the bowsprit glued in.

- 436 replies
-
- 3
-
-
- Syren
- Model Shipways
- (and 1 more)
-
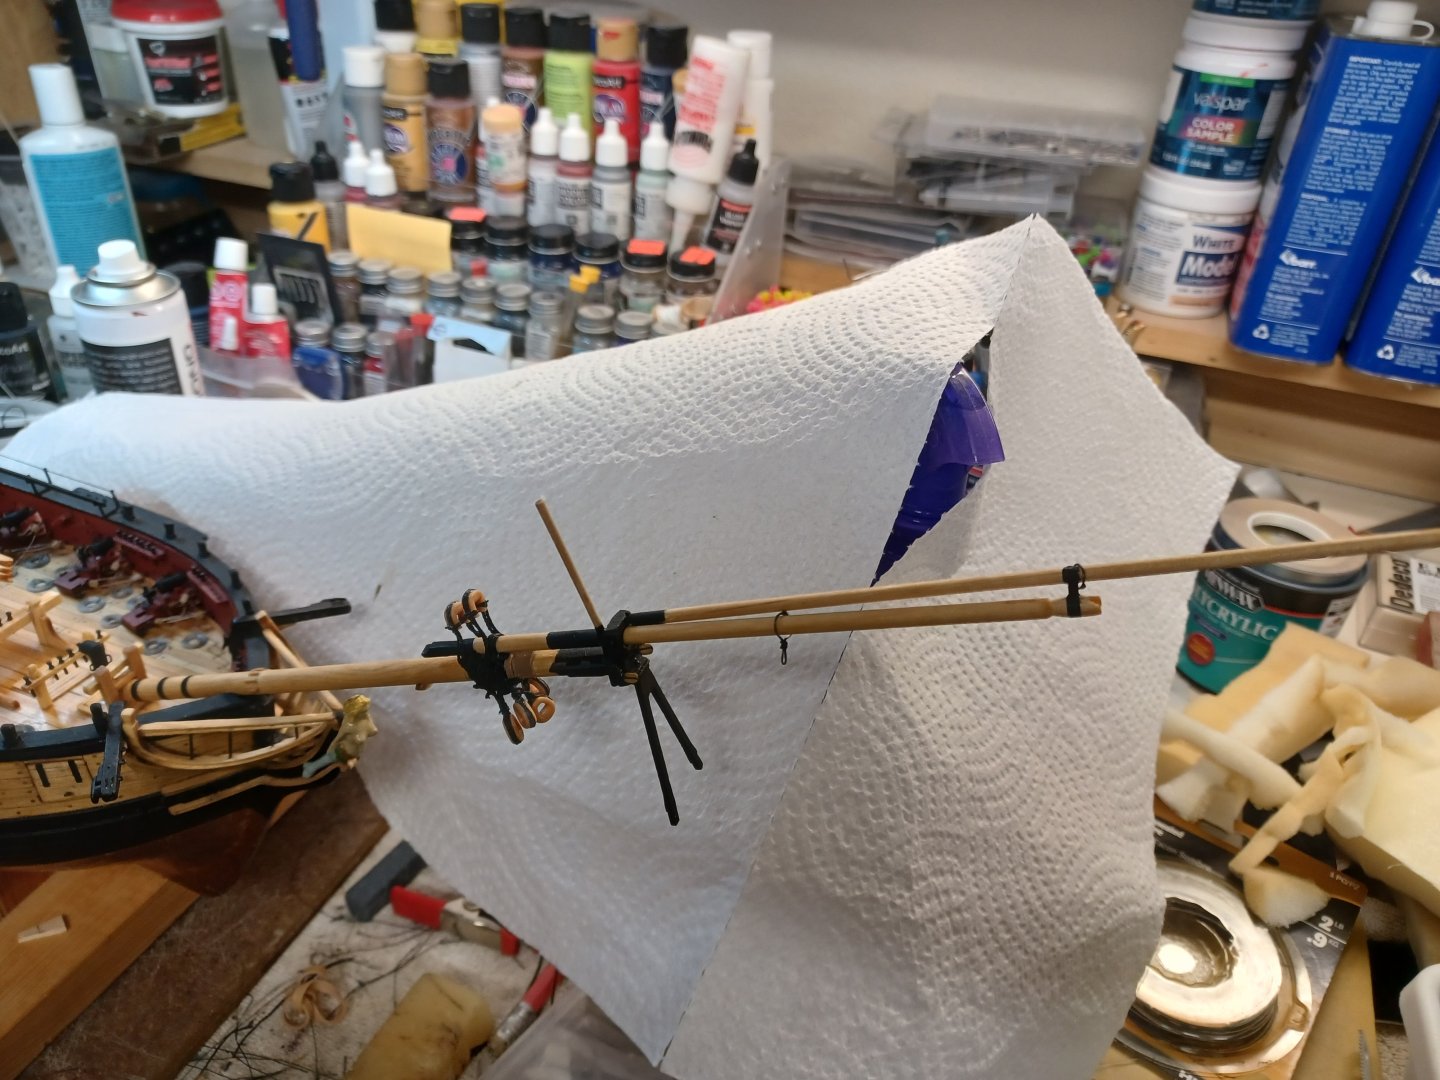
Conglomeration of Rigging, and some Profane Comments & Newbie Note It was like stuffing a size 12 foot into a size 8 shoe, but after some pushing, shoving, and appropriate encouragement I got the bobstays, and open heart rigging onto the bowsprit. I am glad that it is black which helps to clean them up visually. We had rain so the temp dropped some, allowing me to make a little progress….. now….a couple of warnings Newbie Note 1. Do not, repeat, do not attach the dolphin striker, or Ball Truck before this step. I know the instruction booklet has them installed before now, but if you are like me, you will just have to replace them.
- 436 replies
-
- 1
-
-
- Syren
- Model Shipways
- (and 1 more)
-
Even In The Heat It hasn’t been fun, but with a couple hours a day, I have completed the bob stays and stay collars. Still have the installs to do, but at least, they are together. Although, I will admit that looking at the space where they go, and how many there are, it’s going to be very tight fitting them all in. It’s also flying season, and I have some maintenance to do on a couple of planes, but should get to the Syren this week.

- 436 replies
-
- 2
-
-
- Syren
- Model Shipways
- (and 1 more)
-
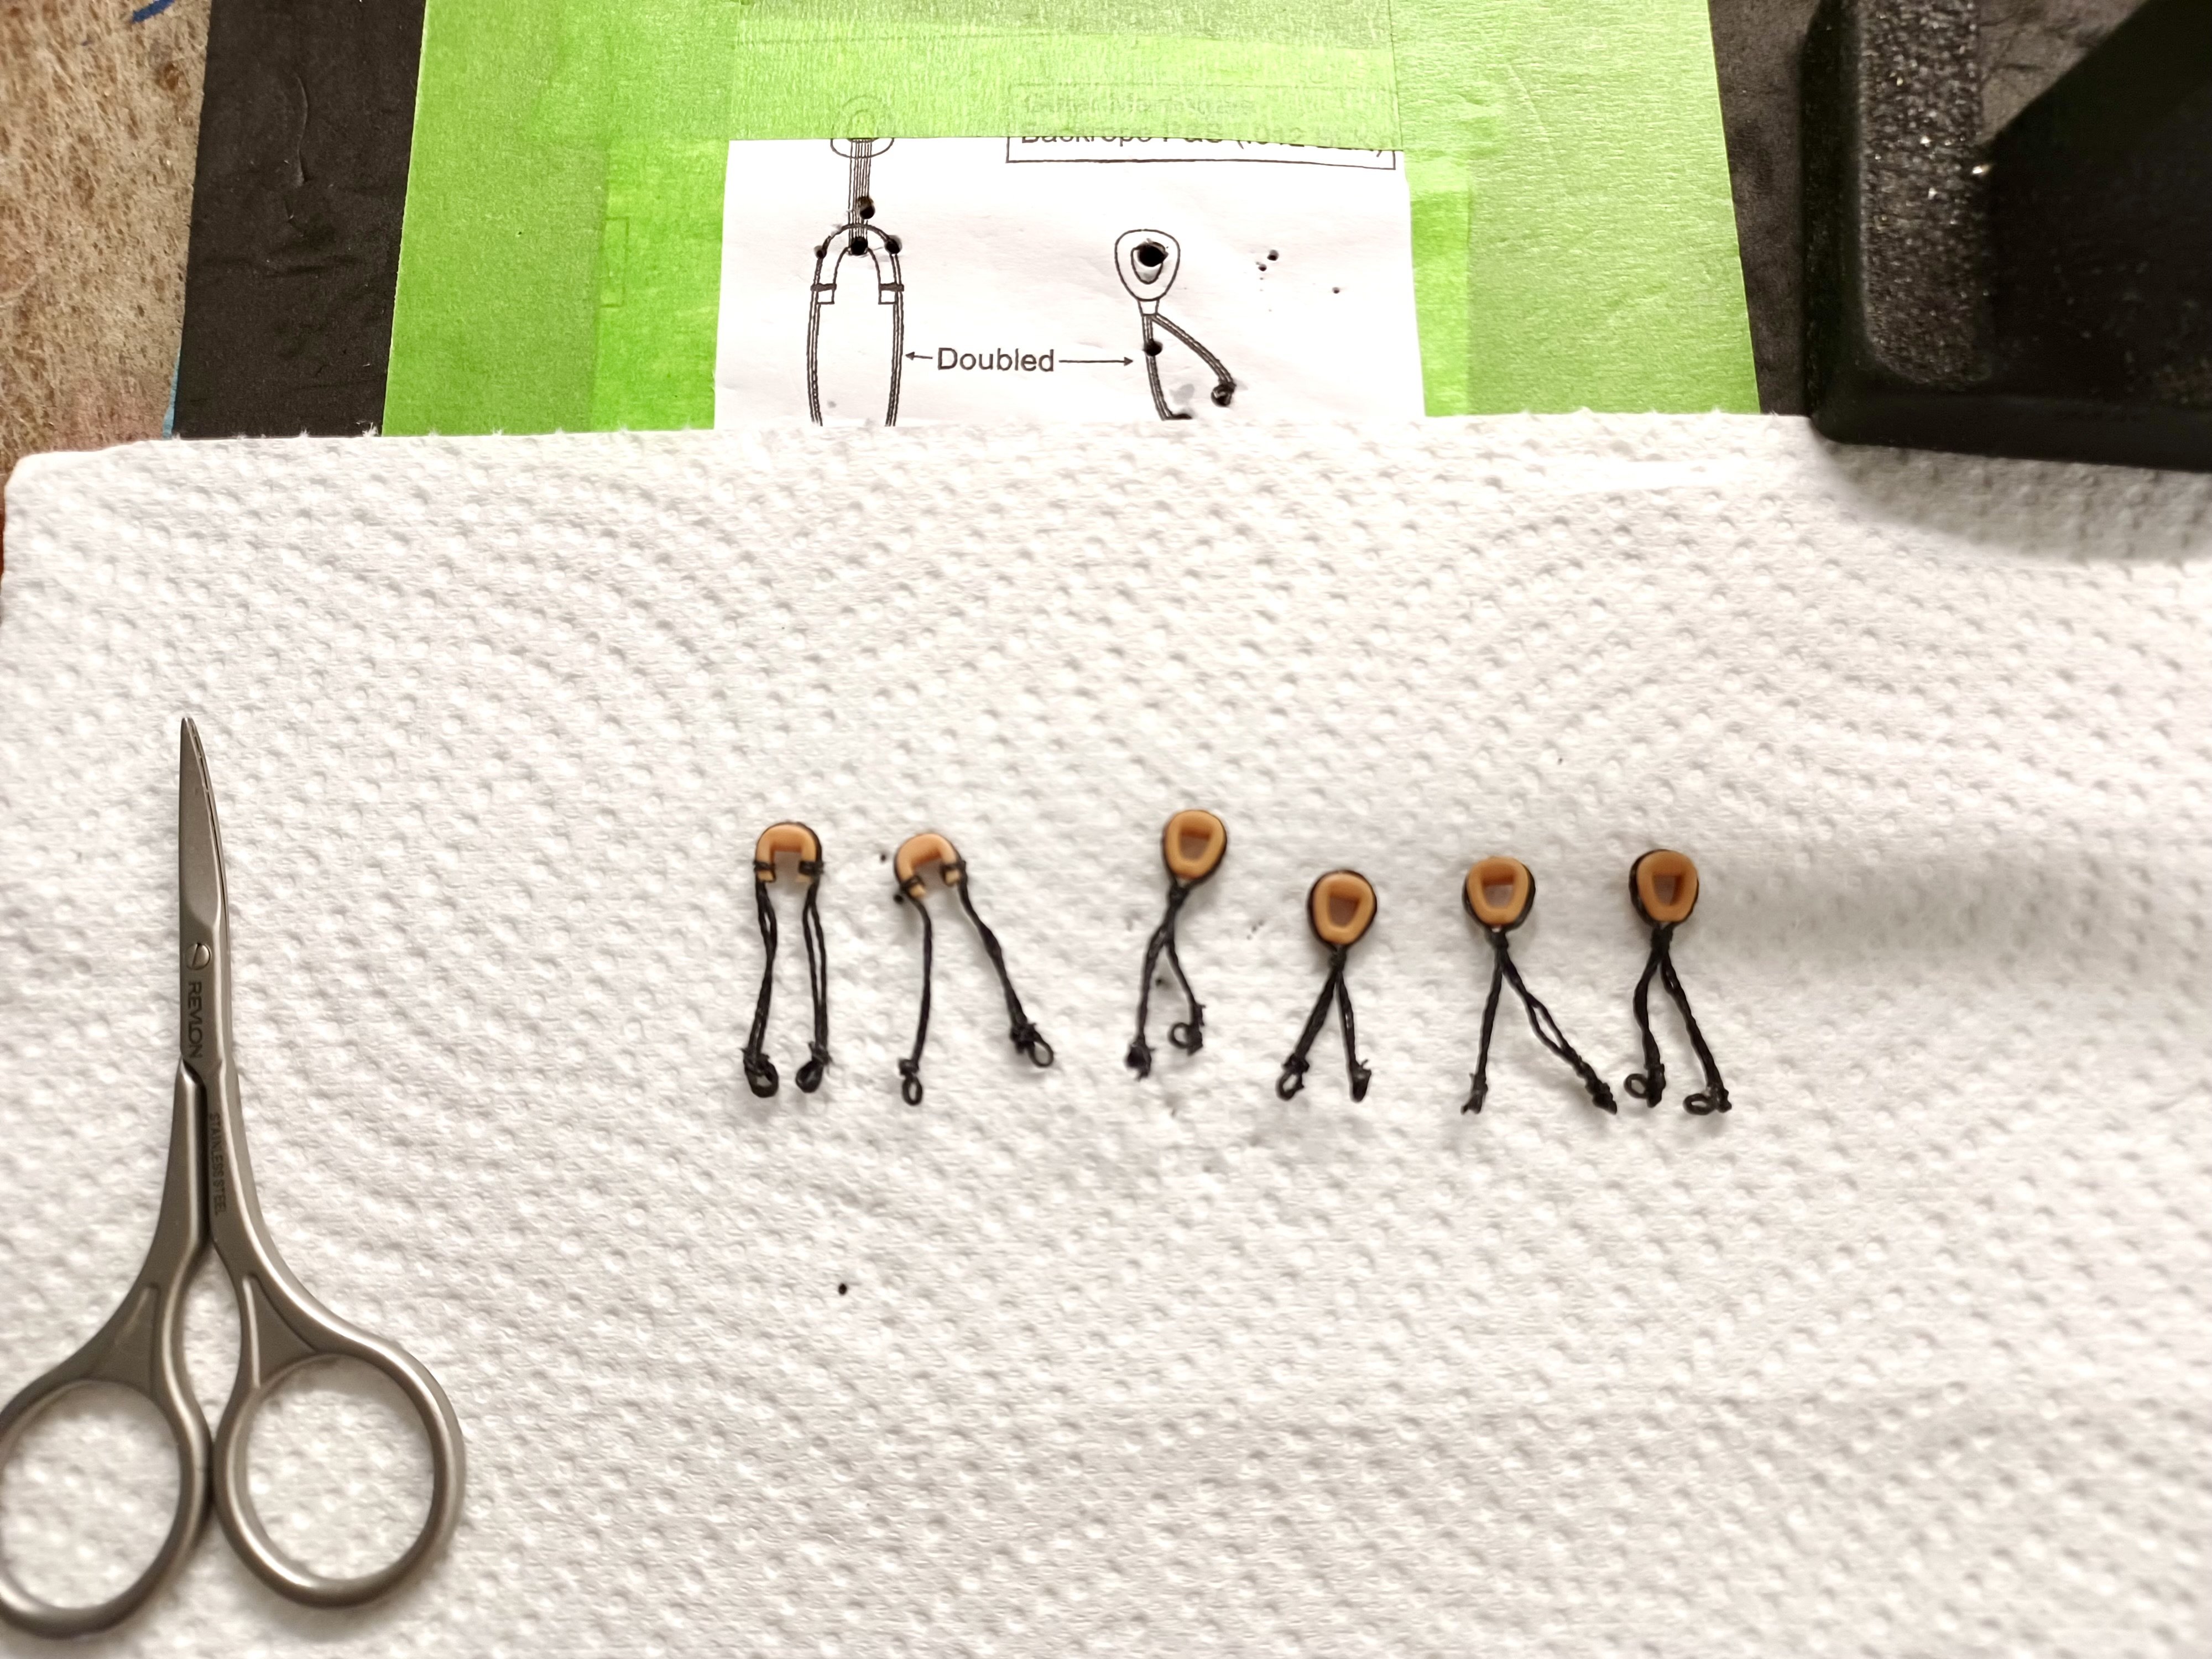
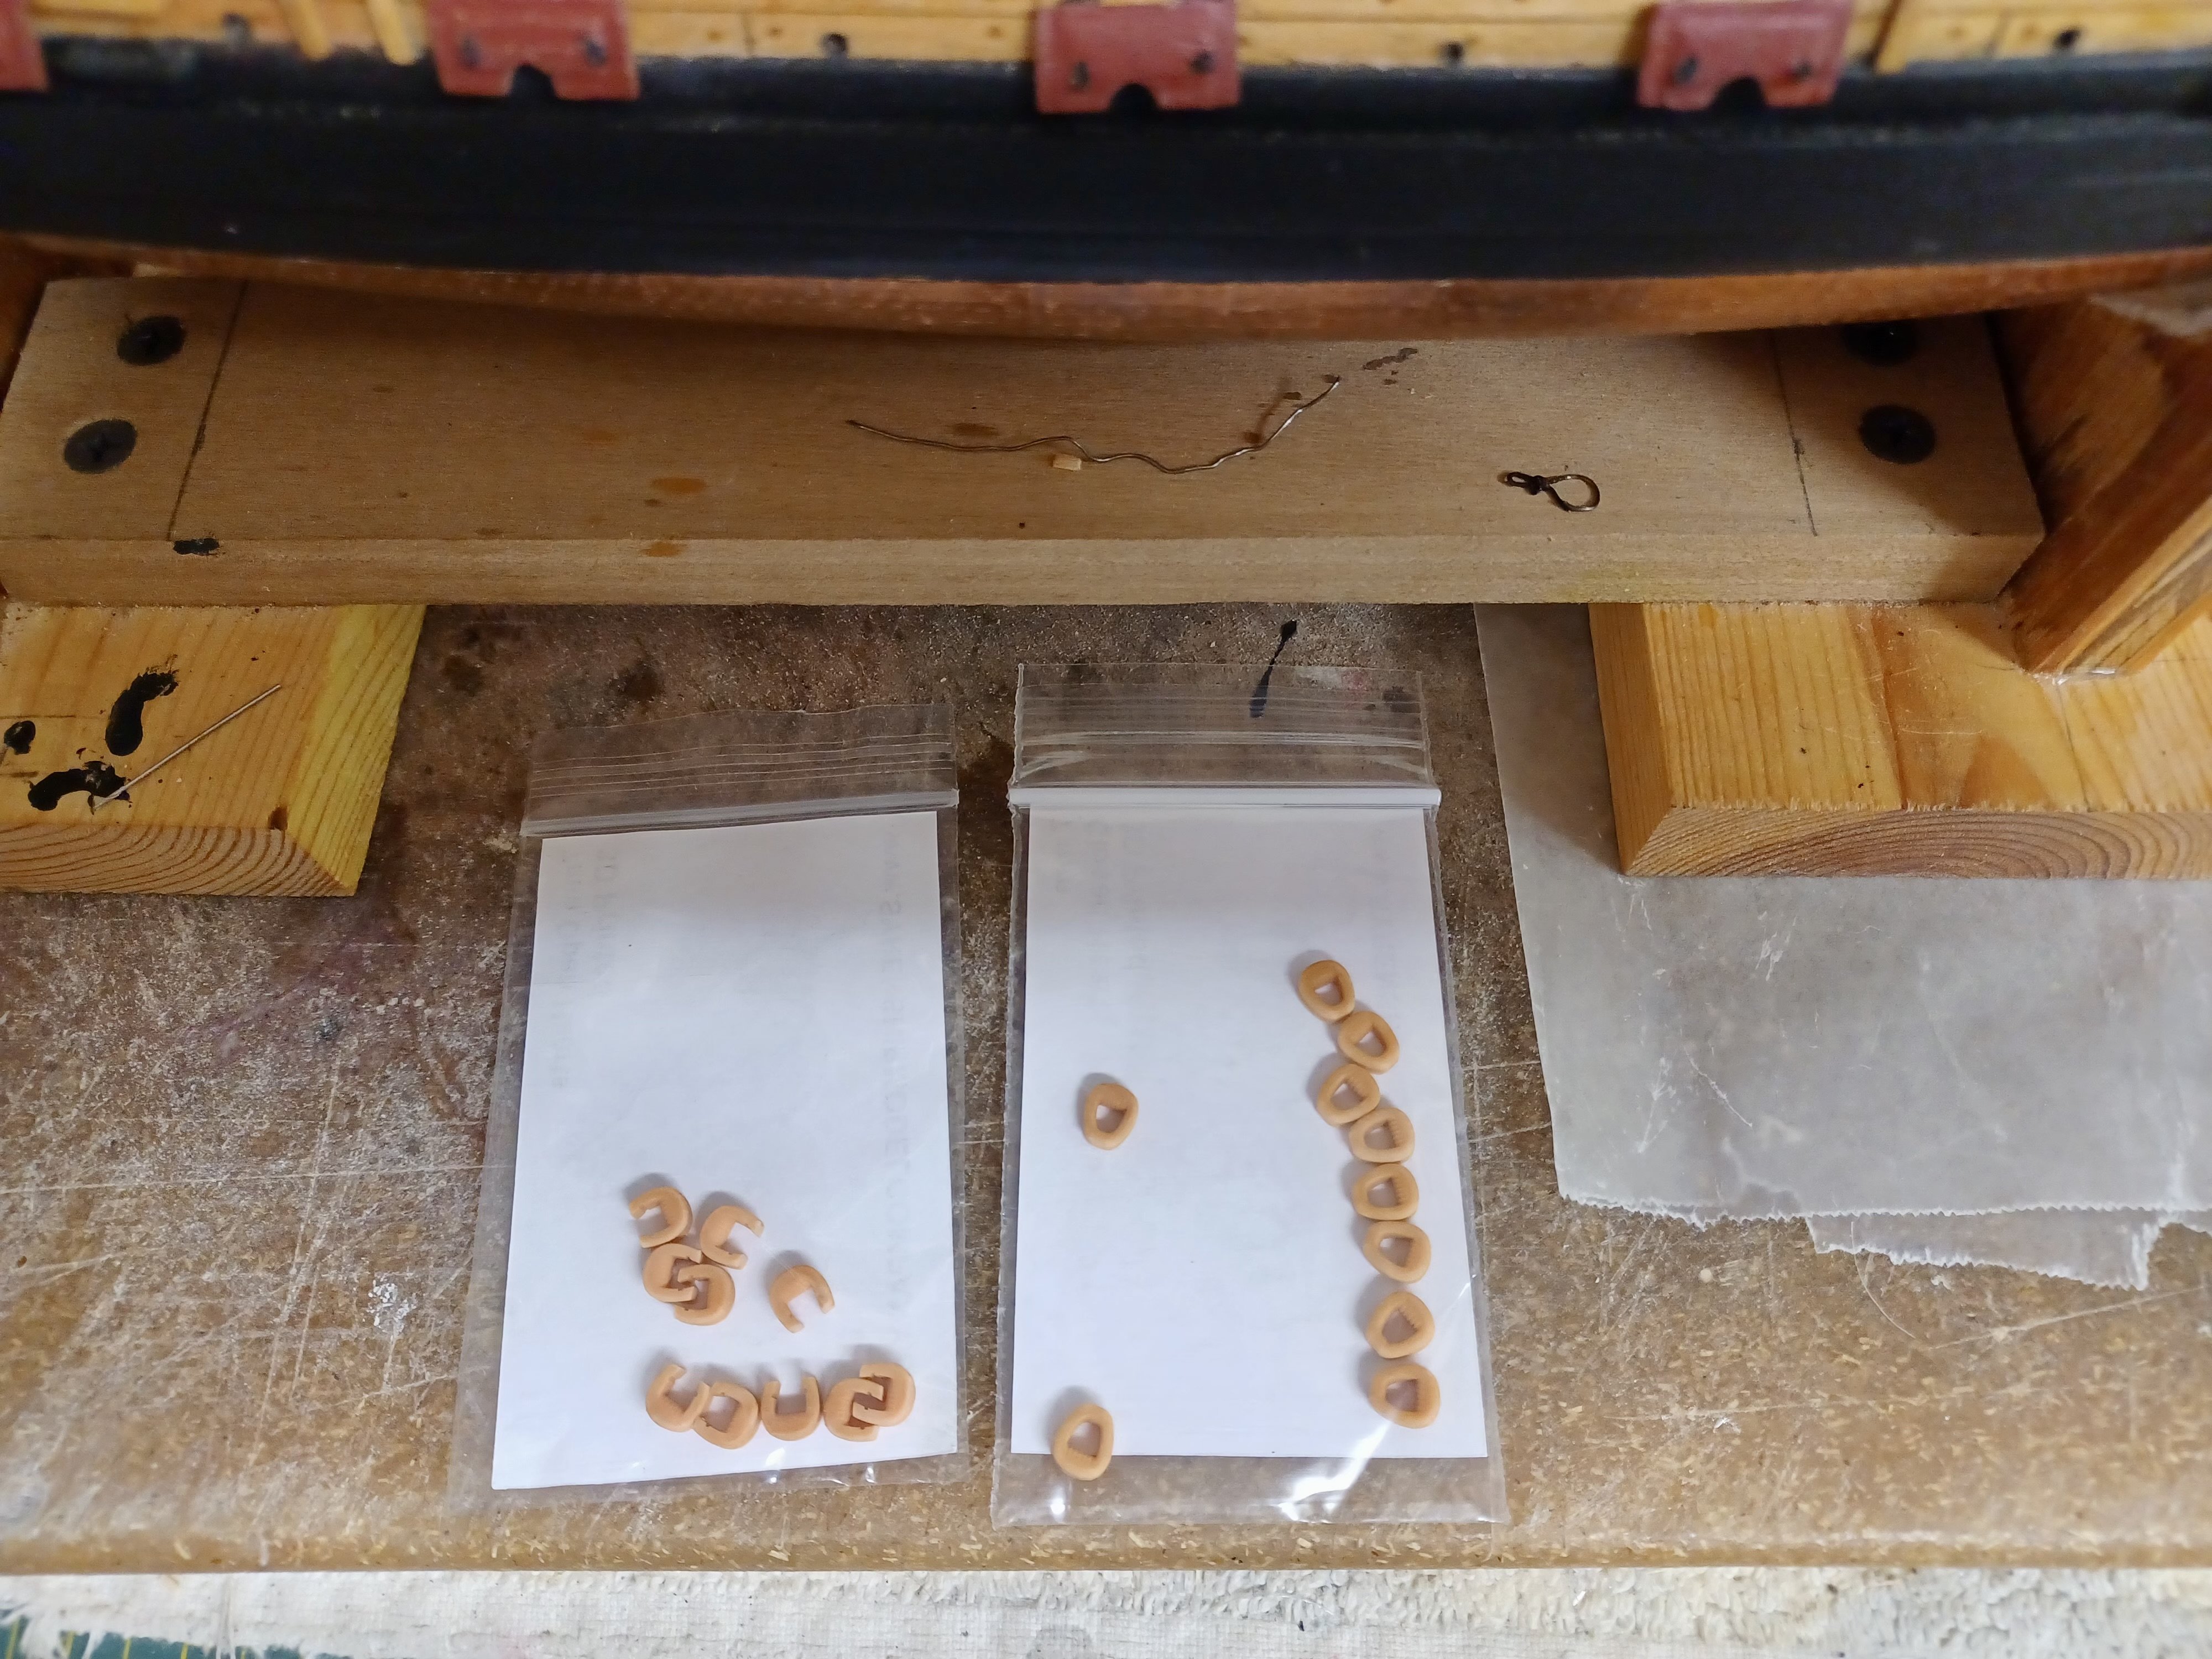
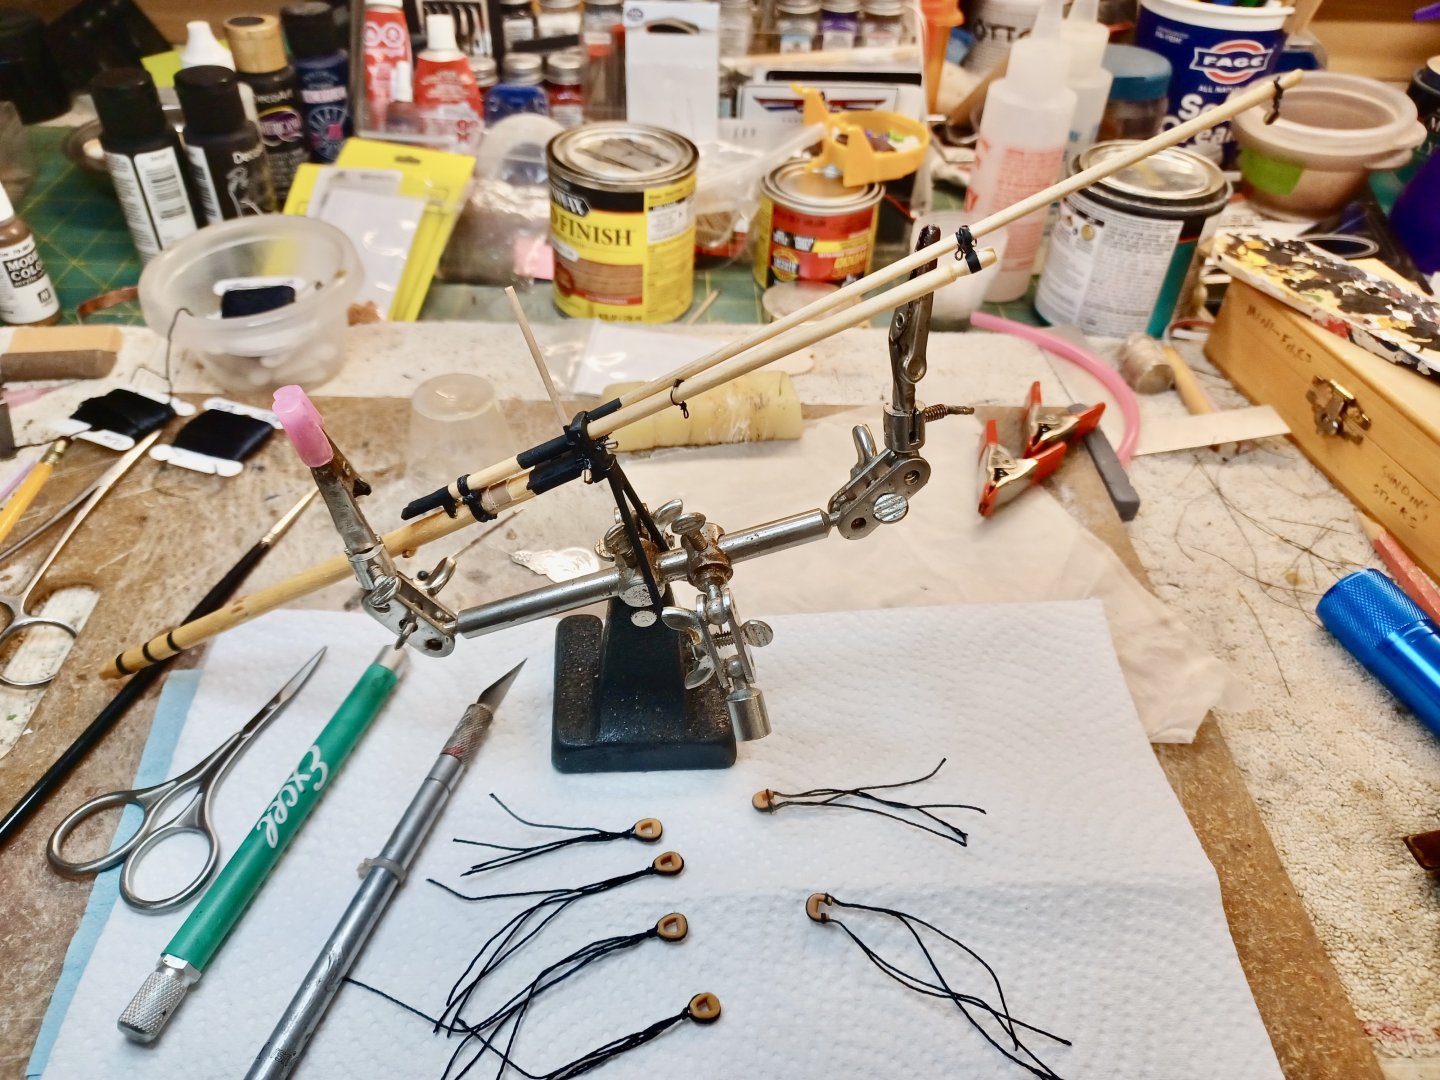
Slow and steady as she goes….. I have made some progress over the last couple of days. The single blocks have been installed on the flying jib boom, and the bowsprit cap. They are a little difficult to see, but came out fine. The open and closed collars are well along in their completion and will be installed when I get the loops in the lines figured out. Then it’s a matter of adding them in the proper order. Newbie notes: I highly recommend the open and closed hearts that I got from the Syren Ship Model Company. They are the 7mm size and are quite strong for printed parts. If you want to work with the wood laser cut ones do not let me stop you. However, if the wood is weak you can get pretty frustrated. My opinion only…they should be included in the kit due to their size, but that’s just me.
- 436 replies
-
- 3
-
-
- Syren
- Model Shipways
- (and 1 more)
-
Thanks, @Dr PR What you indicate about the small coolers is exactly what I expected. I work in a 3 car garage, so I don’t anticipate cooling the whole thing. I have decided to do what I have done in the past. Just work in the morning for a few hours and when the humidity is lower. I could move inside my home office, but there is so much to move. I can make progress. As seen by my next post.
-
Been Struggling….. To those following this build, hang in there. Two things have been slowing my progress on the bowsprit. First, this is the time of year that the heat reduces the time I can spend working in the ship in the garage. So much so, that I am considering purchasing one of those small “coolers” that work in small areas. I have been researching them and trying to separate truth from advertising. Second, is the creation and install of the open and closed hearts. The instruction manual, and practicum are a little hazy. So, I have been going through other Syren build logs to try and find clarifications. Last night I found the clarification on the build by @abelson To me it is the most clear, and concise set of pictures and instructions I have found. My personal thanks go out to him. I am now confident that I can begin moving forward. That just leaves the heat, which I am already working on. 😊
- 436 replies
-
- 2
-
-
- Syren
- Model Shipways
- (and 1 more)
-
Thanks Phil, I thought about light ply, as I have quite a bit of it. However, I just wasn’t in the mood to shape 10 of them. If the resin hearts turn out to be too brittle, I will go to elsewhere. The flying club I am in has a couple of members that make parts for us, but you are right about very small parts. To me, 3D printing still has a way to go before it can create strong usable pieces. I will be providing information on the quality of the resin hearts going forward.
- 436 replies
-
- 1
-
-
- Syren
- Model Shipways
- (and 1 more)
-
It Was Inevitable… After the open heart experience of crumbling wood, I started on the closed heart parts. I was able to shape the first one and it came out ok. The second, however, broke when trying to remove the laser marks. It took me less than a minute to decide that with 10 needed, I did not have the patience to create the closed hearts, nor did I want to go back and create the open ones either. So, I bought them. I have held off from any additional work until they arrived from Syren Model Company. I do not fault the kit manufacturer for providing them as laser cut parts, but there comes a point where parts this small just as well be included with the kit. That said, this is not the only reason I have not moved forward. Since my work area is in the garage, summer is not the best time to work there. It has been around 90 degrees, with 70-80% humidity. (Right now it is 83 with 78% and it’s only 10:15am.) Now that I have the parts, I will begin my work early, with a fan, and go until it is too hot. Should be able to begin updating again.

- 436 replies
-
- 3
-
-
- Syren
- Model Shipways
- (and 1 more)
-
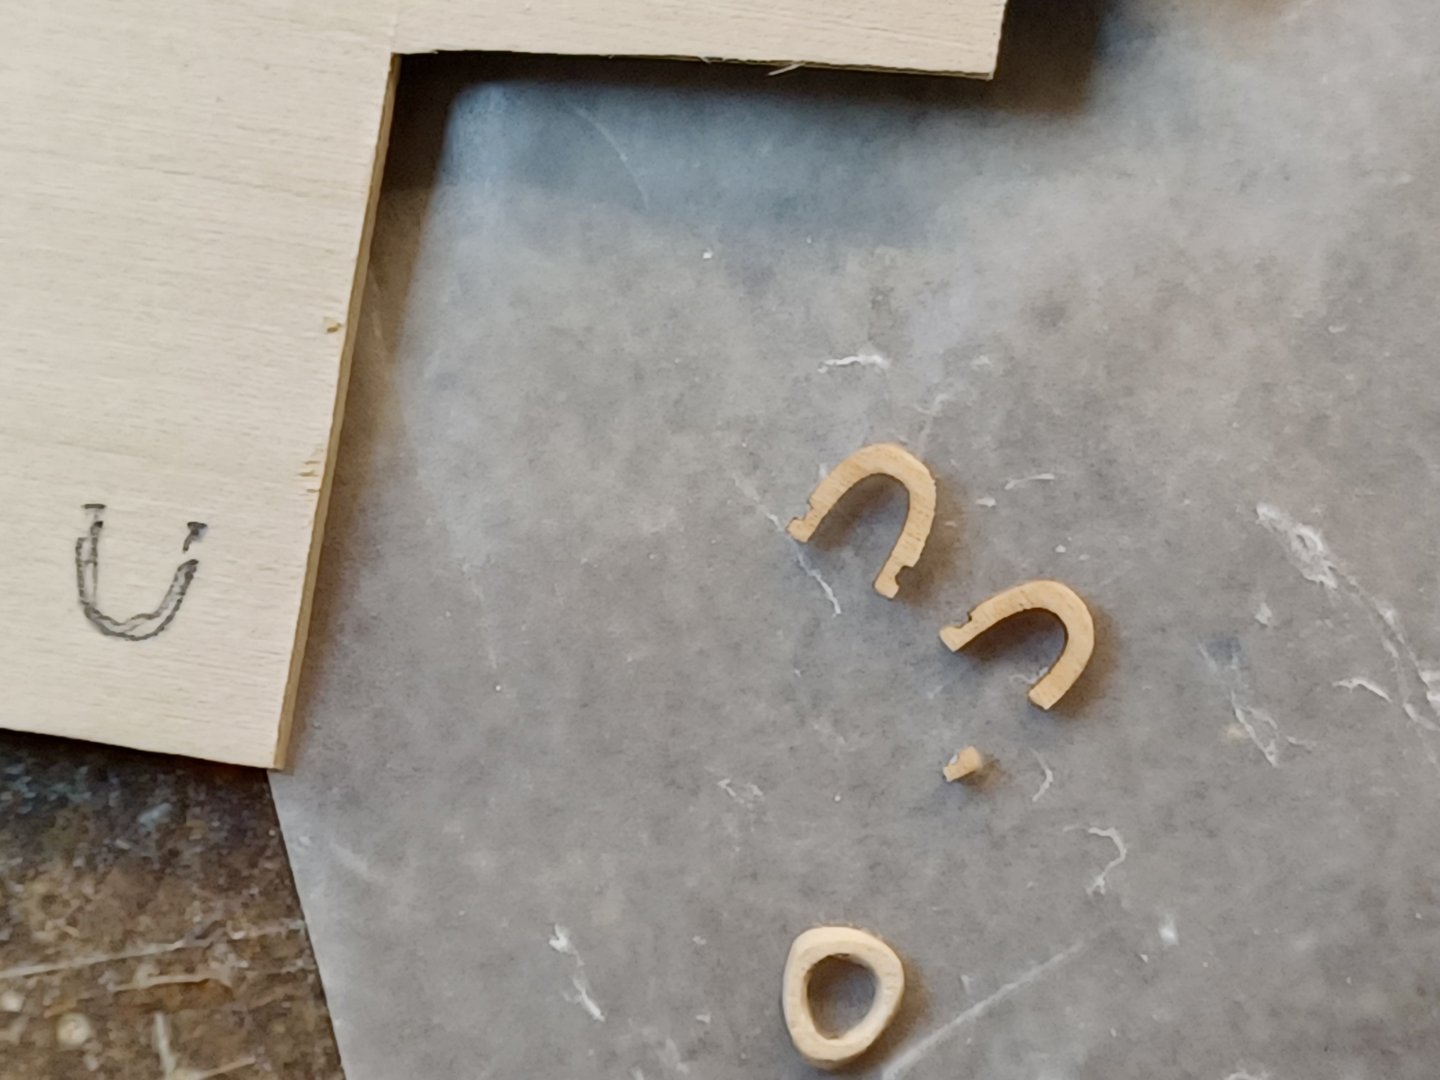
And Here We Go Again…. Open and Closed Hearts Although I was not looking forward to another mini shaping process, I thought I was prepared to shape it with very careful treatment. (see picture). I decided to remove the closed hearts (10) from the laser cut stock, and begin sanding their shape. I left the center of them in place and delicately sanded clean their shape outside first. The one is in the picture is number 1 of the 10, and I think it is very workable. Only 9 more to go…yikes. However, the Open Hearts are another story. Like the fife rail, the wood is very crumbly, so much so, that I was barely able to remove the laser marks. In fact, the first two, came apart at the slightest touch. So, on the next two, I barely removed the laser marks, and then decided to bathe them in a mixture of white glue and water. My thought is to strengthen the parts before shaping and hardening their surface. Well, that didn’t work either…at least for one of them. In the picture, you can see one that is complete while the second has a part that has already fallen off. This while only soaking in the water/glue mixture. So, I will probably make 2 new open hearts out of different wood as I did with the fife rail. Once resolved, I will do another update. My Thoughts: I appreciate the fact that multiple copies of both parts are provided in the kit. However, for the open hearts there only 4 when the piece of wood they are cut out of has enough room for many more. Even then, I am not sure if it would make any difference.
- 436 replies
-
- 2
-
-
- Syren
- Model Shipways
- (and 1 more)
-
Thank you Phil, I have appreciated everyone’s compliments and input. As to your questions, no I am not going to add sails. Since this is my first build ever, I am following the notes from Chuck’s prototype build and the instructions in the manual. The points you raise are valid ones and I find them informative. However, I am posting this as a guide to other first time builders and trying to give them something that gives them direction on how and when I did things coming from another first time builder. I am totally amazed as to how complex, detailed, and intricate this model is even at 1/64 scale. I think it is a good thing that I did not know this before I started. If I had, I might have done something else. That said, I am going to press on and hope that this guide can help other newbies to build it, or to decide if they want to move forward. Thank you, again, for your ideas and input it is appreciated.
- 436 replies
-
- 1
-
-
- Syren
- Model Shipways
- (and 1 more)