


Albuk
-
Posts
74 -
Joined
-
Last visited
Content Type
Profiles
Forums
Gallery
Events
Posts posted by Albuk
-
-
What does the catalog say about Bracera's scale? Is it 1:15 or 1:20?
Cheers,
Alex
-
Thank you, Anja and Elmir. That was the easy part, but I made (again!) the garboard plank to curve too much upwards at the bow which will result in having to use drop planks. I don't know how will the grooves between planks look like in that case (not very nice, I suppose) but, due to the shape of the hull, to do it right I would have needed to bend the strips laterally a lot more then I did. Strips that thin don't like been treated that way.
Alex
-
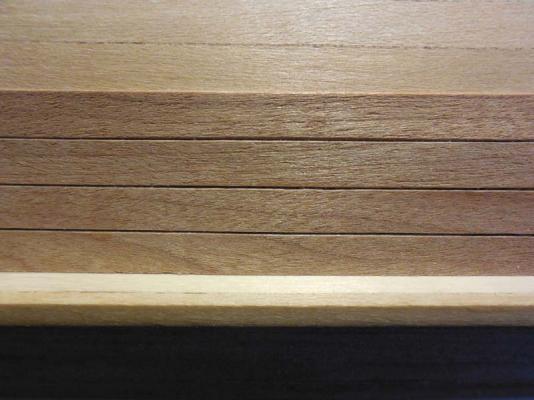
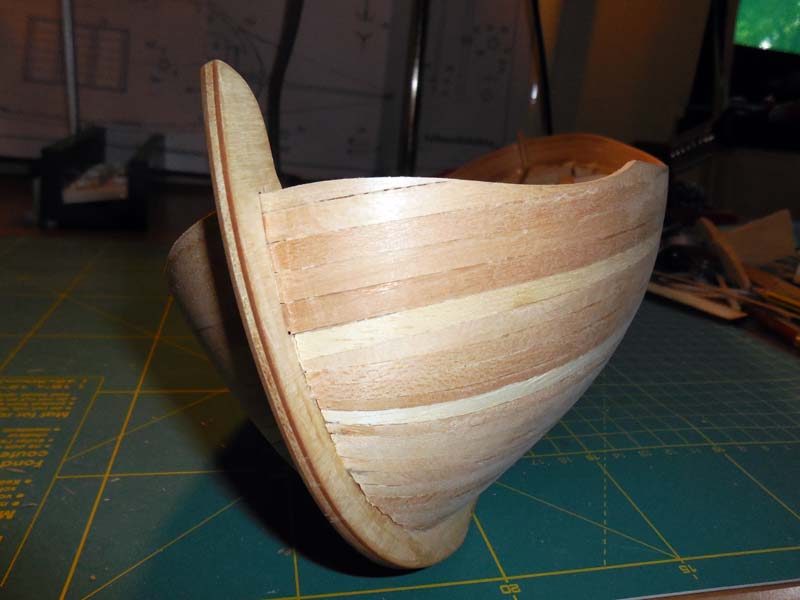
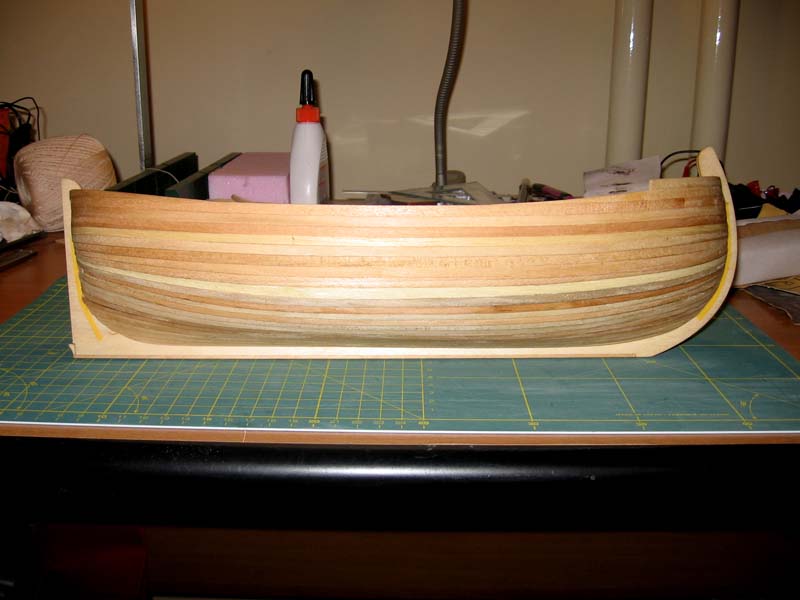
I decided to start placing the veneer strips from the keel to practice my second planking skills. The hull below the waterline will be painted anyway so any mistake will be covered. Before placing the strips, I beveled the edges so that, at least in theory, each separate plank will show through the paint.
- sonicmcdude, Dida and Wishmaster
-
 3
3
-
Thank you Anja. I haven't tried gluing with the help of a flatiron yet because it is so hot in Belgrade this last days, that I don't even want to think about using any type of heating appliance. I will test it for sure, one of these days but not on the model. If it works, it might make things a bit easier.
Alex
-
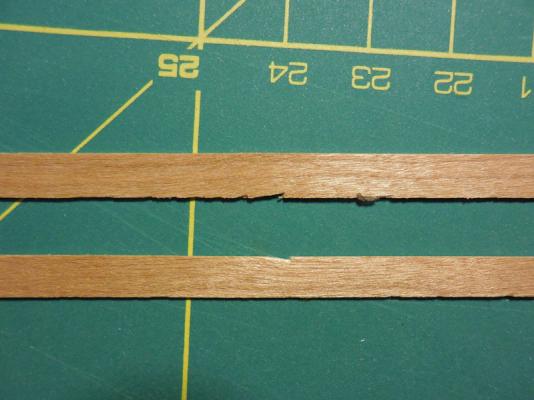
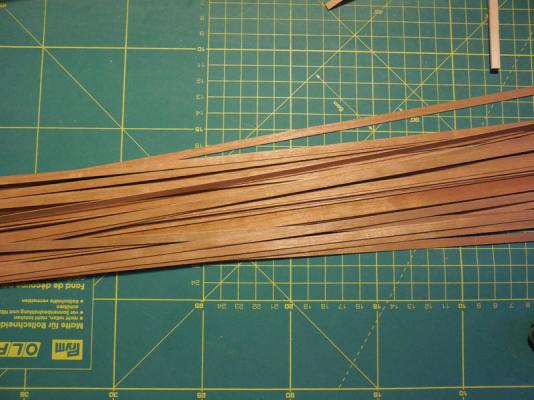
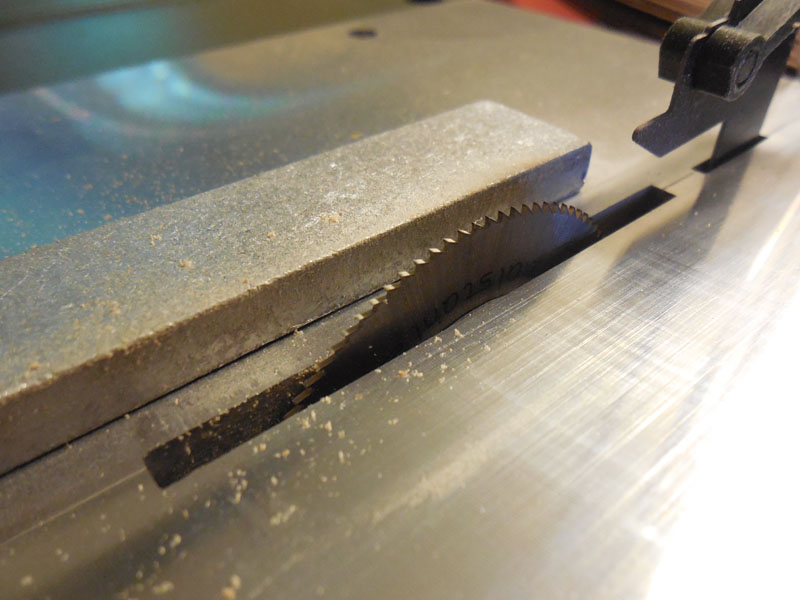
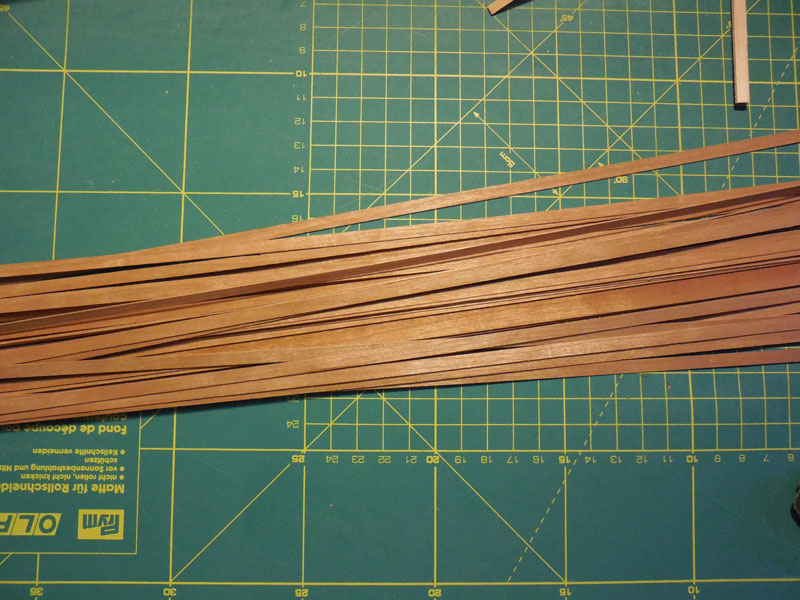
My new toy has finally arrived. To be able to cut the 0.6mm cherry veneer that I acquired, I changed the blade that came with the saw with a smaller toothed one. I had to keep my fingers very near the blade while cutting, otherwise the edge of the strips would chip off. It was really scary but I managed to make nice and strait strips and keep my fingers attached to the rest of my body.
I am uncertain how to glue the second layer to the hull without having problems with excess glue getting on top of the strips. I need them clean for staining. I was thinking of applying a thin layer of CA on the hull with a paintbrush, let it dry a bit, then wet the veneer strip, position it and use a flatiron to make it stick. I have no idea how the CA will react. Ideas are welcome!

-
-
Nice cargo Elmir. Good luck with your saw.
Alex
-
Thank you Elmir. I eagerly wait the continuation of your build log and our "curse of the table saw" to pass

Mark, thank you for your kind words. Whishmaster (Elmir) is also building one. I wish I had done a better job planking the stern as the second planking would have been unnecessary then. My plan is to stain the hull above the waterline and for that to happen, better planking is needed.
Alex
-
Thank you Anja and Frank. Frank, I really like your Supply... those barnacles... wow!
Alex
-
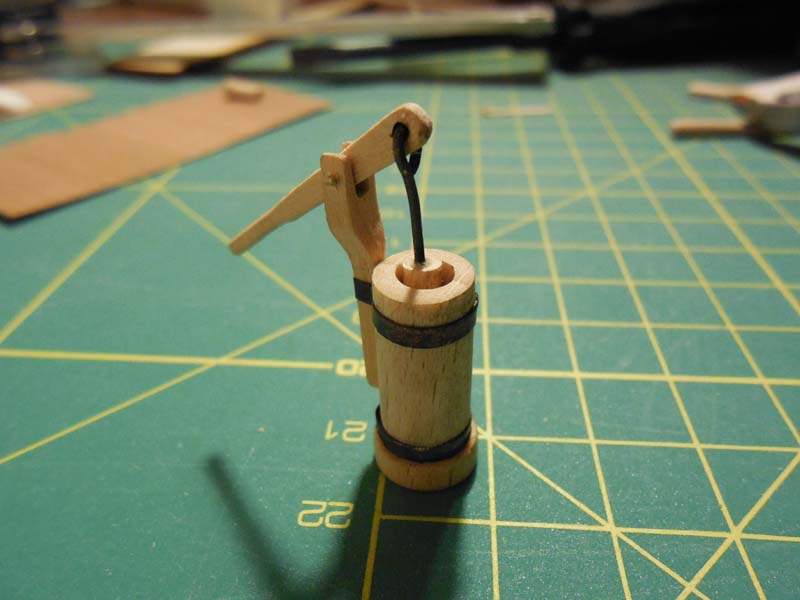
While waiting for the table saw to arrive, I decided to make a pump and test a patina for copper and brass that I bought. I made the pump from a beech wood dowel and have to stain it yet. The patina that I used for the metal parts is some kind of acid of a transparent light blue color which had to be diluted with water. Brass turned immediately black, while copper took a few minutes. On brass, the black oxide doesn't come off easily, unlike copper.

- sonicmcdude and Dida
-
2
-
Thanks Matti, I still need to learn to start spilling earlier and use drop planks to avoid clinkering.
Alex
-
-
Hello Anja,
Thank you for the link, it is very informative. I managed to get my hands on a small amount of American cherry 0.6mm veneer. The funny story is that when I went to buy it, the lady at the shop told me that the minimum amount was 50 square meters. When she saw my jaw drop to the ground and eyes pop out, she sent me to their workshop to see If they had some leftovers. They didn't have European cherry, which I wanted, but I got the American variety for free.
Regarding Elmir, I asked him for advice on the Proxxon table saw as I was about to order one. His post stated a problem with it so I wanted to see what was it about, before pushing the button. There was no problem, he just wants to get rid of the belt mechanism and told me to definitely go for it. So, now I am waiting for it to arrive and continue with the build.
Alex
- Anja and Wishmaster
-
2
-
Hello Anja,
Thank you for taking interest in my build.
It took more sanding then I anticipated to get rid of the clinkering, but I wasn't worried too much about it, since I would go for a second planking layer anyway. What I am worried about is making my own second layer strips. The ones that came with the kit can be seen glued on the bulkheads of the cargo bay that I made. They are very grainy and difficult to cut them for spilling.
I have seen Elmir's build and have been in contact with him via PM. It is nice to see another Bracera being built. I was feeling kind of alone building mine

The stain that I used is a water based walnut wood stain.
Cheers,
Alex
- Wishmaster and Anja
-
2
-
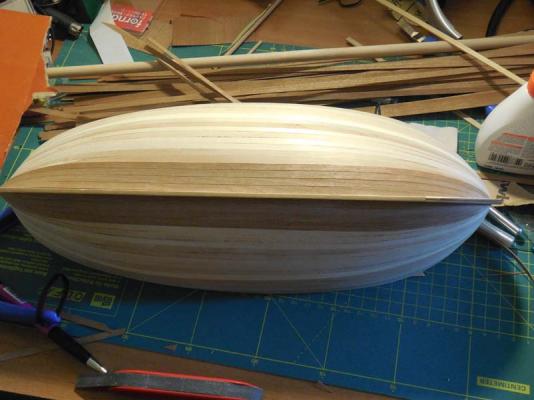
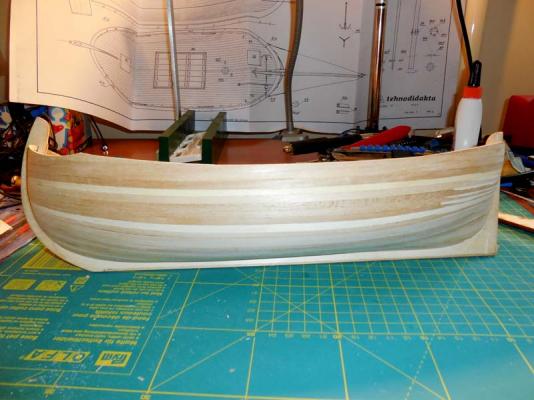
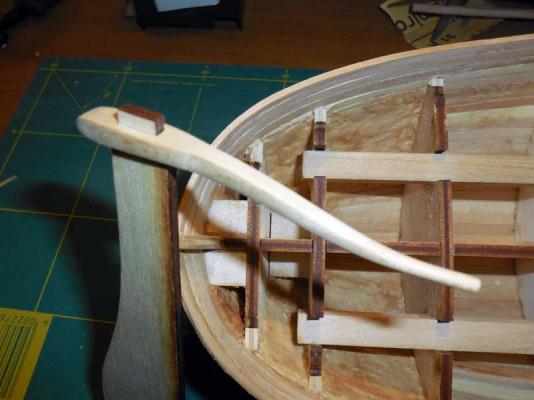
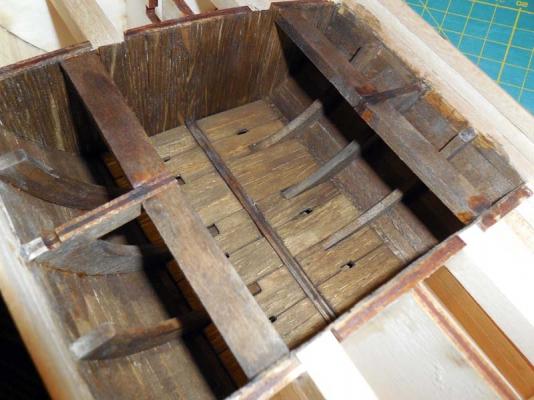
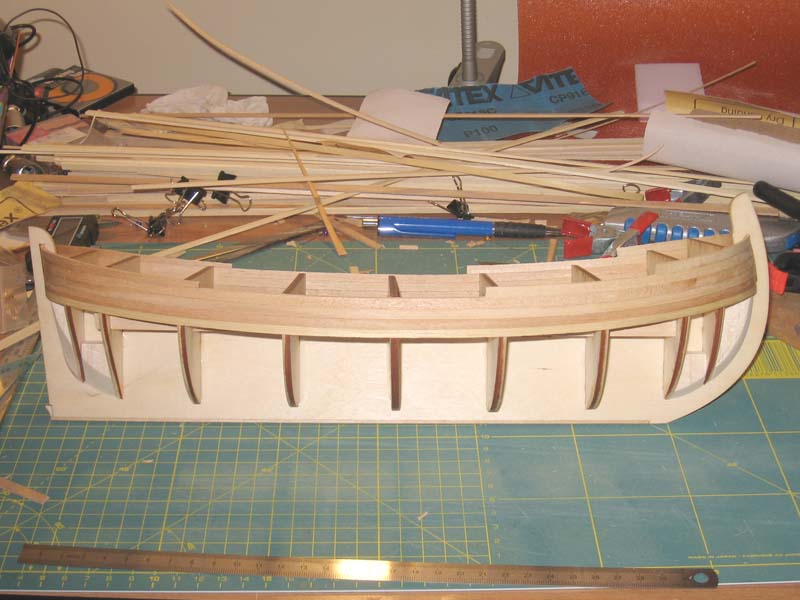
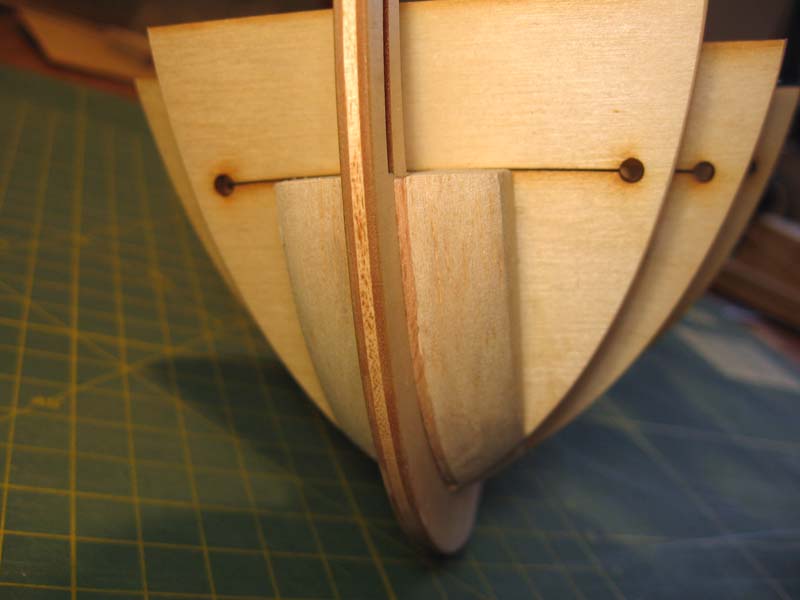
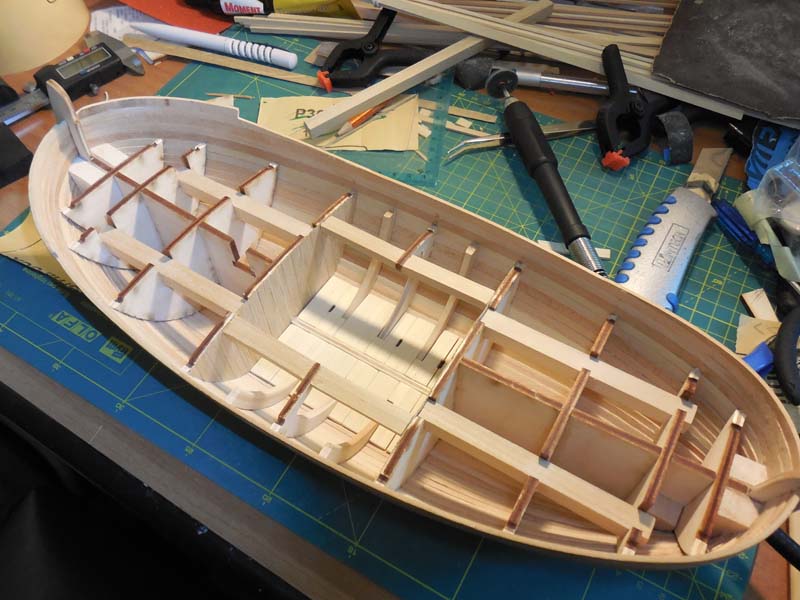
A little bit more work done on my Bracera build. I sanded the hull of the vessel, shaped the bow and is now ready for the second planking. I had problems at the stern with clinkering so I hade to put filler (diluted PVA and sawdust) on both sides as the hull was getting paper thin. I am not happy with the second planking strips that I got with the kit so I am thinking of buying cherry veneer and making my own. In the meanwhile, I started working on the rudder and stained the cargo bay.
-
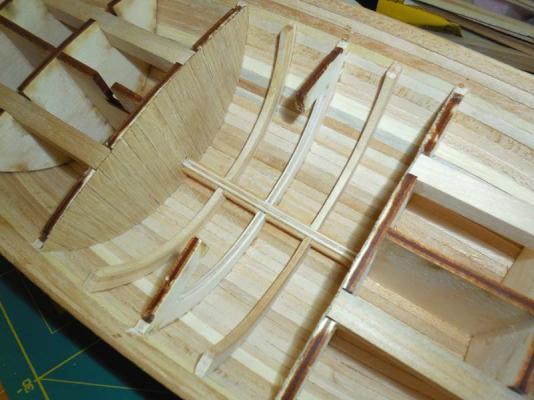
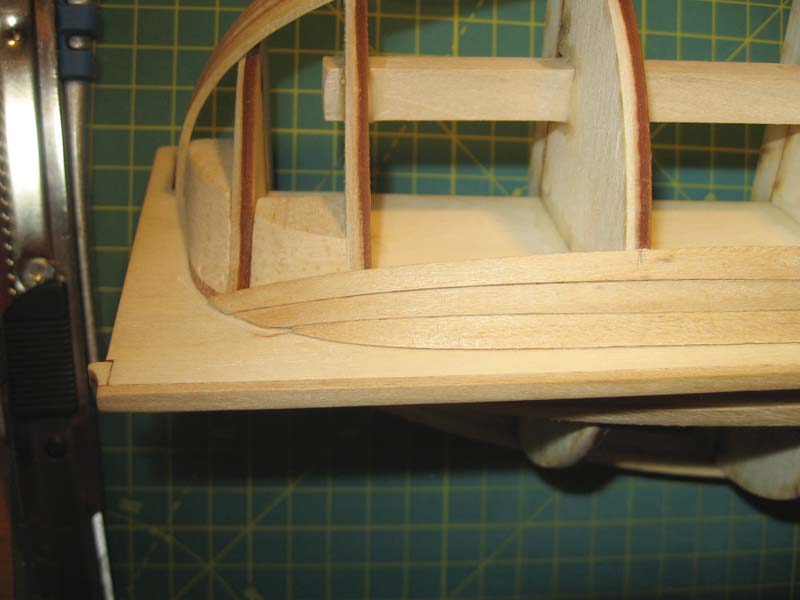
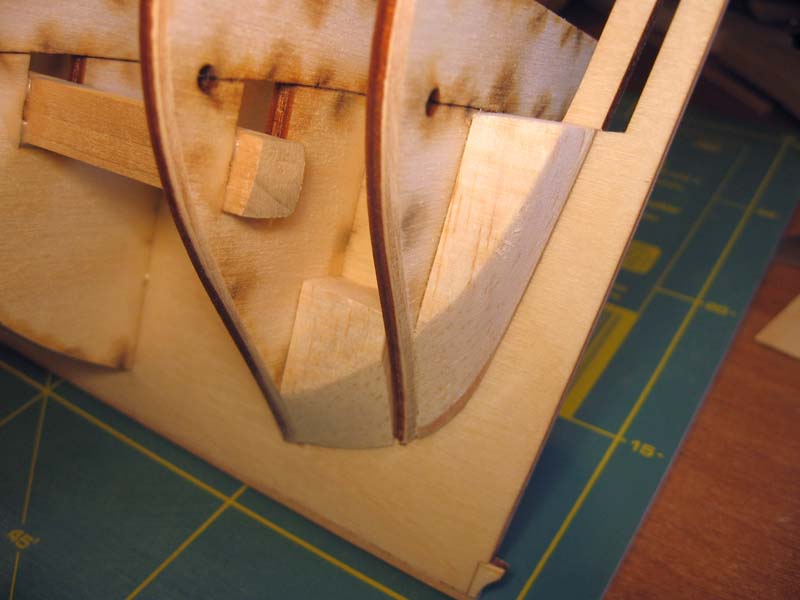
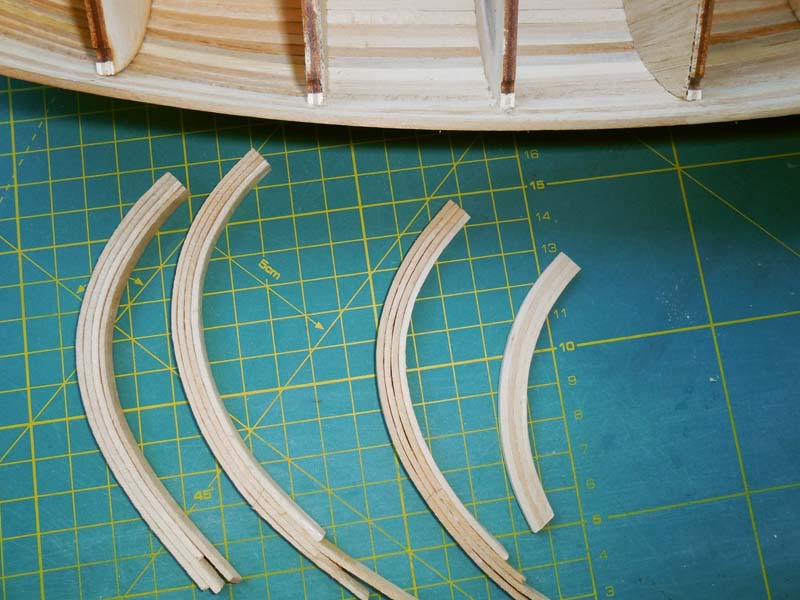
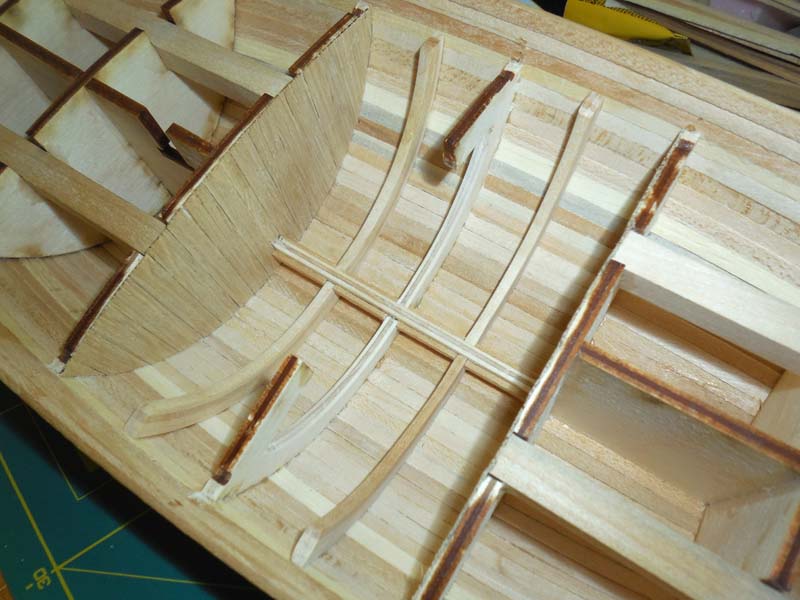
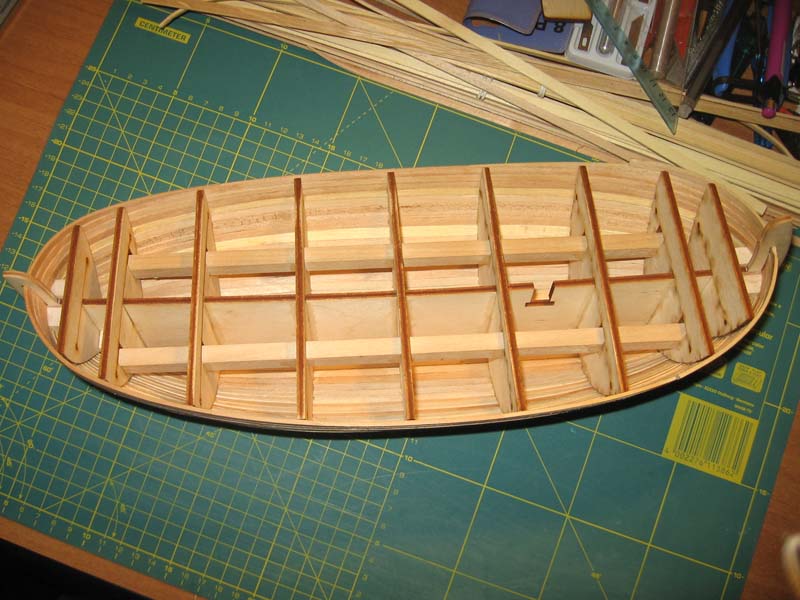
I cut the top of the bulkheads as shown on the plans but then decided to make the cargo bay semi open. To do that, I cut the center bulkhead to look as a rib with a help of a Dremel type tool. I made four more ribs with leftover planks by bending them to the shape of the hull and then gluing them one on top of the other. I tried bending a plank laterally but couldn't get such a pronounced curve so I went with layering planks, which took some time, but I am happy with the result. Next, I made the floor planks and lastly glued back the two rods which I cut in half to make them narrower.


- Dida and olliechristo
-
2
-
-
Hey, I like that weathered look of the cabin! Nice!
Alex
-
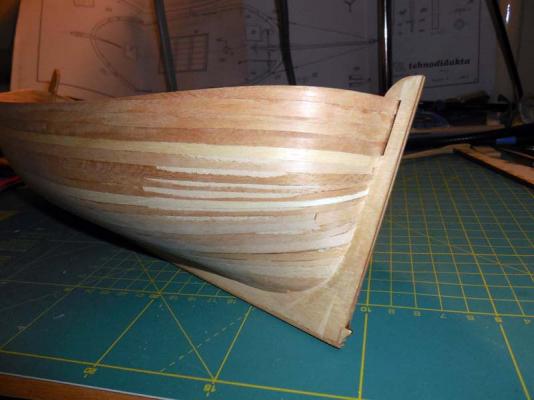
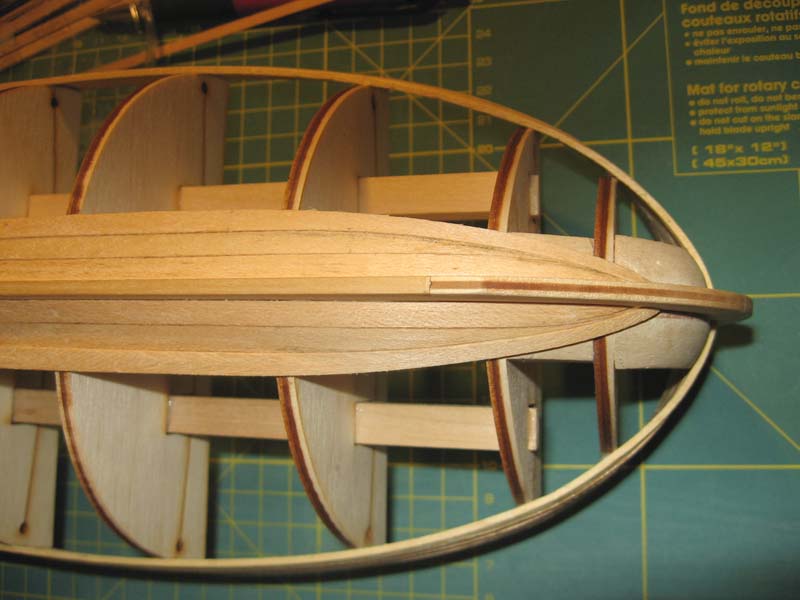
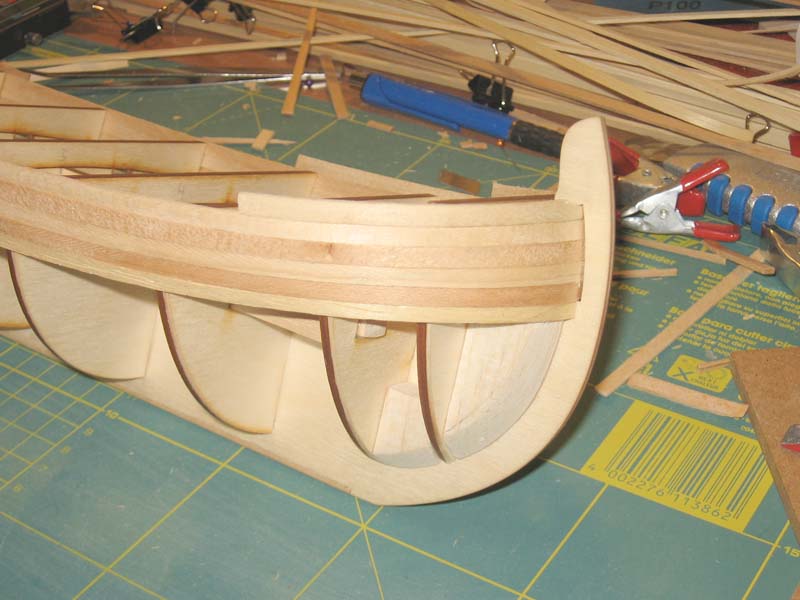
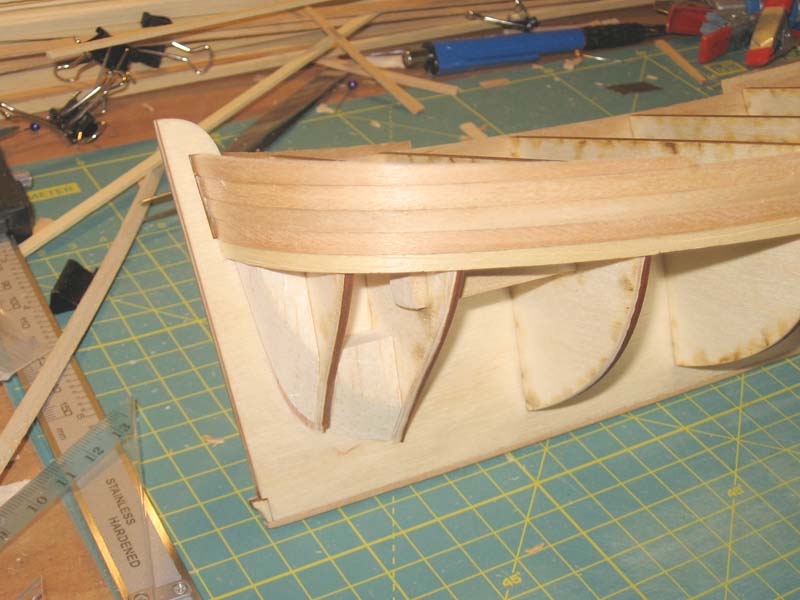
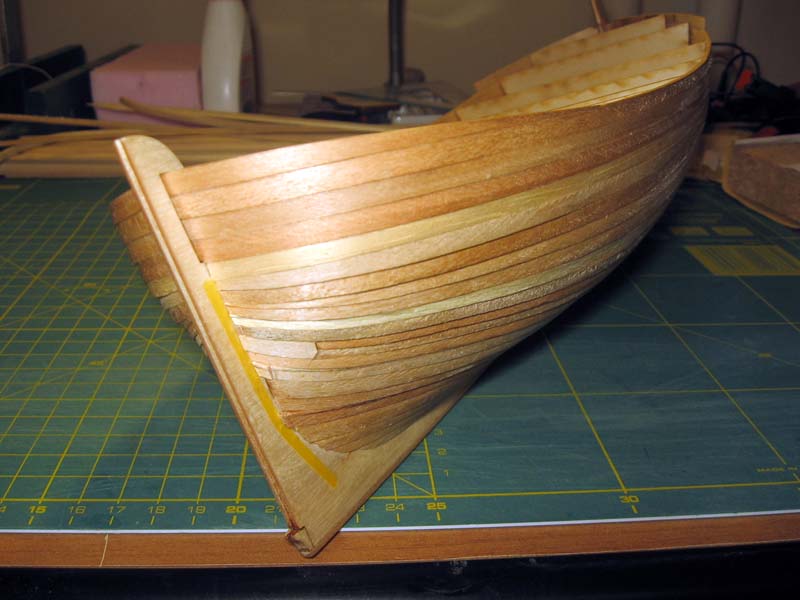
I placed a couple more planks for the weekend. I made the garboard strake too long at the bow and I had to taper the next plank to a pointy edge so that the following planks would have a normal bend. Not a nice job but it will be covered with a second layer of planking (which I hope to do better). The stern seems to be OK.
- Wishmaster, Aussie048 and Dida
-
3
-
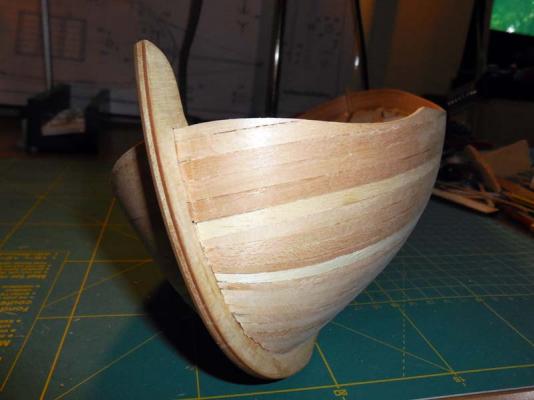
I began planking the first layer. I seem to have forgotten how it is done as I cracked the first three planks. I was cursing, swearing the Basswood planks that came with the kit. Took an Obeche plank from my previous build, soaked it and applied heat to bend it without a glitch. Since I had just a few Obeche planks left, I decided to try the Basswood again. Soaked it a bit longer in hot water and then using a steam iron and soldering iron (the part before the tip which I kept at 200C), I took my time and with a little bit more patience and less pressure I bent the plank to the shape of the hull. It was not the wood after all, it was me! Basswood seems to be stiffer than Obeche but unlike Obeche doesn't start splintering when pushed too much. It just cracks.
- Dida, Aussie048 and Wishmaster
-
3
-
-
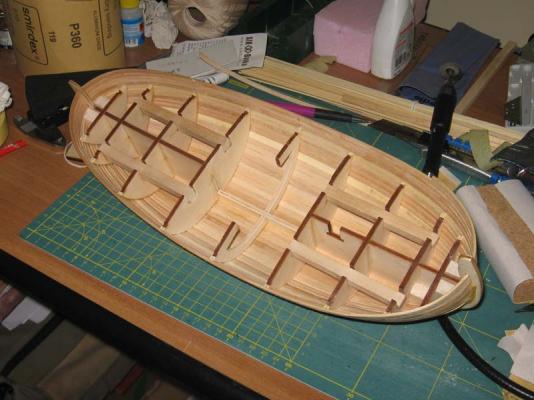
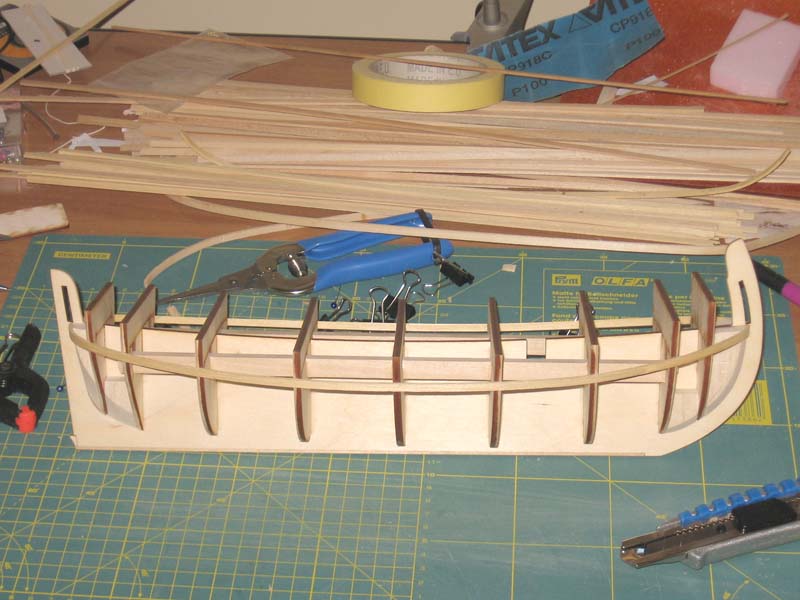
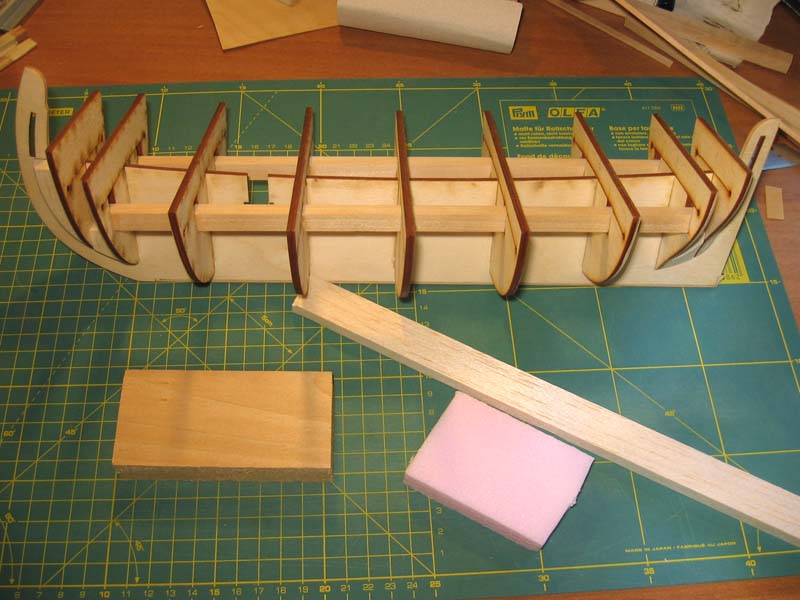
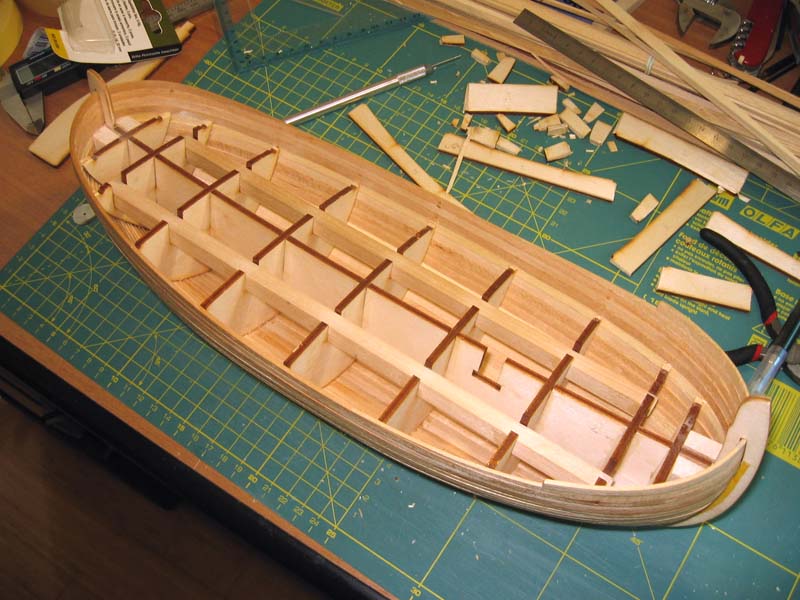
For the filler blocks, the kit came with two choices: Basswood and rigid polystyrene foam. Basswood would need too much time and effort to shape with the tools I have, so I tried the foam. It is easy to shape and rigid enough, but the dust is very fine and sticky. Since the admiral was frowning I decided to go with Balsa with a vacuum cleaner ready for action.
To make a nice edge (Balsa did not hold it well) I used a wide, 1.5mm thick beech plank from the kit, shaped it and then glued the Balsa block on top. I pre-shaped them as in the plans and glued them to the bulkheads. The final shape was reached while fairing the bulkheads.

- Aussie048, Salty Sea Dog, Dida and 1 other
-
4
-
Thank you for your kind words Popeye. Your builds of the Cux and Mary Ann were very inspirational during my build. Unfortunately (or fortunately), my day job involves a lot of staring at computer monitors so my eyes end up very tired to be able to devote the time this beautiful hobby deserves.
Cheers
Alex
-
Thank you Steffen! It was a long journey (7-8 months?) with a happy ending.
Alex


Cutty Sark by NenadM
in - Build logs for subjects built 1851 - 1900
Posted
Thank you Nenad. I know about Wishmaster's scale. I work with the same plans and was wondering which scale is the true one as I was told it is 1:15.
Alex