ZackP
-
Posts
27 -
Joined
-
Last visited
Content Type
Profiles
Forums
Gallery
Events
Everything posted by ZackP
-
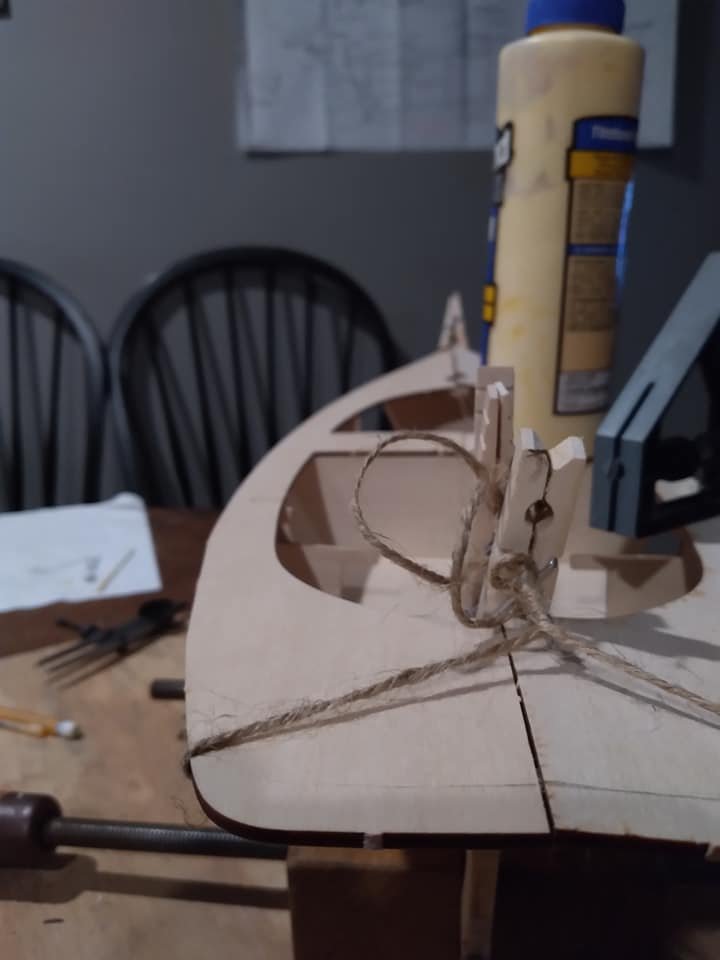
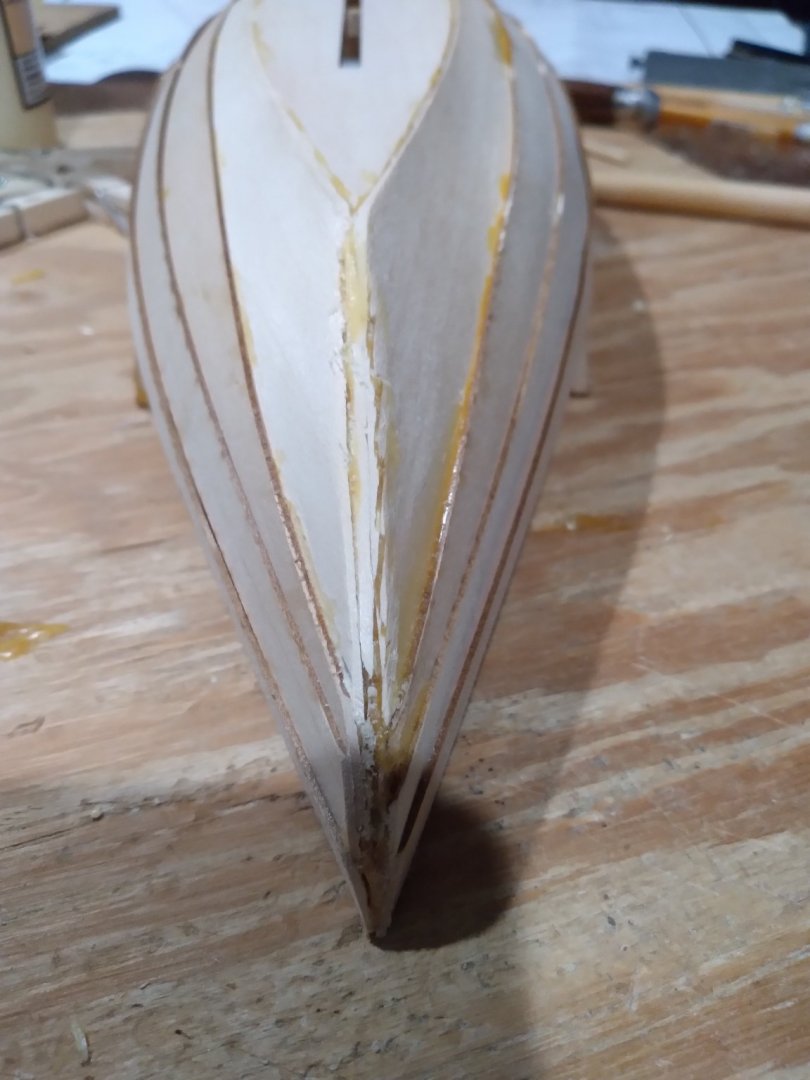
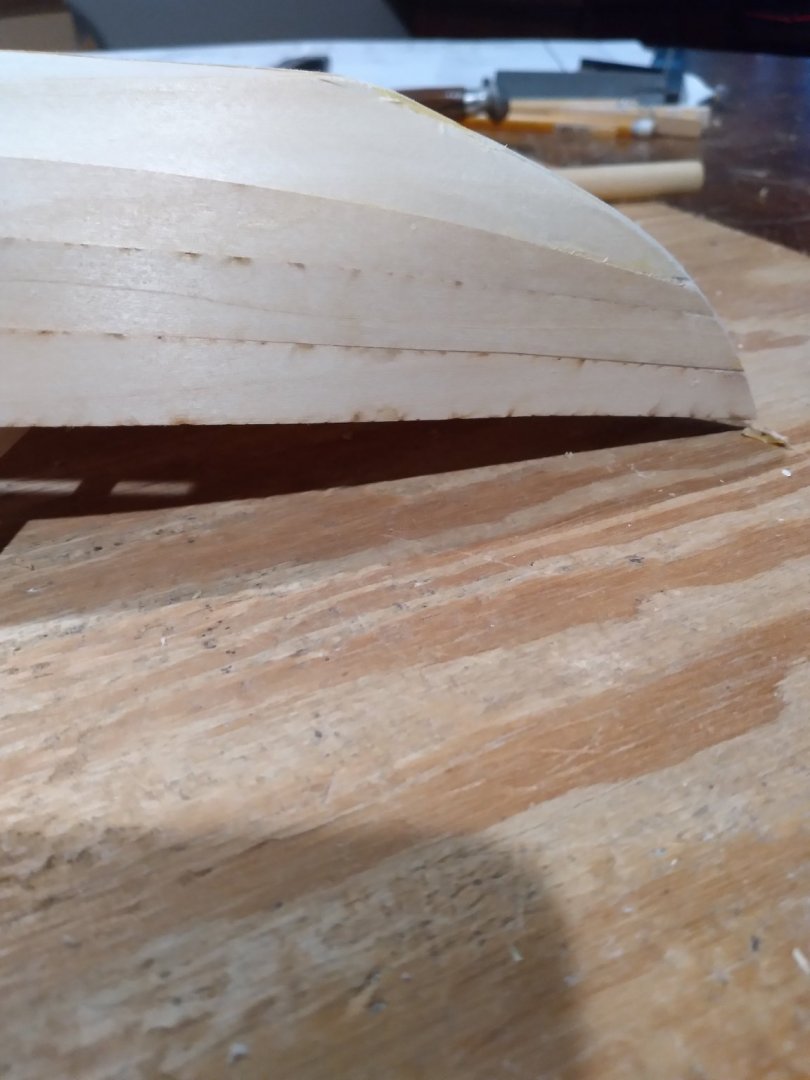
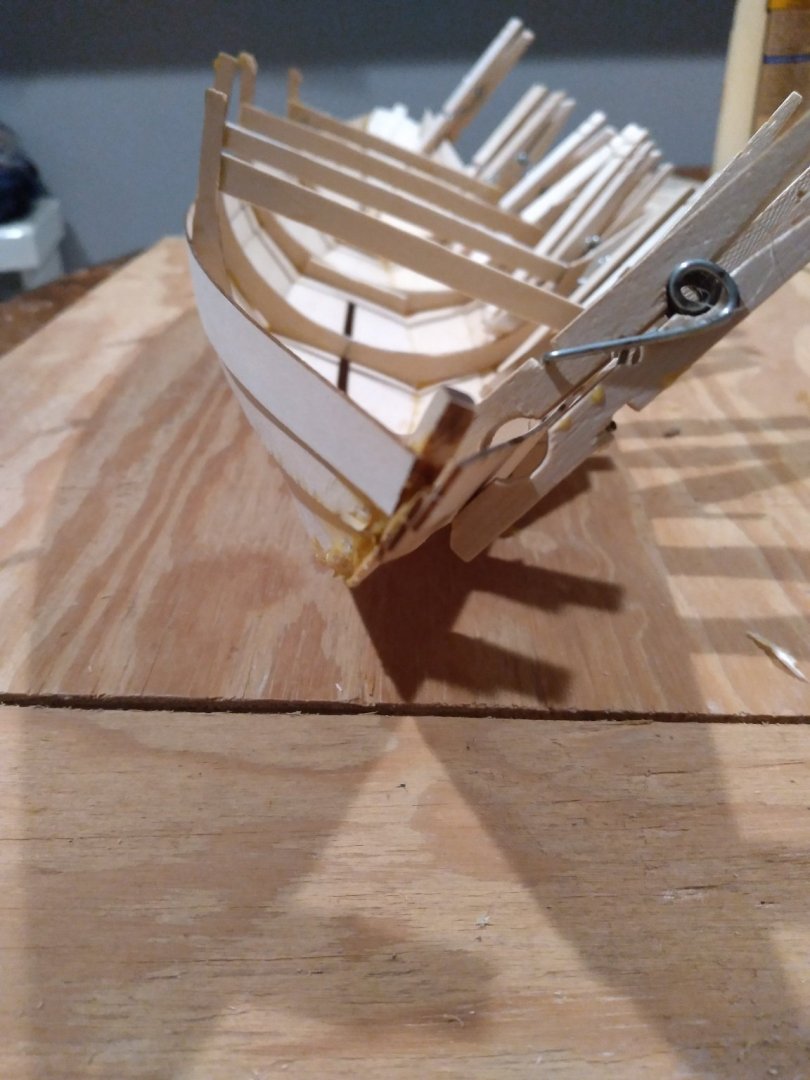
Transom attached. The pictures and errant pencil lines make it looks worse than it is. I'm sure it will all be fine with some fairing when I start the planking.
-
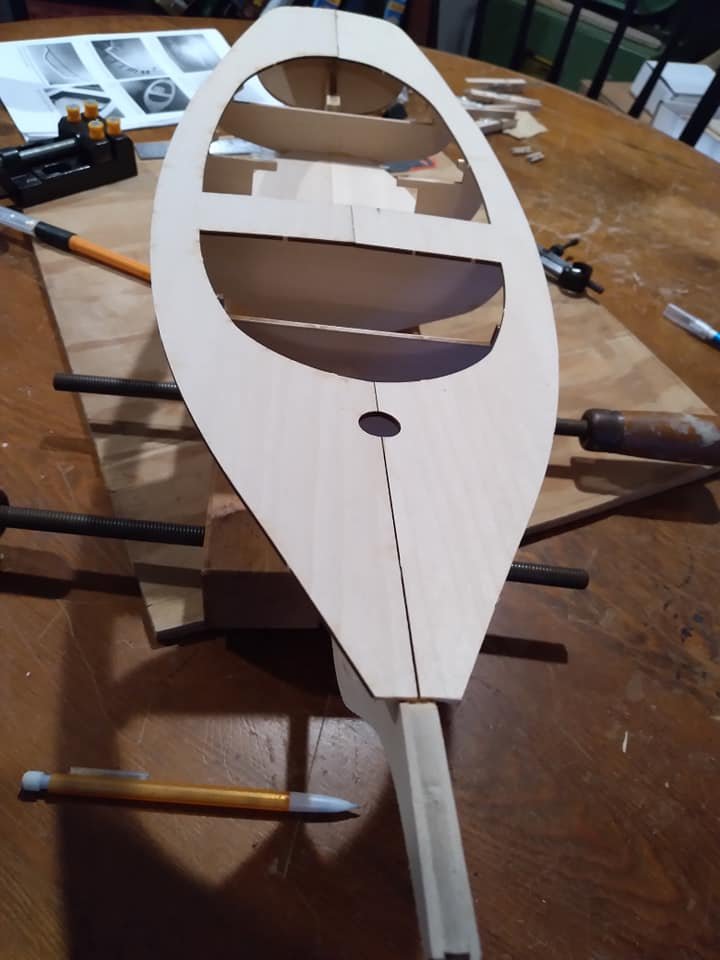
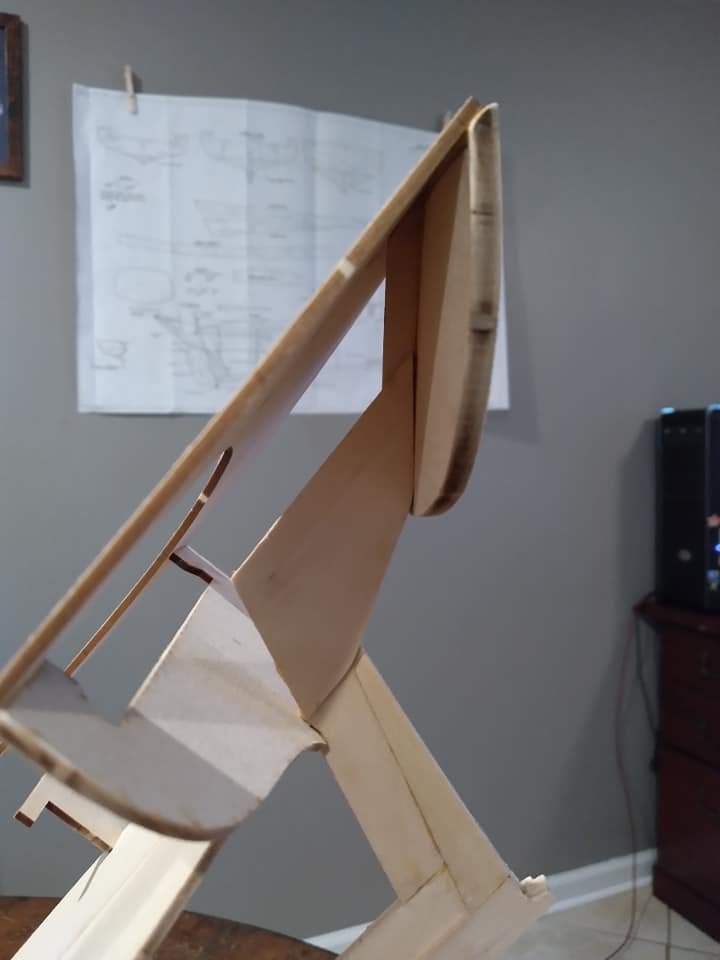
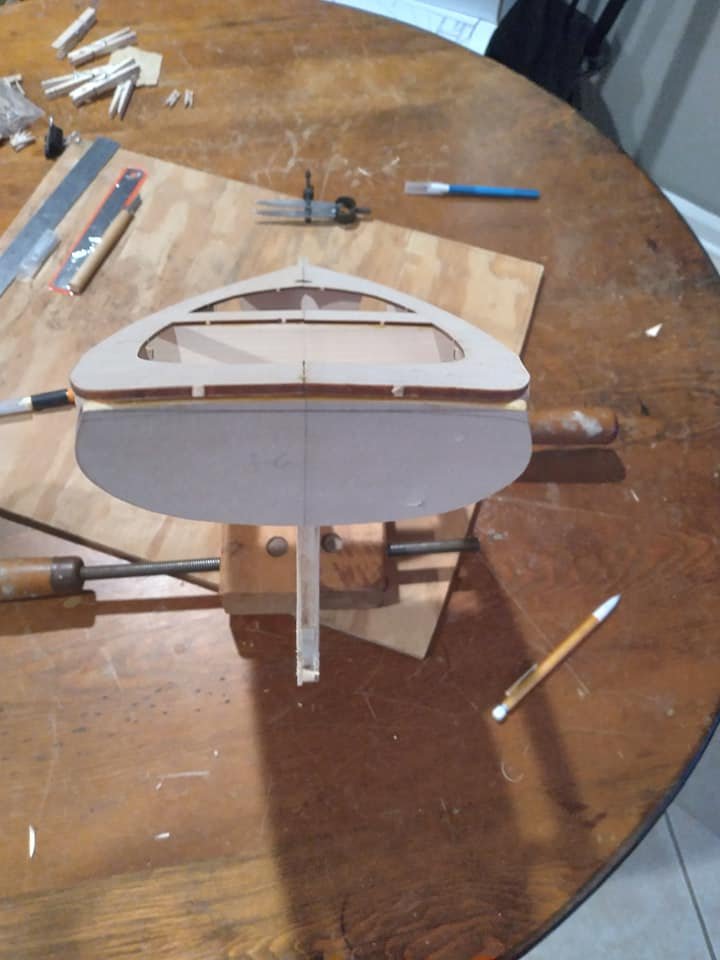
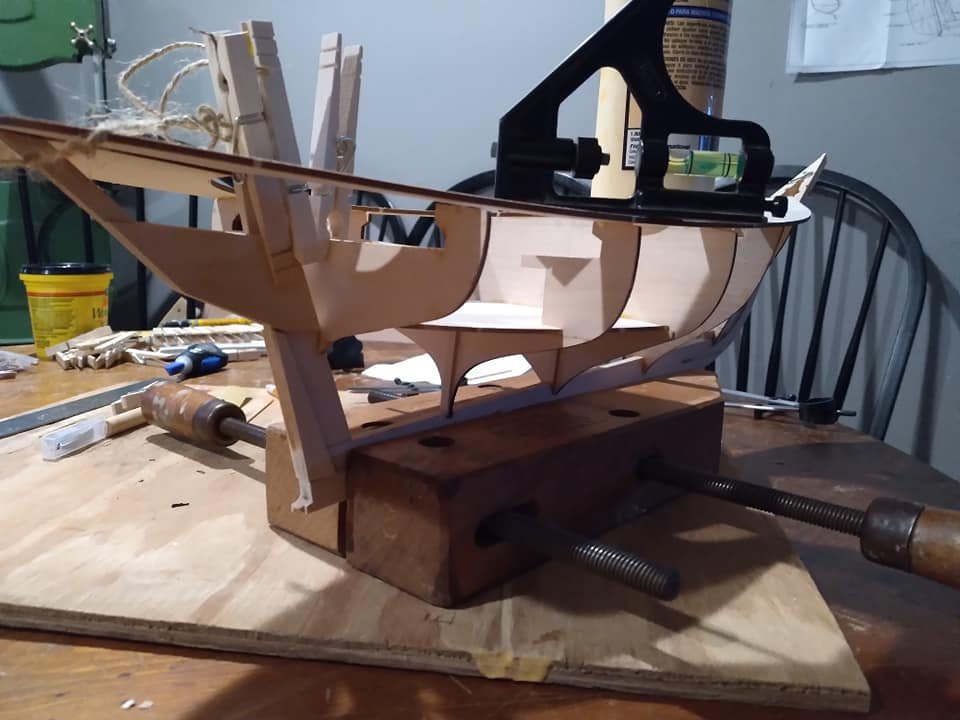
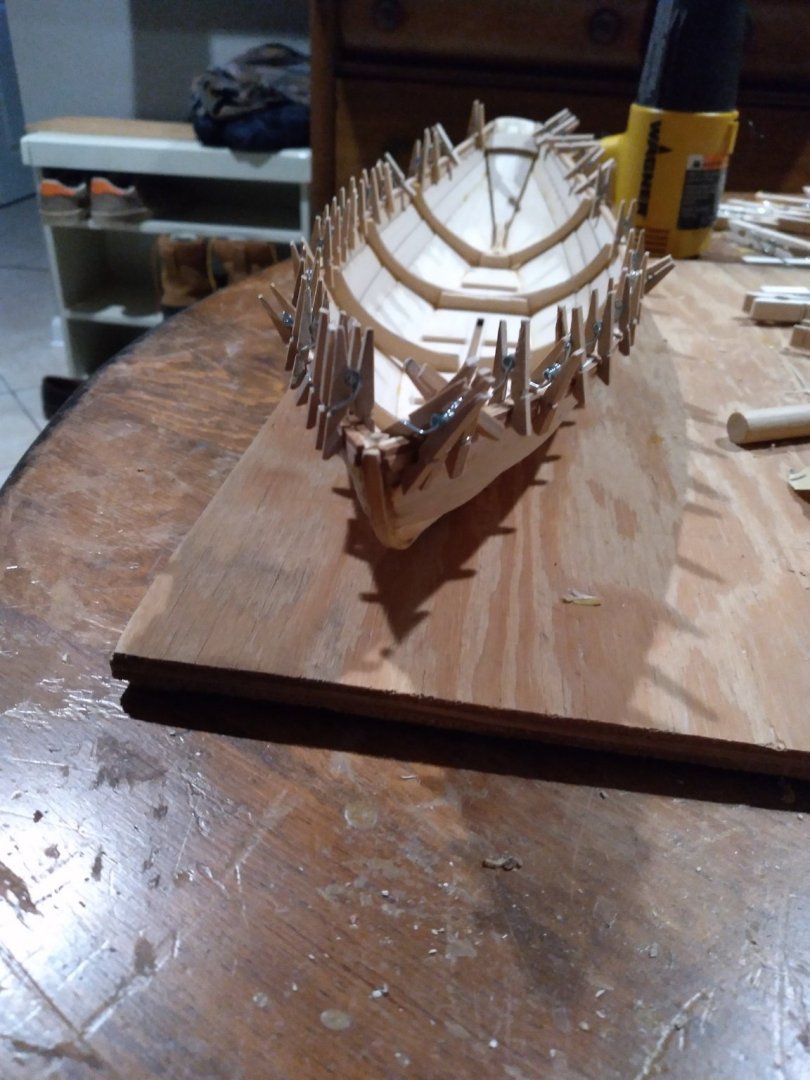
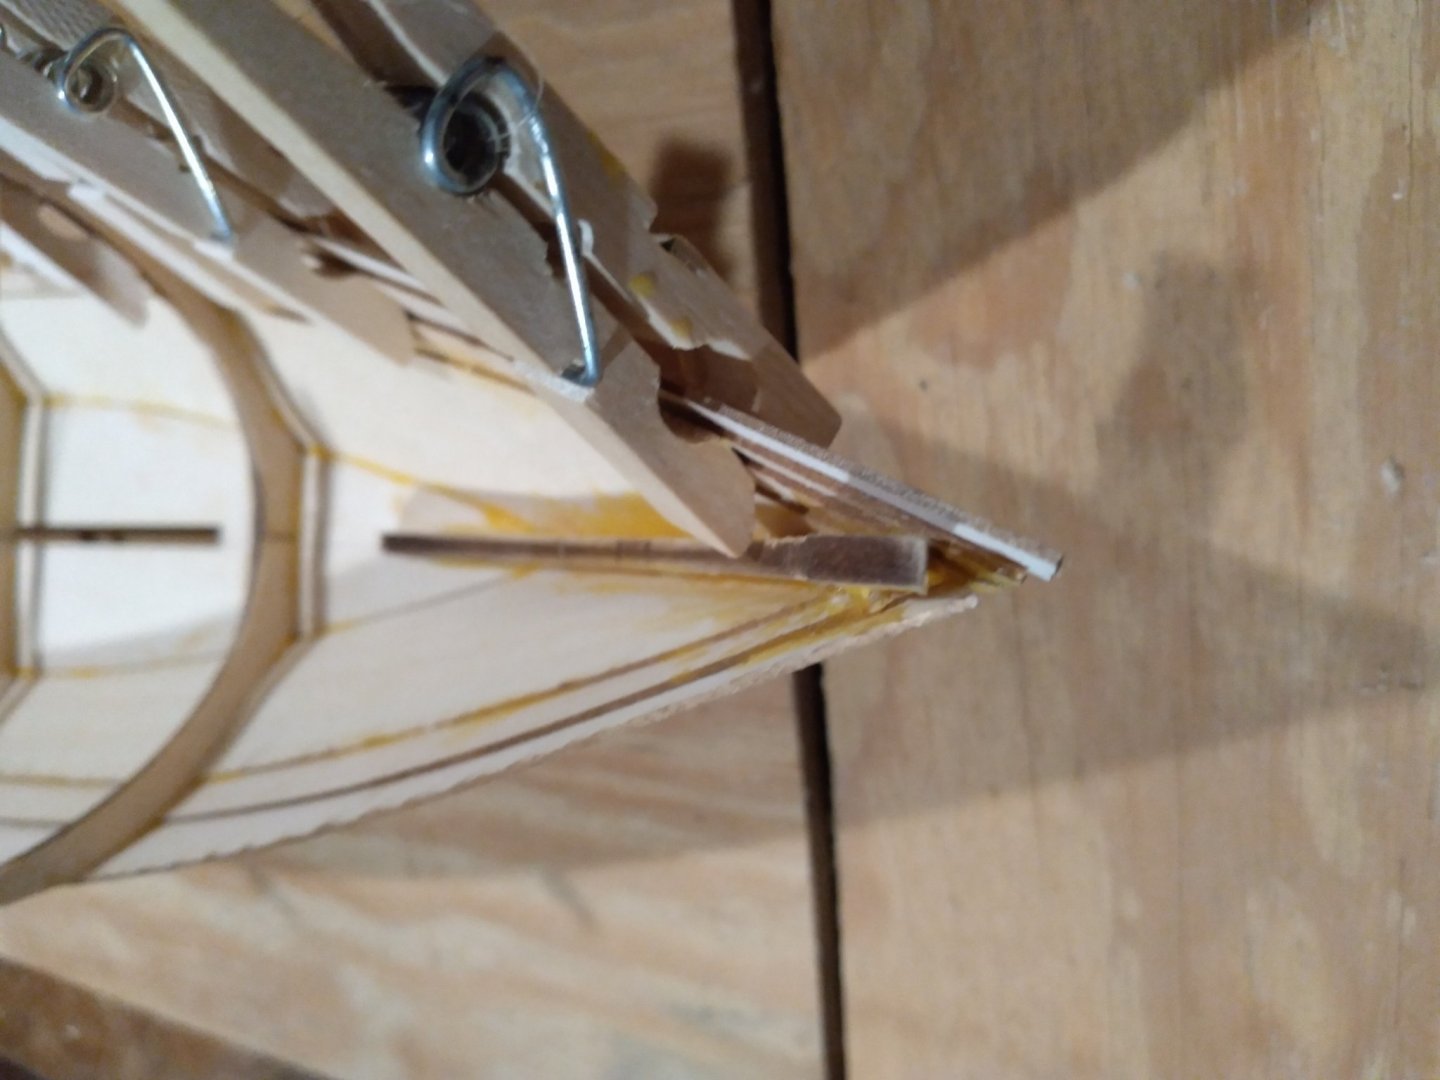
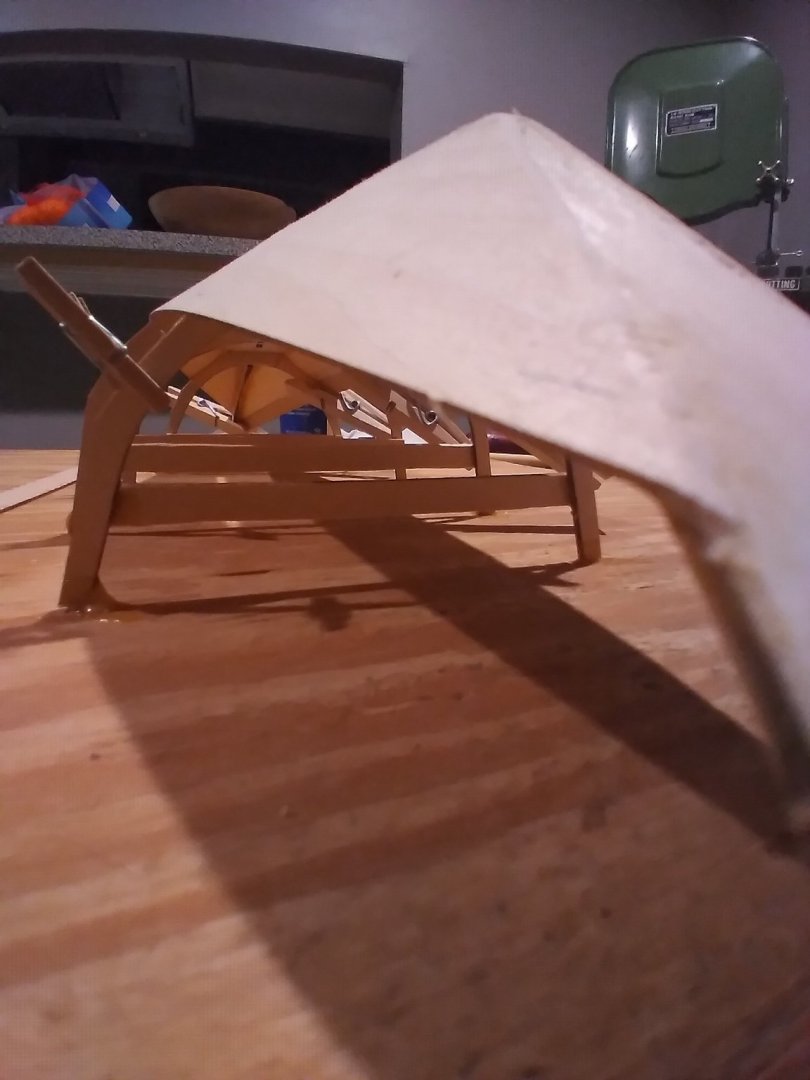
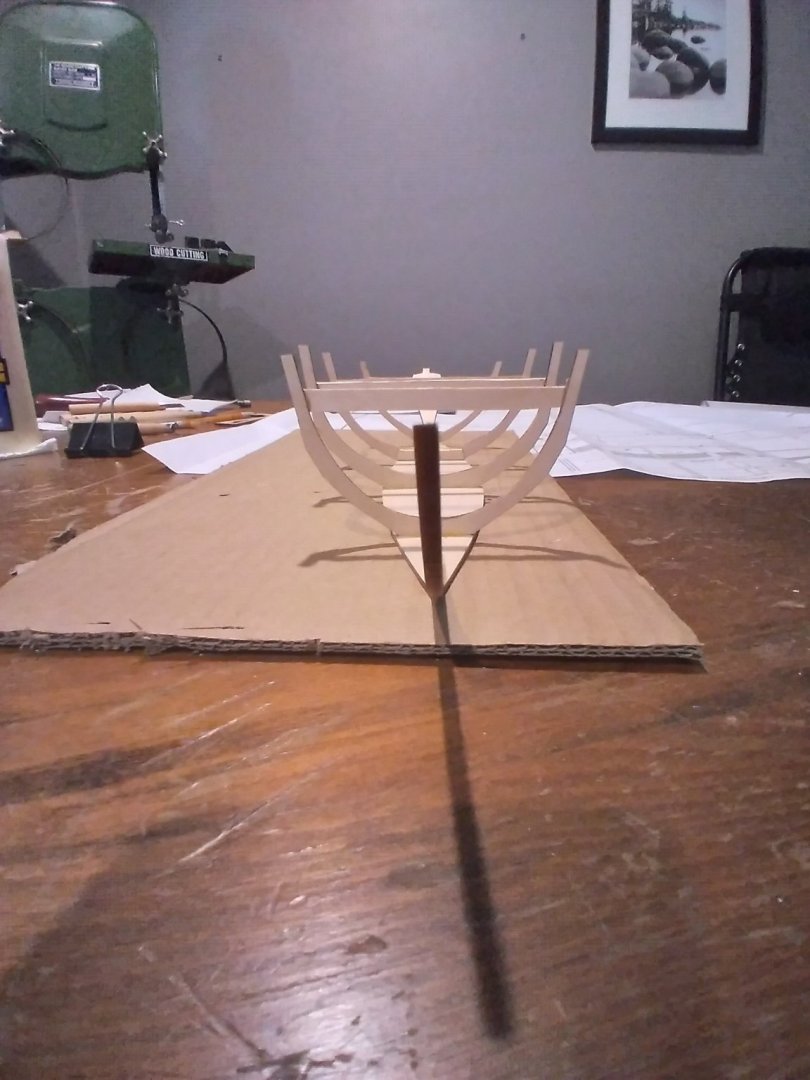
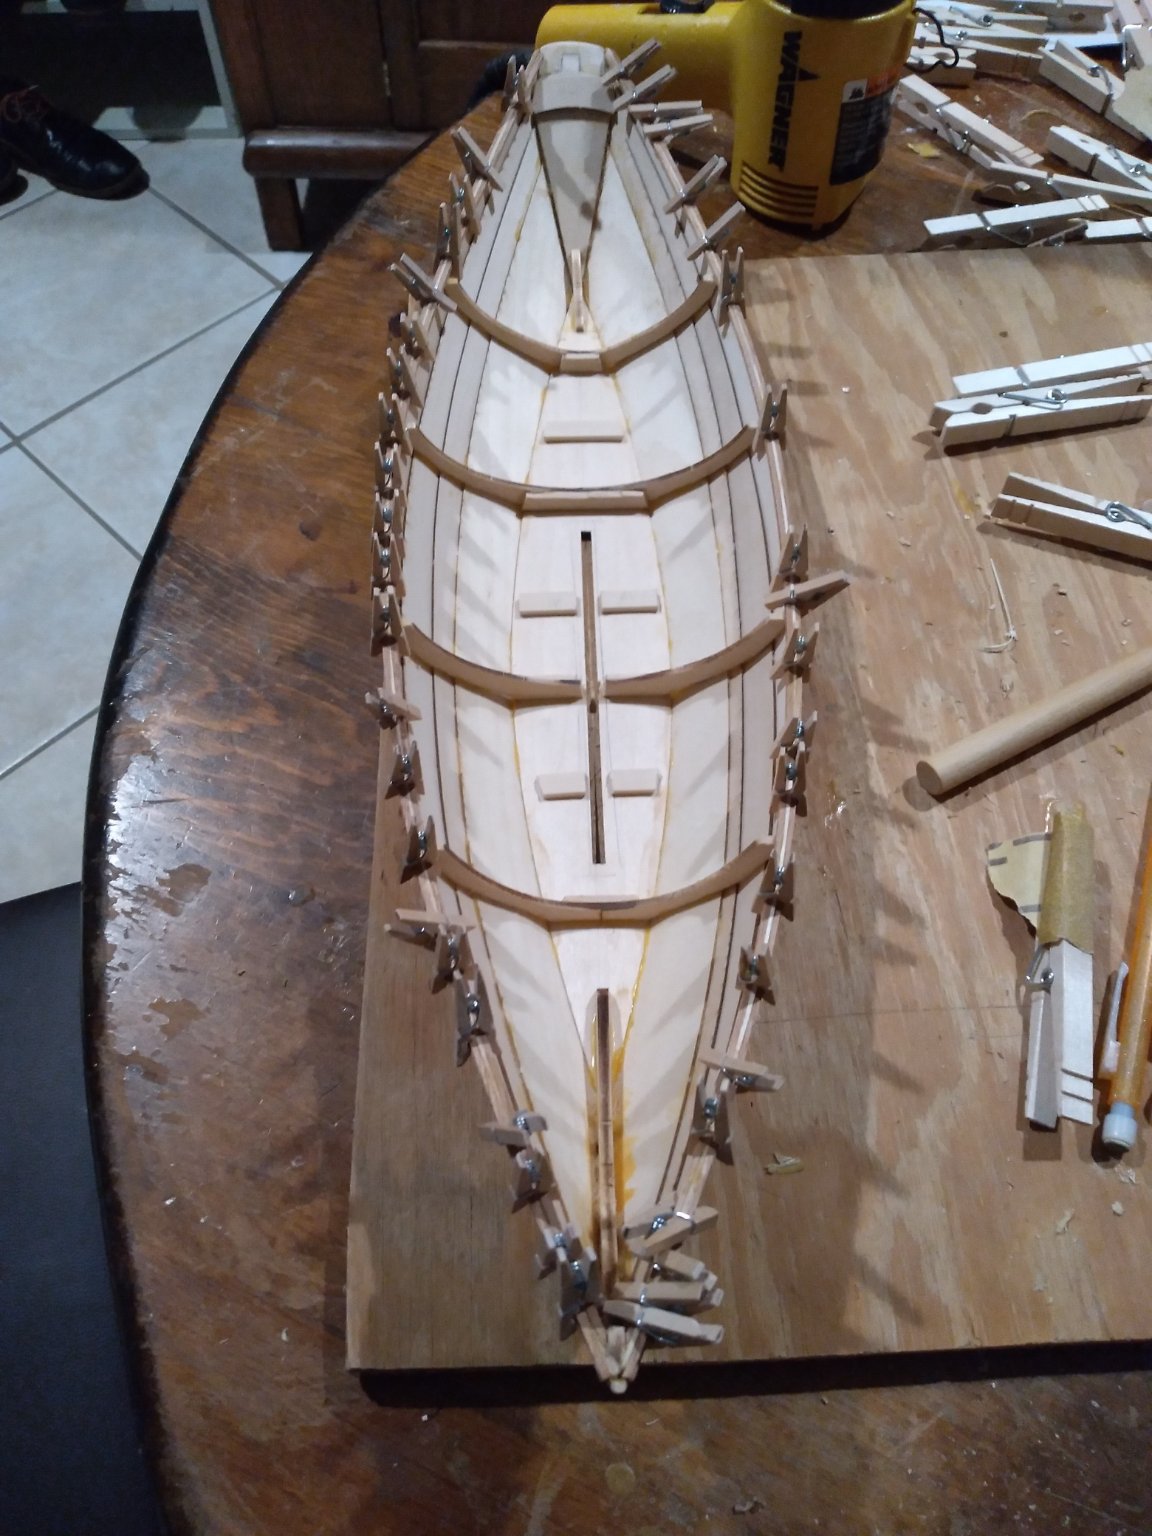
Thanks alross, It sat in the vice for 3 weeks with me looking at it and toying with it. I ended up angling the aft-most bulkhead forward almost 1/2" which forced F4 and F3 into nearly perfect position. I tacked F5-F3 into place, let it dry, then fastened F2, F1, and the stem, then stern. What I didn't realize at first is that attaching the deck, IS the stage where the alignment happens. The deck pieces don't just fall right on top of the bulkheads. This is the step where the proper spacing is made. Once the remainder of the bulkheads are secured to the deck, I'll fine tune some of the edges, and fair out the slope on the deck, and fill in the few thousandths gap in between the deck halves. Starting to look like a boat instead of a pile of sticks now!

-
Thanks for the tip, Thistle! I just ordered a copy. I am having trouble with the deck placement. no matter what I try F5 overhangs the deck. F1-F4 lineup perfectly. With the floor in place, moving F5 forward also changes the placement of F4 and F3 throwing those two out of alignment. Any tips on the best way to proceed? I think trimming the excess off of F5 will cause massive problems getting the planking to sit fair. Maybe I could sister a strip to each deck half making it wider, then reshape the deck to meet the bulkheads? Really scratching my head on this one.

-
ccoyle, this is the big version 1" scale; 31" LOA
-
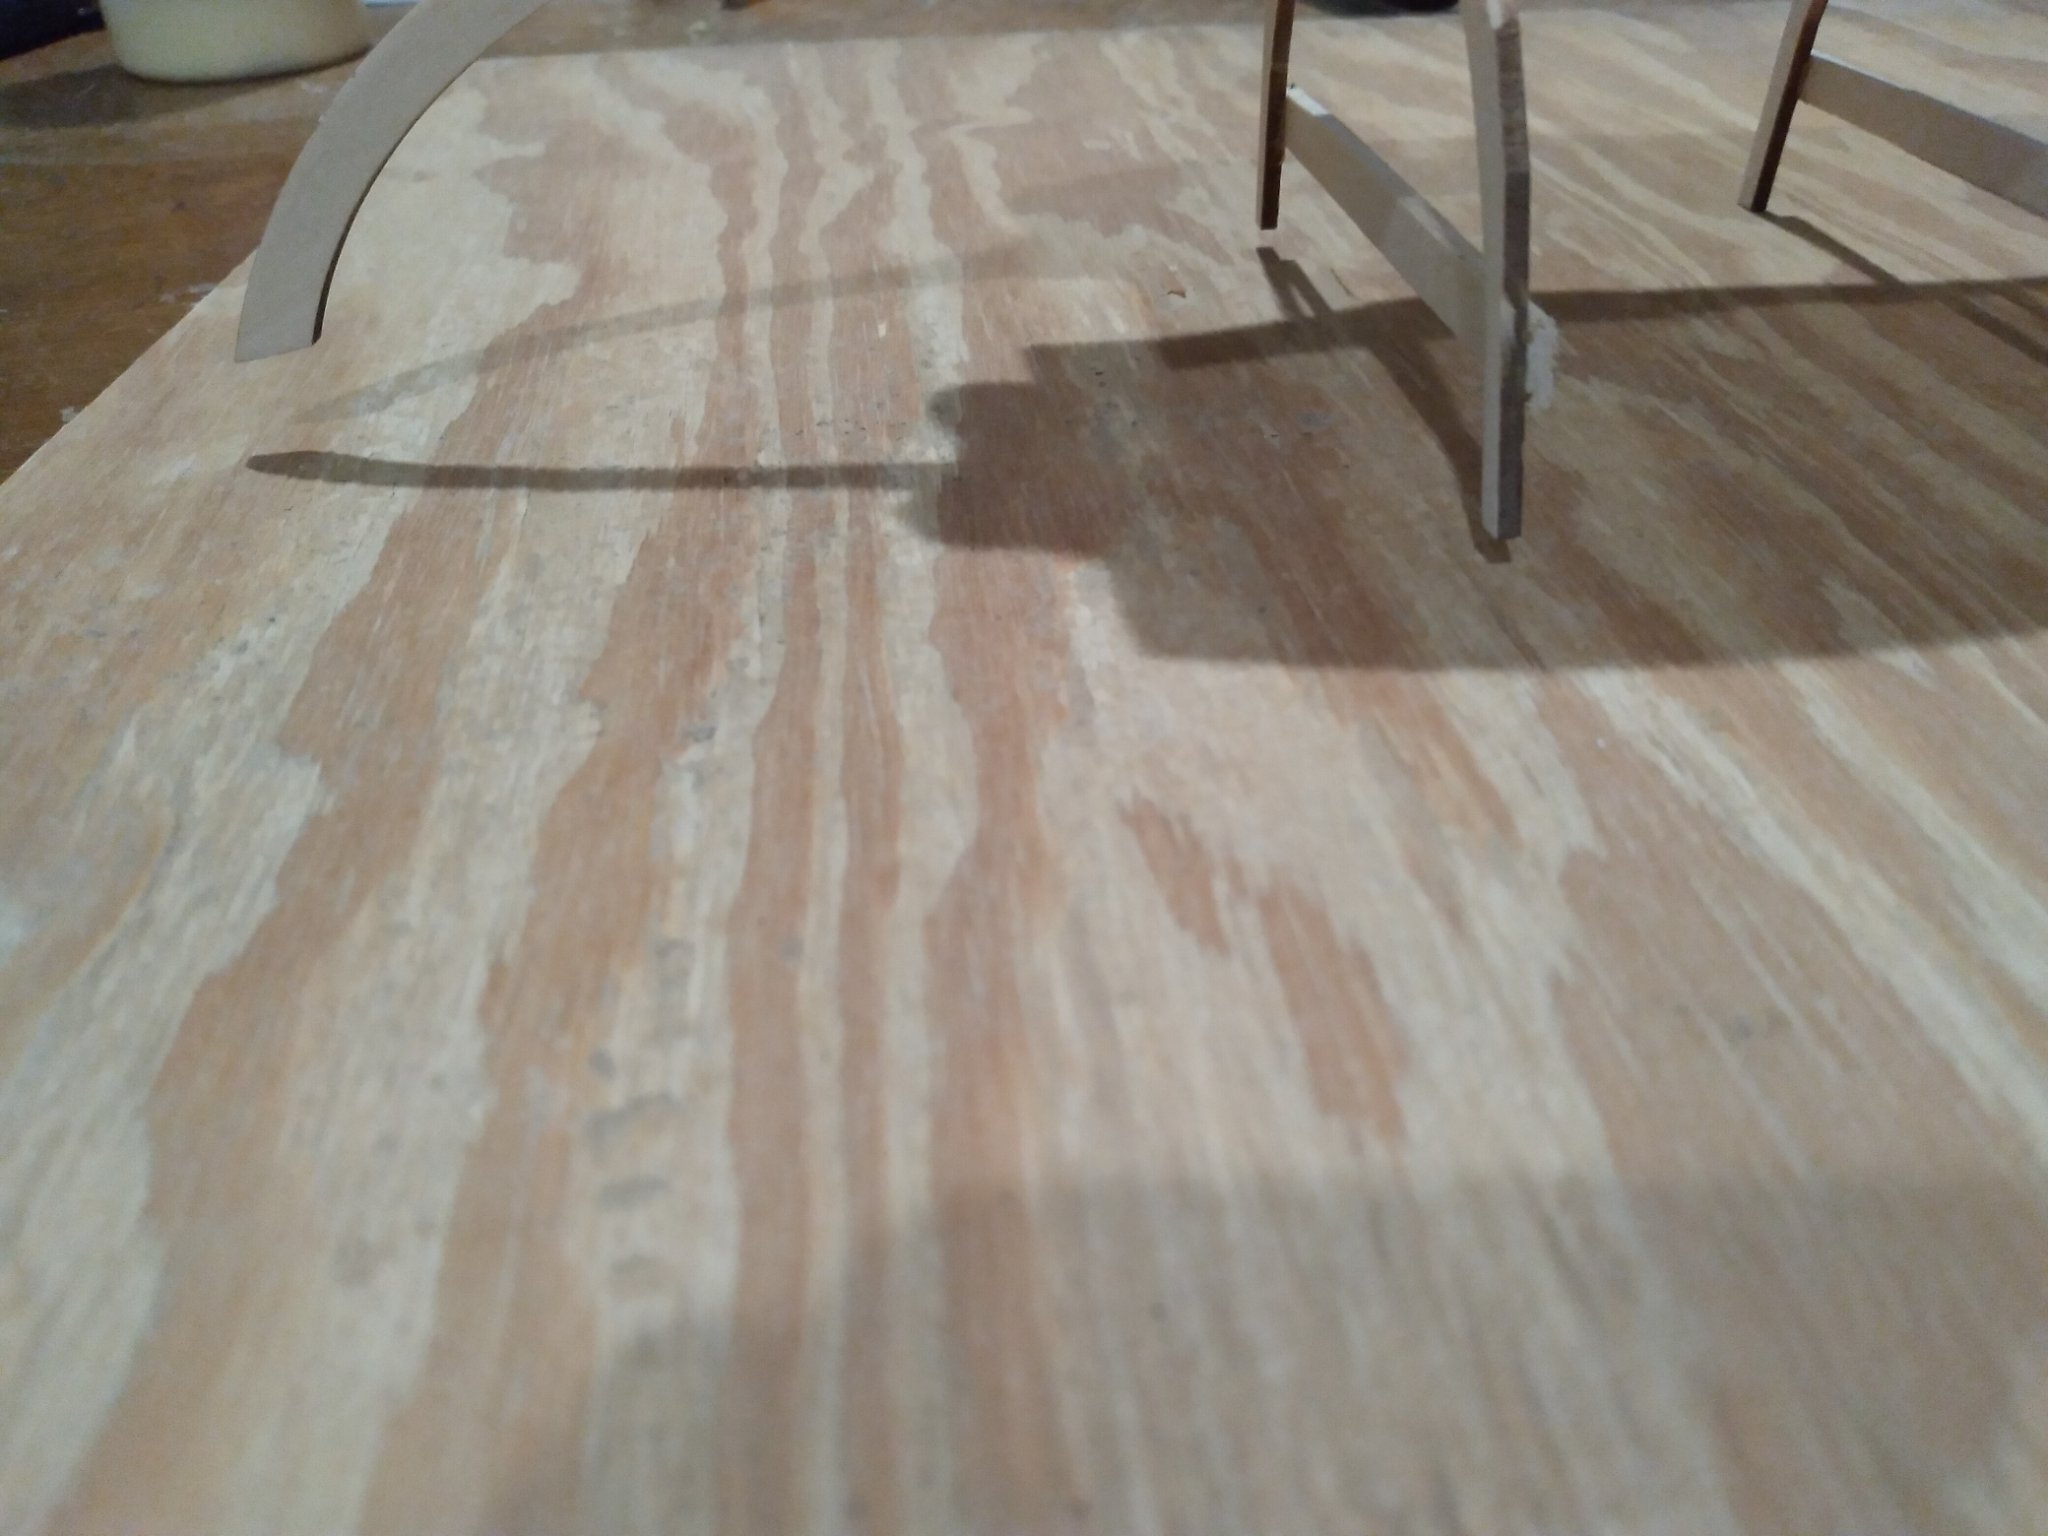
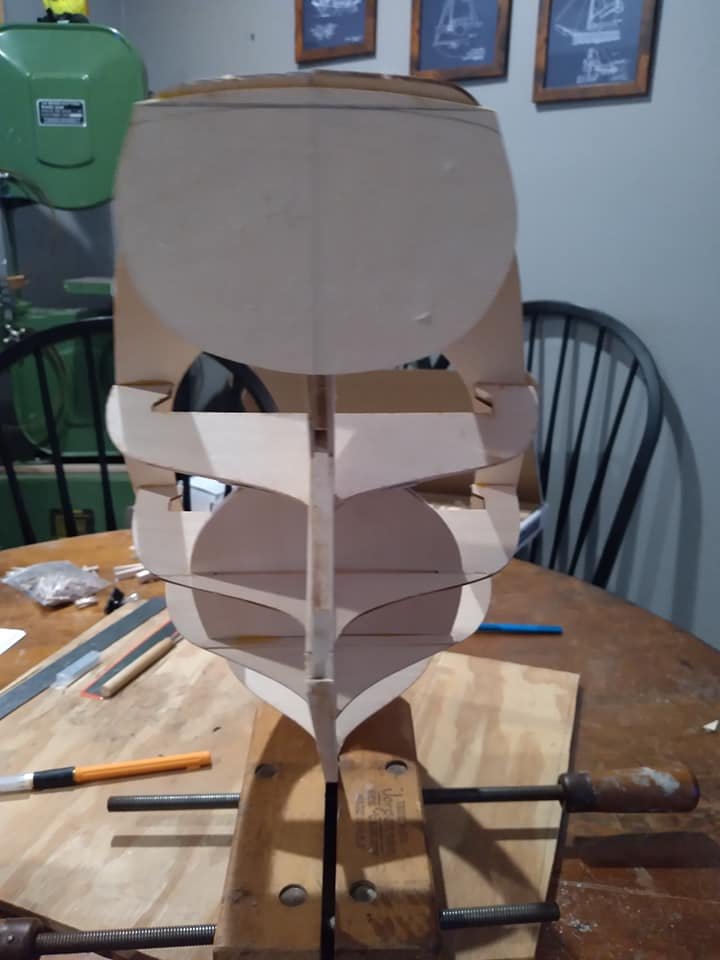
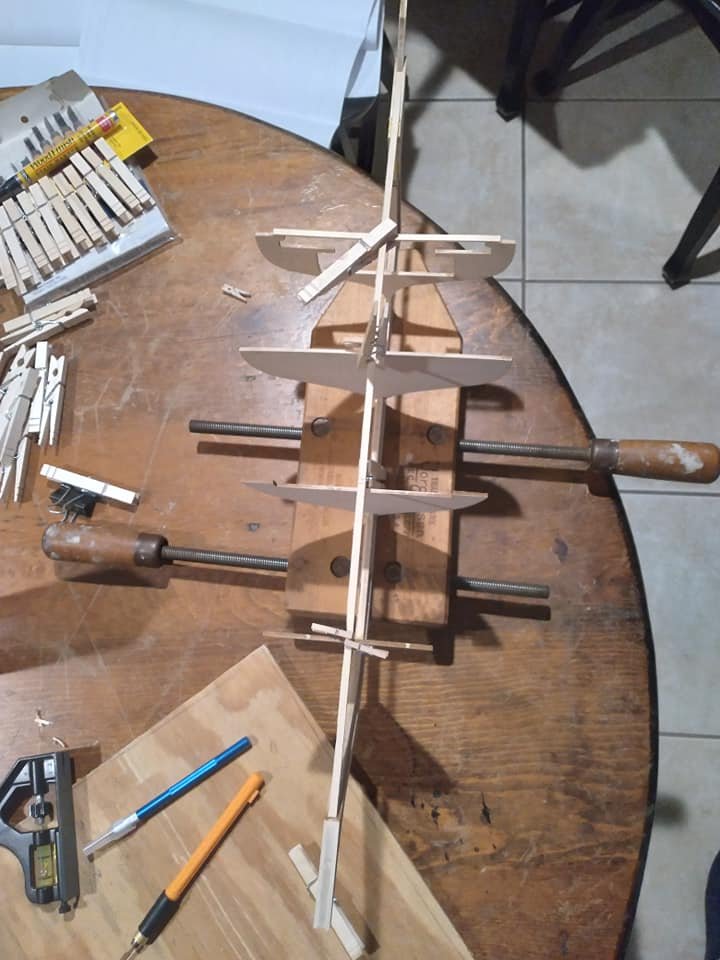
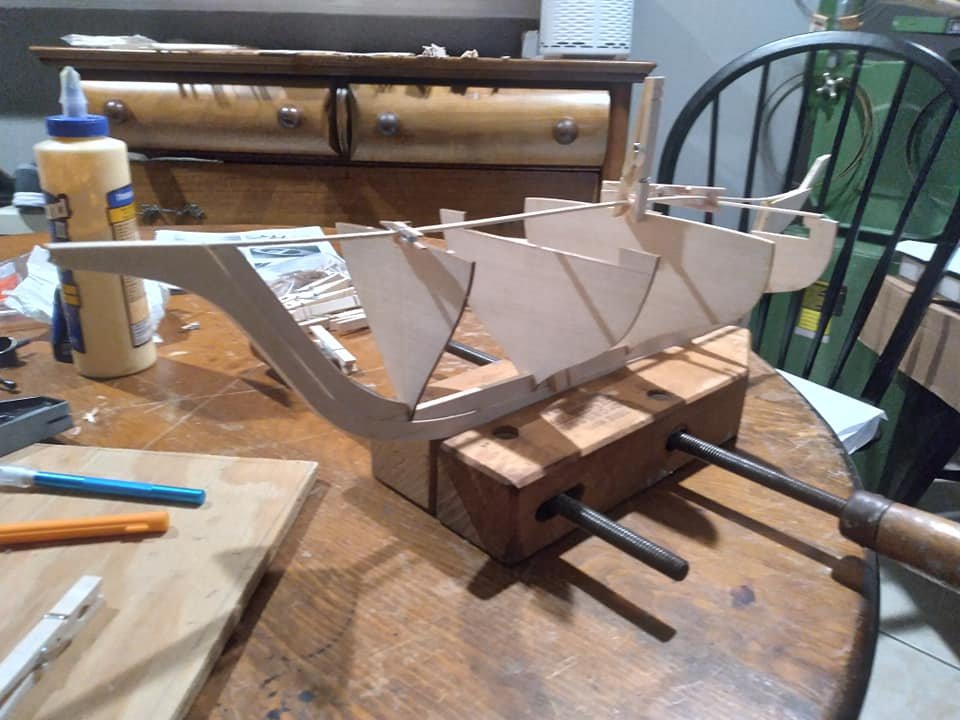
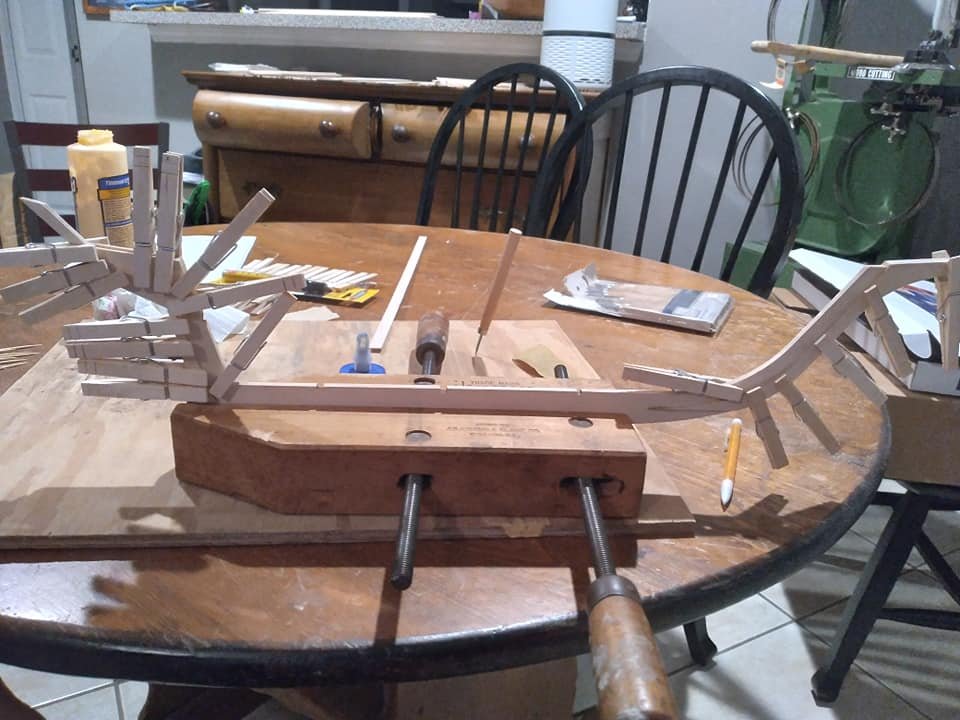
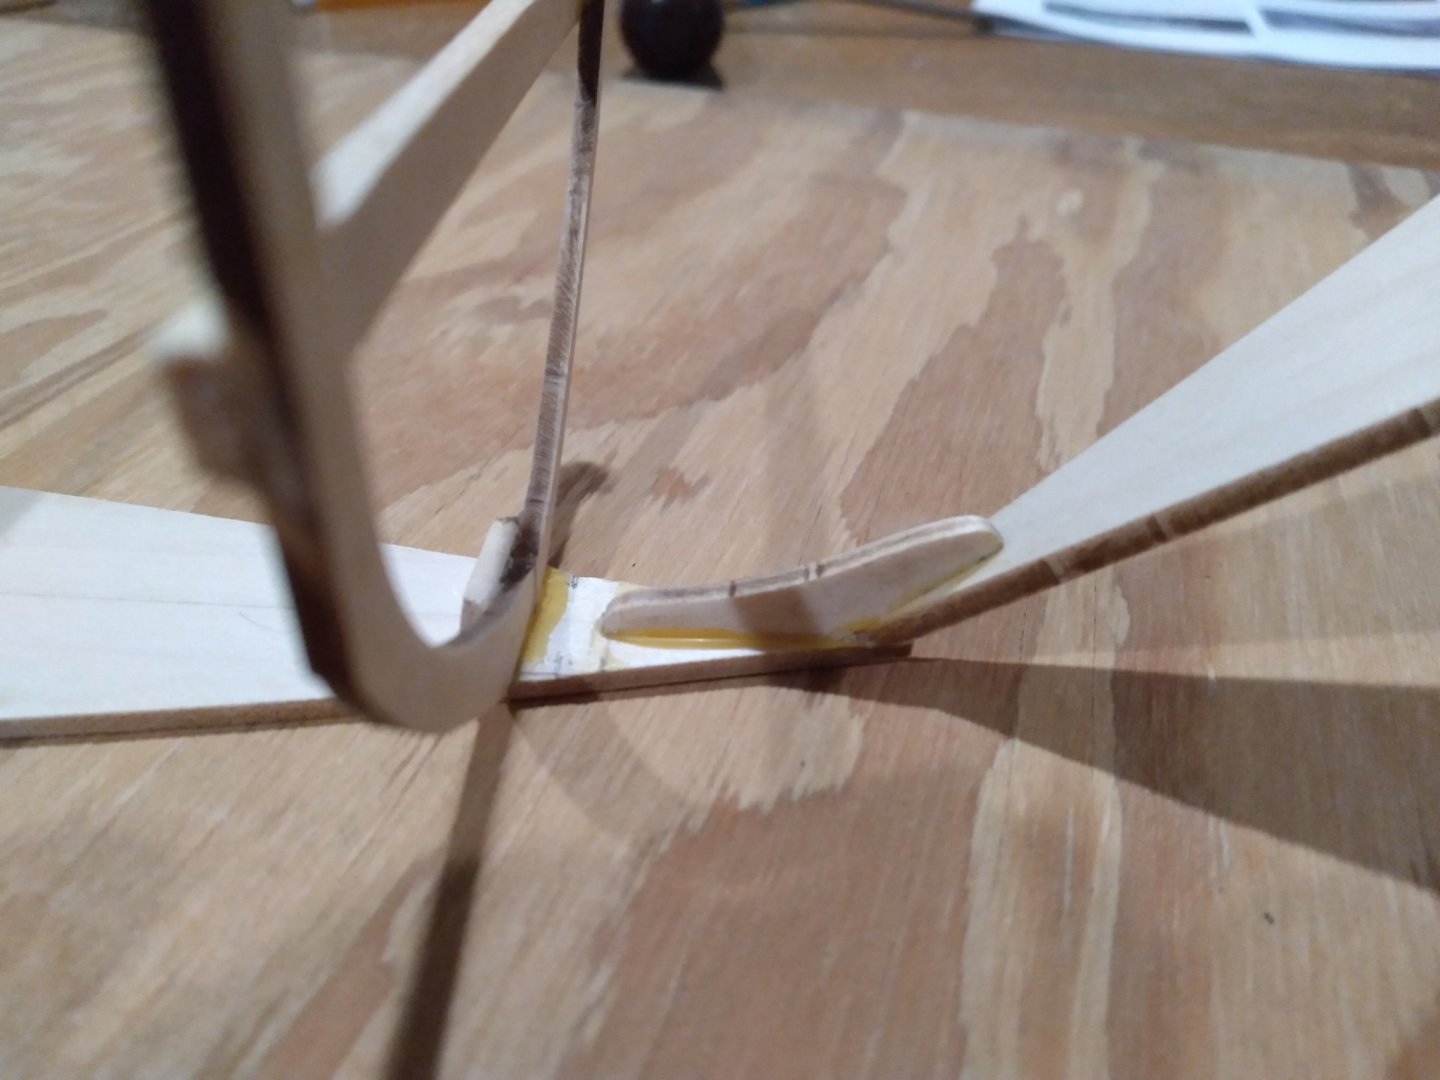
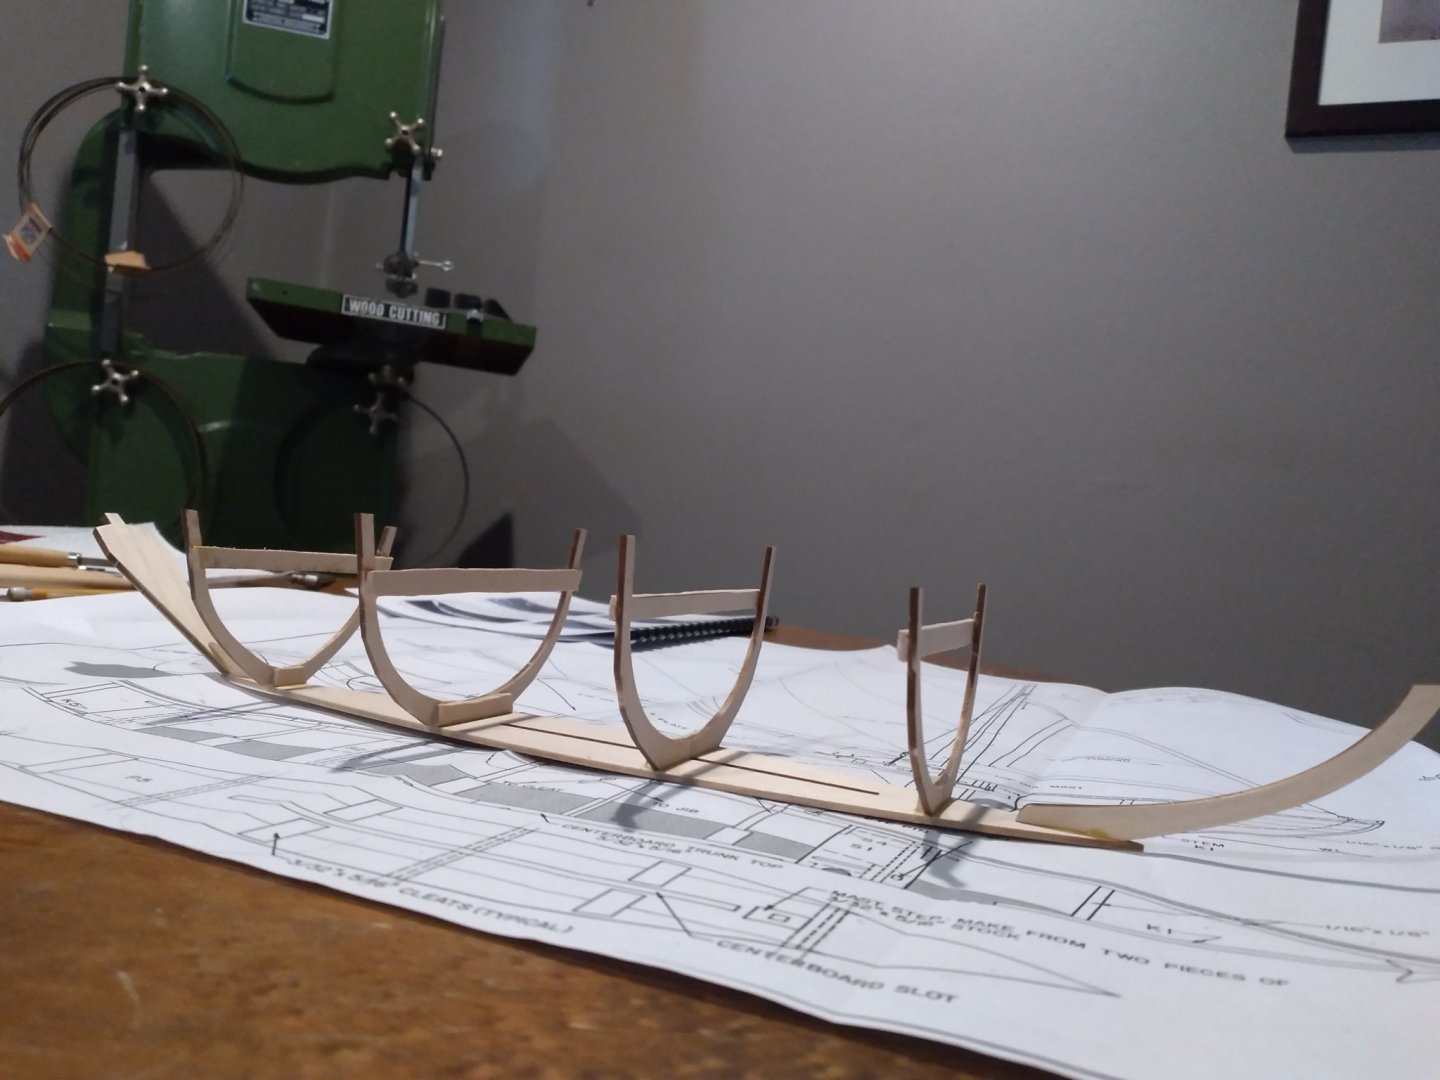
Gluing bulkheads 1-4 was pretty dicey. Minimal solid reference points. I used dividers to take off the spacing from the plans, then referenced each frames mid-line and corners to the previous frame. I'm sure there is a much better way to do it, but it looks pretty close to me.

-
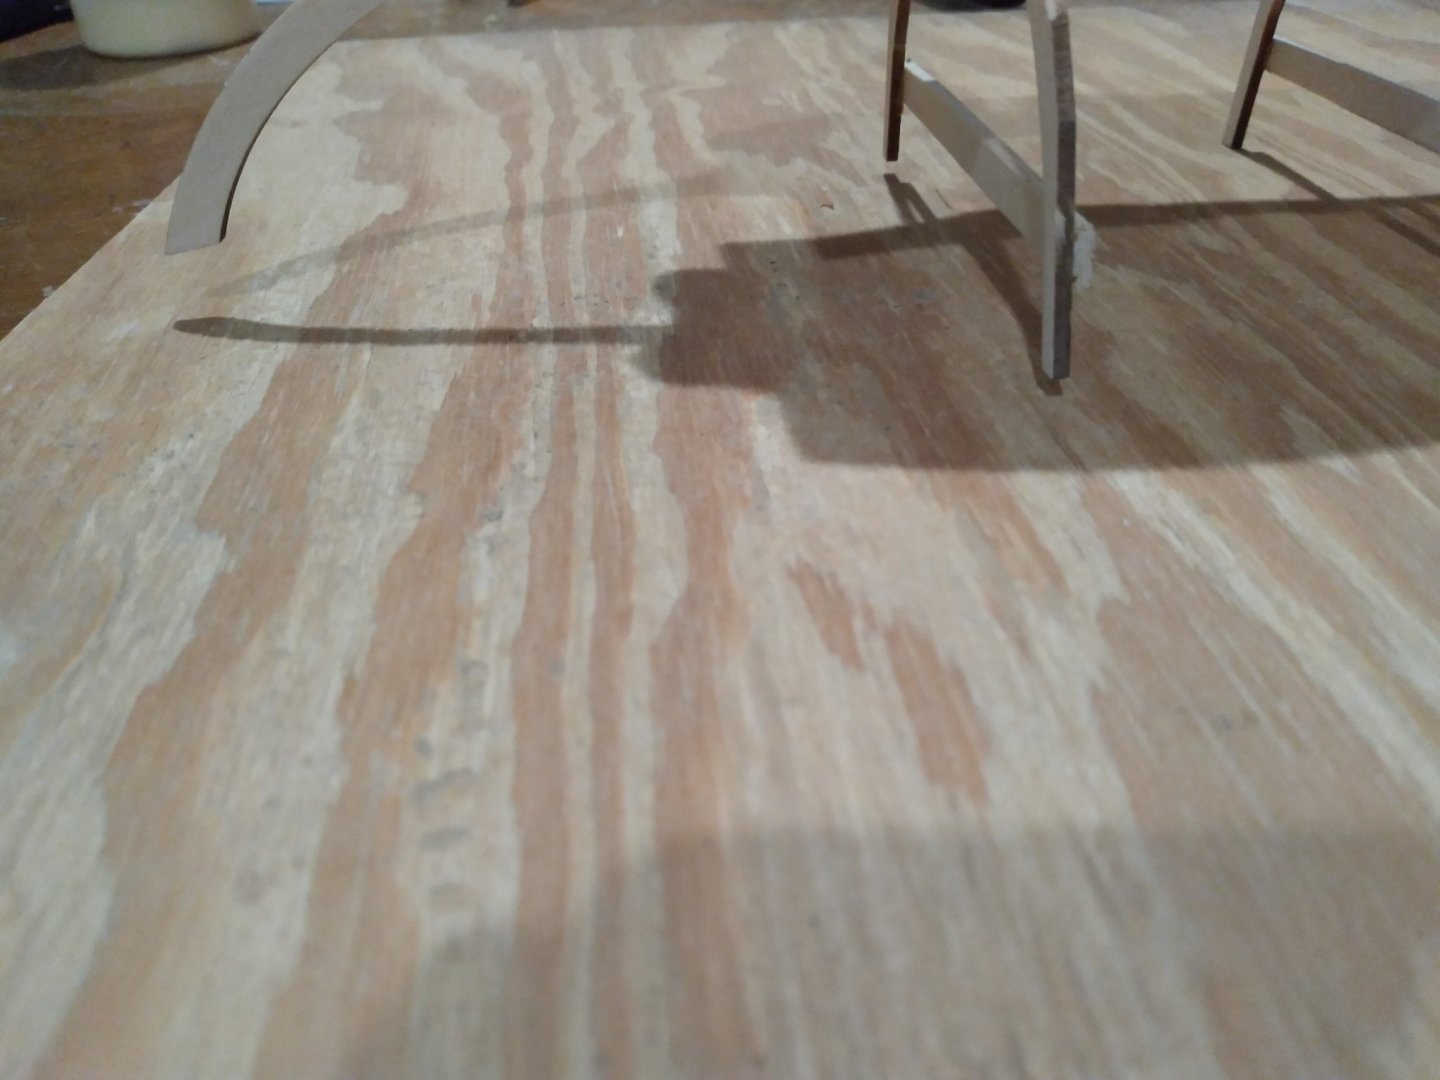
Keel glue up is done. Bulkheads are marked and braces installed. The handscrew makes an excellent cradle
-
I was really excited to get this and tore right into it. Lumbar yard laid out, and keel glue up under way.
-
I may still go back and re-cut/sew the sails to get the seams facing the same way. The main looks like I sewed it drunk (pleading the 5th); Maybe I can put some more halyard tension on the jib to pull some of the mast rake out. The fore-triangle doesn't look the same as the plans.
-
Thank you! This kit was a great learning experience! The plans and parts were all spot-on. I learned a ton about the building techniques, and hopefully wont repeat the same mistakes twice XD
-
Going through some messy IRL stuff and didn't keep up with pictures, but I'm calling this one good enough for government work (I can say that, I worked in state government for 14 years XD)
- 25 replies
-
- 7
-

-
- Bluejacket Shipcrafters
- Swampscott dory
- (and 1 more)
-
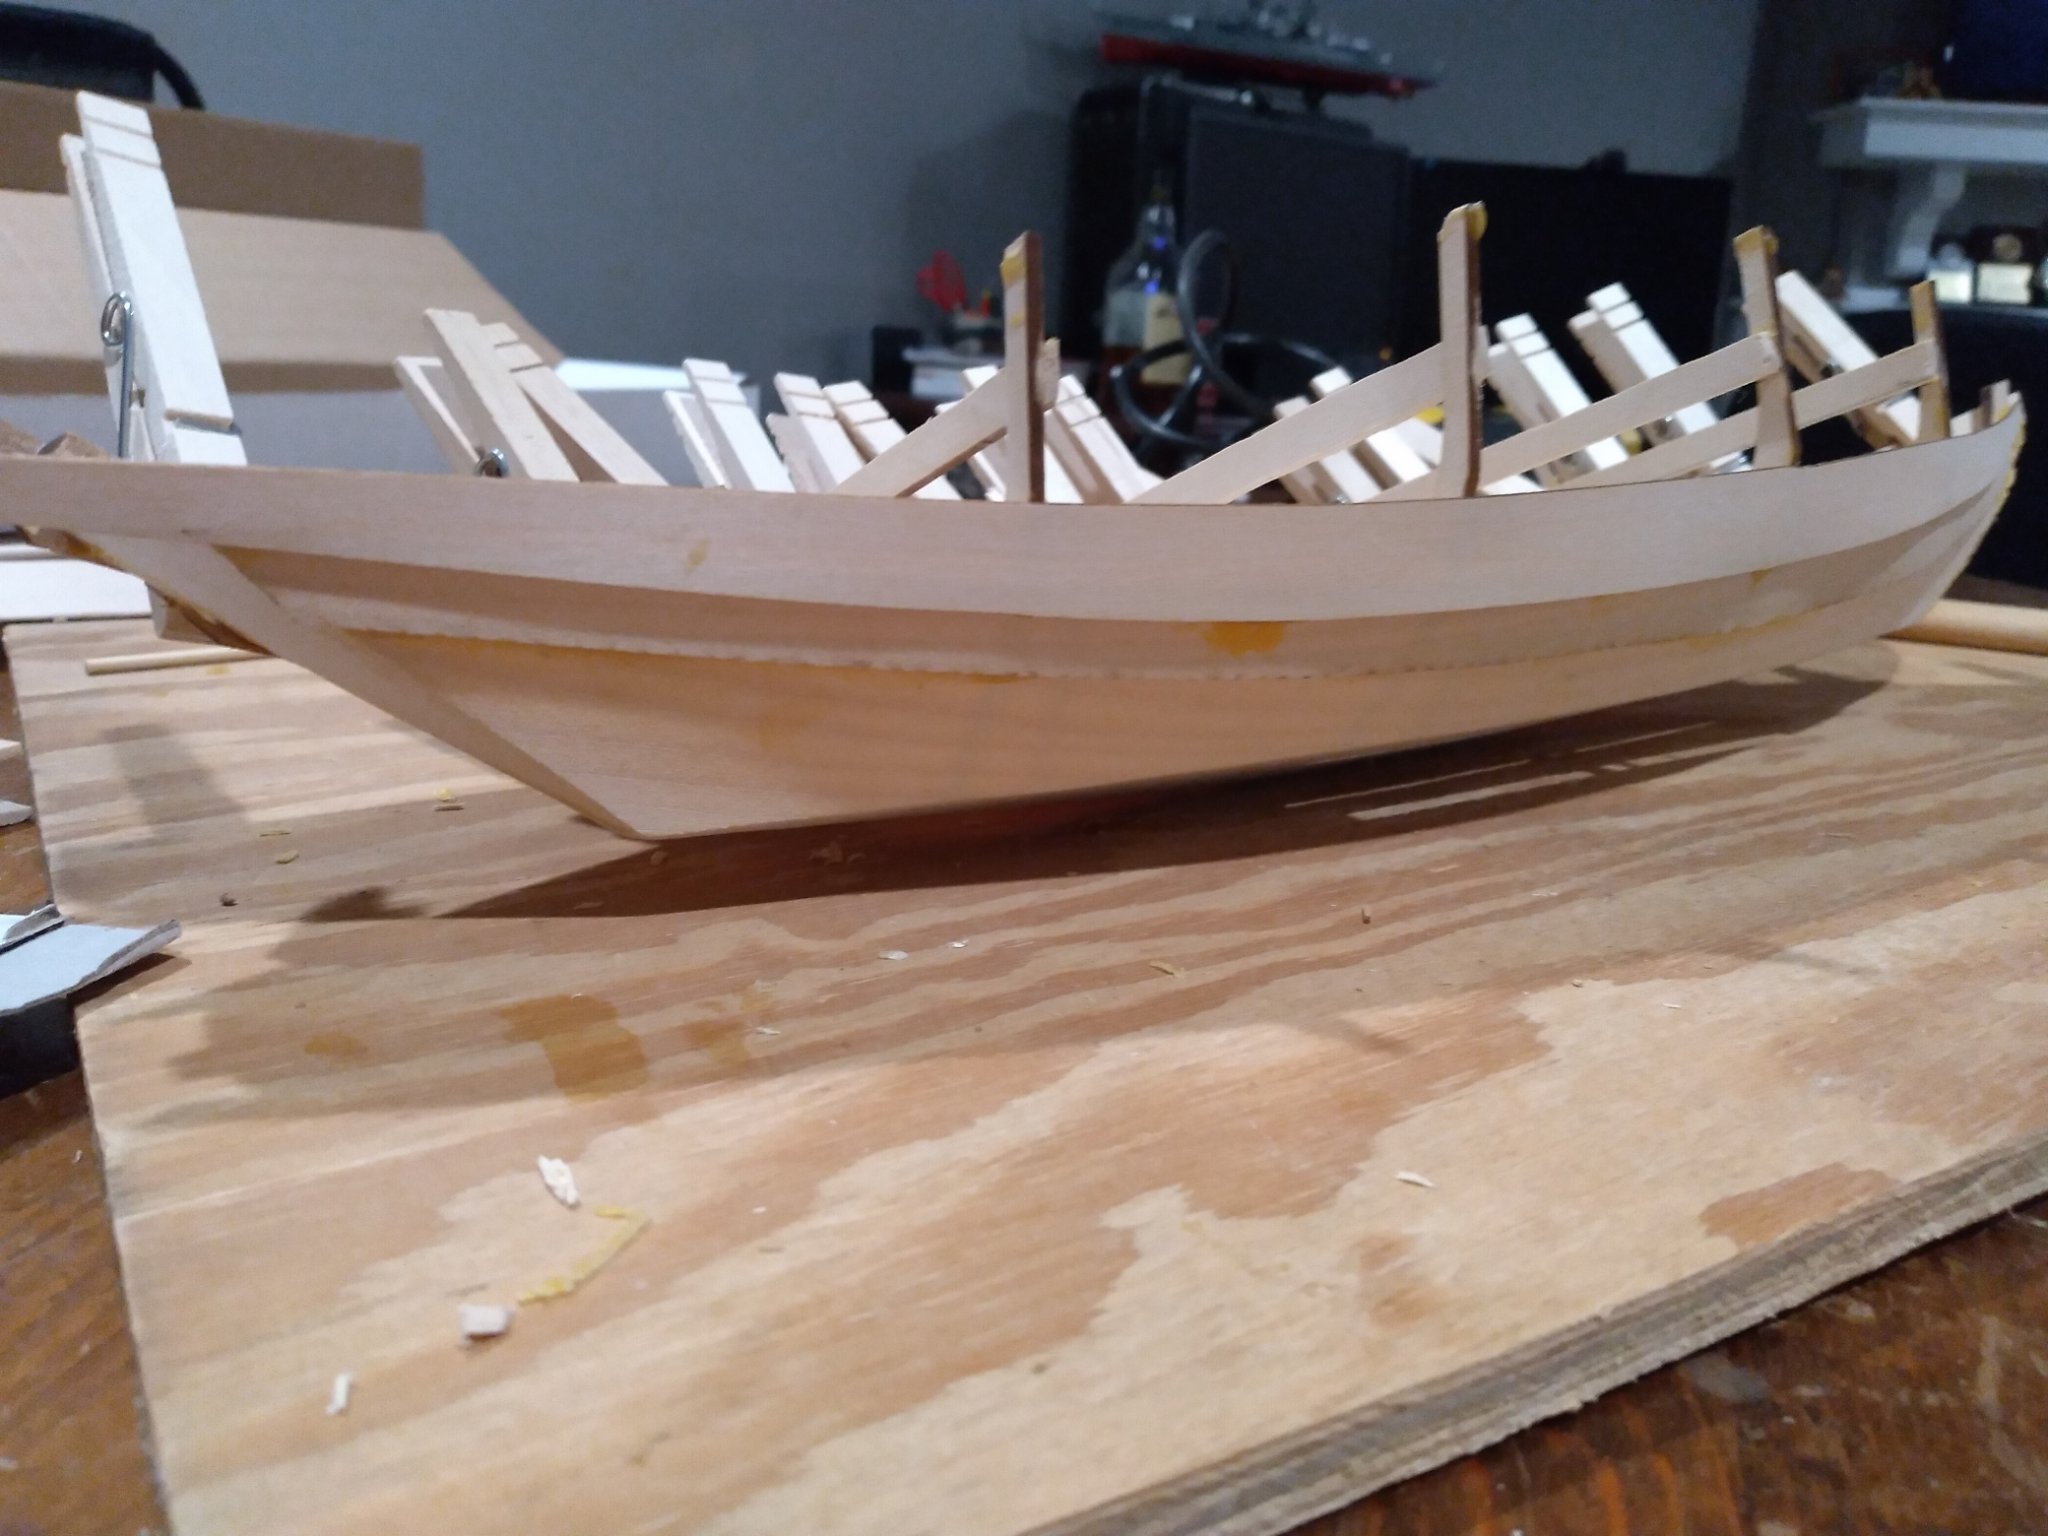
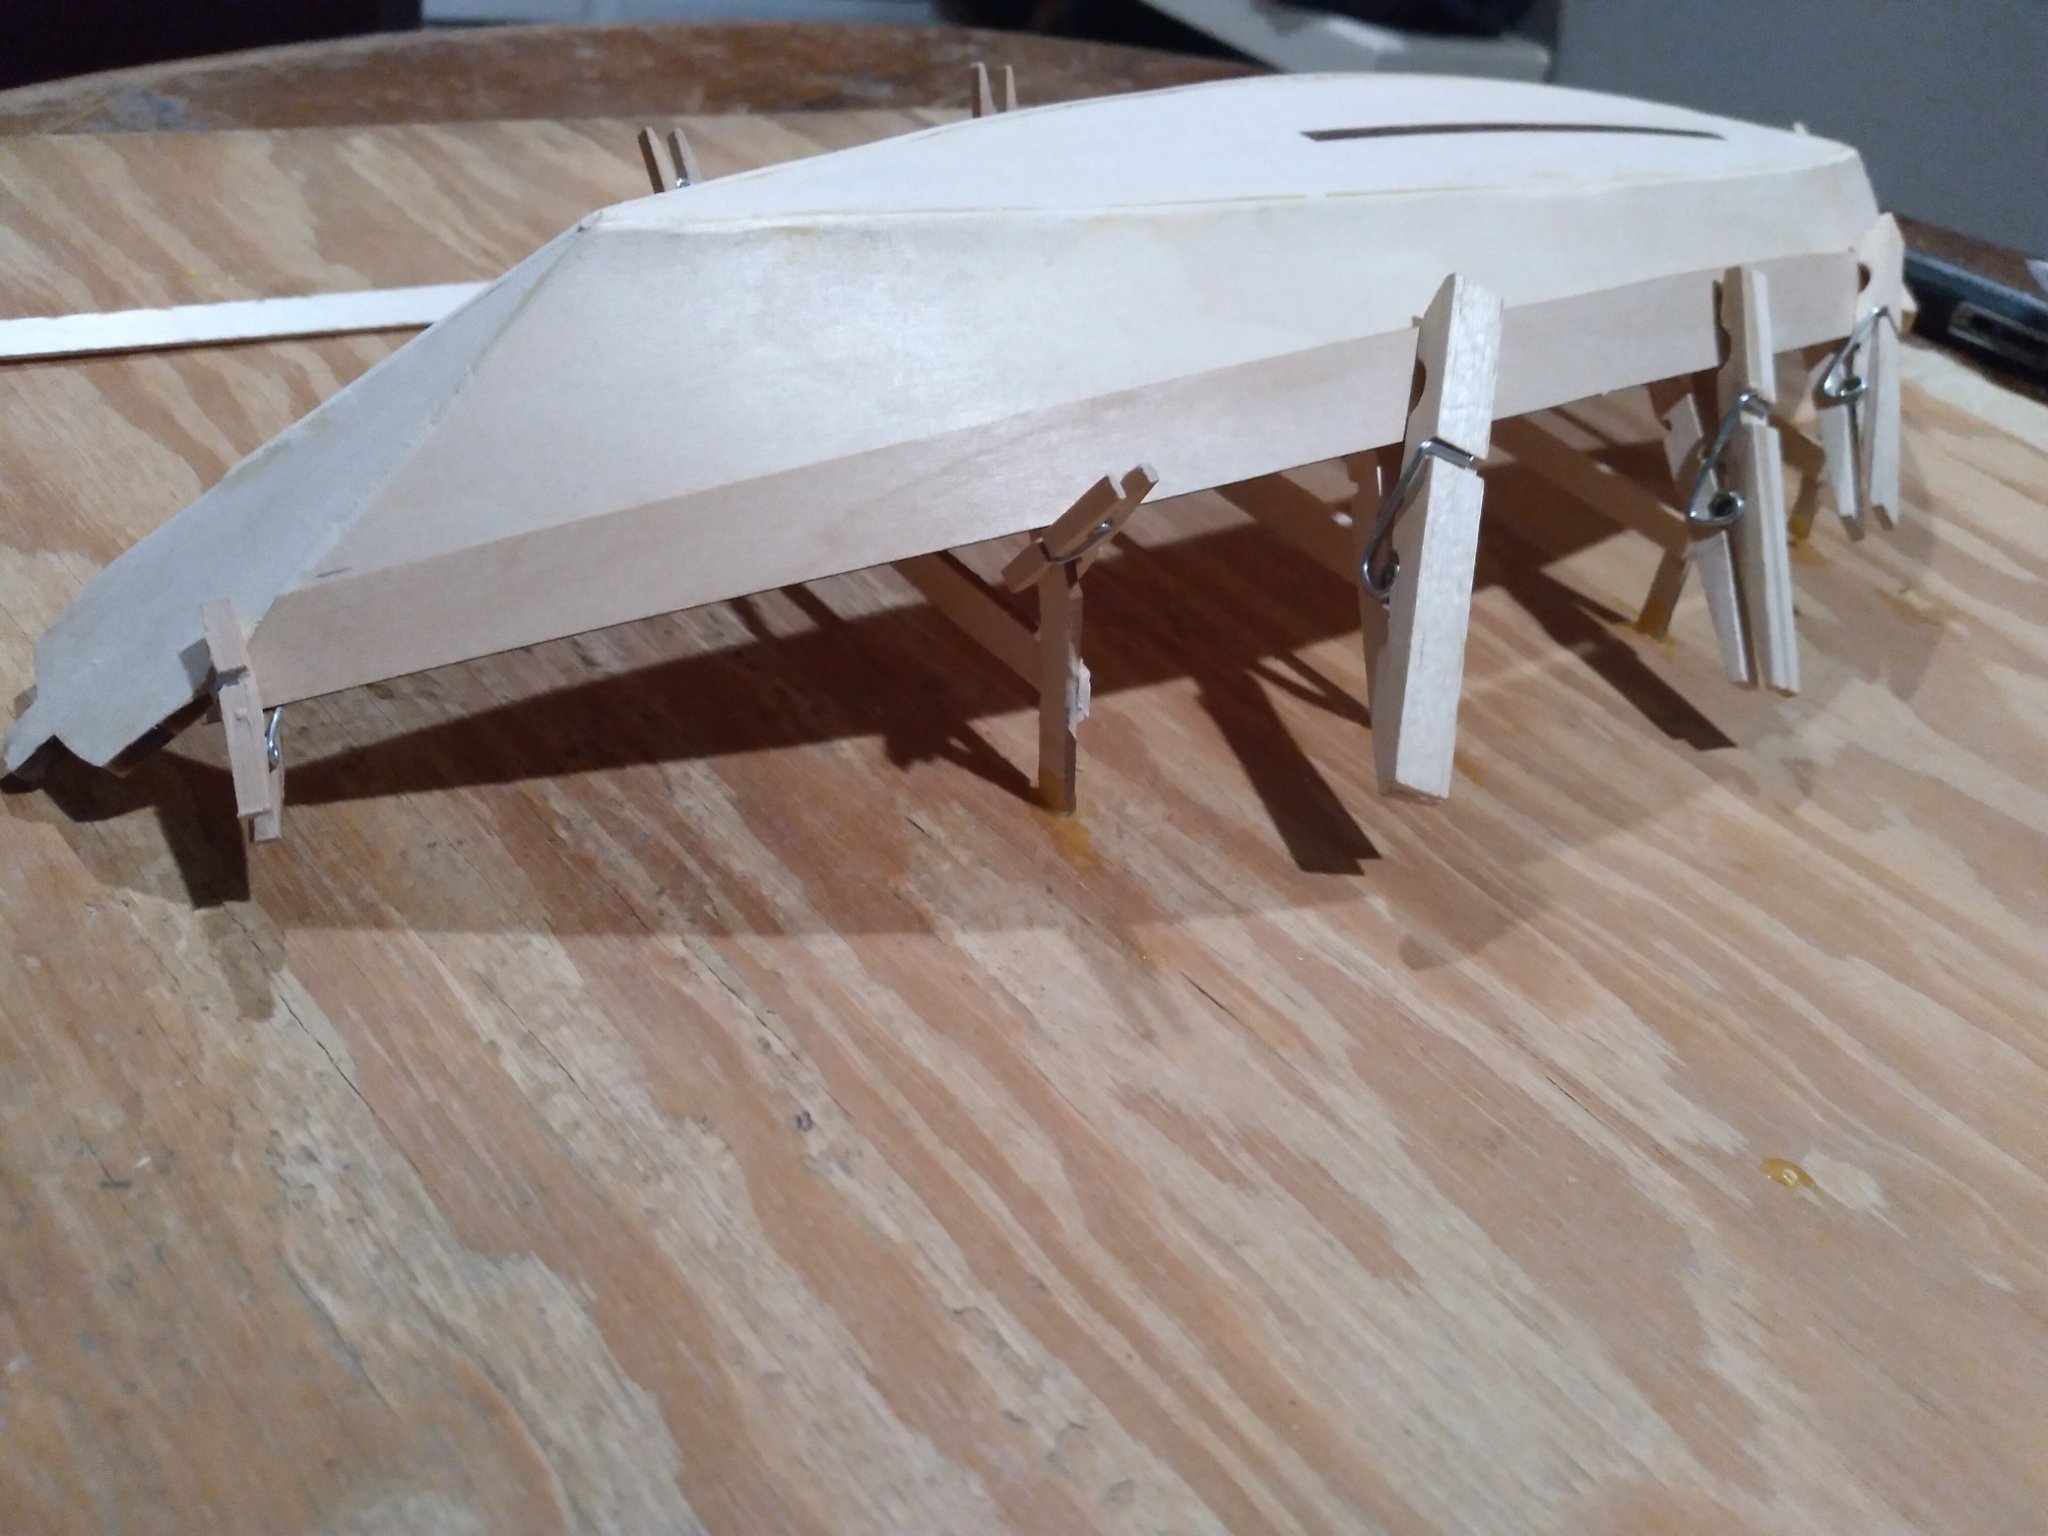
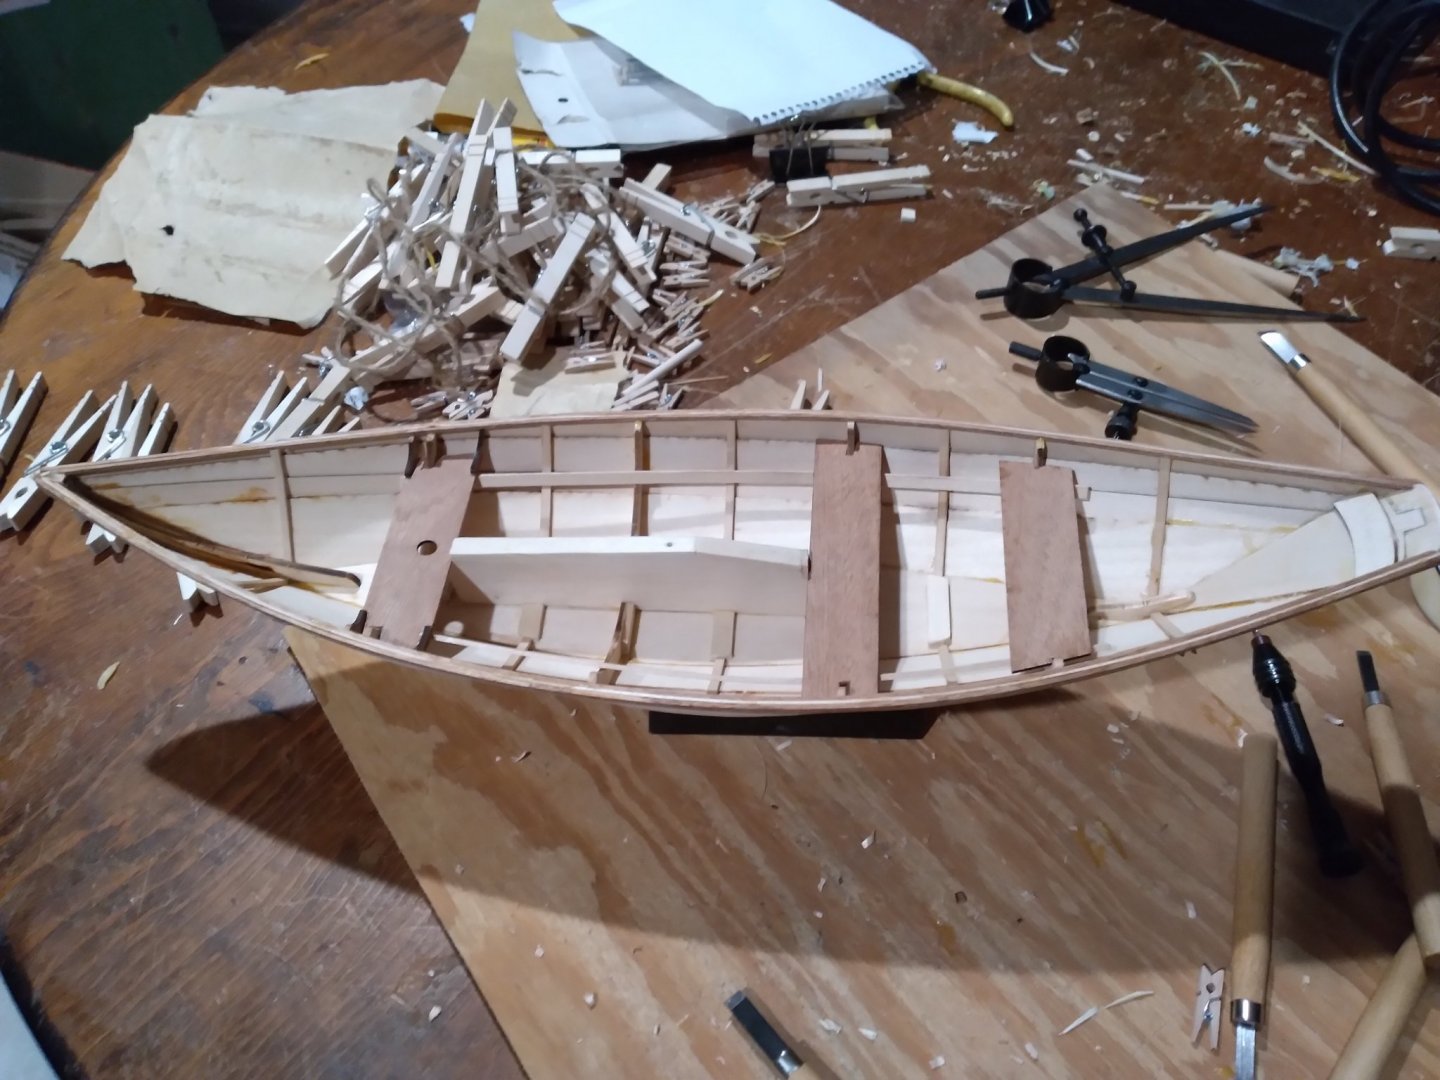
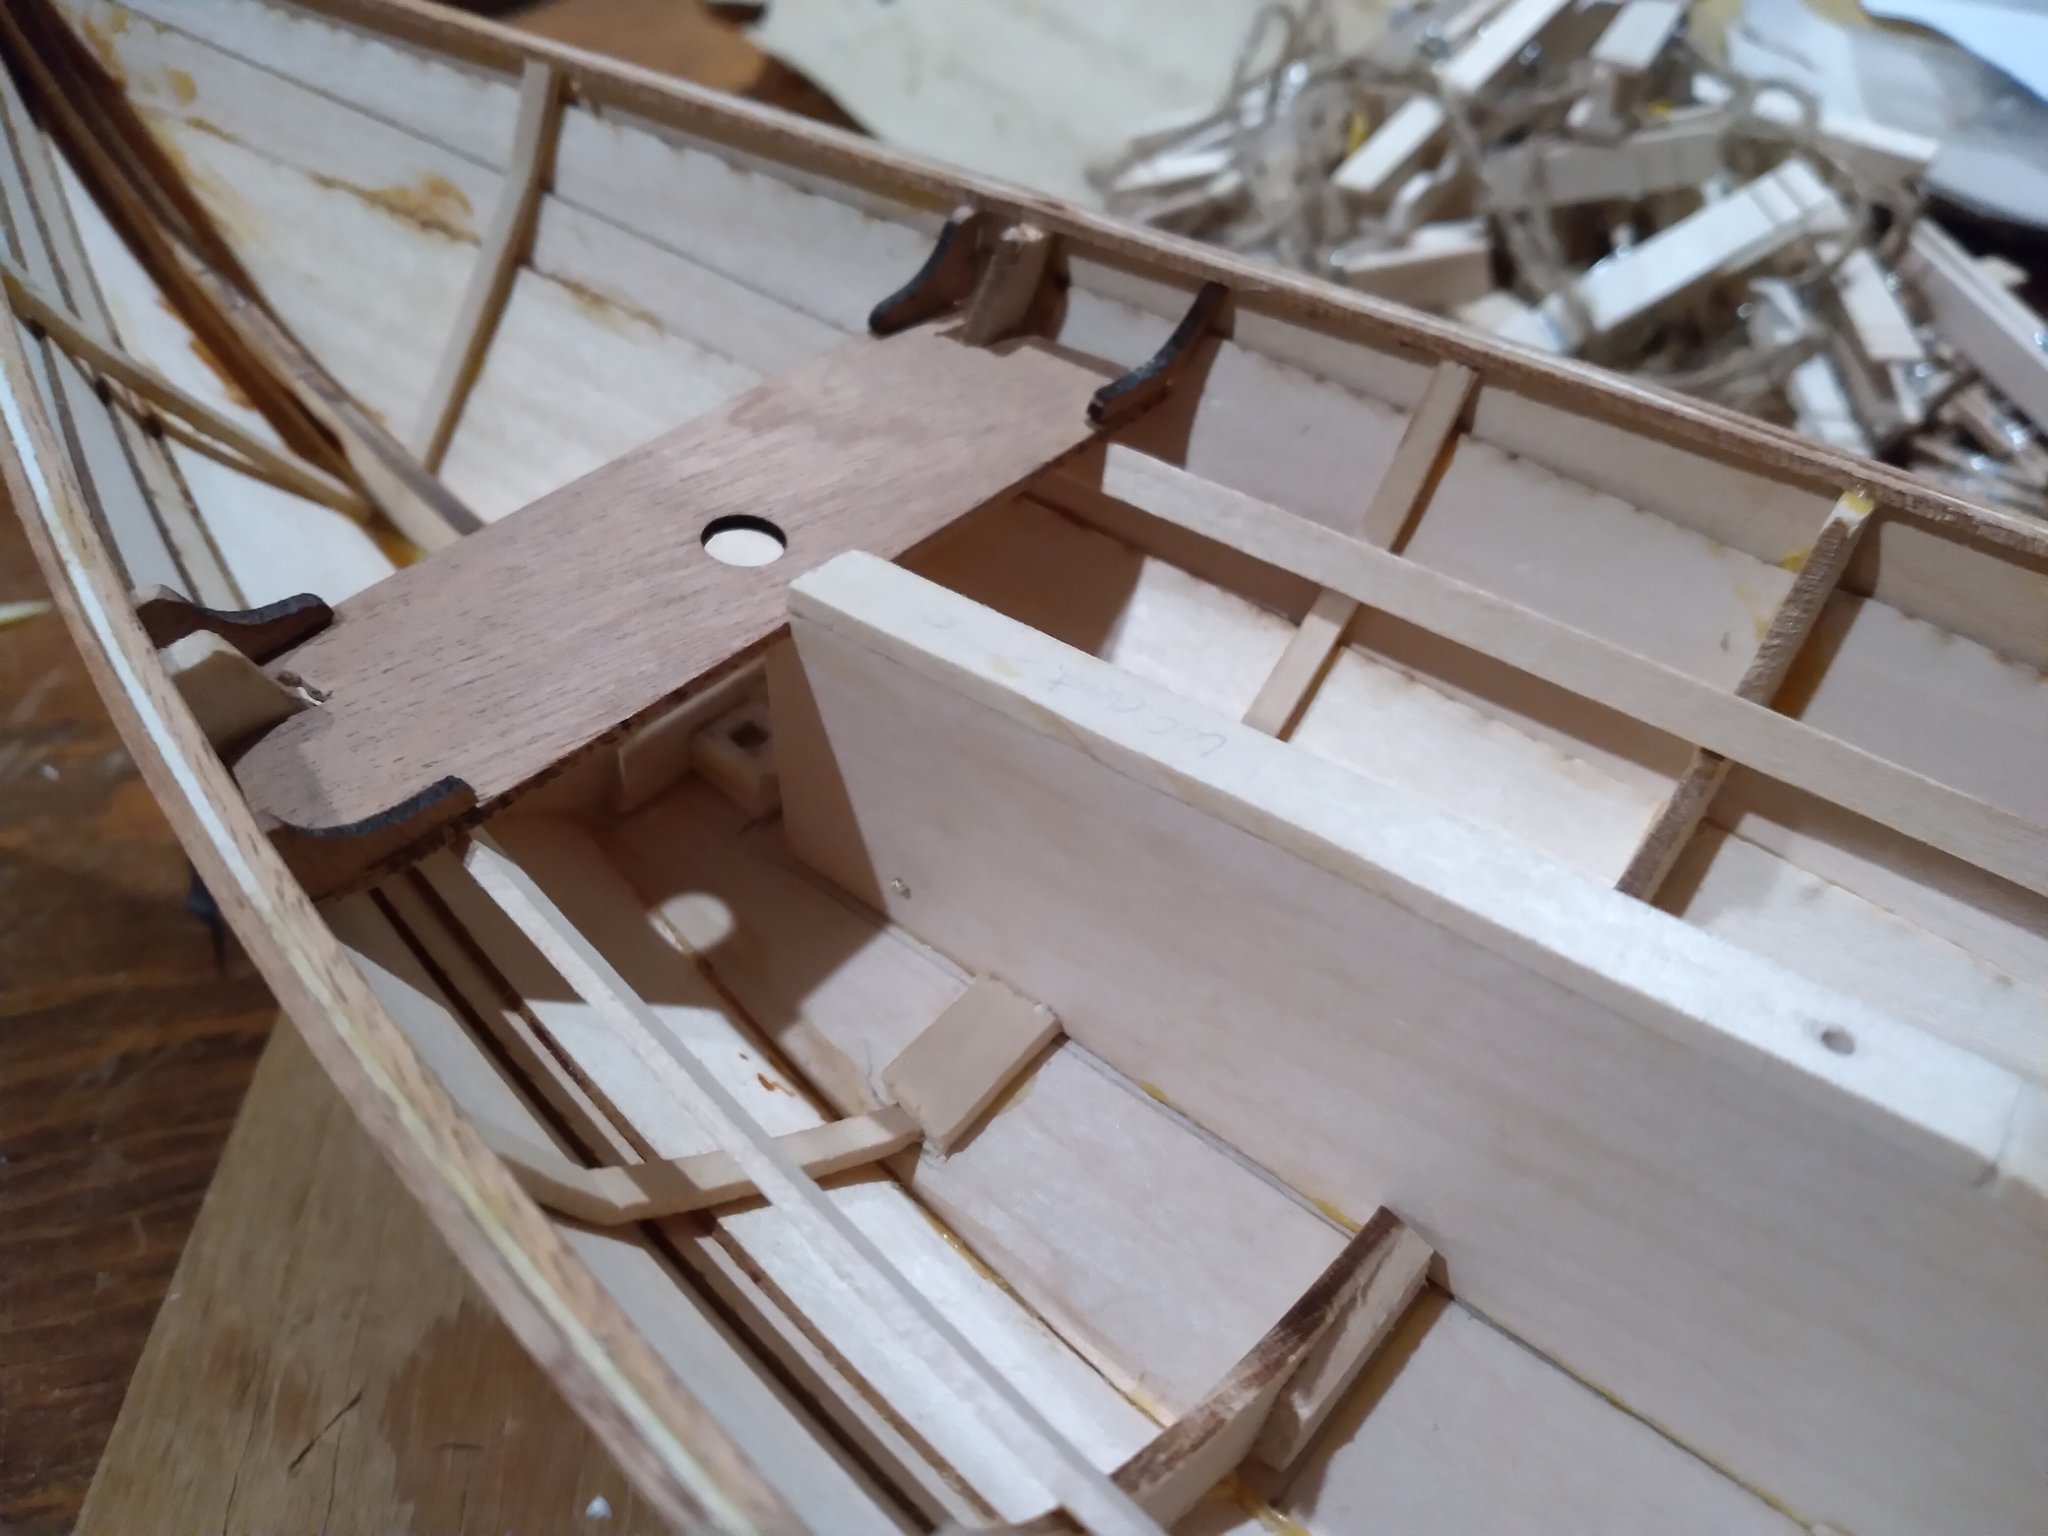
This project has taken a back seat for a while. Here is some more progress over the last month. Realized rub strakes and cap rails installed were installed incorrectly. Too late to go back. Thwarts, knees, and keelbox installed. Tiller and rudder assembled and installed. Mast dry-fit. Oars finished. Will add more pics later.

- 25 replies
-
- 2
-
-
- Bluejacket Shipcrafters
- Swampscott dory
- (and 1 more)
-
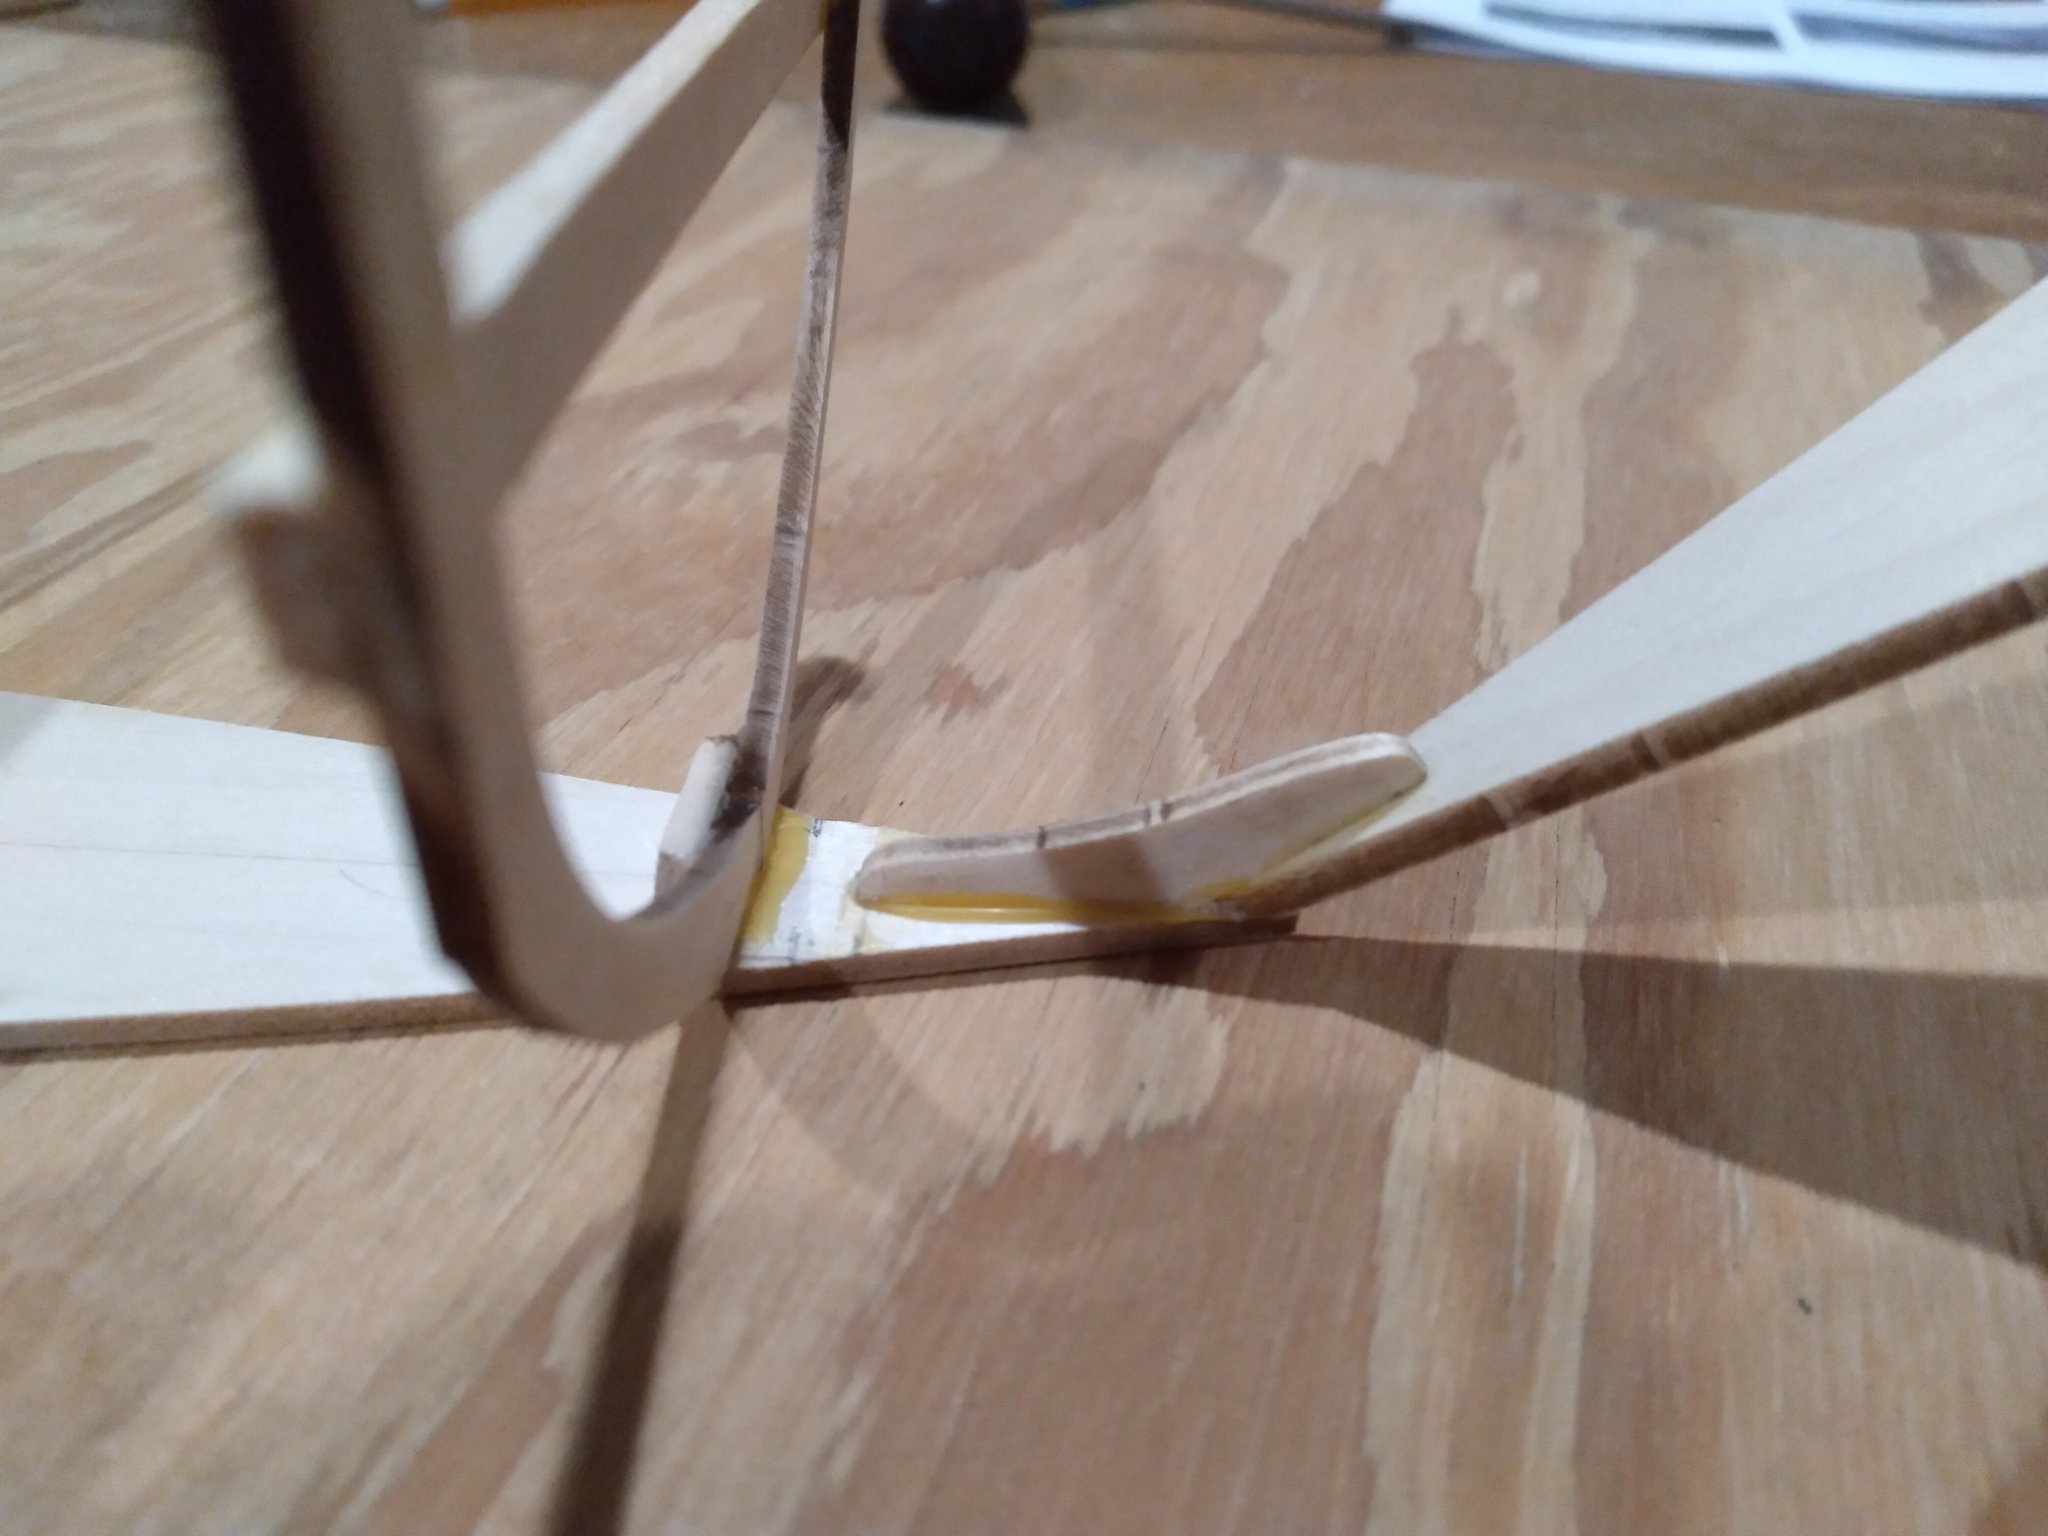
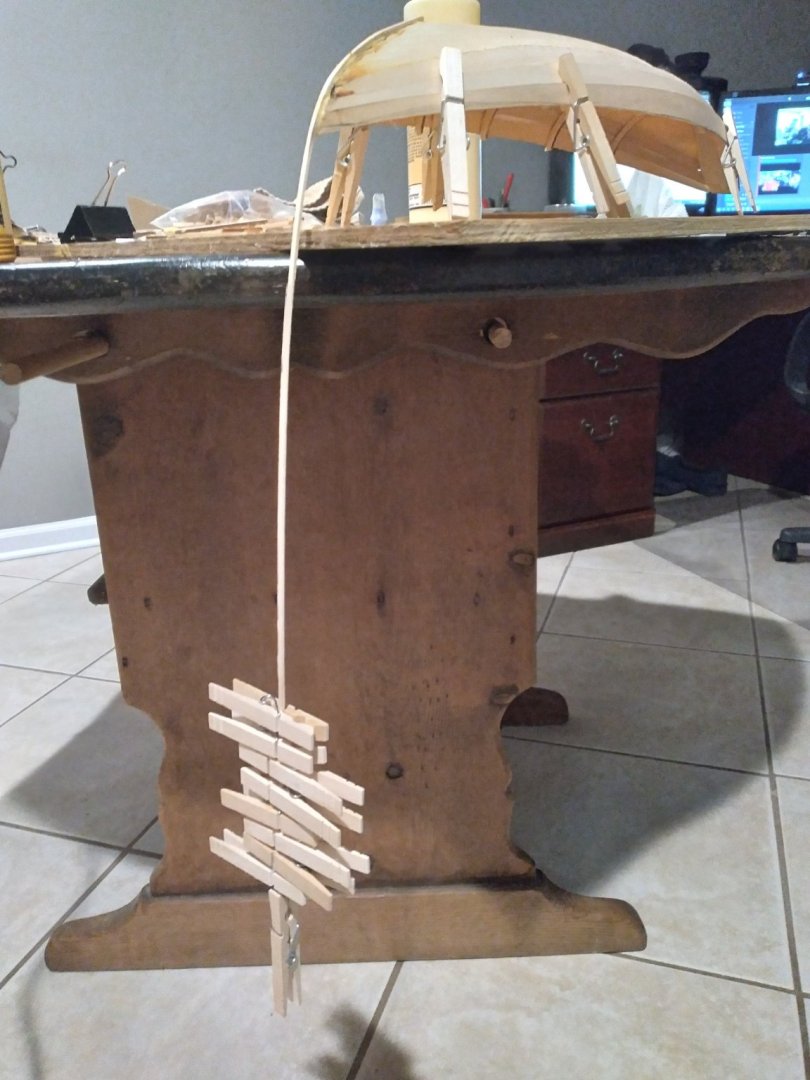
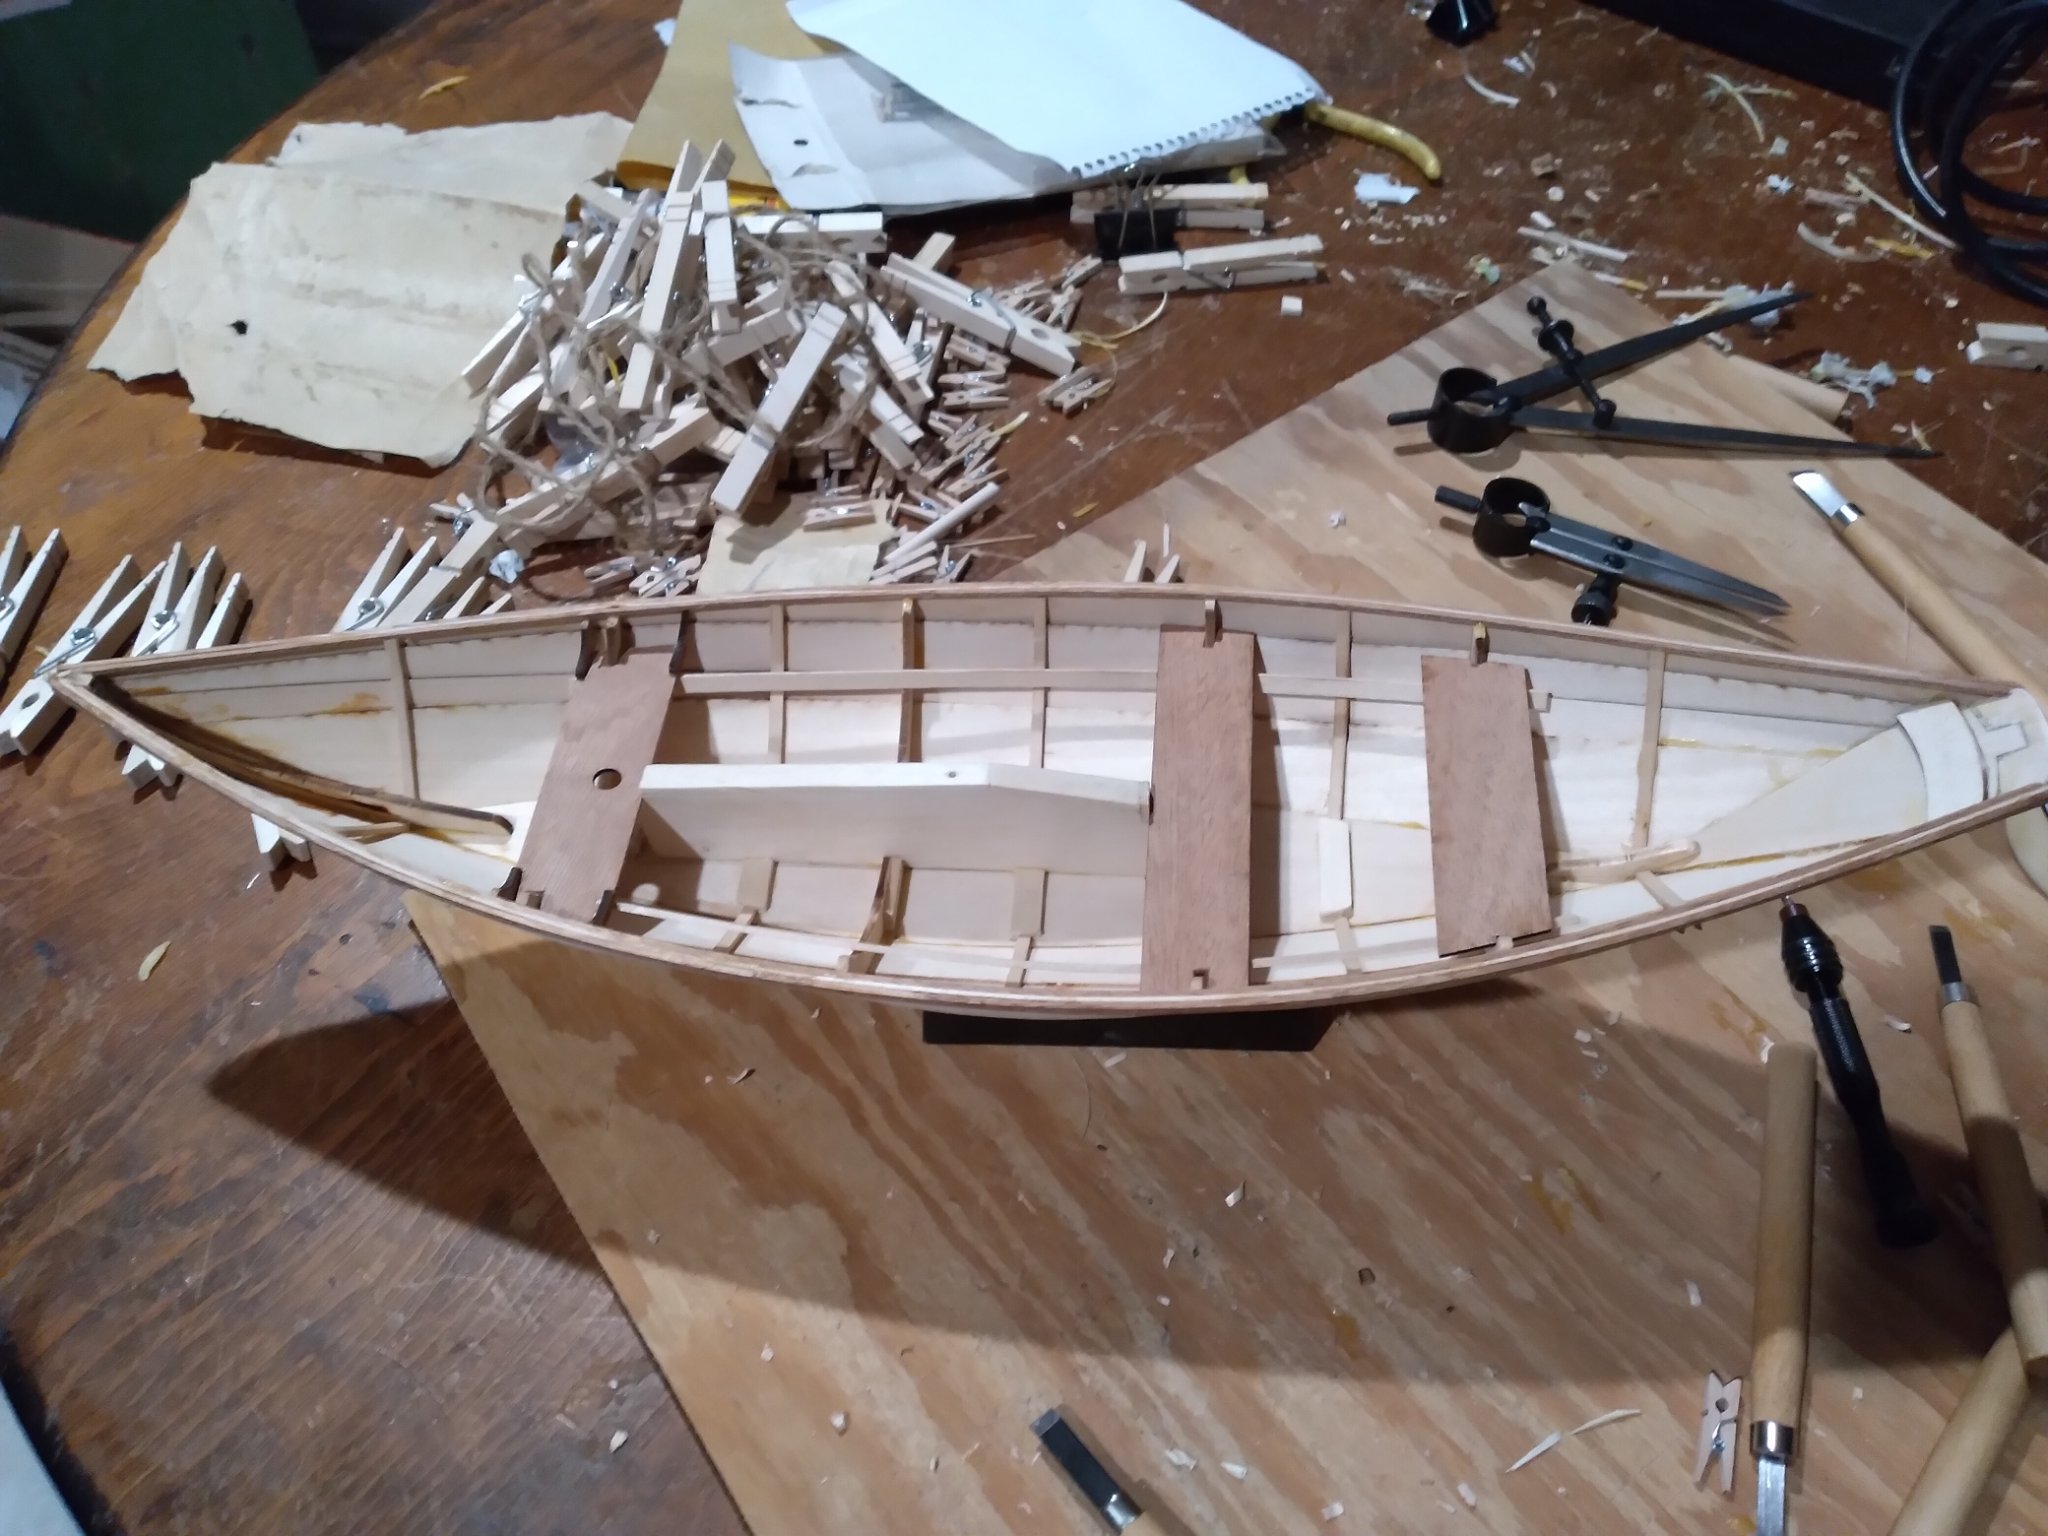
Gripe bent and installed. I secured the bottom with glue, and once it was set added a clothes pin to the end. Ran the heat gun over the strip until it bent, added more weight, repeat until sufficient. I got too aggressive and broke it one time and had to repeat. Frames cut to length. Cap rail/rub strake installed. Floor cleats installed and F2 cut for keel box. More fairing and removing glue drips.

- 25 replies
-
- 2
-
-
- Bluejacket Shipcrafters
- Swampscott dory
- (and 1 more)
-
I transferred the sheer line by measuring the plans at each frame and used a carpenters square to mark the sheer planks. The pencil lines still don't look right, but it's a starting point. I think a lot of this is going to be eyeballed. I plan to use 80grit sandpaper instead of cutting. I think the less aggressive removal will give me plenty of time to check the symmetry. What is everyone's preferred method of marking sheer lines?
.thumb.jpg.5193ff0528e6bcf222cc55048da8ed12.jpg)
.thumb.jpg.ba6f8b78636150825c4b5bb10df29cd0.jpg)
.thumb.jpg.88e80dfd9f32568e5baeea7b70729d77.jpg)
.thumb.jpg.74ebf4dfef7e0663668dc297b434237a.jpg)
.thumb.jpg.42828efb4f847780d7692d452a3b54de.jpg)
.thumb.jpg.62f99636bf333a404d5775dafb93ecfc.jpg)
- 25 replies
-
- 2
-
-
- Bluejacket Shipcrafters
- Swampscott dory
- (and 1 more)
-
Thanks for those pictures! I was having a hard time seeing the detail from the drawings. I goofed something up early on, I think I installed the P3 planks backwards. The taper isn't symmetrical, and I think that had a serious impact on the others.
- 25 replies
-
- 1
-
-
- Bluejacket Shipcrafters
- Swampscott dory
- (and 1 more)
-
Somehow I managed to mount the transom almost 1/4" too low. I fabricated an extension and got the planking closed up and faired. I'll finish shaping it after I get the sheer lines transferred from the drawings. I cleaned up the bow a little bit and started to square it off in preparation for the gripe. I started fairing the bow, but decided to put it down for the night and re-assess the progress tomorrow. Next steps are to transfer the sheer line and trim the frames down. Planning to do one more all-around fairing after that step.

- 25 replies
-
- 2
-
-
- Bluejacket Shipcrafters
- Swampscott dory
- (and 1 more)
-
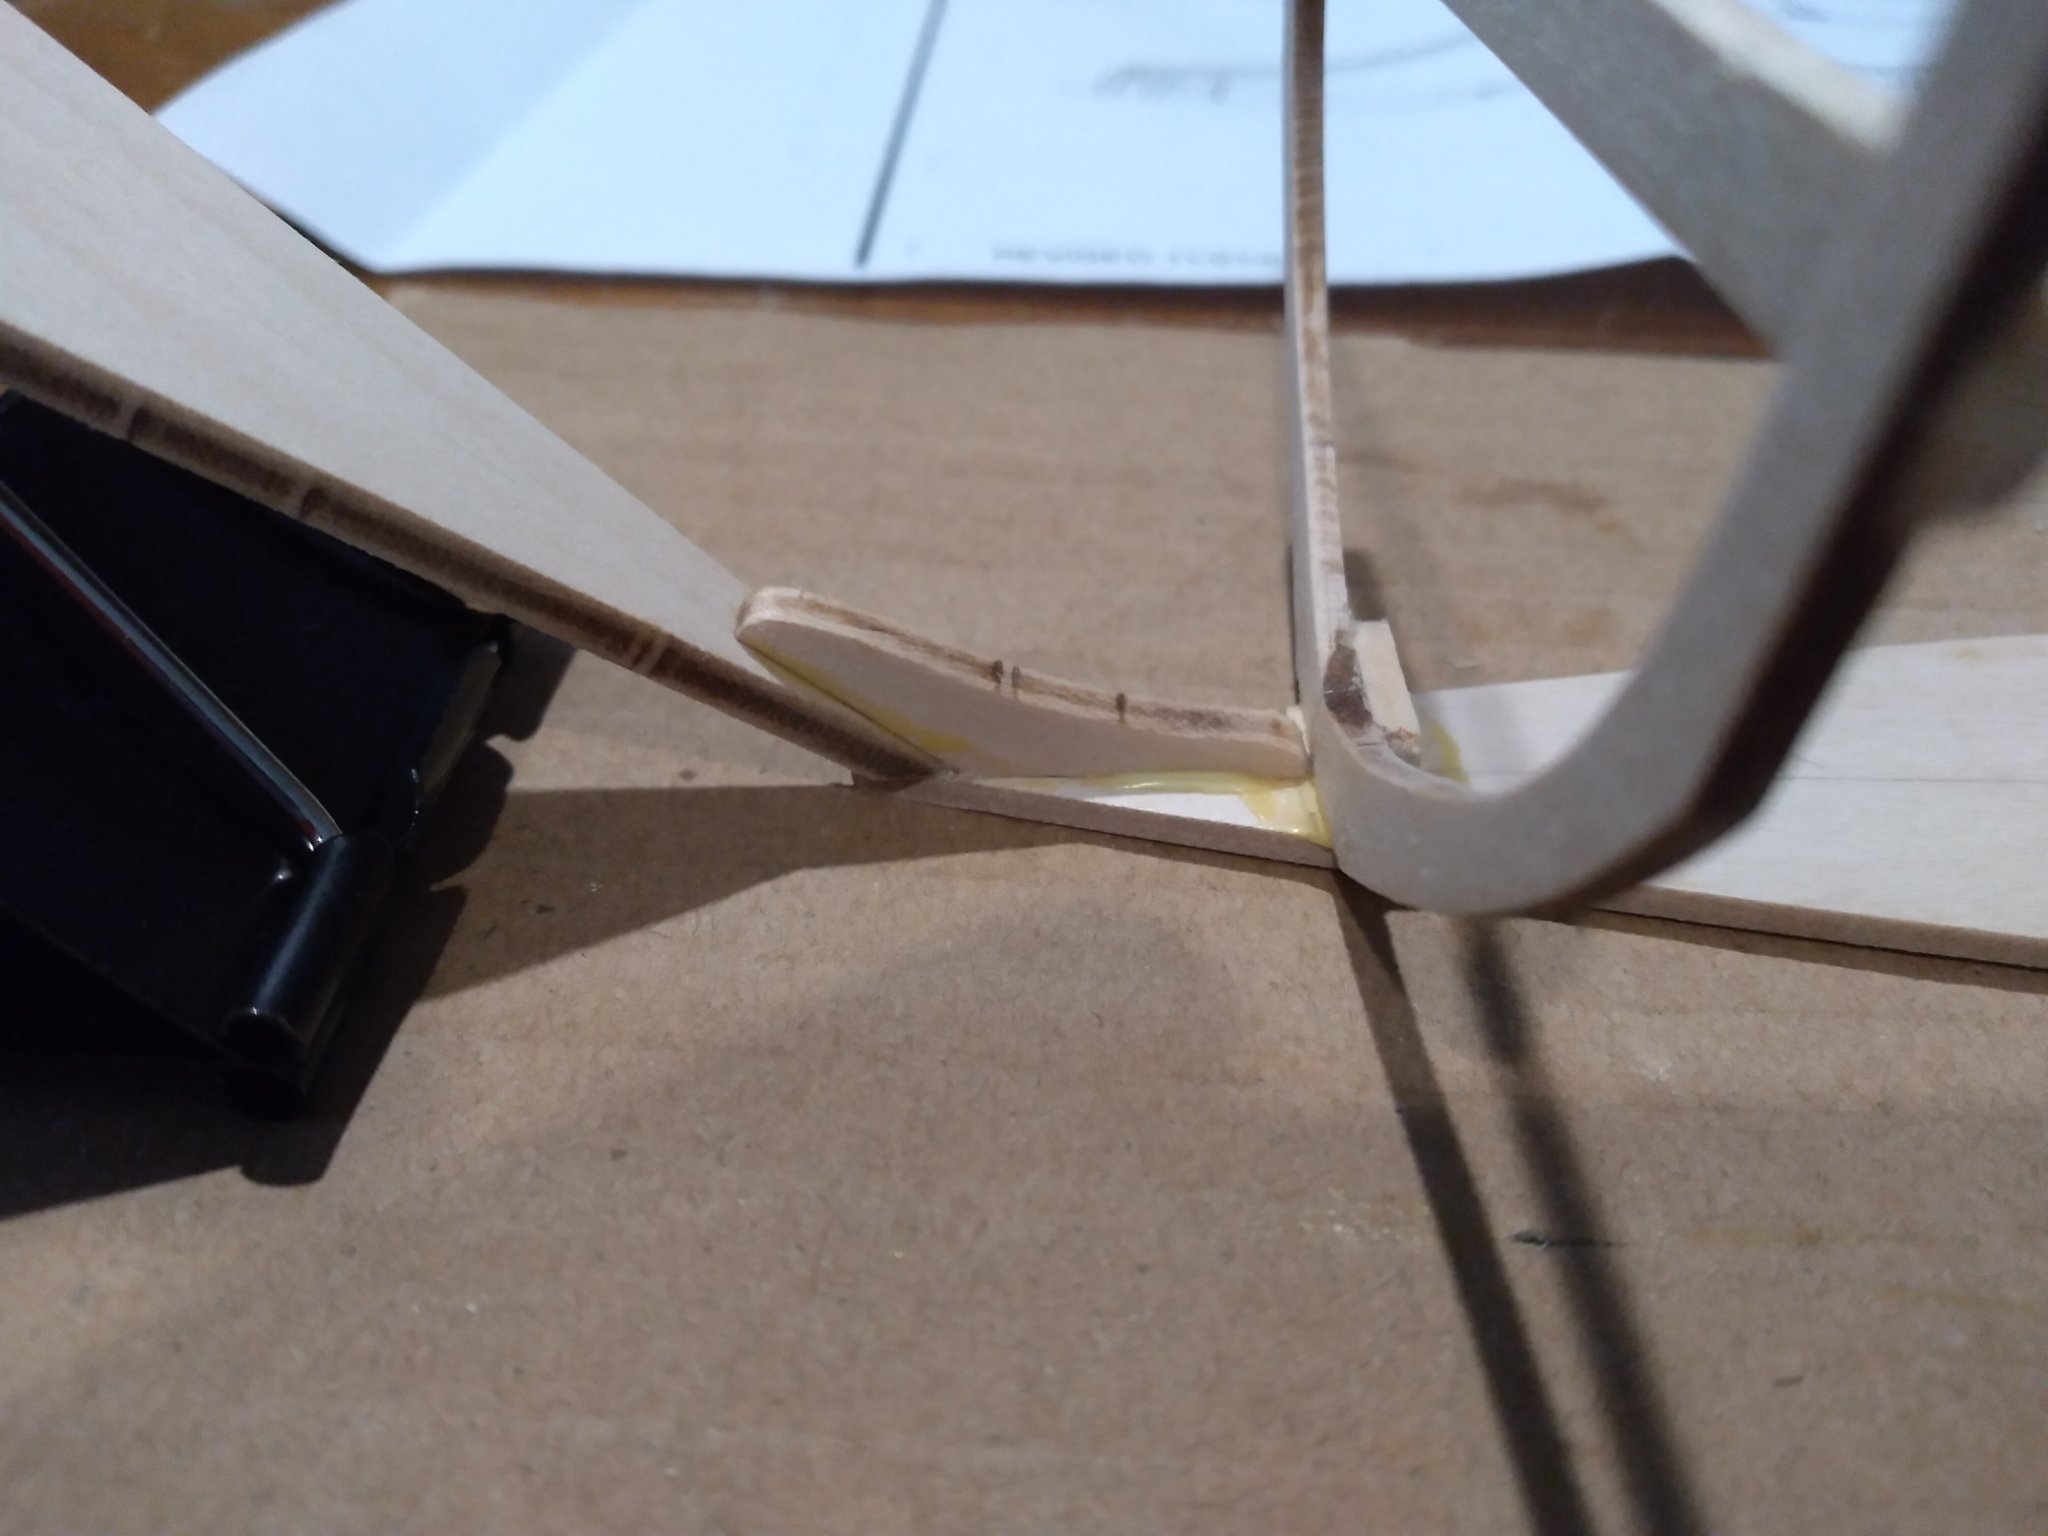
Straightened the stem as best I could. I need to extend the bevel before I close up the bow. After having to cut and reglue the planks. I think I can hide most of this with some sanding and paint. Everything ended up a little too high as pointed out earlier. Not quite sure what to do about it yet. Overall progress:


- 25 replies
-
- 1
-
-
- Bluejacket Shipcrafters
- Swampscott dory
- (and 1 more)
-
So everything has kind of gone off the rails and it's mostly a salvage operation at this point. This model will definitely have to be painted lol. The upshot is, I am learning something new every time I touch the model. The port side garboard introduced a nasty twist to the stem, which threw off the alignment of the starboard side. I think I mounted the P2-port side plank backwards, hence it being too high on the transom. Being new to this; I used entirely too much glue to separate it and remount. The hull is little lop-sided, but it's solid as a rock. I had to cut the garboards off the stem, straighten it and re-glue. Right now the P2 planks seem to be laying nicely and symmetrically, but both are a little bit high. Once the bent frames and thwarts are installed, I think it will hide most of the asymmetry on the lower planks. Will post some pictures of the carnage tonight.
- 25 replies
-
- 2
-
-
- Bluejacket Shipcrafters
- Swampscott dory
- (and 1 more)
-
Ended up moving the F4 forward again, and moving the F1 frame aft. The garboard planks laid up much nicer after. Tonight, I faired the frames, bottom, stem and transom; Then got the garboard planks glued up and faired. I have the port side P3 plank test fitted, but not glued yet.

- 25 replies
-
- 1
-
-
- Bluejacket Shipcrafters
- Swampscott dory
- (and 1 more)
-
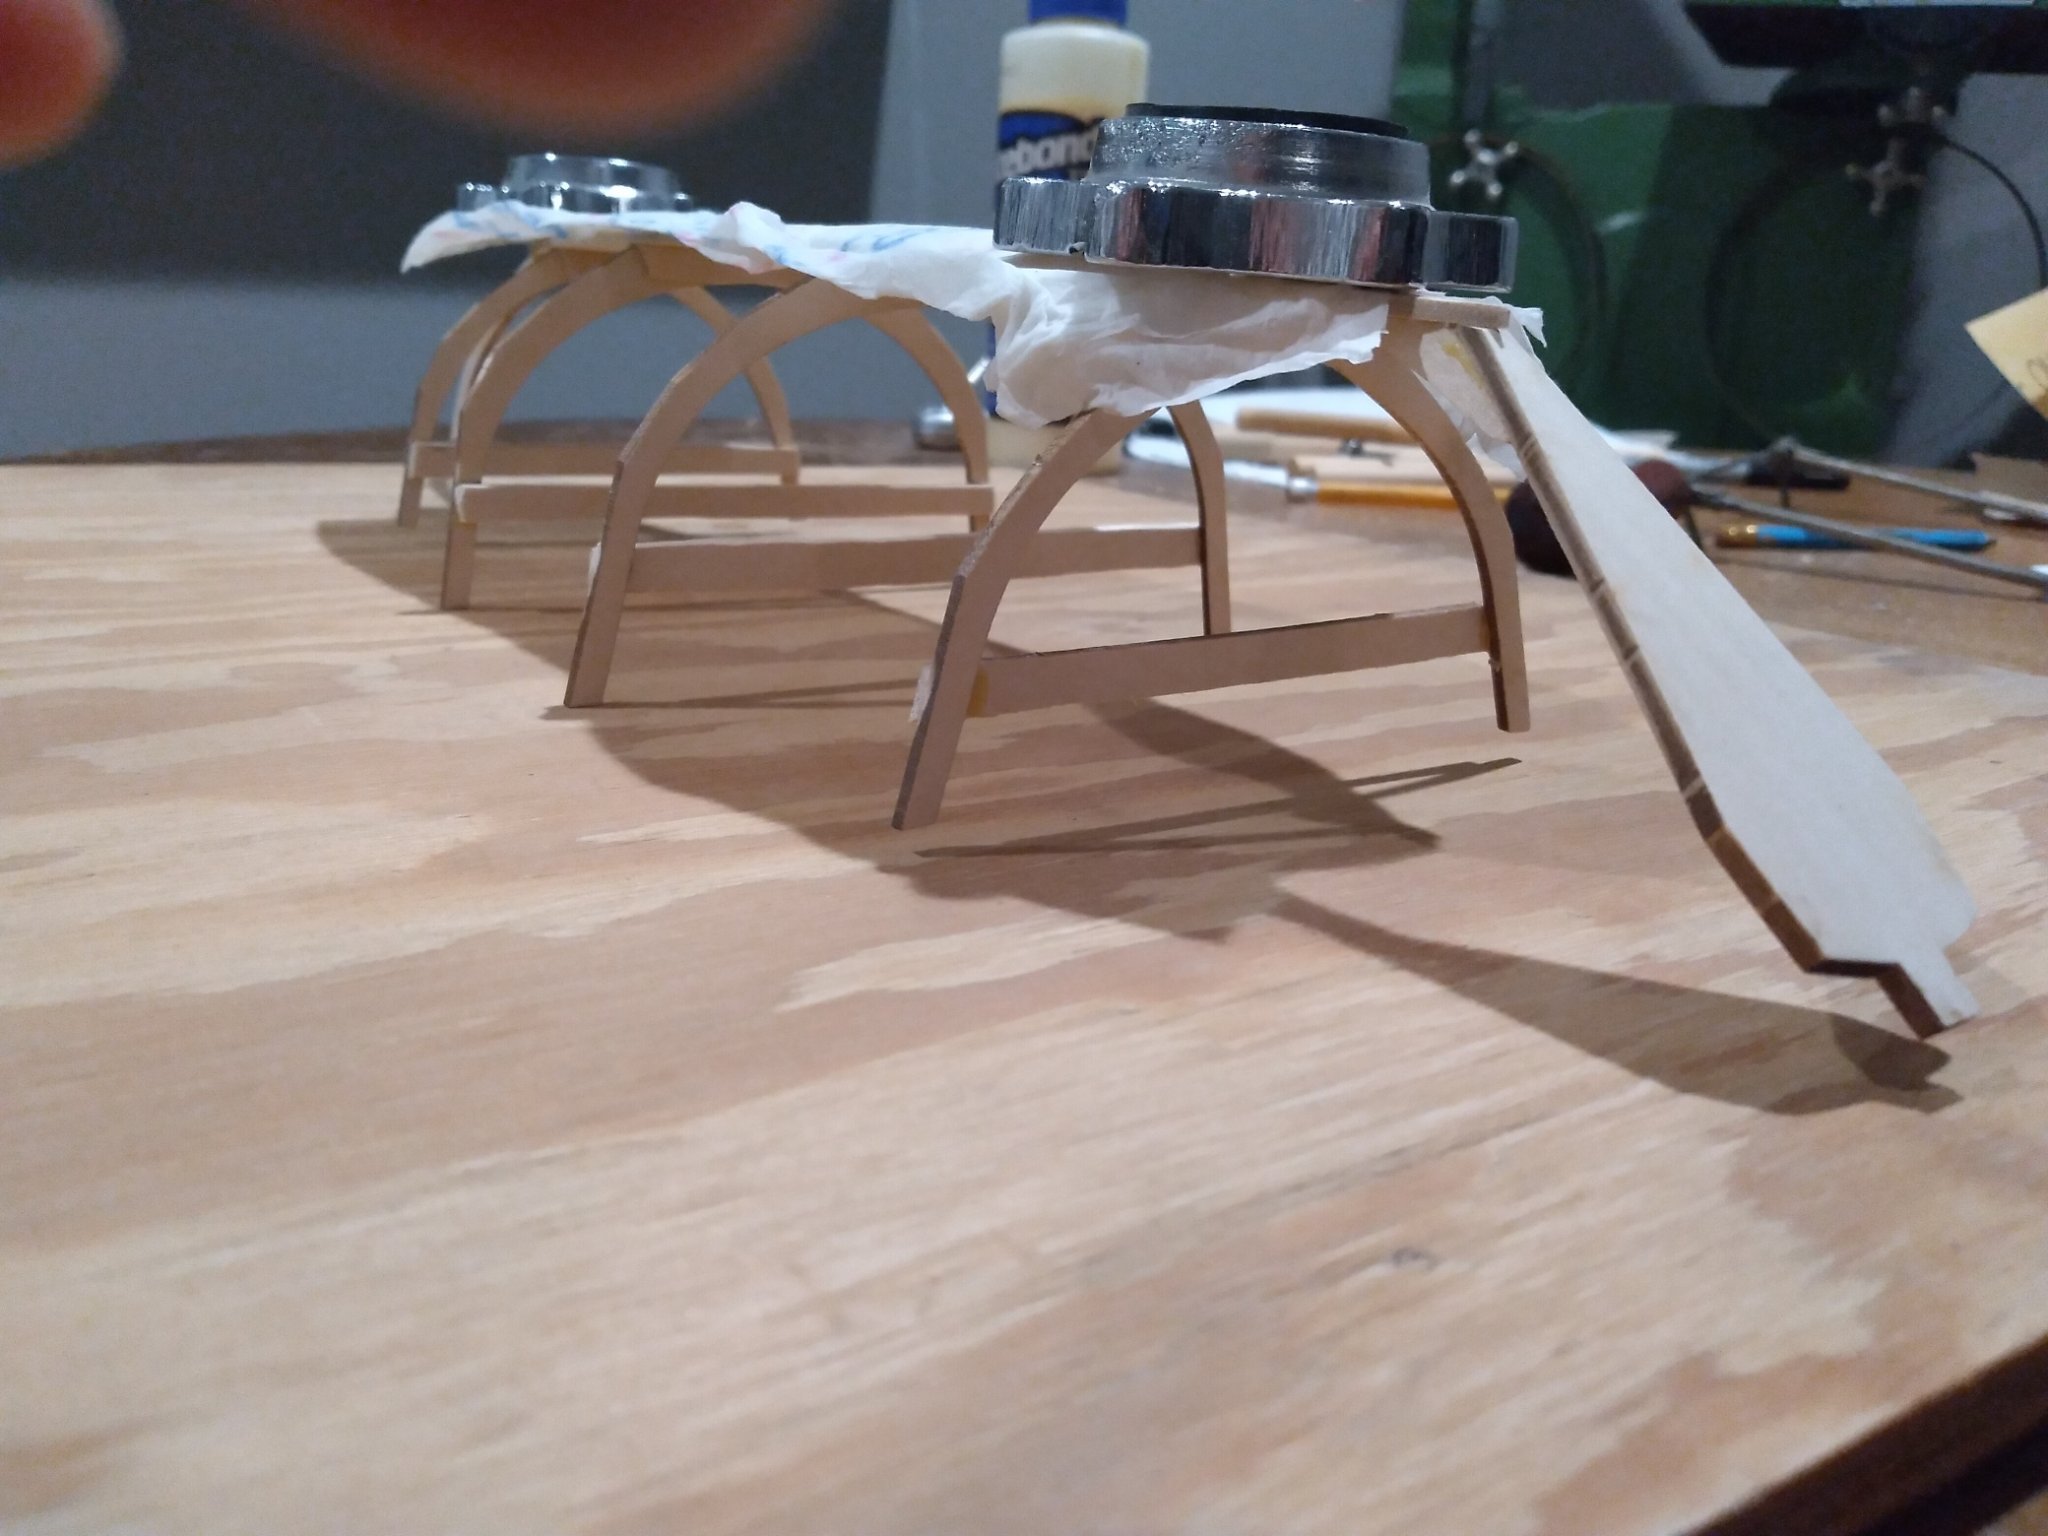
The weight wasn't heavy enough, so I'm trying again tonight with more weight.
-
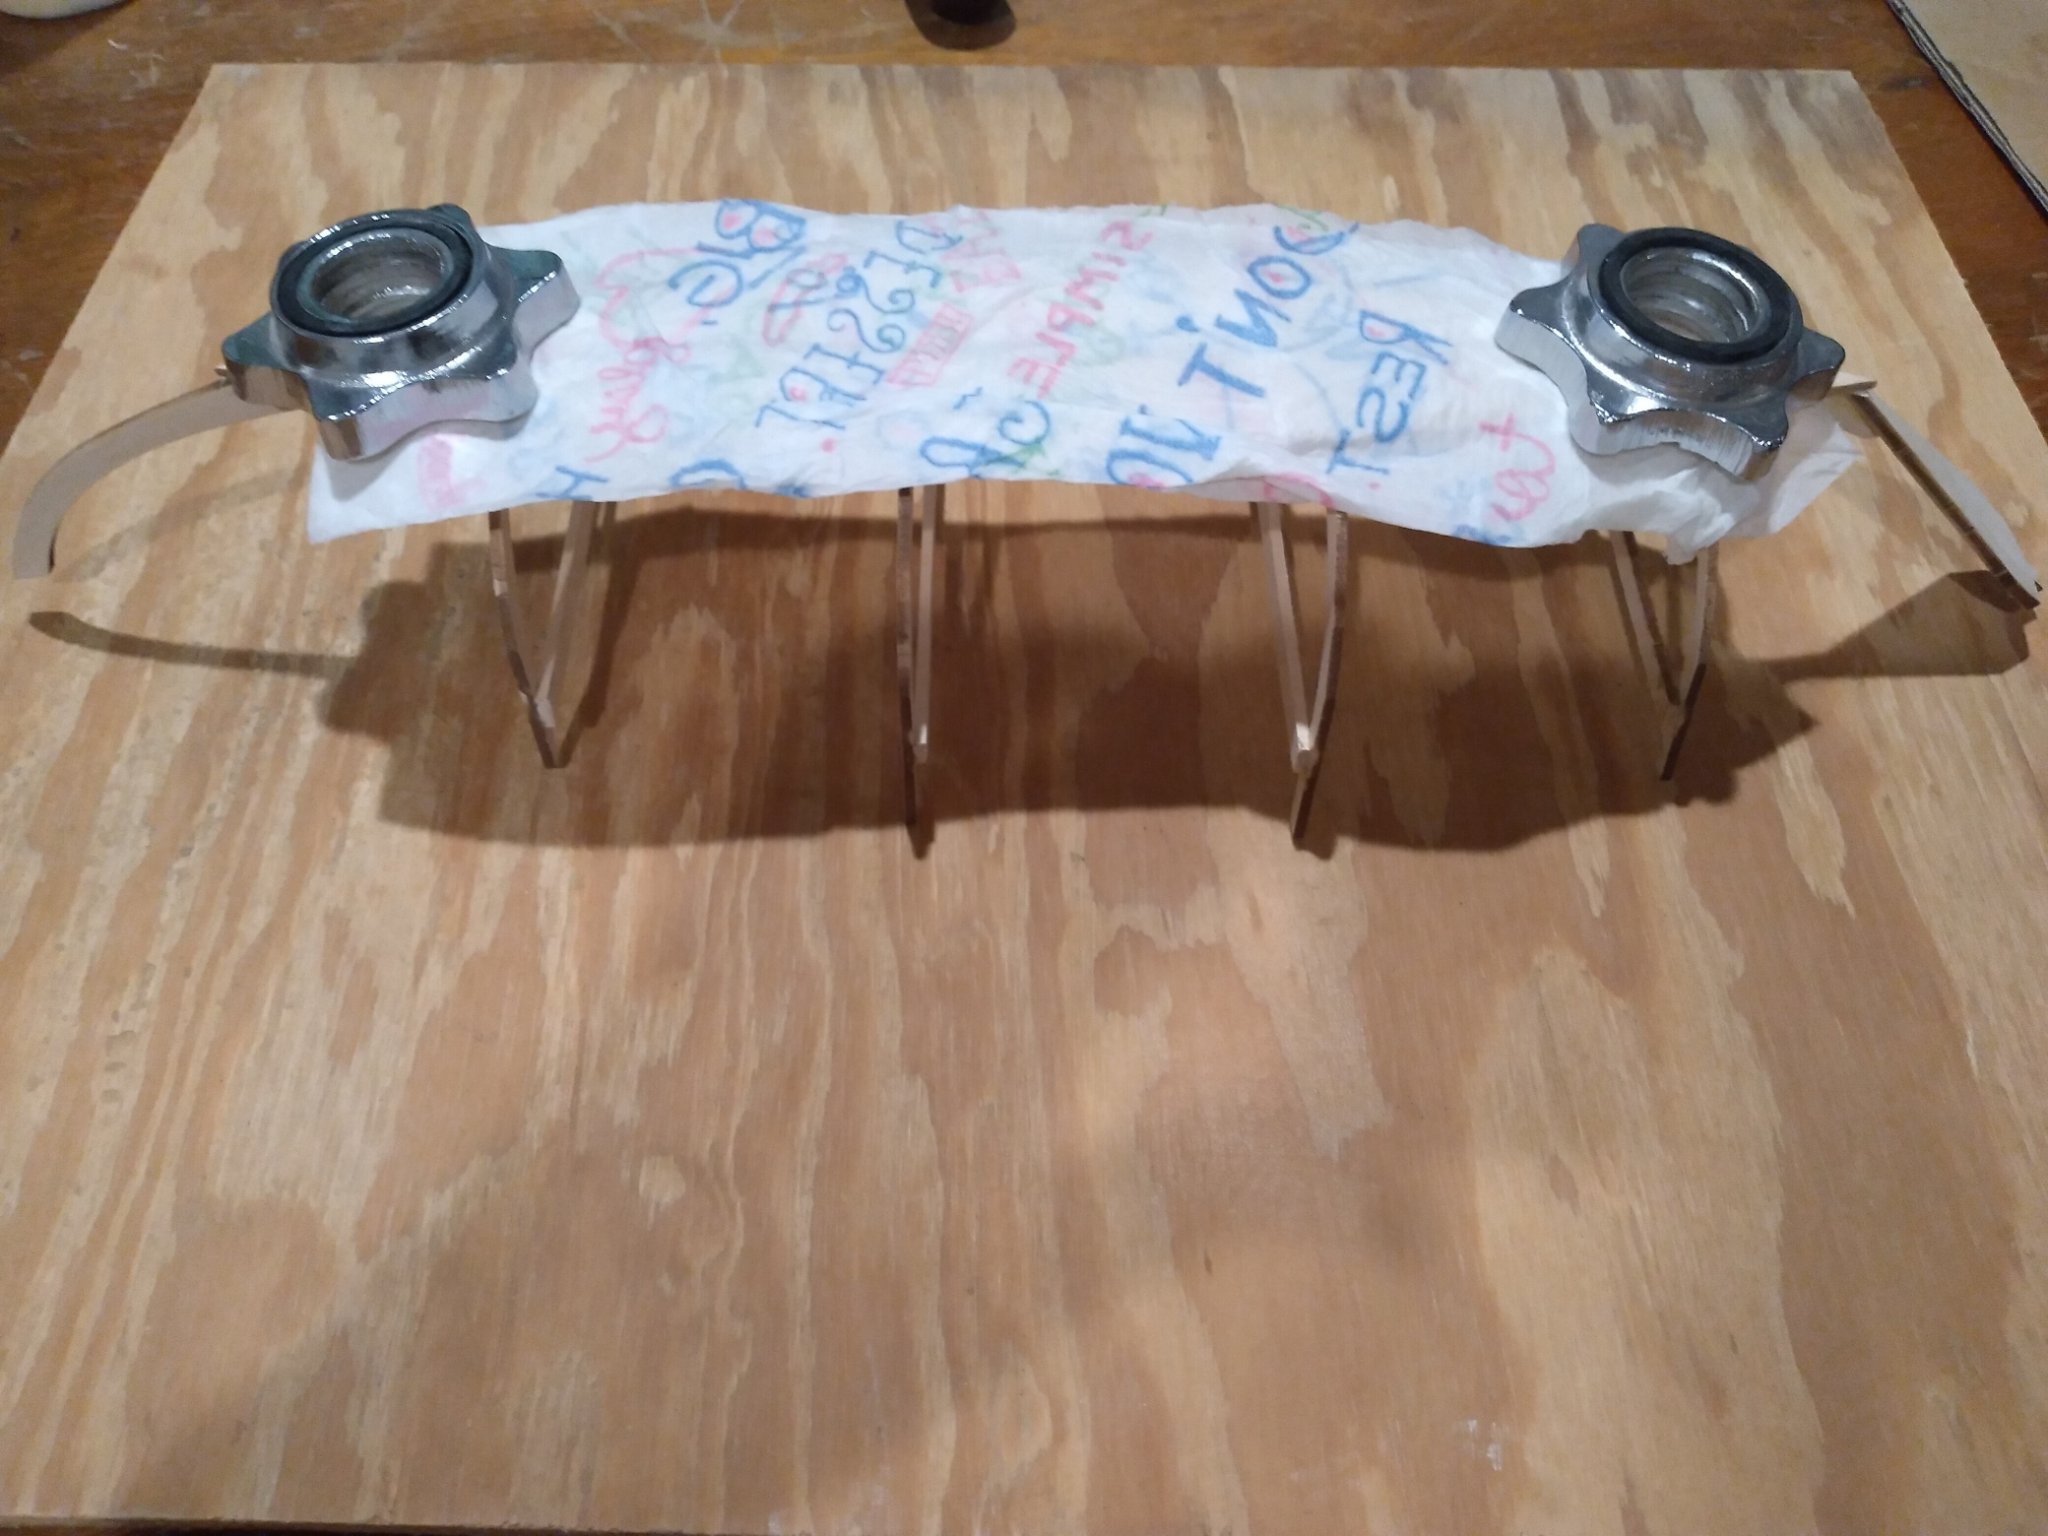
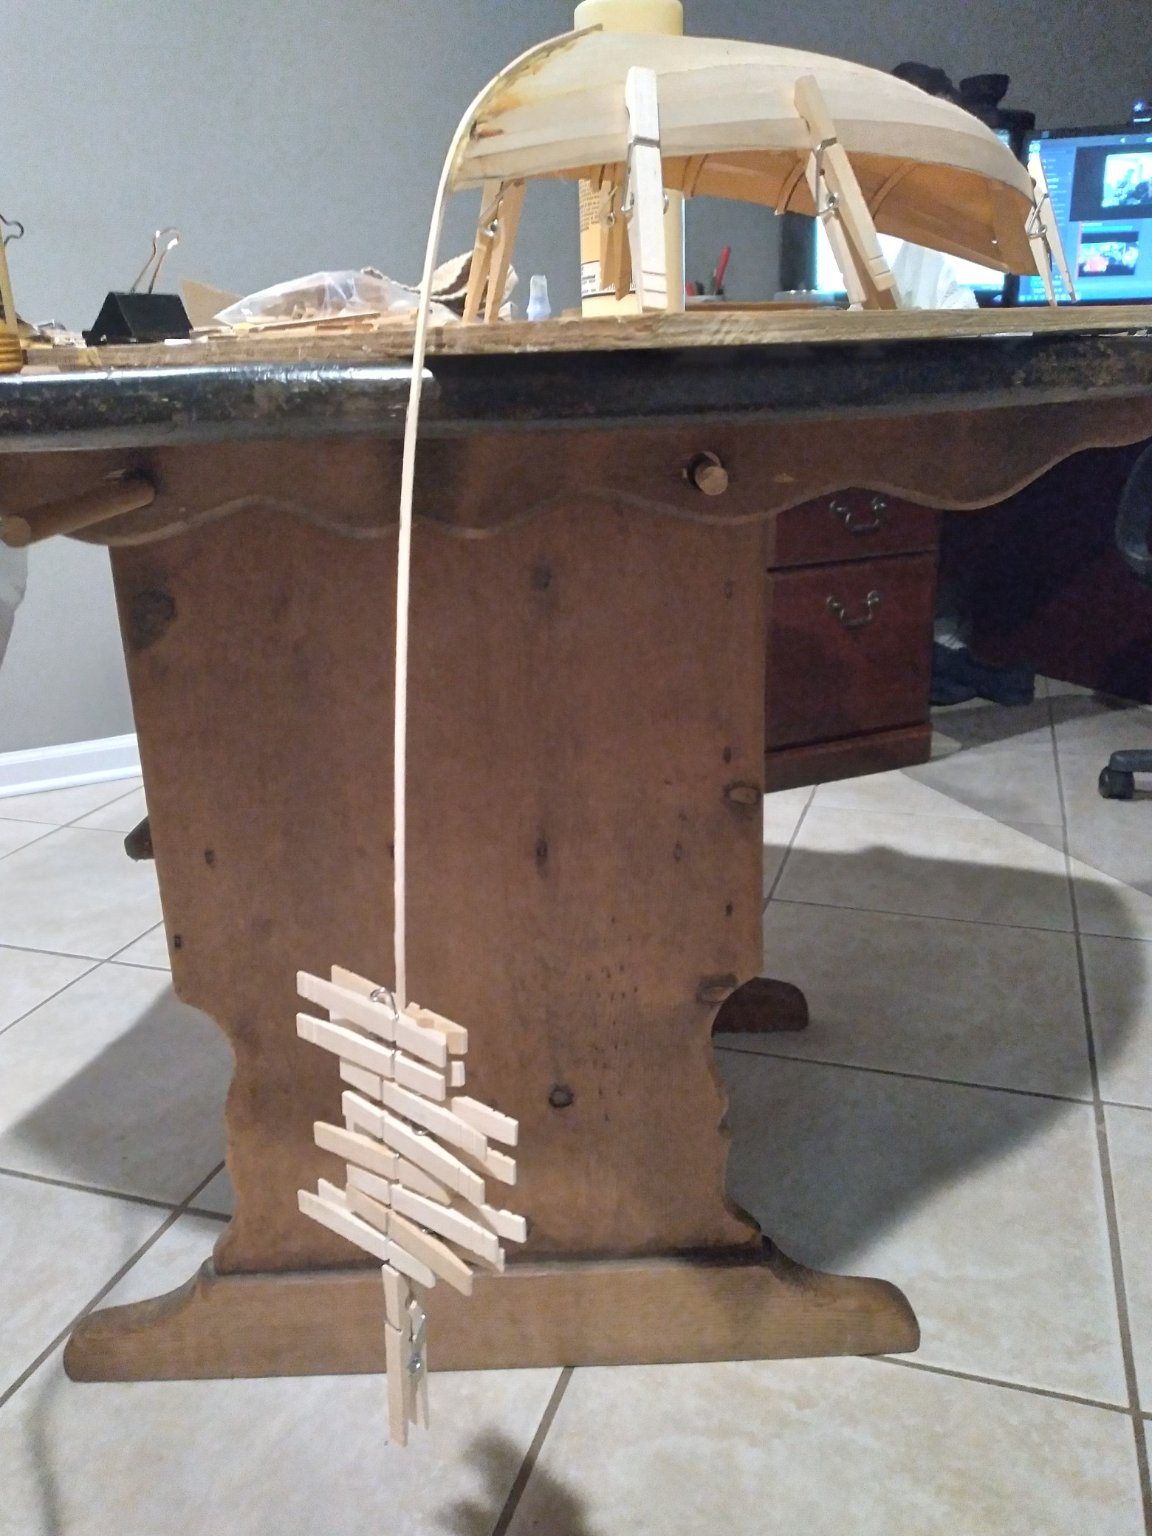
Corrected the aft frame placement; still have some cleanup to do on the glue squeeze-out. Found a build board, started the bending process of the bottom. I'm using a wet paper towel and a couple of dumbbell collars. Have a ways to go, I'll check it again in the morning.


- 25 replies
-
- 1
-
-
- Bluejacket Shipcrafters
- Swampscott dory
- (and 1 more)
-
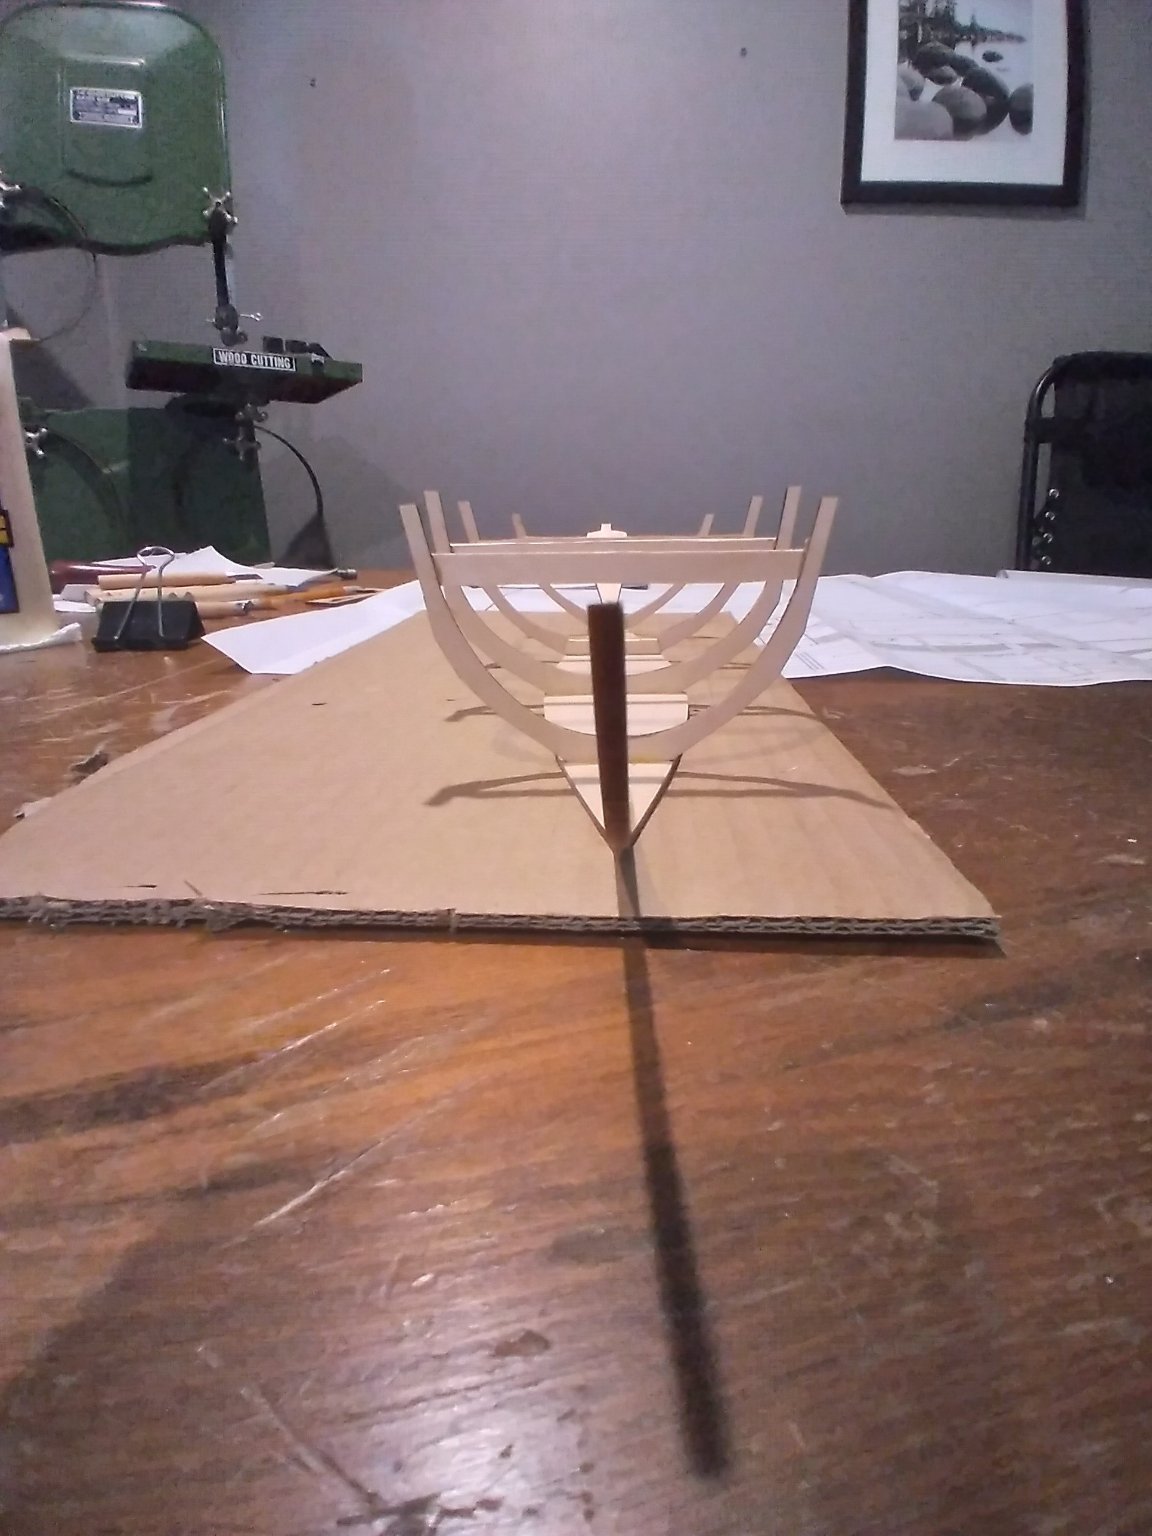
Frames, stem, transom, and knee sanded and glued to the bottom. Taking the time to draw a center line on the bottom and labeling bow and stern helped a lot with placement. I almost mixed it up several times. Eyeballed alignment; not perfect, but I think I can work with it. I made an error when transferring the frame pattern to the bottom. F4 is too far aft by roughly 1/4". Once the stem and transom set, I'll try removing the offending frame repositioning it. I could probably shoe-horn the planks on as-is, but it seems like an error of that size would drastically change the shape.

- 25 replies
-
- 1
-
-
- Bluejacket Shipcrafters
- Swampscott dory
- (and 1 more)
-
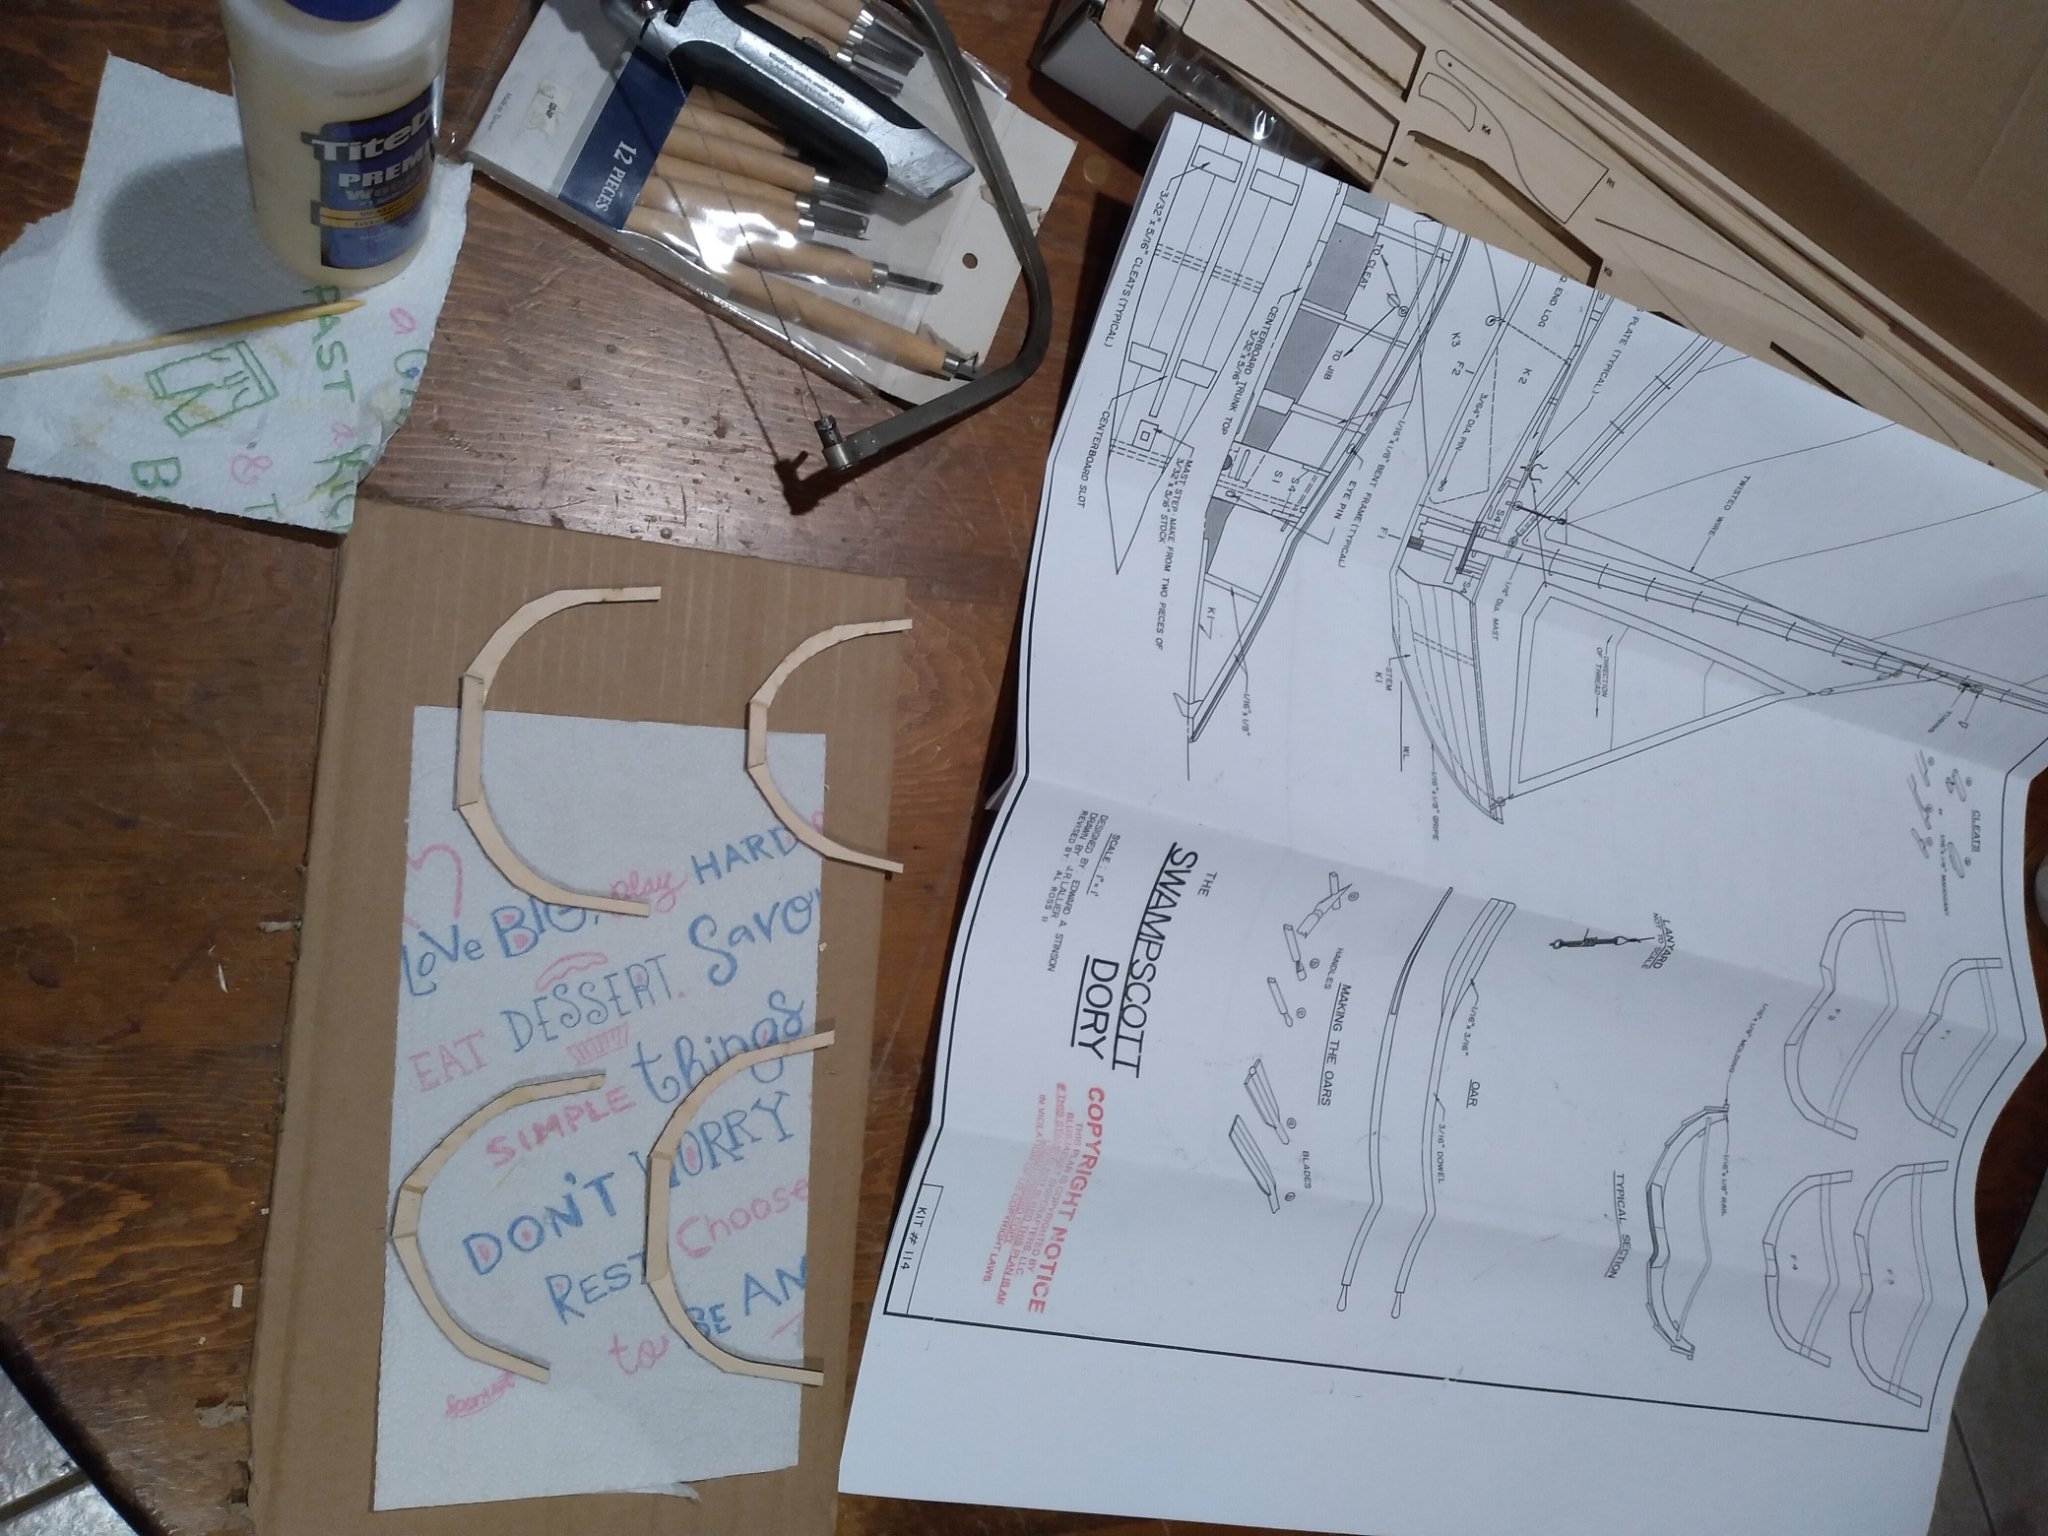
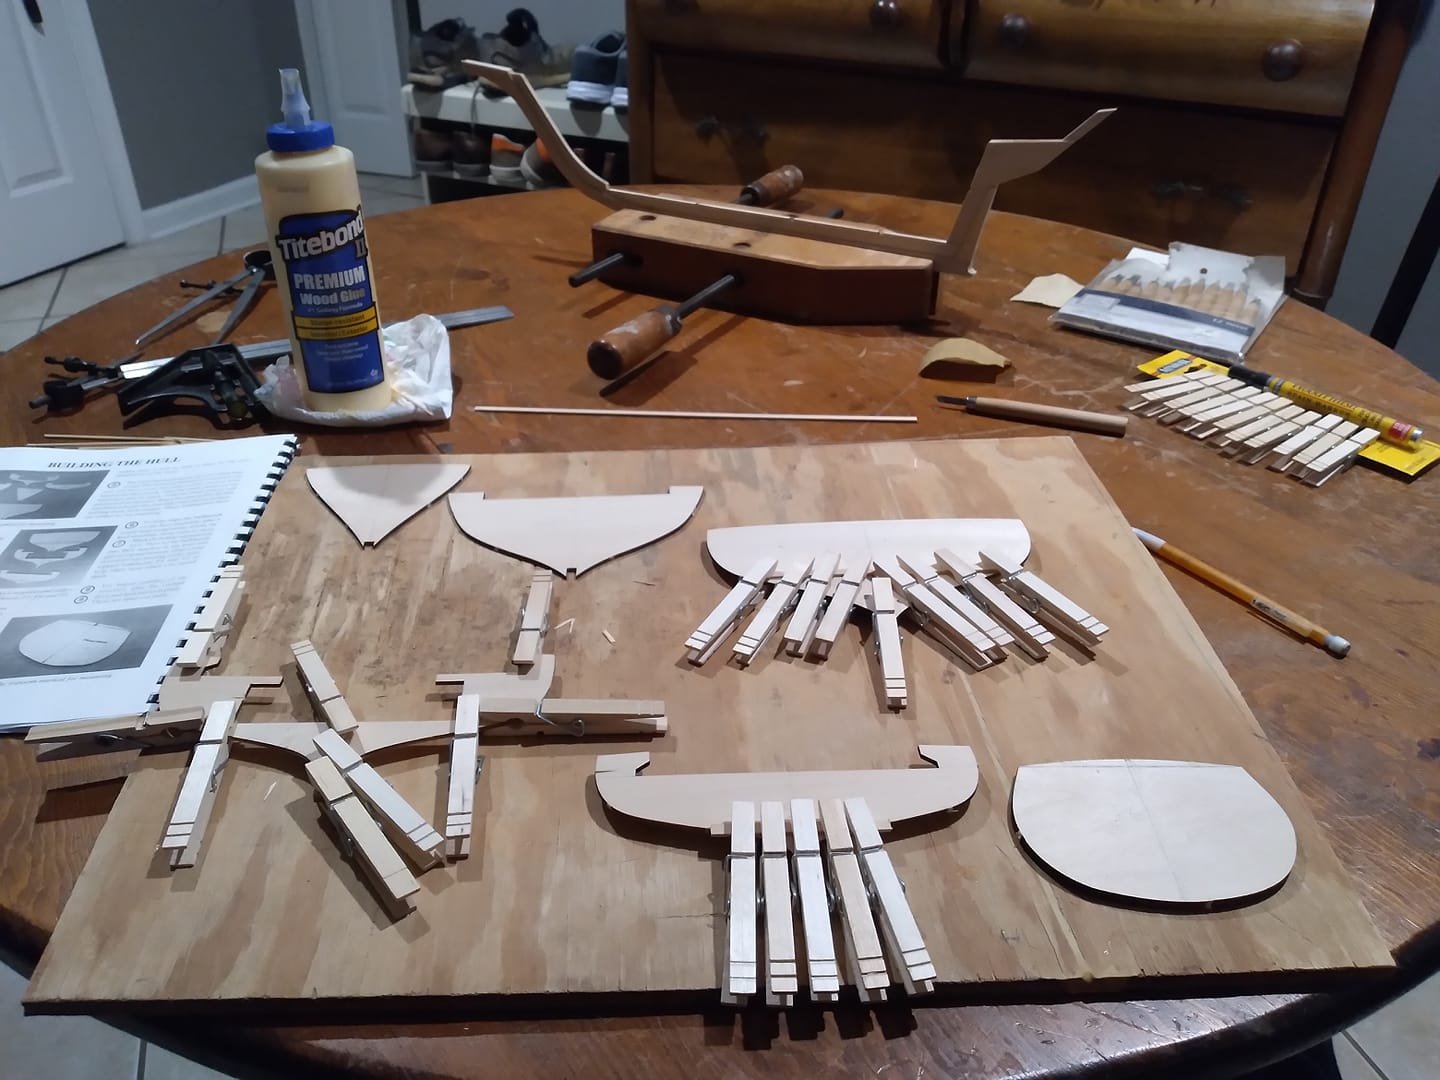
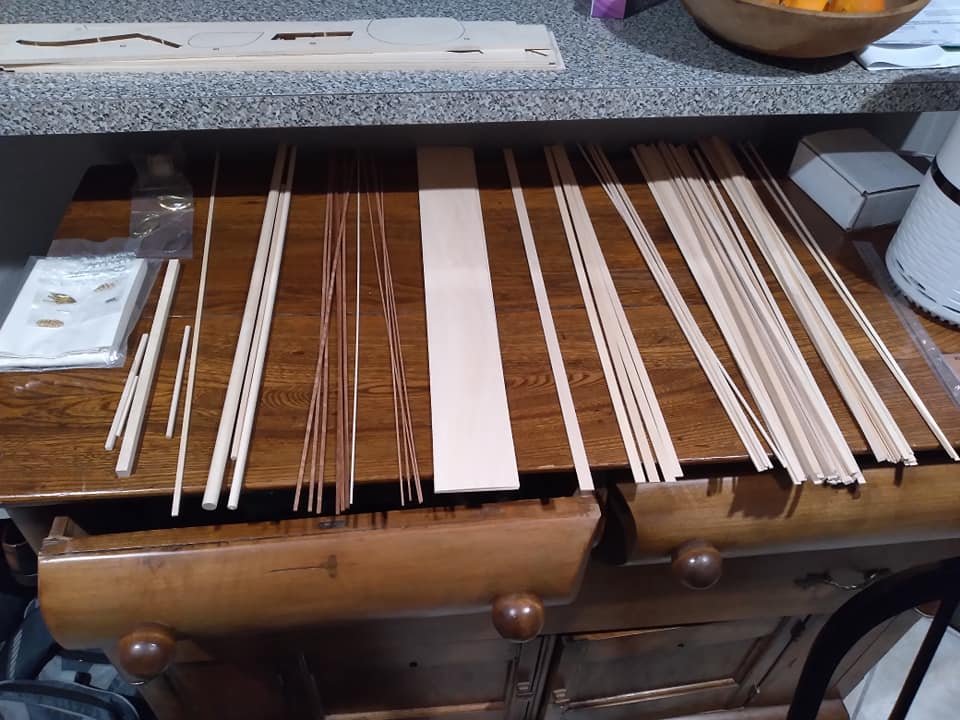
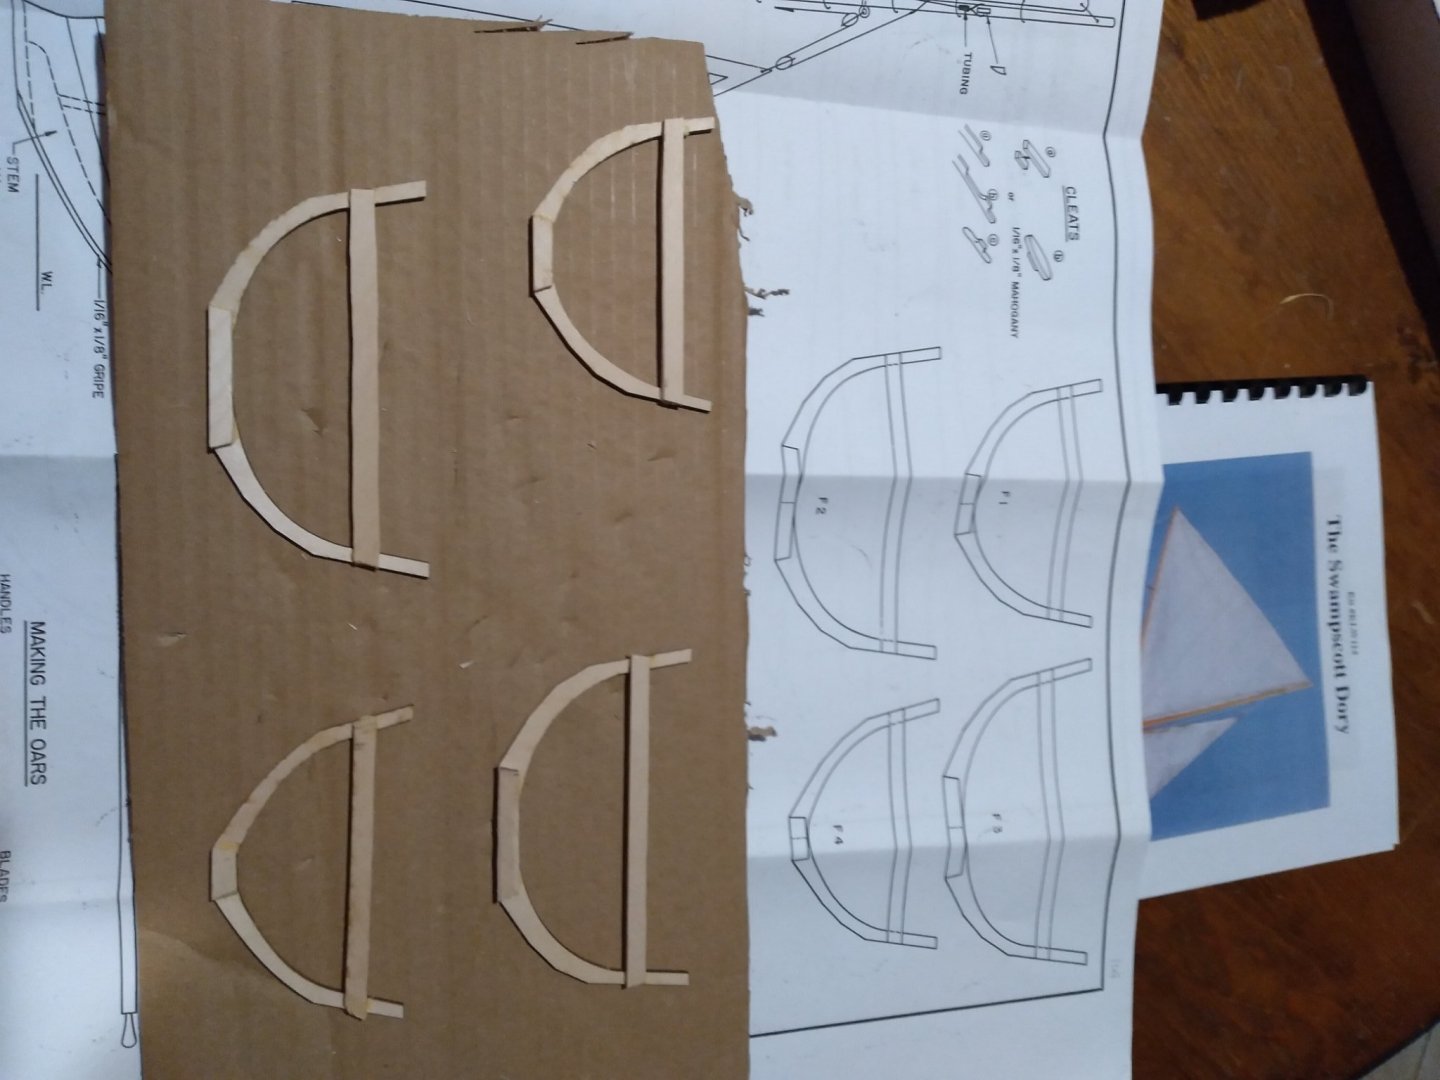
I went ahead and dug in despite initially wanting to wait for calipers, dividers, vices, clamps and all sorts of other goodies. I decided to leave the interior natural and hit it with some varnish after assembly. Having never worked with basswood before.. this stuff is SOFT. Its like cutting poster board or styrofoam. I tried cutting the braces and gussets with various hand-held wood and metal jig saw blades. In the end the coping saw won out giving a very clean cut and tracking along a pre-scored line. I found that scoring with the razor knife and snapping for rips was much faster and yielded much cleaner results. Crosscutting involved scoring and sawing. The material tended to pinch and fray when getting too deep with the razor across the grain. The frames were assembled using a great deal of eye-balling. The plan is to trim off the slop from my hand cuts, and sand out the glue/laser marks before mounting to the assembly board. The history behind these boats seems very utilitarian, so maybe a little bit of variance here or there will add some character. The shape of F2 and F3 varies about 1/8" from the plans. I could have got that closer using clamps. Nothing I don't think I can fix in the fairing step. I may have messed it up enough that all the errors average out.. that's how it works right...? /s The frames were glued and allowed to dry over night. Braces glued tonight.

- 25 replies
-
- 1
-
-
- Bluejacket Shipcrafters
- Swampscott dory
- (and 1 more)
-
Wow what a rabbit hole! This is such a versatile boat. I found examples with everything from flotation lockers to a fully decked version with cockpit. Lots of examples of lug rigs, and gaff rigs; even one ketch rig. It might be a fun side project to build a sampling of different rigs/sail plans to display along side, but I'm really getting ahead of myself. I'll be building this model as laid out in the drawings. I do like the look of the white topsides and red bottom as pictured on the box. I plan to leave the spars natural and just varnish them. Undecided how to finish the interior hull. I want to experiment with either staining or teaking the gunnels, thwarts, and frames. Since I haven't worked with these particular materials before, it would be prudent to work up some samples on scrap pieces first. Will post back once I have worked up the samples.
- 25 replies
-
- 1
-
-
- Bluejacket Shipcrafters
- Swampscott dory
- (and 1 more)
-
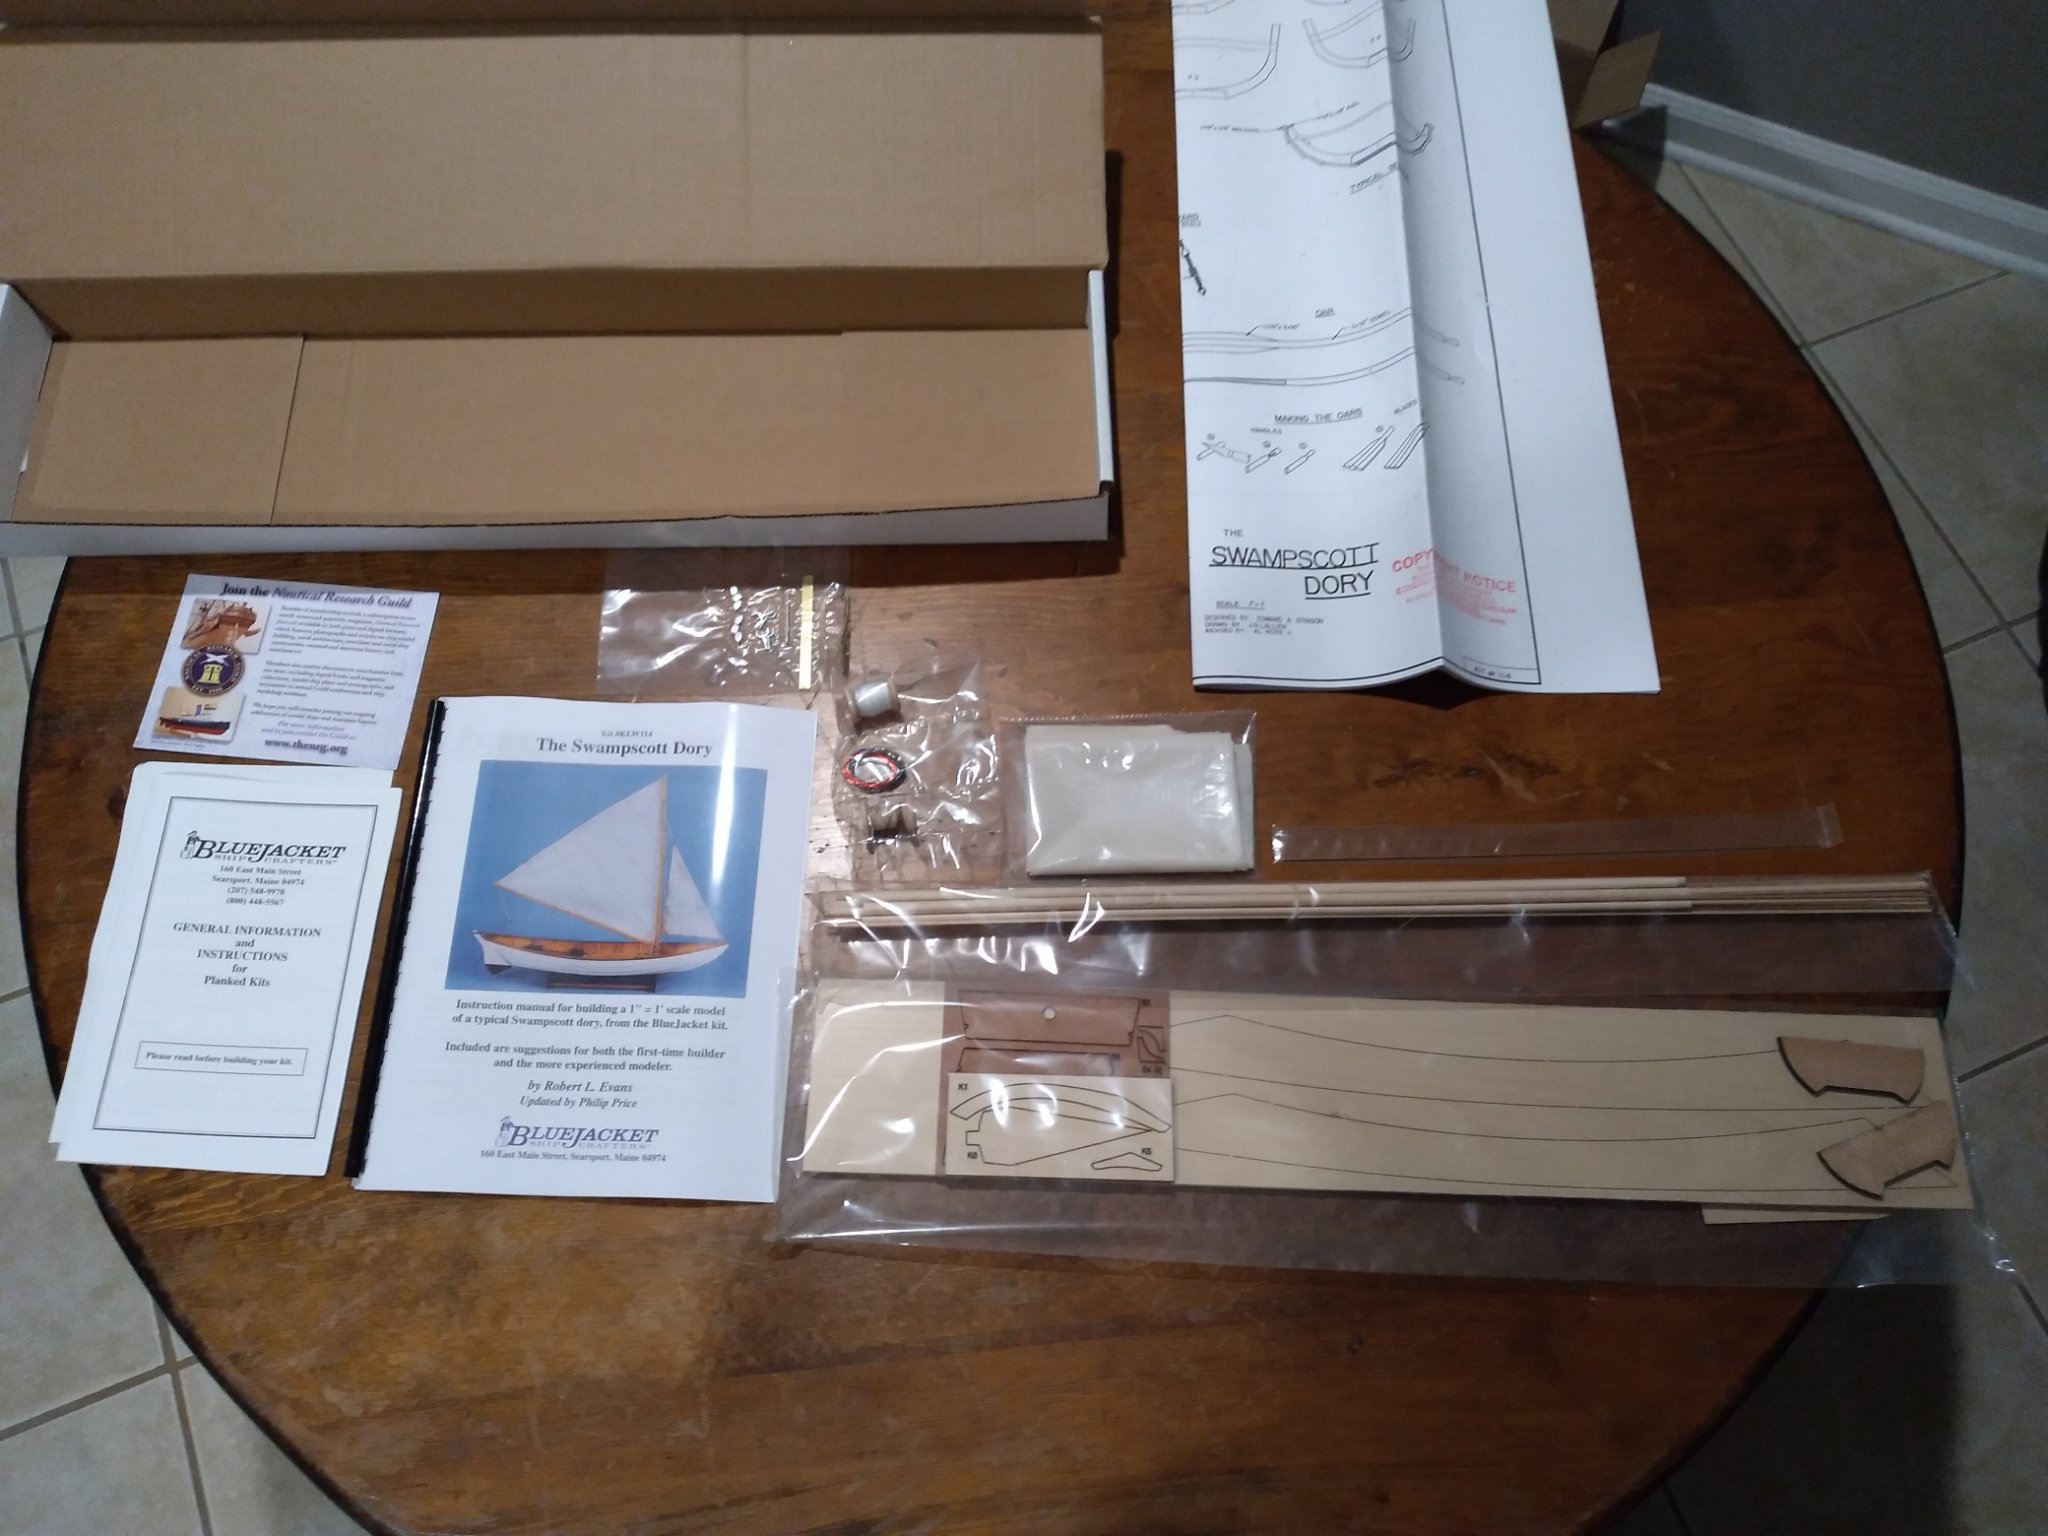
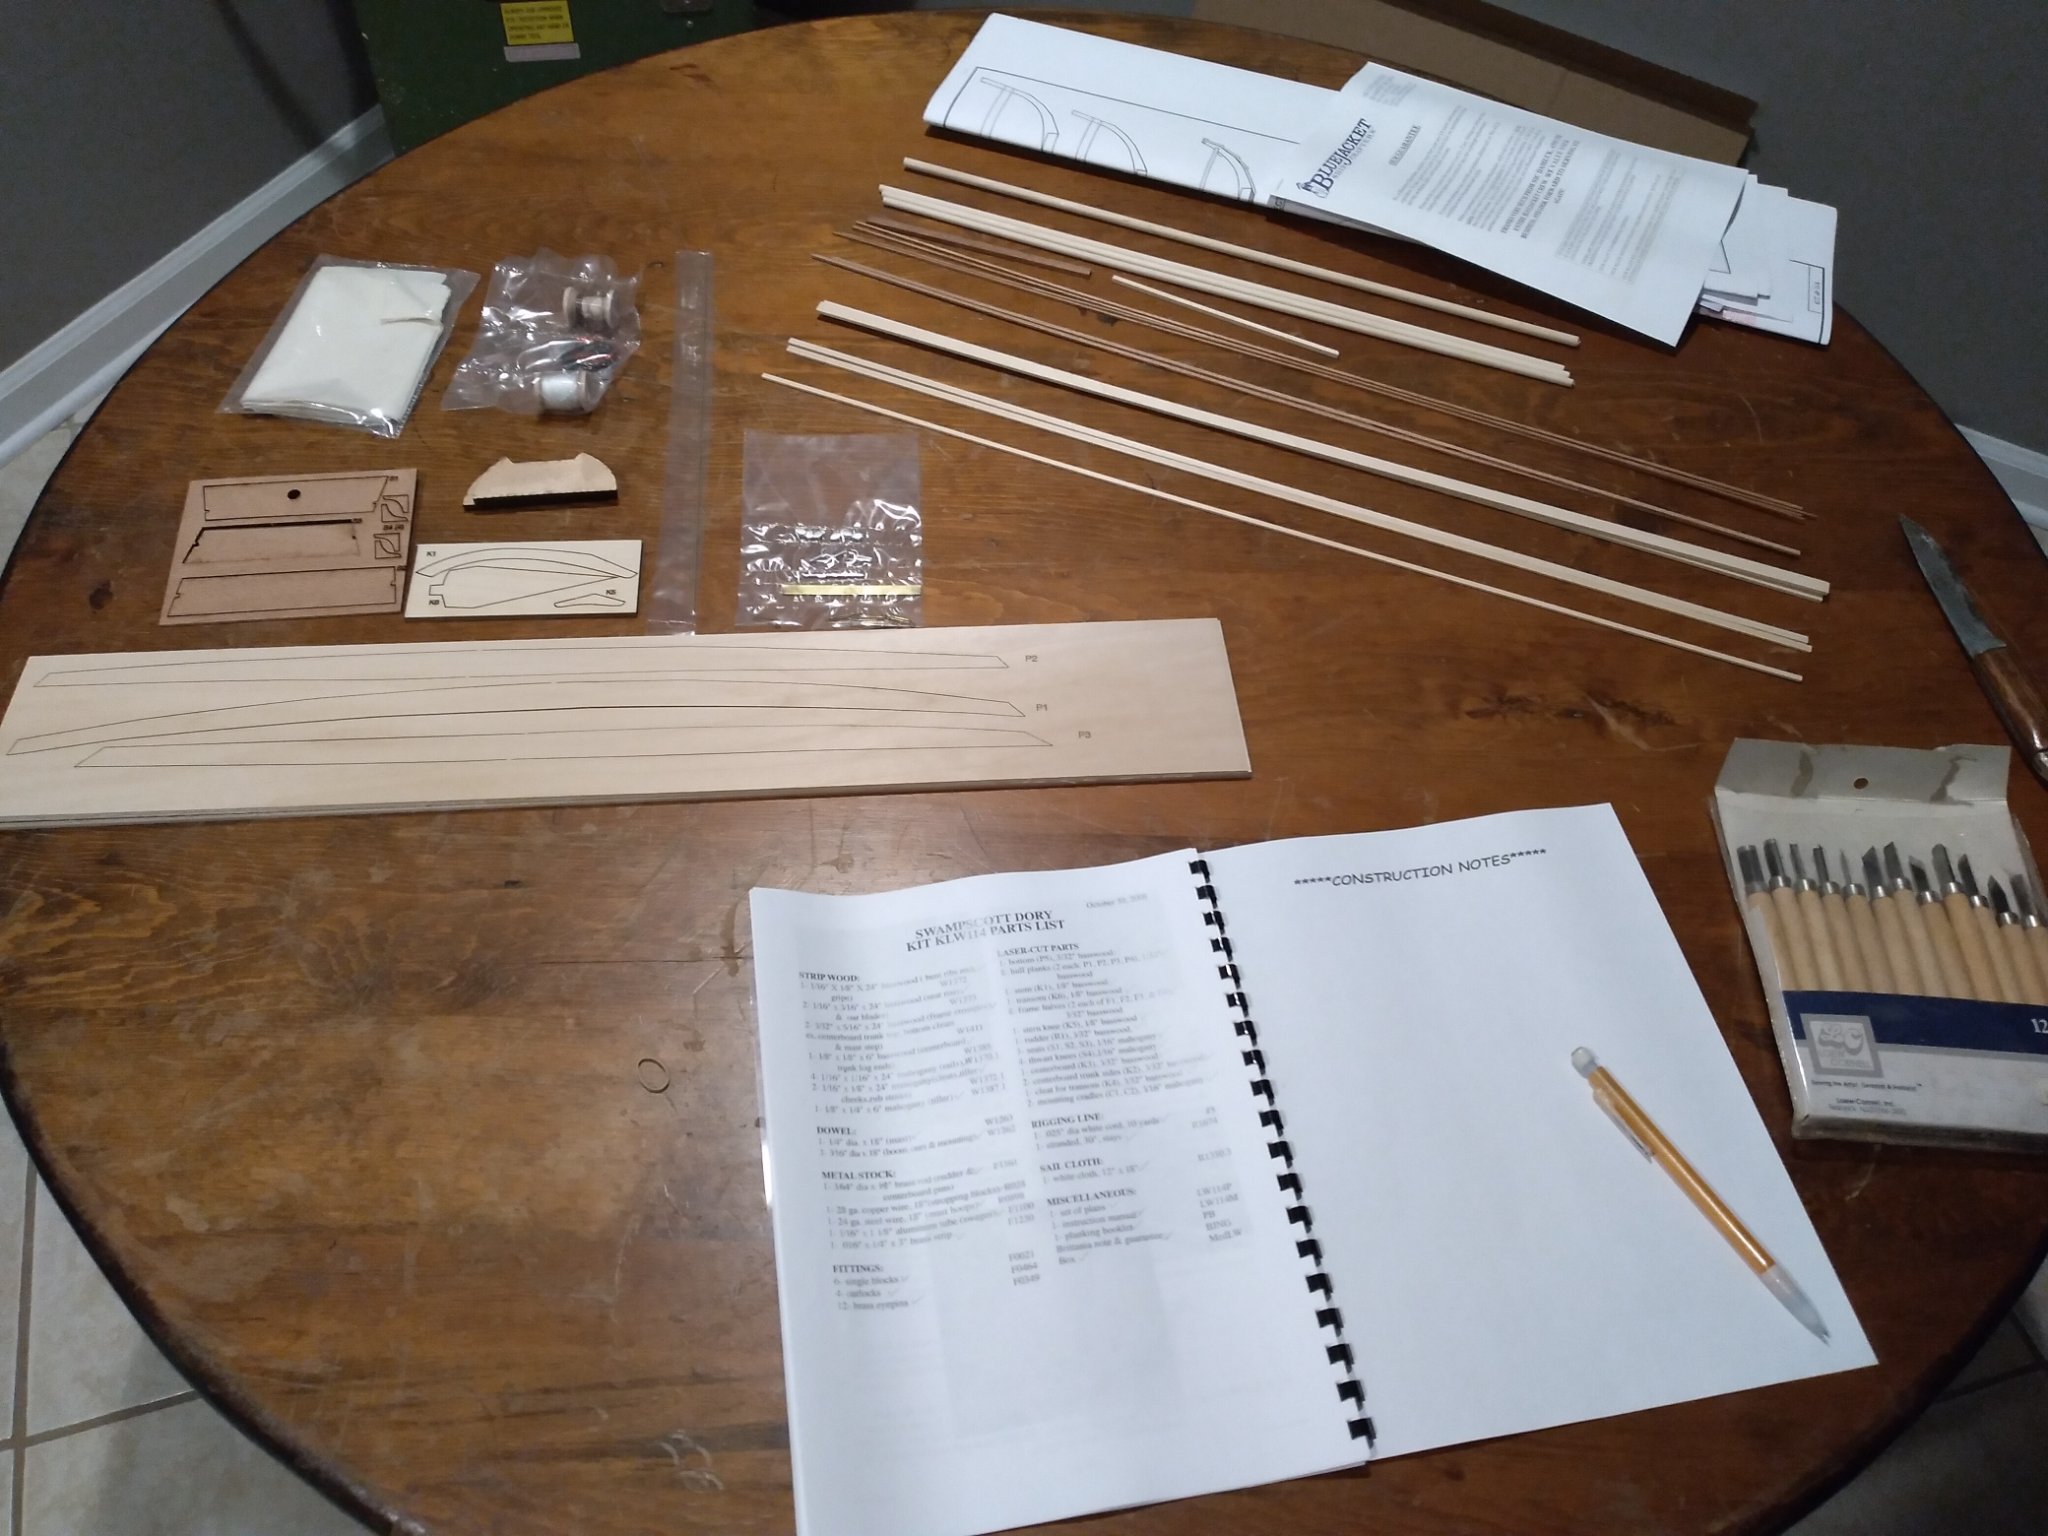
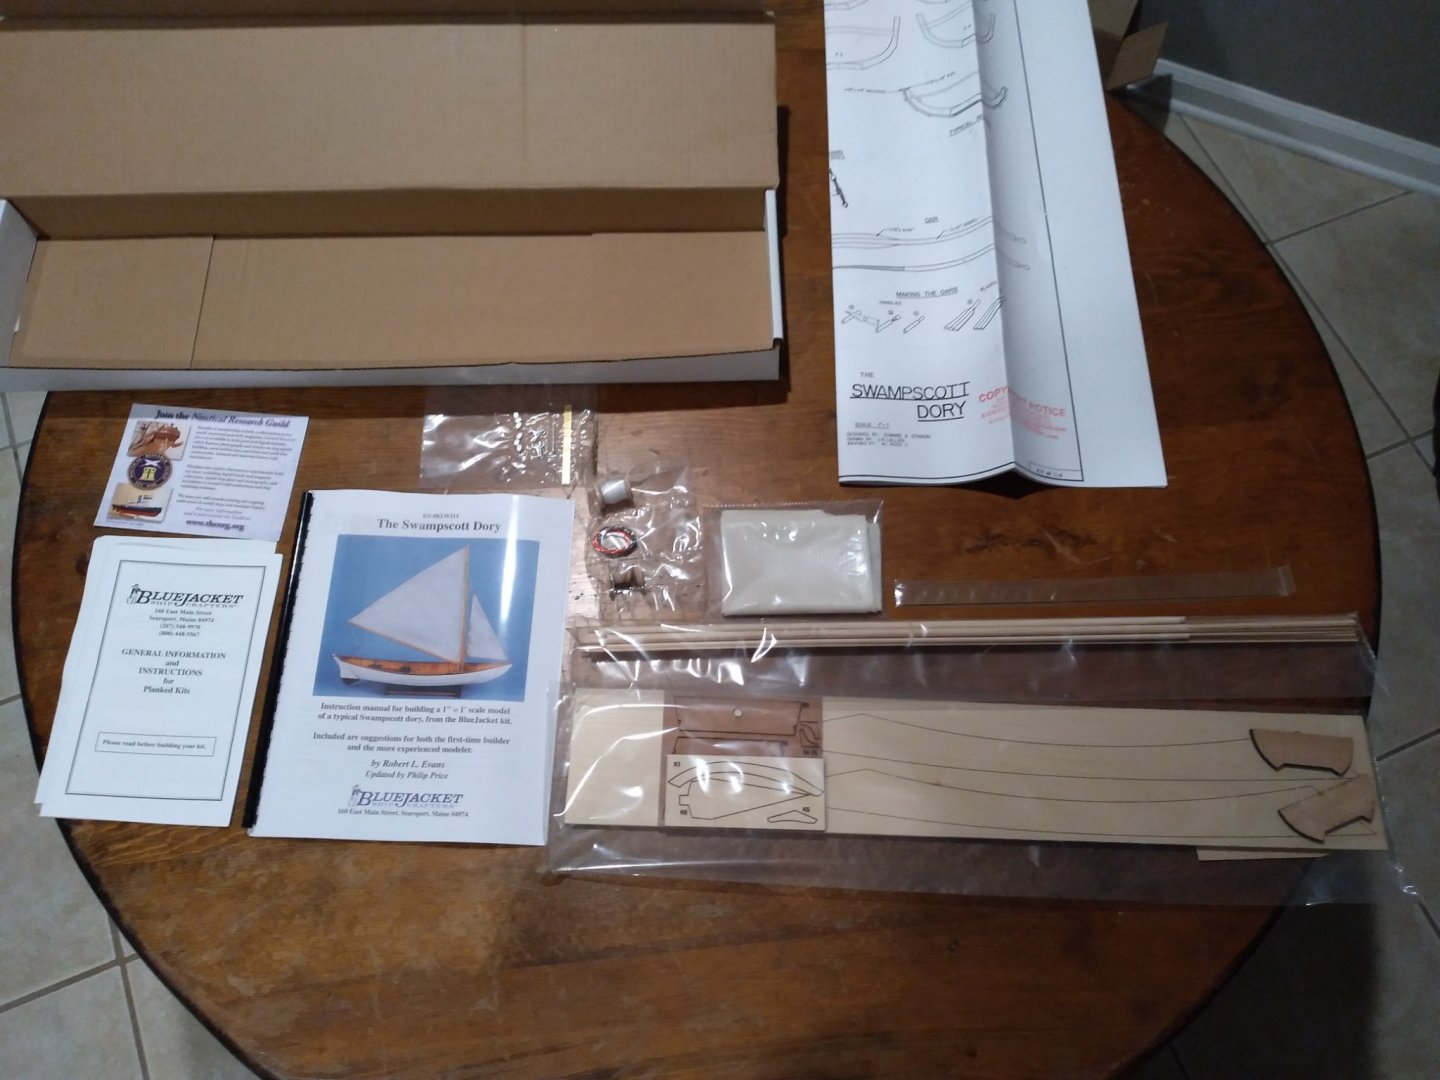
I chose this Swampscott Dory kit as my first build for it's relative simplicity, good documentation/popularity, and its employment of real world building techniques. I figure if I get stuck somewhere, there's lot of material out there to help. The kit came in today, I managed to restrain myself and not whip out the titebond right away. I unboxed everything and did take-offs against the plan and parts list. Everything accounted for and in great shape I'll be moving slowly through this build. I just read the instructions cover to cover, and I have some prep work to do before the heavy lifting starts. My To Do list for this week consists of finding a suitable construction base, researching a color/finish scheme, and collecting the rest of the recommended tools.
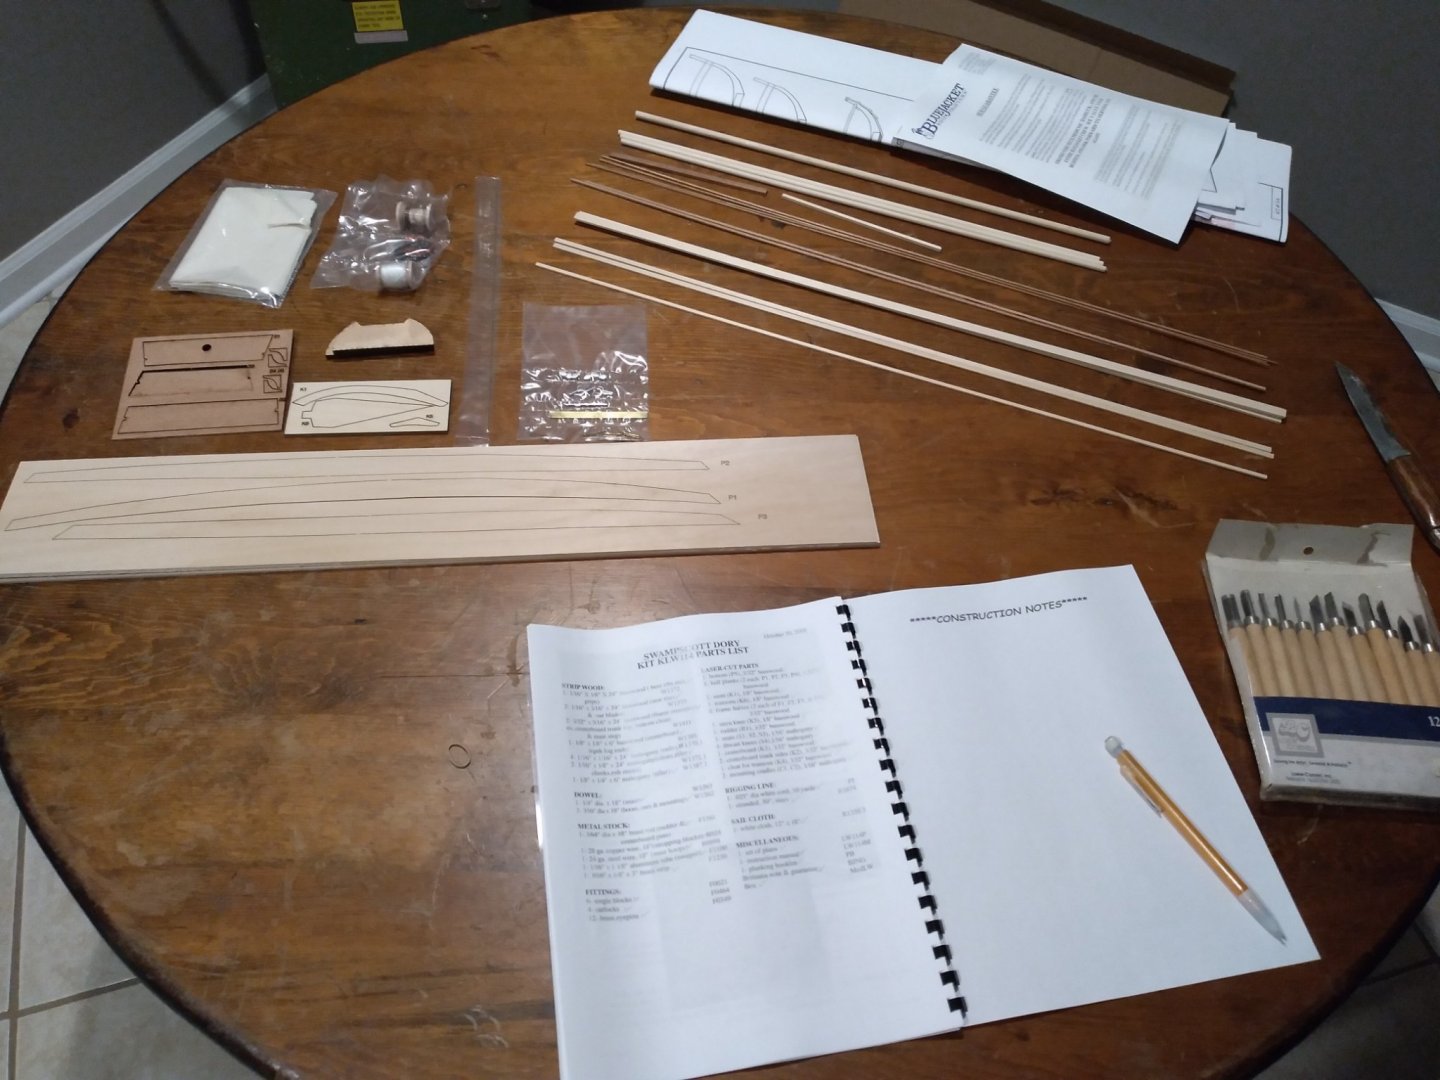
- 25 replies
-
- 8
-
-
- Bluejacket Shipcrafters
- Swampscott dory
- (and 1 more)
-
I was eyeing this same model, maybe it will be next. I race J/30s, along side a couple of J/22s, and last year a J/24 joined the PHRF fleet. All the one-design owners follow the class rules (as closely as beer league allows), and therefore are rated the same. We end up with several mini-one-design fleets in the middle of the larger mixed fleets. Really fun boats. Looking forward to seeing the build progress!


.jpg.8edf57bc7fdfe621425eadc2c6c75596.jpg)
.jpg.b25a8b10312923c0a3cbce8eb18af2b4.jpg)
.jpg.f92063c50b58d0453e6f646351f6a50a.jpg)
.jpg.e2e7f28fd9791bbd967a75b5431188e0.jpg)
.jpg.775c3f431e66af37c9f32051243ba6ff.jpg)
.jpg.bac2e43f46ed4c4b45ec6f3d4e954df2.jpg)