builder_Nick
-
Posts
18 -
Joined
-
Last visited
Content Type
Profiles
Forums
Gallery
Events
Everything posted by builder_Nick
-
 10 strakes left on the port side
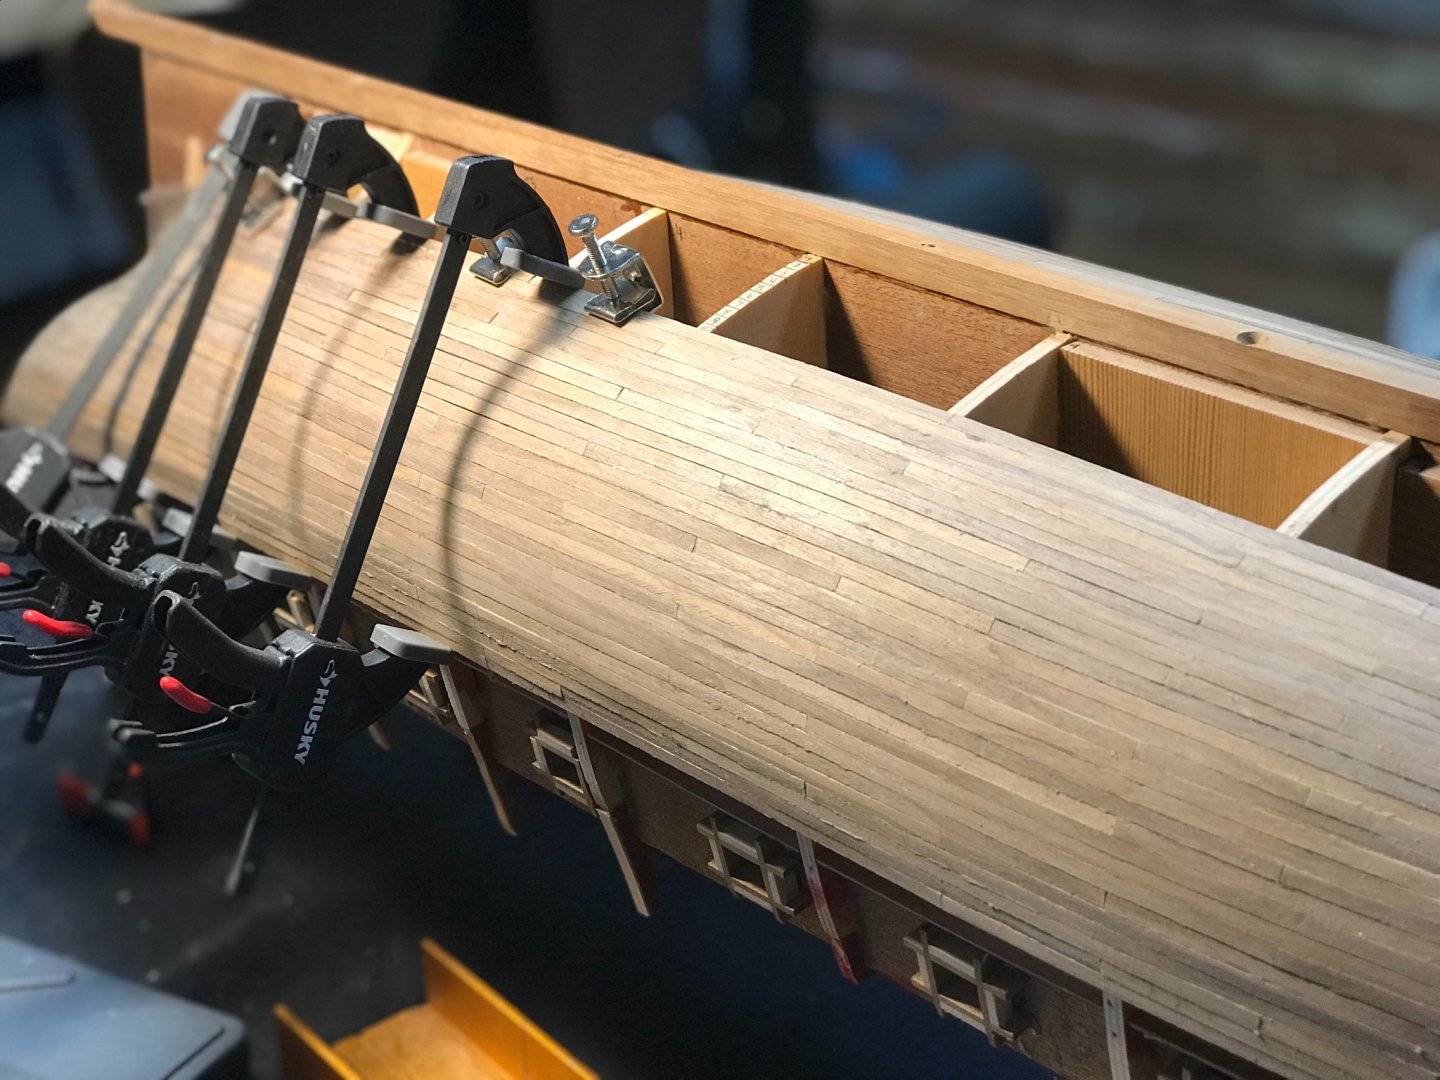
-
I’m getting closer and closer trying to add a strake each day. I might finish a side by early next week.

-
Thanks! I was nervous about planking this way, but I’m glad I did.
-
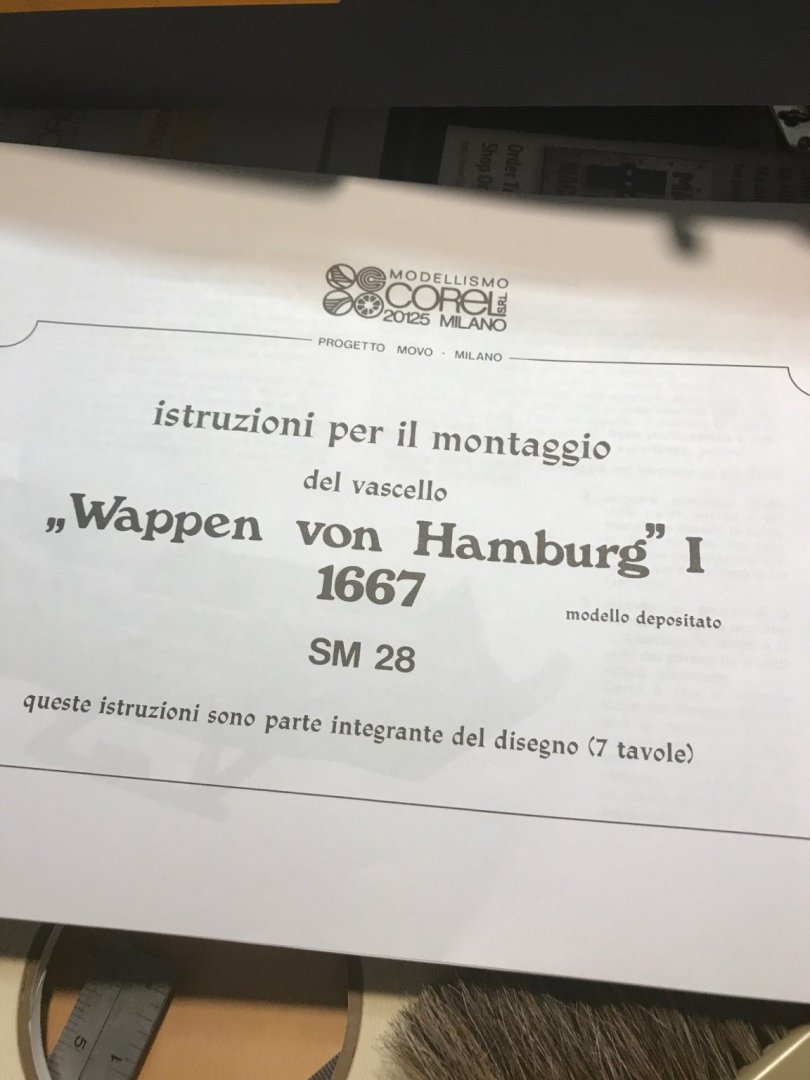
I also want to mention that I now have the instructions that I was missing! Model Expo was a huge help and contacted Corel about getting it. I received an envelope with the instructions and a note written in Italian. I’m grateful to finally have the images that the instructions reference.


-
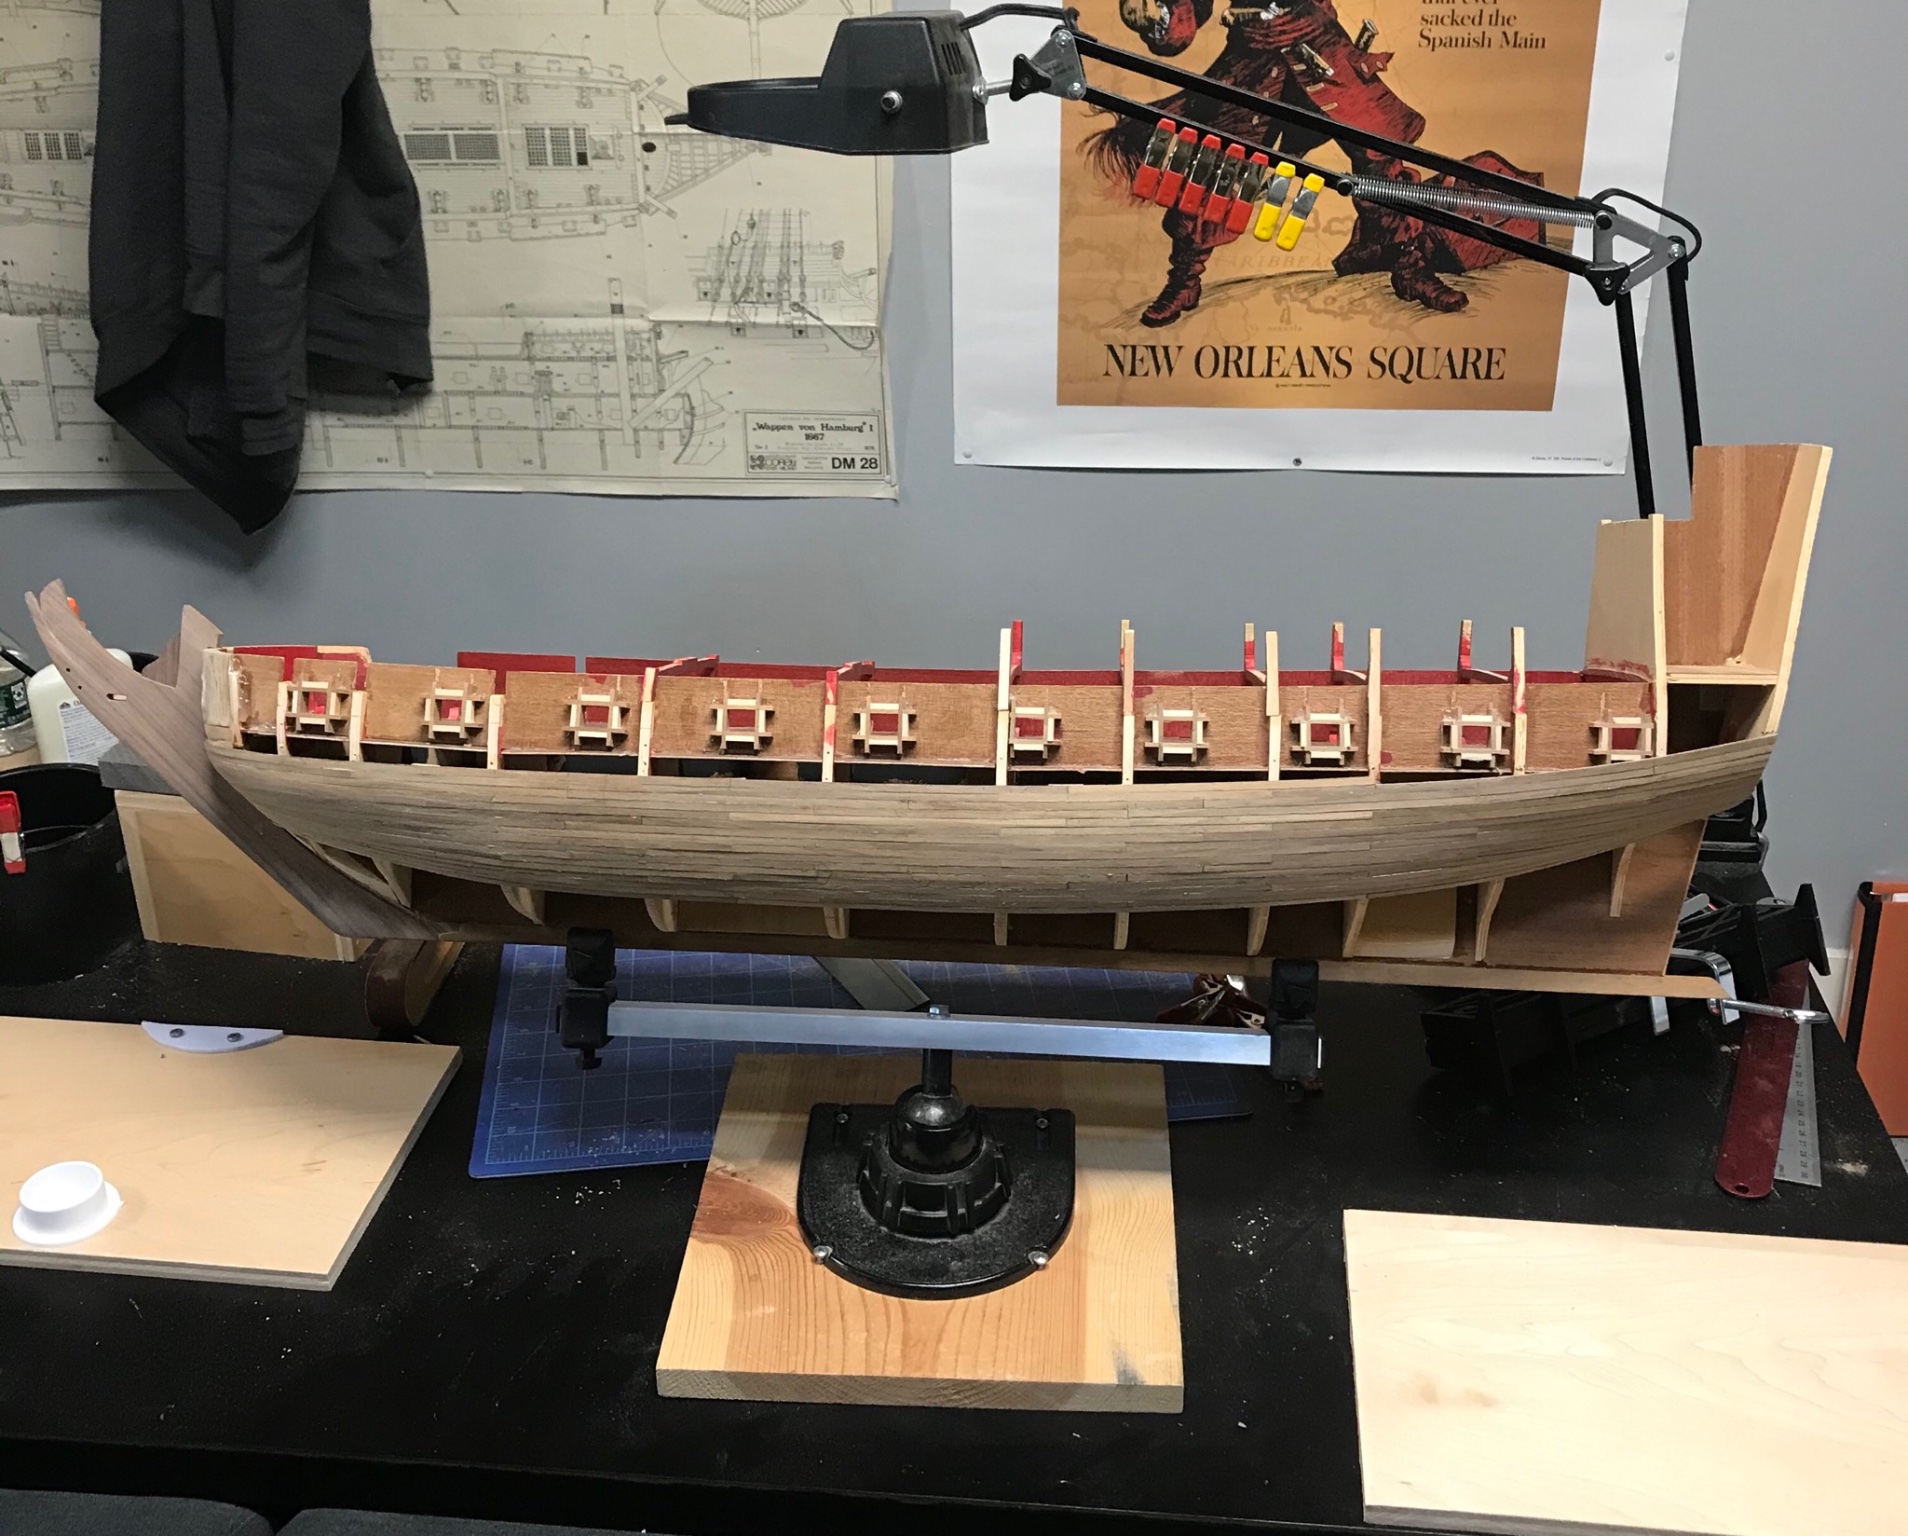
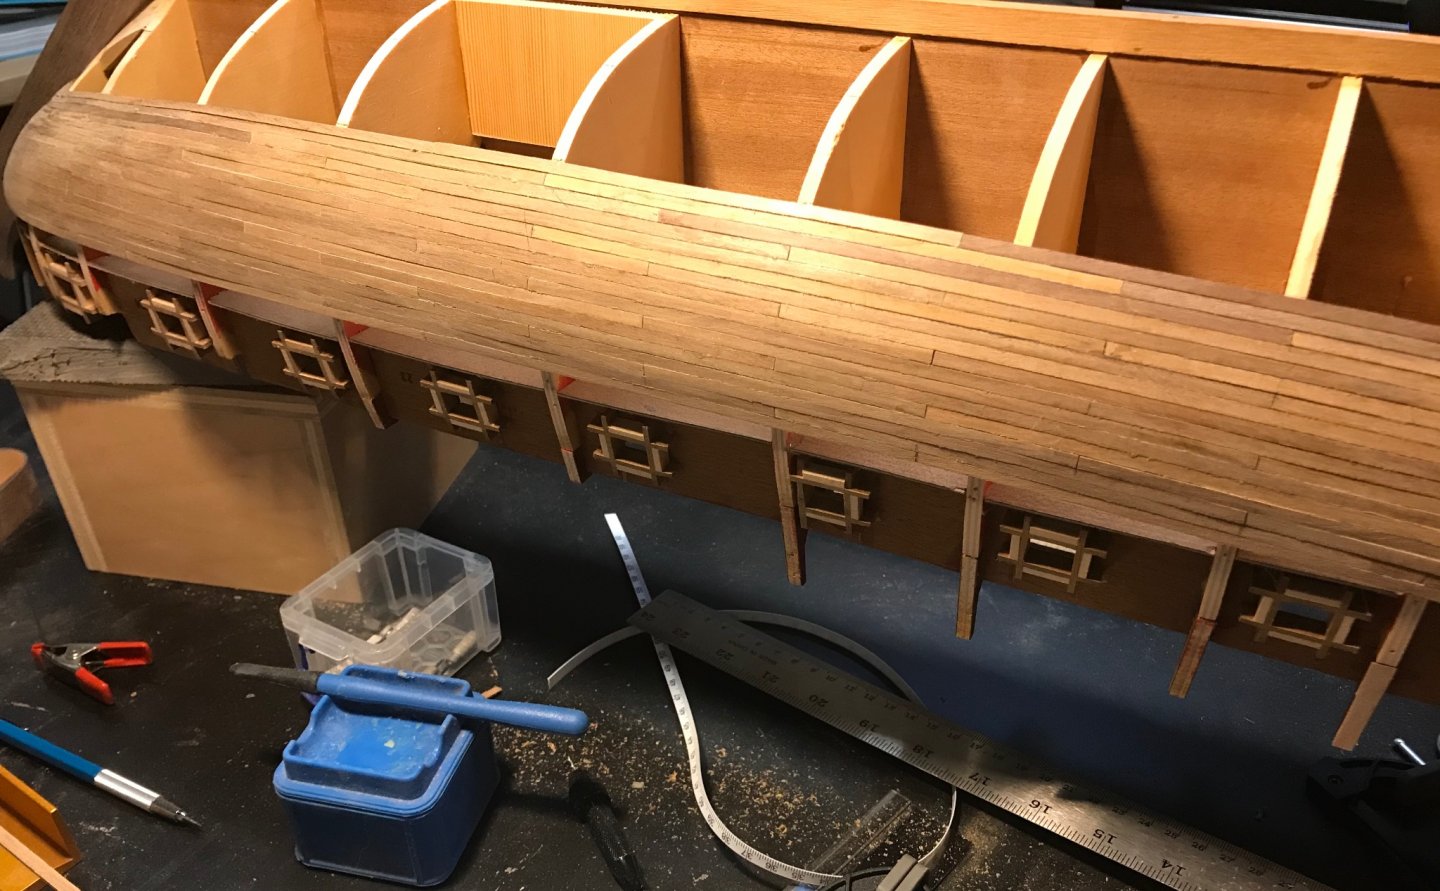
Not too much to report. The planking continues on with each strake keeping me humble. I feel like my process is working well and that I’m seeing better results with each strake I complete. I have about 20 more to go before I reach the keel.


-
A quick update to show that I’m still progressing on the planks. I decided to try for more realistic scale lengths. I like the look of the joints and the variations in tone it creates. I also darkened the edges with a pencil.
-
So it begins... the first row of planking is attached on both sides. The plank bending around the bow went well for my first try. I’ll be getting plenty of practice moving forward.

-
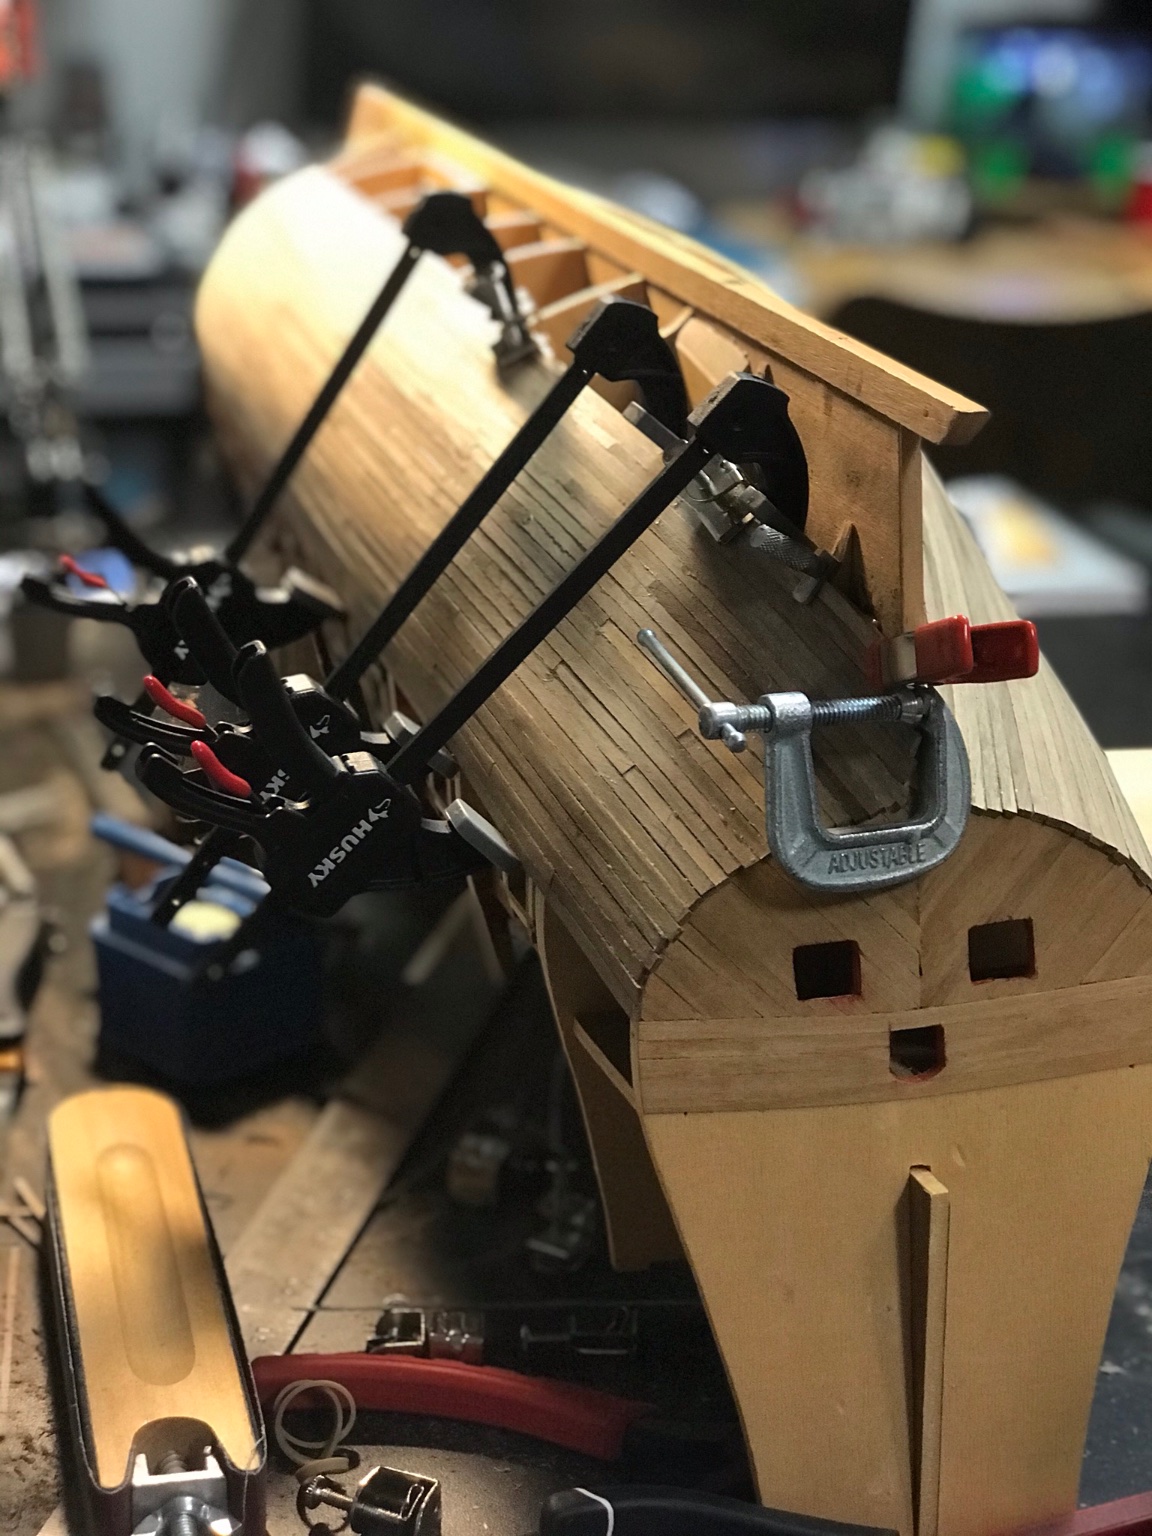
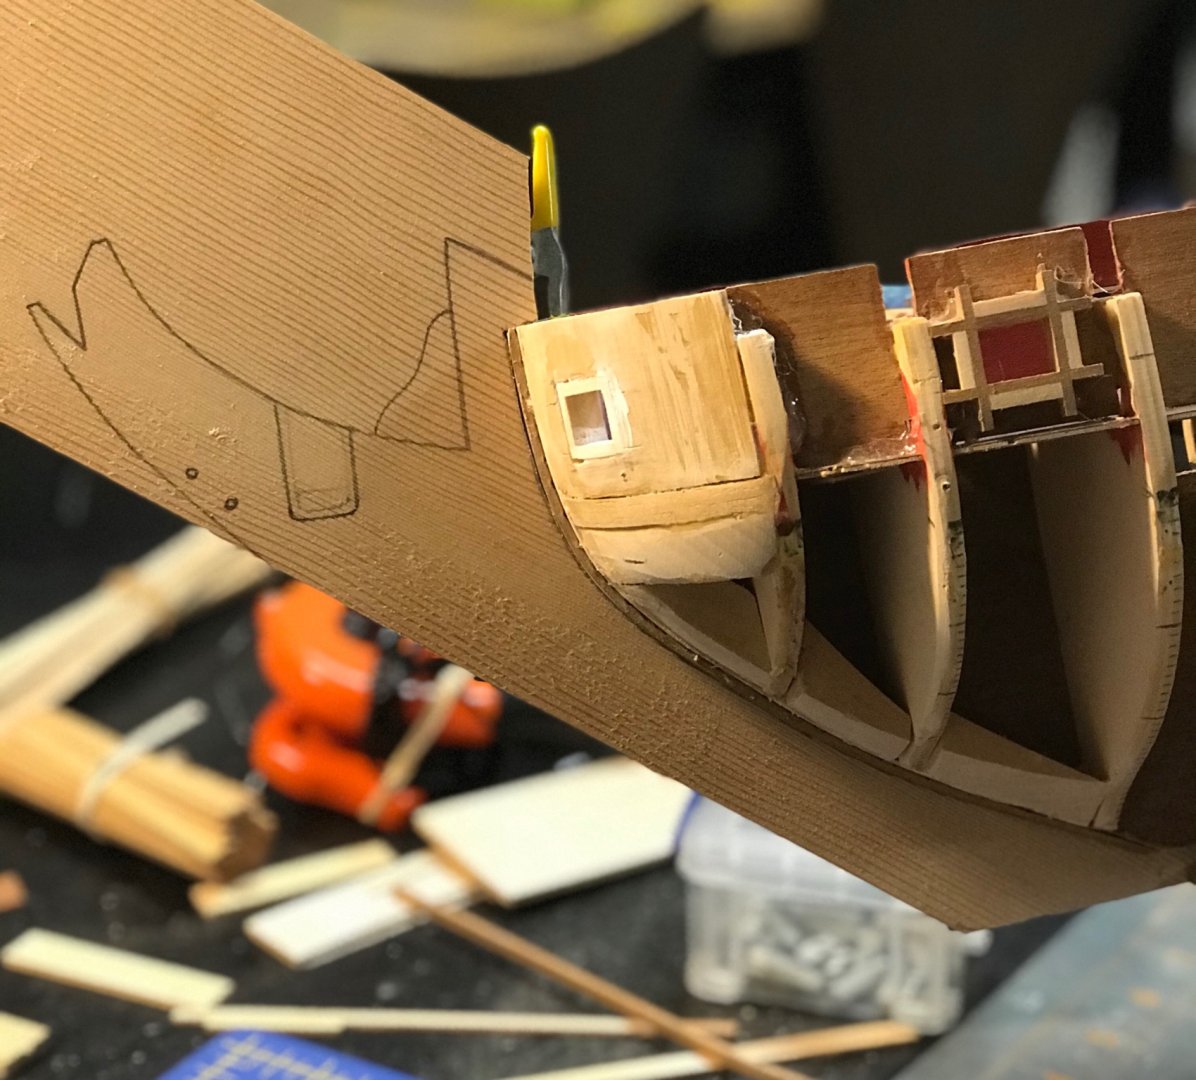
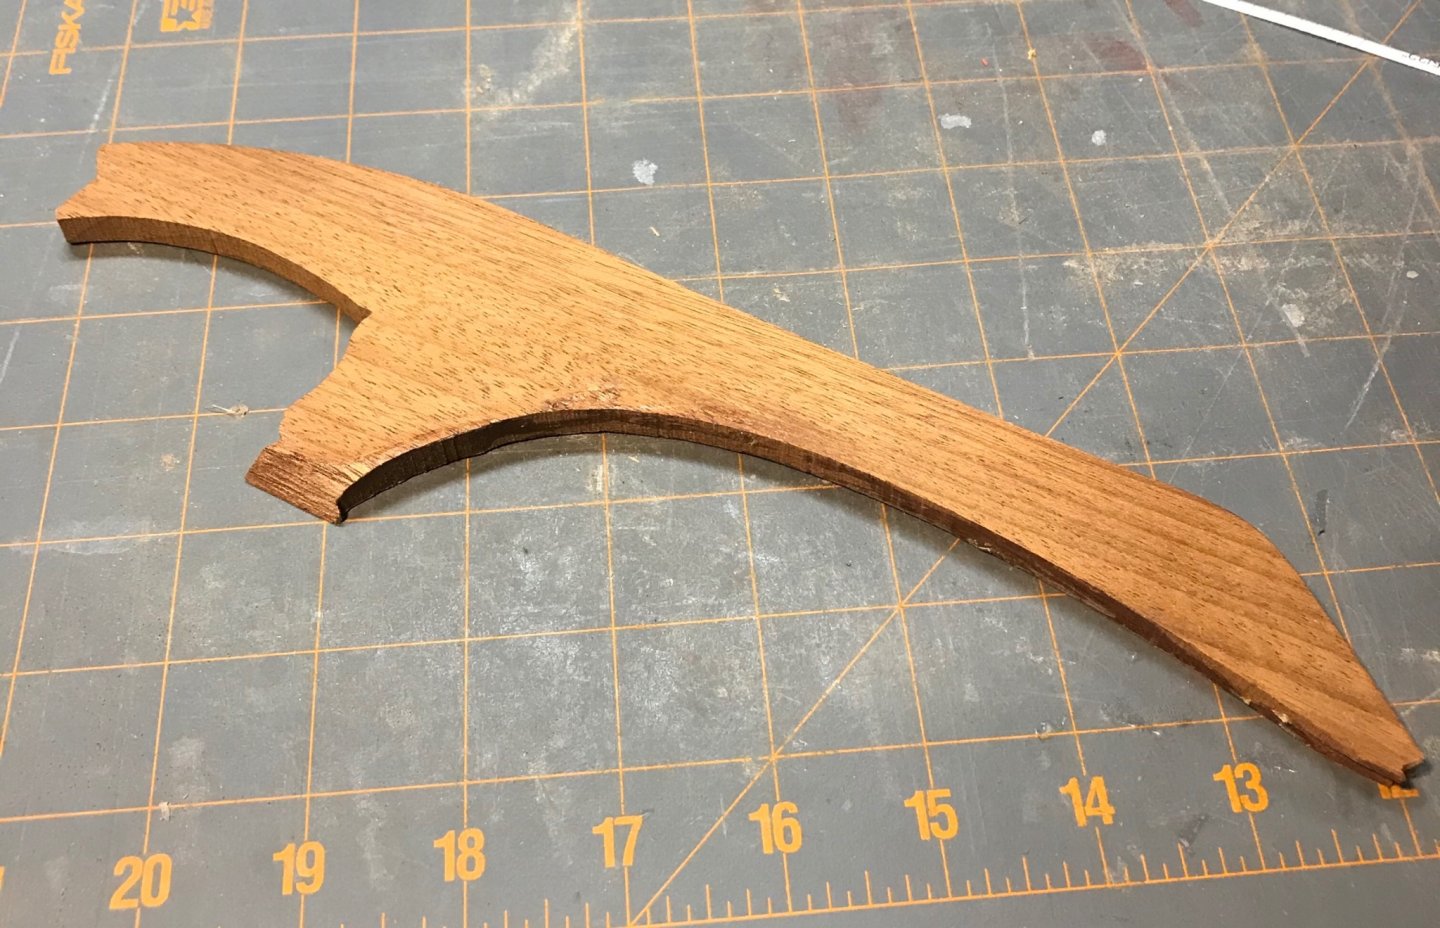
The new stempost is ready to go. There are a few details to finish, but those are going to wait for later in the build.

-
Working on a template for the new stempost. The shape of the bow is a little different than the plans so I needed to make sure the template is good before working in walnut.
-
Glad to have you follow along. I was trying to figure that out too. It seems like it was well glued and then removed for some reason. I don't have the broken piece from the top, but the bottom part that connects to the keel was still attached to the keel.
-
Thanks for the compliment! It is an adventure.
-
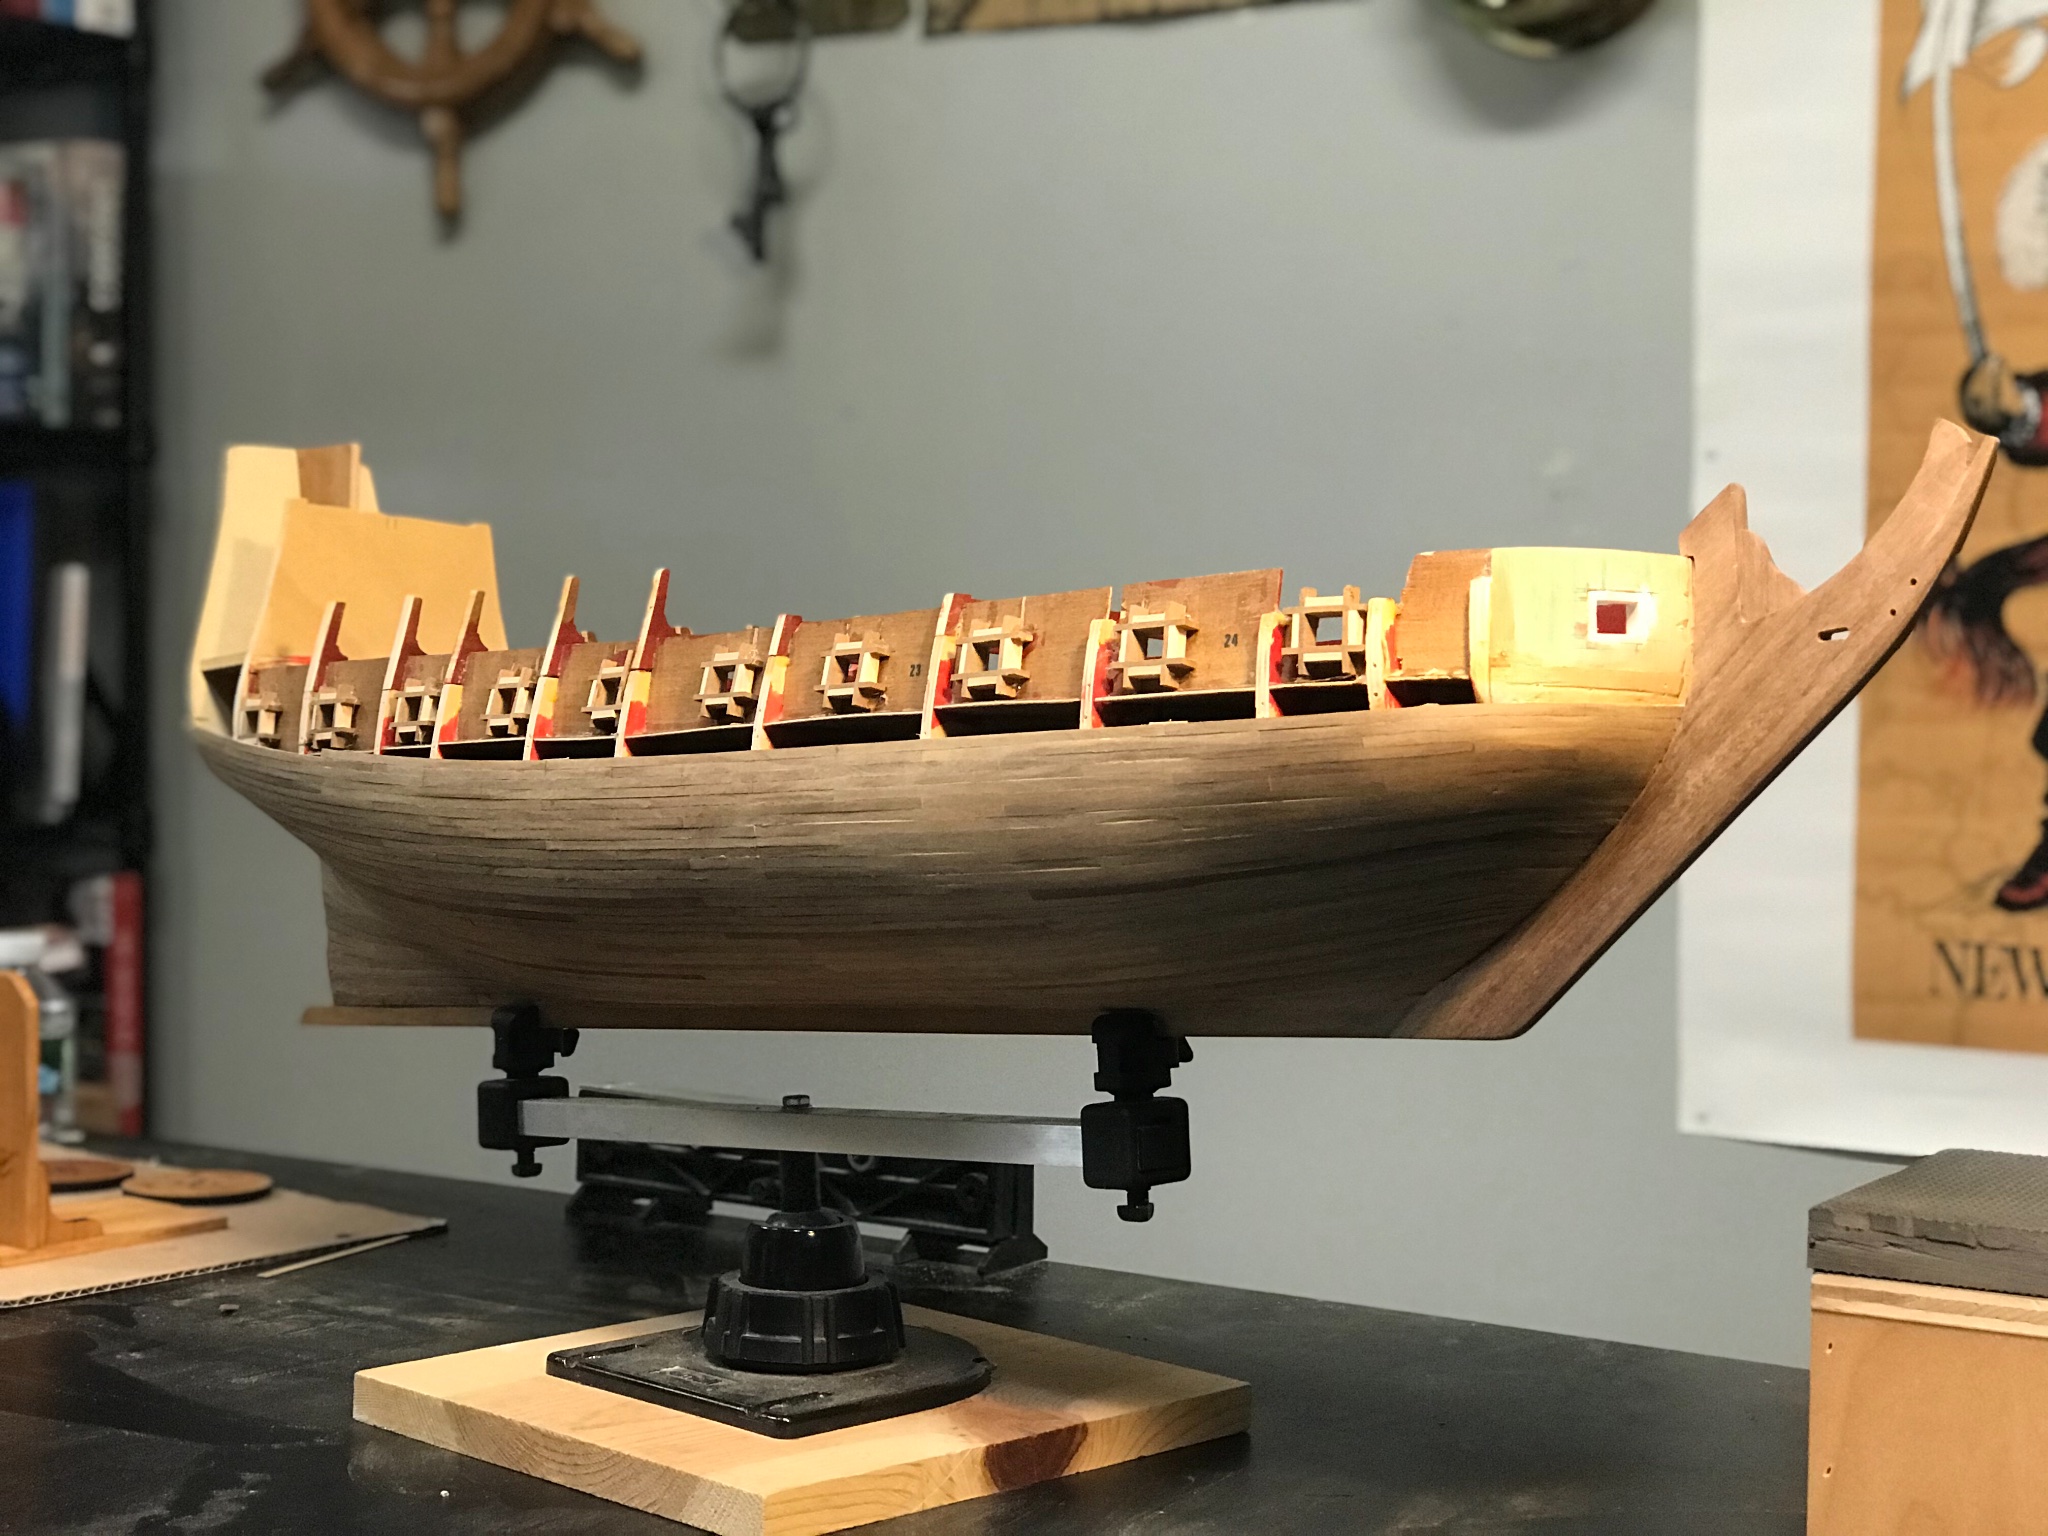
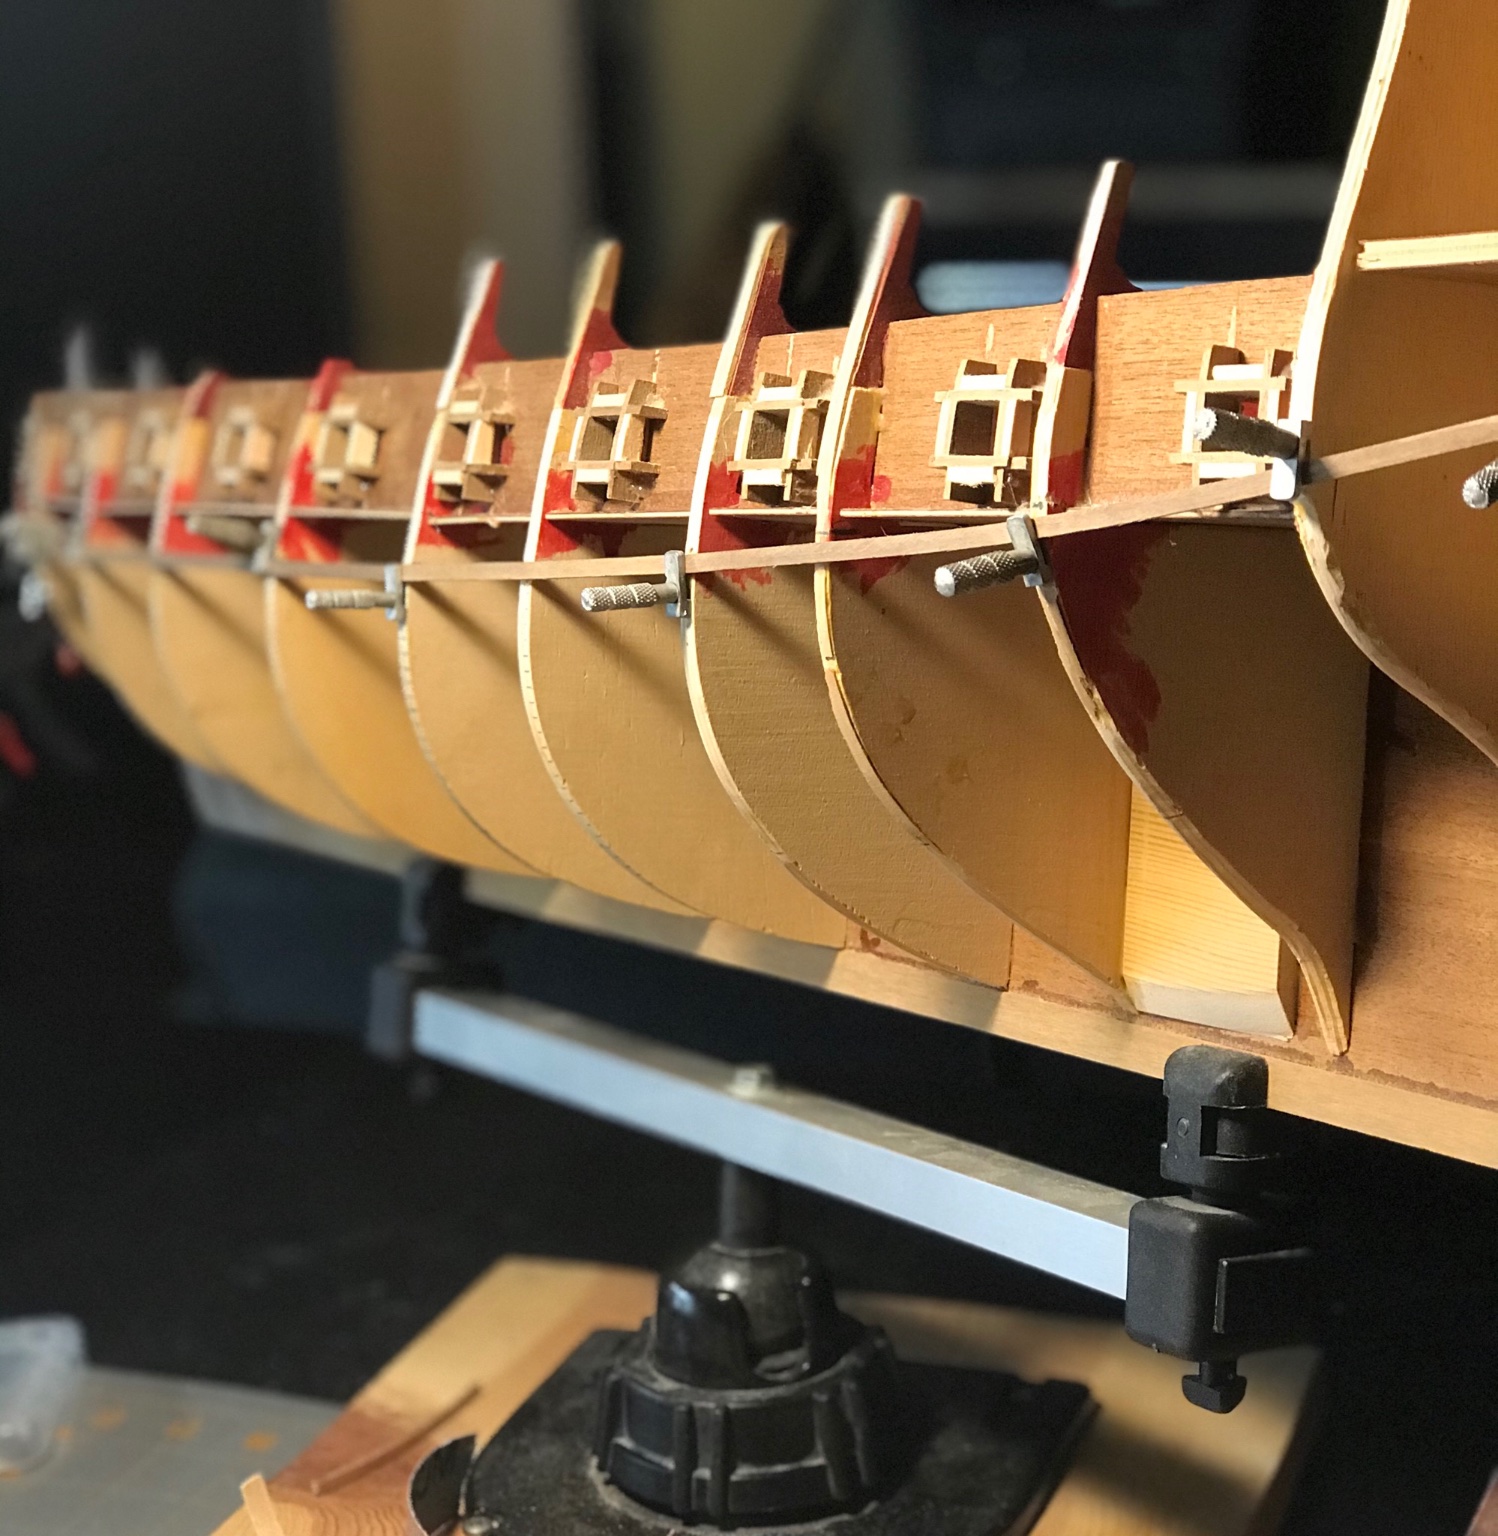
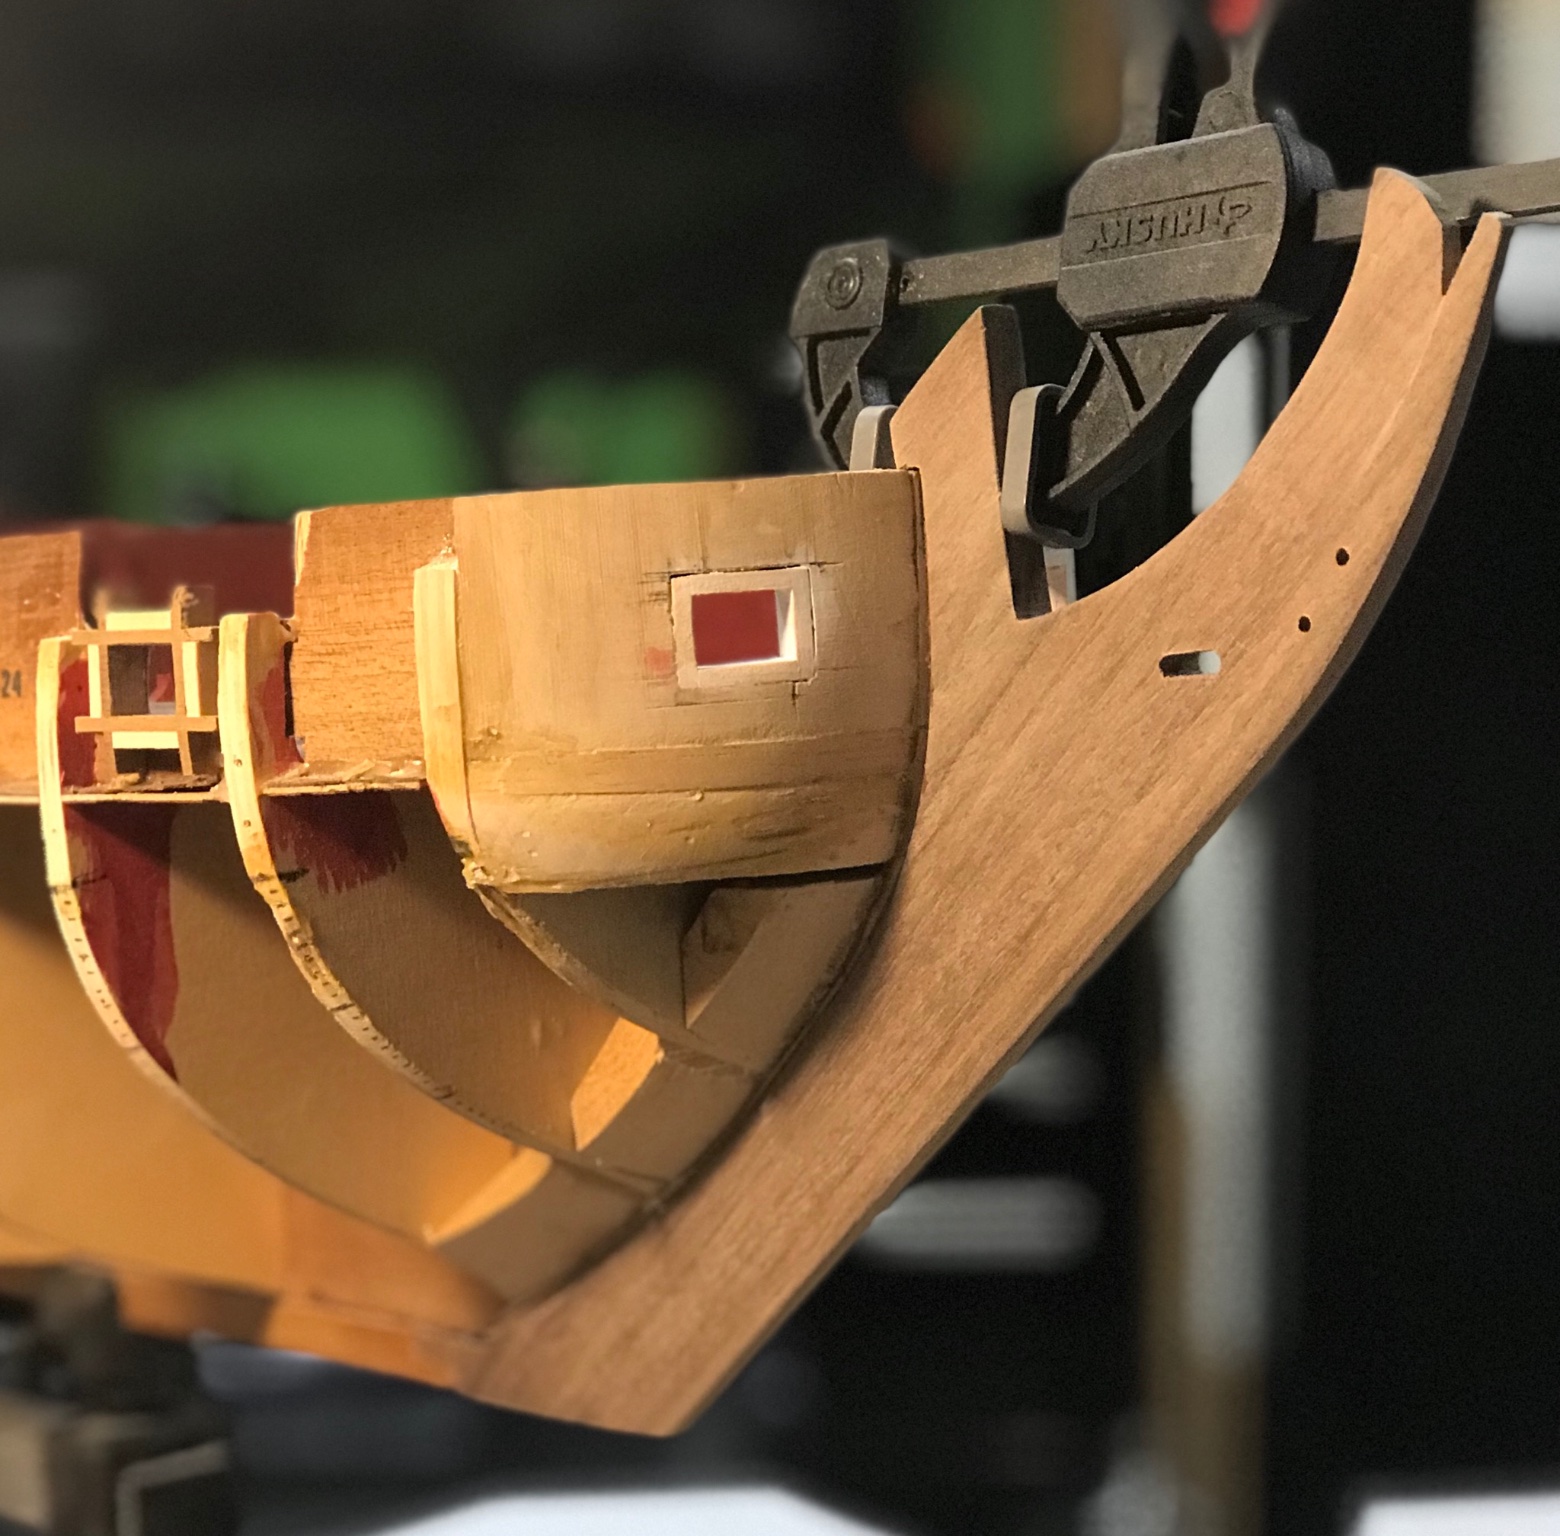
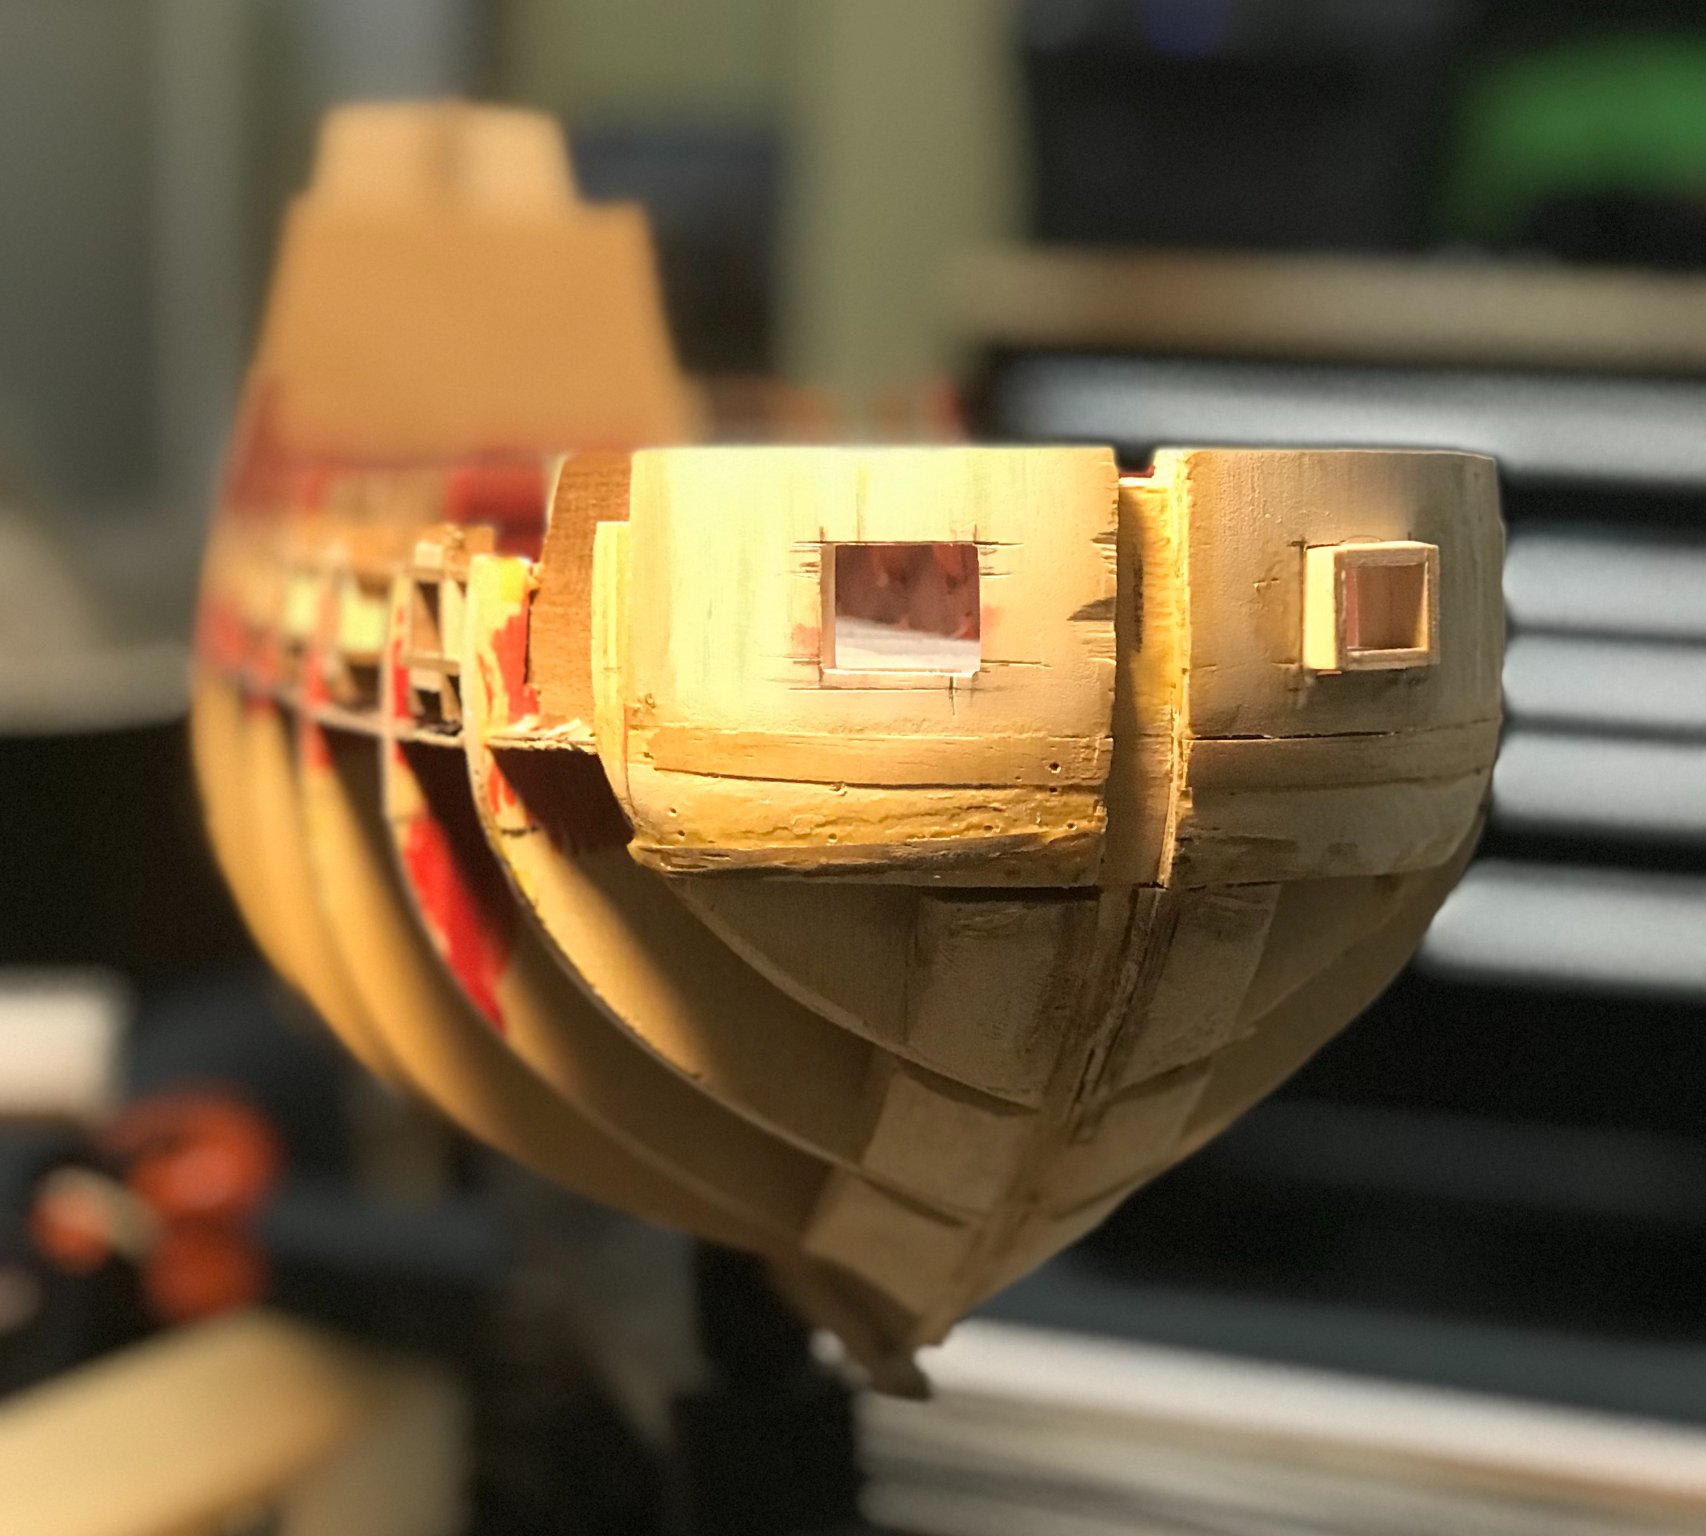
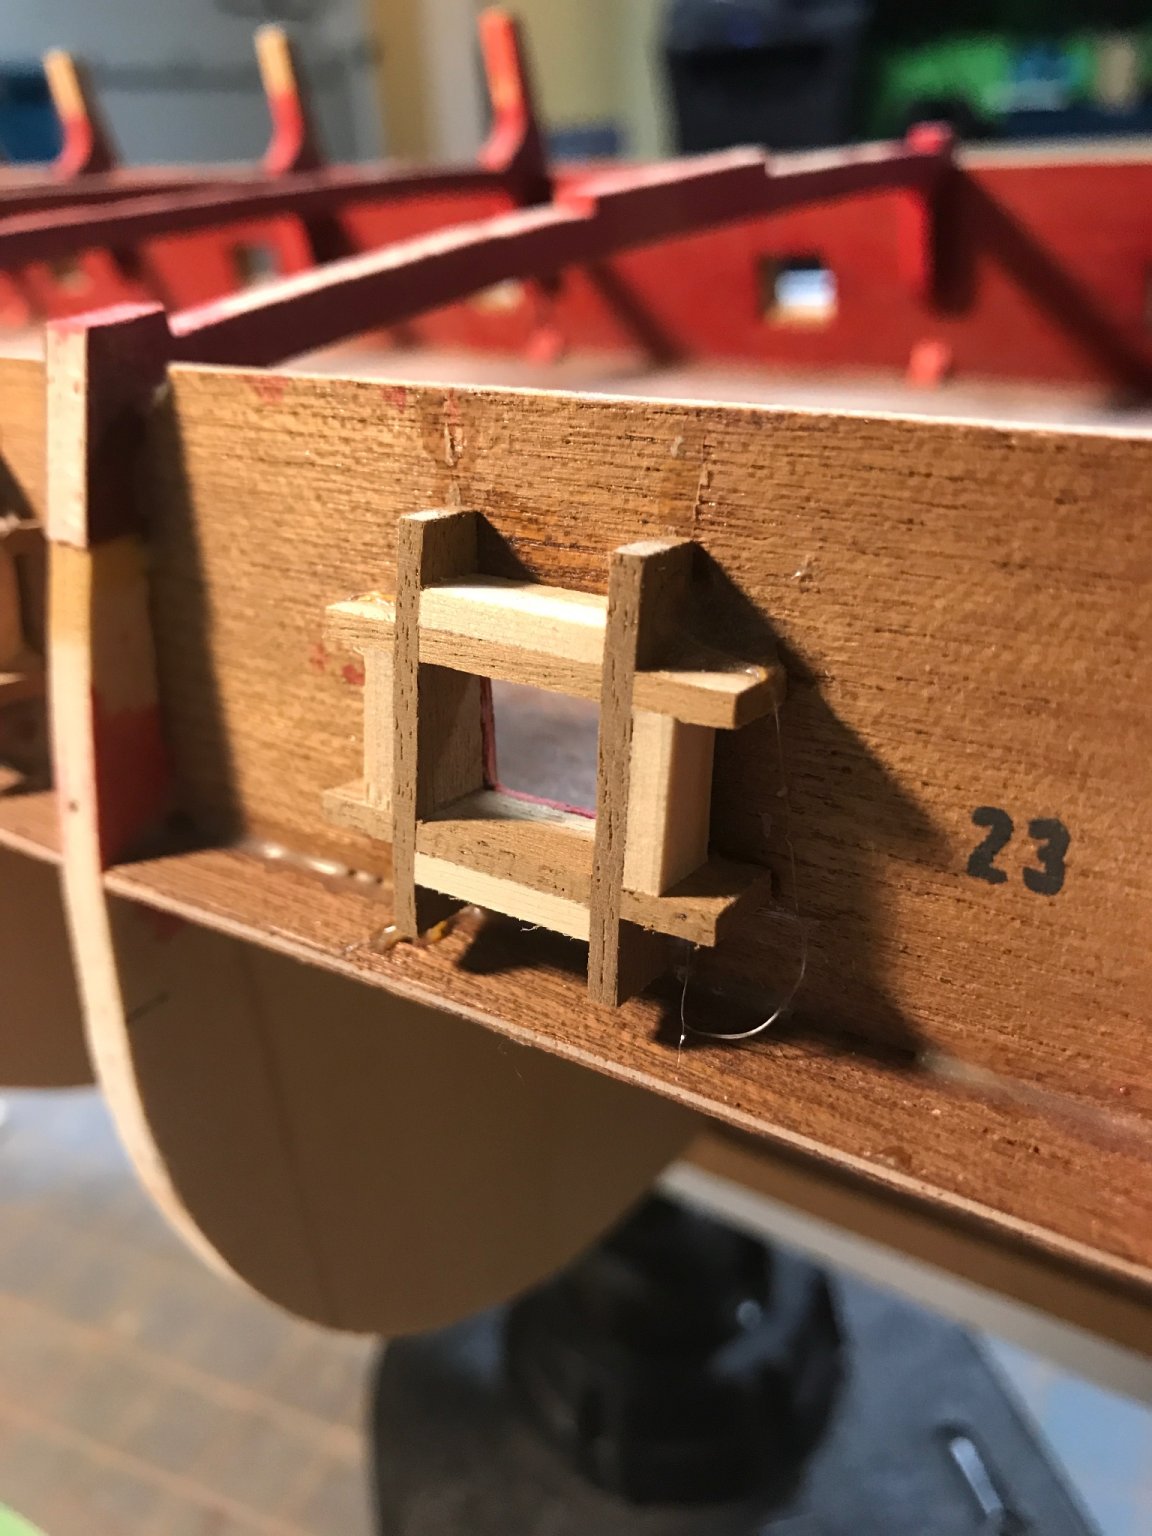
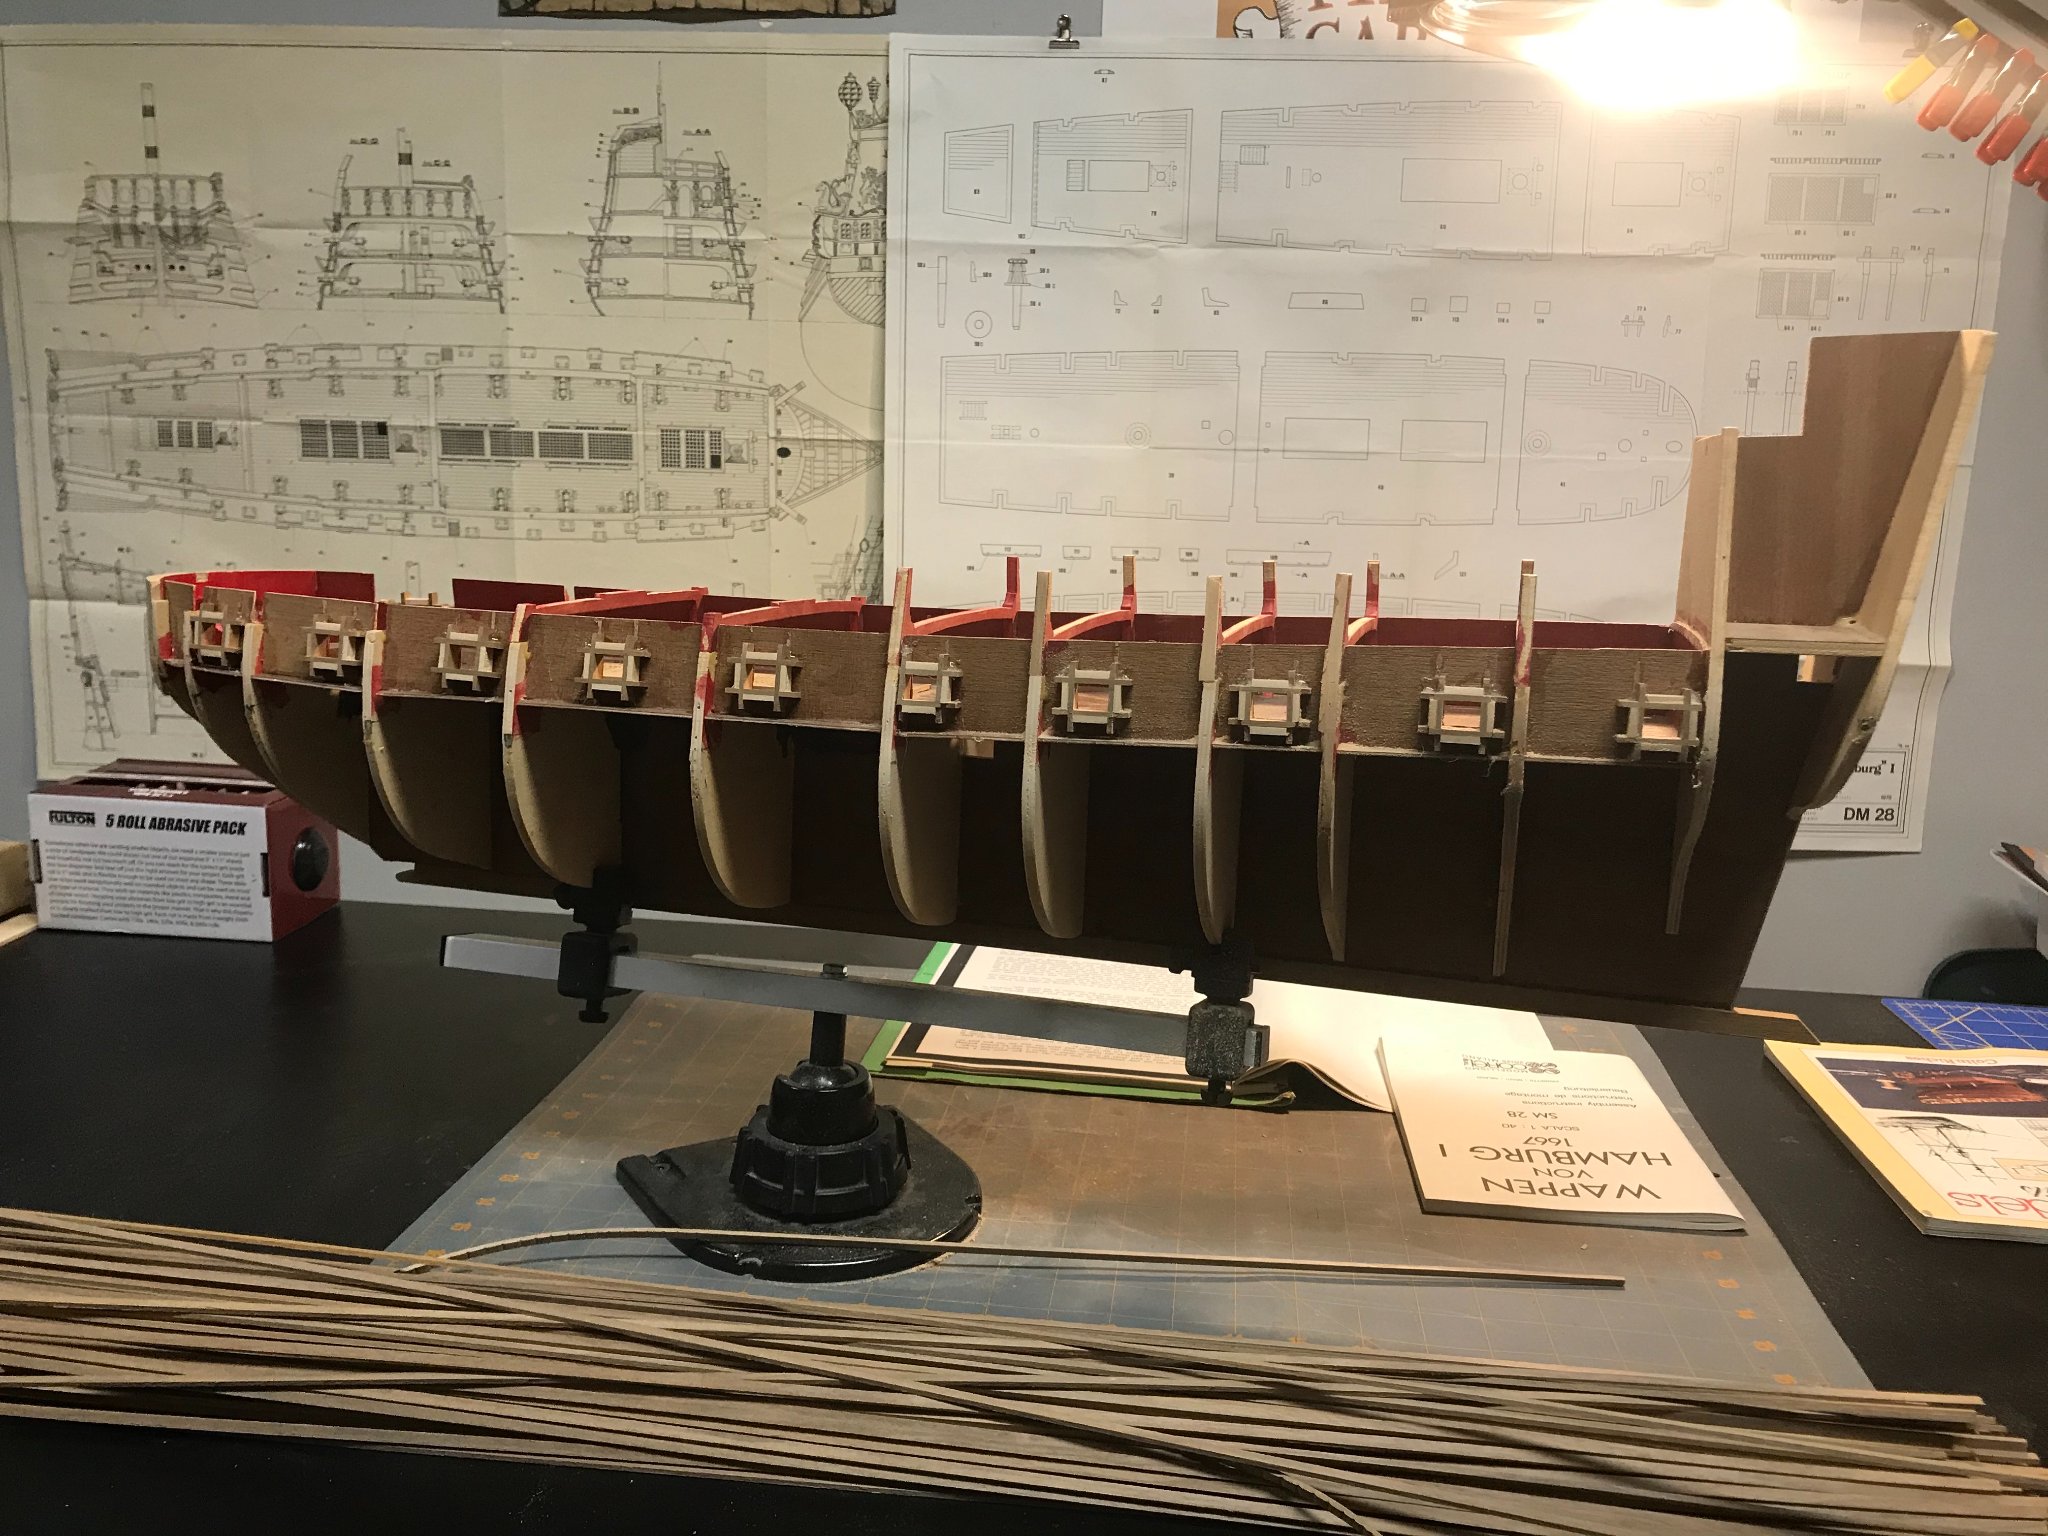
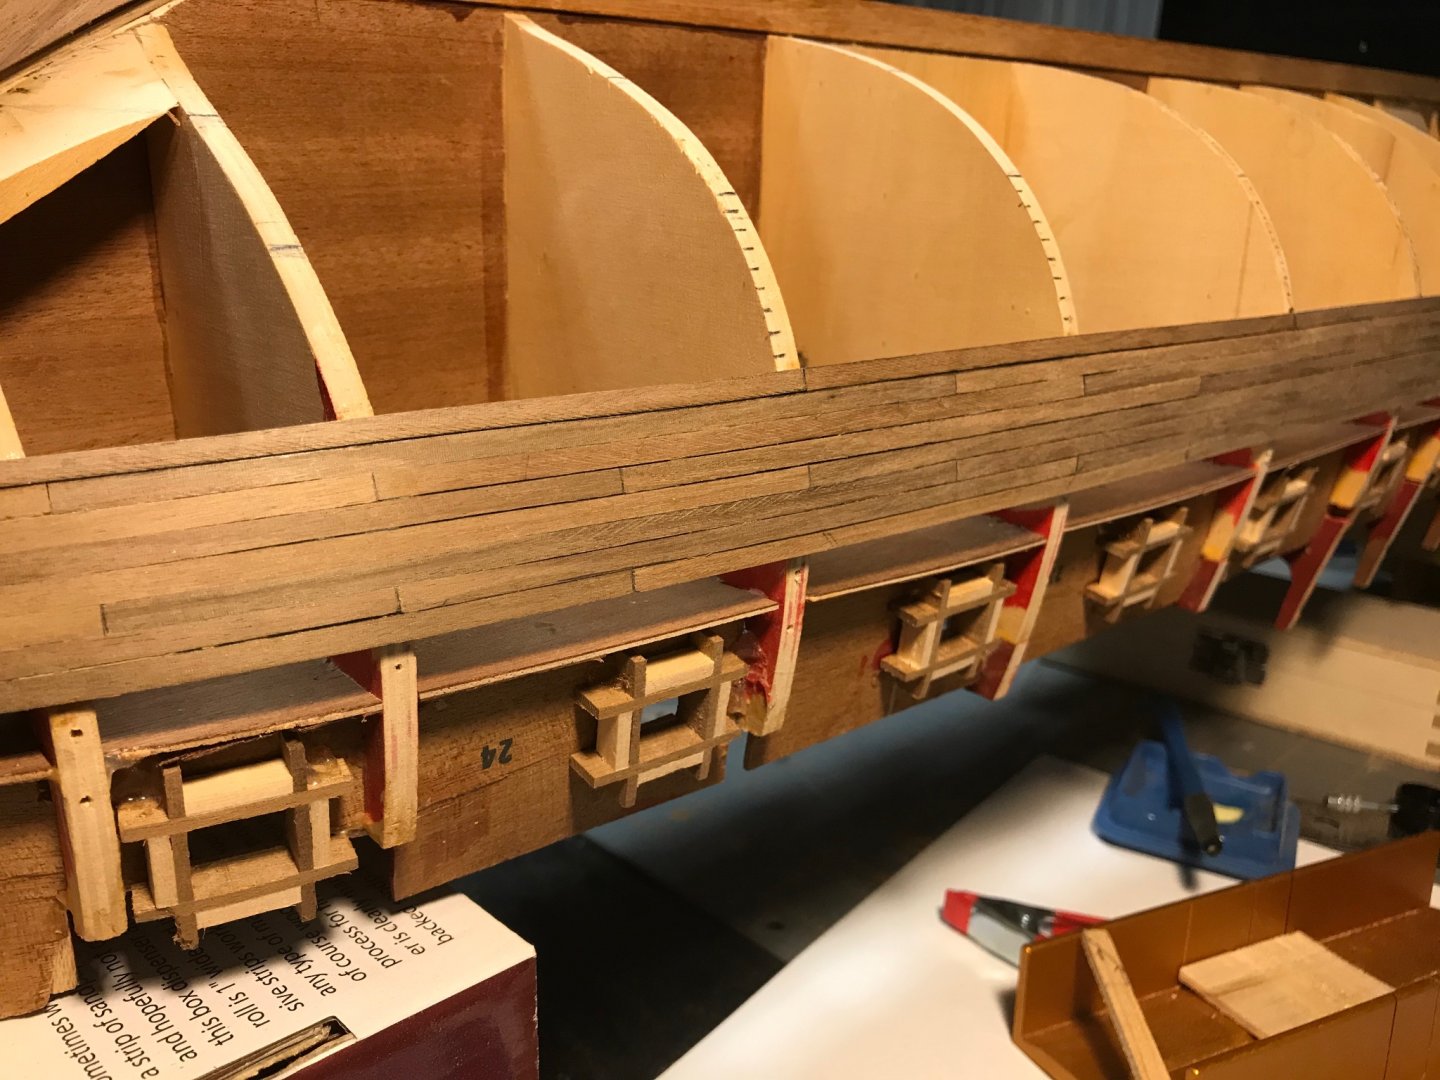
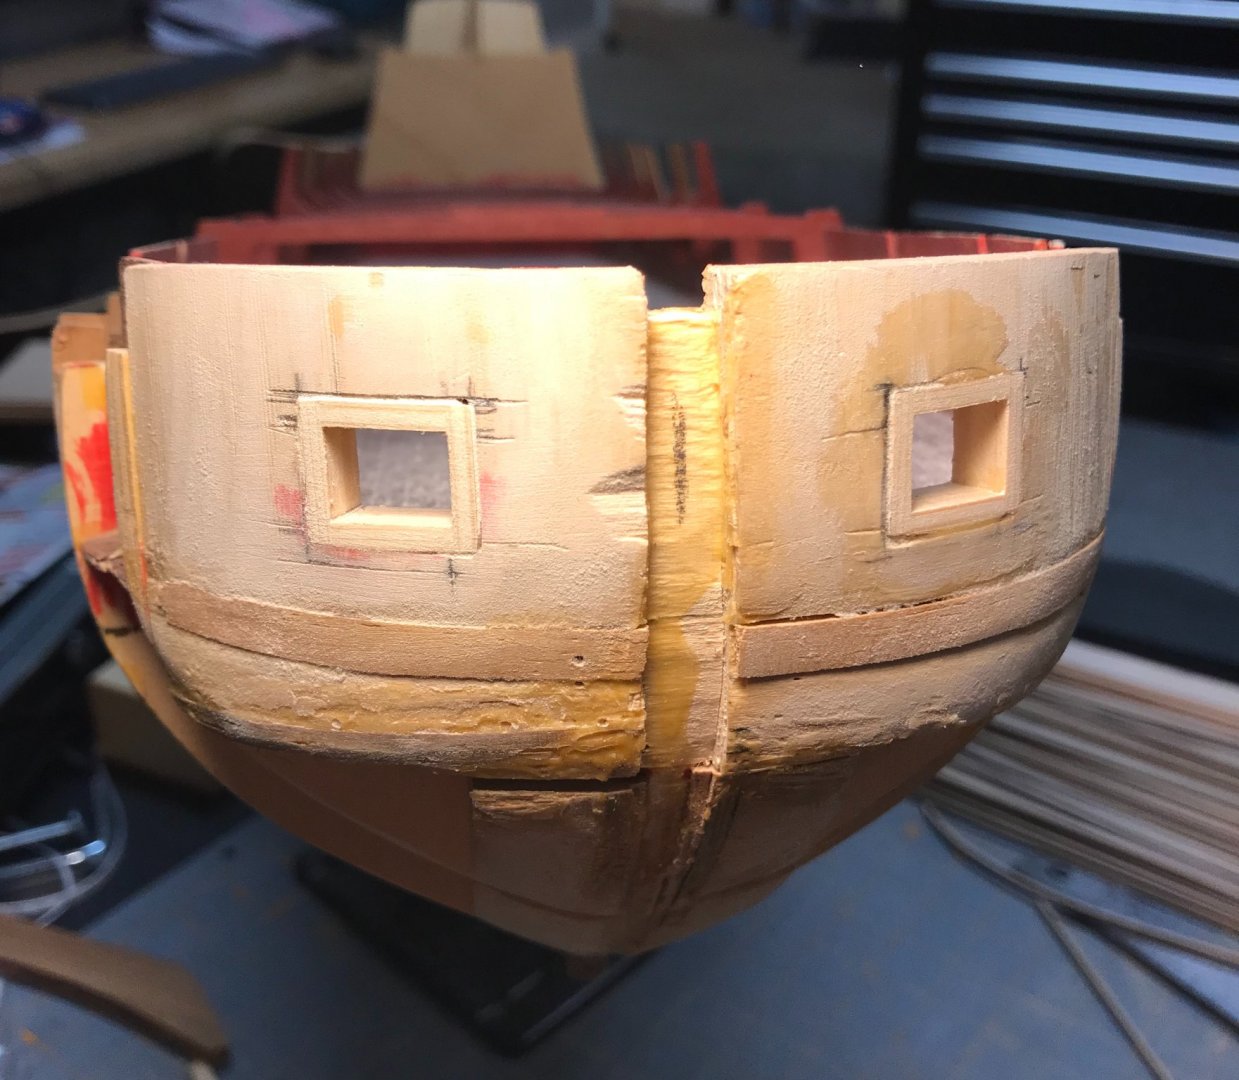
The ports on the bow are unique as they are meant to be cut in through a crescent piece of wood without frames like the others. While probably a minor detail, I was pleased with the way the other ports looked and decided to give these two a similar treatment by making the openings bigger and creating custom frames. The first picture shows the over cut opening on the left and one of the frames installed on the right. I made the frames deep enough to get the inside and outside curves. The second picture shows the frames trimmed, sanded, and installed. All ports on the gun deck are now uniform with clean, accurate, square edged frames. Now that the ports are installed, I am going to give the ship a once over to do some fairing. I need to figure out what was happening around the bow that caused some deviation from the original plan. As the pictures show, there is a slot cut in that I don't see mentioned in the instructions or any pictures of other builds I have found. I am hoping it was only for additional strength. My concern is that it will bring the stem back and interfere with future alignments. I may adjust my new stem that I am milling to accommodate the slot depth. There is also some strips of wood added and saw marks that make me think some fairing had taken place to correct the shape. I am going to do some research into fairing techniques and then get this ship a step closer to planking.

-
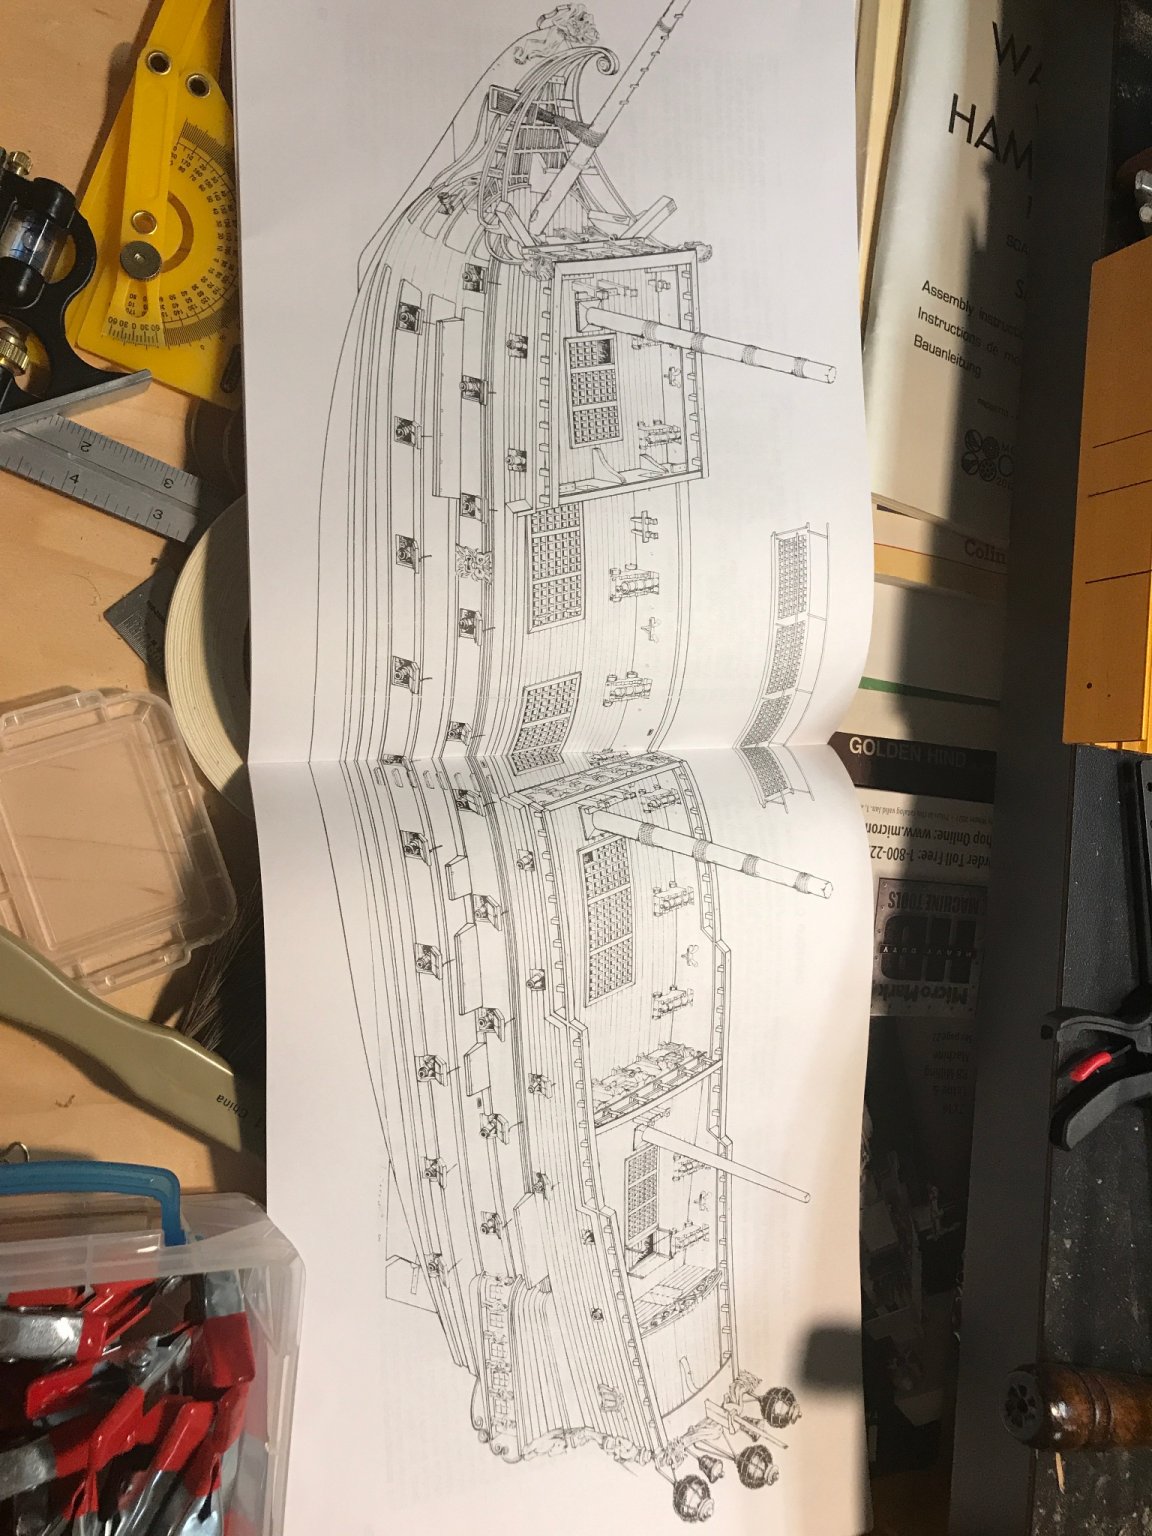
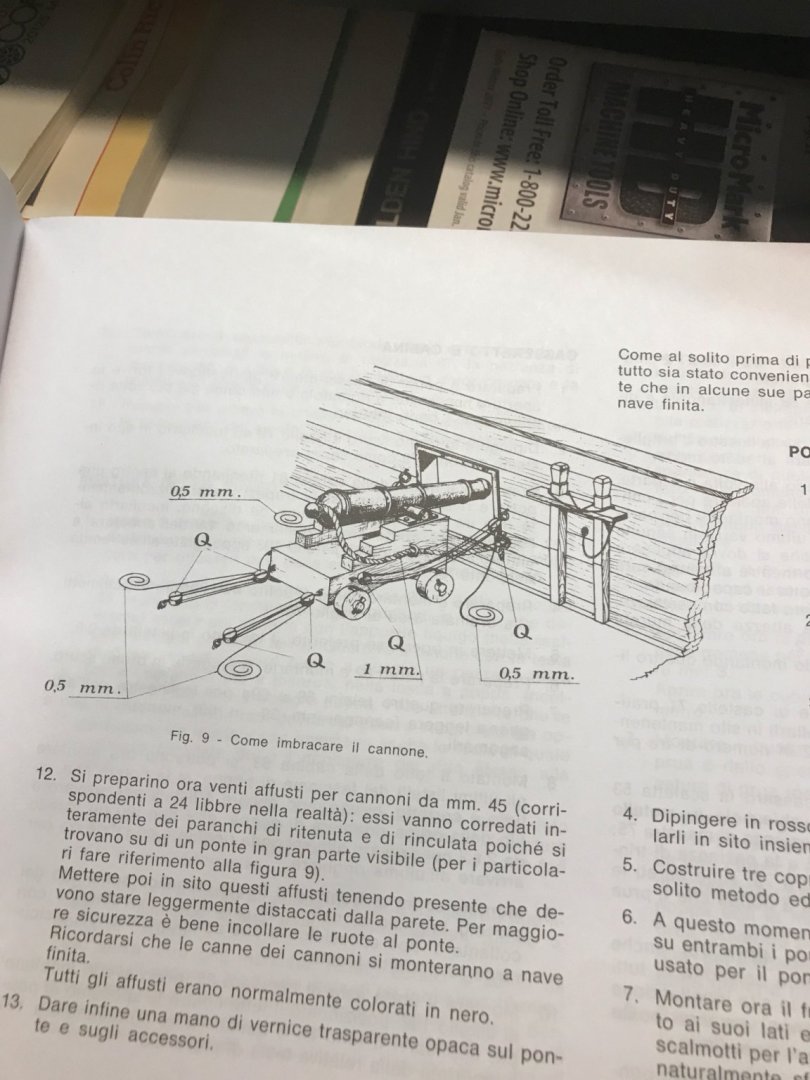
While hunting for reference pictures on the web, I stumbled across an image of the instructions. It clearly showed a technical drawing reference that I don’t have. Time to figure out how to get a copy.
-
I was looking through the box and found the stempost. It appears to have been glued on the bow and then removed. I’m not sure if it was intentionally or accidentally removed. It suffered some damage and doesn’t seem usable. I have some walnut to mill a new one. The stempost doesn’t appear in the instructions yet, but I like the technique of leaving a rabbet to tuck planks cleanly. I’ll be doing a little more research as I plan out how to mill the stempost and incorporate the rabbet.
-
I have been comparing the instructions, drawings, and model to determine the completed steps. I’m hoping I have all the literature. The instructions refer to figure #s that I don’t see. The picture below states, “Fig. 8 shows in detail...” Is there more than the assembly instruction manual and plan drawings? Some elements have been completed out of sequence with the instructions. I know that is fine and that many builders work in different ways. I just want to make sure I understand what has been done and what I should do next.

-
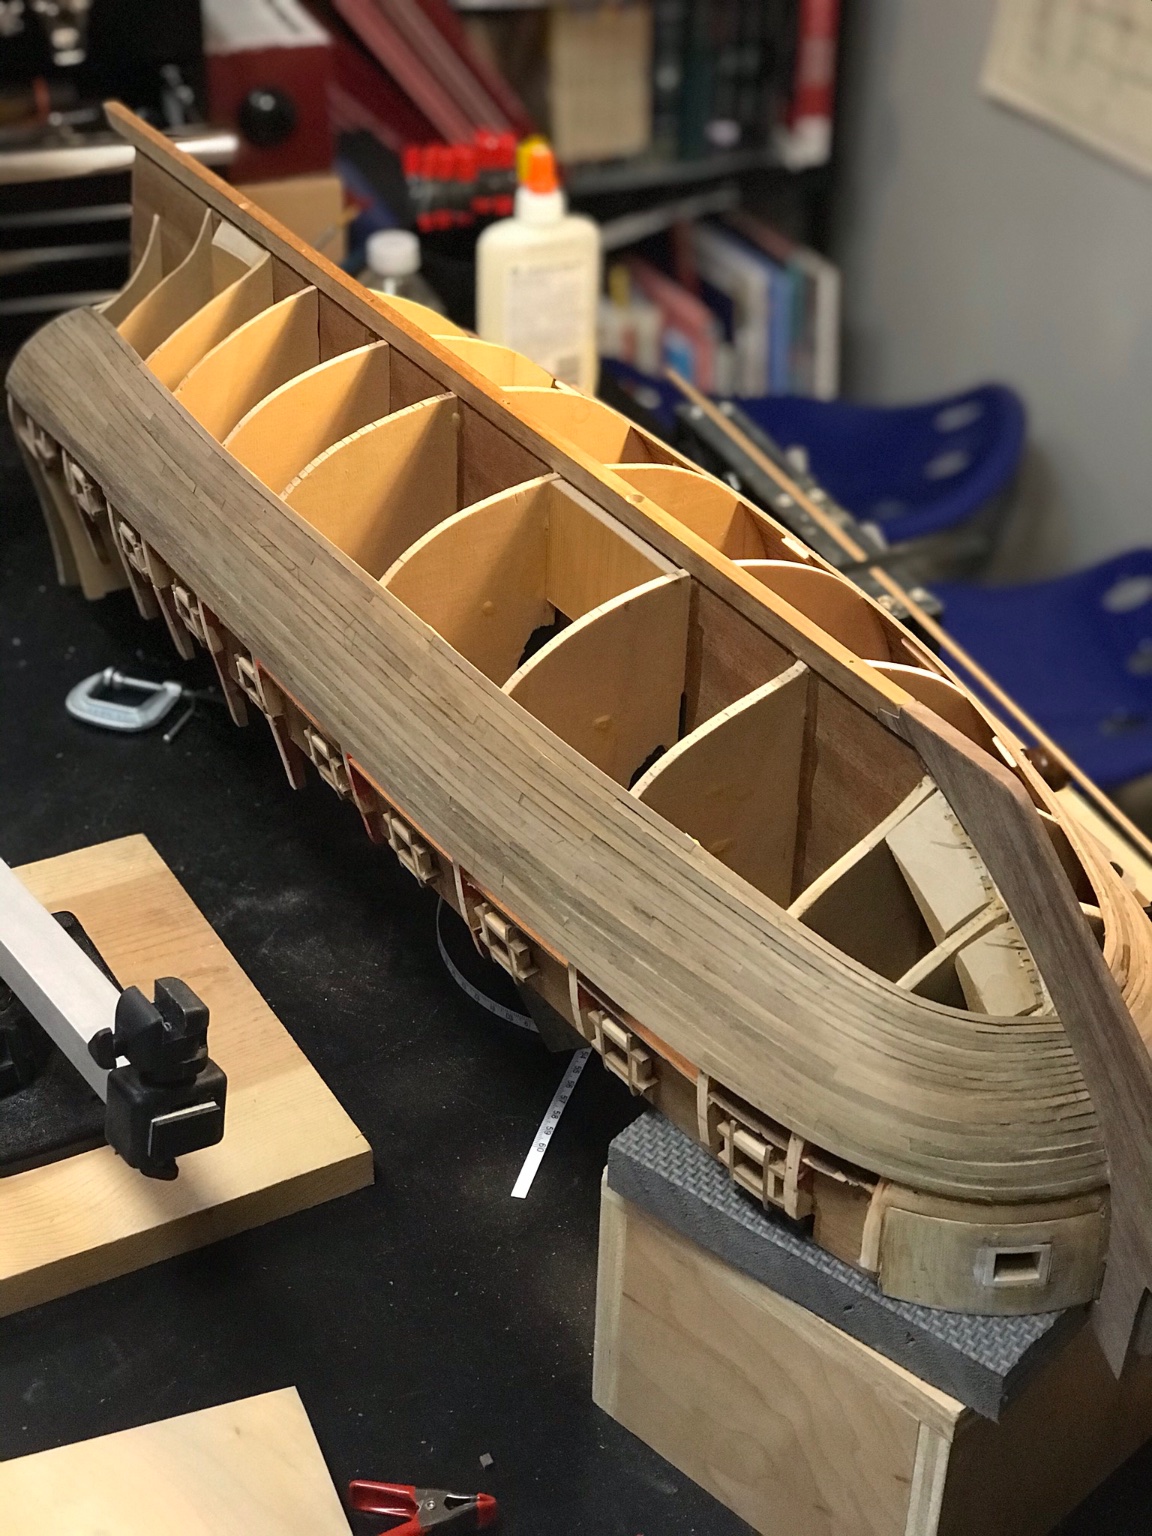
My wife’s grandpa passed away shortly after giving me the kit. It had some damage and a few elements in progress that I adjusted. He had built custom frames for the gun ports. Unfortunately, they were varied in size and location so I opted to remove them and use the frames from the kit. This allowed me to align them and know that each will be of uniform size. They are now glued and sanded to match the curvature of the ship. I also added blocking for better attachment of the planks.

-
Hello Everyone! I am starting a build log for the Wappen Von Hamburg kit from Corel. The start of my build comes with some back story as I am not the one who purchased the kit or started the build. A number of years back I was along for a family visit to my wife's grandfather. During the visit he took interest in my woodworking experience and asked if I would be willing to fix a few ships he had build years earlier that had been damaged. I enjoy models, tall ships, and a good challenge so I took them home and restored them as best I could. When returning the ships, I was presented with two kits and an assortment of tools and supplies that he felt should go to someone that would appreciate them. One of the kits was the Wappen and the other the Victory. The Wappen had been started and the Victory untouched. Life was too busy with work and family. The kits remained in storage for many years until recently. The adventure begins as I tackle what I understand to be a very complex and advanced kit as a complete novice. I look forward to documenting this journey and hopefully getting feedback and advice from those with more experience than I.