

.jpg.1743a3c02056fc41f770a3271ef2dcc0.jpg)
Stickman
-
Posts
10 -
Joined
-
Last visited
Content Type
Profiles
Forums
Gallery
Events
Posts posted by Stickman
-
-
Very nice work! I love your modifications! I am building this kit as well. One thing I would like to know... after you stained the hull did you give it a flat clearcoat afterwards to seal the stain?
-
On 3/23/2021 at 8:38 AM, End Of The Line said:
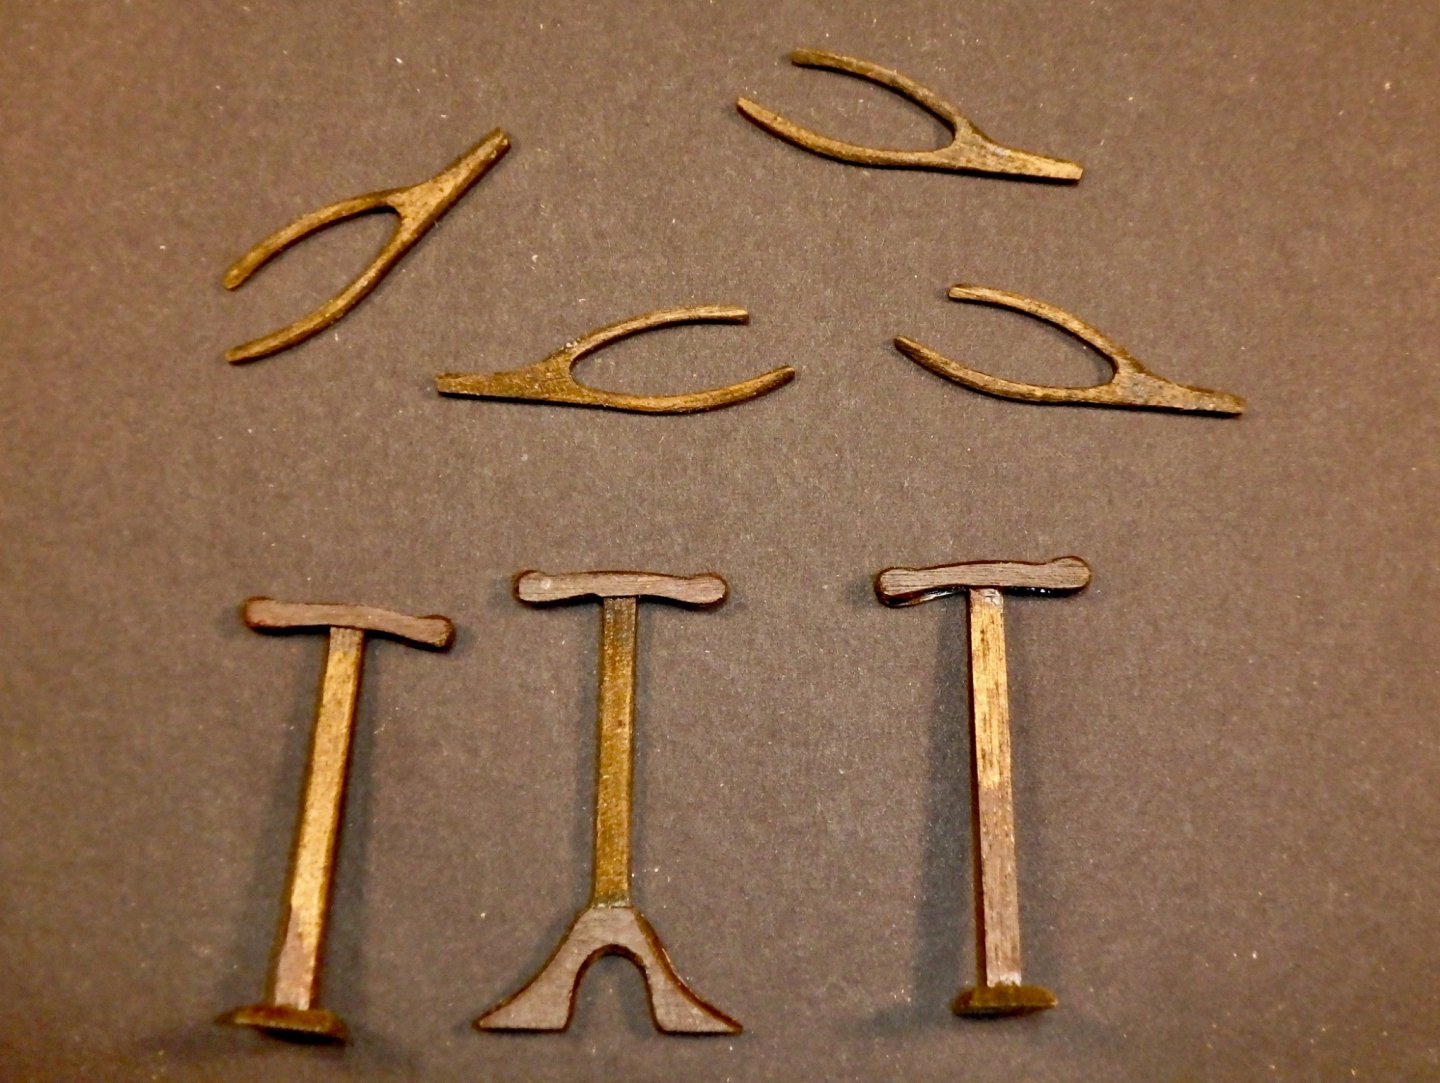
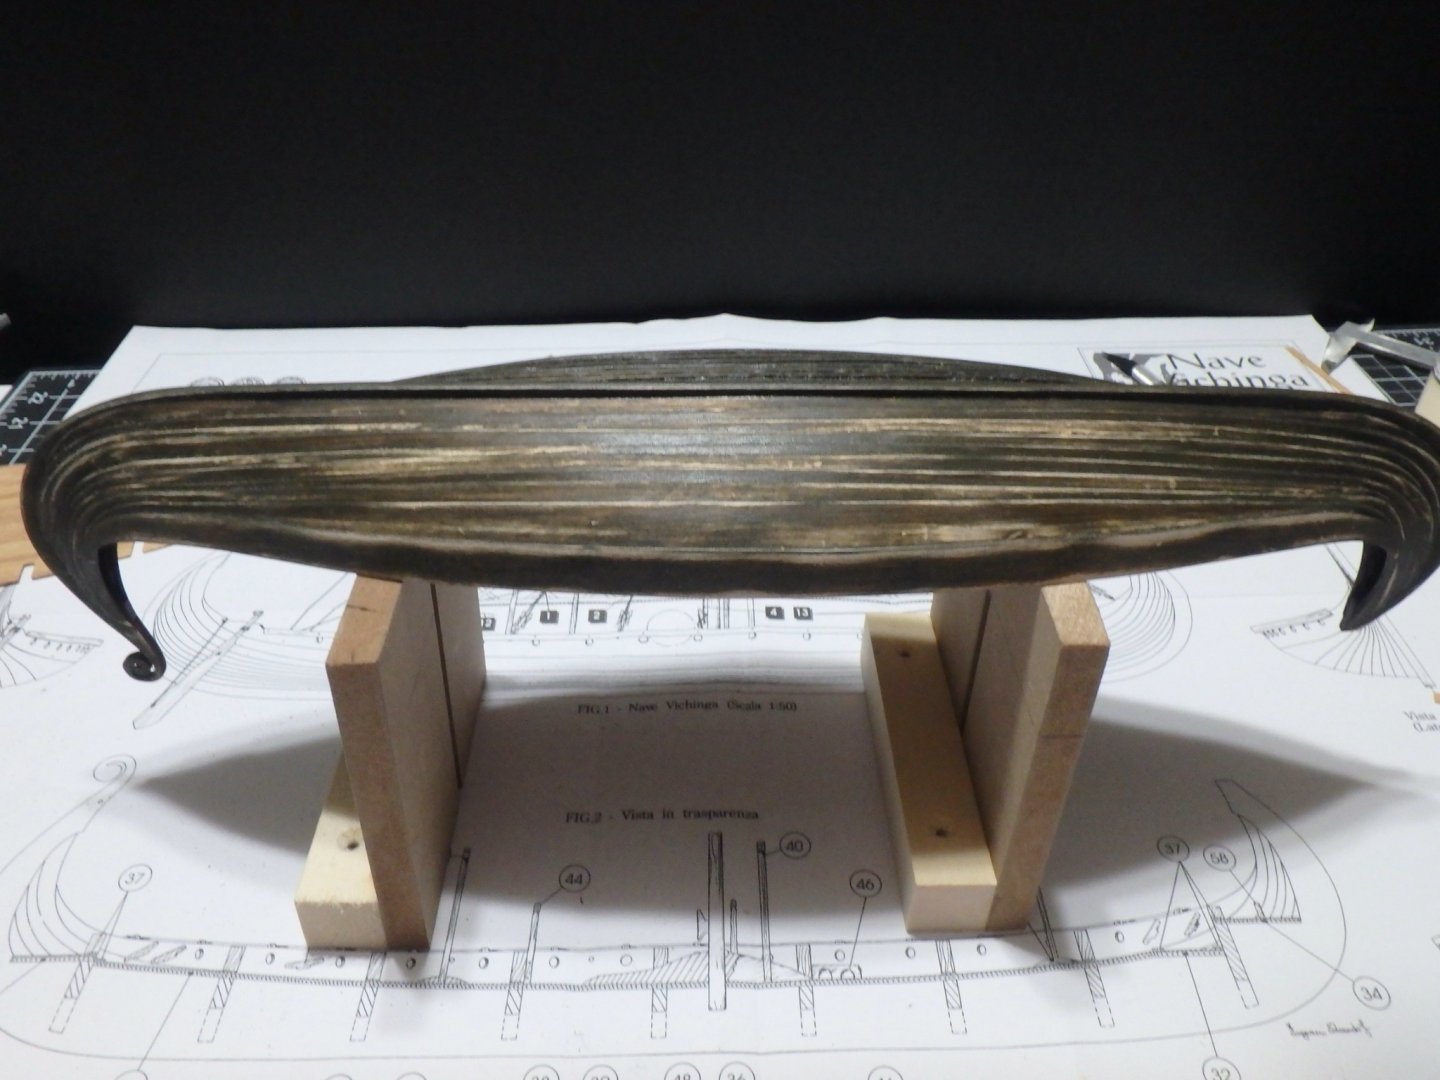
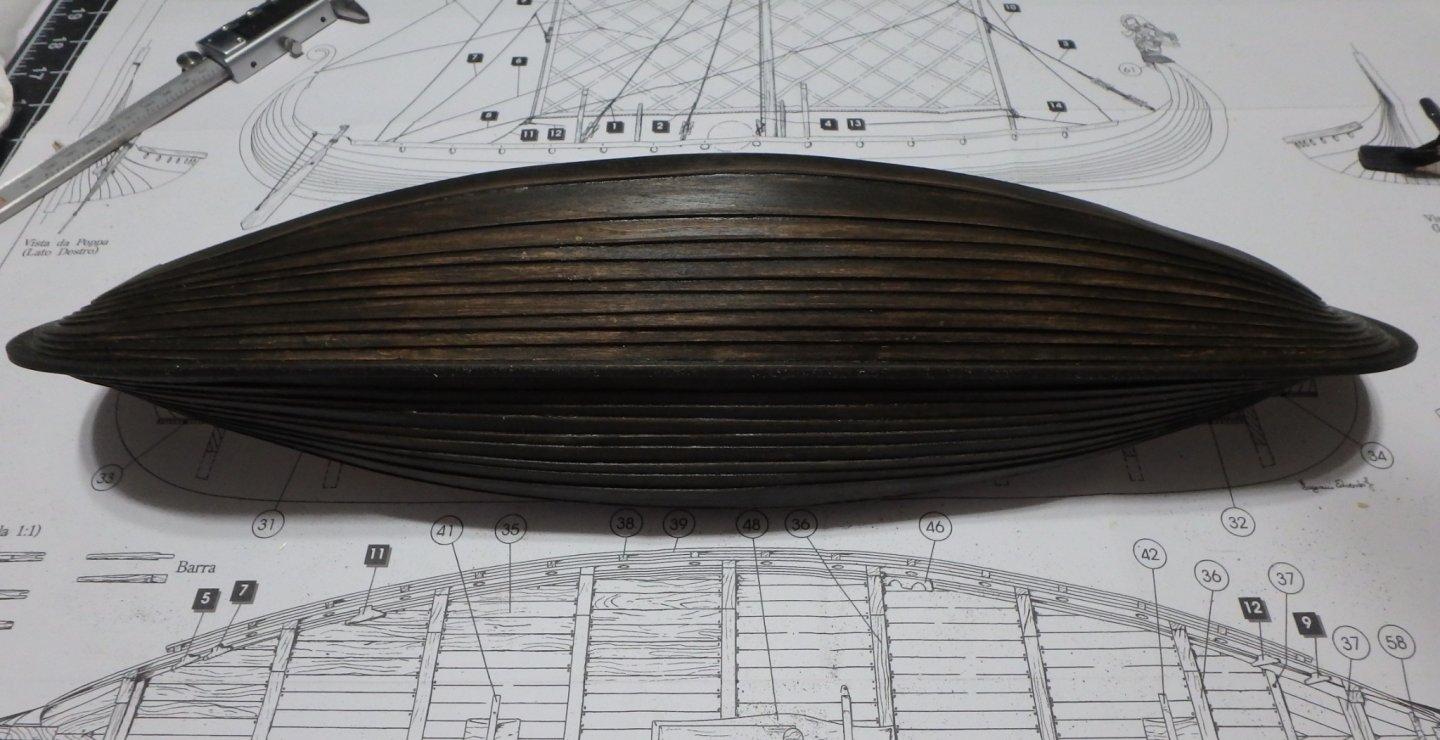
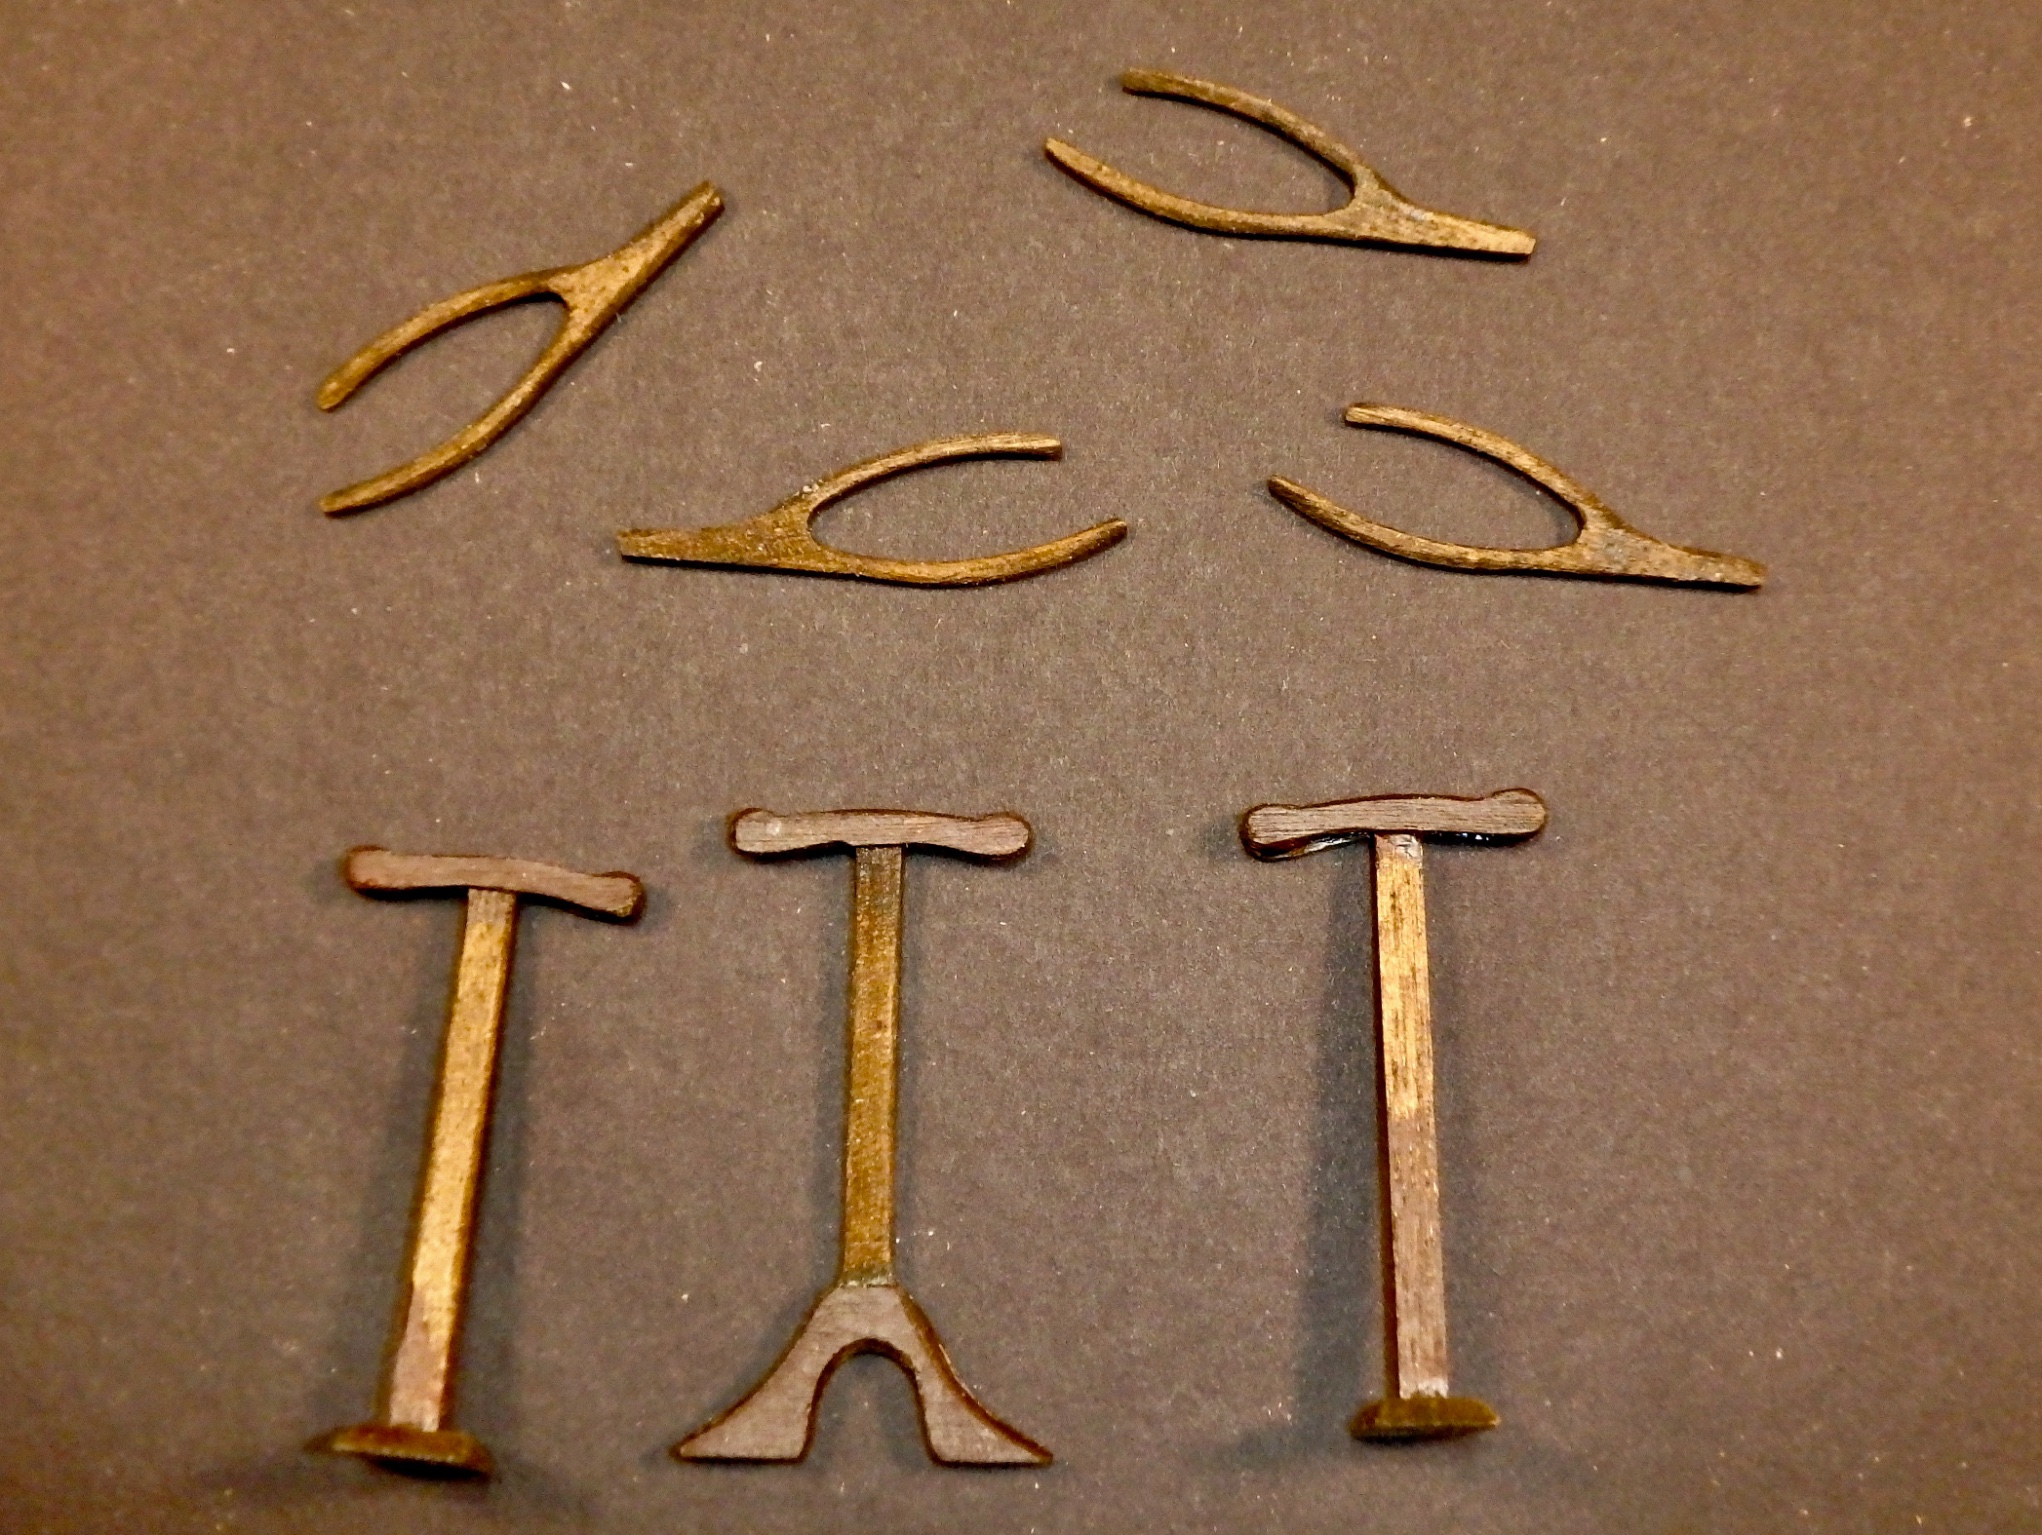
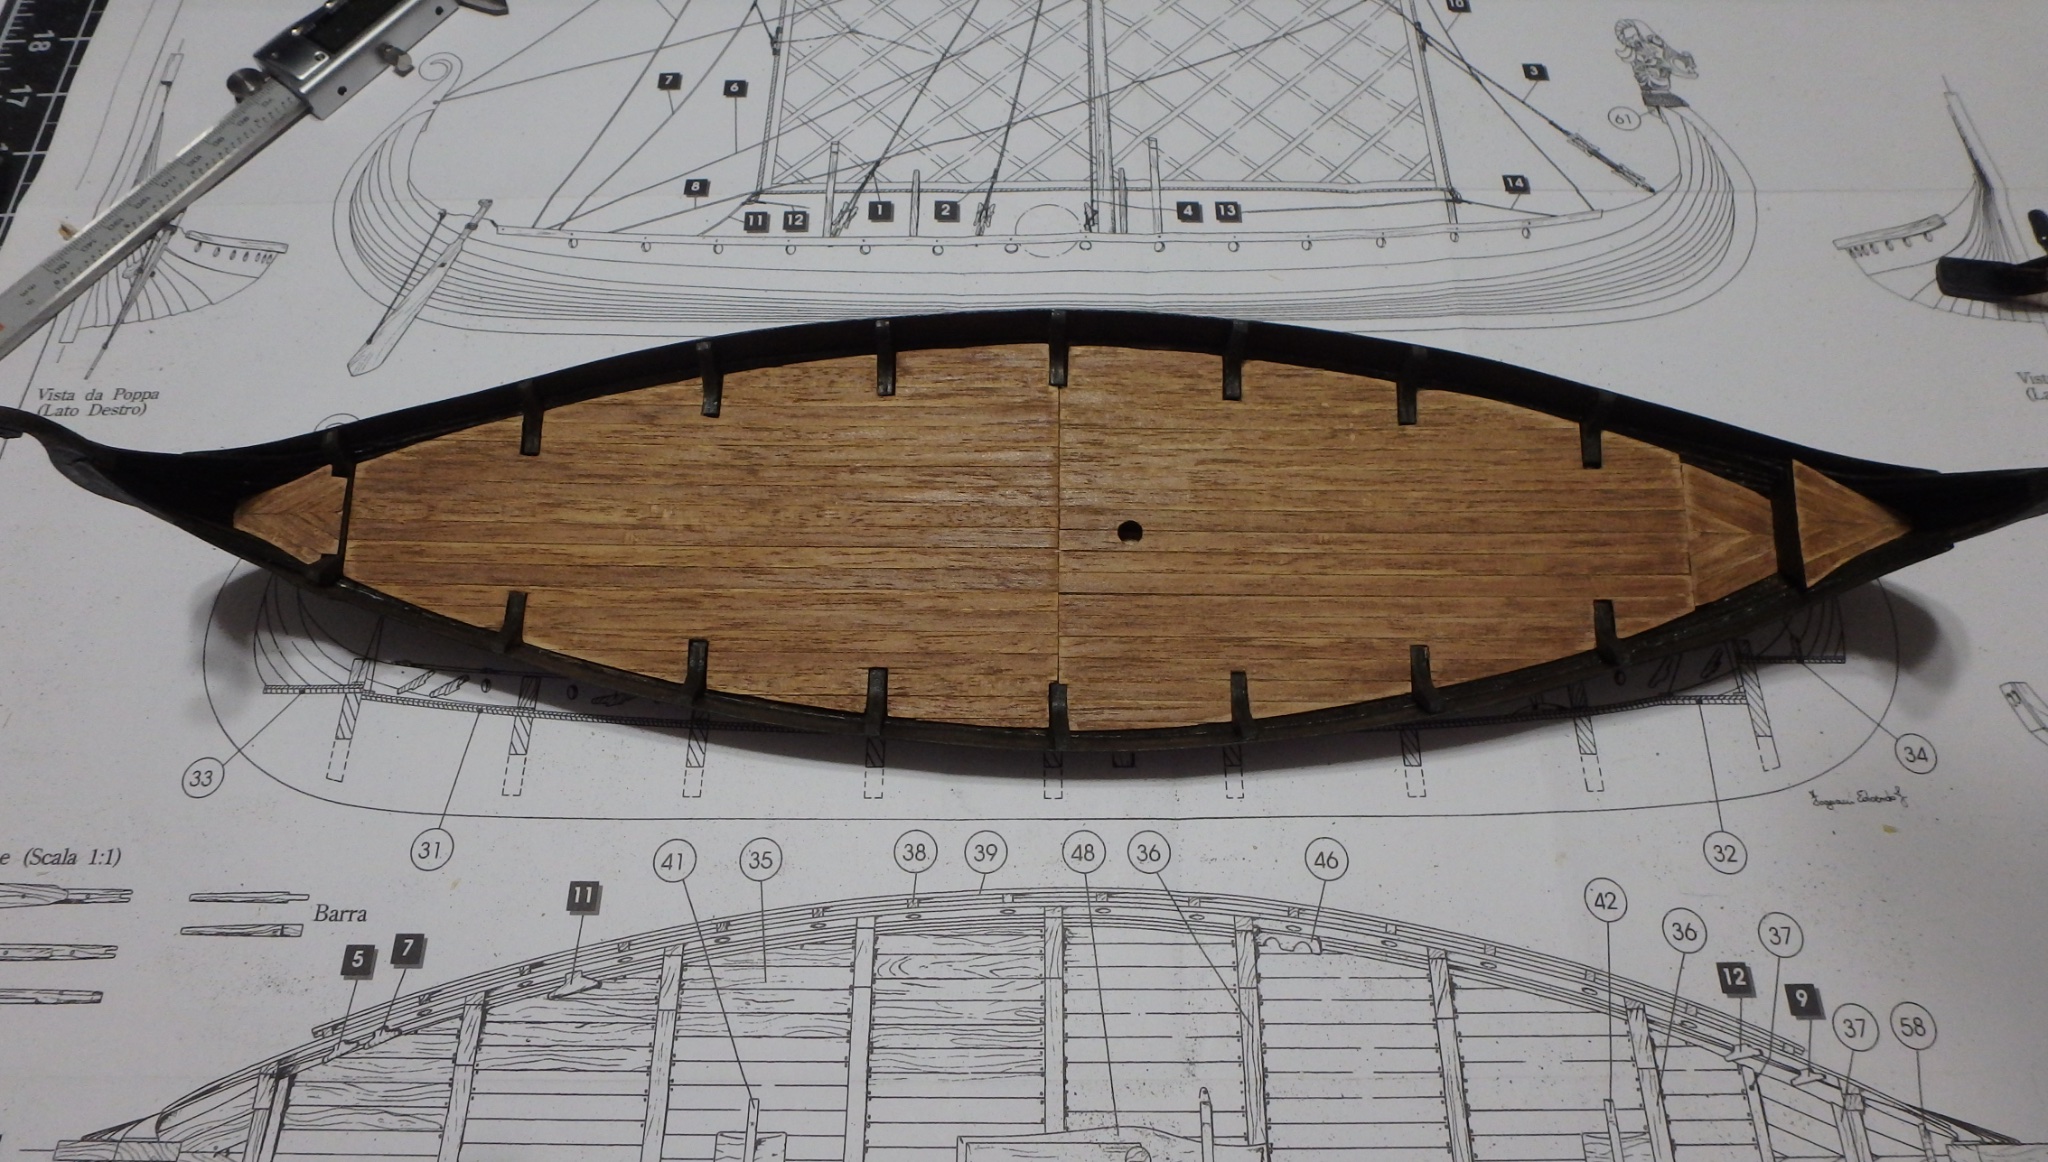
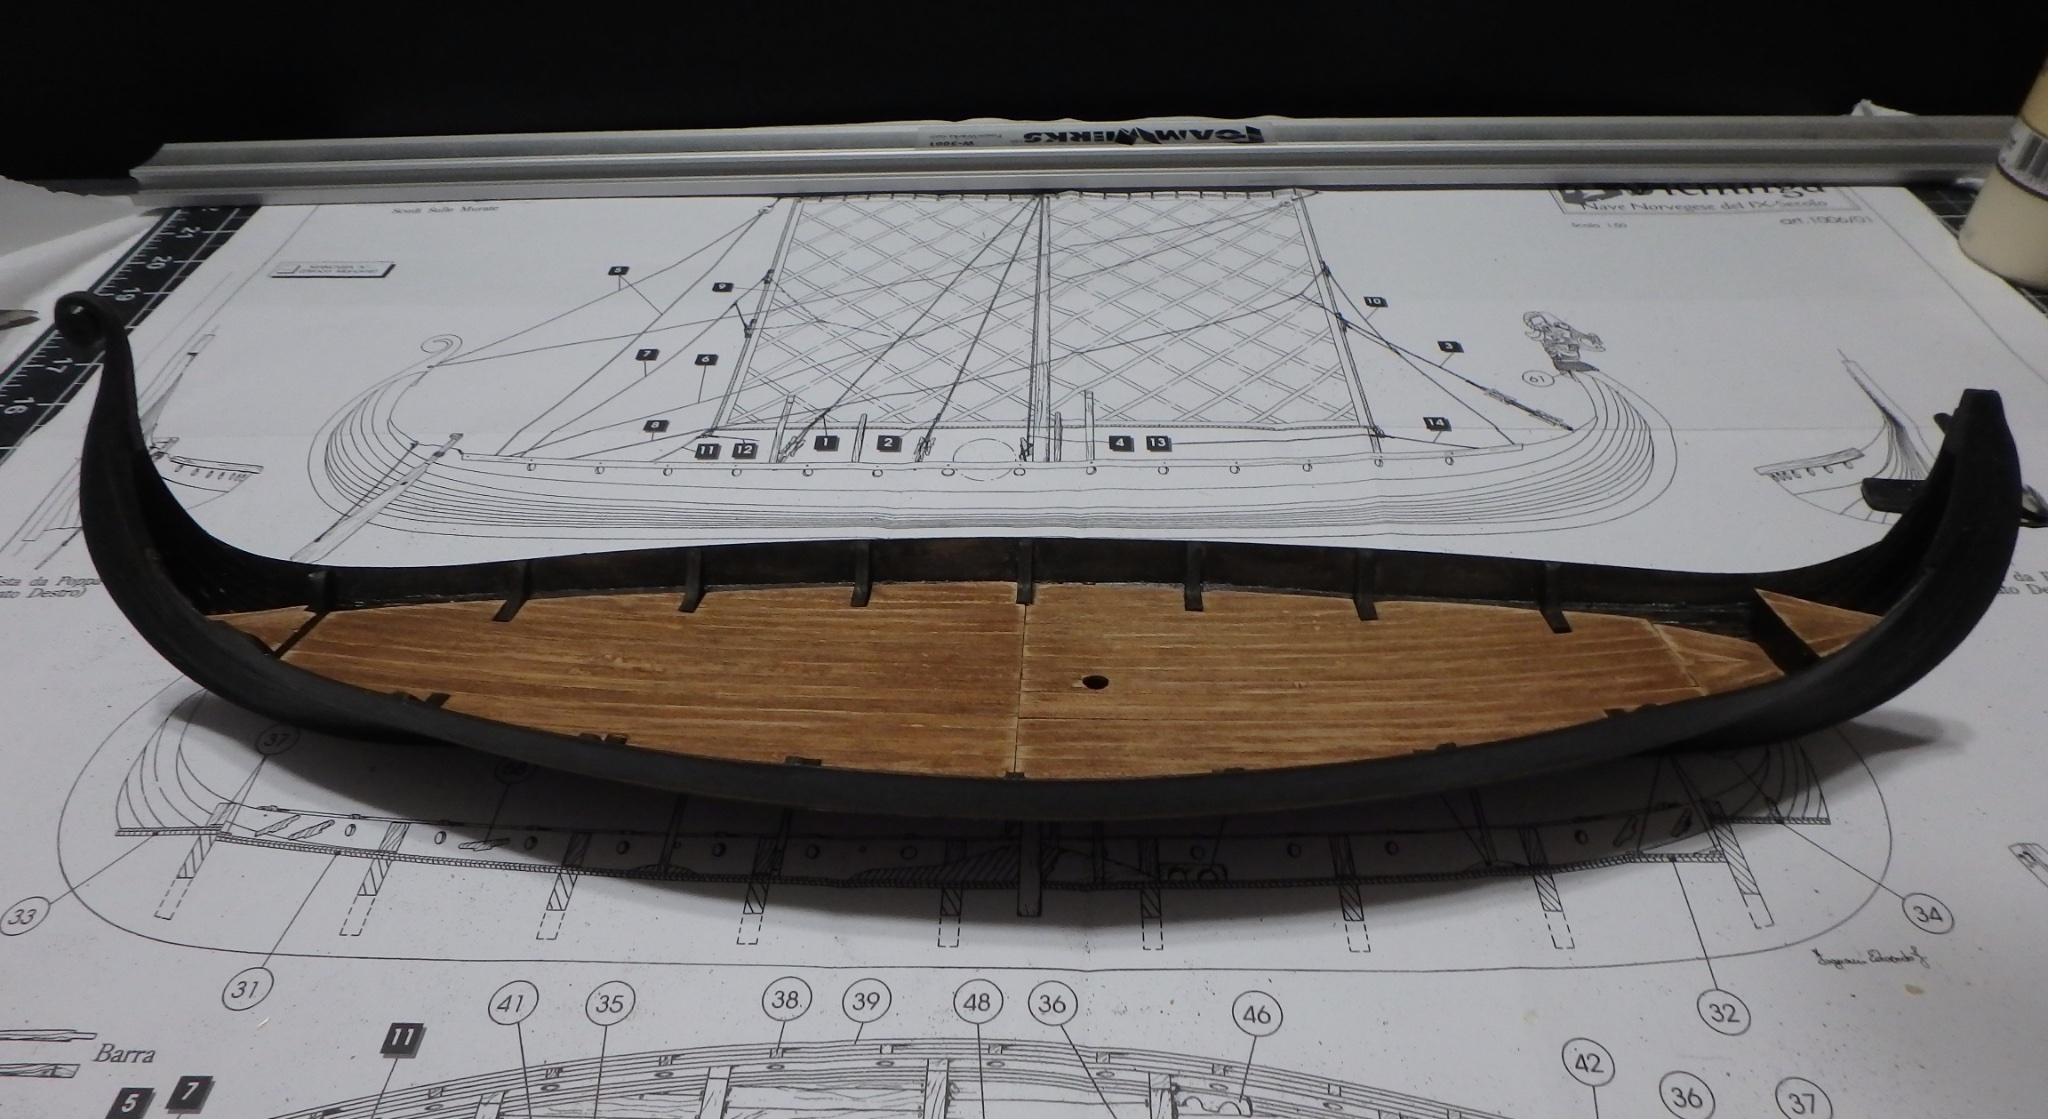
I started working on the small part shaping the oar racks and assembling the trestles. The trestles were cut with the wood grain going across the upper arms. It would only be a matter be a matter of time before they broke, so I used some of the scrap planking plywood to provide linear reenforcement along the length of the arms. The additional thickness looks right to me, because they would have been constructed with a mortice and tenon joint to the top arms. The base of the trestle that straddles the mast fish was treated the same.
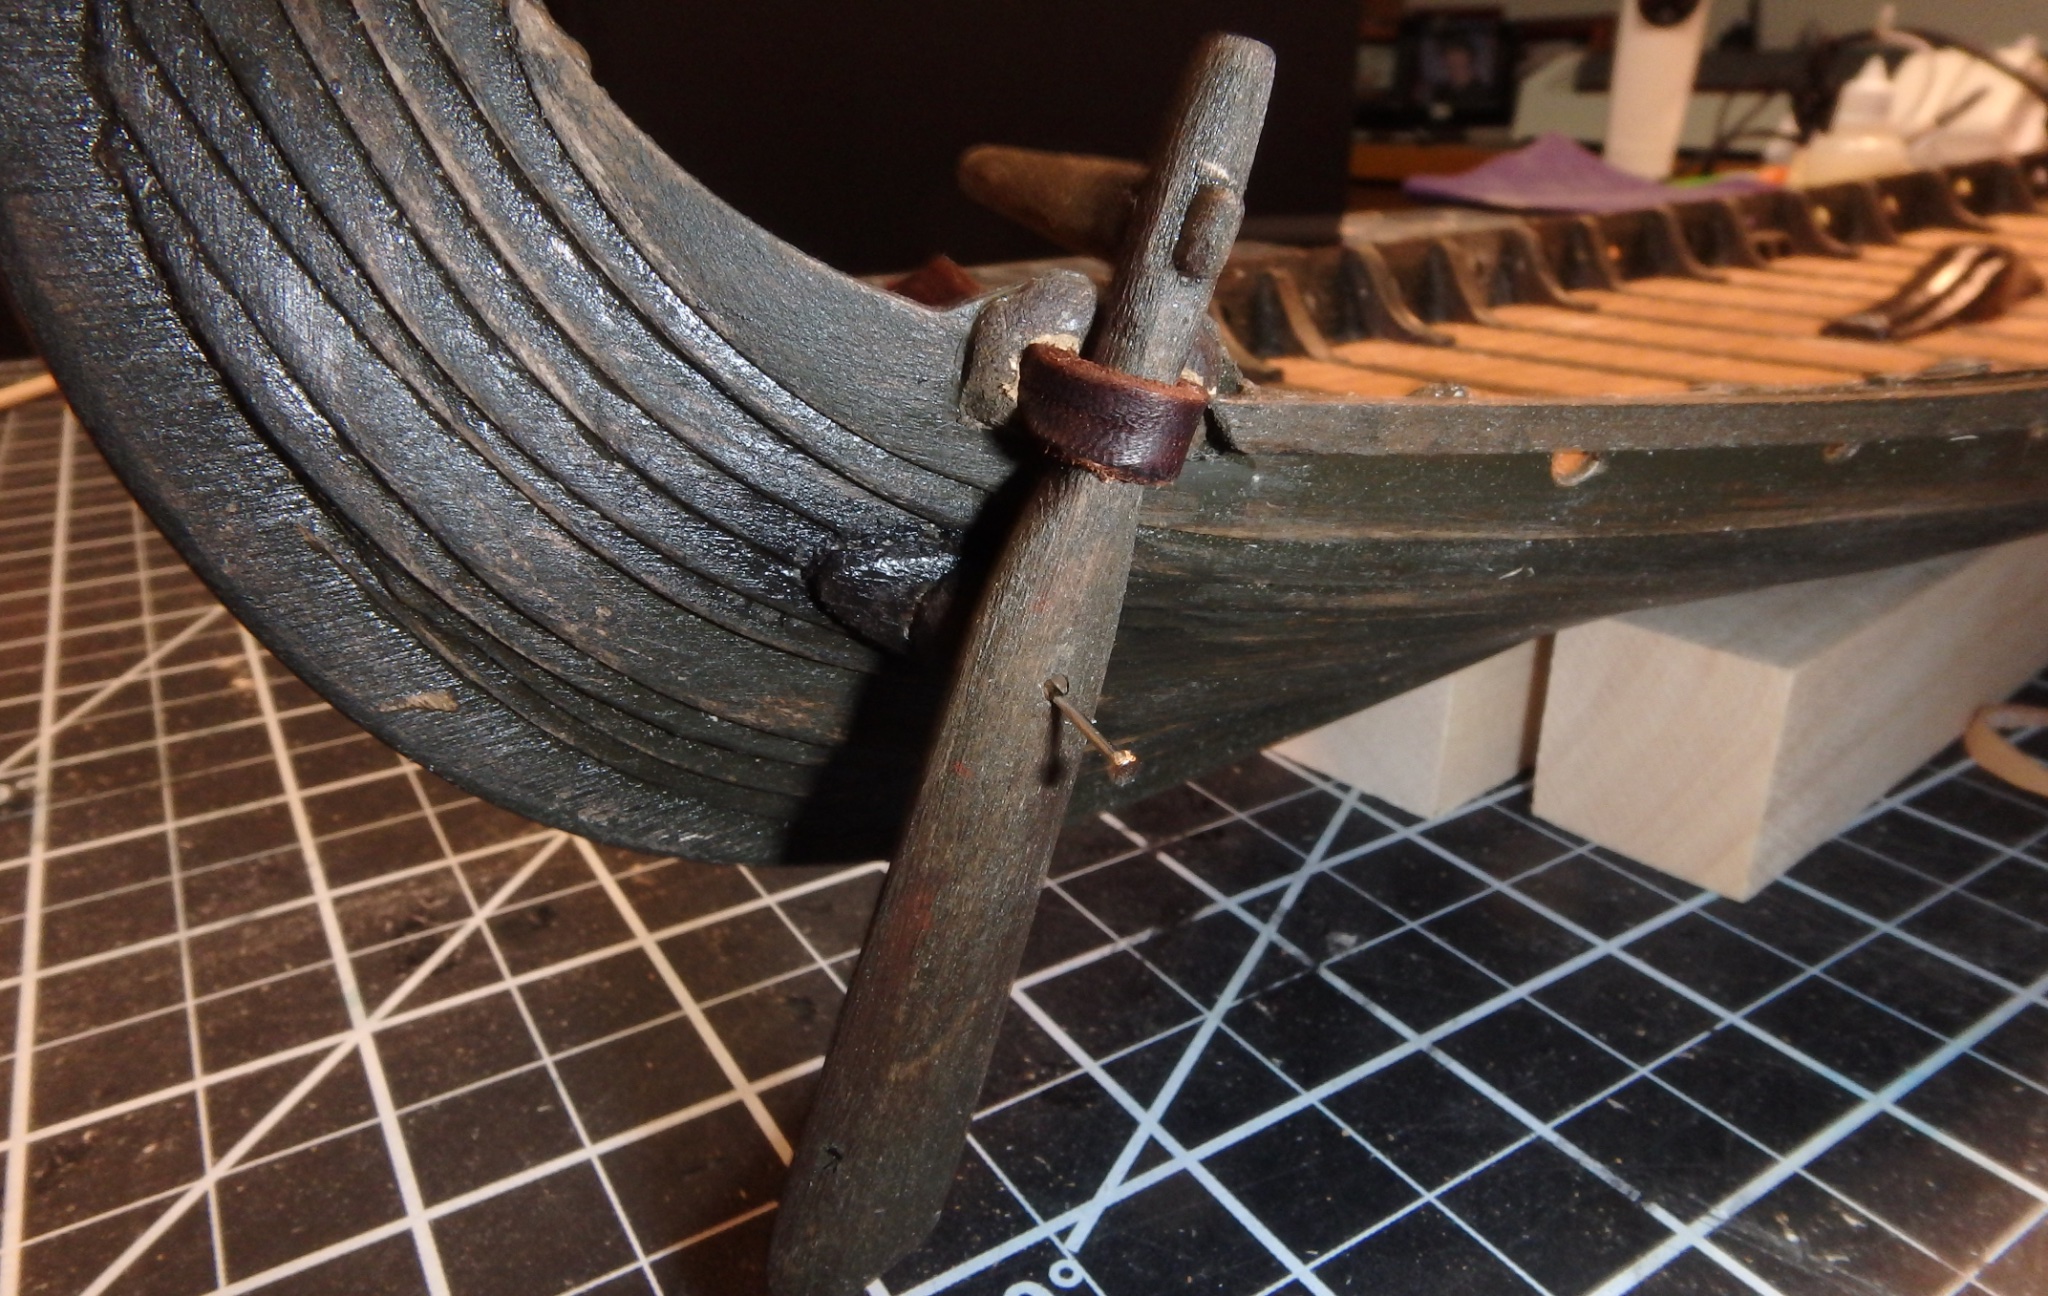
I looked over the parts supplied for the steering oar and decided that I could do better. I carved the rudder from basswood and cut a mortice to receive the steering arm. The bead provided for the lower attachment point was a little insubstantial, so I added an oval lozenge to make it look more like some reconstructions. I added a reenforcement pad for the upper mount and will use some thin leather instead of the cord recommended in the kit. If course the pin will be replaced with knotted cord when I rig.

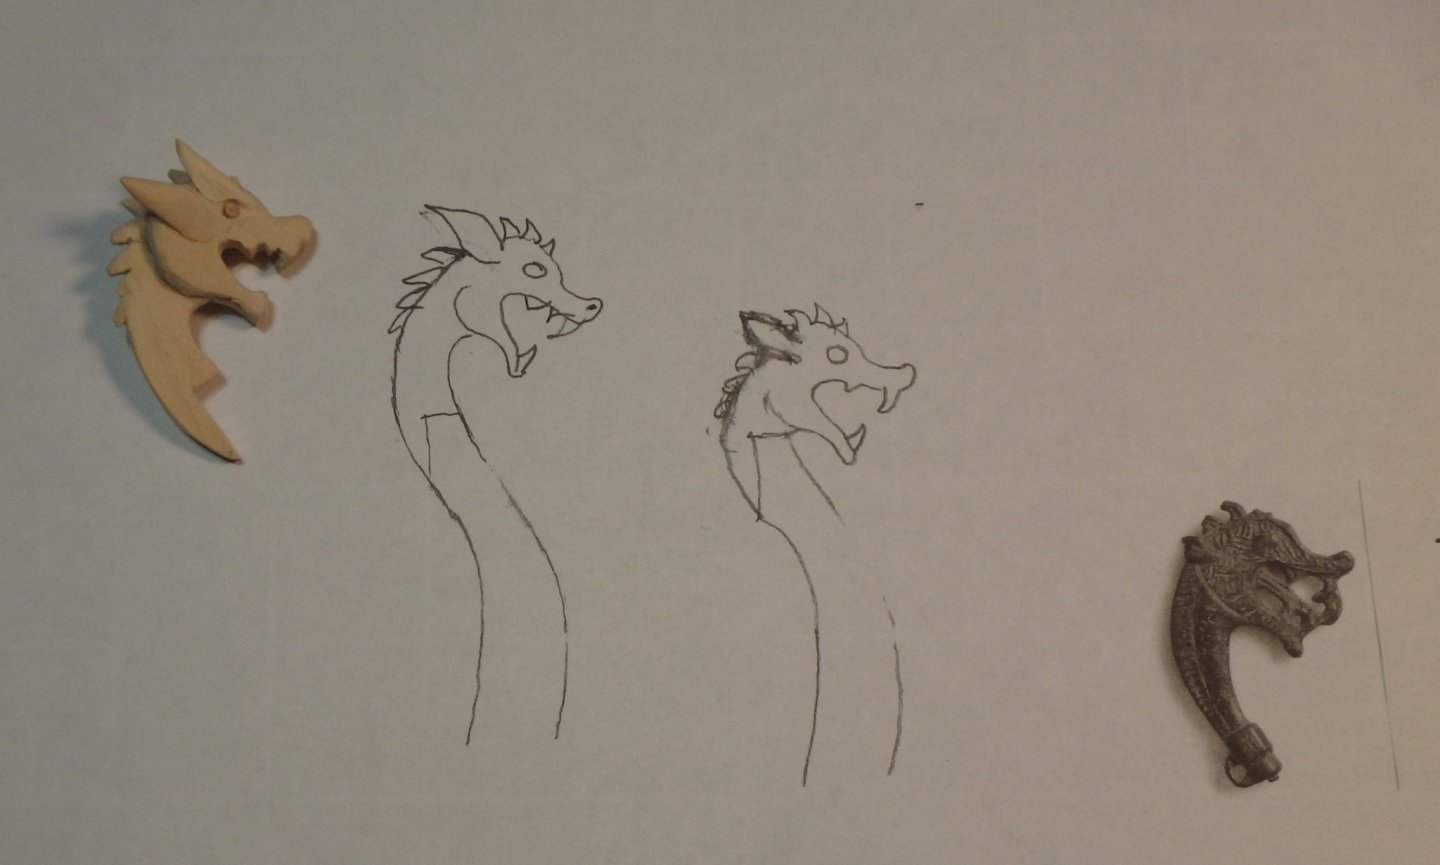
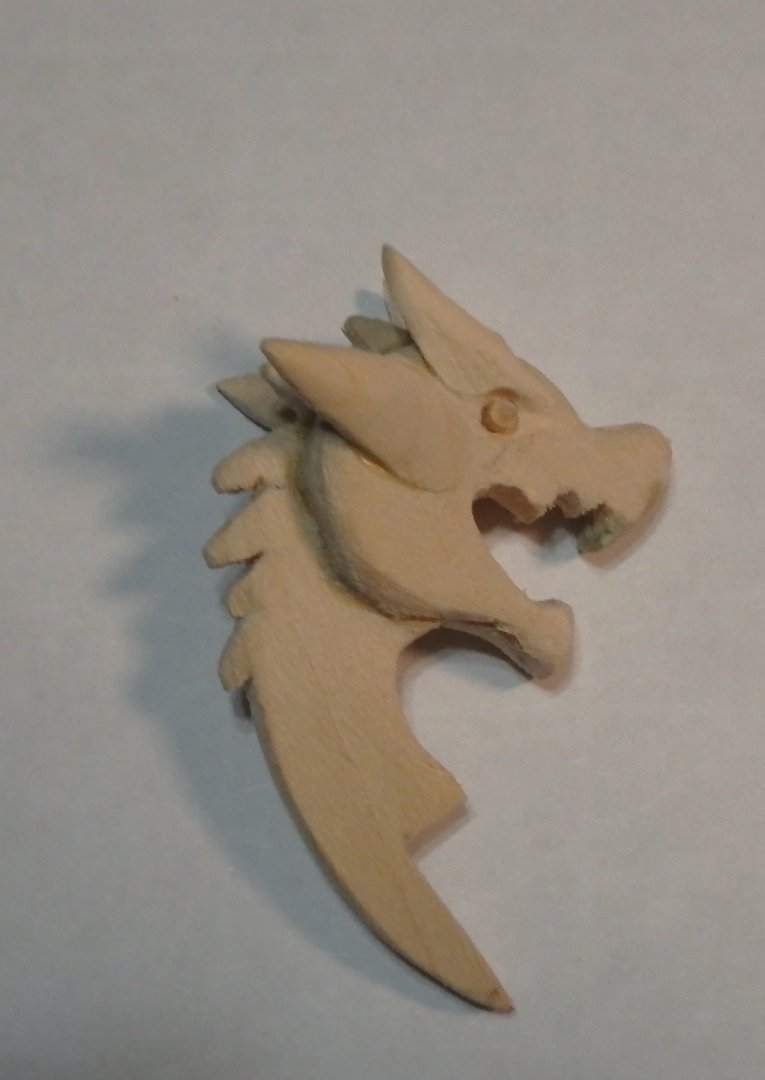
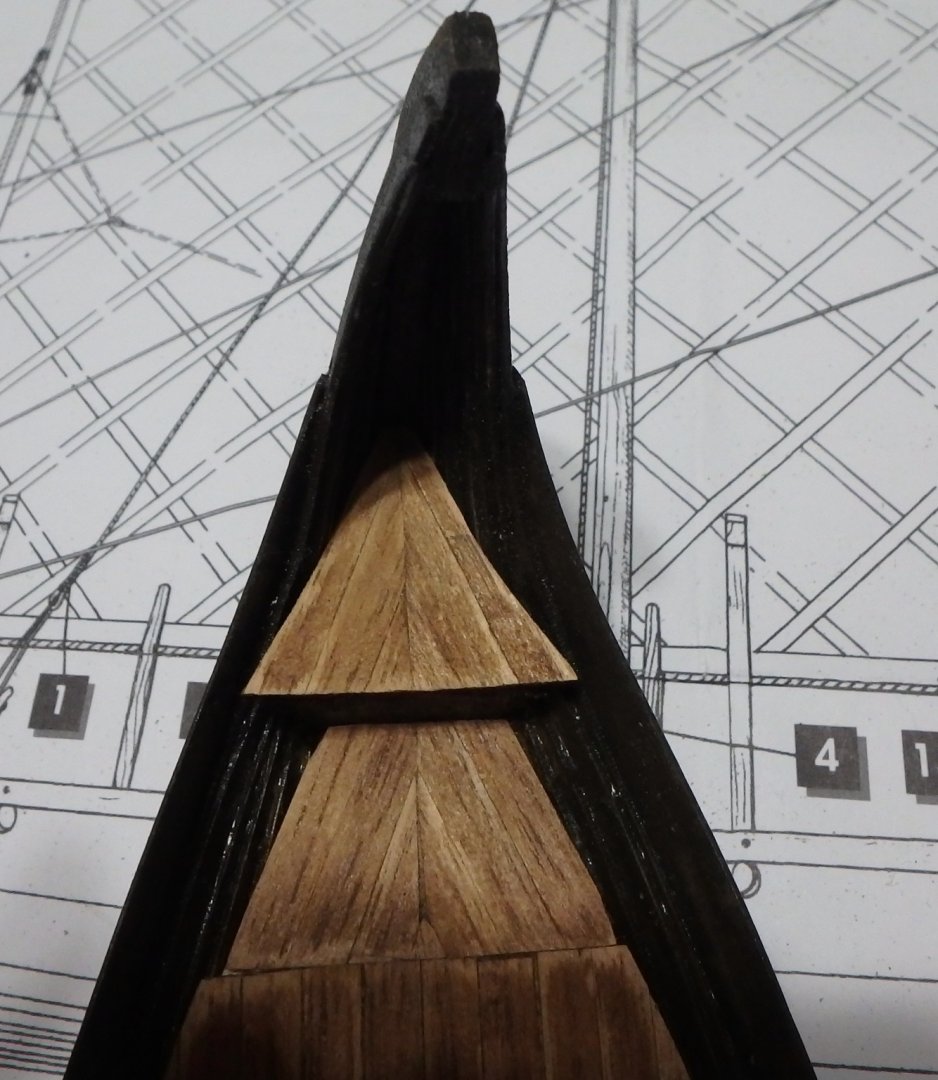
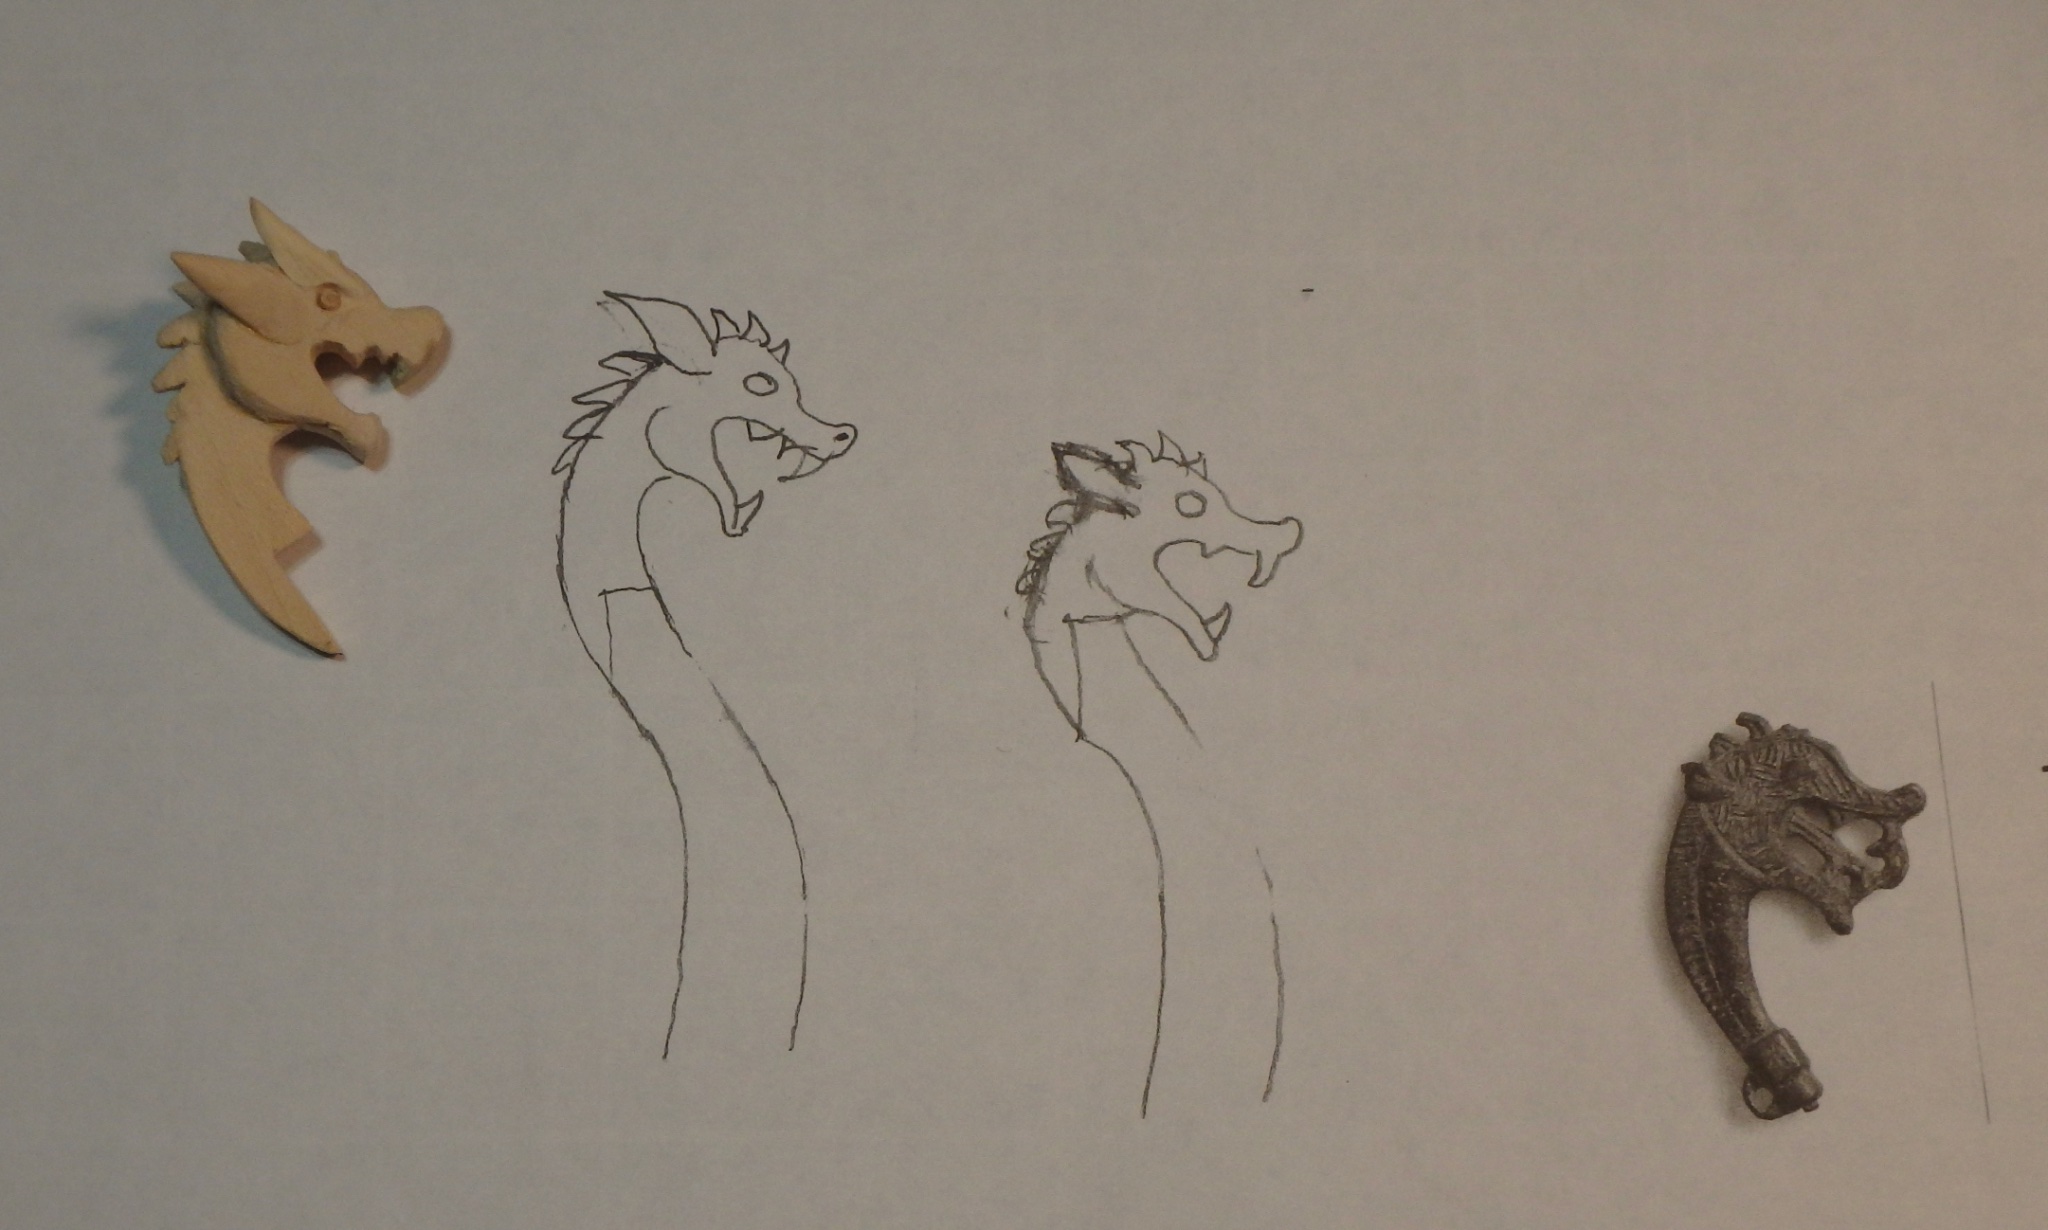
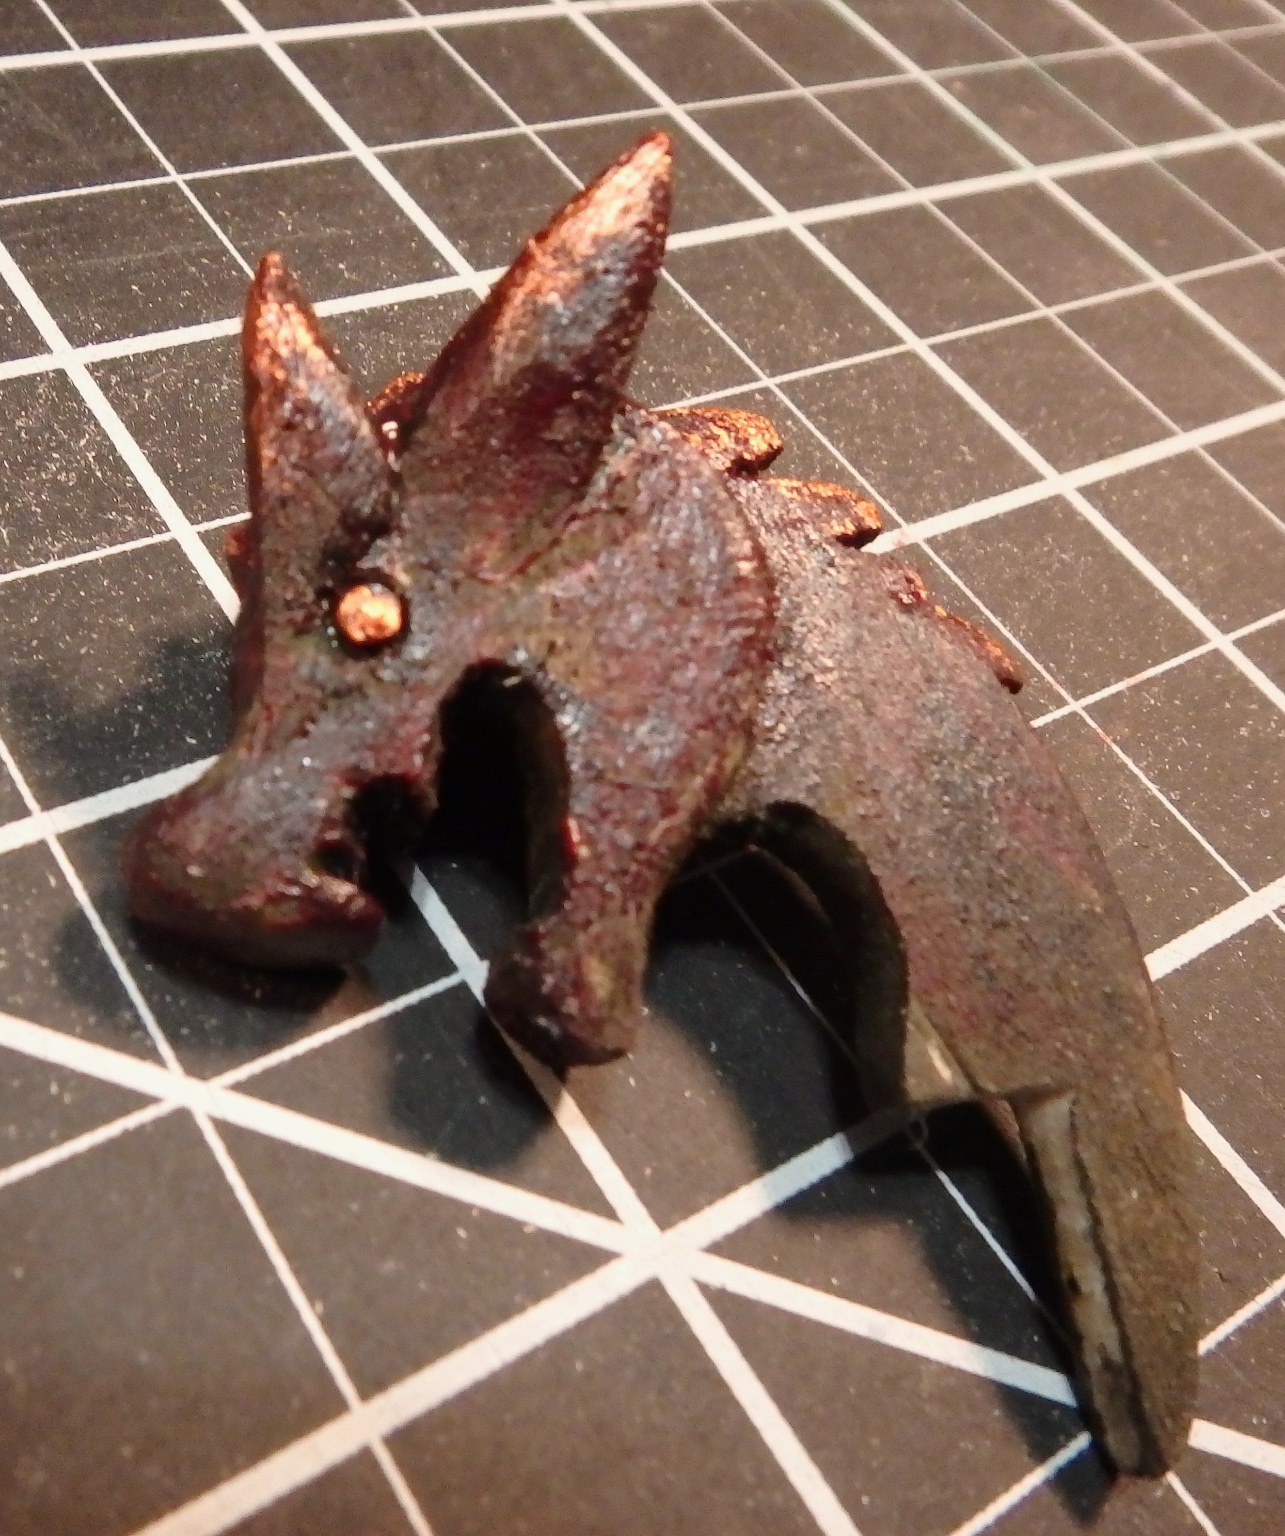
I took a stab at carving the figure head too. I like it, but the horns make it look more like a fantasy dragon than I intended. I may use it or make something a bit more stylized.
 On 3/23/2021 at 8:38 AM, End Of The Line said:
I started working on the small part shaping the oar racks and assembling the trestles. The trestles were cut with the wood grain going across the upper arms. It would only be a matter be a matter of time before they broke, so I used some of the scrap planking plywood to provide linear reenforcement along the length of the arms. The additional thickness looks right to me, because they would have been constructed with a mortice and tenon joint to the top arms. The base of the trestle that straddles the mast fish was treated the same.
I looked over the parts supplied for the steering oar and decided that I could do better. I carved the rudder from basswood and cut a mortice to receive the steering arm. The bead provided for the lower attachment point was a little insubstantial, so I added an oval lozenge to make it look more like some reconstructions. I added a reenforcement pad for the upper mount and will use some thin leather instead of the cord recommended in the kit. If course the pin will be replaced with knotted cord when I rig.
I took a stab at carving the figure head too. I like it, but the horns make it look more like a fantasy dragon than I intended. I may use it or make something a bit more stylized.
That looks fantastic!!
-
Thanks for the additional information. I did not realize the difference in in the stains. The learning curve has started!
-
Thanks Nelson. It seems there have been a few methods tried for planking this model. I guess I will have to try it with a scrap piece of plywood from the kit and see which works best. I will likely start a build log when I get started. Currently I am building my first ship which is the AL La Provencale. So far so good. I am ready to start building the sails. I should have probably done a log for that as well, but it might be too late.
-
23 hours ago, End Of The Line said:
On to staining the hull and deck! I used Minwax water-based semi-transparent stain in dark walnut for the hull. I applied two coats wiping after I allowed the stain to penetrate the wood. This left the hull uniformly dark except for the bits of glue that I missed in preparation for stain. Oh well, it was all part of my plan.
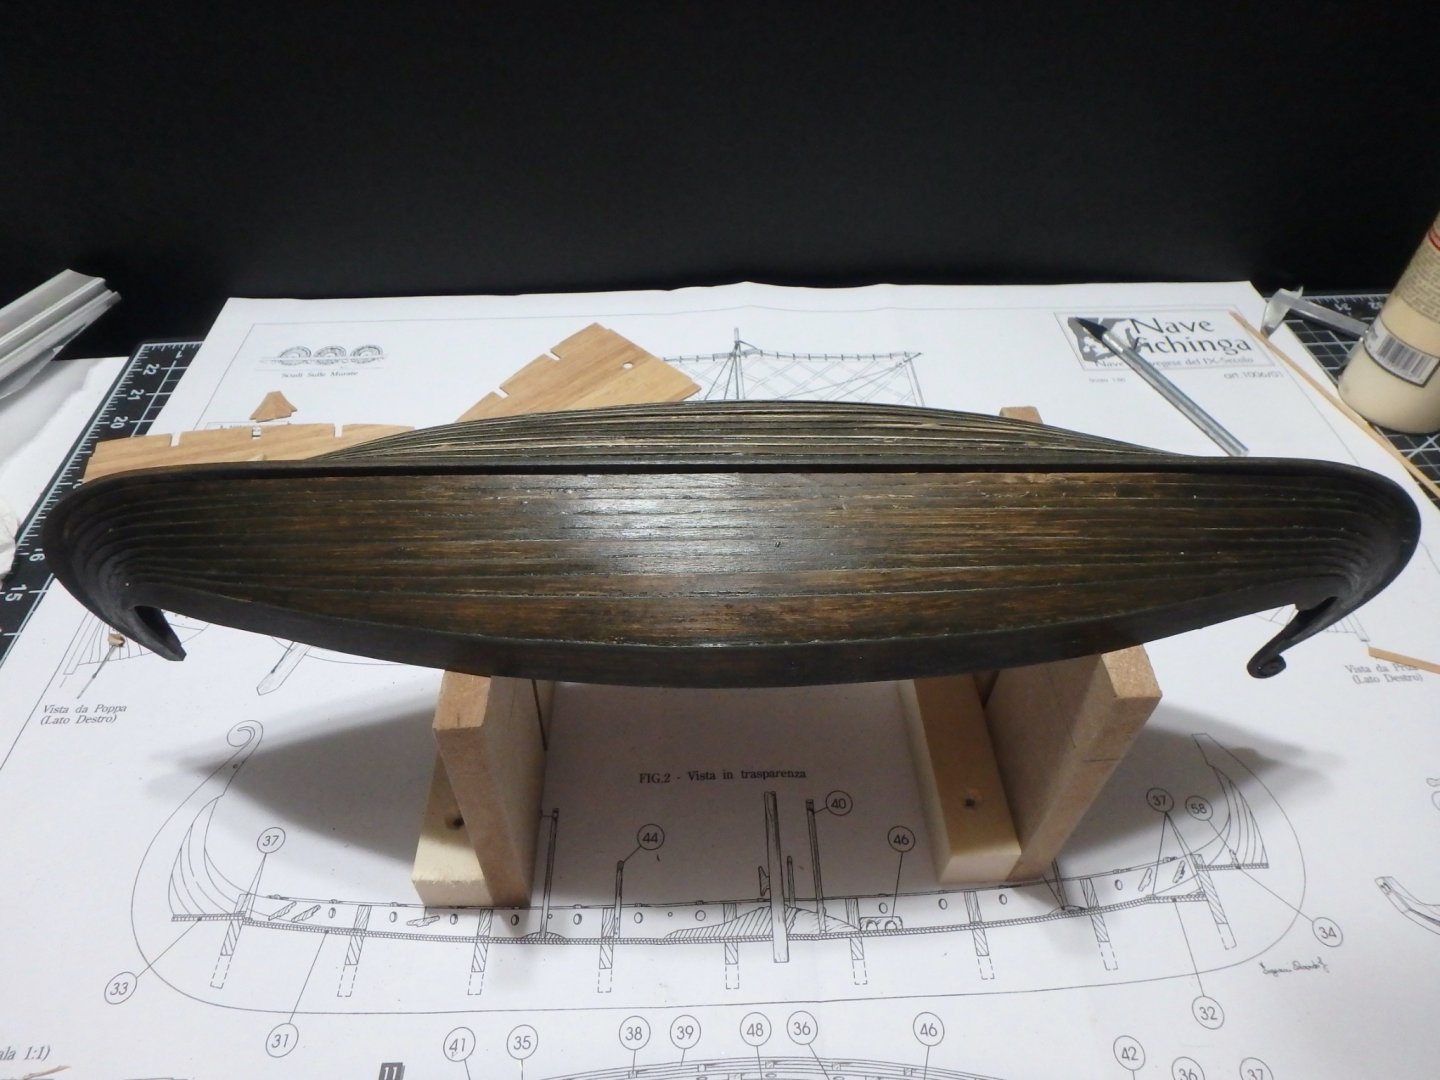
I cleaned up the glue that I had missed in round one. I sanded the hull to create light areas that will be highlights on the finished hull.
I finished the hull color by wiping on a layer of the stain.
For the deck, I started with the dark walnut stain, but warmed it up with some burnt sienna acrylic paint. I thinned with acrylic airbrush medium and a bit of water. I applied one coat and sanded it to create highlights, but with the stain emphasizing the planks and grain. After a second round of stain and sanding here's the result.


Hi, I will be starting this build shortly so I’m happy to find your build log. It is interesting that the stain penetrated despite the fact that the planks were soaked in thinned glue. I would have expected poor stain penetration. However, It looks fantastic.
Ric
-
-
Hi Matt, Nice job on a beautiful model. It made me pick one up! Especially since I've been watching the Vikings series! I was just looking at the instructions for the planking and it says to soak the plywood planks in a mixture of water and glue and to let dry before gluing the planking onto the bulkheads. It also says to score the planks lengthwise so that they can bend in the middle. My question is did you follow these instructions? My fear is that if you soak the planks with white glue how can you stain afterwards? Also the plywood is pretty thin to be scoring with a knife.
Thanks,
Ric
-
Hi! Nice Job. Did you have any problems with the first hull planking? In particular, did the planks meet all the forming ribs near the bow of the boat? I read another review where the builder had lots of problems with the fit of the planks to the formers and that there were areas where the planks did not touch the ribs near the front. The curve did not match the ribs if you know what I mean.
-


Viking Drakkar by Matt H - FINISHED - Amati - Scale 1:50
in - Kit subjects built Up to and including 1500 AD
Posted
Hi Matt. Very nice ship! Its been a while but I have slowly been working on my Drakkar. The boat is pretty much done. I may submit a build log, but in the meantime I have a question regarding the rigging of your ship. The main plans show a side view of the lines supporting the main mast. These are identified as line 1 and 2. However the overhead plan view does not show where these lines attach on the sides of the ship. Lines 1 and 2 are omitted. In fact there are no cleats in the presumed locations to tie these two lines to the sides. What did you do? I can't tell from your photos. Did you fabricate some cleats?