HOLIDAY DONATION DRIVE - SUPPORT MSW - DO YOUR PART TO KEEP THIS GREAT FORUM GOING!
×


Markus16
-
Posts
40 -
Joined
-
Last visited
Content Type
Profiles
Forums
Gallery
Events
Everything posted by Markus16
-
Mistake, I meant 2mm blocks, not holes!
-
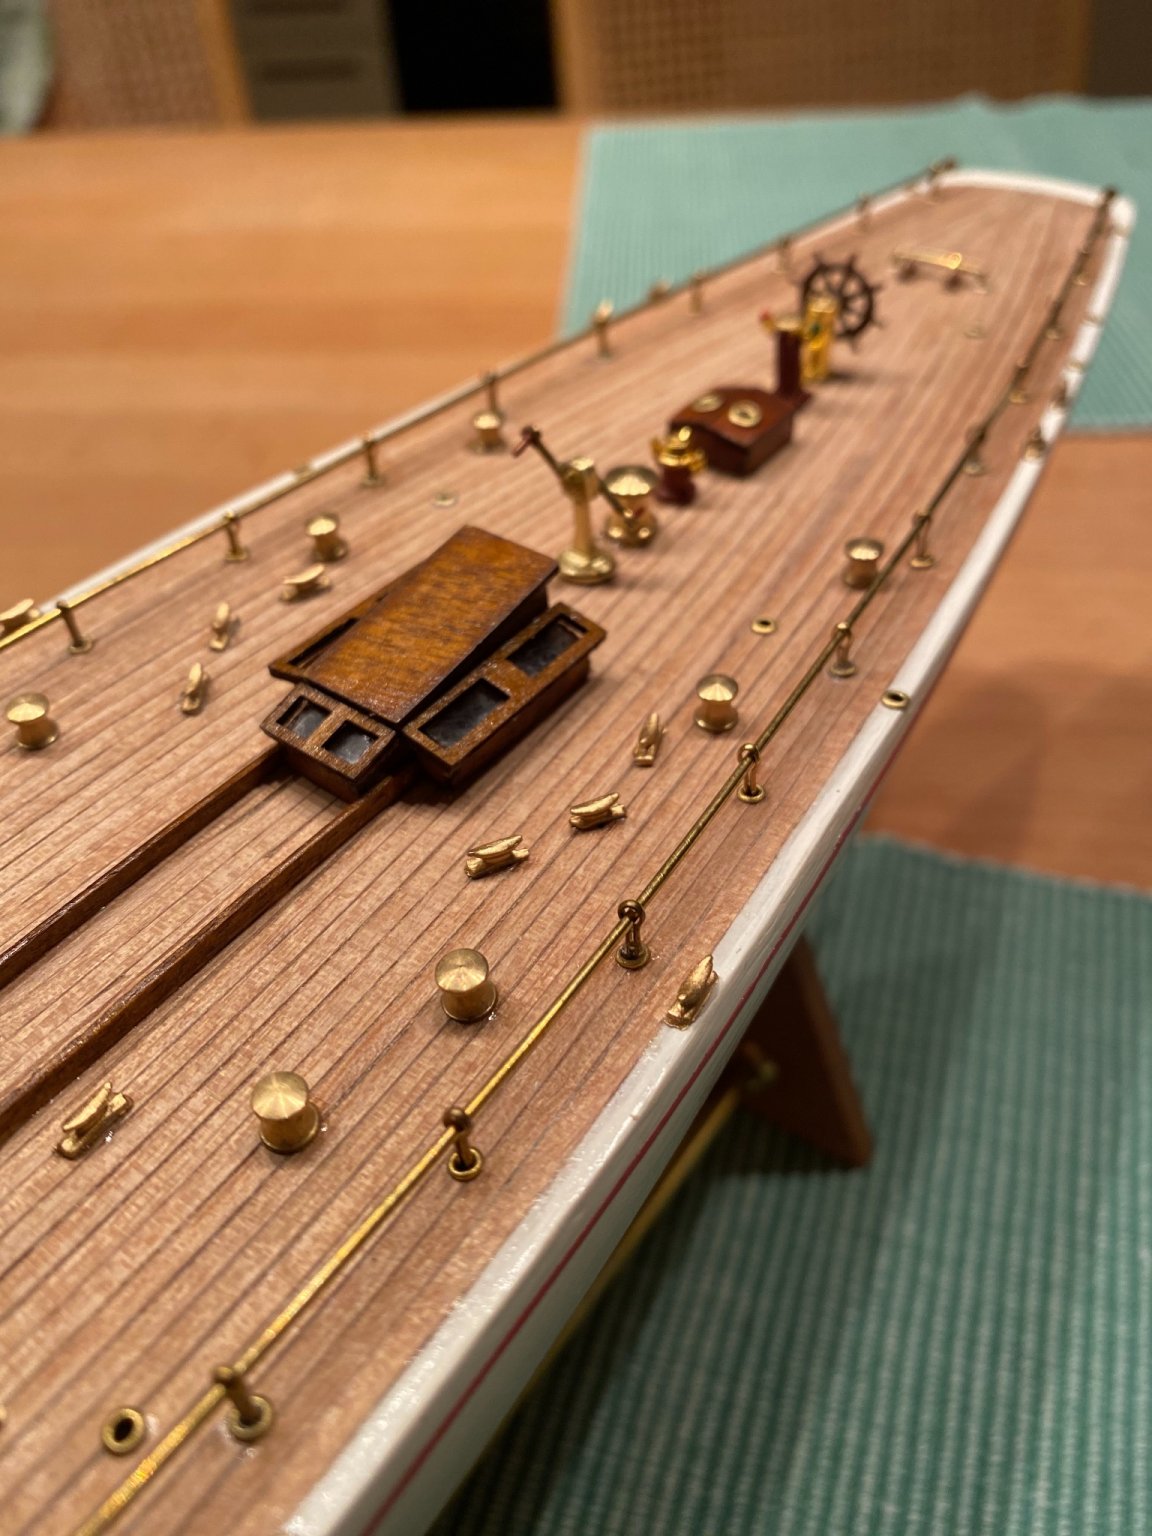
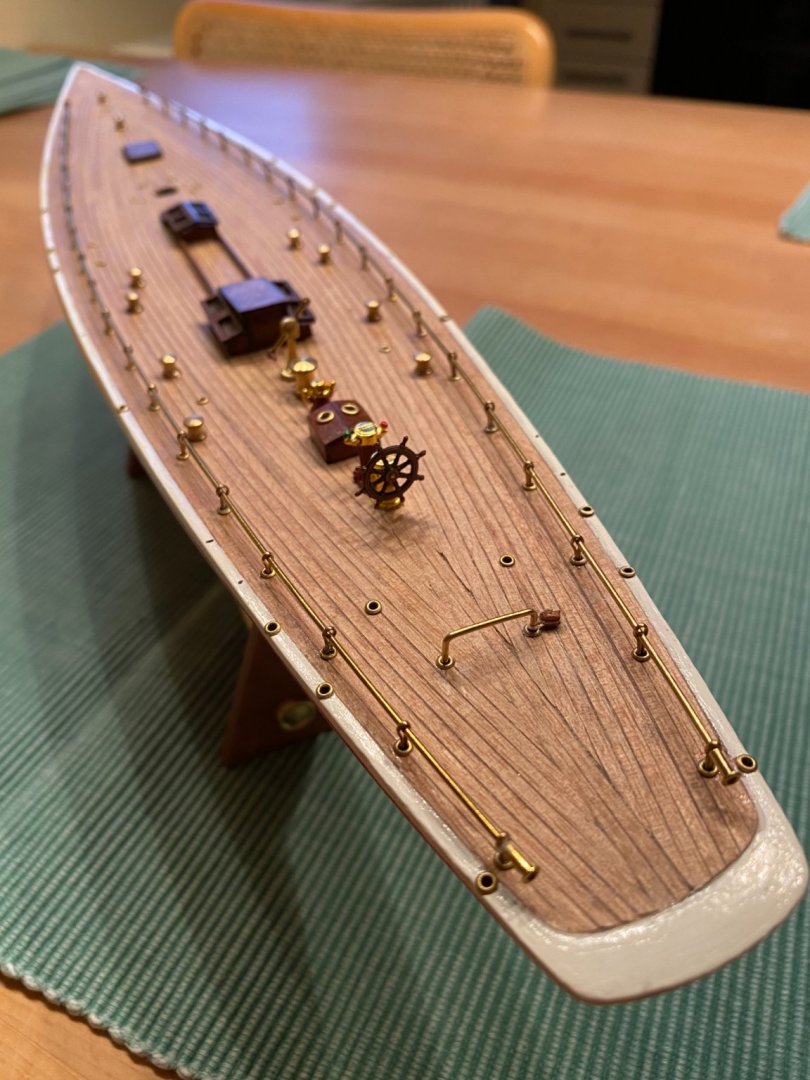
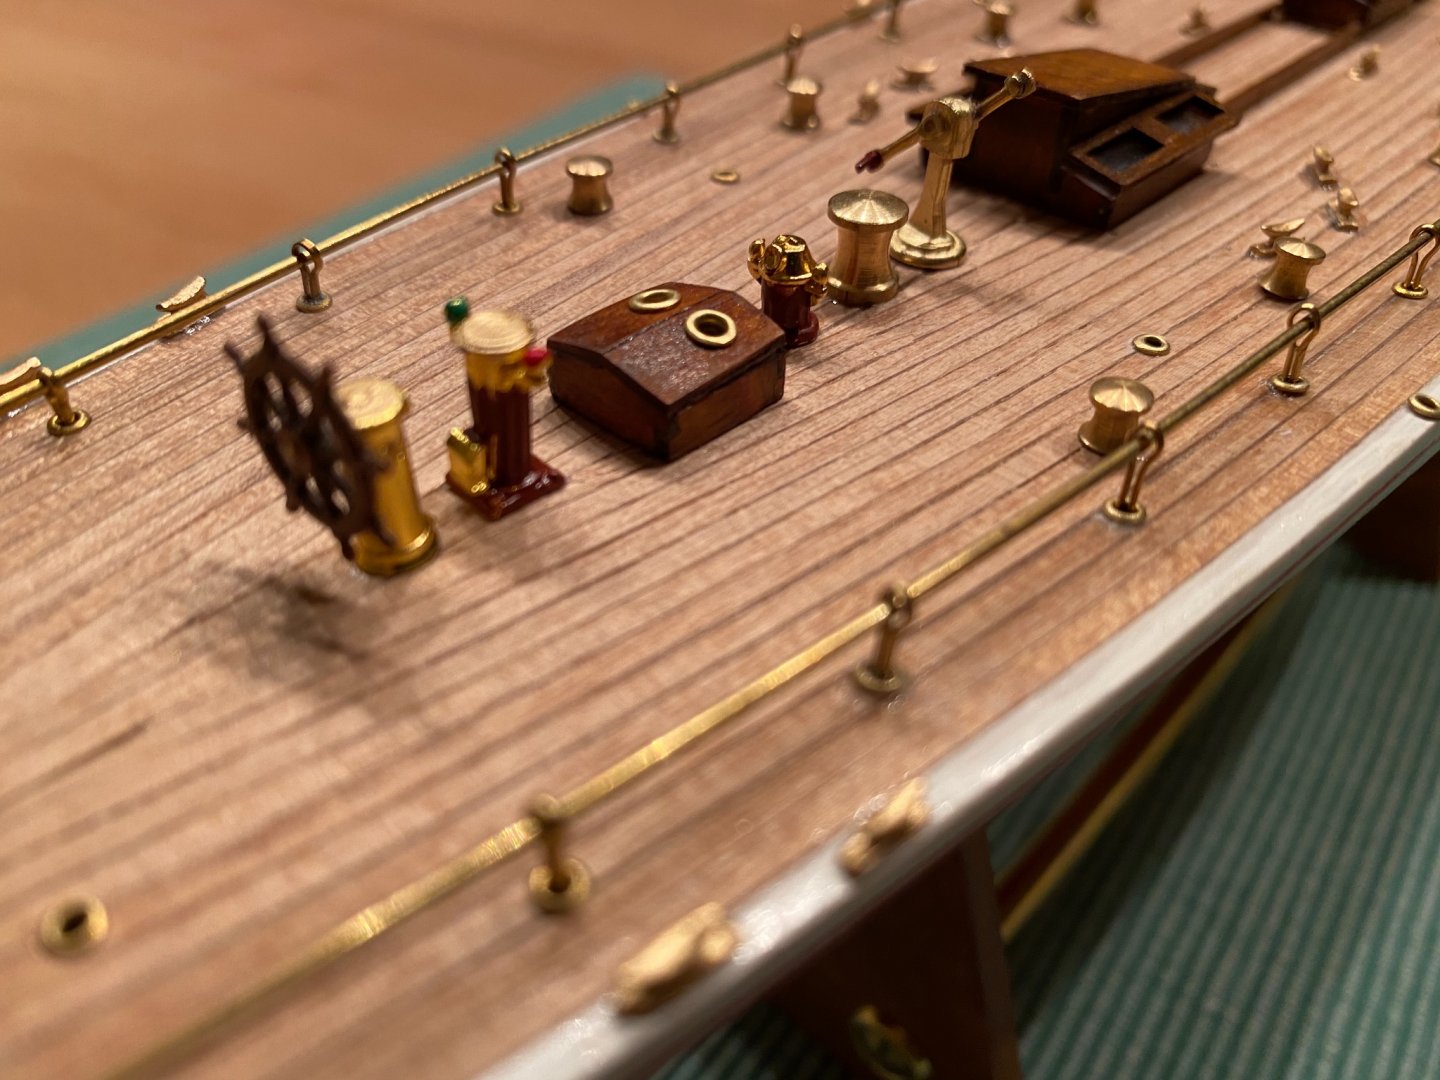
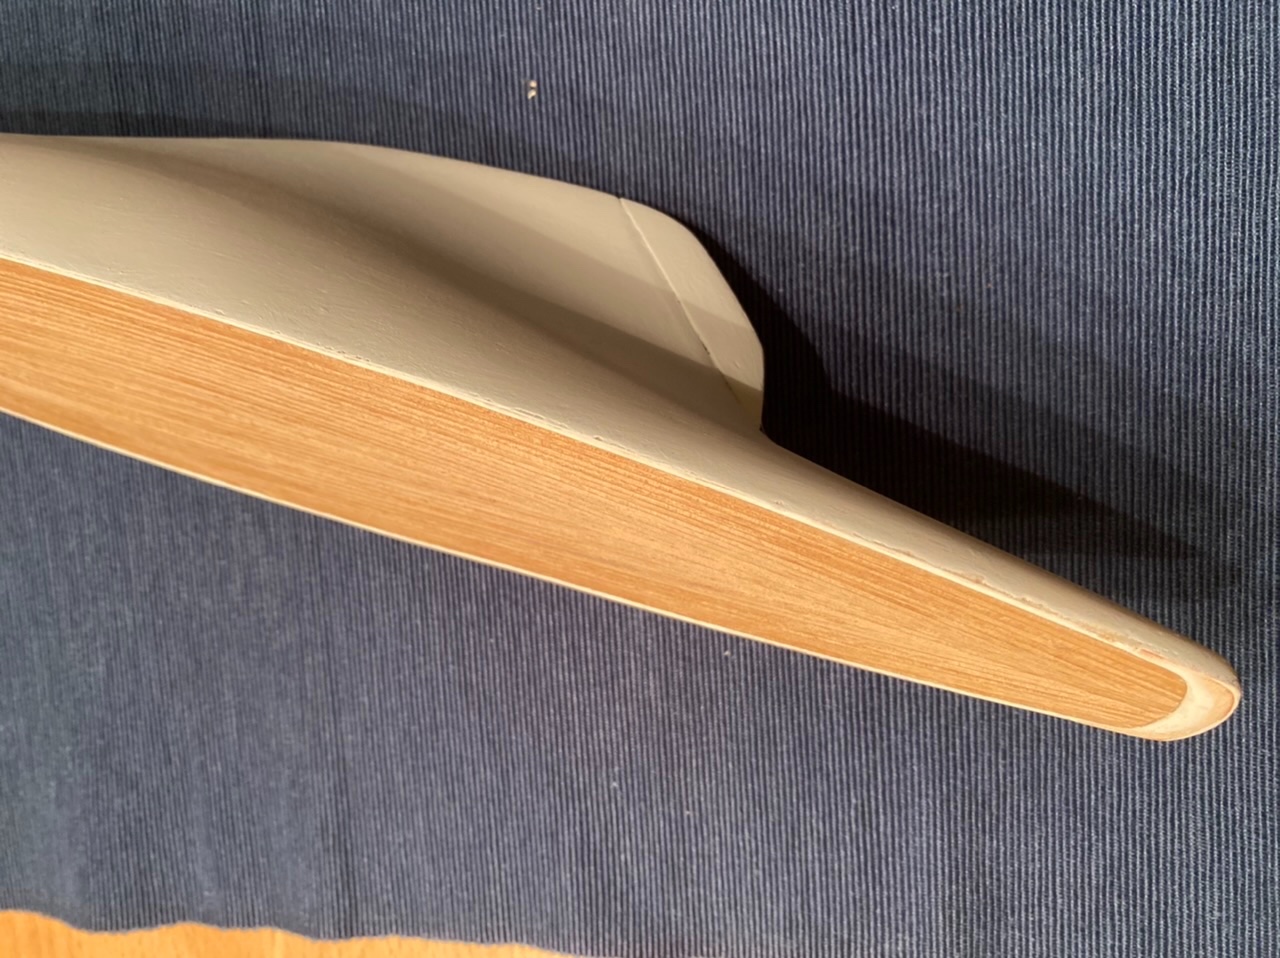
 Dear forum members, just finished the deck. I didn‘t like the silver color of the enclosed cleats and so I tried to paint them in a brass color. The Revell brass color looked more like copper and so I used gold. For the deck structure like the cabin house I used cherry stain instead of mohagony.

-
Dear Jezza, I also agree to Bob‘s reply. The small 2mm-holes of the Rainbow are really a challenge. I’ve re-drilled the holes and used super glue on a needle and wiped off the excess. I’m also working on the Rainbow right now and would love to see some pictures of your progress.
-
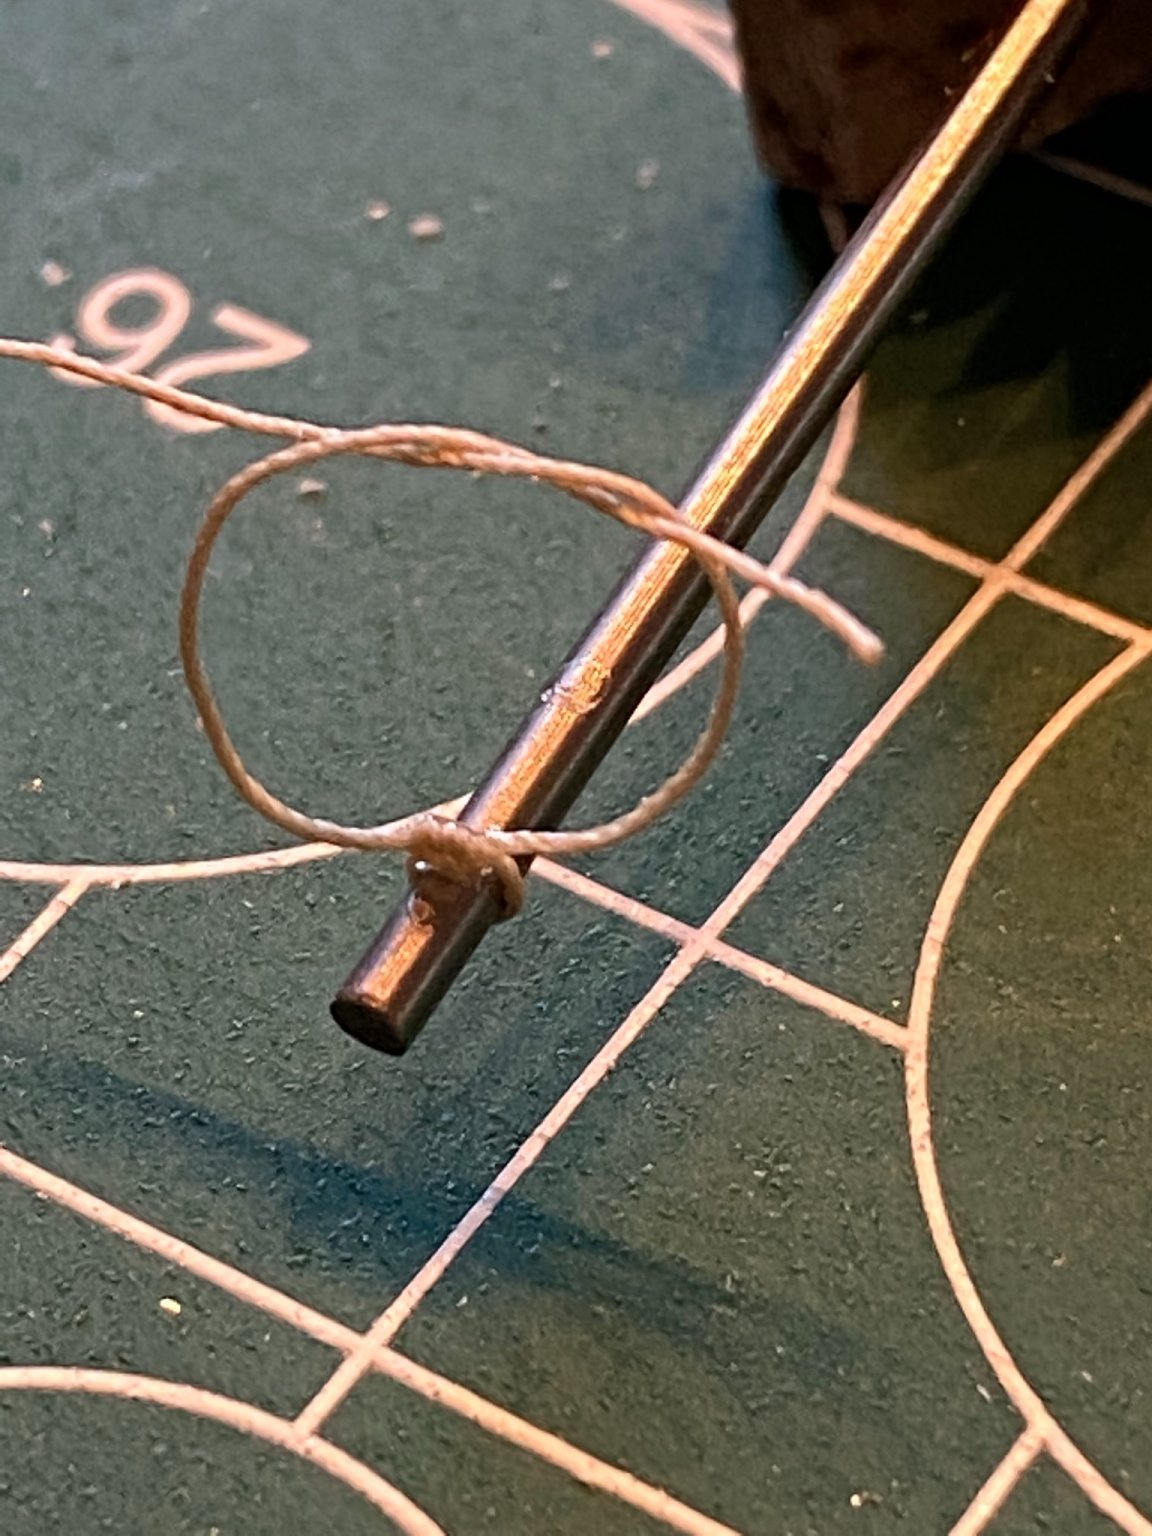
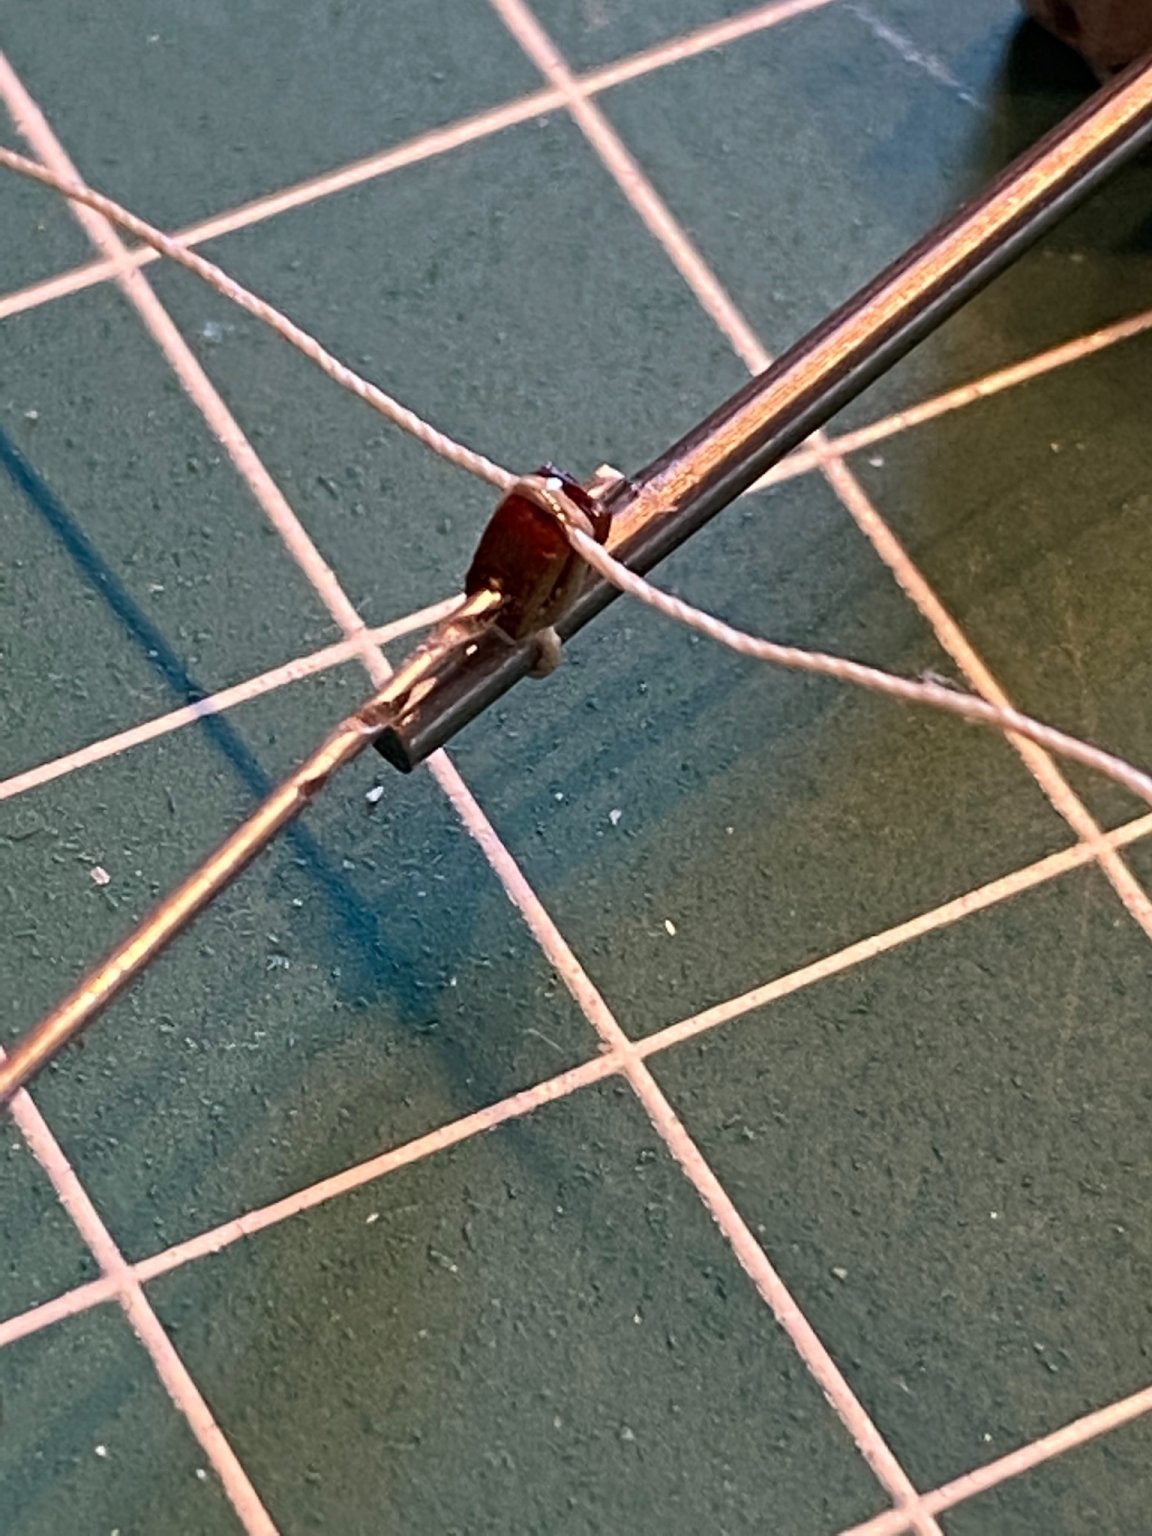
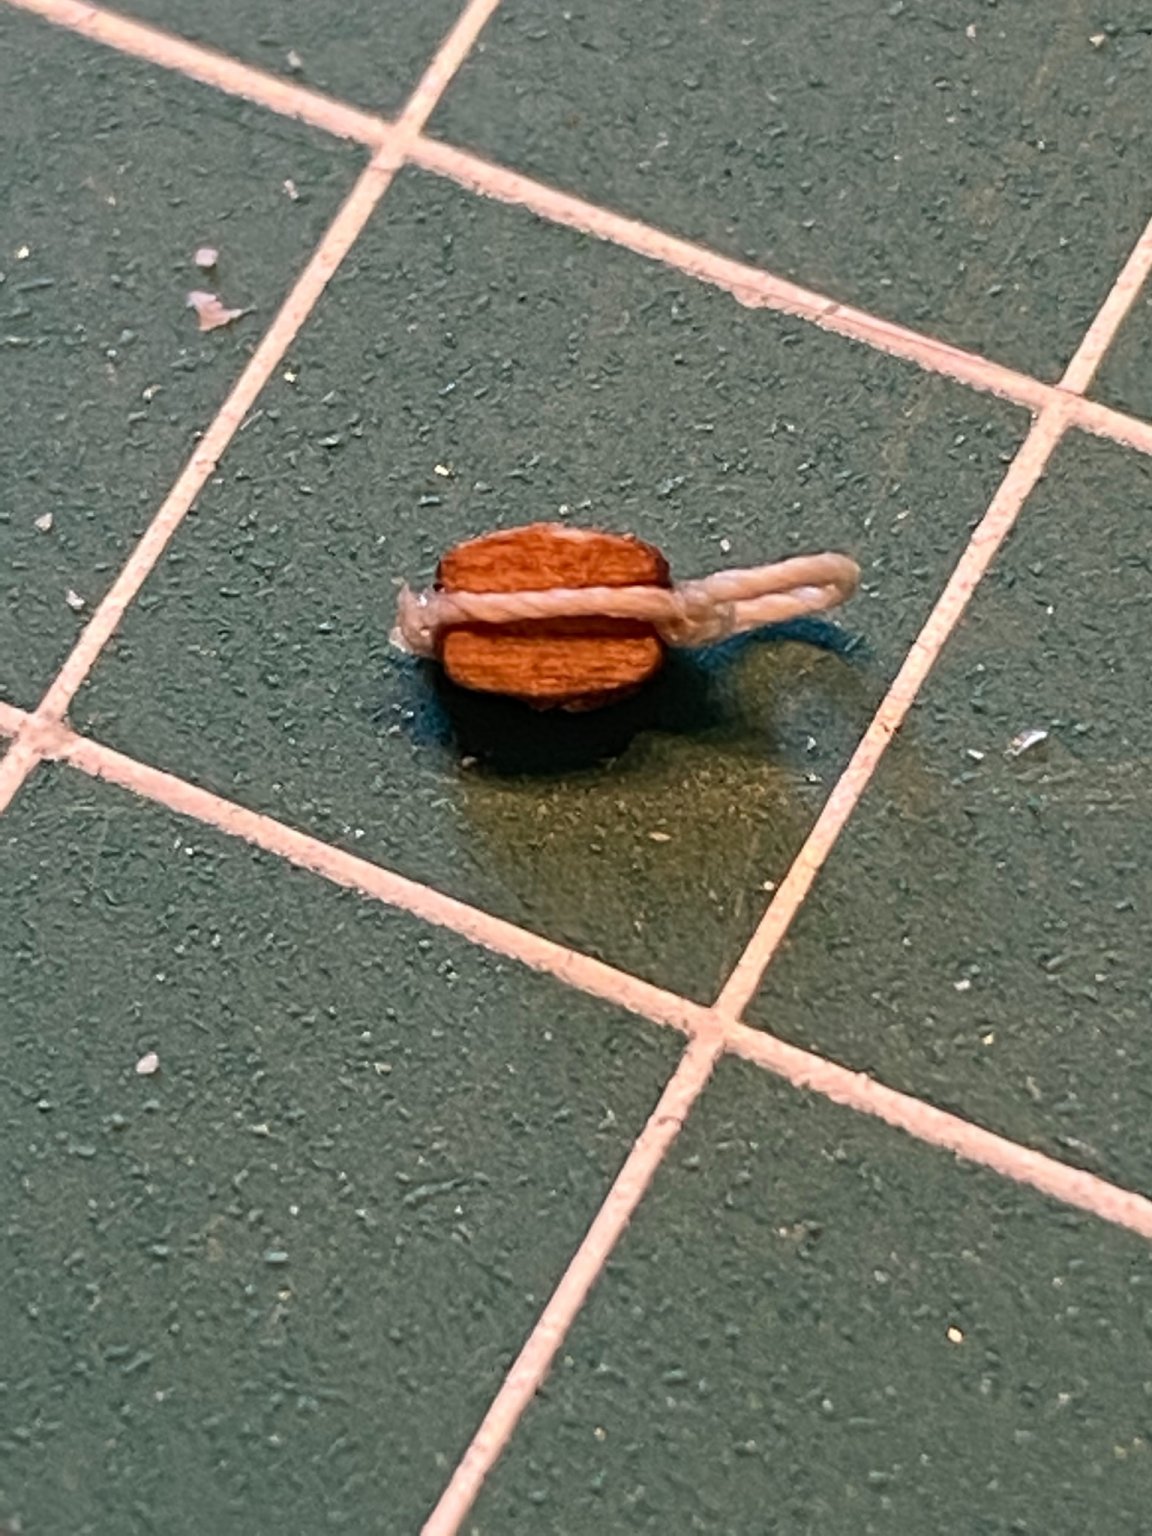
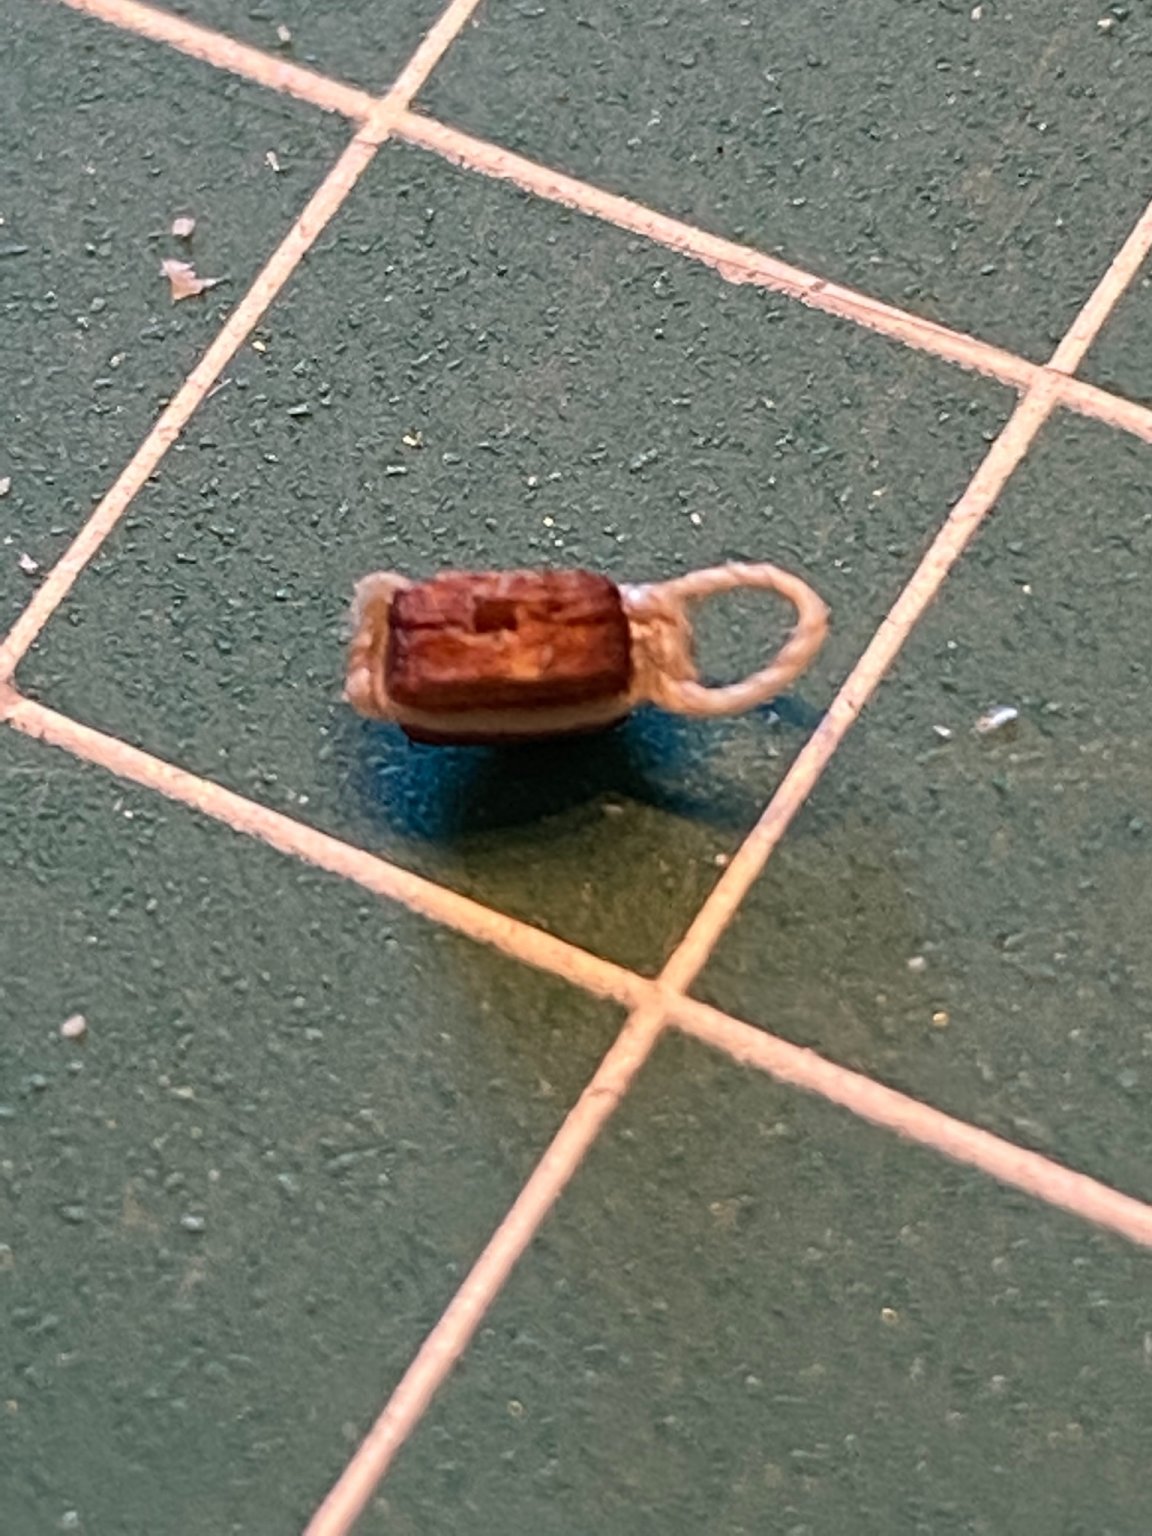
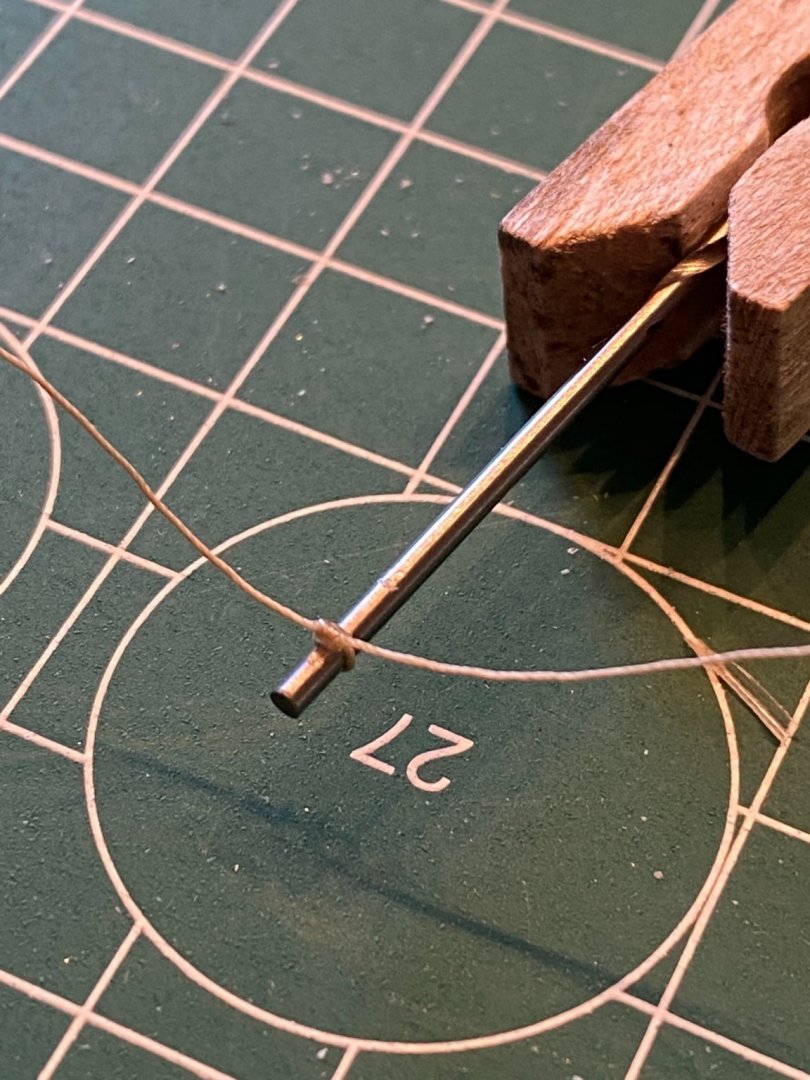
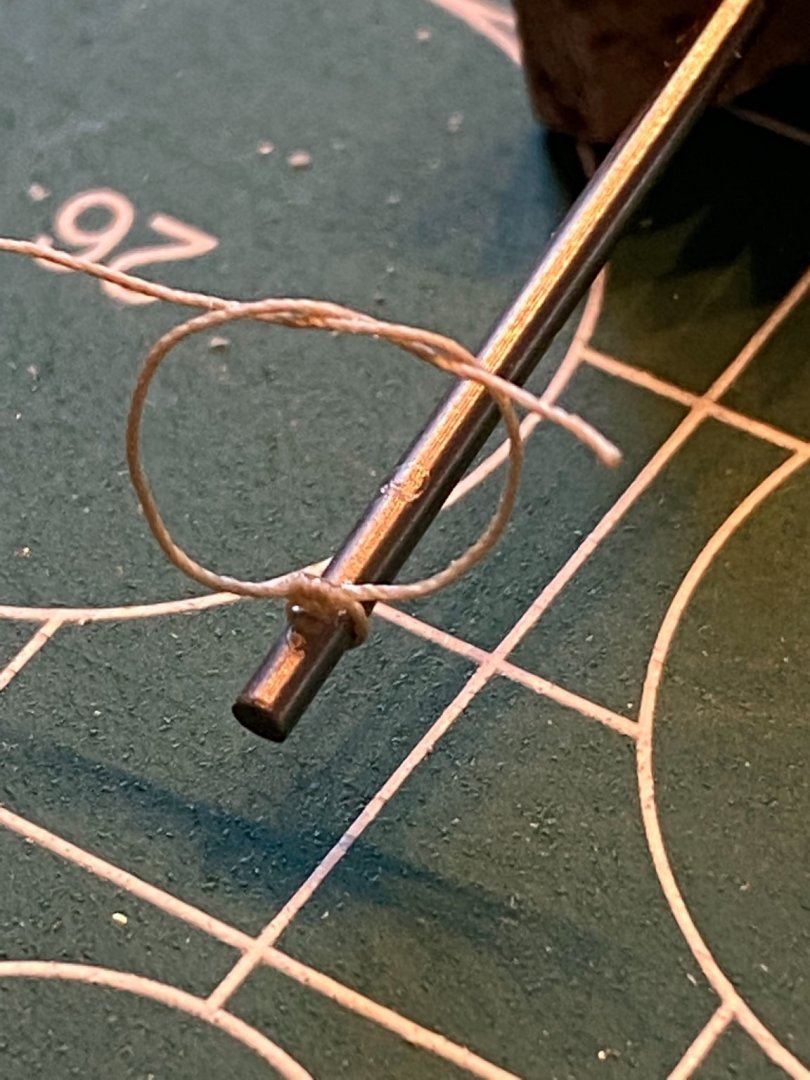
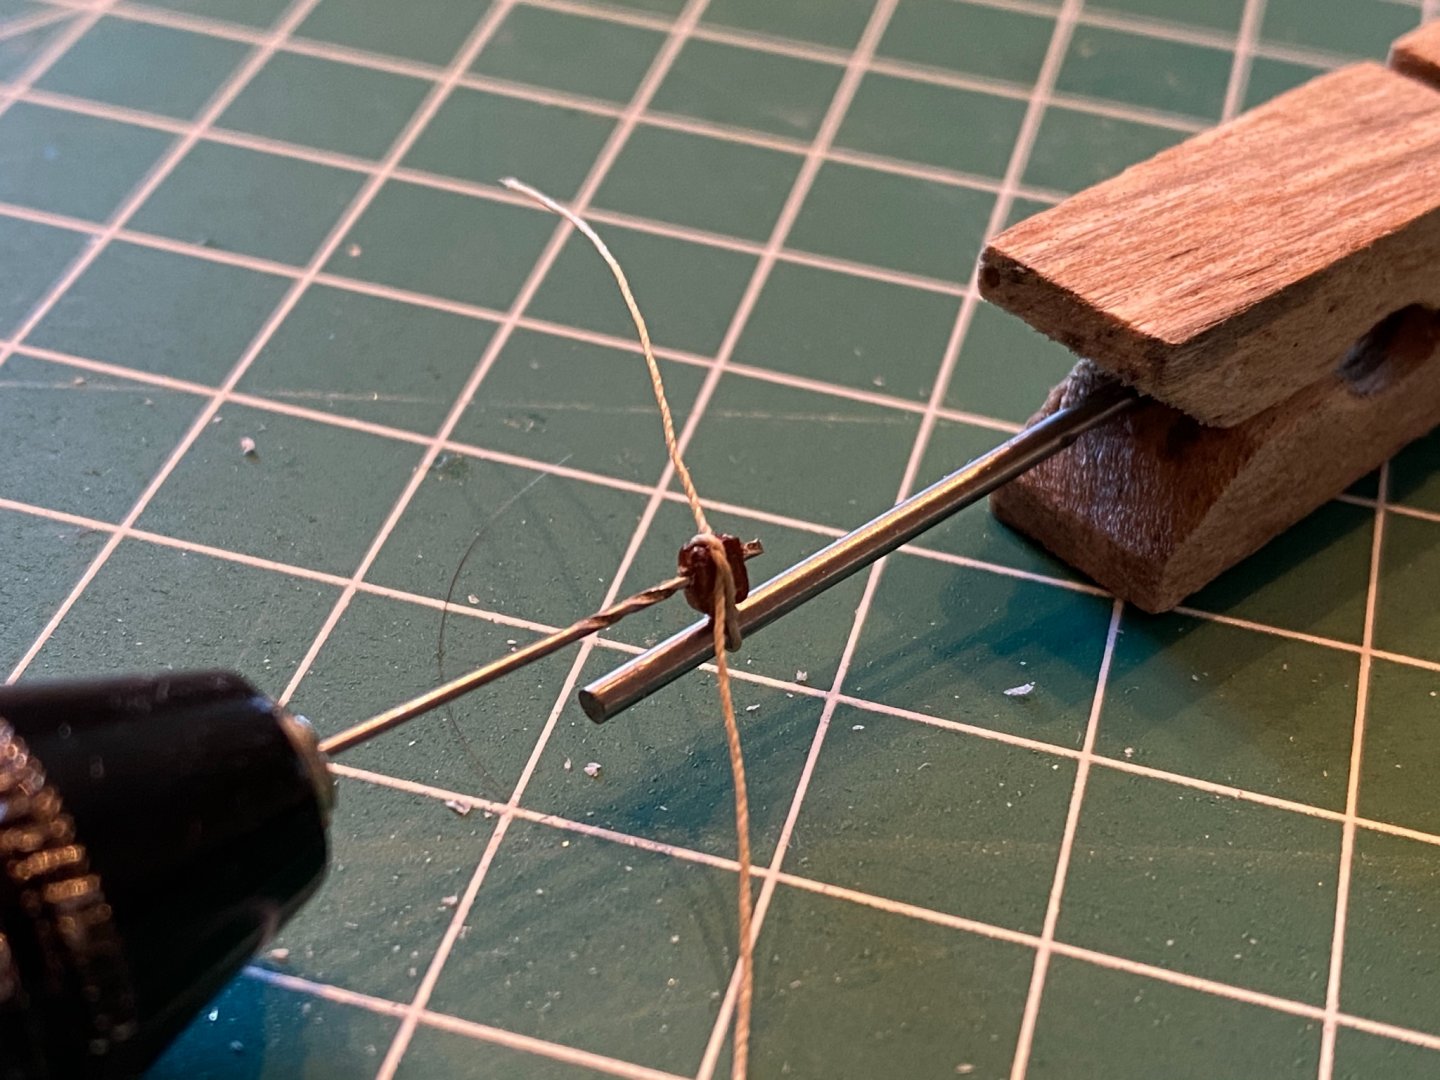
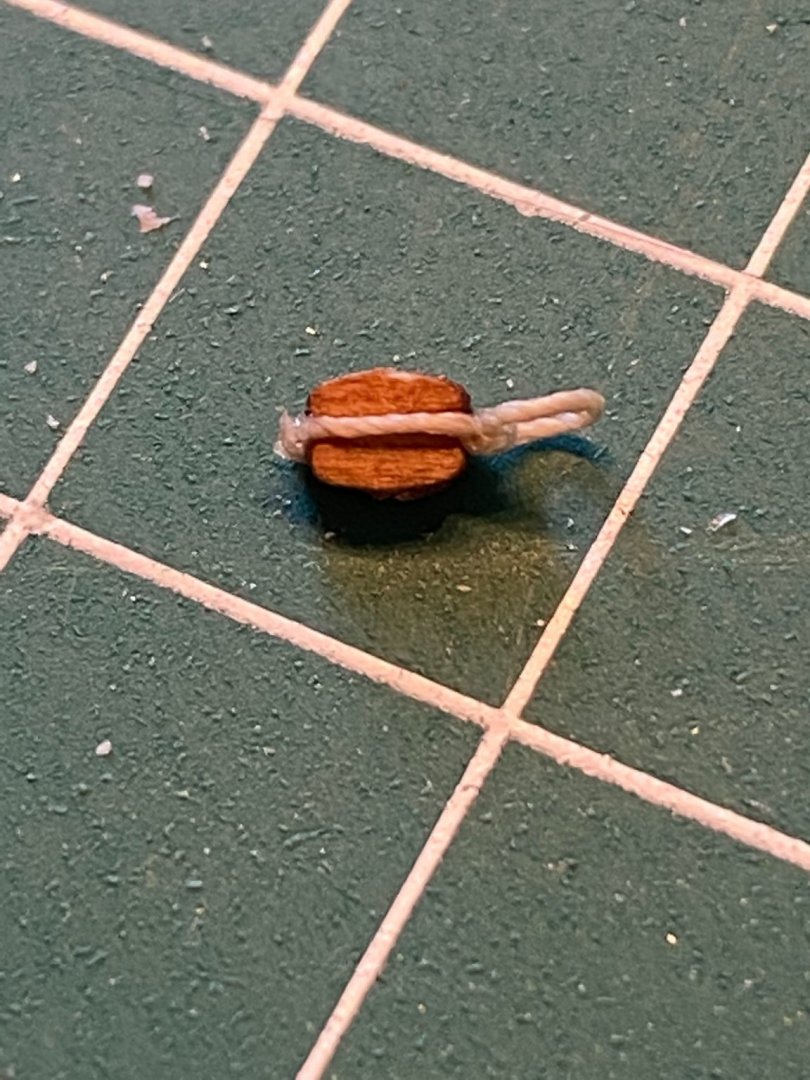
Dear forum members, after a tendinitis and countless outbursts I have now finished preparing the 2mm blocks 😅Allan, now I know what you meant with „bar shrouds“ 😉To save other newbies from the same experience, I‘d like to give a step by step manual of how I finally managed to do it. First I re-drilled the holes with a hand drill and left the block on the drill. After cutting a short piece (7 cm / 3 inch) from the enclosed table twine I knotted a reef knot around a steel pin held by a clothes peg and fixed it with glue. After that I prepared a half reef knot and placed the block on the hand drill exactly above the glued knot and pulled it tight. The most difficult step was to complete the other half reef knot. I picked up the right end with my left hand and took it to the left side. With fine tweezers I picked up the left end from behind and pushed it through the loop from the front. After pulling tight I also fixed the knot with glue and cut off the rest with fine scissors. (Also a good training for my English skills, I hope I explained it in a reasonably good way)


-
- 5
-

-

-
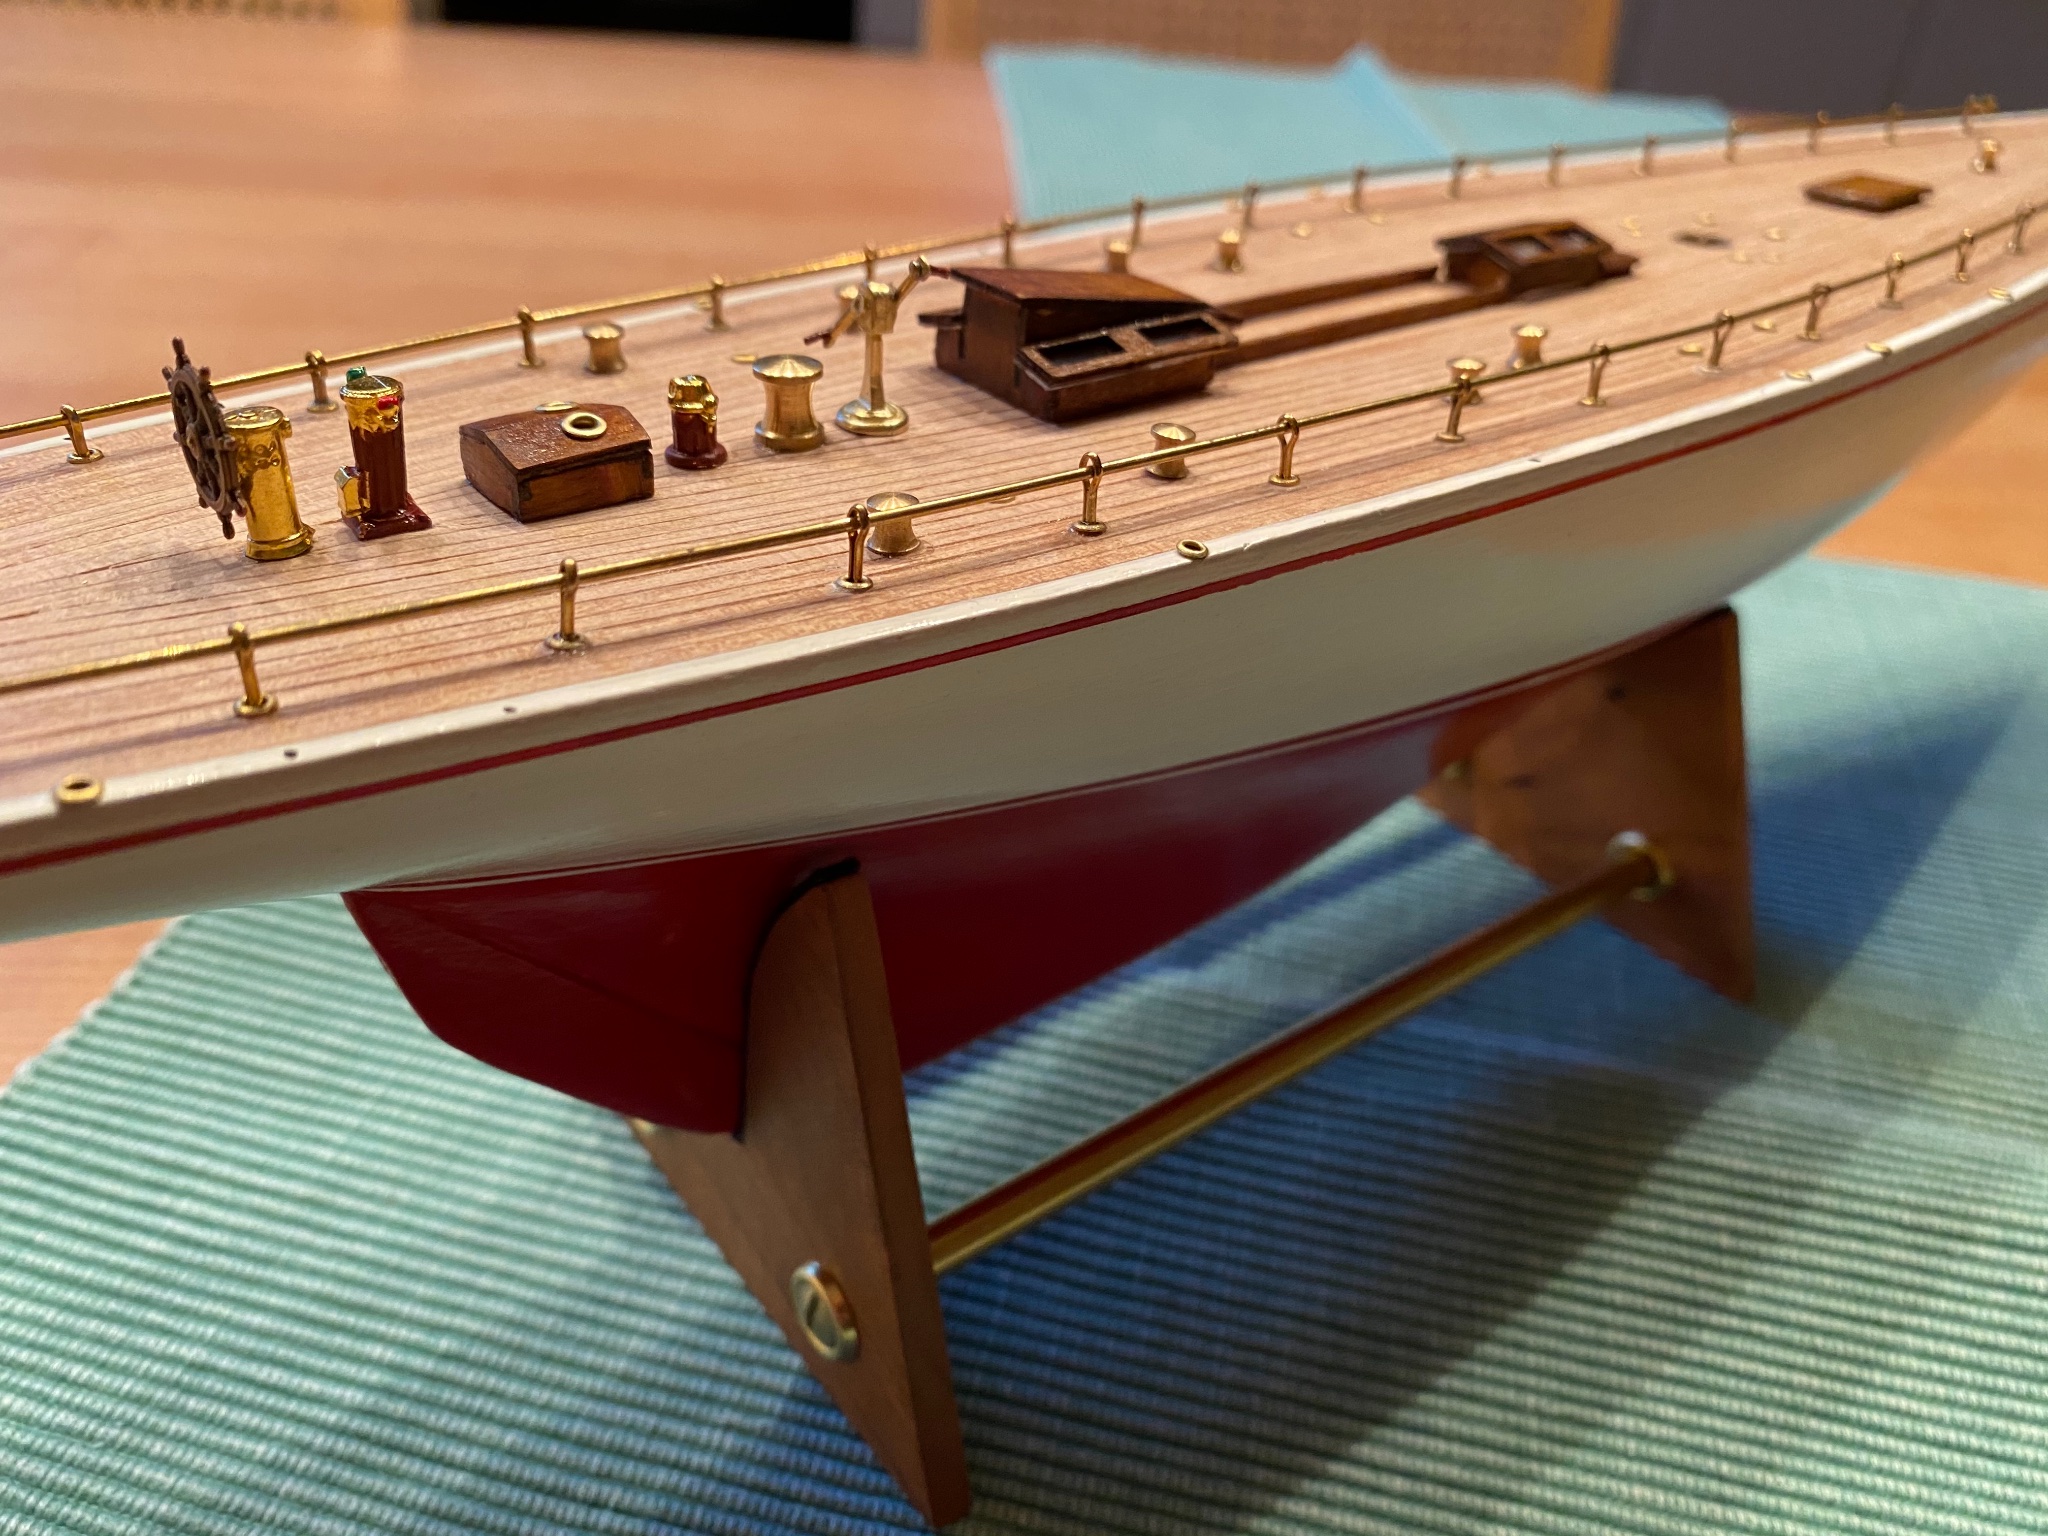
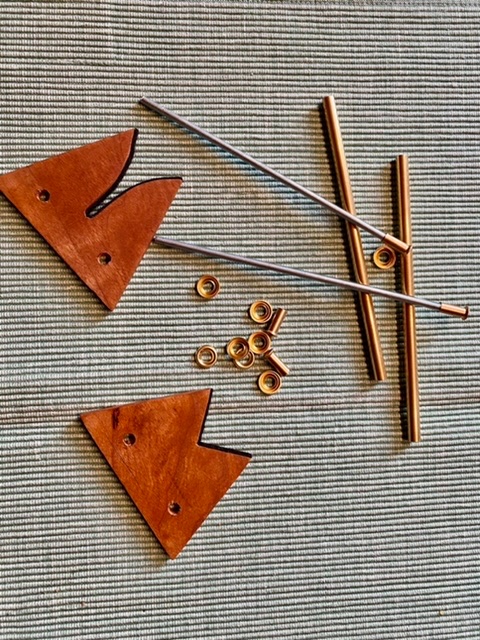
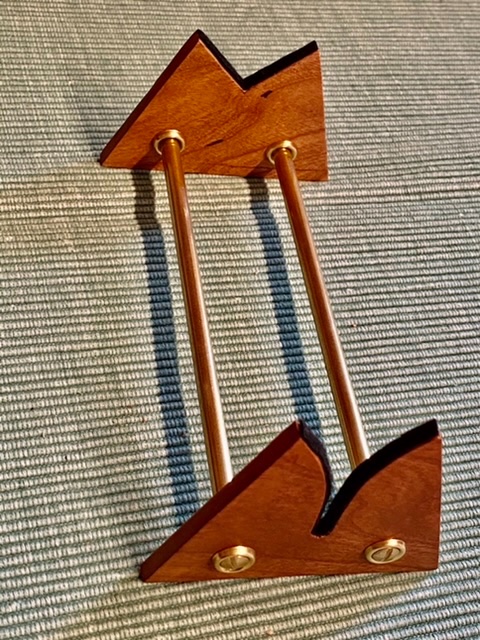
The enclosed stand for the ship really looked low-quality and so I build my own one with brass pipe, threaded rod, cherry wood and black felt pad.
-
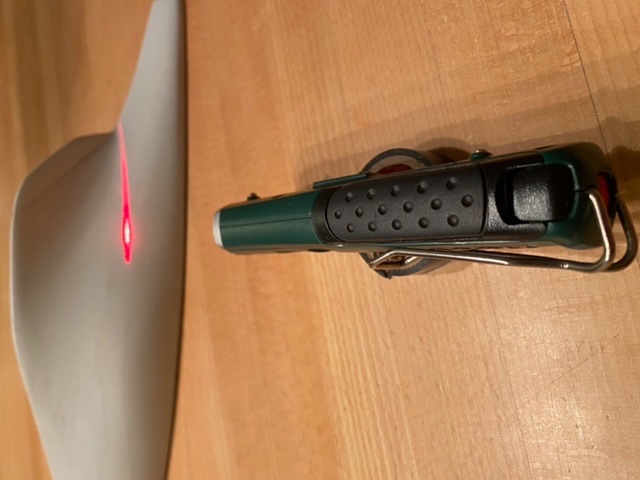
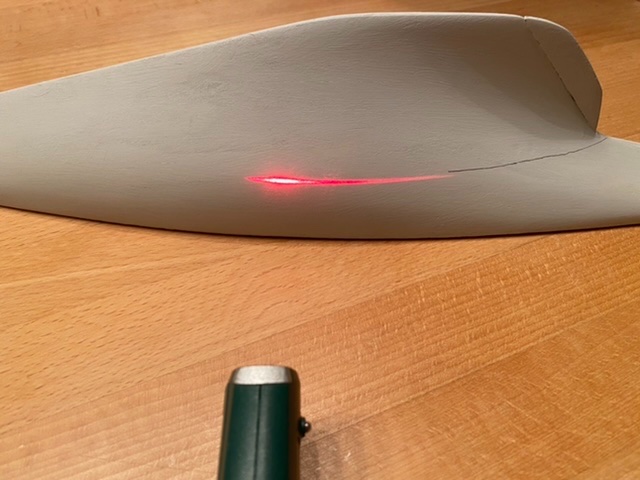
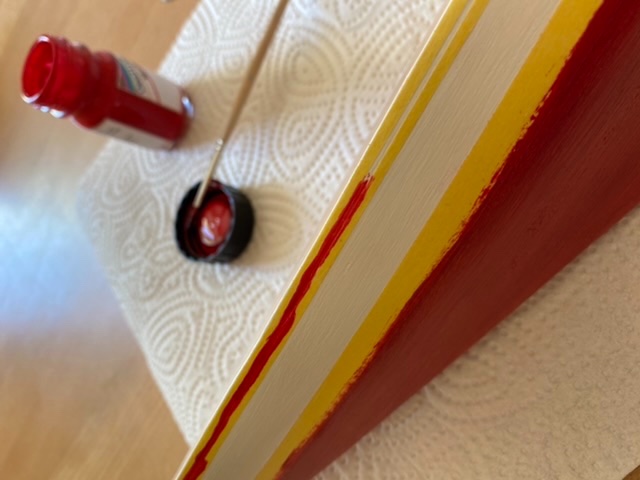
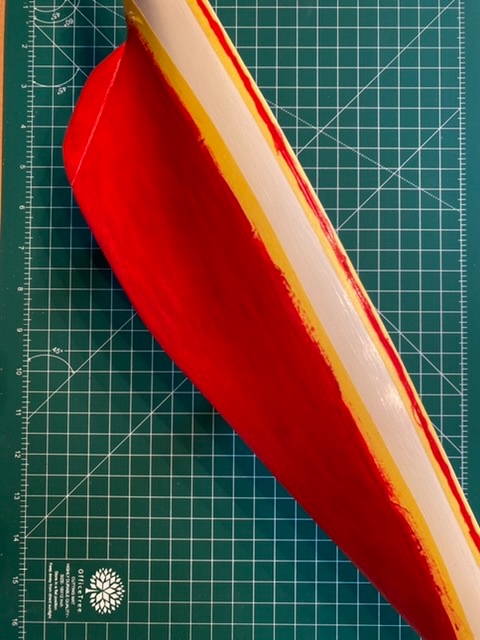
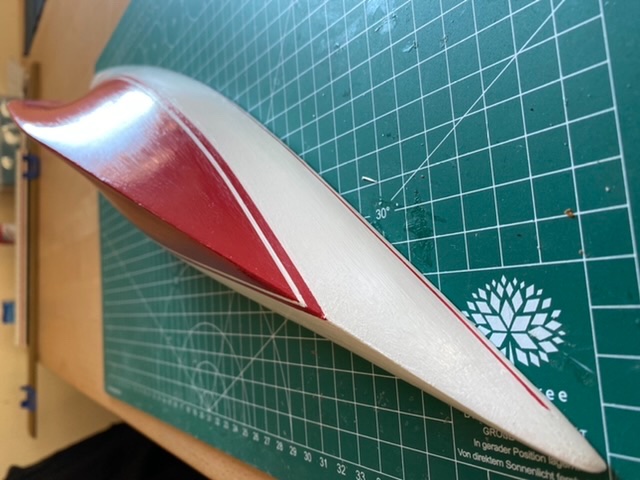
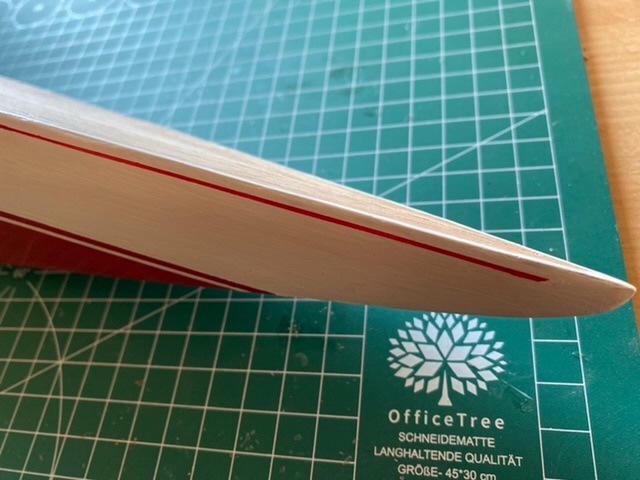
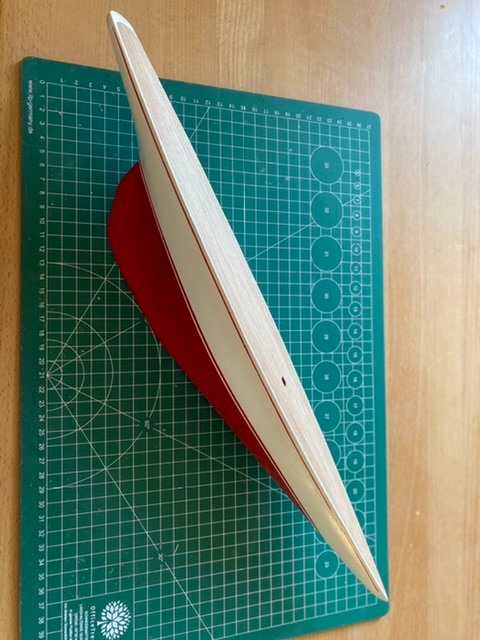
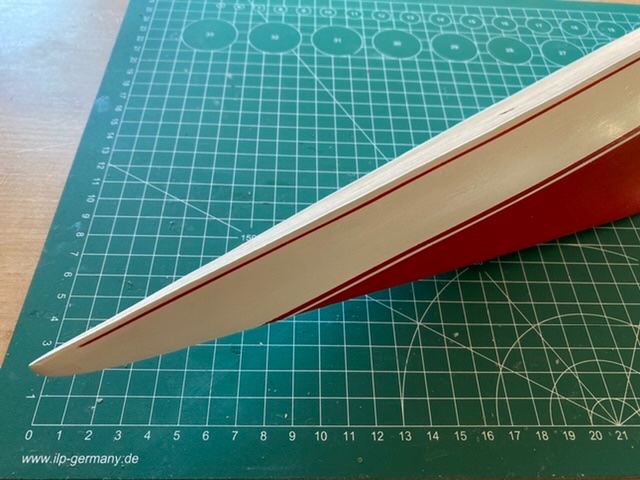
Lots of time to carry on at this weekend! Amati suggested to build a sort of stand with an attached pencil to draw the waterline, but this really didn‘t work. So I took a spirit level with a laser and pulled it along the hull. It took me quite a while to think up how to paint the thin decorative stripes and so I took a „Revell“ masking tape which was quite ok, but not optimal. I had to correct the stripes several times. I think next time I‘ll try „frogtape“. Choosing the right color for the hull also wasn‘t easy. Of course I would have preferred mohagony for the lower part, but on the one hand the original Rainbow had a metal hull and on the other hand painting some color that just „looks like mohagony“ on a resin hull was not acceptable for me. Unfortunately I couldn’t find any color fotos of the original Rainbow and so I took crimson red (RAL 3002). After several layers with a smooth brush and a finish with transparent varnish it worked out fine. What really annoyed me was that you can still see fine lines from the brush and despite sanding it several times with 400 and 600 grit I couldn‘t really remove the grooves. I‘d like to know if someone of you has a good advice how to achieve a really smooth varnish. Would a spray color be a better option?
-
Mast base and sail cloth for a J-Class Yacht?
Markus16 replied to Markus16's topic in Masting, rigging and sails
Hi mnl, thanks for your reply. The Smiley related to Allan! I‘ve just ordered a few sheets of sailspan and a 8mm mast base. Looking forward to carry on building! -
Mast base and sail cloth for a J-Class Yacht?
Markus16 replied to Markus16's topic in Masting, rigging and sails
😂 -
Mast base and sail cloth for a J-Class Yacht?
Markus16 replied to Markus16's topic in Masting, rigging and sails
Dear Roger, thank you very much for your reply. A pear shape would have been more appealing to me than a round one. I‘m pretty sure I‘m gonna search through this forum thorougly before starting my „Endeavour“ kit! Since I‘m German I have to look several things up. You wrote about „bar shrouds“. The translation says it‘s cloth for wrapping corpses. Is that the correct translation? -
Mast base and sail cloth for a J-Class Yacht?
Markus16 replied to Markus16's topic in Masting, rigging and sails
Dear Allan, thank you very much for your reply. I‘ve watched some videos of Tom Lauria right now and they‘re really helpful. I‘m glad I found this forum, it‘s making things so much easier for a beginner and gives me a motivational boost. By the way, do you have an opinion about using a mast base for my Rainbow? -
Mast base and sail cloth for a J-Class Yacht?
Markus16 replied to Markus16's topic in Masting, rigging and sails
Thank you very much so far. I totally agree with Allan that a rough sail will ruin the sight of a filigree model. The scale of my ship is 1/80 and sewing the hem with a hemstitch foot will be another challenge for me. In Germany there’s a saying: You grow with your tasks. -
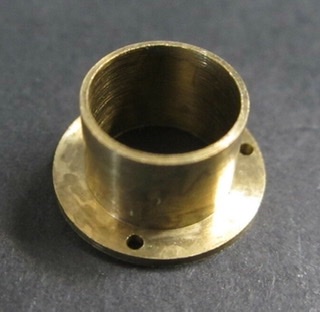
Dear forum members, I‘m just building my first model kit and so there are lots of things for me to consider. One thing is if it would be fitting to use a brass mast base for my J-Class Rainbow. I know that those yachts didn‘t use them and if someone tells me „for the type of ships with a mast base you’d better also build some cannon hatches“ of course I wouldn‘t. Another thing is my consideration about the sail cloth. The quality of the included sail is awful (too shiny with large imprinted lines). I was thinking about sacrificing one of my old white dress shirts or taking taffeta. Does somebody of you know the material of those sails in the 1930‘s? Thanks for every good advice!
-
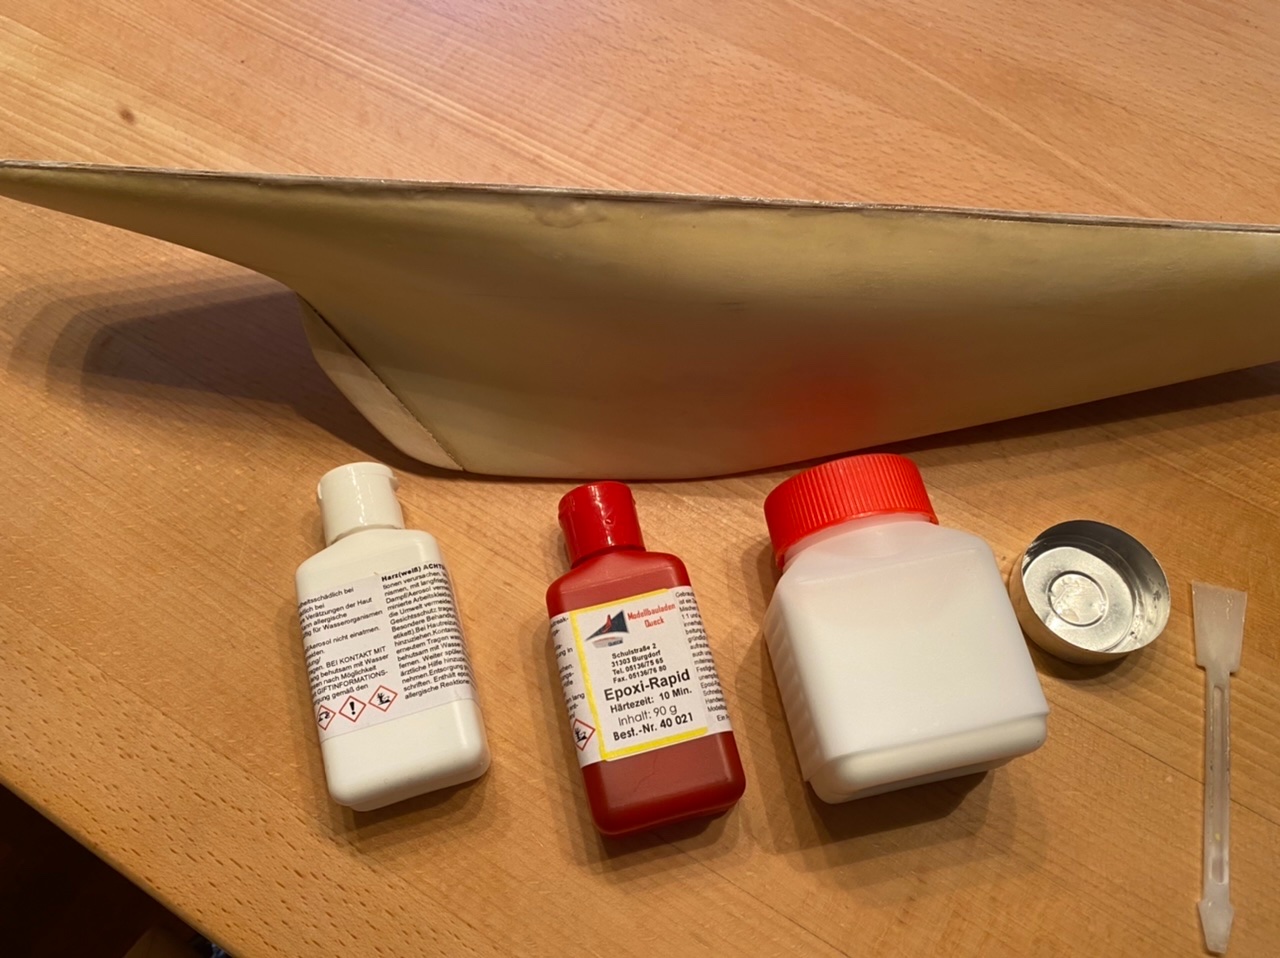
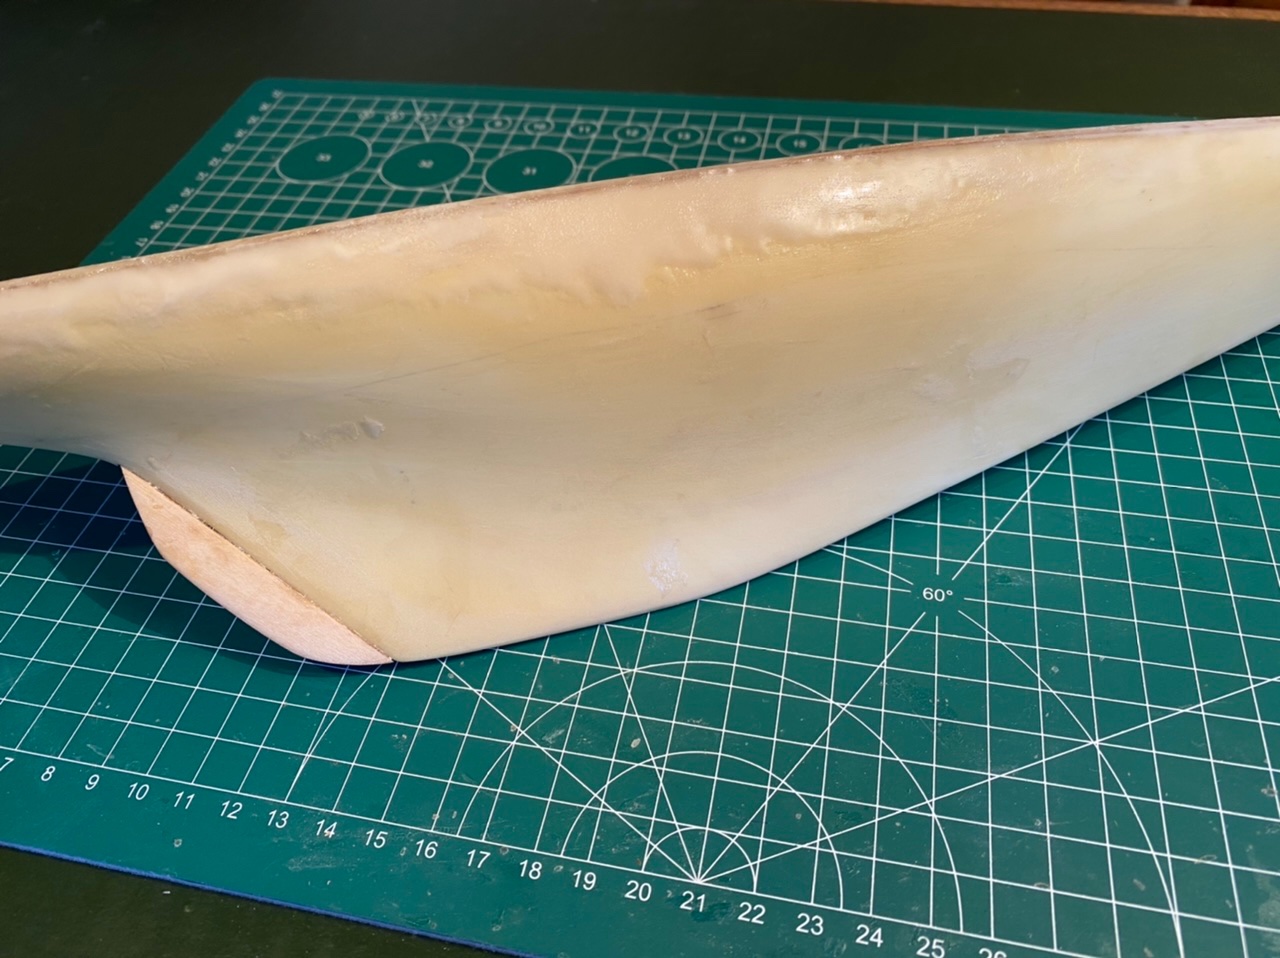
Hi, Nirvana, thanks for your reply. I‘m sorry you got me wrong. There are no bubbles in the epoxy. I used „microballons“, which is a filler to thicken the epoxy. That‘s what the guy at my model store advised me to use. The warp is already compensated, I didn‘t take any pictures, but it was somewhere between 5-10mm. I was also thinking about painting the hull first, but at least I didn‘t want to have any visible transition between hull and deck and I knew I would have to fill and sand the transition.
-
After finishing the deck I wanted to glue the deck on the hull but had to realize that it had warped significantly. The only explanation for this seemed to me that I used wood glue. So I first glued the stern and after complete drying the bow, fixing each with elastic band. As it still didn‘t fit properly I compensated it with epoxy resin, so called microballons (don’t know if this is the right term in english) and lots of sanding. Probably some of you might give me a note what the reasons for the warp could have been.
-
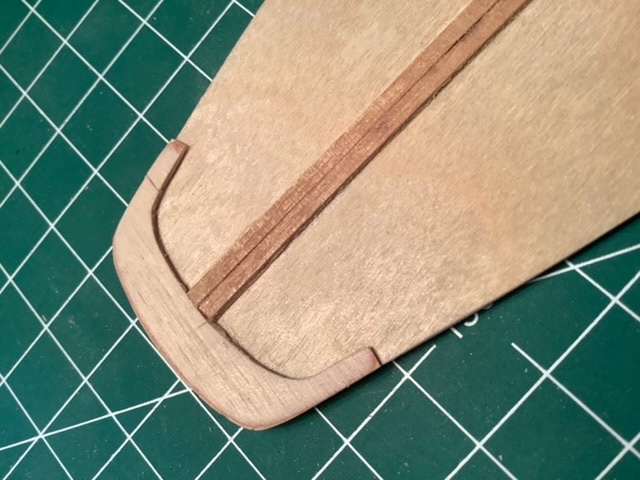
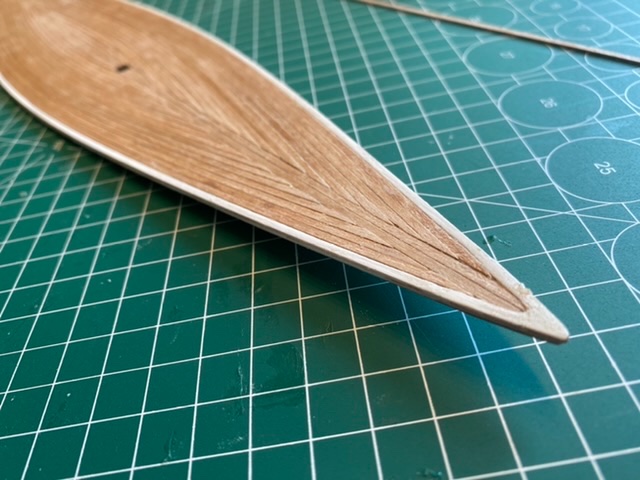
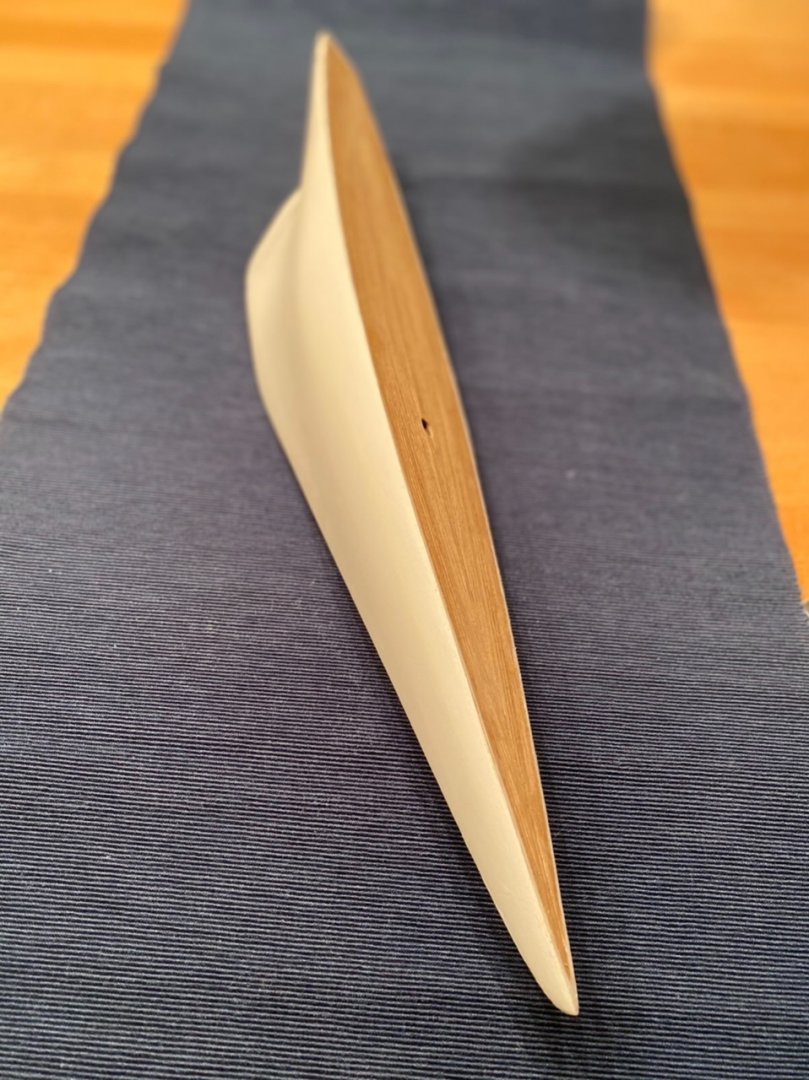
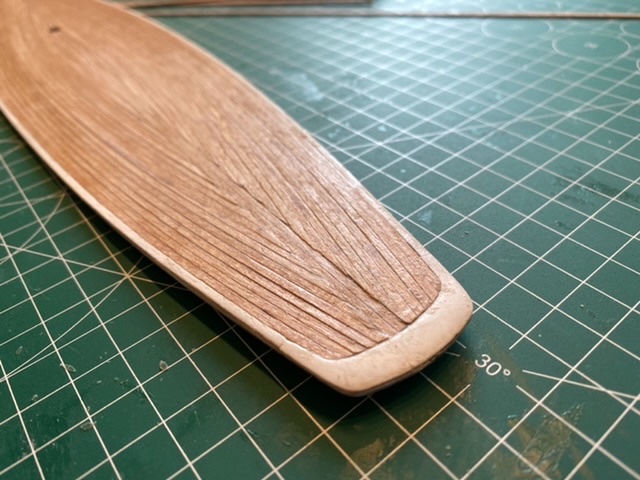
Dear forum members, I‘m a newbie both in this forum and in building models as well. I‘d like to tell you about my first approaches as well as asking for some tipps. When my wife had the idea that two sailboats would be a nice decoration I bought a ready assembled model of a J Class Yacht and was totally disappointed about the poor quality. So I found the kits of Amati‘s Rainbow with a resin hull and Endeavour with a wooden hull. With a first glance at the pieces I began to foresee on which adventure I had embarked. I hope you don‘t say „oh no, not another Amati J Class kit“! Since I wanted t o have a good edging of the deck, I built a bow and stern on my own and painted it in white together with the outer deck planks. After that the further planking with a scalpel and 600 sandpaper. Unfortunately I was not able to fit it together absolutely mirror-inverted.


-
Dear forum members, I‘m a newbie both in this forum and in building models as well. I‘d like to tell you about my first approaches as well as asking for some tipps. When my wife had the idea that two sailboats would be a nice decoration I bought a ready assembled model of a J Class Yacht and was totally disappointed about the poor quality. So I found the kits of Amati‘s Rainbow with a resin hull and Endeavour with a wooden hull. With a first glance at the pieces I began to foresee on which adventure I had embarked. I hope you don‘t say „oh no, not another Amati J Class kit“! Since I wanted t o have a good edging of the deck, I built a bow and stern on my own and painted it in white together with the outer deck planks. After that the further planking with a scalpel and 600 sandpaper. Unfortunately I was not able to fit it together absolutely mirror-inverted.