Punxsutawney_Phil
-
Posts
9 -
Joined
-
Last visited
-
 Rudolf reacted to a post in a topic:
Thermopylae by Punxsutawney_Phil - Sergal - 1:124 - first build
Rudolf reacted to a post in a topic:
Thermopylae by Punxsutawney_Phil - Sergal - 1:124 - first build
-
Rudolf reacted to a post in a topic:
Thermopylae by Punxsutawney_Phil - Sergal - 1:124 - first build
-
Rudolf reacted to a post in a topic:
Thermopylae by Punxsutawney_Phil - Sergal - 1:124 - first build
-
Rudolf reacted to a post in a topic:
Thermopylae by Punxsutawney_Phil - Sergal - 1:124 - first build
-
Thanks for the advice. I will look into it. Let‘s see if I can find something for Apple machines…
-
Punxsutawney_Phil reacted to a post in a topic:
Thermopylae by Punxsutawney_Phil - Sergal - 1:124 - first build
-
 Punxsutawney_Phil reacted to a post in a topic:
Thermopylae by Punxsutawney_Phil - Sergal - 1:124 - first build
Punxsutawney_Phil reacted to a post in a topic:
Thermopylae by Punxsutawney_Phil - Sergal - 1:124 - first build
-
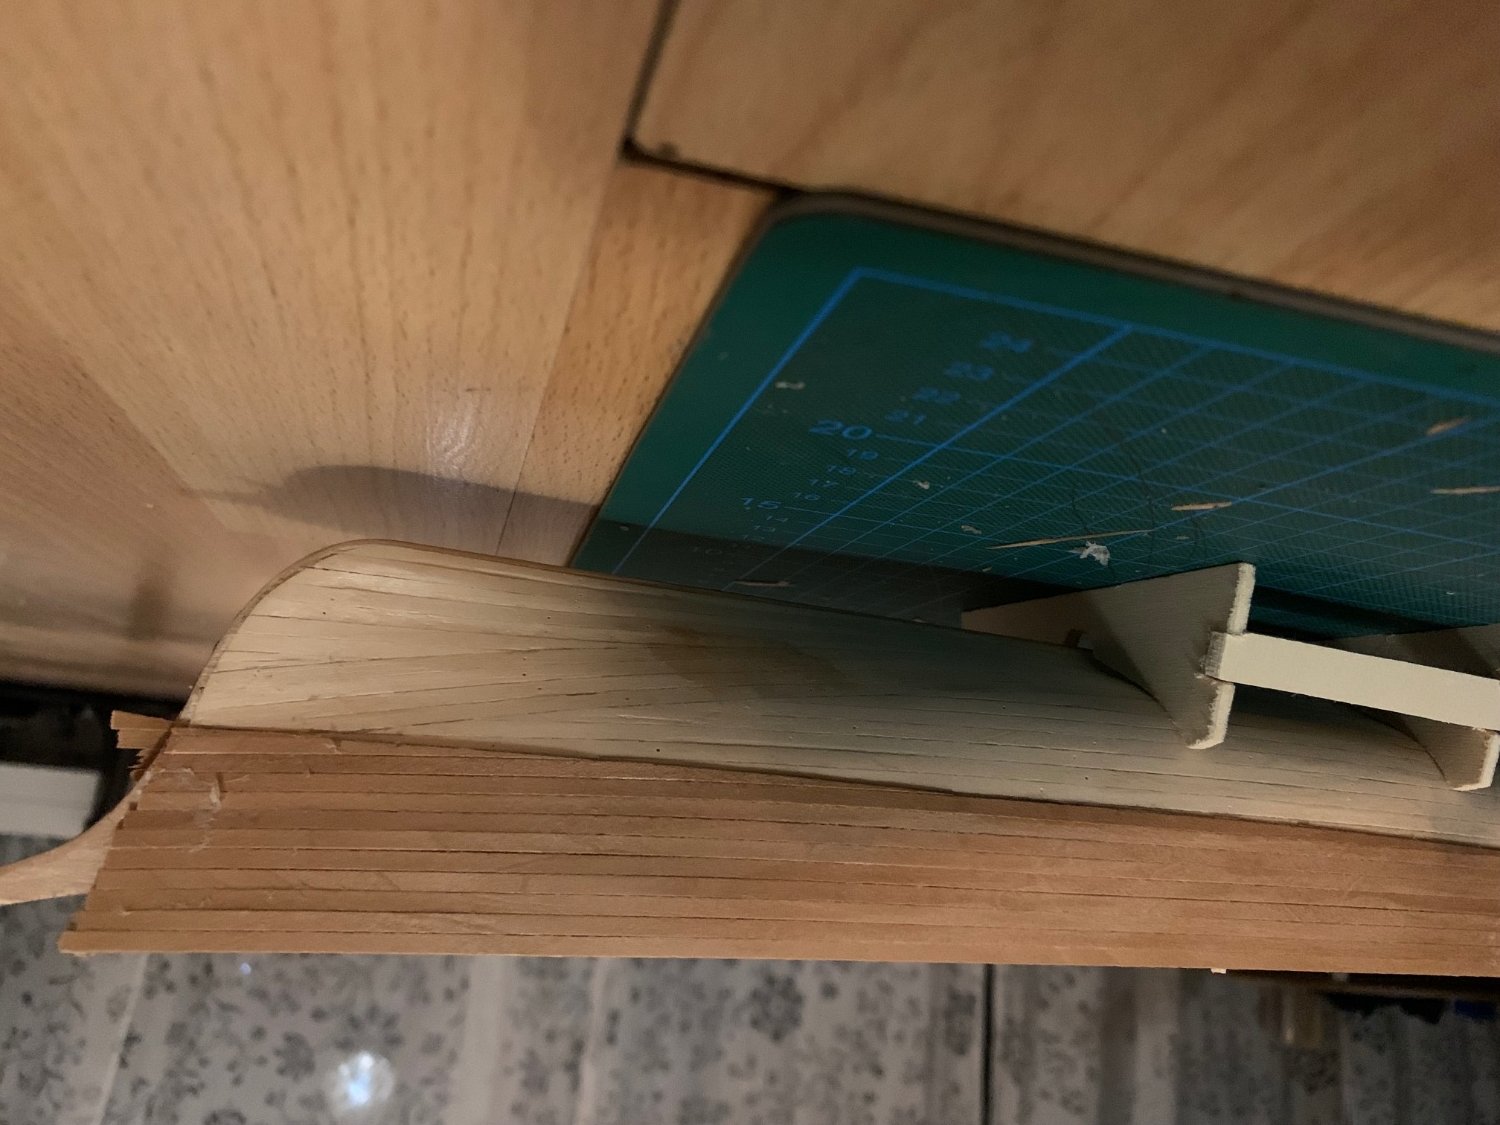
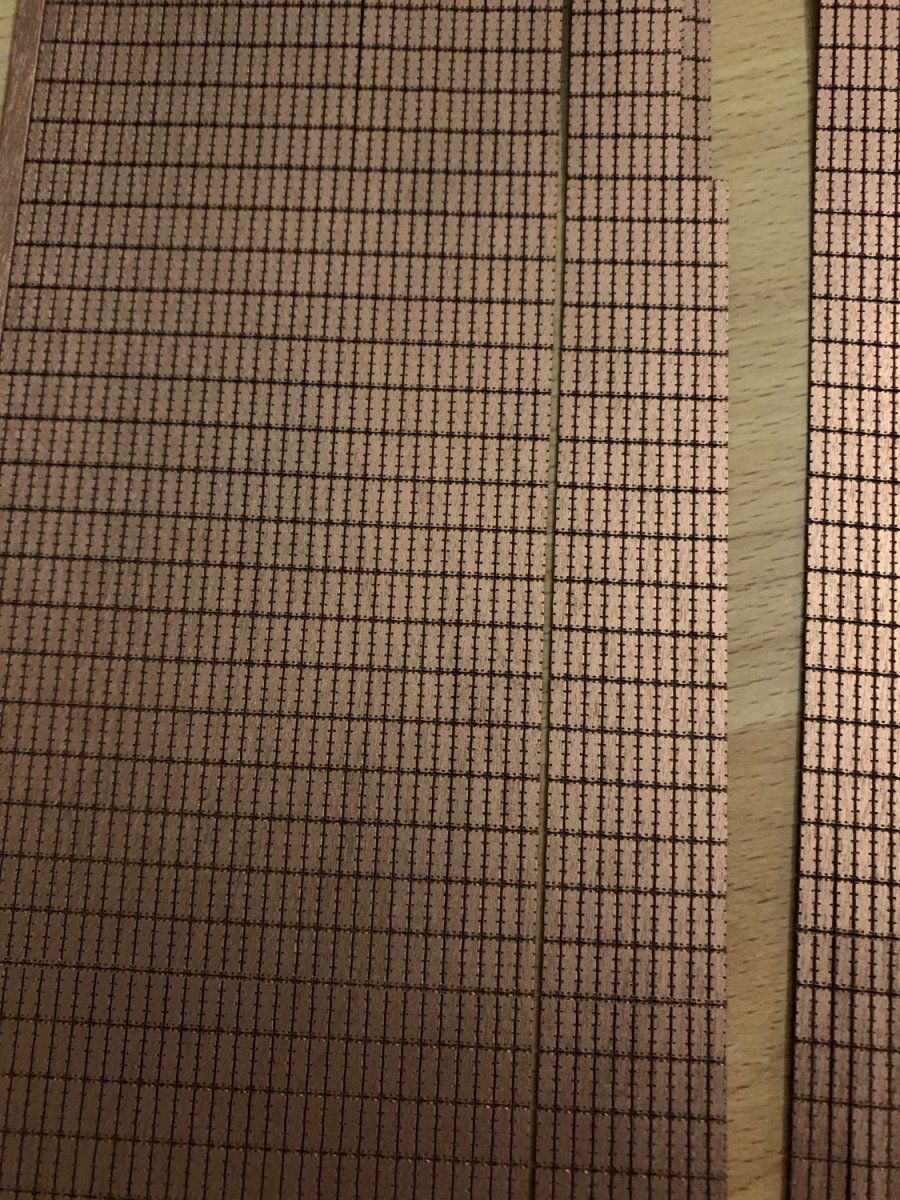
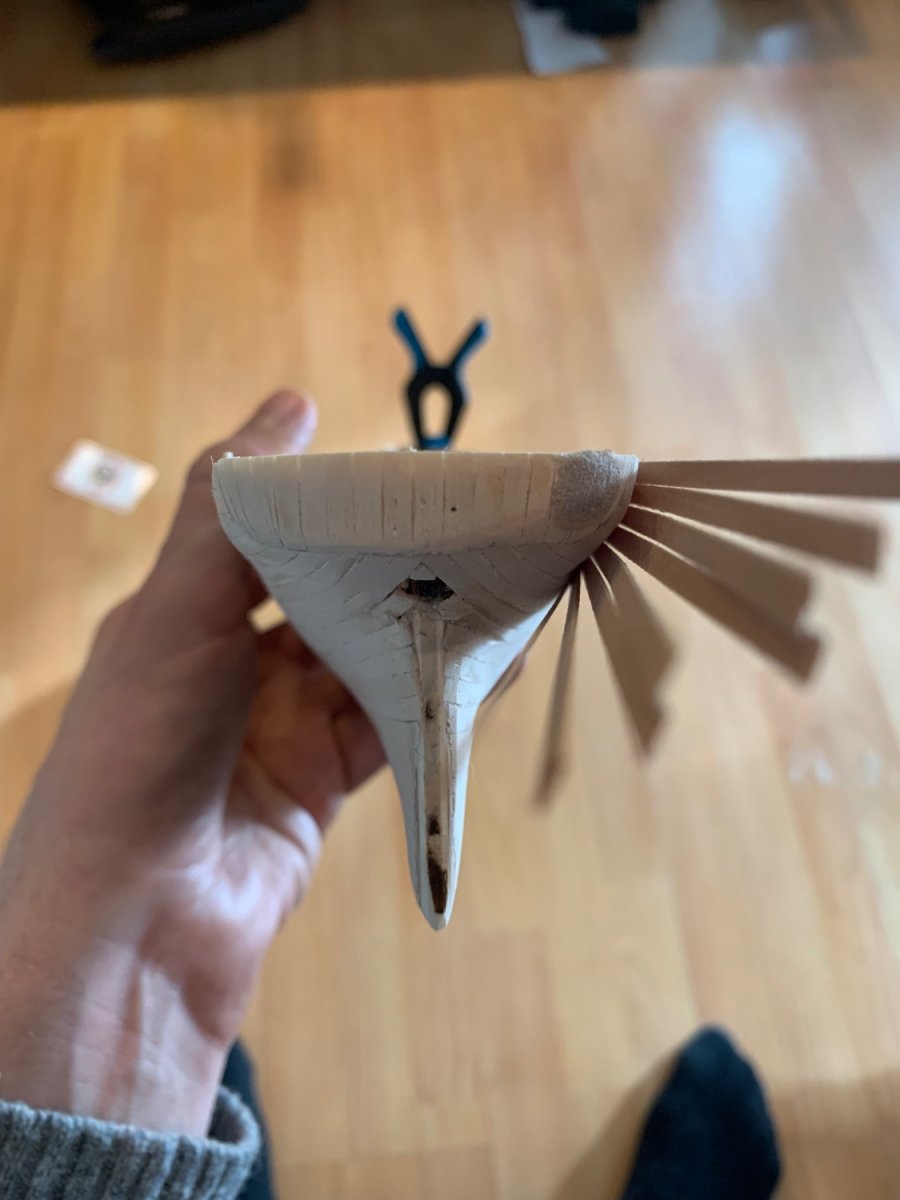
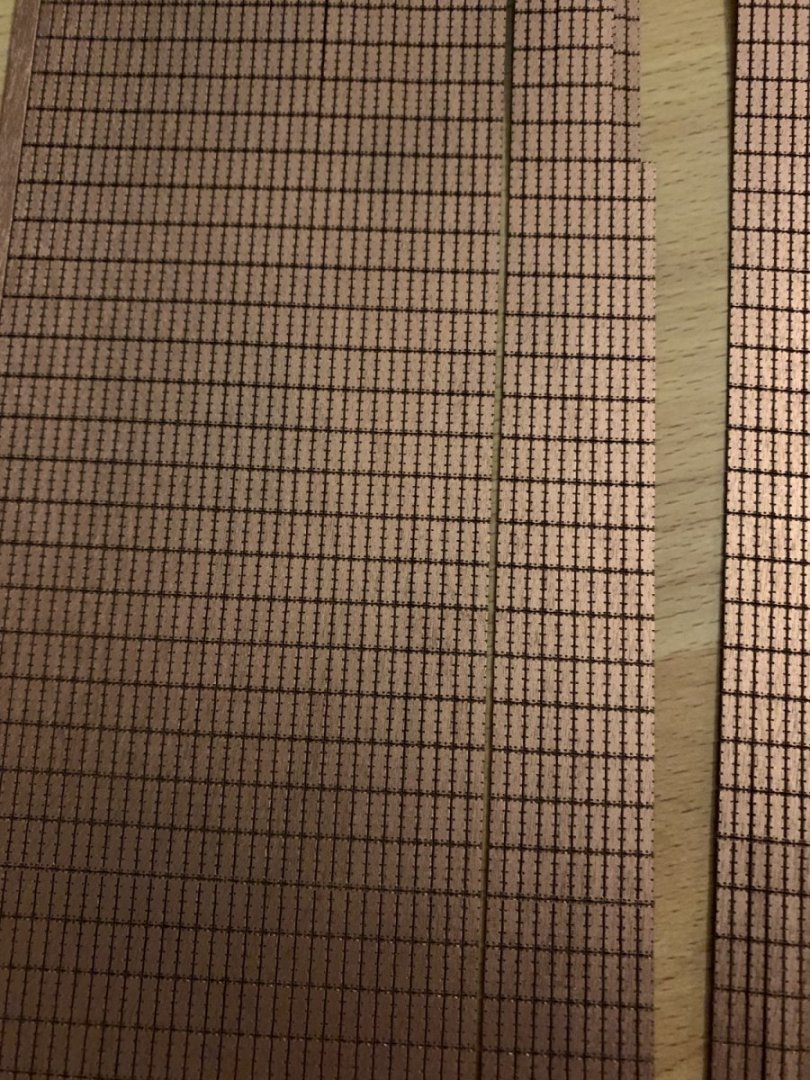
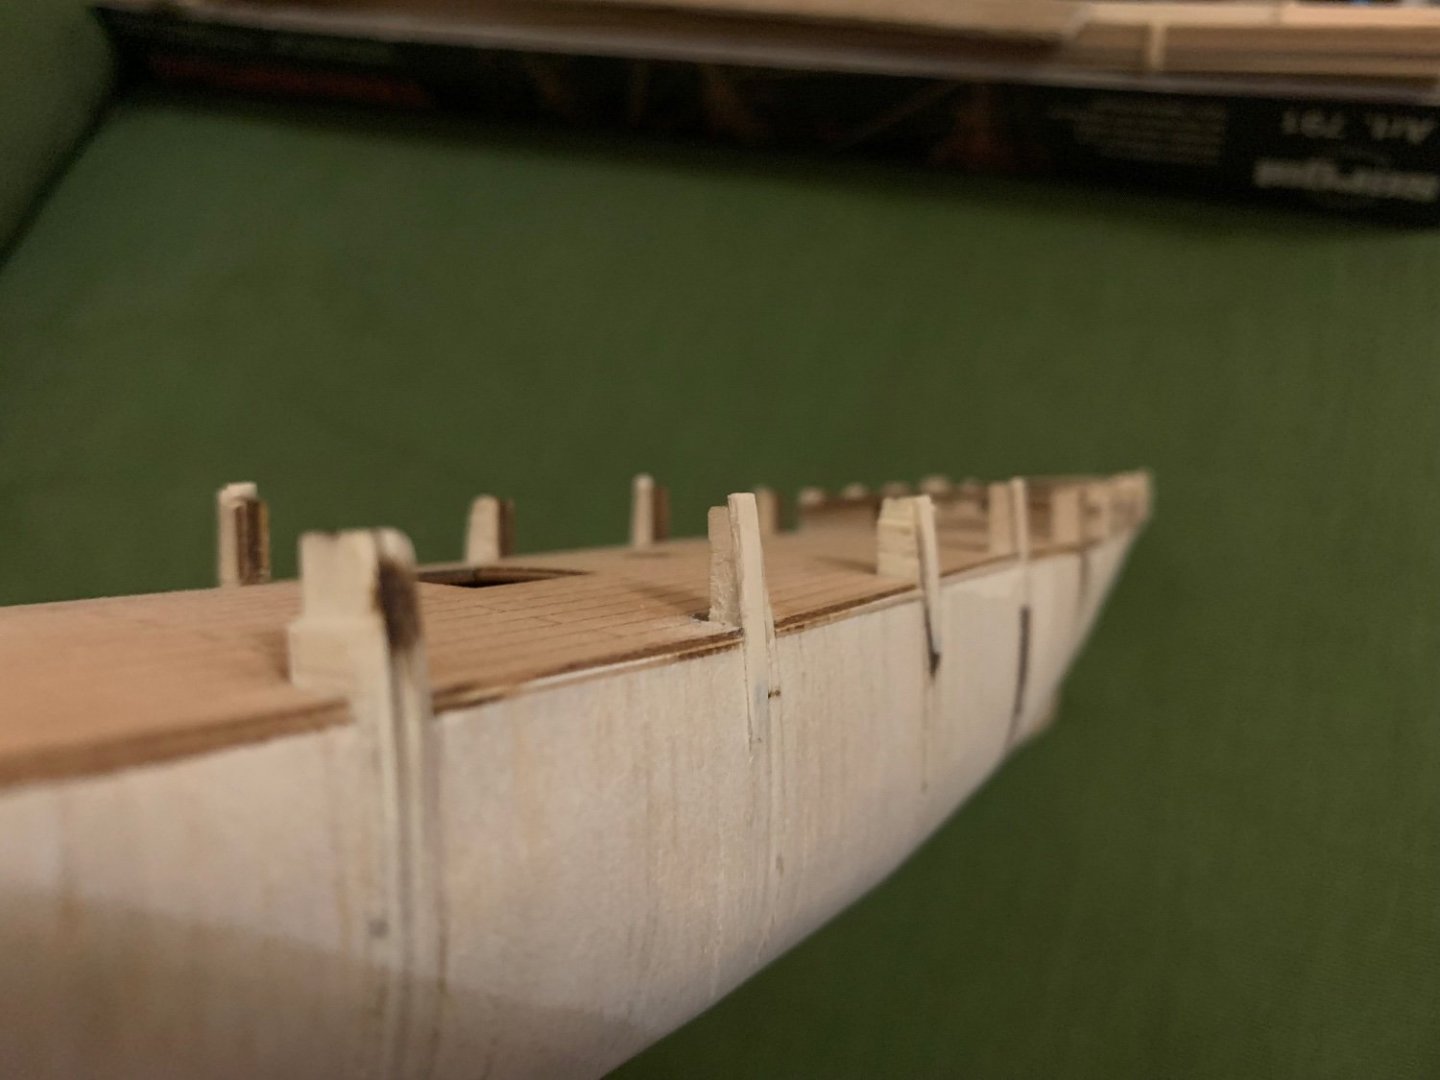
I found the link to a model made by Cyril Hume to get inspired by. https://collection.maas.museum/object/211834 I built a little jig to mark a line above the waterline where the copper plates will join the second layer of planking. I don't know why the pictures are the wrong way around. They're fine on my computer... The last one is of the copper imitation. I still have to figure out how to apply it to the hull properly. You can break it down into single plates. I would prefer to keep the strips intact though. Don't know how to bring it around the curves with a snug fit und not too large gaps in between.

- 12 replies
-
- 1
-
-
- Thermopylae
- Sergal
- (and 2 more)
-
ccoyle reacted to a post in a topic:
Thermopylae by Punxsutawney_Phil - Sergal - 1:124 - first build
-
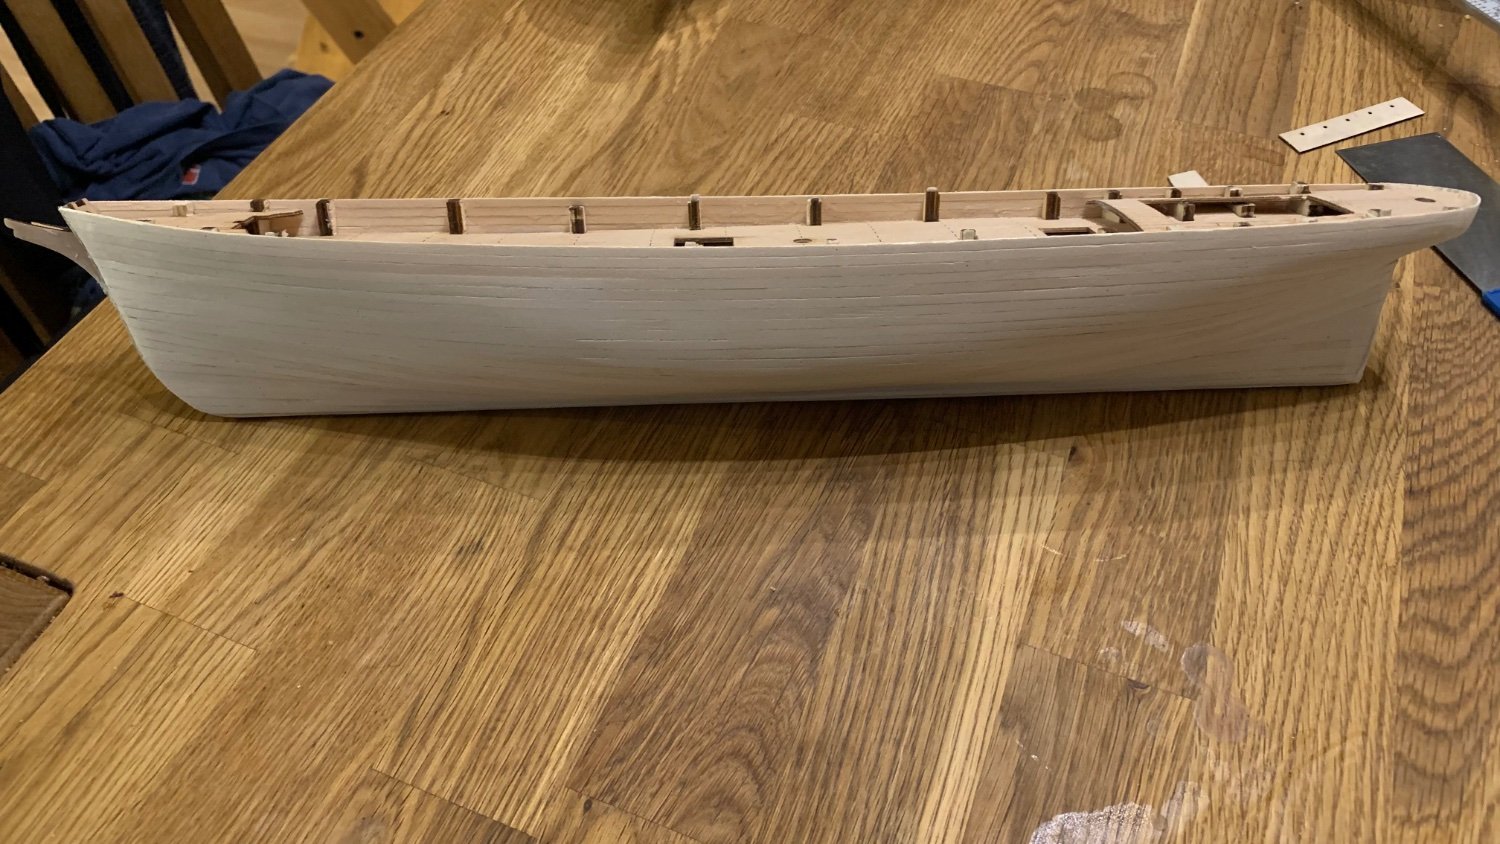
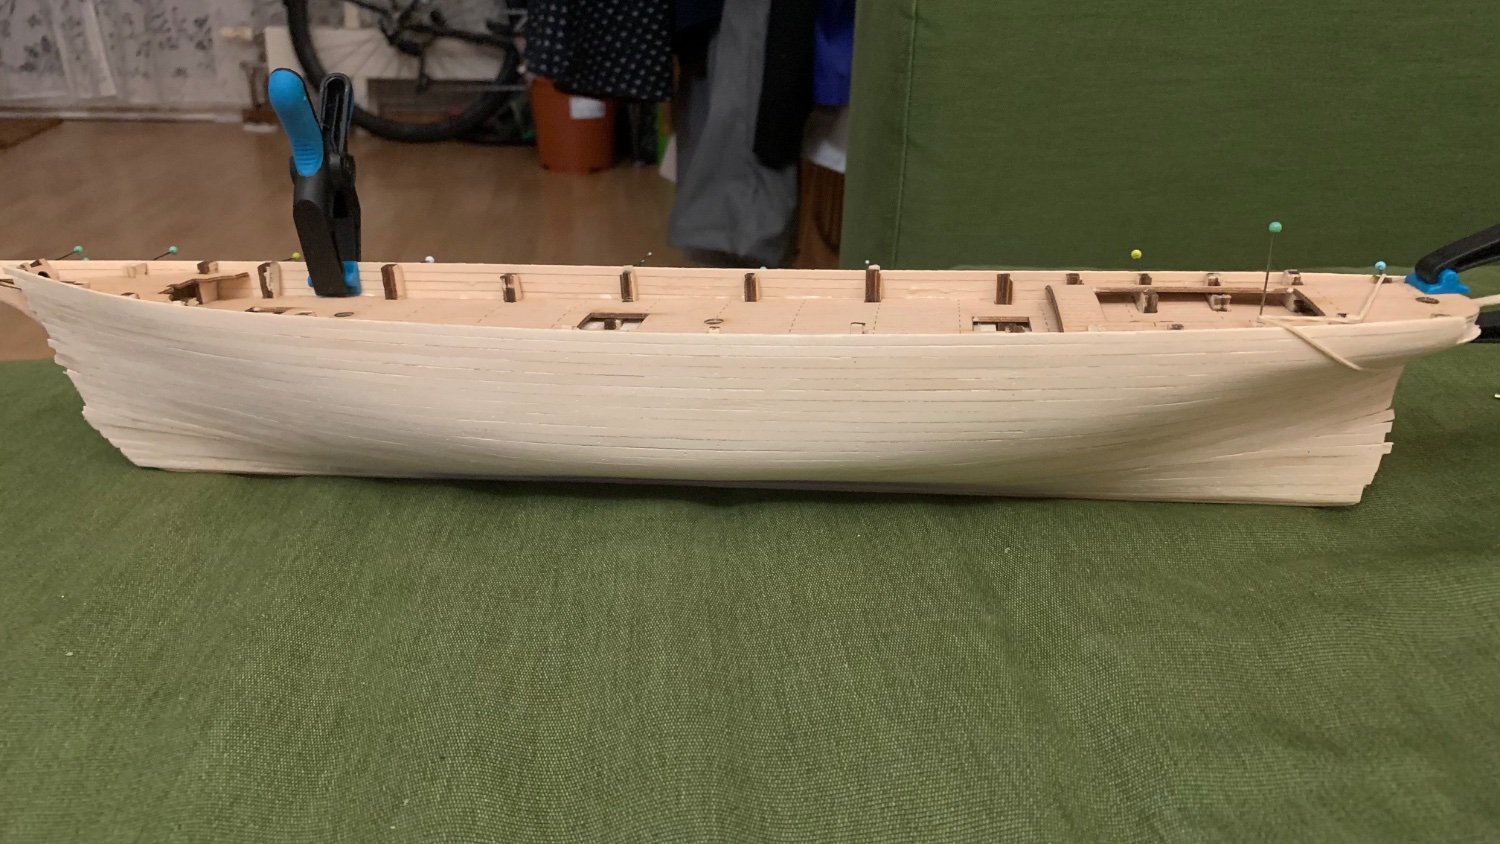
I did some research on how I would paint the hull once it would be finished. I stumbled across the copper plating the original ships had. I found a copper imitation that seems to be in scale and bought it. Since it would stick out too far over the hull I'll have to add a second layer of planks after all. The birch planks above the deck can use some stiffening up too, so it makes sense.


- 12 replies
-
- 2
-
-
- Thermopylae
- Sergal
- (and 2 more)
-
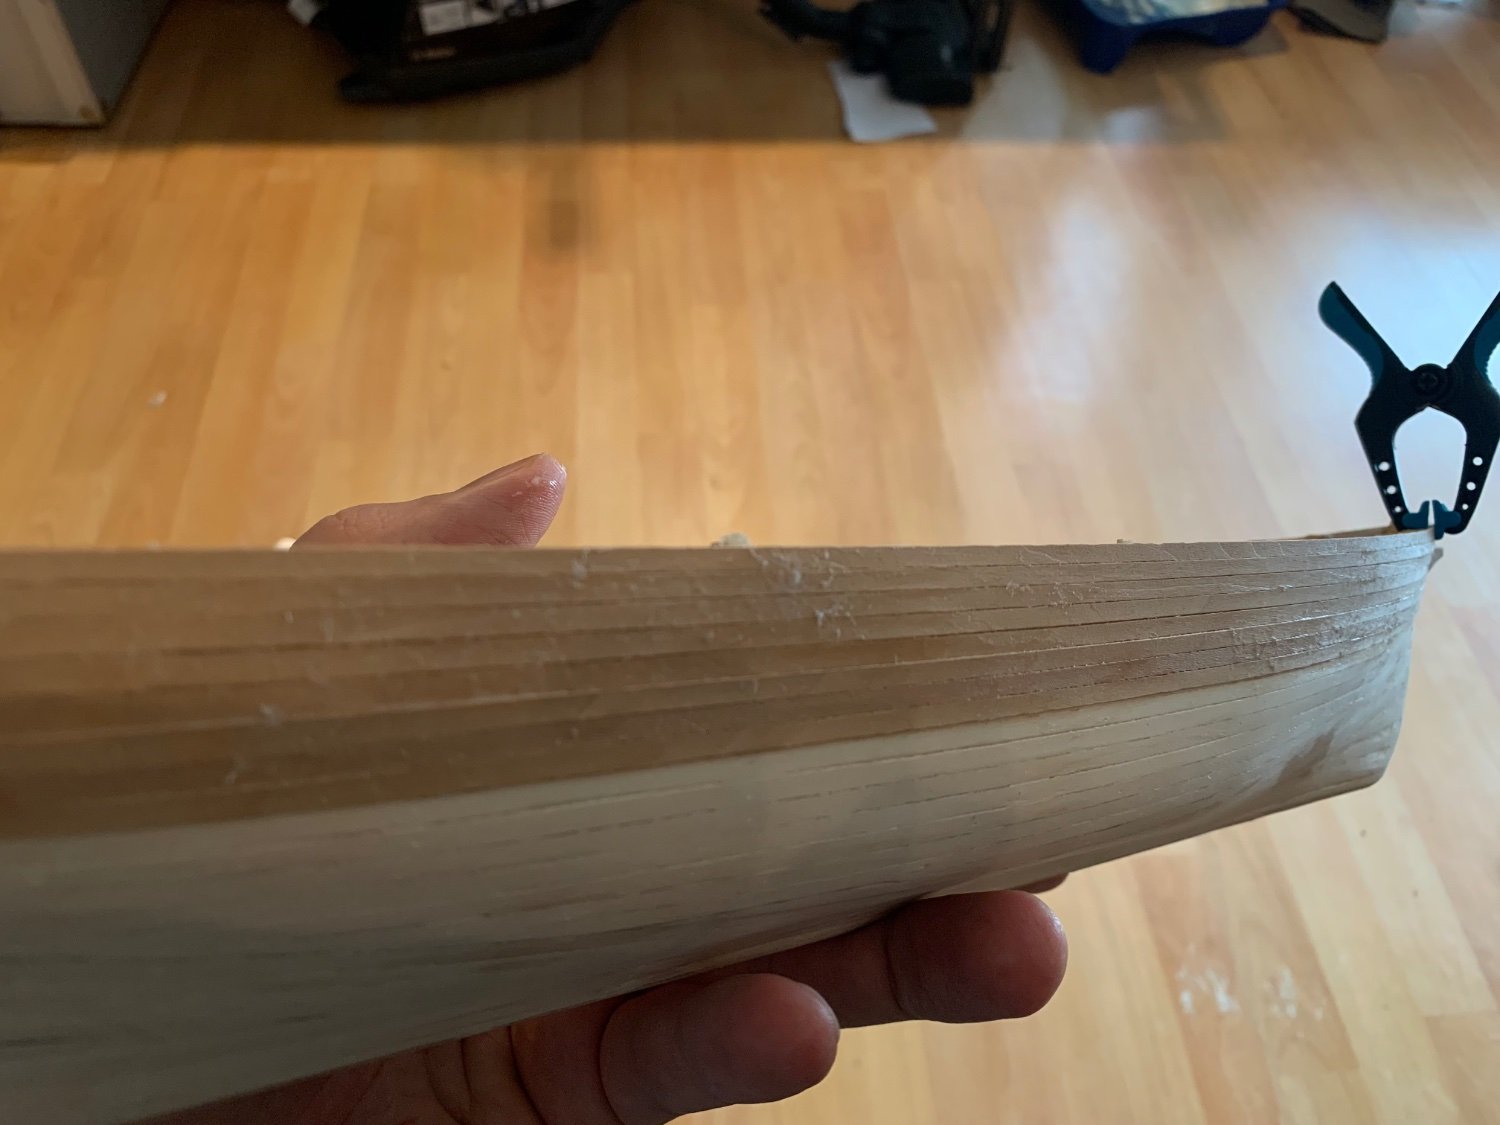
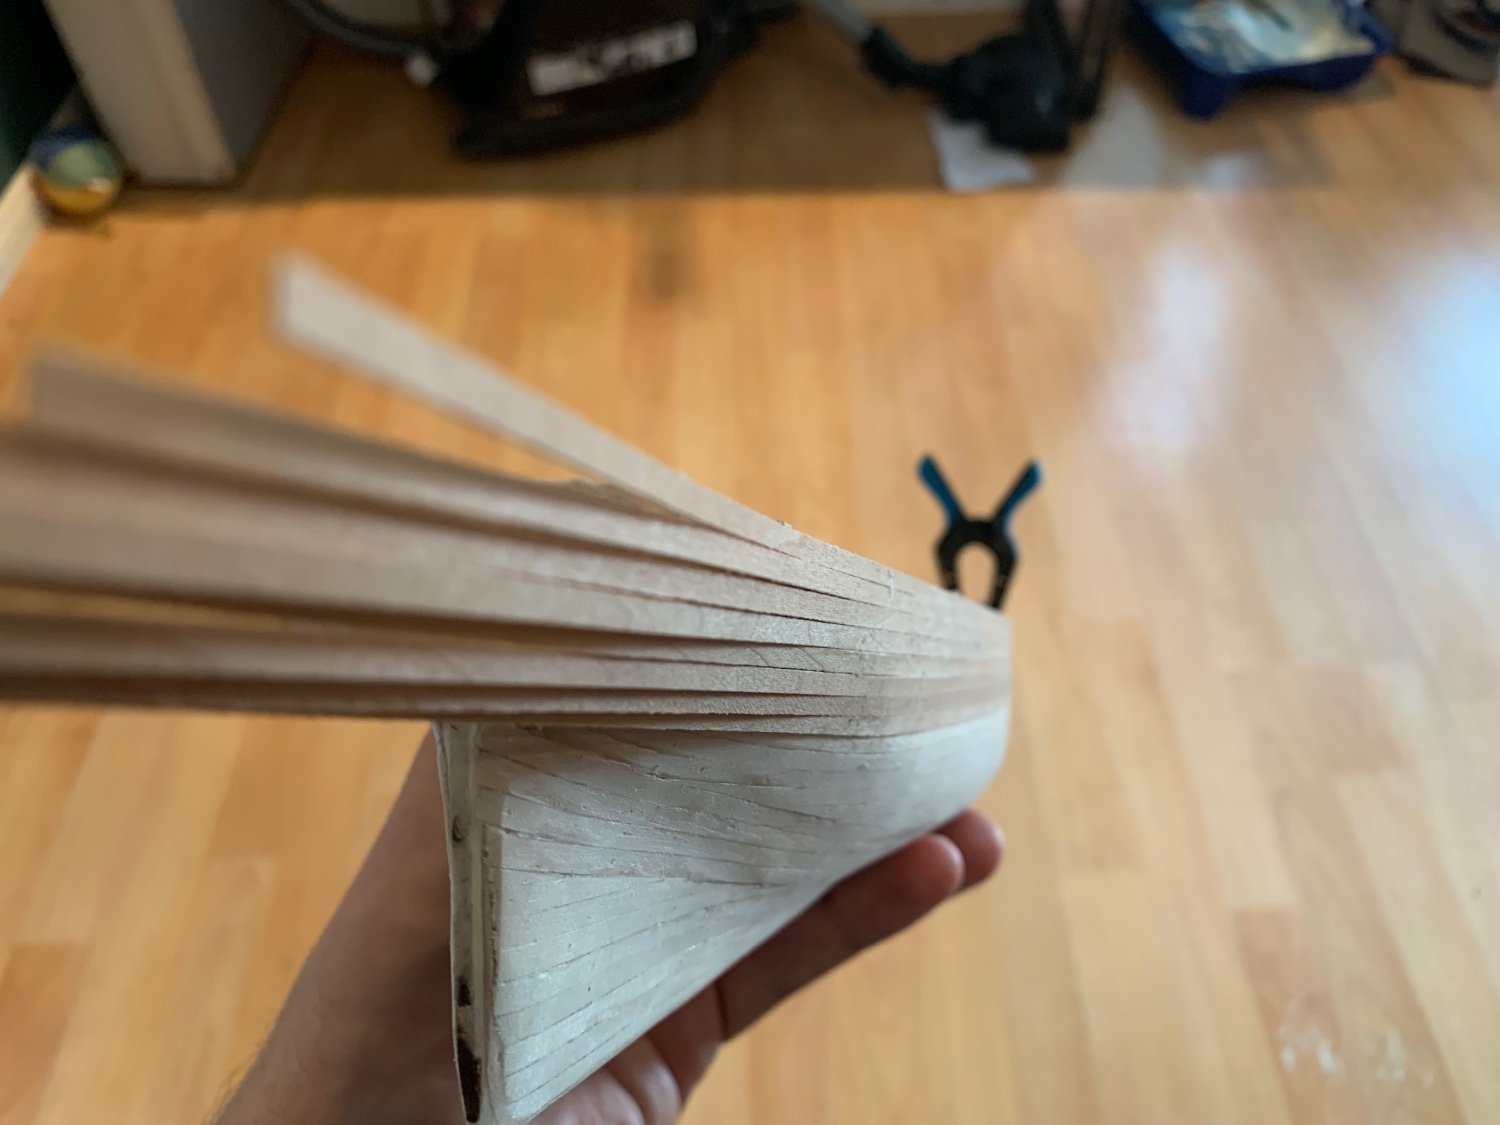
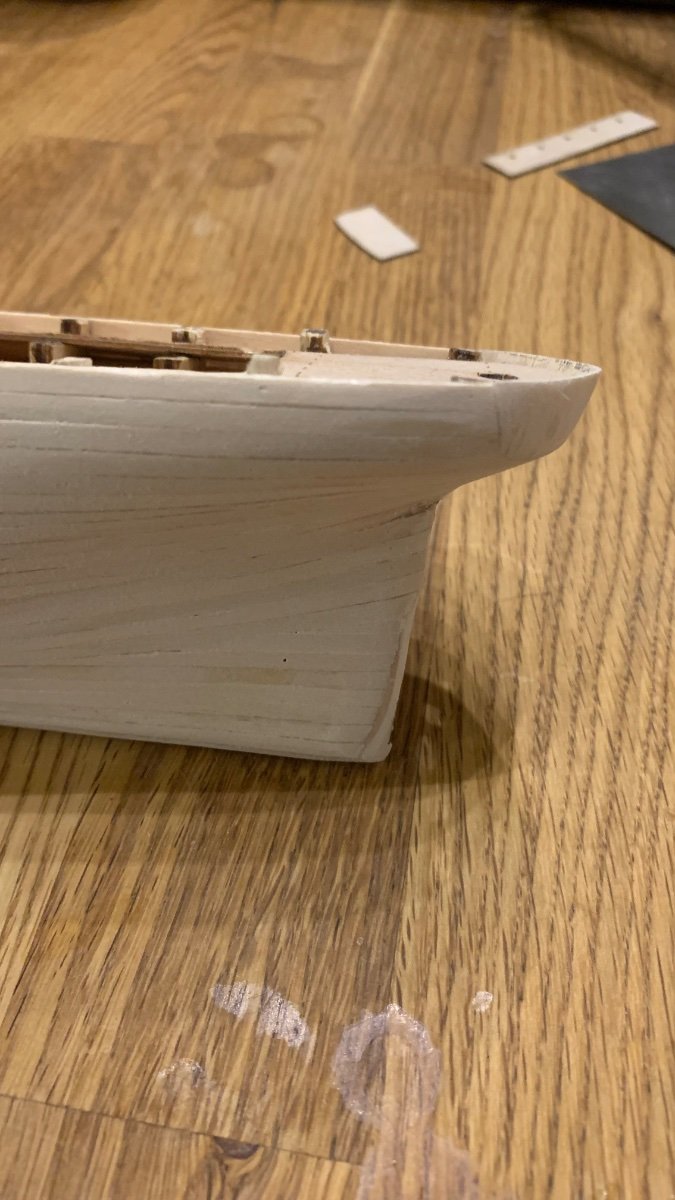
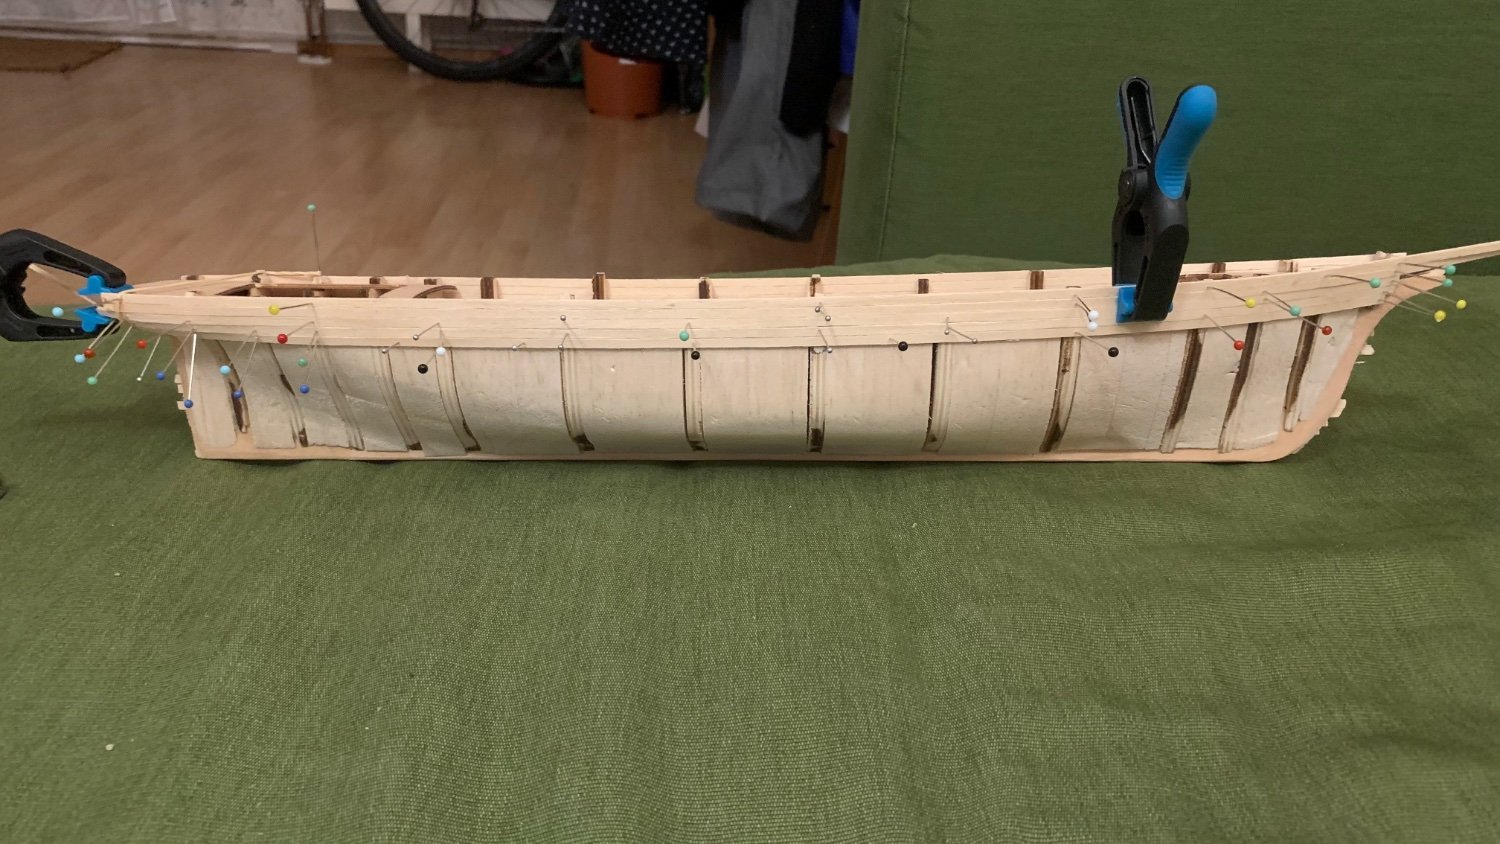
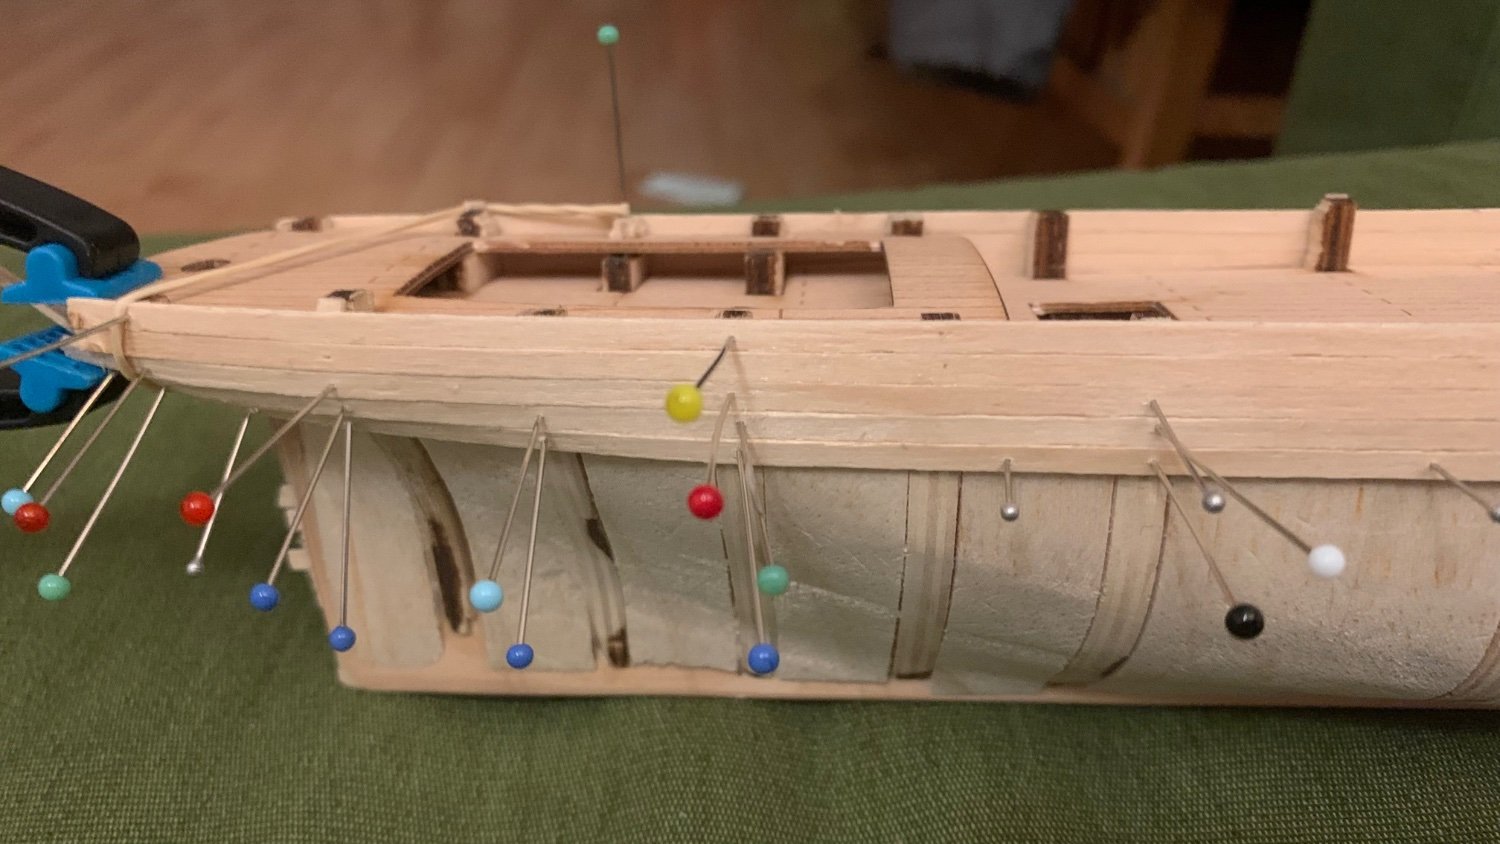
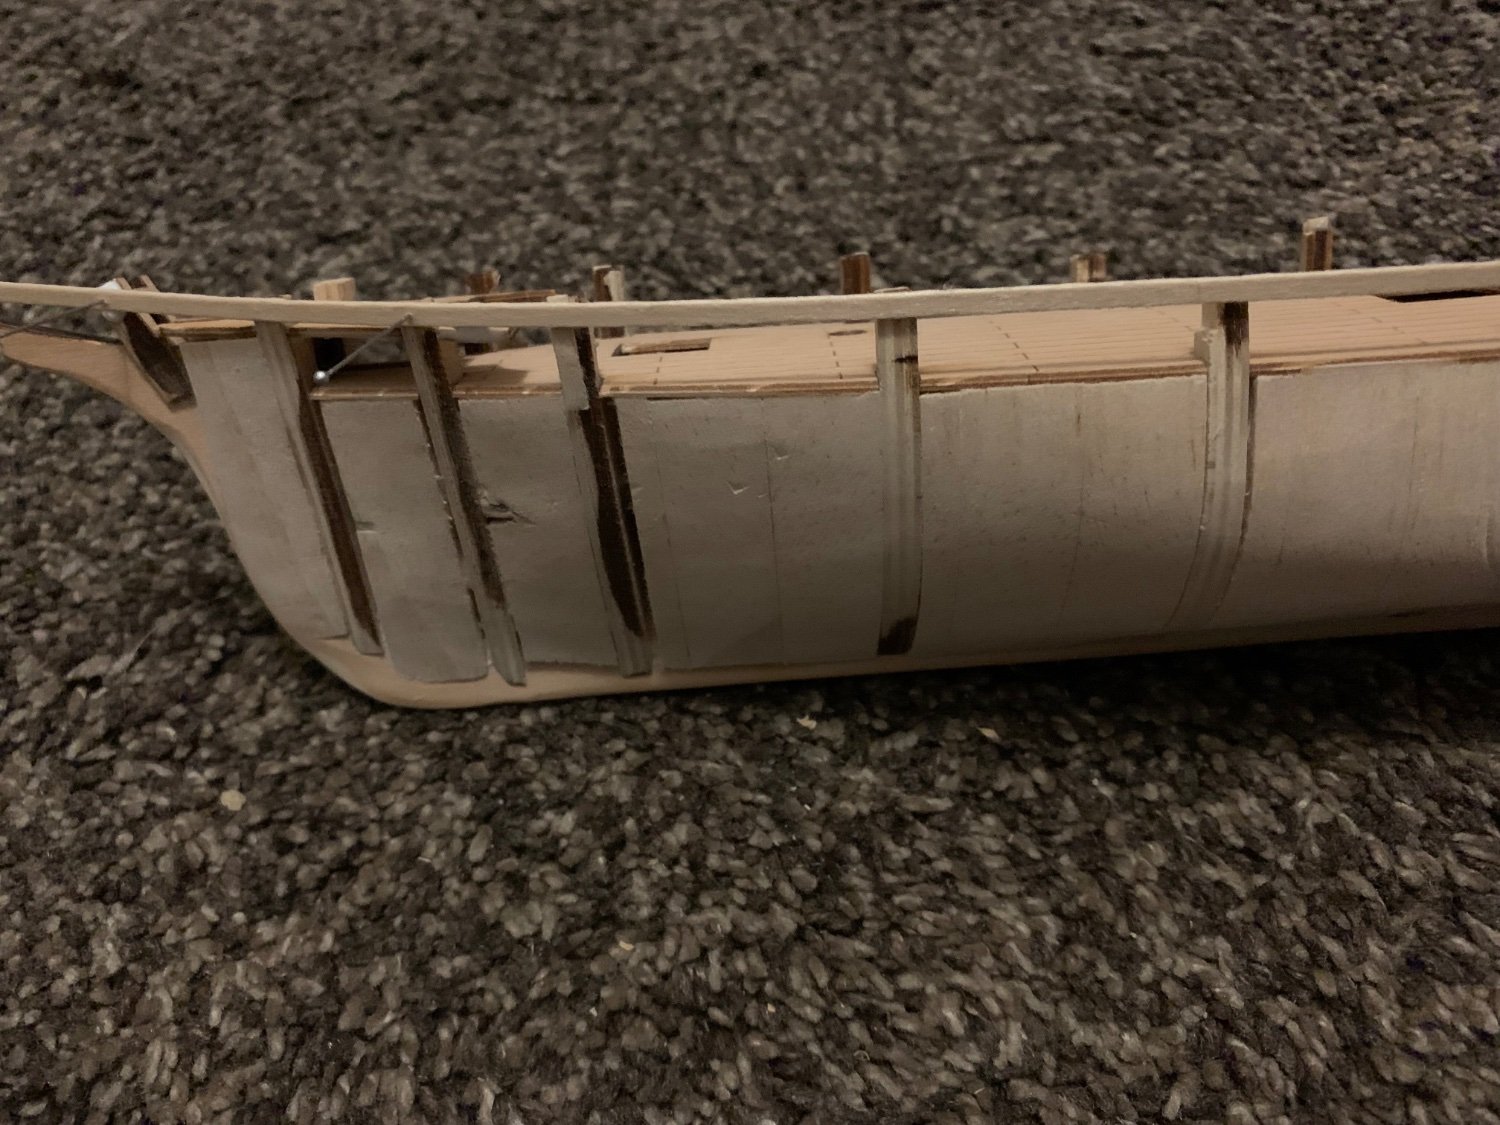
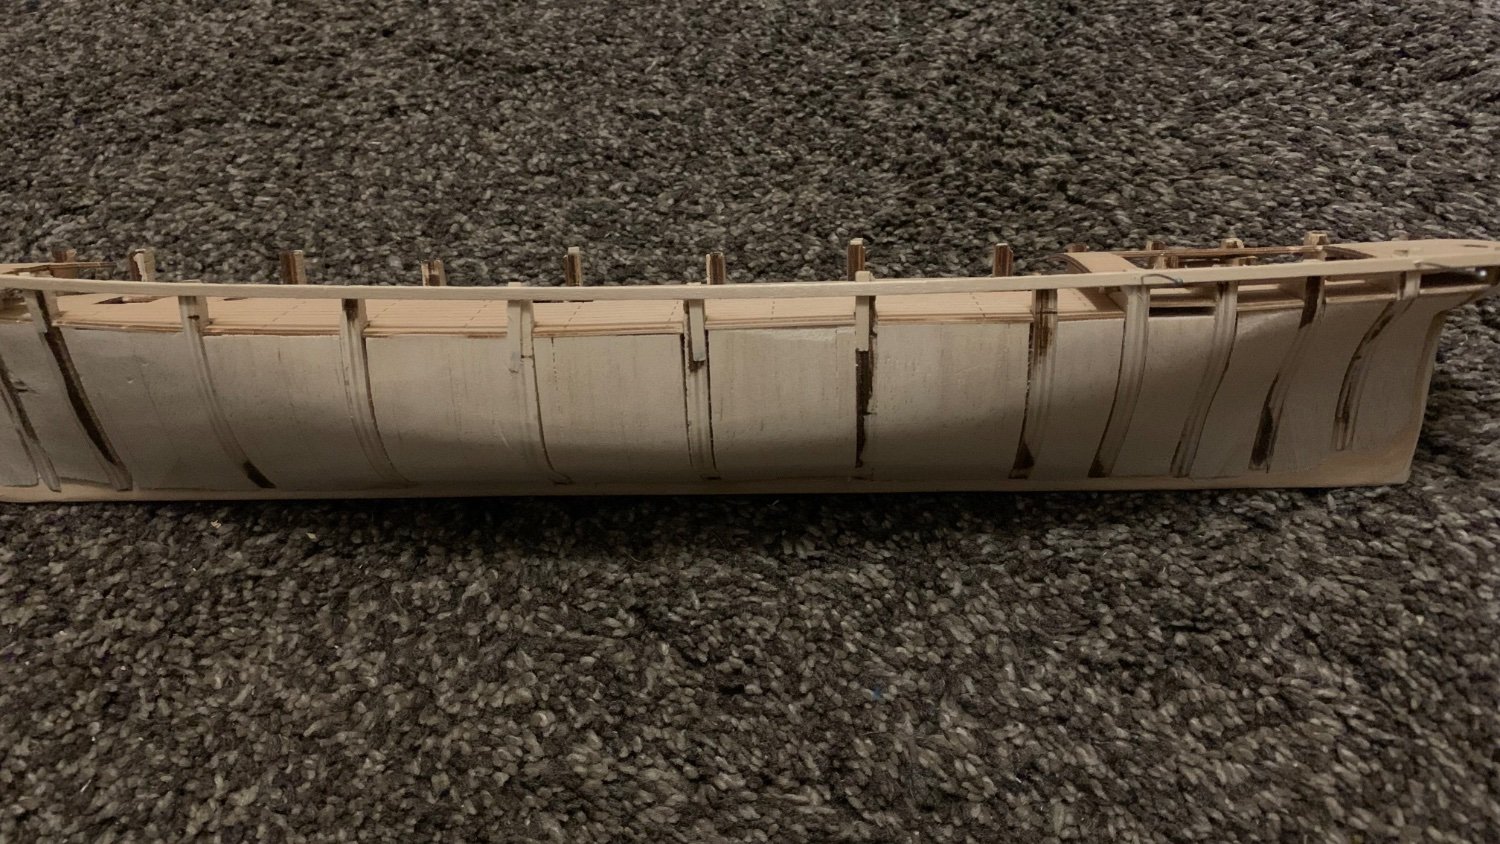
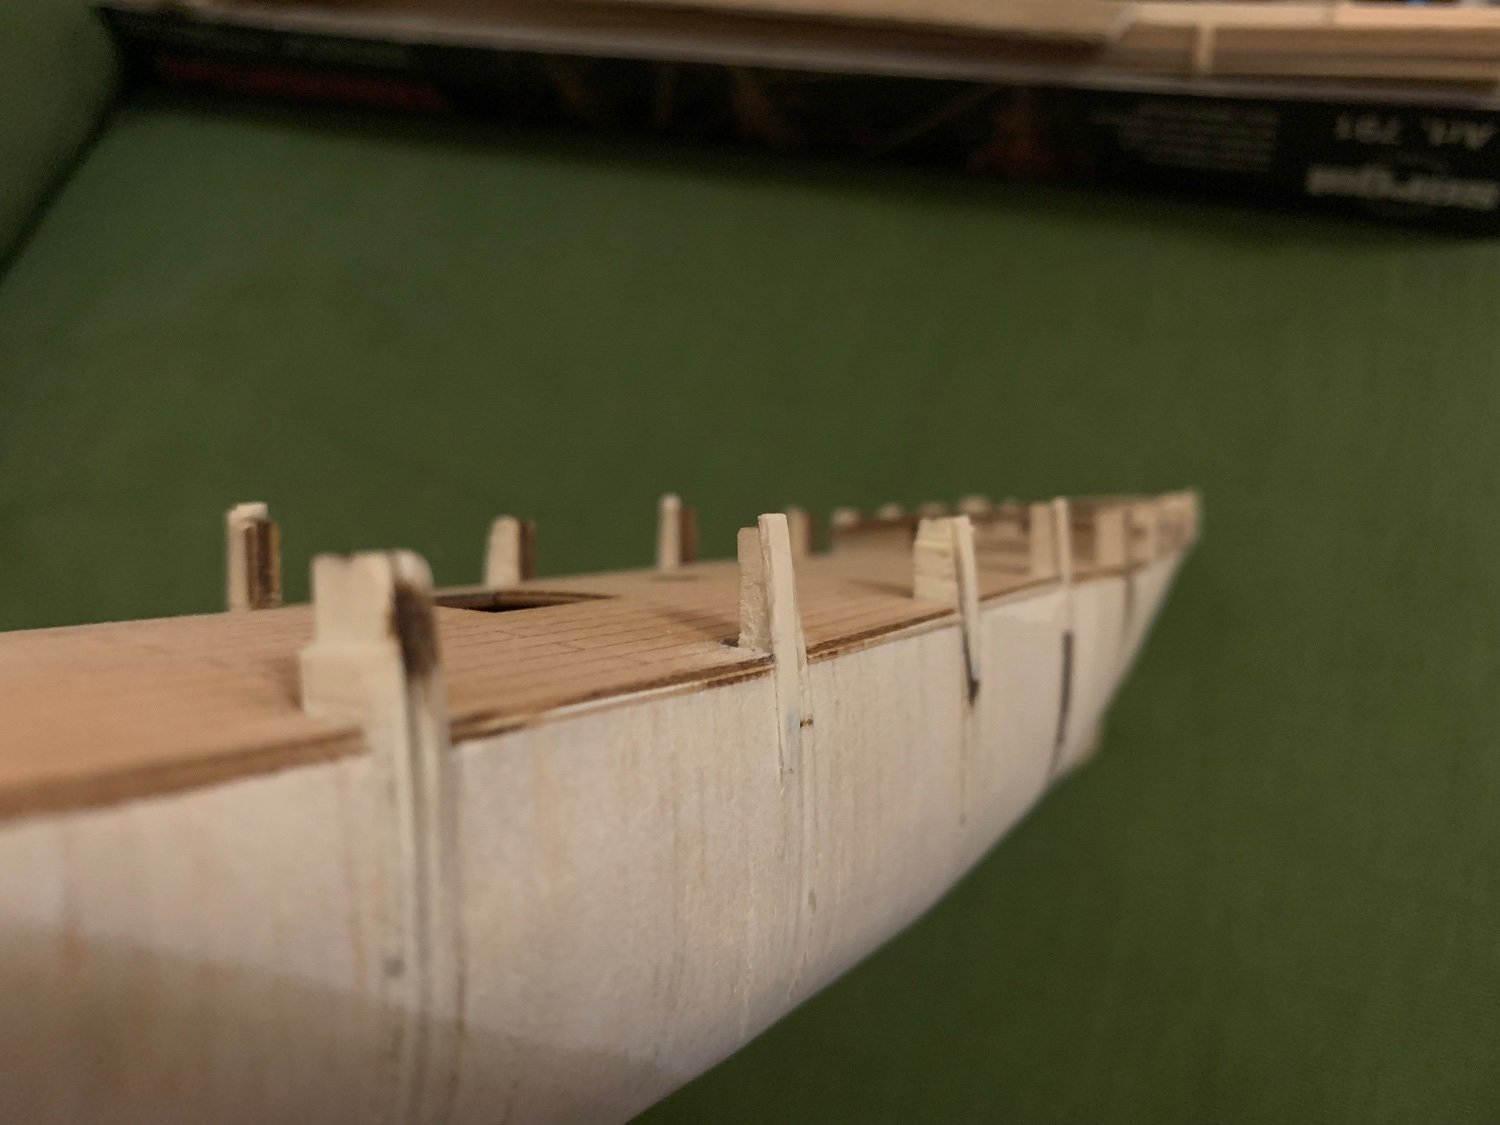
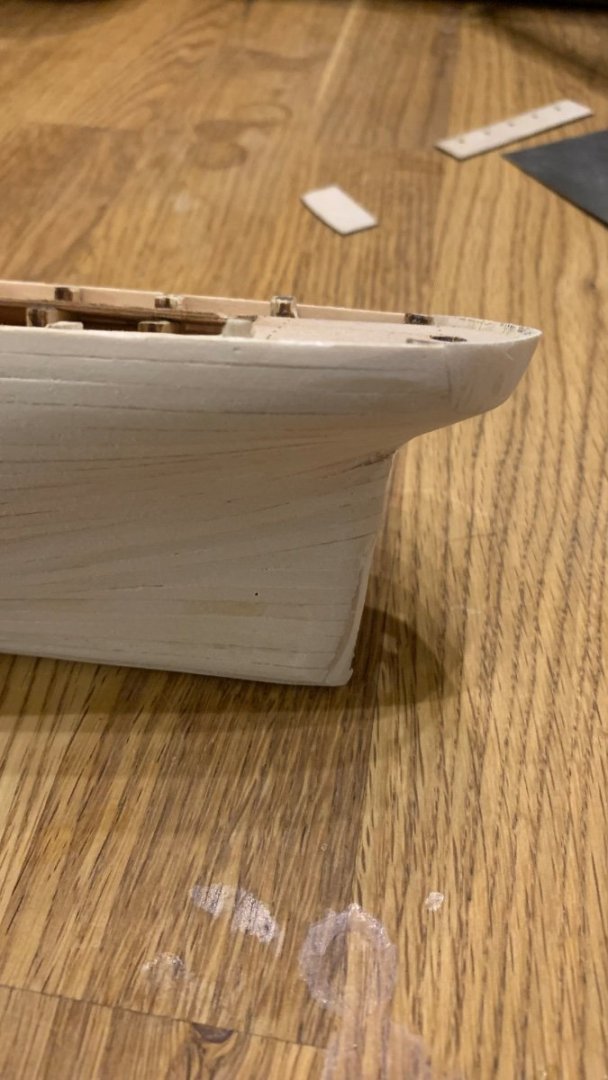
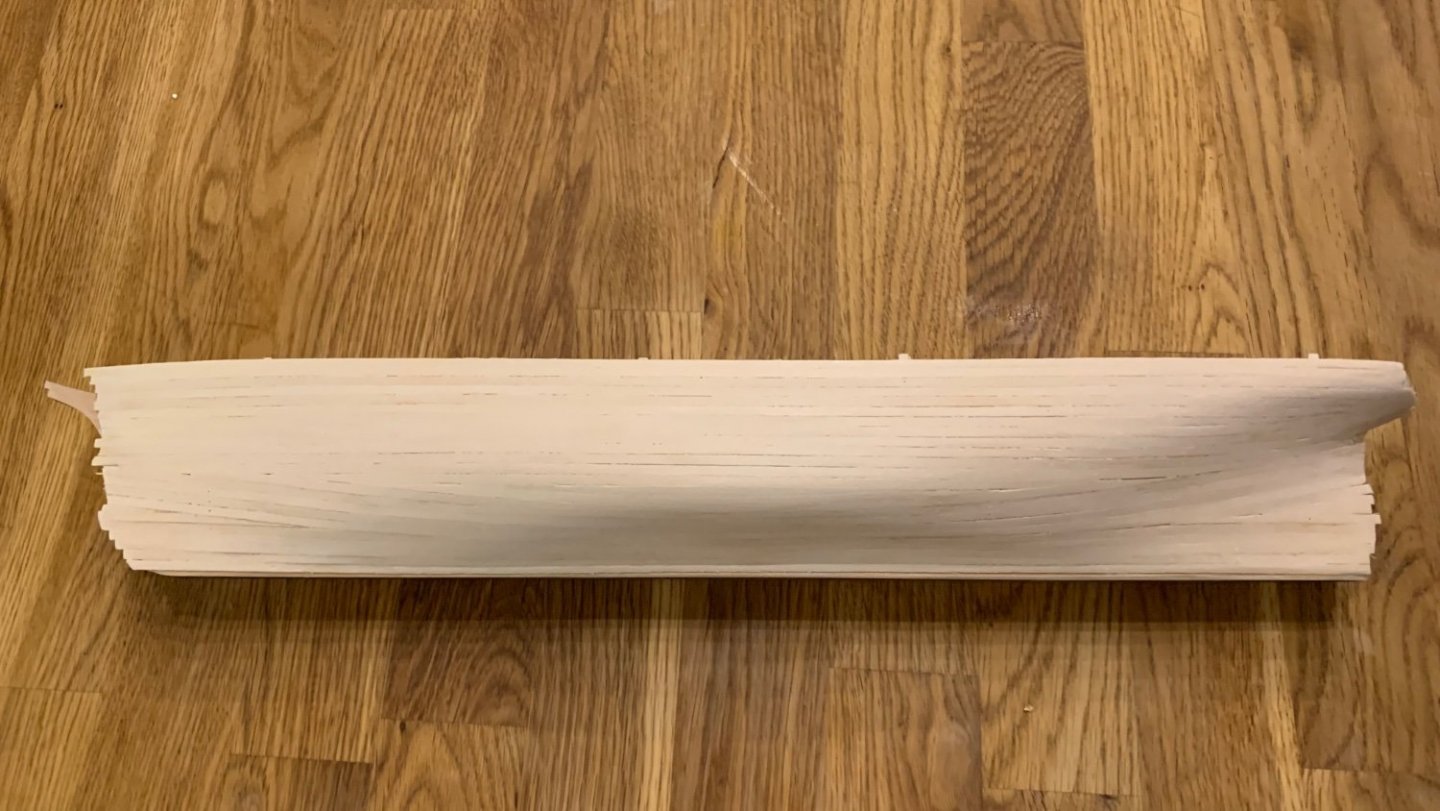
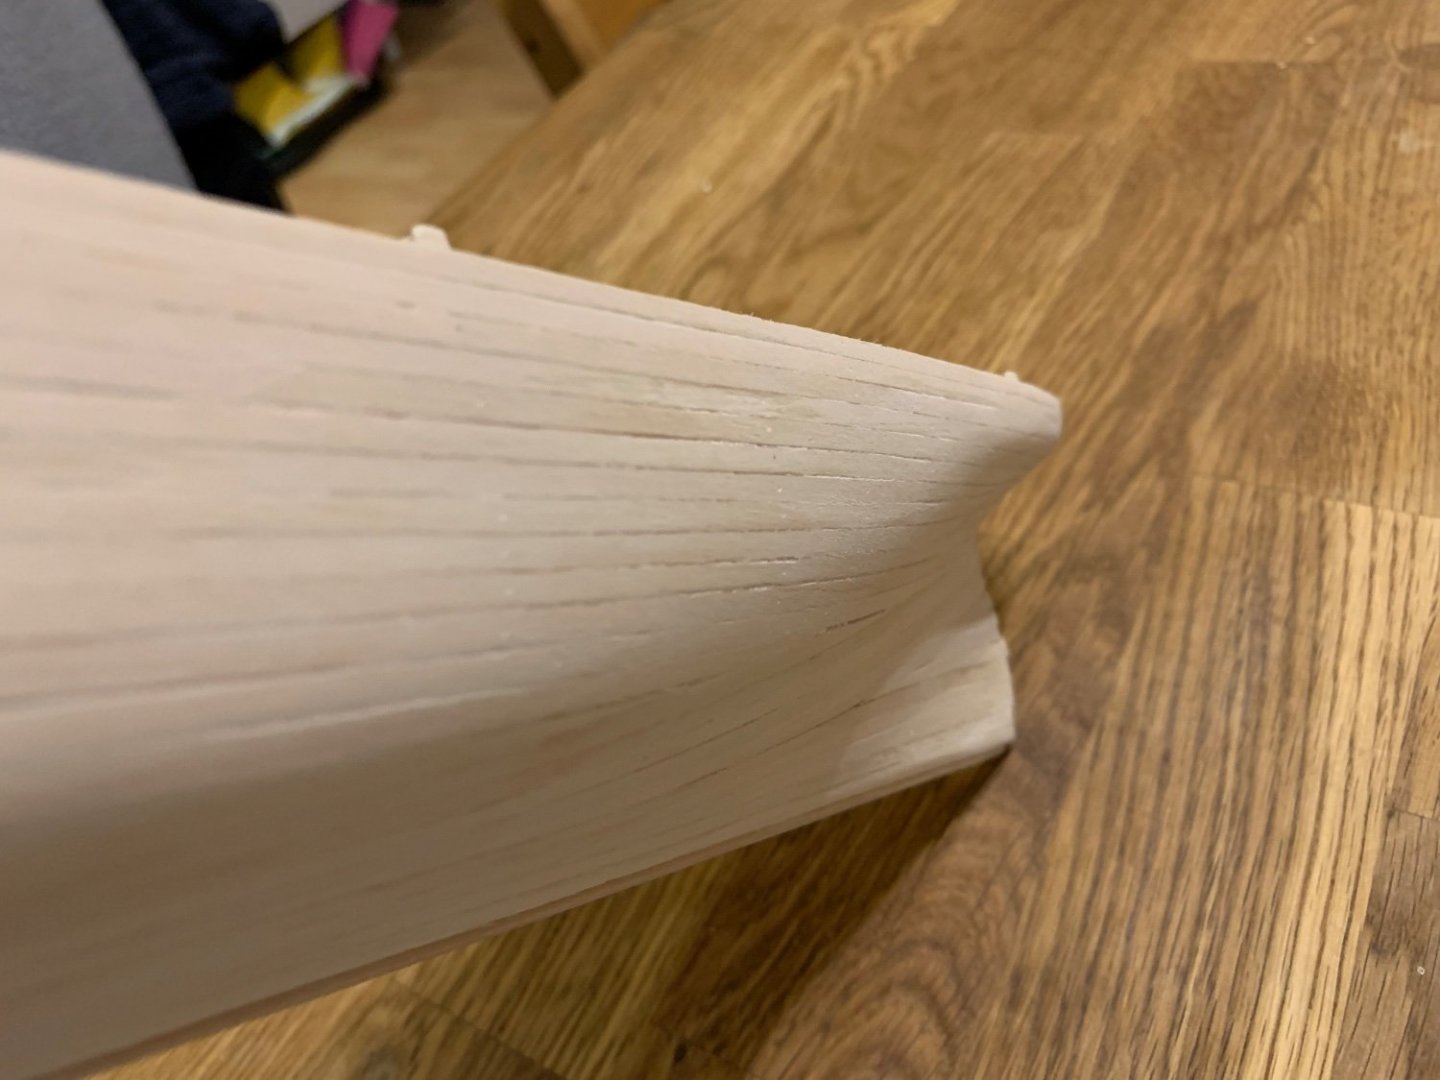
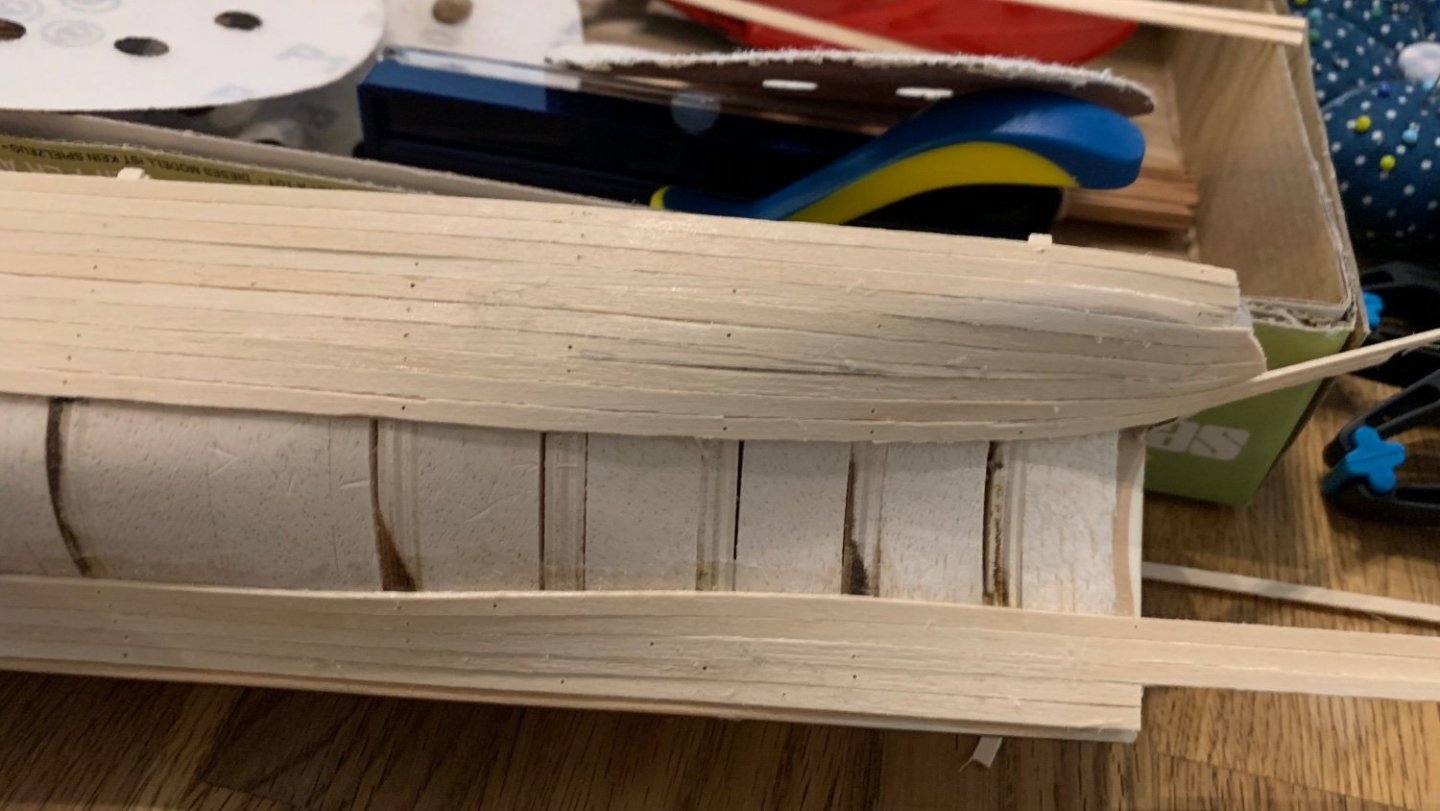
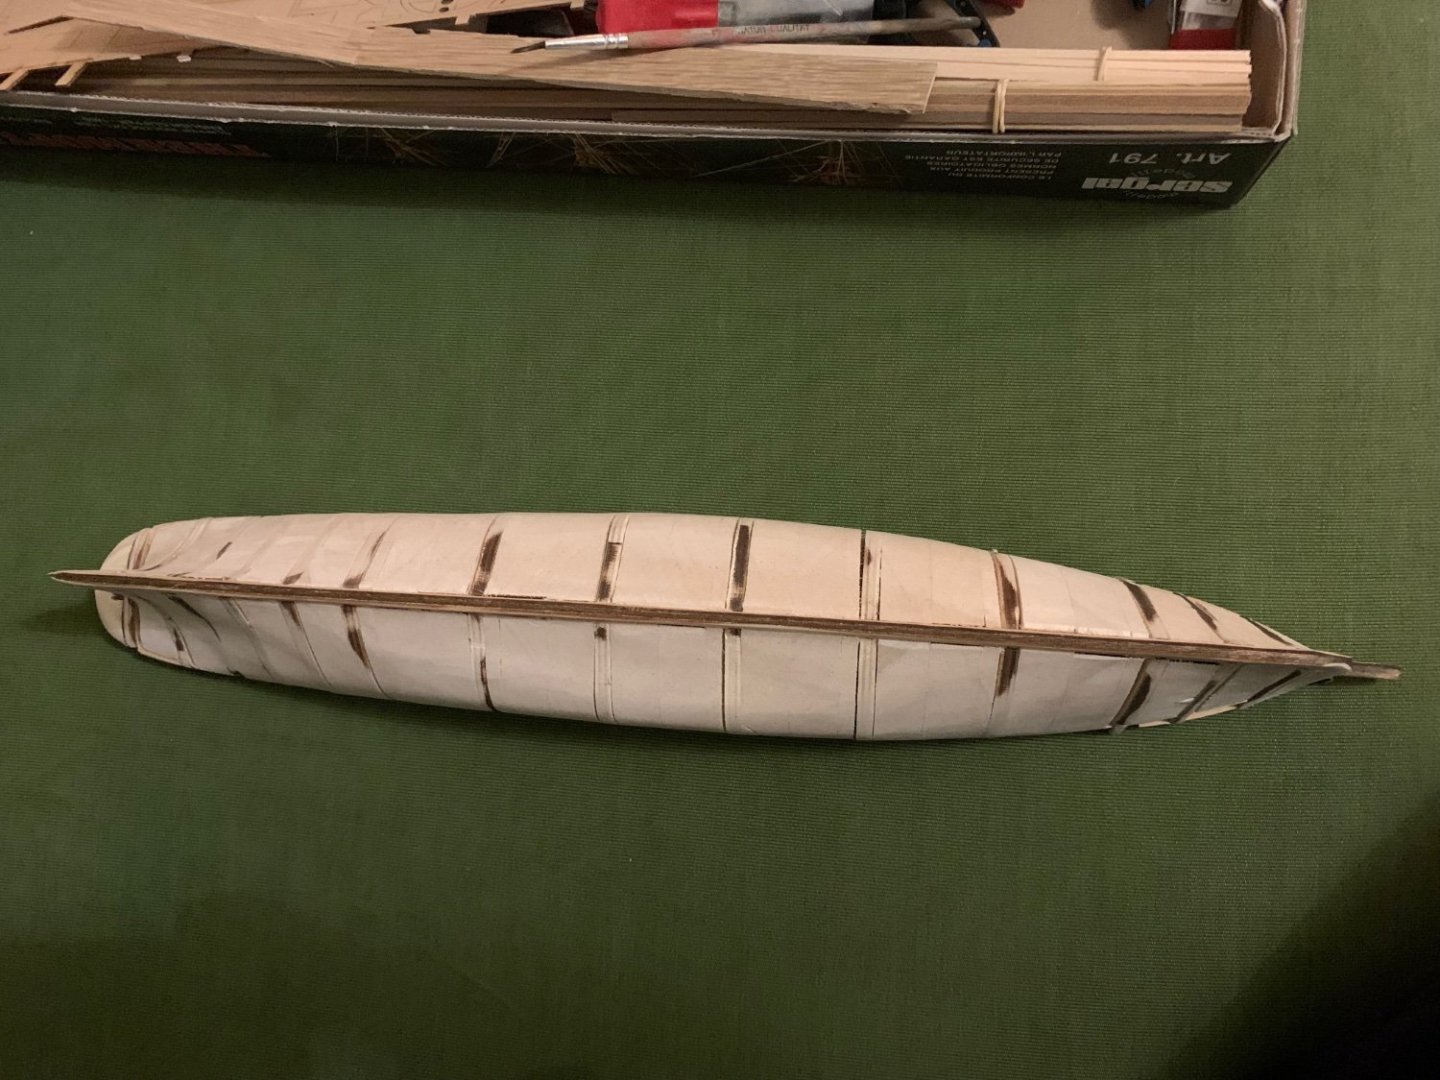
Starboards done, now the stern. Not sure yet if I cut the strips too close to the poop deck. Let's see how I can salvage this.

- 12 replies
-
- 1
-
-
- Thermopylae
- Sergal
- (and 2 more)
-
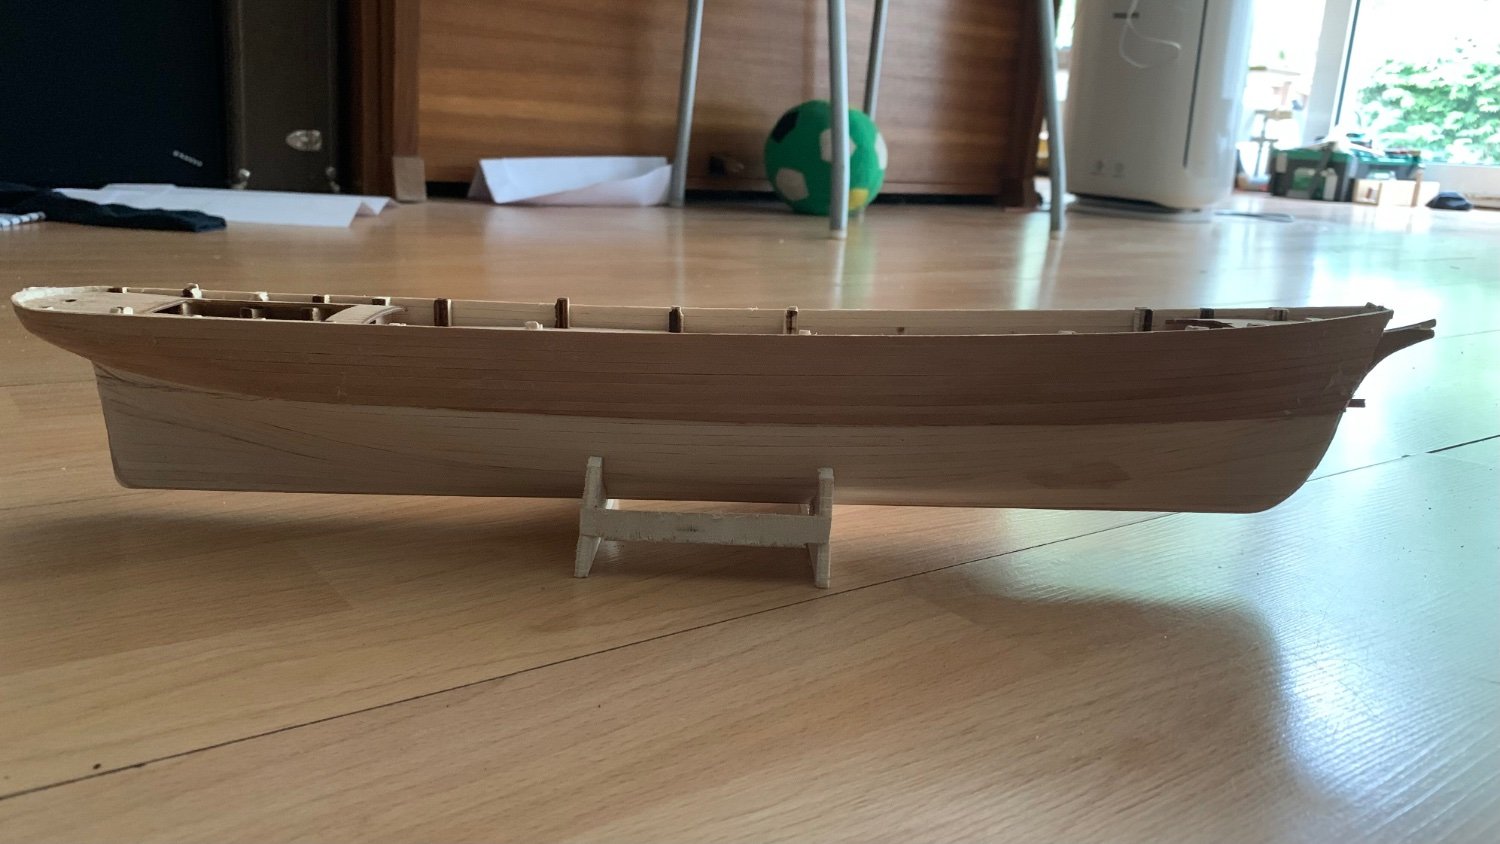
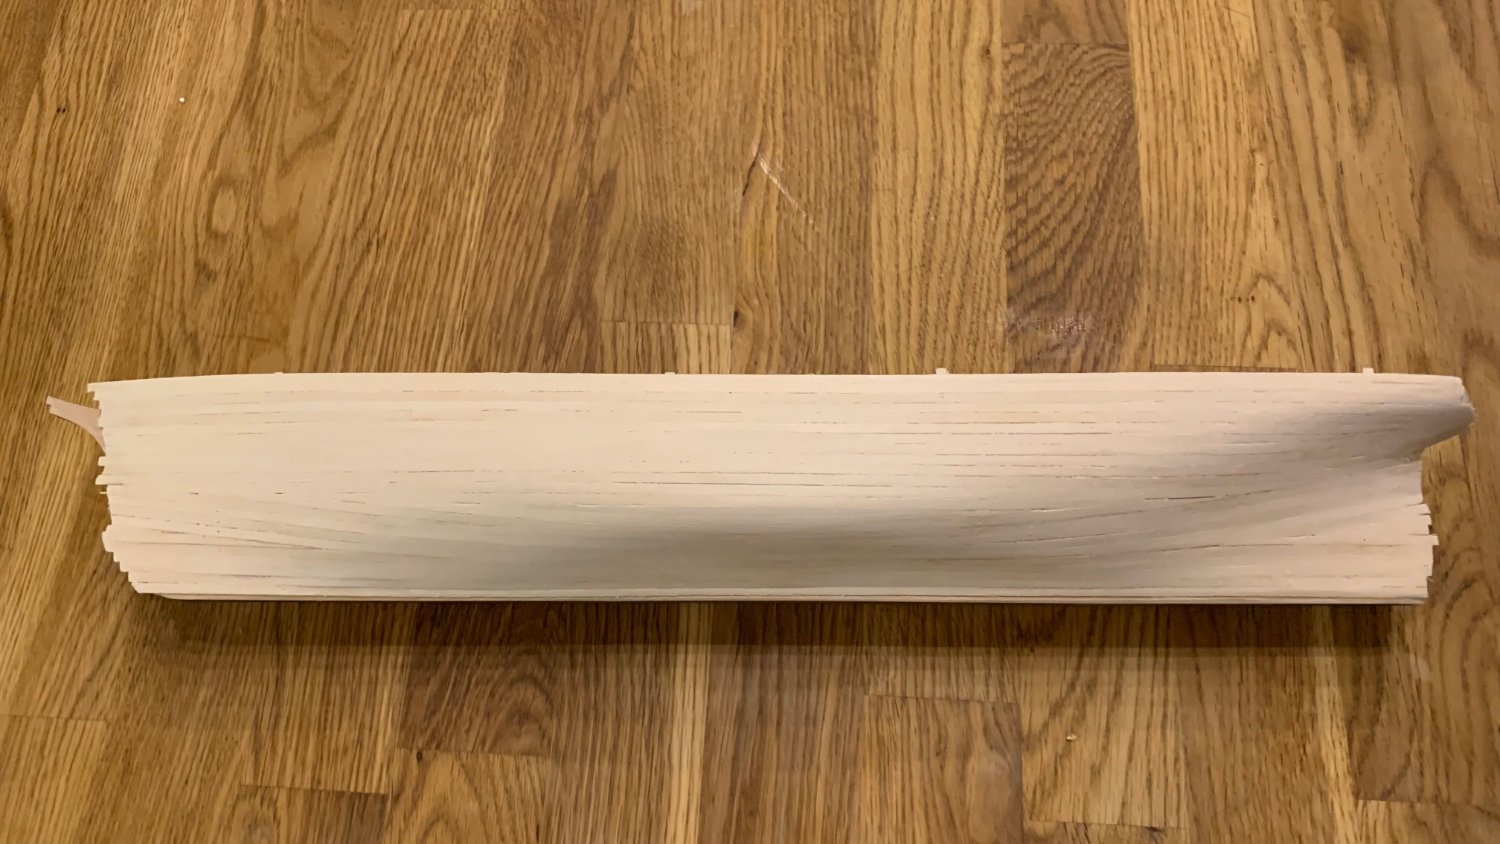
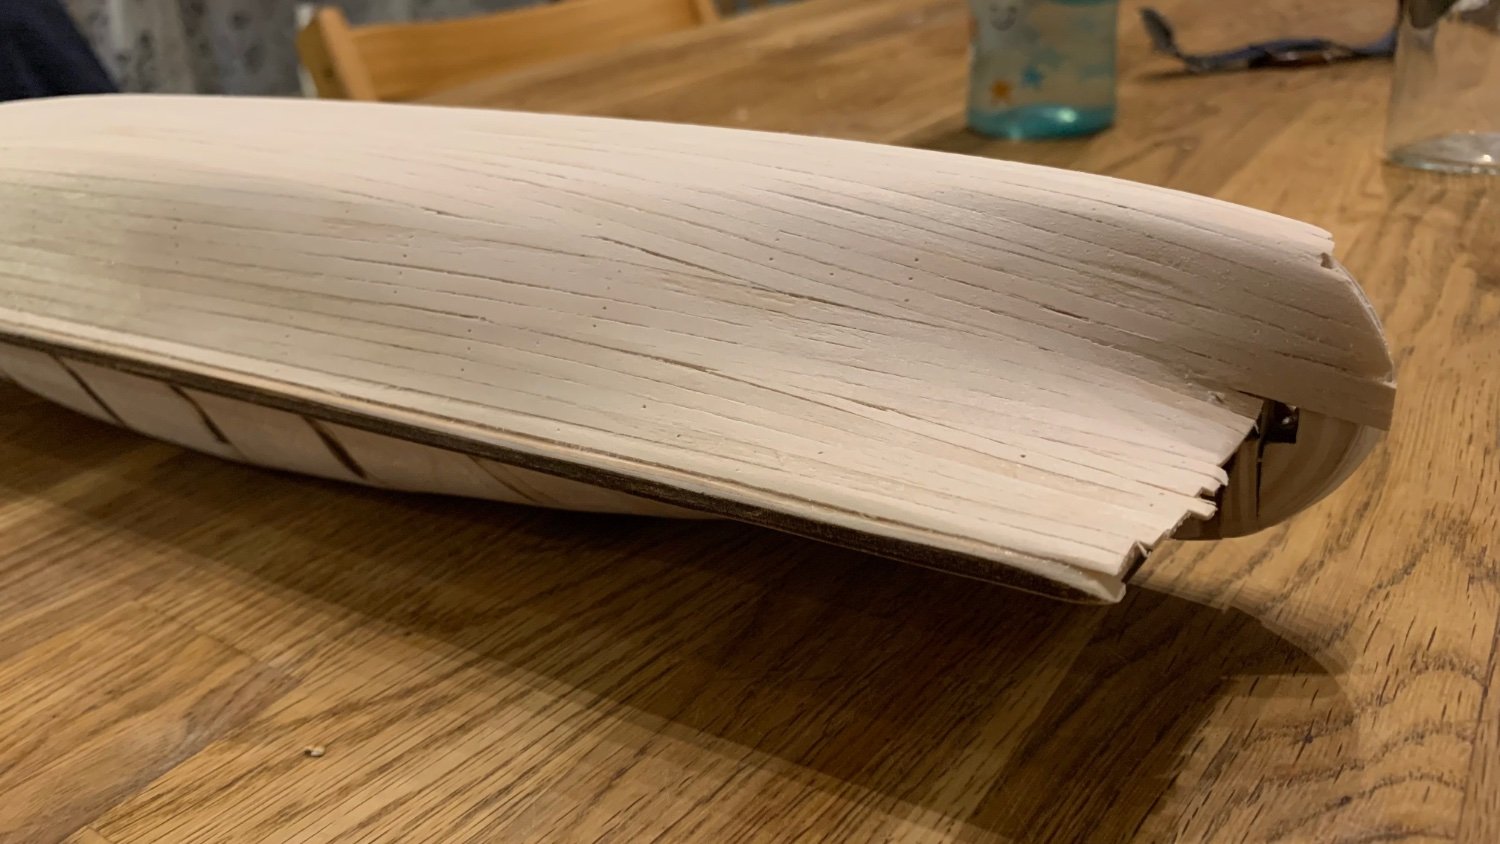
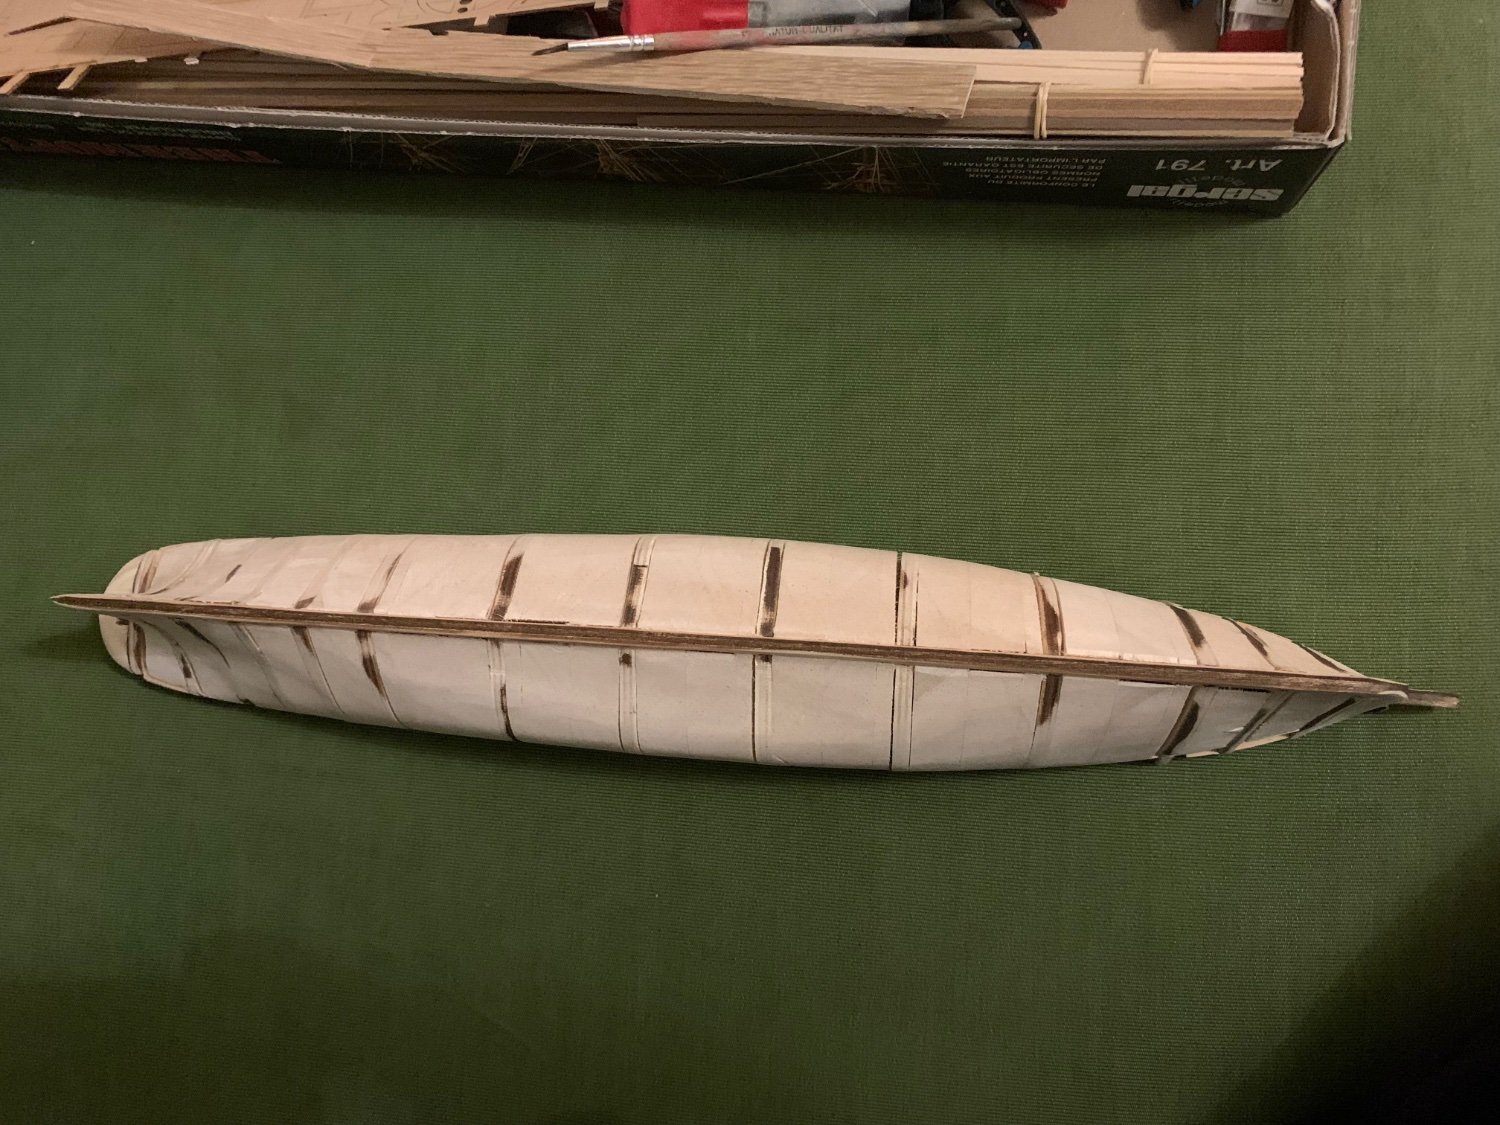
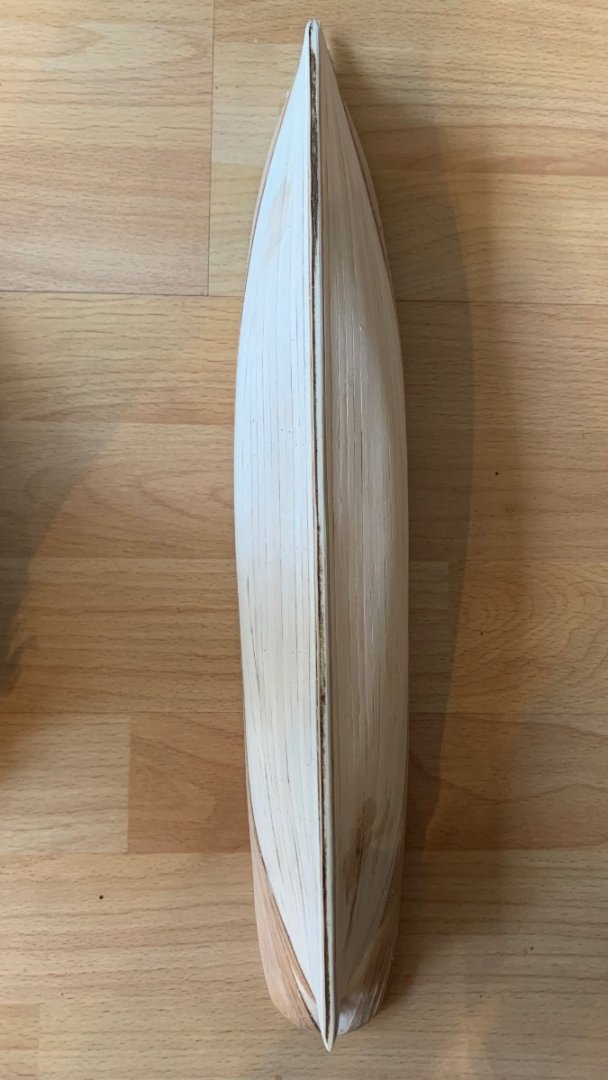
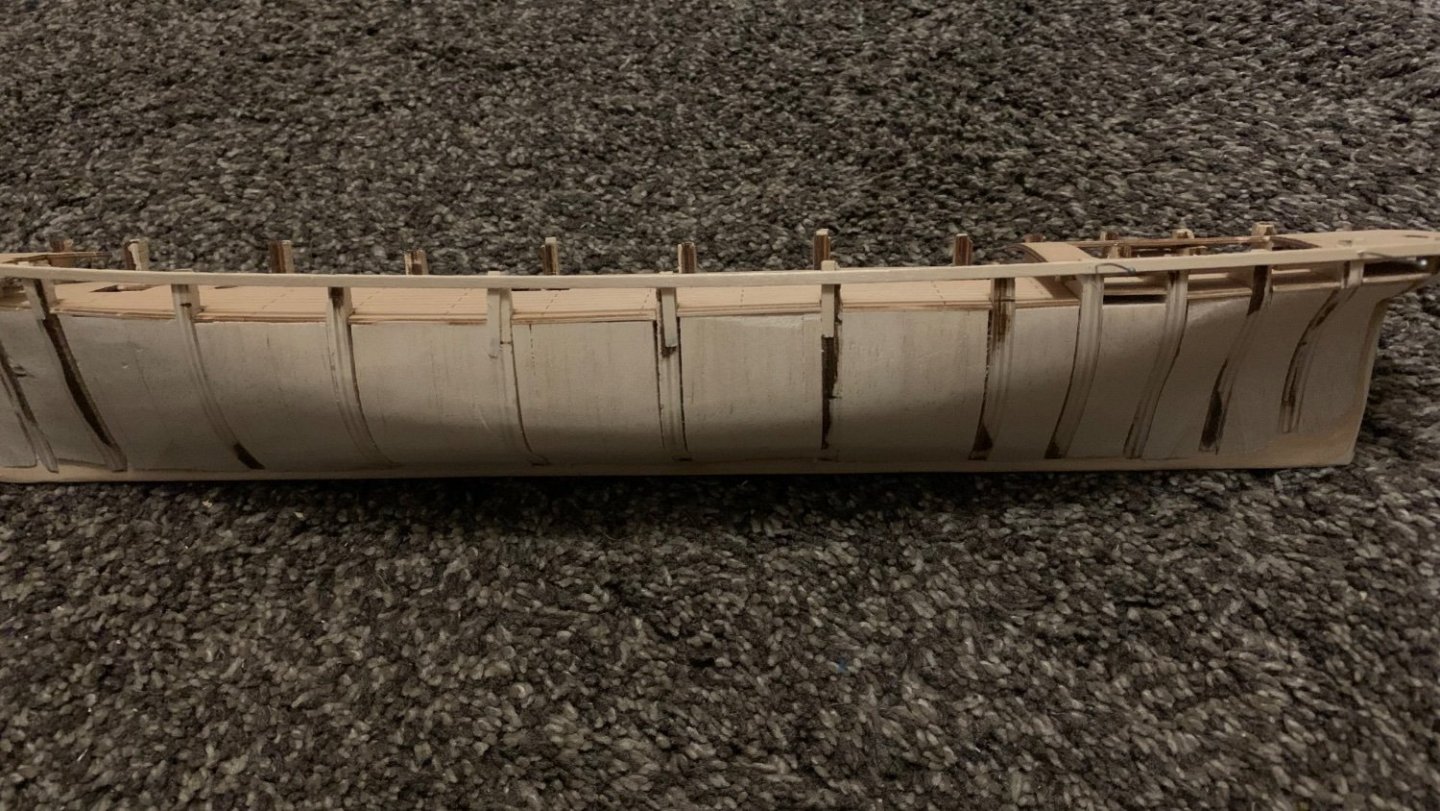
The first layer of planks is glued to the portside. Stern is left to go. I sanded it a bit to see if I could get the bumps out without going through the entire wooden strip. I'm pretty happy so far. Not sure if I need a second layer at this point.


-
Planking started with the topmost plank as described in the instruction. I bought a hand drill so I could pre-drill little 0,5 mm holes where I would stick pins to fixate the planks while the glue would set. The first couple of planks I did one by one starting midships. Then two at a time. The stern I left for later once I got a feel for the wooden strips and how they would bend. It took me quite some time to figure out which plank would go all the way back to the stern and where I had to blend two planks into one so they wouldn't lift off and leave me with a clinkered hull. Due to the balsa wood I wasn't limited to let them blend on a bulkhead. In the planking technique thread I saw some very sophisticated ways to blend two planks into one or split one into two. But since I could glue them anywhere I wanted on the balsa wood I just cut them along the line they went along the next plank.


-
ccoyle reacted to a post in a topic:
Thermopylae by Punxsutawney_Phil - Sergal - 1:124 - first build
-
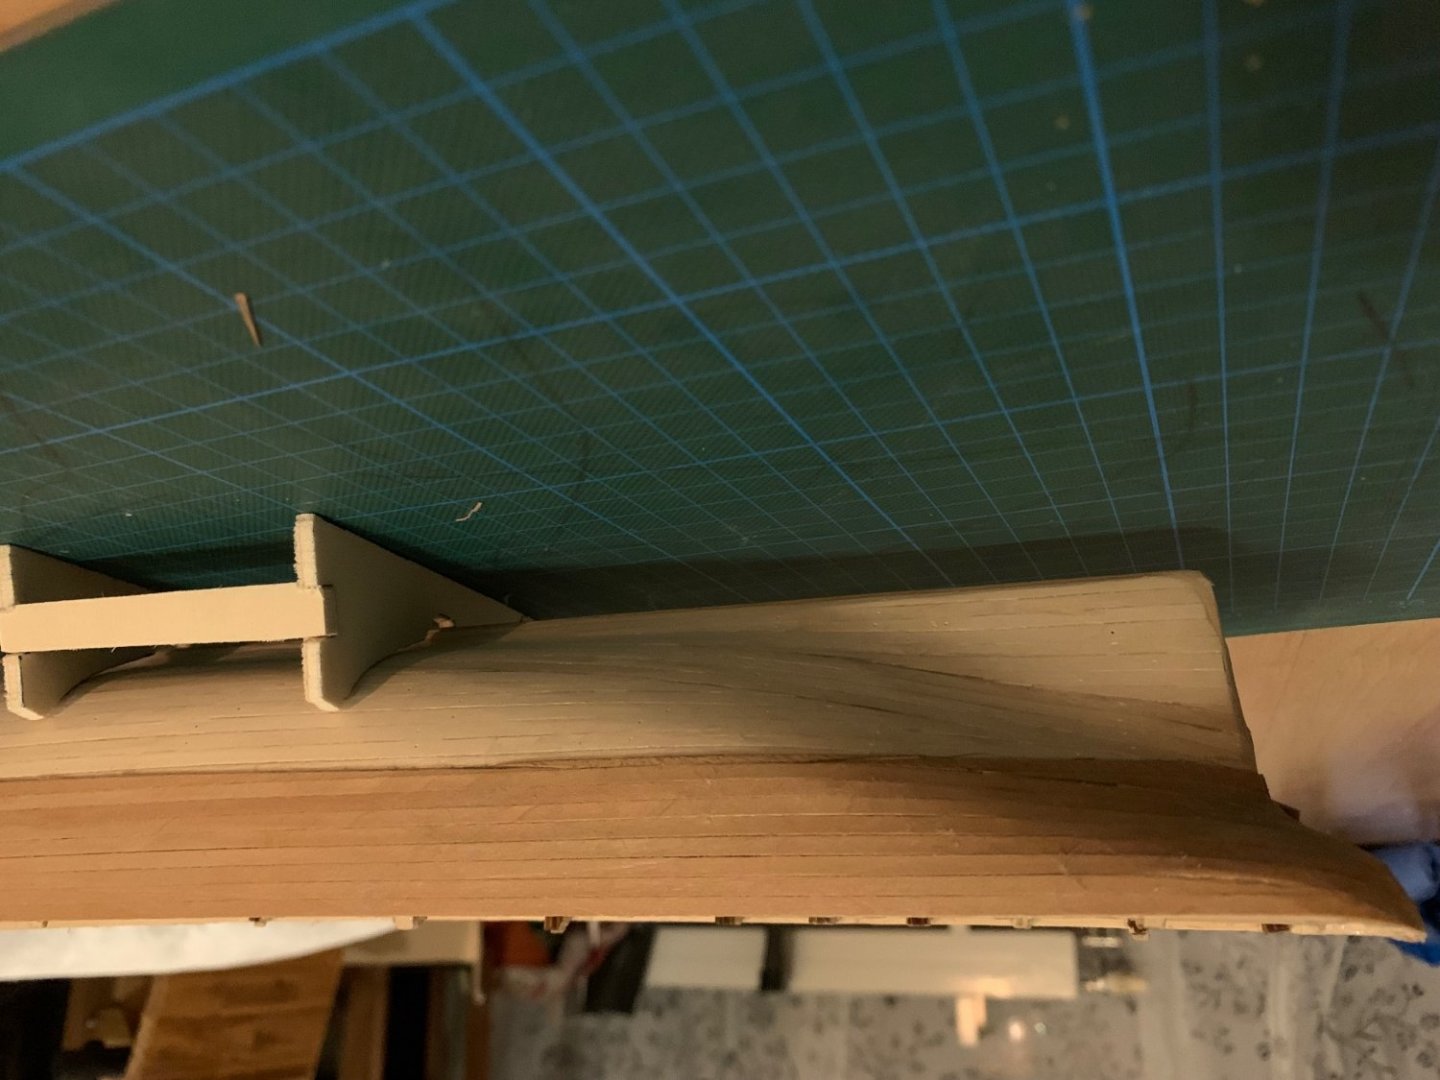
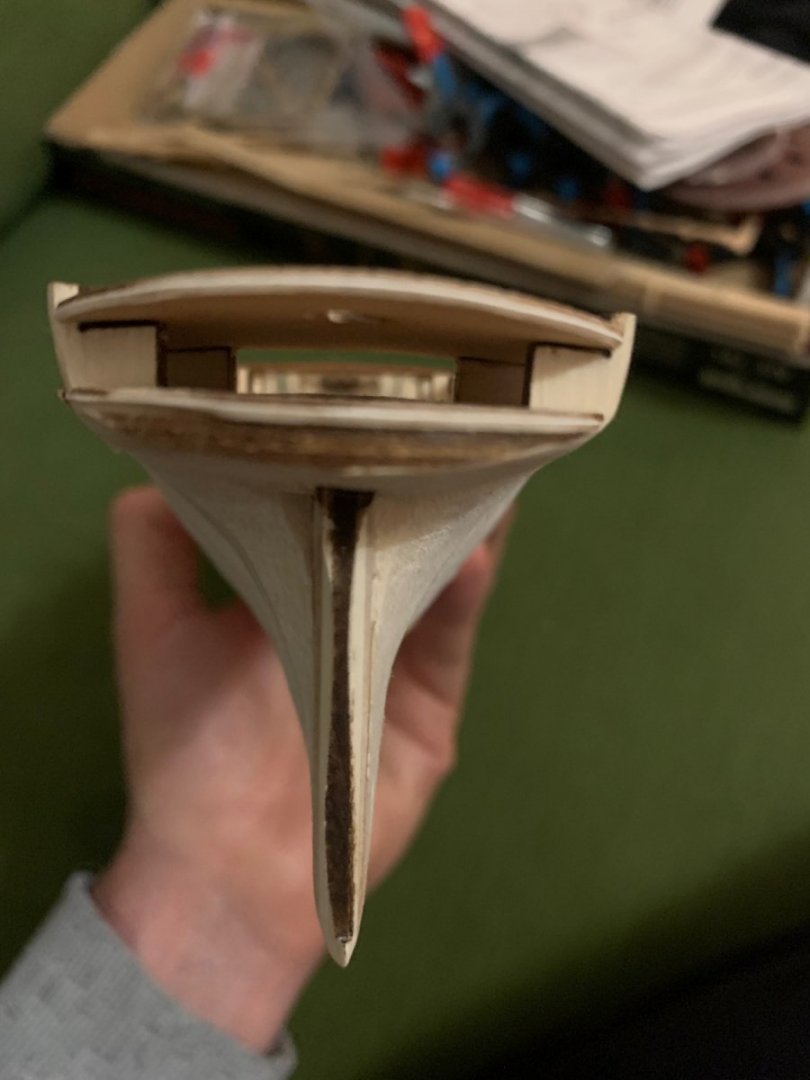
I was happy to have a band saw in my workshop. A third of the ribs weren't properly cut. Fortunately all the outlines were well recognizable, so I sawed them out myself. Gluing the ribs and the keel went well with just minimal effort in sanding the slots. One problem I had with the first kit as a child was achieving a streamlined hull. The wooden strips would always go straight over the thickness of the rib and then start to curve towards the next rib. The contact surface with the rib however was straight. So the hull looked polygonal rather than streamlined. (does that make sense? Do you know what I mean) So this time I thought I'd fill the spaces between the ribs with balsa wood and sand them down to the ribs. I built a little jig to make my orbital sander stationary and then guided the hull along the sander. Worked like a charm. In the second picture you'll see that I had to glue small pieces of wooden strips to the topmost parts of some bulkheads because I overdid it with the sander.
- 12 replies
-
- 1
-
-
- Thermopylae
- Sergal
- (and 2 more)
-
ccoyle reacted to a post in a topic:
Thermopylae by Punxsutawney_Phil - Sergal - 1:124 - first build
-
Hello, I stumbled across this forum looking for advice for my first model ship and boy did I spent time coming across interesting topic after topic...So I thought I'd give something back and start a build log. I started this model a while ago but wanted to make some progress first before starting the log. Just in case I wouldn't go through with it... I'm from Berlin/Germany so excuse my english. I'll do my best. However I expect to struggle especially with the naval vocabulary. I actually got the exact same kit when I was a child. I was about twelve years old I think and in over my head. I don't even know anymore who spent that much money to give me that present and then left me alone to deal with it. I managed to plank have the hull, then went out of wooden walnut strips, because most of them broke while I tried to glue them to the ribs. It looked awful. So I left it to the dust. It gnawed at me over the years that I couldn’t finish it back then. So last year, 22 years later, I bought another kit and started looking over the kit’s contents and the build plan. What a mess – hence the search for advice and my arrival at this forum. It is my first model. I like working with wood however. I have built two skin-on-frame kayaks, several sheds and play huts as well as pieces of furniture. However, nothing as delicate as a 1:124 model. I can handle criticism and suggestions for improvement. I really want it to look good, so please don’t sugarcoat it when you stumble across some mistakes I make just because I’m a beginner. Long story short: here’s my build log:
- 12 replies
-
- 1
-
-
- Thermopylae
- Sergal
- (and 2 more)