bigpav
-
Posts
58 -
Joined
-
Last visited
Content Type
Profiles
Forums
Gallery
Events
Everything posted by bigpav
-
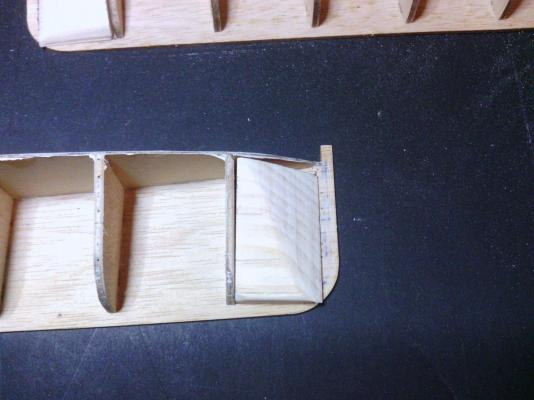
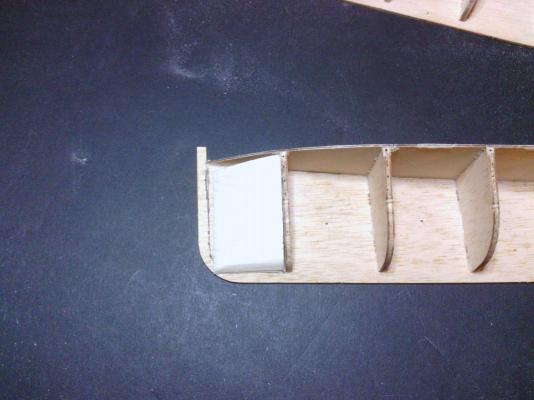
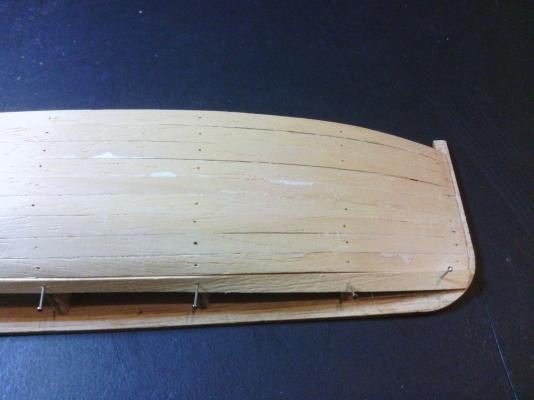
 Hello again all. It has been a few weeks since my last post, things have been very busy. The other day I finally got to sit down and get a little bit done. I had stated before that I needed to remove the planks that had been done before due to glue failure. I read that planks could not be bent laterally, but realized that my uncle had done so. In reading the directions, it said to plank first at the deck level so that is where I started. On the second plank there was a gap onthe bow and stern. I filled these in with long triangular pieces. I amfar less than satisfied with the results and fell like I am doing soething wrong. Any advice? By the way, this wood is terrible! Seems so brittle and very hard to work with. Scott

-
Plank Beveling and stealers
bigpav replied to bigpav's topic in Building, Framing, Planking and plating a ships hull and deck
Thanks guys, I guess my biggest concern right now is when and where do I use stealers? -
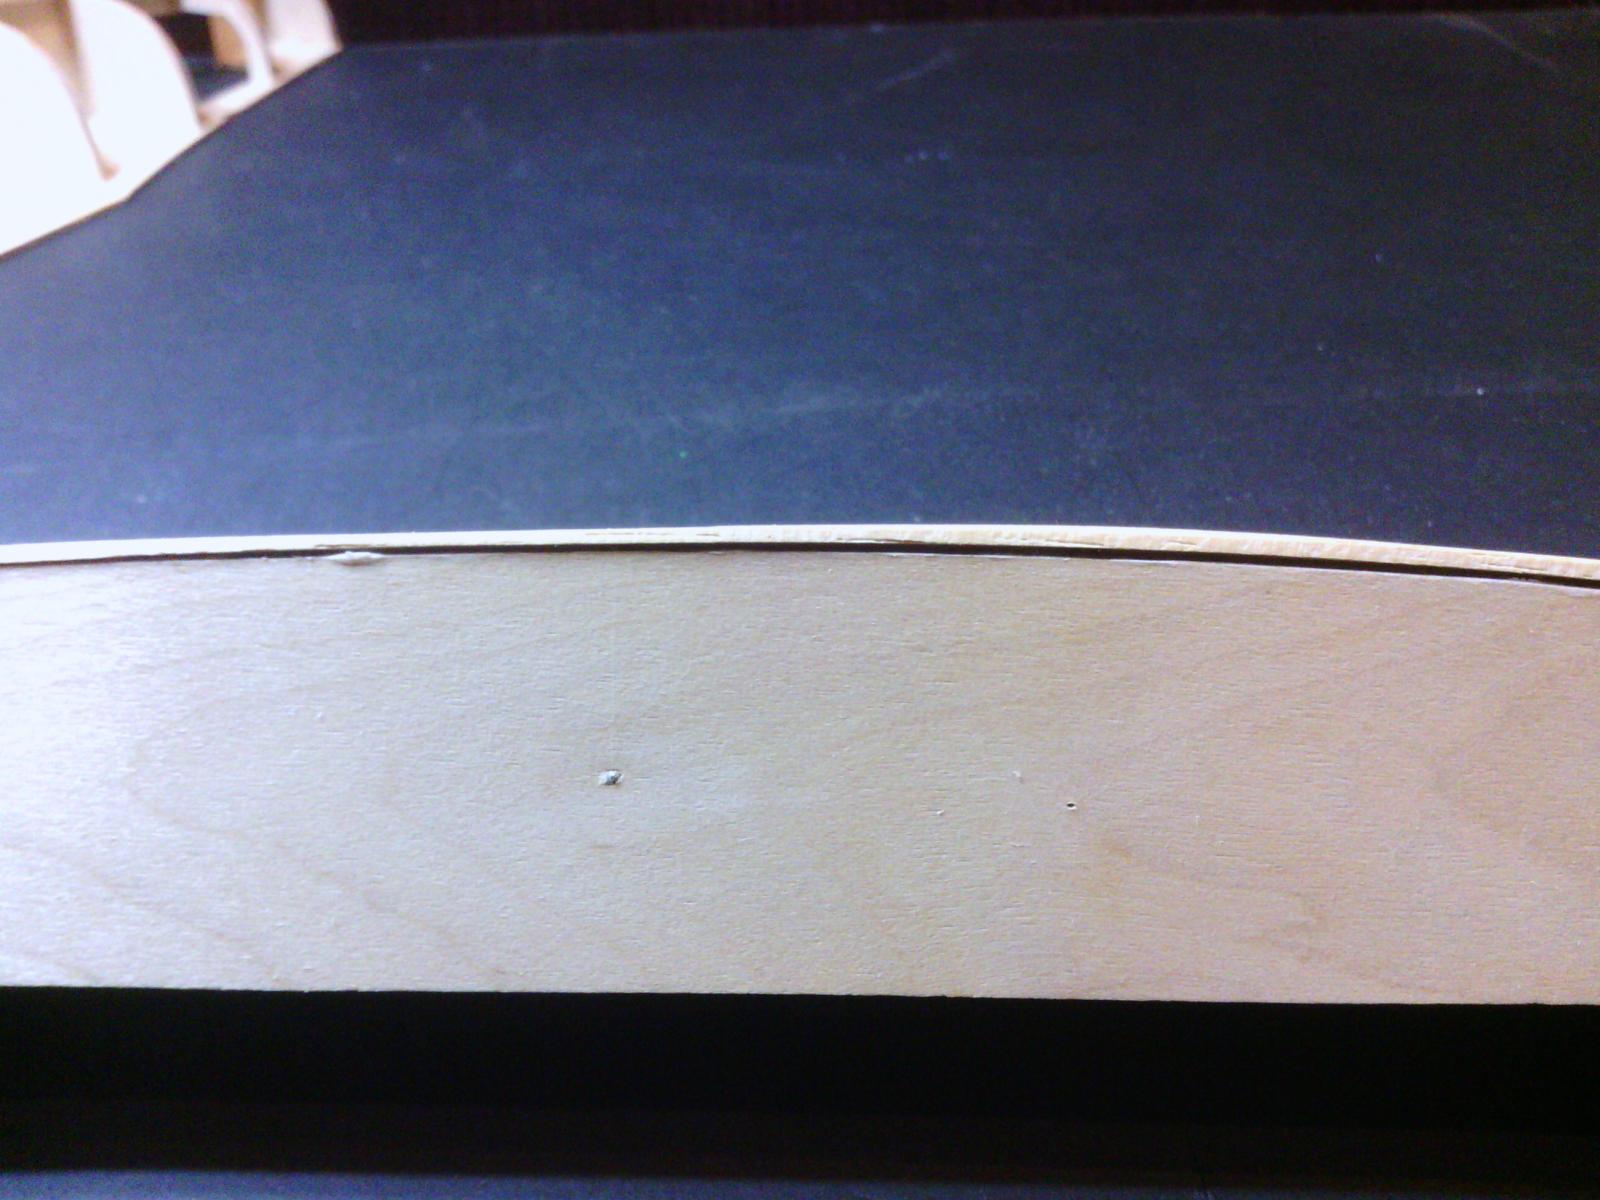
Hey guys I have a question that I should have asked earlier. I read all the articles about planking and I am still somewhat baffled. When you plank, you are supposed to bevel the upper back side of each plank to mate correctly to the last plank, correct? If so, how do you guys do it? Jig? Hobby knife? Sandpaper? Lastley, can someone please explain stealers and half stealers, I really am not grasping that. The current build that I am doing is my first. It is a single later plank, which is plank on frame correct? I have a few planks down and I feel that I am doing it wrong. I know that this model will be painted so I can use wood filler, but I do not want to get into any bad habits or teach myself a bad skill set. I also want to stick with, but I feel as though I am getting discouraged and I only have 5 planks down. Any help would be great and would be very much appreciated. Thanks Scott
-
plank steaming
bigpav replied to bigpav's topic in Building, Framing, Planking and plating a ships hull and deck
I would say yours is way better as far as portability! Had you made a thread I would be stealing my wifes curling iron as soon as I read it. I was expanding my woodworking and will be incorporating steam bent wood in some of my projects. I figured why not try for my hobby as well. That's not to say that my wives curling iron may still go missing! -
plank steaming
bigpav replied to bigpav's topic in Building, Framing, Planking and plating a ships hull and deck
Thanks a lot Bob. You shoul definately find that kettle! I am still tinkering with somethings but when the final product is done I will let you know! Scott -
plank steaming
bigpav replied to bigpav's topic in Building, Framing, Planking and plating a ships hull and deck
I knew I forgot something! They were both1.5mm thick and 5mm wide. They were both about 24 inches long, one slightly longer. I forgot to measure radius, but it was that of a beer glass! Haha lets say 3 inches. I know that with practice and familiarity with the unit I can get a little tighter bends. -
plank steaming
bigpav replied to bigpav's topic in Building, Framing, Planking and plating a ships hull and deck
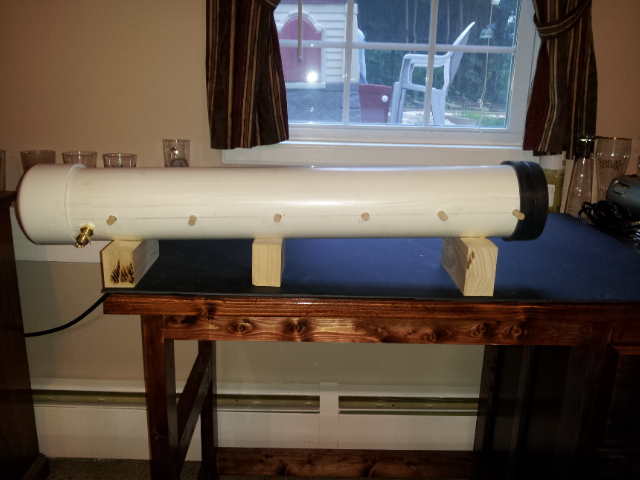
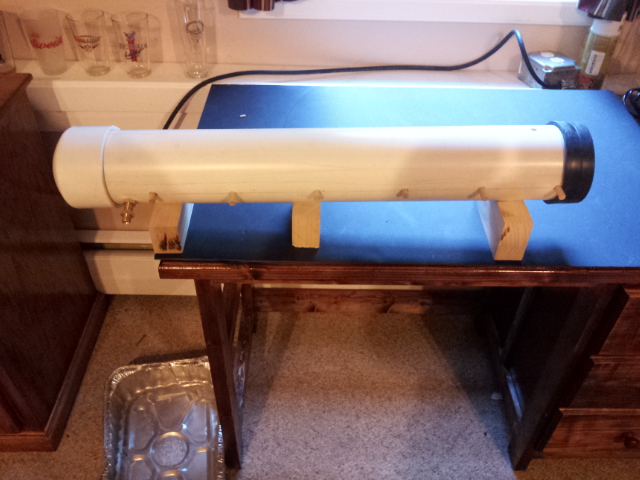
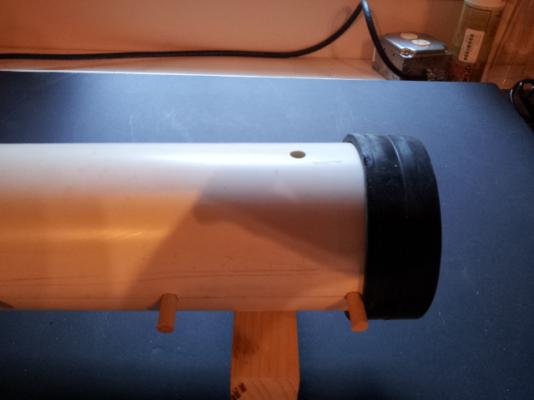
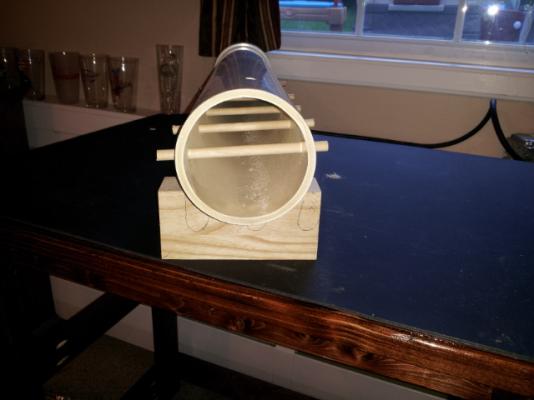
O.k here are the test results. In a link that RiverRat posted, drazen had steamed his planks for 30 minutes. This was a good starting point, but I found that an extra 15 minutes really made the wood pliable. As far as the steam vessle goes, it worked great! This was a test vessel, so I found a few things that I want to change. First, I have a condensate hole in the back where thewater just comes out and splashes into a pan on the floor. I am going to add a drain line and drop it into the pan. This will eliminate the current watery mess that have. Second, I want to move the steam supply to the back cap, I think I might get a better steam surround this way. Third, I want to add a thermometer to see what is going on in there and if need be, insulate the unit. I didn't get fancy with my bends but they were able to bend around themselves easily. With more practice I am sure I can do really tight bends. In the picture below the wood on the left is cherry I belive and the right is a wood supplied with my kit called obeche. Just a few things if you guys build one out of pvc, pitch it back to your supply to allow the condensate to drain and support the unit with a least three supports. The pvc really get soft and if not supported, will bend drastically. Like I said before, I will be using this for my wood working as well as my hobby. Including the Earlex steam generator at full price, this setup came out to less than $100. I know you can use a tea kettle for a steam source. I found that alll new electric kettles will shut off when they achieve a boil. Also, I do not feel comfortable using a portable heat source, especially in my workshop so this was the best choice for me.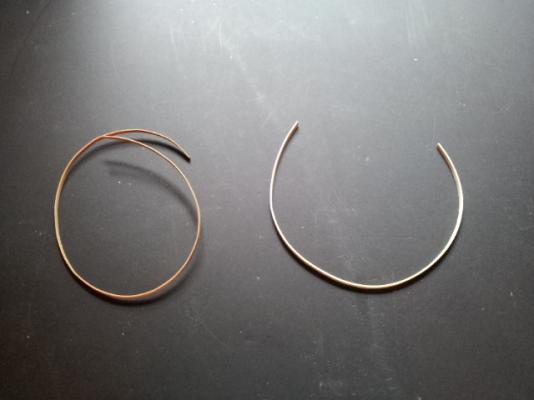
-
plank steaming
bigpav replied to bigpav's topic in Building, Framing, Planking and plating a ships hull and deck
Do you have link? I couldn't find anything. -
plank steaming
bigpav replied to bigpav's topic in Building, Framing, Planking and plating a ships hull and deck
Most definatly! I work on steam boilers from time to time and have been on thd wrong end before, not fun! -
plank steaming
bigpav replied to bigpav's topic in Building, Framing, Planking and plating a ships hull and deck
I decided to go with the Earlex steam generator. I picked it up at a Woodcraft. They run for $70, but I had a gift card burning a hole in my wallet! It has gotten great reviews, but I will let you know tomorrow how it works out. -
plank steaming
bigpav replied to bigpav's topic in Building, Framing, Planking and plating a ships hull and deck
Well here is what I have so far. I am going to try this 4" pvc tube that I have. Capped one end and used a fernco cap for the outlet. I drilled 6 holes and inserted 3/8 wooden rods for a shelf. I didn't seal the rods, they swell with the steam and seal themselves. Didn't forget the drain hole, it's near the steam inlet on the bottem. Also have a vent near the outlet, don't want the pvc to explode! I plan on using it tomorrow, so we shall see how it works.

-
plank steaming
bigpav replied to bigpav's topic in Building, Framing, Planking and plating a ships hull and deck
Thanks guys, that helps a lot! I have some 4" pvc and fittings (perks of the trade I'm in). Just going to throw something together tonight and build a more permanent wooden box during the week. Going to have to make a couple different ones. A box for large wood working would be a little ridiculous for model ship building. -
I wasn't sure where this topic should go, but I put it here because it is about planking. Anyways, I have been thinking about building a steam box for my wood shop. I know that I could use it for ship building as well. My question is, how long do you steam the planks for? For woodworking it is generally 1 hour per inch of thickness. Also, does anyone out there have any suggestions for making a steam box. Wood or pvc pipe? Thanks Scott
-
Thank you so much!
-
Hey everyone I have a question. I had a family member serve on a French ship in the mid 1700's. I'm not familiar with any good resources and we have a very small library here in town. The name of the ship was the "LaFontaine". Please forgive the spelling. So anyways., I was just wondering if anyone can steer me in the right direction. Thanks Scott
-
I just bought an extra wheel and the leather strop. It really puts a great edge on. It is an air cooled unit so you can't leave your blade on longer than 5 seconds at a time. Other than that it really is easy to use! Scott
-
I have the Work Sharp ws3000. I have tried other systems and I never got the hang of stones. This system works awesome and puts a great edge on everything. Real easy to use also.
-
Hey Bob I just saw this thread and found it truely great. I really loved how you made the buckets! Looking forward to seeing your other builds!
-
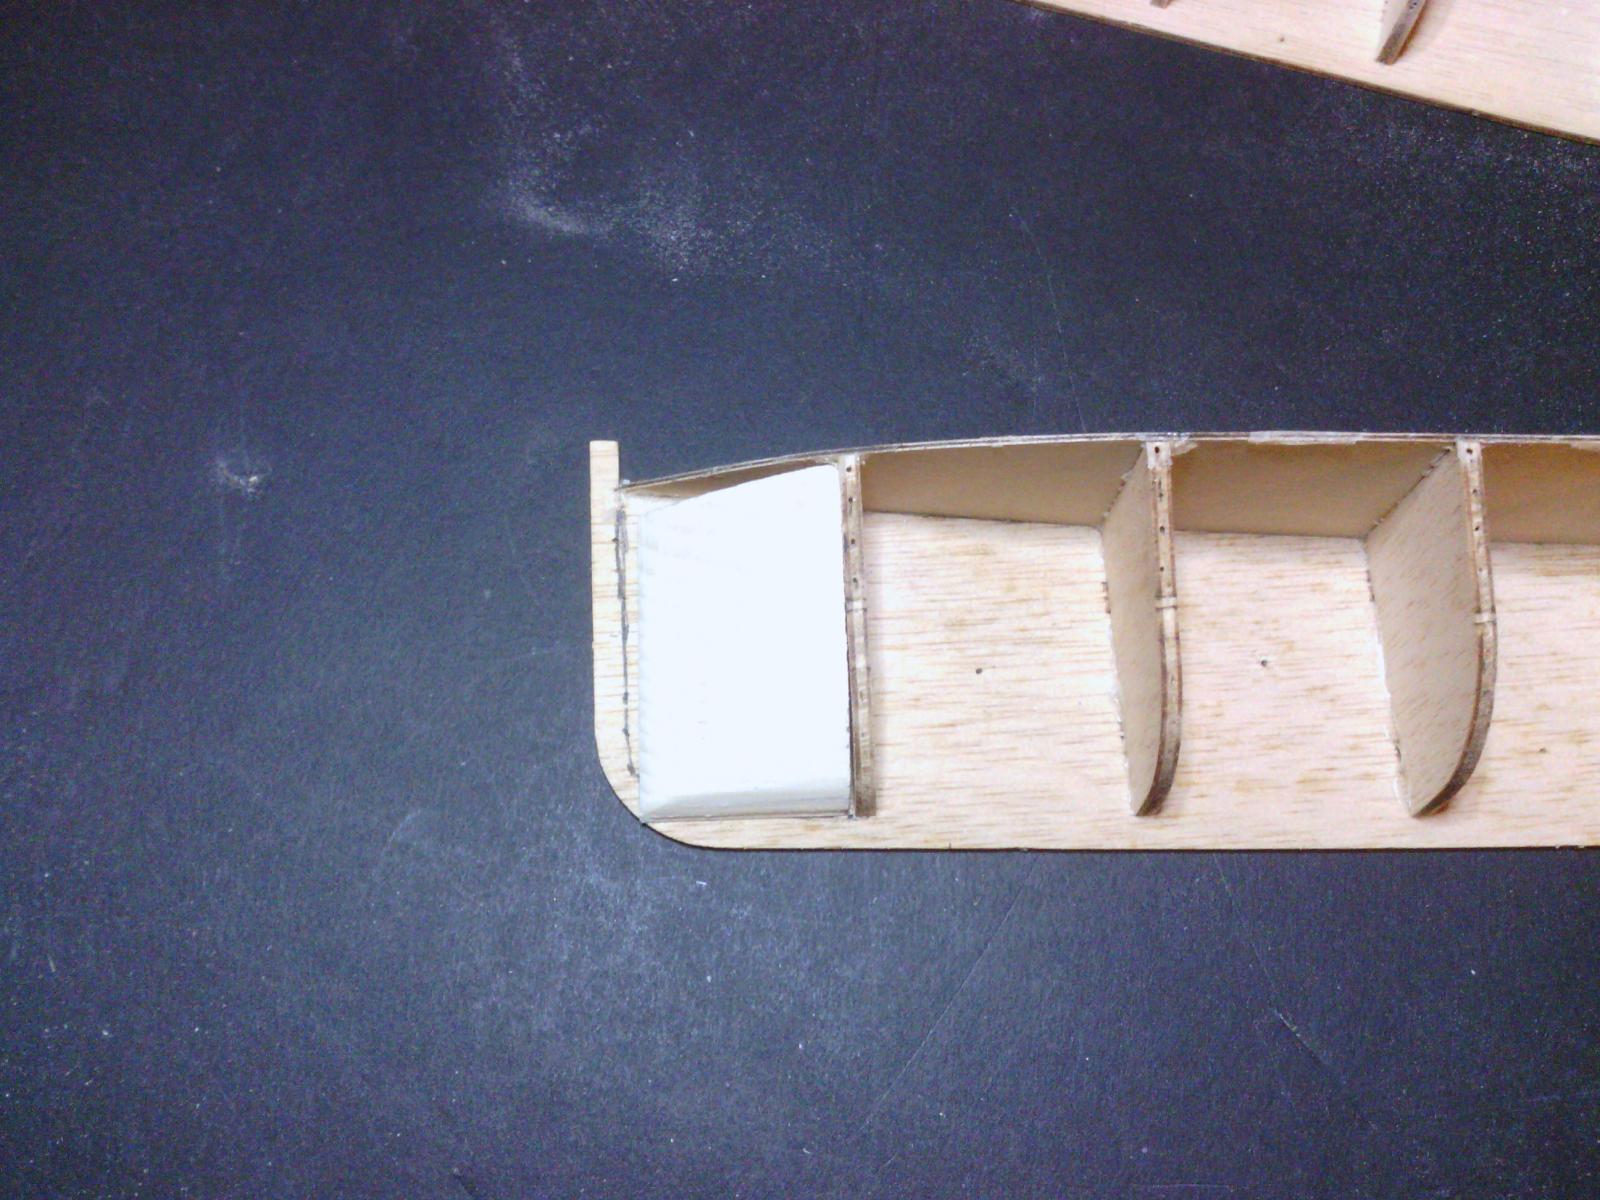
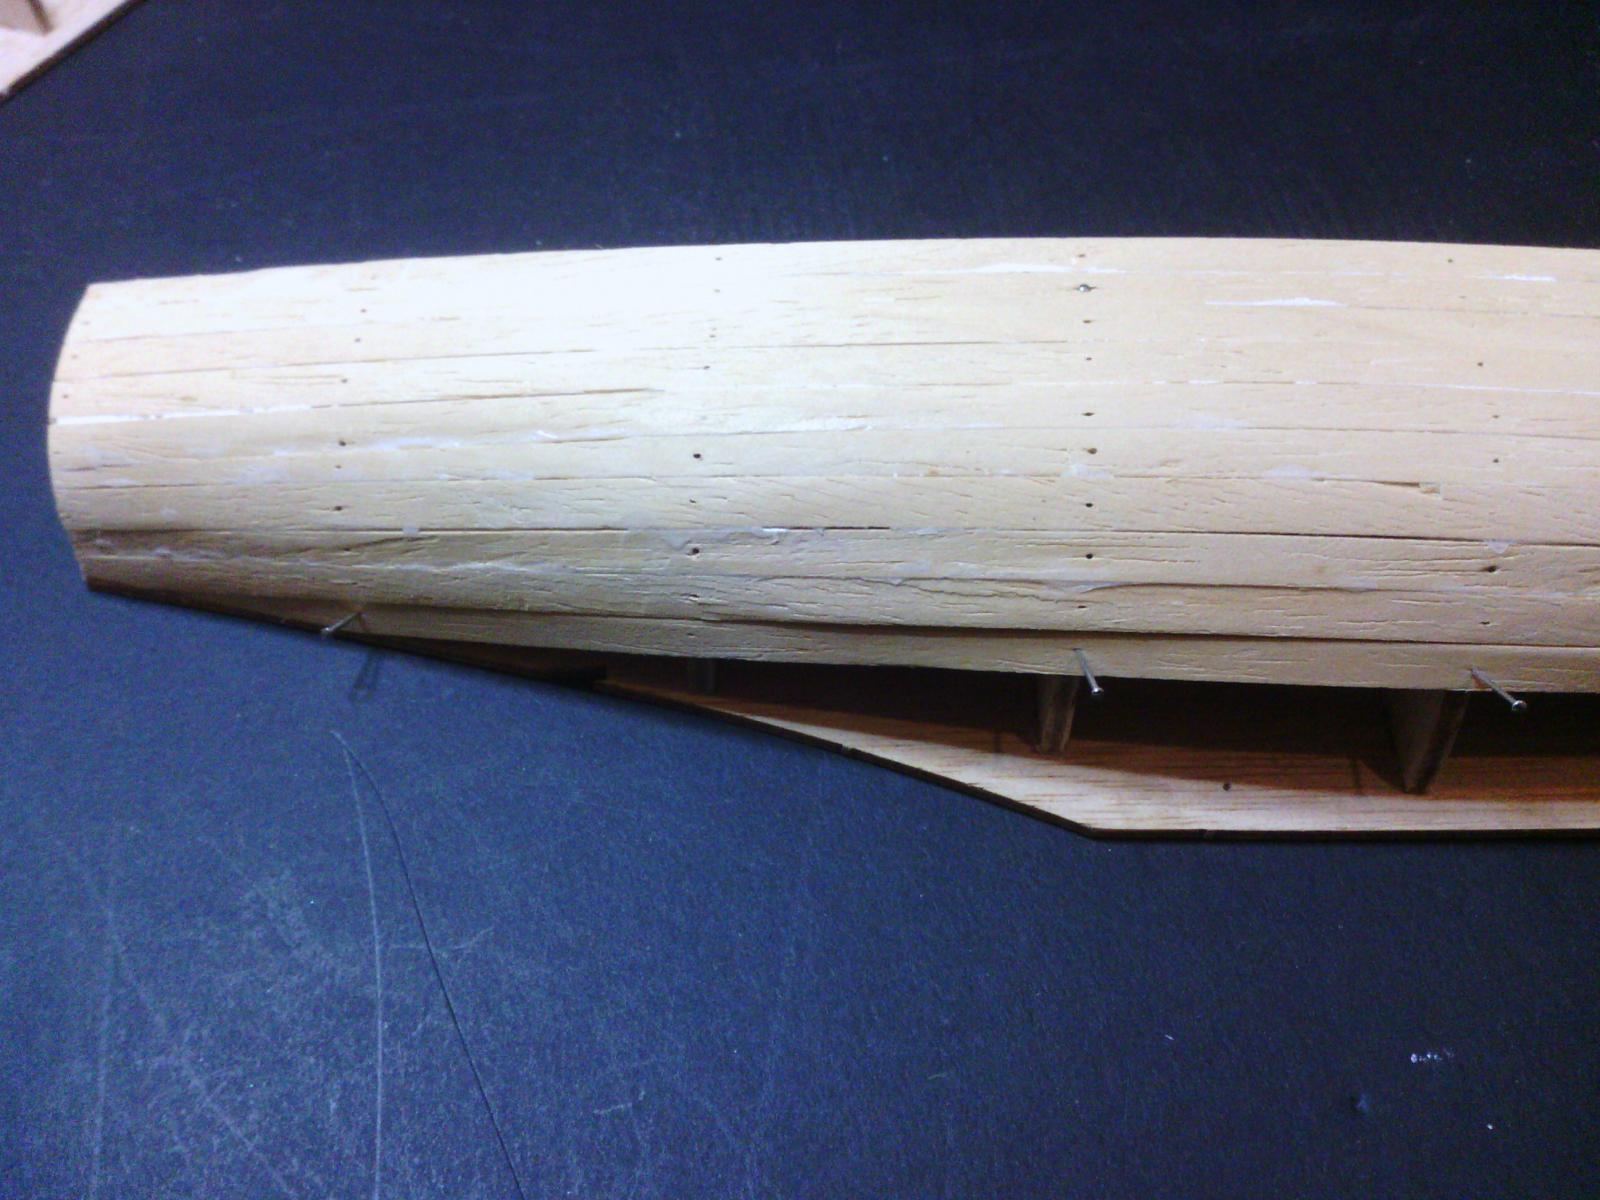
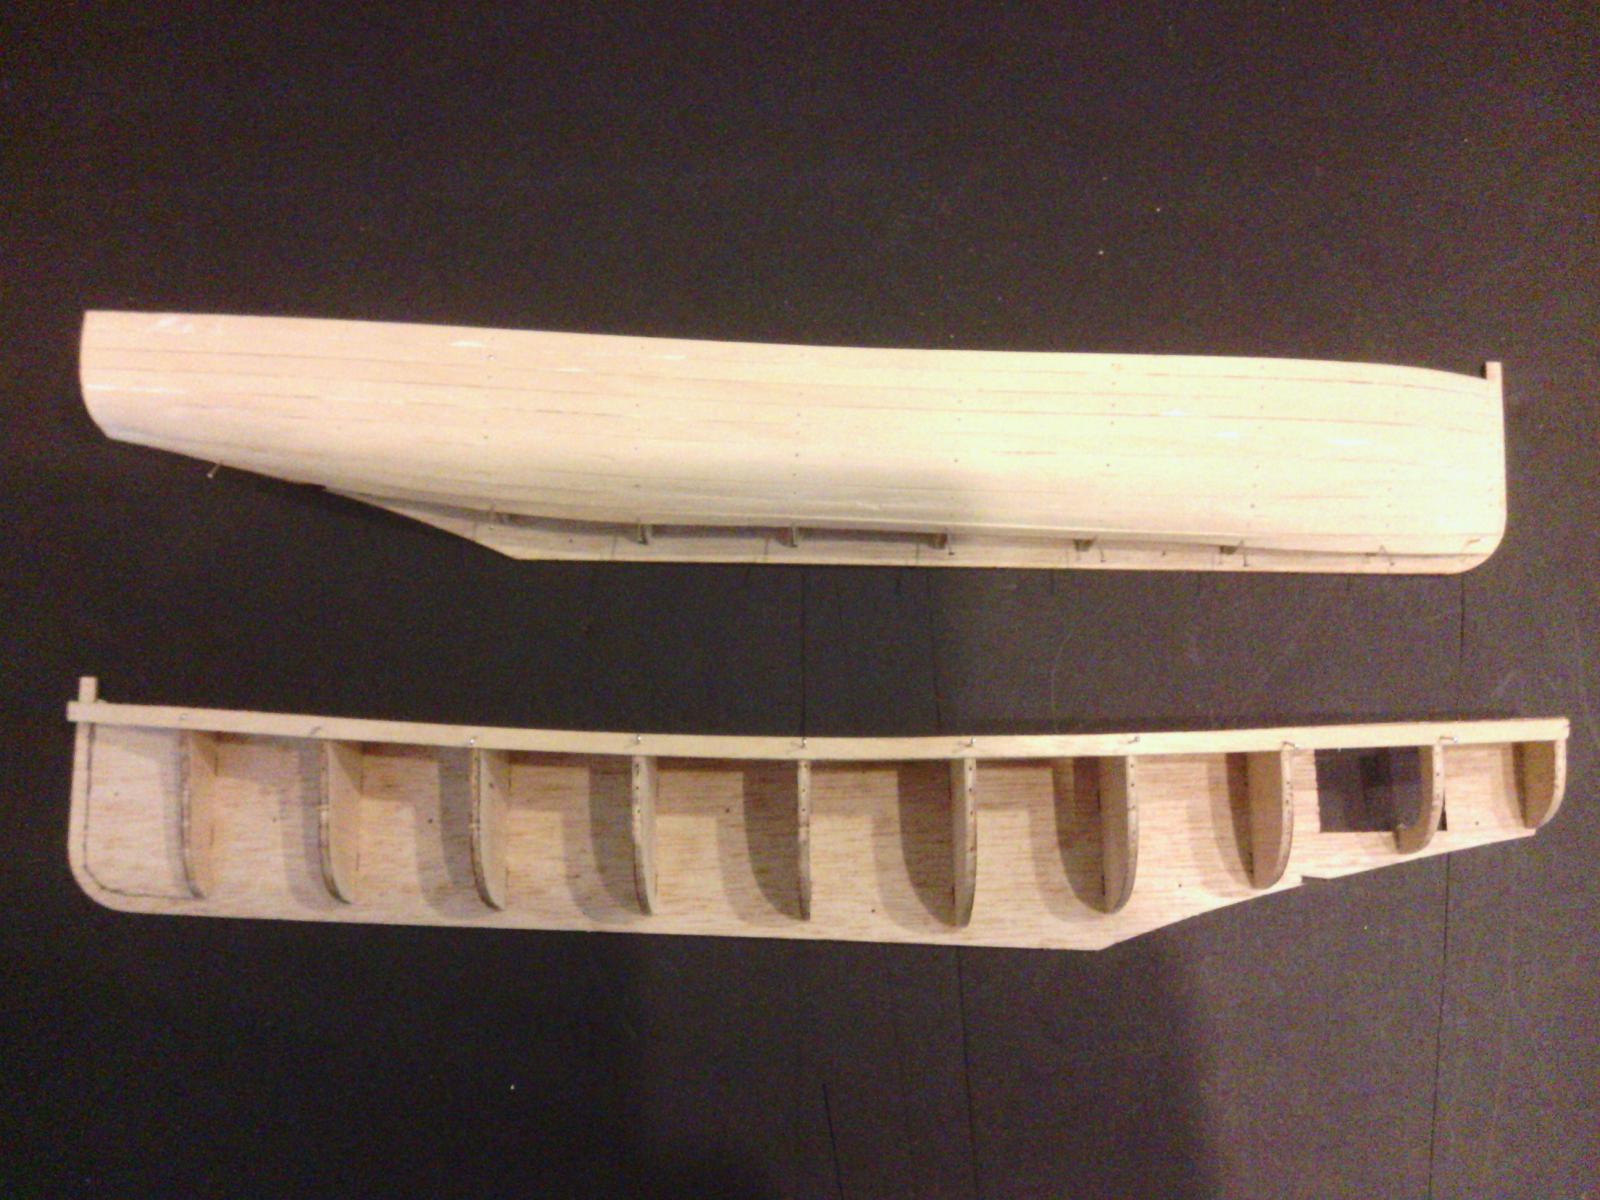
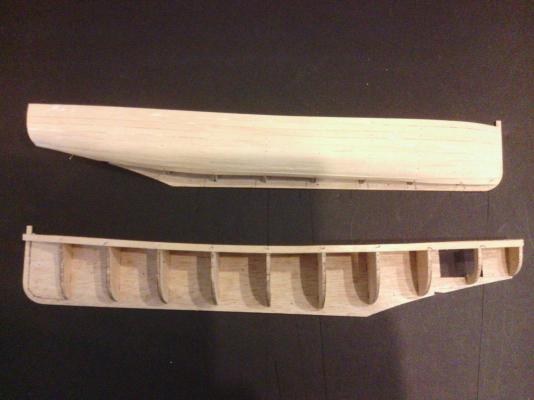
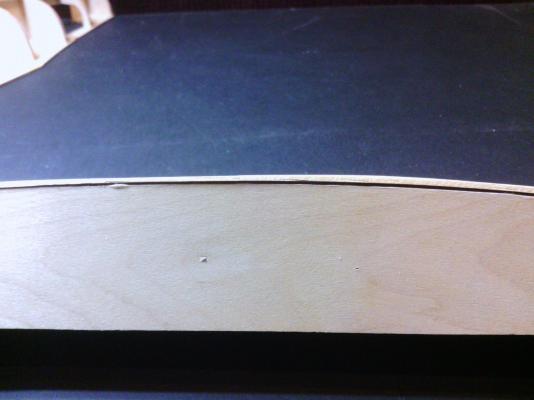
So I have found some time to really look at the model. All of the planks were warped and coming apart. Everything seems good and still glued well. I have decided to remove the planks which wasn't hard, they were mostly all unglued anyway. So...today I began my first filler blocks. They still need shaping...a lot of shaping, but it is a start. Going to stop now, my brain hurts. Oh yeah, found out something cool tonight. My paint booth that I made for my plastic models doubles as a great sanding booth! Very happy about that. Only real problem is the size great for 1/35 scale armoured vehicles but a little tight for ships. Guess I'll be making another one.
-
Billing Boats Paint
bigpav replied to HKC's topic in Painting, finishing and weathering products and techniques
I have also tried to get replacement parts. I emailed billing boats U.S.A. and they told me that they could no longer help me. Thanks for the tip on Age of Sail, I hope they can help me out. -
Yes this is my first wood model. I have been doing plastic models for a few years. I was used to more detailed instruction and steps. Looking at, basically a blue print, and going from there is a pretty cool challenge. I am very excited and can't wait to start. I just want to make sure I take it slow and not ruin anything. I went through a box of his "spare" parts and found some good planks to use to replace the damaged ones. I do want to keep as much of his work as possible. I really don't want this to be just my kit.
-
Hey Mark, the articles have been very helpful. Slowly, I'm learning, but it seemsa little intimidating. I will check the instructions again, but I am not sure what wood it is. I know that this model is going to be painted so I could use some filler to fix the spacing problems. The other half wasn't started so I can just plank that (hopefully doing a good job). Thanks again for the advice.
-
Hey all! So recently I posted that I had a family member pass away. He was really into ship modelling. I found three kits left behind in his house. Doing some research I found that the Renown is a beginners kit. I took inventory of the kit and everything is there. Now I have a lot of questions. The pictures that I will post will show how he started to plank the hull. Some of the boards aren't fitting properly and others are "springy". Should I or can I pull the planks and start over? If so, where can I buy planks? What type of glue do you guys use and are the nails neccesary? Last question, when you plank, do you bevel the edges to make them fit tighter? Thank you so much for your time.

- 23 replies
-
- 1
-

-
- renown
- billing boats
- (and 1 more)