Demostenes
-
Posts
29 -
Joined
-
Last visited
Content Type
Profiles
Forums
Gallery
Events
Everything posted by Demostenes
-
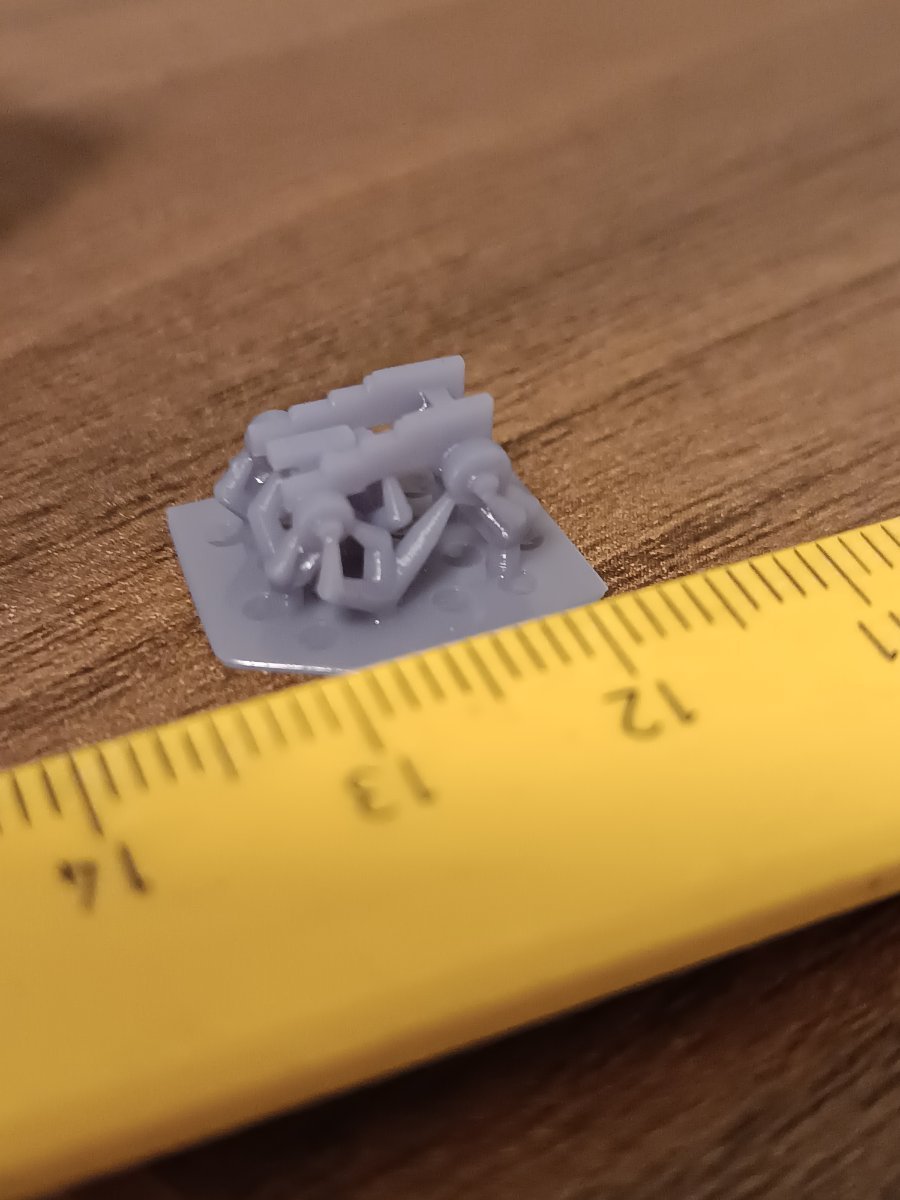
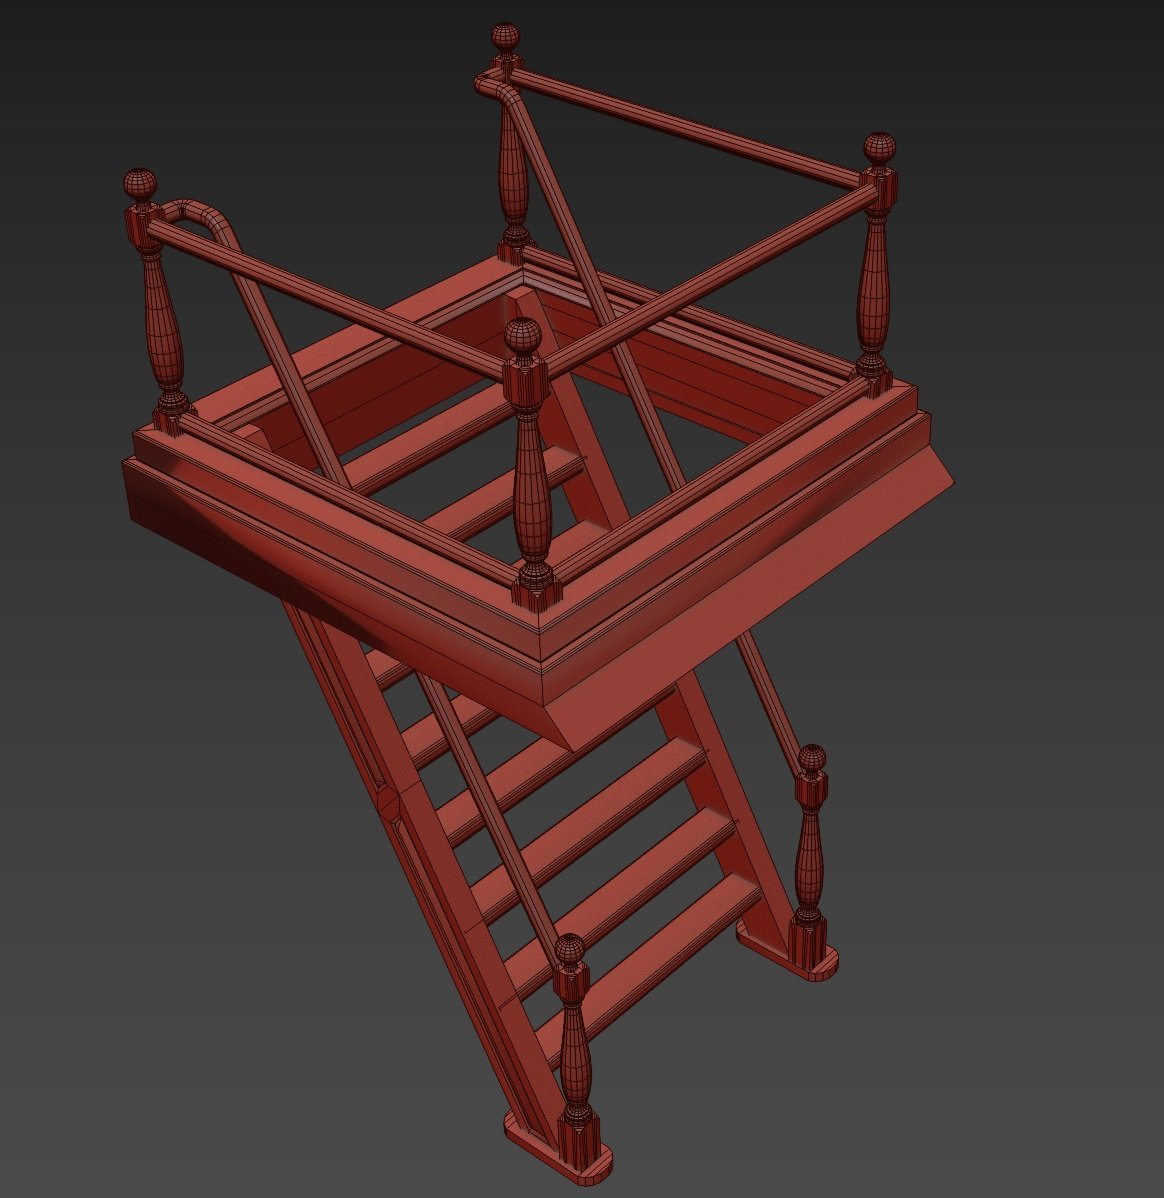
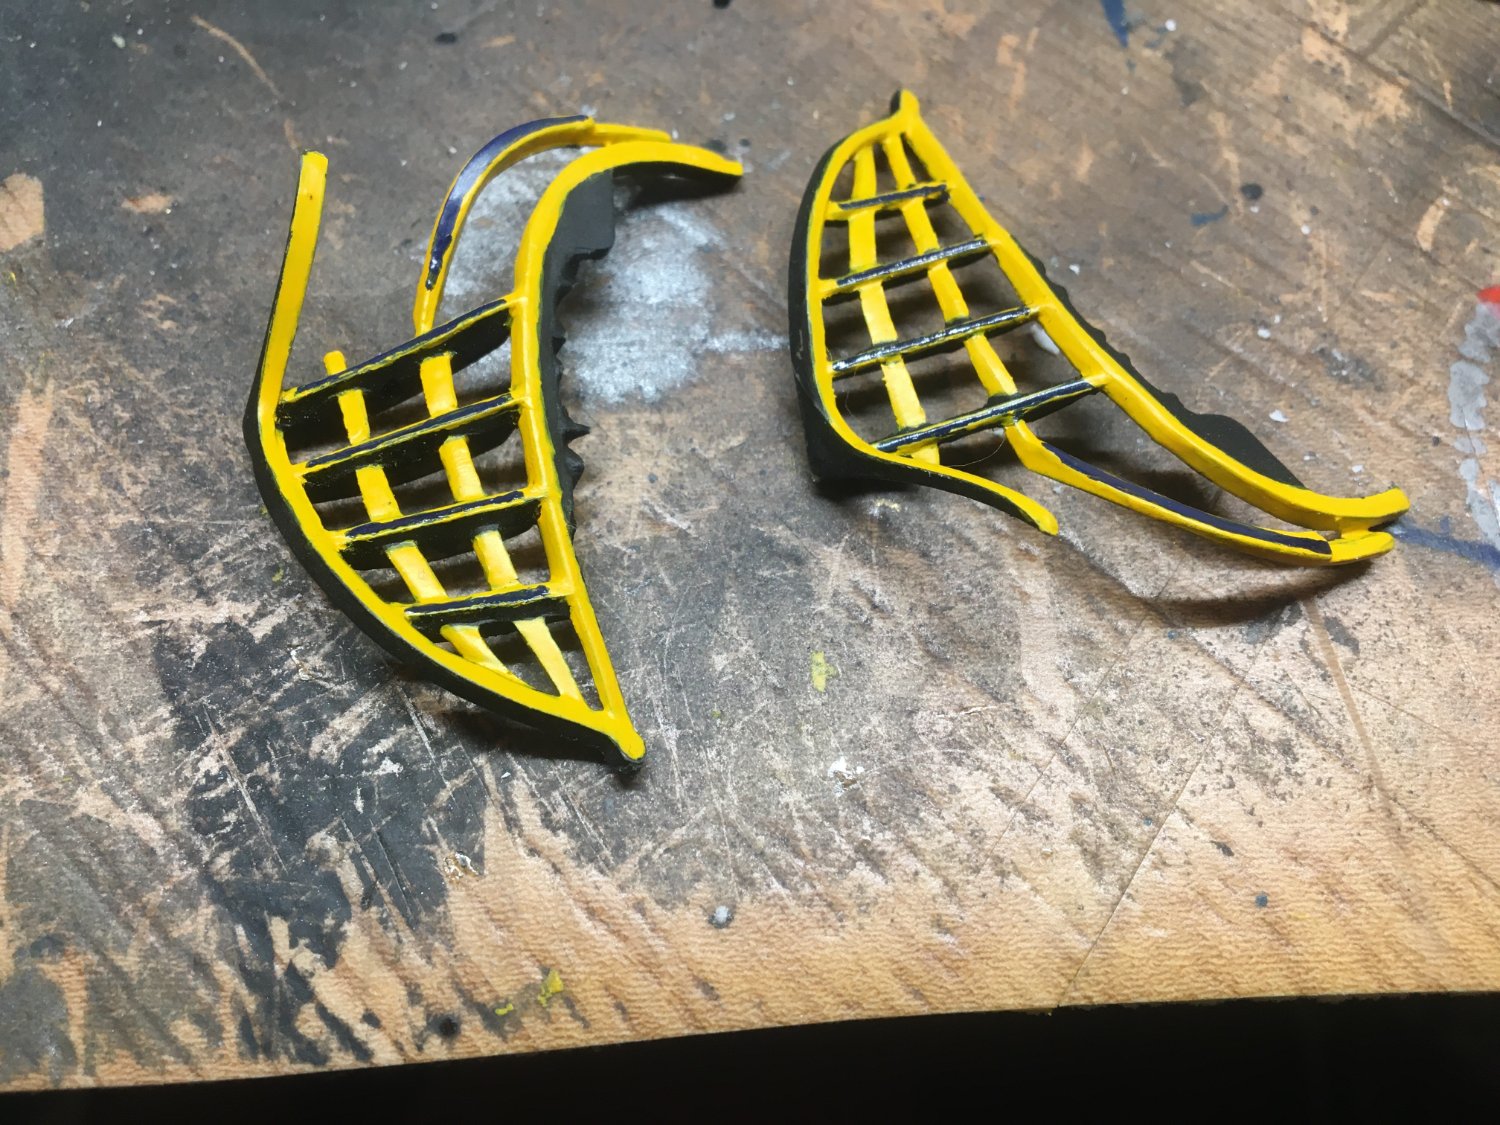
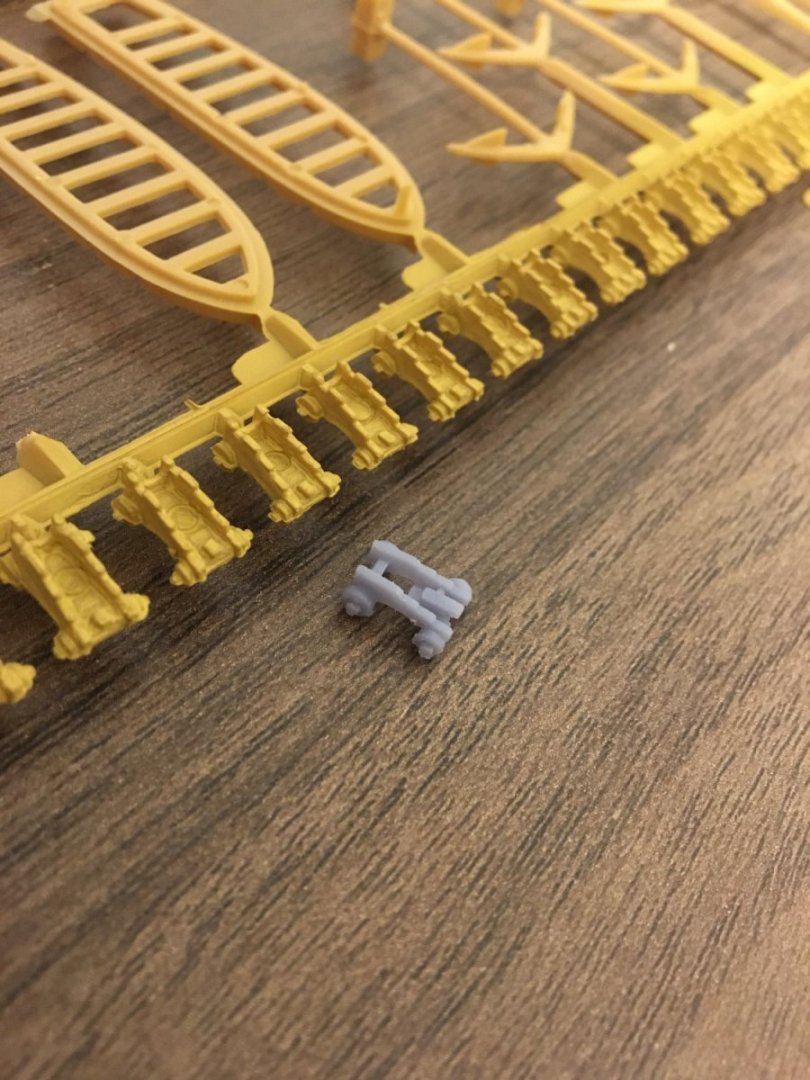
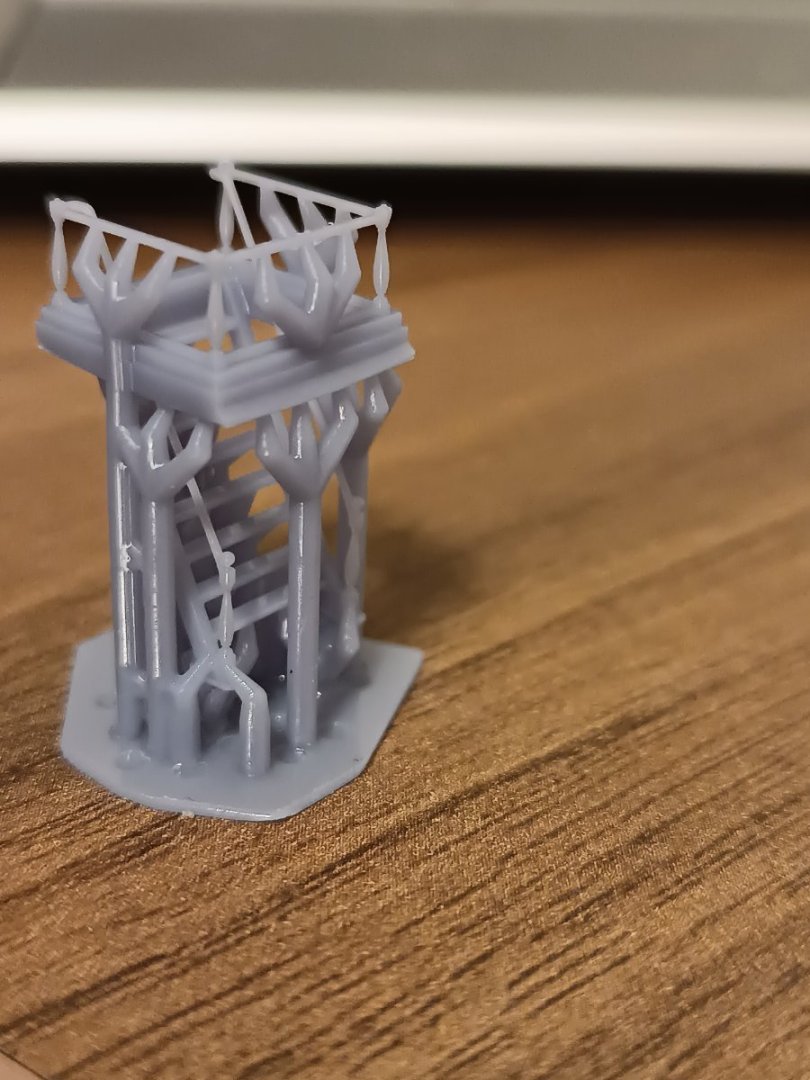
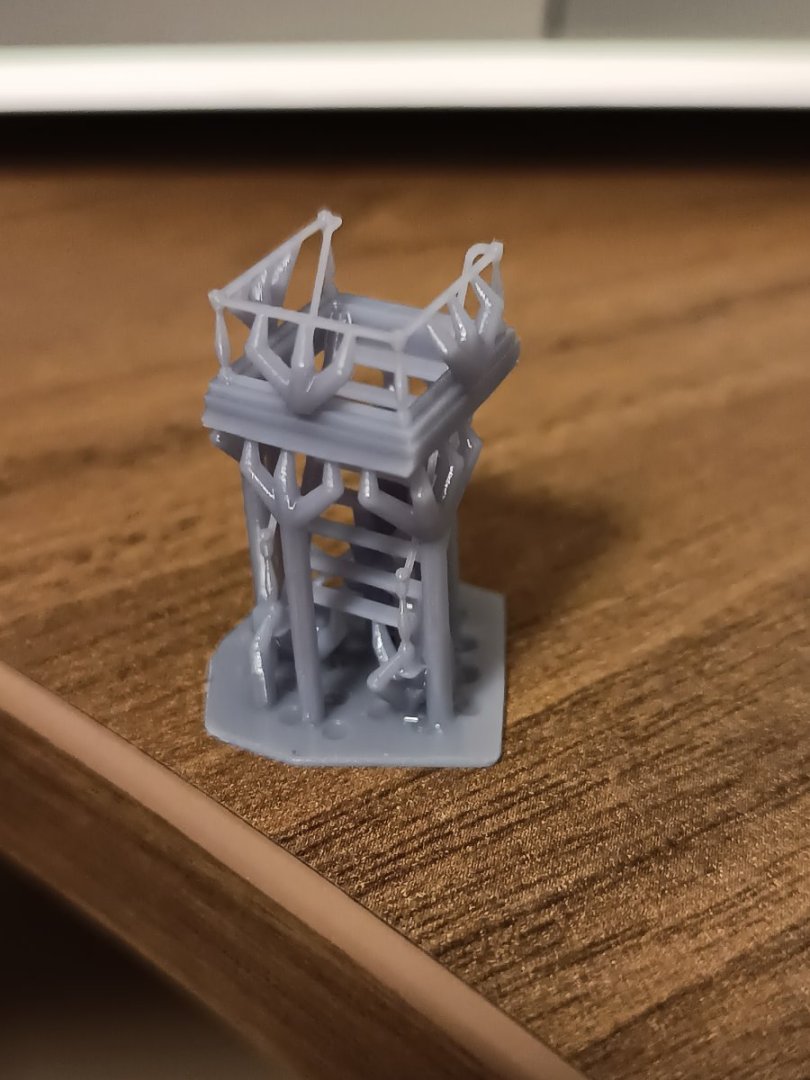
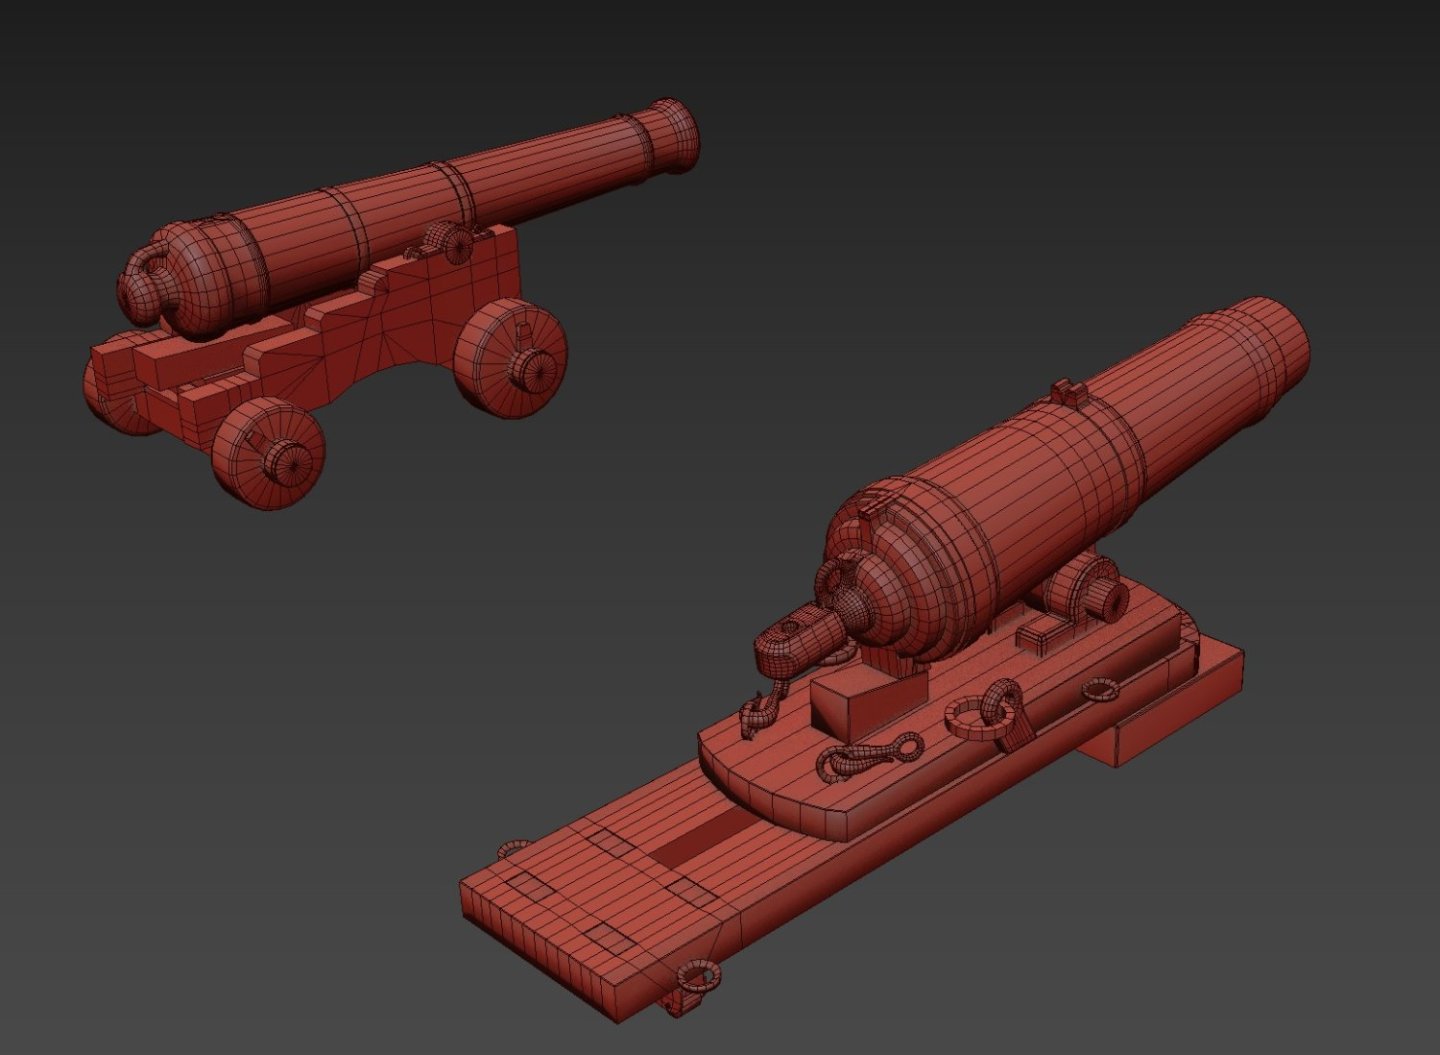
Here are first printing results. Automatically generated supports, defaults values, standard resin. It was my first print ever. I also used film for fast printing, which unfortunately affects sharpness and overall quality. This mean, there is still space for improvement, I was printing on 0,05mm layer height, but I can go even to 0,01. There are definitelly better resins for this, I have to put supports manually to not affect model that much and also try print with standard film. I was quite surpised I was able to print even these small railings, this is sub milimetr detail. For example cannon already look much sharper than original and there is zero post processing (no sanding, i just removed supports).

-
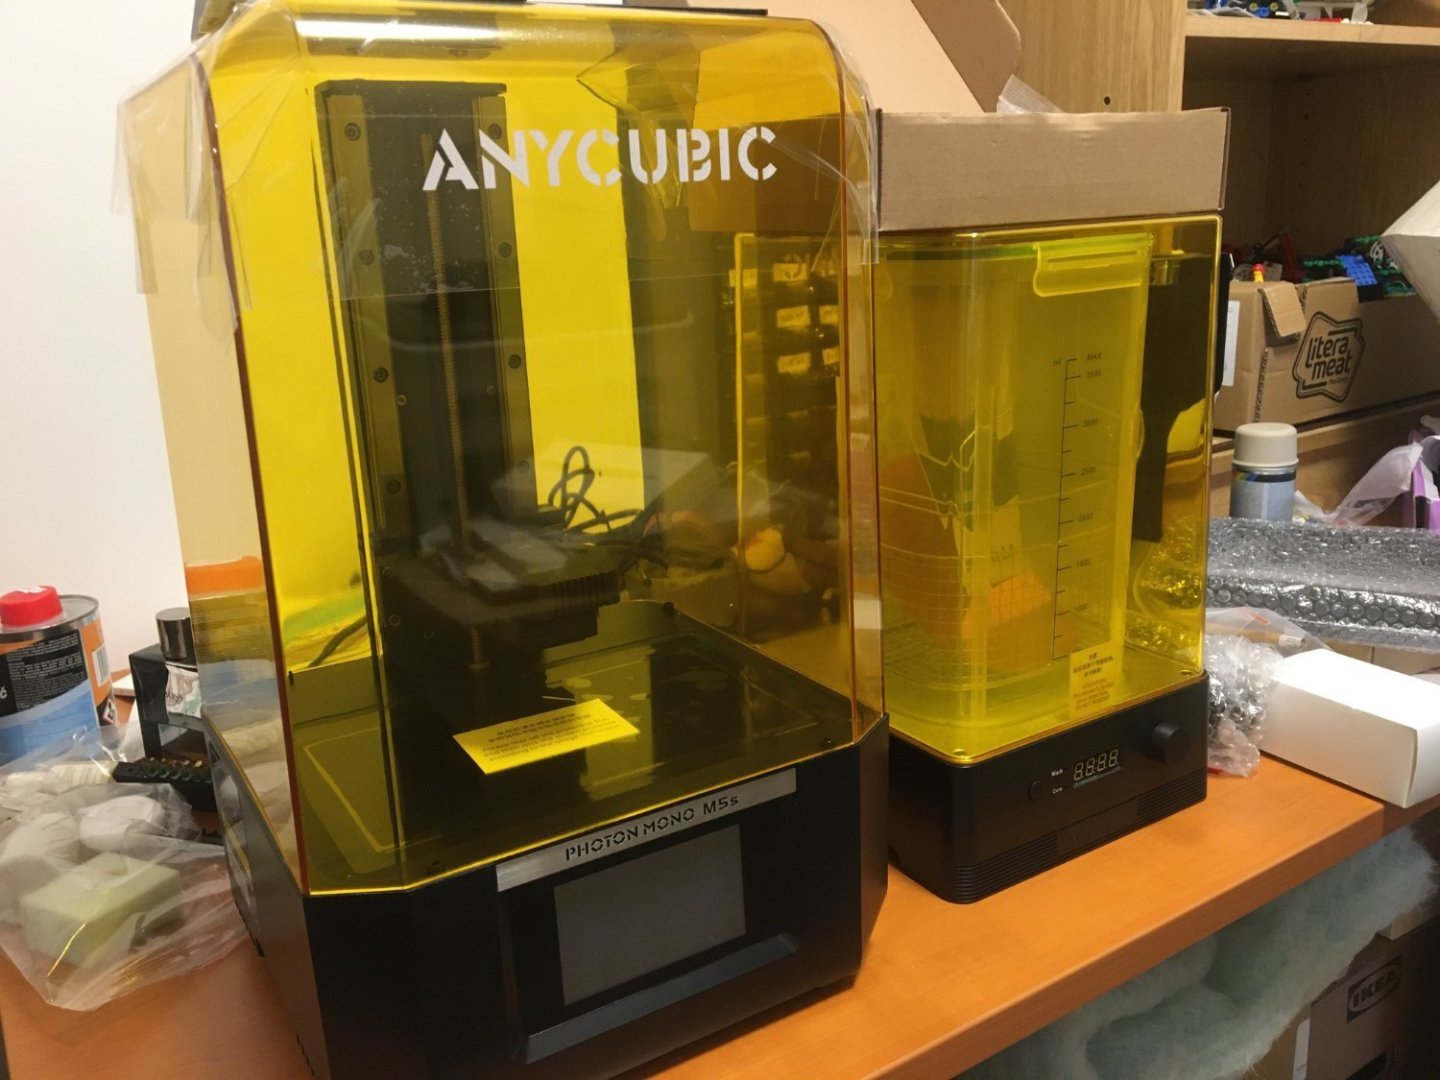
As I wrote before, I gave up on that printer kickstarter (lesson learned, never ever buy anything there) and bought something else and probably even better. Today arrived 12k resin printer from Anycubic, so now fun begins.
-
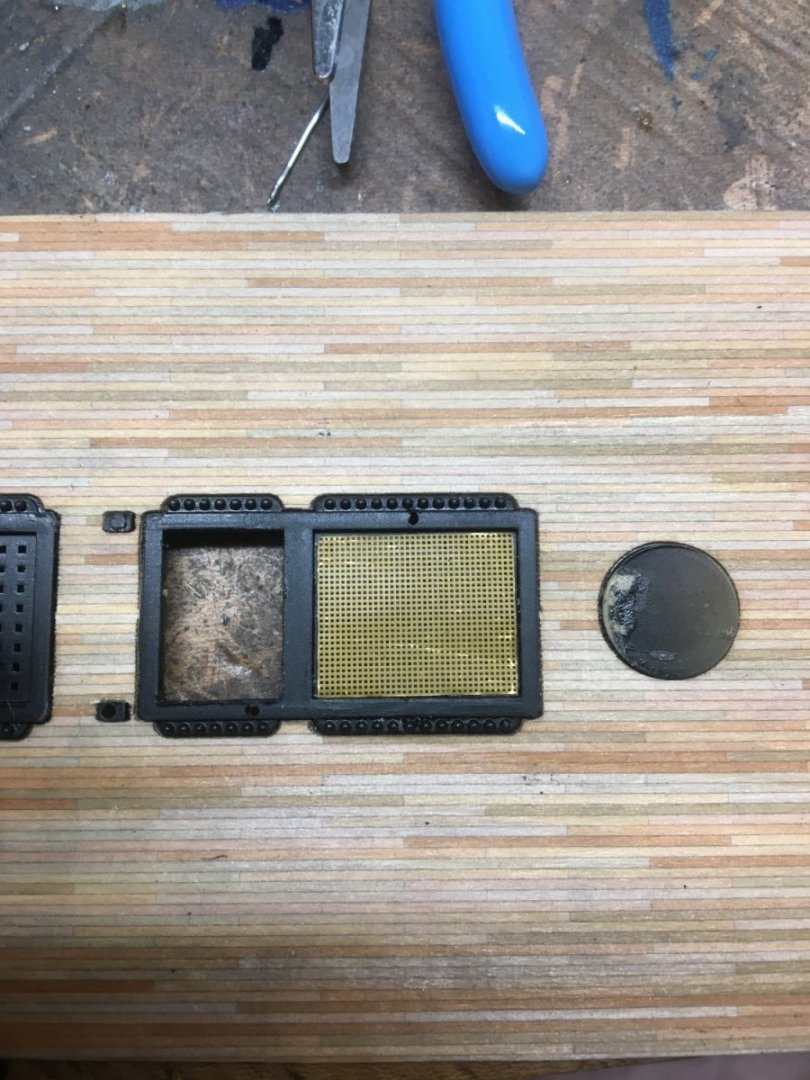
I will not print theese cannon balls, I bought various 0,8-1,2mm steel spheres on ali express. It will fit perfectly. I made small research regarding cannons and these are aproximate dimensions of cannon balls for 1/180 model: 18 pounder cca 0,71mm 24 pounder cca 0,77mm 42 pounder cca 0,95mm 48 pounder cca 1 mm 68 pounder cca 1,1mm
-
It should be on 8k SLA printer (resin), it has resolution of 0,02mm. You probably have to use more flexible resin to make that not brittle, but this is just matter of experimenting. On FDM printer (filament) I am not that sure (smallest details probably not), but nowdays even these have good "resolution". Friend of mine was lately printing some plastic pieces for furniture for me (original was crap) and I was surprised by level of quality even on FDM printer. Anyway I am already starting to regret I ordered that SLA printer through kickstarter, it was big mistake. Almost 3/4 year delay in delivery, I should bought something similar in more standard way, just little bit more pricier. Once I start prining, I will definitelly share results, what was possible to print and what not. This is reason why I am preparing these models in advance, to have something to experiment on. I will probably try even print these hammocks netting holders, it doesnt hurt to try. Unfortunatelly last 1/2 year I am preparing to move to new house and there is so much issues with that, that I have not much time for modelling.
-
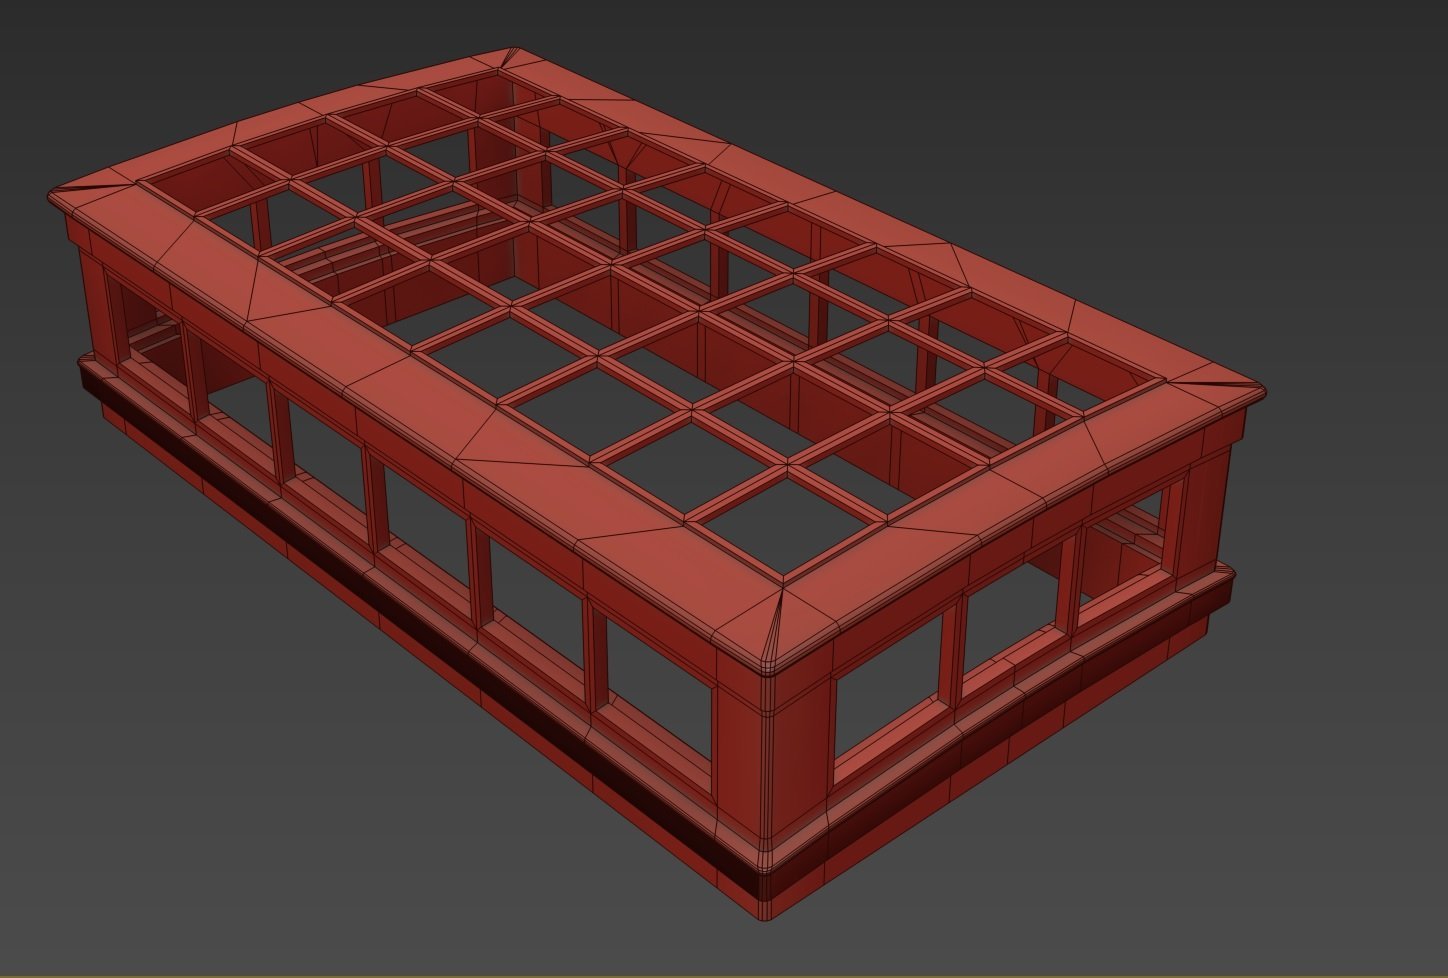
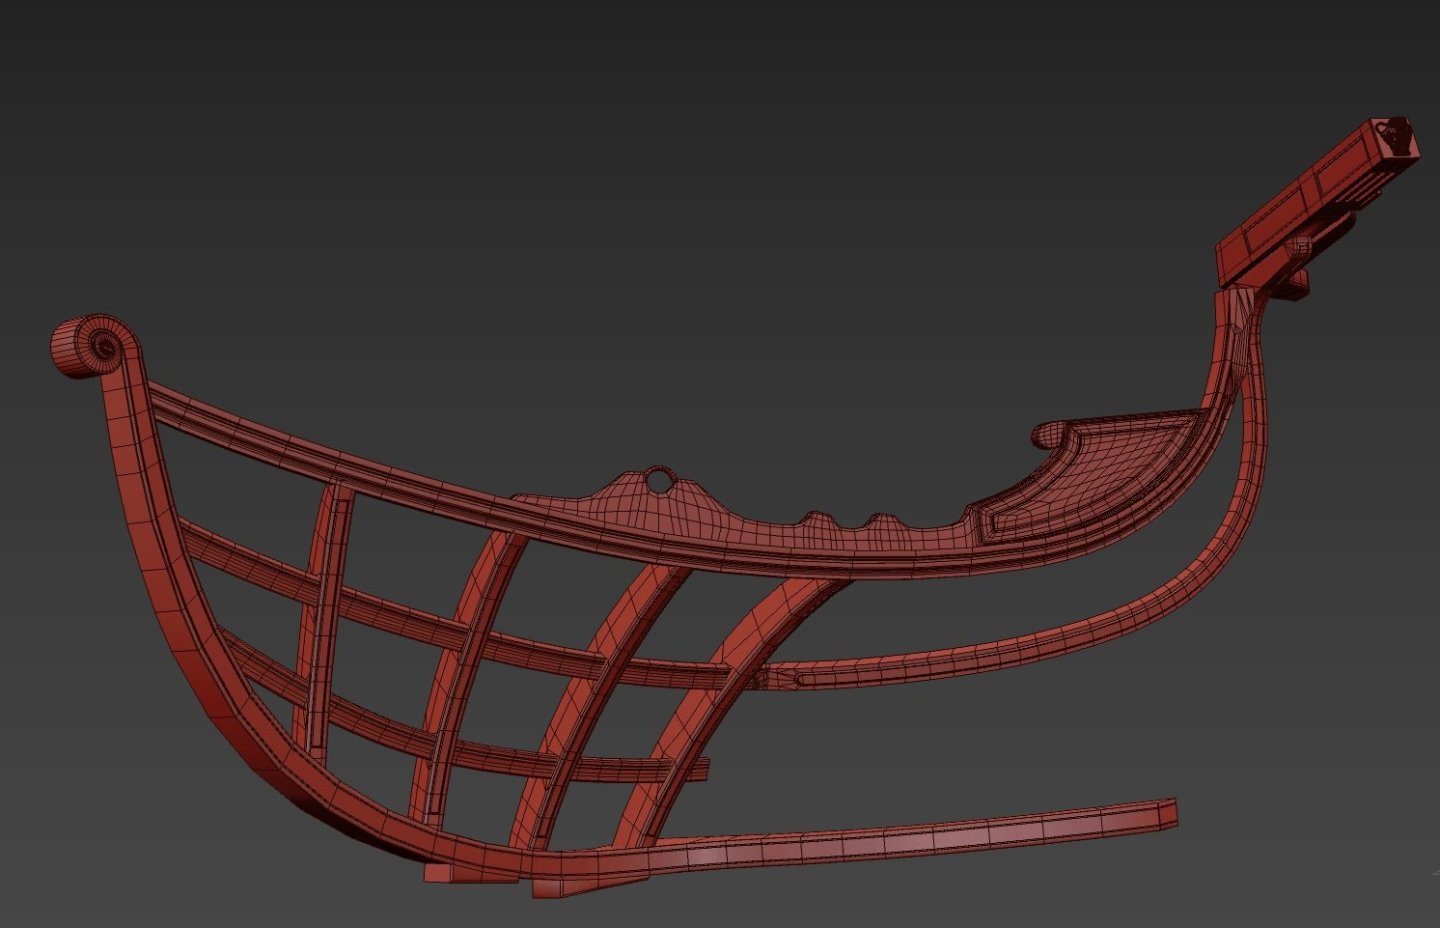
There is indeed question, how much of these details is printable. Also I will probably split it into parts and assemble after printing. But such adjustments are simple.
-
Goal of this is to print it as two separate parts, so painting will became piece of cake:

-
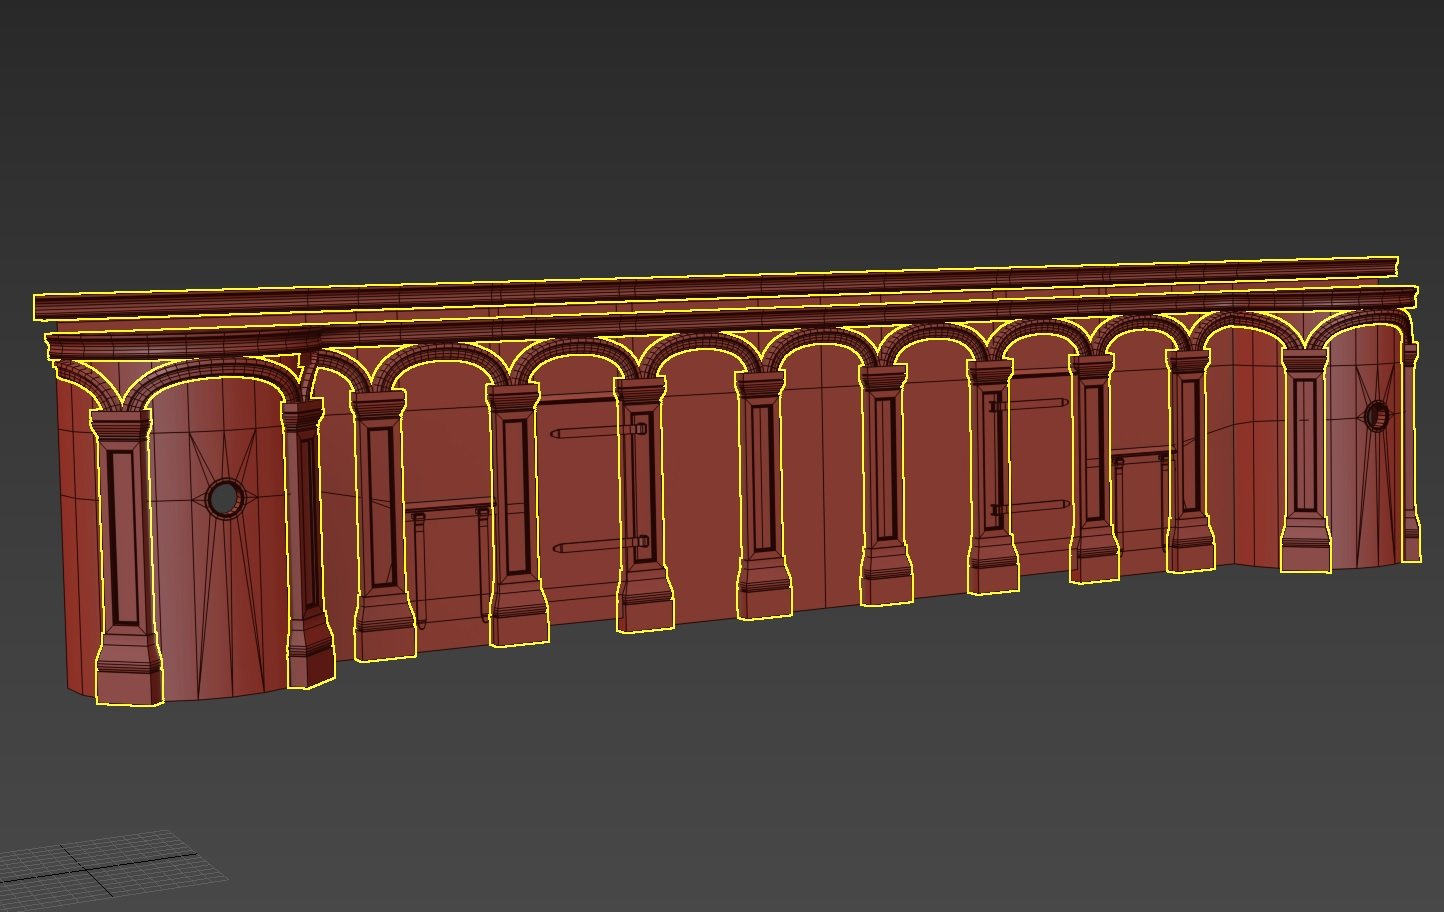
I didnt have that much time I expected thanks to some illness, but there is some progress: I also started preparing parts, which I believe deserve more detail. There will be more: We will see, what printer can handle when it arrives (should be soon). Printing resolution (0,02mm) should be enough to print these details....There will be probably some tuning needed to be able to fit it onto model. In case of bigger issues I will 3d scan that model part via photogrammetry and use it directly in modelling tool as "template".


-
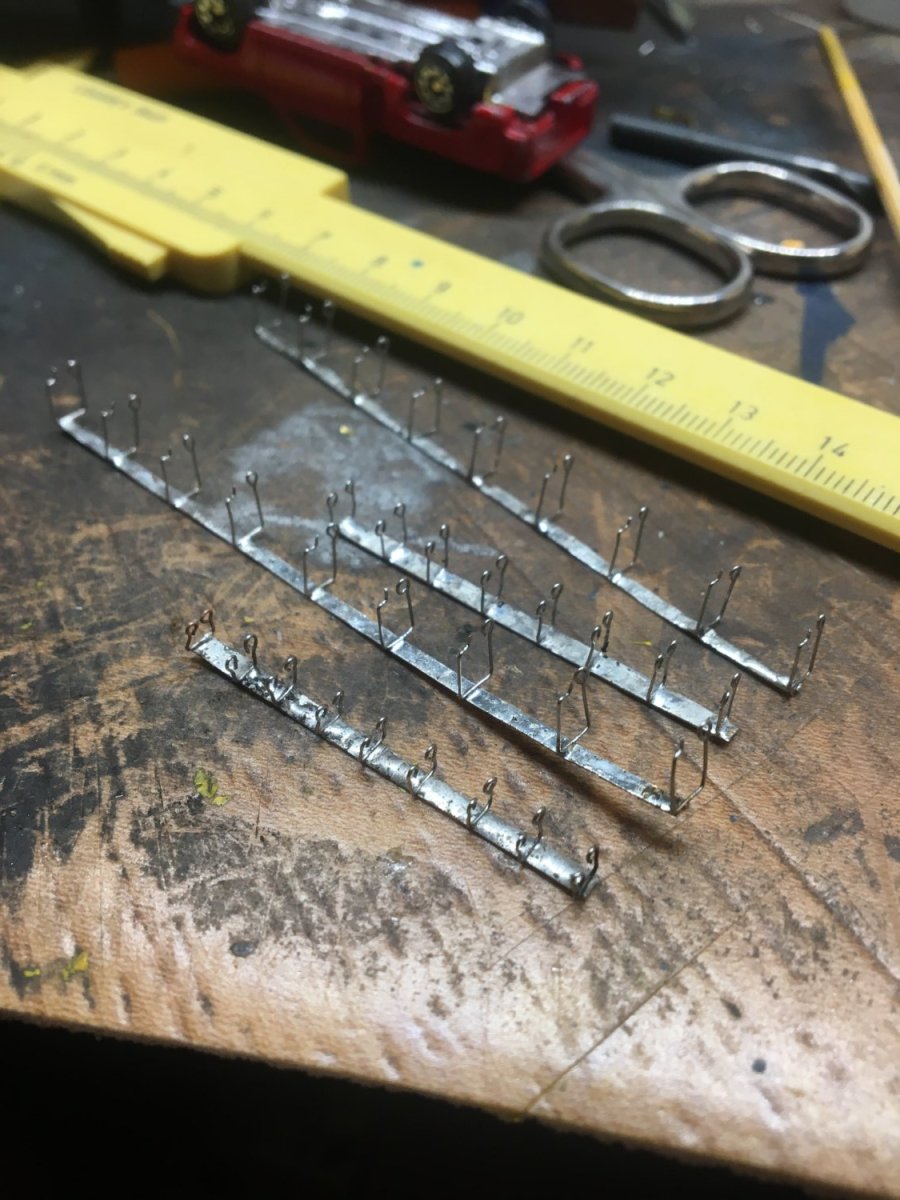
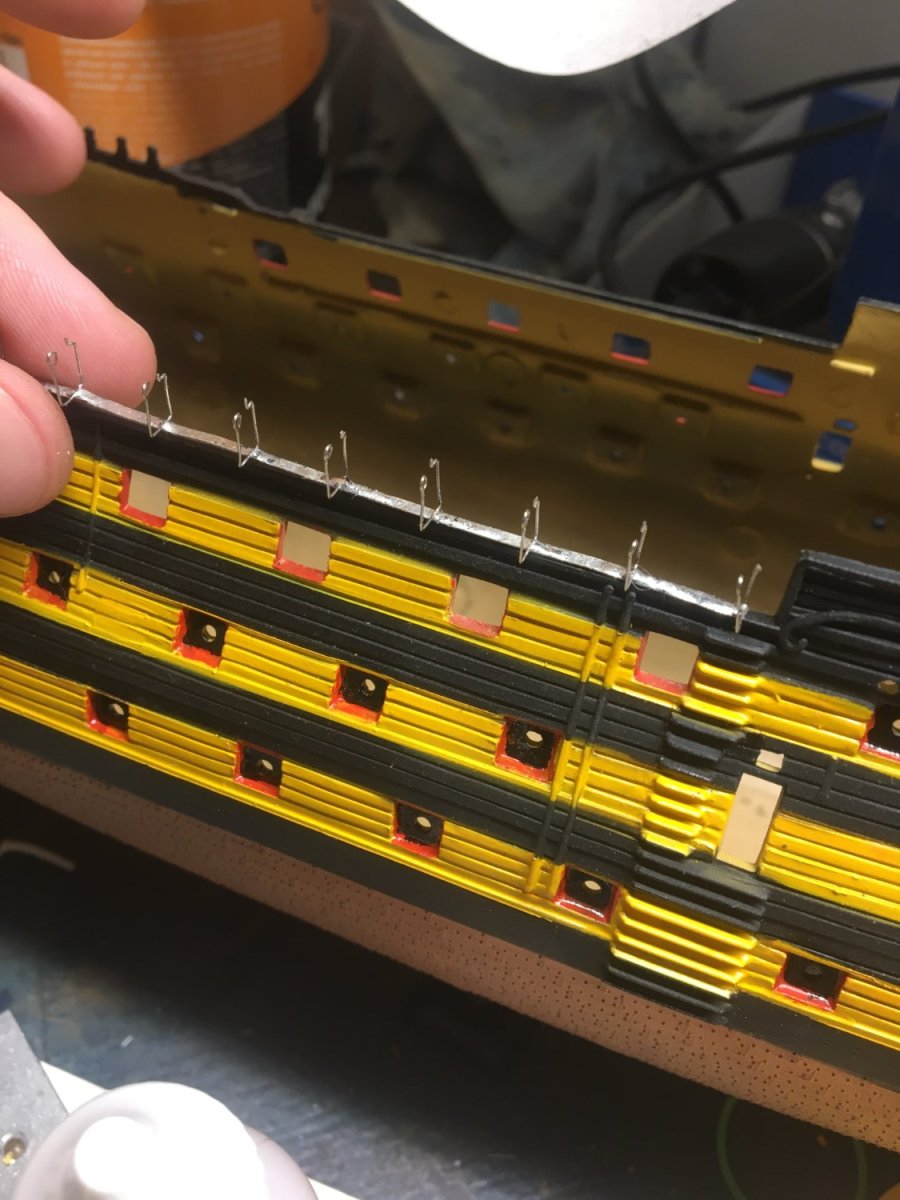
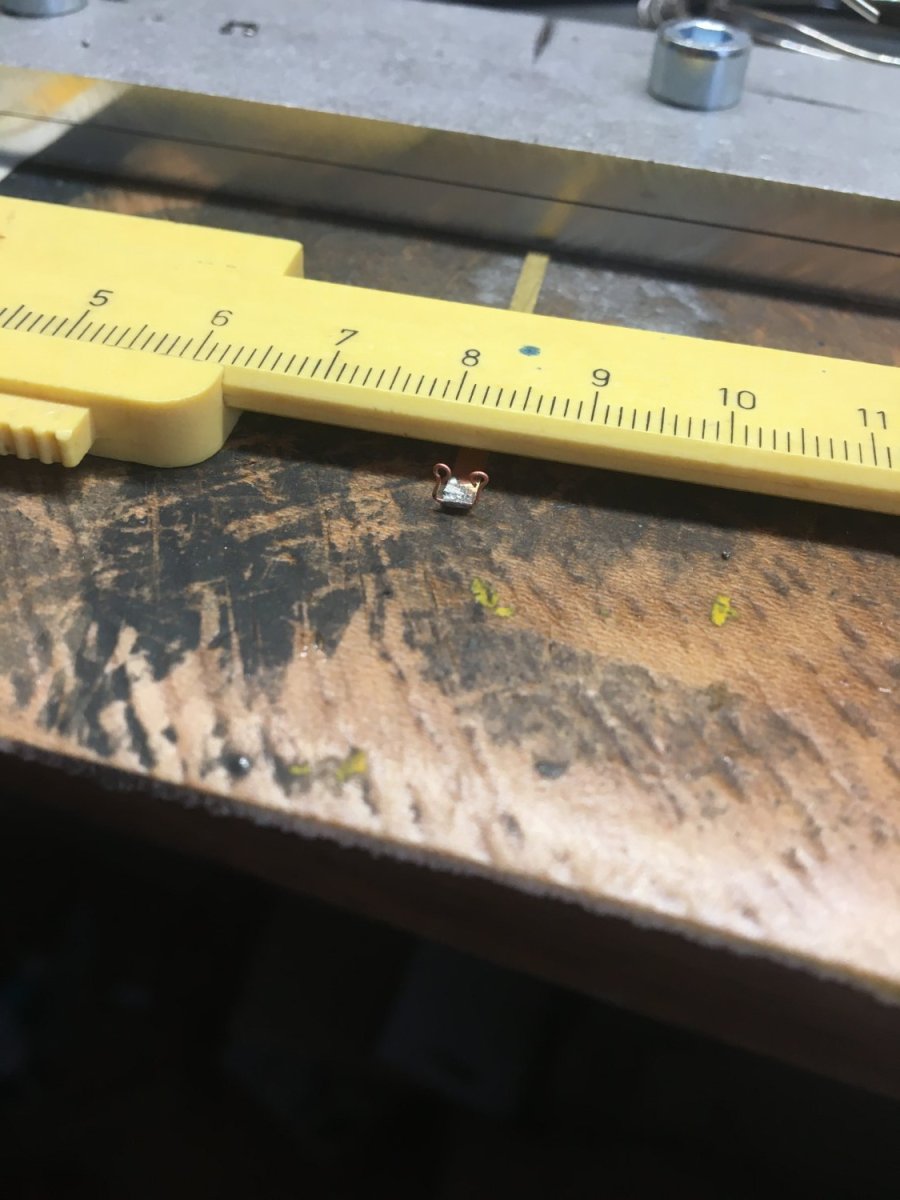
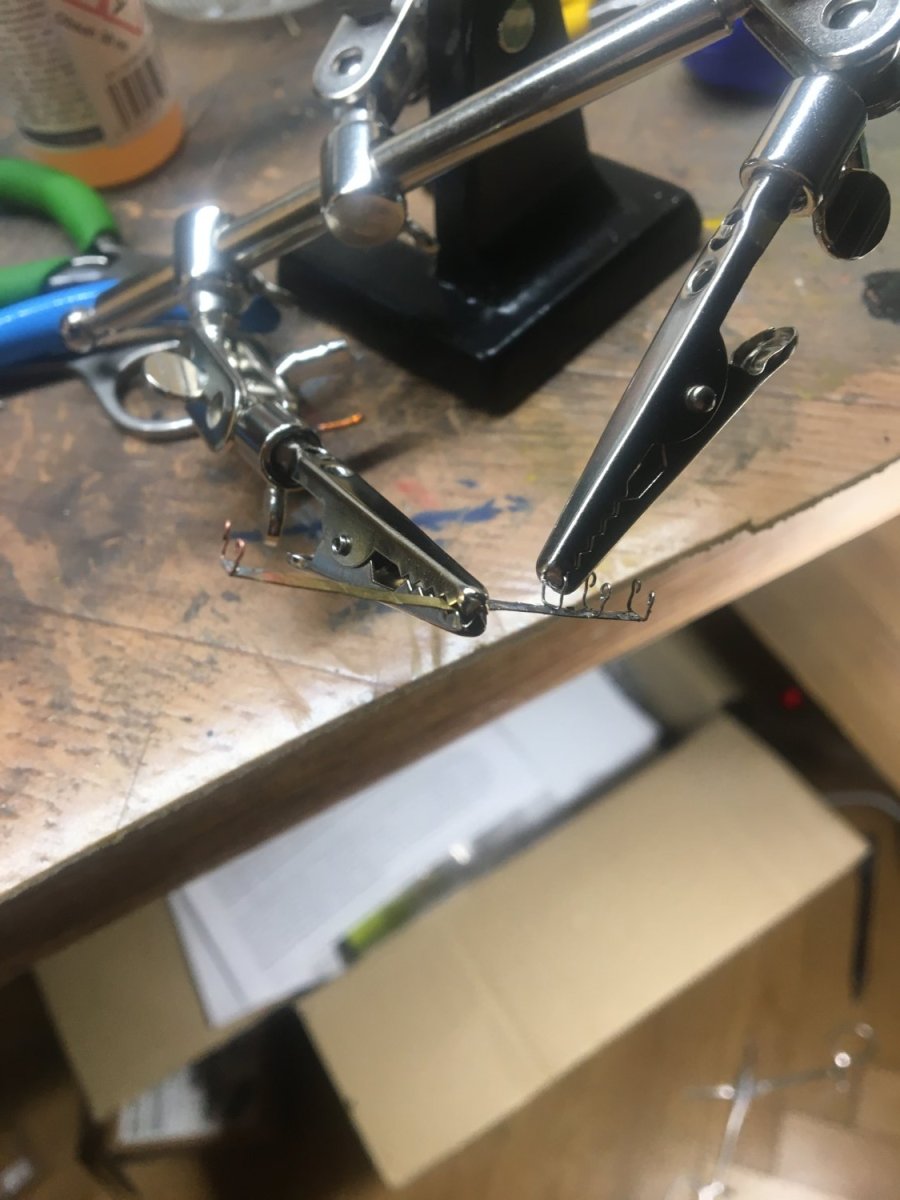
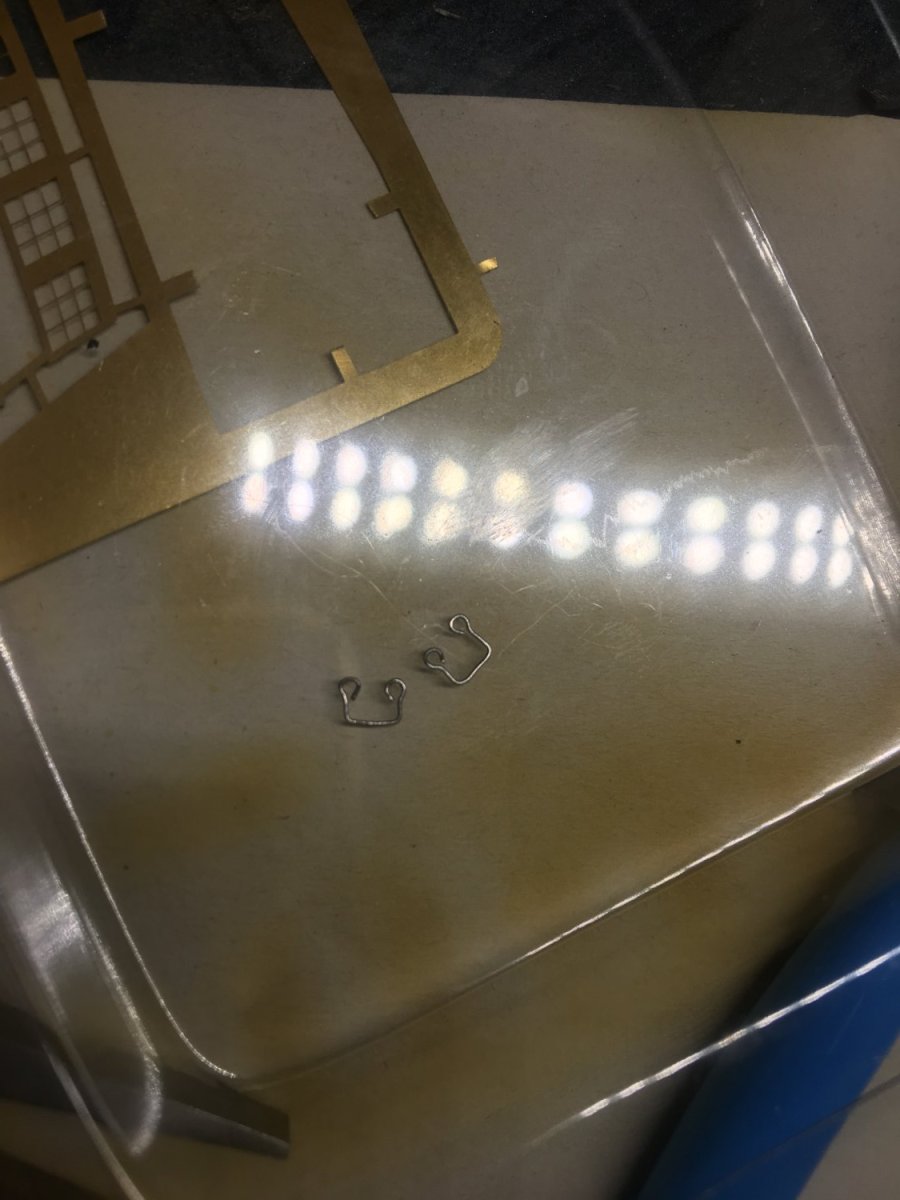
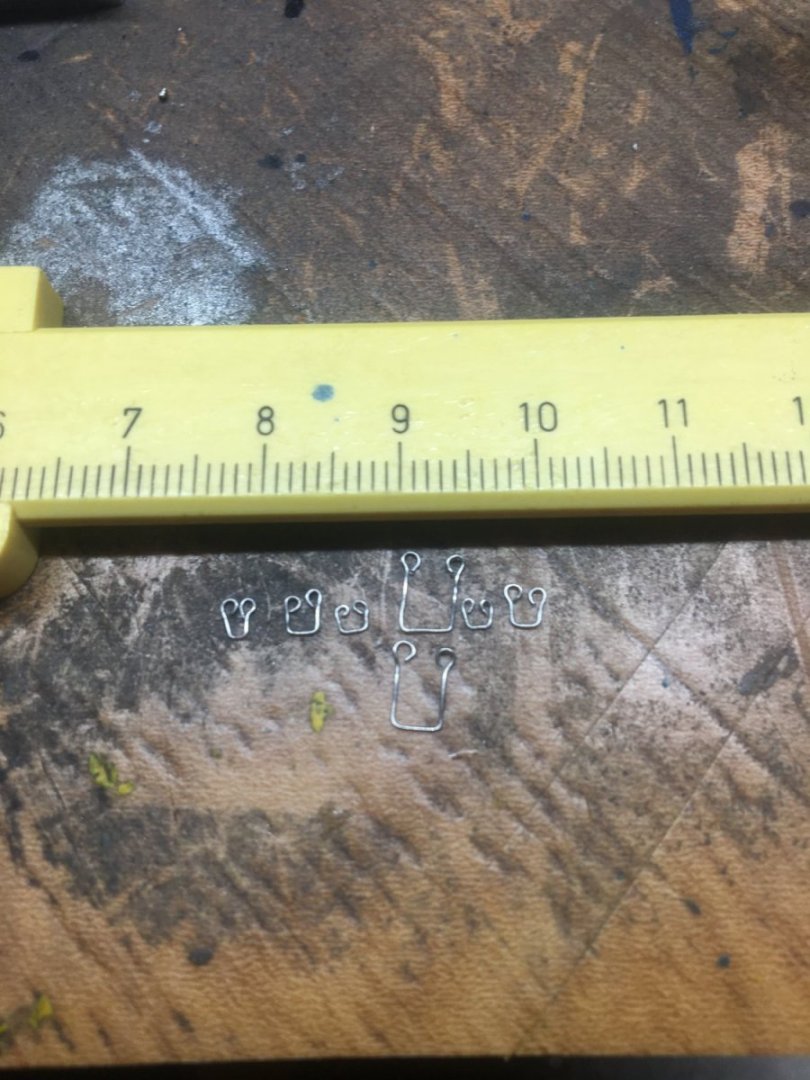
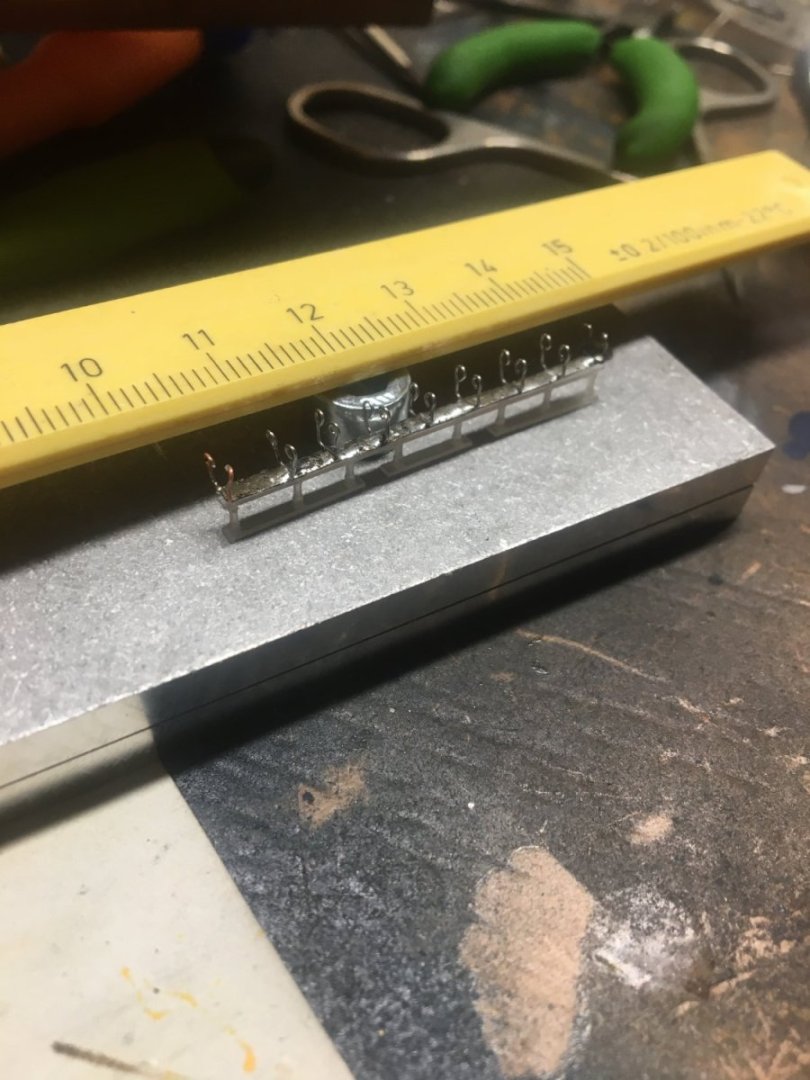
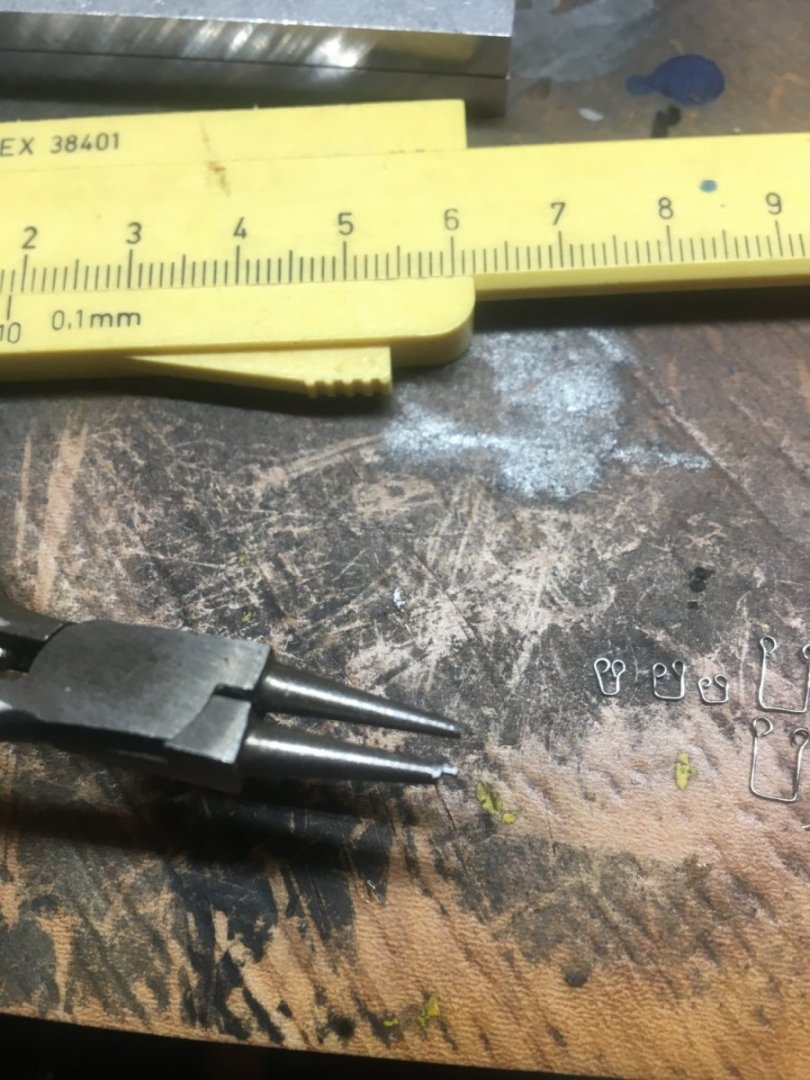
While I am waiting for 3d printer, I ve decided to do some details. I really like hammocks nettings, it is great detail. I ve bought some photoetched ones, but they are too straight, too perfect, it simply does not look good without real nettings (https://www.britmodeller.com/forums/index.php?/topic/234932536-scalewarships-hms-victory-etch-set/). So I was experimenting with some other approaches. Wire was obvious solution, first I tried 0,3mm copper one, but it is quite soft and for bigger parts it would bend. So I ve used 0,3mm steel wire. Easy to work with and it is quite sturdy. As proof of concept, I ve decided to do the smallest ones. If I can do theese, I can to rest easily. There was quite steep learning curve. The biggest problem was doing these small ones similar and in reasonable time. I ve spent 15-20 minutes on one and literally 0,5mm difference was enough to make it look totally different: After some time I ve figured out proper way and started to produce them in bigger ammount. One takes cca 1-2 minutes, which is acceptable. Eyes are little bit overscaled, but there was not way how to make them smaller (and looking similar in bigger ammount): Even thou I had to modify small cheap kettle pliers to be able to go under 1mm eye size: Other issue was soldering. Gluing it directly on plastic wouldnt hold, so only way is to solder it on small piece of copper. Cooper wire went without any issues, but I had problem to solder steel wires, which was solved by proper flux and some tricks from youtube: Another problem was, that I have to be quick, or heat will loosen already soldered ones. but after some time, I figured repeatable way how to do it and since then I was quite fast: I think this looks quite OK. The bigger ones will be piece of cake, they are 2-3x bigger. So now I need to do some painting and put there some netting, but I already have some ideas, this shouldnt be big problem. So I know, what I will do during december To not get some OCD, my plan is to do just 5-10 pieces daily which will take 5-20 minutes and I can finish in one month or sooner.


-
Actualy I was thinking about creating in 3d and printing....This is fun project for me and I like to test various approaches. There are also some details missing, so it would be opportunity to add them.
-
Thanks, I will try. In this scale that blue stripe has cca 0,5-0,75mm. Btw, really nice model, I cant imagine how you did this in 1/600.
-
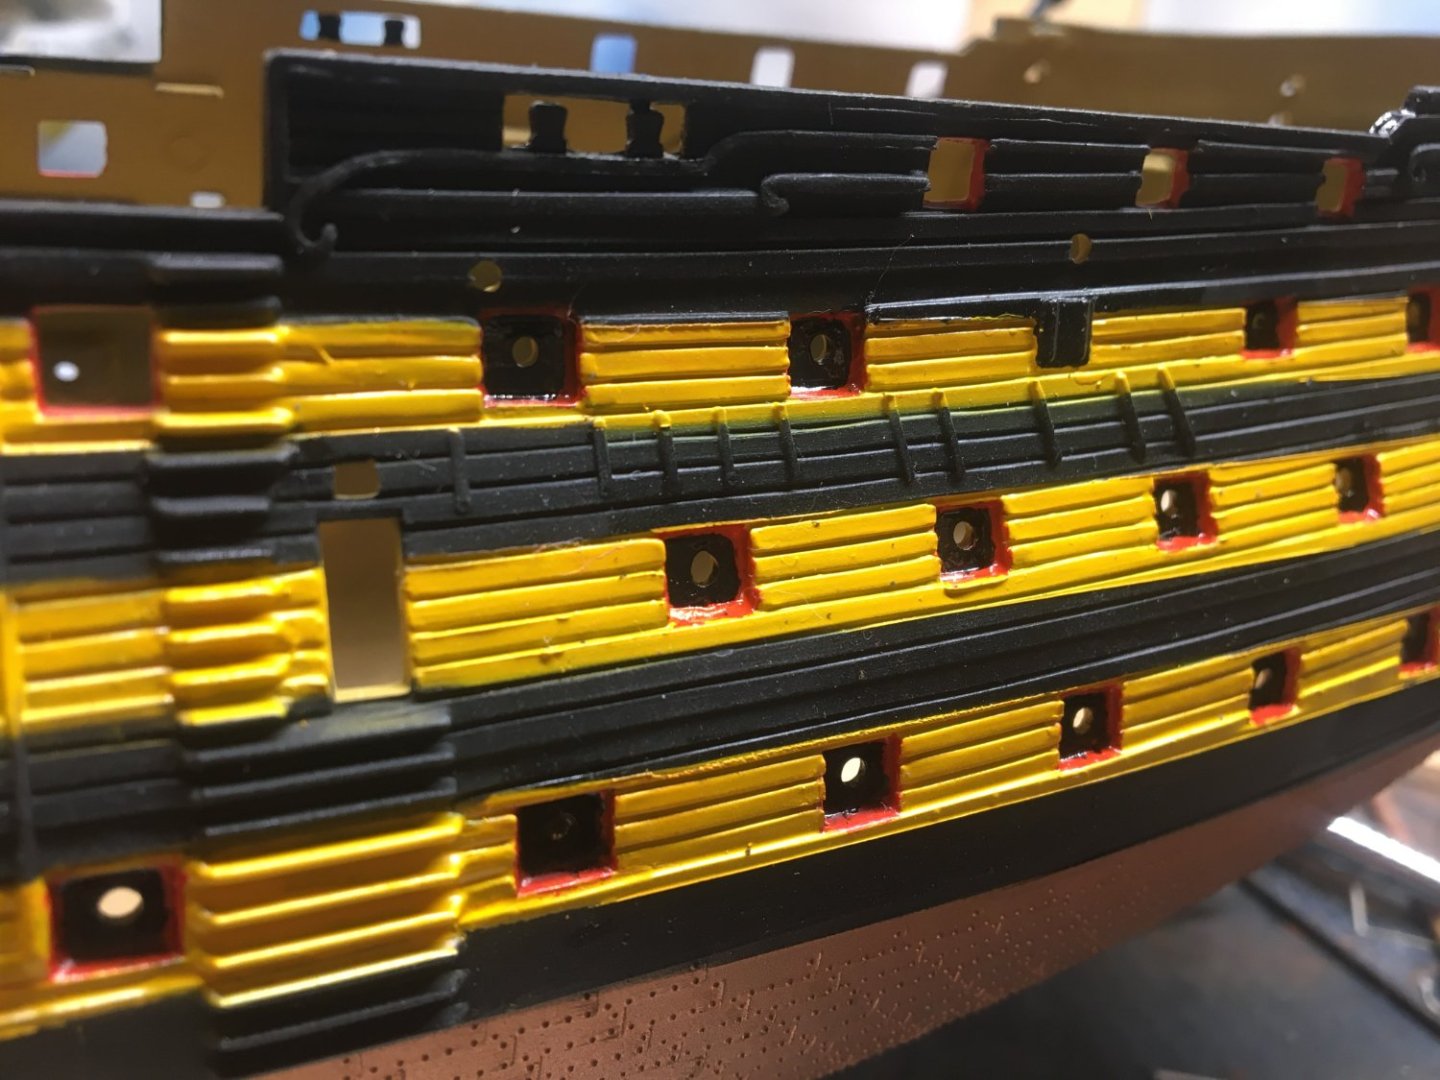
While waiting for 3d printer (should be to the end of the year), I painted some other parts. First two clorors went +- OK, but adding blue stripes seems like failure to me. I tried several times, including some masking, but it seems in this scale there is not good solution. Maybe redesign this piece and make small "recess", so color would be physically separated like on real ship.
-
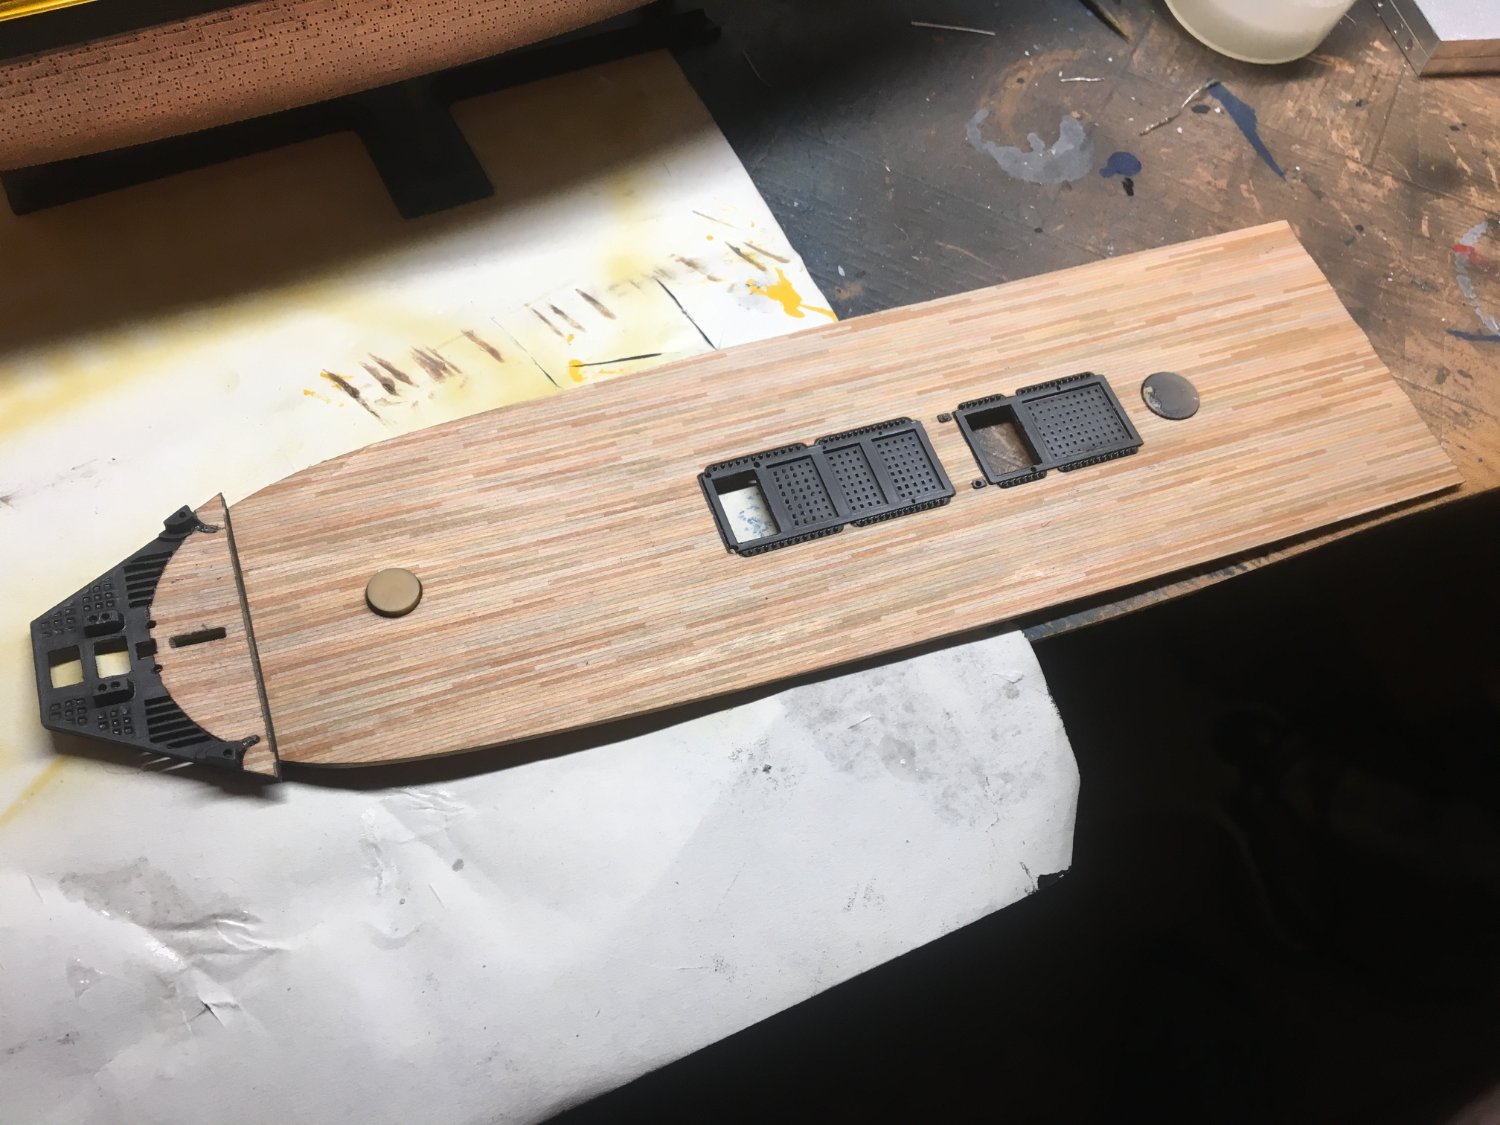
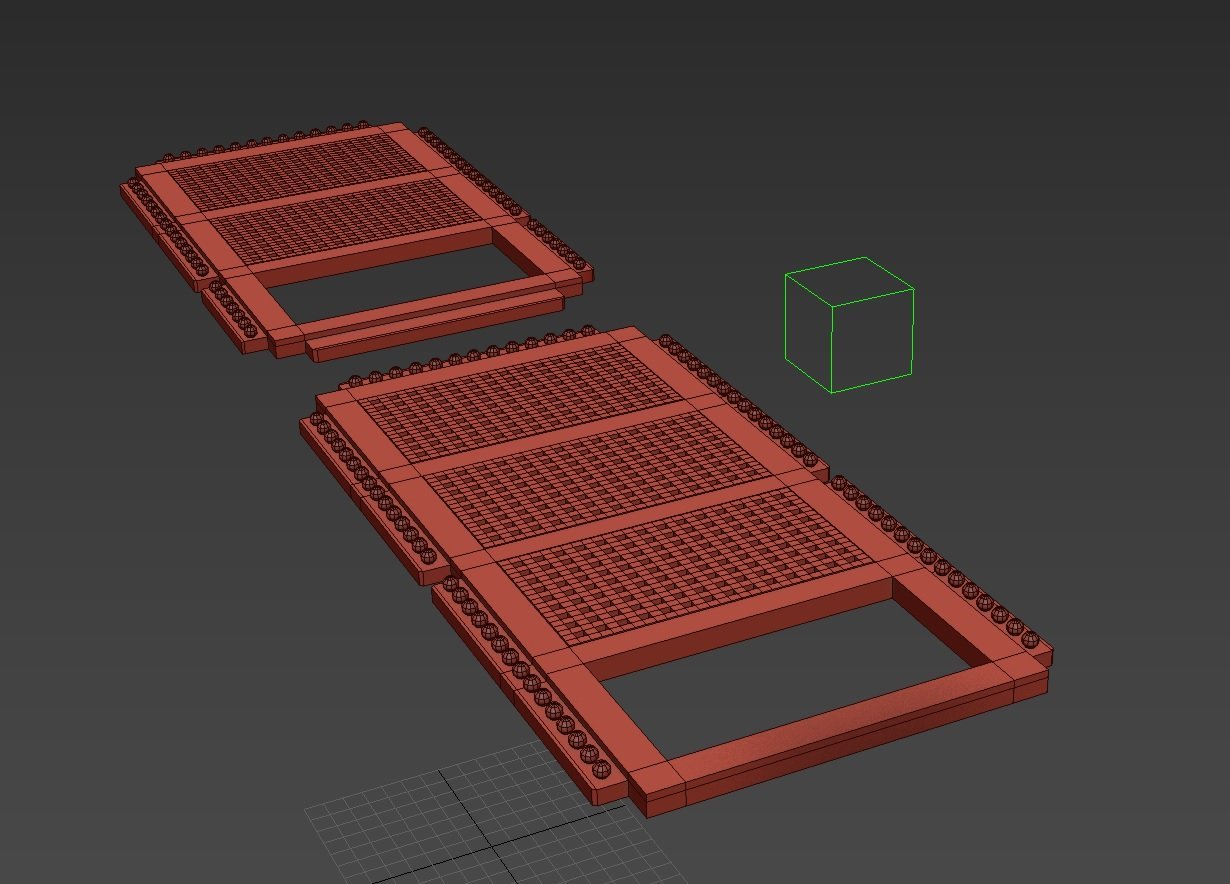
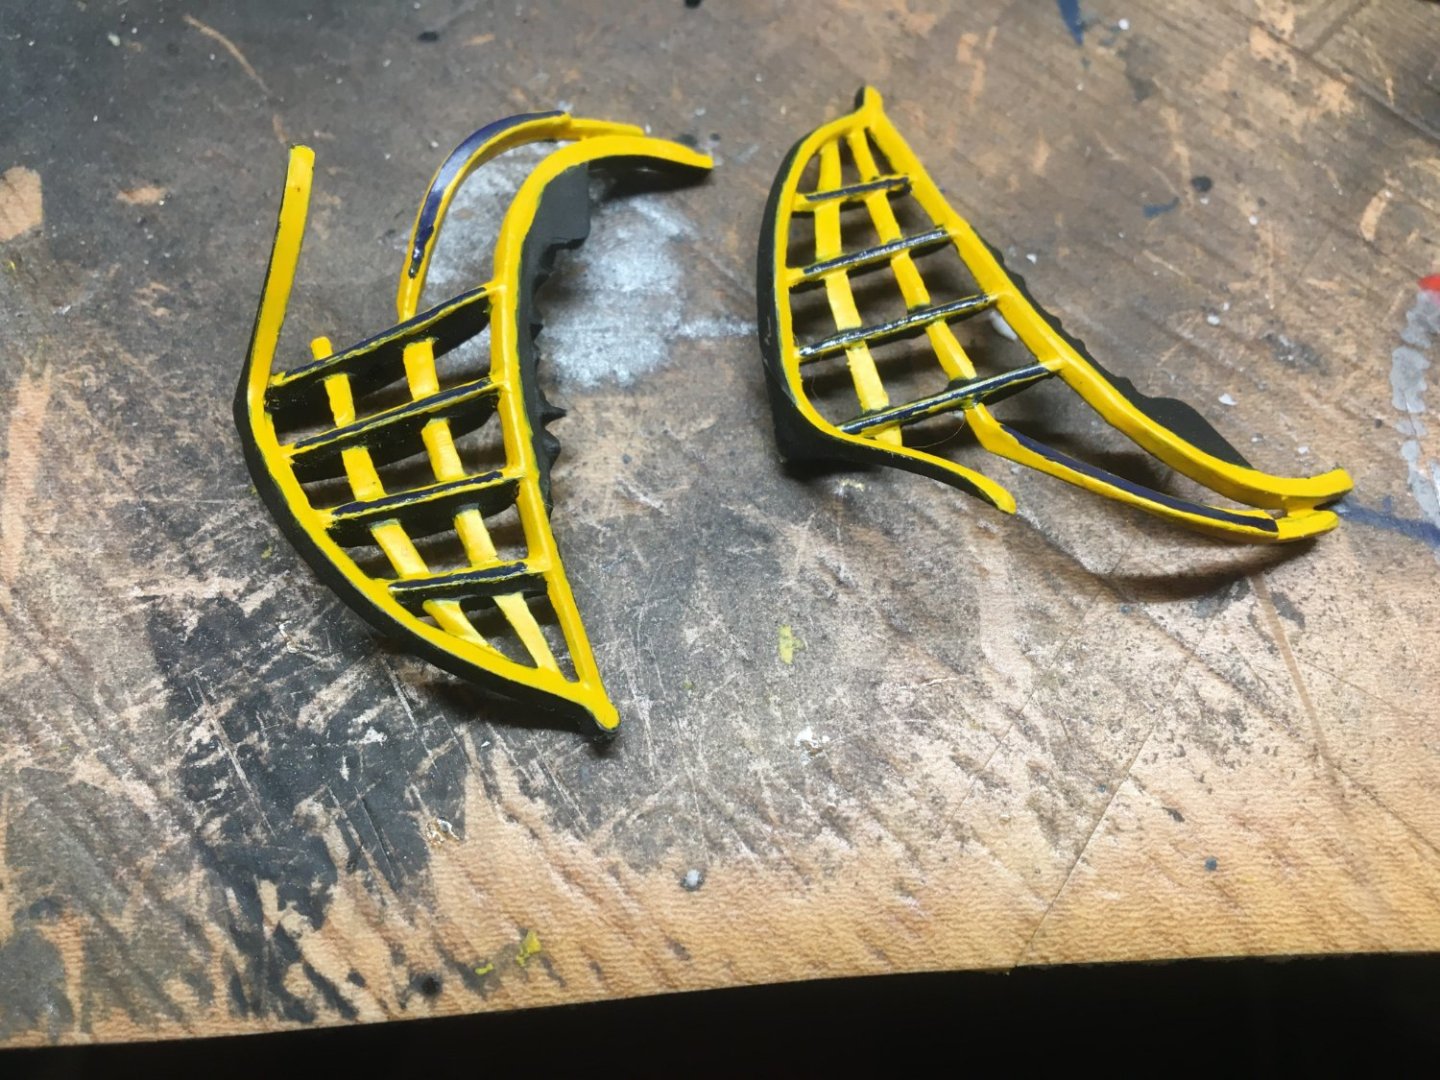
Yeah, it seems, the set (https://scalewarship.com/index.php?route=product/product&product_id=1292) is not done properly. Some of these gratings are OK, some not. But problem is little bit deeper, since I added veneer deck, it added thickness and grating frames are now not that visible. In reality it seems like cca 15-20 cms, which is cca1mm in this scale and it isnt by far. So my goal is to add little bit of height. I cant do that just with brass, I need to modify it whole. Probably nonsense doing it in "old school" way, but should be easy with 3d print. I will take it as proof of concept what is possible and what not...If I fail, I will indeed use your method and find something more suitable, I really appreciate your advices. Other option could be to make own etch and make it "3d" via foldable sides, but this is far more work than 3d print (and I doubt I would be able to do it on the first attempt). I generally like to discover new approaches and if I fail, well, I failed. There is lots of experience even from failure.
-
We will see I am actually really looking forward to this process, so far I was only doing 3d models (for games), never printing anything.
-
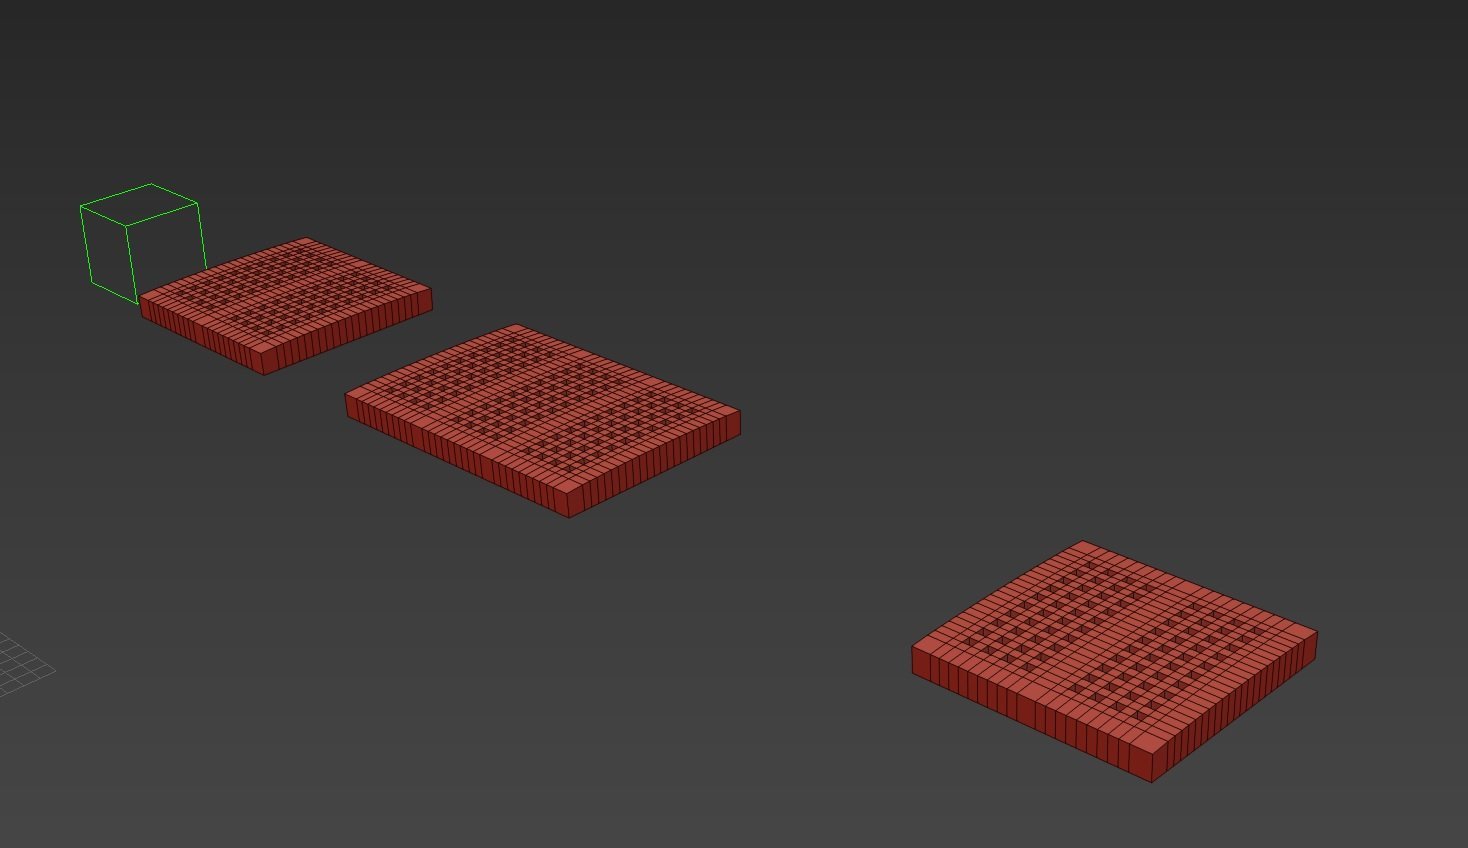
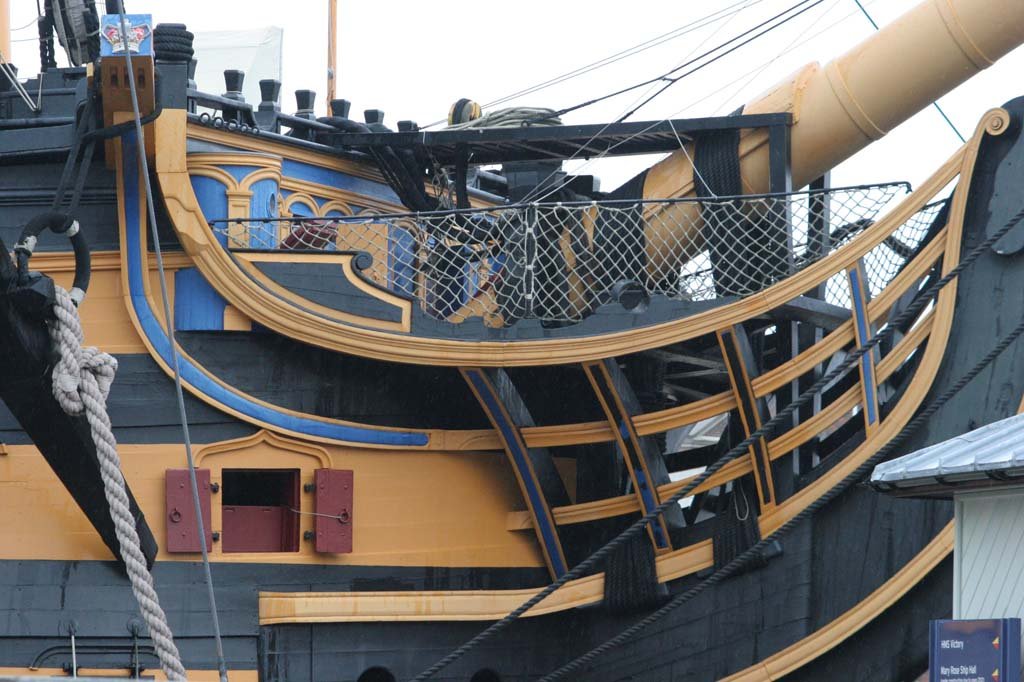
It is this one: https://www.scaledecks.eu/shop339226f0/Wood-Deck-for-1-180-HMS-Victory-fits-Airfix-kit-p163968818 I have some etch meant directly for this model, but I dont like it. Number of holes absolutely does not correspond with reality. Also real grating were not flat, but slightly curved. To model this in 3d modelling tool would be really simple, so this will be first thing I will try to make and print I hope I will have my printer to the end of the year, it will have 0,02mm precision, so this should give reasonable quality even in this scale. I have s
-
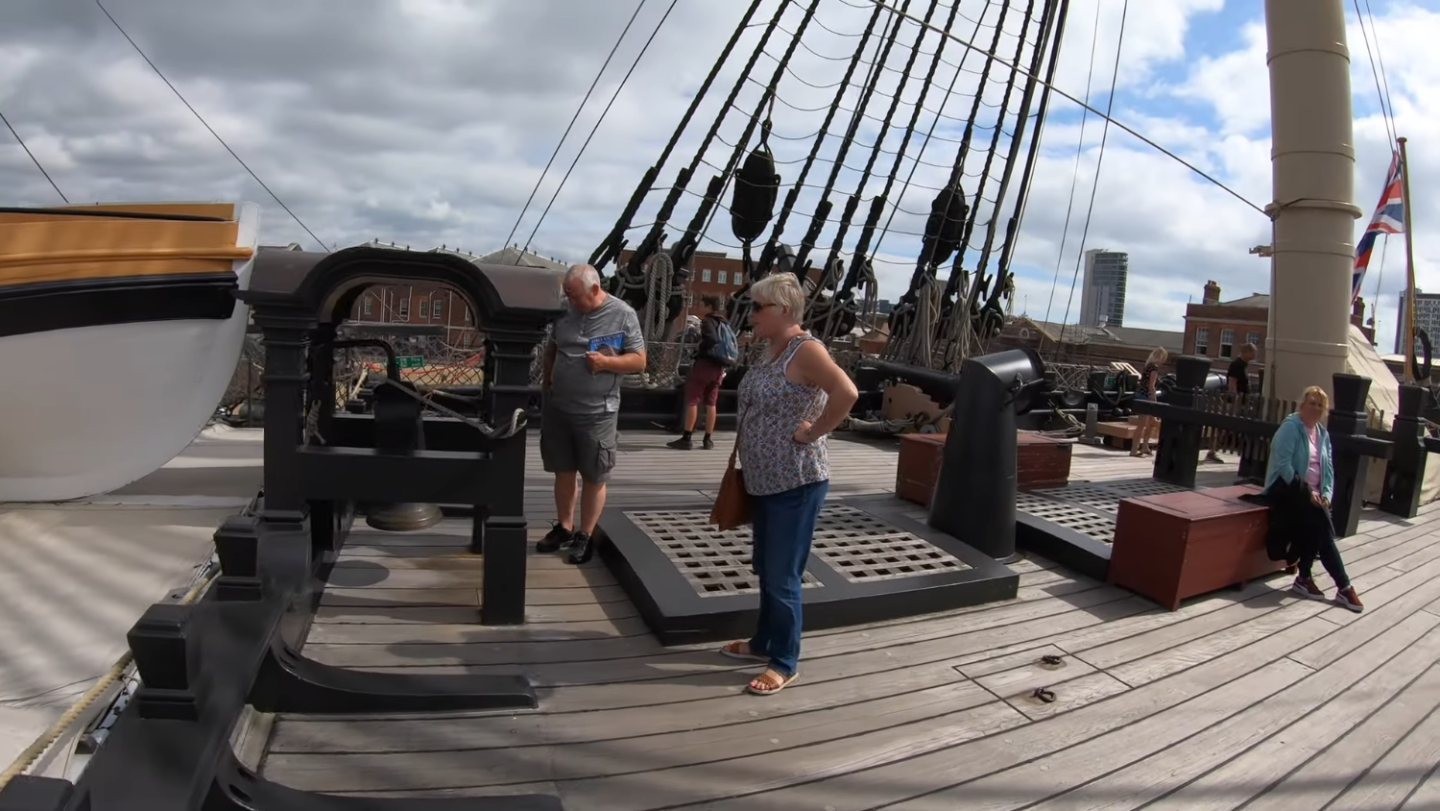
I started to do decks, but I dont like gratings. This is something to solve when my 3d printer arrives.

-
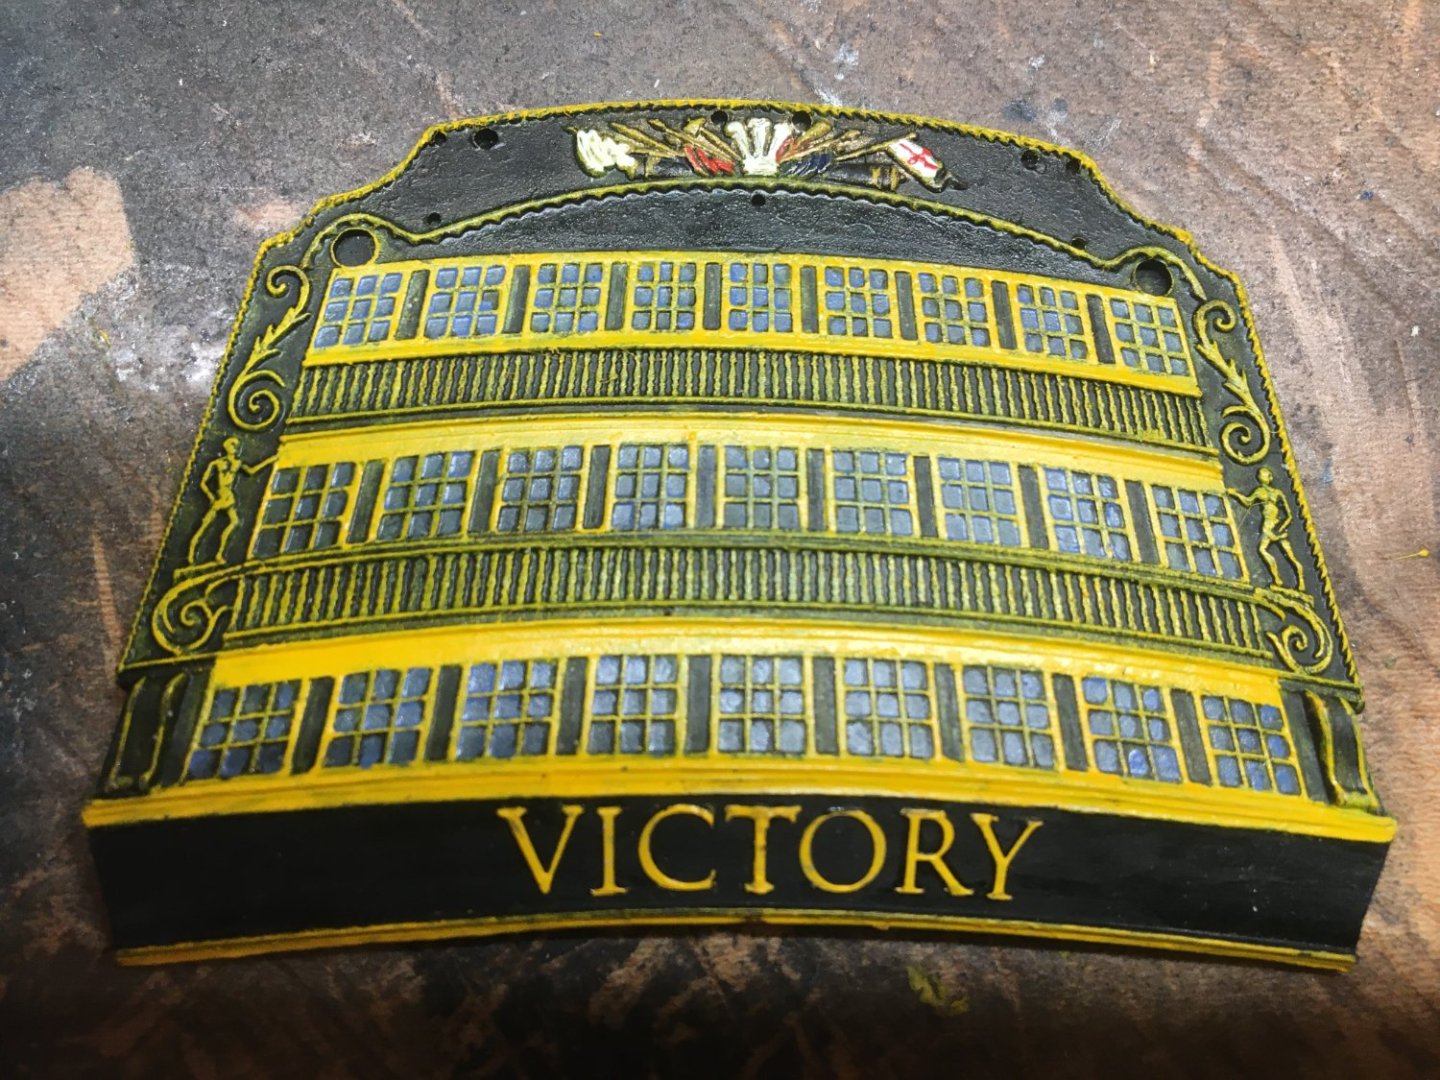
Little bit of progress, this was my first drybrushing attempt ever. Trophy of arms still needs little bit of tuning: I am still thinking if it is worthy to use this photo etch for windows. In that case I would have to probably build basic layout of cabins, or at least some black box with little bit of depth:
-
Actually I should already have on the way 8k resin 3d printer (though it will probably take some time until it arrives, it was recently funded kickstarter from company, who already delivered several times, so not that much risky). I spend many years modelling for computer games as semi-professional hobby, so 3d modelling is nothing problematic for me and potential to increase detail is tremendous. Things like railings are very simple to model, so I am now studying various details and soon I will start preparing 3d models.
-
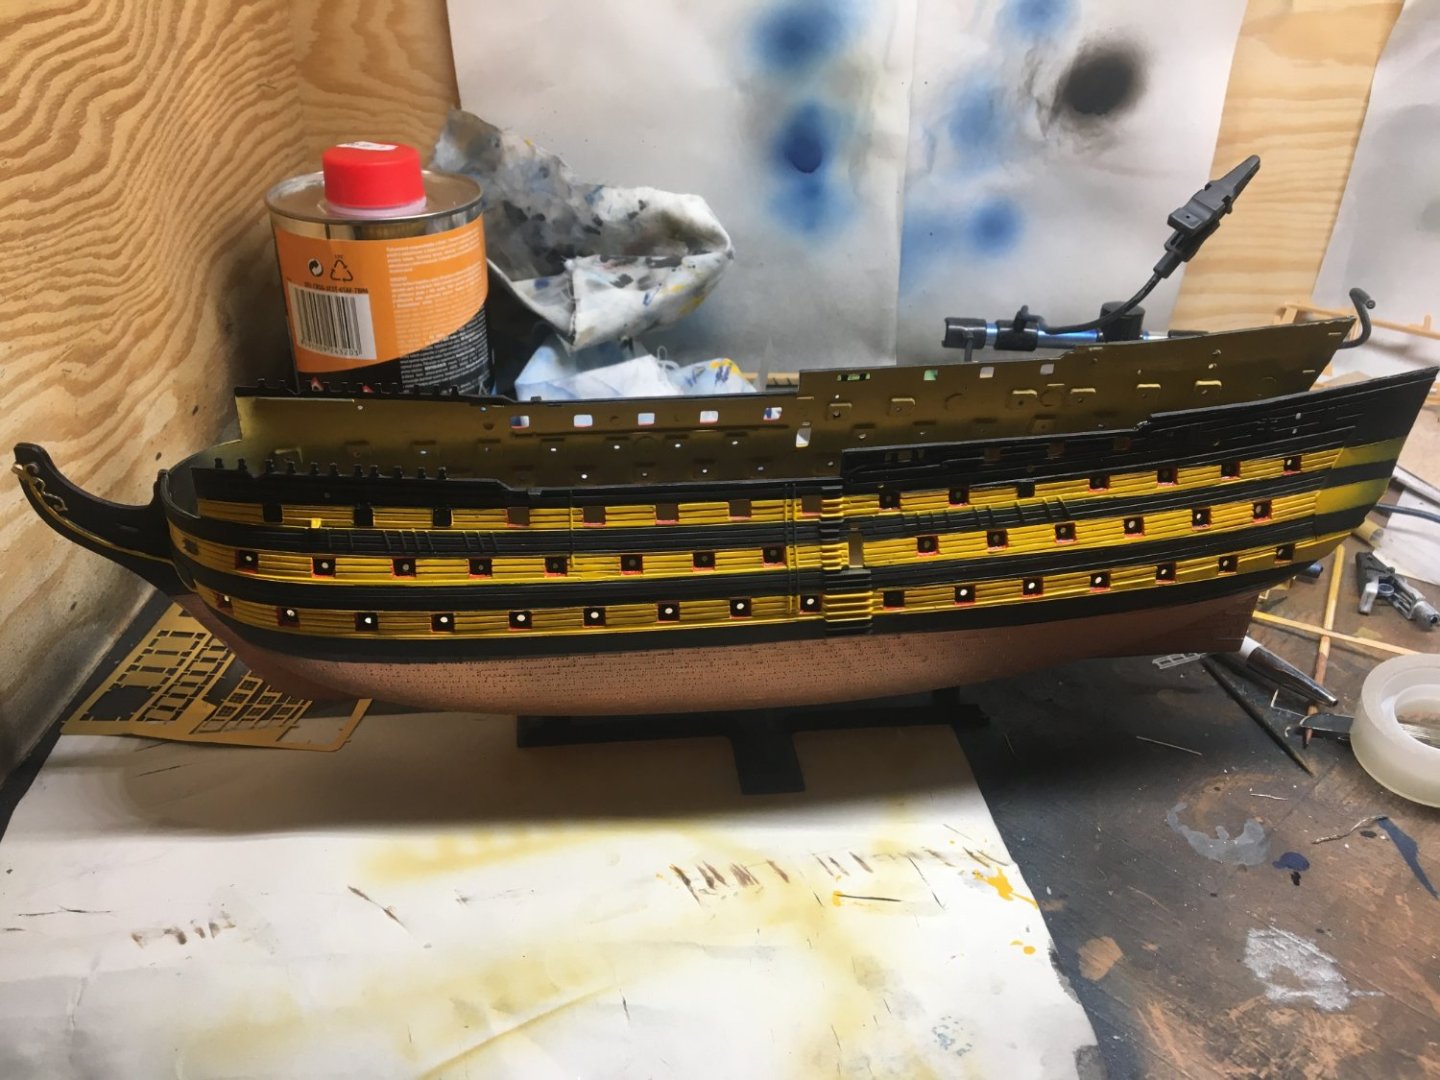
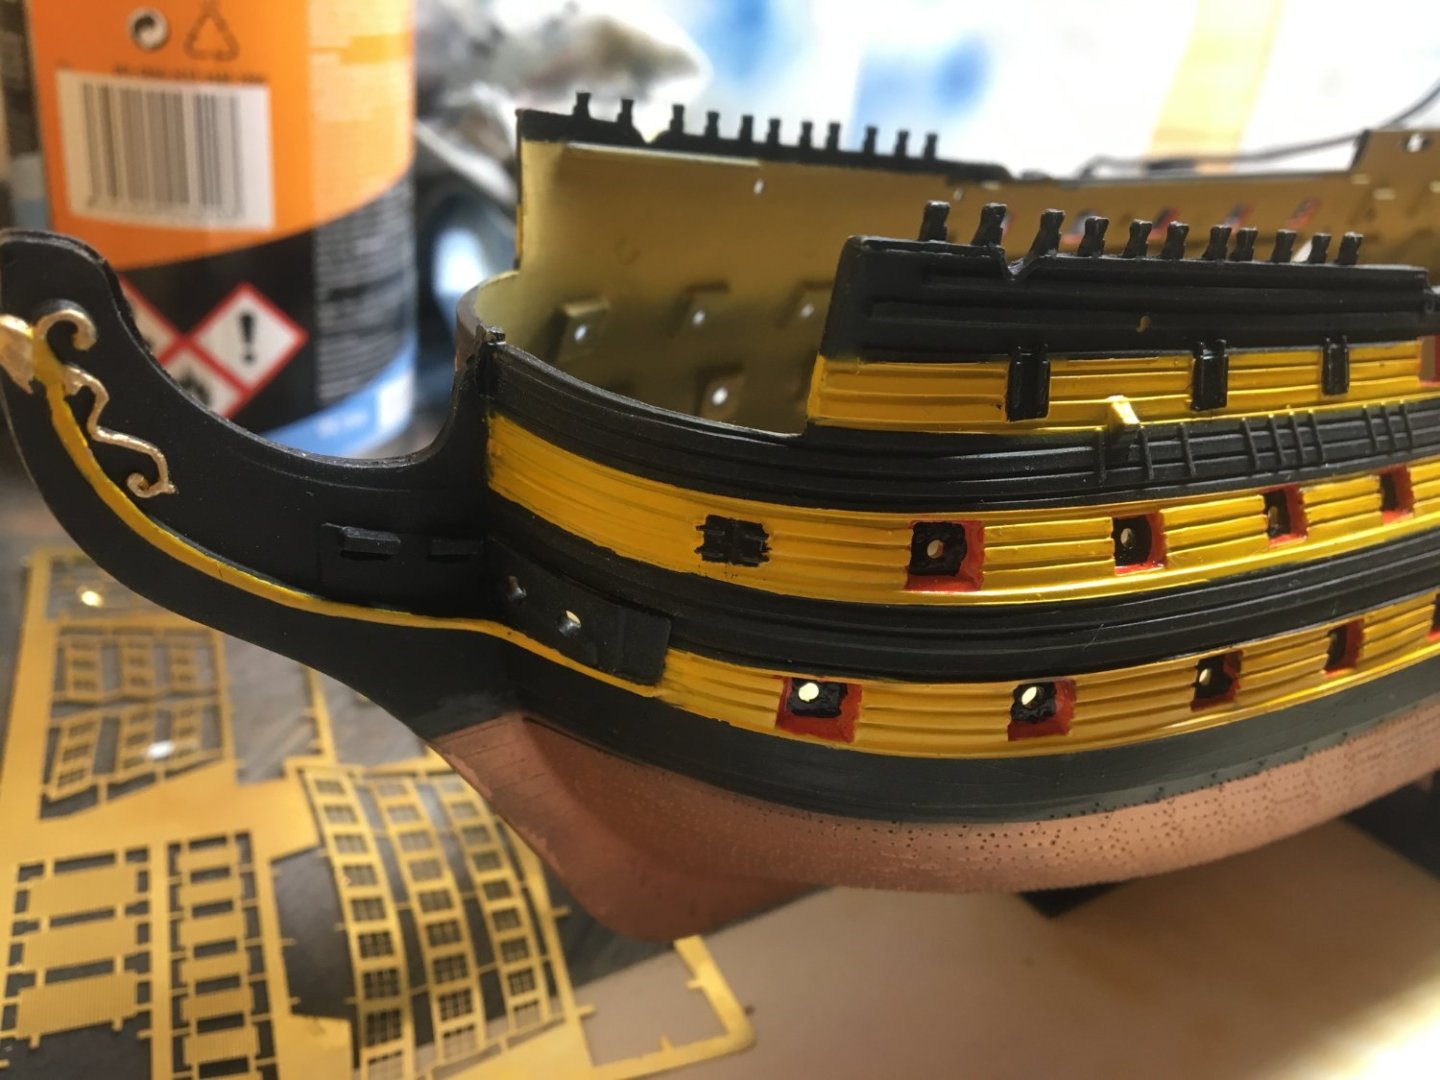
Finally I was able to finish basic painting of the hull. Maybe I will later add little bit of weathering, but now I am more focusing on various details and approach how to reproduce them in this build. I ve added little bit of felt on these supports, to not scratch the hull:

-
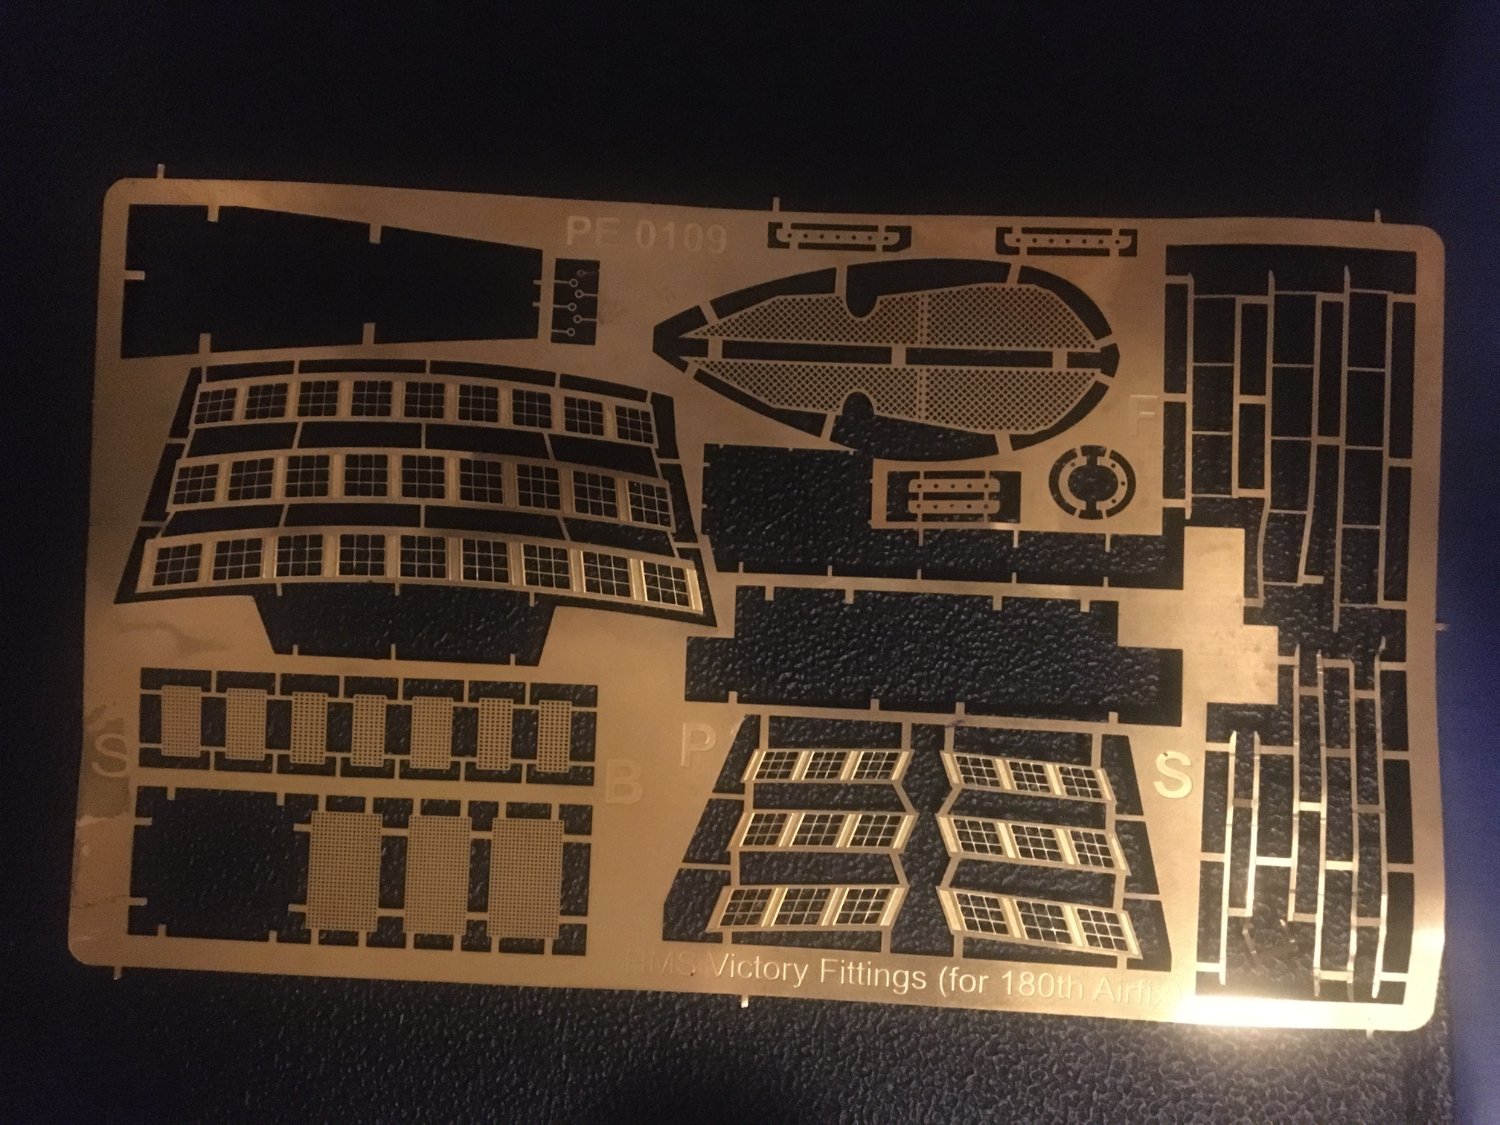
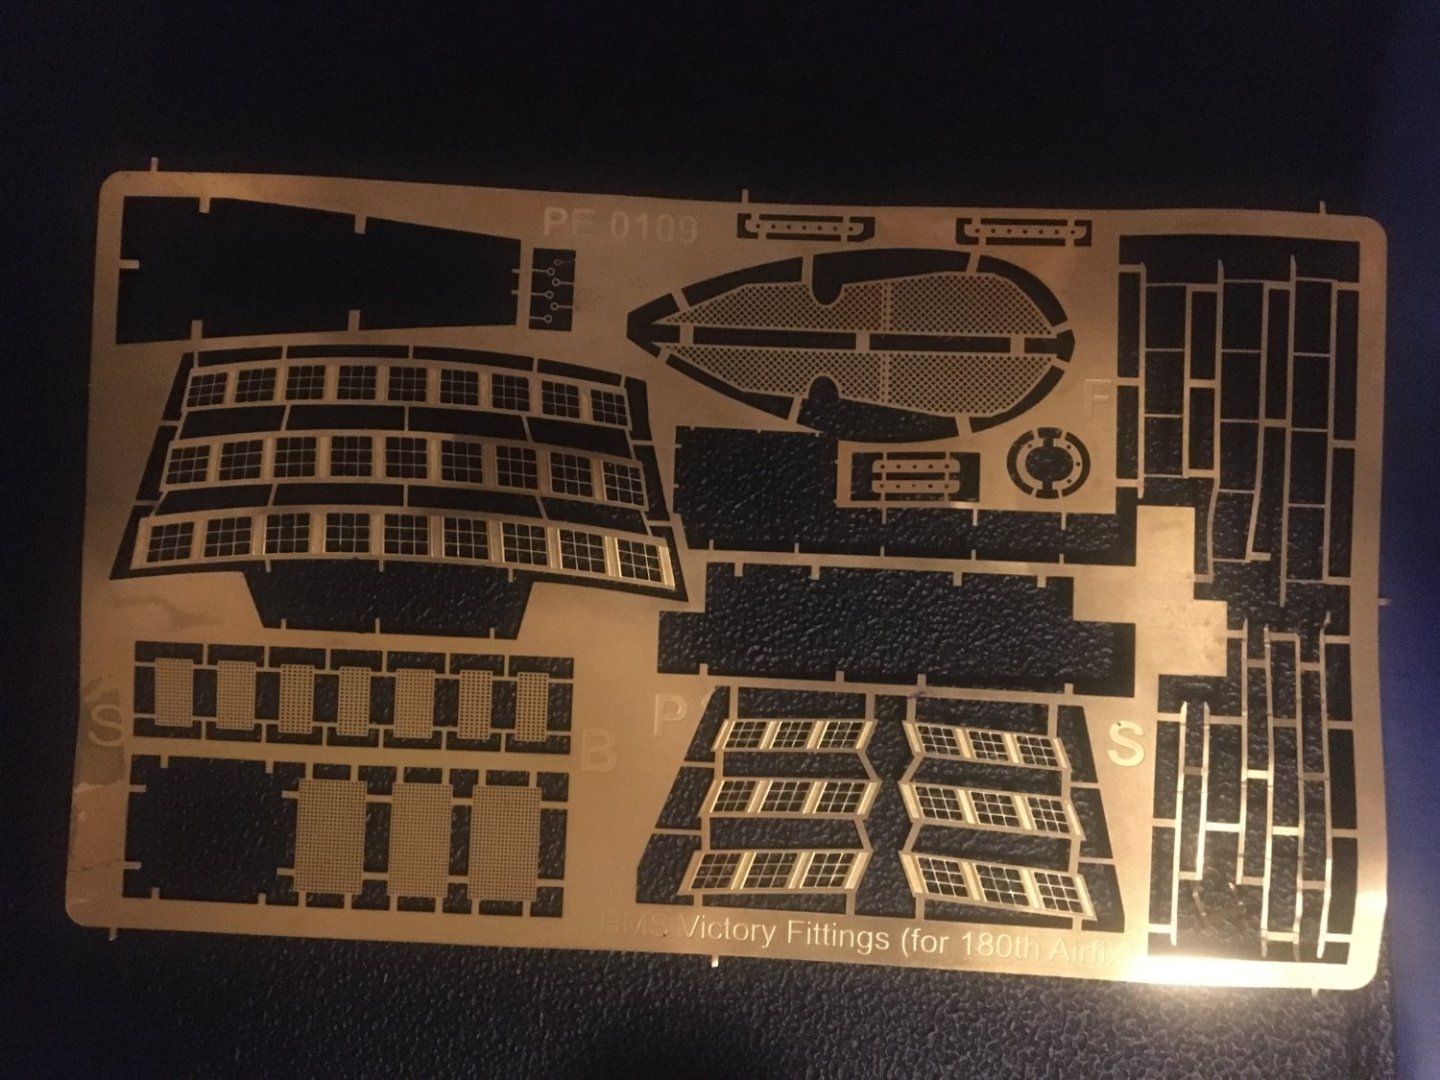
Hello, I ve recently started with this kit. It is my first scalemodel sail ship (actually second model after more than 26 years pause) , so I am not sure what is reasonably possible in this scale (and what I will be able to do), but this is what is fun on such project. I have no ambitions to finish fast, just have fun by trying various approaches, inventing new ones, remaking things to achieve better results, etc...I have not much free time in my life (small daughter), so it will probably take lot of time. But it does not matter, goal is to have a fun and create something nice. Currently I started working on the hull and I am studying various resources (huge thanks to Shipman) including this forum (there are indeed some inspiring builds). I also bought veneer deck, some rigging accesories (https://www.hismodel.com/articles-category-38), some small resin parts (https://scalewarship.com/index.php?route=product/product&product_id=1303&search=victory&description=true) and photo-etch (https://scalewarship.com/index.php?route=product/product&product_id=1292 and https://www.britmodeller.com/forums/index.php?/topic/234932536-scalewarships-hms-victory-etch-set/). I am not sure I will use everything from these photo etches, for example hammocks looks unnatural (everything too straight), wooden gratings have mostly higher number of holes than real ship, so they dont look well, etc...Well, I will see, I have already some ideas. First I have to do some small POCs, what is feasible and what not.
-
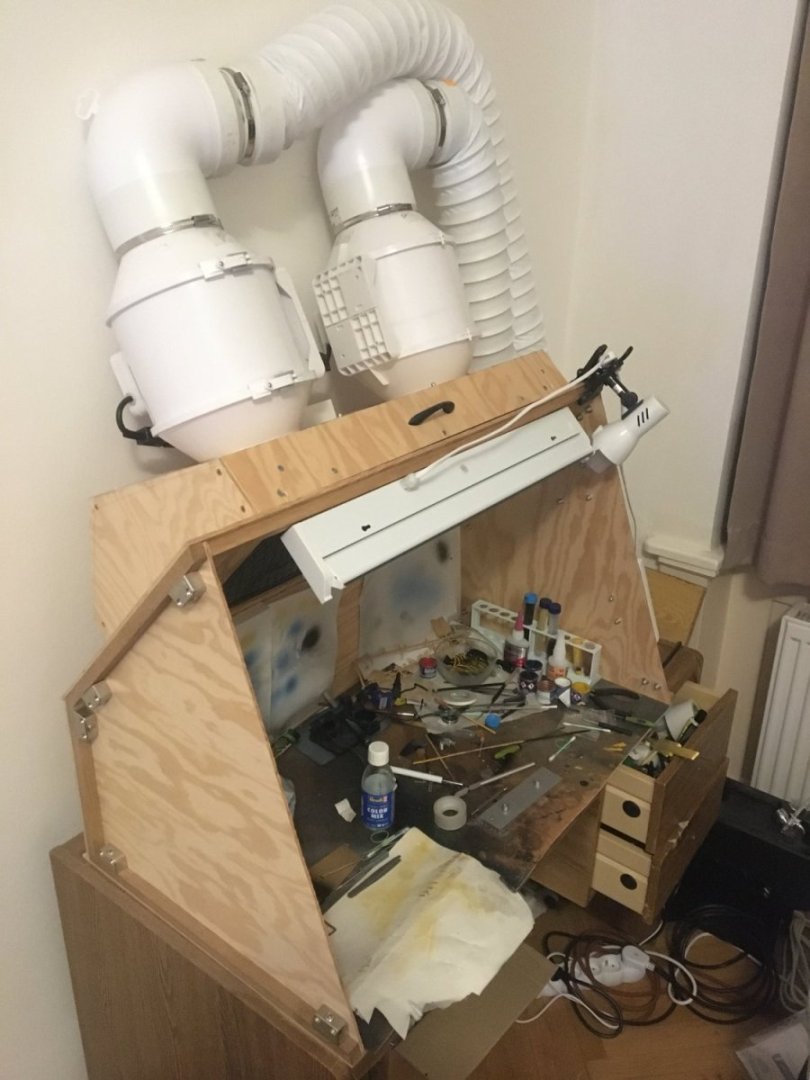
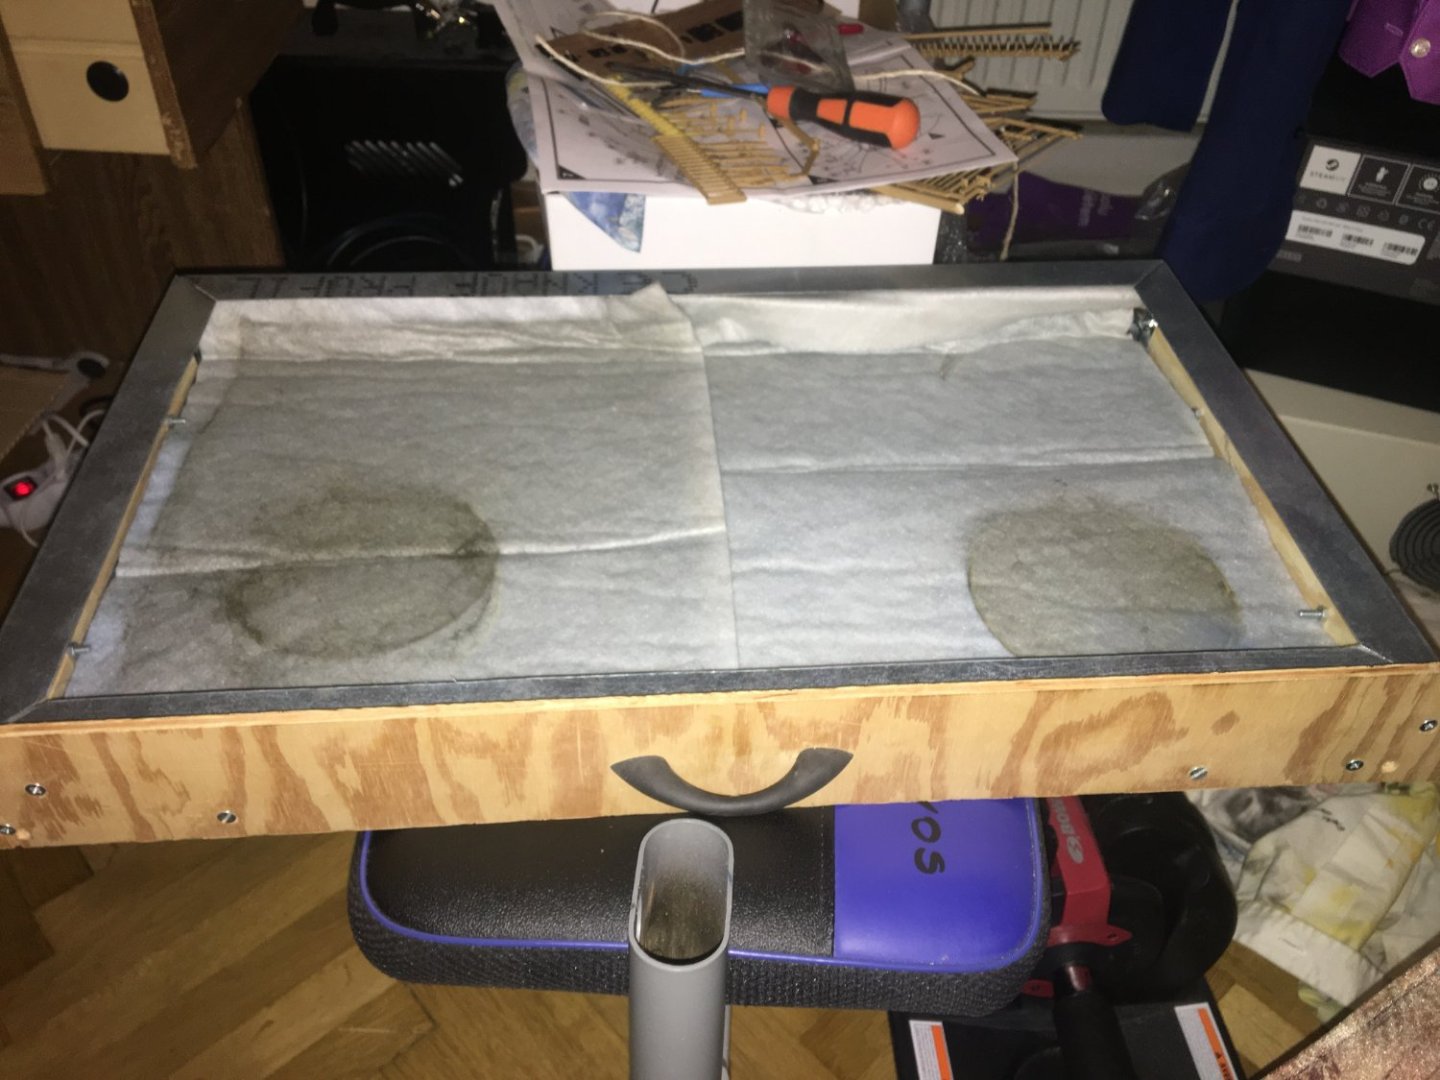
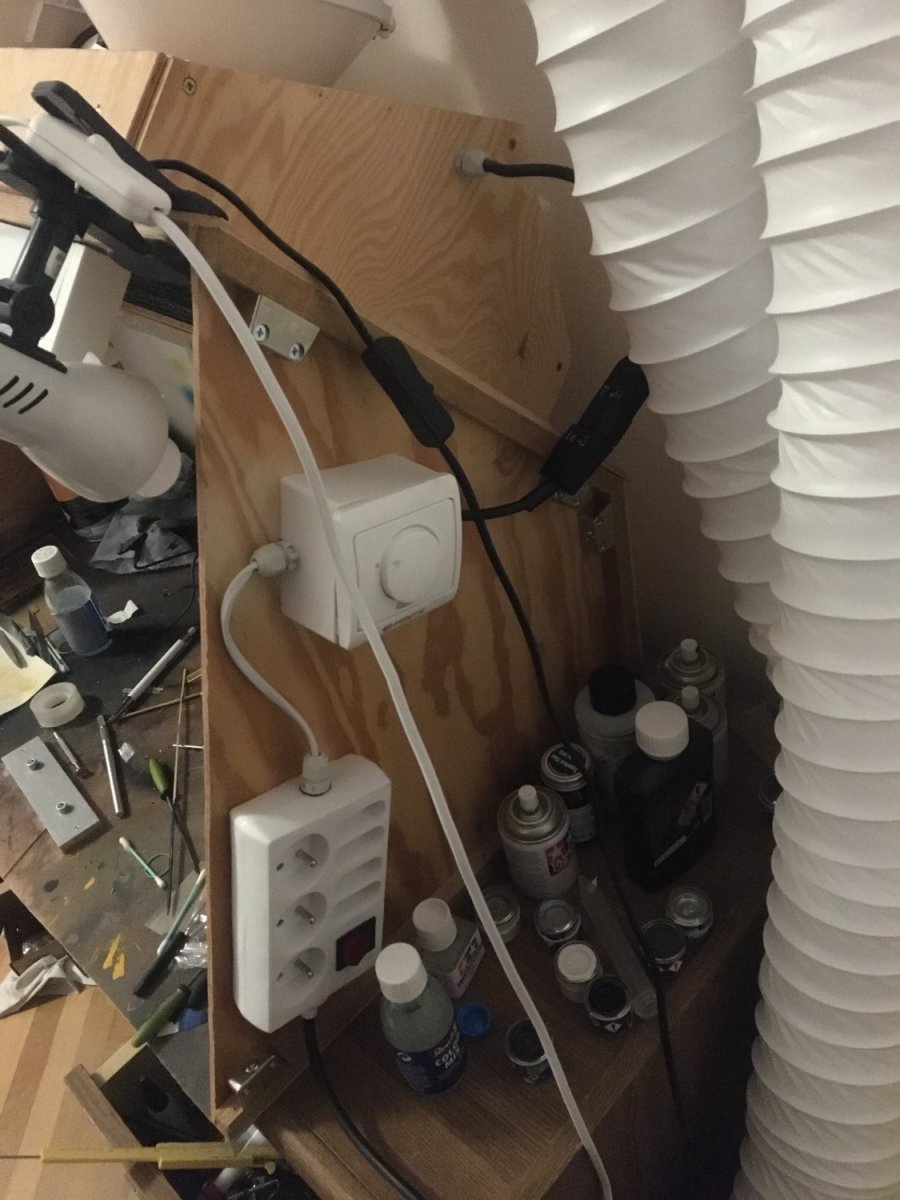
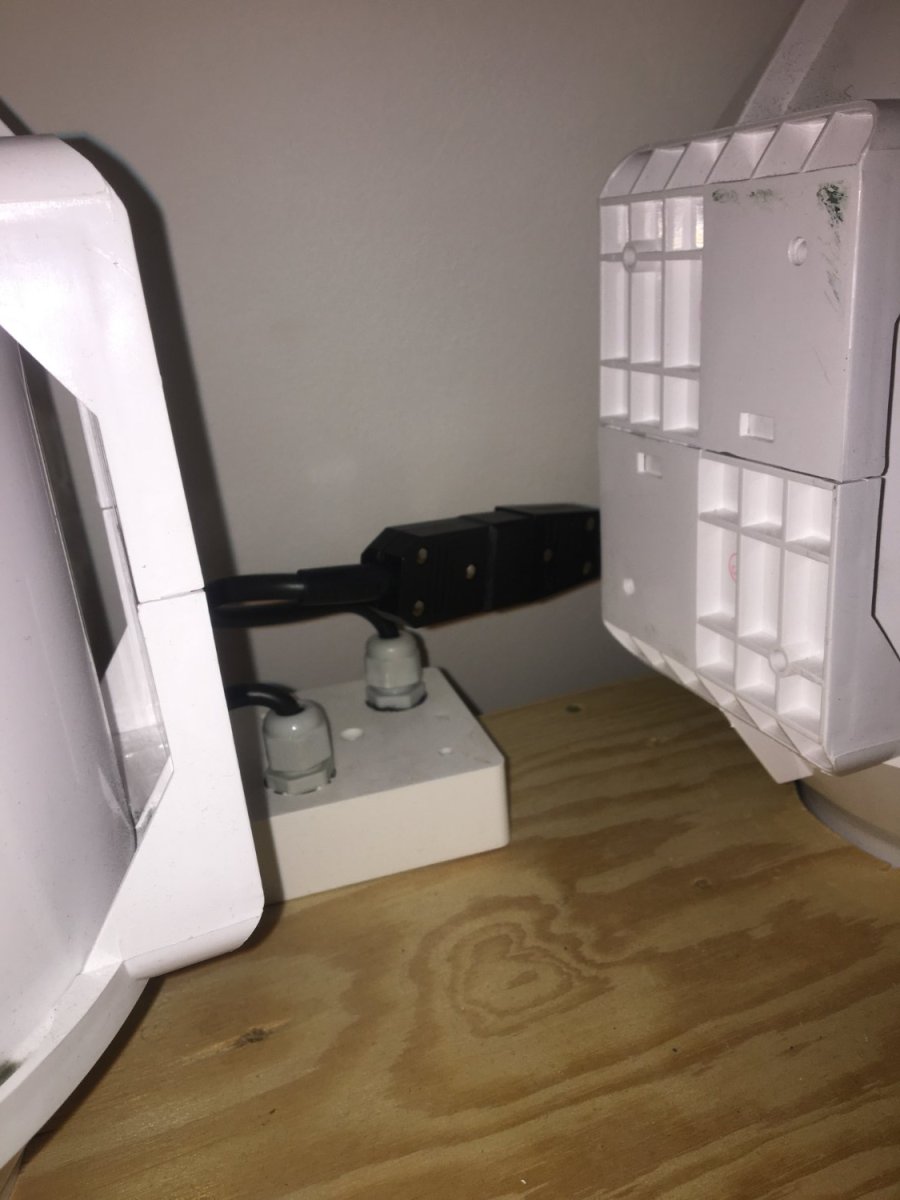
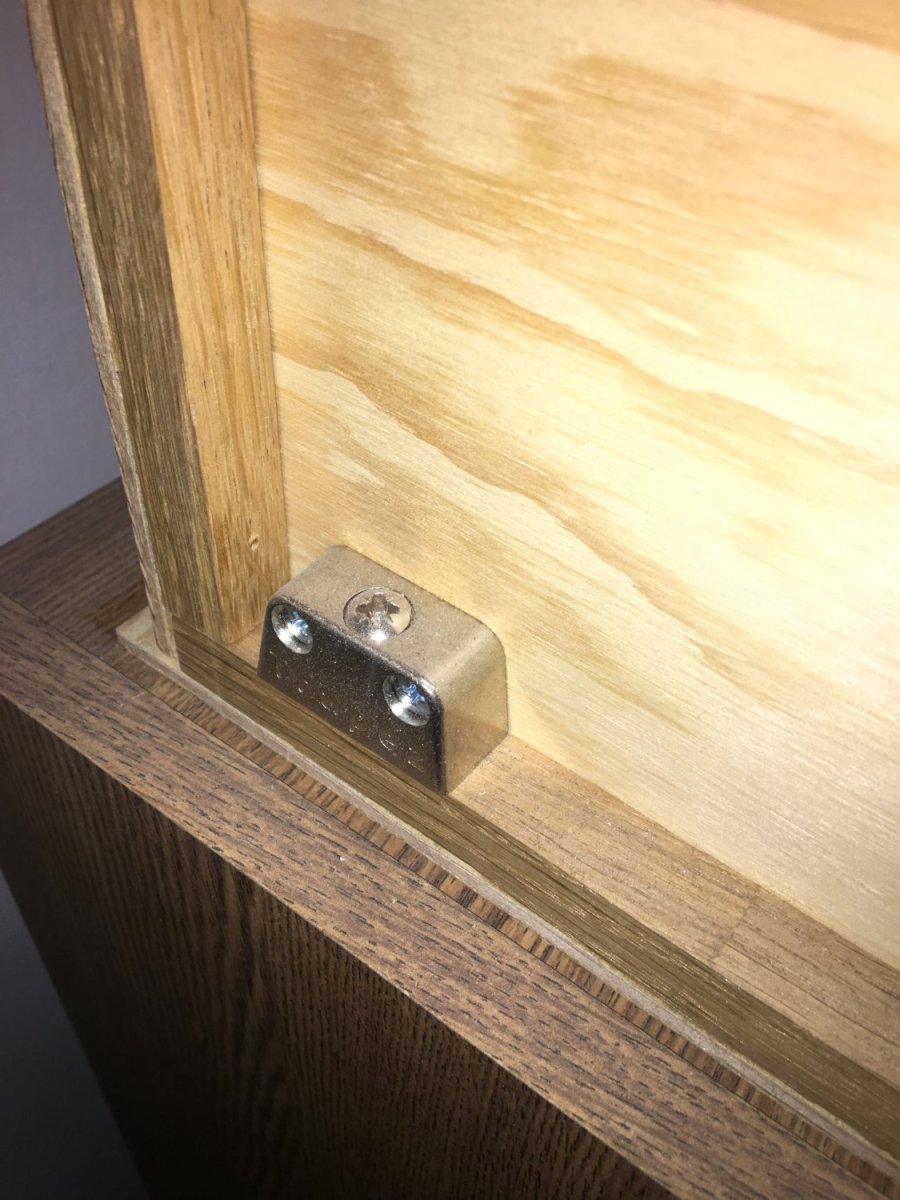
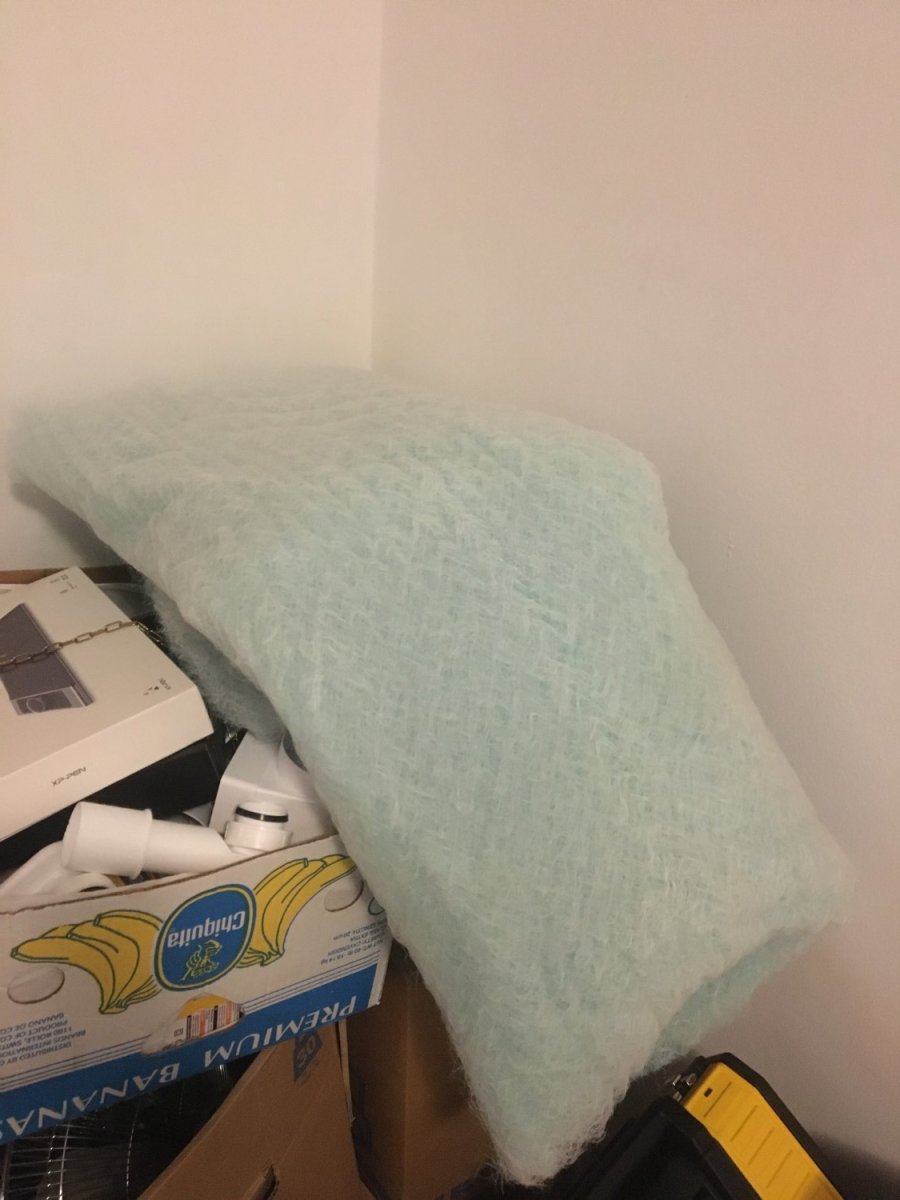
To prevent having color dust in whole room, I wanted to buy spray booth. But I didnt like anything on the market, so I ve decided to build my own. In this topic I want to share some experience, I gained during this mini-project. I decided to make it little bit bigger and use it also as workspace, so it is sized to fit medium sized models (1/350 battleship will fit there easily). Other requirment was ability to vent fumes via flexible hose through window. Design of box is nothing special, I only wanted to make it easily transportable, so everything is connected via "locks" for furniture, so it is no problem to disassemble it by loosening few screws. First I bought some bathroom fans and it was more or less working (filters were catching some color dust), but they simply havent enough power to push it even through 2m of flexible hose. So there was a good lesson. Standard small fans with low wattage (usually 5-10 Watts) are good only for transporting air on very short distance (in case of bathroom fans through wall). To be able to transport it through hose, you also need to check static pressure parameter (Pa) which is fan able to generate. Typical 220v bathroom fan has cca 90m3/hour and it is able to generate 48Pa of pressure. According to some tables, 50Pa should be enough for 2m of pipe, but it was not. In my case hose is not straight and it will never be and there is big lost of efficiency if there are any sharp angles etc. Also filter causes HUGE lost of pressure. So I ve decided to buy fan really meant for transporting air through pipes. Just size is totally different league and parameters also (55W, 350m3 and 350Pa). I bought two, just in case. Well, I have tendency to slightly overengineer sometimes, but price difference wasnt that big and who wouldn´t want to be sure? And this really works: Because of sheer power, I ve also installed regulator, so I can easily control strength of venting. On one side I put plug hub, because there is never enough of plugs: For lightning I used some LED array for kitchens to not have point lightsource as main light source. I chose model with glass protection of LEDs, so I can easily clean color from it, if needed: All electronic parts including fans are not hardwired, but can be easily removed by disconnecting connectors: Example of furniture "lock": I also made drawer-like cartridge for filters, so I can put inside any filter, even industry level 5cm thick filter for car spraying stations: It is surprisingly not expensive, you only need to buy several square meters at once: For workspace I use PVC flooring, it is easily replacable and good for cutting. I am improving this design from time to time, so in case I do something interesting, I will update.