MORE HANDBOOKS ARE ON THEIR WAY! We will let you know when they get here.
×


Dave Wood
-
Posts
93 -
Joined
-
Last visited
Content Type
Profiles
Forums
Gallery
Events
Everything posted by Dave Wood
-
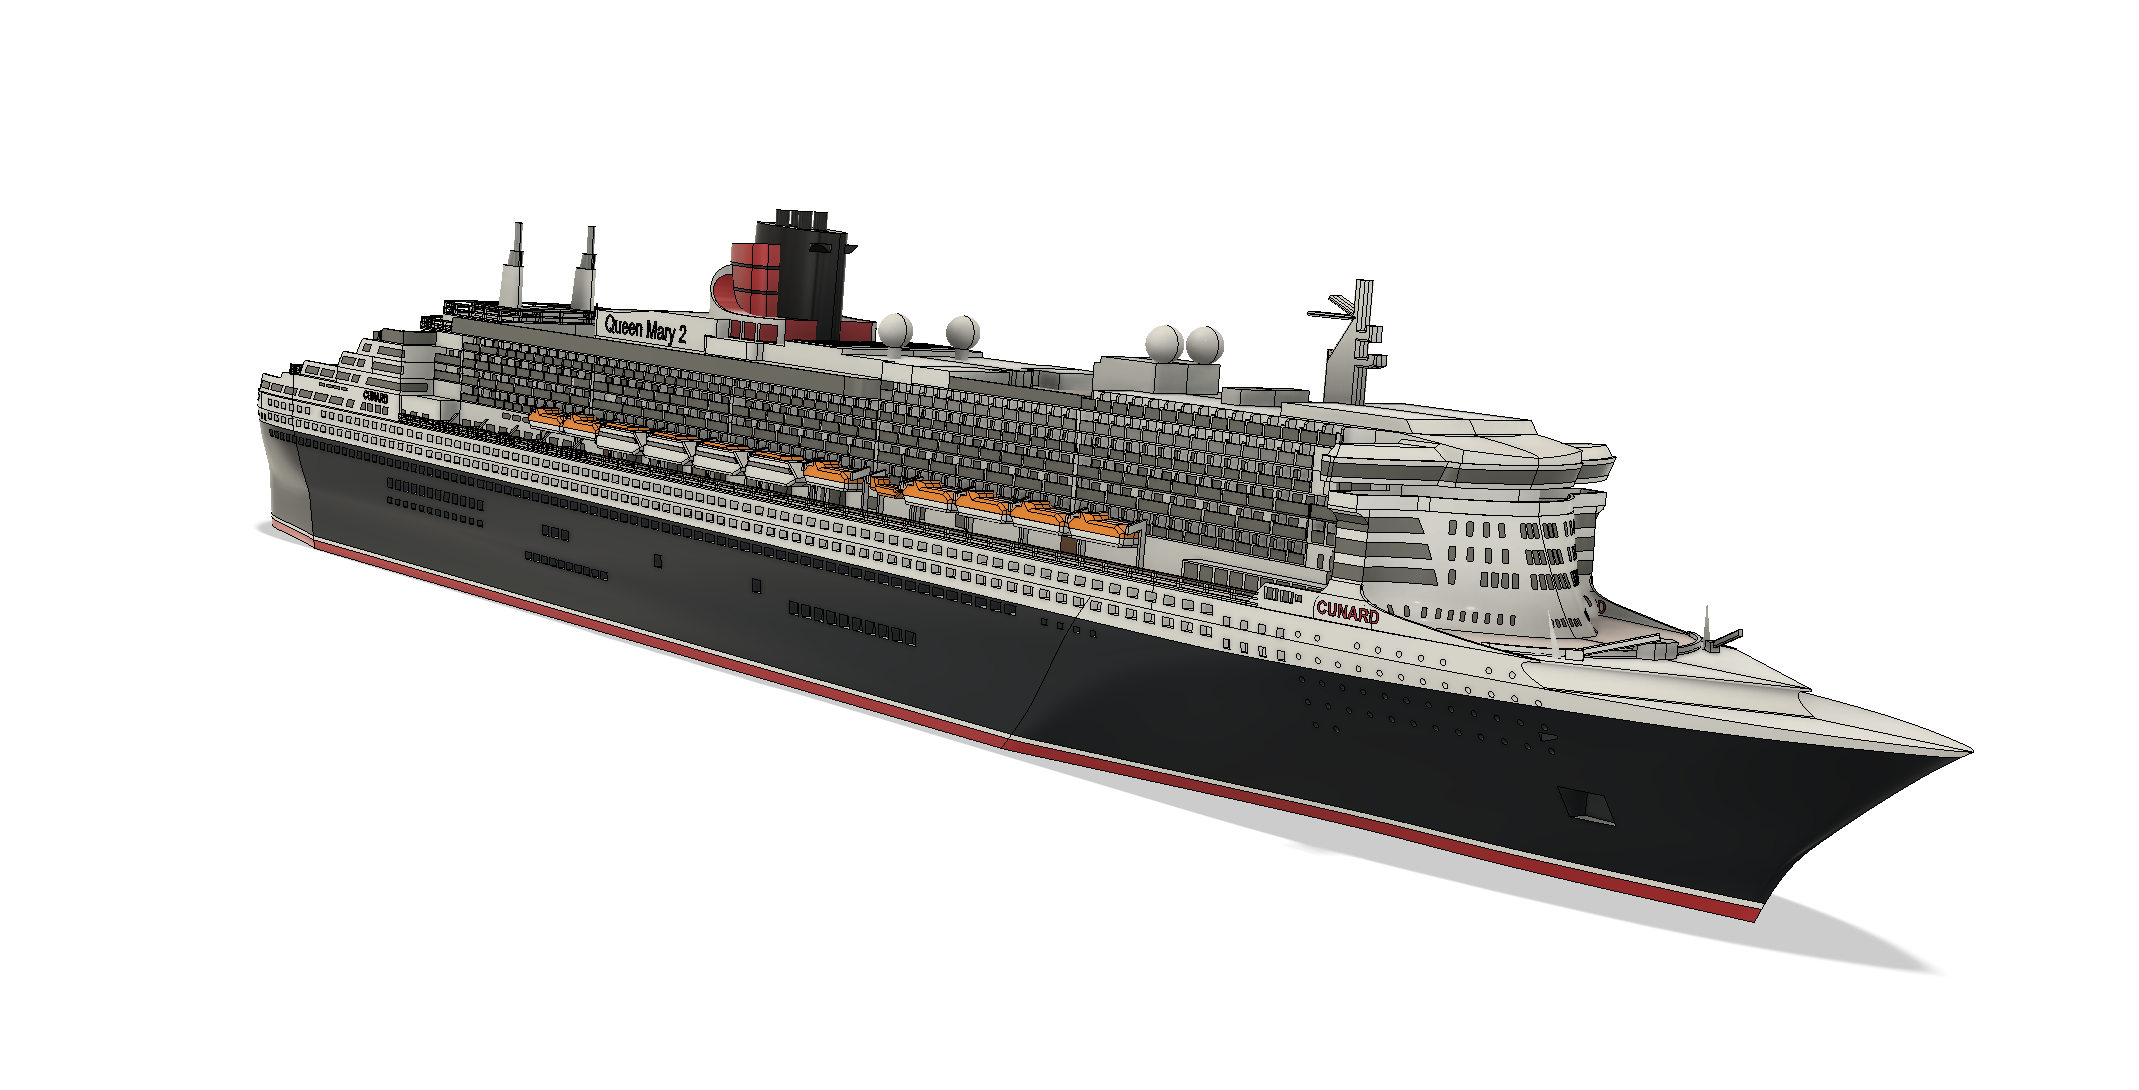
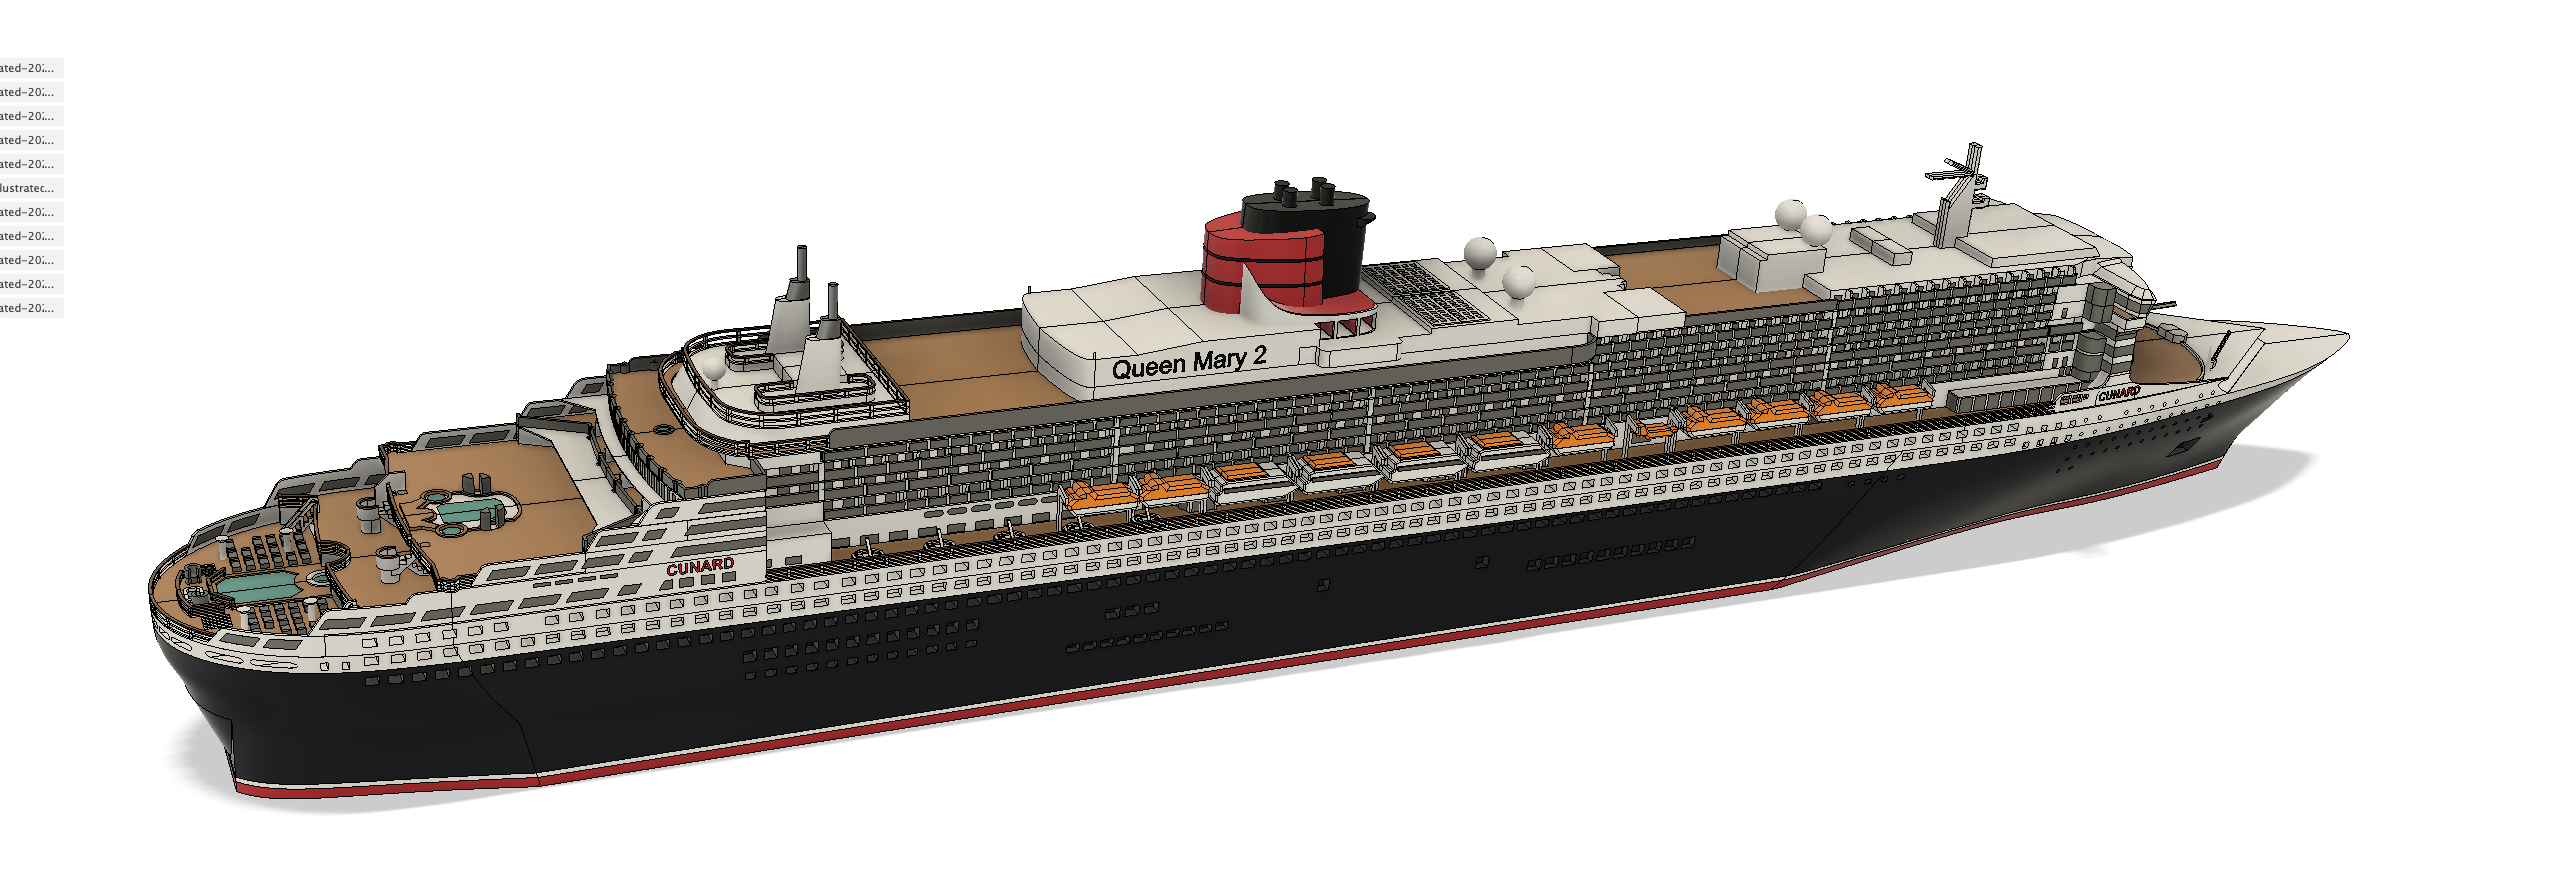
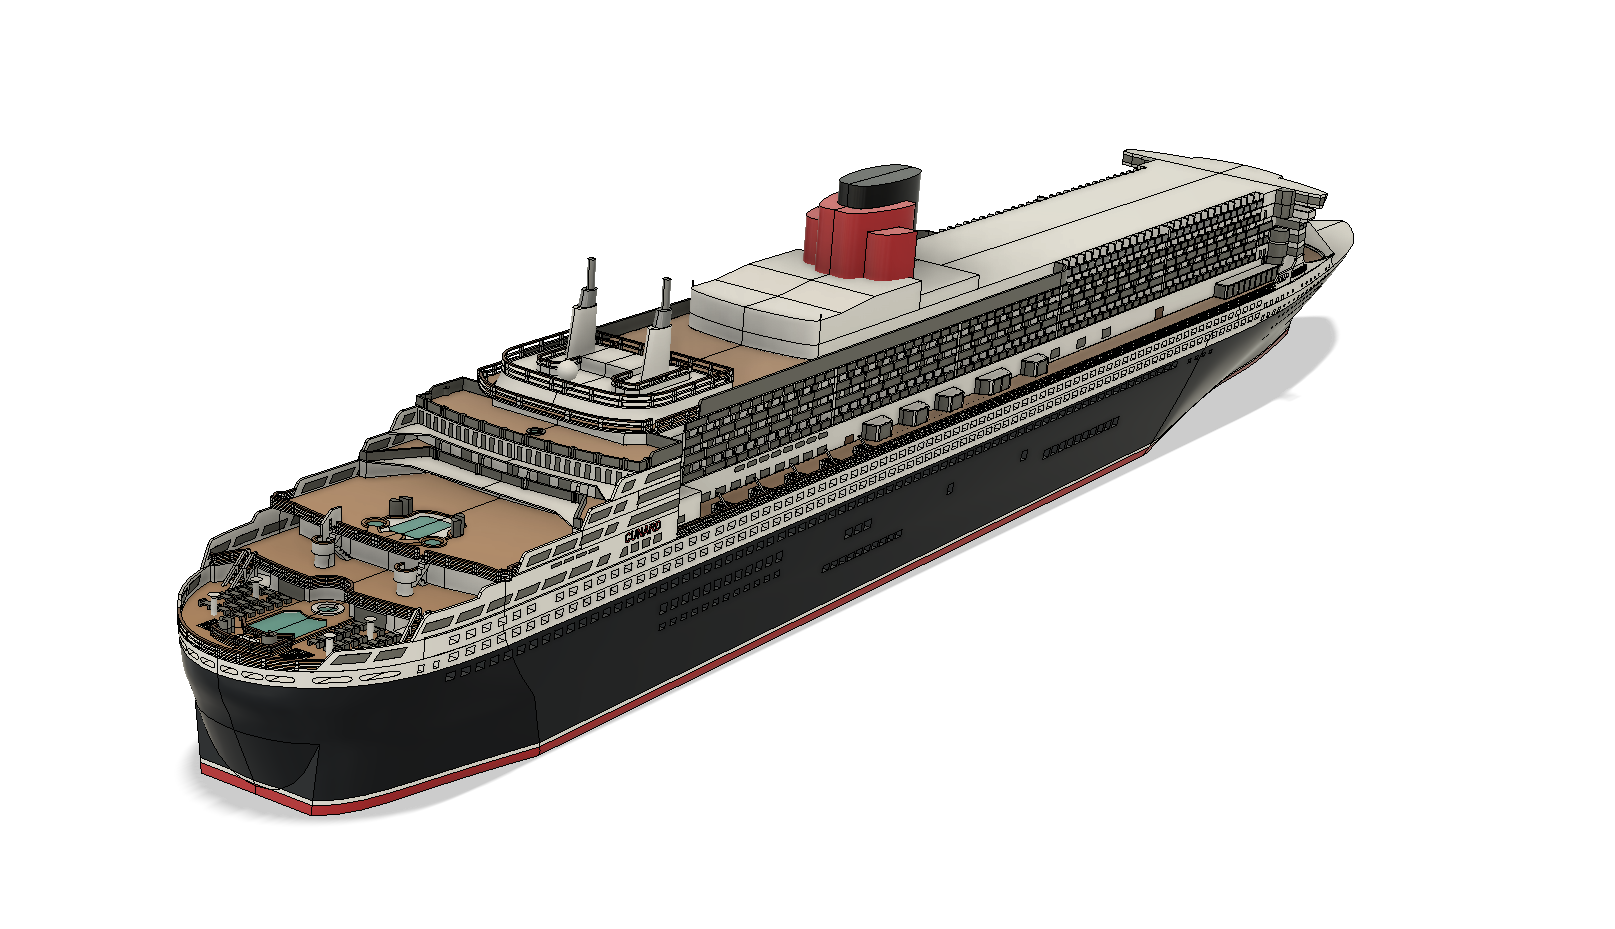
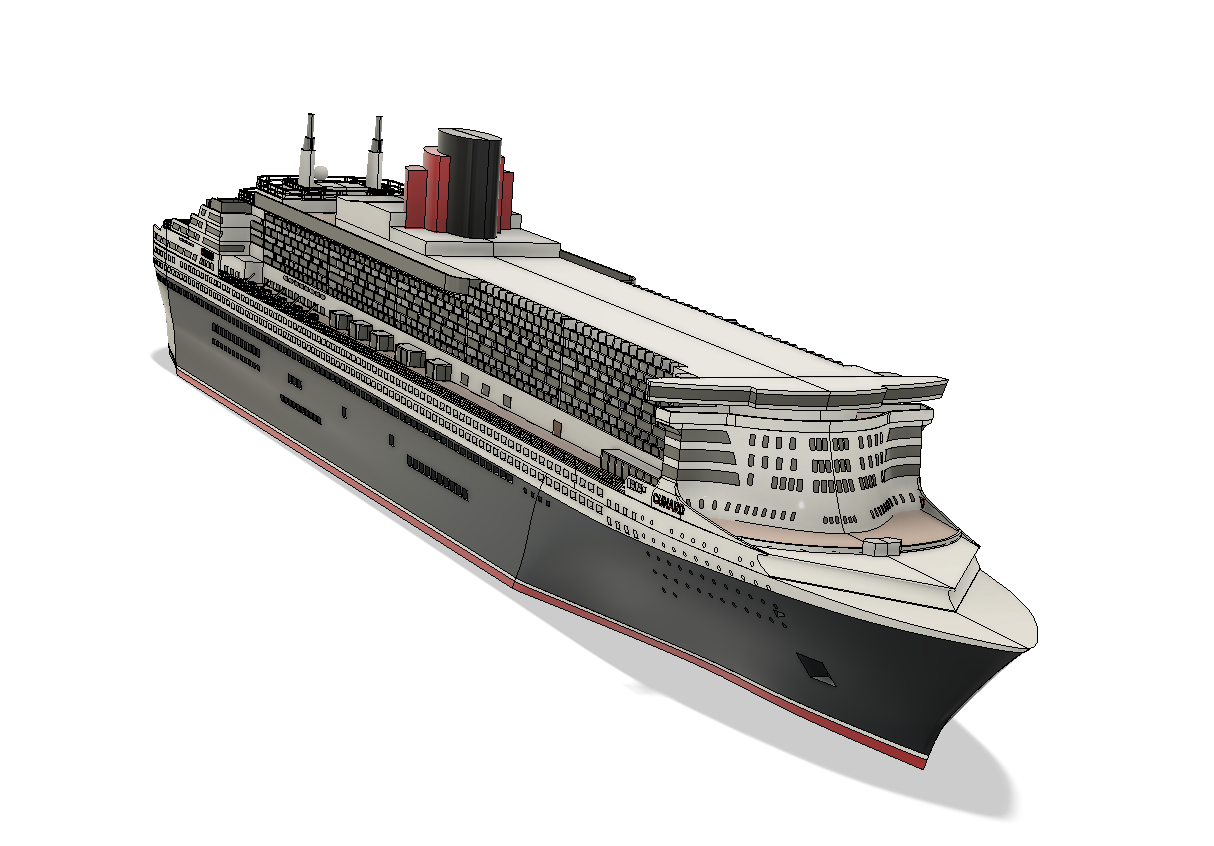
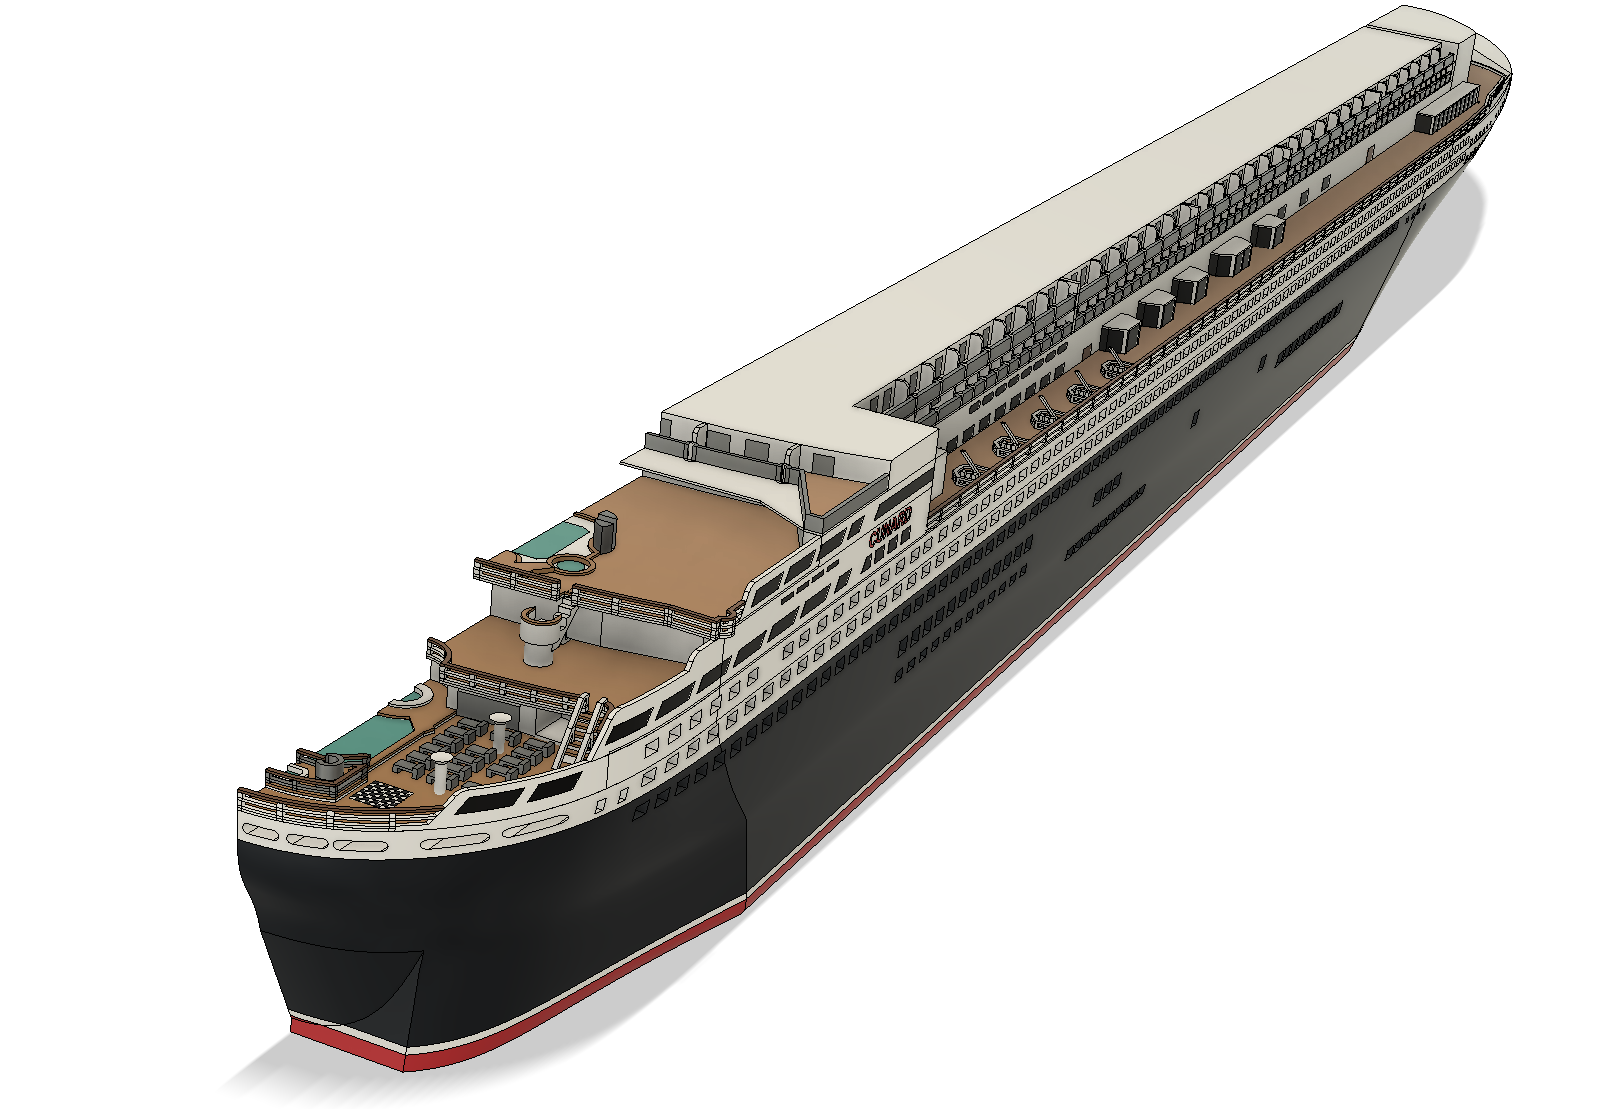
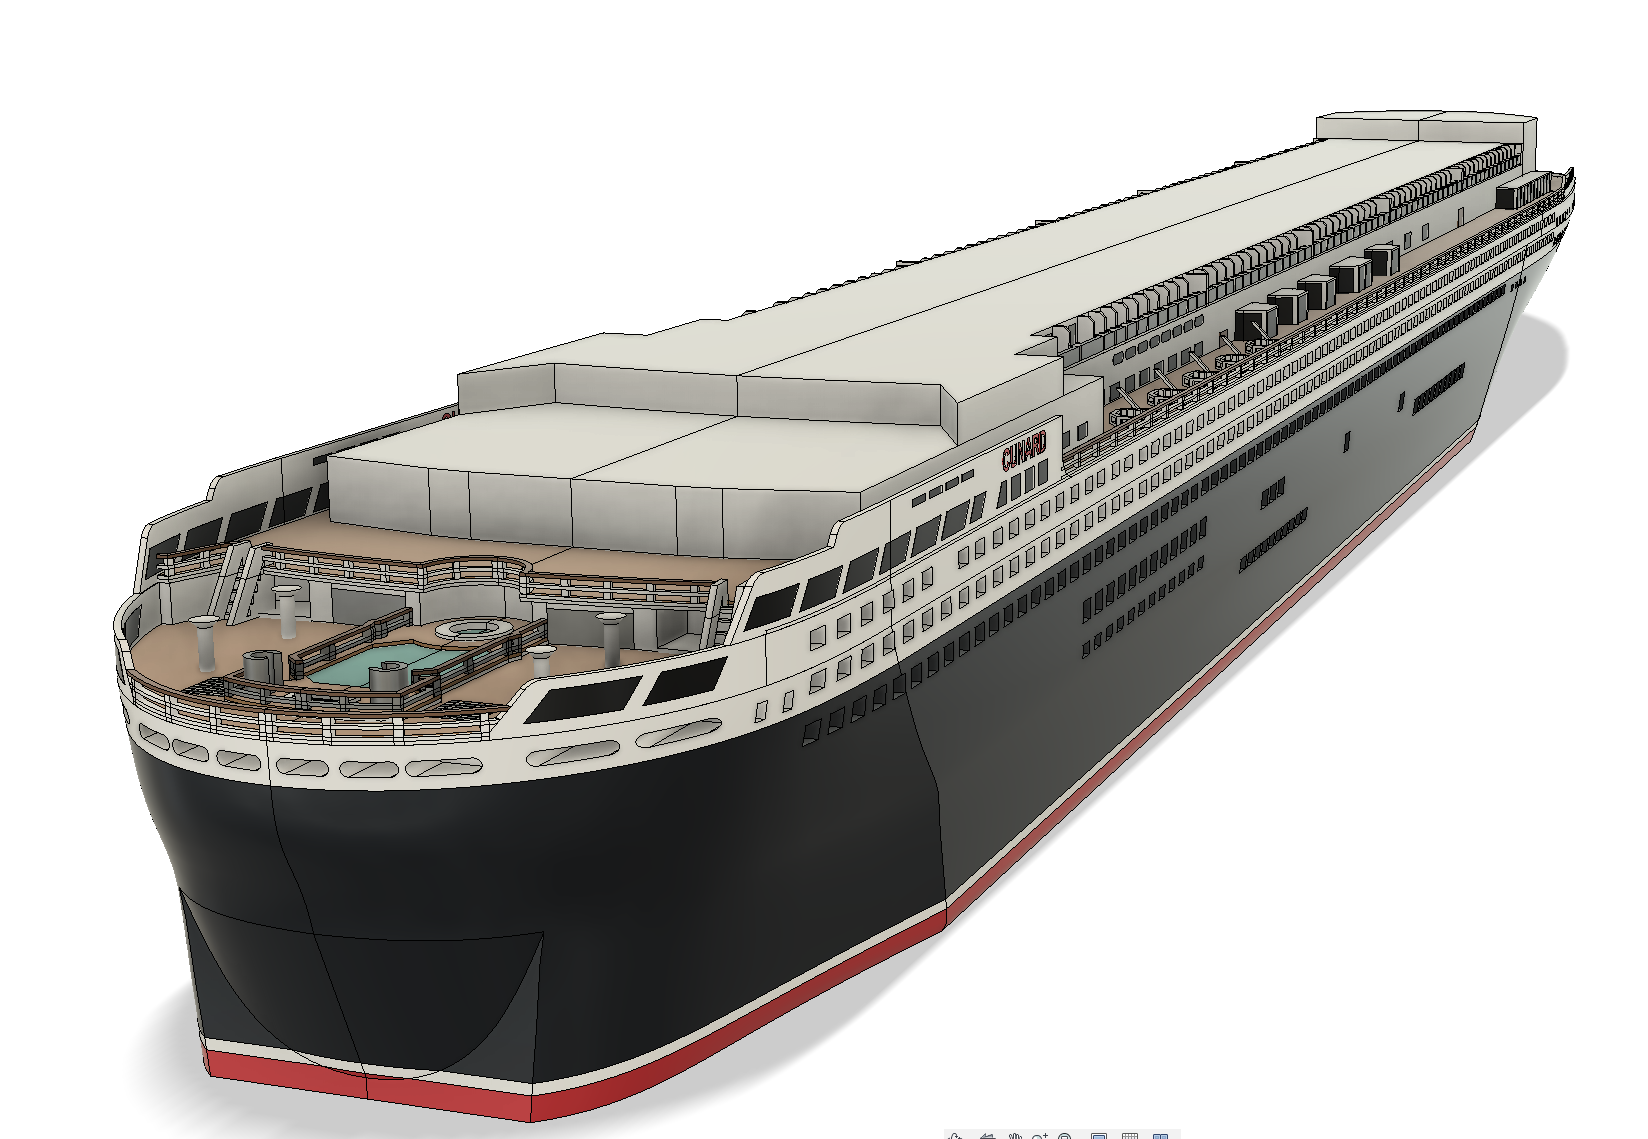
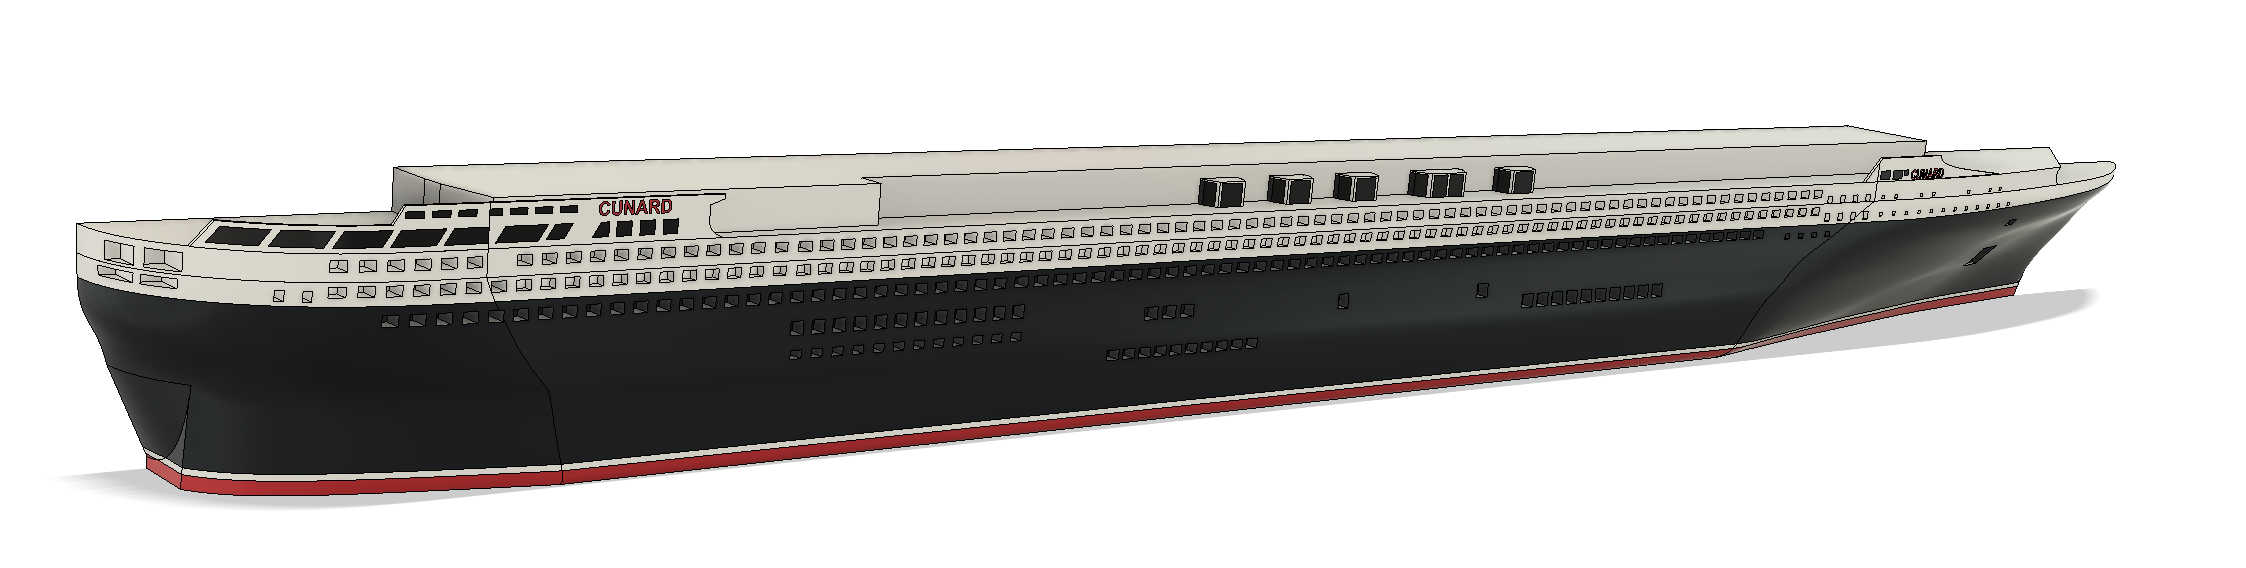
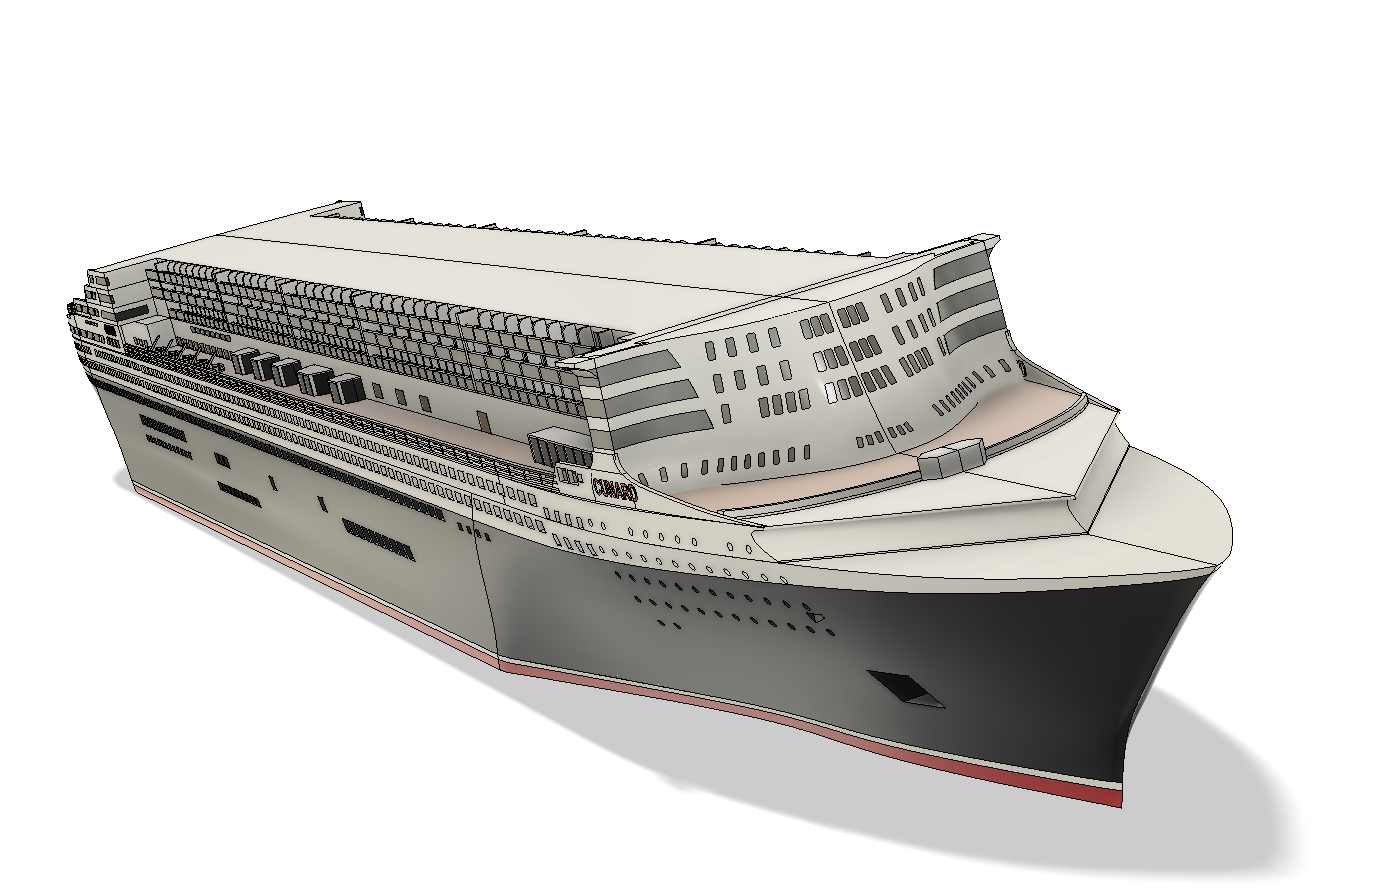
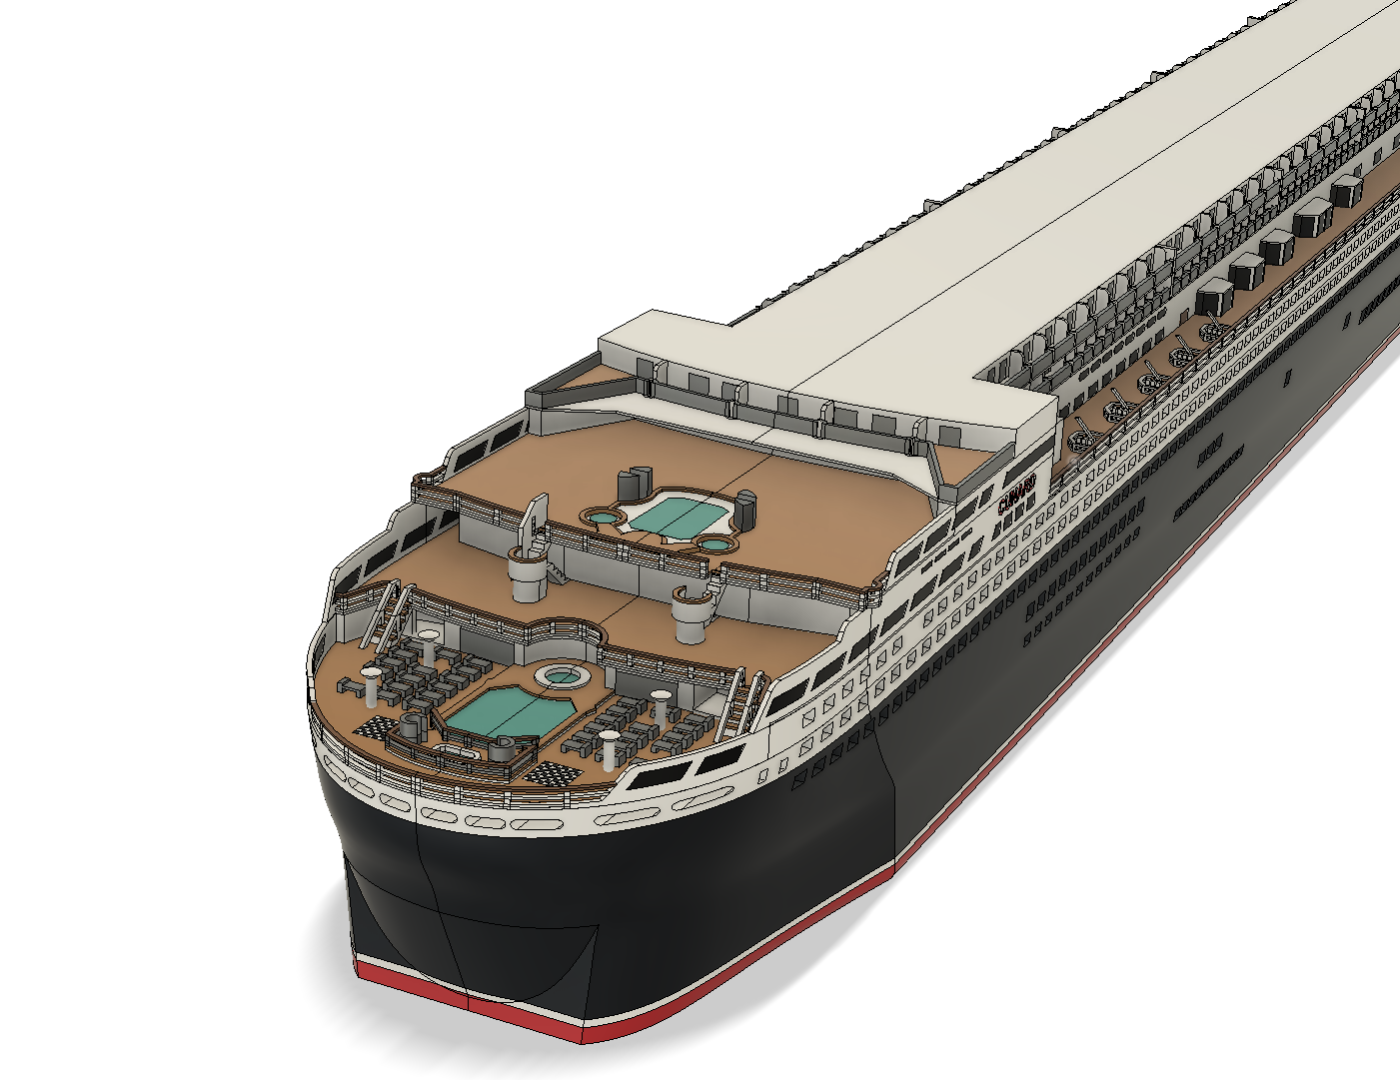
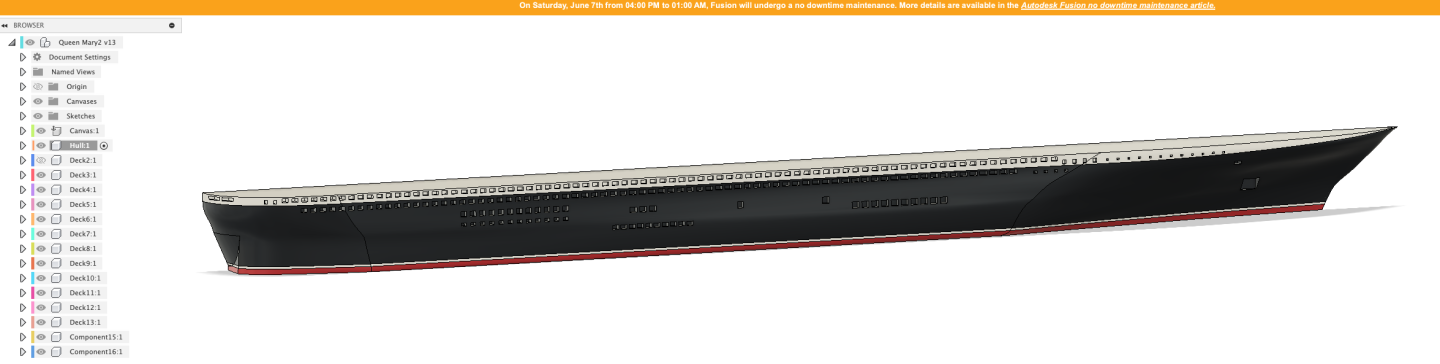
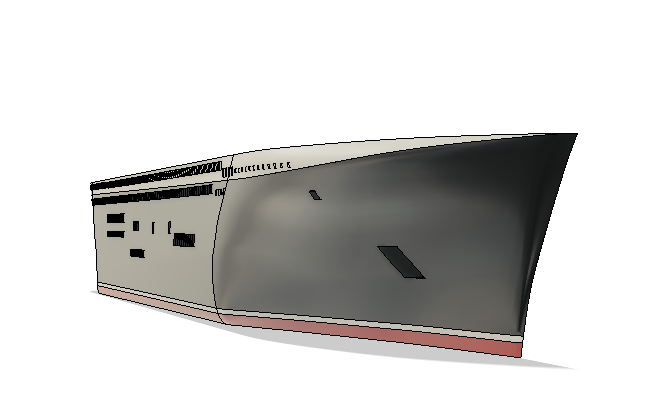
More details added - plus short video showing how the decks appear in Fusion 360.
-
Further refinements made - see here for 360 degree render.
- 34 replies
-
- 1
-

-
- Queen Mary 2
- 3d printed
- (and 1 more)
-
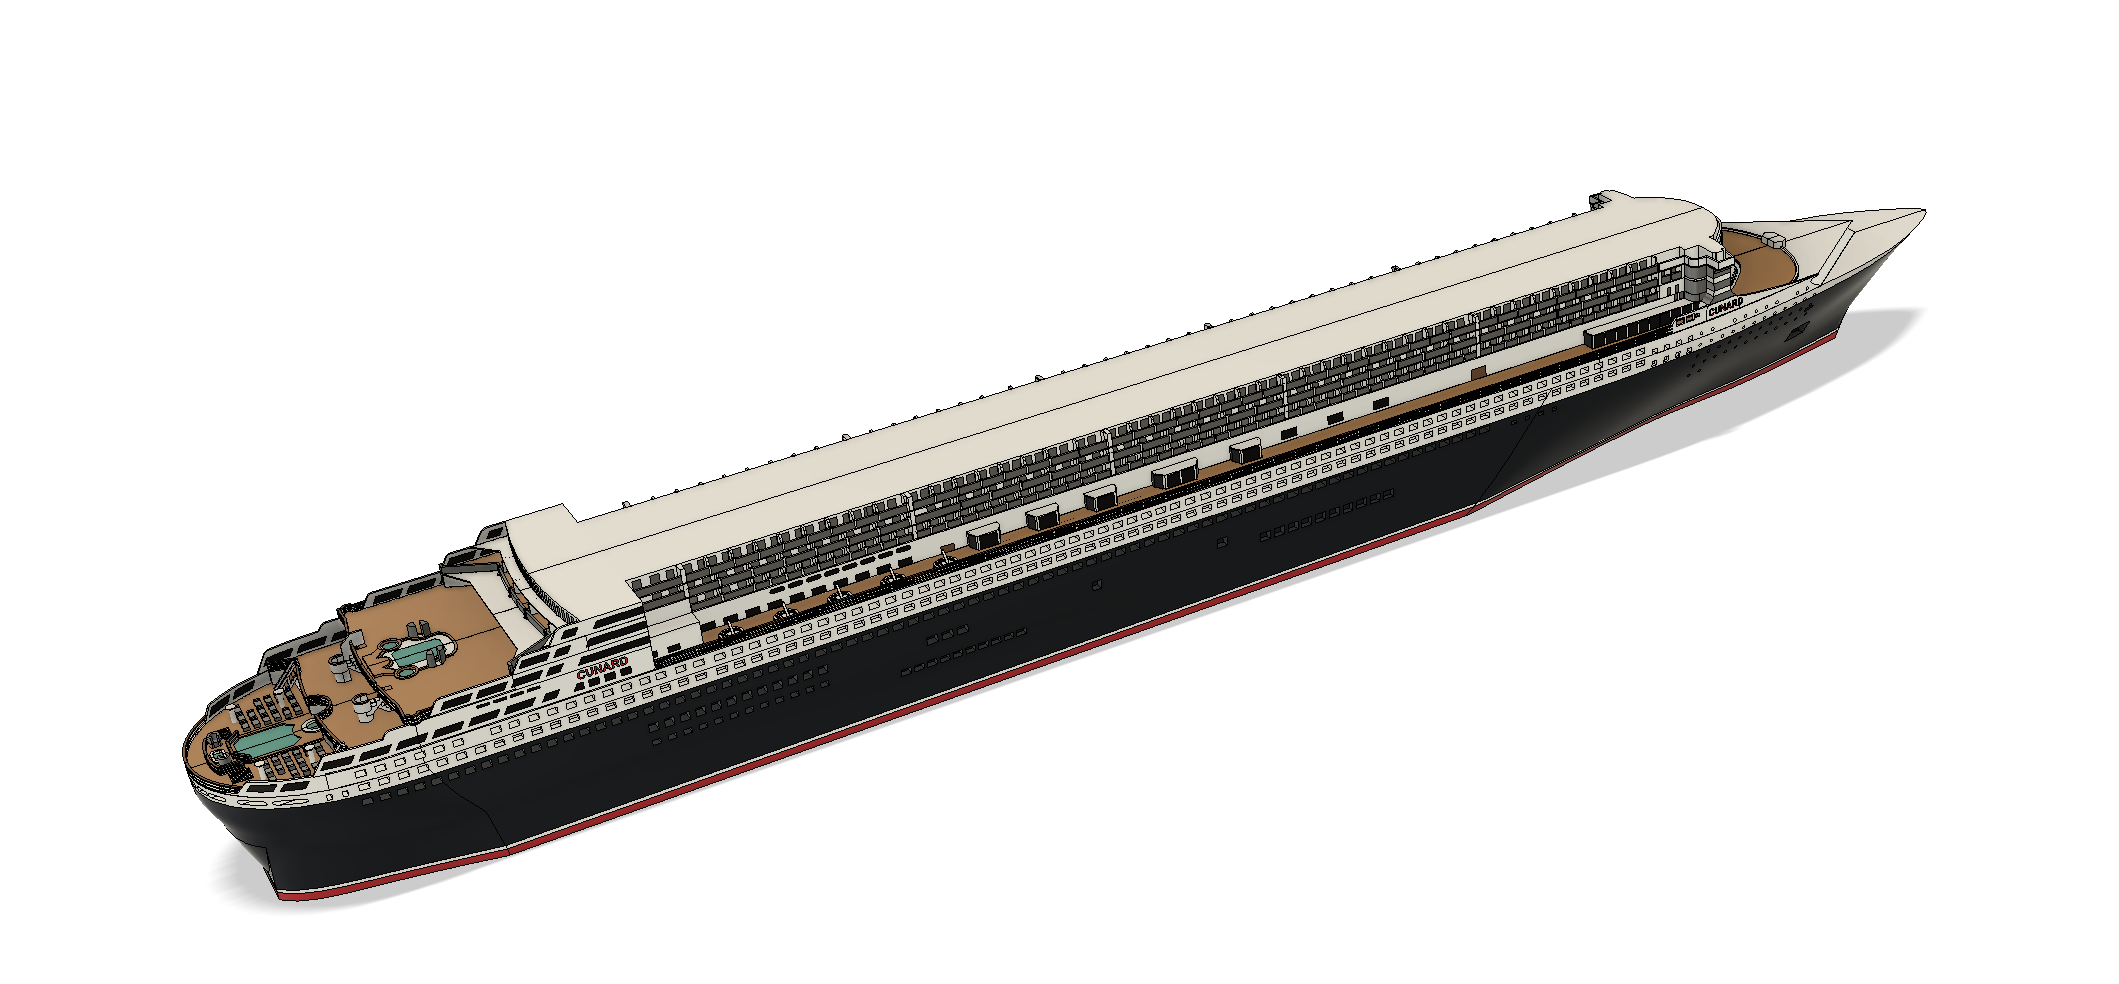
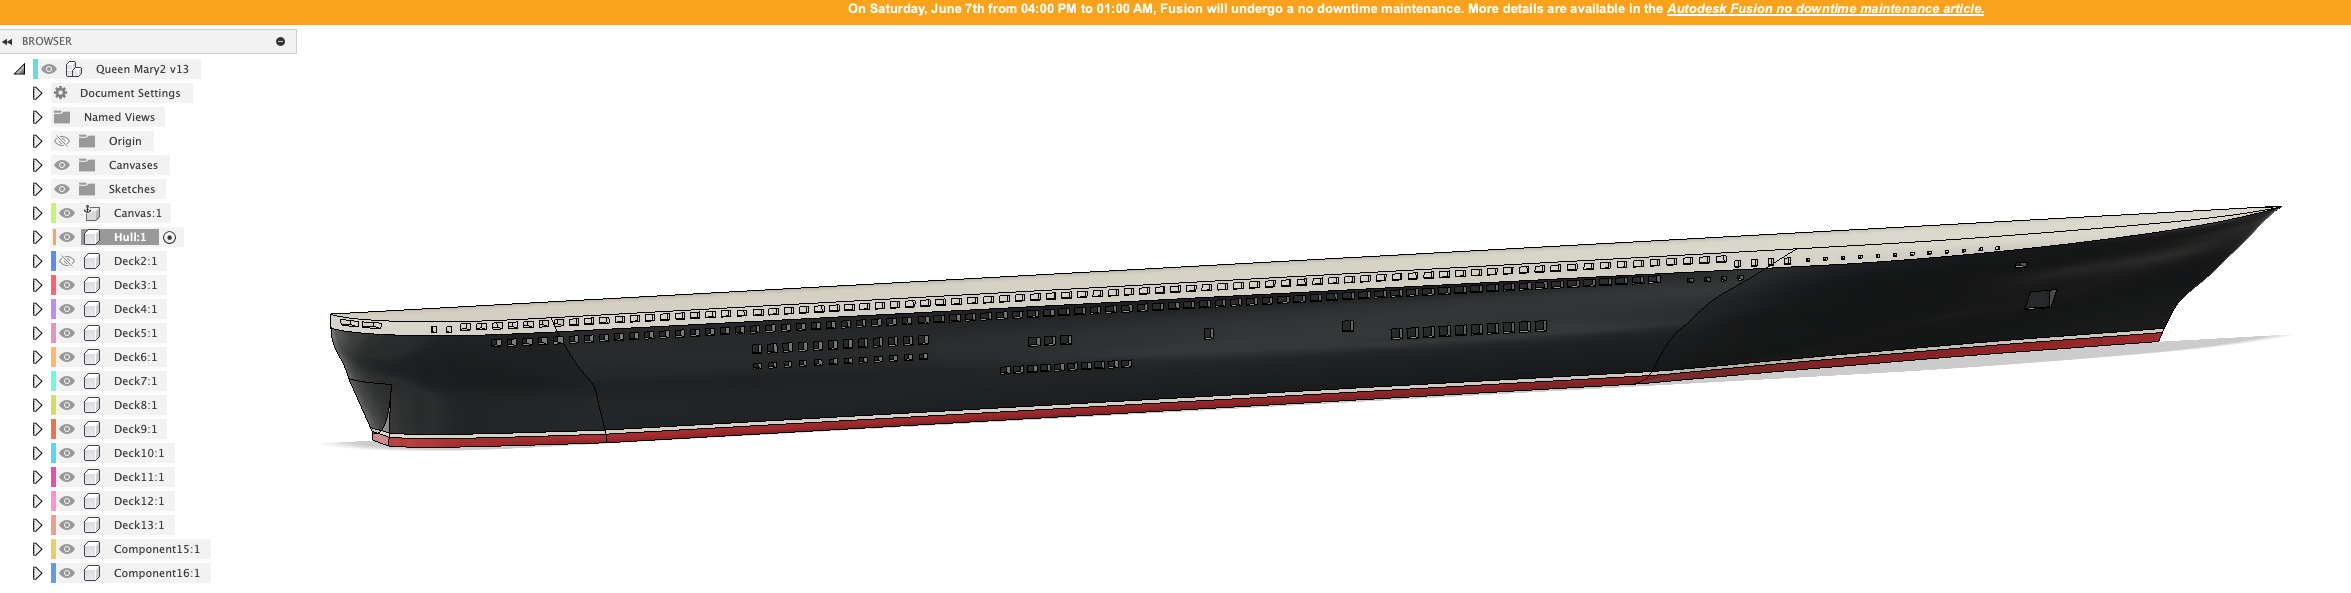
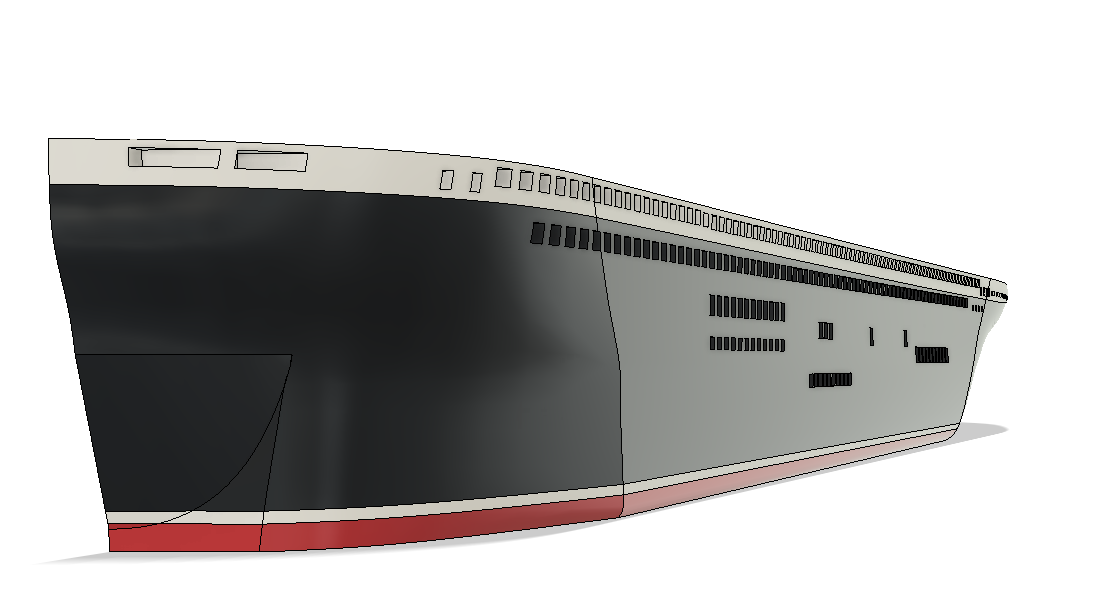
Found I had got the decks confused at the front - had put the observation deck in one too low - so windows were all wrong too. Now corrected.
- 34 replies
-
- 4
-
-
- Queen Mary 2
- 3d printed
- (and 1 more)
-
Quite a few improvements made to rear of decks, plus deck 9 now coming along

- 34 replies
-
- 2
-
-
- Queen Mary 2
- 3d printed
- (and 1 more)
-
Filled out some of the details on deck6 & 7, plus started on deck8

- 34 replies
-
- 2
-
-
- Queen Mary 2
- 3d printed
- (and 1 more)
-
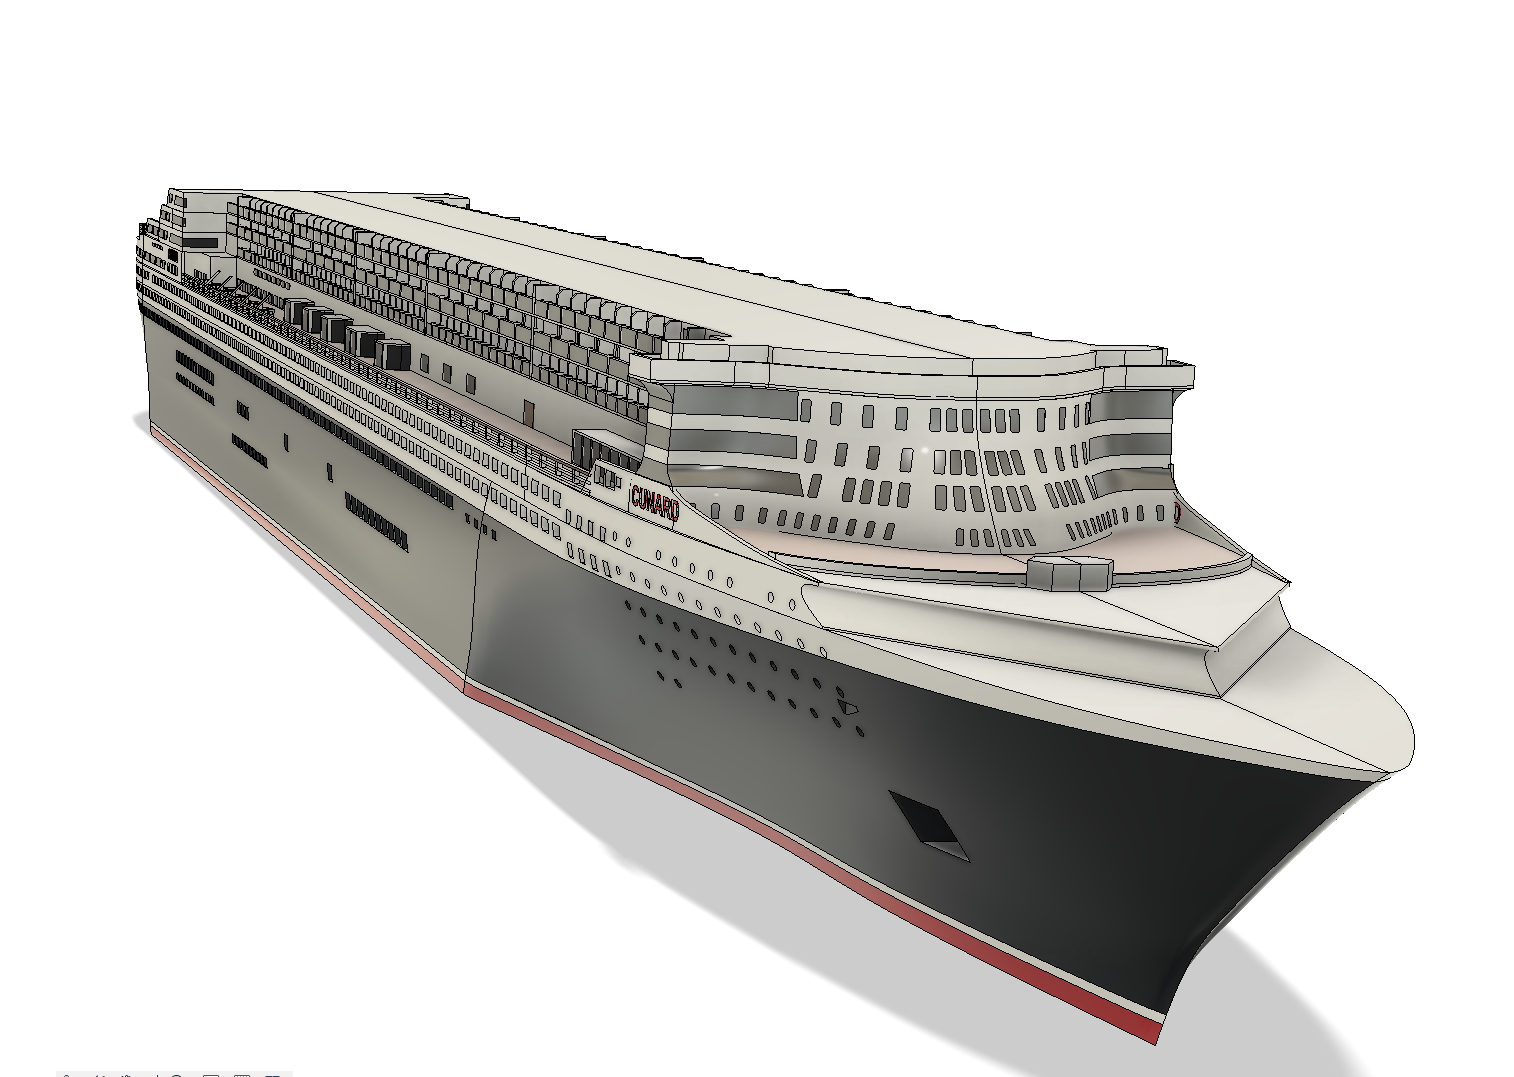
Made a start yesterday on QM2 Multi Colour 3d printed model - will design it for 1:500 initially, then scale down to 1:1000 Modelling from deck plans from Cunard site and various photos, using Fusion 360. Will then Muti colour 3d print on a BambuLab X1C or H2D. Hull shape needs a bit of work. Will mirror it once a few more decks are done.
- 34 replies
-
- 1
-
-
- Queen Mary 2
- 3d printed
- (and 1 more)
-
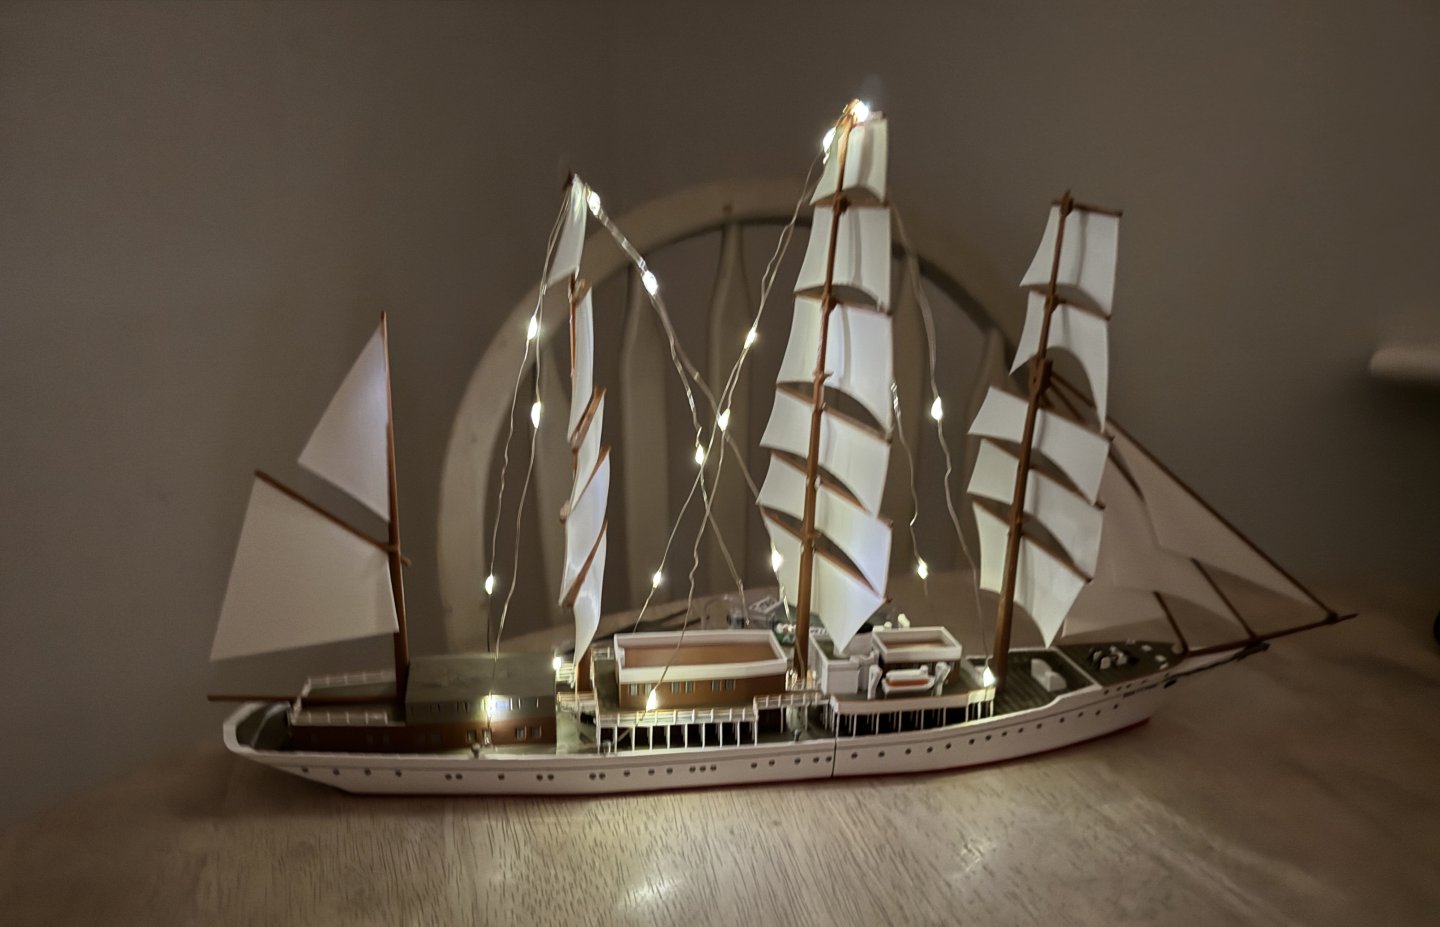
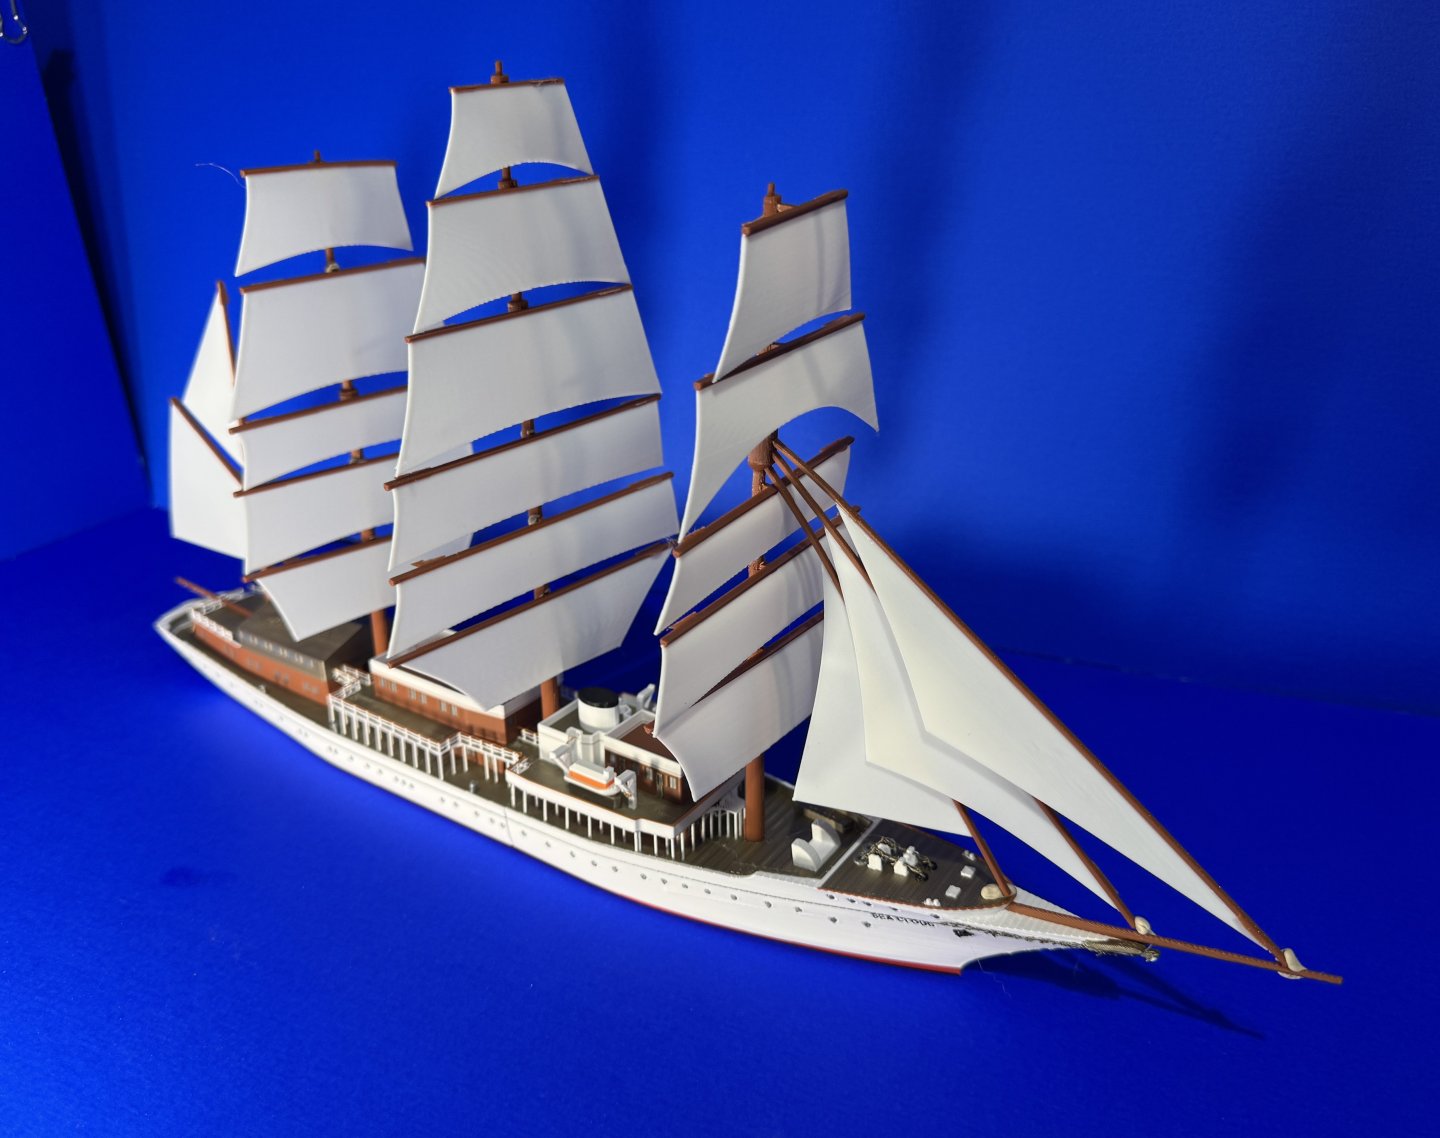
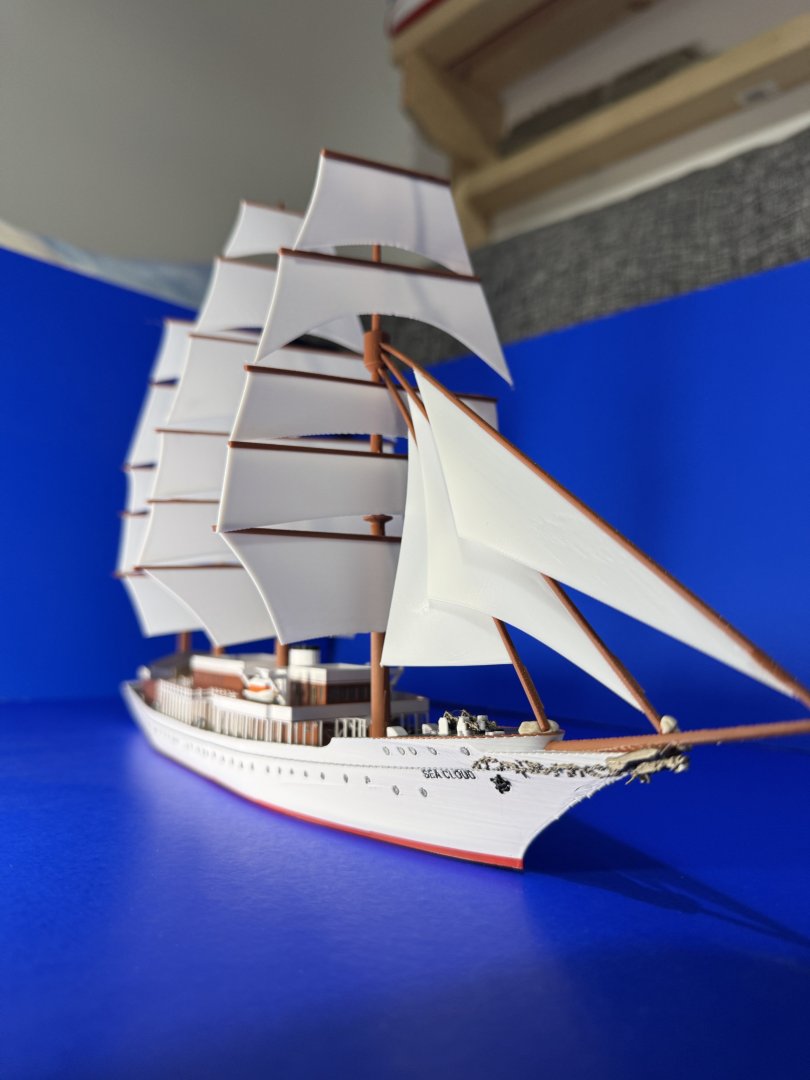
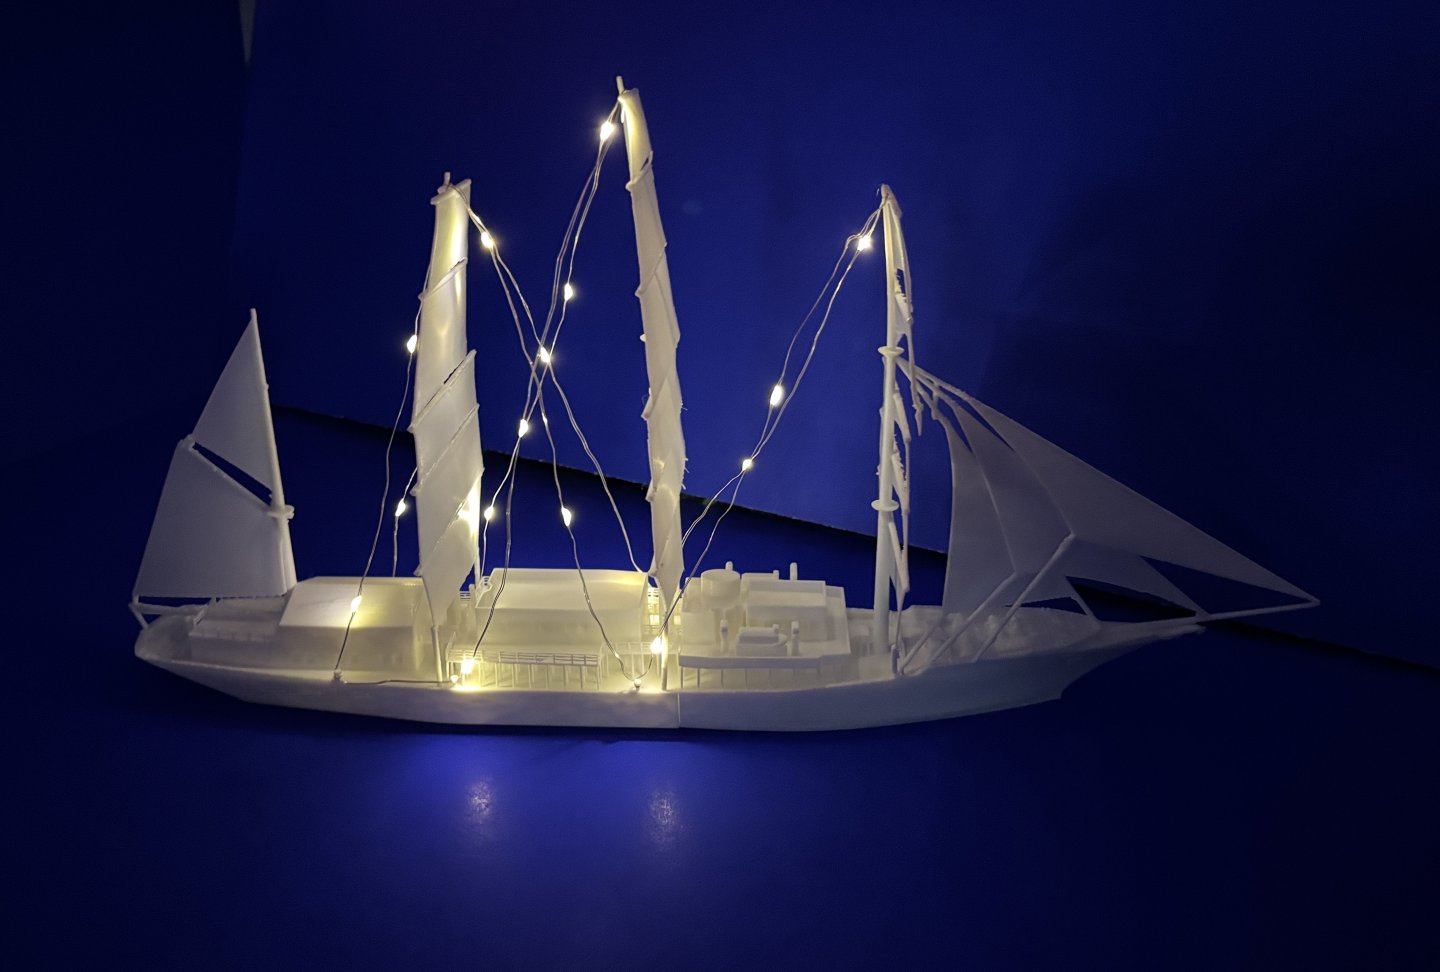
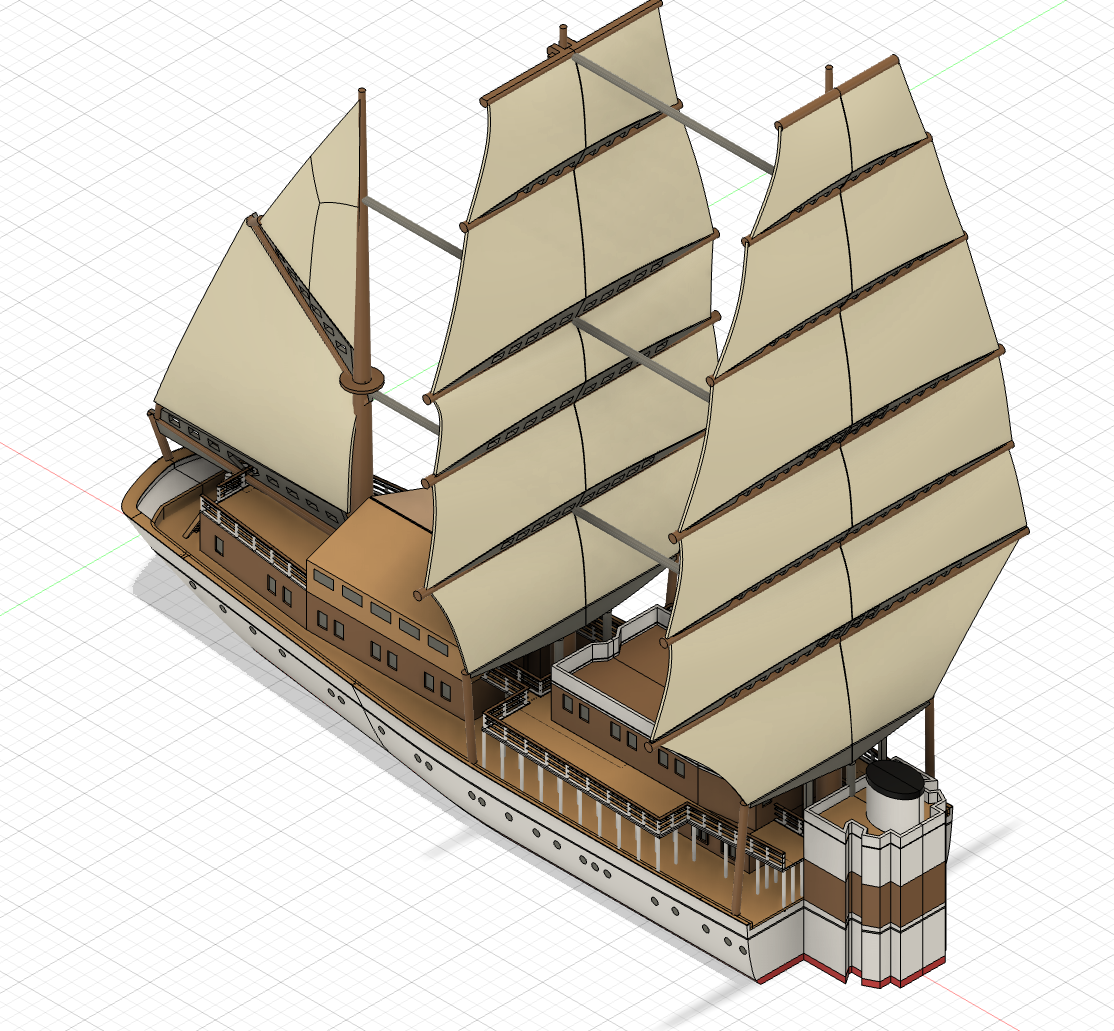
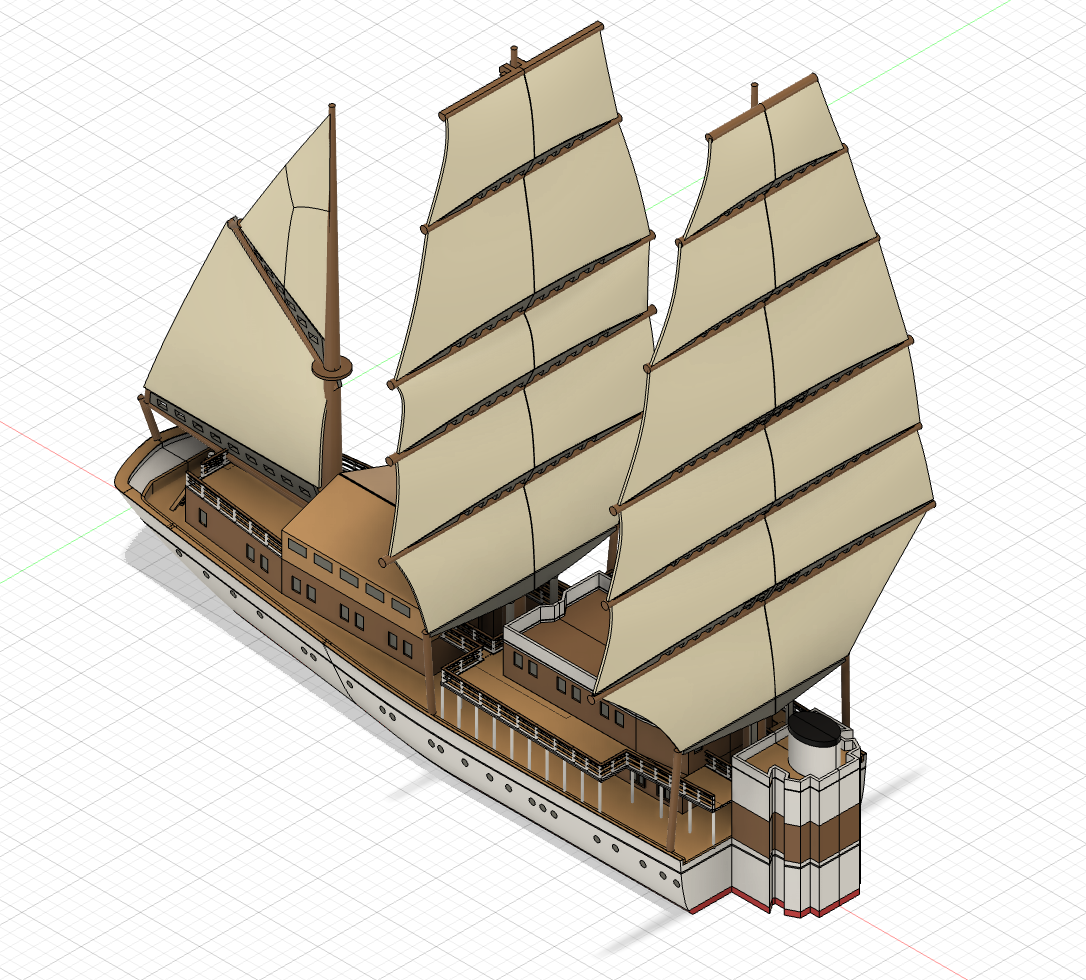
Sea Cloud Multi Colour with a few lights for rigging.

-
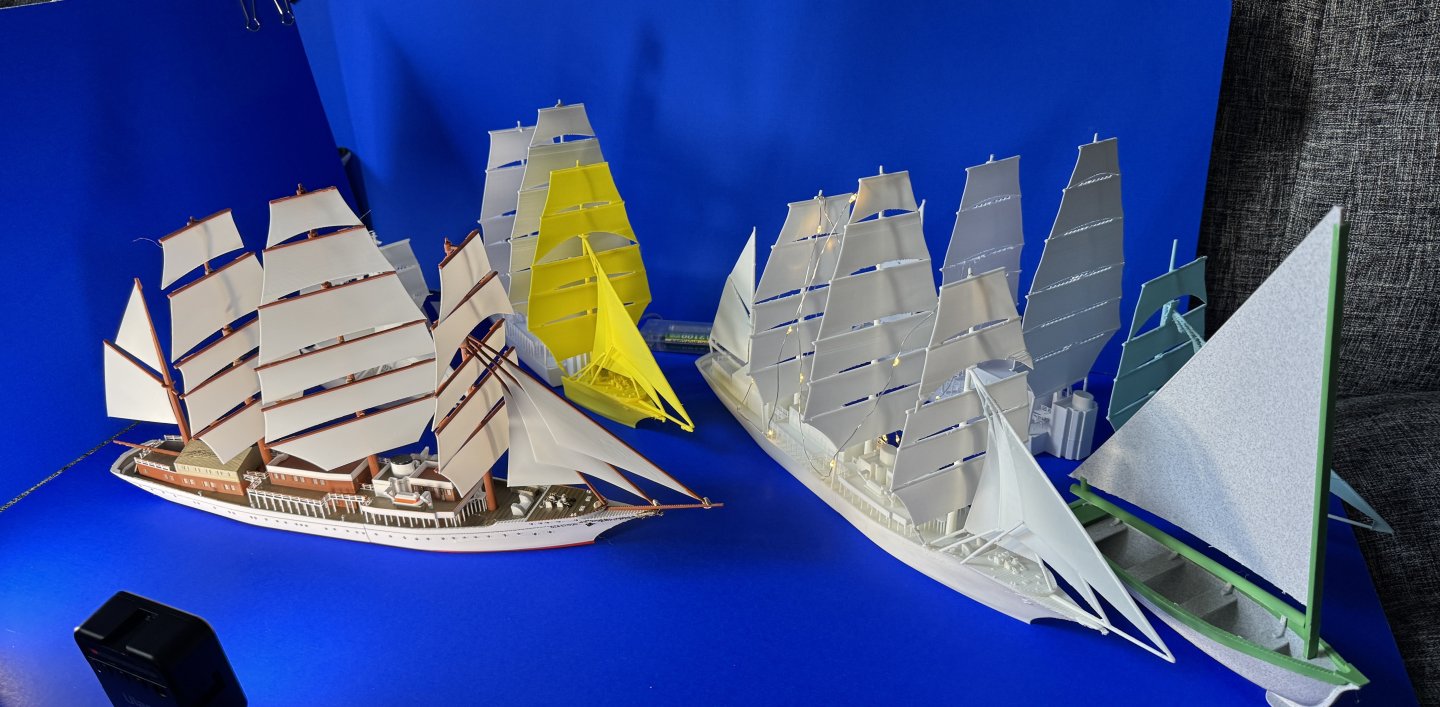
Ship with some of its earlier prototypes before they are melted down - see this video for details of how I recycle my old prints.
-
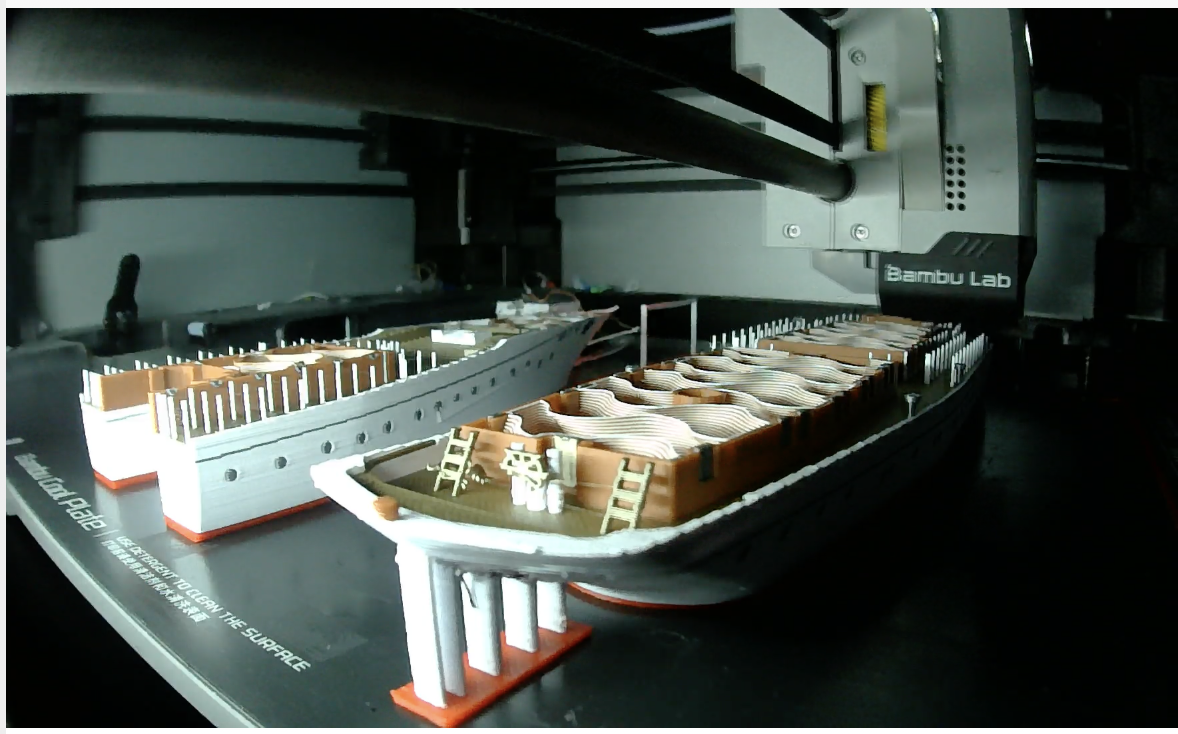
Some time lapses of the 3d prints
-
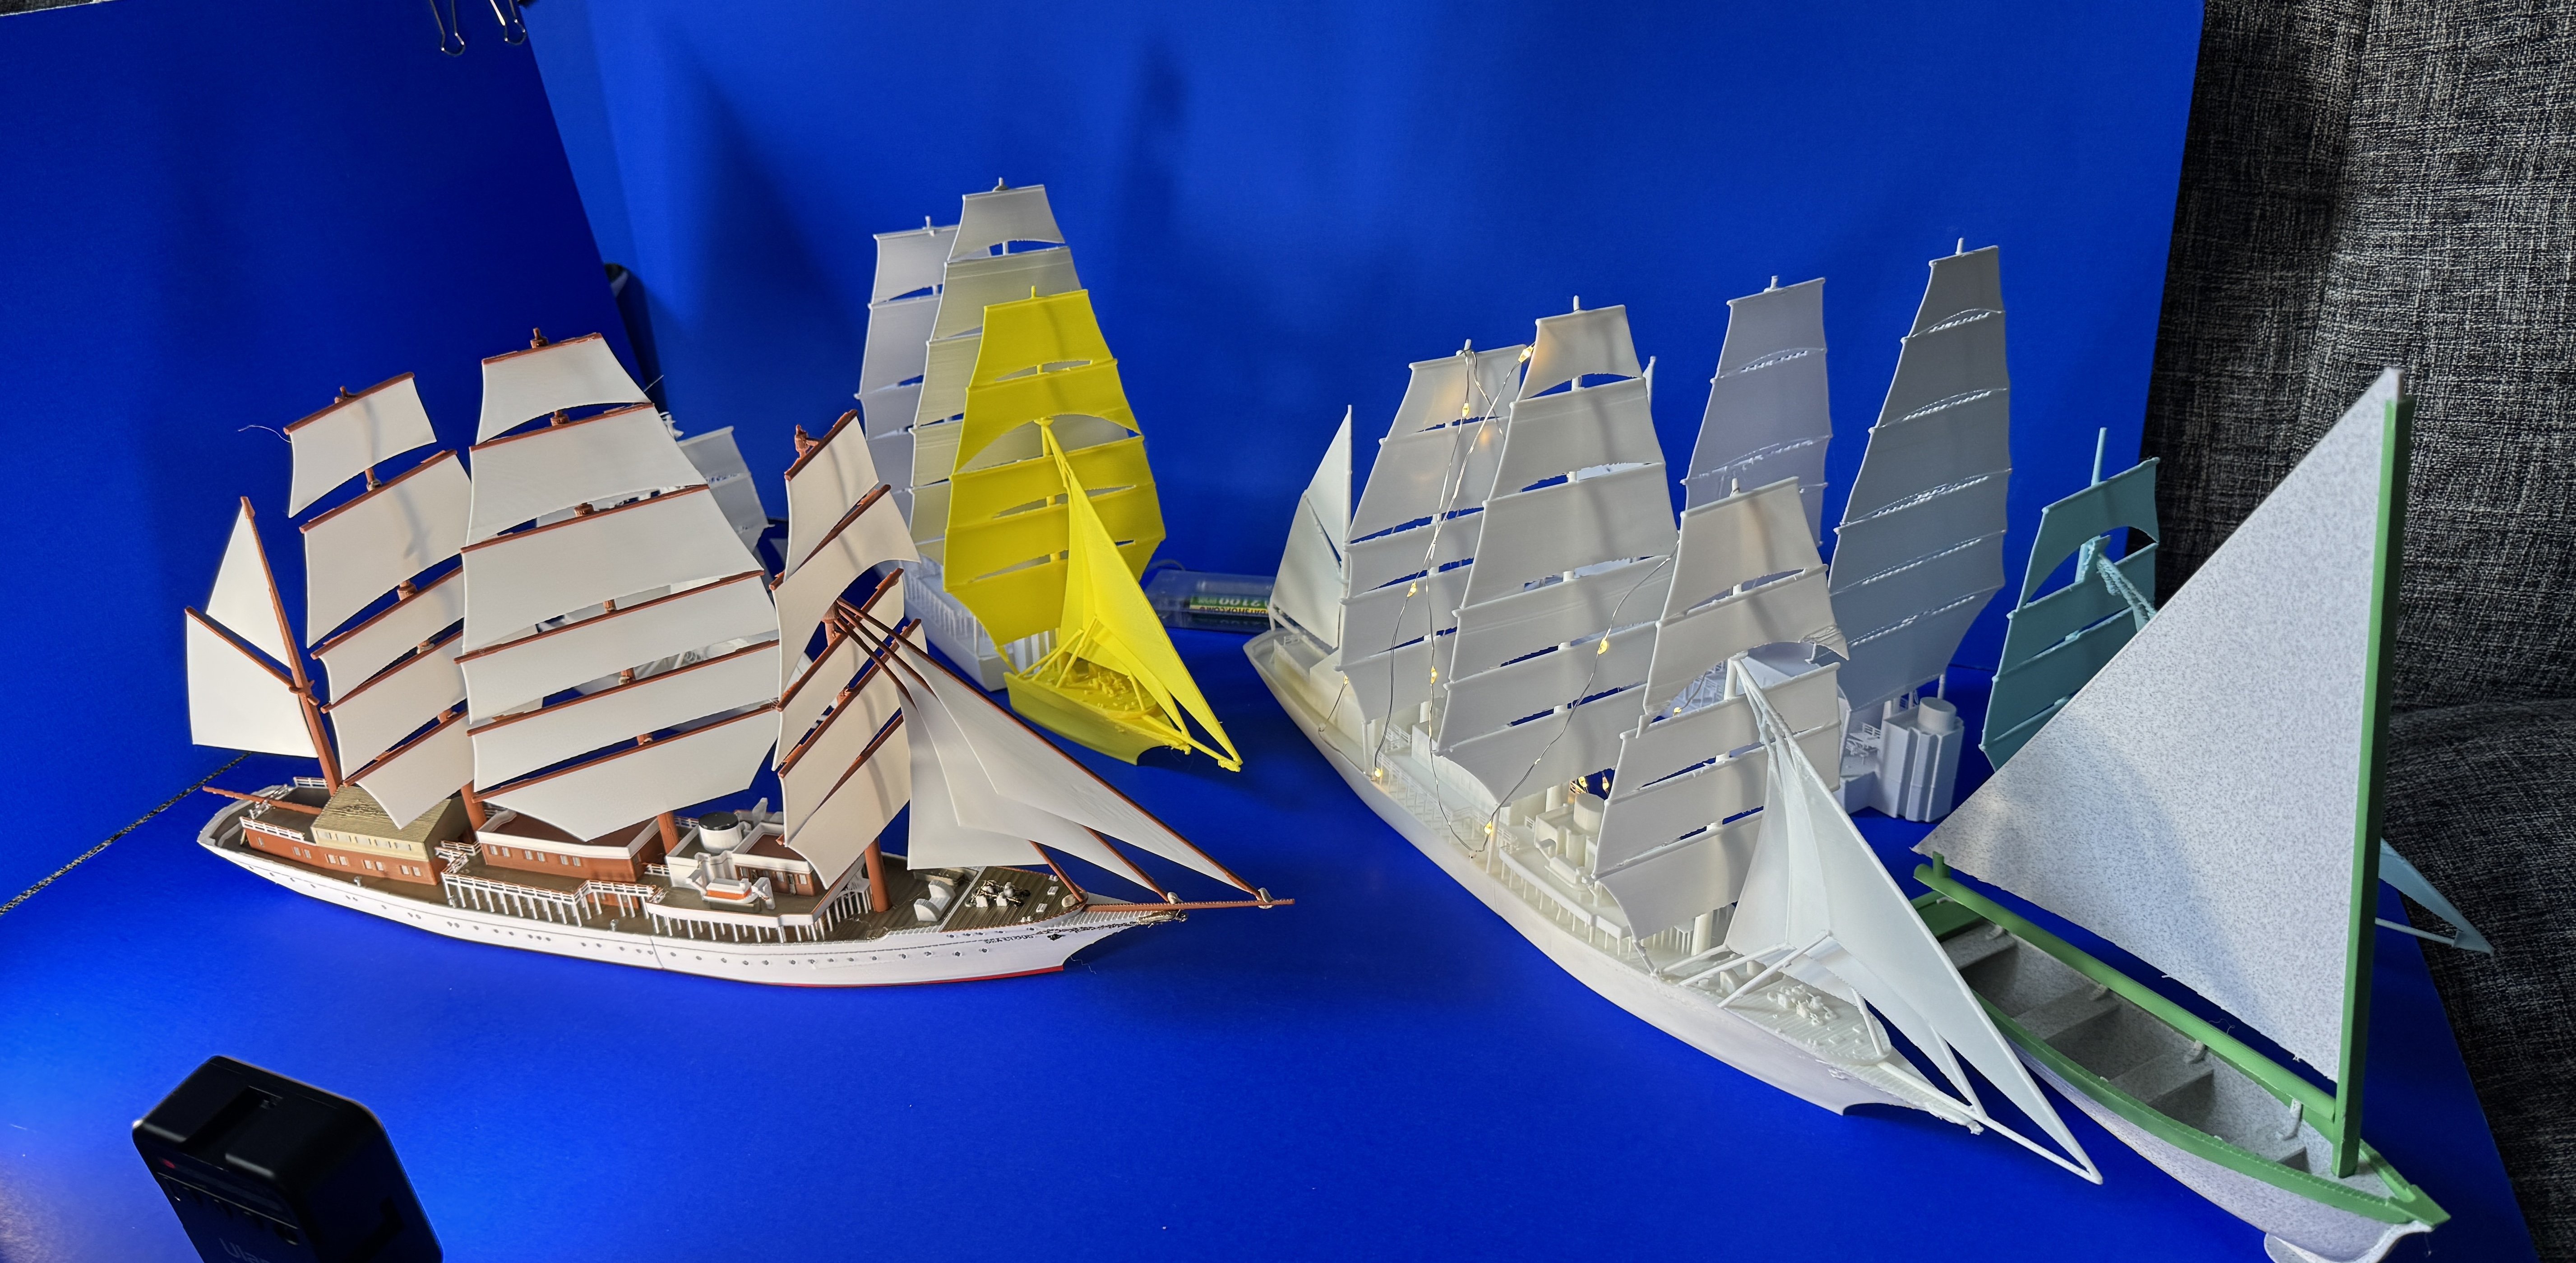
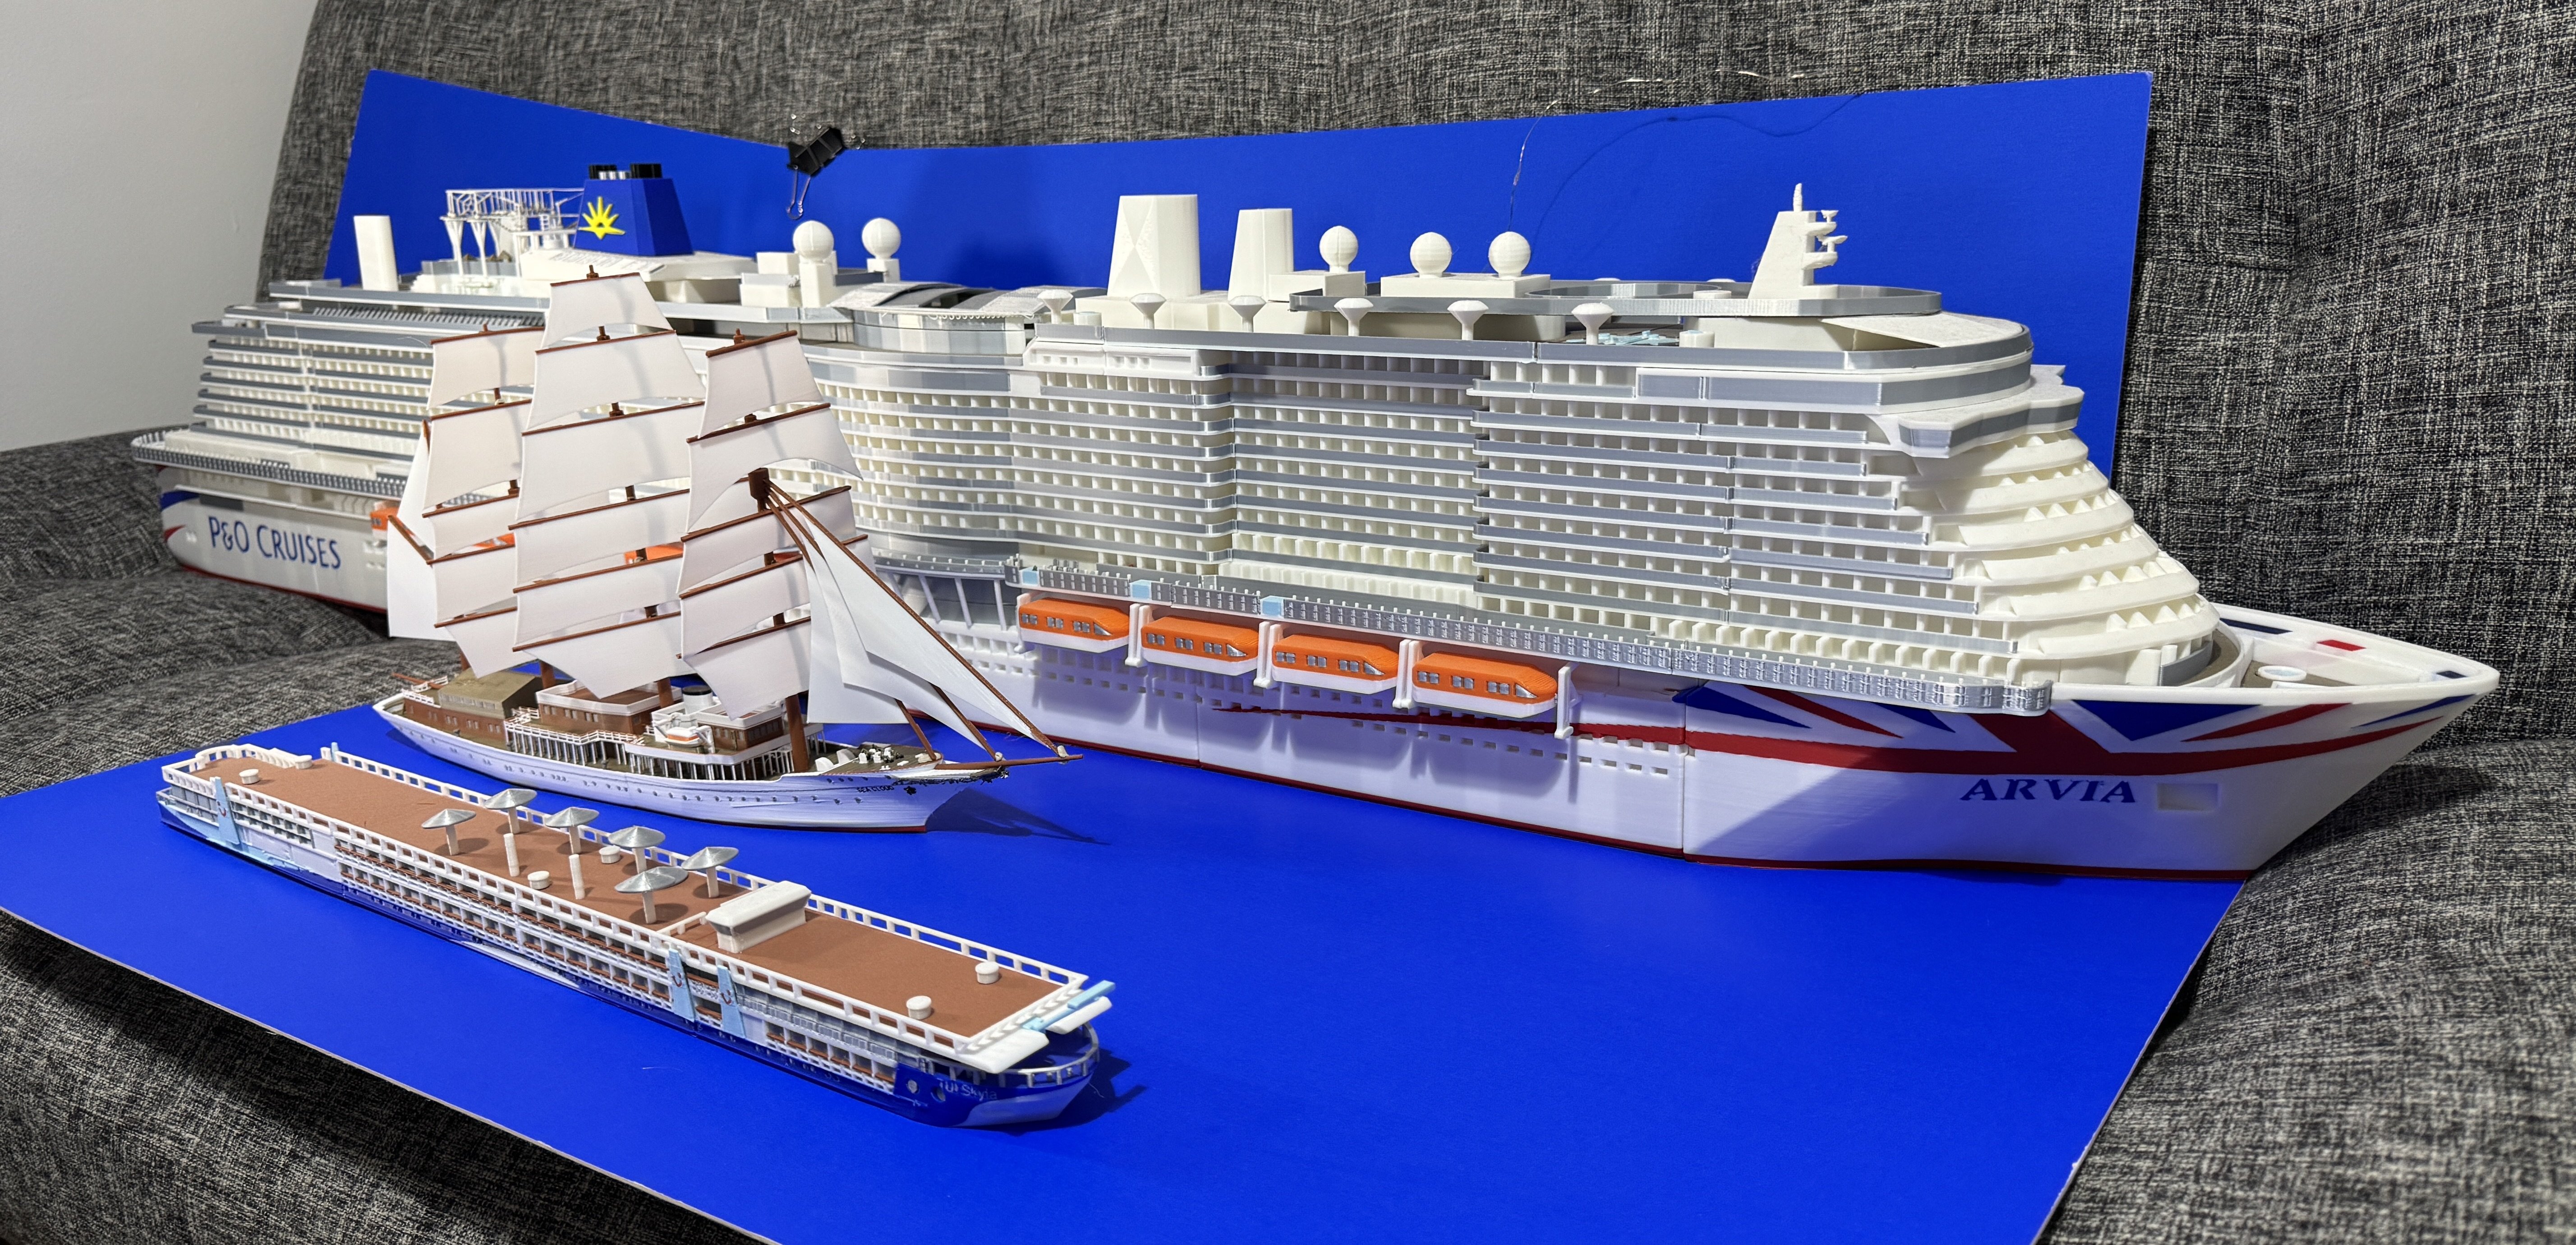
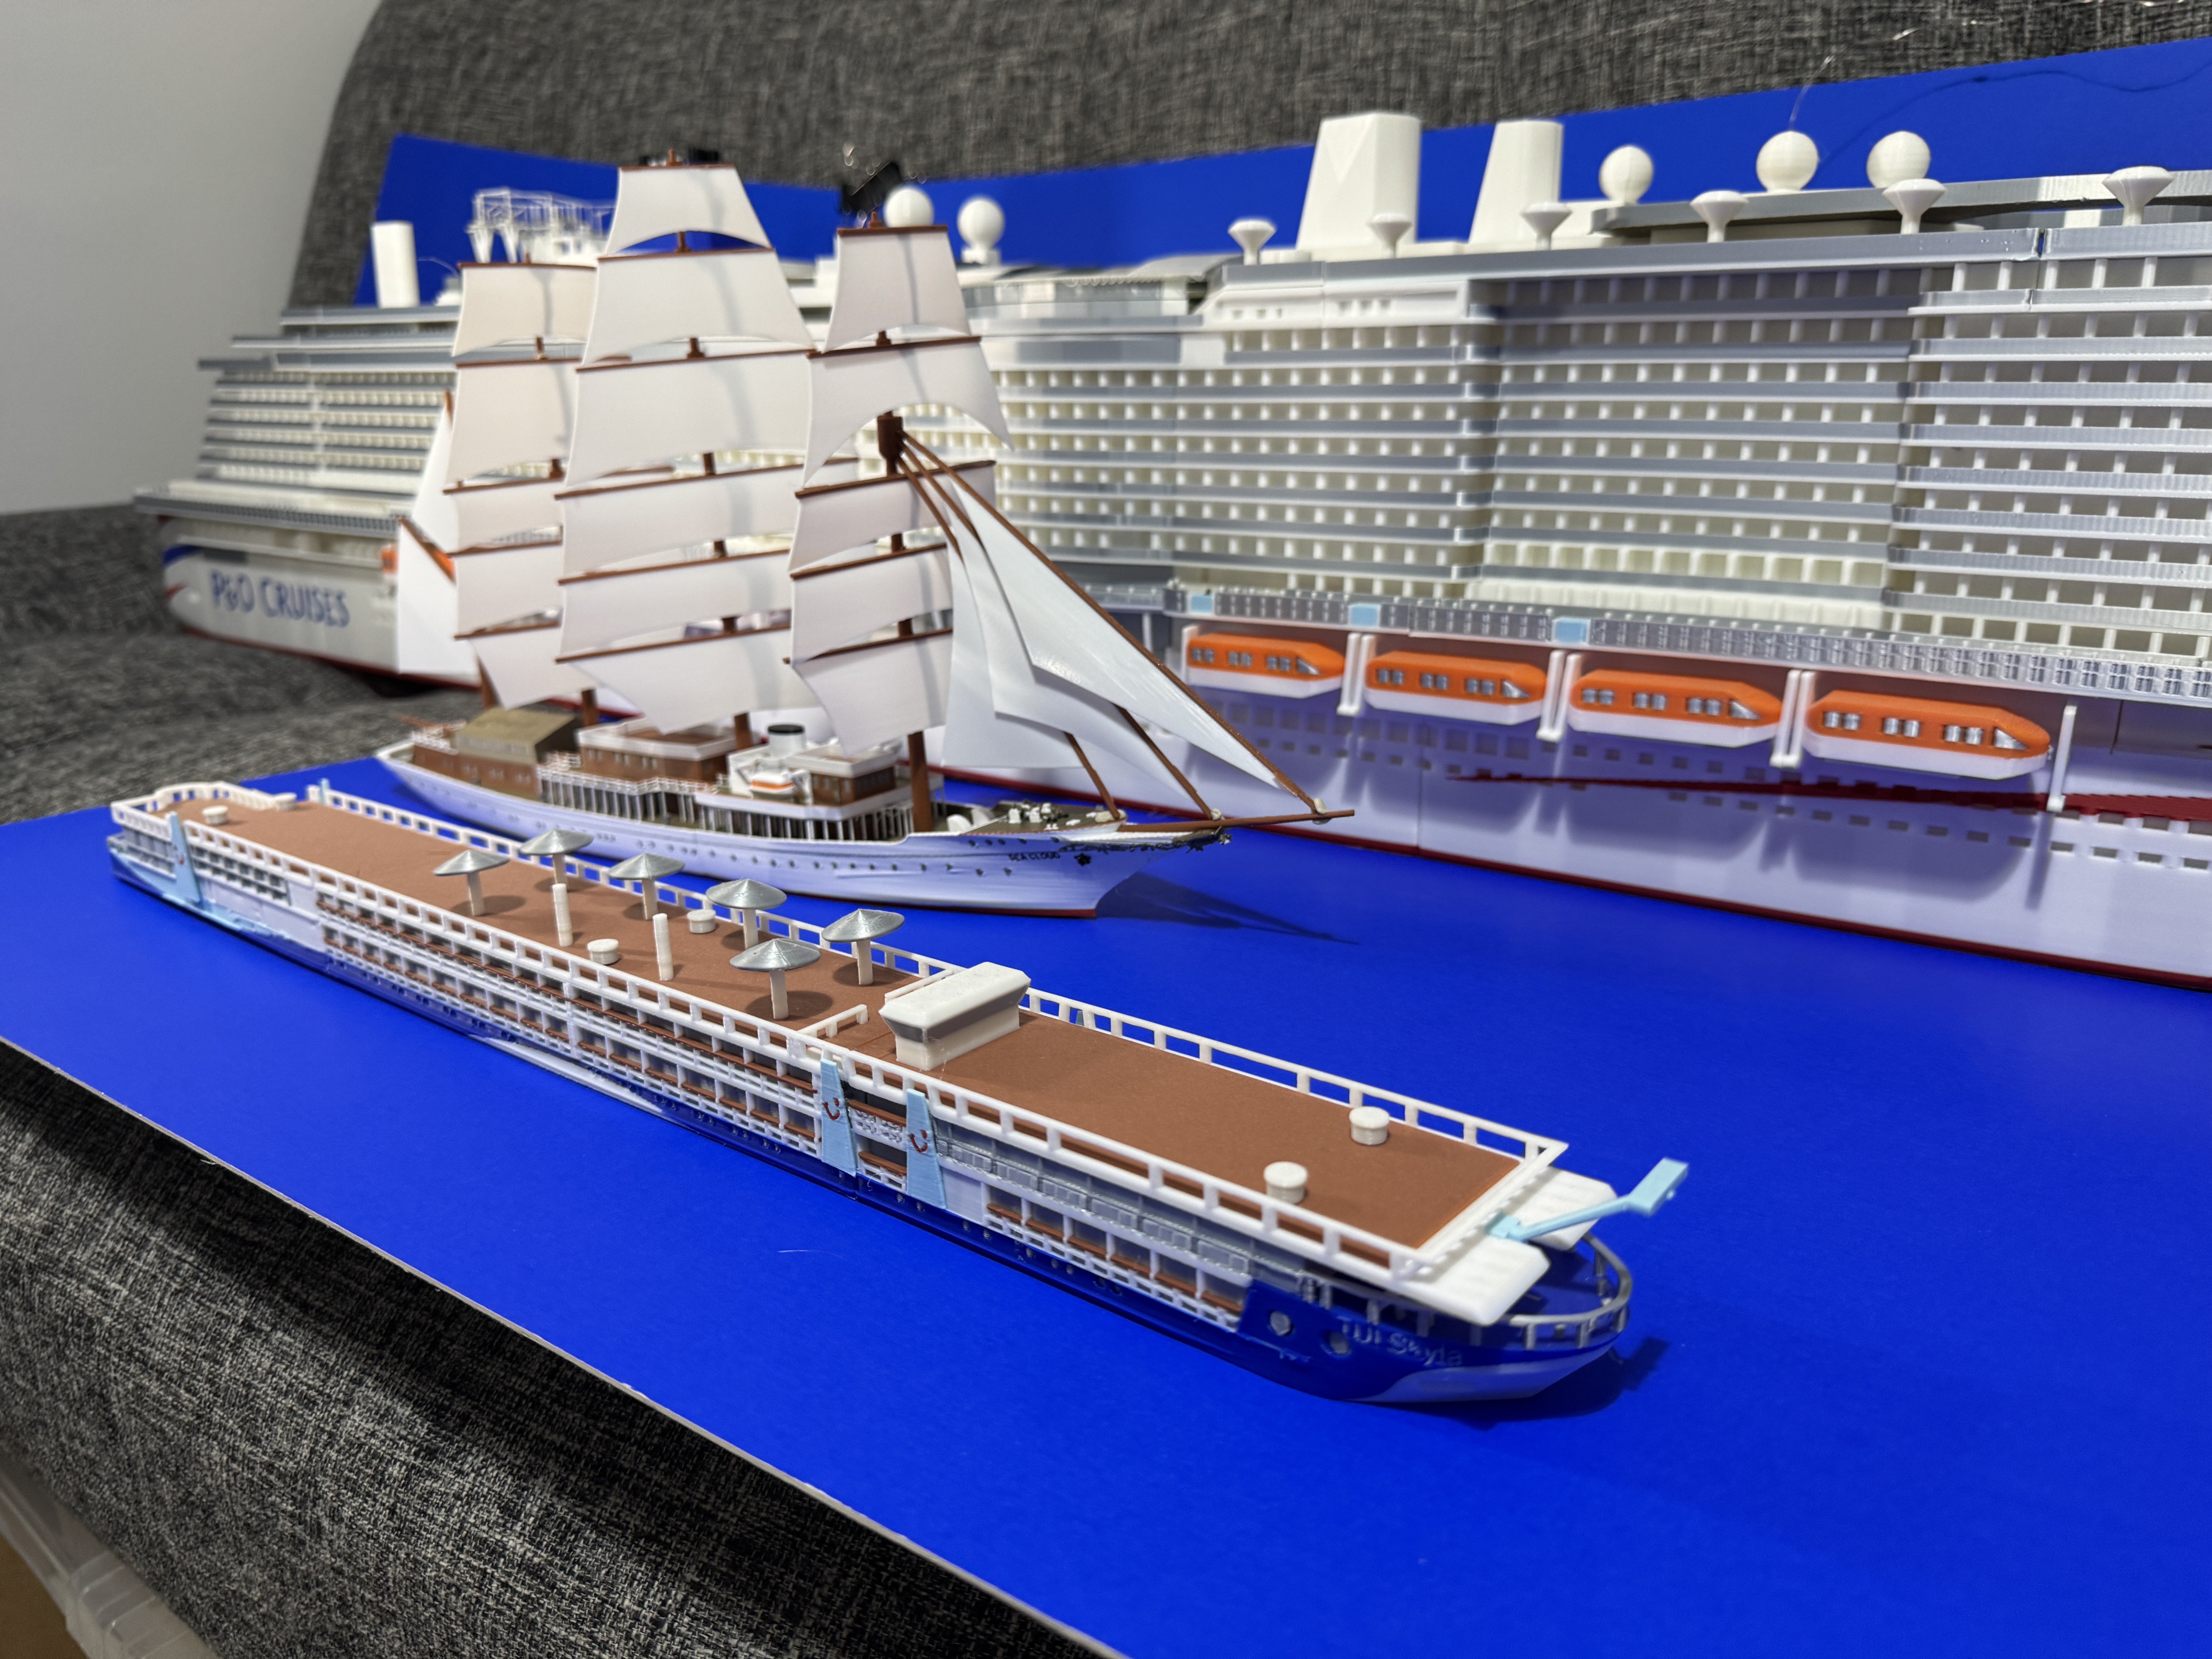
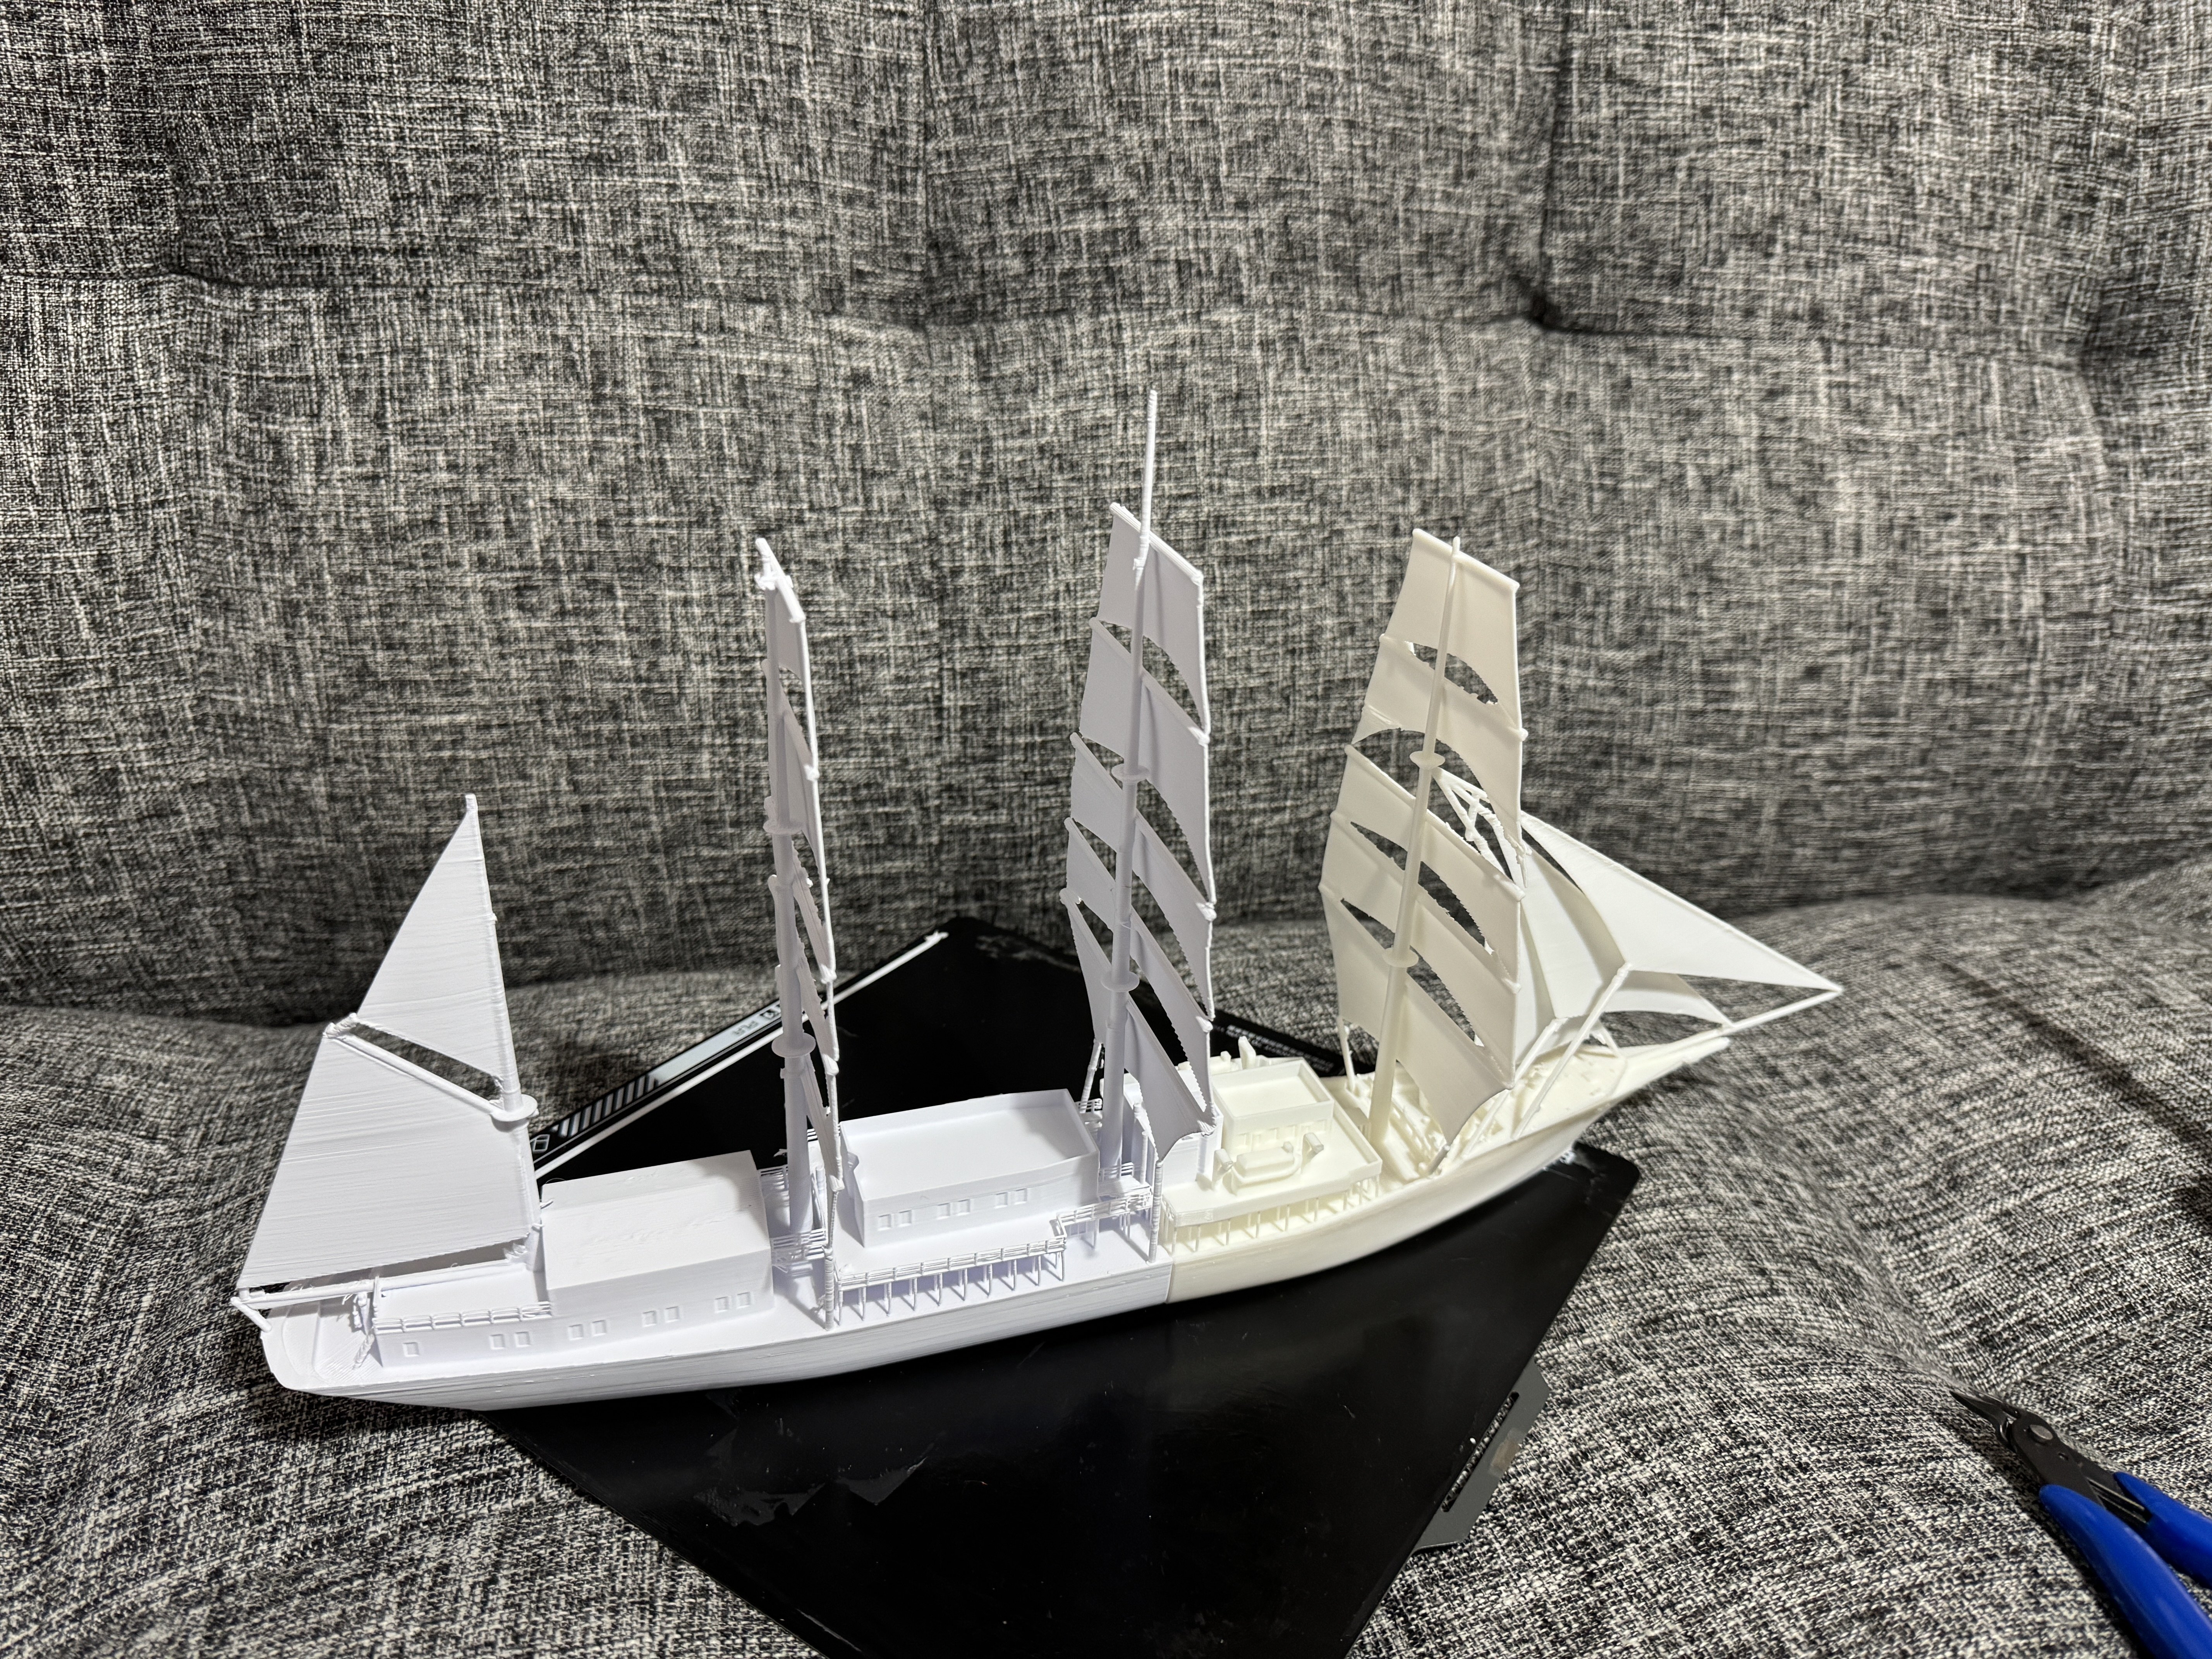
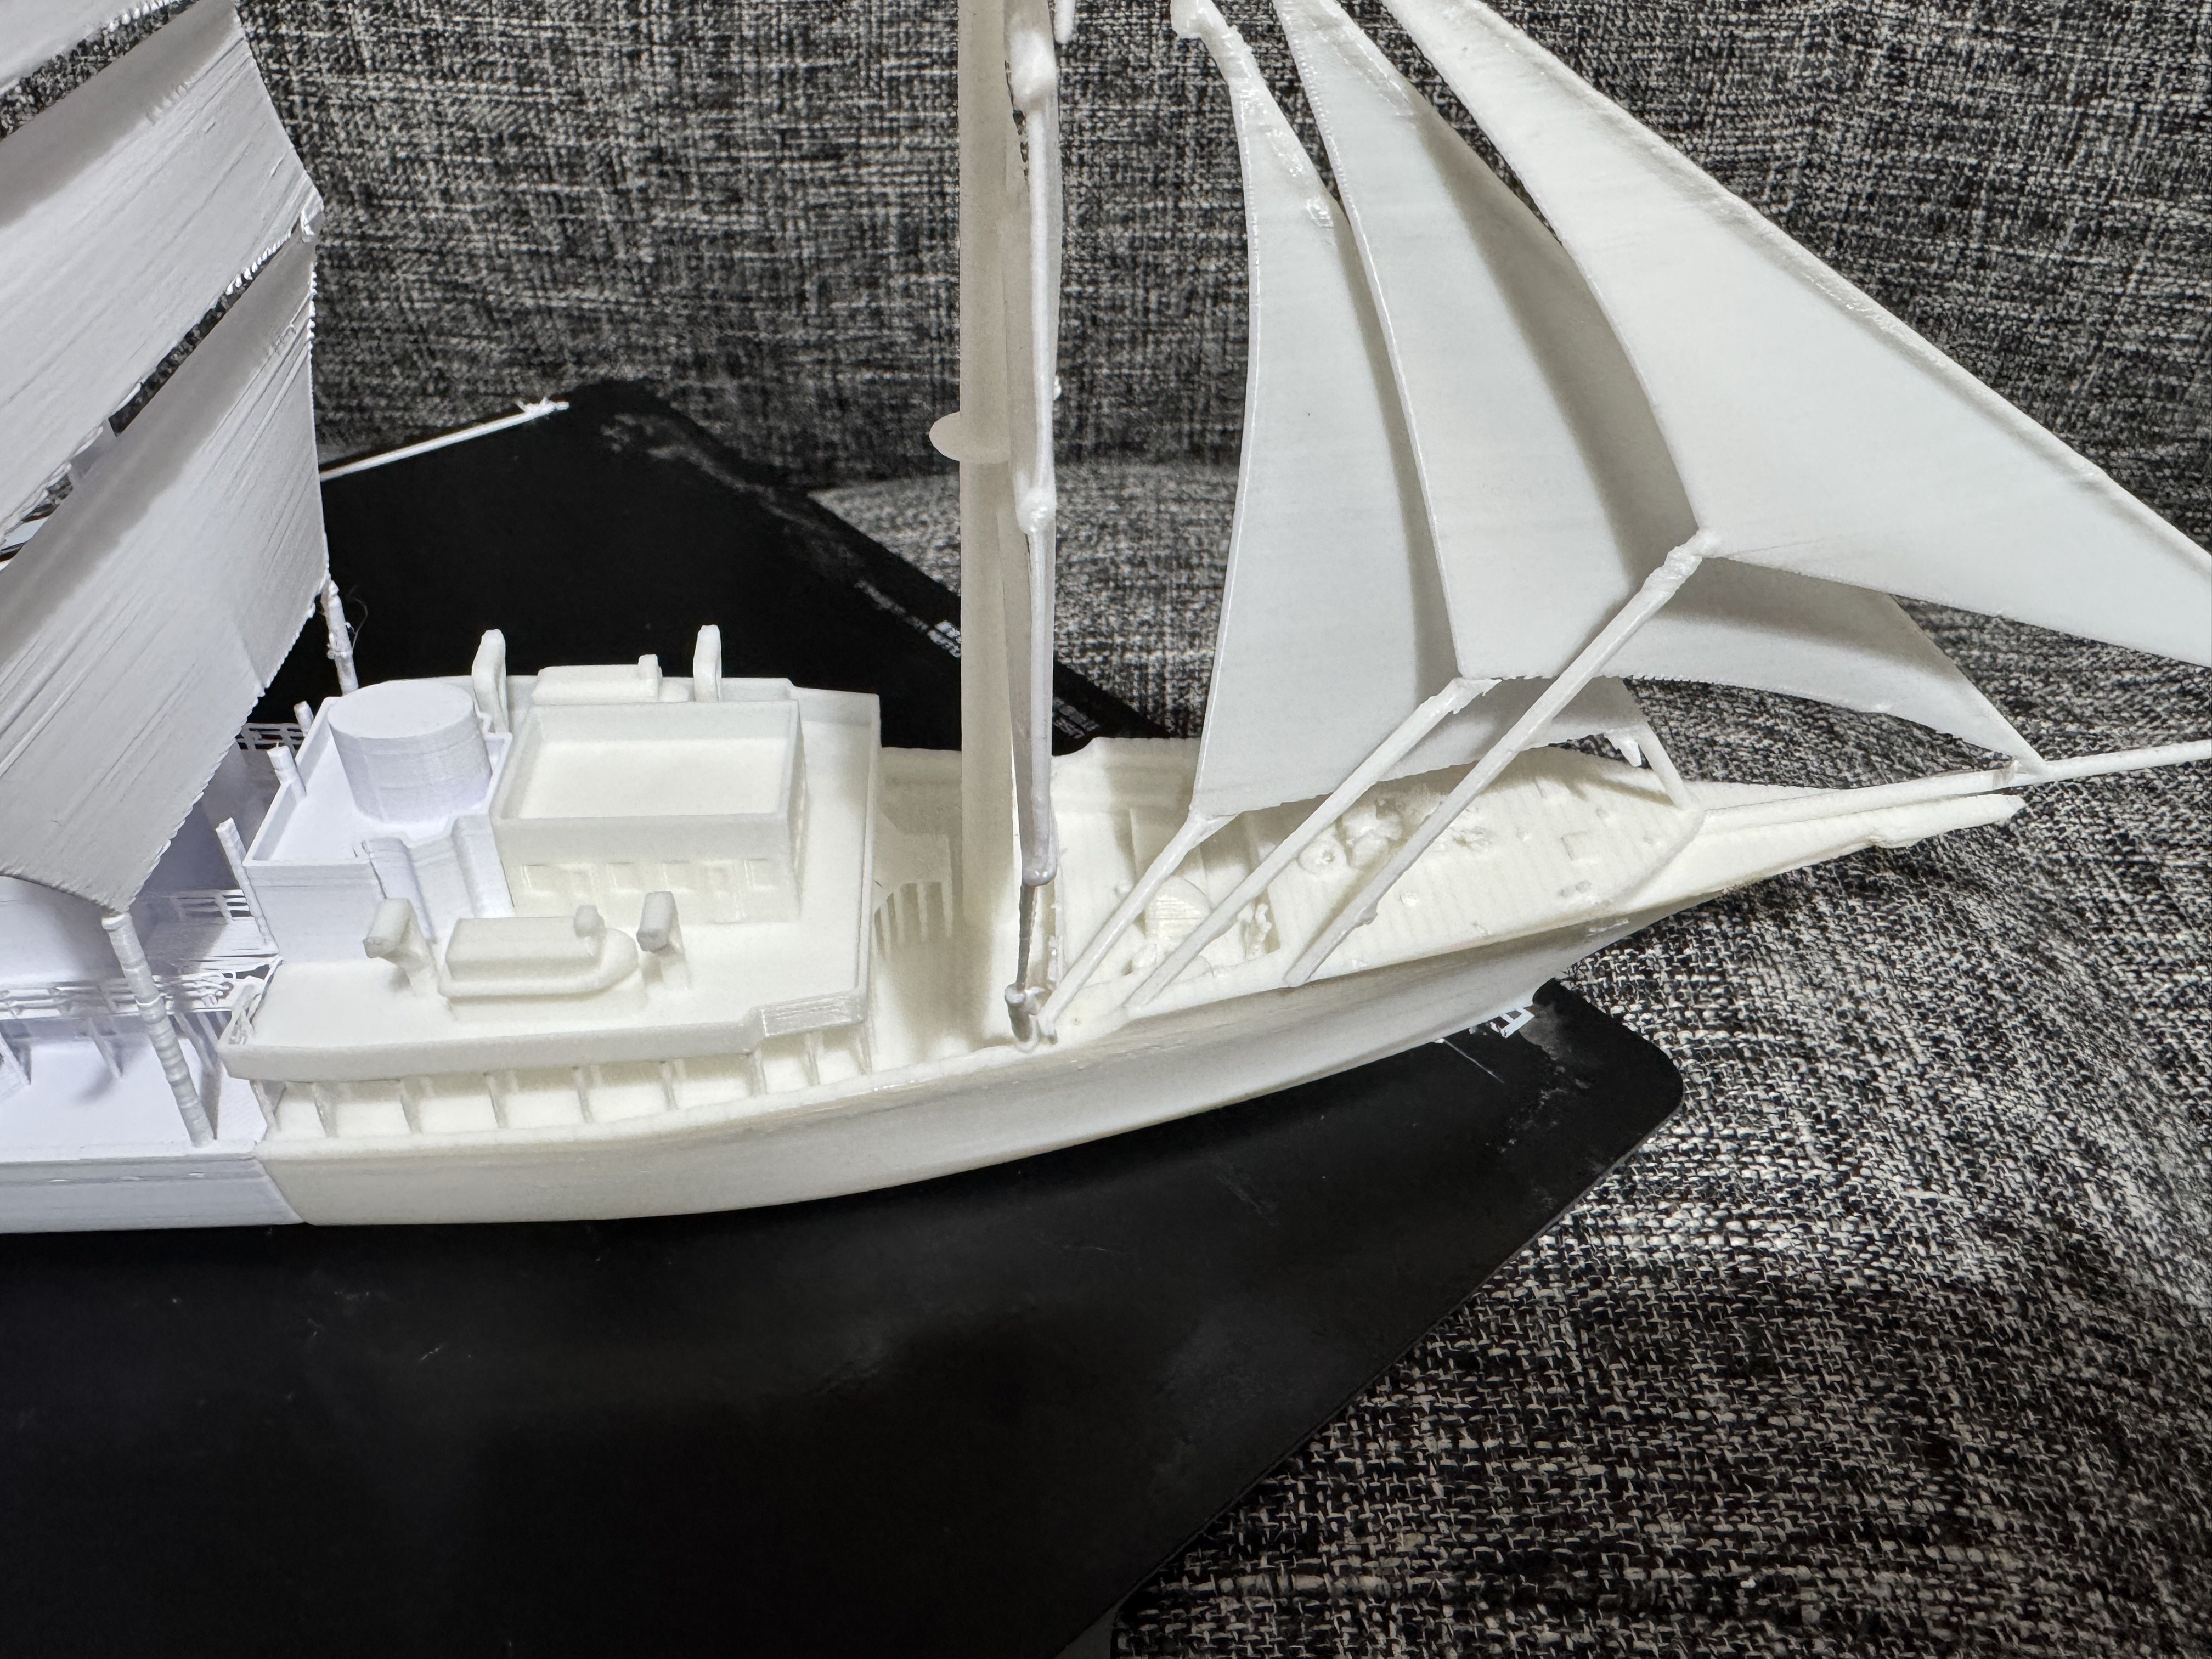
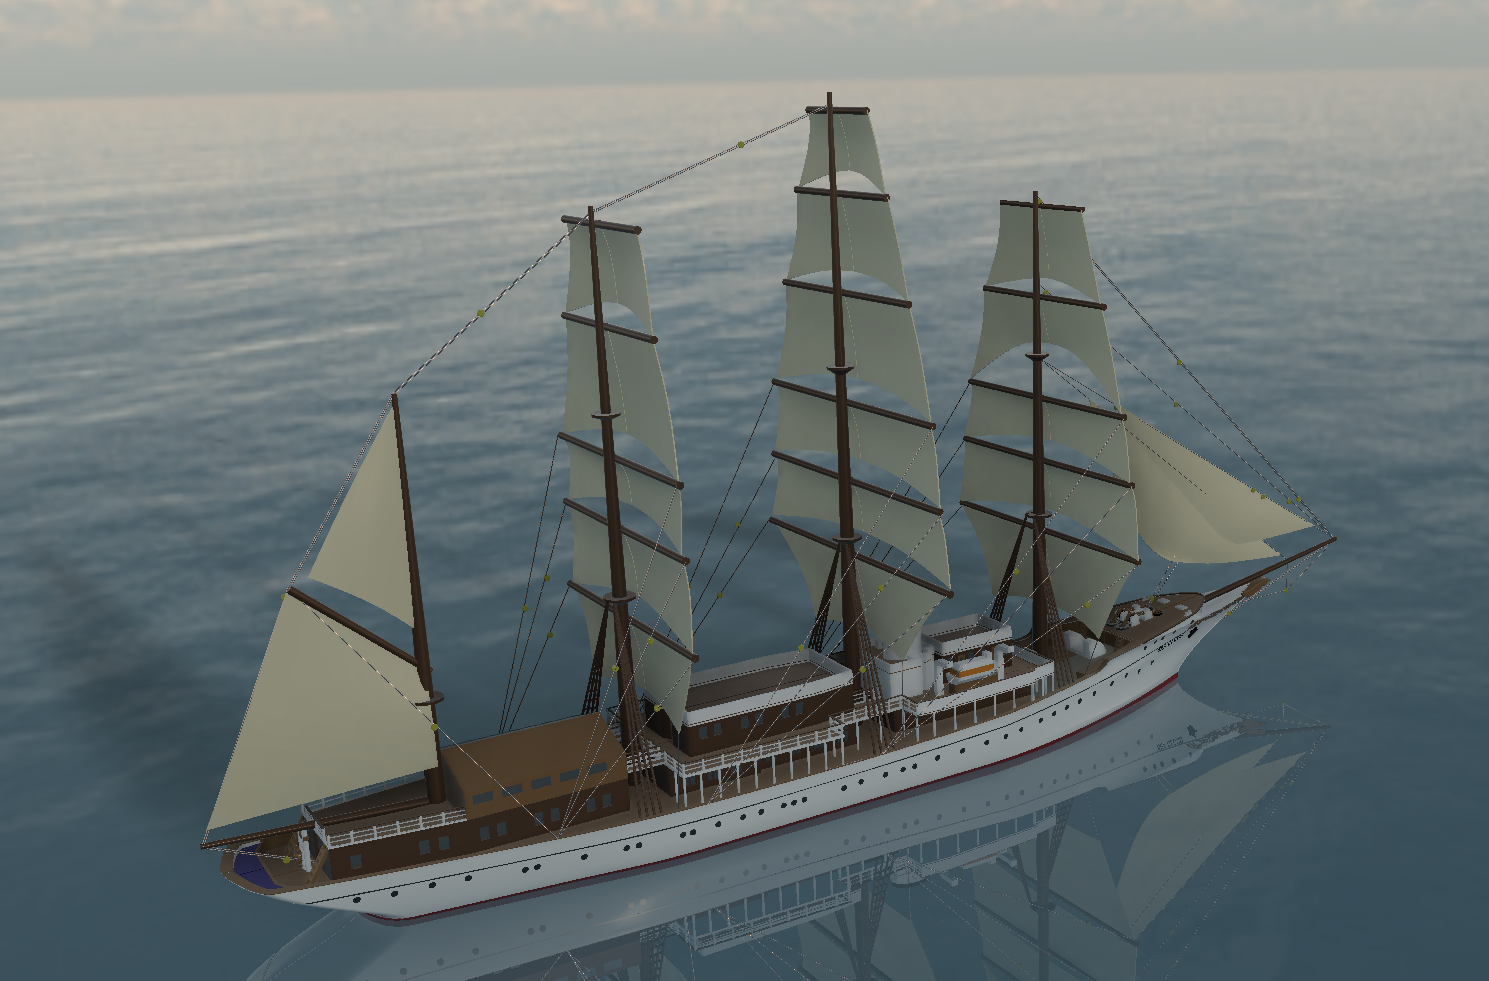
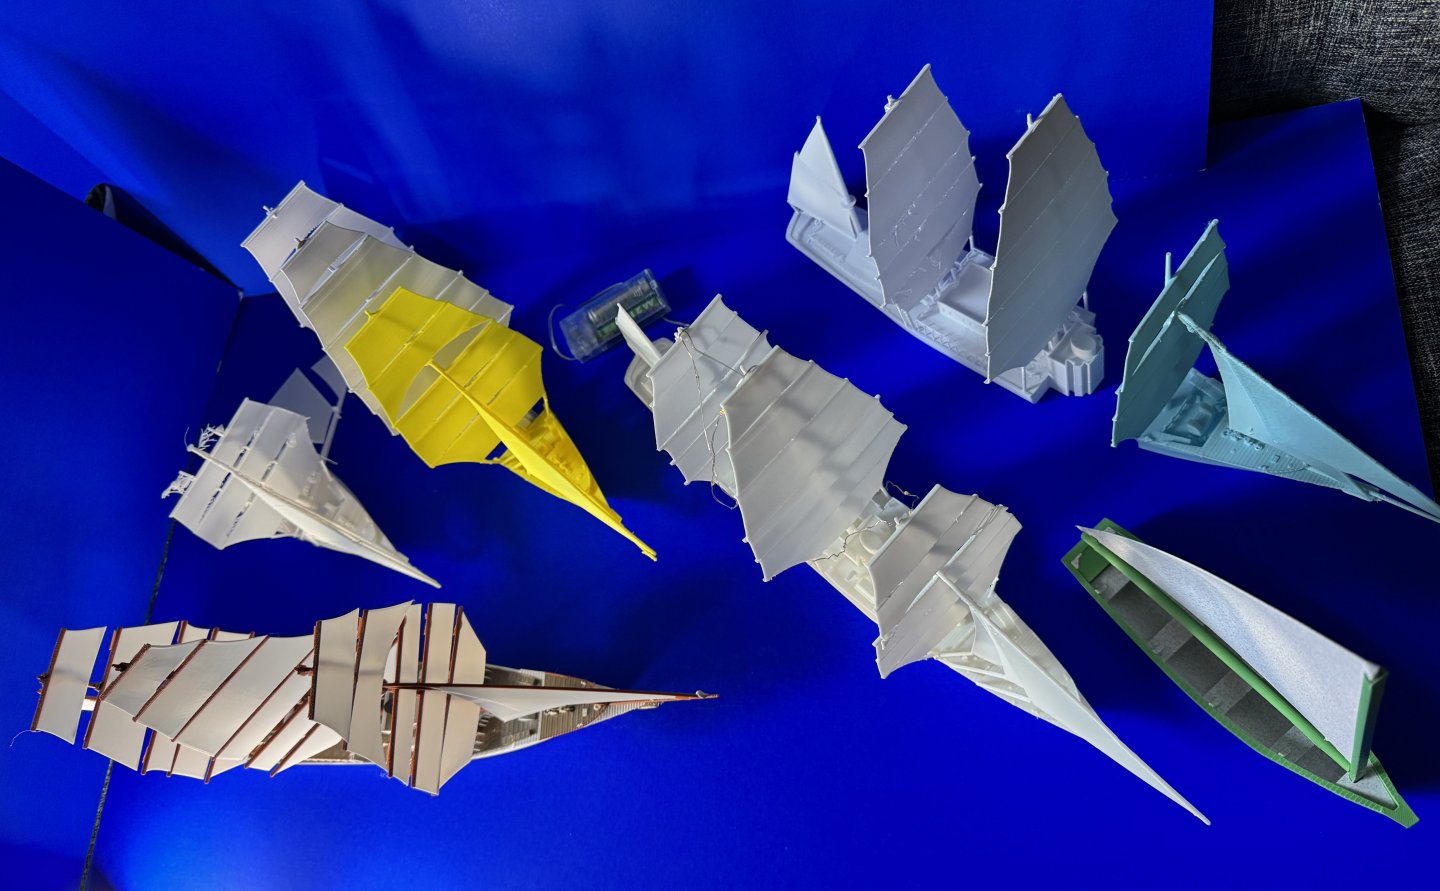
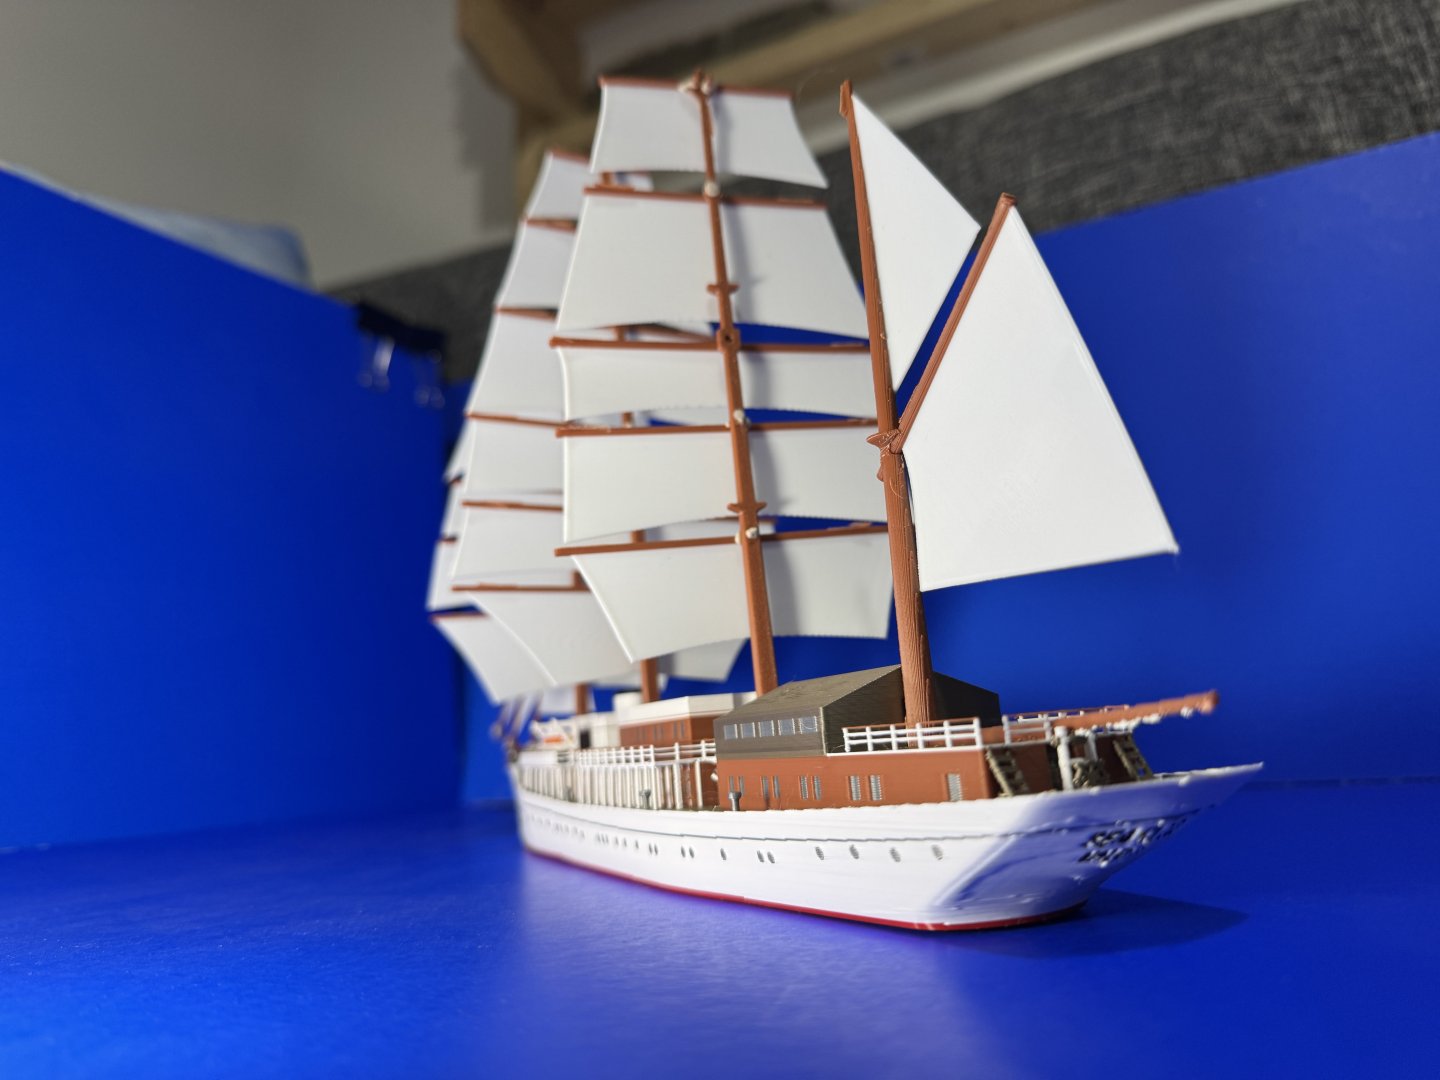
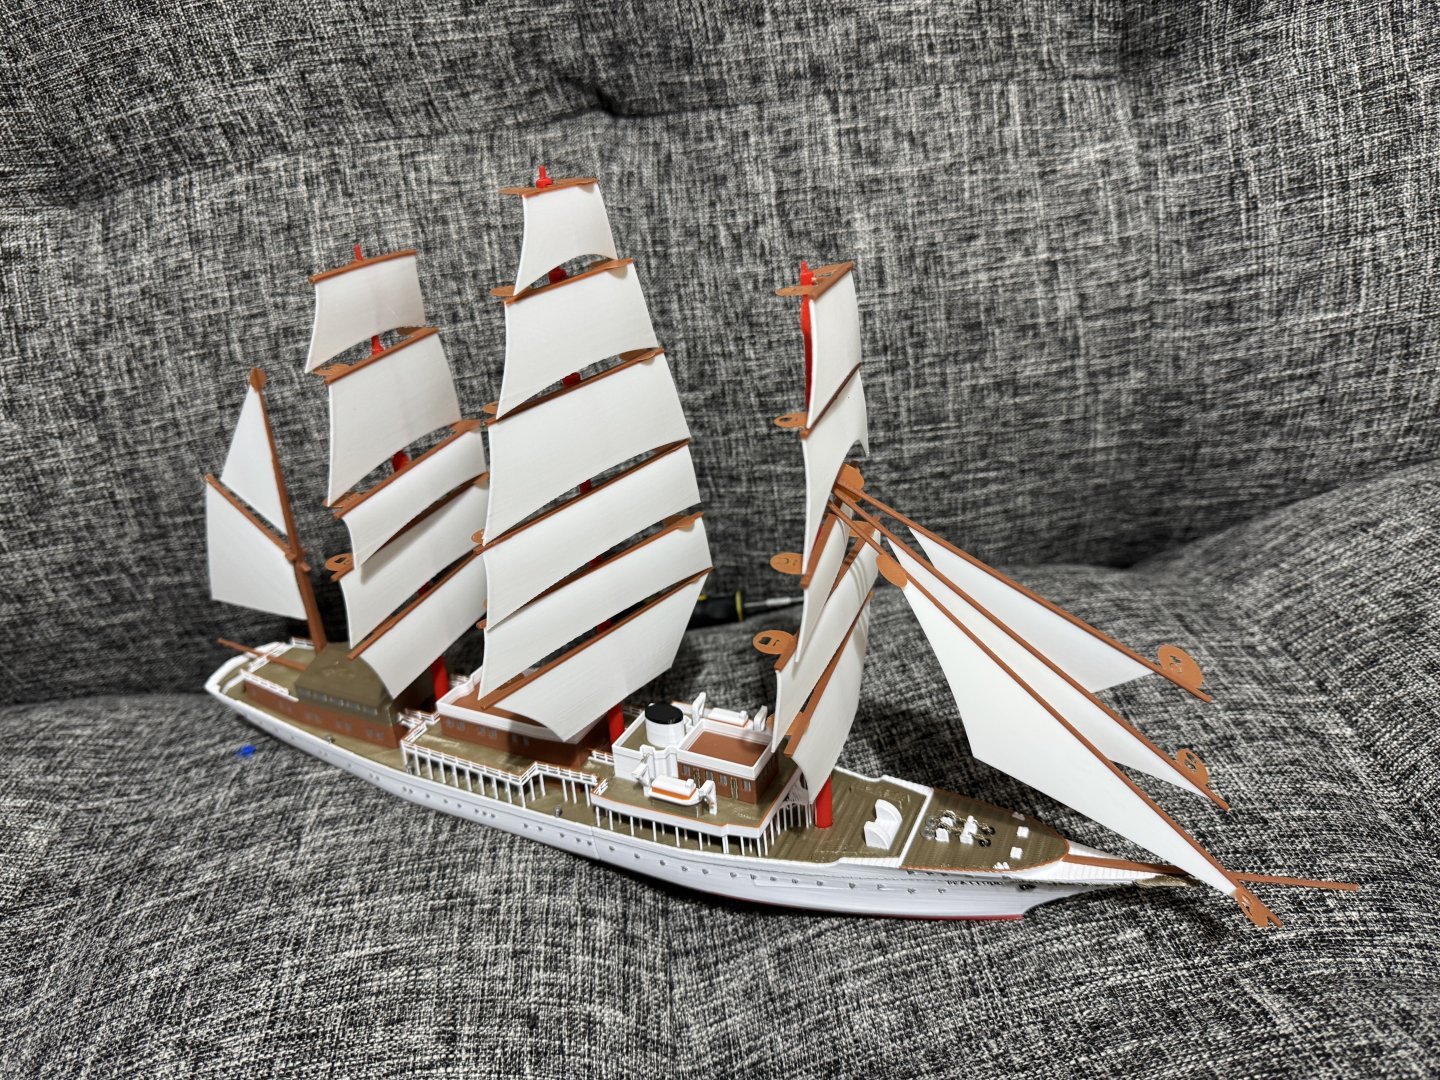
After correct colour masts added and initial cleanup. Will probably do a version will fuller sails, plus might even create a 1943 'grey' version. Pictured with rest of 3d printed 1:250 fleet

-
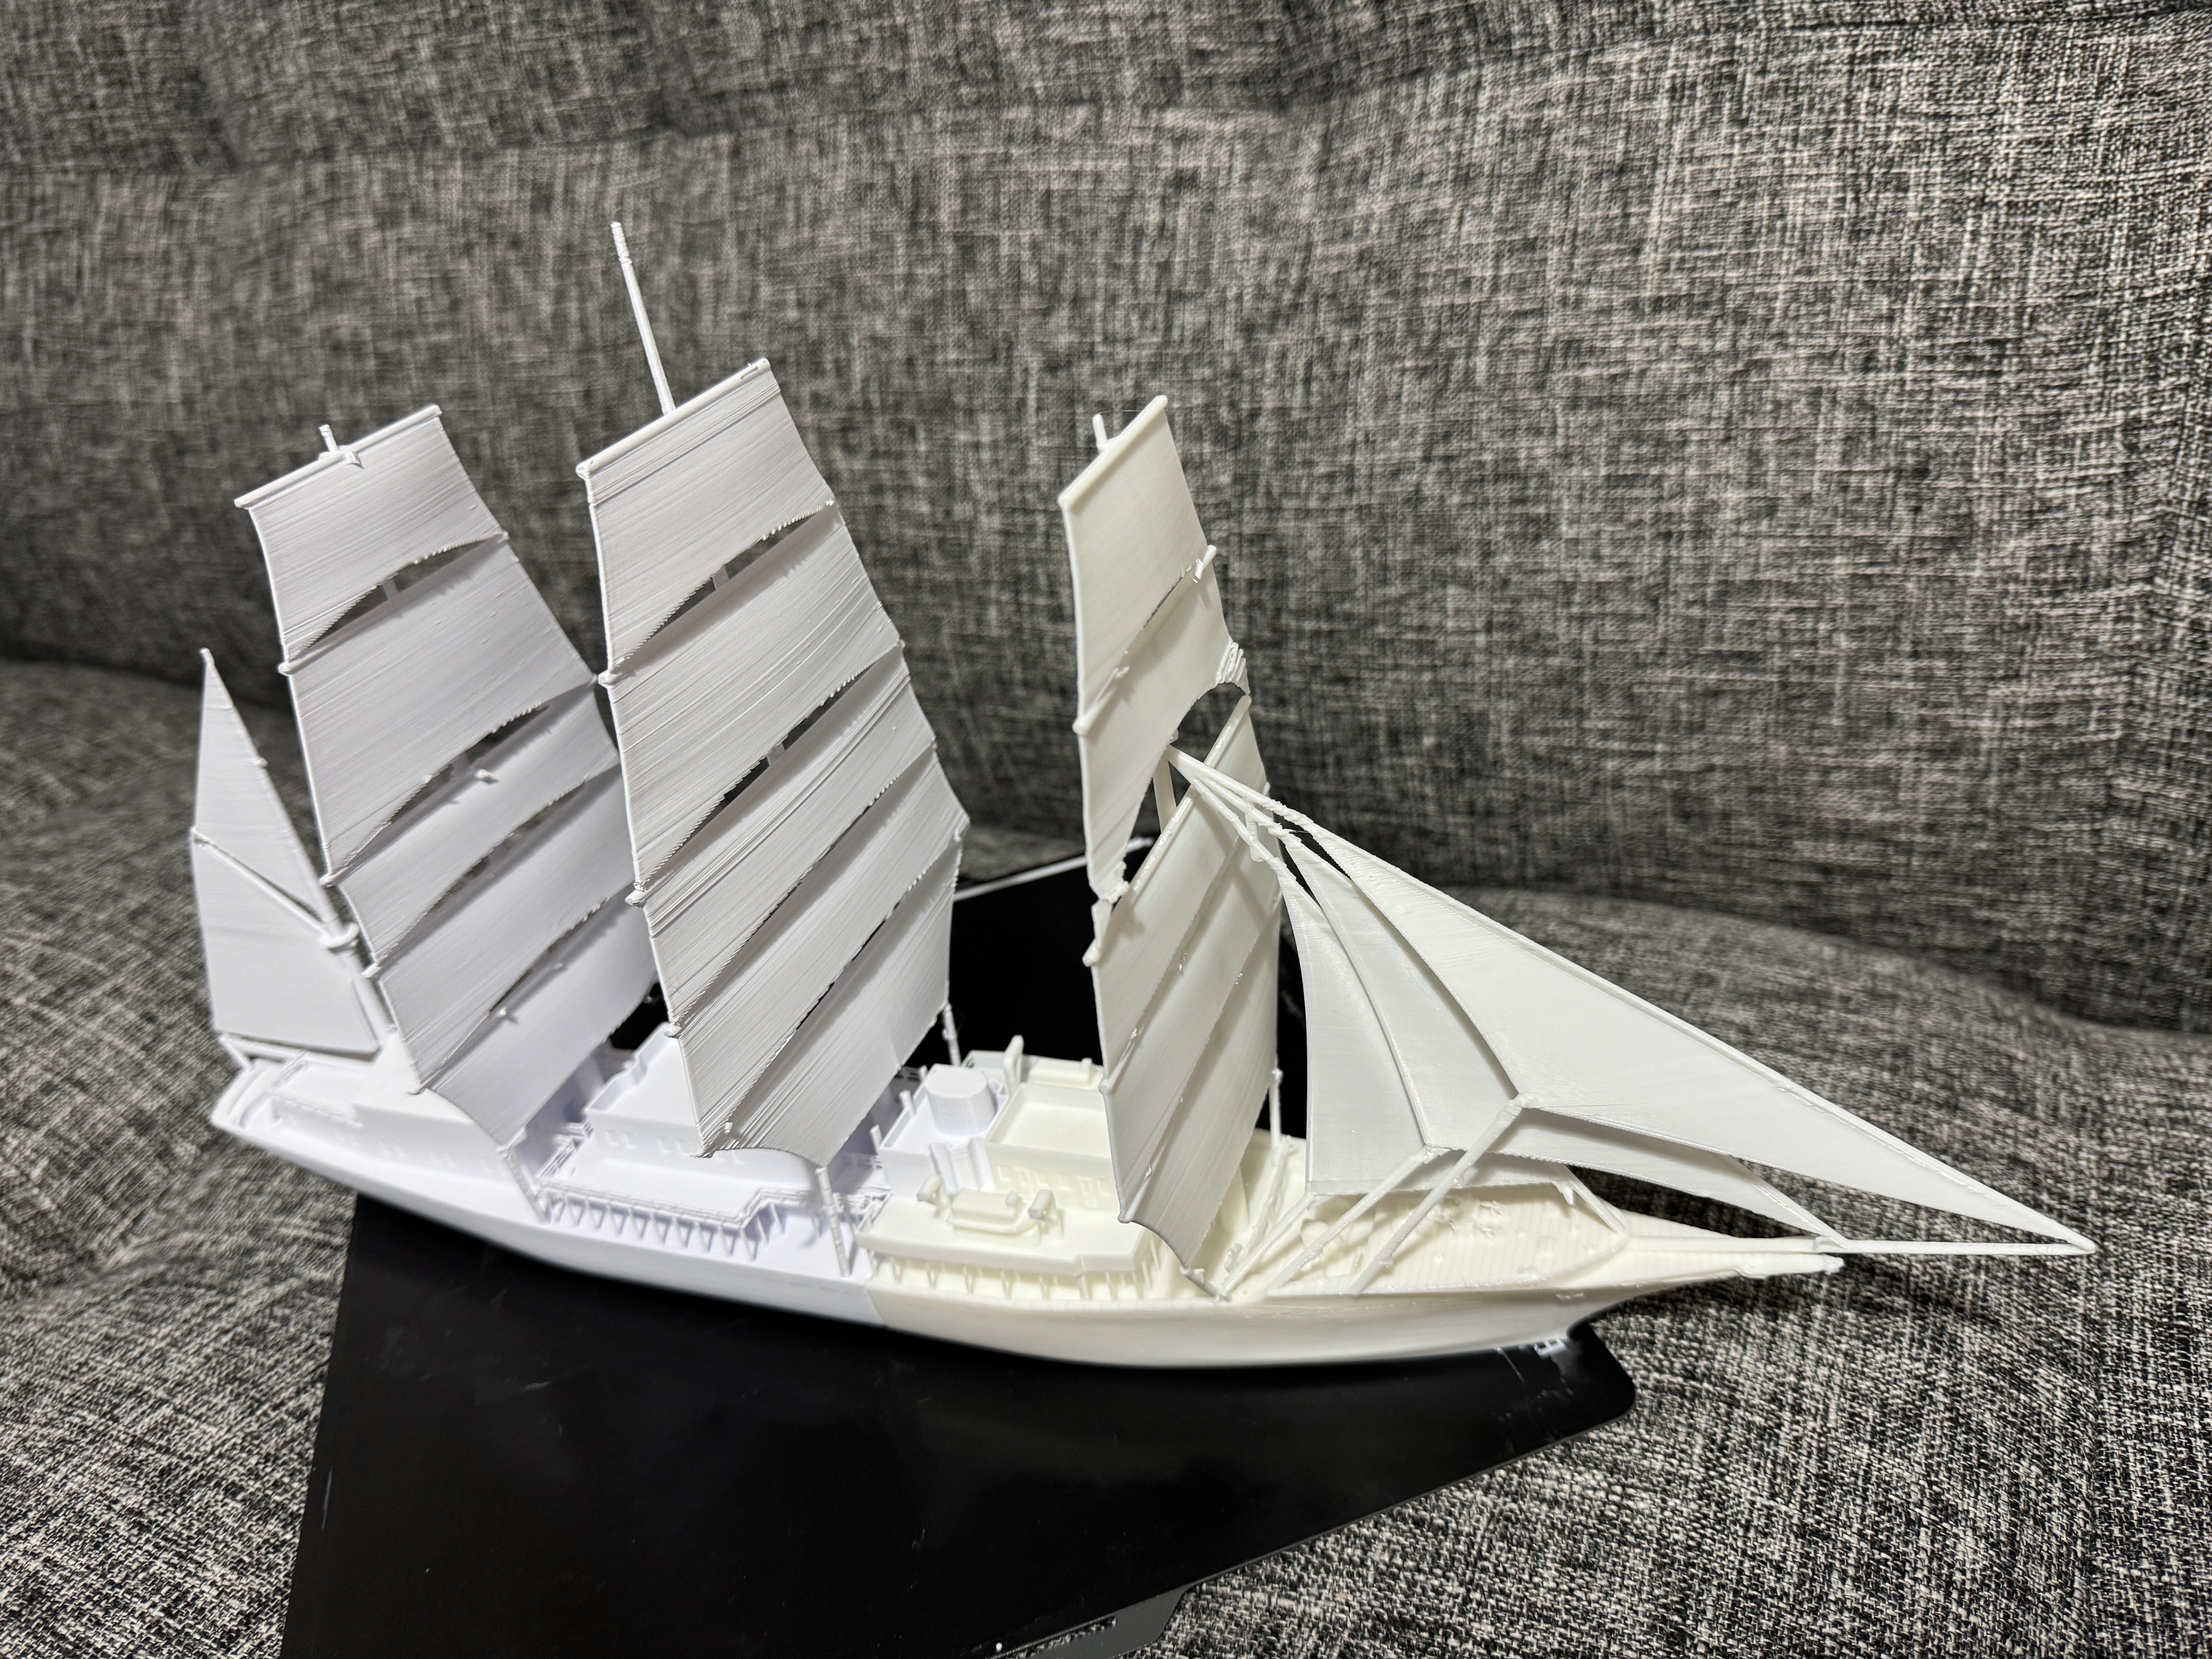
Almost complete -
-
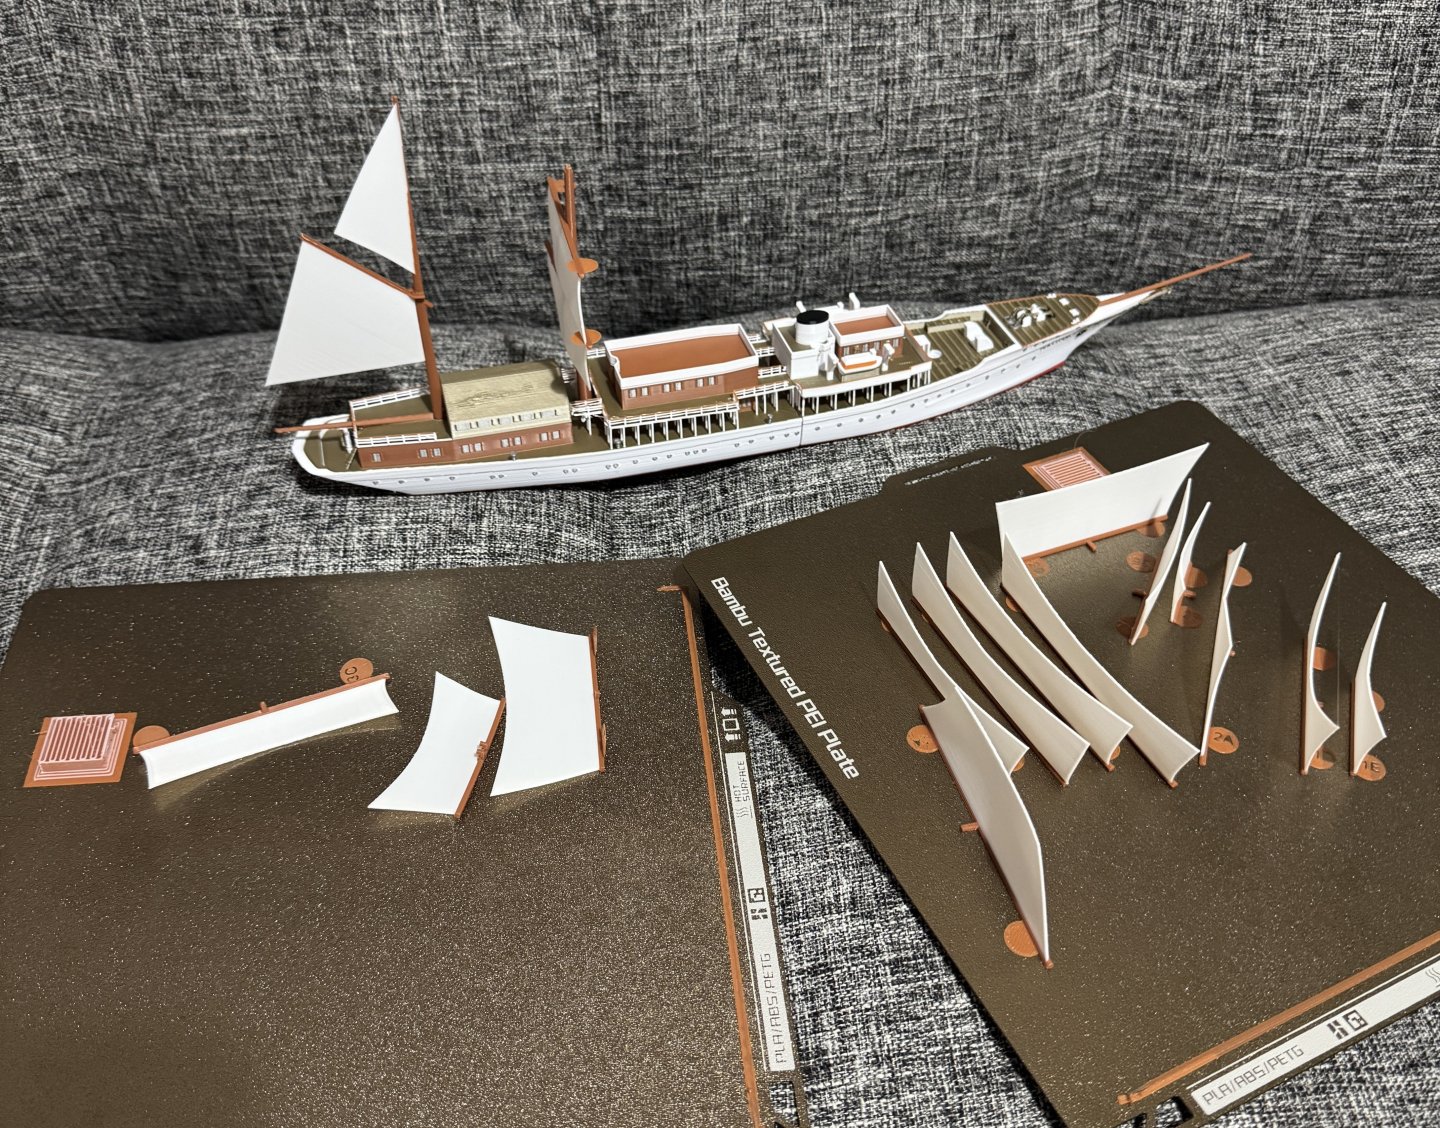
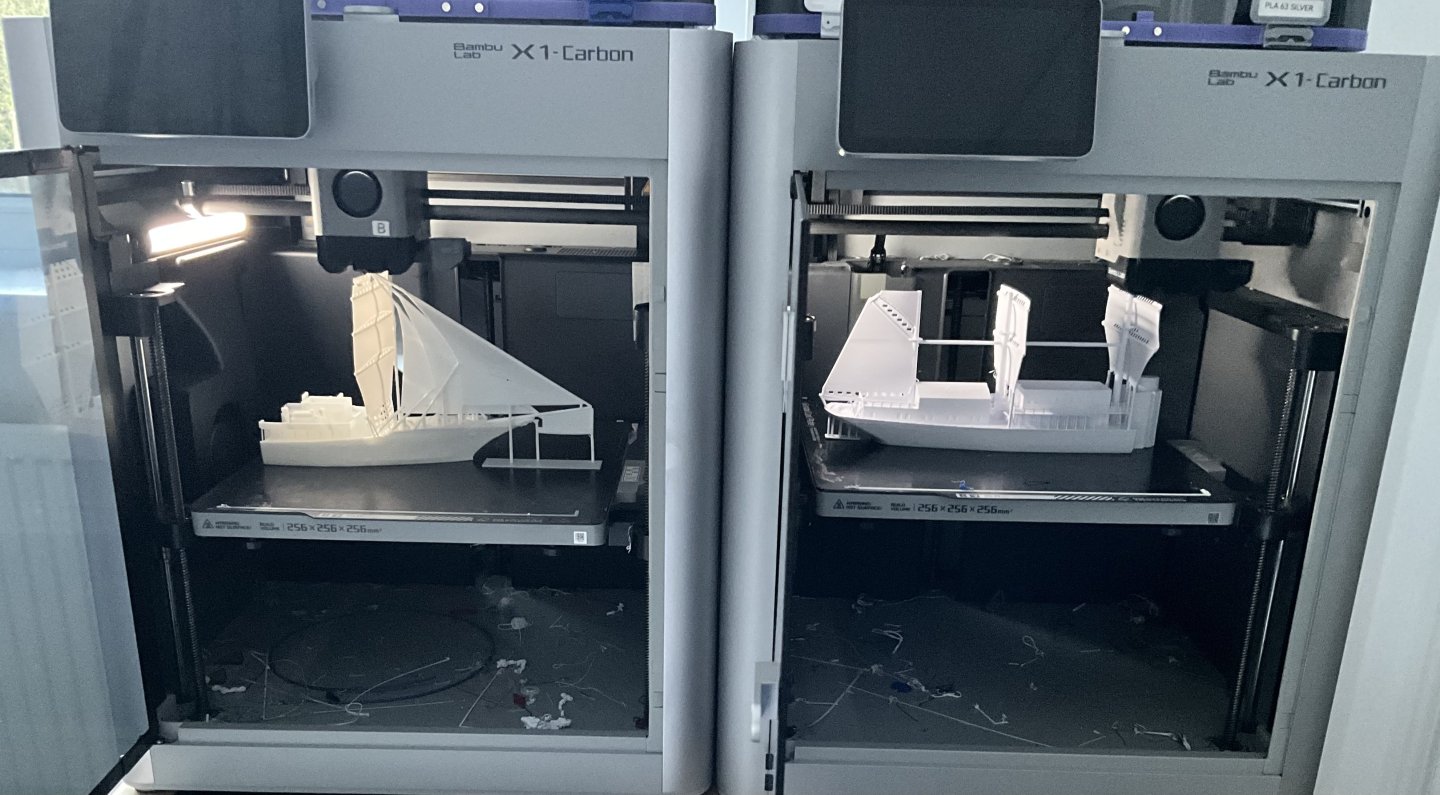
Multi Colour print now ready to start. Will print masts and sails separately - as otherwise the colour changes between white and brown will take almost 2 days. 50% printed

-
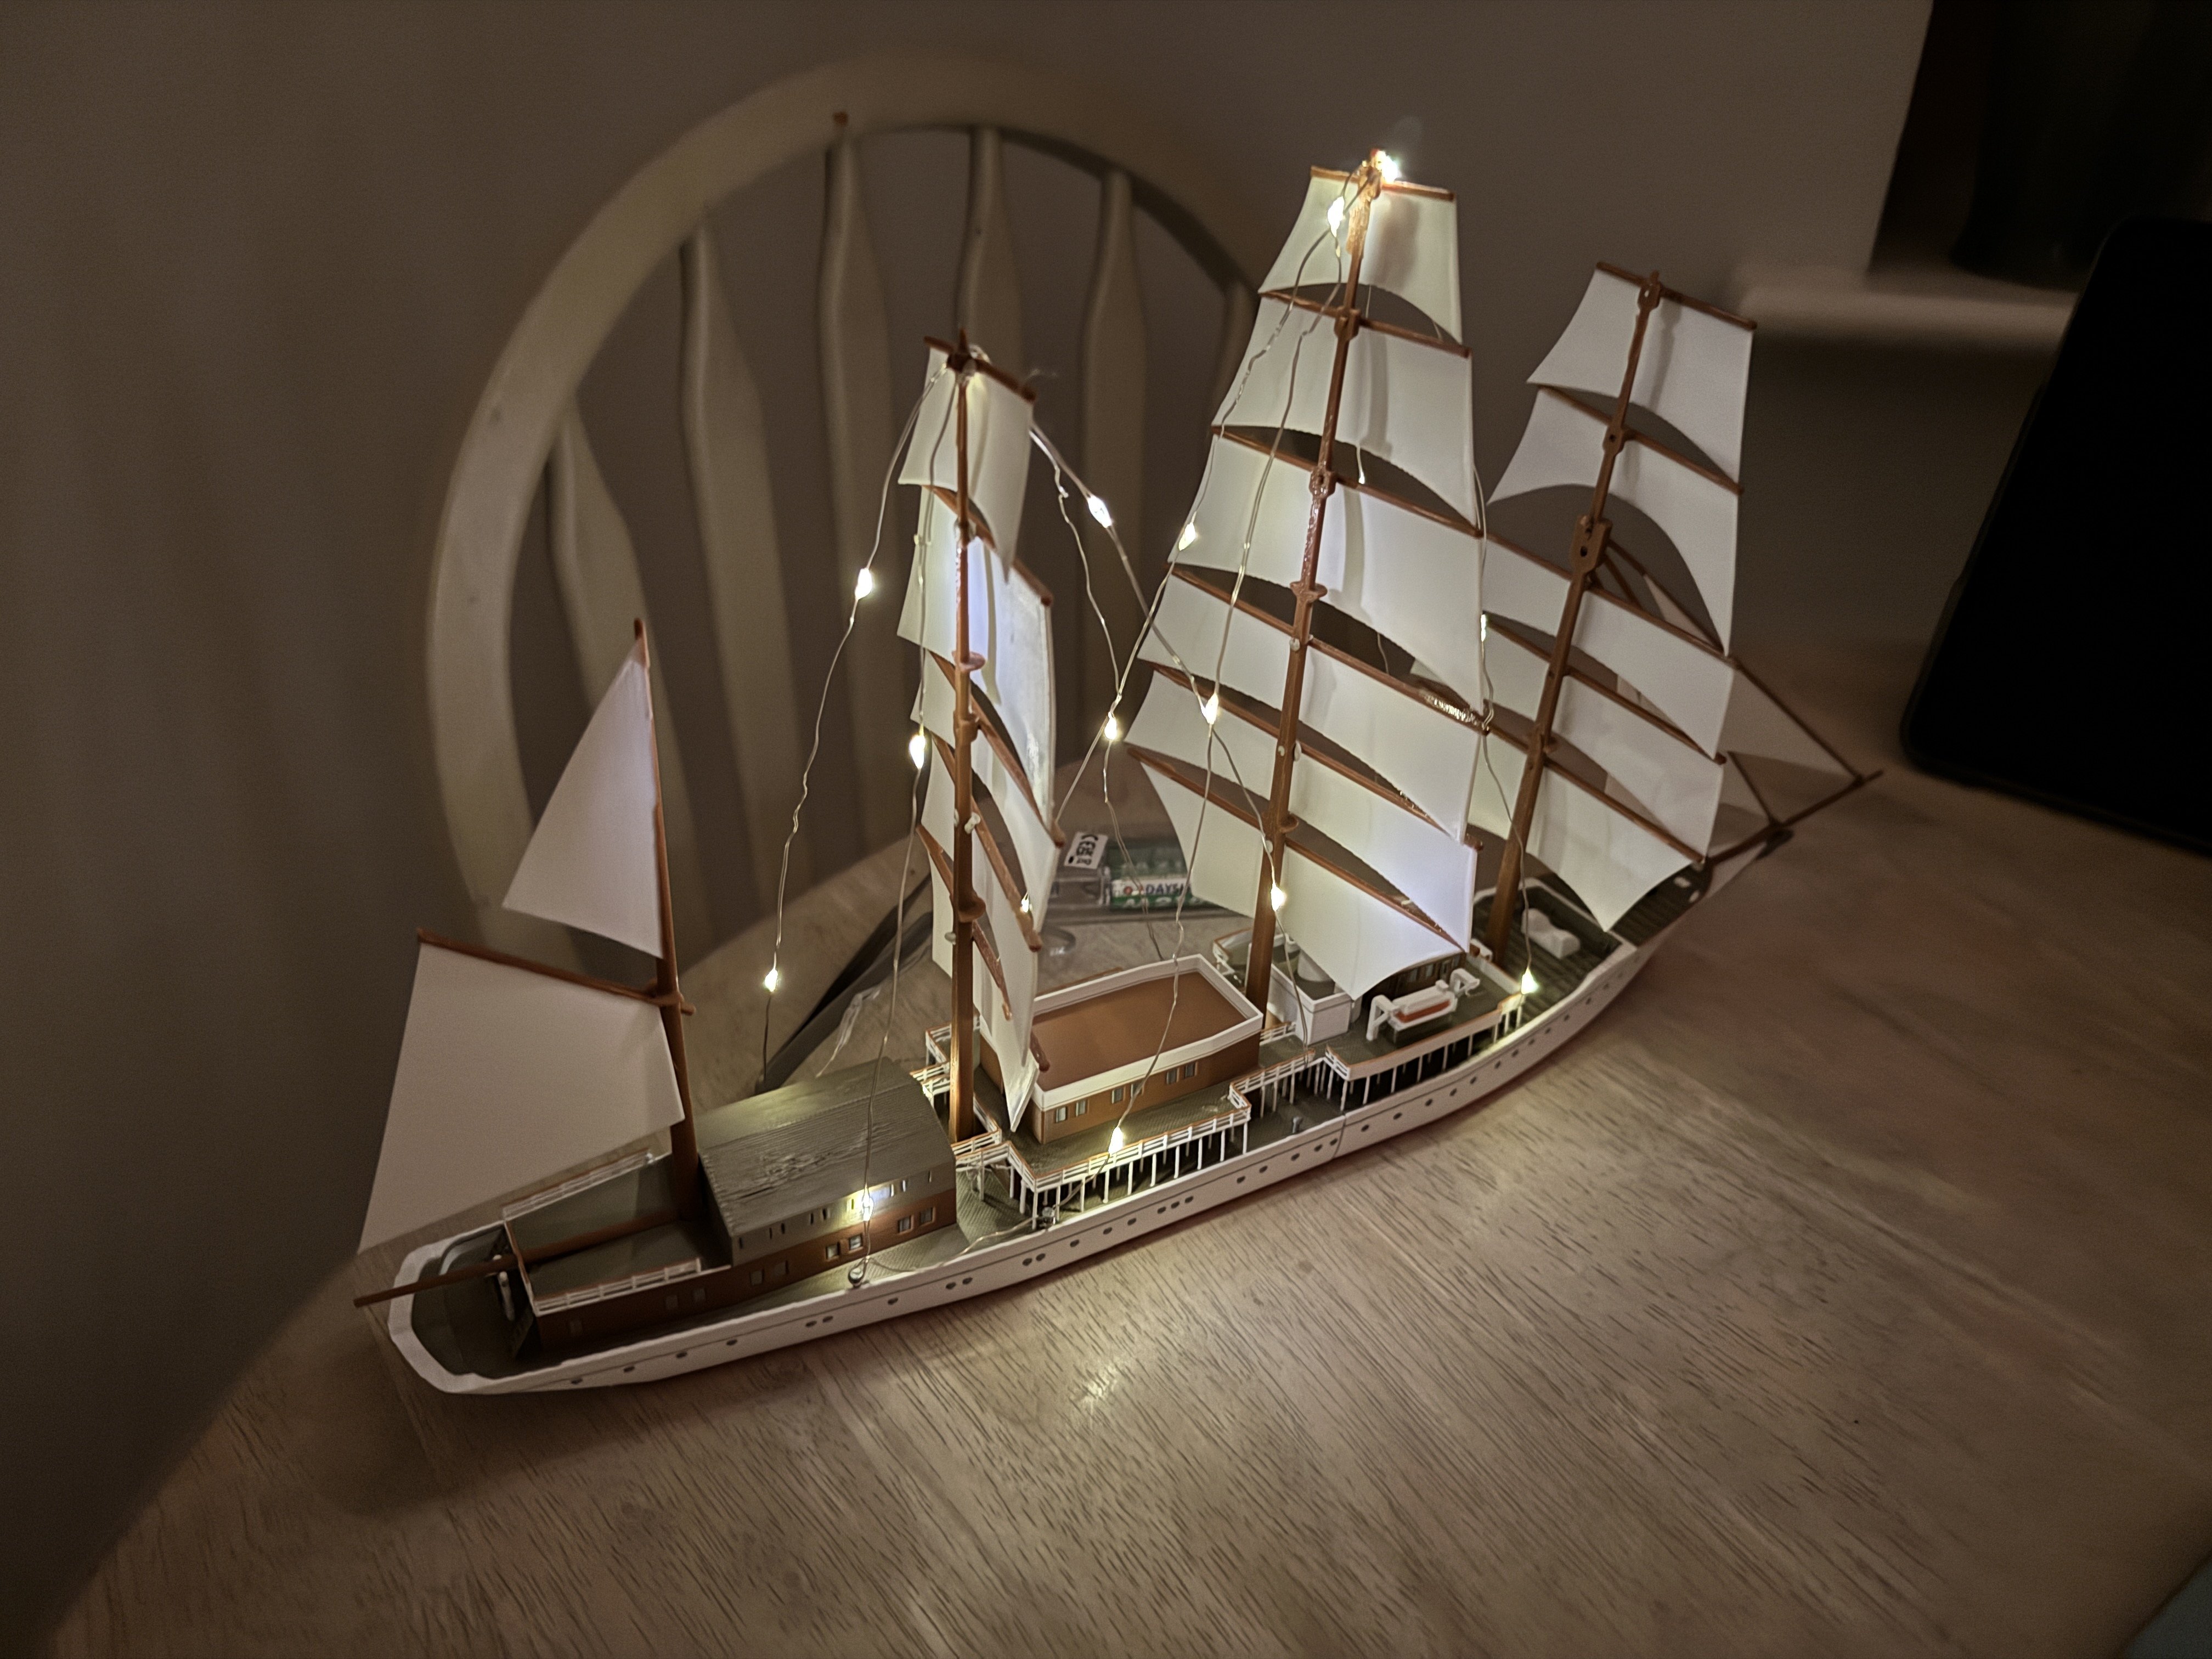
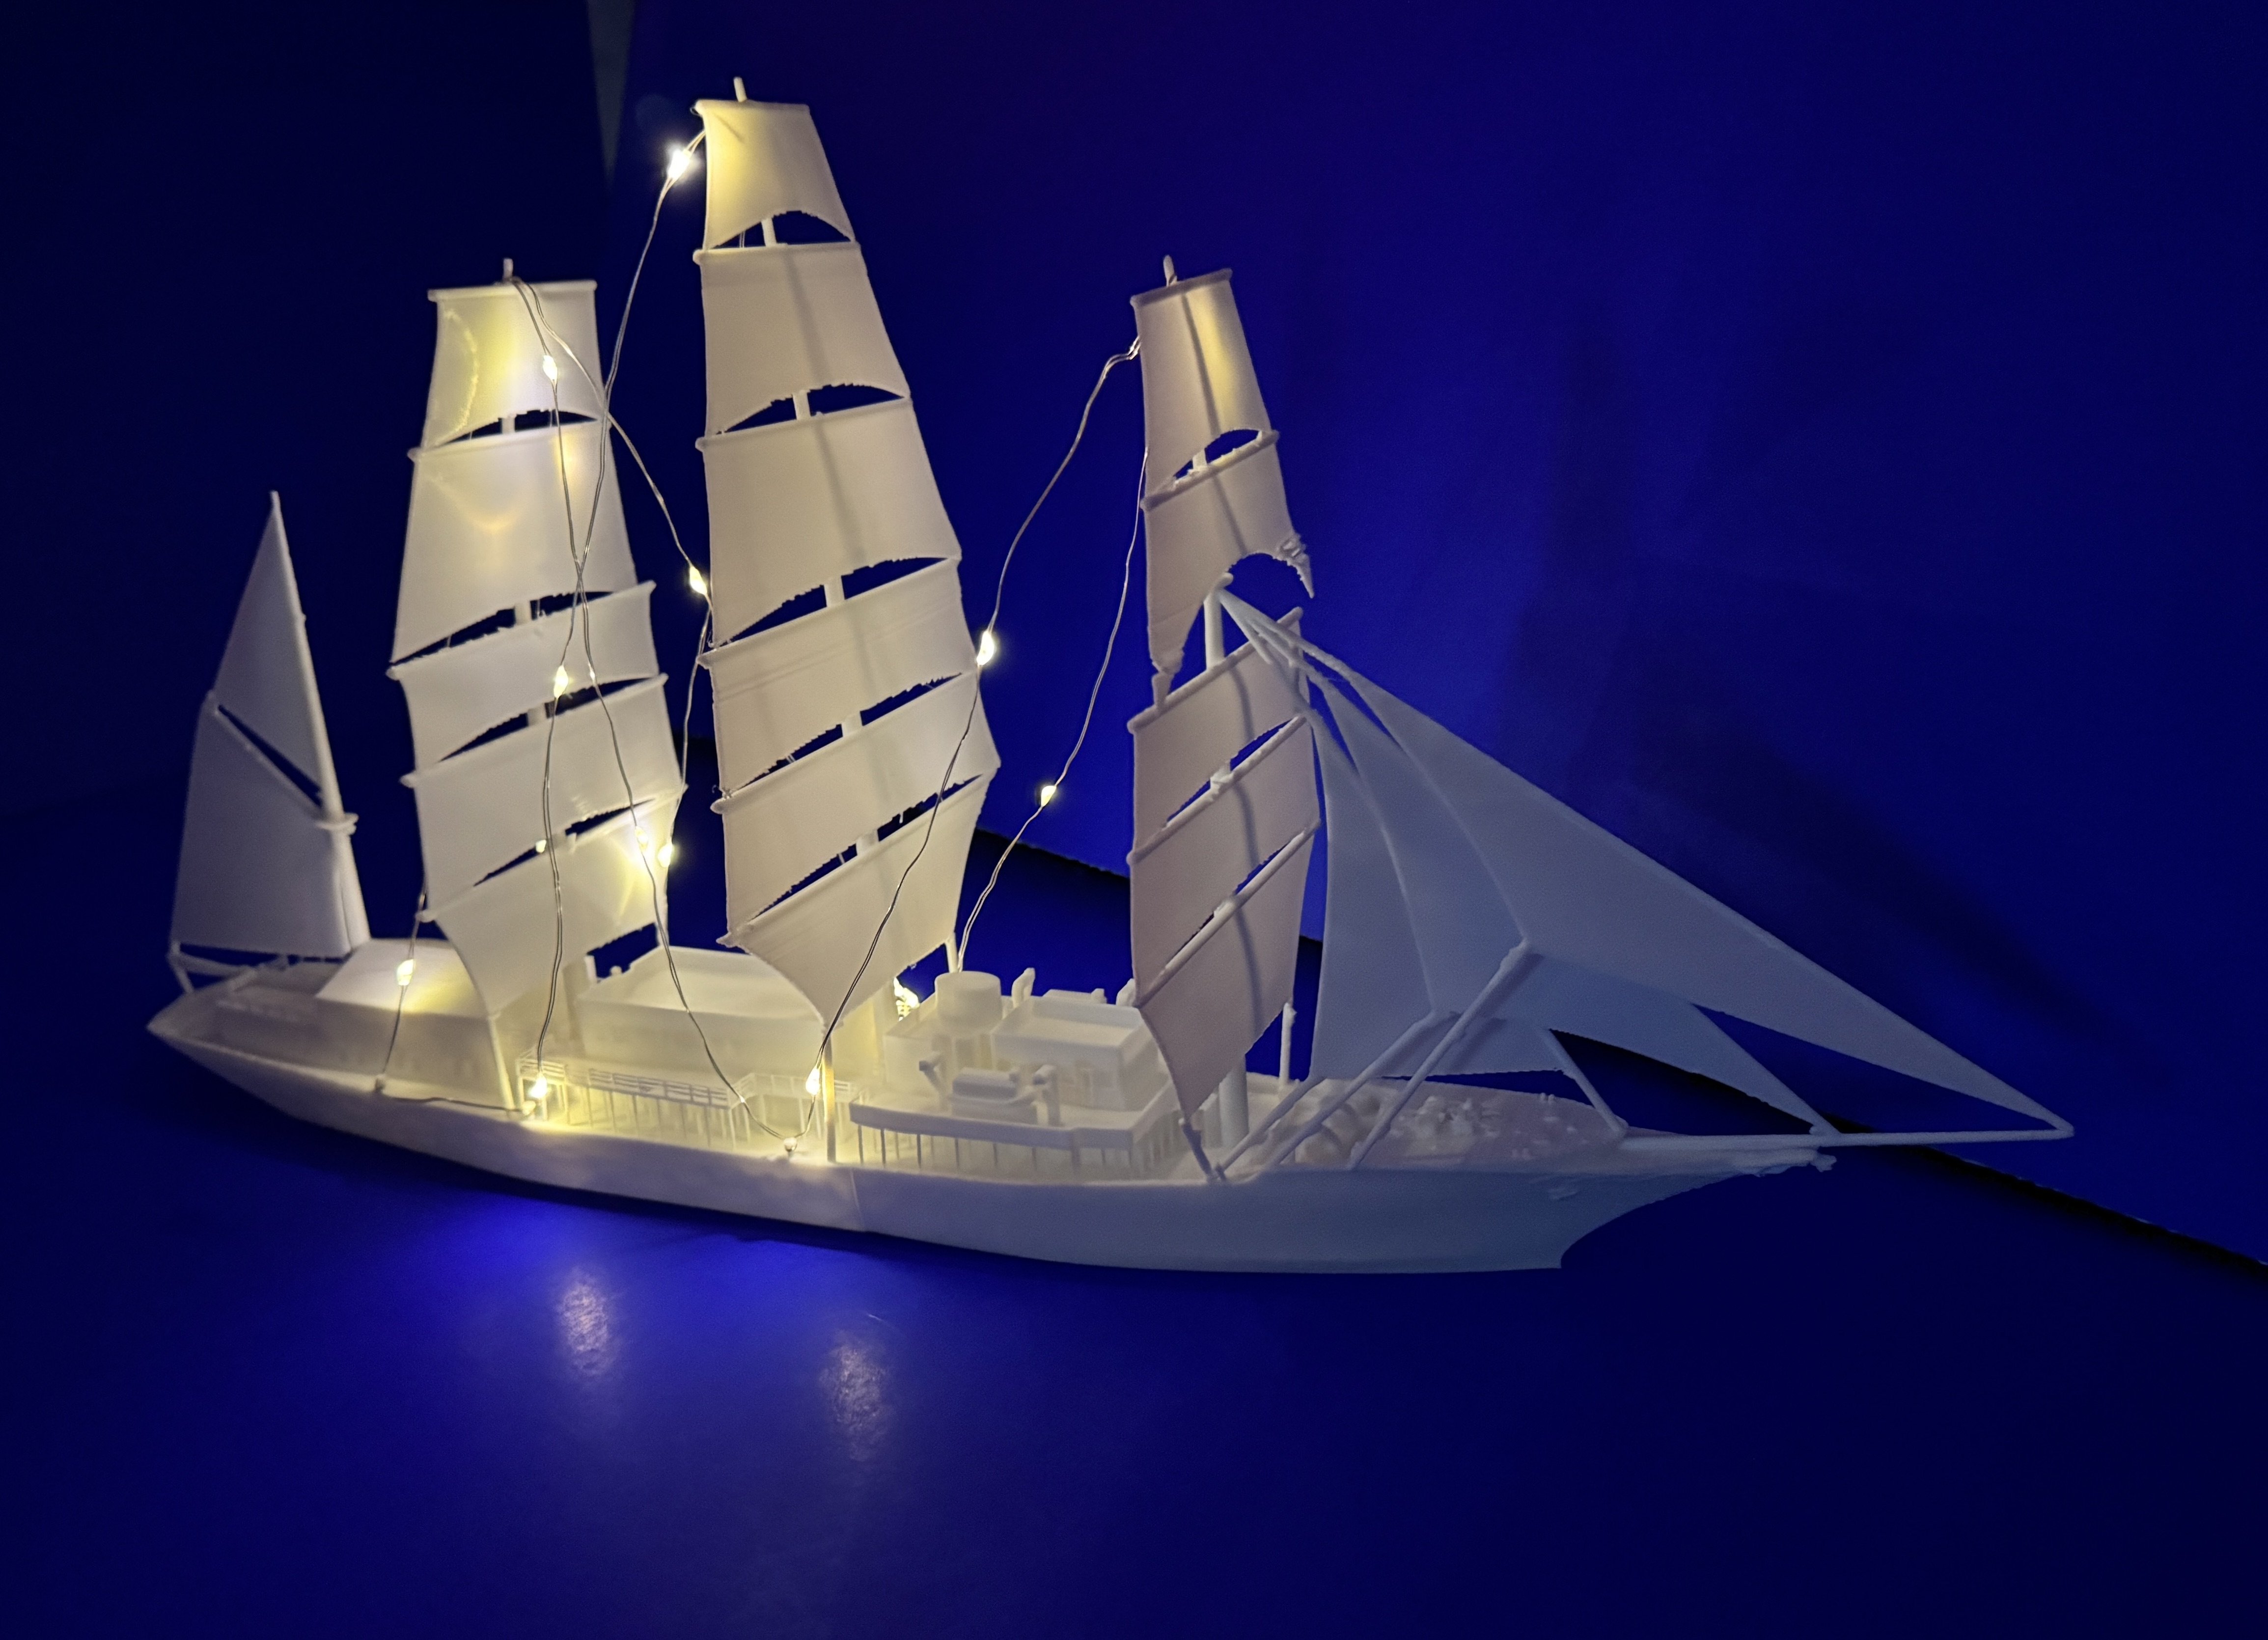
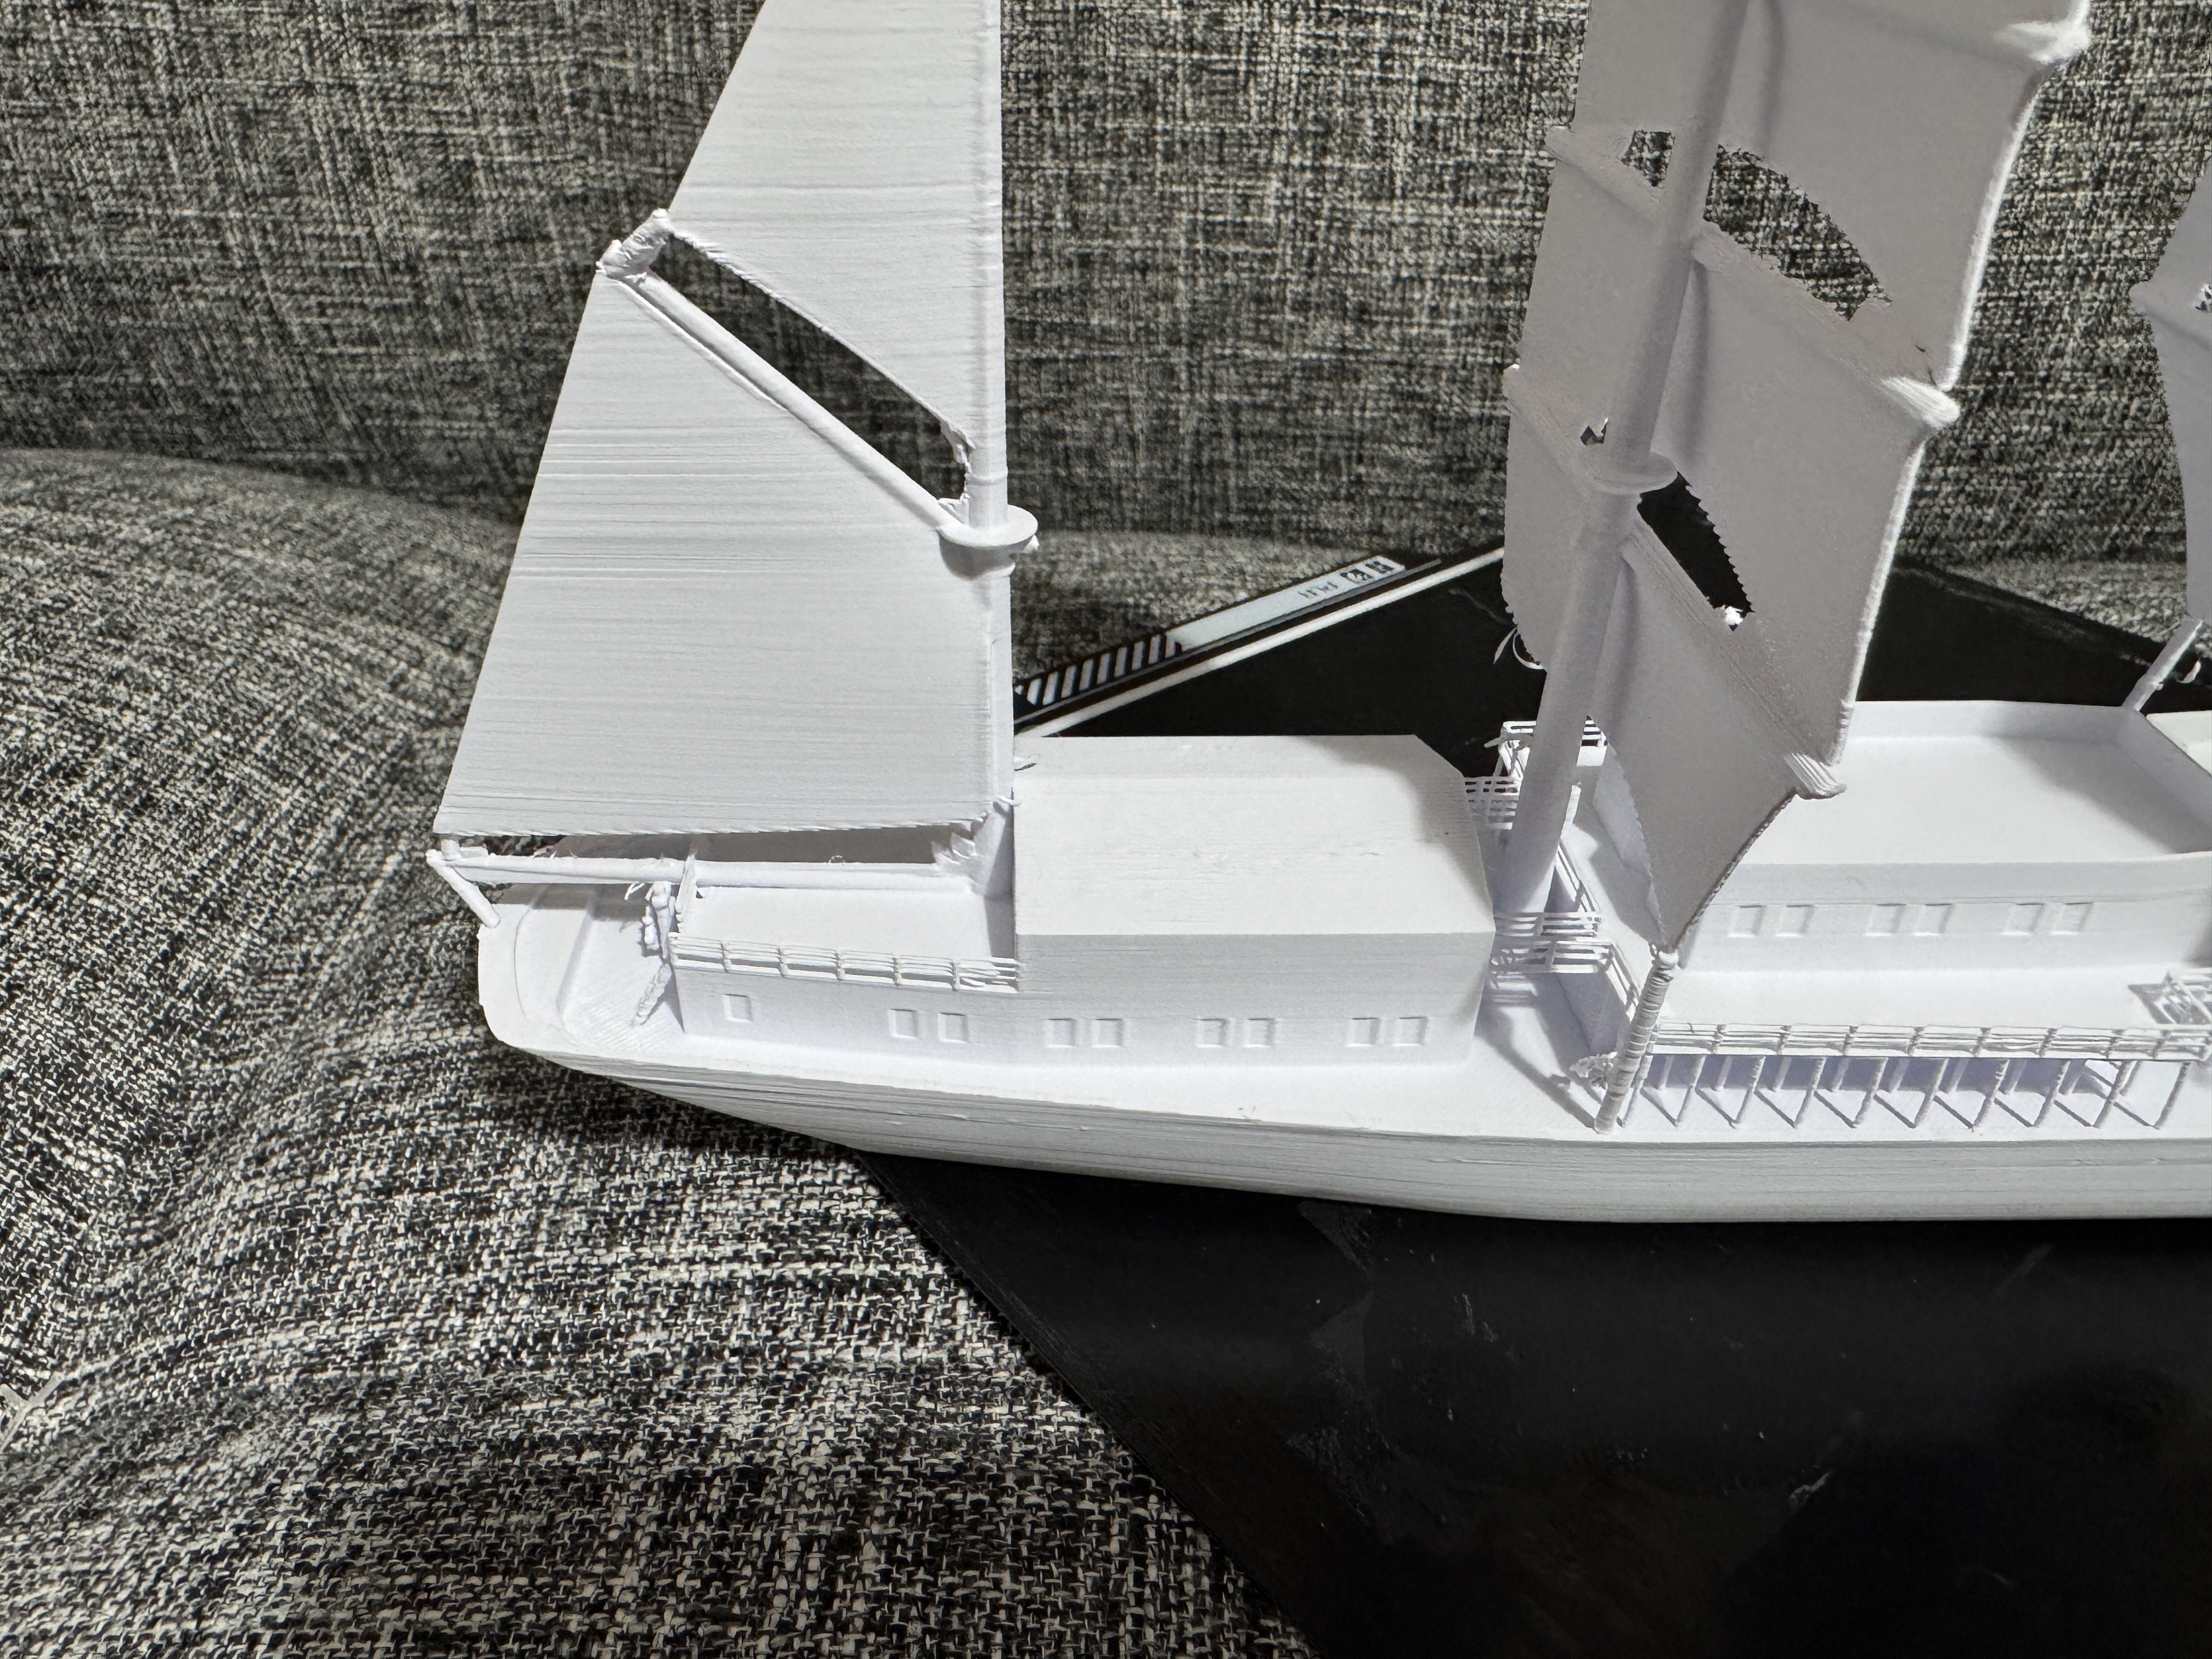
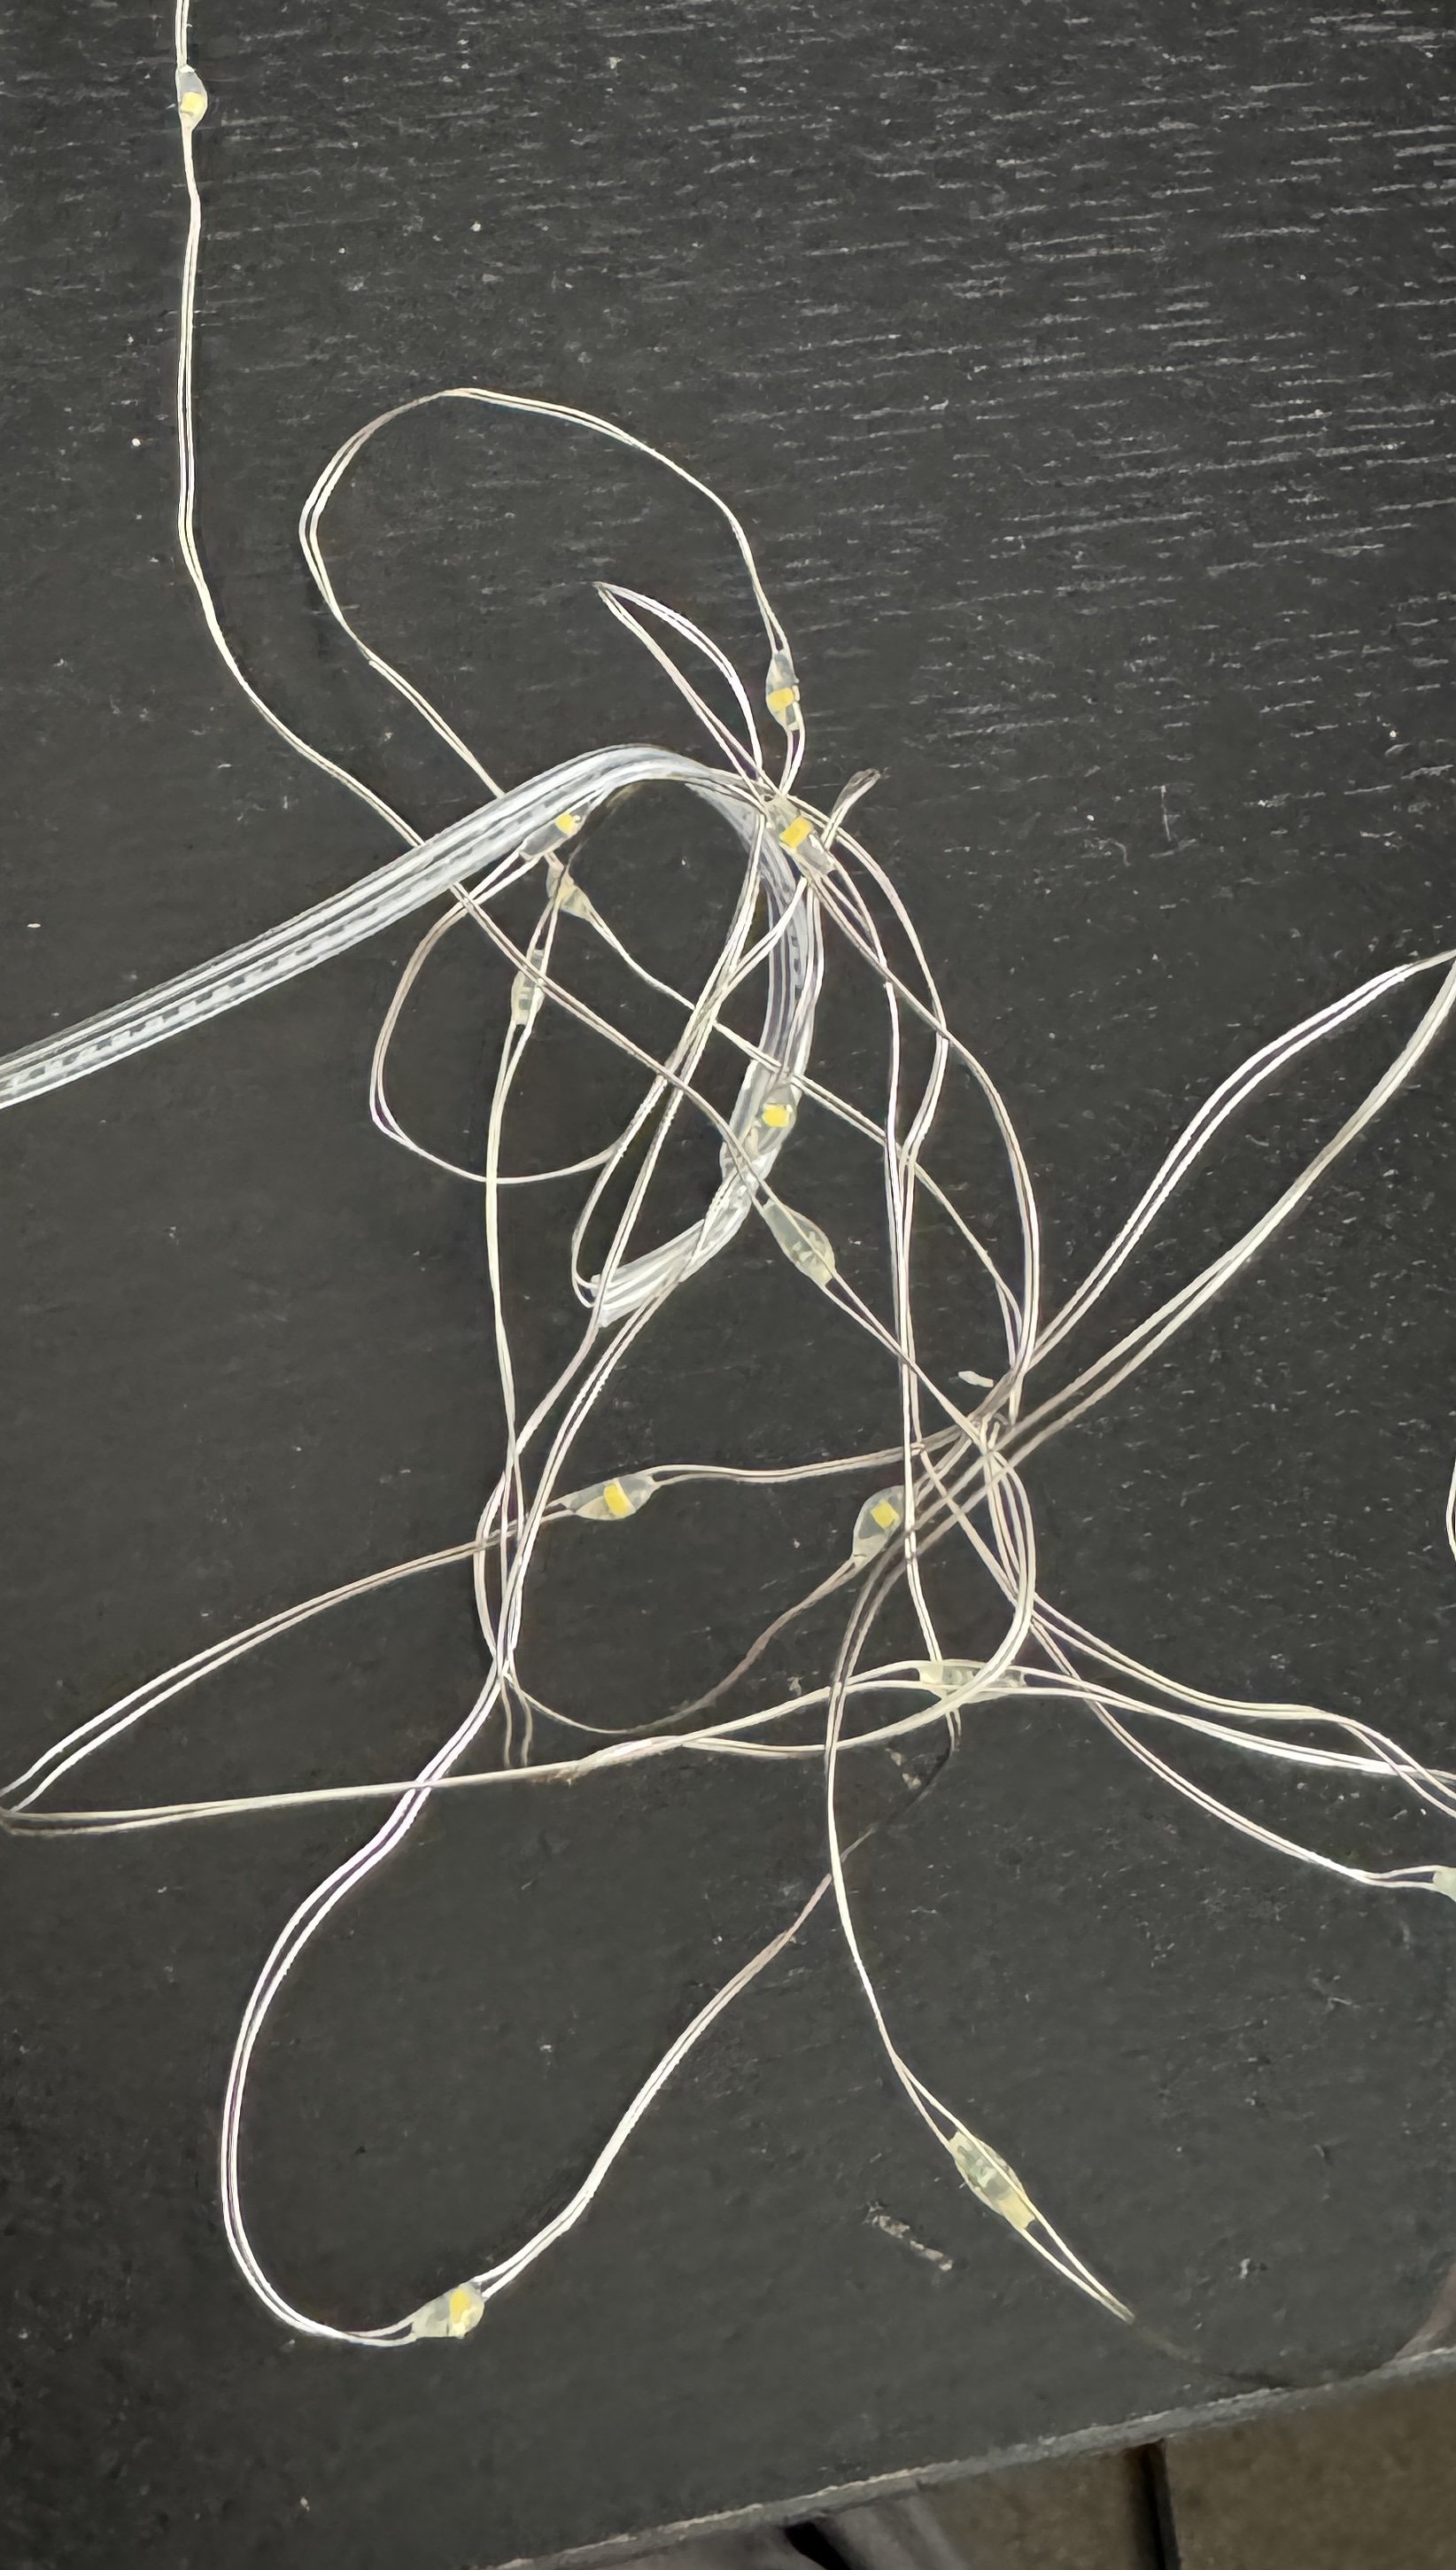
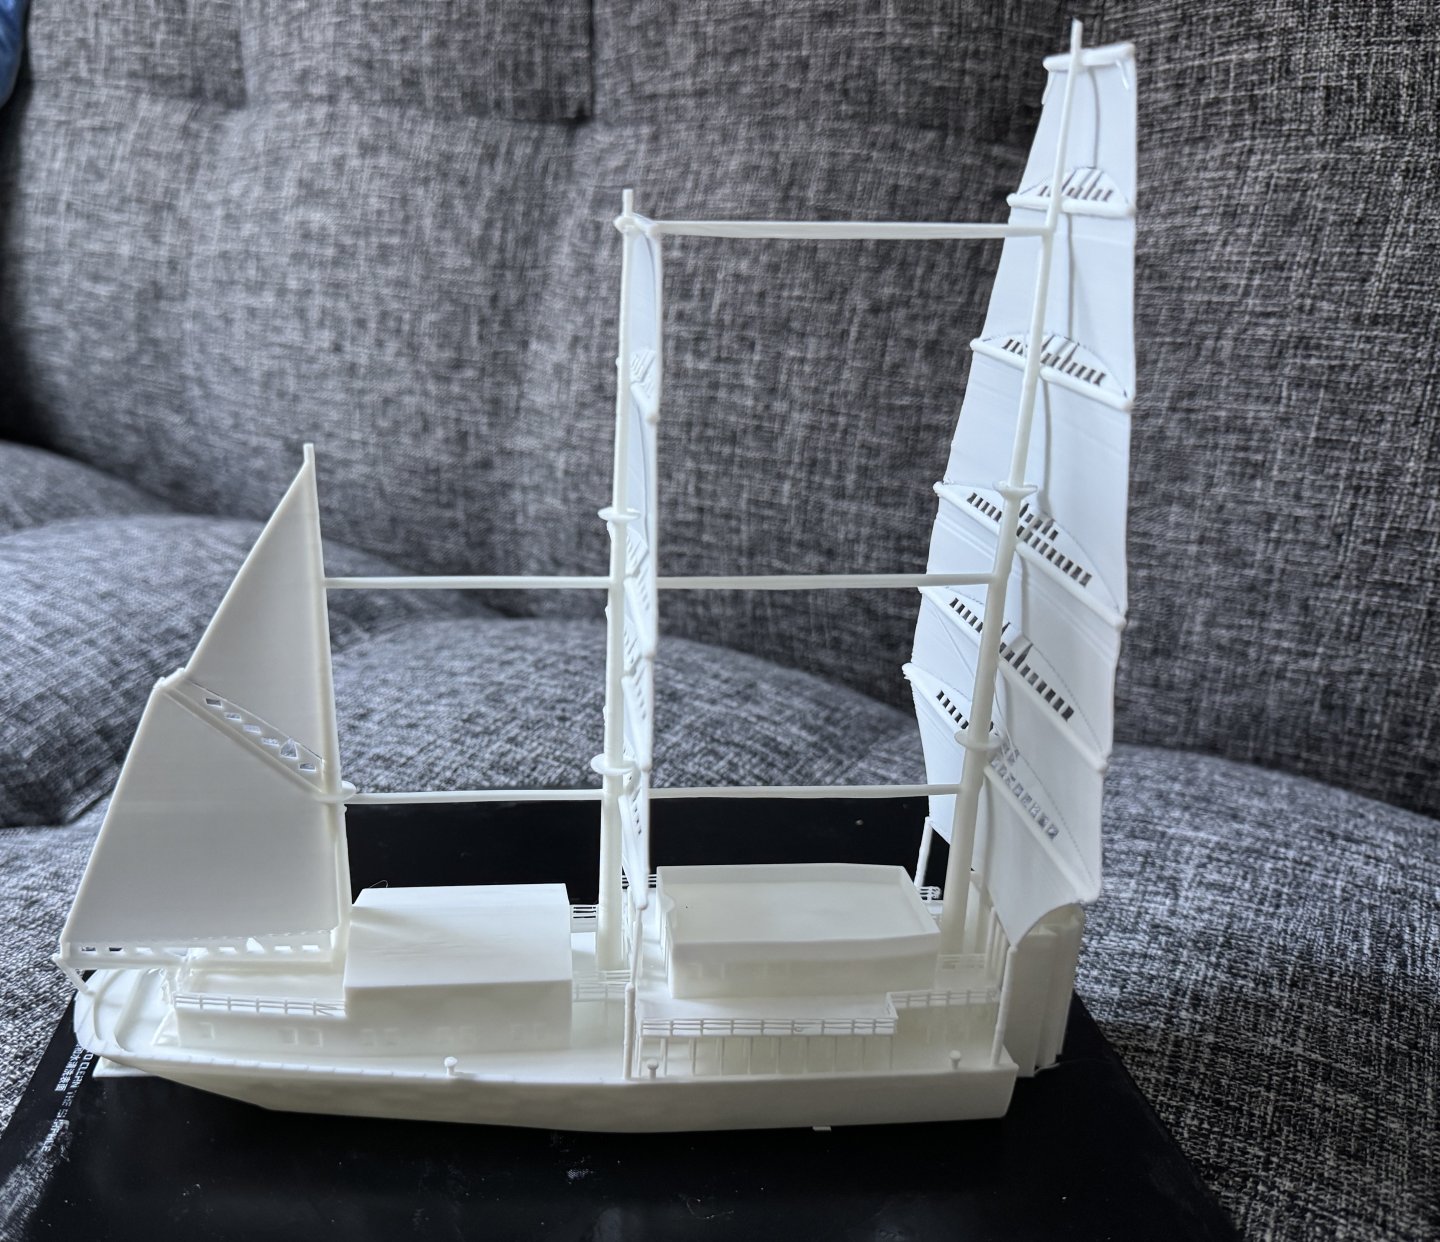
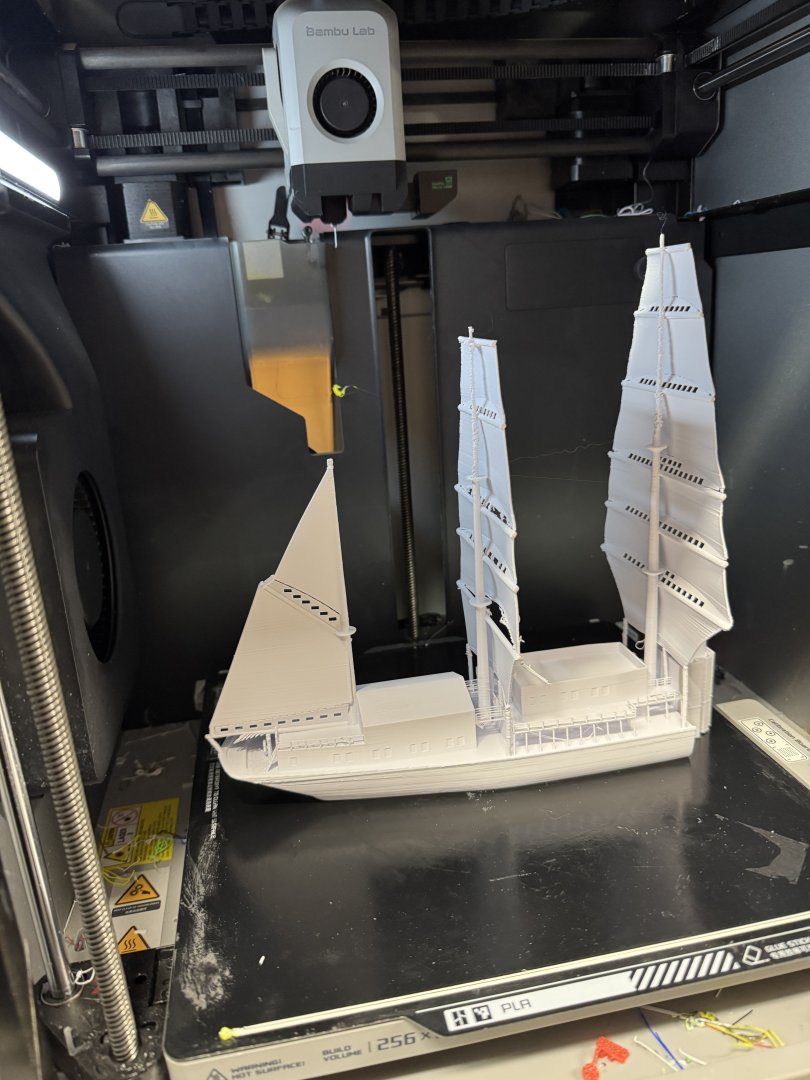
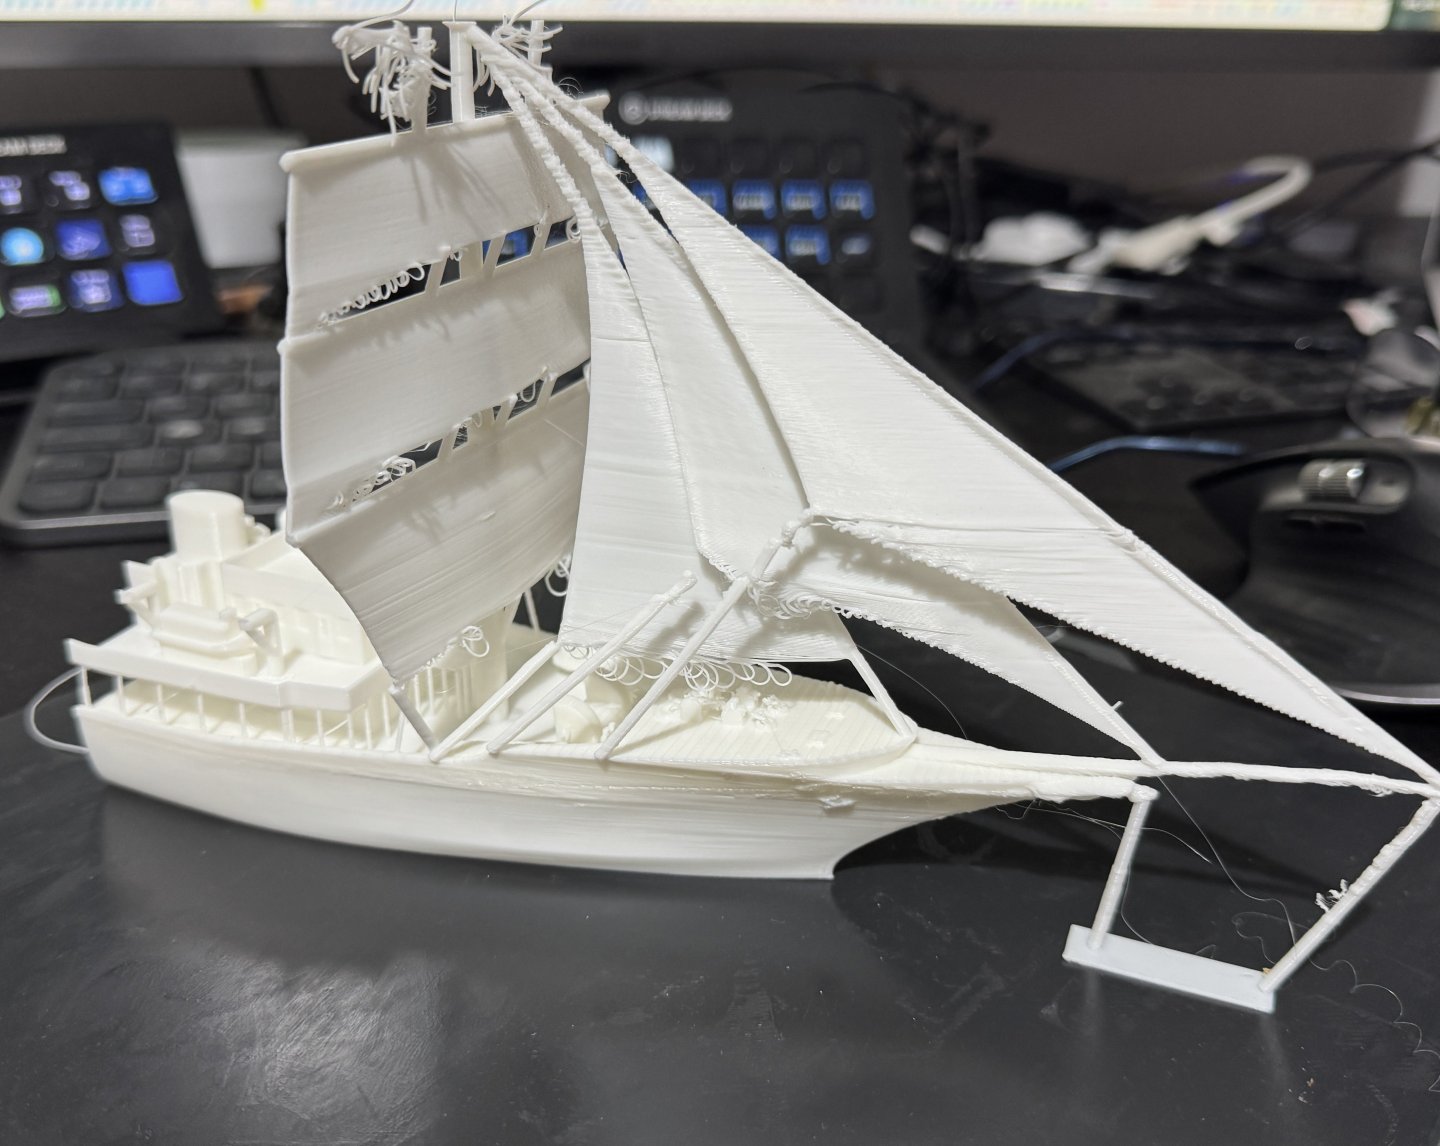
After some improvements to the supports back half printed almost perfectly. Not sure whether to rig it with thread or wire - looks quite nice with LED light strings.

-
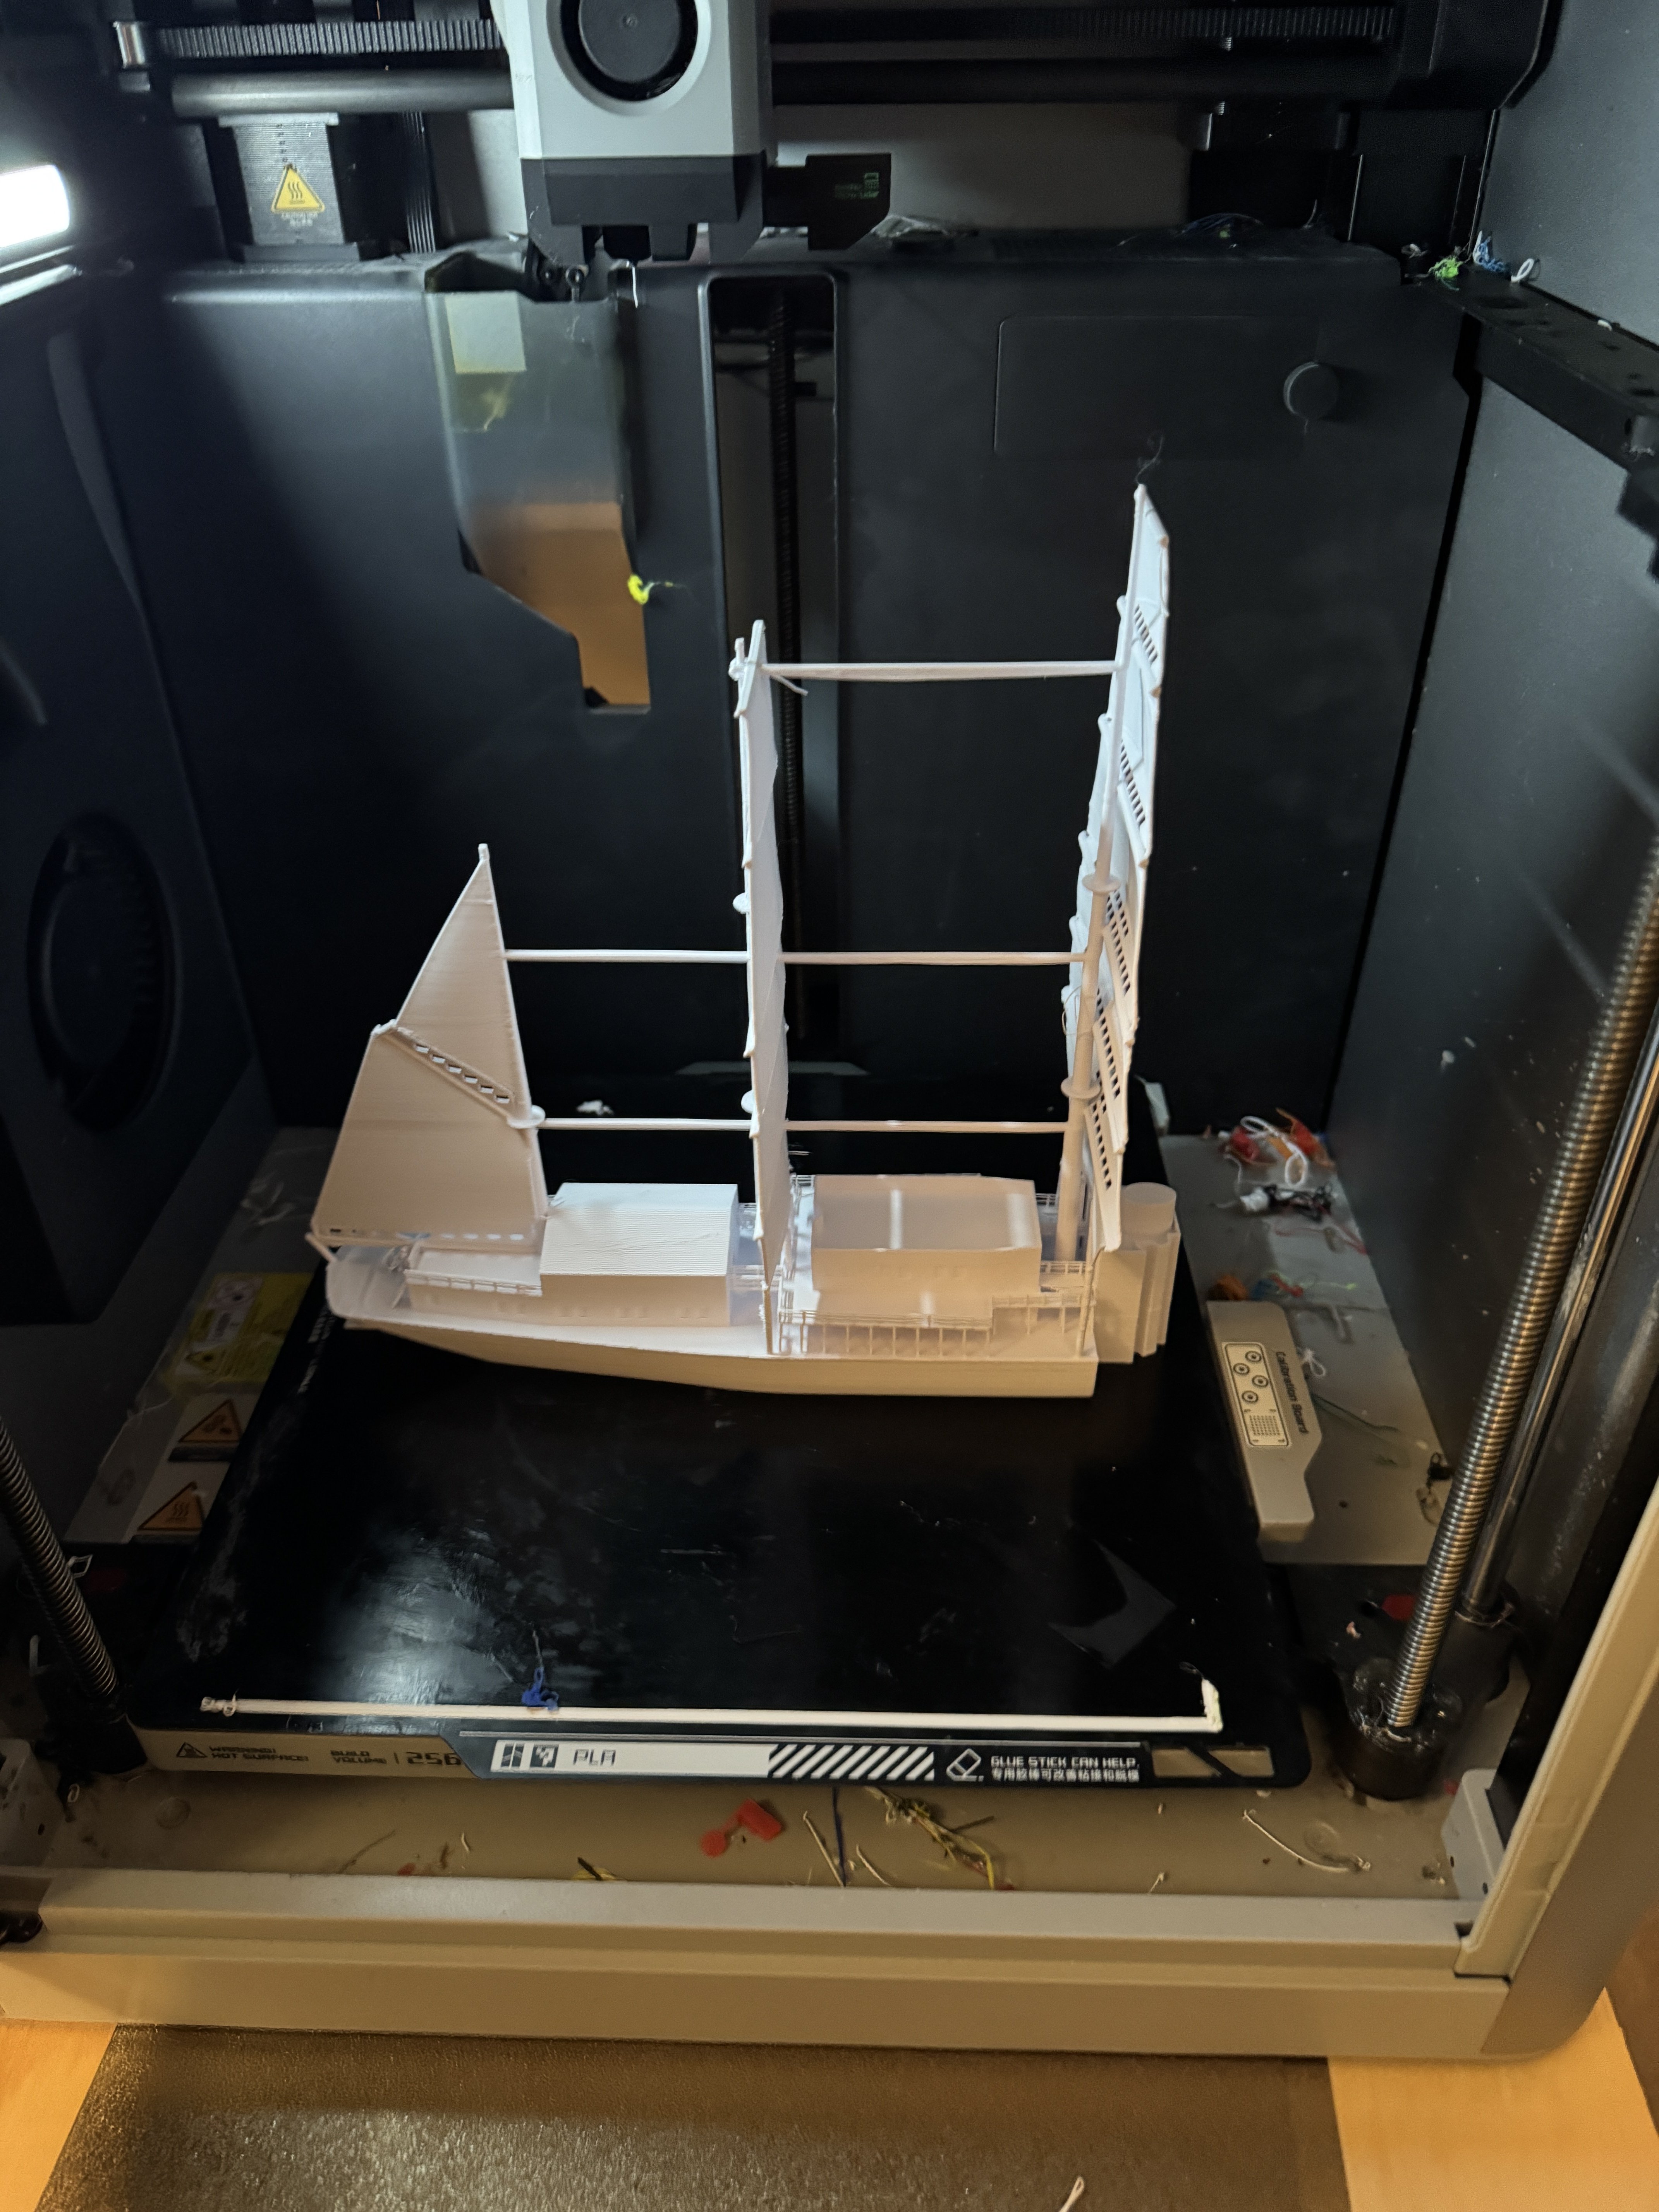
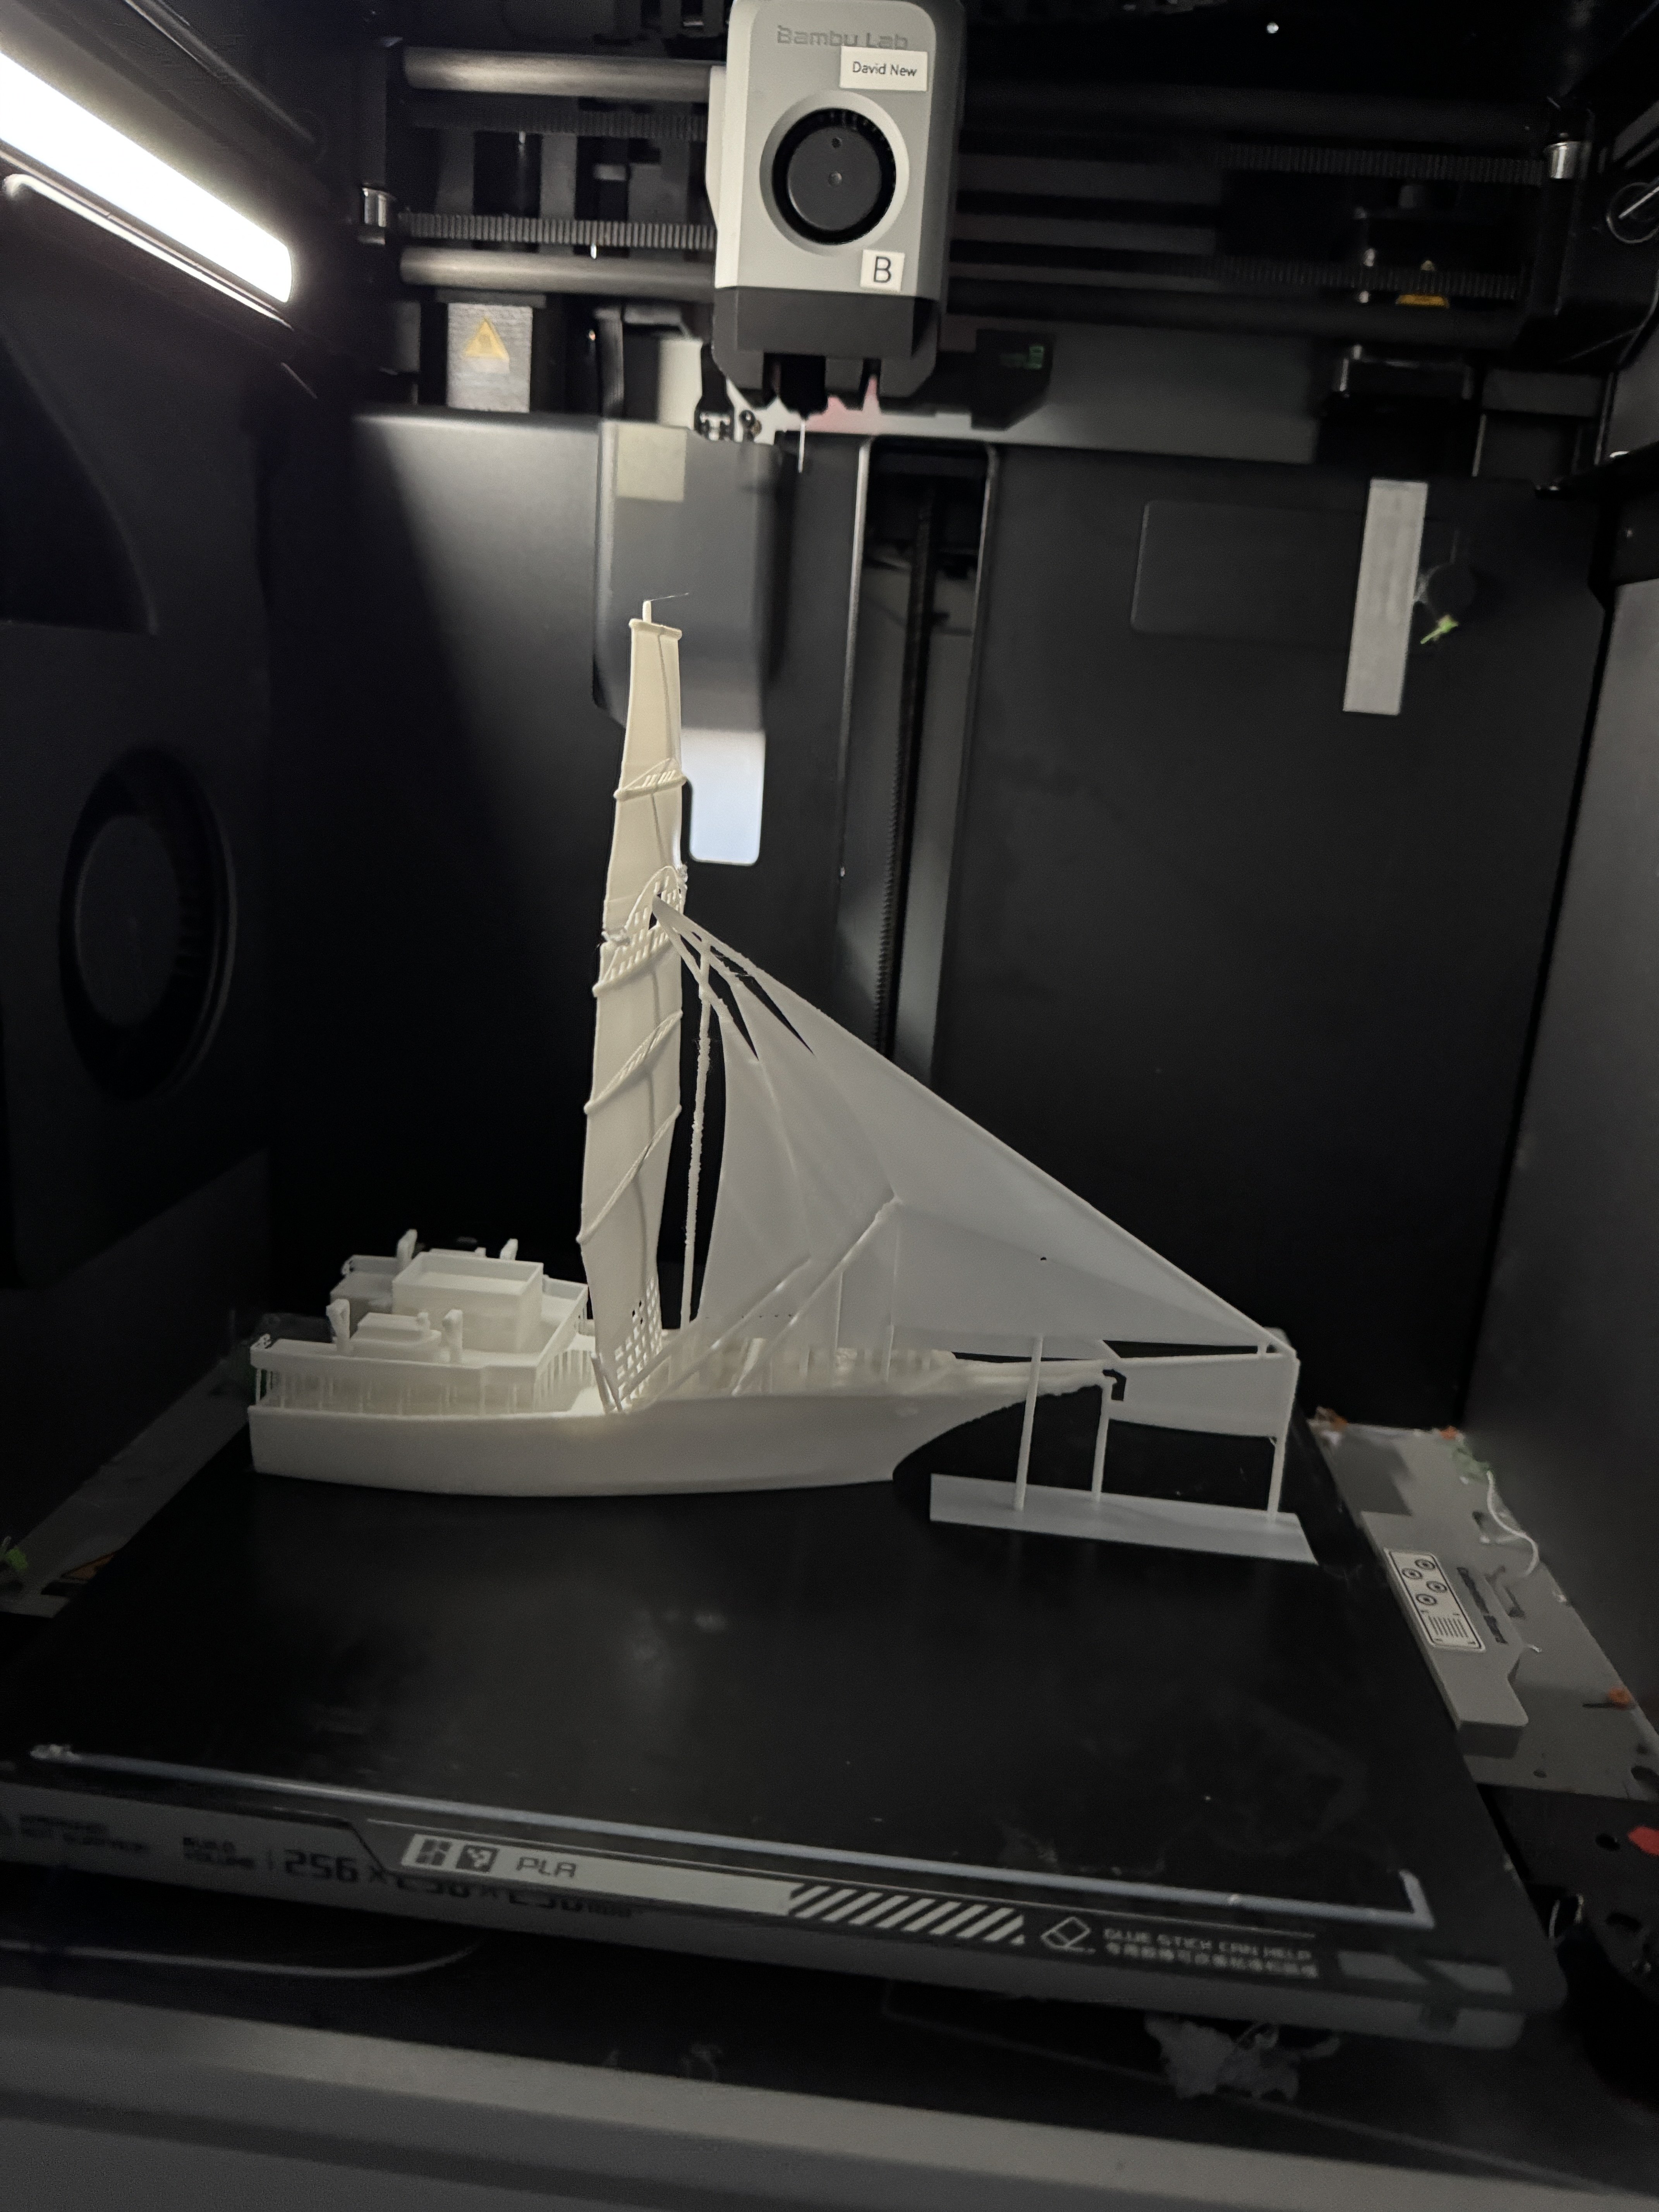
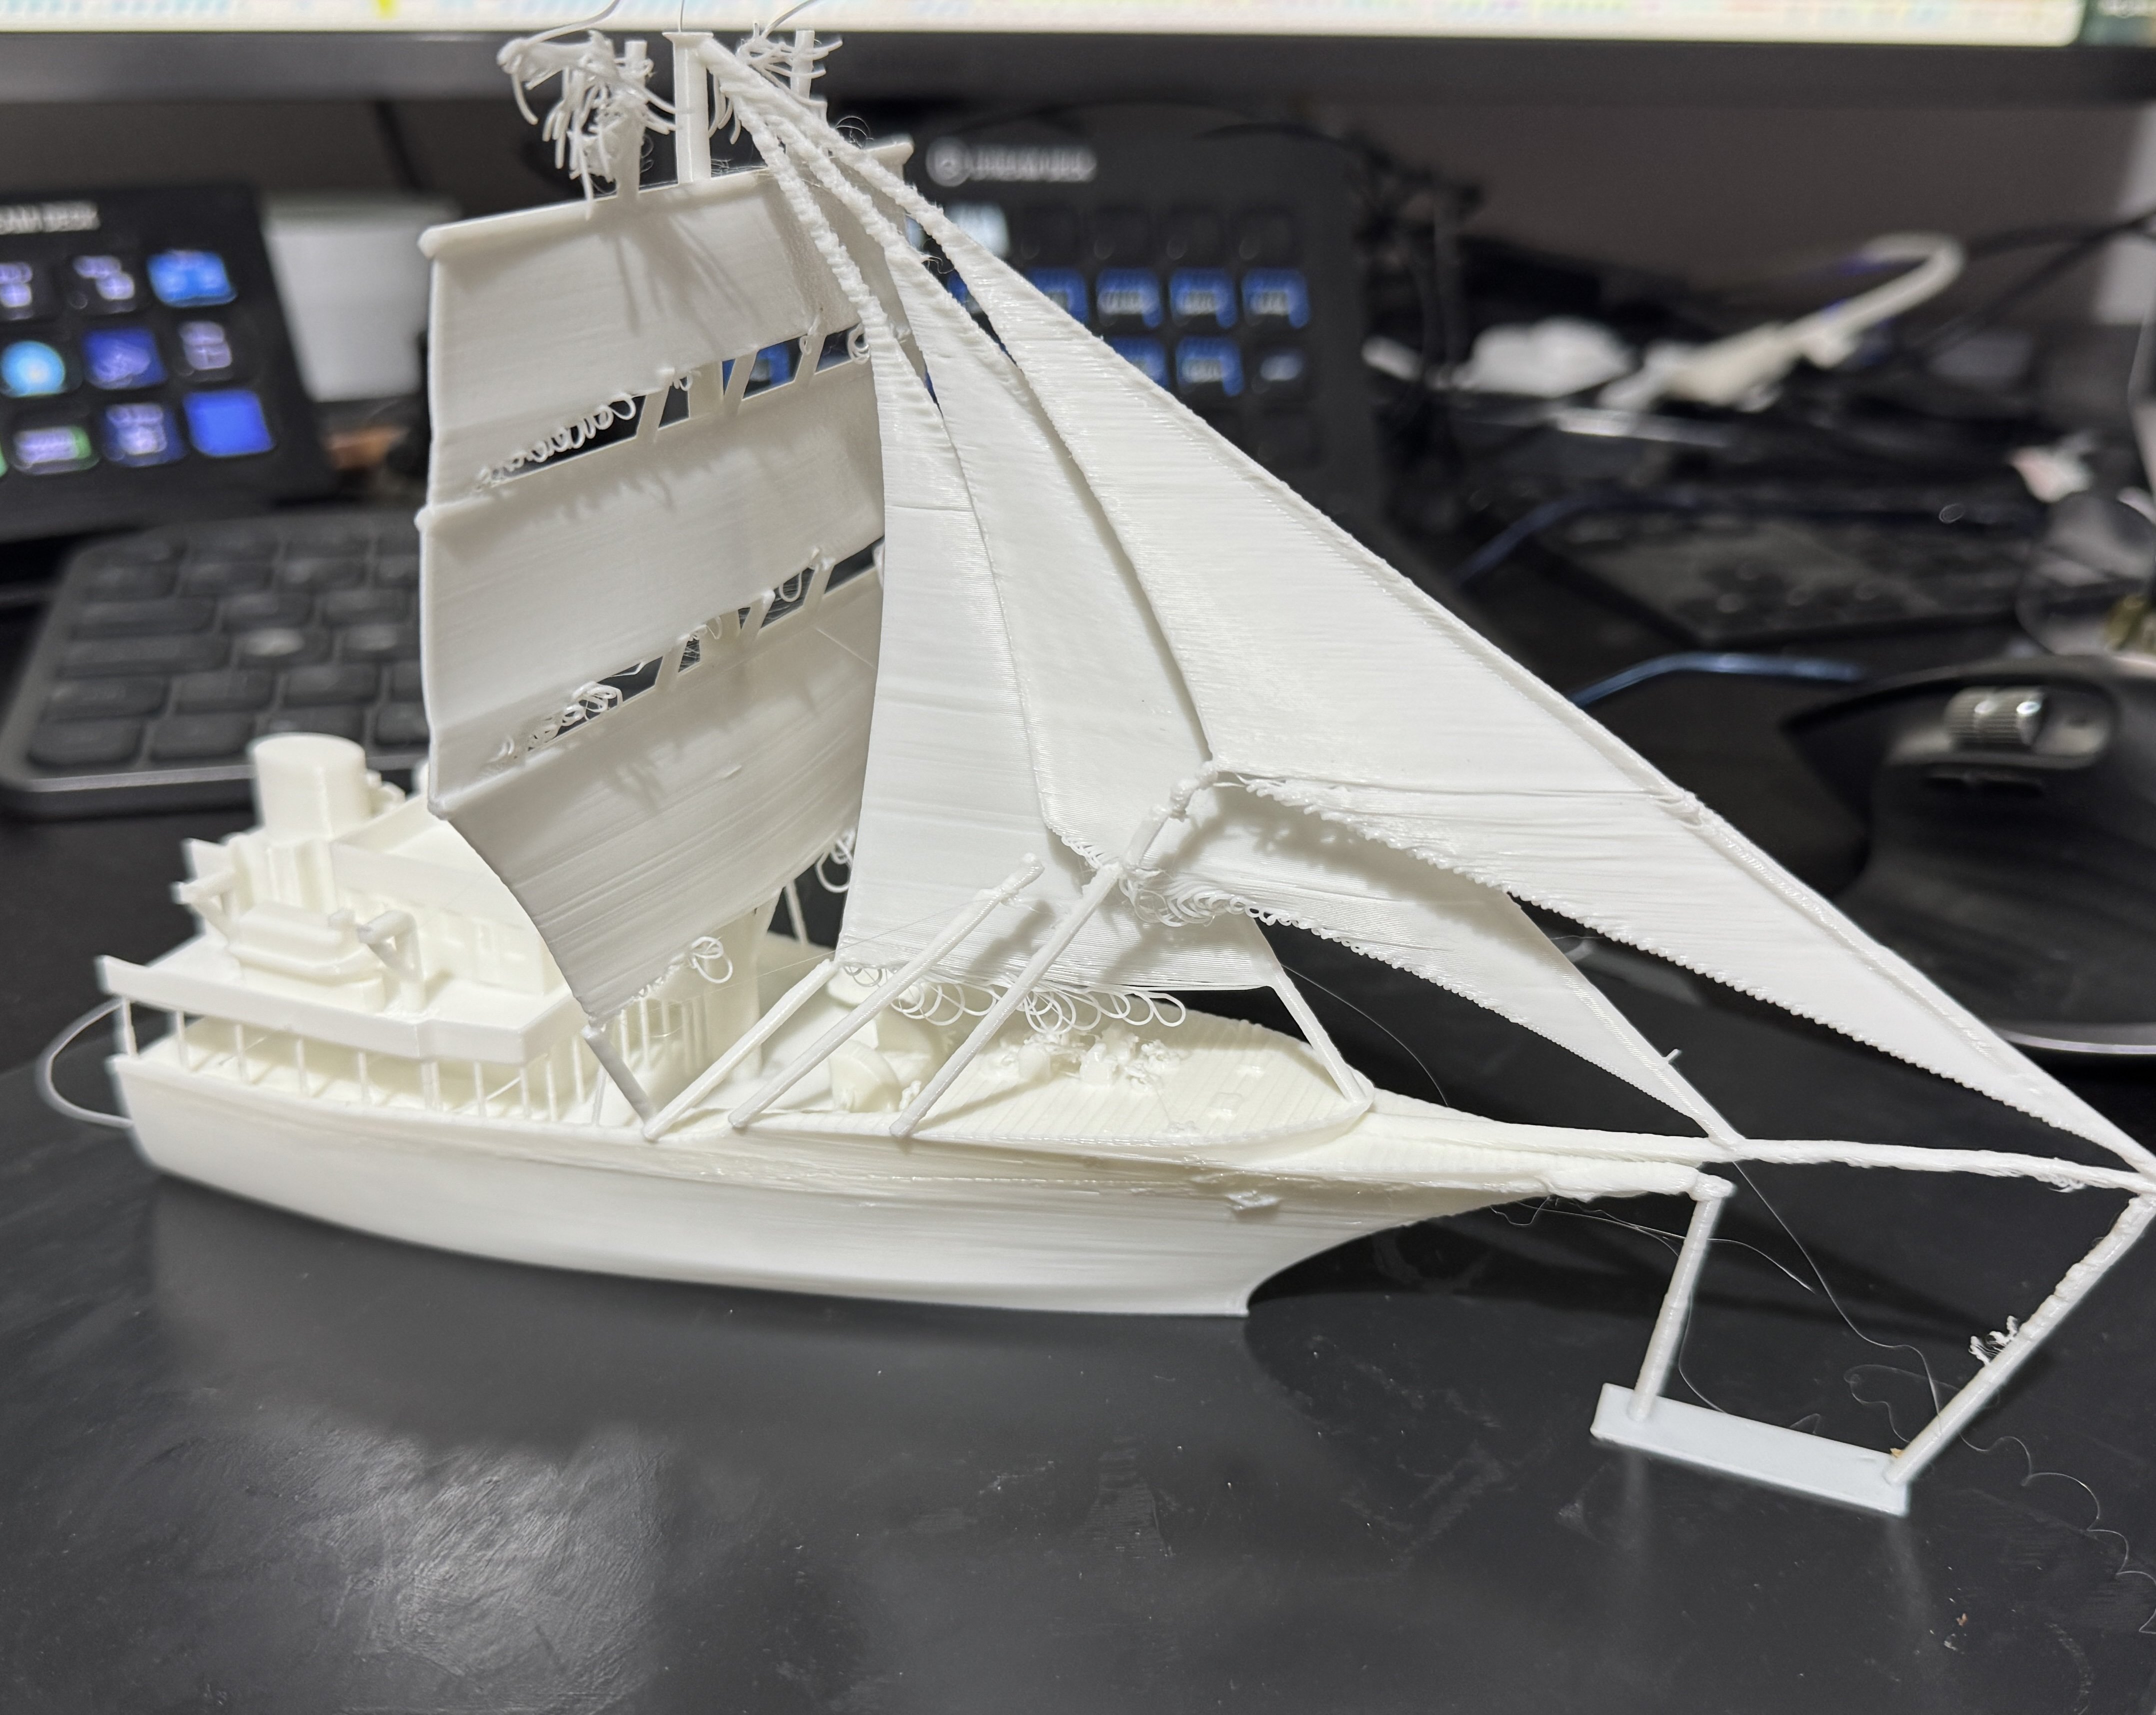
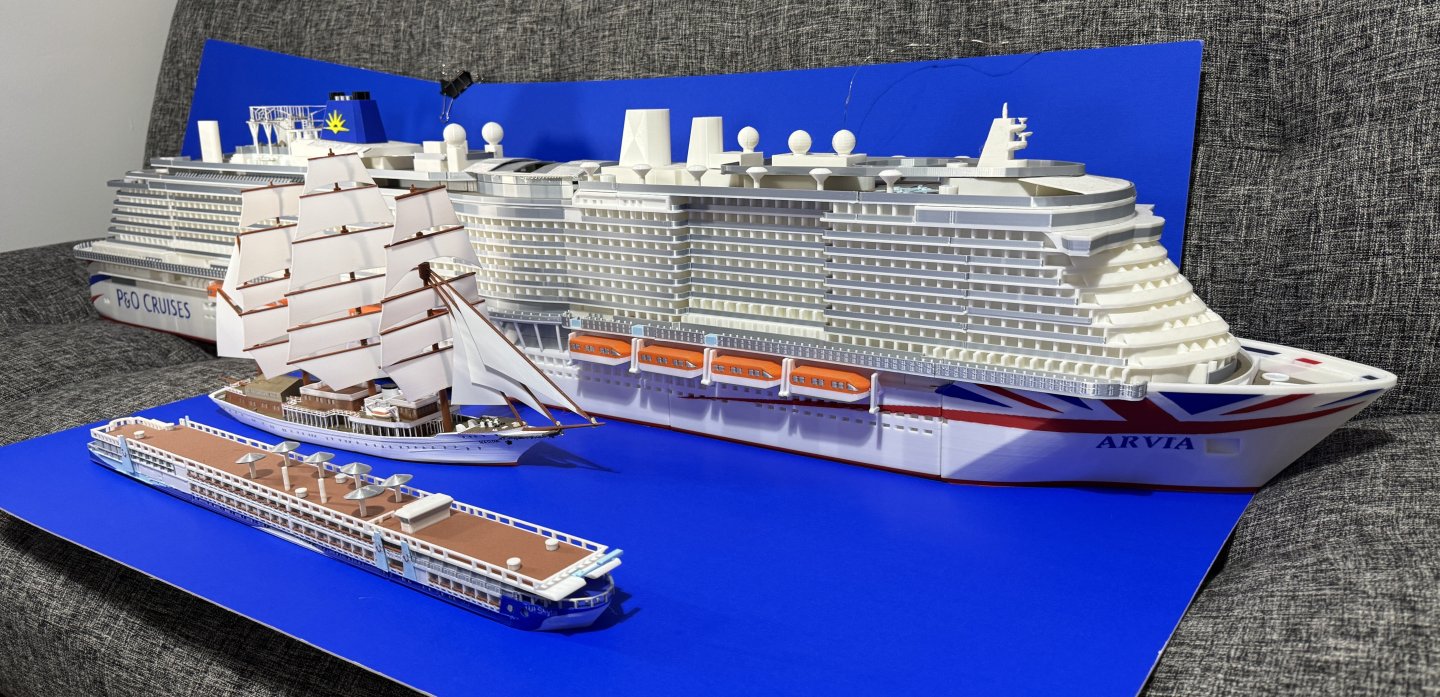
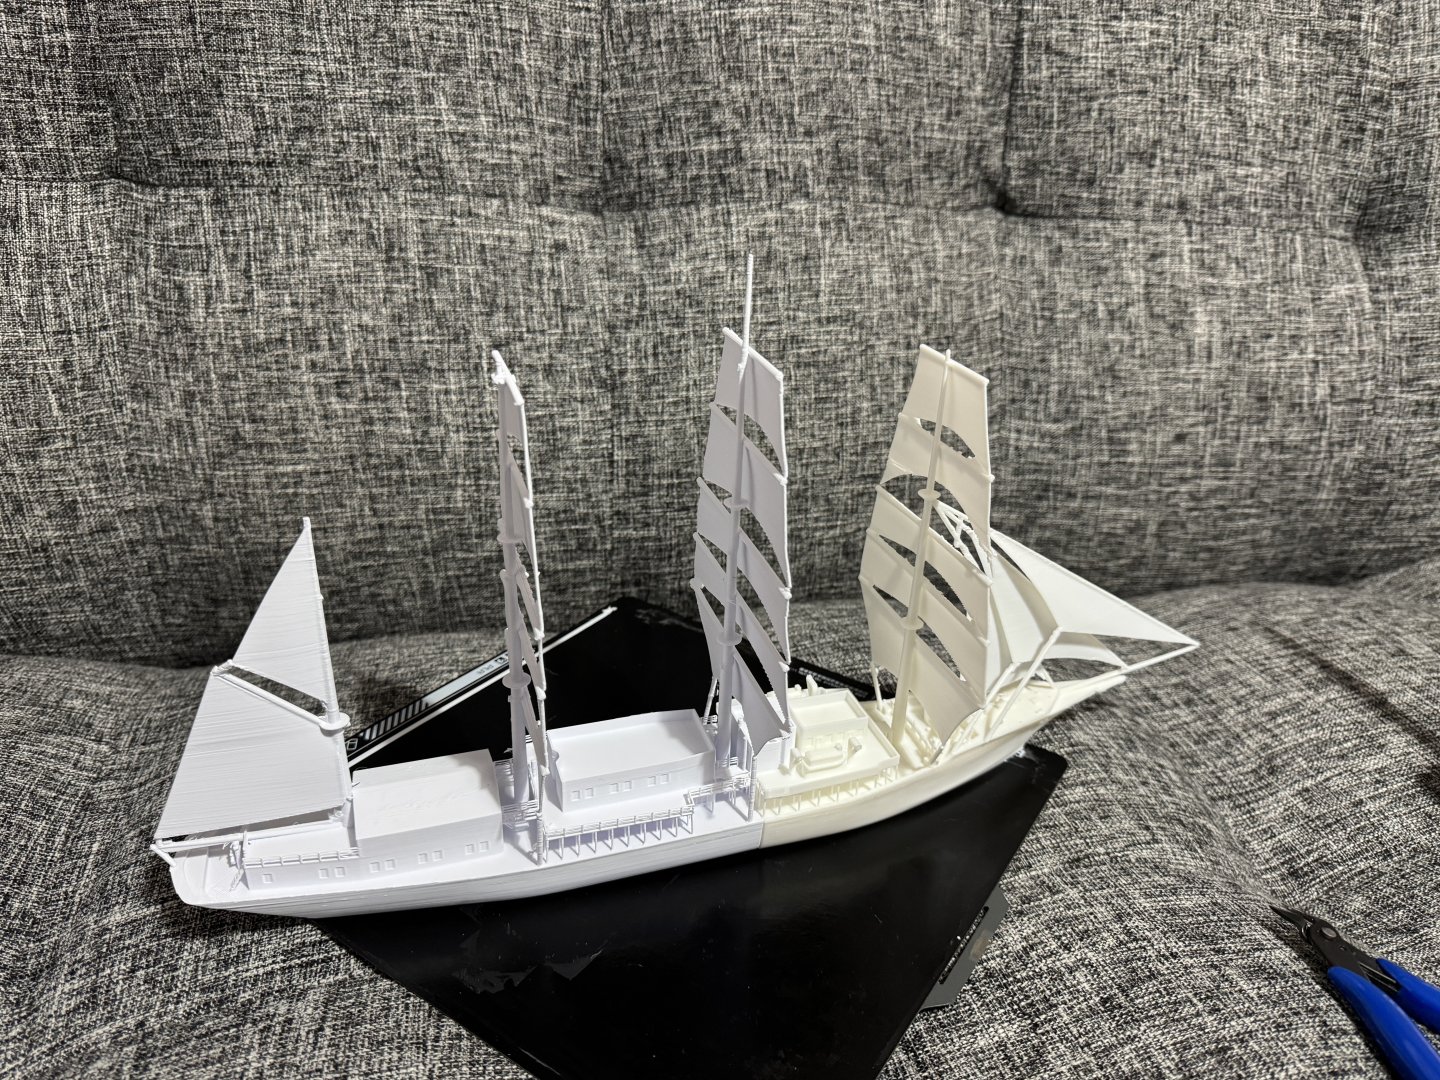
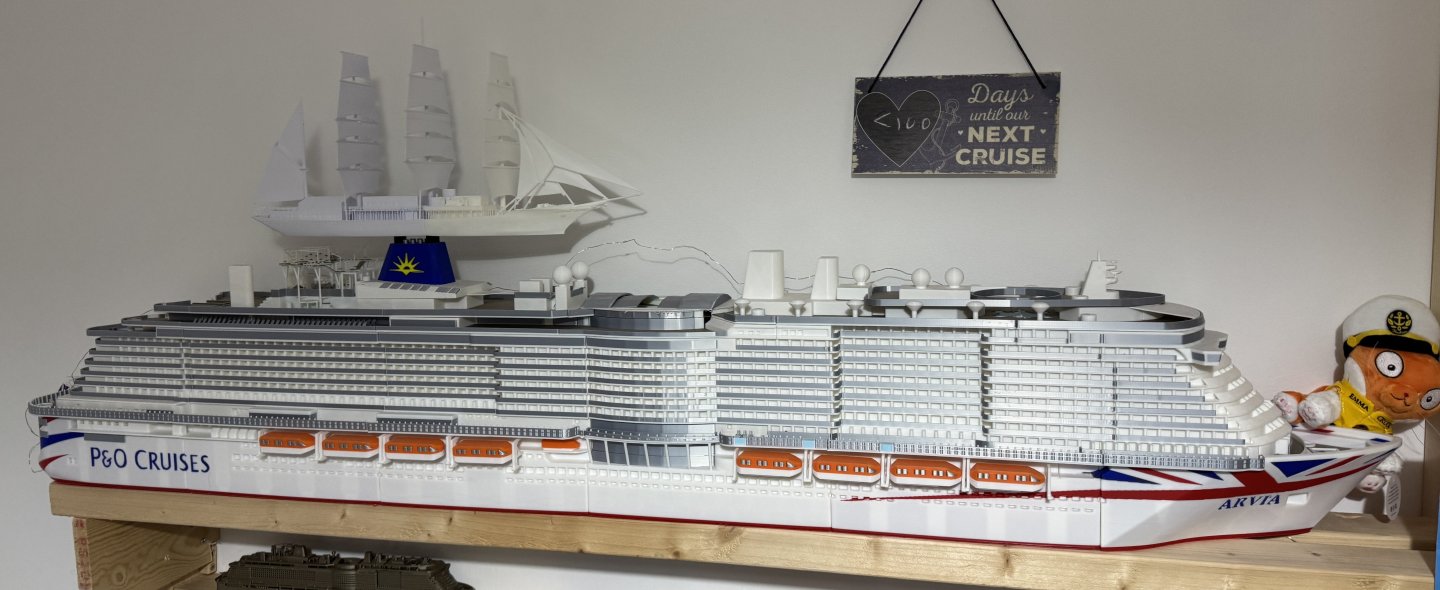
First complete print - still a bit messy - but getting closer In printer Up closer For scale - size comparison with P&O Arvia 1:250


-
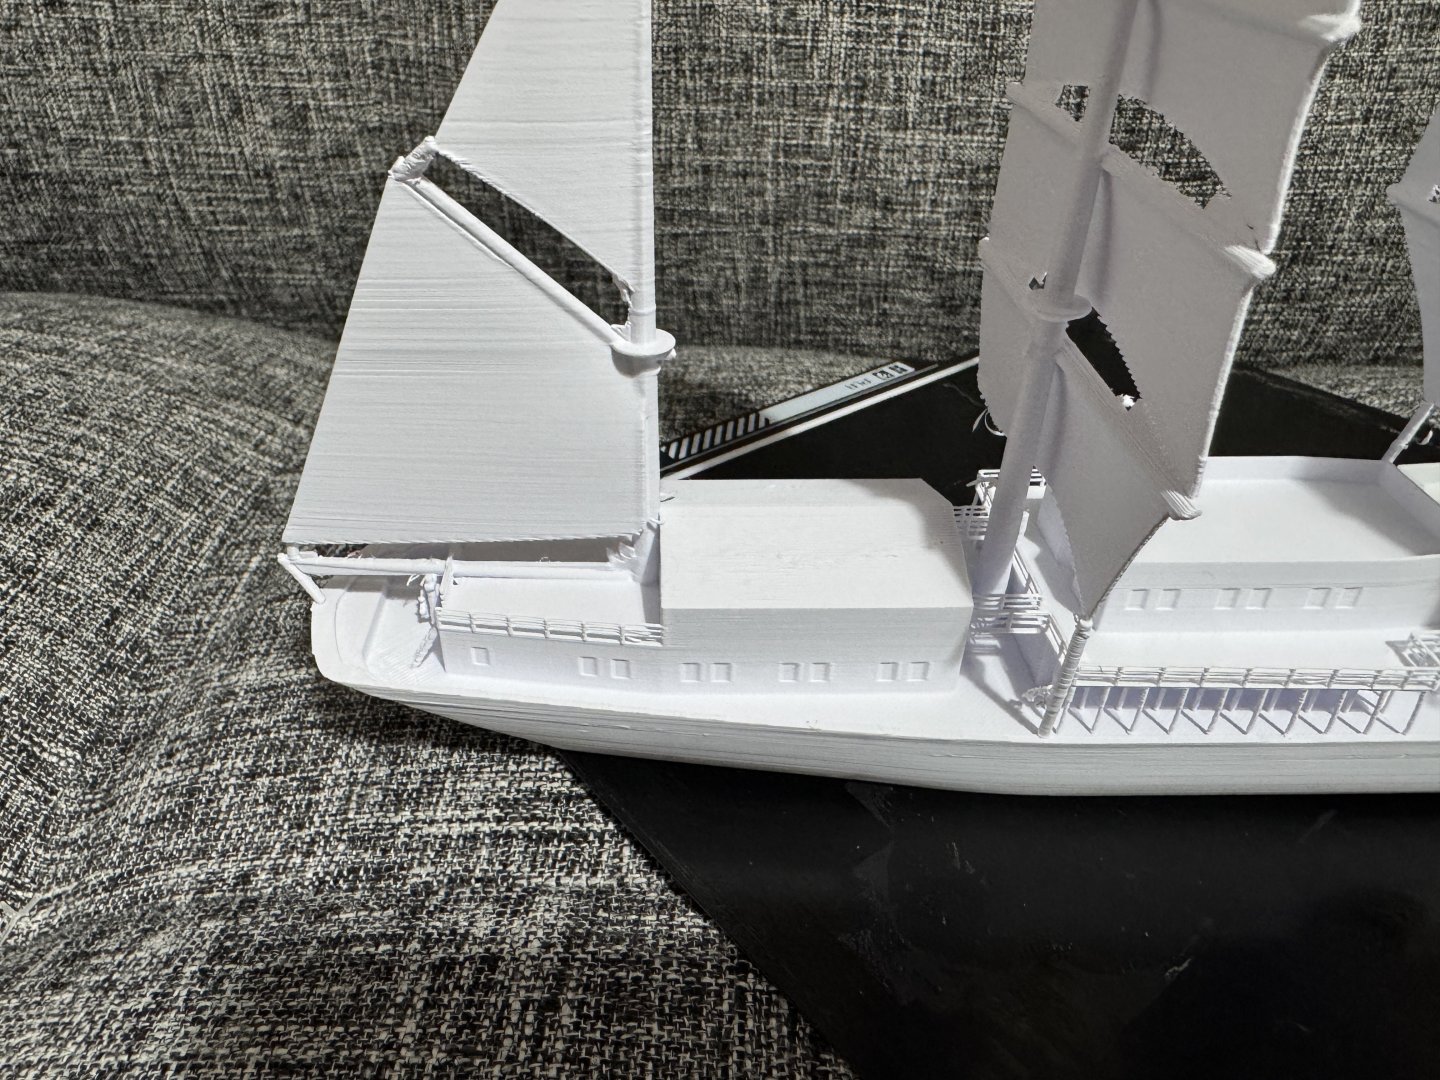
Print came out fairly well - but a few tweaks required Masts swayed a bit while printing - so going to try to see if some temporarily horizontal stabilisers help too
-
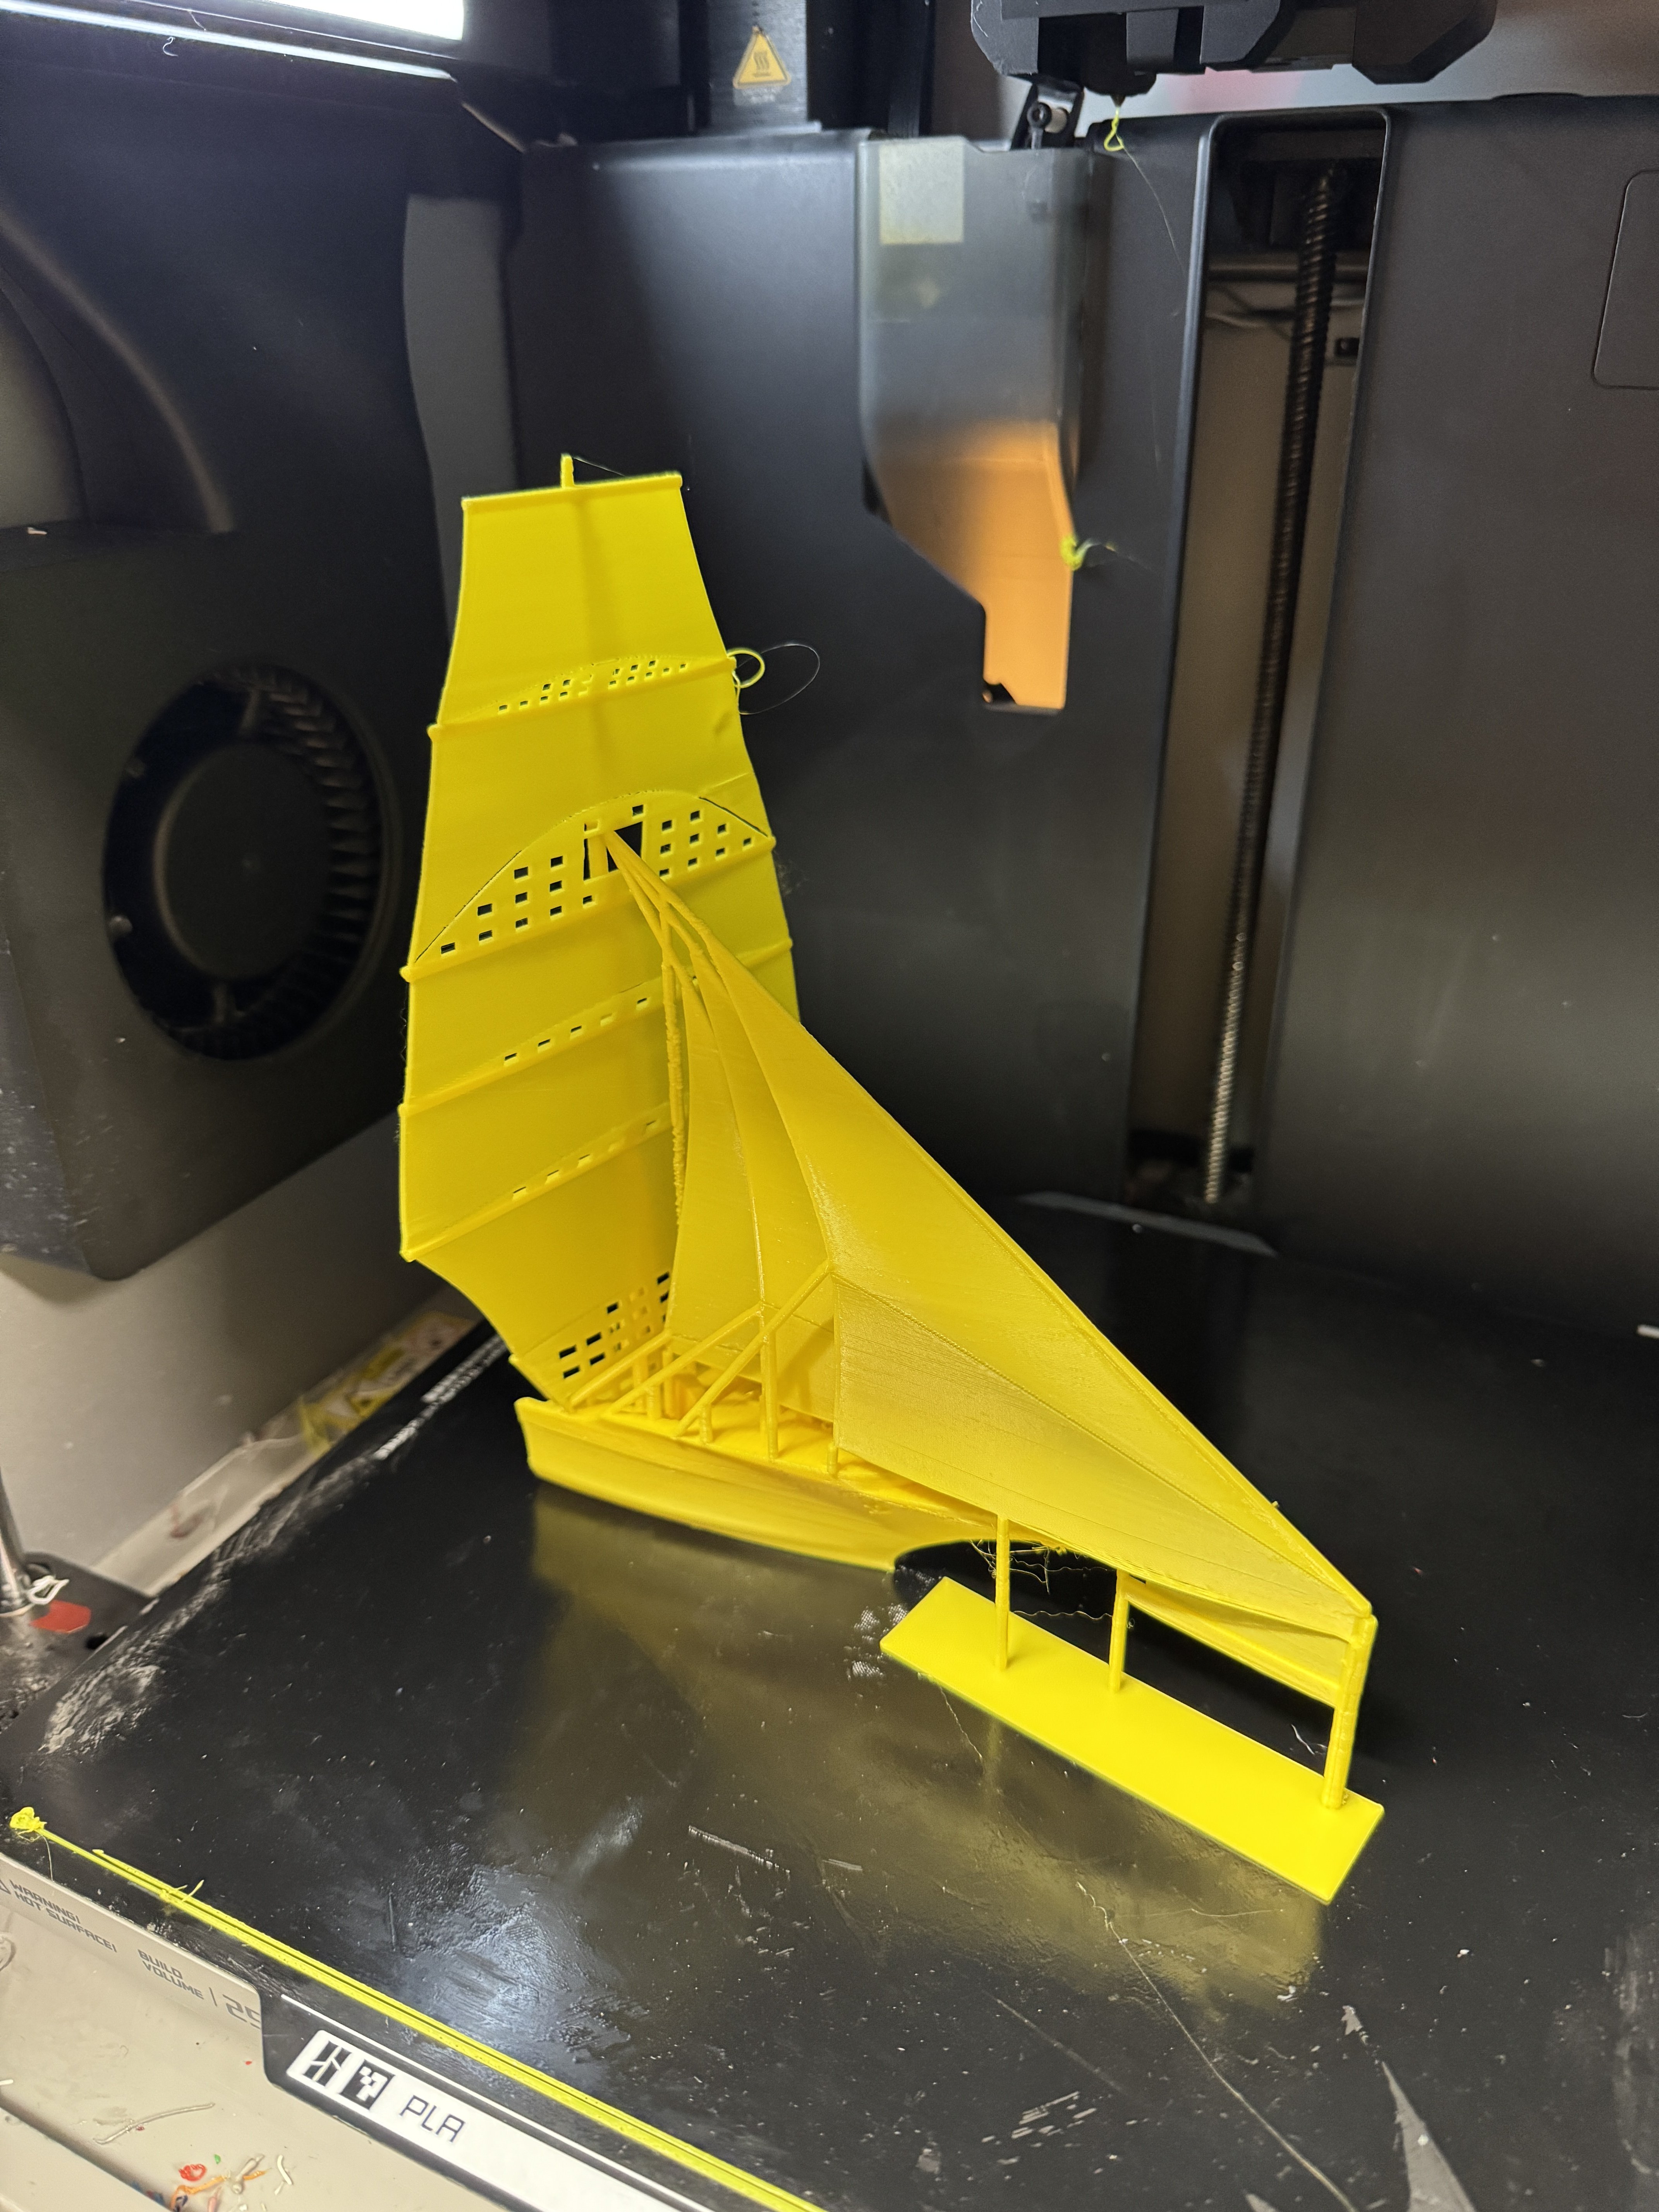
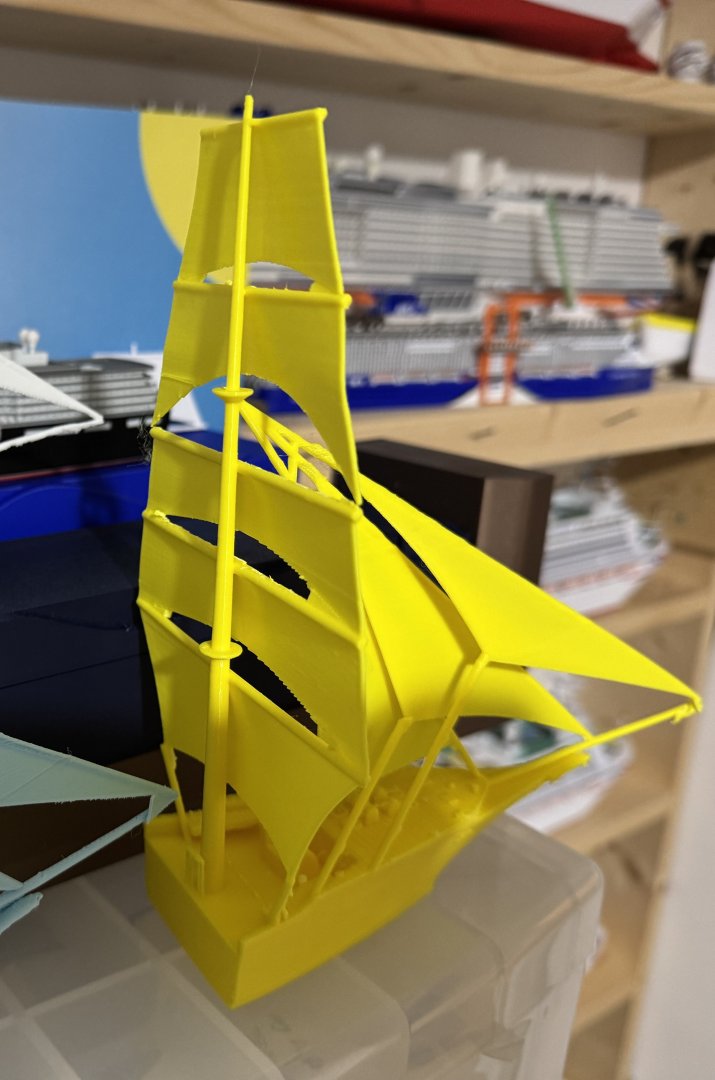
Supports now applied to all sails, and ship now properly split into 2 sections for printing single colour at a scale of 1:250. Next step is a single colour test print of the rear half.


-
Making progress on Sea Cloud 3d print - initial single colour attempt at 3d print (without enough supports). Adding some custom supports seems to have fixed the issue

-
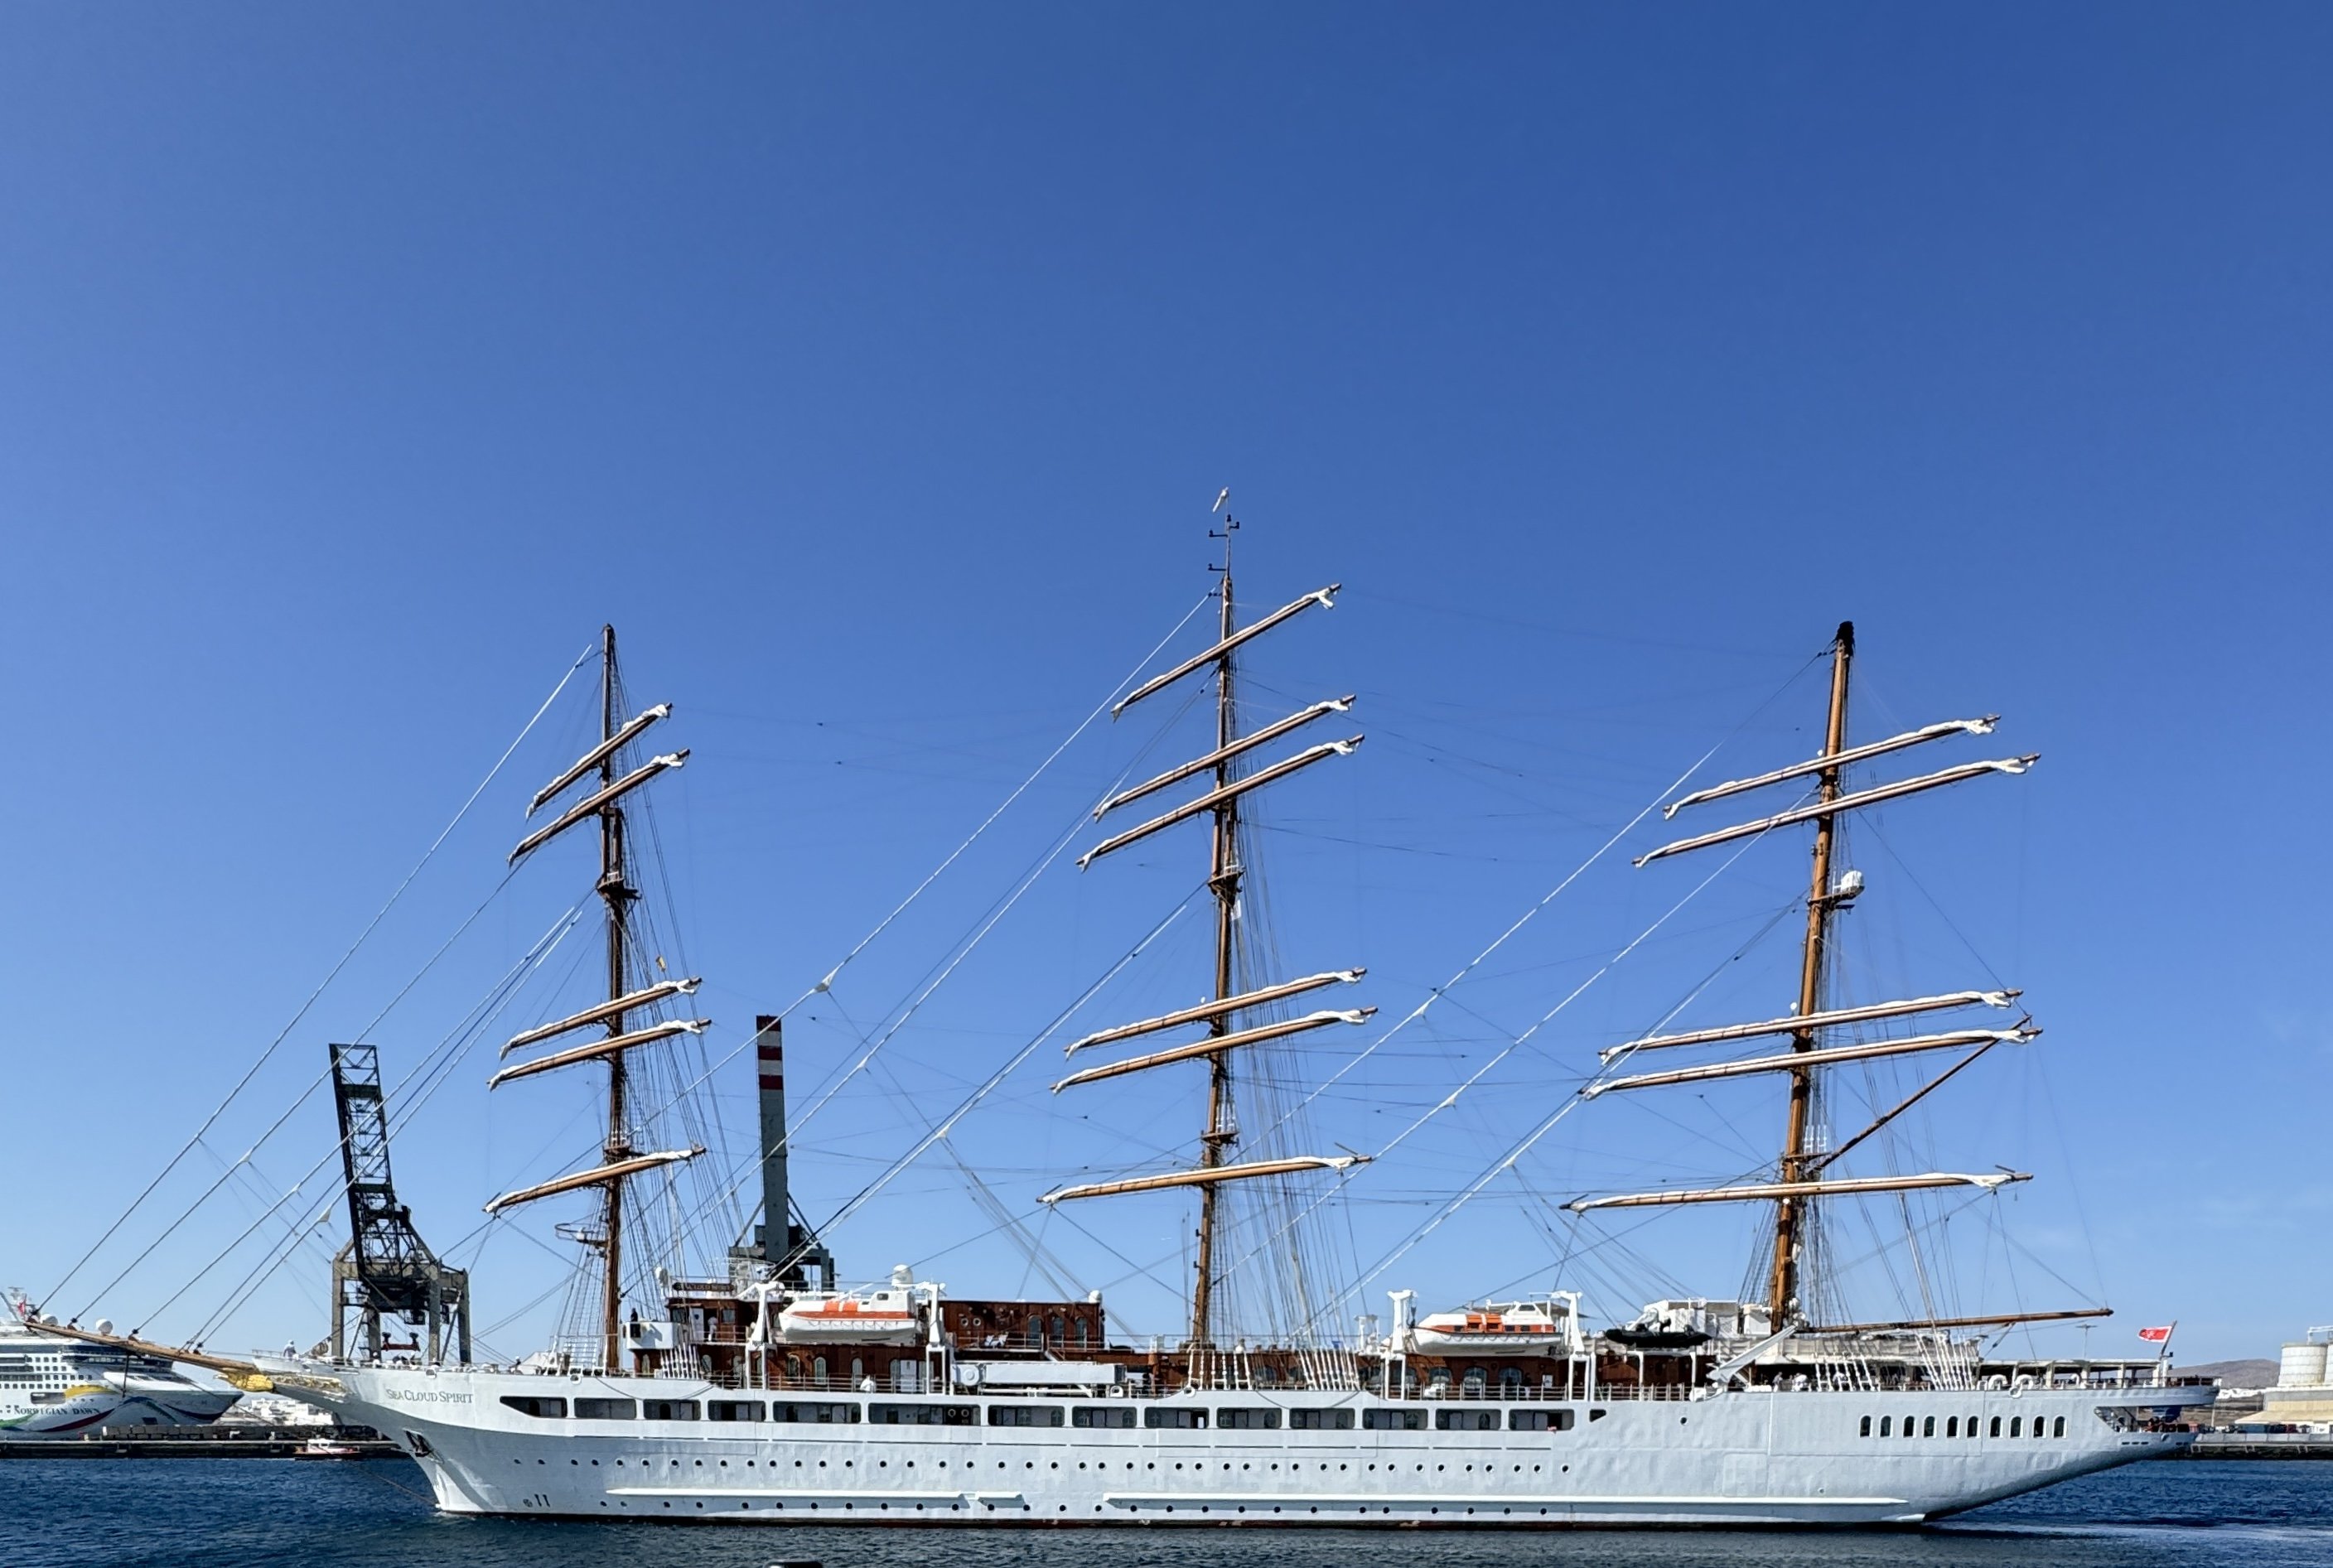
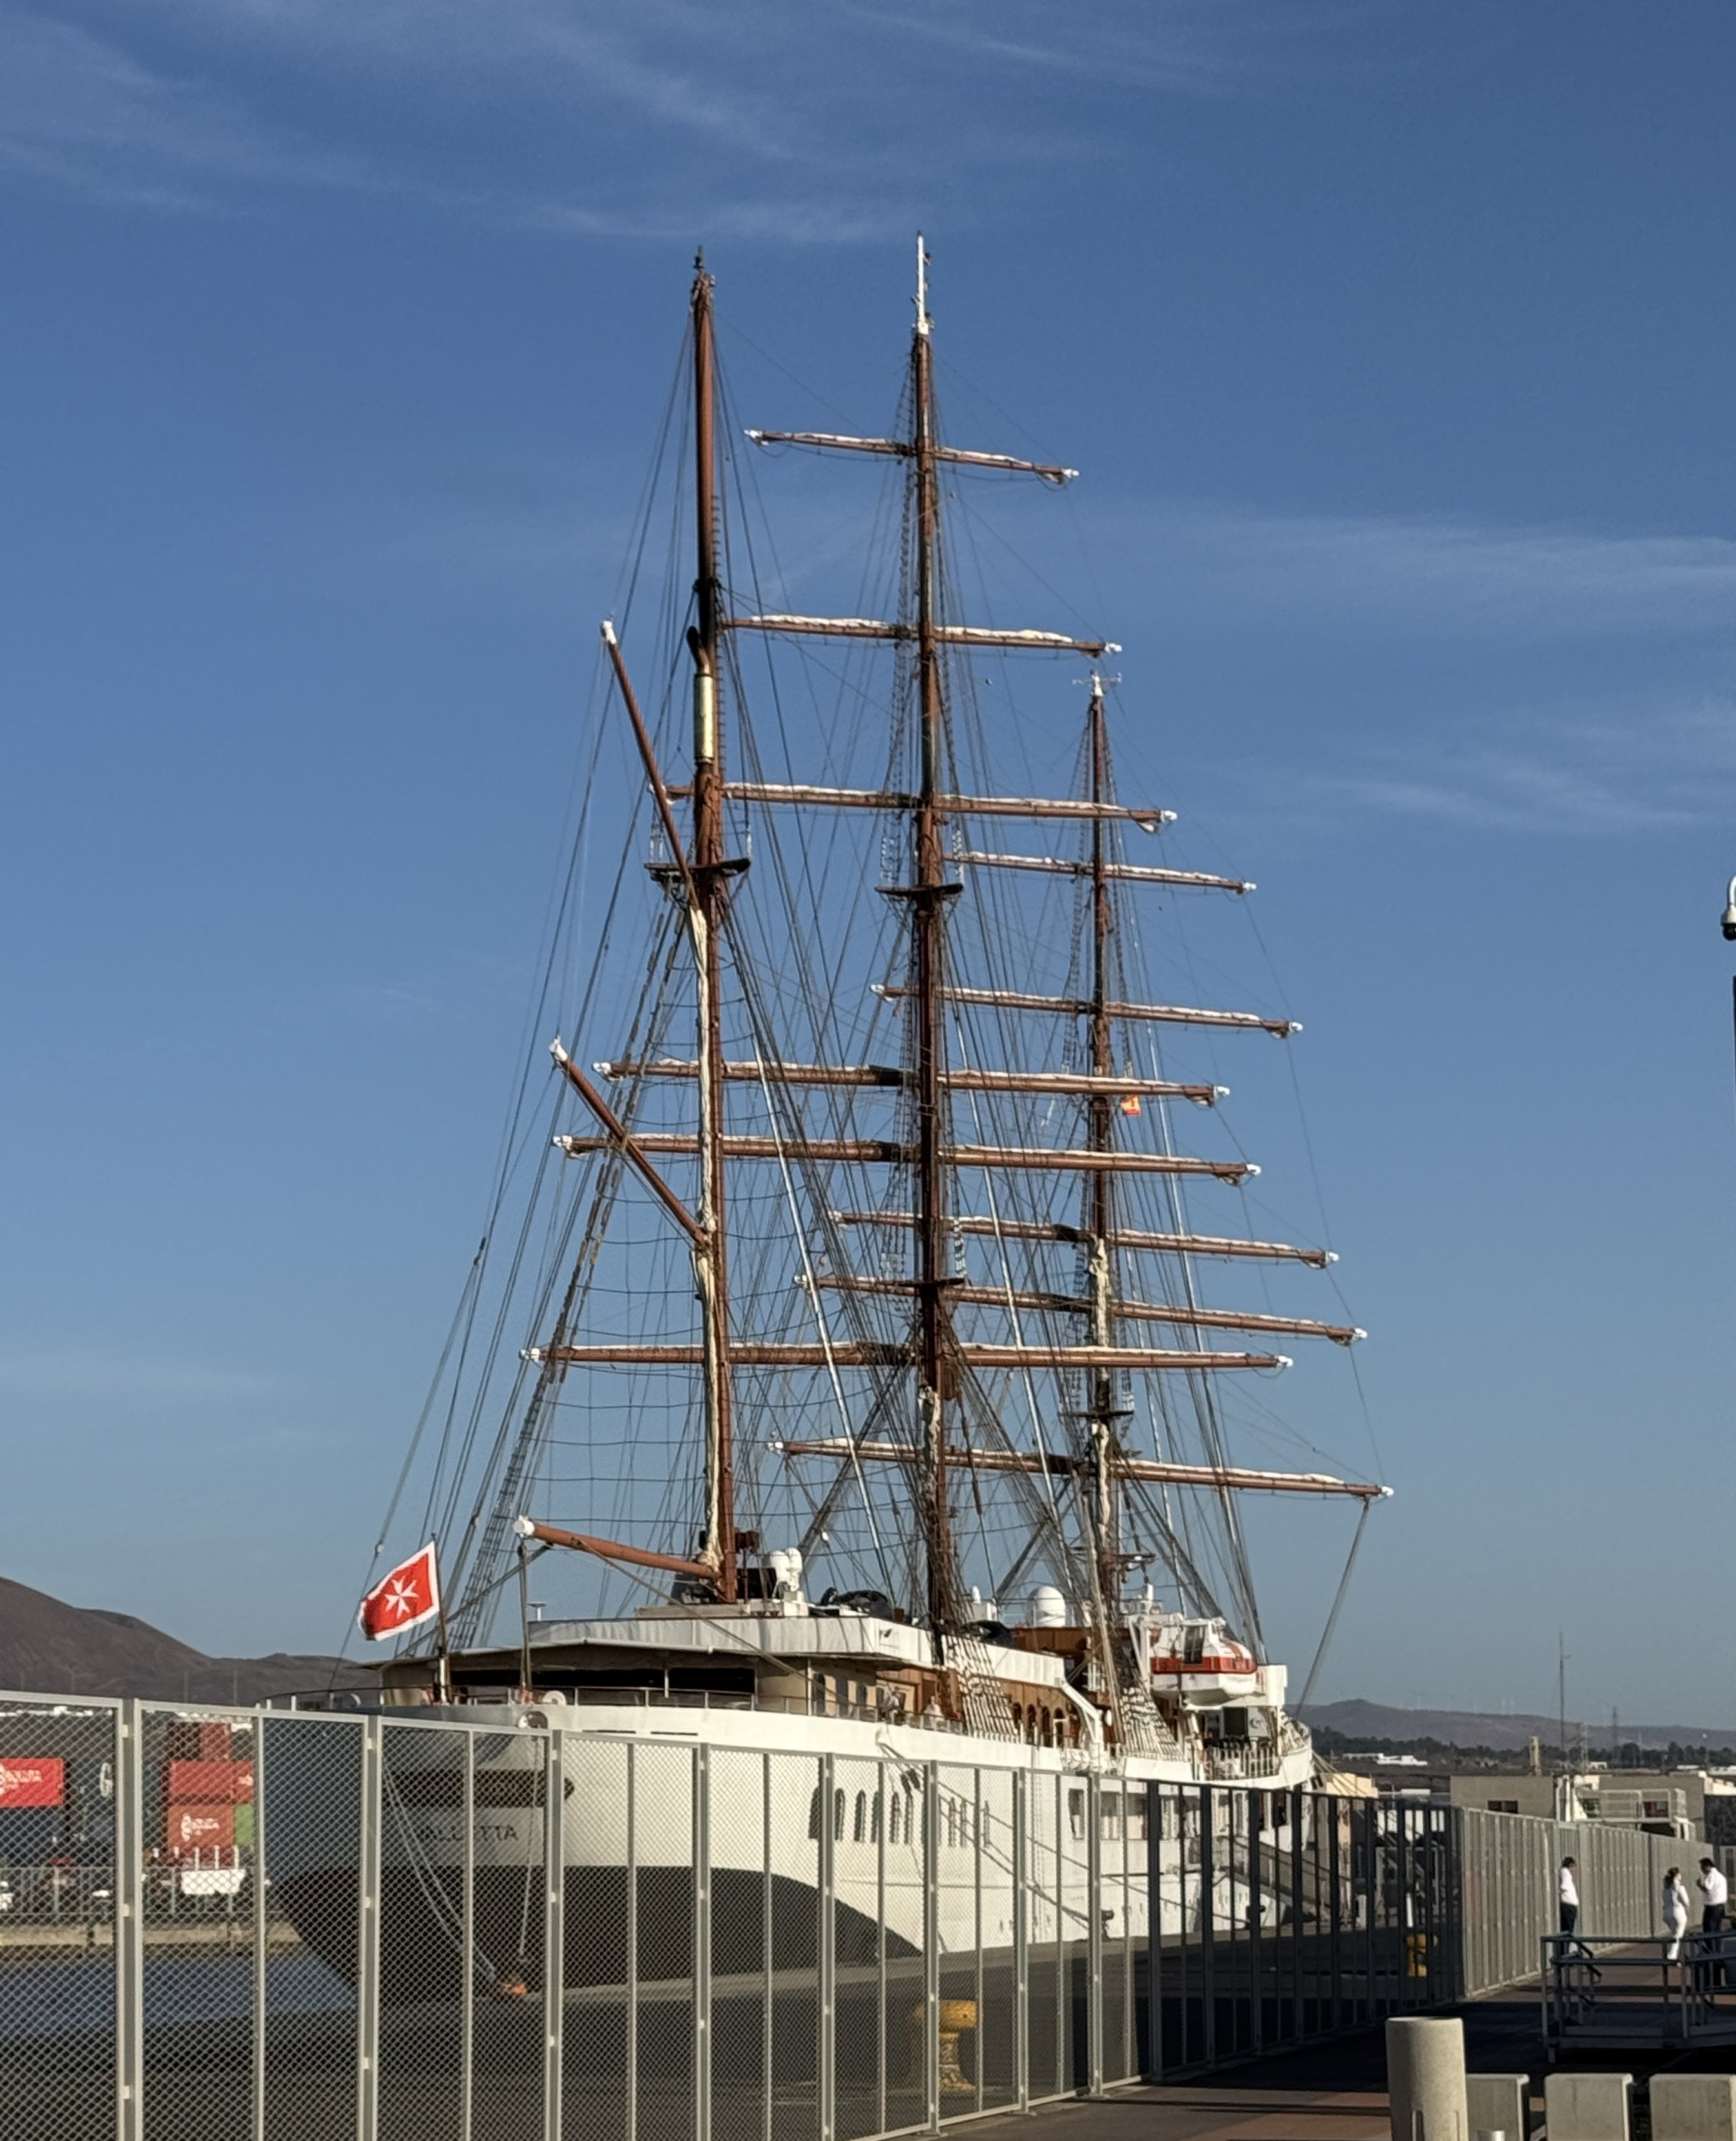
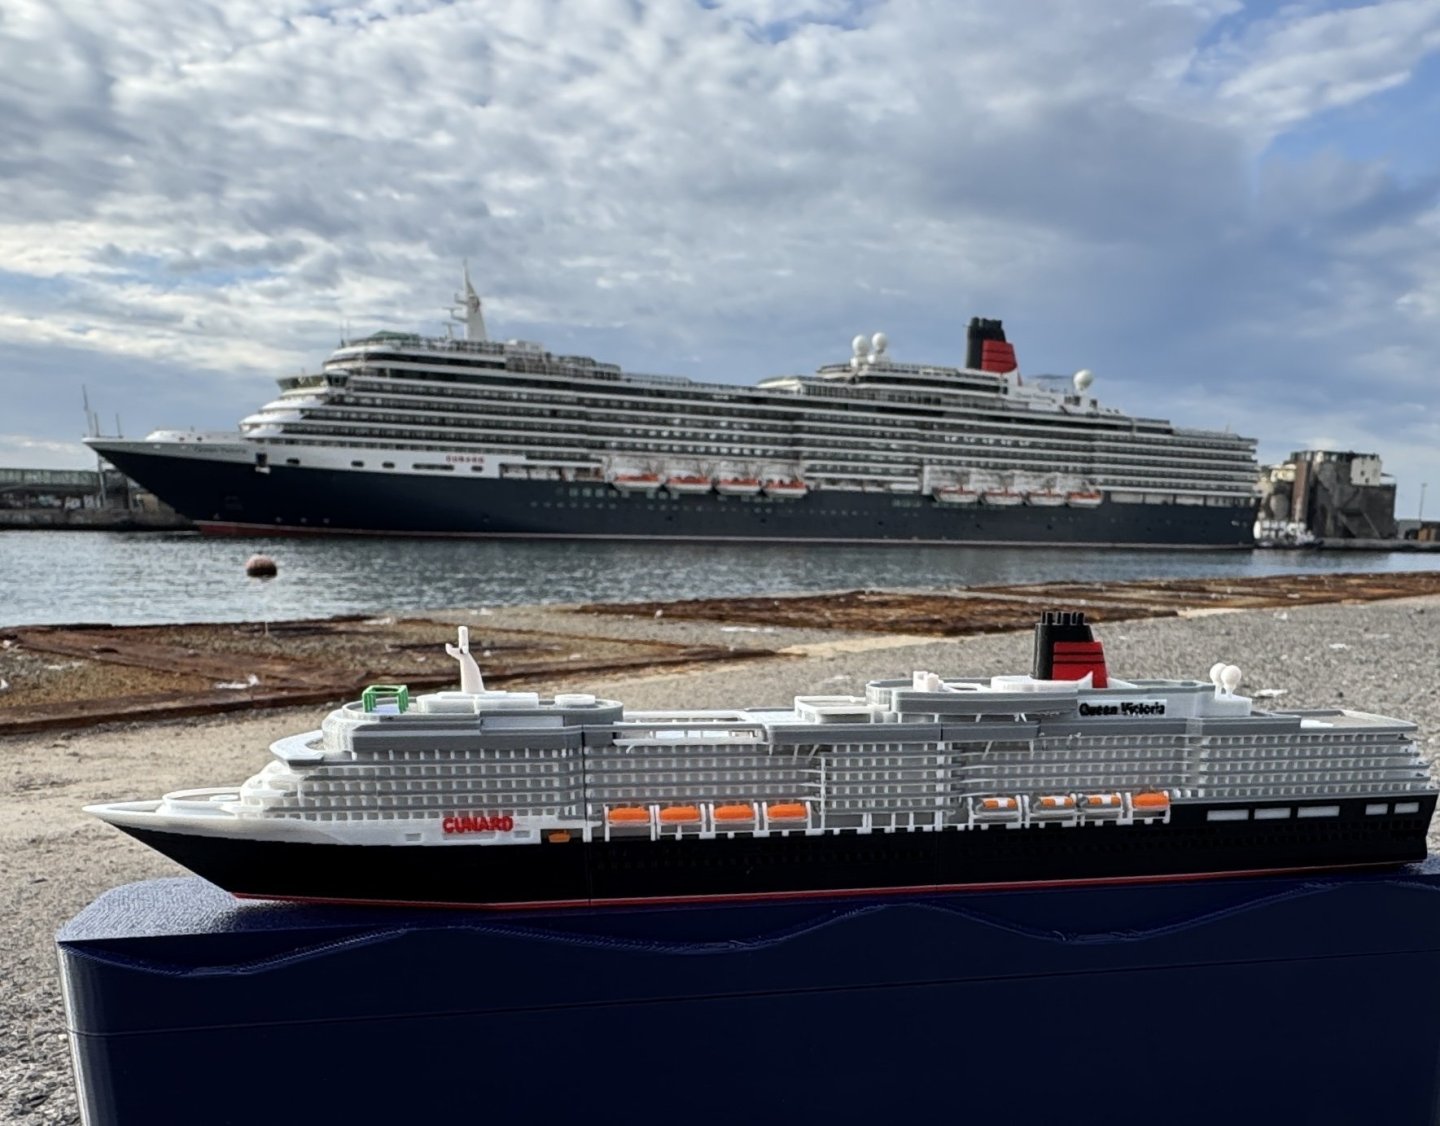
came across the rest of the Sea Cloud fleet in Lanzarote last week (while on Cunard Queen Victoria) - Sea Cloud Spirit See Cloud 2 From Queen Victoria (pictured in Madeira with one of my other models)


-
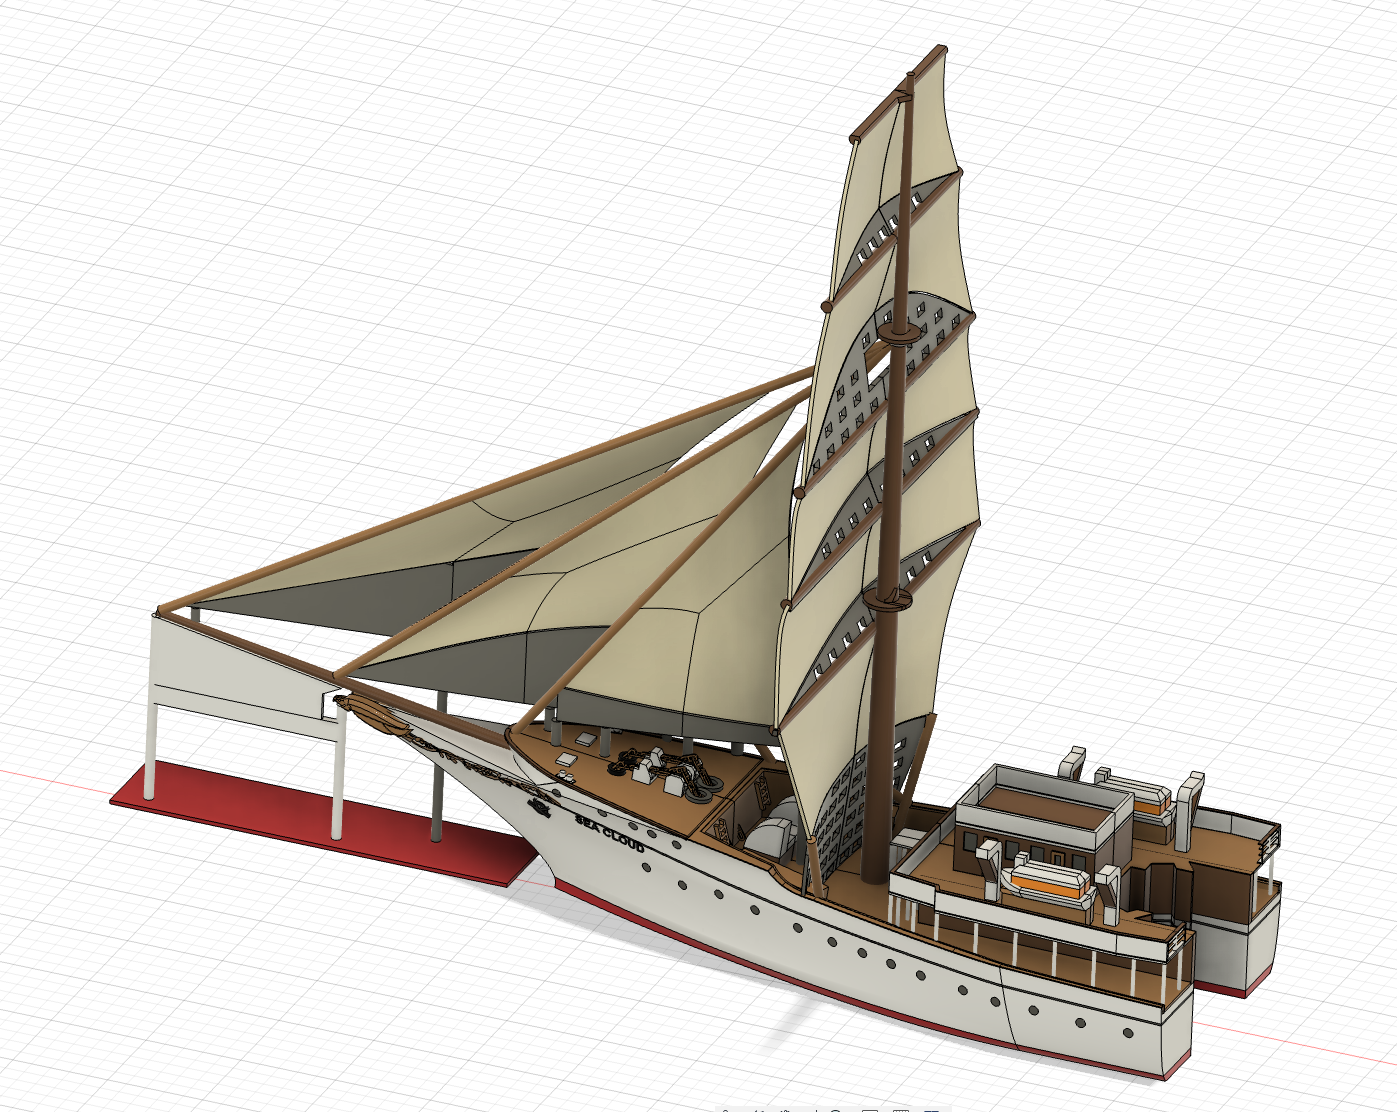
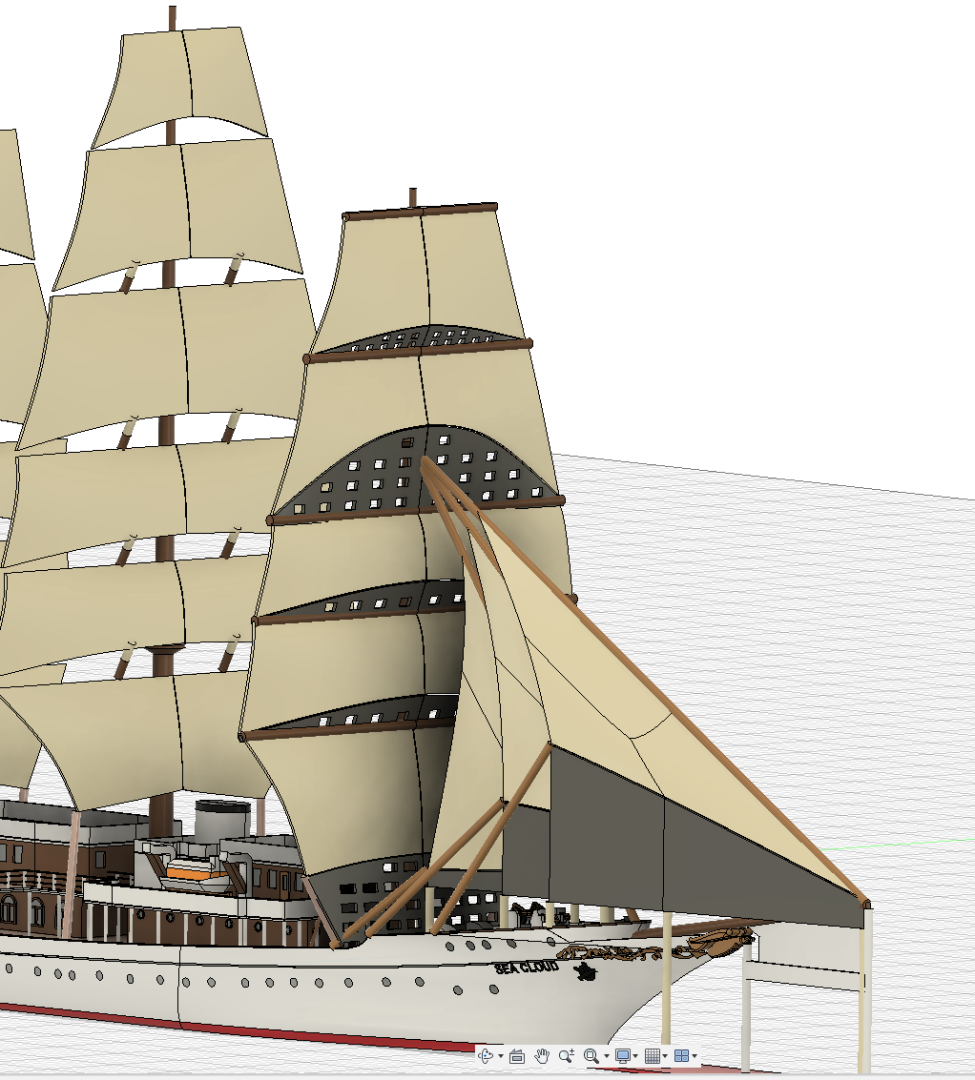
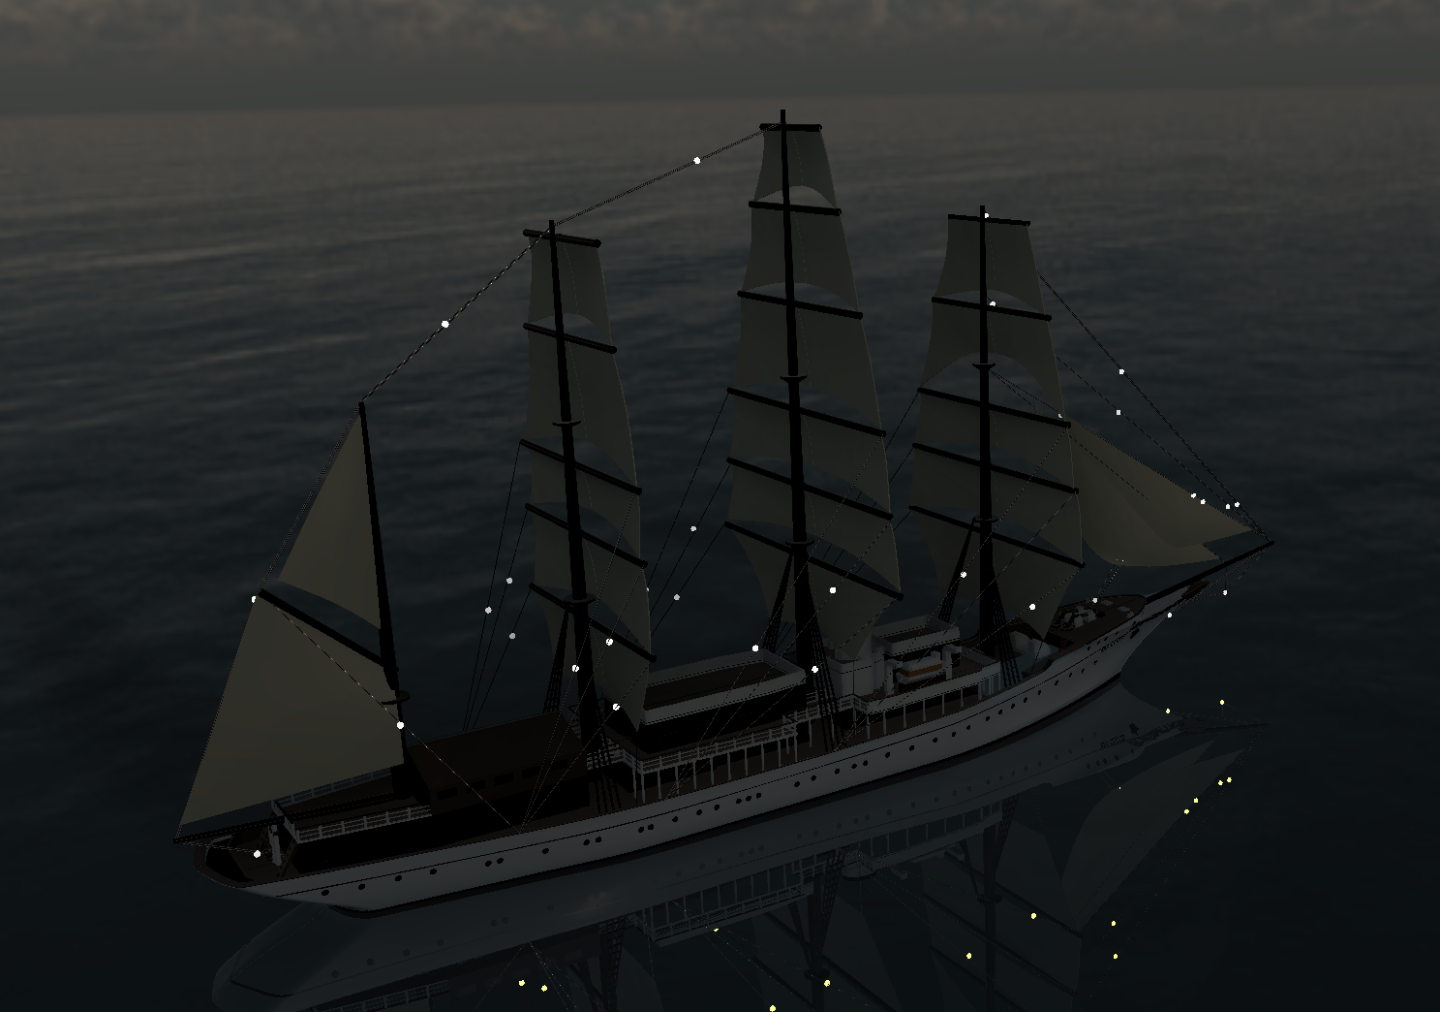
Has been wrestling with what to do about the ropes - whether to 3d print them etc. - Decided in the first instance to try making them out of copper wire led strings - The wires are doubled up and are about 0.25mm diameter - with the led's about 100mm apart. Should like quite good hopefully. Example render attached. Day time Night time


-
Not afraid not whoever that is.