MORE HANDBOOKS ARE ON THEIR WAY! We will let you know when they get here.
×


Dave Wood
-
Posts
93 -
Joined
-
Last visited
Content Type
Profiles
Forums
Gallery
Events
Everything posted by Dave Wood
-
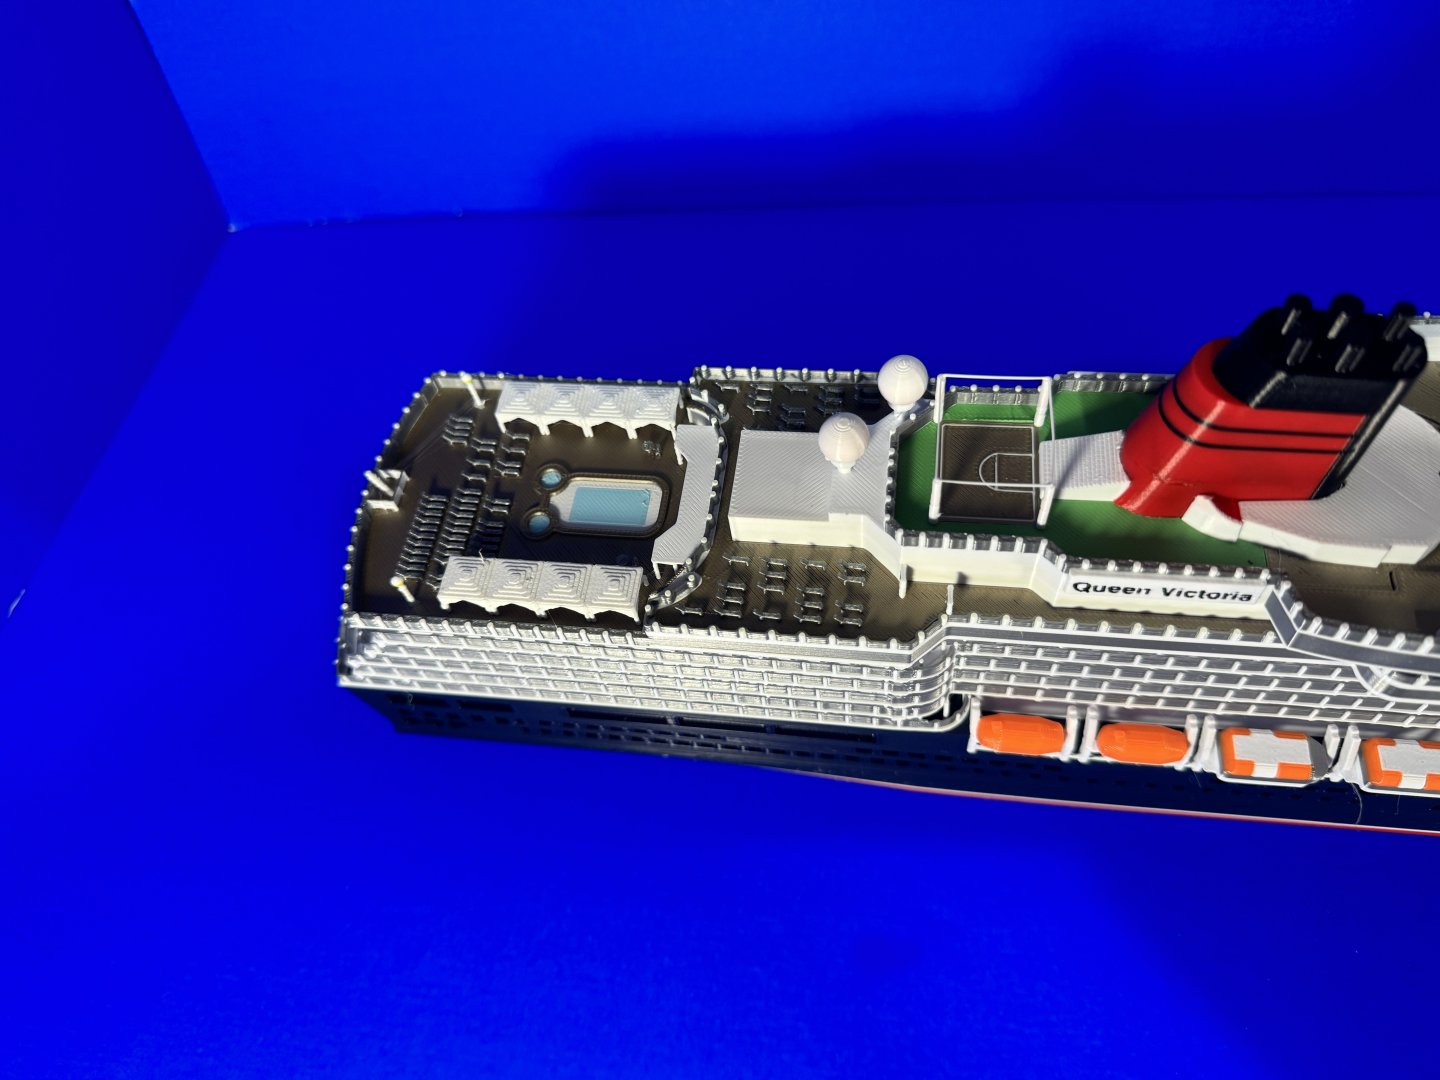
Fair bit more progress on the some of the deck stuff and decoration

-
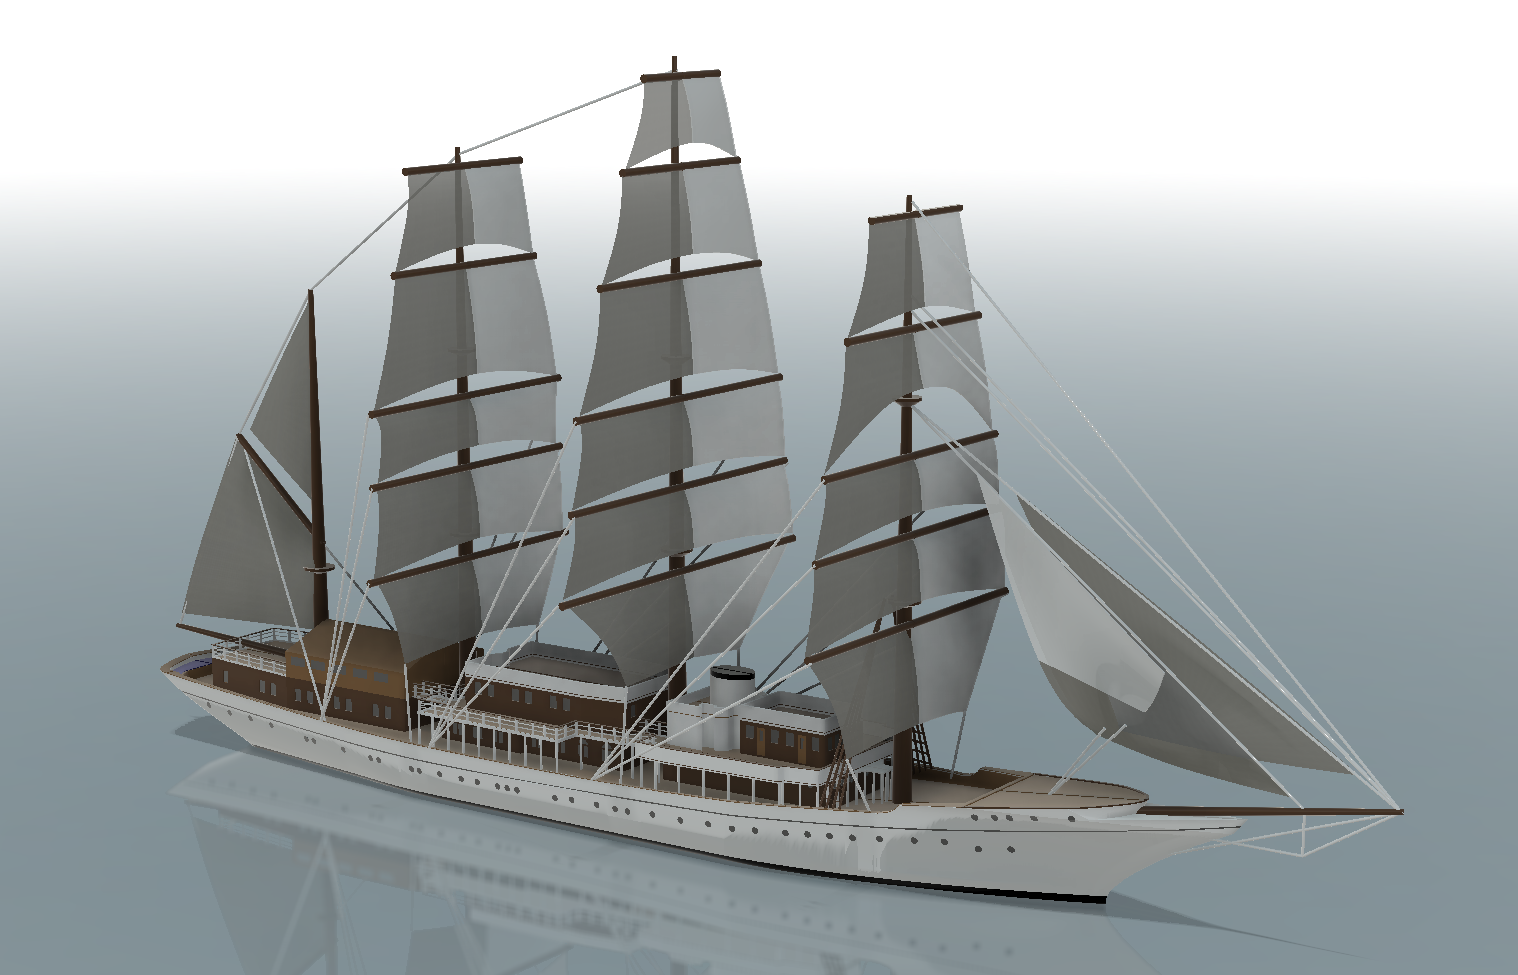
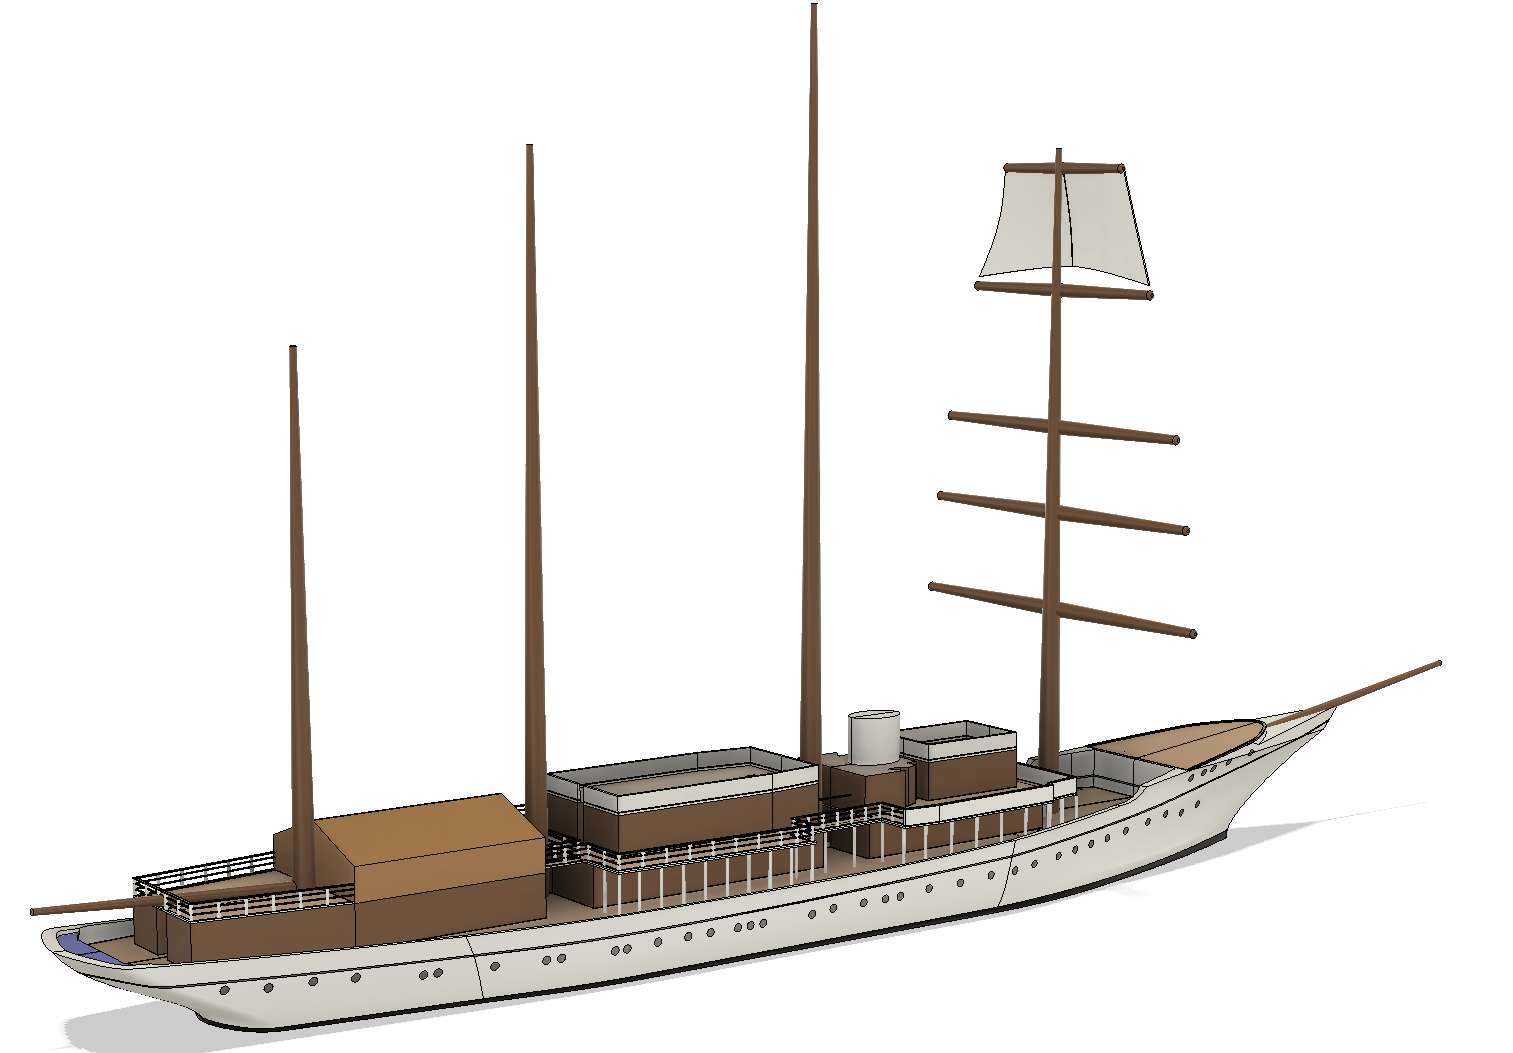
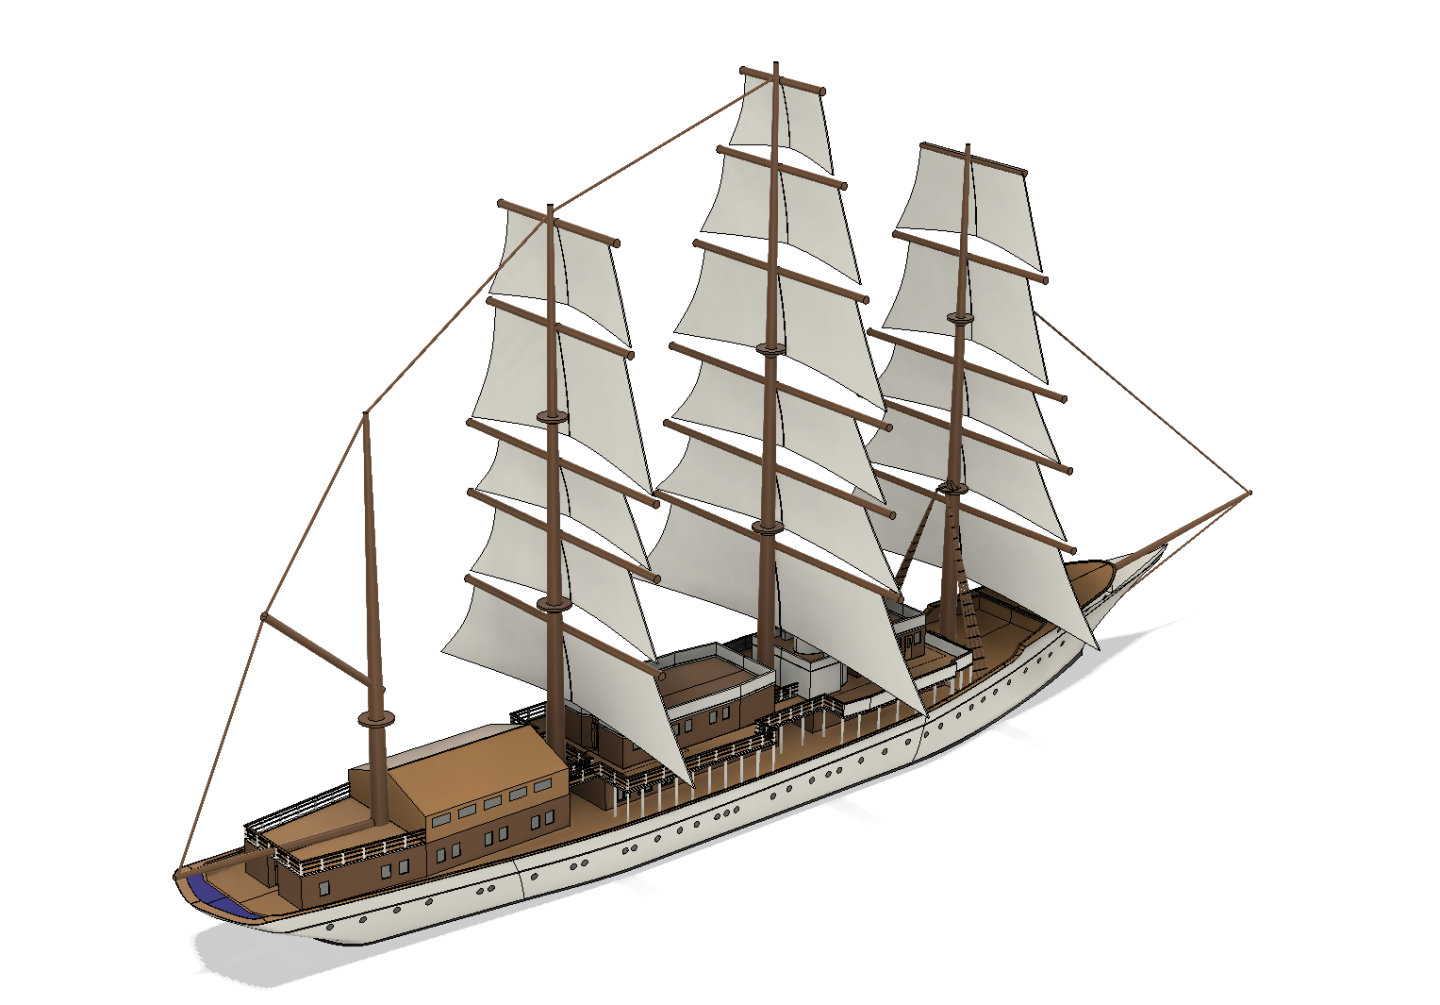
Missing sails added and individually shaped for each mast. Update - added a few more ropes


-
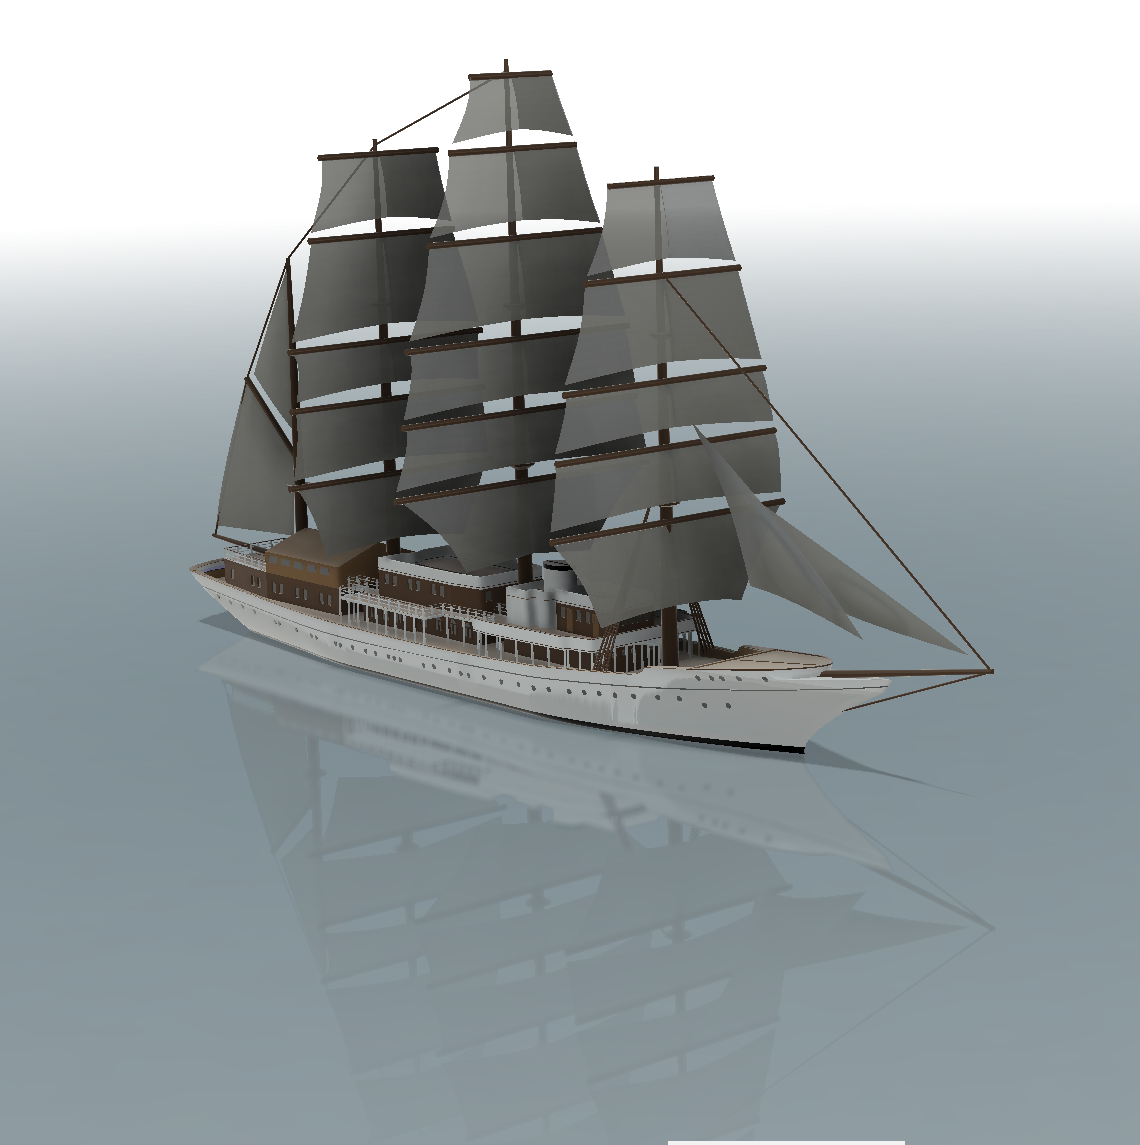
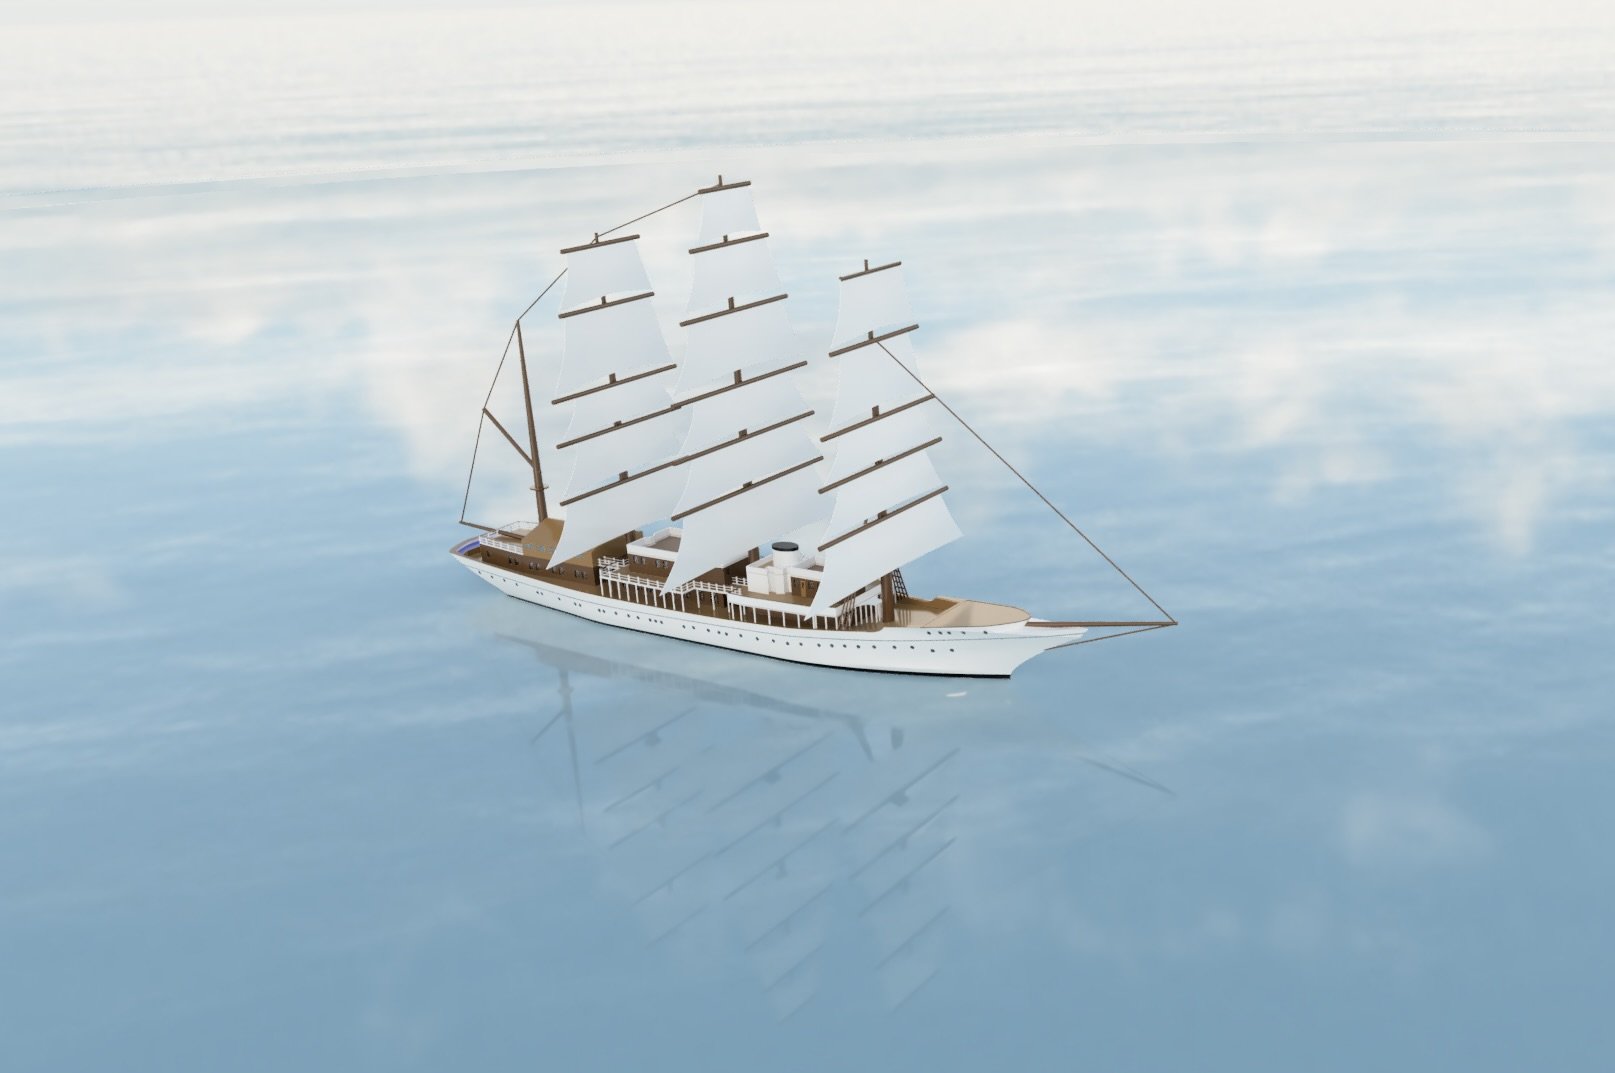
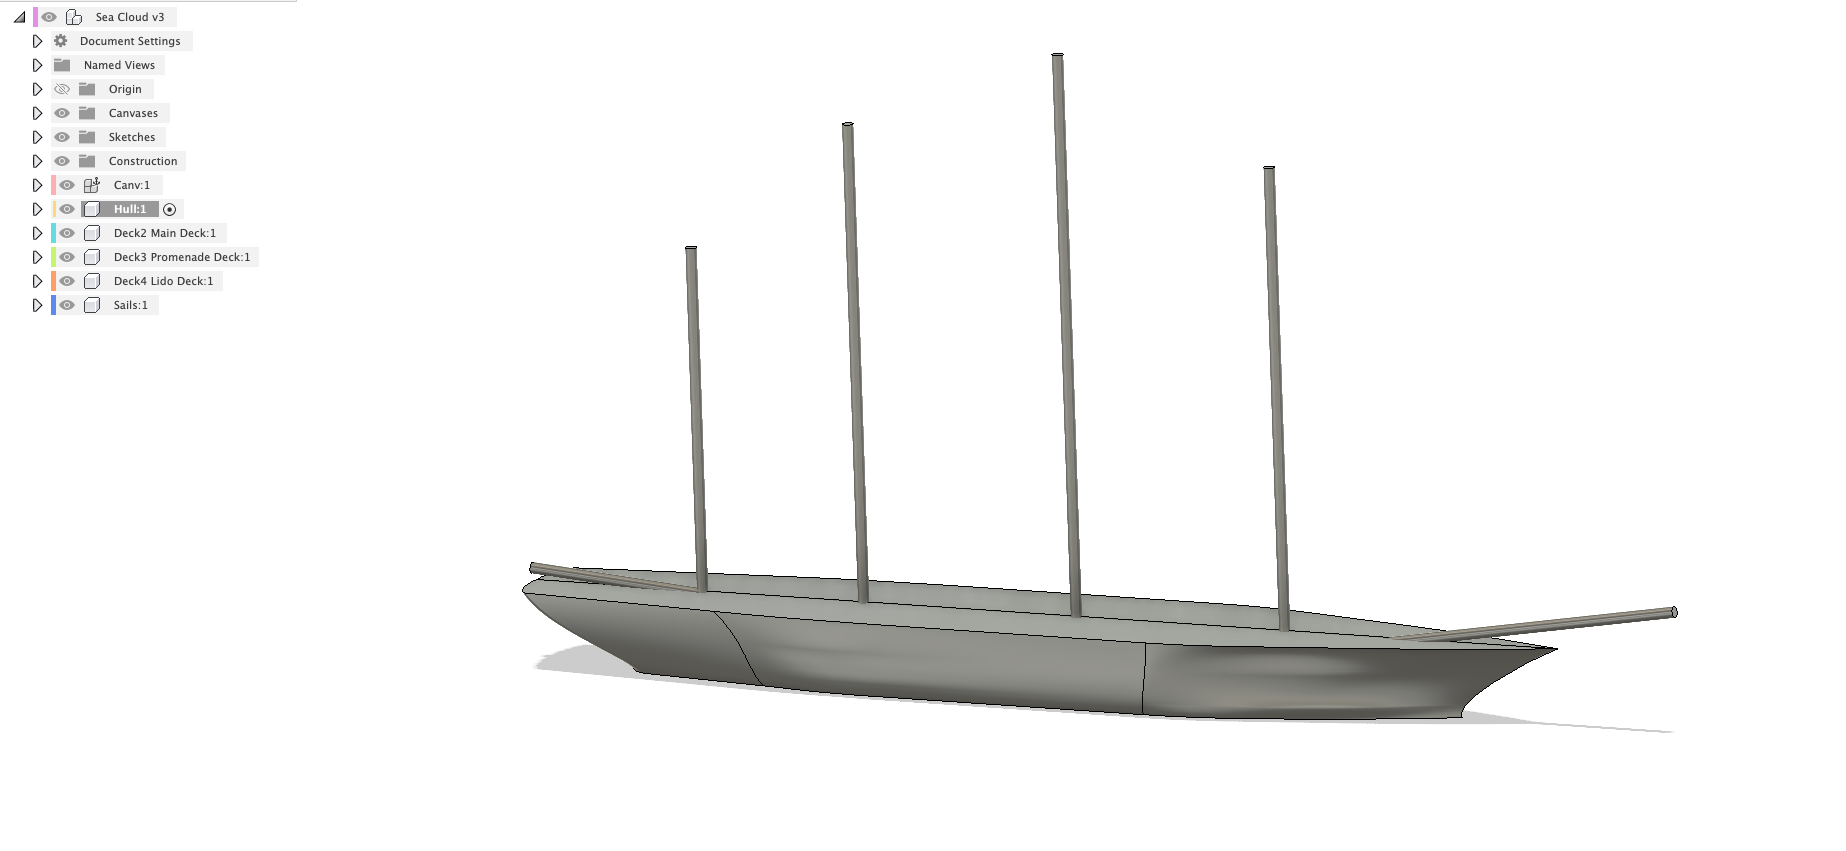
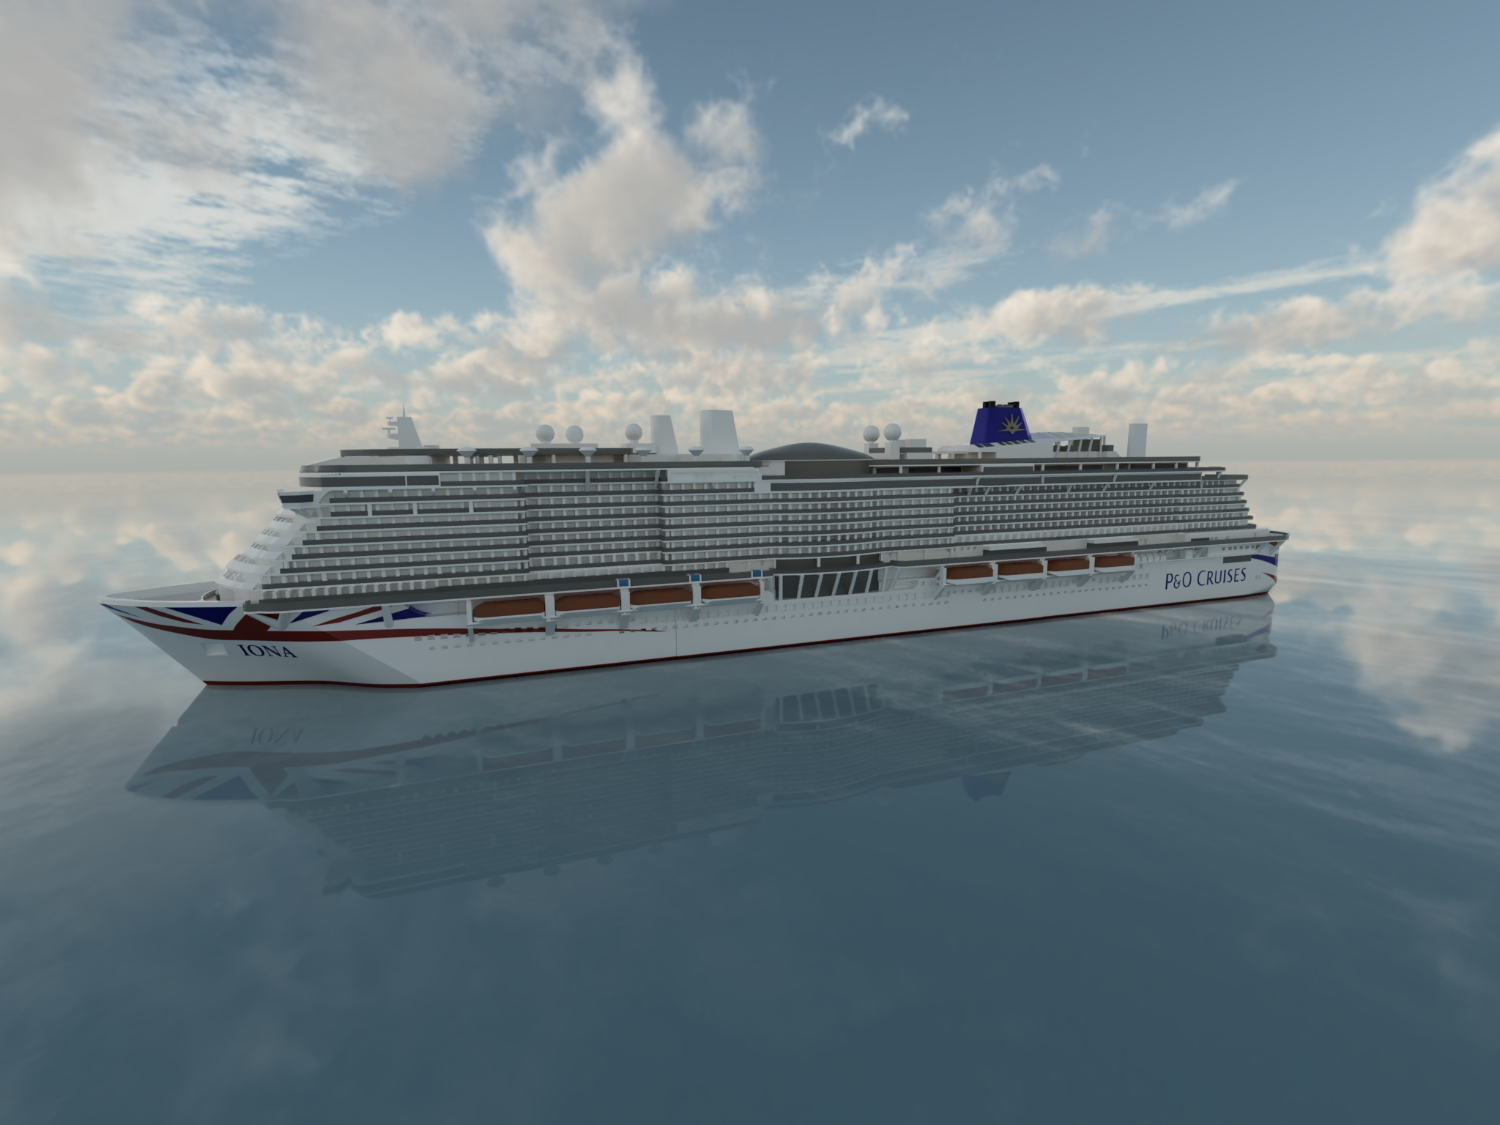
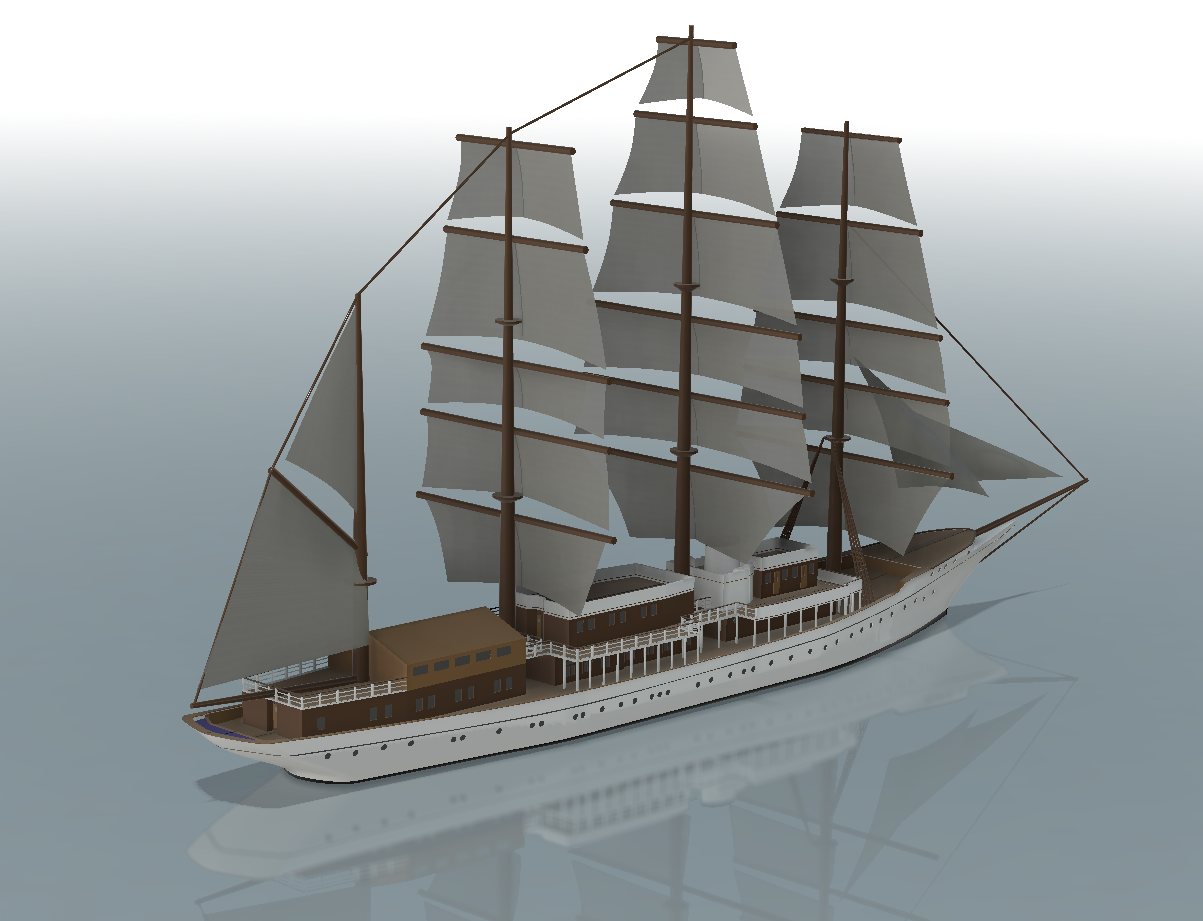
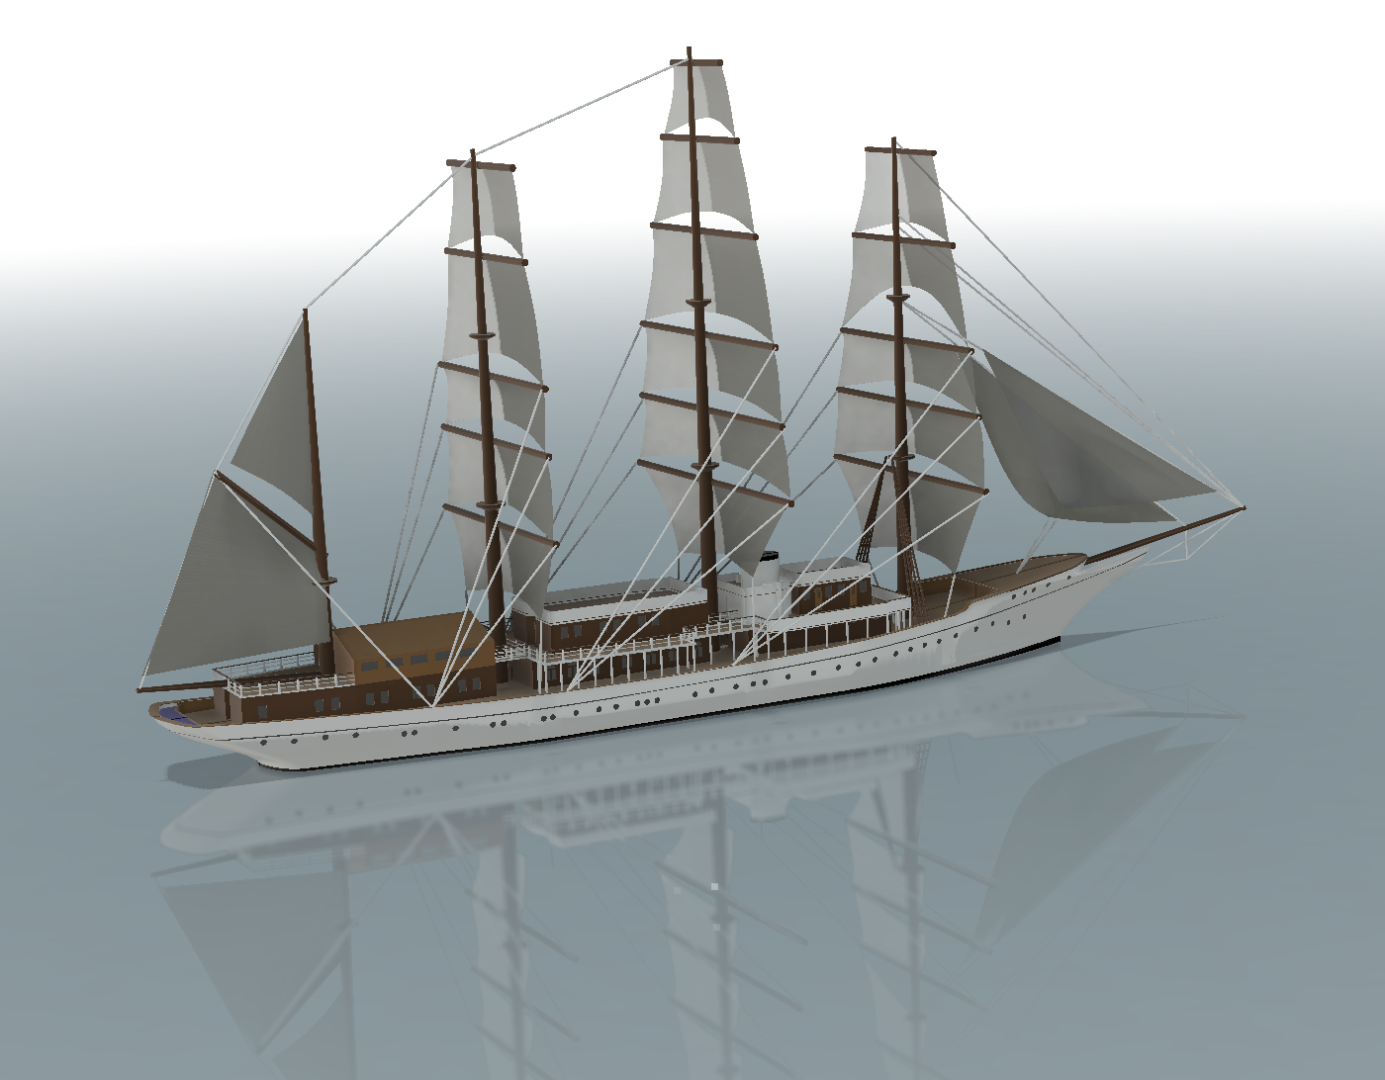
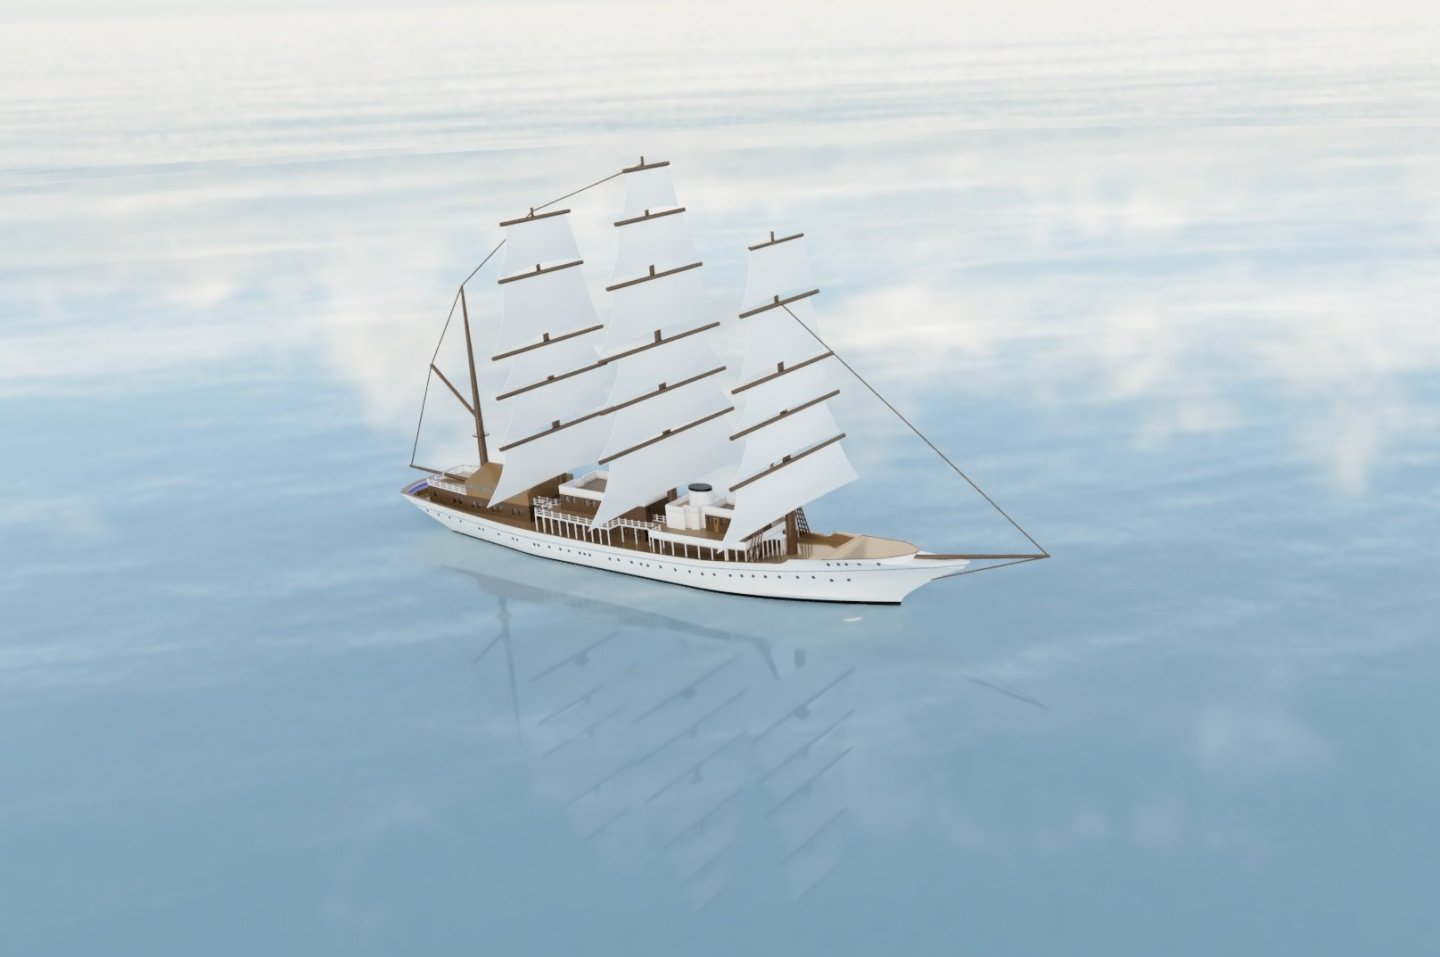
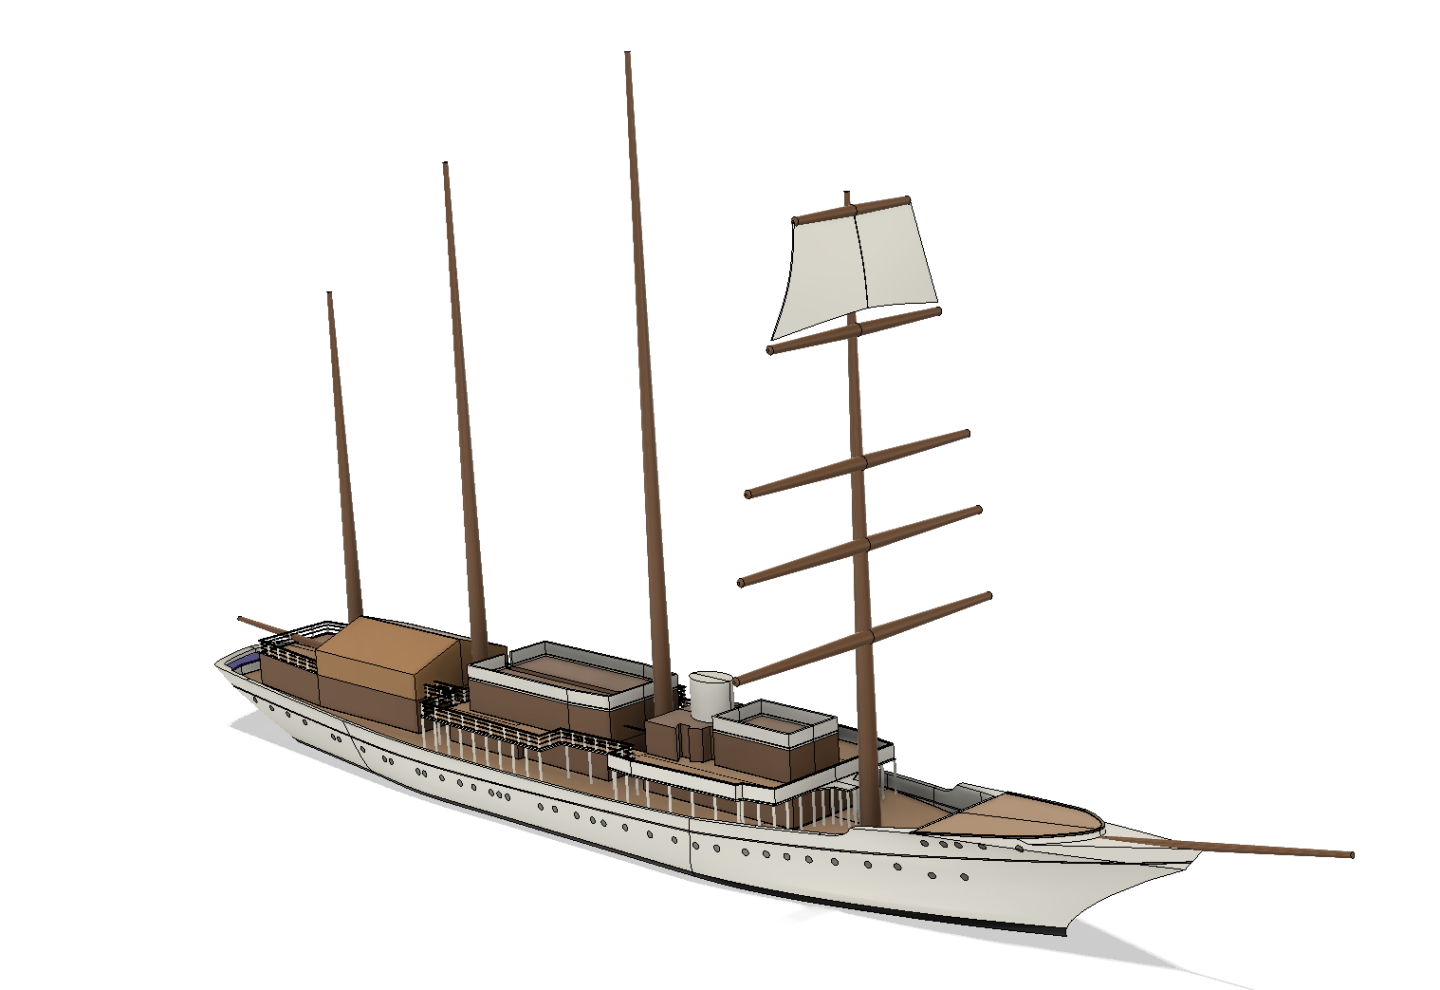
Quite good progress today on 3d model. Need to do some more work on the sails and add more details - but might try some test prints before going too much farther. Some comparison shots Rendered version With some other much larger cruise ships


-
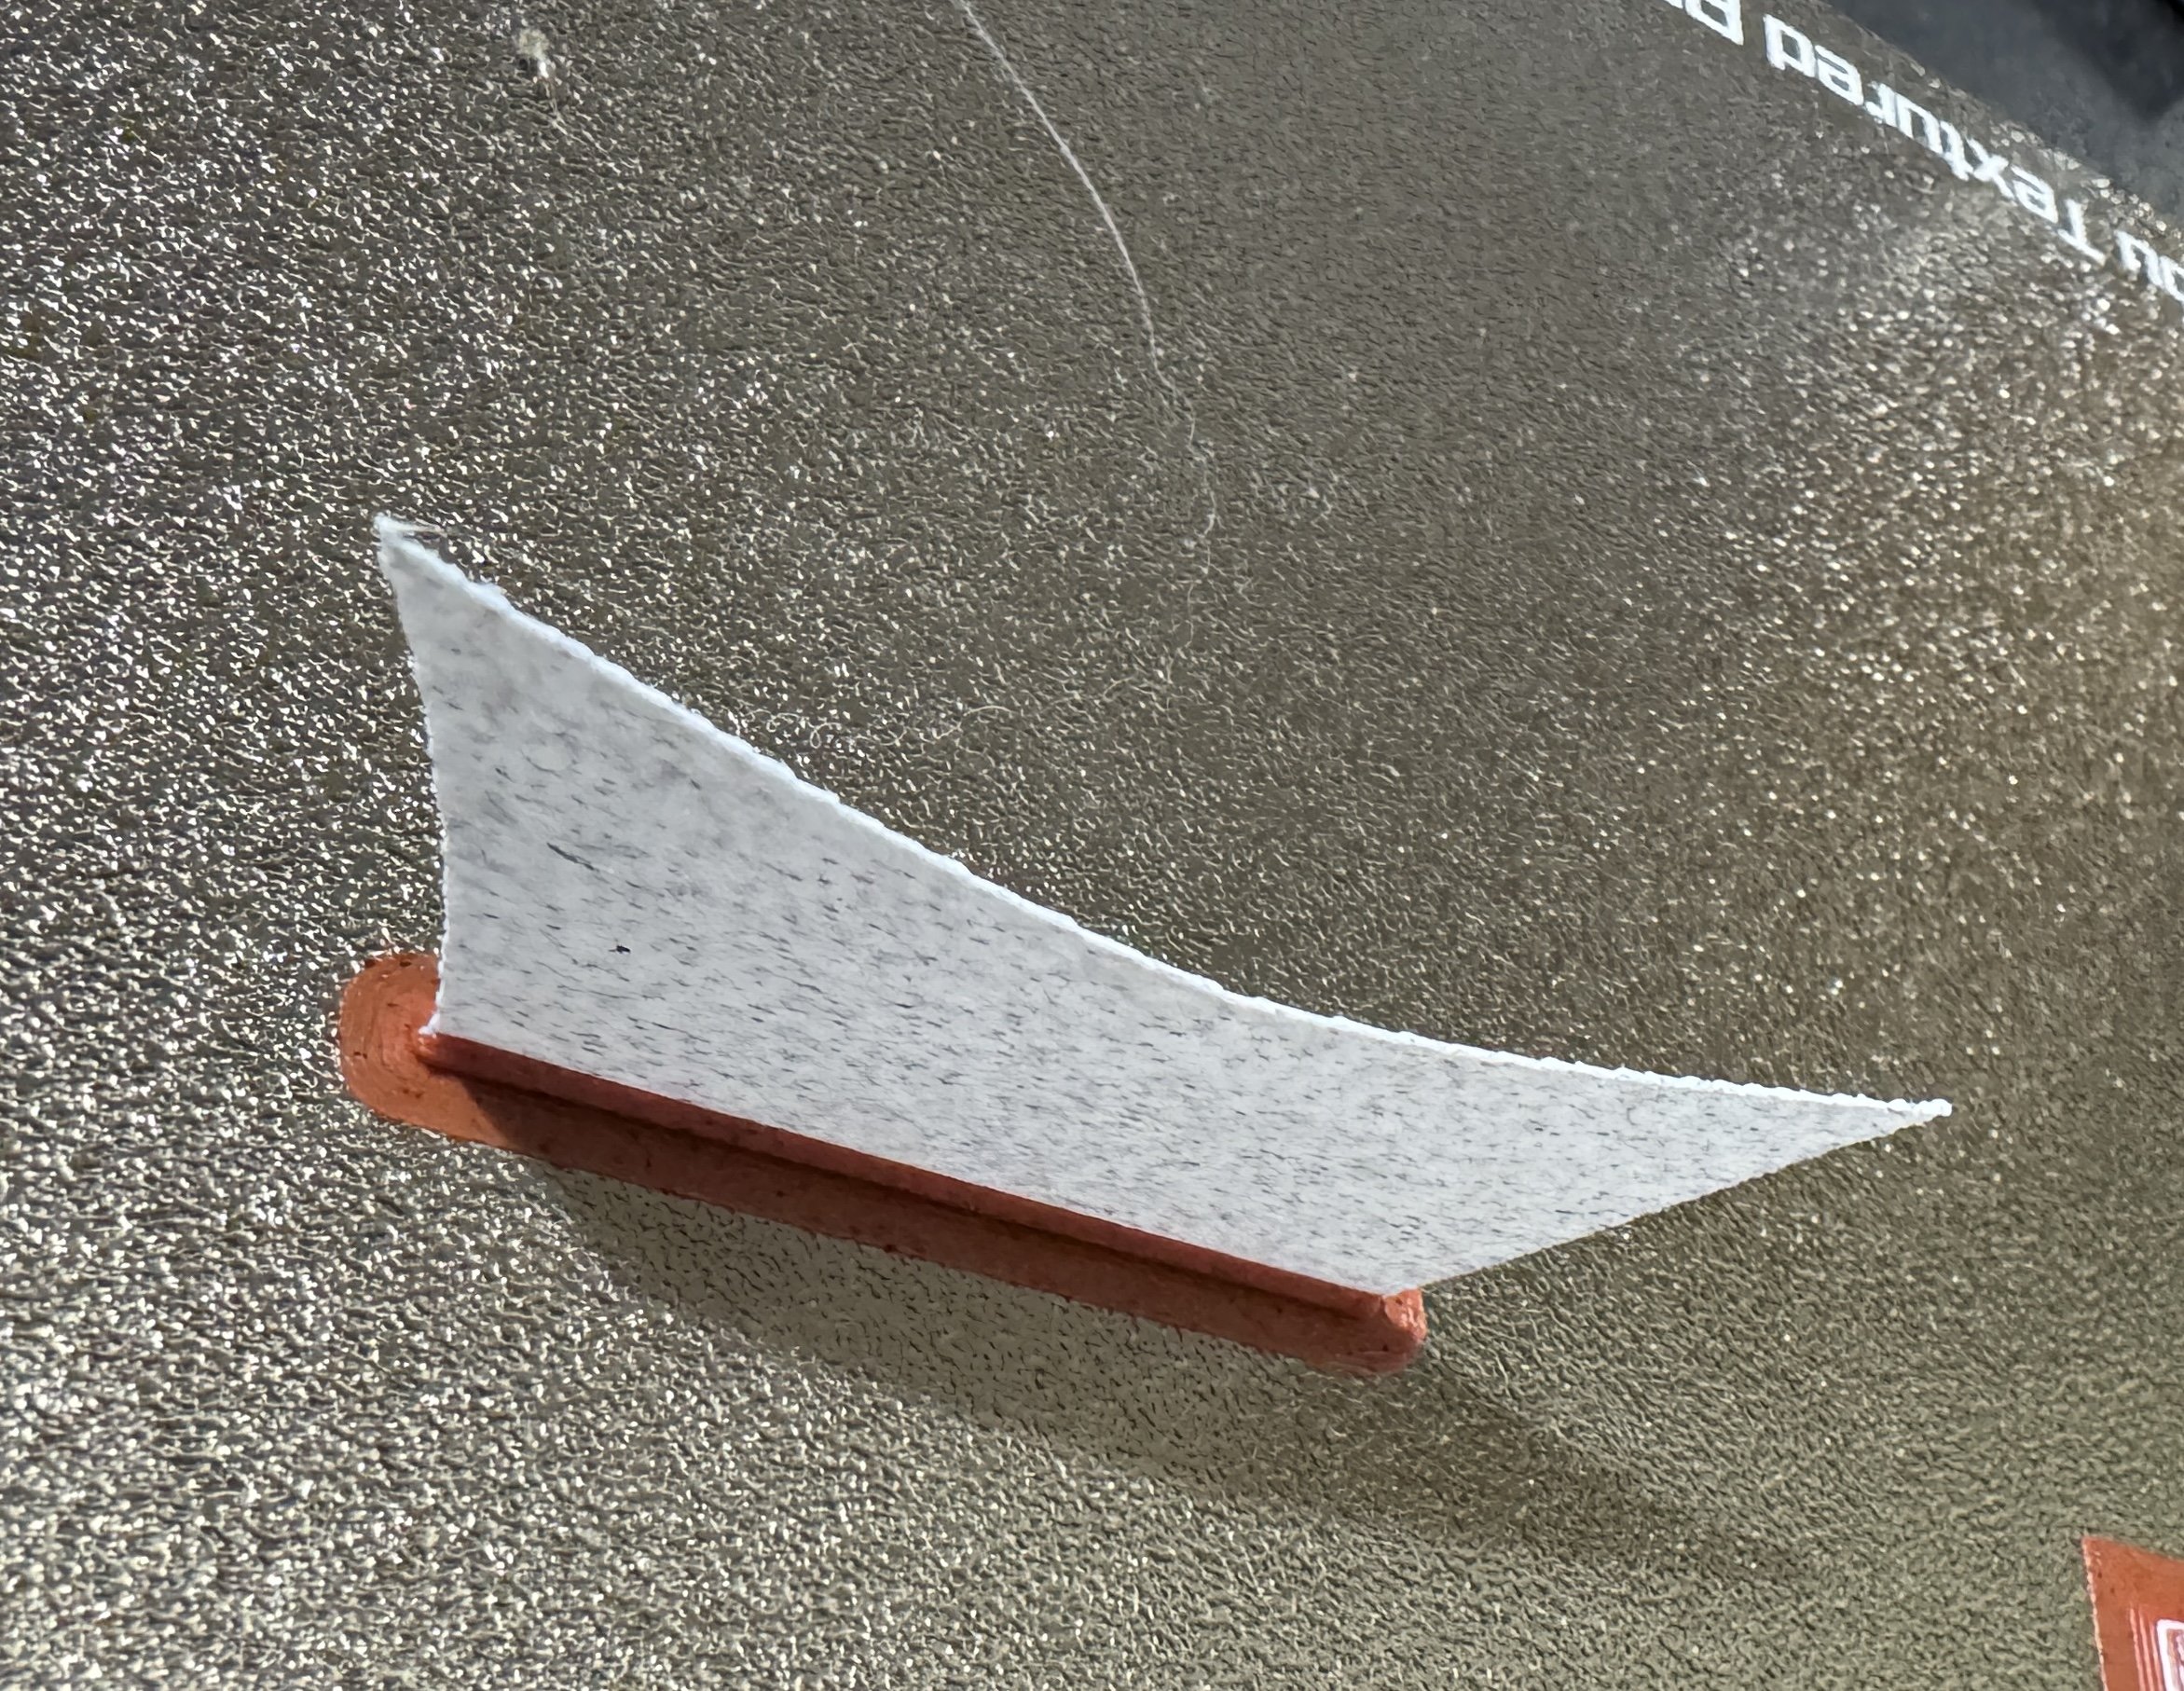
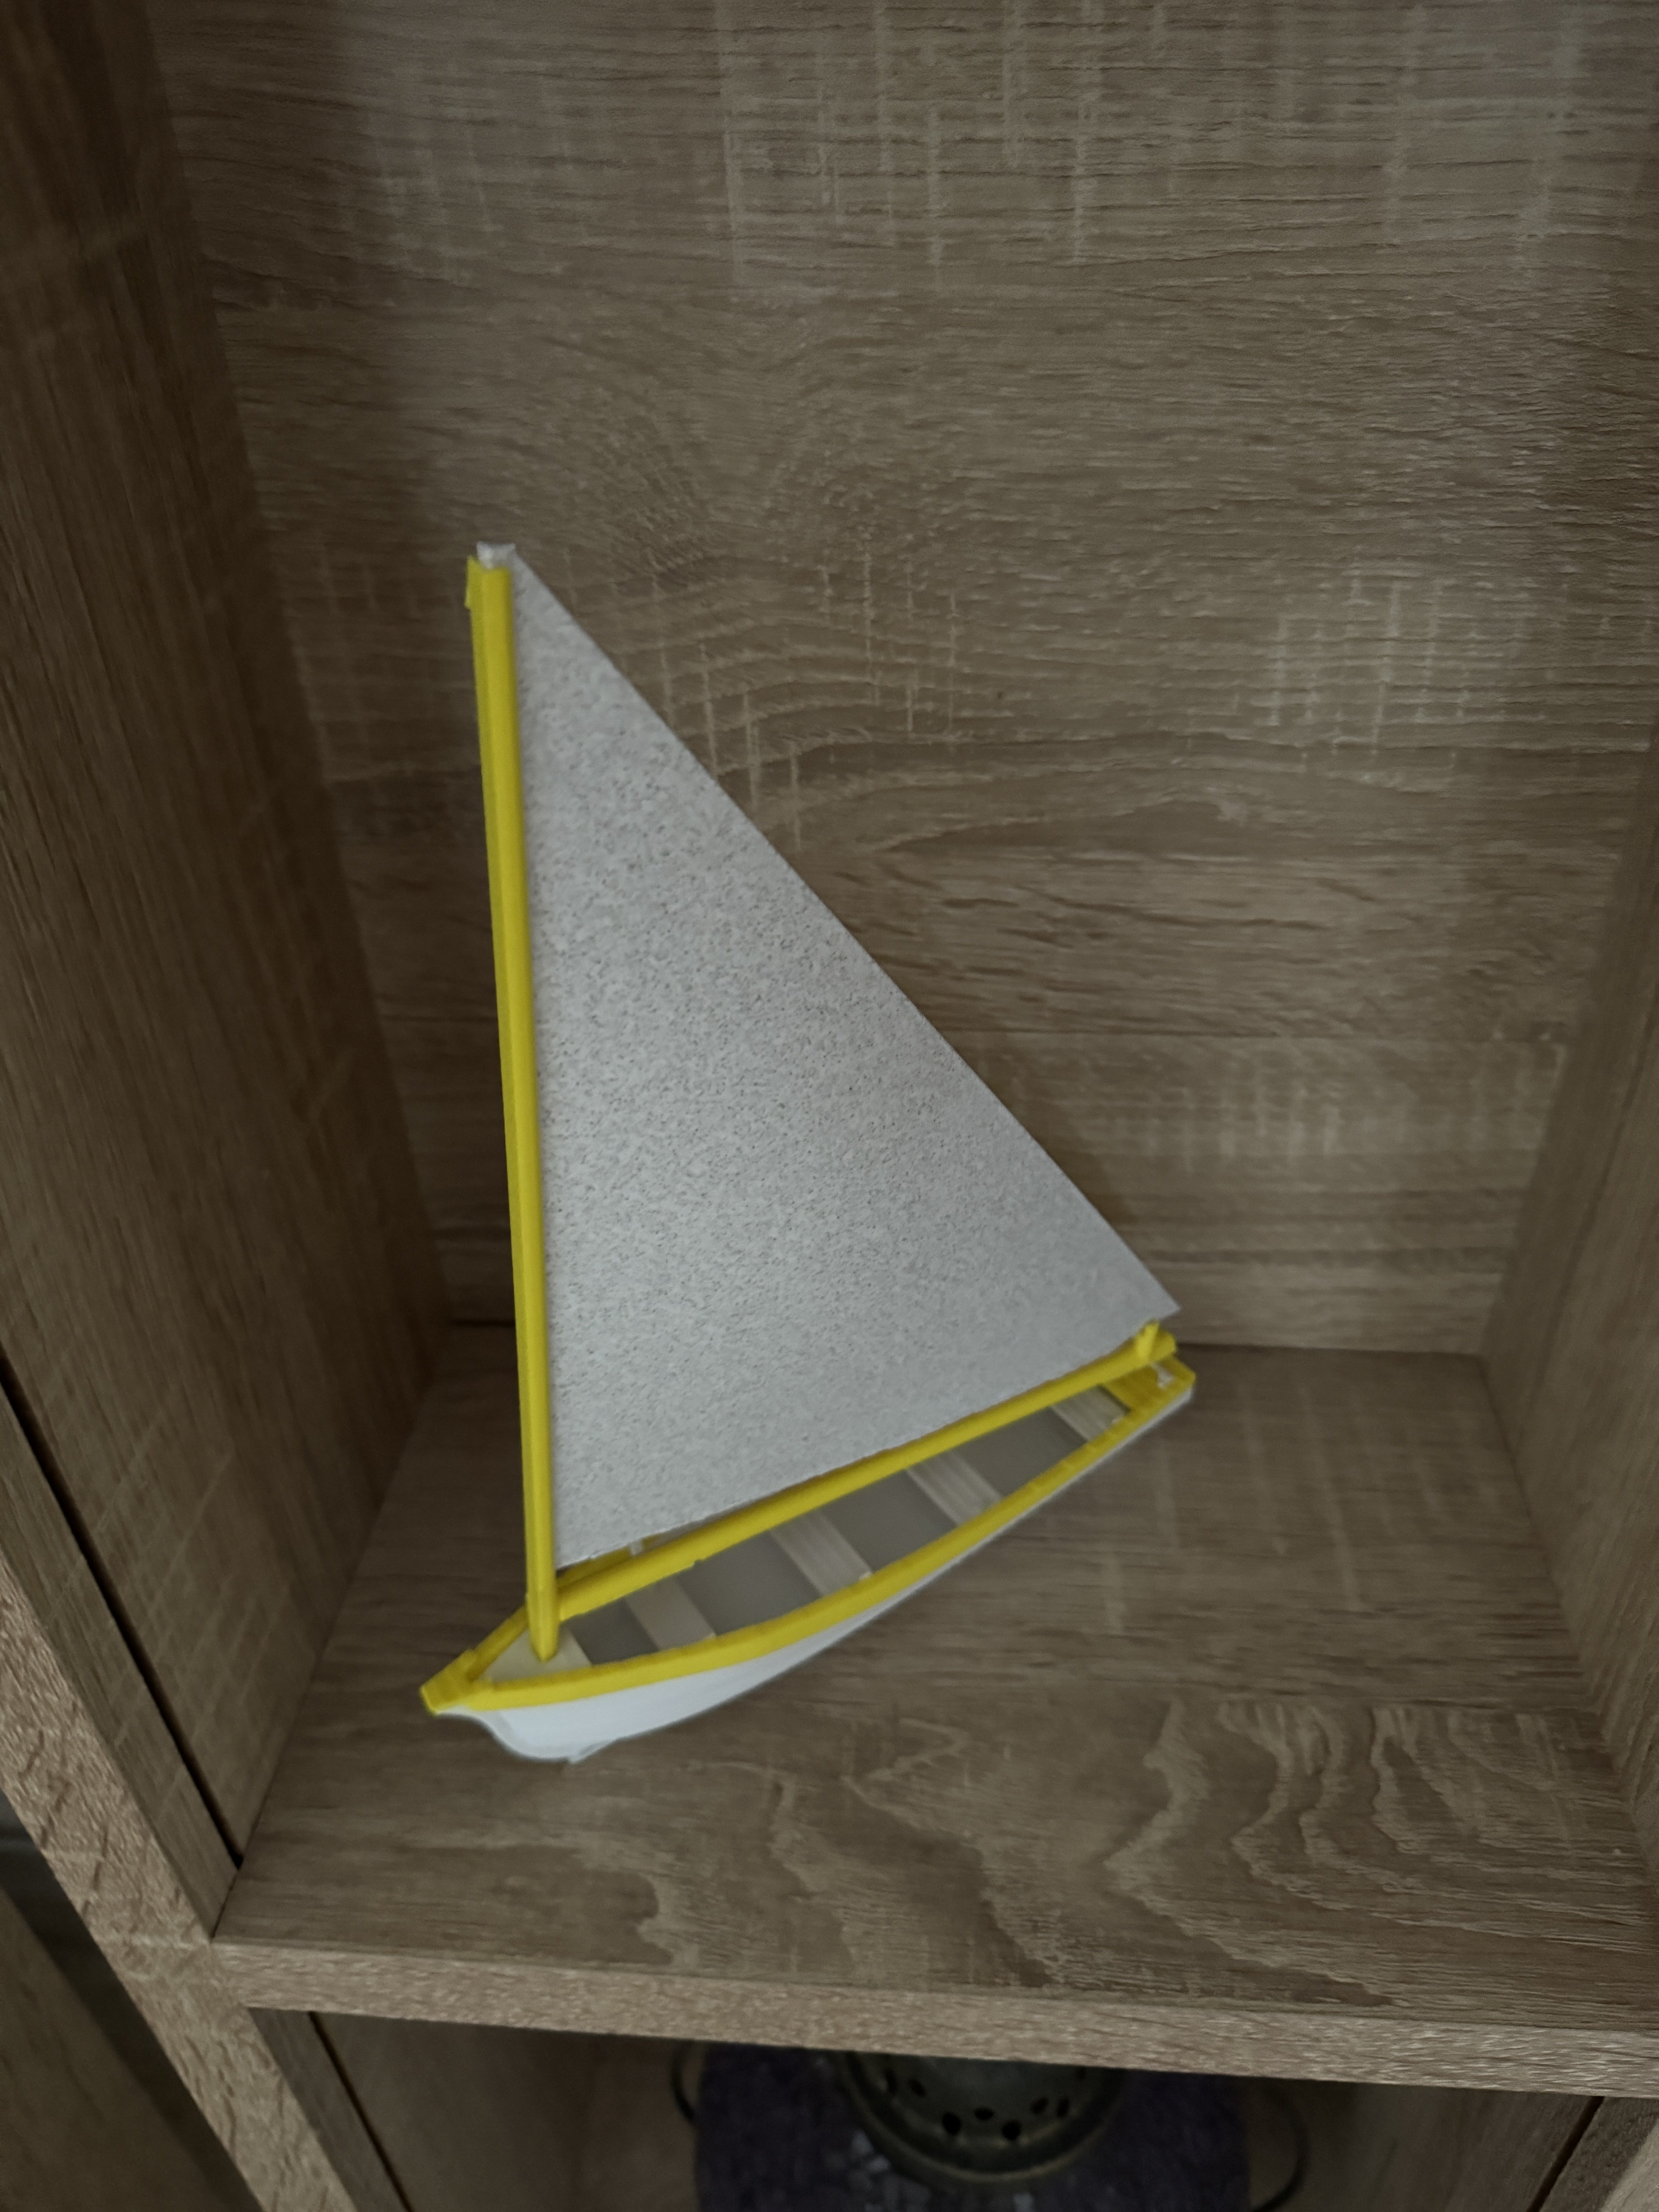
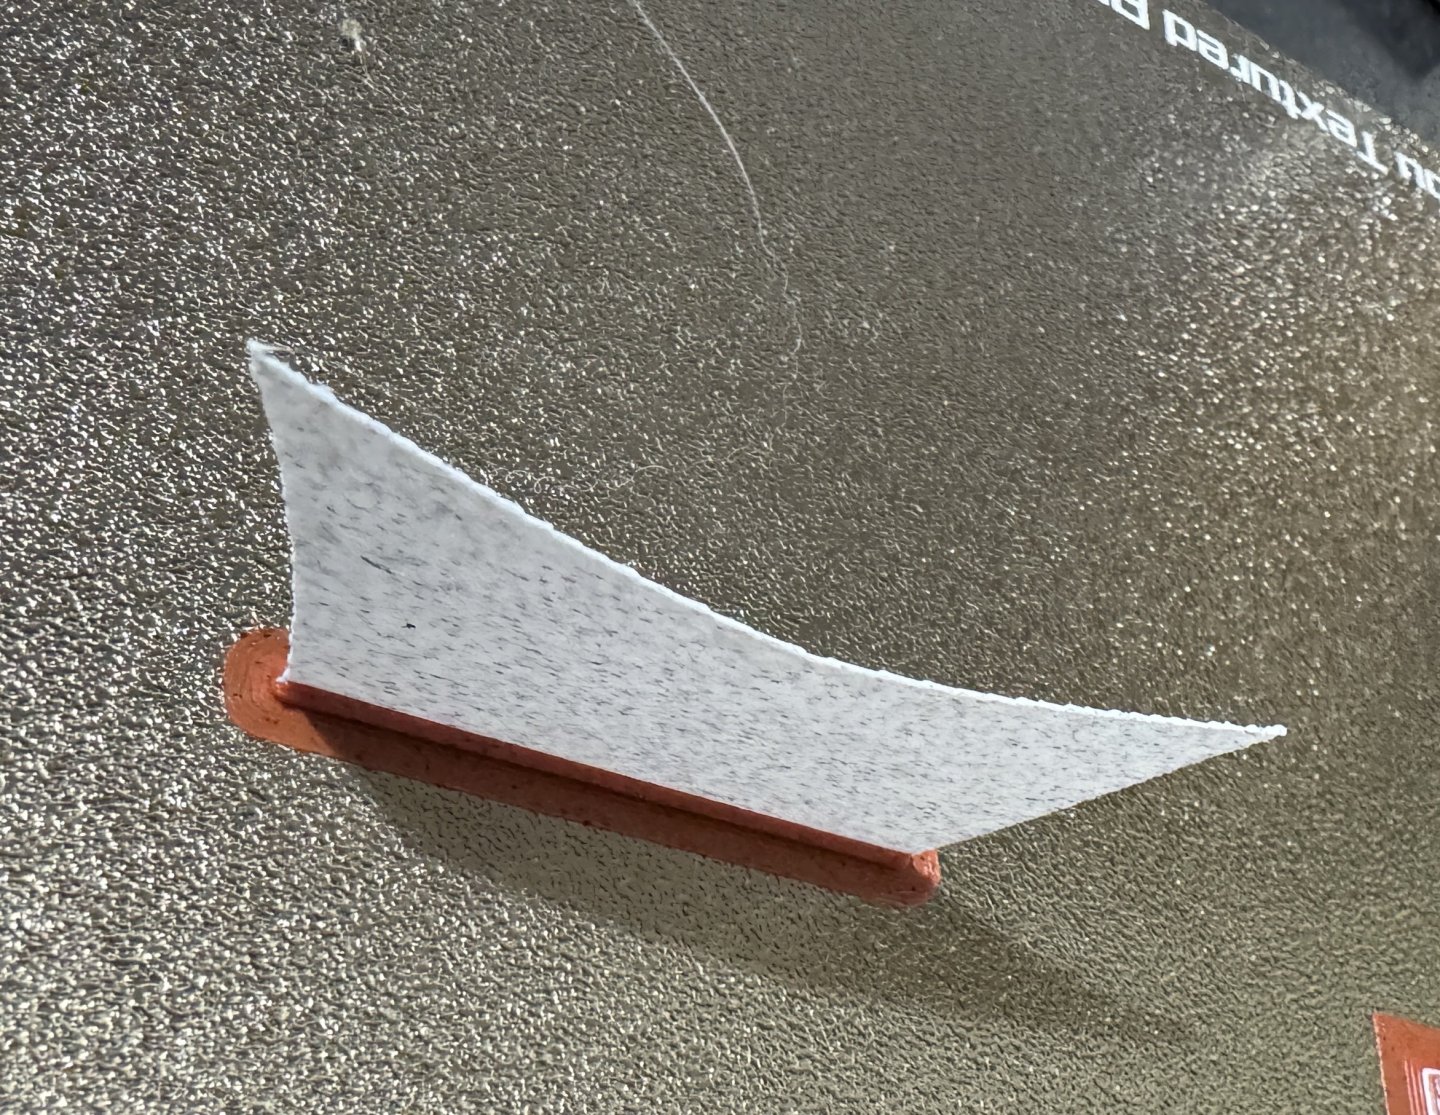
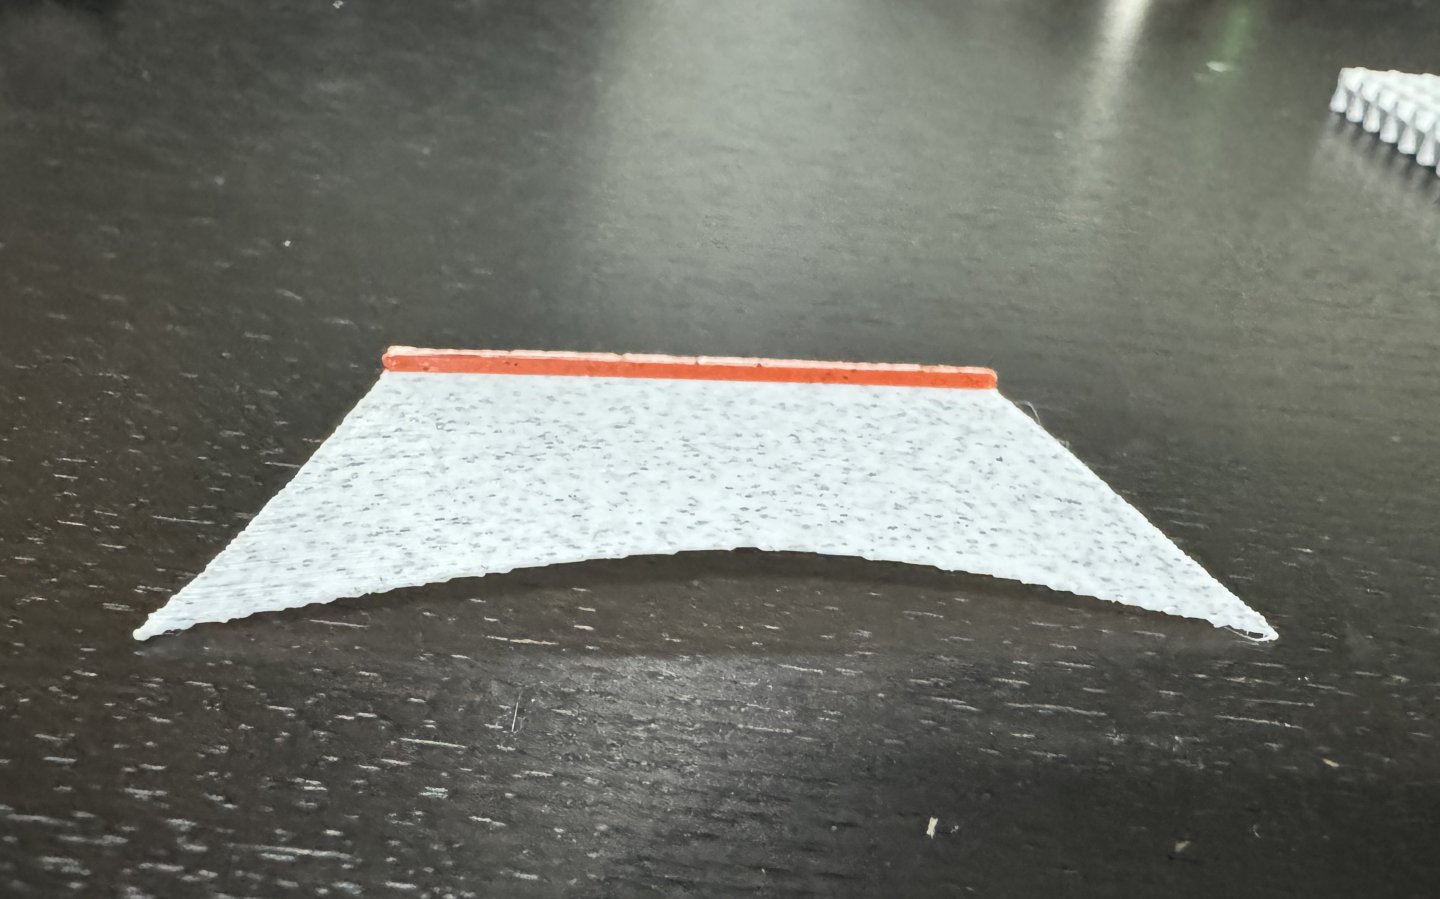
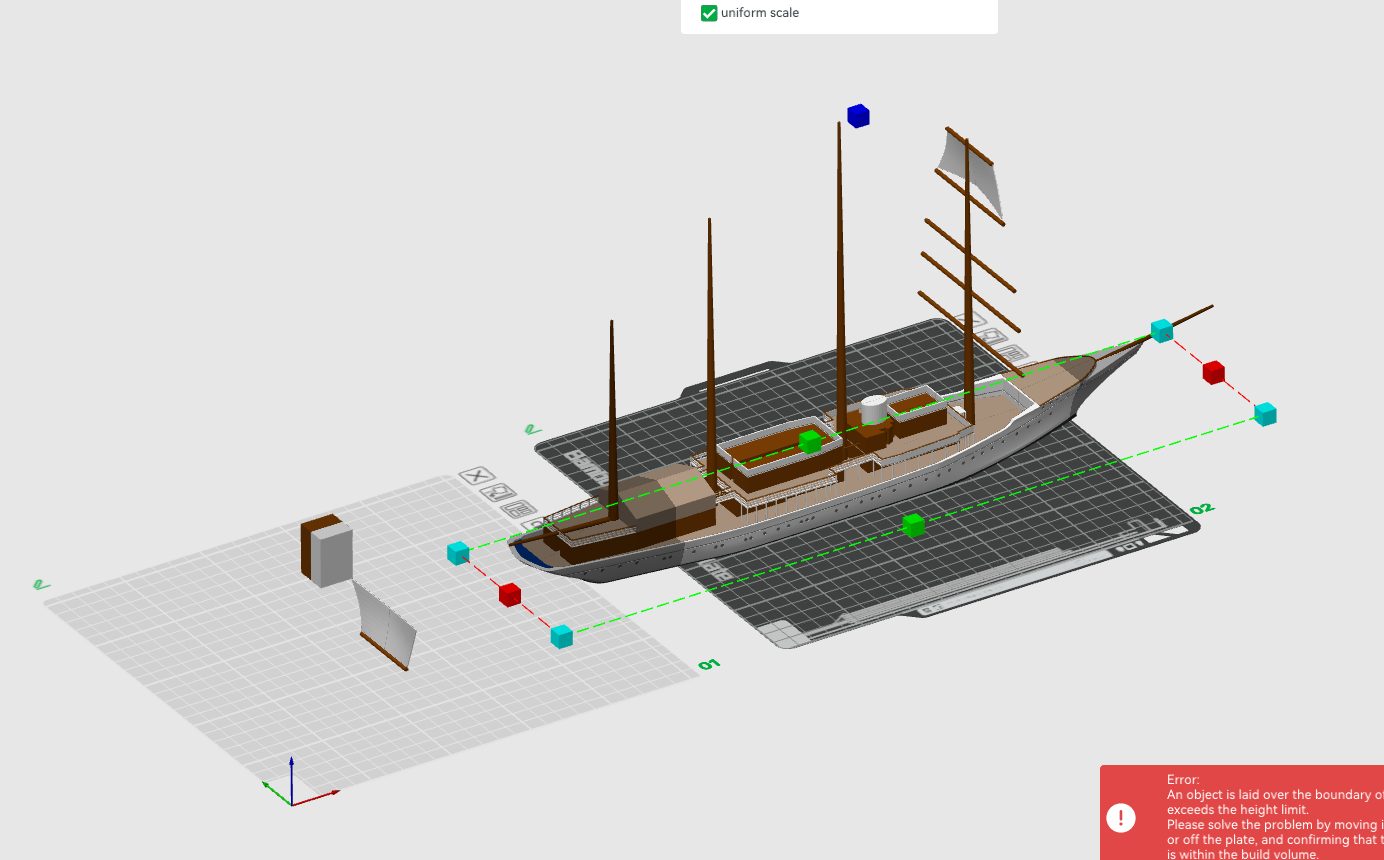
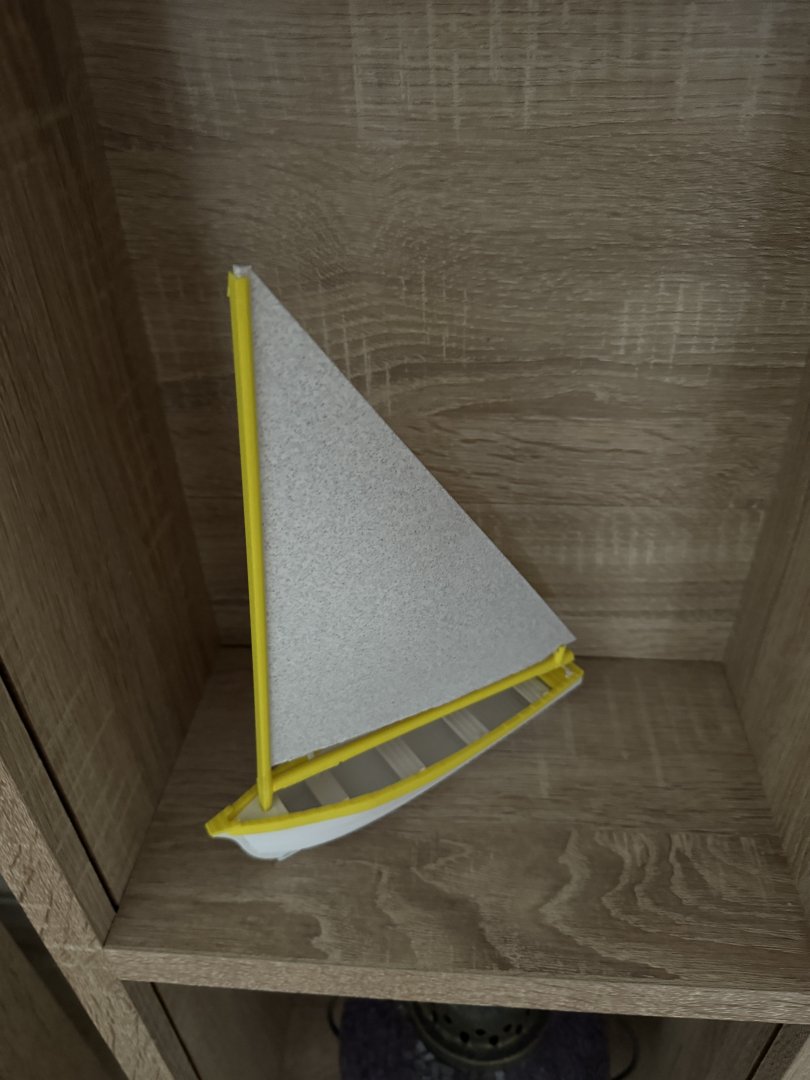
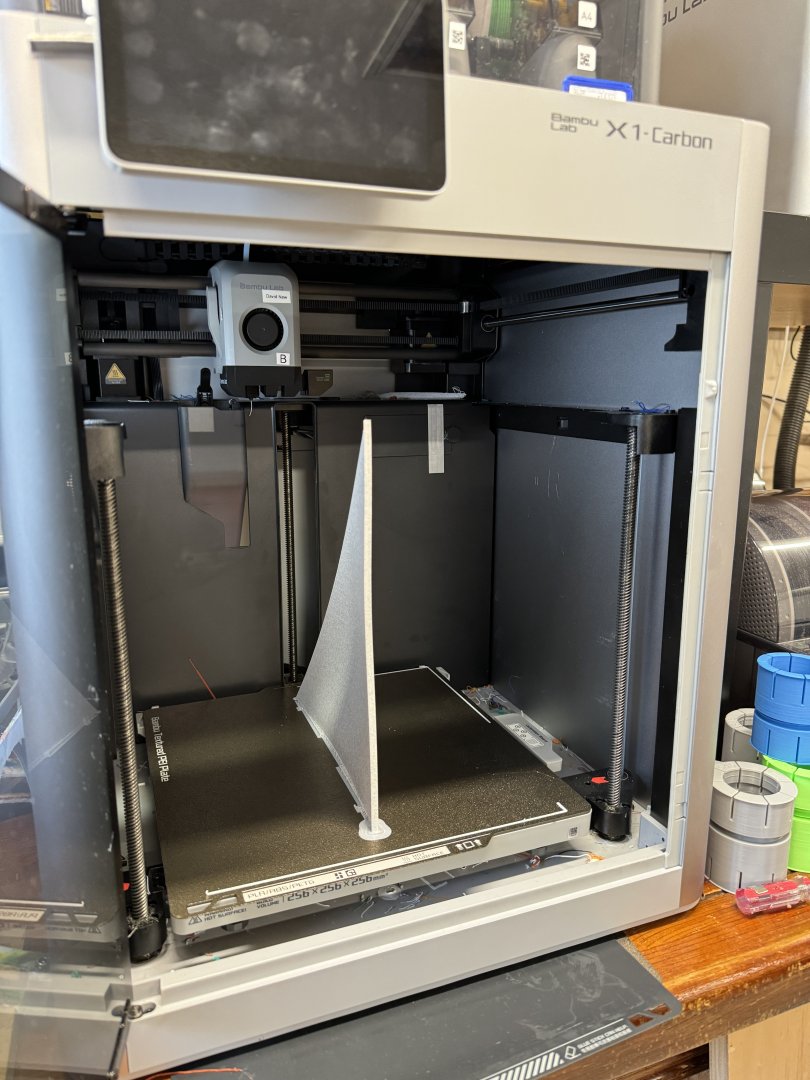
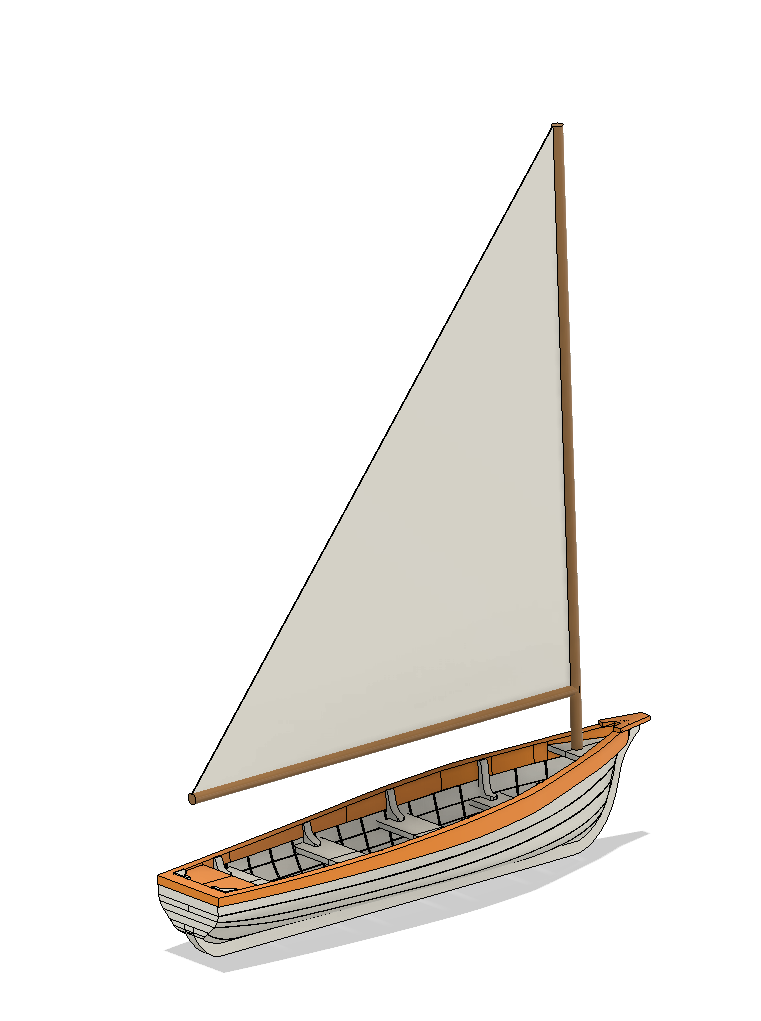
Tried a test print of the little sail at the top of the front mast to see if it would be practical at 1:250 scale. Came out pretty well. Illustration of the size of the ship at 1:250 scale compared to build plate - so should only need to split it once in the middle. Lots more detail to add - especially the ropes, windows, doors and deck furniture.
-
Design starting to come along nicely Added some more detail


-
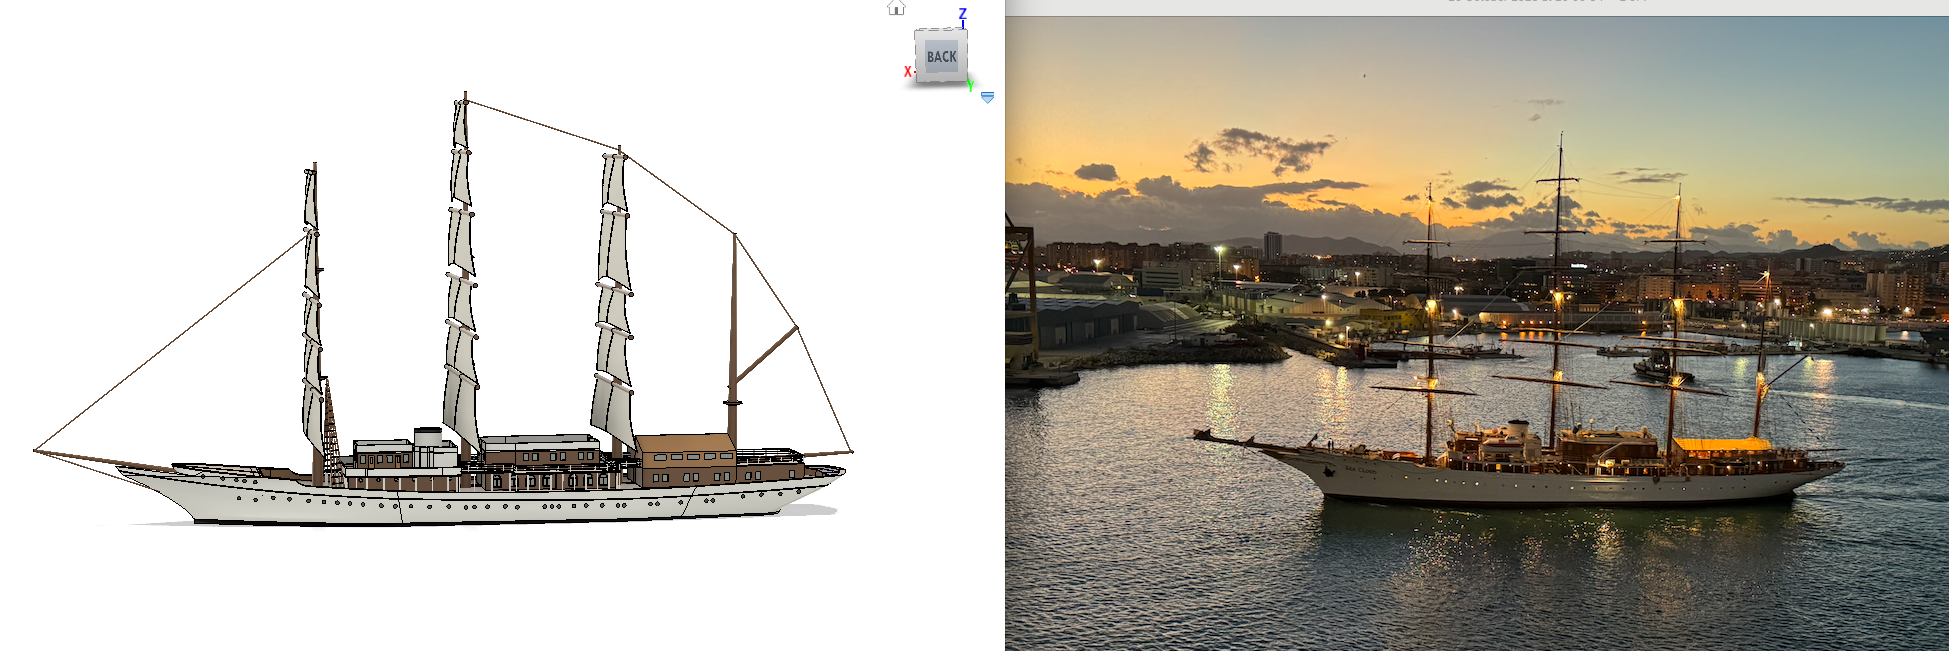
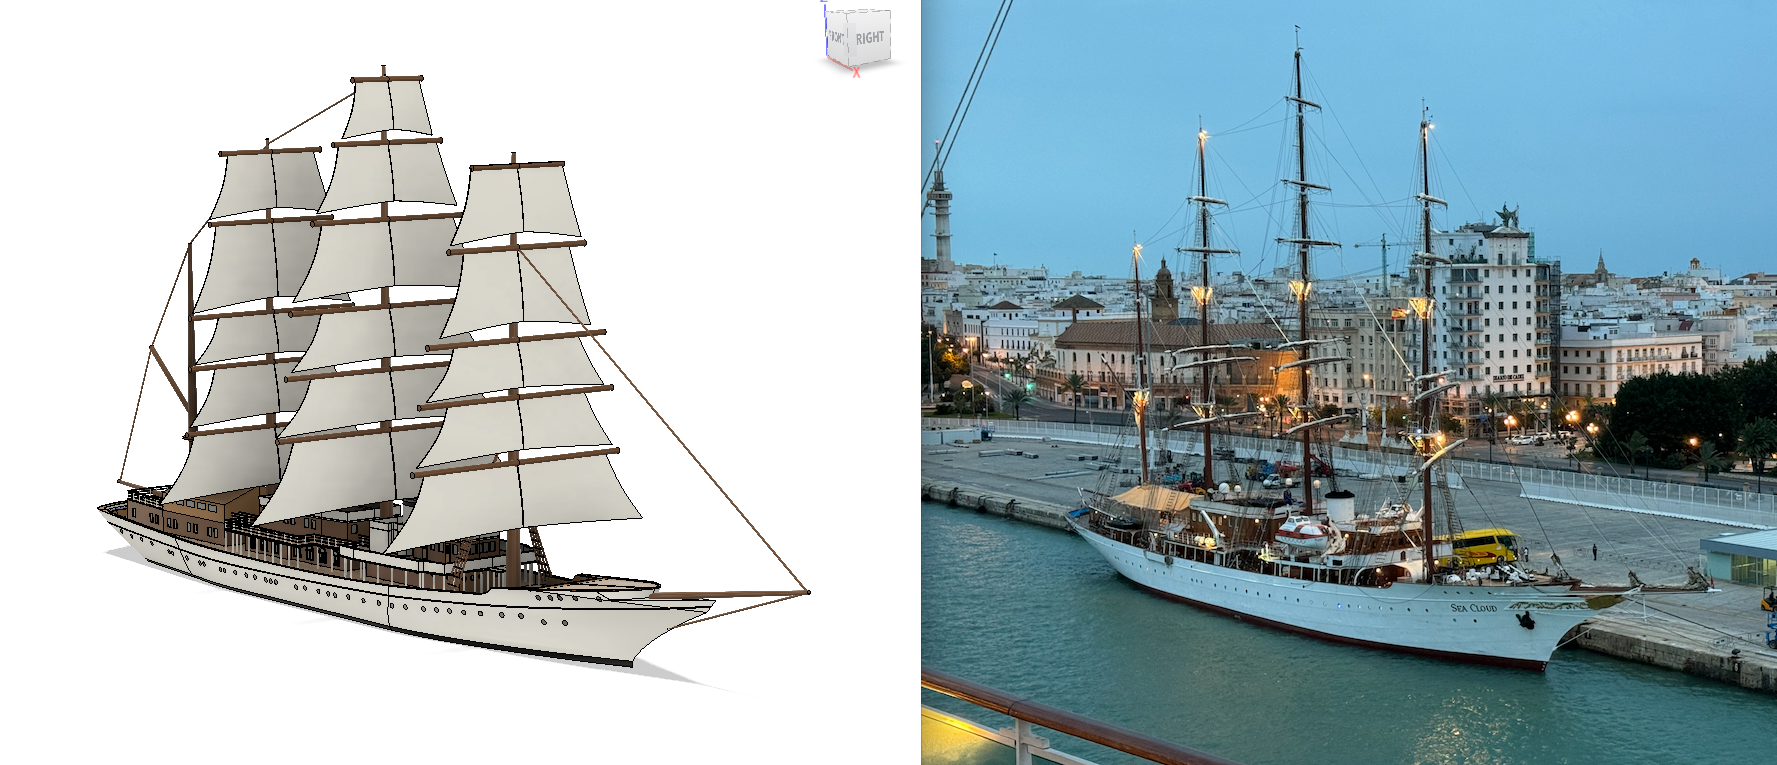
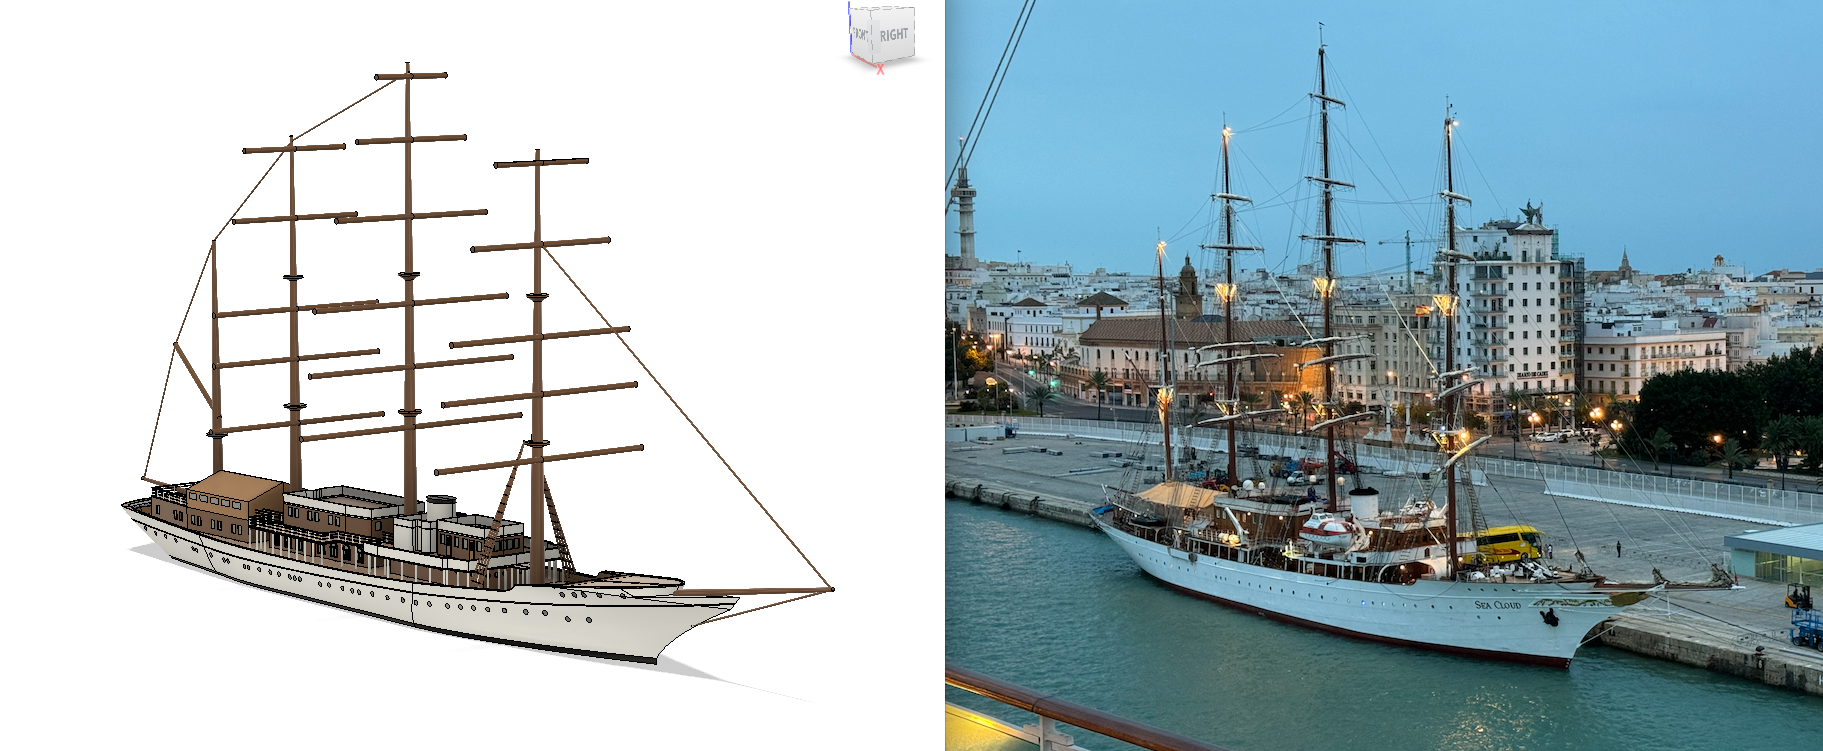
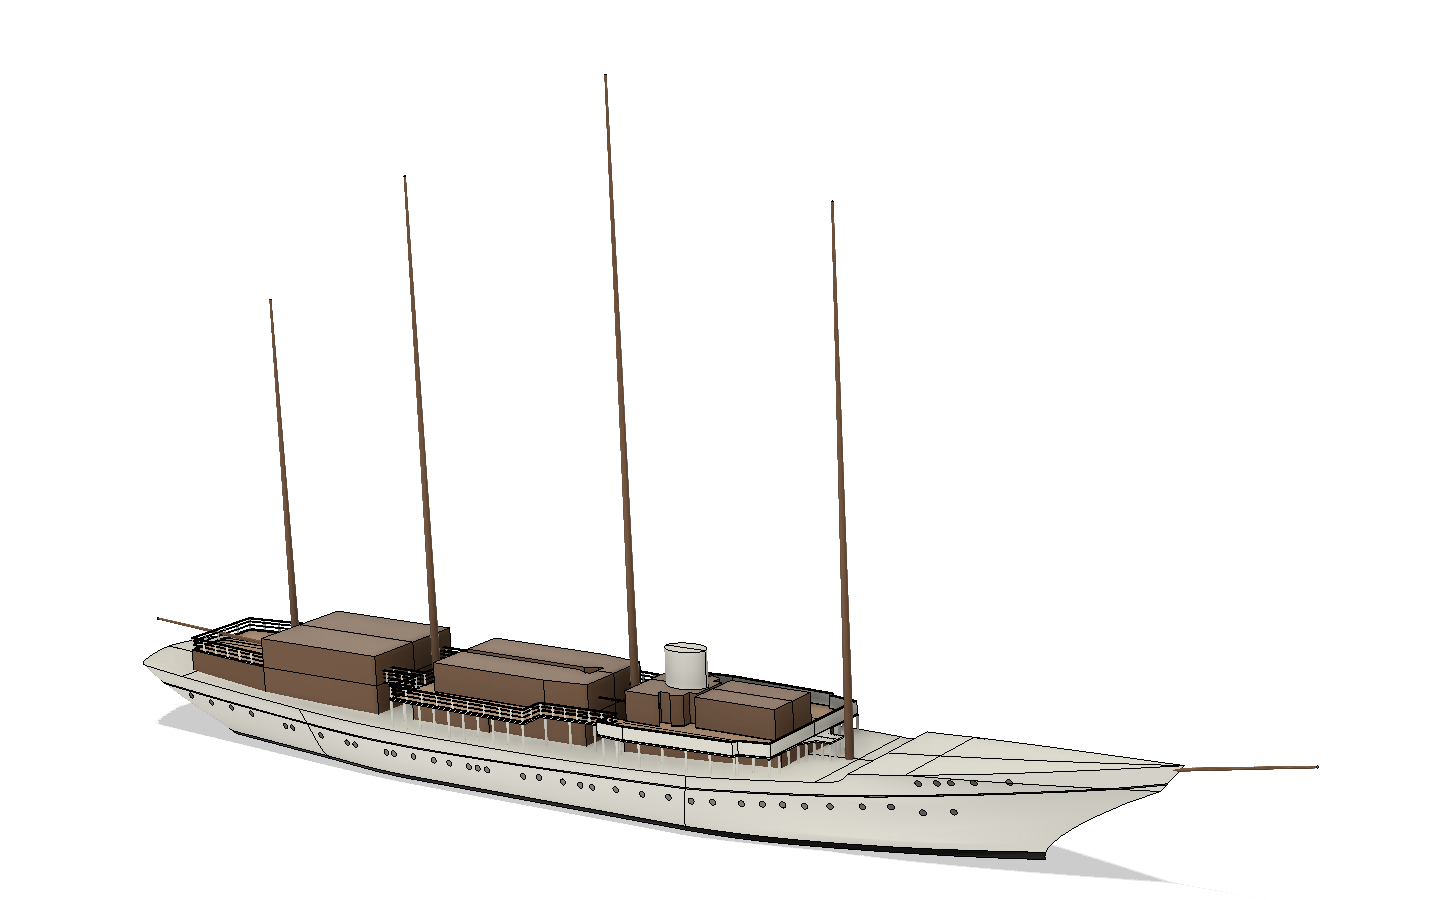
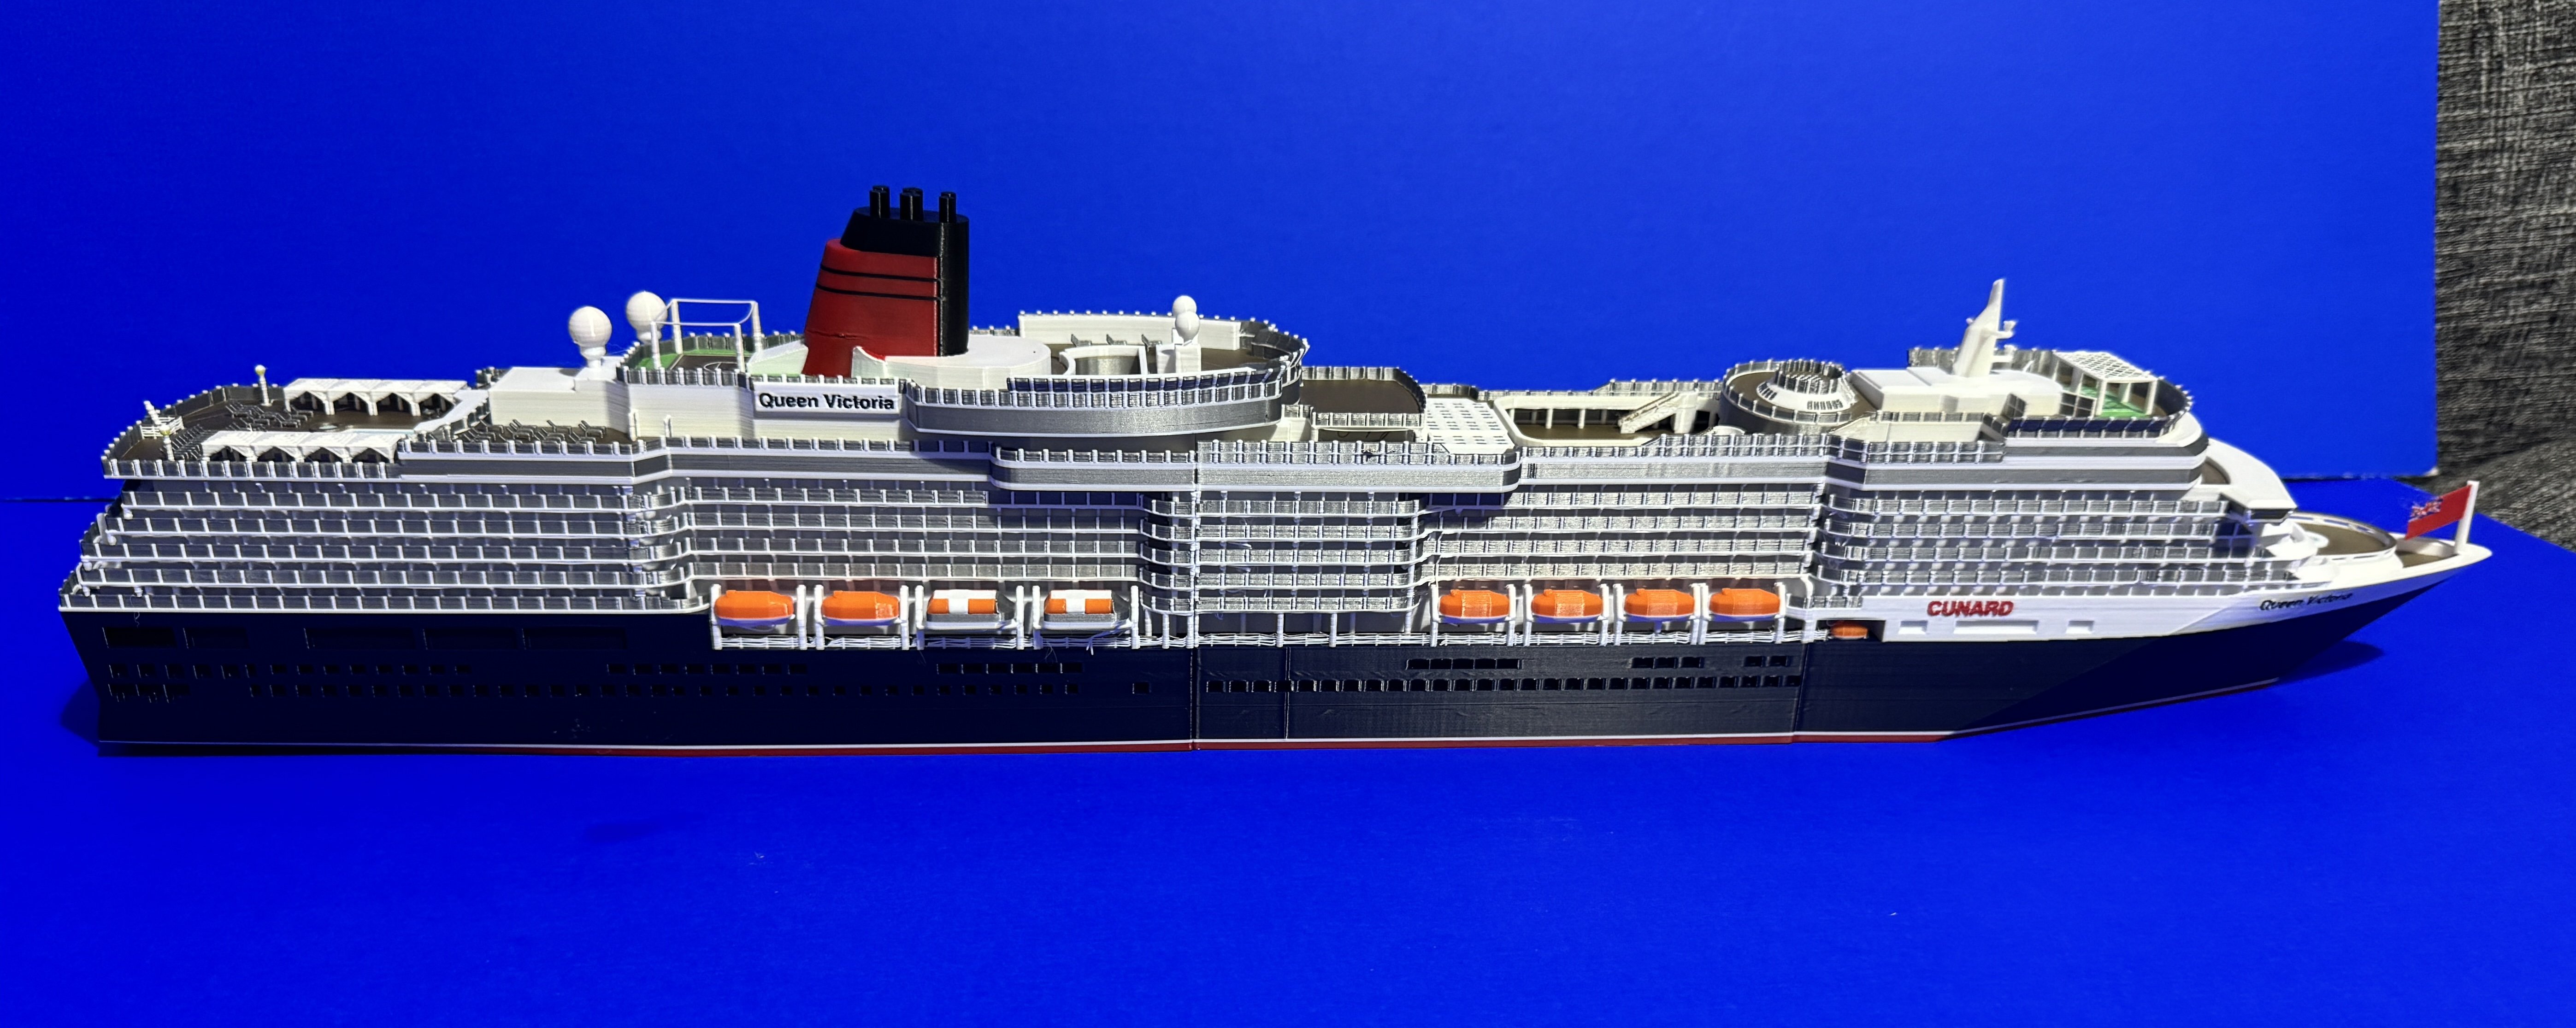
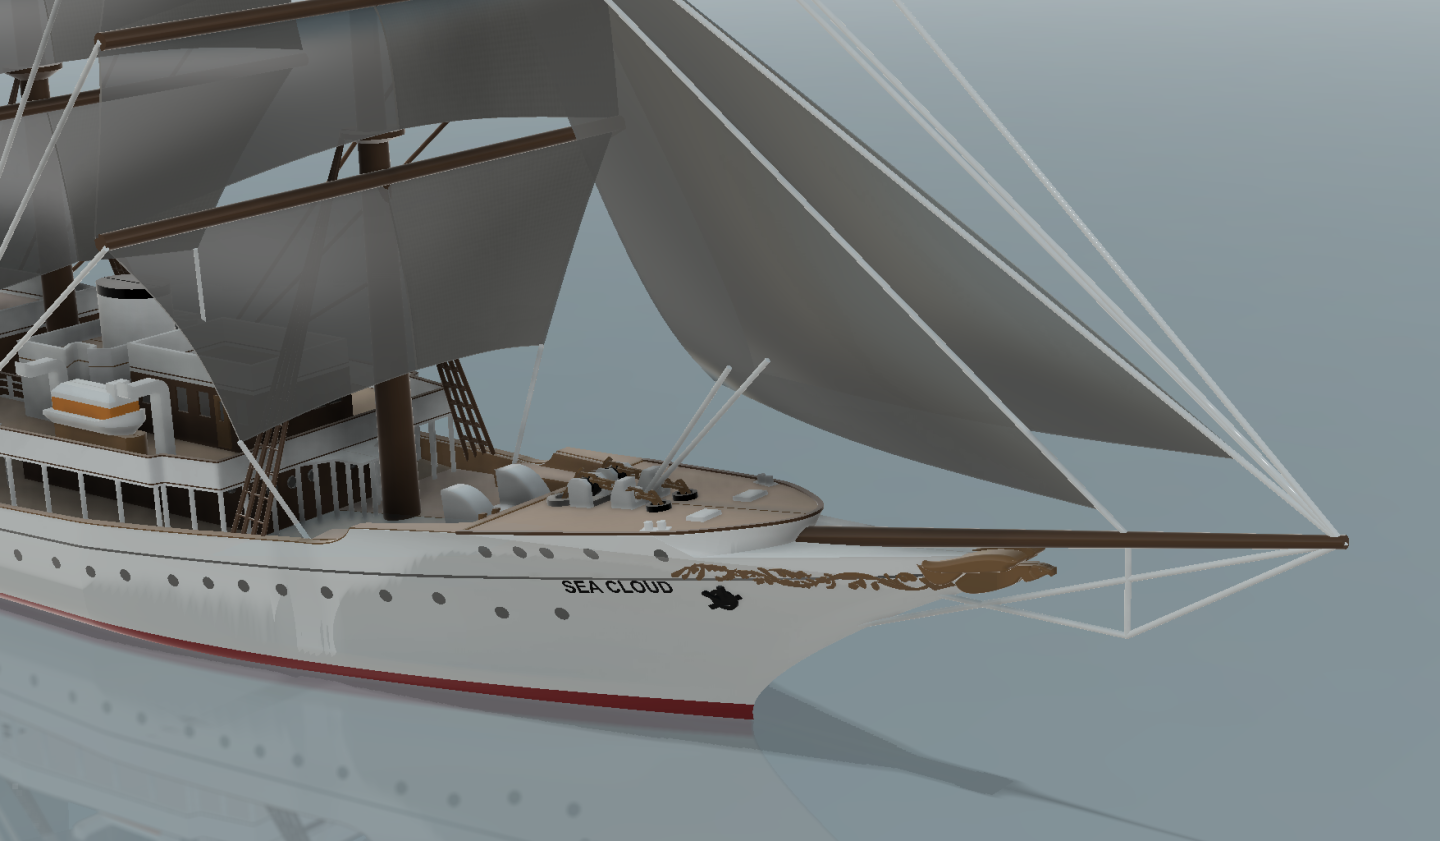
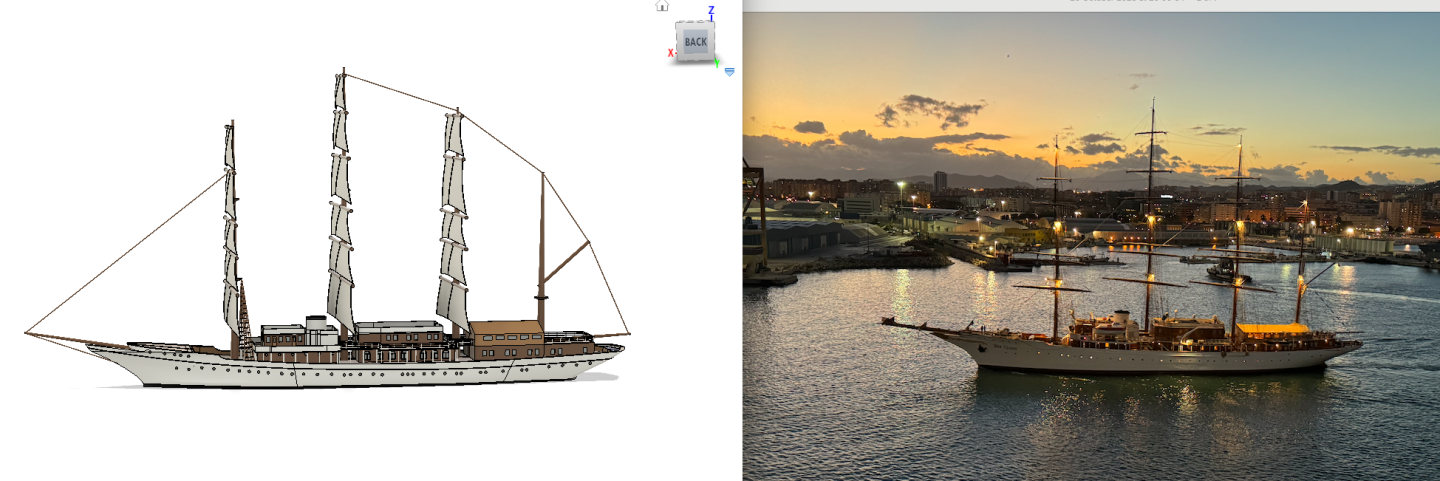
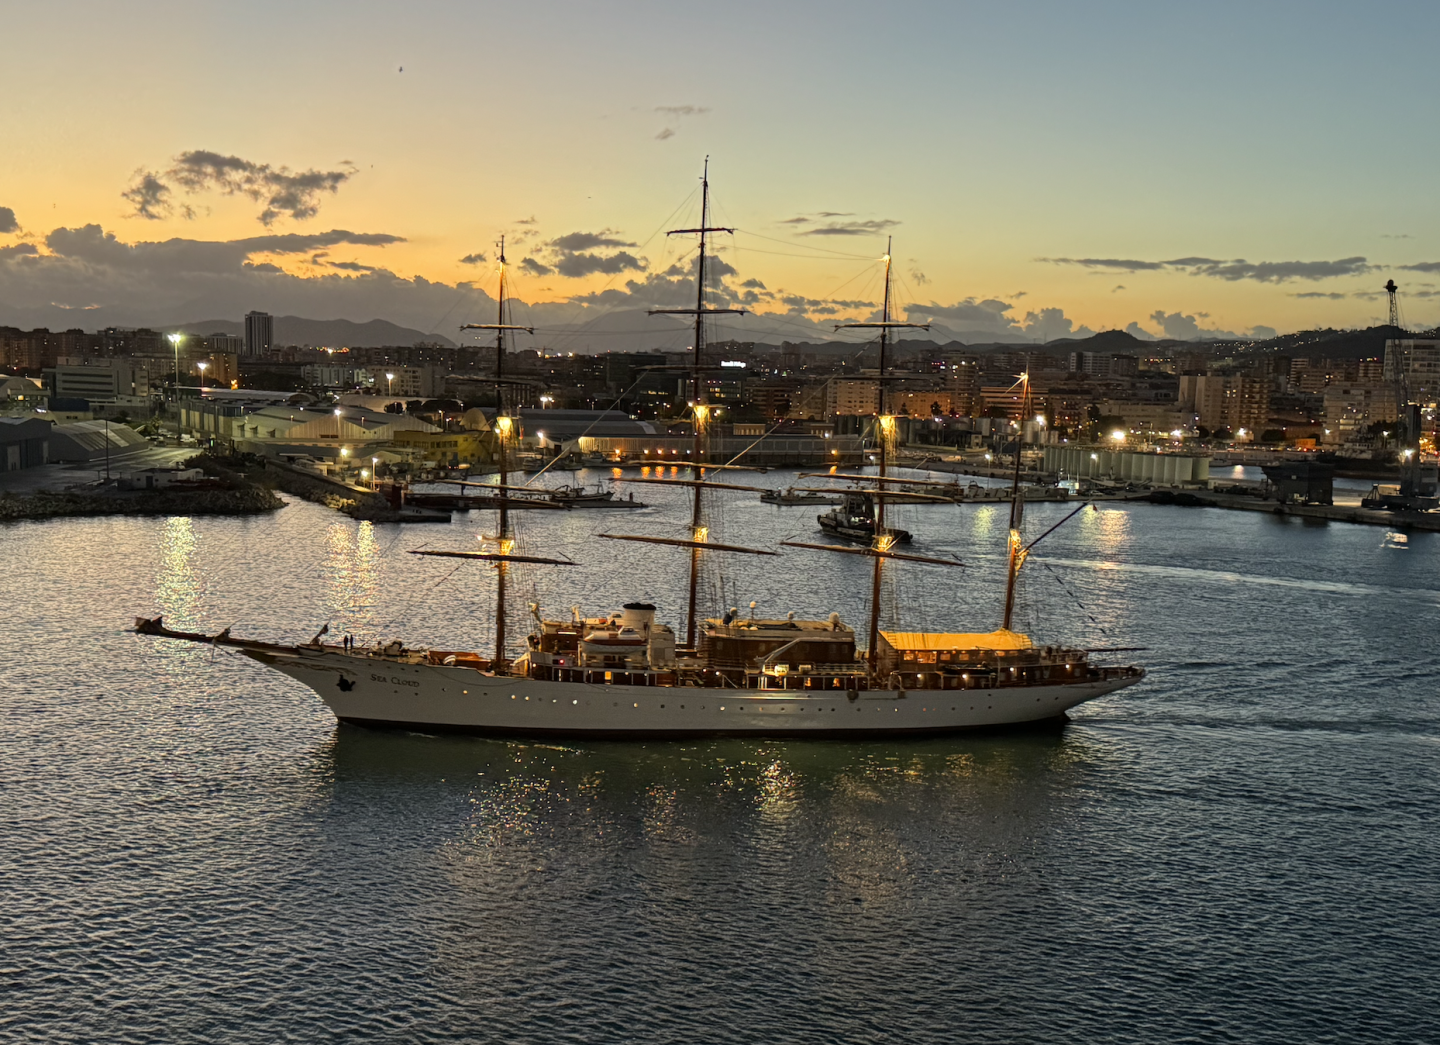
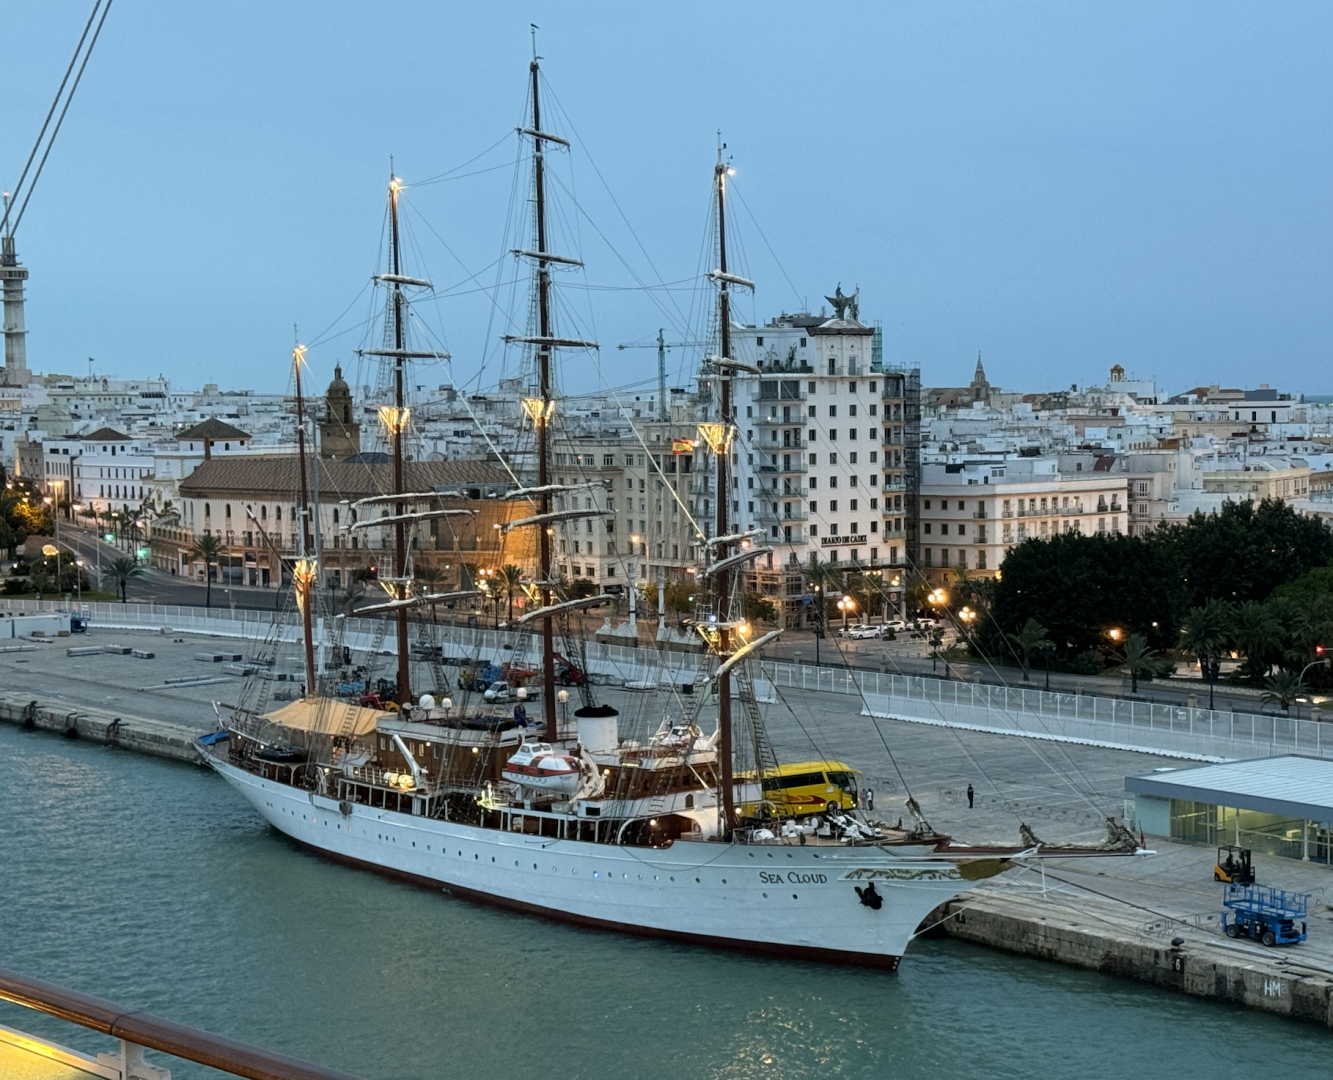
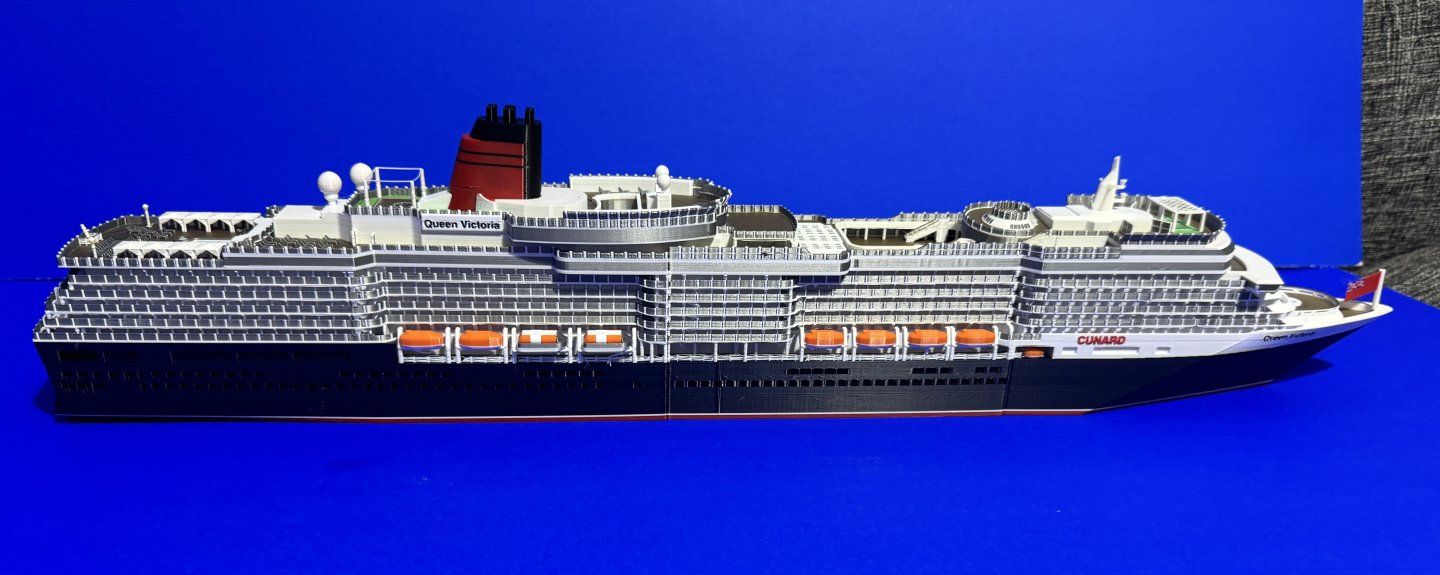
I have started today on a 3d model for 3d printing of Sea Cloud - this 1931 ship is pictured by me last year in Malaga and Cadiz. (from P&O Cruises Azura). The design will be done in Autodesk Fusion 360 and then printed multi colour on a 3d printer. This will be my first sailed ship and previous cruise ship models I have produced are all more recent ships. First prototype picture of a test ship with sail attached too. Background info on the ship here - with pictures of the ship in full sail and details of its fairly long history. https://www.seacloud.com/en/sea-cloud/ My most recent conventional cruise ship model is here - this is a 1:500 version of Cunard Queen Victoria. This ship is about 300m long and the model about 60cm long - vs Sea Cloud being 109m long - so the 1:250 Sea Cloud model will be about 2/3 of the length of this model or about 42cm. Might decide to increase the scale a bit if the detail proves challenging to model/print at 1:250.

-
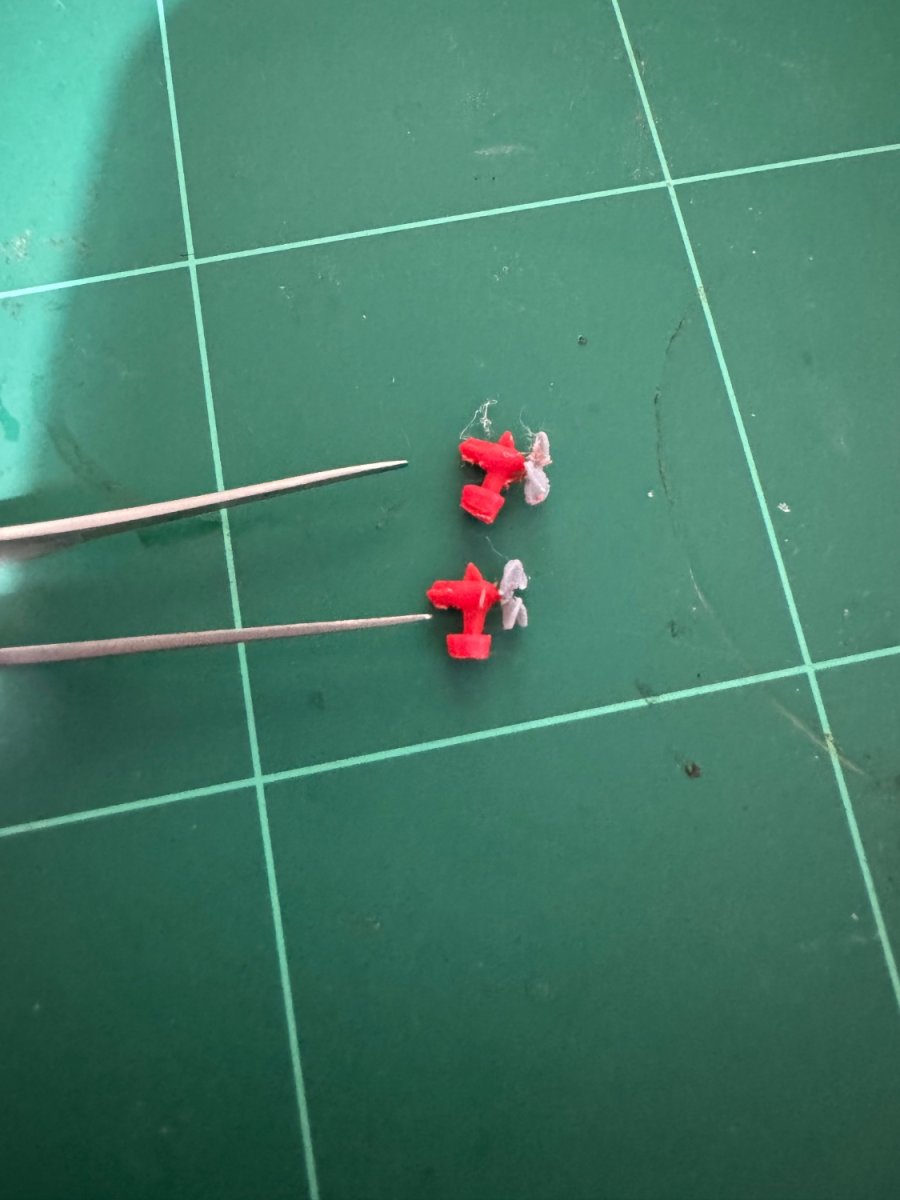
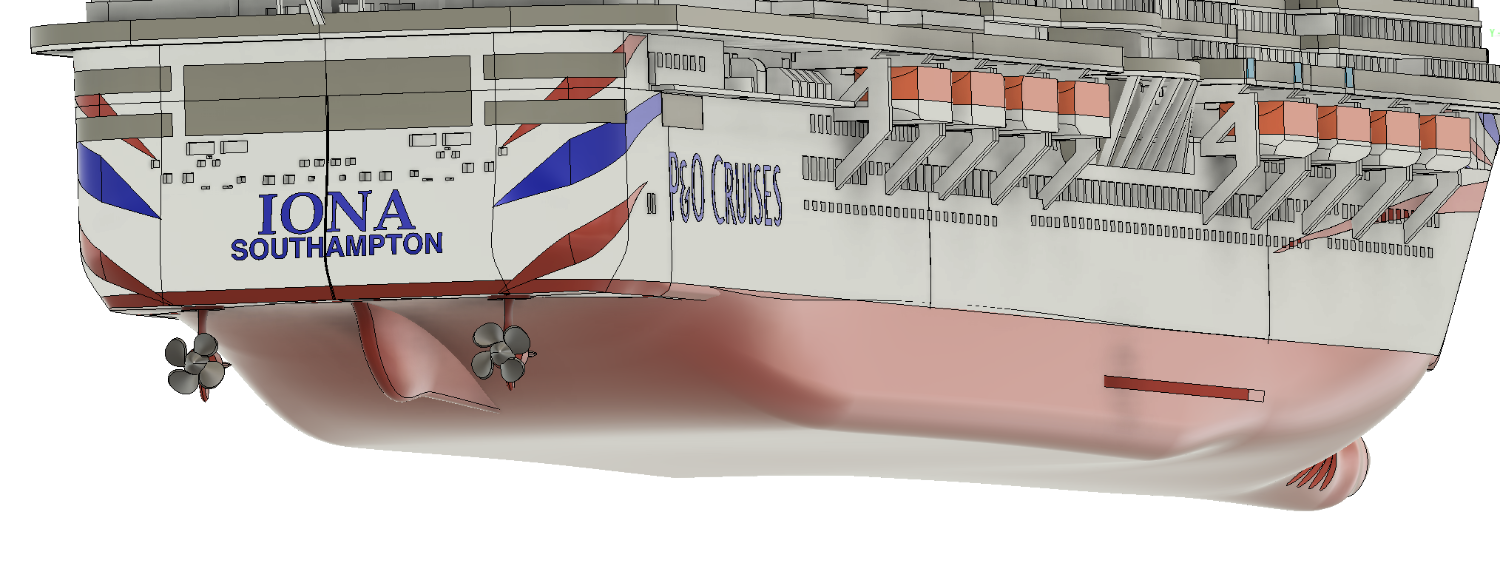
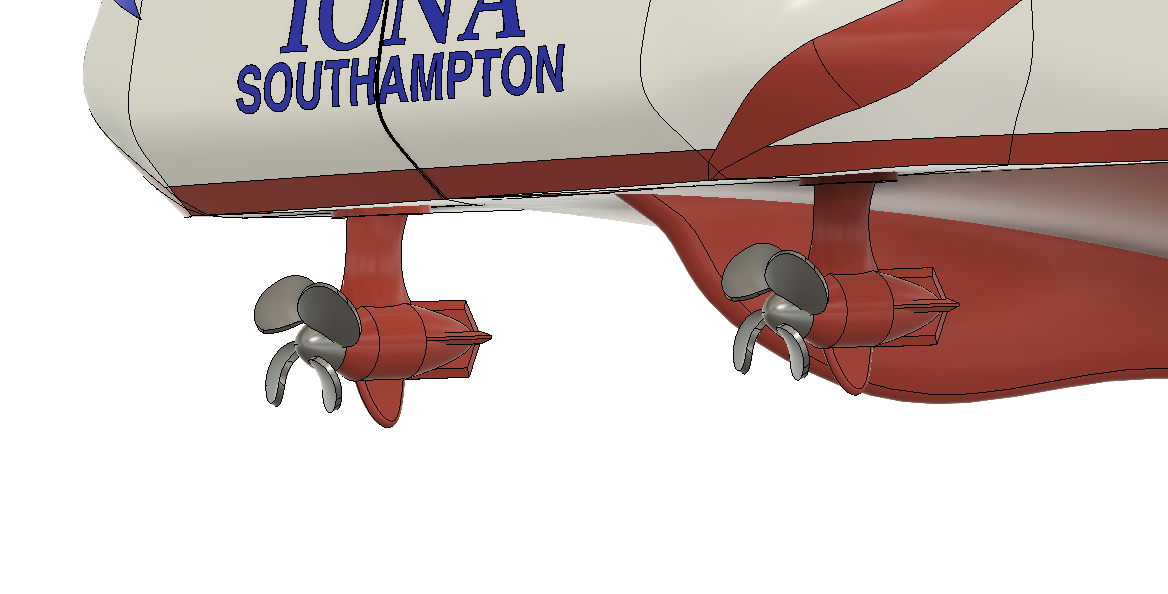
Good progress made today on printing the underwater hull. One of the biggest problems is that the Azipods are so small - but managed to get them to work - prints a little bit stringy - but I think I can clean them up. 1:1000 version (which is 1/4 of the size of the big ship in this thread) now more or less complete - just need to do a final reporting tomorrow with the bow thruster props and stabilisers too.

-
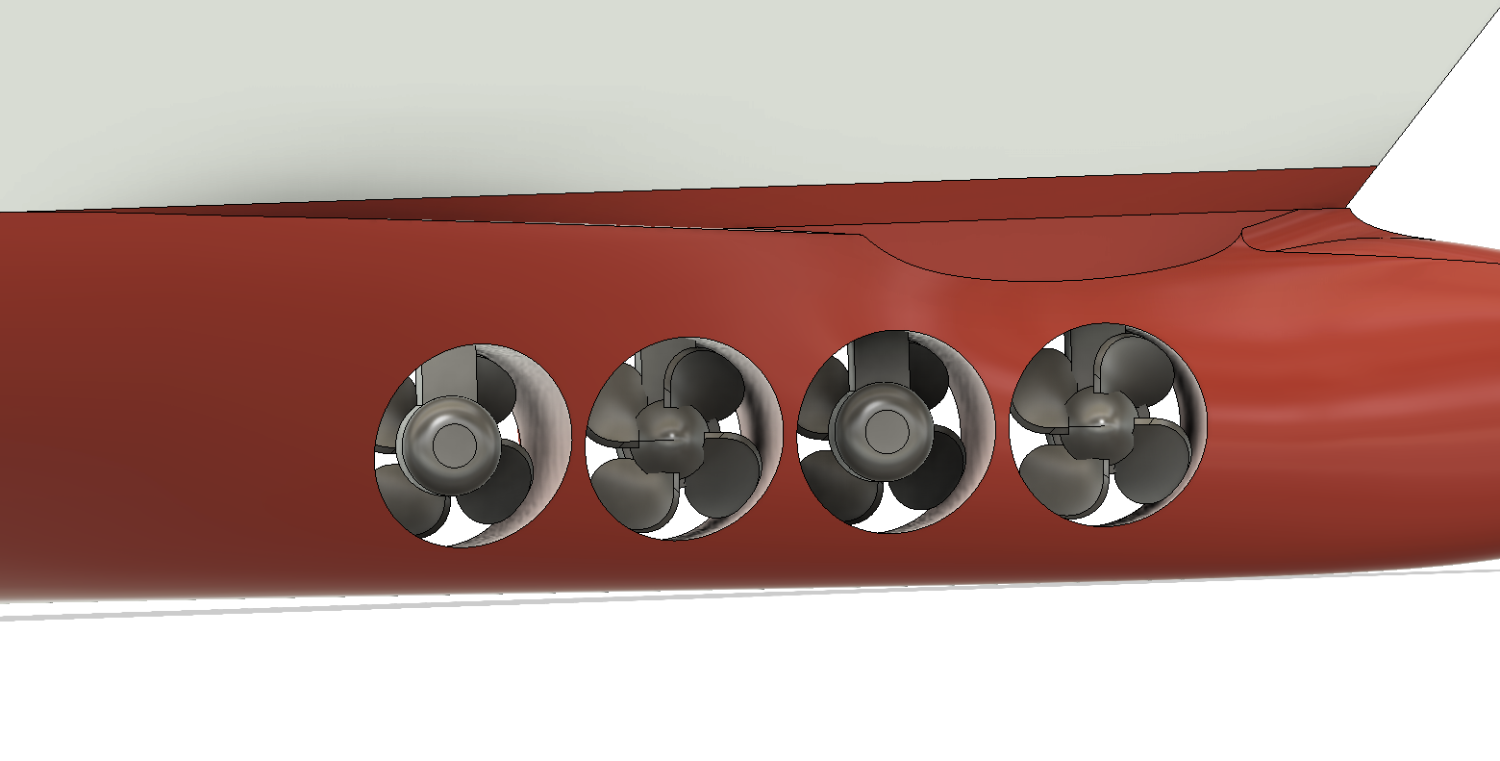
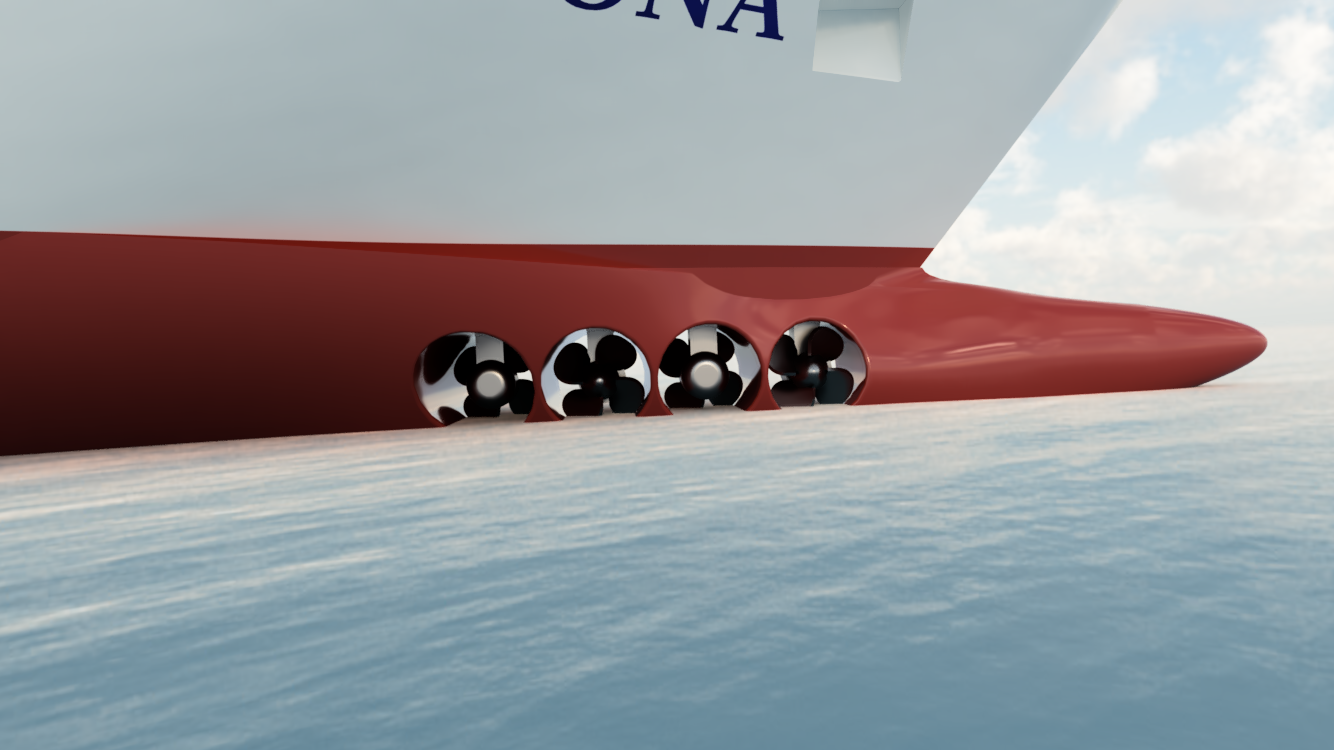
Thanks Javelin for the info - have updated the bow thrusters to add in motors that are on opposite side of propellors that turn in the same direction. Will add some grills too at some point
-
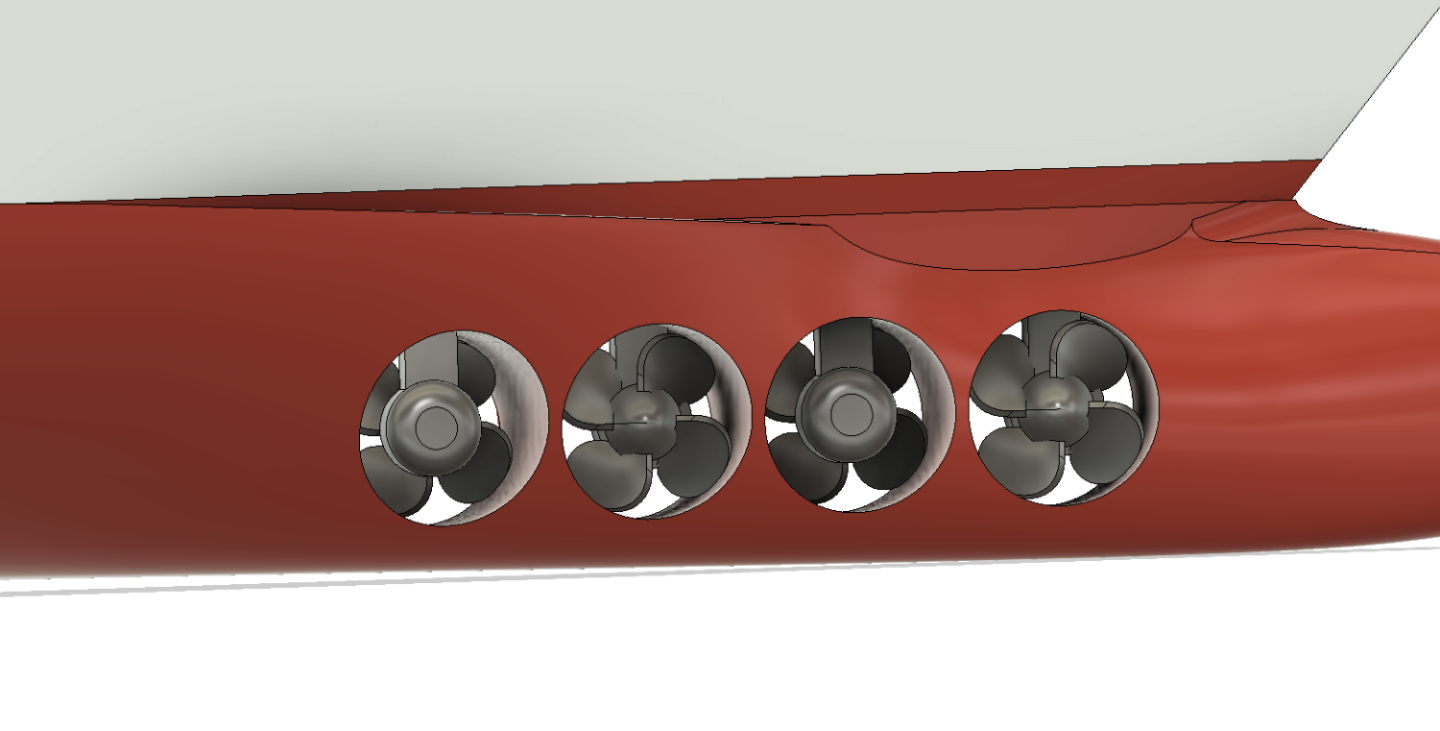
Thanks for the feedback - have corrected the underside of the ship to a) Remove 3 thrusters, b) Swap the direction of some of the propellors, c) Aim the stabilisers slightly down. Have also included some Fusion 360 renders too


-
Great thanks for the feedback and you are correct I thought those signs on the side mean't there were thrusters there, so will remove them. Plus will also angle the fins down a bit. Also I think I need to change the direction of the propellors too on one of the azipods and two of the remaining thrusters.
-
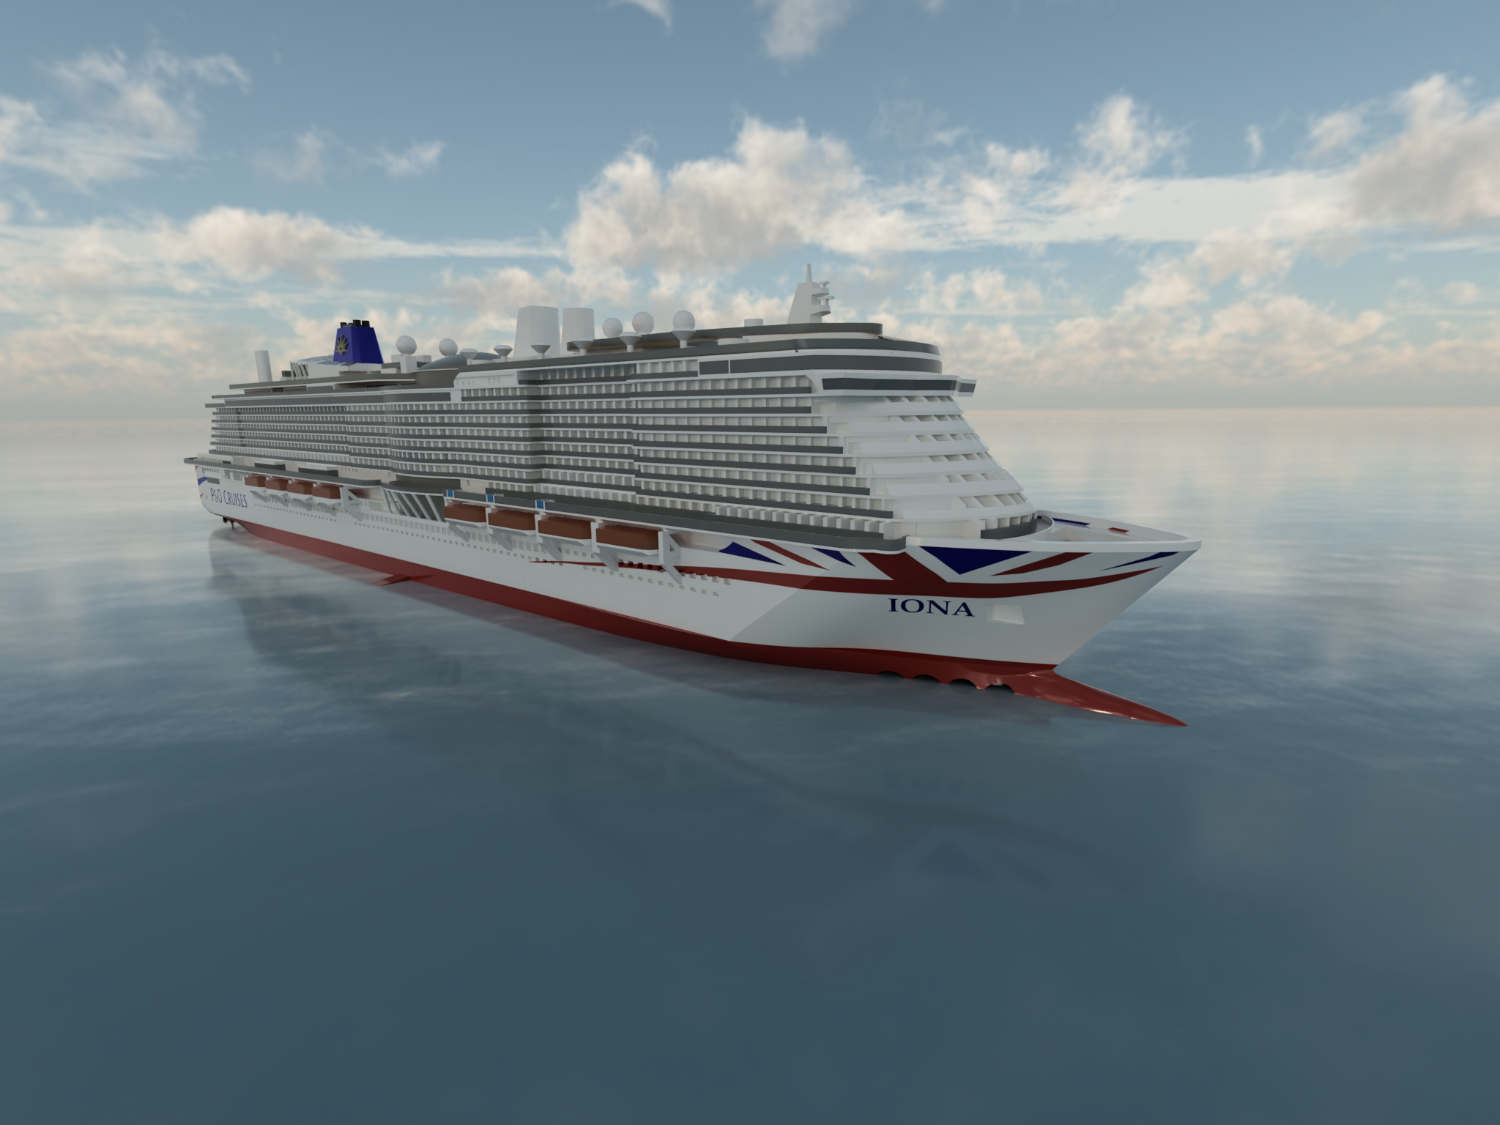
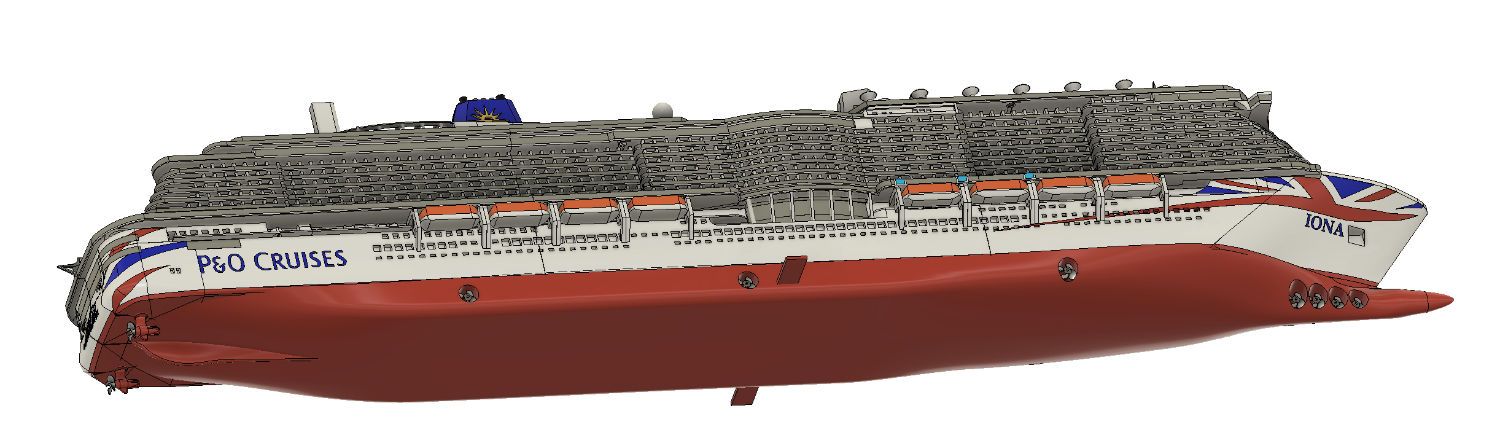
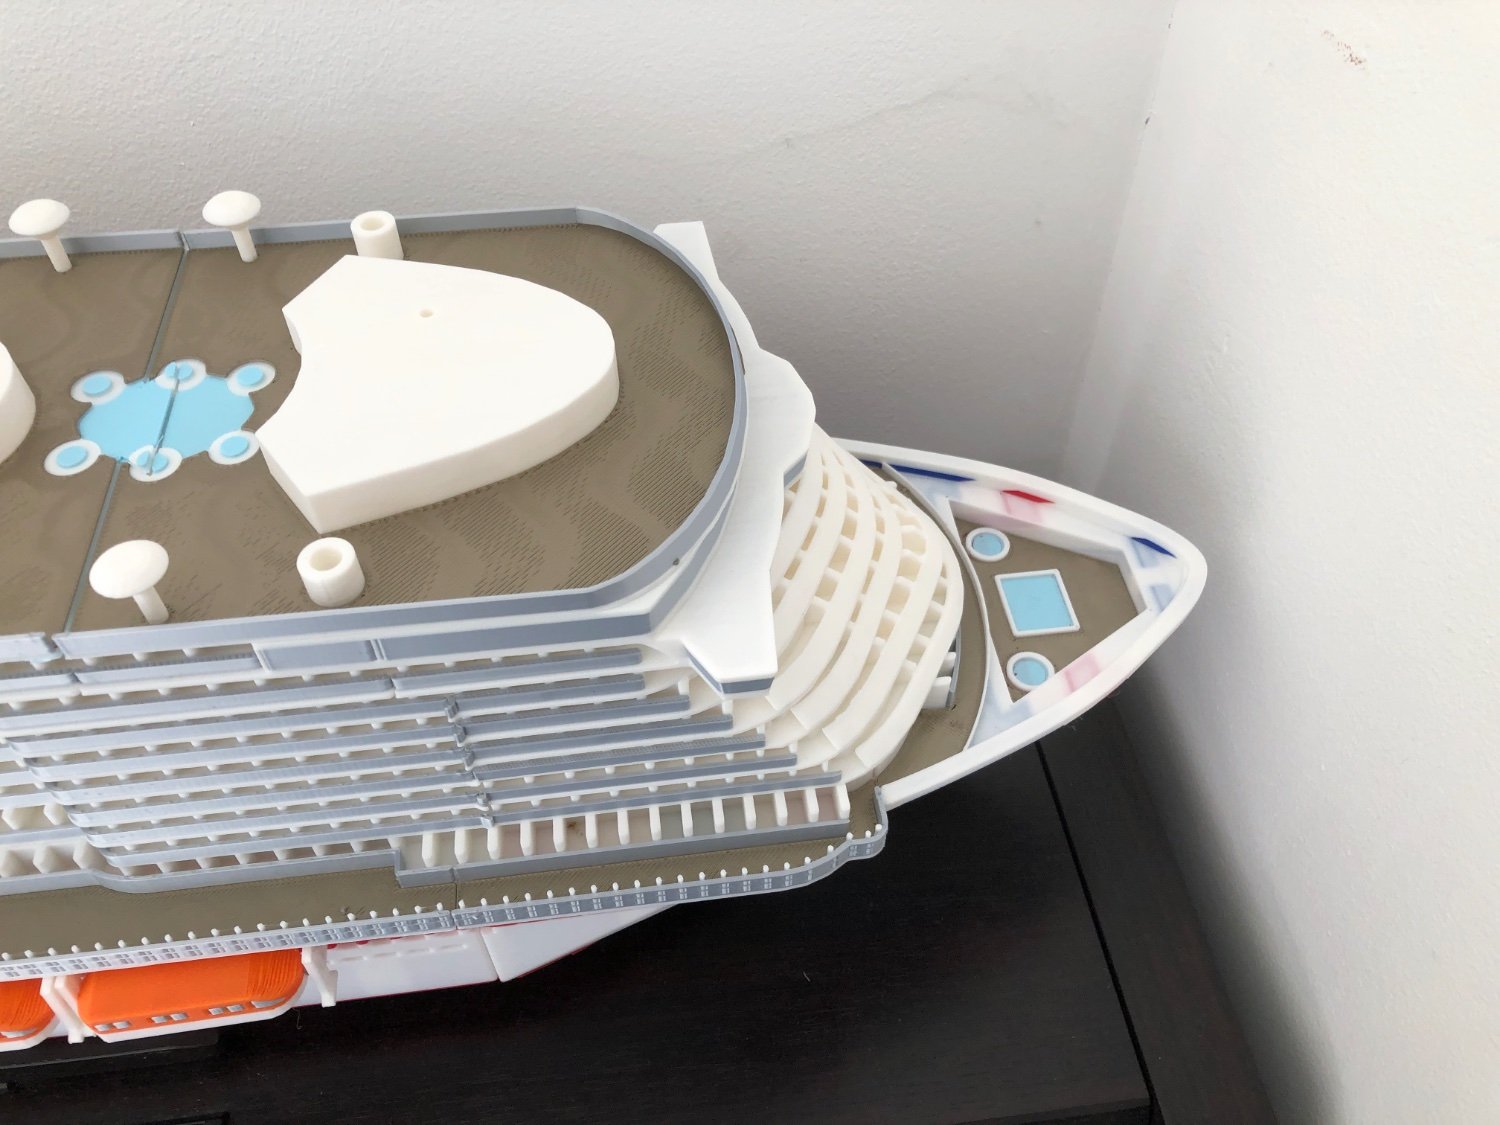
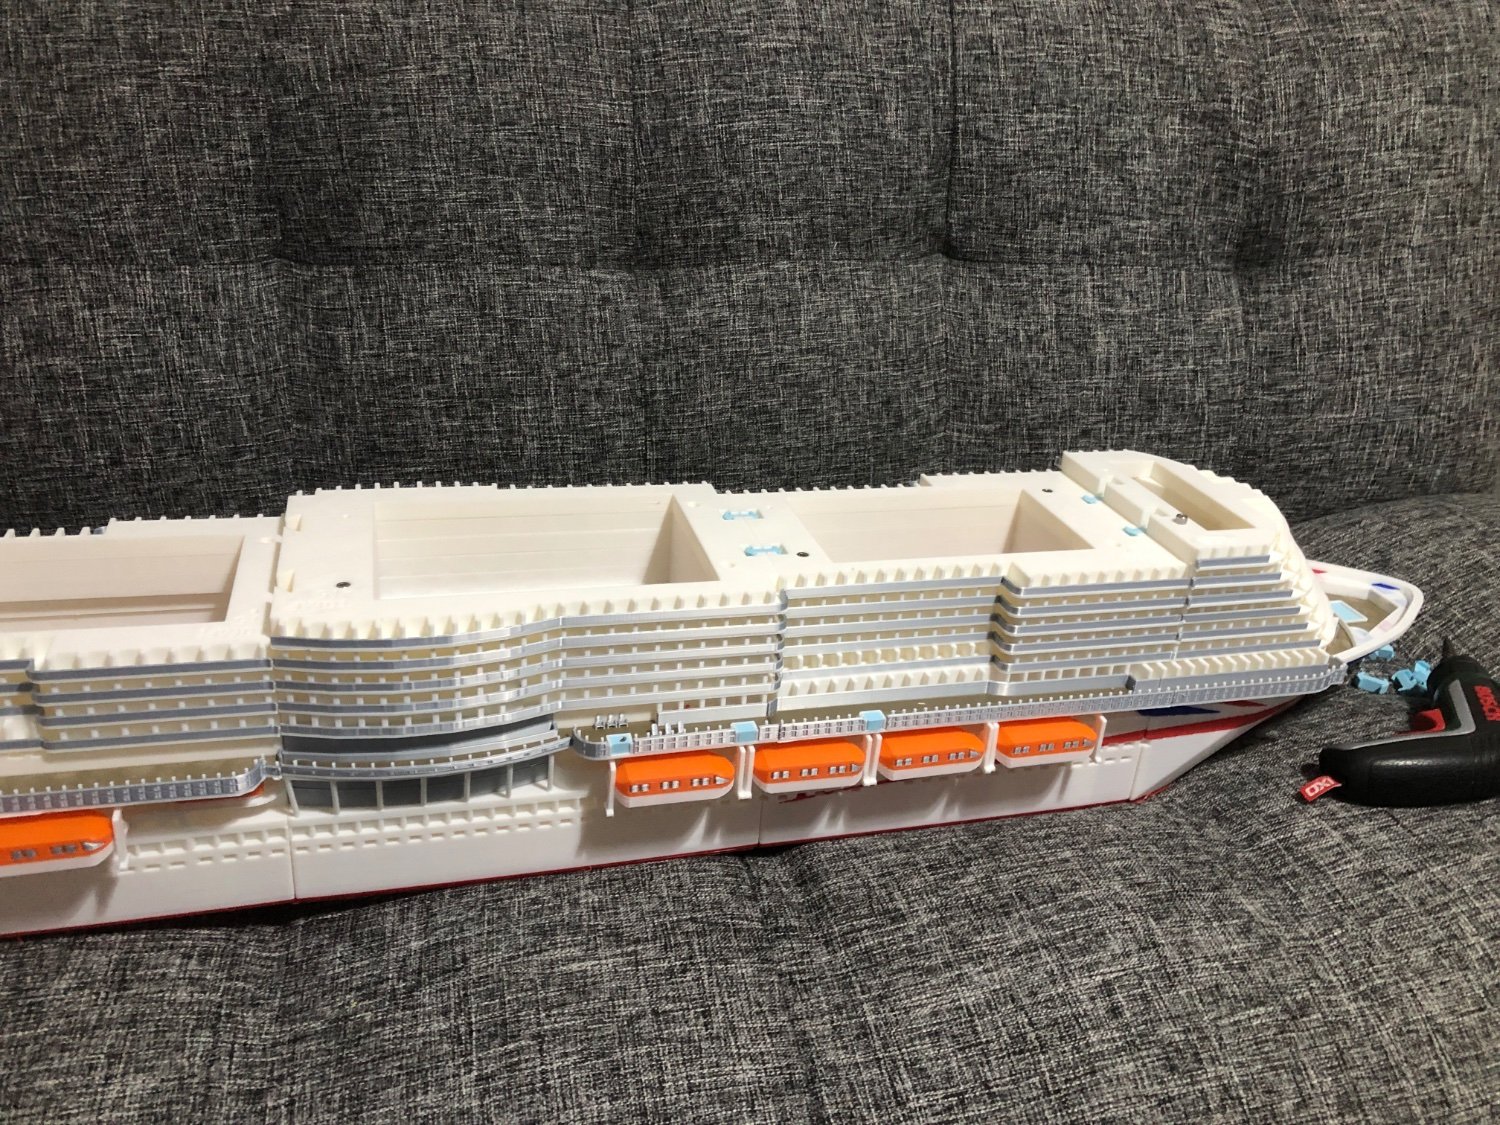
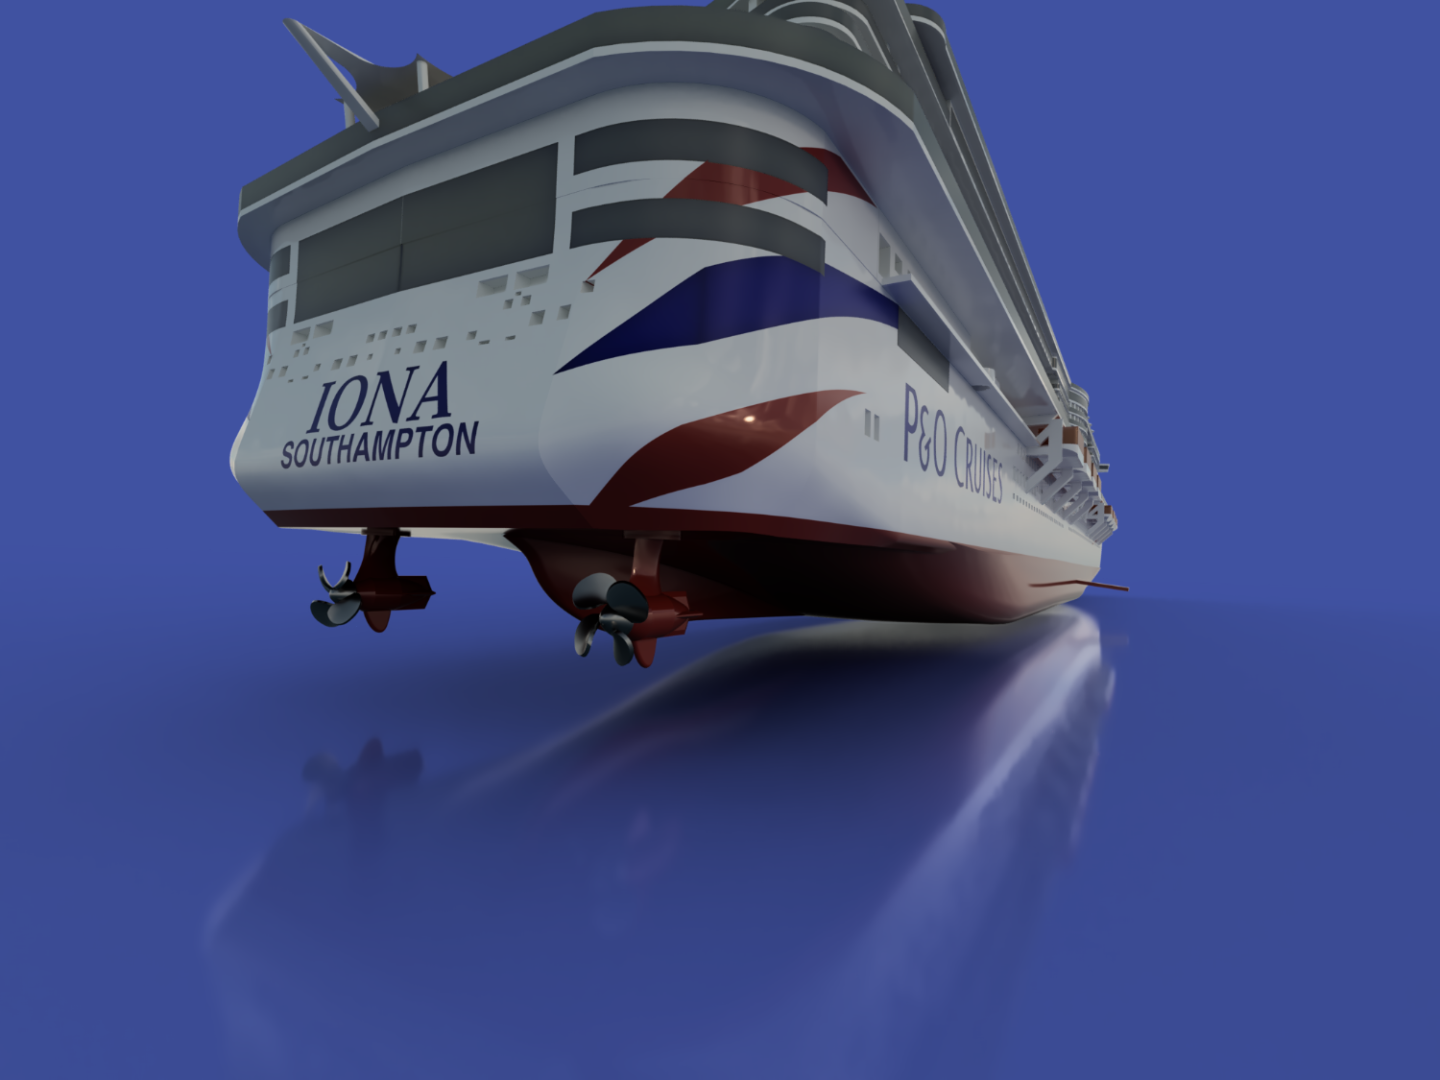
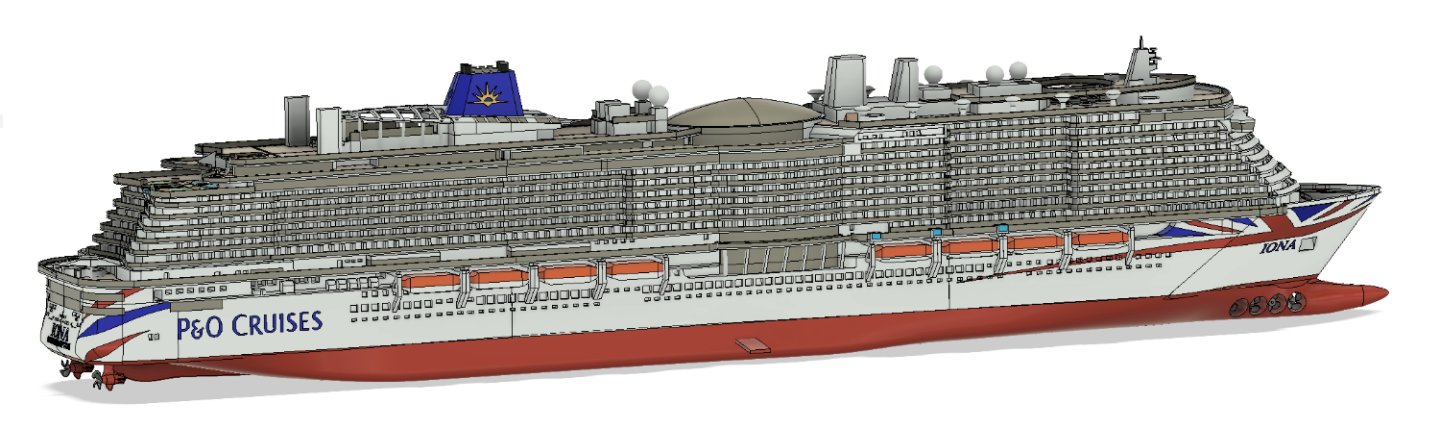
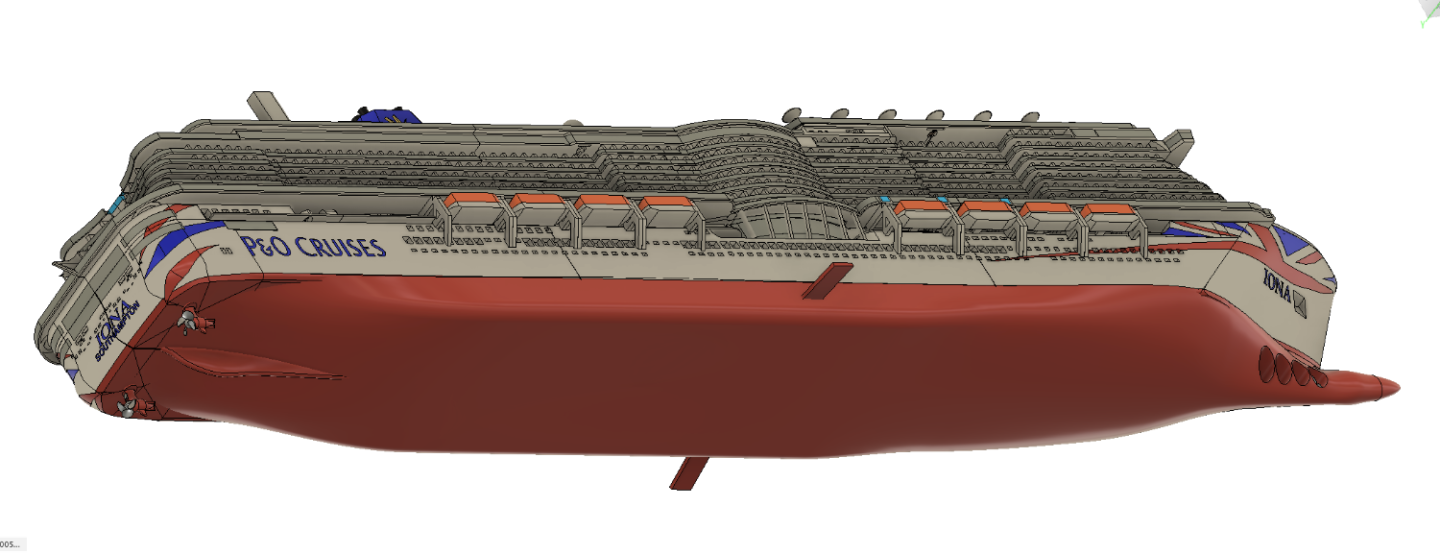
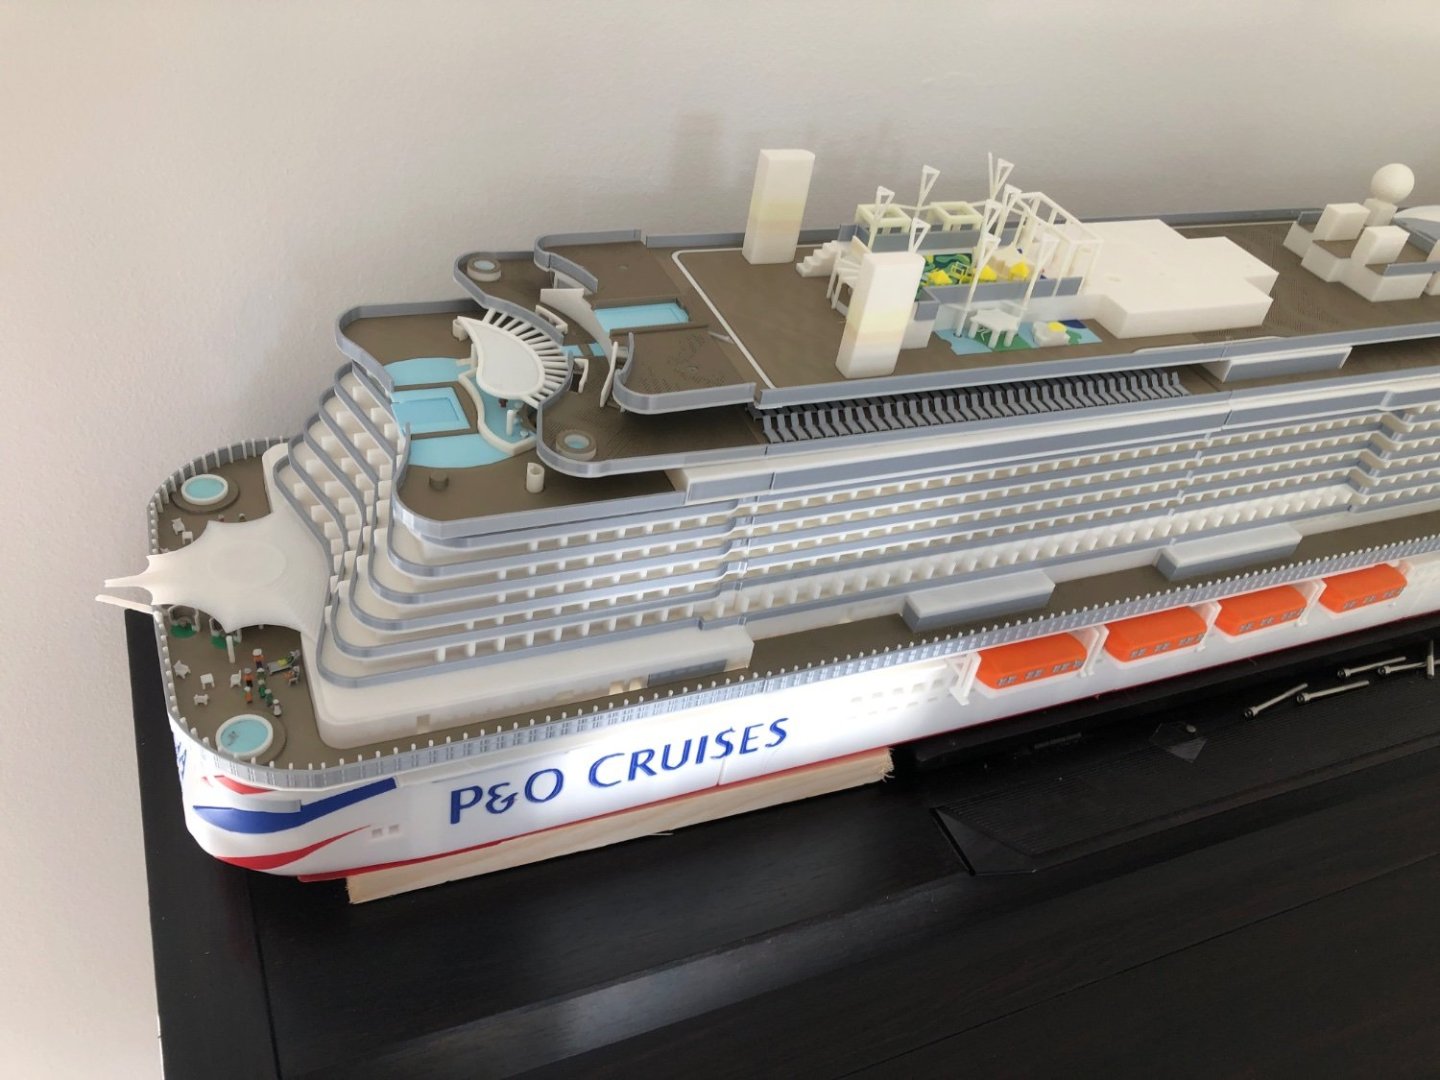
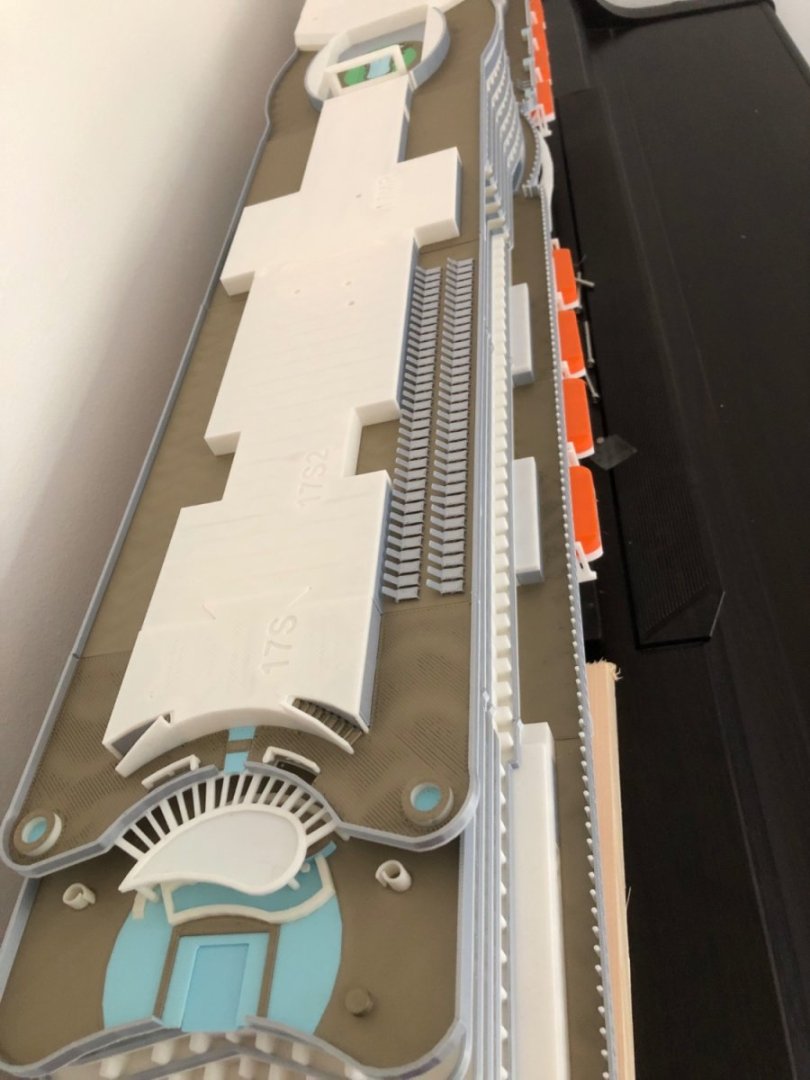
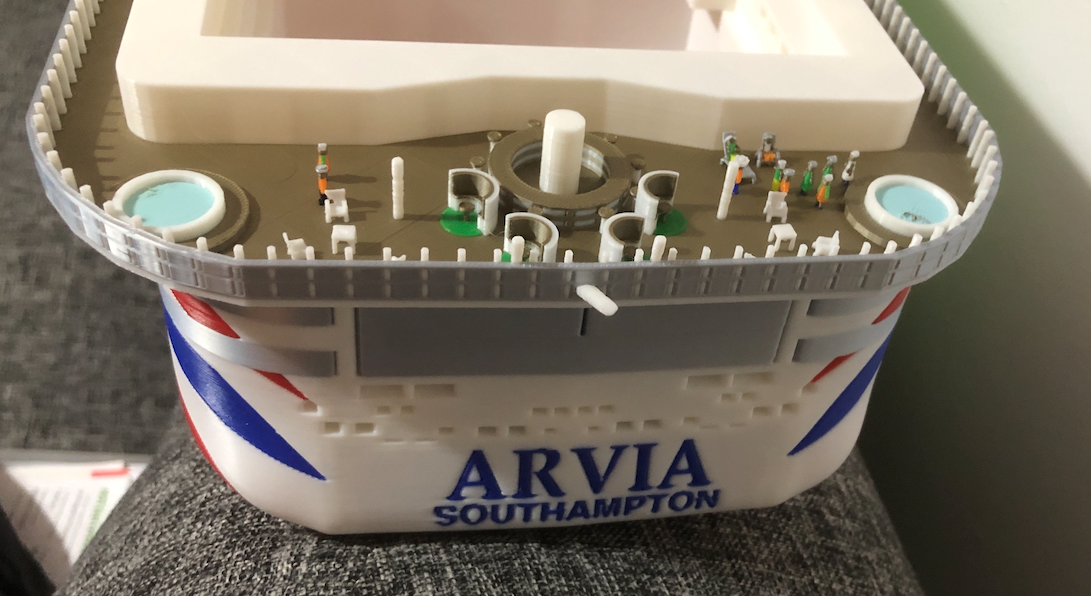
Finally got round to modelling the underwater parts of Arvia - presented in this pictures underneath Iona - as I assume the two sisters are probably identical under the water. Not sure if I have got the proportions correct, shapes quite right, or whether I have missed any bits. Will probably just apply these additions to my 1:1000 versions initially. Got the shapes from various photos on Cruise Critic and YouTube. May contact yard as suggested a few months ago - with this pictures to see if they are willing to help with better pictures or plans.

-
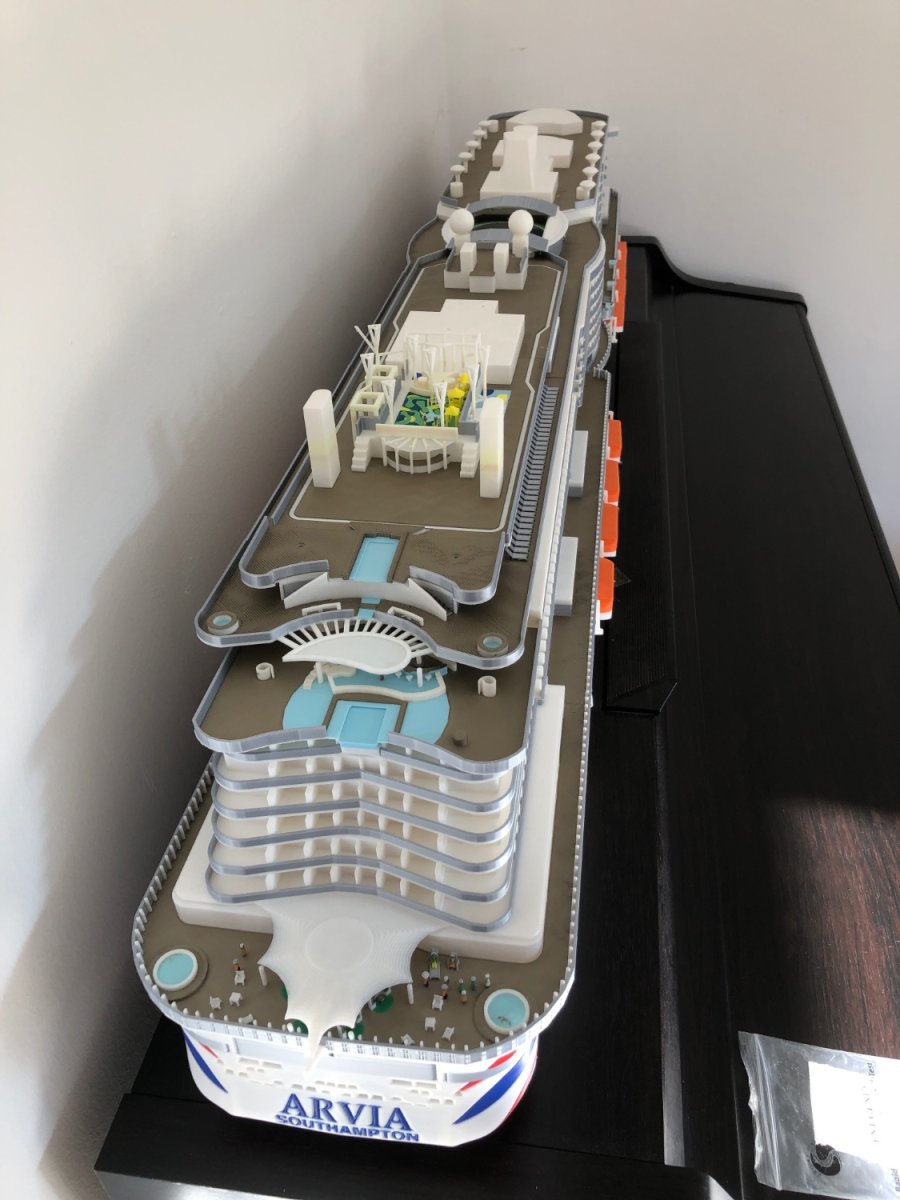
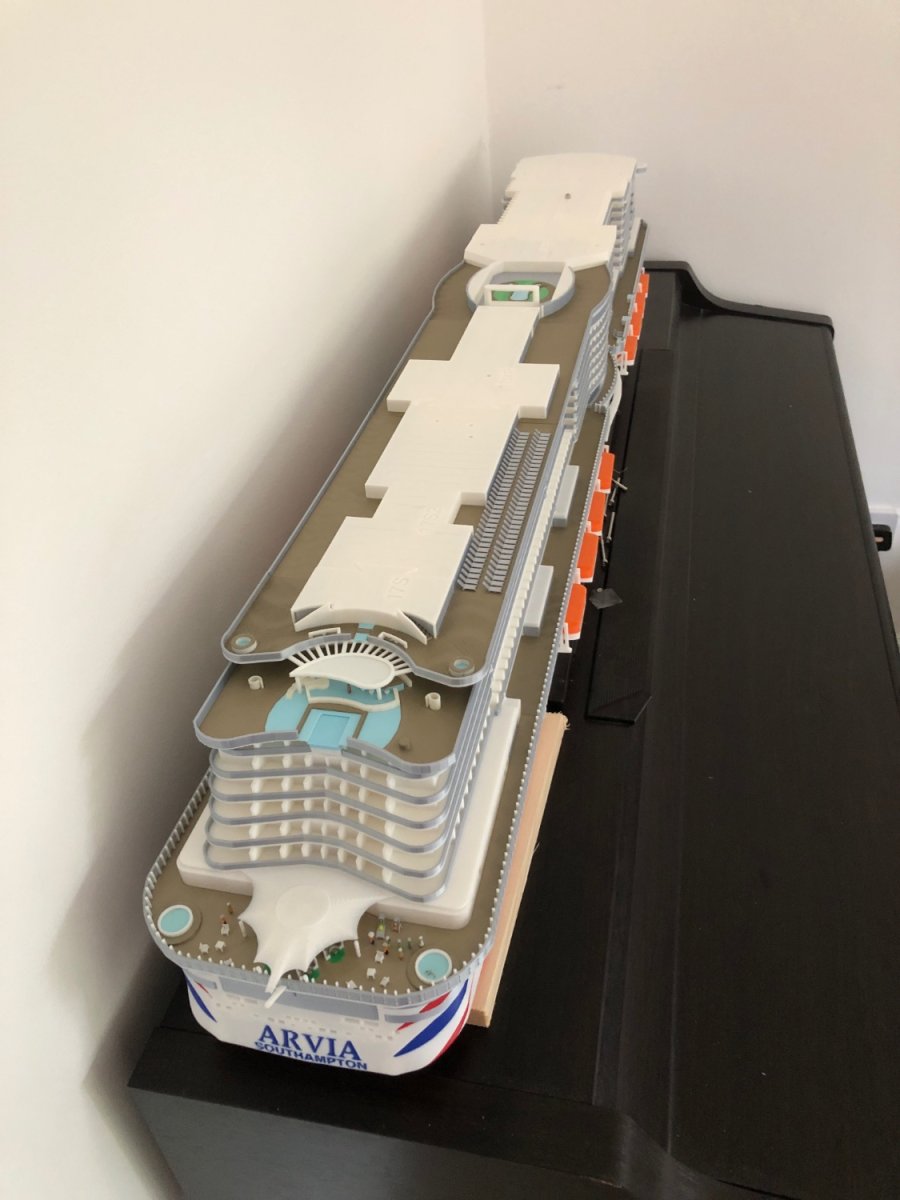
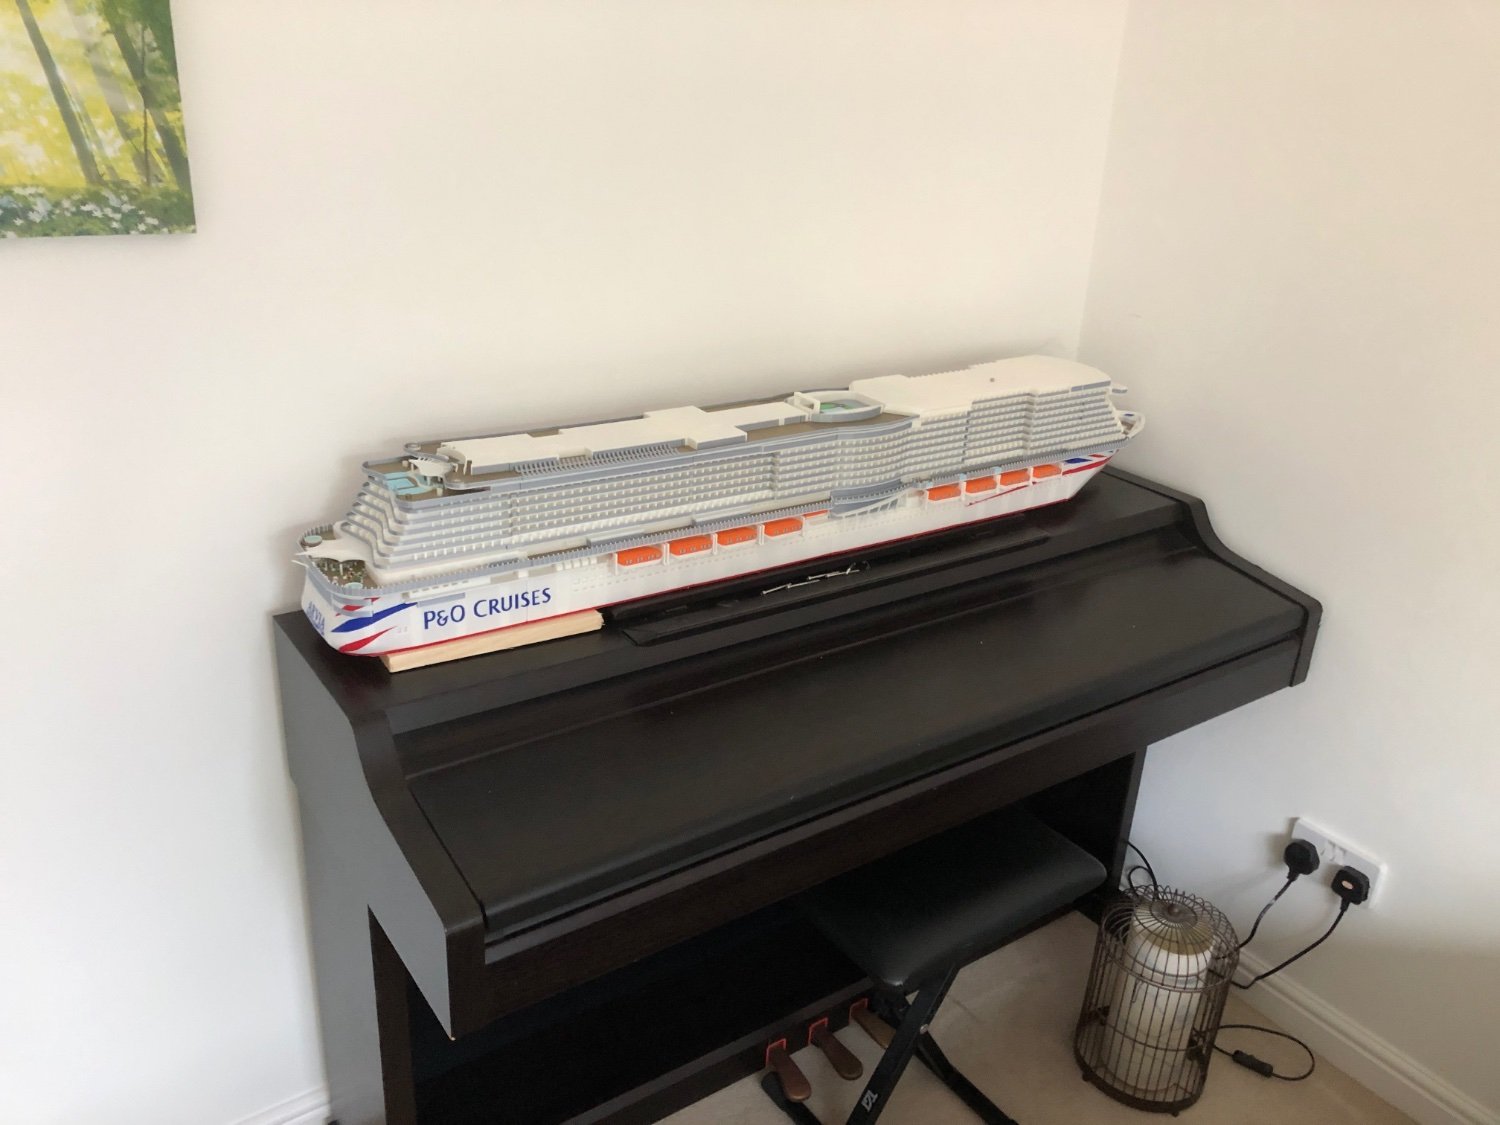
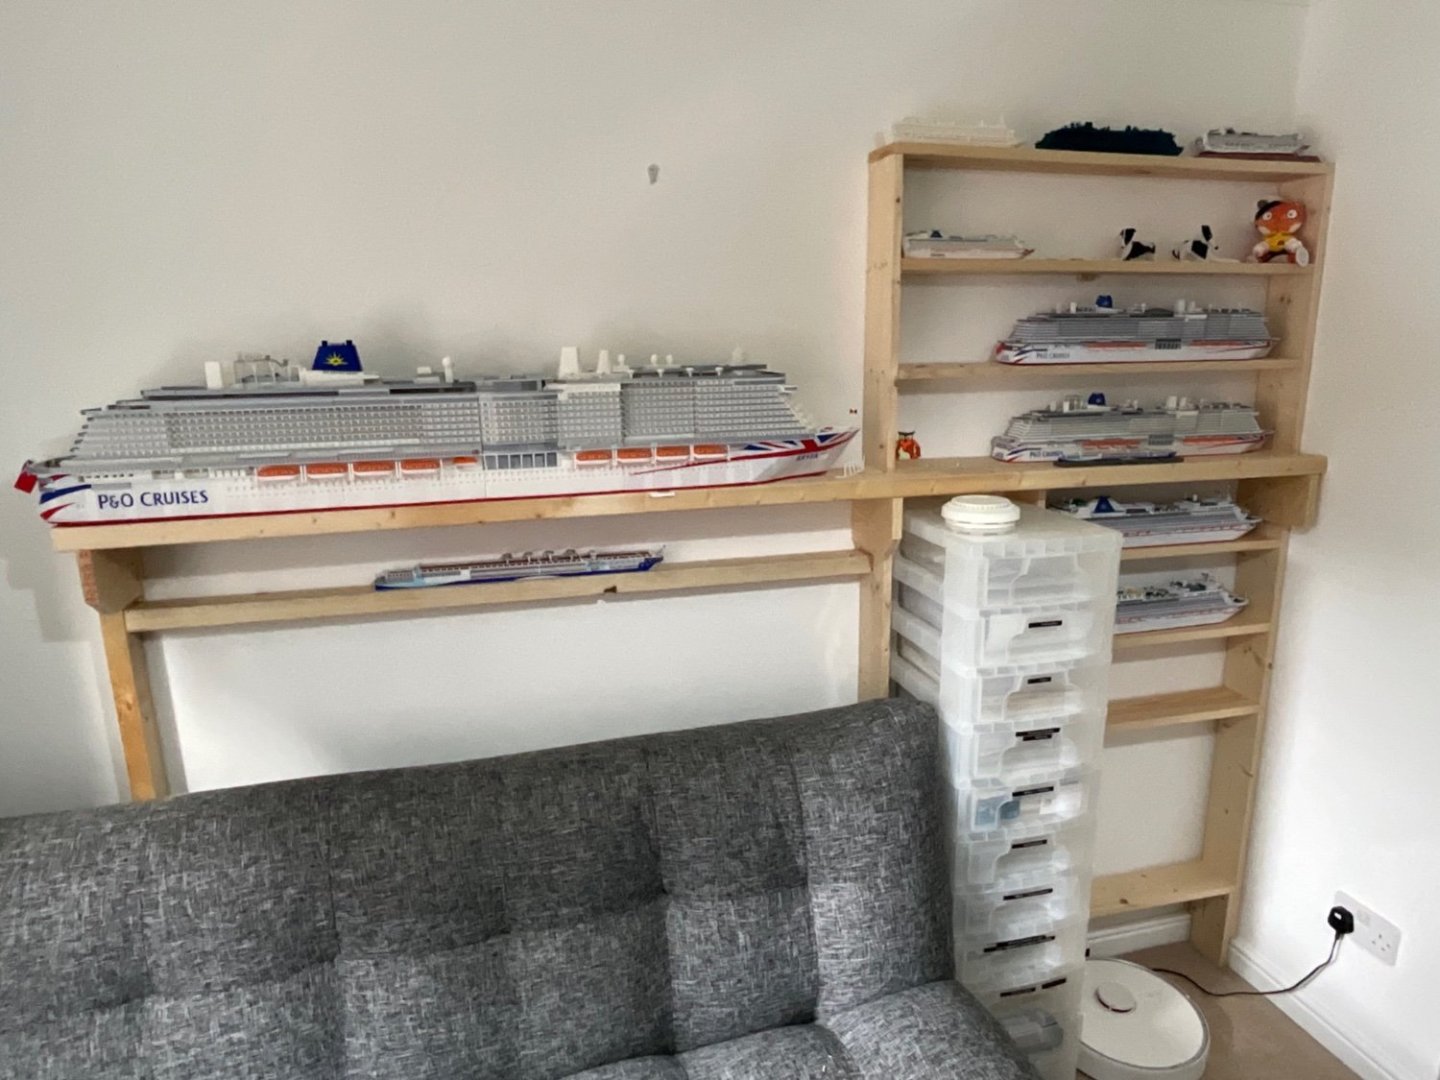
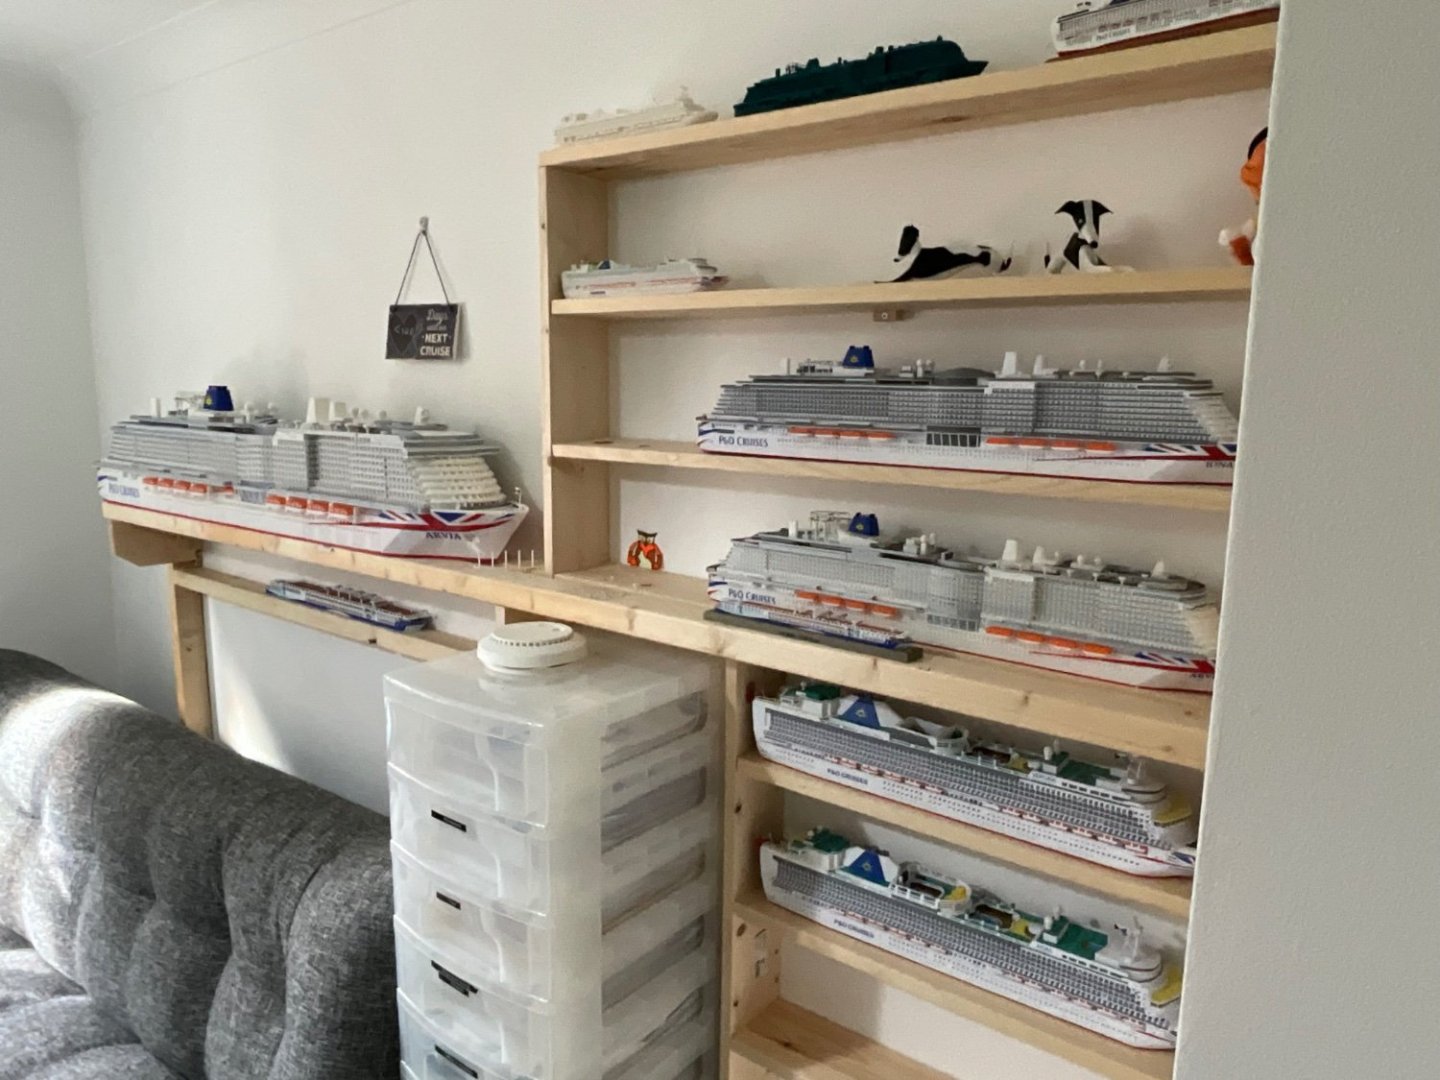
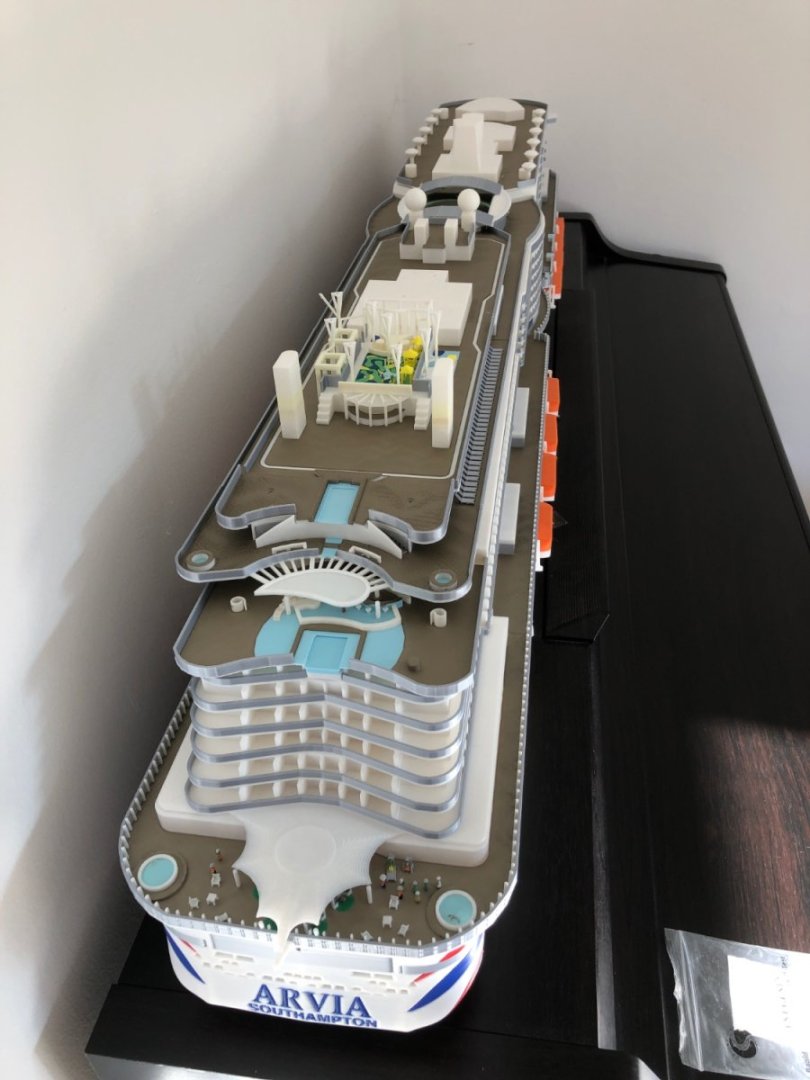
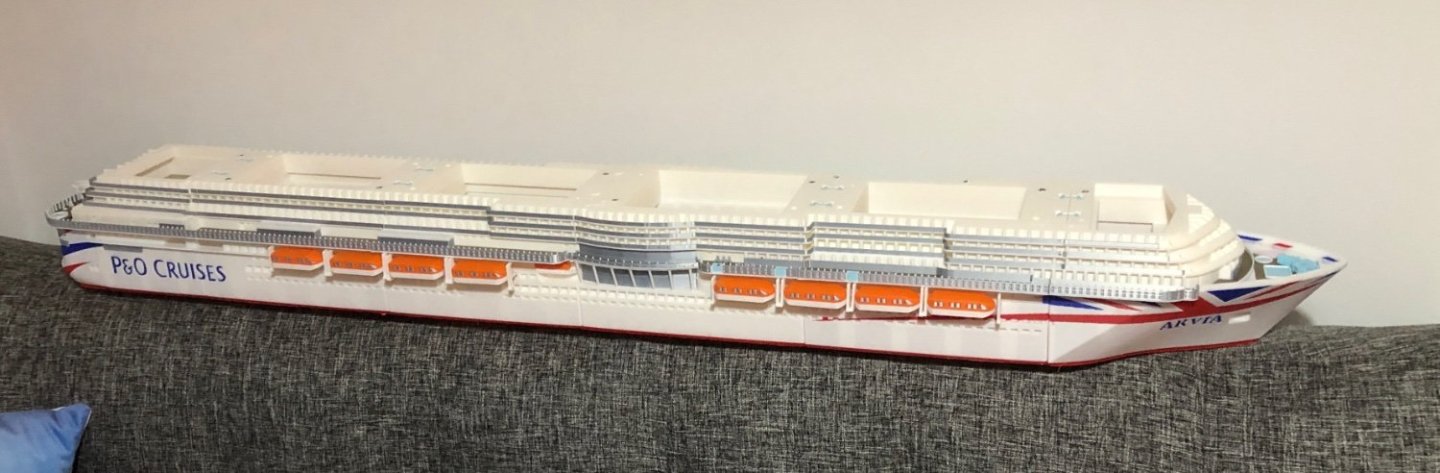
Now installed in upgraded cabinet with rest of fleet.
-
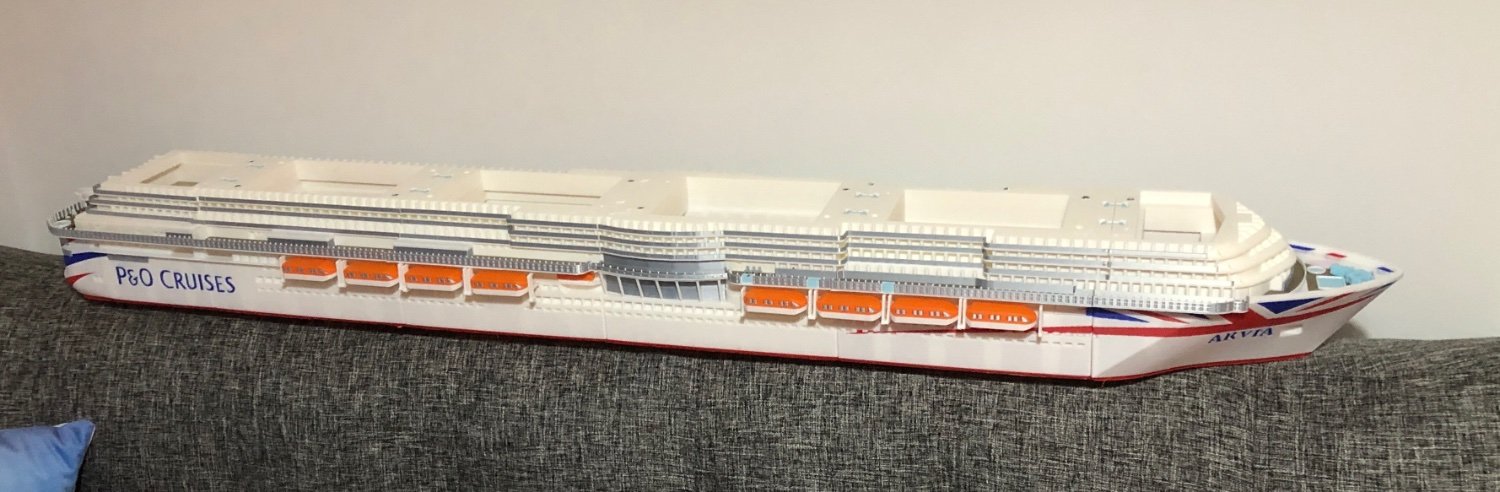
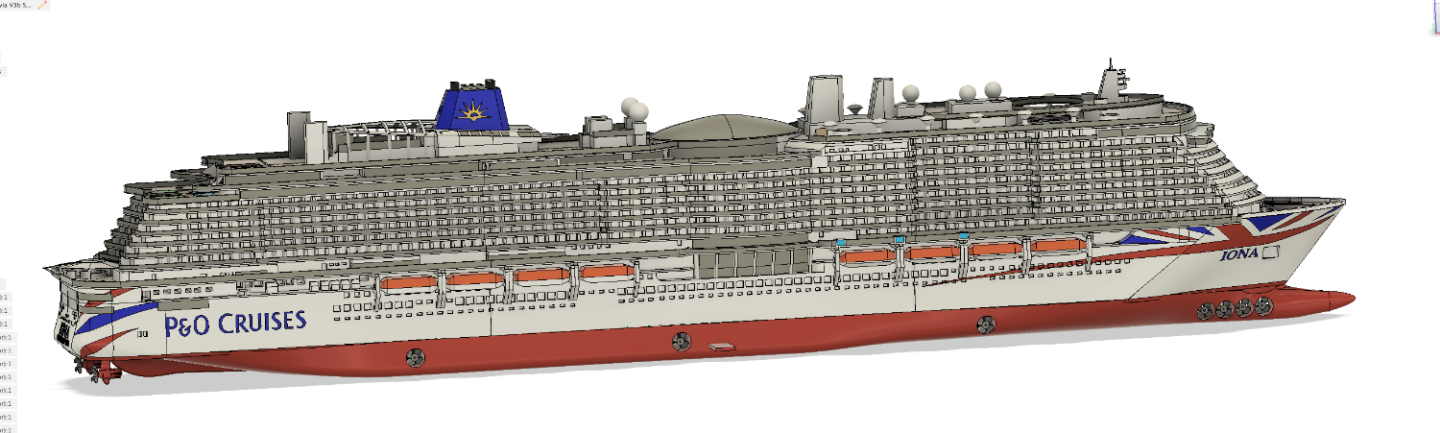
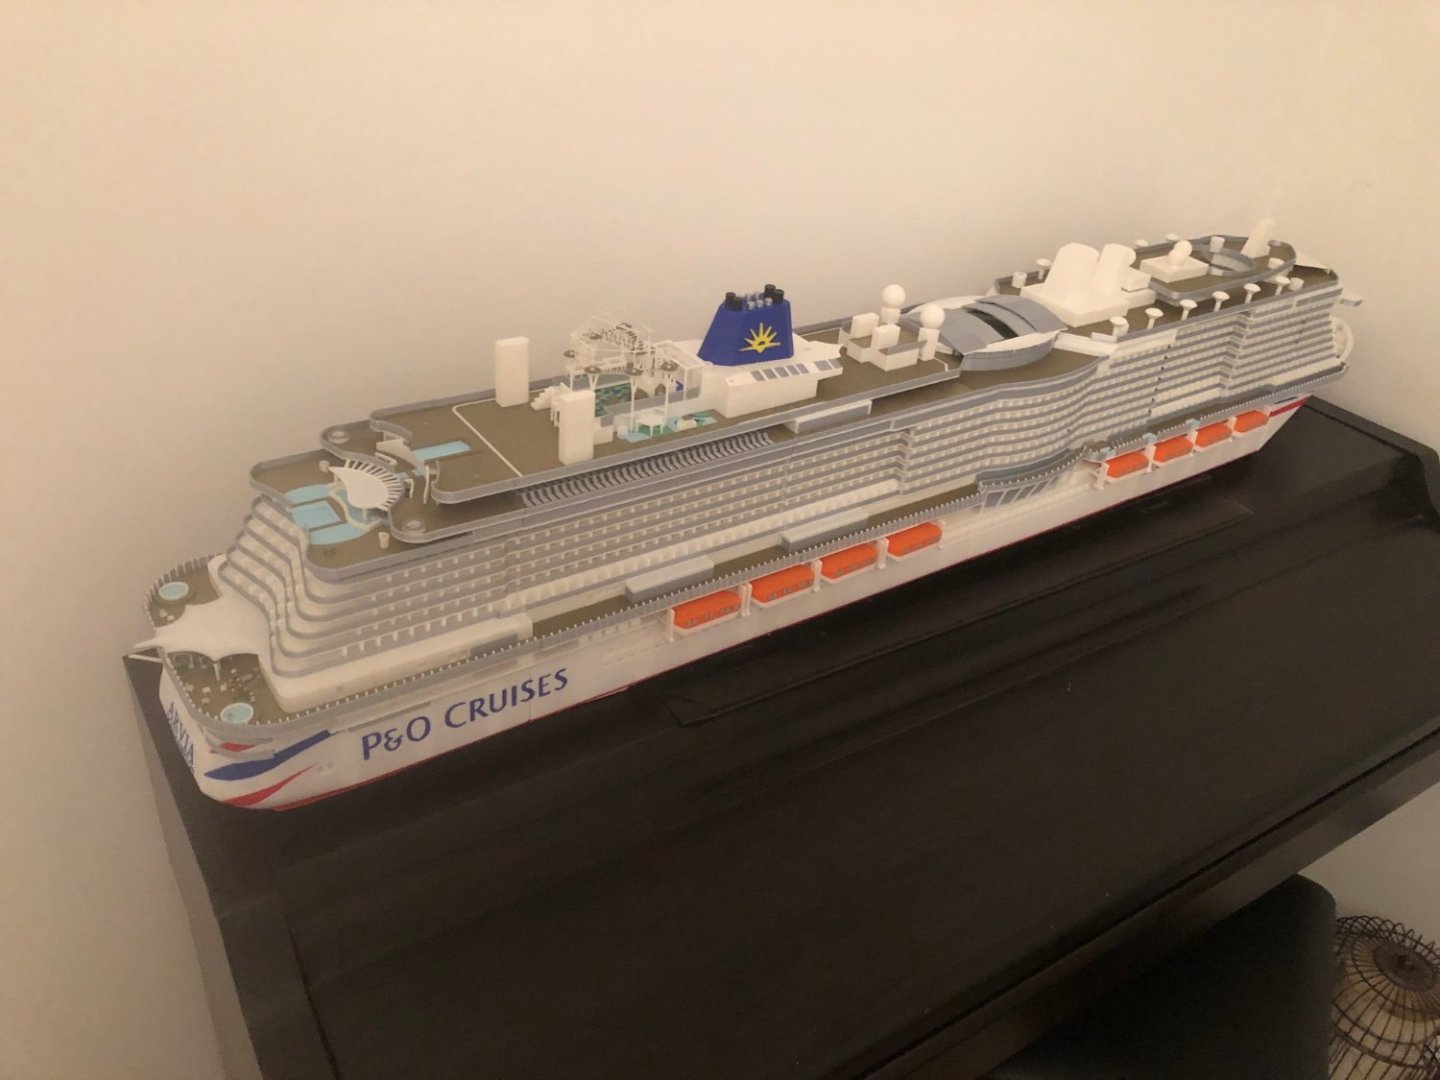
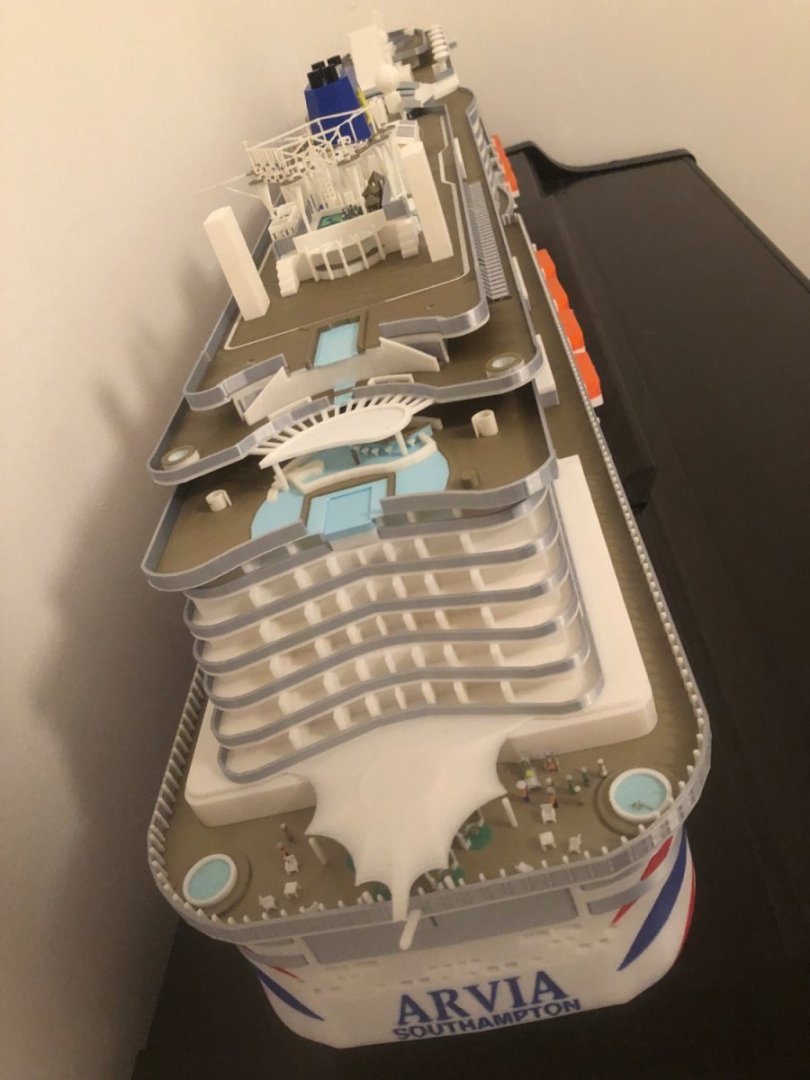
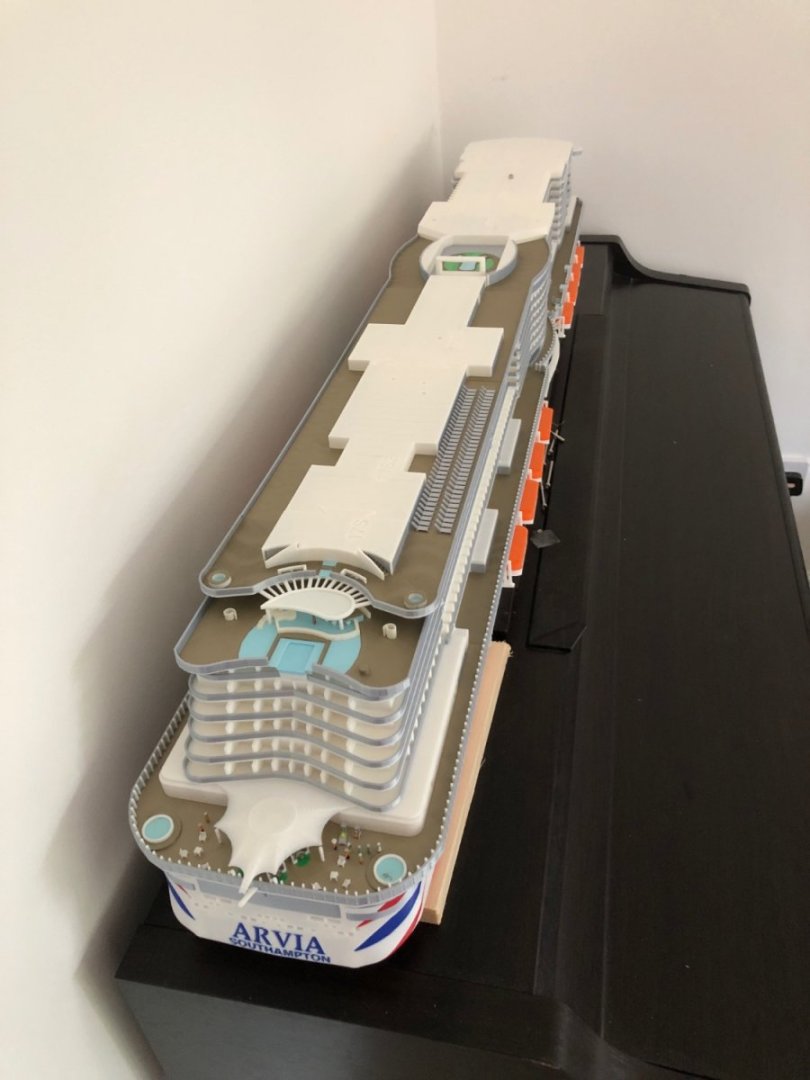
Finished. Might just add a few flags. Biggest problem now is finding somewhere suitable in the house to display it. IMG_8354.mov
-
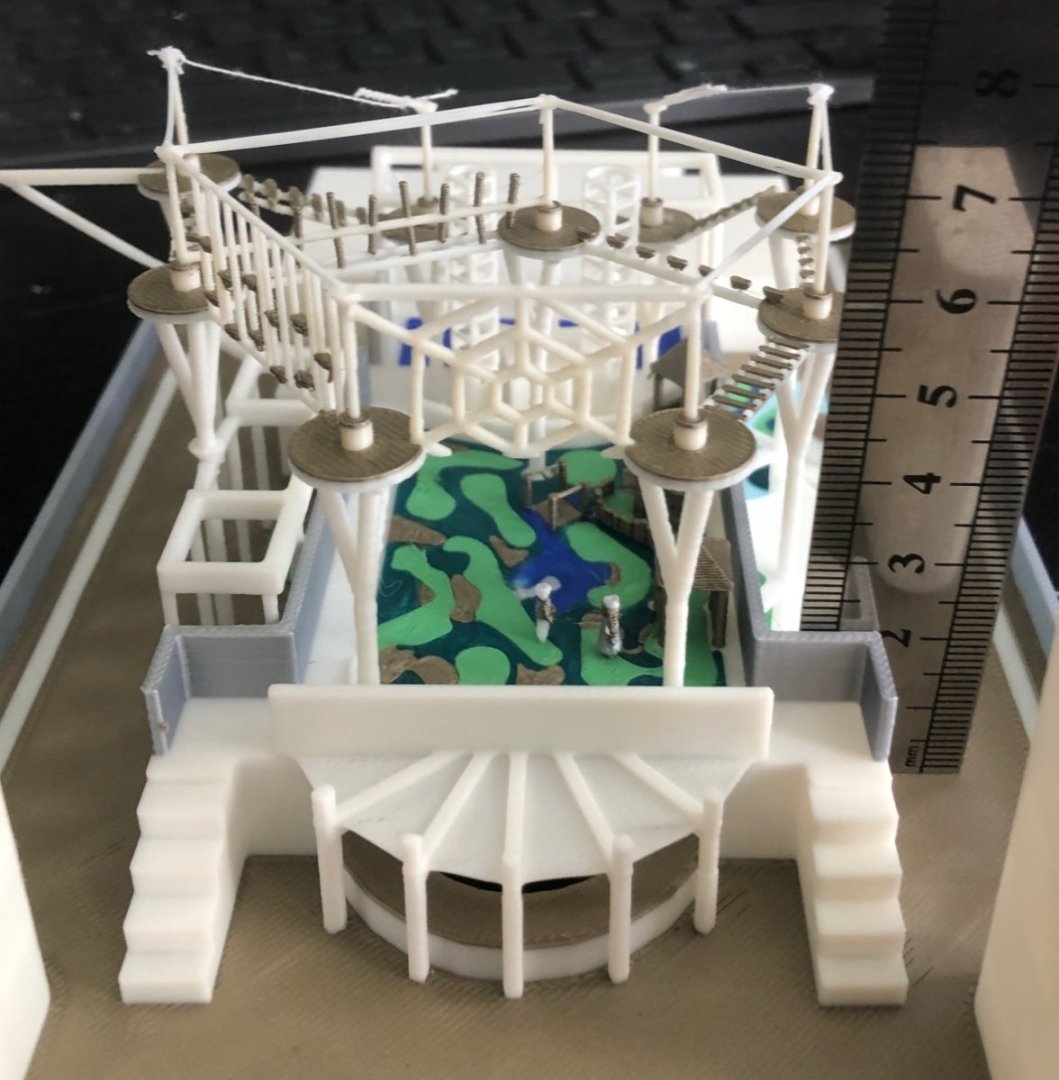
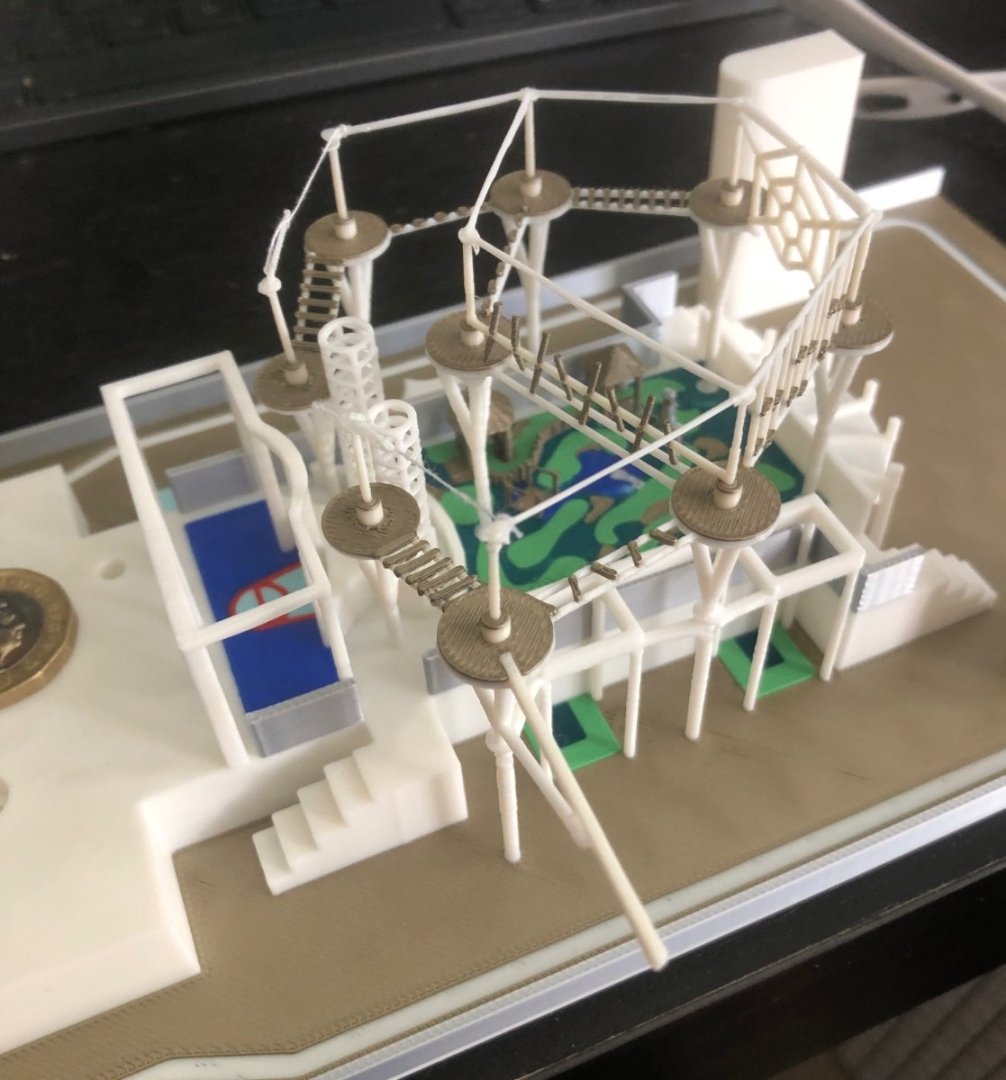
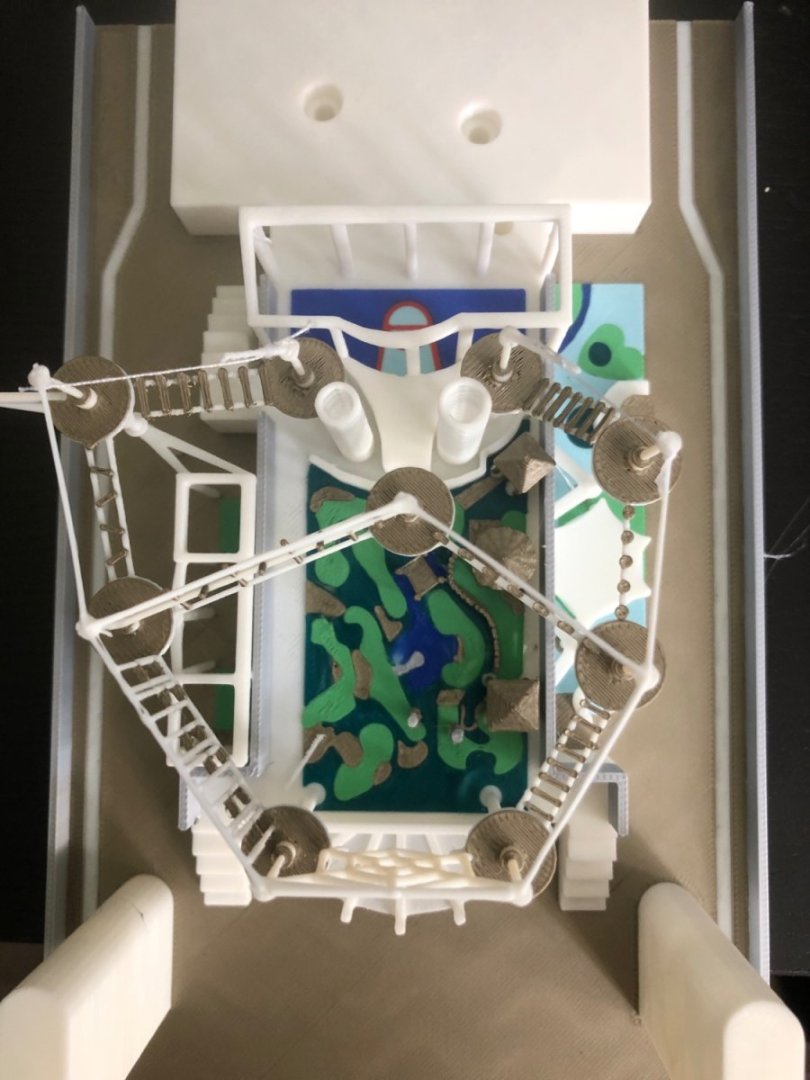
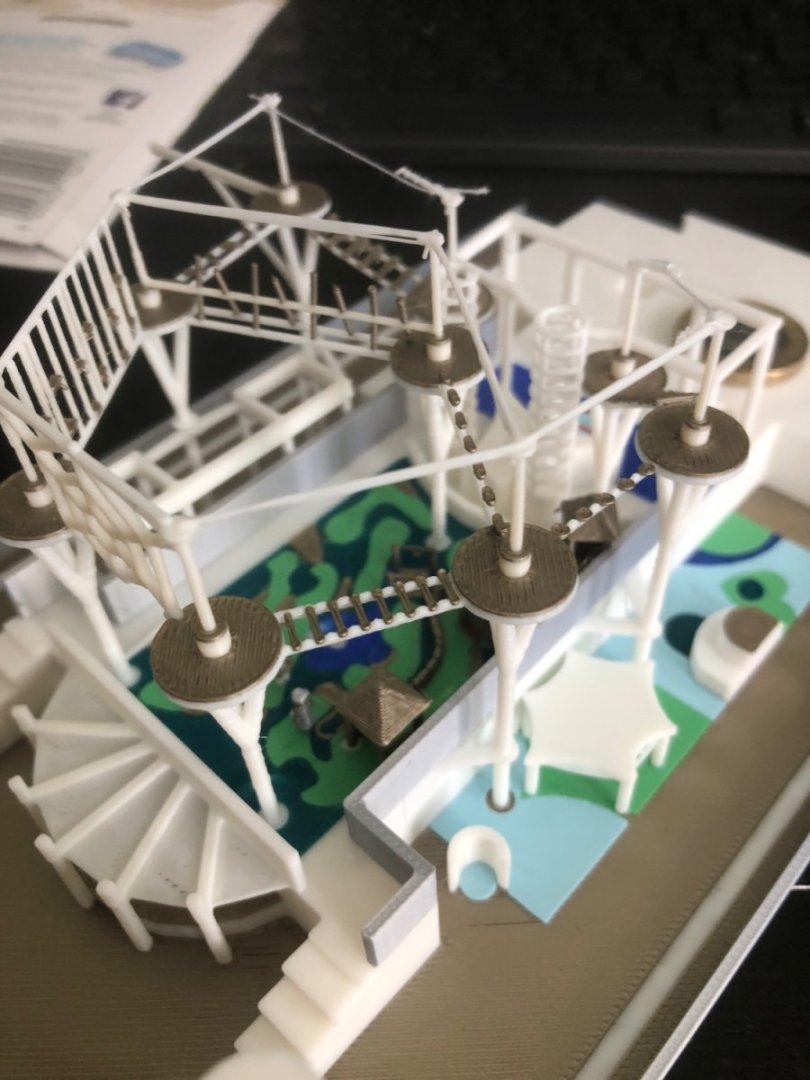
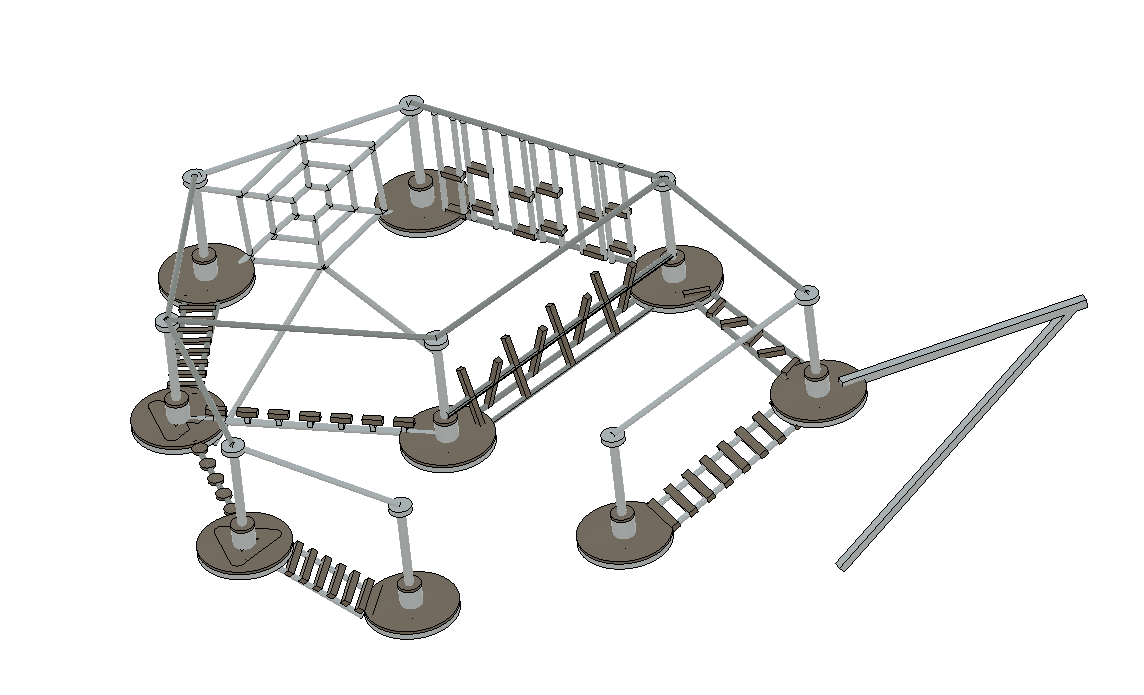
Quite pleased at how the high ropes etc. print came out - had to resort to thread to rescue a couple of failed sections - but maybe I should use it a little more for some other ropes.
-
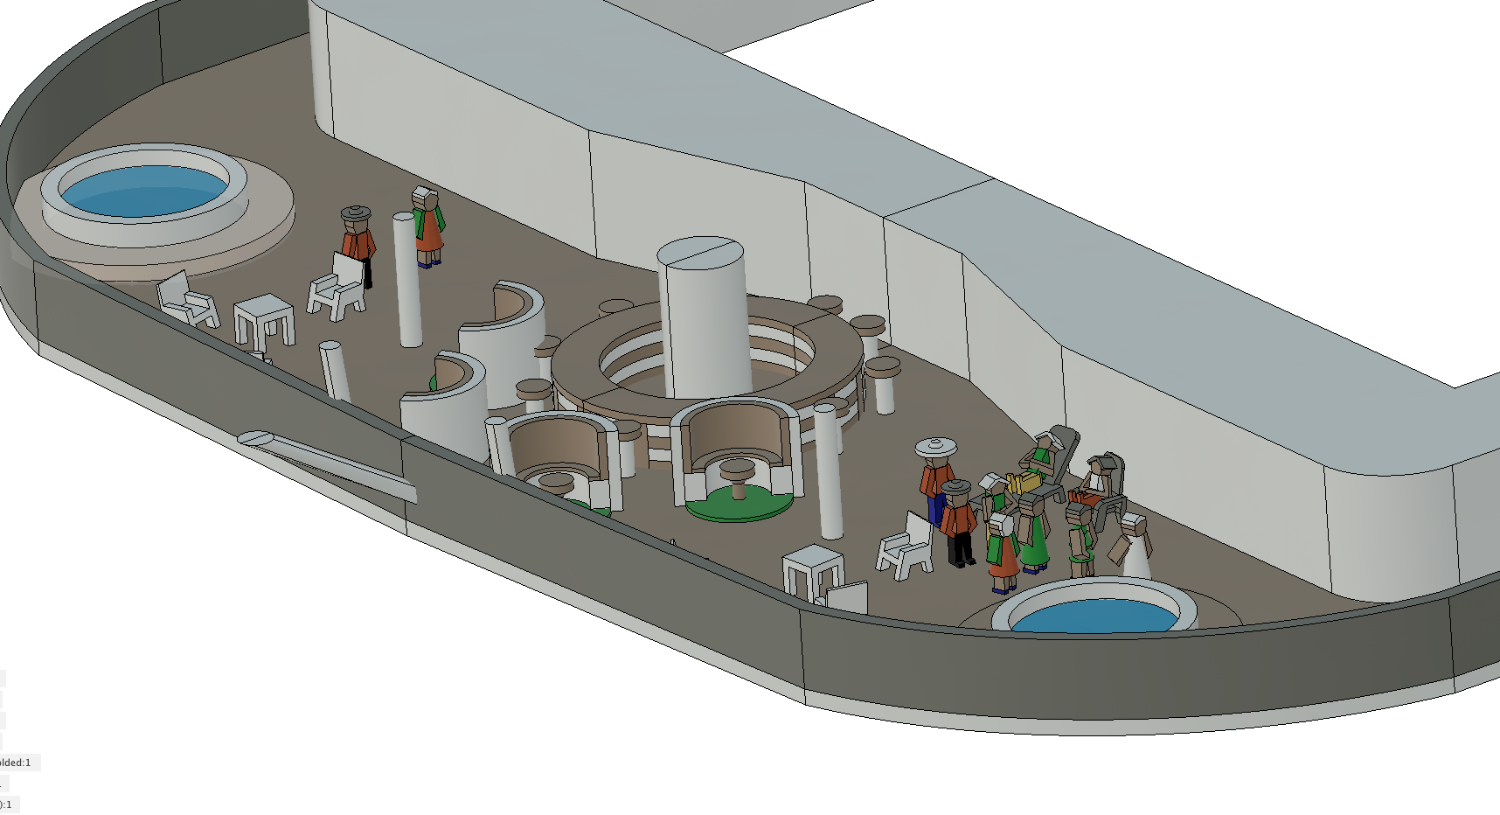
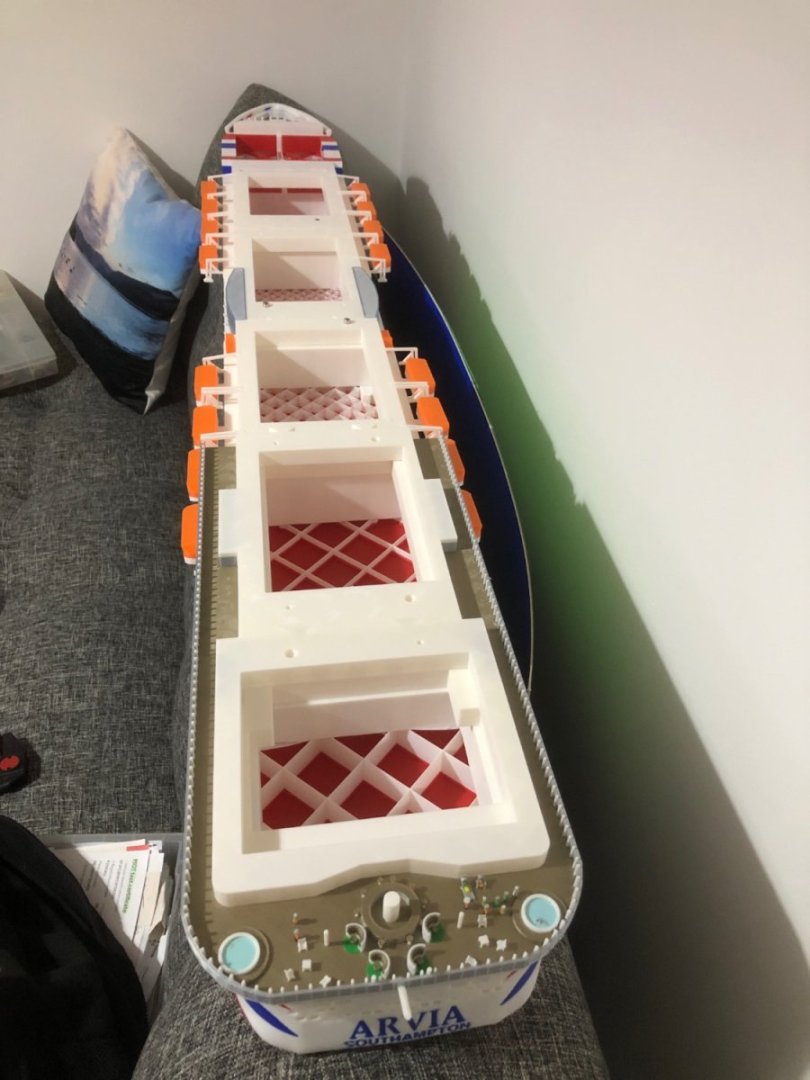
Closer to realistic high ropes now modelled, plus some corrections to deck 18 - not sure how well it is going to print though.
-
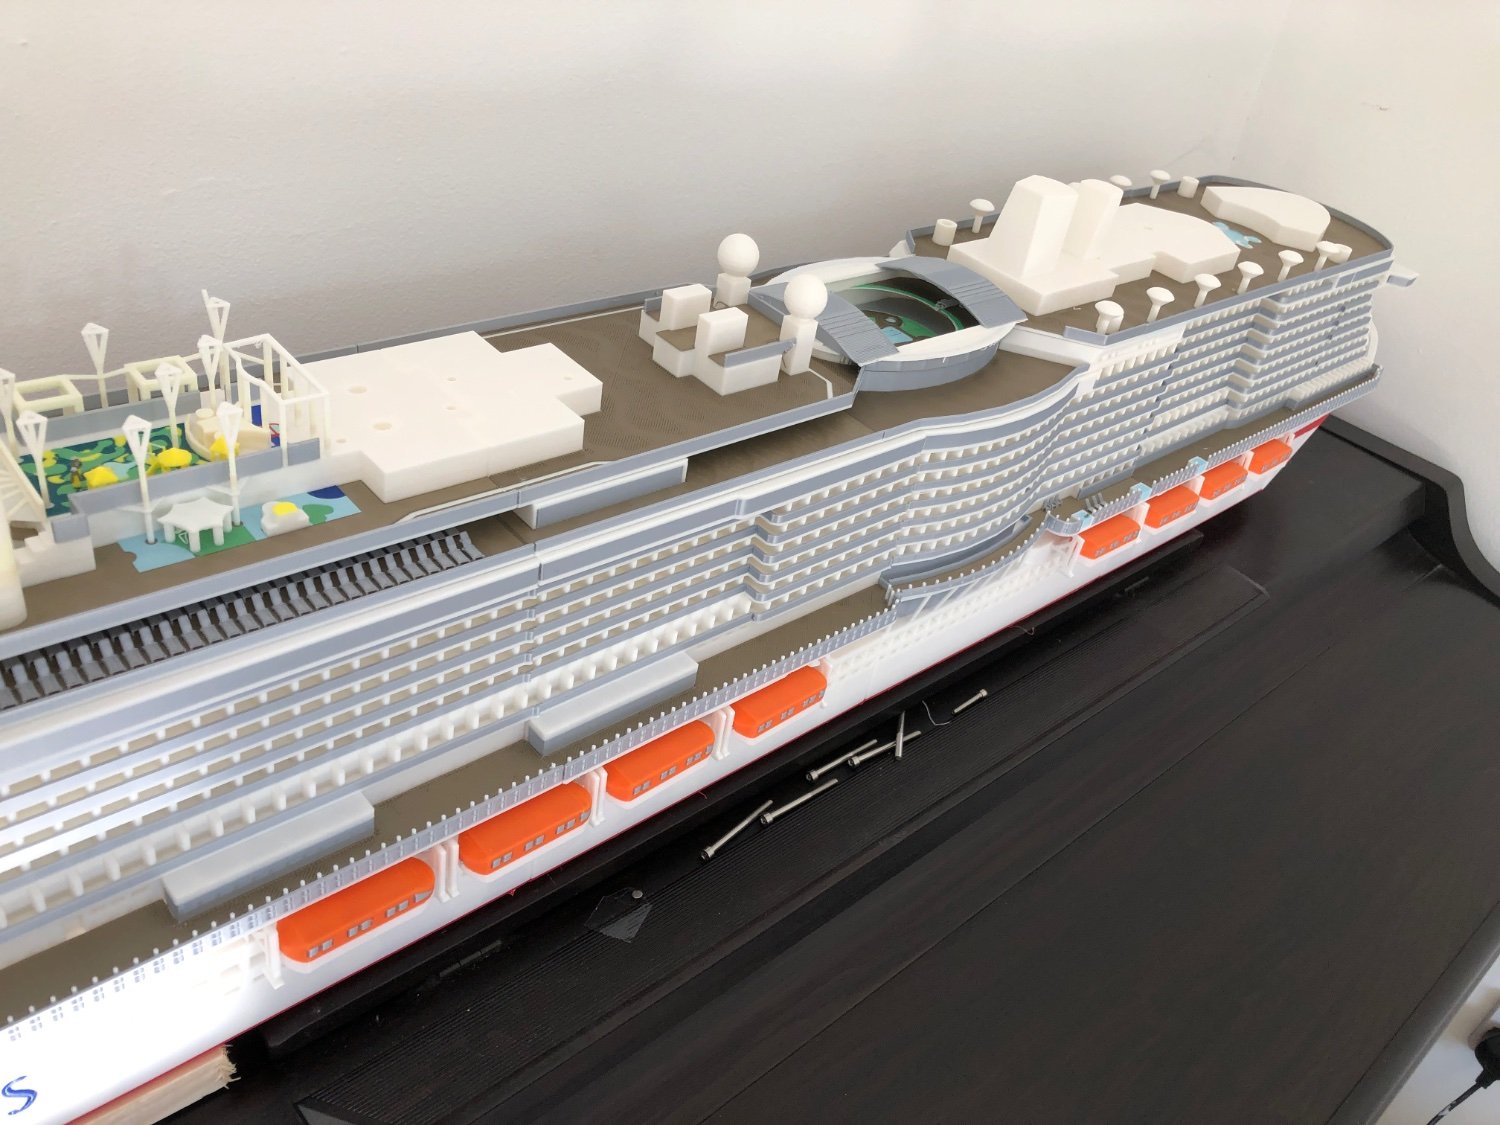
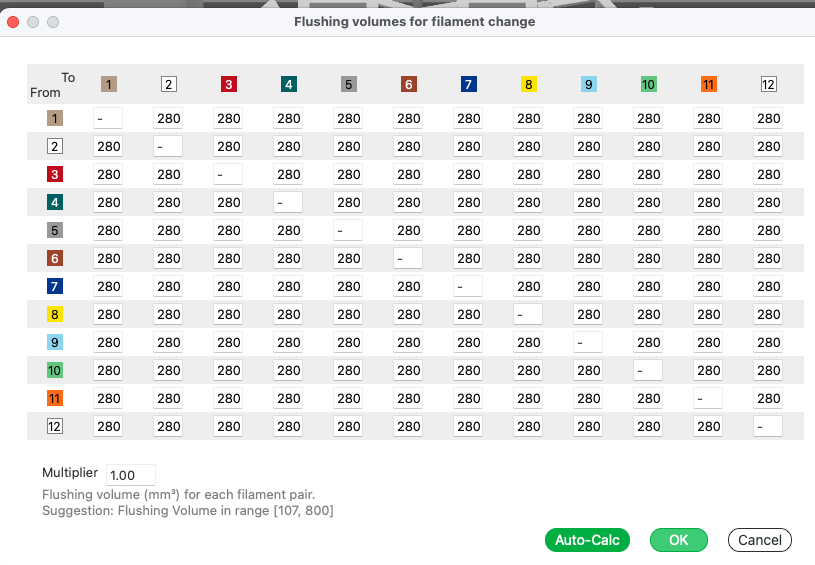
Bit of yellow staining on some white parts - so should have increased flushing volumes, but will do for now. So that's all of deck 18 now complete. Might reprint though with a more sandy yellow colour filament if I can find a suitable one. Just deck 19 and funnel to go now.


-
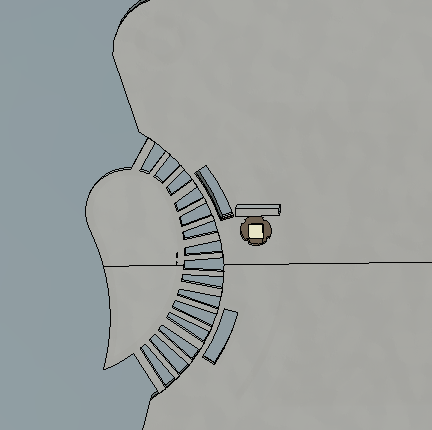
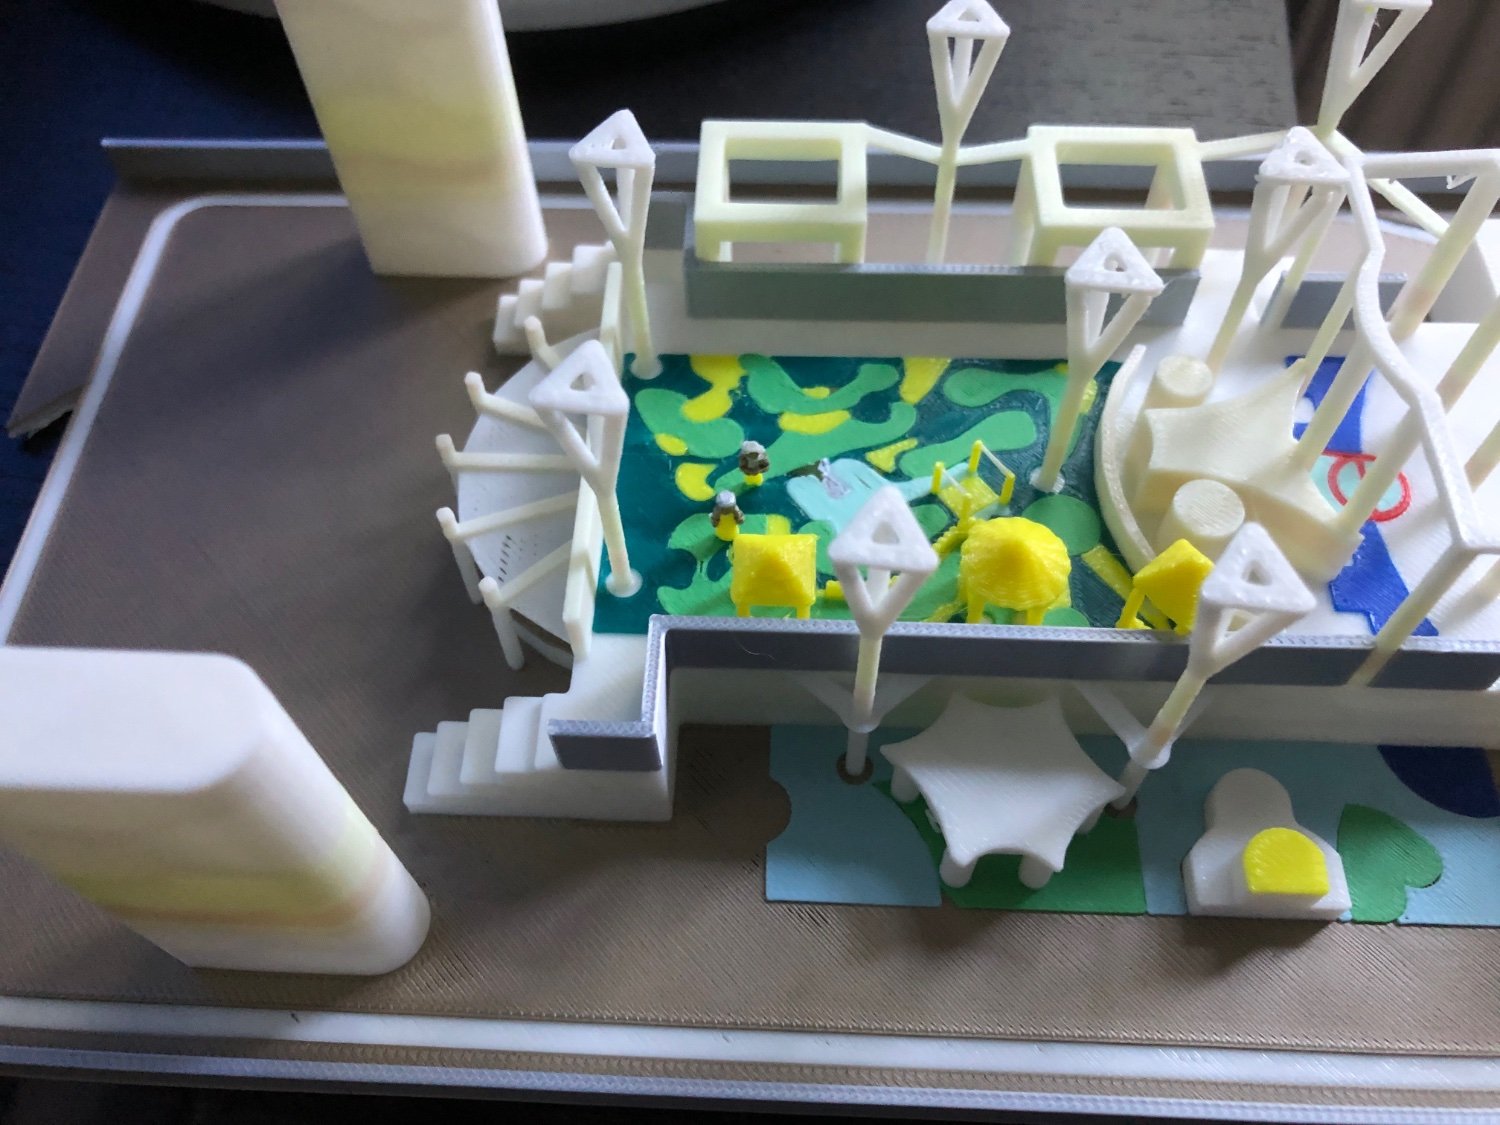
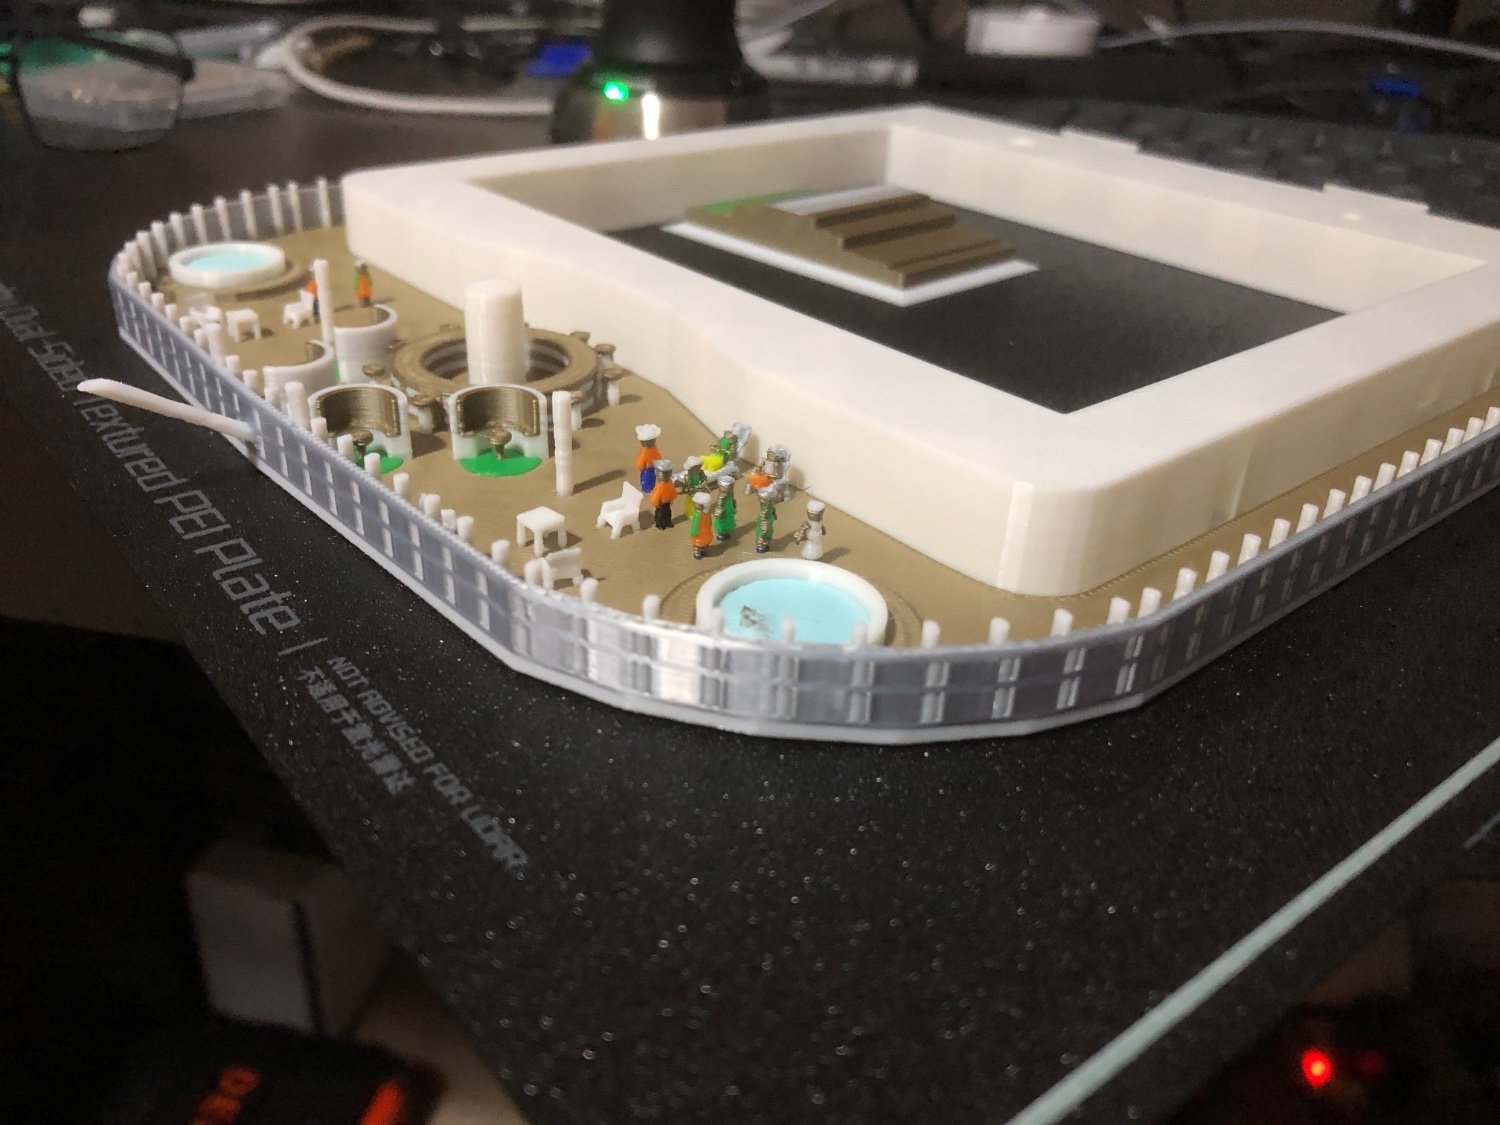
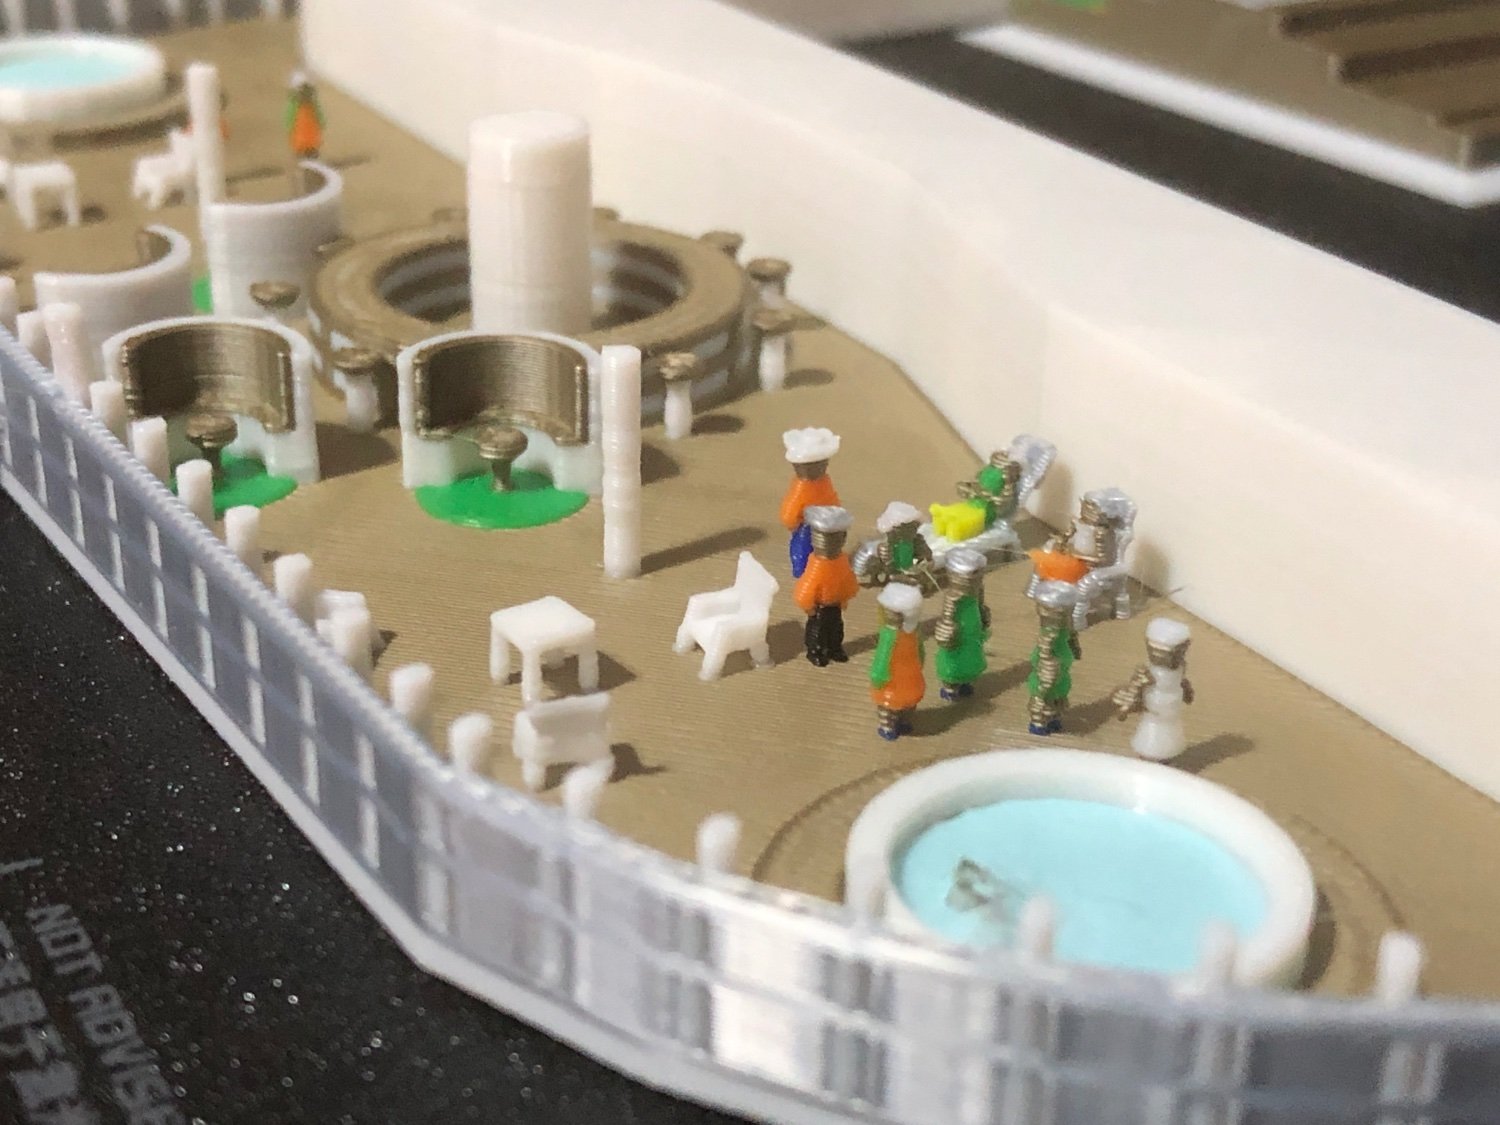
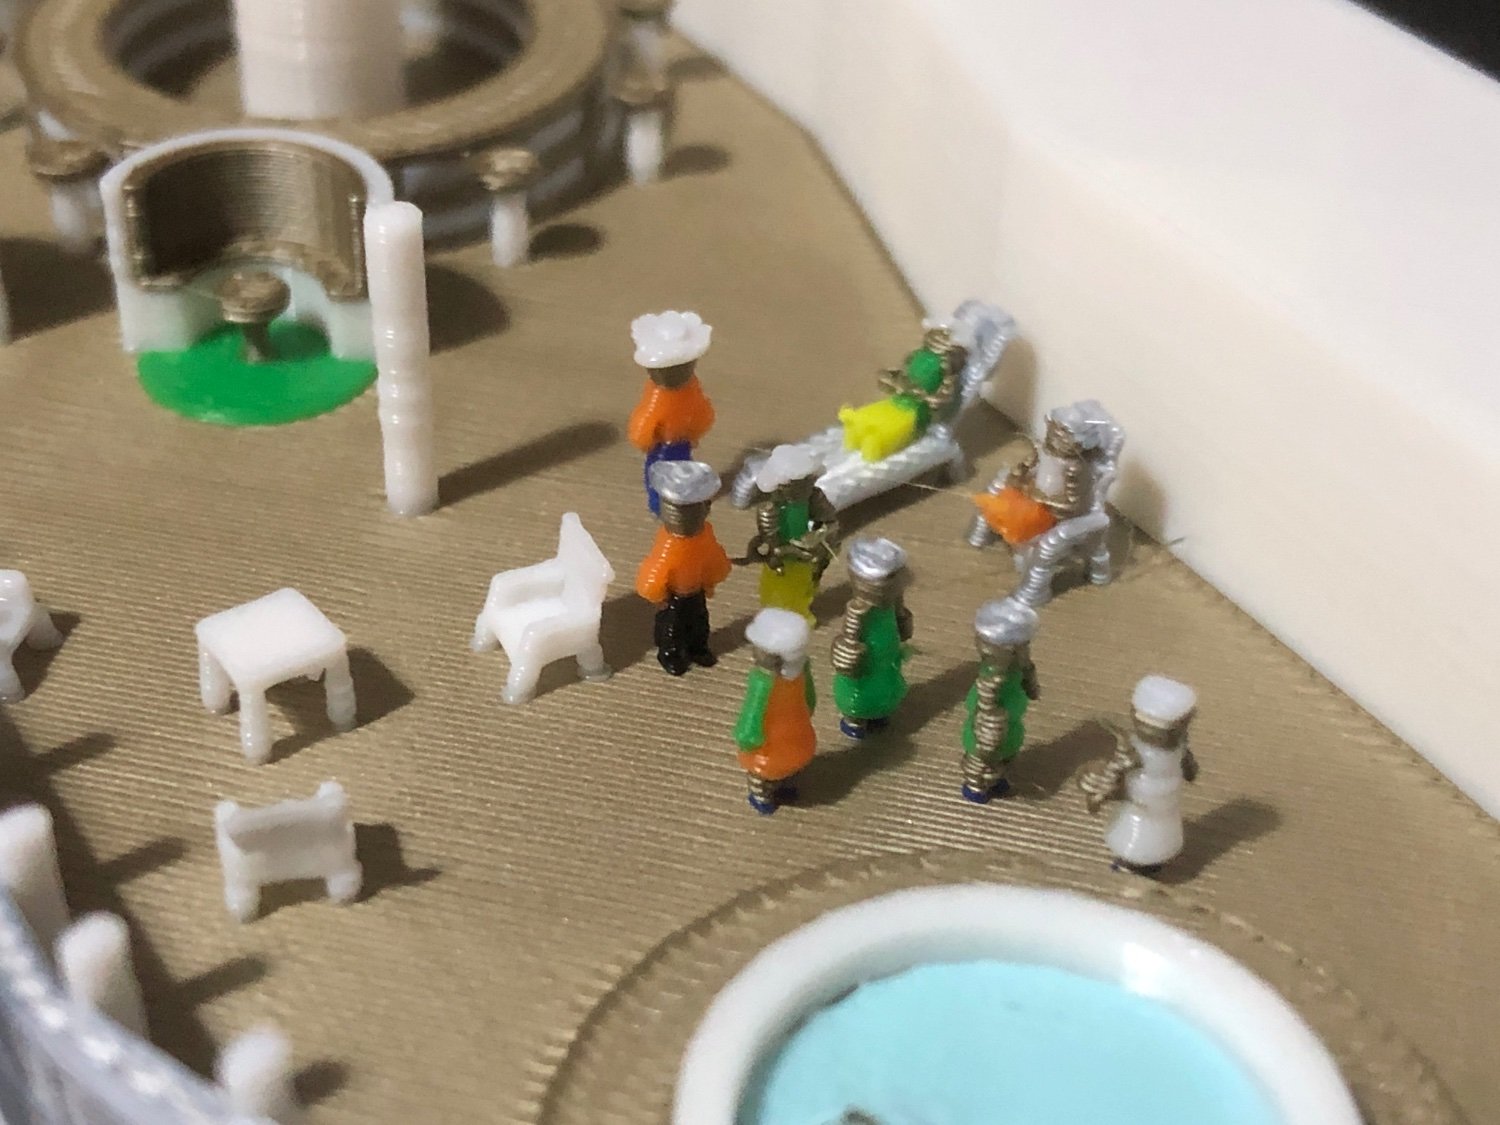
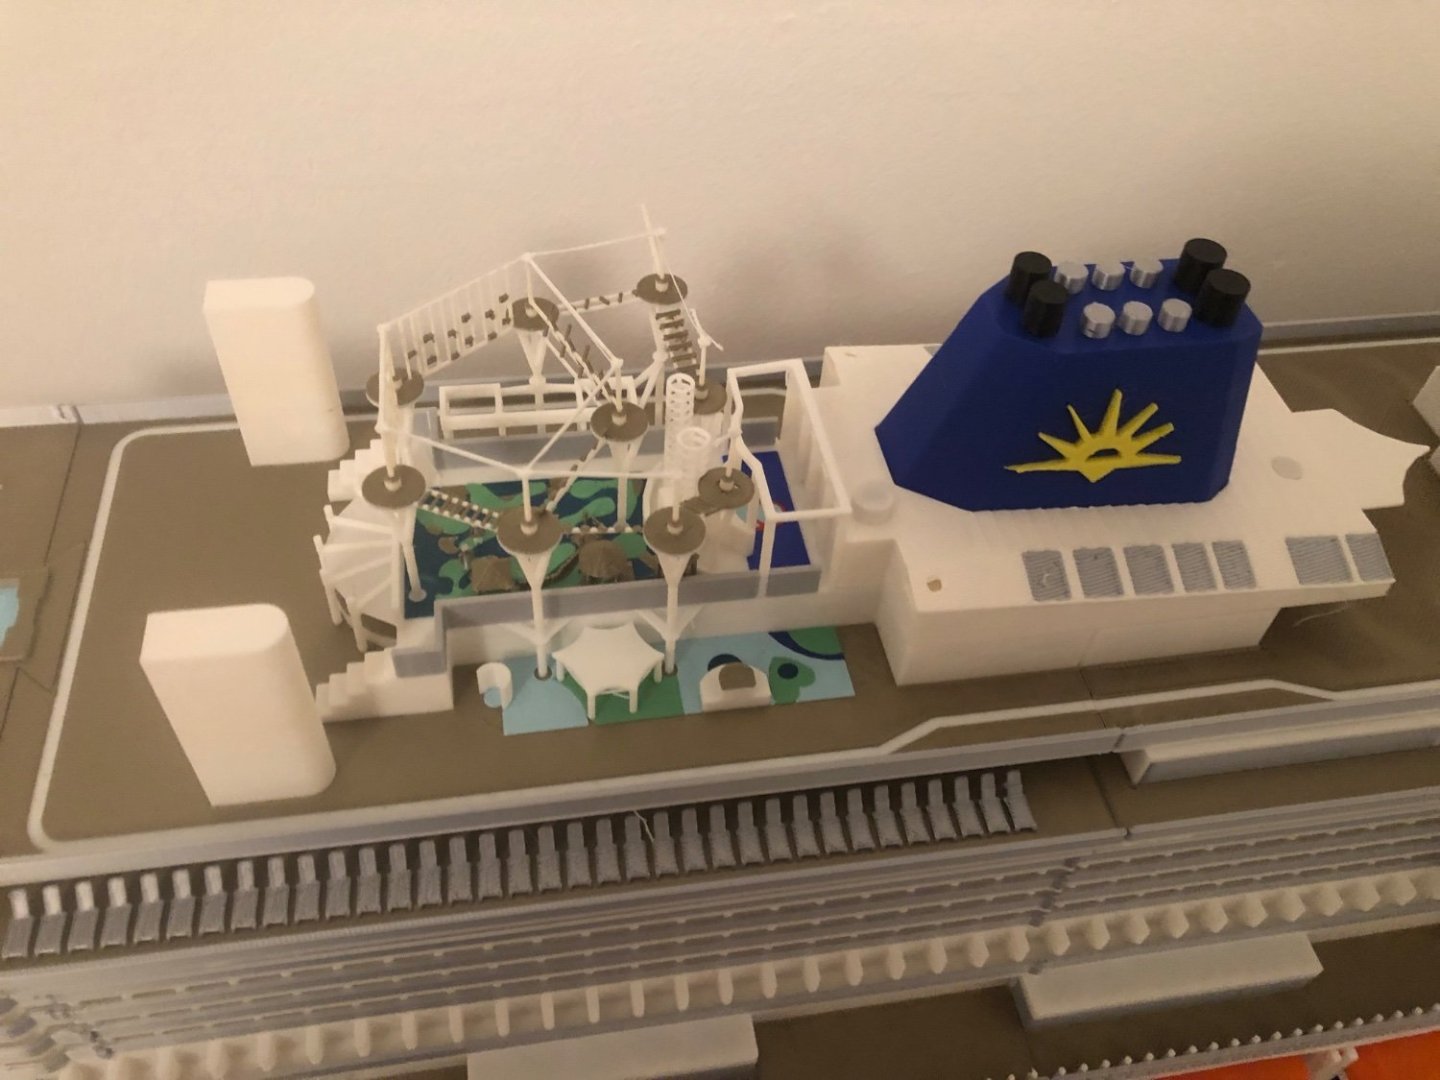
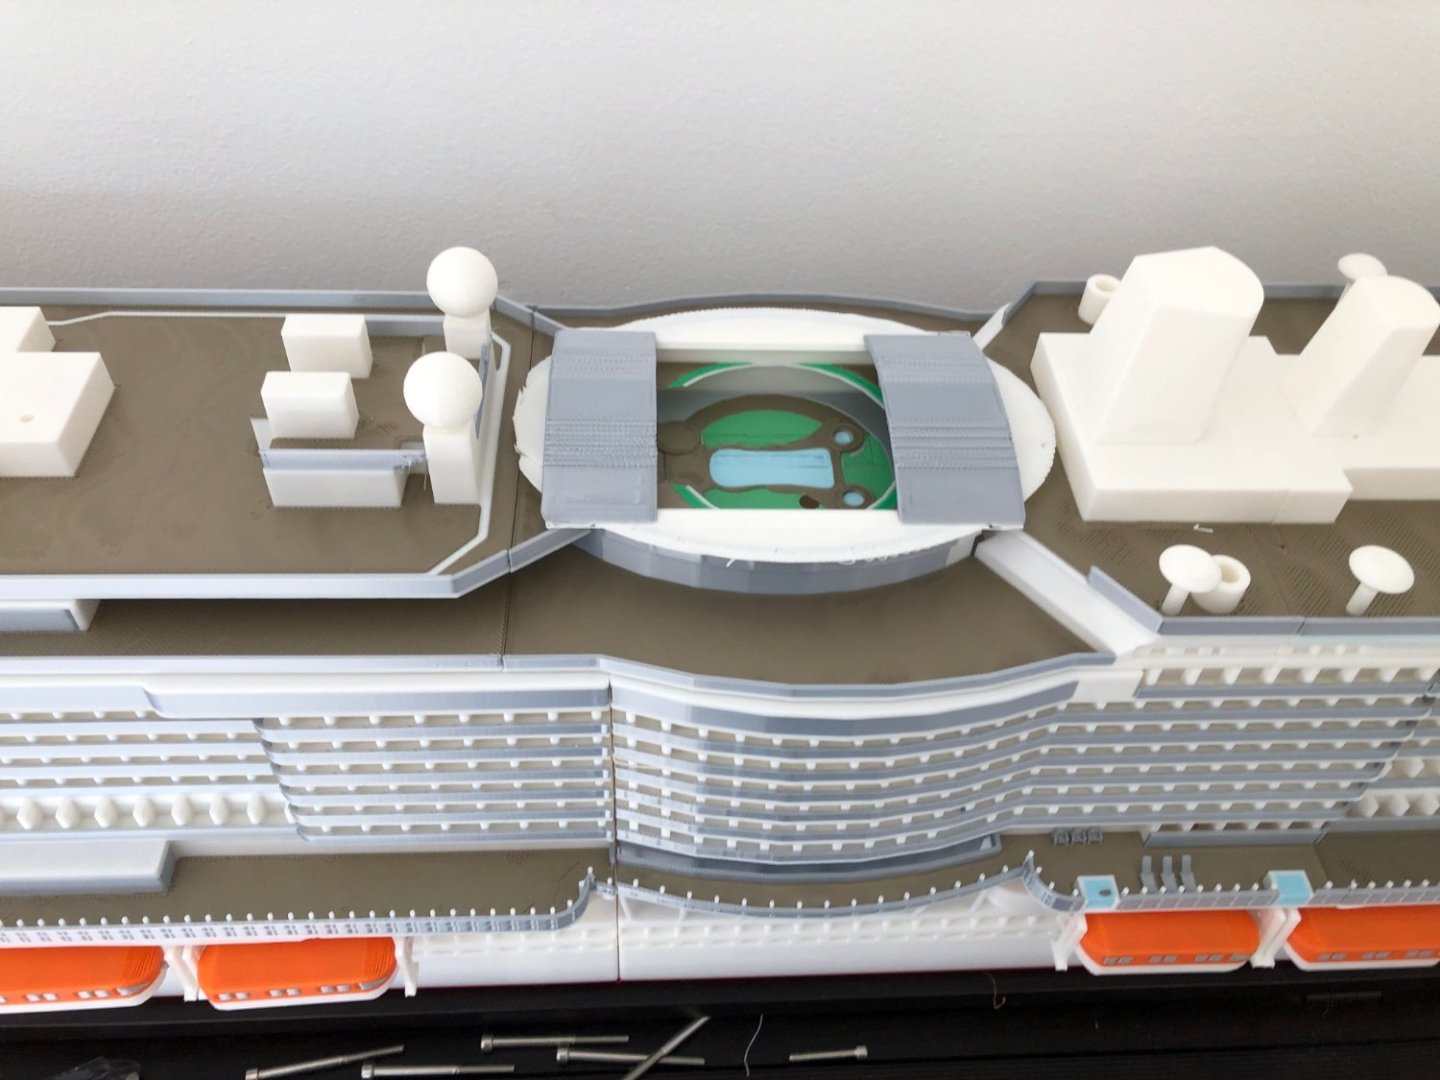
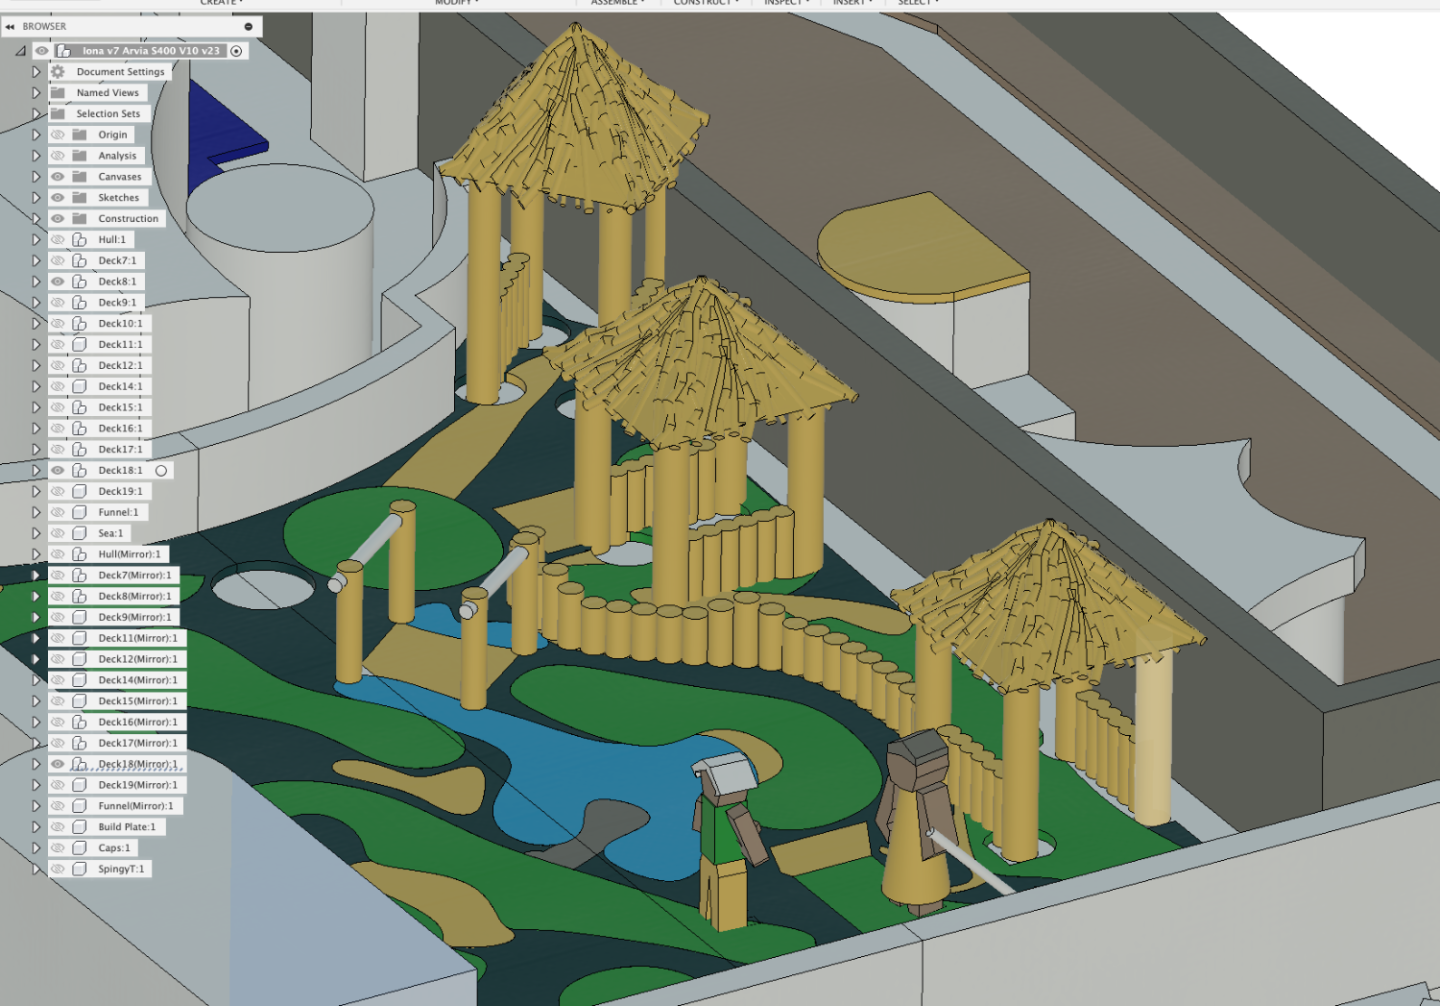
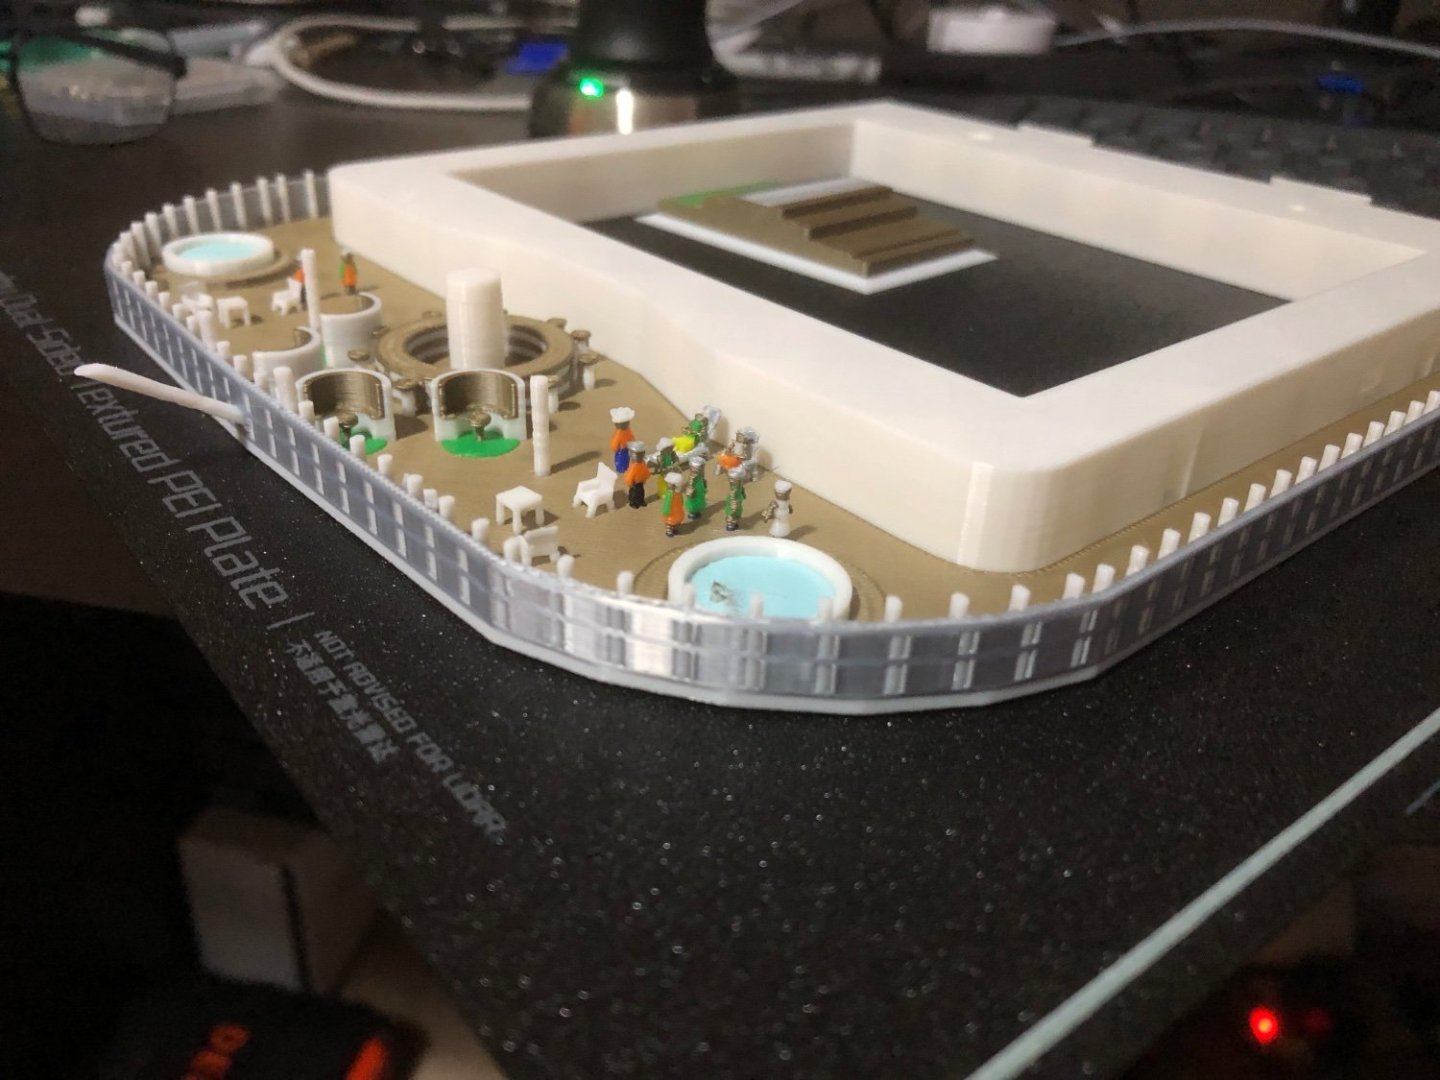
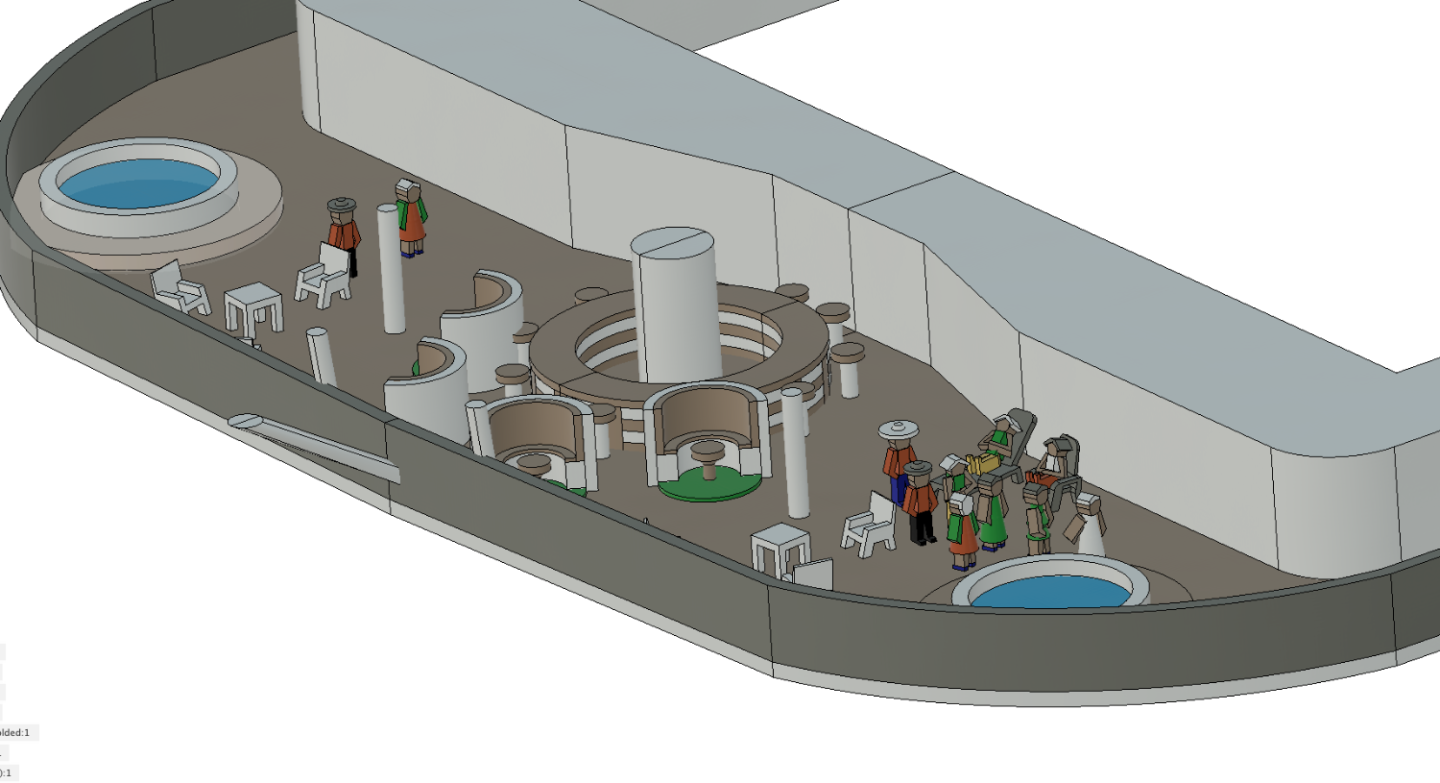
Finer details of onboard crazy golf coming along - quite please with roofs of little shacks - did it with a loft, which is shelled, then on one surface put some random sketch lines, then did pipes along each line. Then did a circular pattern to replicate the lines over each face.
-
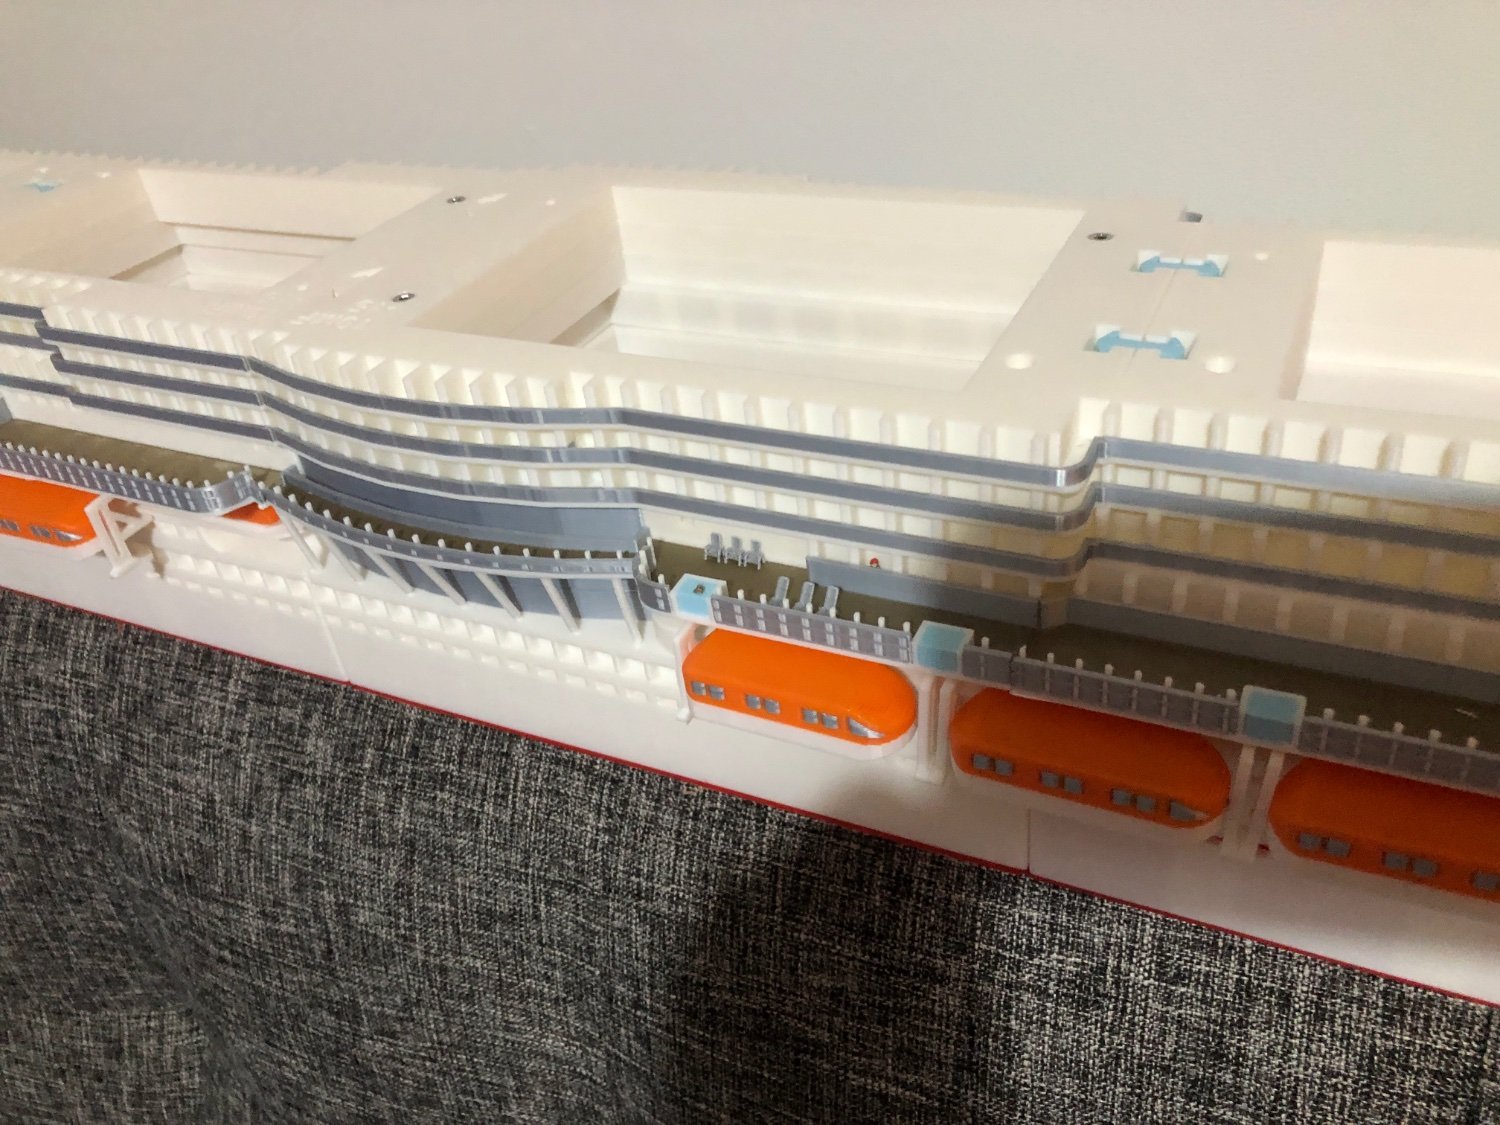
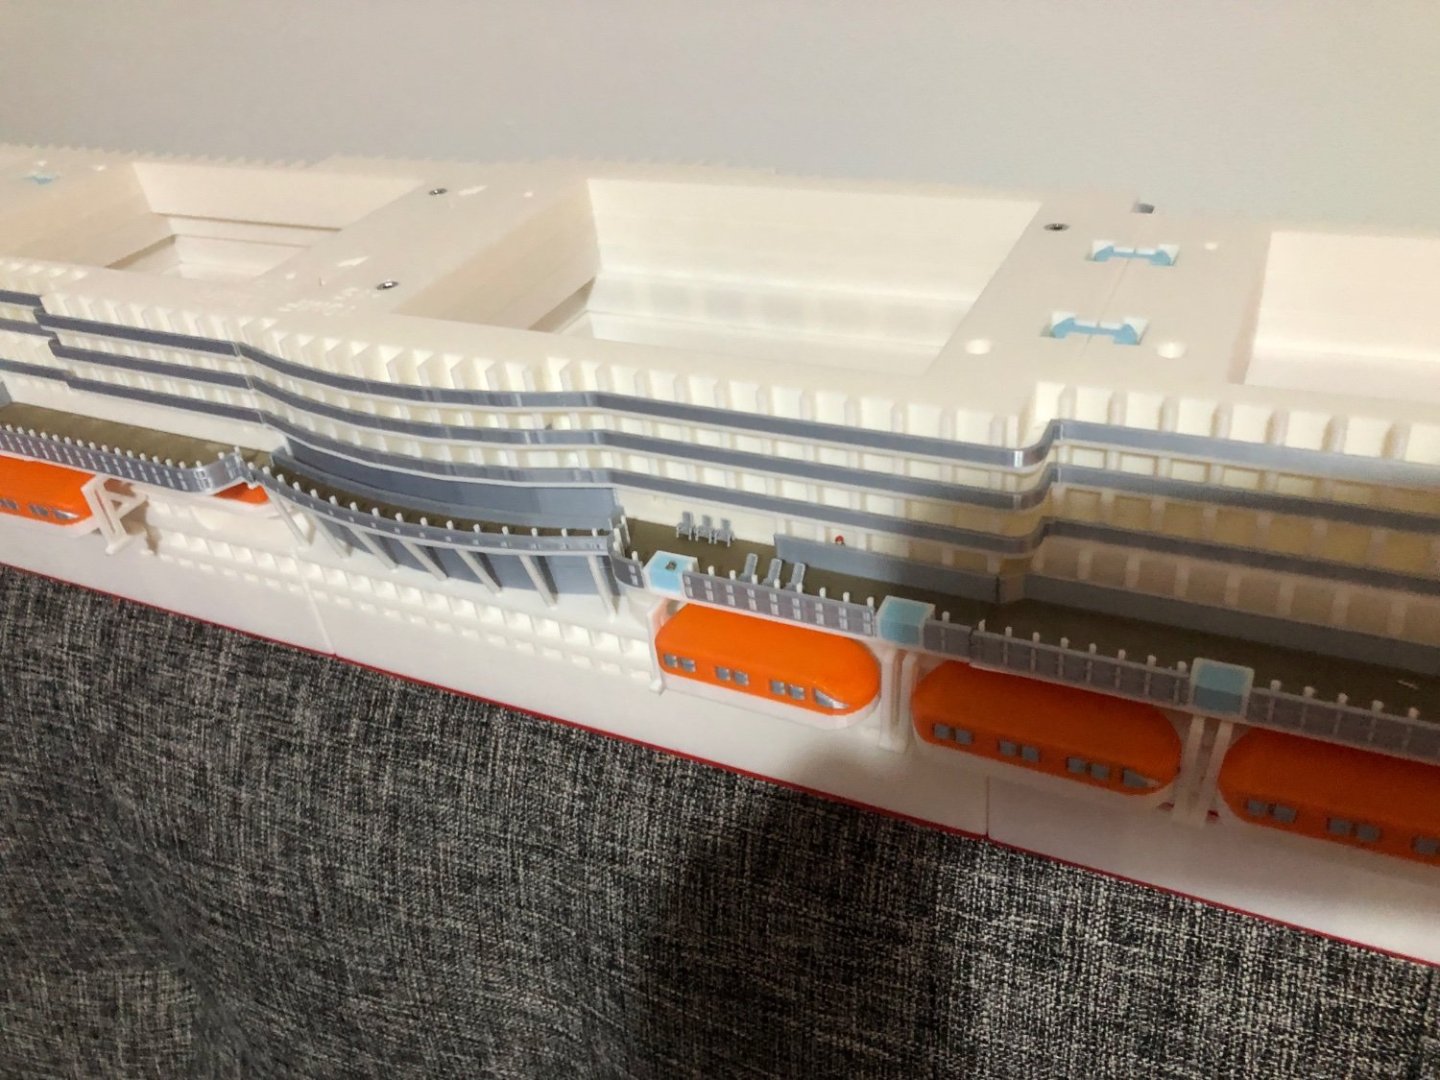
Now complete up to Deck17 - most of deck18 ready to go - just the high ropes and golf course to add detail to. Biggest issue is fixing Deck17 down - had hoped to do this deck with magnets - however proving difficult to get them to fit on the underside. Quite pleased how the Sun Beds came out.

-
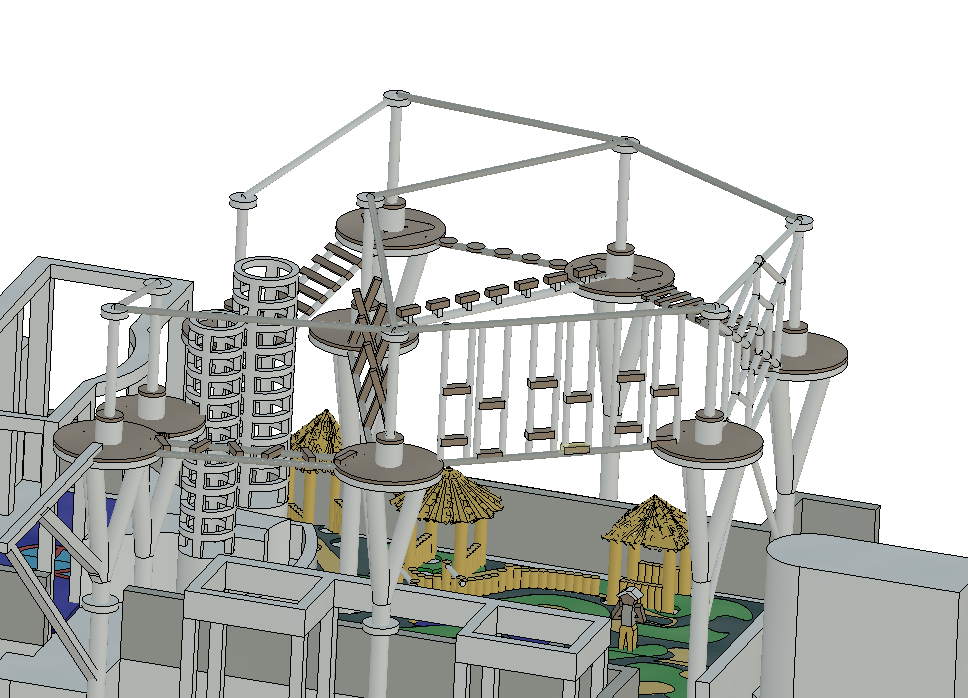
Just discovered this fantastic thread on Cruise Community. Arvia Construction wish I'd found it earlier - but will be very useful for later below waterline additions. Plus I think I will also try and break the 1:1000 version into real sections as they were delivered - might try making a video that intersperses the parts being delivered and then being built up one by one. Deck build up continuing to progress nicely - also interesting to see the difference in scale between this 1:250 model and the 1:1000 P&O Cruises Ventura model that I am also working on. Its a slightly smaller ship - but looks tiny compared to Ariva 250. Next stage is to Model more detail into Deck16 before I can print it- particularly the swim up bar at the back.

-
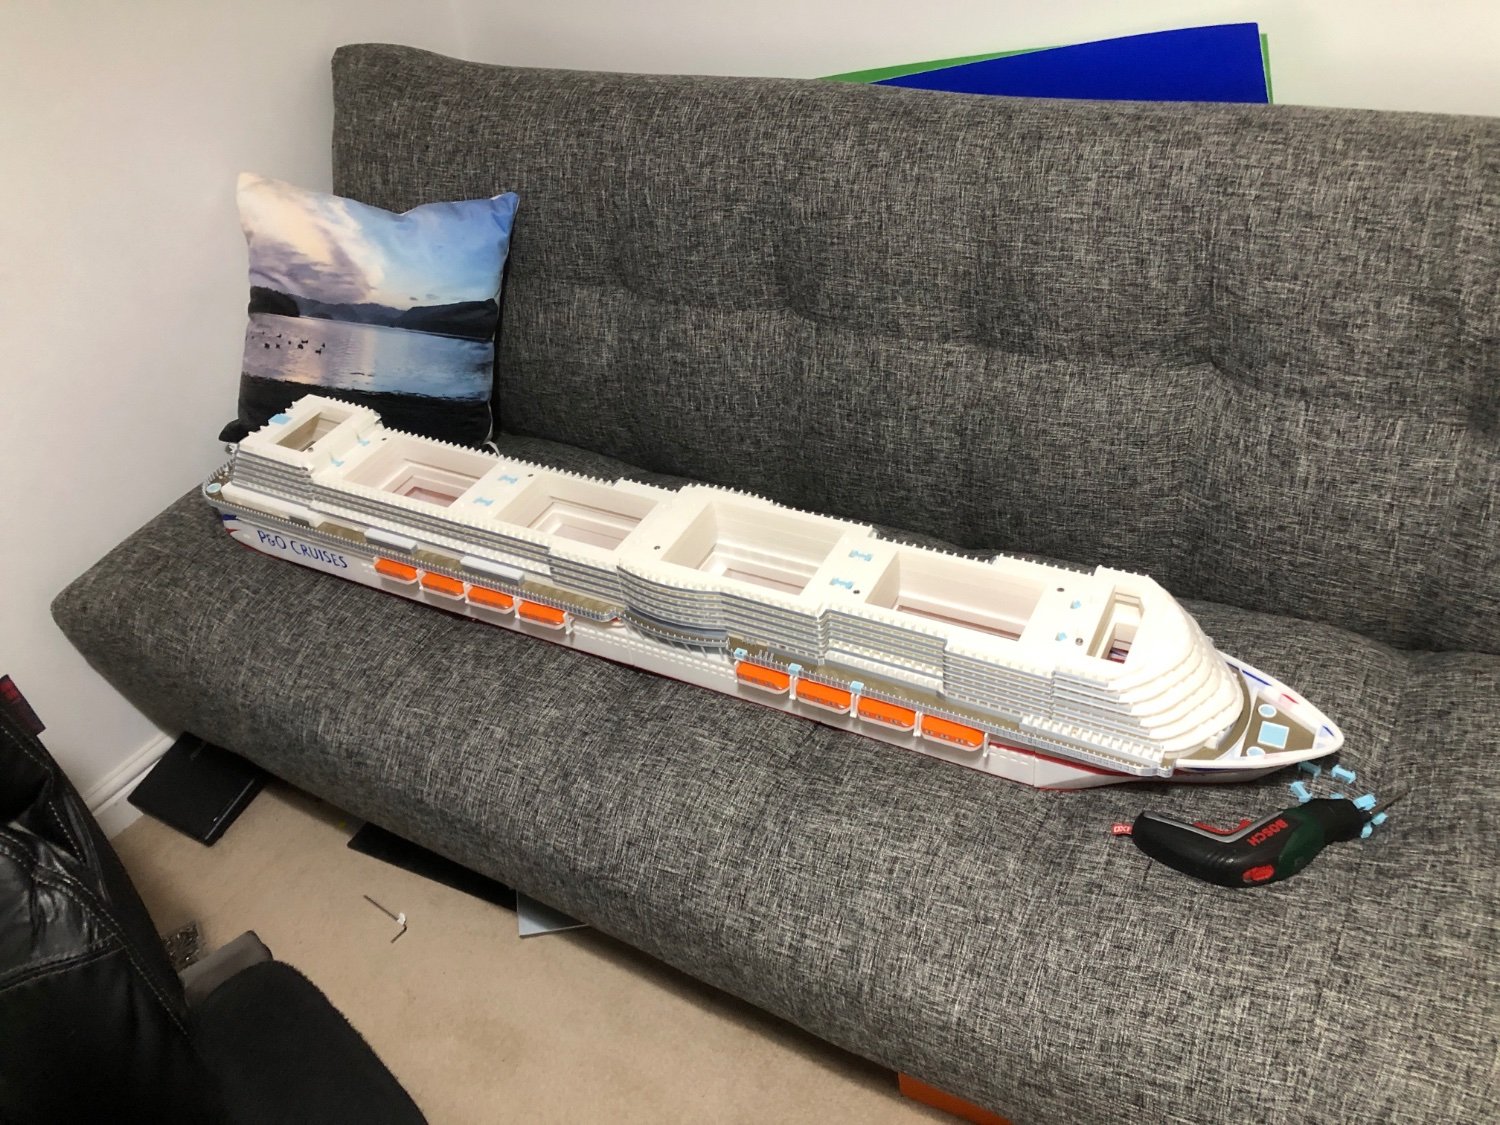
Ship really starting to take shape.


-
Sorry about that - mine didn't seem to appear at first, but it is now coming up in the 'Overview section' - just beneath 'content view behavour'
-
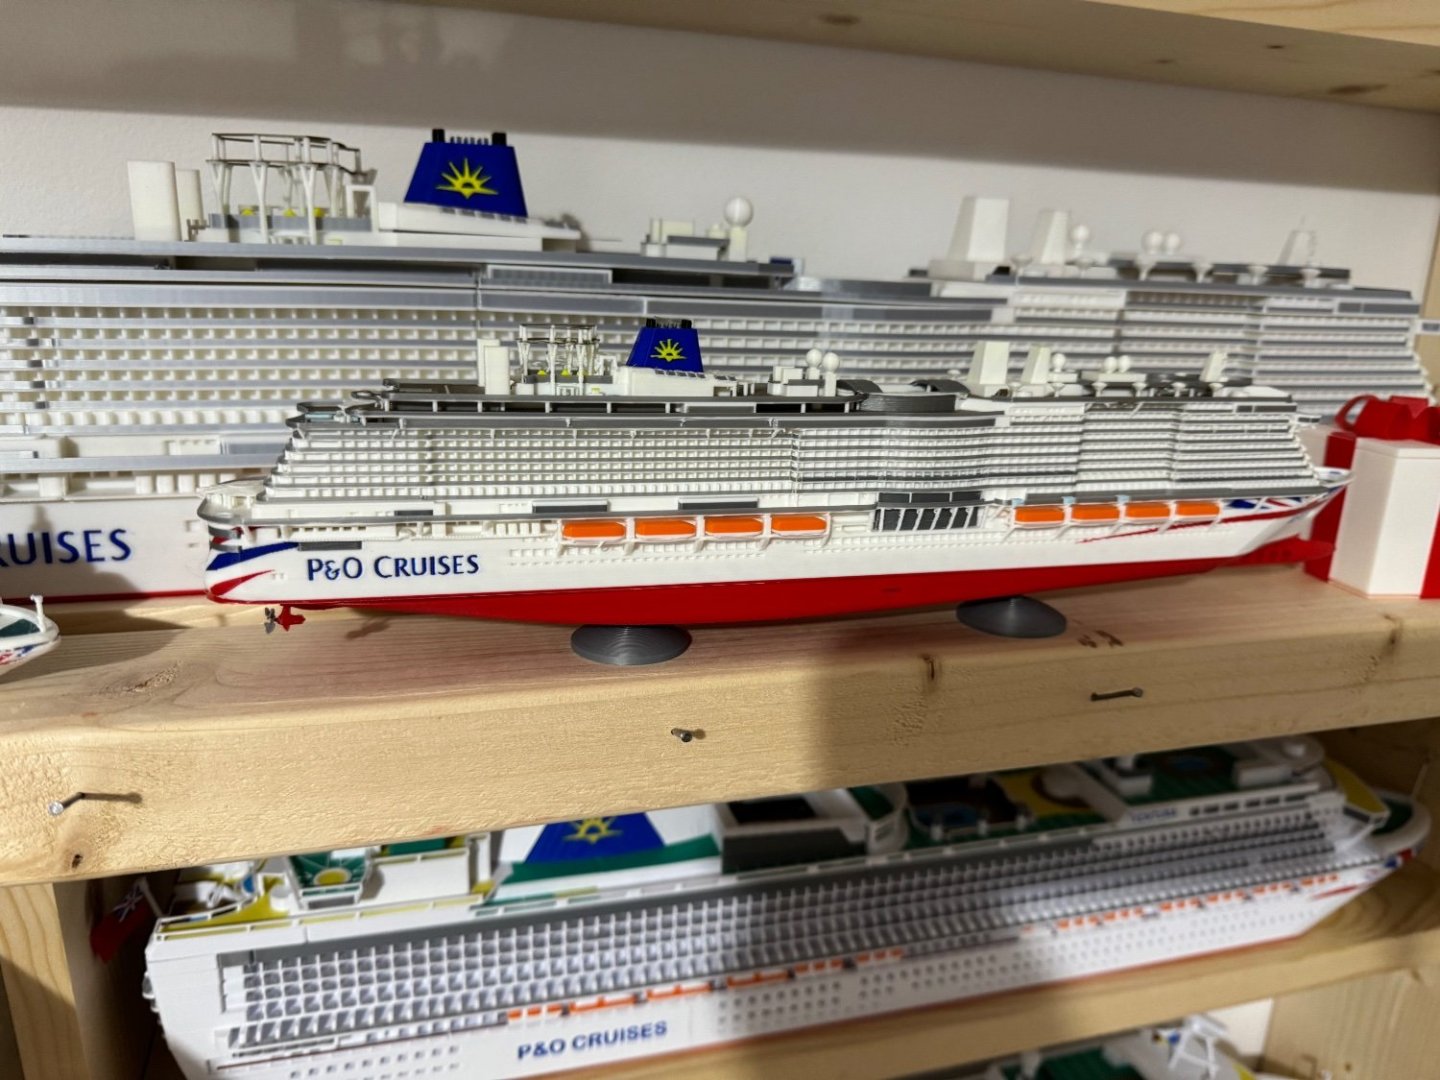
Haha - Given the lack of interest in the 1:500 models I published - probably won't bother releasing 1:250 models any time soon. Plus this will probably be the only one I do myself as printing it is taking weeks to print the 100+ plates, plus I don't have the space for too many. I am however going to opposite direction - currently prototyping a 1:1000 version of Ventura that you can print on a single plate. About 6 hrs printing time single colour and about 20hrs multi colour.
-
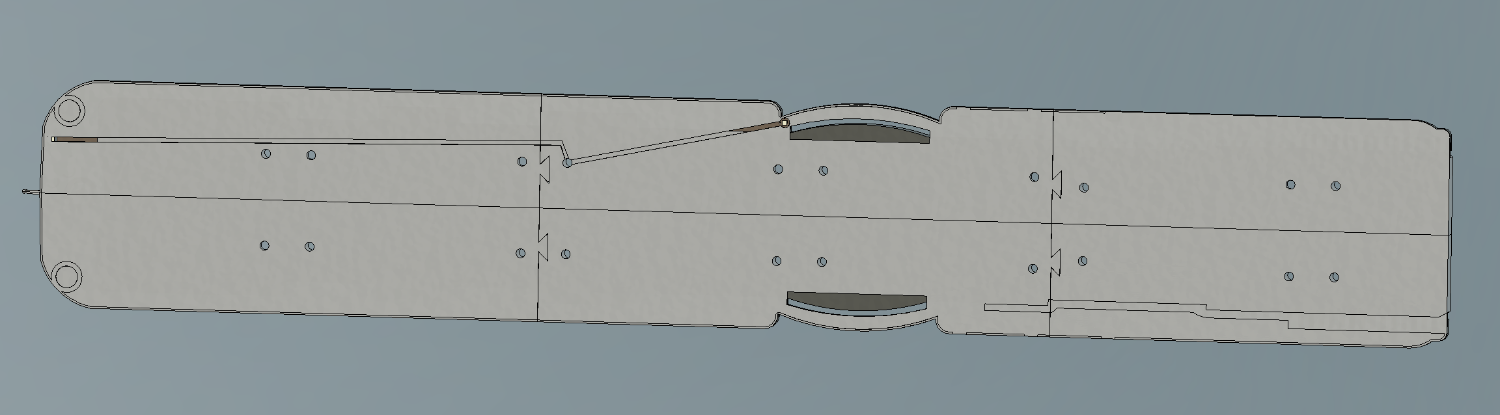
Now up to deck 11, with deck 12-15 ready to print (Luckily the middle 4 sections of deck 10-15 are all identical). Had some challenges with Fusion 360 - particularly relating to changing my deck section joining method over from 'tight dovetails' to mostly 'springy T slot' (other than the centre joint with is a 'loose dovetail' to allow for dissassembly. Quite pleased with furniture demo on Promenade deck, and example person in controversial 'Balcony Mini Suite'. Will likely also create a 1:1250 version of Arvia model too - as _CNPICs on printables has printed my Iona 1:500 model single colour in one go at 1:1250 and it came out surprisingly well. Iona 1:1250 print.
-
From a distance and with my eye sight deck8 stern print looking pretty good. Could perhaps refine the tiny models a little bit or maybe use a different filament for the arms - its PLA Metal. Still quite pleased with the results. Back section took about 8 hrs to print. Back section of deck 8 printed on 0.4mm nozzle, rest of ship so far all printed on 0.6mm Nozzle.


-
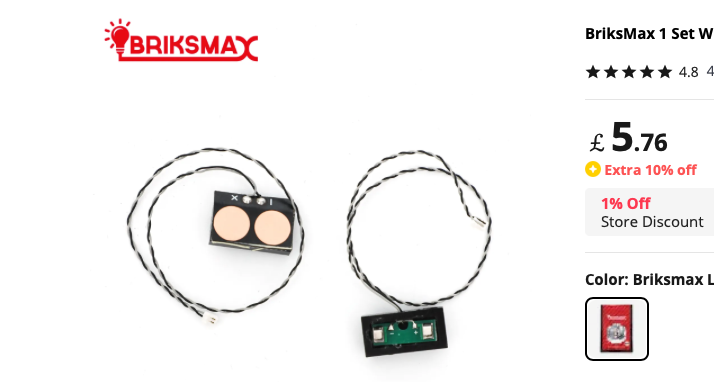
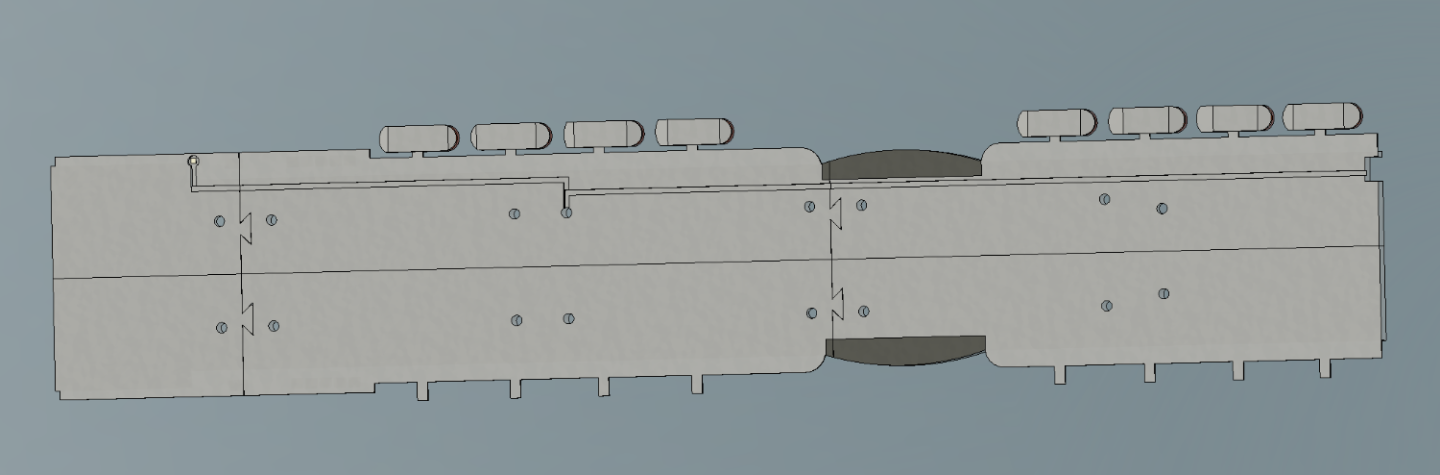
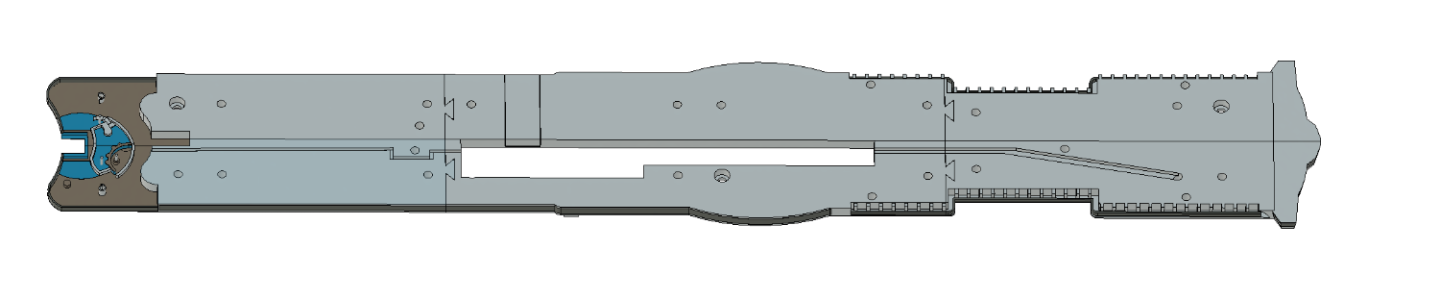
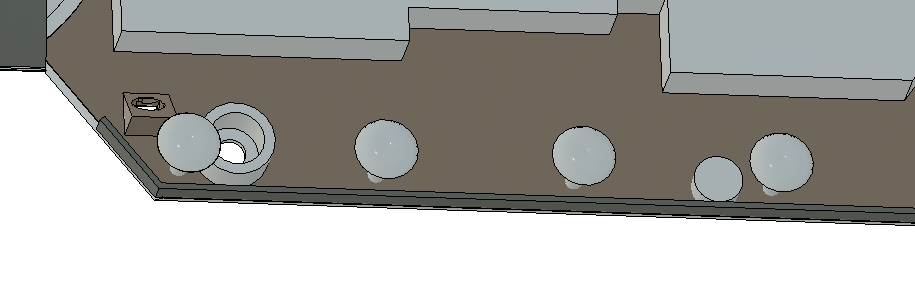
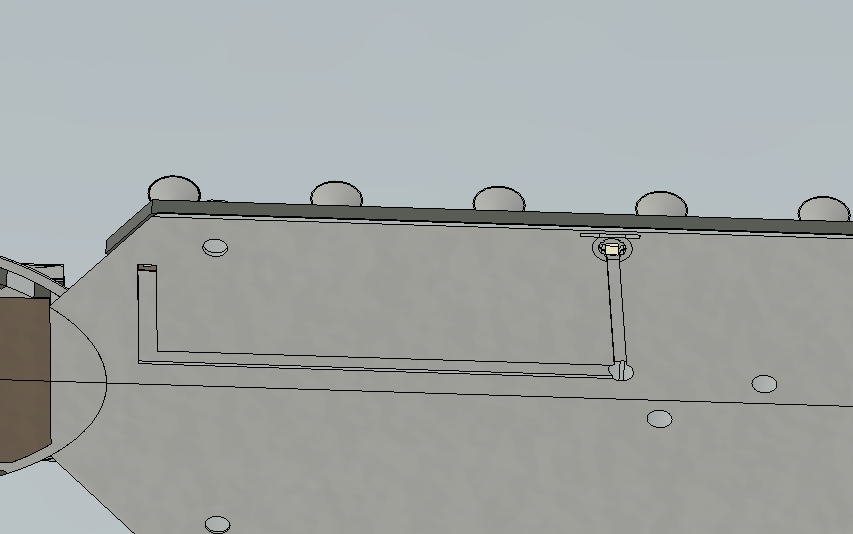
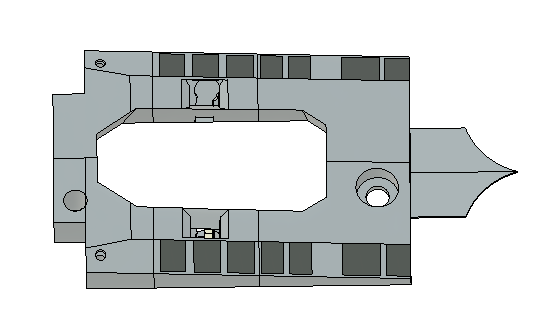
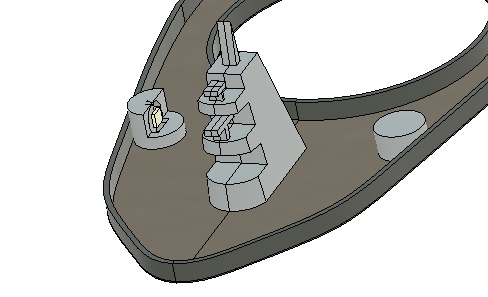
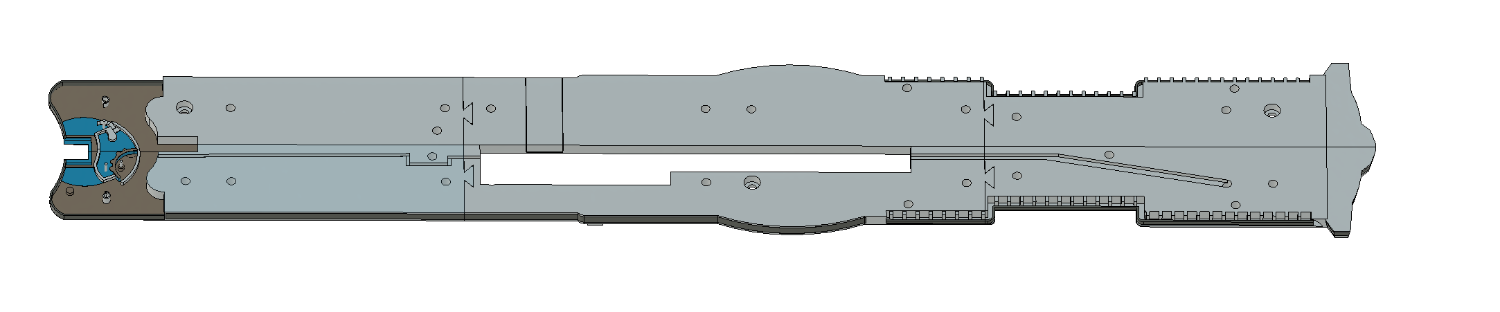
Quite a few changes to design required to incorporate wiring for LED lighting. Lessons learned. 1. Don't leave floors too thin when adding in cable runs - otherwise reprints will be required 2. Making the internals of the ship more hollow would make it much easier to add things like lighting for other future models. 3. Doing cable runs below decks is easier to manage than above - as wires can be taped in place before decks are bolted down 4. Allow inter deck holes to be big enough to accommodate shrink wrapped extensions to smaller wires 5. Make designs for LED holders more generic - to allow for changes to lights - and add ons such as individually addressable LEDs. 6. Consider having the collection point for the wiring at the bottom rather than near the top - so it is easier to handle wiring without having to worry about hiding it. 7. Check that cable routes are efficient and won't result in the need for extensions. 7. Consider adding wireless inter deck wiring interconnects like these in future designs - to make putting the model together, taking it apart and maintenance. Changes made to design to incorporate wiring + LED holders Deck7. - New channels and LED Holder Deck8 - new channels Deck16 - with space to wiring hub Deck17 - LED holder Deck18 Deck19 Funnel