-
Posts
73 -
Joined
-
Last visited
Content Type
Profiles
Forums
Gallery
Events
Everything posted by uscharin
-
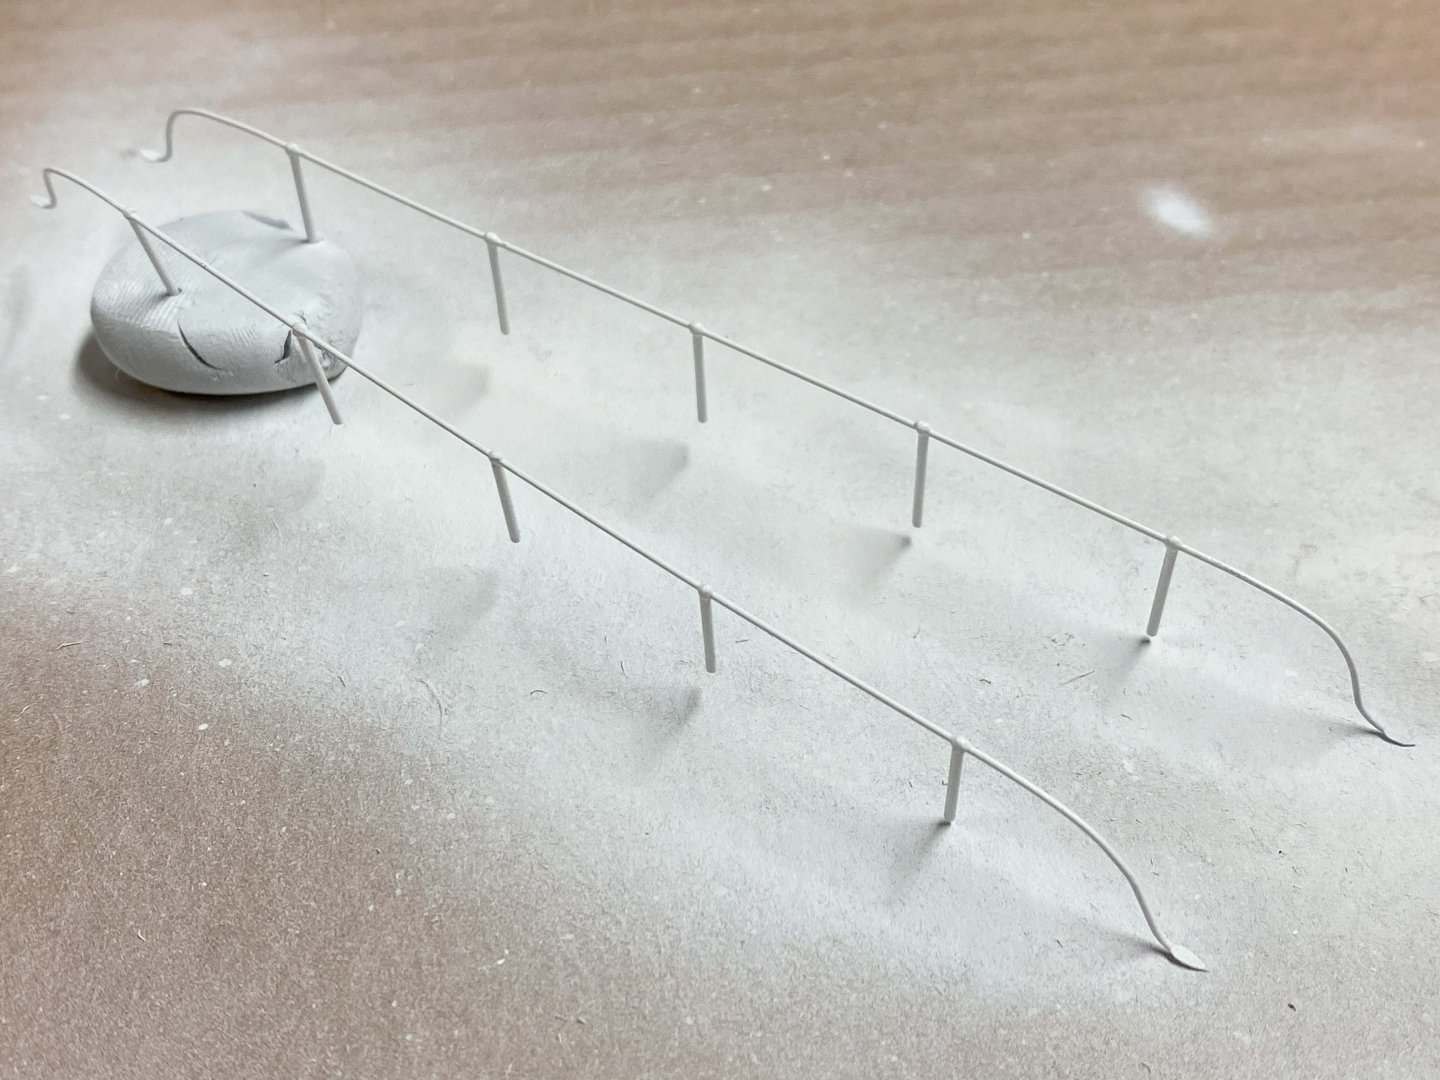
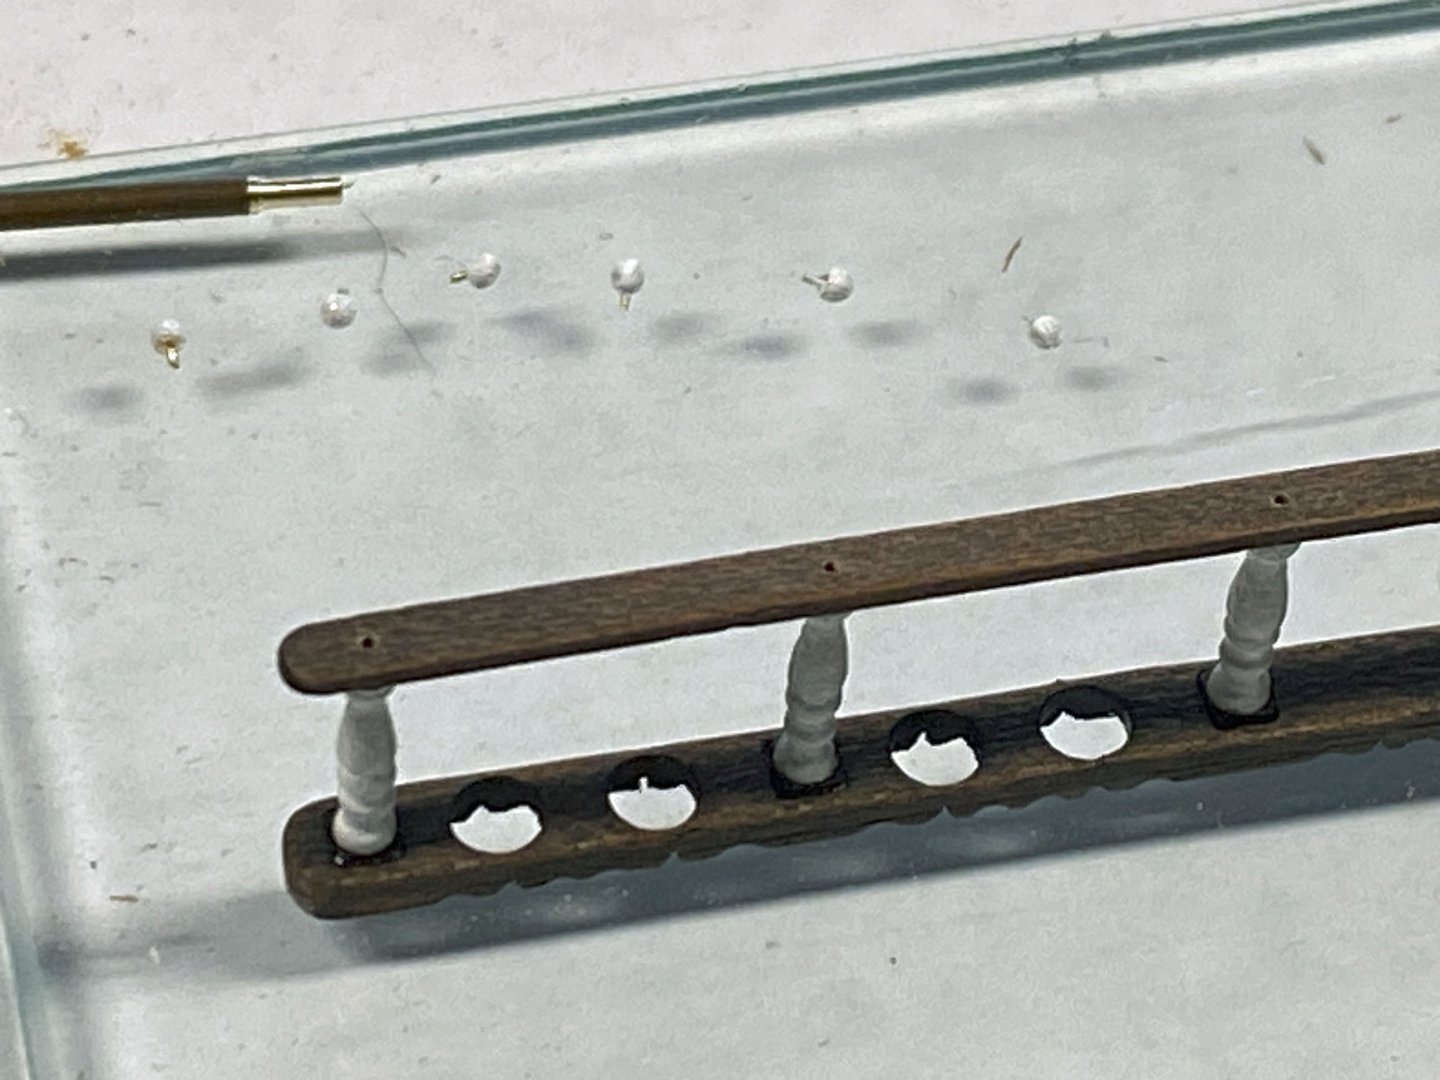
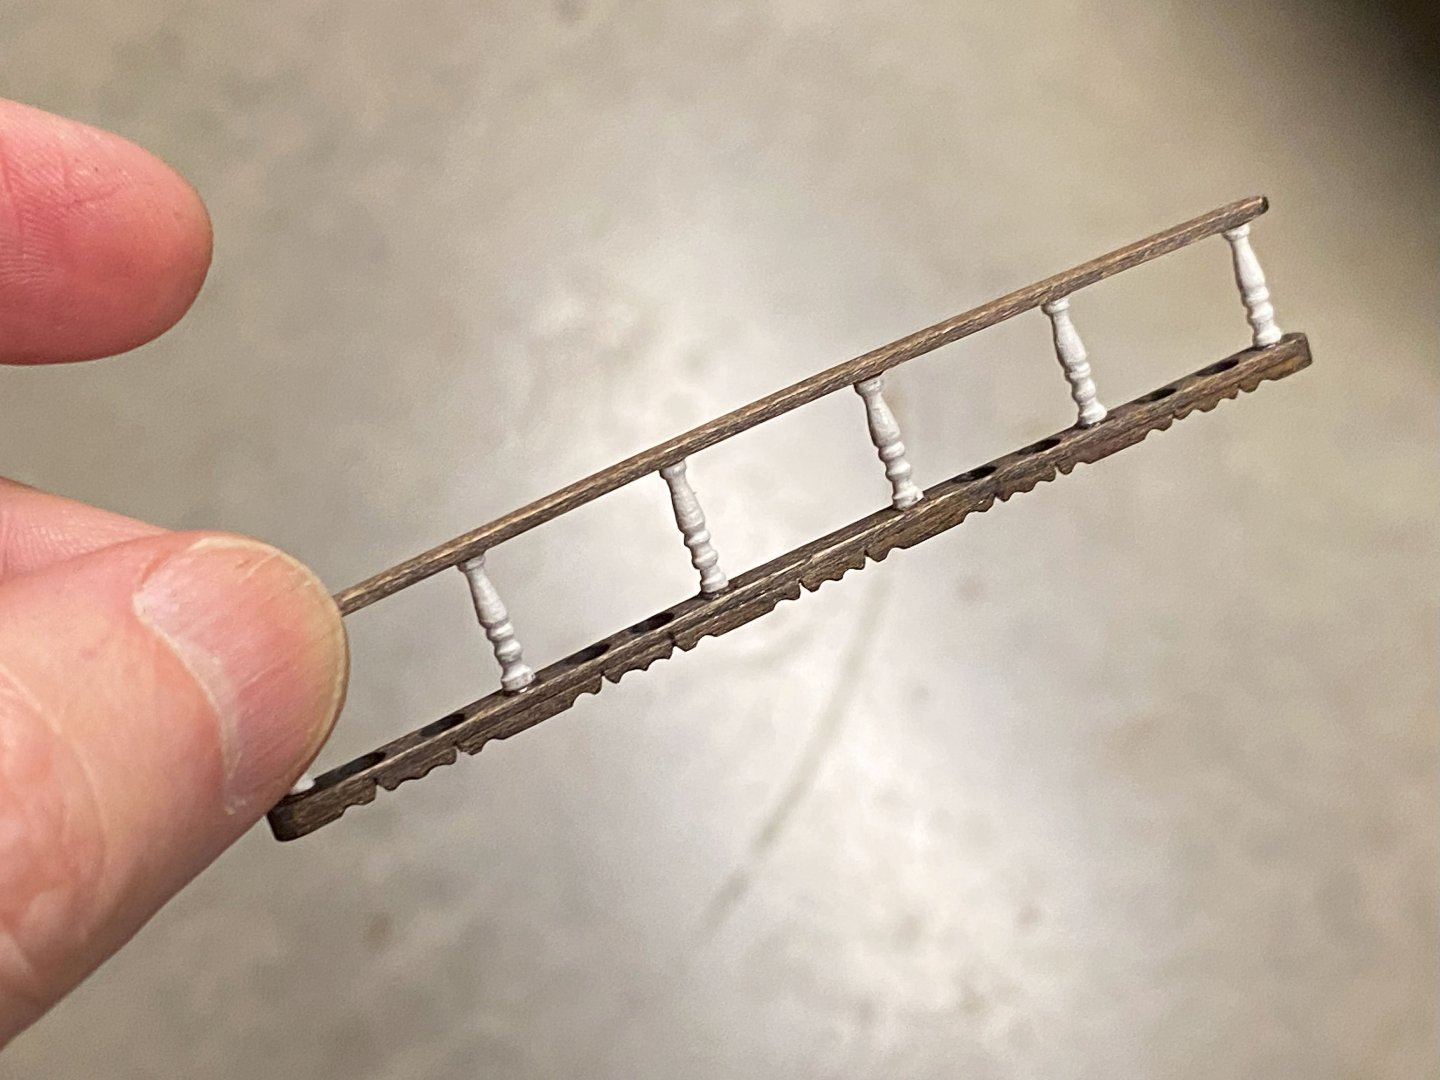
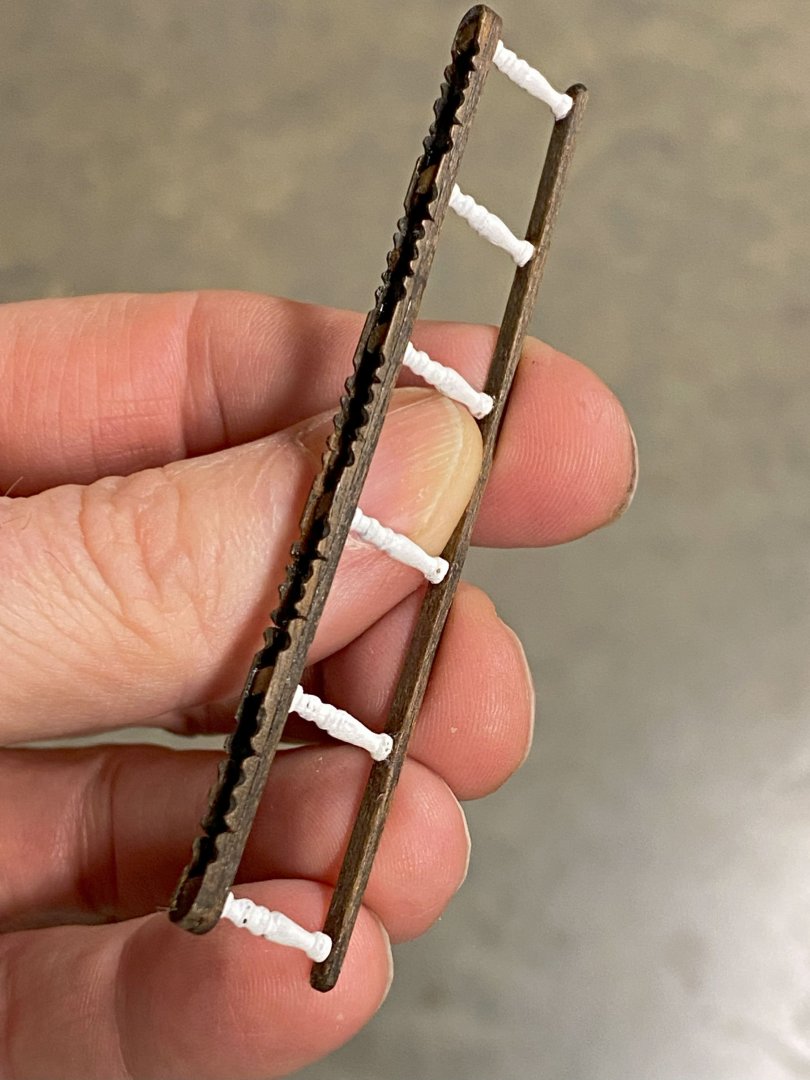
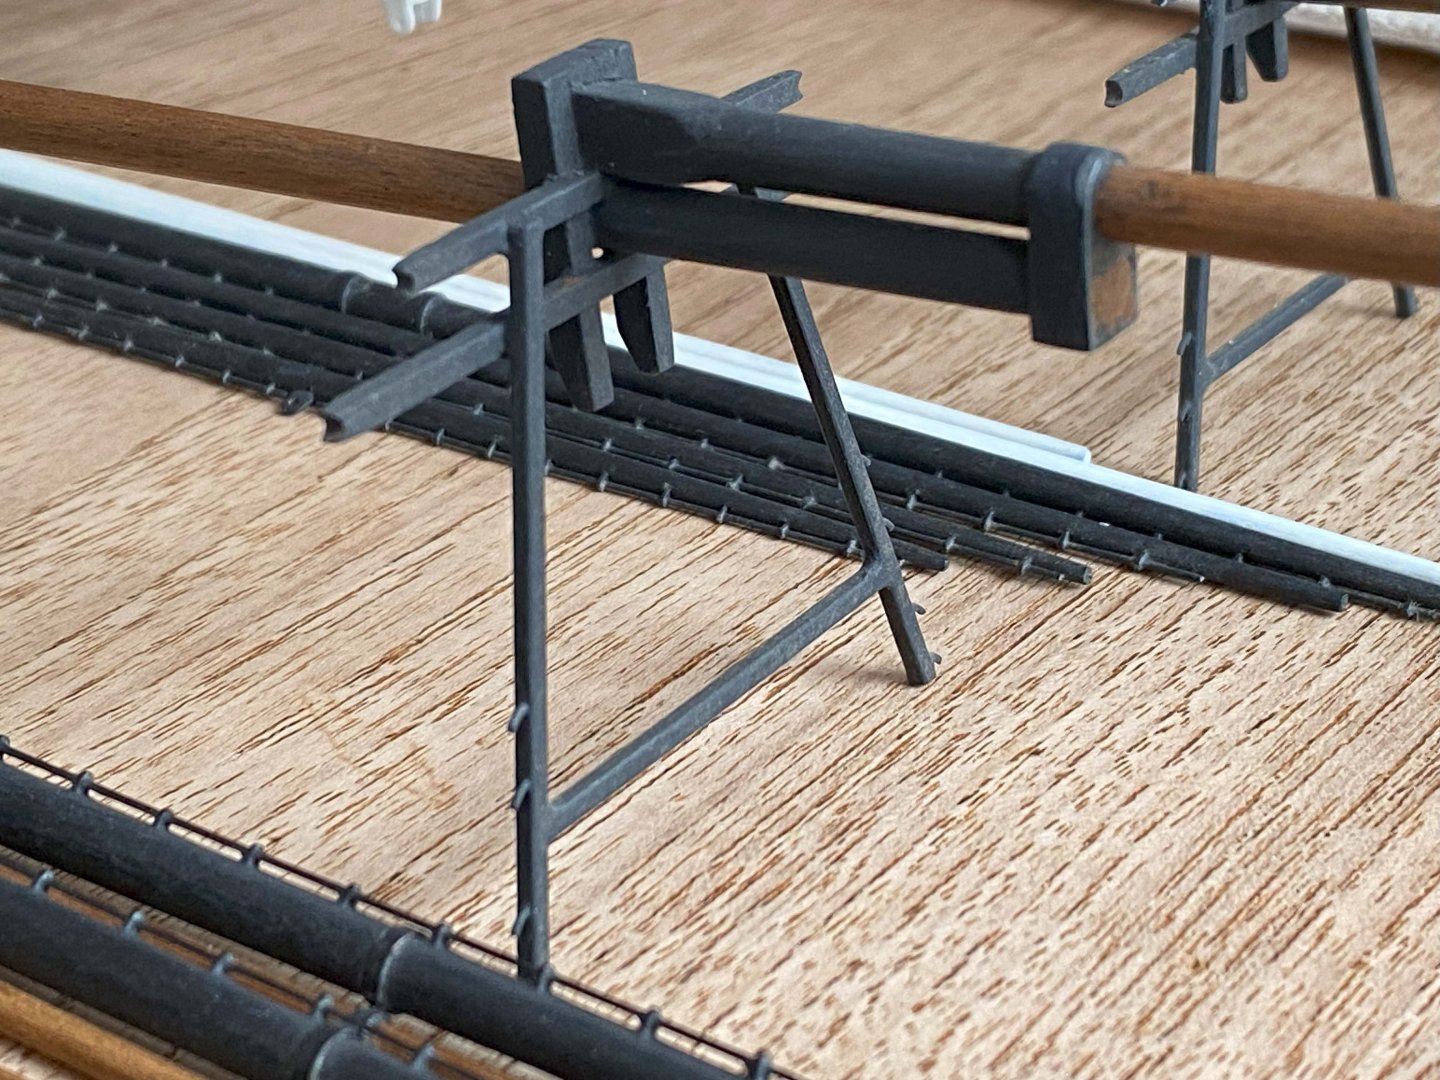
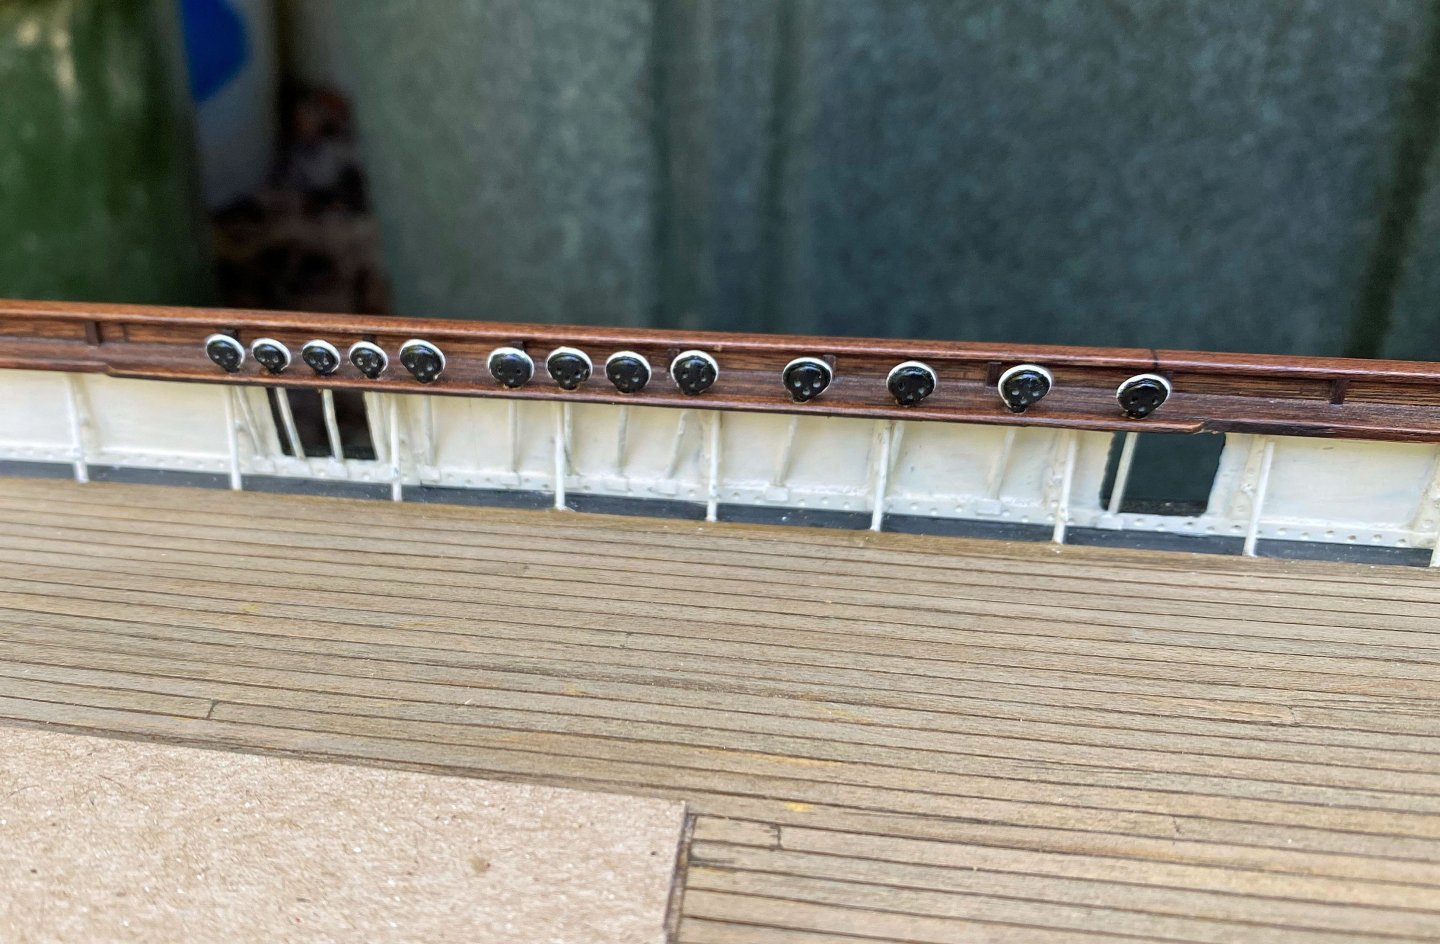
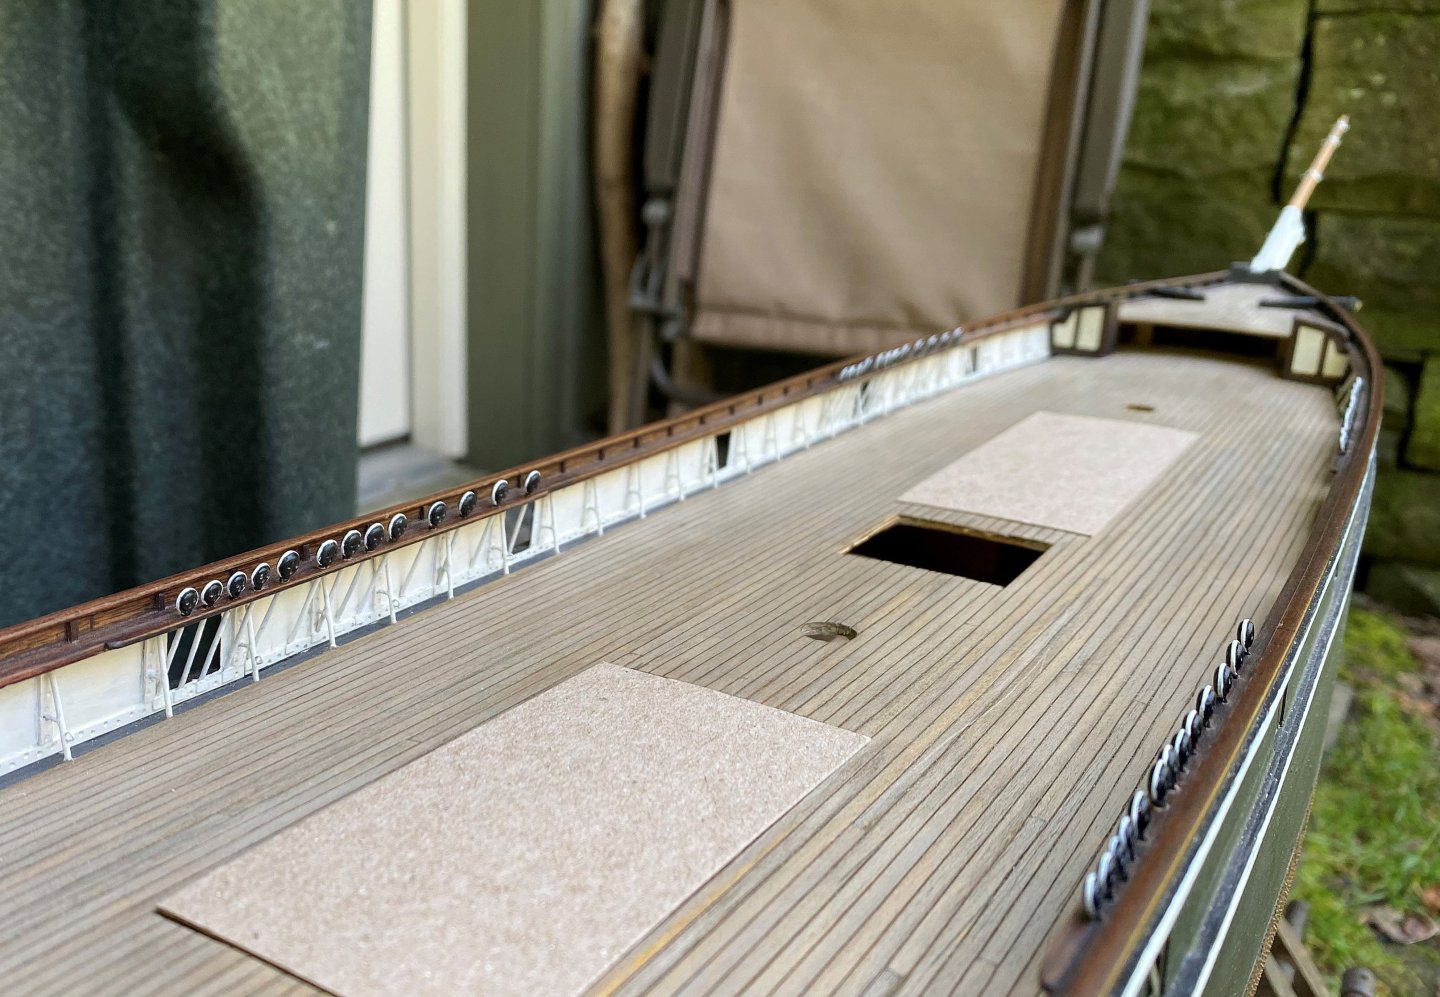
So, accepted delivery of the brass rods I ordered and promptly spent an entire day working on the poop railings. The success of my plan was absolutely not guaranteed. Decided to post the results as I'm pretty happy that I have a method that worked, if not a bit tedious to execute. But that is all part of the challenge and satisfaction of modeling. I decided on 0.8mm rod for the stanchions and 0.5mm rod for the railing. That gets it pretty close to scale, but scale would be smaller sized. My eyes and hands would have trouble if much smaller. The process was to squeeze flat (~2mm) the end of a 0.8mm rod with smooth-faced pliers, then drill a 0.5mm hole through the flat. After that I filed excess brass from around the hole to make a tight ring. Once the hole is made, I then cut the stanchion to length measuring from the hole. The problem with my method is that the hole is never exactly where I want it as this is done free-hand and the drill tends to skate around. I learned something new about the CS after trying to verify the number of stanchions to make. The Underhill plans which I often reference (which are supposed to be based on Longridges Falmouth observations) show 7 stanchions on each side, while the Campbell (as built) plans show 5. After studying my Falmouth images, I counted 6! Most of my Falmouth images of the poop are taken from the port side. I haven't looked into it, but the CS was fixed in place, and I believe the port side was generally the side that received the best sunlight. I did however find a couple pictures where I could count the starboard side... and there were 5! This was a surprise and no idea why the difference. In the end I decided to go with 5 on each side despite the historical inaccuracy. I located and drilled holes along each side of the poop and pressed the stanchions into place. I then ran the railings. I did this as the stanchions are held in place while I soldered the intersections. After soldering I pulled the assemblies out to paint. I use a solder that is 96% Sn and 4% Ag. I have my soldering iron set for 740C as the Ag requires more heat to flow well. I dabbed on some flux, applied a small amount of solder to the iron tip, and then applied to the joint. This makes it less likely to over-apply solder. It is totally a matter of feel as to how much solder to use. The goal is to fill the joint to make a somewhat spherical look. I had to paint the railings twice as in my zeal to finish I forgot to wash the flux off with EtOH. Paint doesn't stick to flux. My next step is to try and do the outer railings, which feature two rail runs. the lower rail is smaller than the top rail, so will use 0.45mm rod. These stanchions will likely be much harder to make but doable. A soldering test. Needed a little more solder. A late Falmouth image of the poop. Note the uneven stanchion counts!
- 100 replies
-
- Cutty Sark
- Sergal
-
(and 1 more)
Tagged with:
-
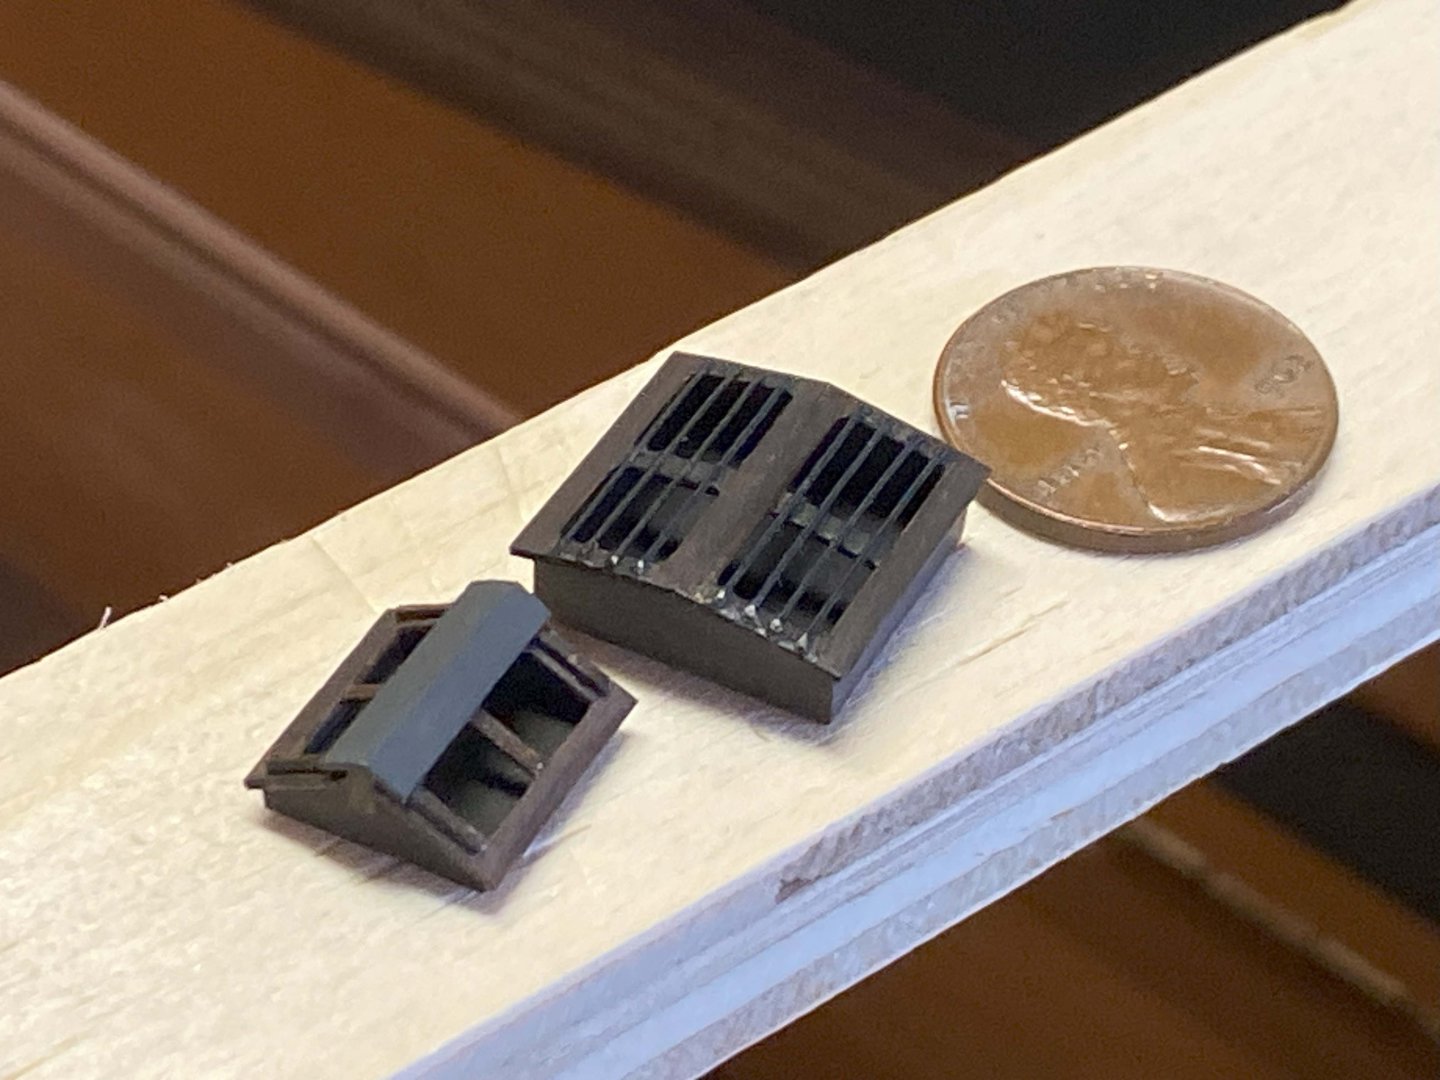
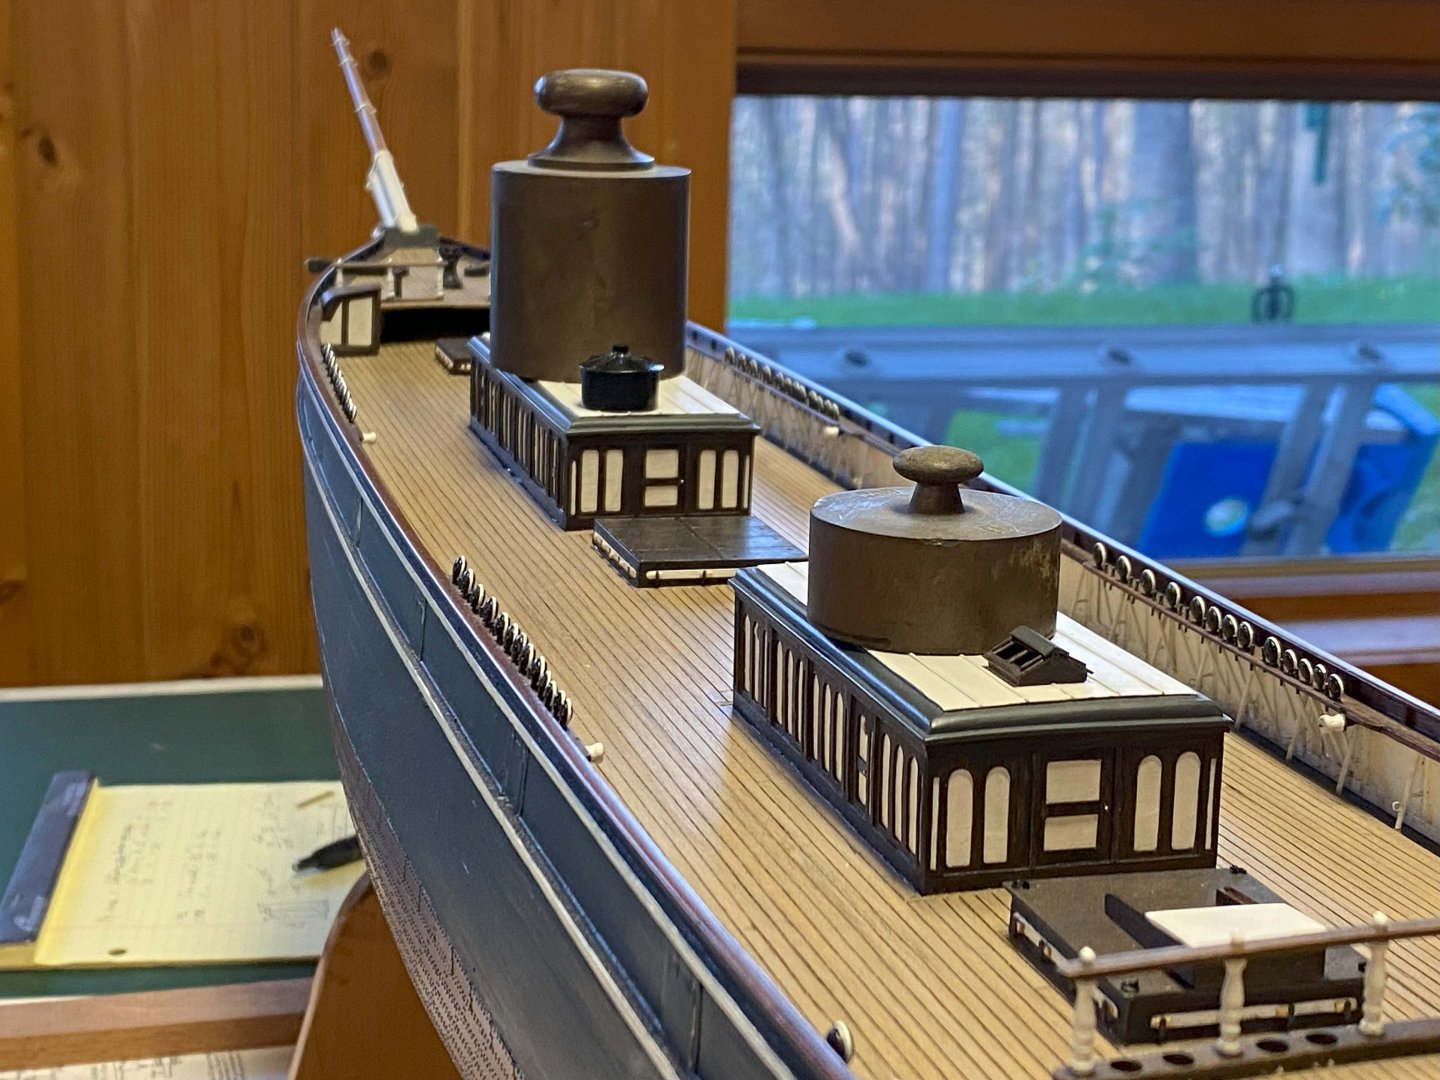
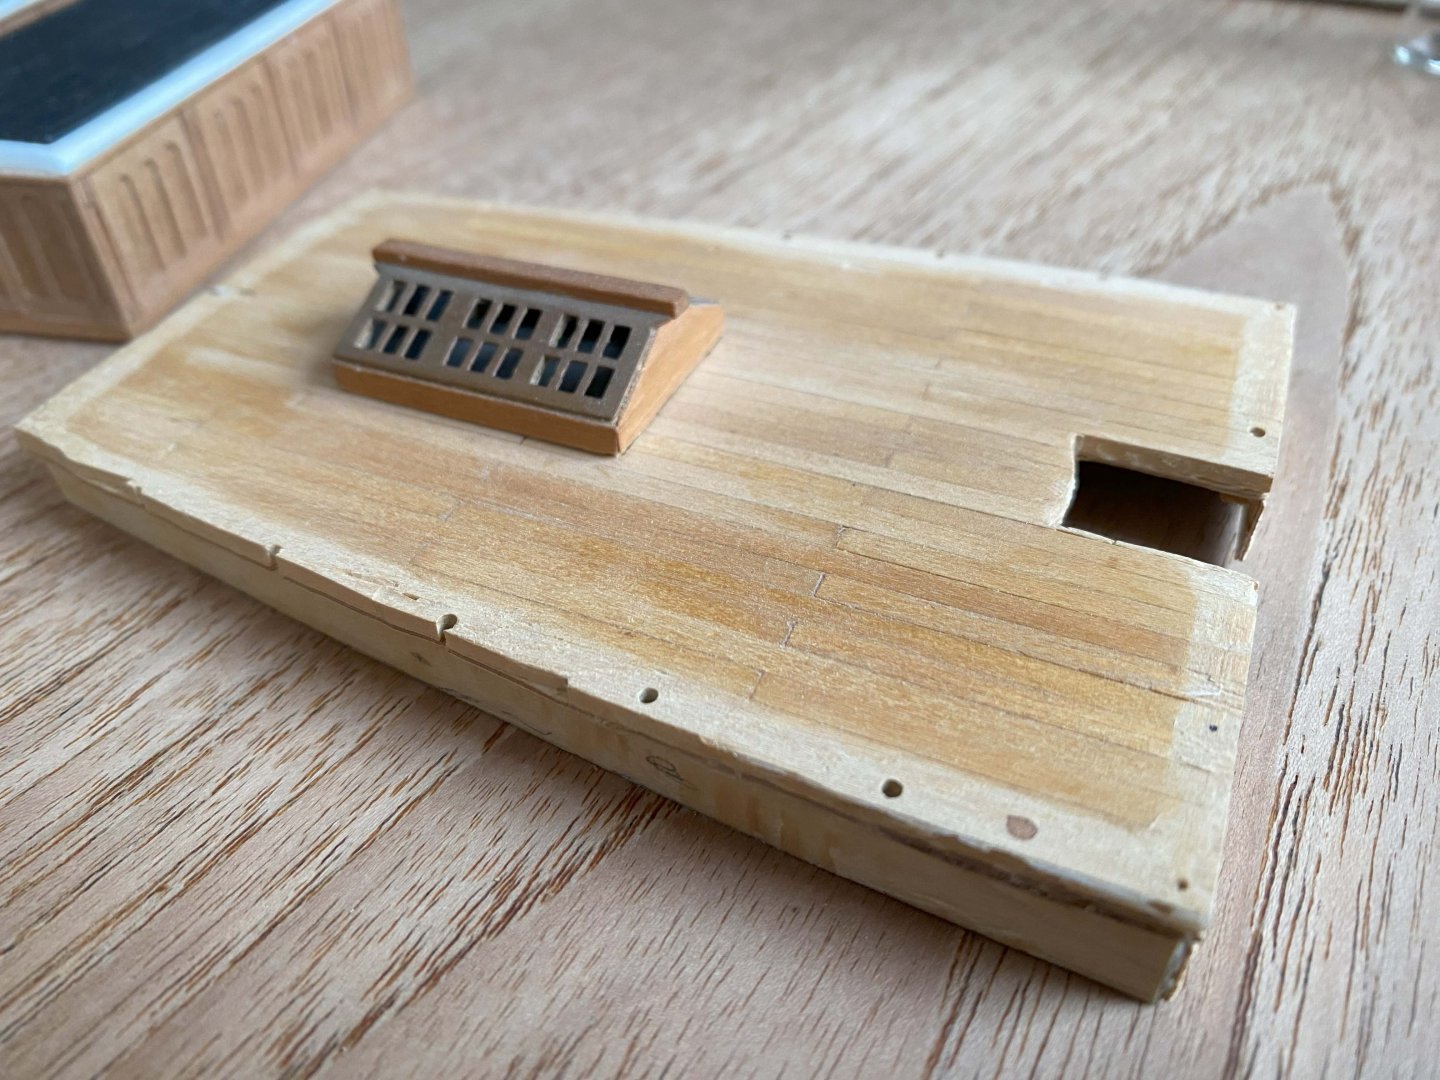
Have been inching along on the poop deck cabin. Far from finished and not glued into place yet but far enough along to show some measurable progress. In an earlier post I showed where I stopped work on the re-do some 40 years ago. I was in the process of reshaping it. I removed the old skylight, finished shaping the sides and then put down a new deck over the old one. As with the other houses, I used 0.5mm thick cherry veneer to layer up the vertical faces of the cabin itself and entry ways. The caps and entry tops were done with 1mm stock. Didn't turn out too bad but man was it a lot of tedious work. The most difficult part of the skylight was cutting the rods out of soft Fe wire. The real skylight features more guard rods but at this scale I had to reduce the number. As it was, I ended up gluing each rod into place freehand. Your eye can pick up the uneven spacing but not too much to spoil the effect. Next, I'll figure out a way to make the railings. Have been giving that a lot of thought. I don't have the brass rod sizes to do this so needed to order a selection. Looking forward to the railings and will at the same time probably work on all the other railings for efficiency's sake. Doesn't appear the poop railings are included on the current CS restoration, or maybe my pictures are too old. I will also be making a binnacle, stern lamp, and a couple other deck features found during the early Falmouth days.
- 100 replies
-
- Cutty Sark
- Sergal
-
(and 1 more)
Tagged with:
-
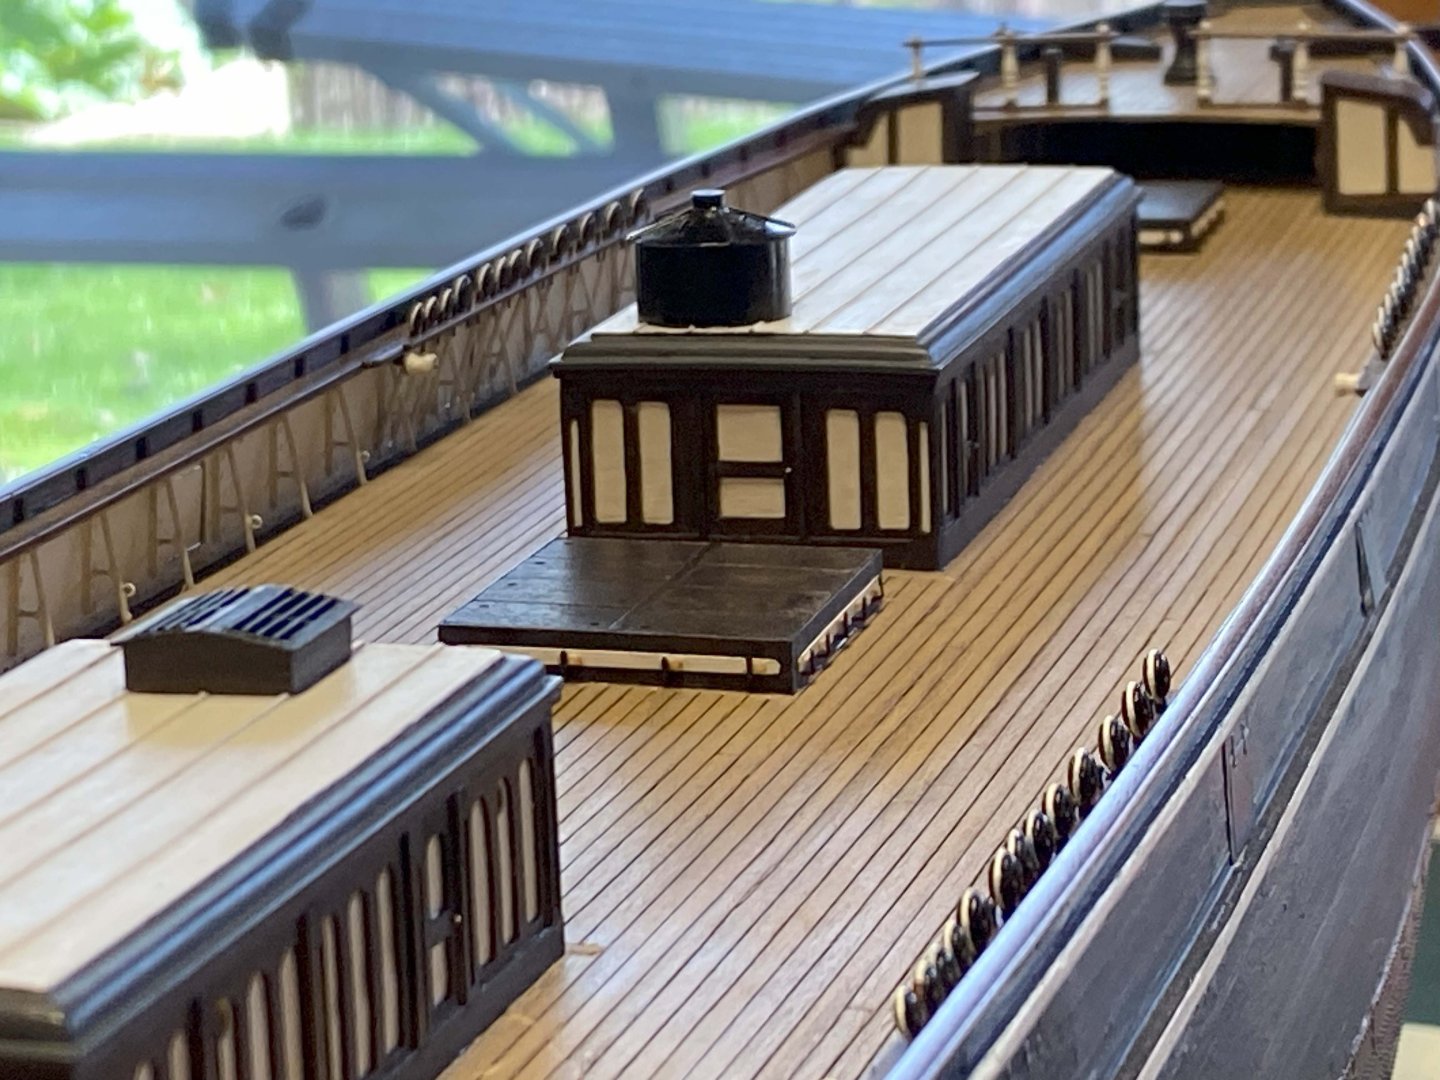
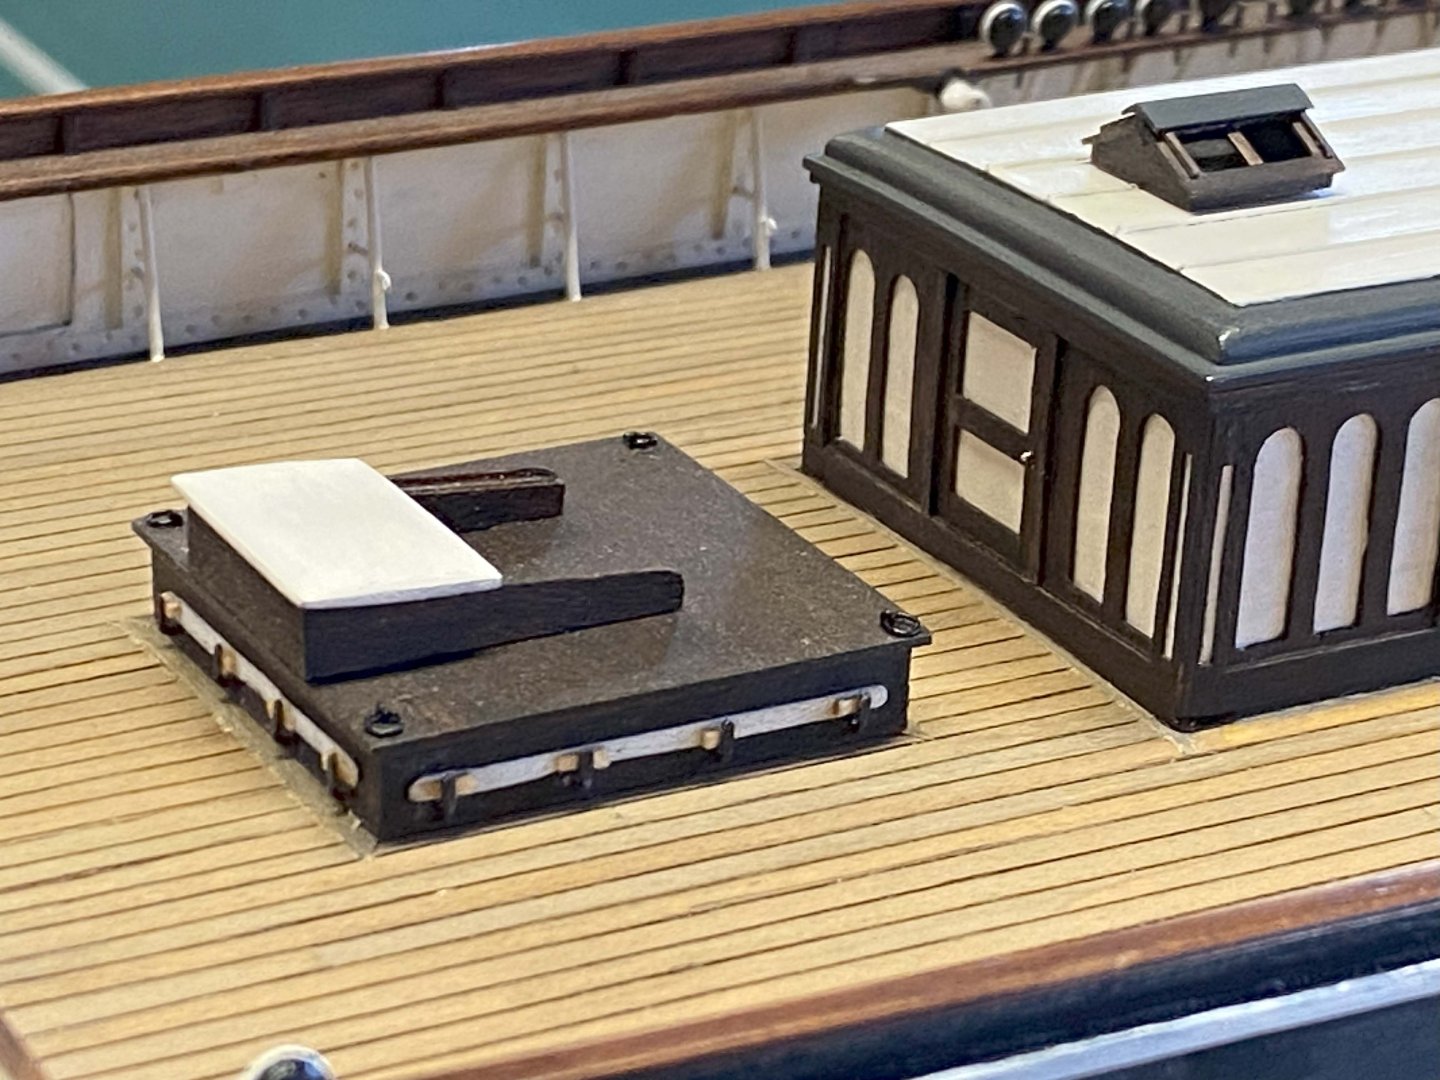
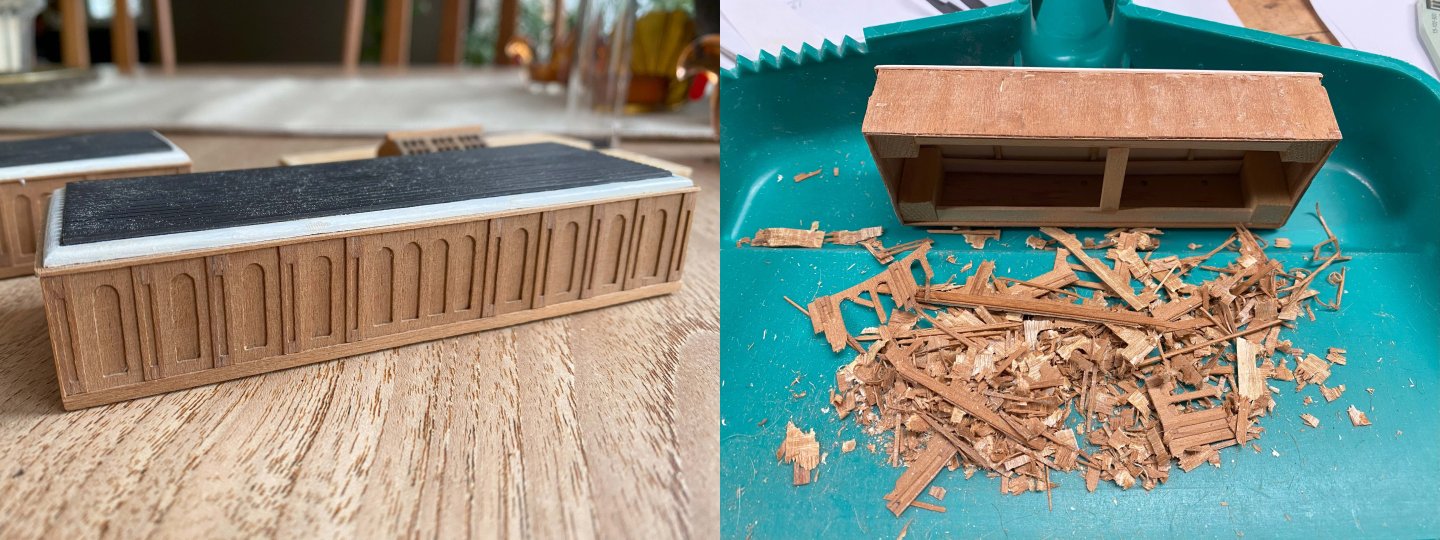
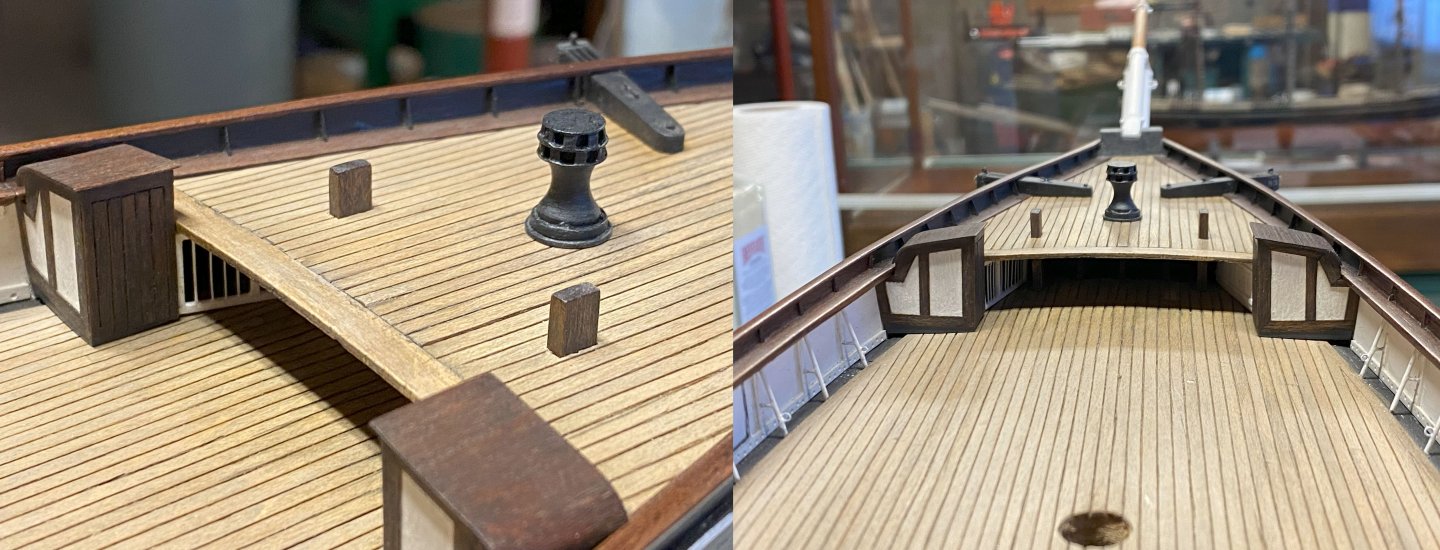
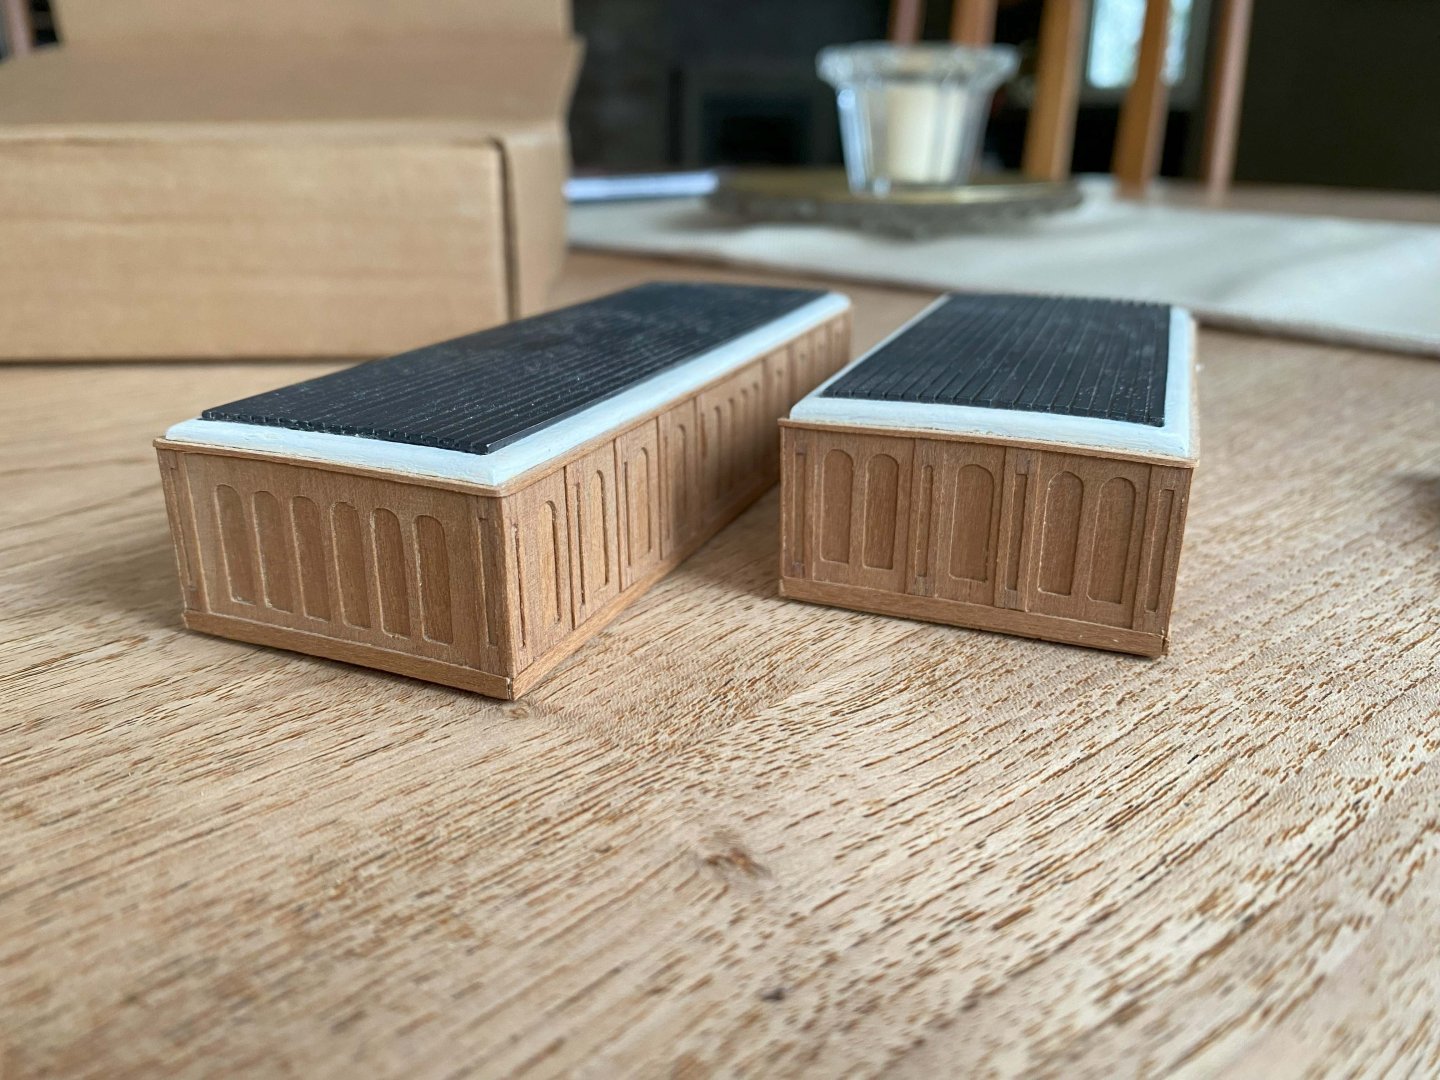
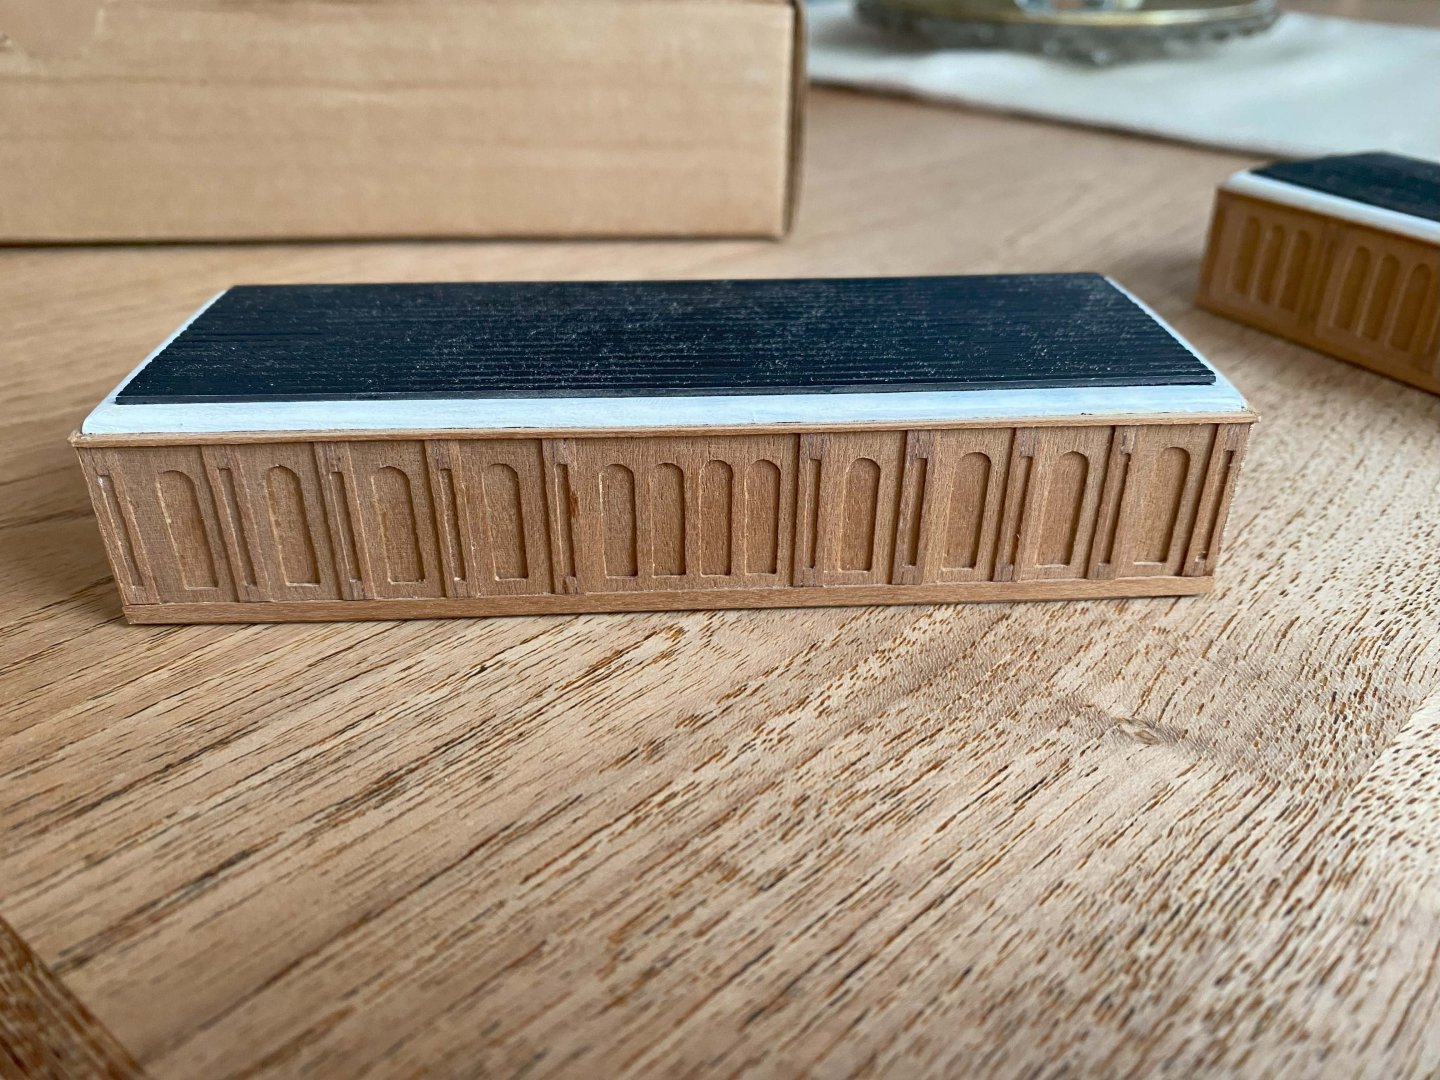
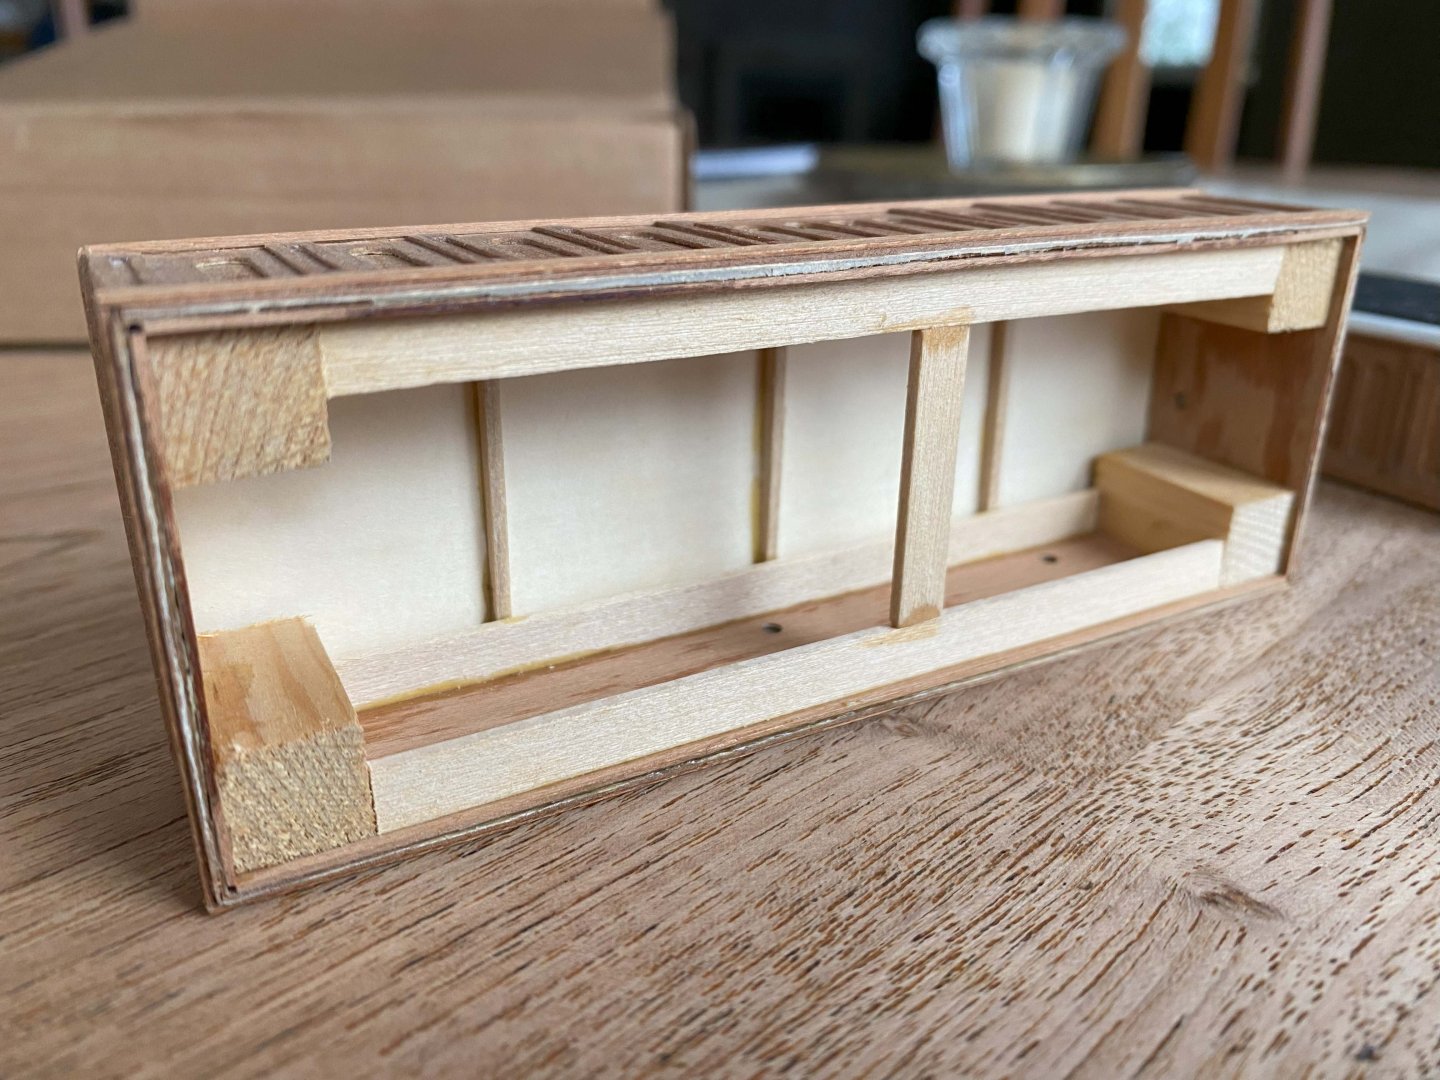
Now that spring weather has arrived, I've been 'fortunate' enough to have had a long spell of cold weather to keep me indoors. Found the time to work on the main deck houses and hatchways. The layout of the deck houses does change over CS's timeline. How exactly they were at early Falmouth proved a little frustrating. Just couldn't find enough written or photo evidence to make it all clear. In the end I defaulted to Harold Underhill's plans knowing they are not entirely correct. Back in post #38 I showed the deck houses as I had left them 40 years ago. Felt I could do a little better so made the painful decision to scraped them clean and started over. In this latest attempt I used a finer grained cherry veneer and dressed it down to 0.5mm thickness. The layering process yielded pretty good results. Everything is hand cut and filed so lots of variation. At least the variations are not too obvious to a casual viewer. At the point I'm modeling the CS, the main deck house roofs were covered over with a tarred roofing felt, as per Longridge. To help hold the felt down there were batten strips that ran the length of the houses. The forward house was fitted with a large freshwater tank on the roof. This tank was later removed. I still need to fabricate the cable compressor that mounts on the main house roof, along with various chimneys, vents, etc. The hatchways turned out pretty good. Again, all made with cherry. Pretty much everything I'm modeling uses either 0.5mm or 1.0mm thick veneer. The aft hatch is fitted with a booby companion way. Couldn't determine if the booby was fitted in early Falmouth, but it makes sense it was in order to help trainees have easy access to the tween deck. Made the hatch bars out of steel from a used alcohol can. The cleats are copper wire that I flattened with smooth-faced pliers.
- 100 replies
-
- Cutty Sark
- Sergal
-
(and 1 more)
Tagged with:
-
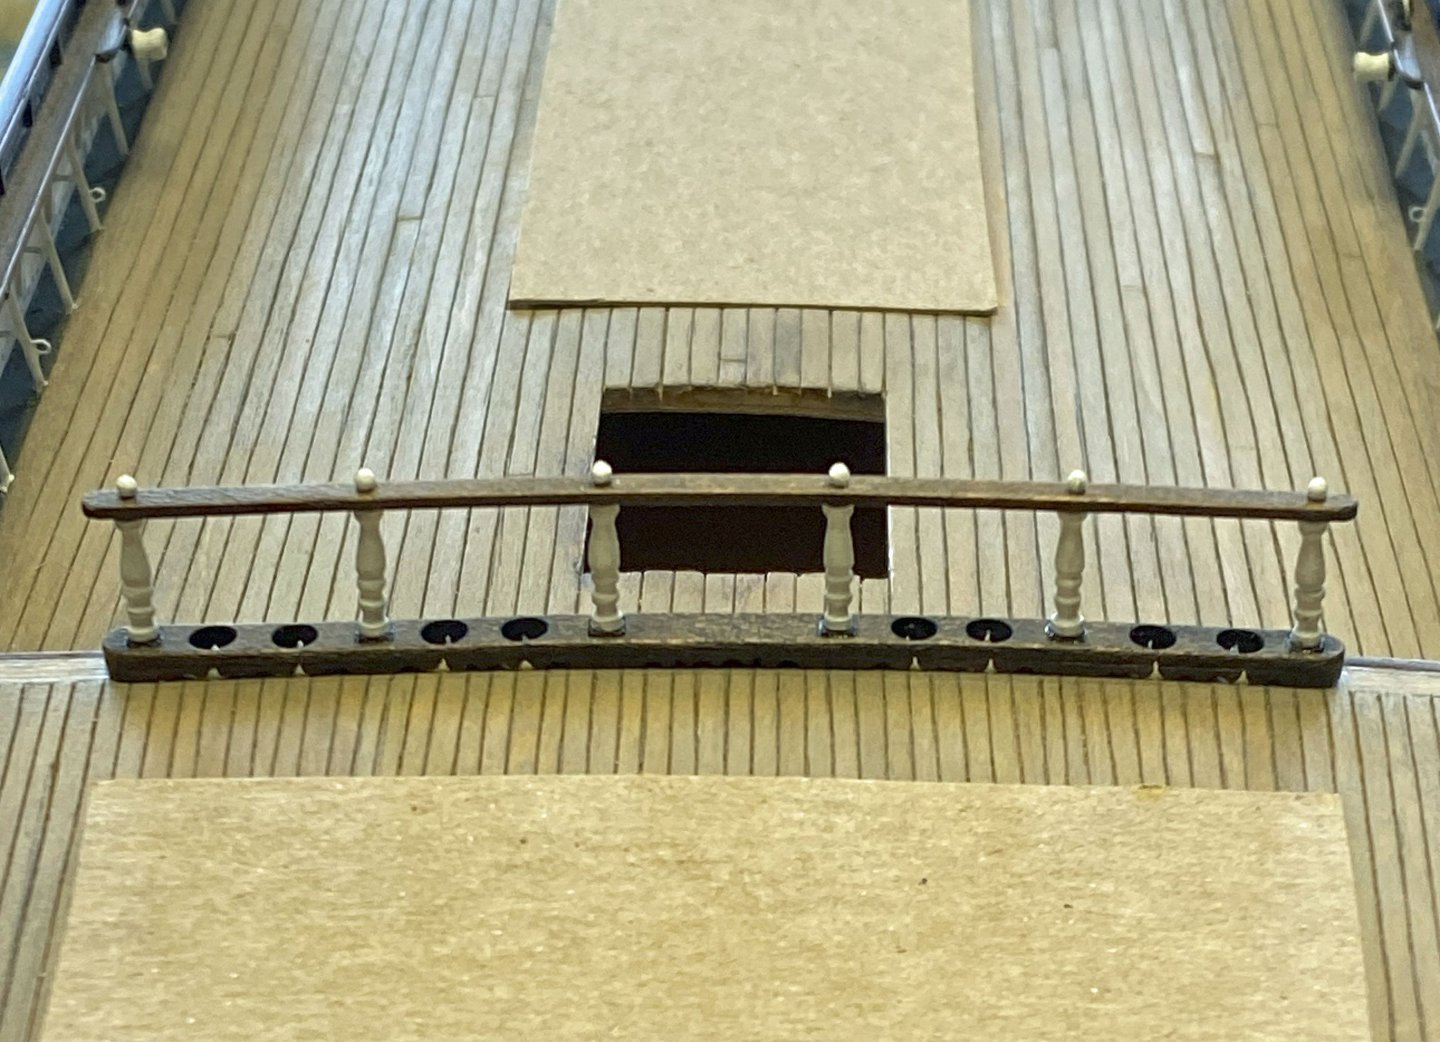
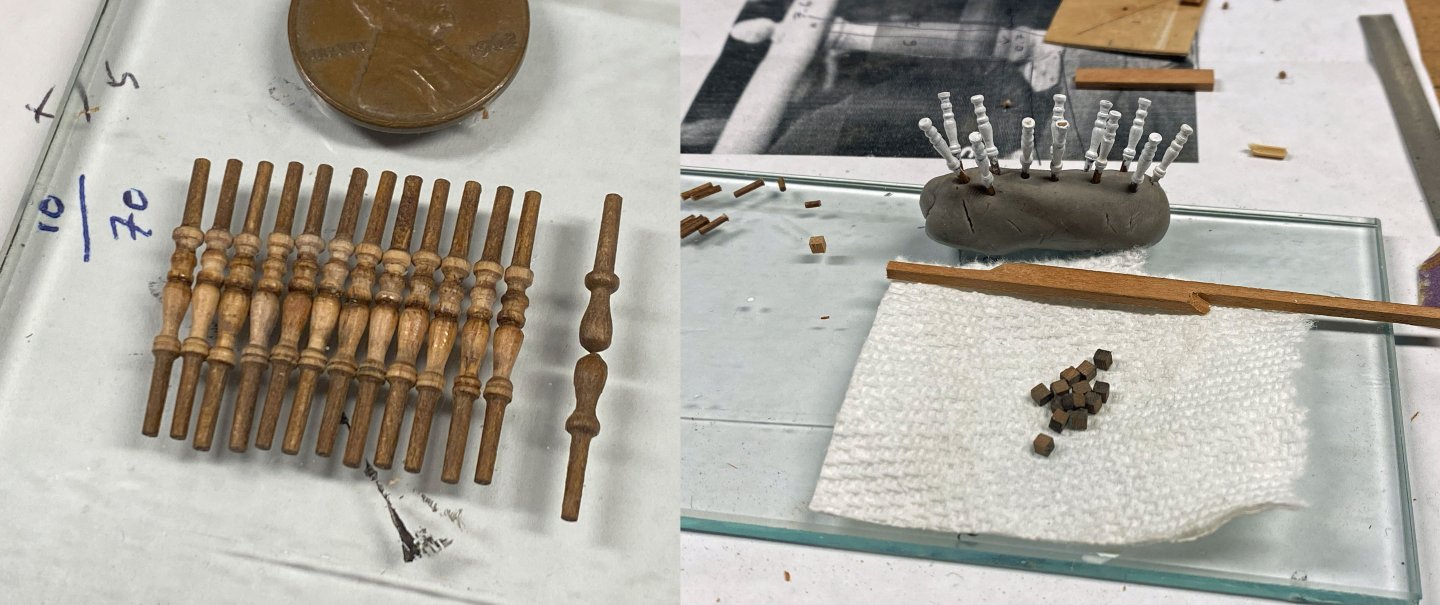
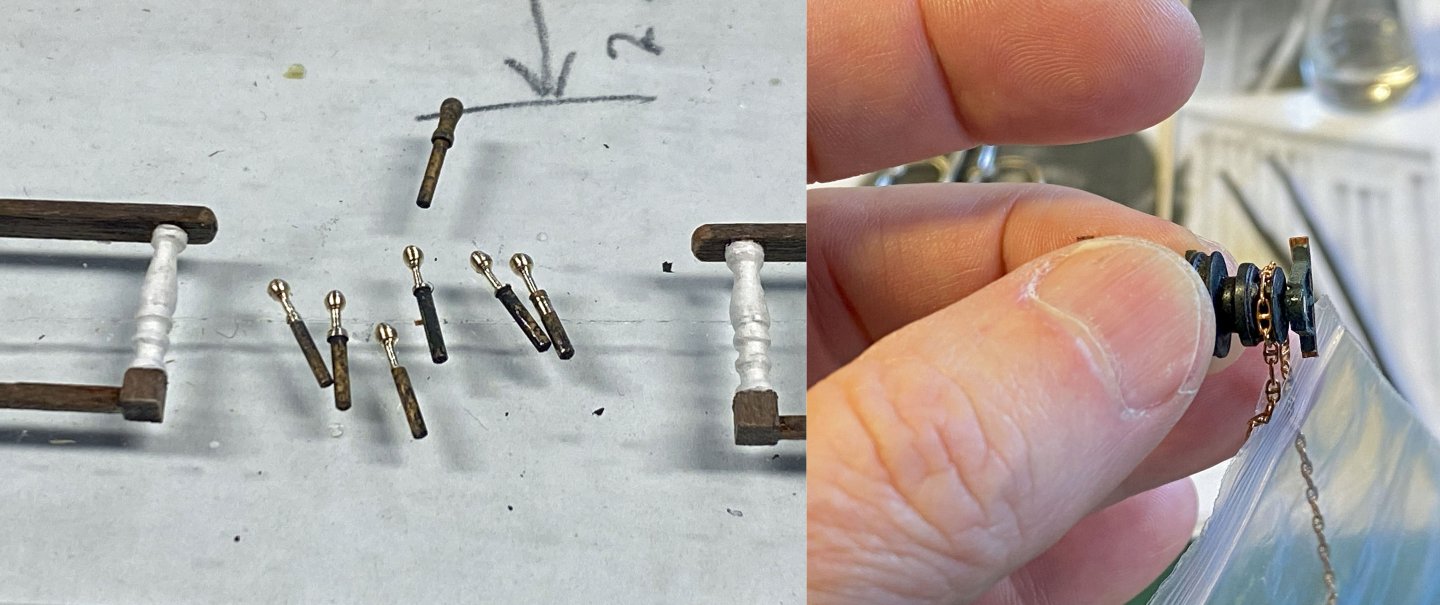
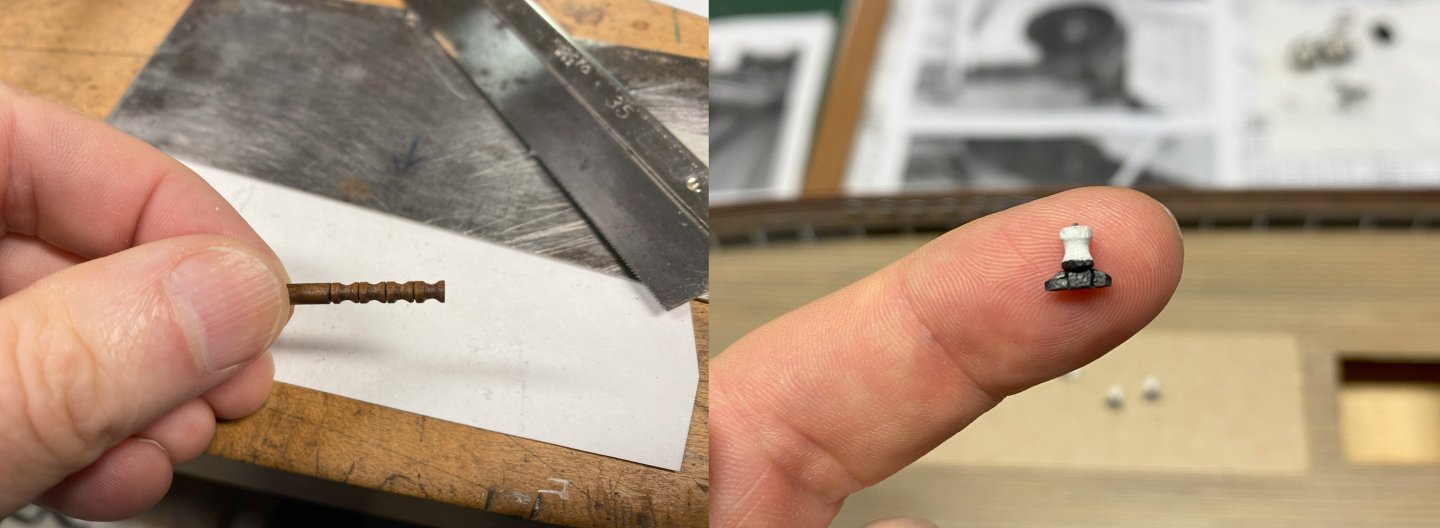
Decided to make the poop railing before I lost the extra turned posts I made. Pretty much the same drill as with the forecastle railing, except I turned the finials out of brass rod this time. The thick-bodied white paint I used made a mess. Looks fine enough so decided against a re-do. The fire bucket apron was a small disaster as I broke it in half twice trying to file the scroll work. Scroll work didn't turn out as I hoped but does suggest the original and adds interest.
- 100 replies
-
- Cutty Sark
- Sergal
-
(and 1 more)
Tagged with:
-
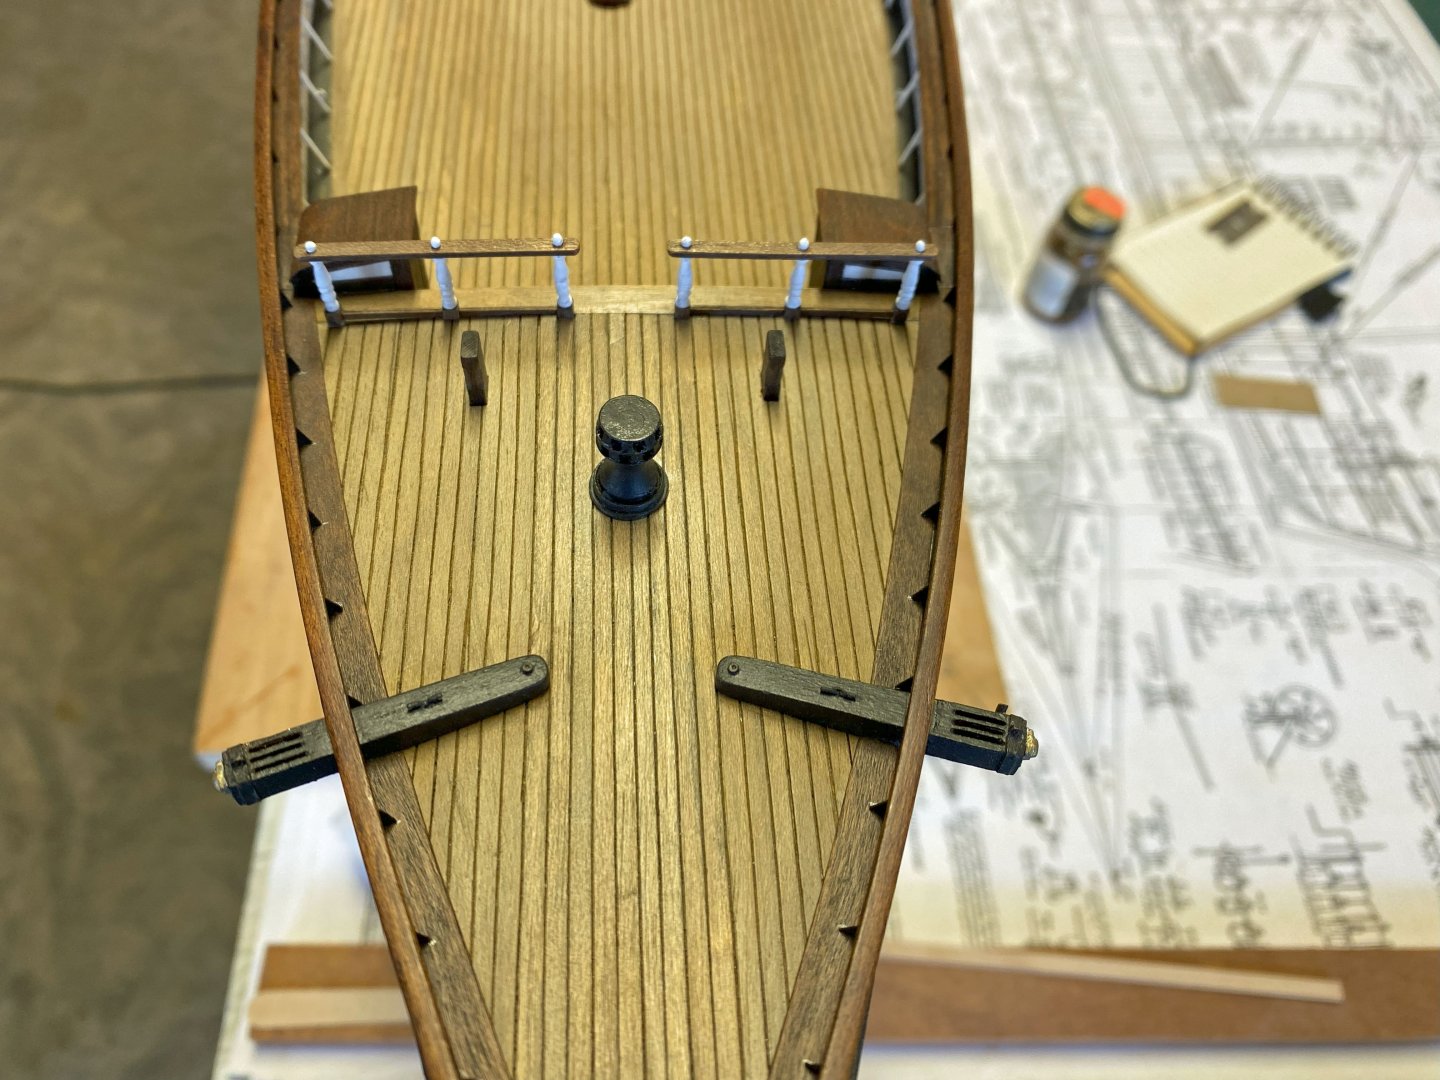
Over the last few days (very time-consuming work), I fabricated and installed the wooden forecastle railing. I made extra posts for when I get to the poop railing. I kind of dreaded this as I own no micro/watch making lathe. This is the first occasion I wish I had more than my handheld Dremel and small files. Never-the-less, I found a way. For each pillar I used two 12mm "walnut" belaying pins that came with the original model kit. I was happy I could use them in this way. The stem on each pin chucked up nicely and was useful in handling the posts. I made the acorn finials out of 8mm brass belaying pins. The wood rails and blocks I made out of cherry and stained. On a separate topic, I ordered some 3mm studded chain from AliExpress (China) in hopes it would be useable. It was the closest to being scale and didn't find anything else that was promising. I think it will work out fine once painted and weathered. I was pleasantly surprised that the chain fit the scaled windlass drive pockets perfectly. Once the chain is prepared, I can wrap the windlass and install it permanently. I will also add a couple chain pipes that will deliver the chain to the alternate chain locker located in the former crew berthing area under the forecastle. All this, of course, will be almost impossible to see once the model is done. I'll have pictures 🙂
- 100 replies
-
- Cutty Sark
- Sergal
-
(and 1 more)
Tagged with:
-
Thanks Peter, Glad to see you back at work on your CS. I have the same reference books you speak of, and they are indeed invaluable. While it will be some time before I can start rigging, I am watching your progress closely. Excellent work and will no doubt help inform my future efforts. Is it my imagination that your yards are a dark olive green? If so, I really like the look. Ron
- 100 replies
-
- Cutty Sark
- Sergal
-
(and 1 more)
Tagged with:
-
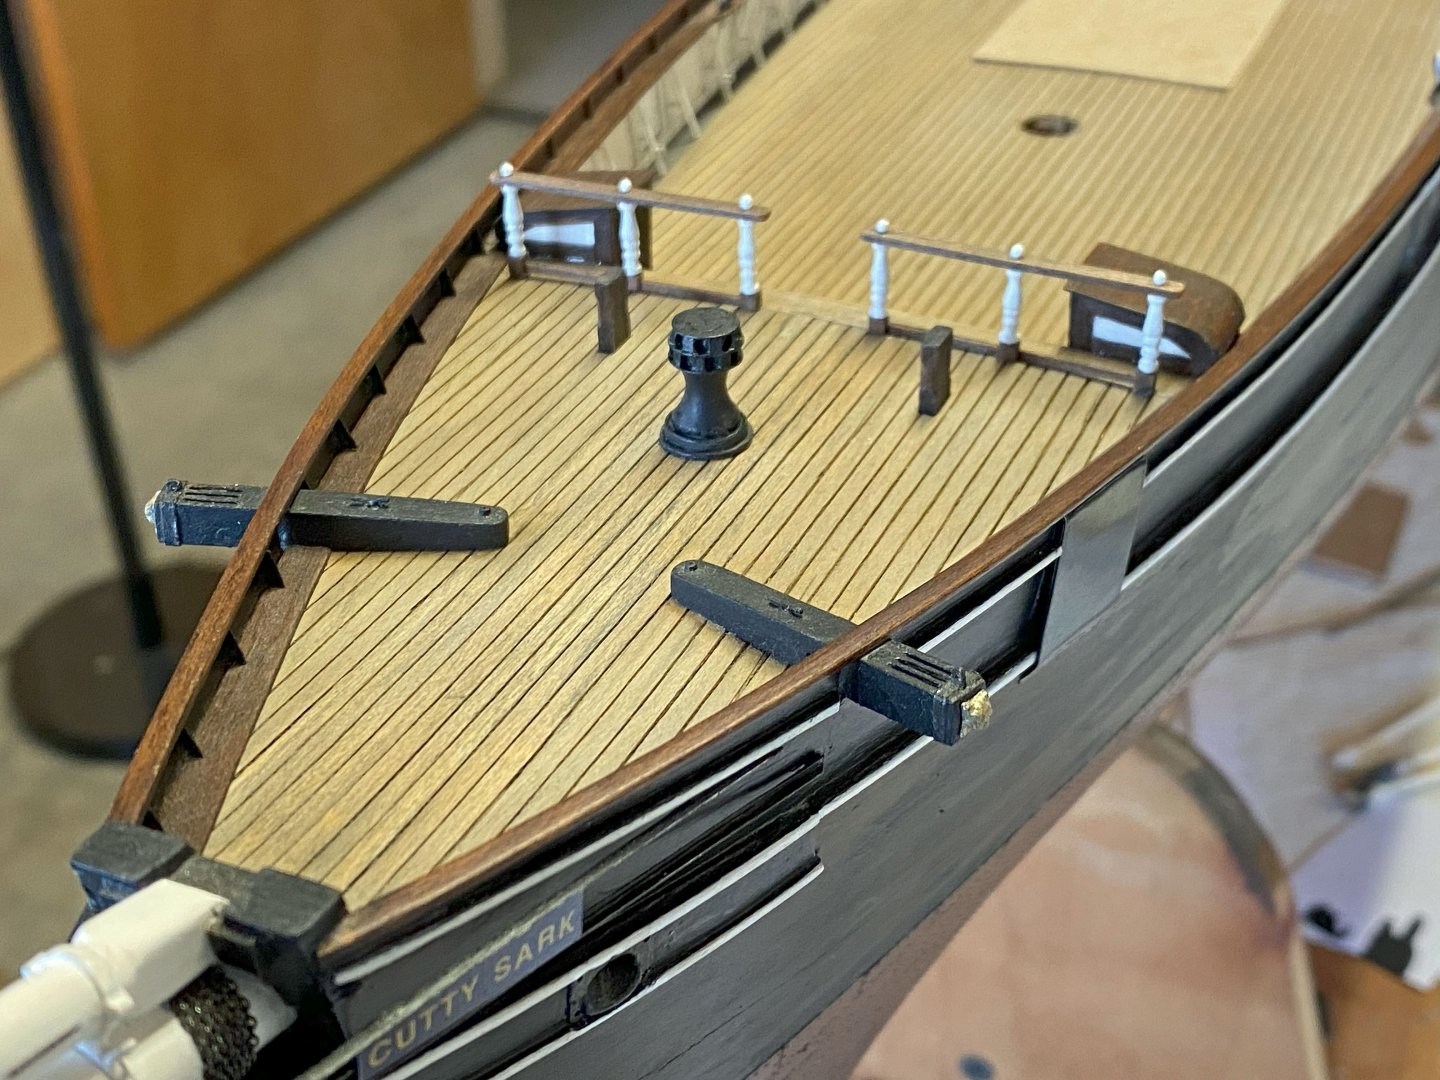
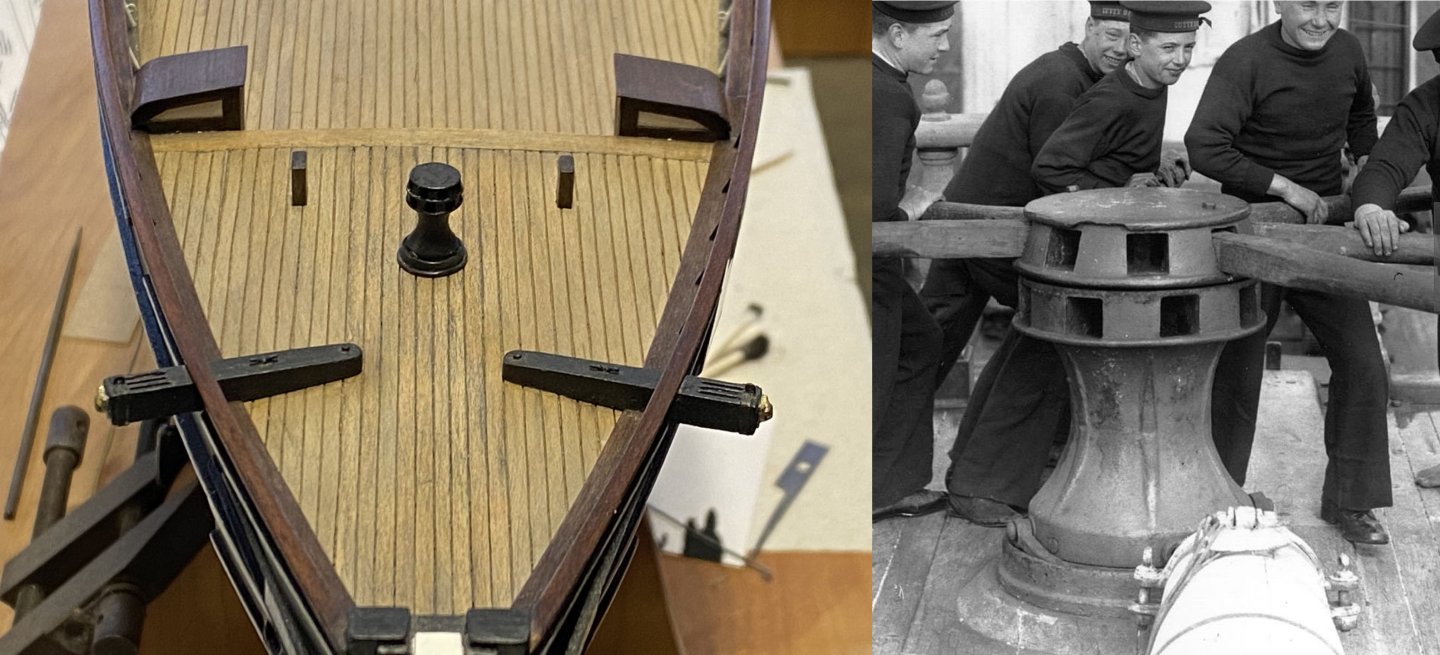
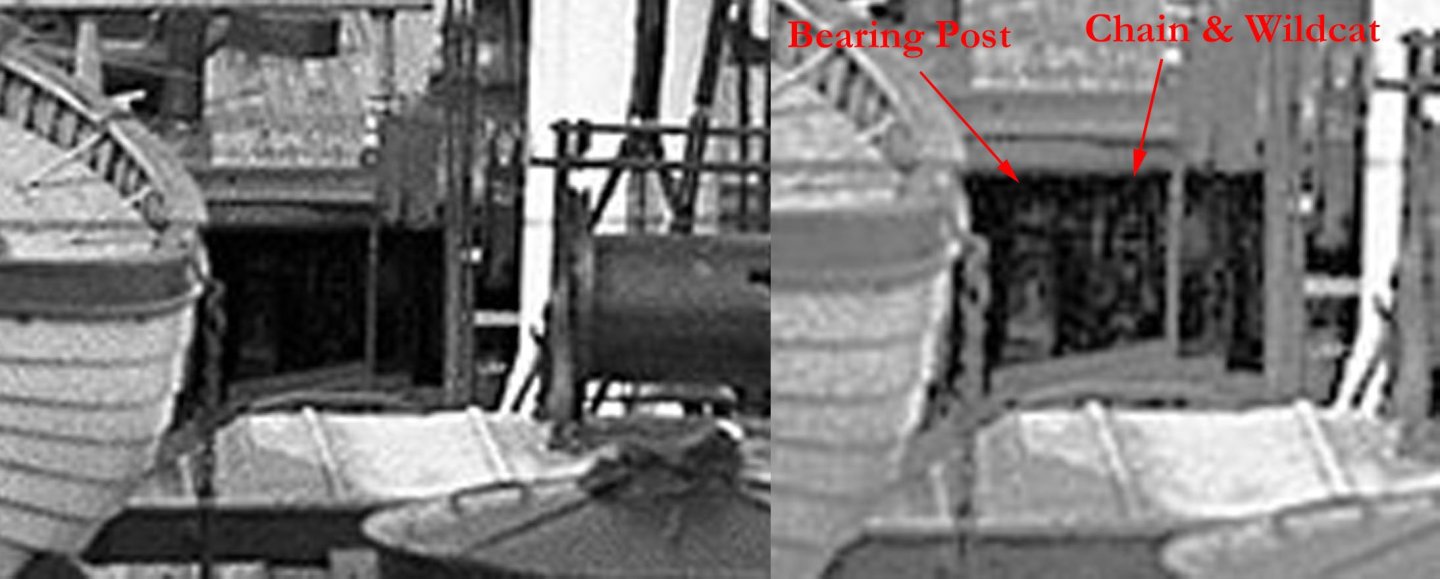
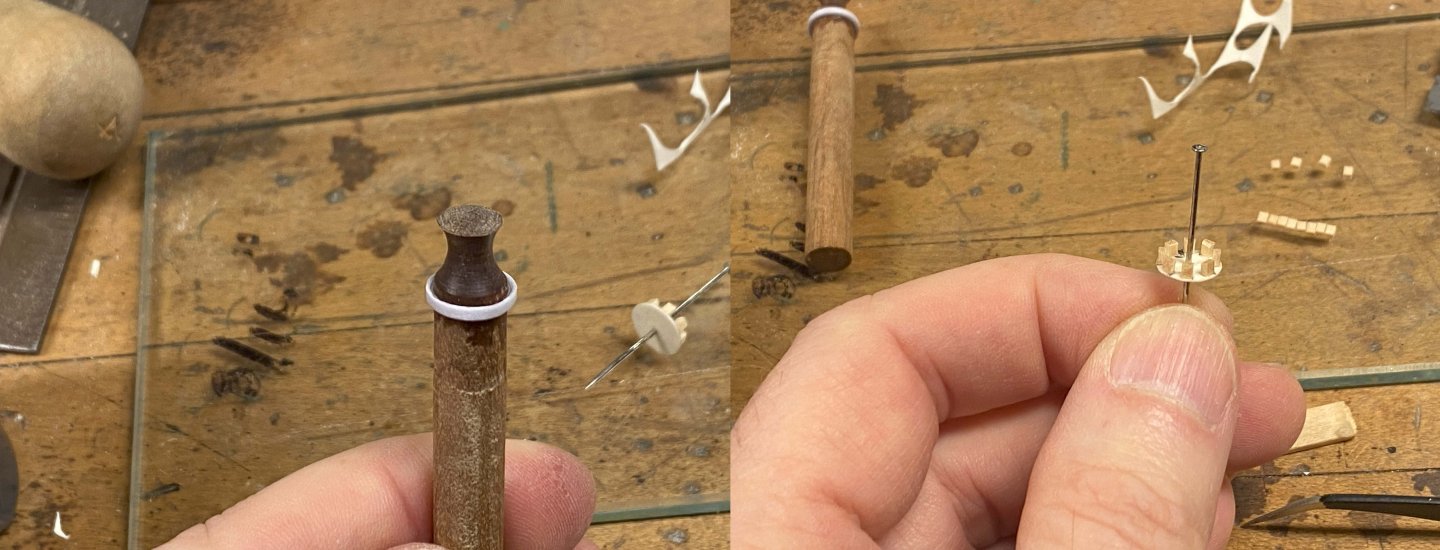
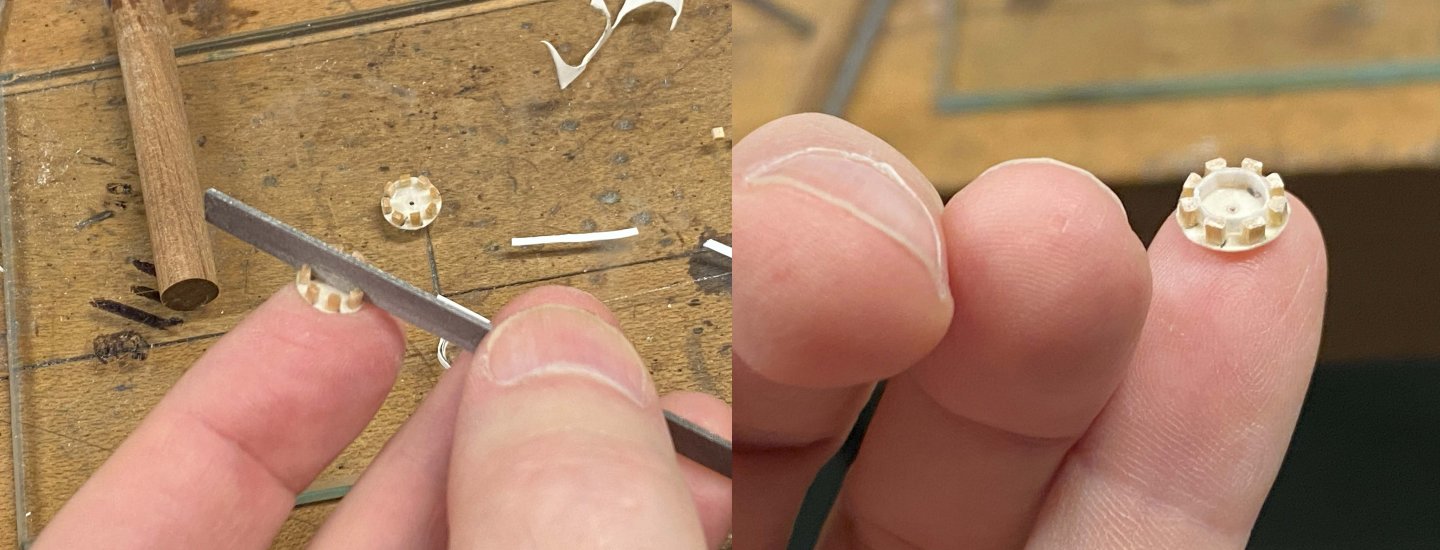
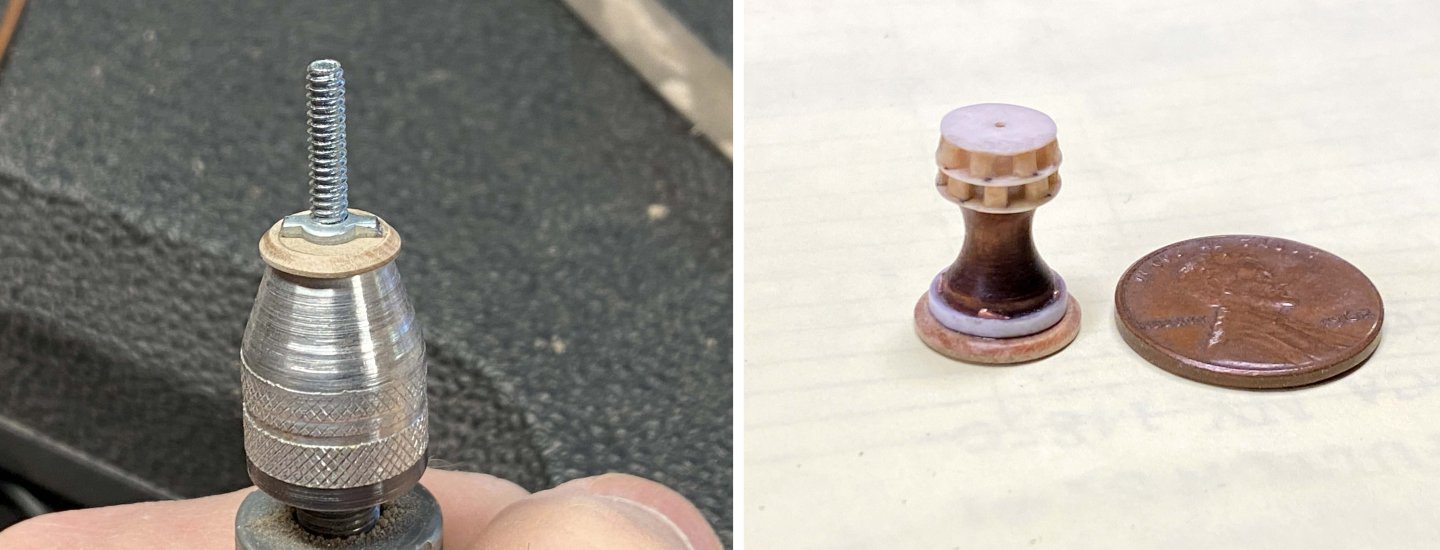
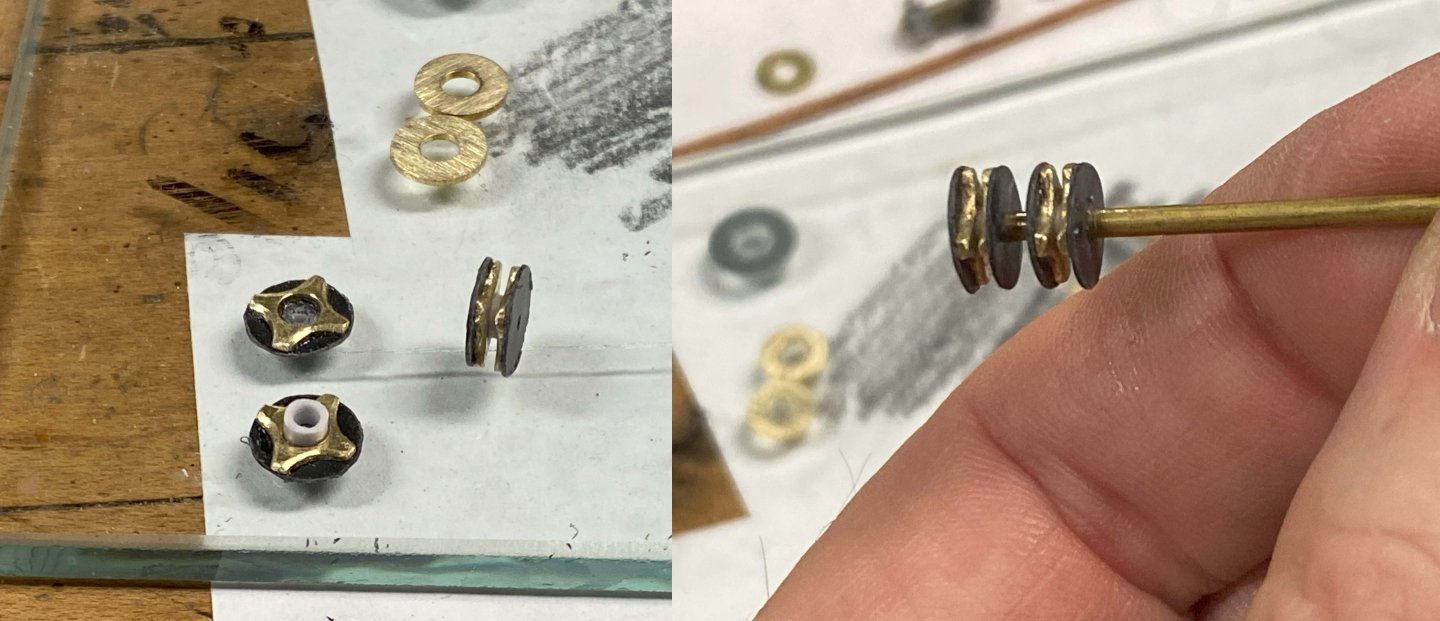
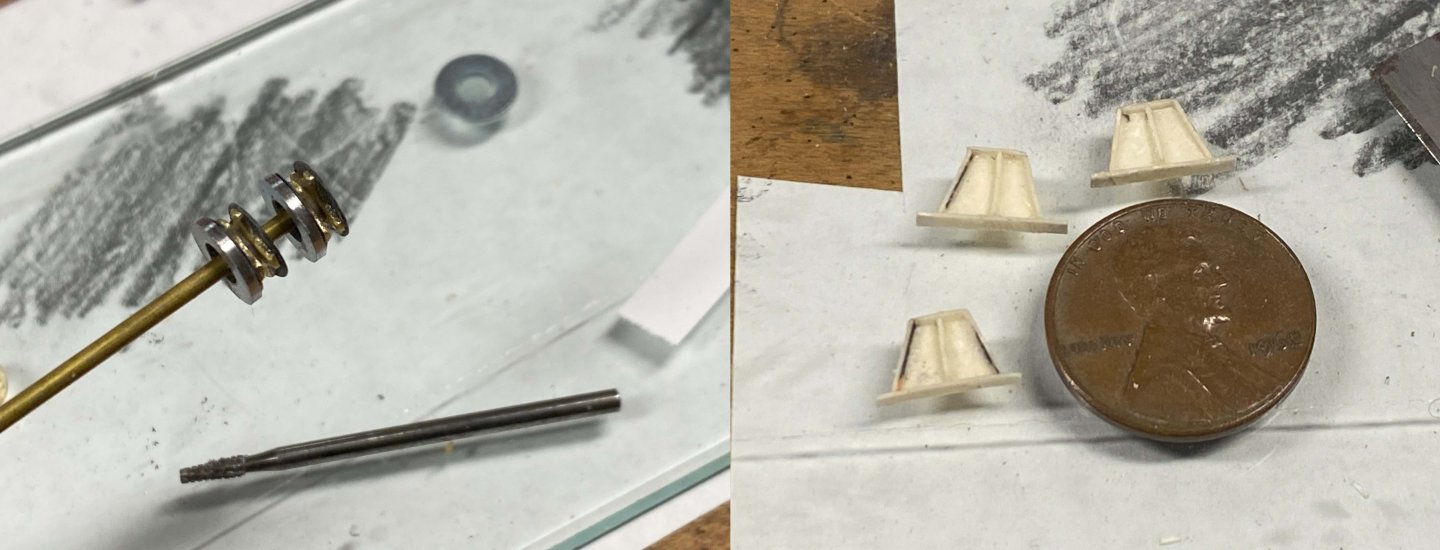
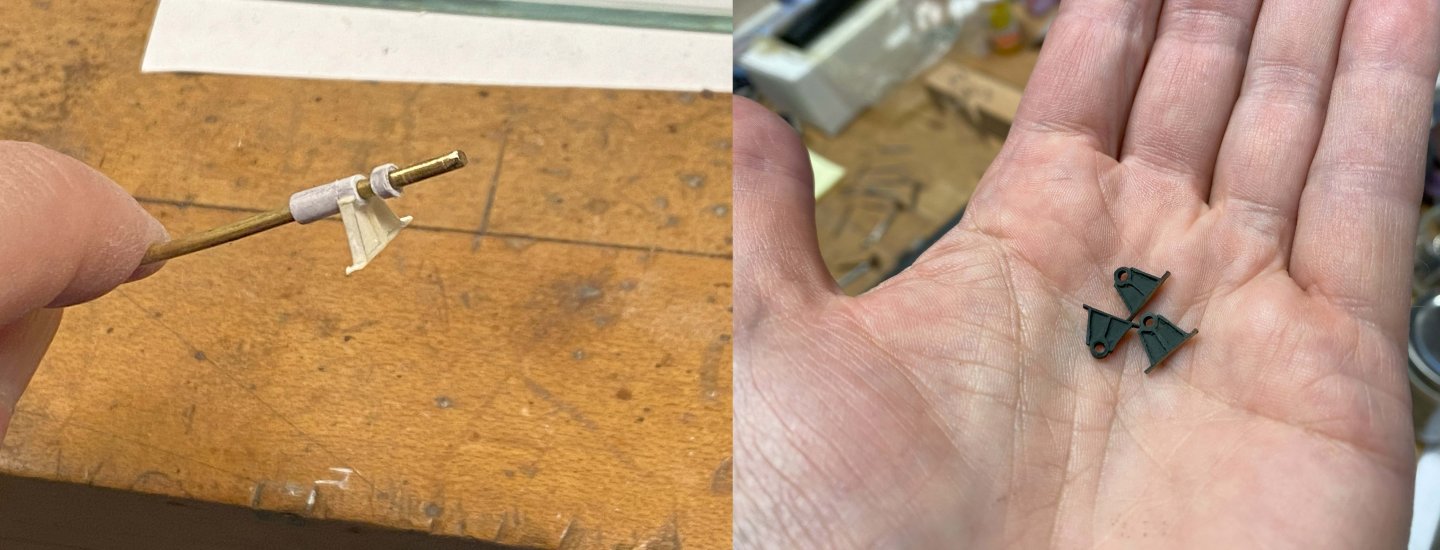
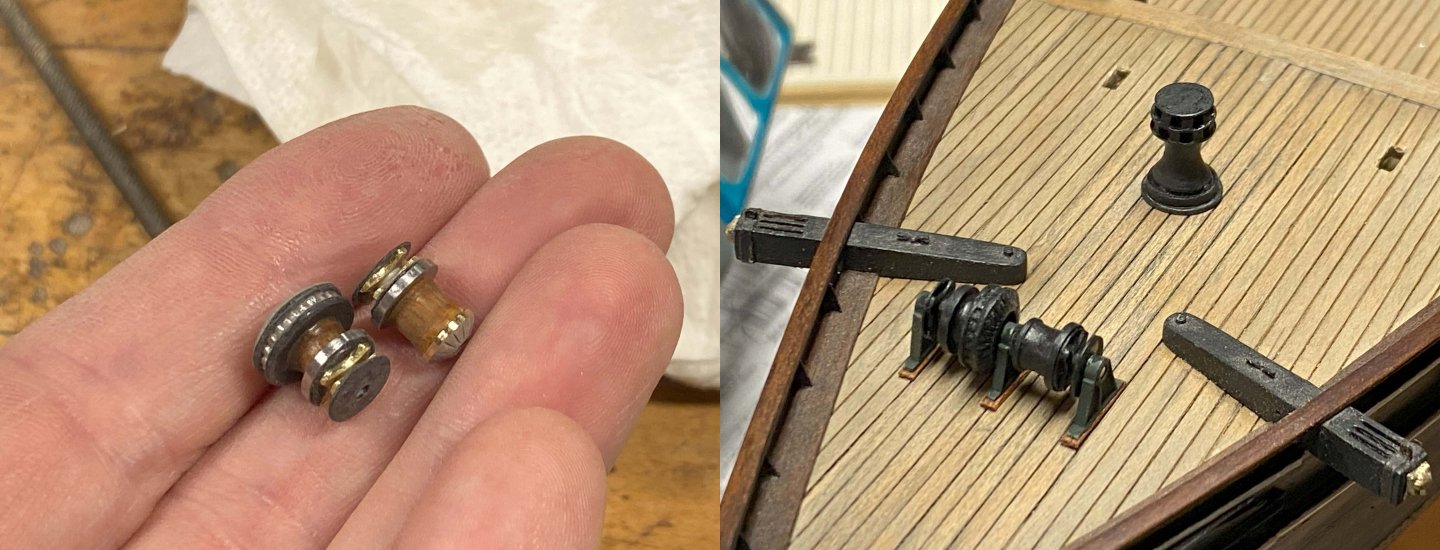
Back to the CS after an all-consuming home renovation project. Produced a capstan, windlass, and two mooring posts fitted on/under the forecastle. From an historical point of view this was fun as none of these items are as they might have been when the CS was originally launched. What I have modeled are Portuguese owner modifications. Capstan – This was no mystery as I have clear pictures of the double-head iron pattern. I neglected to add whelps to my model but don’t think anyone will notice. I used greeting card stock to fabricate the iron head discs. Simply cut out the circles and apply water thin CA to harden. The pawl tray was built up by rolling up two widths of printer paper and then saturating with water thin CA to harden. Worked pretty well. The pictures below should help. Mooring/Towing Posts – These are for sure a carry-over from the original CS design. Would have also served to support the original windlass. Windlass – This was really interesting to research but very hard to decide what it might look like. I got clues from Longridge who described it as of an “ordinary” pattern with bevel drive gear and drum (band) brakes, installed by the Portuguese. I was also able to pull some detail from a Falmouth photo (see below) that clearly shows the anchor chain and pocket drive sprocket (wildcat). No brake drum outboard of the wildcat so that helped narrow it down. I eventually decided that some version of an Emerson/Emerson-Walker was used. Of course, I don’t know that for sure and it hardly matters as all my modeling efforts are essentially hidden. You can only capture a glimpse of it when looking at a shallow angle with illumination. Once the ship is all finished you will be hard pressed to see it w/o a bore scope or dental mirror. It seems like a terrible waste of effort, but it was important to me to have it there. The pigsty turned out good enough, but I used paint brush bristles for the bars, and they keep moving around as temp/humidity fluctuate. Not good. Will probably replace with something metallic for stability. Capstan Windlass Wildcats cut from small brass washers and backed with thin high-density polystyrene packaging rescued from trash can. Spacer between halves made from rolled up printer paper and frozen with CA Brake drums made with small steel washers ground down on Dremel "lathe". Cast iron supports made out of greeting card stock and frozen with CA. Made shaft bearings out of rolled up printer paper to make a tube and then frozen with CA. Worked well. The pawl wheel is made out of a steel washer and hand cut with small file. Warping drums are wood turned on my Dremel tool. Didn't bother with including a vertical drive pinion gear. As with most everything else on this part, there is a big reduction in detail as who is ever going to see it!
- 100 replies
-
- Cutty Sark
- Sergal
-
(and 1 more)
Tagged with:
-
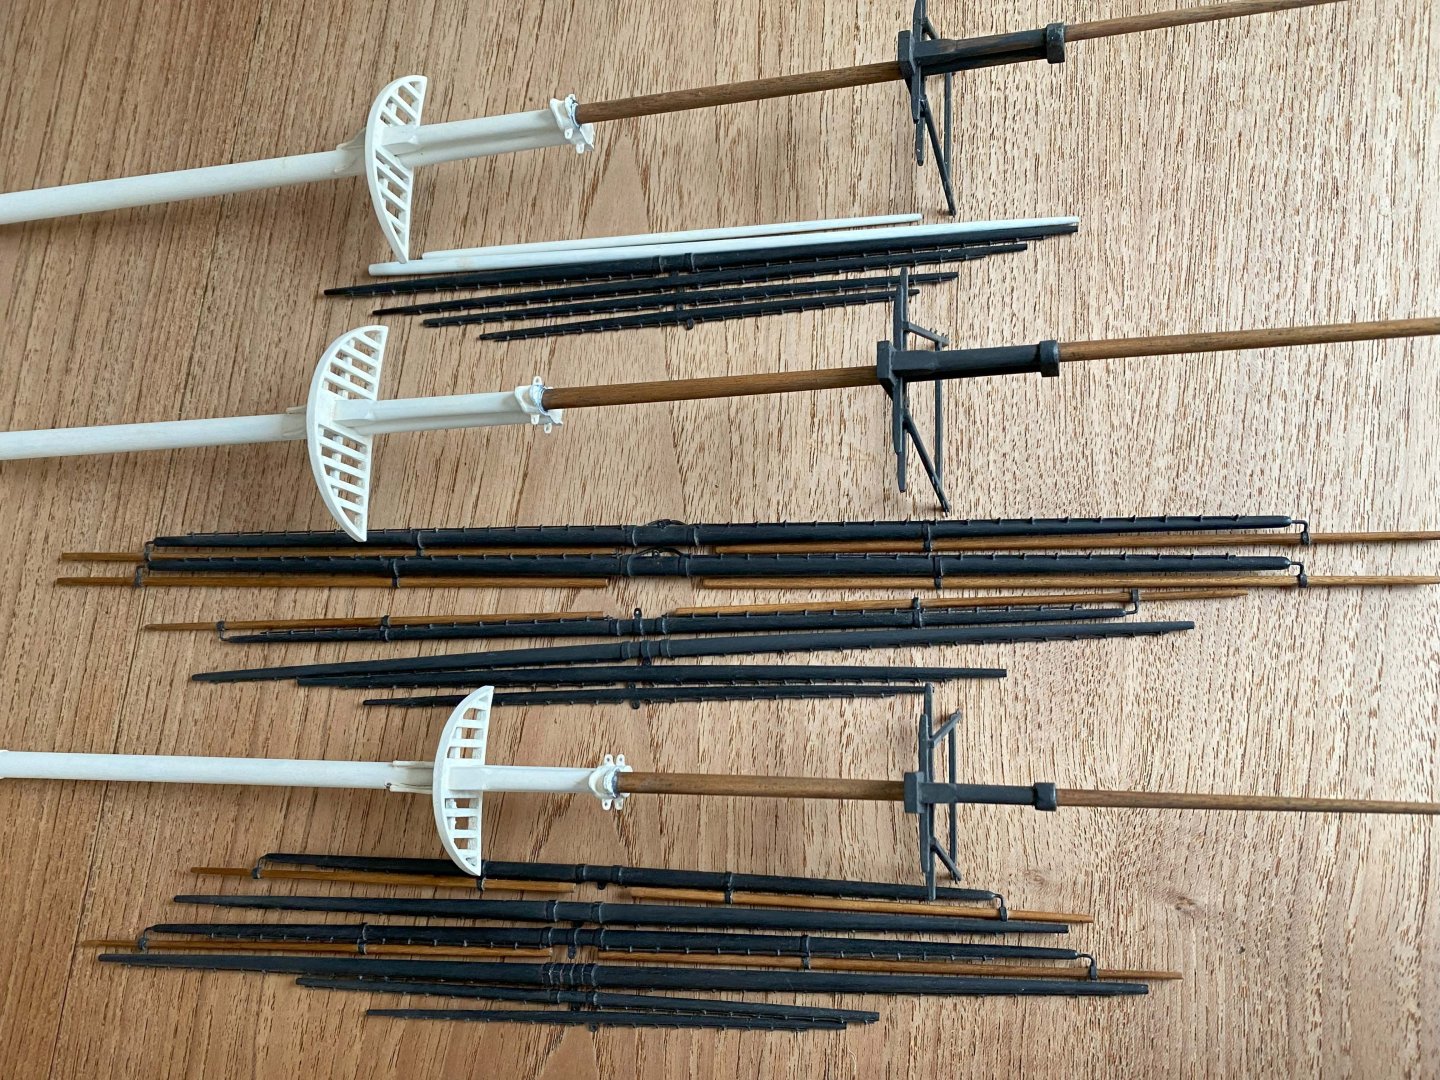
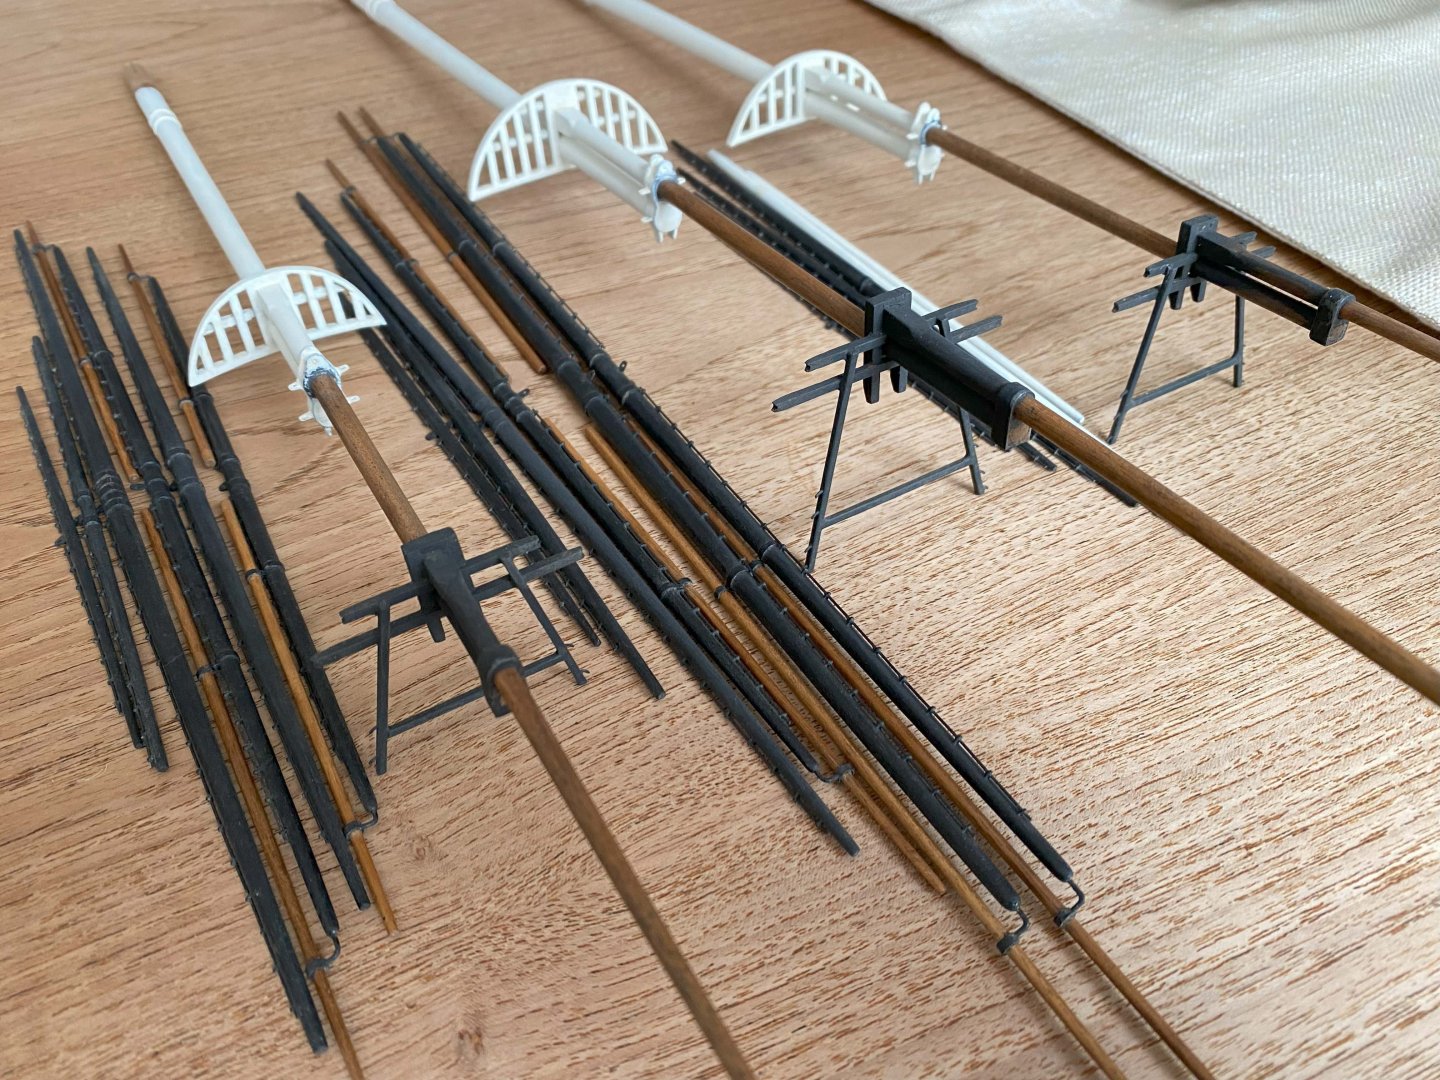
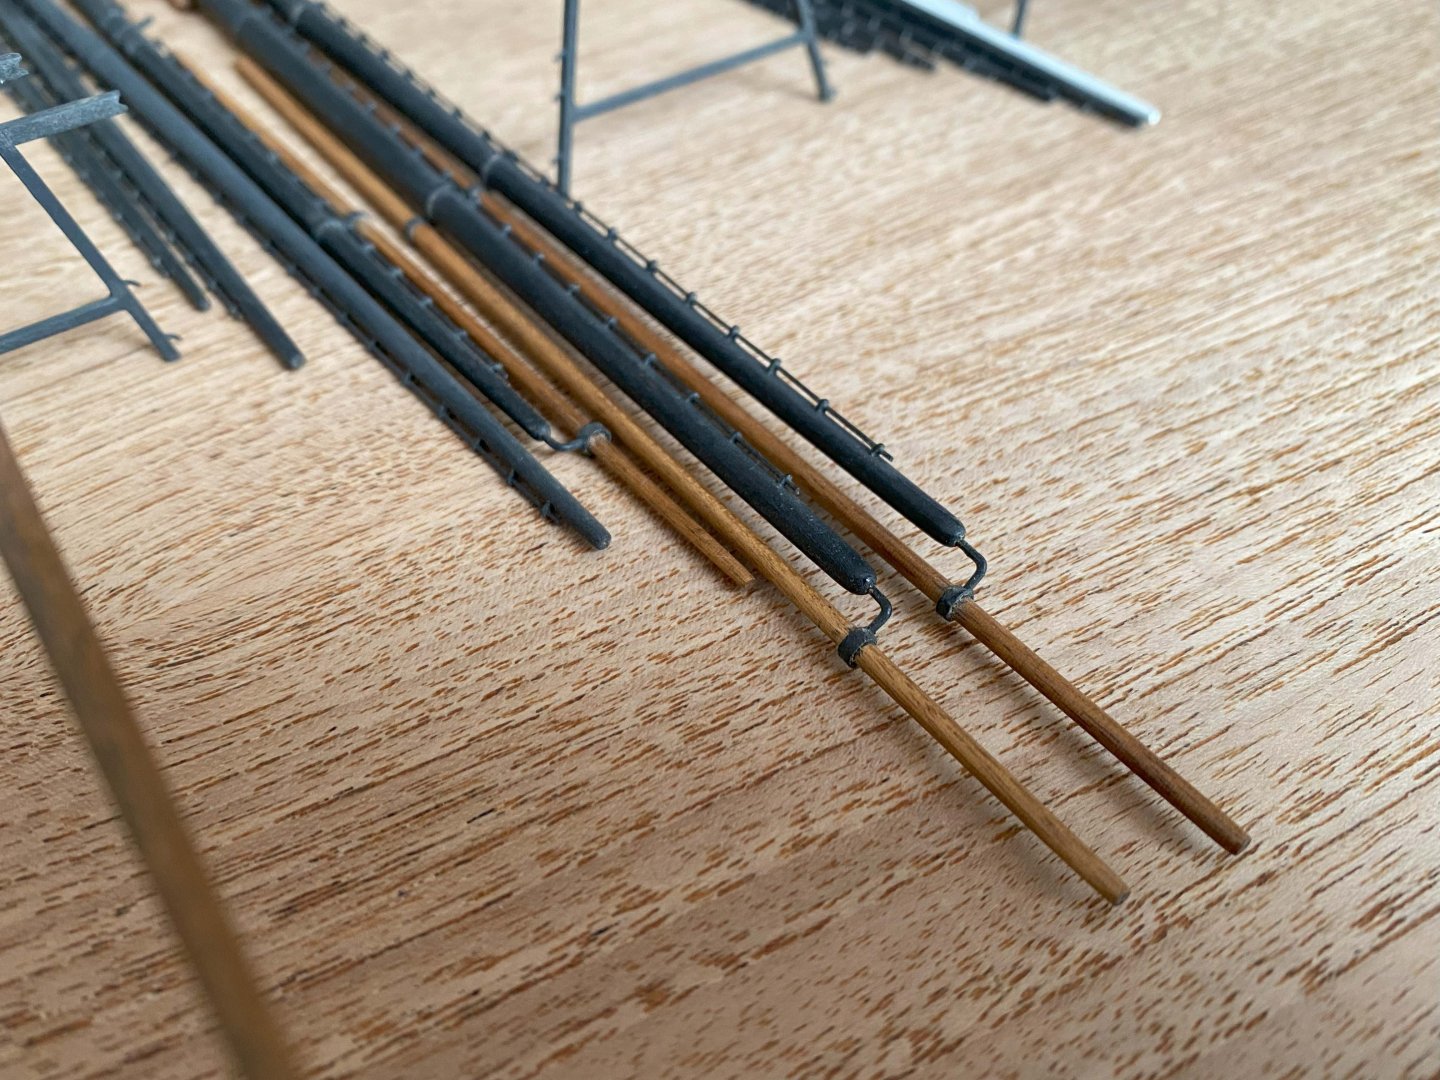
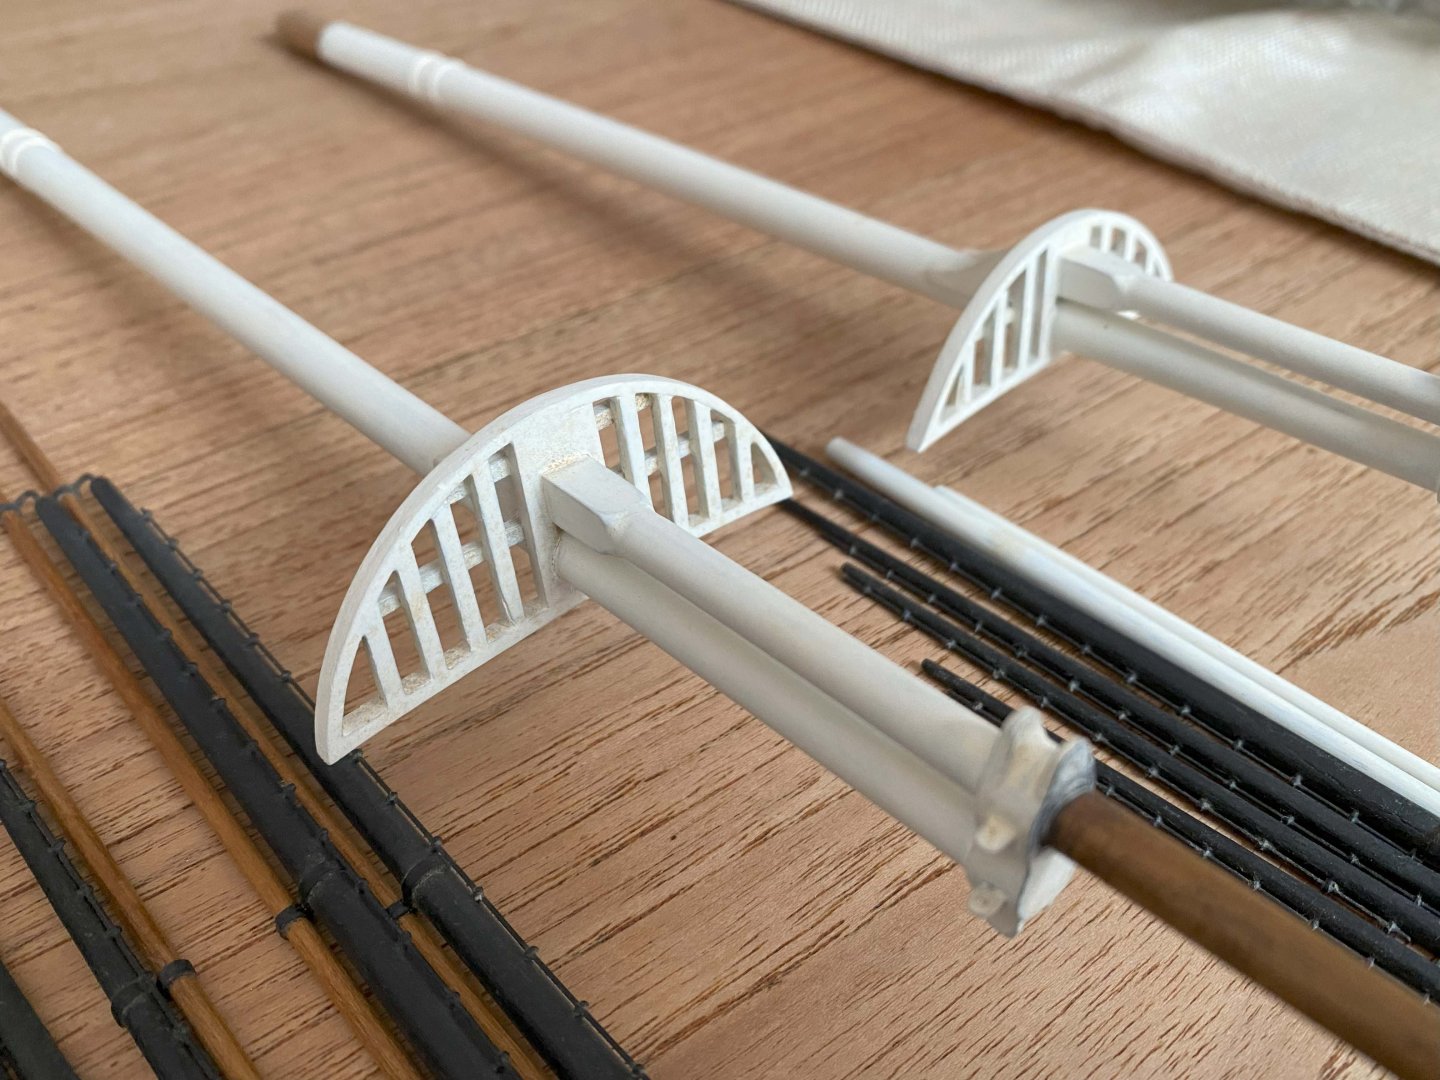
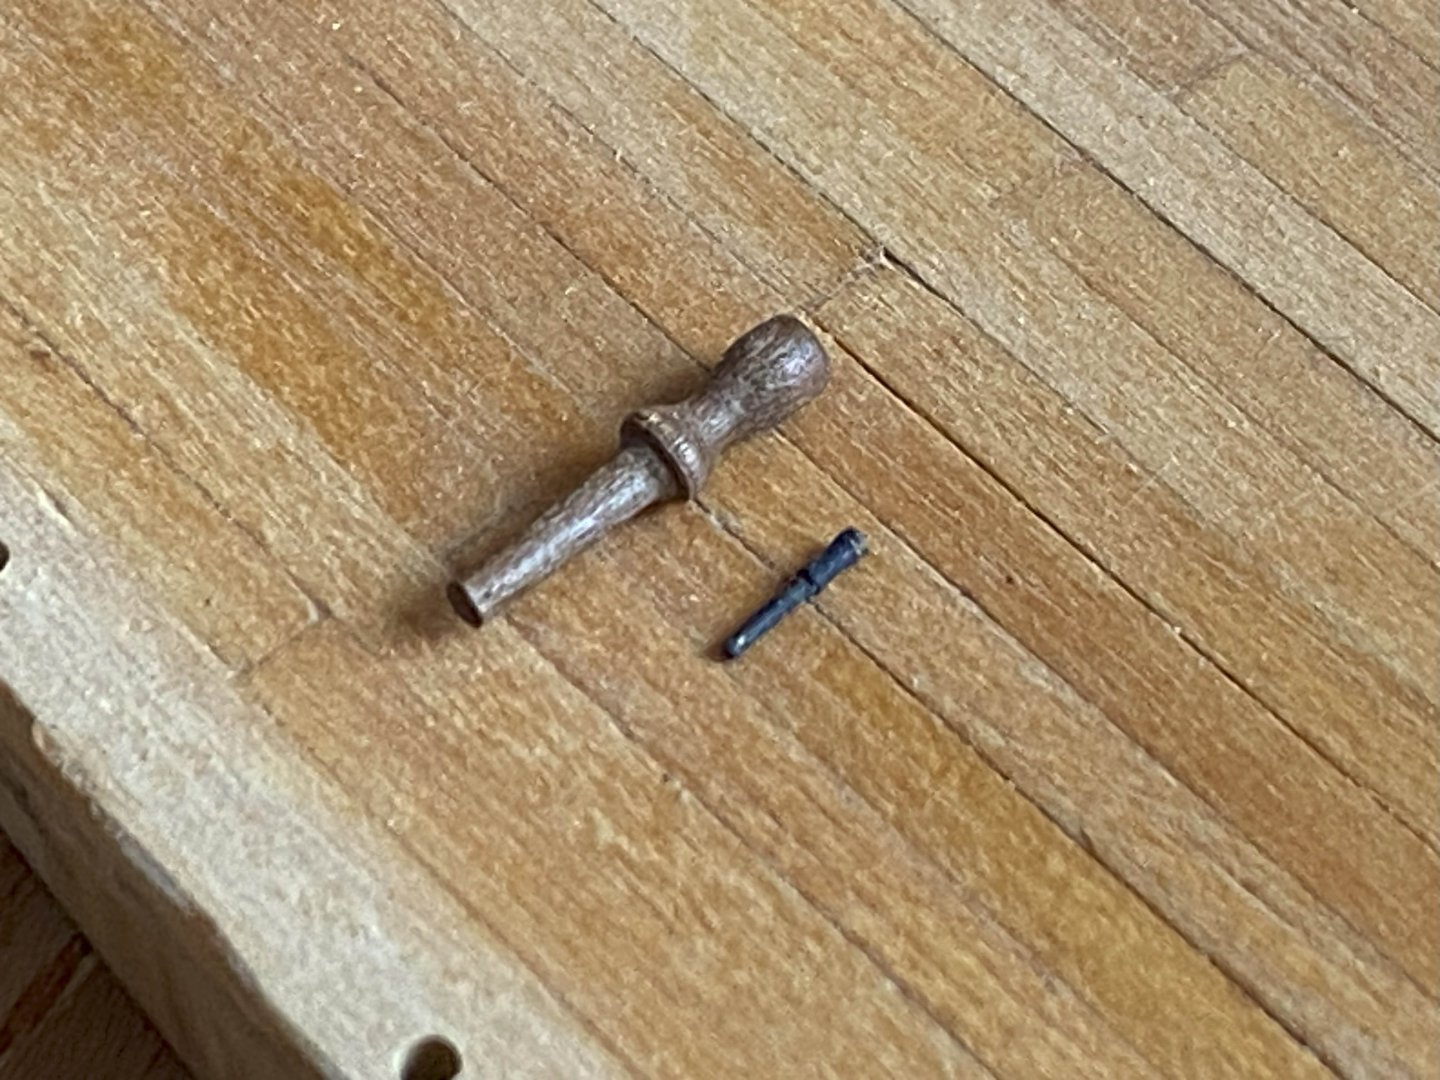
Just after my last update my basement shop area (where I do my modeling) was shut down so extensive renovations could be performed... stud walls, updated electrical, plumbing, foam insulation, etc. It has been a trying mess and not over yet. I expect by the end of December I will be back to work on the CS in much cozier and functional surroundings. Today I dug out my masts and deck houses to see what work they will need. A little nostalgic as this is all 40-year-old work. Thought a few of you might enjoy a closer look at my early efforts. Here are a few shots of all the masts and yards. The three mast tops were built to Sergal's plans and need to be completely redone. The three crosstrees were redone and are much closer to original but still look a little heavy to me. The jackstays were redone to bring closer to scale and are probably going to be fine after a little work. Sad to say all my stunsail booms will need to be removed. Even though Longridge included them on his model, I can find no evidence they were used at Falmouth. A shame as they really add a lot of interest. Never finished the deck houses, which I started to cover using cherry veneer. Lots needs to be fixed and the roof decks are wrong. I had only just started reshaping the poop and still has original skylight. My plan was to cover with more cherry and different decking. Lastly, I found an original Sergal-supplied walnut belaying pin. Here it is next to the blackened brass pins I'm now using to illustrate the difference in scale.
- 100 replies
-
- Cutty Sark
- Sergal
-
(and 1 more)
Tagged with:
-
A smallish update today. Lately, my pondering to fabricating ratio has been about 10 to 1. The copper tiles continued to darken slightly for a couple days as the fixative cured. An improvement, I believe, and now feel I can declare that effort completed and move on. Marked out, drilled, and installed commercially available belaying pins. I ended up using blackened 3/16" brass pins even though they are slightly smaller than scale, which is mostly to do with length than girth. If in doubt, go smaller not bigger. I also fabricated the 4 mini rail winches. I turned all 4 simultaneously on my Dremel-like tool using 3mm walnut dowel. I did them side-by-side which made it easy to judge their relative shape. Before parting the drums, I dipped them in shellac to seal and stabilize so they would be less likely to splinter during the parting process. Funny thing about adding details, I had drilled a small hole to add a pin to represent the winch crank handle stem, but then removed it. It looked terrible. Seems when you reach a certain concentration of detail the look you are going for collapses.
- 100 replies
-
- Cutty Sark
- Sergal
-
(and 1 more)
Tagged with:
-
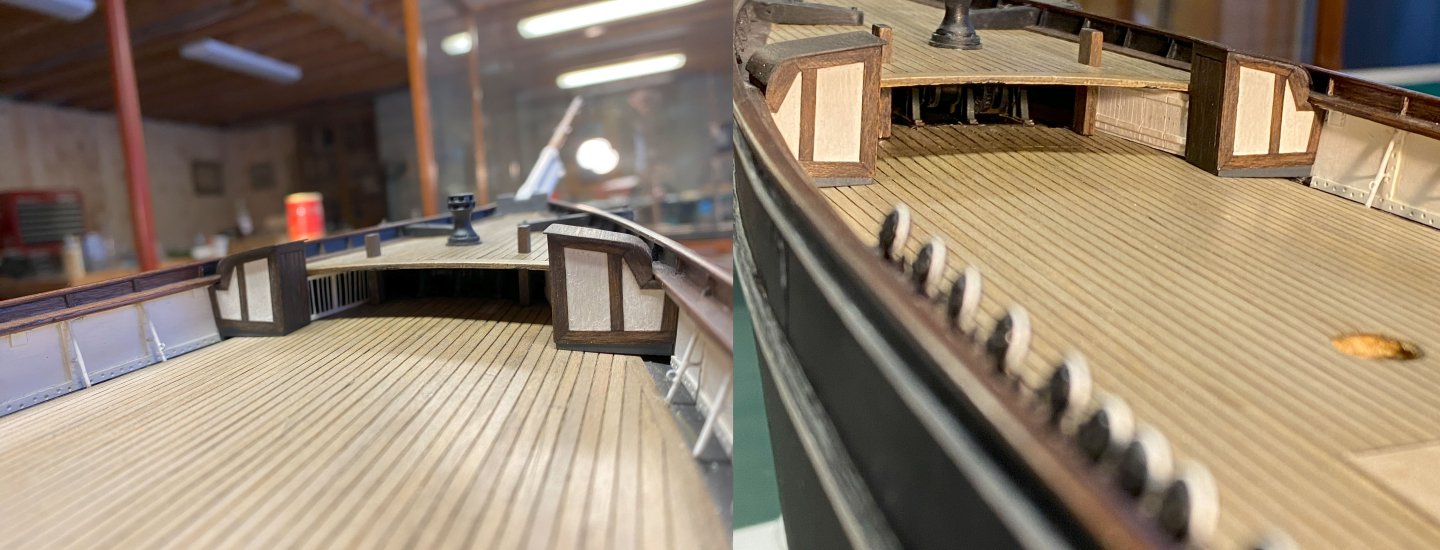
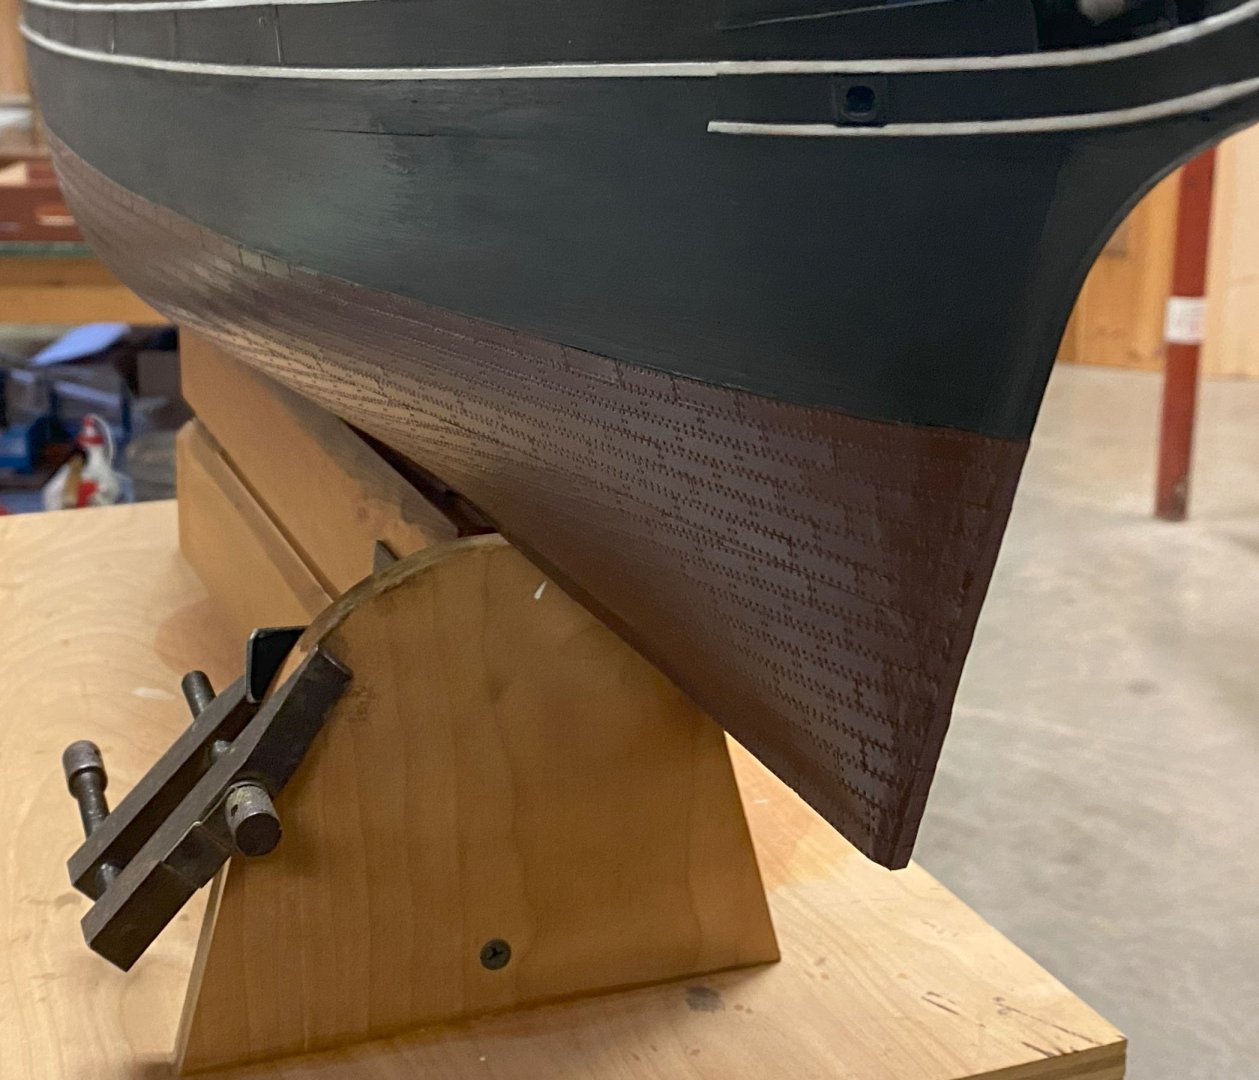
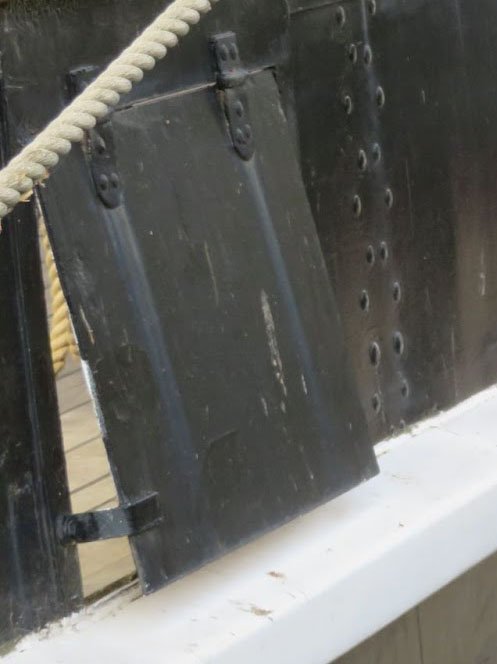
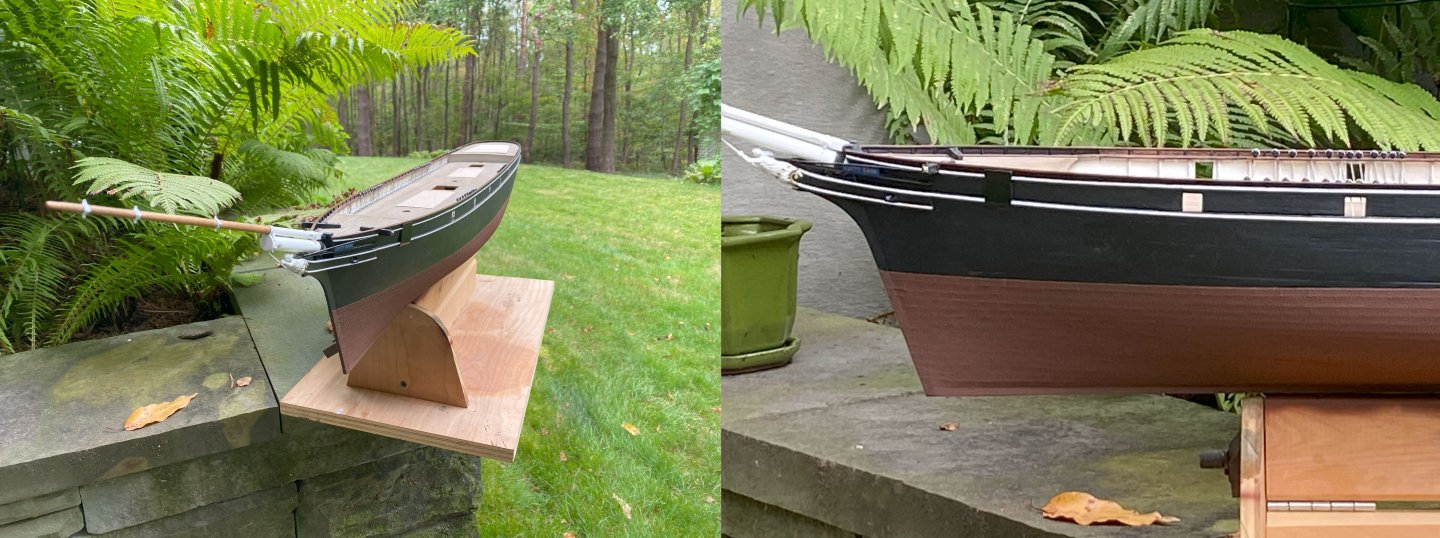
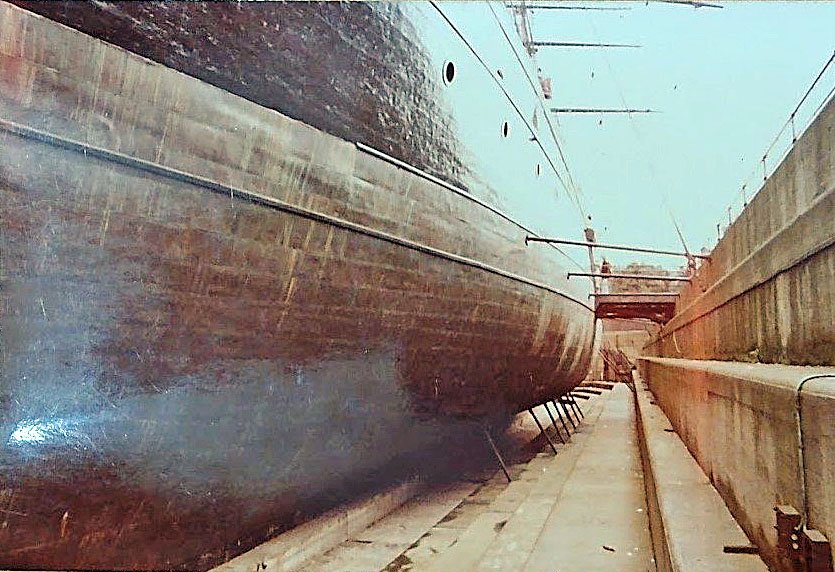
Having lived with my paint job on the copper hull I decided to simply seal it with Krylon workable fixative spray. After the initial paint application, it did continue to darken a bit over a few days as I expected. I finally decided all it really needed was a little sheen. The fixative provided just the right dull shine and also protects the paint job. While it seemed a shame to cover real copper, it isn't Muntz metal that has bathed in sea water for 50 odd years to the early Falmouth period I'm modeling. The model now looks balanced to me and less busy. Down the line I might consider adding some aftereffects, but it will be VERY subtle. Reality is the metal below the waterline would have been very monochromatic while in the water. There would be no verdigris below the waterline and only a little from the waterline on up in addition to sea salt buildup, etc., if sitting at anchor. I don't want the hull to look like it is in drydock nor display the model with a "bathtub" ring at the waterline... unless I am doing a waterline model. It would just look odd and distracting to me. Took this picture today right after applying the fixative. My cellphone camera is terrible and even worse in low light, so please forgive the poor-quality images and the distortion due to wide-angle shot (see below) I also tackled the wash/freeing ports. The existing openings are the size and position a la Sergal, which are not in the proper locations (not going to move them) or opening size. I decided to make frames to span the current opening that look similar to what you would find on the CS to which I would attach a properly scaled door. The doors are 10mm square made out of the same steel I harvested from an alcohol can (see post #9). The frames were made out of an aluminum beverage can I found along the roadside. The hinges are made from 0.025mm copper foil with acrylic adhesive on one side. The foil was designed for stained glass work but works nicely for model making. I added a little CA to the copper hinges to make them more secure and the final paint further locked it all together. I painted the interior surfaces white and the outside black to match the hull using Model Expo's Hull Spar Black, which is water based. I used my new airbrush to apply the color, which proved quite painful. For future airbrush work I'll stick with the Tamiya colors. You had to add a little water in order to spray it, but it was really hard to get the right ratio and cleanup was quite difficult. Never again. Still, I managed to get the paint on and in the process discovered that if I backed off on the air pressure, I could get larger droplet sizes that made the surface look like corroded iron; not that anyone is likely to notice. I then glued the whole assembly over the bulwark openings. The model doors can currently be opened and closed but I'll fix them into a position once I decide how I want them to look... open, closed, or something in between. Pictures I have of the CS that immediately follow the Dowman restoration at Falmouth show the ports mostly open at varying shallow angles and don't appear to be locked in place with any clips. My guess is all the hinges were so corroded that most of the doors would not close completely under their own weight. After studying late Falmouth pictures, I can make out clips were added to hold the ports open; the same ones you see today (see below) I believe these clips were eventually added for safety reasons. Afterall, the ship was a training vessel at this point and was no longer going out on the high seas. During an ocean storm waves might break onto the deck. When this happened the freeing port doors would open to let the bulk of the sea water out quickly. My guess is there was some sort of clip to lock the doors shut when the seas were calm. Just don't know, but it makes sense to me. Who would want to hear the doors opening and slamming shut if the ship was rocking?
- 100 replies
-
- Cutty Sark
- Sergal
-
(and 1 more)
Tagged with:
-
Today I finally found both the time and nerve to paint my hull tiles. I purchased a Paasche H model airbrush and a couple Tamiya paint colors for this job. This was my very first time holding an airbrush so did a little research before the purchase. I have to say, now that I have one, I kick myself for not getting one years ago. The airbrush I purchased is a rather simple single-stage high-volume model. It can go down to about a 1/16" coverage to upwards of about 1.5 inches. I was surprised by how efficient they are with paint and how completely controllable the applications are. My goal has been to achieve a deeply aged Muntz metal look. It has been very illusive. After some experimentation on small non-copper targets, I decided to mix 1:1 FX-9 to FX-64. I then thinned 1:1 paint to lacquer thinner. I used the H-5 head and HC-5 aircap that came with the airbrush, which will throw the most air and paint. I ran it with my pancake compressor set to output 30psi. The job took so little air volume my compressor only cycled once at the beginning and that was it. As you might notice I simply plugged the airbrush line directly to the compressor. I plan to get a filter for future work. The paint is fresh when the pictures were taken, and I know it will darken over the next day or two. Even after it darkens, I think it will need more work to deepen the brown. I also want to "dirty" it up a bit as it looks too clean for my liking. Now that I have an airbrush, shading/adjusting the base coat I put on today will be easy. I just need to stare at it for a few days and try to figure out next steps.
- 100 replies
-
- Cutty Sark
- Sergal
-
(and 1 more)
Tagged with:
-
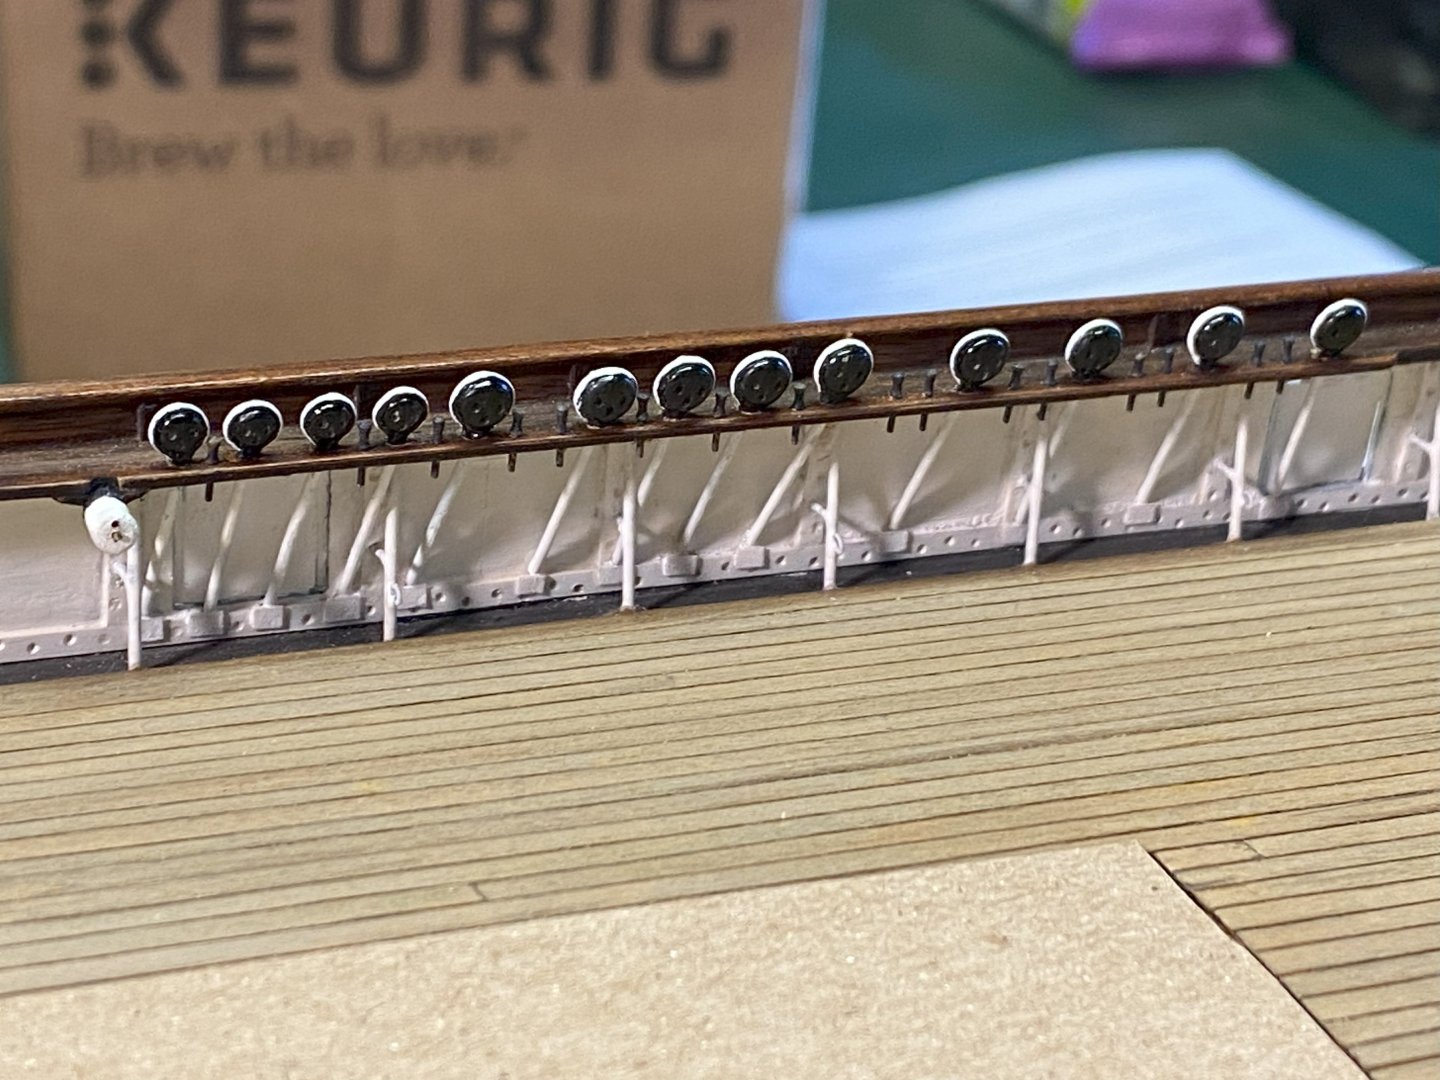
Been away from the boat for the last 3 weeks to work on my house exterior before the fall weather closes in. I'm back. While I was away, my new air brush and paints showed up. Once I have had a chance to set up the air brush and test some paint options, I'll be painting the copper tiles to look, hopefully, like aged Muntz metal. I'll cover that topic once I have some results to show. Decided to work on the deadeyes over the last few days. Modeling them was a bit frustrating as the details I wanted to execute were far too hard on my mental health. Still, I feel that I was able to catch the spirit of them while making fabrication much easier. Even though there is a range of eye sizes on the original ship, practicality gets in the way. I decided to go with 4mm and 3mm eyes and chose Syren's 3D printed versions. I was pleasantly surprised by how nice the eyes are. Good job, Syren. I used brass rod for the iron stays and soft copper wire to make the straps. I burnished the copper wire to somewhat flatten it for effect. and then wrapped the eyes and soldered to brass rod. I don't know what polymer the 3D printed eyes are made of but was worried that they might melt during soldering. Turned out not be a problem and I didn't ruin a single one. After soldering I bathed the assemblies in ethanol for a minute or two to clean off flux residue. Here again, I was worried how the eyes might hold up so tested first. After a couple minutes I could see pigment getting leached from the eyes and after drying down the eyes shrank slightly. Not a problem for me in either case. I painted the eyes black using an acrylic enamel spray and then scuffed up a bit with 0000 steel wool to soften the look. My first attempt using a water-based paint failed as the paint would rub right off. After painting I used an appropriately sized drill bit to ream out paint residue from the eyelets. I then hand painted the white areas with a water-based paint that adhered nicely to the enamel. All 4 existing pin rail bump outs were according to Sergal plans, which were not correct. I replaced all 4 after which I located and drilled all the stay locations, which is a tricky and time-consuming process. There is a small rectangular iron plate at the bottom of each stay that attaches to the iron bulwark. To simulate that I cut little paper squares from a paper dinner plate and glued in place and then saturated/fixed with CA. During this whole process I discovered all the wash/freeing ports are in the wrong locations. Not even close. Oh well, add this to the list of things that I will not be attempting to remedy. My cellphone camera takes really crummy pictures in low light, so removed the poor ones and adding these for a better look...
- 100 replies
-
- Cutty Sark
- Sergal
-
(and 1 more)
Tagged with:
-
Rob, tried to pull some of the color back out of your old picture. Yup, that is definitely the look I'm going for. Time to experiment a bit before taking the plunge. When my airbrush arrives and have chosen some suitable paints, I'll begin the selection process. Makes me nervous but I'm now convinced paint is the only way to go.
- 100 replies
-
- Cutty Sark
- Sergal
-
(and 1 more)
Tagged with:
-
Rob, what can I say. I love doing things the hard way. Your Great Republic hull looks fantastic. I searched your build log to find that you used Rust-Oleum Flat Chestnut right out of the can? I would probably have never tried that, but the results look terrific. My hull copper has darkened a fair amount over the years so not sure of color choices I might try but paint it will be. Deeply appreciate your help and guidance! Ron
- 100 replies
-
- Cutty Sark
- Sergal
-
(and 1 more)
Tagged with:
-
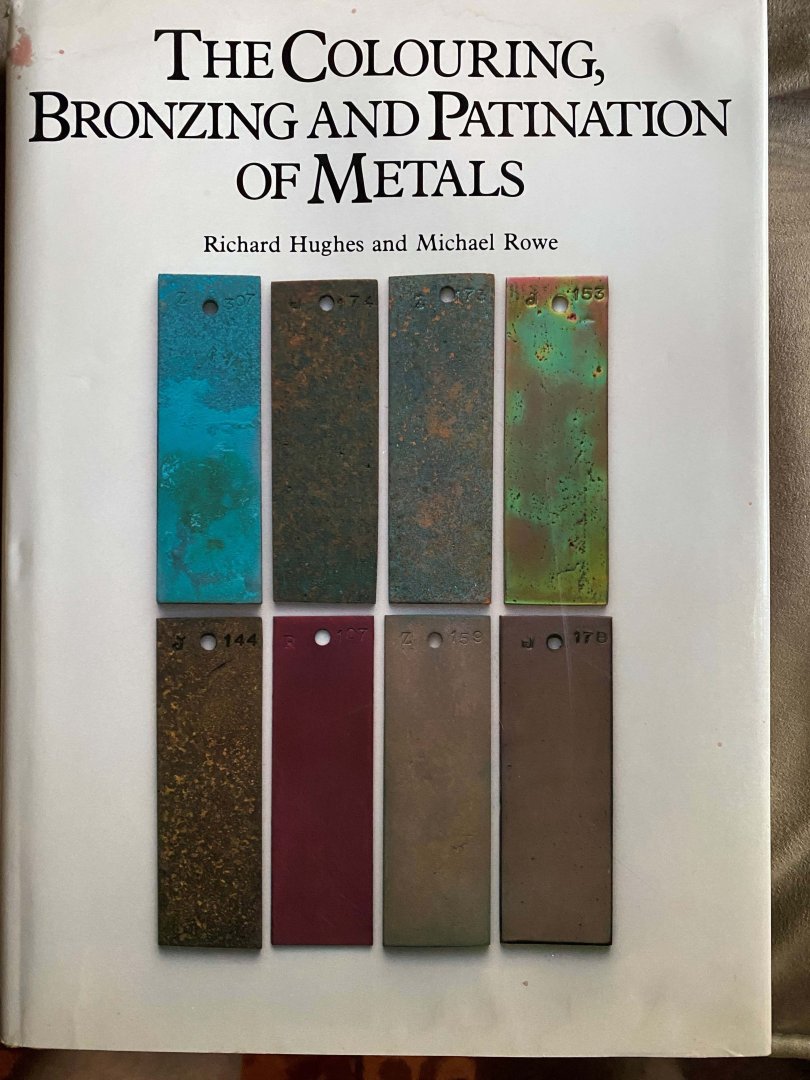
A quick update. Spent the day feverishly mixing up all sorts of Cu patination recipes. The book pictured below provided most of my recipes and has been a reliable reference for many years. I have some experience in the patination of bronze statuary and gun metals, so not a neophyte. I could achieve something very close to what I wanted but had to apply to the work hot (200+degF) with many, many coats, and then oil at the end. Absolutely not something I'm going to subject my model to. Other than the heat involved, a great deal of corrosive chemical would most likely get wicked up between the tiles and be hard to neutralize. Just not worth the risk. If I could go back 40 years, I would patinate the copper tiles and then apply. Another "old work" issue that is a hill too far. I'm putting away the chemicals and will order an airbrush. Never owned or used one but feel with a little experimentation I can come up with a semi-transparent coloration that gets to where I want to be. Arg.
- 100 replies
-
- Cutty Sark
- Sergal
-
(and 1 more)
Tagged with:
-
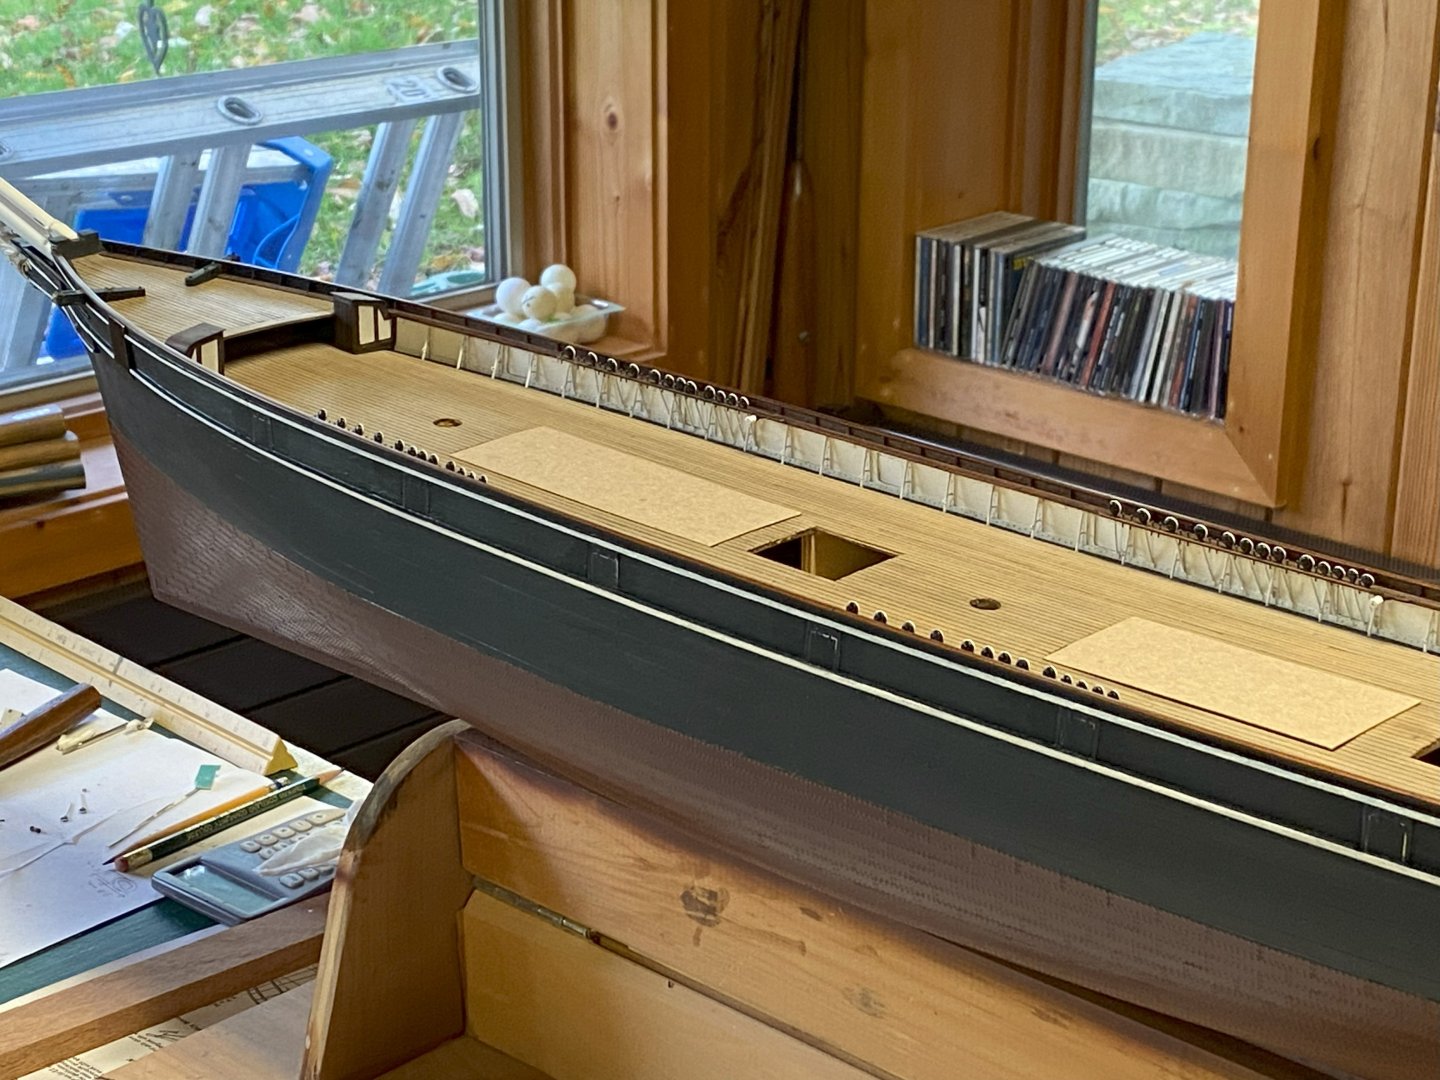
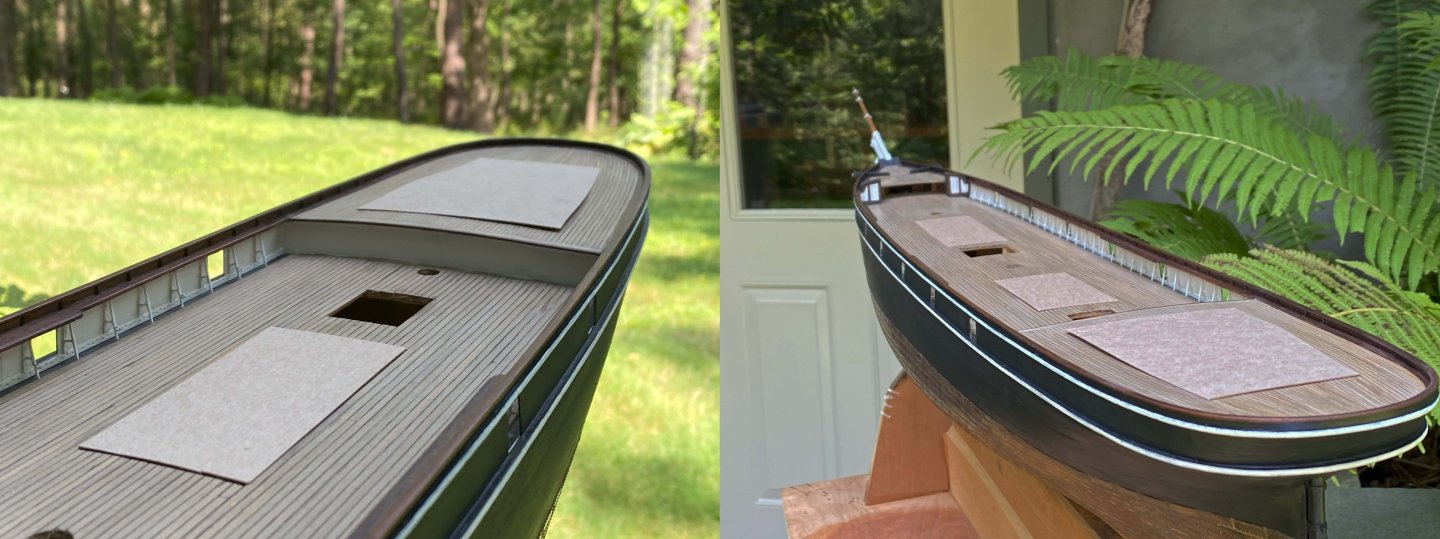
Considering all the many hours of recent work, I don't feel like I have much to show for it. Seems most of my time is spent trying to fix old work issues that keep cropping up. Some old work issues I have decided to let go as they will be far too painful to fix. Case in point is the forward end of the forecastle deck. When I reset the decking forty years ago I did it following Longridges drawings. He showed the bowsprit buried beneath the decking. His model also supported that. Years later I got access to Falmouth images that showed that was not the case. I decided it would be far too much trouble to reset the deck elevation in order to allow the bowsprit to come proud of the deck, so it is what it is. The poop deck on the other hand was relatively easy to reset as it too was wrong. The main deck pin rail could not run continuously over the poop deck. That I more or less fixed with a great deal of difficulty. Apart from the deck elevation issues, I did manage some new work. I added cap rails and simulated iron framing to the forecastle, which really adds interest to the boat. The forecastle bulwarks were painted black to be consistent with how it was at Falmouth. I also worked on tightening up the hull paint and tried to unify the "teak" stain coloration. That was hard to do as it is made up of no less than 3 different species of wood. To date, I have experimented with many copper patination recipes. Turns out, making pure copper look like deeply aged Muntz metal is not easy. So much so I'm actually starting to consider paint. I am trying to achieve a dark reddish brown. In my next attempt I will try using ferric nitrate/ferric chloride at different ratios. While this is designed to go on hot I will, for obvious reasons, avoid that. I have ferric chloride on hand but no ferric nitrate. Fortunately, I have 5# of Fe powder on hand as well as HNO3 so can make my own... which is way more fun. I don't experiment on the boat directly, but use Cu scrap laying around. Wish me luck.
- 100 replies
-
- Cutty Sark
- Sergal
-
(and 1 more)
Tagged with:
-
Rob, thanks for the tip and pin rail clarification. I'll have to do some trials to see how much trouble this going to be, and how good/clean I can make it look. I don't want an eye sore. BTW, I've been enjoying your Staghound project. Did you gild your hound with real Au leaf? Sure looks like it and looks pretty sharp.
- 100 replies
-
- Cutty Sark
- Sergal
-
(and 1 more)
Tagged with:
-
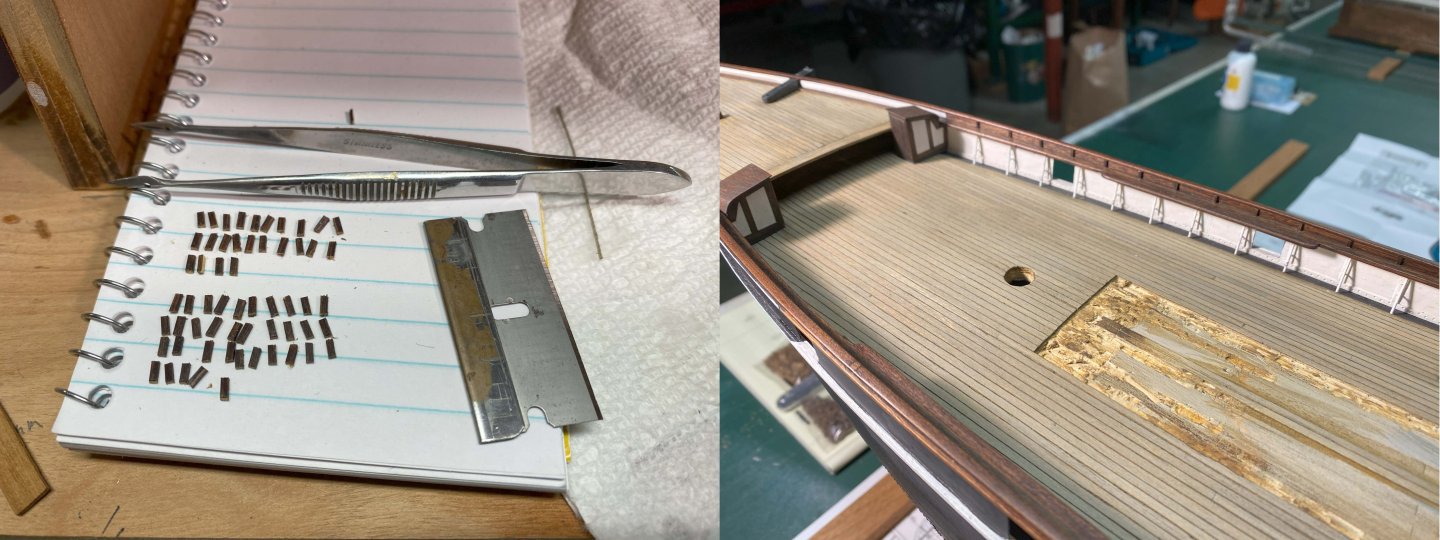
Bathroom renovation is now complete so can return to boat building. Spent a huge number of hours installing the 70+ teak mini stanchions between top and bottom rails. Cutting, fitting, and gluing was especially tedious, but the cumulative visual effect of them is worth the effort. Stressing a little now about how to execute the decorative ovoid panels that go between. At the point I'm modeling the CS all of this was stained over the same dark color. If they were white at that time, I could possibly cut out white paper panels and forget the raised moulding, but that is not the case. It is either find a way to simulate the moulding (super difficult) or leave it off entirely, which is currently the direction I'm heading.
- 100 replies
-
- Cutty Sark
- Sergal
-
(and 1 more)
Tagged with:
-
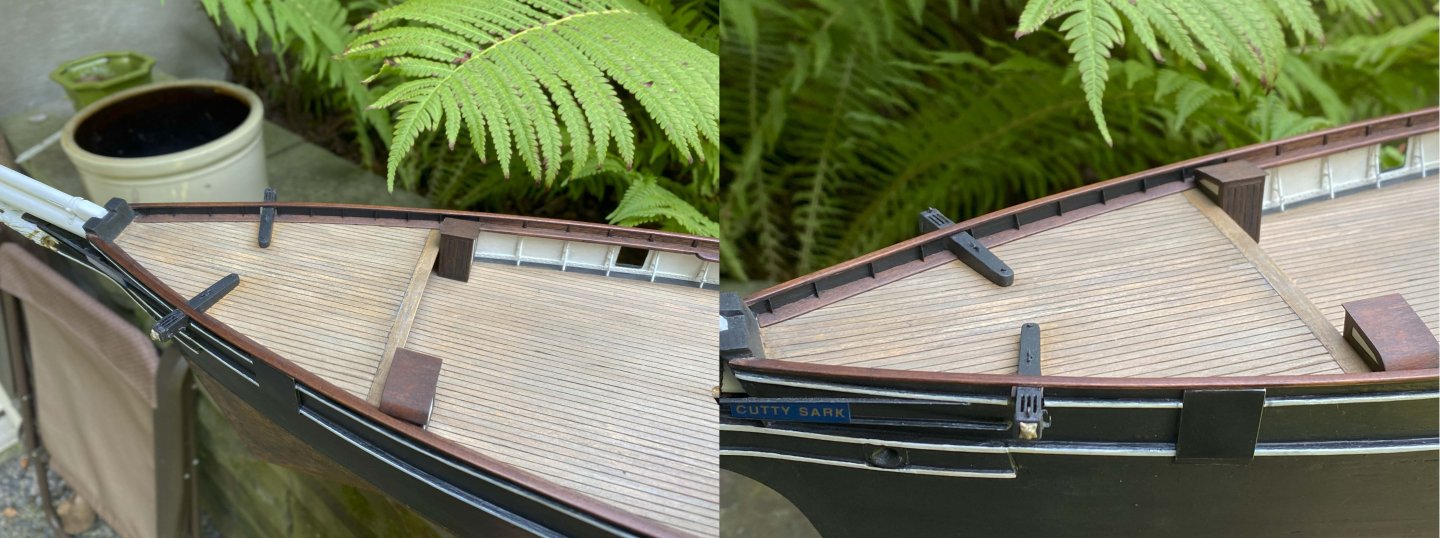
Have not been able to spend much time on the boat lately. My wife has me working on her bathroom remodel project. Regardless, I still found some time to address the stanchions. I hate having to redo my old work but decided I needed to despite the pain involved. My original stanchions were simply a single brass rod with no rings or braces. Fixing that has proved very tedious. All of this could have been so much easier if I had originally completed the stanchions before installing them. I tried making the braces out of brass rod but that proved too difficult. Trimming each brass brace to length with nippers was a nightmare. The brace lengths were 2.5mm +/- which meant every brace is custom fit. As an alternative I tried saturating some rigging rope with CA to make ridged and that worked great. I could easily trim with a razor blade all 60 of them. Next came the rings. After some trial and error, I wrapped 0.25mm iron wire (32-gauge wire plus galvanized coating) around a 0.9mm drill shank and then split the loops with nippers. The resulting rings were crude, as the picture shows, and each needed to be fine-tuned before installation. There were 30 of them to install. I ended up making about a dozen more as they would jump out of my tweezers like fleas, never to be found again. As it is, the stanchions are alternate plain (no ring) and with ring. During the early Falmouth days, the CS also had stanchions with double rings, cleats, and a plain bent rod. I need to study some old pictures to determine which will need a second ring or cleat. I have one picture that shows a bent rod but not sure of position. It all gets a little obsessive. The CS stanchions were quite corroded at this point in history so my retrofit effort that disrupted old paint, the rope braces, etc., actually lends to the corrosion damage look. A bonus not due to skill.
- 100 replies
-
- Cutty Sark
- Sergal
-
(and 1 more)
Tagged with:
About us
Modelshipworld - Advancing Ship Modeling through Research
SSL Secured
Your security is important for us so this Website is SSL-Secured
NRG Mailing Address
Nautical Research Guild
237 South Lincoln Street
Westmont IL, 60559-1917
Model Ship World ® and the MSW logo are Registered Trademarks, and belong to the Nautical Research Guild (United States Patent and Trademark Office: No. 6,929,264 & No. 6,929,274, registered Dec. 20, 2022)
Helpful Links
About the NRG
If you enjoy building ship models that are historically accurate as well as beautiful, then The Nautical Research Guild (NRG) is just right for you.
The Guild is a non-profit educational organization whose mission is to “Advance Ship Modeling Through Research”. We provide support to our members in their efforts to raise the quality of their model ships.
The Nautical Research Guild has published our world-renowned quarterly magazine, The Nautical Research Journal, since 1955. The pages of the Journal are full of articles by accomplished ship modelers who show you how they create those exquisite details on their models, and by maritime historians who show you the correct details to build. The Journal is available in both print and digital editions. Go to the NRG web site (www.thenrg.org) to download a complimentary digital copy of the Journal. The NRG also publishes plan sets, books and compilations of back issues of the Journal and the former Ships in Scale and Model Ship Builder magazines.


