
GeneralNuisance
-
Posts
41 -
Joined
-
Last visited
Content Type
Profiles
Forums
Gallery
Events
Everything posted by GeneralNuisance
-
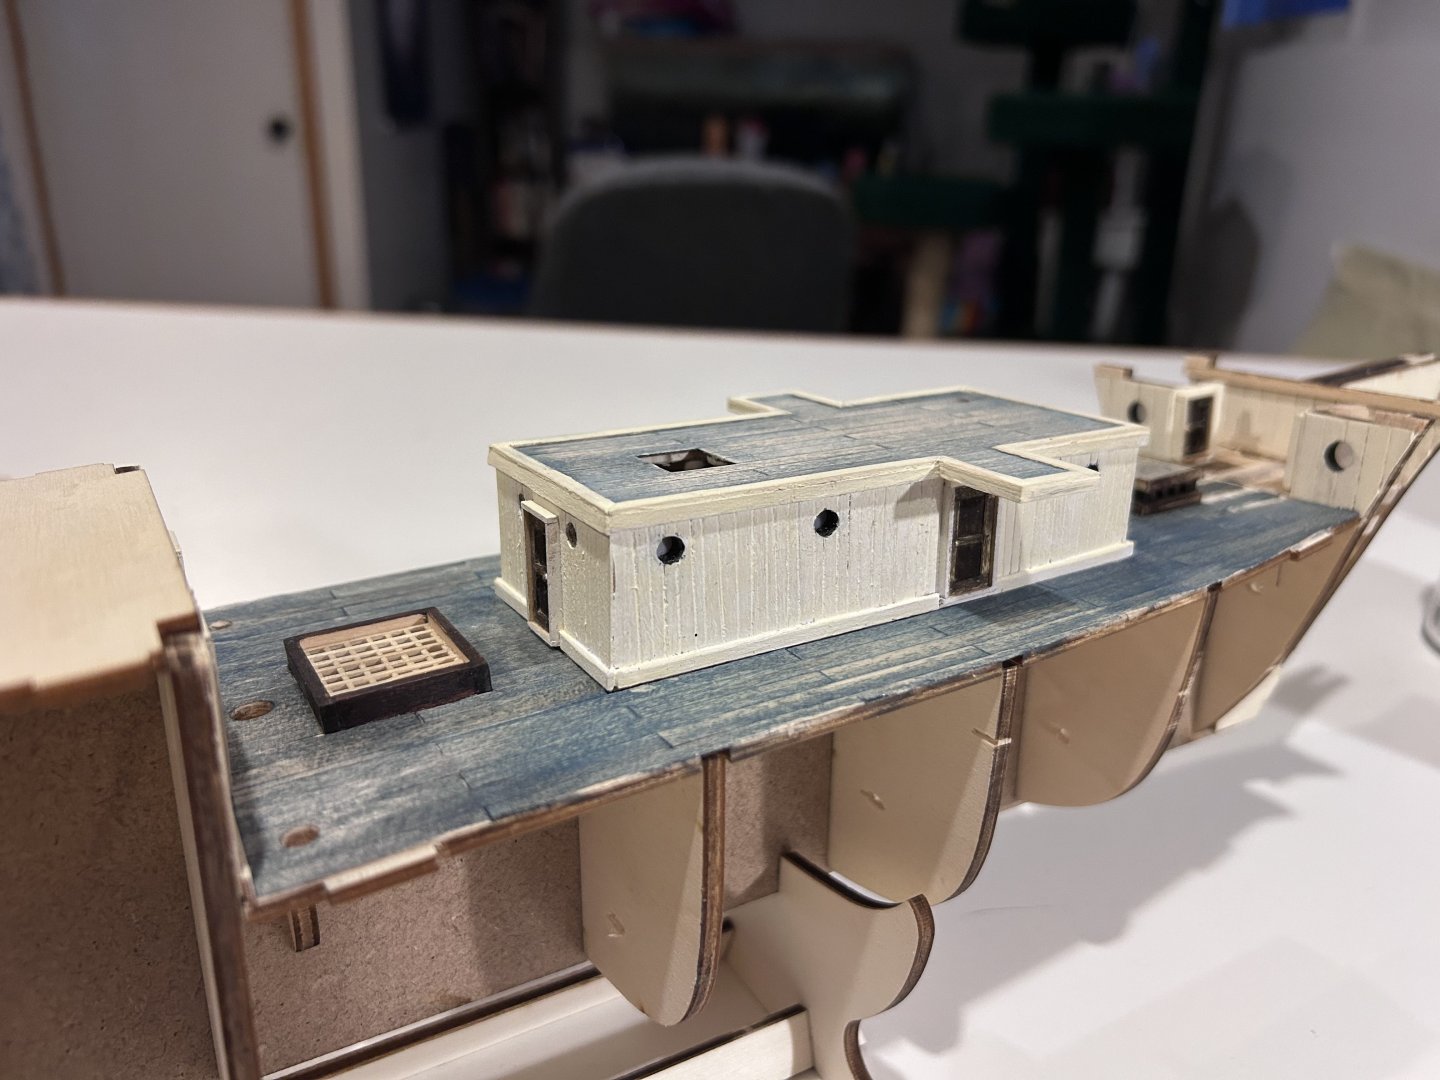
 Big update. So following in the footsteps of @Pierre Greborio I opted to stain the deck an aged gray as this seems to be in line with the sort of wear the deck would have experienced in the extreme southern waters. I want to lighten it up a little more but for the moment I’m quite satisfied with the look especially in contrast to the white. You’ll notice I changed the rear hatch with a far simpler grating. Beneath both hatches though I’ve added the same cricket material I’ve been using for the portholes so that when I add lighting it will give some nice effects. Moving to the galley I put down my flooring and after giving it a test with the skylight hatch I’ve decided I really like how it looks. I’ll save the furnishing of the inch or so you can actually see for the final touches that I’ll be doing near the end prior to rigging. Moving astern I opted to follow in the footsteps of a few other builders and create some depth in the hatchway which will look really great as the real light system is installed. Finally I’ve opted to include the Antarctic skylight hatchway modification if for no other reason than I really like the look of it especially with the light effects.


-
I’ve been having the same debate, much of what I see tells the story of a solid black hull but then there’s this pic where there’s a color differentiation below the etched line on the prow. So I’m debating splitting the difference and perhaps having two different shades of black, one above and one below. This would, in my mind, serve as the best of both worlds. Also I deeply appreciate your research on the deck color as it pushed me towards a navy gray color that i think looks pretty sharp especially when sanded and weathered.

-
idk if you’re interested but I found a windless that’s about as contemporary as we can hope for for the Endurance. I’m getting mine printed from a friend with a resin printer but here’s the link (and I can send a copy of the file if you want it) https://cults3d.com/en/3d-model/game/icebreaker-bow-windlass-print_rc_dream
-
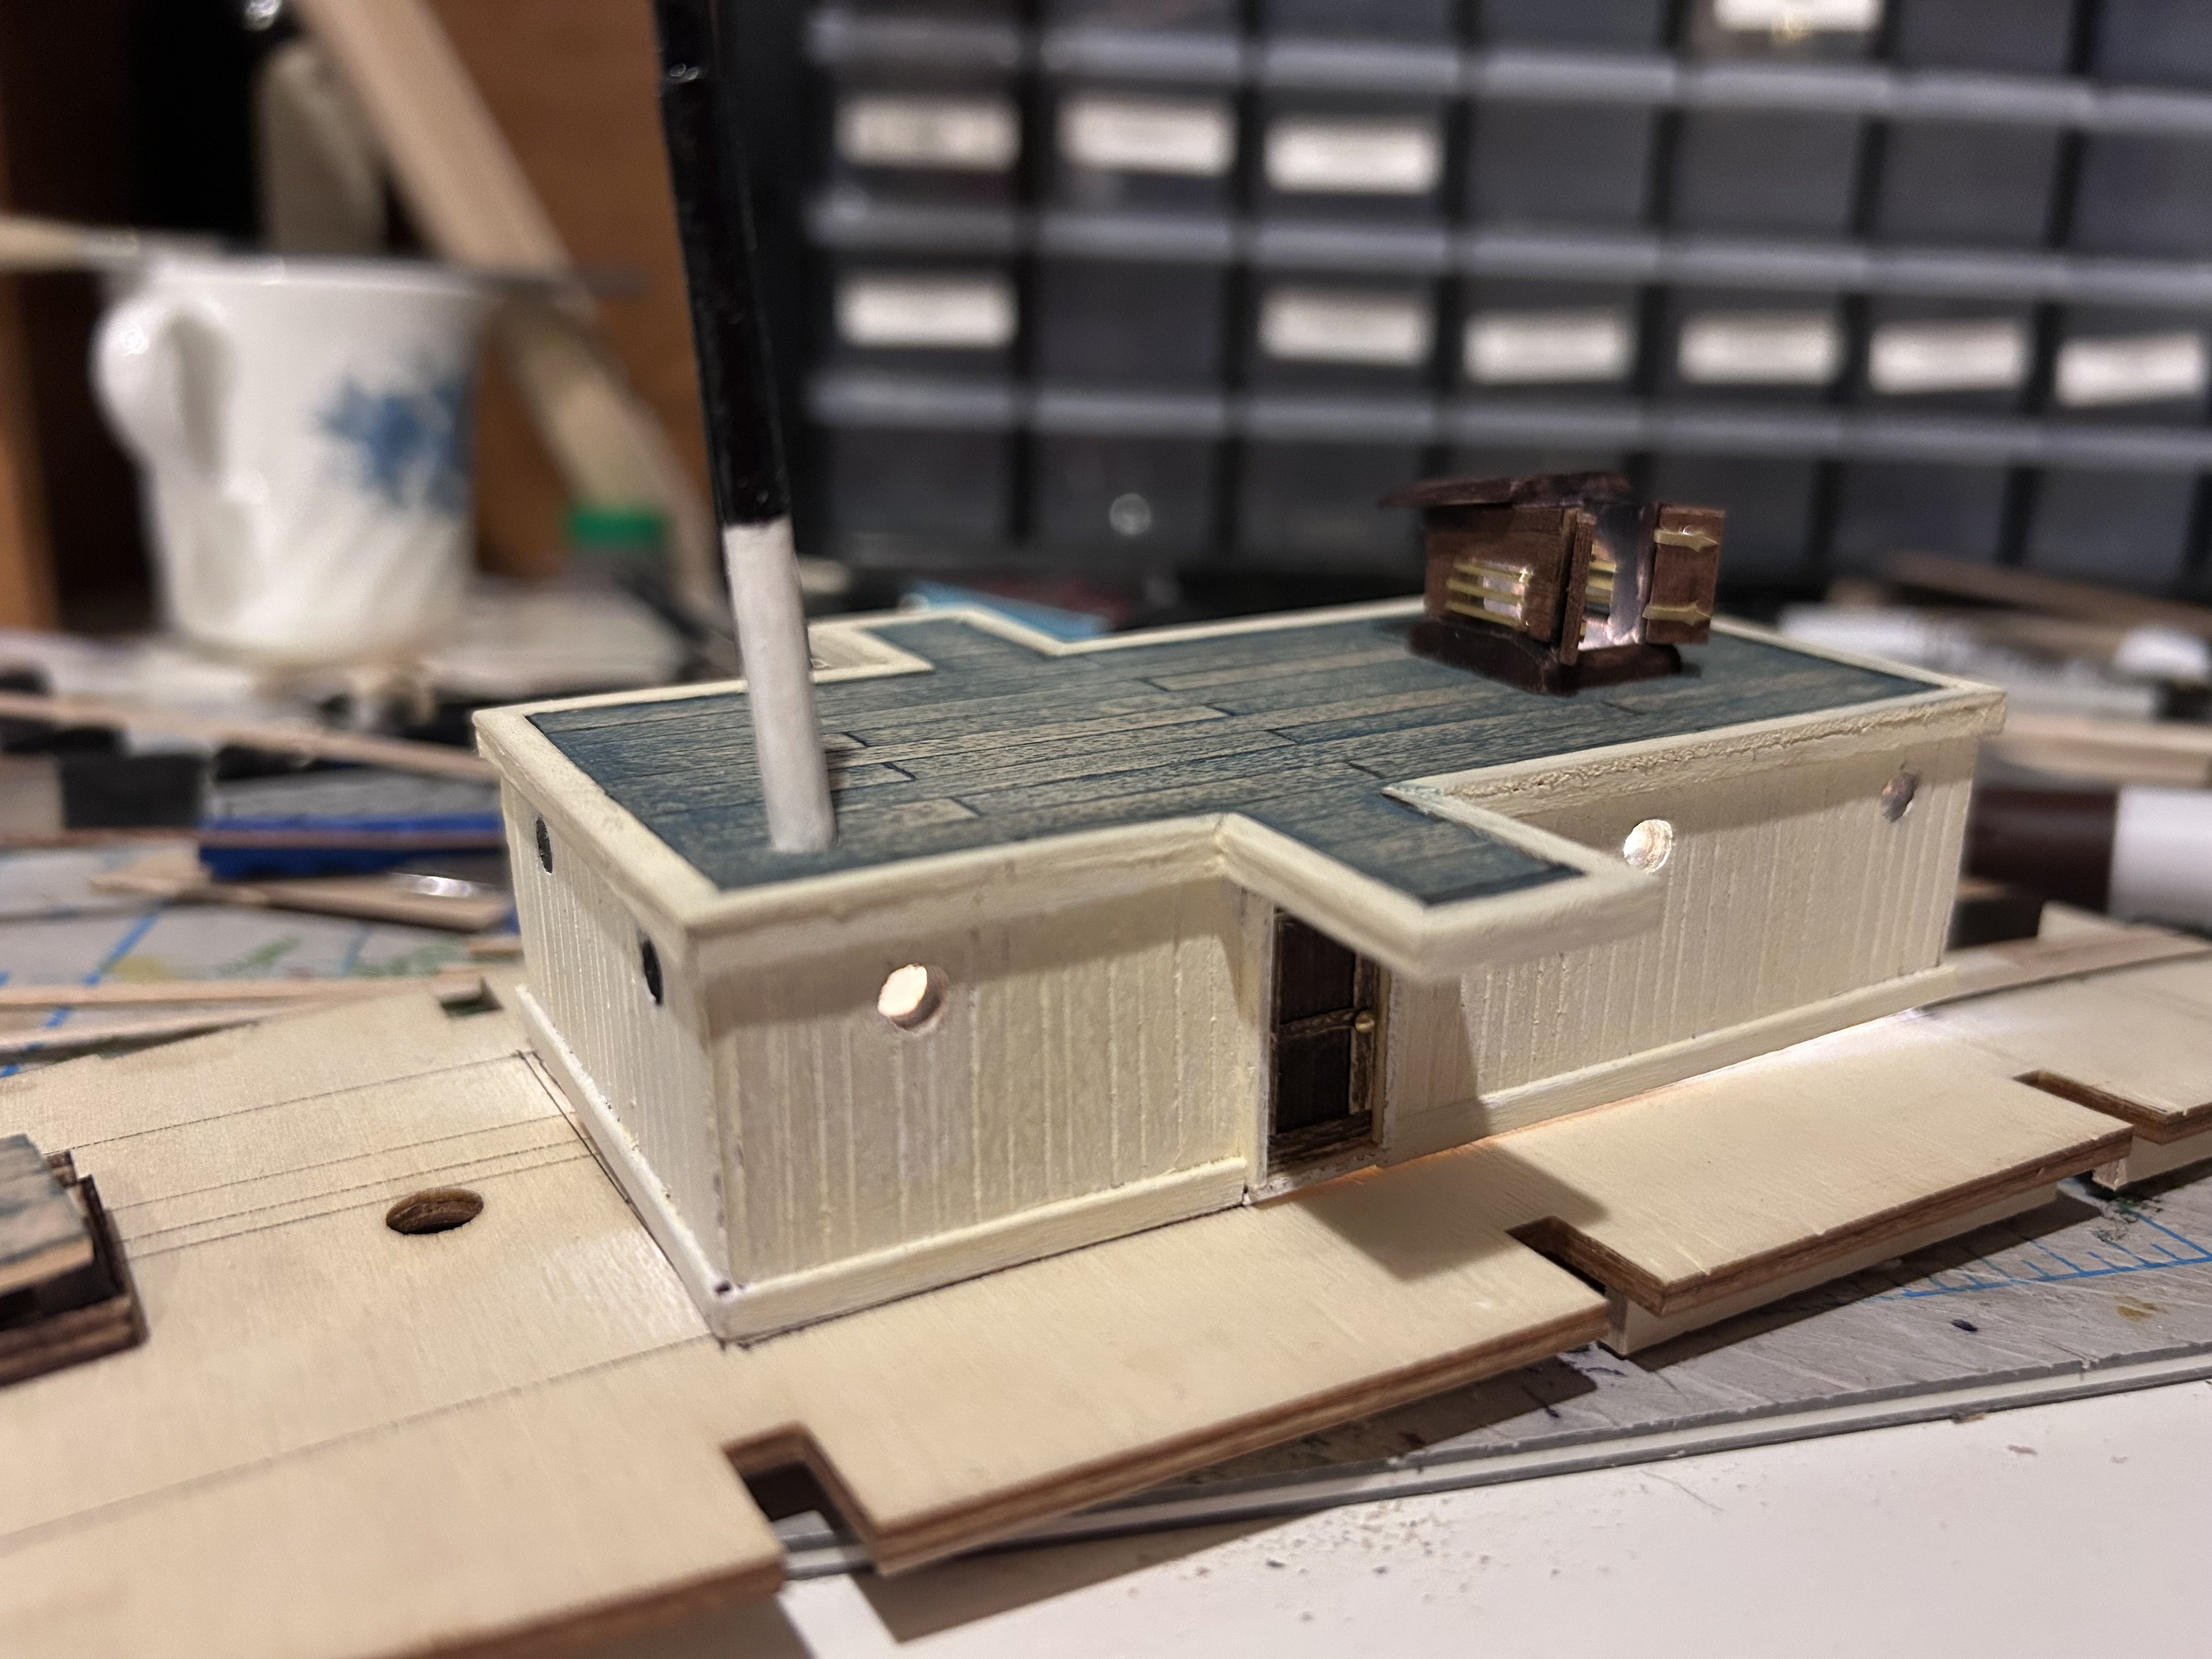
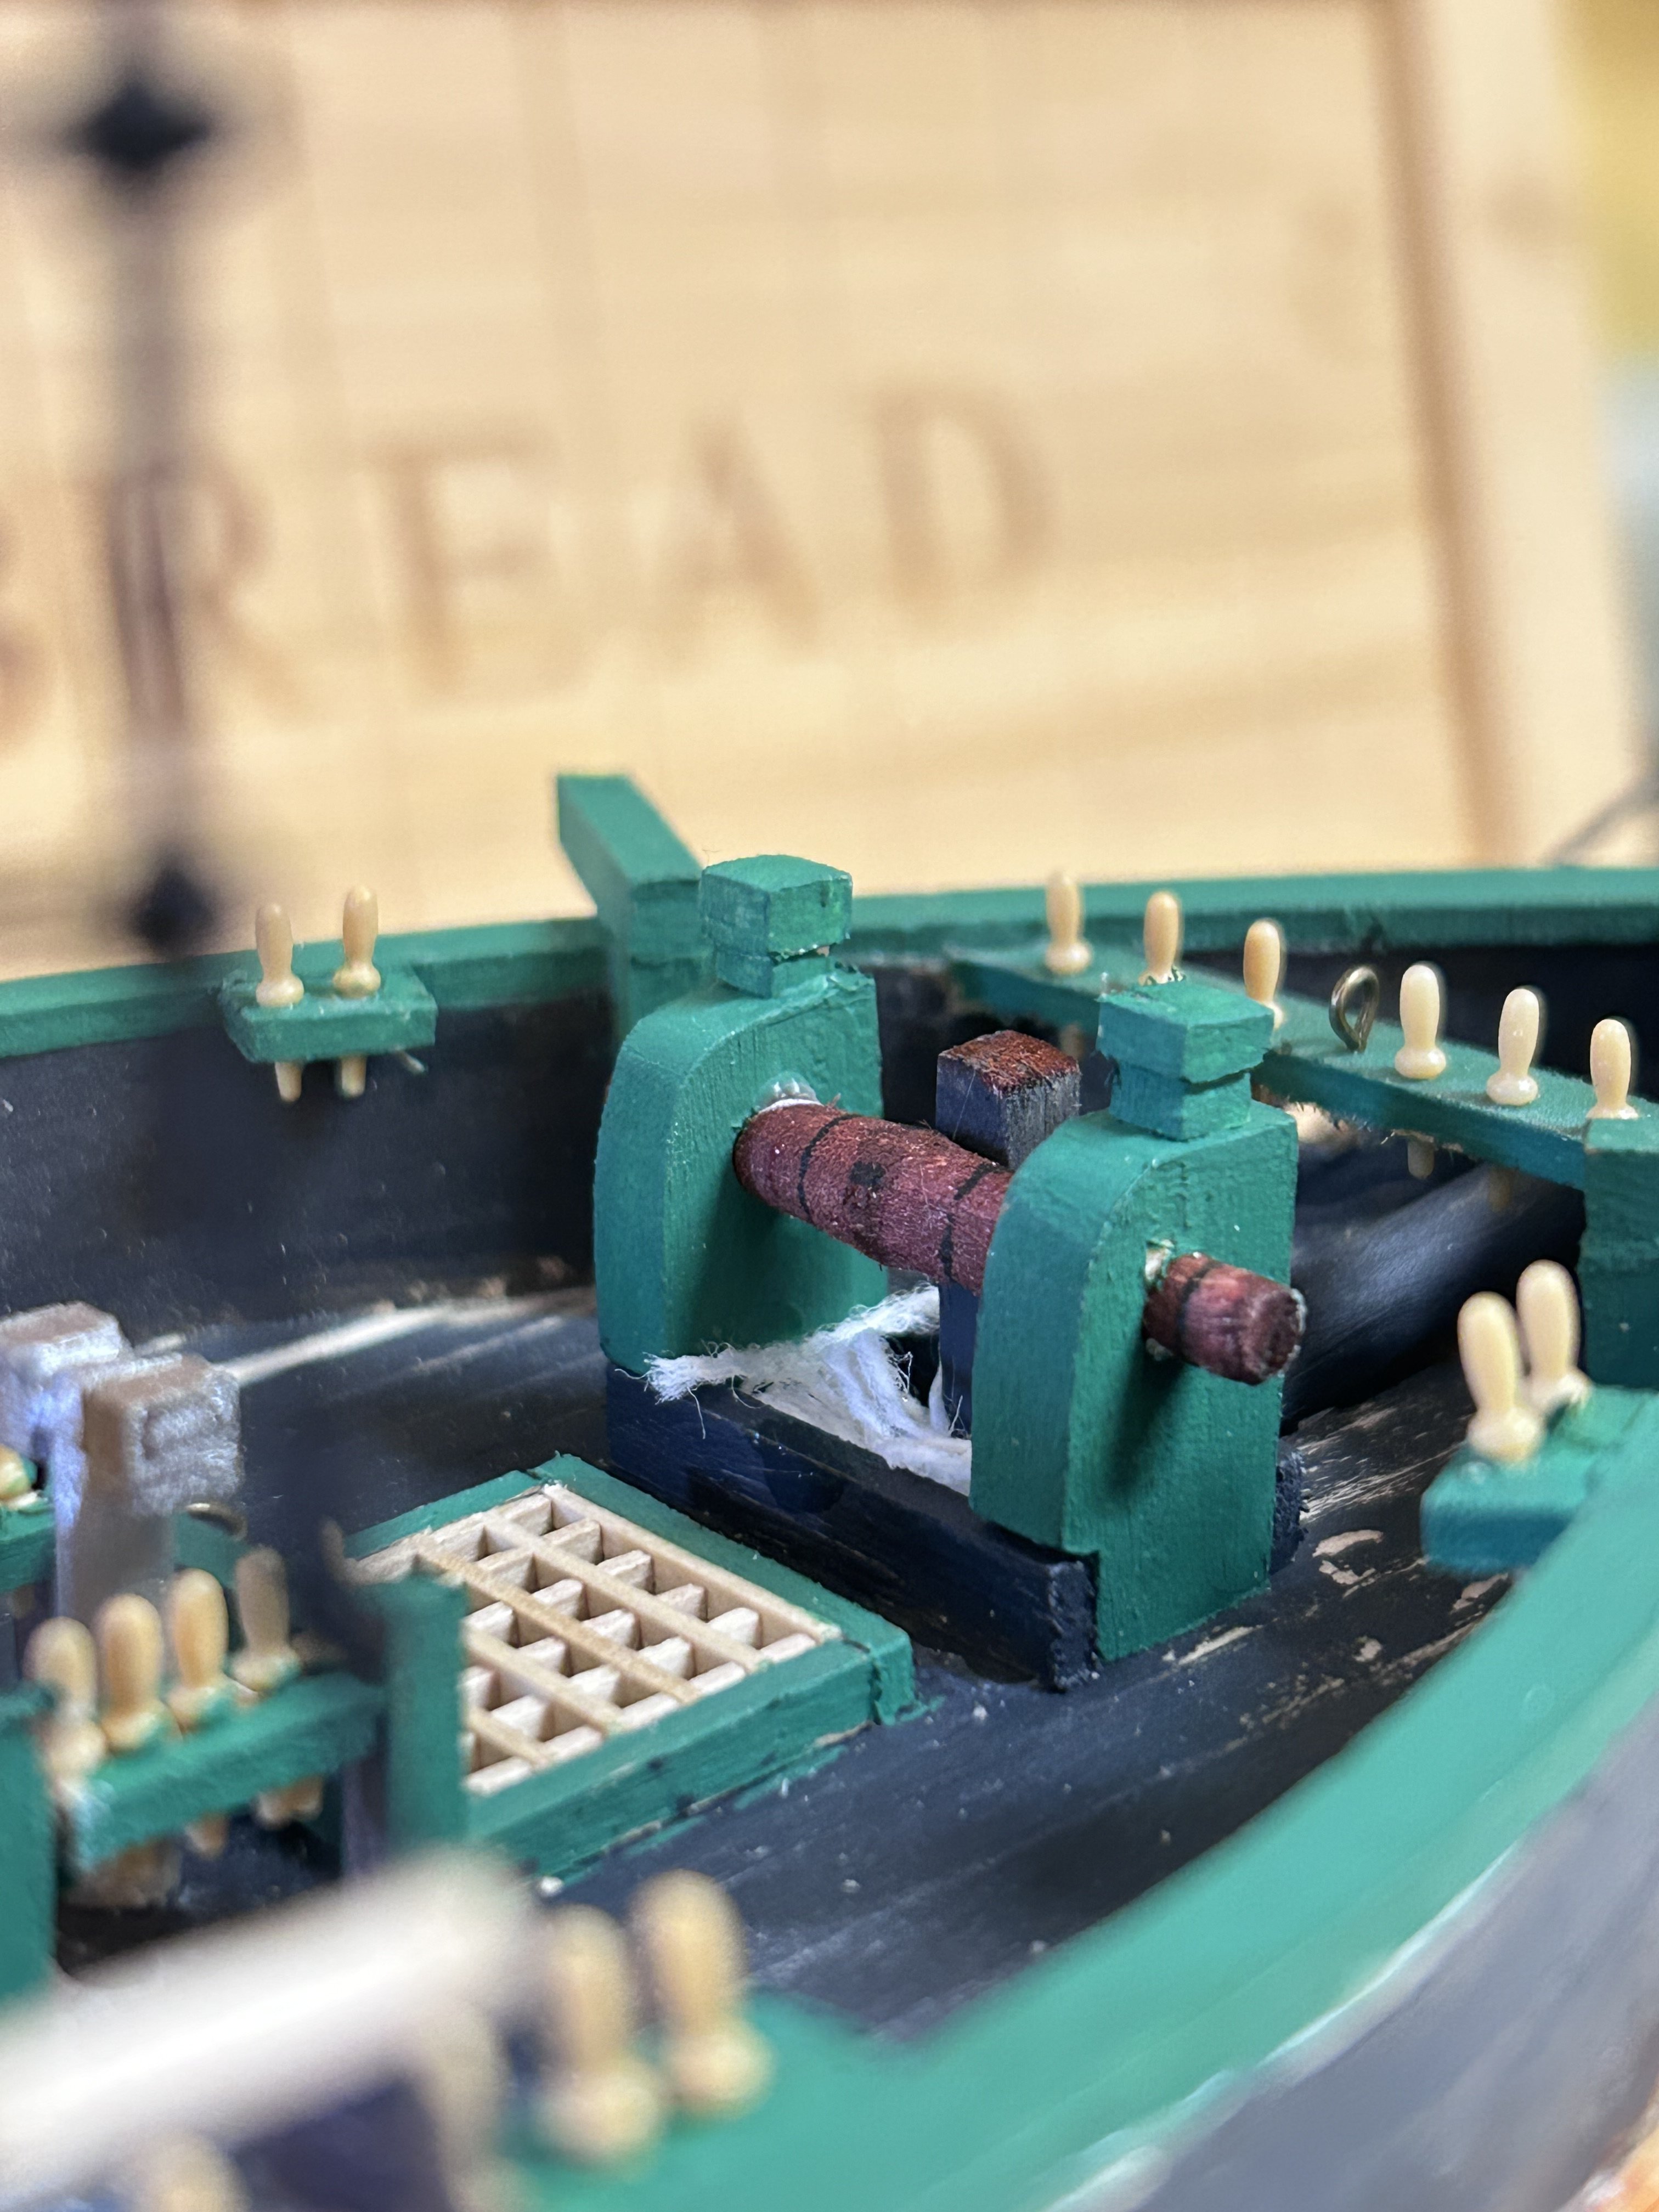
Galley roof planked. Hole cut for skylight/hatchway. 3d printed windlass ordered. After some searching online I finally tracked down a windlass that’s probably about as close as I’ll come to a period accurate windlass. This one, steam powered, is based off a 1914 German ice breaker and… yeah that’s about as close to perfect as I can ask for. If anyone’s interested you can find it here: https://cults3d.com/en/3d-model/game/icebreaker-bow-windlass-print_rc_dream


-
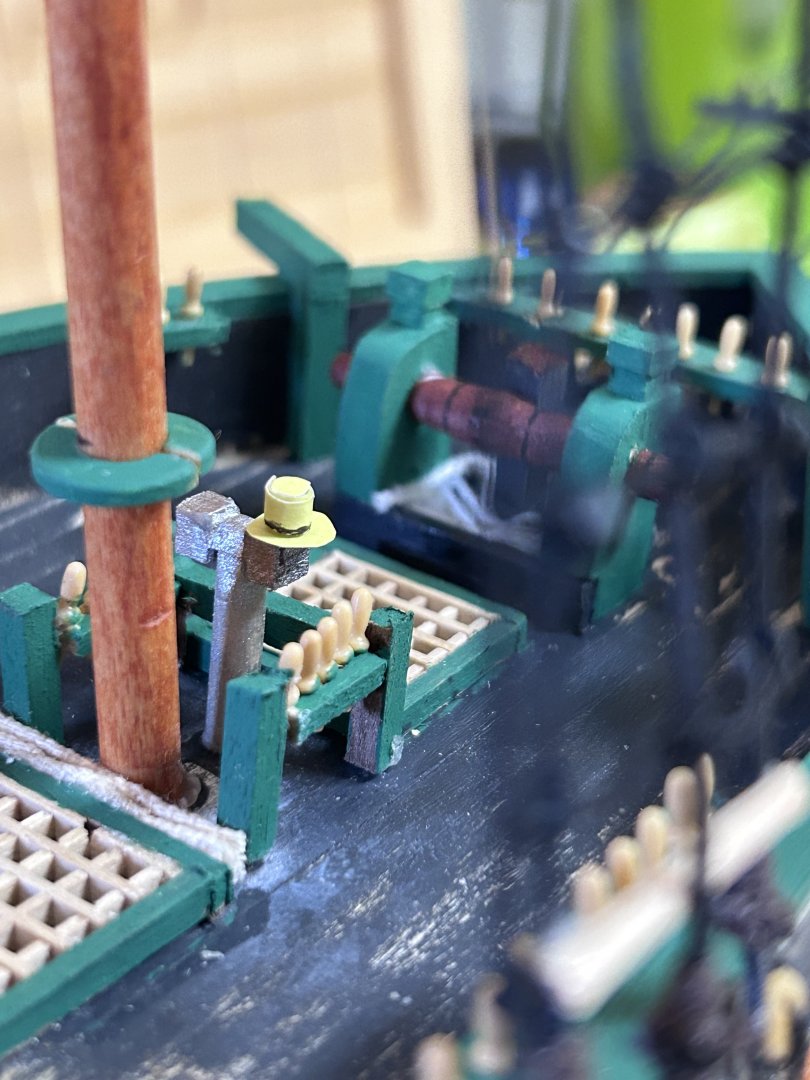
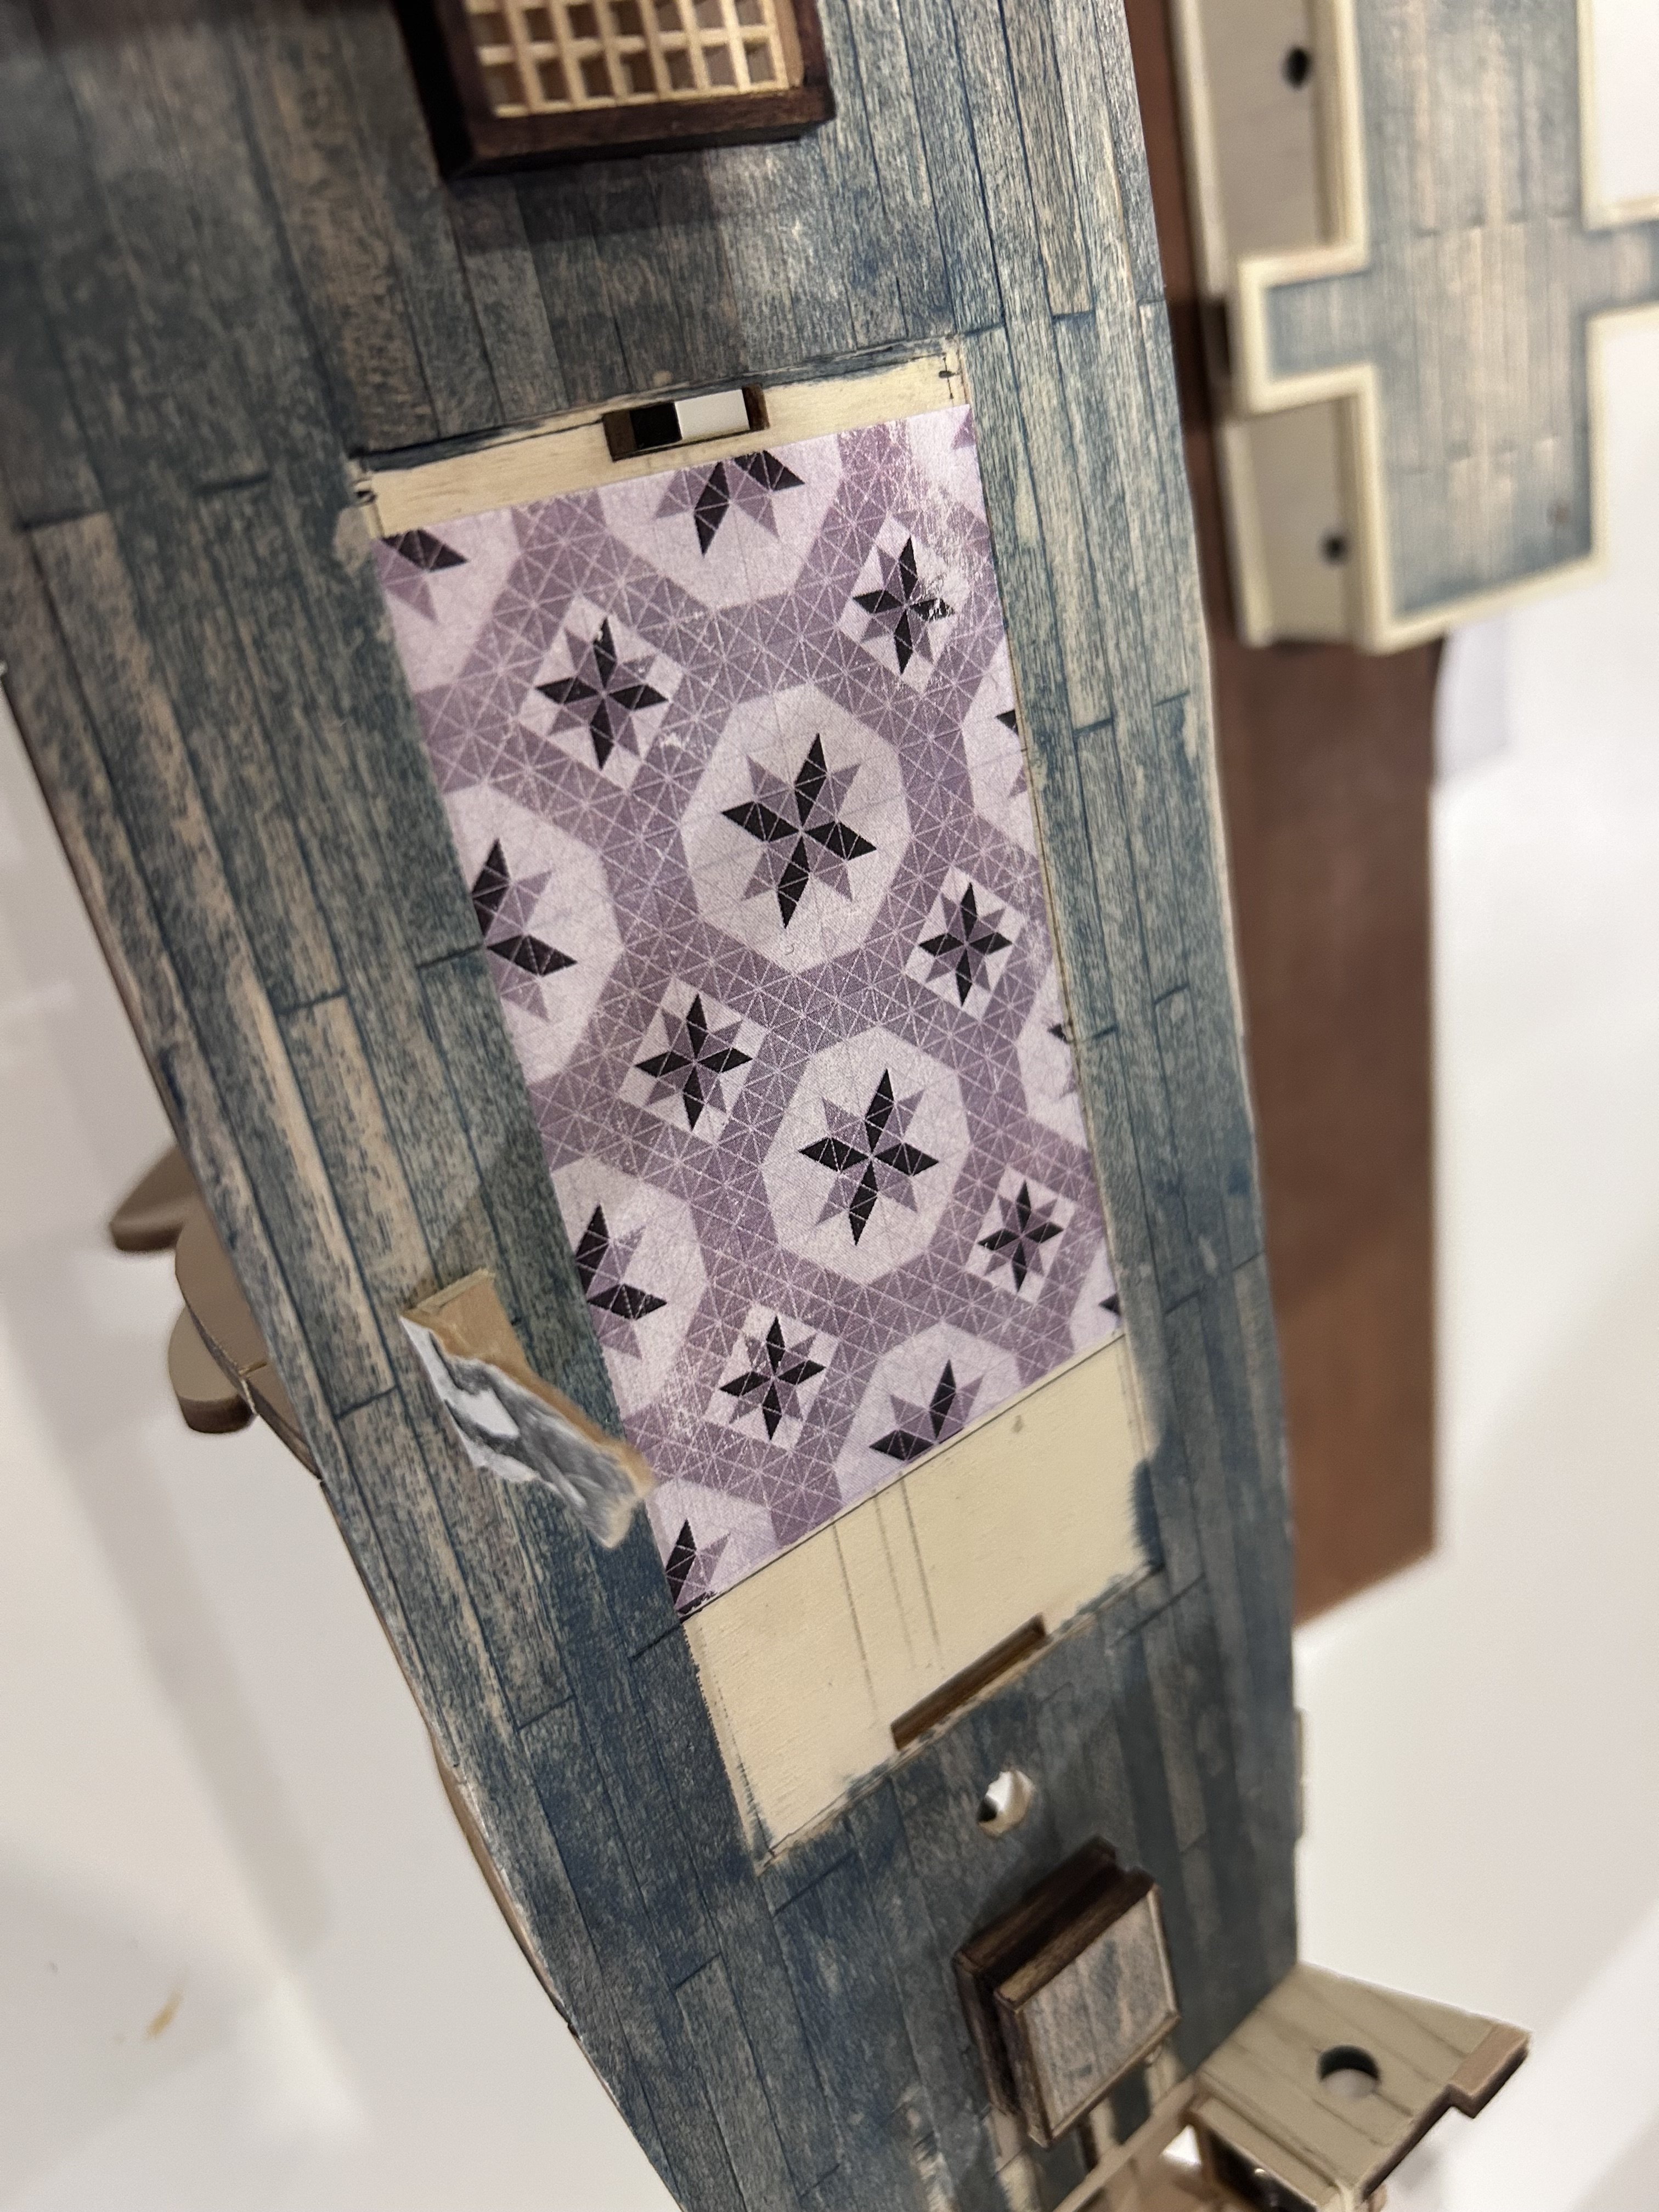
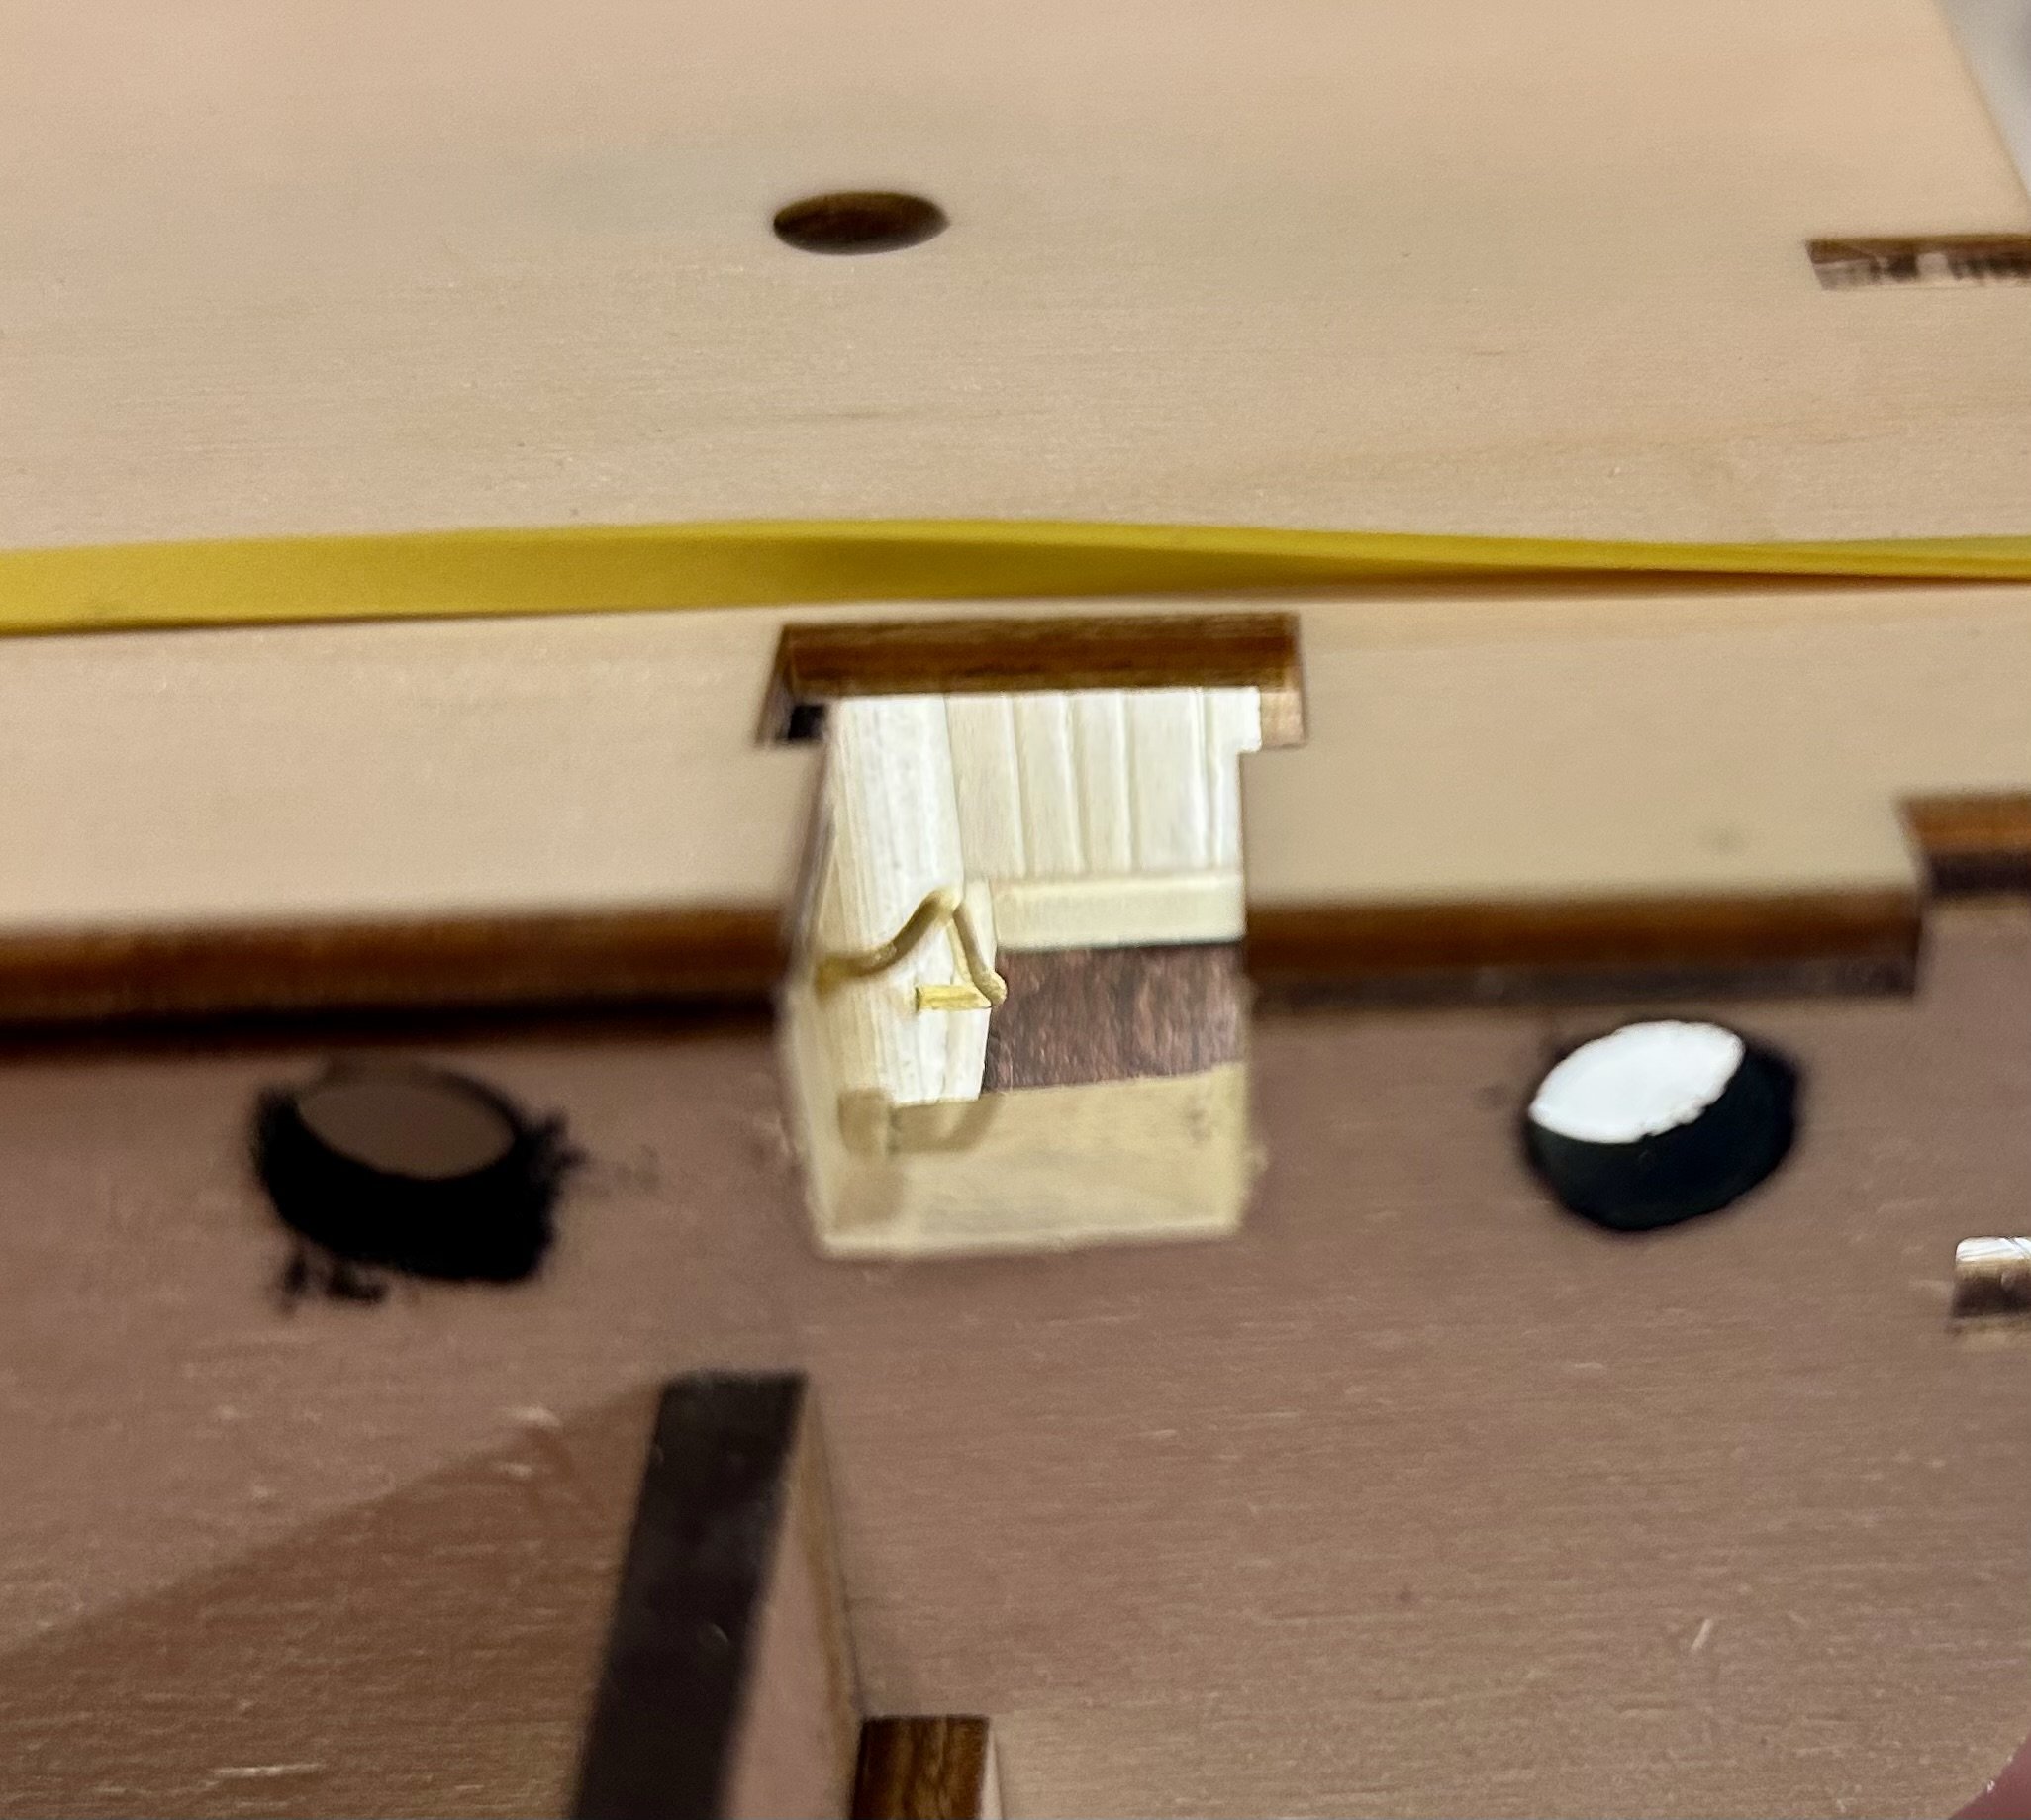
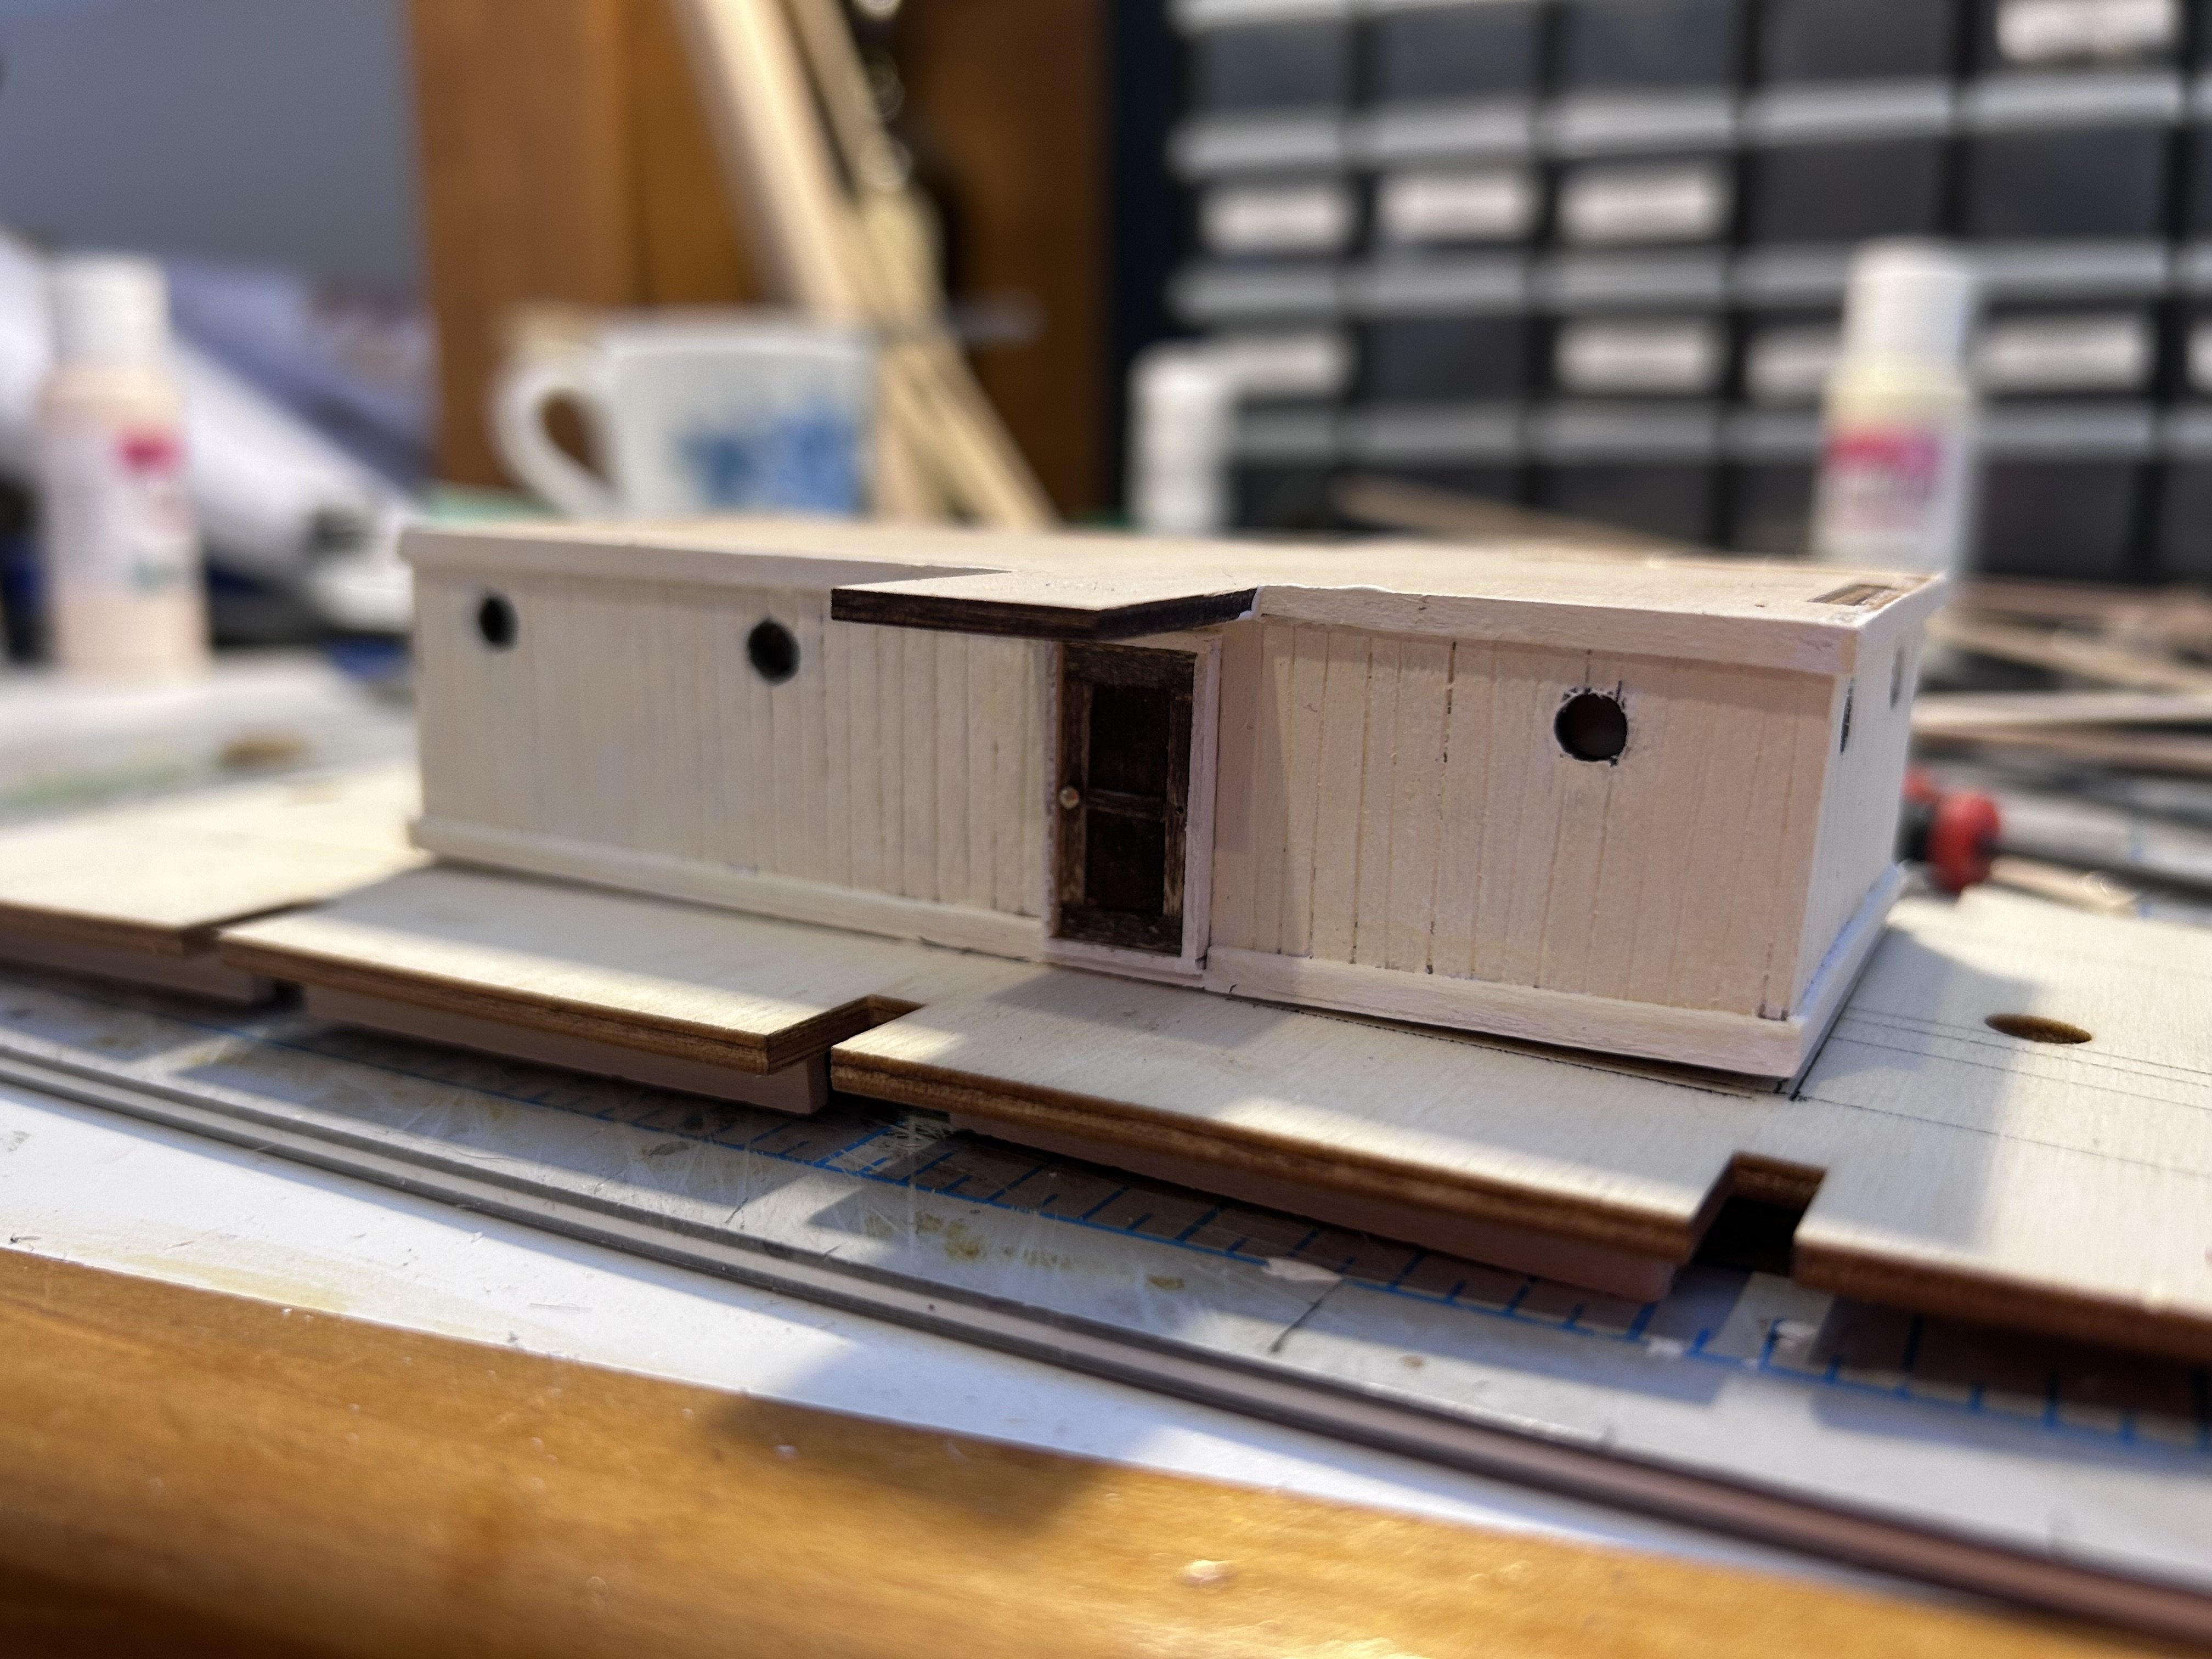
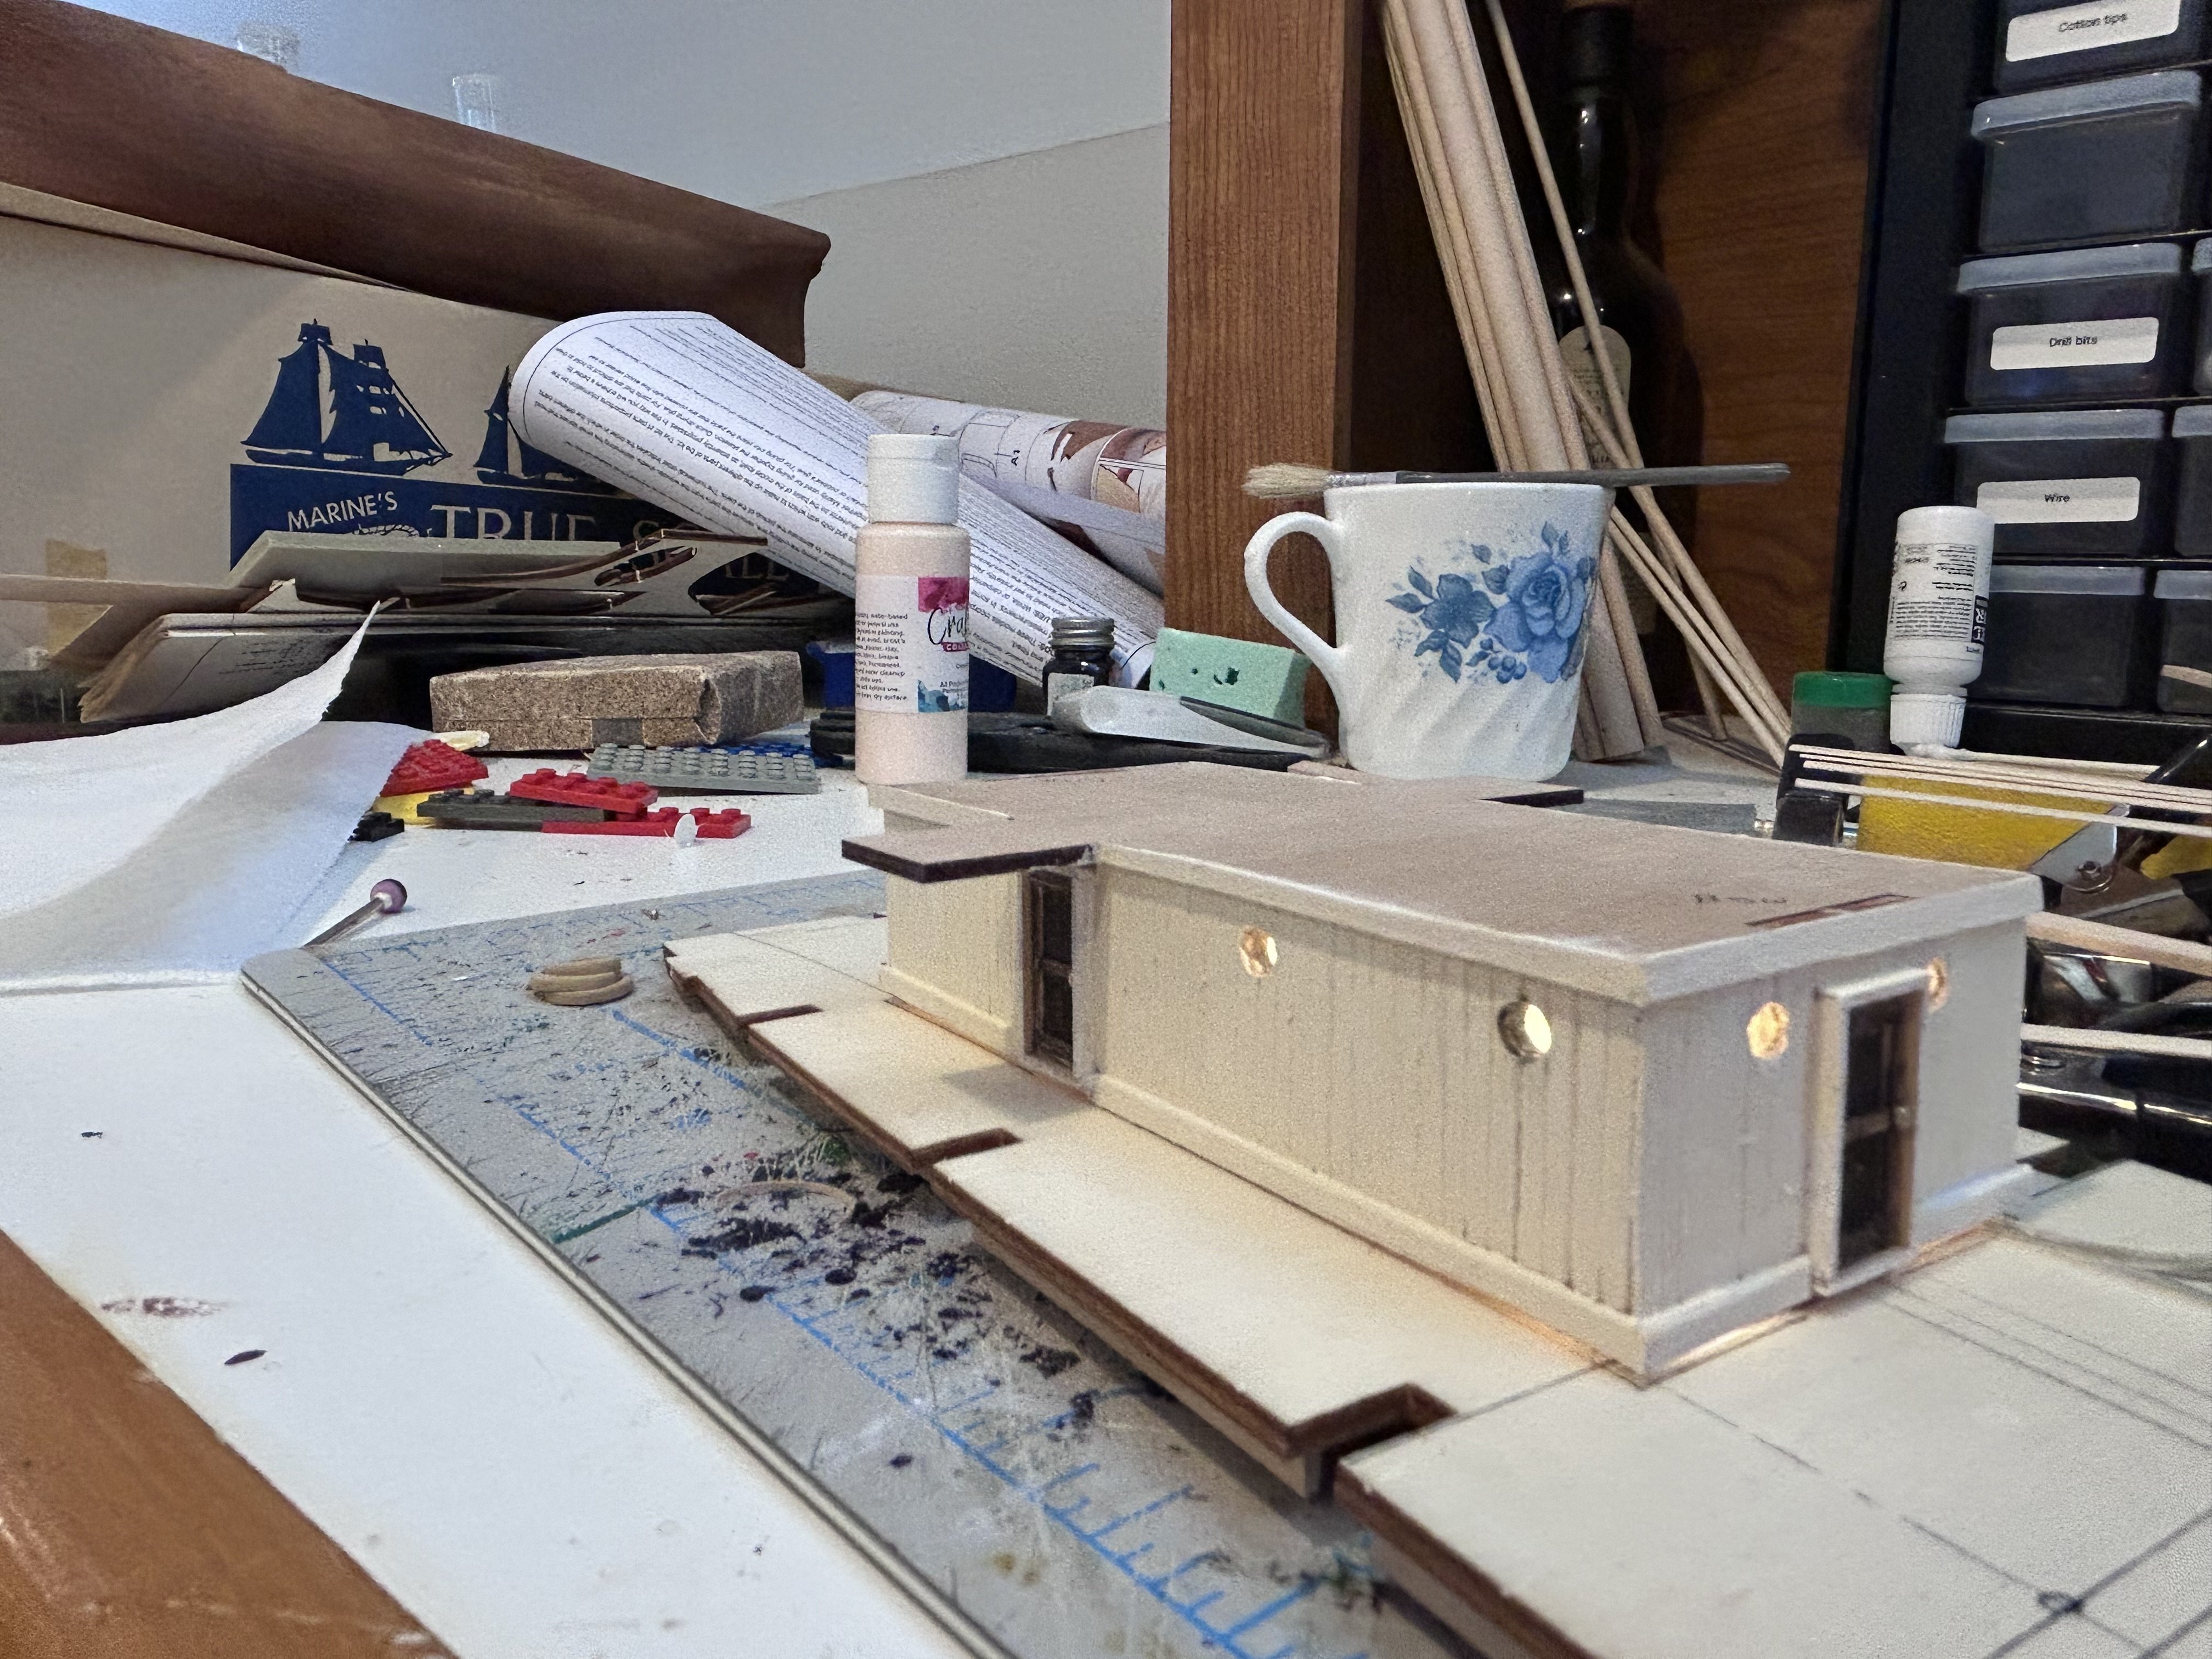
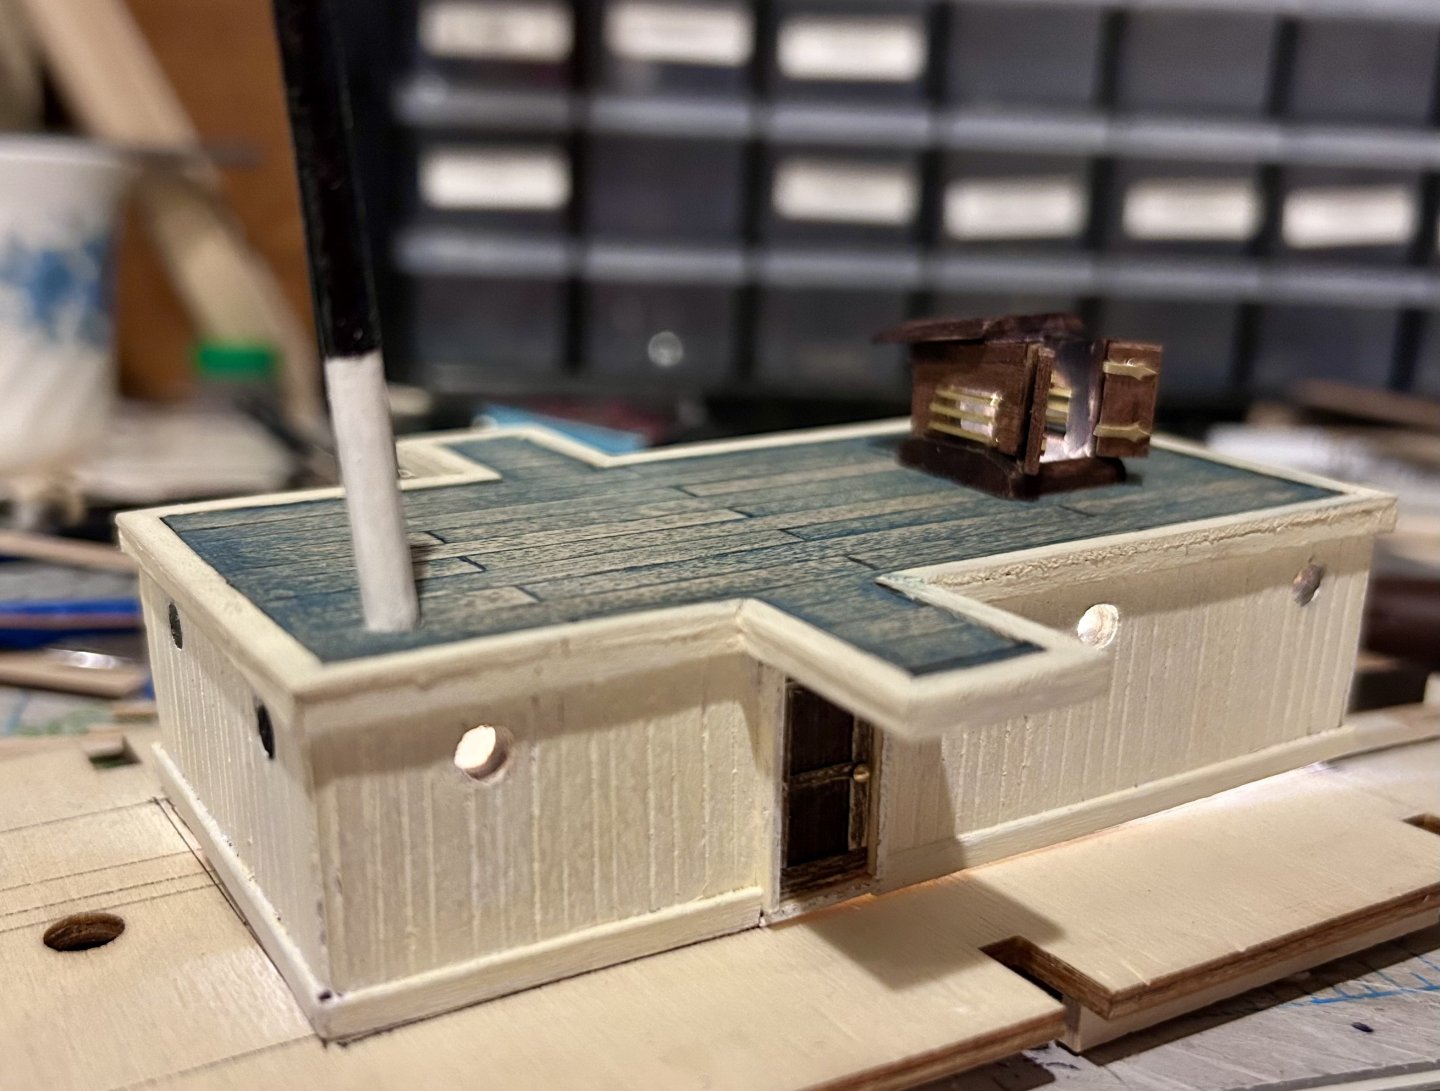
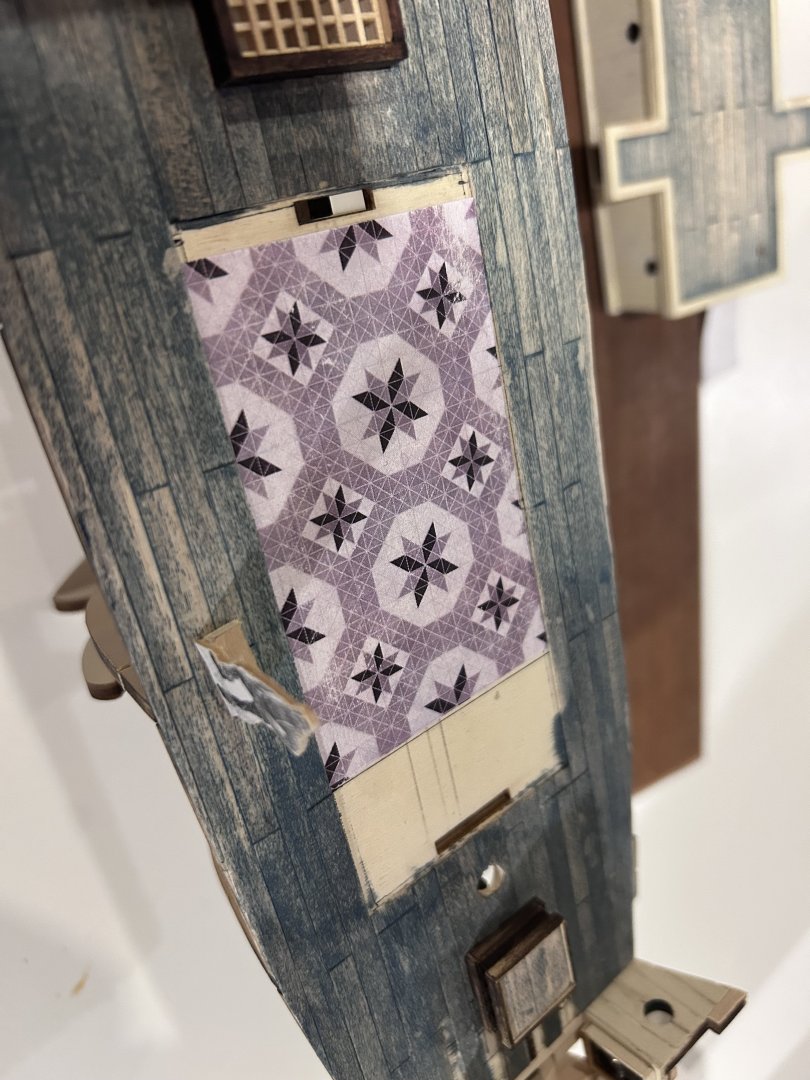
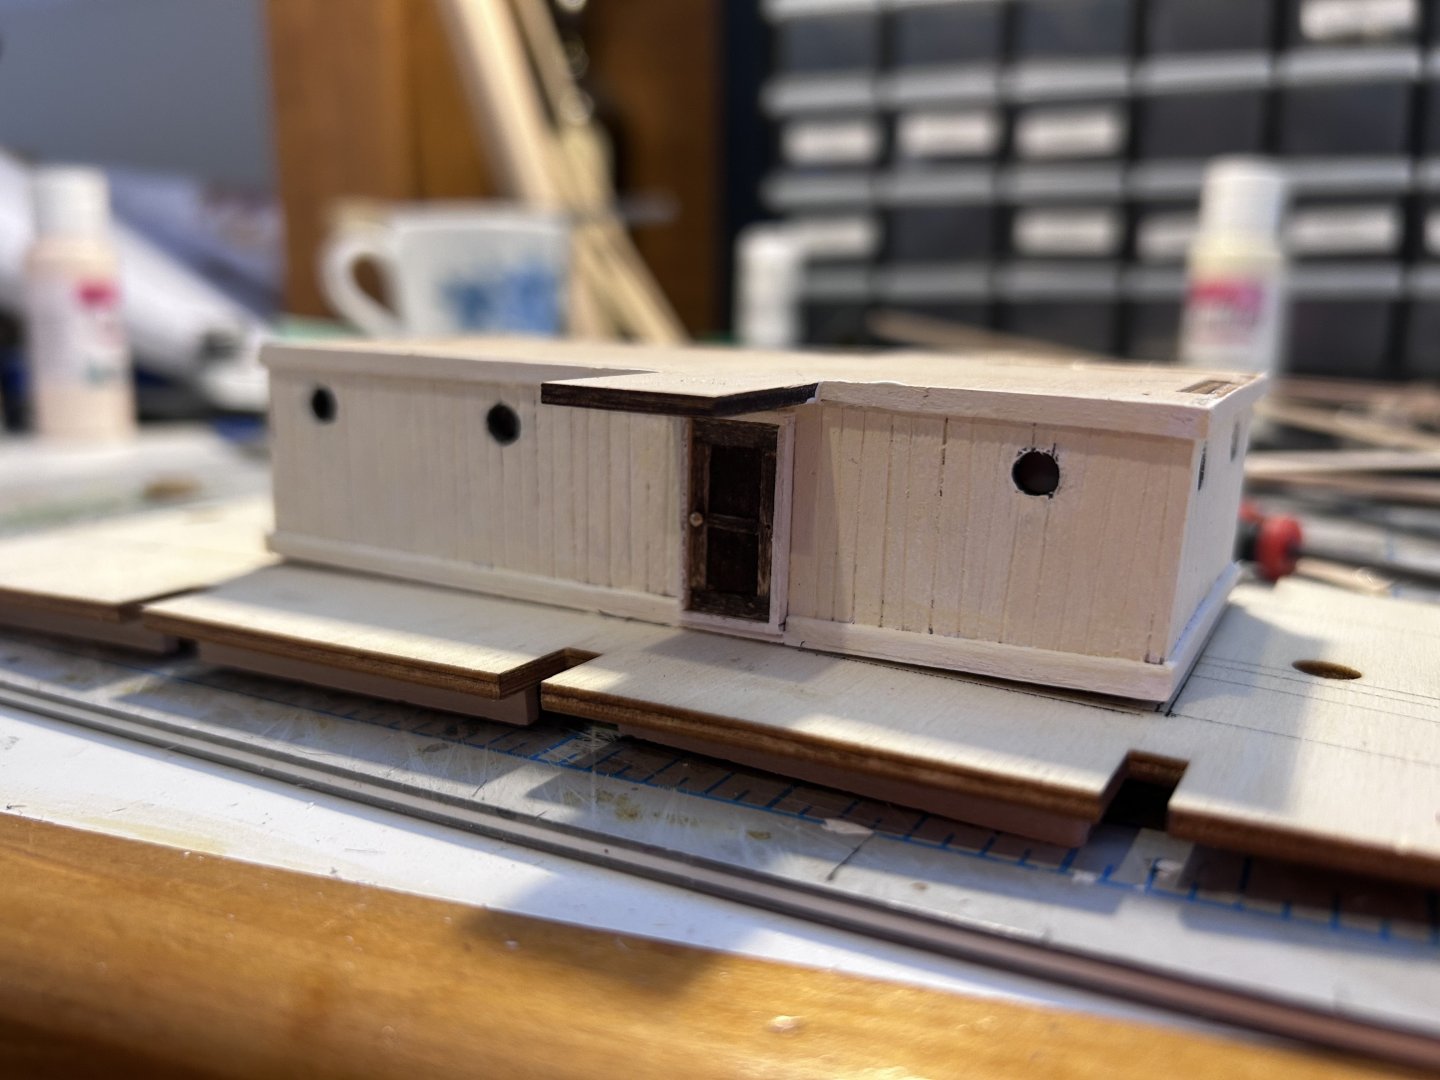
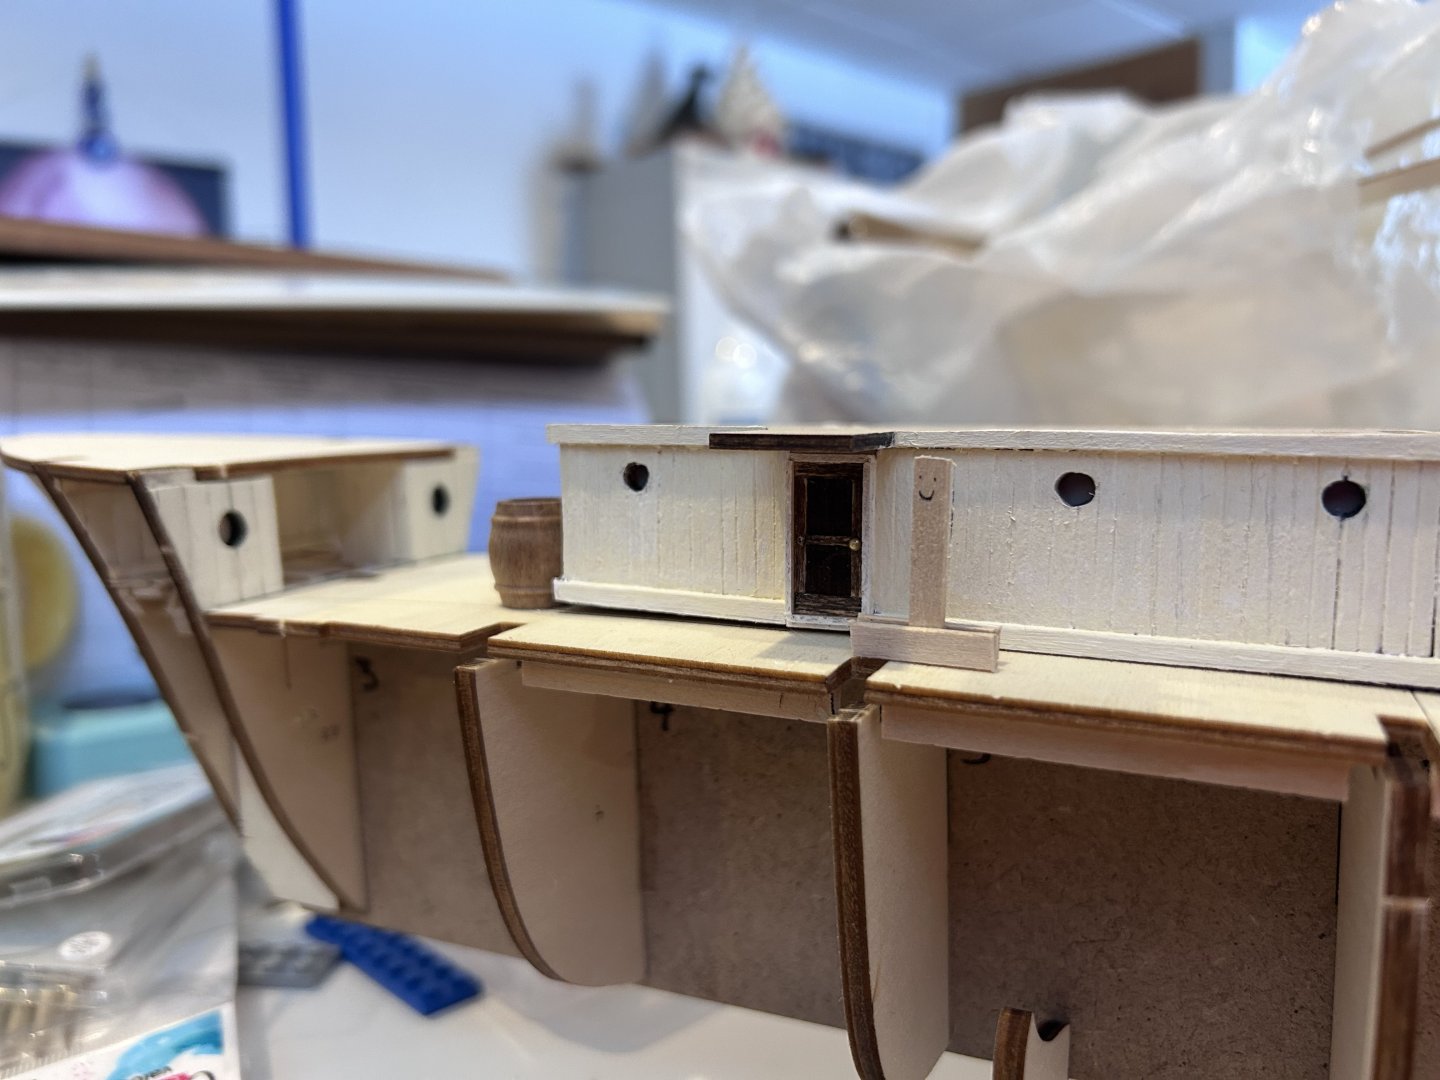
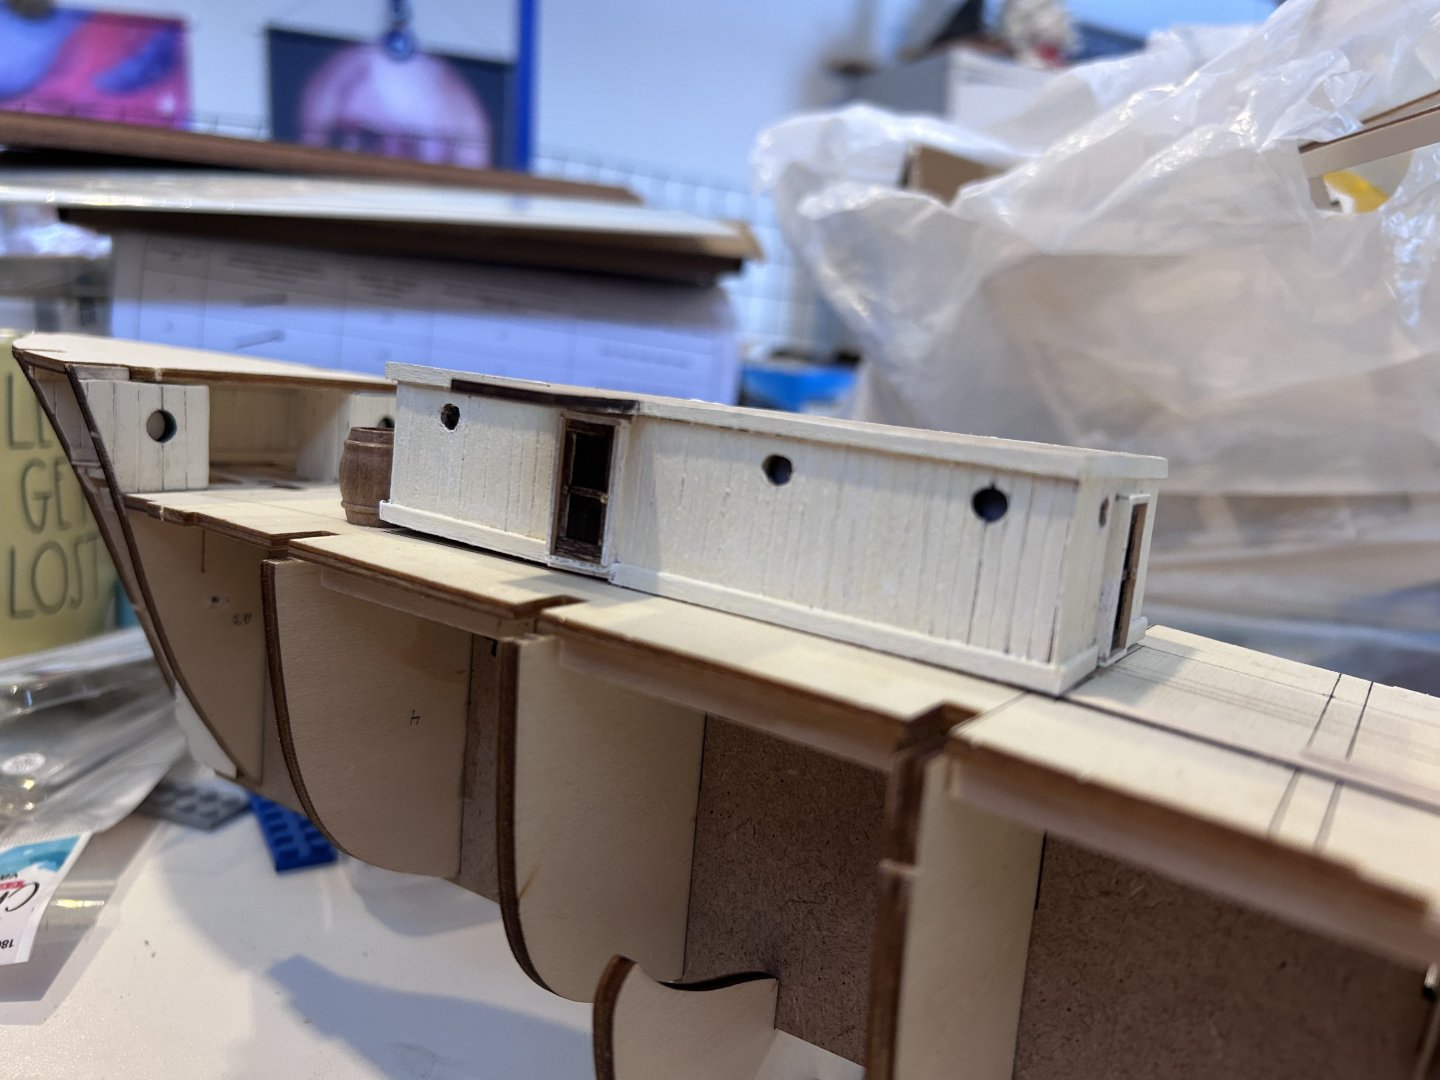
A significant update since my last check-in. I knew as I was building the main galley that I wanted to go with the stripping as seen in builds like @MarcinPrzybys, and so after doing some file work on each plank supplied I think it came out to something that looks much superior to the flat boards the instructions would have me go with. I should also mention that I made each door myself rather than use the supplied brass doors as I think this gives it that much more texture. You’ll notice around the doors there are frames as well, I’m not totally sure this would be accurate to the ship BUT given that ships of then were the precursors to ships of today I thought it would make more sense for the doors to be framed (and especially not flush with the deck) as this would better allow for battening in severe weather and would likewise keep water on deck from getting through the doors. All of this also allowed me to do a test run of the lighting I’ve decided to commit to though jury’s out on exactly what I plan to do for my lighting system, I’m currently using fairy lights but I’m really not sure as to the long term viability of these as opposed to something more heavy duty. Ah well, the point is that it’s a good test to see how it looks for now. So, here’s where I’m left having to decide whether or not I want to do a rough interior to the galley that would be visible from the hatch that was added as the ship neared Antarctica that has been the subject of much debate among other builders. I plan to cut a hole into the ceiling of the galley but I’m currently debating as to whether I want to commit to creating an interior or if I just want to put more of the opaque material in that I used in the portholes (cricket printer material makes for great lightbox windows for the record). So I’ll actually throw that question out to anyone who might be following. I know the answer will likely be “it’s your build” but I’d love to hear other thoughts. Really I’d just be furnishing as far in as one would be able to see looking through the above hatchway but being as I’ve found a flooring pattern that looks close enough to the pattern used on the ship itself I think it’s another one of those things that would make for a fantastic addition. Running total: 25 hours Scale check with Woody, a scale version of a 6’ tall person.

-
It seems as though we’re shipmates as this is the same build I’m currently working on. Nice to have a companion along the way rather than just looking at the work of those who’ve come before me.
-
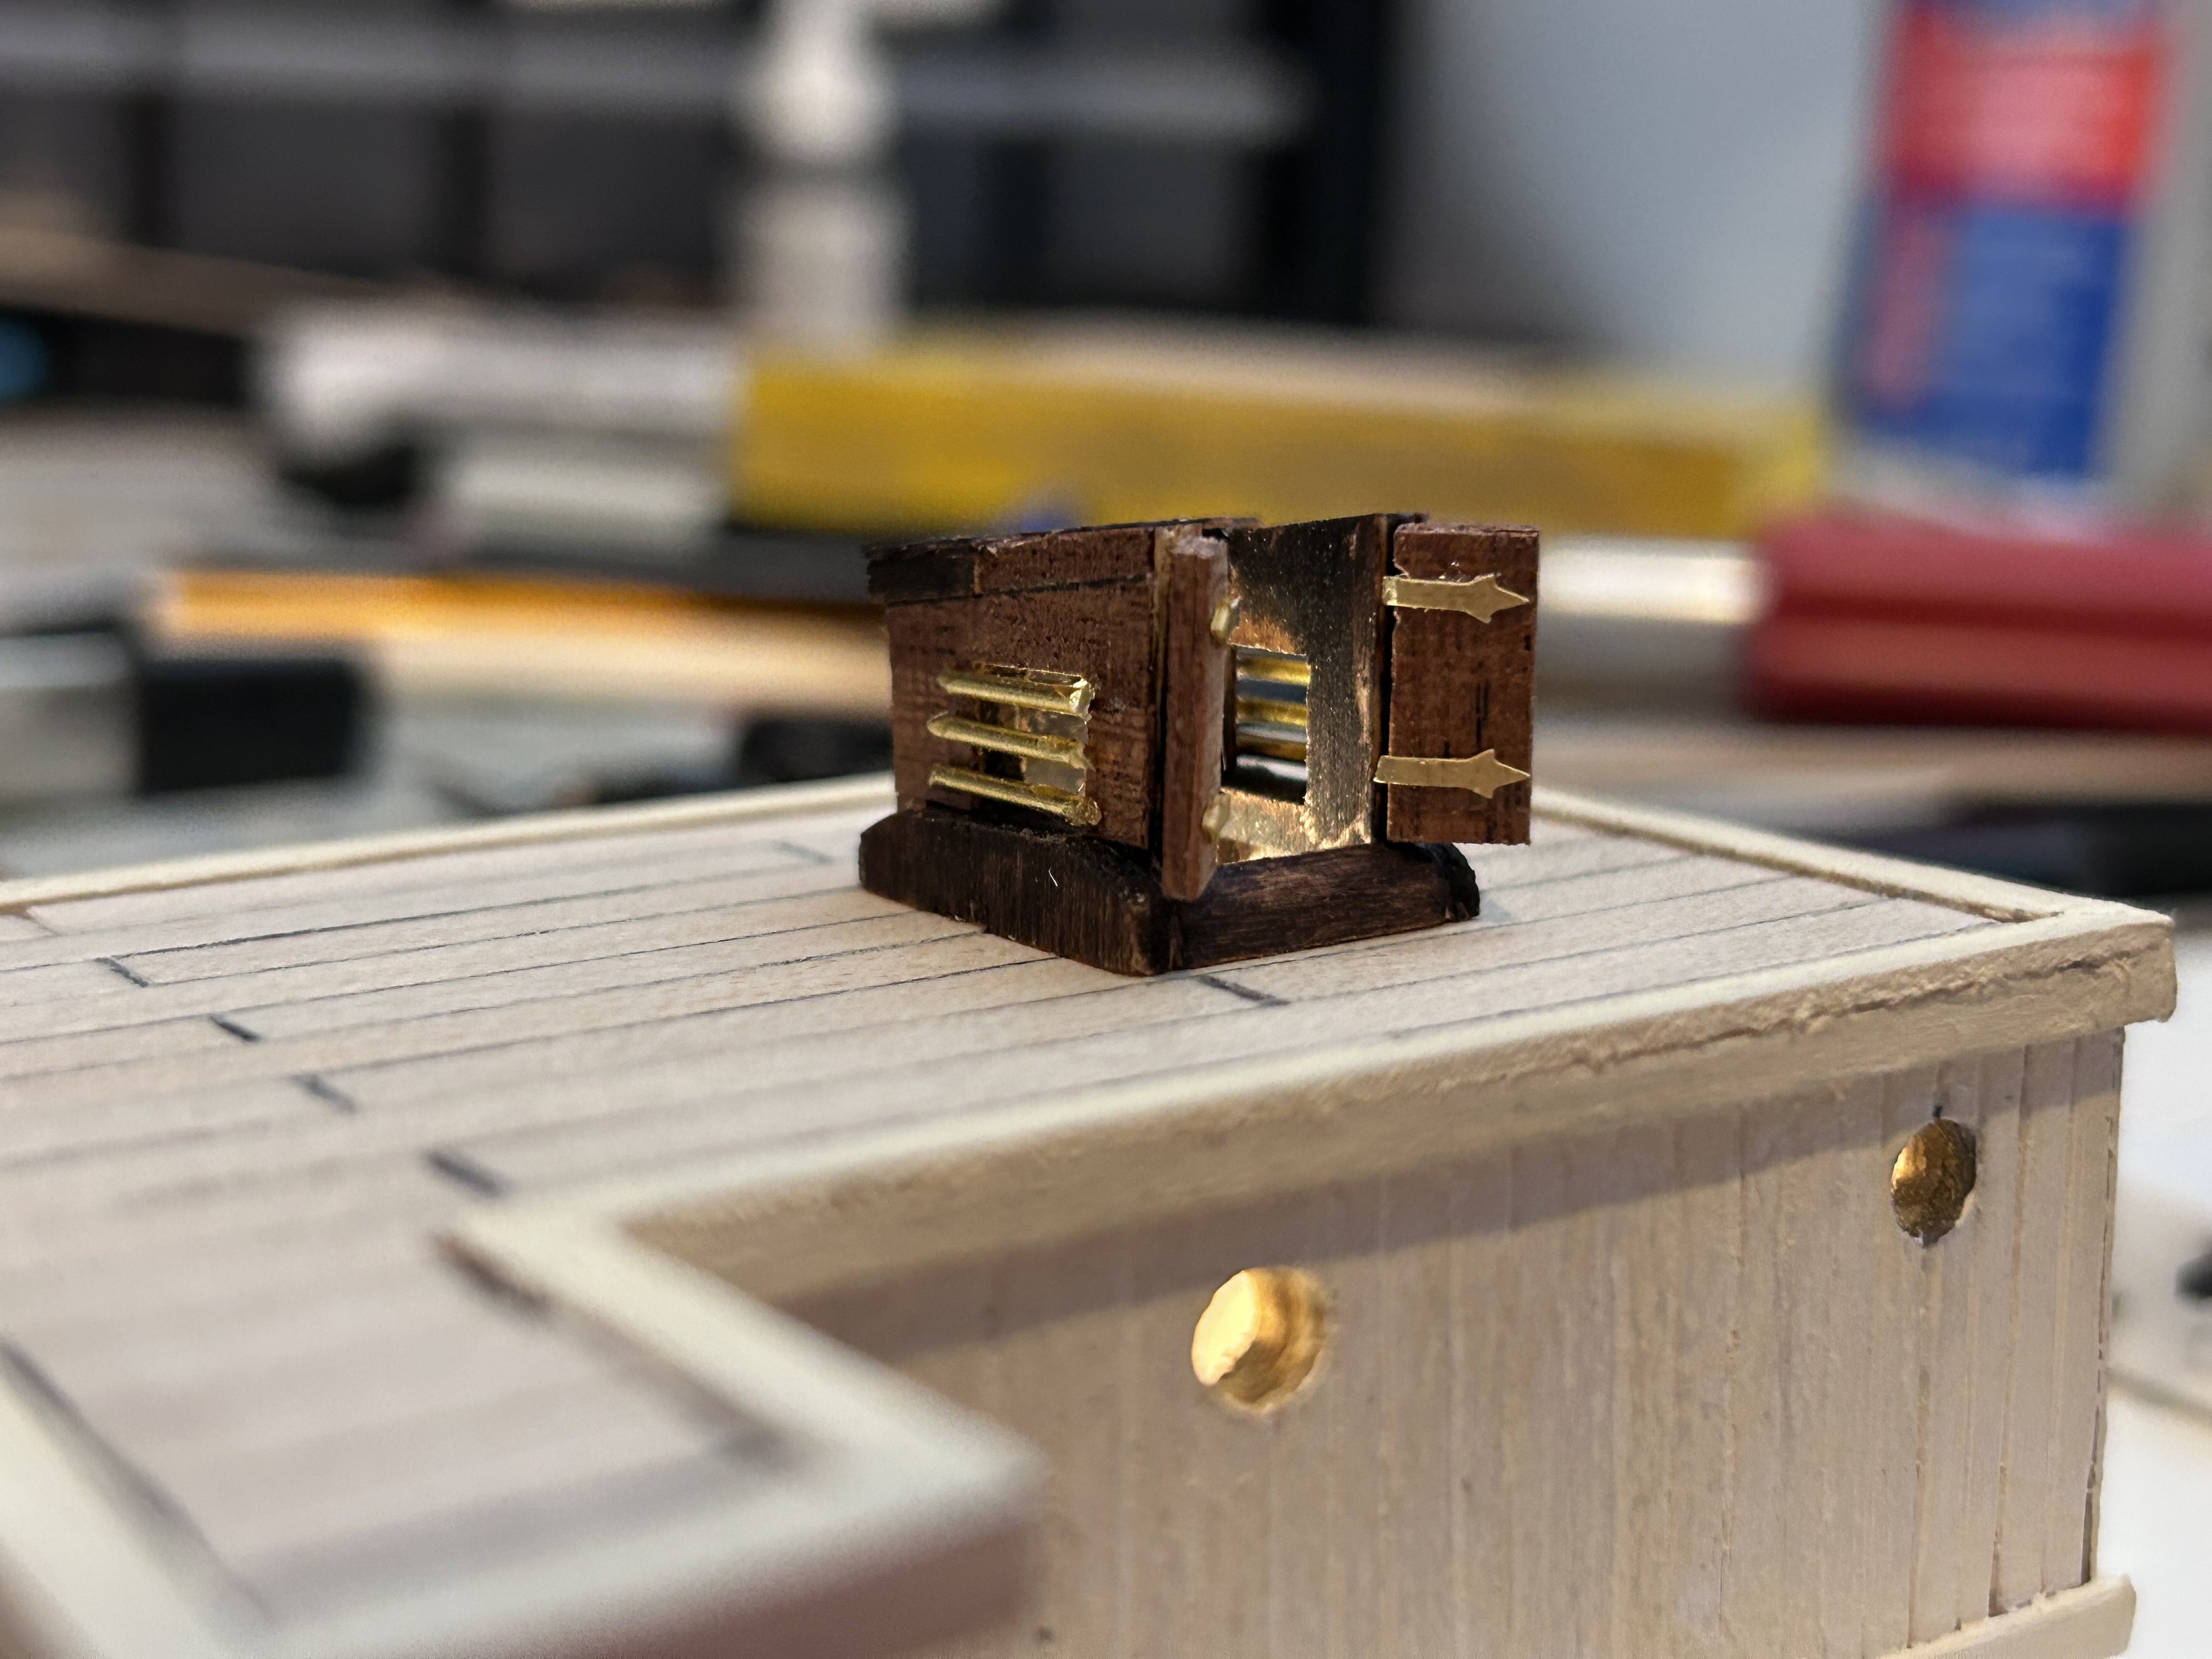
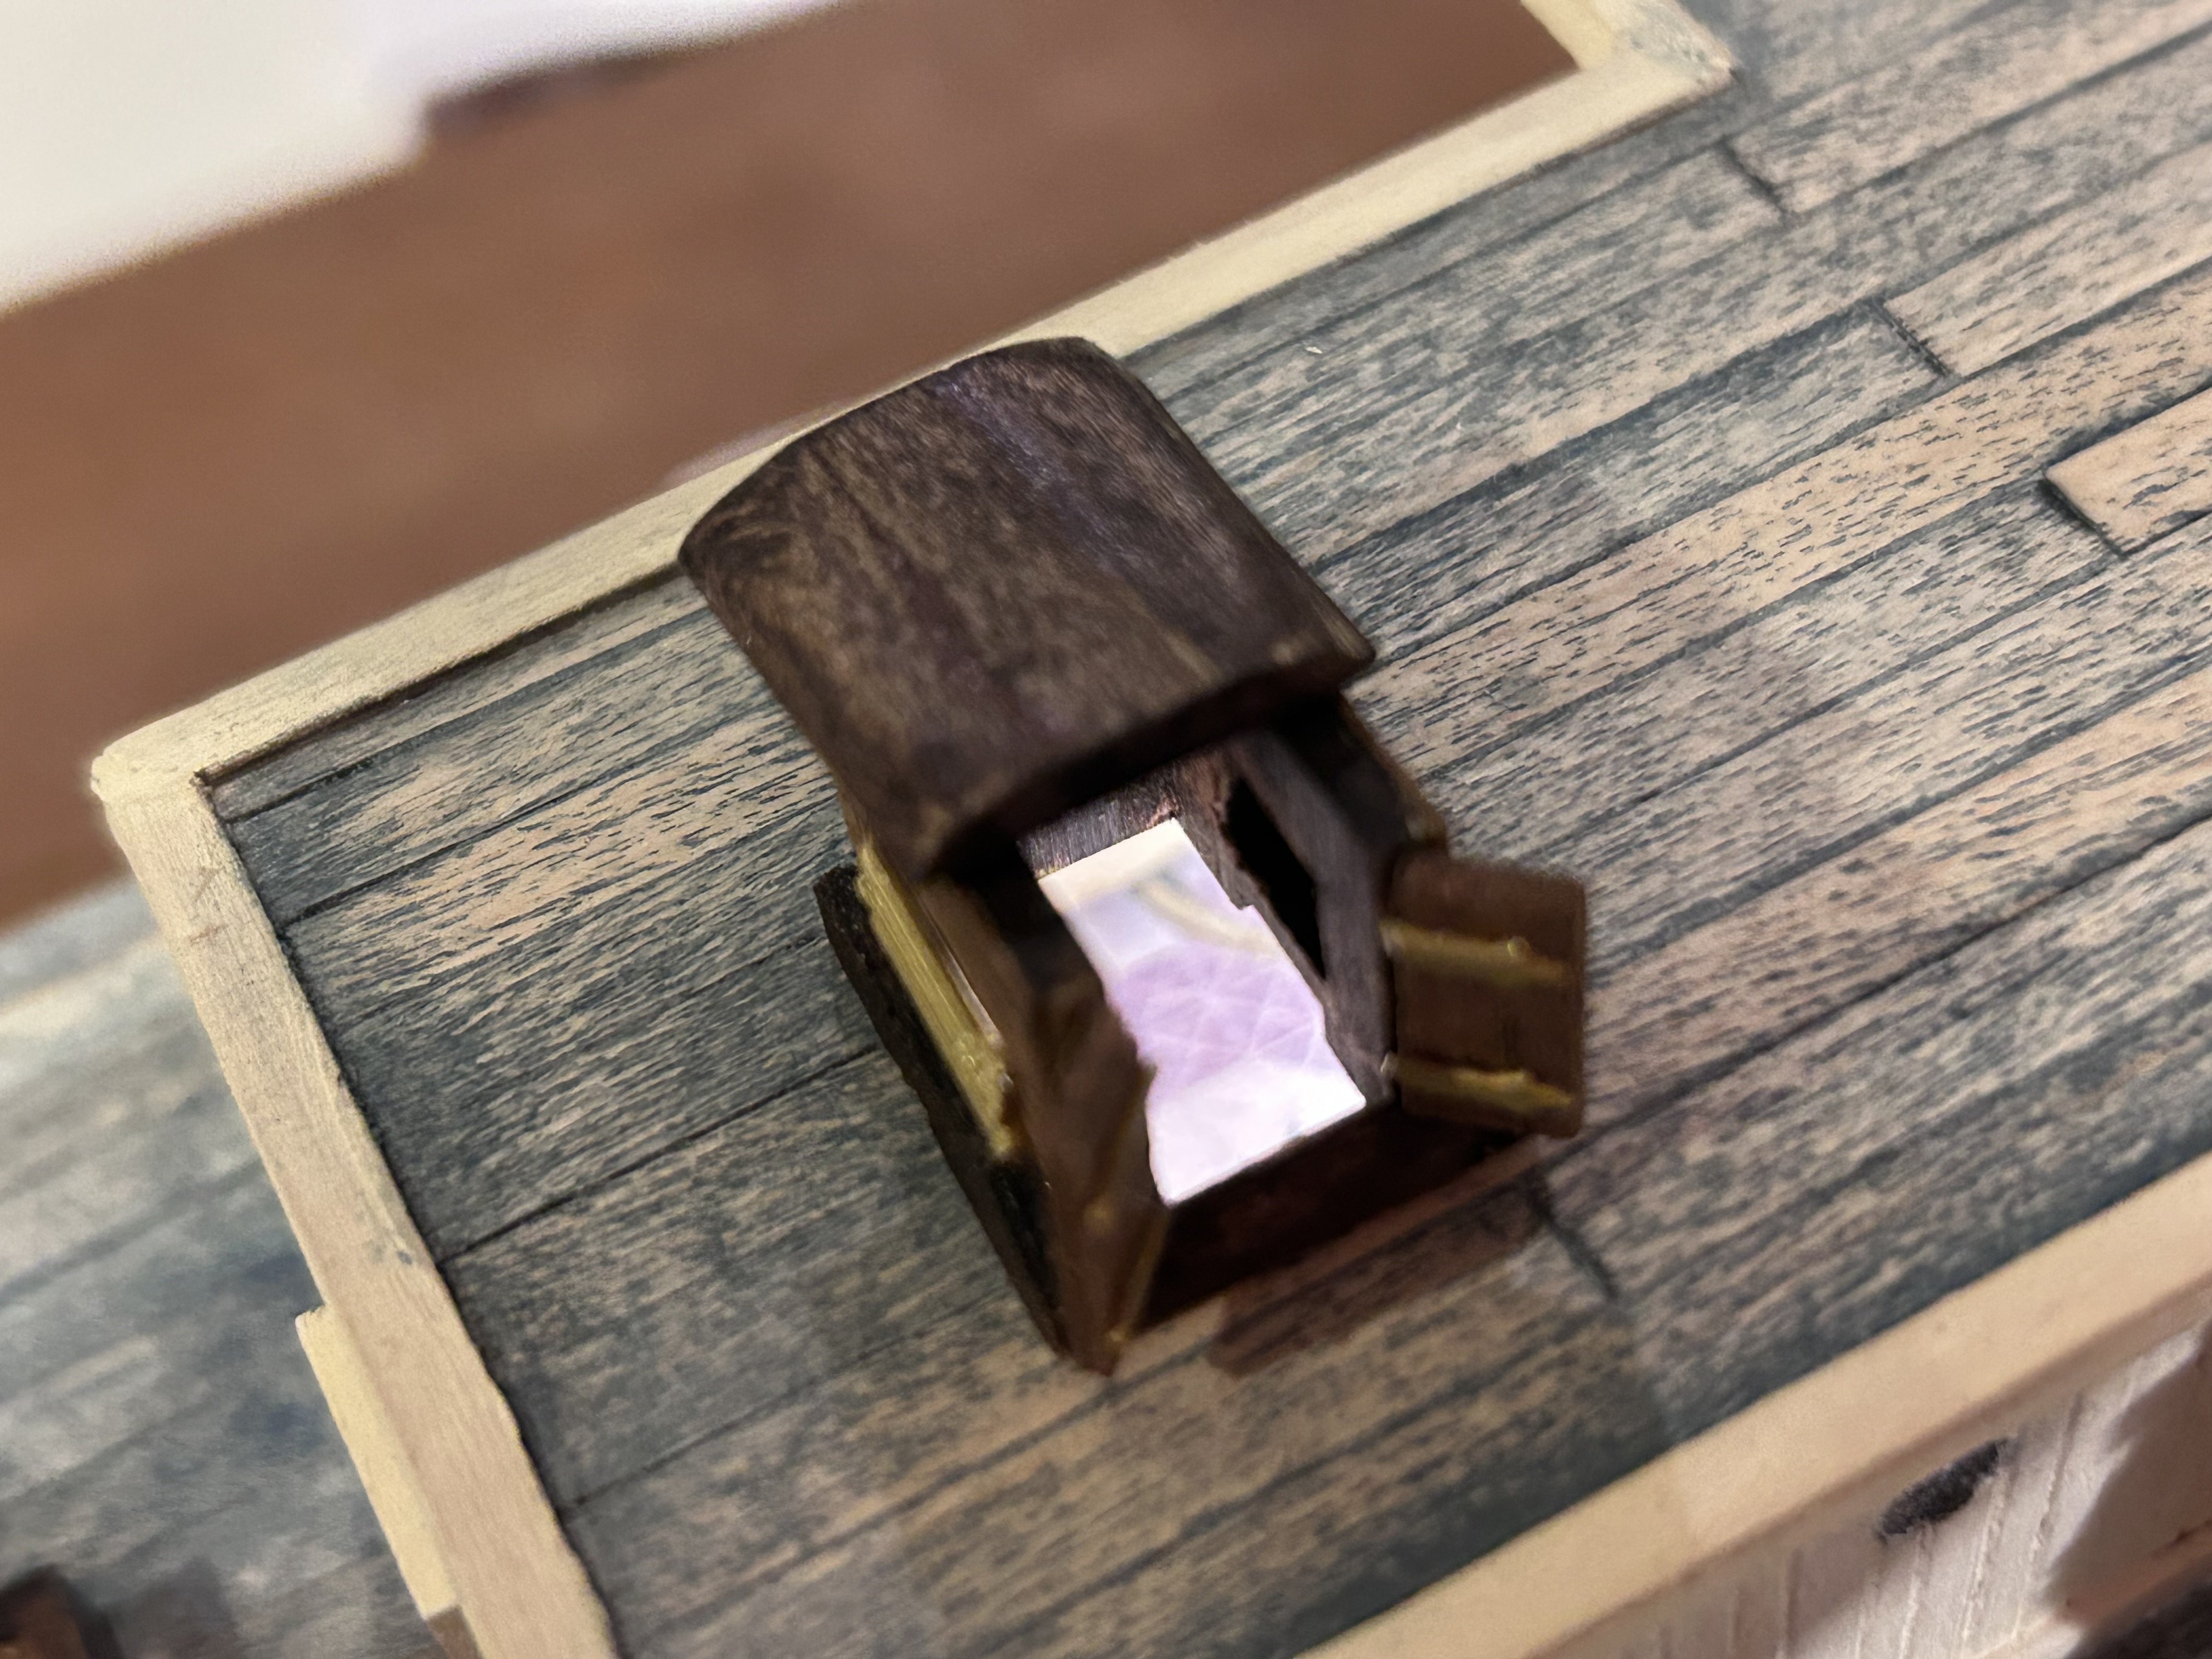
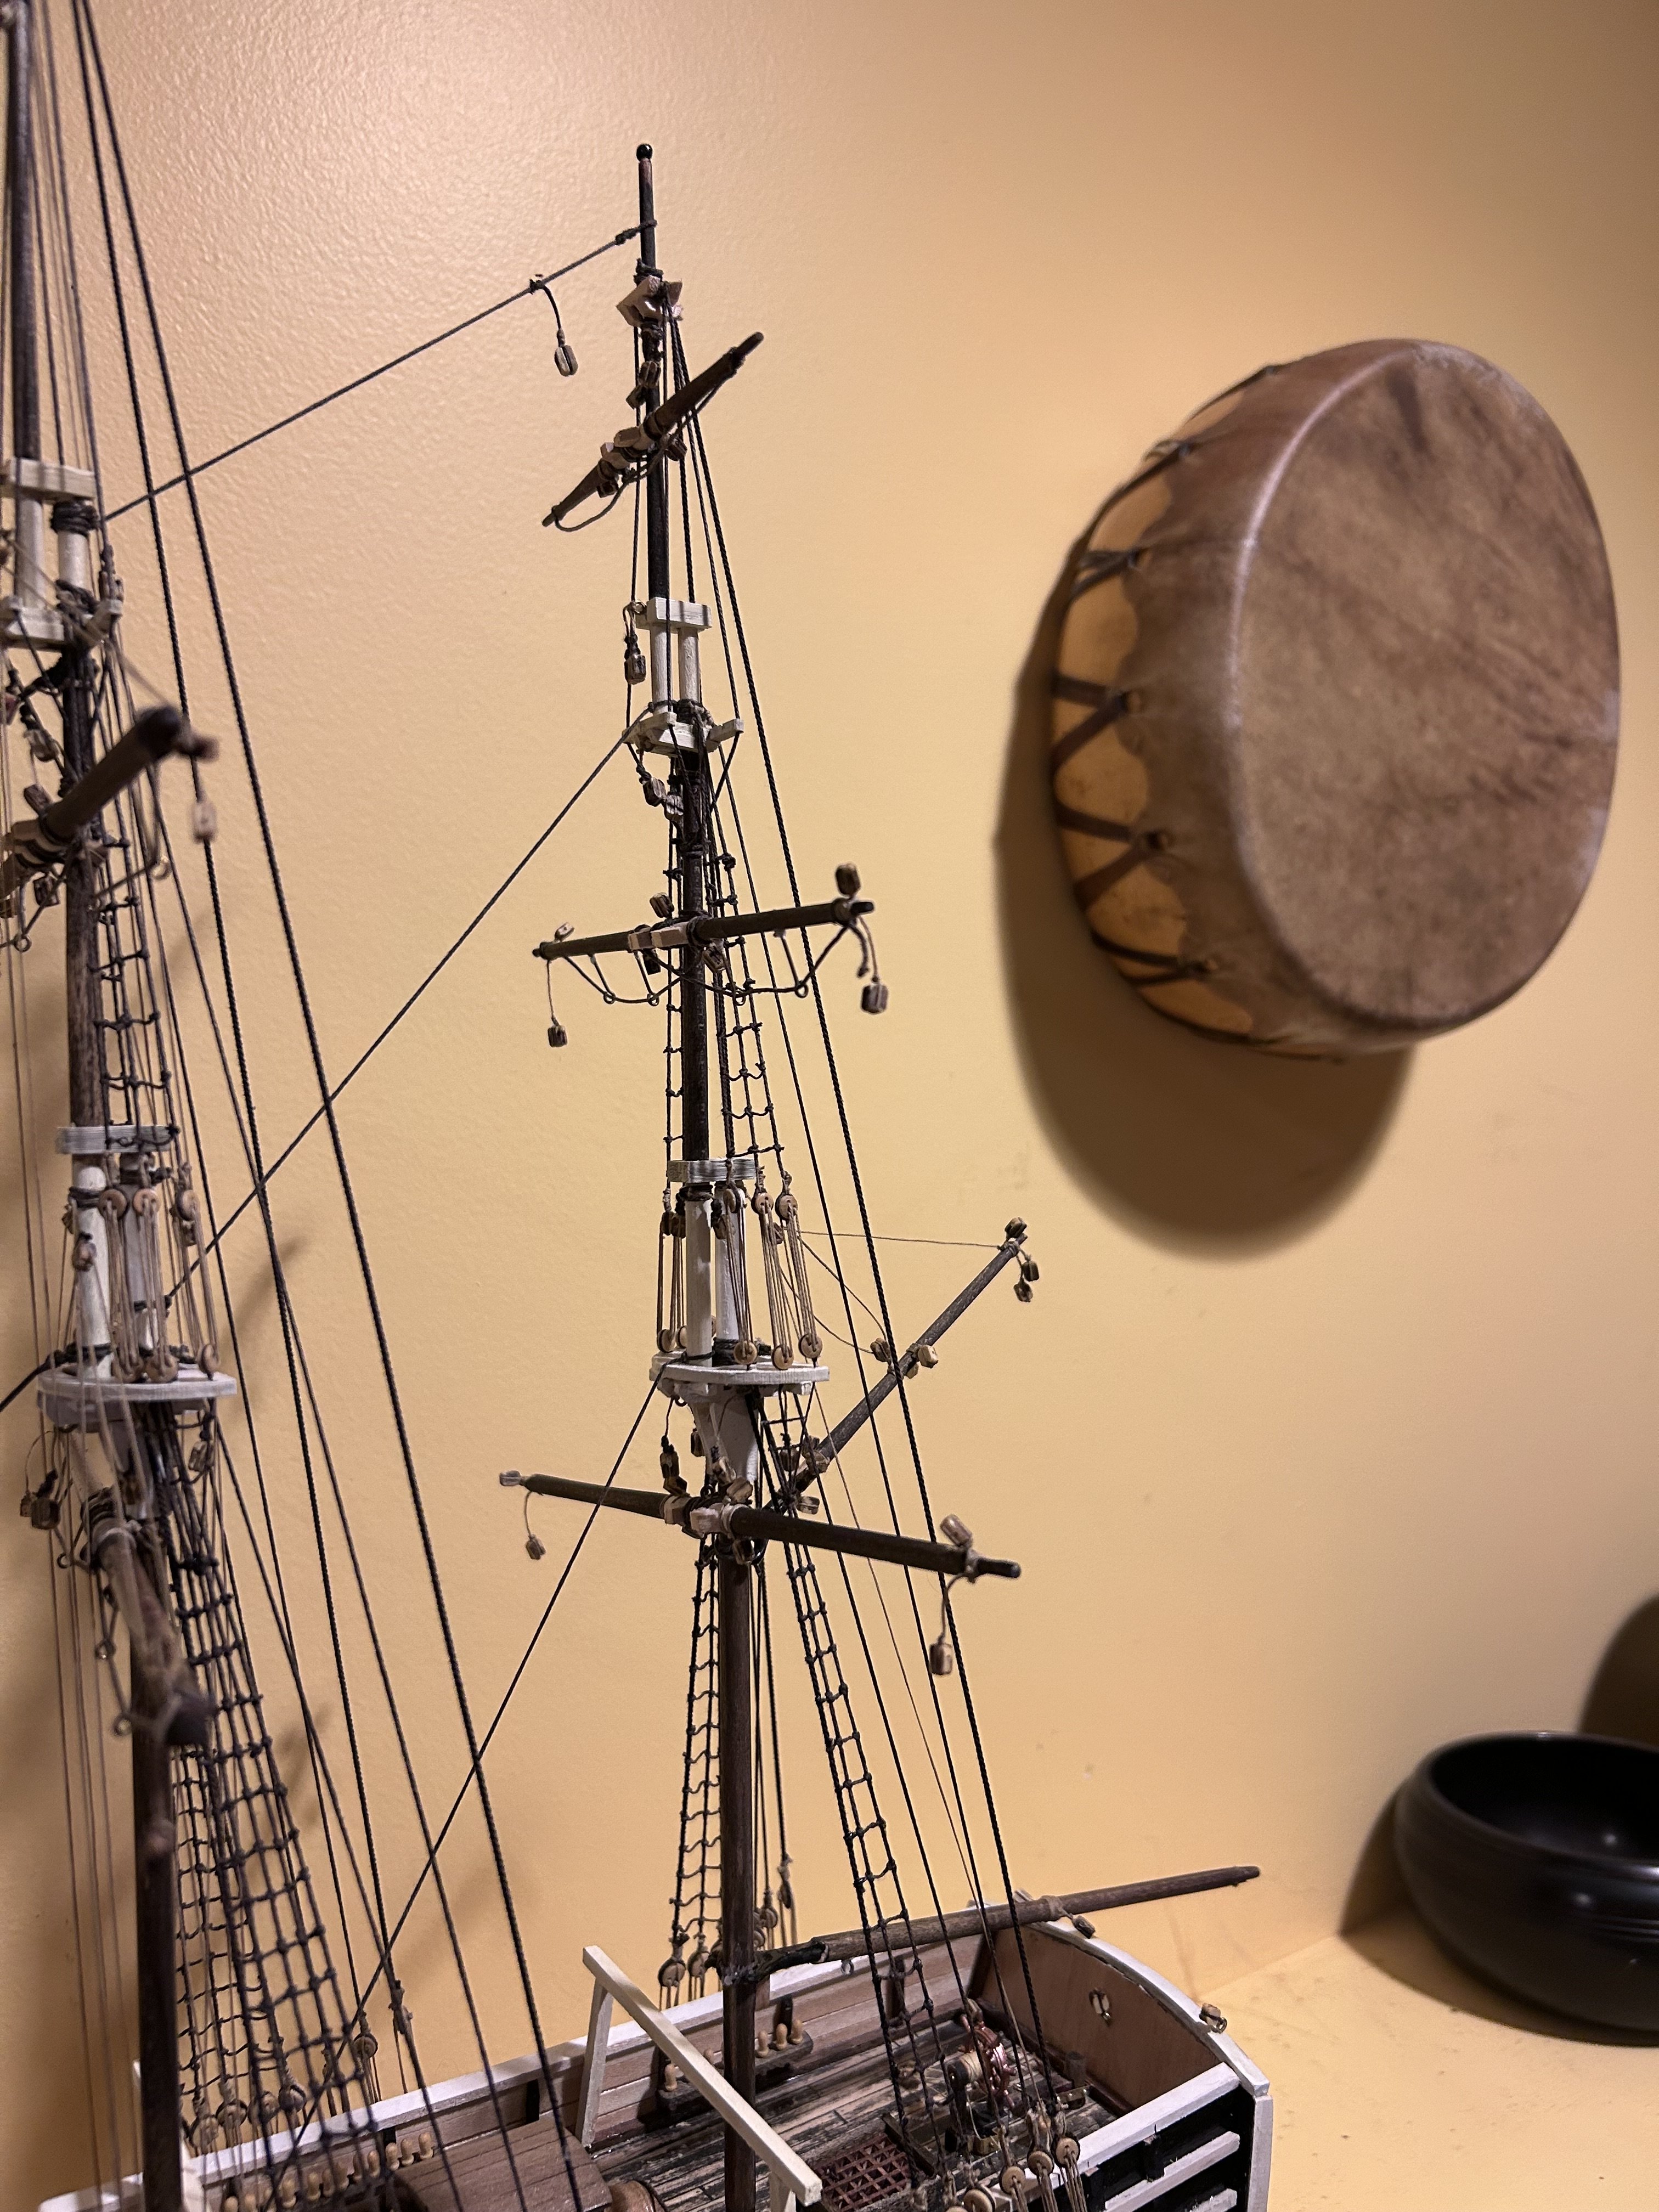
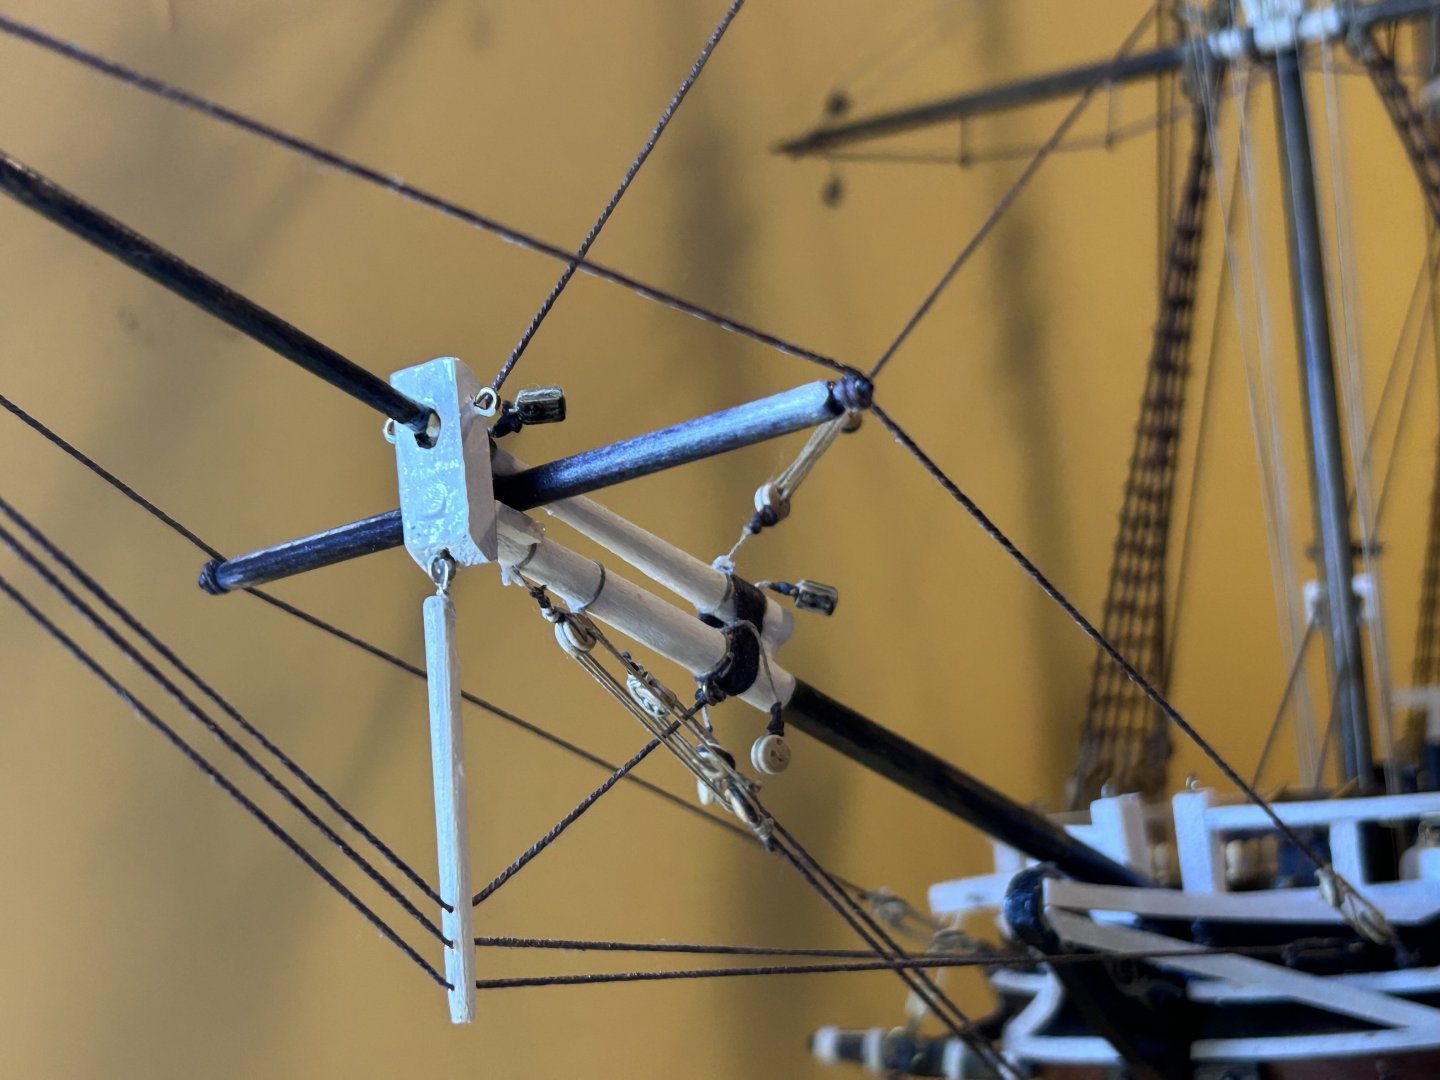
Update on the windlass and lamp rooms: I’ve shingled the inner walls and plan to paint them white. I’ve painted the interior of the portholes gunmetal grey to simulate metal. I have opaque tracing paper coming to line the porthole interiors so there will be light that can come through but not enough to see inside. I have a set of fairy lights coming with 20 lights. This number will be enough to light each room and porthole and provide the needed effect I’m looking for, as you can see in the lower left of bulkhead A3 there’s a hole drilled through which will be used to feed the lights through. Work time today: 4 hours Total time: 10 hours

-
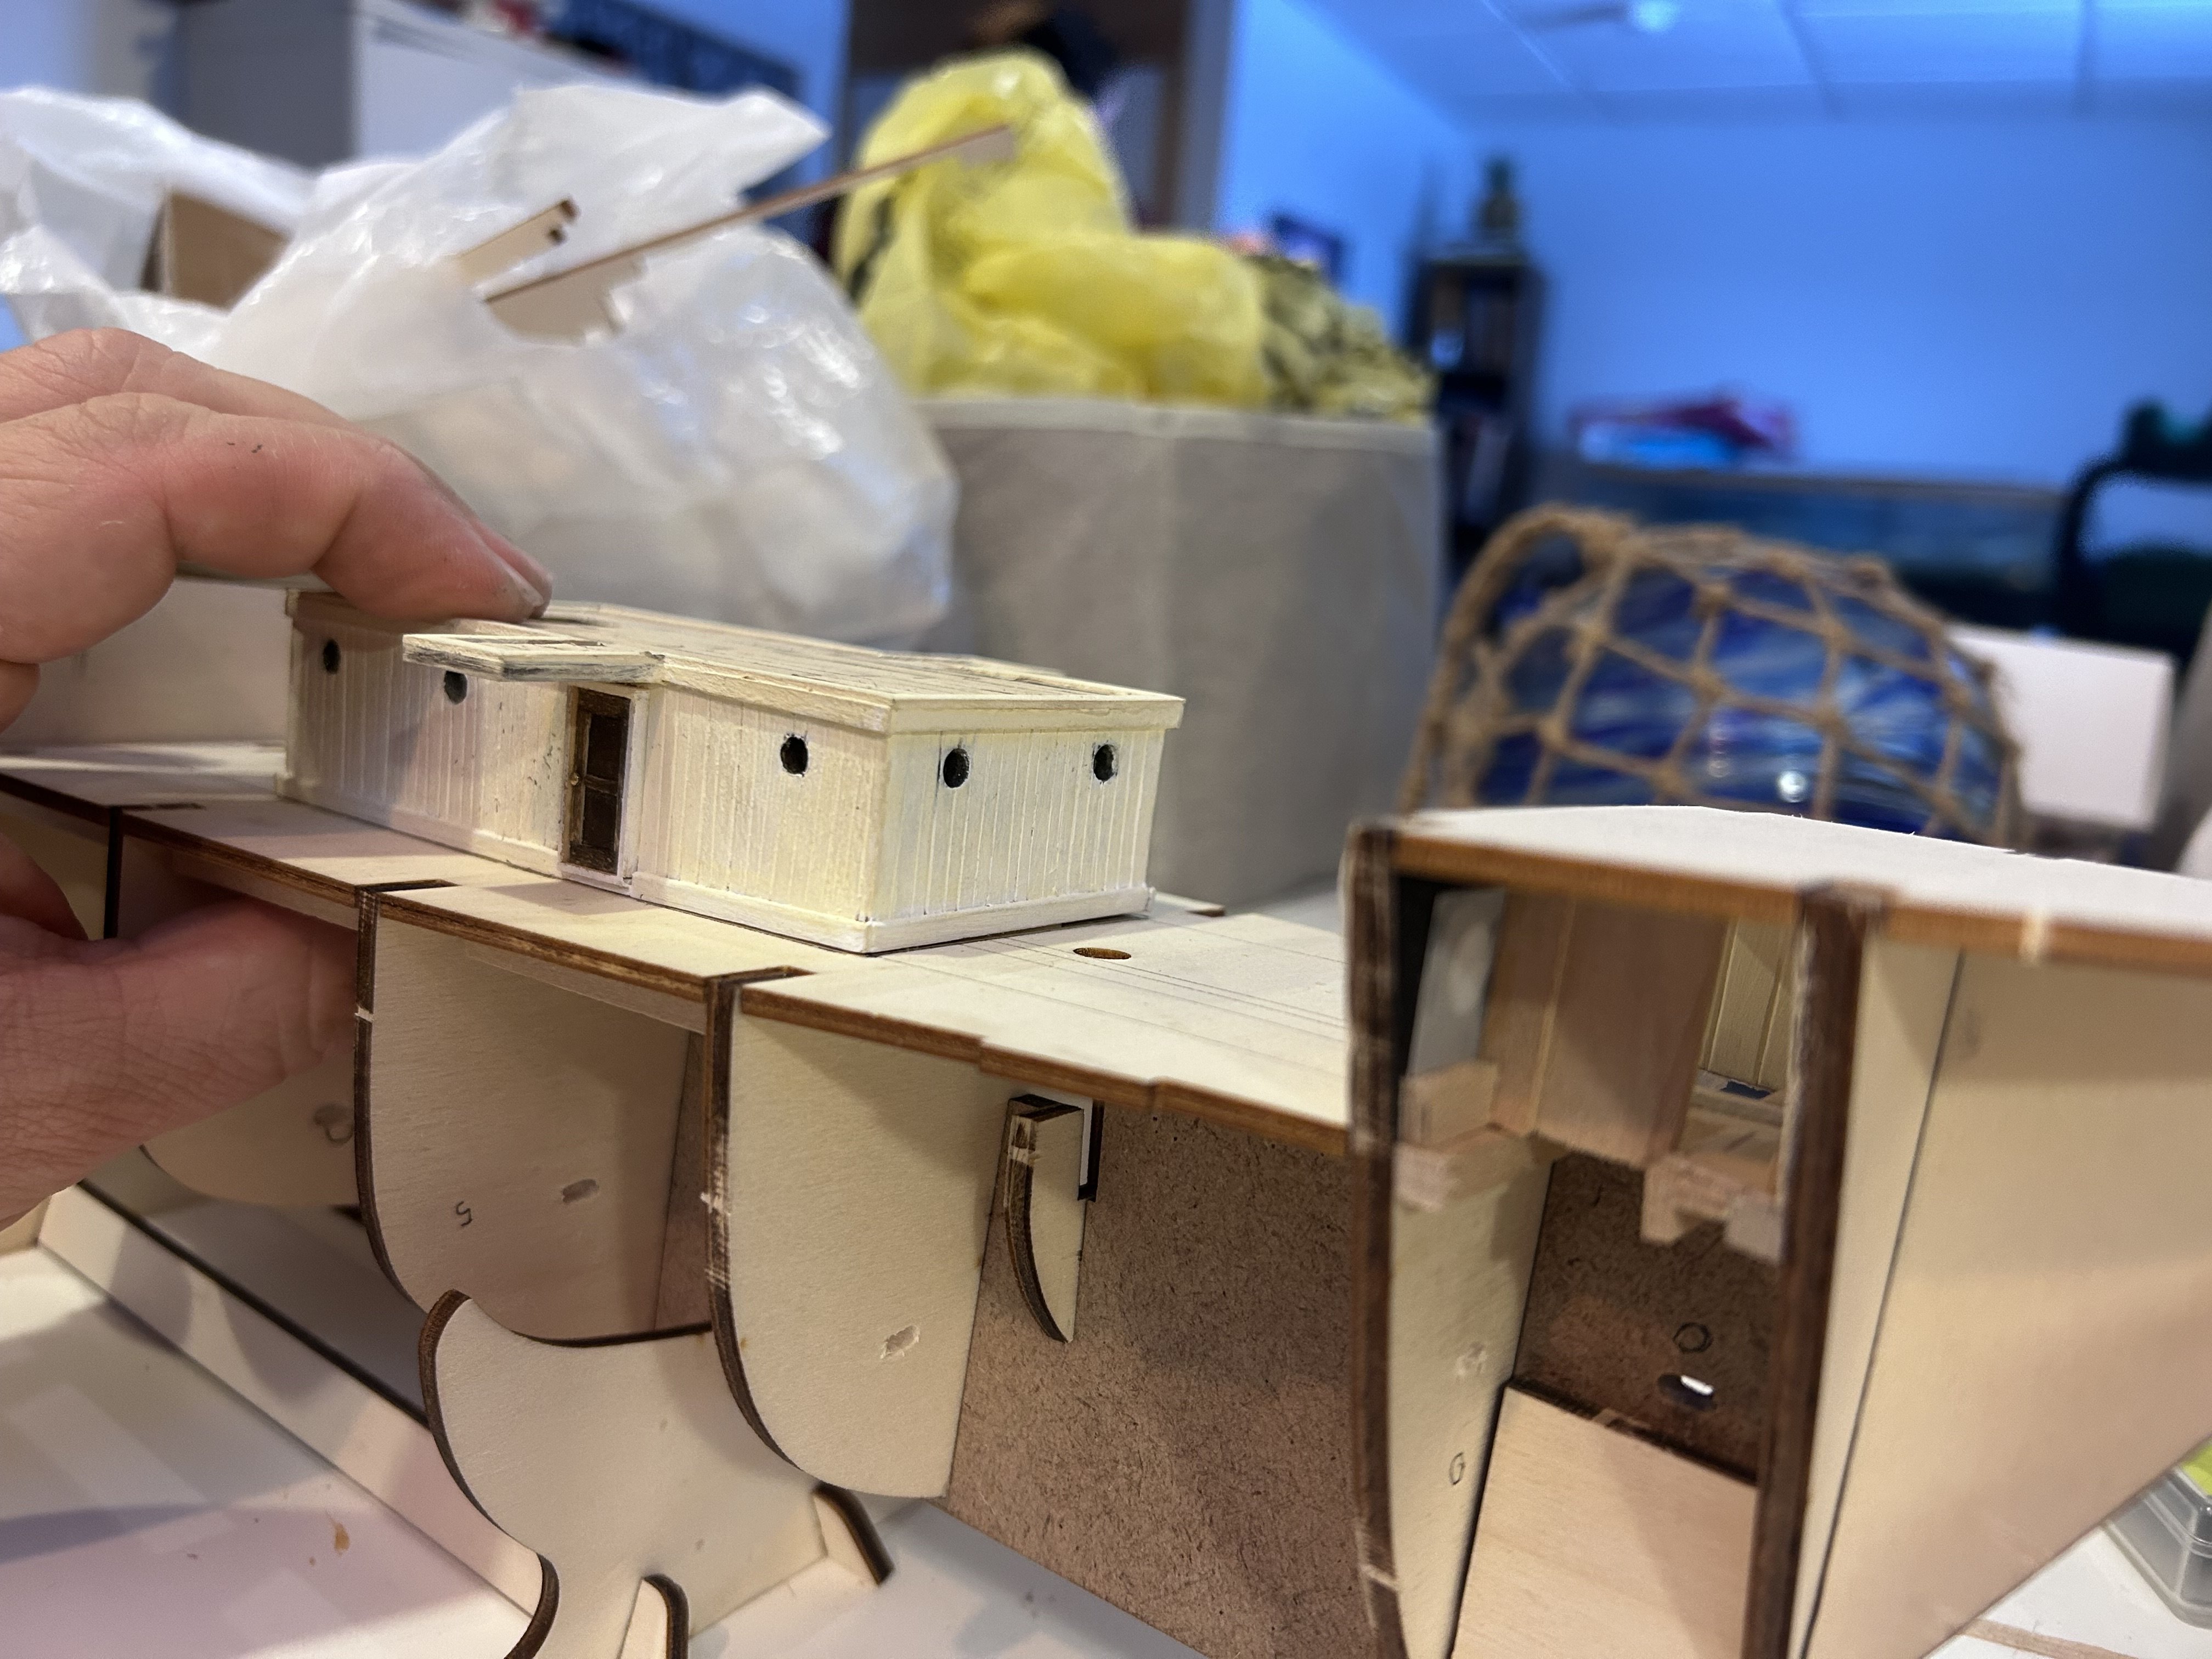
I finished off my Essex yesterday which means, at last, it’s time to begin the Endurance in earnest! Starting at the forecastle; I’m following in the footsteps of several who came before me and planking the outer wall with tapered planks so as to make the wood more apparent. I found a grinding dremel head that matches the 1/4” aimed for by guys like @Tomculb and it allowed me more control with no fear of the wood breaking as I went. Got some good smoked wood smell as the friction burned a little but nothing too problematic. I also sanded down the wood and used a file to really make those board divisions pop. If it’s still to my liking when I paint it I plan to do some dry brushing to get some grime in those cracks (like a real ship would have). As you can see with the clamp I put some boards in place so as to make my job easier when it comes time to plank the windlass room and lamp rooms. I'm also planning ahead to do some lighting through the ship but am planning to go the cheap route and simply use fairy lights that I’ll run through the whole ship. These will provide that nice warm yellow glow rather than the harsh white usually associated with LEDs. Thanks for stopping in!


-
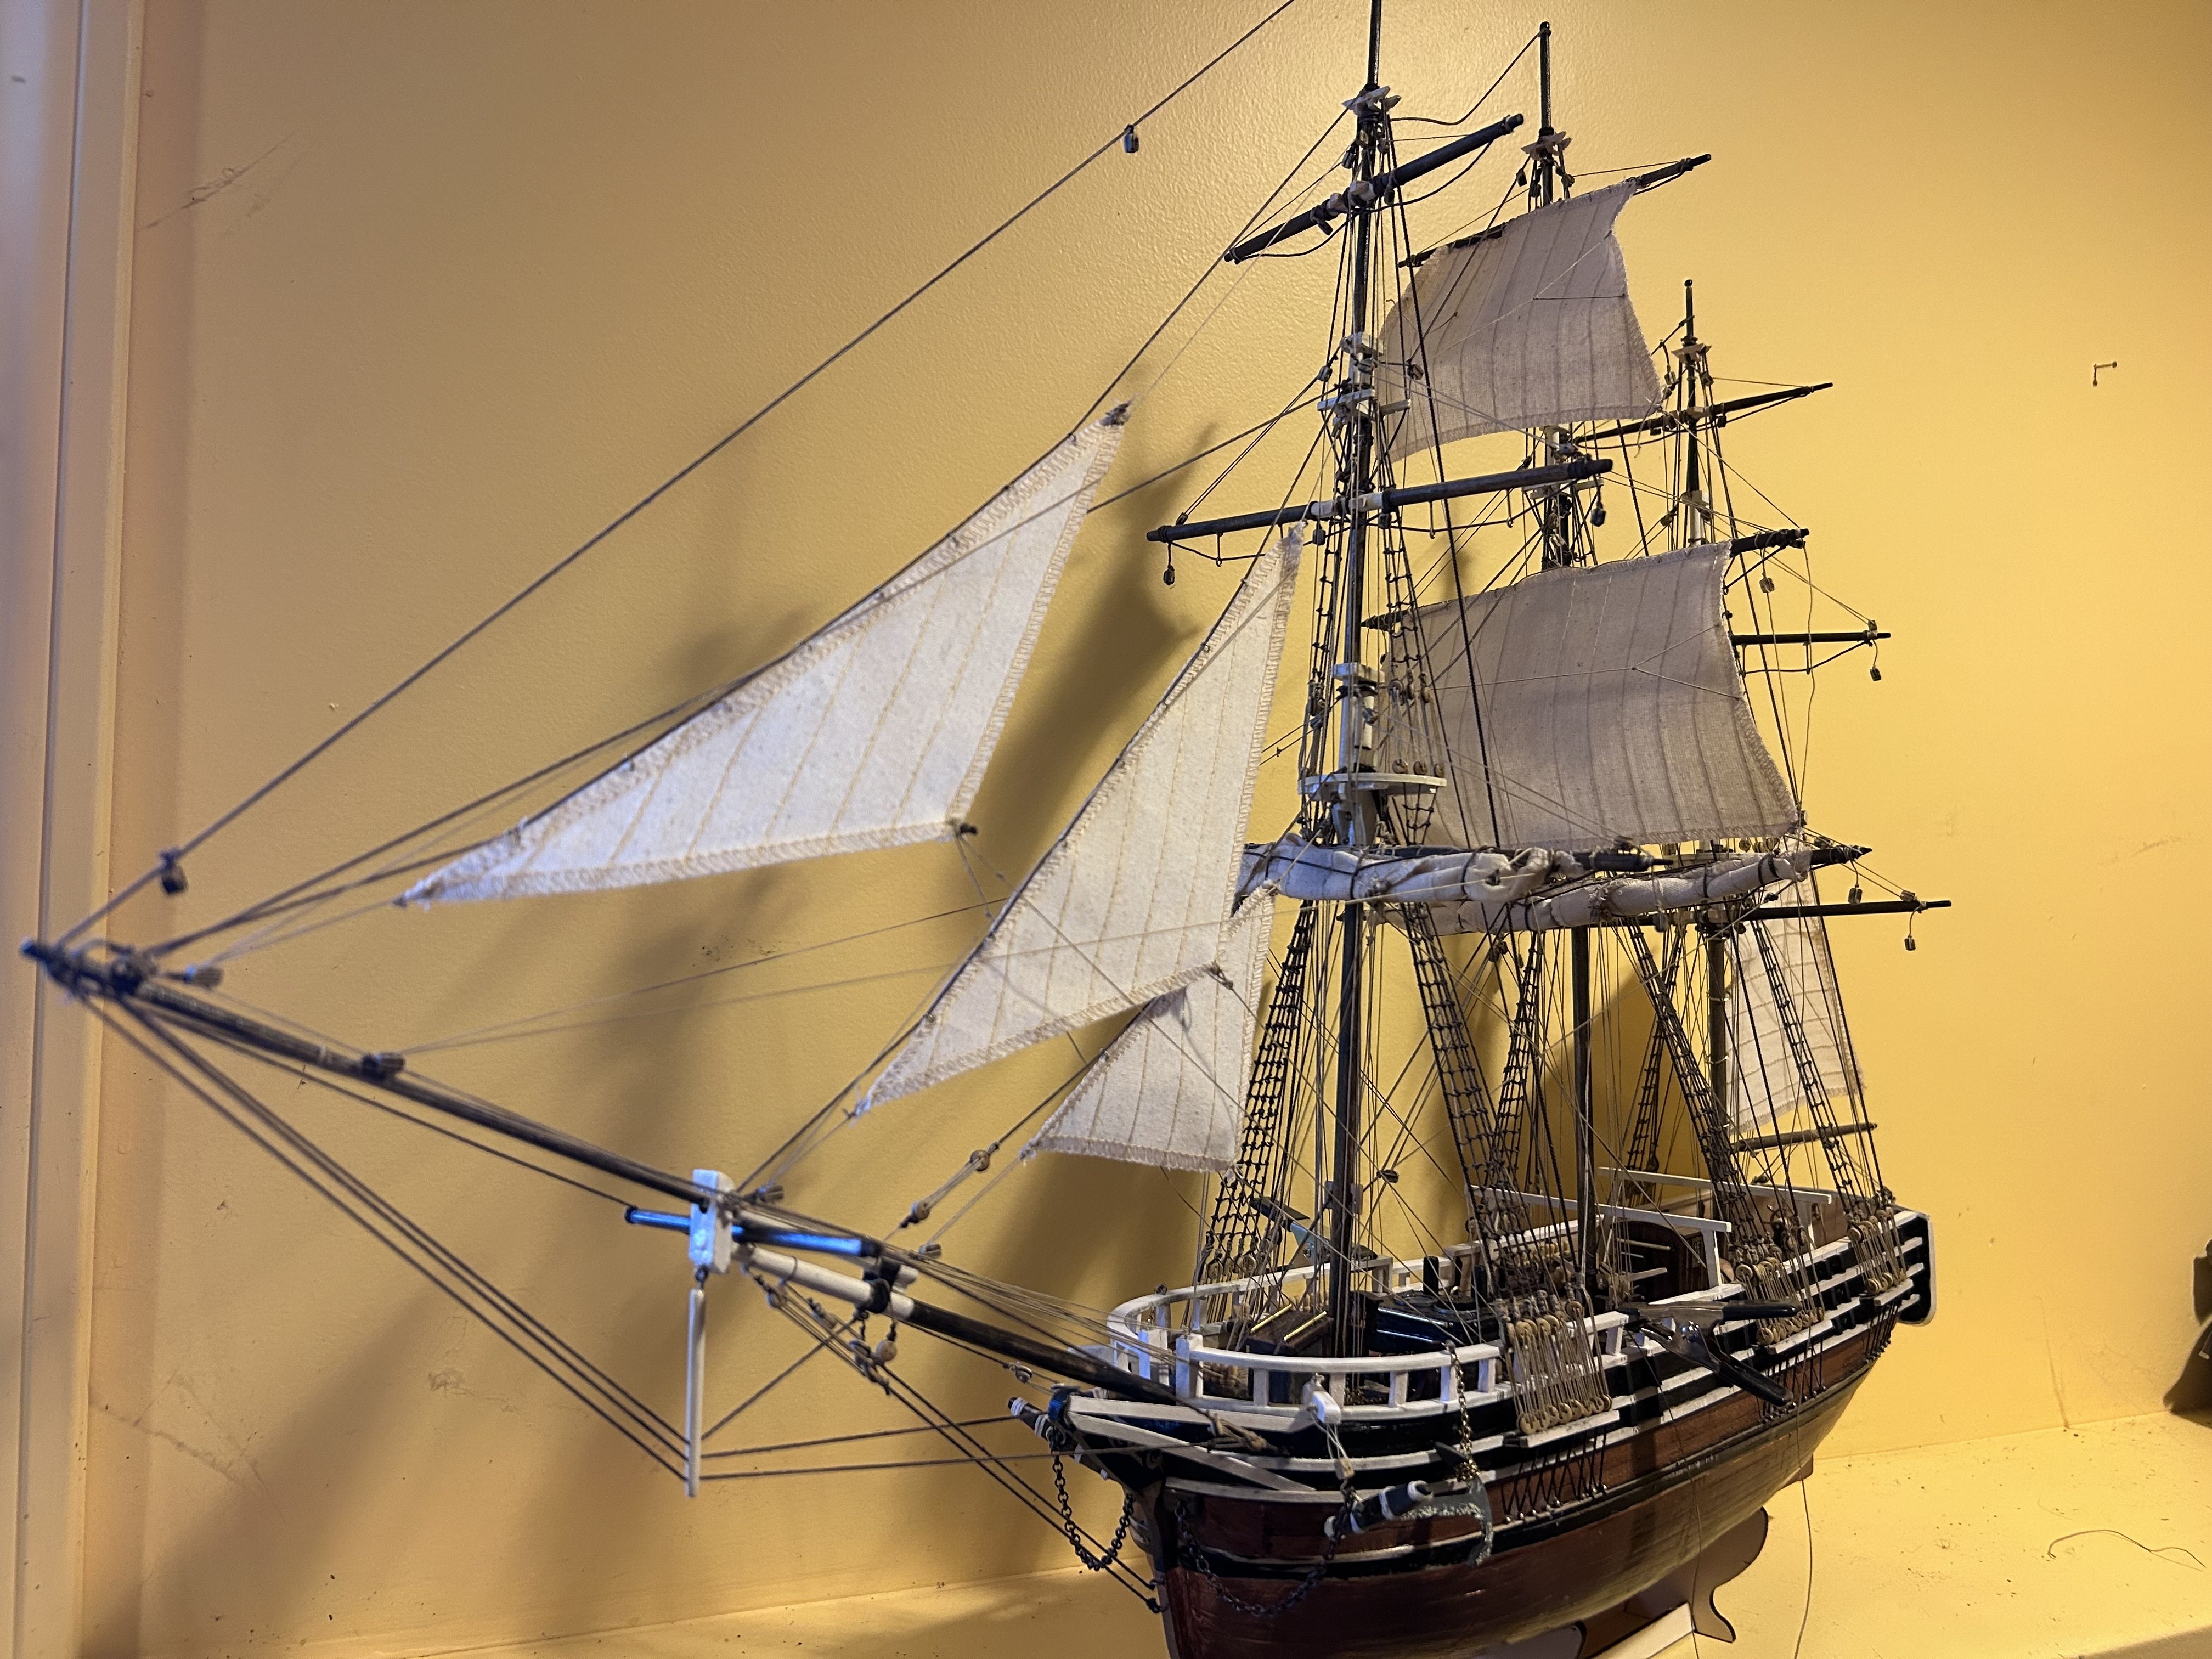
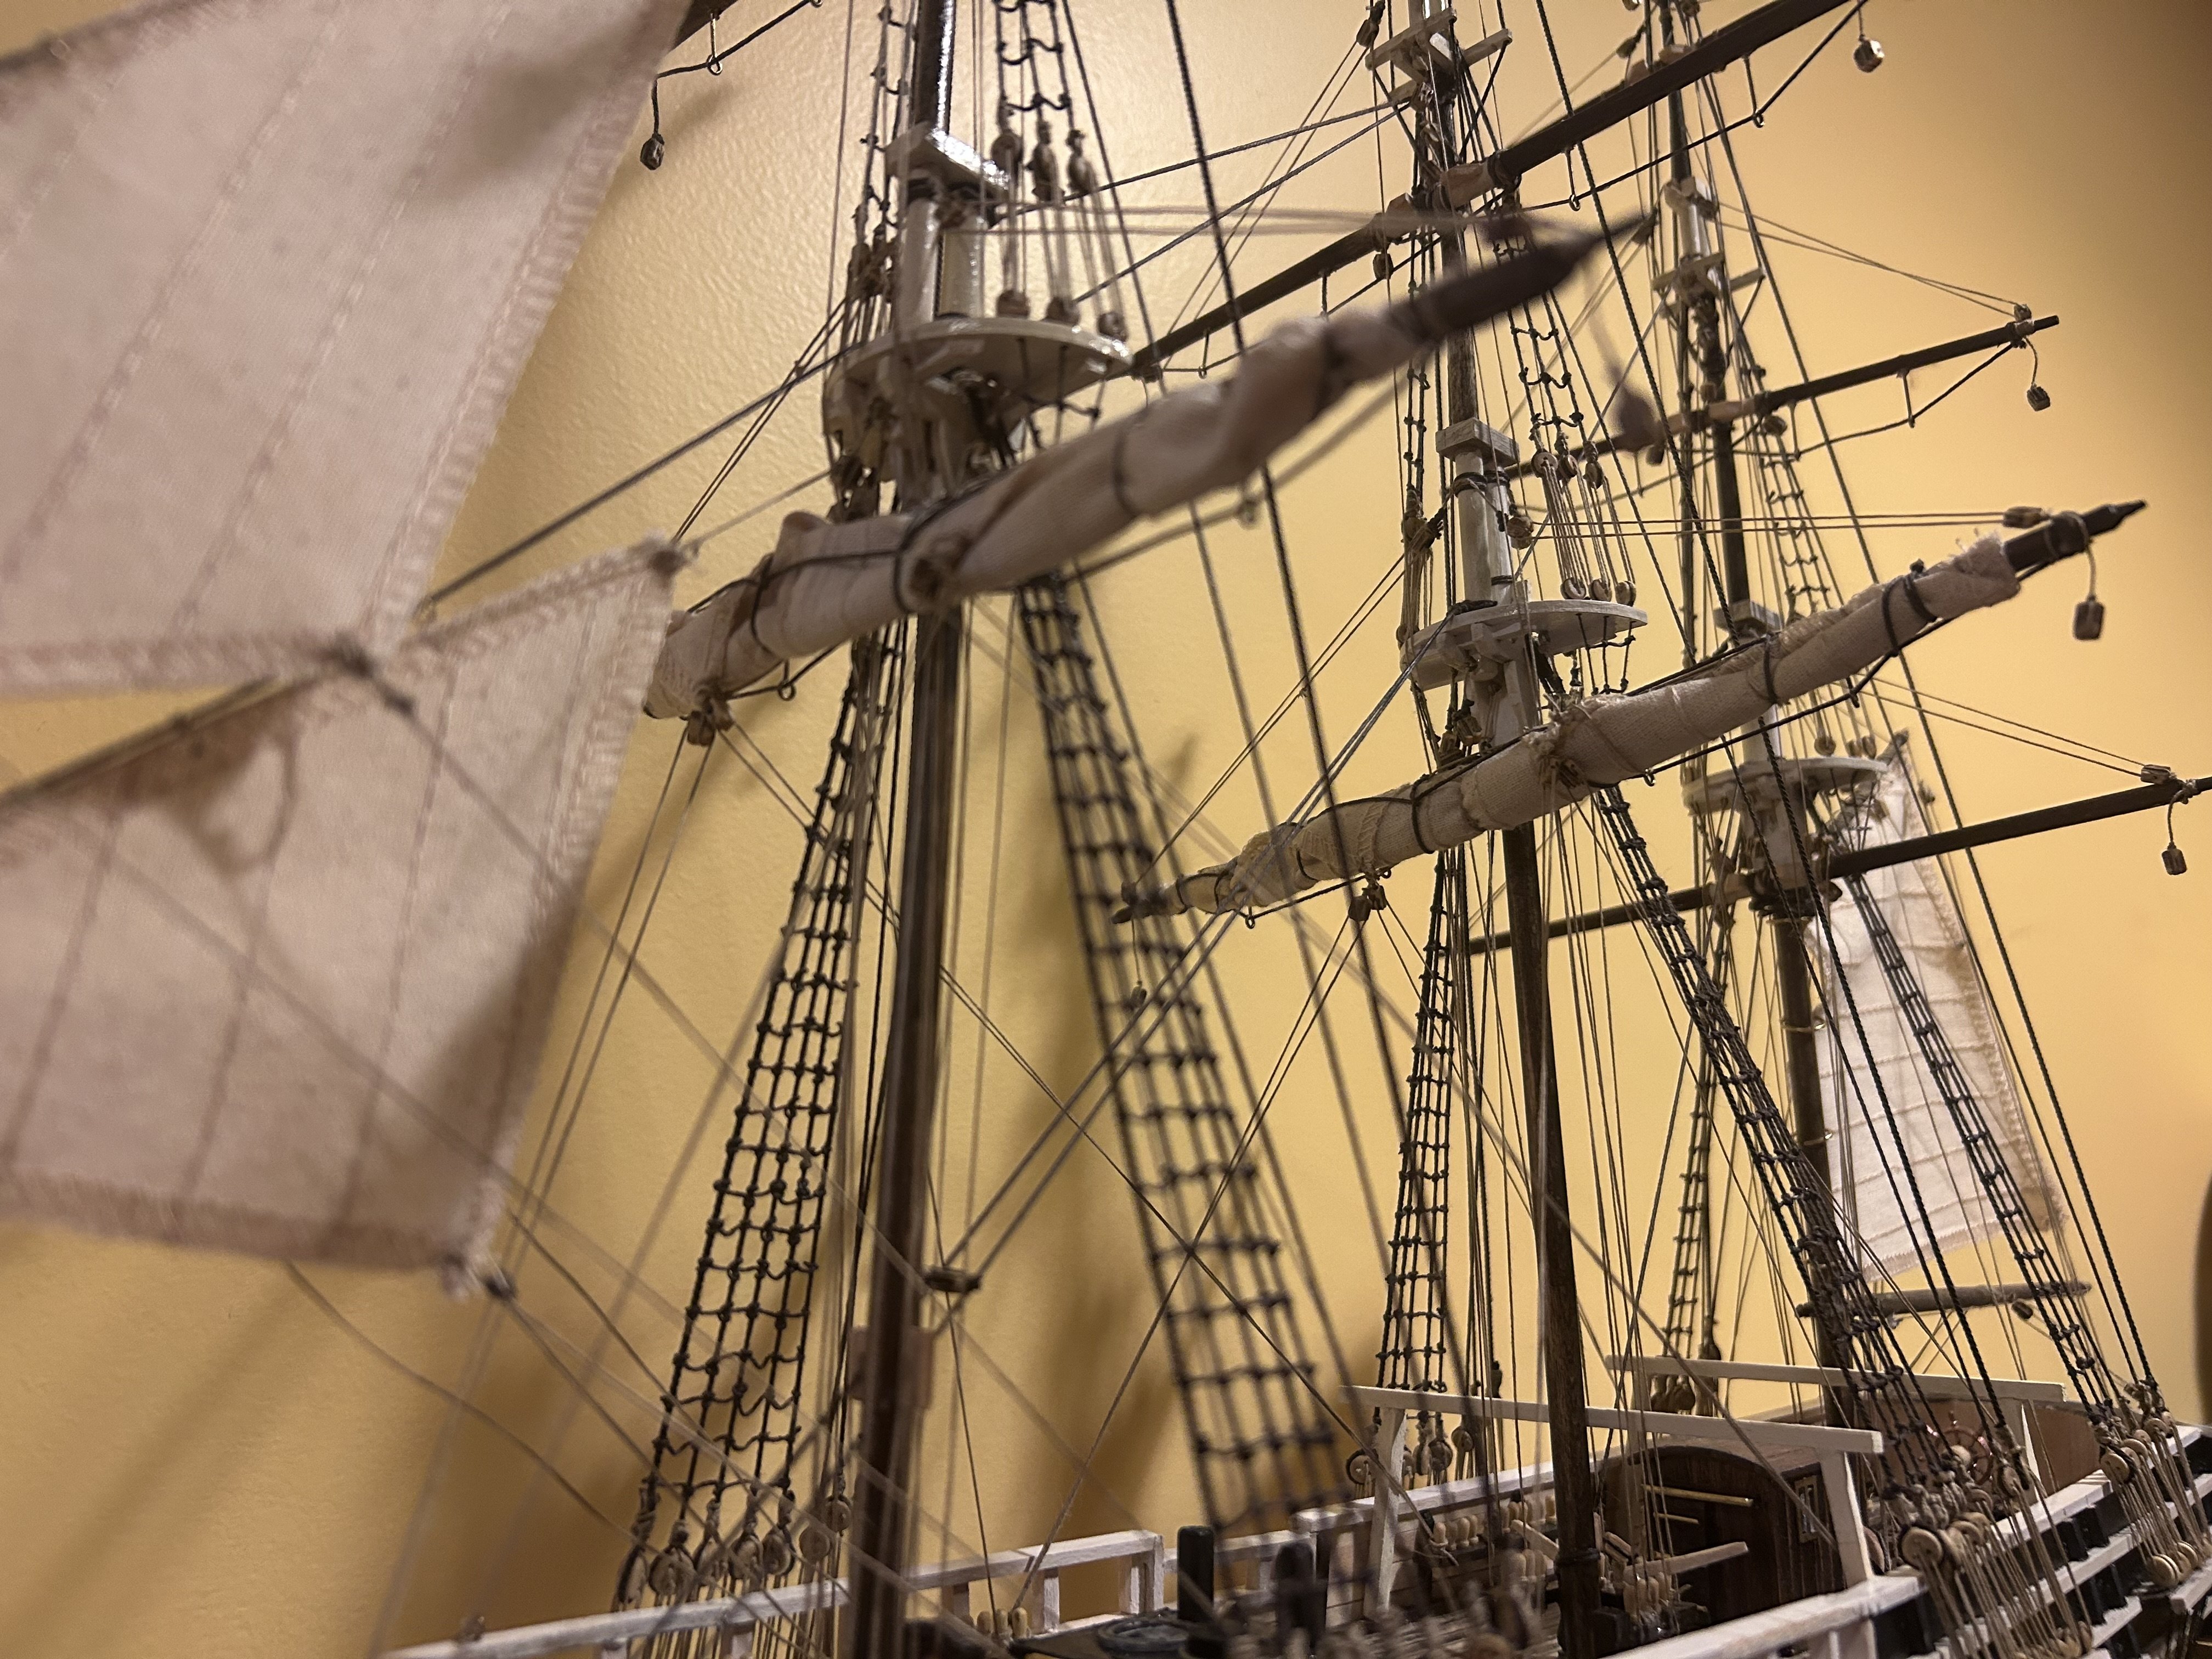
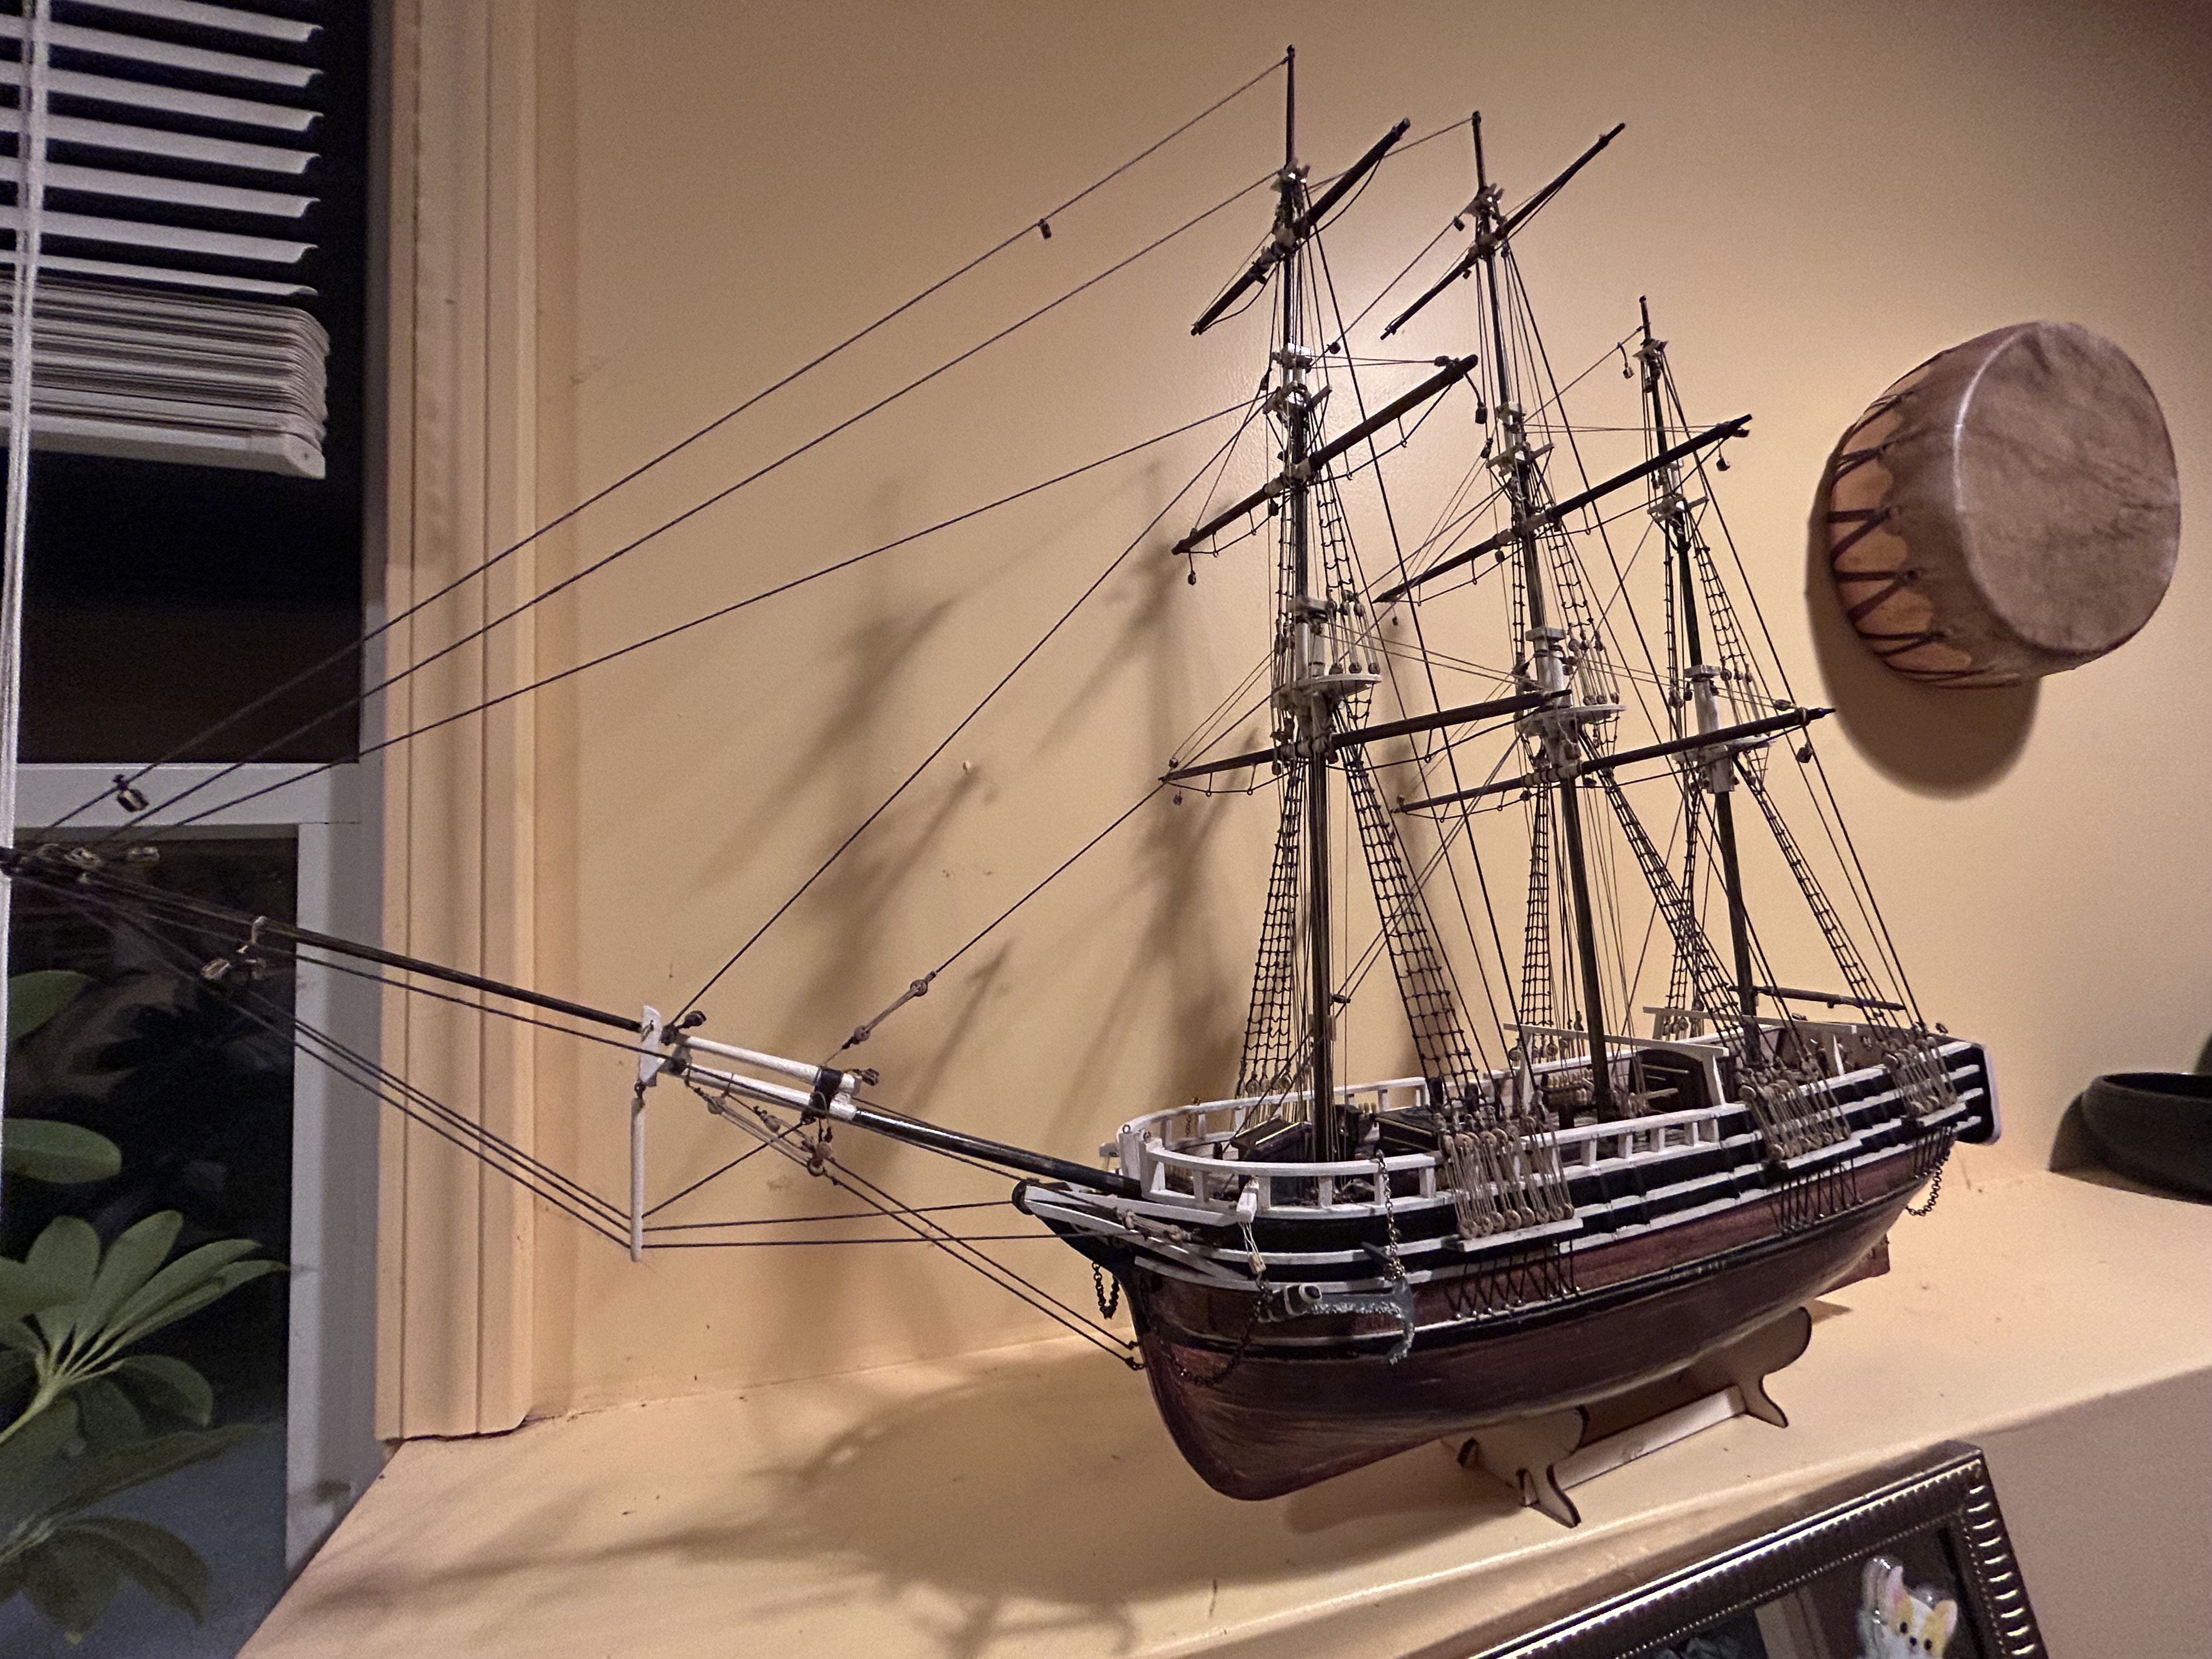
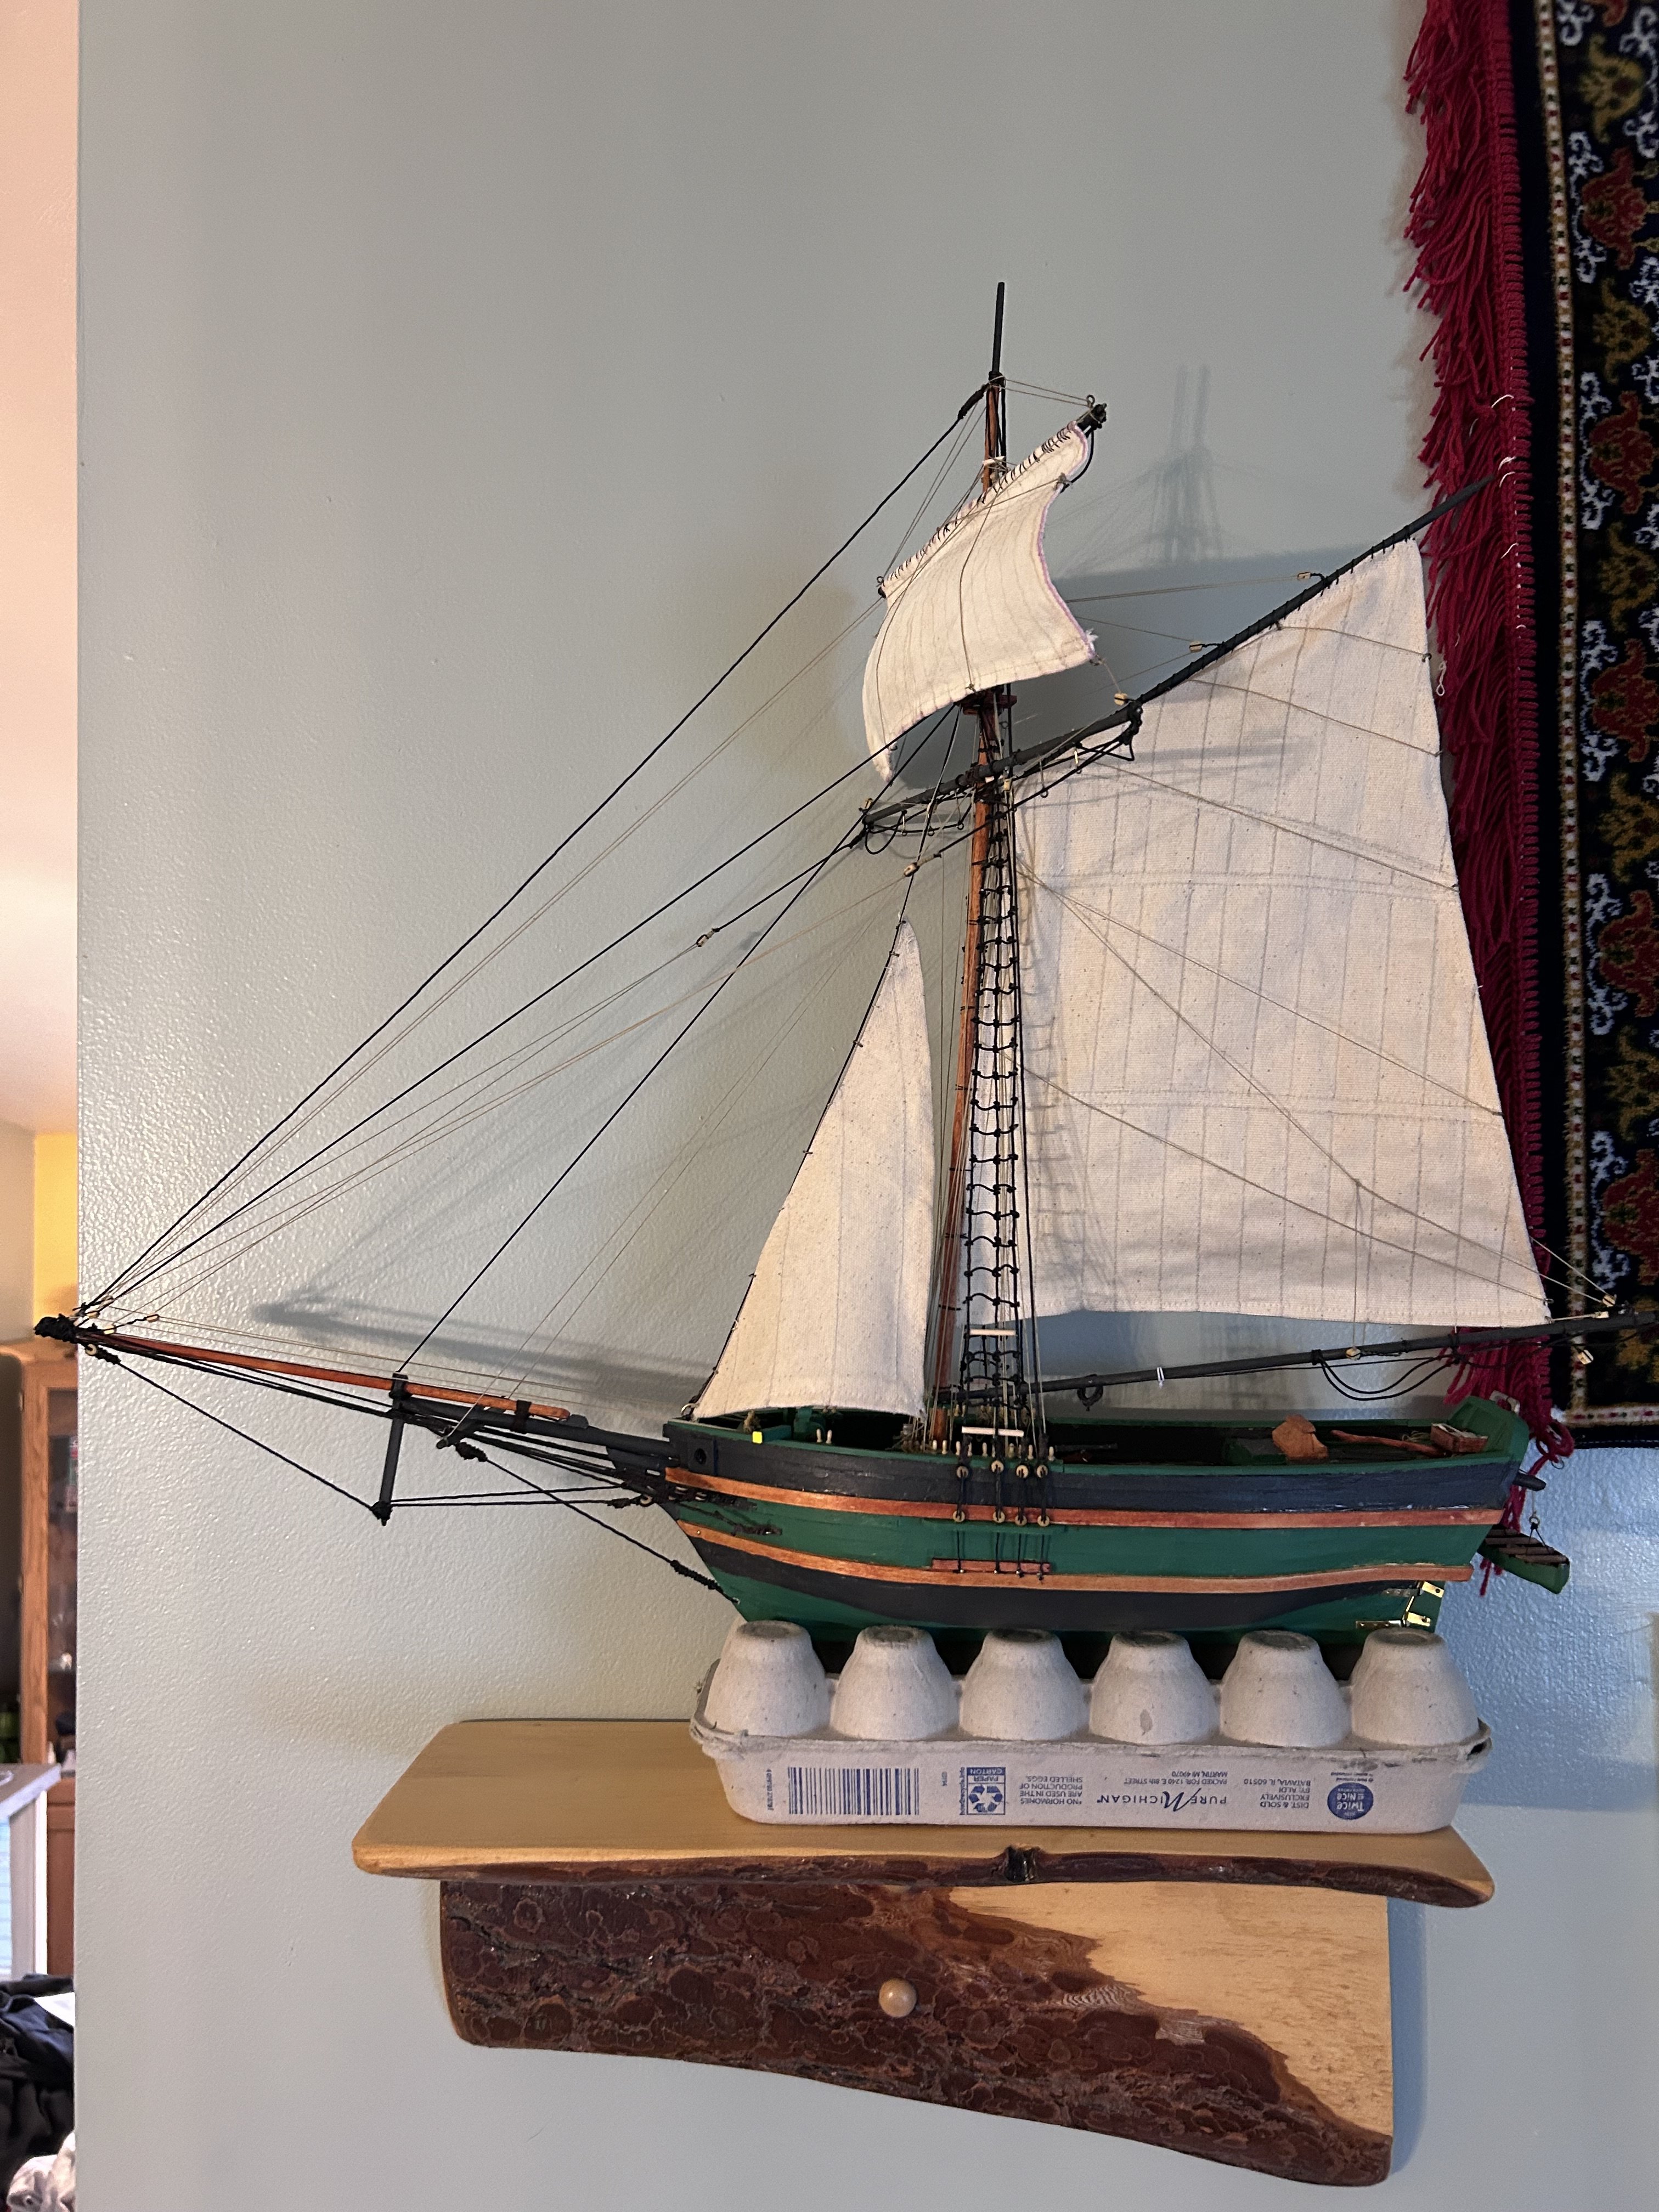
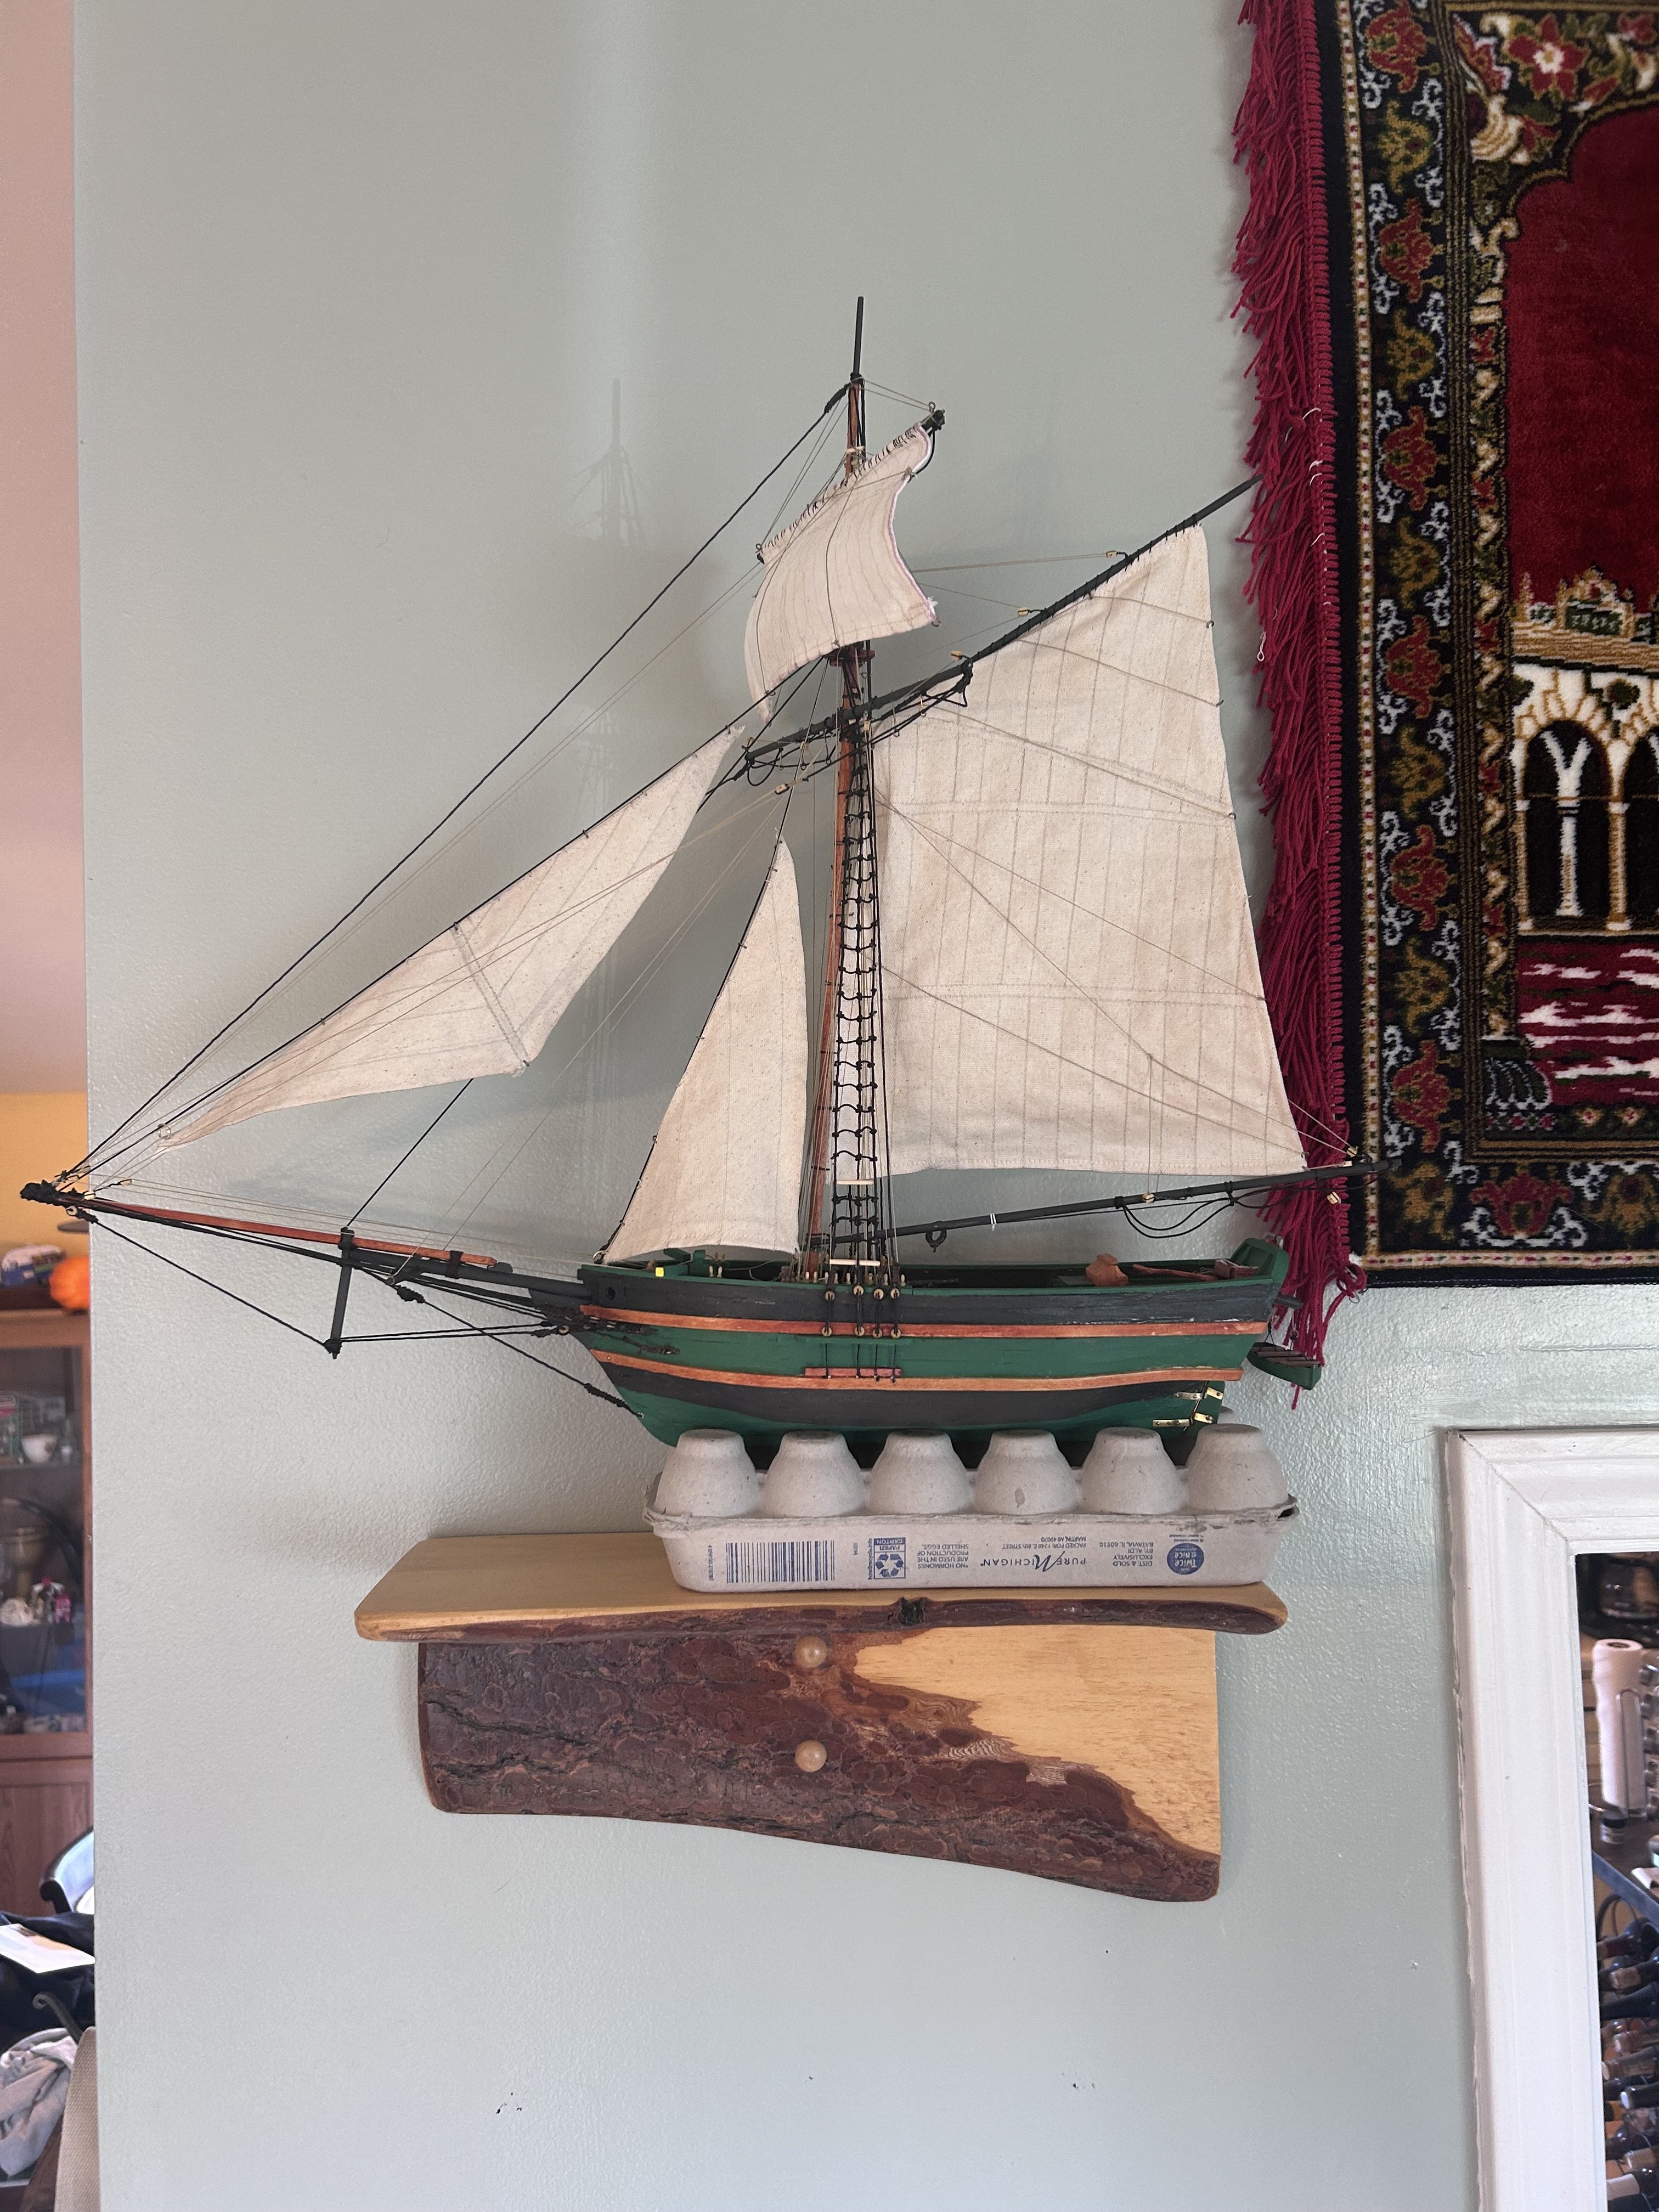
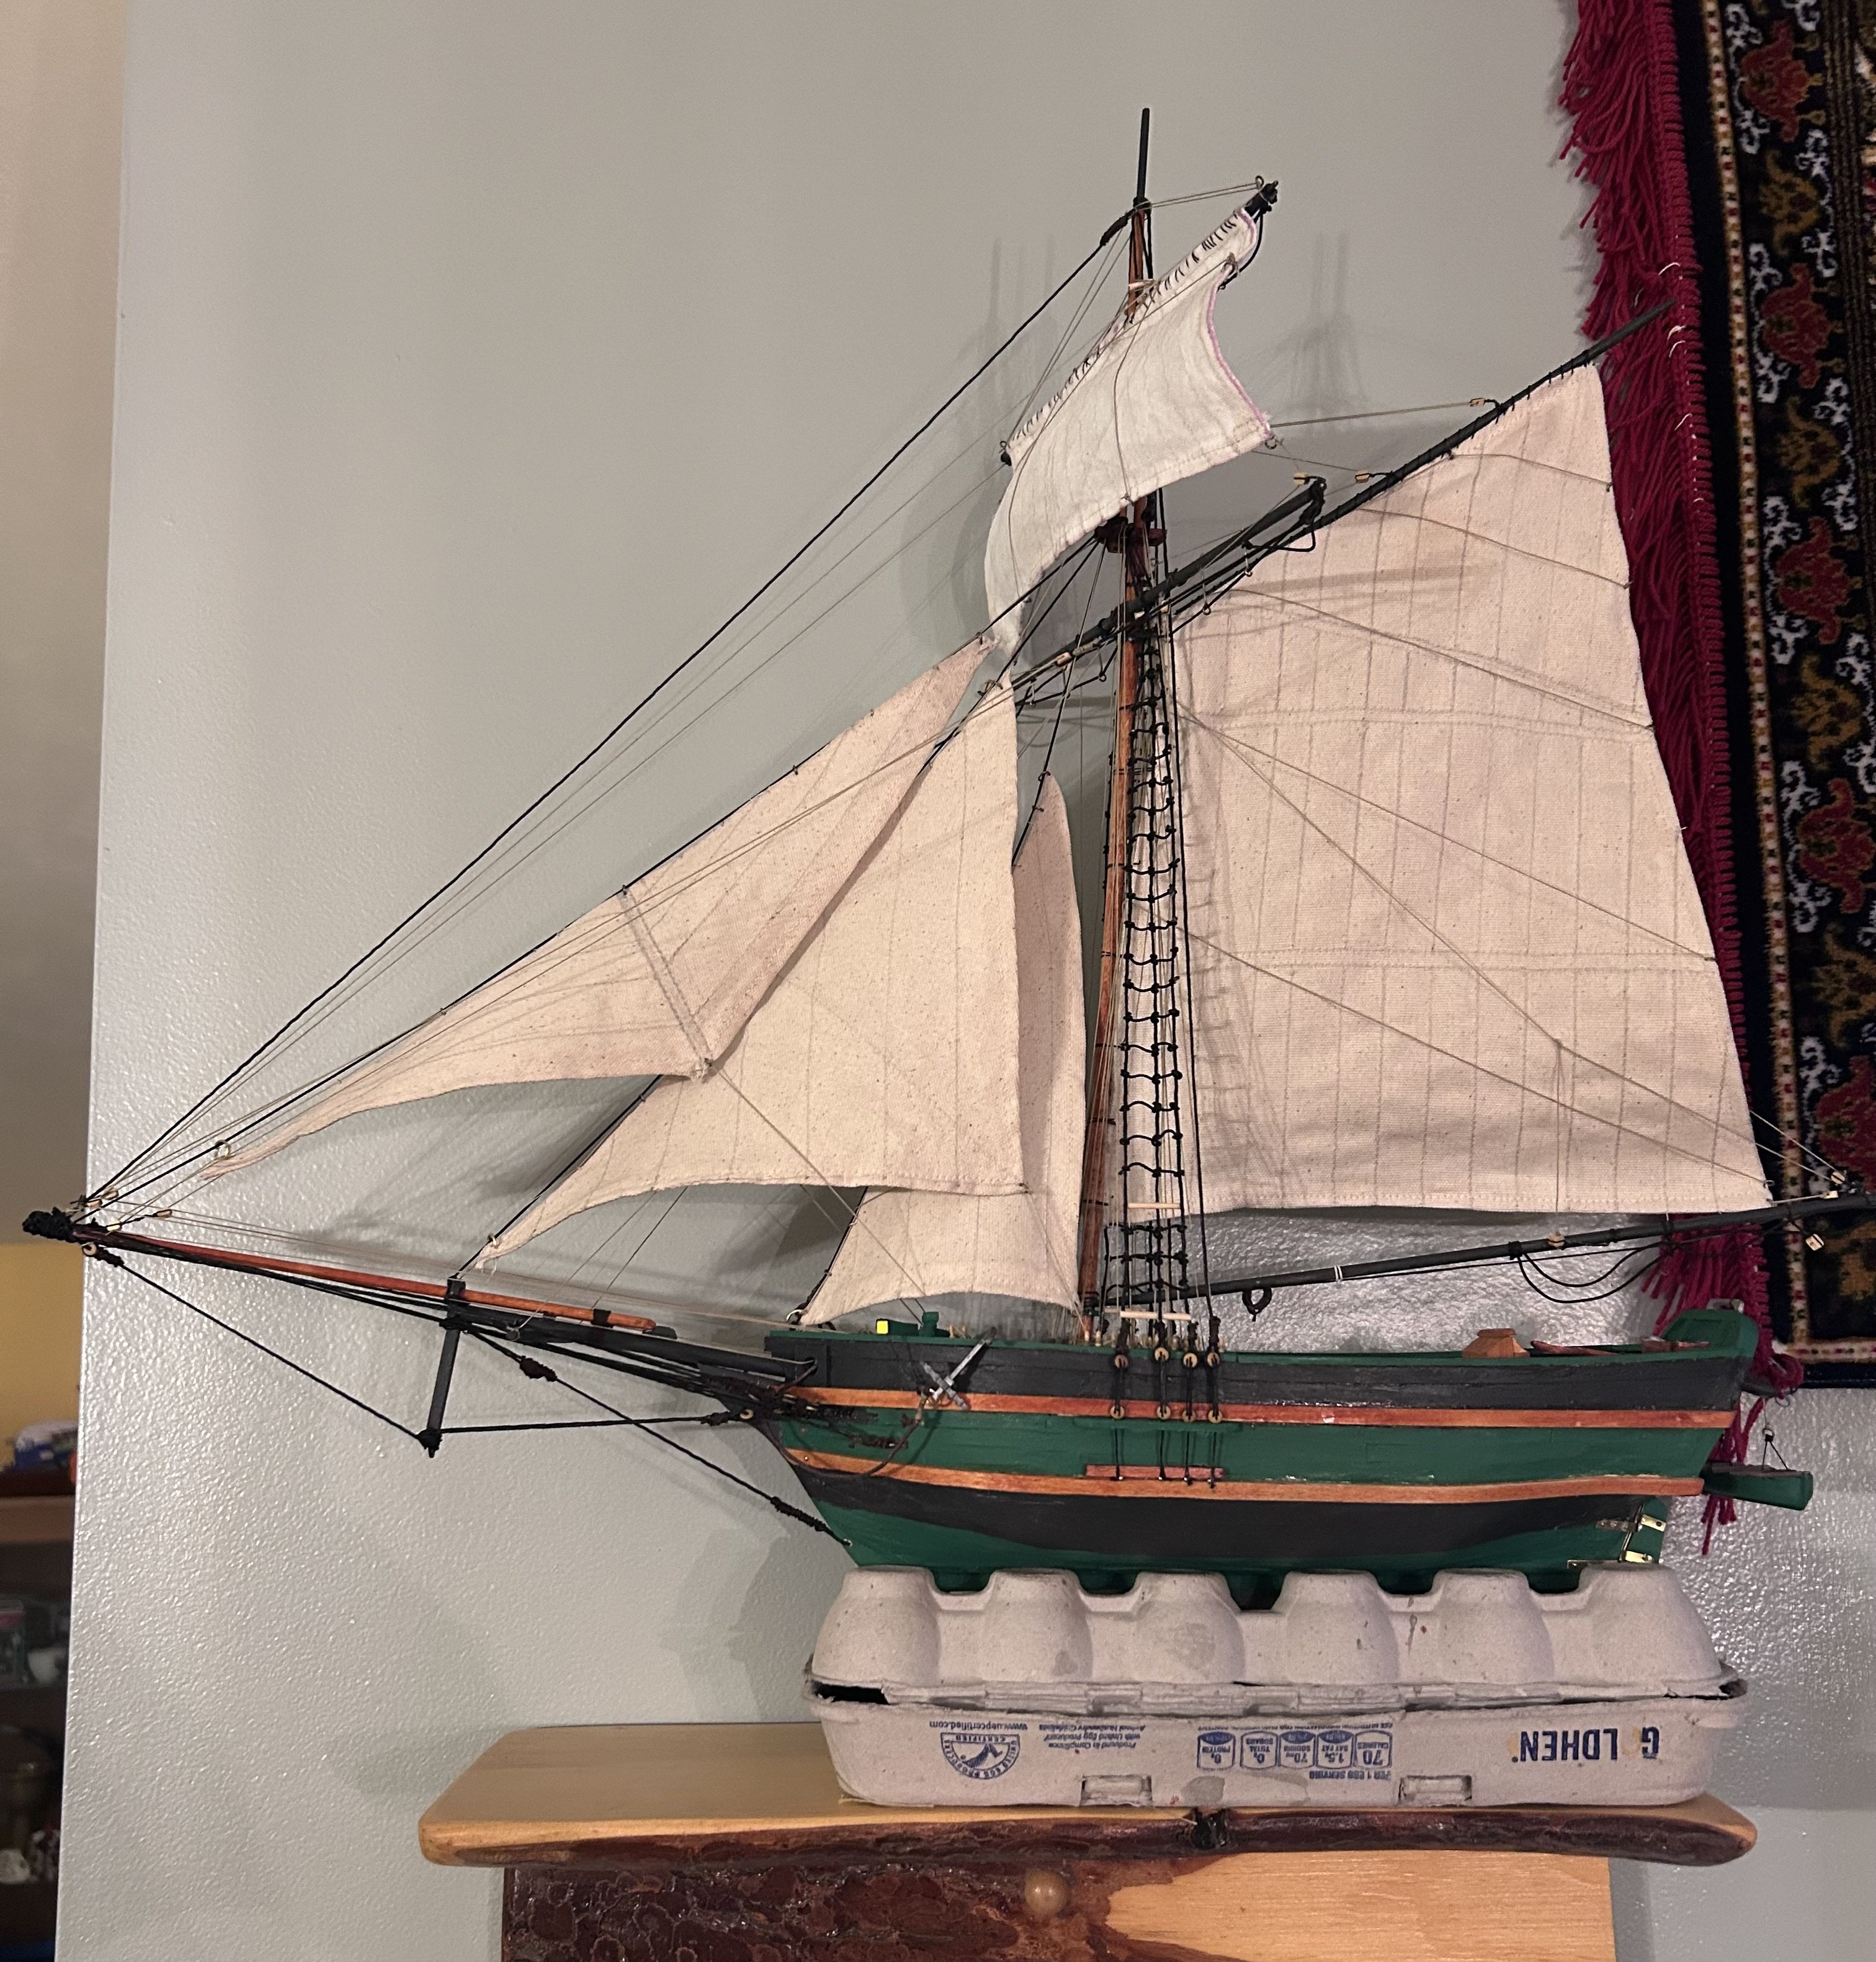
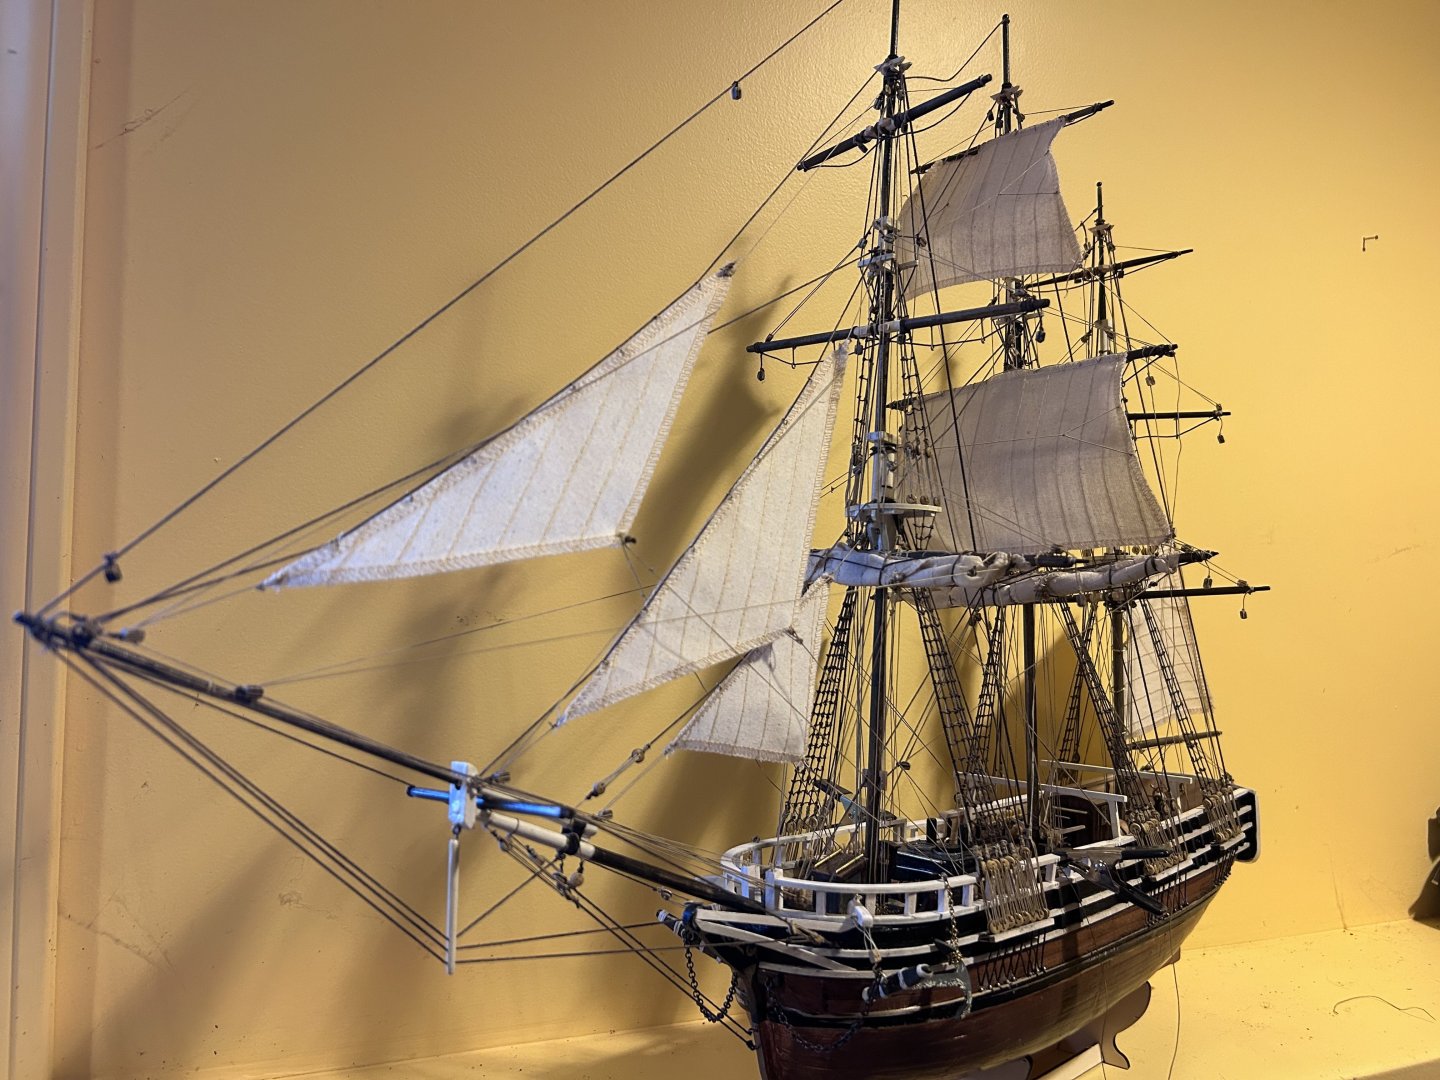
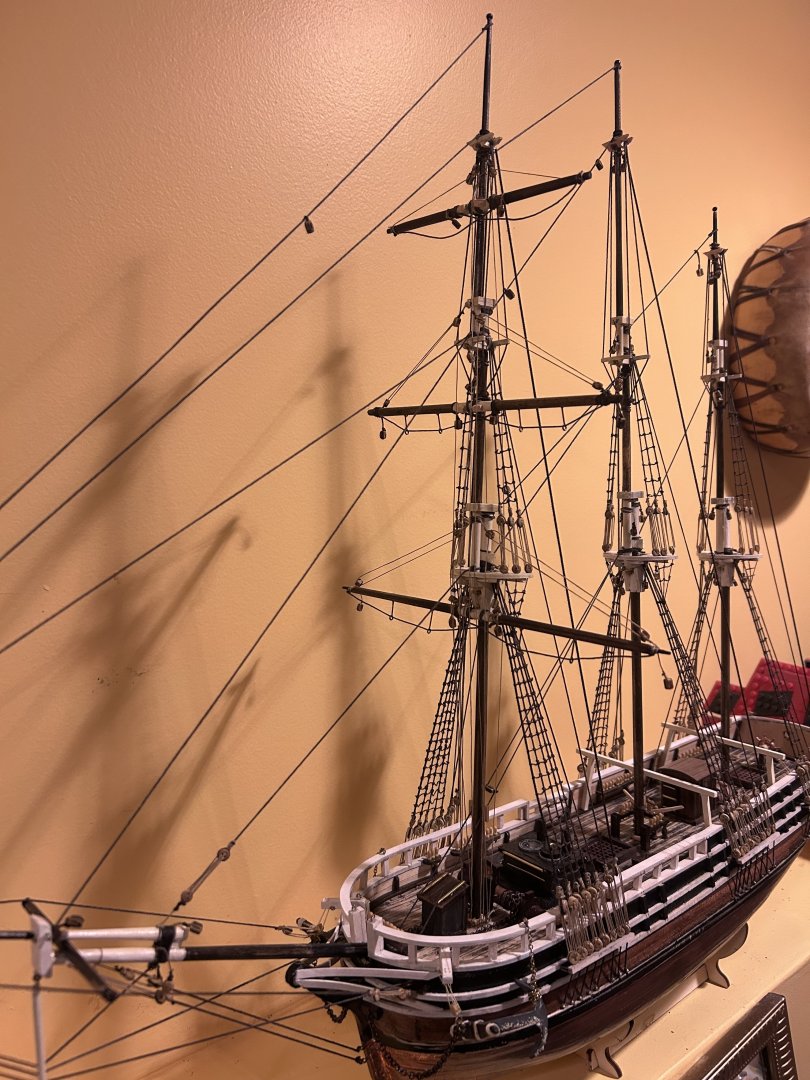
Big update. I added the sails and finished the rigging. The rigging is not perfect and I may have taken a few shortcuts as everything gets so jumbled up anyway that no one will notice some lines that don’t fully reach the deck. One thing that kept bugging me was the anchor chain. I hated that it dangled so far and so finally I went back and fixed it. All that remains is: - small boats installation - hanks on pins - paint touch ups - small details on deck


-
Progress and some setbacks. I got the sheets installed on the mainsail and that all went well until I realized part of the reason I was getting sag in some of my lines is because I attached the two sets on lines on the sail too high. So it’s pulling in the wrong place on the block it connects to, thus causing sag. I decided then that it really didn’t bother me so much that I needed to redo it. However there was something that did bother me and that was the sag in the jib line, I just couldn’t let it go. And so for that one I went back and tightened the top of the line. It lessened the sag, not totally but enough that I could love with it. The thing I know about these builds is that the ONLY person who ever notices these flaws is me, and if I can live with it everyone else can too. Today it’s on to prepping the remaining four sails.
-
Alright, we’re nearing the main stretch. After deciding to furl the lower sails so as to leave the deck more visible I’ve run into the problem of there being so many lines that it’s hard to tie them to the pegs without pulling on another line or fouling something or other. So really it all boils down to patience and sturdy hands. On the side I’ve also been working on a cheap model from Amazon and doing the preliminary work on the Endurance. I’m quite happy with how the sails turned out. I toyed with some different designs but in the end I opted for just furling the sails provided in the kit.

-
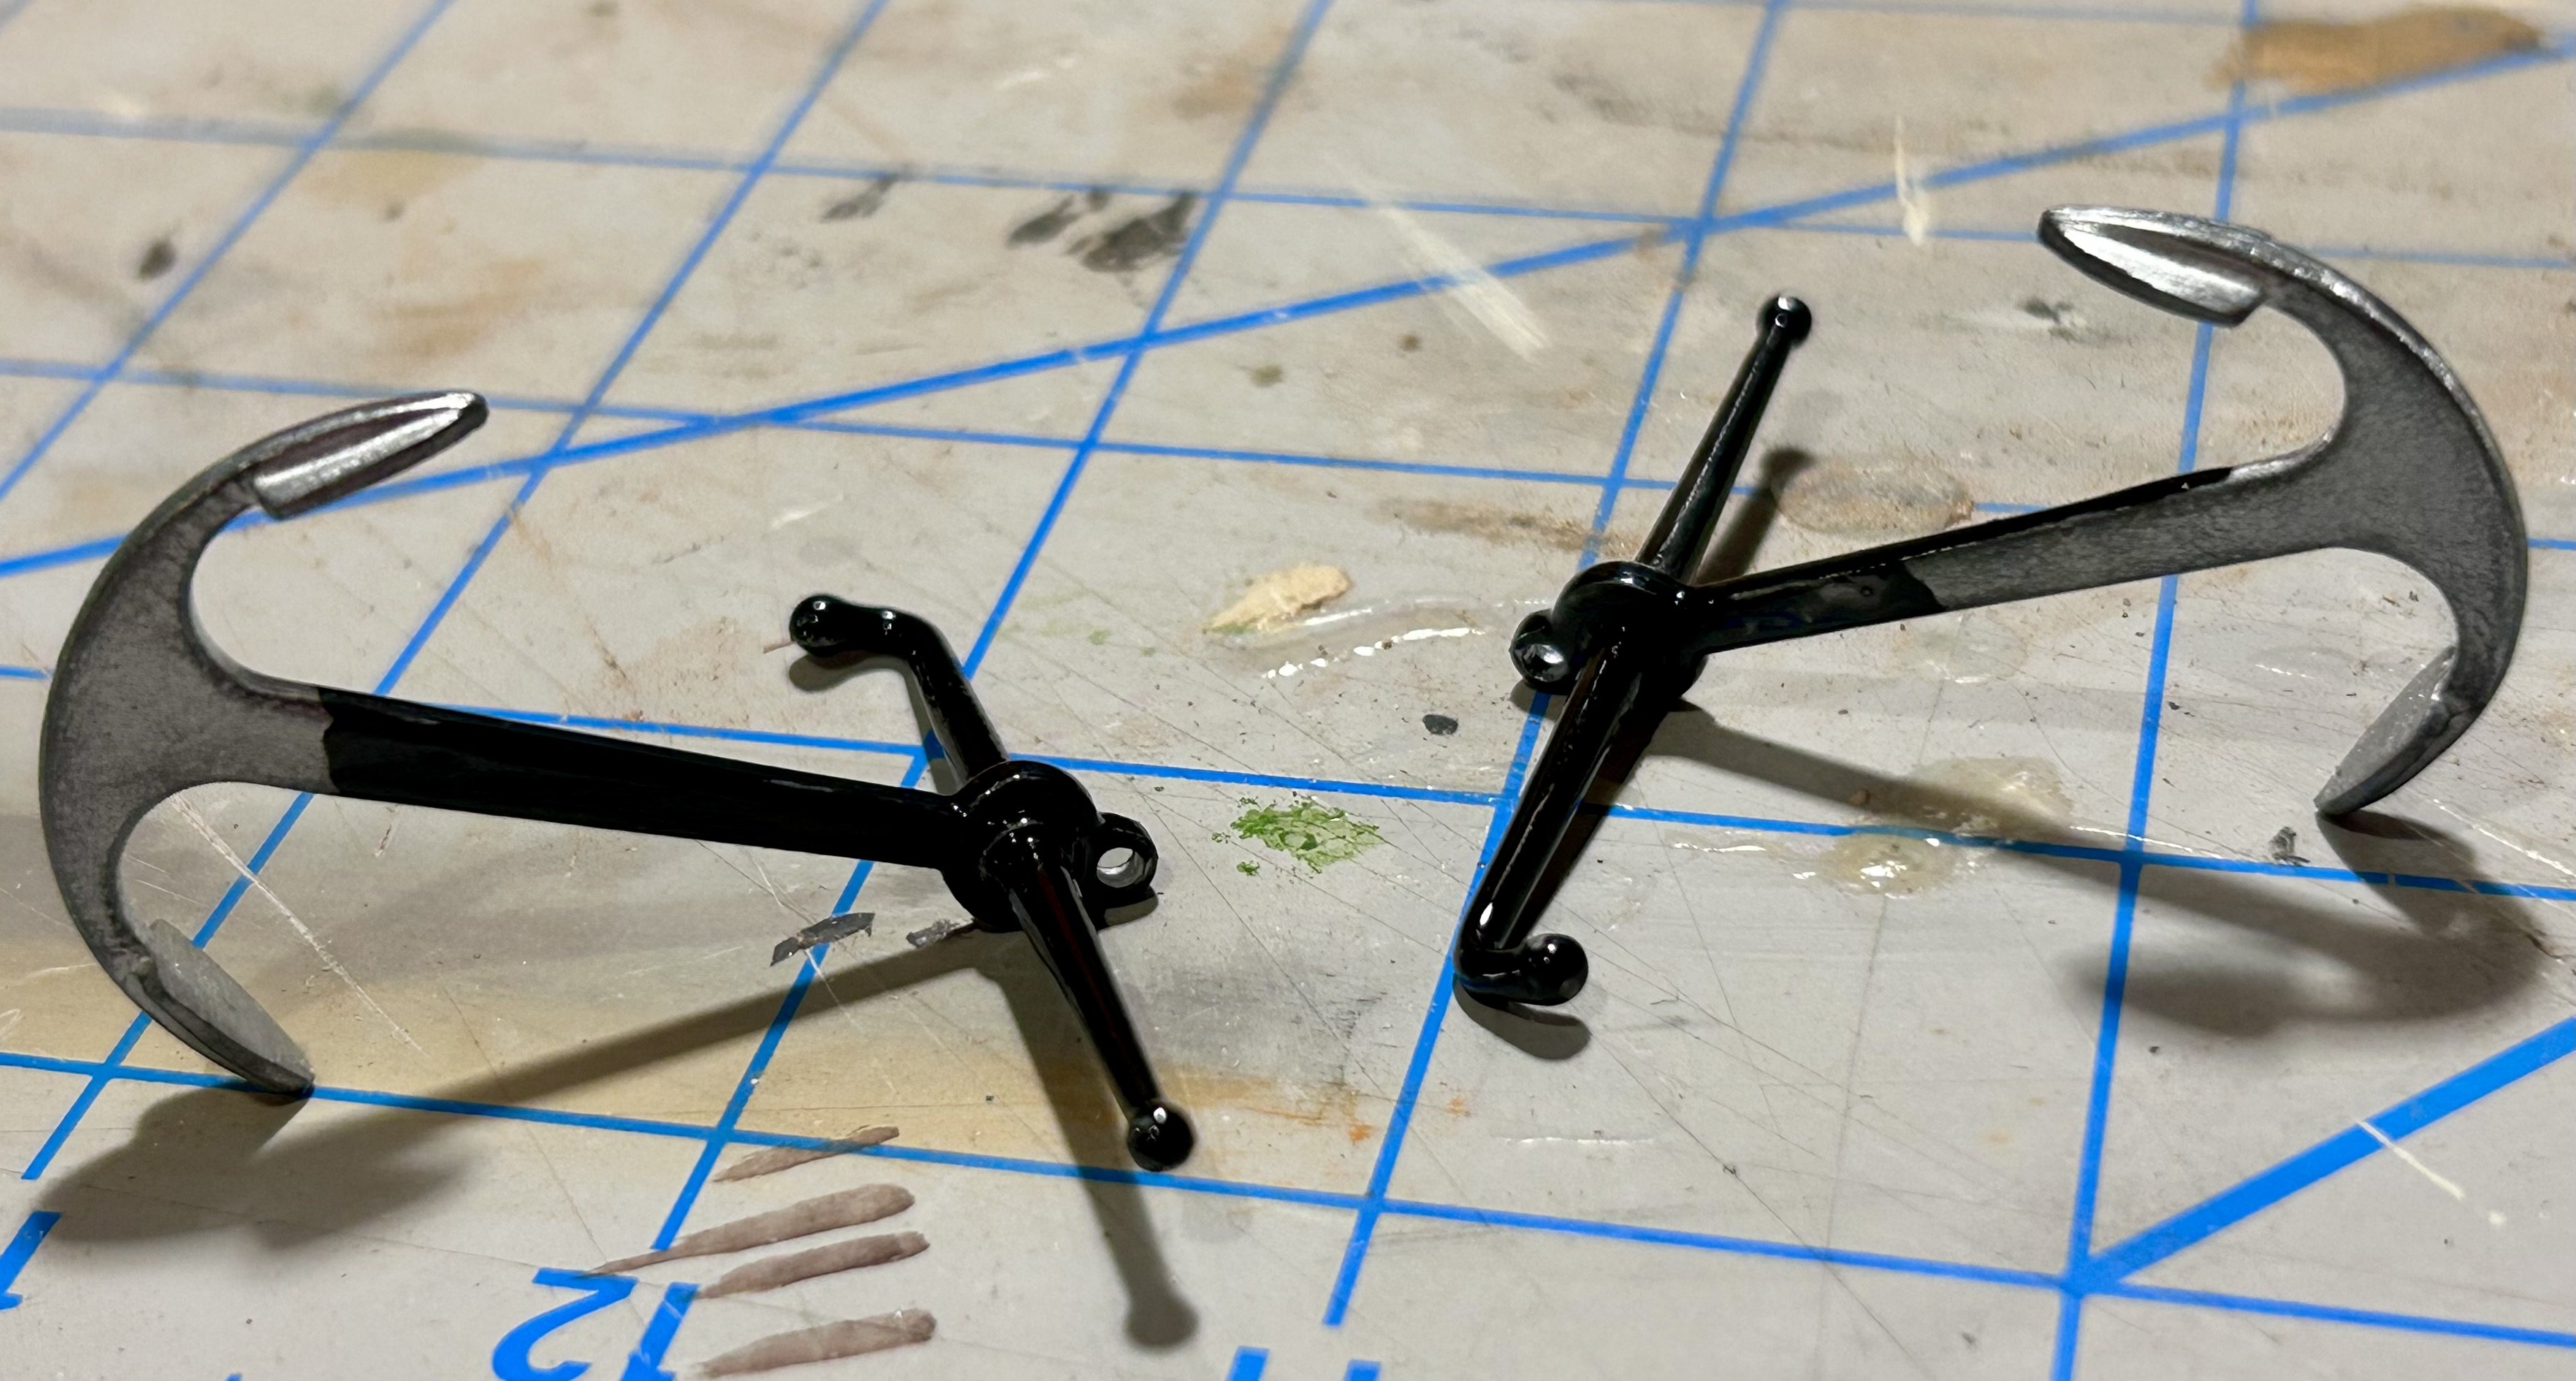
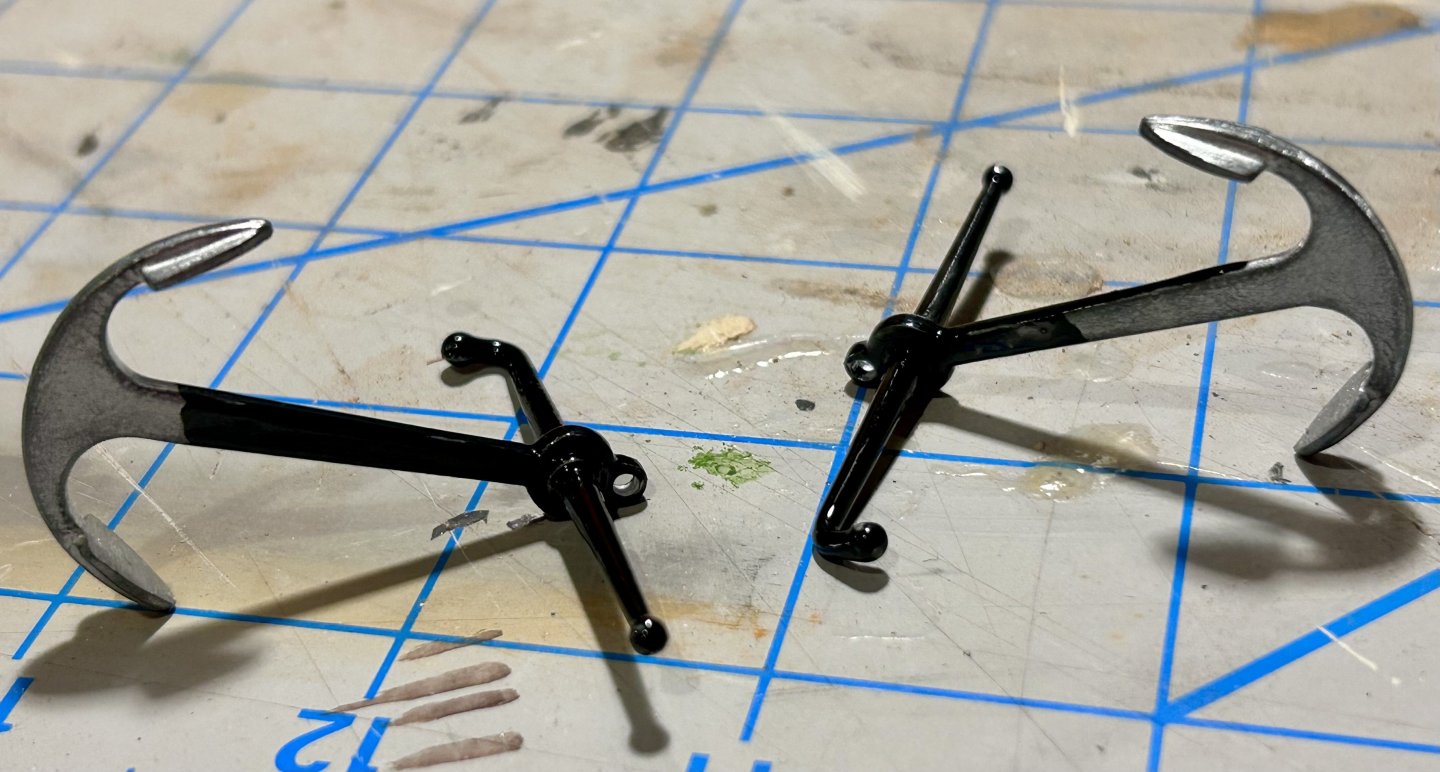
In today’s session I got to work cutting down the main bulkhead in the two areas I want to add my own touches to, namely the space for the windlass beneath the forecastle and the adjustment to the propeller space, making it rectangular as opposed to the semicircle it has standard in the kit. This follows in the footsteps of many other builders I’ve seen on here. Additionally I ordered some resin stanchions from a guy with a resin printer that @theoracle09 designed as that option is far more affordable than the brass ones which I was able to find, at minimum, for $8 for a pack of 10. As I got the ship on Black Friday I really didn’t feel like spending half the price of the ship on stanchions. Finally, I finished the anchors paint job off. As I said in a previous post, I opted for enamel even though it leaves the anchors shiner than I’d prefer, but! In my head narrative that’s just because they have a fresh coat of the paint they would regularly repaint them with. Something not removed from reality at all as I know many ships that have the shiny paint on any and every surface. Total time 2 hours

-
Thanks for the input. After part time volunteering two summers now on a tall ship here in Michigan I think the thing I love most about doing these builds are the “flavors of life,” the little touches that reject perfection and embrace these being working ships that were apt to get scuffed, damaged, and dirty
-
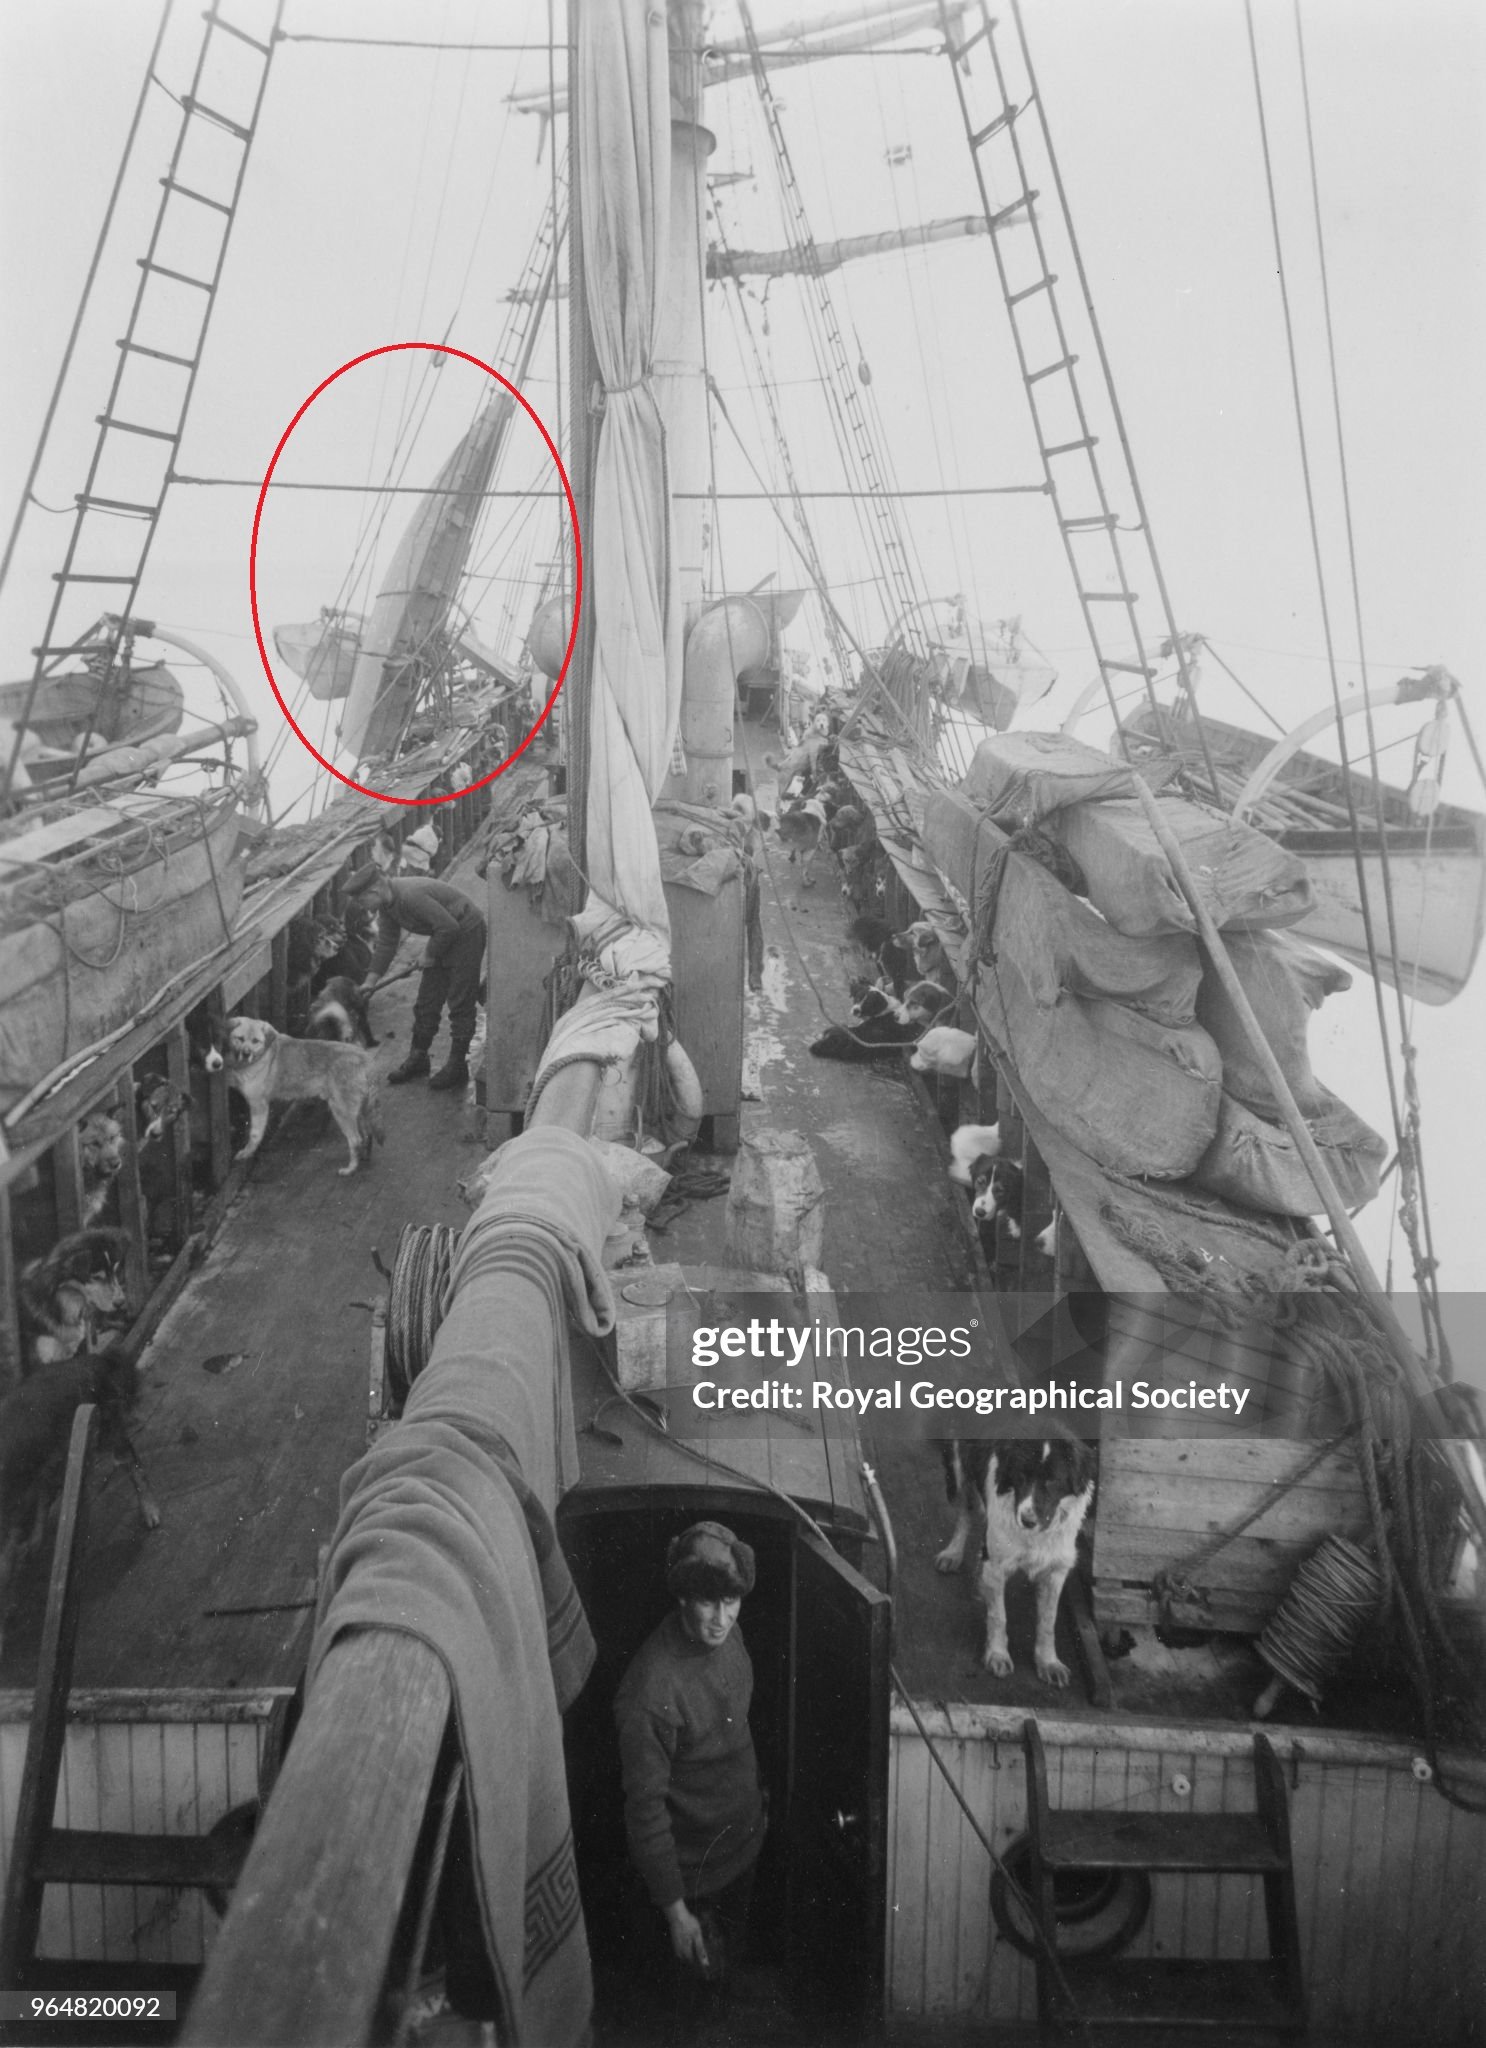
So in my early research in trying to get this ship designed I noticed there appears to be an extra boat lashed to the main mast's ratlines. As I'm doing some planning ahead I'm wondering if this would be a worthy addition to the build as it adds more flavor to the build. I recognize that might be me getting very ahead of myself but I think it's worth considering. @Tomculb any thoughts on this that could help?

-
The jibs are in place as is the mizzen sail. I’m currently trying to find an effective way to shape the sails and would appreciate any suggestions that are effective.

-
Today it was the outer and staysail jibs. I love this part of the build when I start to really see it all coming together. I’ve got a lot of work to do yet but we’re making progress and getting closer
-
Starting off I wanted to do something small I could work into my rotation as I finish off Essex so I took to the anchors. I’ve seen some different choices for paint/staining on these and I opted for enamel paints. It gives it a little more of a shine than I’d prefer to be there so I’m not totally sold on whether I’ll keep this paint or strip it and add another. I found some difficulty in finding a glue that would properly bond the two parts of the anchor—which is part of the reason I went with the enamel because it acts like its own glue, though if anyone has some suggestions for another material I’d happily hear it out.
-
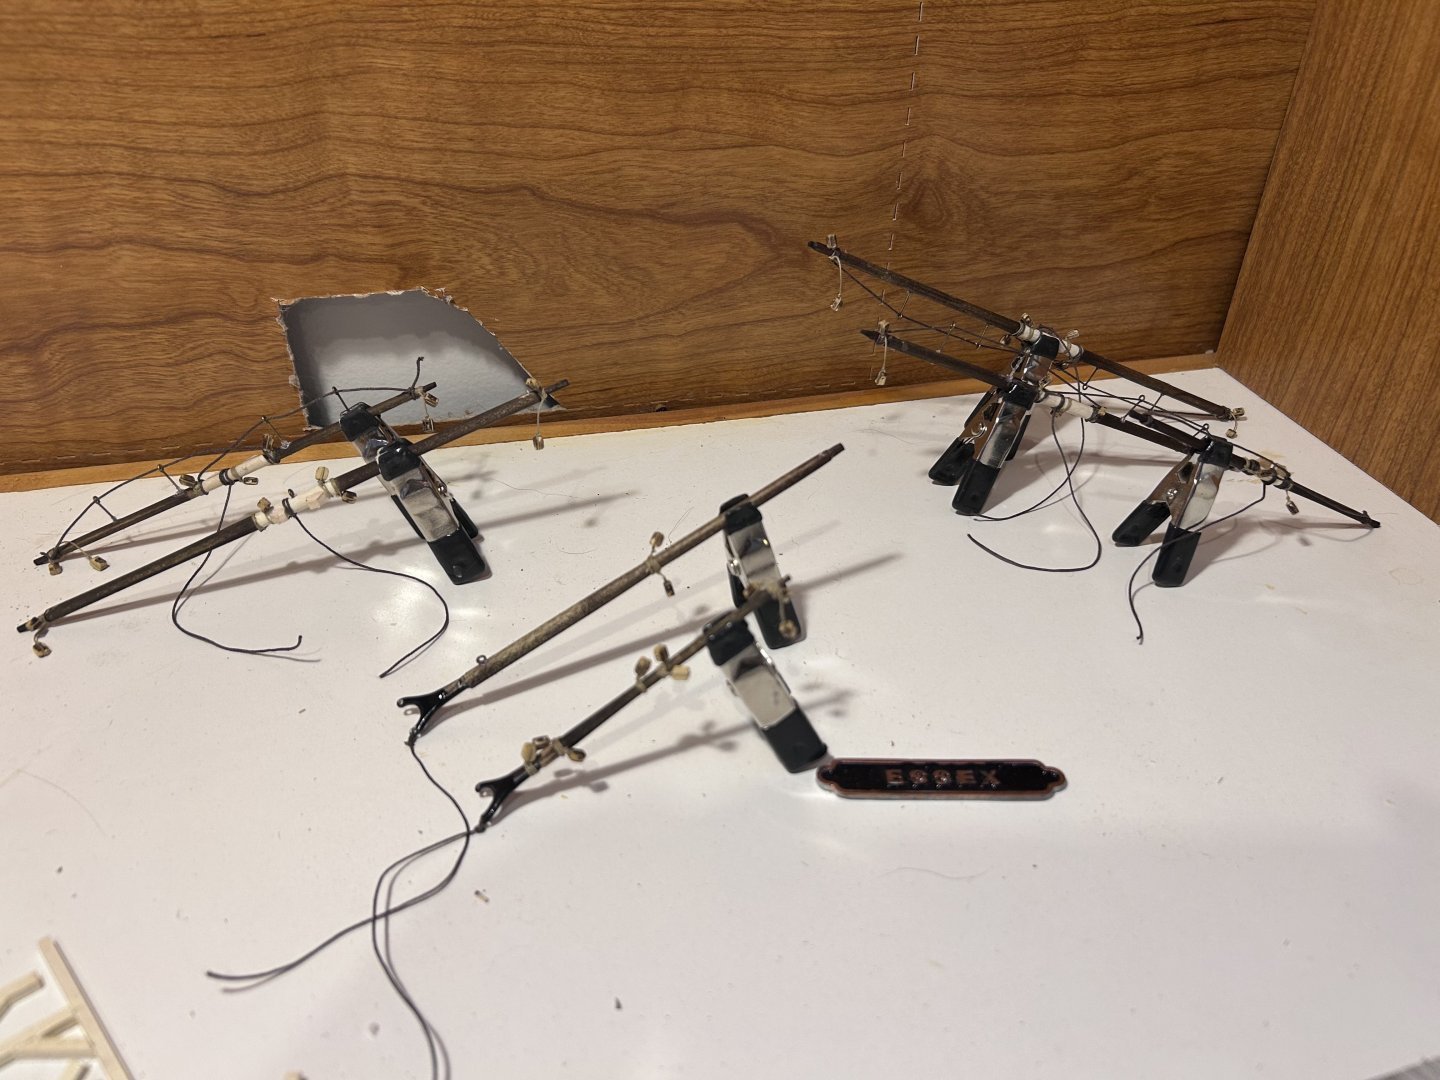
Got the yards on the mizzen finished. Next up will be lines and then the long work of sheets before I reach the finishing touches.

-
Got back to the shipyard and finished off the yards on the main mast. Of course I realized I somehow forgot one of the yards for the mizzen, so I’ll have to backtrack to get that together before I can put the finishing touches on the yard rigging.

-
Finished the yards today, time for a few days off for a family Christmas.
-
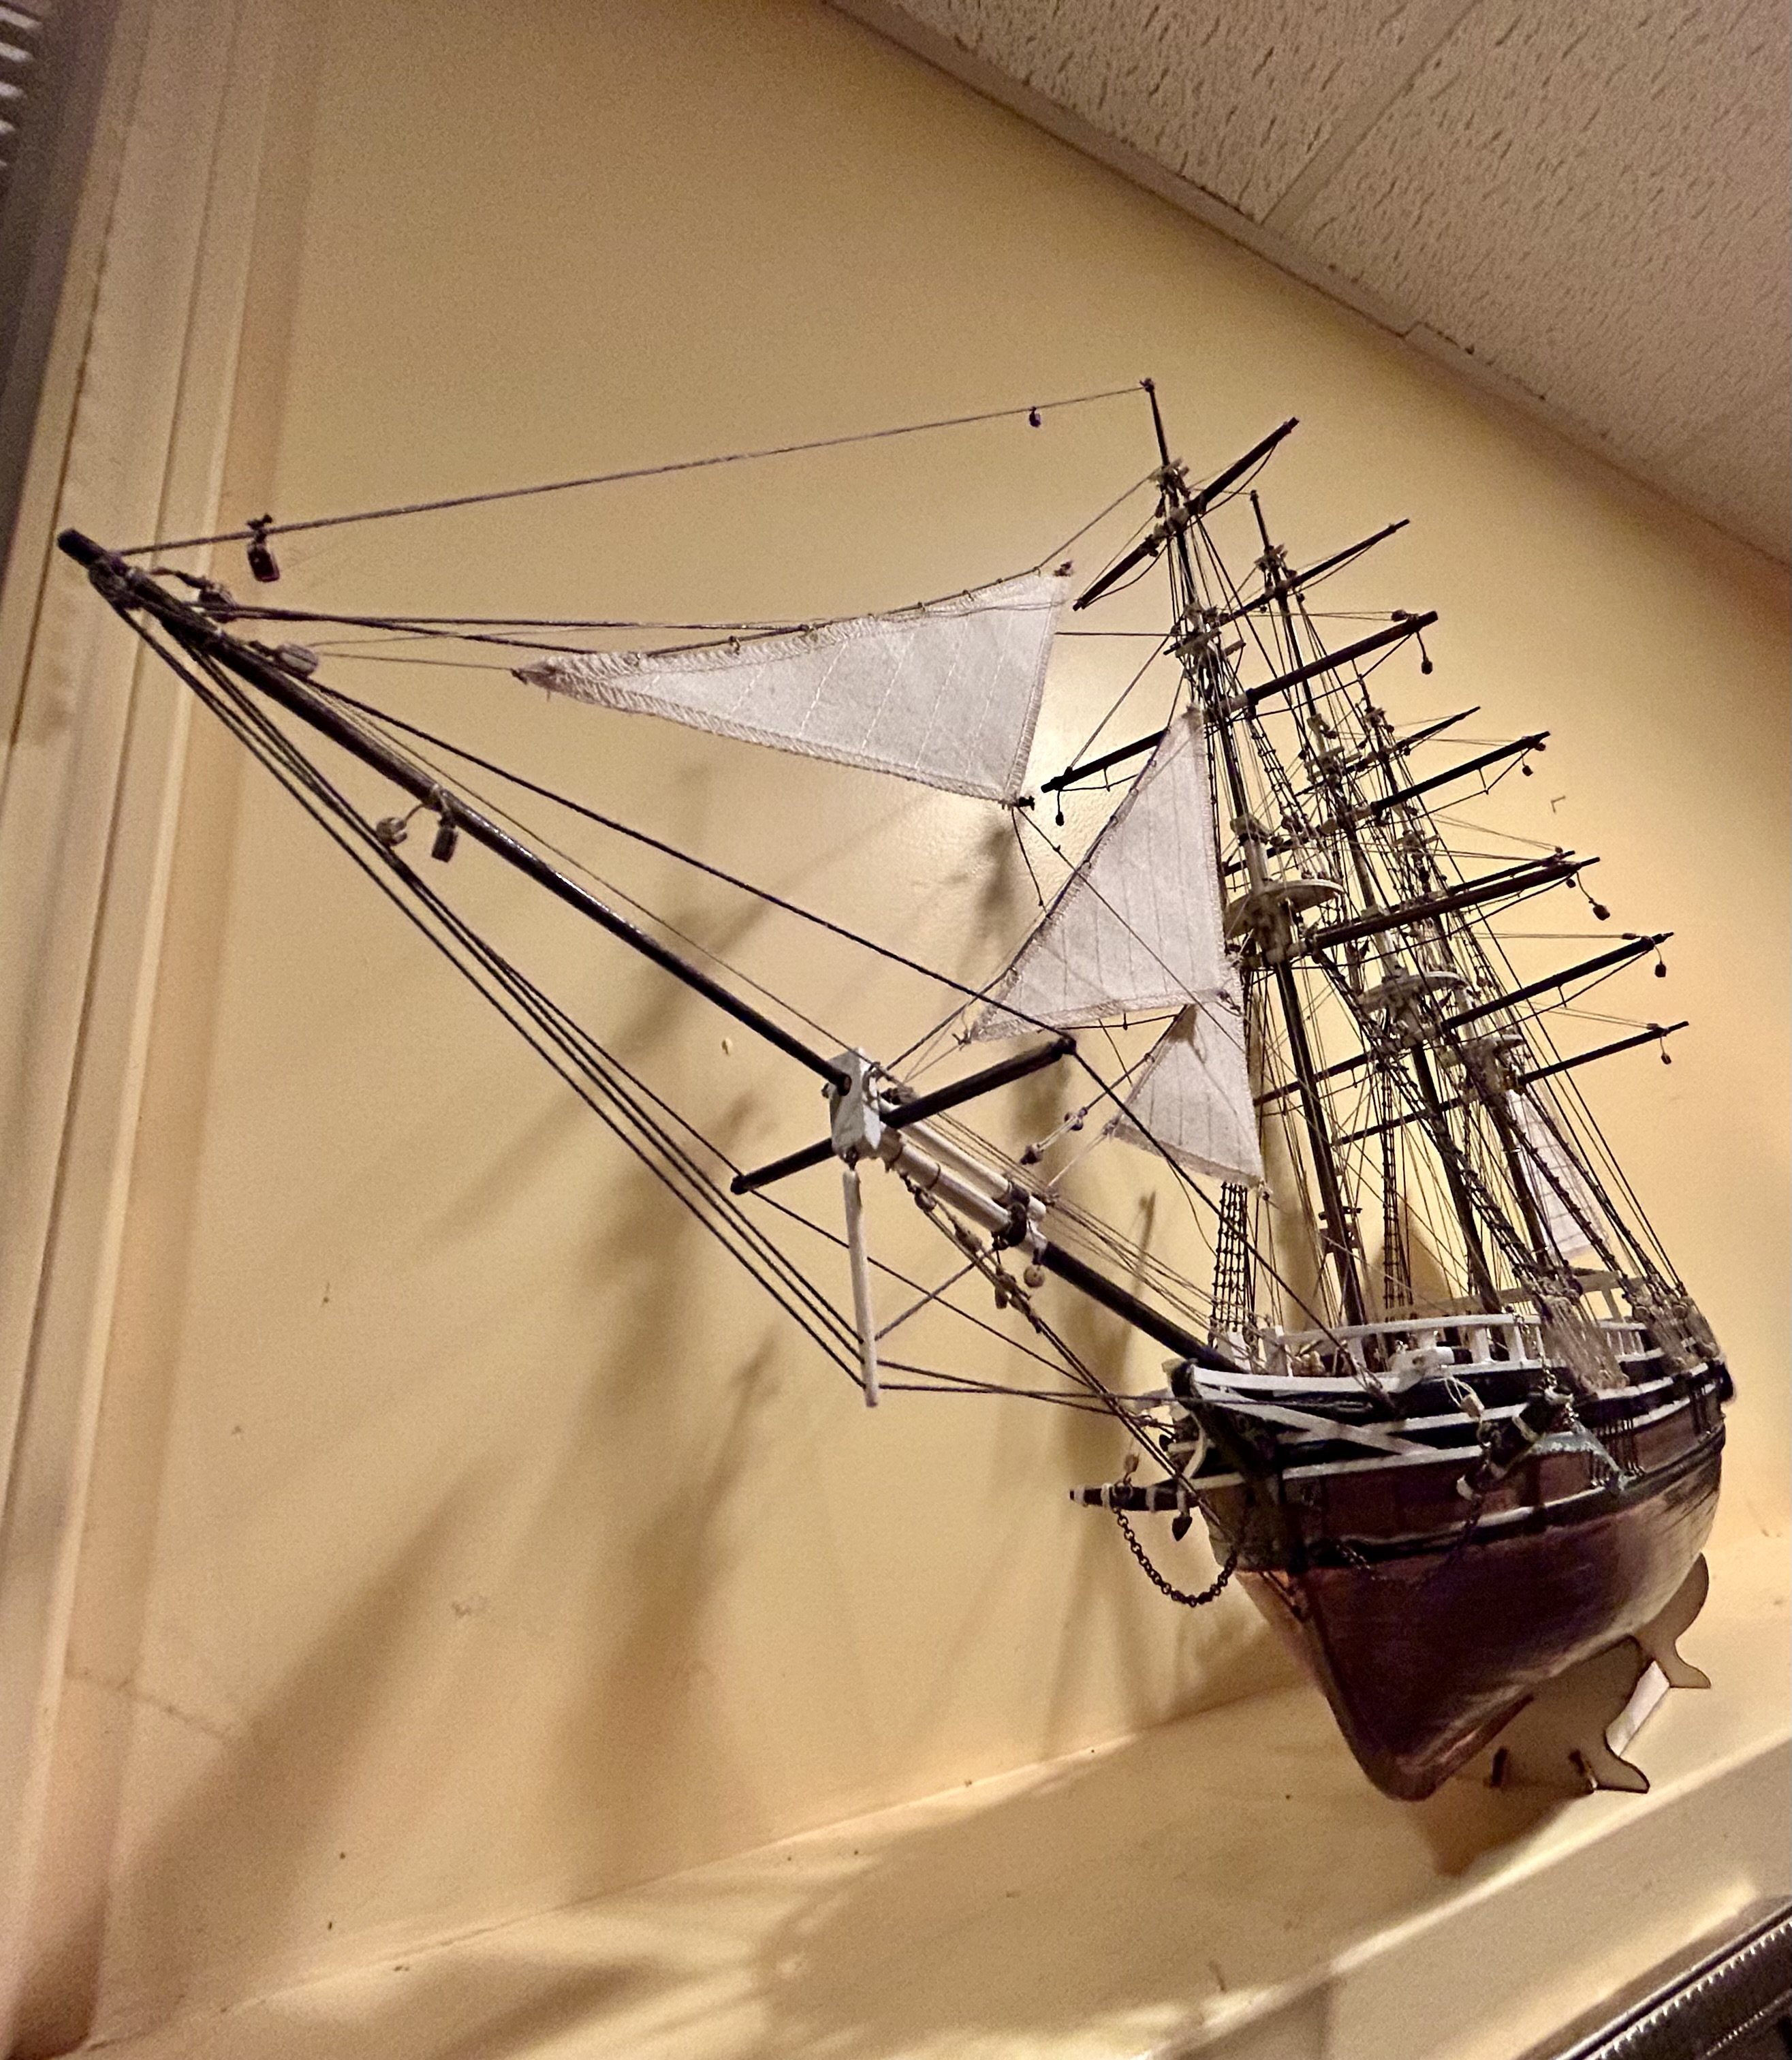
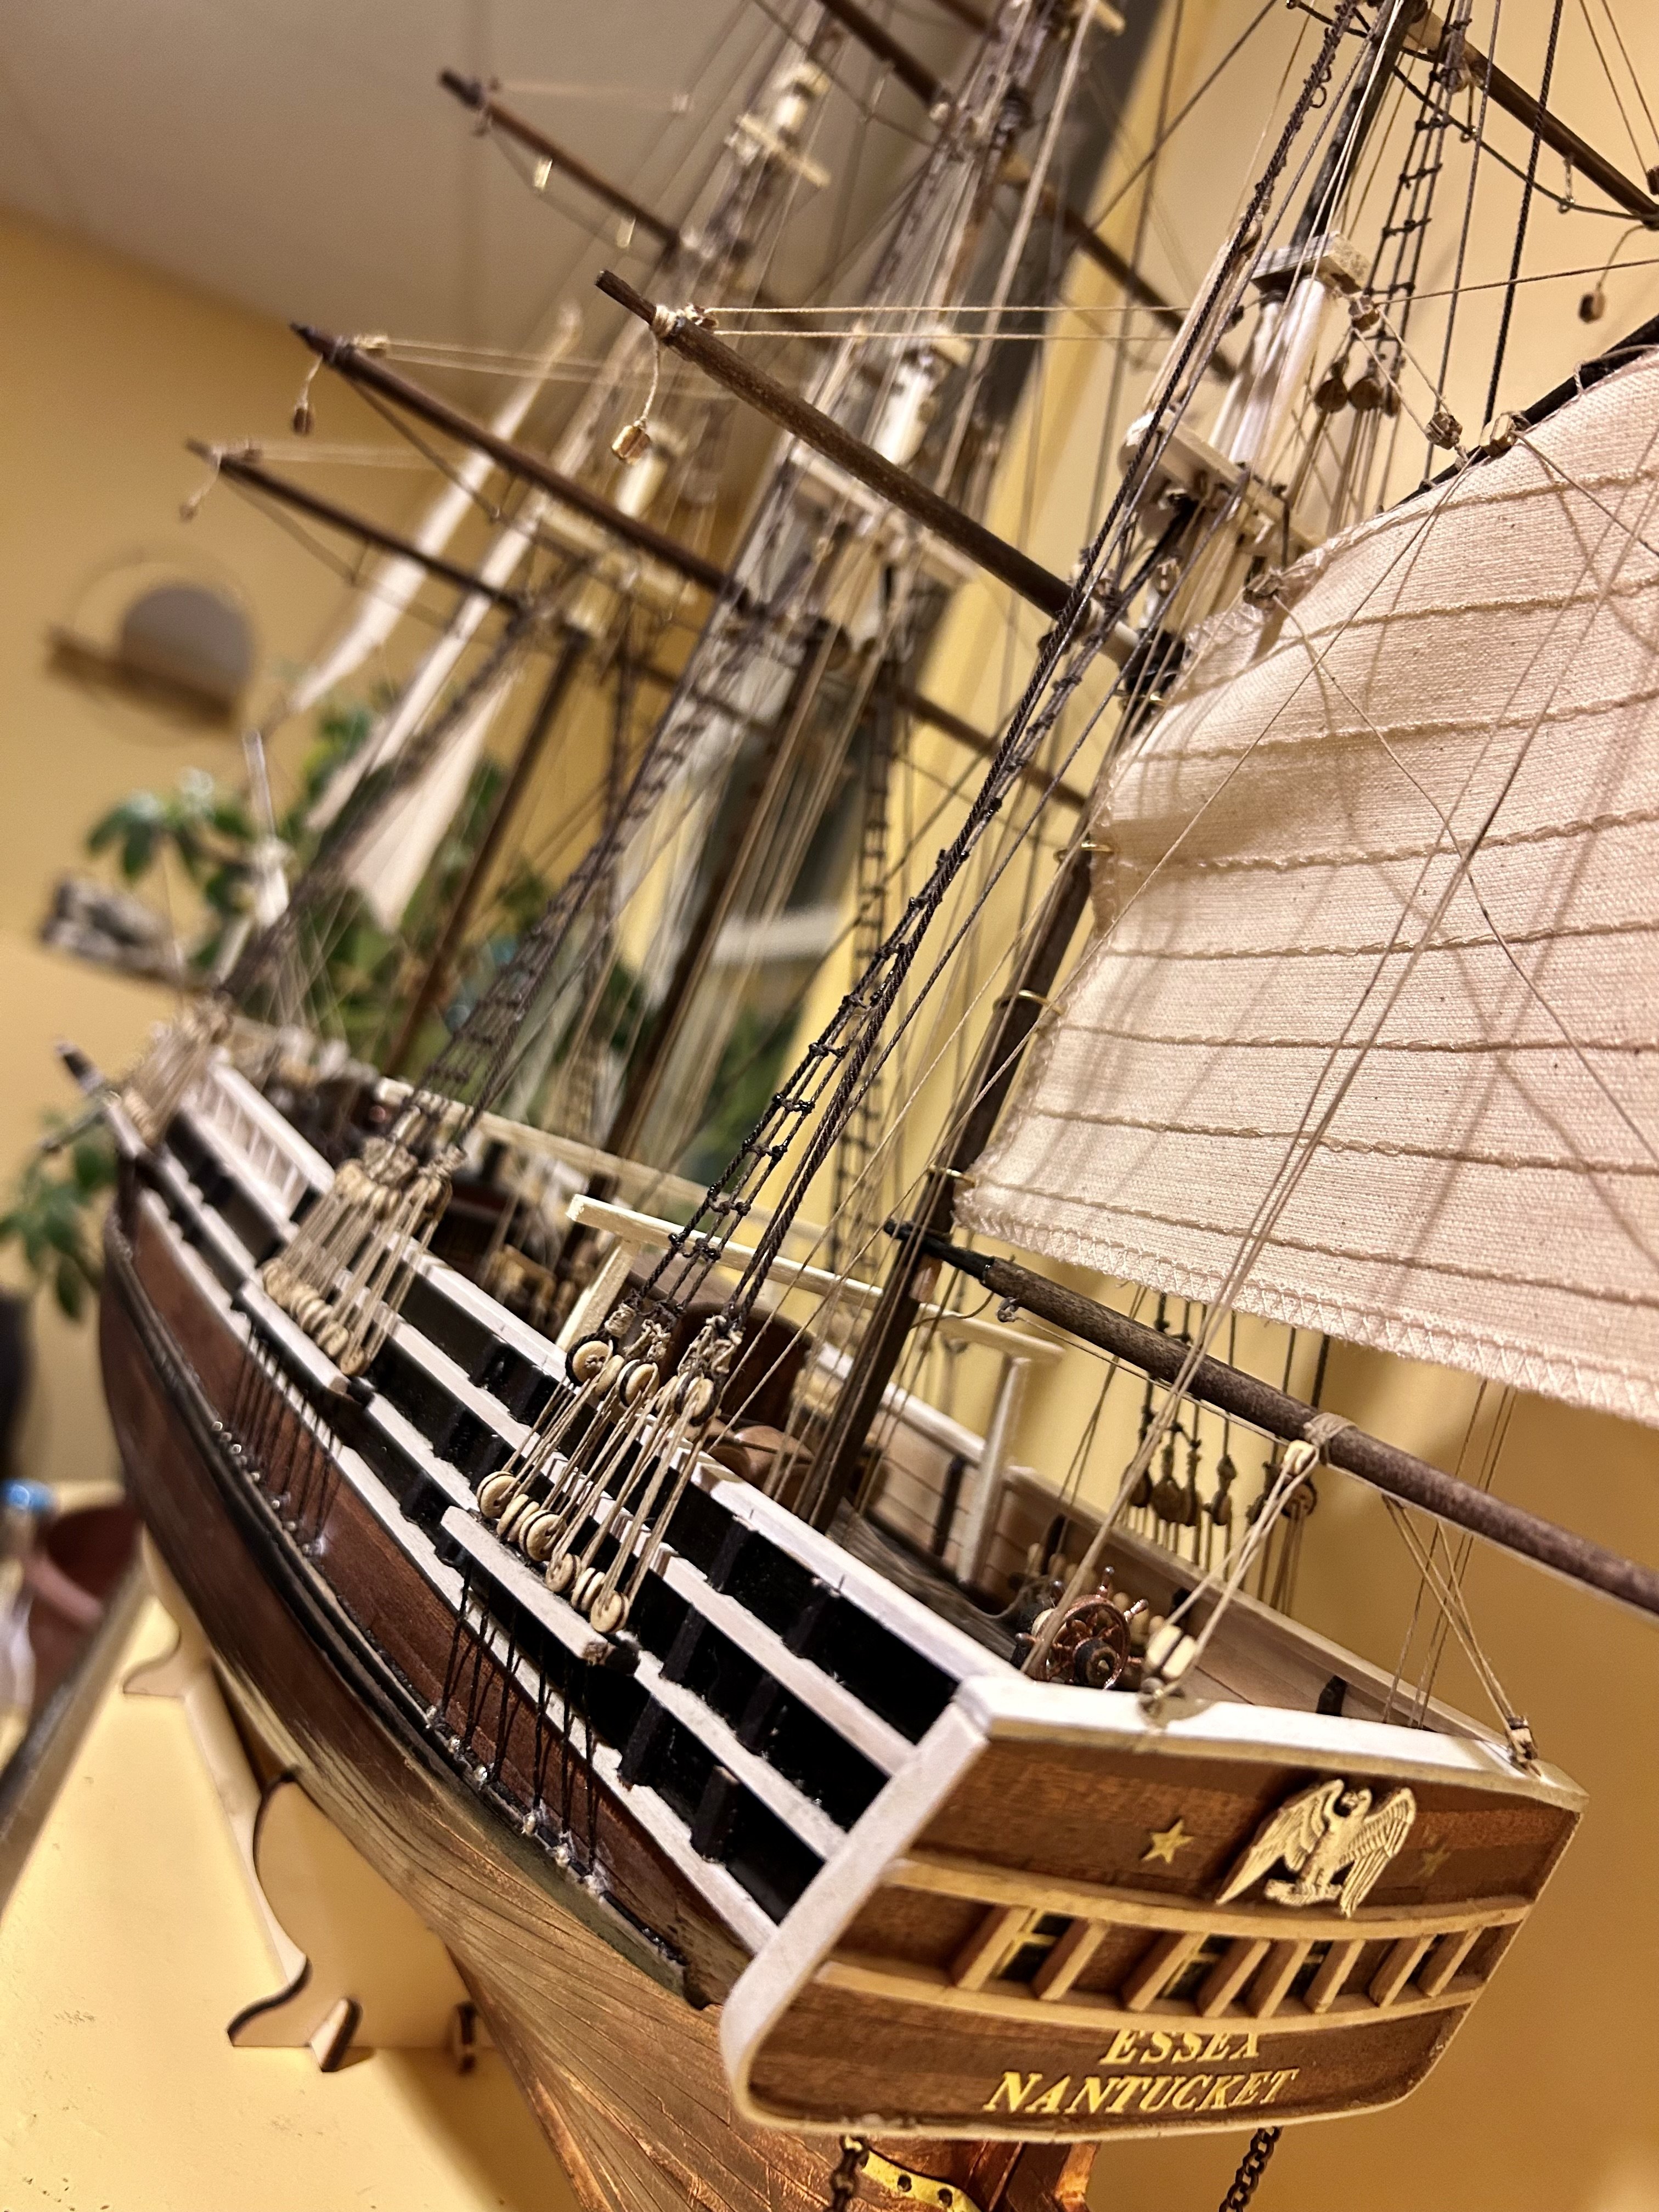
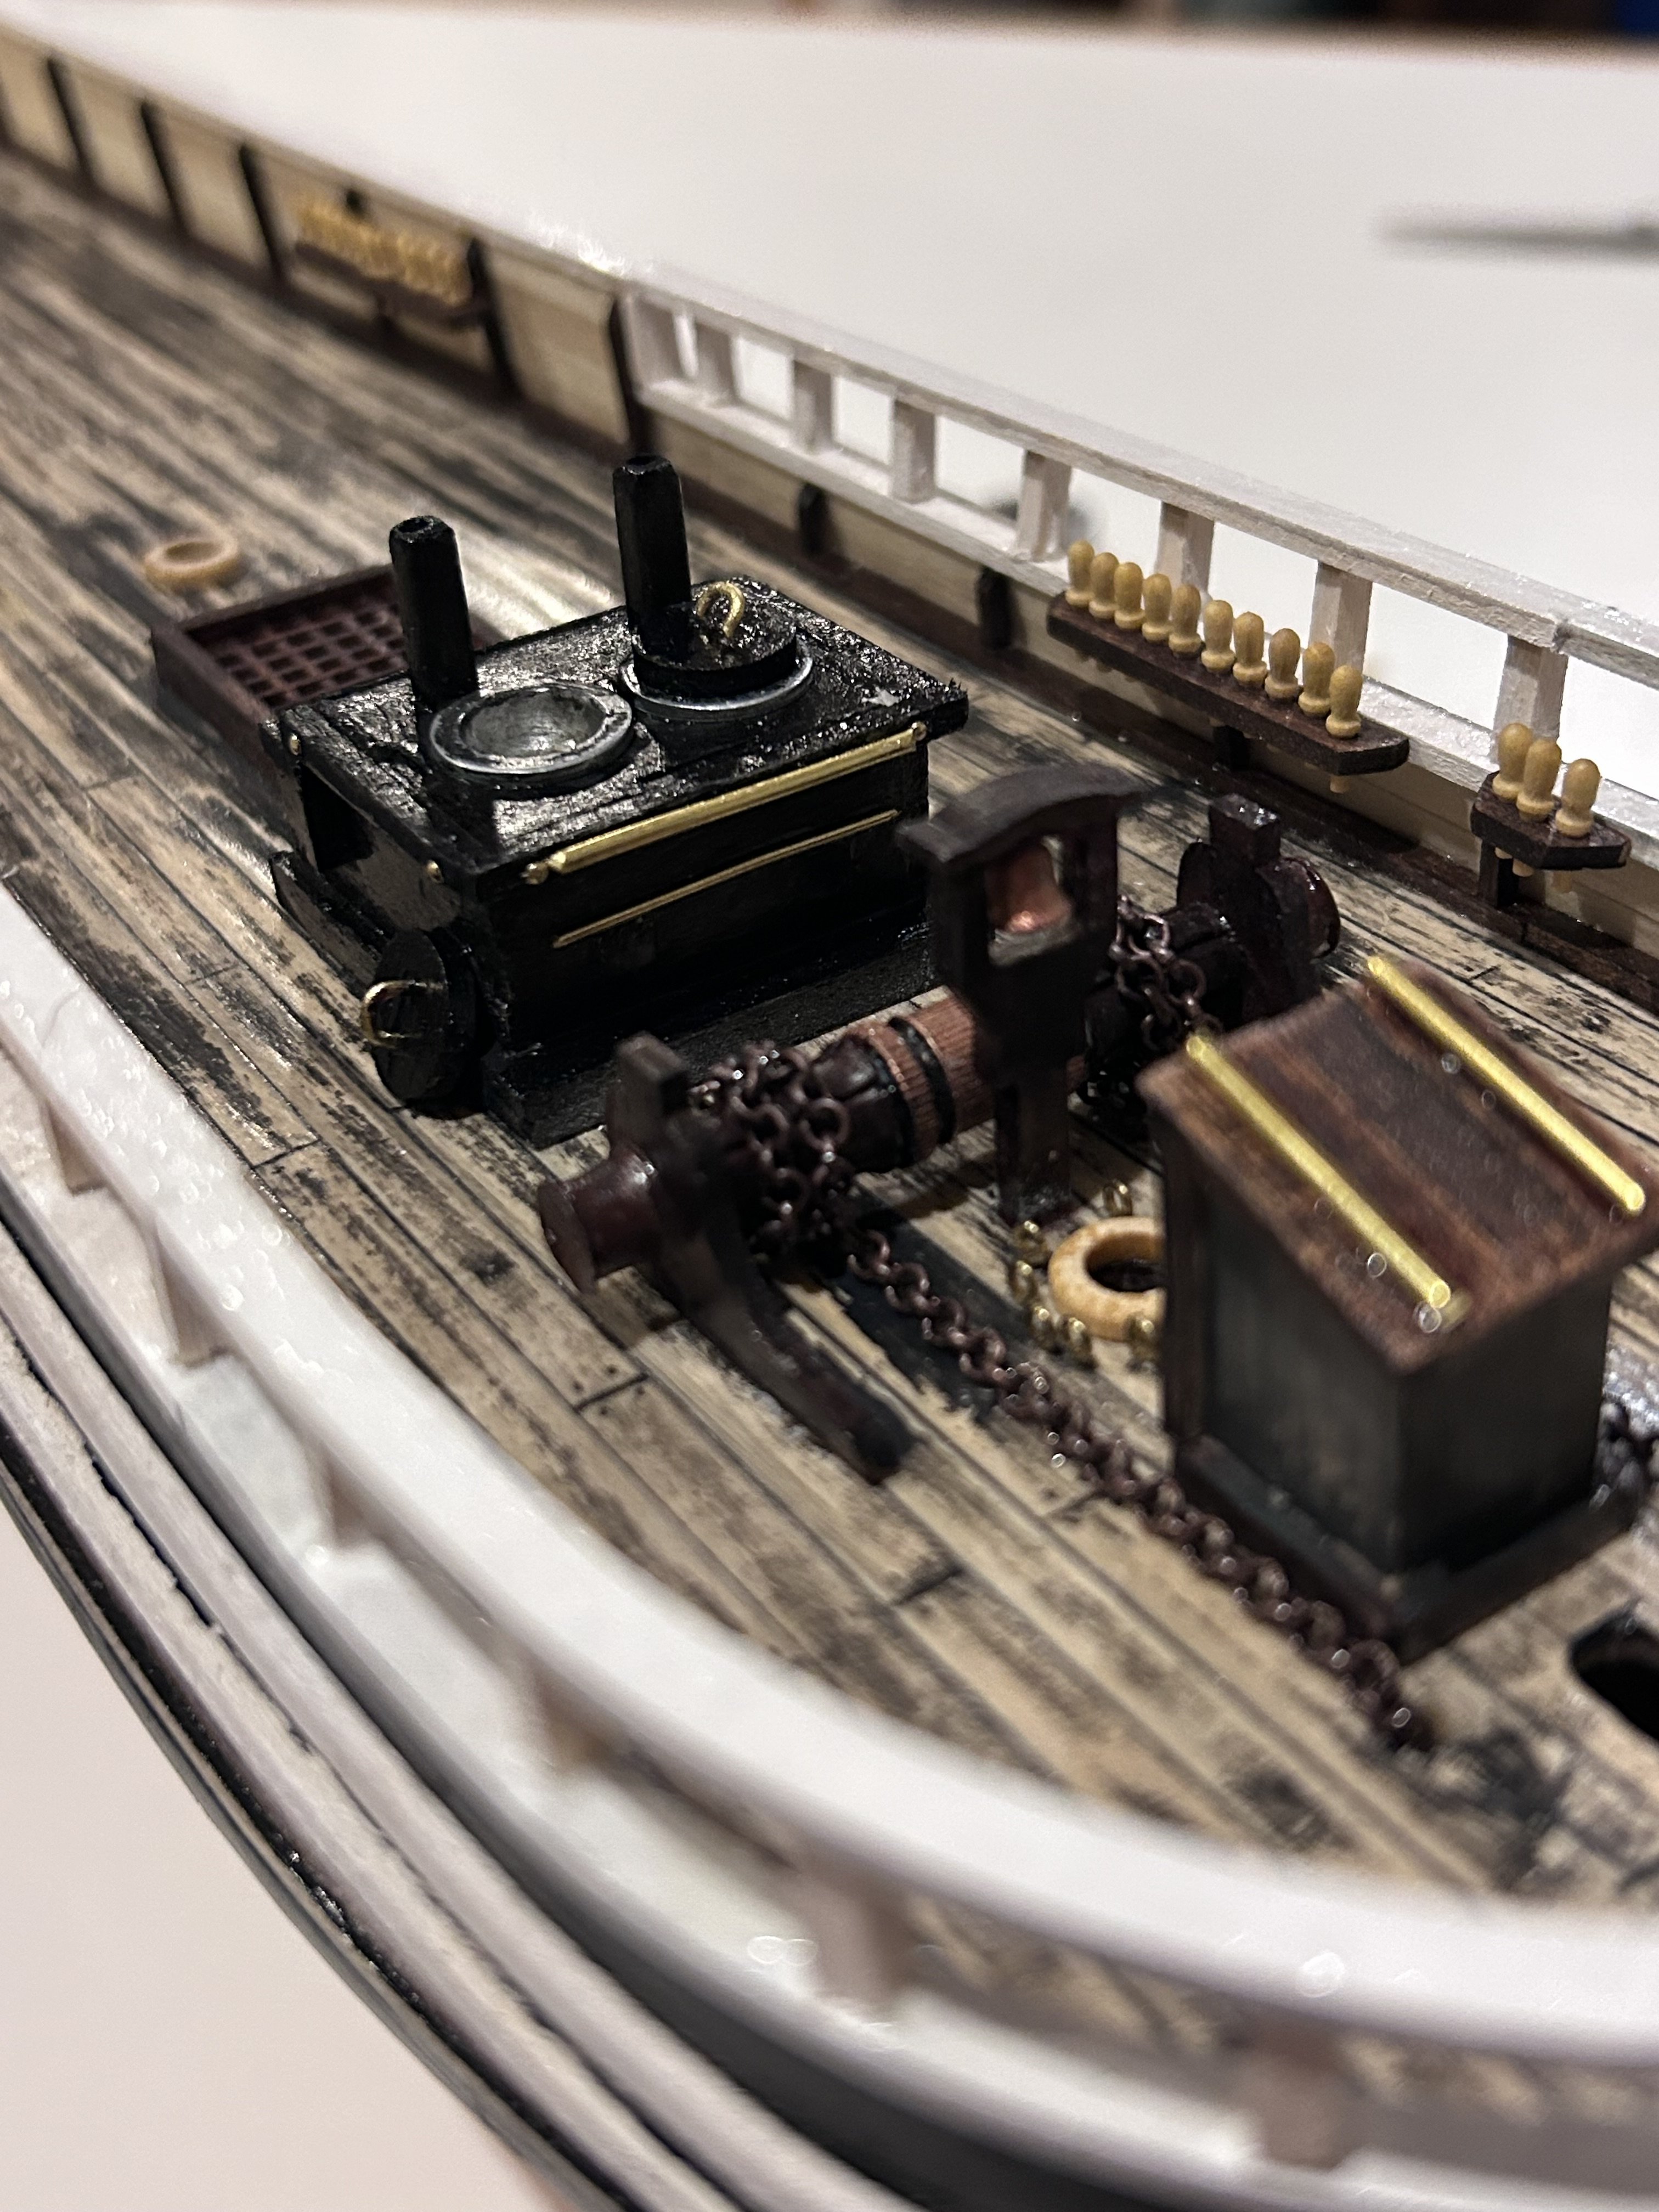
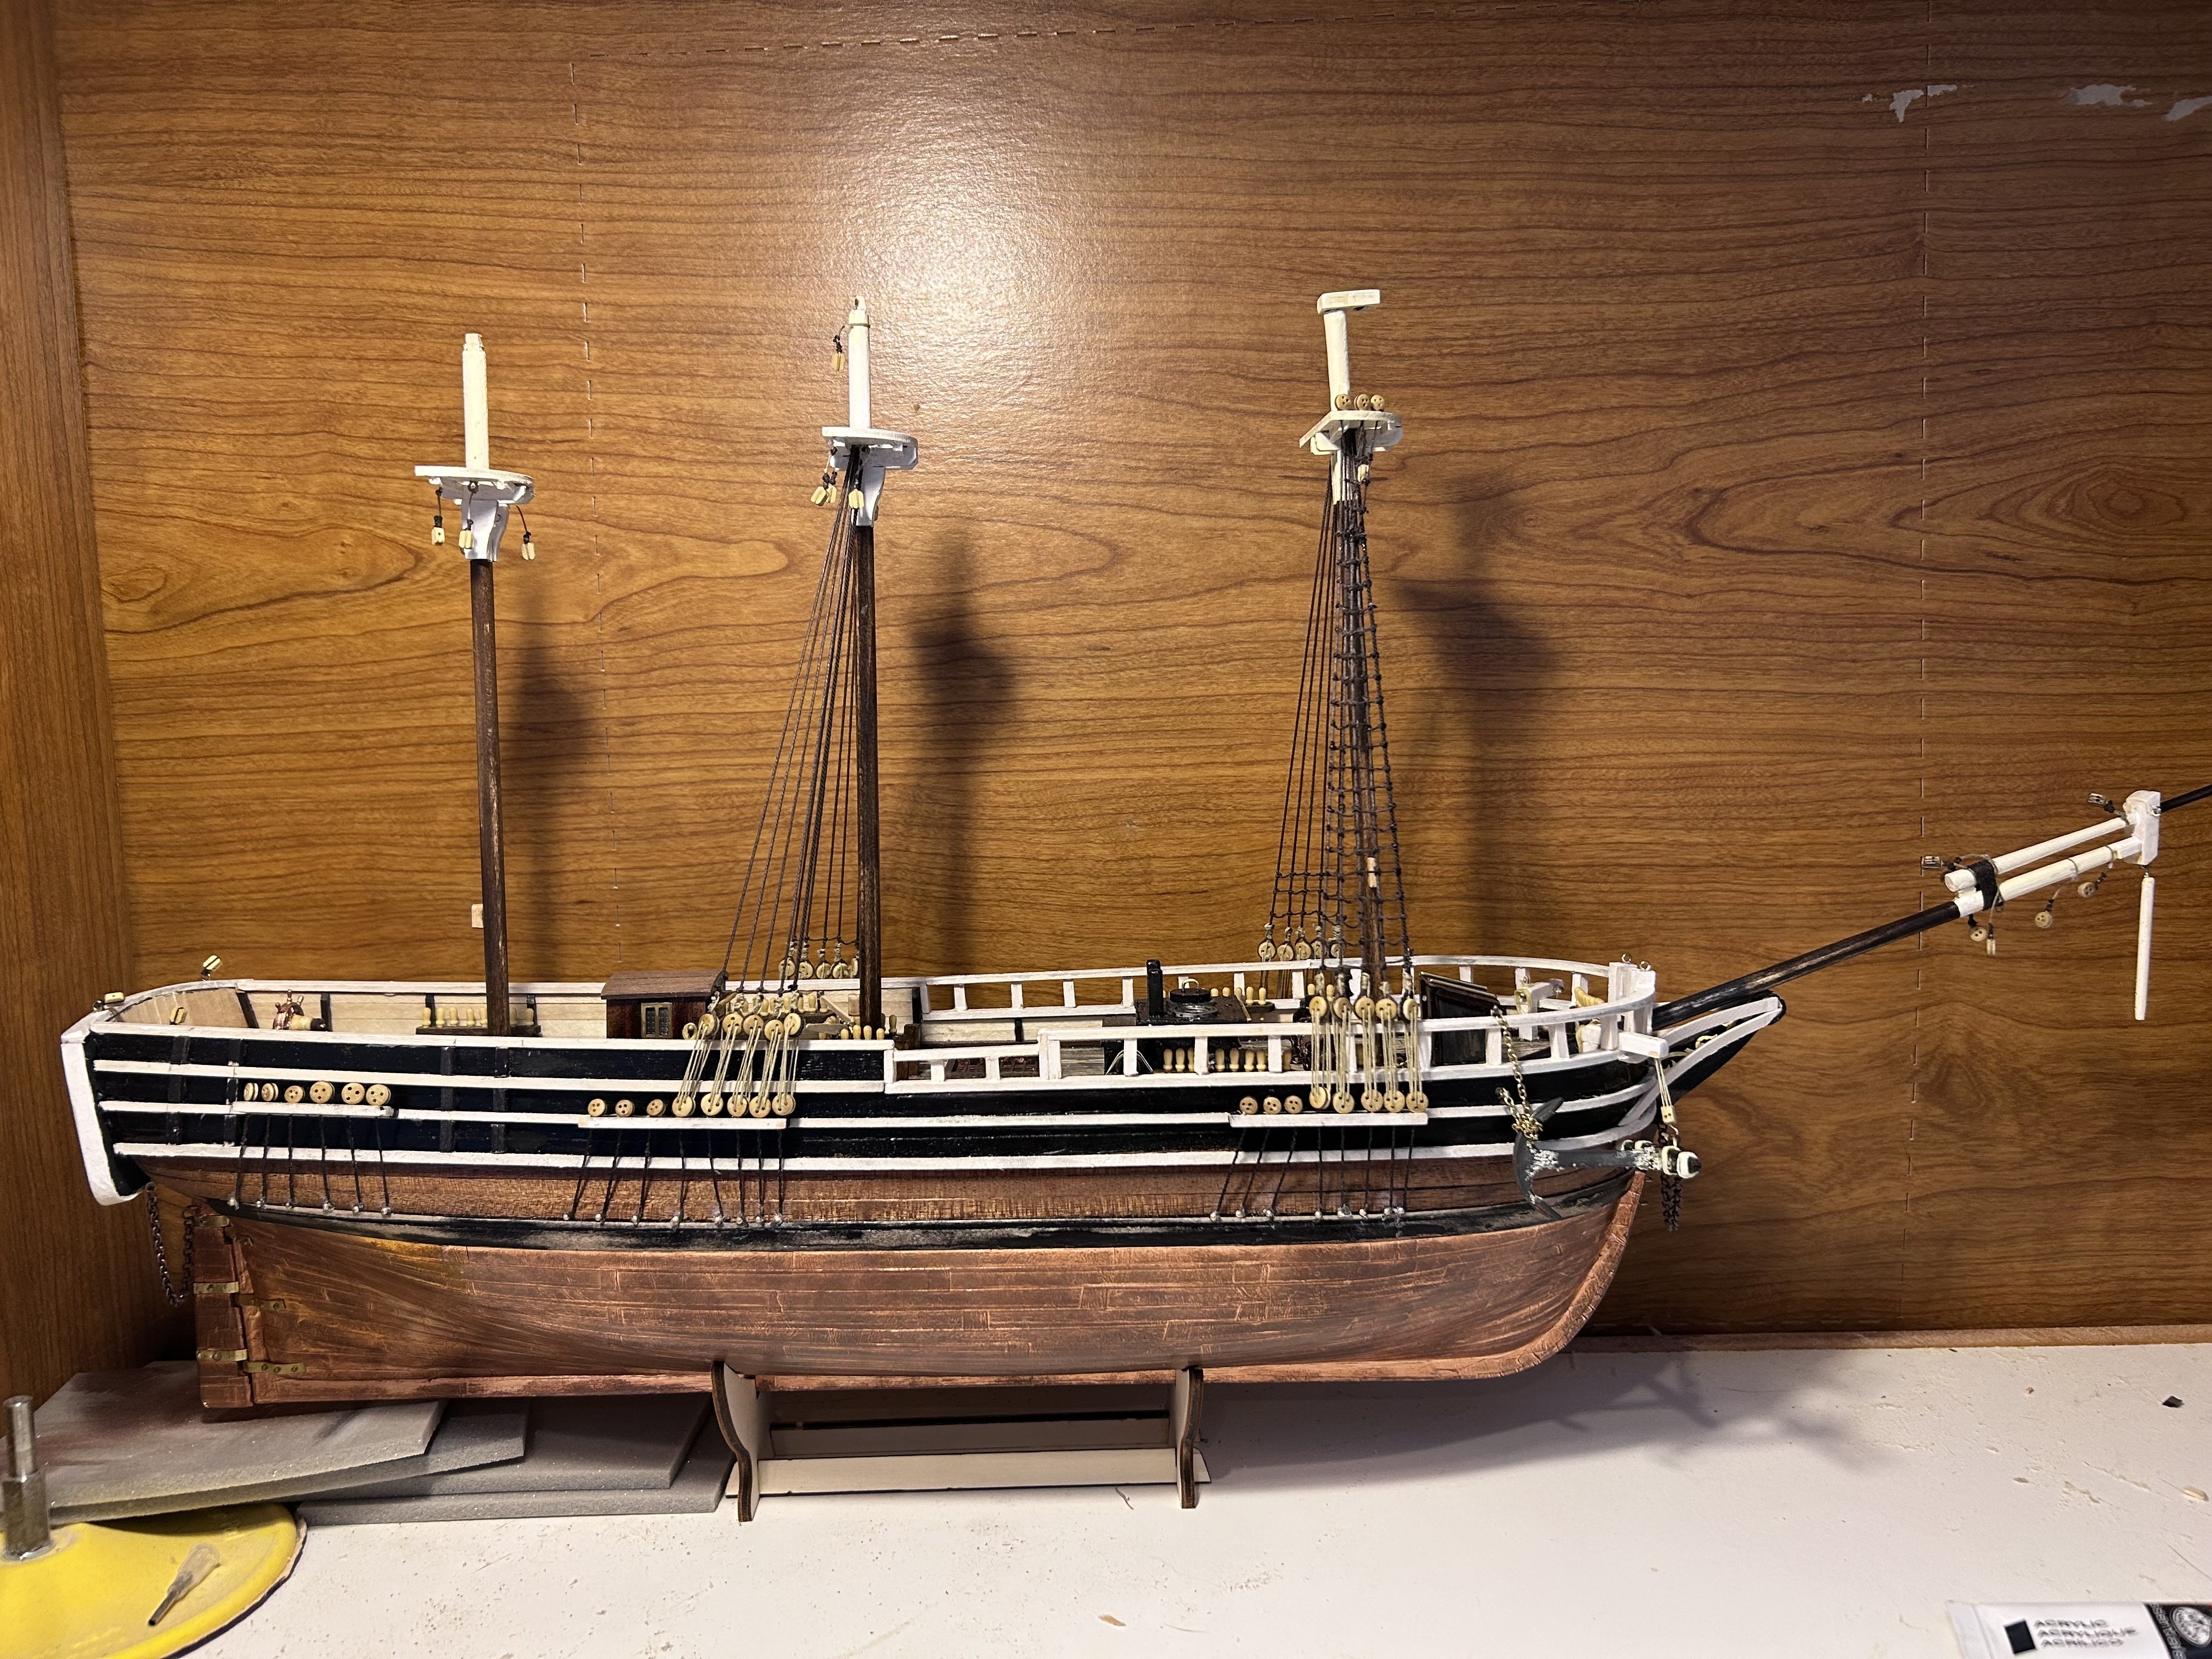
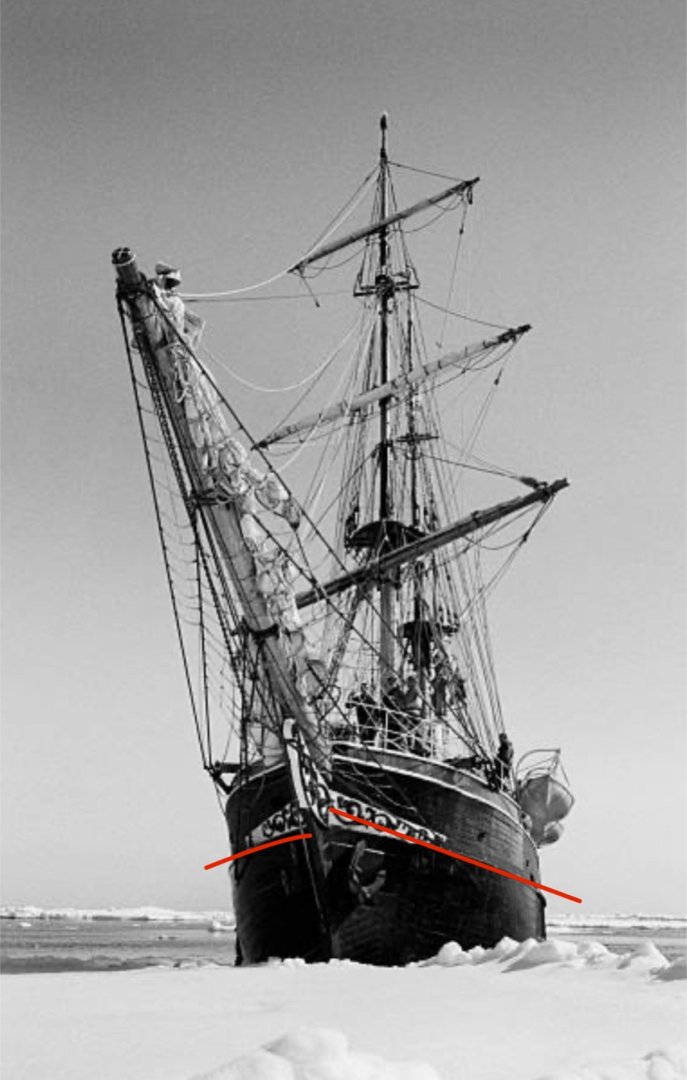
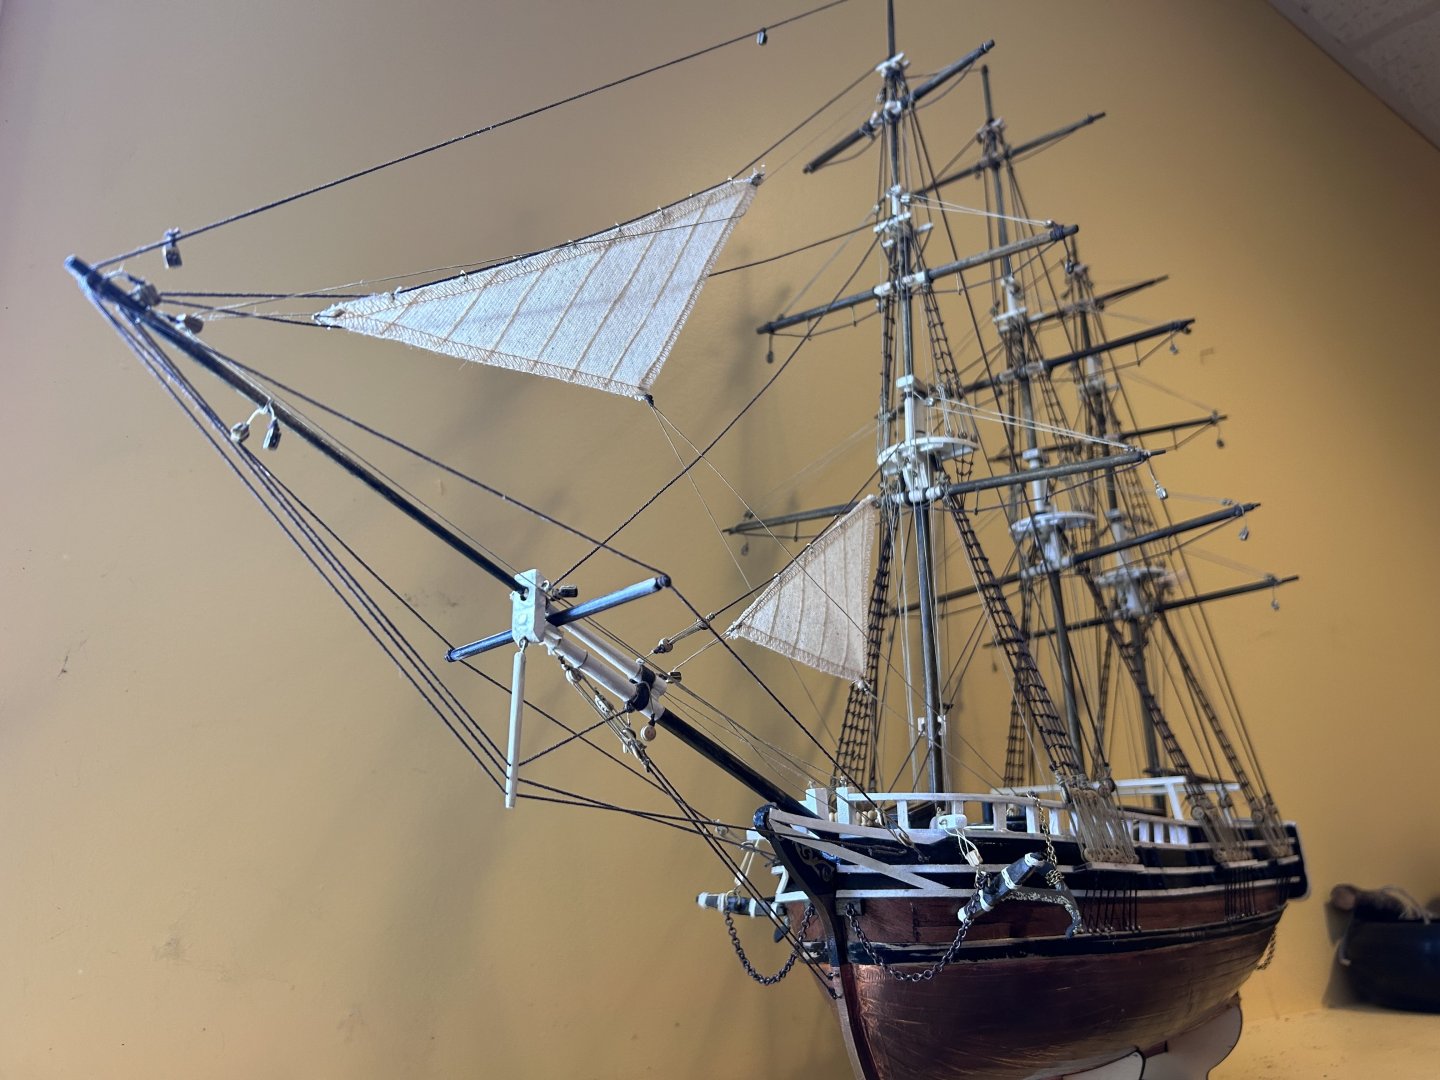
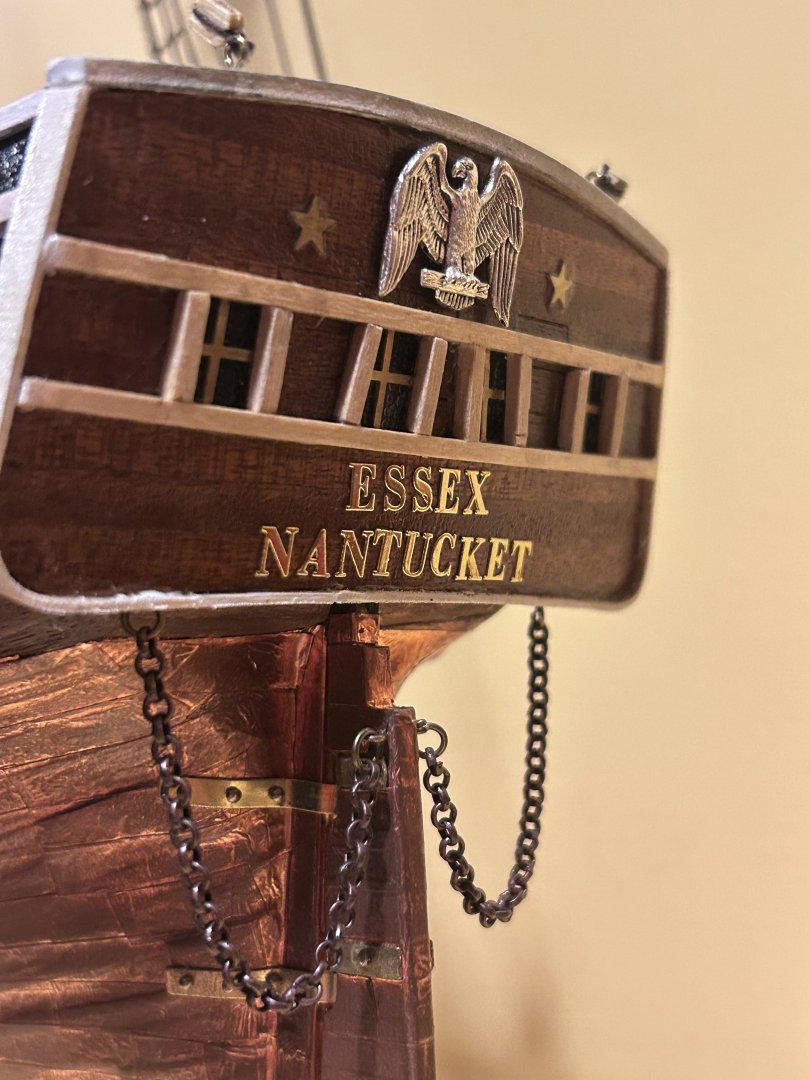
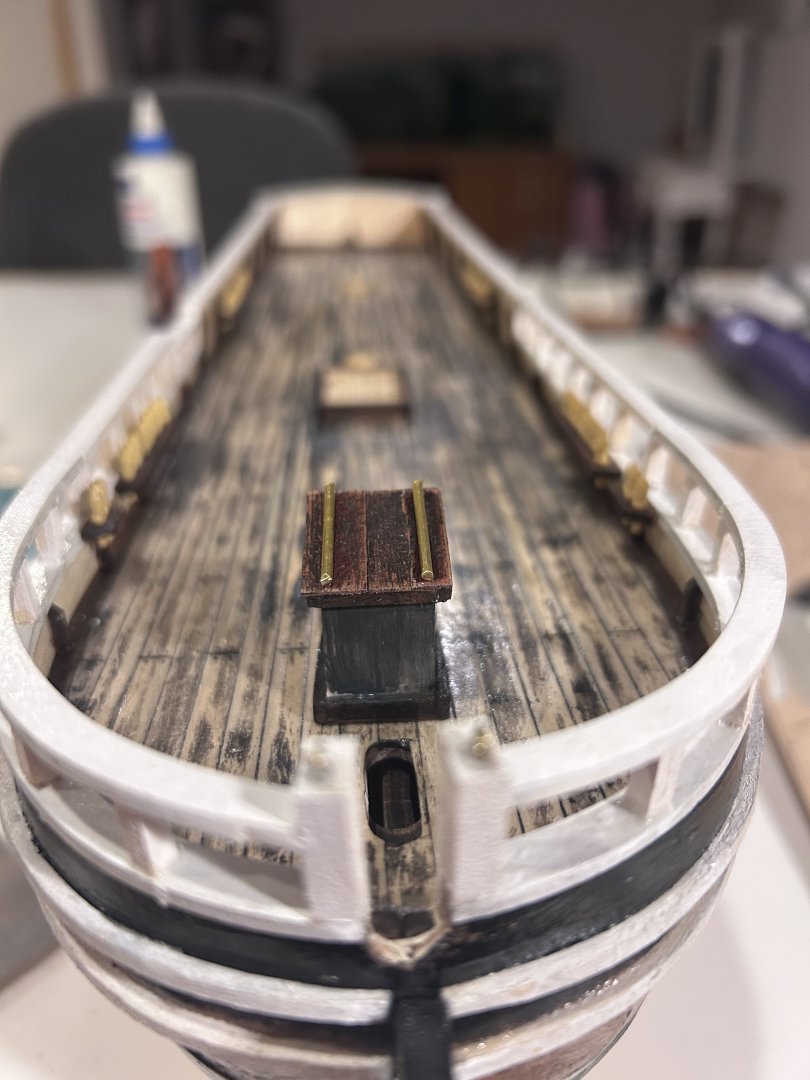
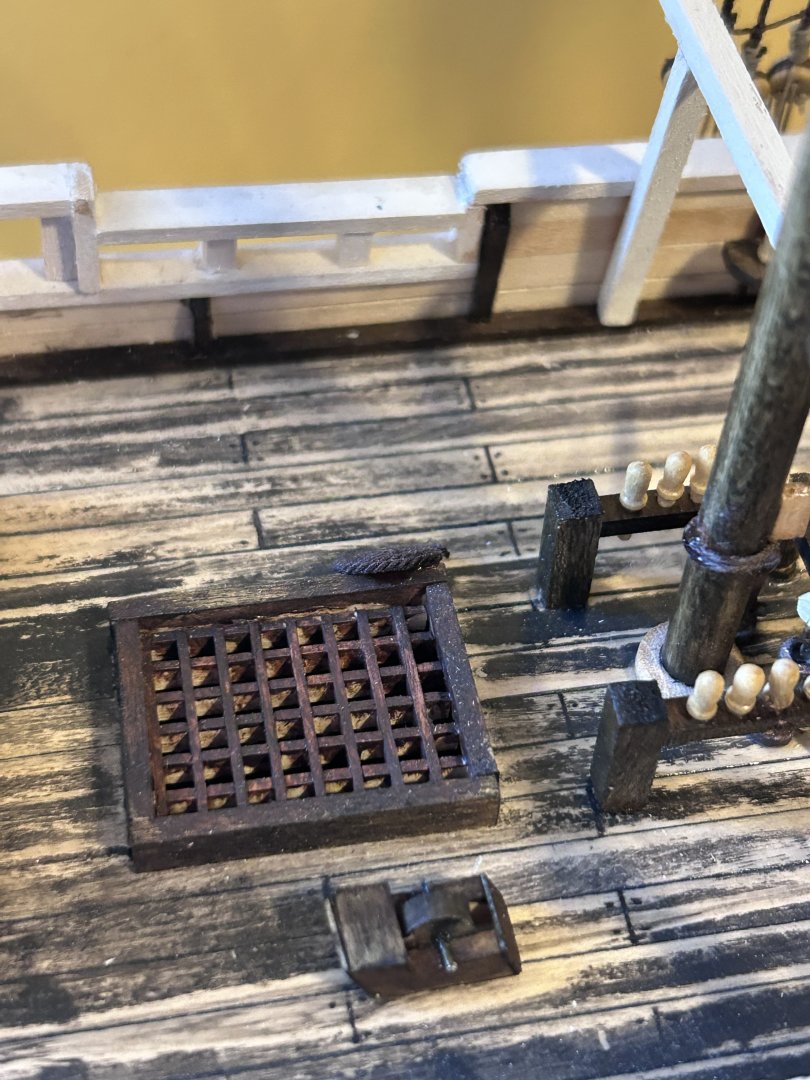
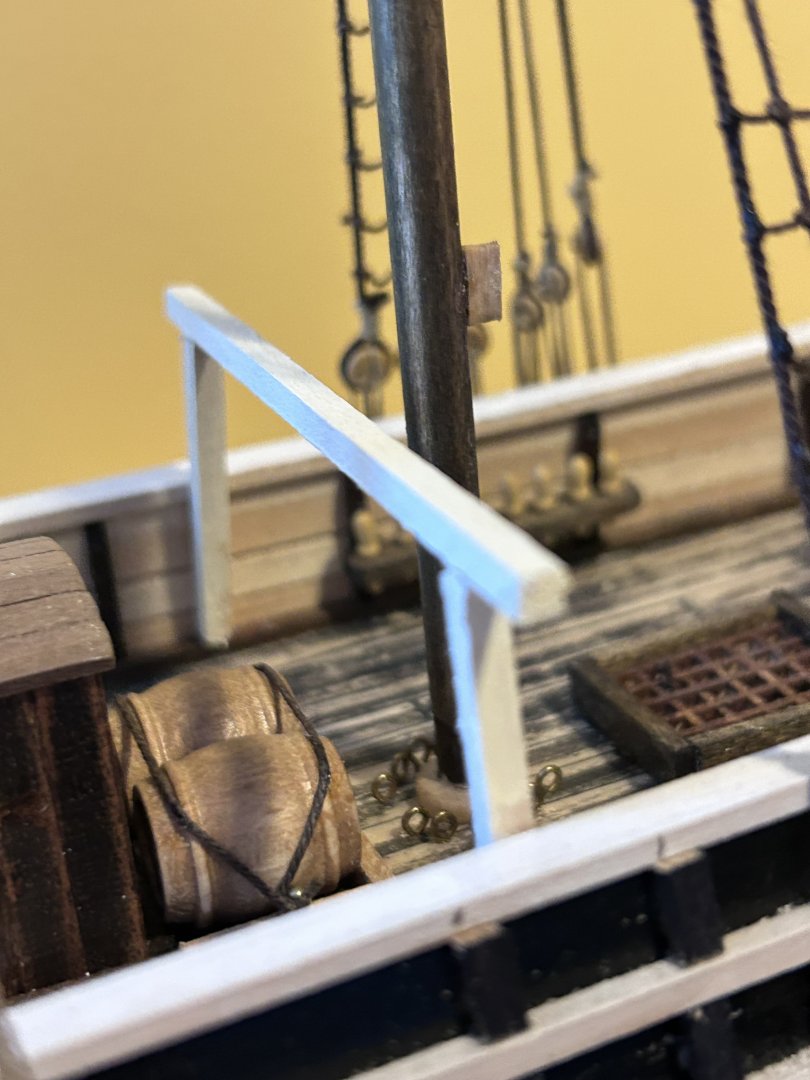
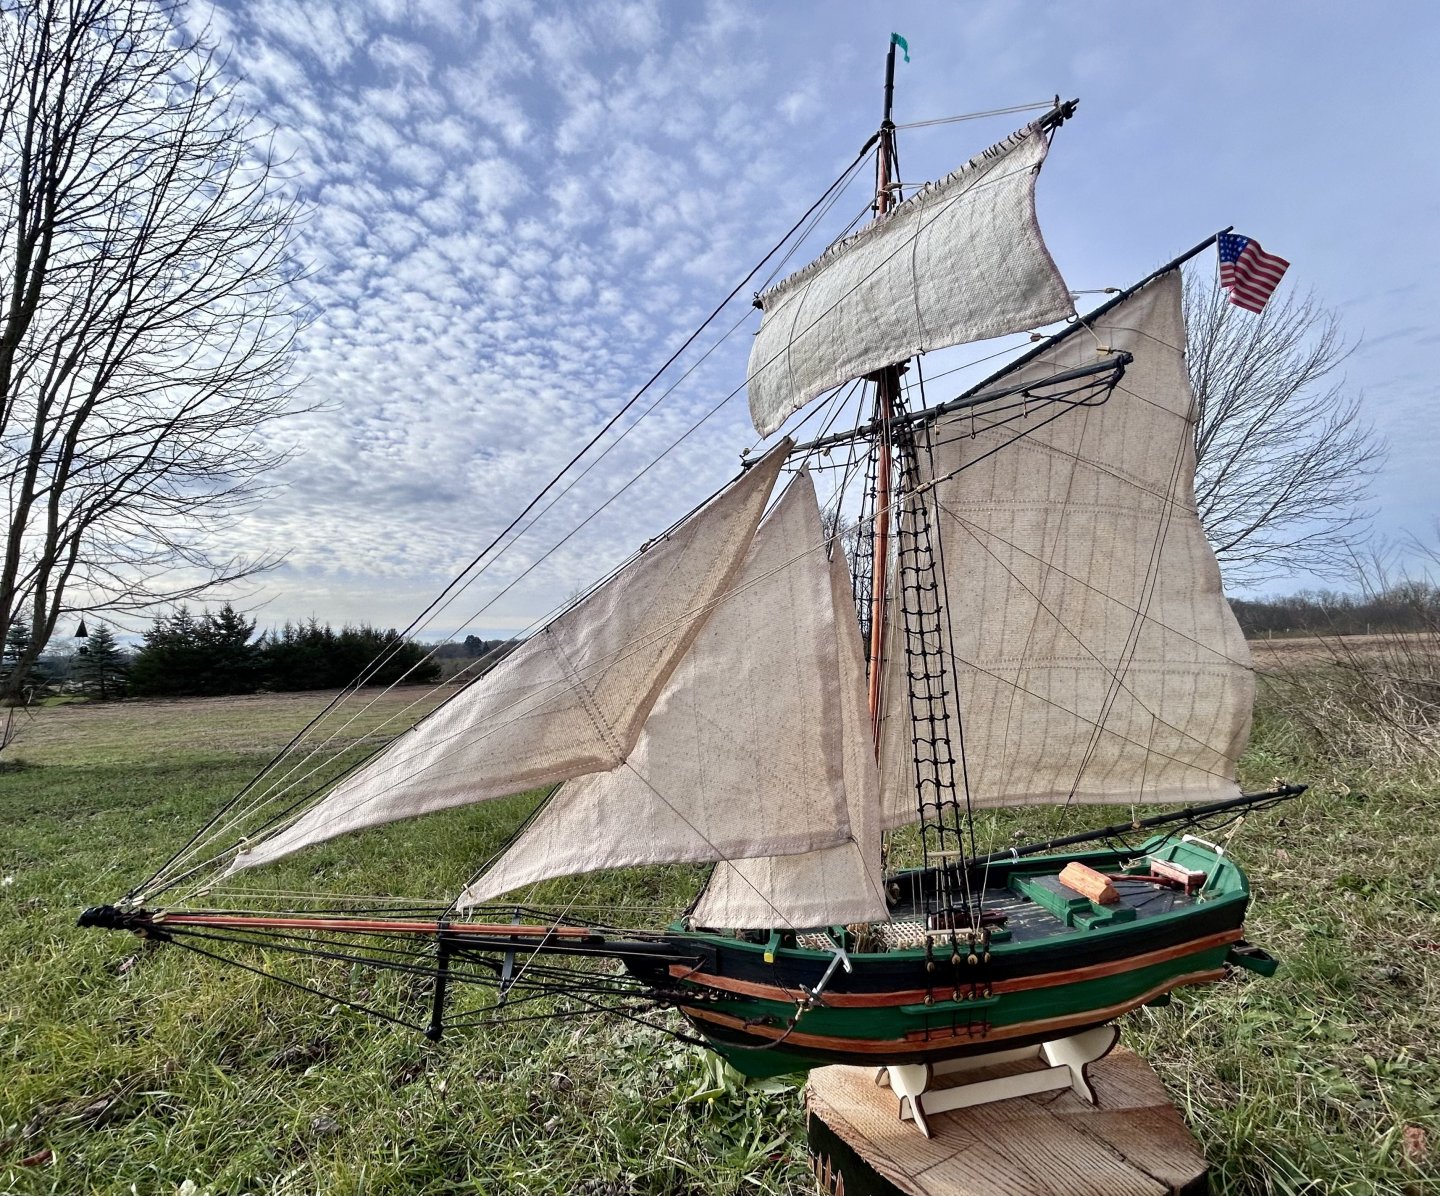
The first deviation is in the stern. After looking at the historical paintings, modern depictions (Heart of the Sea was a big inspiration), and watching videos from Home Harbor on YouTube, I opted for a different layout. This allowed for the eagle insignia as well as the placement of the name plate which, in this case, was made from some gold stickers. Finding the eagle was the real struggle, I bought a 100 pack of assorted eagle pendants online and the quarter style eagle ended up being the only one that fit… and so it became the eagle on the stern. You’ll also notice I added rudder chains that weren’t in the original build and while I know these wouldn’t sag this much on the real ship, again, I find the look of it like this to be striking and so artistry won over accuracy. Another change I made was in the tryworks. While the original style called for an exposed brick layout, I preferred the idea of a tarred or painted brick oven and so I went with that. Historically accurate? Probably not but it fits better with the aesthetic I’m going for. Next is the alterations in the deck. You’ll notice the weathering as I like to make my ships look as though they’ve been sailed for a few seasons rather than being the off the lot clean. My practical time on a ship then has shown me how quickly the paint on deck wears down so I think it has, once again, a nice look to it. In addition to this I made the decision of cutting an actual hole into the deck for the hatchway, I painted the interior black to lend a greater effect and depth. You’ll also notice the sharpening wheel and the coil of rope, again, for greater effect. I altered the wheel rigging as well into something functional. Now if I turn it the rudder will turn! Which I just found neat. Some barrels for texture. Finally I added a spritsail yard. The reason for this is, firstly, aesthetic, but also because in a great many of the paintings of the ship the spritsail yard is present (and once again it offers more line texturing so it got included).


-
This is more a “final lap” type of post as I didn’t start it when I began the build but rather here during the final stages of getting the yards, rigging, and sails completed. Fortunately the rigging is where I think it all comes together. One thing I learned in this build was the history of coppering and so when learning about this I needed to add this as a feature as I think it adds a certain pop. This is a bit of a deviation from the build recommendation but as I refuse to pay the 50 odd bucks for the Occre paint I think I prefer it. That being said I didn’t go with the more accurate planking version but rather settled for applying it, at times unevenly. Does it look as good as if I applied the rivets and such? No, but it doesn’t really bother me as the overall effect is striking and it’s only upon close inspection that anyone would notice (and even then the only ones who would notice would be other shipbuilders). Next post will be the major deviations and modifications from the kit as it’s intended to be built.

-
As a final note the rigging is, to the best of my ability, accurate to the original and would be fully functional if allowed to move.
-
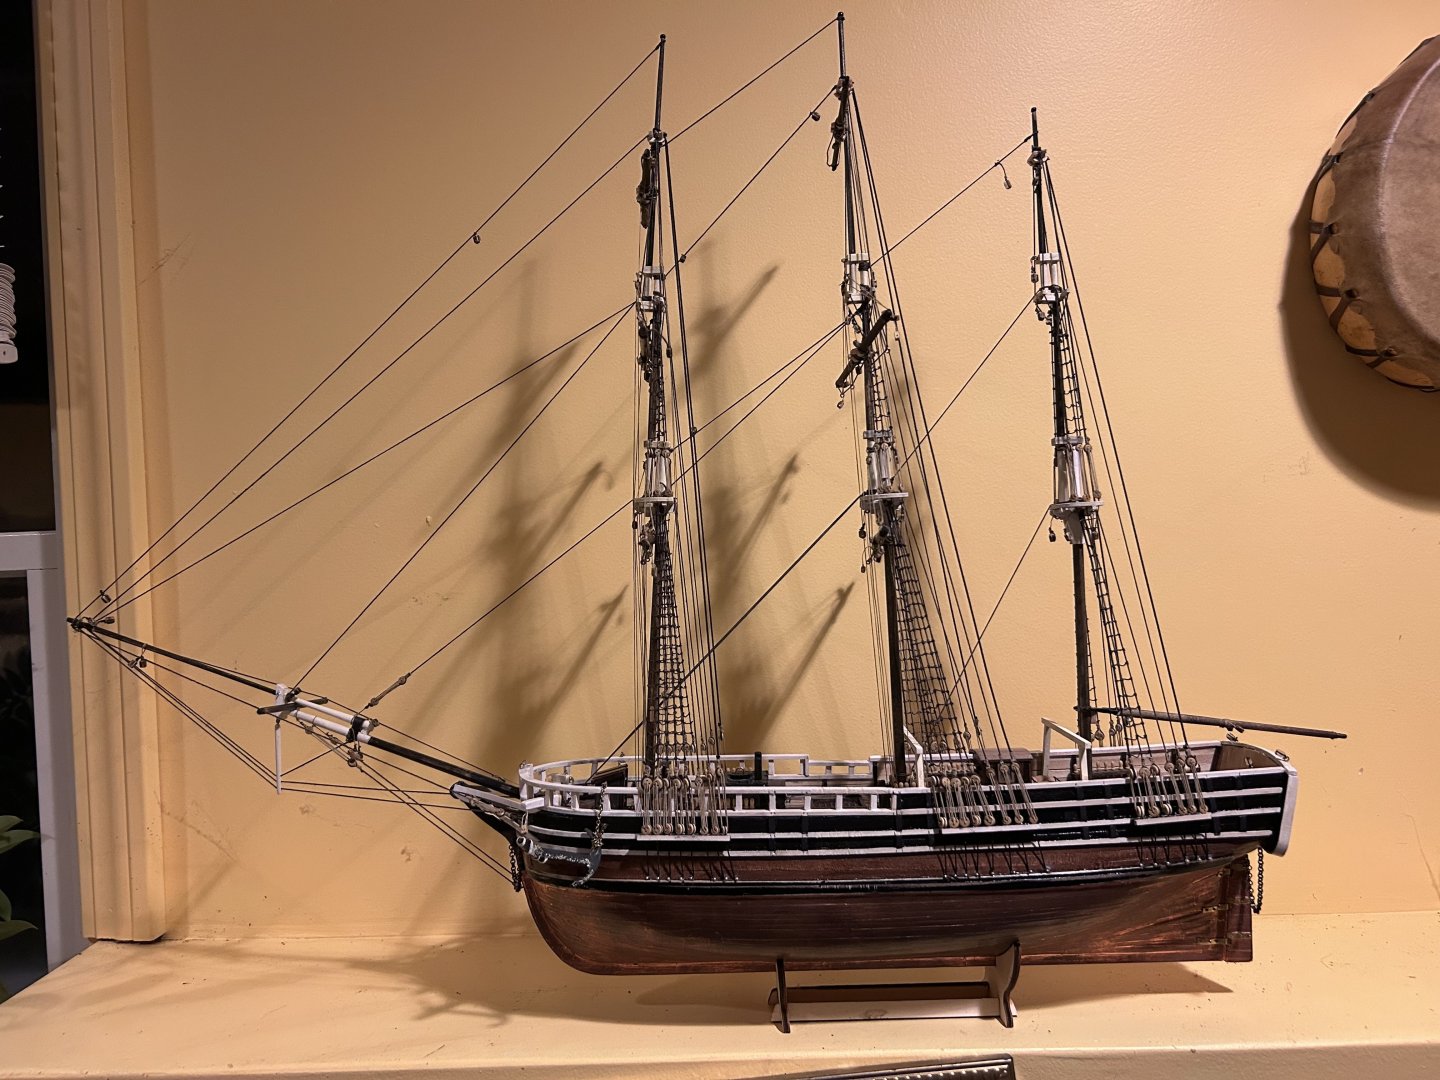
And finally we arrive at the rigging and sheets. From the top, main, and staysail. To the outer. And finally the inner. These properly scaled sheets were made for me by a friend who recently passed from a sudden heart attack. I’m grateful to her for this gift and it’s a nice way to honor her memory to have it included in my finished model. As I said at the beginning, I completed this model in November of 2024 and it stands as one of the best pieces I’ve done in terms of lessons learned. The ship is mounted on a piece of retired topsail yard from the original ship which I feel gives it a little extra personality. Thanks for reading along, next time I’ll have an actual log to follow along with as opposed to this log which has been retroactively reassembled. Im currently in the final stages of the Essex with the Endurance sitting and waiting to start.


-
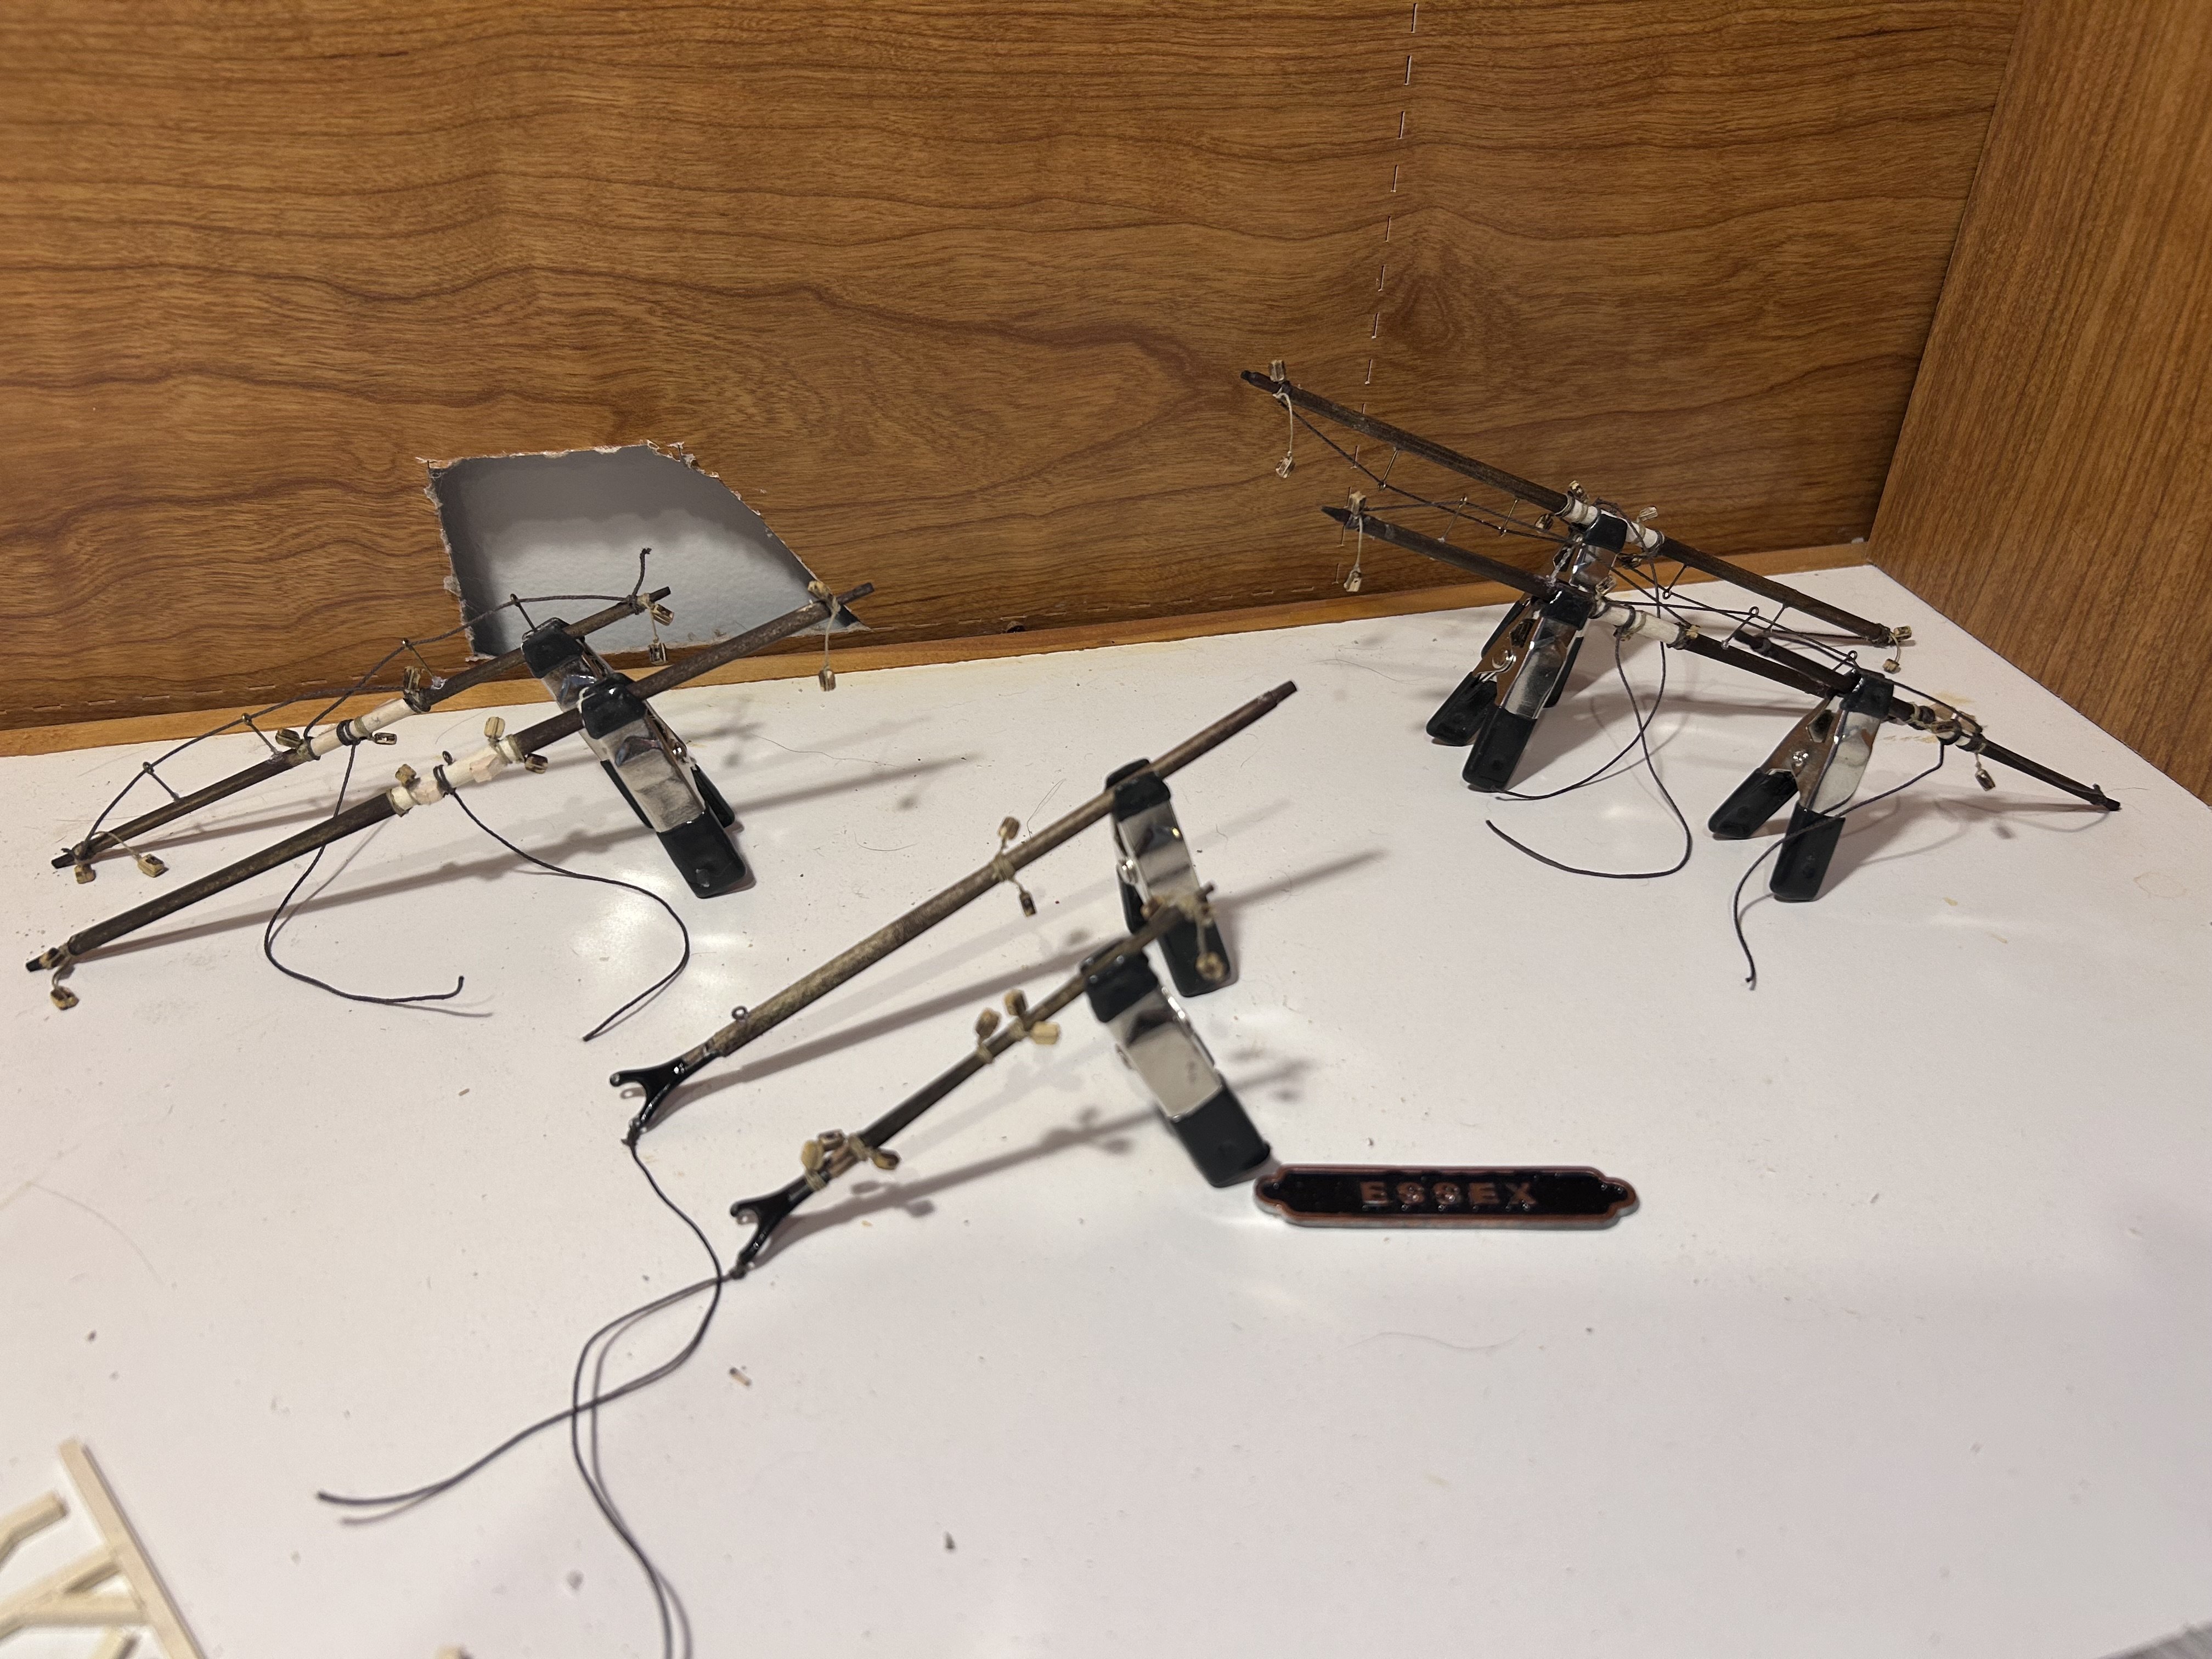
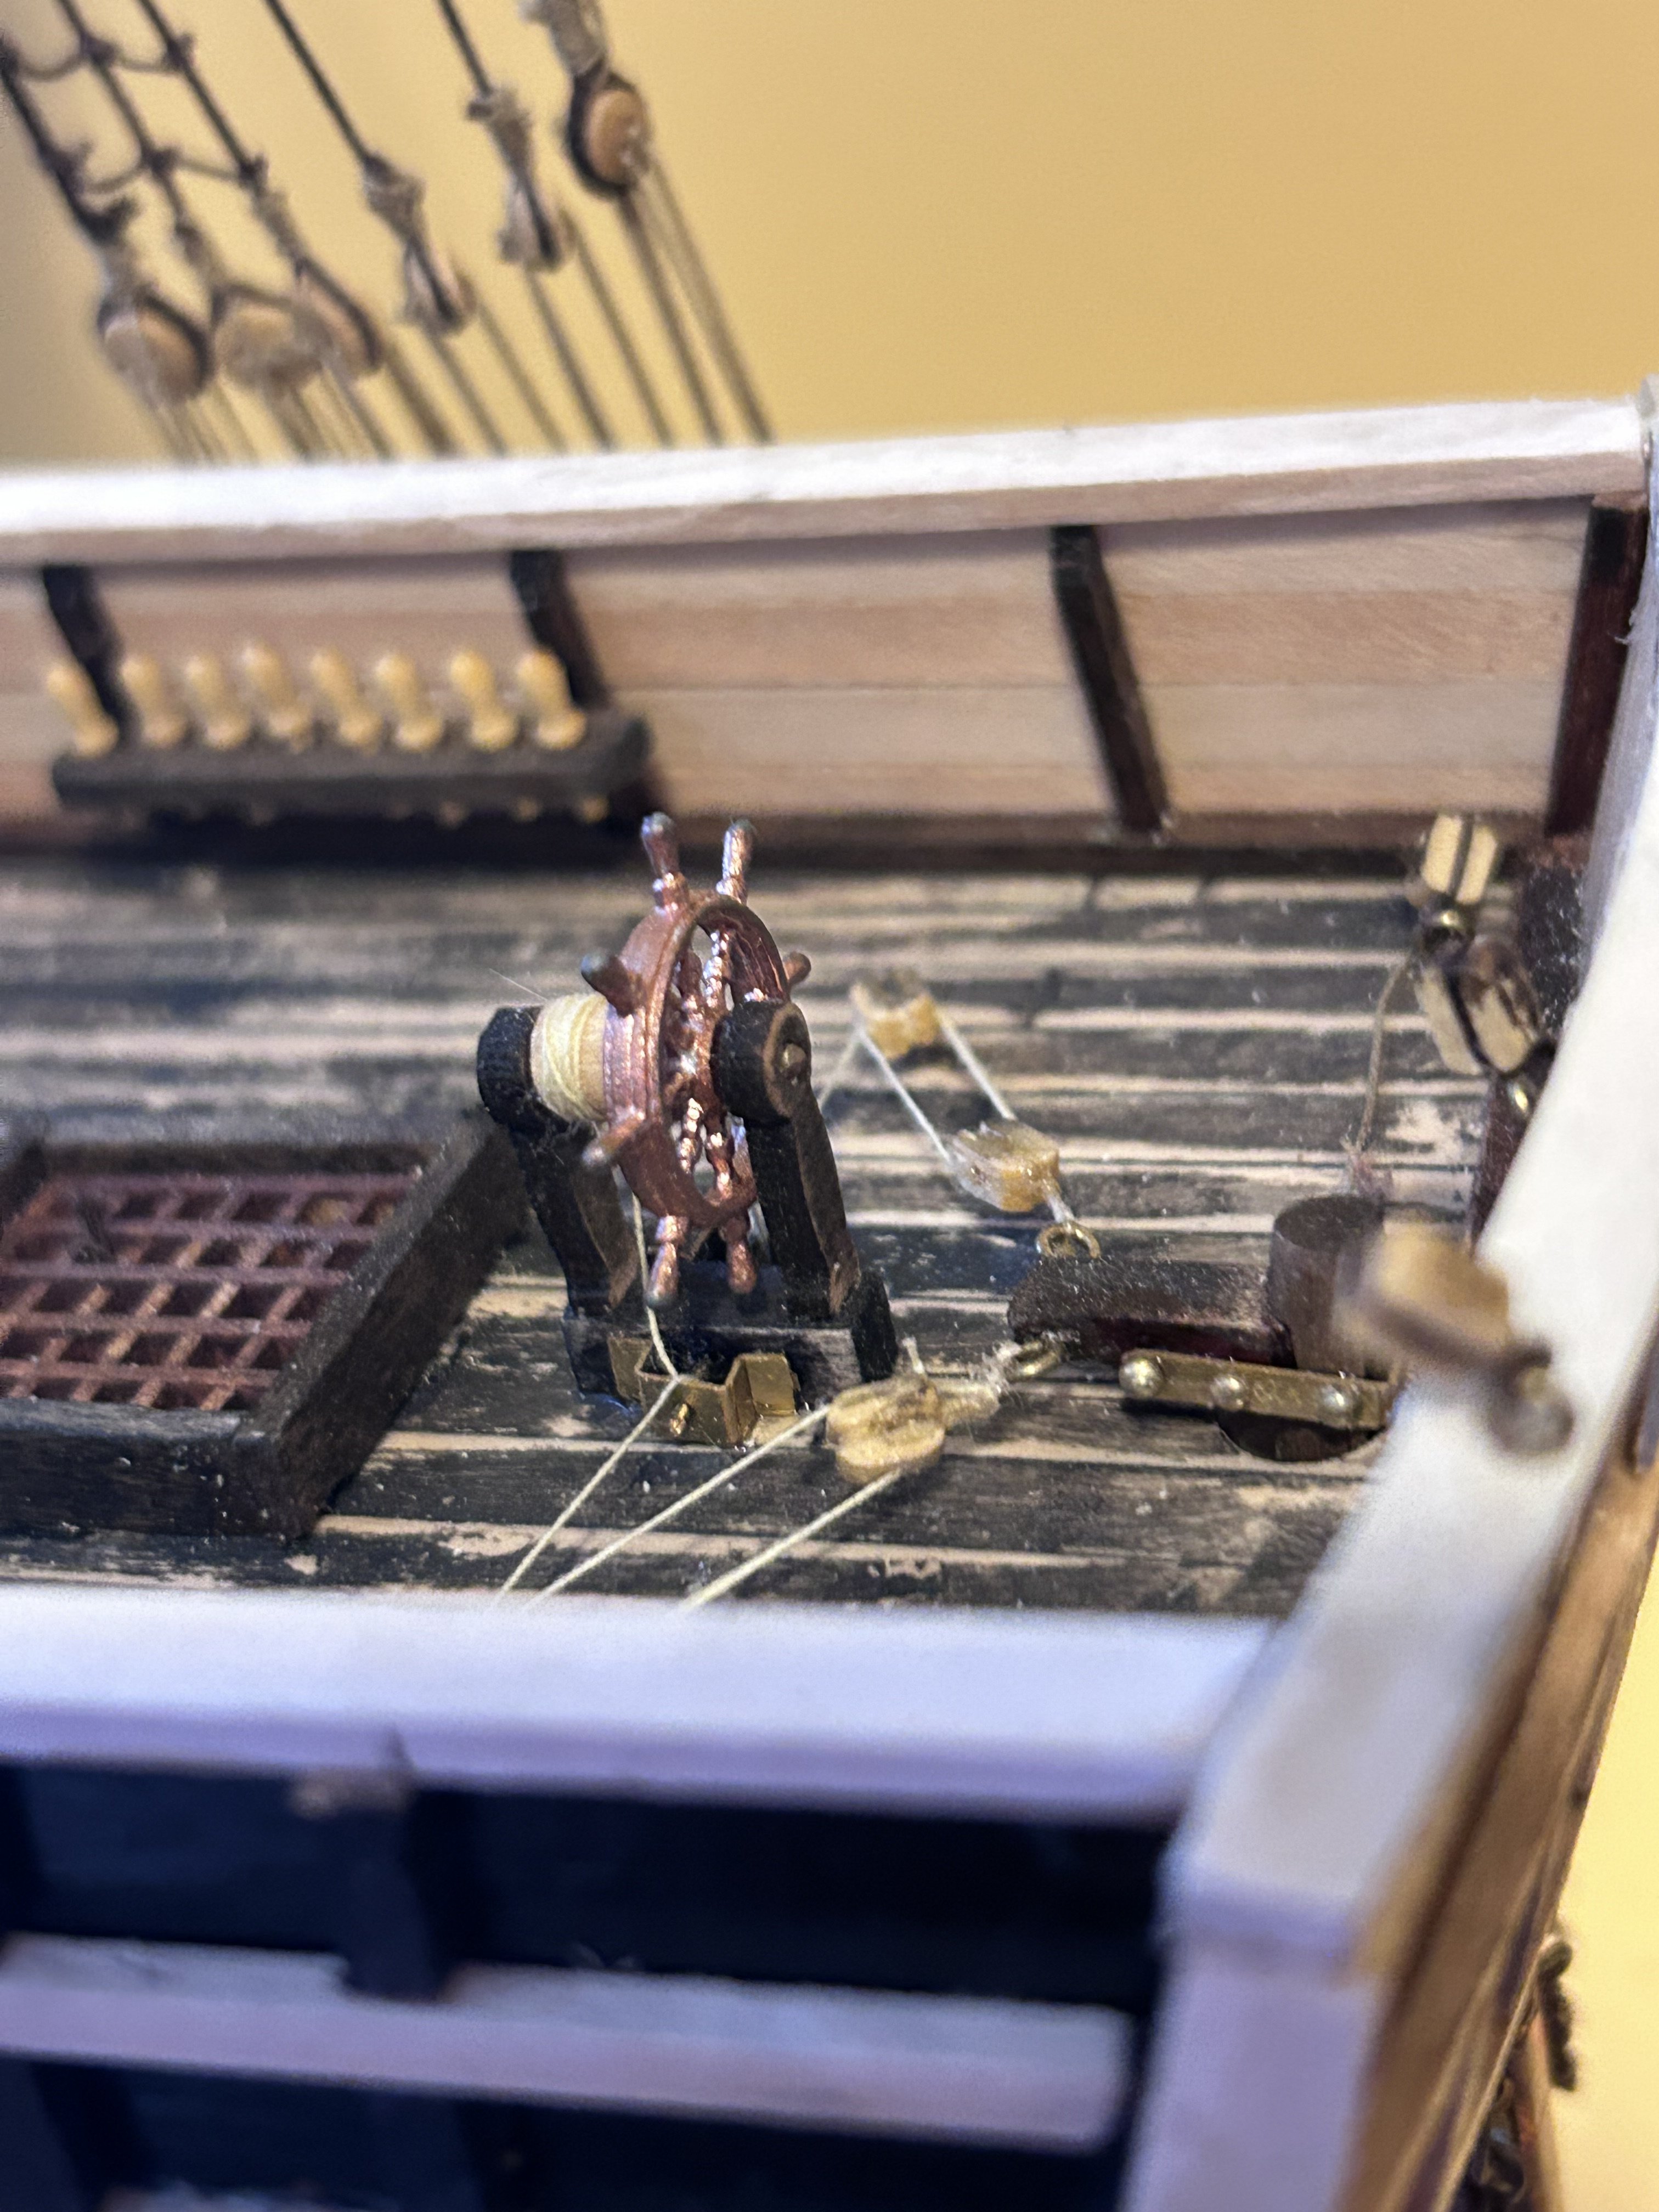
Deck detail. So first up I had to create a windless that matched the style of the ship’s while also maintaining the scale. This was the result. Other than it being a little taller than the real life version it stands as a faithful recreation. And what model would be complete without a few nods to friends. The friend who made my jacket regularly leaves his hat on the ship’s stovepipe so I wanted to throw it in as a little tribute to him. Finally we have the ship’s name plate and the small boat the Little Belt. While the recreation has an inflatable dinghy on the rear I, of course, wanted to spring for something a little more authentic (and make use of the small boat included in the Albatros) Much like the ratlines this is another one of those things that sits on the to do list to be redone at a later date with gold sticker letters.