HOLIDAY DONATION DRIVE - SUPPORT MSW - DO YOUR PART TO KEEP THIS GREAT FORUM GOING! (Only 36 donations so far out of 49,000 members - C'mon guys!)
×


Andy Thurston
-
Posts
27 -
Joined
-
Last visited
1 Follower

-
 Captain Amateur reacted to a post in a topic:
HMS Bellona by Andy Thurston - Corel - 1/100
Captain Amateur reacted to a post in a topic:
HMS Bellona by Andy Thurston - Corel - 1/100
-
 Hi Captain Regarding the bulkheads, the deck was a little proud of the bulkheads in a few places, so I just sanded the deck back till it was flush with the bulkheads. Only about 1mm max was removed at any point, so there is little consequence with how the ship will look on completion. Best regards, Andy.
 -
GrandpaPhil reacted to a post in a topic:
My ropewalk made from Meccano
-
Andy Thurston reacted to a post in a topic:
HMS Bellona by Andy Thurston - Corel - 1/100
-
Andy Thurston reacted to a post in a topic:
HMS Bellona by Andy Thurston - Corel - 1/100
-
Andy Thurston reacted to a post in a topic:
HMS Bellona by Andy Thurston - Corel - 1/100
-
Frecap reacted to a post in a topic:
HMS Bellona by Andy Thurston - Corel - 1/100
-
Ryland Craze reacted to a post in a topic:
HMS Bellona by Andy Thurston - Corel - 1/100
-
 yvesvidal reacted to a post in a topic:
HMS Bellona by Andy Thurston - Corel - 1/100
yvesvidal reacted to a post in a topic:
HMS Bellona by Andy Thurston - Corel - 1/100
-
Ronald-V reacted to a post in a topic:
HMS Bellona by Andy Thurston - Corel - 1/100
-
Nearshore reacted to a post in a topic:
HMS Bellona by Andy Thurston - Corel - 1/100
-
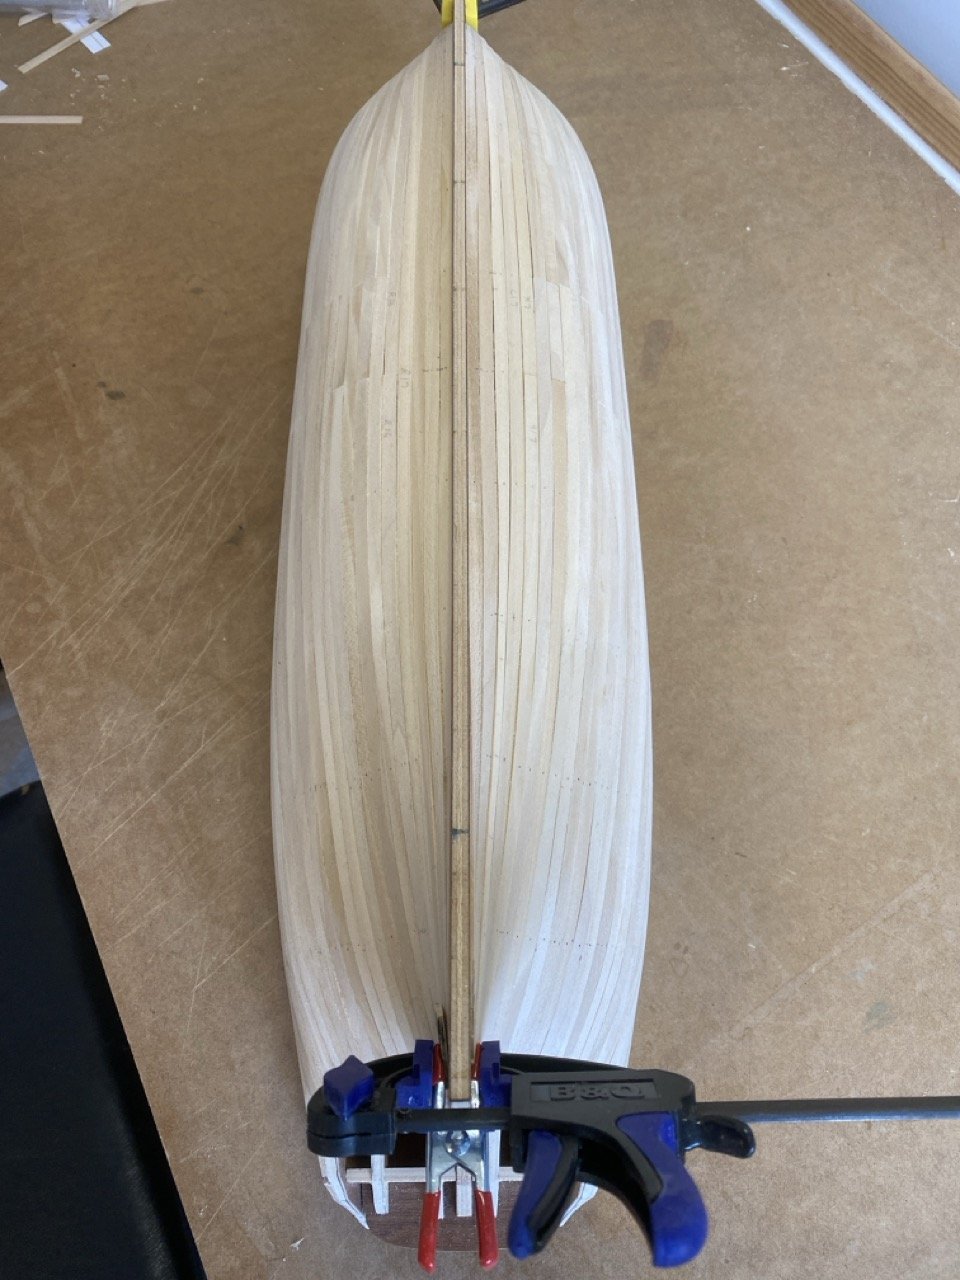
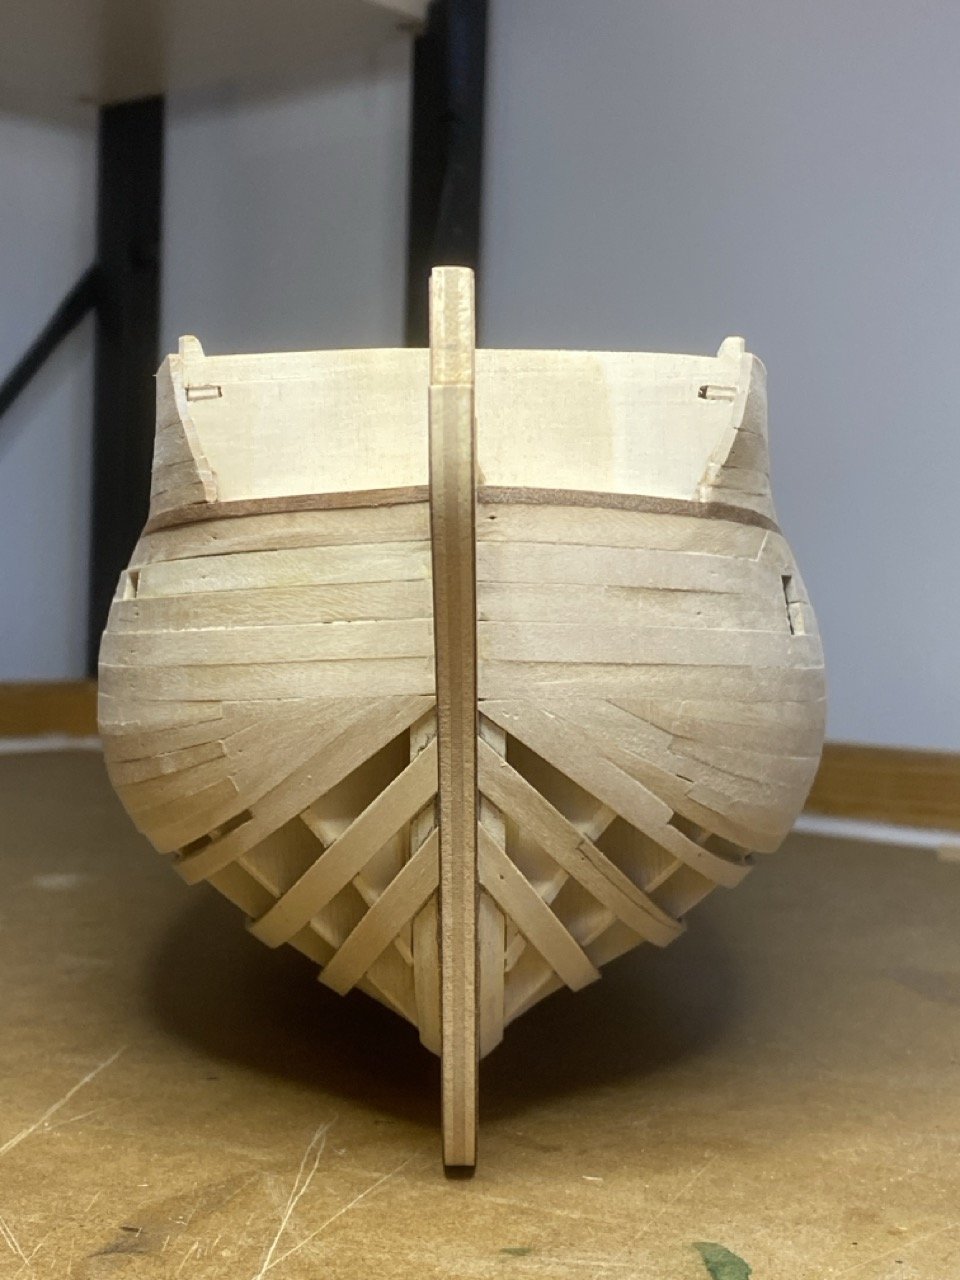
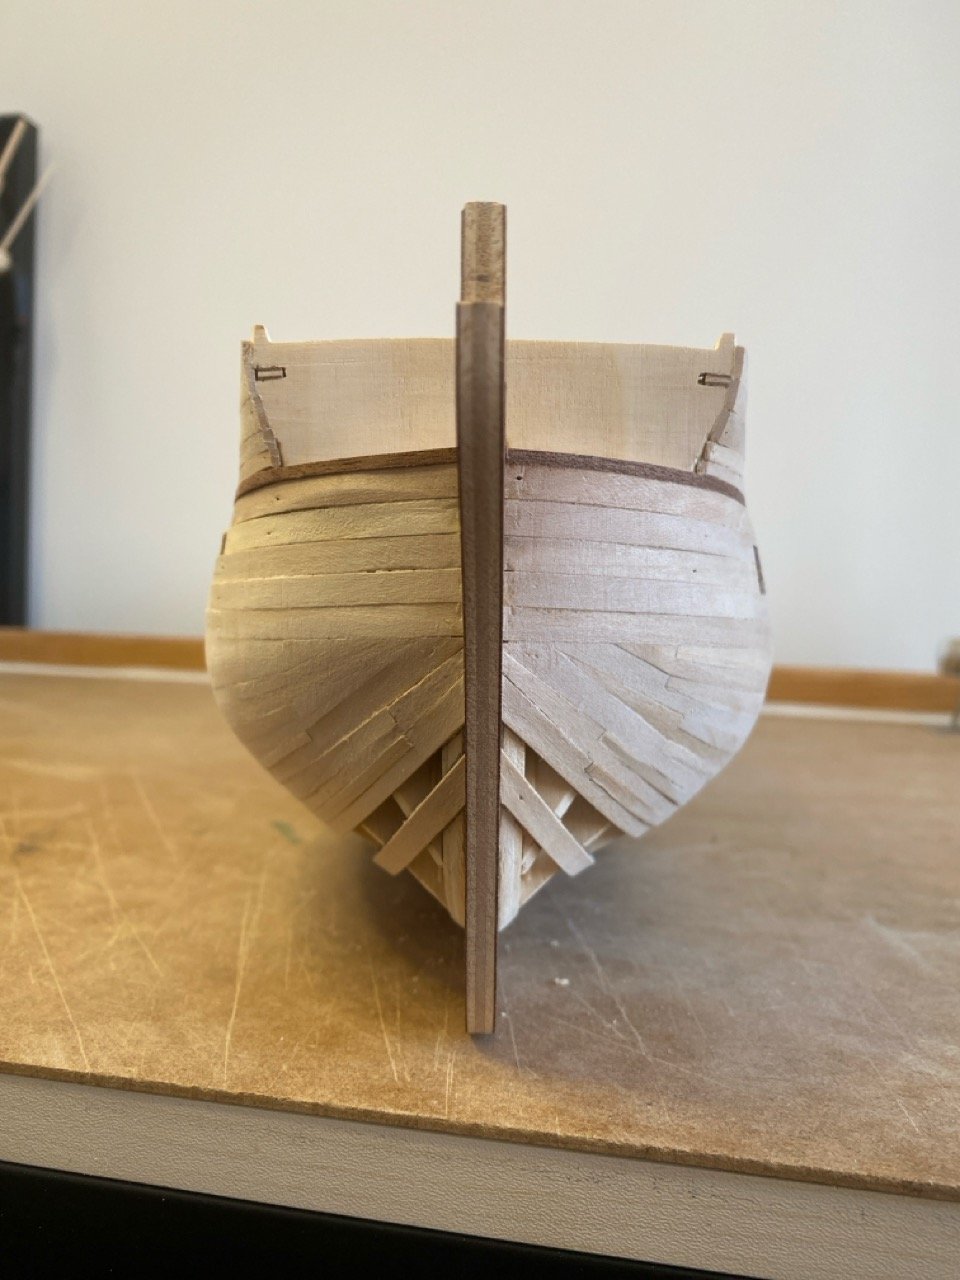
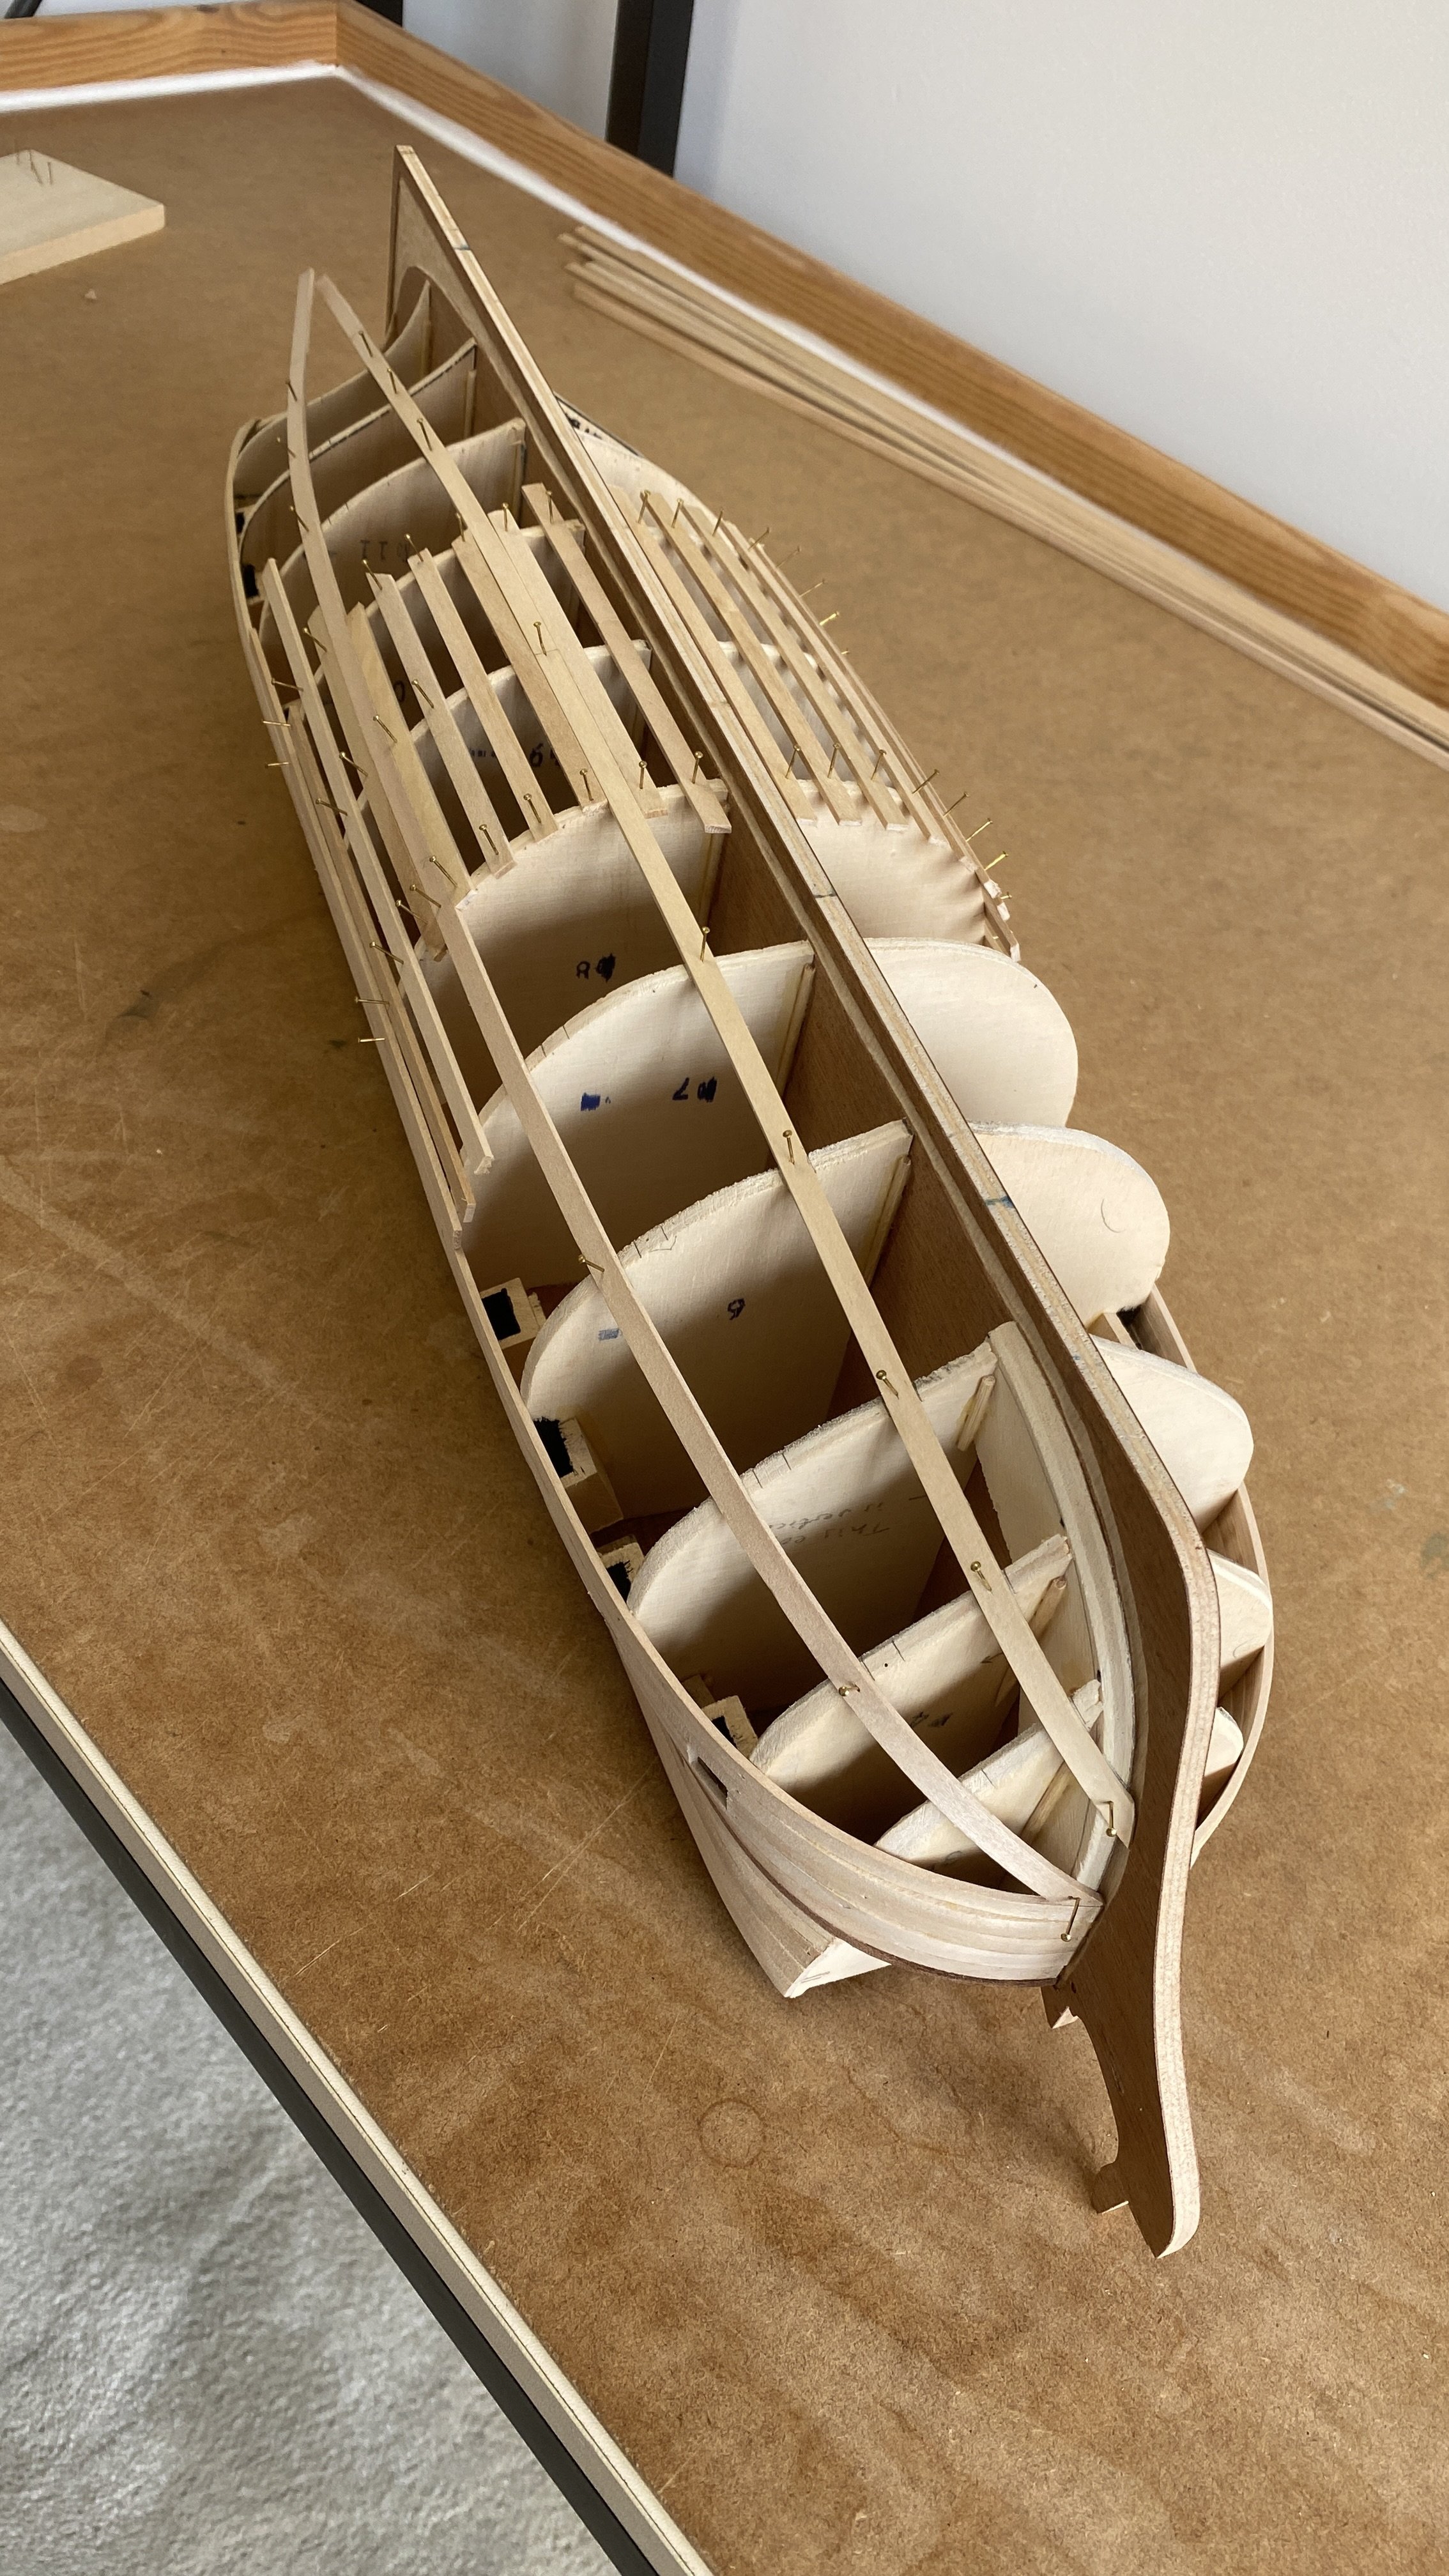
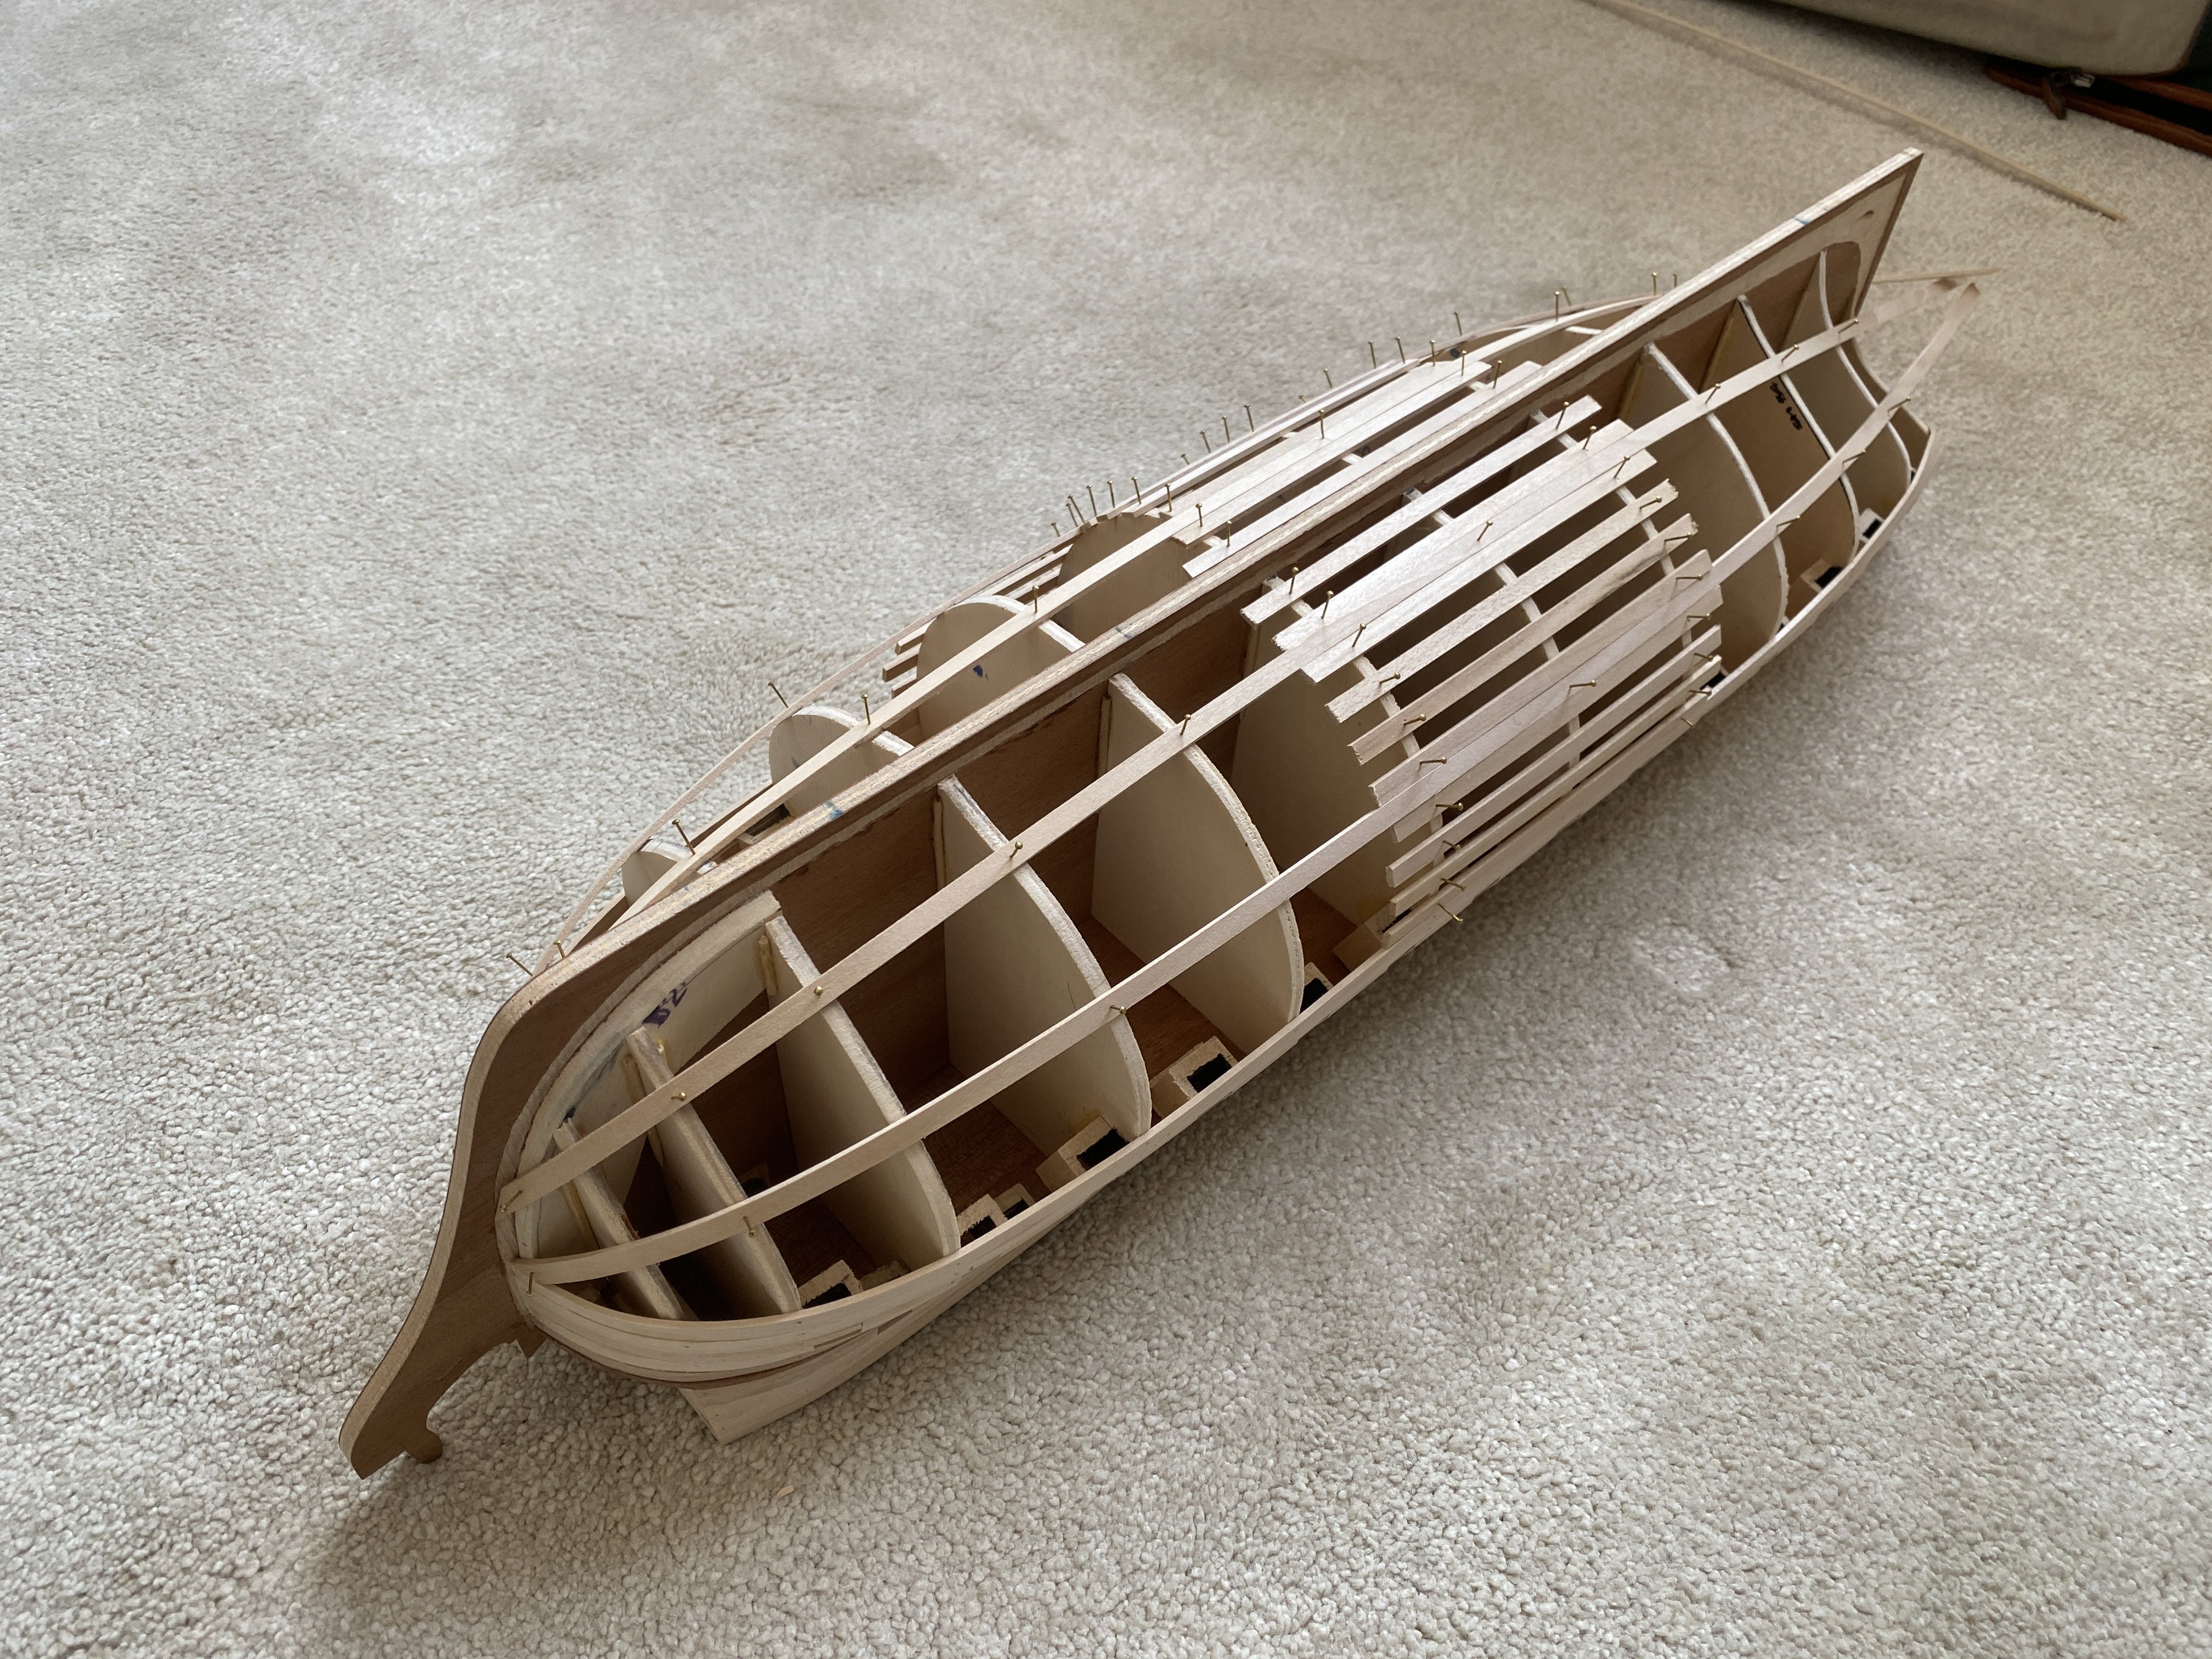
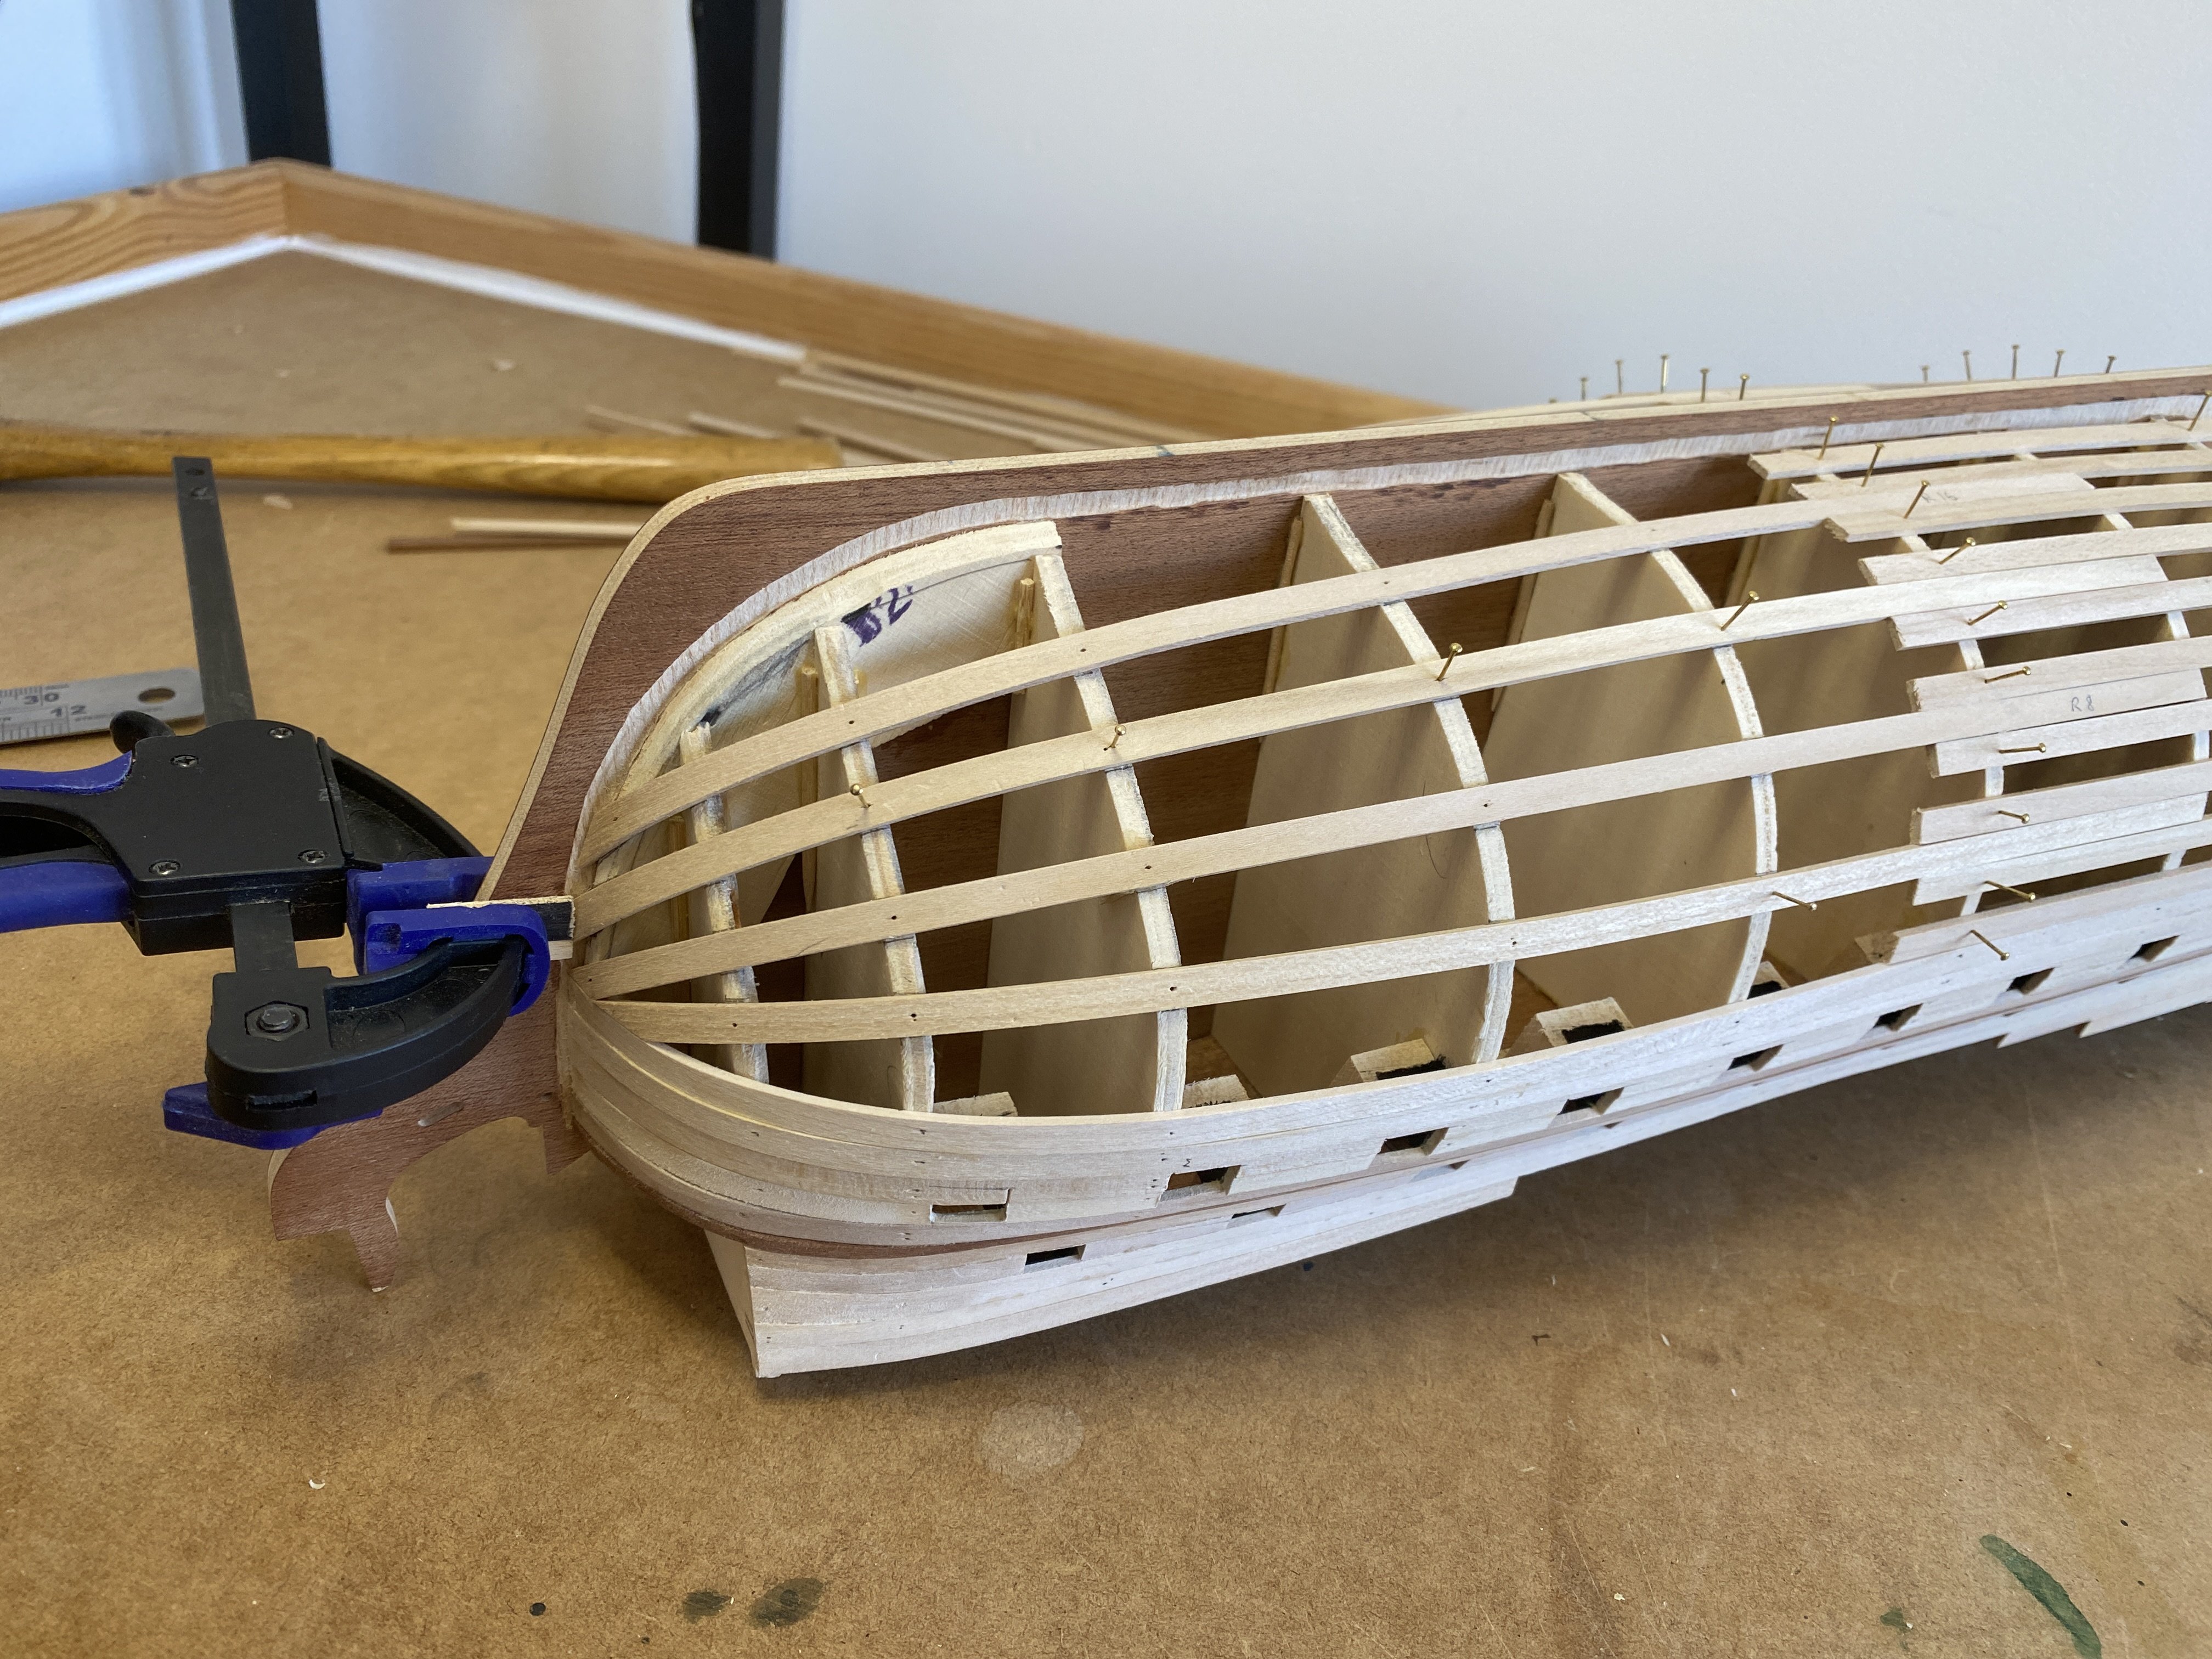
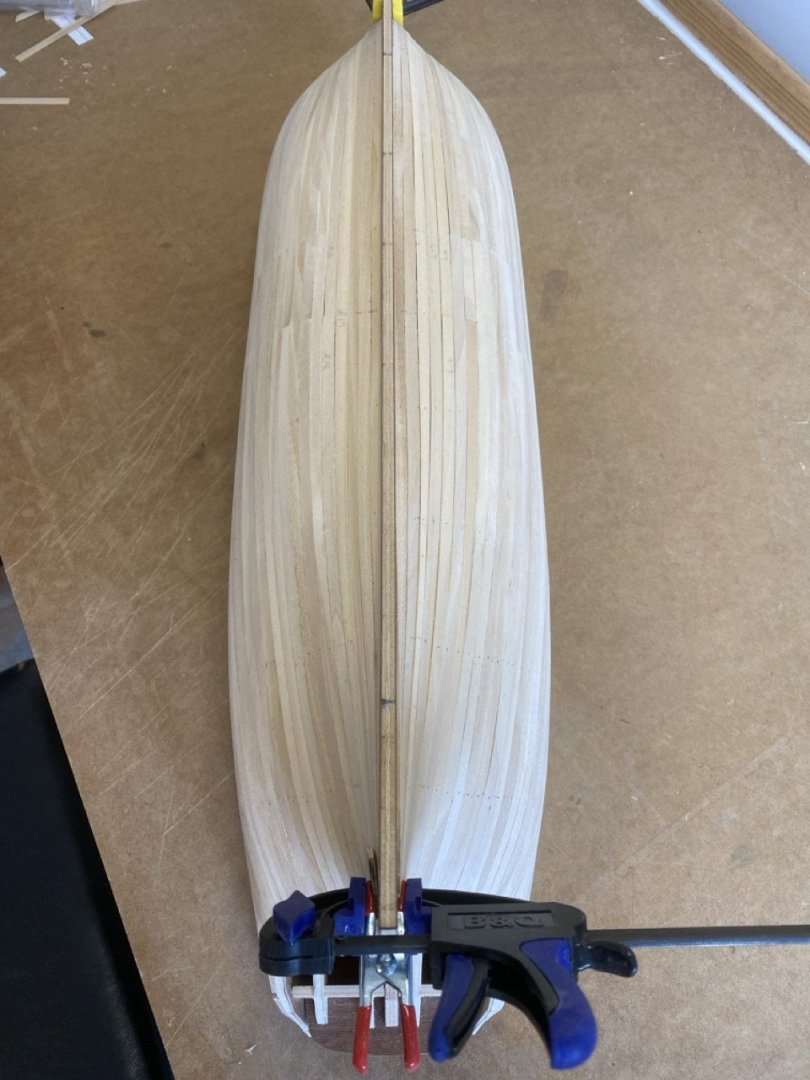
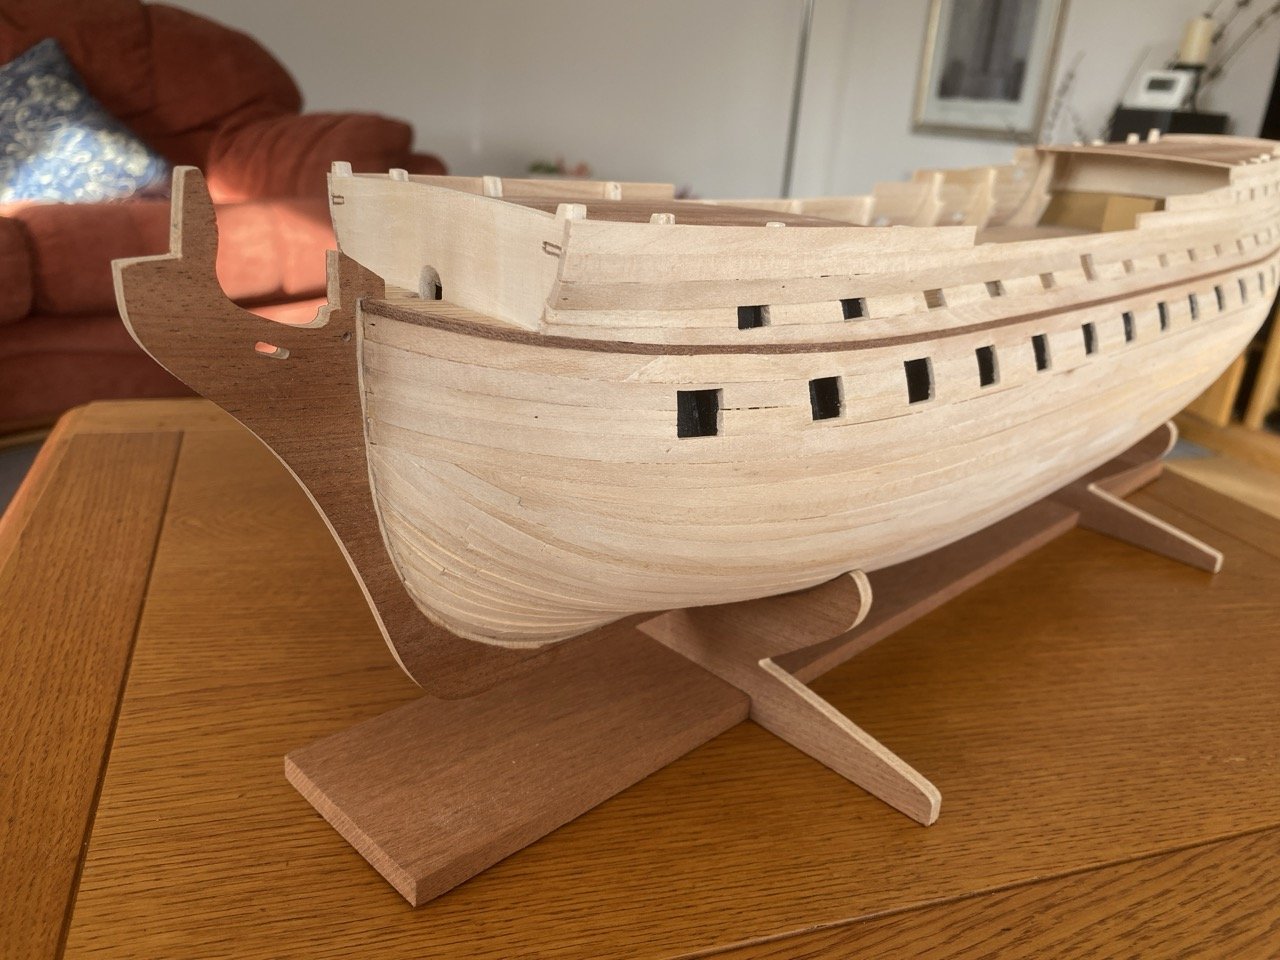
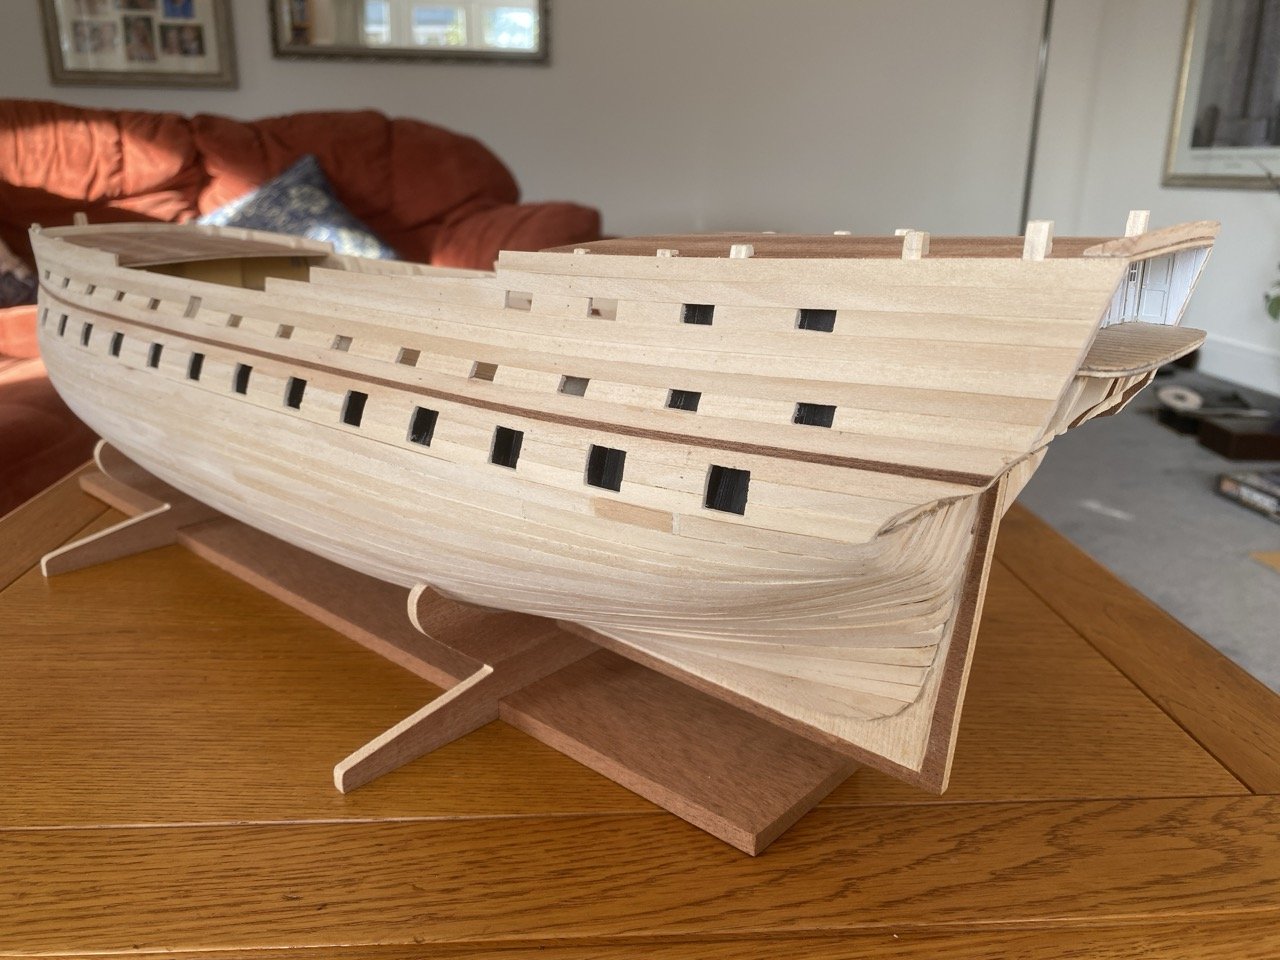
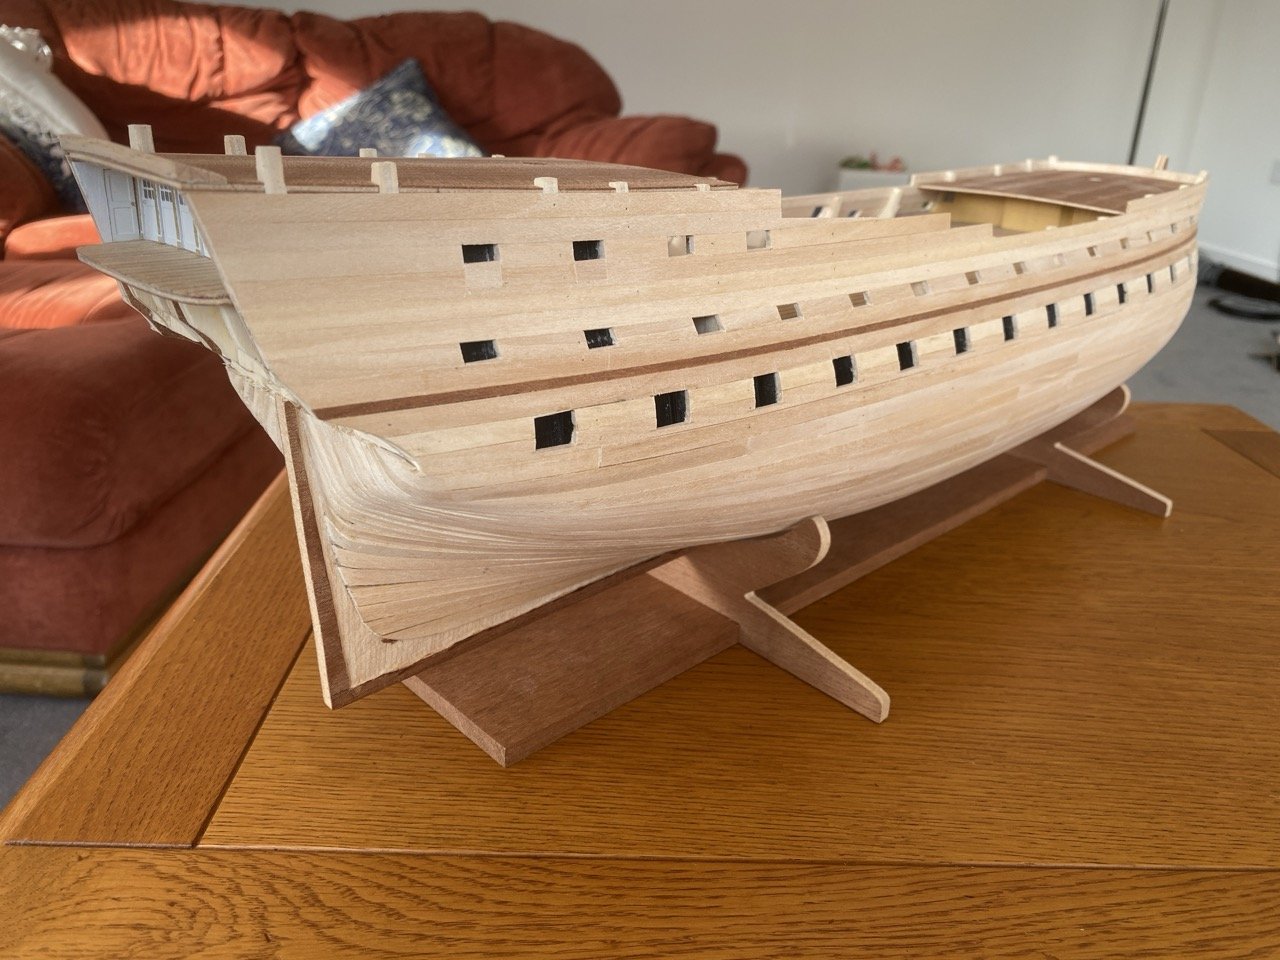
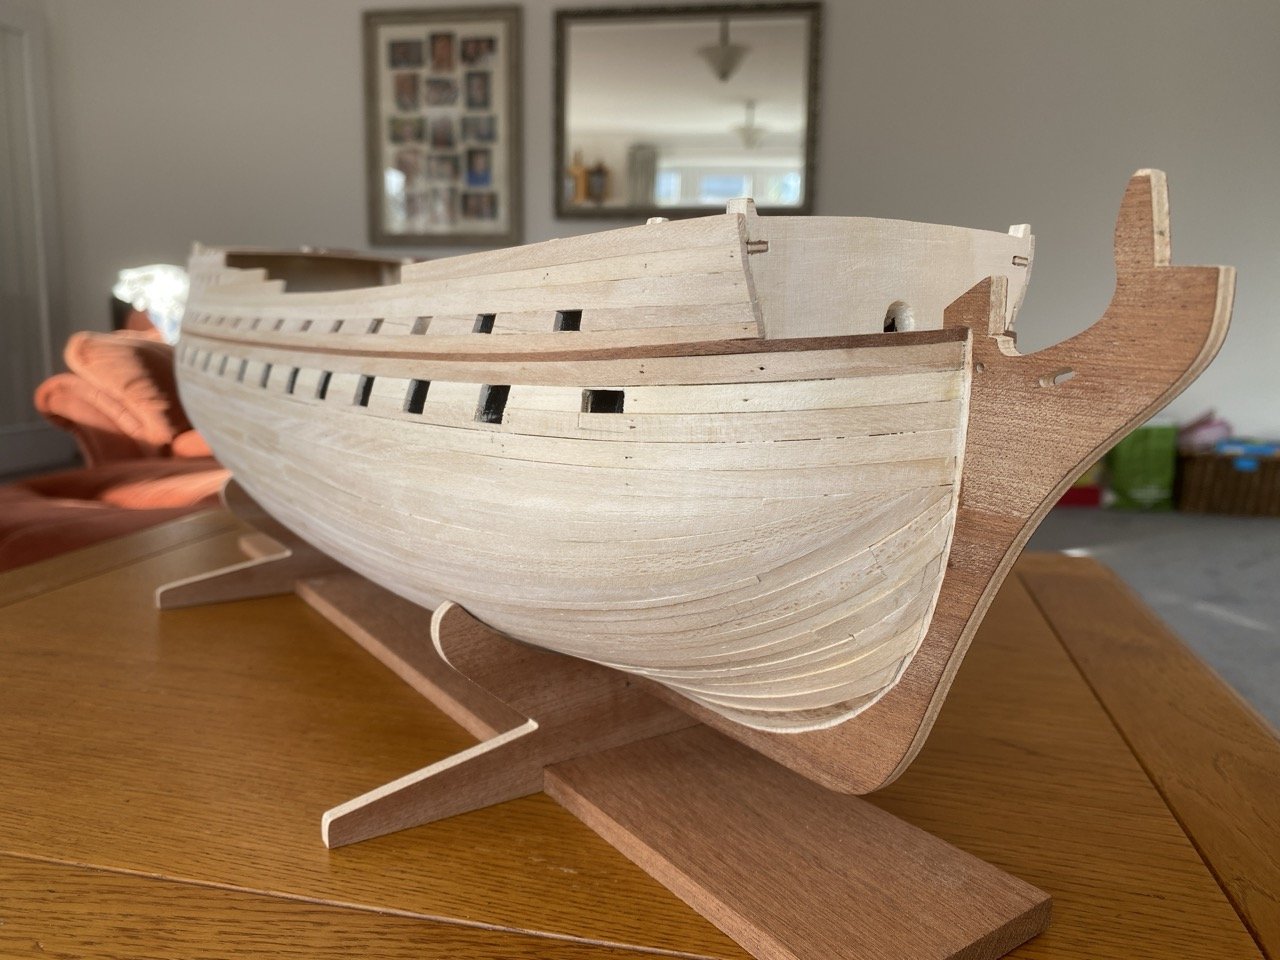
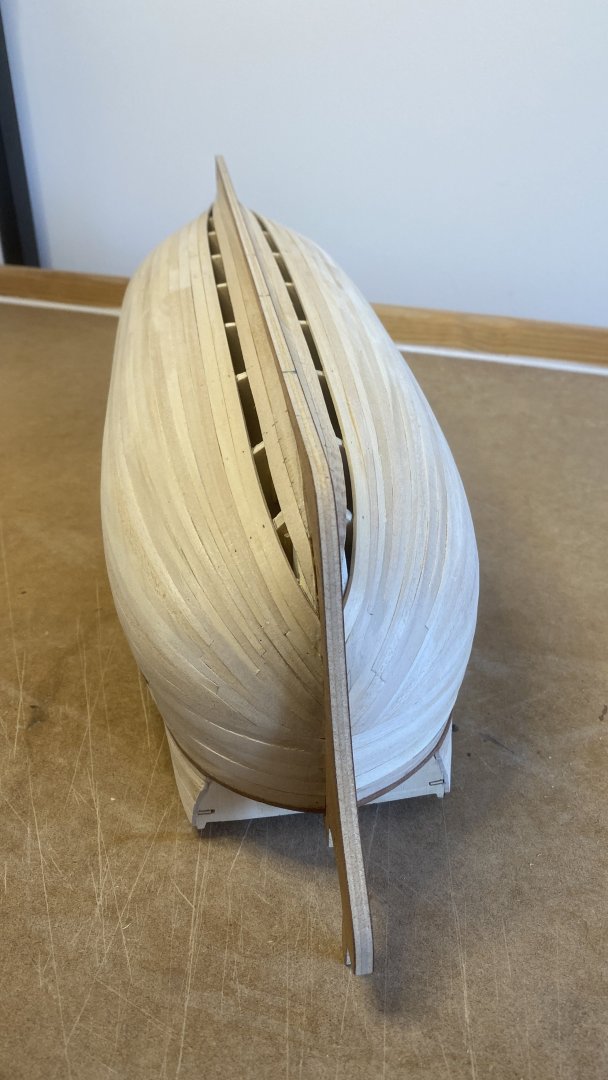
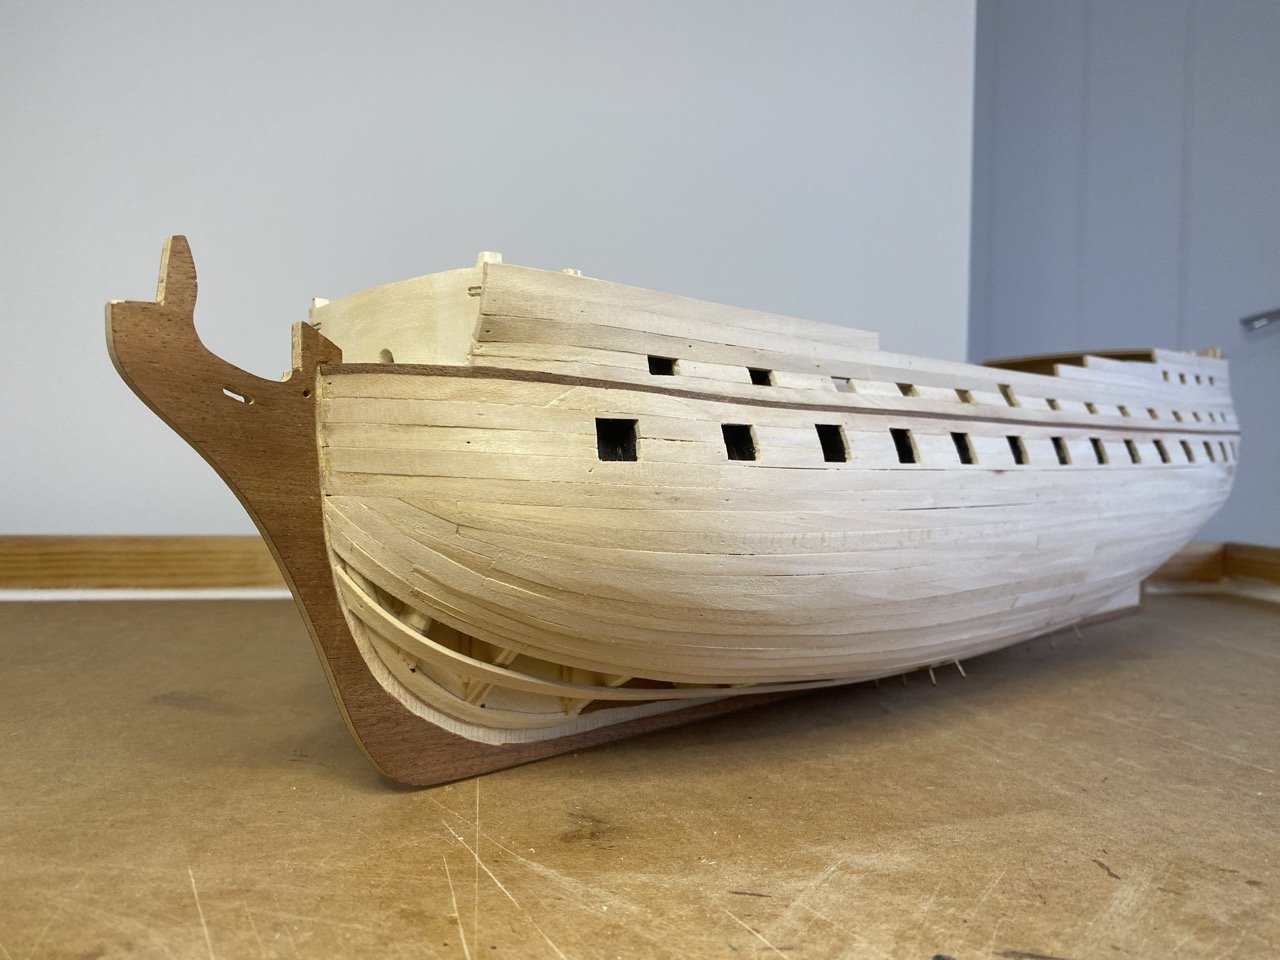
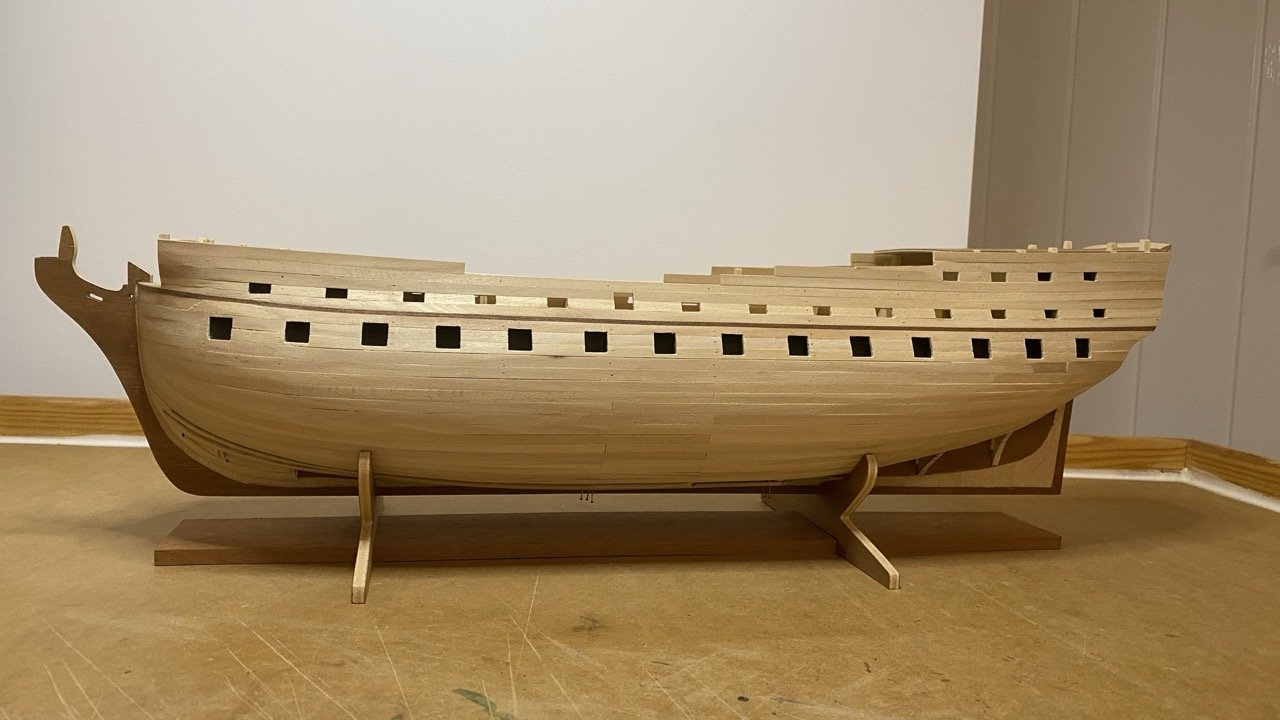
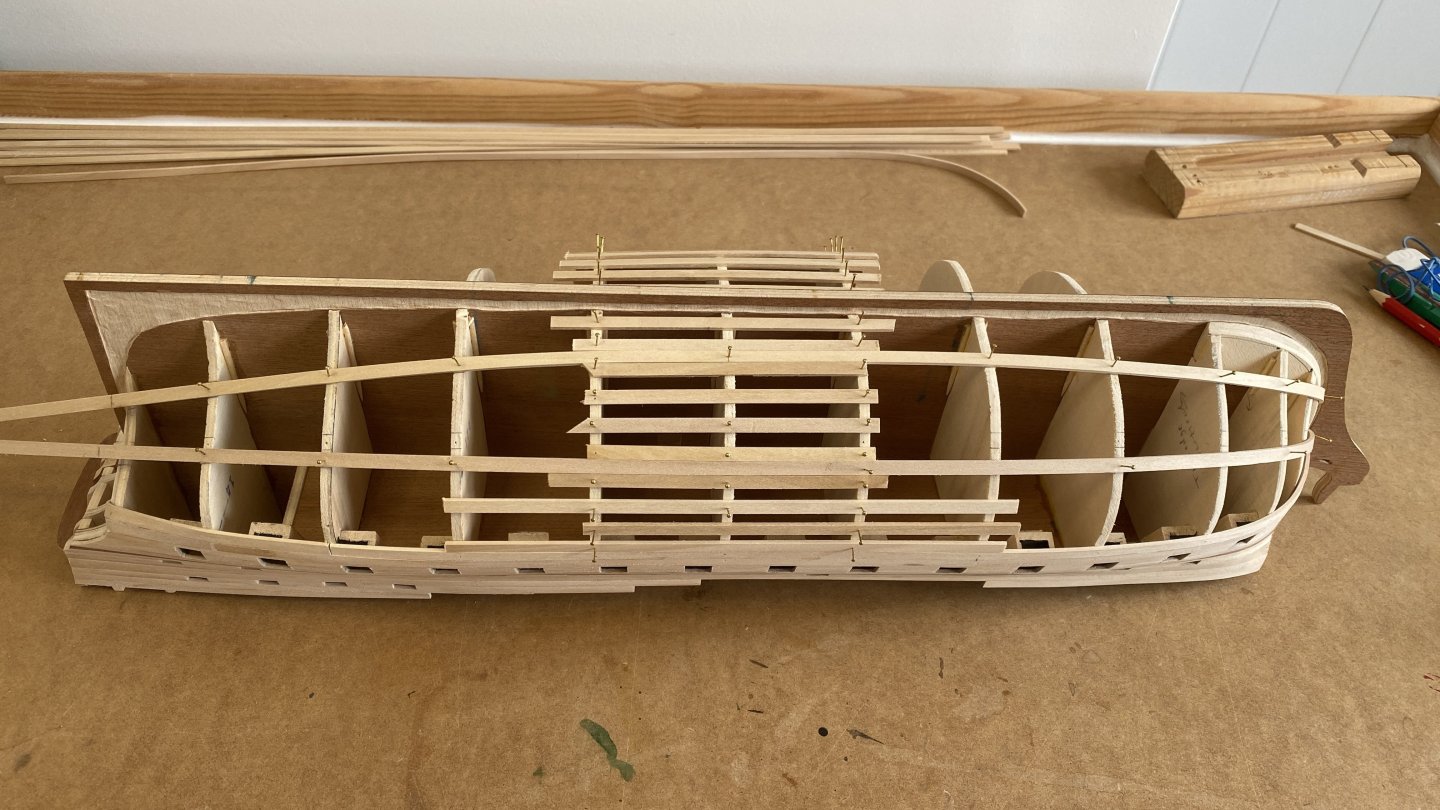
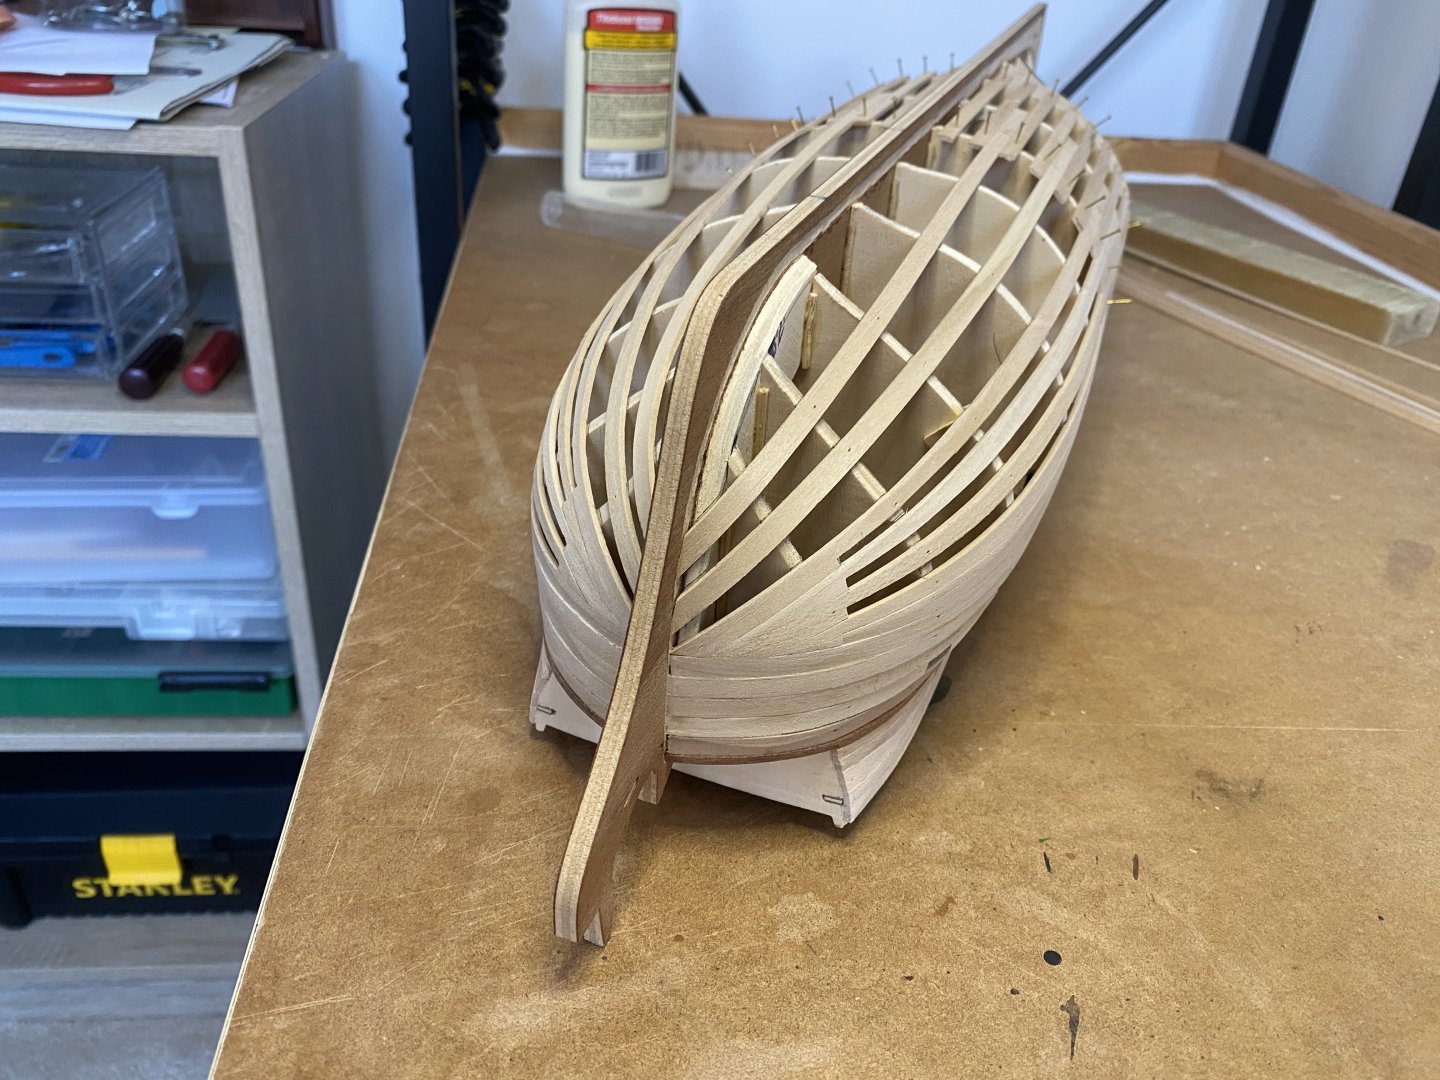
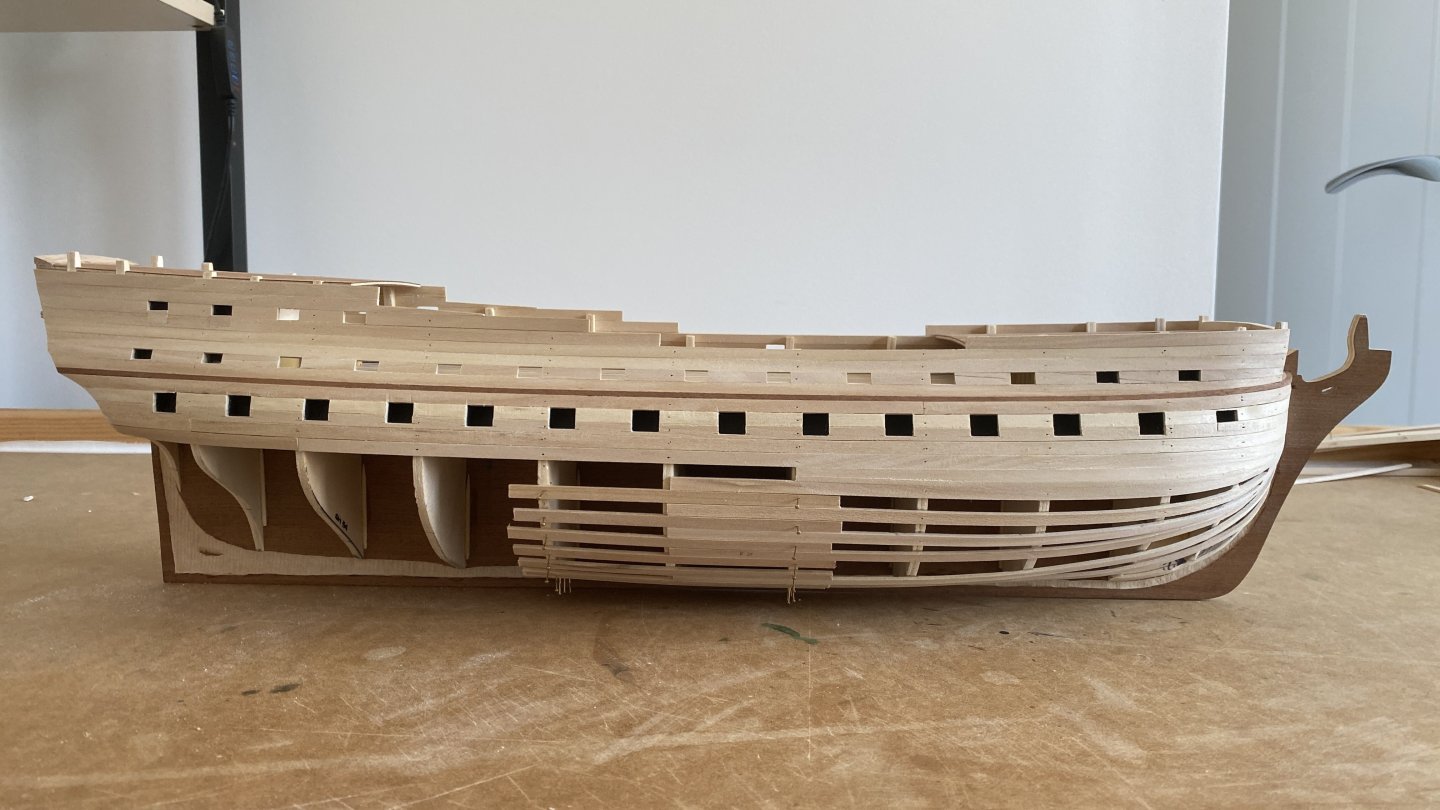
Milestone moment... just finished the inner hull planking. Got a few minor recesses to fill and then I can sand it down smooth. On the whole I'm pleased with how it's gone. Took from June 19th till Oct 7th, so that's quite slow progress, but quicker than my last build. At least it's finished now. 🙂

-
yvesvidal reacted to a post in a topic:
HMS Bellona by Andy Thurston - Corel - 1/100
-
Nearshore reacted to a post in a topic:
HMS Bellona by Andy Thurston - Corel - 1/100
-
Frecap reacted to a post in a topic:
HMS Bellona by Andy Thurston - Corel - 1/100
-
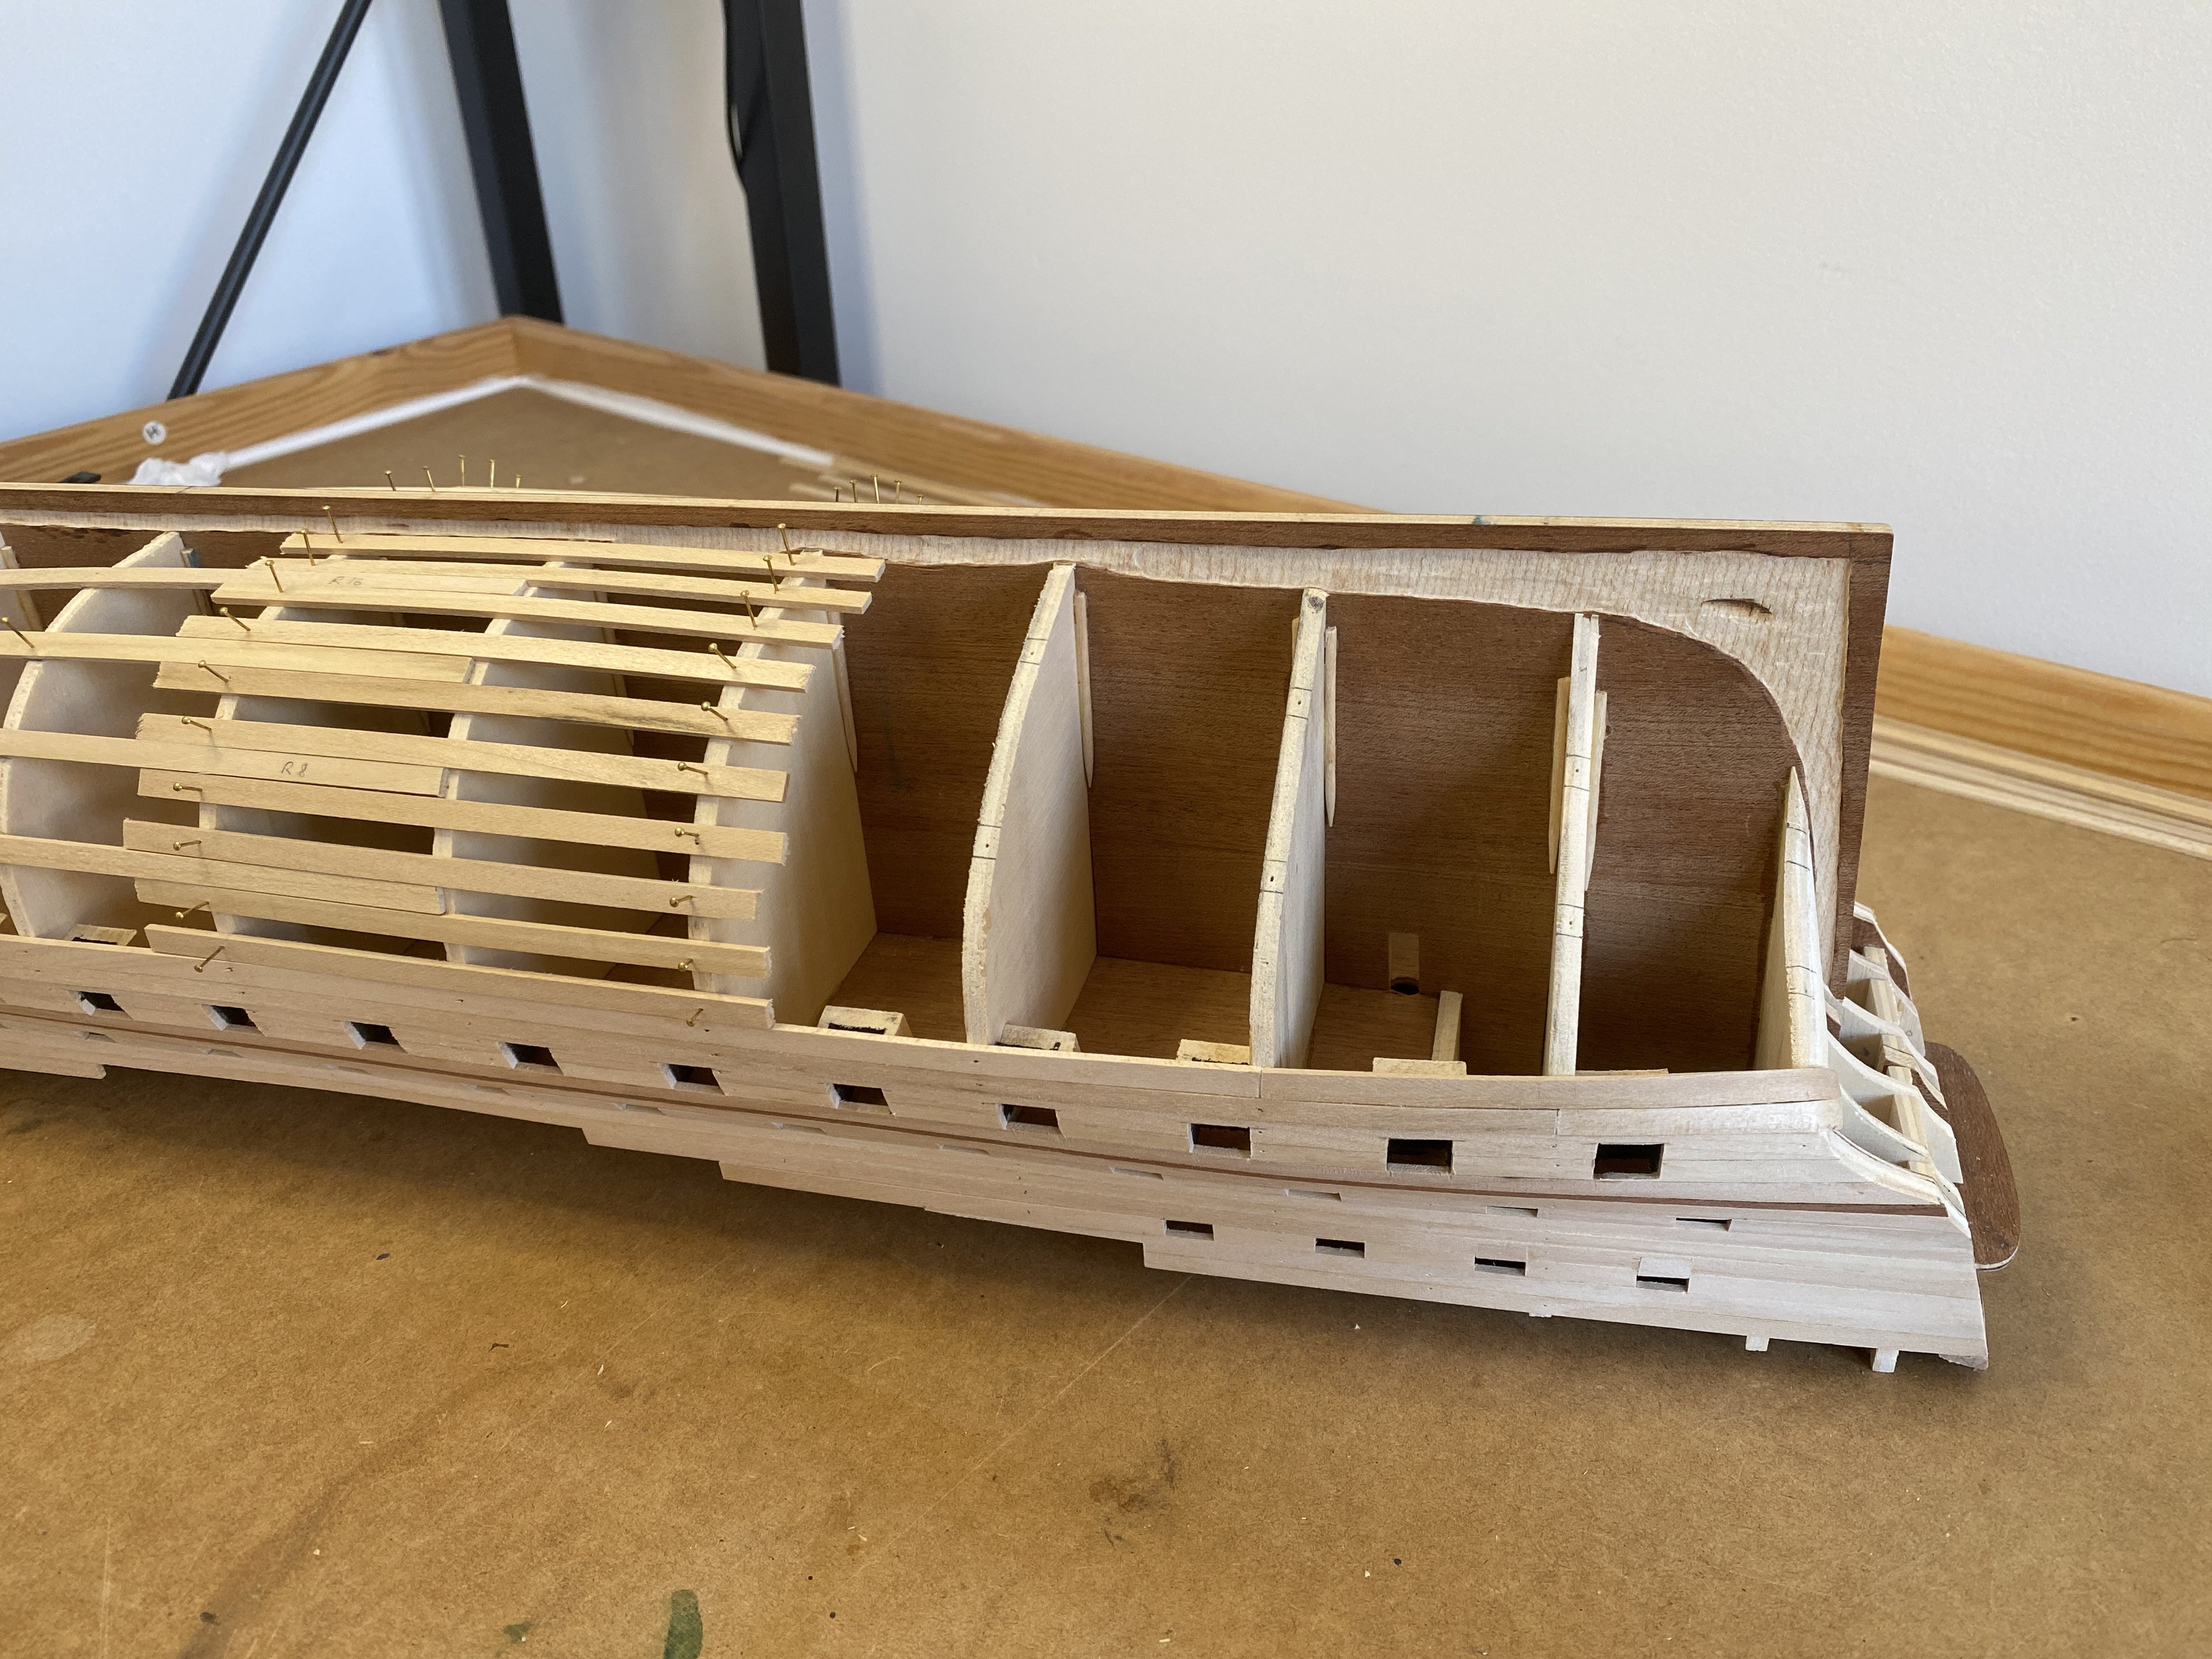
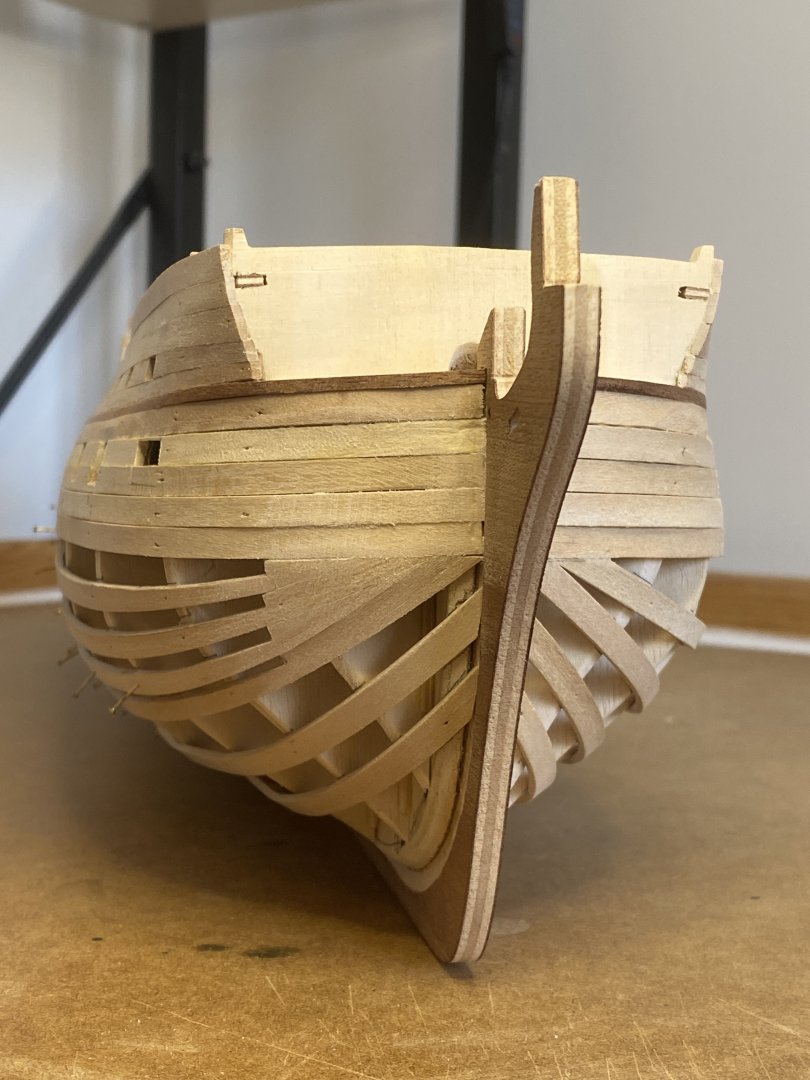
100th inner hull plank glued on today... just more two to go! I've terminated the inner hull planks at the stern along the curved line indicated in the plans (Sheet 5, Figure A). If I need to add any additional bits later that will be simple enough. Interestingly I've not needed to fit any stealers. Not what I expected, but the inner hull planks have fitted rather well without.
-
Hi Frecap and Nearshore... many thanks for both your replies above. The photos are extremely useful. Frecap, I will definitely consider thinning down the stem and the sternpost - I like the visual effect. Nearshore, I think I'm going to extend the inner hull planking to very near to the sternpost but will probably stop just shy of the endpoint. I will confess that the cutting and fitting of the inner hull planks that transition from following the bulwarks to lying flat on the hull are quite intimidating so I'll probably dry-fit and trial them quite a few times before finally gluing. I'm still very new to this!!!
-
Andy Thurston reacted to a post in a topic:
HMS Bellona by Andy Thurston - Corel - 1/100
-
Andy Thurston reacted to a post in a topic:
HMS Bellona by Andy Thurston - Corel - 1/100
-
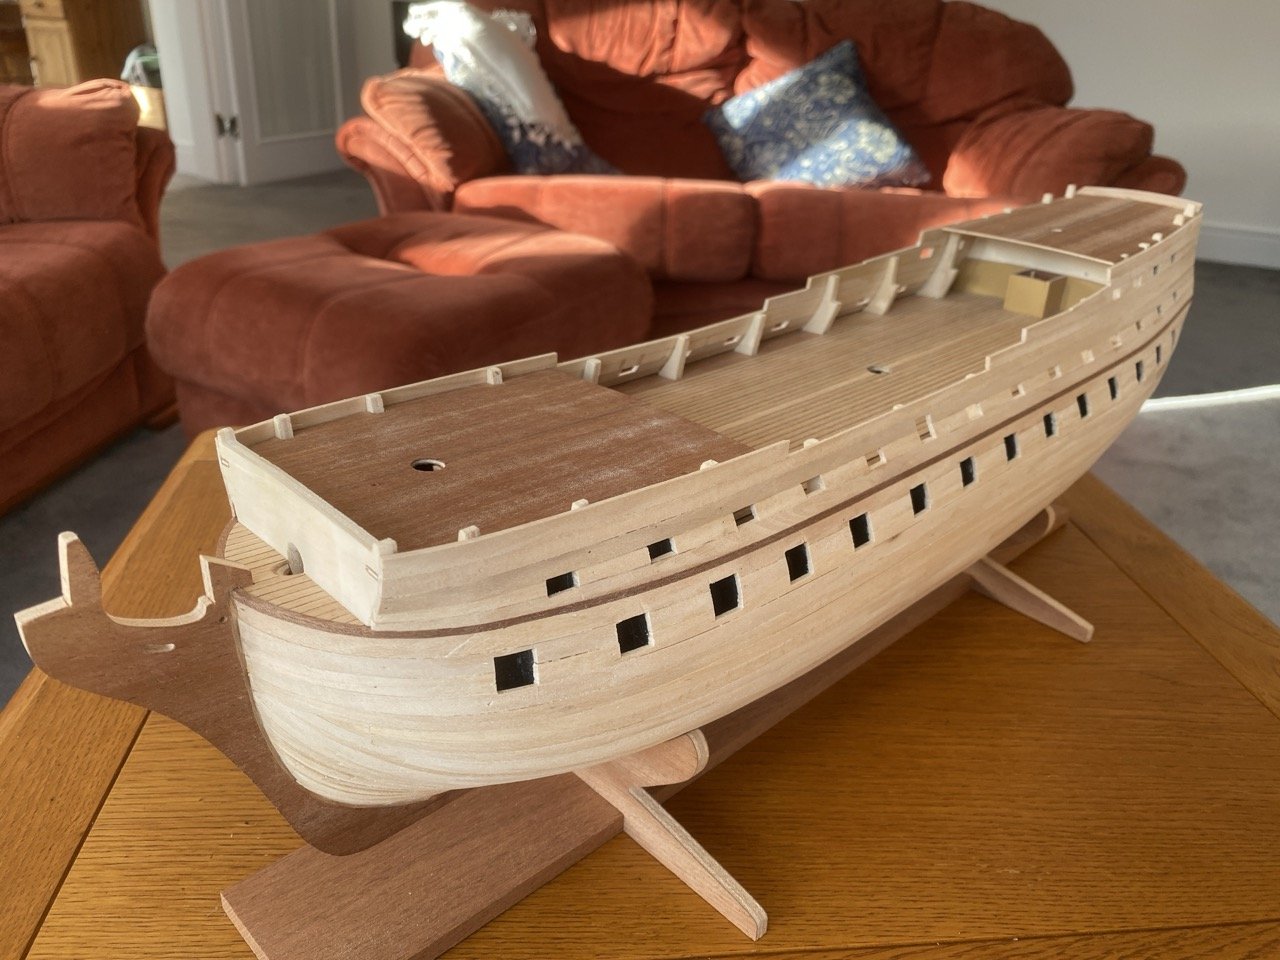
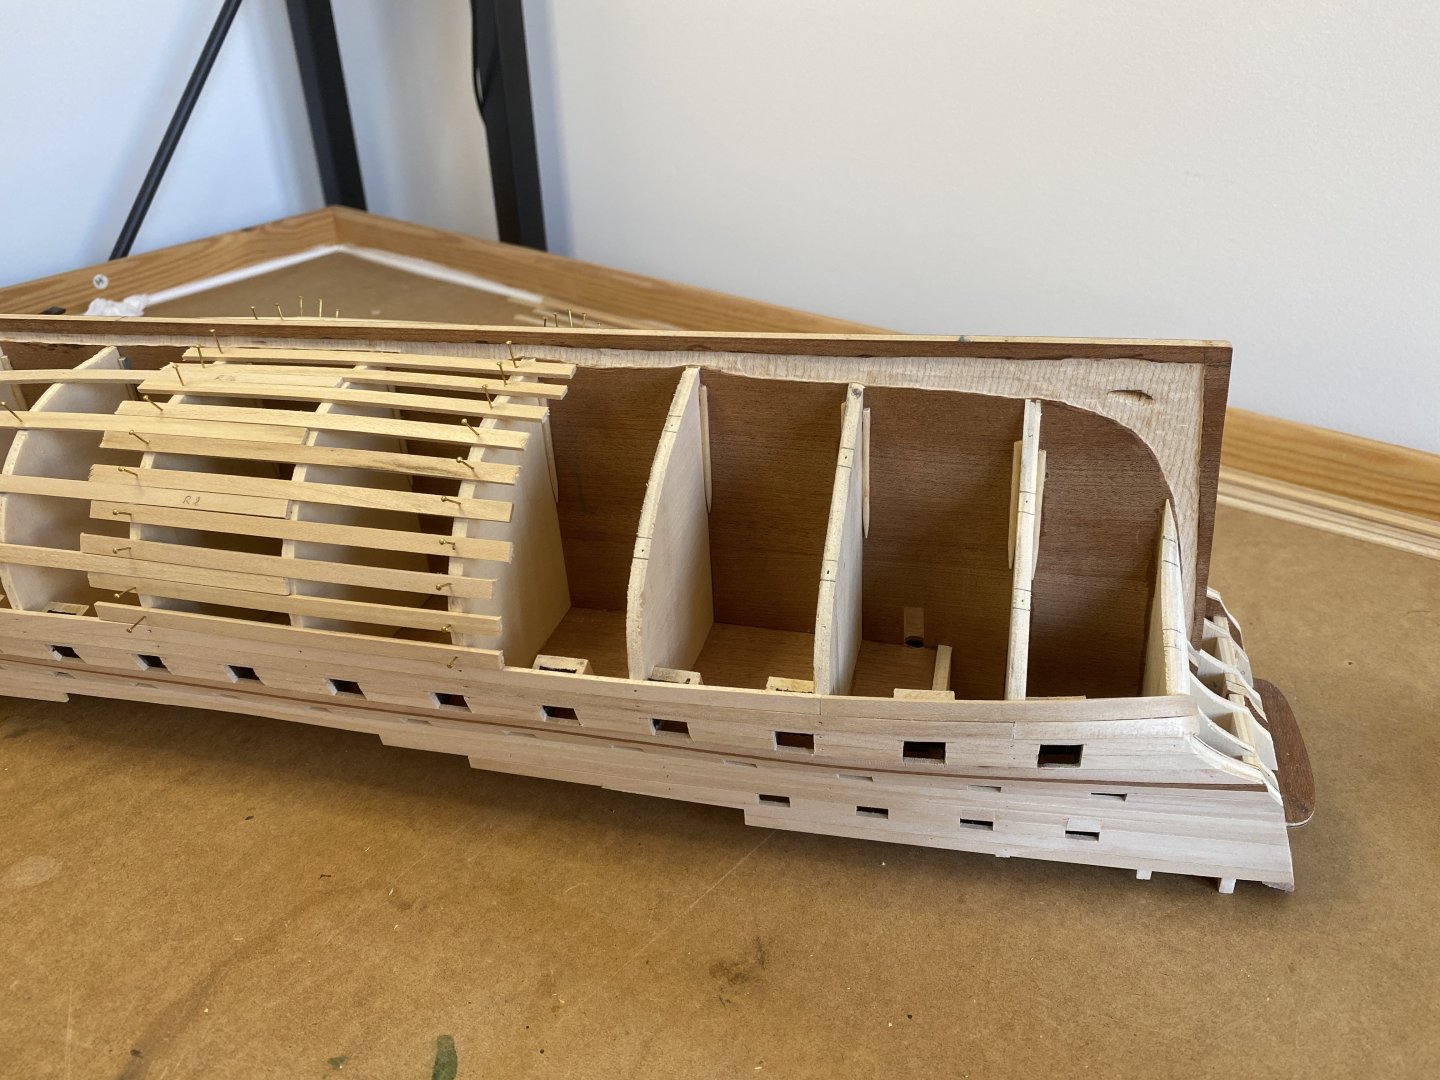
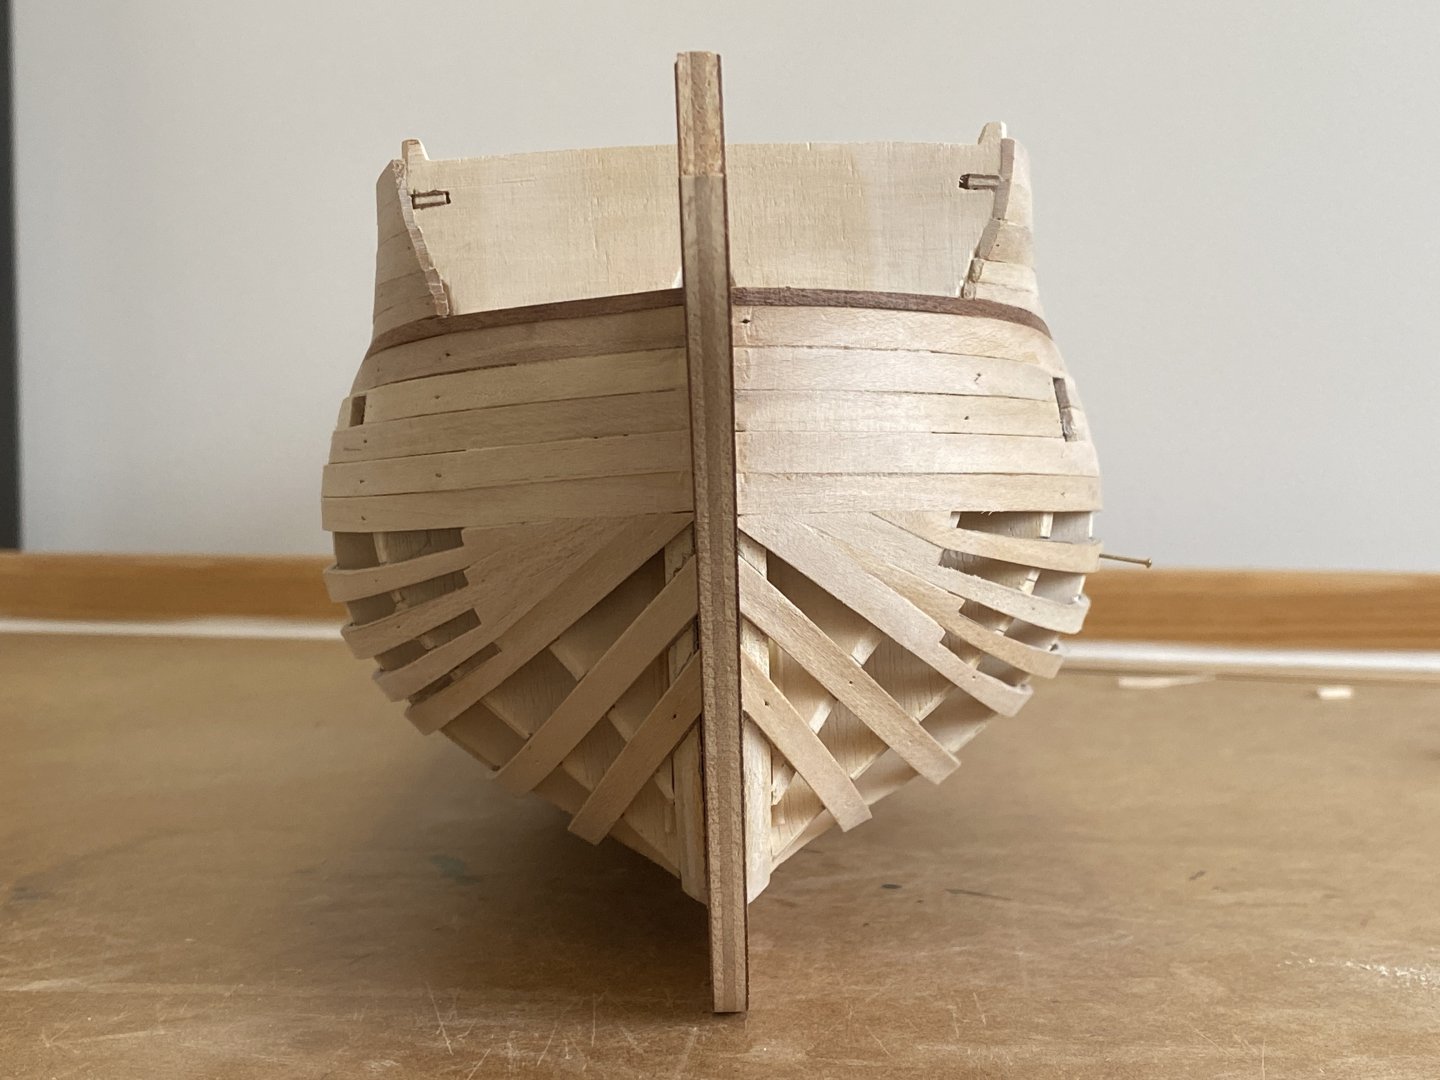
Three months and five days since I added the first inner hull plank and I've still not finished. I'm hoping to complete the inner hull in the next few weeks. I've noticed in other build logs the inner hull planks all going all the way back to the sternpost, whereas the instructions say "at stern, it is better not to cover the keel No. 1, stopping along the lower limit of frames No. 12, 14 and 15". It seems to me that stopping the inner hull planking before it reaches the stern post is a good thing, otherwise the hull would be an additional 3mm wide at the sternpost, which I don't think I want. I'd welcome anyones advice on this. Regards to all, Andy.


-
Andy Thurston reacted to a post in a topic:
HMS Bellona by Andy Thurston - Corel - 1/100
-
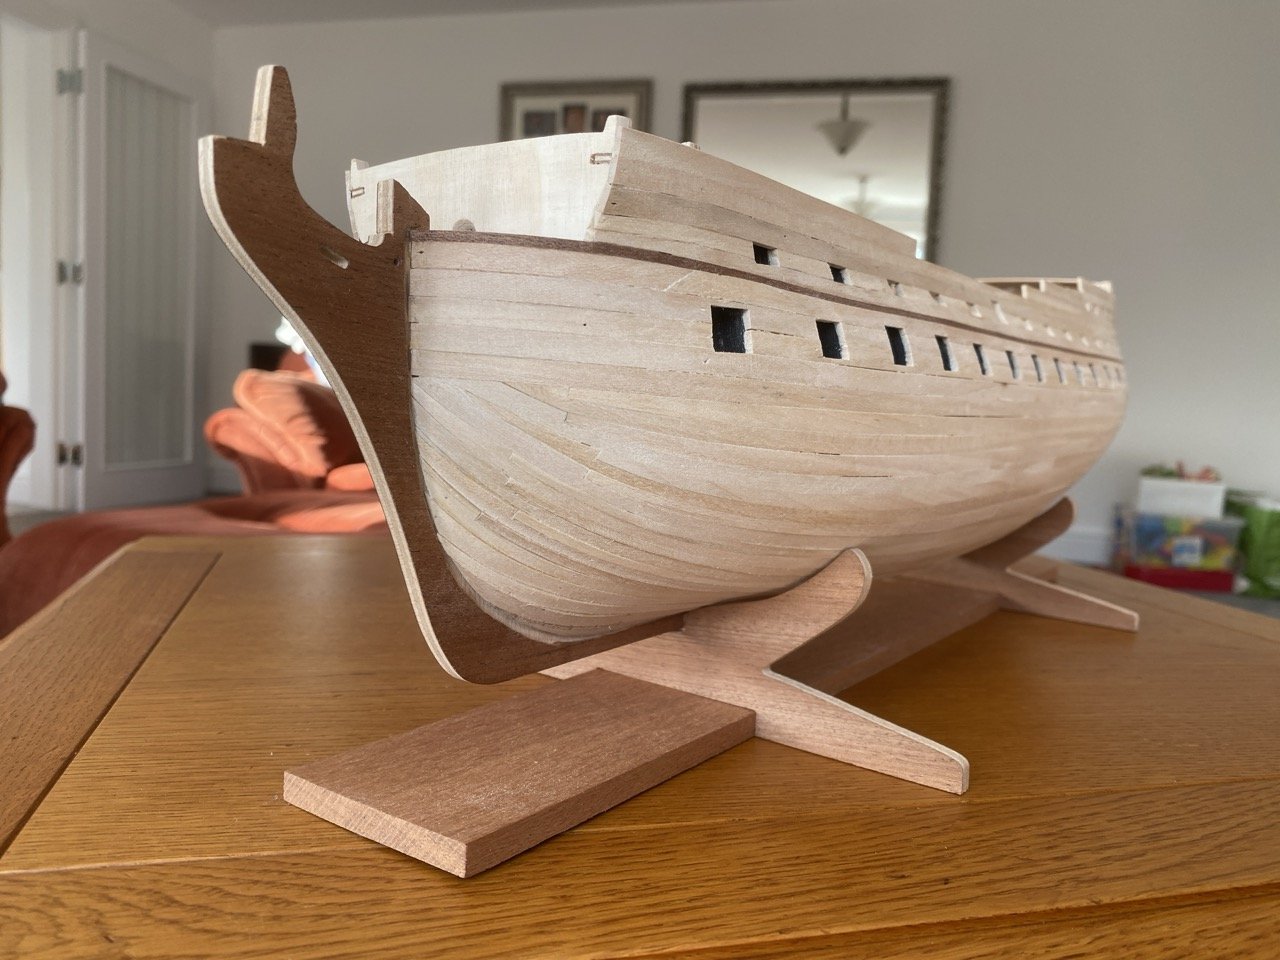
Hi Frecap I love what you've done at the stern on your Bellona model! You've really got the curvature in the wood done excellently. I hope I can achieve the same with my build, though I'm a long way behind you, so that'll come much later. Best wishes, Andy
-
Andy Thurston reacted to a post in a topic:
HMS Bellona by Frecap - Corel - 1:100
-
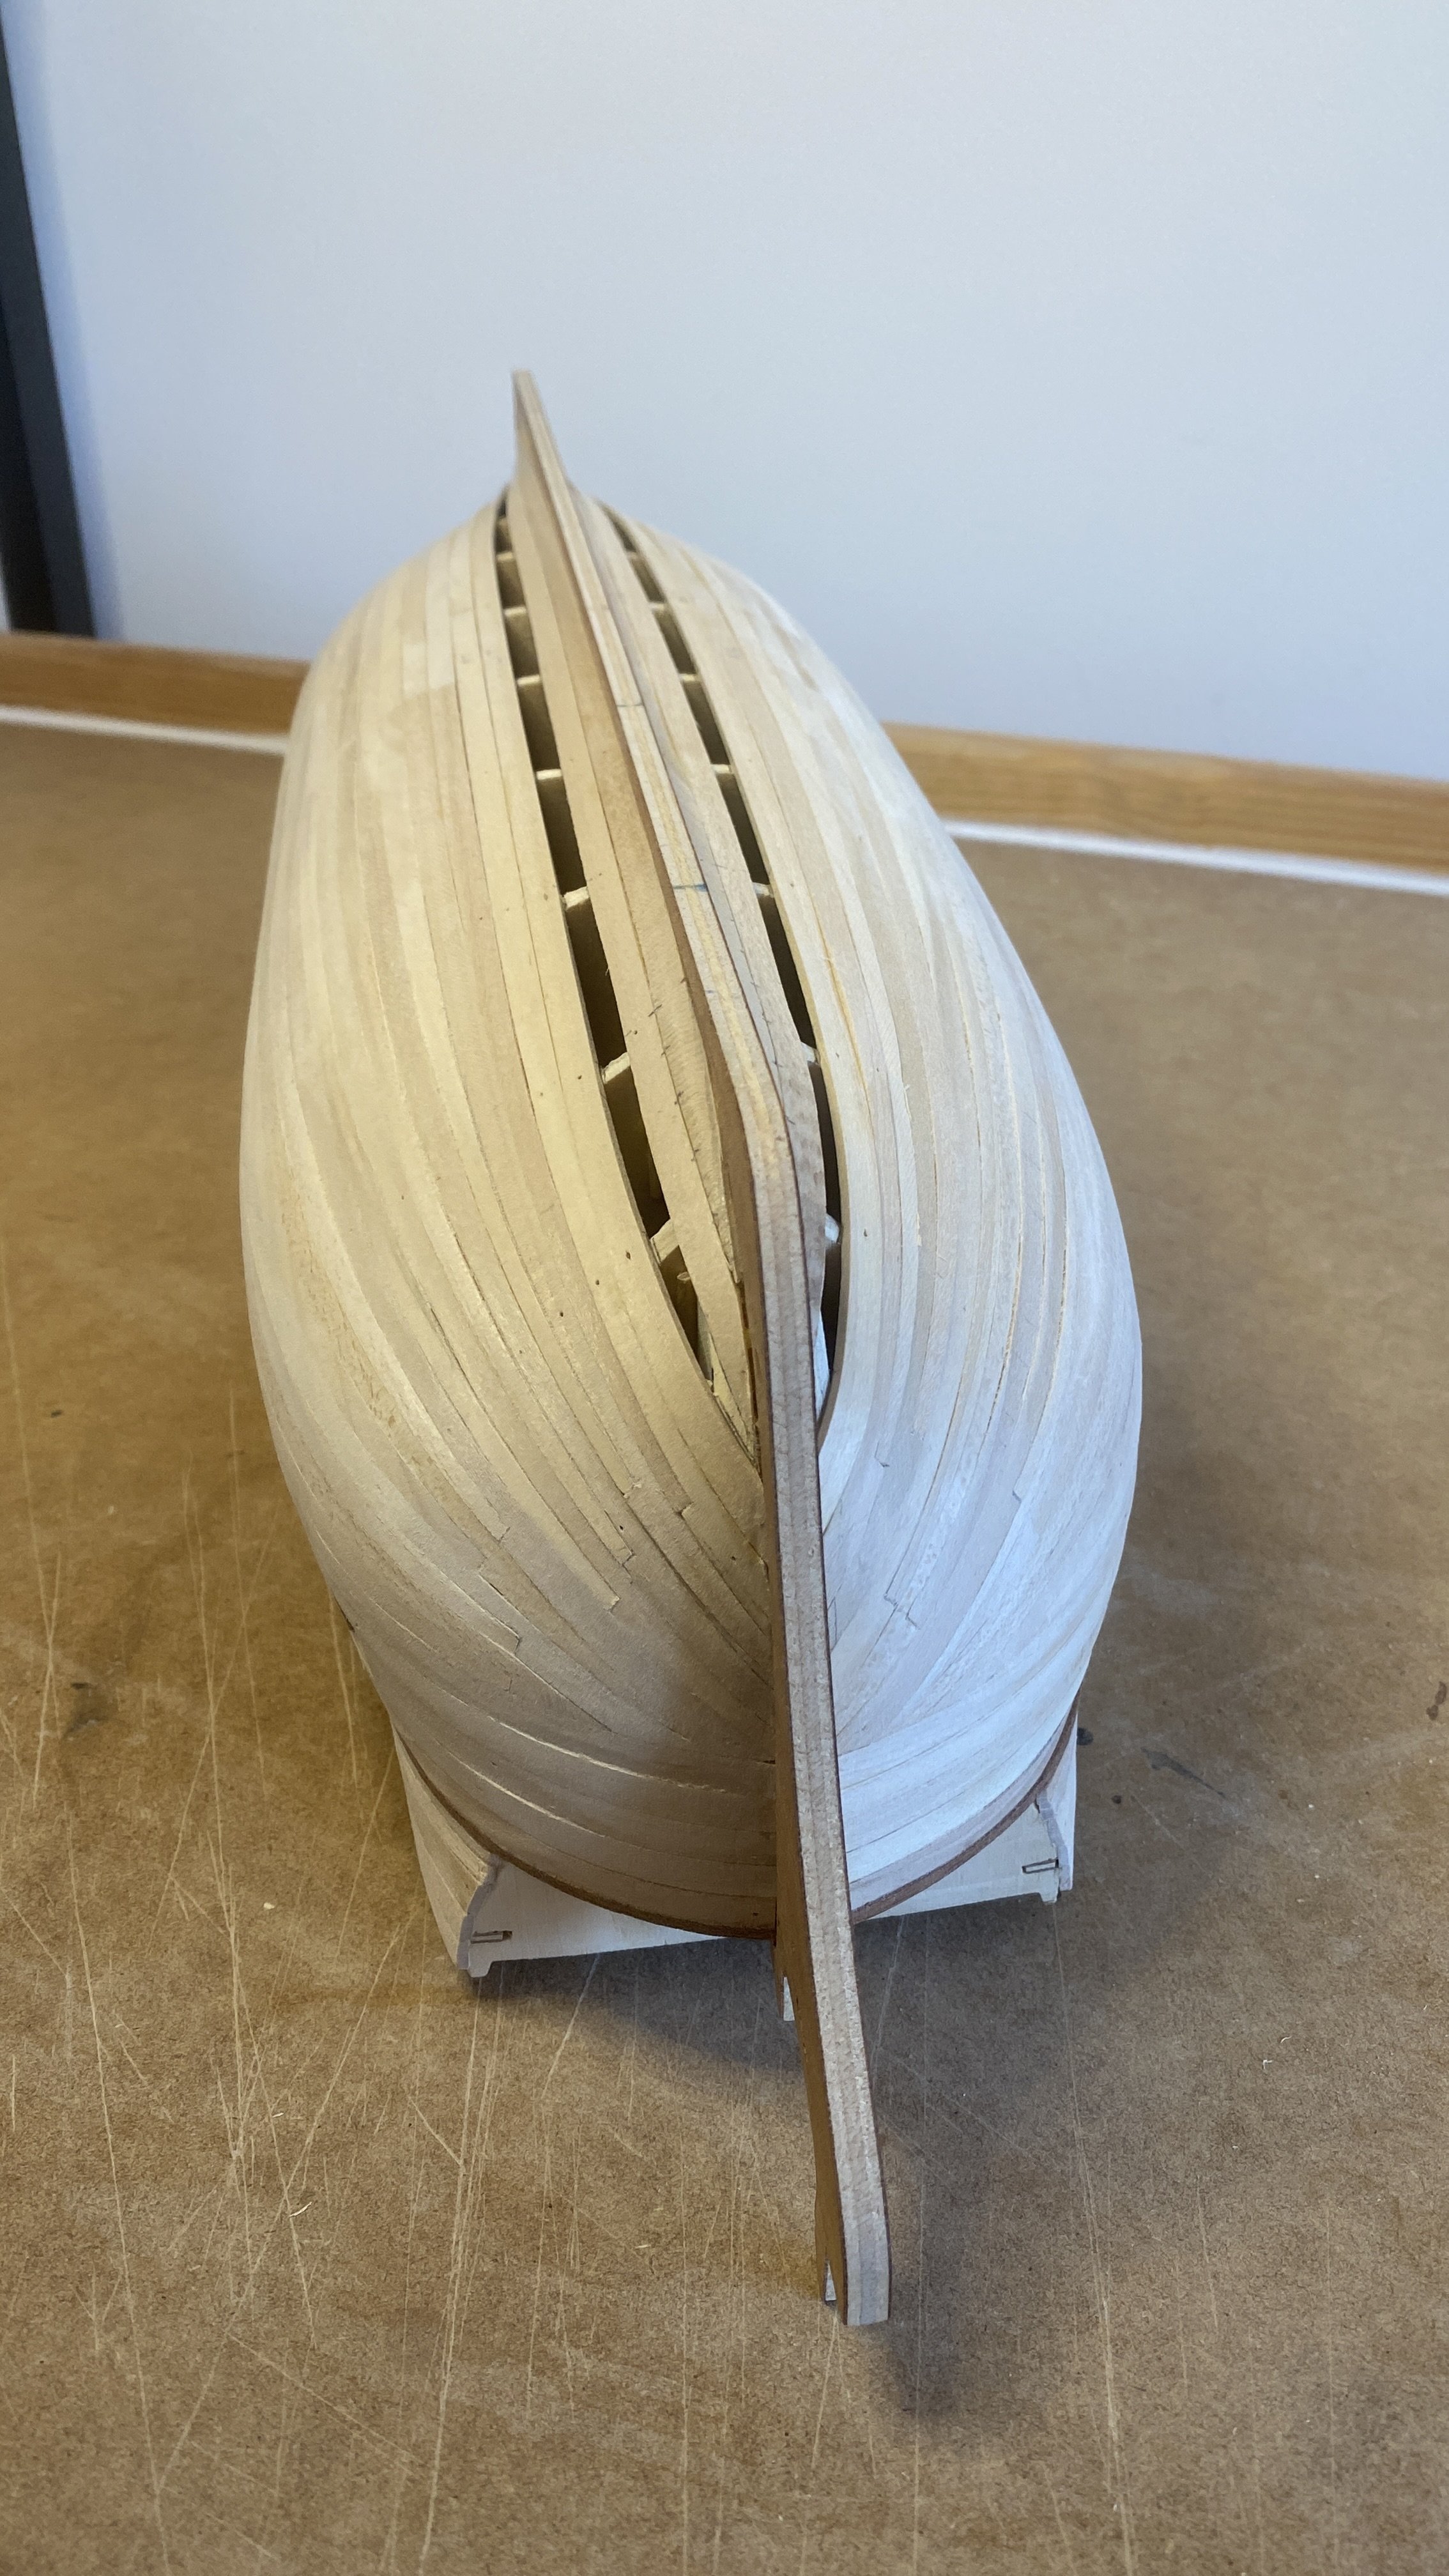
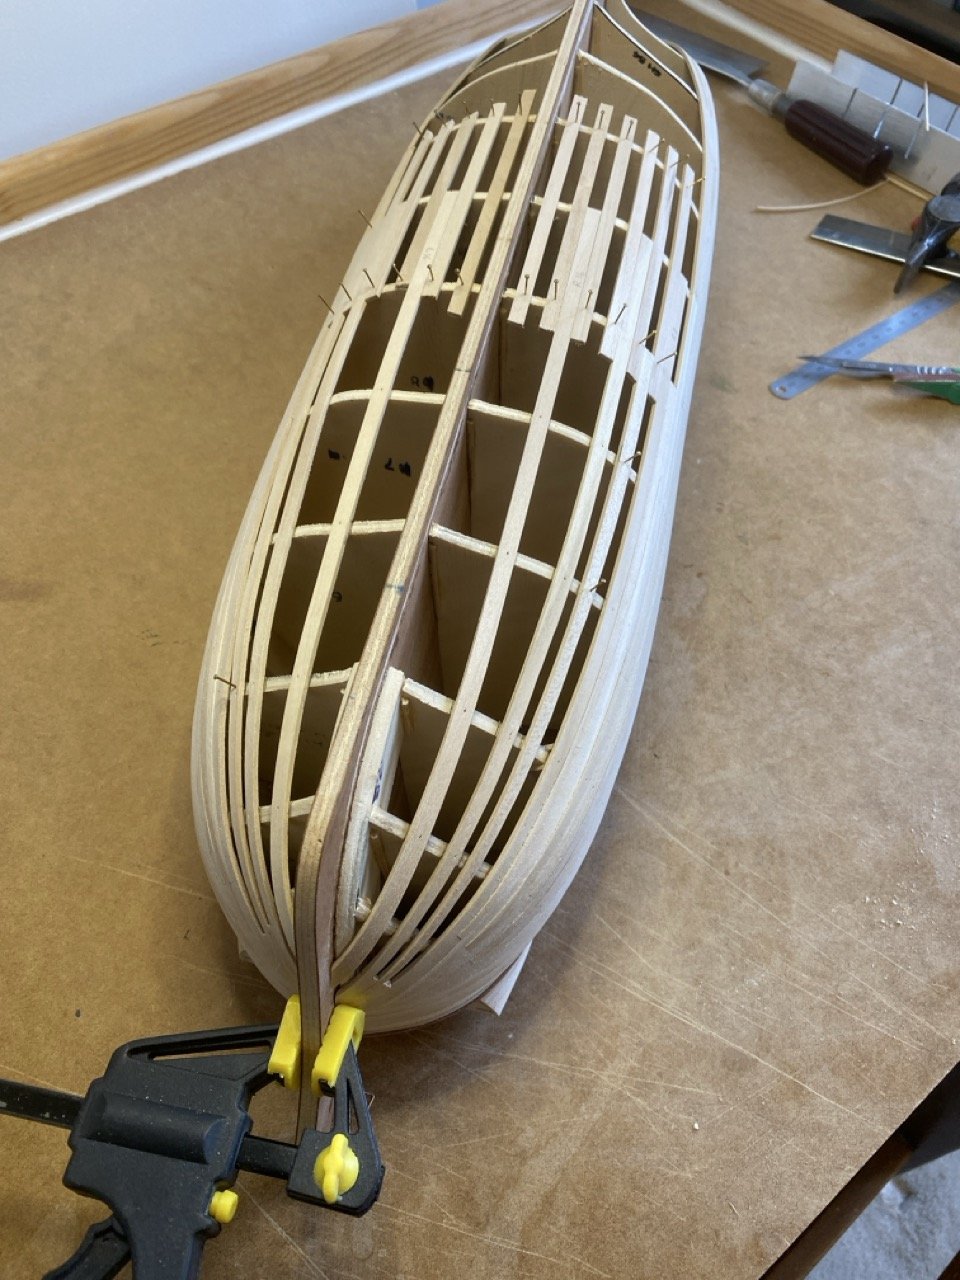
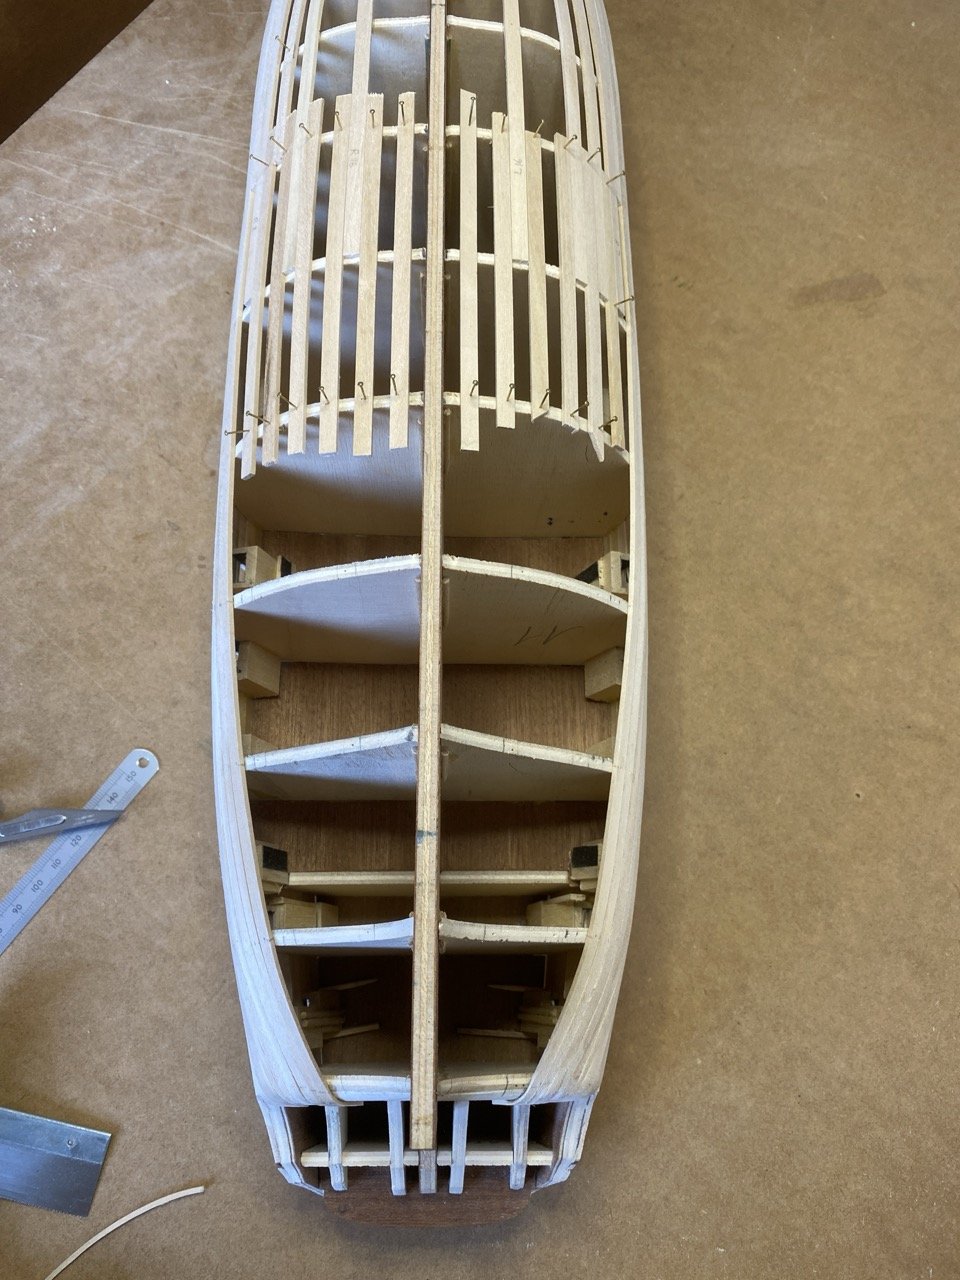
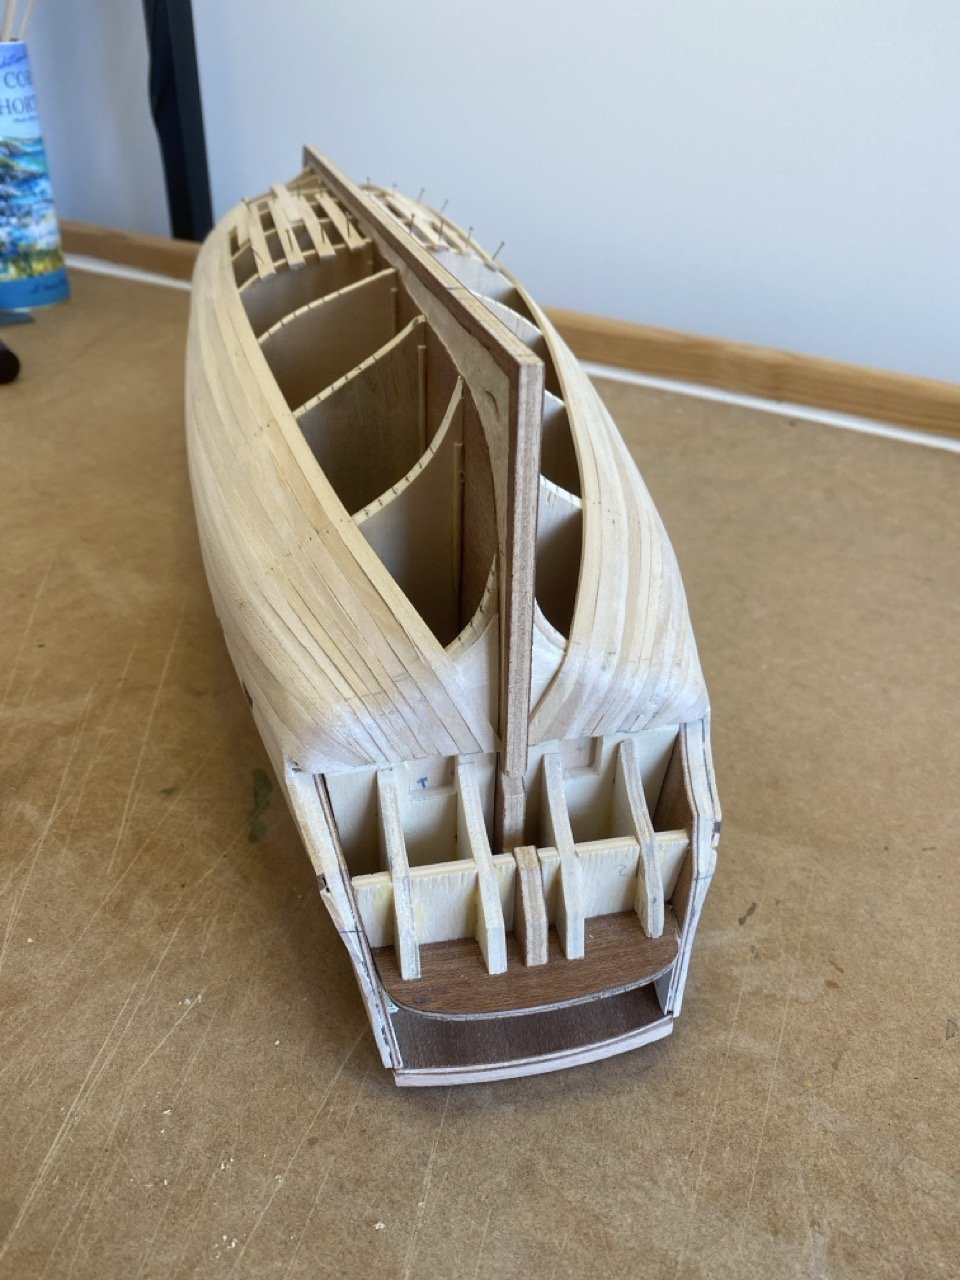
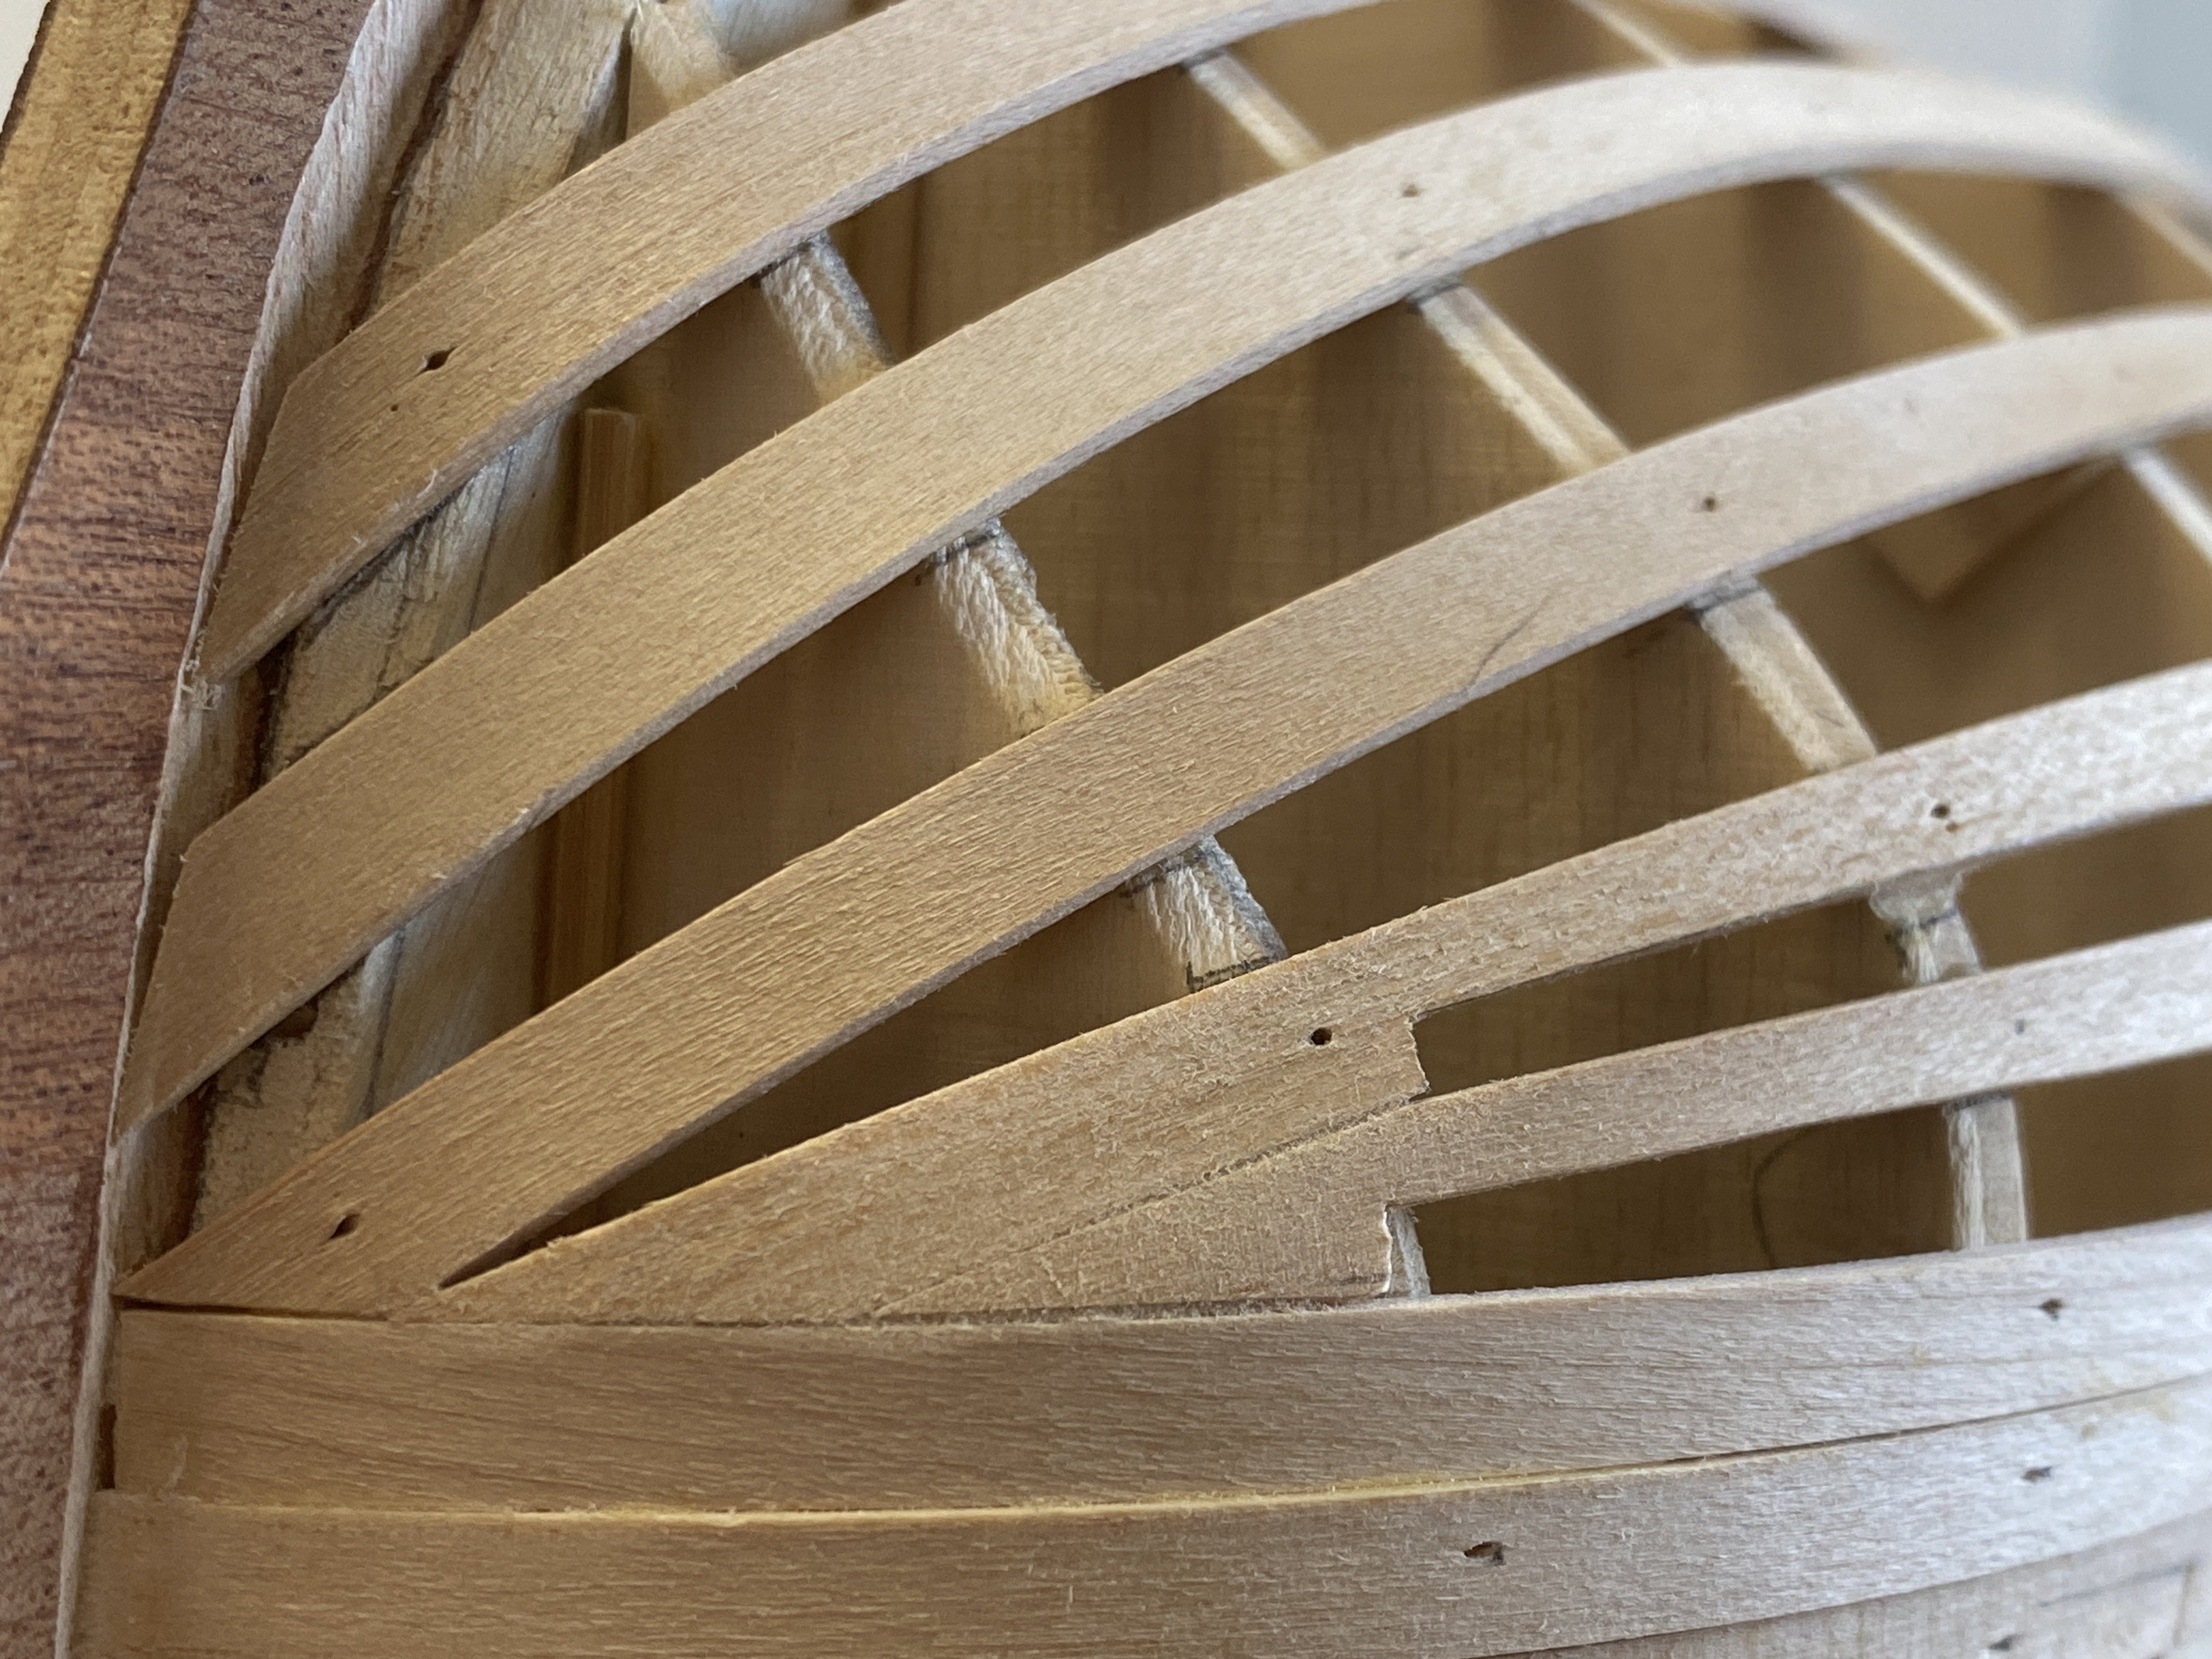
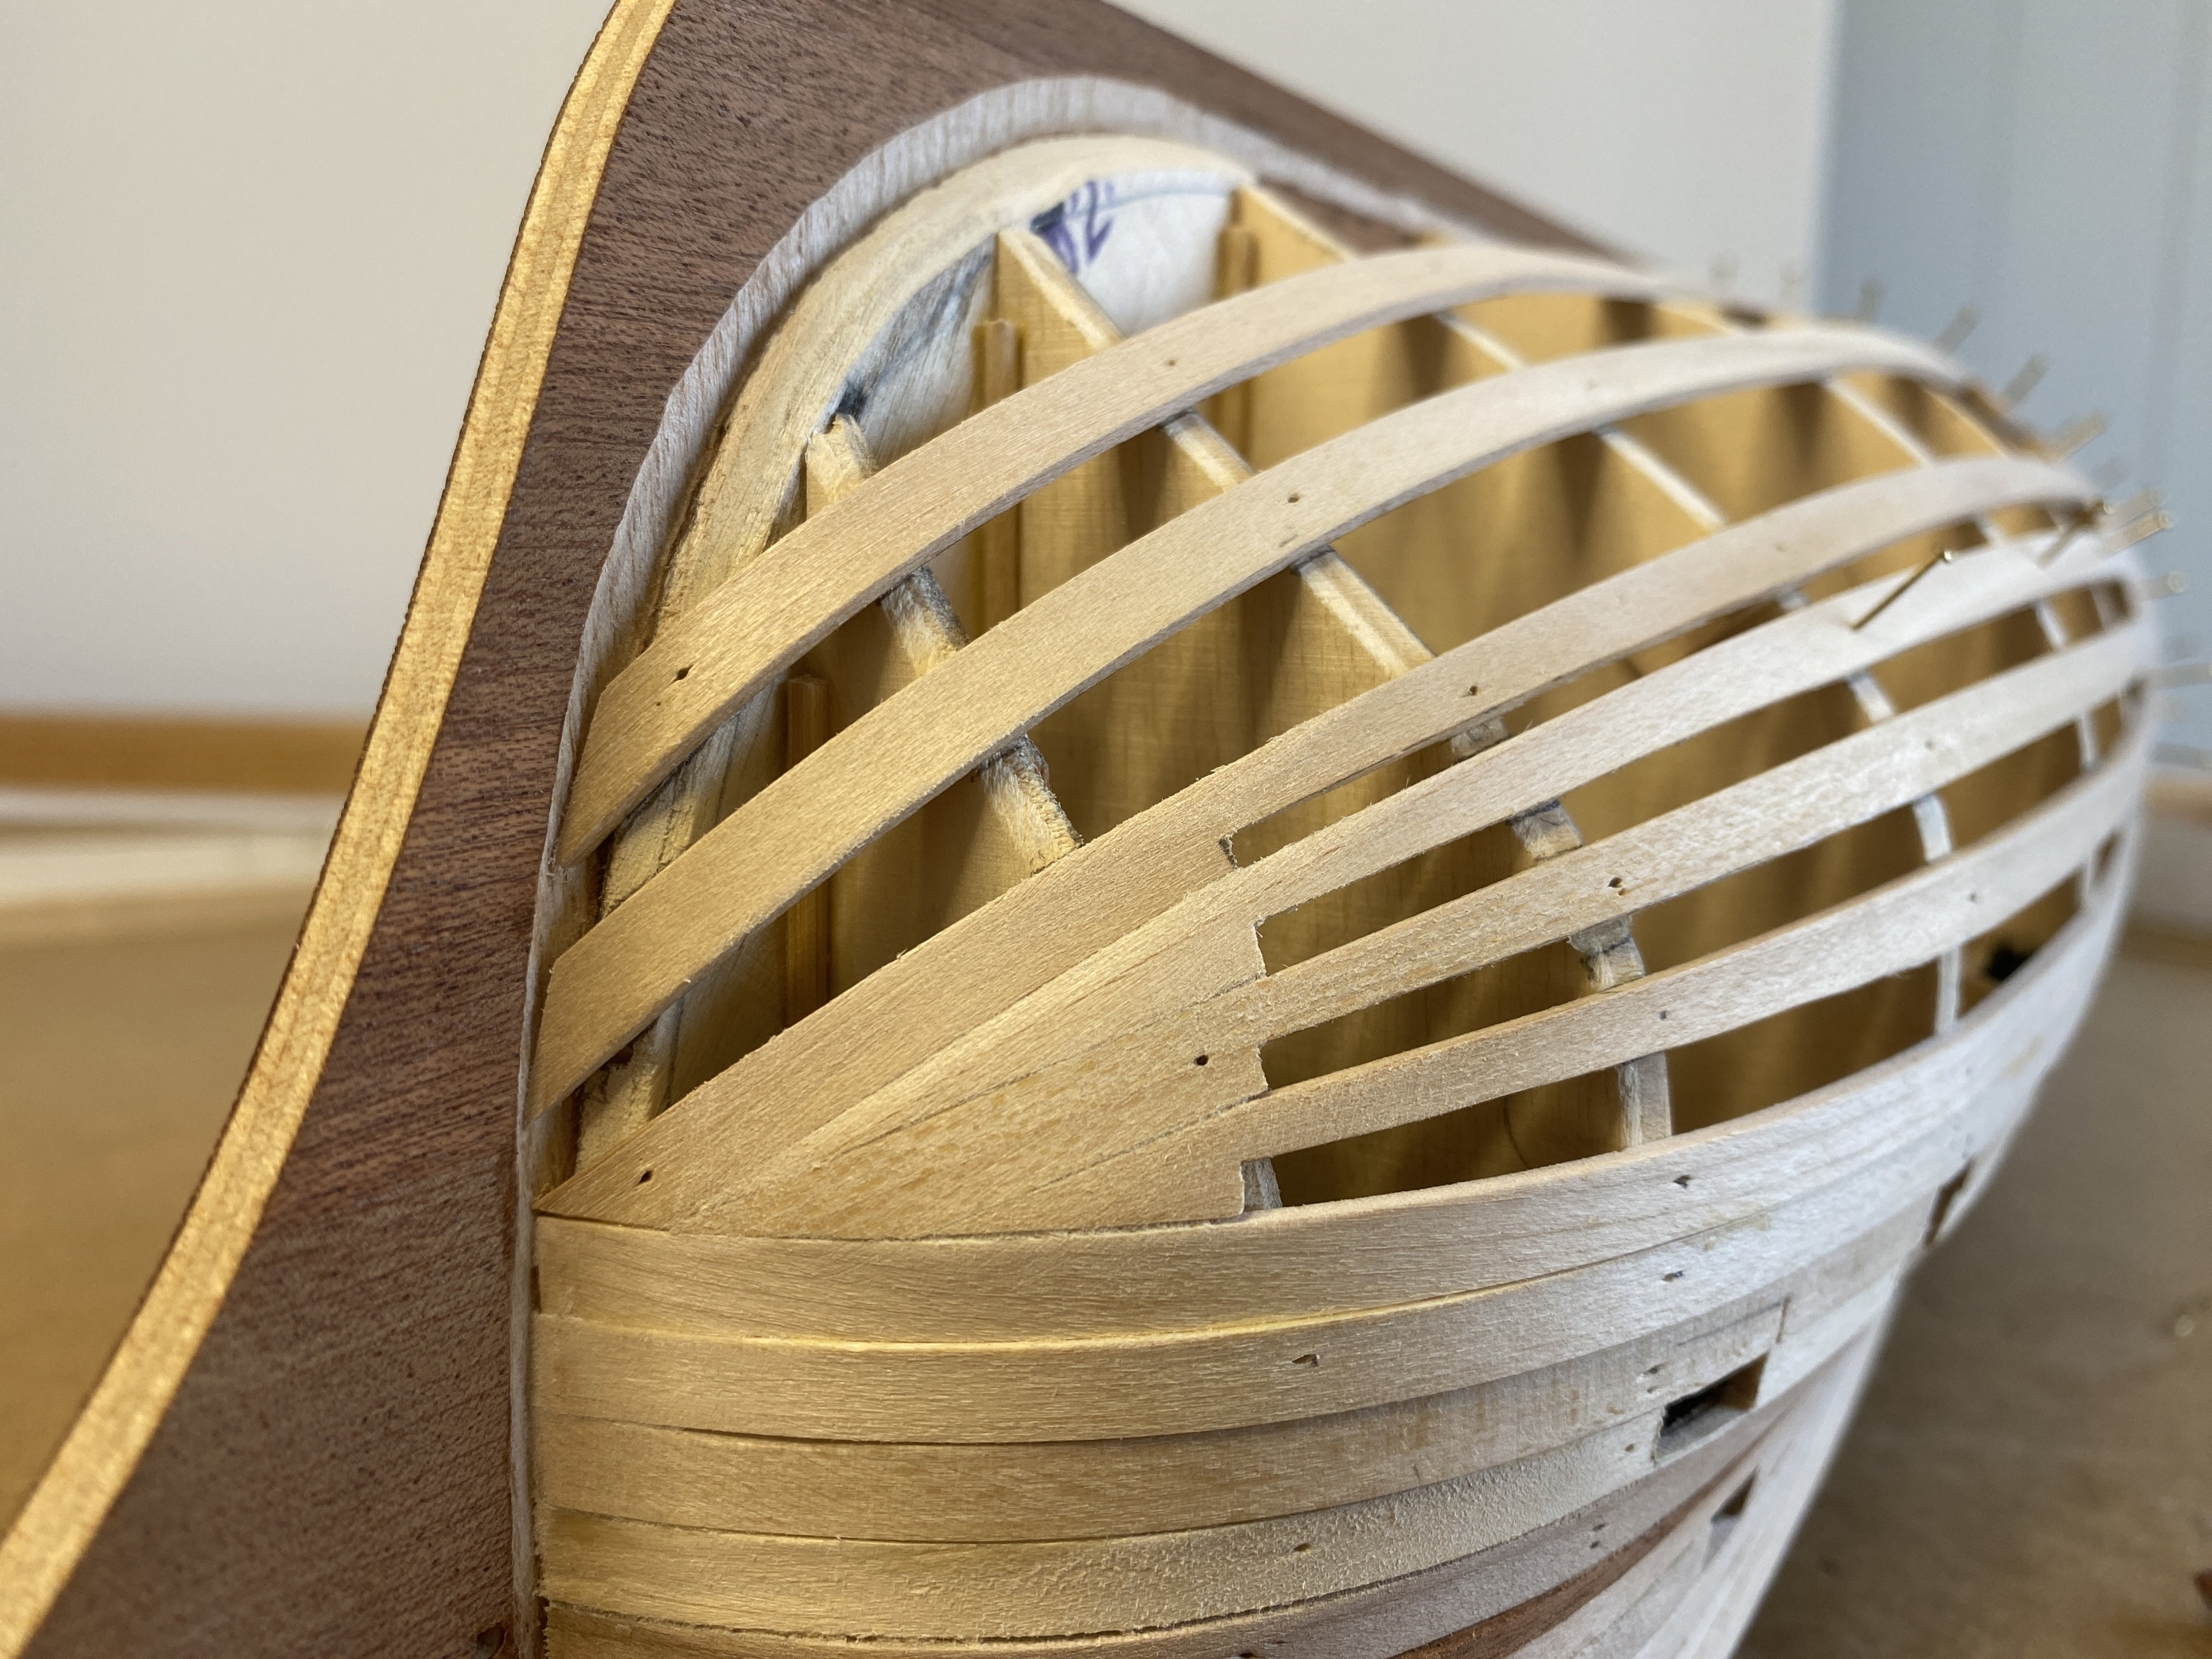
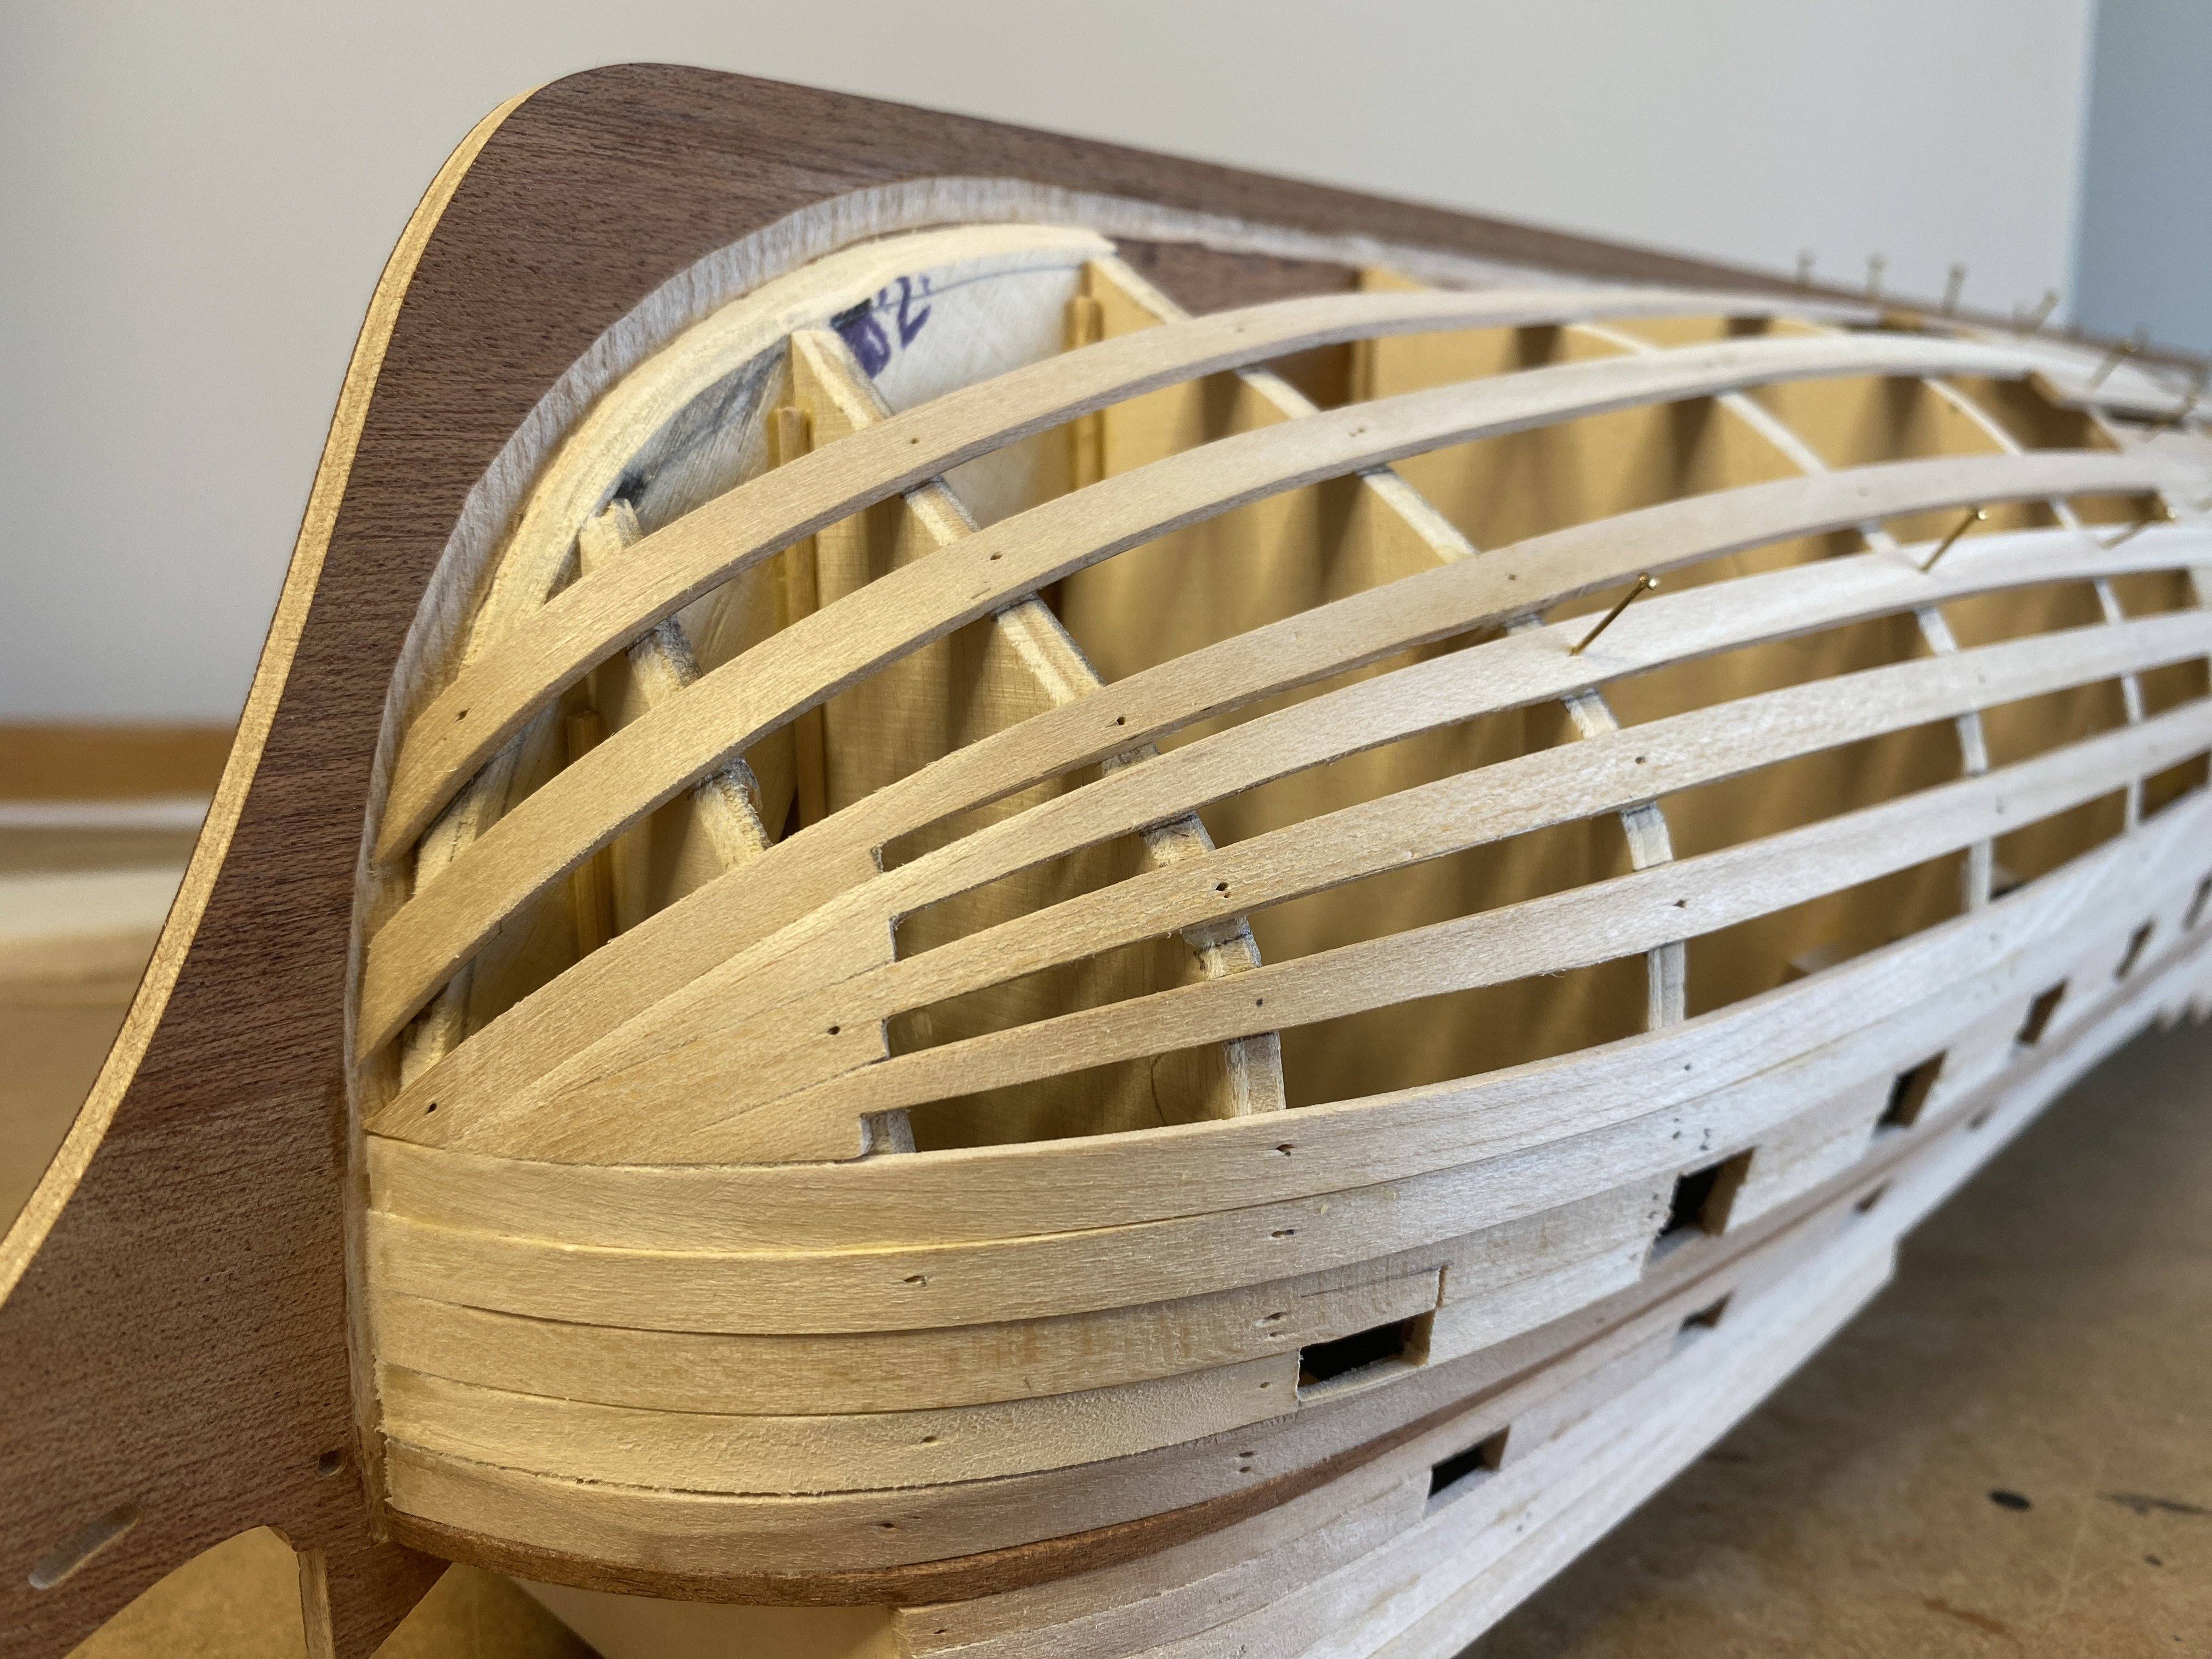
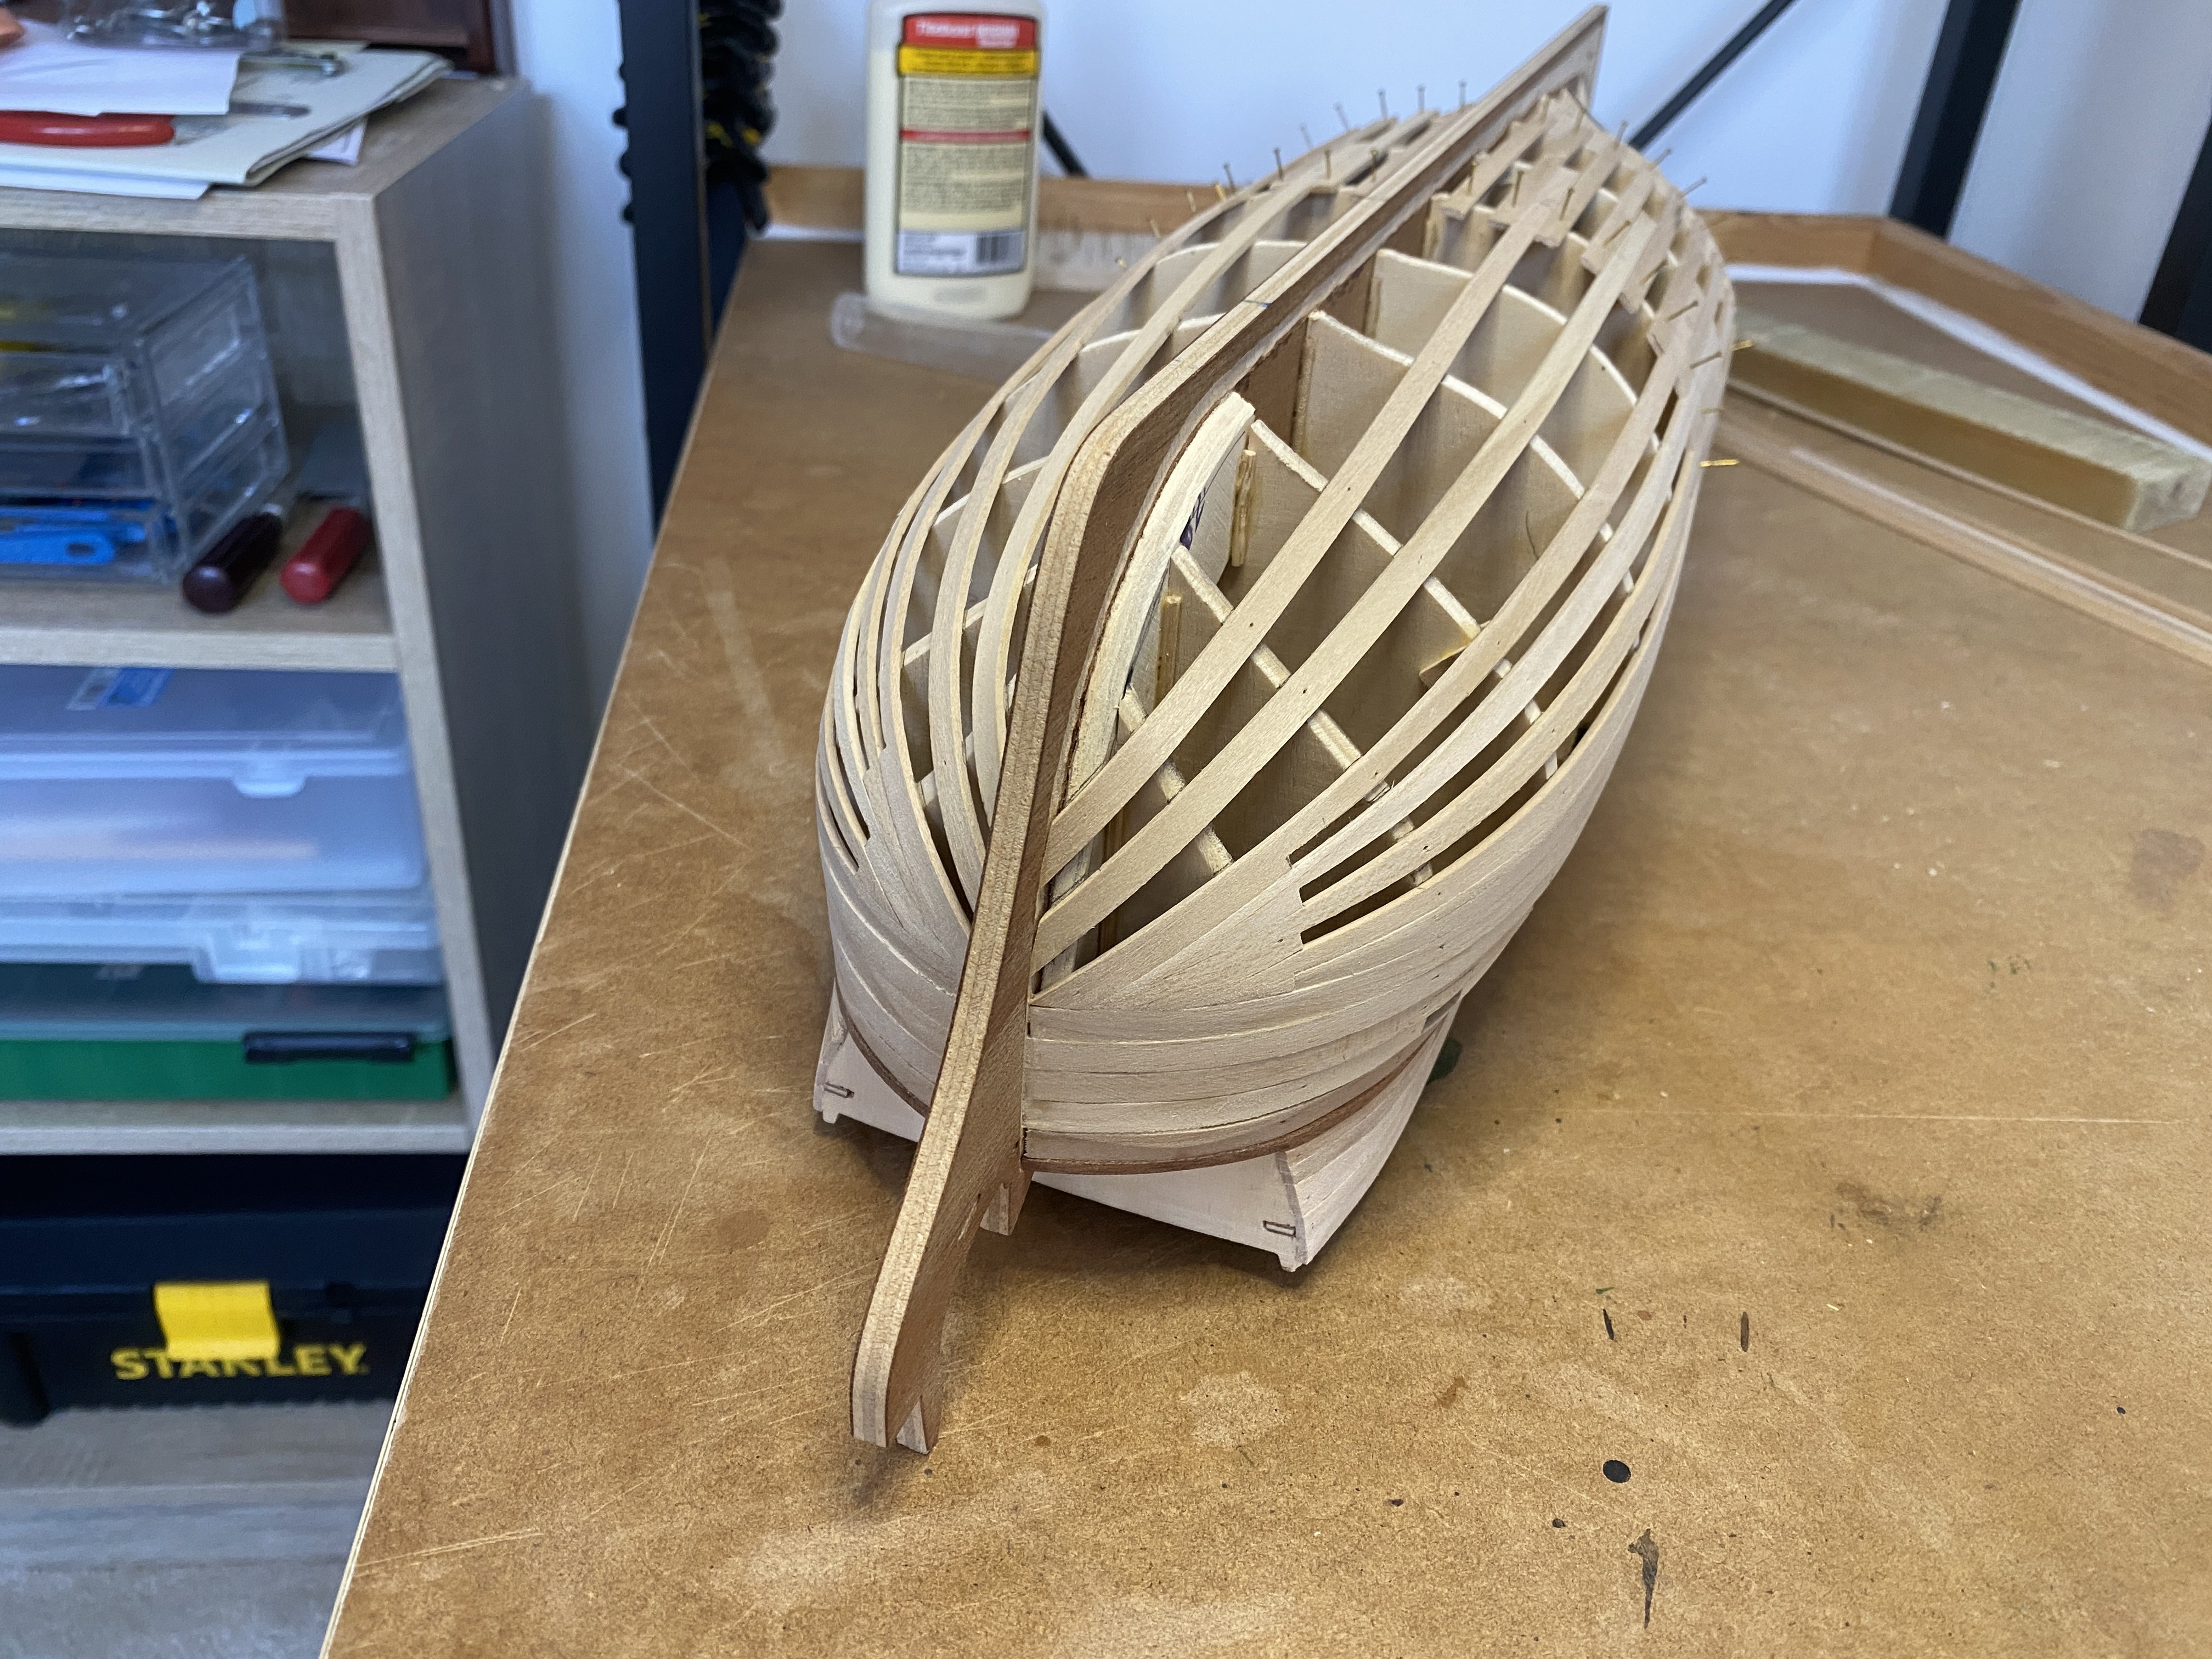
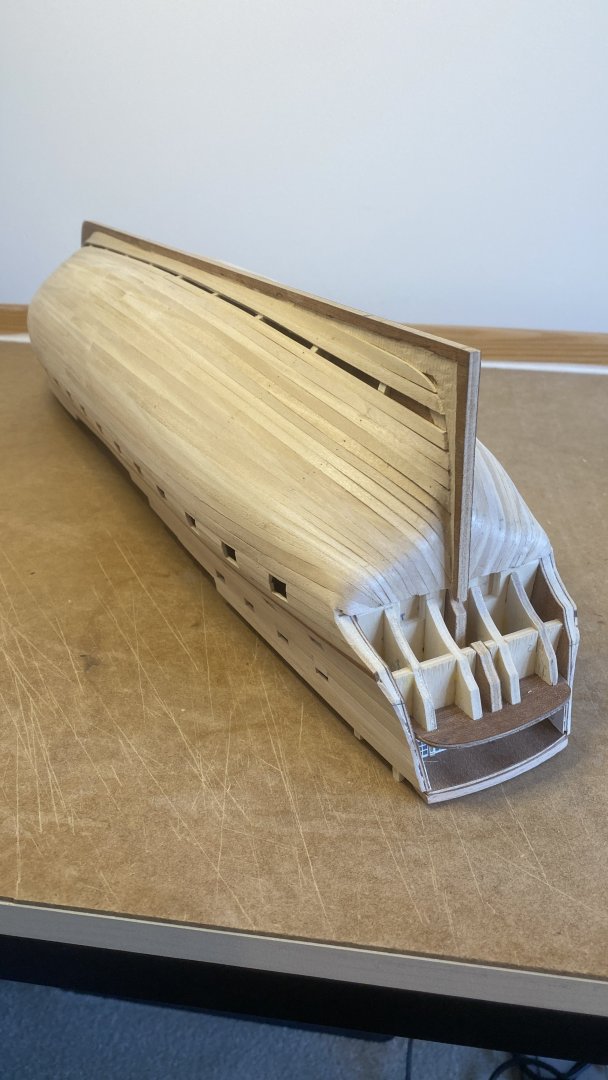
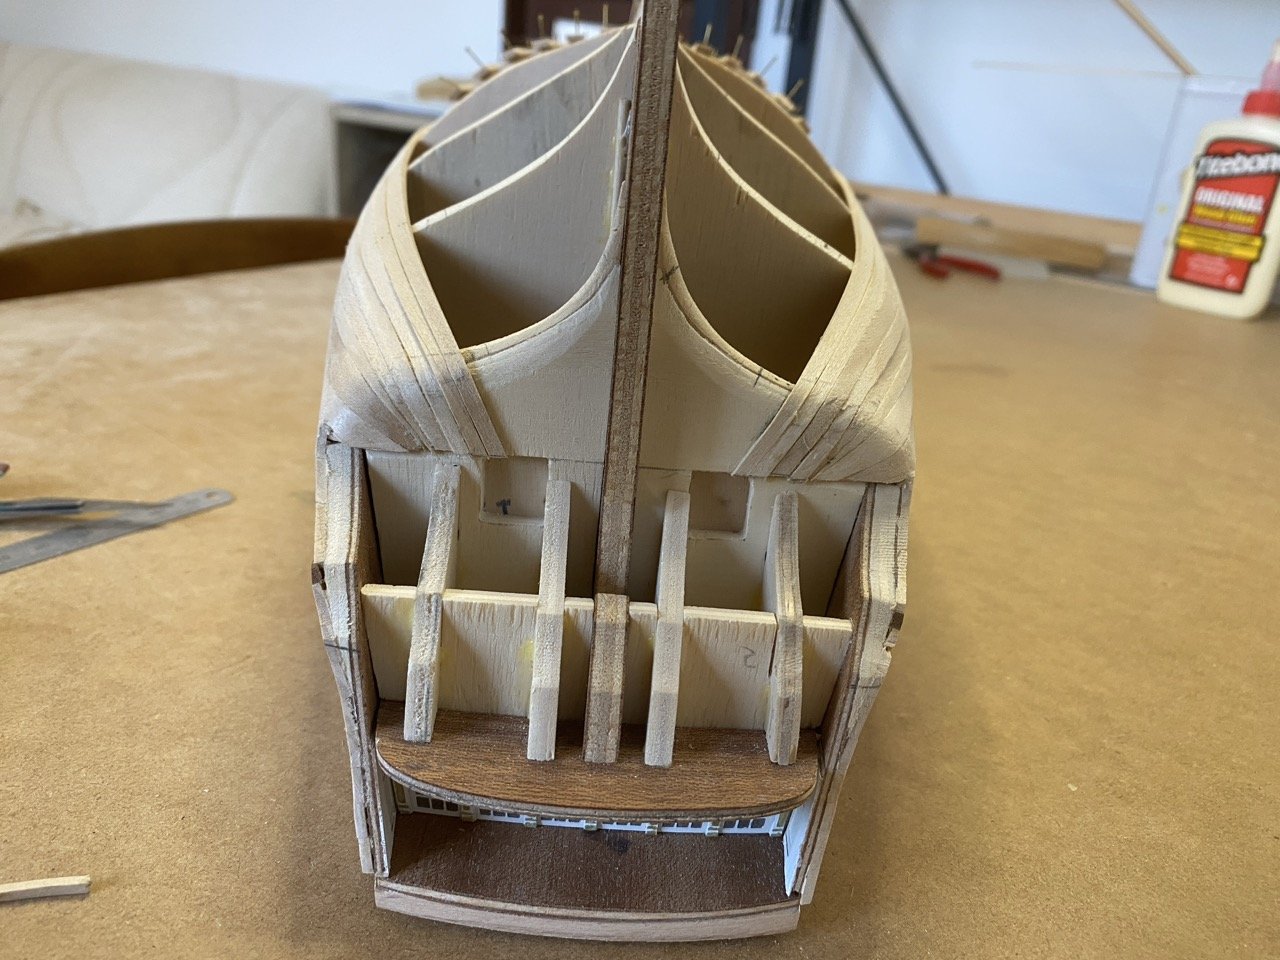
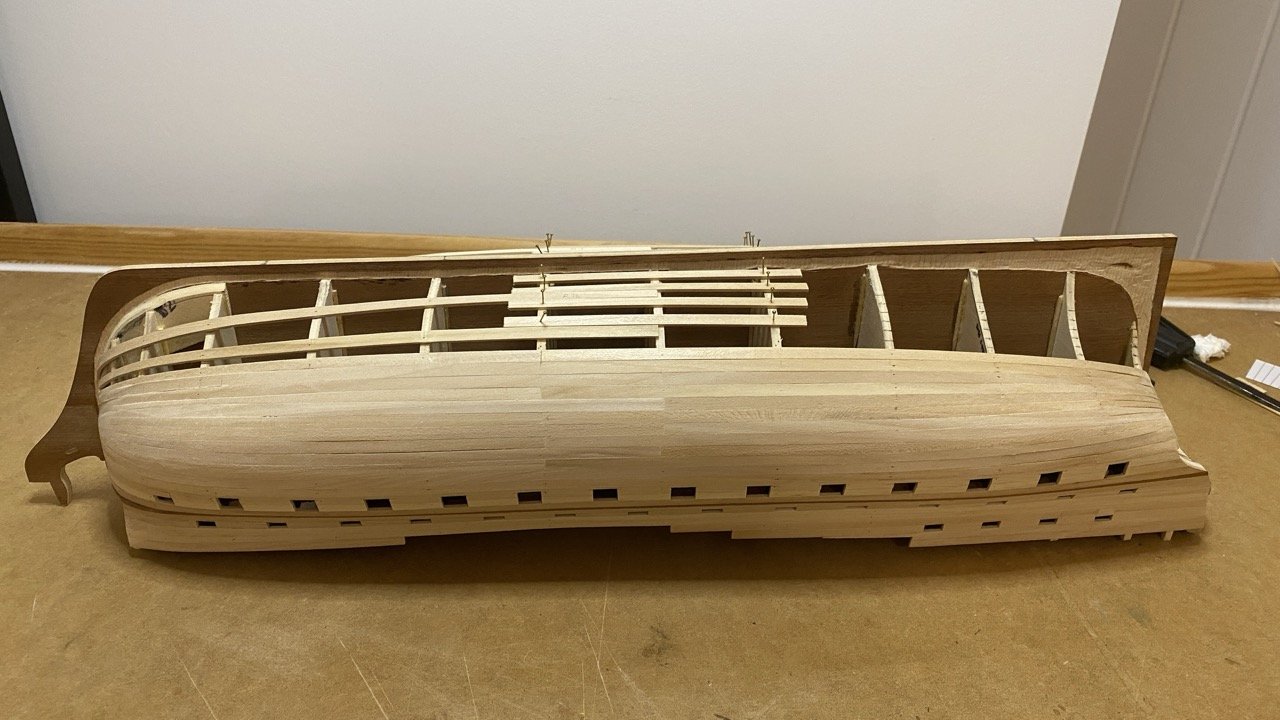
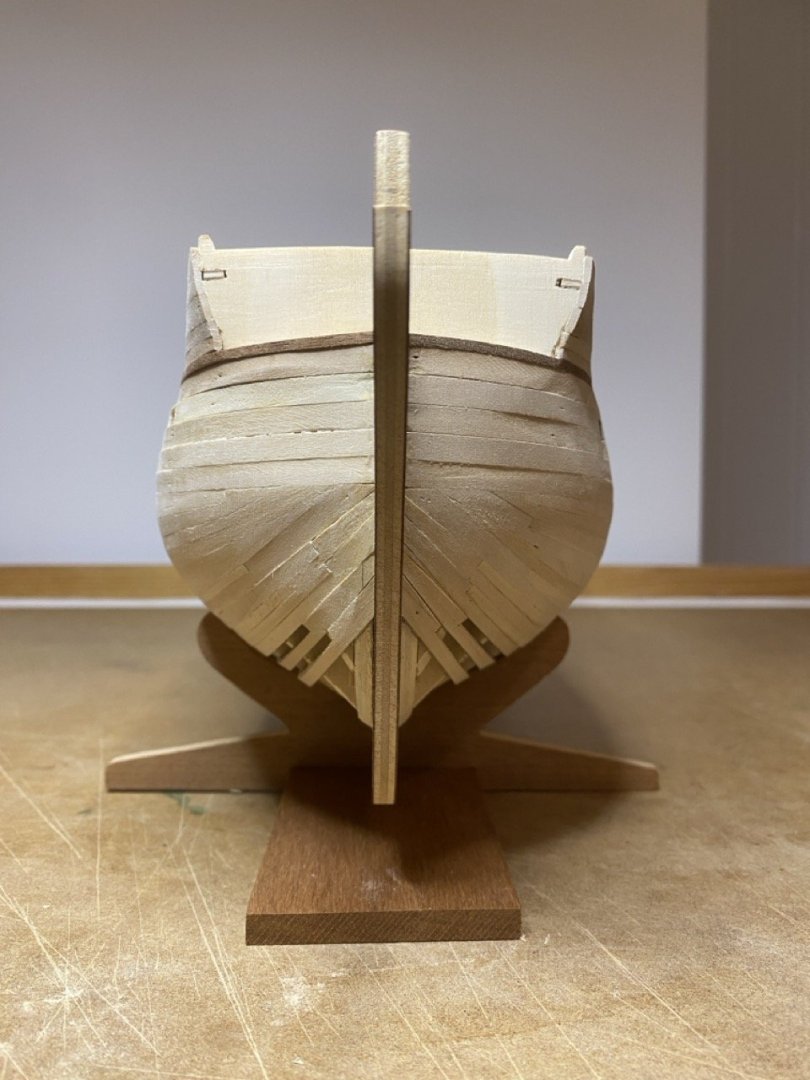
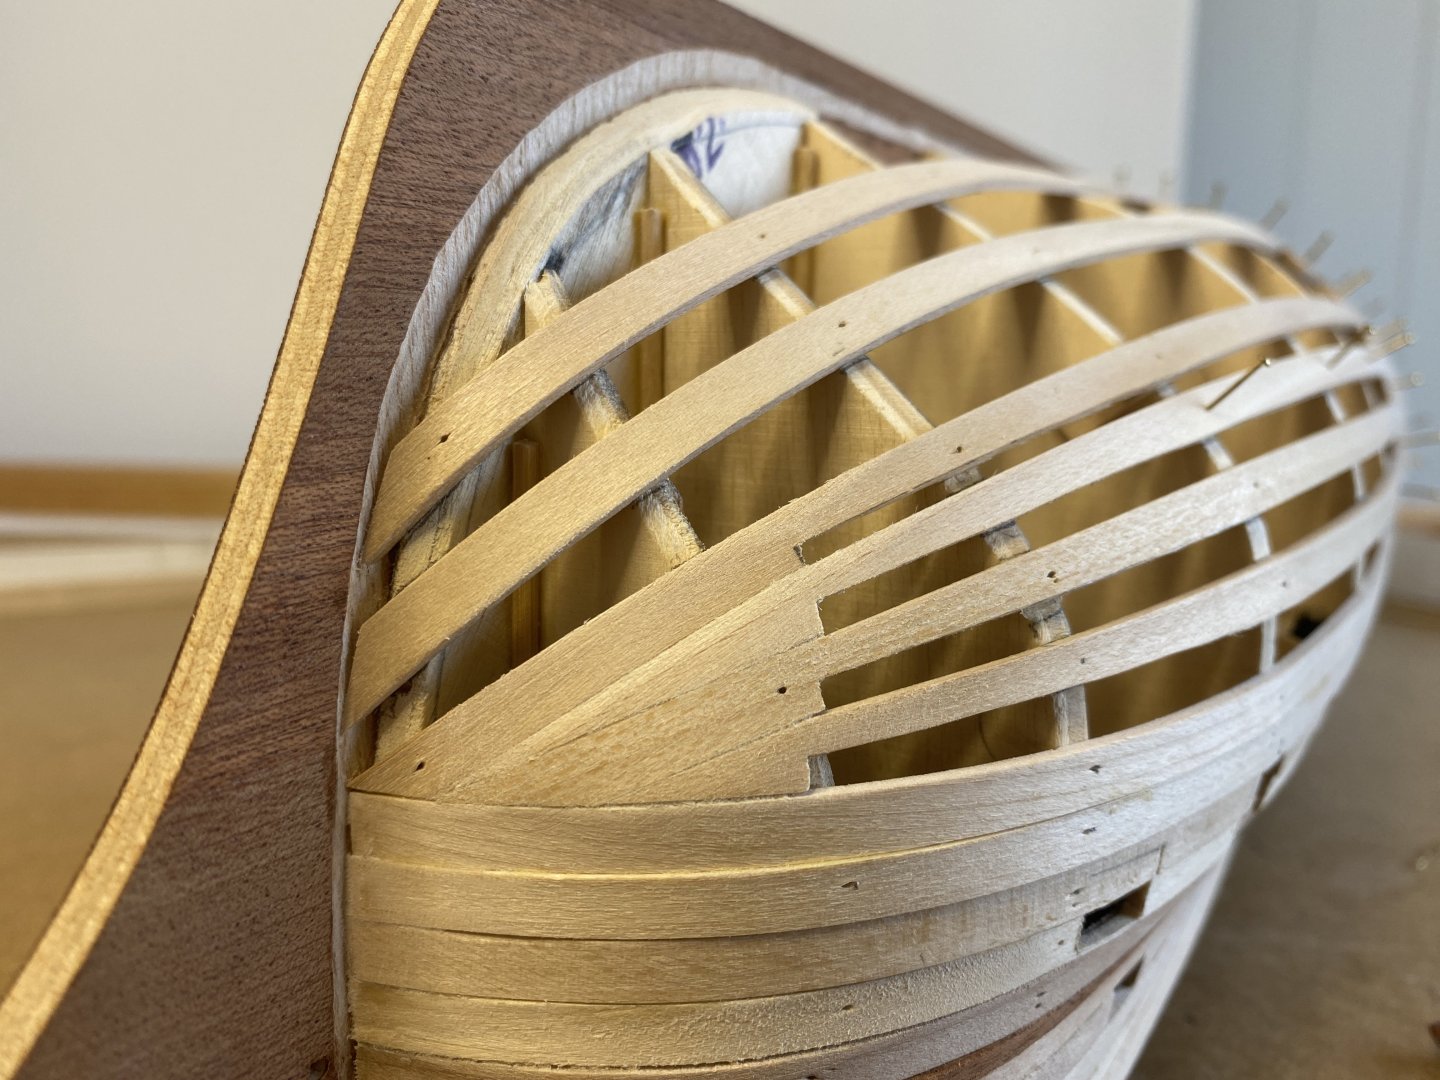
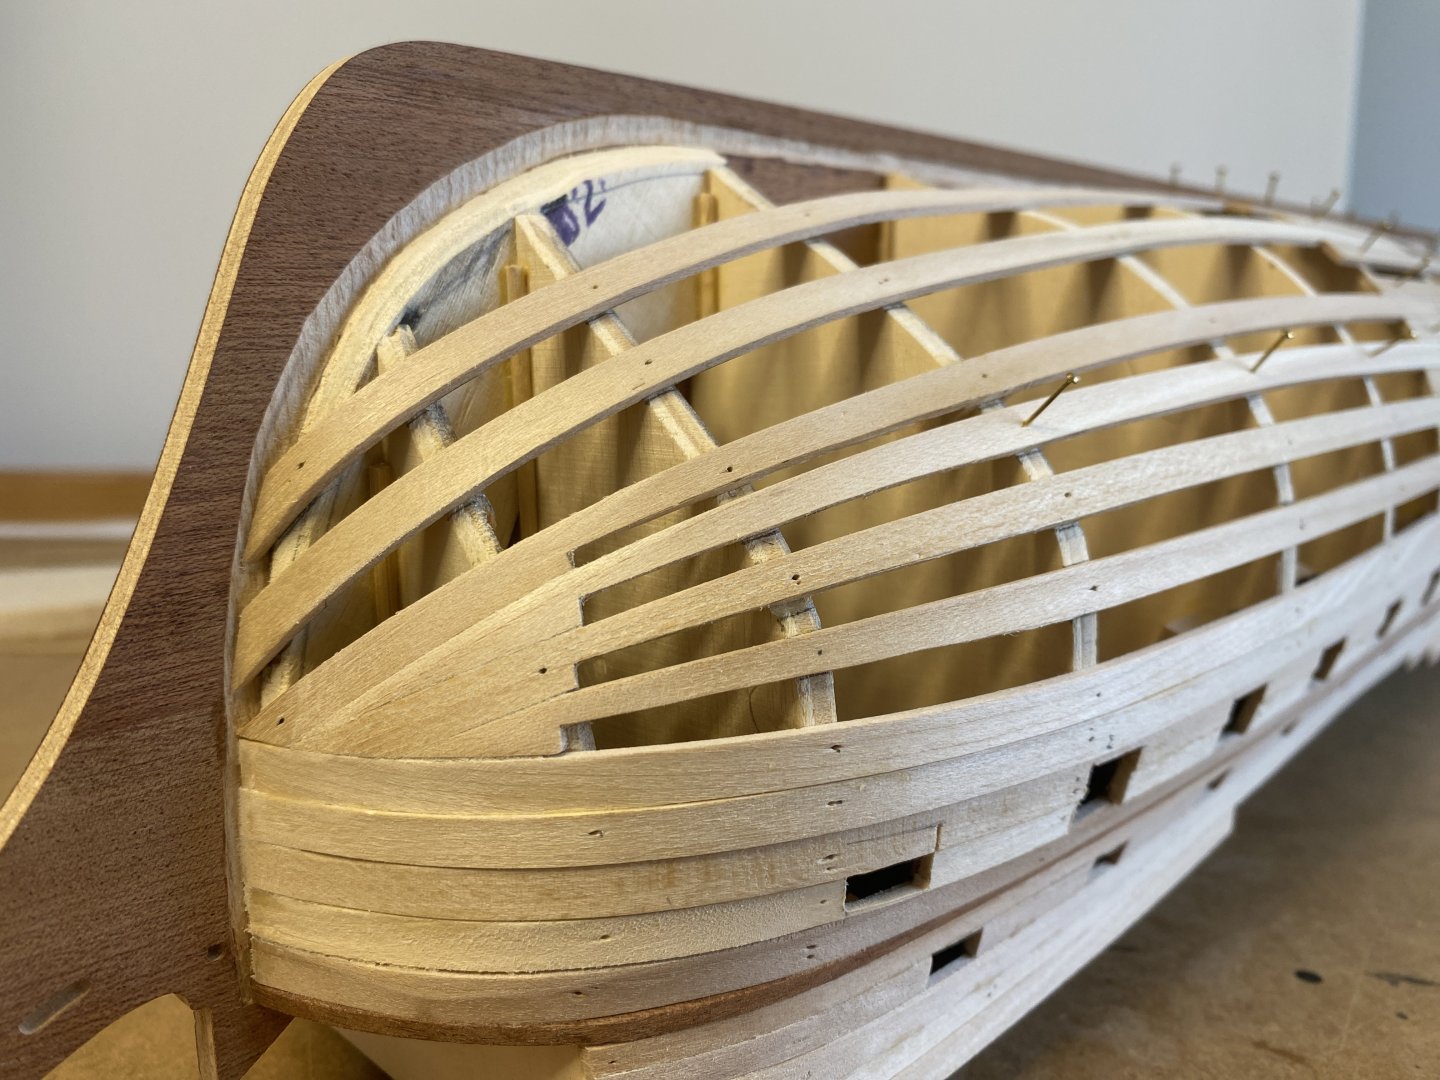
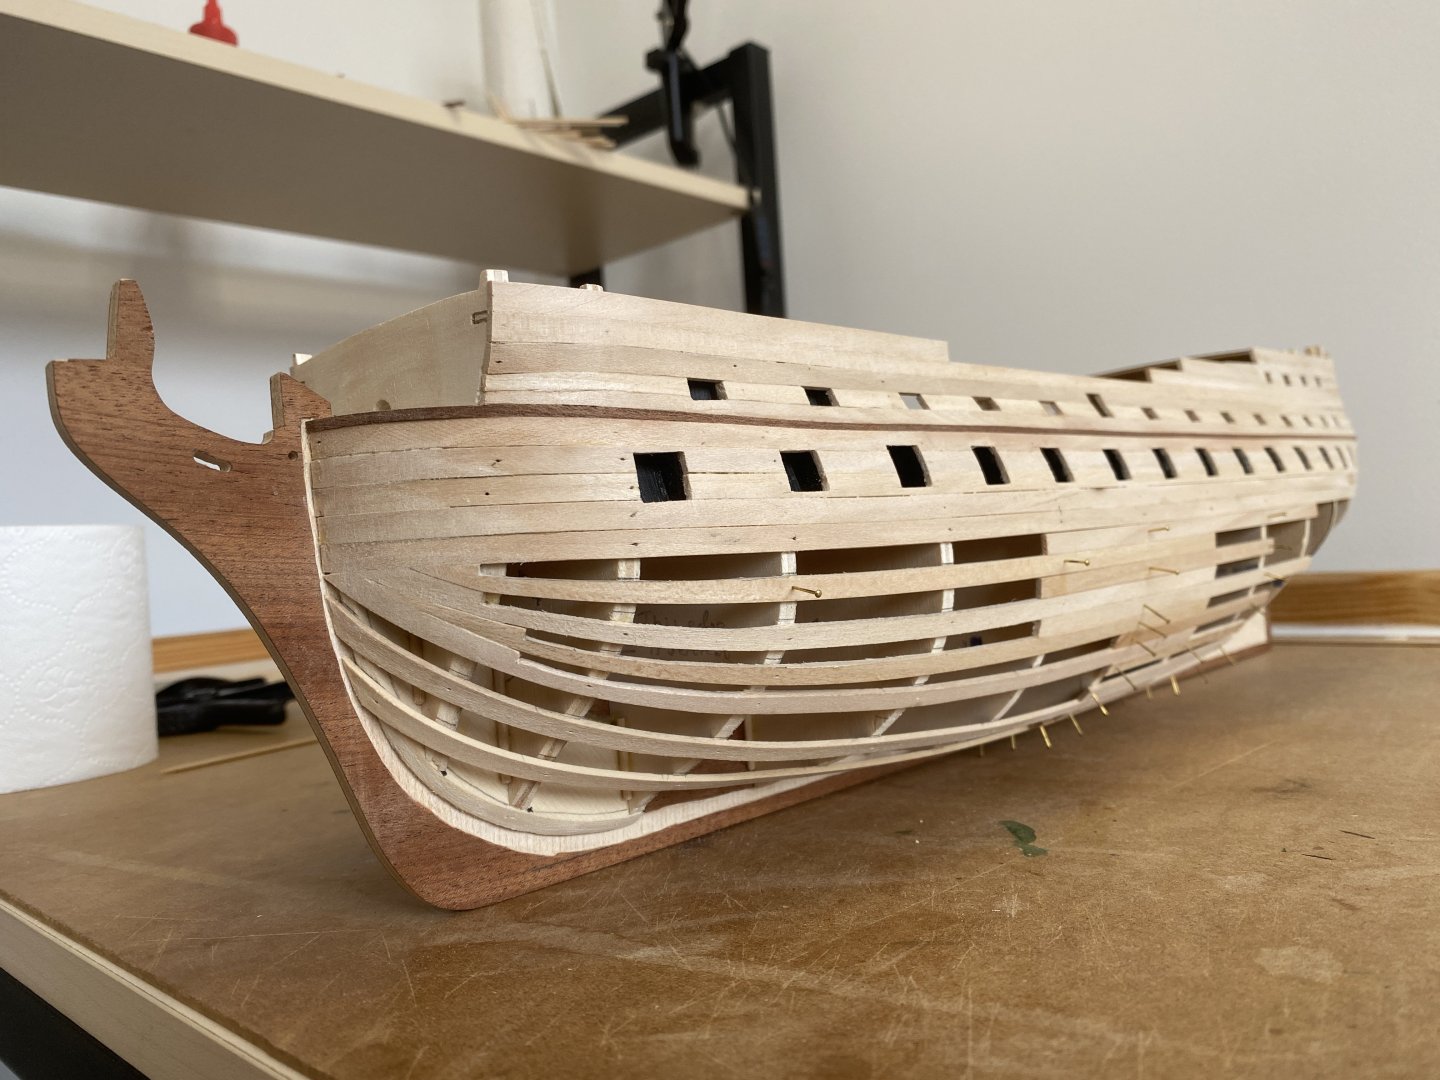
A few pictures of progress with the inner hull. A bit unusually I believe, I've decided to do the lower hull planks that wrap around the stern in half-length sections, to avoid the complication of having to get a precise finish at the stern and at the bow on the same plank and at the same glueing event. By having separate bow and stern planks I can restrict the complication to just a single end of the ship at any one time. So far this is working well. Another thing I'm doing that may not be standard is to put in the bow planks in a binary-divide fashion, i.e. firstly at large space intervals, then adding the planks in the middle region of those, and then in the middle region of those, and so on, to fill the space in a binary fashion. I've chosen to do this so that I can get the planks to follow the natural curvature of the bows. If I put them on sequentially, neighbour after neighbour, I found that this causes a gradual and incremental error in the planks from following the natural lines of the hull. It means a bit more sanding to get the final planks in place, as they must each be located between two close neighbouring planks. The additional work is helping to ensure that the planks follow the natural contours without aggregation of errors. Thus far this is giving a simpler planking operation than I got with the first ship I built, which required an awful lot of bending of the planks so that they would deviate from the natural hull curvature. Suffice to say that the outer hull planks won't necessarily follow this natural curvature approach, and so I anticipate them taking a long time to fit in a realistic fashion. In contrast, I'm planning to fit the stern half of each plank sequentially, as I've found that there is less aggregation of errors and that the planks if spaced evenly do follow the curvature of the hull more readily than they do at the bow. As I get closer to the keel I know that I'll have to fit a lot of spacer planks, which I think are called "stealers", but this is quite usual. Though it's a lot of work and taking a long time, I'm pleased with the results so far.


-
Andy Thurston reacted to a post in a topic:
HMS Bellona by Nearshore - Corel - 1:100
-
Andy Thurston reacted to a post in a topic:
HMS Bellona by Andy Thurston - Corel - 1/100
-
Andy Thurston reacted to a post in a topic:
HMS Bellona by Andy Thurston - Corel - 1/100
-
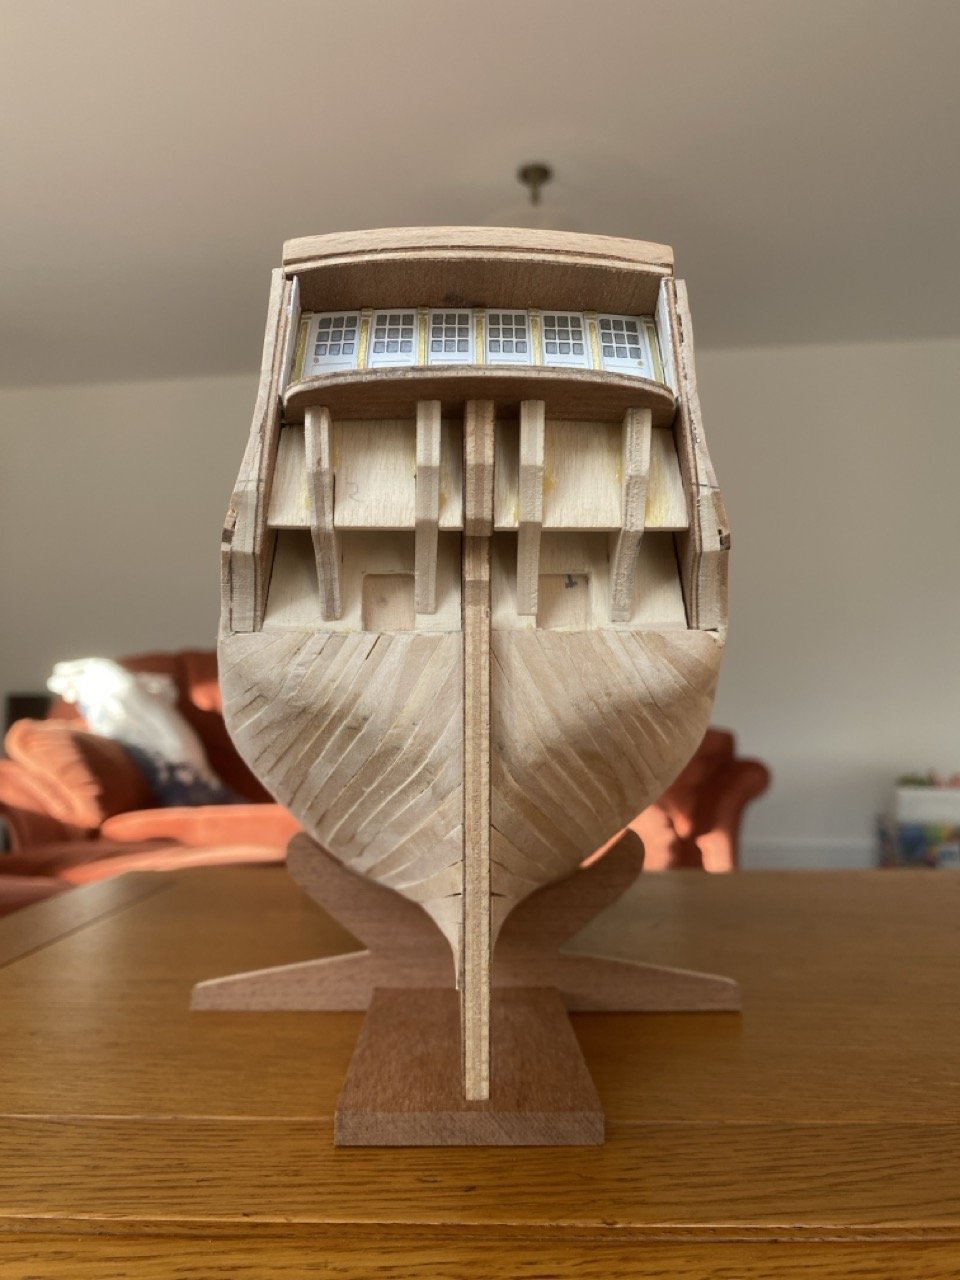
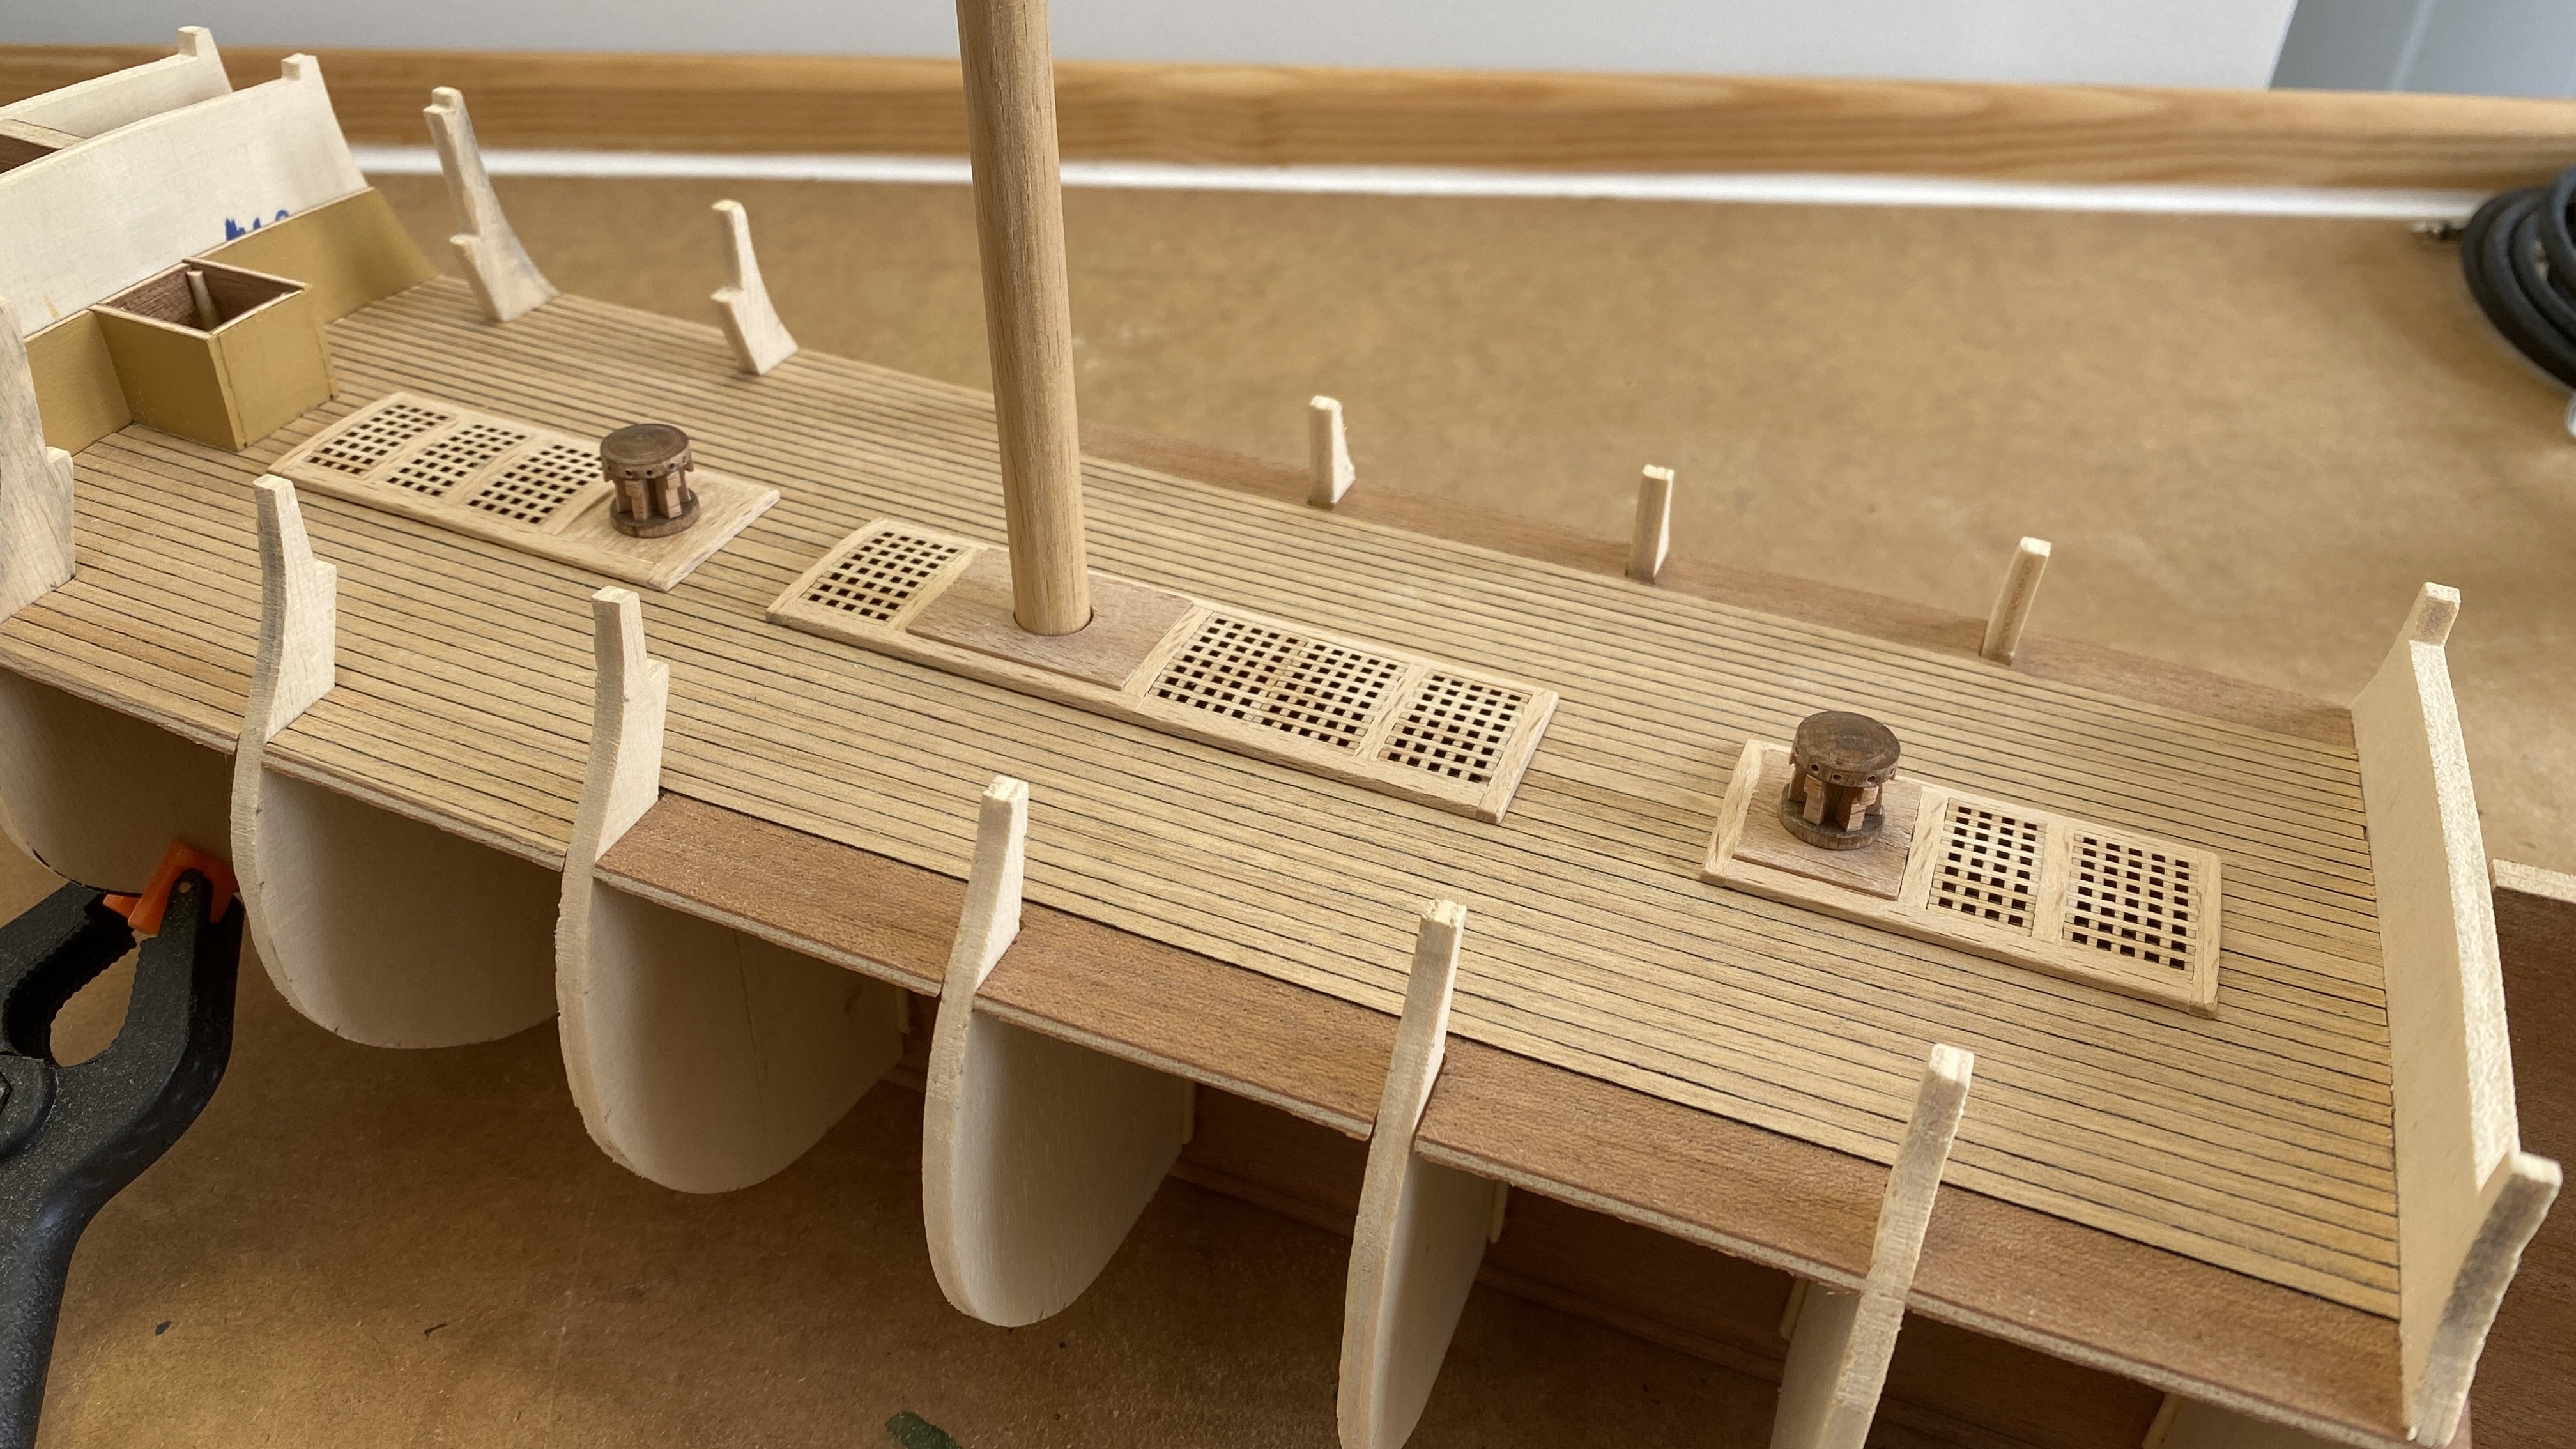
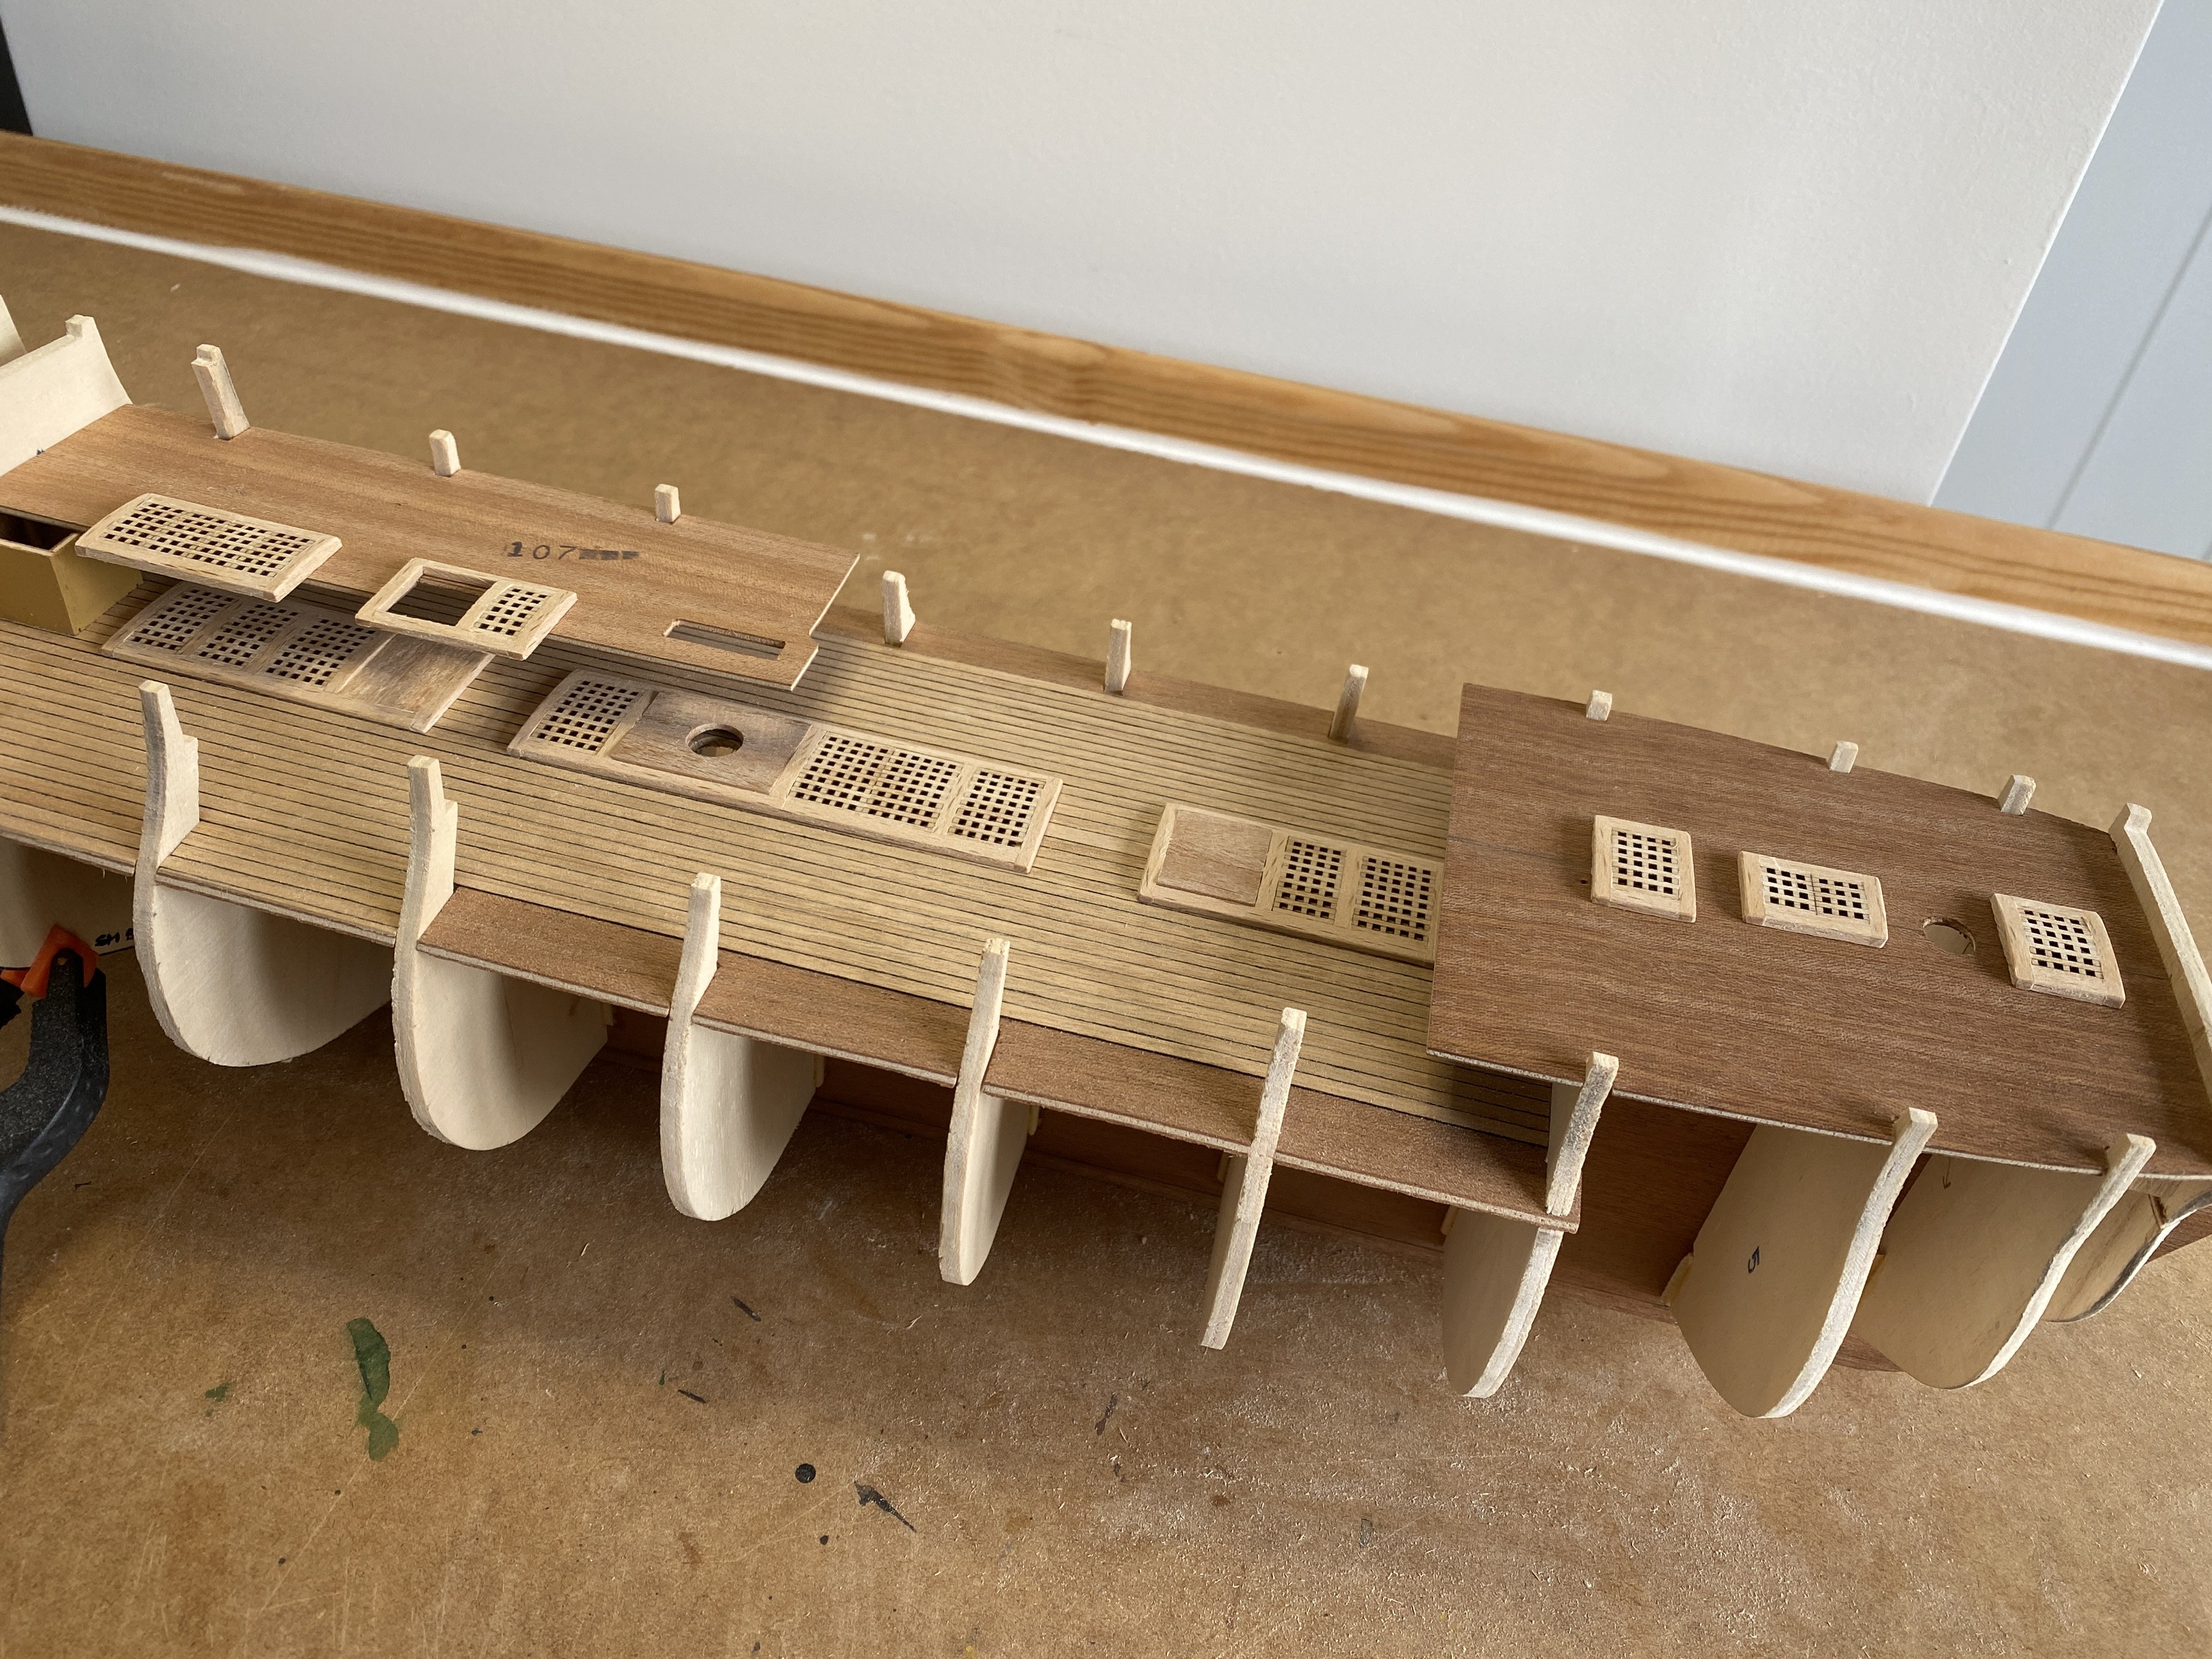
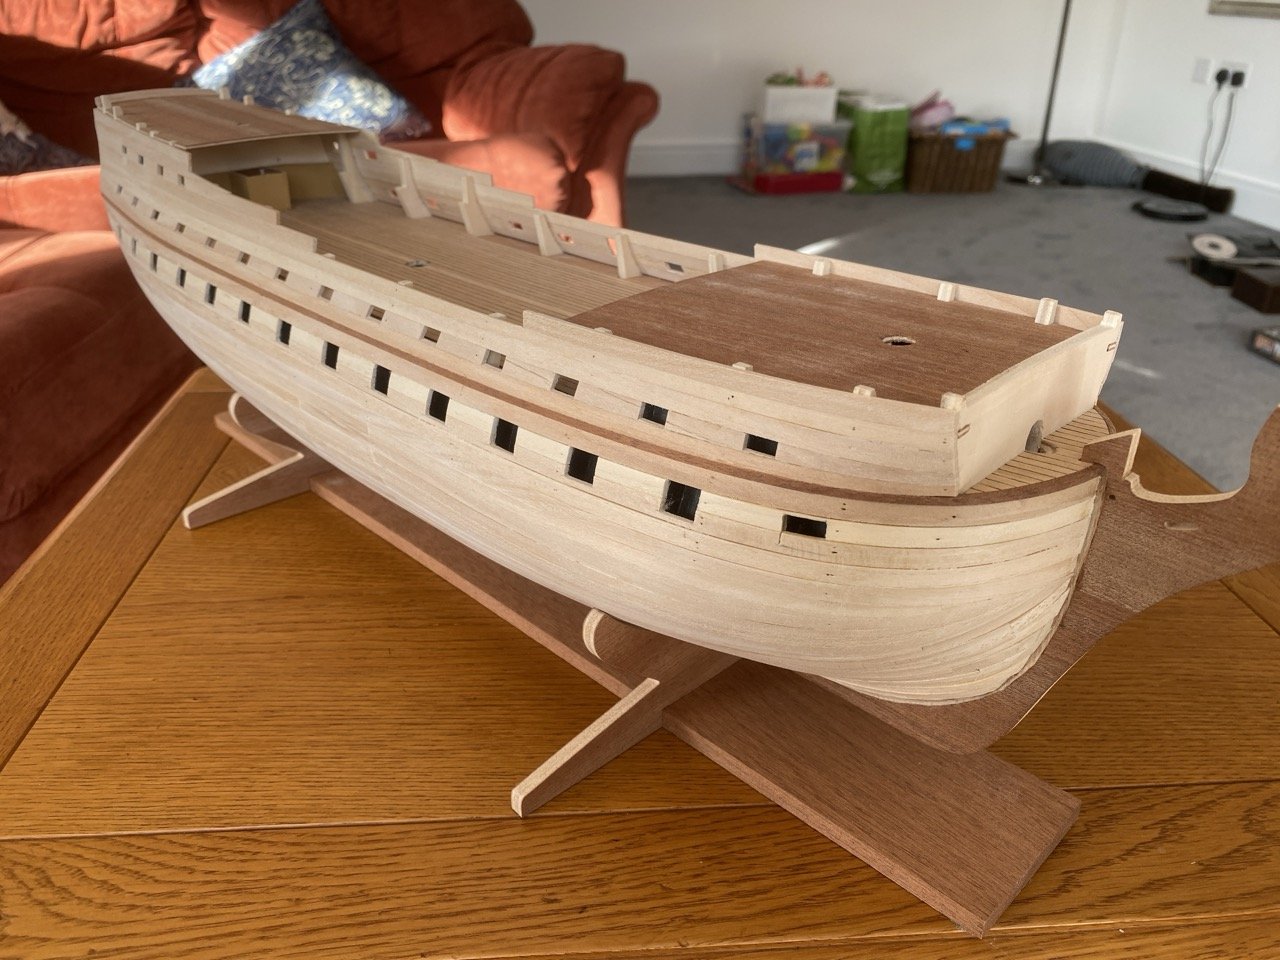
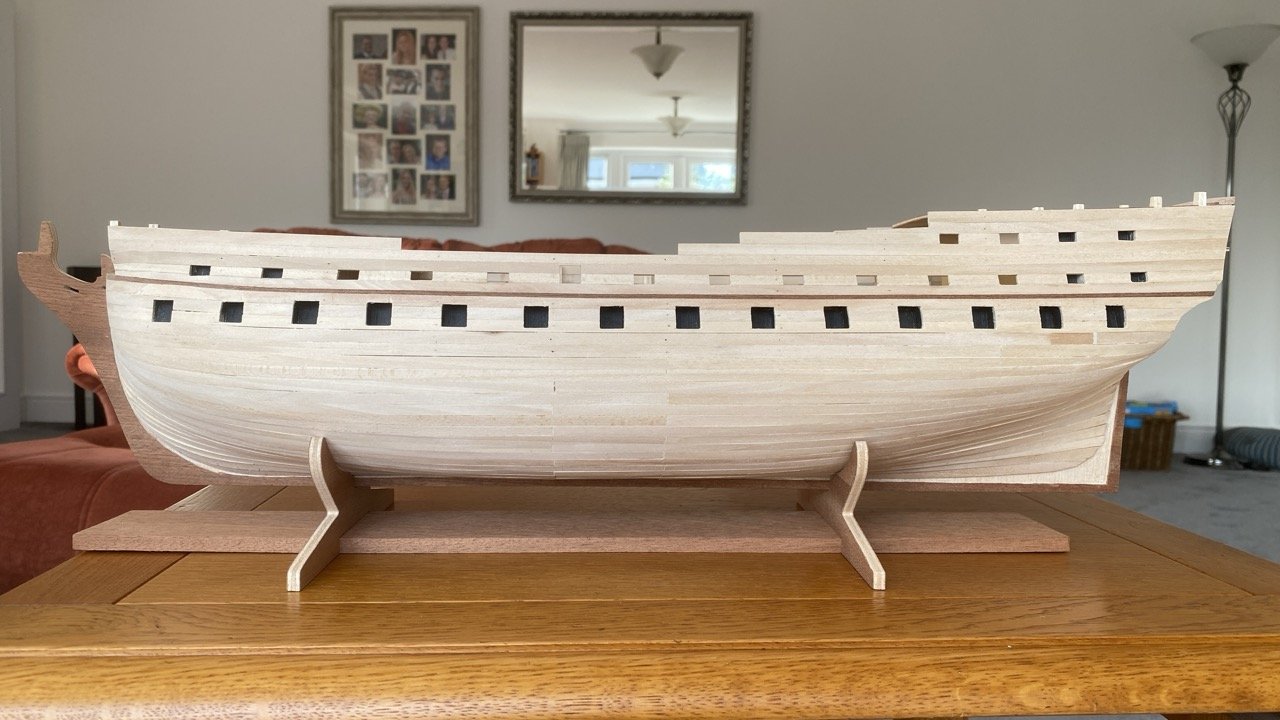
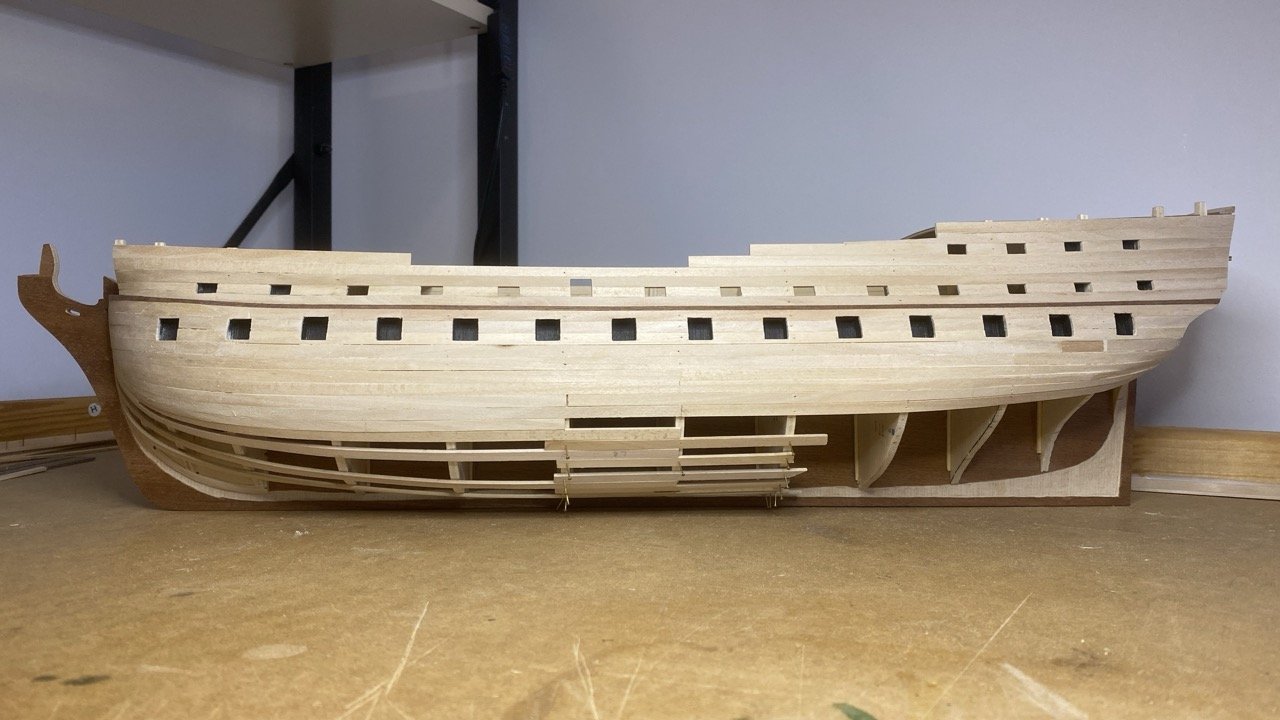
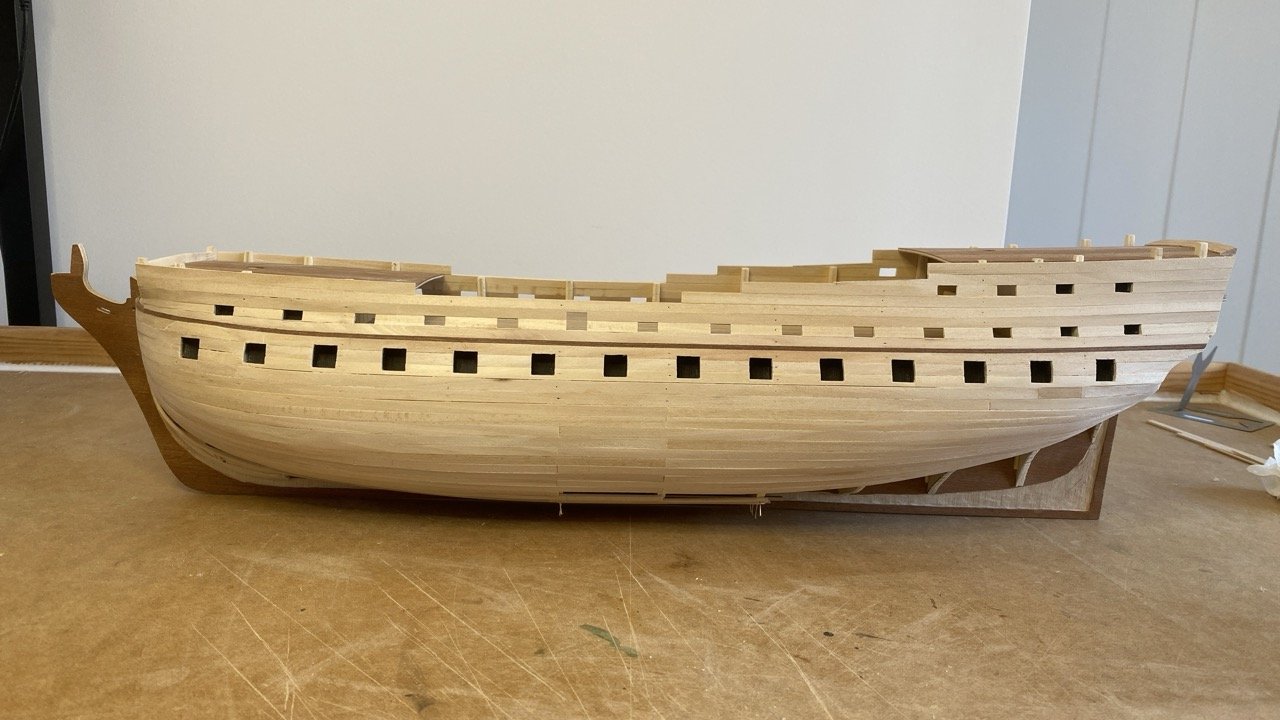
First layer of planking underway, with a few interesting decisions and discoveries along the way. I put the first plank on in accordance with the plans. After the glue dried I decided that it was a little bit too low around the third and fourth bulkheads so rather than lift the entire plank I just sawed through it along the centre of the fifth bulkhead, lifted the plank from the 3rd, 4th and 5th bulkheads, and re-glued the plank slightly higher than before. This worked fine and gave a better line along the plank. I then tested where the other planks would lie and realised that the barrels of the canons on the main deck would be hard up against the top of the gun ports after fitting subsequent planks, so I inserted a length of 2mm x 2mm wood above the first plank to raise the subsequent rows of planks above the decks. I had some spare 2x2mm wood from a previous kit, seen in the darker colour on the photos. Planking in the upwards direction was then reasonably straight forward. I deviated from the instructions when fitting the half gun enclosures. The instructions said to fit planks 30a & 30b 10mm apart, and similarly with planks 30c & 30d, and also 30e & 30f, and to then glue the gun enclosures behind those planks. I didn't fancy doing this on the concave hull surfaces as I thought it could make fitting the in-between planks challenging and also a bit awkward for filing the middle region of the edges of the gun enclosures to match the profile of the hull. I also didn't fancy doing it on the convex hull surfaces as this would likely leave a gap between the half-gun enclosure and the protruding hull planks. So in each case I decided to fit the gun enclosures to the first plank (having bevelled the edge to make the gun enclosure proud of the hull for the remaining planks) and then shape the enclosures to the hull and add the remaining three planks per gun-port successively. This then makes it very easy to saw the first half of each gun port using a modelling tenon saw because there aren't any other planks to get in the way. To be honest this deviation from Corel's instructions has worked out quite well, so no real regrets about this decision. One final thing to note is that having fitted plank 30a in accordance with Corel's instructions, I found that the main deck gun ports would be significantly lower than the two stern chaser gun ports, so I've decided that I will cut the main deck gun ports 2mm higher than indicated in the plans. This will also then give a more uniform height spacing between the three rows of gun ports, and effectively compensate for the addition of the 2mm x 2mm strip mentioned above. This kit is proving quite challenging - I suppose because it's only my second build - but I'm enjoying it which is probably what matters most 🙂 N.B. in the last photo you'll spot that I extended the two upper gun ports in the downwards direction instead of the correct upwards direction... oops! I later glued in some filler plank sections to correct this.


-
Hi Nearshore Yes, I've made a few decisions that I later think were daft! Hopefully I'll soon get time to make some additions to the post, where you'll see some discussion of where I think I could have made better choices. Hey though, it's a really fun learning curve... loving every minute of this build 🙂 I will confess to you that I've downloaded over 200 of your photos, and you're my main source of reference for my own build... I hope you don't mind! Best wishes, Andy
-
Andy Thurston changed their profile photo
-
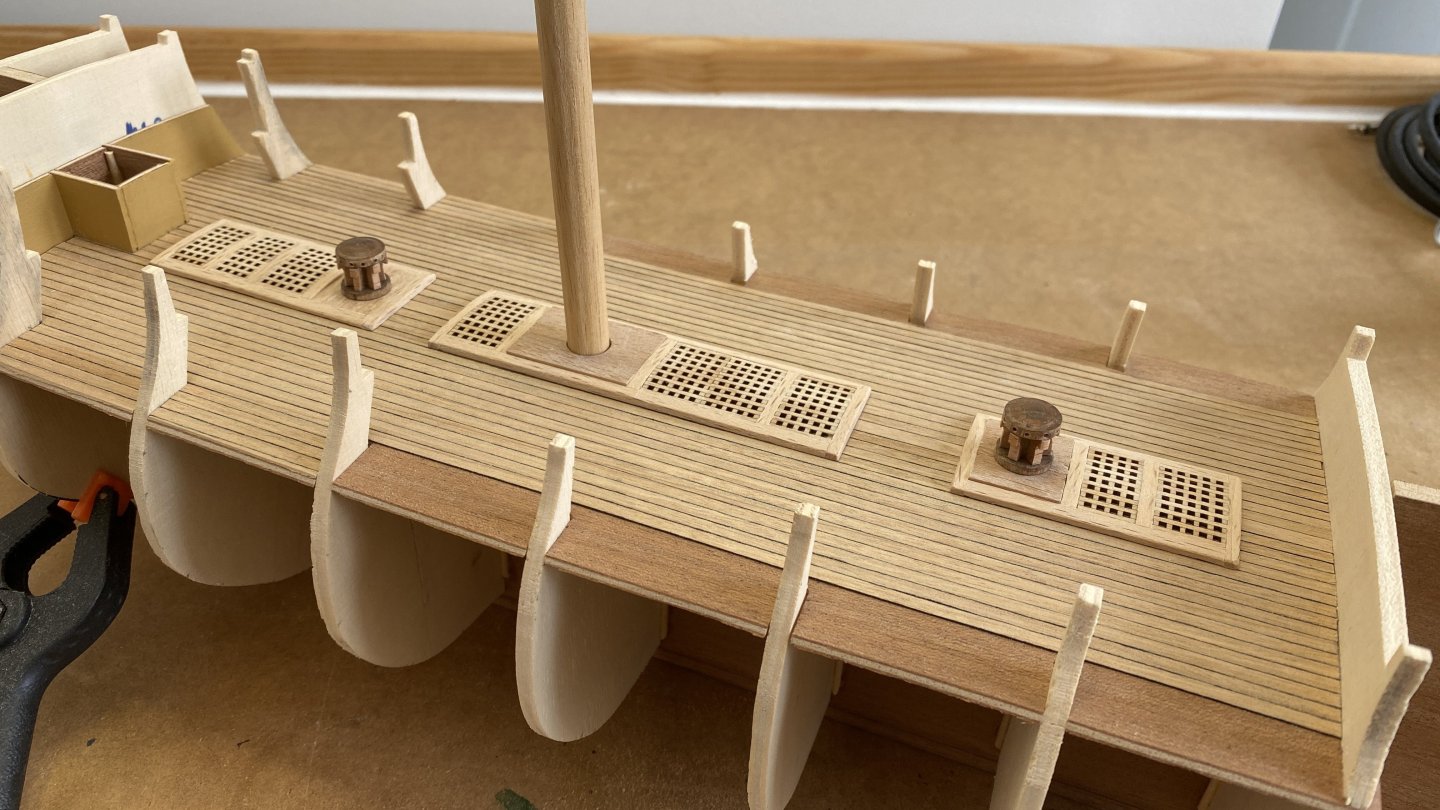
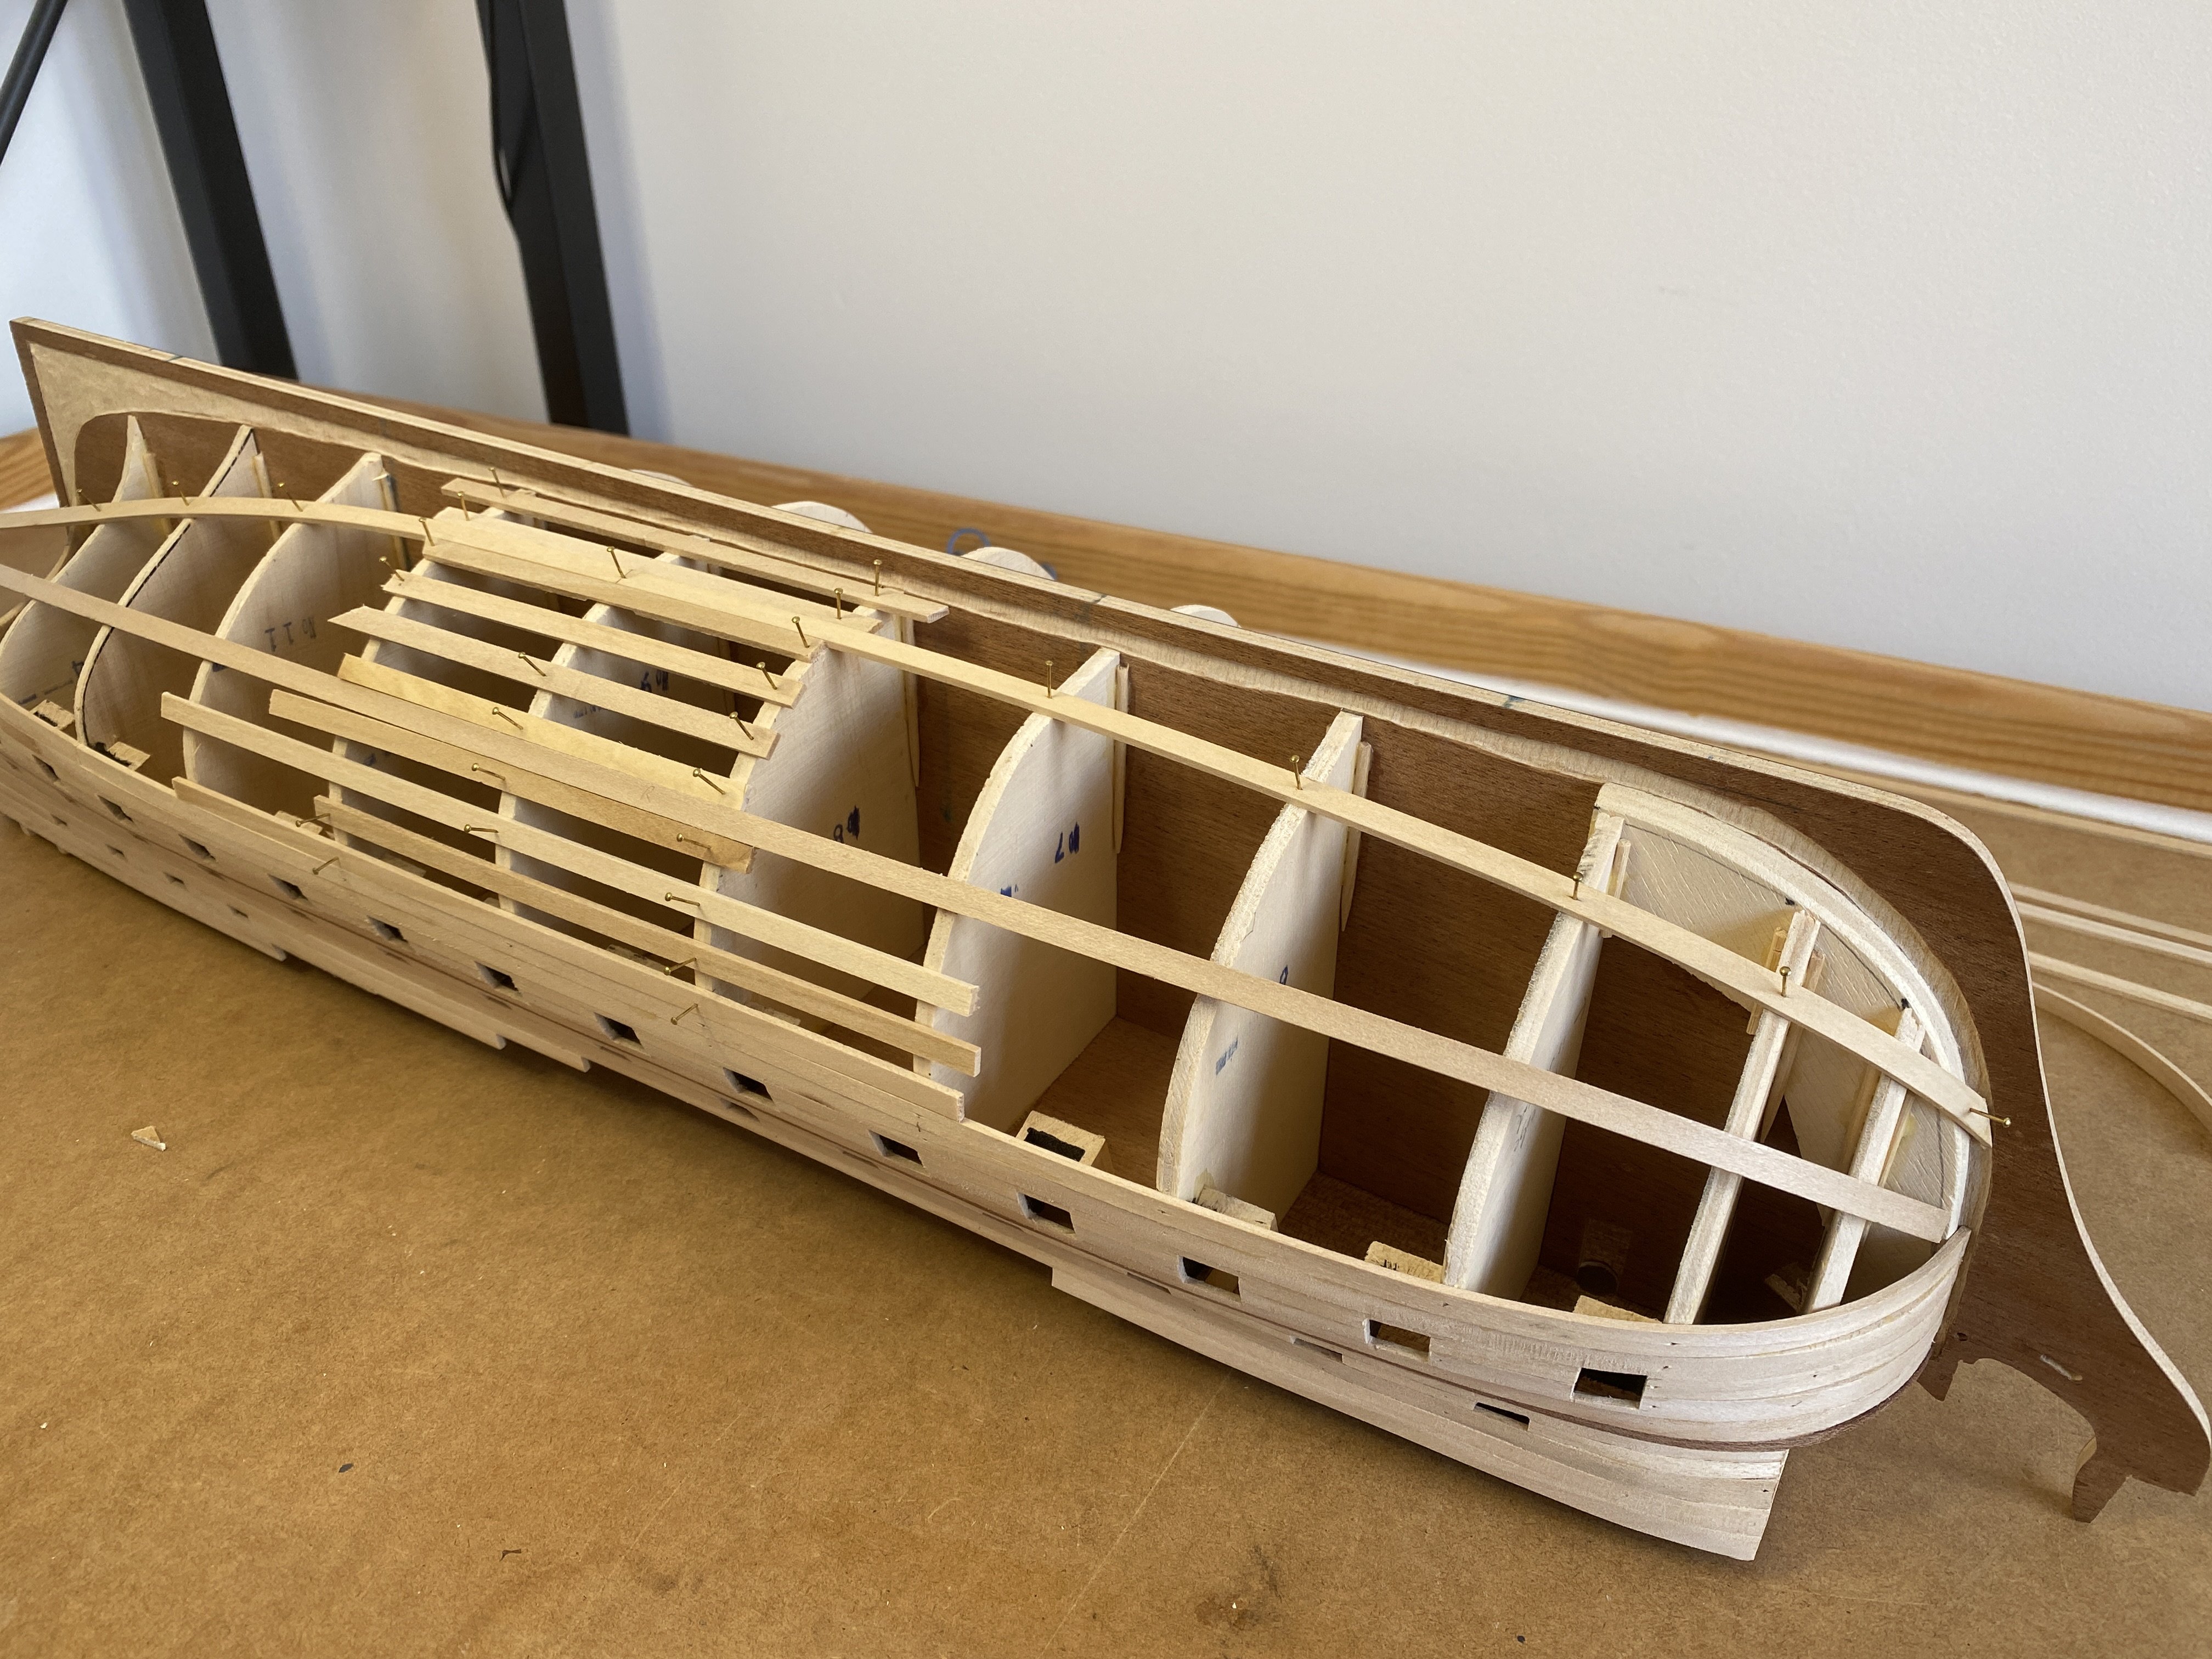
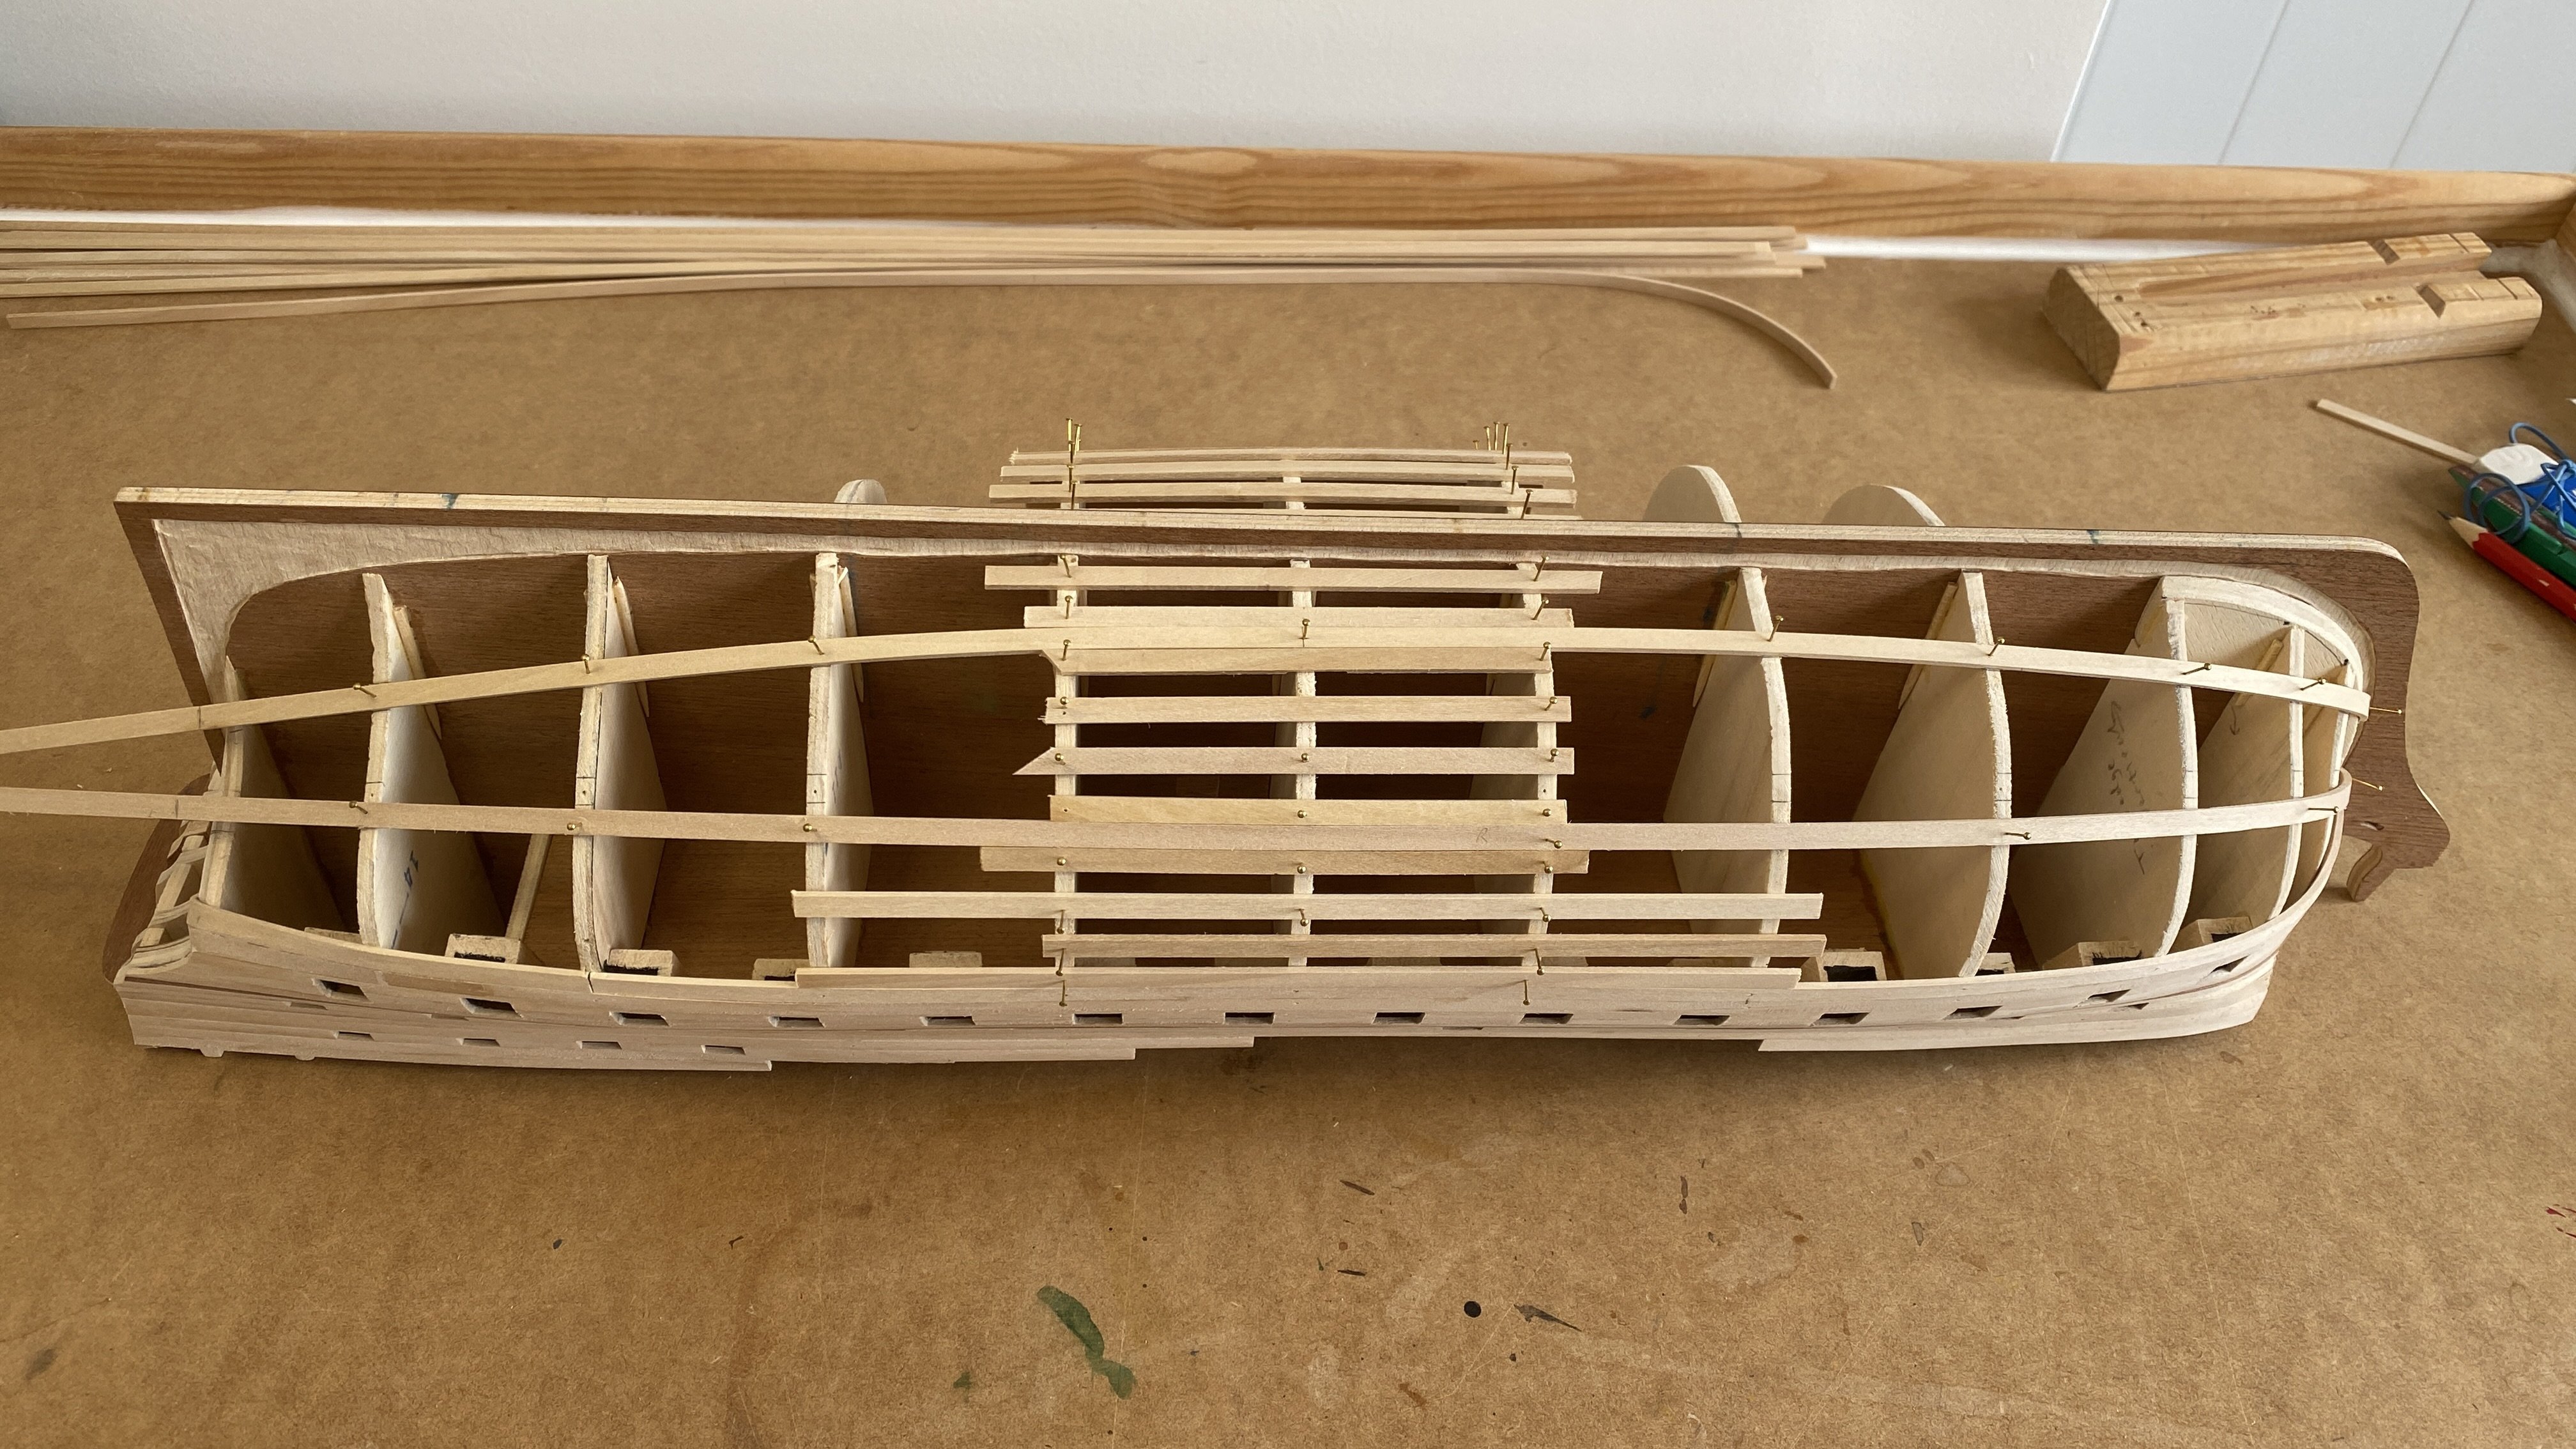
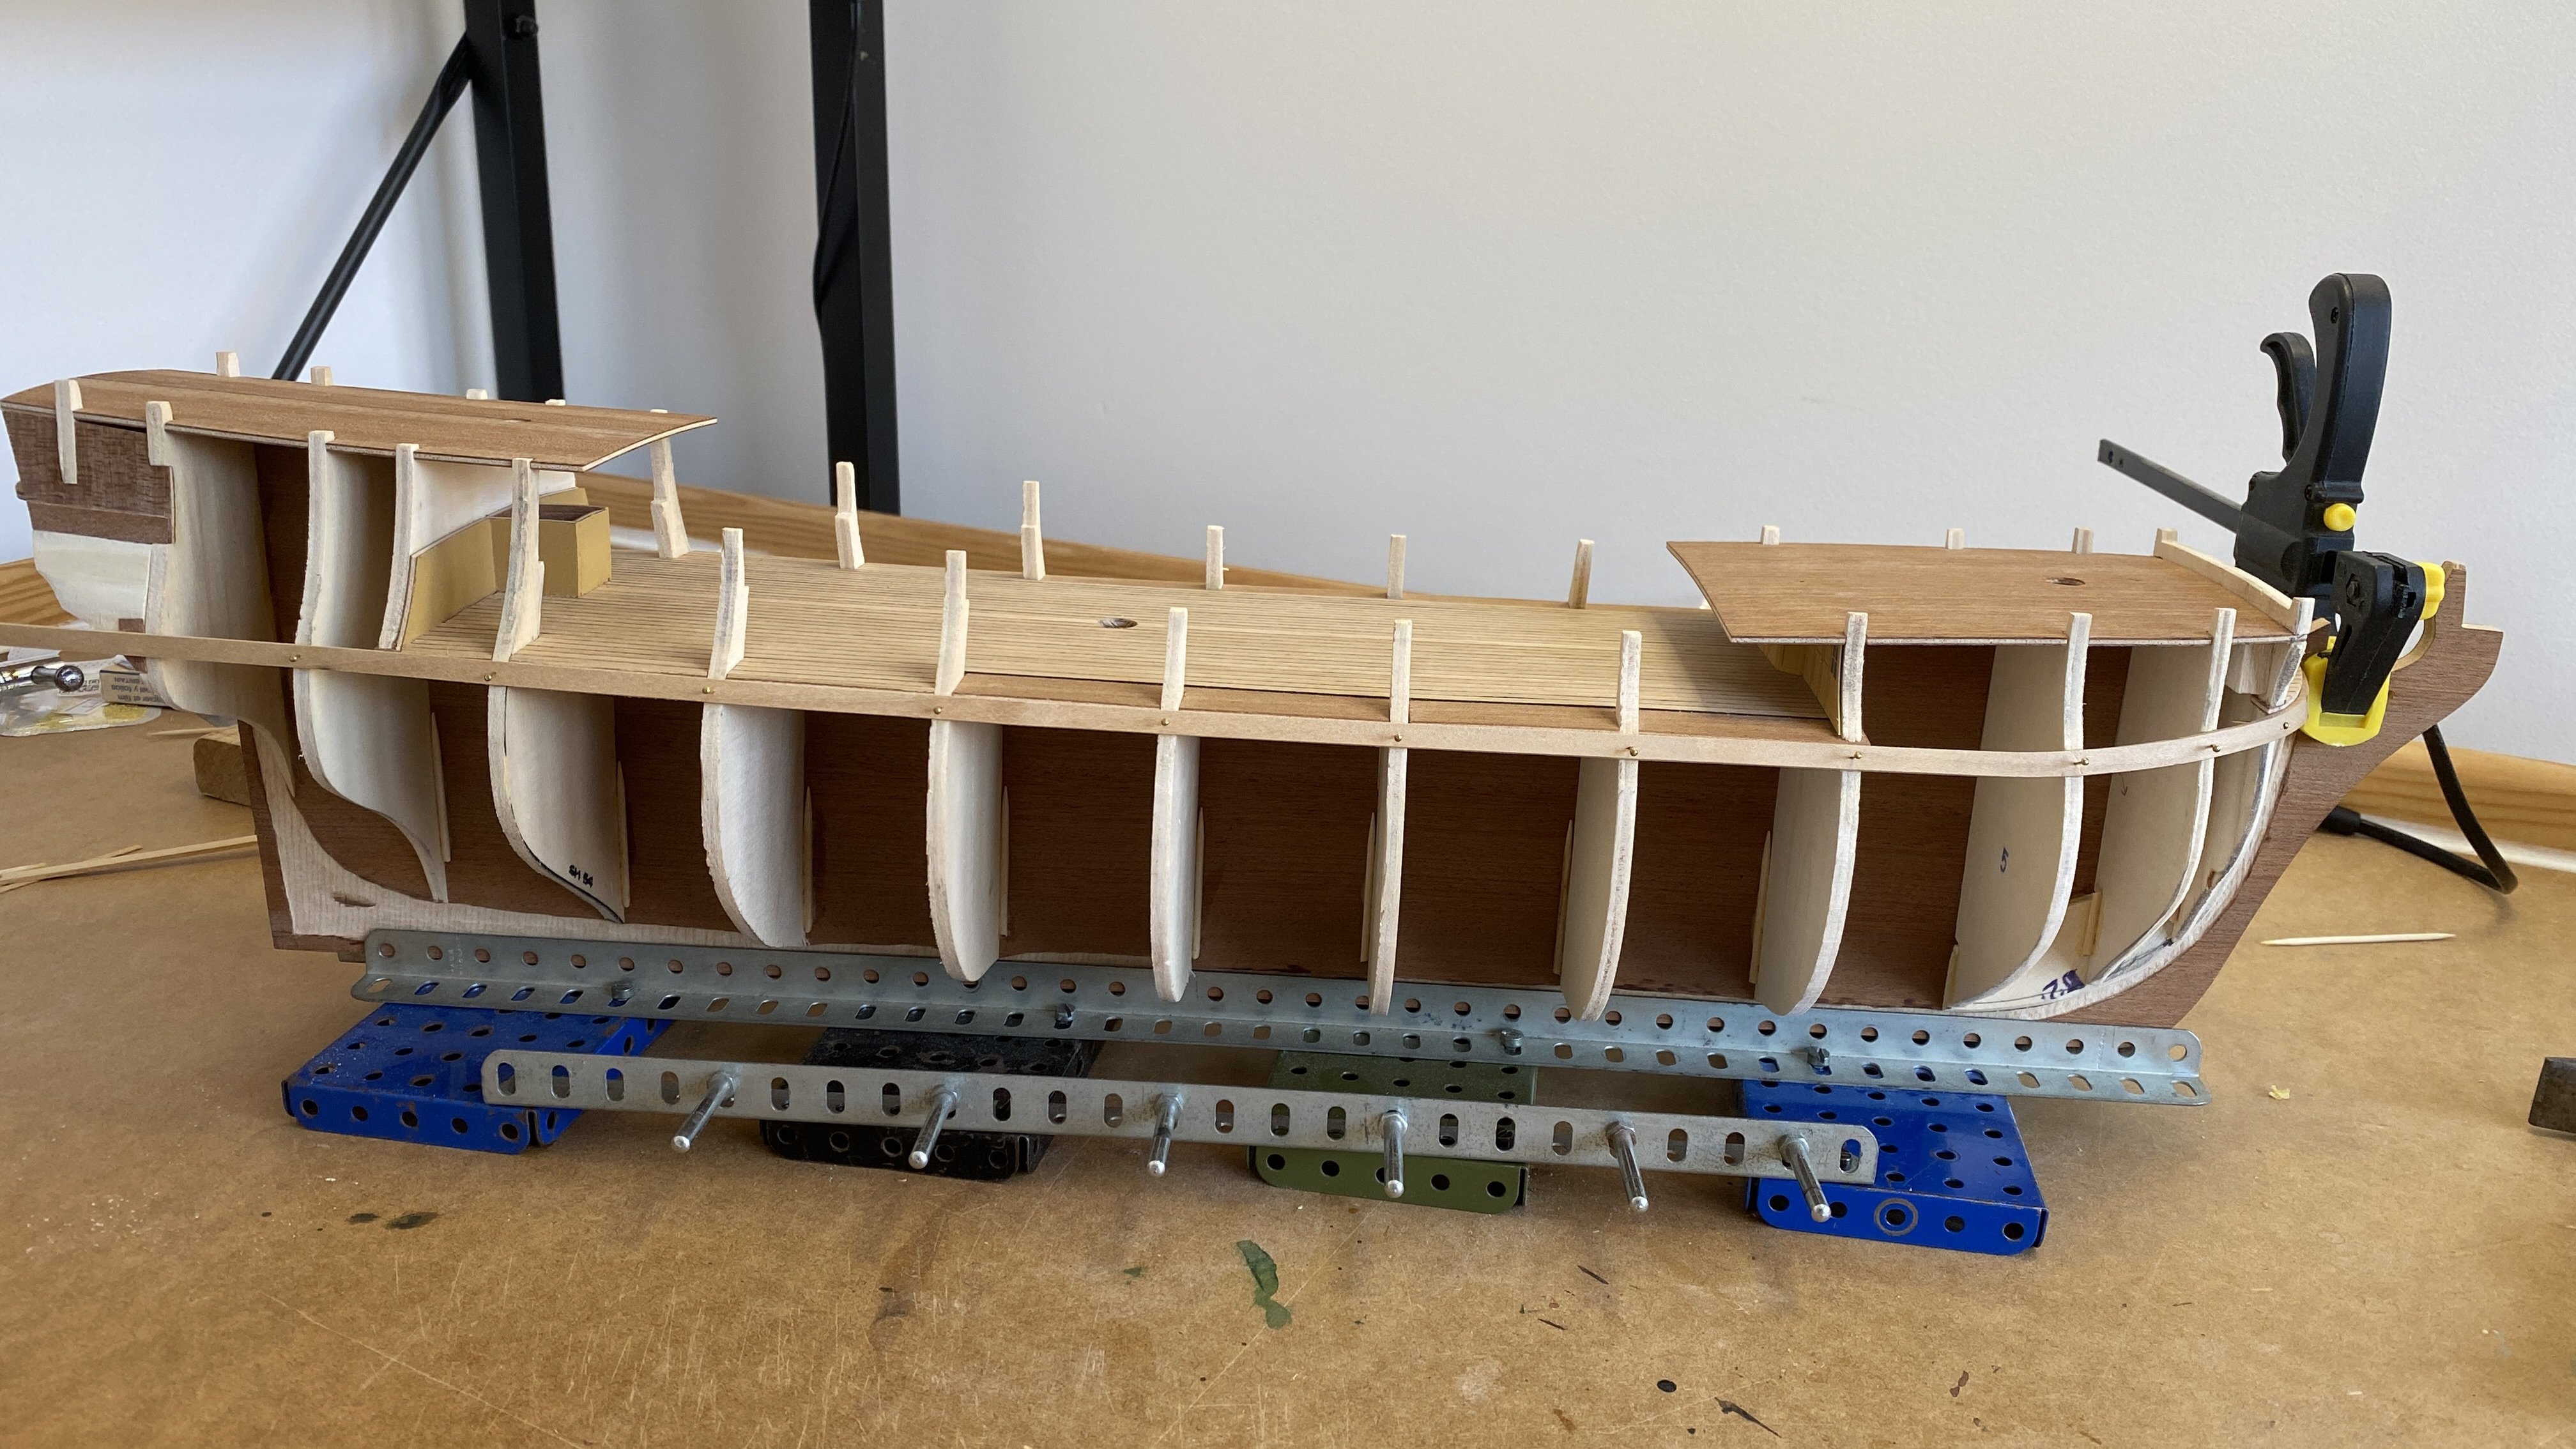
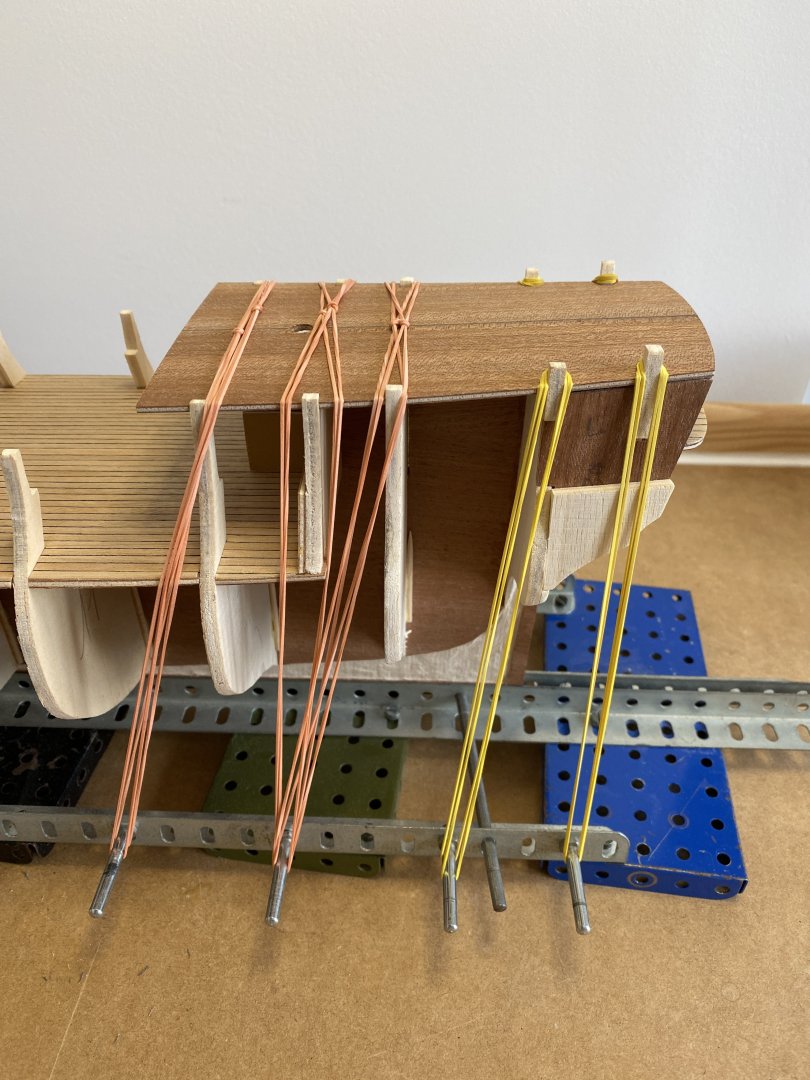
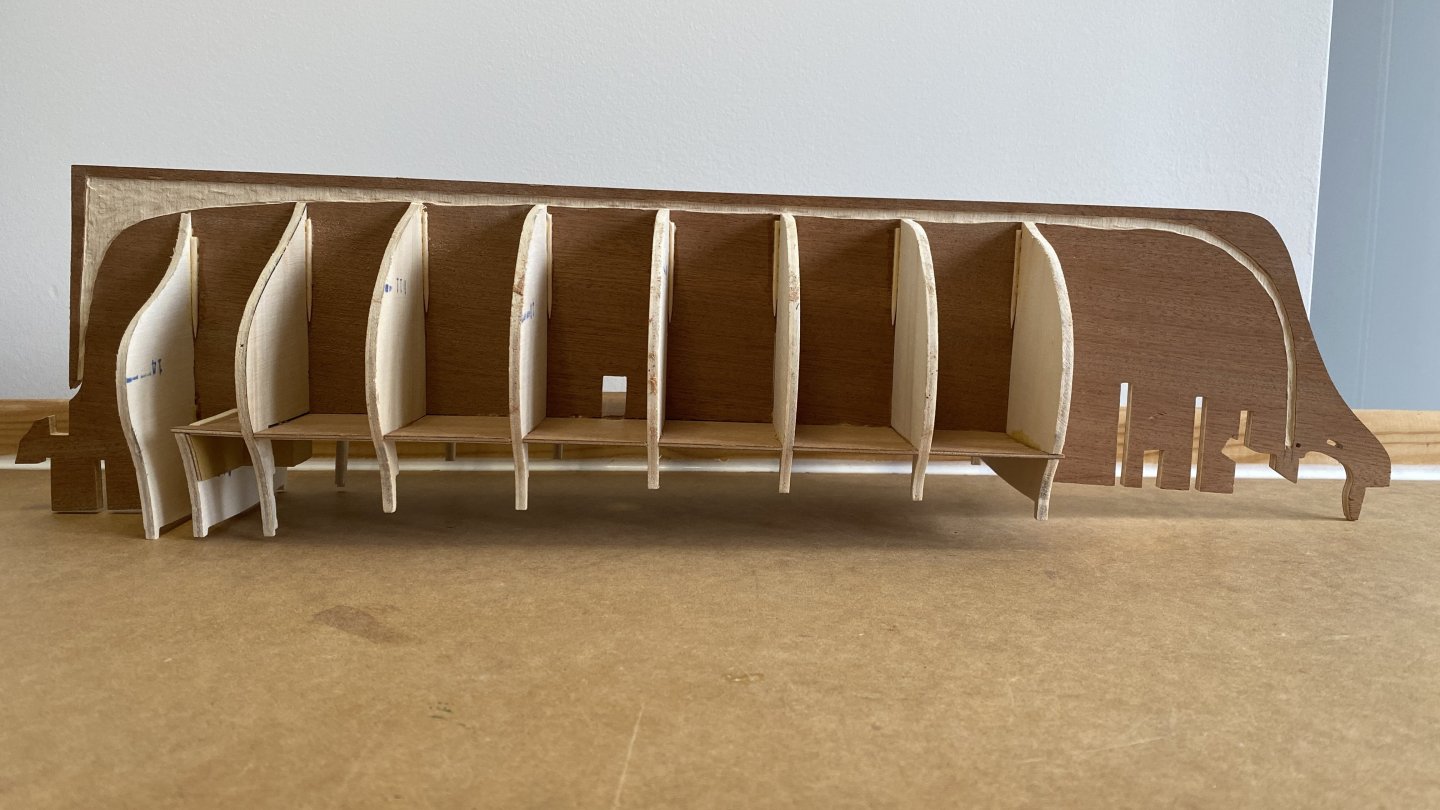
The poop deck is the last thing I need to attach before I can start the hull planking. My childhood Meccano set proving very useful once again.
-
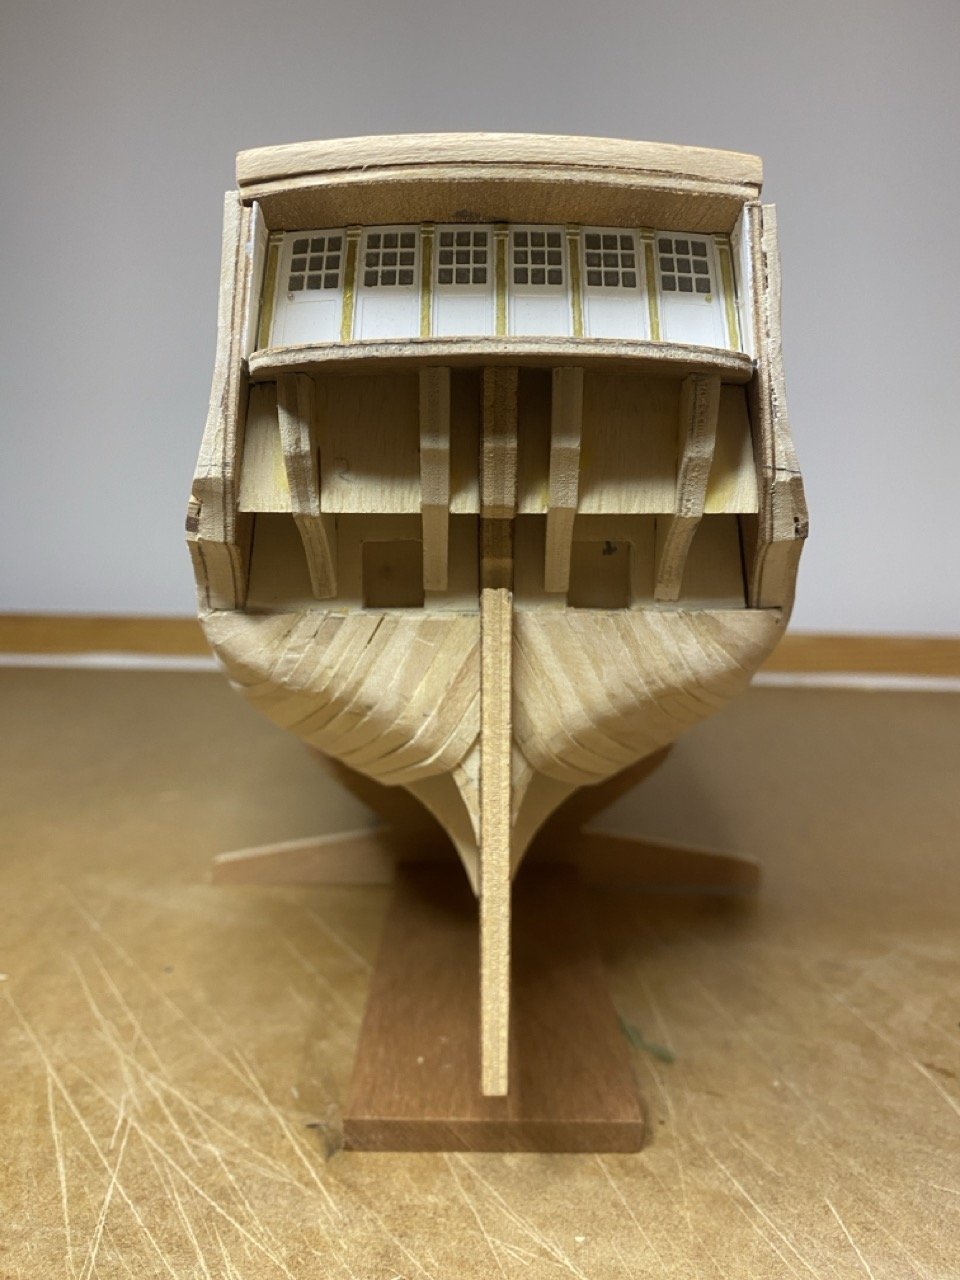
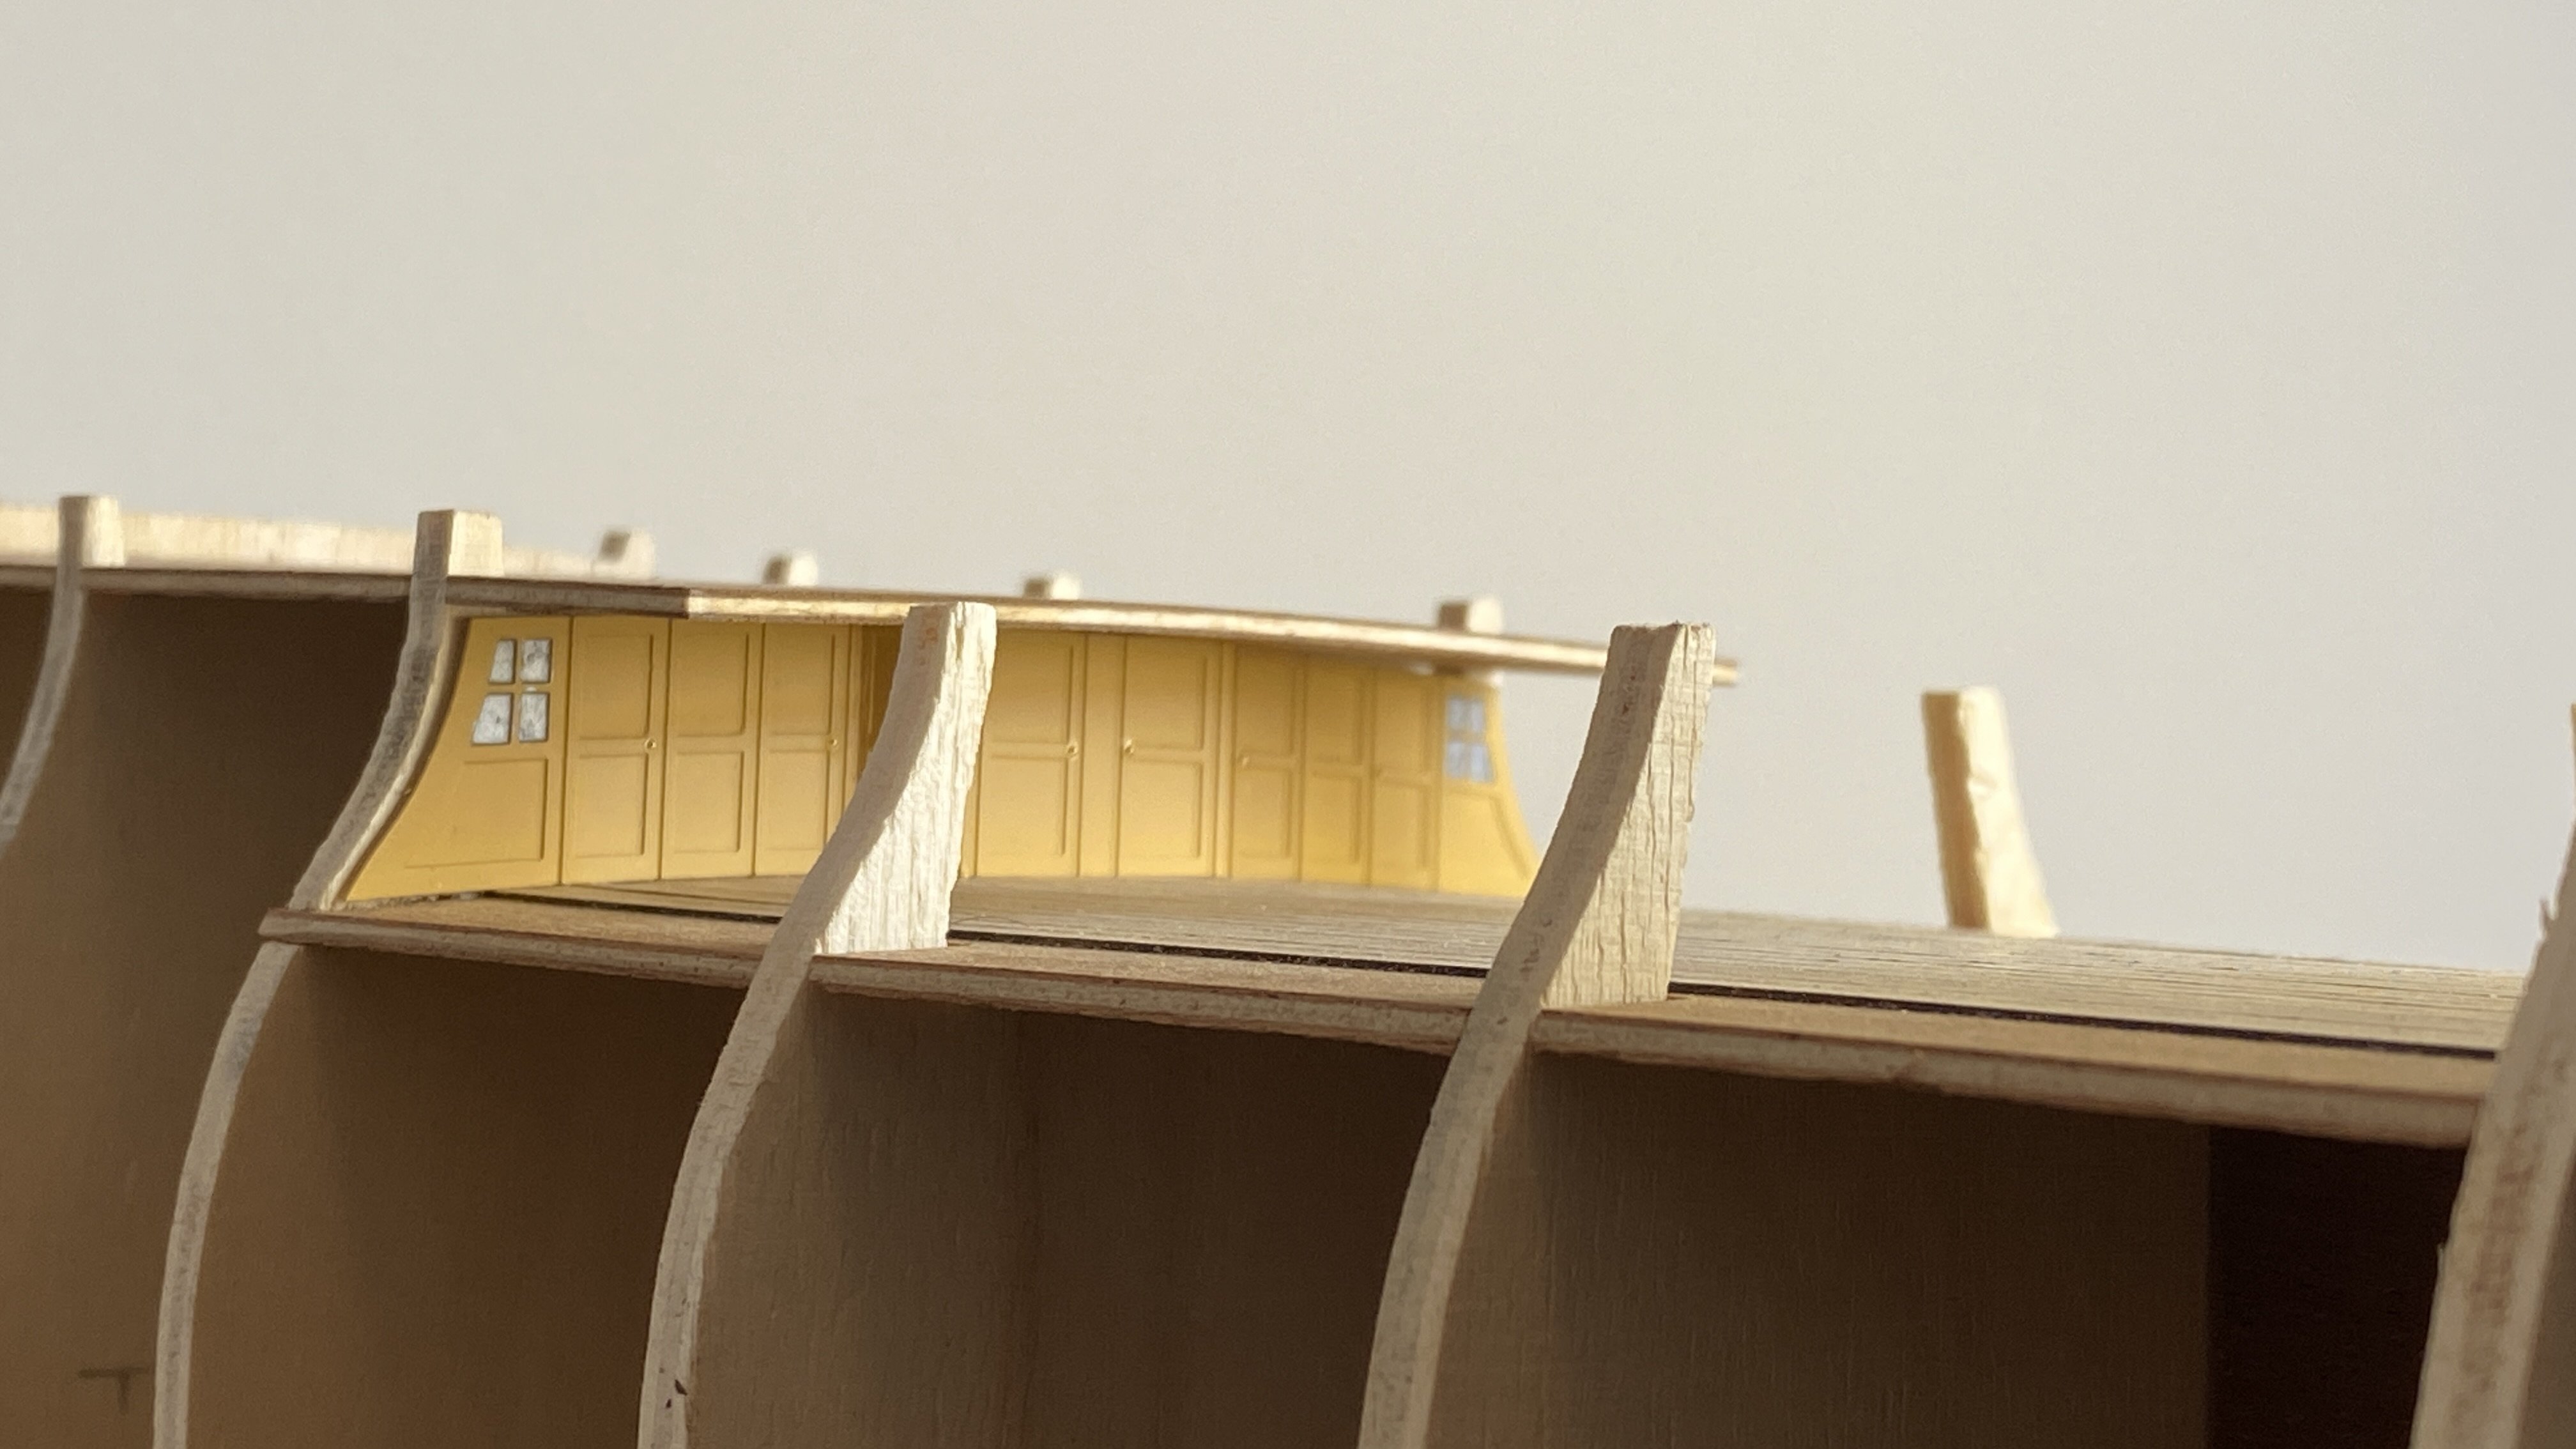
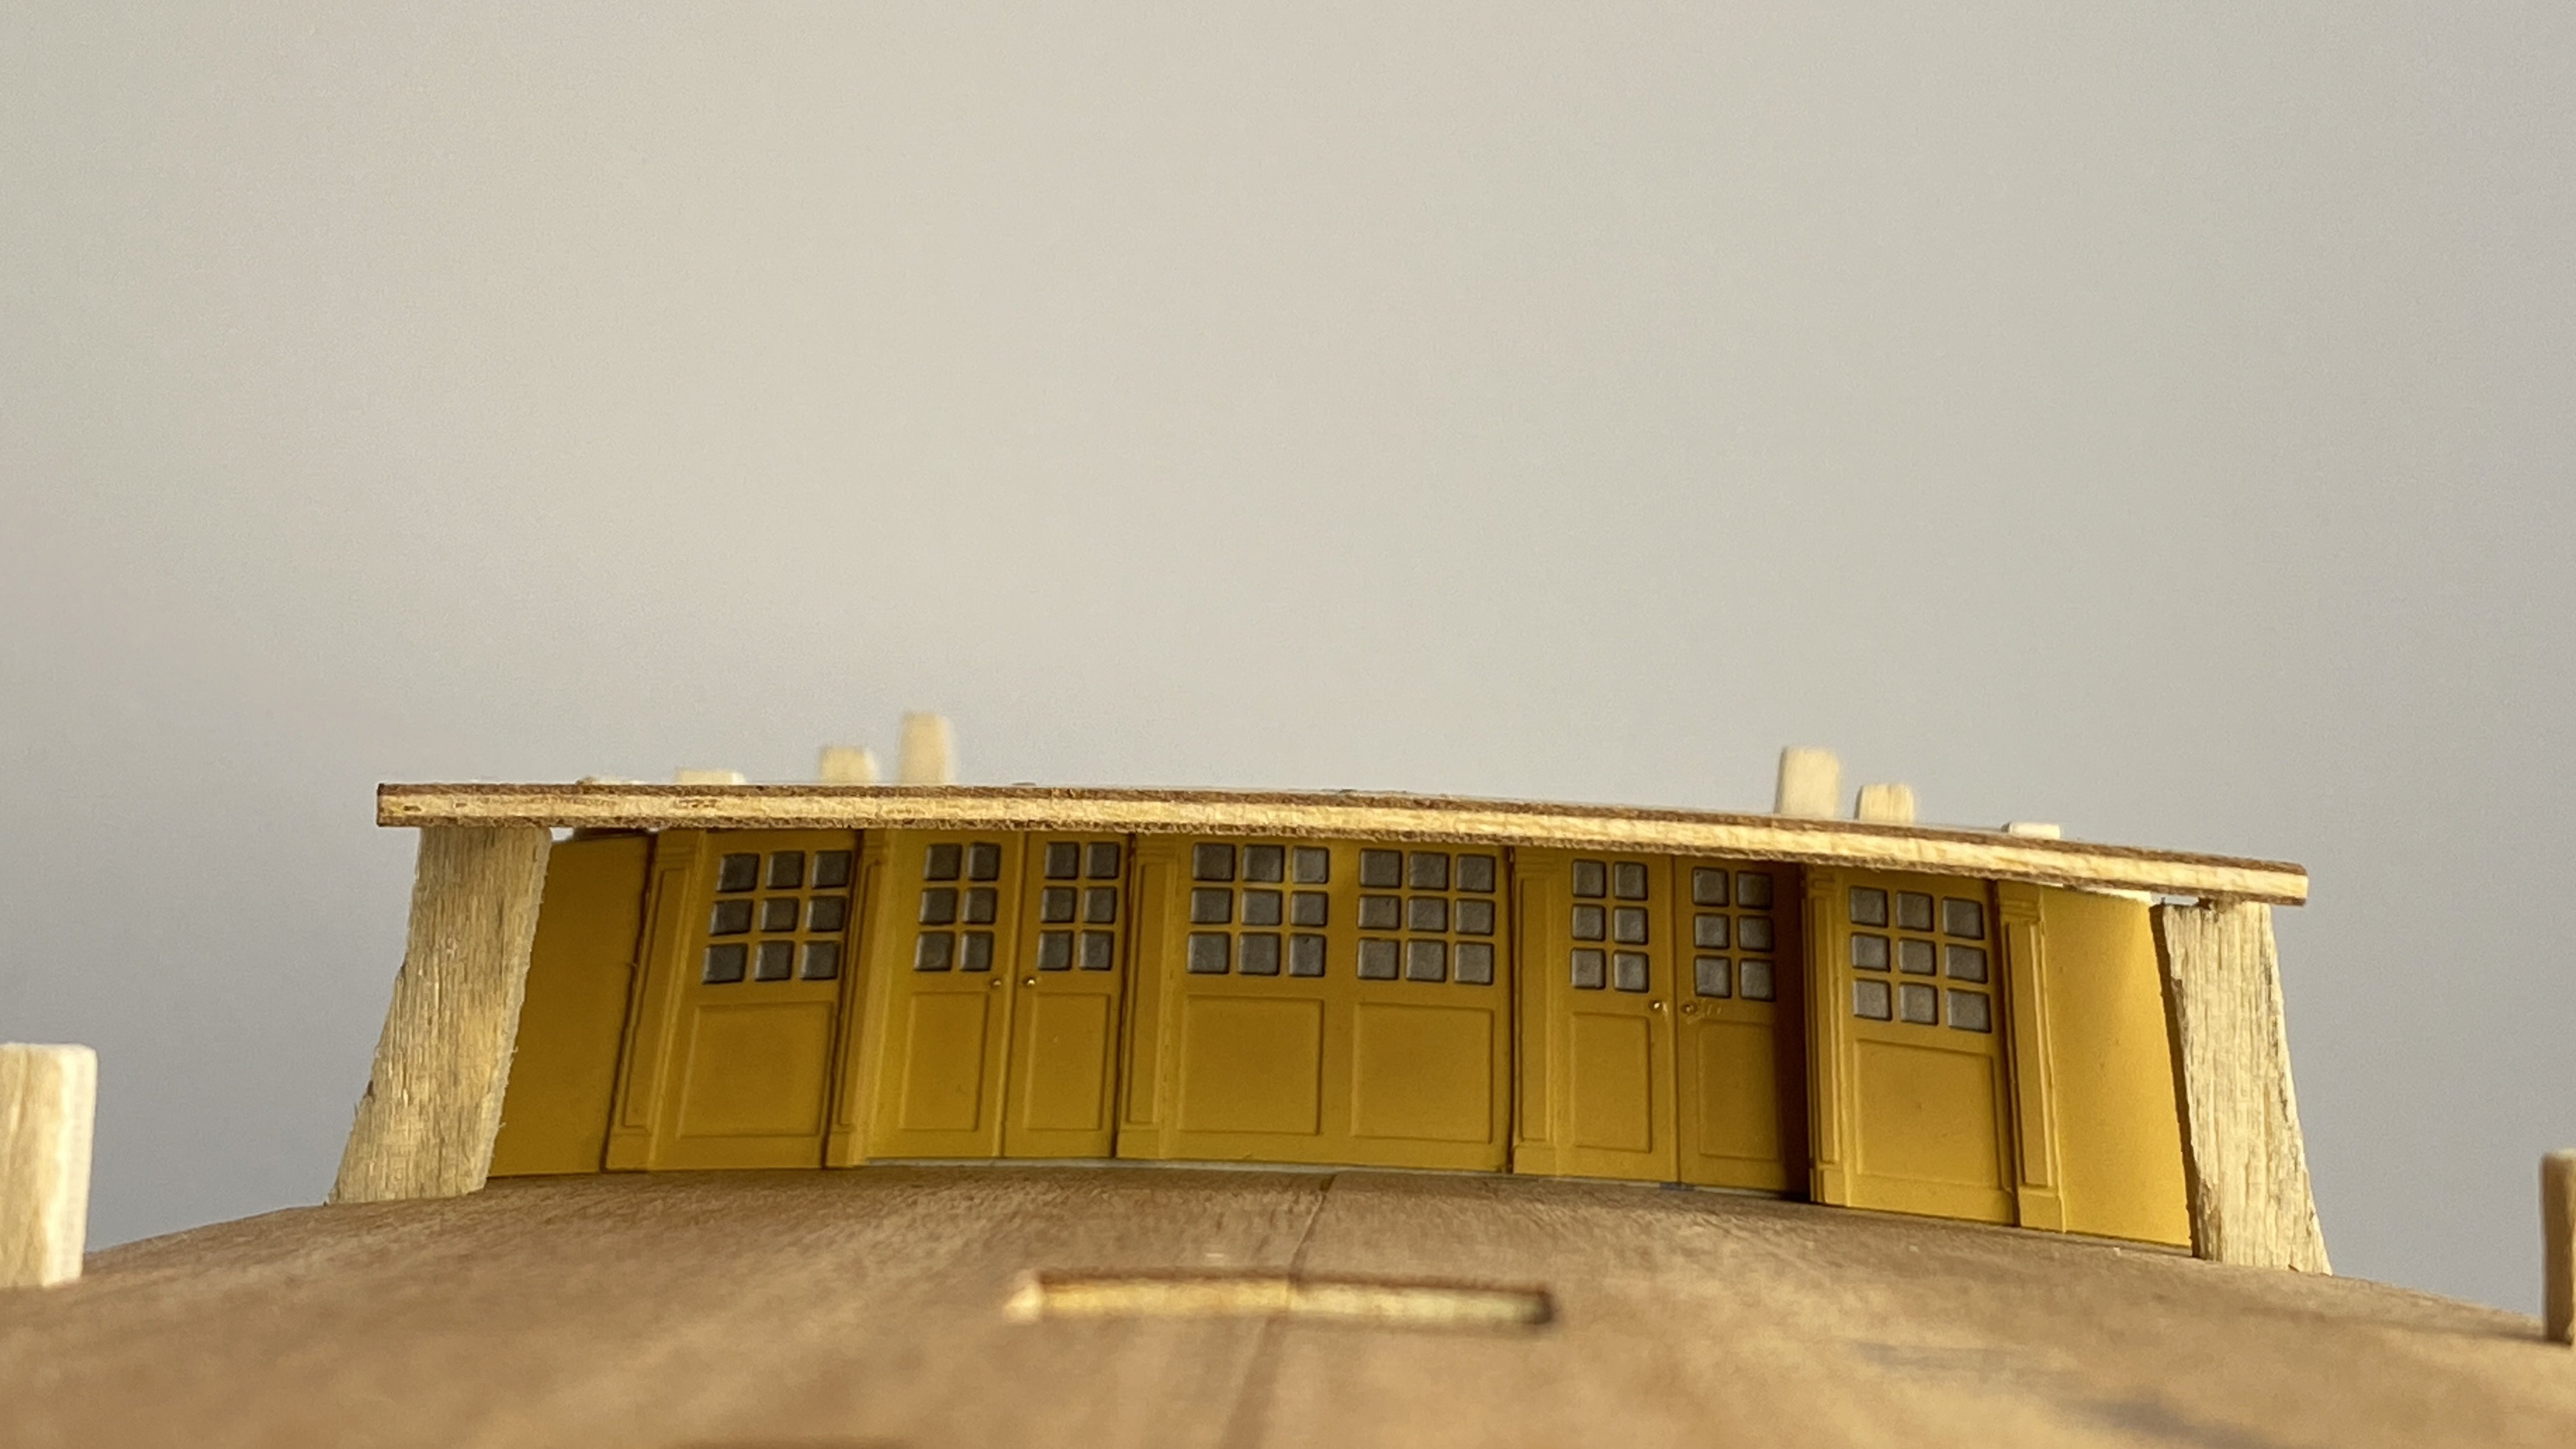
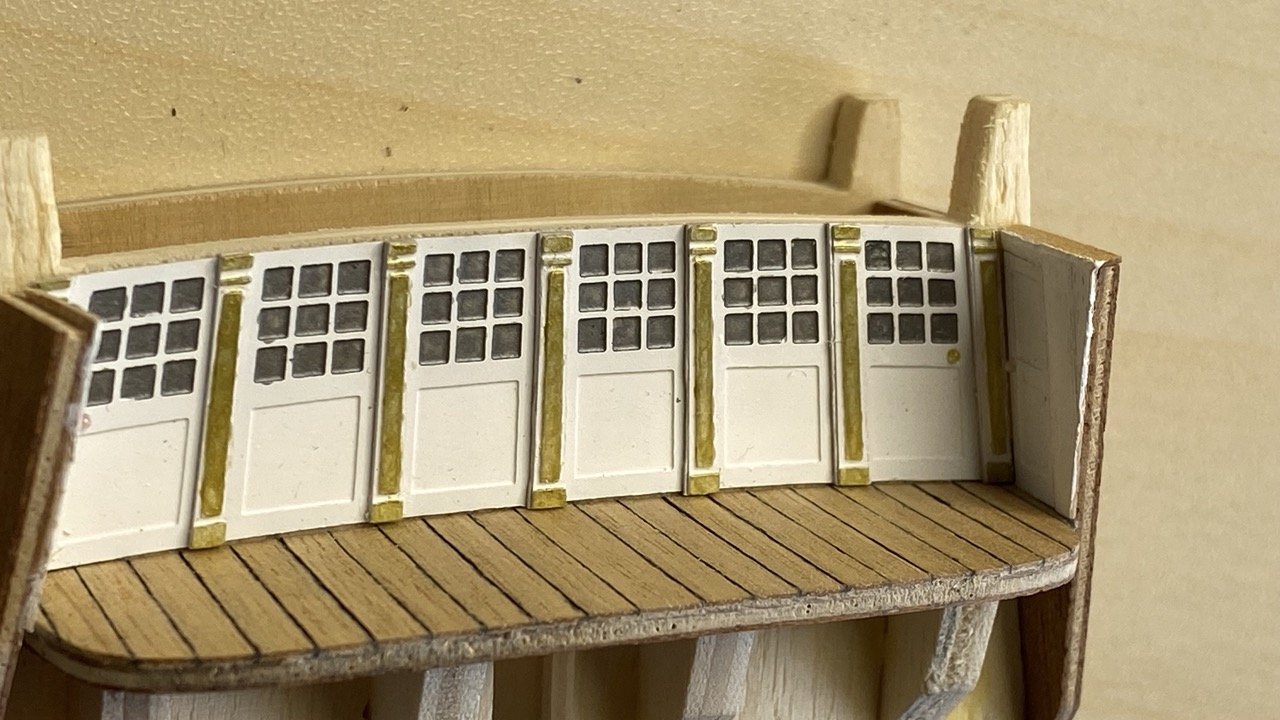
Having learnt from my many mistakes doing the stern gallery, the photo etch detailing on the bulkheads of the bow deck and the poop deck only took a couple of days to complete. I've glued the bow bulkhead detailing into place, but the detailing for the poop deck will be glued in place after the quarter deck has been fitted. (I'll need to slightly dismantle it to get it into position, but that's a trivial problem.) Corel suggest using tack heads for the doorknobs, but at this scale they would represent doorknobs about 20cm in diameter, so I glued tiny resin beads in place: these are perhaps a bit too small, but I prefer them to the tack heads.


-
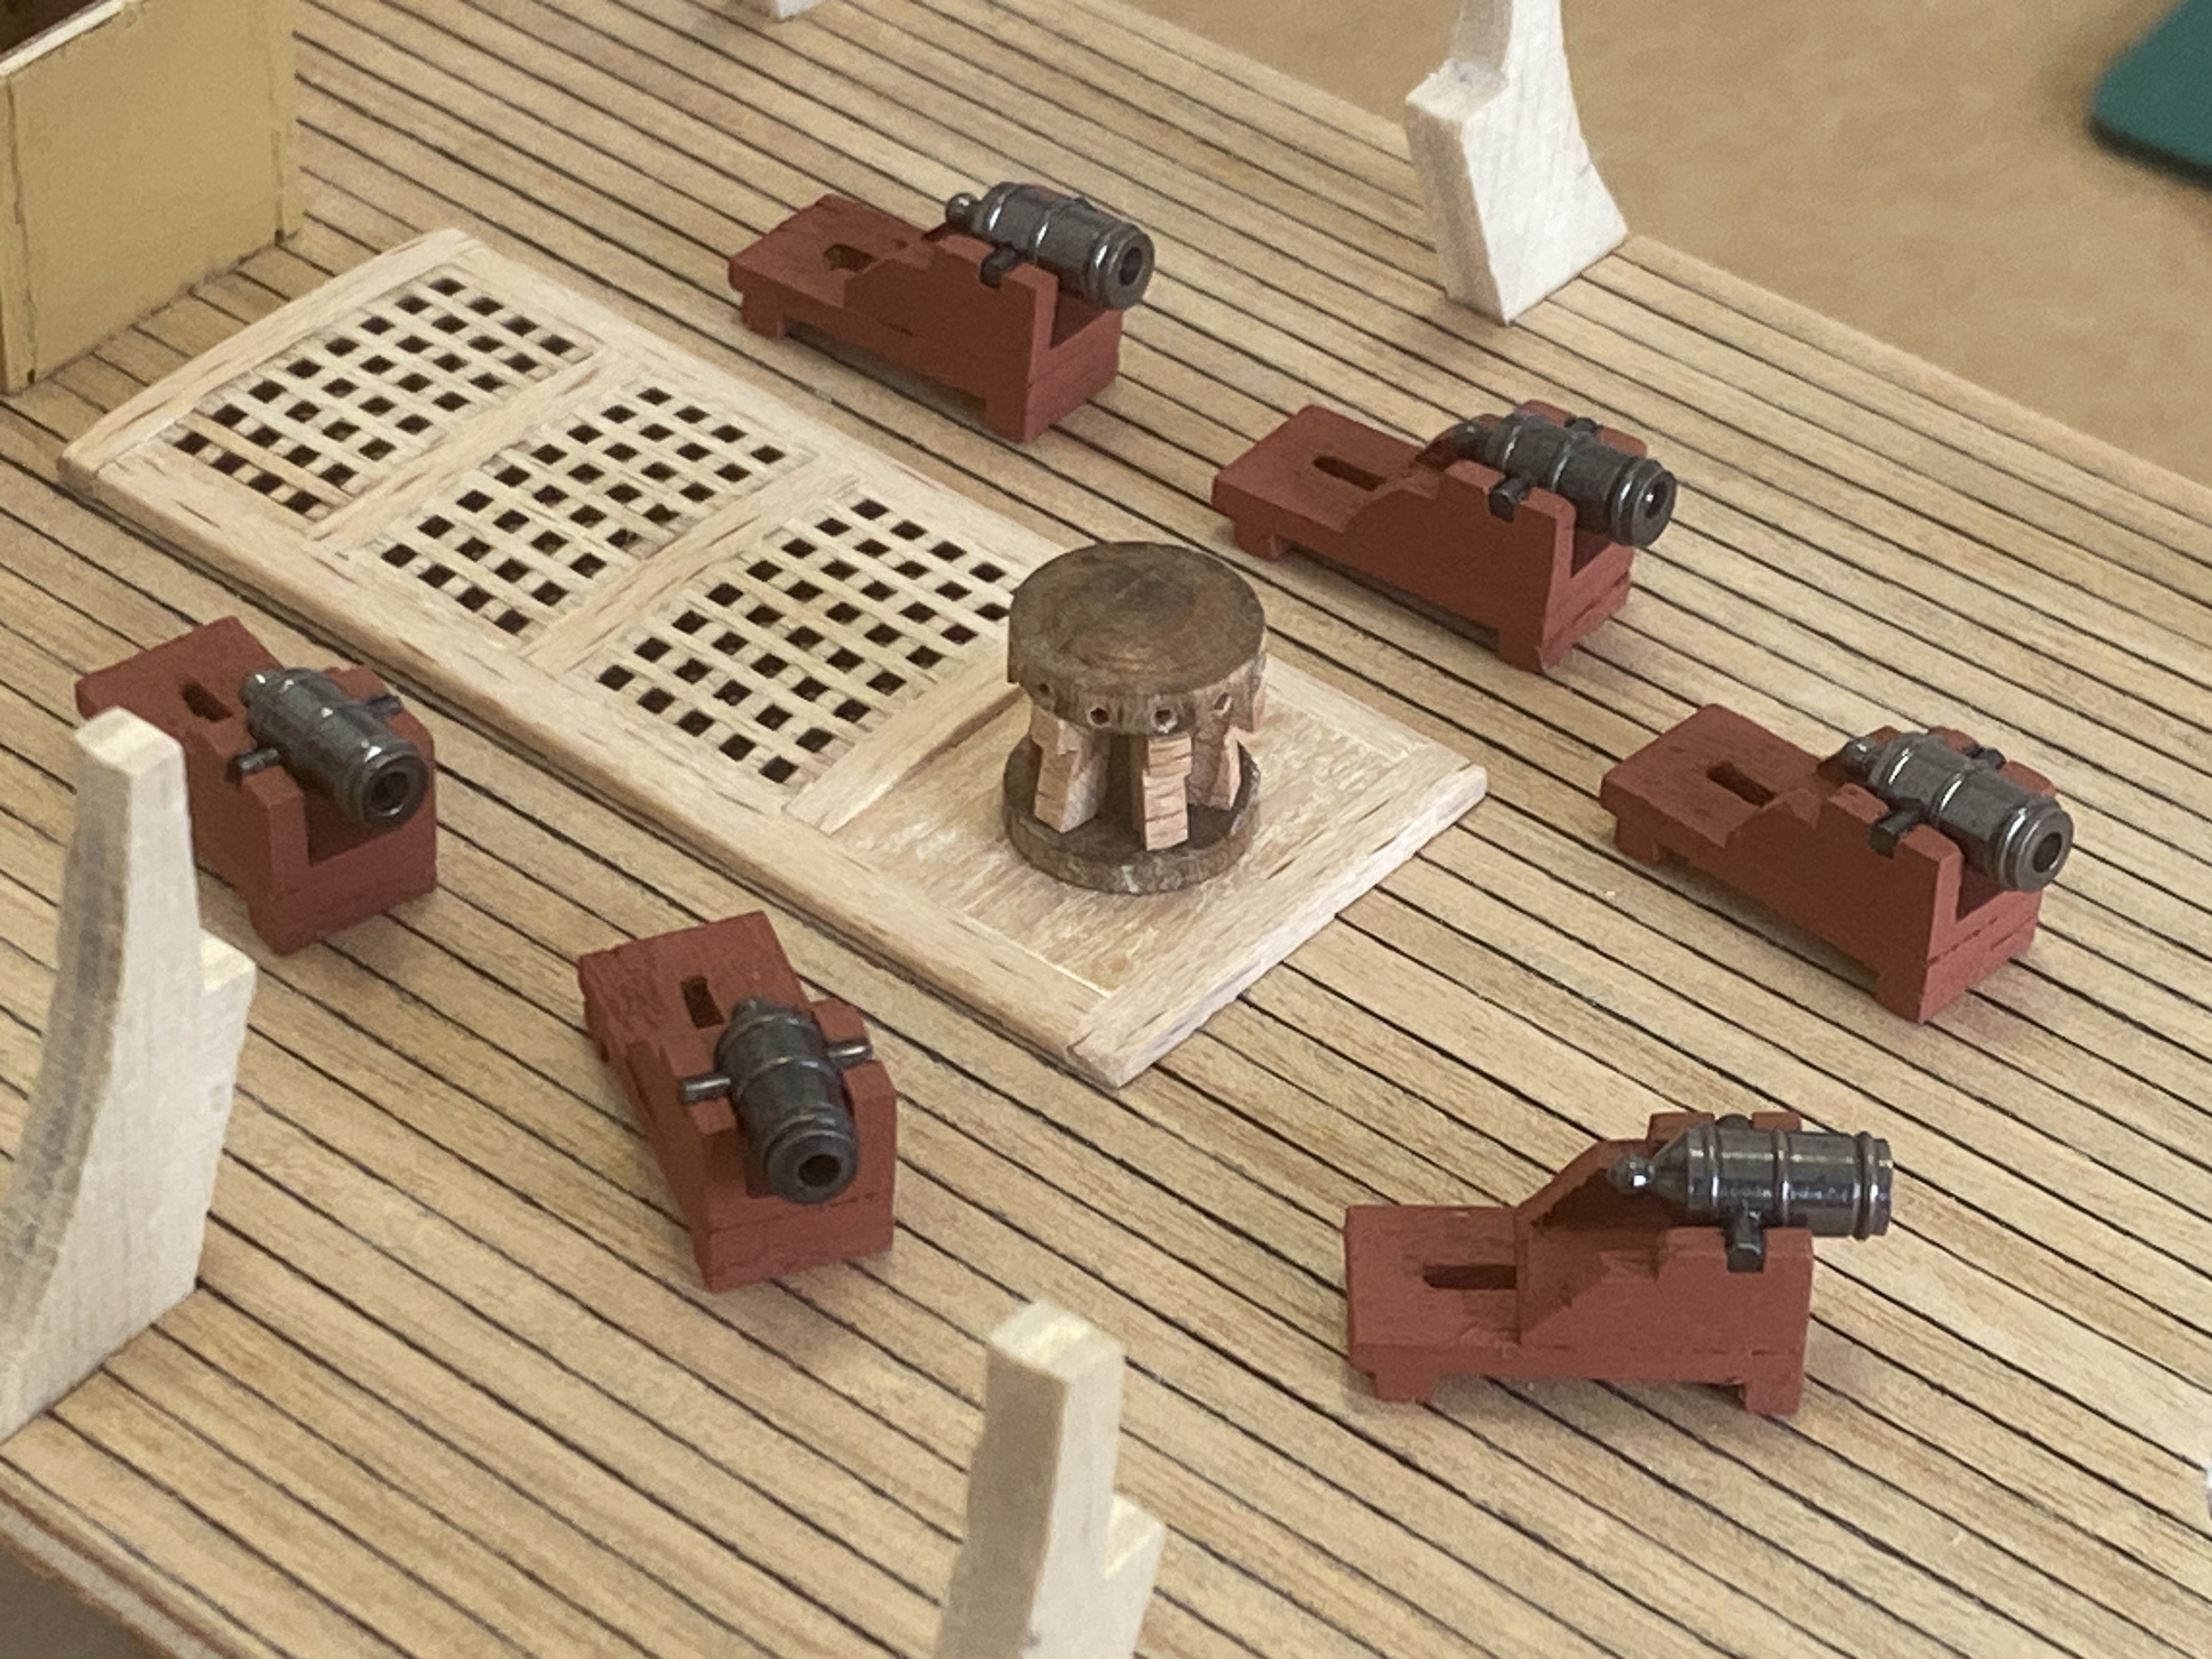
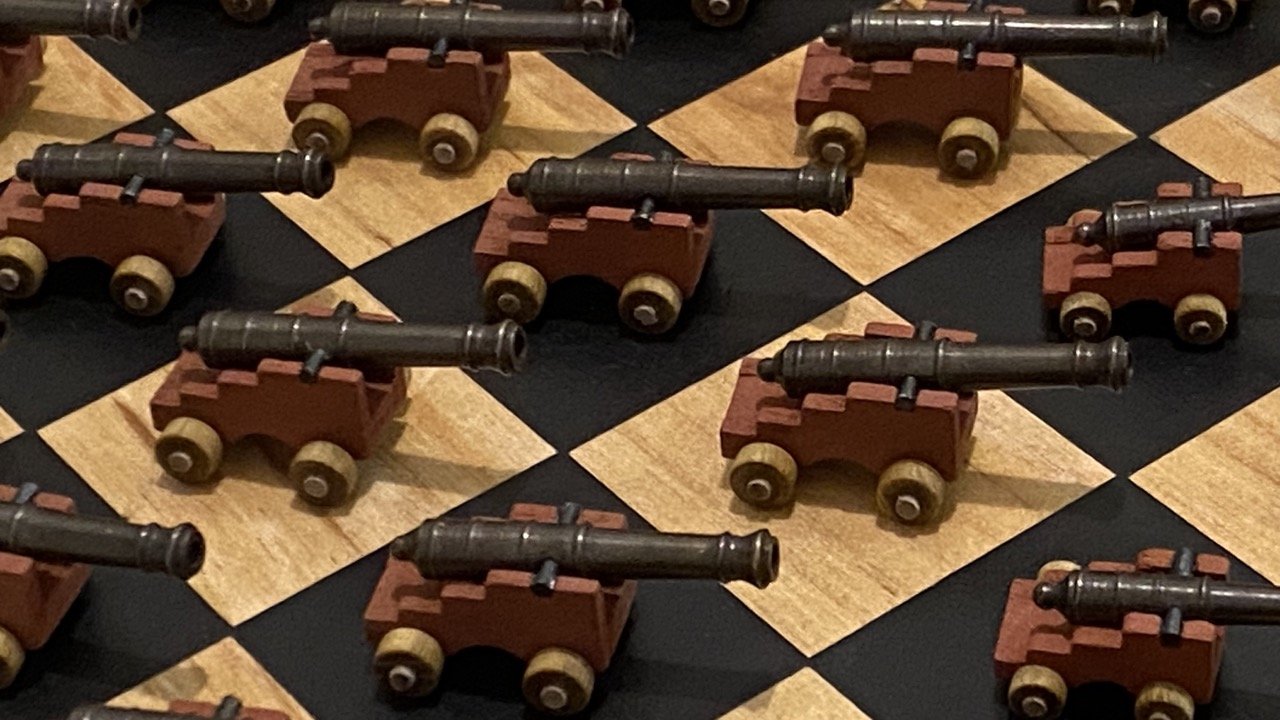
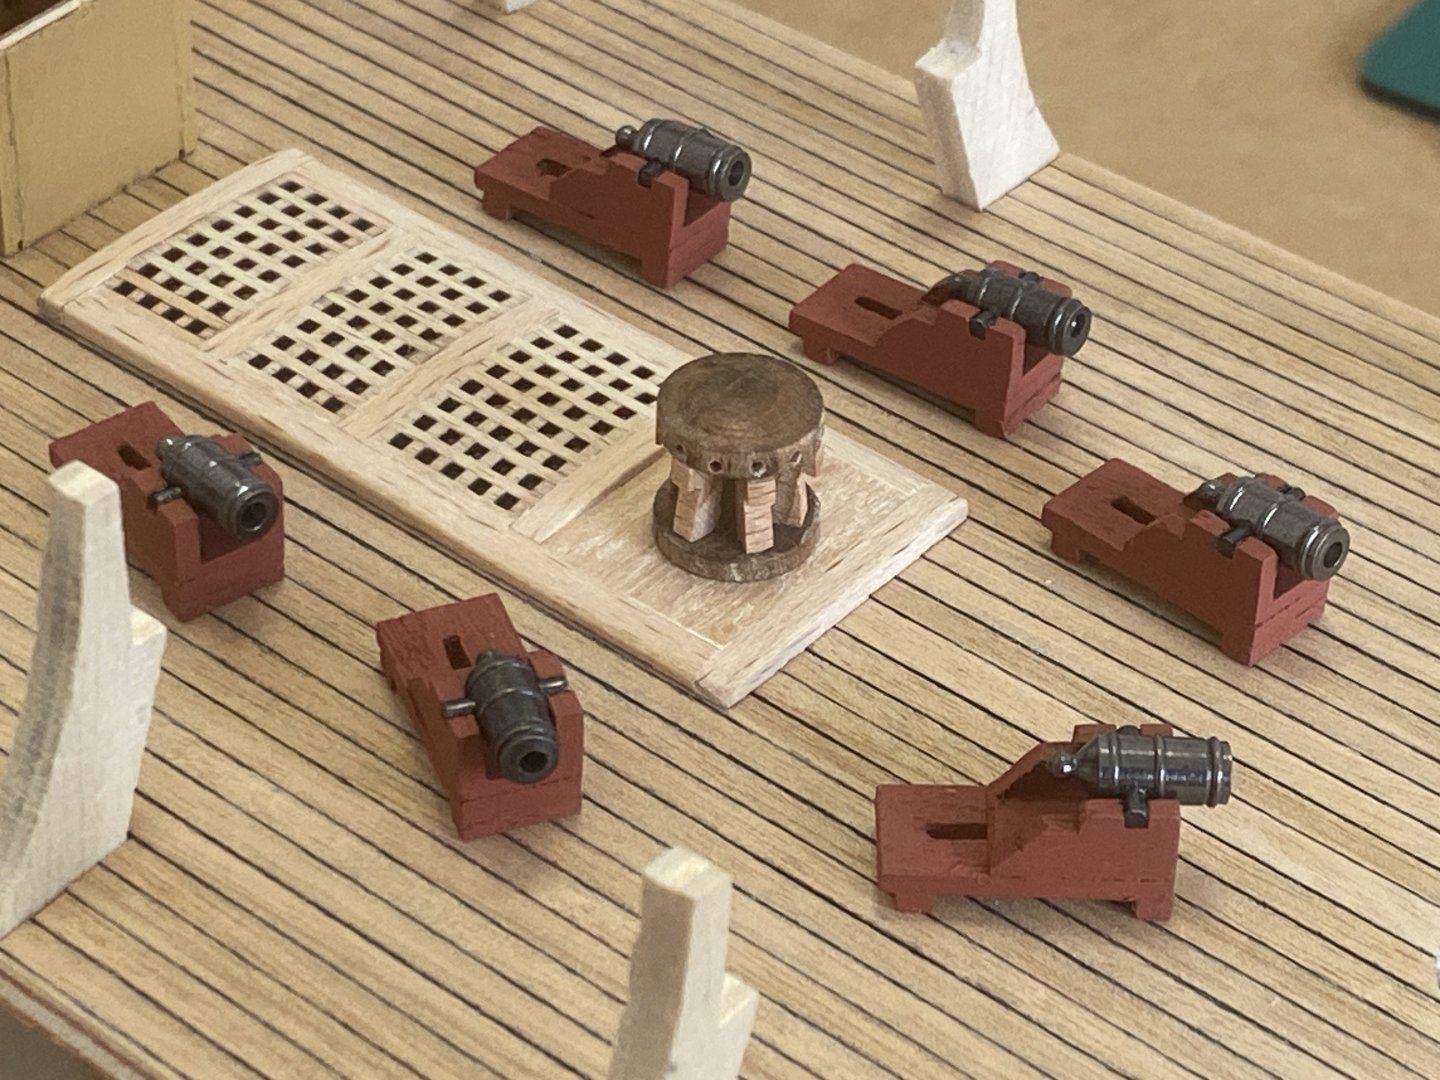
I made all the canons and carronades: as with the early construction of the gratings this was a deferral activity whilst I was procrastinating about planking the hull. The Corel kit suggests using brass wire for the axels but it looks wrong as I wanted to use wood. I was unable to source any with a suitably small diameter so I sanded down round larger wooden strip to the required diameter (using the Dremel and gripping the wood with sandpaper until the diameter had reduced sufficiently): took a while but I'm happy with the results.
-
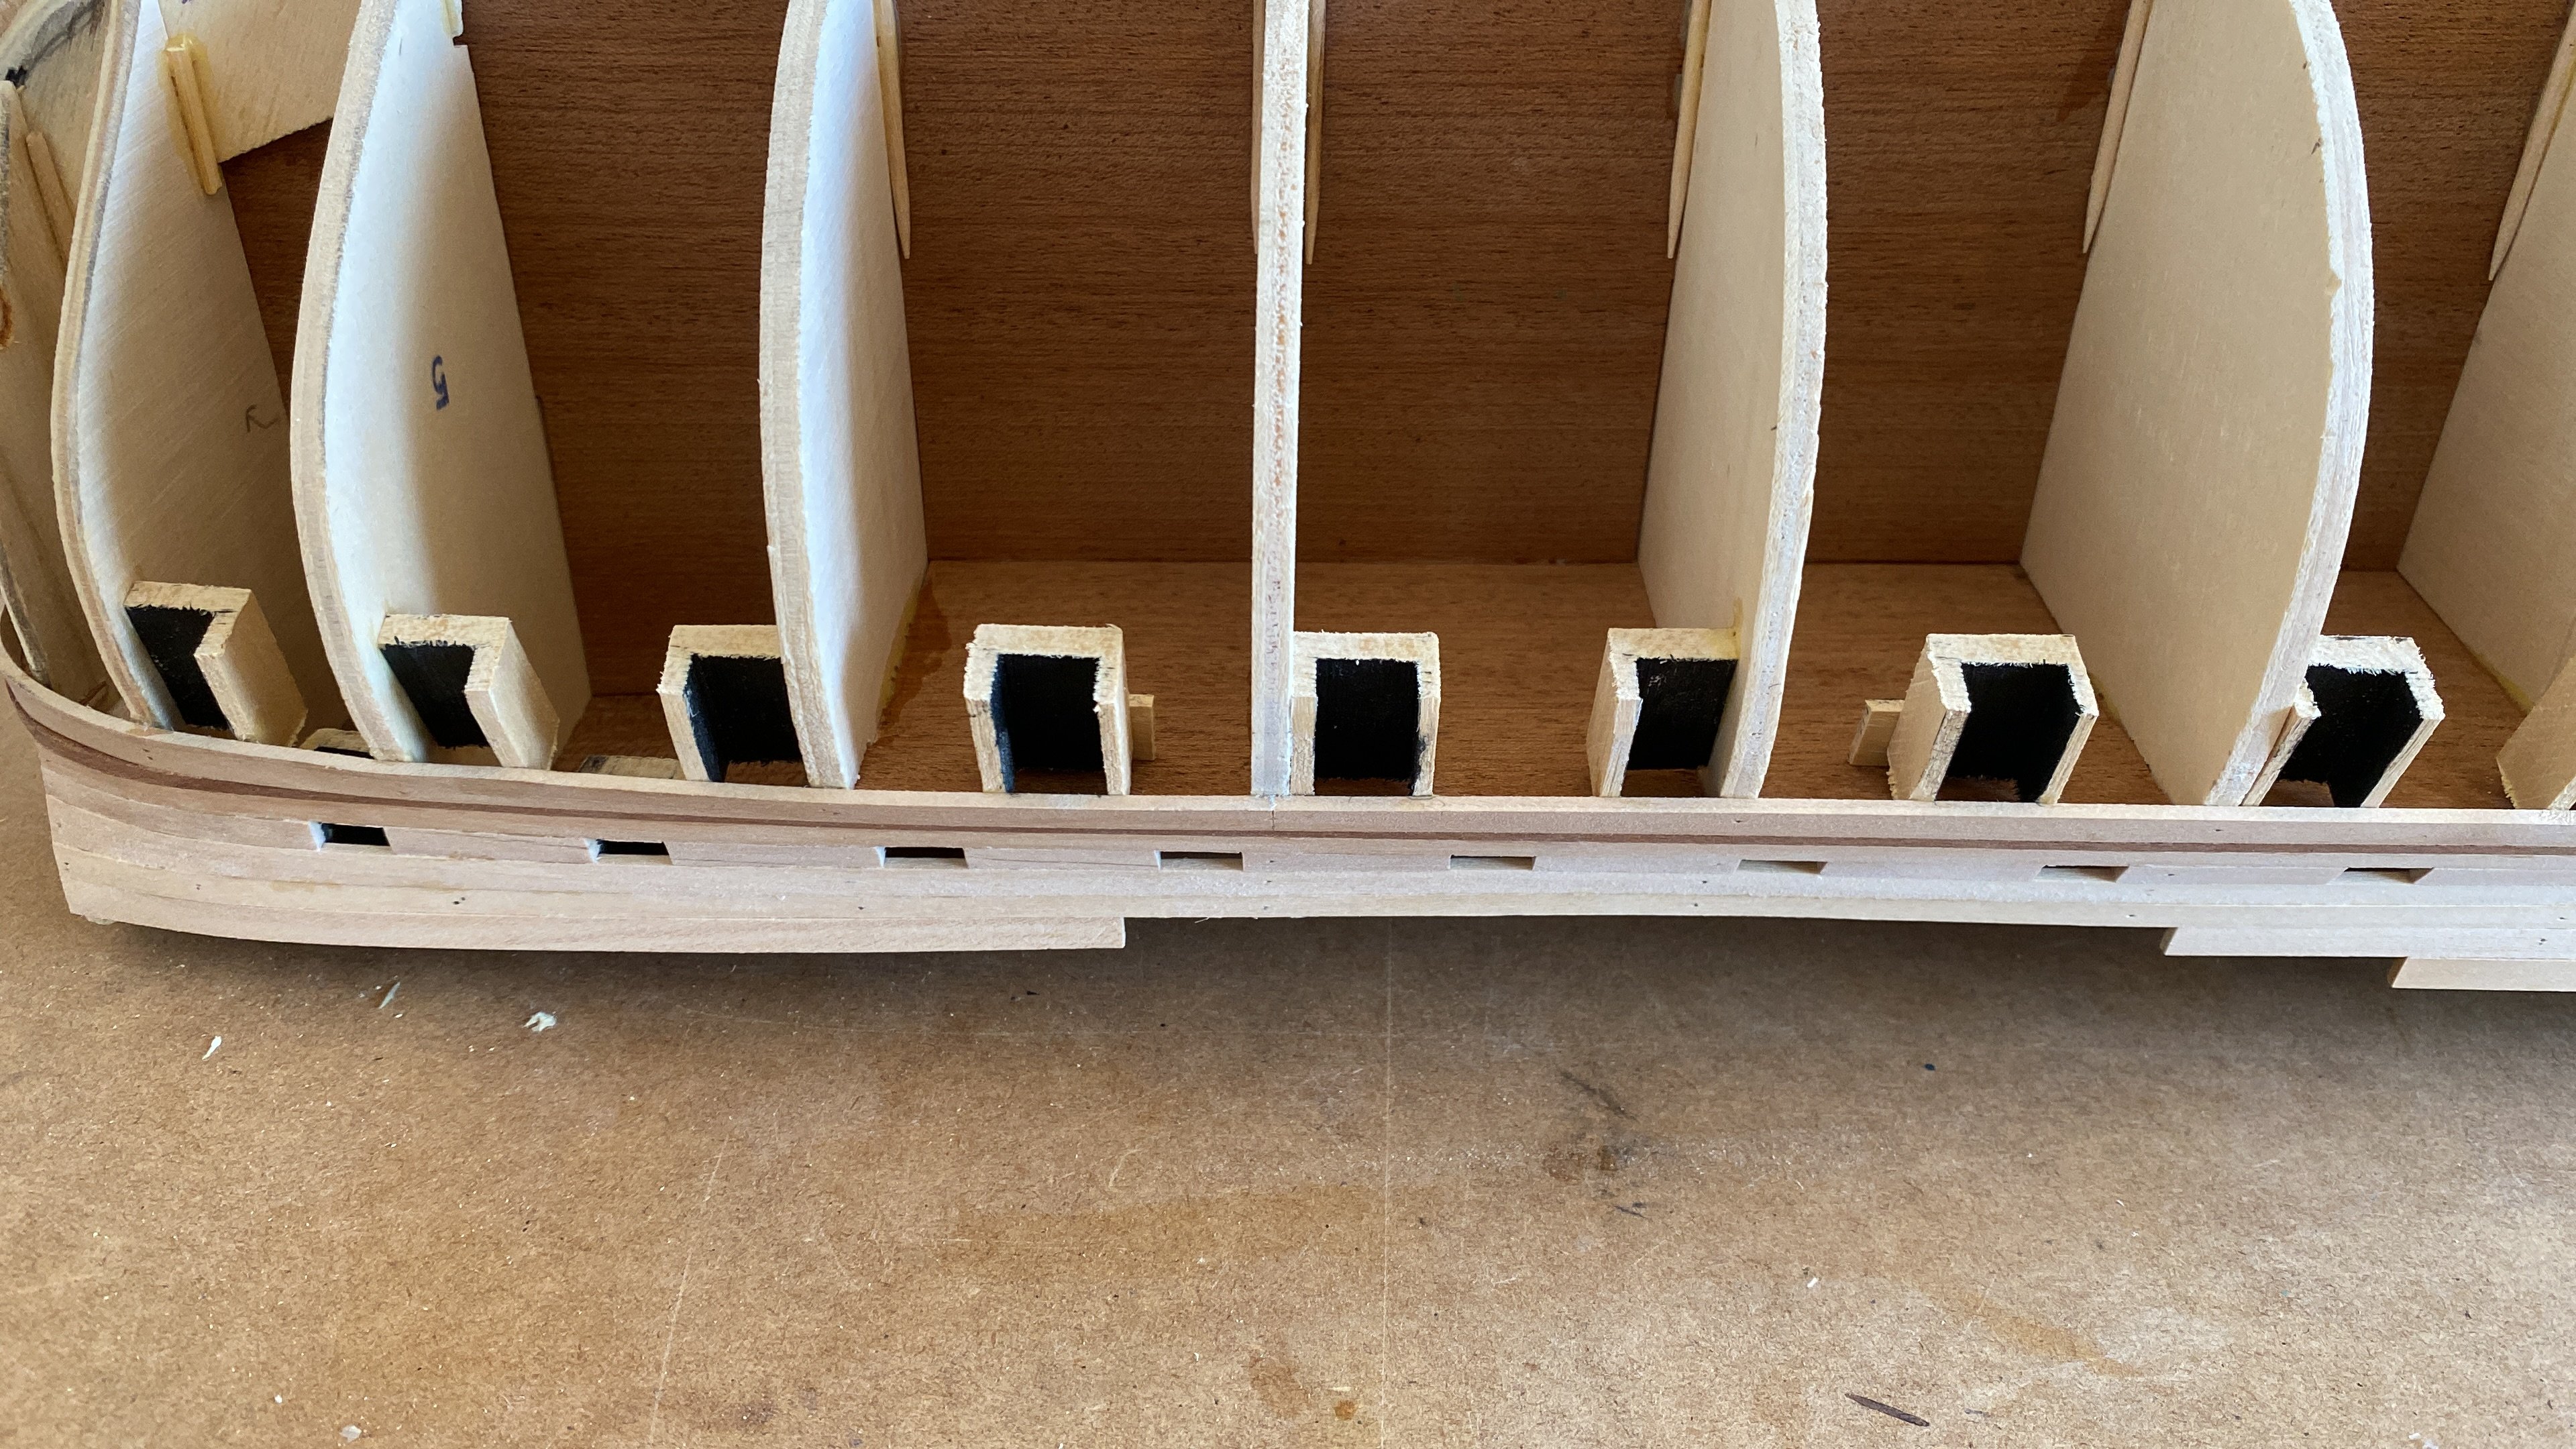
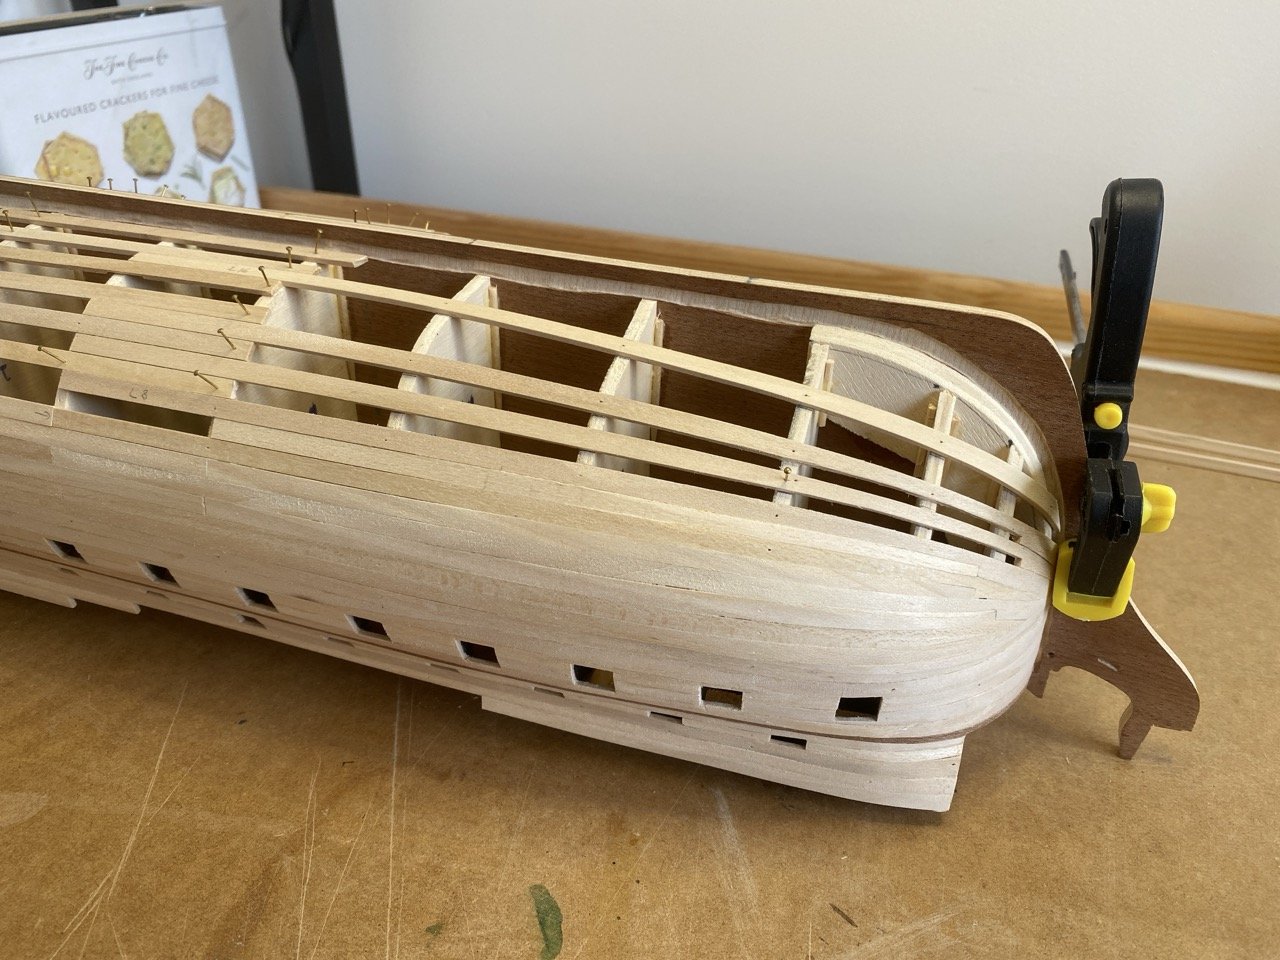
Having seen other build logs (those by Harlequin and Nearshore in particular) I realised I should cut a rabbet line so I can slightly recess the hull planks to help me hide any issues where they join the hull. I really wish I'd done this before adding the bulkheads. I used a Dremel to remove the outer layer of the plywood keel and found that a small silicon carbide cutting wheel was good for removing the bulk of the wood, and then a scalpel to get into the corner near to where the rudder will go. I can make any small adjustments to the width of the rabbet line as and when needed, but I think this will do for now.
-
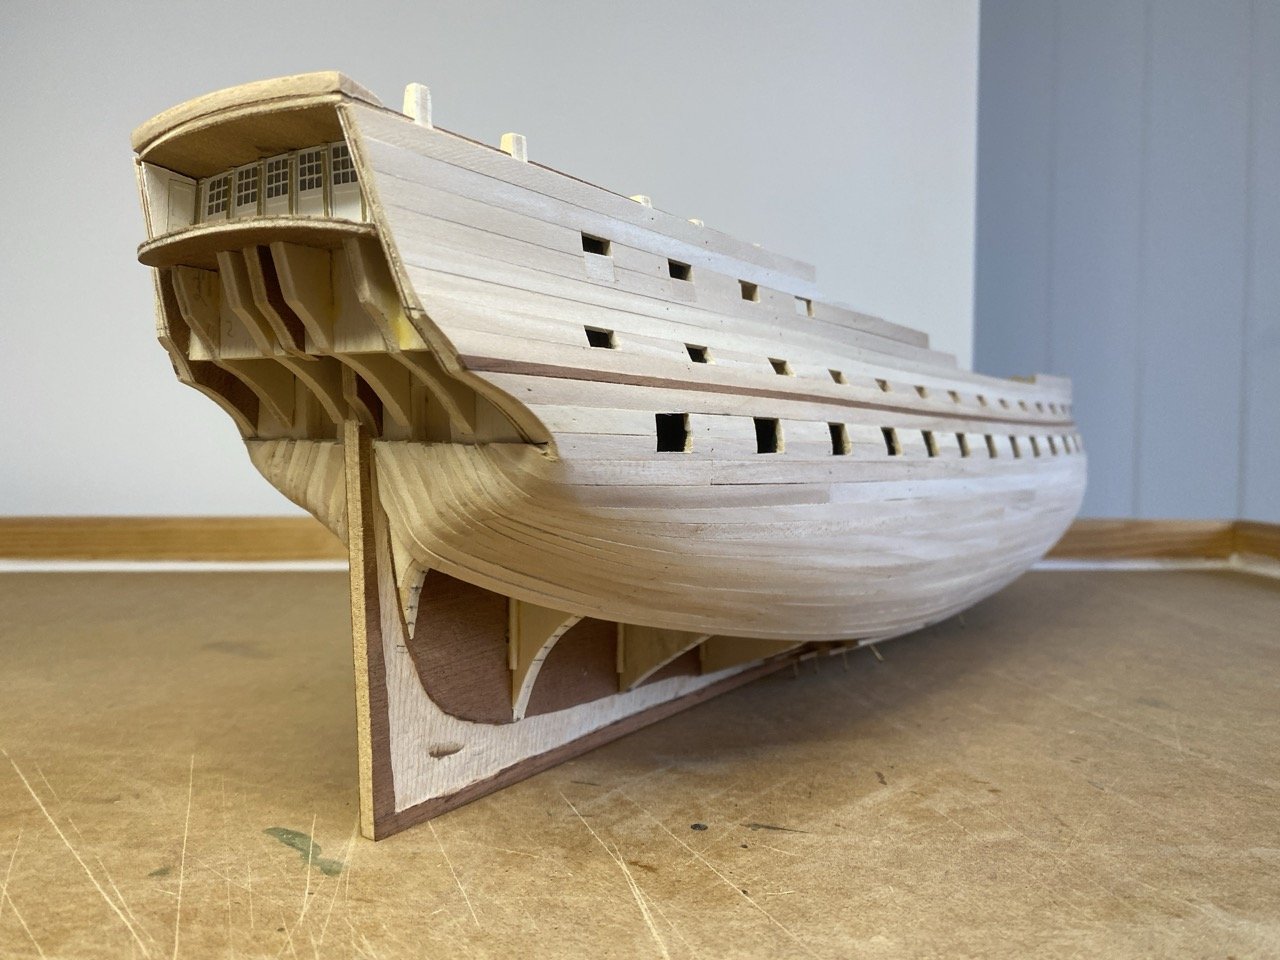
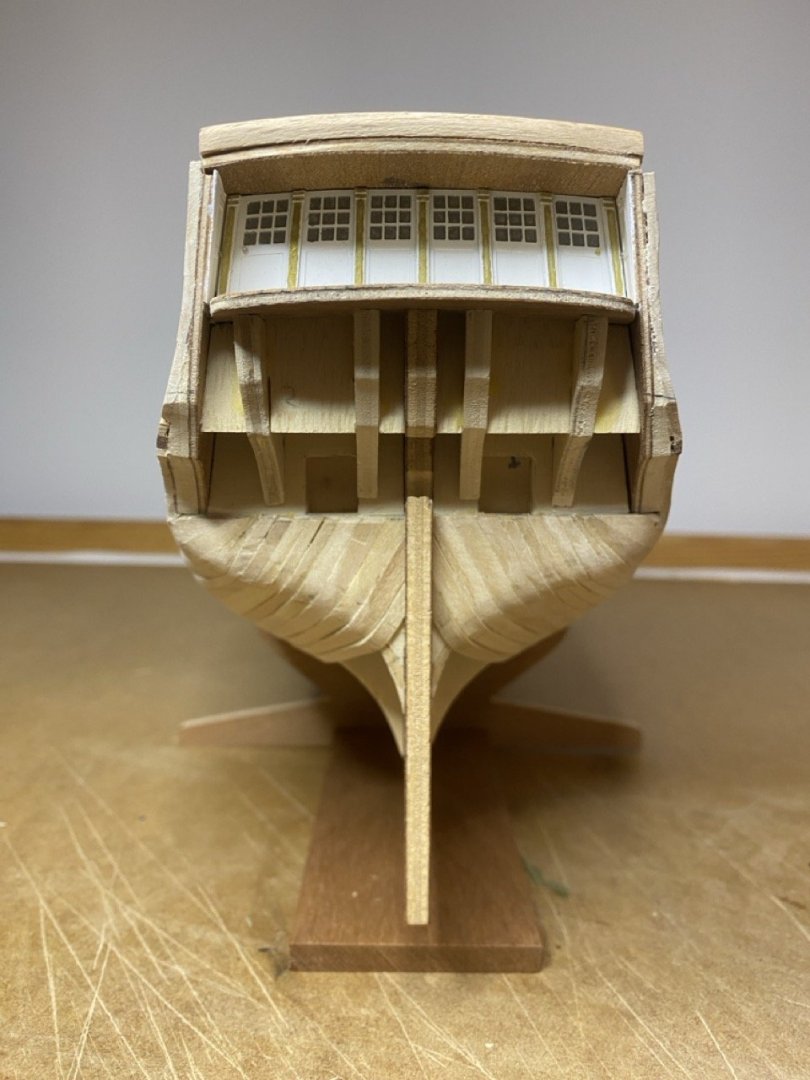
The stern gallery took about three attempts till I was happy with it. The first time I painted it with a brush and it looked awful, so I stripped all the paint from it and spray painted it, but then I made a real mess when I tried to do the glass in the windows, so I completely stripped it apart, again removed all the paint, and then on this third attempt managed to get it to a satisfactory standard. To paint the windows I used Vallejo Gun Metal metallic paint thinned down and mixed with flow improver, which I then added to the recessed window and pushed to the edges of the windows using a tooth pick: the paint flowed to the edges of the windows largely from the effect of surface tension and capillary action... worked rather well. The decoration on the pillars isn't the brass from the etched pieces but is metallic bright brass paint, again from Vallejo. To be honest it looks a bit messy in the blown-up picture, but with the naked eye it looks quite tidy 🙂
-
Three views of the gratings in various stages of completion. I didn't get on at all well with the grating components supplied with the kit, so I bought a sheet of laser-cut grating from eBay and cut it down to the required grid sizes. They are fractionally larger than those provided by Corel, but the difference is trivial. I made these much earlier than needed as something to do while I procrastinated about completing the hull ready to do the hull planking 🙂