HOLIDAY DONATION DRIVE - SUPPORT MSW - DO YOUR PART TO KEEP THIS GREAT FORUM GOING! (Only 72 donations so far out of 49,000 members - Can we at least get 100? C'mon guys!)
×

Ship_Right
-
Posts
49 -
Joined
-
Last visited
Content Type
Profiles
Forums
Gallery
Events
Everything posted by Ship_Right
-
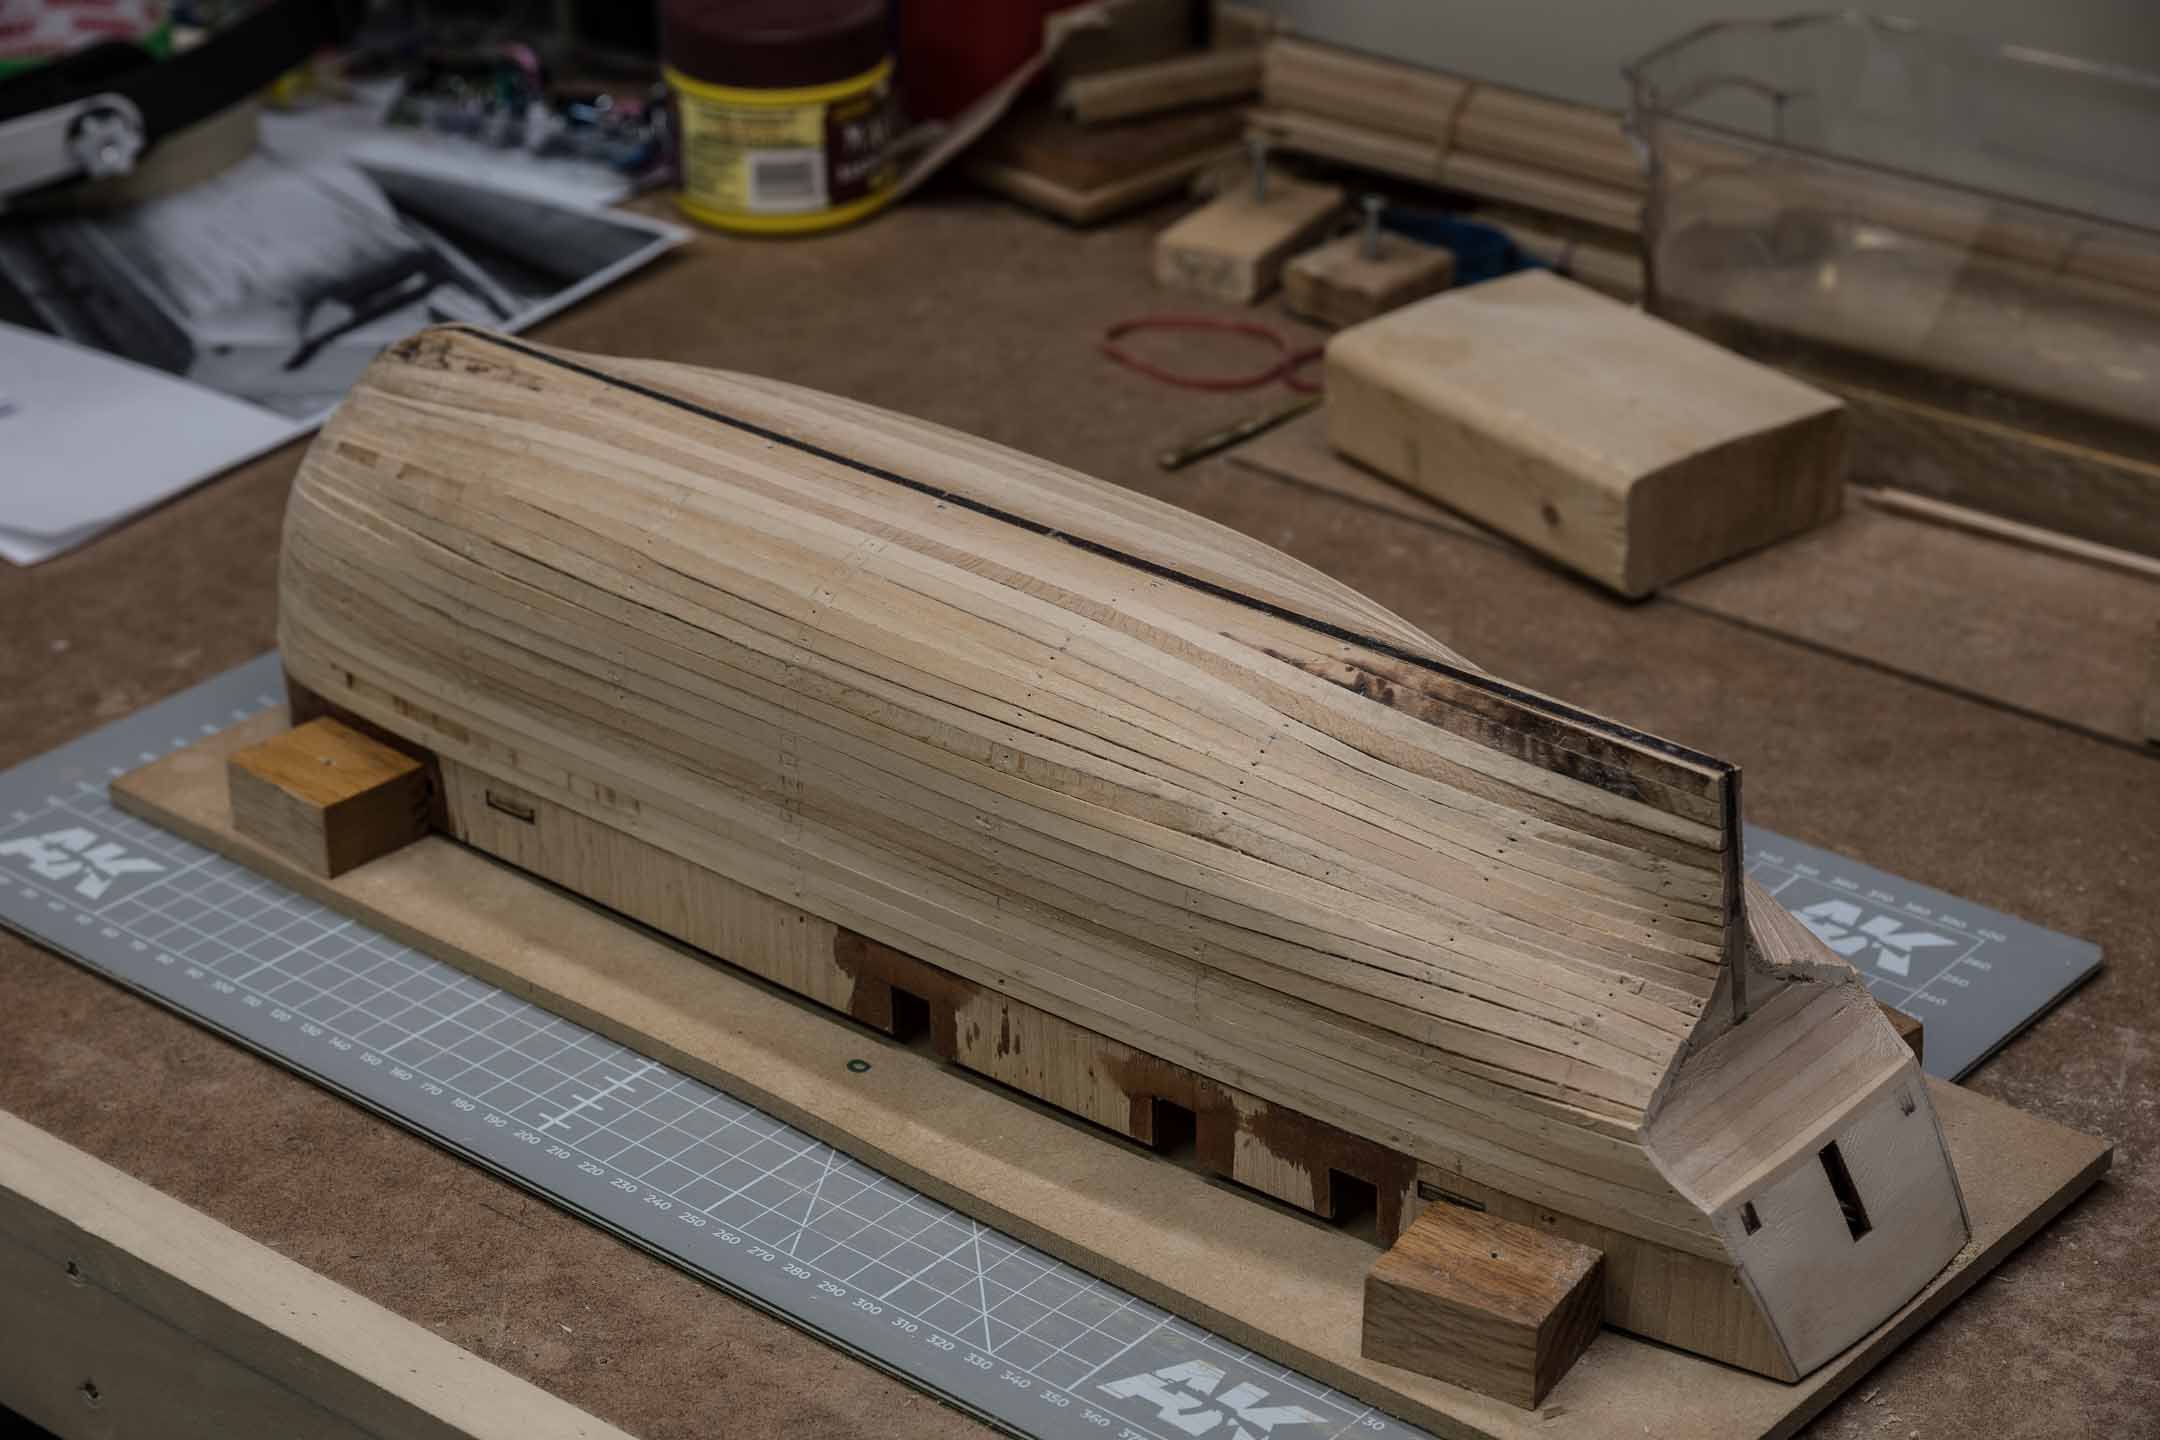
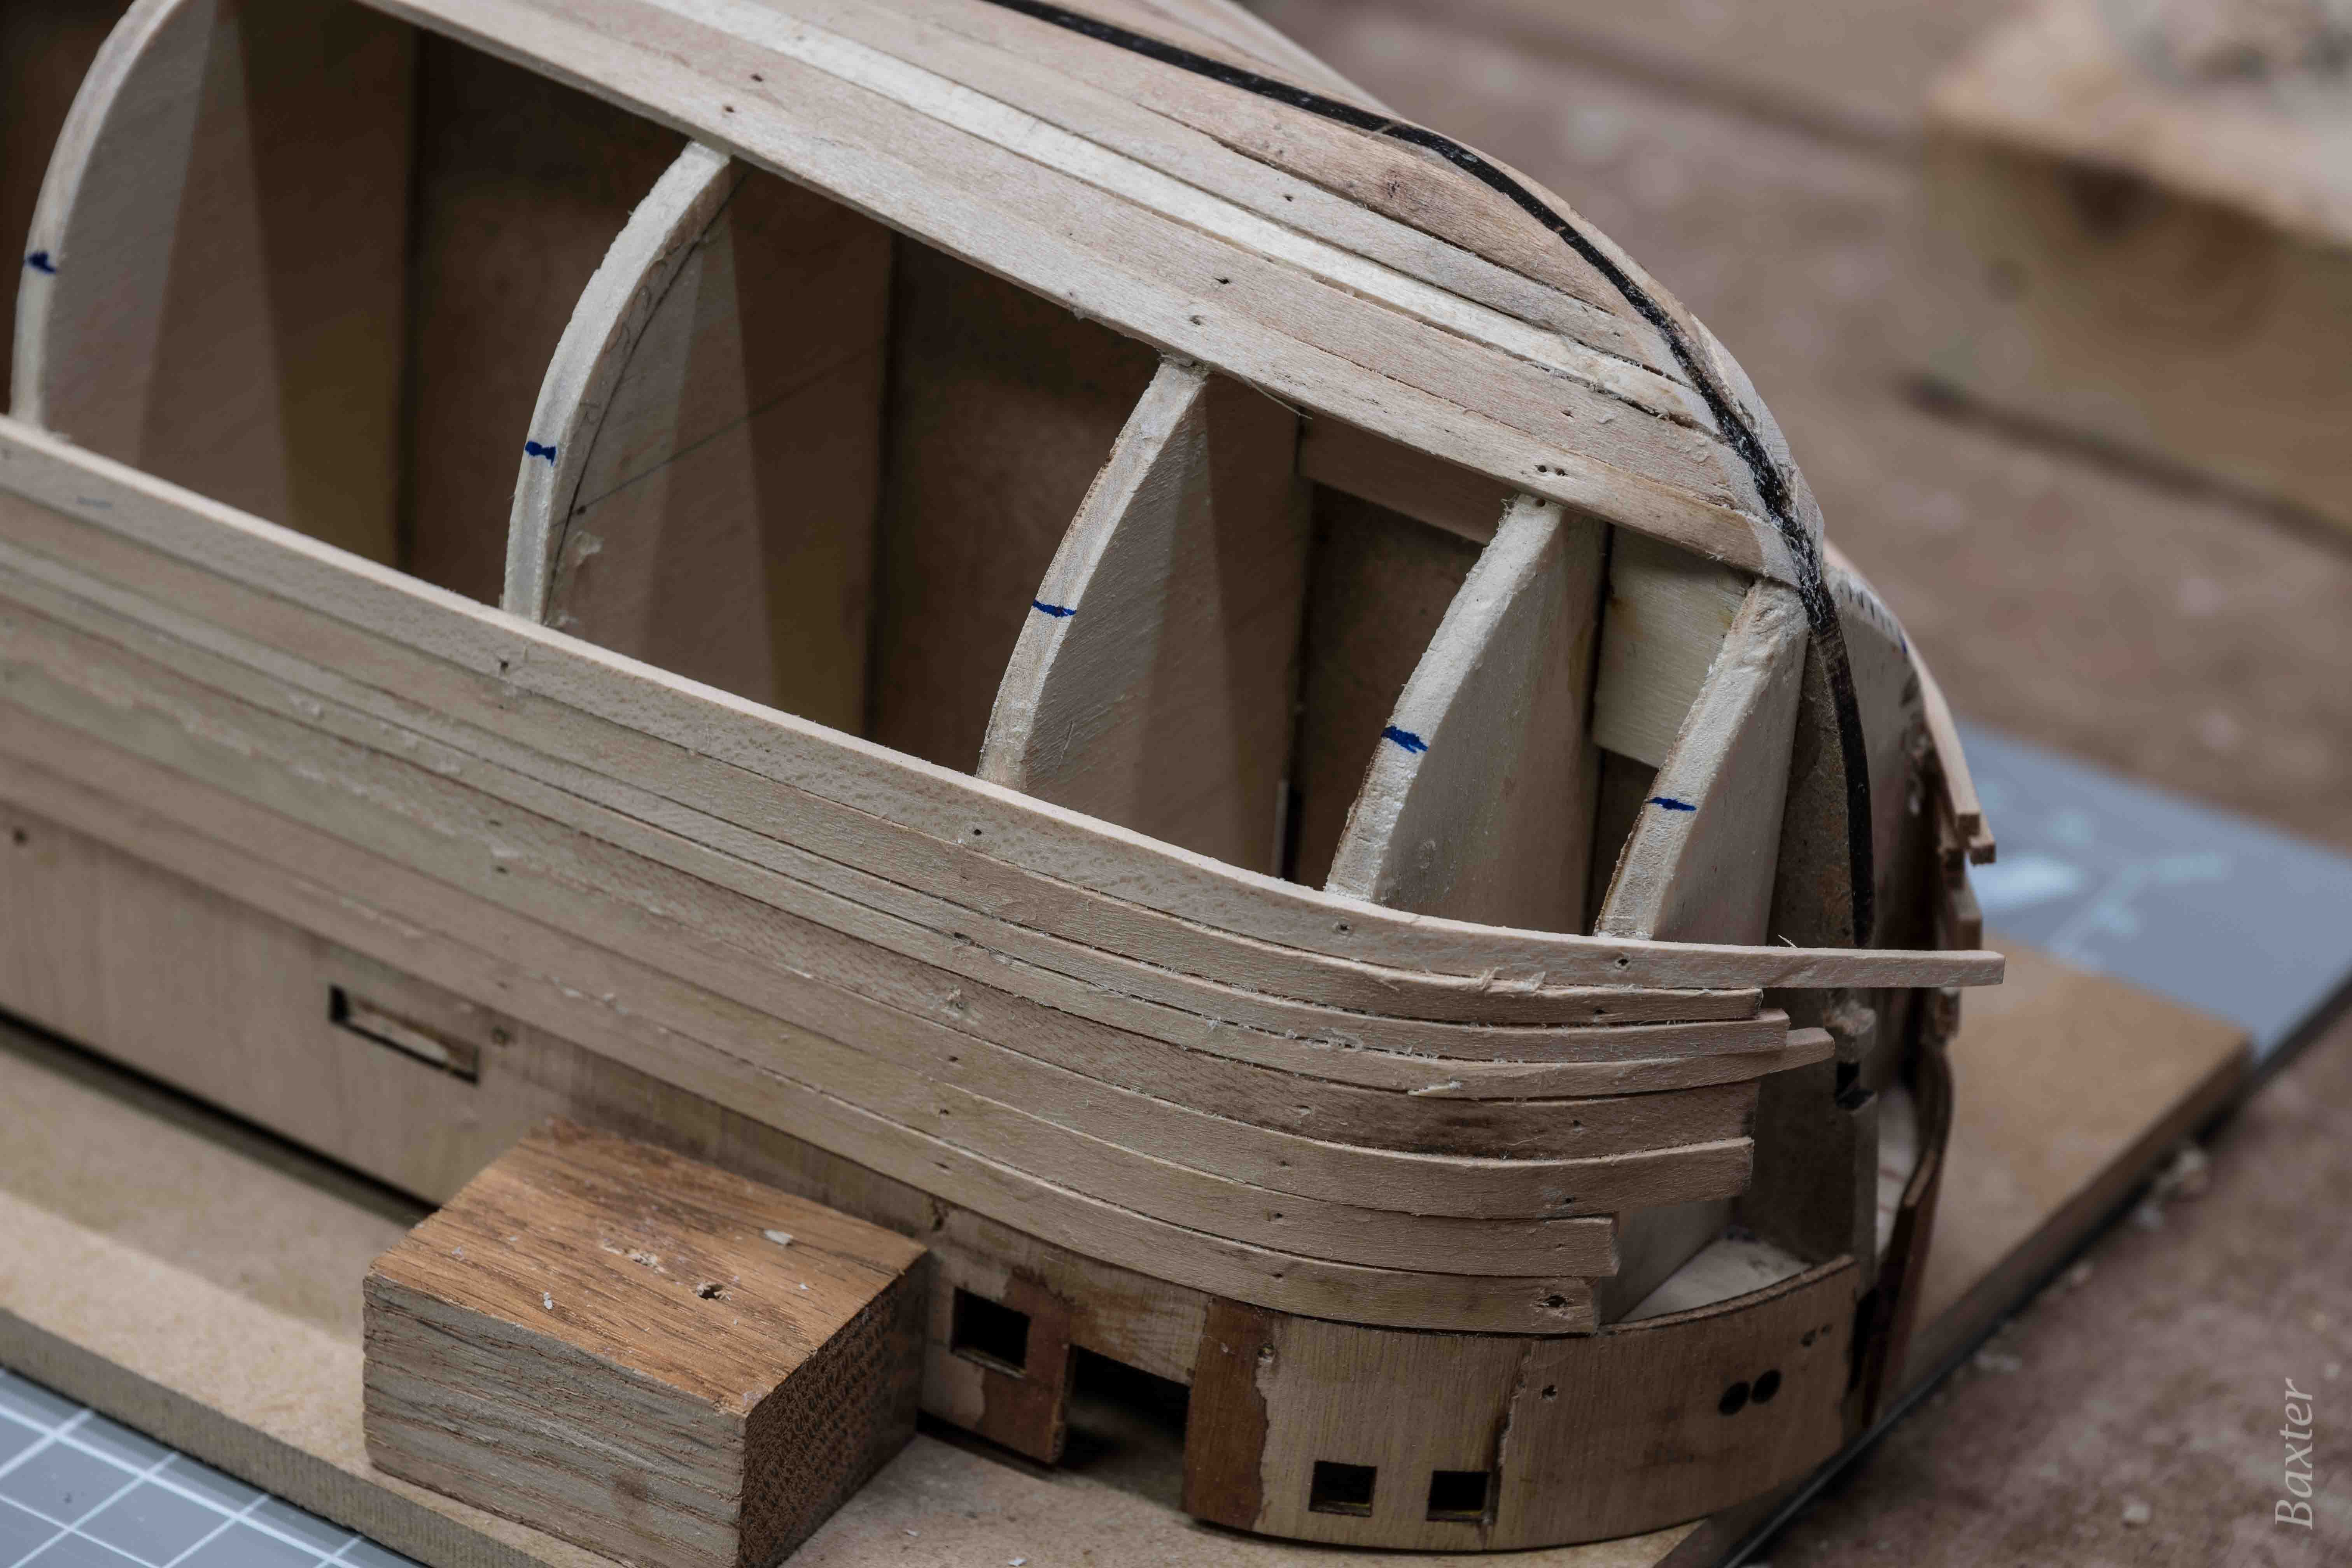
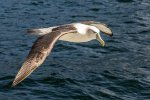
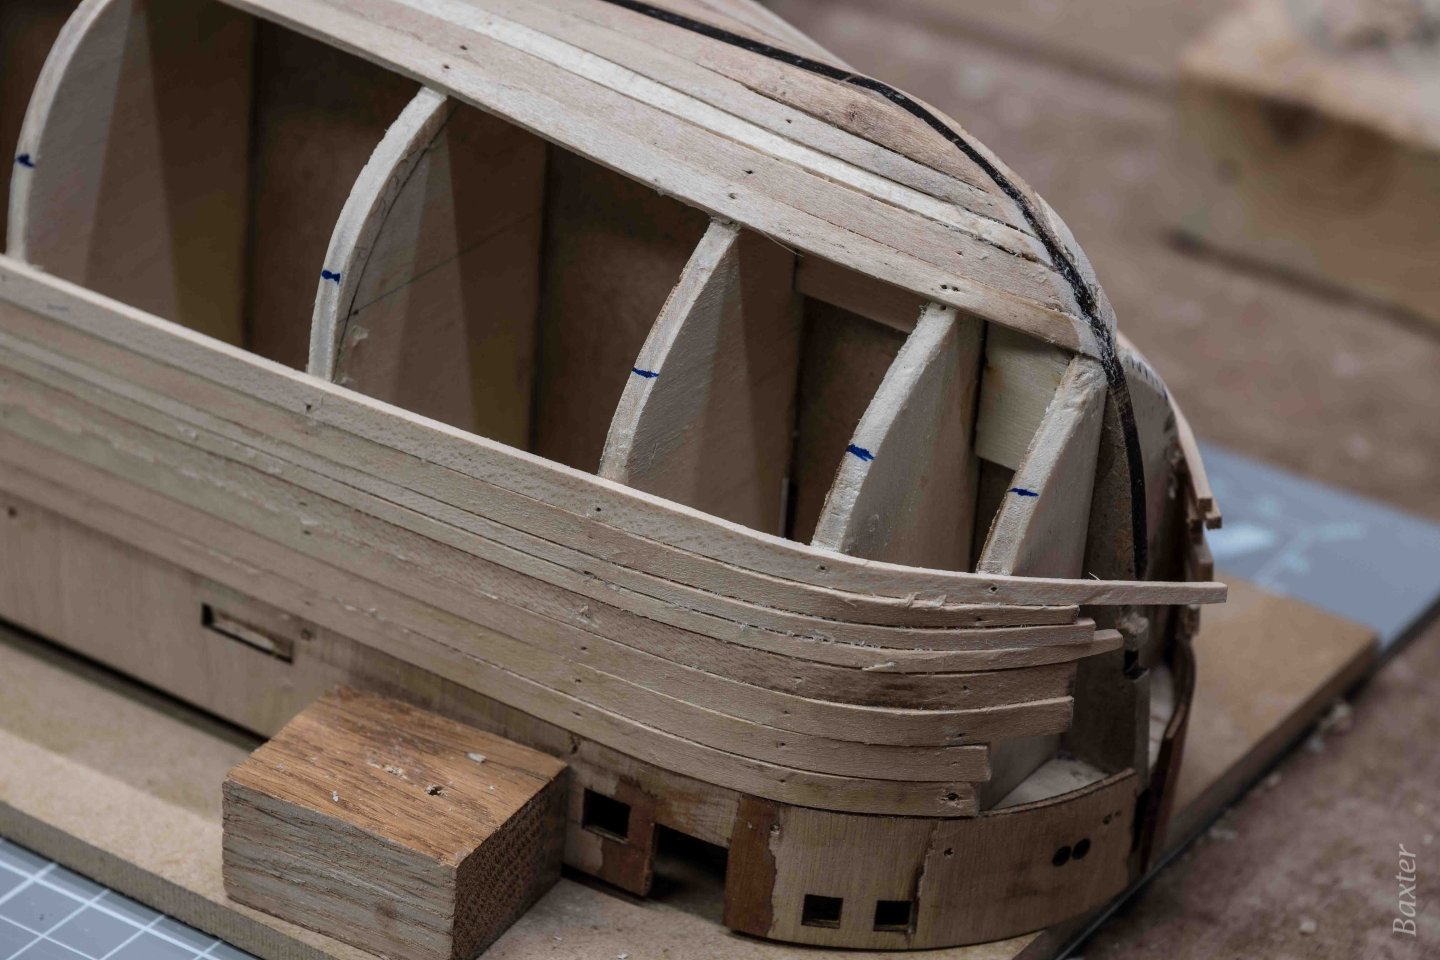
 Been away from this log while I completed the first level of planking. My first time doing this, and I guess the results reflect that. However, I'm not unhappy with it. There are some small gaps, but I managed to complete it using full length planks throughout. Broke a few with my impatience in bending ☹️ but fixed them. I'm expecting it all to work out after sanding, and then the second layer will cover it all up anyway.
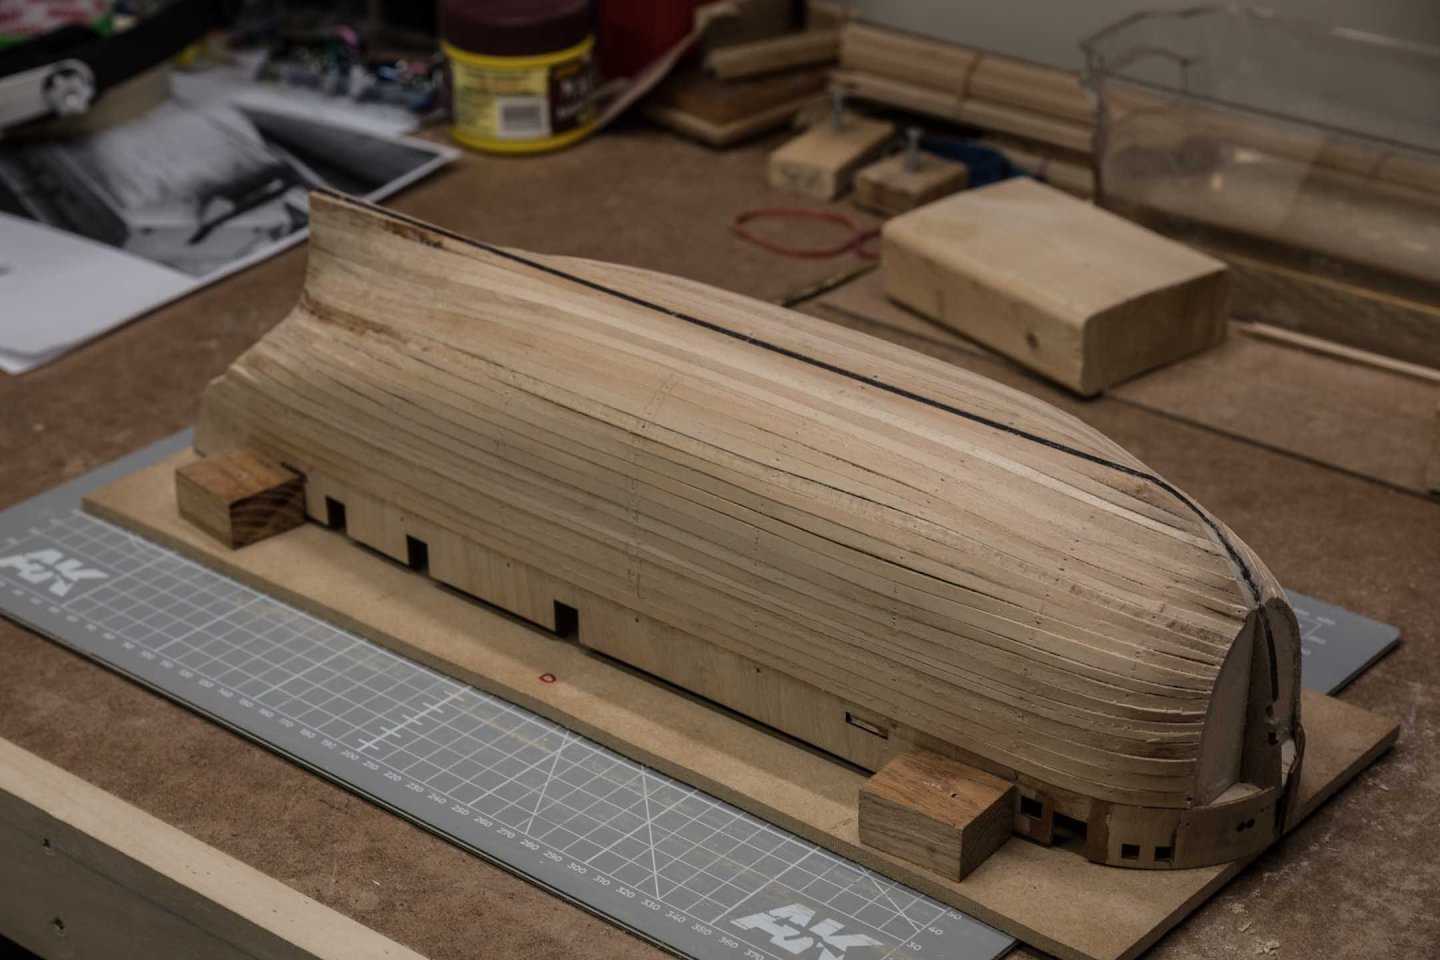
- 72 replies
-
- 4
-

-
- Arctic Exploration
- Erebus
- (and 1 more)
-
I used the dimensions in the kit plans to cut the length, keeping the same distance from the bow forwards when mounted in the original location. When I measure it now, it is 105 mm. I could cut a new one, but I'm not sure what that will do to other parts of the kit rigging.
-
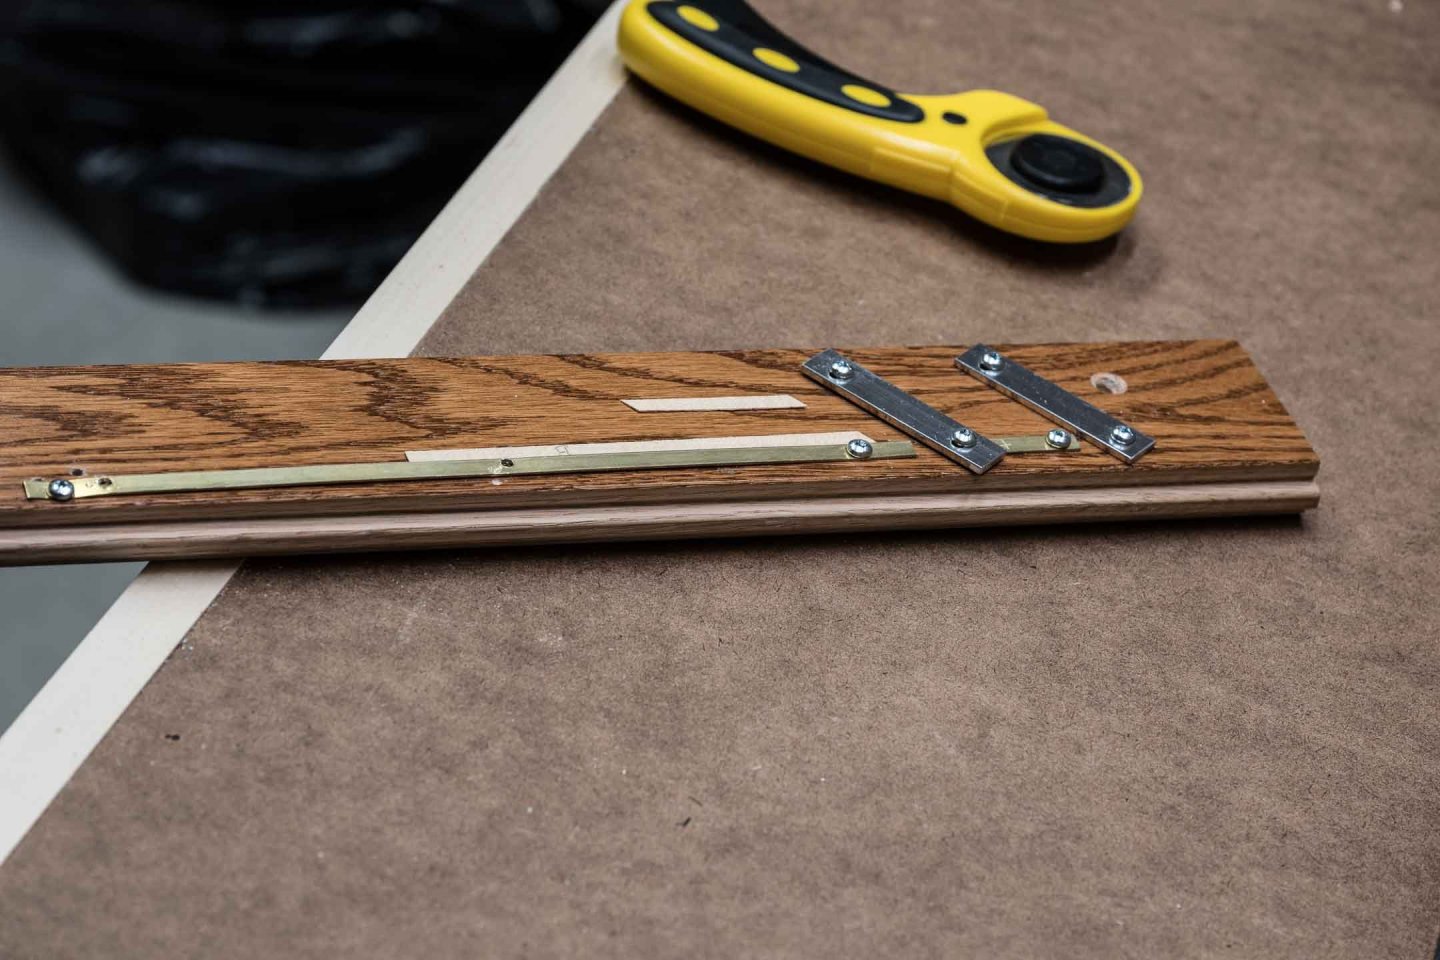
I'm part way through the first layer of planking. A few things I have learned along the way: My planking tool was way too hot (you can see the burn marks on the planks closest to the keel). I purchased an 1800W fan controller from Amazon, and set to the high end of the middle range it seems to be working well. The low priced compact iron I purchased also does an excellent job helping bend the planks. A trick I came up with for tapering planks, and in some cases cutting them down for their full length, is to lay a piece of double sided sticky tape down on the cutting mat, and stick the plank to it before cutting it. This prevents it from sliding when I am halfway through the cut. I just can't see filing down the pin heads the way OcCre describes, so I am pulling the pins out once the glue is dry. Sometimes the OcCre pin pusher was pushing the pins in too far (difficult to control the amount of force) making it hard to extract the pins later. Putting a thin piece of brass strip right next to the pin before pushing it in stops the pin head from being buried in the plank. Pictures below show current progress ...
- 72 replies
-
- 2
-
-
- Arctic Exploration
- Erebus
- (and 1 more)
-
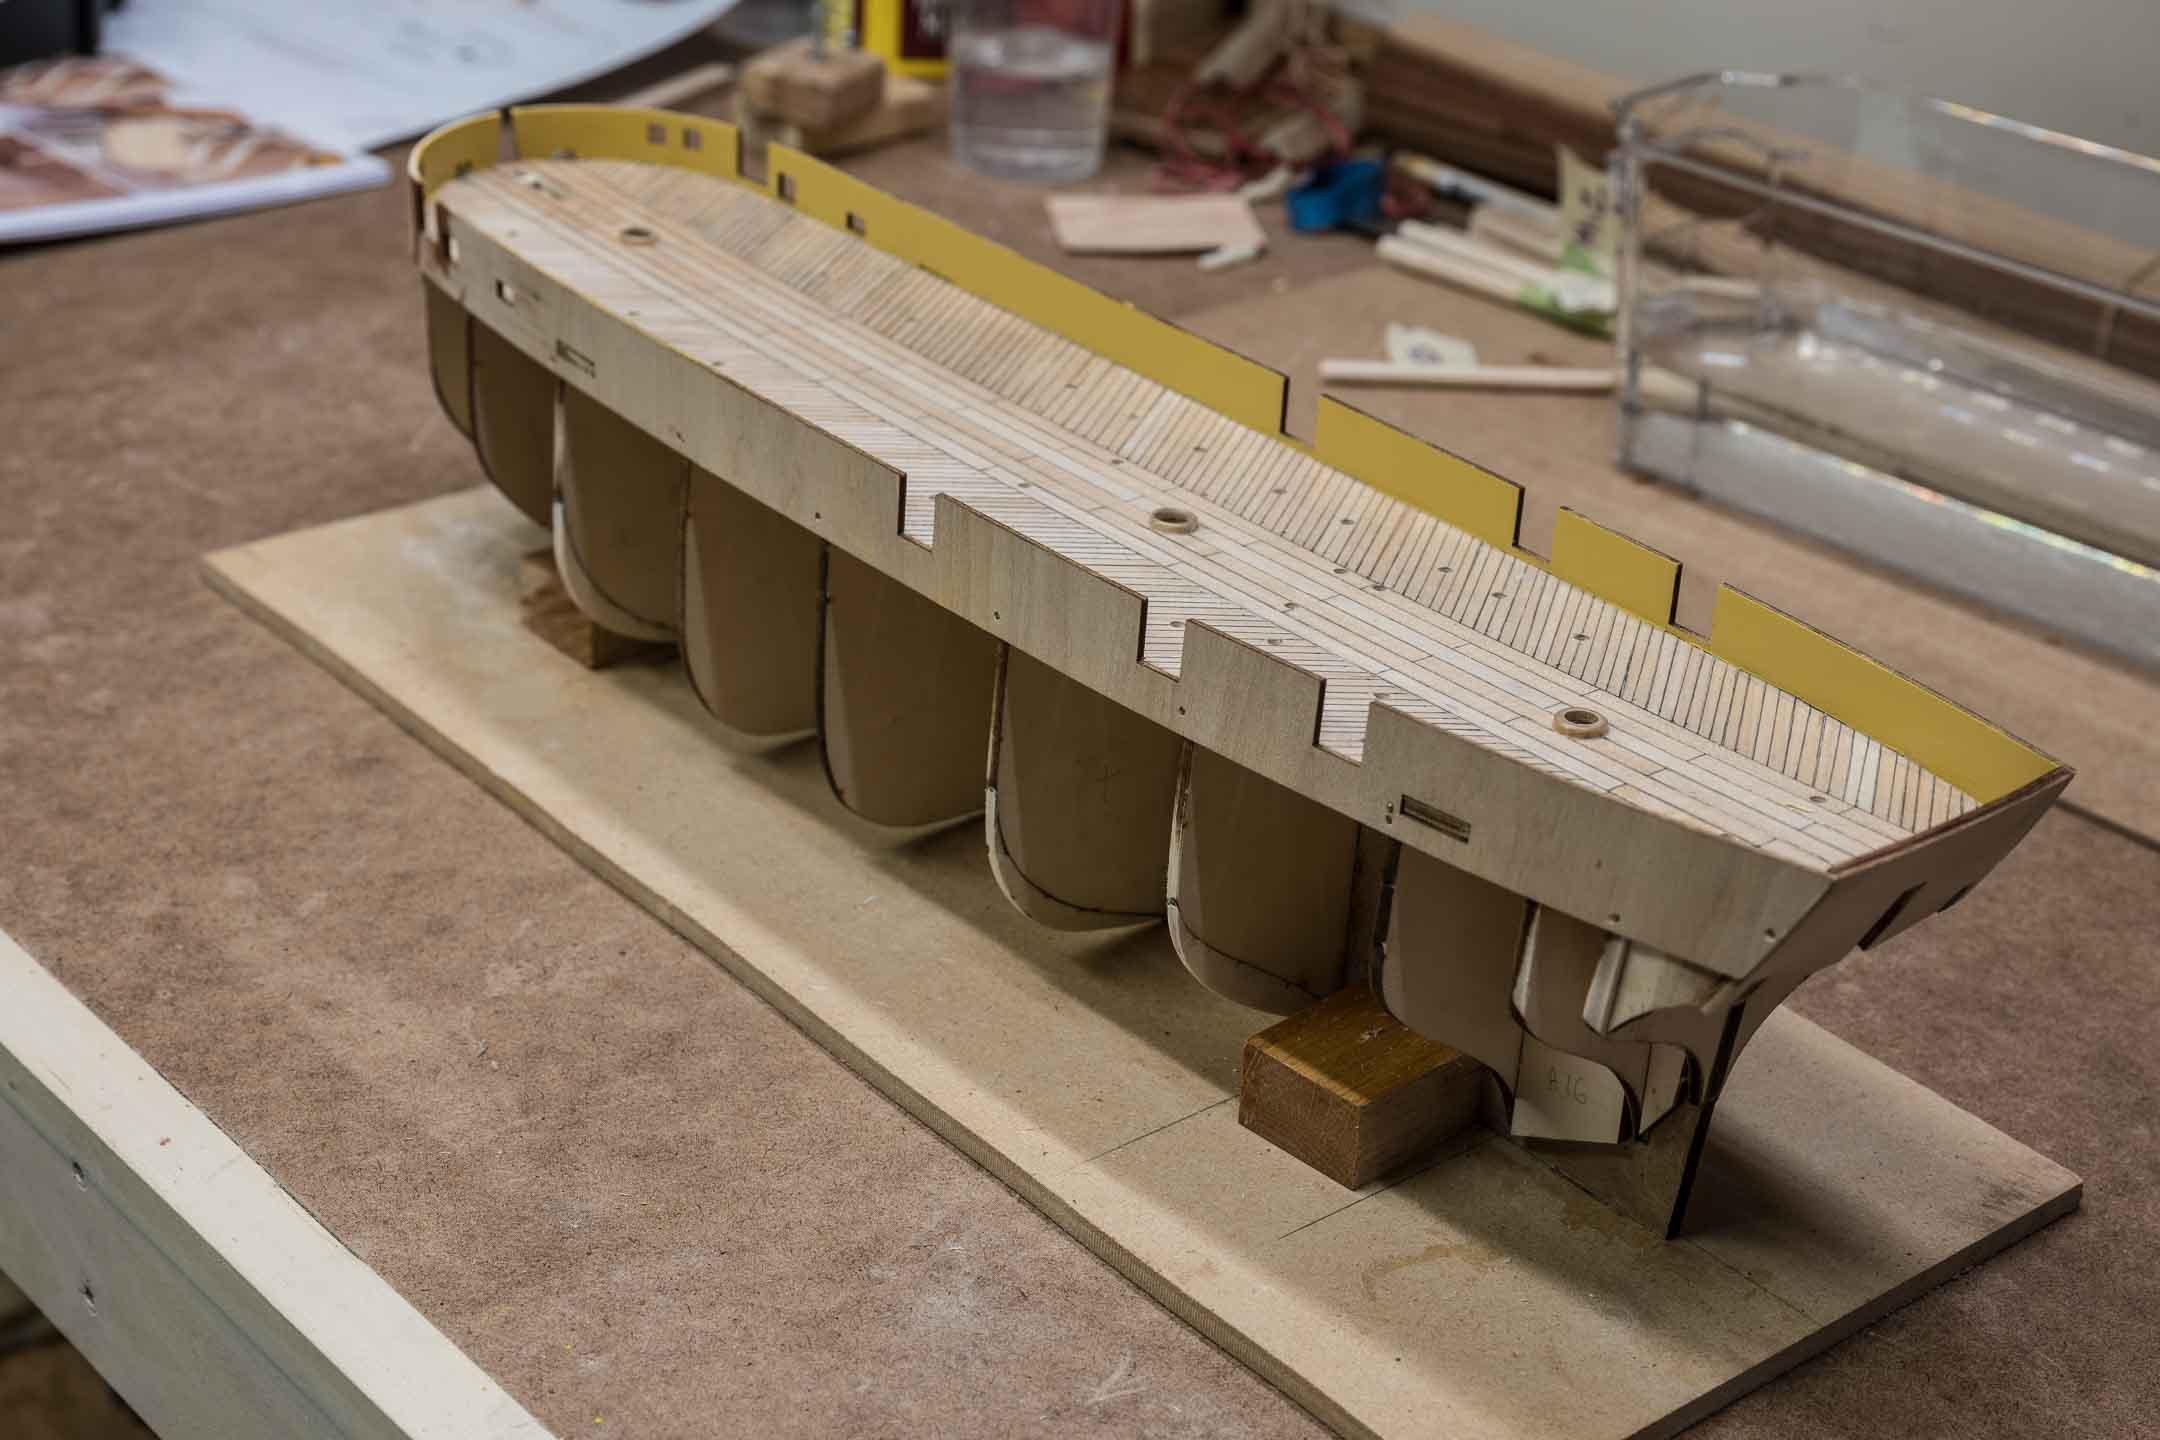
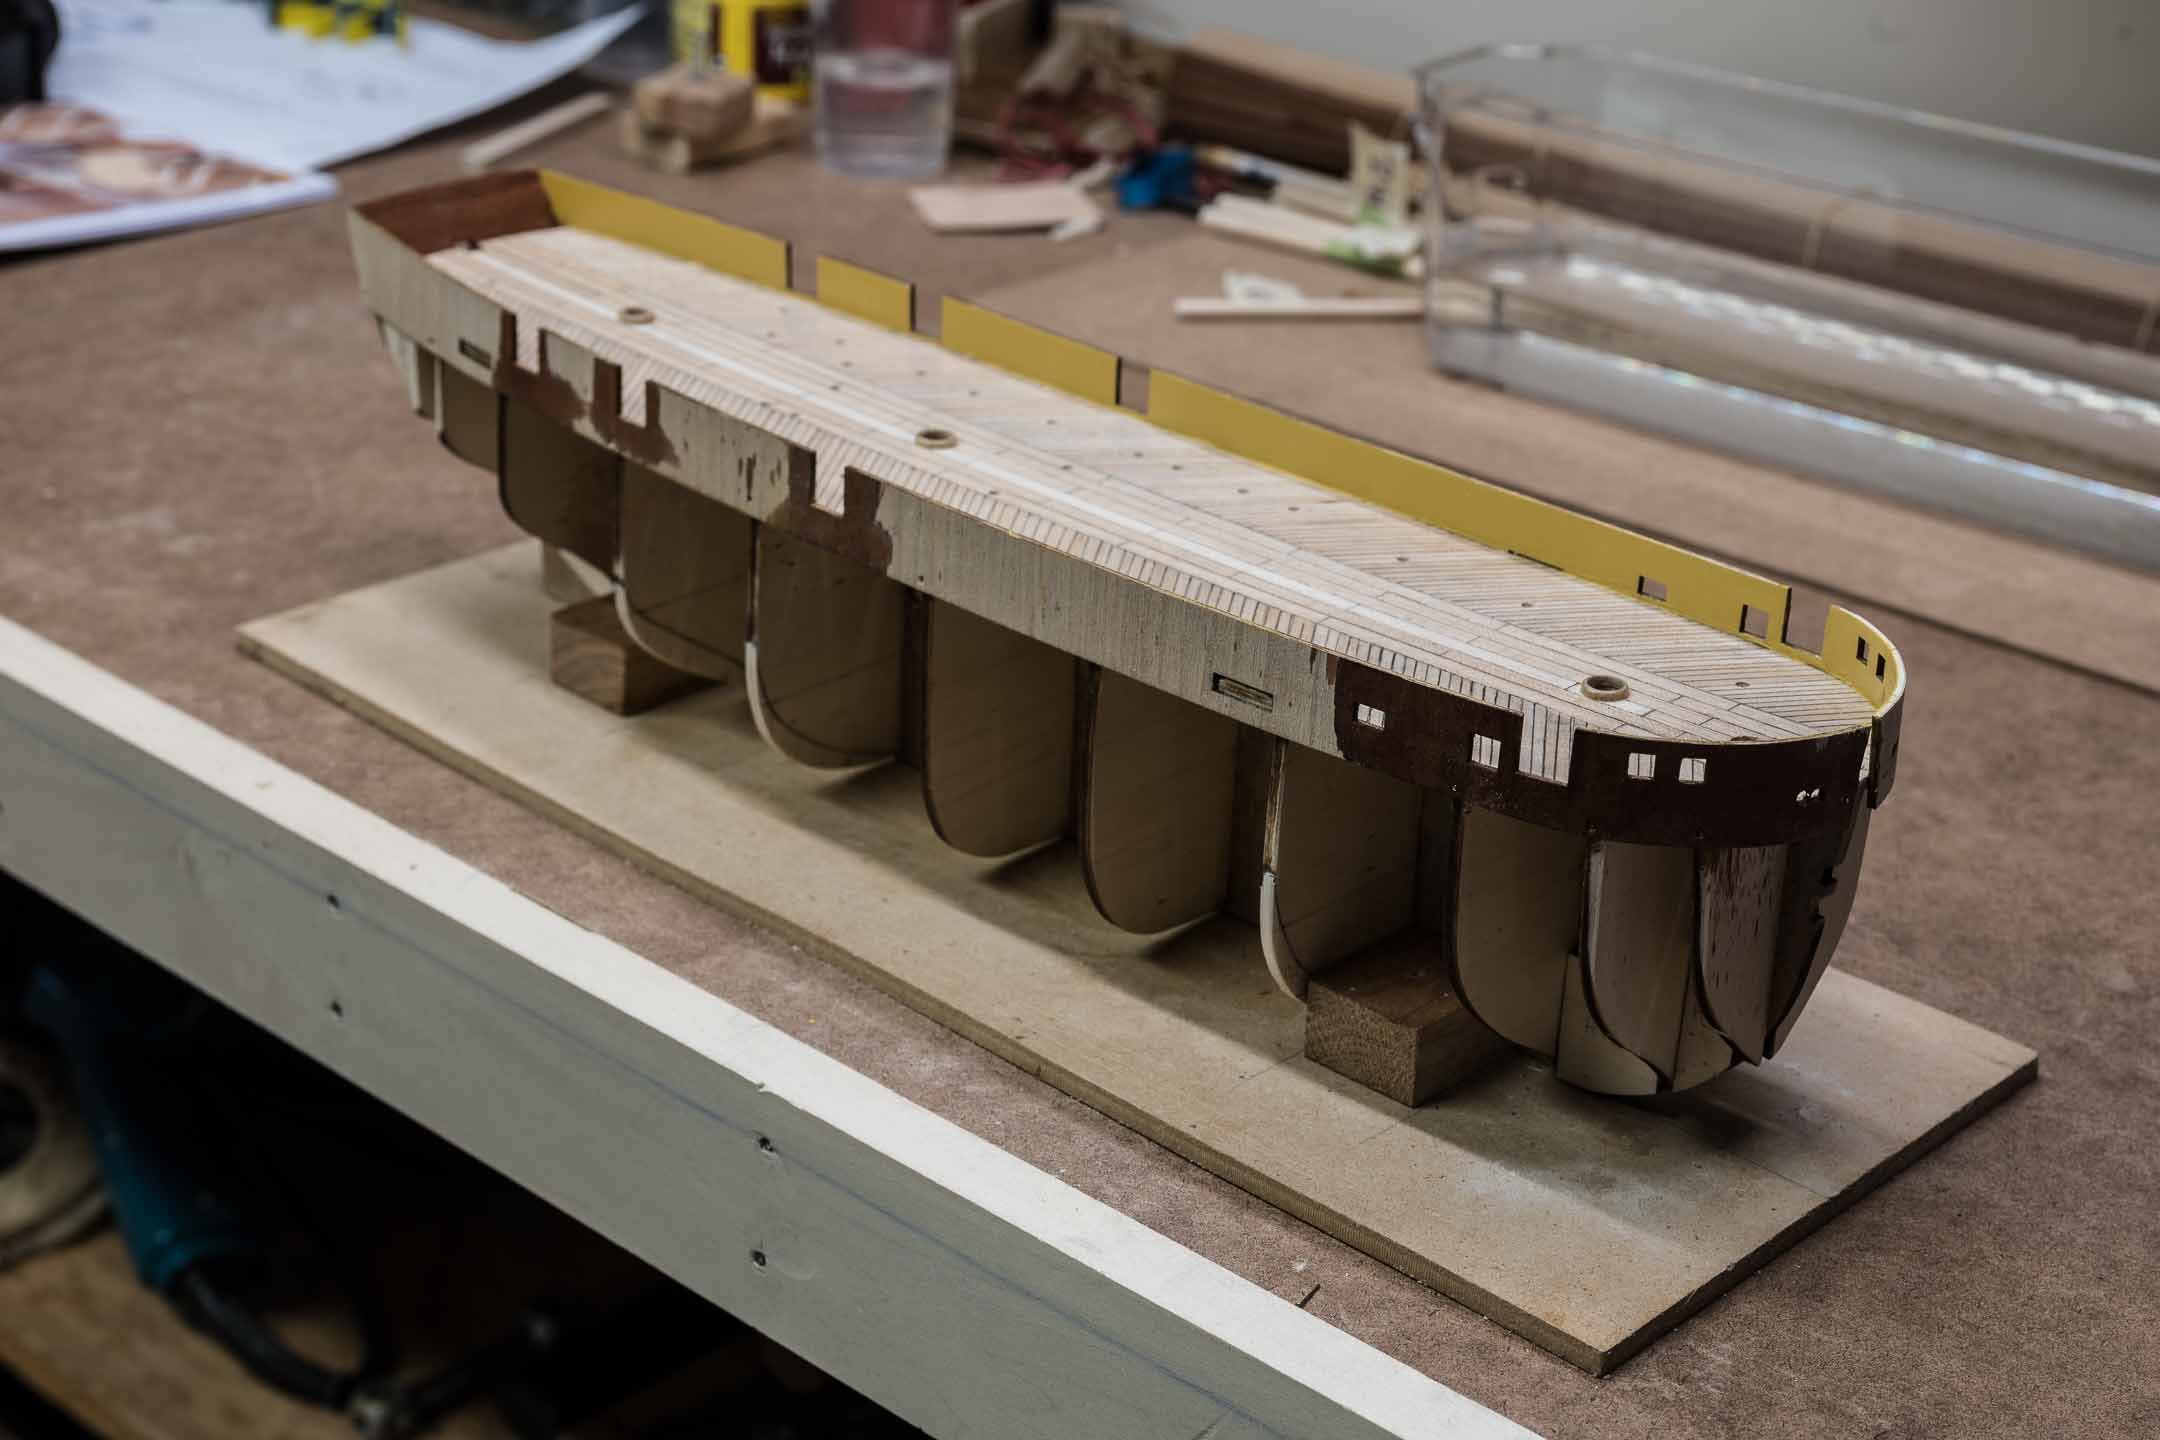
I fitted the wales which now overlapped the transom by just enough. Painted according to the Royal Navy scheme - i.e. yellow on the inside of the wales - I used the Yellow Ochre paint from OcCre. All ready for the next challenge!

- 72 replies
-
- 4
-
-
- Arctic Exploration
- Erebus
- (and 1 more)
-
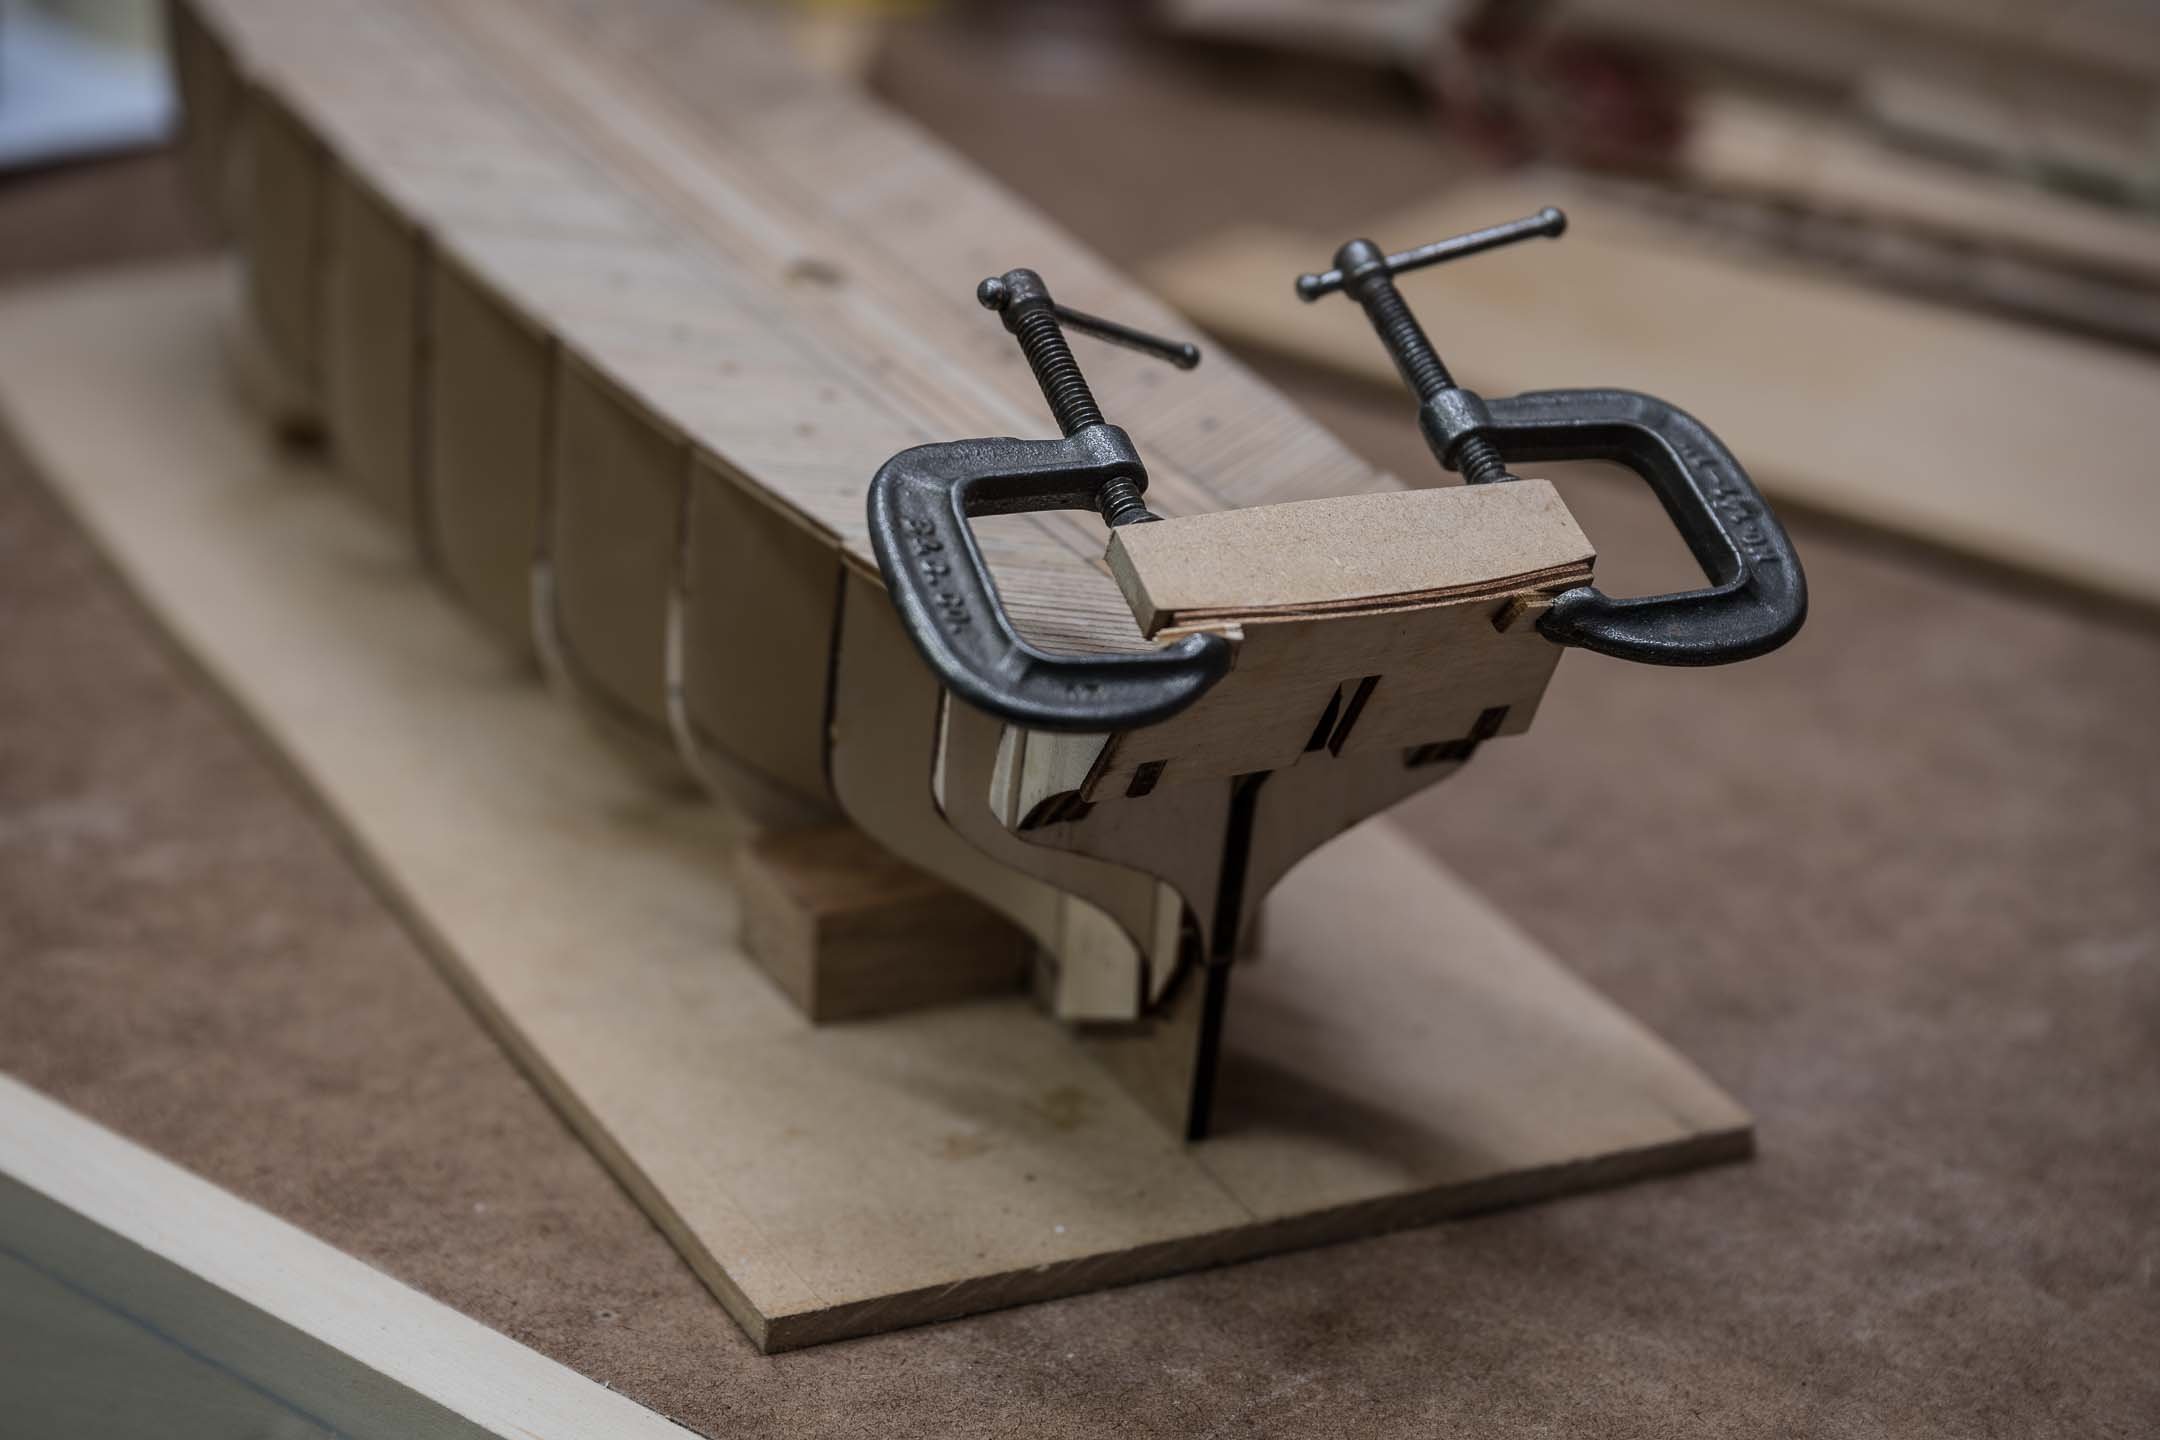
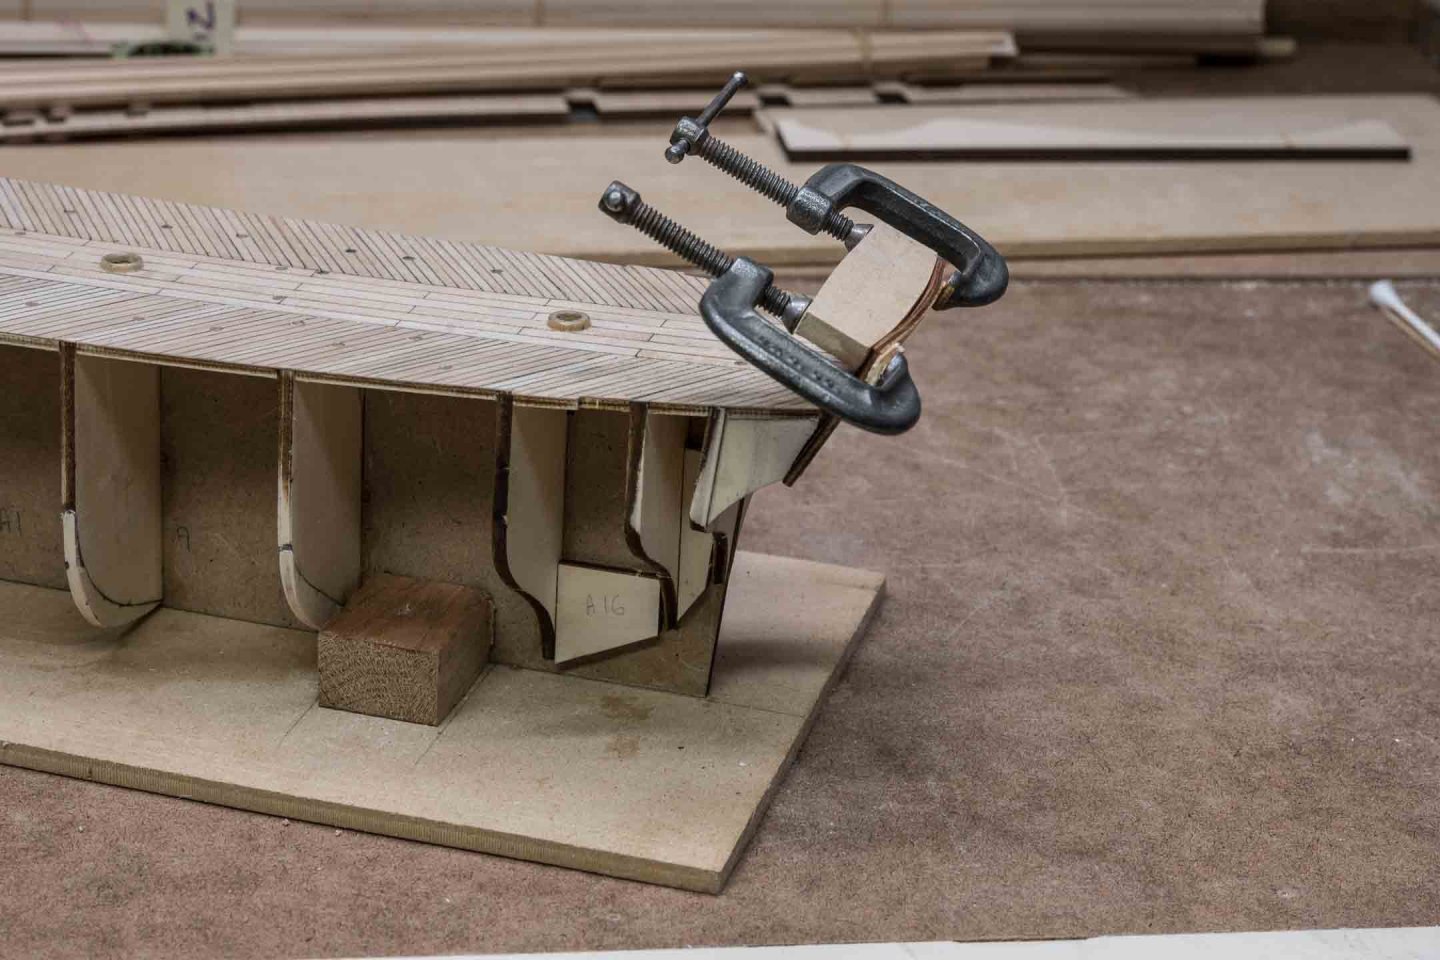
I referred to a problem with fitting the transom ... no-one else has mentioned this, but when I looked at the videos and phots It seemed that the transom had to be curved. Only slightly - but my efforts to do this were inadequate, so when I offered up the wales they fell short. Since the transom was now glued in place, I made a curved form, "painted" the exposed areas of the transom with water and let it soak in for a while. Then I clamped the form in place and used an iron to apply some heat from the behind the stern. I let it all dry out and cool off.

- 72 replies
-
- 2
-
-
- Arctic Exploration
- Erebus
- (and 1 more)
-
Well, it's been a rough week ... I followed the OcCre videos. Marked the planking on the deck. They don't specify what pencil to use, so thinking it needed to be fairly soft (to not score the veneer) I chose a 2B pencil. Maybe that was what caused my problems (but I don't know). I could have sent a note to OcCre to ask them what to use, but I didn't expect any problems. Remembering Keith's comments about plank widths, I looked at the Betts' dimensions of the ship and scaled off the drawings. It turns out that the diagonal planks needed to be exactly half the width of the 5mm supplied in the kit, so I drew lines at the plank edges as well as halfway between them. (The width of the long centre planks didn't lend itself to this approach, so I left them "as supplied.") So far so good. Next step in the video is to sand the deck prior to varnishing. What a disaster! Sanding took the graphite from the pencil marks and smeared it across the planks, into the grain of the veneer, making them blotchy and dirty-looking. I was about a quarter along one side when I realized what was happening. Initial attempts to rectify (more sanding, water wash) were completely ineffective. I thought about it overnight, not sure whether to treat the whole deck the same way, or leave it the way it was and move forward with varnish. In one last desperate attempt I used some coarse (120 grit) sandpaper to see if I could clean the boards up without total destroying them. To my relief, this worked (yes I had to re-mark all the boards, but a small price to pay!) - at least to provide an acceptable result. I am counting on loads of "deck furniture" to disguise the remaining smudges. Photos will follow after I finish installing the transom (another unexpected challenge) and the wales.
- 72 replies
-
- 1
-
-
- Arctic Exploration
- Erebus
- (and 1 more)
-
Happy New Year to everyone, and thank you for all who offer me help and advice as I progress through this build. This kind of modelling is new to me, so every word of assistance is gratefully received! I have read Michael Palin's book - along with several really good books about the Franklin Expedition, the searches and the people involved. In fact they are what led me to this project.
- 72 replies
-
- 1
-
-
- Arctic Exploration
- Erebus
- (and 1 more)
-
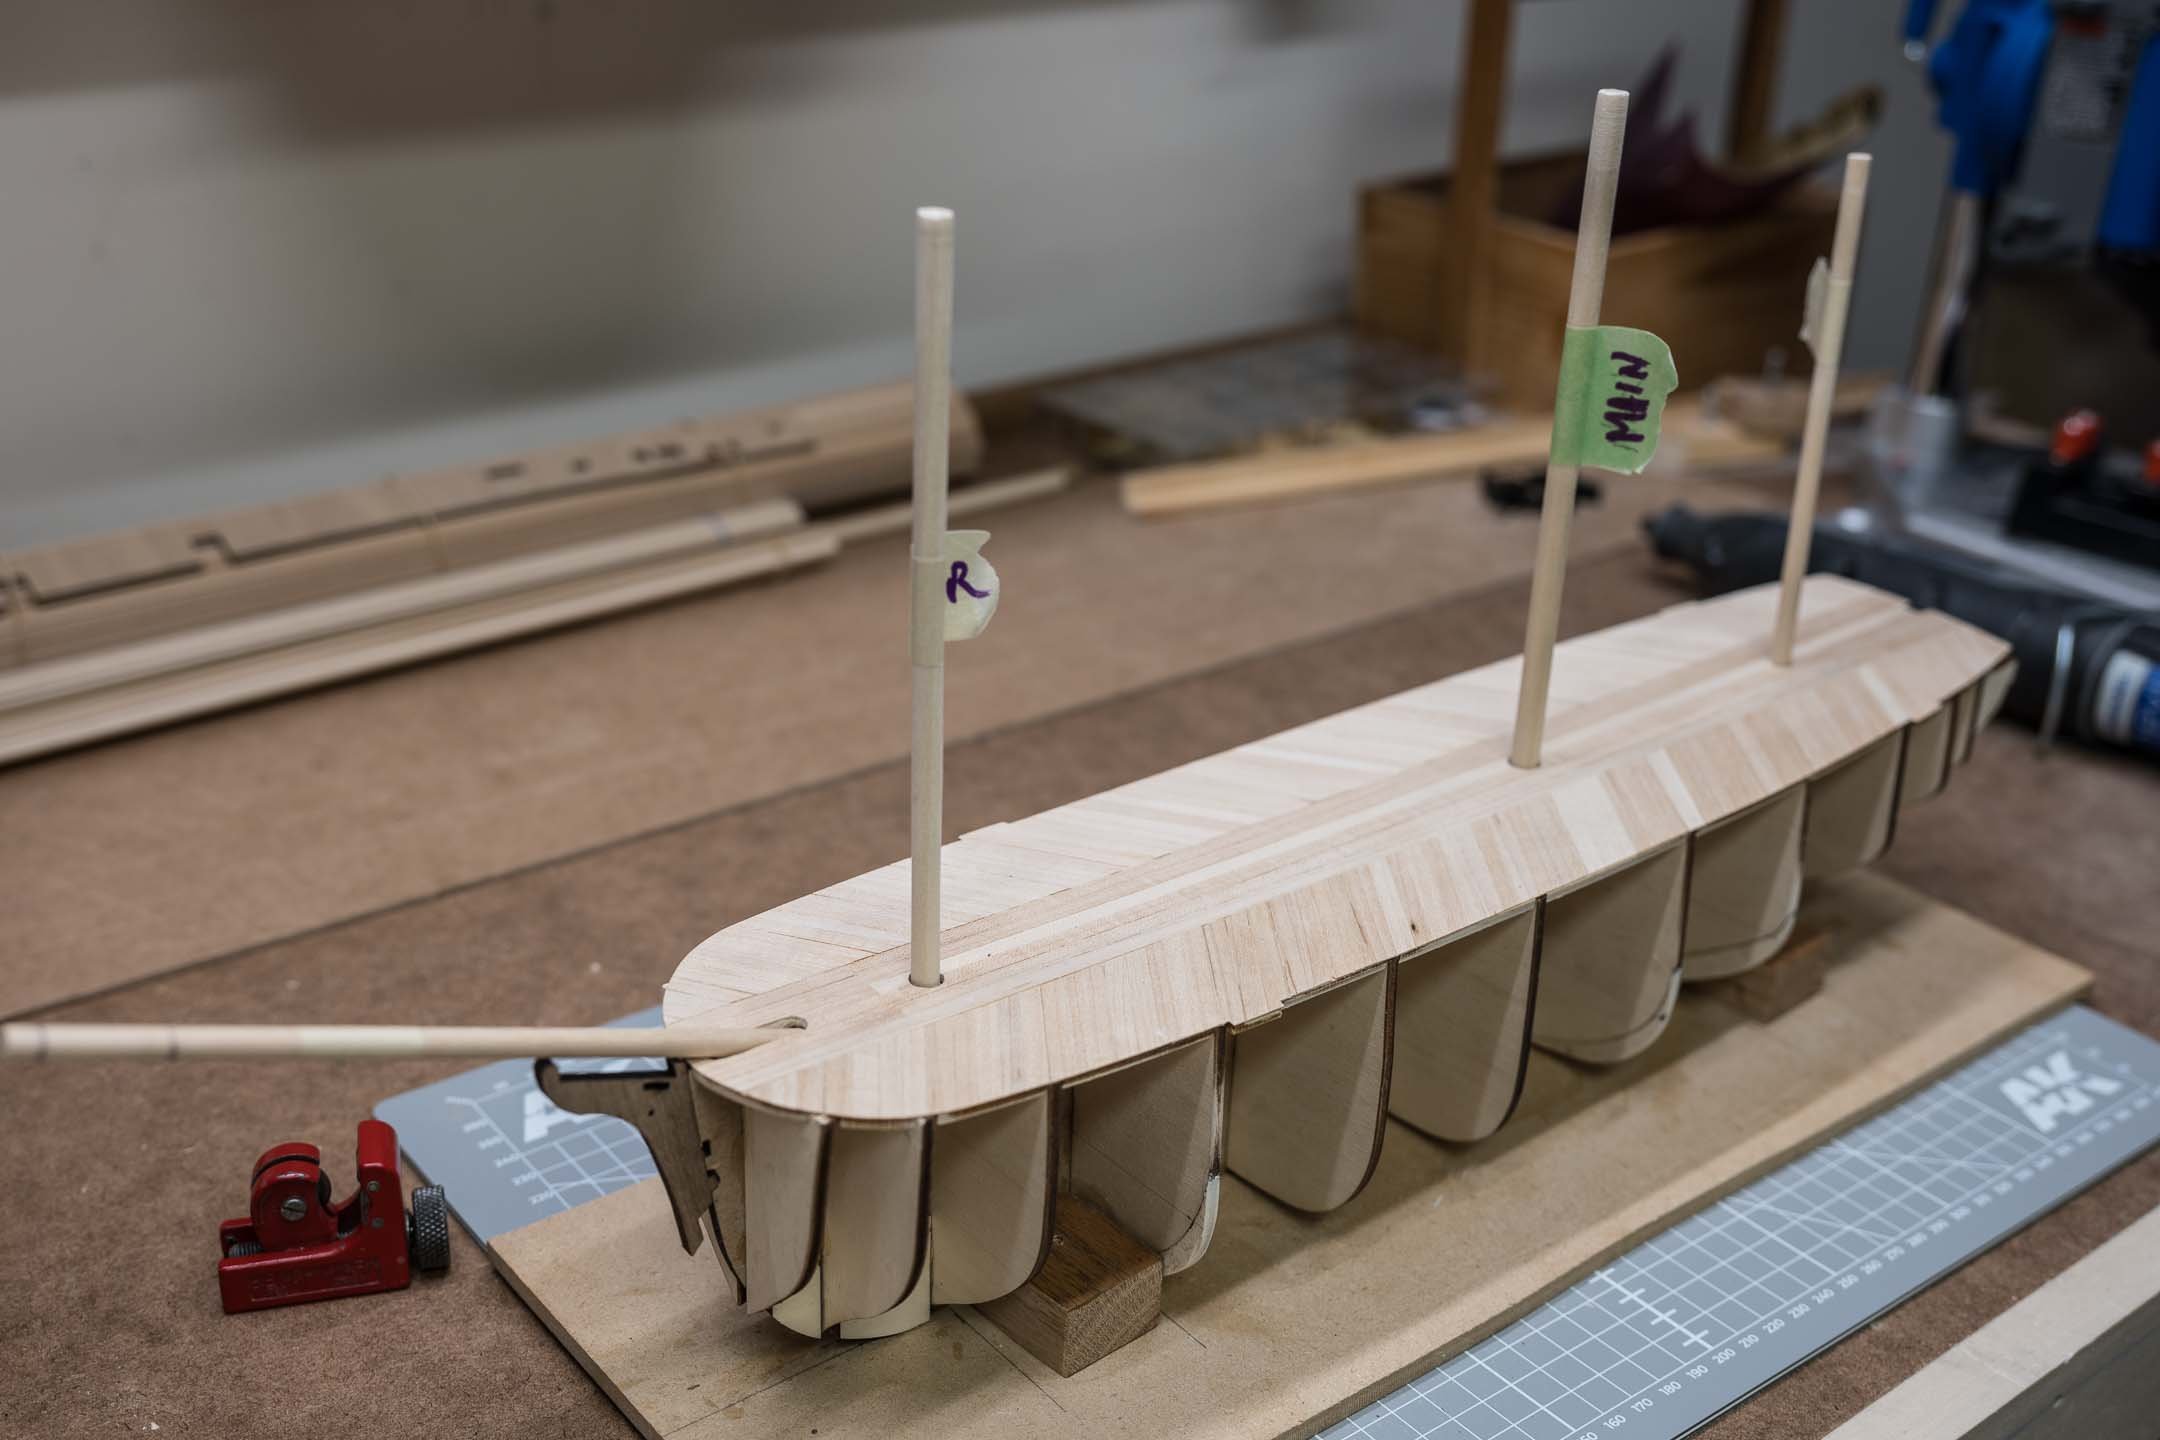
I've sanded the foremast down. Size isn't as consistent as I'd like but it will suffice. I cut all the masts to their final length, and temporarily "stepped" them. The red gadget in the photo is a small copper pipe cutter which I used to cut the dowel - makes a perfect right-angled cut. The photo shows the bowsprit with the modified forepeak taped on temporarily. Haven't cut the bowsprit to length yet - I'm guessing I need to make it so that it protrudes in front of the bow by the same amount as the original one did when mounted further back. I need to look at Matt Betts's book (which I did purchase) to see if it gives me an answer to that question. (Edit: No it probably won't - Matt's book is about the Terror, and my understanding is that the Erebus bowsprit s different).

- 72 replies
-
- 4
-
-
- Arctic Exploration
- Erebus
- (and 1 more)
-
Evo-Stick is available in Canada - though it looks on the expensive side. Couldn't find the "Fast-Grab" type, but didn't search too hard.
-
Wish I had paid more attention to the colour of the planks - I would have made sure the centre planks were all the same. I'm asking myself - do I really need to mark (with pencil) all the diagonal plank outlines, as they show in the video tutorial? I can see marking the centre planks ... Now I have a Dremel with a drill press I'm going to drill the holes in the deck - at least the larger ones - before I glues the deck to the frame. I've also dry fitted the bowsprit and modified its support (Forepeak?) while I still have access to the centre of the frame, and I've squared off the bottom of the 8mm Mainmast and Foremast to fit without modifying the frame. Still struggling with how to reduce the new foremast from 8mm to 7mm and make it a consistent diameter.
-
I started to panic when, having read in OcCre's parts list that I needed 75 pieces of deck plank, I realized that this number was wrong. I don't know where OcCre got it from. 120 was closer. I couldn't remember how many I had used on tests and discarded warped strips. In the end I had enough, but I was sweating for a while!
-
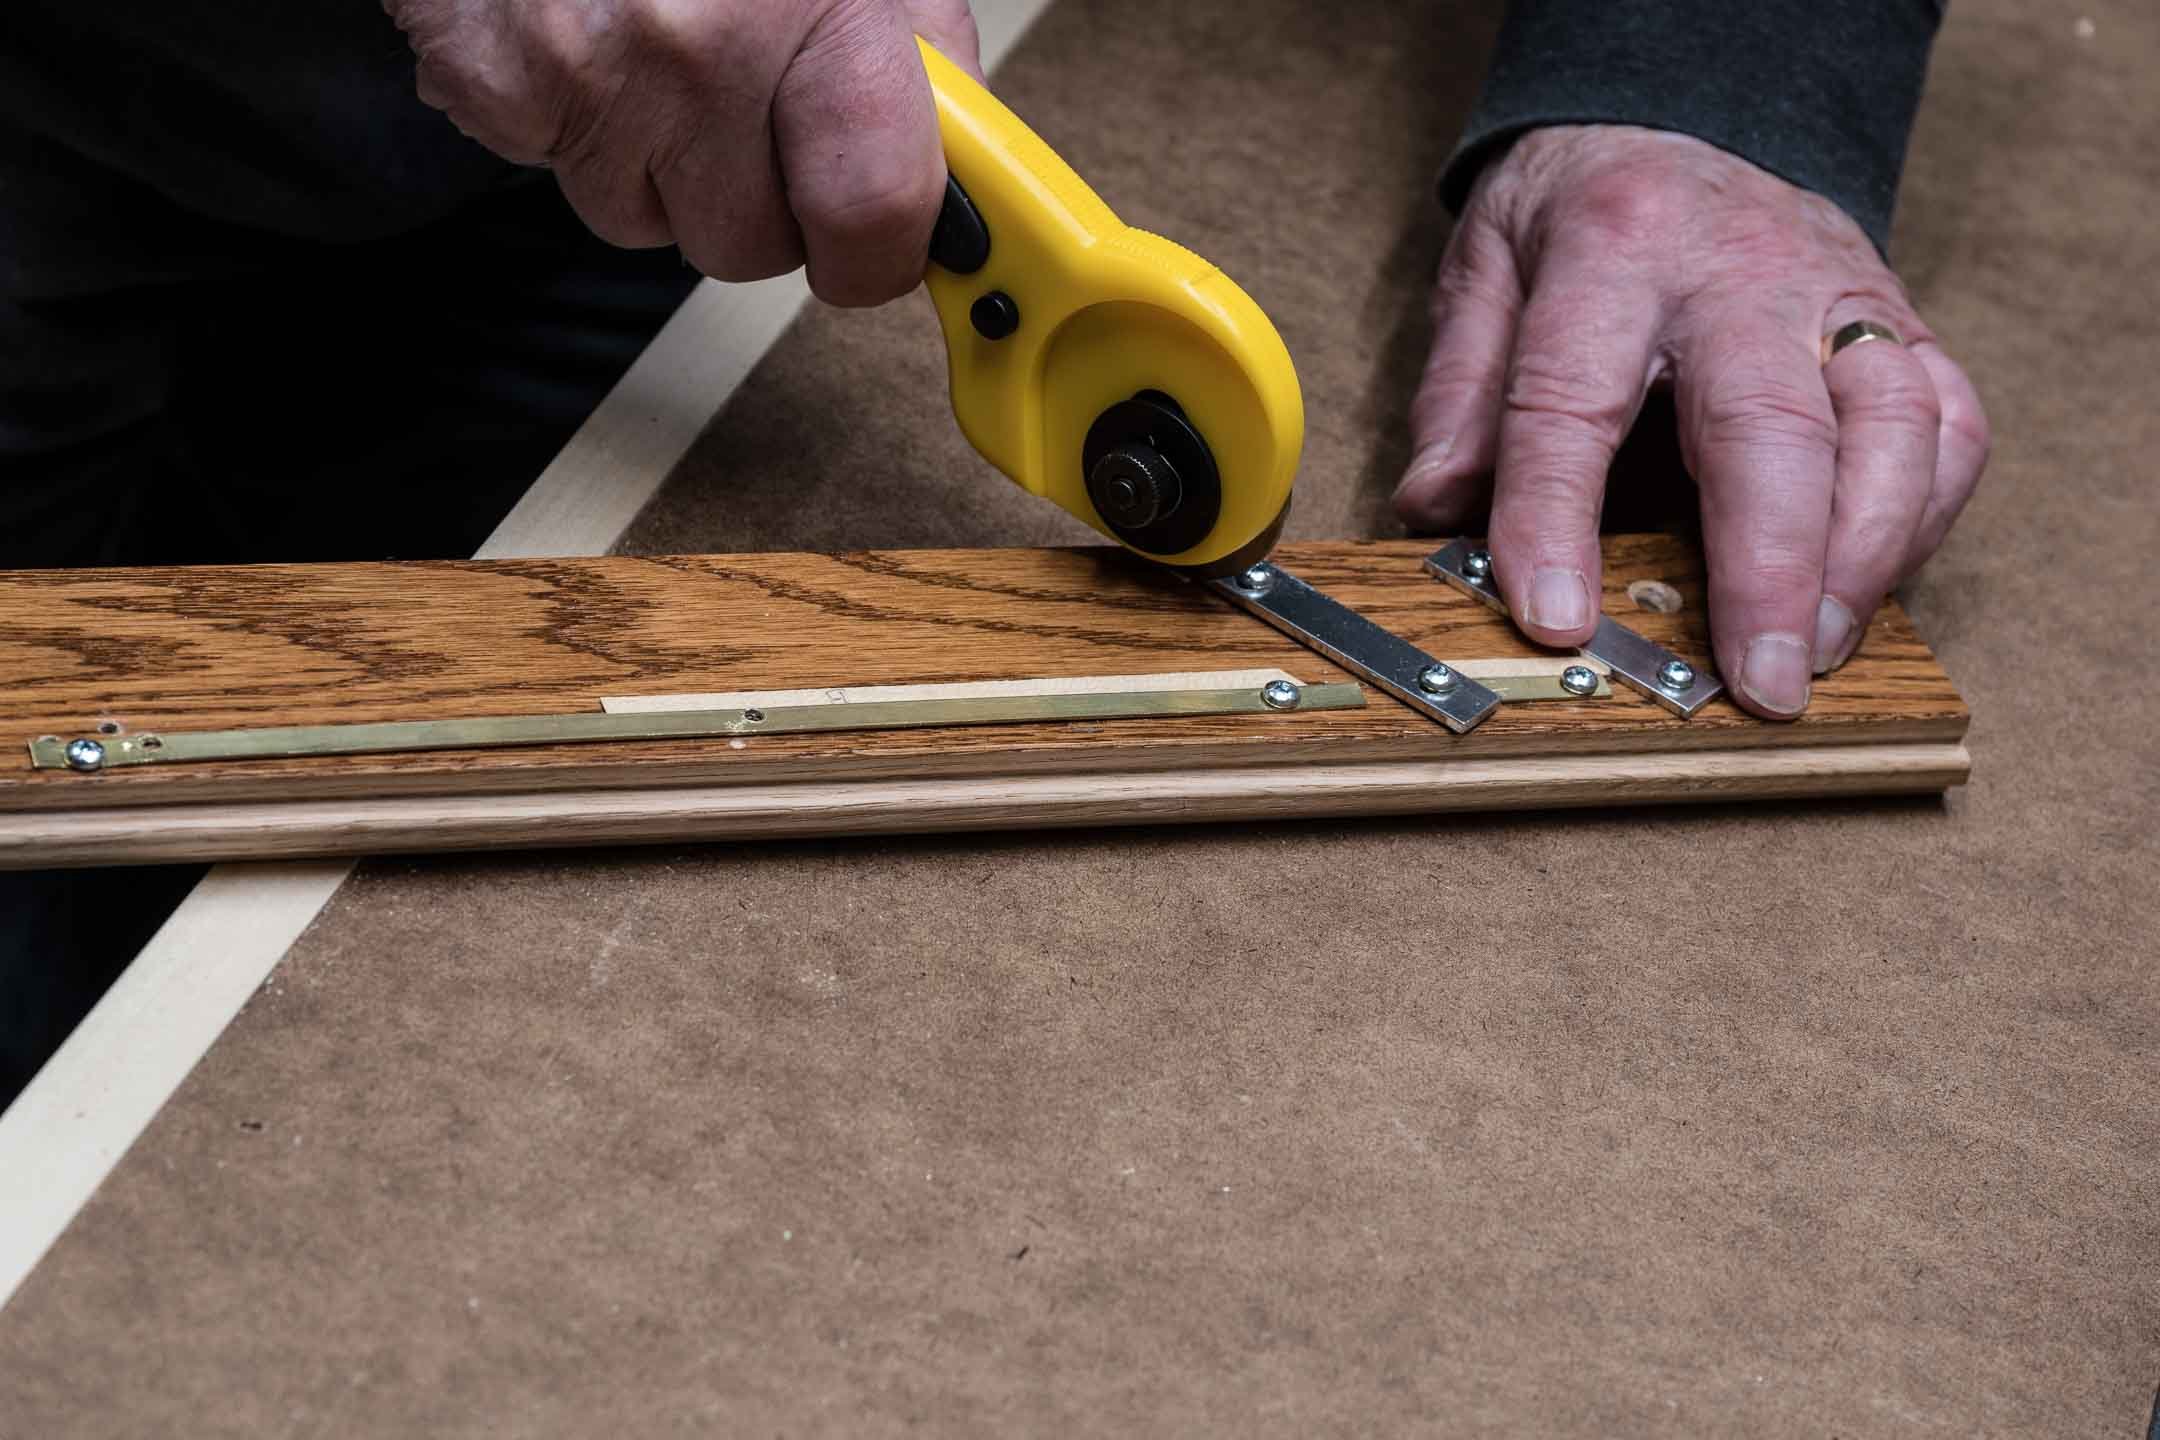
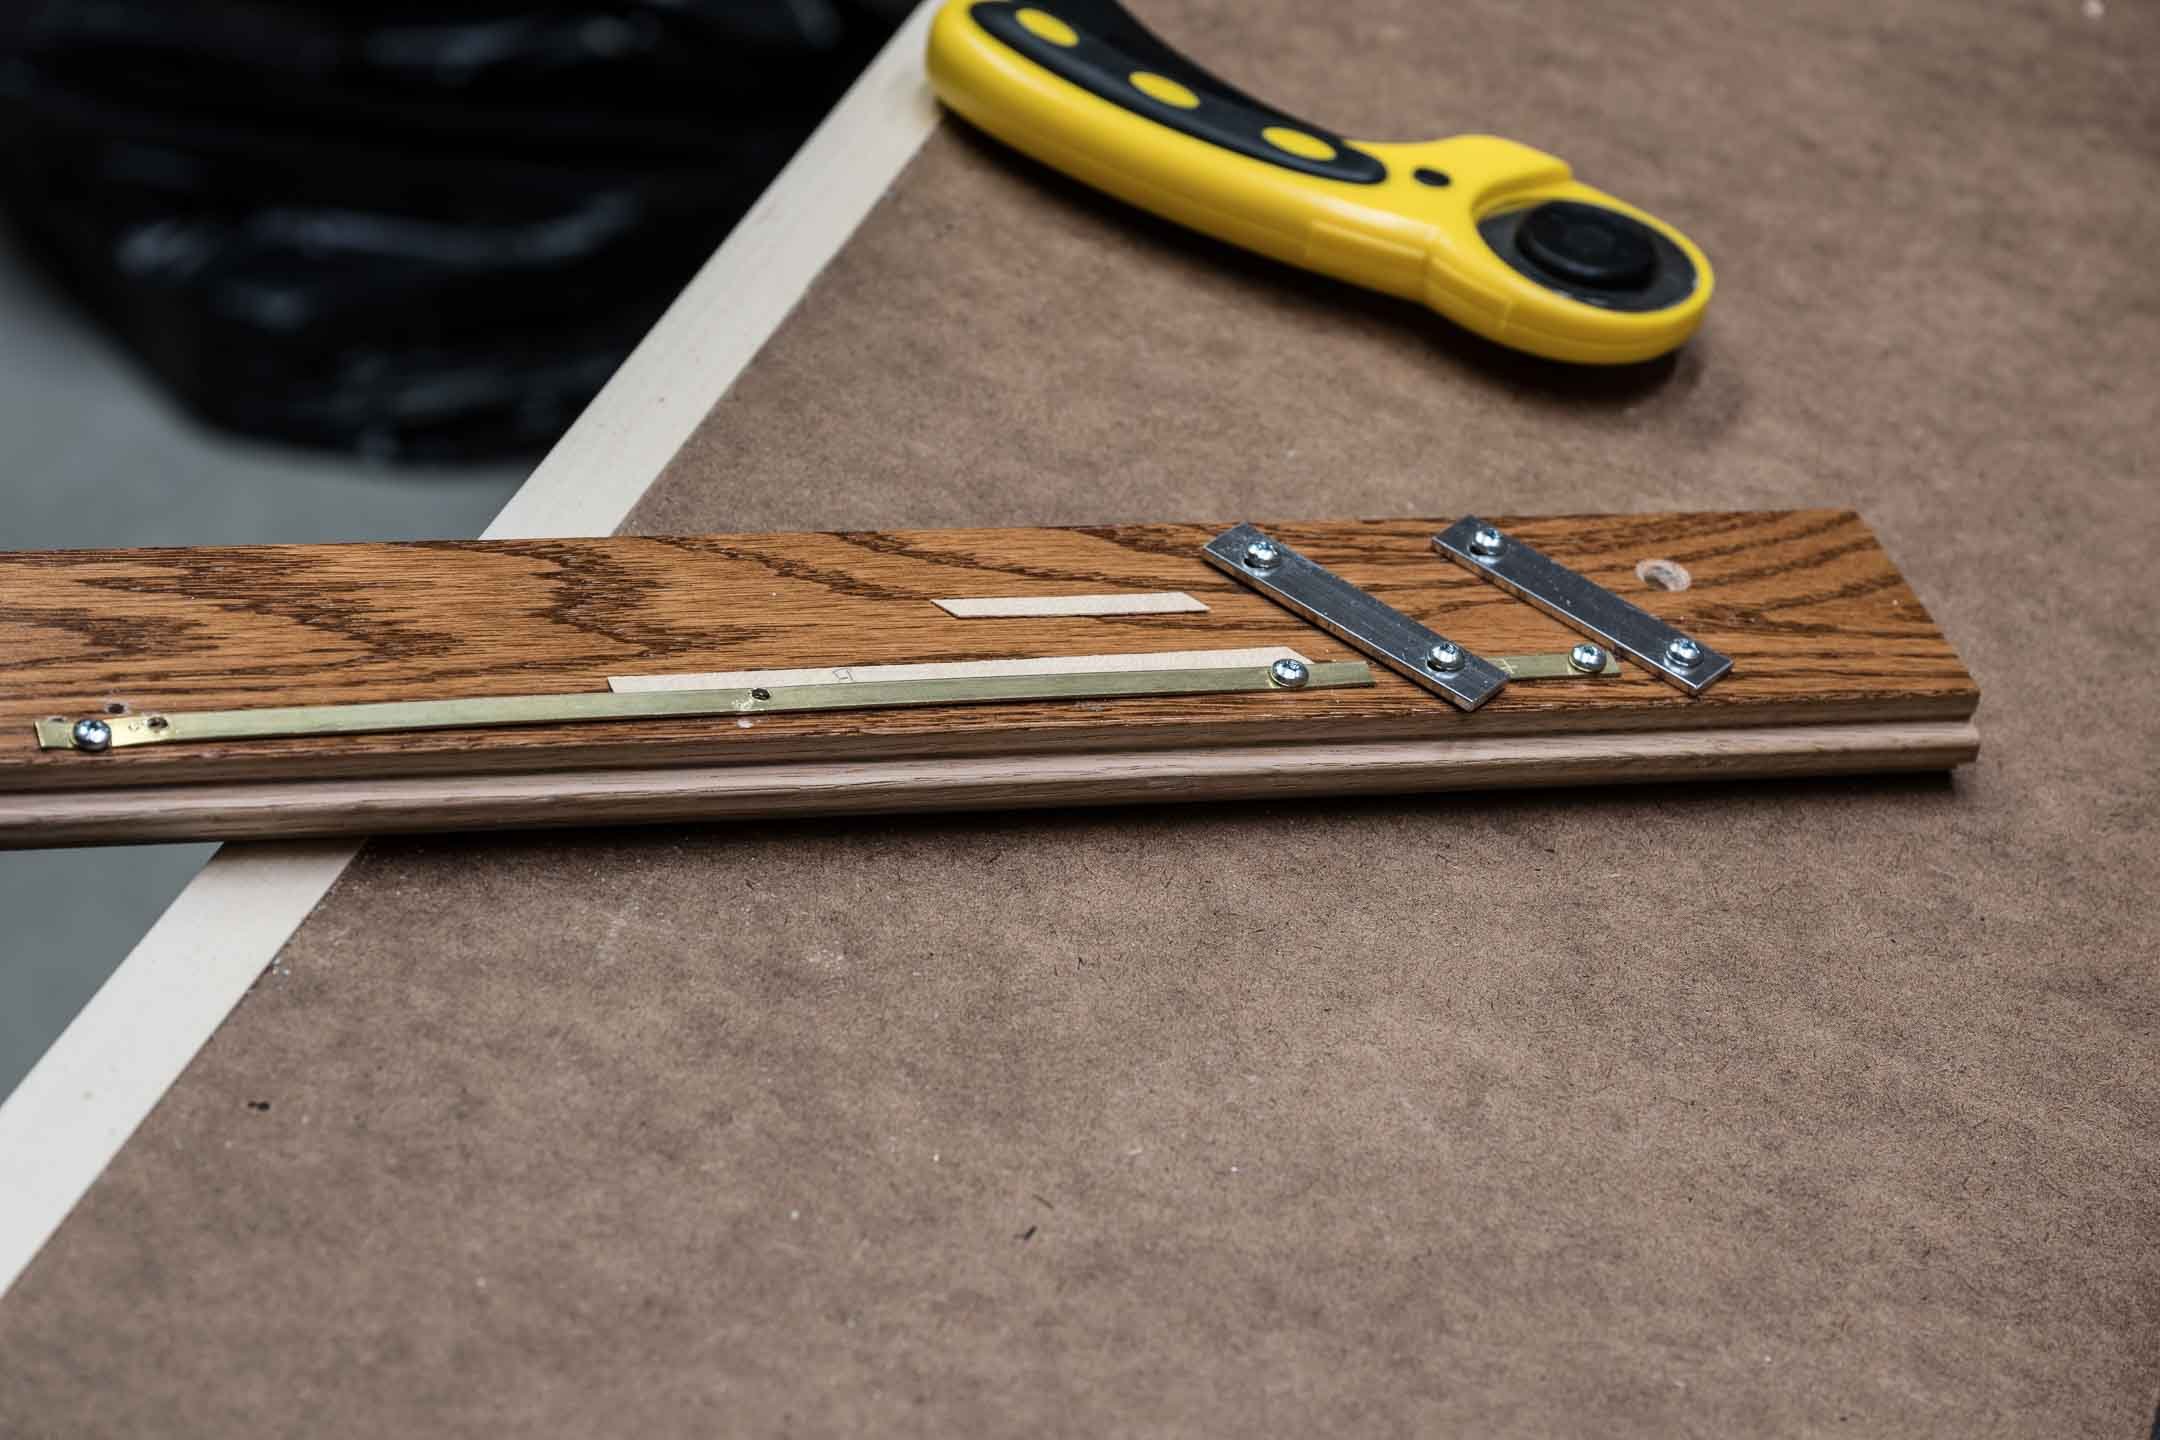
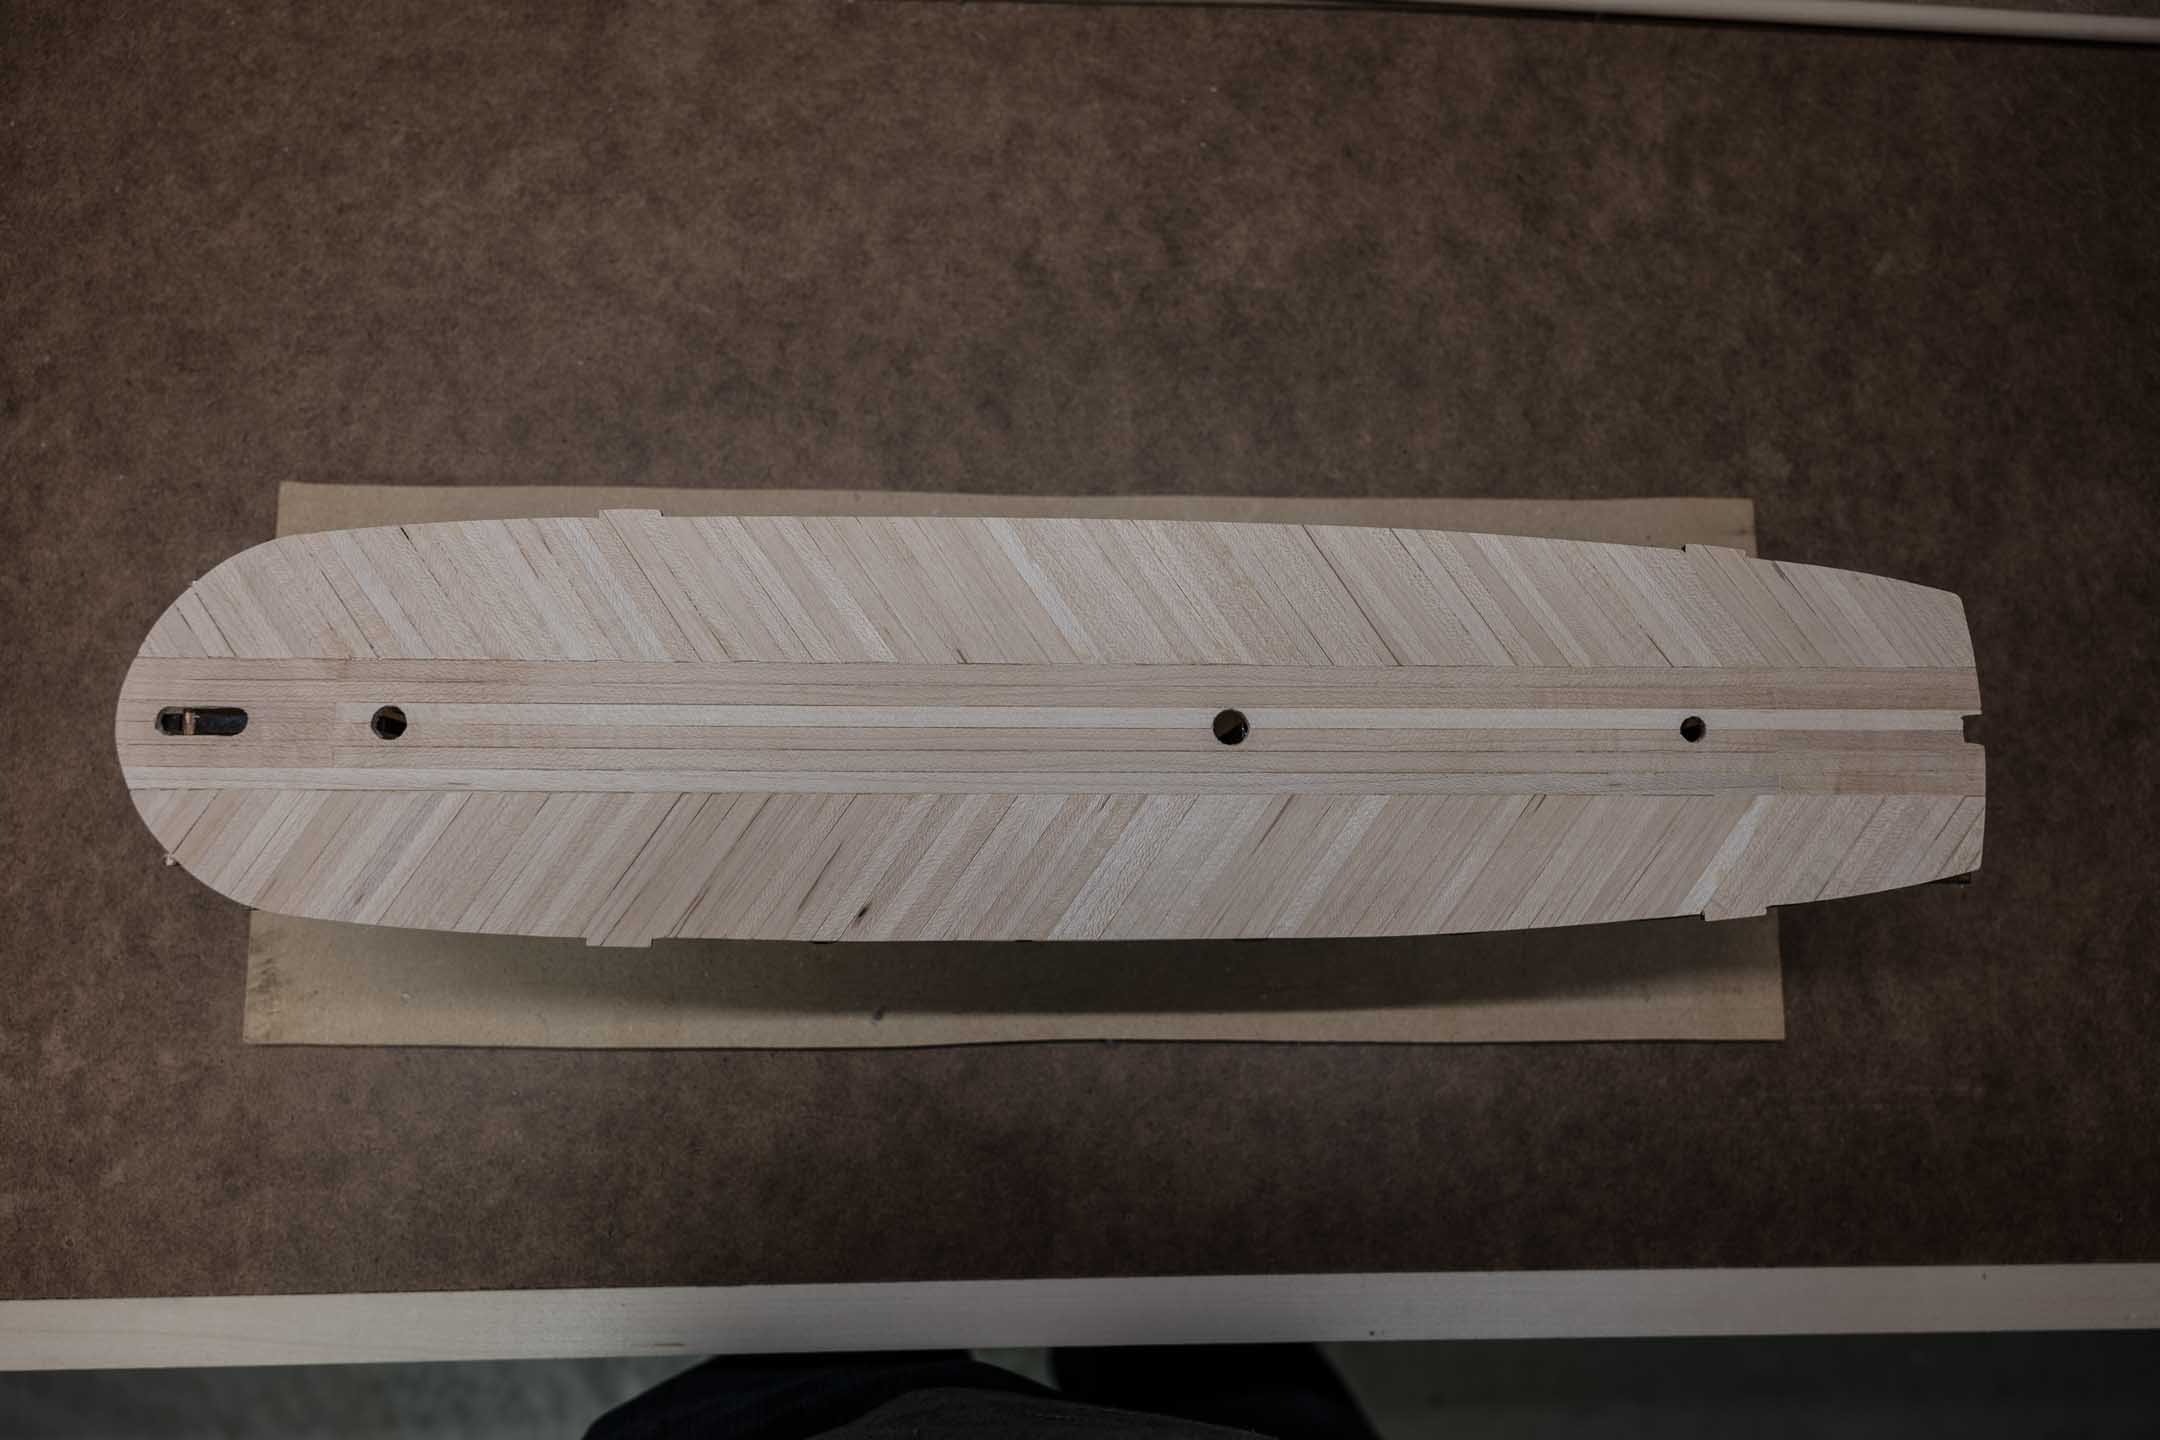
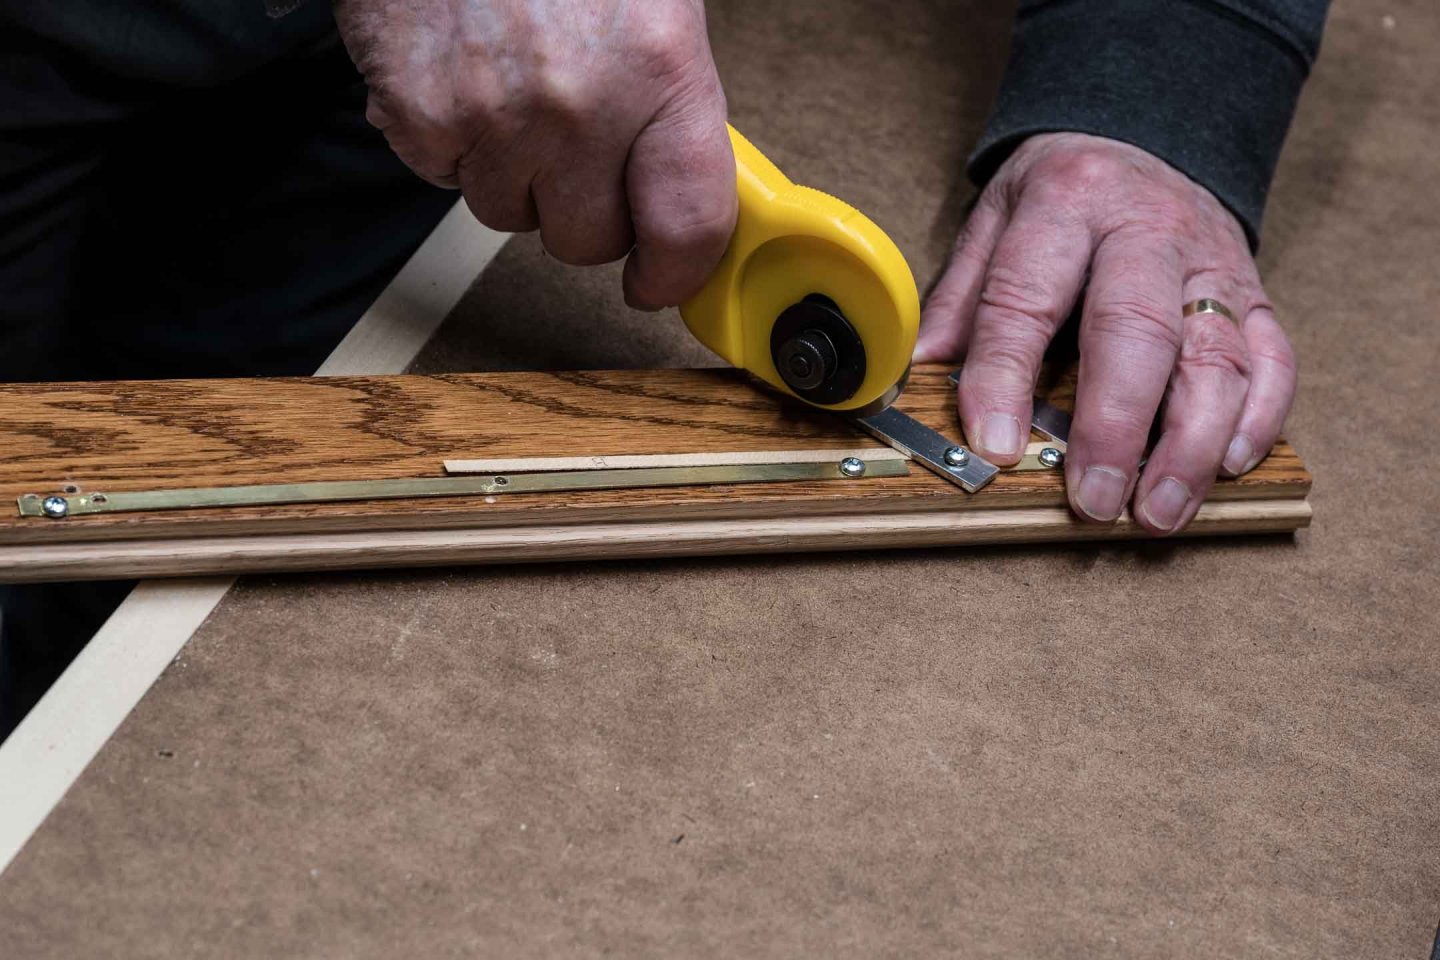
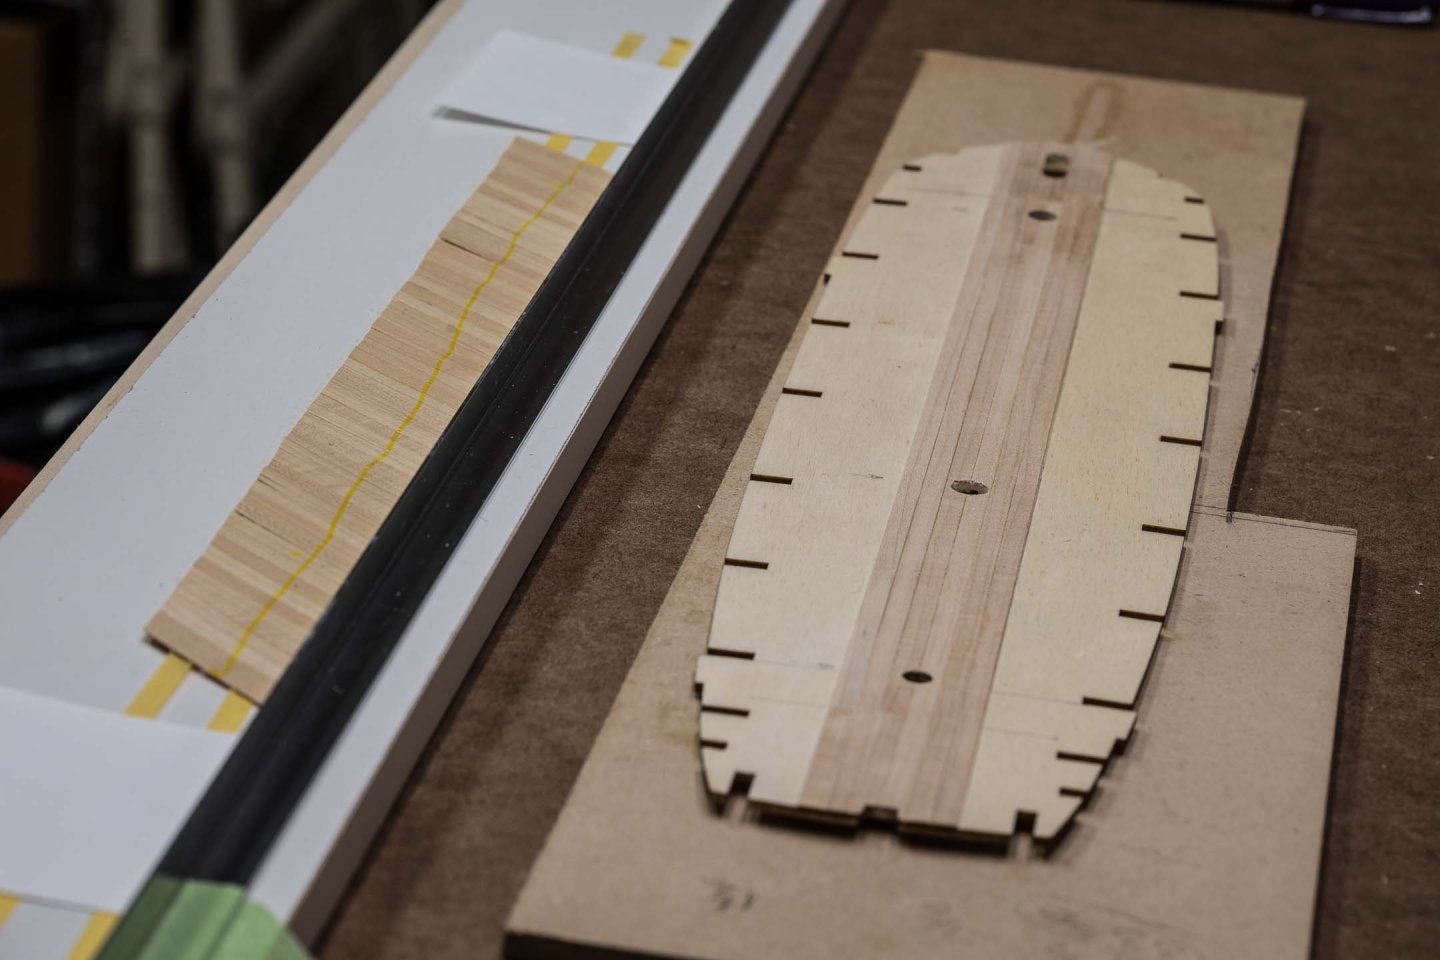
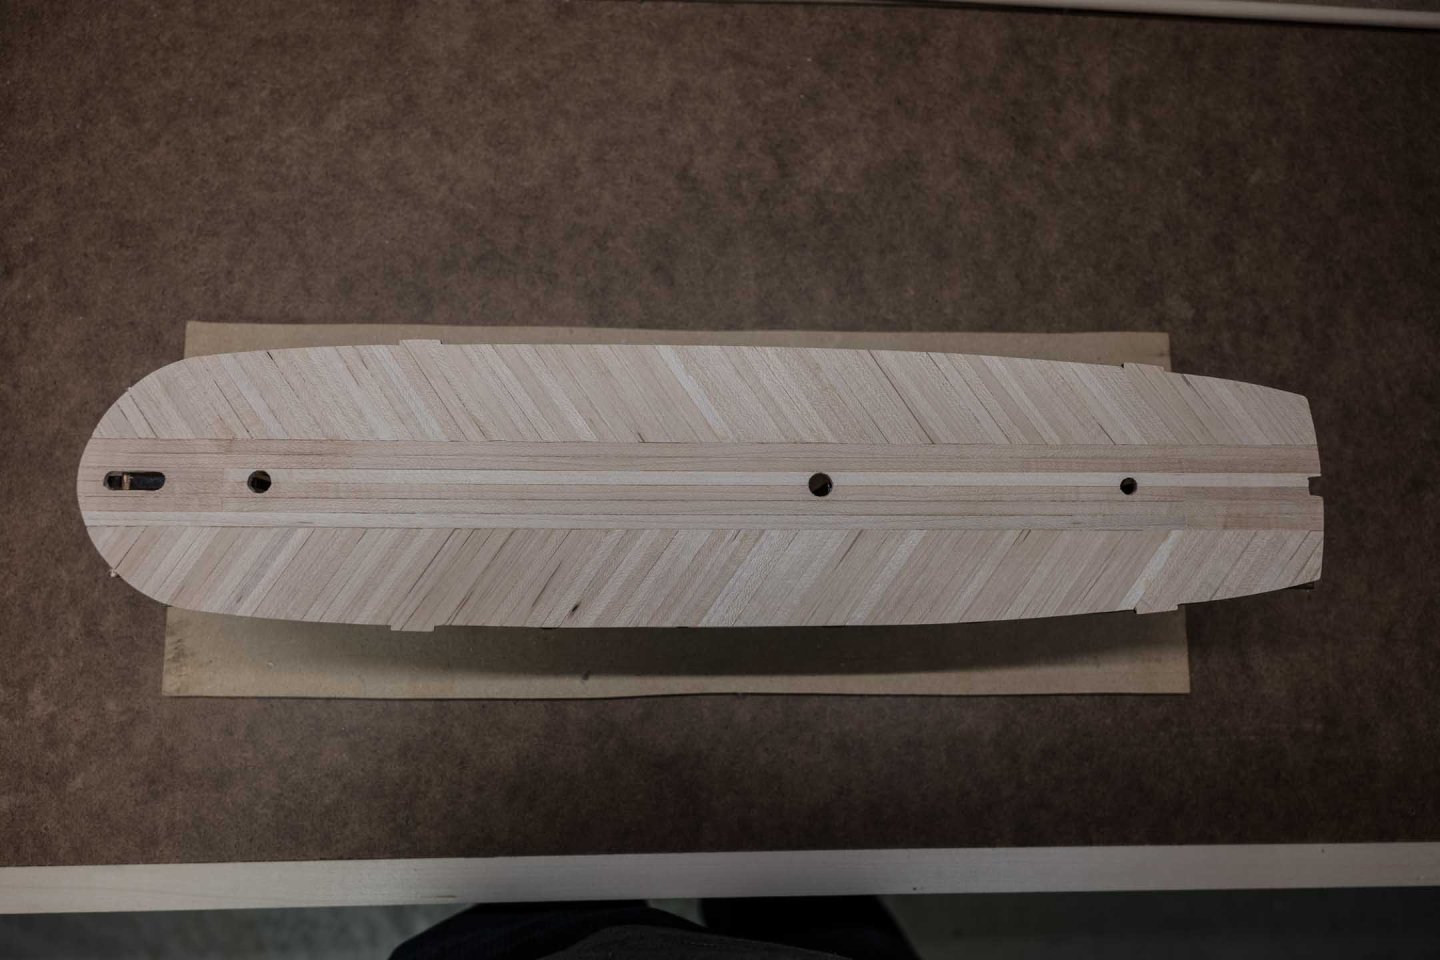
I set up a jig to cut the diagonal deck planks. Took an hour (maybe two) to make the jig, but the actual cutting was then really quick (maybe 30 mins to cut all ~120 planks, all really consistent in length and angle. I laid out the planks on modeling tape against a straight edge. Fiddly work required some patience ... Brushing glue over them also stuck them to each other which was fine - but on my second run (the other side of the ship) I finished by trimming all of them at once with a straight-edge (taking care not to take off too much!) on the side that was to butt against the centre deck planks. About 1/2 mm. After the glue had dried, I marked the glued side with a yellow sharpie in case any of them fell out or I had to figure out which side was glued. Here is the end result: I used the disc knife to trim wherever I could - better a "rolling" cut than a "sliding" one.

- 72 replies
-
- 4
-
-
- Arctic Exploration
- Erebus
- (and 1 more)
-
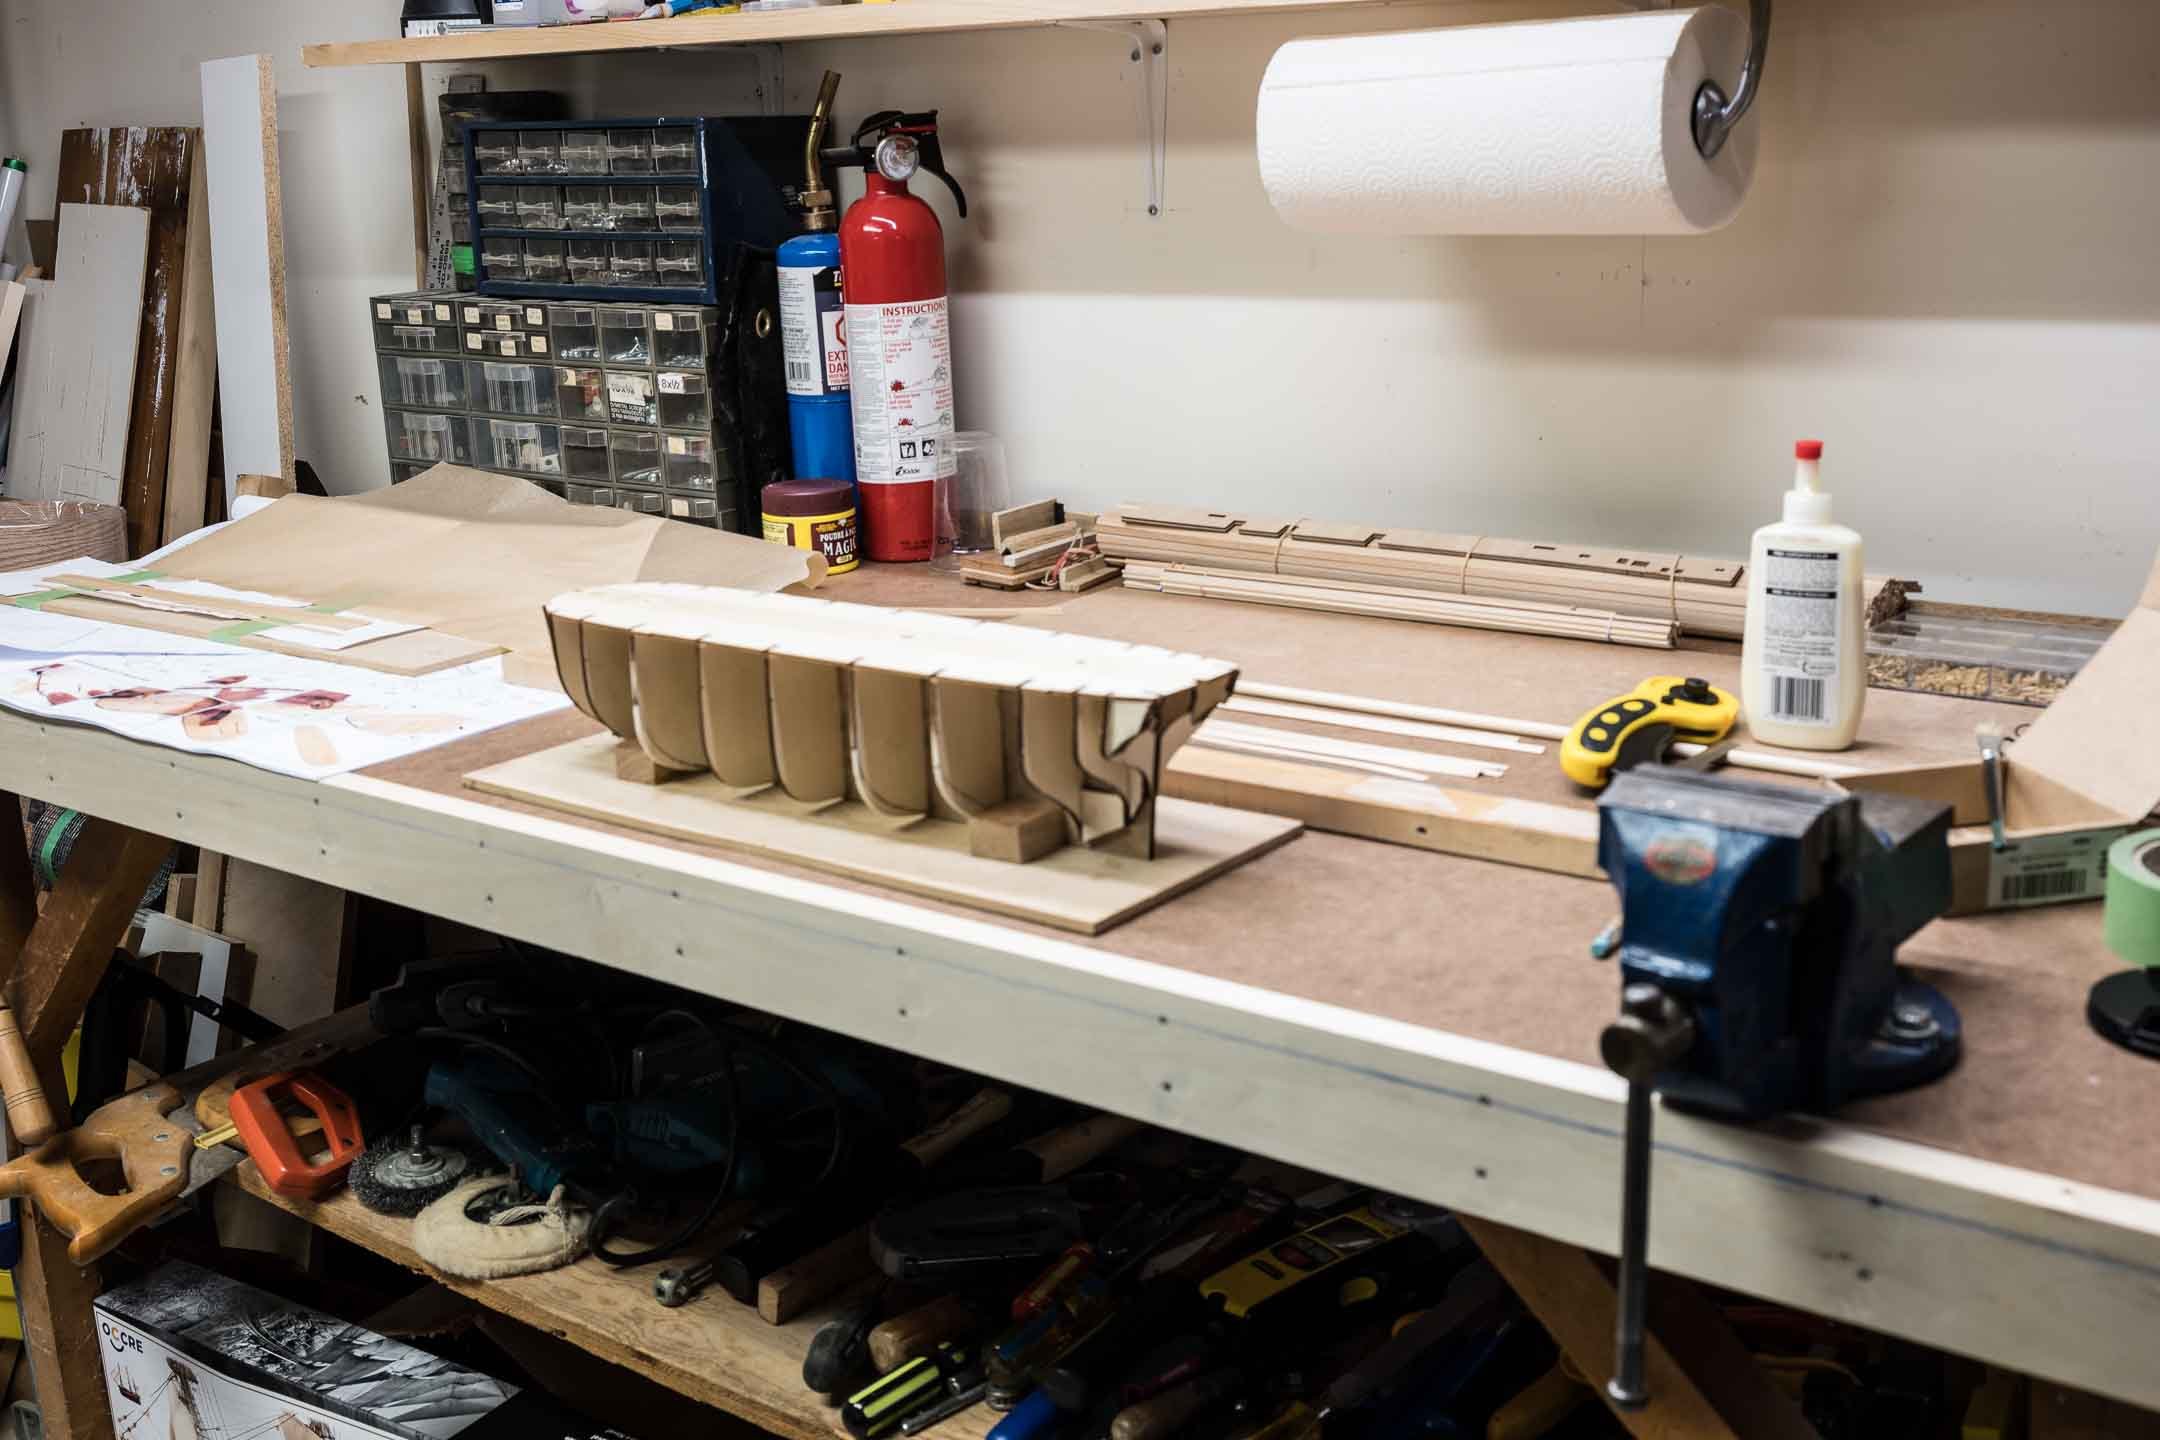
Spent some time before the holiday season to get organized. Refurbished the workbench I built 50+ years ago, after cleaning off all the junk that had accumulated from other projects. Thought I had sorted out what glue to use for the deck planking - I felt comfortable with contact cement especially having purchased a local brand that is easy to source and is odourless. Then I read the fine print - it said not suitable for extra thin veneer. Some research yielded confirmation that water-based contact cement is not suitable. I hadn't opened the bottle, so was able to return it. Brushable contact cements are few and far between here in Canada, so I did more research and found this Youtube video that gave some official validation to an approach mentioned in a few places on the MSW site. The video specifically relates to the Tite-Bond brand of PVA, but I had a local brand (LePages Pro Carpenter Glue) sitting on my shelf so I ran some tests, which were successful. Essentially the method is: Brush PVA glue on to both pieces to be glued. Dilute the glue with up to 10% water to make it flow better. Really spread it out to make it a thin layer. Let it dry. I tested waiting 5 mins, and then I did another test waiting 24 hours. Both worked. Put the pieces together, glue side to glue side. Move them around as much as you want to place them correctly. Run a hot iron over them to press them together. The video says use the hottest setting, but I was concerned I was marking the wood with too much heat, so I dialed it back to the bottom of the "Cotton" setting - more tests on scrap veneer, successful. Five seconds seemed plenty long enough to complete the bond. I completed the deck planking using this method.

- 72 replies
-
- 2
-
-
- Arctic Exploration
- Erebus
- (and 1 more)
-
It may seem I'm being picky and focusing on details that I am months away from needing for construction, but I am aware that I will need to make sure the deck openings and mast steps and seats are set up for the sizes of spars I end up using. As a result of my failed searches to locate a source for 7 mm dowel I looked further into my kit and into Keith s's build of HMS Terror. He stated in 2020 that "I've replaced the bowsprit, fore, and main. The main is 8mm and the fore & sprite are 6mm. The mizzen is the same 5mm dowel that was provided in the kit." Interestingly, my kit drawings show that all the (lower part of the) masts, as well as the bowsprit, are 6 mm dia. Following this and Keith s's determination of sizes, I only need to change the main mast size to 8 mm (close enough to 5/16", which is readily available). Should I increase the upper mast sections proportionally? If I decide to do that, I could use the 6 mm dowel supplied for the main mast lower section as the middle section, and the 5 mm dowel supplied for the middle section as the upper section. I'm itching to start serious building, but these are important decisions for me to make up front!
-
Keith, from your build log I think this - with the photos - is the key to what I have to do with the bowsprit: "... altered forepeak glued in place- as already mentioned i trimmed it back below the gammoning hole to look more like the admiralty plans while altering the angle slightly to align with the altered bowsprit (also had to take a little off the scarph joints)." Thanks for the direction.
- 72 replies
-
- 1
-
-
- Arctic Exploration
- Erebus
- (and 1 more)
-
Thanks Keith - I had lost track of the Keith s build log but have now found it again. I just found a piece of dowel in my basement that is 7.4 mm dia - which I would use for the main if it was only straight - it has a slight curve to it, it's been standing in a corner of my workshop probably for > 15 years ☹️. Need to find a source in Toronto for the right materials. My focus for modifications to the kit is now on: Main Mast Foremast Bowsprit (but still don't quite understand the geometry with the new location) 10-Spoke wheels (The Caldercraft ones would cost me over C$60 by the time shipping is included, so I'm thinking of the ones from Syren - but I can't get a shipping cost until the Canadian Postal Strike is over. Grrr).
- 72 replies
-
- 1
-
-
- Arctic Exploration
- Erebus
- (and 1 more)
-
Thanks Keith. There are many modifications that you made that with my inexperience I don't feel I am ready to make, so will just be following the kit. However, I am curious about the mast sizes and the bowsprit modifications. I couldn't see on your log how you handled the bowsprit angle - moving it forward either changes the angle or demands a modification to its support? Also I looked for the new mast sizes and didn't find them. Probably because I am not yet conversant enough with the search engine? I know I have read somewhere about the increased mast size, but was it someone else's build log. I really do appreciate your comments and suggestions.
- 72 replies
-
- 1
-
-
- Arctic Exploration
- Erebus
- (and 1 more)
-
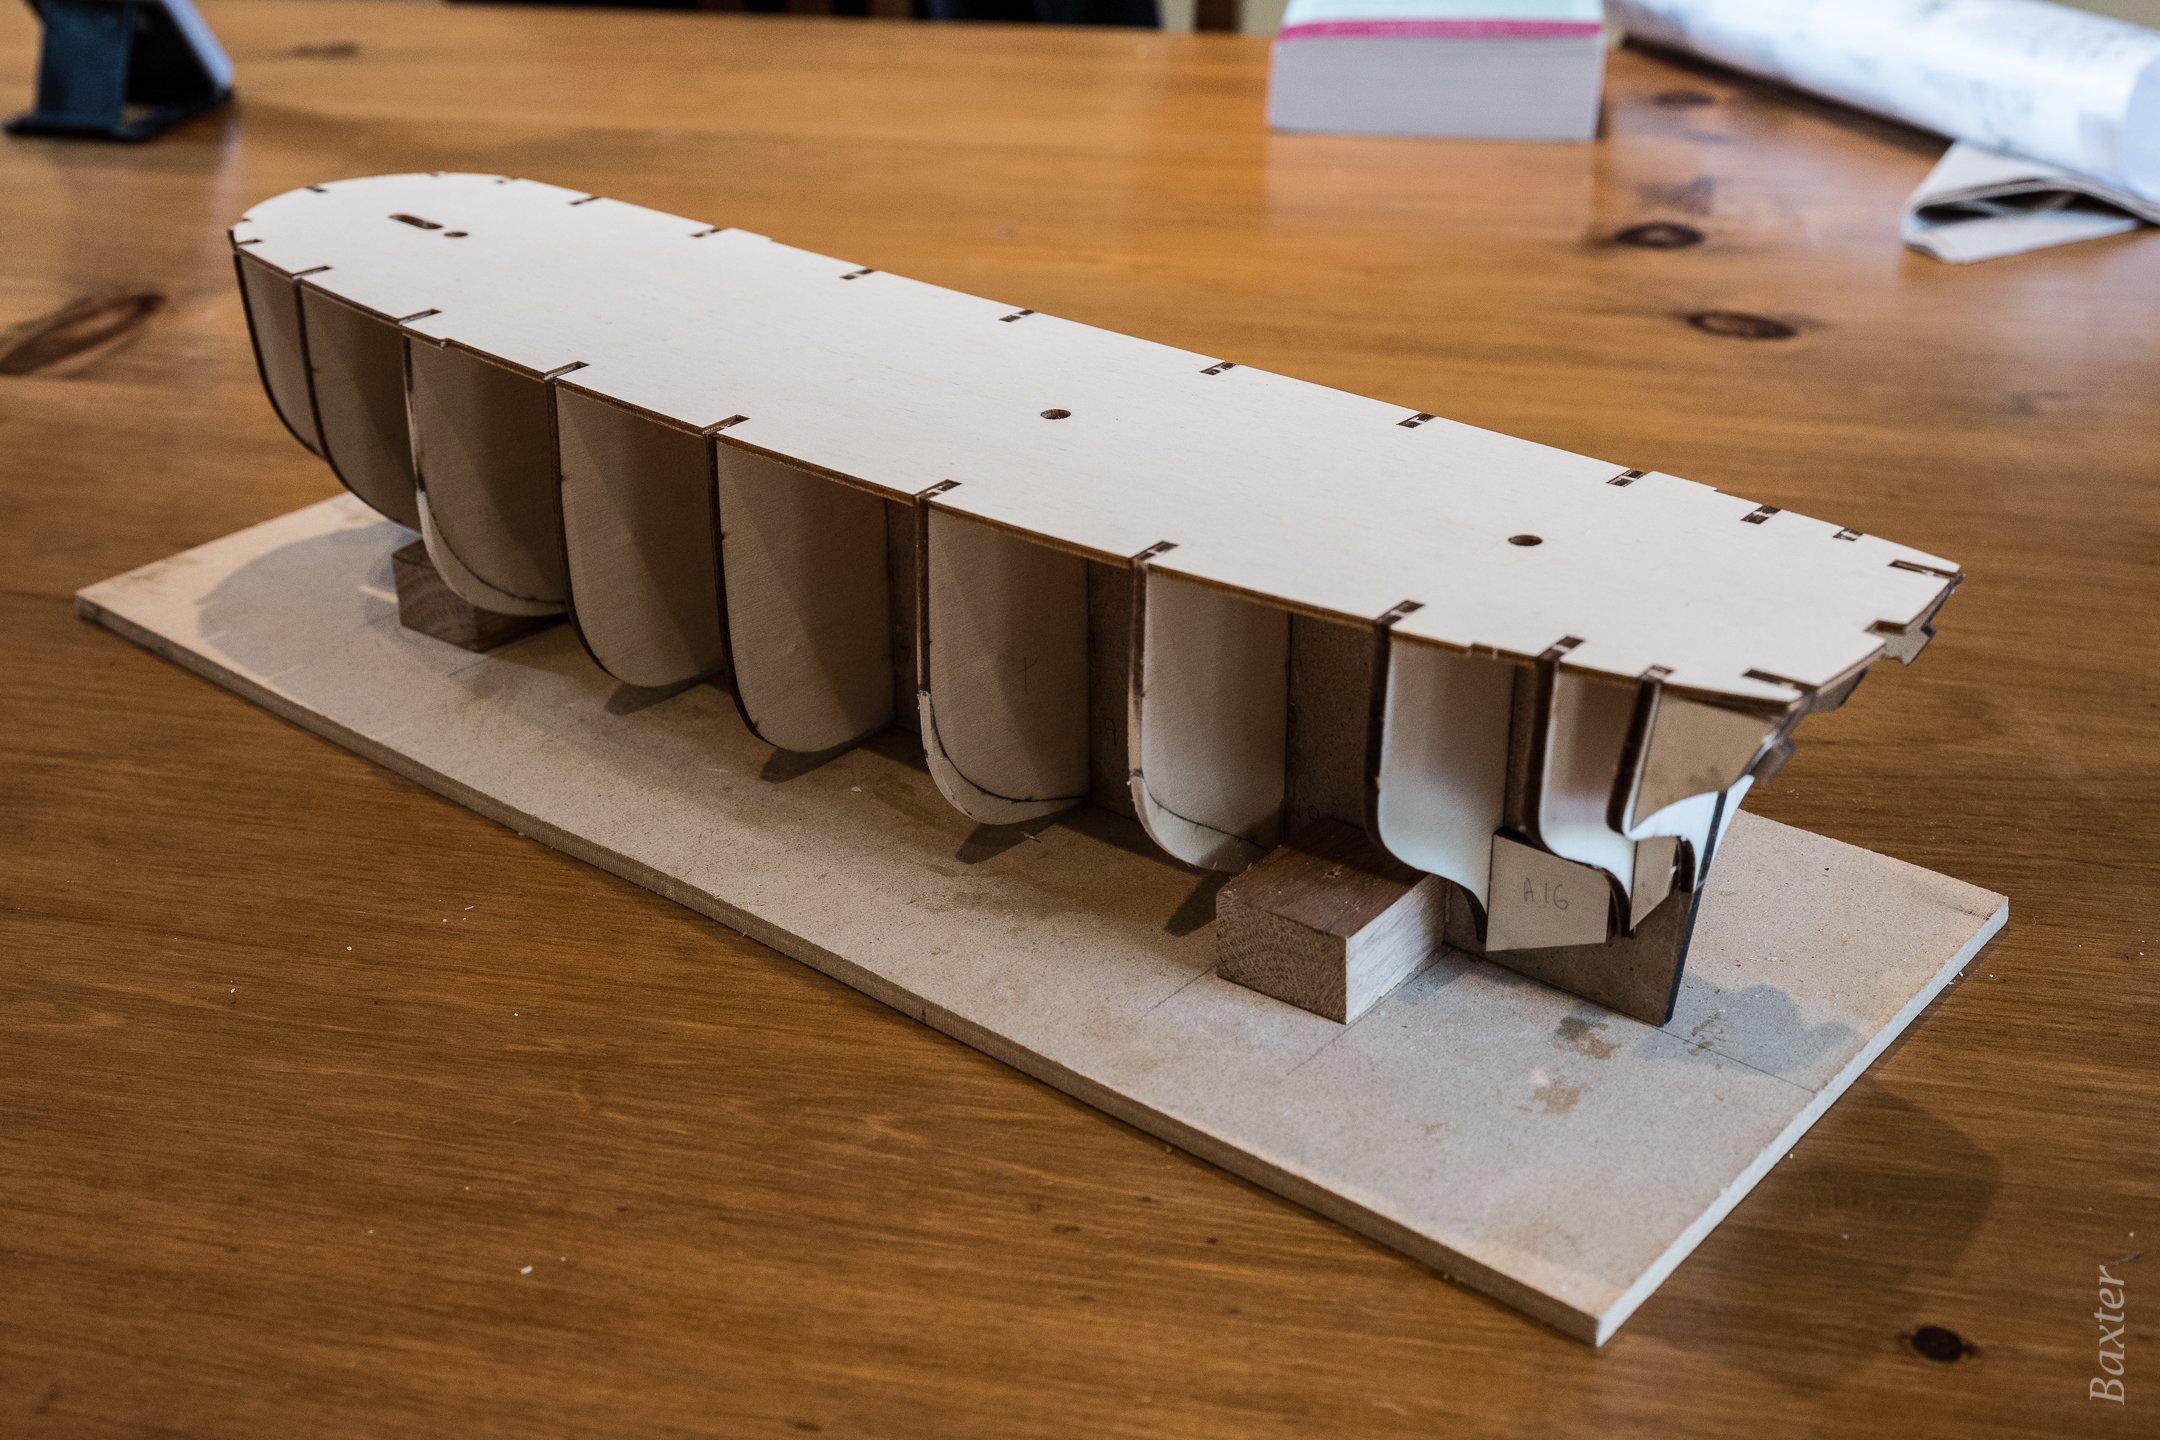
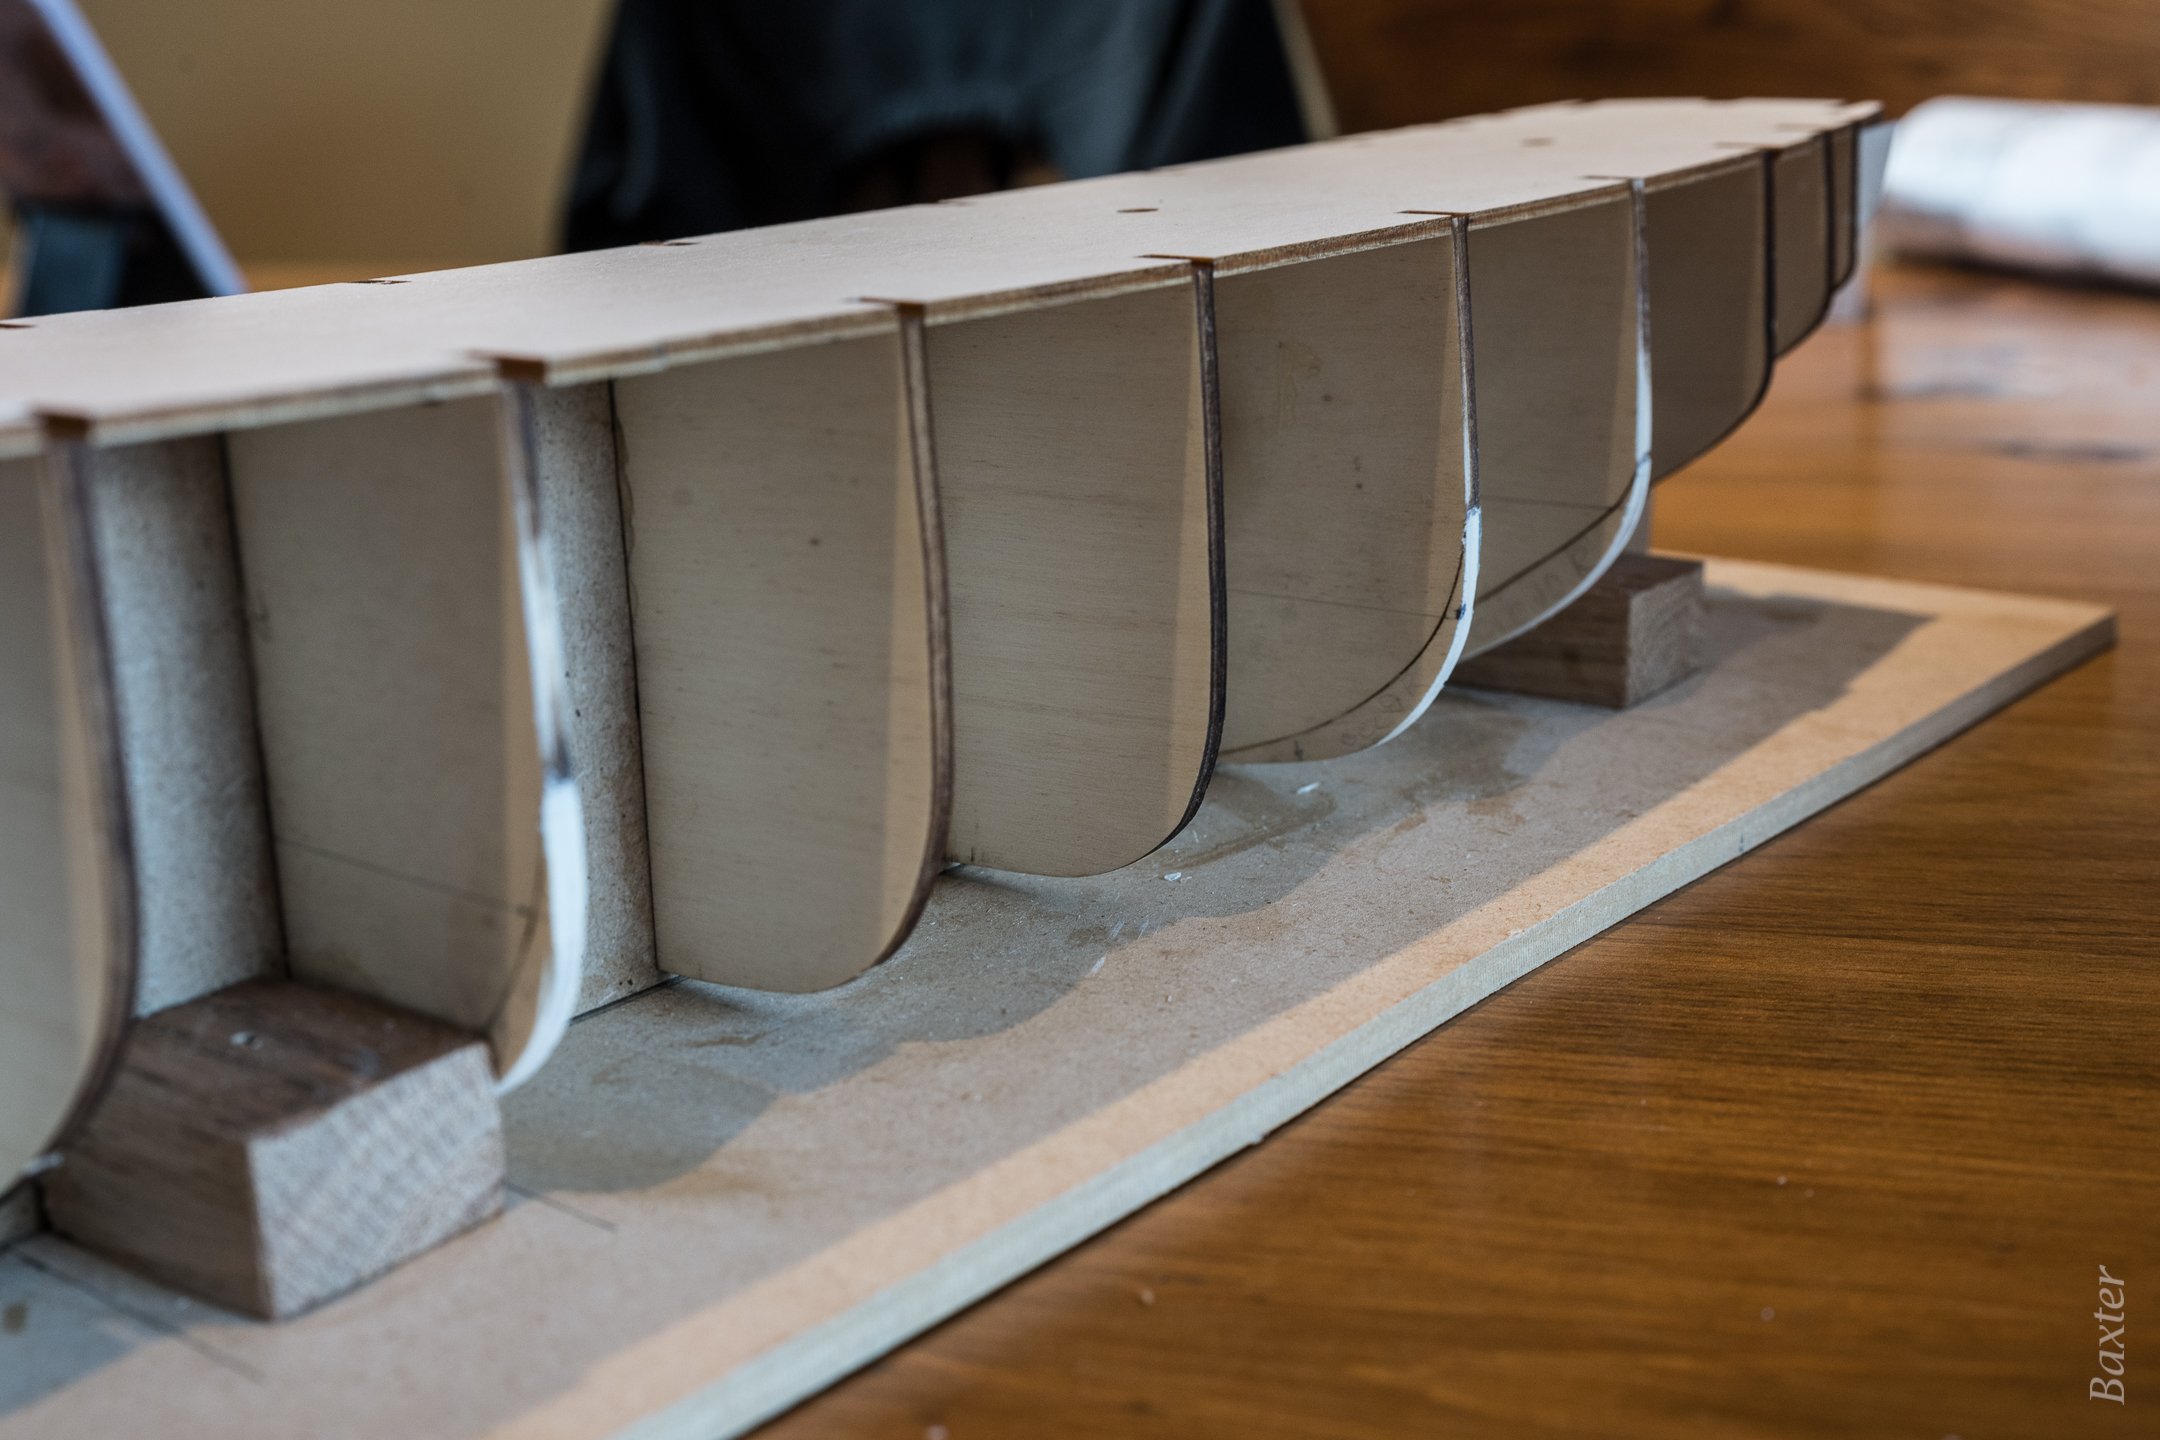
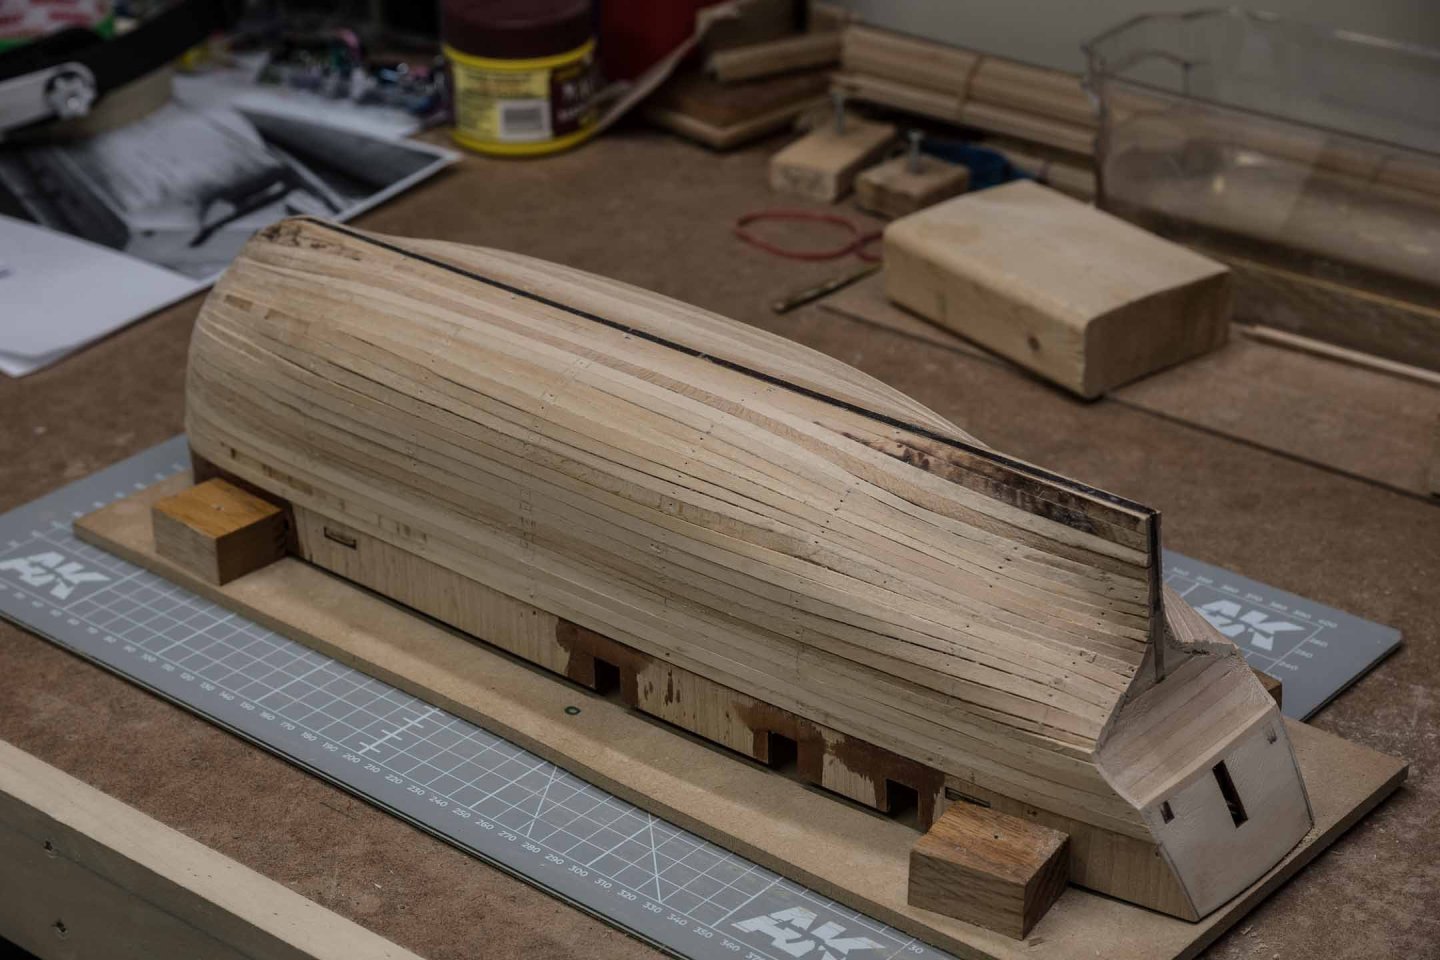
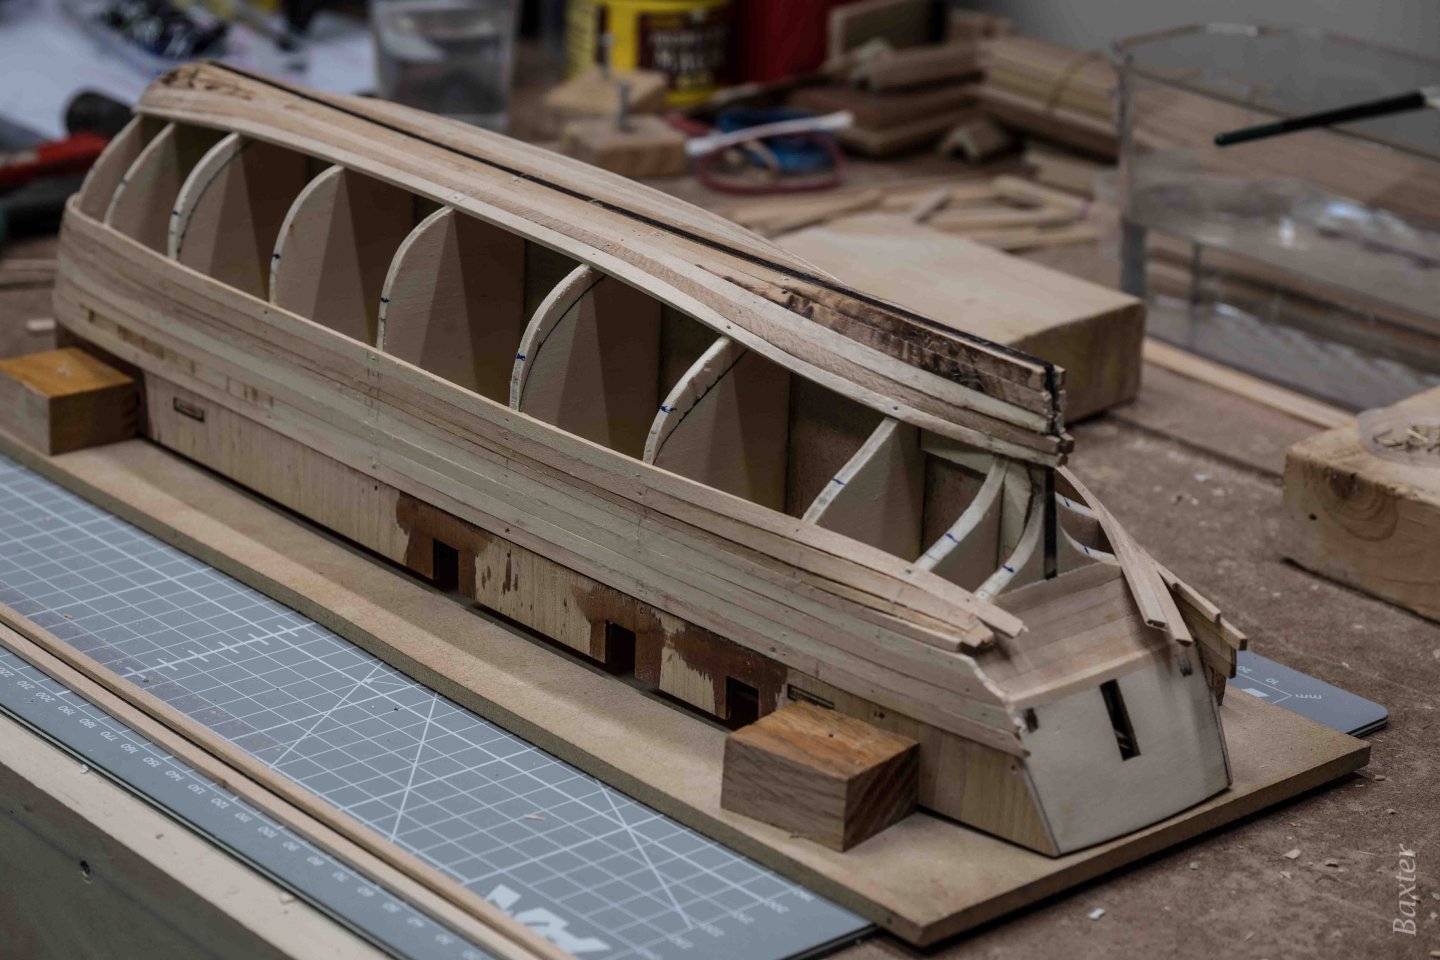
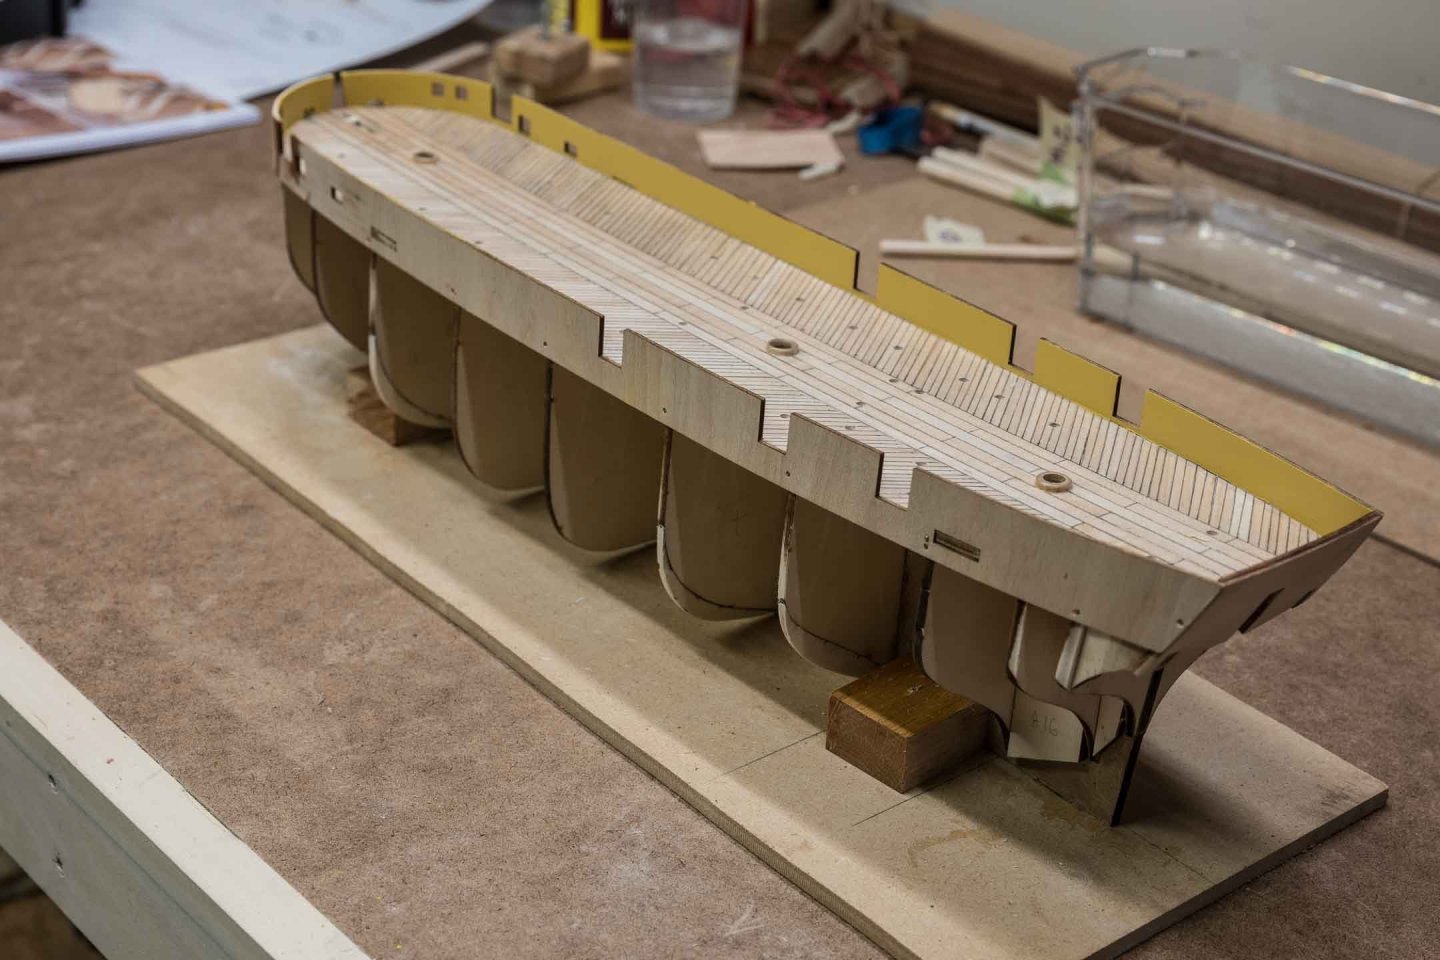
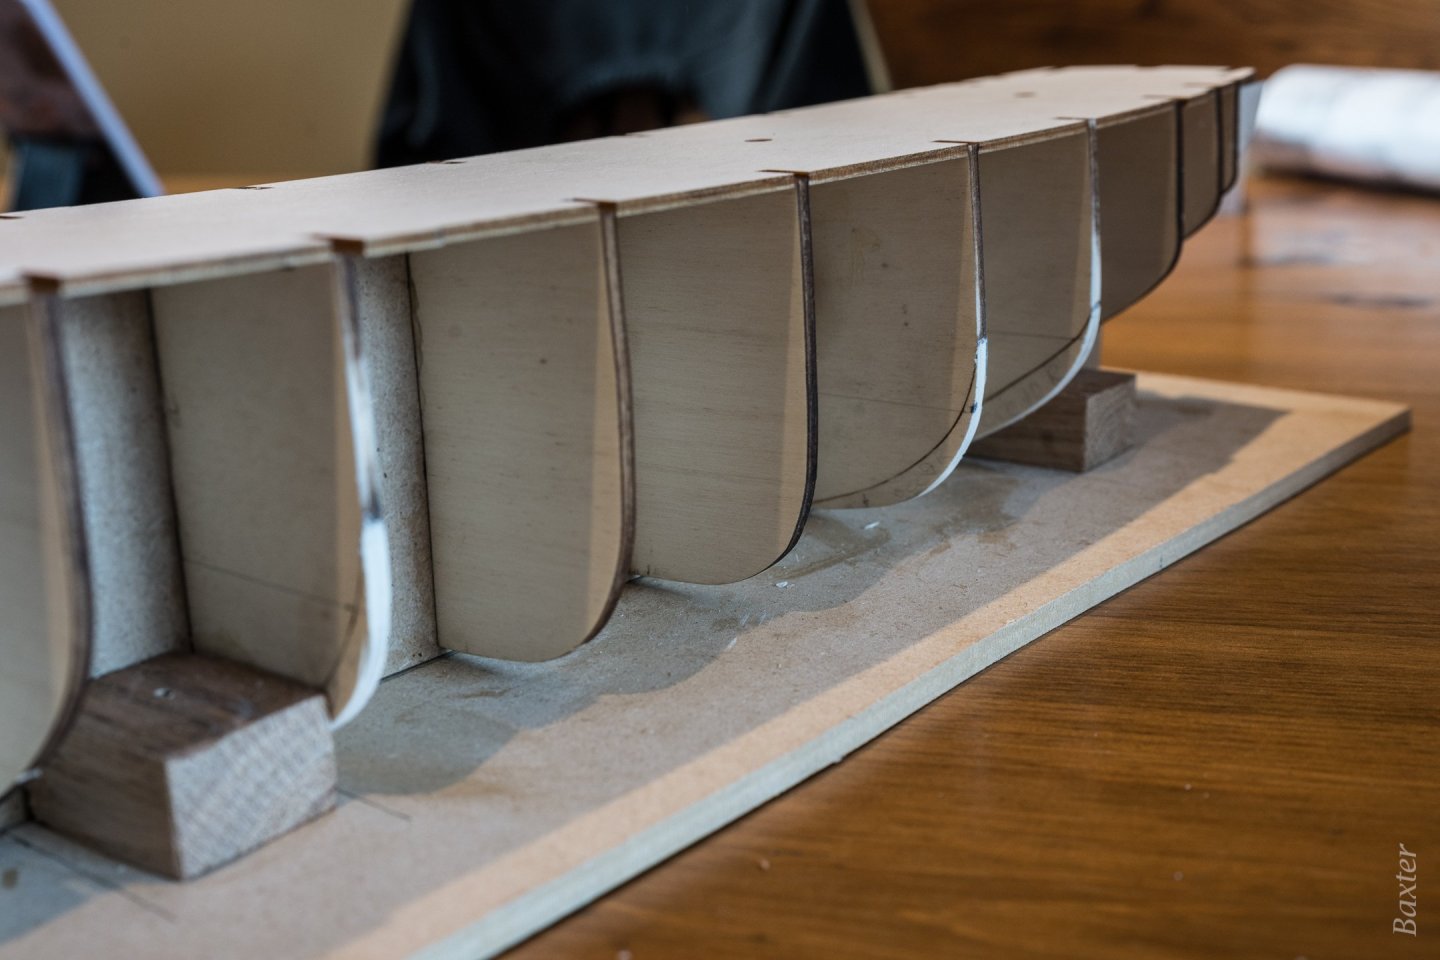
Photos attached are two views with all the frames built out, glued, shaped and installed. Just for into, I'm using LePage's "No More Clamp" glue - so far I really like it. Has enough time for readjustment (5 minutes), but don't need to hold things in place for too long (10 seconds according to the instructions). The deck is not yet glued, and I am questioning the order in which to do the deck planking and assembly. I see two serious options: The OcCre instructions would have me plank the deck, assemble it to the framework, then plank the hull. This means the planking would be done on a flat deck, and the deck then (slightly) curved to fit the framework. Turning the assembly over to plank the hull then exposes the deck planking to damage during the hull planking. My instinct is to assemble the deck to the frame, plank the hull, then plank the deck. Assembling the deck to the frame and gluing it in place will provide rigidity to the assembly to help maintain symmetry while the hull planking proceeds, and leaving the deck planking till later avoids rubbing and damage to the deck planking while the hull is planked and sanded to shape.

- 72 replies
-
- 7
-
-
- Arctic Exploration
- Erebus
- (and 1 more)
-
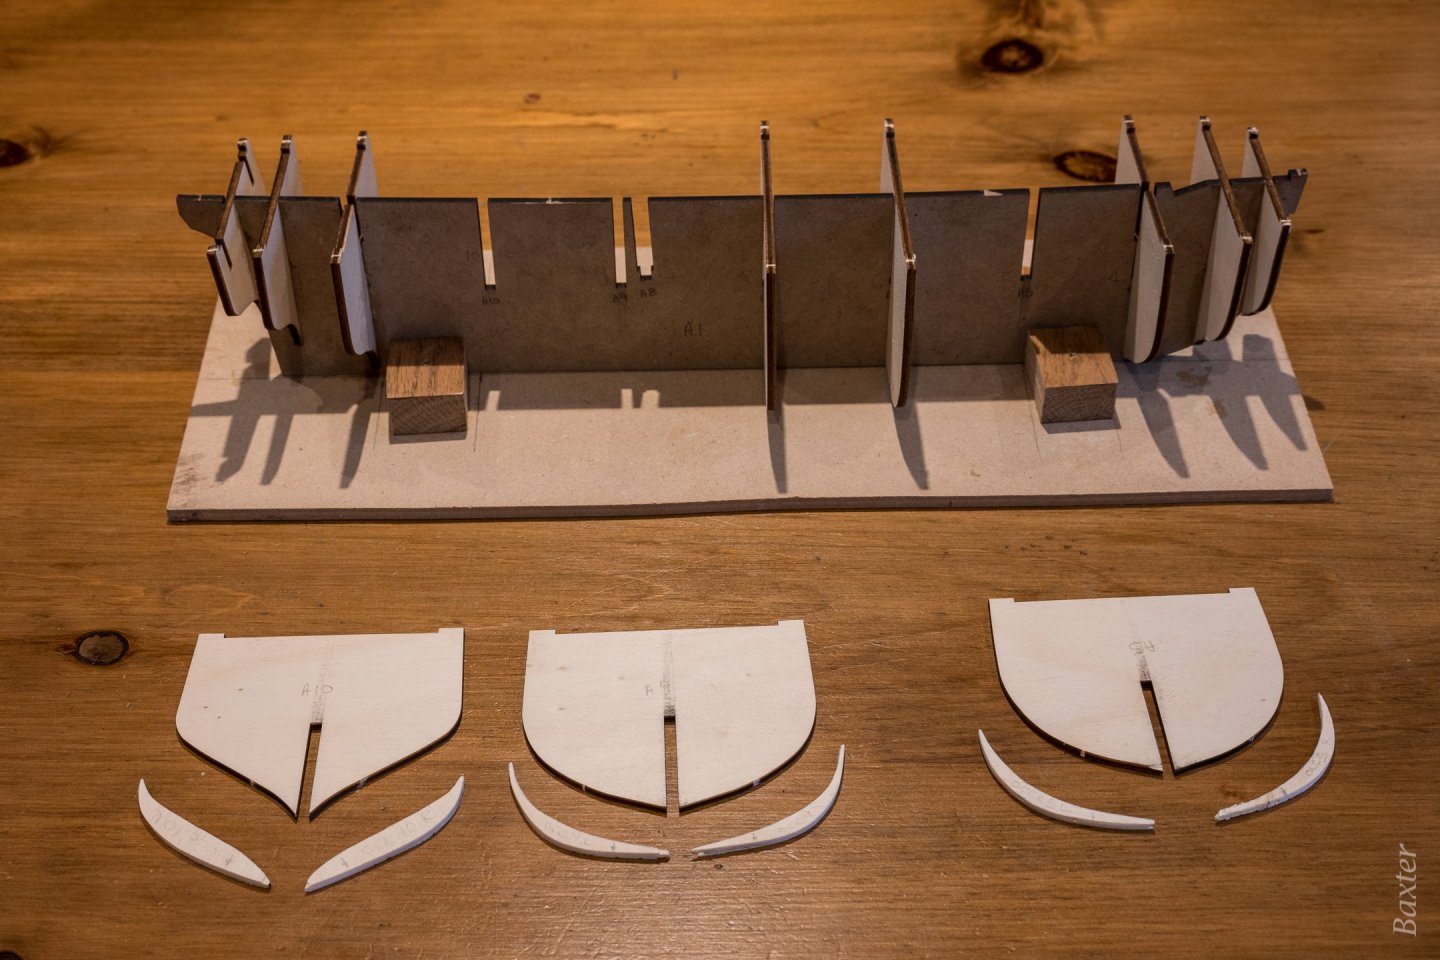
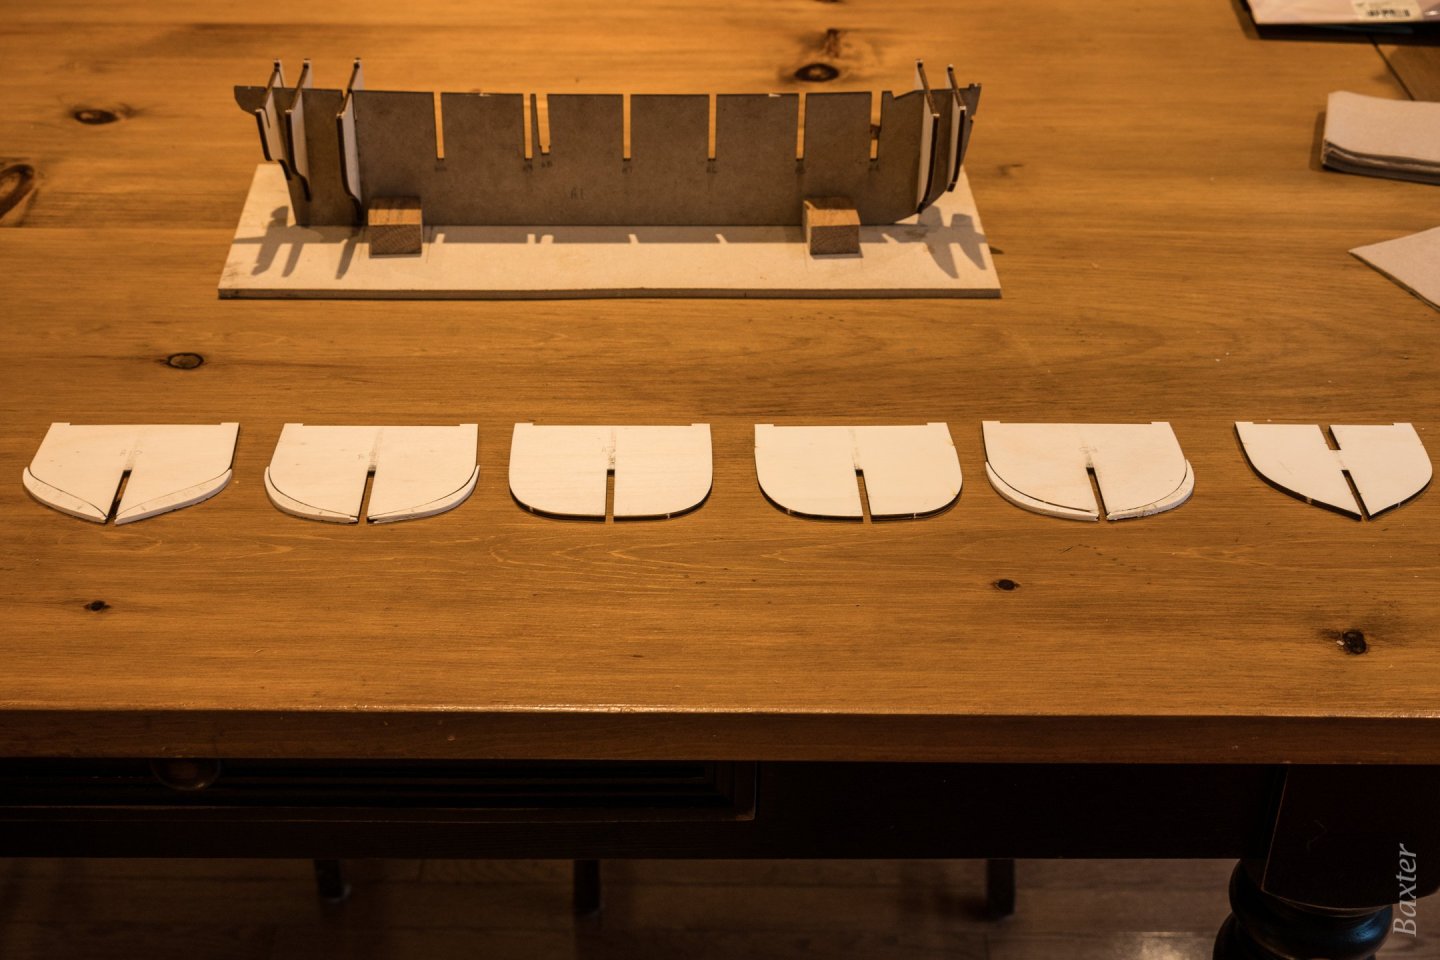
Initial pieces to build out frames 5, 9 and 10 shown before assembly. I interpreted the dimensions as best I could from Matthew Betts' book. Managed to find enough scraps of wood in the sprue in the kit. Rough to work with but I think it will do the job, once they are glued. They will need final sanding and shaping so the bottom of the hull is all at the same level. Shown here with frames 4, 6 and 7 which will remain unmodified: I did see suggestions that one way to eliminate the "bulge" was to sand down frames 6 and 7, but it seems to me the resulting hull shape would not be accurate.
- 72 replies
-
- 6
-
-
- Arctic Exploration
- Erebus
- (and 1 more)
-
Hello Everyone. I have opened the box ... After reading many posts and a couple of build logs on this site I have decided to try to deal with the "Hull Bulge" by "building out" three of the frames/bulkheads, based on Matthew Betts' detailed description, using wood from the OcCre sprue that held the frames supplied in the kit. Results of these efforts will be posted. Modifying the frames should be easy enough; planking is what scares me 😬
- 72 replies
-
- 2
-
-
- Arctic Exploration
- Erebus
- (and 1 more)
-
Hello As a new member of this model making community I am amazed and daunted by the skills and ingenuity of the members. While I am going to have a hard time to live up to these standards, I do want to try a few of the modifications that you have taken on, but I need to better understand the details ... I am just starting my model of the Erebus, and would like to eliminate "the bulge" in the hull, but do not fully understand what has to be done. I have boiled my questions down to this: Which of the frames should be modified? Is it 4, 5 and 9, whose profiles would need to be enlarged to be more closely matched to 6 & 7? Do any drawings exist of the modified frames, and if so, are those drawings available for me to create new frames? I would be grateful for any help I can get! Guy
-
I could make this work (I think) but first I need to answer my original question - "Which of the frames should be modified? Is it 4, 5 and 9, whose profiles would need to be enlarged to be more closely matched to 6 & 7?" If 4,5 and 9 do indeed need to be enlarged, I will first have to cut new pieces - or "build out" the ones I have. Guy
-
Yes indeed it is!
-
I am a newbie to this forum, and also to ship modelling - my modelling experience has mainly been plastic kits over many years - so I apologize in advance if this question is out of place. If I should be posting this question somewhere else in the forum I would welcome the advice. I have read some of the build logs for this ship, and for the Terror, and there I found discussions about the "bulge" in the model ship's hull. I would like to modify the frames on my hull to take care of this, but I don't have the expertise to interpret the drawings and photos I have seen so far. I have boiled my questions down to this: Which of the frames should be modified? Is it 4, 5 and 9, whose profiles would need to be enlarged to be more closely matched to 6 & 7? Has anyone created drawings of what the shapes of these frames should be, and if so, are those drawings available for me to create new frames? I am really looking forward to building this model, and I suspect I will already have plenty of challenges ahead of me in the planking and beyond - but with challenges overcome come rich rewards!