Mowzer
-
Posts
22 -
Joined
-
Last visited
Content Type
Profiles
Forums
Gallery
Events
Everything posted by Mowzer
-
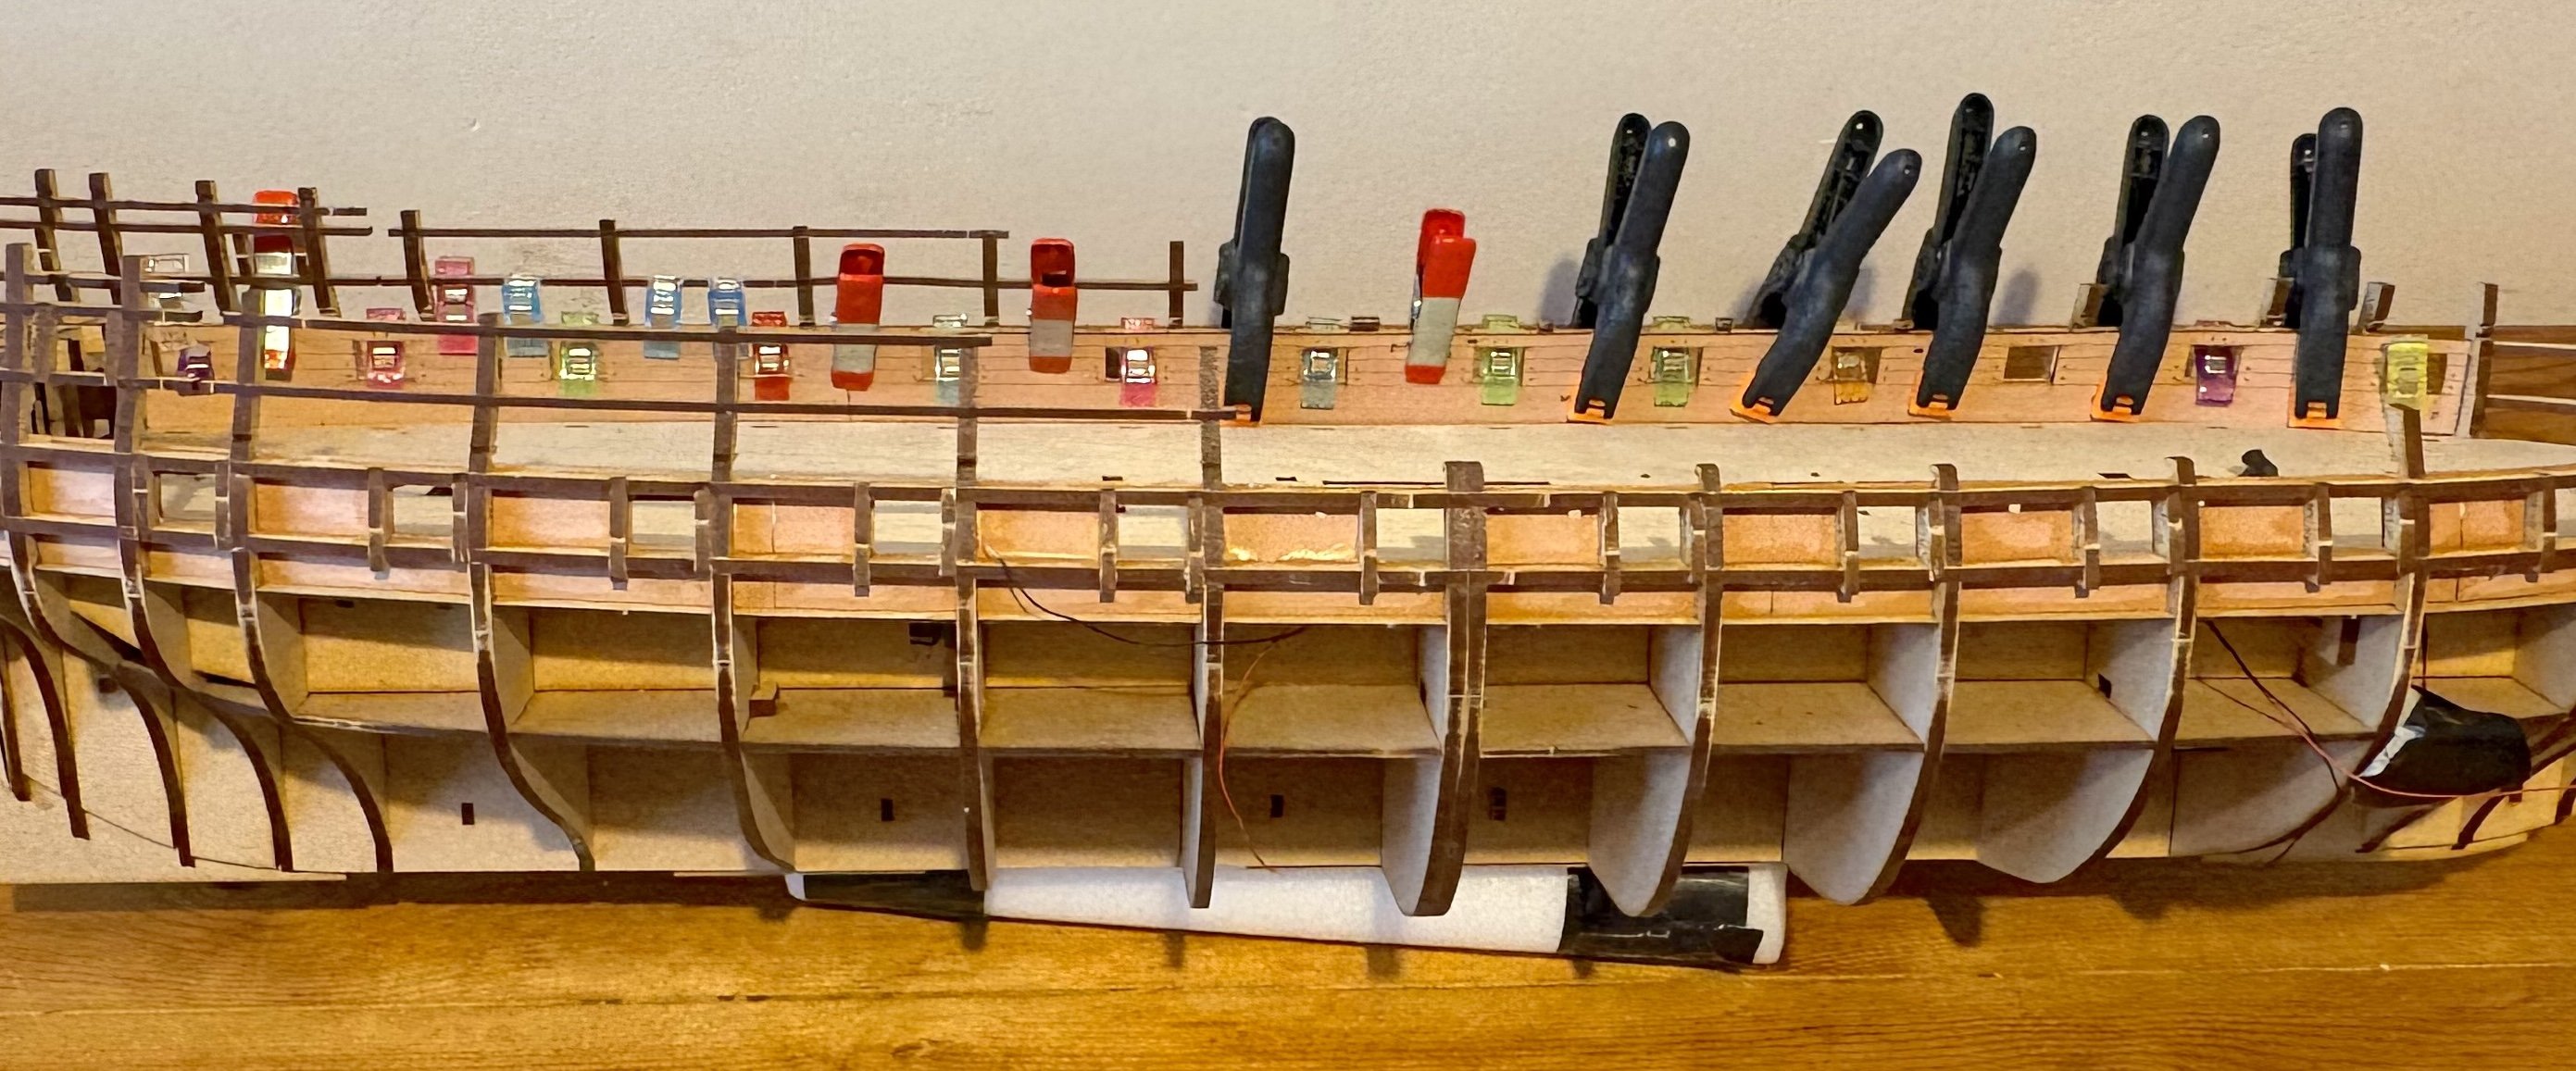
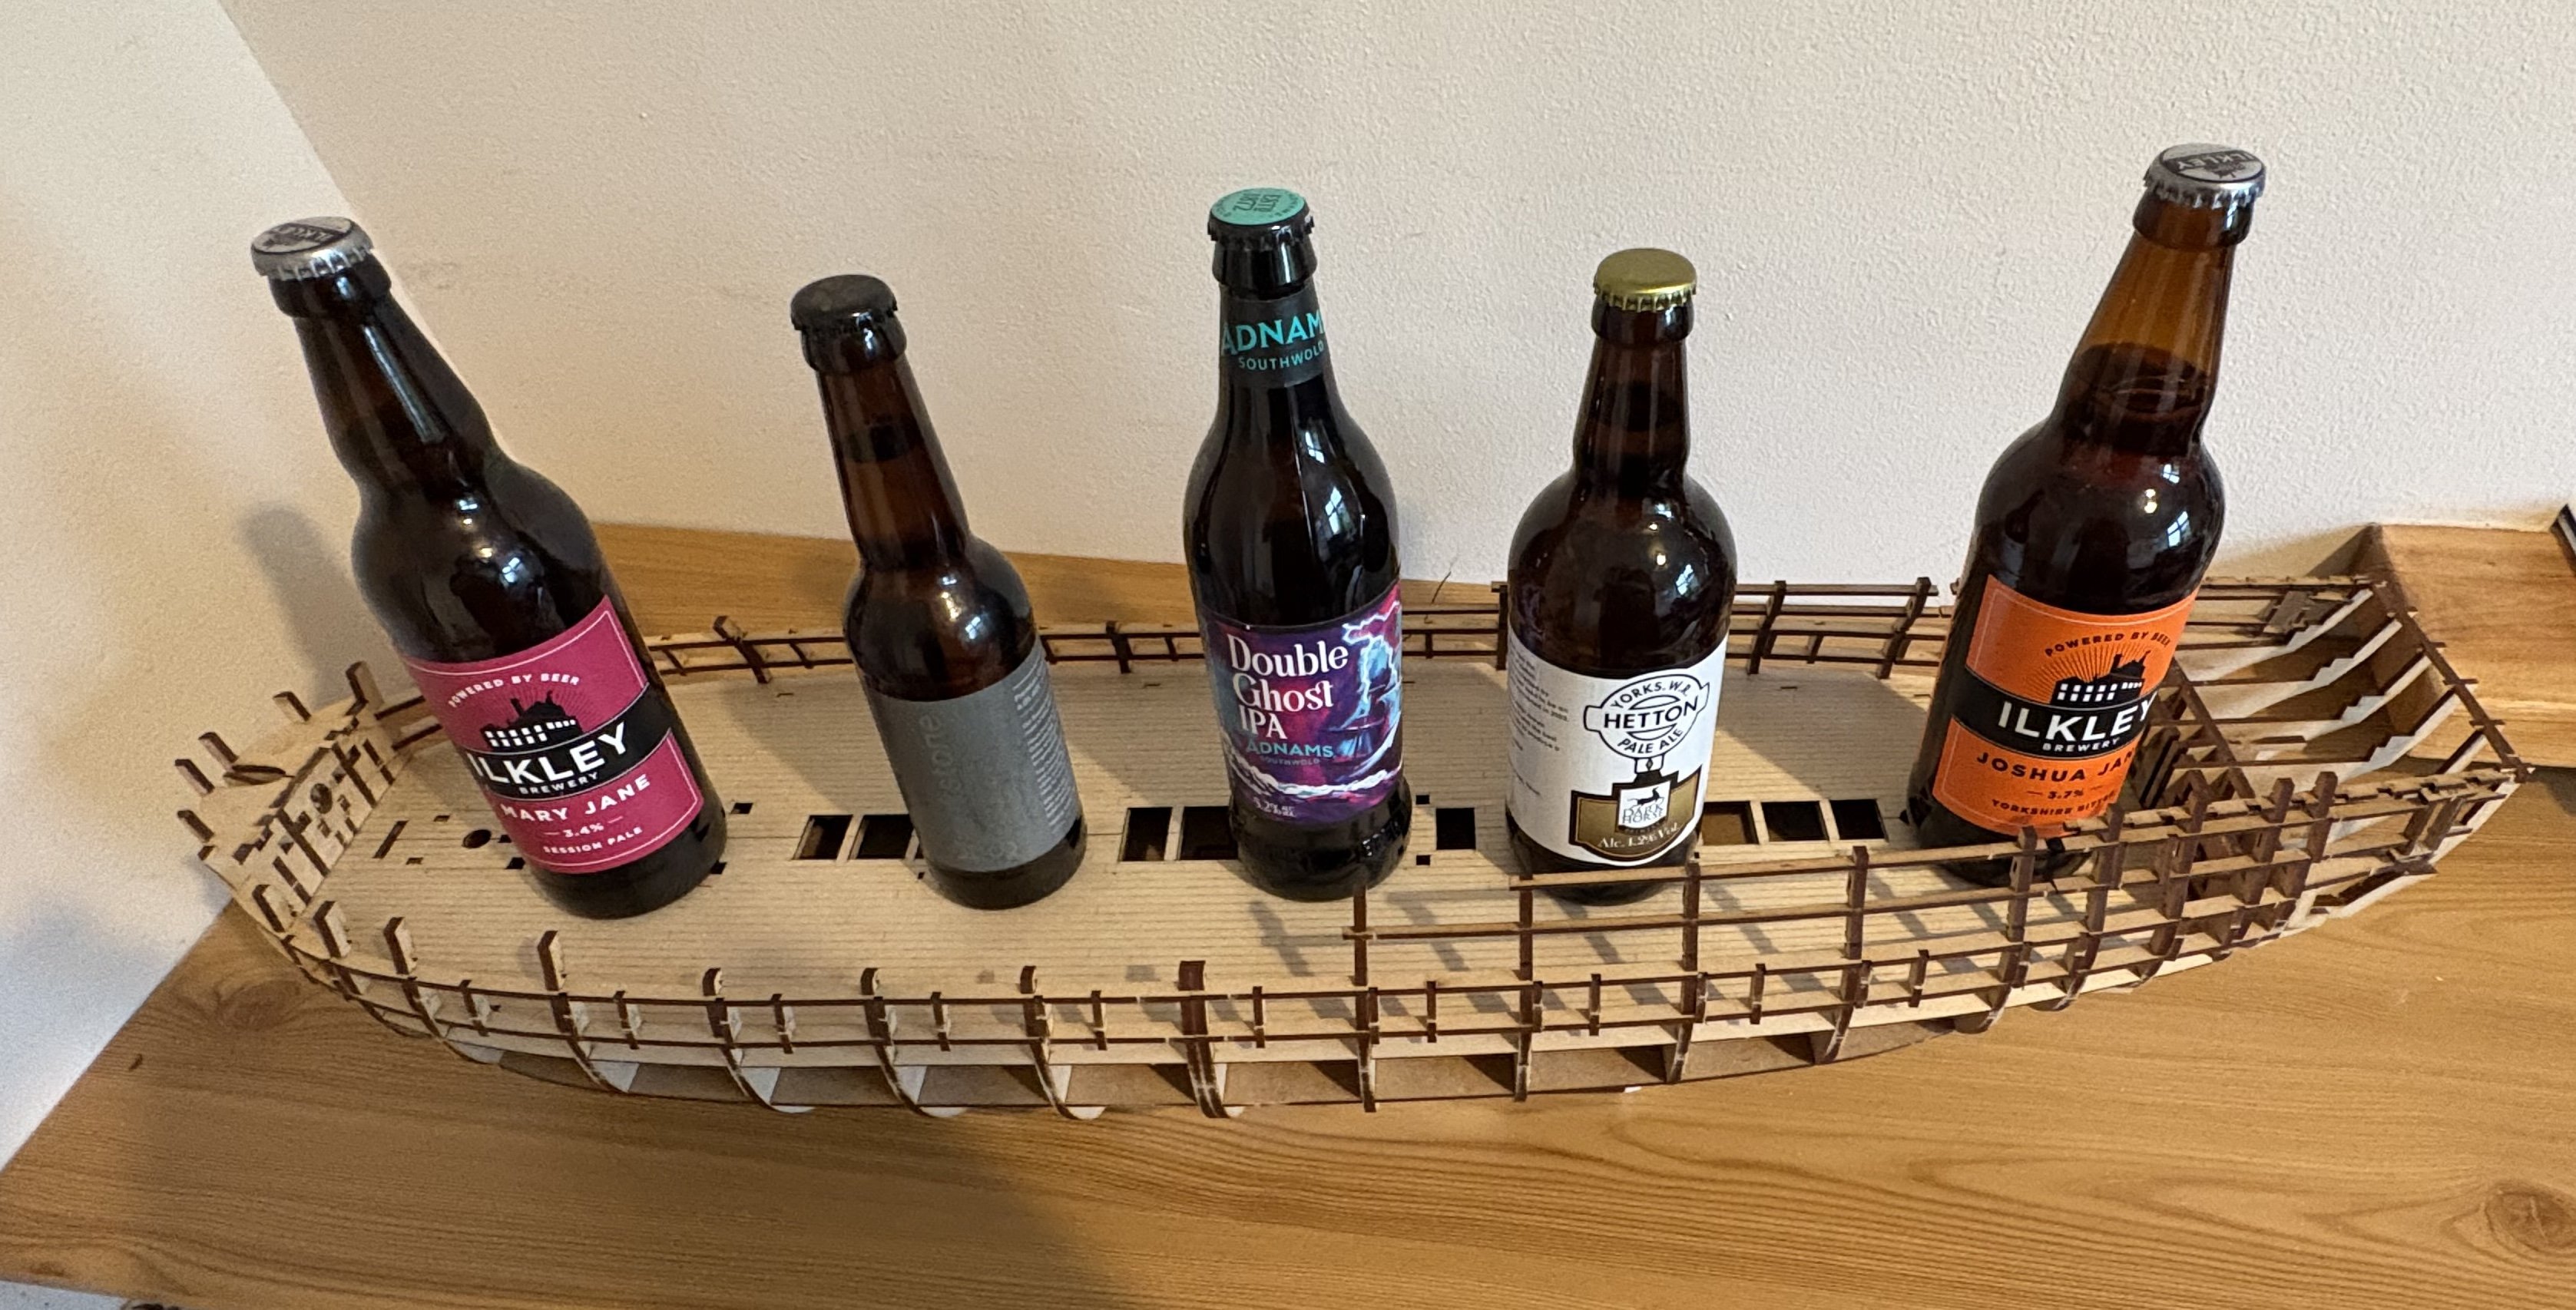
 Andrew, glad to have found a fellow fan of the Ilkley brewery. Mary Jane is an excellent beer, full of flavour and yet at 3.4%, it’s practically a soft drink. They did a fabulous Christmas beer, “Mary Christmas”, but it was very hard to find… Yes, I have to admit that the Indy ‘flies' together at this stage. I’ve been following others' build logs, and I think everyone experiences the same thing: it’s so beautifully designed that we all make rapid progress, and the fast results encourage us to do “just another half hour…." I think from now on, things slow down a bit. So- moving on to adding the inner bulwarks. First, sanding the sides. Maybe others use some power tools or sandpaper fixed to wooden blocks… I just use pieces of 80-grit sandpaper folded over, and worked by hand. This gives me maximum flexibility on the curves of the ship, and allows me to “feel” my way through the process. The down side is that I’ve now sanded my fingerprints off and my computer’s login process won’t recognise me any more. Careful testing of the inner bulwark pieces showed that they were flexible enough not to need messing around with heat and water to bend them. A couple of them needed a millimetre shaving off the bottoms so that they fitted properly against the deck- but there was something hugely satisfying in the way that all the gunports lined up perfectly. One lesson for me here is that we really can’t ever have too many clamps- and indeed, a wide variety of clamps. In this case, the little sewing clamps, stolen from the Admiral’s dress-making stores, were just perfect and at £2.99 for 20, I’ve ordered a large stash of them for the future. Next, I’ve never used the method of dry-fitting things first, and then brushing glue into the joins, without removing the parts… but this worked perfectly here. Getting everything fitted without glue allowed lots of small adjustments with the clamps, and not having to worry about glue setting whilst doing this meant it was a more relaxed process.

-
In which offense is taken (or, "hey! I resemble that remark")
Mowzer replied to Cena's topic in New member Introductions
All great literature through the millennia is based on the principle of "our hero takes on a challenge against the odds, and despite many battles, wins in the end". If that wasn't reason enough to start a build log, I don't know what is. I've got a 10-day-old Vanguard Indefatigable build log (my second build, so completely inappropriate for a novice)... so join me ! Take up your weapons (glue and craft knife) and add a new story! -
Yes, you have to imagine it with an English accent, describing the "a*** end" of the ship. With this sort of bad language not allowed, I am worried about future posts regarding planking the deck, where I need to discuss the 3 butt shift pattern.
-
Thanks Ross. As you can tell, I'm uncertain of my abilities on this one, but I'm glad you've checked over my methodology and have confirmed I'm doing things correctly. I am also looking forward to seeing what process I make!
-
The next project is a big one. Adding the engraved plywood deck. I was a bit scared of doing this, but once more, I calmly following the instructions instead of panicking, and everything was fine. I have seen that other have installed the deck one half at a time, but I went for the build manual method of taping the two halves together with masking tape to make a hinge, then dropping it into place. This was the first time that a dry fit revealed a problem, my bulkhead no.2 was slightly mis-aligned, maybe 2mm out of being level, and the deck edge wouldn’t pop into its allocated slot. A bit of sanding levelled the bulkhead, and a dry fit confirmed that the deck was all going to end up flat and level. Glueing the deck down needed a change of adhesive. I usually use Titebond Quick and Thick as my “go-to” glue, but the last thing I needed at this stage, with a complicated procedure involving much adjustment, was a quick-setting glue. So for this task, I used Titebond II, the yellow stuff, which sets more slowly, giving me time to brush it onto all the beams and bulkheads, then wiggle the deck into place. Again, the cleverness of the design is striking: the rim of the deck engages with slots around the edge of the ship, ensuring it’s, level and perfectly in place; and then with some weight on the centre line, the deck is fixed to the assorted beams such that it lays perfectly flat. It’s almost as if Chris’s kit is built to eliminate any possibility of a novice builder stuffing up. Then- time to test- I wonder what the lights look like?


-
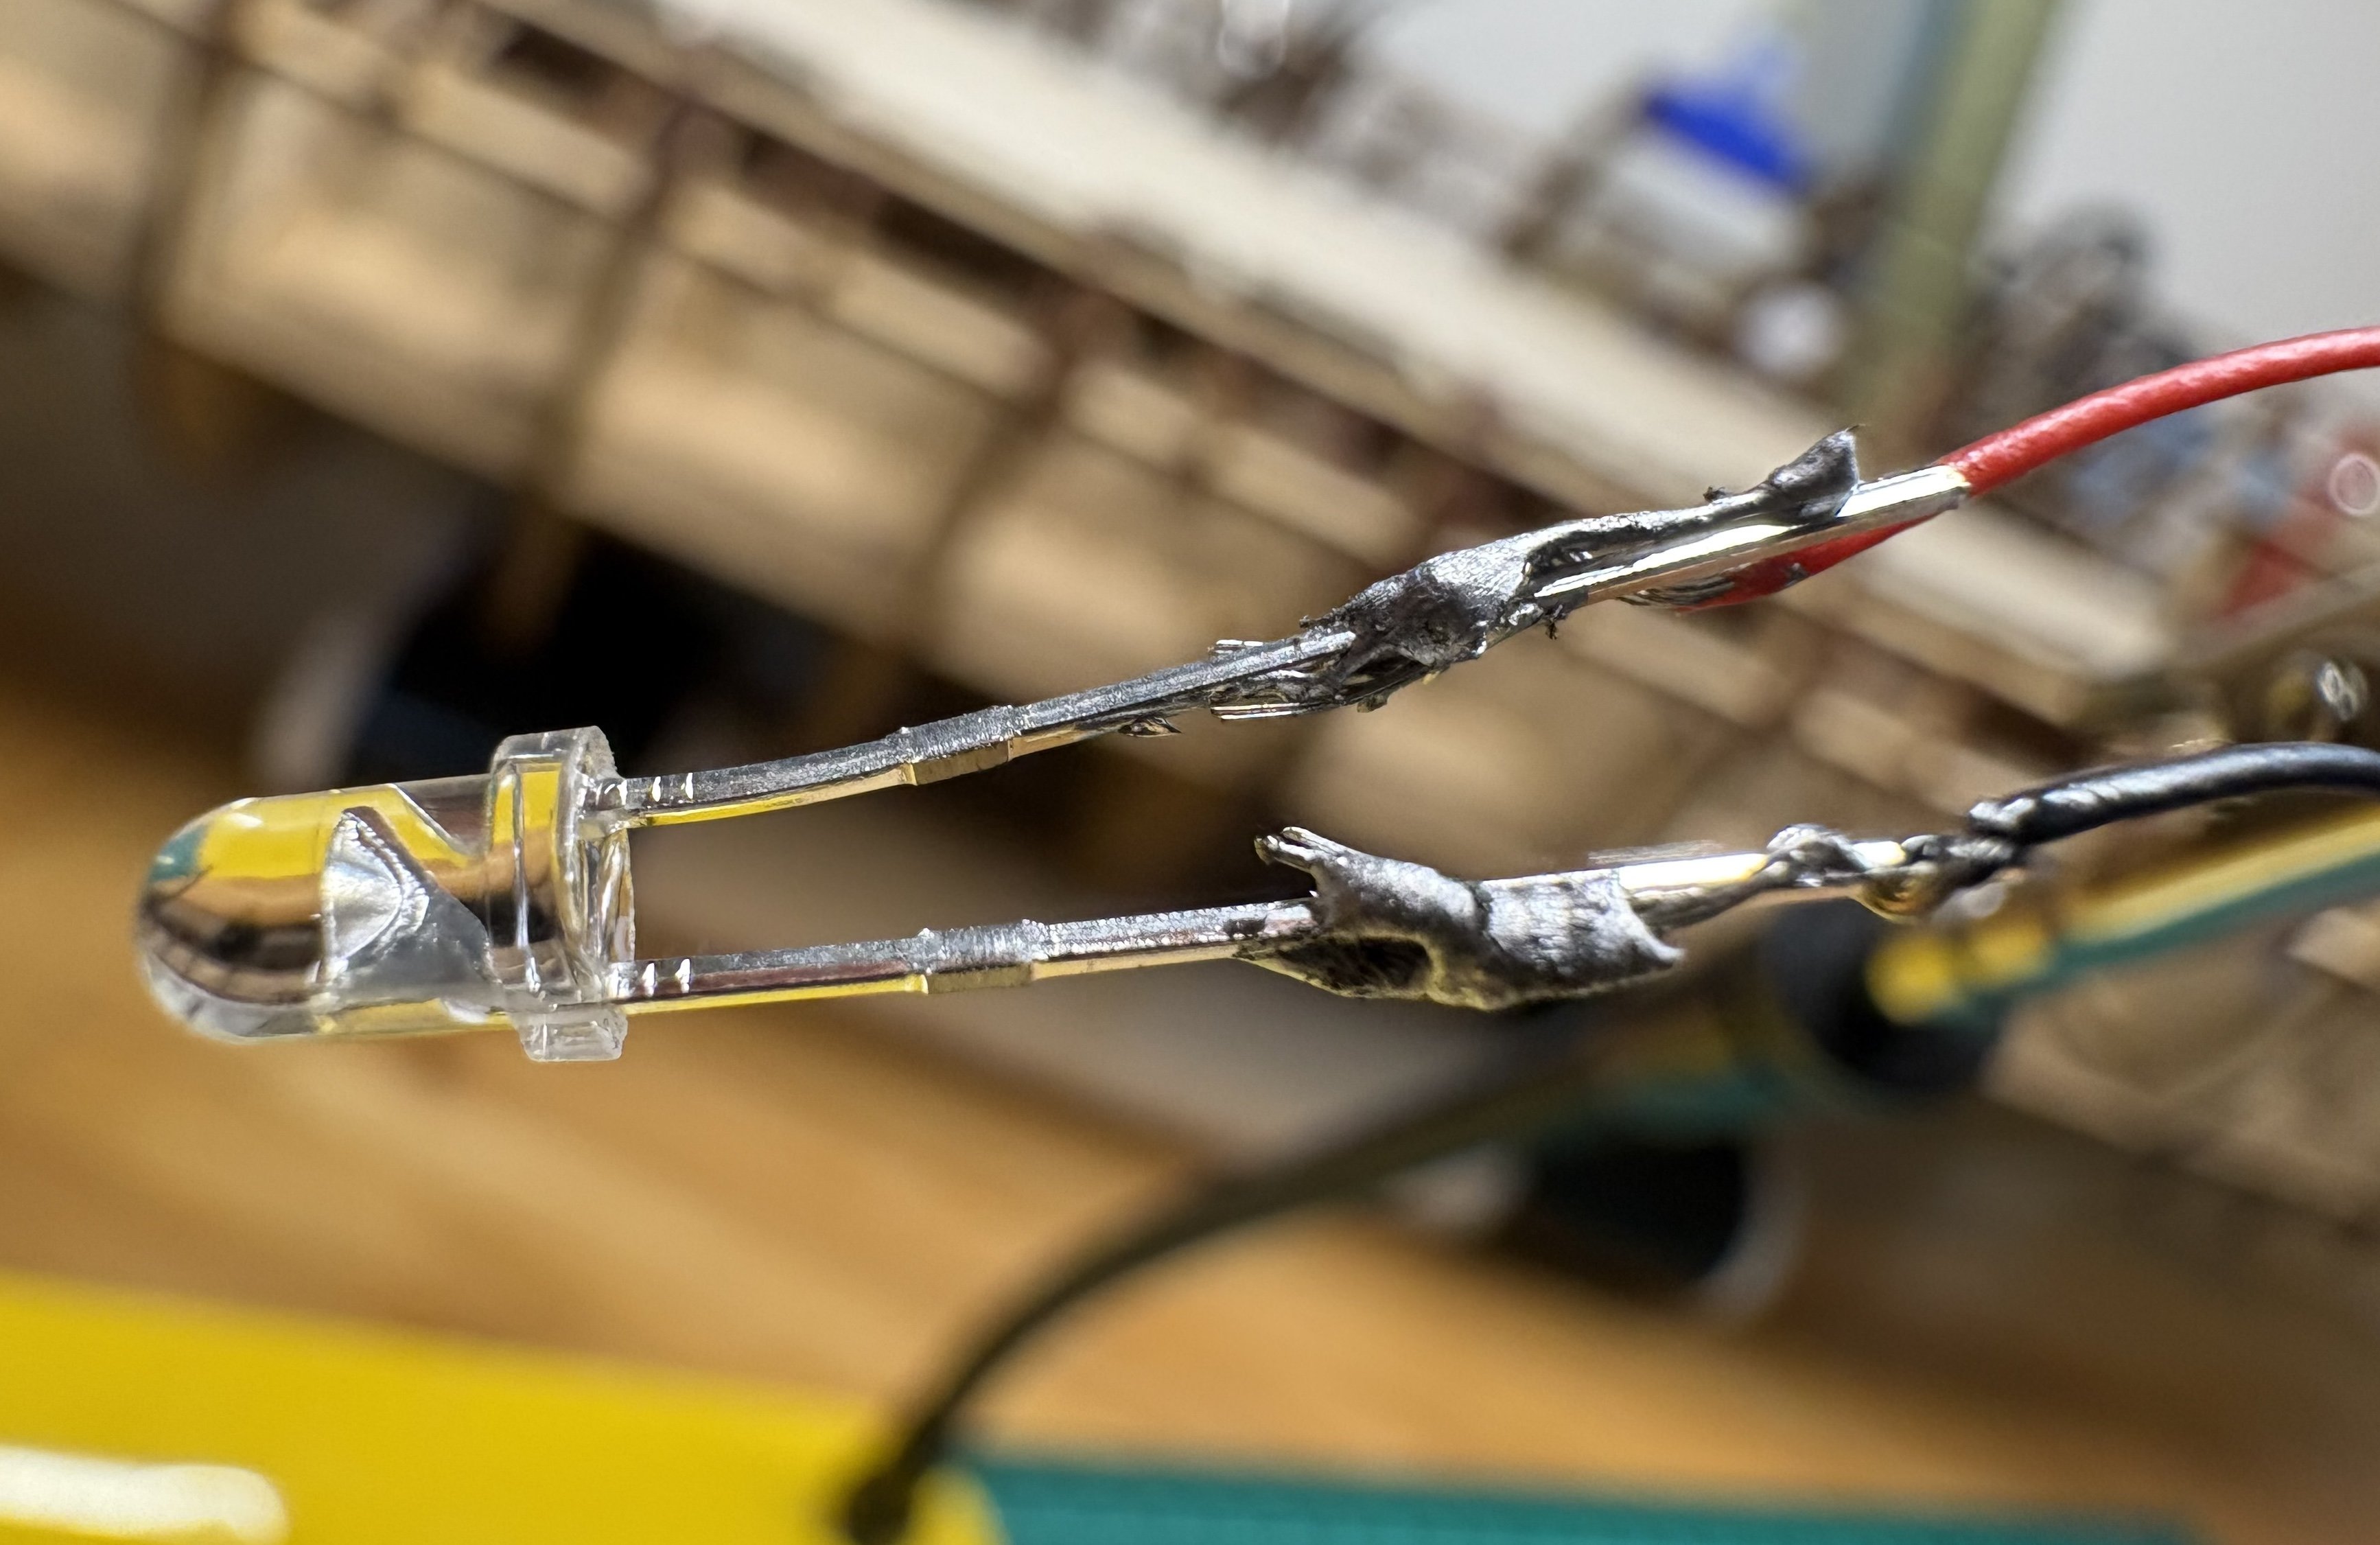
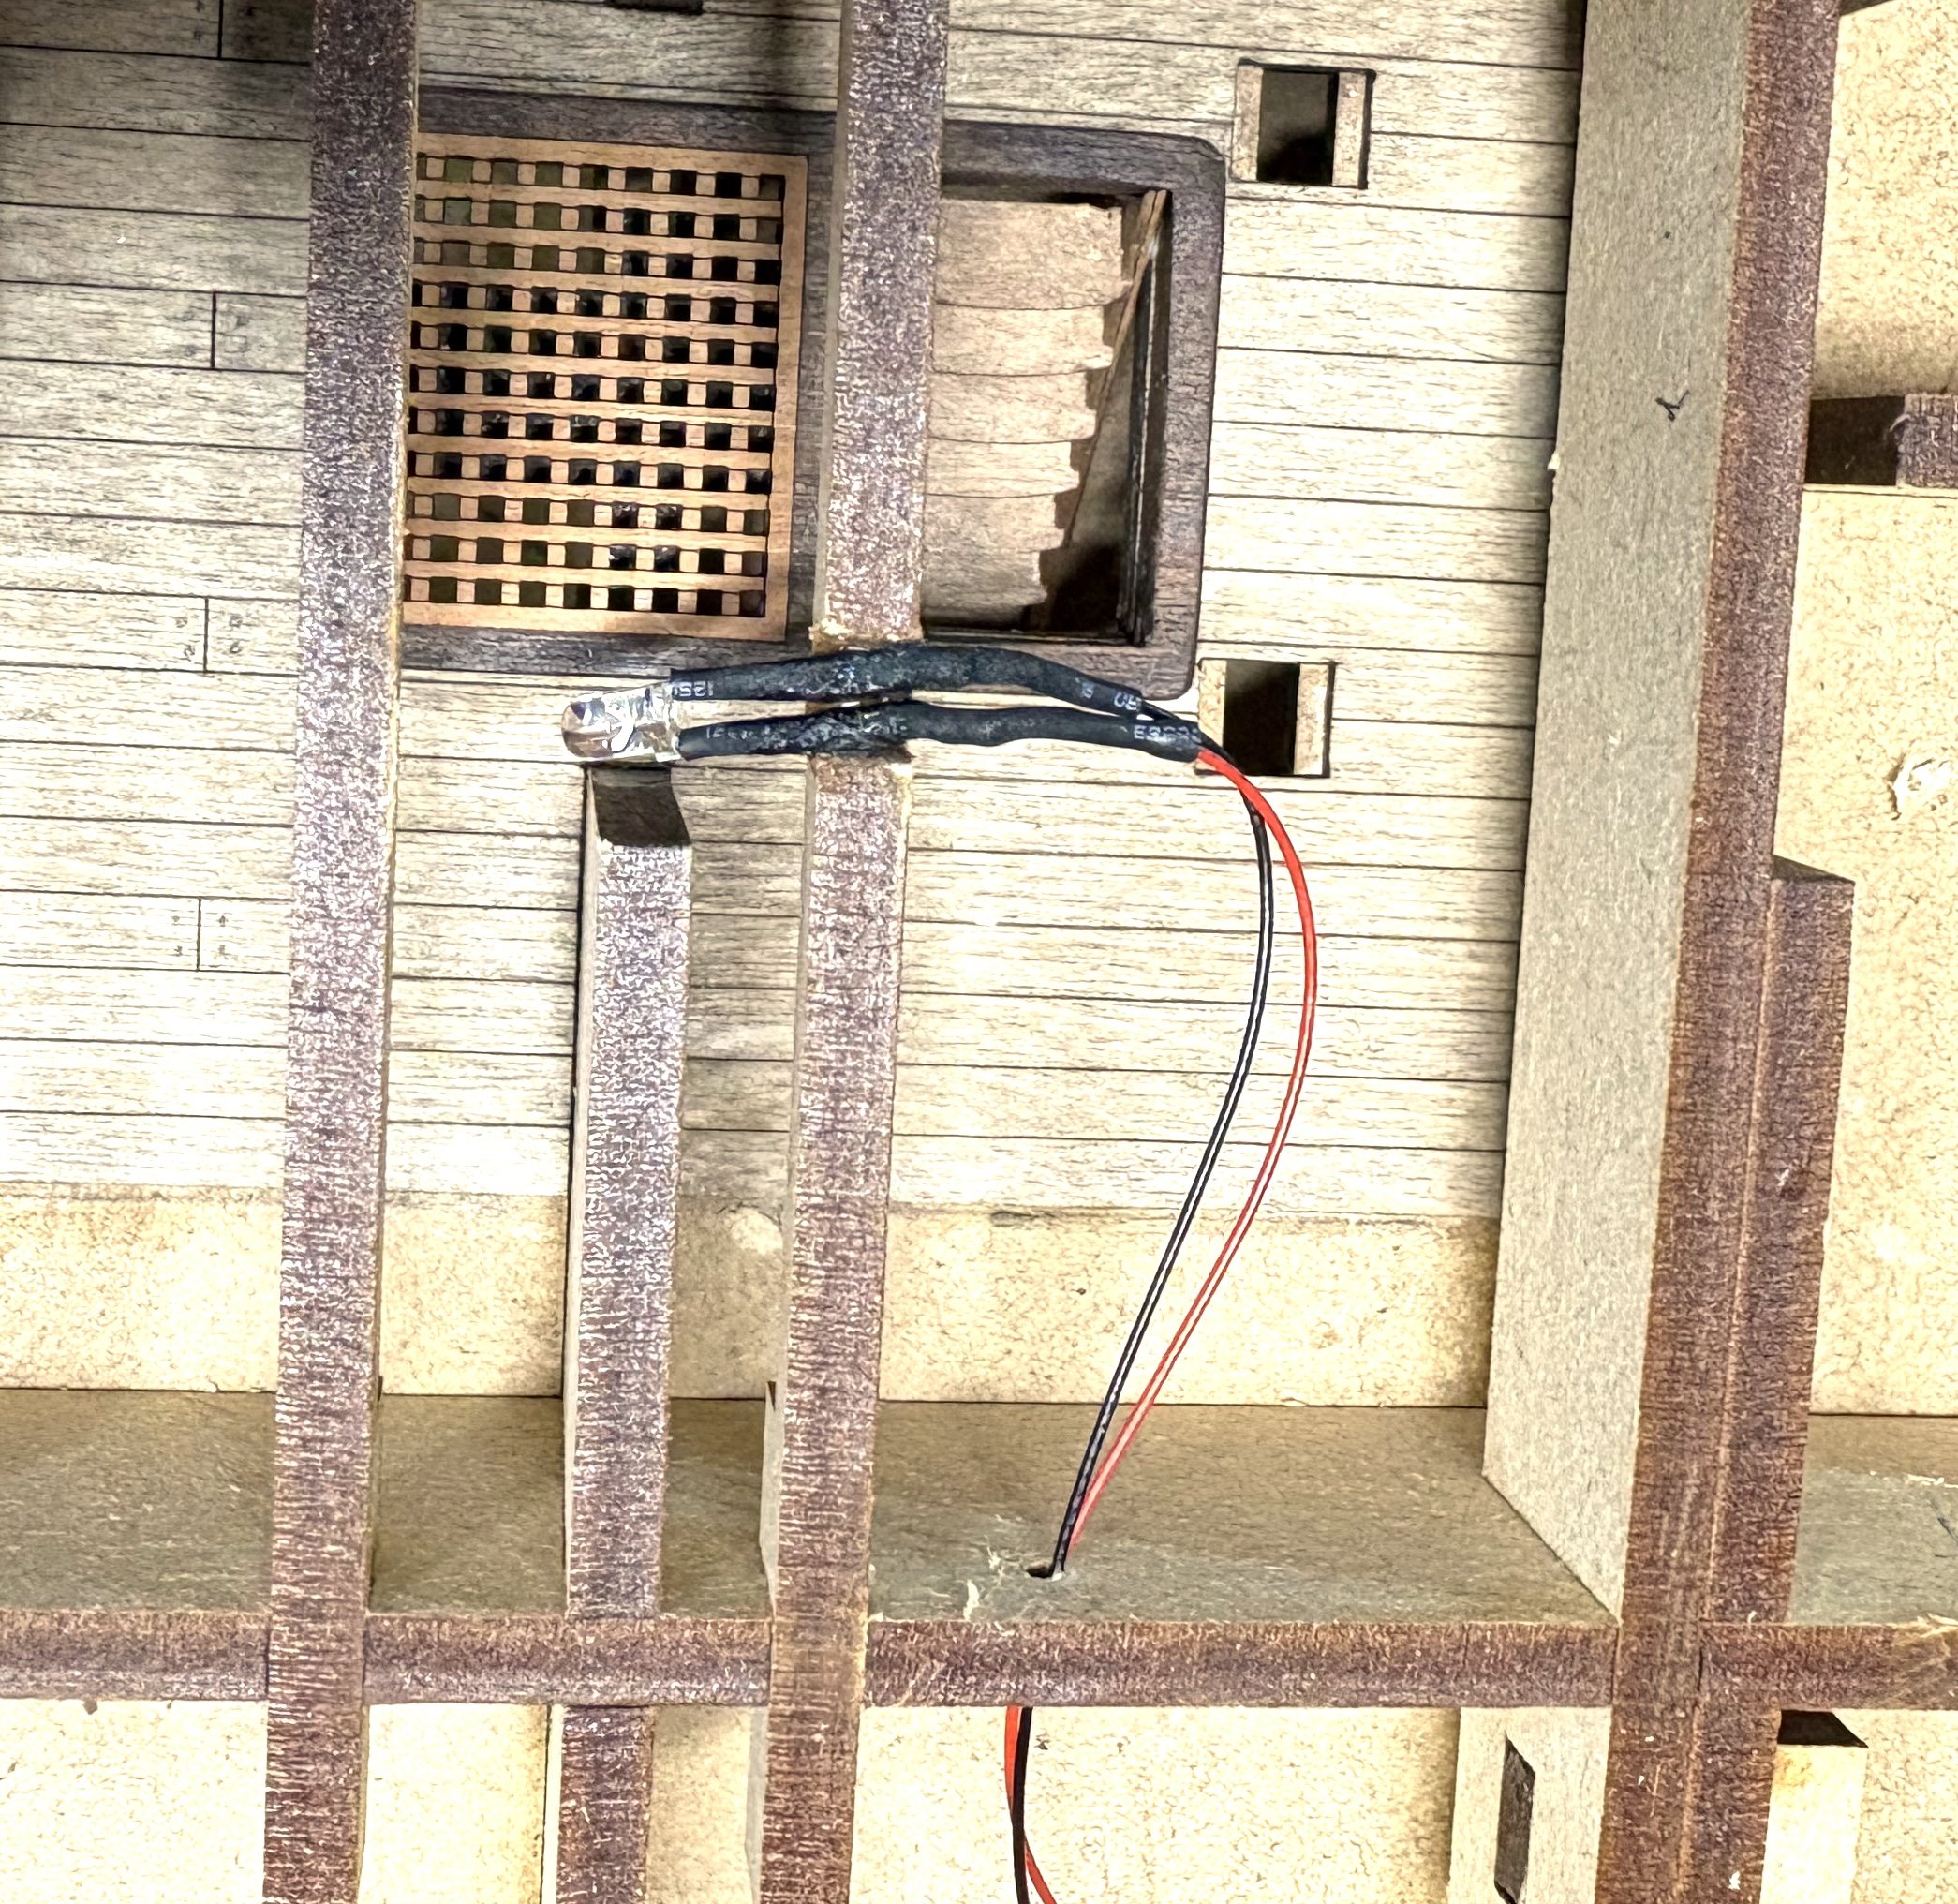
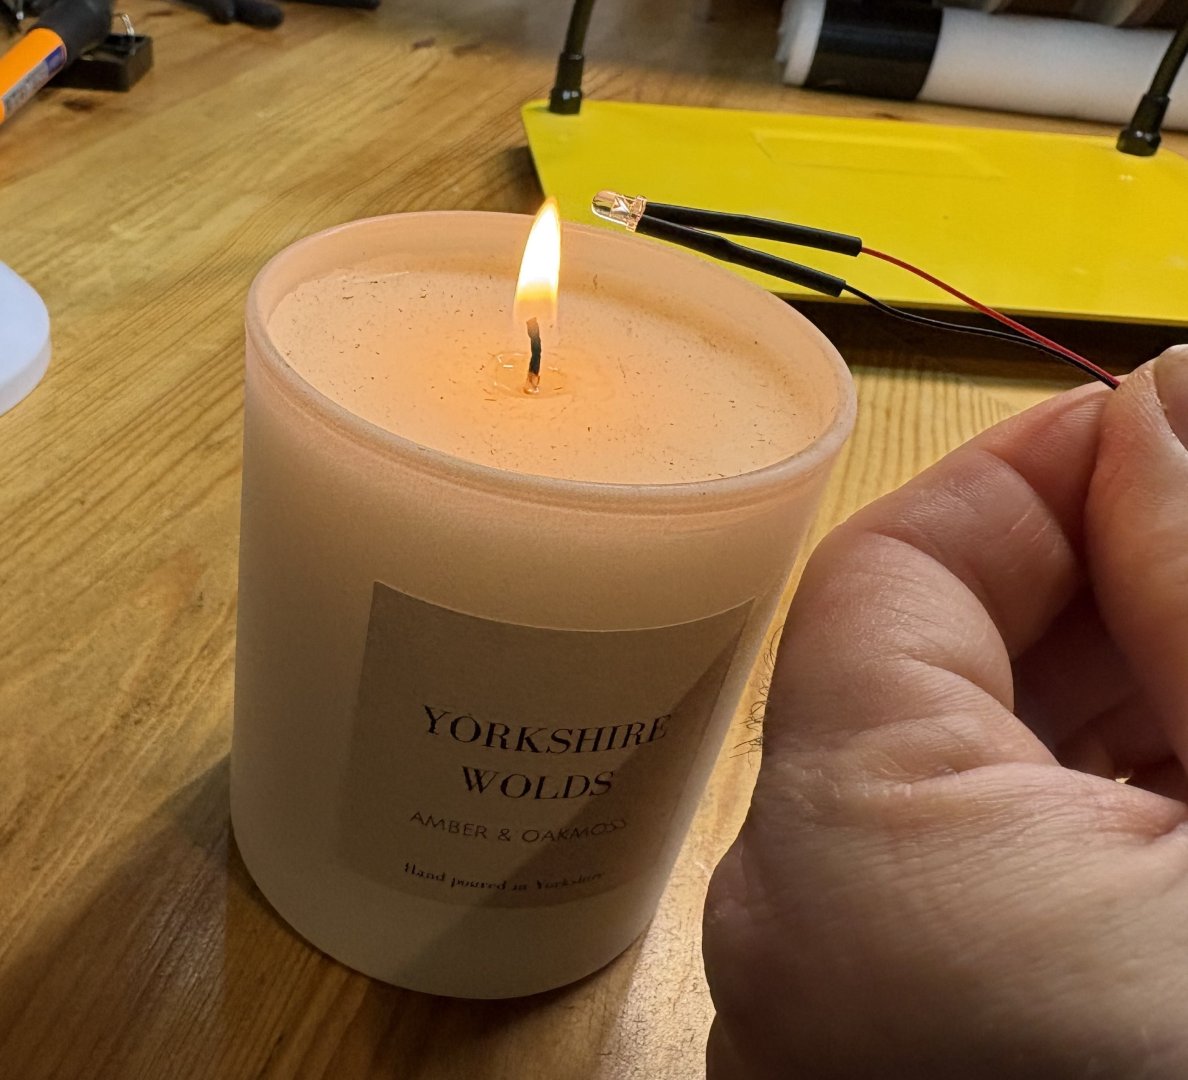
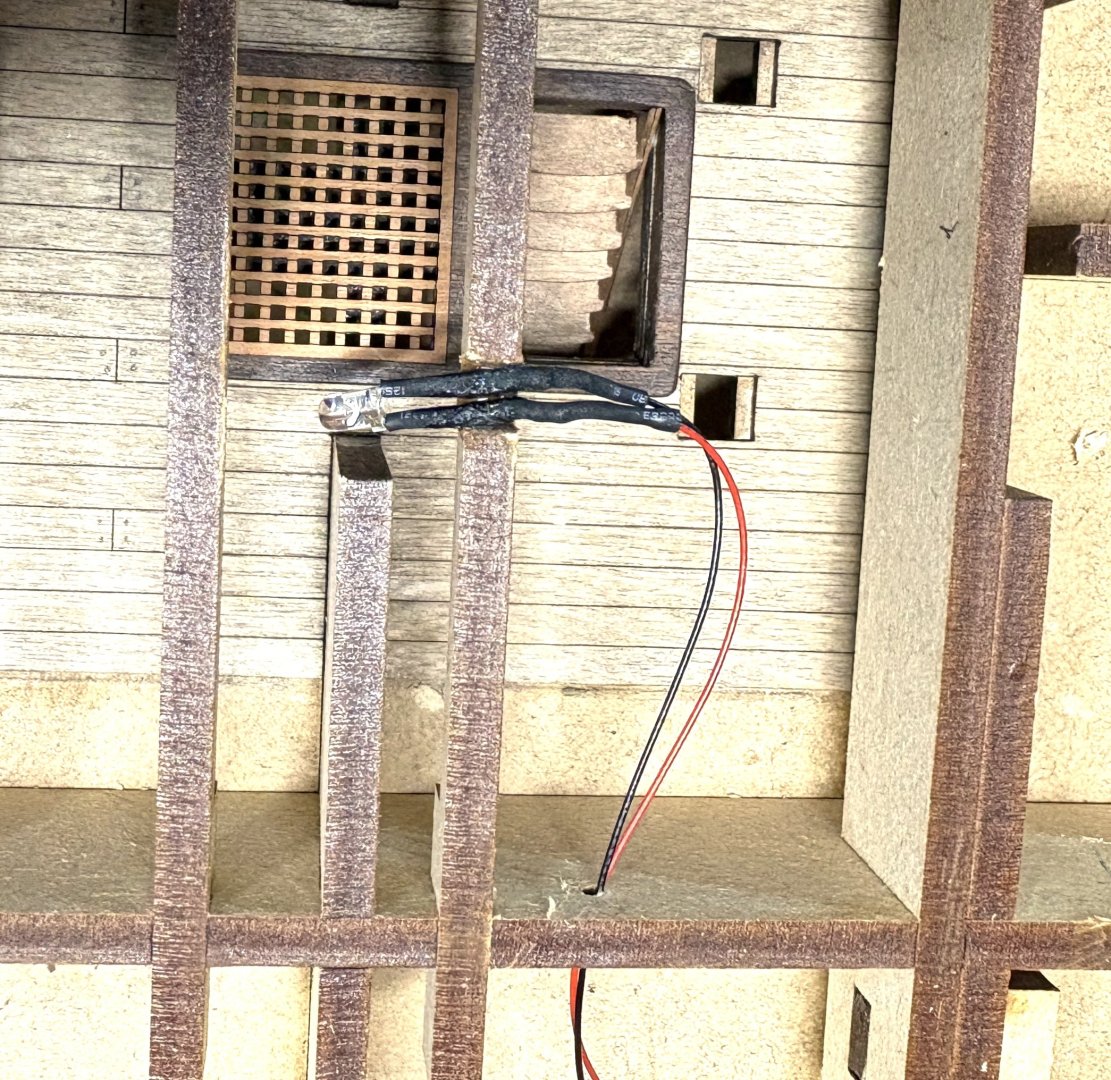
More pieces slot together beautifully at the “a*** end”. Our forum doesn’t allow mildly bad language, sorry about the asterisks. I had a bit of a problem assembling the quarter galley doorways, they were just a little bit too tight and the slots needed a little sanding before they would fit together. I still think they’re a millimetre or so out, but I’m guessing I can fix this later on. Time for another experiment. The Indy would look great with some LED lights, so I’d added the Artesania Latina lights set to my Vanguard order. This gives us 3 steady LEDs and 10 candle-light-flicker LEDs. I’m not sure about my ability to do this- but in the last 35 years, I’ve completely rewired half a dozen houses (real ones, as parts of renovations, not model ones), so how hard can it be? Er. First step was some reading. So- starting at the start, if we run these off the AL 3v battery pack, then they don’t need resistors in the circuit; and as long as the circuit is wired with the lights in parallel, they say that we can add as many extra LEDS as we like. Also, candle-flicker LEDs are about 40p each. I’ve ordered some more from Amazon. Next, I took some inspiration from @Clark, who has added lights to his Indy. Thank-you, Clark, for your build log guidance. My setup is intended to be way simpler and more basic- and also, I’m largely making it up as I go along, since I don’t know what I am doing. Here in the bowels of the ship is the place to see if it works. If it doesn’t or looks it rubbish, I can abandon the experiment and since nothing down here will ever be seen anyway, no-one will ever know, apart from you and me. This is a good excuse to buy some new tools and learn something new. Sometimes, in the gloom of January, we need something like this to get us out of bed in the mornings. I invested in a £12 soldering iron- and stuck some wires to a couple of LEDs (red cable, positive, connects to the longer arm of the LED.) I hope to improve my soldering skills in time. Then some heat-shrink tubing was added and heat-shrunk with a flame from a scented candle that I got for Christmas. I cut a small notch in two of the deck beams and glued the LEDs in place.


-
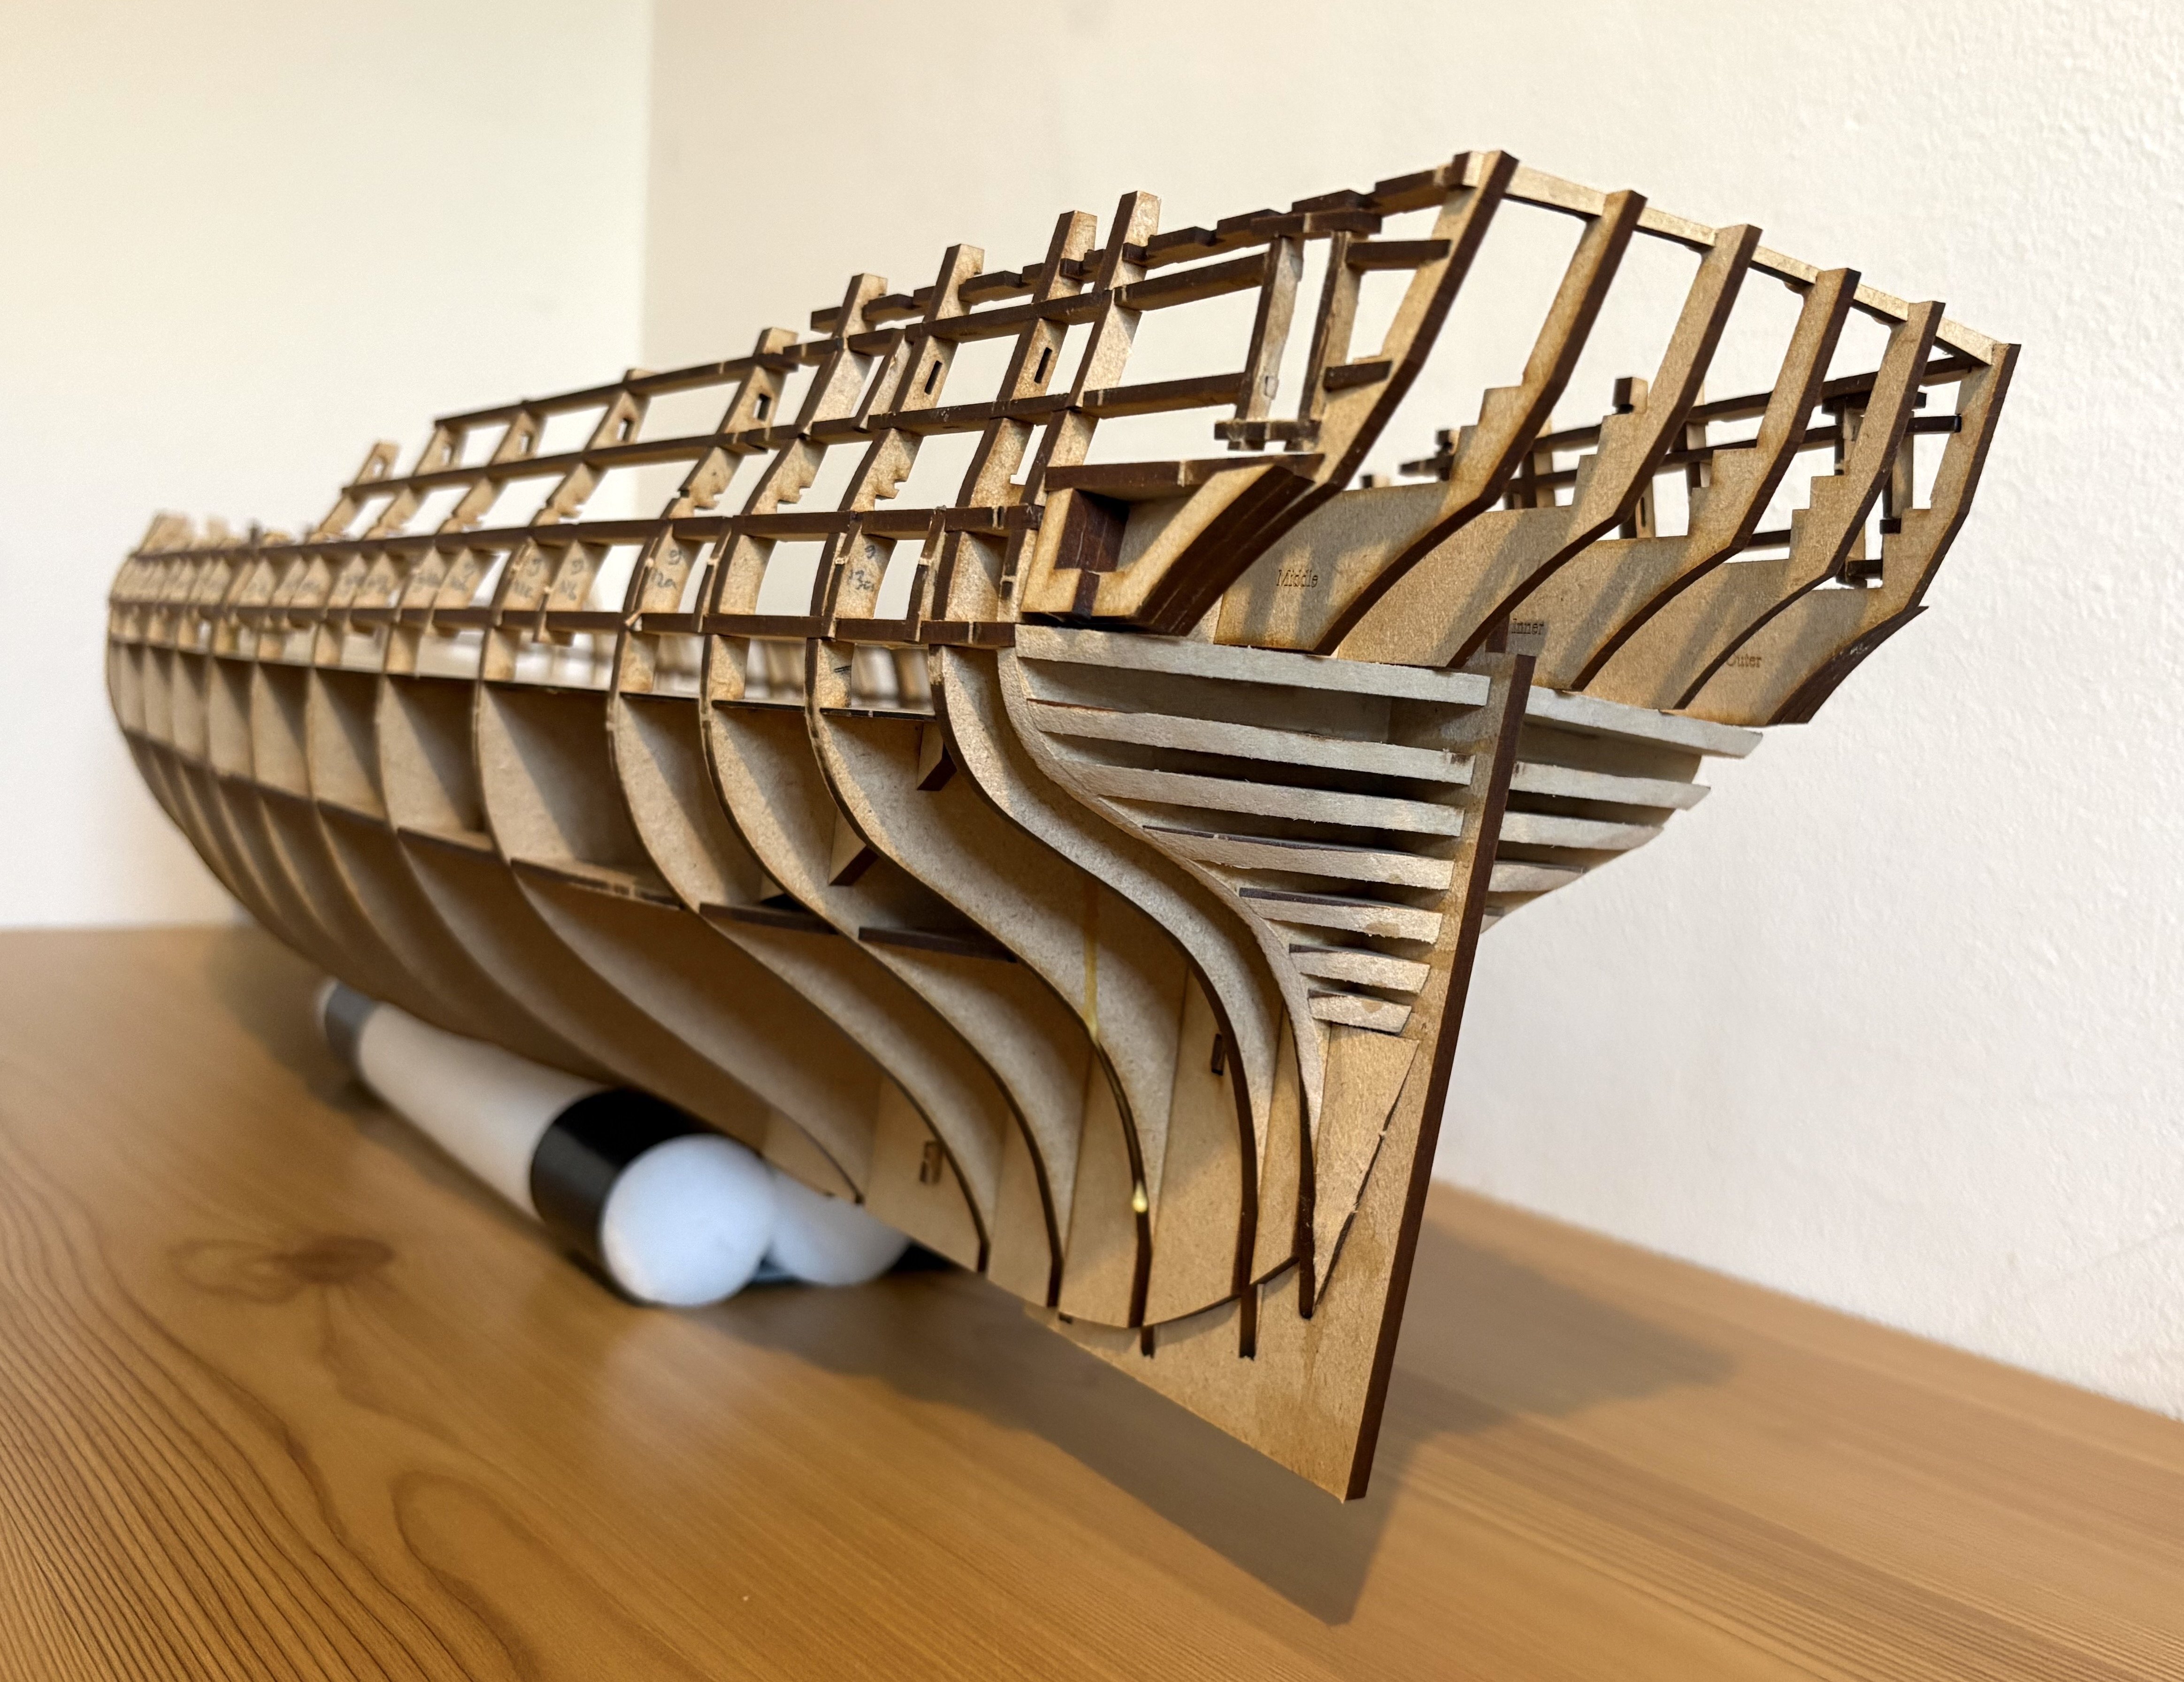
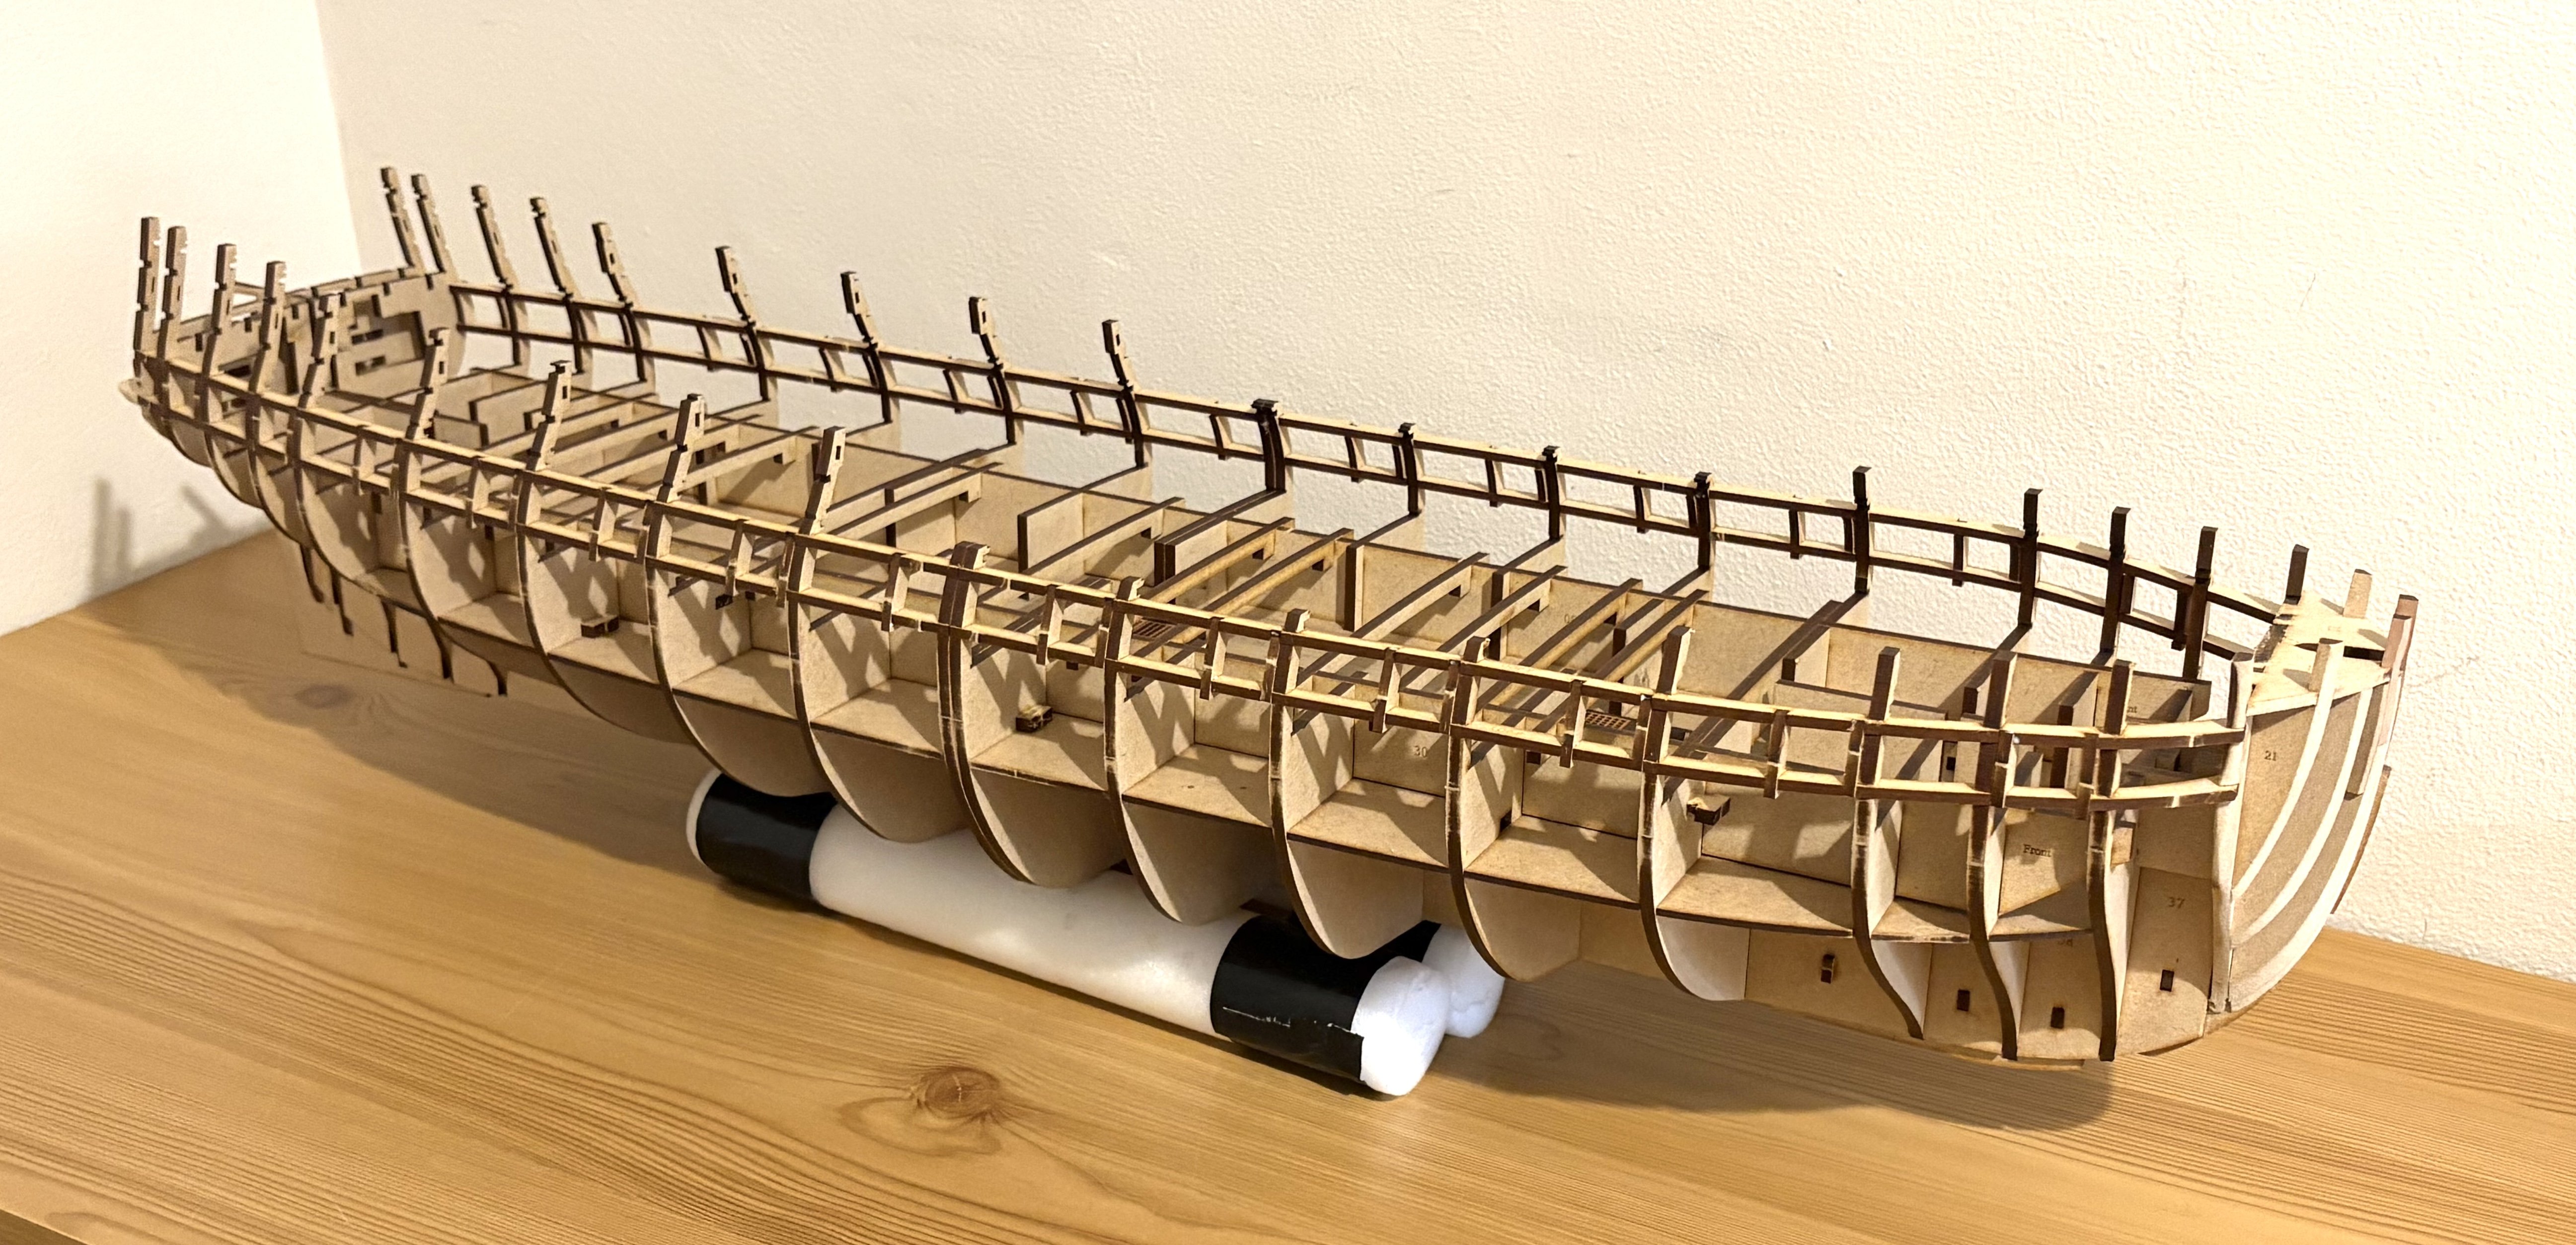
A couple more hours yesterday on the hull. The Admiral visited the shipyard yesterday, although I think this was only because she was looking for a distraction from doing her tax return. I was showing her the stern and bow assemblies in place. Now, bearing in mind that she’s a professional historian, she wanted confirmation that “the bow is the pointy bit and the stern is the ****-end?” Ok, so I’ll admit that my knowledge of nautical terms doesn’t extend much beyond this either. In terms of the build, I’ve added some deck beams and built up the gun port parts. The thing that continues to astonish me is how perfectly it all fits together with sub-millimetre precision, and rapidly becomes an imposing model. I don’t know anything about the computer design and laser-cutting tech behind these kits, but as I assemble these parts, my feeling is that Chris is using all his experience and every bit of tech innovation possible to create cutting-edge (ha ha) kits in a different league to everyone else. If I can employ a metaphor here, it feels like Vanguard models is a superfast-broadband company, while all the others are still on dial-up. Occre, I mean you here.

-
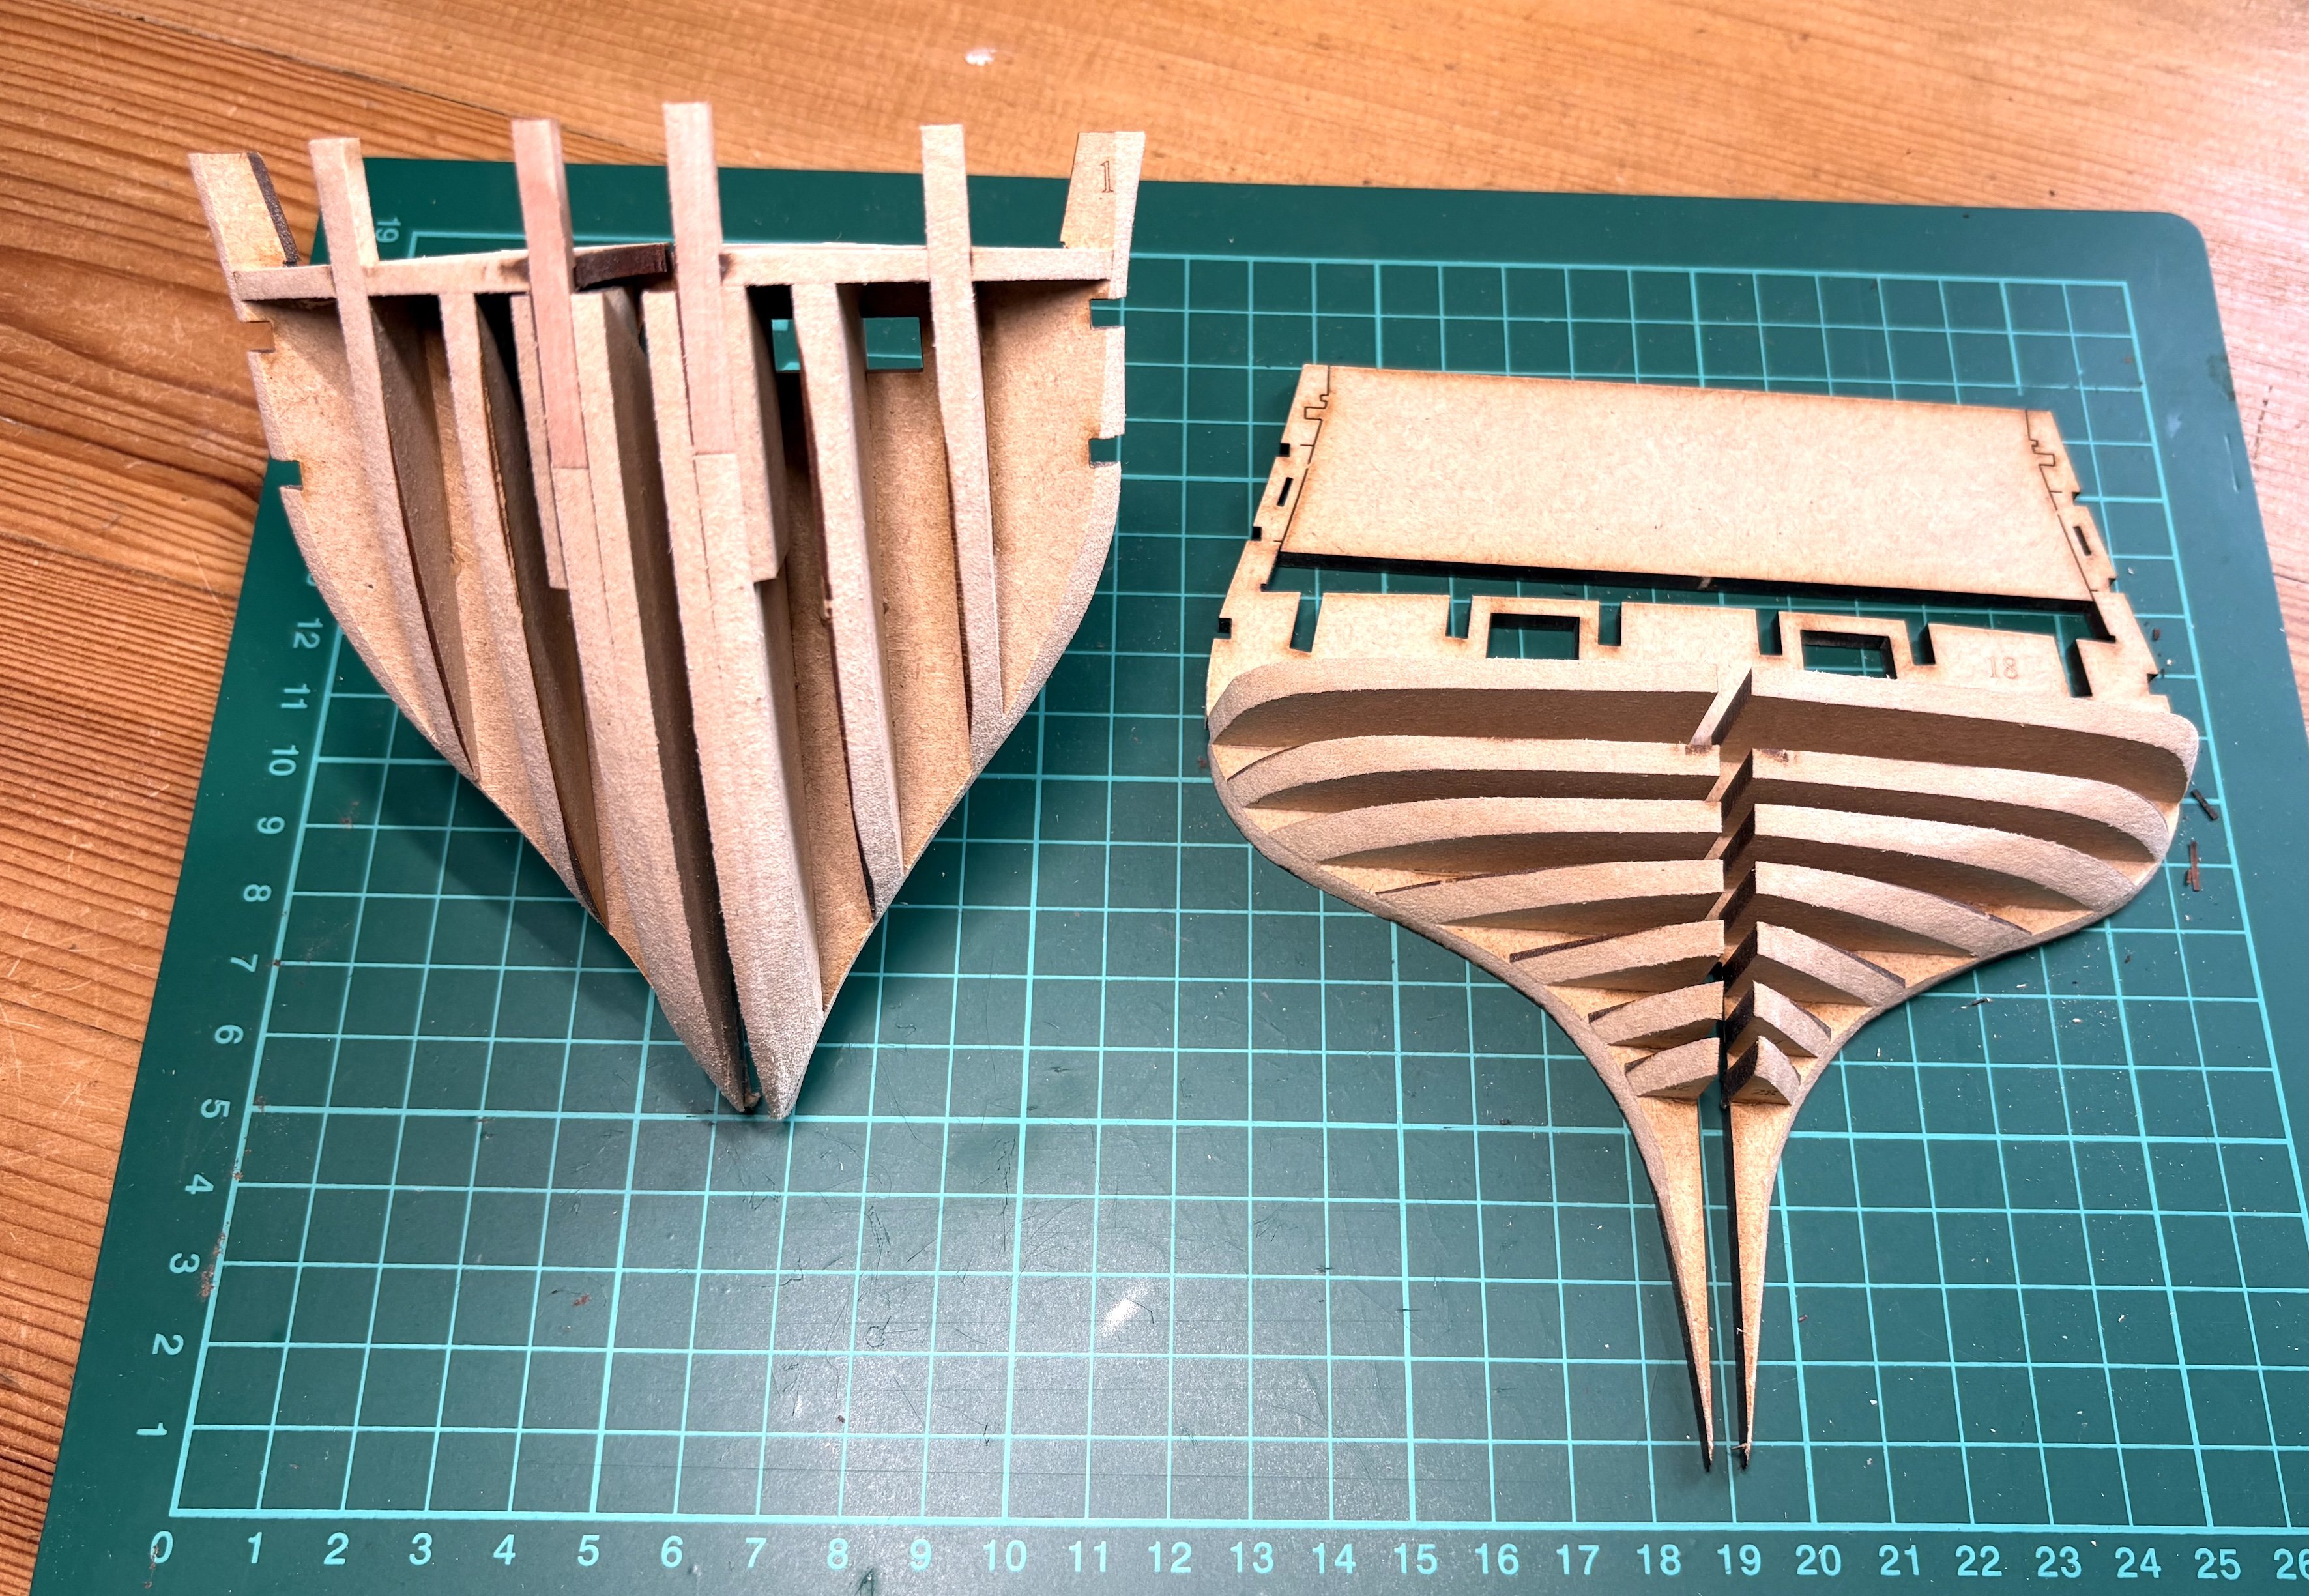
Moving onto a stage which needs something more than just slotting together: the bow and stern assemblies. This was the first point at which I had “an issue”. The plan is to slot the front bulkhead into place, then glue parts onto it which will form the shape of the bow- then remove the assembly as a small unit for shaping. However, when examining the ensuing problem, it turns out that a small amount of the glue that had been applied to the tabs as the parts slotted into place had dribbled down, unseen, onto the keel… the same keel where the instructions say “DO NOT GLUE to the key itself”. It took me 45 minutes with scalpels, razor blades and a small Tamiya saw to gently free the assembly… all the while terrified that there might be a big CRACK with the entire front of the Indy breaking off. I note that @Blue Ensign had the same problem at this stage… maybe future builders could be EXTRA careful with the glue on the tabs, or maybe assemble these parts away from the keel. The issues weren’t over though- after struggling to get the assembly off the hull, the sodding thing wouldn’t go back on again, despite the parts that contact the keel being sanded smooth. It needed a few “gentle” taps with my pin hammer and some choice language to whack it back into place. I needed a stiff drink after that. I had been a bit wary of sanding the assemblies into shape. However, this was the time to follow advice from other build logs, invest in a Black and Decker mouse sander, and then head to my shed to make some sawdust. I was worried that the sander would tear through the mdf and leave me with a heap of dust and broken bits on the floor, so started cautiously with 120 grit sheets. This made no impression at all on the mdf. The answer was to use 80 grit sheets. I found gently sanding the assemblies rather relaxing, and the first point at which I felt I was actively crafting the model. Really enjoying this project.

-
Thanks for all the comments, everyone. I have been very hesitant to join in on the group, but my misgivings have been unfounded. I think there's many of us who are just enjoying building our models, even though they're not perfect... although maybe those with the greatest skills are probably those who are most wiling to post their results. So just to answer people, @JacquesCousteau.... yup, I've started my Indefatigable build log! For the next few weeks, while it's cold and miserable outside, I can indulge my urge to hibernate by heading to my hobby room. @Harvey Golden, I agree completely, some things MUST be done well if they are done at all. I've mentioned in my build log that I have some friends who enjoy some serious mountain climbing. If they have a bad day pursuing their hobby, they could end up in intensive care, or worse. However, if I stuff up my model building, then, somehow, life will go on. The main point is that we just have a go, and enjoy the process... if something is worth doing, then it's worth DOING (and not just thinking about it.) And with that, I'm going to go and make some sawdust.
-
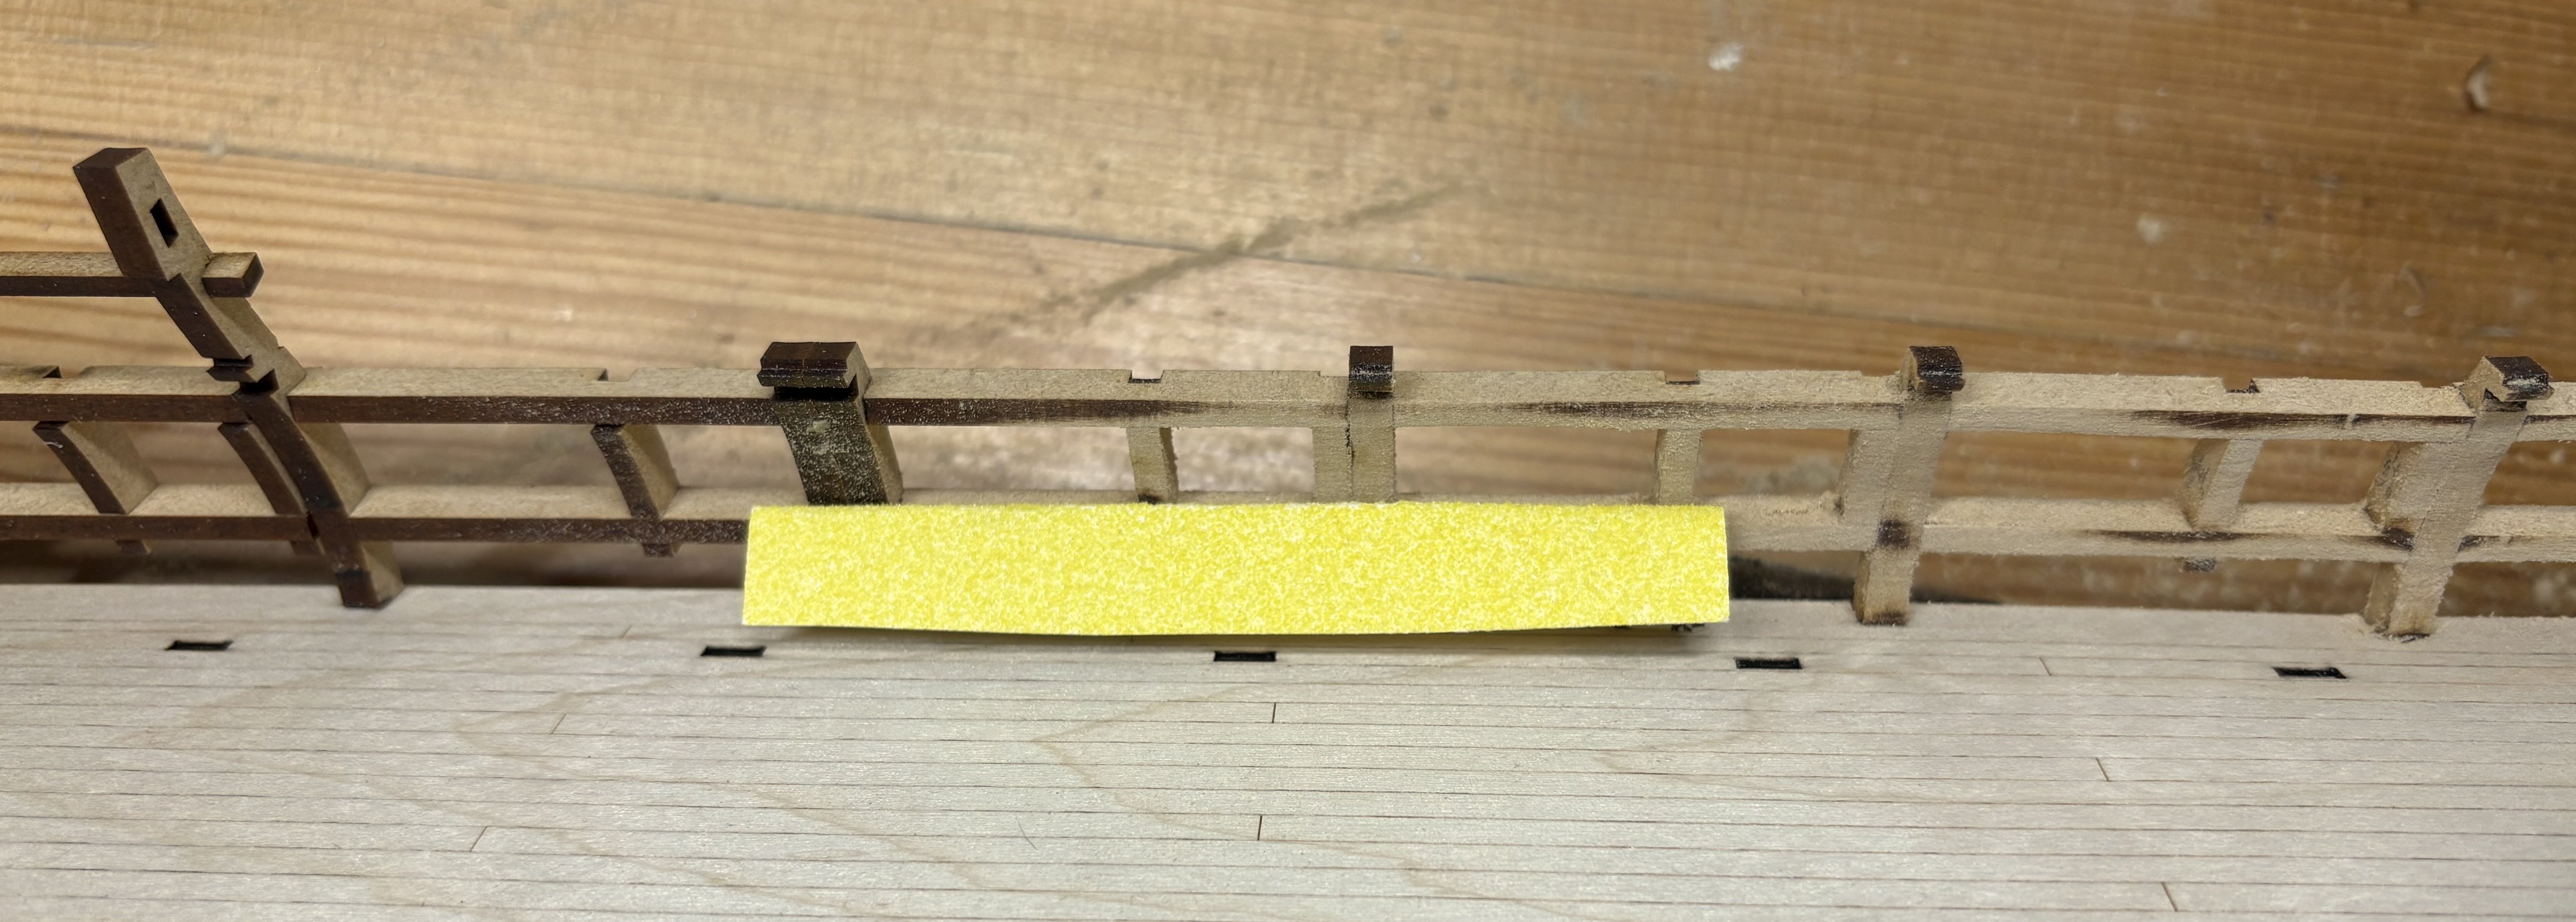
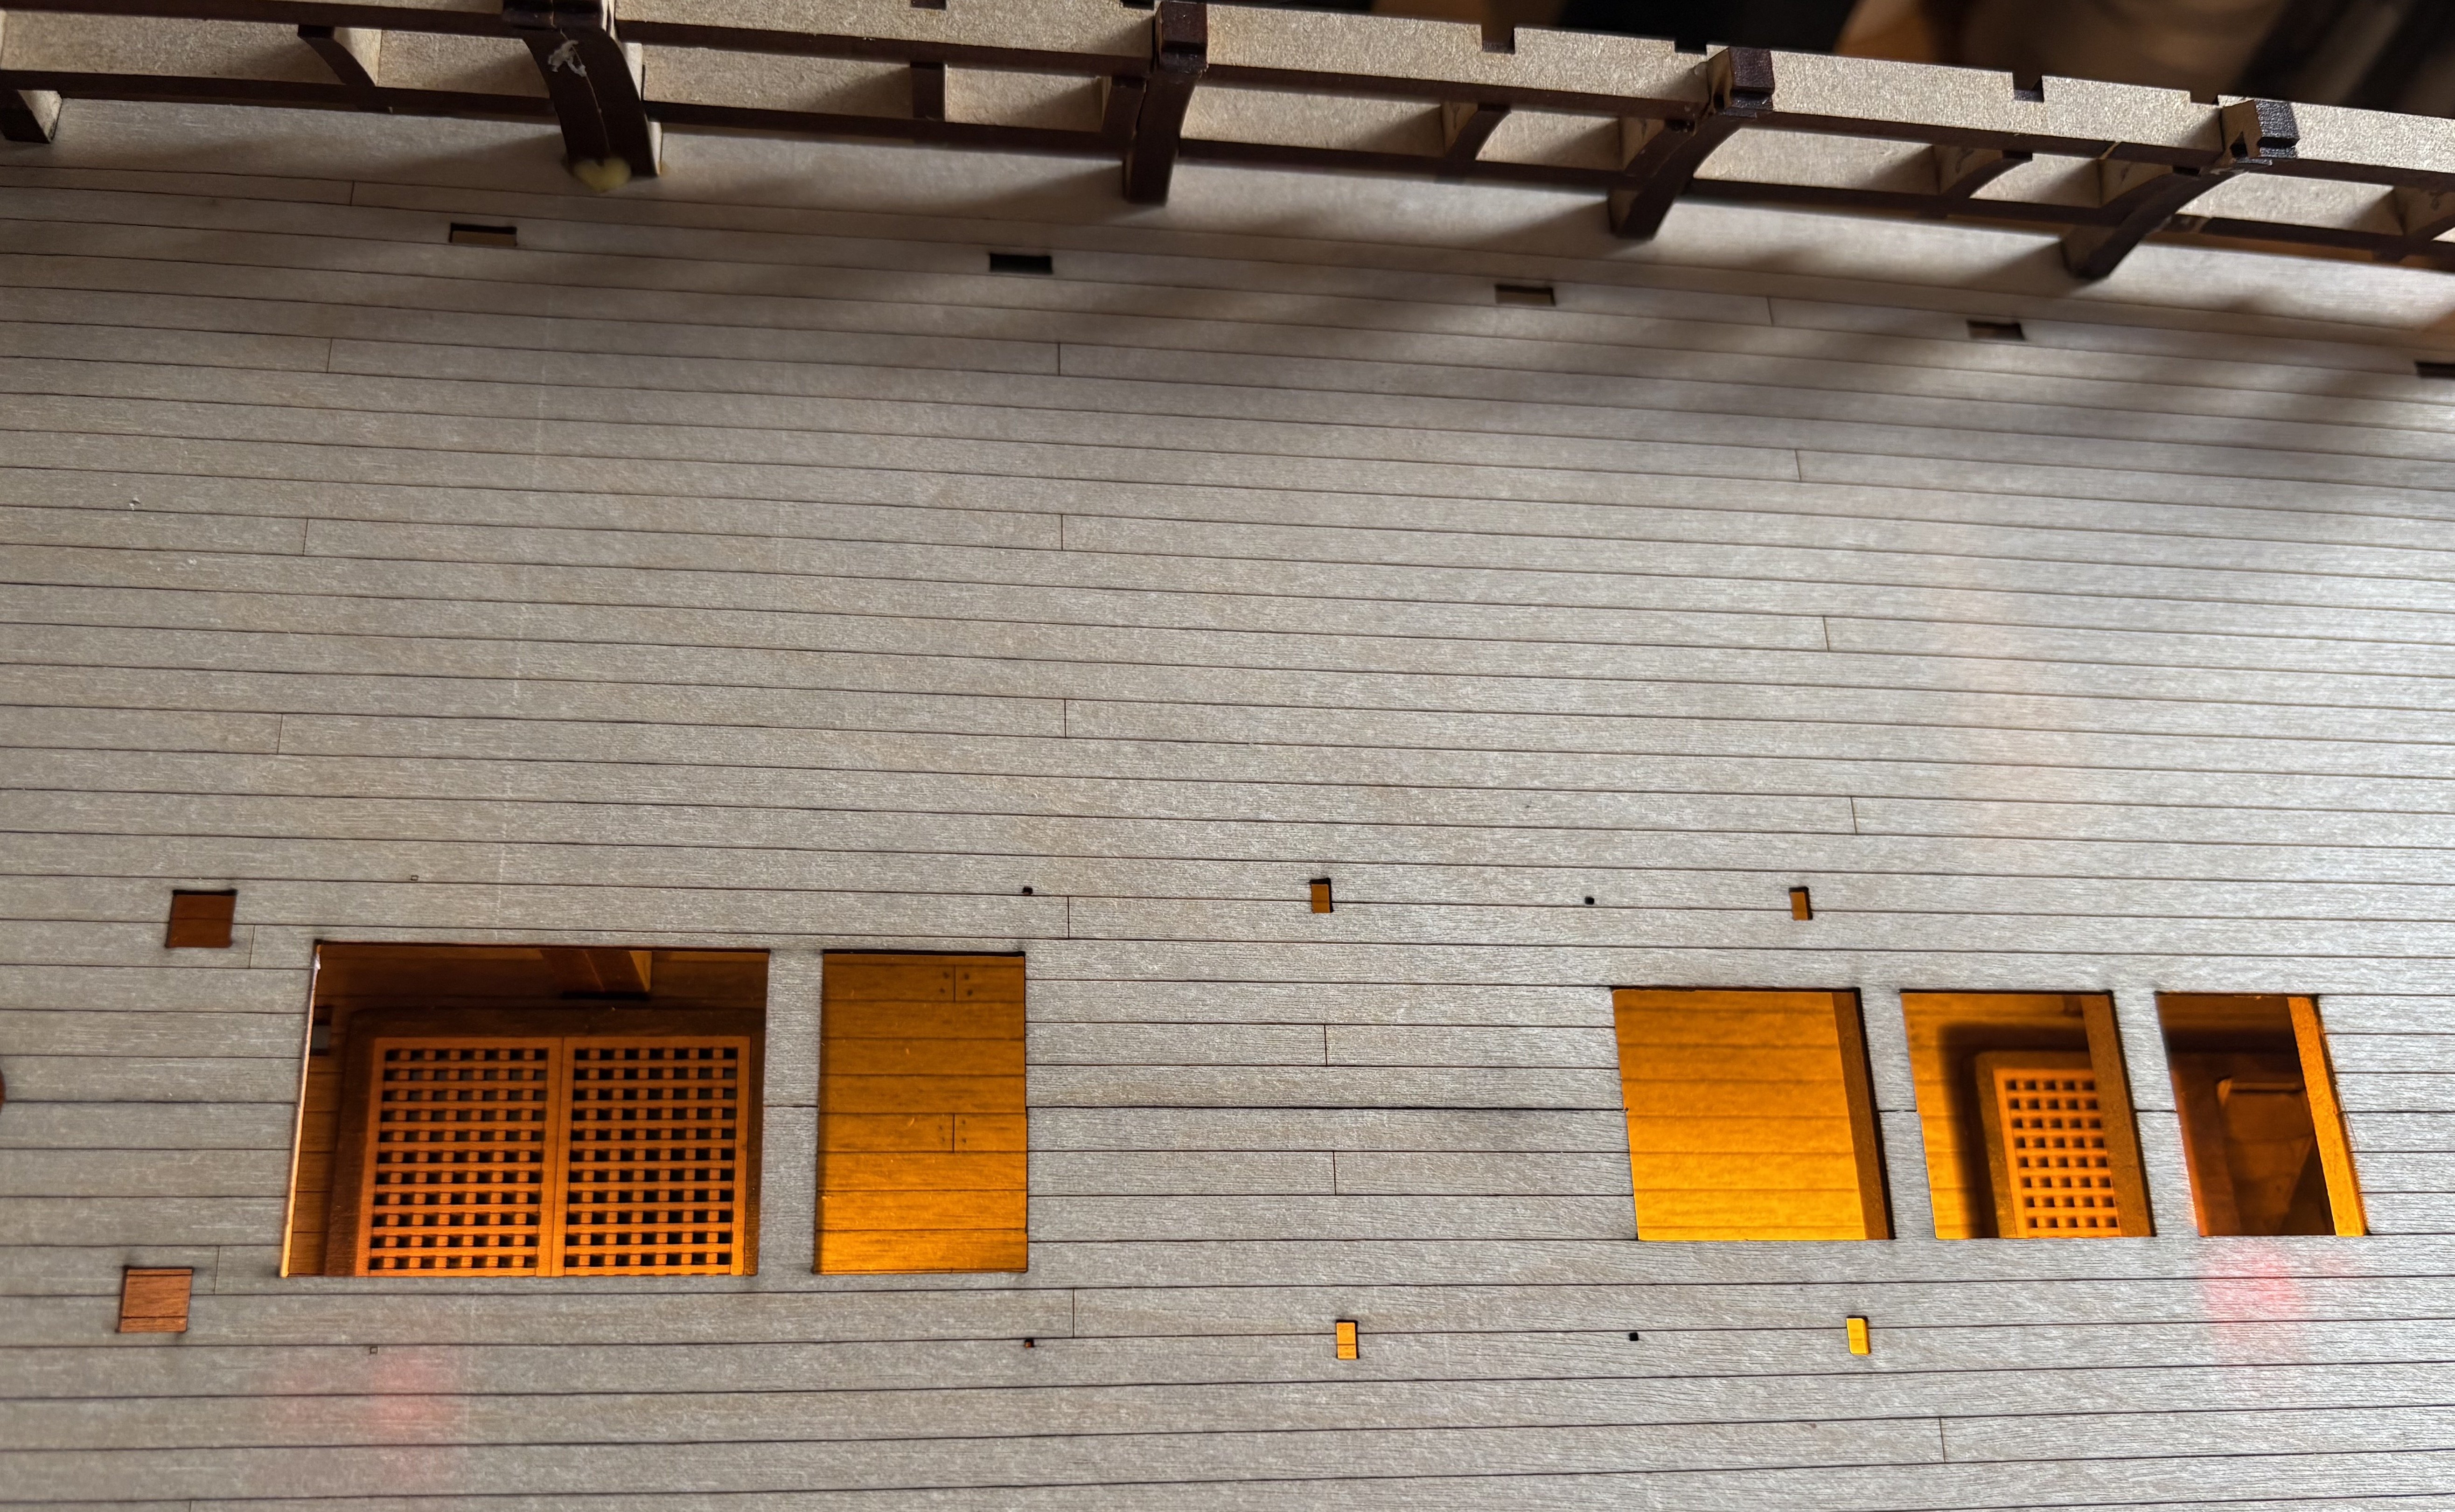
There's a cradle supplied to hold the ship once it's got its keel and it's planked... but at this stage, a different support is needed. I think others have bought specific items for this job, or built quality support systems. I've duck-taped some foam pieces together. This supports the hull nicely at this stage, and I can adapt this system to provide support in future if the ship is ever going to be sitting on its side. Moving onto the lower deck. This won’t be seen, so there’s a case for slapping the parts together and moving on. However… still being influenced from the world of plastic model aircraft, that’s not the way it’s done. In the world of aircraft modelling, the idea seems to be to build a highly detailed cockpit, complete with intricate weathering, and then seal up the fuselage- so that the product of hours of beautiful, detailed work is never seen again. I’m not sure what to make of this. On one hand, we can take photographs of our cockpits before we seal them away, so we know what’s there, post them on social media of course, and there’s the pride in making a good job of the model… but then again… it seems utterly bonkers. I’m thinking that when I go back to plastic aircraft kits, I’m going to look into ways of cutting a removable panel so that I can revisit my work. But back to our lower deck. This is a good opportunity to do some experiments and see what works- knowing that if it’s rubbish, it will be hidden away and I can pretend it never happened. First experiment- colour of the lower deck. Personally, I just don’t like the look of the pale wood, whether it’s lime planking or the pale maple plywood. I think my problem is that I’ve done an awful lot of work with pine over the years, in house renovations and furniture making- so now I can’t get it out of my head that these pale decks look like freshly cut pine- which is neither authentic not aesthetically pleasing. So either I need some intensive therapy- or I need to change the colour of the decks. There’s a whole debate to be had over what’s authentic vs what looks good in model building, and another debate over what colour the decks should be. In this case, I reasoned the ship’s decks would have be made out of oak (although I would be happy to be corrected on this point). Therefore, aiming give it the look of oak, I gave it a thin coat of stain (in this case my “oak” stain is 1 part Furniture Clinic brand “dark oak” to 3 parts of their “Antique Pine.” Second experiment- wood stain on the hatches. Again, not worrying too much about what might or might not be authentic, I thought Eck’s hatches with the darker edge looked lovely, so copied his idea and used dark oak dye on the edge. I’ve seen these two-tone hatches on other models on other ships. What types of wood would these have been made of? Would they have looked like this? How much do I actually care? At the moment, I think these look nice, so I’ll stick to this as my future colour scheme for hatches. Third experiment- my favourite furniture / floor finish has been Osmo Polyx Oil in clear matt, and I wonder if this is a good finish for all the wood parts of the Indy? So far, this seems fine on the deck and the hatches. It doesn’t change the colour of the stained deck, but adds a little colour to the pear parts of the hatches. I like it. Fourth experiment- do surfaces treated with Polyx oil stick together with CA glue, or does the finish prevent the glue from working? Result: CA glue sticks well to the oil finish. So far so good.


-
So, let’s make a start on the hull. This first stage of hull assembly is like doing one of those Rokr wooden models, or assembling lego. Everything just flies together. Every part is laser cut with such precision that it pops out of the sheets and slides together firmly and precisely. The entire section of fitting the bulkheads to the keel only took a couple of hours. Compare this to Occre’s Beagle where there’s no end of extra tabs to cut through to release each part, and then each part needs sanding before it will fit together properly. So no need for any further details from me at this stage- other build logs have talked through these early stages with clarity and plenty of photos. There’s no challenges worth discussing at this point. Main thoughts so far: oh my god this is fun. This really does feel like being a kid again, but this time round with the best toy from the shop.

-
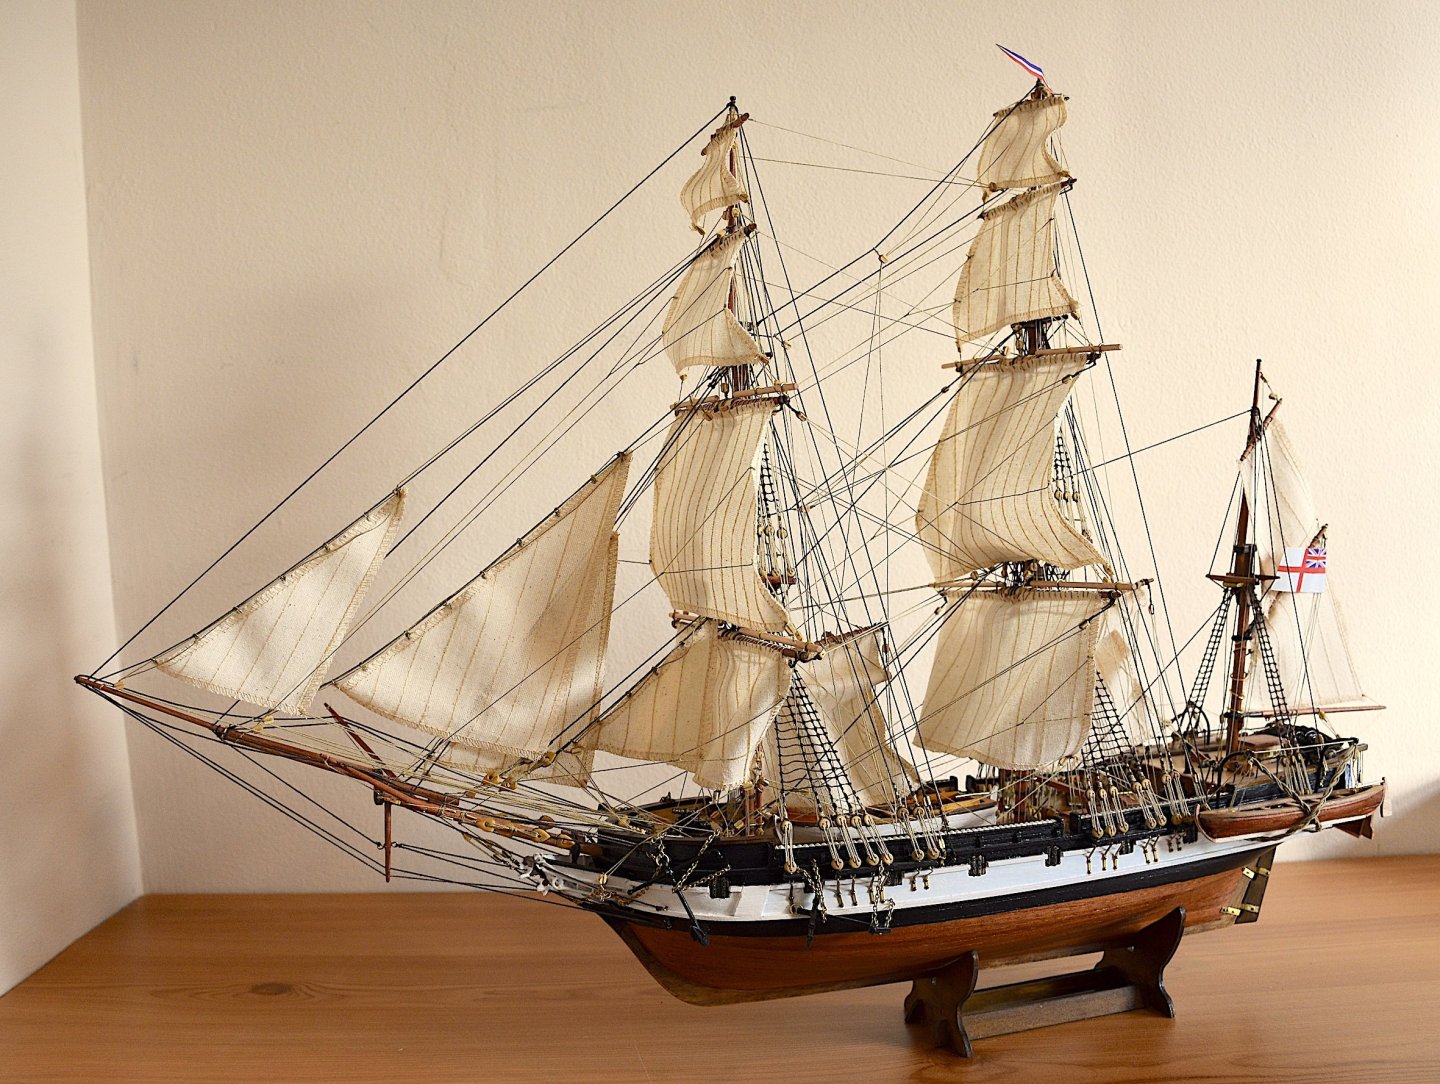
Using the modern terminology, I'll "start my journey". Our story starts with a very large cardboard box being delivered. And it's time to introduce one of the main characters: after unpacking the kit box from the outer brown card box- The Ship’s Cat moved in immediately. Even if my Indy project ends in total failure, at least my cat is happy. I moved the kit box to the hobby room ready to start work. The Ship’s Cat has decided that he is going to be helping me ALL THE TIME on this project. Some might doubt the wisdom of mixing cats with ship building, particularly at the rigging stage, but this one has shown no interest in destroying my Beagle, and is happy as long as he can share my hobby room chair with me ("share" means "me perched on the edge of MY chair to give him room".) I’m not going to do an unboxing video or list the bits and pieces in the box- others have done this far better than I could. All I’ll say is that opening this kit made me feel like a kid on Christmas morning. Everything about the kit screams quality. After doing so much woodwork in the past, there's something decadent about all these gorgeous timbers in the box. I'm thrilled to bits with it all. So- first steps, as ever in our modern world, Health and Safety. At this point, time to introduce another character, The Admiral who tried to take the box away from me for my own safety at this point saying “it means mental age”. We then bickered about who was the most immature, with me pointing out that she’s the one who has published a guide to “Naughty medieval embroidery”, so anyone wanting to move away from ship building, to sewing pictures of medieval-style walking genitalia, this is the book for you. (So I won that argument.) Continuing the pre-build health and safety briefing, I’ve noted carefully what Chris has to say on a project such as mine: “We cannot advocate such a build for anyone who is only on a learning journey or never built a ship before. By advanced, we mean for modellers who have built numerous other ships/boats and mastered many of those skills required to succeed with a ship kit of this complexity.” This is a wise disclaimer and I have fully taken it on board. And, obviously, decided to ignore it. Just to be clear here, I agree completely with Chris and I don't advocate than anyone else should follow my example of jumping in at the deep end. So let’s make a start. And as anyone who has worked in an organisation will know, when there is work to be done, the first step is avoiding the work by holding a series of meetings. My naval officers are having a discussion to sort out the finer details of their anticipated Indefatigable design. They are going to be sorely disappointed. This is one of the points which sums up my approach. The officers are painted up from Chris’s “officers at table” set, which I think is no longer available (if so, that’s such a shame, because it’s a fantastic little set and was a lot of fun). The painted figures look fine when viewed with the naked eye (or at least my 56 year old eyes with reading glasses.) But with a bit of macro photography, my inadequacies as an artist become obvious. When I take a quick look on the internet at what other figure painters can do with advanced skills, it’s clear that my efforts won’t be held up as shining examples of the art. But for me- I’m happy to rate these chaps as “good enough”. I’ll see if I can find the time to paint the Edward Pellew figure in a similar fashion, to stand on deck and supervise progress as my build continues.


-
Thanks for your comments guys! I appreciate that you're all going to be at my side with help and advice on this one. To be fair, I wouldn't have even considered tackling this project without the community here on MSW. I know I can follow others' build logs- and I know that if (when) I get stuck, I can cry for help. Tim- I've found a fellow spirit, with my guiding principle in your signature! James- I was just composing my next post on this adventure (which will appear somewhere below), and I'm aware of the possibility that it might all end up in disaster. The odds are against me in terms of overall MSW build logs that are abandoned... and yet... I can't find any abandoned Indy logs. I would say, though, that the work you do with Chris is in a completely different league to all the other manufacturers. Your manual makes the others look like they're still carving instructions on stone tablets.
-
Gentlemen, I have a theory. (You’ve got to imagine I’m delivering this in the manner of a bewhiskered Victorian scientist giving a speech at a lectern in a mahogany-panelled lecture theatre, filled with equally bewhiskered Victorian gentlemen. ) My theory is that an “expert level” model ship kit with well prepared, detailed instructions is actually easier for a relative newbie to complete than the “beginner/ intermediate” kits with the truly terrible instructions that are being sold by most manufacturers. To test my hypothesis, I propose an experiment (it’s ok guys, you can breathe out now, I’m not seeking funding for an expedition). The experiment is as follows: as a relative newcomer, I’m going to do Vanguard’s Indefatigable. Here’s the background to my proposed ground-breaking research. It seems there’s so many kits out there which COULD be great- but have such terrible instructions that nobody except the most experienced builders can tackle them. Other kits just don’t fit together properly and the manufacturers expect us to iron out their mistakes for them. My theory is that a truly great kit fits together perfectly, and has instructions that even an idiot can follow. As a test case, I put myself forwards as that idiot. So far, I’ve done Occre’s Beagle and got increasingly frustrated with the instructions. They feel like they were knocked up on a Friday afternoon- where the writer started at 1pm giving excellent detail on the simple early stages, but then ran out of time as the afternoon wore on, and the further they get into writing the build instructions, and the more detail is needed, then with one eye on the clock, the more they skimmed over it. I think it must ended up at 4.55pm and time for everyone in the office to go to the pub where the writer finished writing with something along the lines of “to complete the model, make the masts and do the rigging”. Even with the 140 youtube videos they provide, I found they contradicted the written instructions and left me baffled. So let’s skip from the very sensible entry-level Beagle, straight to what I think is the most expensive kit on the market… and, I put it to you, gentlemen, that this is possibly the very best kit ever made. There might be two questions here- first, is the Indefatigable the best model from a kit once completed?; and question two, does the massive detailed manual and many many sheets of plans mean it has the best set of guidance for any model, ever? Could the best model ship actually be one of the most accessible projects, even for a relative newbie? Here’s my initial train of thought: When I was choosing which kit to buy as a second build, I spent a bit of time (ok, days and days) looking through pretty much all the kits on the market, and reading the instructions whenever they were available online. My conclusion from this early fact-gathering part of my project indicates that Indefatigable manual is hugely detailed, leading the would-be model shipwright through every step of the process. Other kits’ instructions seem to be a few pages of typed instructions with 5 sheets of sketches. I wouldn’t trust anything at all from Occre, for example. Vanguard Models produce the best written, clearest, instructions of any manufacturer, by a long way. Even the glossy manual itself is a thing of beauty. Yes, I could have chosen one of the simpler models- but to test my theory to the max- Indy is the one. I’ve always been a fan of jumping in at the deep end in life. Once you’re in at the deep end, you’re very motivated to learn to swim- quickly. In this case- what’s the worst that could happen? Some friends of mine have hobbies such as mountain climbing. In comparison, the "worst case scenario" of a disaster in my new hobby here is quite trivial. I realise that going from the Beagle to the Indefatigable is a bit like learning to ride a tricycle and then getting behind the controls of a fighter jet. . But then again, when you’re flying a fighter jet, you can’t just get the manual out and make a cup of tea and read through everyone else’s experiences on the internet. So at this point, can I just say thanks to Kevin, Glenn Uk, Blue Ensign, Eck and Clark for your build logs. These are essential references for me. All your work in writing them up is much appreciated. Many of you here are true experts in naval history and model ship construction and can modify or adapt every stage of their build. My attitude is that what Chris Watton doesn’t know about producing a commercial kit probably isn’t worth knowing. Many of you gents can take these kits to another level with your skills and knowledge, but for me, as I said in my new member intro post, I’m “just an assembler”, and if I can complete this kit to Chris’s specifications, I’ll have the model of my dreams. While I’m rambling, I might as well go off on another one- how many of us feel a bit intimidated by the beautiful ships built by the most skilled members here on the forum, so much so that we’re shy of posting? I thought long and hard about exposing myself to the potential embarrasment of this project- and then thought what the heck. As far as I can tell, there’s about 7 Indy logs here- and yet I assume that Chris has sold hundreds of Indy kits- presumably not all of which have turned out as precisely built as the logs here…. Maybe if I post my progress on this one- with my potentially catastrophic lack of skills- then others might be encouraged to join in too??? I don’t expect mine will be as perfect as the others here, but for me, the joy is in constructing the kit. Another point I was making in my intro post was “don’t let the perfect me the enemy of the good”. If I worried about making a perfect job of this kit, I would never even open the box. The finer details are not so important for me. I’m not a historian, although in a cruel twist of fate, the Admiral is. However, she’s mainly interested in medieval fabrics so the only nearest she has come to showing an interest in my ship models are in the quality of the threads and the material used for sails. When I voiced some of my doubts about this project to the Admiral – who incidentally makes a living from selling very complicated medieval sewing kits- she said “you’re so bloody-minded that you’ll finish it even if it takes you five years and you have a breakdown over it”. So it’s encouraging that someone has complete faith in me. Right- there comes a point in every research project where we must stop talking and move from theoretical considerations to the hands-on practical stages. The Indefatigable has now moved to the workbench. (My “workbench" used to be my “desk” back in the days when I did any actual work, in the same way that my “home office”, where my “desk” lived is now my “hobby room”.) Some of you might already be pulling up a chair for this- anticipating some riveting car-crash entertainment, while others of you might be watching from behind the sofa. Everyone is welcome. So- with Vanguard’s Indefatigable- here we go.
-
After lurking on this site for a few months now, I read a feature in the paper over the weekend saying that lurking on social media is bad for us. Apparently, it’s rather like going to the pub on our own and standing at the bar with a pint, watching everyone else having fun enjoying animated conversations, but not joining in and feeling increasingly sad. So- maybe I should introduce myself. Ok, deep breath- Hello everyone, my name’s Gareth and I’m an alco- Wait, no, wrong group. Try again. So a bit about me. I think my story is going to be familiar to many of us here. Many years of working for a living, and then having an urge to return to the simpler pleasures of when we were younger- model building- but now, instead of pocket-money models, we now have the rewards from those years of work to be able to pick the big expensive kits off the top shelf. I made a lifestyle decision to take a sort of early semi-retirement at 55, feeling horribly burnt out, and started to find that a bit of model building was hugely therapeutic. I don’t think I’m the only one here who has a tendency towards stress- but who also finds that sitting down with their modelling project is hugely calming. Over the last few years of stressy work, I self-medicated with Lego and paint-by-numbers, but with a bit more time on my hands, I wondered if I could relive that feeling of being in my early teens with nothing to do all day but building airfix kits? A couple of aircraft later, and I was hooked. But then, you will all know how it goes, once you’re on that path, you find yourself craving a bigger and bigger hit each time, and I quickly needed to get my fix from larger, more expensive kits, and then wondered if it was possible to build one of those tall ship models with all the complicated rigging and stuff? I’ve done some cabinet making in the past, so had a bit of faith in my ability to work with wood- but had no faith in my ability to do the rigging. But then again, I could spend days and days on Model Ship World learning about the techniques... Much internet-based research was done and Occre’s Beagle arrived on my doorstep. A few months later, and I can confirm that these ship kits are indeed the crack cocaine of model building. There is no going back now. In hindsight, I should have jumped in and done a Beagle build log here, if only to list the errors and mistakes in Occre’s instructions. I’d opened the box assuming that a kit's instructions would be comprehensive, or, at least, correct. Neither is the case. I was annoyed right from the first page, where I was trying to distinguish “lime” from “sycamore” strips in my kit (there is only one type of pale wood in the box), right through to the rigging, where the written instructions show one thing, the video instructions show something entirely different, and the picture on the box shows a third way. Other ropes have no indication at all as to where they should tie off. Discussing these points in a group like this- or at least ranting about them- would have been helpful. However, I’ve been hugely wary of these online forums and social media. I’ve been put off joining in by a certain sort of expert on modelling forums who feel the need to criticise every small detail in others’ work. I remember one guy on another group who had posted up his progress saying how much he was enjoying putting together one of the bigger plastic aircraft kits, but then other people said he’d be doing better if he modified everything to enhance the historical detail; he replied saying that the pleasure he got from the hobby was constructing the kit as it was, out of the box, without having to think too much. One comment on this was “so you’re not a modeller, you’re just an assembler.” Someone else asked for some help and advice on a plastic model aircraft facebook group recently and got told by one of the experts, “put it back on the shelf and work though a simpler kit until you can learn to do it properly”. On “another wooden model ship forum”, some of the most experienced modellers tell us that while their scratch-built models are the correct way to do it, us kit builders are “just doing paint by numbers”. I’ve seen dedicated kit builders ridiculed because, for example, the hinges on their ship's cabin doors are on the wrong side and “if you're not going to do it properly, you shouldn’t be doing it at all.” So I’m going to say something now which might have some forum members throwing chairs around in rage and getting myself banned before I’ve even begun: I just like the quiet craftsmanship of assembling a kit. I’m just not that interested in precise historical accuracy. My only actual experience of tall ships was a visit to the Trincomalee in Hartlepool when my partner was onboard telling Halloween stories to schoolchildren, in character as the “Dread Pirate Jemima” (how many of you feel a little bit sick at lack of historical accuracy here?) Also- compared to many of the beautiful precision builds I've seen on the build logs here- I’m just a bit rubbish. When I was baffled by the Beagle’s non-existent rigging directions, I was happy to tie off ropes in vaguely the right area and tell myself “that will do.” I read some useful advice on another forum for these times: we can ask ourselves, “Is this model going in a museum? Are you building this to impress others- or just yourself? And most importantly- are you enjoying building this?" So can I issue a rallying cry to all the other lurkers here? We might not be expert modellers. We might not get the details right. But maybe the joy of the hobby is just in heading to our man-caves and sticking bits of wood together. With this in mind- I’m going to set up my next build log as soon as I’ve posted this- fully aware that mine will never reach the standards that others have set. And that’s ok. Join me! Who else wants to share their less-than-stellar builds? A useful phrase that I tell myself when building is, “don’t let the perfect be the enemy of the good”. My efforts will never be as good as those of people who have been honing their skills over years, so I’m not going to beat myself up about it. The danger is that if we chase perfection, we give up, or perhaps get discouraged and not even make a start. So- “that will do” and “that’s good enough” are useful phrases to work with. As for this intro, that will do. As the Beagle sails off into the sunset- onto my new build log.
- 16 replies
-
- 18
-

-
This is all great news. I’m already clearing my schedule for 2029. Credit card at the ready, I’m Royal George order no 0001. In the meantime, we can hone our skills ready for the flagship build with Surprise, Agamemnon and Ty- I mean, “mystery Restoration Era warship”.
-
Has everyone else picked up on the most exciting thing from the interview... the prospect of a Royal George? I'm sure I'm not the only one who's disappointed that Chris's Amati 1/64 Victory never made it to market- I hardly dare bring the subject up- but it feels like Amati shelved the project in the manner of the store manager who bangs his fist on the counter and yells to the customer, "for the hundredth time today! there's no demand for it!" But if we all want a project for the future to aspire to, I'd guess a Vanguard Royal George might make the even the best current Victory model look like a coracle. My credit card trigger finger is getting itchy already.
-
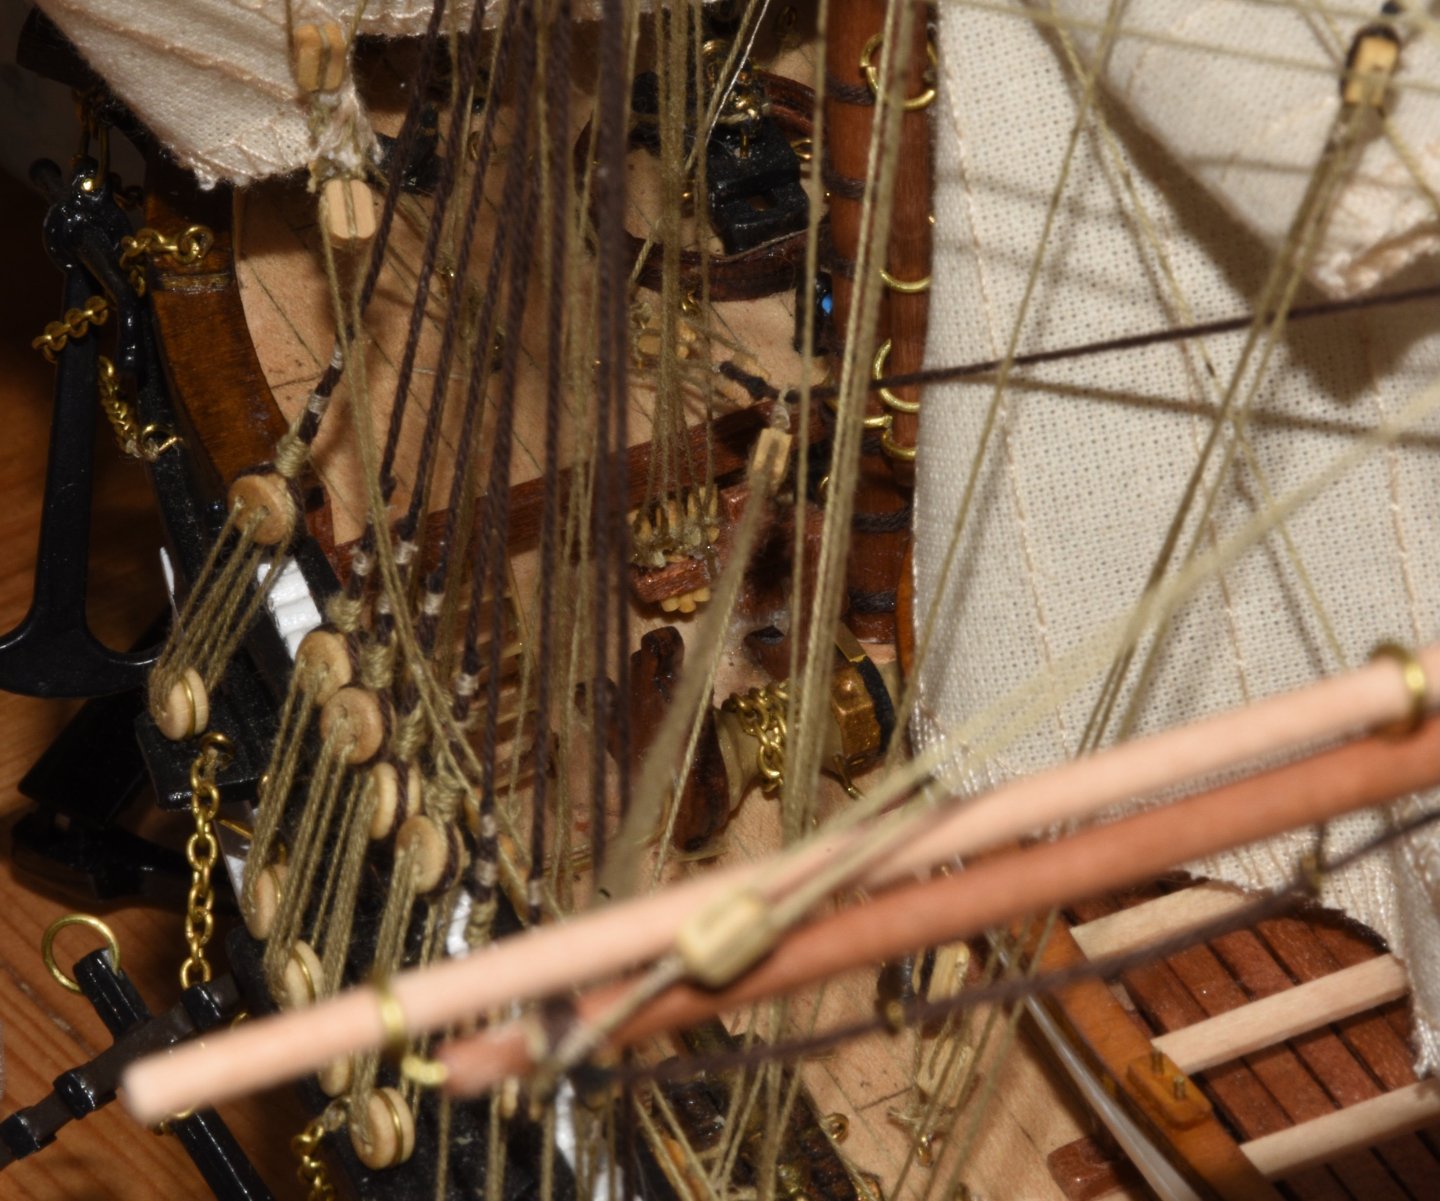
In my defence, I think this next photo puts the pinrail more into context (ie it can't really be seen). I still wish I'd been able to belay all my ropes properly though. I'll keep avidly following your build log here, so I can see how it should have been done. Still more work to do on mine, however.

-
You've made a beautiful job of that pinrail, you'll be glad of all those pins later on. To be fair, when the rest of the deck parts and rigging are in place- it's quite hard to see that rail. However, with only the recommended 6 belaying pins, my Beagle's "Captain's Choice" ended up being fixing the ropes wherever he could find a fixing, and maybe just glueing some excess ropes onto the belaying pins. I took a photo which was intended to show that you can't really see that pinrail once you've added the mast and sails, but, in fact, a bit of macro photography with a flash clearly shows my Captain's Bodge Choice of CA glue- along with the remaining fuzz on the Occre ropes (which beeswax didn't fully resolve) and an unexpected number of cat hairs on board too.
-
Can I offer a suggestion to head off a future problem with occre’s plans? You’ve made a beautiful pinrail near the mast to hold the six belaying pins as per the plans. However, later on, occre will want you to put fourteen (!!!) rigging ropes on those six pins… but your upgraded rail has room for more pins….
-
I'm coming to the end of my Beagle build, and I can only confirm that the instructions get worse the further you go. When we get to the rigging, the paper instructions are completely wrong and omit essential connection points, the video instructions for the same ropes don't make it clear what goes where, but firmly contradict the paper instruction, but at least there's an option on the box photo showing a third way to get it wrong. As an "entry level" model for Occre, I'm amazing anyone ever buys another of their kits after their experience of this one.